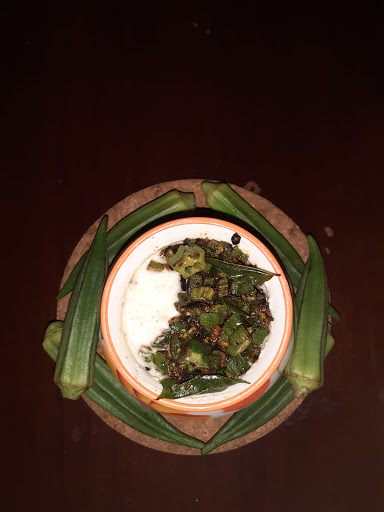
Bhindi Raita
Raita is a yoghurt-based condiment. It usually contains cooked or raw vegetables/fruits/pulses, mixed with the Yogurt/Dahi and tempered with Mustard and Jeera. The Raita is usually served with Biriyani, Pulav, Parathas, Naans or can be served as a dip for Kebabs too.
Today I chose to make Bhindi(Lady’s Finger) Raita as an accompaniment for Masala Rice( recipe given in Rice section), as the crisply cooked Bhindi combines beautifully with the spiced curd and imparts a lovely texture and flavour to the Yoghurt. This Raita goes well with both North Indian and South Indian dishes.
Let’s get to the recipe right away.
PREP TIME: 5 Mins COOK TIME: 15 Mins
TOTAL TIME: 20 COURSE:ACCOMPANIMET CUISINE: NORTH / SOUTH INDIAN AUTHOR: RAJNI RAM
Ingredients:
Curd /Yogurt 400 gm(fresh not sour)
Bhindi /Okra/Lady’s Finger 6 to 8 big ones
Jeera /Cumin powder 1.5 tsp
Red chilli powder 1/2 tsp, for more spice, add 1 tsp
Salt as per taste( some will be added while cooking Bhindi too)
Mustard 1 tsp
Jeera / Cumin whole 1 tsp
Urad dal split 1 tsp
Dry red chilli 1 big broken to bits
Curry leaves few
Asafoetida powder/ Hing 1/2 tsp
Oil 2 tbsp
Directions:
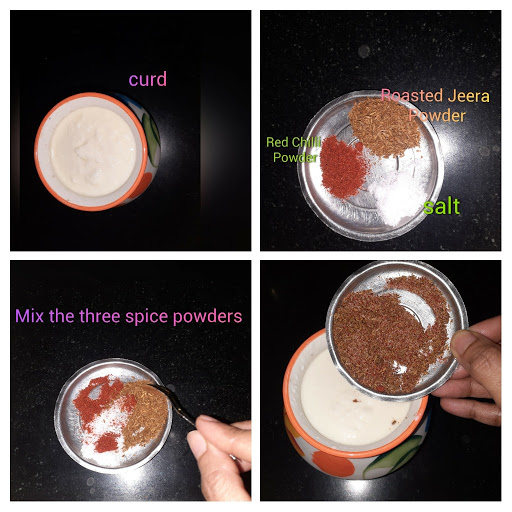
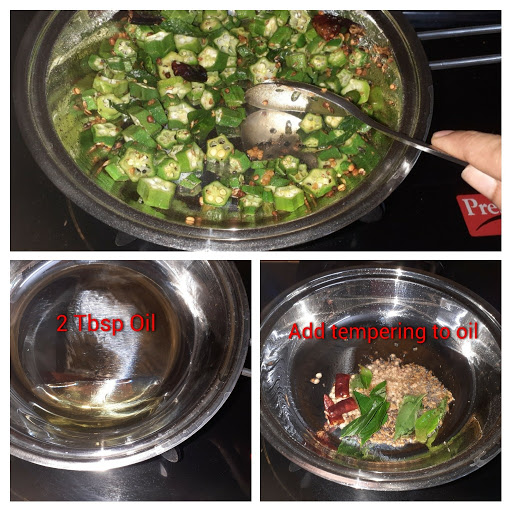
Take 400 gm curd, smoothen it with a ladle, do not whip or churn it. Add the spice powders- red chilli powder, Jeera powder and salt to the curd. Mix gently and keep in the refrigerator to chill. Next, take 2 Tbsp oil in a Karahi/ Pan and heat. Add the tempering of Mustard, Jeera, Urad dal, dry Red chilli, Curry leaves and Hing ( asafoetida), fry to a golden colour and add in the Bhindi. On high flame saute by stirring continuously for 2 mins, add salt and continue to saute. Keep stirring from time to time until the Bhindi is cooked and turns crisp. Put off the stove and cool it. Once cooled it can now be added to the chilled spiced curd. Yummy Bhindi Raita is ready to serve.
STEPWISE RECIPE FOLLOWS:
1. Assemble all ingredients.
2. Take 400 gm Curd and smoothen it out with a ladle, don’t beat or whip it vigorously. To this add the spice mix of cumin powder, red chilli powder and add salt. Stir nicely and put it in the refrigerator to chill
3.In a Karahi/ Pan heat 2 Tbsp oil and add in the tempering of mustard, jeera, hing, urad dal, dry red chilli and fry until golden in colour. Add in the Bhindi.
4. Fry the Bhindi on high flame for 2 mins, add salt and continue to saute. Keep at it until the Bhindi turns crisp(will shrink in size). Put off the stove and cool the Bhindi. Once cool the bhindi can be added to the chilled spiced curd.
5. Bhindi Raita is ready to serve. Serve it will Parathas, Biriyanis, Pulav’s or serve with Masala Rice( recipe in Rice section). Enjoy!
Notes:
1. Ensure you cool the fried Bhindi before you add it to the spiced curd mixture. If it is hot the curd will thin down.
2. Always fry Bhindi on high heat and constant stirring or else it can turn slimy.
3. If in case the Bhindi does turn slimy, then add either Idli Podi( gunpowder that’s used as an accompaniment for Idlis, Check recipes under Masala Powders) or Dal powder(check recipe under powders).
another tip is to cut Bhindi few hours prior and put it in the refrigerator for an hour or two. Remove it from the refrigerator and don’t thaw, put it in the Karahi directly.
3. why am I giving so many instructions on cooking the Bhindi?, because a crunchy Bhindi makes a good Raita.
If you tried this recipe and liked it, comment below. Would love to hear from you.
Mint/Pudina Raita
Mint by itself is such a flavourful herb, it heightens the taste of everything else. Since it has a strong flavour it should be used in moderation. Here I have made a Raita(curd sauce) with Mint, which goes well with Parathas, Naans, Kebabs and with any mixed rice variety. The lovely green colour and the minty freshness gets the salivary buds in action. This is a simple recipe and takes under 7 minutes to make if you have all ingredients ready.
Well, one may think why am I blogging something so simple, something that anyone can make. Well, its just to establish the fact that something as simple as a well made Raita can lift the effect of a recipe gone wrong. People trying their hand at cooking for the first time will be encouraged by its simplicity to try cooking more often.
Let’s get to the recipe right away.
PREP TIME: 10 Mins COOK TIME: 5 Mins
TOTAL TIME: 15Mins COURSE: MAIN
CUISINE: SOUTH INDIAN/ SERVINGS: 4
NORTH INDIAN
Ingredients: Author: Rajni Ram
Mint leaves 1/2 a bunch
Green chilli 1(if not hot enough can add one more)
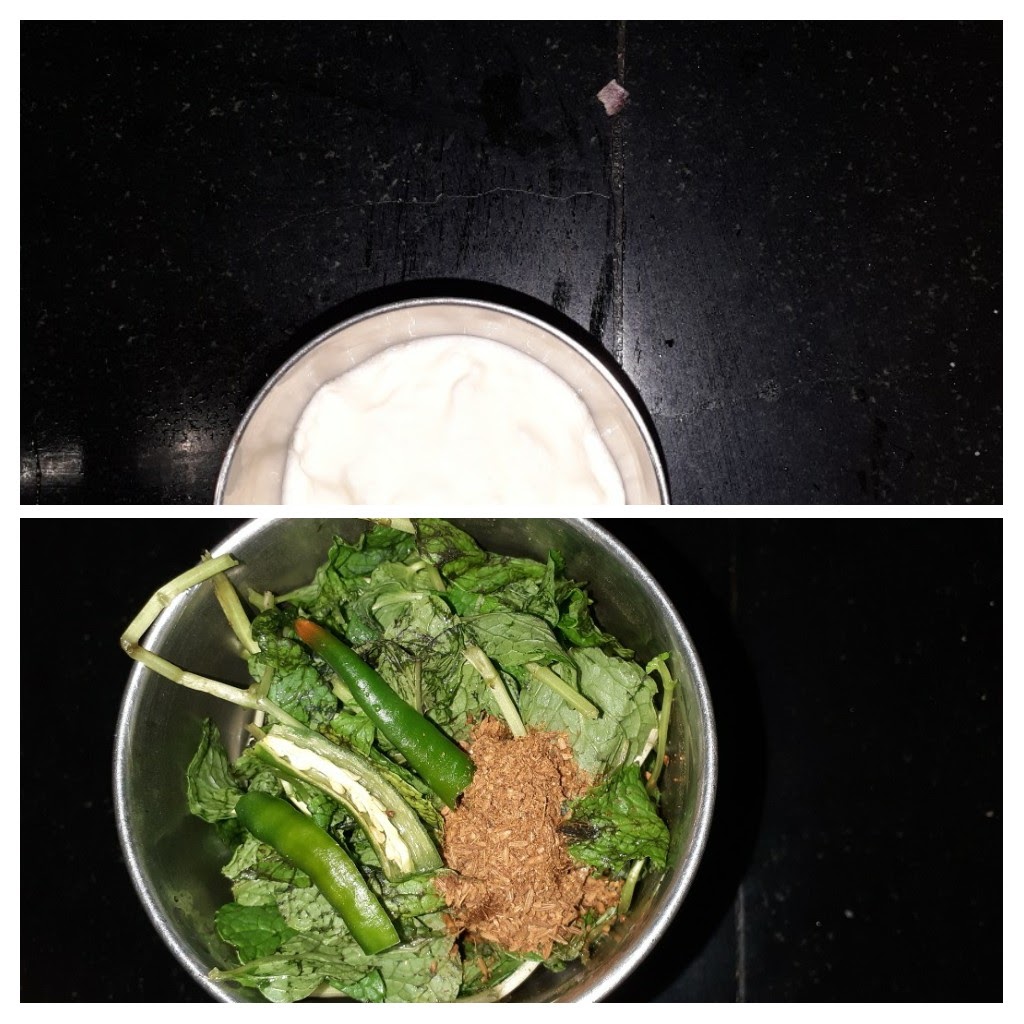
Curd 400 gms
Roasted Jeera powder 1/2 tsp
Salt as per taste.
Directions:
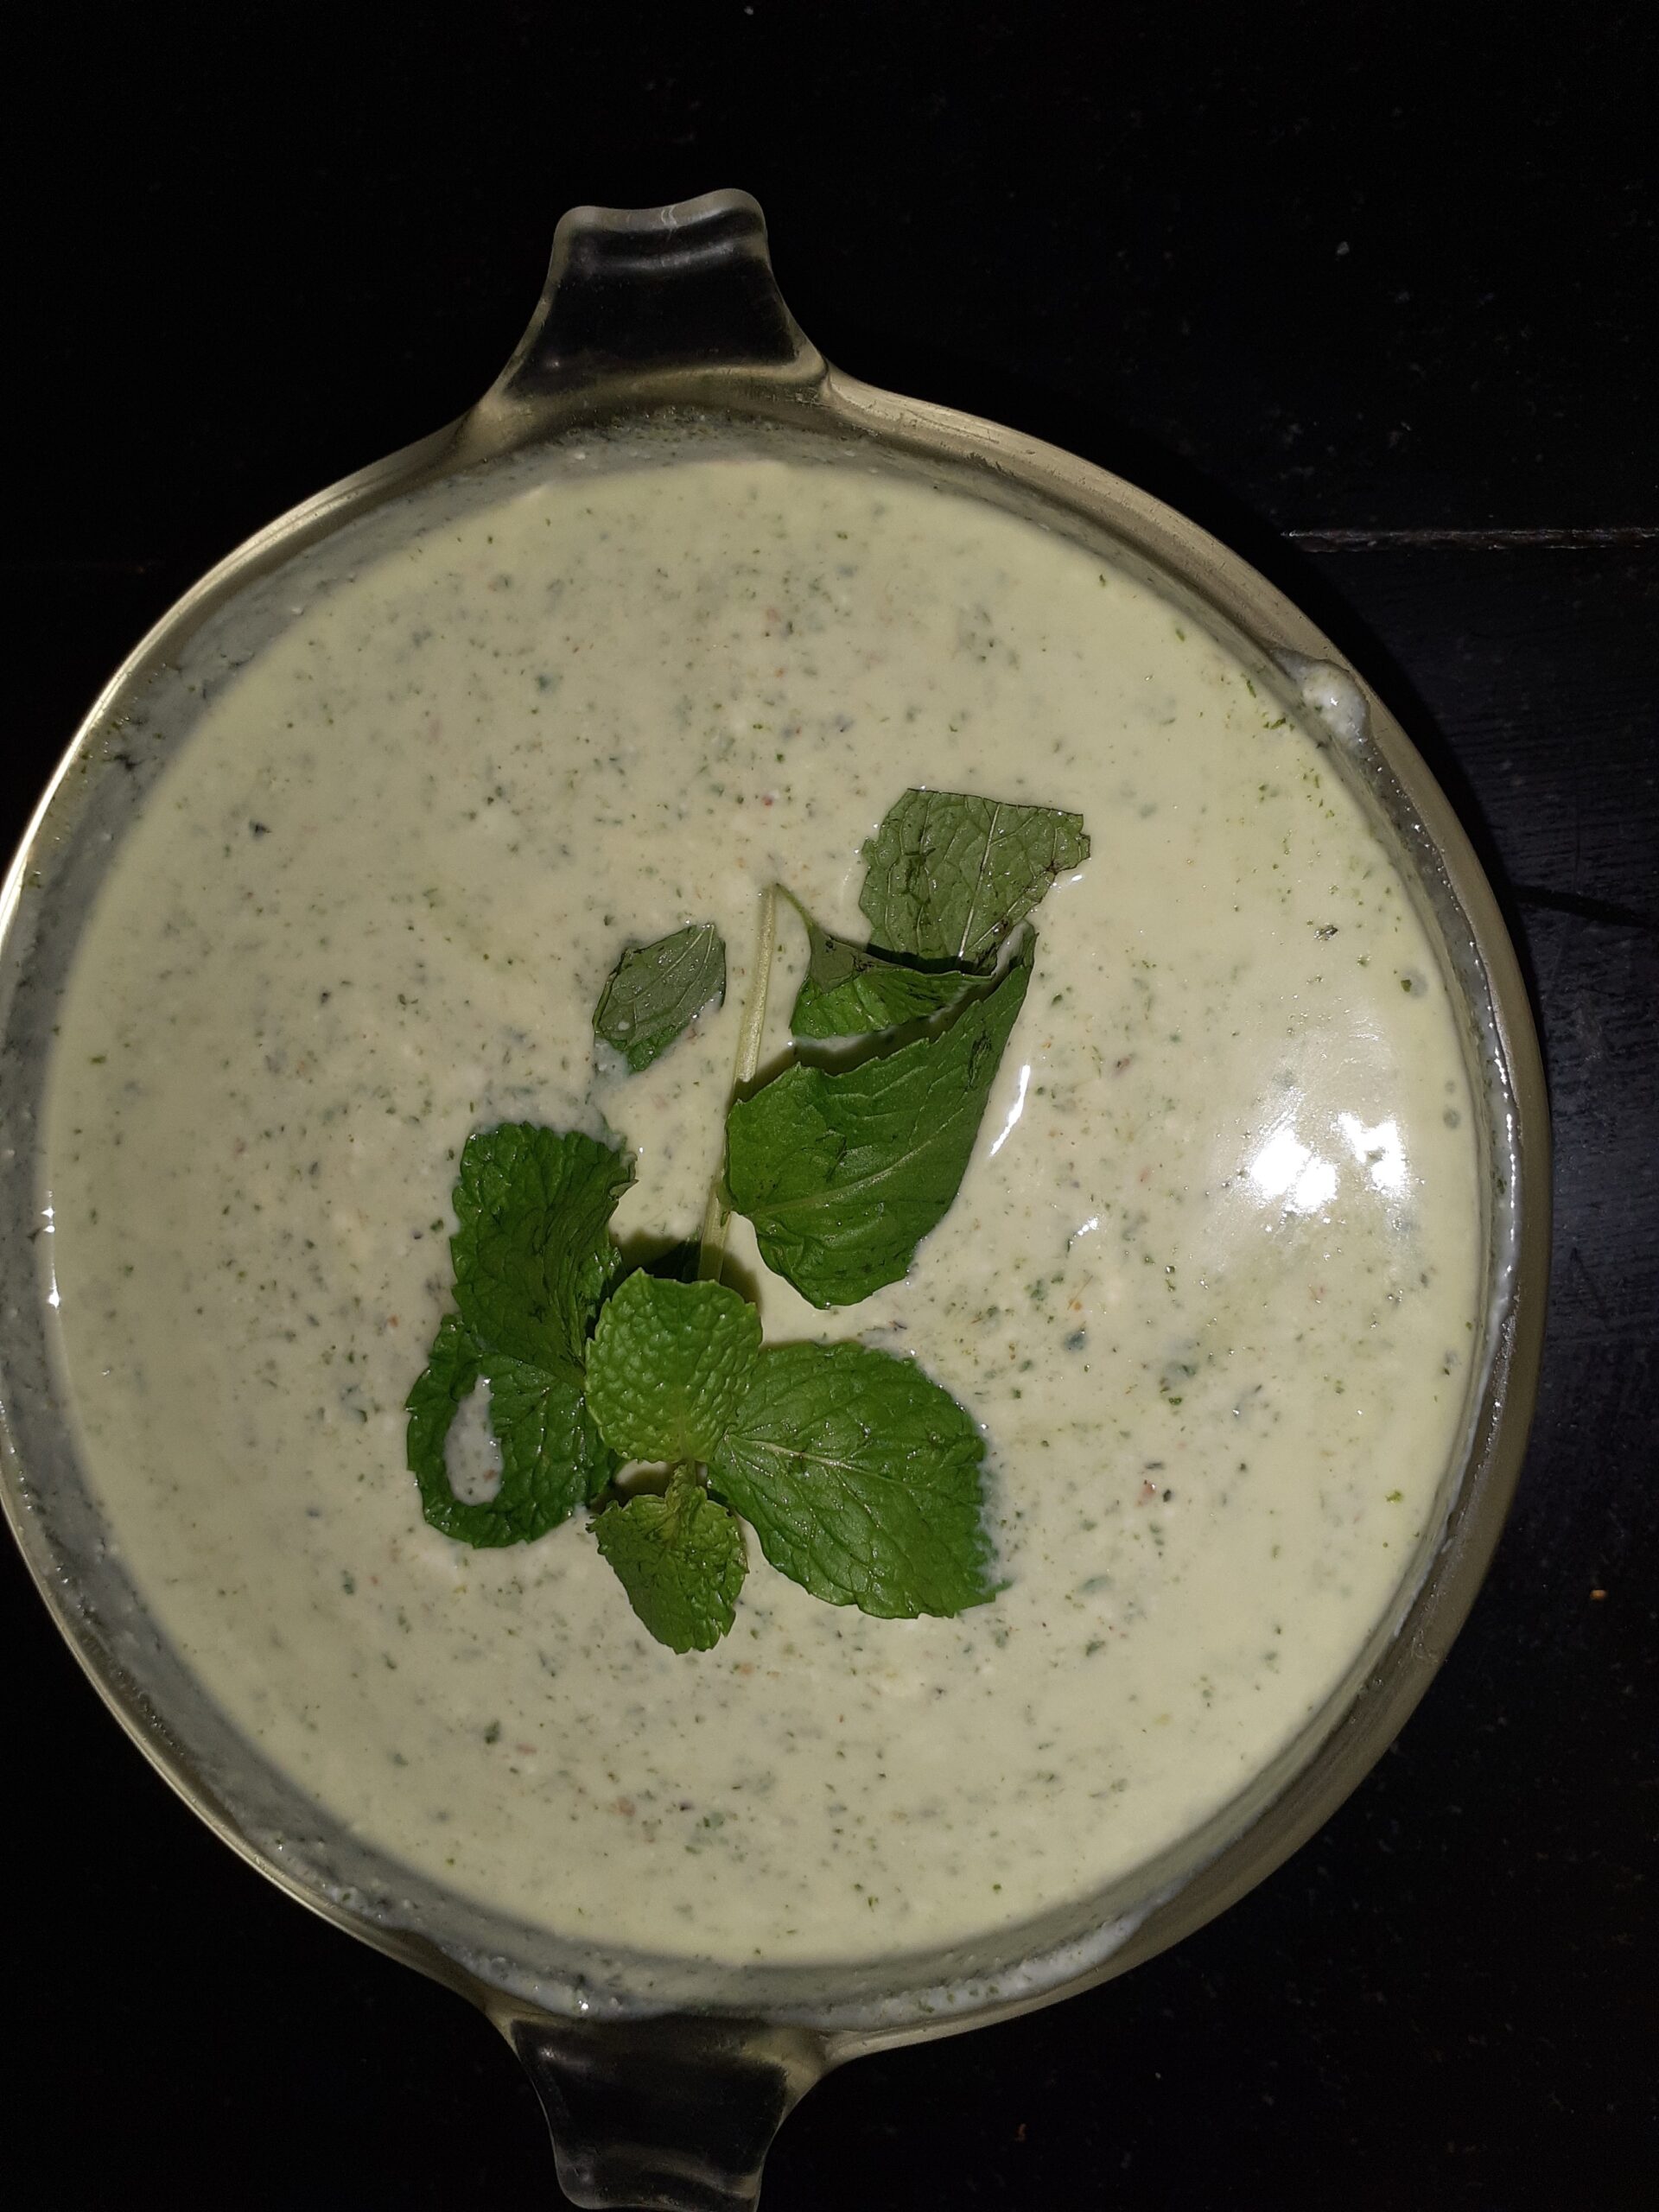
Wash the Mint leaves well and let the water drain. Smoothen the curd( do not beat or whip). Put the Mint leaves, Green chillies, roasted Jeera powder and salt in a blender and give it a good spin. Add about a cup of curd from the 400 gms to the blender and grind to a smooth paste. Now add this paste to the remaining curd and mix well. Put it in the refrigerator until ready to serve. Enjoy the Mint Raita with your meal. Bon Appetit.
STEPWISE RECIPE FOLLOWS:
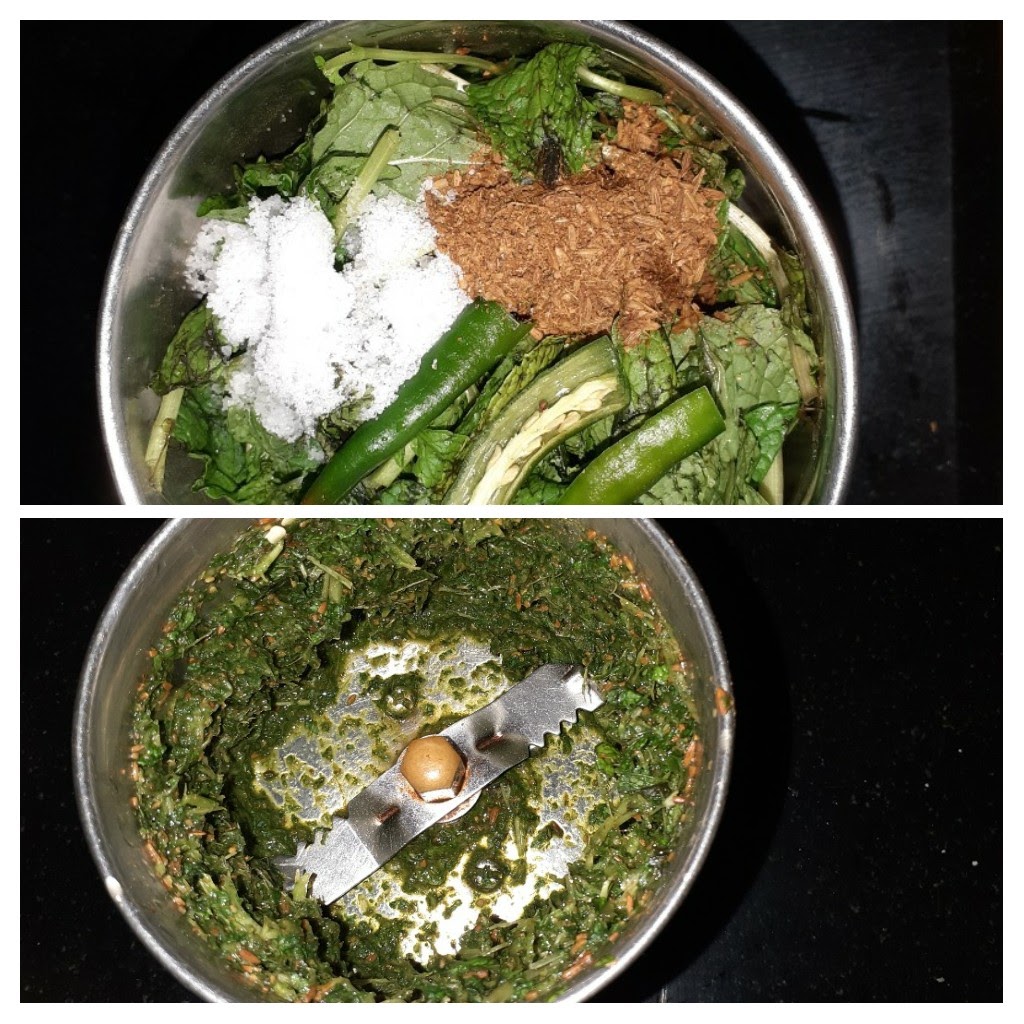
1. Assemble all ingredients. Wash Mint leaves and drain the water.
2. Put the mint leaves(you can put the tender stems too), green chillies, roasted Jeera powder and salt in a blender and blend.
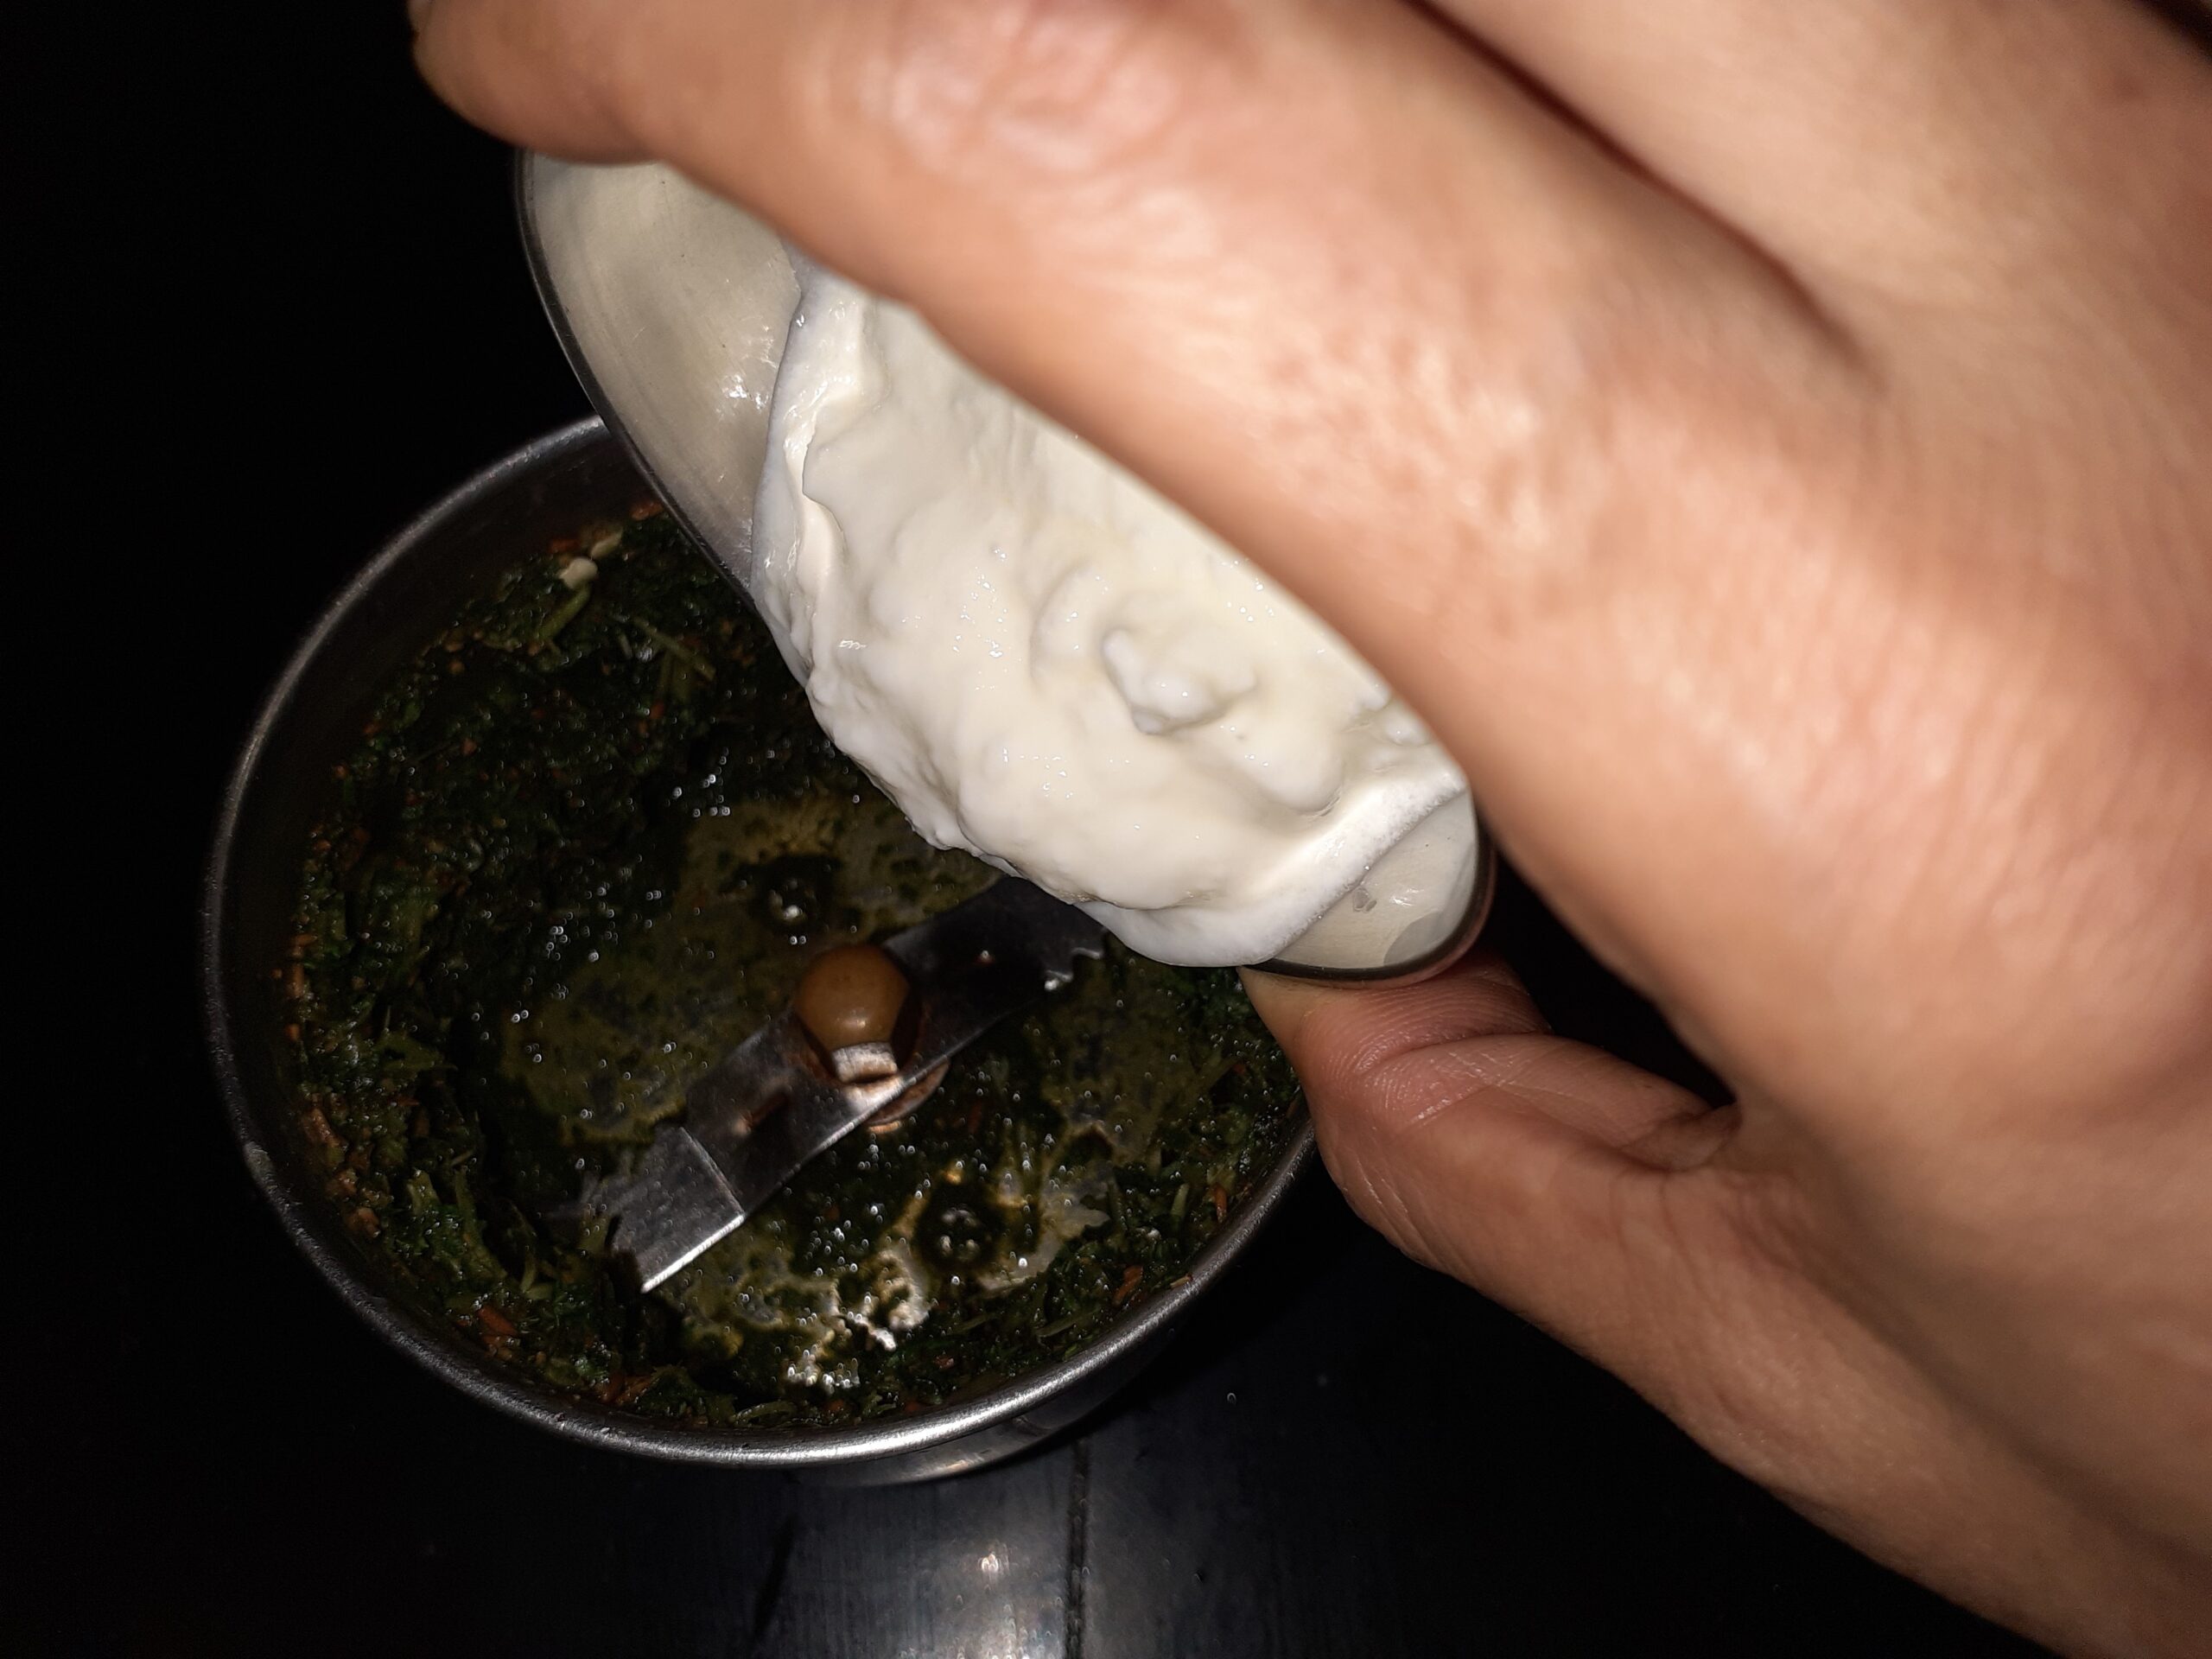
3. Now add a cup of curd to the ground mix and give it a good spin. It should become a fine paste.
4. Add this paste to the remaining curd and mix well. The Mint Raita is ready. Put it in the refrigerator until ready to serve.
Notes:
1. You can temper the raita with mustard and jeera if you wish. I haven’t done it, as I think the Mint by itself is enough.
2. You can add grated Cucumbers, Carrot or finely chopped onion or Boondi to this raita.
3. This Raita can also be used to soak Dahi Vadas.
If you tried this recipe and liked it, comment below. Would love to hear from you.