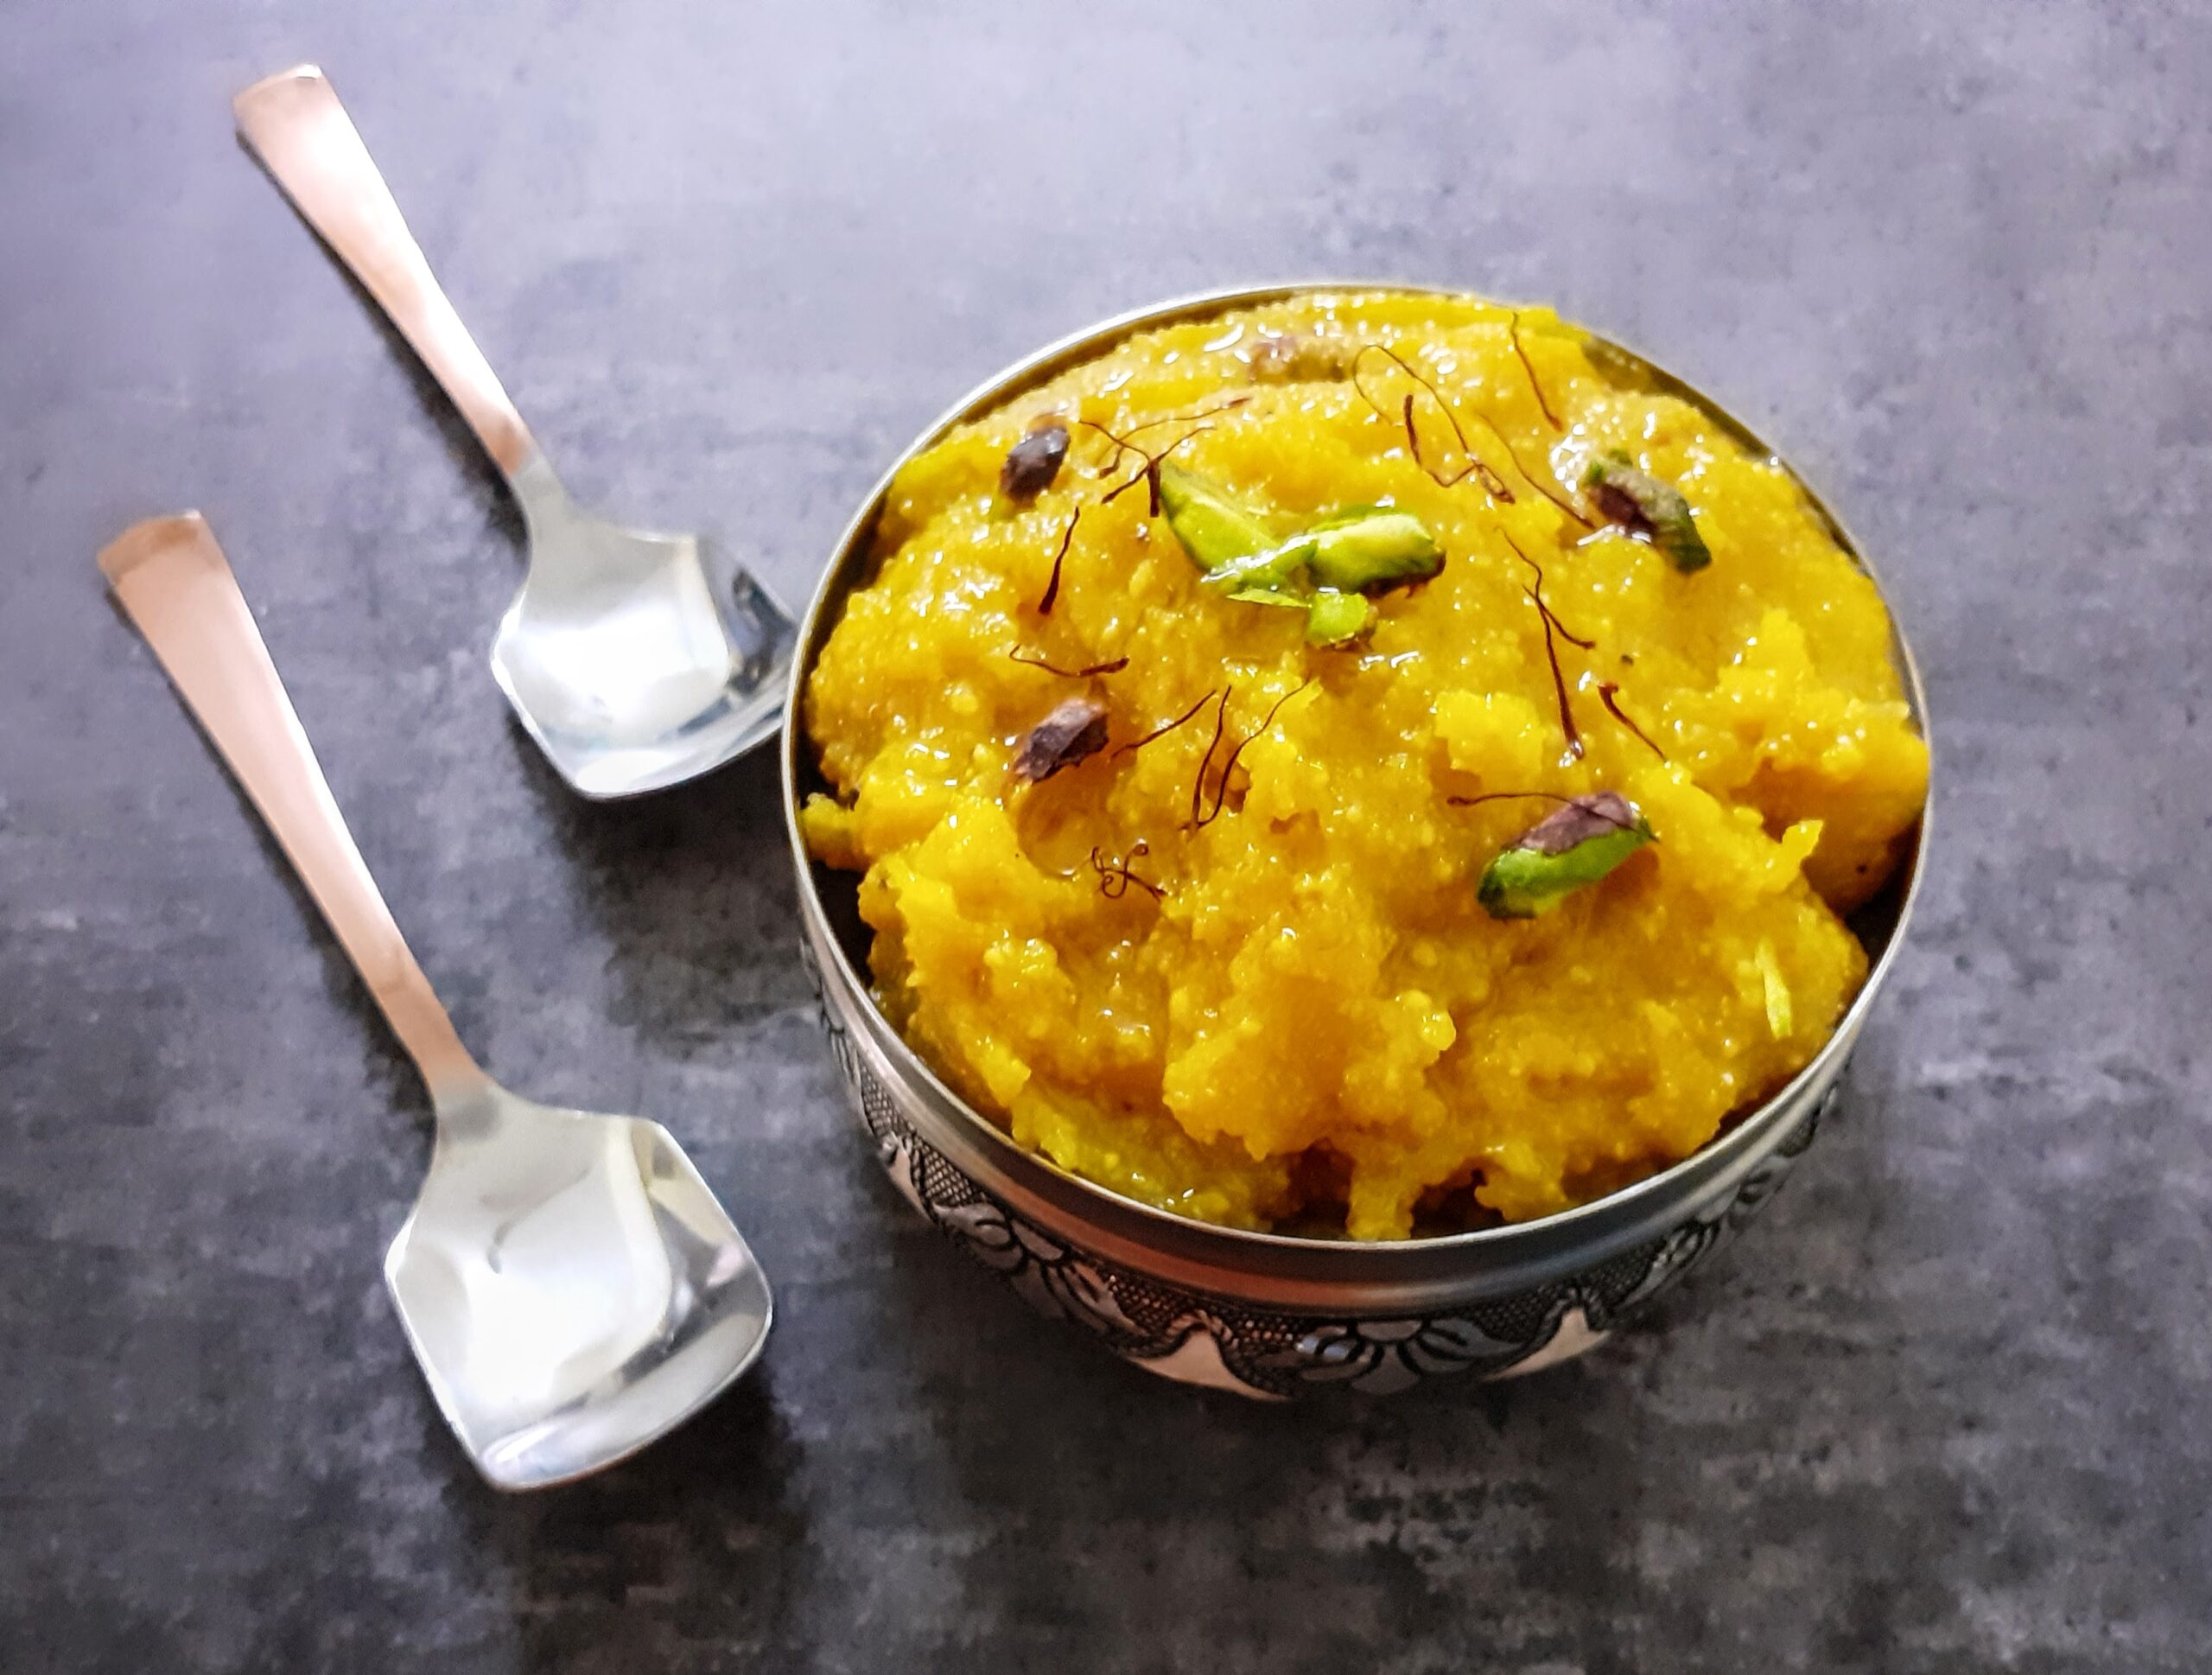
Moong dal Halwa is an Indian dessert made from yellow lentils. It is basically a fudge and is very rich because of the amount ghee/ clarified butter added to it. Though I make many sweet varieties and desserts, I’m not generally the one who will stay until dessert. I’m immensely intuitive while I create sweet dishes, but I don’t crave sweets much. But this halwa is very close to my heart because it probably is the first sweet dish I ever liked. Thanks to our stint in Delhi, I have got to taste the best ones.
Infact, I liked this sweet dish so much that I have attempted to make it in the past, failed miserably and had given up on ever trying it again. But last year during the pandemic lockdown I was craving it badly, and as you know “ when you want something very badly, the universe conspires to make it happen” ????. So I had a viola moment during Diwali, while I was documenting the sweets and savoury prepared by me, when a simple method to make this halwa struck m
If you have attempted making this halwa any time or have searched the net for the recipe, all of them will tell you it takes 3 to 4 hours to get this sweet dish done. The actual recipe asks to soak and grind the lentils and them cook it in milk/ water and then add the sweetening agent. As I have claimed here on the blog before, I will take a short cut as long as it does not alter the taste, flavour and texture of the dish. And I took a short cut to this recipe and I don’t regret it because the outcome was just like the original.
If you follow the procedure as given here by me without altering I’m sure it’s a no fail recipe. And why stand by the stove for hours when you can get the same taste and flavour in an hour’s time? Having failed at this recipe many times, and knowing what went wrong each time, this time the recipe was made with so much conviction of technique that it turned out wonderfully.
Yellow food colour/turmeric powder for colour 2 pinches
Ghee 100 GM approx
Cardamom/ Elaichi powder 1/4 tsp
Almonds and Pistachio chopped a few
Directions:
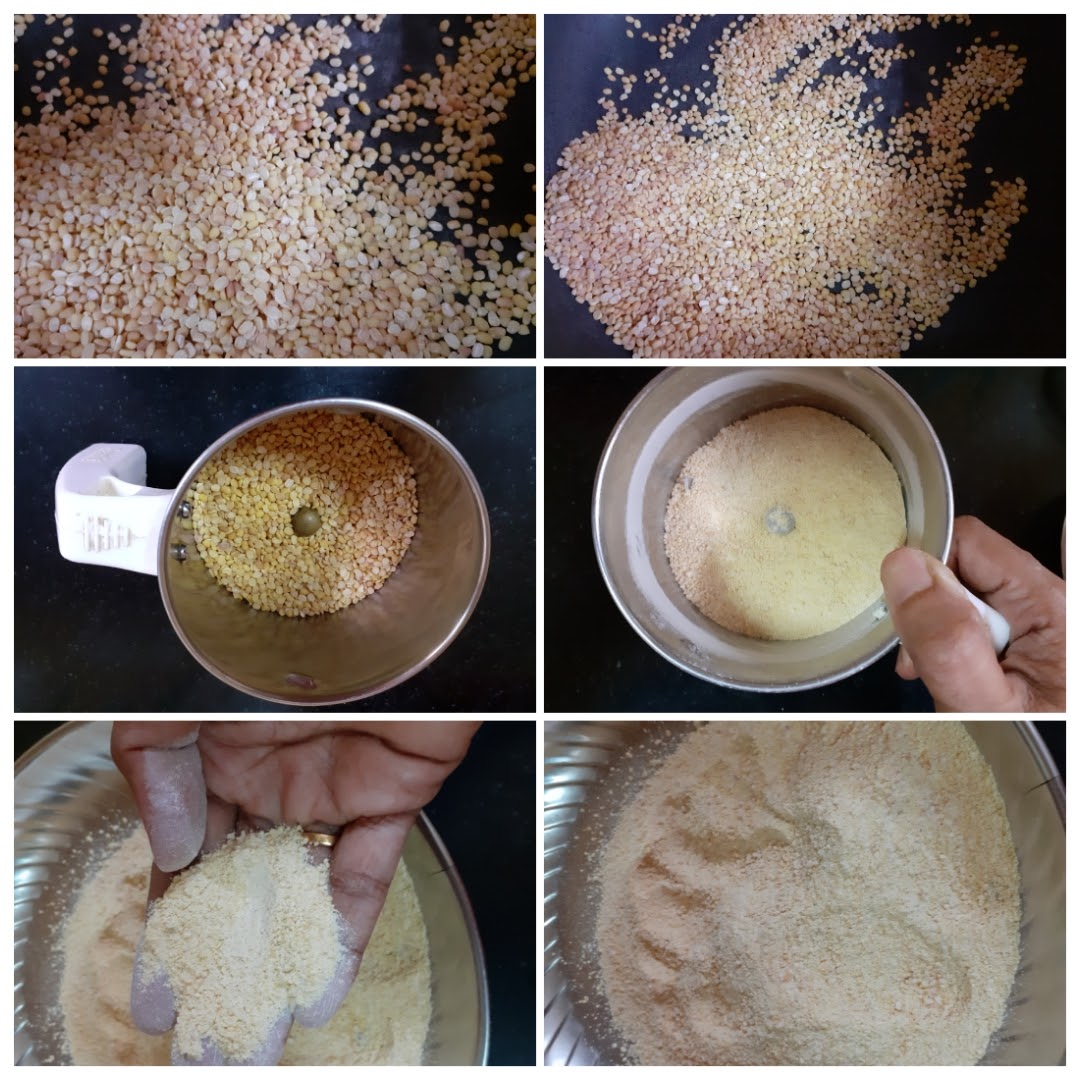
The foremost and important step is dry roasting the dal to a light brown colour. This has to be done patiently on low heat. On this depends the entire recipe. First put a pan/ kadai on flame and warm it. Now put the dal and start the roasting procedure by stirring constantly. This step can be done ahead. Cool the roasted dal and grind it in a blender. For a smooth texture of halwa grind it finely, for a grainy texture grind it coarse. Whole dal should not be visible. Now put this ground dal powder in a pan, add one cup milk, followed by 2 cups water, and stir to make it lump free. Now put the pan on the flame, add the food colour/turmeric powder, and start cooking the mixture on medium flame. Slowly the mixture will start thickening. If adding saffron strands, add now. Keep stirring gently, scraping the sides of the pan from time to time. Once the mixture thickens, check if there is any rawness in the smell. That is, if the dal smell/ taste is still coming. If yes, add another ladle of milk and continue to stir again. If your mixture has thickened and there is no raw smell or taste, add the sugar gently and start stirring again. As the sugar melts the dal mixture will liquefy. Don’t worry and continue to stir. The mixture will start thickening again. Now is the time to start pouring the ghee. Pour one ladle at a time and stir until the ghee is absorbed. Continue this process until no more ghee gets absorbed, but remains on the halwa. You will also notice that at this stage your mixture/ halwa no longer sticks to the pan/ kadai bottom, but comes out clean while stirring. Another way to tell the Halwa is done, is when you take a little of it in your fingers and try to form a ball, you should be able to do it. Add the cardamom powder and nuts and transfer the halwa to a container. The delicious Moong dal halwa is ready to relish .
STEPWISE RECIPE FOLLOWS:
1. First out a pan/ kadai on flame and warm it. Now put the dal and start the roasting procedure by stirring constantly. This step can be done ahead. Cool the roasted dal and grind it in a blender. For a smooth texture of halwa grind it finely, for a grainy texture grind it coarse.
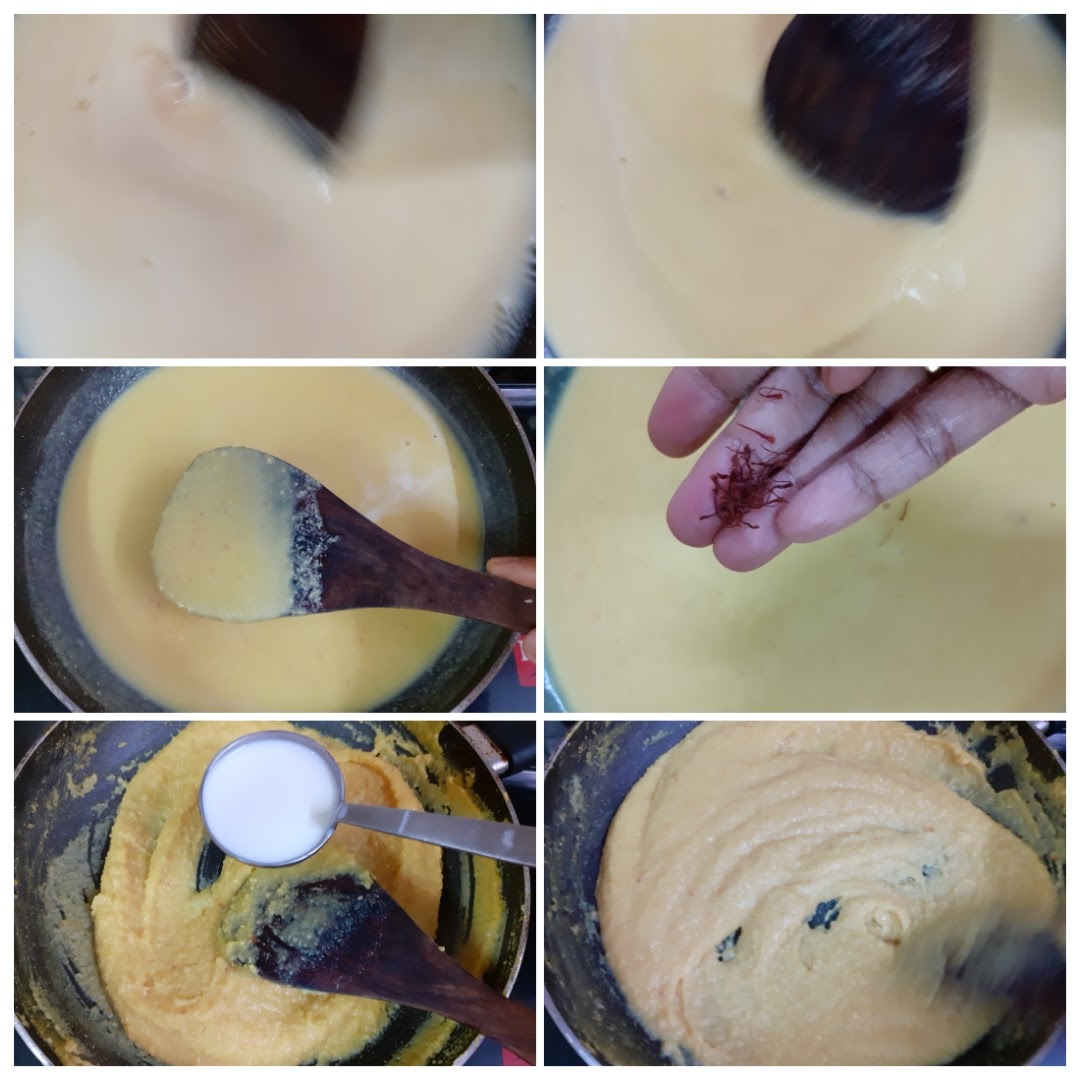
2. Now put this ground dal powder in a pan, add one cup milk, followed by 2 cups water, and stir to make it lump free. Now put the pan on the flame, add the food colour/turmeric powder, and start cooking the mixture on medium flame.
3. Slowly the mixture will start thickening. Keep stirring gently, scraping the sides of the pan from time to time. If adding saffron strands, add now. Once the mixture thickens, check if there is any rawness in the smell. That is, if the dal smell/ taste is still coming. If yes, add another ladle of milk and continue to stir again. If your mixture has thickened and there is no raw smell or taste, add the sugar gently and start stirring again.
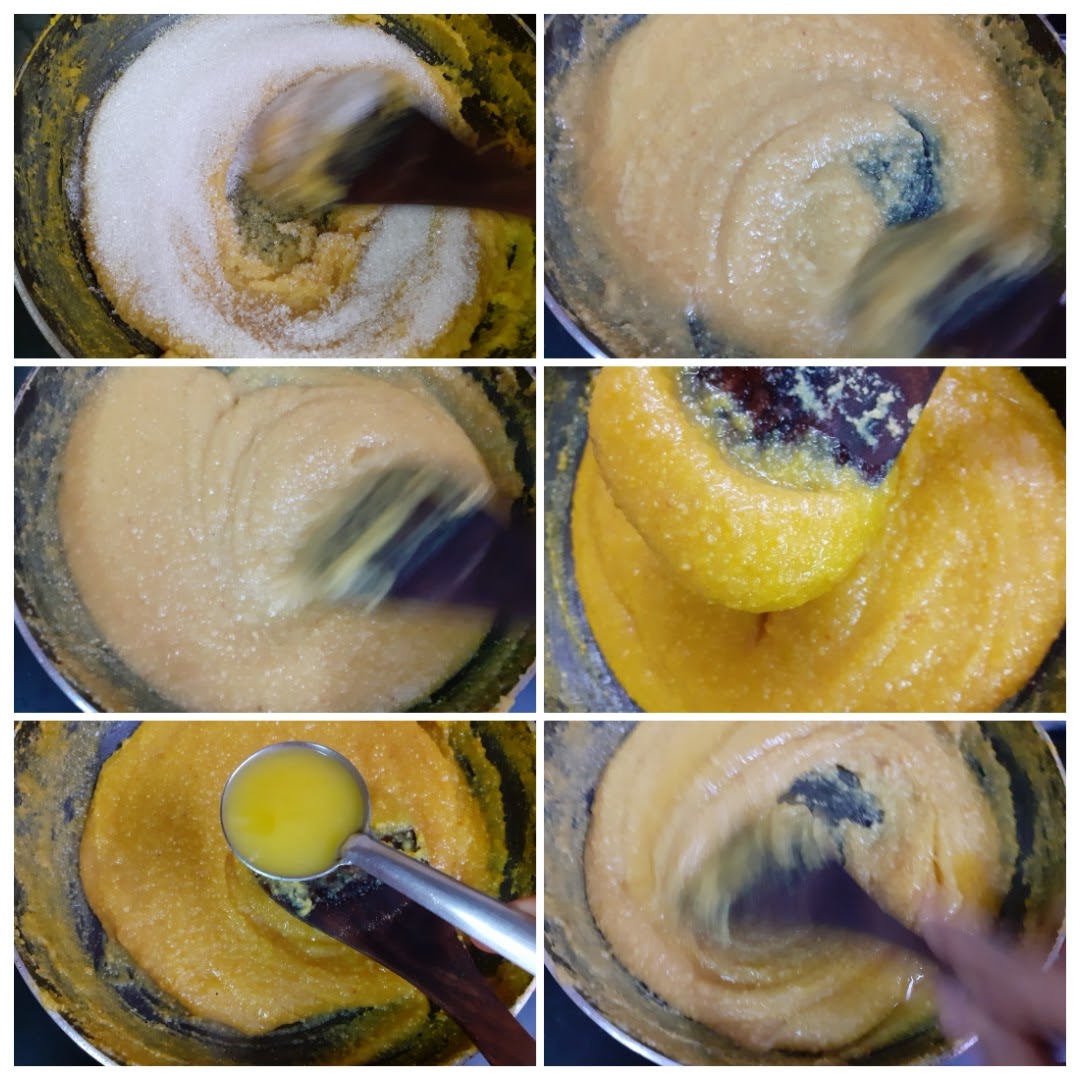
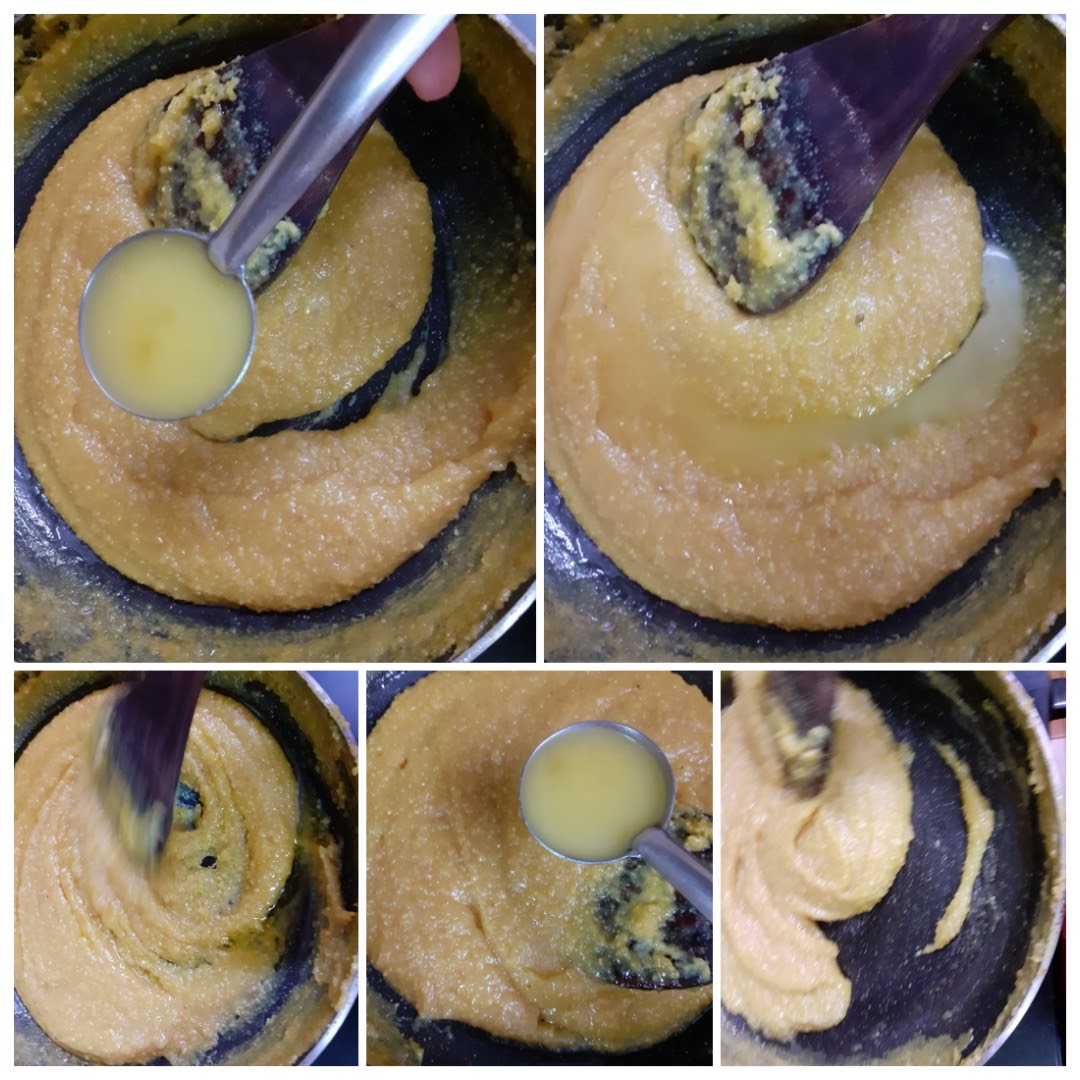
4. As the sugar melts the dal mixture will liquefy. Don’t worry and continue to stir. The mixture will start thickening again. Now is the time to start pouring the ghee. Pour one ladle at a time and stir until the ghee is absorbed. Continue this process until no more ghee gets absorbed, but remains on the halwa.
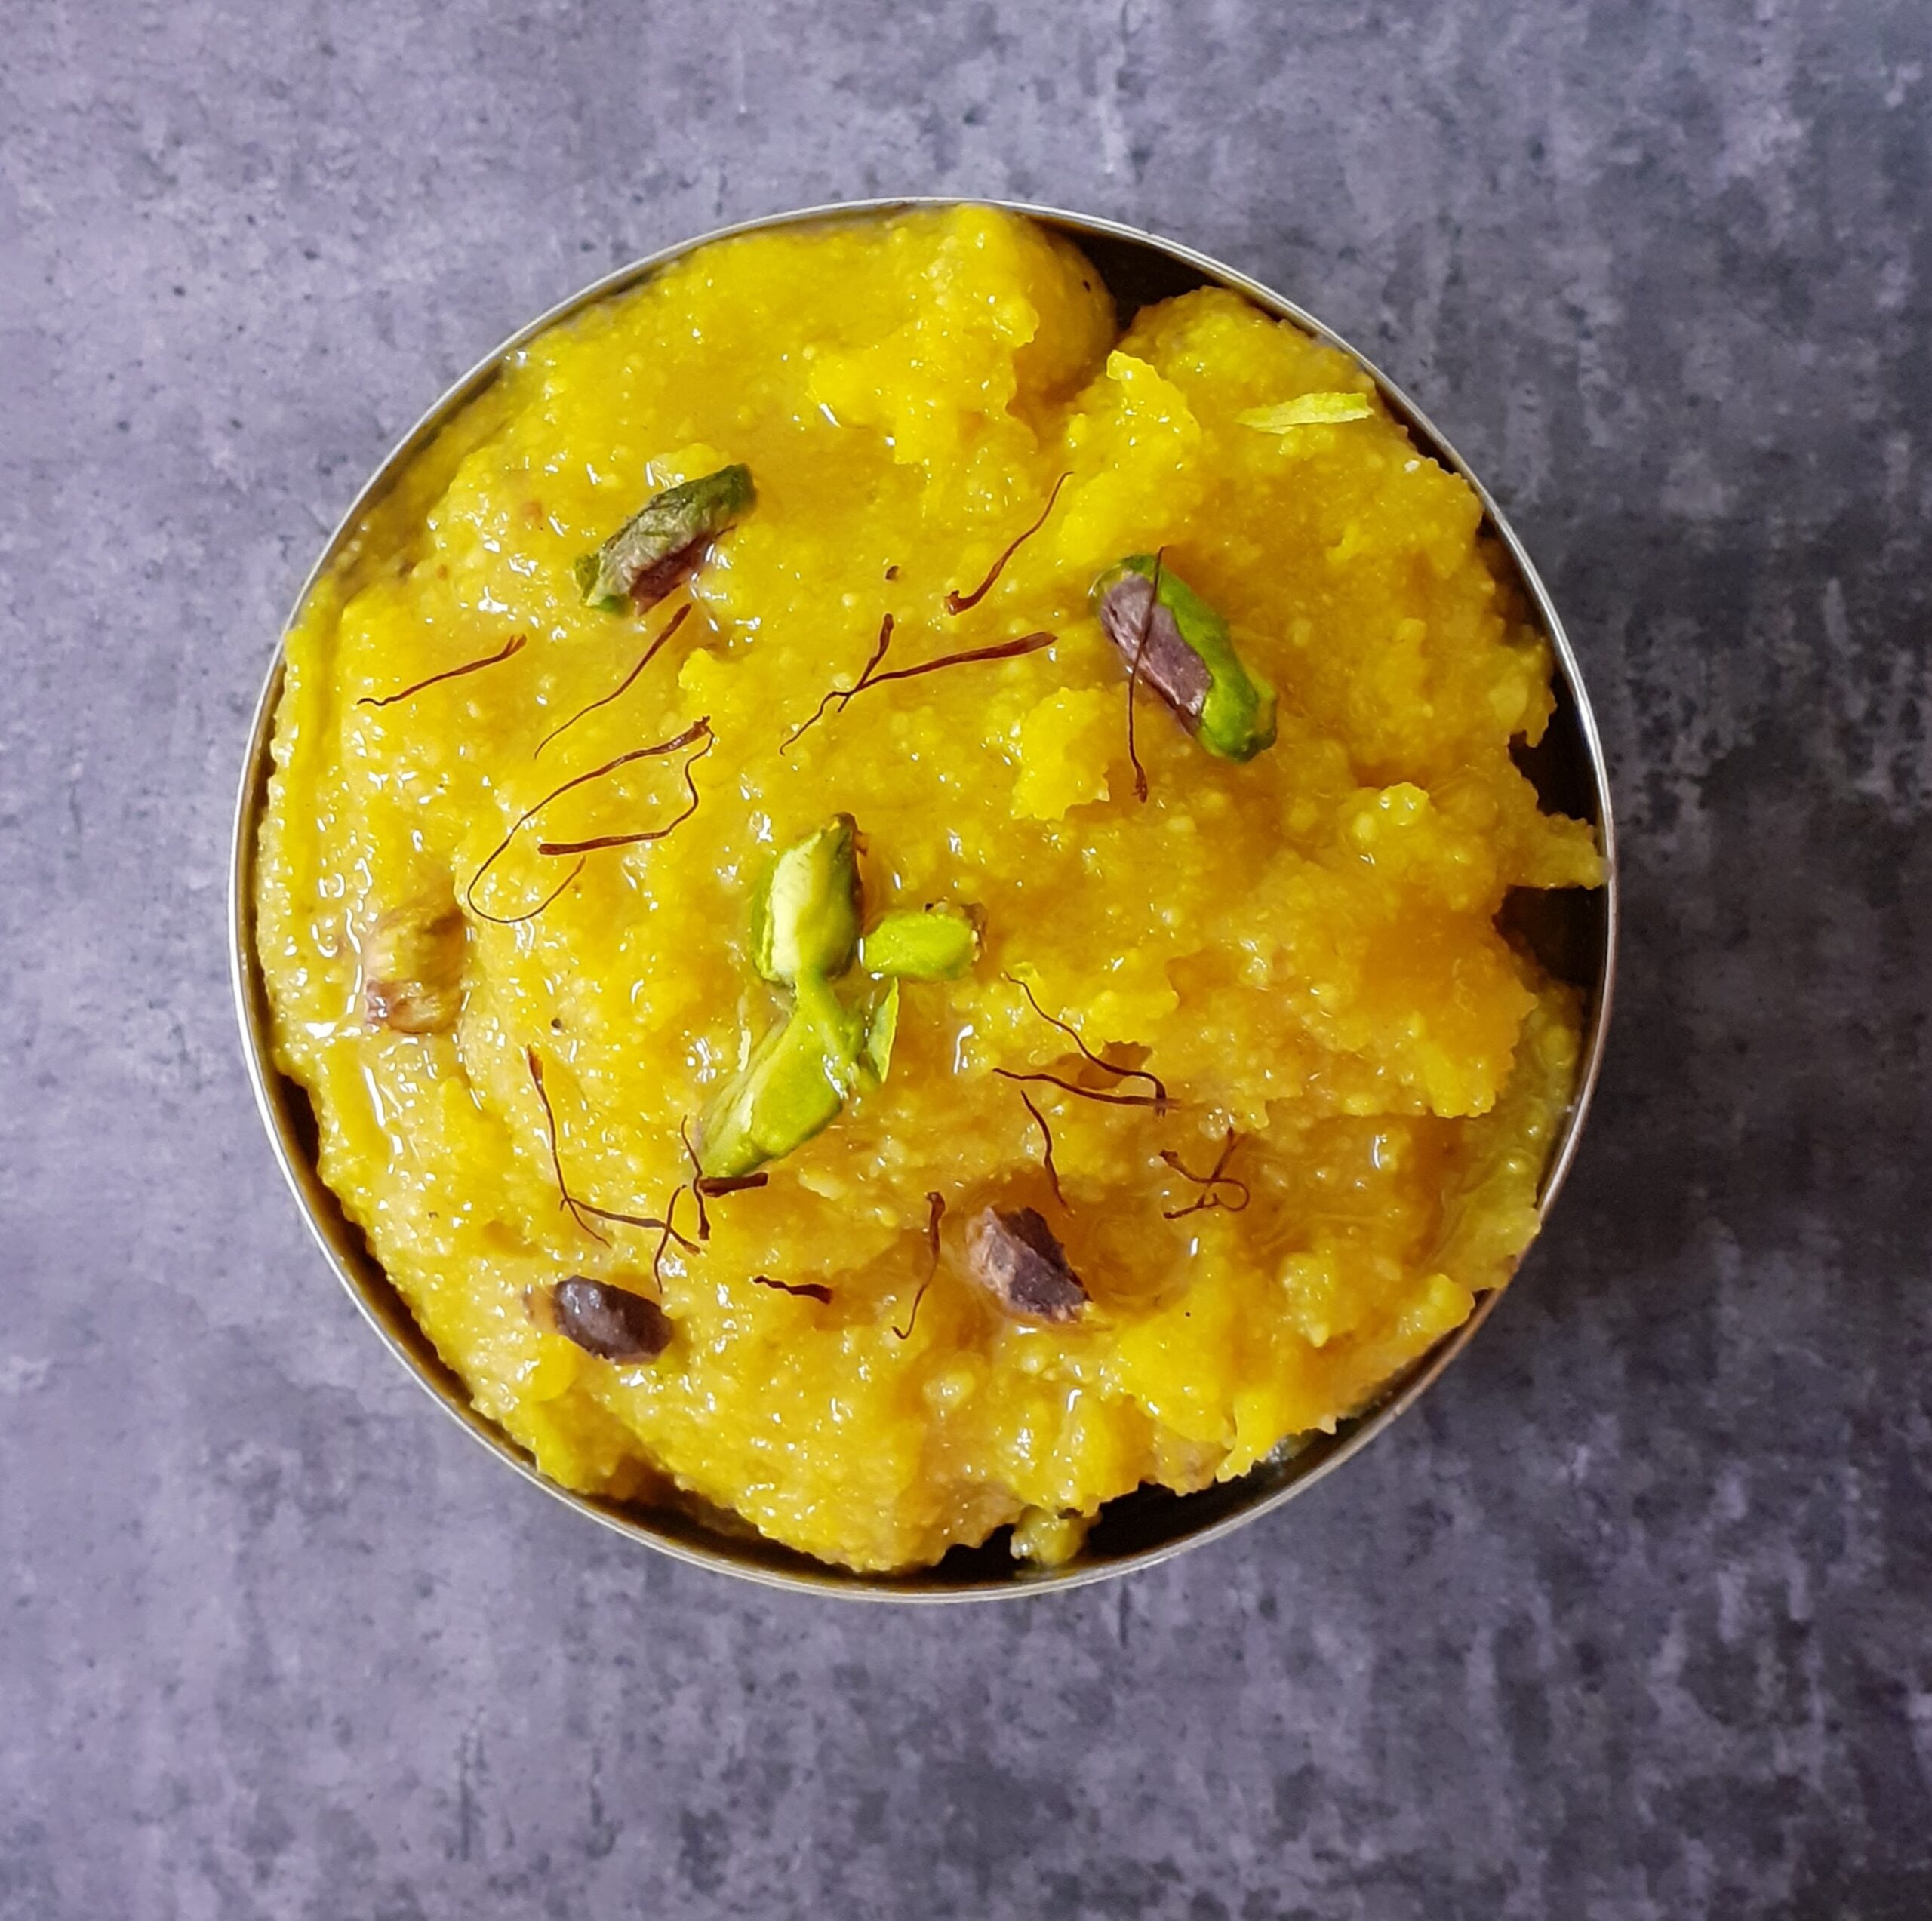
5. You will also notice that at this stage your mixture/ halwa no longer sticks to the pan/ kadai bottom, but comes out clean while stirring. Another way to tell the Halwa is done, is when you take a little of it in your fingers and try to form a ball, you should be able to do it. Add the cardamom powder and nuts and transfer the halwa to a container. The delicious Moong dal halwa is ready to relish .
NOTES:
1. The foremost and important step is dry roasting the dal to a light brown colour. This has to be done patiently on low heat. On this depends the entire recipe.
2. Ensure the Kadai is warm before you put in the dal for roasting. This way the Dal will get roasted evenly and quickly.
3. I like a grainy texture, so while grinding, I stopped just before super fine.
4. Adding more ghee than required will subdue the taste of the dal. When the dal mixture no longer takes in the ghee, as soon as poured and stirred, stop adding any more ghee.
5. I used a non stick pan for making the Halwa and recommend the same for now. I will soon be trying in a regular kadai and shall update the recipe then.
6. I have kept my Halwa colour yellow, by frying it to a light brown and then adding turmeric powder(which is a natural colour). If you prefer a browner version, roast the dal to a deeper brown and proceed with the recipe.
7. I have used turmeric powder instead of food colour, as it is natural and two pinches of it do not make a difference to the taste of the halwa.
If you tried this recipe and liked it please comment below. I would love to hear from you. If you have a query about the recipe email us and ill respond as soon as I can.
If you would like to receive our recipes on your mail please leave your mail id at the homepage. Every time Rajjo’s Kitchen has a new post we will mail the recipe to you.
GAJAR HALWA/ CARROT HALWA
Gajar Halwa/ Carrot Halwa is a very popular Indian dessert. Mostly a winter dessert. Though it is made frequently with the regular carrots ( English Carrots), using the Delhi Carrots or Red Carrots as they are called gives the best results.
This is one dessert I love and consider it very sacred, so if you are looking for an easy, one pot or microwave recipe, you are going to be disappointed. As far as Gajar Halwa is concerned I am old school. I cook it in milk( and a whole lot of milk) so that the raw taste of the Carrots is gone and the milk crumbles to a Rabri like texture. The taste of such a Halwa is divine. This is one recipe I have never made with regular carrot except in my dessert recipe- Gajar halwa Barfi where I was shaping it like fudge( Barfi) and using Khoya to speed up the process. Whereas this recipe of Gajar Halwa is a slow cook process. The slower it cooks the better it tastes. Am I disappointing you? Well, make it like this and you will be hooked to it for life. Remember the best things in life come with a lot of patience.
My belief is that when I wait a whole year for the Red Carrots to appear in the Market and then make the Halwa, then it should be made the authentic way. Which does not involve adding condensed milk or Koya or milk powder but in cooking the carrots in milk( whole cream), to perfection.
I use only whole cream milk to make this dessert. So the taste of the Halwa depends entirely on the quality of milk. A full/whole cream milk Halwa will give you better taste and I can say this because I have tried it will all milk varieties available in the market and what works best is whole/full cream milk.
So after the whole mega write up, taking you to the recipe. While you are here do check out my other carrot based desserts like Carrot Kheer( another speciality from Rajjo’s Kitchenn) and Gajar Halwa Barfi.
PREP TIME:30 COOK TIME: 1hr
TOTAL TIME:1hr.30Mins COURSE: DESSERT
CUISINE: INDIAN SERVINGS: 6
AUTHOR: Rajni Ram
Ingredients:
Carrots ( Preferably Red ones) 1.5 kilo grated
Milk whole cream/ full cream 2 litres
Sugar 300 gm
Cardamom/ Elaichi powder
Ghee 4 tbsp
Cashews a new broken
Directions:
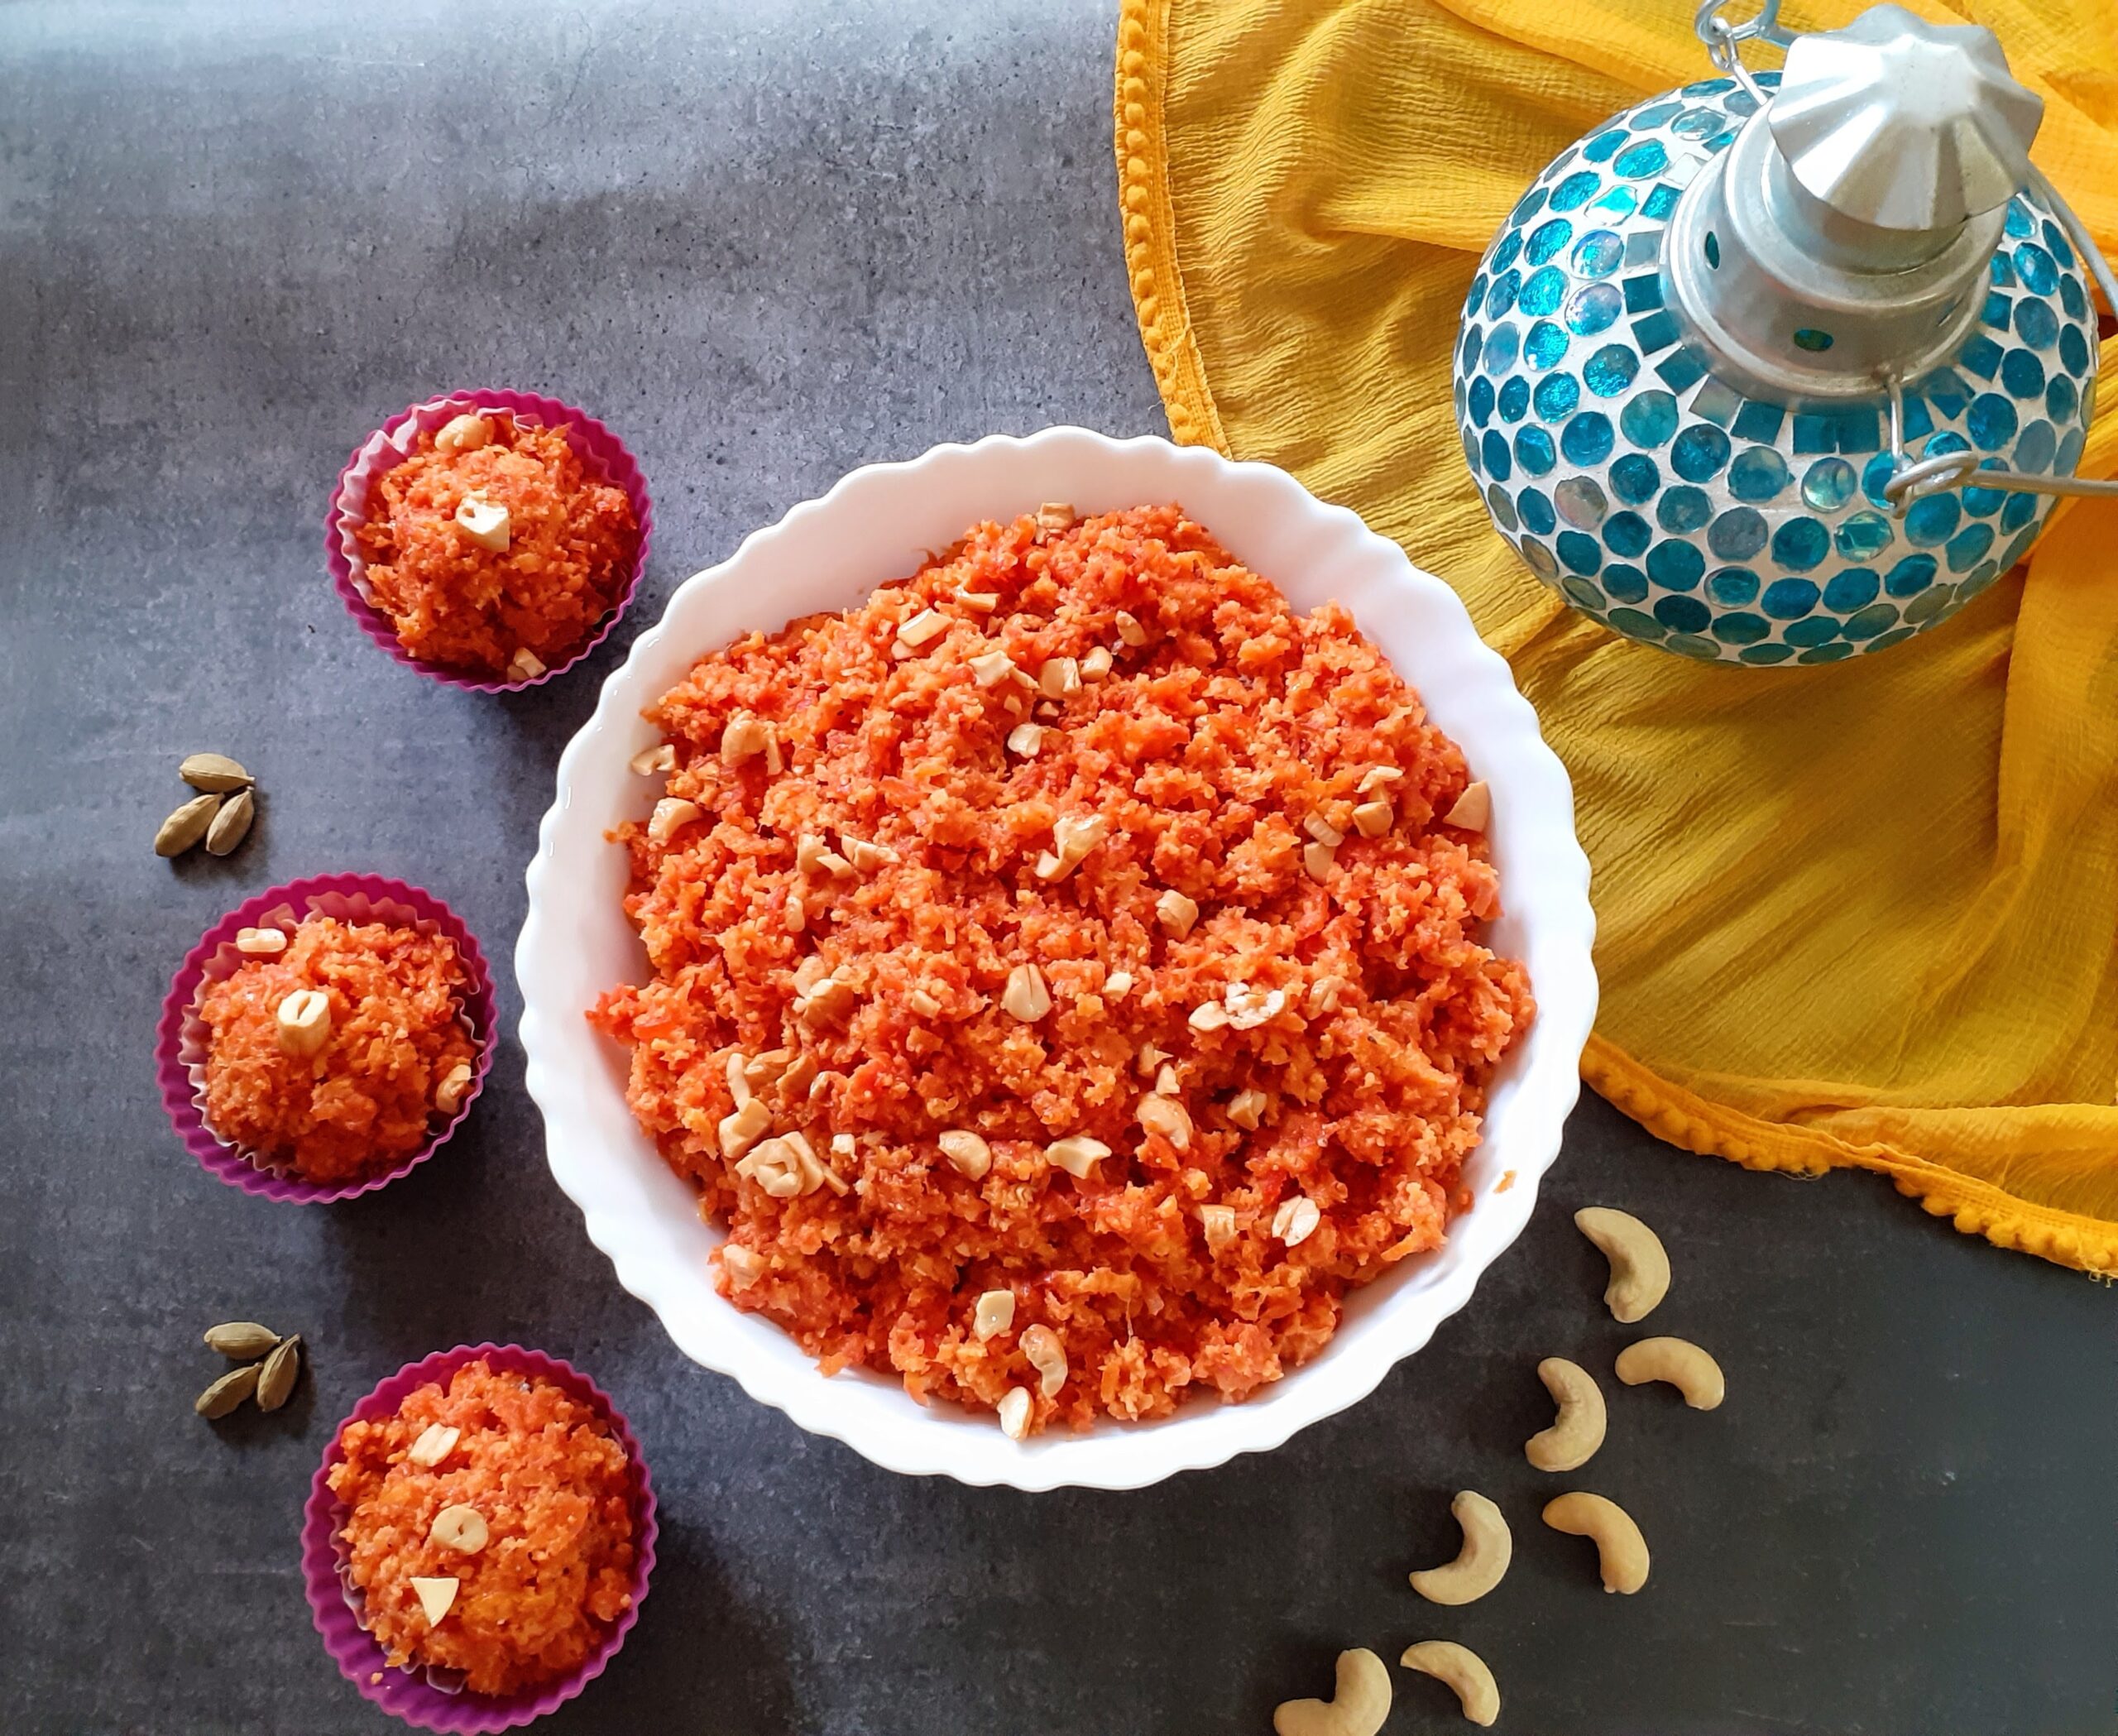
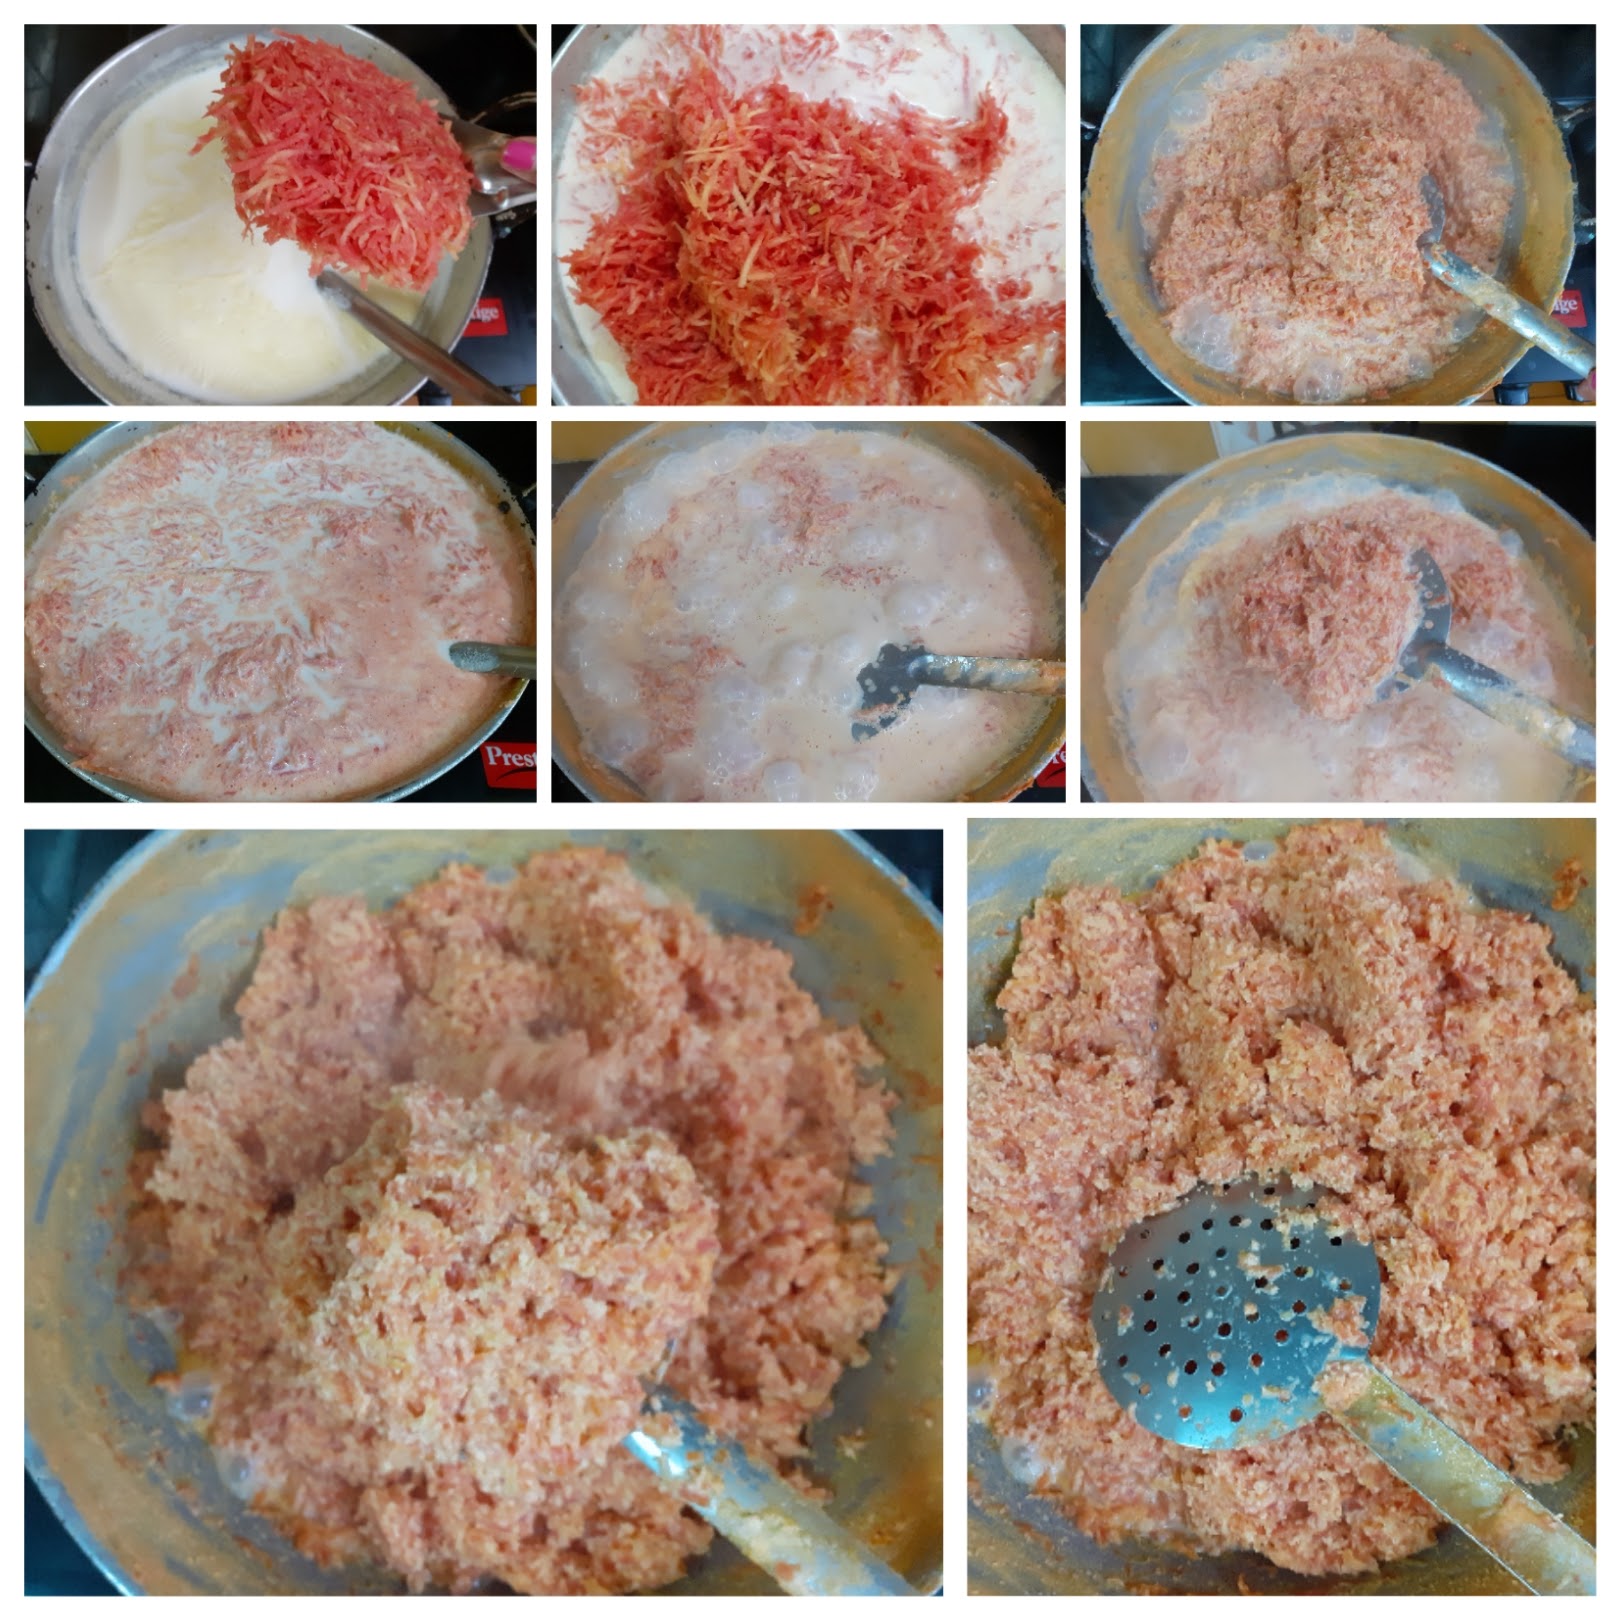
Wash, peel and grate the carrots and keep aside. In a huge thick bottomed vessel/ kadai/ or urli boil the milk. When it comes to a boil, reduce the flame and put in the grated carrots. Start stirring the mixture. The flame can be increased now but constant stirring is required . This process has to continue until almost all the milk dries up. The texture will look like Rabri stickng to carrot. Once all milk dries up, reduce the flame and add the sugar. Continue to stir again. Once the sugar is added the mixture will liquify, continue to stir until all the moisture is absorbed. The halwa will come together but it will not be gooey. Now add the cardamom powder. Fry the nuts in ghee and pour it over the halwa along with the nuts. The healthy and delicious Gajar Halwa is ready. Serve warm. Bon Appetite.
STEPWISE RECIPE FOLLOWS:
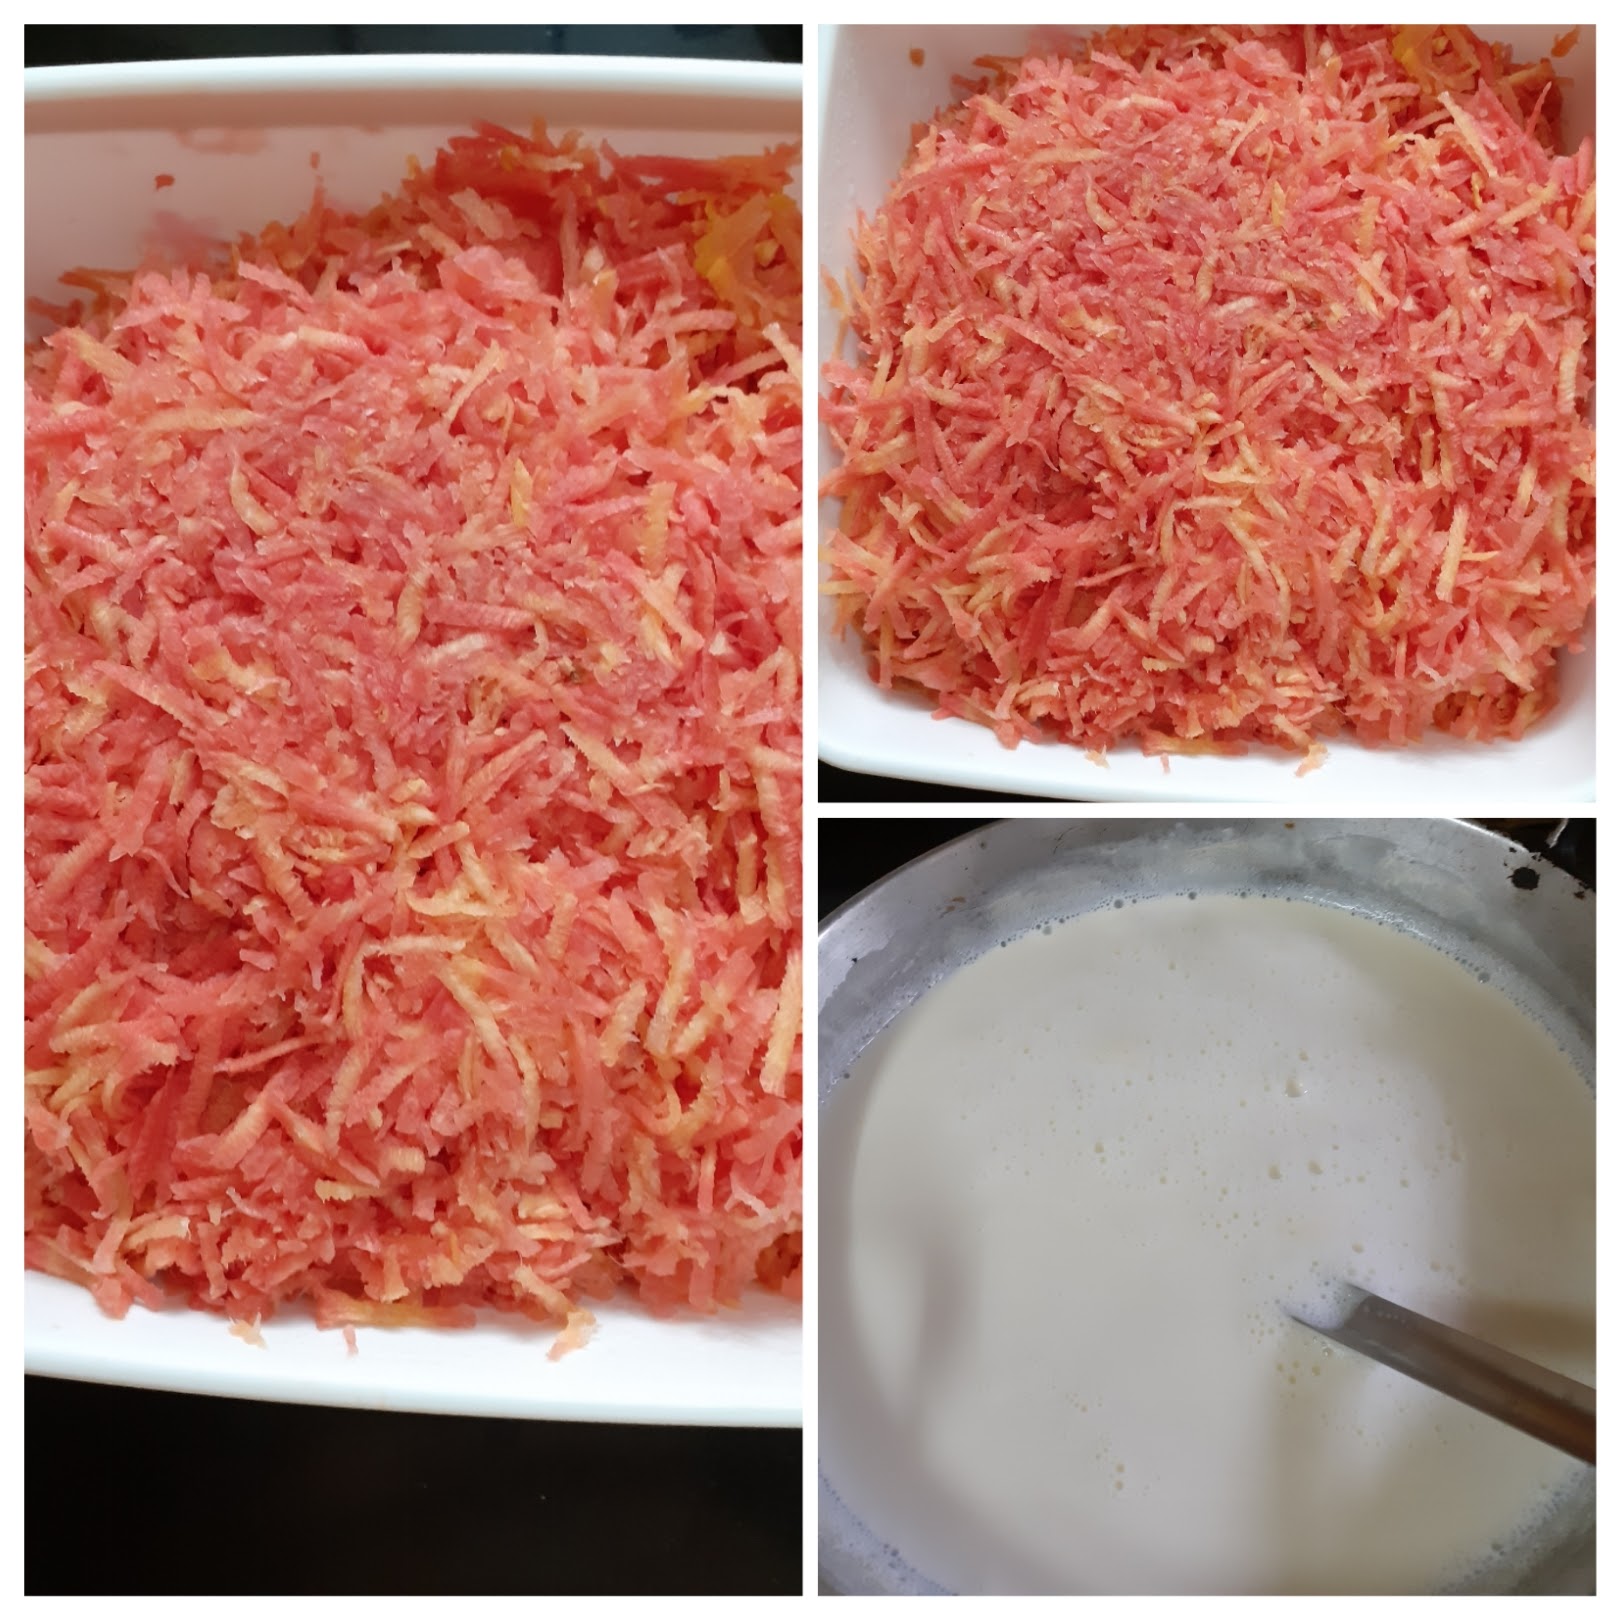
1. Wash, peel and grate the carrots and keep aside. In a huge thick bottomed vessel/ kadai/ or Urli boil the milk.
2. When it comes to a boil, reduce the flame and put in the grated carrots. Start stirring the mixture. The flame can be increased now but constant stirring is required . This process has to continue until almost all the milk dries up. Showing you the stages of reduction in pictures below that are self explanatory.
3. Once all milk dries up, reduce the flame and add the sugar. Continue to stir again. Once the sugar is added the mixture will liquefy, continue to stir until all the moisture is absorbed. The Halwa will come together but it will not be gooey. (forgot to click a picture finally to show the final consistency, so have included the one showing the cardamom powder. Please follow that texture for final consistency of Halwa).
4. Now add the cardamom powder. Fry the nuts in ghee and pour it over the Halwa along with the nuts. The healthy and delicious Gajar Halwa is ready. Serve warm.
NOTES:
1. While cooking at high heat keep stirring constantly to avoid burning the contents at the bottom of the pan.
2. Actually after sometime of cooking the milk and carrot mixture , it does not overflow from the vessel. That time the stirring can be relaxed a bit, but stir every couple of minutes. If you are following this reduce flame when not stirring.
3. Good quality full cream milk yields the best result, the Halwa can be made with milk of any consistency though. The results may not be what I have described .
4. Feel free to try this with regular Carrots too. Method being the same.
5. Sometimes people try to over power the subtle carrot flavour by adding huge amounts of ghee. This is not required. Pouring ghee at the right time is very important, such that the flavour is enhanced and a lot of ghee is not poured unnecessarily. Check out my Cakkara Pongal post for the directions on how to pour the ghee.
If you tried this recipe and liked it please comment below. I would love to hear from you. If you have a query about the recipe email us and ill respond as soon as I can.
If you would like to receive our recipes in your mail please leave your mail id at the homepage. Every time Rajjo’s Kitchen has a new post we will mail the recipe to you.
Sugiyan
Sugiyan or Sukhiyan as it is called is a traditional snack in Kerala and Tamilnadu. It is also made in Andhra Pradesh and is called Boorelu. This snack is like a sweet version of the Aloo Bonda where the Aloo is replaced with a sweet Chana dal or Moong dal and Jaggery filling and instead of Besan Urad dal and rice flour are used as a batter to cover the filling(Poornam). Coconut is also added to the filling that enhances the taste. This is also a snack that people make for festivals. As the festival time is nearing blogging this recipe may be helpful. I usually make it around Navarathri and Diwali to serve it to guests who visit home.
As I had mentioned that the poornam (filling) is made with Moong dal too, but I personally feel the chana dal filling is tastier. Some also use whole moong(payaru) to make the filling.
I use this filling of Sugiyan to make Puran Poli(Boli/Bobbatlu/Hoolige) also. So what I usually do is make them both simultaneously. I use wheat flour majorly with a hint of maida to make Puran Poli, the Sugiyan is had the same day as it doesn’t taste fresh or hold good the next day, it is like an instant snack, whereas Puran Poli can be consumed with 2-3 days if stored properly.
One needs to grind the batter carefully and the rest of the recipe is quite easy. In this recipe, I will also show you an easy way to make the filling.
While you are here check out my other dessert recipes like Pineapple Rabdi,
Carrot Kheer, Chakkara Pongal, Atte Ka Sheera, Akkara vadisal, and more.
Here is the recipe of Sugiyan for you–
PREP TIME: 20 Mins(1 hr soak) COOK TIME: 40 Mins
TOTAL TIME: 60 Mins COURSE: SNACK
CUISINE: SOUTH INDIAN SERVINGS: 6
AUTHOR: Rajni Ram
Ingredients:
Urad dal 1 cup soaked for 1-hour
Chana dal 1 cup roasted to light brown
Turmeric powder 1/2 tsp
Rice flour 2 tbsp
Jaggery 1 cup powdered
Coconut grated 1/2 cup
Cardamom powder 1 tsp
Oil for frying
Directions: for the filling:
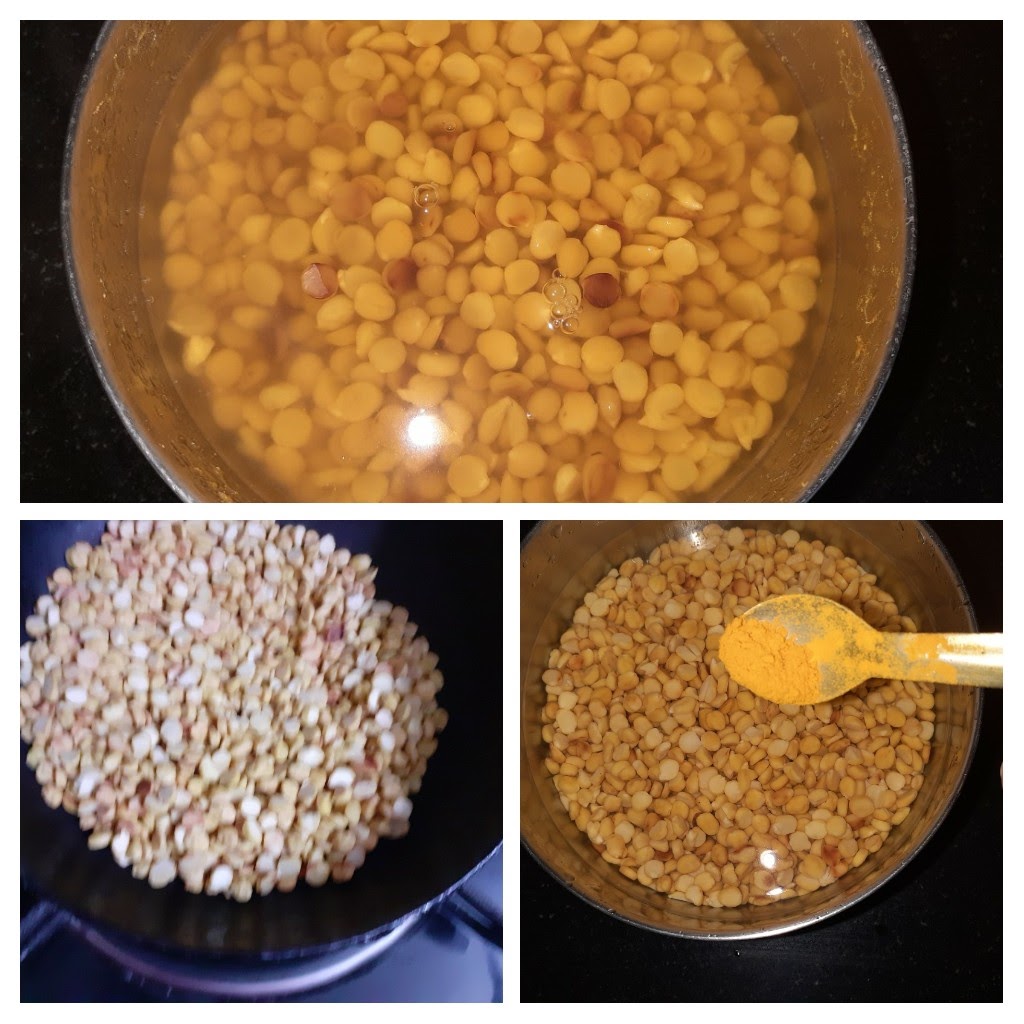
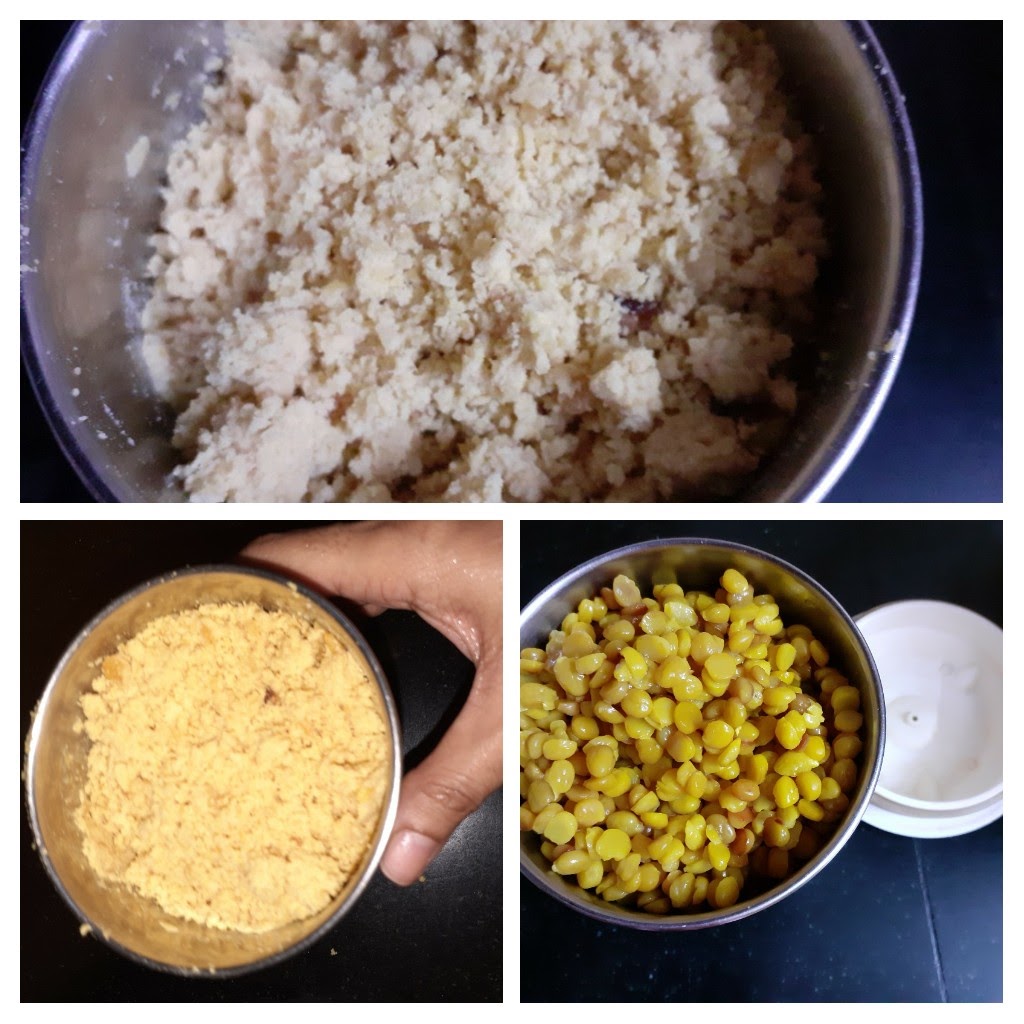
Dry roast the Chana dal to a light brown, you will get a nice aroma of the dal. Switch off the flame, remove and cook in a pressure cooker with 1/2 tsp turmeric powder and adequate water for 2-3 whistles(not more), as we want the dal to be rightly cooked, not mushy. Once the dal is cooked and the pressure in the cooker has subsided, remove the dal and put it in a strainer for all the water to drain off for about 5 minutes. Now put the dal into the dry grinding unit of the processor and blitz. Open stir the contents well and blitz again to a fine powder. After grinding it will resemble wet sand. Now in a Karahi put in the jaggery and the ground dal, followed by grated coconut( add no water) and keep stirring, in low flame. The jaggery will start melting and within 5 minutes of stirring the filling will become well combined. Even if it seems a little dry, don’t be tempted to add water. The jaggery will be enough to bind it. Add the Cardamom powder and keep stirring and when it forms a lump, put off the flame and let it cool. Once the filling has cooled, make small balls of them and keep aside.
Directions for the outer crust:
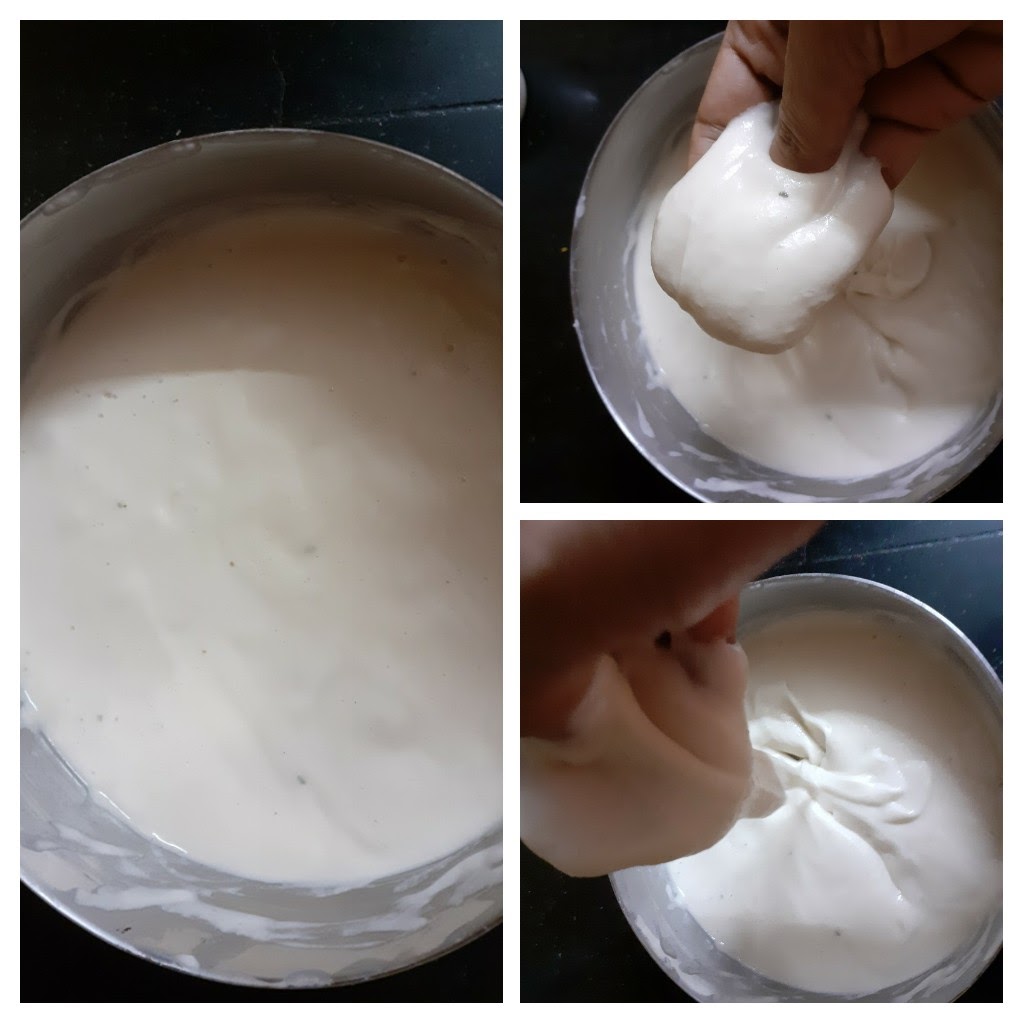
Soak the Urad dal for 1 hour and grind. Don’t allow it to soak for a long time, as then it soaks up a lot of oil while frying. The dal has to be ground to a smooth and thick batter, with water as required. The batter should stick to the filling and not roll off it, that should be the consistency. A runny or flowy batter will not stick to the filling. After grinding transfer to a dish, add 2 tablespoons of rice flour and 1/2 tsp salt. Now add little water if required as the rice flour would have absorbed all moisture from the urad dal paste.
Directions to make Sugiyan:
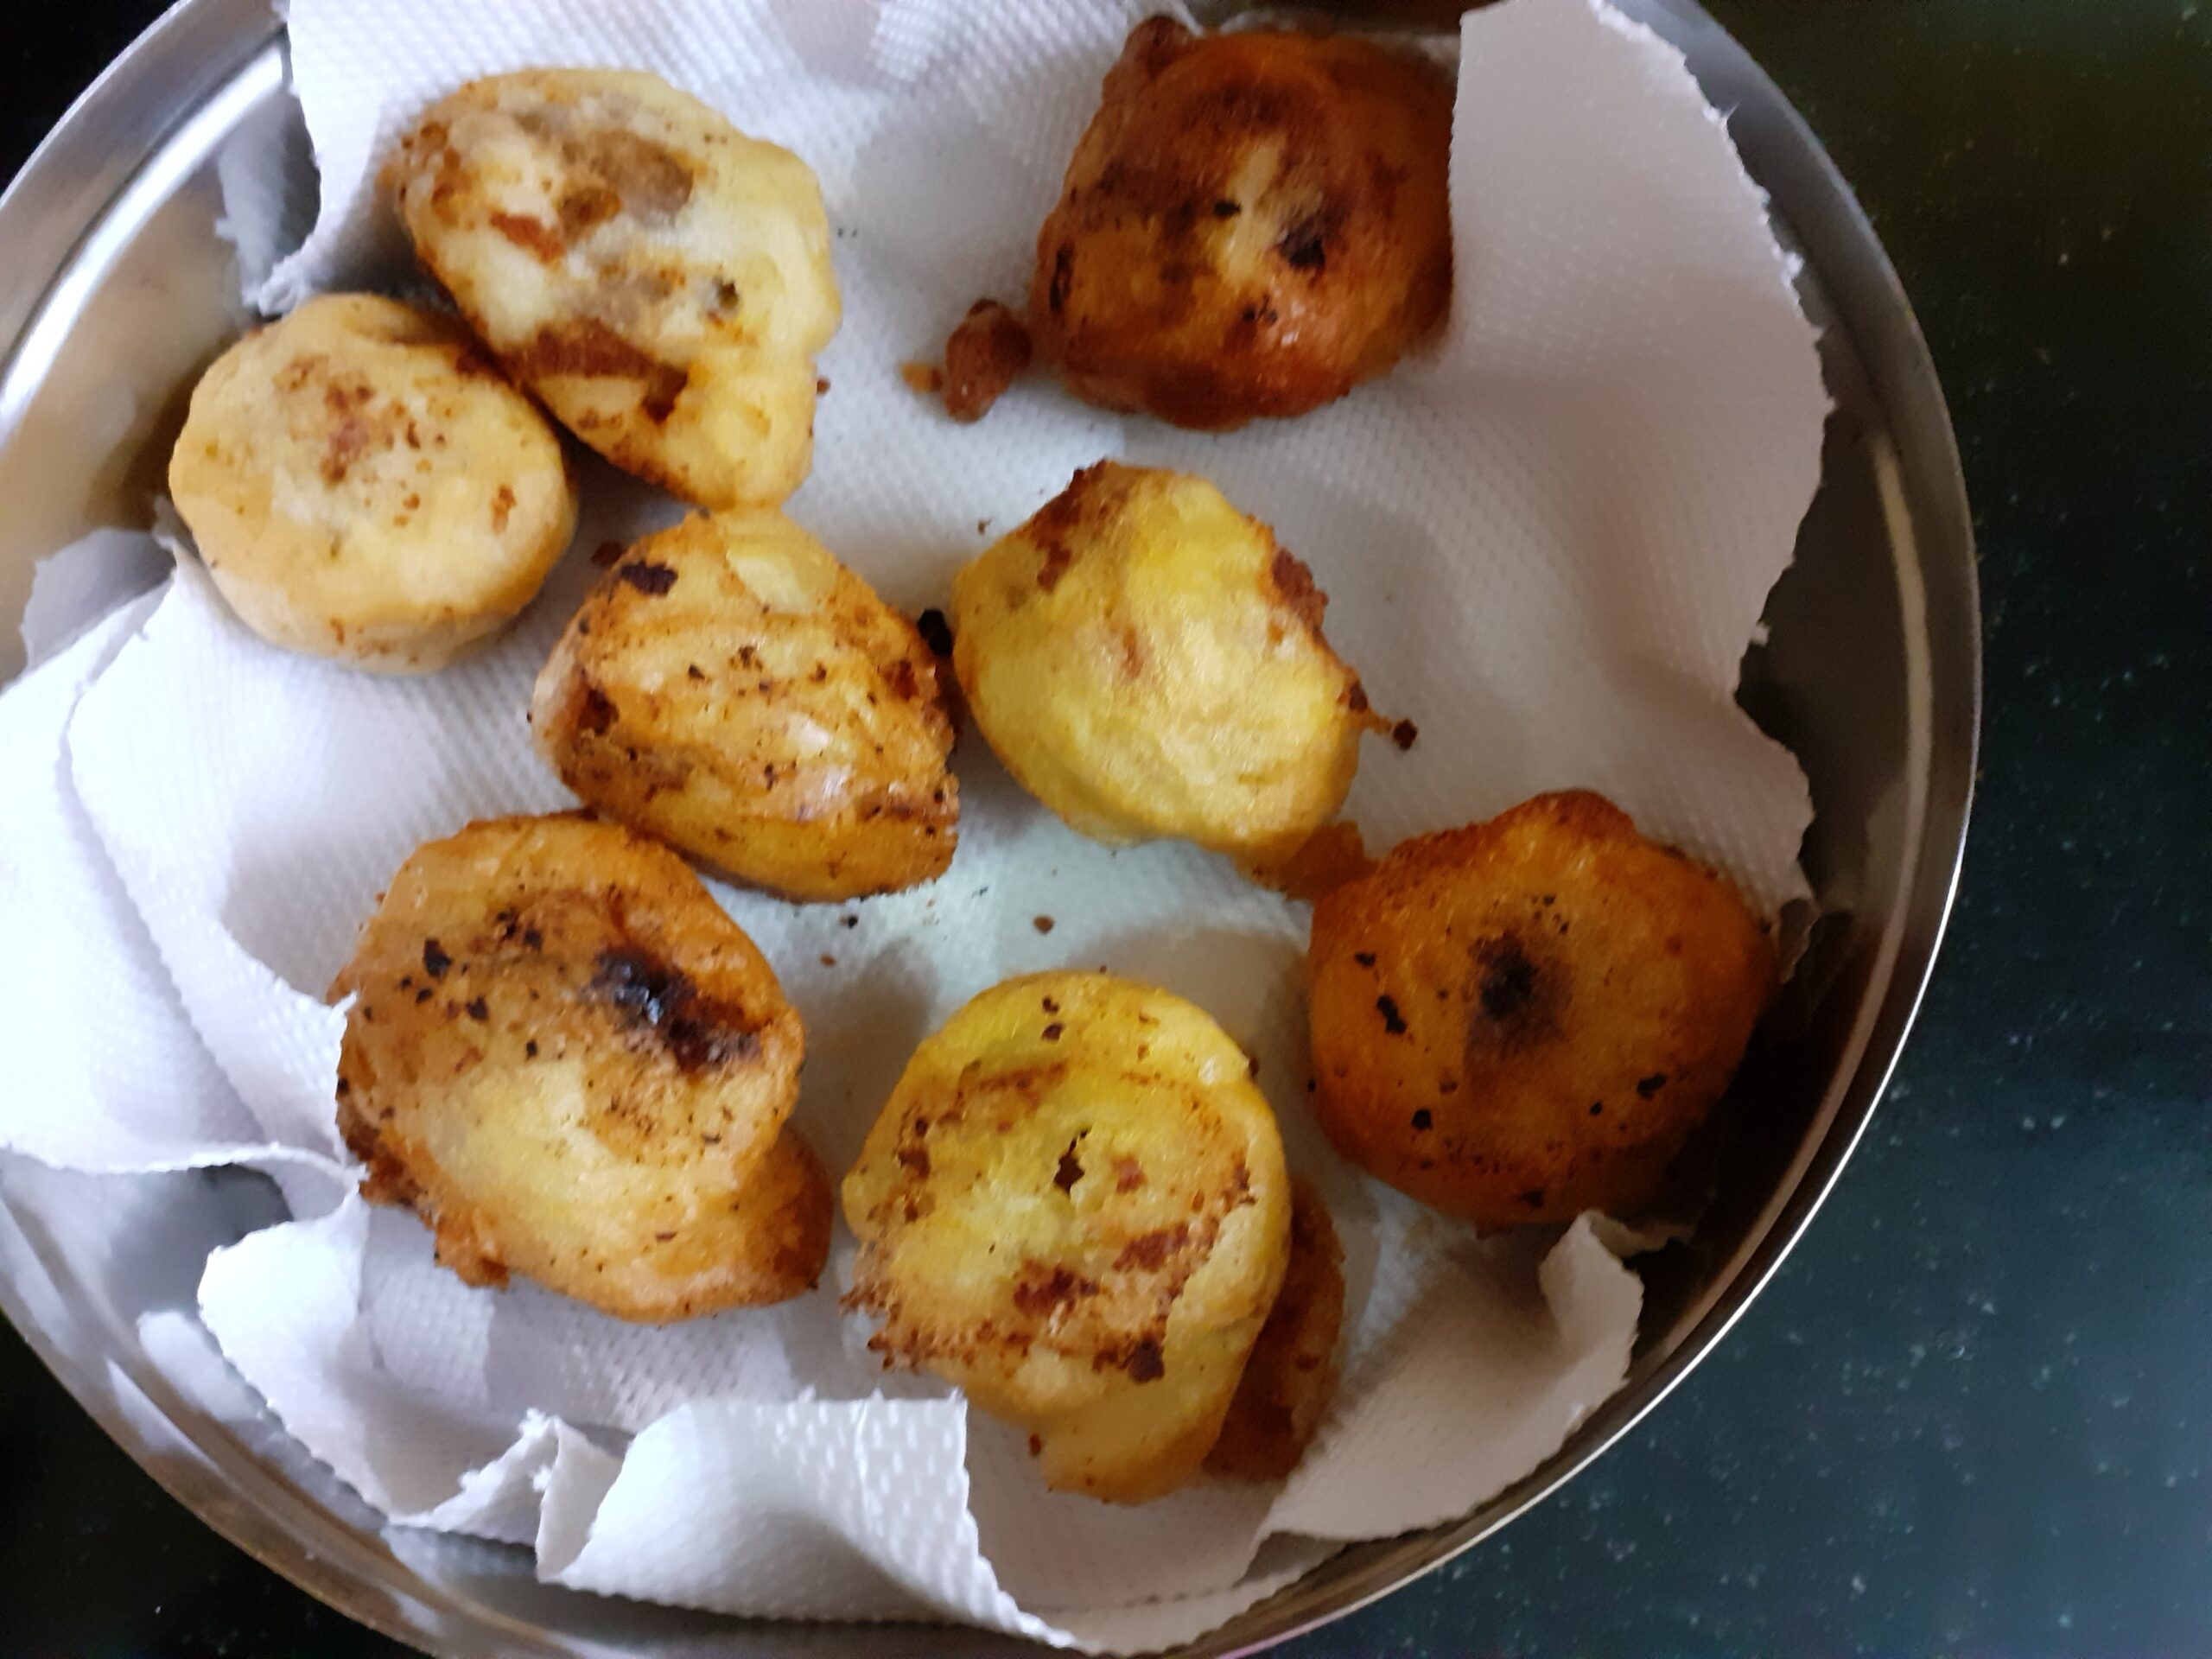
Heat oil for frying to medium-high. Now take one ball at a time, roll it in the batter, or smear the batter all over the filling, it should be a thick coating or it will split in the oil and, drop them gently into the oil. Fry 4-5 of them at a time. Remove when golden brown in colour. Drain them on an absorbent paper. Repeat for the entire lot of filling. The delicious Sugiyan is ready. Serve with tea or make it as Prasad(offering) for Puja and enjoy it. Bon Appetit.
STEPWISE RECIPE FOLLOWS:
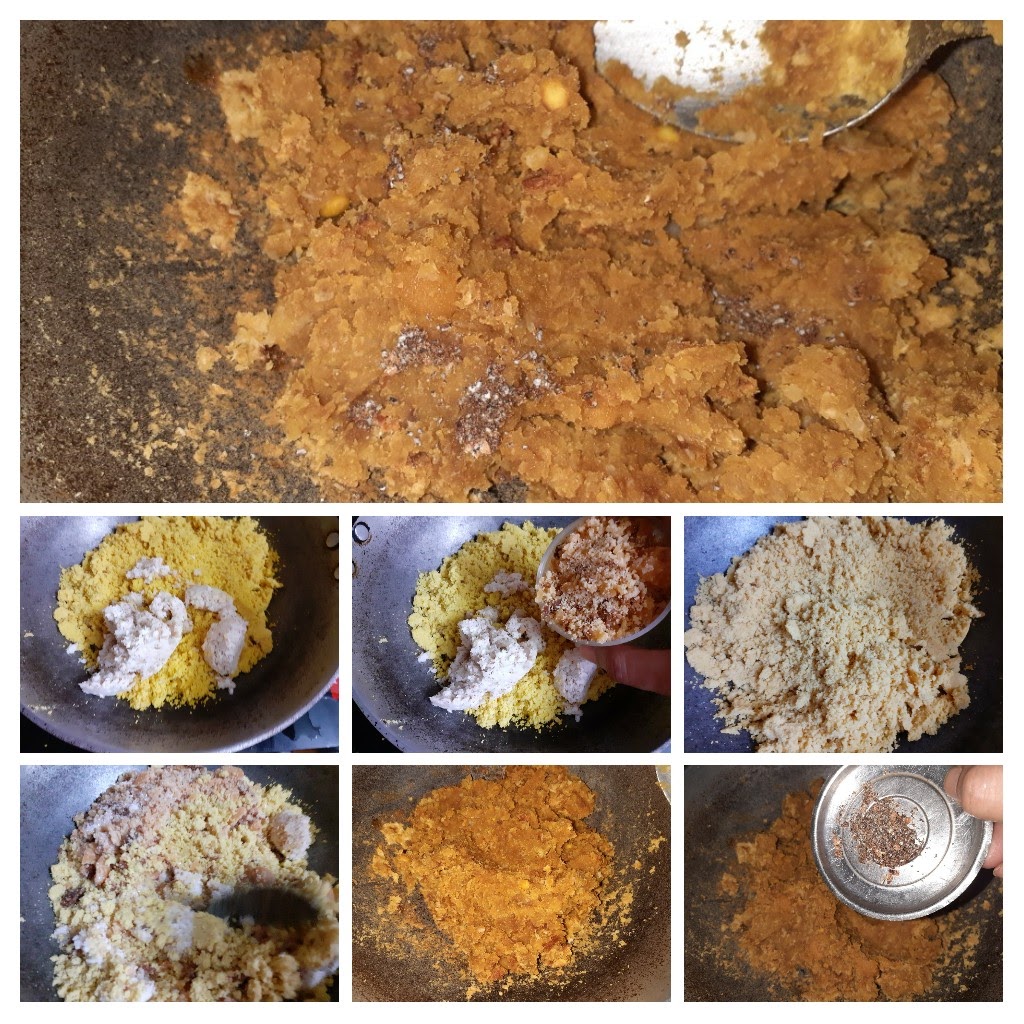
1. Assemble all ingredients. Soak the dal for an hour. Dry roast the Chana dal and pressure cook for 2 -3 whistles and no more.
2. For the Outer crust(cover)- Grind the soaked Urad dal by adding little water to a smooth but thick paste(idli batter consistency or a little thicker also is fine). Stir in 1.5 to 2 tablespoons of rice flour. If the batter gets too thick, add a little amount of water to get it back to the right consistency, given above. ( I forgot to take a picture of adding Rice flour, so please keep in mind and ad it).
3. For filling- Dry roast the Chana dal until light brown in colour, you will get a nice sweet aroma when you are getting to that stage. Pour required water and add turmeric powder and pressure cook it for 2-3 whistles, and not more. Once the pressure reduces, take the dal and drain it completely of all the water and allow it to cool for 5 minutes.
4. Now put the warm Dal into the dry grinding jar and blend to a powdery texture, without any water. Give it a mix and spin again, the mixture should be fine and should resemble wet sand.
5. Put this ground Dal mixture in a Kadai and add the jaggery and grated coconut to it. Switch on the flame on low and start stirring this mixture. Do not add any water, the jaggery will start melting in the heat and help in combining. Add the cardamom and keep stirring until the mixture comes together and forms a lump. Put off the flame and cool the mixture.
6. To make the Sugiyan- Heat oil in a karahi for frying. Heat should be medium-high. Now make lemon sized(or a little bigger too is ok) balls of the filling and keep it aside. Check if the oil is hot by dropping little of the batter into it. If it sizzles and rises immediately, it is ready for frying.
7. Now take the Urad dal – Rice flour batter and dunk each ball into it gently, use your hands to smear the batter on the filling if required ad cover the ball. Gently drop it into the oil and fry to a golden brown colour. 4-5 Sugiyans can be fried at a time. Drain them on absorbent paper. Repeat for the entire filling and enjoy them hot.
NOTE:
1. I recommend not soaking the Urad dal for more than an hour as it soaks in lot of oil while frying.
2. The jaggery can be reduced to 3/4 cup depending on how sweet it is.
3. I forgot to take a picture of adding the rice flour, so don’t forget to add it if following only the pictures.
If you tried this recipe and liked it please comment/ tag Rajjo’s kitchen on Facebook and Instagram and please follow us on my blog https://rajnirams.blogspot.com/
If you wish to receive the recipes as an email please leave your id on the homepage near the mail icon. Whenever Rajjo’s Kitchen has a new post it will be mailed to you.
Chakkara Pongal/Sweet Pongal
The month of Aadi(as per Tamil calender) or Aashad is a very auspicious one in South India as it marks the beginning of festivals which begin with Ganesh Chaturthi and Janmashtami and goes up to Pongal in January which is the month of Thai(Tamil) or Paush. The Chakkara Pongal is considered to be the prime offering to the Mother Goddess. This sweet Pongal is also the offering to the Sun God on the Makara Shankranti day/Pongal festival.
This being the Aadi month I made Chakkara Pongal too and it came out well as always. But there is a lot to tell about the proportions and how I arrived at the current one after a lot of hit and trial methods. Is it that tough you may ask? Certainly not. In fact, it is the most simple one provided the right proportions of Rice, Dal, and jaggery is used.
Chakkara Pongal was my favourite sweet dish as a child(the only one I liked as I was not fond of sweets, now I like most of them) and I would get my mom to make it frequently. As I grew older I learnt to make it from my mother and eventually my mother in law. I believed our’s was the best Chakkara Pongal as compared to most South Indian households(as it is very common to make it here often) until I had it as prasad(offering) in a temple around 10 years ago and that Chakkara Pongal wowed me. I so fell in love with that taste and it was unlike any other Sweet Pongal I had tasted before. From then on started my quest for the right proportions to make this recipe. I asked a lot many people of the proportions they used, I browsed many websites to check out the best recipe, and also tried all these whenever I made the Sweet Pongal but “that” one recipe always eluded me. It is not even that this recipe has many ingredients, whatever it is we have to play around the proportions of Rice, dal(moong dal/ Chana dal) and Jaggery. So I tried many permutations and combinations until I arrived at the current one. I have used the one-pot method, but the same recipe works well for pot in pot method too. Hope you all will find it easy to prepare and also delicious. Looking forward to your comments.
Dry roast the Moong dal until light brown on a low flame. In a vessel take the rice and add the roasted moong dal to it. Wash the rice and dal together and put them in the cooker. Pour 4 cups water and cook for 5 to 6 whistles. Once the pressure releases mash the rice and dal nicely with the back of a ladle or masher. Set aside. Take the jaggery in a vessel or pan and add 1/4 cup water. Switch on the flame to low and dissolve the jaggery until it froths up. switch off and cool for 5 minutes(the jaggery mixture can be prepared when the rice is cooking, it will save time later). Now strain the liquid jaggery directly into the mashed rice-dal mixture in the cooker. Switch on the flame, add 1/4 cup milk and 1/4 cup water. Stir the mixture nicely and cook on low fire for 5 minutes or until the Pongal comes together and the jaggery is not runny anymore. Switch off the flame. In a tempering Kadai take 1 tbsp ghee and heat. Add the Cashewnuts and fry, followed by raisins. Pour this mixture on the cooked Pongal and also add the cardamom powder, raw camphor and the nutmeg powder(optional). Pour the remaining ghee over the Pongal. The delicious Pongal is ready. Enjoy. Bon Appetit.
STEPWISE RECIPE FOLLOWS:
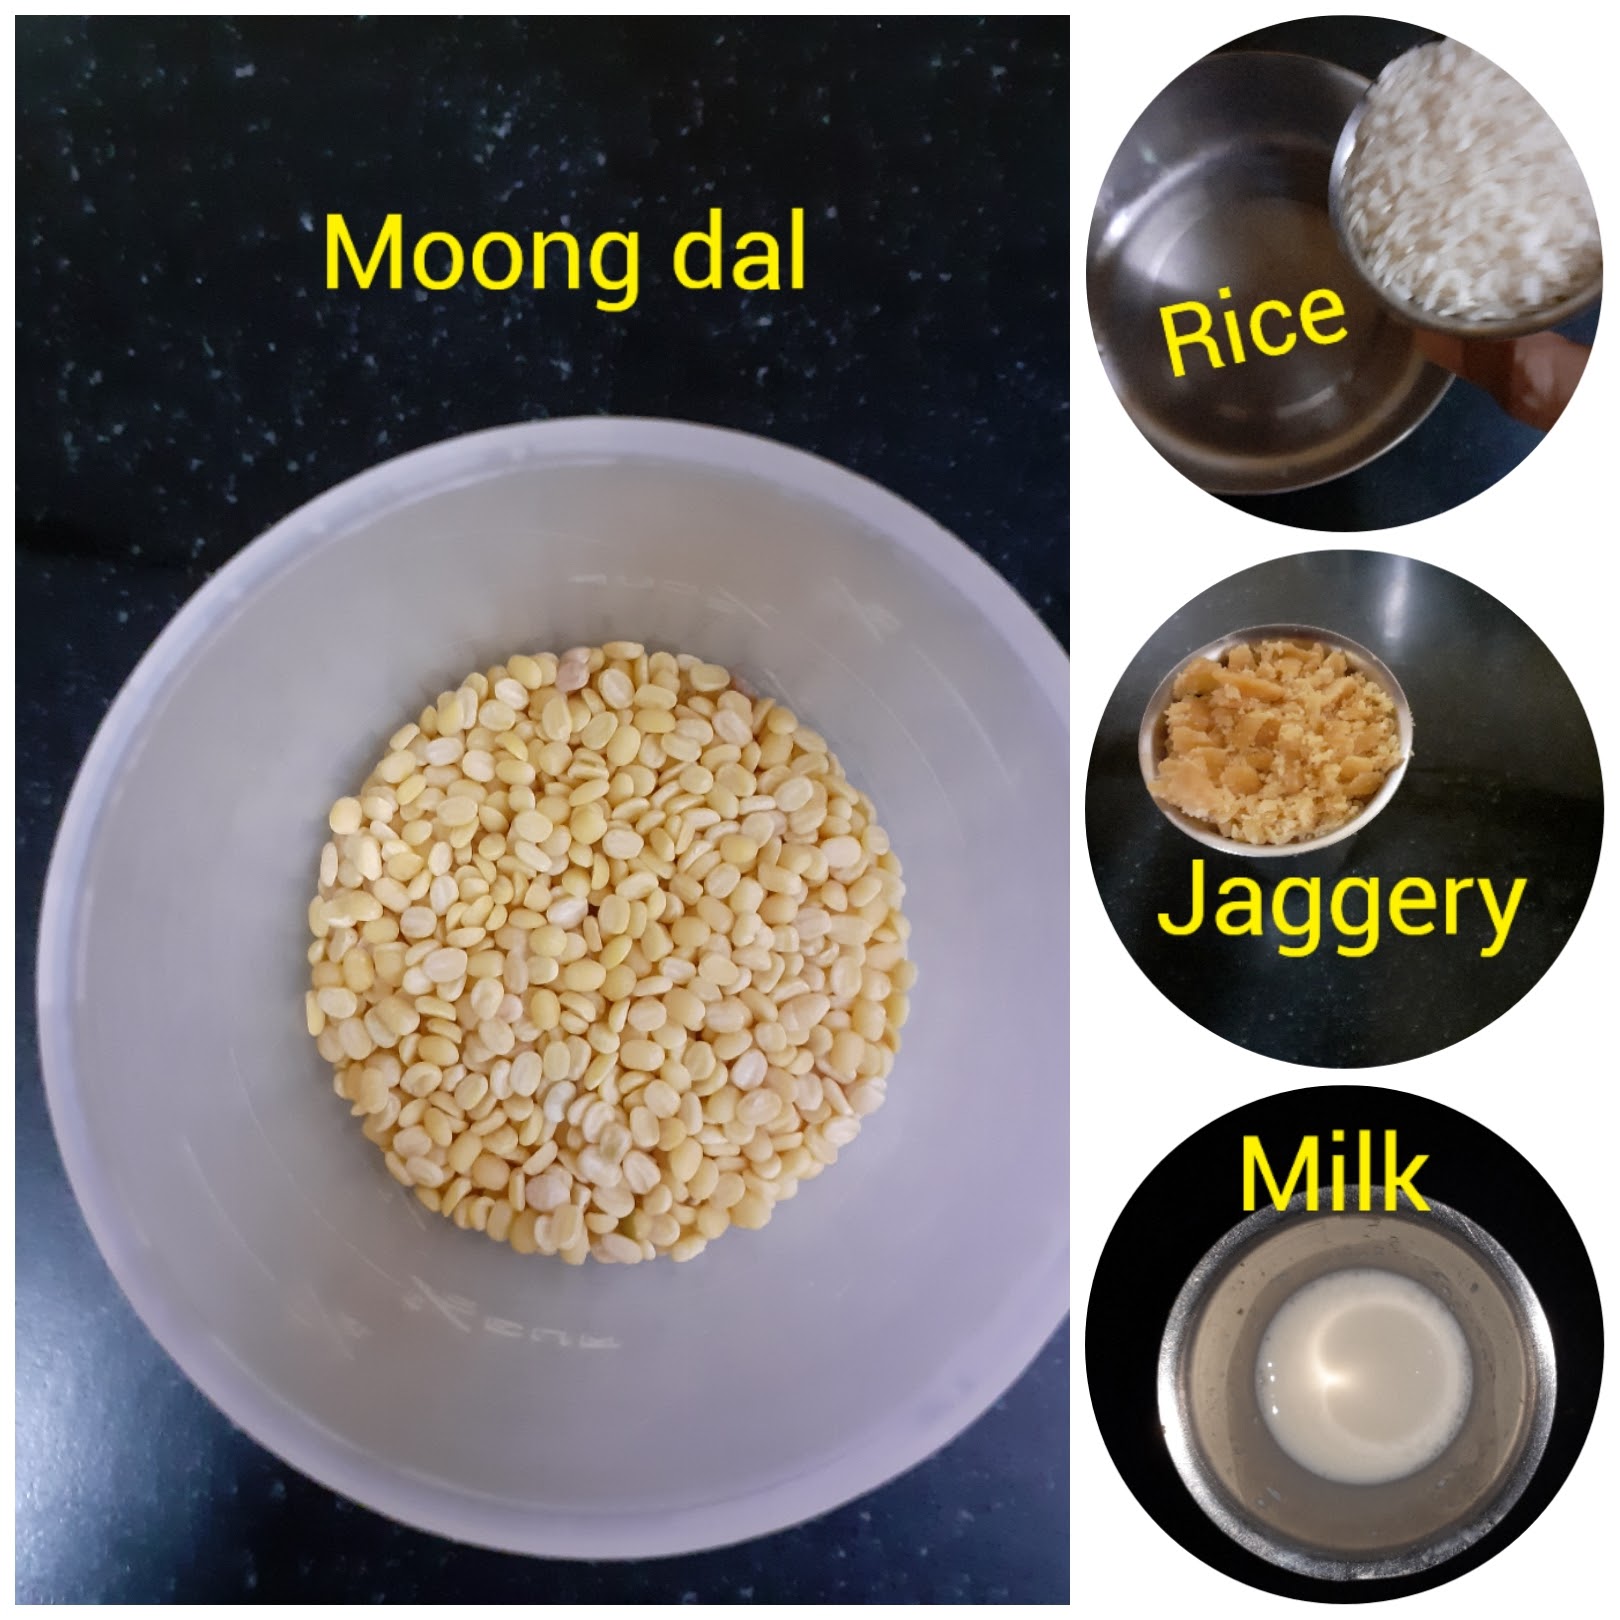
1. Assemble all ingredients.
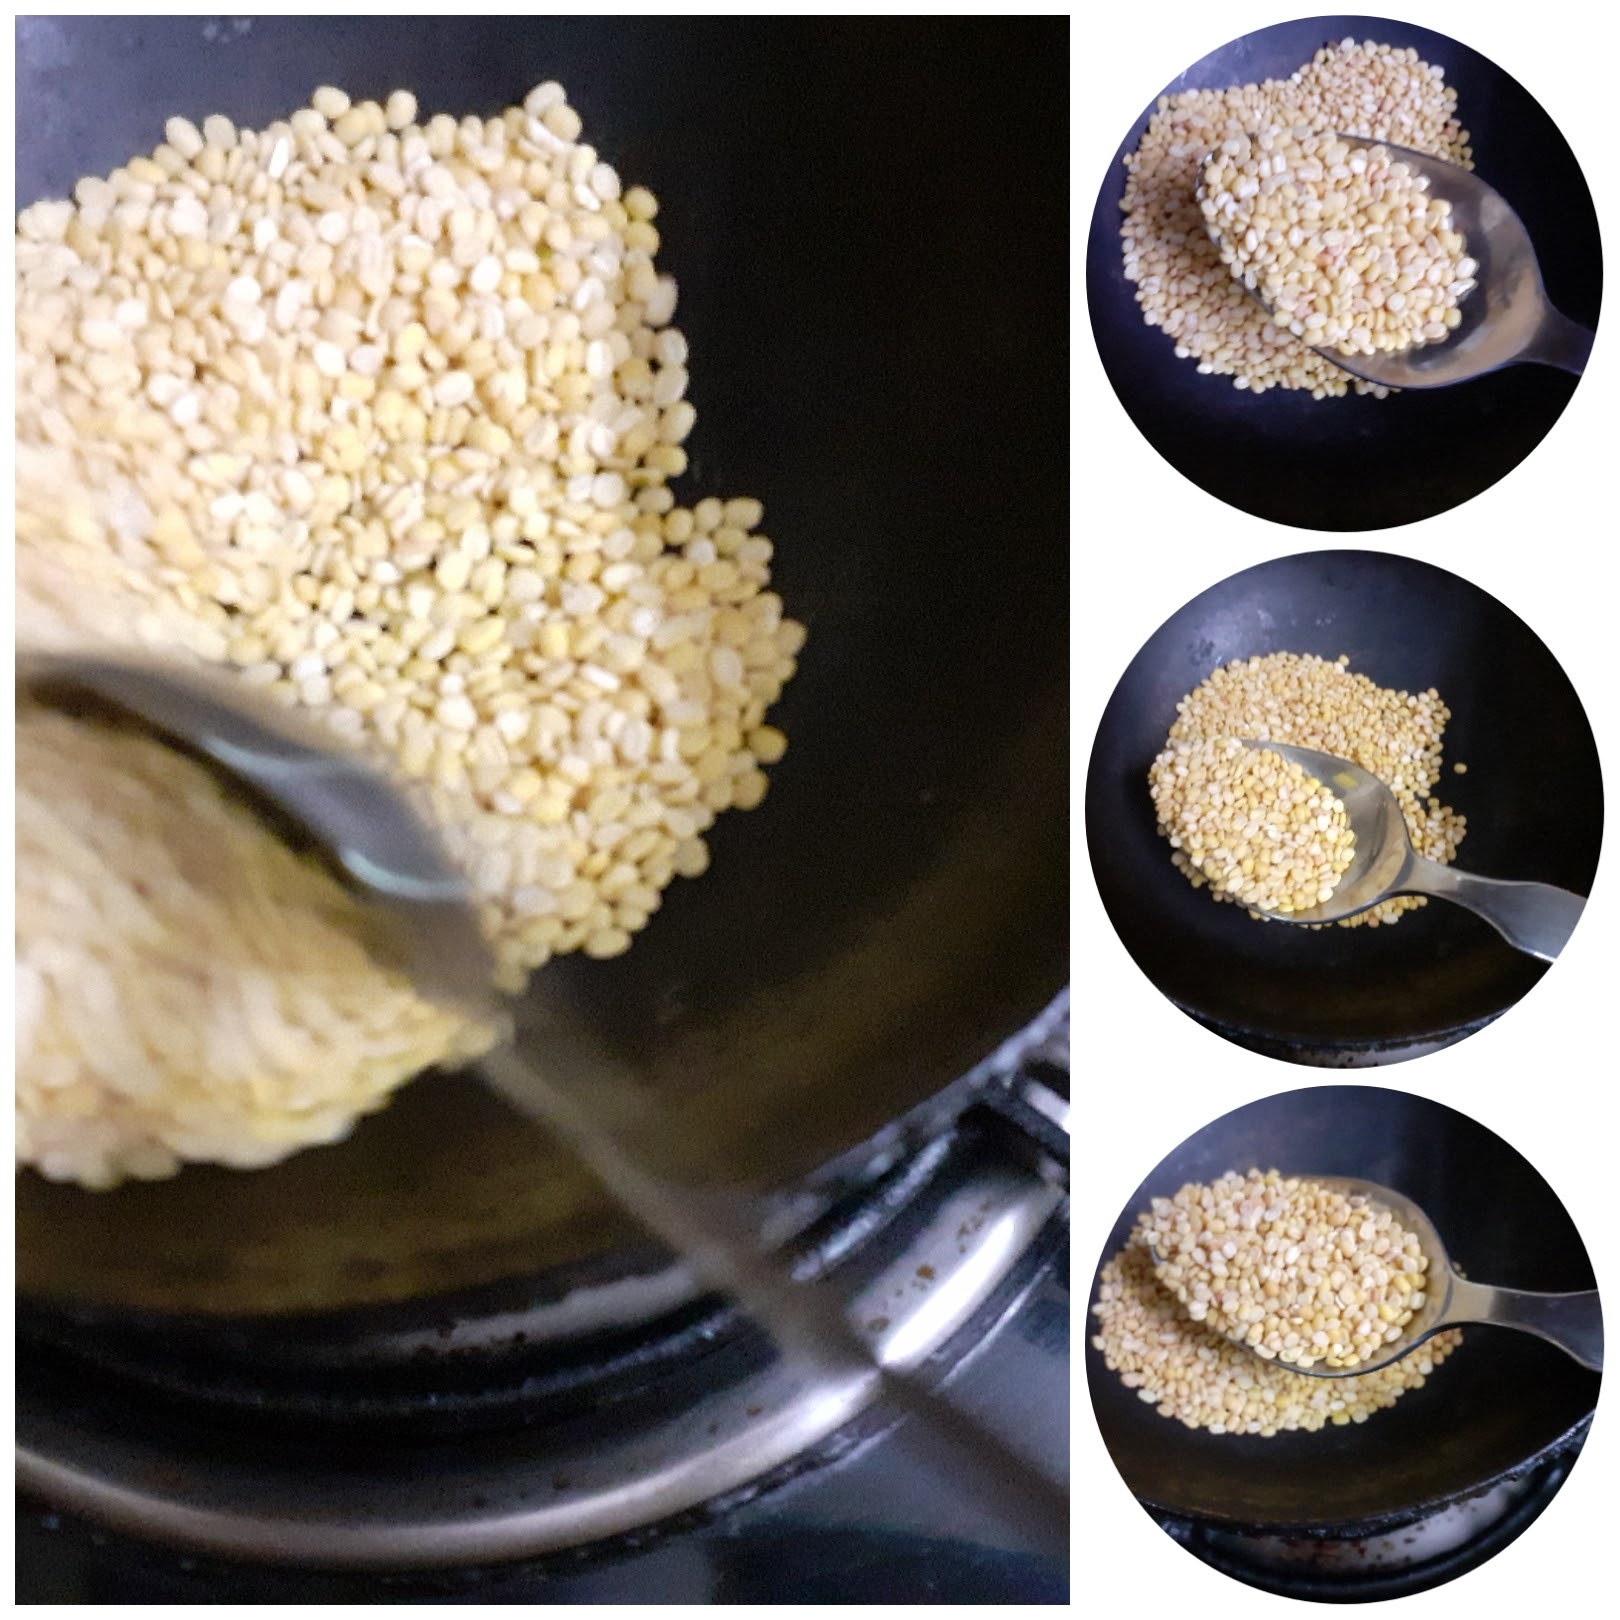
2. Dry roast moong dal over a low flame until light brown.
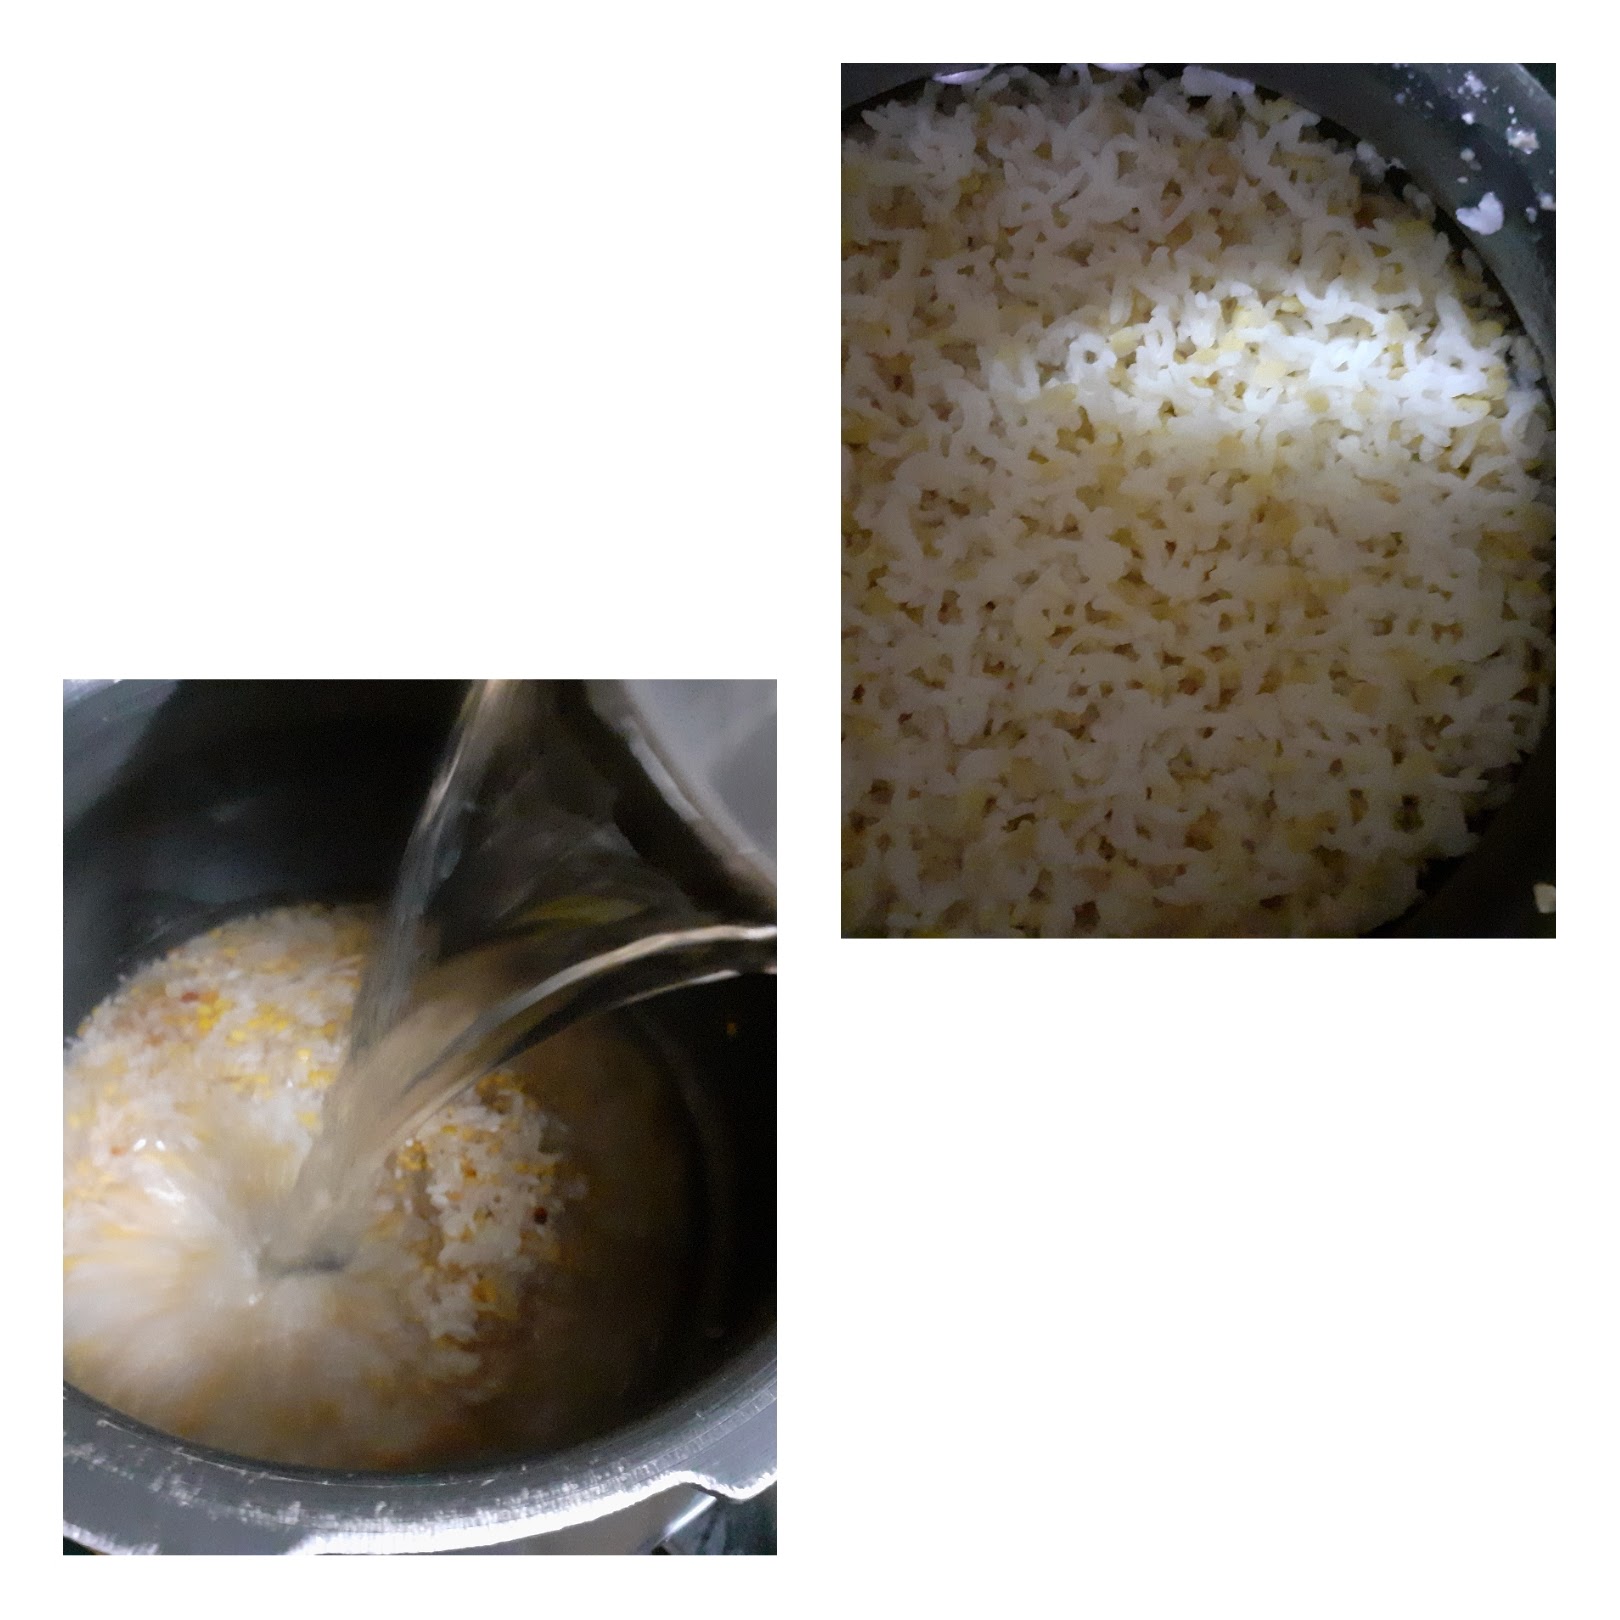
3. Take the rice and roasted dal in a vessel and wash nicely and put them in the cooker.
Add caption
4. Add 4 cups water and cook for 5 to 6 whistles. While the rice is cooking take the jaggery in another pan/vessel and add 1/4 cup water and put it on the flame. On low flame dissolve the jaggery and allow to boil until it froths around 2 minutes from dissolving. Switch off the flame.
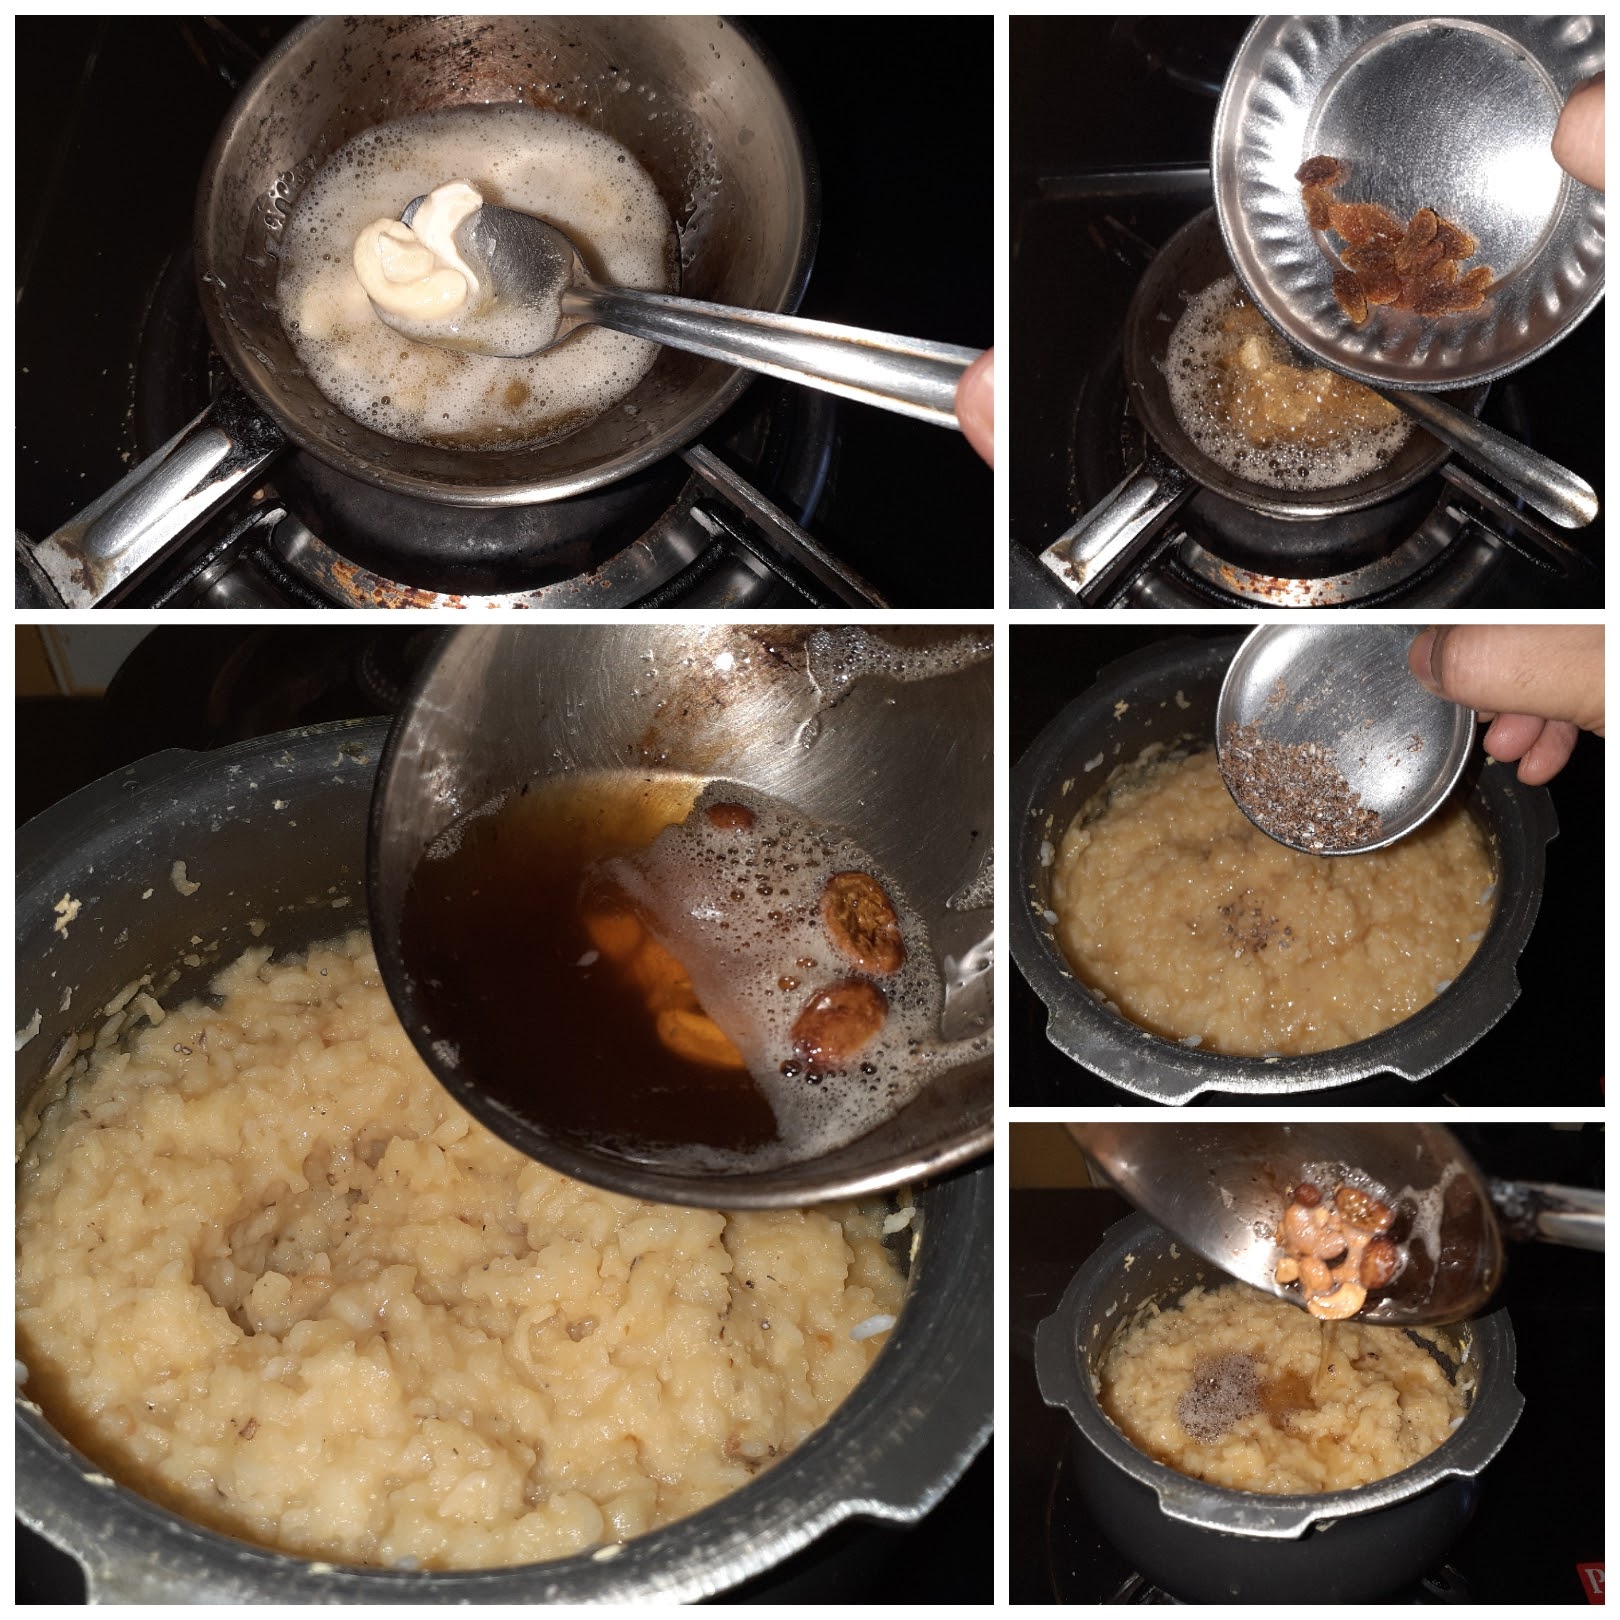
5. Once the pressure in the cooker releases, strain the liquid jaggery over the rice – dal mixture in the cooker. Pour 1/4 cup milk and 1/4 cup water(warm) and stir nicely such that the jaggery is well mixed with the contents in the cooker, add 1 tbsp sugar. Let it cook for 5 minutes on low flame. The Pongal will come together as a nice gooey mixture. Switch off the flame.
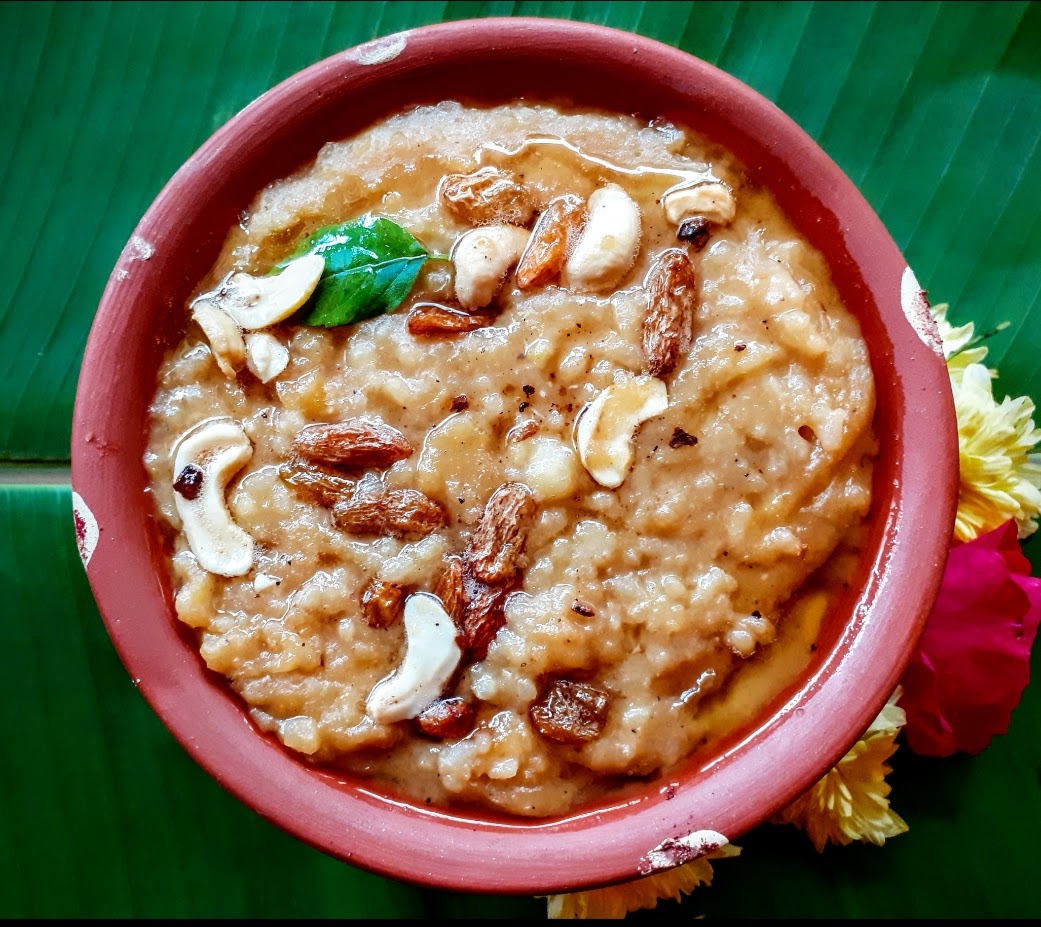
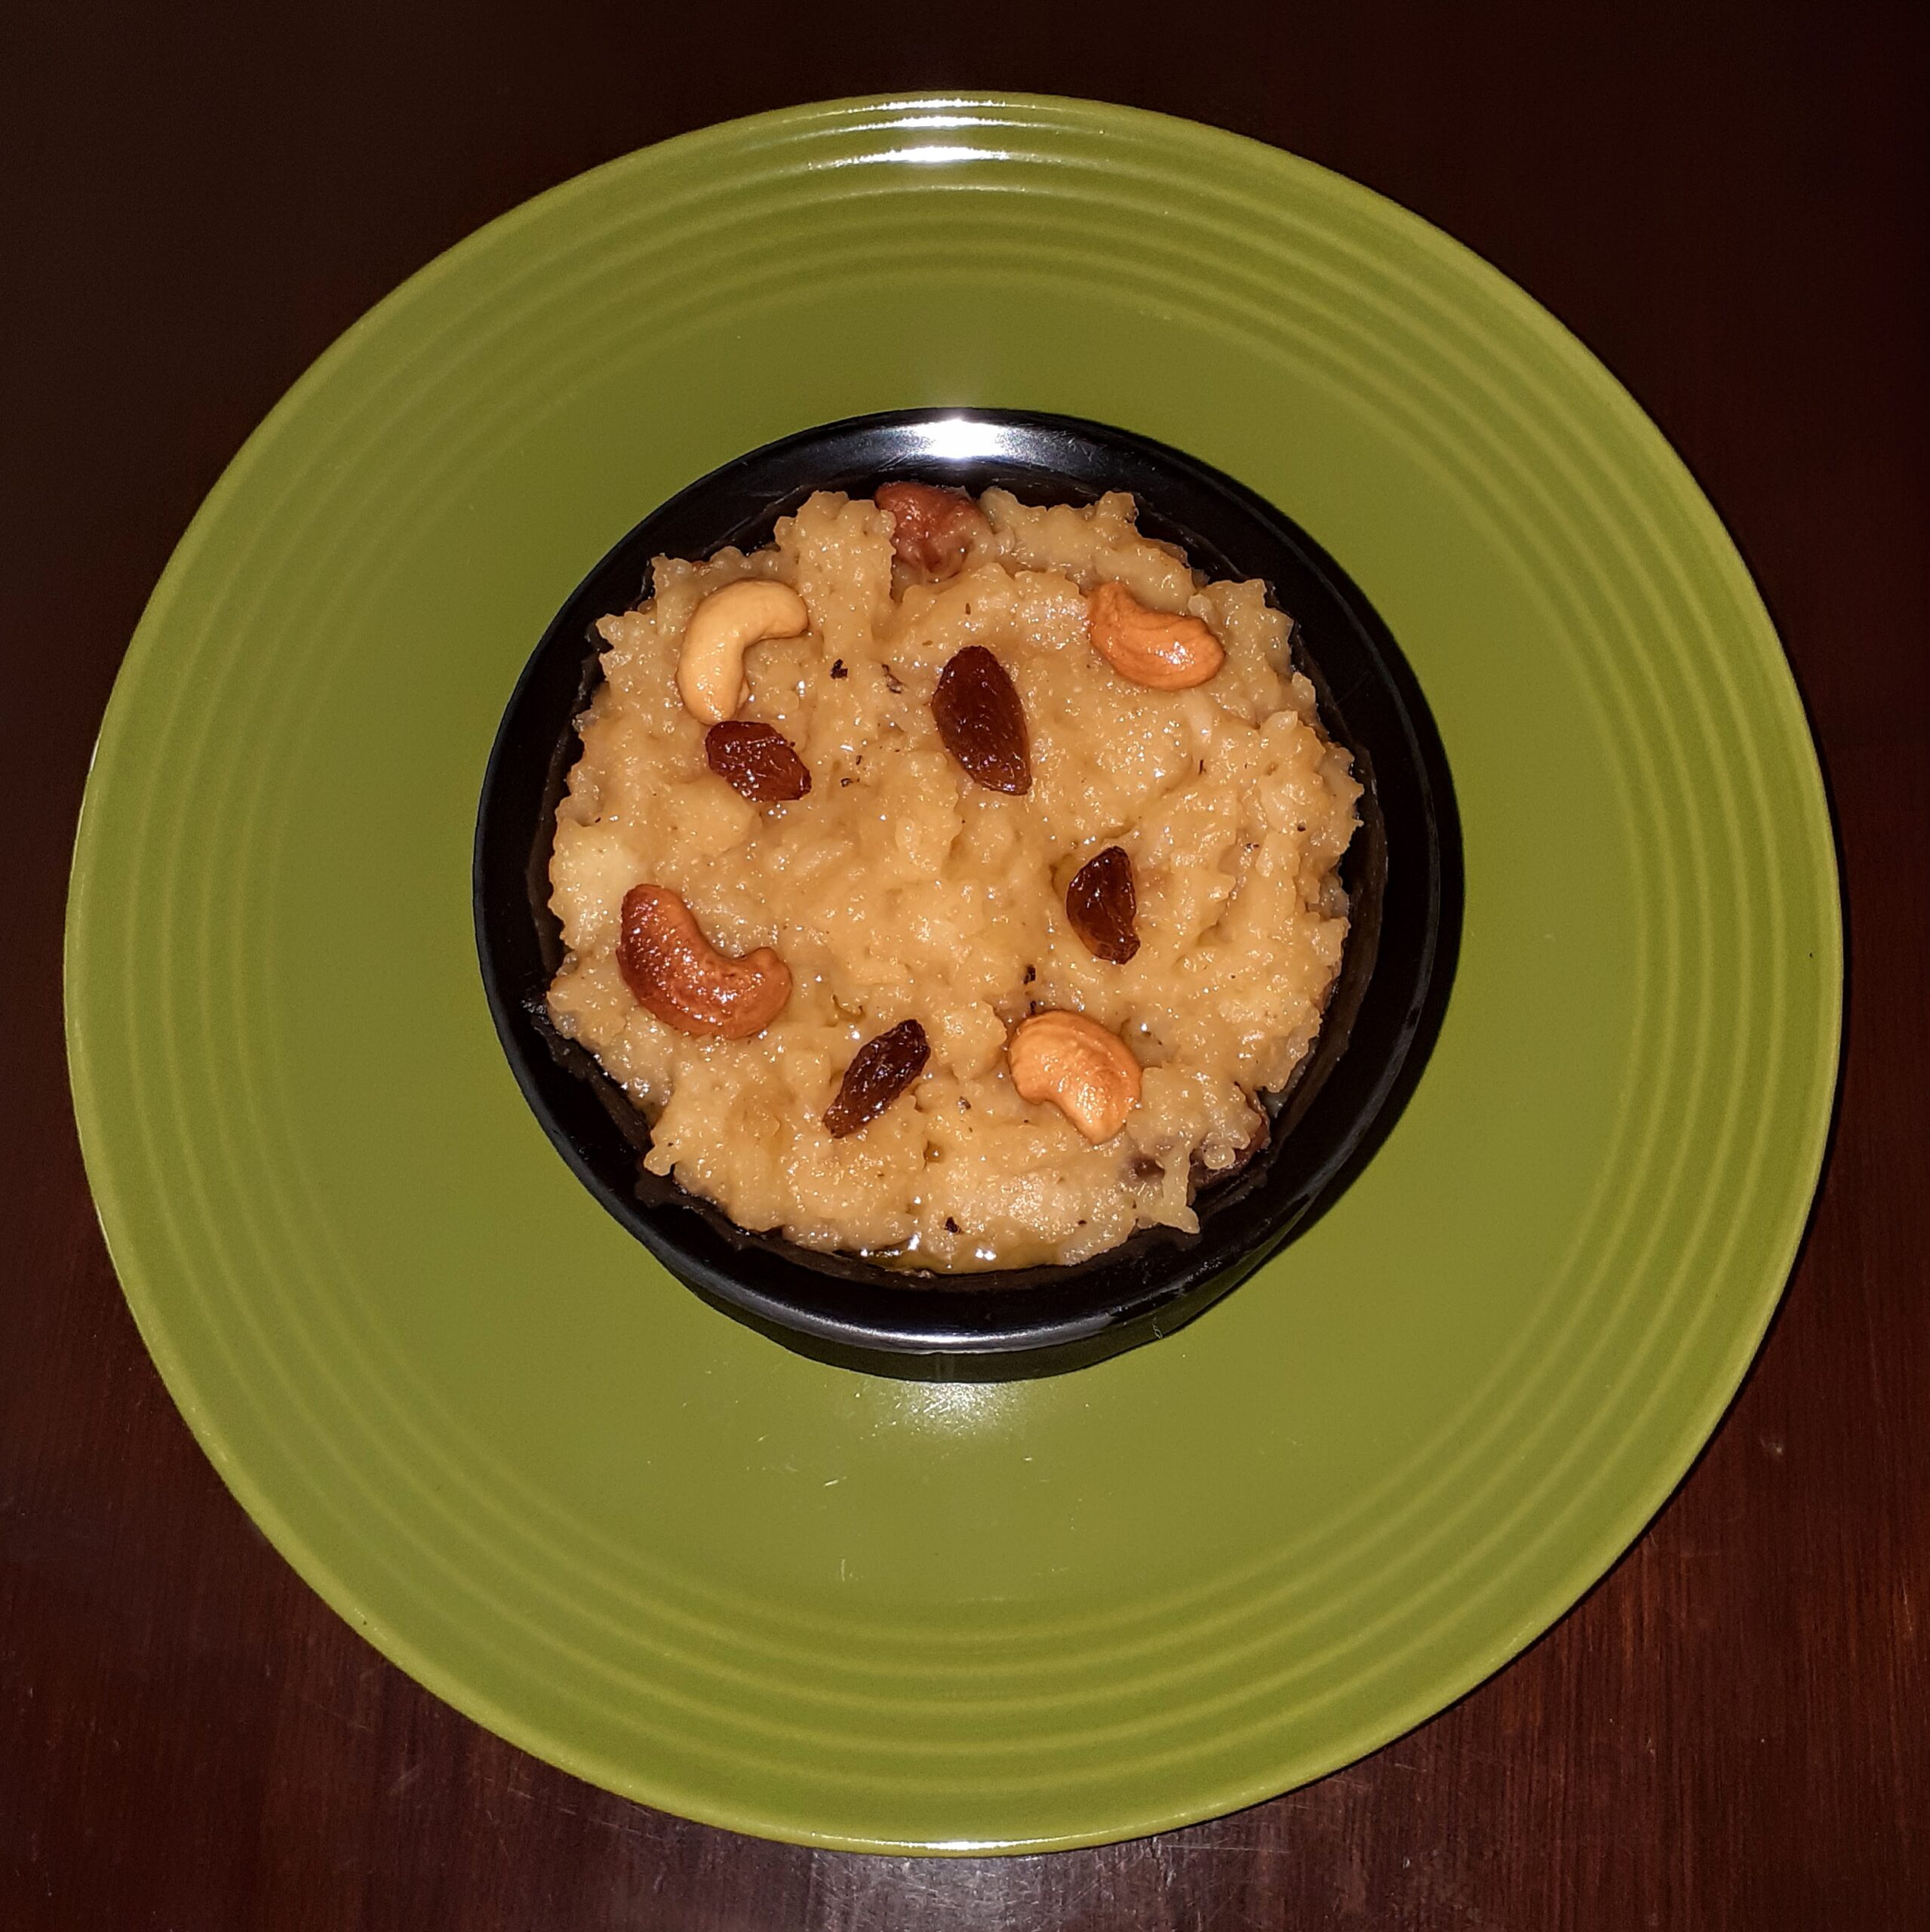
6. In a tempering Kadai or pan add 1 tbsp of ghee and heat. Add in the halved cashew nuts and fry, followed by raisins until they fluff up. Add the cardamom powder, and a pinch of raw camphor(a mini pinch of nutmeg powder too if using). Drop the ghee with nuts and raisins into the Pongal. Top up with remaining ghee. The delicious Chakkara Pongal is ready to serve.
NOTES:
1. I have used 1 cup jaggery, but depending on the sweetness of the jaggery the amount may vary by 1/4 cup.
2. Adding a spoon of sugar to any jaggery based sweet dish they say helps in the jaggery getting integrated into the dish and raises the taste they say. So I have always followed this.
3. Edible Camphor and Nutmeg powder should be used sparingly and only the mentioned amounts. Using more makes the dish bitter.
4. A trick I learnt from my mother in law is to always pour the ghee in the end on top of the sweet dish while it is hot and to not stir it in completely. So when you scoop out the sweet dish the ghee on top will automatically flow down, so you actually won’t have to flood the dish with a lot of ghee.
5. Adding the ghee while it is still hot helps in even spread of the ghee on the dish. Don’t mix the ghee after pouring on the Sweet dish, it makes it heavy and also the dish will keep absorbing how much ever you pour.
If you tried my method of the Chakkara Pongal and liked it please comment below. I would love to hear from you.