This recipe of the humble Poha(beaten rice flakes)/Aval cooked in sugar syrup is one of my favourites. I make it whenever I have a sweet craving or as an offering(Prasad) for Pujas at home. It is similar to the Kesari Bath made with Sooji/Rava Sometimes I make with a combination of other Pohe recipes, to serve during Navarathri when guests visit home.
Poha is also one of the main offerings during Janmashtami and Ganesh Chaturthi. Lord Krishna is known to have loved them and Pohe is what his friend Sudama got him as a gift.
Usually, during these two festivals, people just offer the Pohe and jaggery with coconut scraping as a dry mixture for Prasad. I have observed that though there are few who like it this way, many don’t enjoy it dry. So what I prefer doing is putting it in sugar syrup and stirring it dry, with a dash of ghee, cardamom powder and raw camphor, it tastes absolutely divine.
This recipe is a simple one and gets done in 15 minutes. As I always say the tastiest dishes are usually the simplest. Let’s get to the recipe right away.
While you are here please visit my other Indian sweet recipes such as
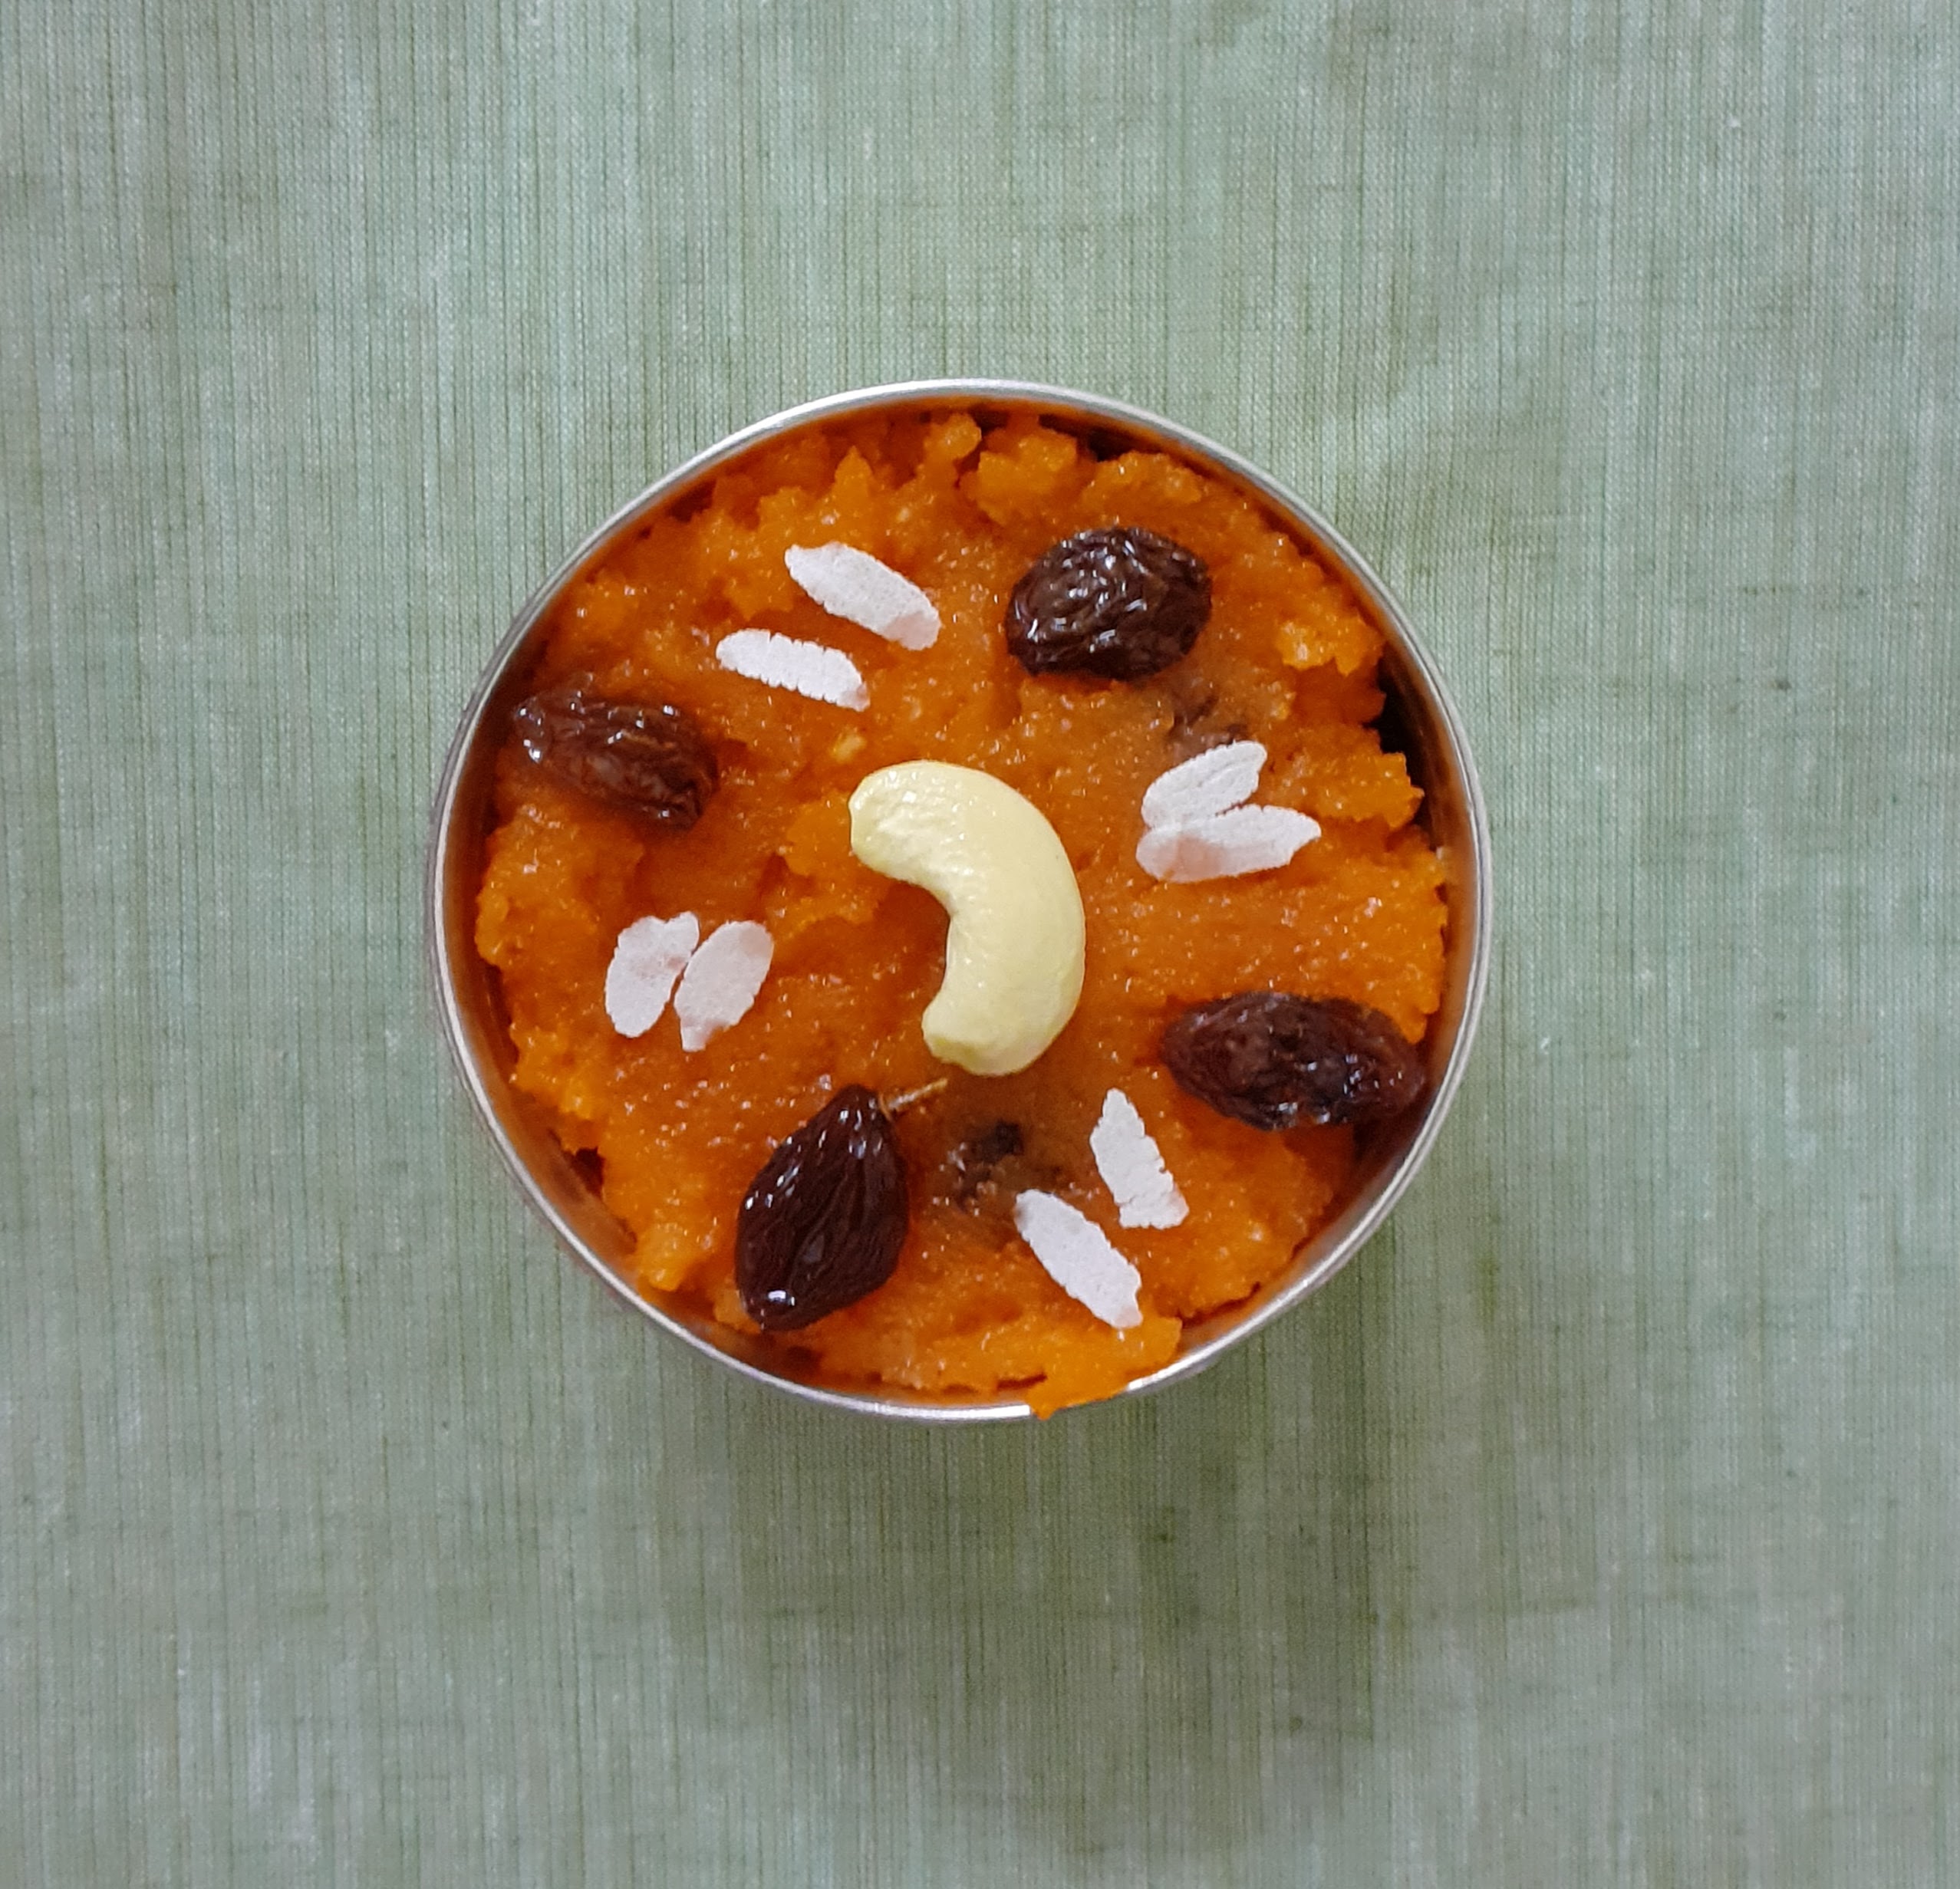
Here is the recipe of Aval Kesari/ Poha Kesari for you-
PREP TIME: 10Mins COOK TIME: 10 Mins
TOTAL TIME: 20Mins COURSE: DESSERT/SWEET
CUISINE: SOUTH INDIAN SERVINGS: 4
AUTHOR: Rajni Ram
Ingredients:
Poha ( thin) 1 cup
Sugar 1/2 cup ( if you prefer less reduce to 1/4cup)
Ghee 1.5 tbsp
Water 1.5 cup
Raisins a few
Cardamom powder 1/4 tsp
Kesari colouring/ orange food colouring 1 pinch
Raw camphor a pinch ( optional)
Directions:
Take 1 tbsp ghee in a Karahi and heat. Add the raisins and fry them until they fluff up. Remove from flame and keep aside. To the same ghee in Karahi add the Poha/ Aval and fry nicely until crisp. To be roasted on low flame, without burning them. Transfer to the dry mixer and cool for 5 mins. Grind it to a Rava/ Sooji like texture and keep aside. Now in the same Karahi add 1.5 cups of water and heat. Add the Kesari powder/ colouring and the sugar and bring it to a boil. Add the raw camphor nos if using. When the water starts boiling slowly drop in the grounded Poha while stirring constantly. Keep stirring until the mixture thickens and the Piha leaves the sides of the Karahi. Add the cardamom powder, followed by the raisins and 1/2 tbsp ghee and mix well. The Aval Kesari is ready to serve.
STEPWISE RECIPE FOLLOWS:
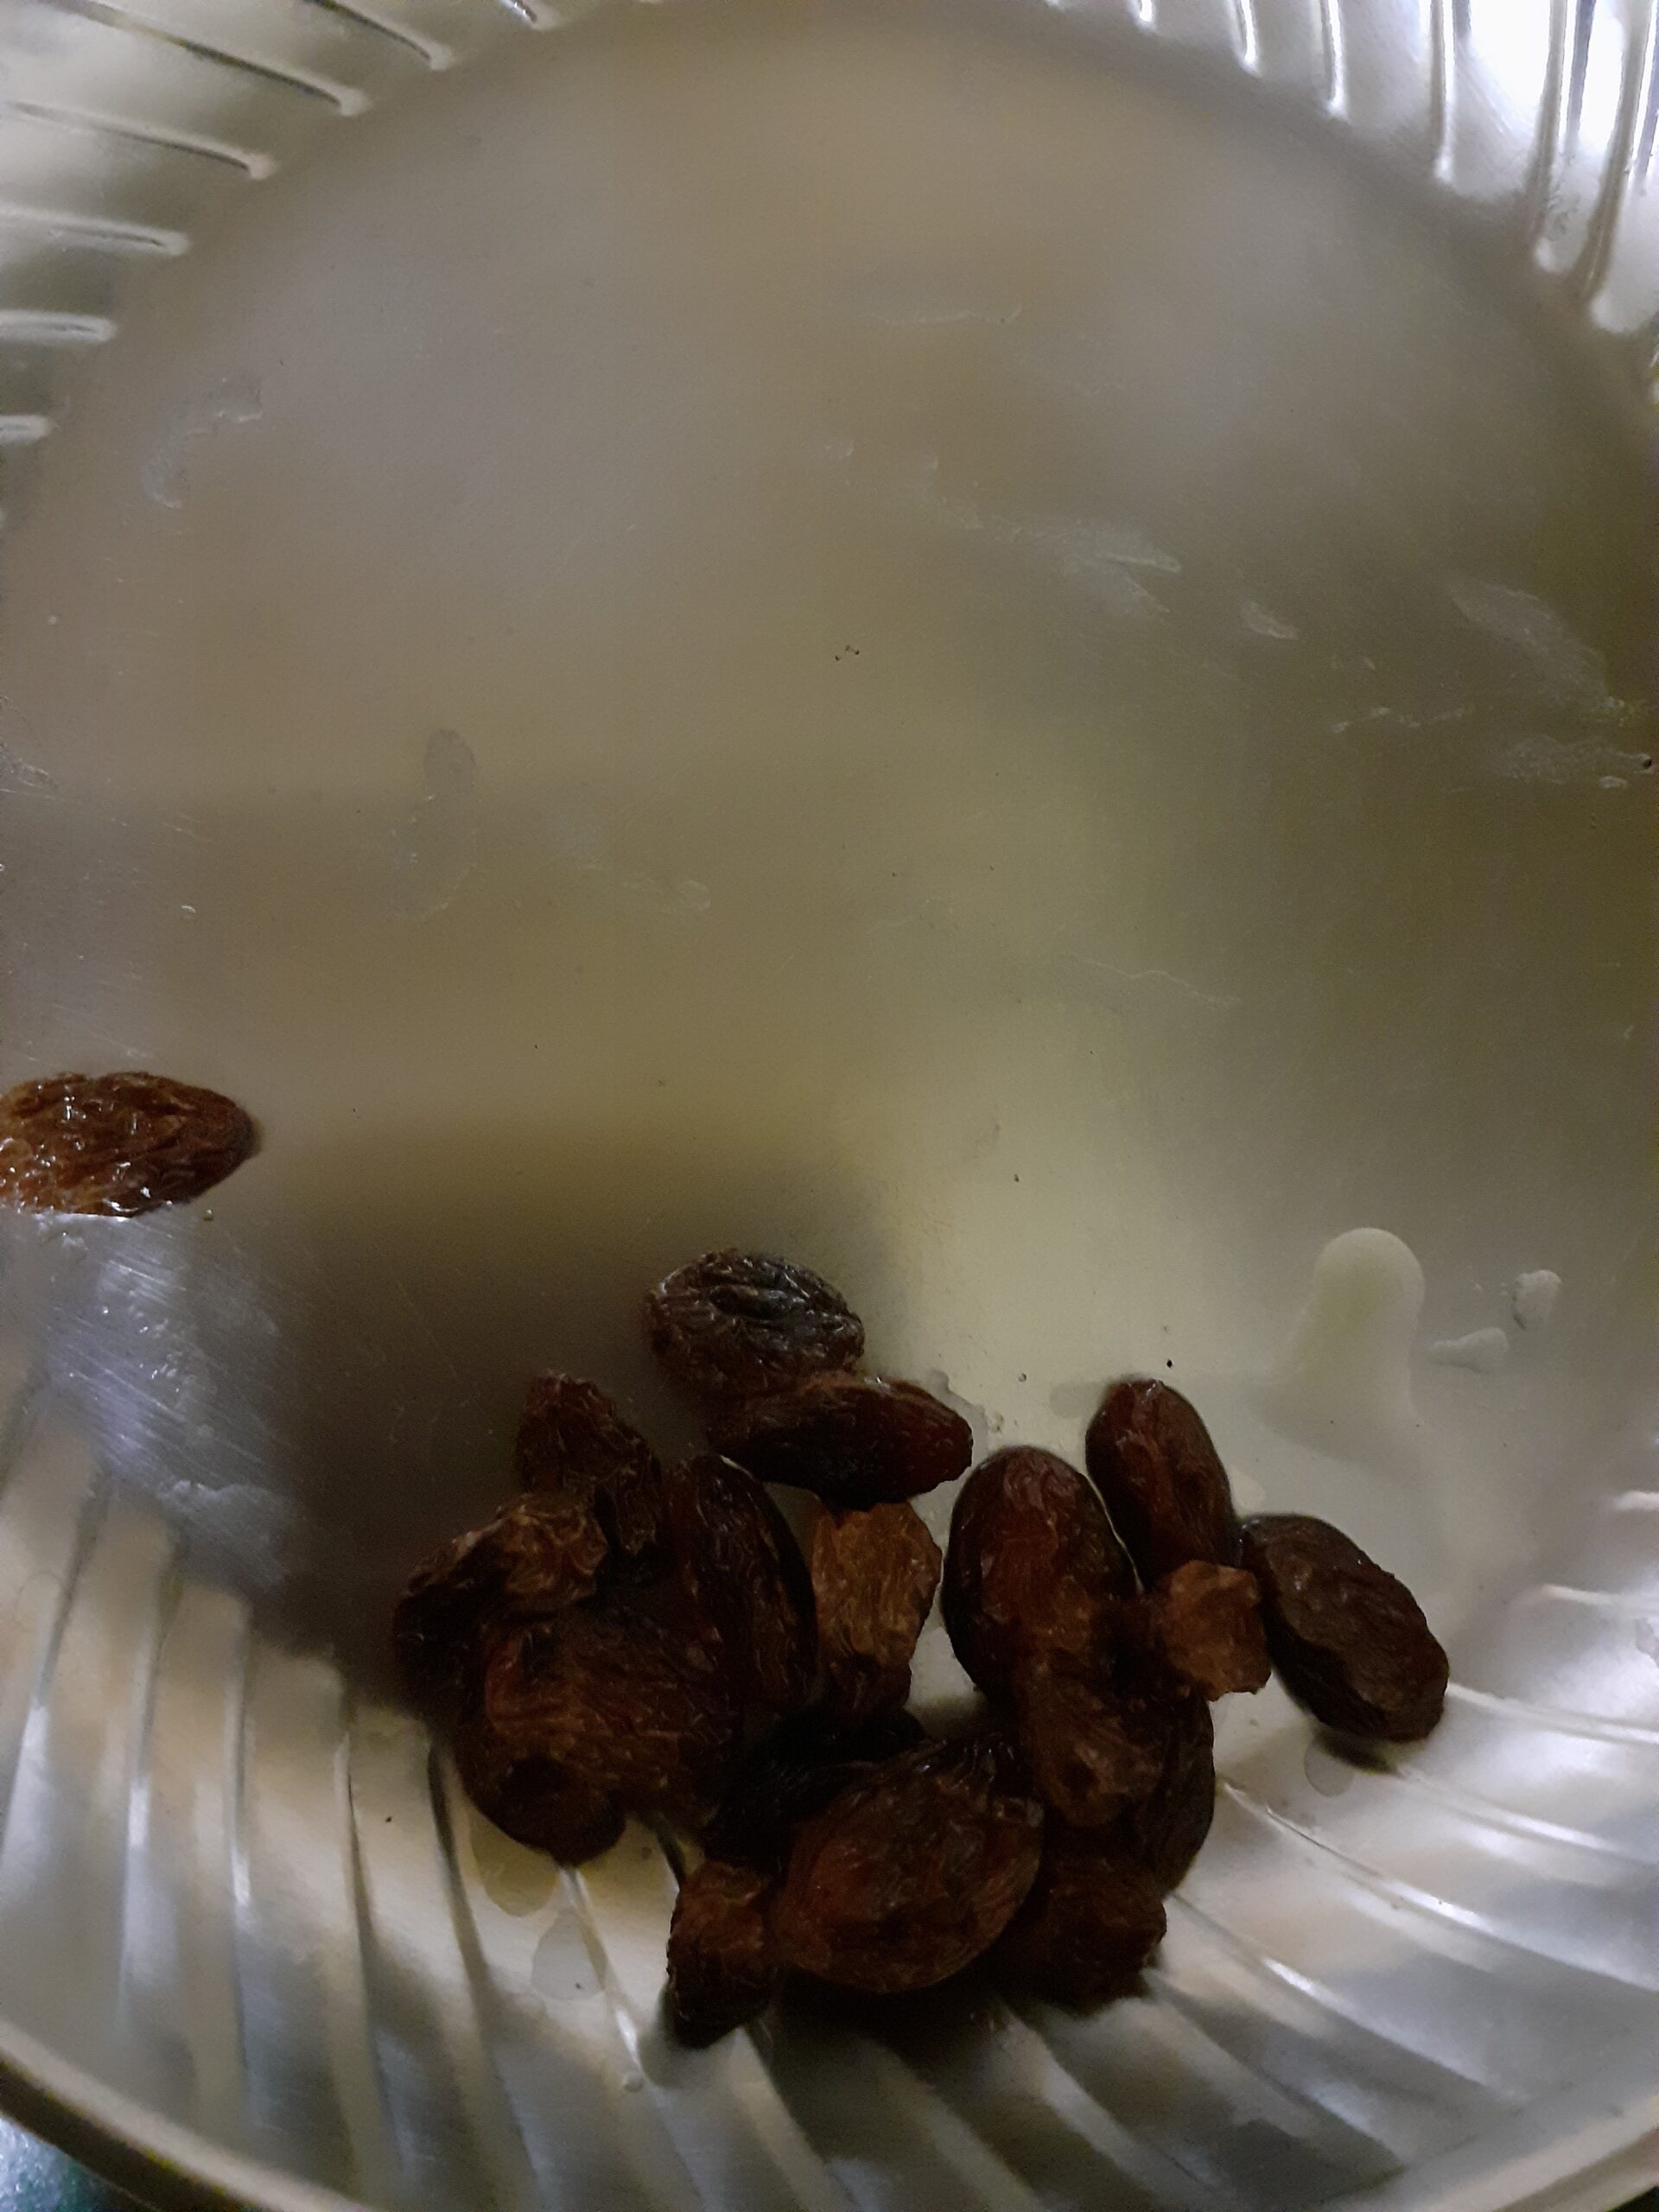
1. Assemble all ingredients. Take 1 tbsp ghee, fry the raisins and keep aside.
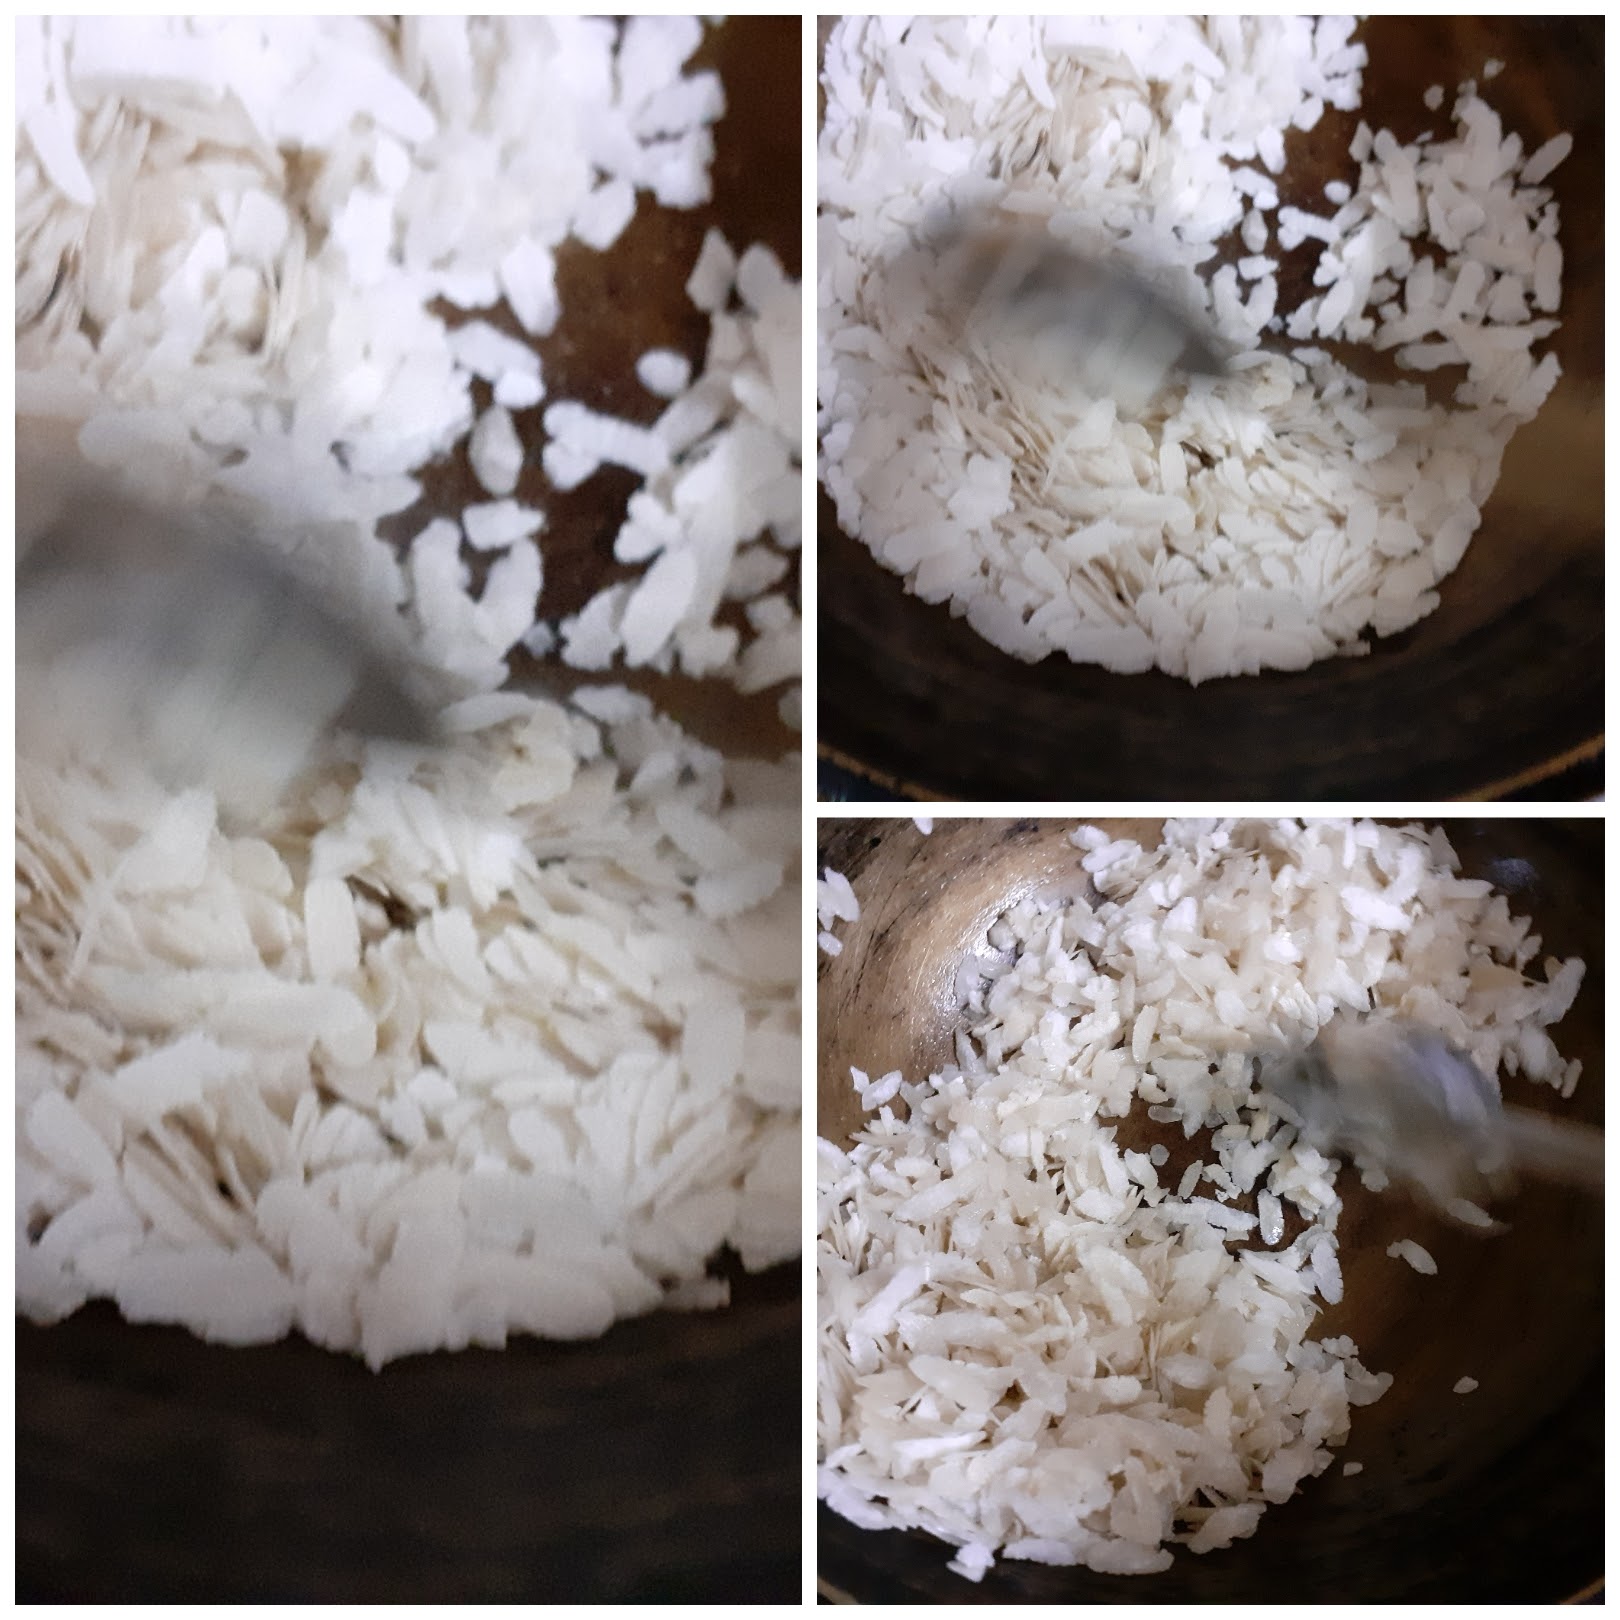
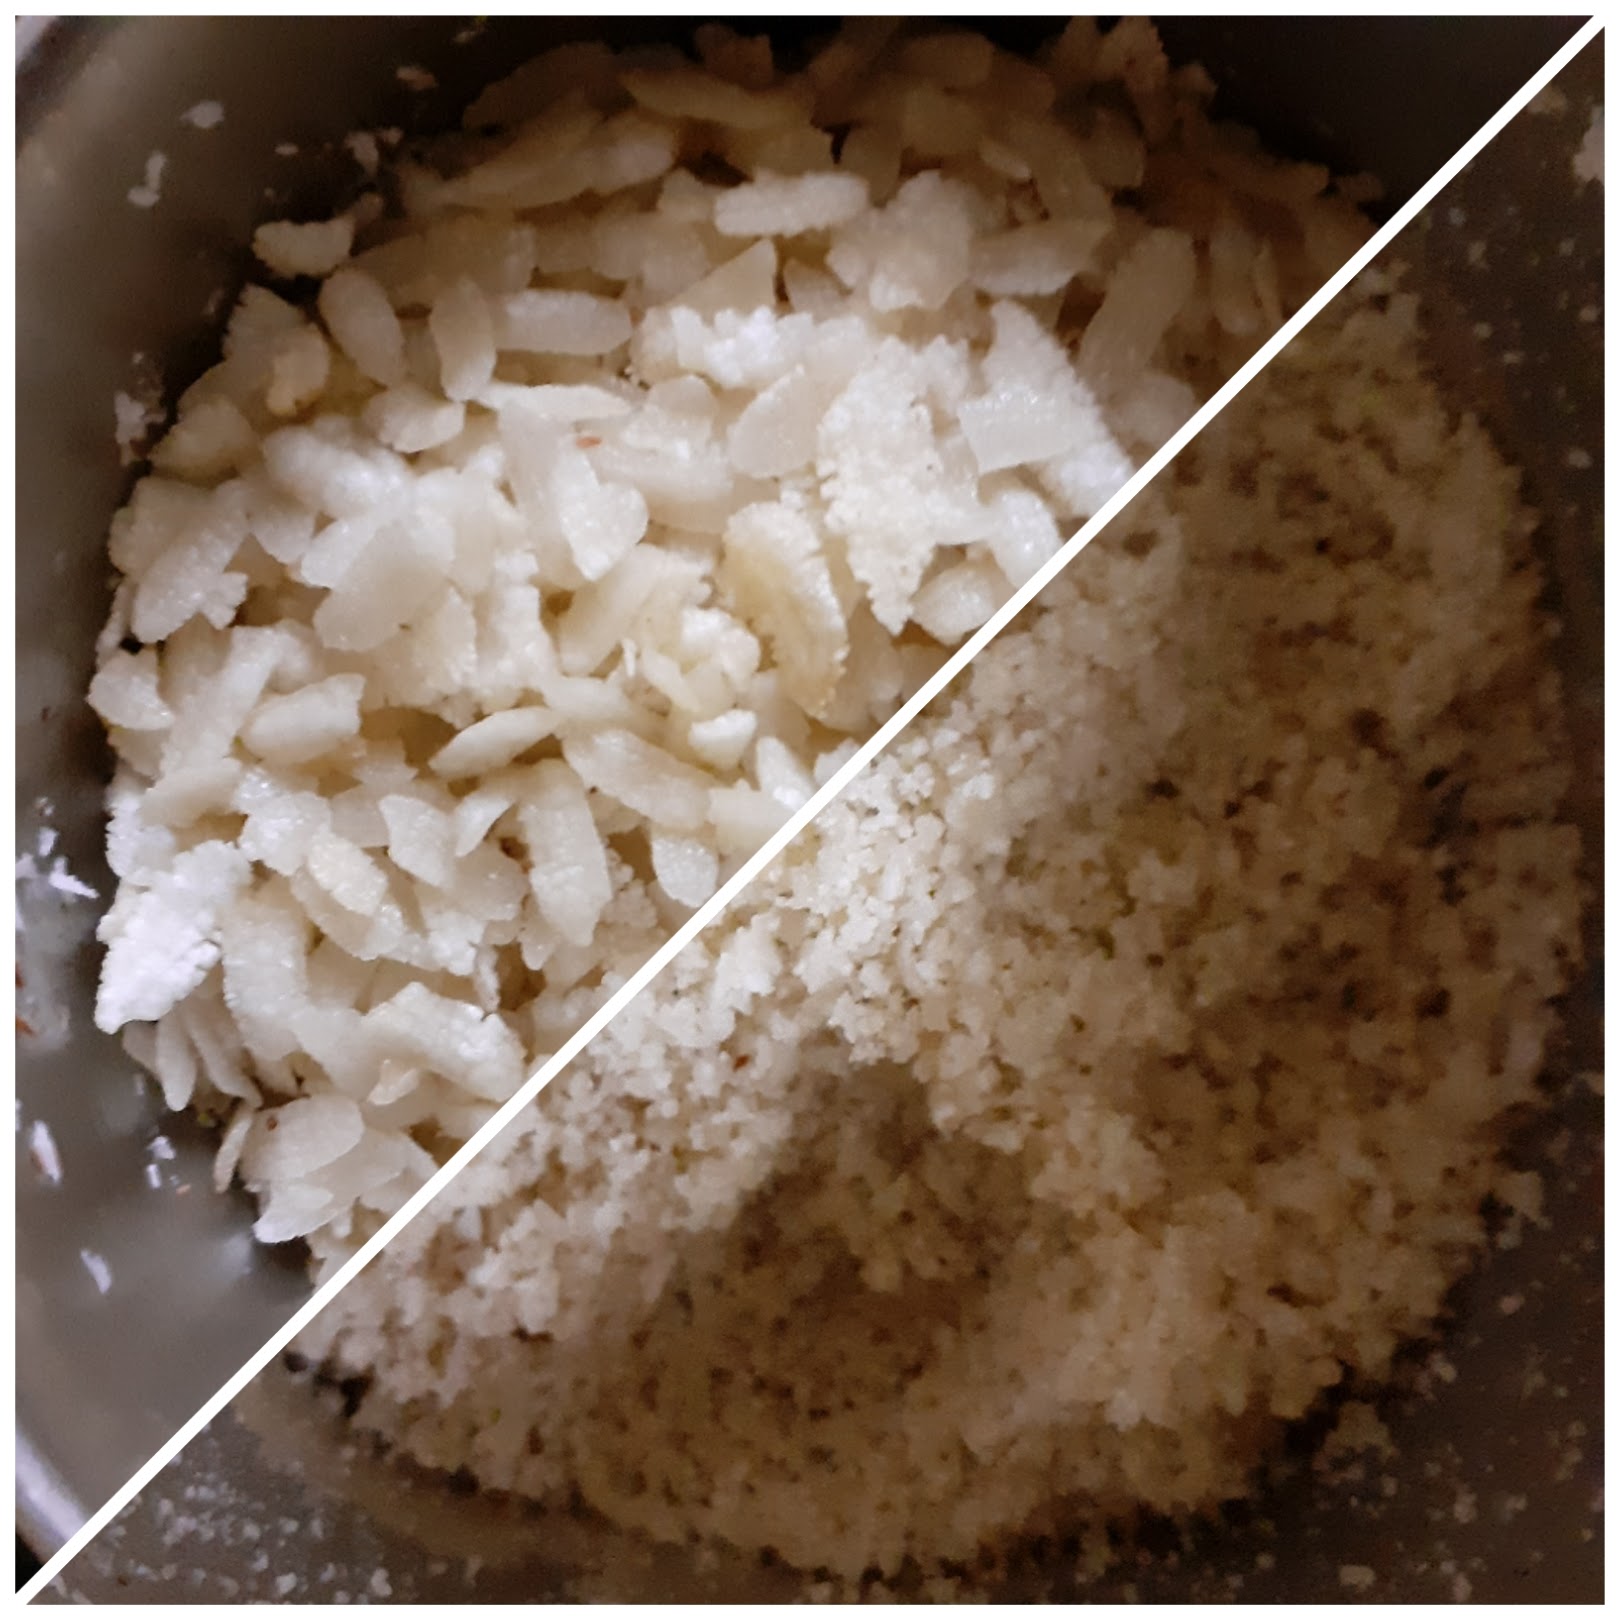
2. To the same ghee add the Poha and fry nicely until crisp. Transfer it to a dry mixer and cool.
3. Now grind it to a Rava/ Sooji like texture and keep aside.
4. Now to the same karahi add 1.5 cup water, Kesari colour and sugar and bring to a boil. Add the raw camphor now if using.
5. When the water boils, slowly drop in the ground Aval/ Poha little by little and stir constantly. Keep stirring until the mixture thickens.
6. Now add the Raisins, cardamom powder and 1/2 spoon ghee to the Poha and mix well. The Aval Kesari is ready to serve to the guest, or to give as an offering.
NOTES:
1. Thick Poha/ Aval can also be used for this but the amount of ghee, water will double up.
2. The Aval is not to be soaked but roasted to get the desired texture.
3. I added 1/4 cup sugar which might be a little less sweet, so up to 1/2 cup sugar can be added.
If you tried this recipe and liked it please comment below. I would love to hear from you.
If you want the recipes emailed to you leave your id in the homepage near the????
icon. Whenever we have a new post the recipe will be mailed to you. Thank you for showing interest in Rajjo’s Kitchen.
Unni Appam/Nei Appam/Sweet Appam
This Appam recipe is the Kerala style Appam, made with soaked raw Rice, Jaggery, Banana and Cardamom. It is one of the most simple recipes and is also one of the main offerings in festivals like Janmashtami, and Ganesh Chaturthi. In our house, it is also an instant snack that my mother would make in a jiffy apart from the soak time. Usually, an Appam mould/ Appa karai is required for this, but some also make it by directly pouring a ladle of batter into the oil and deep-frying. If fried without a mould the shape is flat like that of a Pancake, whereas the one made in a mould is round. It is best made with ghee, though oil too can be substituted for ghee.
Grinding the batter to the right consistency is a critical step, as too dilute a batter will affect the moulding of the appam and the batter may just scatter away in the oil. Therefore I have mentioned the right way to grind the batter in the recipe. Once the batter is ground we are just five minutes away from yummy tasting Nei Appams.
Here is the recipe of Sweet Appam/ Unni Appam for you–
PREP TIME: 10Mins+ 1 hr(soak) COOK TIME: 30Mins
TOTAL TIME: 40Mins COURSE: DESSERT/SWEET
CUISINE: SOUTH INDIAN SERVINGS:15 pcs
AUTHOR: Rajni Ram
Ingredients:
Raw Rice 1 cup soaked for 1-hour minimum ( 1 cup equals 200 gm) ( refer note1)
Jaggery 1 cup powdered/shredded
Banana 1/2 to 3/4 th of 1 large
Cardamom powder 1/2 tsp
Coconut grated or cut to small pieces 2 Tbsp
Directions:
Soak the Rice for a minimum of 1 hour and up to a maximum of 1.5 hours. After soaking, drain all water and out the rice into a blender. Grind it first to a Rava/Sooji like texture without adding water, now add little water and grind to a smooth paste. Take care not to add too much water, as adding jaggery will liquify it further. So try to use only 1/4 cup water to get a smooth texture. Now add the Jaggery and grind again. Add coconut grating and blitz. Mash the bananas with your fingers and add them to the batter and bring again to a smooth batter. Transfer to a vessel and add the cardamom powder. The Appam batter is now ready.
Now put the Appam mould/Appam Chetty or Appa Karal on flame and heat it well. Spoon in the ghee into the moulds liberally. Let the ghee heat up, now spoon the batter into the moulds and fry on one side until golden brown, using a kambi/skewer or a fork, to loosen the edges of the Appam and flip it to the other side and fry until golden brown. To check for doneness, pierce the appam with the skewer/toothpick or fork in the center, if it comes out clean, remove appams from the mould. The delicious Unni appam/ Sweet Paniyarams/ Nei Appams are ready. Enjoy. Bon Appetit.
STEPWISE RECIPE FOLLOWS:
1. Soak rice for 1 hour. It can be soaked up to a maximum of 1.5 hours.
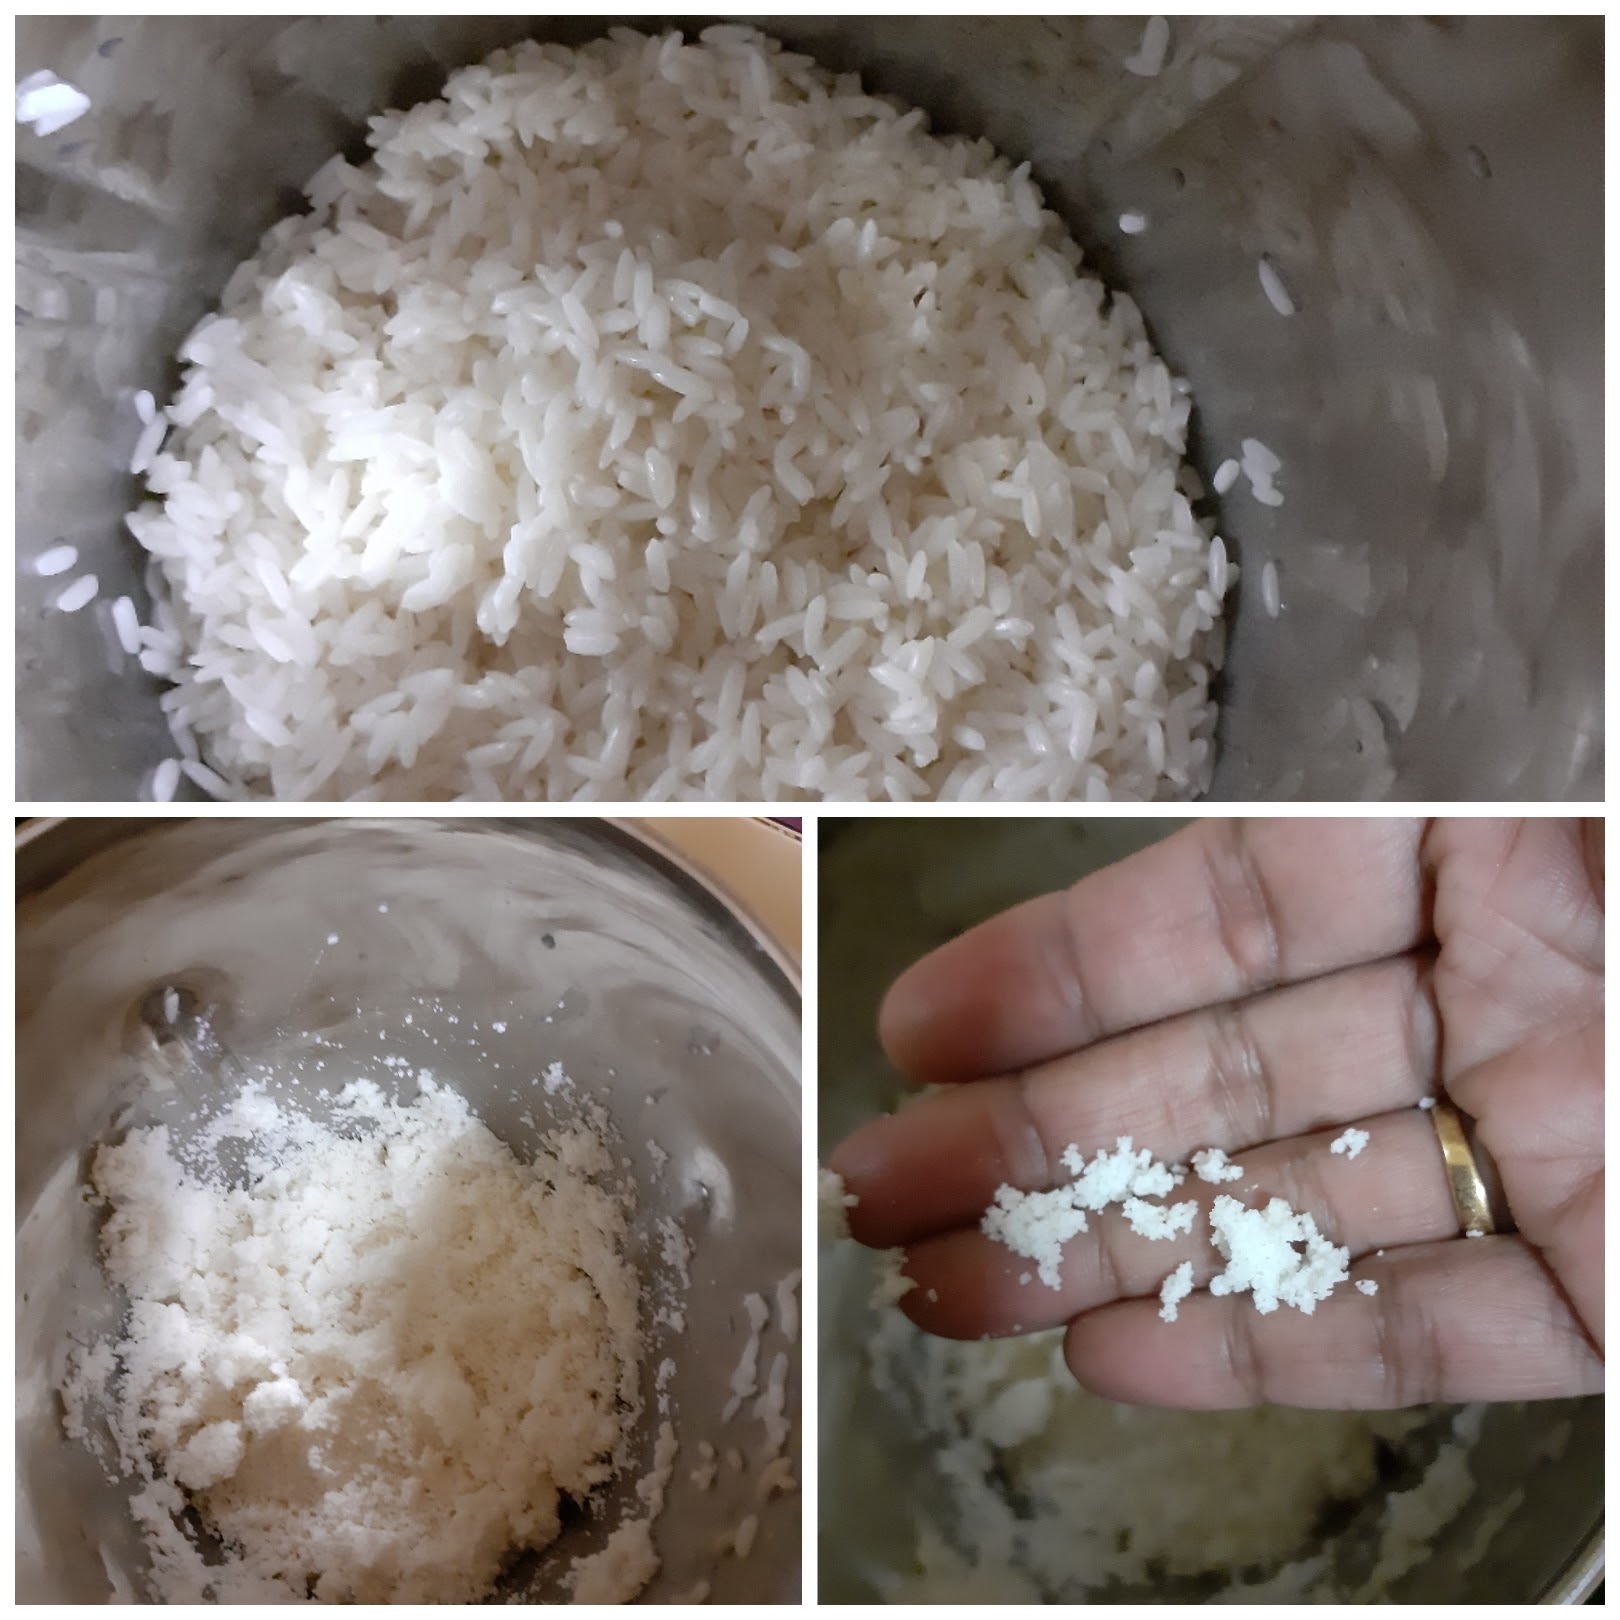
2. After an hour drain all the water and put the rice ina blender and grind it without any water at first to a Rava/Sooji like texture.
3. Now add water little by little and grind it to a smooth paste. Water should be used minimally. I used around 1/4 cup water to grind. Check cup measurement given above.
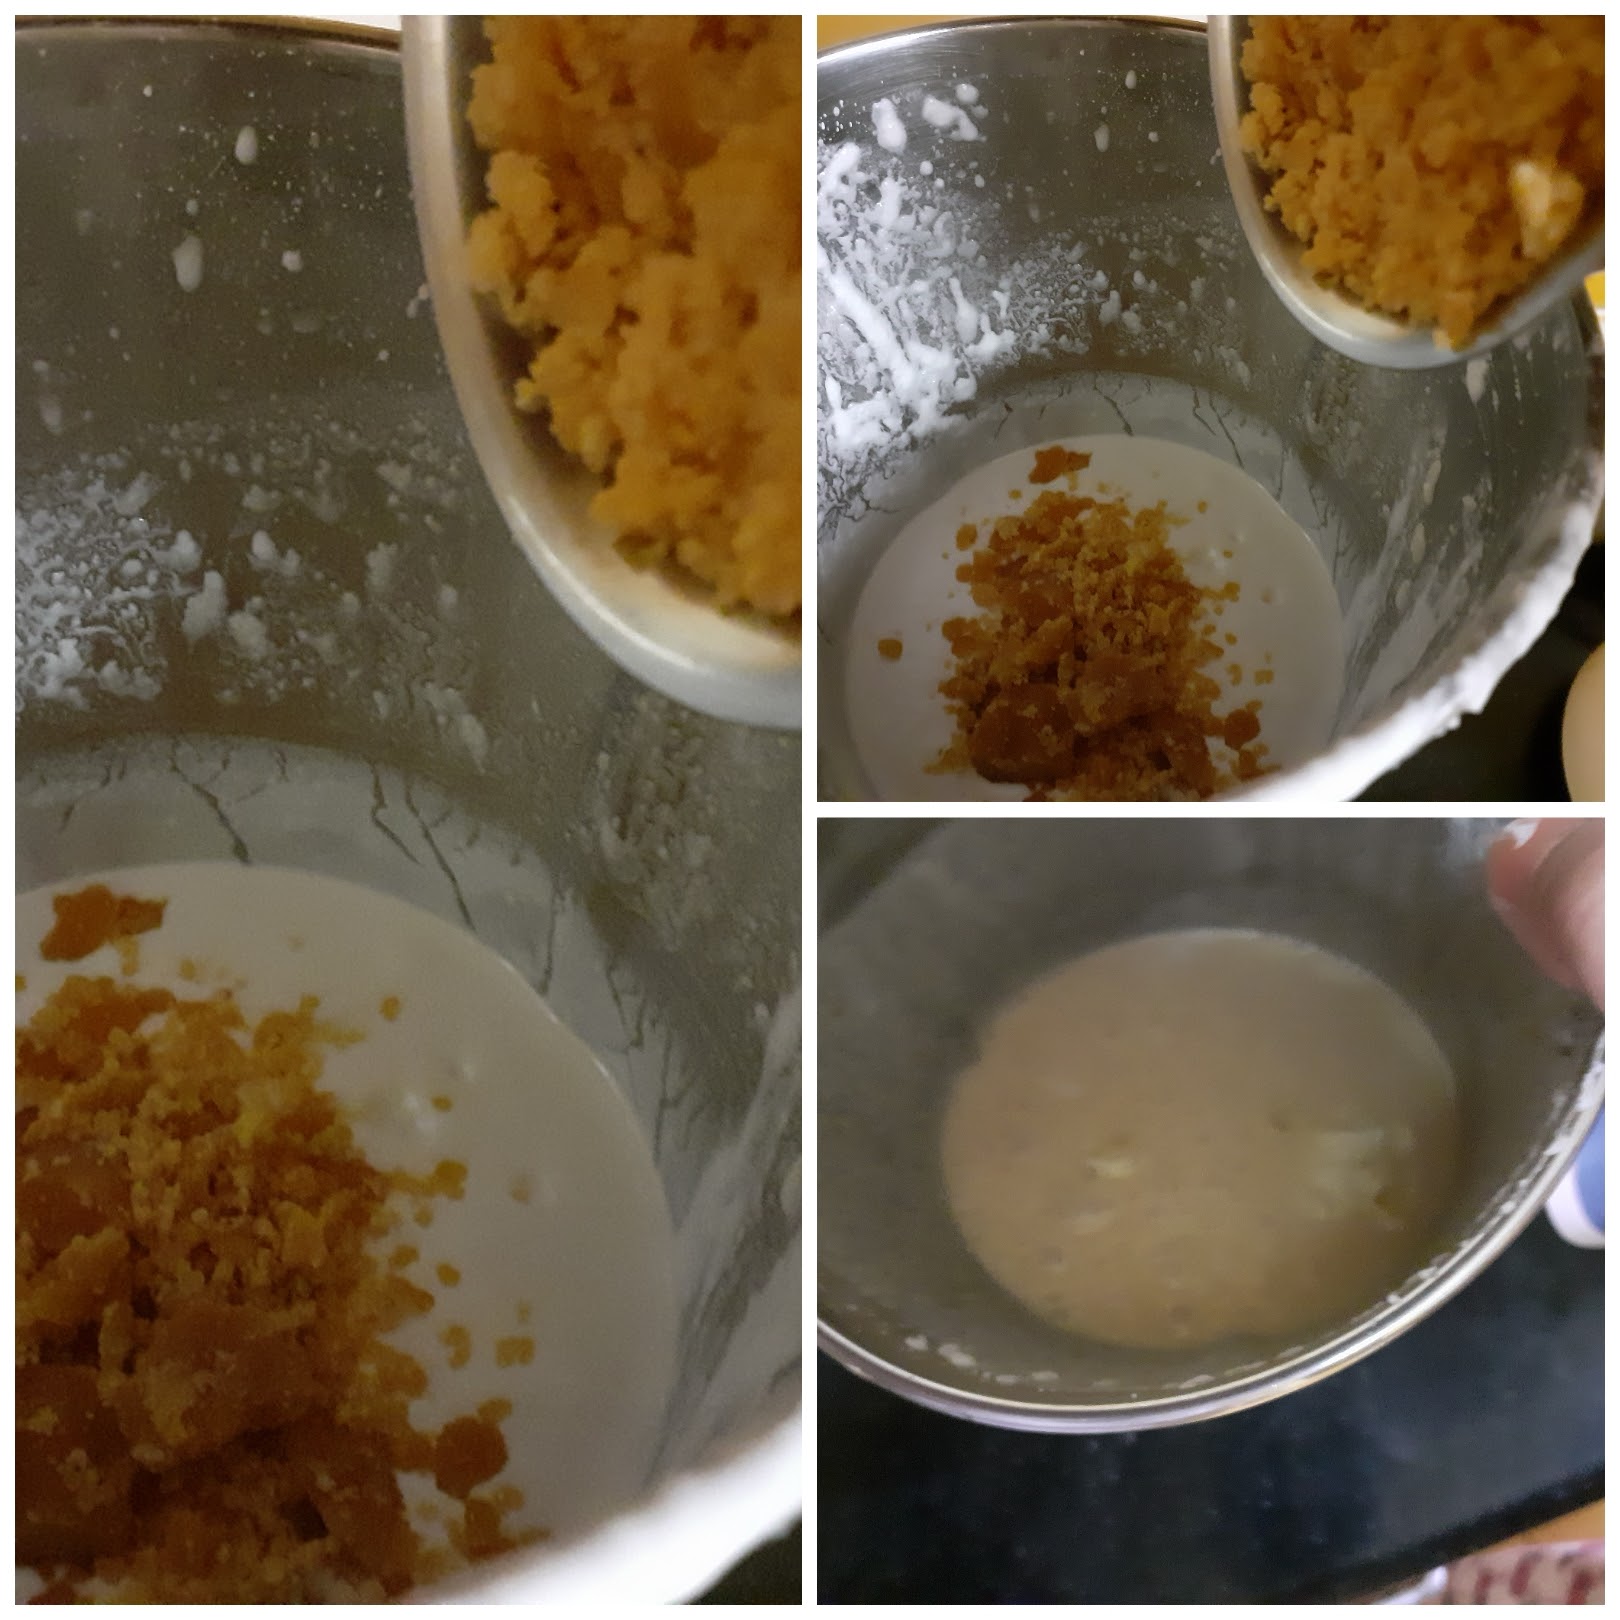
4. Now add the jaggery again and grind to a smooth paste, add the coconut gratings and blitz again.
5. Now mash 3/4 of a Banana with your fingers and add it to the paste, grind once again to a smooth batter. The consistency should be that of dosa batter. Transfer it to a vessel and add the cardamom powder. The appam batter is ready. Have added a mini video to show the consistency of the batter.
6. Put an Appam Chetty on the flame. Spoon in the ghee and heat it. Now spoon in the batter into the moulds and fry on now side until a golden brown. Using a skewer or fork loosen the edges of the appam and gently flip it to the other side and fry again to a golden colour. Repeat for all batter. The Sweet Appams are now ready.
NOTES:
1. Any raw rice variety can be used other than Basmathi as the Basmathi rice does not have a lot of starch content that is required for binding. The appams turn out rubbery with it.
2. While grinding if you end up with a runny batter accidentally, then add rice flour a tablespoon at a time until you achieve the right consistency.
3. If the batter splits or breaks apart in the ghee either your batter is runny or too much jaggery has been added. So modify accordingly and fry.
4. It is ideal to fry these appams in ghee/clarified butter as it tastes best. But oil also can be used.
5. Banana varieties that are sweet can be used. Avoid the slight sour ones like Poovan.
6. Always start with frying a single Appam first so that if something needs to be adjusted it can be done and then the rest can be fried.
If you tried this recipe and liked it please comment below. I would love to hear from you. If you have a query about the recipe email us and ill respond as soon as I can.
If you would like to receive our recipes on your mail please leave your mail id at the homepage. Every time Rajjo’s Kitchen has a new post we will mail the recipe to you.
Sugiyan
Sugiyan or Sukhiyan as it is called is a traditional snack in Kerala and Tamilnadu. It is also made in Andhra Pradesh and is called Boorelu. This snack is like a sweet version of the Aloo Bonda where the Aloo is replaced with a sweet Chana dal or Moong dal and Jaggery filling and instead of Besan Urad dal and rice flour are used as a batter to cover the filling(Poornam). Coconut is also added to the filling that enhances the taste. This is also a snack that people make for festivals. As the festival time is nearing blogging this recipe may be helpful. I usually make it around Navarathri and Diwali to serve it to guests who visit home.
As I had mentioned that the poornam (filling) is made with Moong dal too, but I personally feel the chana dal filling is tastier. Some also use whole moong(payaru) to make the filling.
I use this filling of Sugiyan to make Puran Poli(Boli/Bobbatlu/Hoolige) also. So what I usually do is make them both simultaneously. I use wheat flour majorly with a hint of maida to make Puran Poli, the Sugiyan is had the same day as it doesn’t taste fresh or hold good the next day, it is like an instant snack, whereas Puran Poli can be consumed with 2-3 days if stored properly.
One needs to grind the batter carefully and the rest of the recipe is quite easy. In this recipe, I will also show you an easy way to make the filling.
While you are here check out my other dessert recipes like Pineapple Rabdi,
Carrot Kheer, Chakkara Pongal, Atte Ka Sheera, Akkara vadisal, and more.
Here is the recipe of Sugiyan for you–
PREP TIME: 20 Mins(1 hr soak) COOK TIME: 40 Mins
TOTAL TIME: 60 Mins COURSE: SNACK
CUISINE: SOUTH INDIAN SERVINGS: 6
AUTHOR: Rajni Ram
Ingredients:
Urad dal 1 cup soaked for 1-hour
Chana dal 1 cup roasted to light brown
Turmeric powder 1/2 tsp
Rice flour 2 tbsp
Jaggery 1 cup powdered
Coconut grated 1/2 cup
Cardamom powder 1 tsp
Oil for frying
Directions: for the filling:
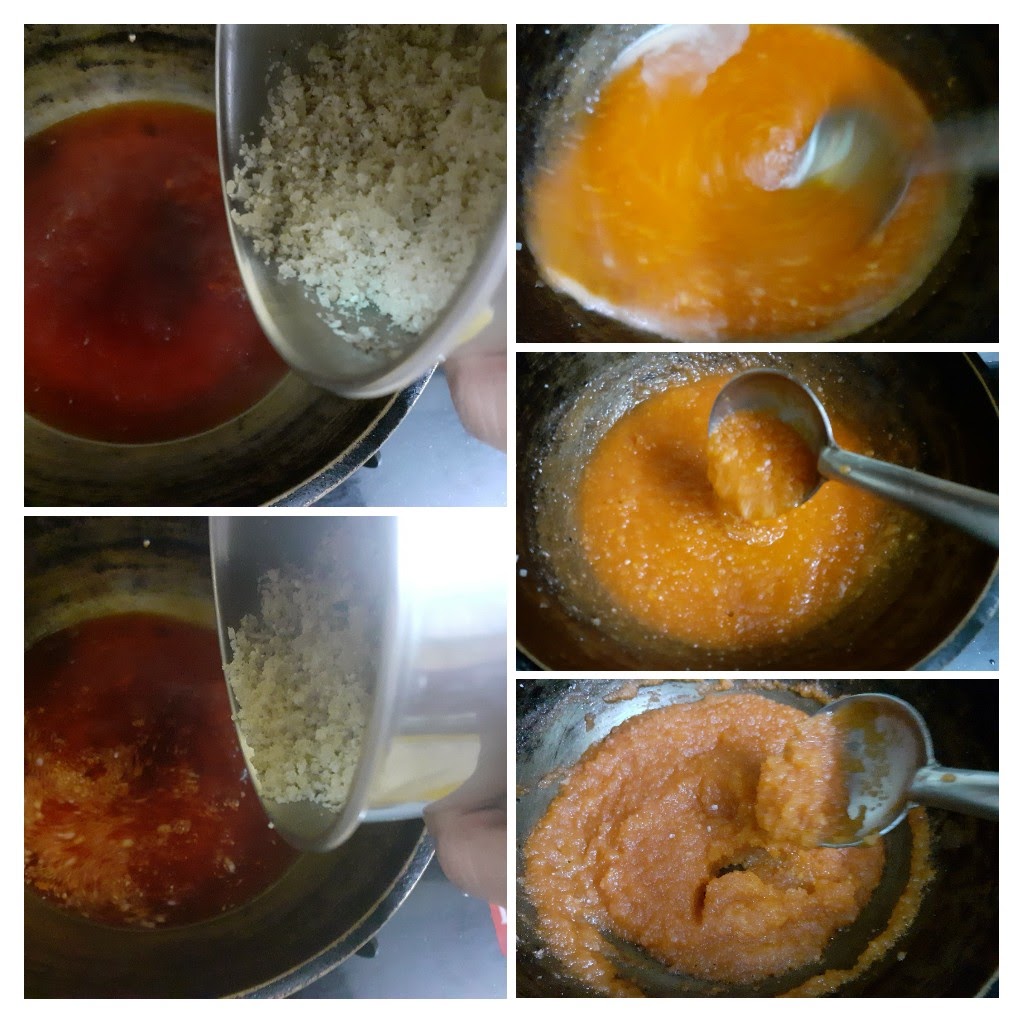
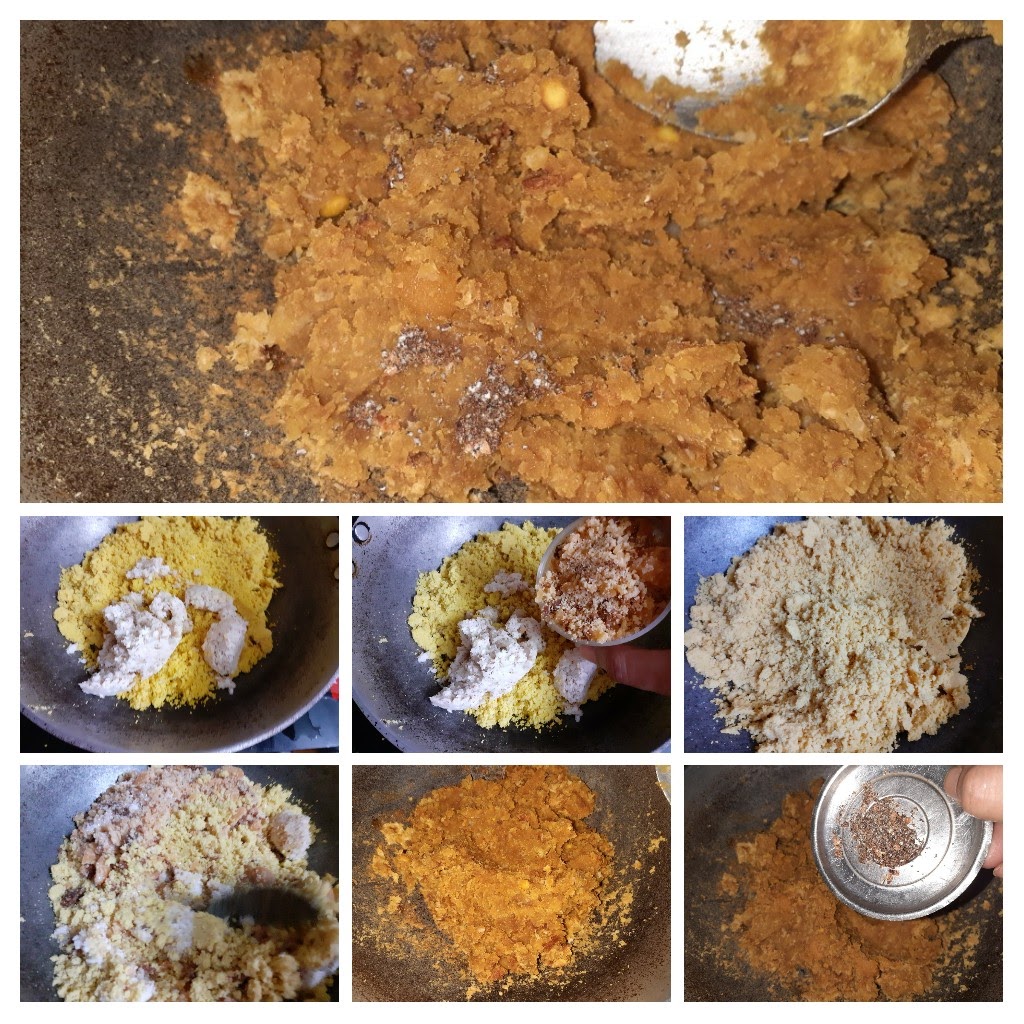
Dry roast the Chana dal to a light brown, you will get a nice aroma of the dal. Switch off the flame, remove and cook in a pressure cooker with 1/2 tsp turmeric powder and adequate water for 2-3 whistles(not more), as we want the dal to be rightly cooked, not mushy. Once the dal is cooked and the pressure in the cooker has subsided, remove the dal and put it in a strainer for all the water to drain off for about 5 minutes. Now put the dal into the dry grinding unit of the processor and blitz. Open stir the contents well and blitz again to a fine powder. After grinding it will resemble wet sand. Now in a Karahi put in the jaggery and the ground dal, followed by grated coconut( add no water) and keep stirring, in low flame. The jaggery will start melting and within 5 minutes of stirring the filling will become well combined. Even if it seems a little dry, don’t be tempted to add water. The jaggery will be enough to bind it. Add the Cardamom powder and keep stirring and when it forms a lump, put off the flame and let it cool. Once the filling has cooled, make small balls of them and keep aside.
Directions for the outer crust:
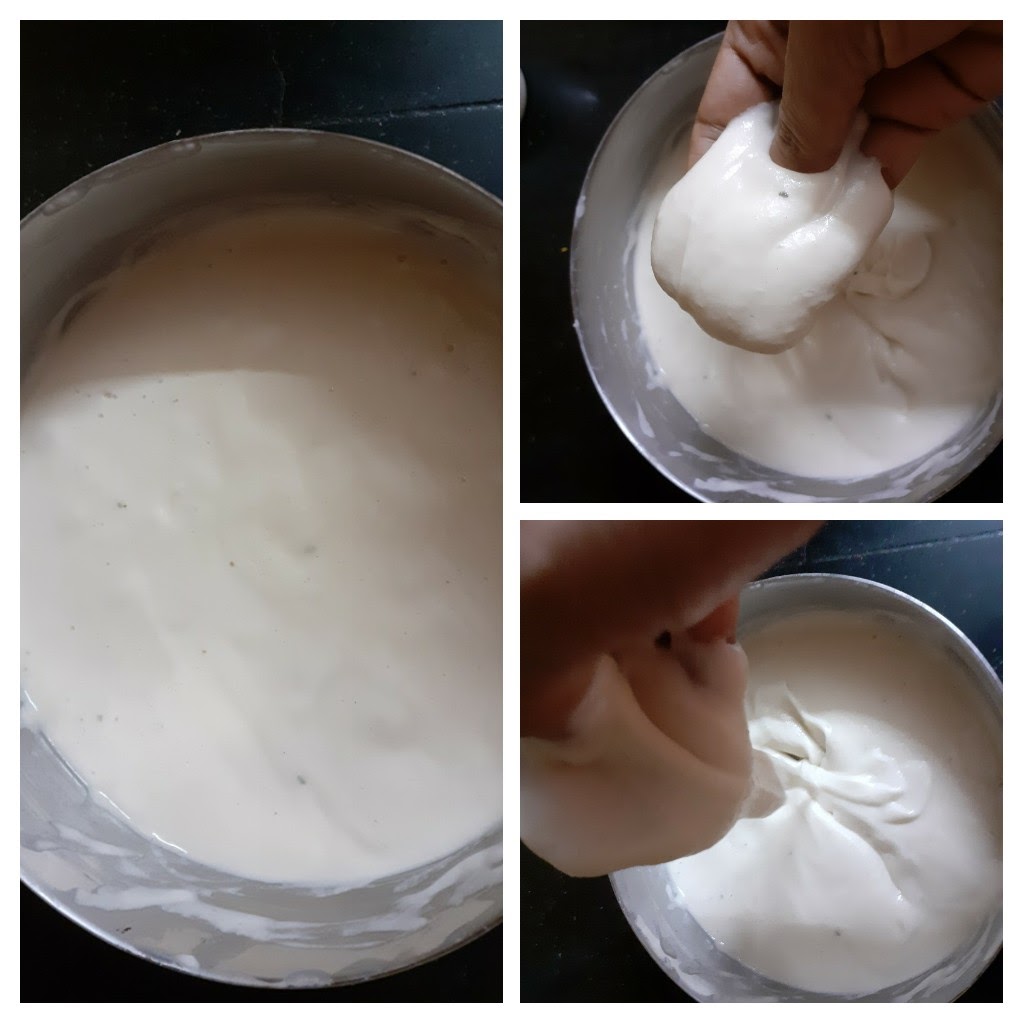
Soak the Urad dal for 1 hour and grind. Don’t allow it to soak for a long time, as then it soaks up a lot of oil while frying. The dal has to be ground to a smooth and thick batter, with water as required. The batter should stick to the filling and not roll off it, that should be the consistency. A runny or flowy batter will not stick to the filling. After grinding transfer to a dish, add 2 tablespoons of rice flour and 1/2 tsp salt. Now add little water if required as the rice flour would have absorbed all moisture from the urad dal paste.
Directions to make Sugiyan:
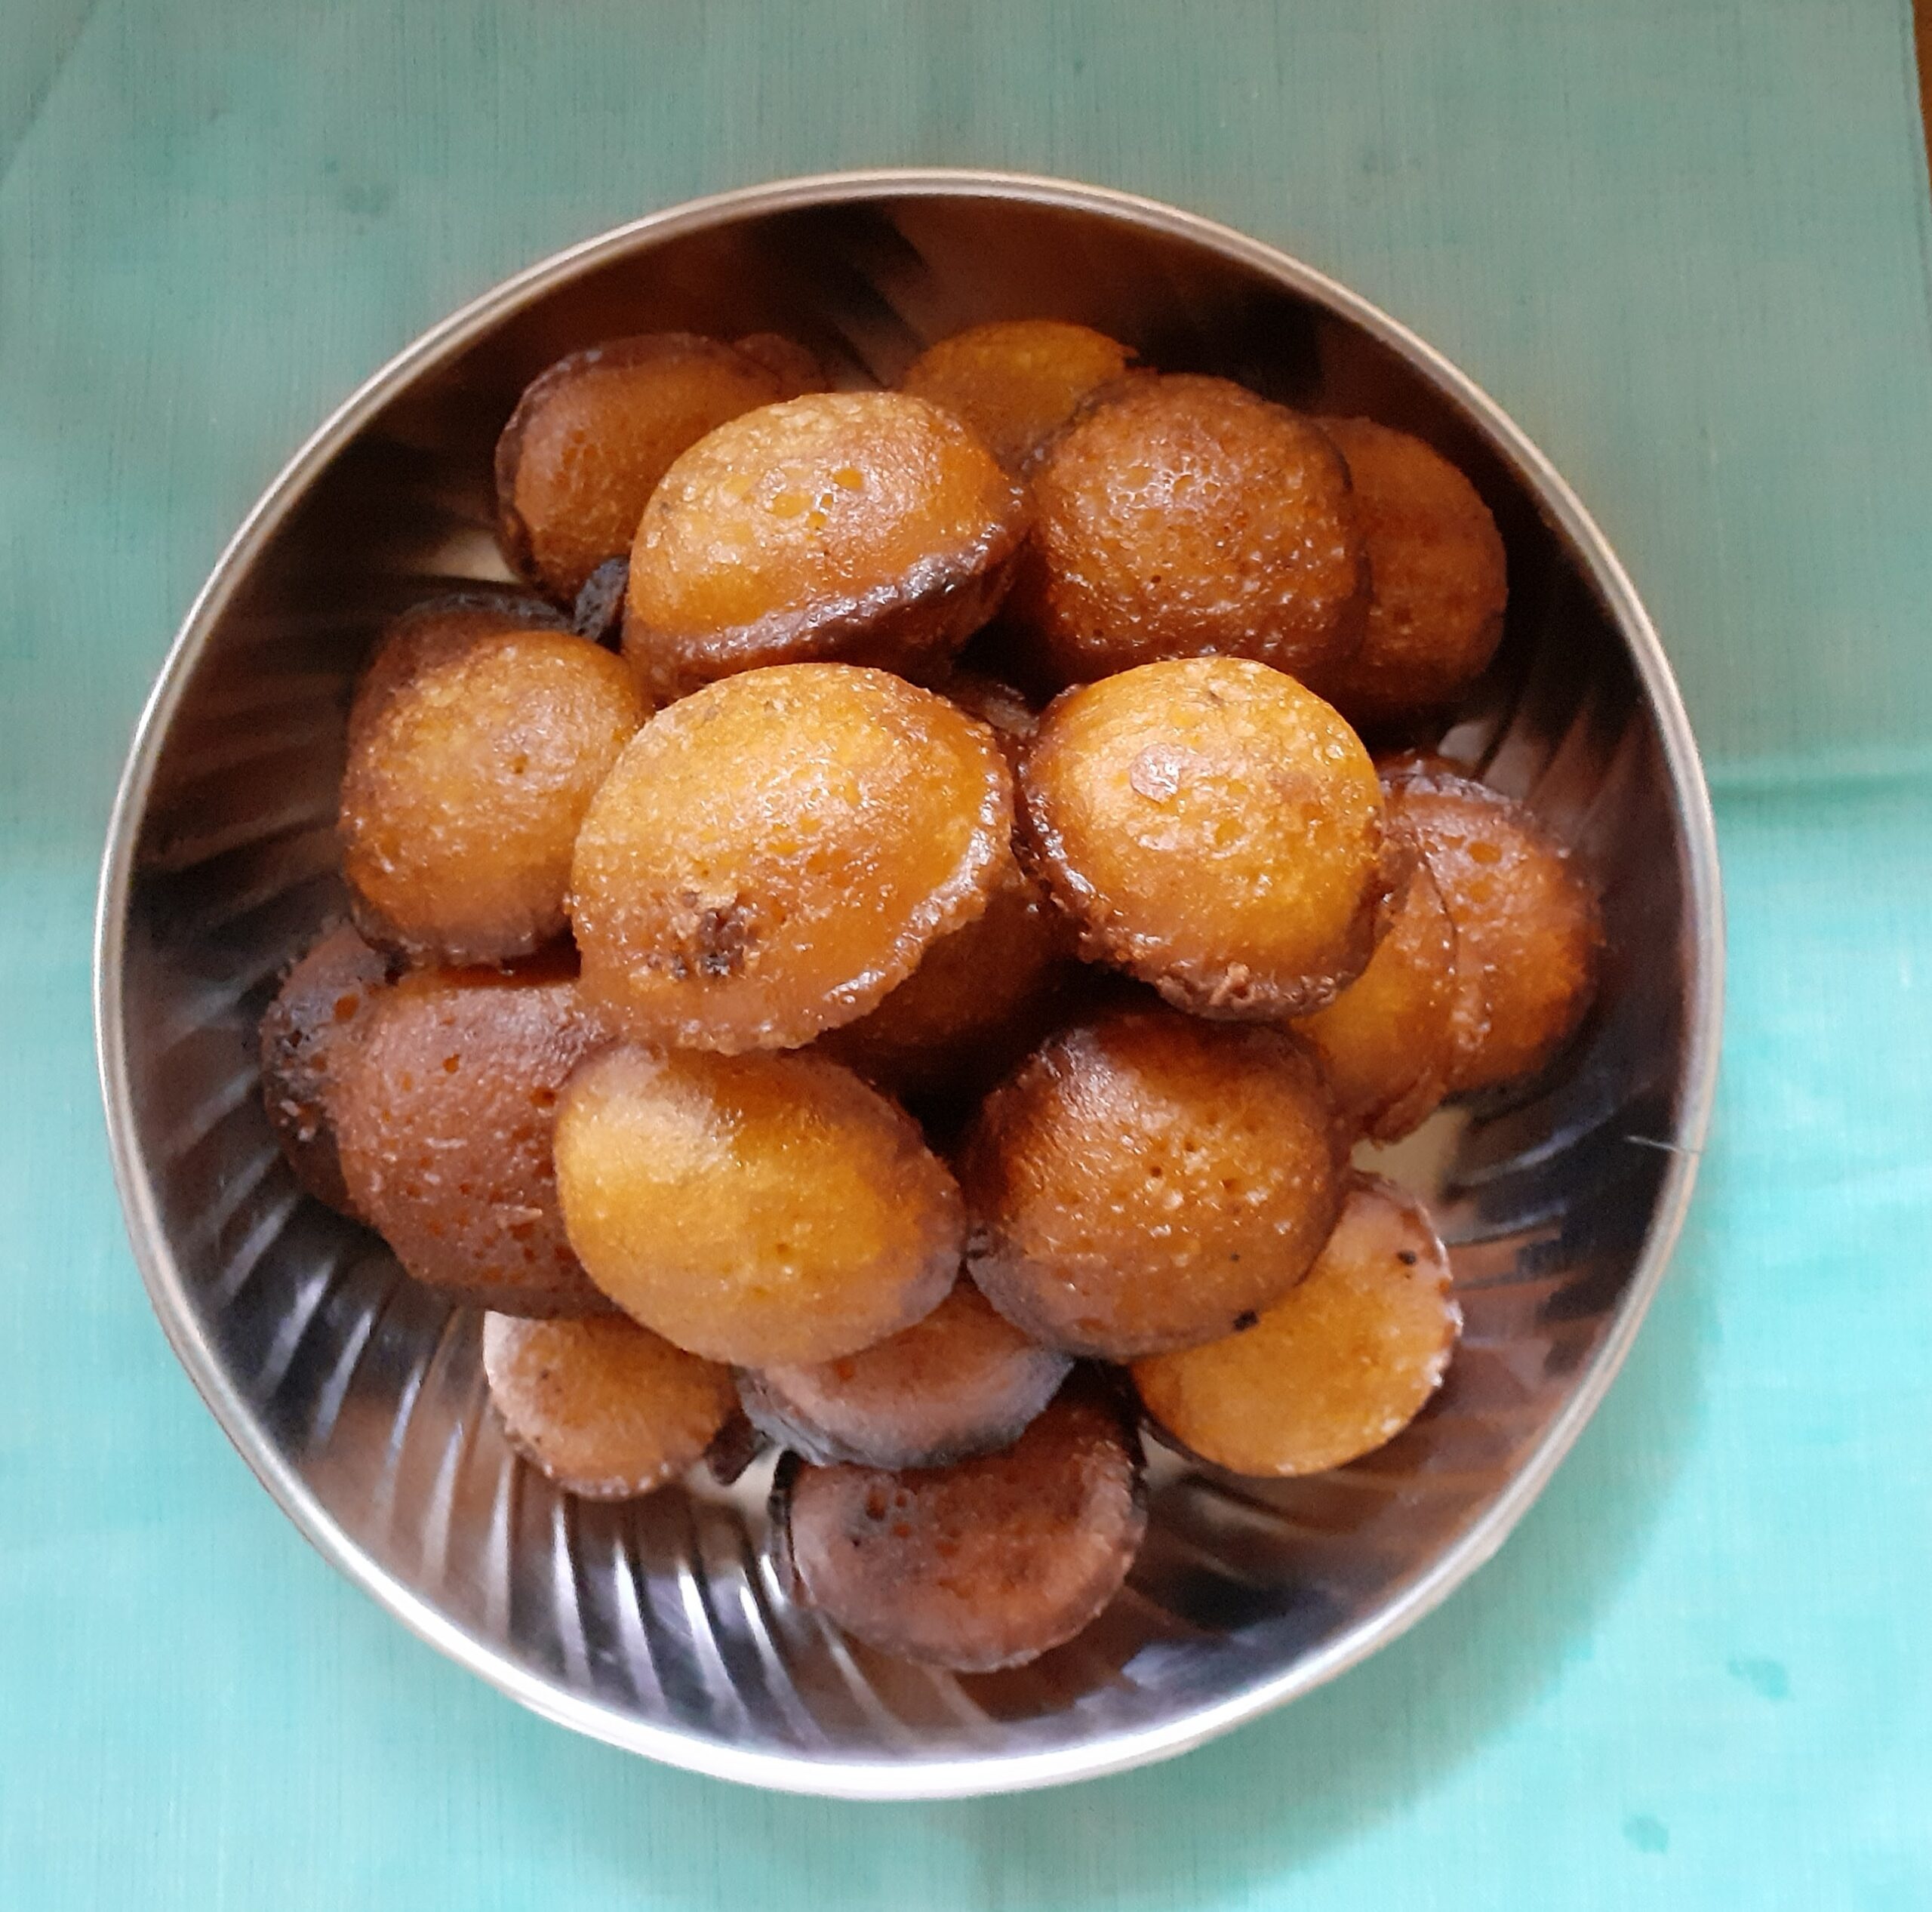
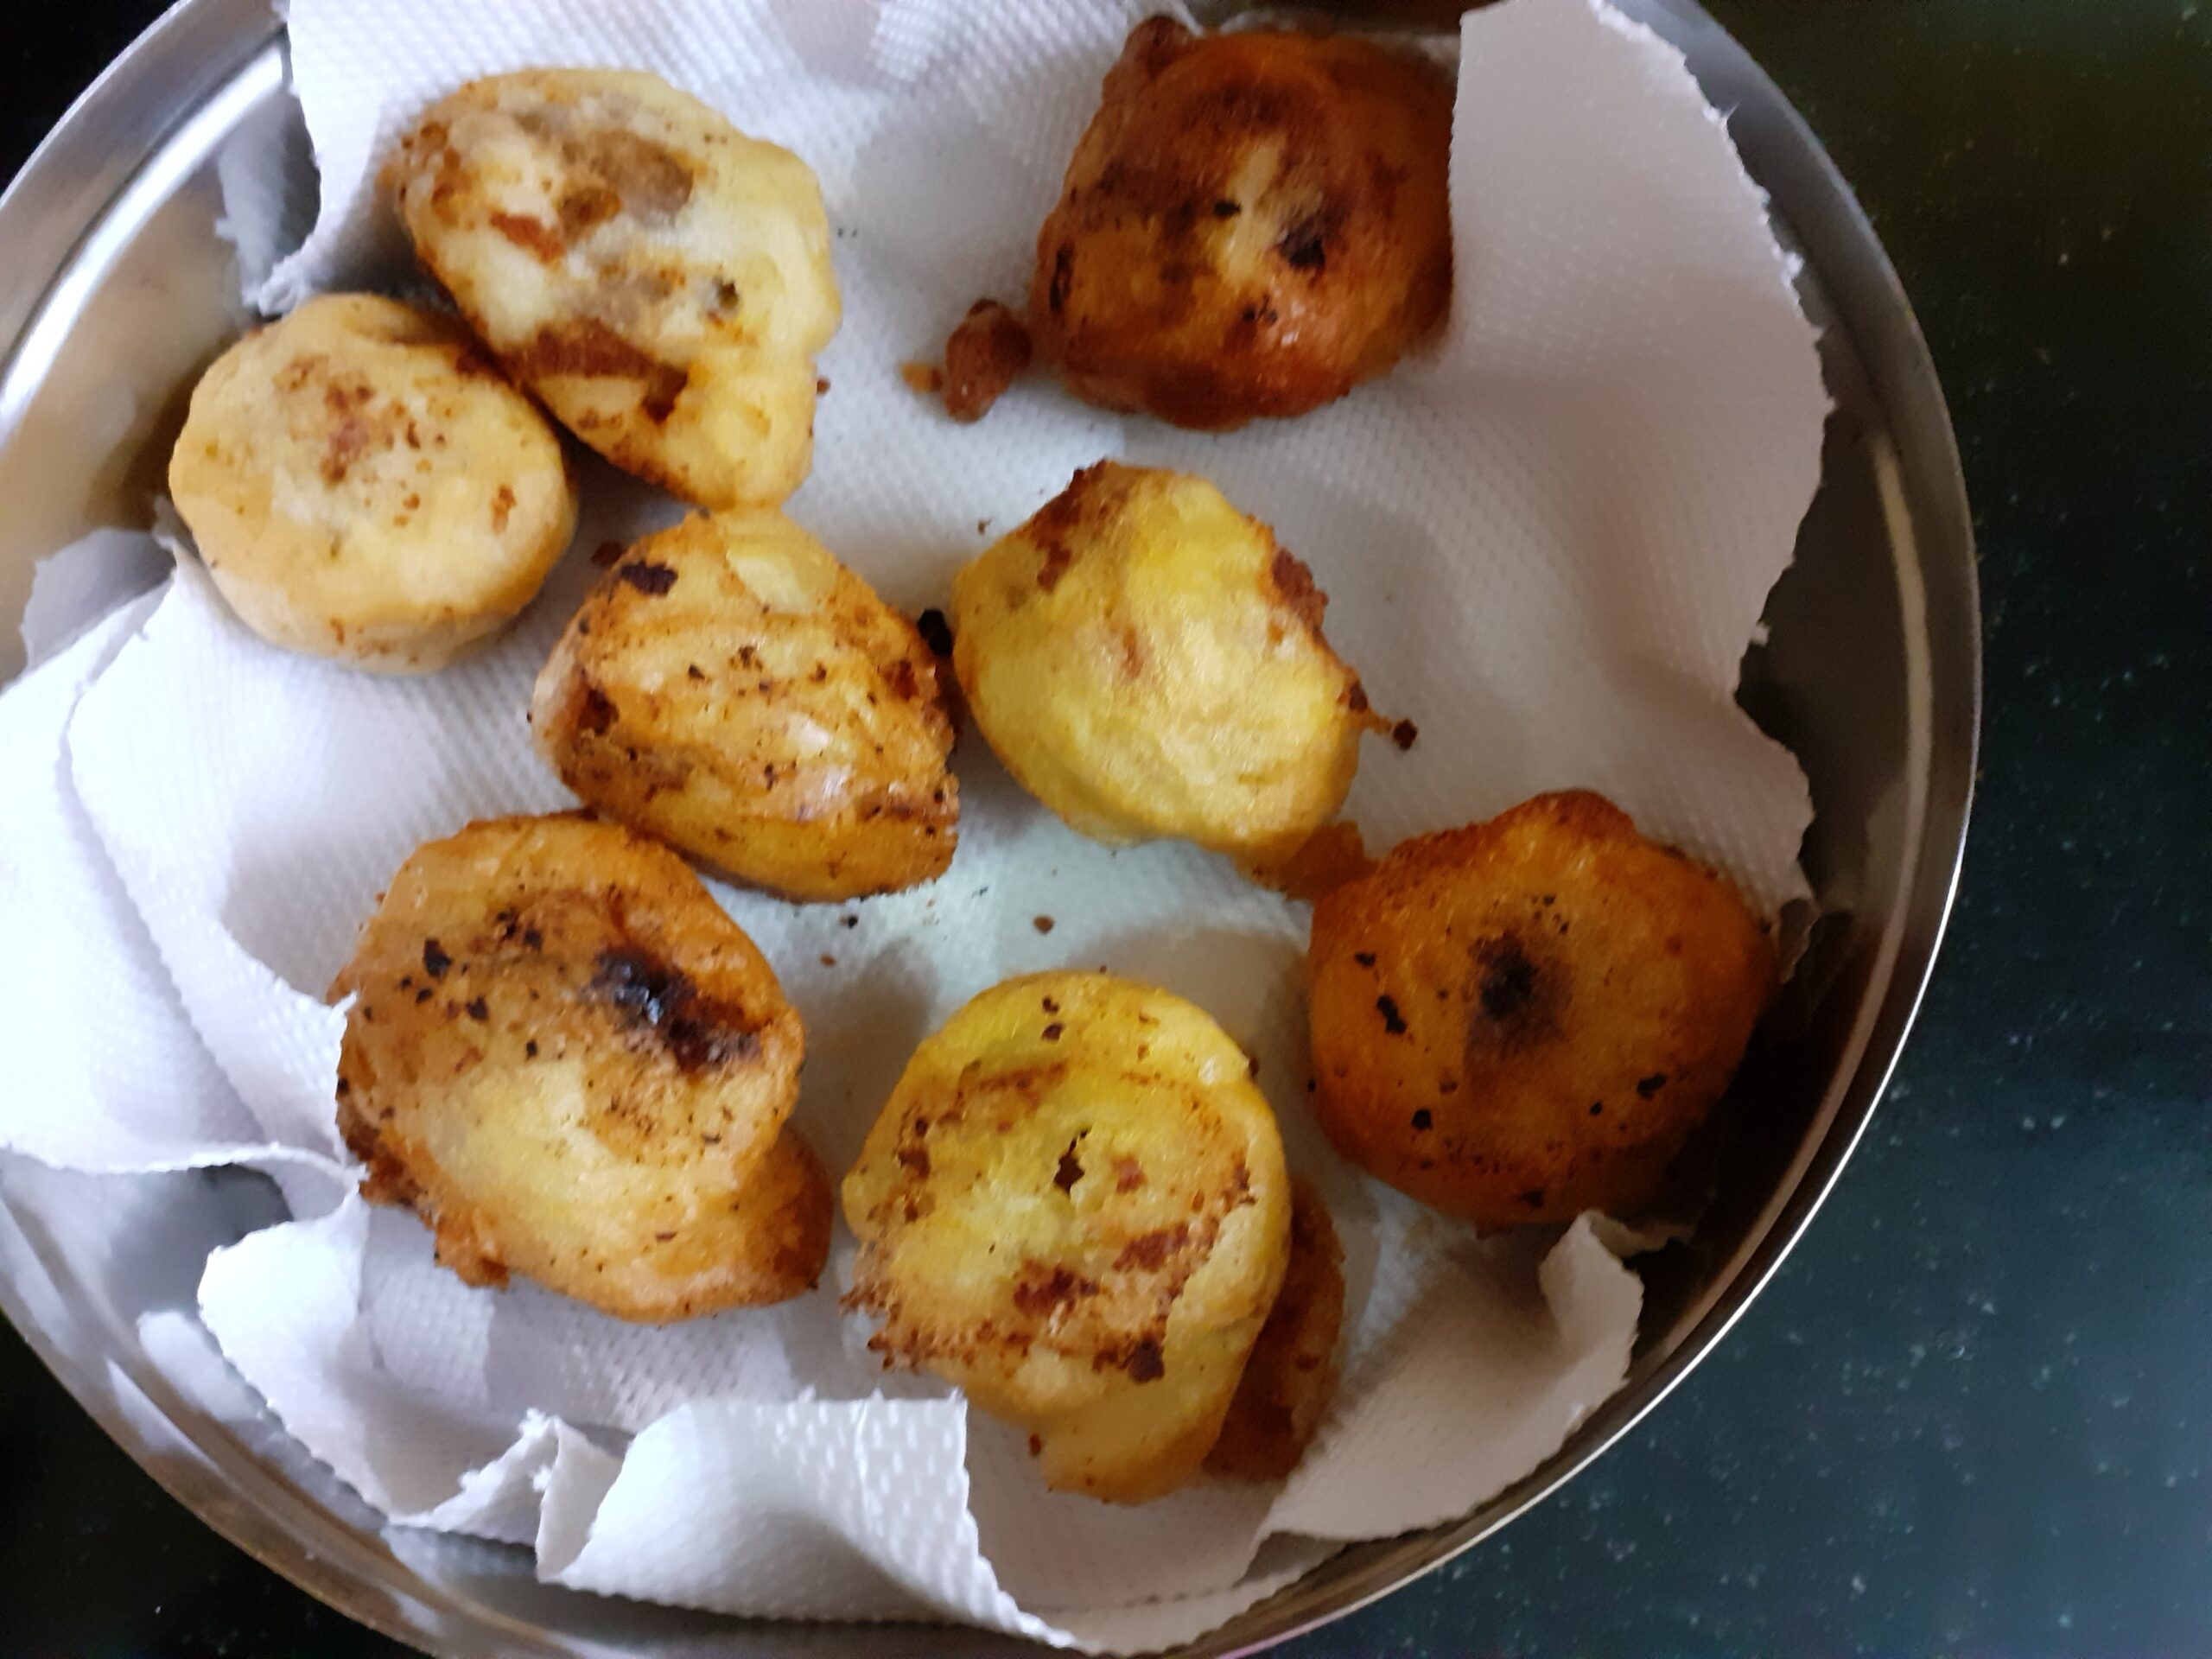
Heat oil for frying to medium-high. Now take one ball at a time, roll it in the batter, or smear the batter all over the filling, it should be a thick coating or it will split in the oil and, drop them gently into the oil. Fry 4-5 of them at a time. Remove when golden brown in colour. Drain them on an absorbent paper. Repeat for the entire lot of filling. The delicious Sugiyan is ready. Serve with tea or make it as Prasad(offering) for Puja and enjoy it. Bon Appetit.
STEPWISE RECIPE FOLLOWS:
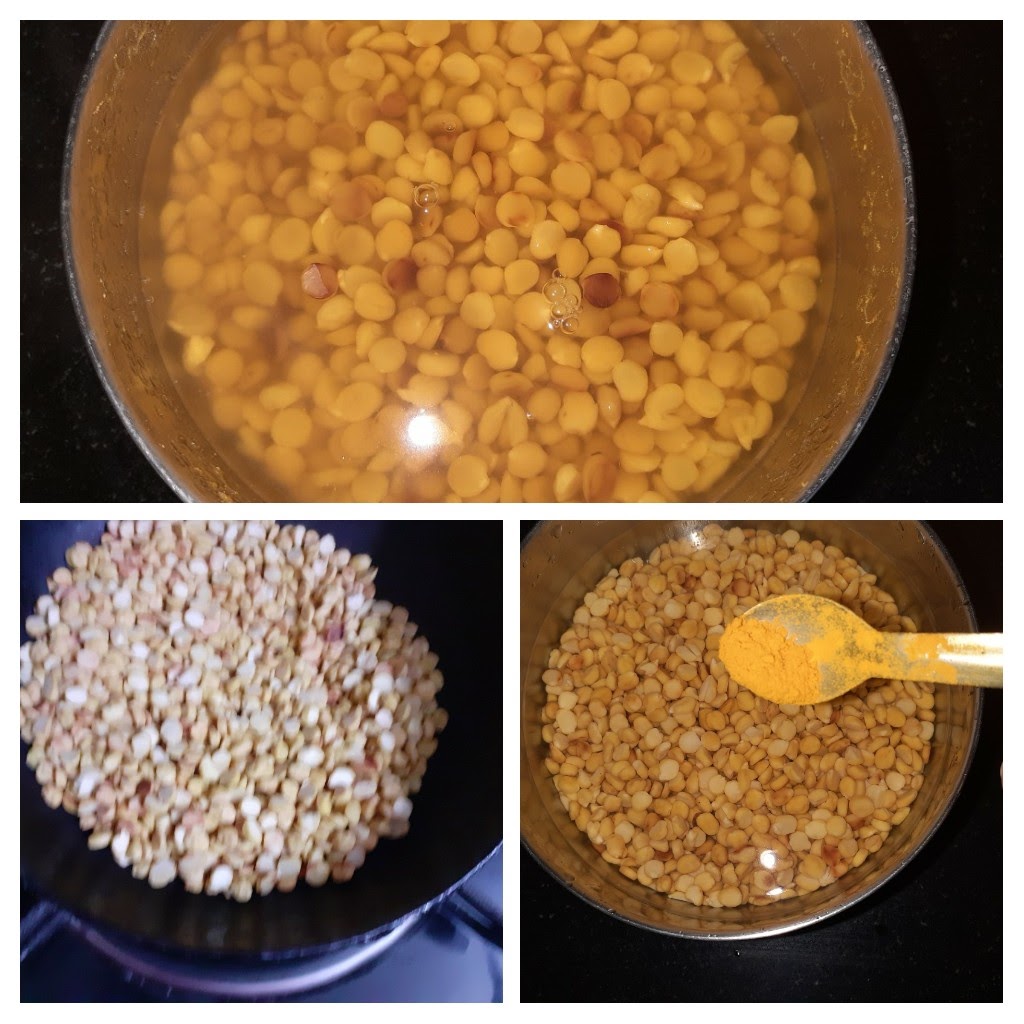
1. Assemble all ingredients. Soak the dal for an hour. Dry roast the Chana dal and pressure cook for 2 -3 whistles and no more.
2. For the Outer crust(cover)- Grind the soaked Urad dal by adding little water to a smooth but thick paste(idli batter consistency or a little thicker also is fine). Stir in 1.5 to 2 tablespoons of rice flour. If the batter gets too thick, add a little amount of water to get it back to the right consistency, given above. ( I forgot to take a picture of adding Rice flour, so please keep in mind and ad it).
3. For filling- Dry roast the Chana dal until light brown in colour, you will get a nice sweet aroma when you are getting to that stage. Pour required water and add turmeric powder and pressure cook it for 2-3 whistles, and not more. Once the pressure reduces, take the dal and drain it completely of all the water and allow it to cool for 5 minutes.
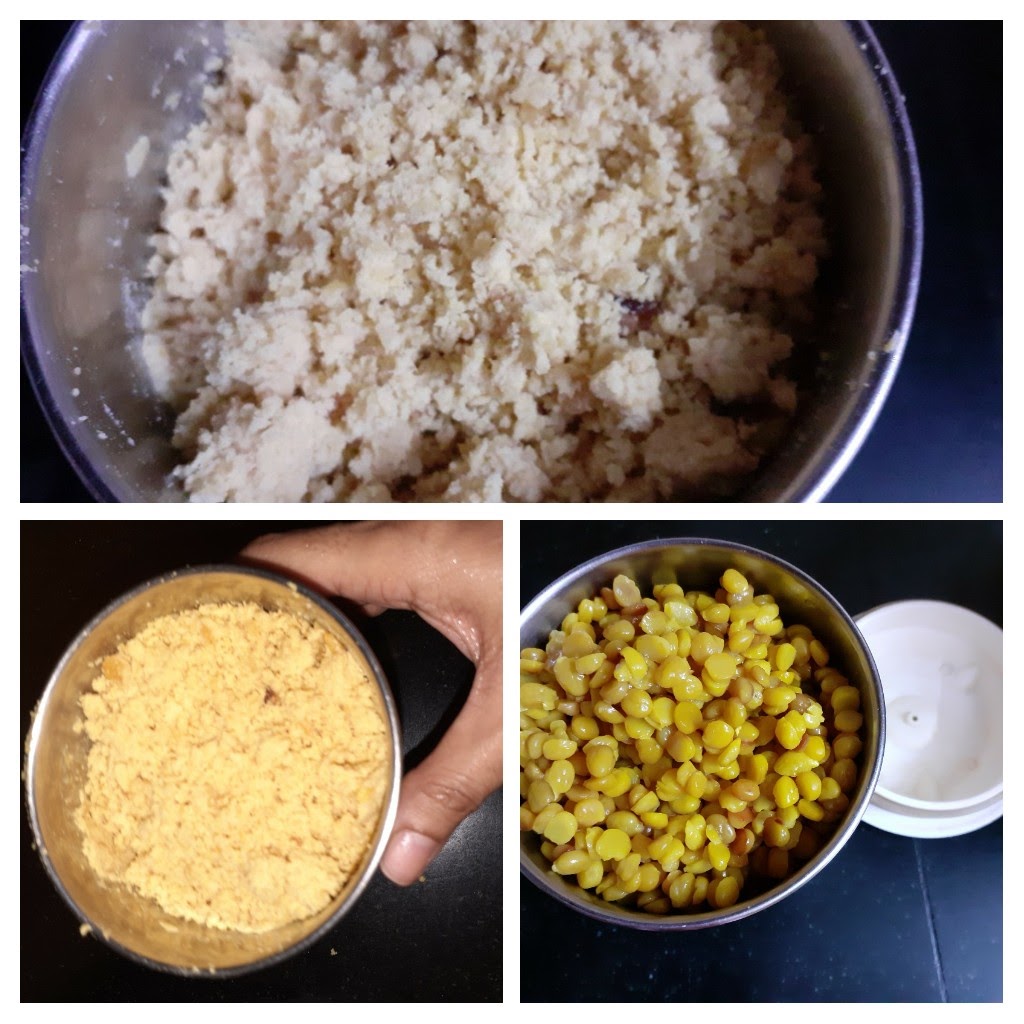
4. Now put the warm Dal into the dry grinding jar and blend to a powdery texture, without any water. Give it a mix and spin again, the mixture should be fine and should resemble wet sand.
5. Put this ground Dal mixture in a Kadai and add the jaggery and grated coconut to it. Switch on the flame on low and start stirring this mixture. Do not add any water, the jaggery will start melting in the heat and help in combining. Add the cardamom and keep stirring until the mixture comes together and forms a lump. Put off the flame and cool the mixture.
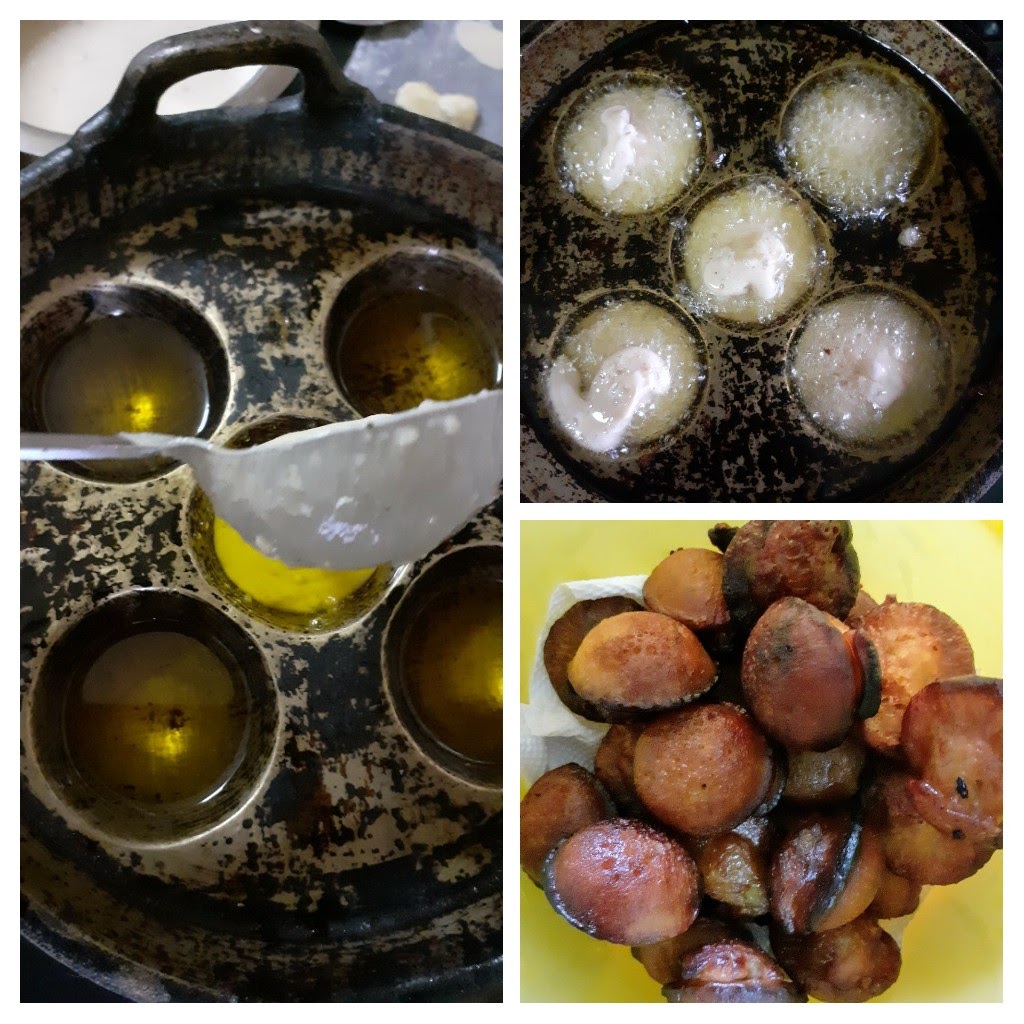
6. To make the Sugiyan- Heat oil in a karahi for frying. Heat should be medium-high. Now make lemon sized(or a little bigger too is ok) balls of the filling and keep it aside. Check if the oil is hot by dropping little of the batter into it. If it sizzles and rises immediately, it is ready for frying.
7. Now take the Urad dal – Rice flour batter and dunk each ball into it gently, use your hands to smear the batter on the filling if required ad cover the ball. Gently drop it into the oil and fry to a golden brown colour. 4-5 Sugiyans can be fried at a time. Drain them on absorbent paper. Repeat for the entire filling and enjoy them hot.
NOTE:
1. I recommend not soaking the Urad dal for more than an hour as it soaks in lot of oil while frying.
2. The jaggery can be reduced to 3/4 cup depending on how sweet it is.
3. I forgot to take a picture of adding the rice flour, so don’t forget to add it if following only the pictures.
If you tried this recipe and liked it please comment/ tag Rajjo’s kitchen on Facebook and Instagram and please follow us on my blog https://rajnirams.blogspot.com/
If you wish to receive the recipes as an email please leave your id on the homepage near the mail icon. Whenever Rajjo’s Kitchen has a new post it will be mailed to you.
Chakkara Pongal/Sweet Pongal
The month of Aadi(as per Tamil calender) or Aashad is a very auspicious one in South India as it marks the beginning of festivals which begin with Ganesh Chaturthi and Janmashtami and goes up to Pongal in January which is the month of Thai(Tamil) or Paush. The Chakkara Pongal is considered to be the prime offering to the Mother Goddess. This sweet Pongal is also the offering to the Sun God on the Makara Shankranti day/Pongal festival.
This being the Aadi month I made Chakkara Pongal too and it came out well as always. But there is a lot to tell about the proportions and how I arrived at the current one after a lot of hit and trial methods. Is it that tough you may ask? Certainly not. In fact, it is the most simple one provided the right proportions of Rice, Dal, and jaggery is used.
Chakkara Pongal was my favourite sweet dish as a child(the only one I liked as I was not fond of sweets, now I like most of them) and I would get my mom to make it frequently. As I grew older I learnt to make it from my mother and eventually my mother in law. I believed our’s was the best Chakkara Pongal as compared to most South Indian households(as it is very common to make it here often) until I had it as prasad(offering) in a temple around 10 years ago and that Chakkara Pongal wowed me. I so fell in love with that taste and it was unlike any other Sweet Pongal I had tasted before. From then on started my quest for the right proportions to make this recipe. I asked a lot many people of the proportions they used, I browsed many websites to check out the best recipe, and also tried all these whenever I made the Sweet Pongal but “that” one recipe always eluded me. It is not even that this recipe has many ingredients, whatever it is we have to play around the proportions of Rice, dal(moong dal/ Chana dal) and Jaggery. So I tried many permutations and combinations until I arrived at the current one. I have used the one-pot method, but the same recipe works well for pot in pot method too. Hope you all will find it easy to prepare and also delicious. Looking forward to your comments.
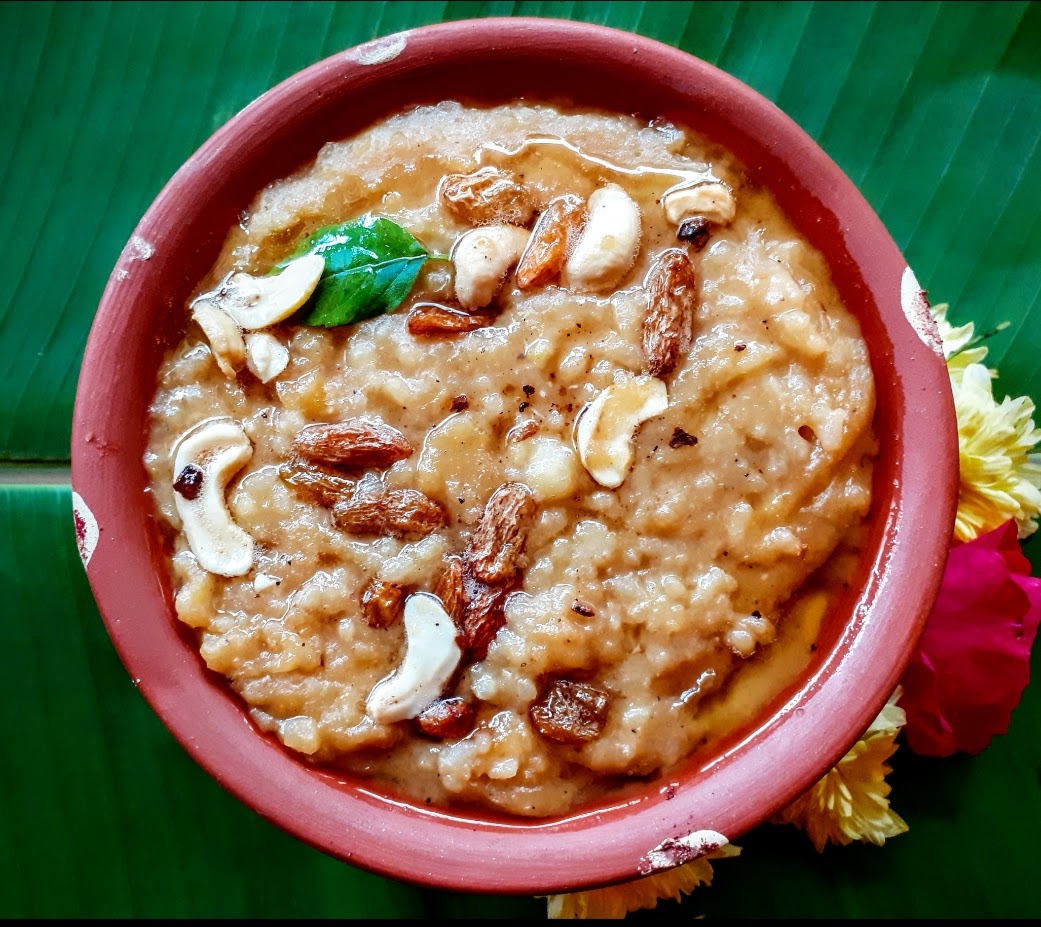
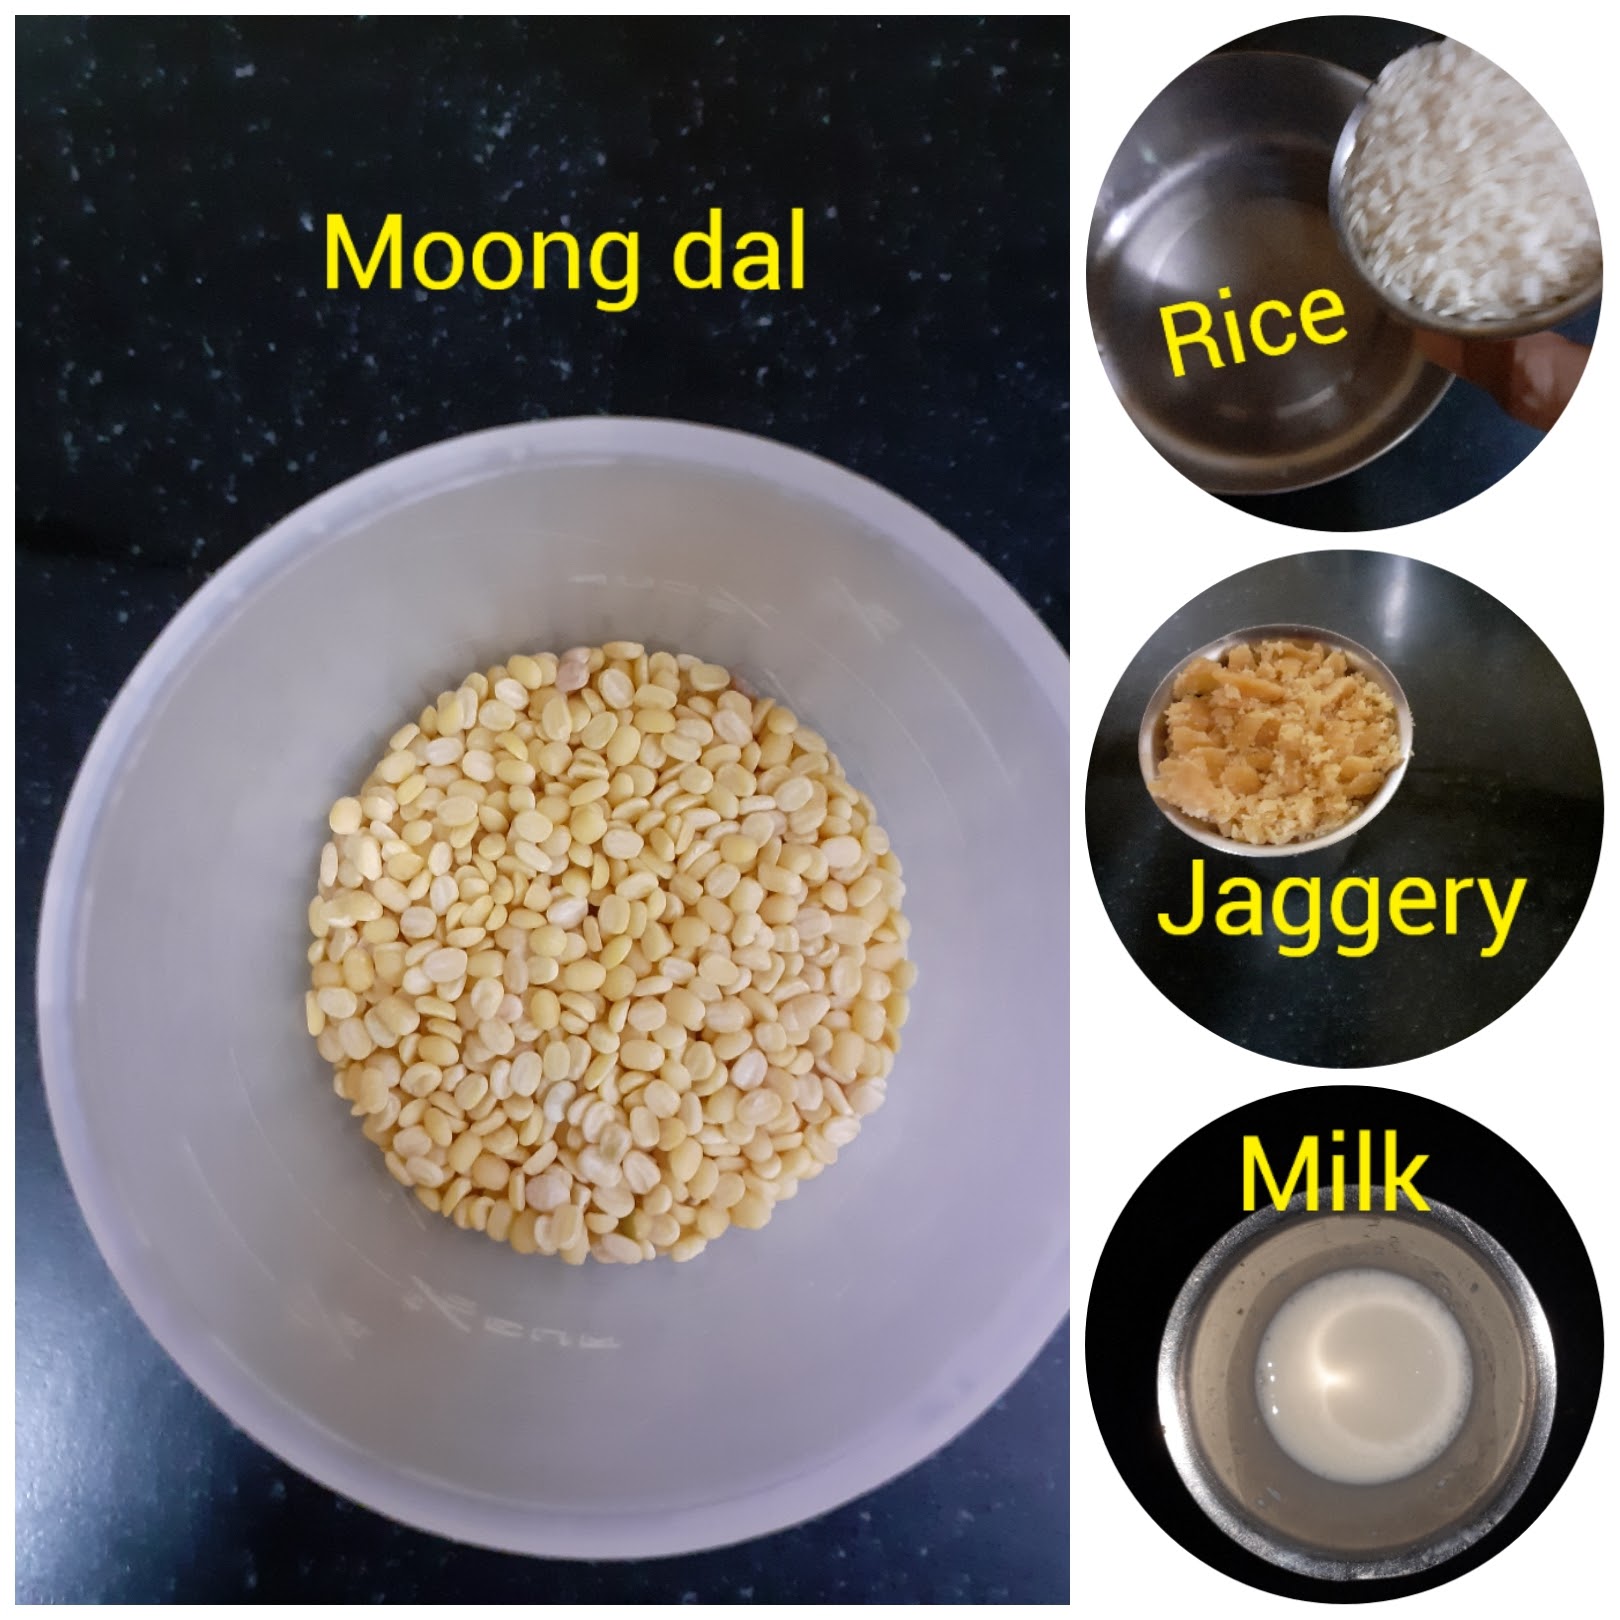
Dry roast the Moong dal until light brown on a low flame. In a vessel take the rice and add the roasted moong dal to it. Wash the rice and dal together and put them in the cooker. Pour 4 cups water and cook for 5 to 6 whistles. Once the pressure releases mash the rice and dal nicely with the back of a ladle or masher. Set aside. Take the jaggery in a vessel or pan and add 1/4 cup water. Switch on the flame to low and dissolve the jaggery until it froths up. switch off and cool for 5 minutes(the jaggery mixture can be prepared when the rice is cooking, it will save time later). Now strain the liquid jaggery directly into the mashed rice-dal mixture in the cooker. Switch on the flame, add 1/4 cup milk and 1/4 cup water. Stir the mixture nicely and cook on low fire for 5 minutes or until the Pongal comes together and the jaggery is not runny anymore. Switch off the flame. In a tempering Kadai take 1 tbsp ghee and heat. Add the Cashewnuts and fry, followed by raisins. Pour this mixture on the cooked Pongal and also add the cardamom powder, raw camphor and the nutmeg powder(optional). Pour the remaining ghee over the Pongal. The delicious Pongal is ready. Enjoy. Bon Appetit.
STEPWISE RECIPE FOLLOWS:
1. Assemble all ingredients.
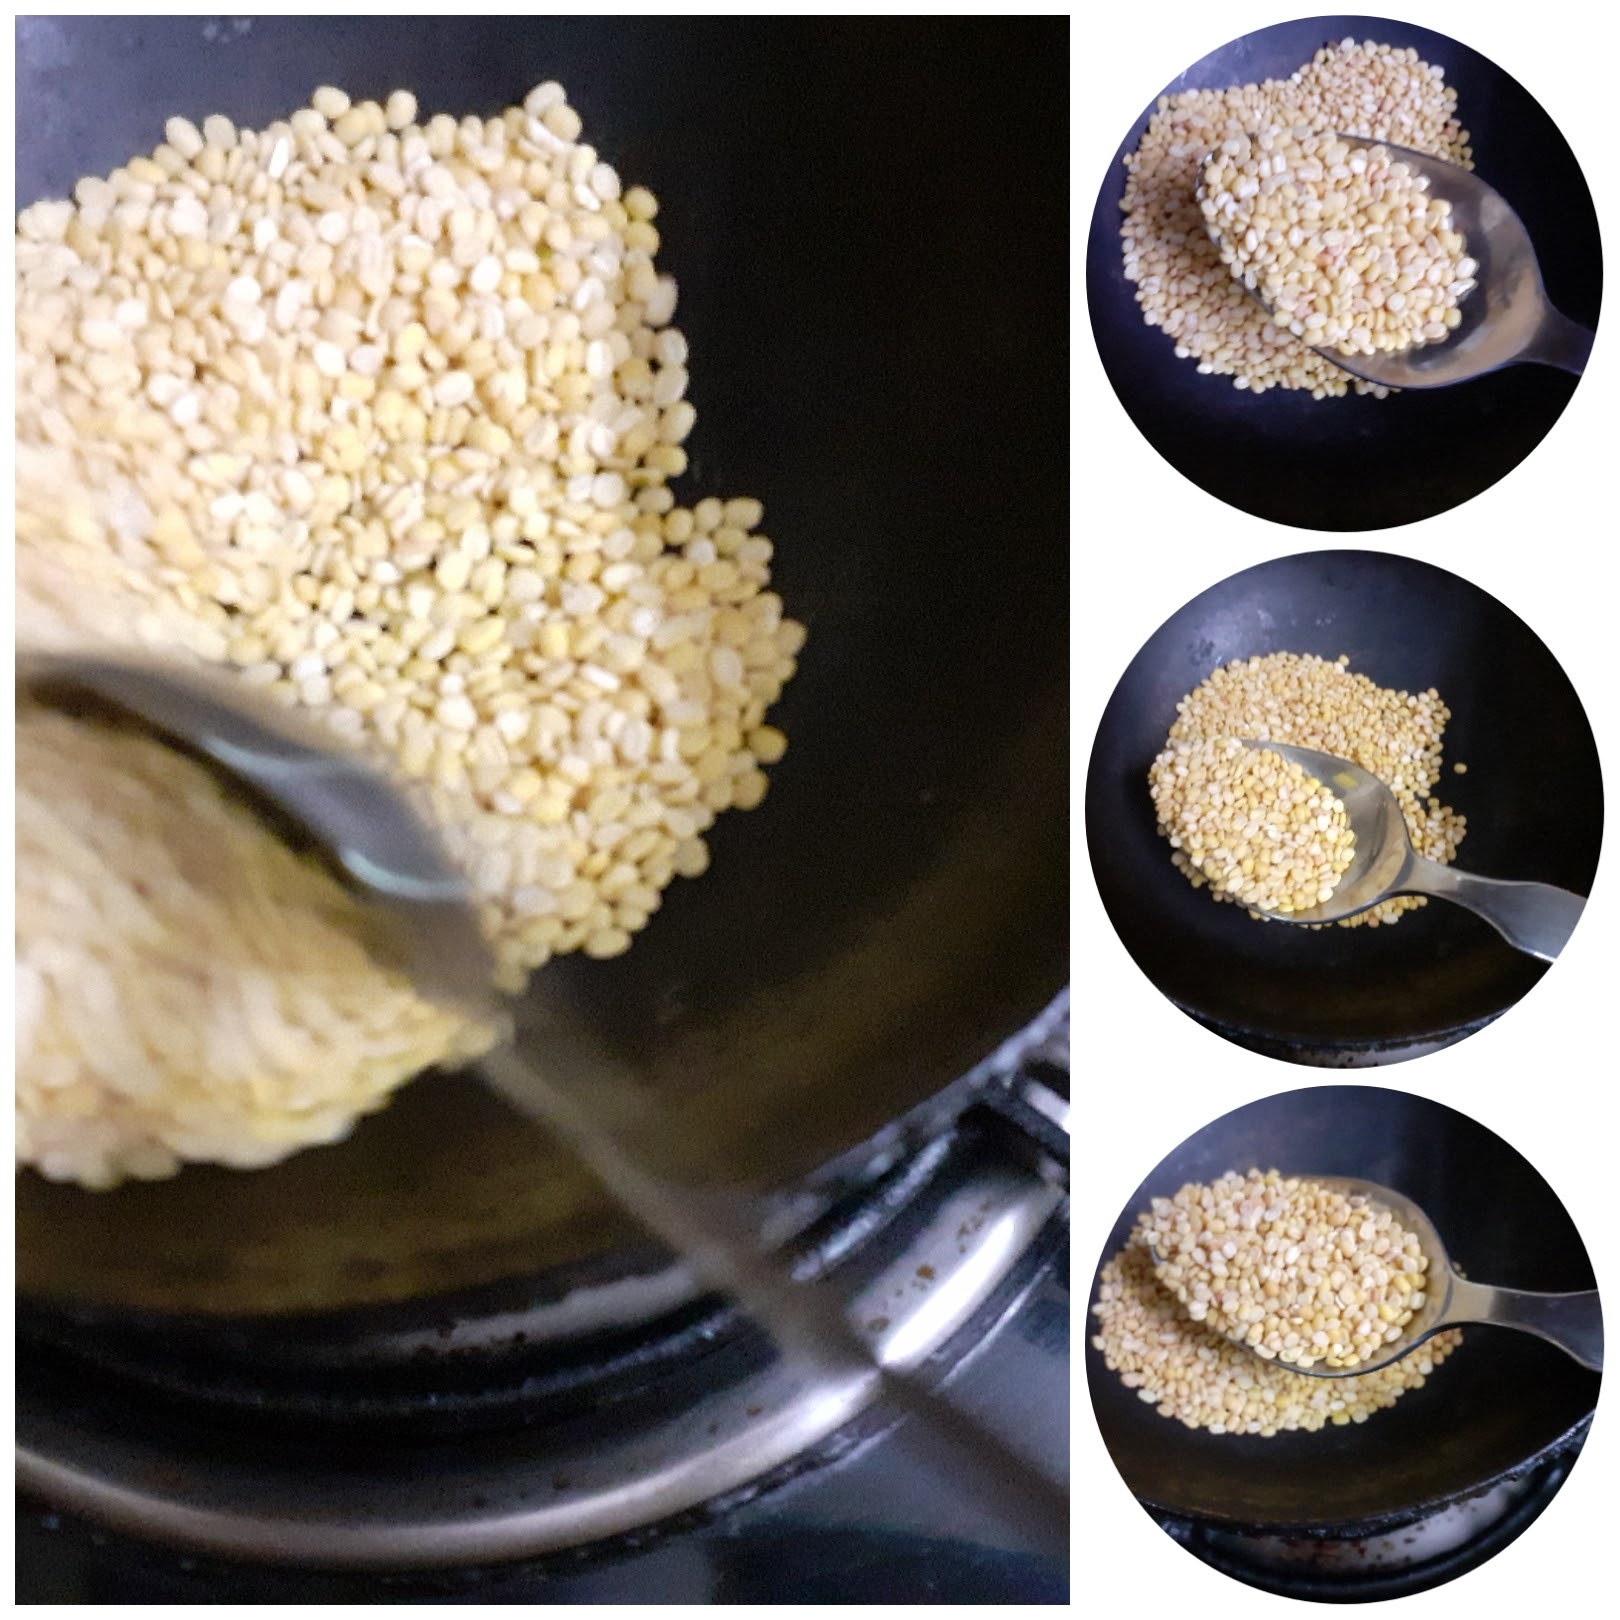
2. Dry roast moong dal over a low flame until light brown.
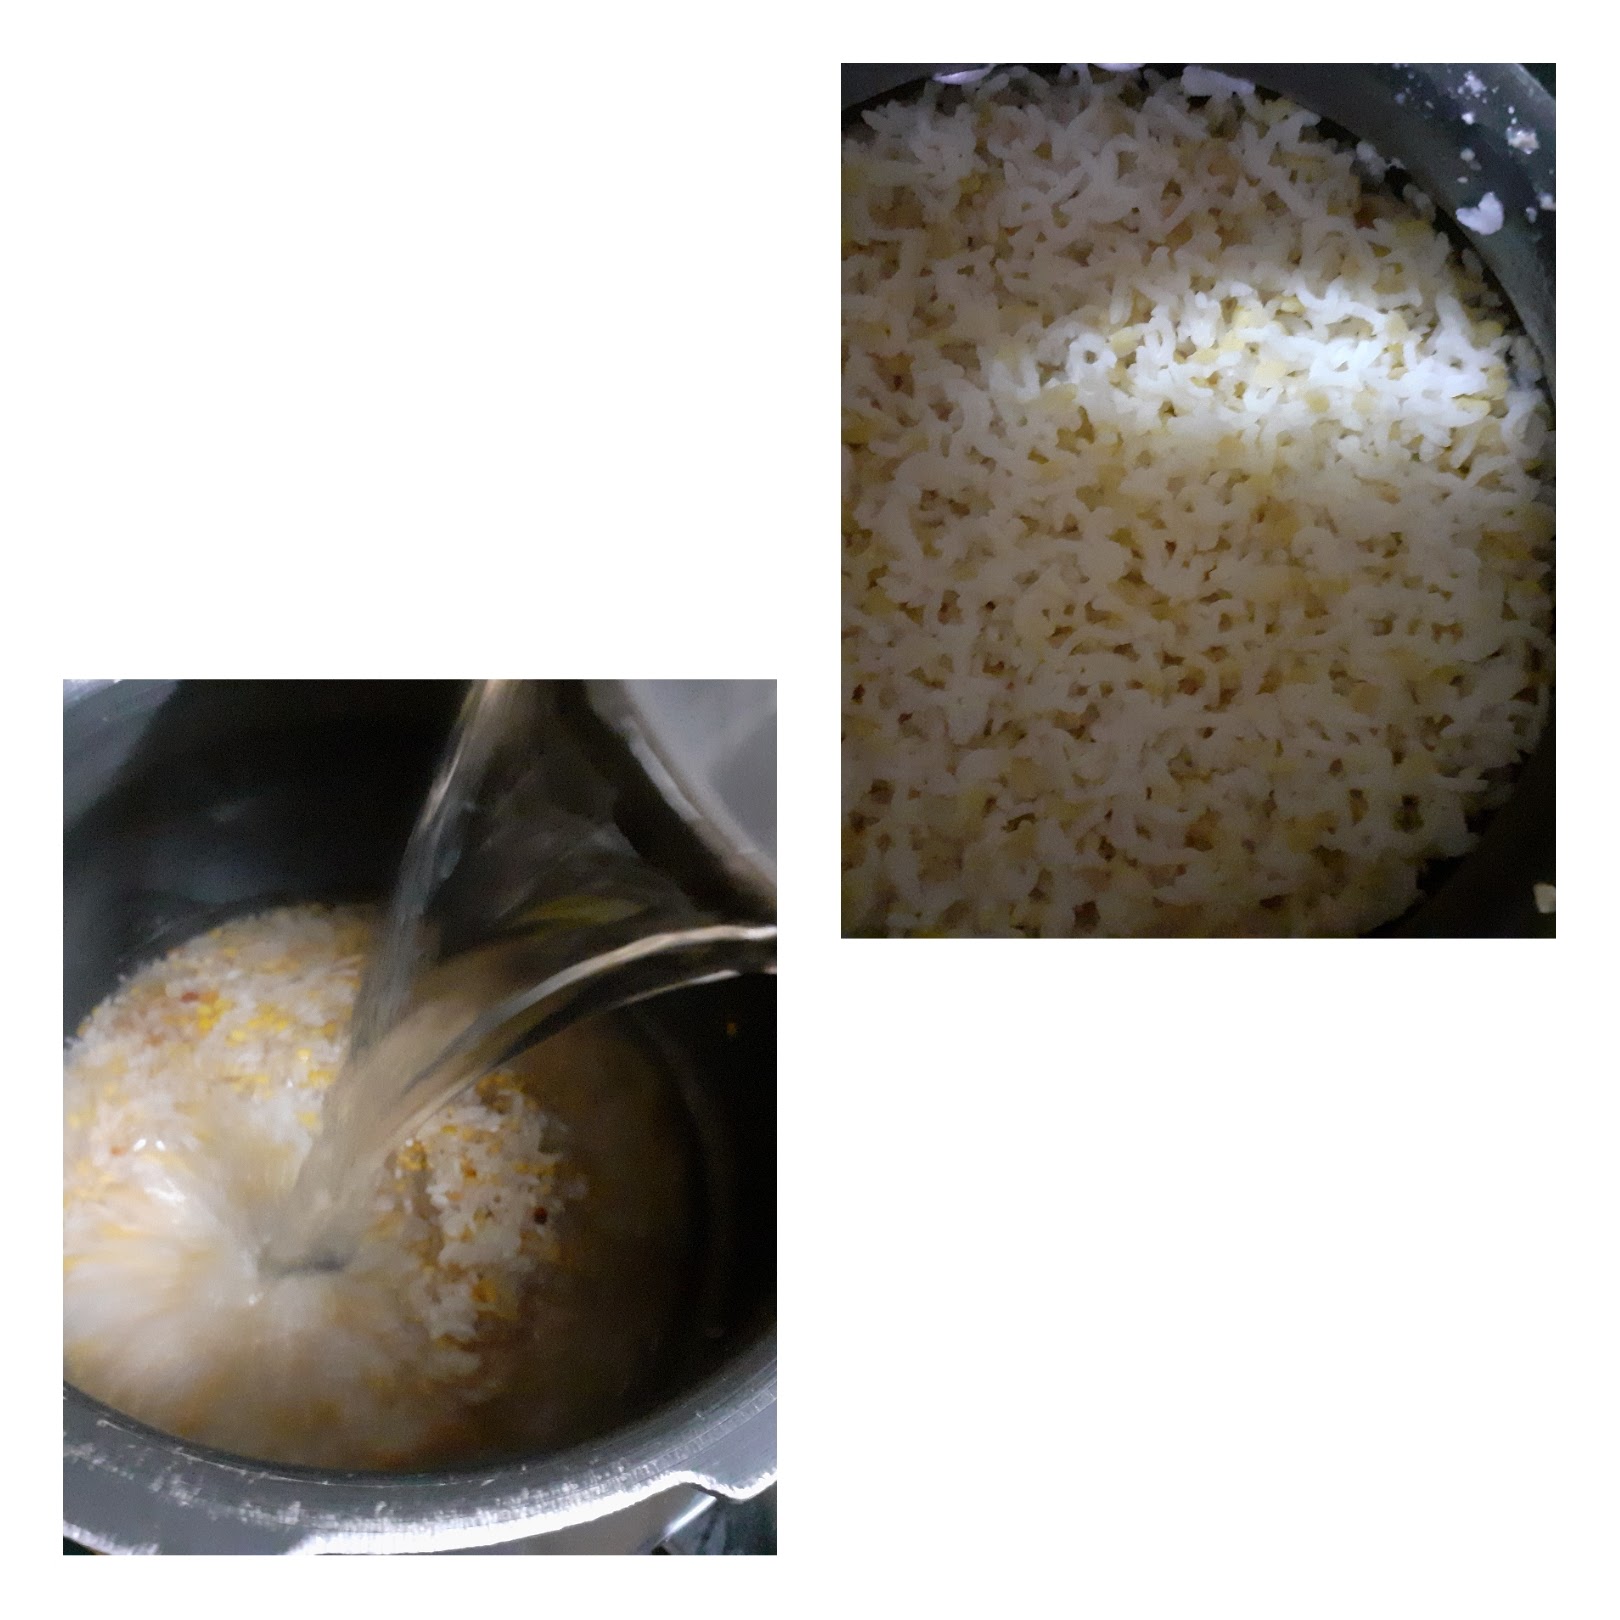
3. Take the rice and roasted dal in a vessel and wash nicely and put them in the cooker.
Add caption
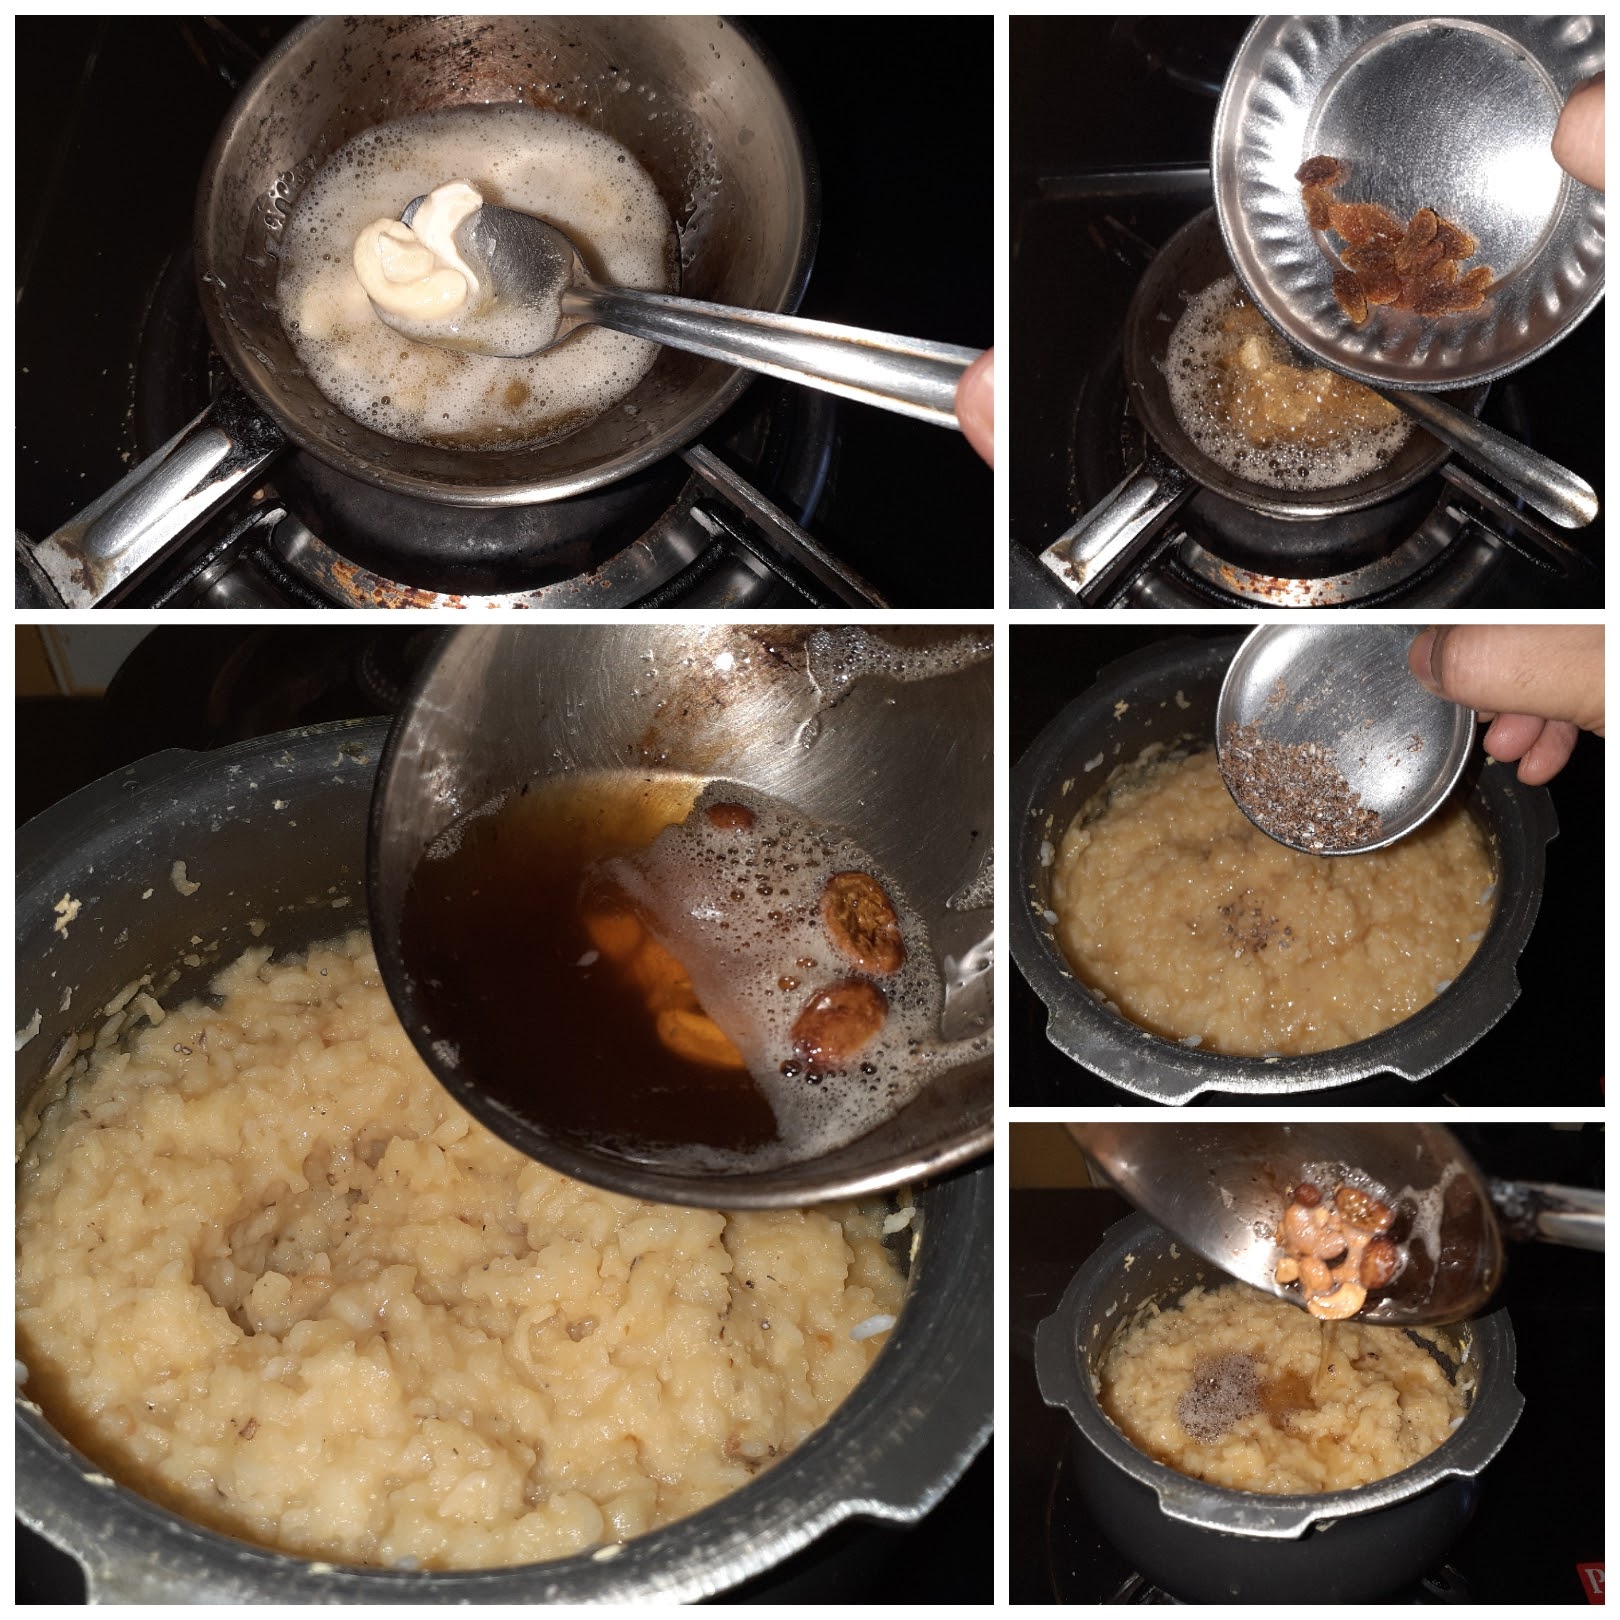
4. Add 4 cups water and cook for 5 to 6 whistles. While the rice is cooking take the jaggery in another pan/vessel and add 1/4 cup water and put it on the flame. On low flame dissolve the jaggery and allow to boil until it froths around 2 minutes from dissolving. Switch off the flame.
5. Once the pressure in the cooker releases, strain the liquid jaggery over the rice – dal mixture in the cooker. Pour 1/4 cup milk and 1/4 cup water(warm) and stir nicely such that the jaggery is well mixed with the contents in the cooker, add 1 tbsp sugar. Let it cook for 5 minutes on low flame. The Pongal will come together as a nice gooey mixture. Switch off the flame.
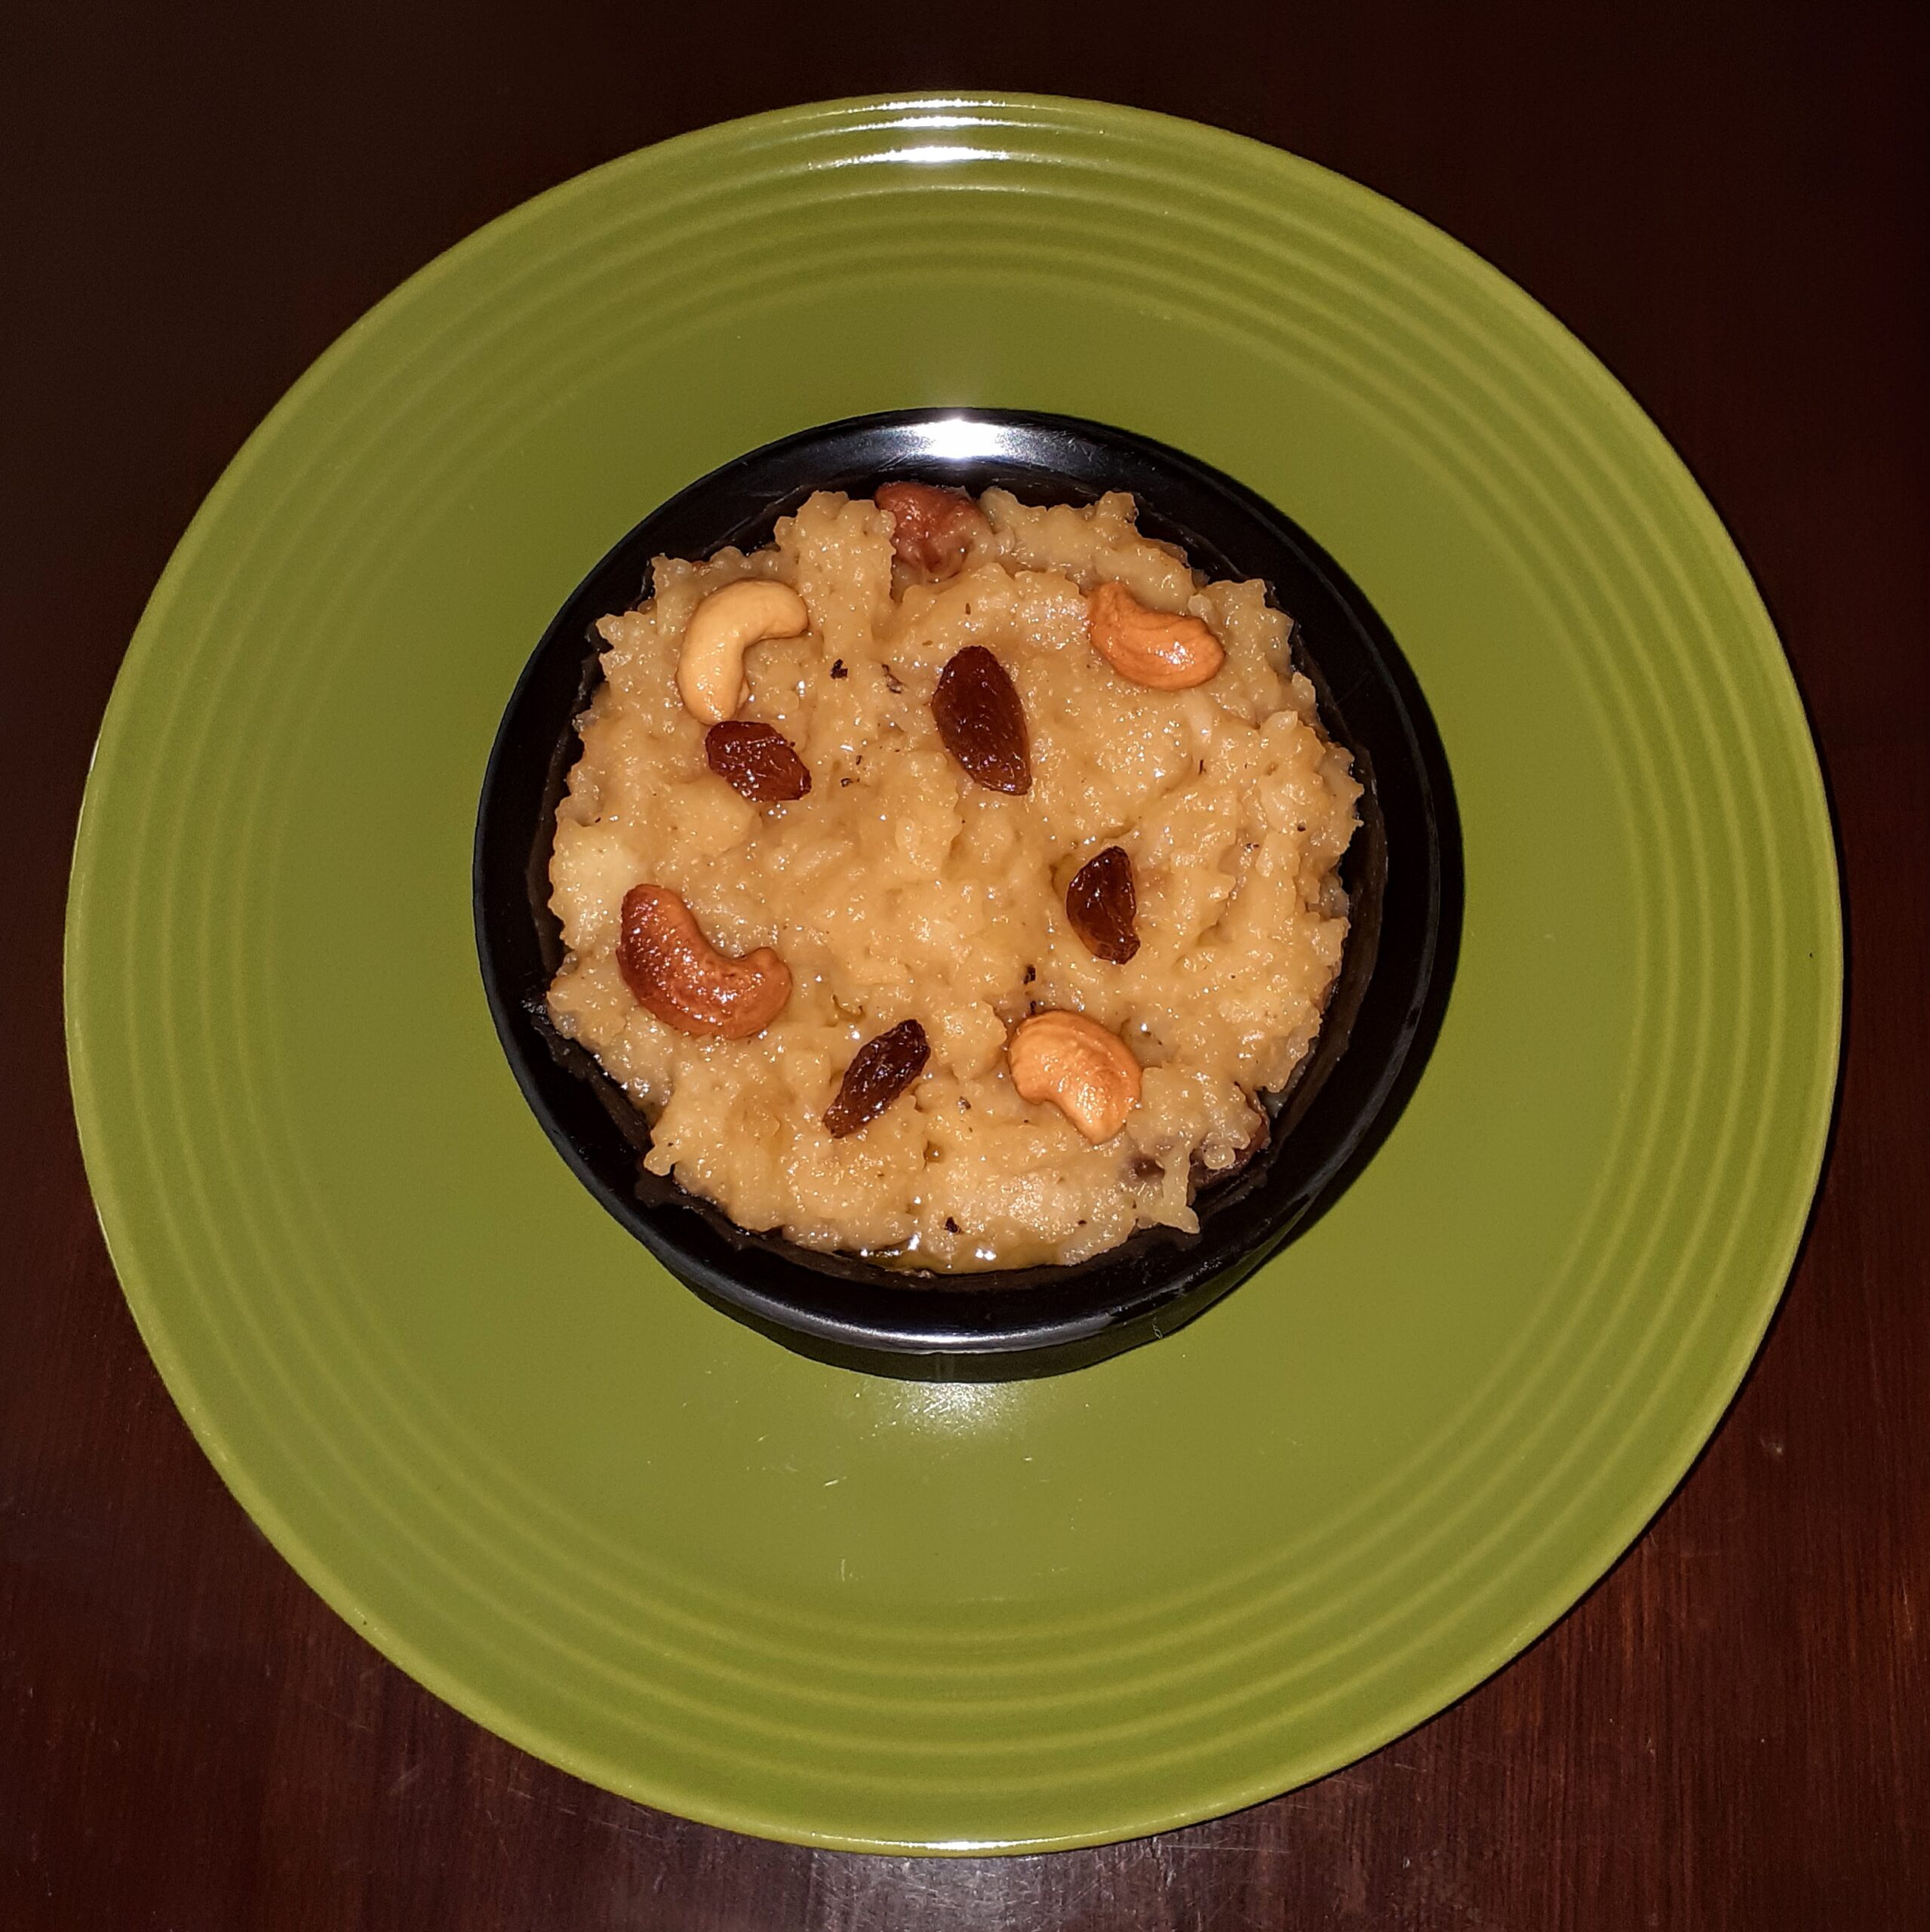
6. In a tempering Kadai or pan add 1 tbsp of ghee and heat. Add in the halved cashew nuts and fry, followed by raisins until they fluff up. Add the cardamom powder, and a pinch of raw camphor(a mini pinch of nutmeg powder too if using). Drop the ghee with nuts and raisins into the Pongal. Top up with remaining ghee. The delicious Chakkara Pongal is ready to serve.
NOTES:
1. I have used 1 cup jaggery, but depending on the sweetness of the jaggery the amount may vary by 1/4 cup.
2. Adding a spoon of sugar to any jaggery based sweet dish they say helps in the jaggery getting integrated into the dish and raises the taste they say. So I have always followed this.
3. Edible Camphor and Nutmeg powder should be used sparingly and only the mentioned amounts. Using more makes the dish bitter.
4. A trick I learnt from my mother in law is to always pour the ghee in the end on top of the sweet dish while it is hot and to not stir it in completely. So when you scoop out the sweet dish the ghee on top will automatically flow down, so you actually won’t have to flood the dish with a lot of ghee.
5. Adding the ghee while it is still hot helps in even spread of the ghee on the dish. Don’t mix the ghee after pouring on the Sweet dish, it makes it heavy and also the dish will keep absorbing how much ever you pour.
If you tried my method of the Chakkara Pongal and liked it please comment below. I would love to hear from you.