Chocolate Truffle/Rum Truffle
Instant Milk Peda/Doodh Peda(easy recipe)
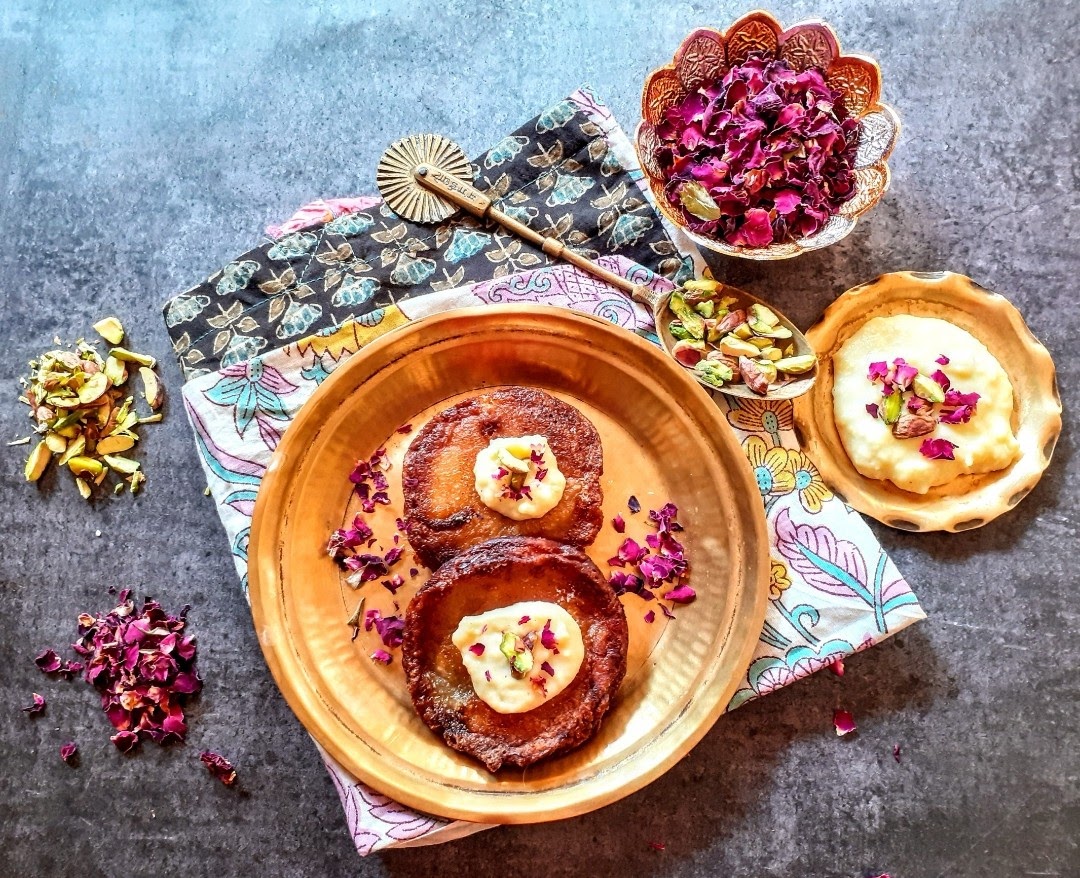
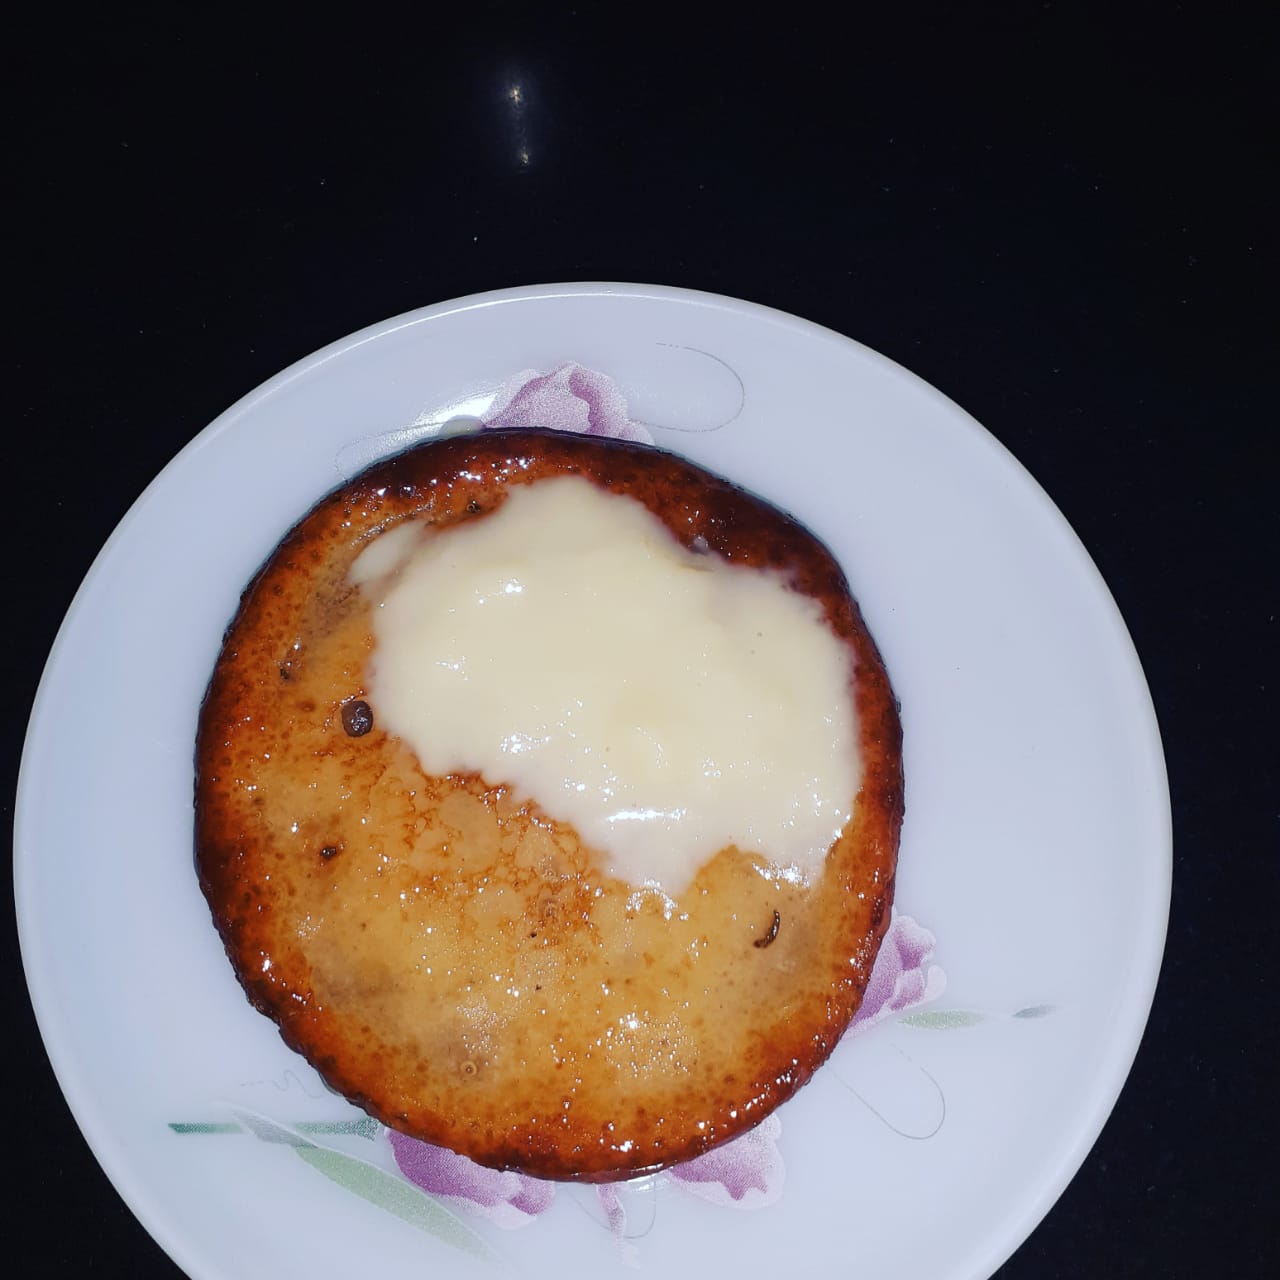
Malpua With Gulab Jamun Mix & Paneer
Malpua is a sweet dish close to my heart and I have taste both the Bengali version and the ones made in the north. I like both of them equally. My hands have been itching to try out this recipe that I thought of and scoured the internet to find if such a one exists. There are a hundred recipes of Malpua with Gulab Jamun mix, but what makes this one different is the use of Paneer(cottage cheese) and Wheat flour. Using Paneer makes the Malpuas soft and fluffy on the inside and wheat flour gives it a little crunch on the exterior.
This is the first time I’m trying out this version and I am happy that it turned out well. Sometimes our hunches do work, and this time the hunch was to use paneer with the mix. The Bengali version of Malpua uses Chenna or paneer along with refined flour though.
The sugar syrup here is a very thin one as it is only to keep the Malpuas moist. I have also made an instant Rabri, the recipe of which I am posting, but I am not uploading the pictures as I couldn’t click any, since the Rabri here was made as an afterthought.
I have a Pineapple Rabri recipe here on the blog which you can refer to. This is the authentic way of making Rabri. Whereas what I have made with the Malpua is a shortcut one, which was made as an accompaniment with the Malpua.
While you are on this page please check out my other sweet/dessert recipes like Apple cake, Carrot Kheer, Unni Appam, Blueberry Cheesecake, Maa Ladoo, Berry Smoothie Icecream, and more…
Here is the recipe of Malpua from Gulab Jamun Mix-
PREP TIME: 10Mins COOK TIME: 30 Mins
TOTAL TIME: 40Mins COURSE: DESSERT/SWEET
CUISINE: INDIAN SERVINGS: 4
AUTHOR: Rajni Ram
Ingredients:
Gulab Jamun Mix 1 cup
Paneer 100 gm minced
wheat flour 1/2 cup
Sugar 1 tbsp( for batter)
Milk 1 cup (or more if required)
Sugar for syrup 1 cup
Water for sugar syrup 1/2 cup
Elaichi/green cardamom 2 pods
Fennel seeds 2 pinches
Oil for frying
Directions for making the batter:
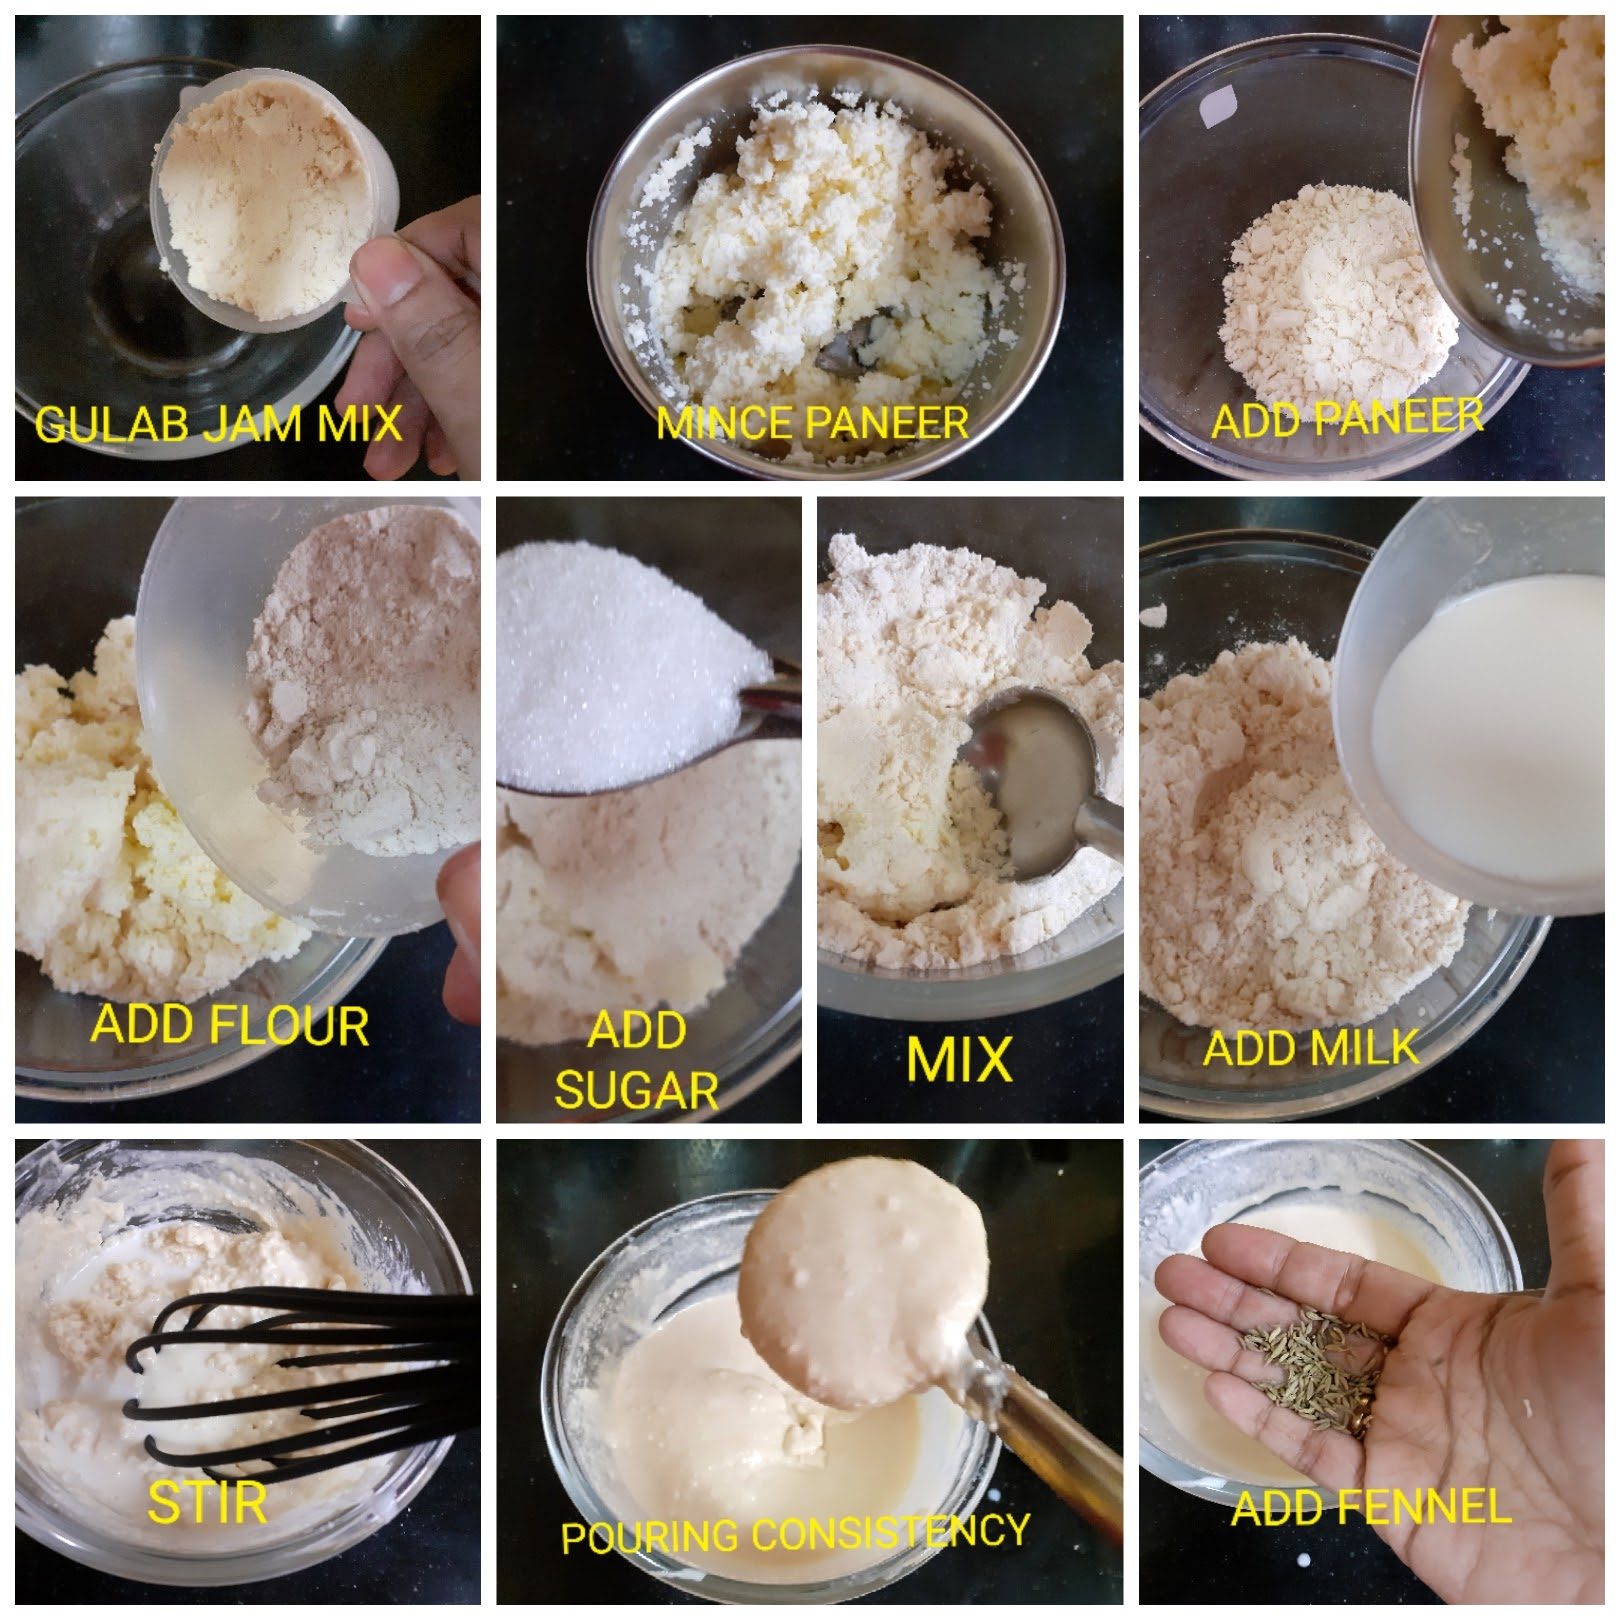
In a bowl take the Gulab Jamun Mix. Mince the paneer in a blender and add it to the Gulab Jamun mix in the bowl, add the wheat flour followed by the 1 tablespoon sugar. Nicely mix them all together to a dry mixture. Now adding milk little by little whisk to form a pouring consistency batter( like dosa batter or a little thicker). Now add the fennel seeds to the batter and mix.
Directions to make the sugar syrup:
In a pan/ flat vessel take one cup sugar, add 1/2 cup water, and put it on the flame. Stirring continuously so that the sugar dissolves, allow it to boil for 2 to 3 minutes, and put off the flame. String consistency of the syrup is not required in this recipe. Add 2 cardamom pods while boiling the syrup.
Directions for making the Malpua:
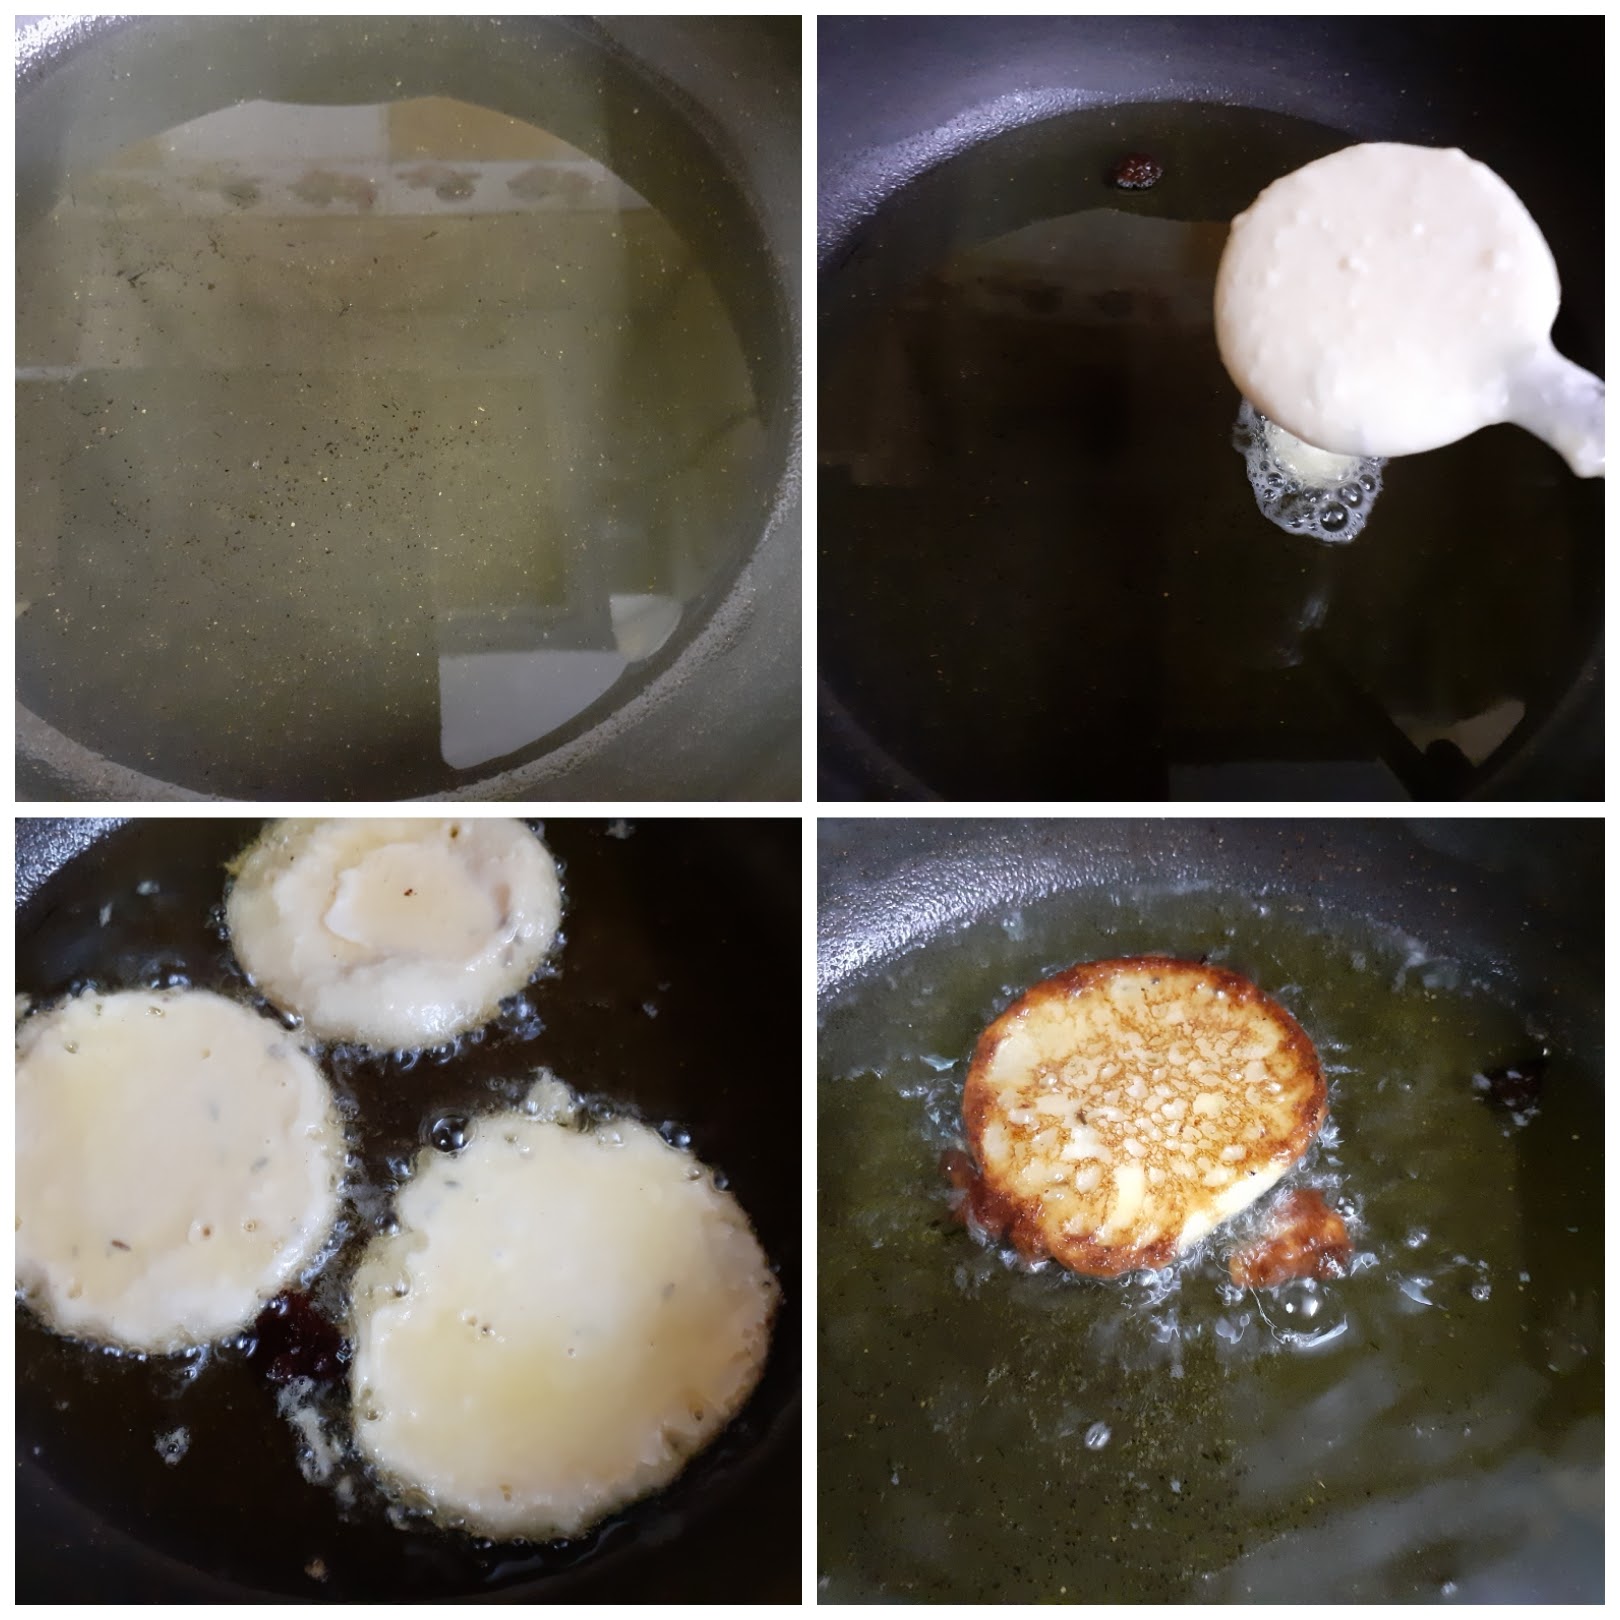
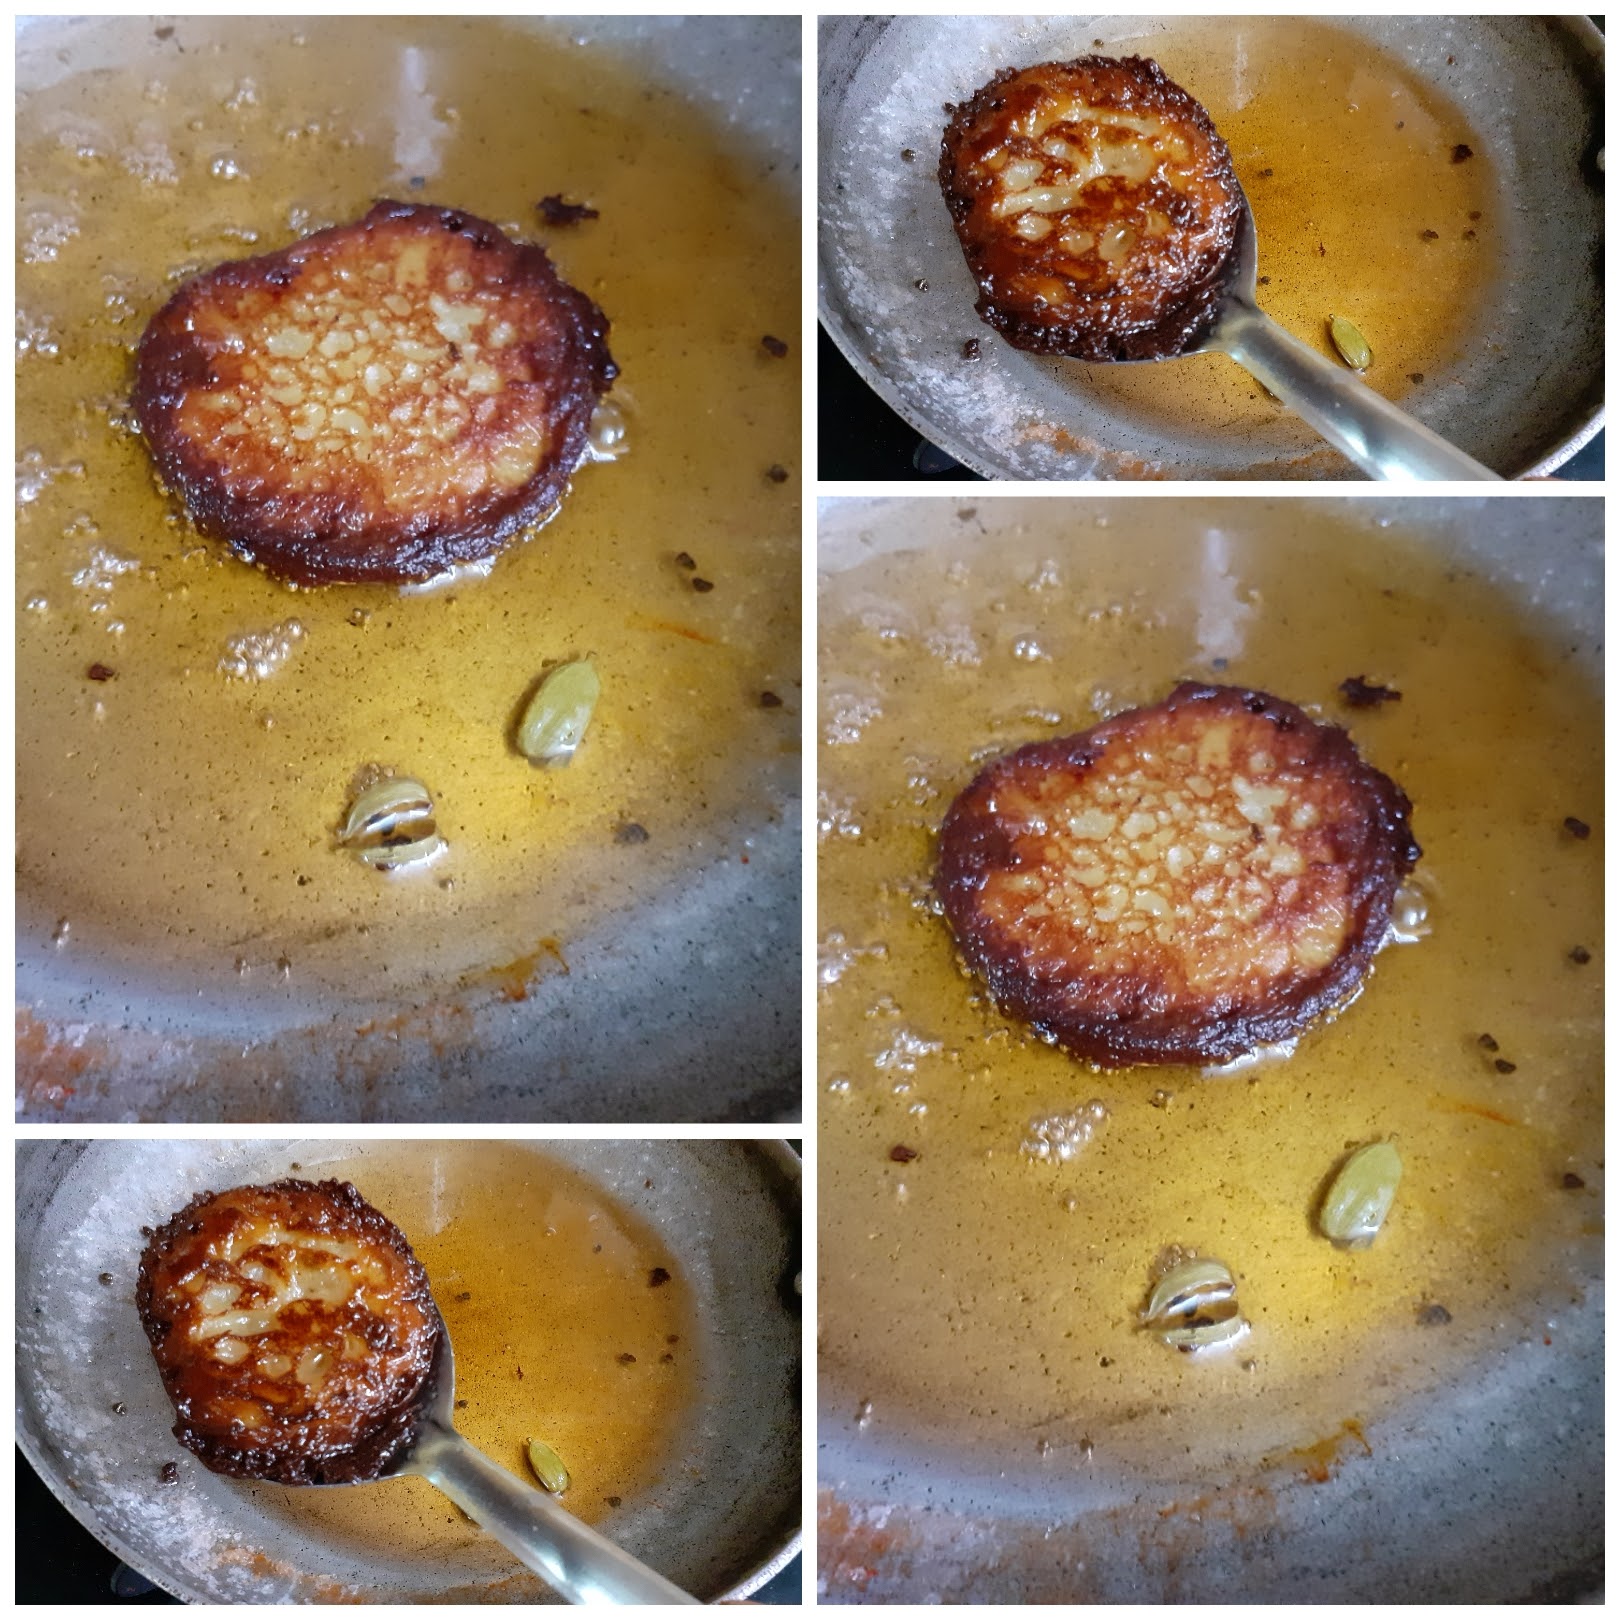
Next, take oil for frying in a flat Karahi or pan preferably and heat. The flame should be medium-high. The oil should not be too hot, nor warm. When you put a little batter, it should sizzle. Now take a scoop of batter in a ladle and pour it into the hot oil. The batter will spread out by itself, like pancakes. Cook on one side and flip it over and cook on the other until both sides are equally golden brown. Remove from oil and drop in the sugar syrup for 10 seconds. Remove and store in a container. If storing for more than a day, let the Malpuas remain in the sugar syrup itself, so that they stay moist. Enjoy the sweet dish. Bon Appetit.
Directions to make instant Rabri ( optional) No pictures for this.
Ingredients:
Milk 1 cup
Sugar 2 tsp
Milk powder 2 tbsp
Directions for Rabri: Take one cup of milk and boil. When it reduces to half, add 2 tsp sugar and 2 tablespoons of milk powder and stir nicely. Within 2 minutes it will reach the desired consistency. Put off the flame and let it cool completely before plating.
STEPWISE RECIPE FOLLOWS:
1. Assemble all ingredients. In a bowl add the Gulab Jamun mix, Paneer, wheat flour, sugar, and mix. Now add milk little by little to make a batter of flowing consistency. Add fennel seeds, mix it in, and keep the batter aside.
2. To prepare the sugar syrup, add 1/2 cup water to 1 cup sugar and put it on the flame to boil. Keep stirring for the sugar to dissolve and boil for 2 to 3 minutes, not more. Put off flame and cool. Add 2 cardamom pods while boiling.
3. In a flat pan/Karahi take oil for deep frying and heat. The flame should be medium-high and the oil should be hot, but not smoking hot. When the batter is poured, it should sizzle. Now take a scoop full of batter and pour it in the oil. Let it spread by itself. Fry until it turns golden brown on one side and then flip it and fry until golden brown on the other side too.
4. Now put the fried Malpua into the sugar syrup and remove after a few seconds if serving immediately. If storing for a day, let the Malpuas remain in the syrup so that they remain moist.
5. Serve warm with Rabri or just as it is.
NOTES:
1. If the sugar syrup solidifies after some time, add a tablespoon of water and put it on the flame and keep the flame very low. The syrup will loosen. Put off the flame. You can keep repeating this process until all the Malpuas are fried, if required.
2. A flat pan or Kadai is the perfect one for frying this sweet as in a curved Kadai the batter may turn to a ball and roundish, instead of a flat pancake-like shape.
3. Before pouring the batter, check if the oil is hot, by dropping some batter gently into the oil. If it sizzles immediately, the oil is ready for frying.
If you tried this recipe and liked it please comment below. I would love to hear from you. If you have a query about the recipe email us and ill respond as soon as I can.
If you would like to receive our recipes in your mail please leave your mail id at the homepage. Every time Rajjo’s Kitchen has a new post we will mail the recipe to you.
Blueberry Cheesecake (Baked)
This is an epic post because I love Blueberries(any berry for that matter) and I have perfected this Blueberry cheesecake finally. And for a recipe to feature on my blog, I should have perfected it before I put it out before you, and that is when I have tried it out 3 times without any mishaps.
Over the years I have tried this recipe quite many times and it would taste fine but, consistency wise there would be some glitch or the other. Also in India, we don’t get fresh Blueberries very often, and even if we do they are expensive. So in this recipe, I have used dried Blueberries that are available in all departmental stores. I wanted to give you a recipe in which things are accessible. The Cream Cheese I have used here is also available at all outlets with a Chiller isle. The recommended one is Philadelphia Cream cheese but I have not used that, just to try if other brands work fine, and yes they do.
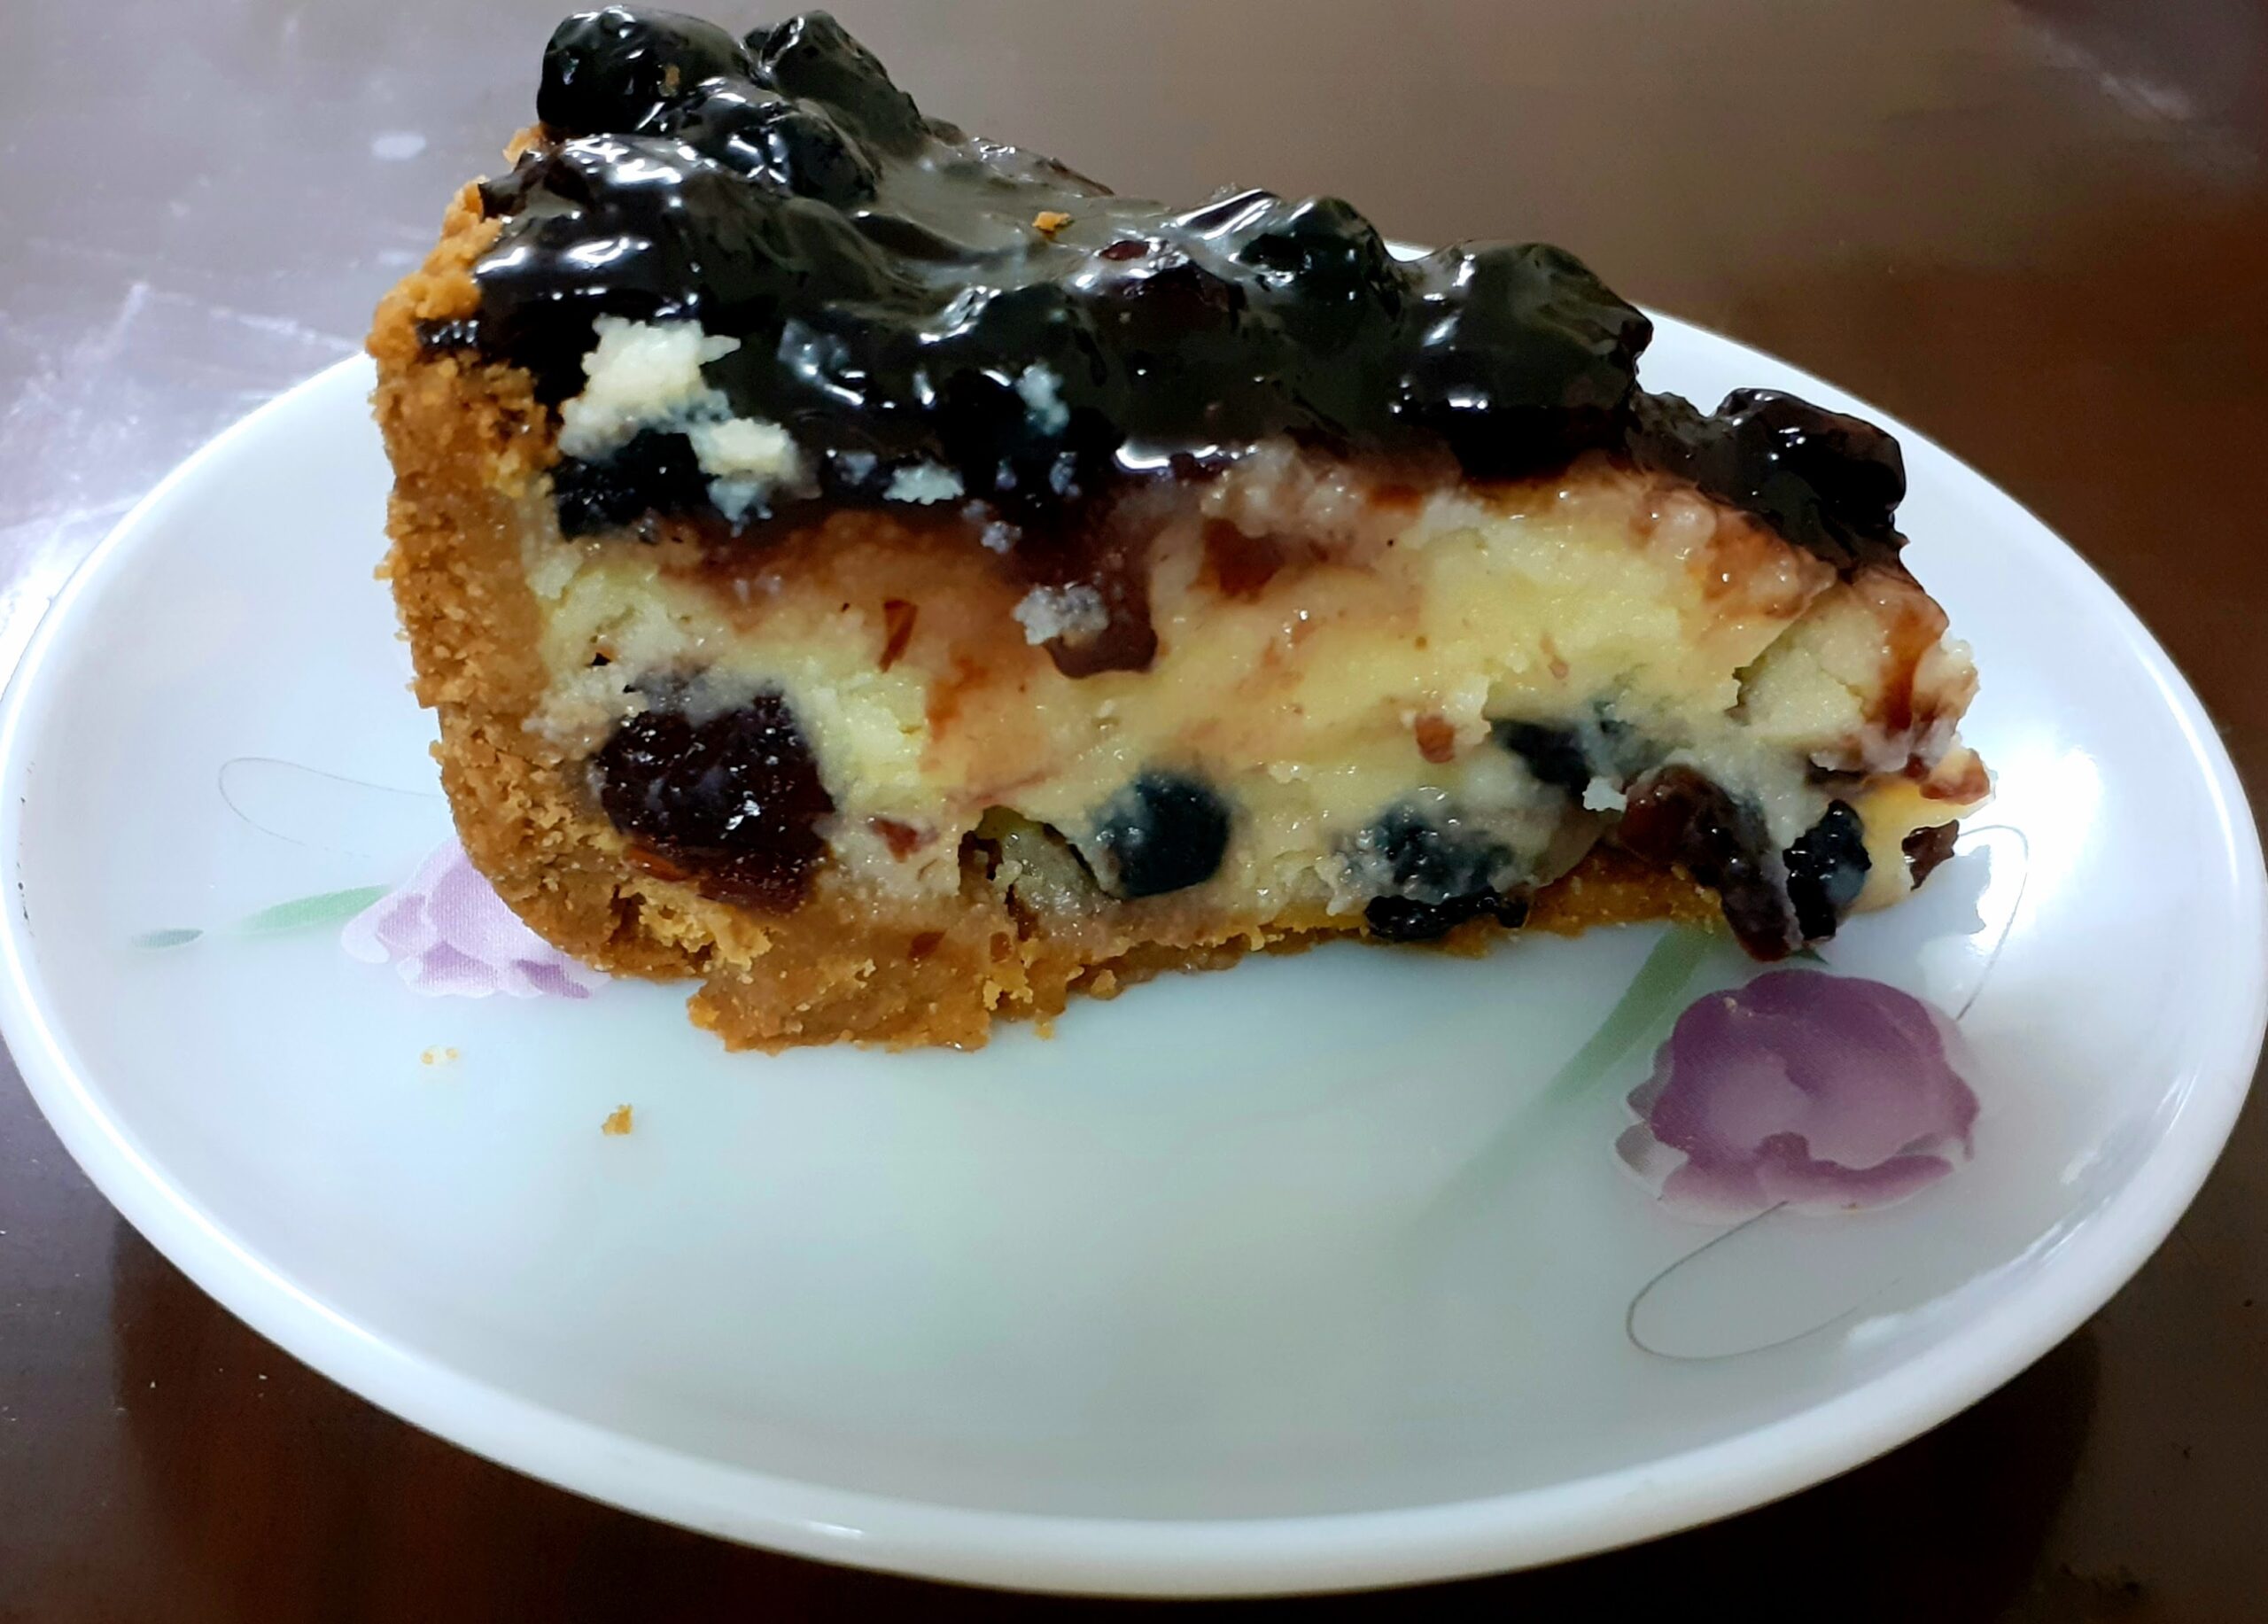
This Cheesecake turning out so well is a dream come true for me, as its always been my wish to make one. Since I love berries I have loaded my Cheesecake with a lot of them, one can reduce the quantity too if they desire.
This recipe is a no-mess, one-bowl recipe so not much of clean up is required. It is light and creamy with a blueberry topping. The thing about them being baked is that they hold well at room temperature, but since I am using a blueberry topping I had to refrigerate for 2 hours. The topping is just an option and is not at all mandatory.
I have simplified the recipe quite a bit. In this recipe, I’m giving stepwise instructions directly.
while you are here please try my other recipes like Apple Crumble,
Pineapple Jam tarts, Nutella fudge brownies, Berry Smoothie Icecream, and more…
Here is the recipe of Blueberry Cheesecake for you-
PREP TIME: 20 Mins COOK TIME: 40 Mins
TOTAL TIME:60Mins COURSE: DESSERT
CUISINE: WORLD FOOD SERVINGS: 6
AUTHOR: Rajni Ram
Ingredients for Base:
Marie Biscuit 1 sheet(20 nos)
Unsalted butter 100 gm
Sugar 2 tbsp(powdered or fine sugar)
Ingredients for Filling:
Creamcheese 320 gm softened(keep out of the refrigerator for 1 hour)
Plain flour/Maida 1 tbsp
Sourcream/Curd 1/3 cup
White Sugar 1/2 cup
Vanilla extract 1.5 tsp
Zest of Lemon- Grate the rind of one whole lemon
Eggs 2
Blueberries(dried) 250 gm (soak in warm water for 30 mins and drain the water)
Icing Sugar for dusting(optional) (refer note2)
* Reserve some blueberries(unsoaked) for later.
Ingredients for Blueberry topping/Sauce:
Blueberries(dried) 1 cup (soaked for 30 mins in warm water and drain water)
Sugar1/4 cup
Cornflour 1 tbsp
Lemon Juice 1 tbsp
Butter 1 tbsp
Blueberry preserve 3/4 of a 240 gm bottle(around 180 gm)
Directions for Sauce:
Place the Blueberries and remaining ingredients(except the preserve) in a saucepan and cook over medium flame. Bring them to a simmer and cook until few of the blueberries burst, around 3 minutes. Keep stirring. Now add the preserve ad stir again. The sauce will come together and become jammy. Remove from flame and cool completely.
Directions for Base:
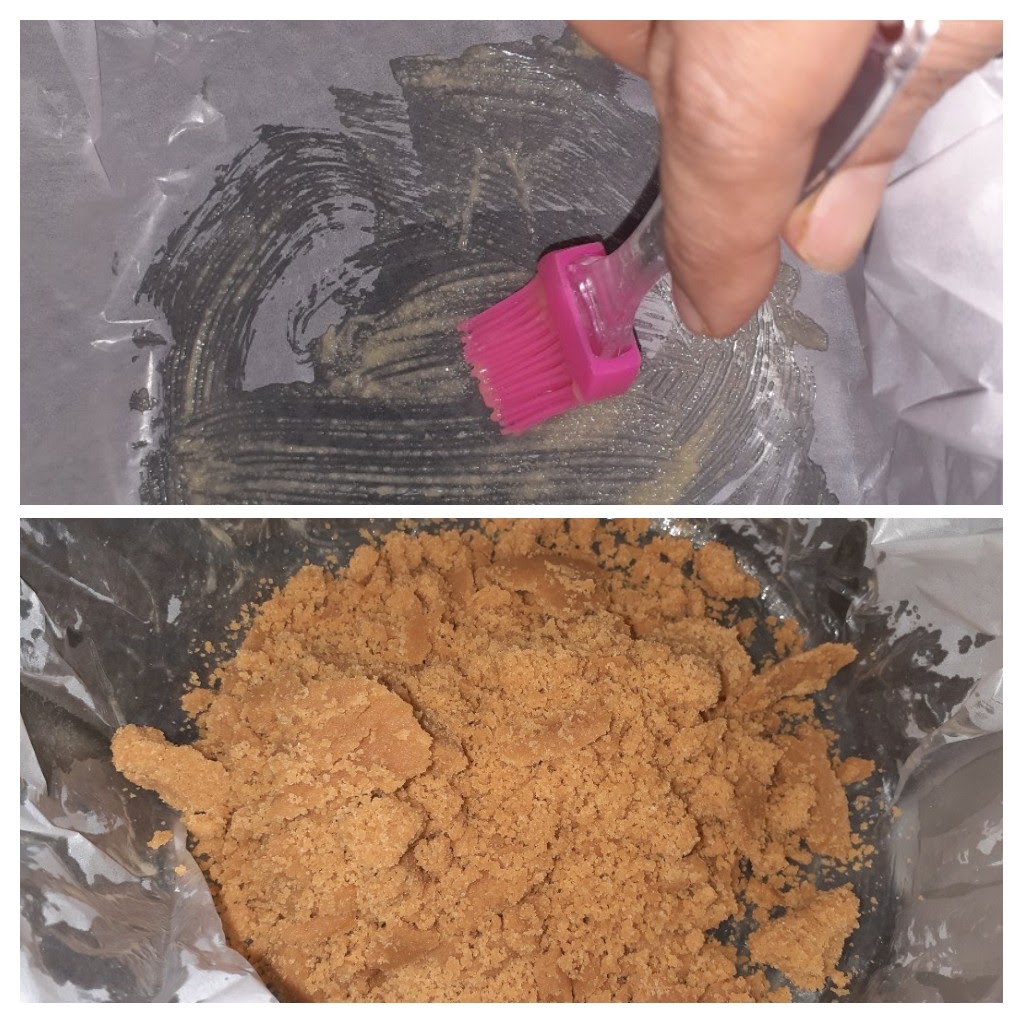
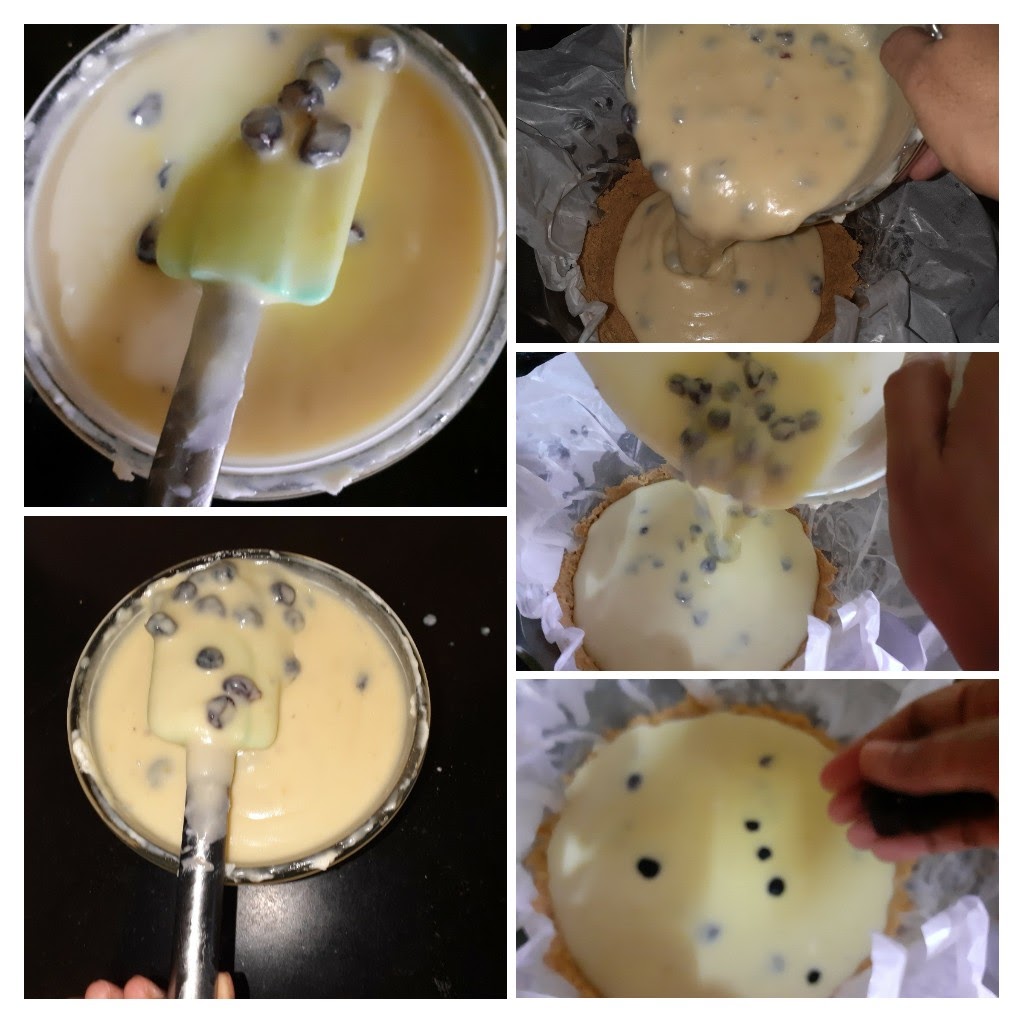
1.Grease or spray a round baking tray/mould with oil and line with parchment paper/butter paper. Place the biscuits in a blender and powder them. Add the butter and sugar to the powdered biscuits and blitz again. It should look like wet sand.
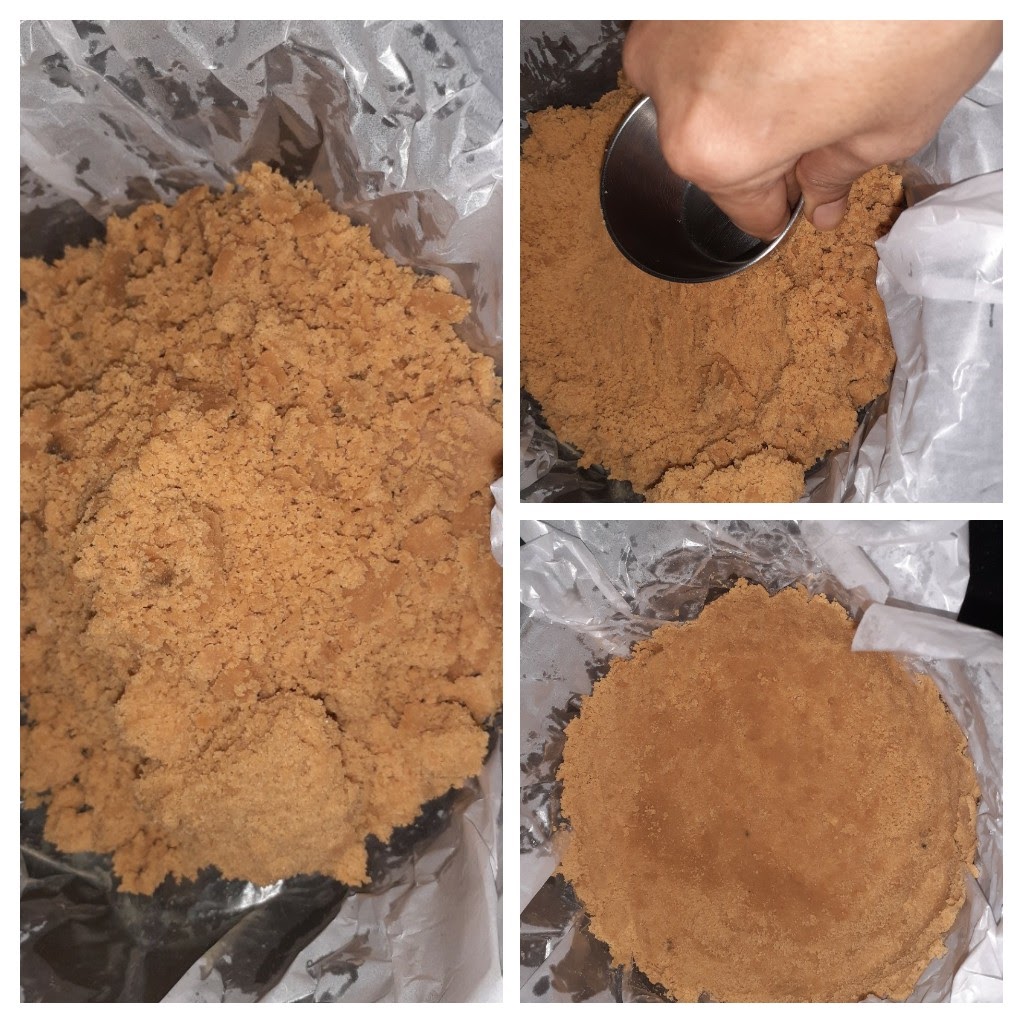
2. Put this mixture into the baking mould and using something flat press it down into the base and also rise in the sides, as this is going to hold the filling and topping, it needs some height. See pictures for reference.
Directions for filling:
1. Firstly preheat the oven to 160 C or 320F. Now start making the filling. Beat Creamcheese(just a spatula will do, stand mixer or electric beater not required, remember I said it a one-bowl recipe????) until smooth, it need not become fluffy. Now add the flour and beat again until just combined.
2. Add sour cream/curd, sugar, vanilla and the lemon zest and beat until combined. Add the eggs one by one beating in between, until just combined. Do not overbeat.
3. Now ensure you have drained all water from the soaked blueberries and add the berries to the cream cheese batter and fold gently. Now pour this batter into the prepared base and top with the reserved unsoaked blueberries.
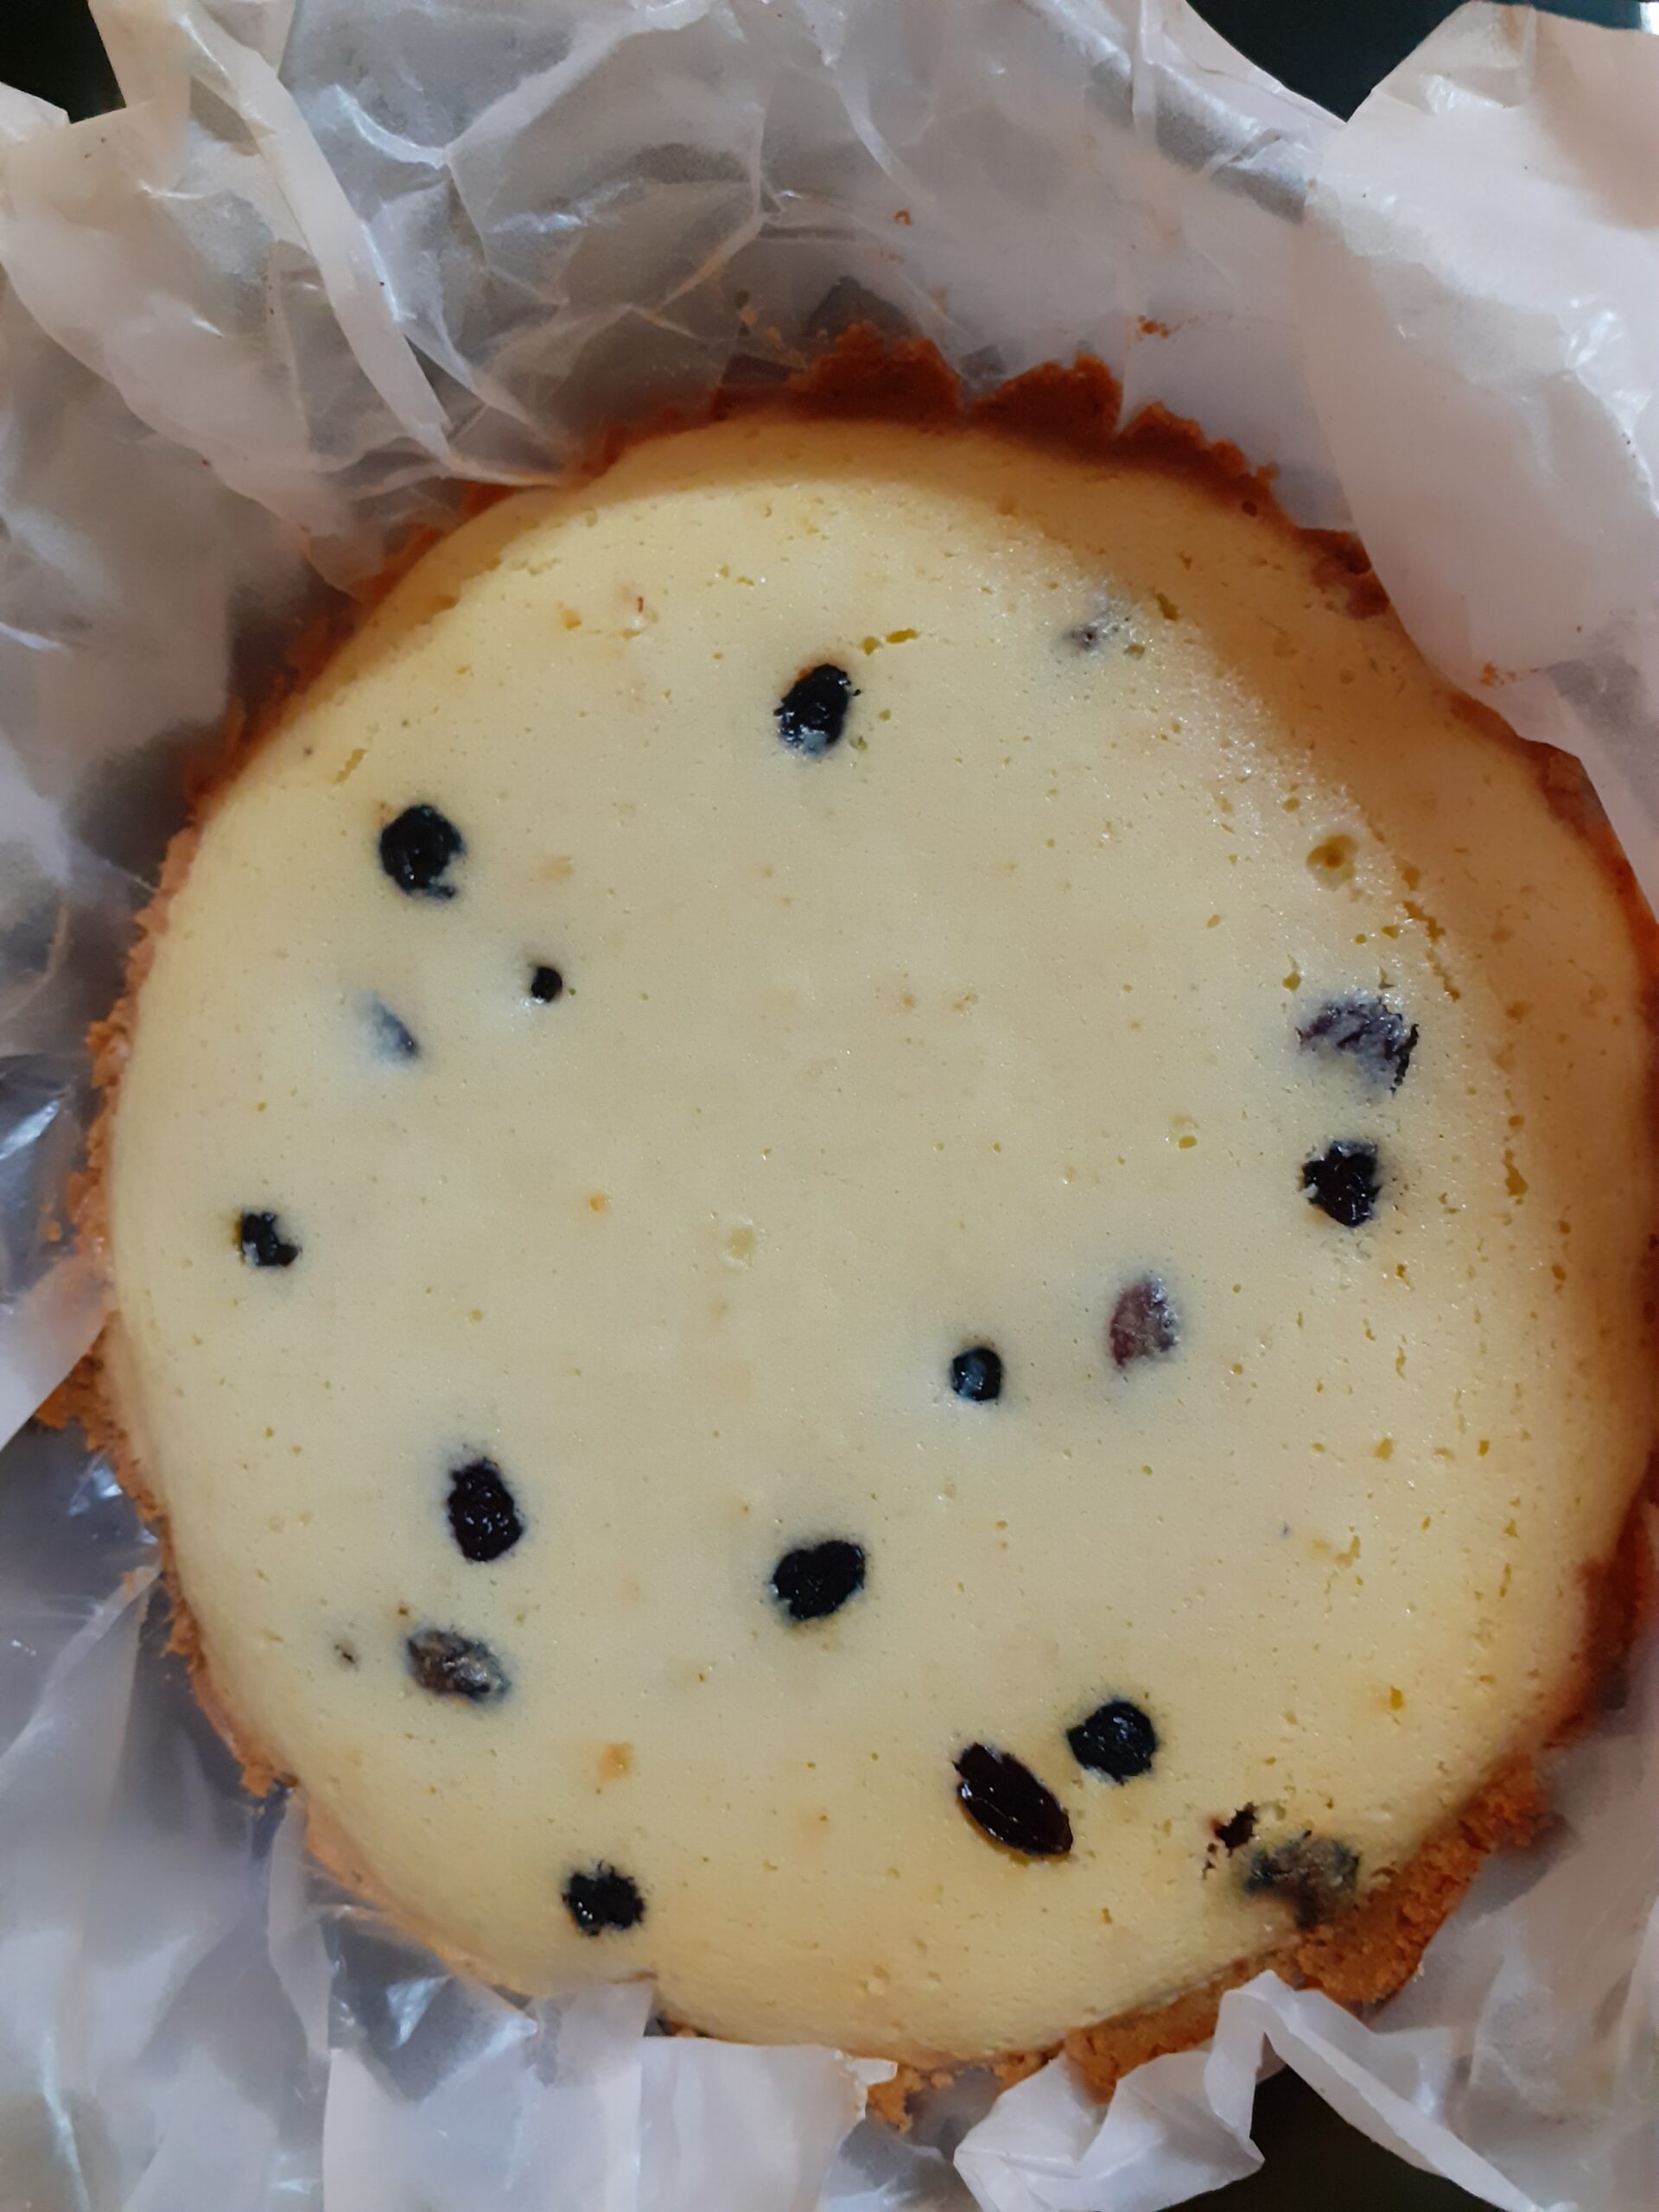
4. Bake for 40 minutes at 180 C or until the cheesecake is set, but the middle of the cake should wobble when you shake it and when you stick in a toothpick it should come out clean. There can be little cracks on the cake, so don’t worry.
5. Cool the cake completely and spread the Blueberry sauce over it( the sauce might have thickened, just microwave it for 20 seconds and it will be spreadable again). Refrigerate for 2 hours and its ready. Enjoy the Berrilicious flavour. Bon Appetit.
NOTES:
1. If using Fresh Blueberries use 1/2 cup sugar for the filling and the entire bottle of the preserve.
2. Topping the cake with Blueberry sauce is optional. If not topping it dust icing sugar over the cake before storing.
3. Try using a spatula for beating as we don’t want the batter to air up and rise. If the batter becomes fluffy, the cake will rise while baking and then go limp on removing it from the oven.
4. If topping the cake with sauce, don’t forget to refrigerate it, only then the topping will set, otherwise when you cut the cake it will drop everywhere.
If you tried this recipe and liked it please comment below. I would love to hear from you. If you have a query about the recipe email us and ill respond as soon as I can.
If you would like to receive our recipes on your mail please leave your mail id at the homepage. Every time Rajjo’s Kitchen has a new post we will mail the recipe to you.
Apple Crumble (Eggless Dessert)
A Crumble is a dessert with all the goodness of a pie sans the effort of making a pie crust. They are very easy to make and can be made with a large variety or combination of fruits. Berry crumble, Pear Crumble, a combination of pear and almond can also be done. Today I decided to make the Crumble as I have been craving it for long, and so I gave in to temptation.
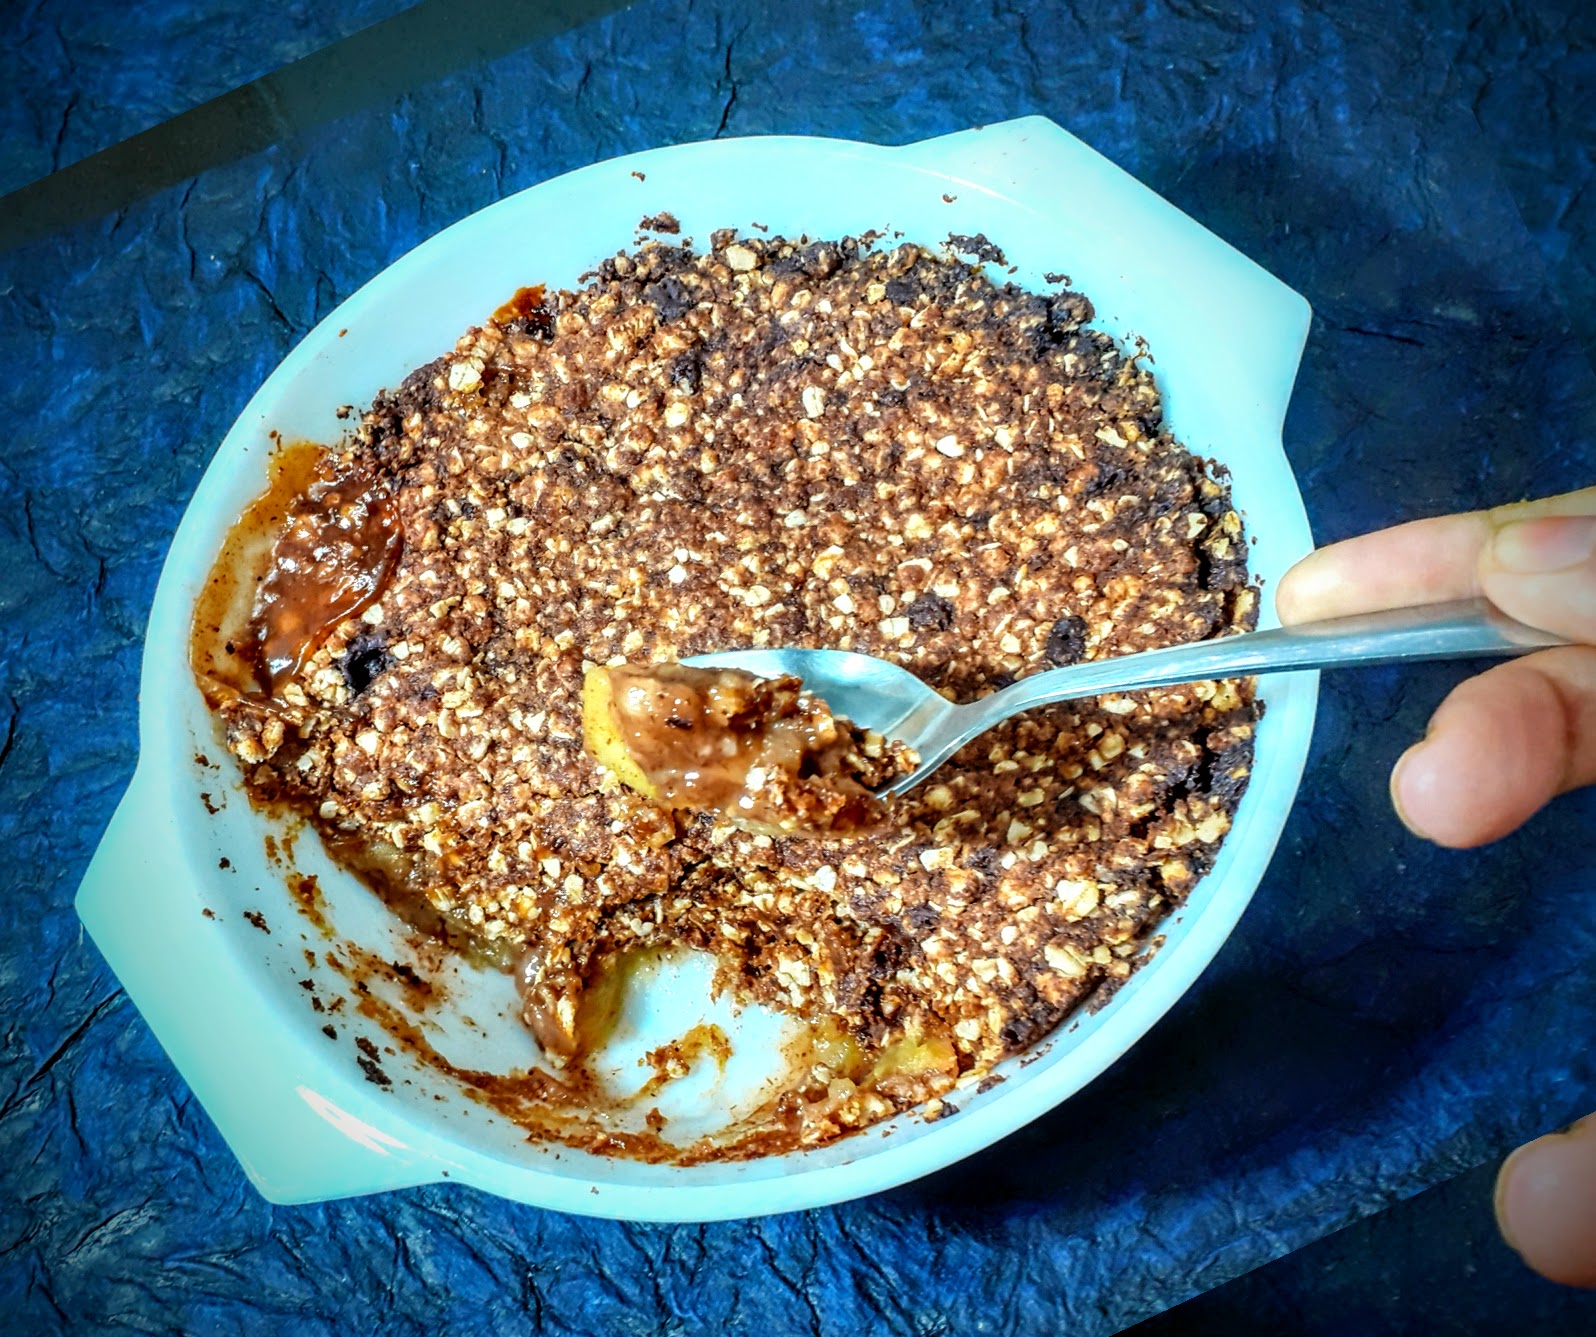
As I think of Apple Crumble a feeling of warmth always spreads over, as this also is a dessert that is served warm, usually with icecream. But believe me when I say, by itself, it is too good to resist. Apple Crumble is a dessert with cinnamon apple filling with a crumbly crunchy crust. As it bakes the apple filling gets jammy and saucy and the aroma that fills the house while this is cooking is so inviting. It’s a very simple dessert and has no eggs. Usually, plain flour is used for this recipe, but I have used half of the plain flour and half of wheat flour, and since this dessert turned out quite well, next time I’m trying out a full wheat flour one..my love for wheat flour is unbeatable.
I’m soon planning to make the Berry Crumble and you, my dear friends will get the first preview I promise. In the meanwhile, as you look up my website check out my recipe for
Pineapple Tart and
Savoury Muffin recipes.
Here is the Apple Crumble recipe for you—
PREP TIME: 15 MINS COOK TIME: 40 MINS
TOTAL TIME: 55 MINS SERVINGS: 5
CUISINE: WORLD FOOD AUTHOR: Rajni Ram
Ingredients for filling:
Apples 2 any variety( firm ones preferred) chopped
Cinnamon powder 2 tsp
Plain flour/refined flour 1 tbsp
White sugar 1/4 cup
Lemon juice 1 tsp
Ingredients for the Crumble:
Wheat flour 1/2 cup
Plain flour 1/2 cup
Oats 1 cup rolled or instant
Butter 120 gms chilled, cut to pieces( refer note 4)
Brown sugar 1 cup
Cinnamon powder 2 tsp
Baking powder 1/2 tsp
Salt 1/4 tsp
Requirement: 1to 1.5 litre Pie dish
Before making the crumble mixture put the oven to preheat at 180 degrees.
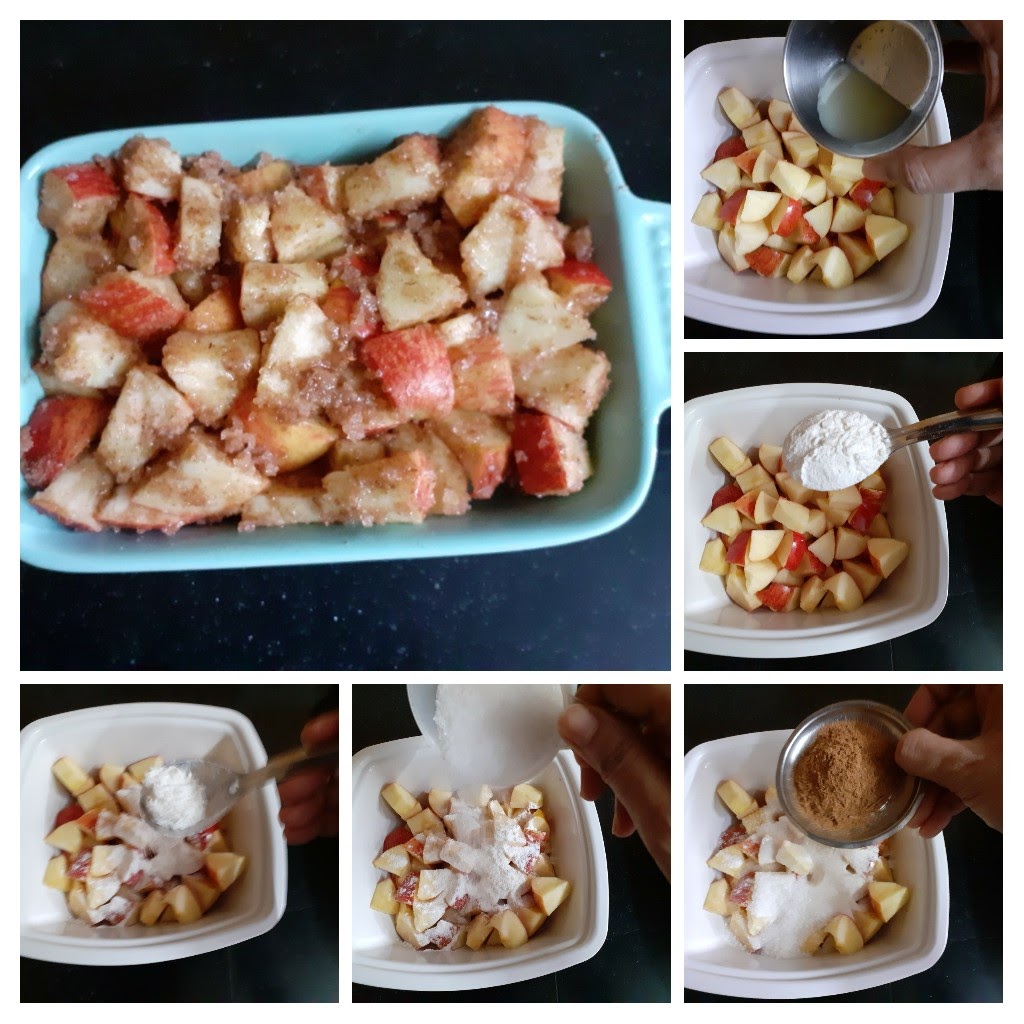
Directions for filling:
In a bowl put in the chopped apples(skin intact), add 1 tbsp flour, lemon juice, sugar and cinnamon powder and mix well. Spread this mixture into the Pie dish and keep aside.
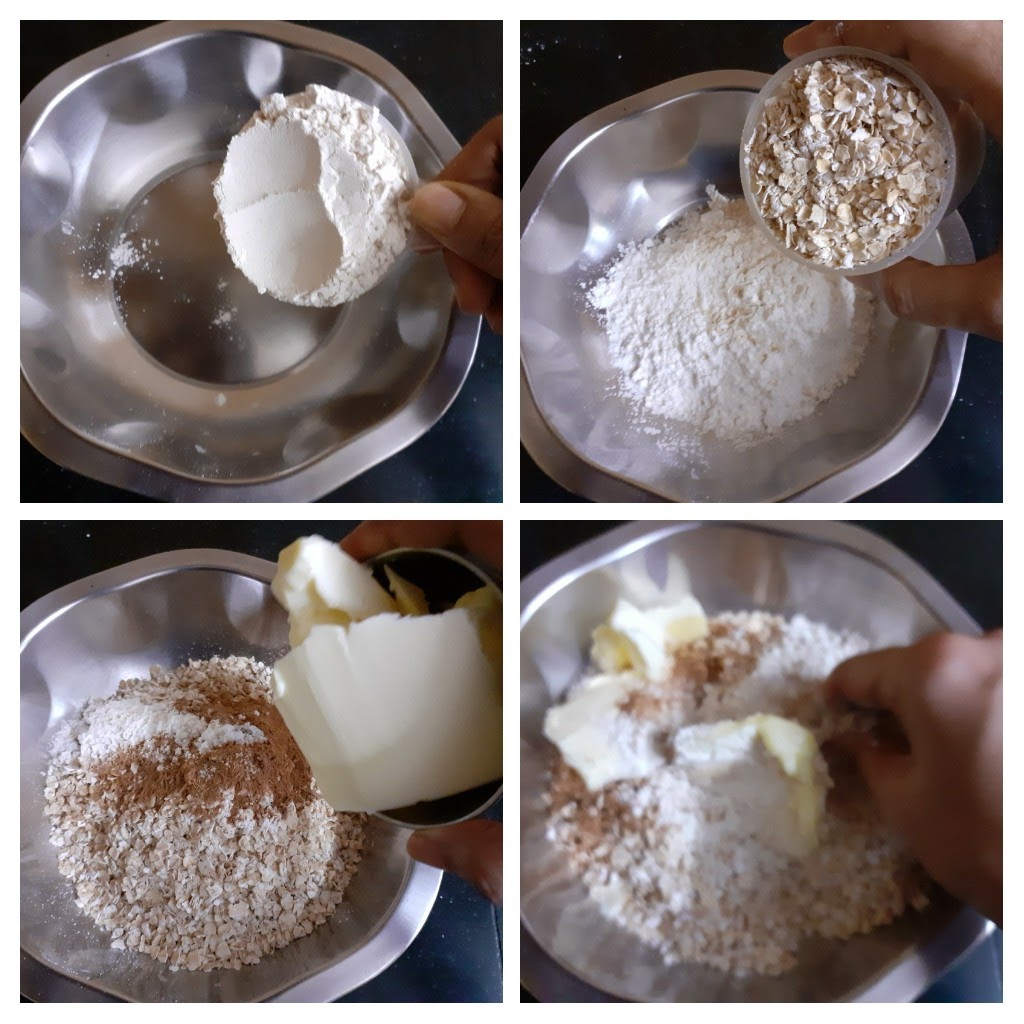
Directions for the Crumble crust:
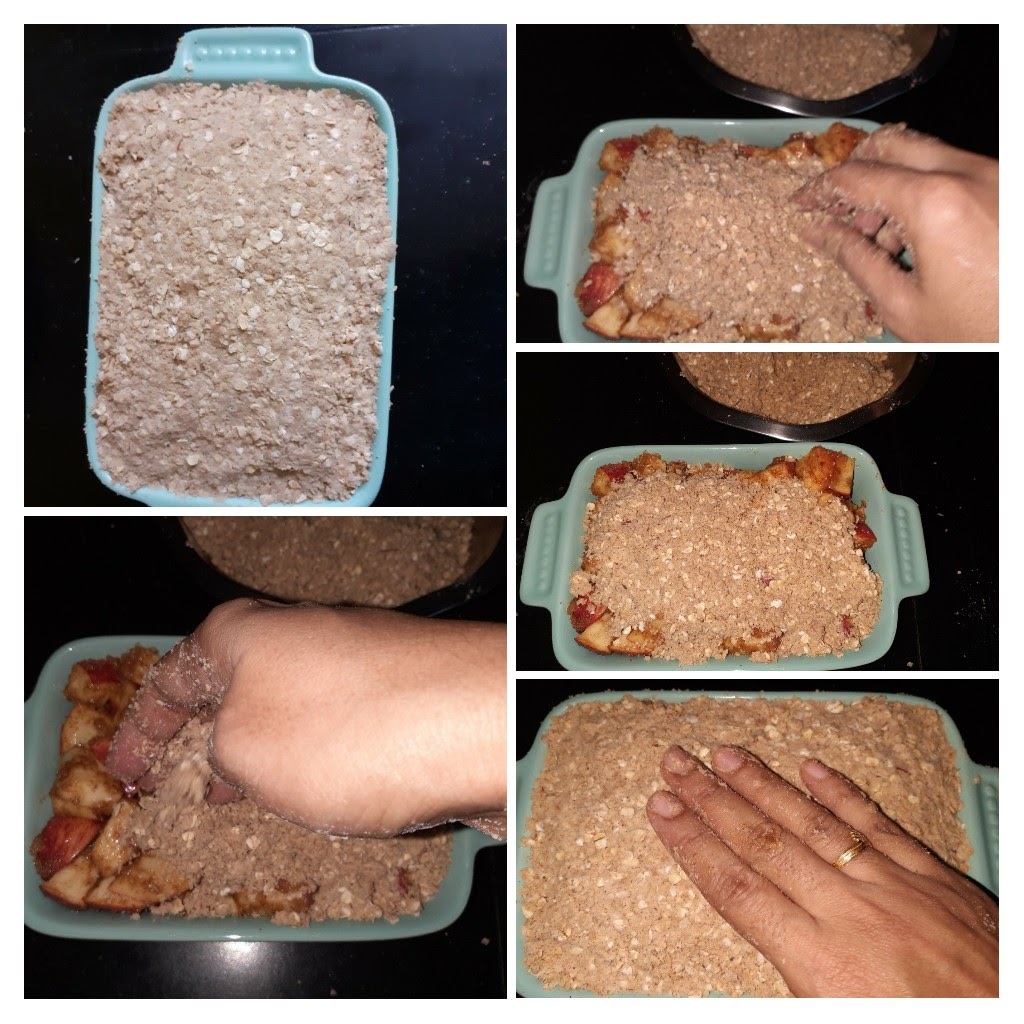
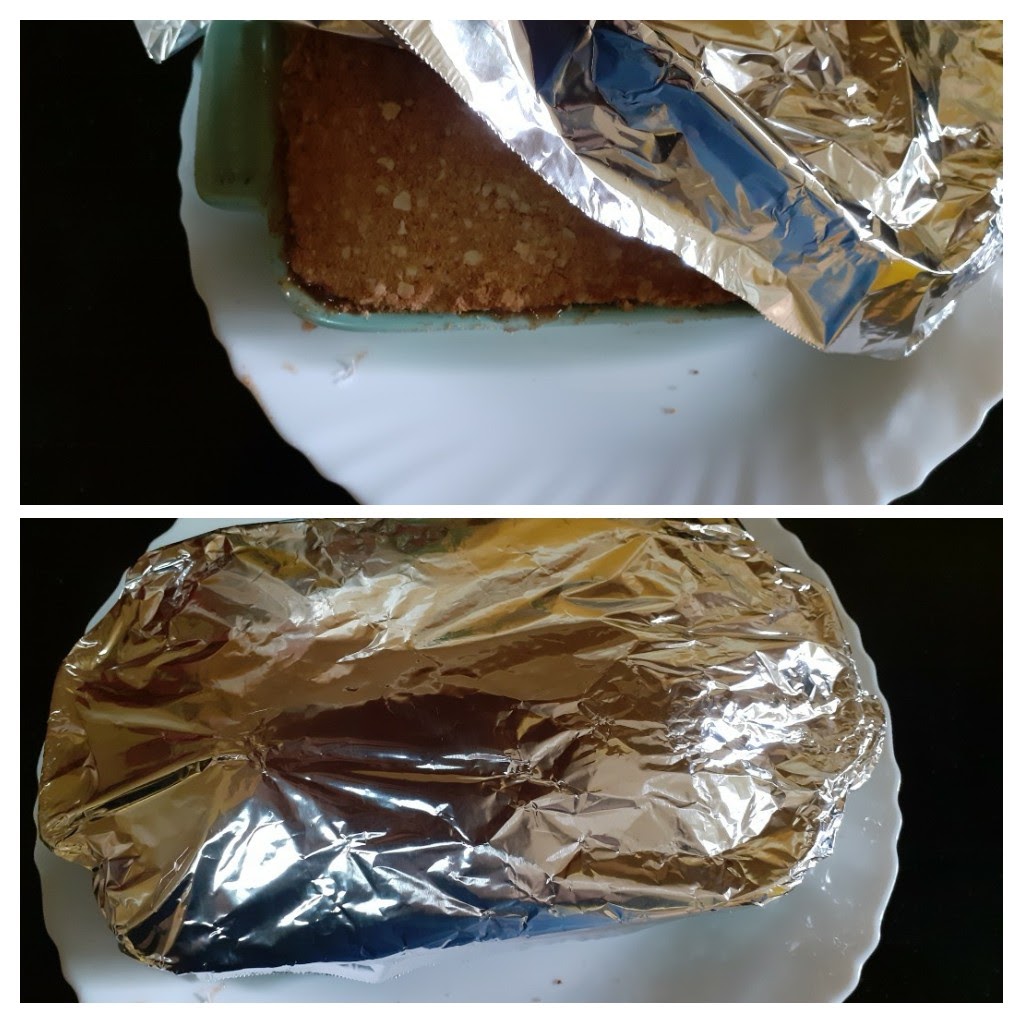
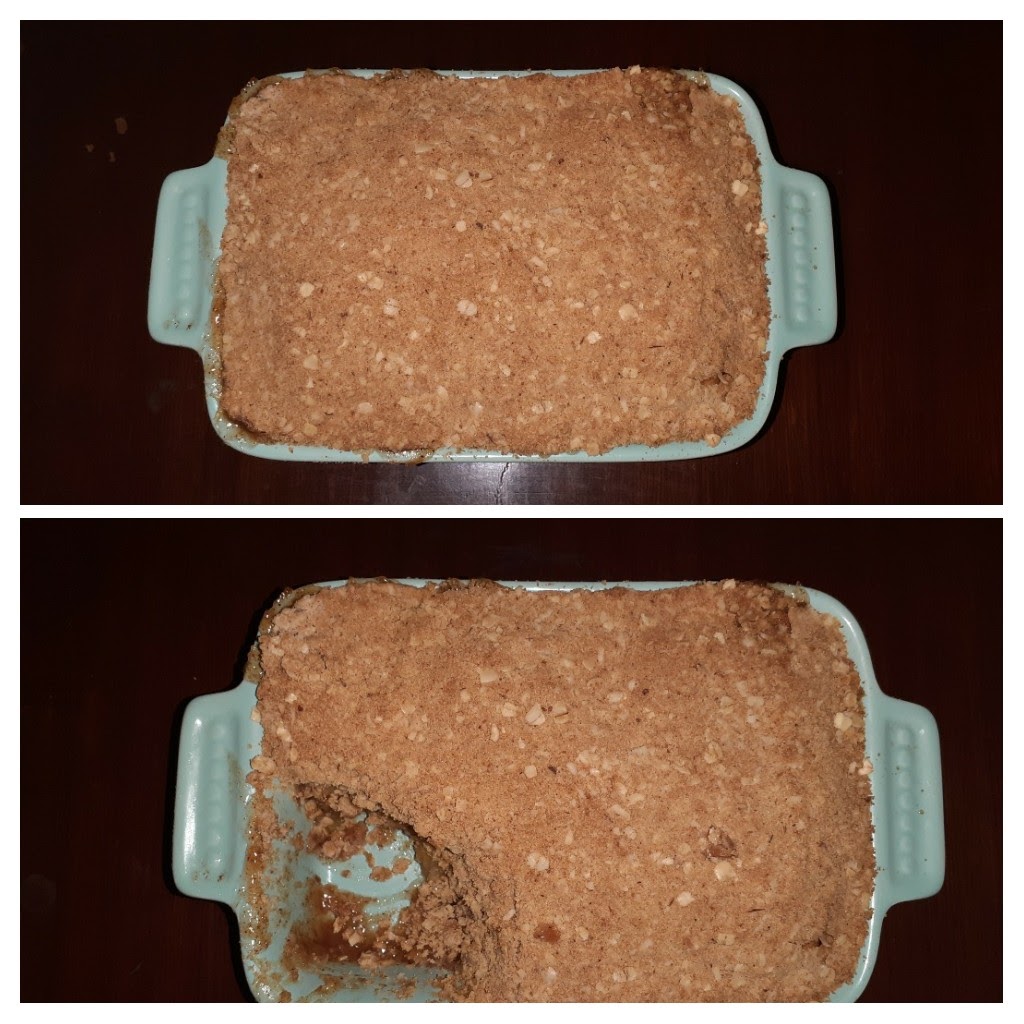
In a bowl take both the flours, oats and add the cubed butter and start rubbing the butter into the oat-flour mixture. As the butter mixes with the flour its appearance becomes crumbly. After all the butter is rubbed in add the baking powder, salt, sugar and cinnamon powder and combine. The mixture should look like wet sand. Now take this flour mixture little by little and start covering the filling in the pie dish. Cover the whole filling compactly and press it down with you palm a bit. Put in the Crumble into a preheated oven and bake at 180 C for 40 minutes. After the oven beeps, get it out, cover with aluminium foil for around 15 minutes and serve warm. Serve with Icecream or just plain. Nutella lovers can drizzle some on top. Enjoy…I’m already craving dessert. Bon Appetit.
STEPWISE RECIPE FOLLOWS:
1. Assemble all ingredients. Chop the apples, powder the cinnamon, put the oven to preheat at 180 degrees.
2. In a bowl combine all the ingredients given under filling put it in the Pie dish and arrange evenly and set aside.
3. In another bowl add the flours( you can stick to a single variety too), the Oats, cinnamon powder and the chilled butter and start rubbing in the butter into the flour oats mixture. By the time the butter combines with the flour, it should appear crumbly.
4. Now add in the baking powder, salt, brown sugar, to the flour-butter mixture and combine again. Now it starts resembling wet sand.
5. Start covering the apple filling with the crumble mixture and gently press down with your palm.
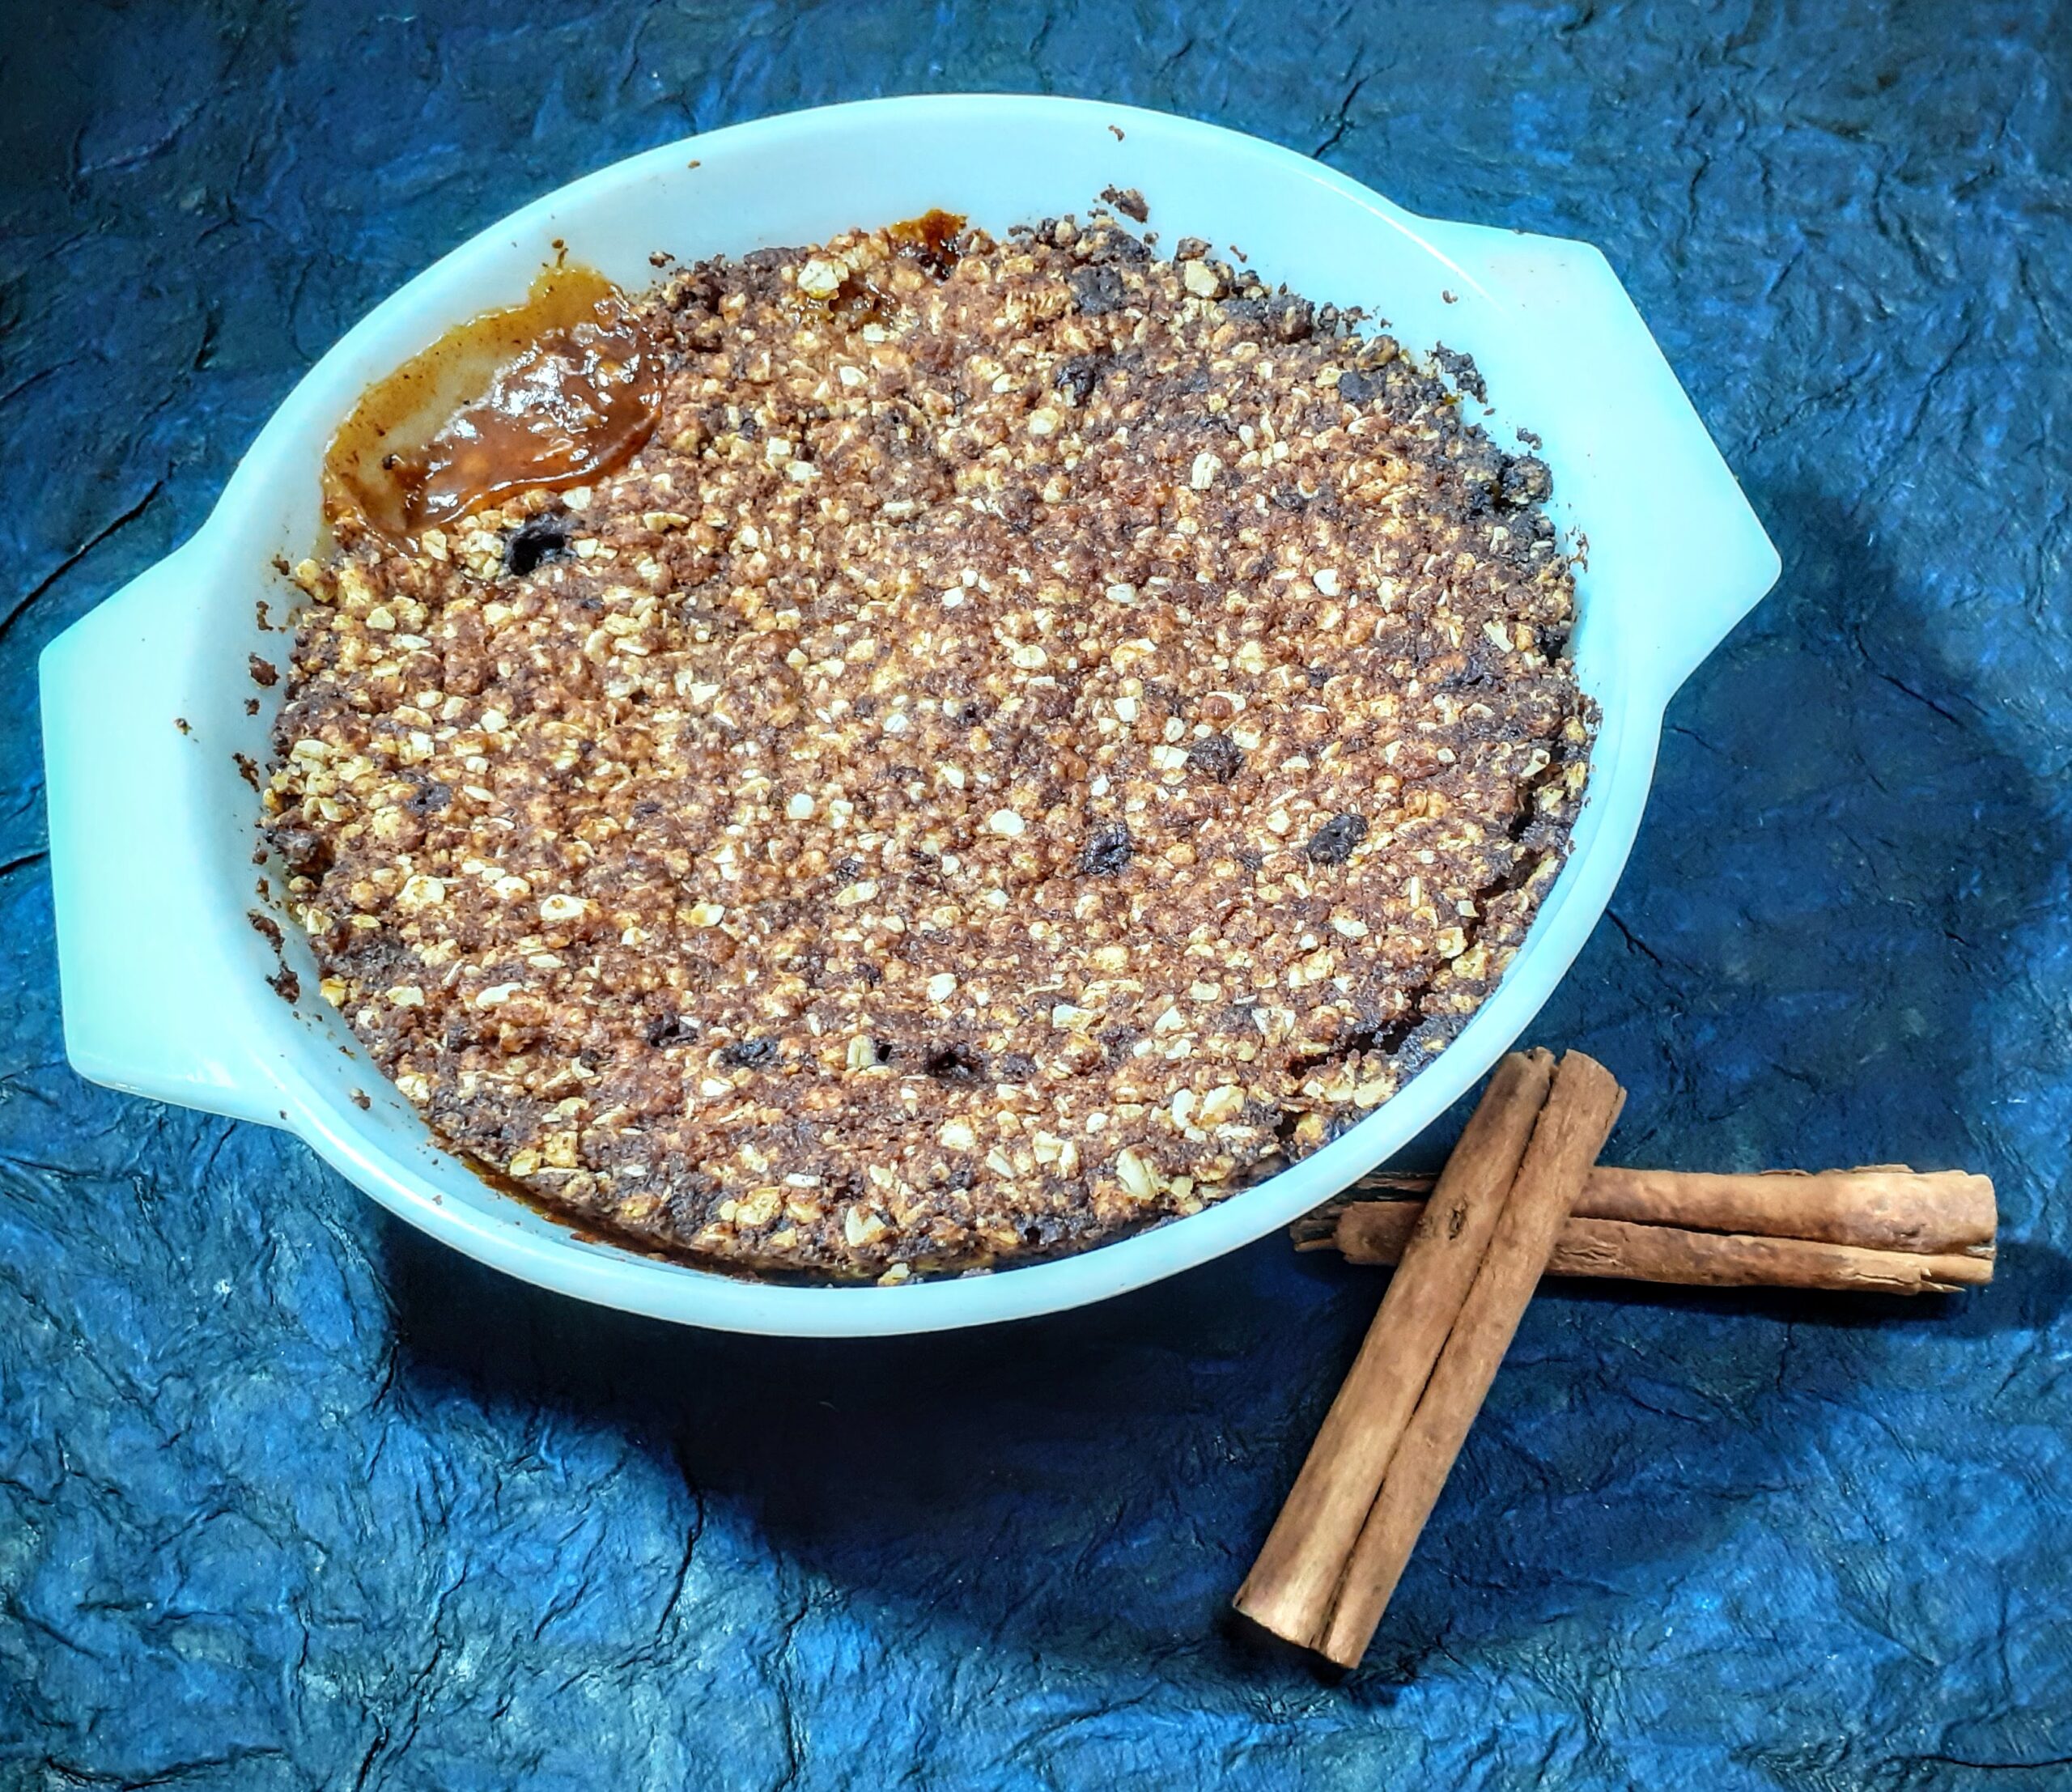
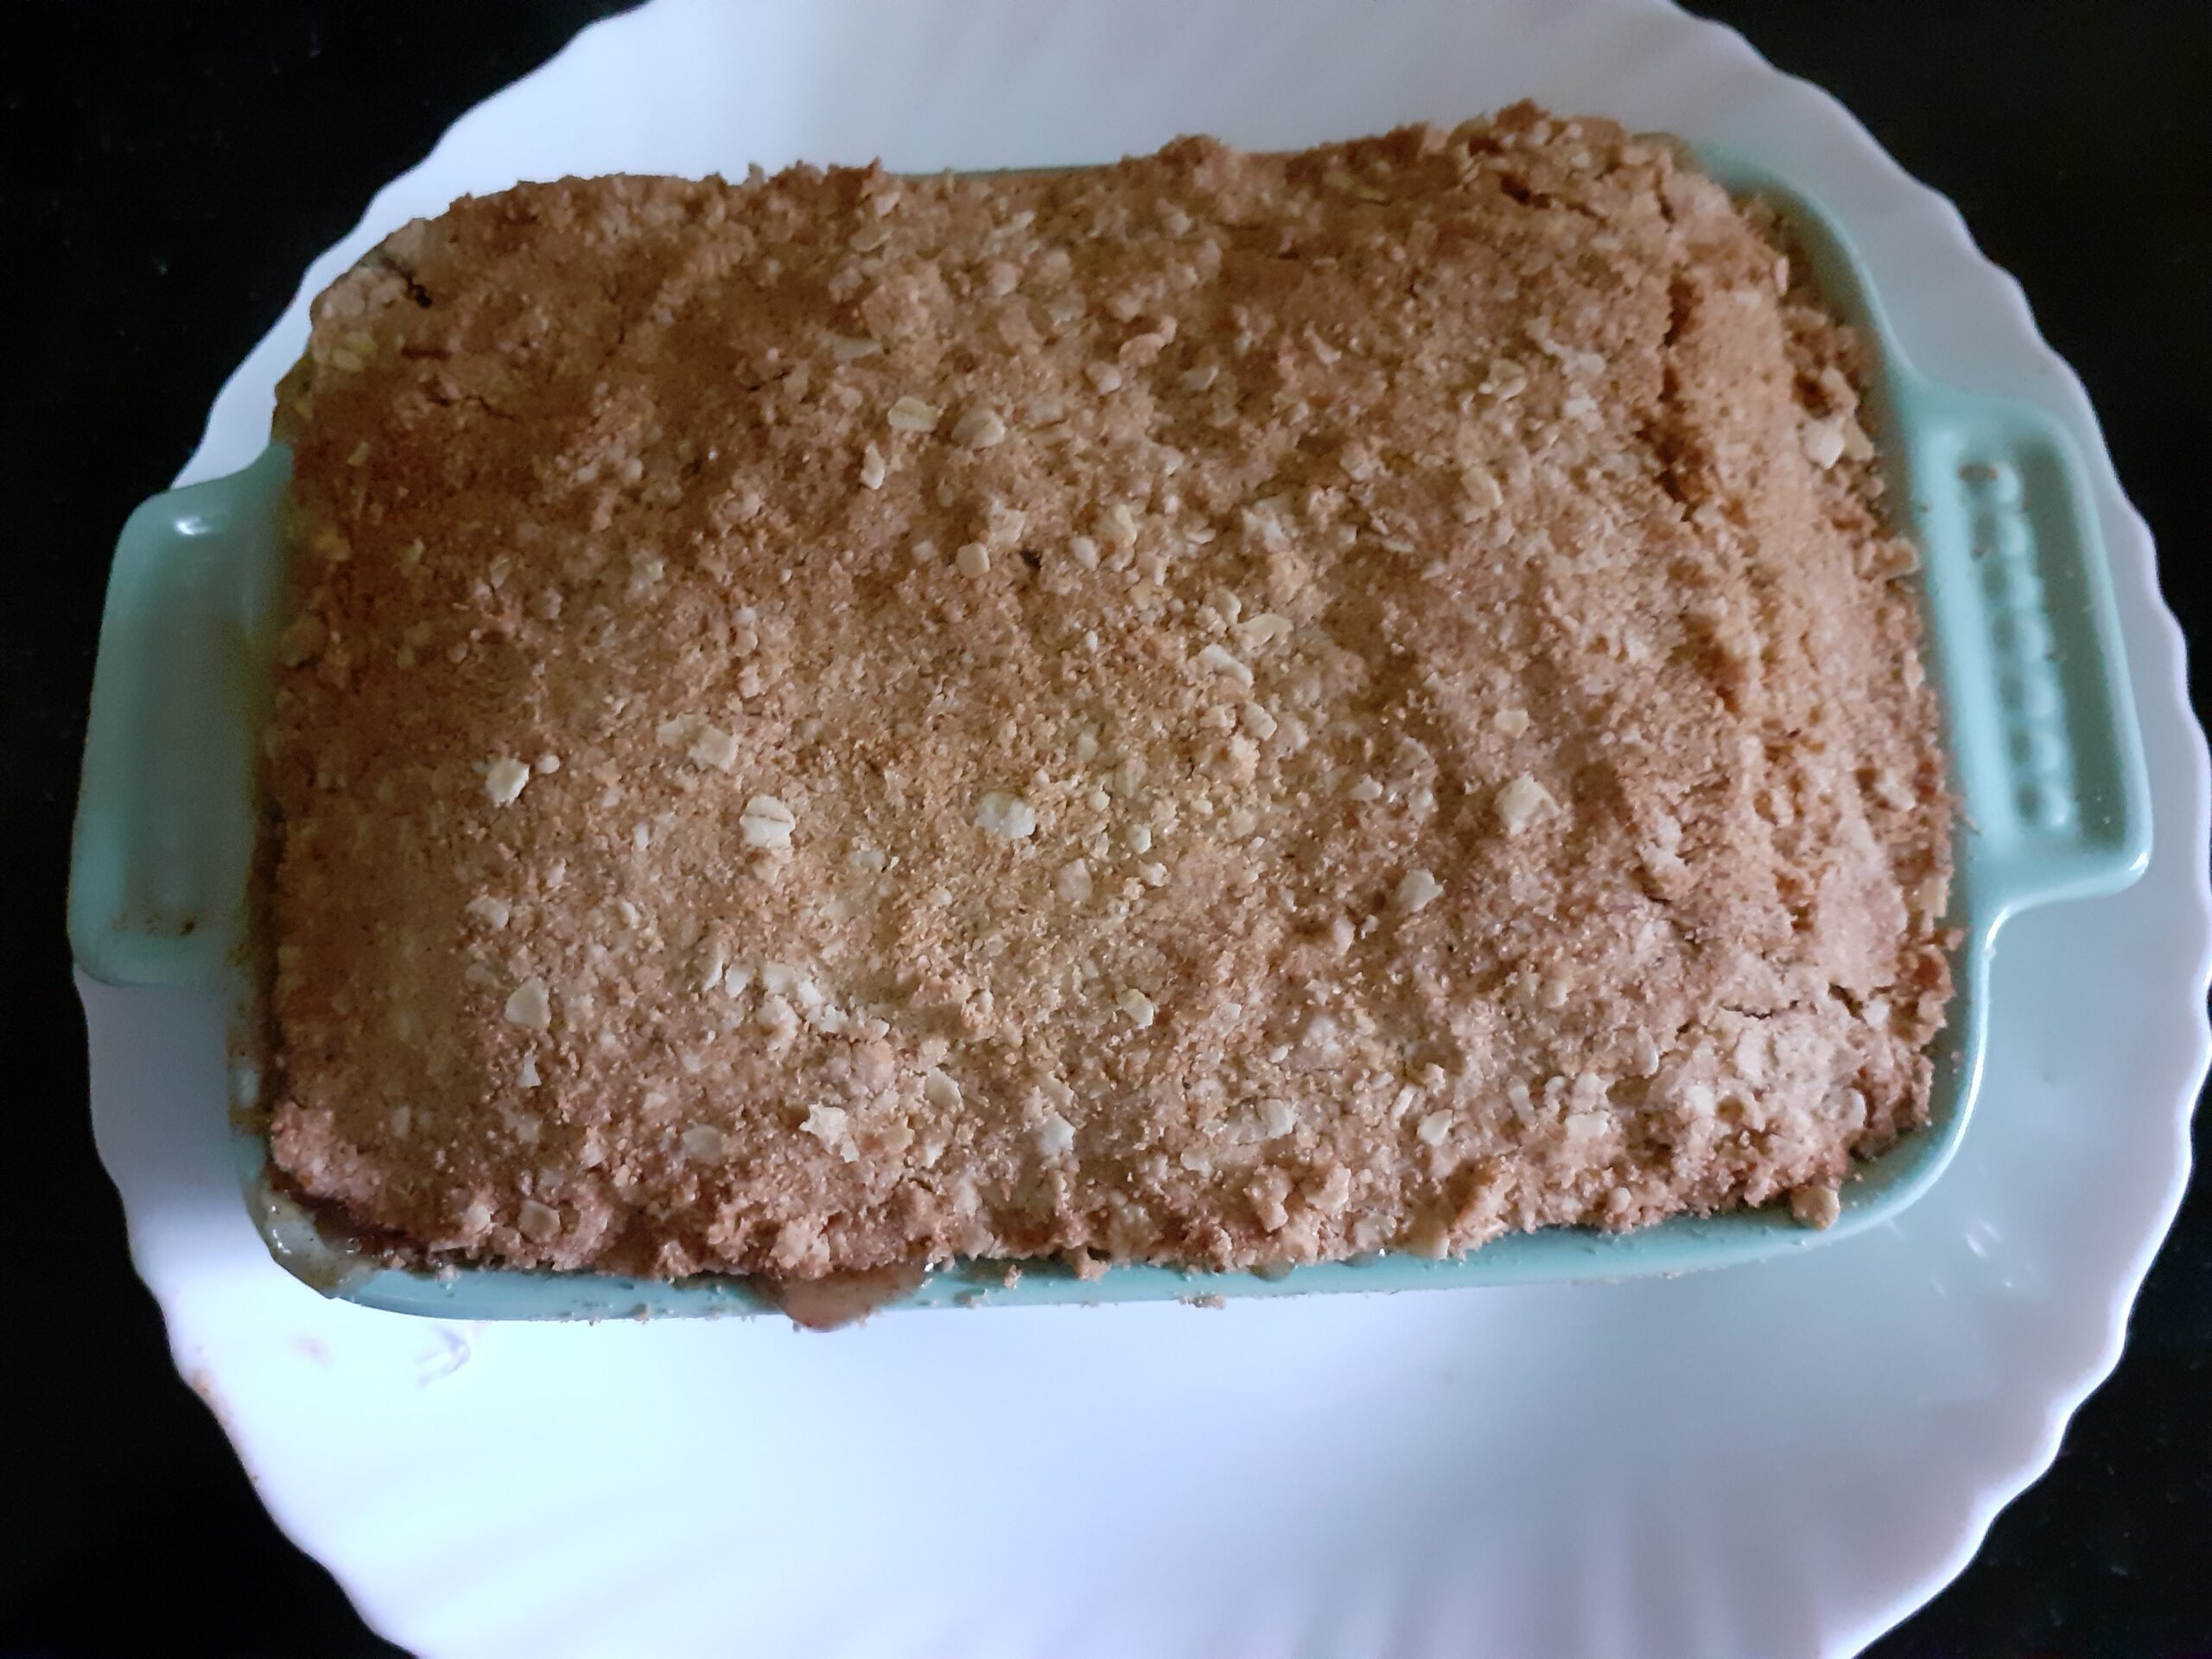
6. Put it in the preheated oven and bake at 180 C or 350 F for 40 minutes, until the crust turns golden brown.
7. Remove from oven and wrap the dish with aluminium foil to retain the heat for 15 minutes. Serve warm as it is or with ice cream.
NOTES:
1. I have mixed atta/ wheat flour and Maida/plain flour, you can use only the Maida too.
2. White sugar can be used in both filling and crumble top and so can the brown sugar in both.
3. Preheating the oven is critical for any baking recipe as this can affect the quality of the dish.
4. For a crisp/ crunchy crust use chilled butter as per recipe. For a chewy crust use melted butter at room temperature. Rest of the recipe remains the same.
YouTube video available for this recipe. Link below ????
https://youtu.be/3AGZCqEI-Qk
If you tried this recipe and liked it please comment below. I would love to hear from you.