Custard Shahi Toast Pudding
Nendran Pazham Halwa/ Banana Halwa
Mohan Puri/ Chandrakala
Sooji Halwa/Semolina Pudding/Sheera
Aval Sakkarai Pongal/ Poha Sweet Pongal
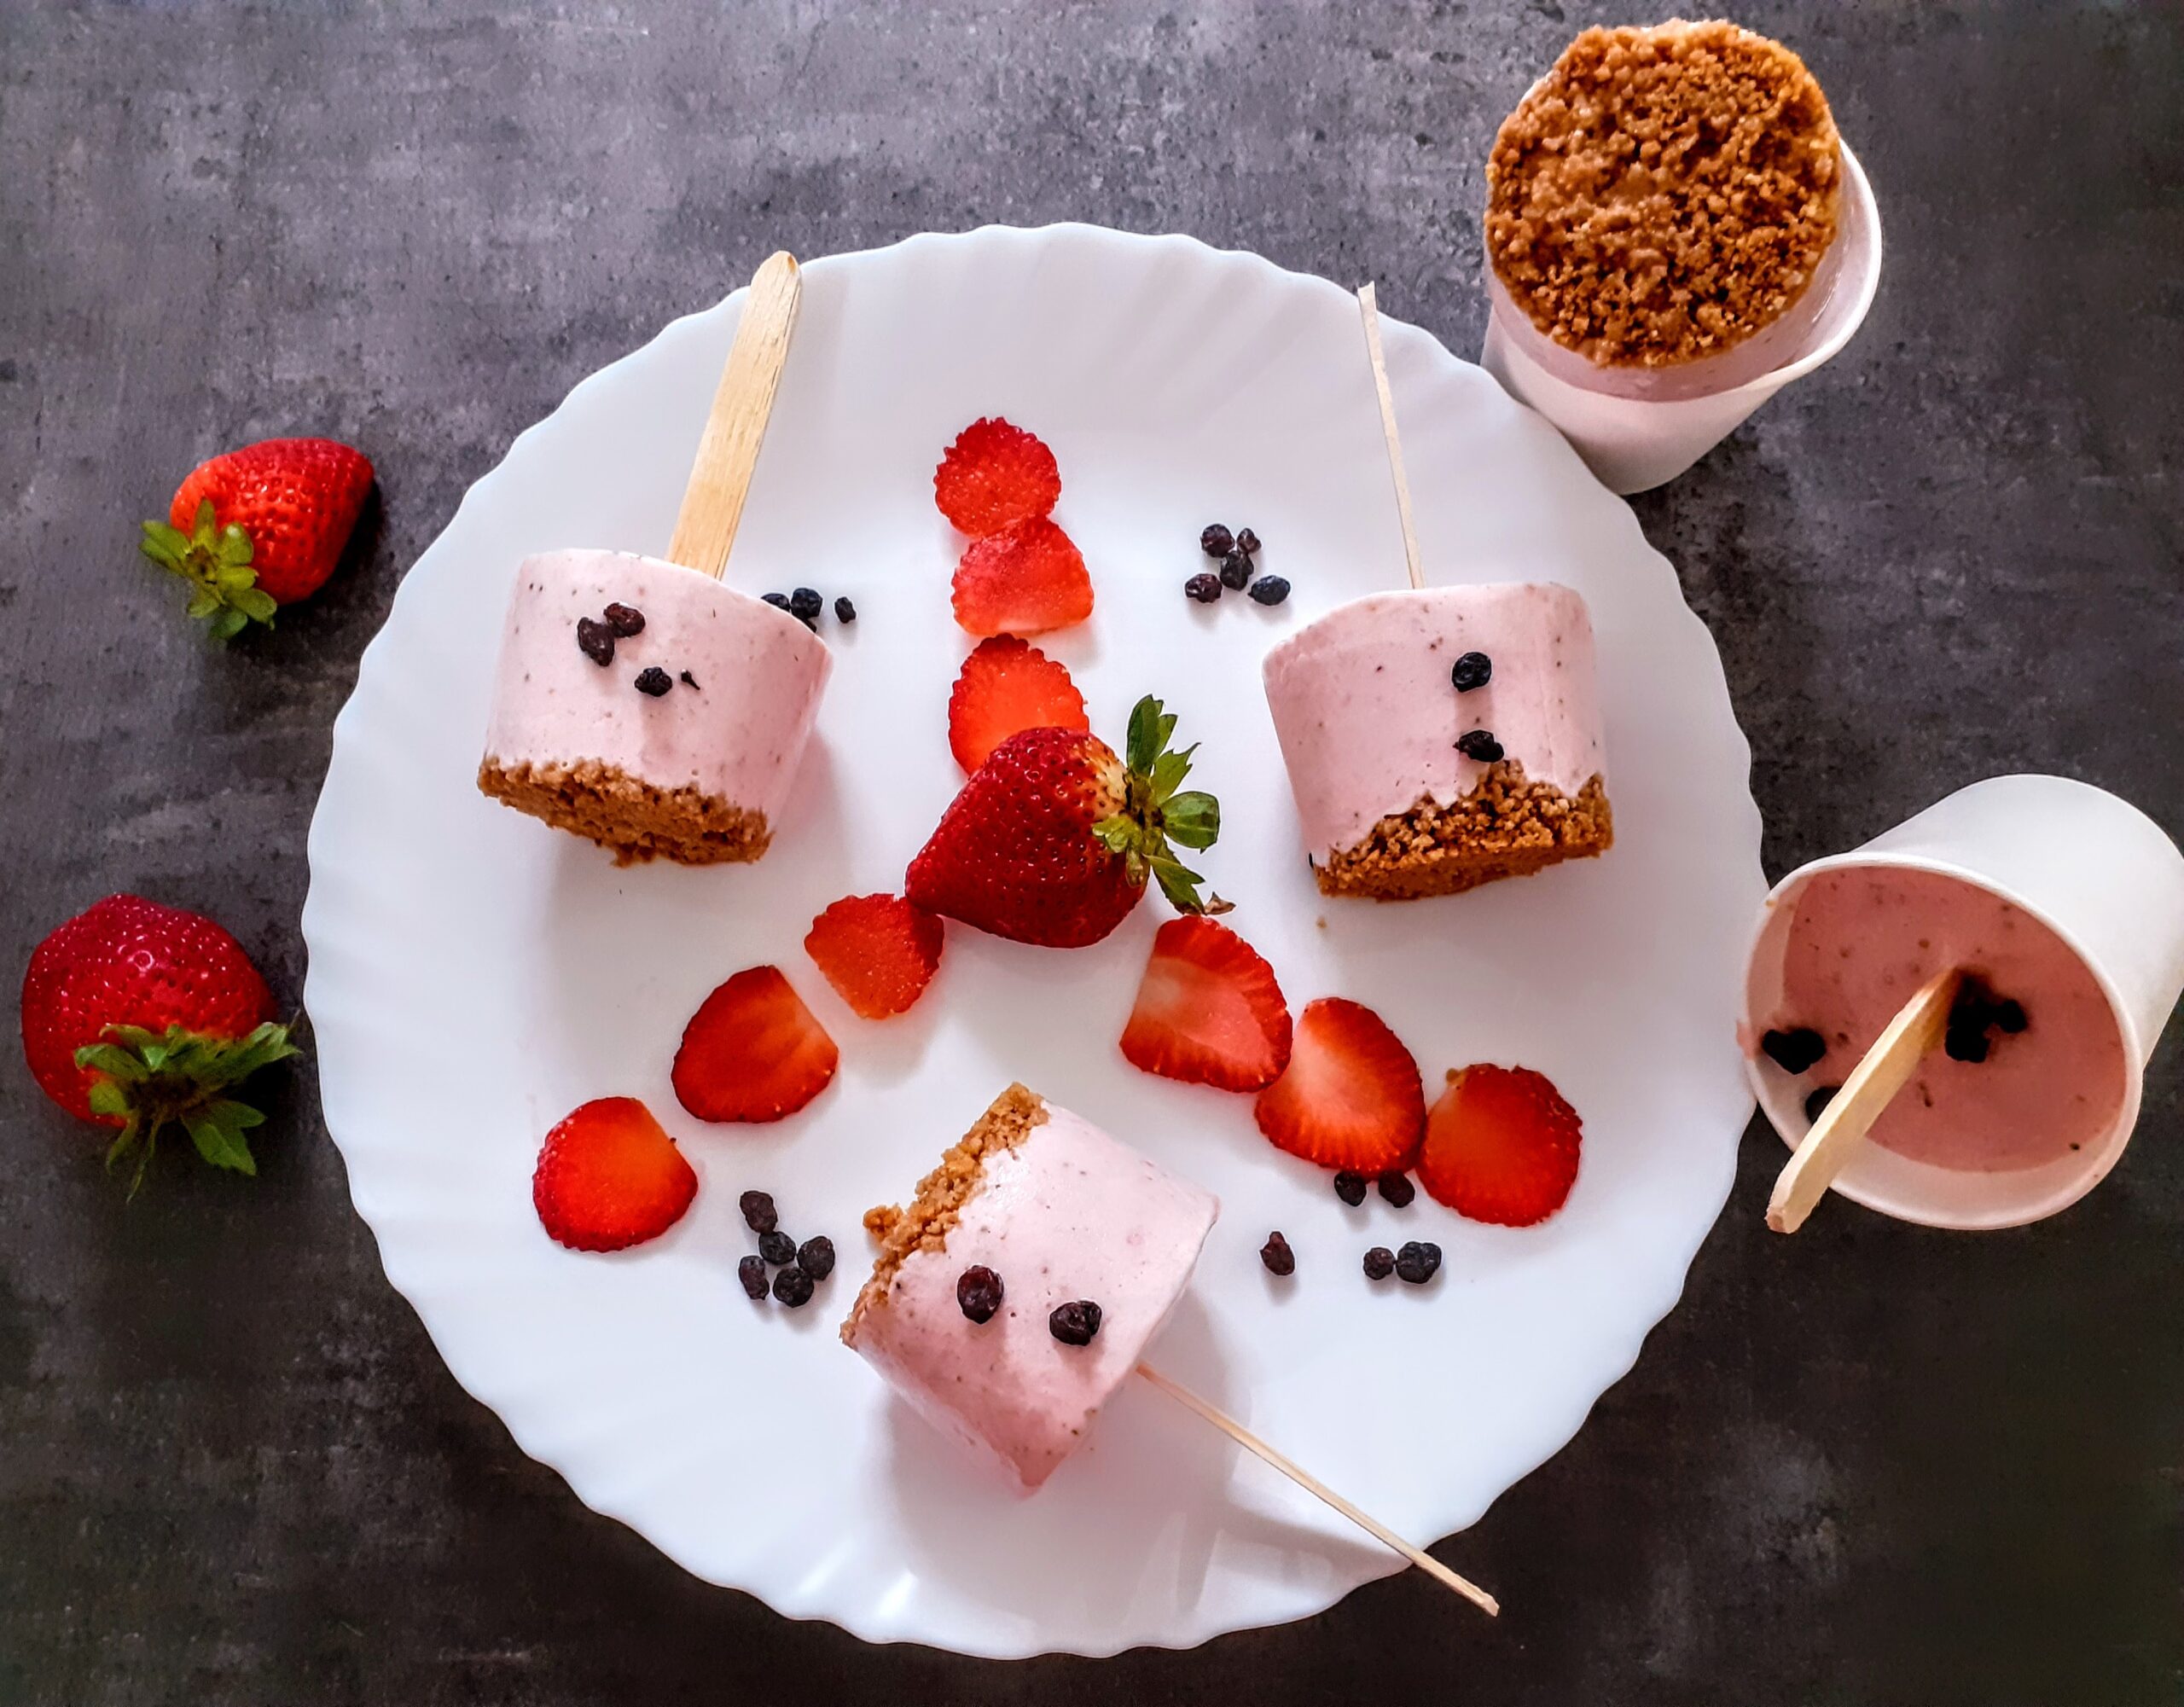
Plum Ice Cream
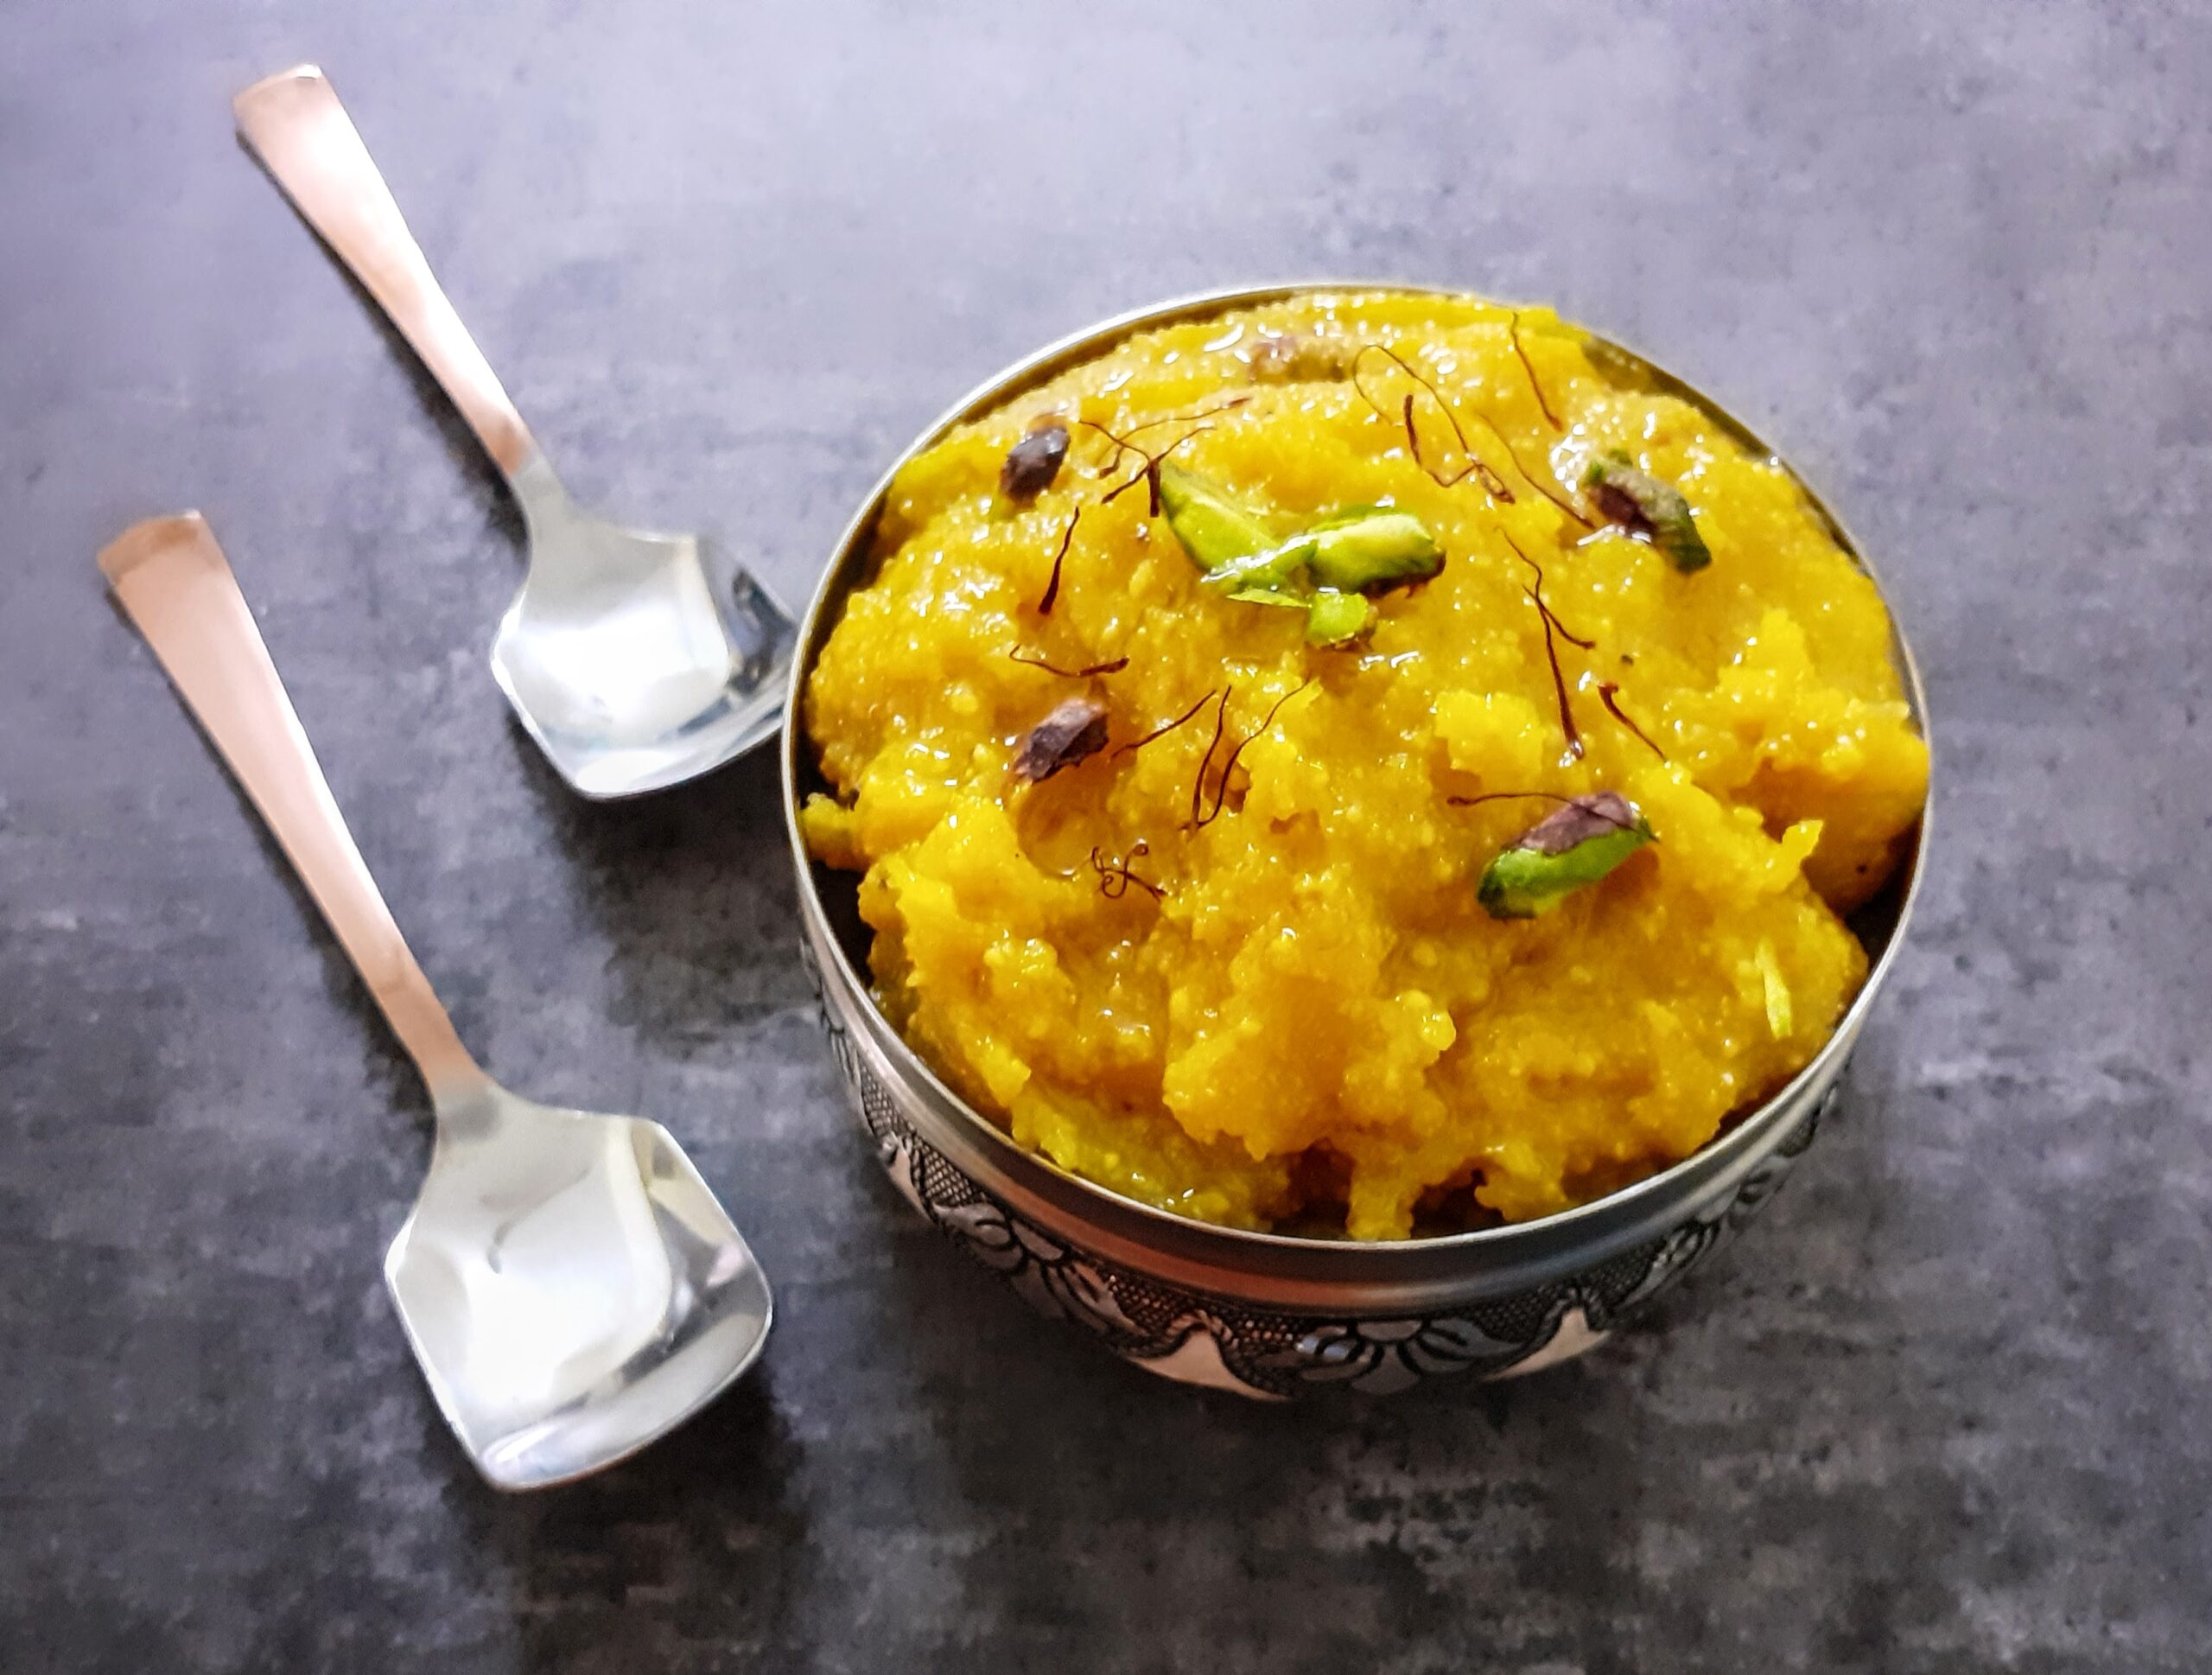
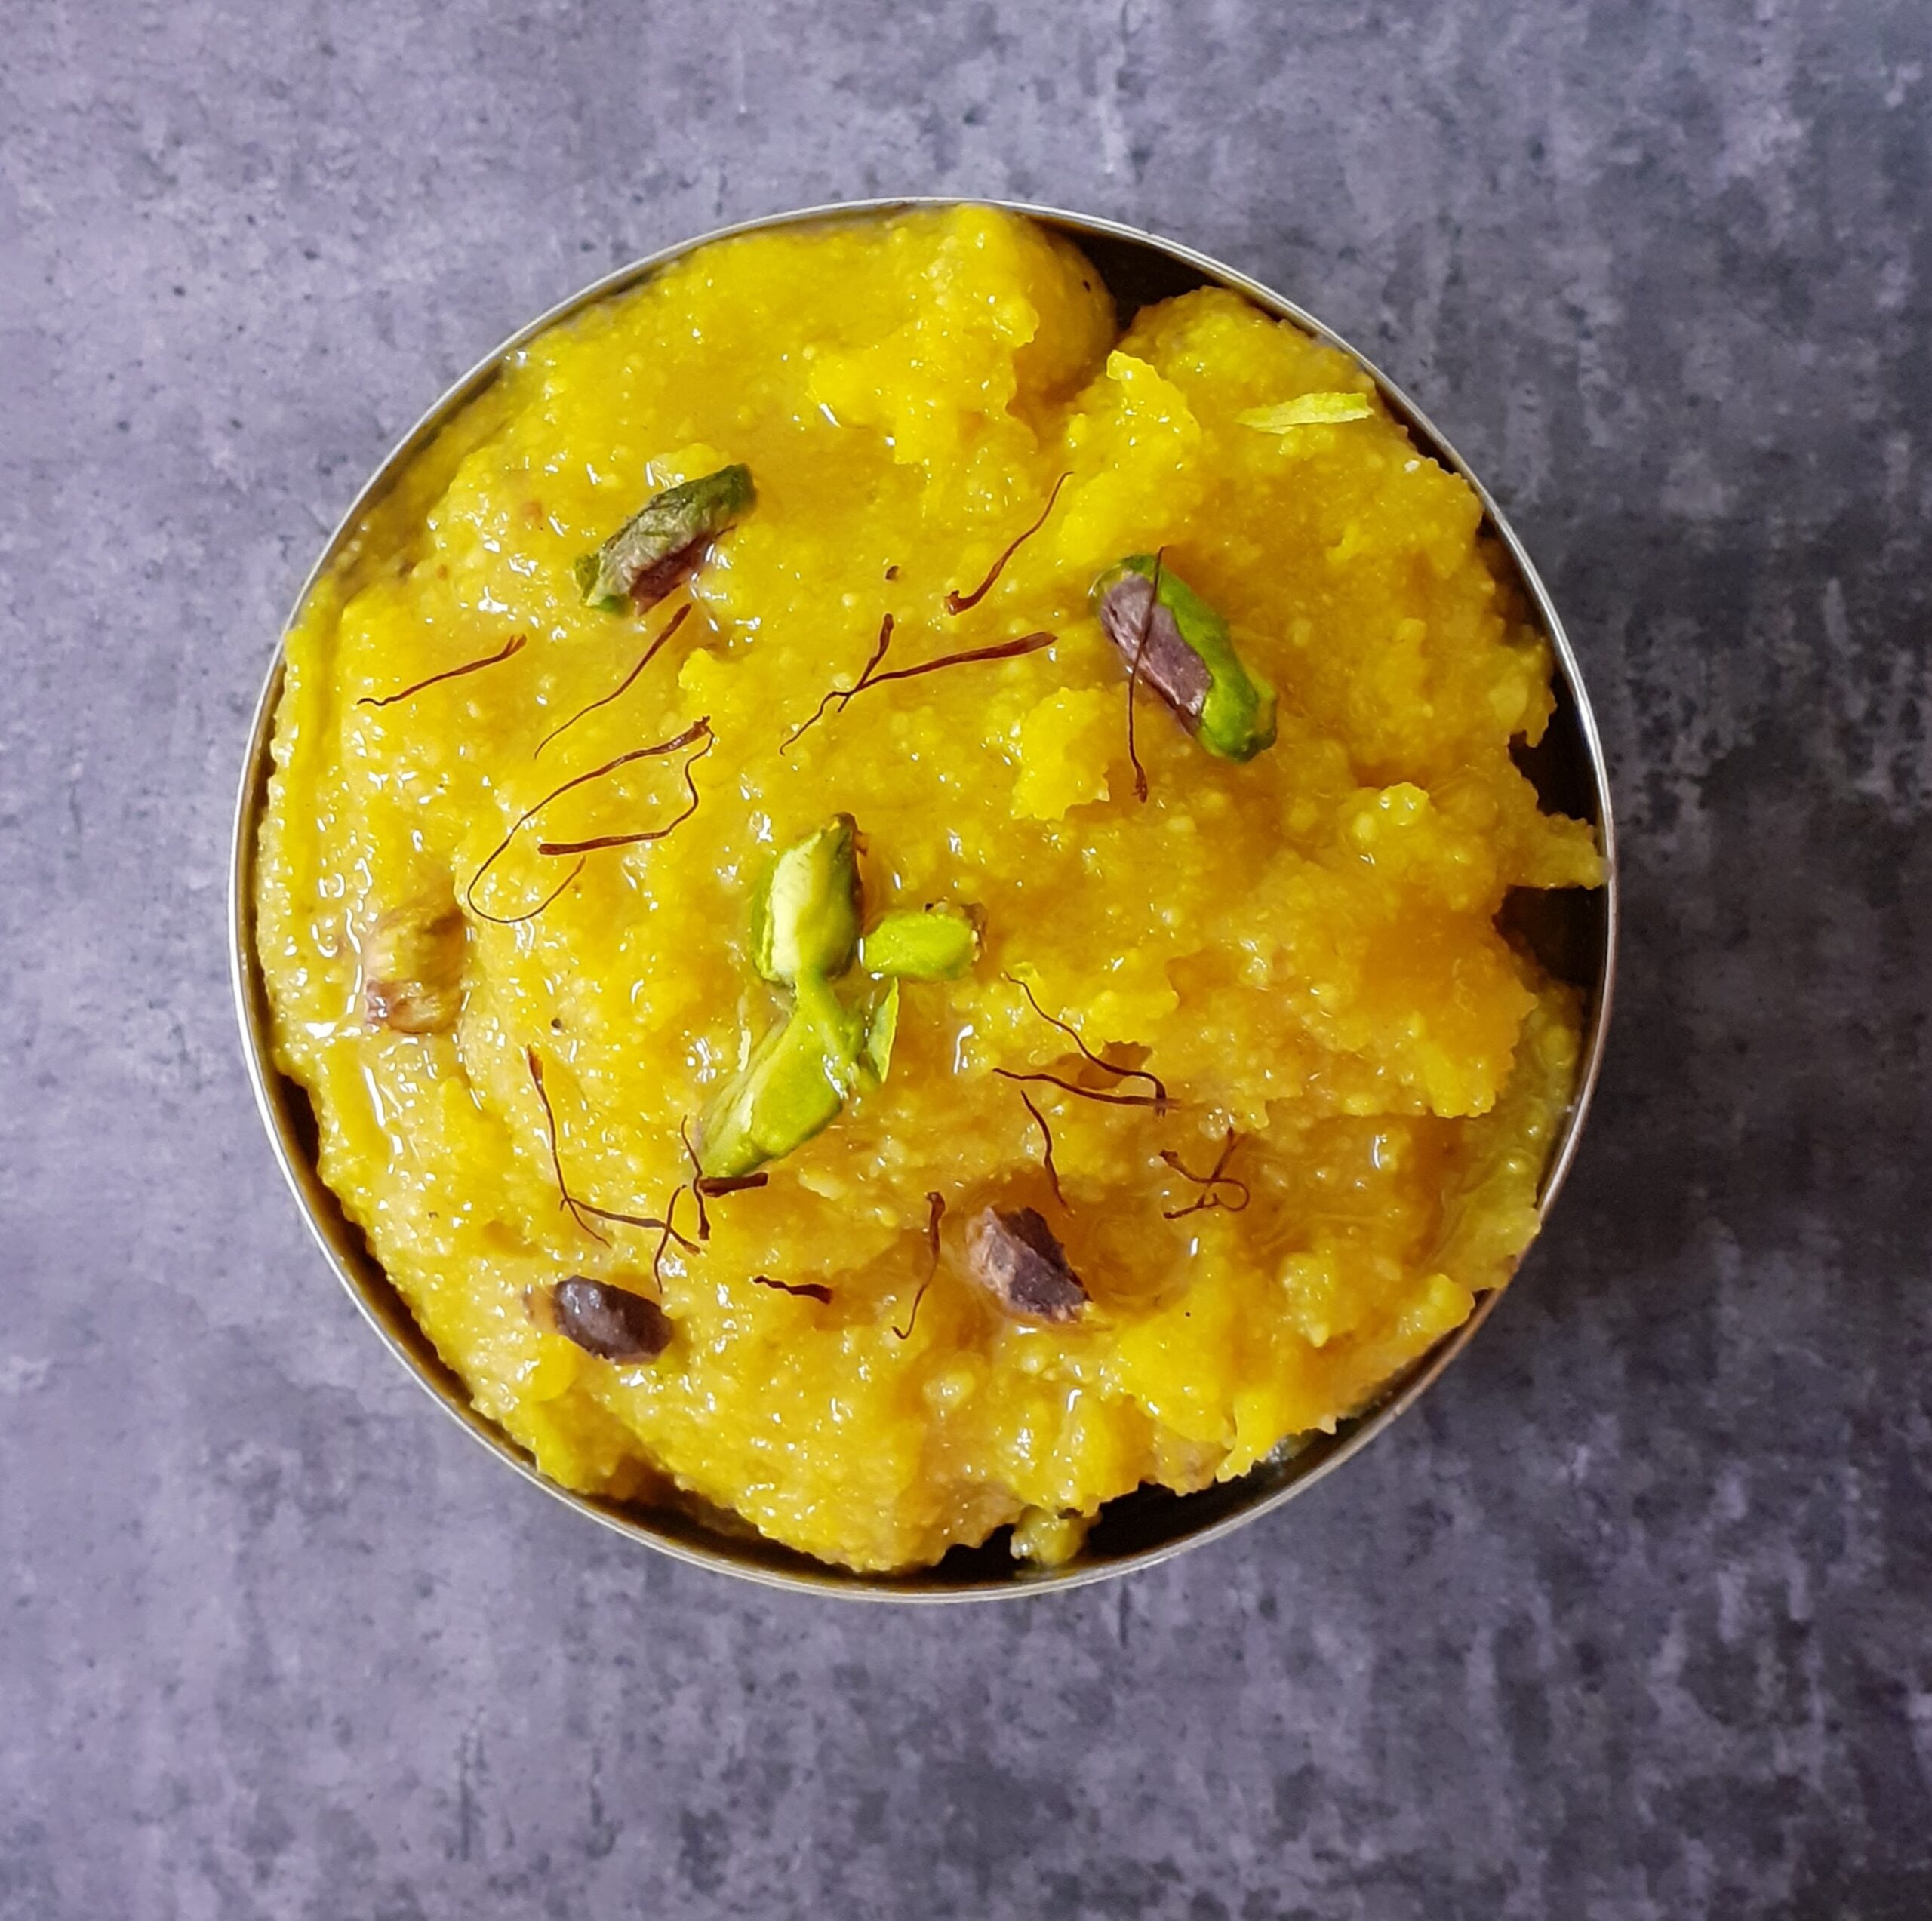
Moong Dal Halwa
Moong dal Halwa is an Indian dessert made from yellow lentils. It is basically a fudge and is very rich because of the amount ghee/ clarified butter added to it. Though I make many sweet varieties and desserts, I’m not generally the one who will stay until dessert. I’m immensely intuitive while I create sweet dishes, but I don’t crave sweets much. But this halwa is very close to my heart because it probably is the first sweet dish I ever liked. Thanks to our stint in Delhi, I have got to taste the best ones.
Infact, I liked this sweet dish so much that I have attempted to make it in the past, failed miserably and had given up on ever trying it again. But last year during the pandemic lockdown I was craving it badly, and as you know “ when you want something very badly, the universe conspires to make it happen” ????. So I had a viola moment during Diwali, while I was documenting the sweets and savoury prepared by me, when a simple method to make this halwa struck m
If you have attempted making this halwa any time or have searched the net for the recipe, all of them will tell you it takes 3 to 4 hours to get this sweet dish done. The actual recipe asks to soak and grind the lentils and them cook it in milk/ water and then add the sweetening agent. As I have claimed here on the blog before, I will take a short cut as long as it does not alter the taste, flavour and texture of the dish. And I took a short cut to this recipe and I don’t regret it because the outcome was just like the original.
If you follow the procedure as given here by me without altering I’m sure it’s a no fail recipe. And why stand by the stove for hours when you can get the same taste and flavour in an hour’s time? Having failed at this recipe many times, and knowing what went wrong each time, this time the recipe was made with so much conviction of technique that it turned out wonderfully.
While you are here do check out other dessert recipes like Carrot kheer, Strawberry and Lemon loaf, Red Poha Ladoo, Shrikhand, Malpua with Gulab Jamun mix, Akkaravadisal, Sweet Poha, and more…
Here is the recipe of Moong Dal Halwa-
Ingredients:
Moong dal split ( yellow lentils) 1 cup
Milk 1 cup
Water 2 cups
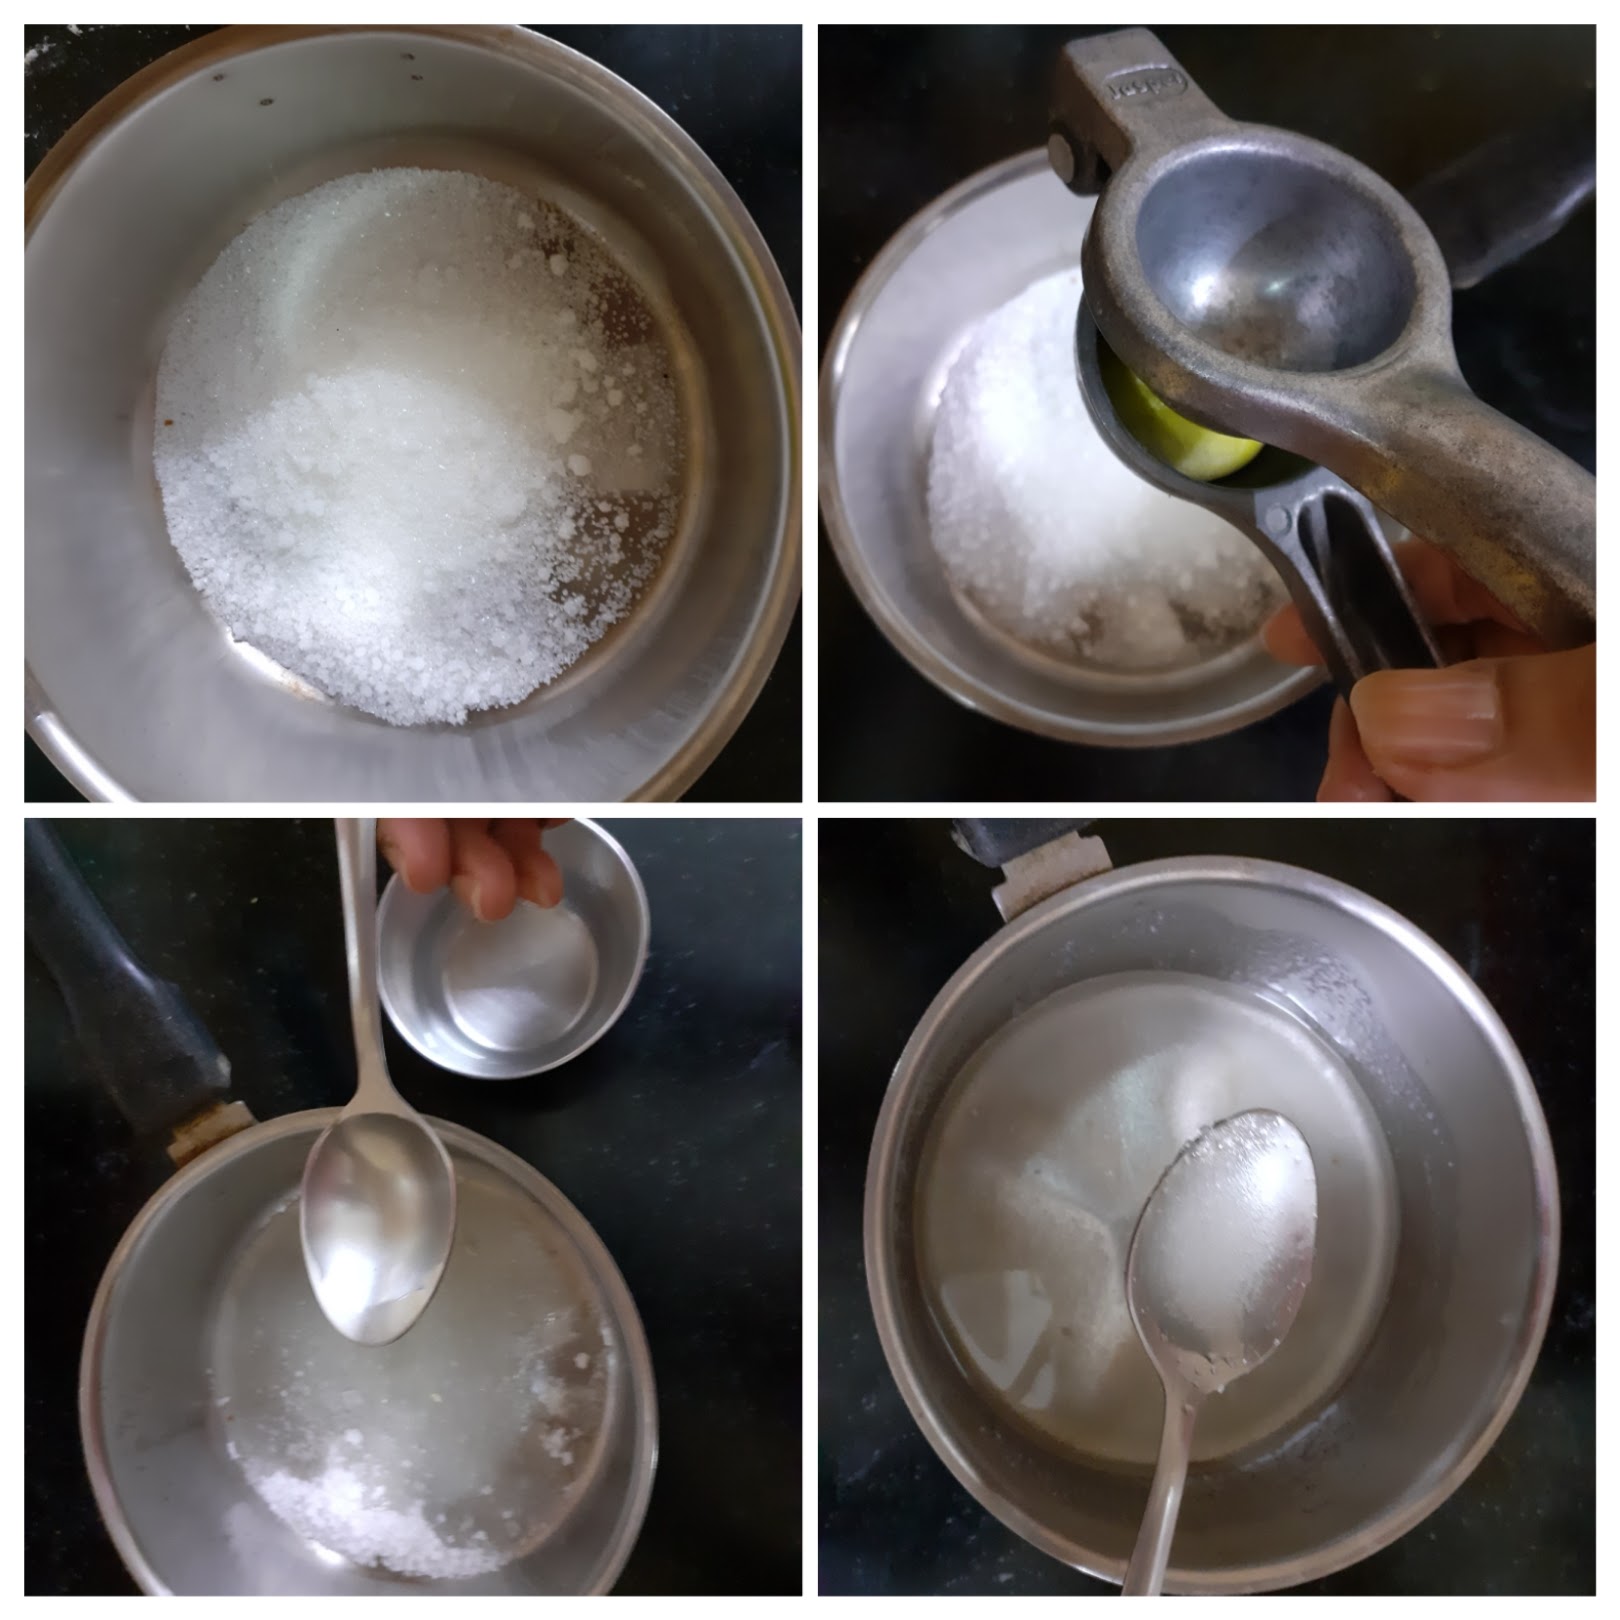
Sugar 1 cup
Saffron strands a few (optional)
Yellow food colour/turmeric powder for colour 2 pinches
Ghee 100 GM approx
Cardamom/ Elaichi powder 1/4 tsp
Almonds and Pistachio chopped a few
Directions:
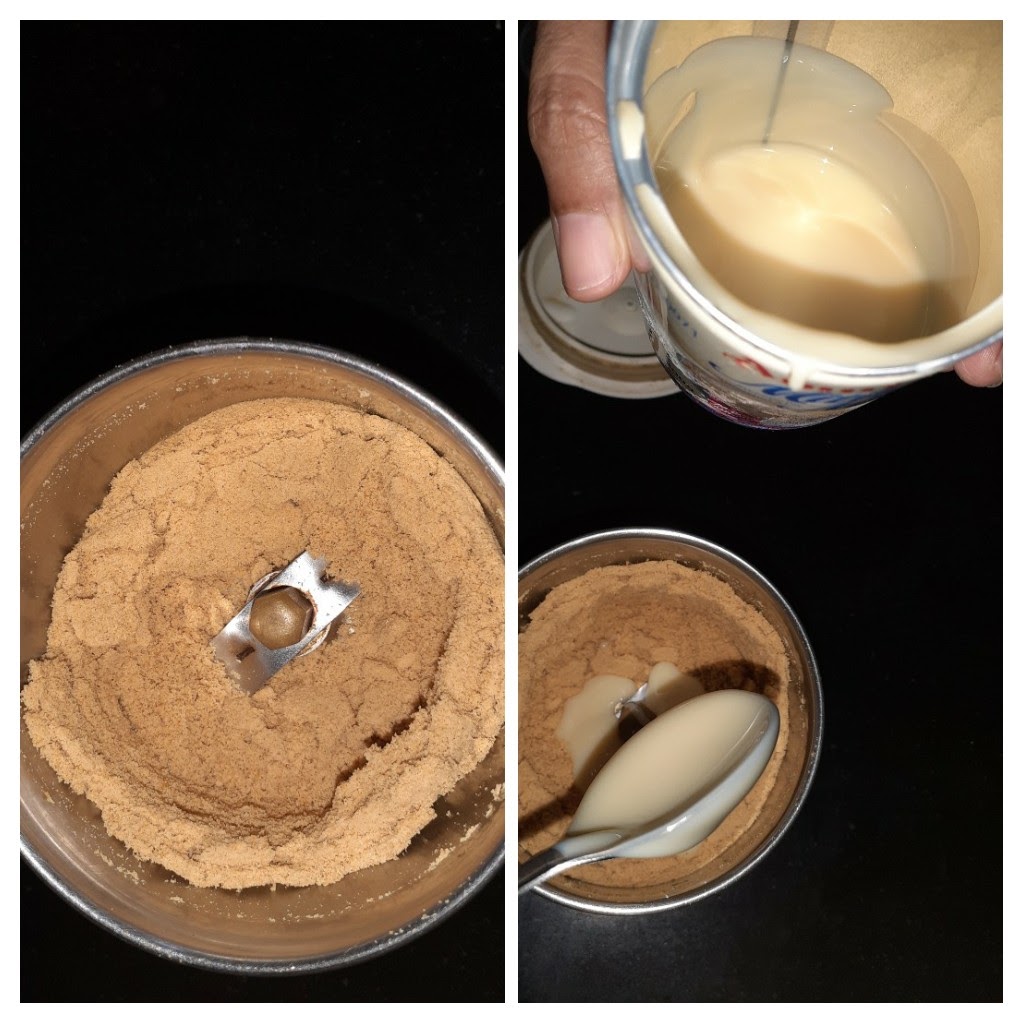
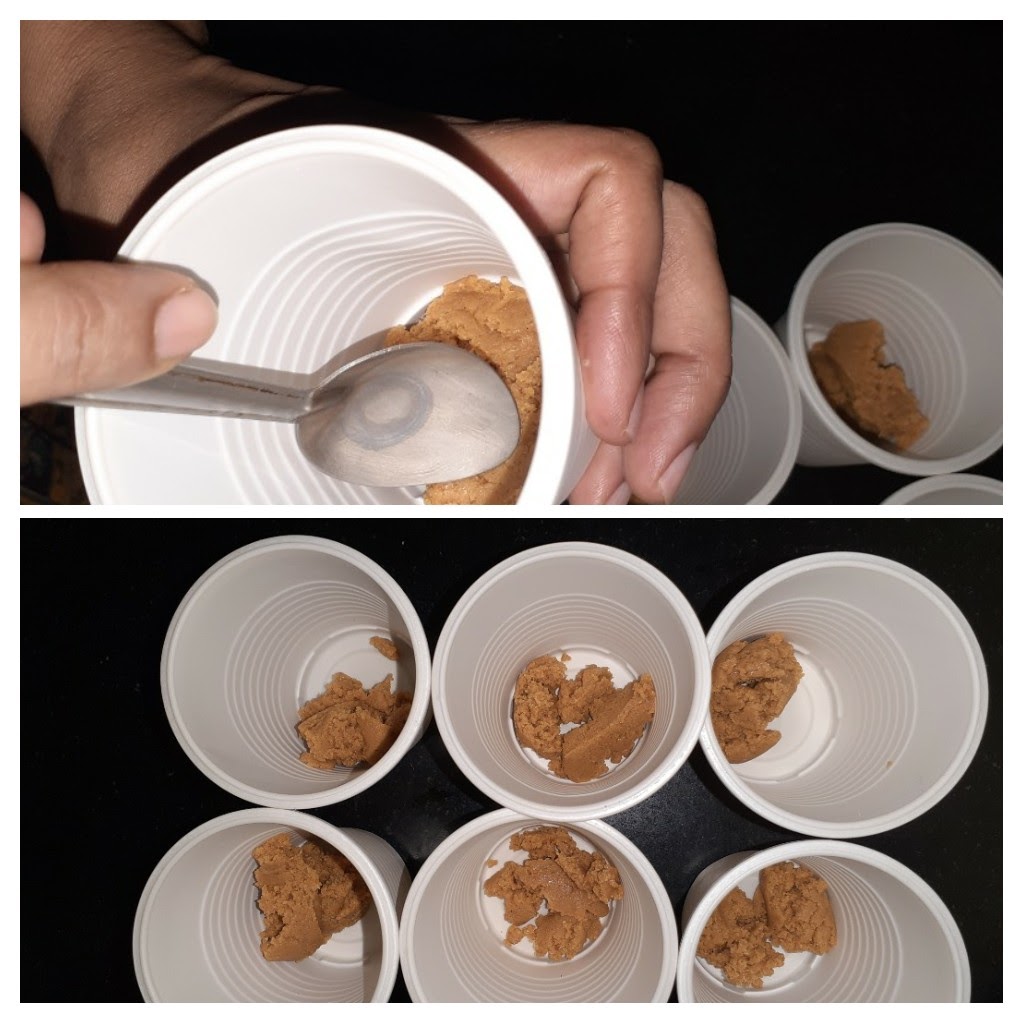
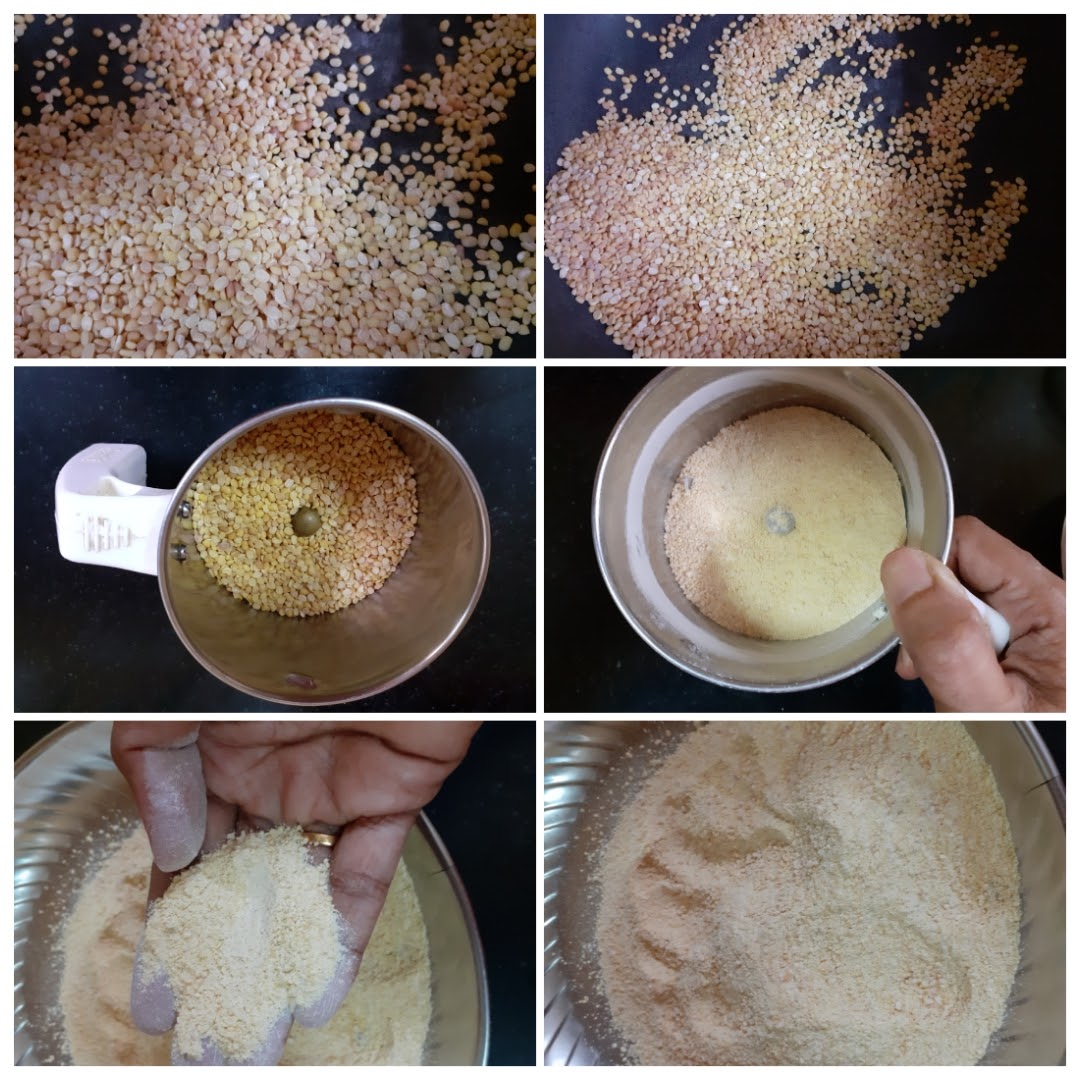
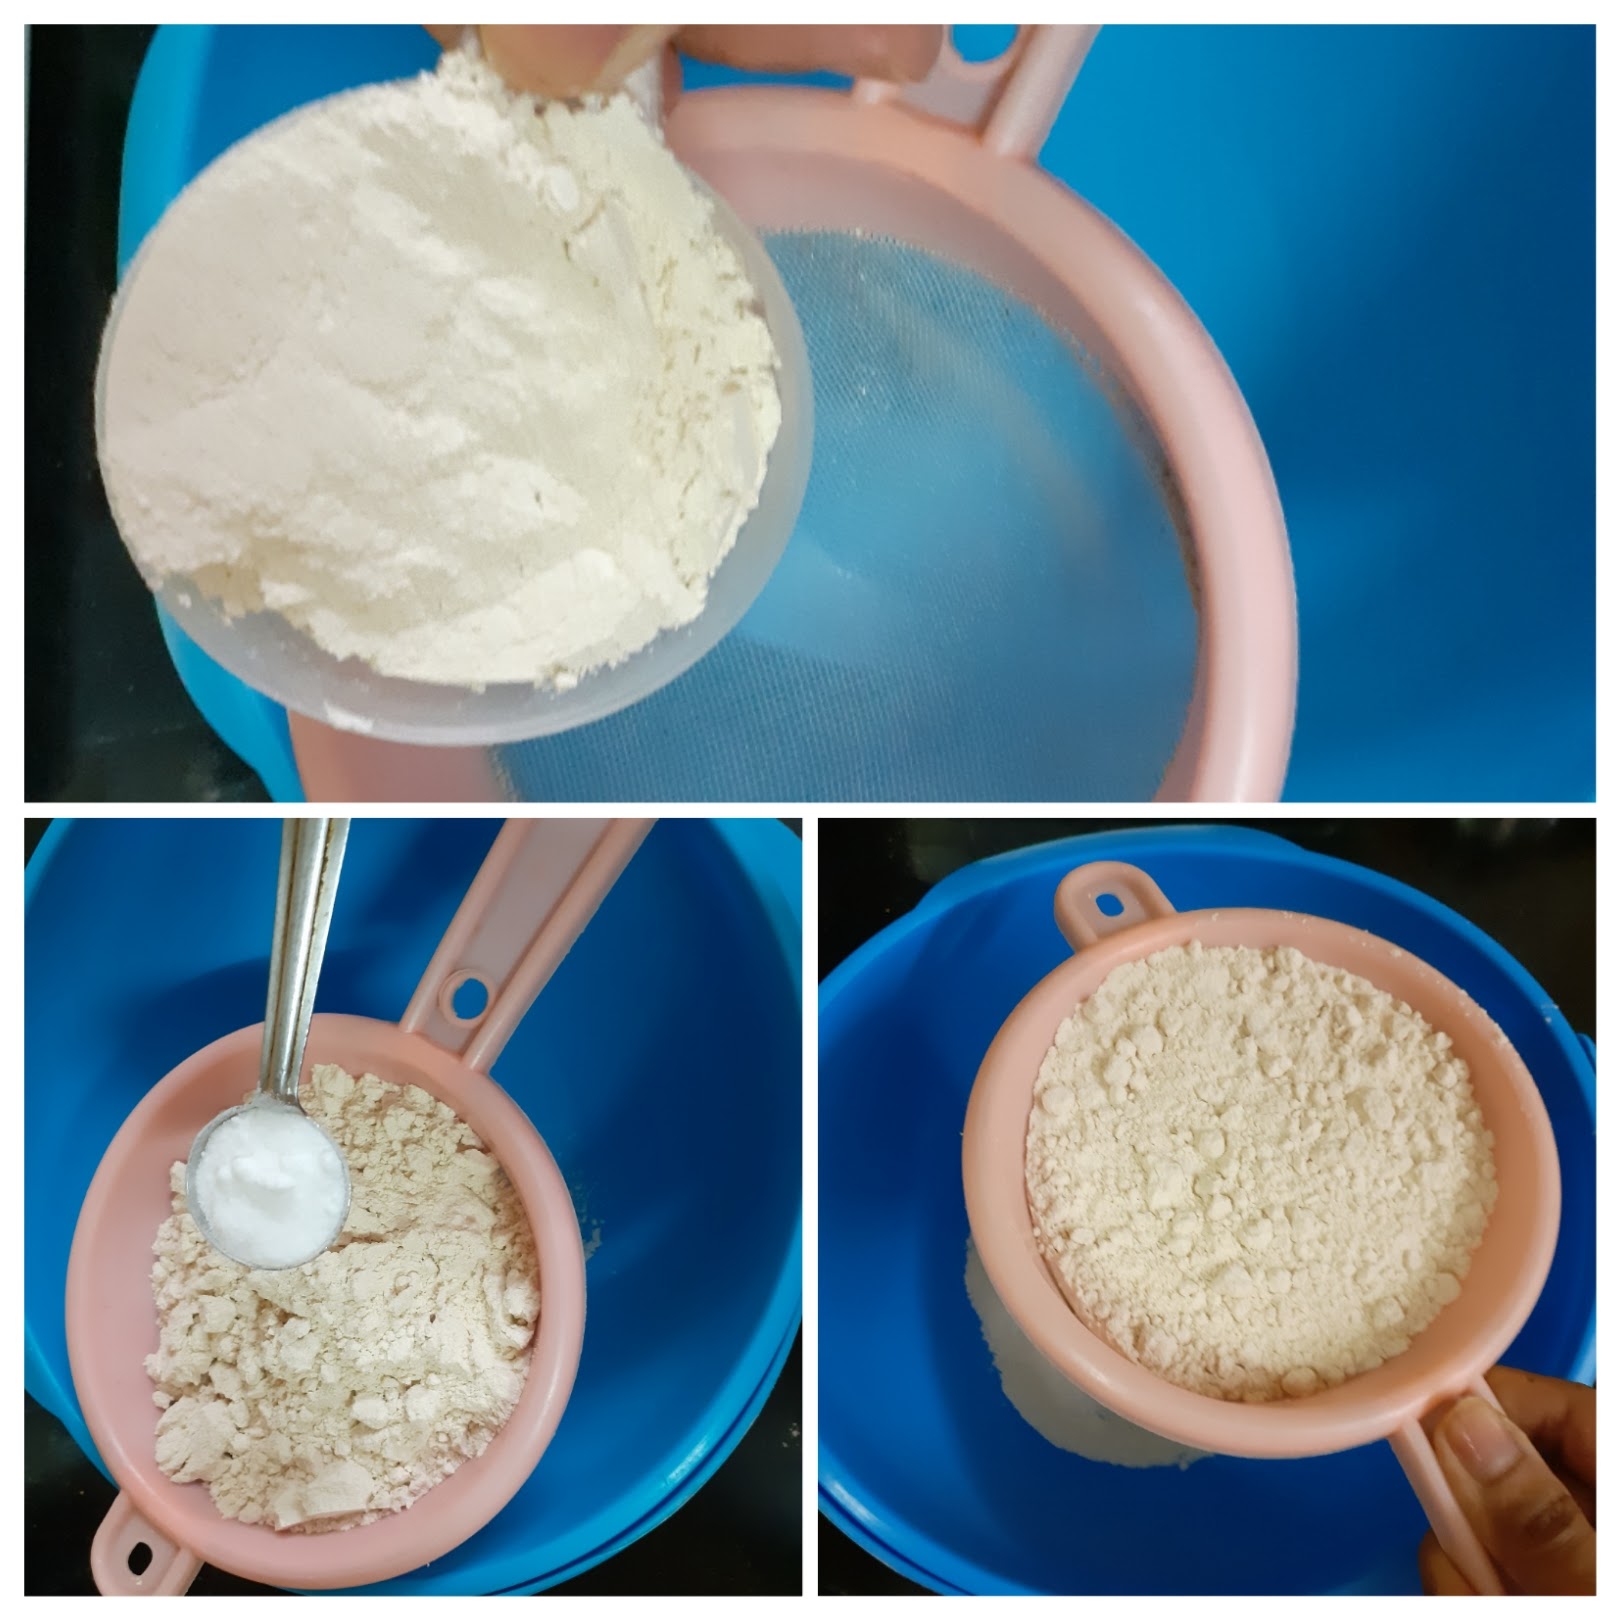
The foremost and important step is dry roasting the dal to a light brown colour. This has to be done patiently on low heat. On this depends the entire recipe. First put a pan/ kadai on flame and warm it. Now put the dal and start the roasting procedure by stirring constantly. This step can be done ahead. Cool the roasted dal and grind it in a blender. For a smooth texture of halwa grind it finely, for a grainy texture grind it coarse. Whole dal should not be visible. Now put this ground dal powder in a pan, add one cup milk, followed by 2 cups water, and stir to make it lump free. Now put the pan on the flame, add the food colour/turmeric powder, and start cooking the mixture on medium flame. Slowly the mixture will start thickening. If adding saffron strands, add now. Keep stirring gently, scraping the sides of the pan from time to time. Once the mixture thickens, check if there is any rawness in the smell. That is, if the dal smell/ taste is still coming. If yes, add another ladle of milk and continue to stir again. If your mixture has thickened and there is no raw smell or taste, add the sugar gently and start stirring again. As the sugar melts the dal mixture will liquefy. Don’t worry and continue to stir. The mixture will start thickening again. Now is the time to start pouring the ghee. Pour one ladle at a time and stir until the ghee is absorbed. Continue this process until no more ghee gets absorbed, but remains on the halwa. You will also notice that at this stage your mixture/ halwa no longer sticks to the pan/ kadai bottom, but comes out clean while stirring. Another way to tell the Halwa is done, is when you take a little of it in your fingers and try to form a ball, you should be able to do it. Add the cardamom powder and nuts and transfer the halwa to a container. The delicious Moong dal halwa is ready to relish .
STEPWISE RECIPE FOLLOWS:
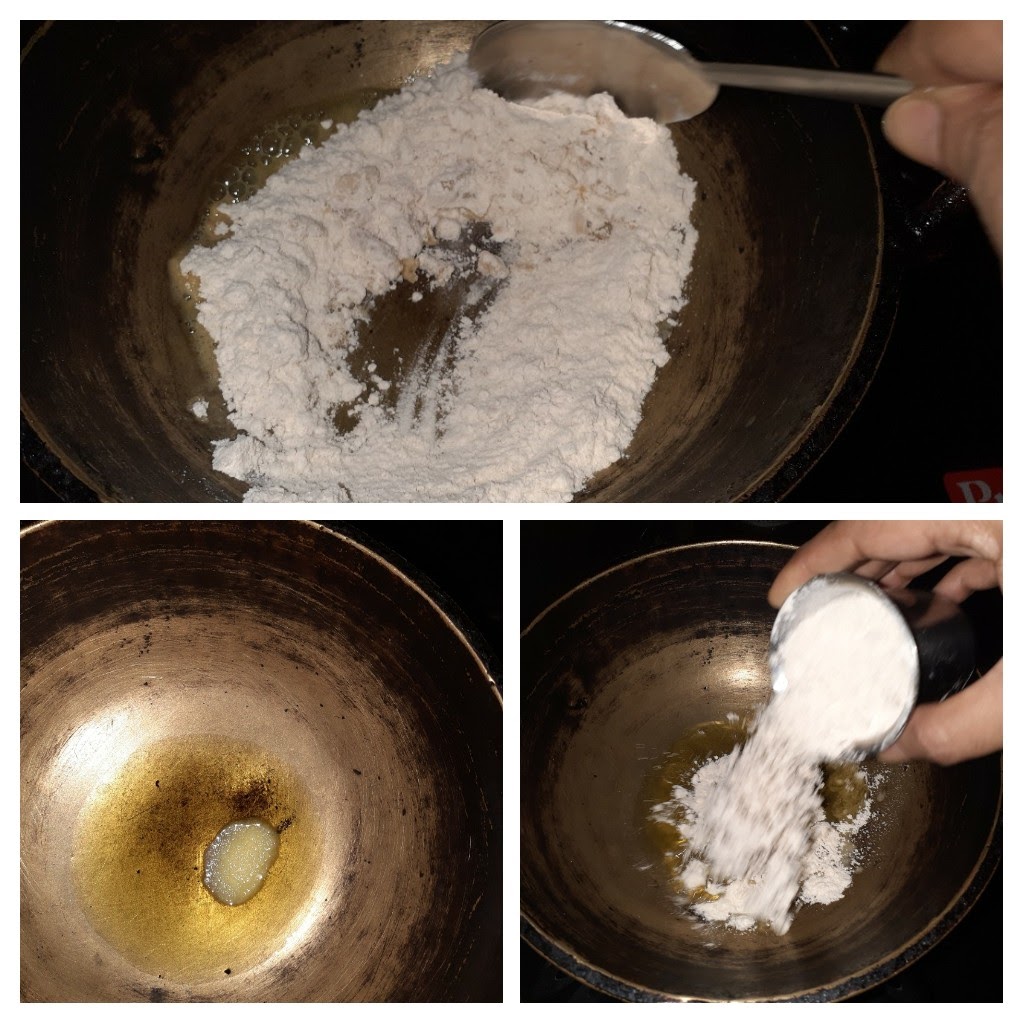
1. First out a pan/ kadai on flame and warm it. Now put the dal and start the roasting procedure by stirring constantly. This step can be done ahead. Cool the roasted dal and grind it in a blender. For a smooth texture of halwa grind it finely, for a grainy texture grind it coarse.
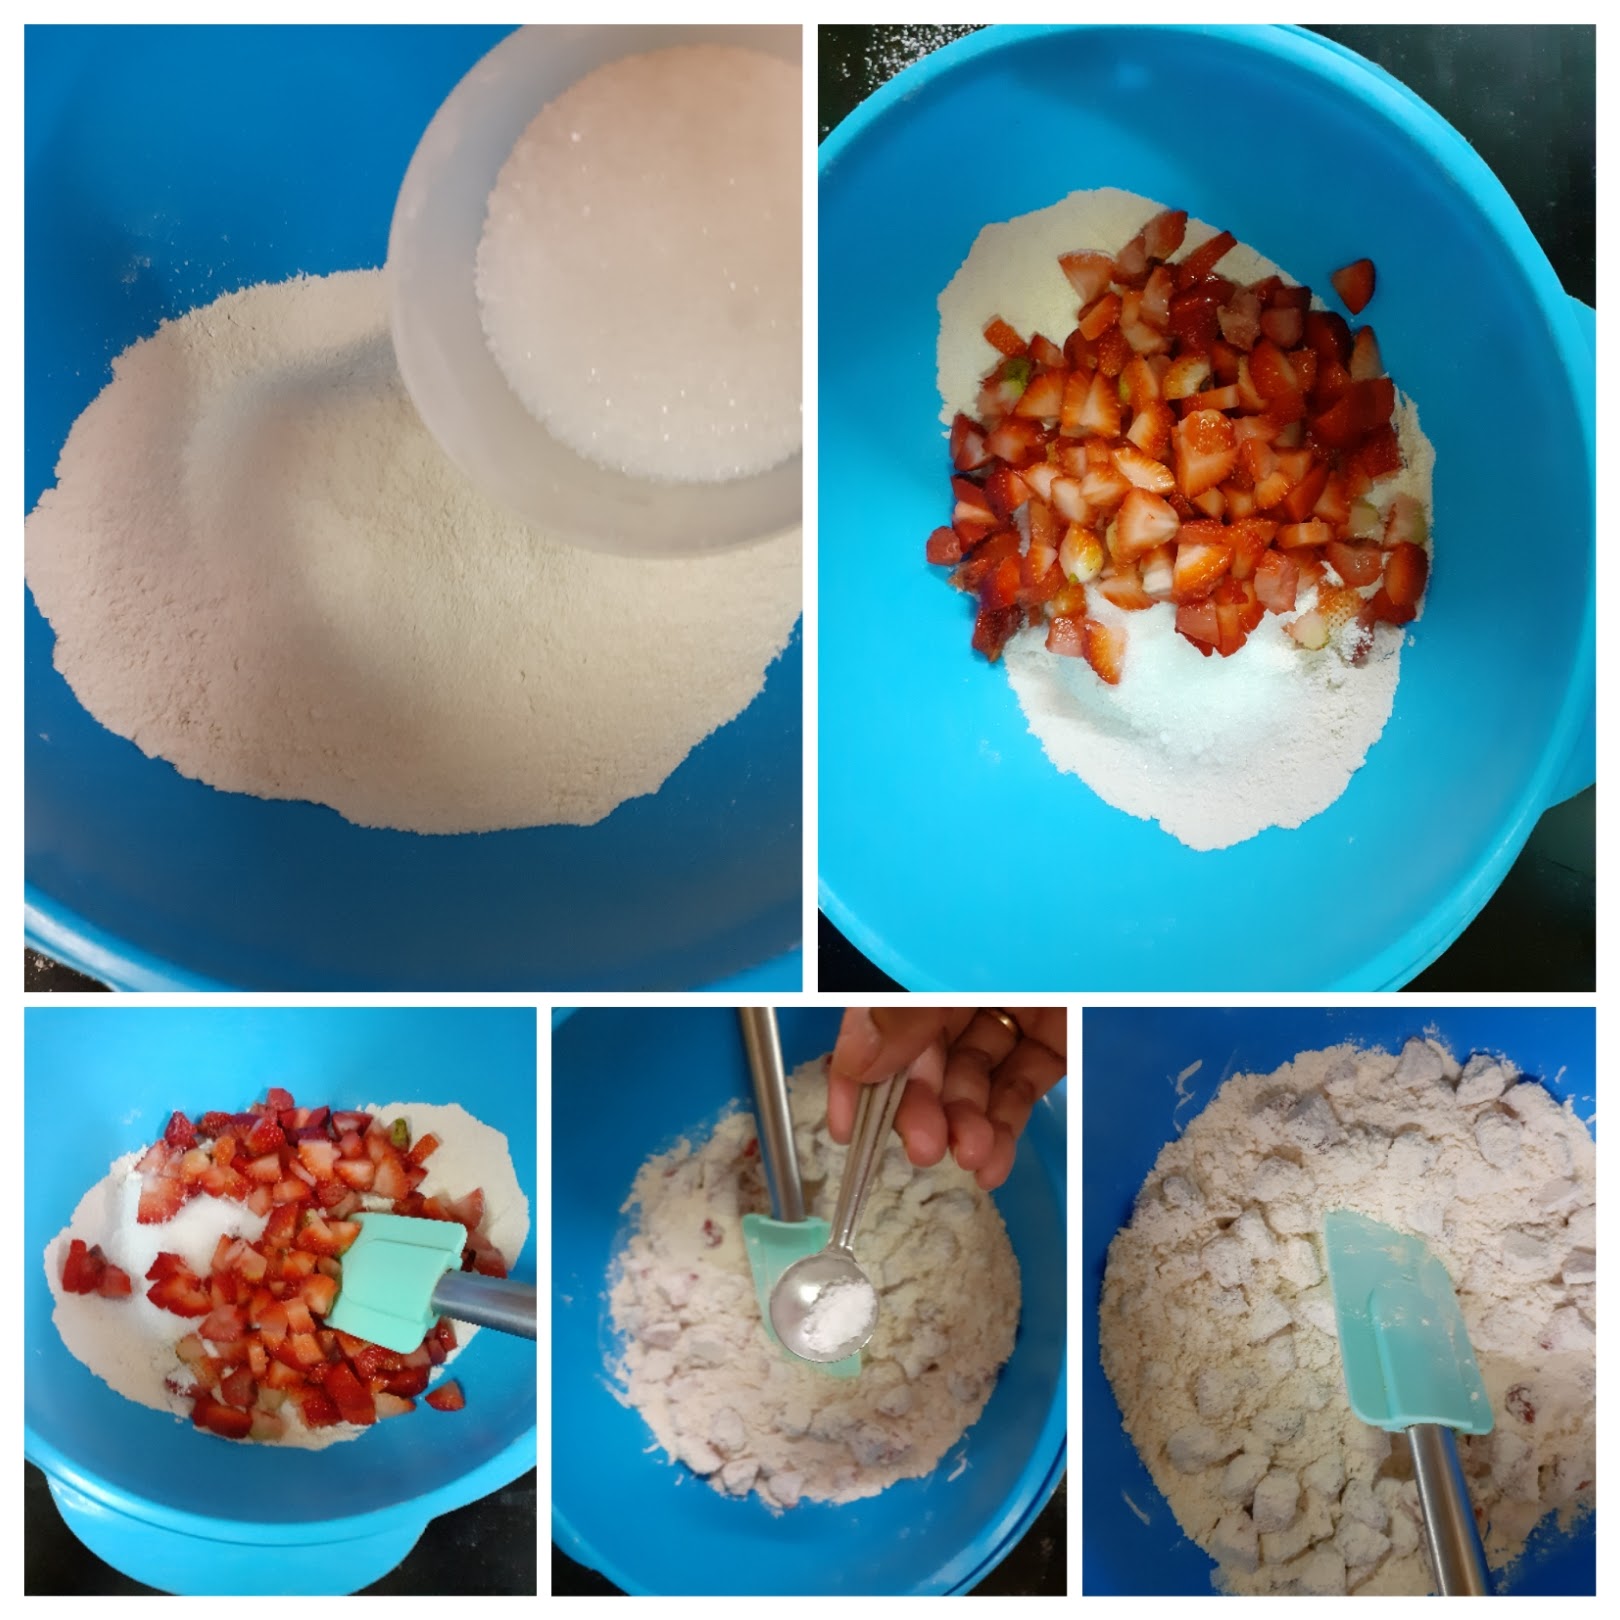
2. Now put this ground dal powder in a pan, add one cup milk, followed by 2 cups water, and stir to make it lump free. Now put the pan on the flame, add the food colour/turmeric powder, and start cooking the mixture on medium flame.

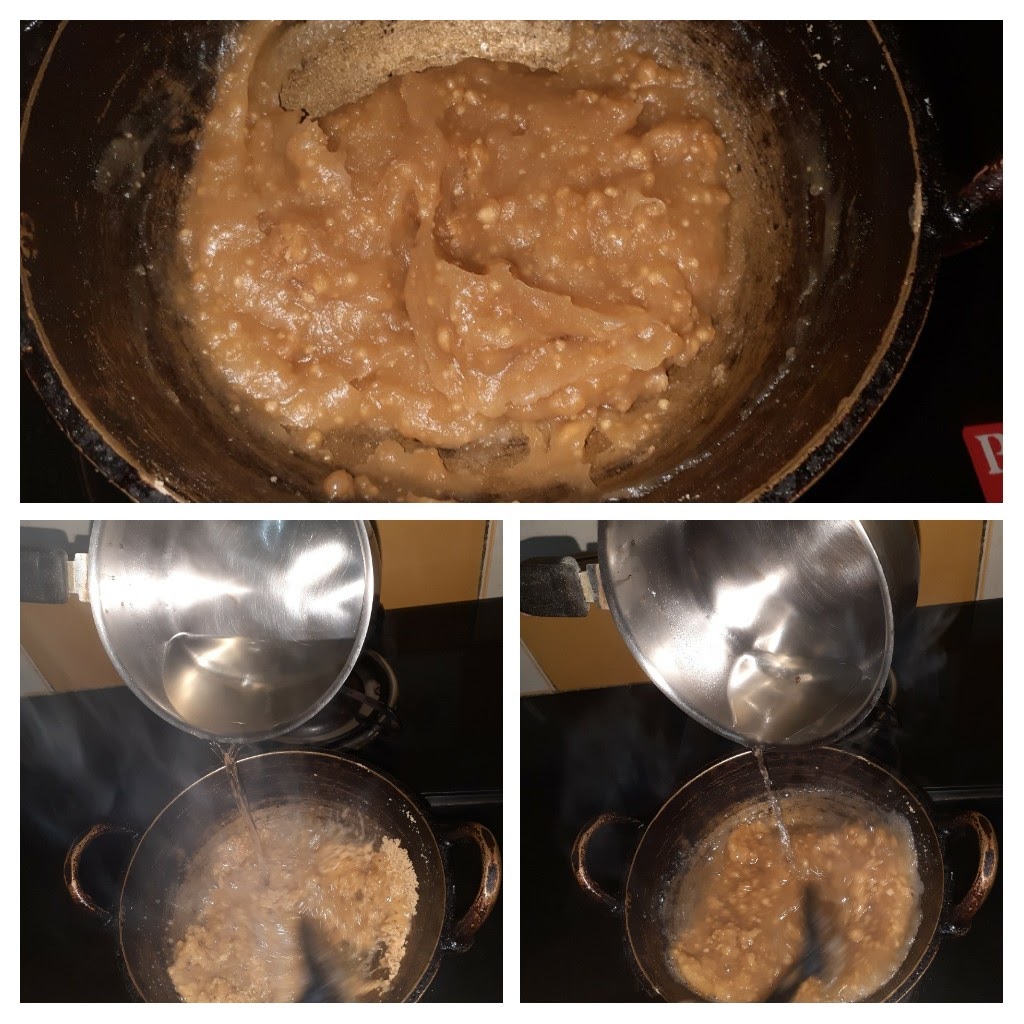
3. Slowly the mixture will start thickening. Keep stirring gently, scraping the sides of the pan from time to time. If adding saffron strands, add now. Once the mixture thickens, check if there is any rawness in the smell. That is, if the dal smell/ taste is still coming. If yes, add another ladle of milk and continue to stir again. If your mixture has thickened and there is no raw smell or taste, add the sugar gently and start stirring again.
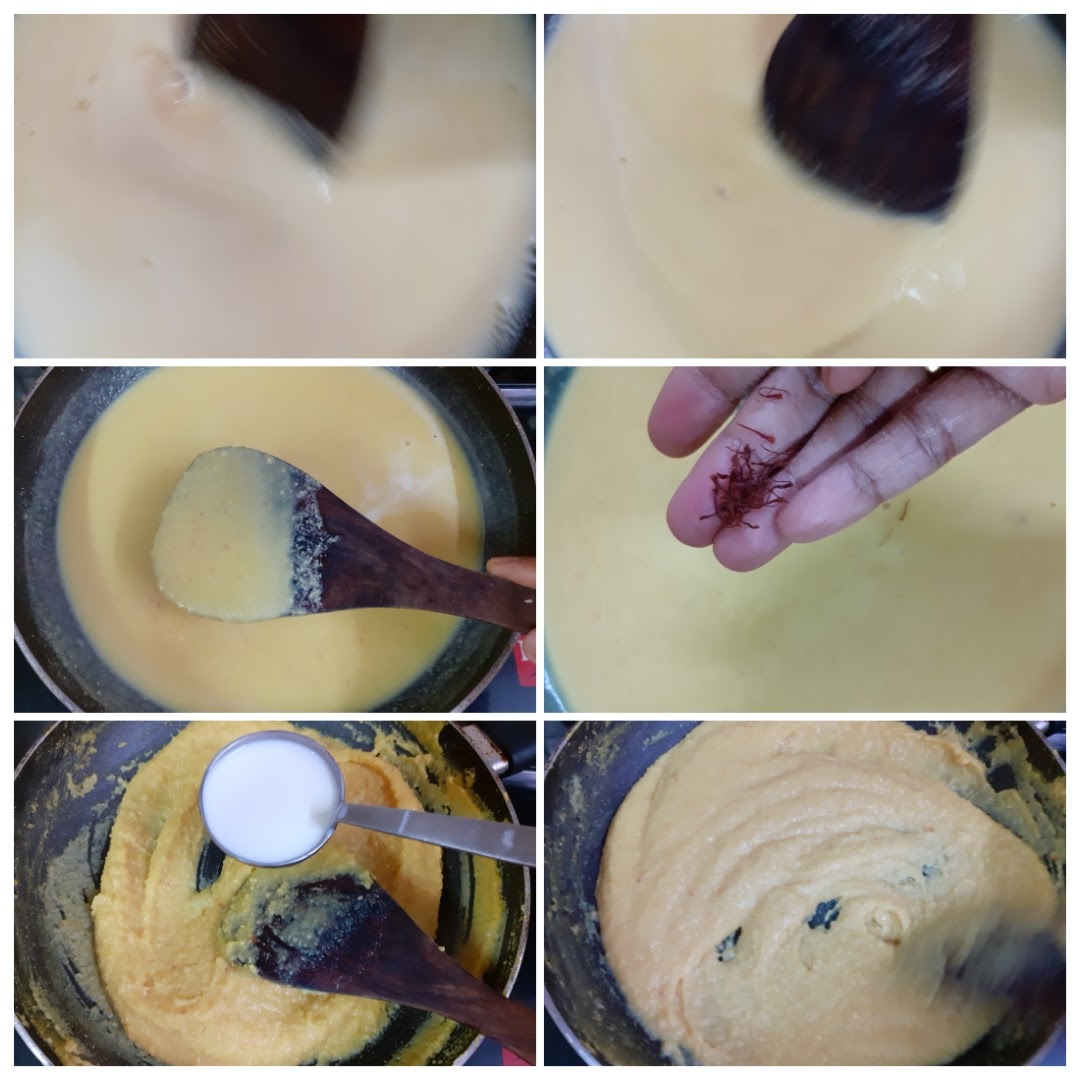
4. As the sugar melts the dal mixture will liquefy. Don’t worry and continue to stir. The mixture will start thickening again. Now is the time to start pouring the ghee. Pour one ladle at a time and stir until the ghee is absorbed. Continue this process until no more ghee gets absorbed, but remains on the halwa.
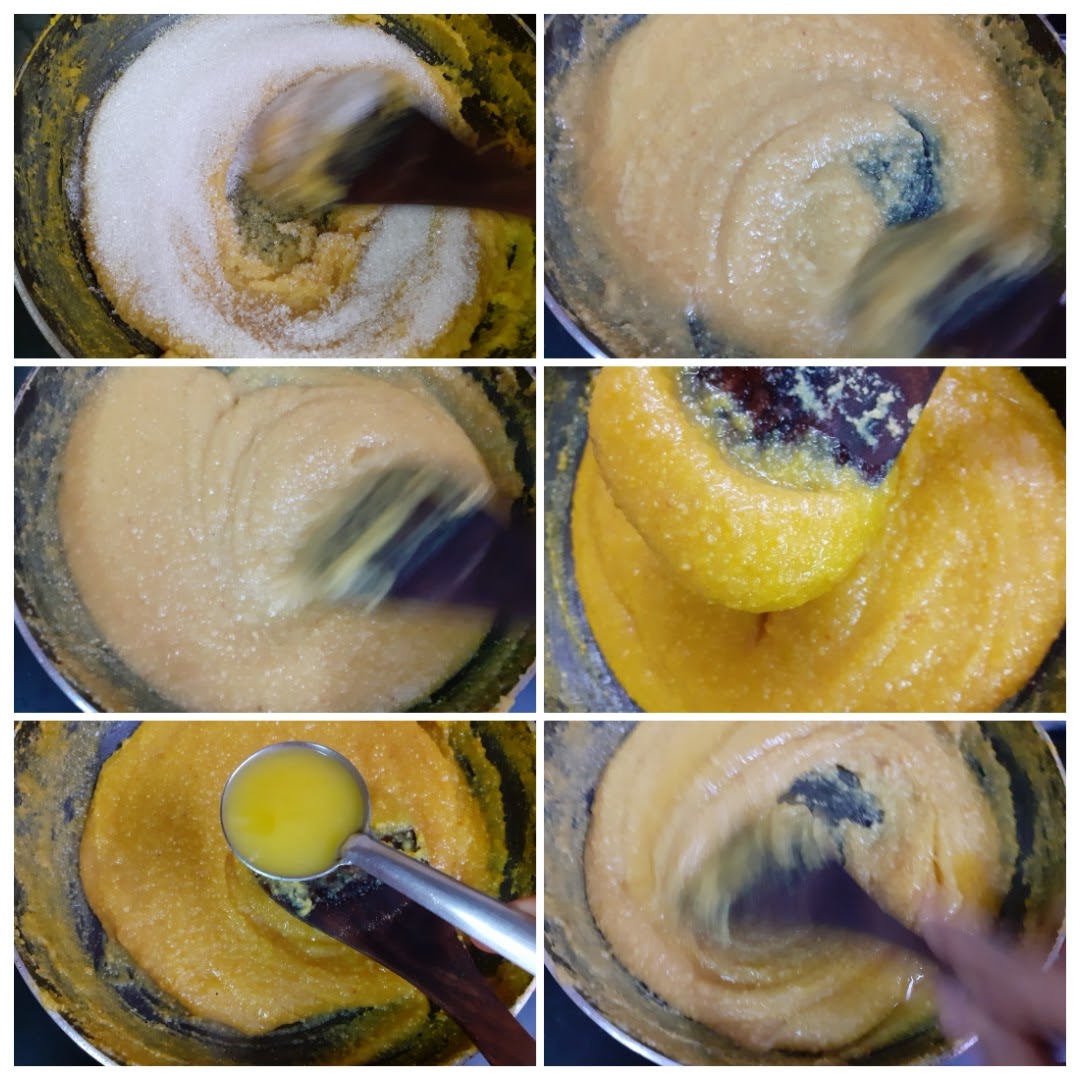
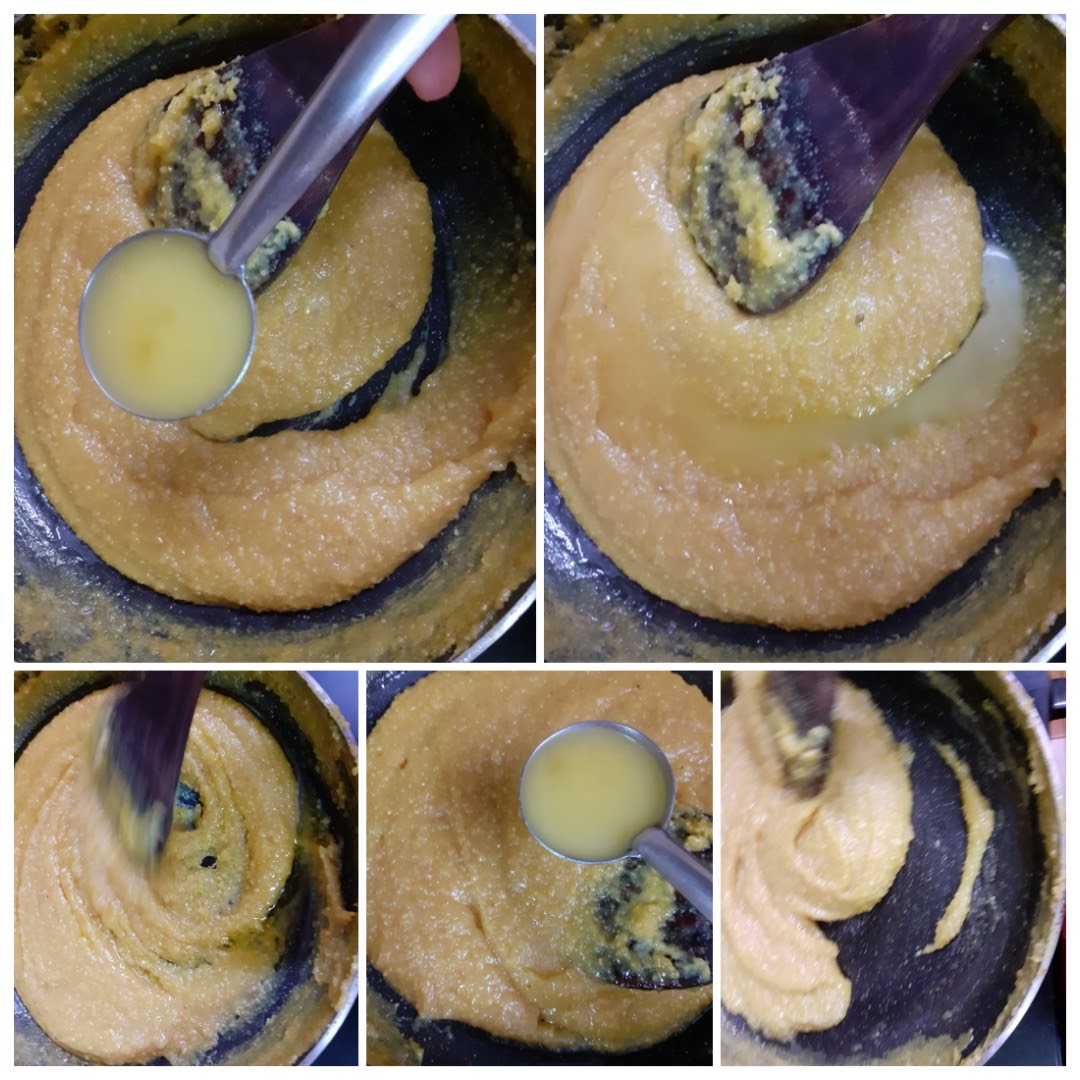
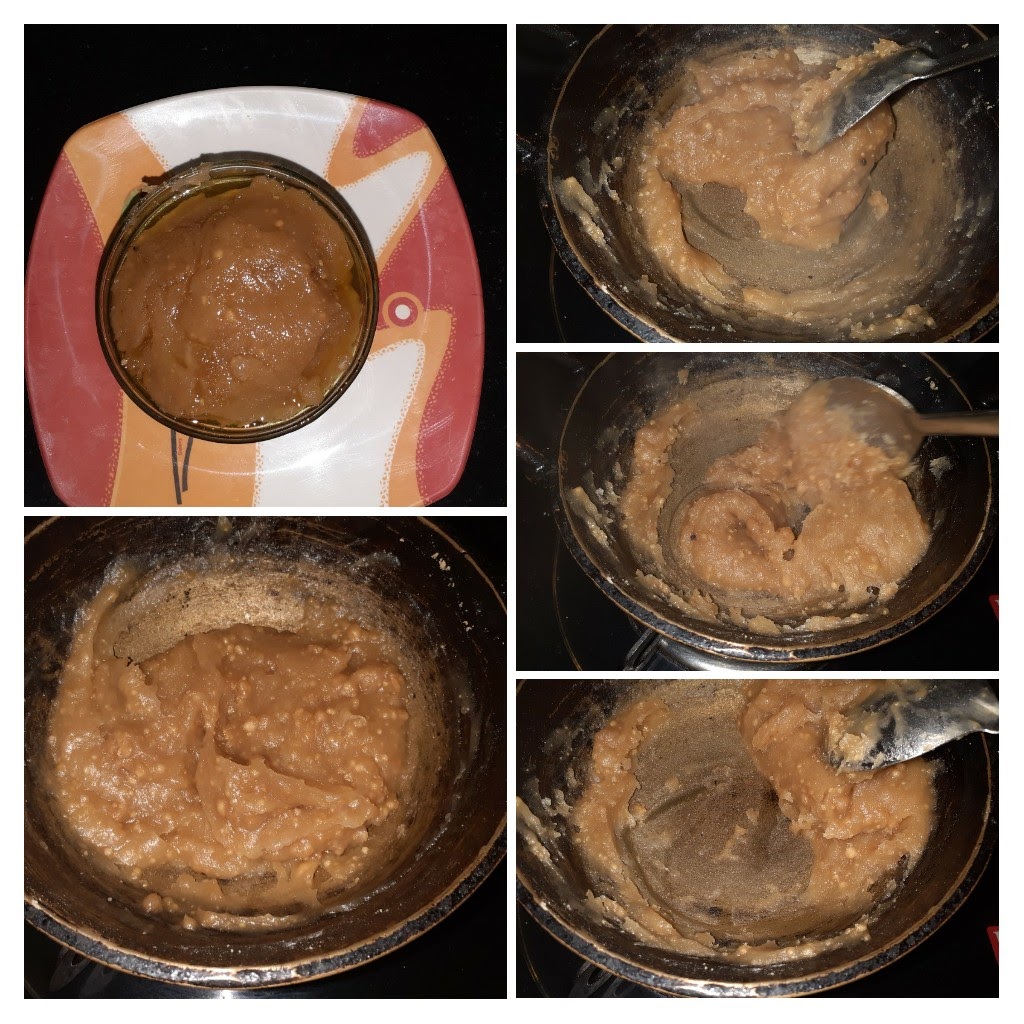
5. You will also notice that at this stage your mixture/ halwa no longer sticks to the pan/ kadai bottom, but comes out clean while stirring. Another way to tell the Halwa is done, is when you take a little of it in your fingers and try to form a ball, you should be able to do it. Add the cardamom powder and nuts and transfer the halwa to a container. The delicious Moong dal halwa is ready to relish .

If you tried this recipe and liked it please comment below. I would love to hear from you. If you have a query about the recipe email us and ill respond as soon as I can.
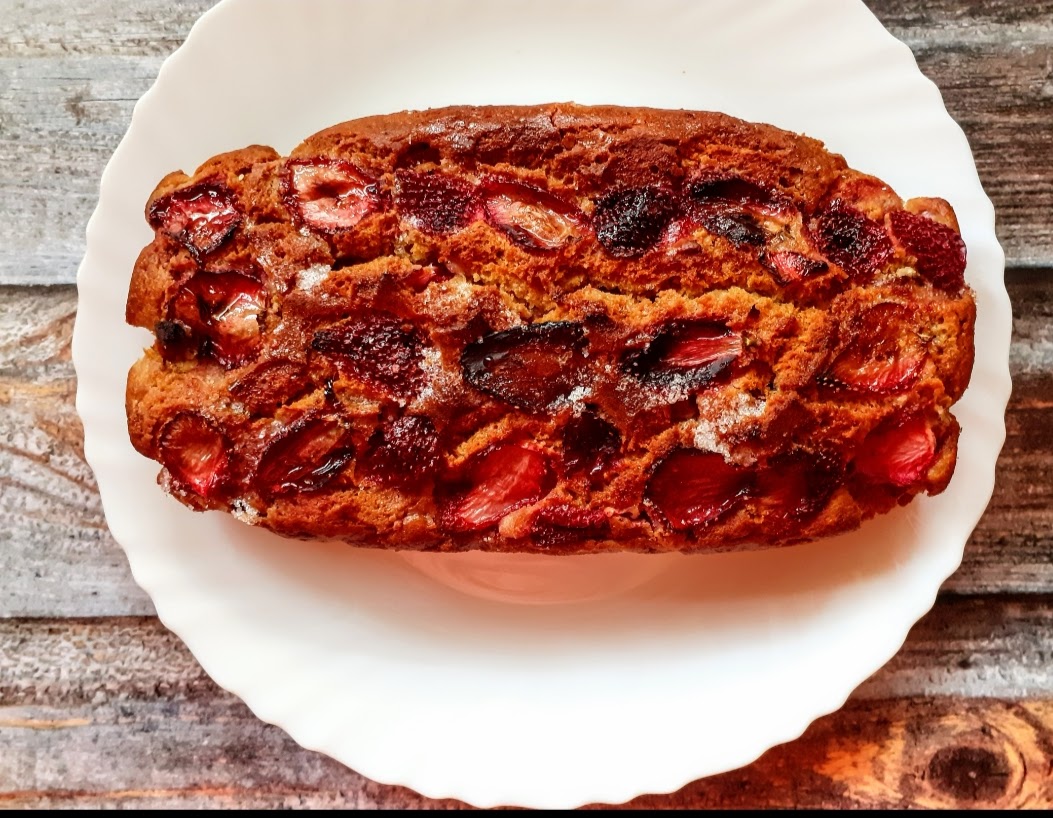
Strawberry & Lemon Loaf
Strawberries are in season now and what better way than storing up on all the goodness on what they have to offer by making, jams, desserts or just eating them fresh. But of course who can refuse a good bowl of Strawberry and cream…are you a berry addict like me? then this dessert/bread is certainly for you. If you are not a fan of berries you shall become one after tasting this????.
This as always is a one bowl recipe and one of the simplest. I have used Whole wheat flour in this recipe, which can be easily swapped with Maida/refined flour if you prefer. A simple dish does not need much of a description I believe, therefore lest get to the recipe directly.
While you are here do check out my other bakes like- Millet Cookies, Easy 2 way Muffins, Upside down Orange Vanilla cake, Oatmeal Cookies, Baked Samosa Pie, Apple Crumble, Pineapple Jam Tart, Blueberry Cheese cake and more…
Here is the recipe for Strawberry Loaf for you-

Apple Cake (Tea Cake)
Until recently I did not know that such delicious cakes could be made using Apples. I mostly stuck to making the Apple Crumble. I came across this recipe some time ago, and as you know I have to try it thrice without errors for it to feature on the blog. So here is the recipe that is foolproof, also no whisking, just mixing, so mess at all.
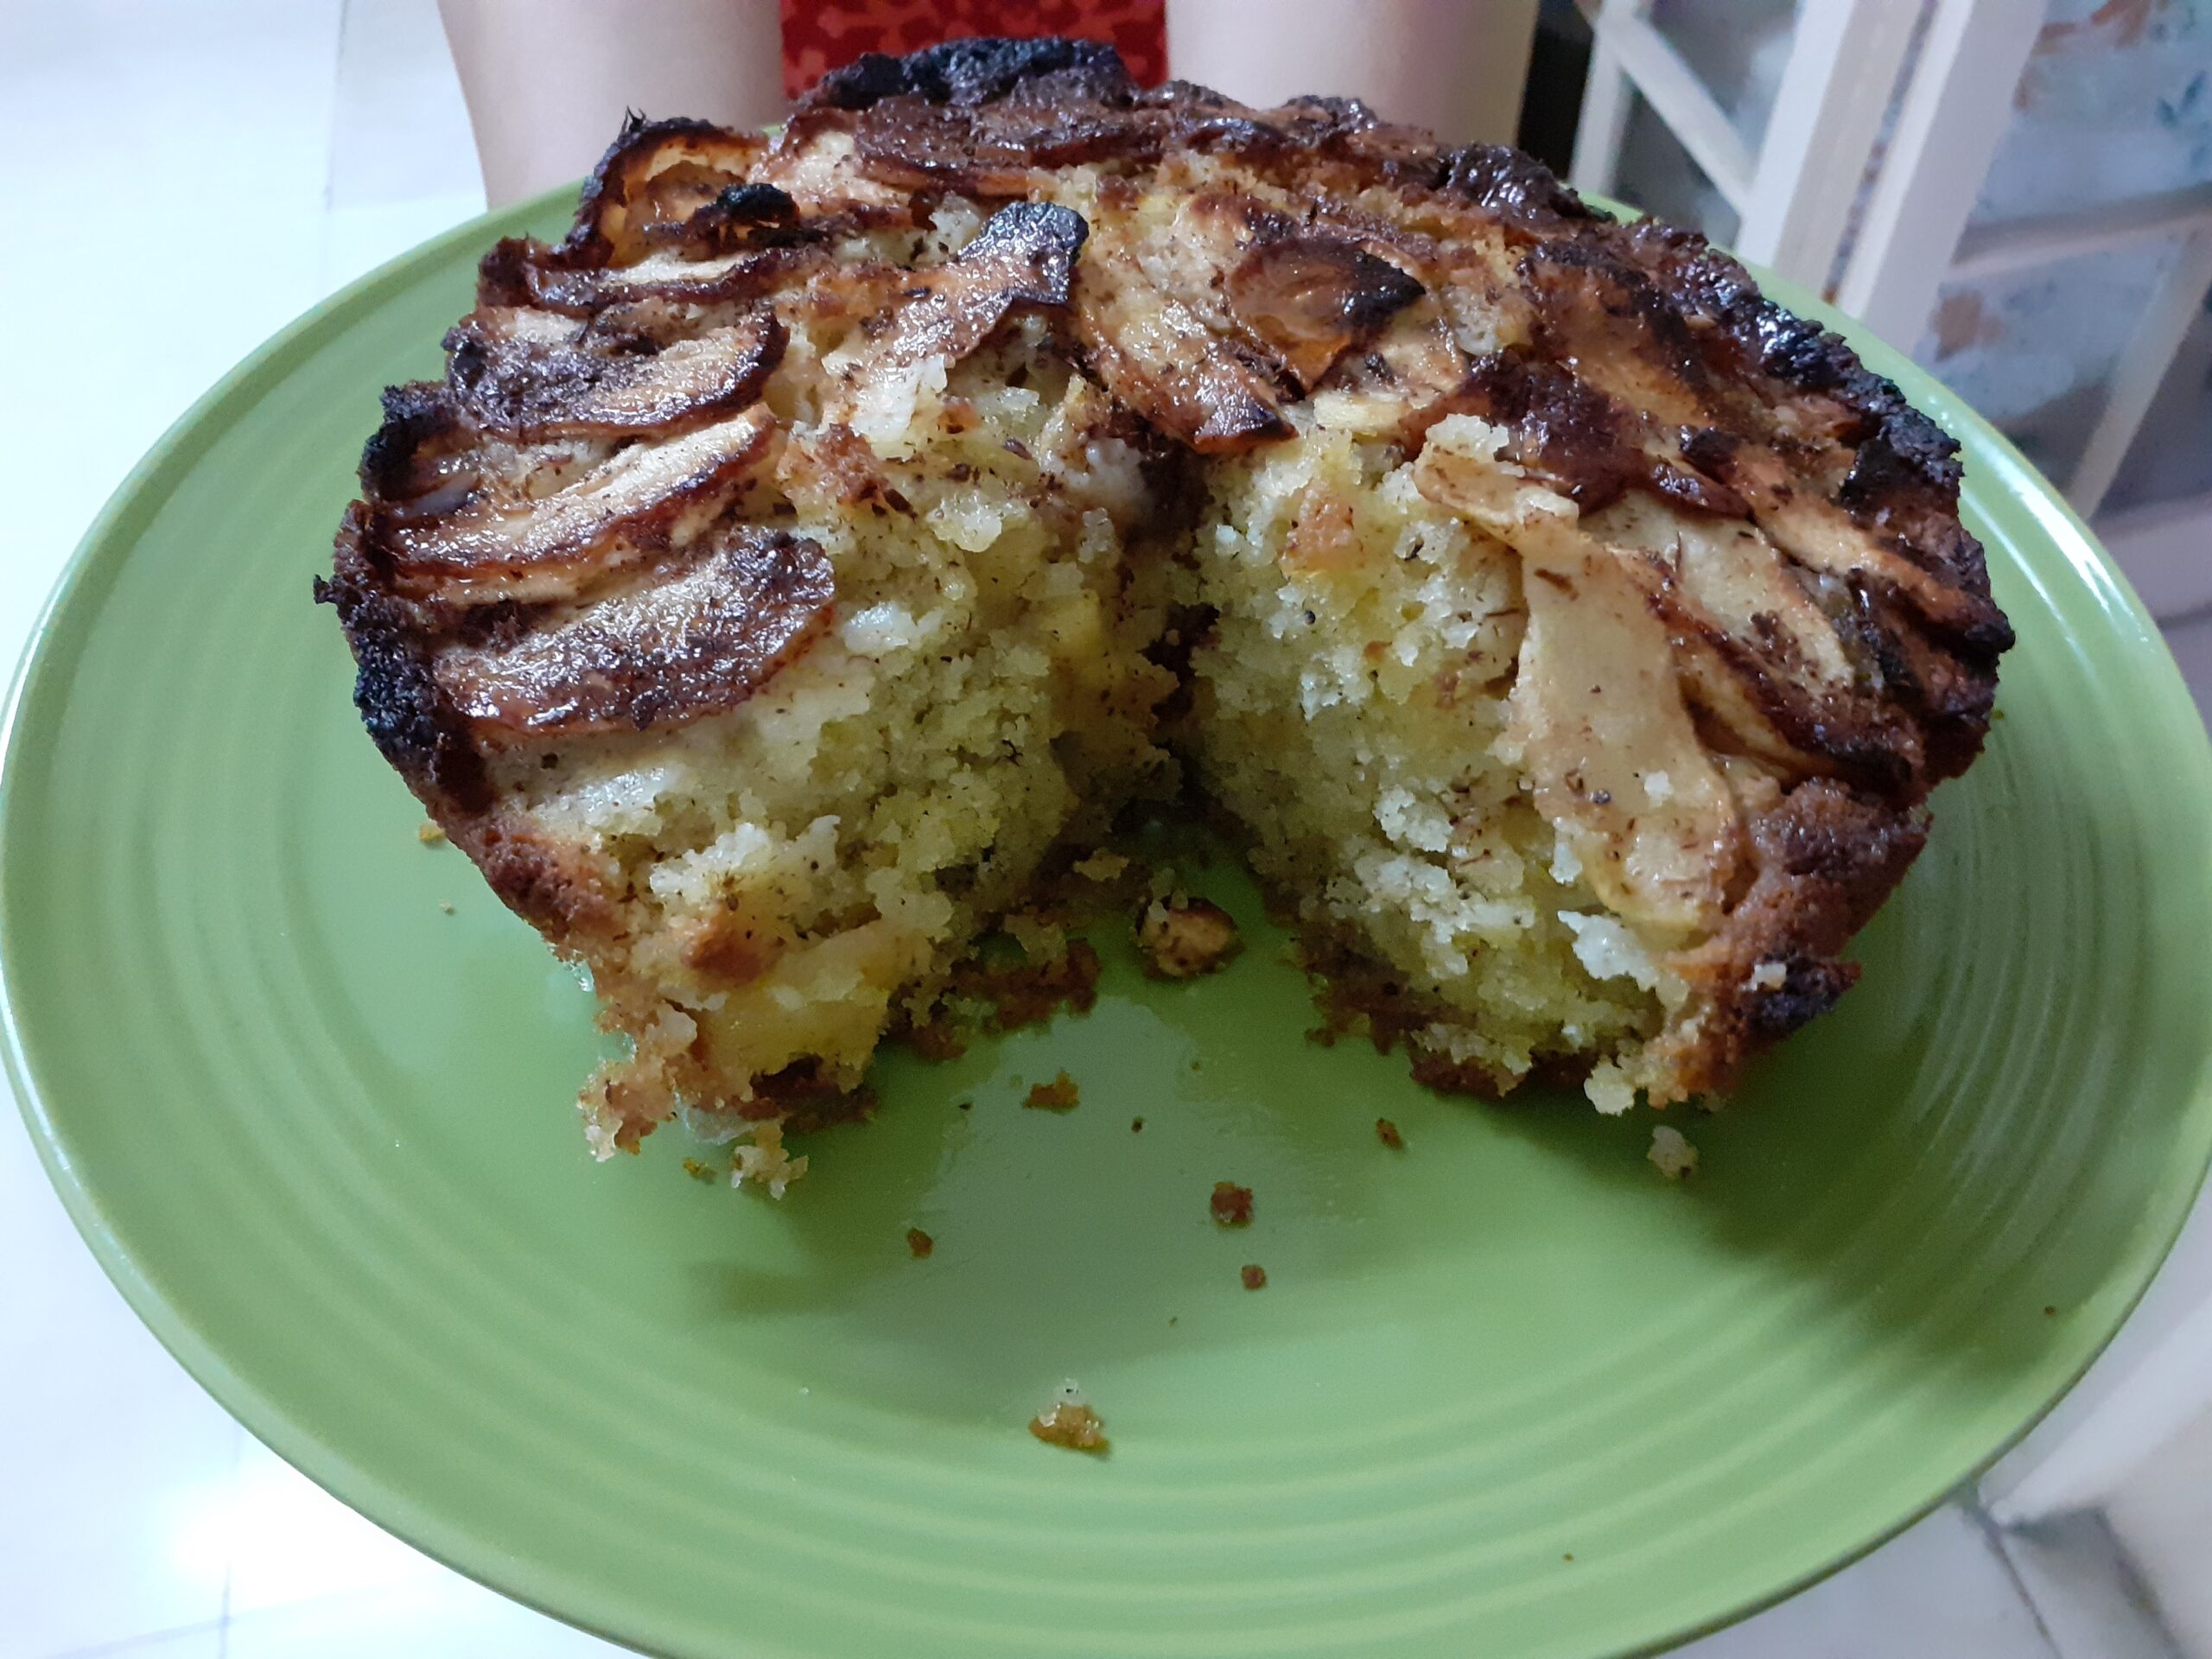
This cake has a very delicate flavour and is a crumbly cake, it is very light and a great tea time cake. What more, it is healthy and kids will love it( you could just drizzle chocolate sauce or Nutella over it for them). It tastes best when warm and keeps good for 2 days at room temperature. Just warm before you serve and it is fresh again.
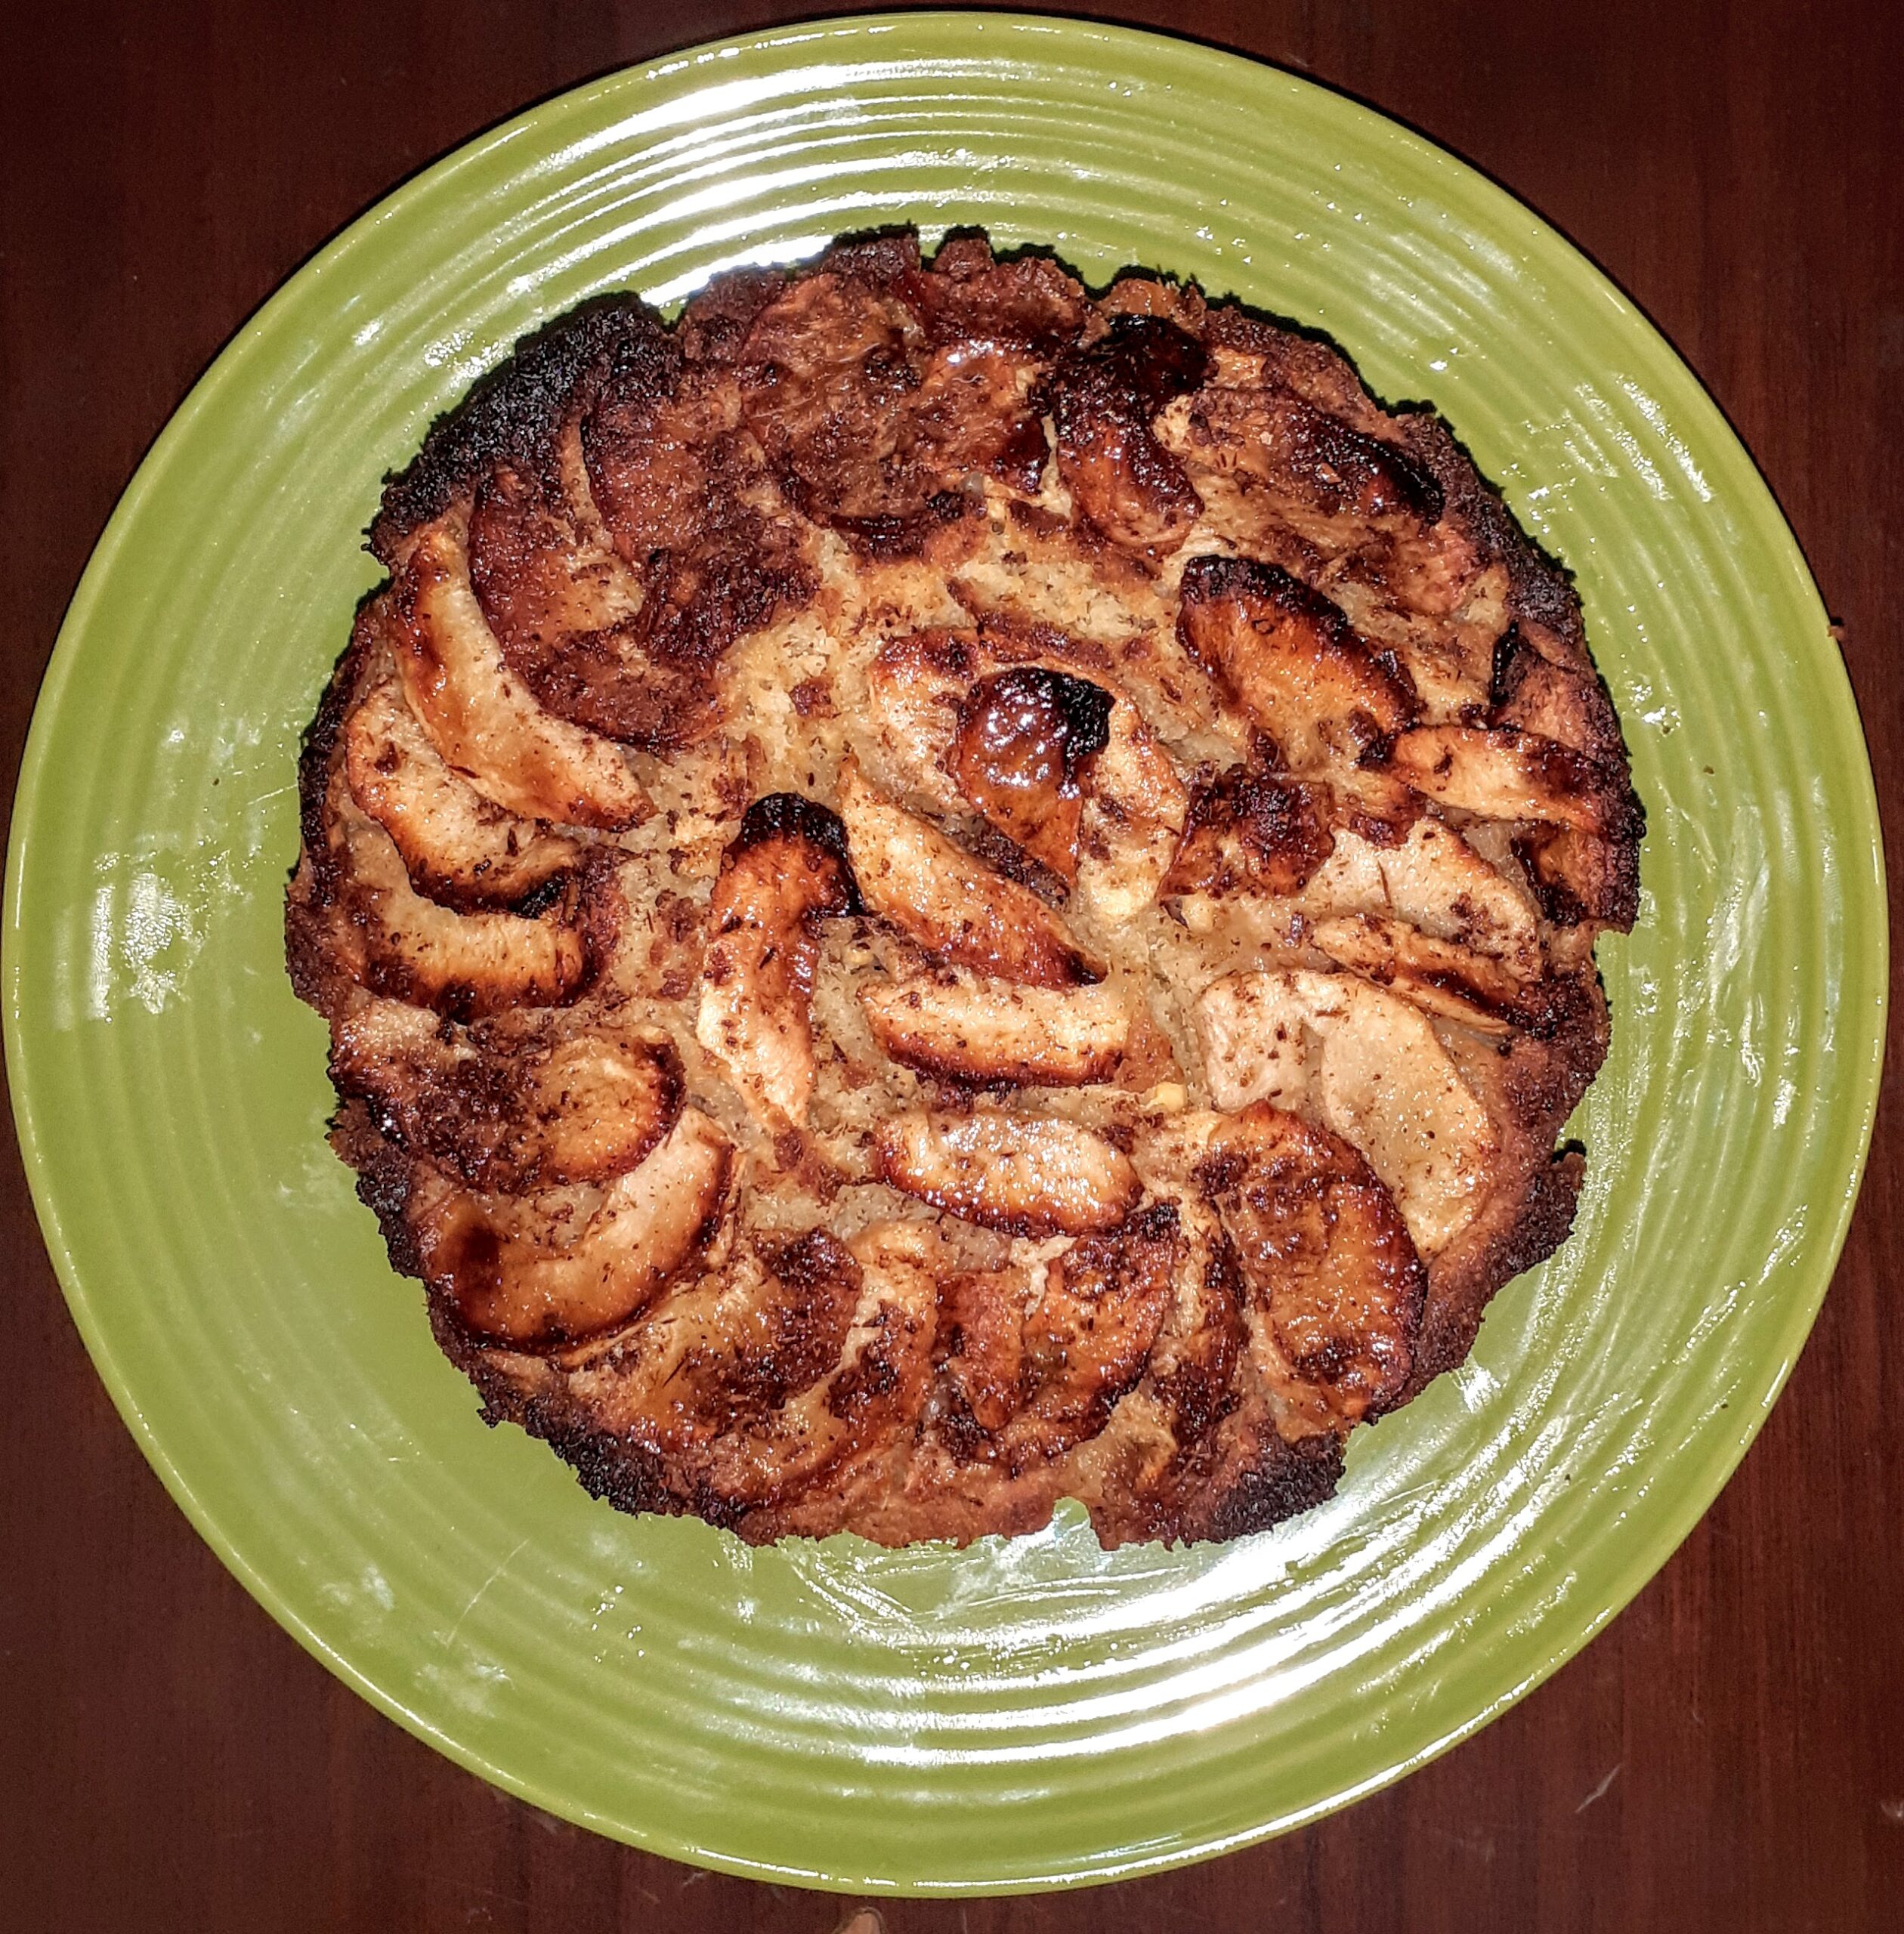
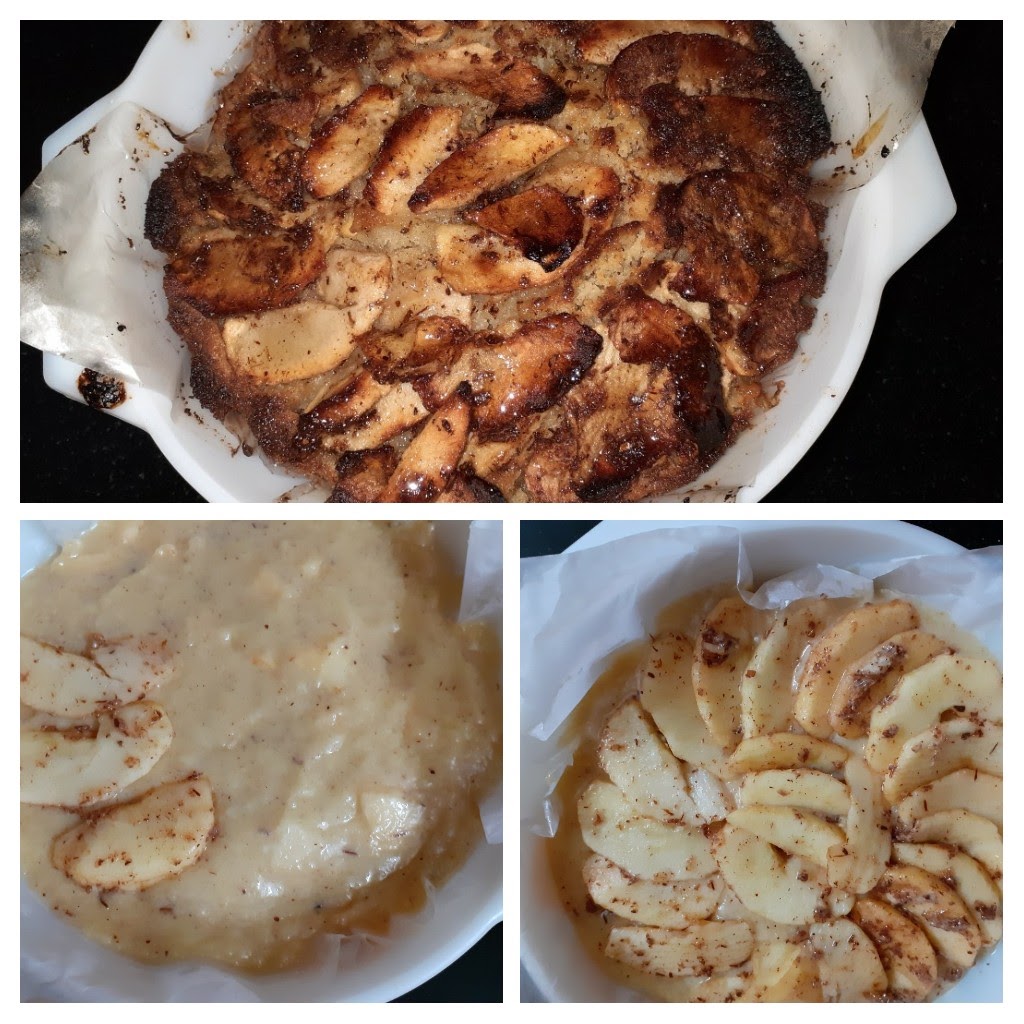
The apple slices that you see in the picture make it look sophisticated, but it is not such a difficult cake to make. The apple slices on top can be excluded altogether, as the cake batter has them already, but I like them with a lot of apples and the glaze and hence I make it this way.
While you are here please check out my other cake recipes like Blueberry Cheesecake, Nutella Fudge brownies, Apple Crumble and Pineapple Jam Tart.
Here is the recipe of Apple Cake for you-
Ingredients for coating apples:
Apples 3 large( any variety) cut half to cubes and half of them in slices.
Cinnamon powder 3 tsp( divided)
Butter 3 tbsp ( divided)
Sugar 2 tbsp (divided)
Dry Ingredients:
Flour/ Maida 1.5 cups
Baking powder 2 tsp
Salt 1/2 tsp
Wet Ingredients:
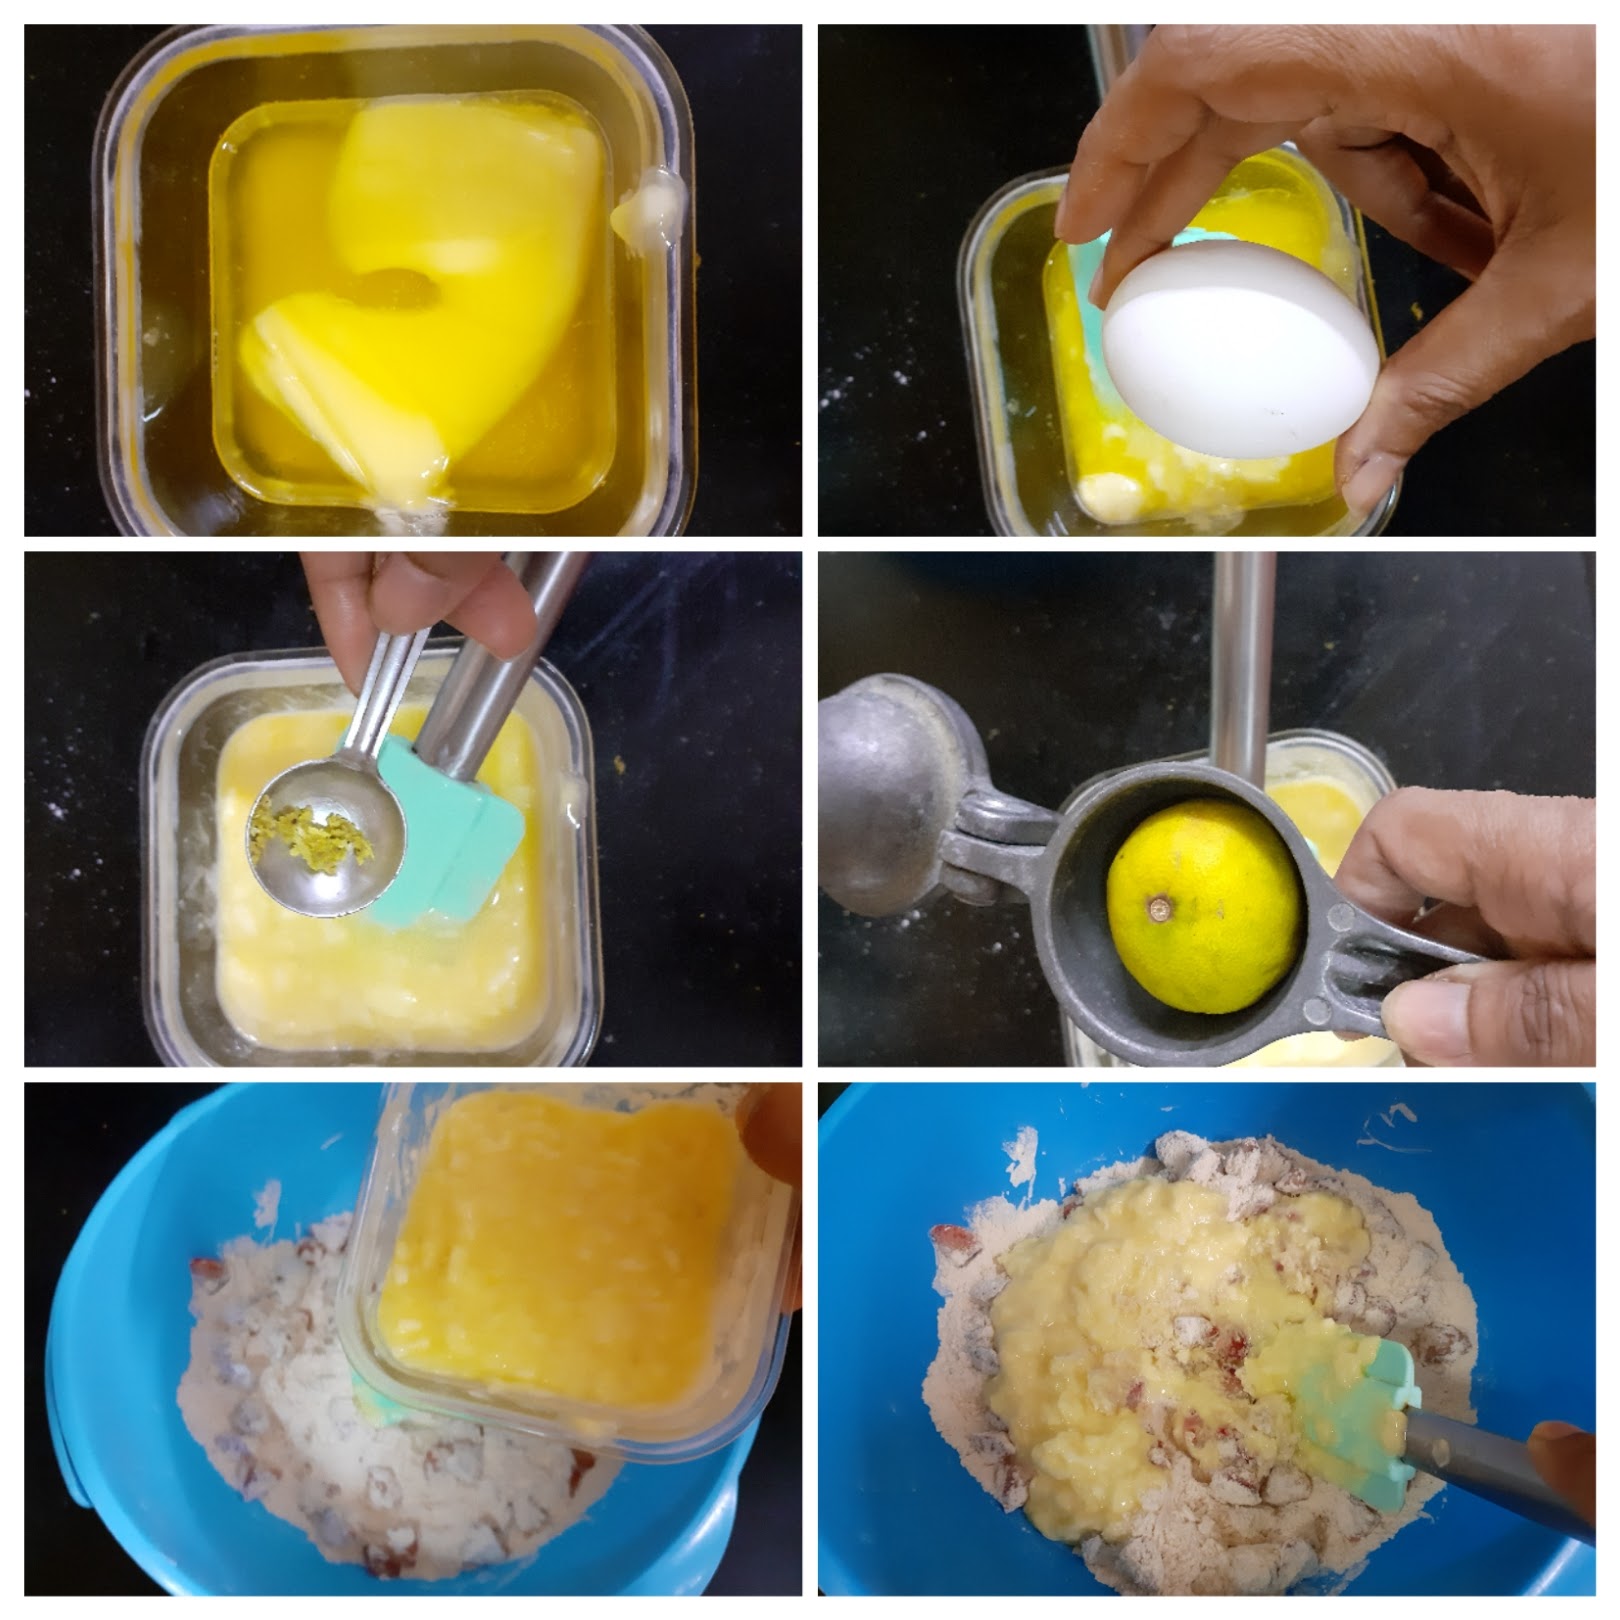
Butter 60 gm melted
Oil ( refined) 1/2 cup
Eggs 2
Sugar ( white) 3/4 cup
Vanilla essence 1 tsp
Glaze:
Honey 2 tbsp.
Directions:
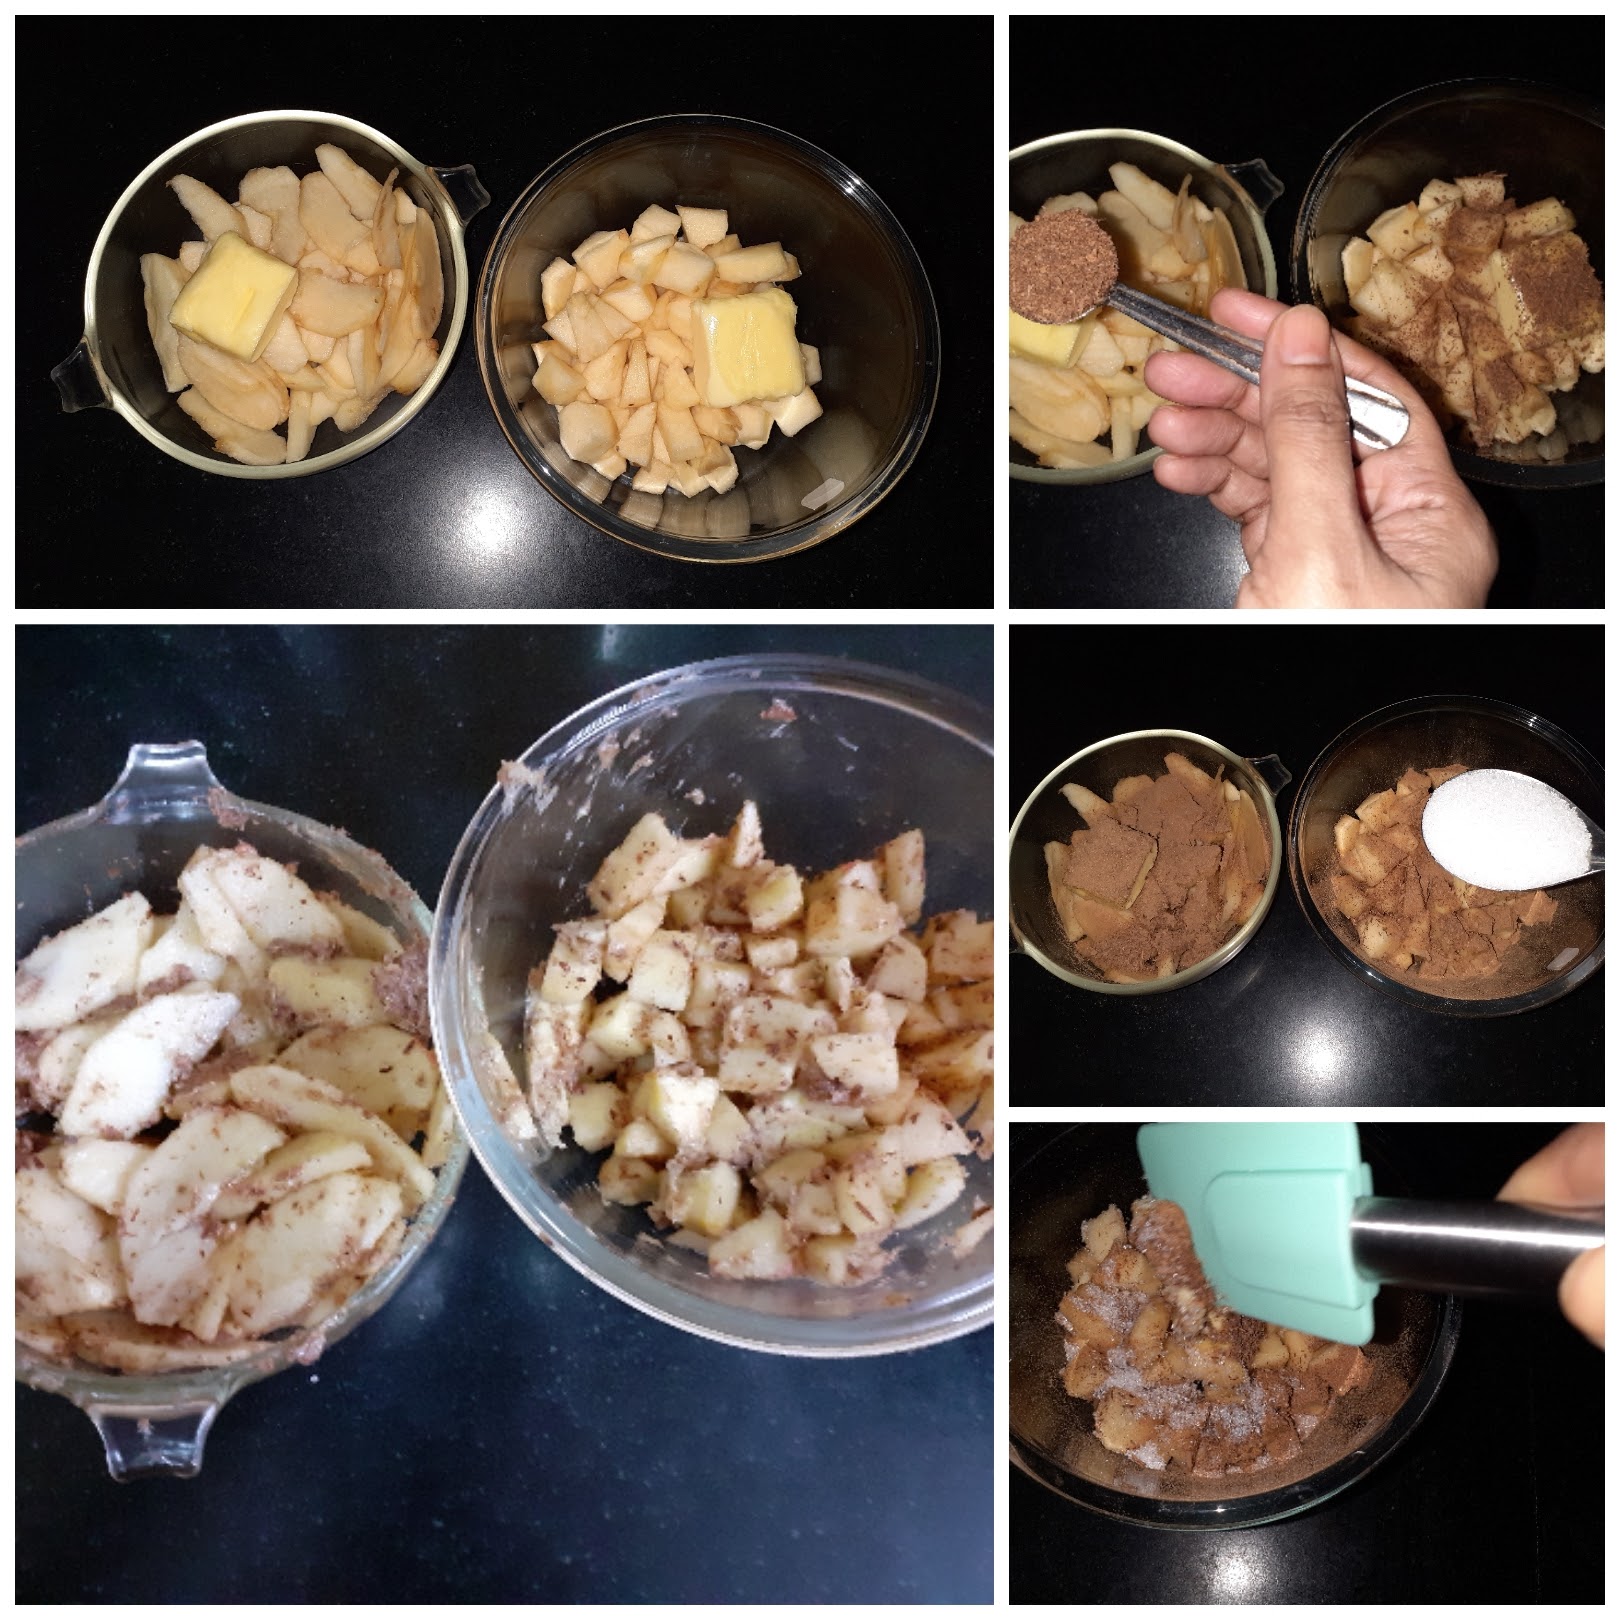
First, peel the apples and chop 1 1/2 apples to small cubes and another 1 1/2 to slices. Pug them in two separate bowls.
Divide and add the cinnamon powder, butter, and sugar between both the bowls equally and mix. Set aside.
Preheat the oven to 200 c and start preparing the cake batter.
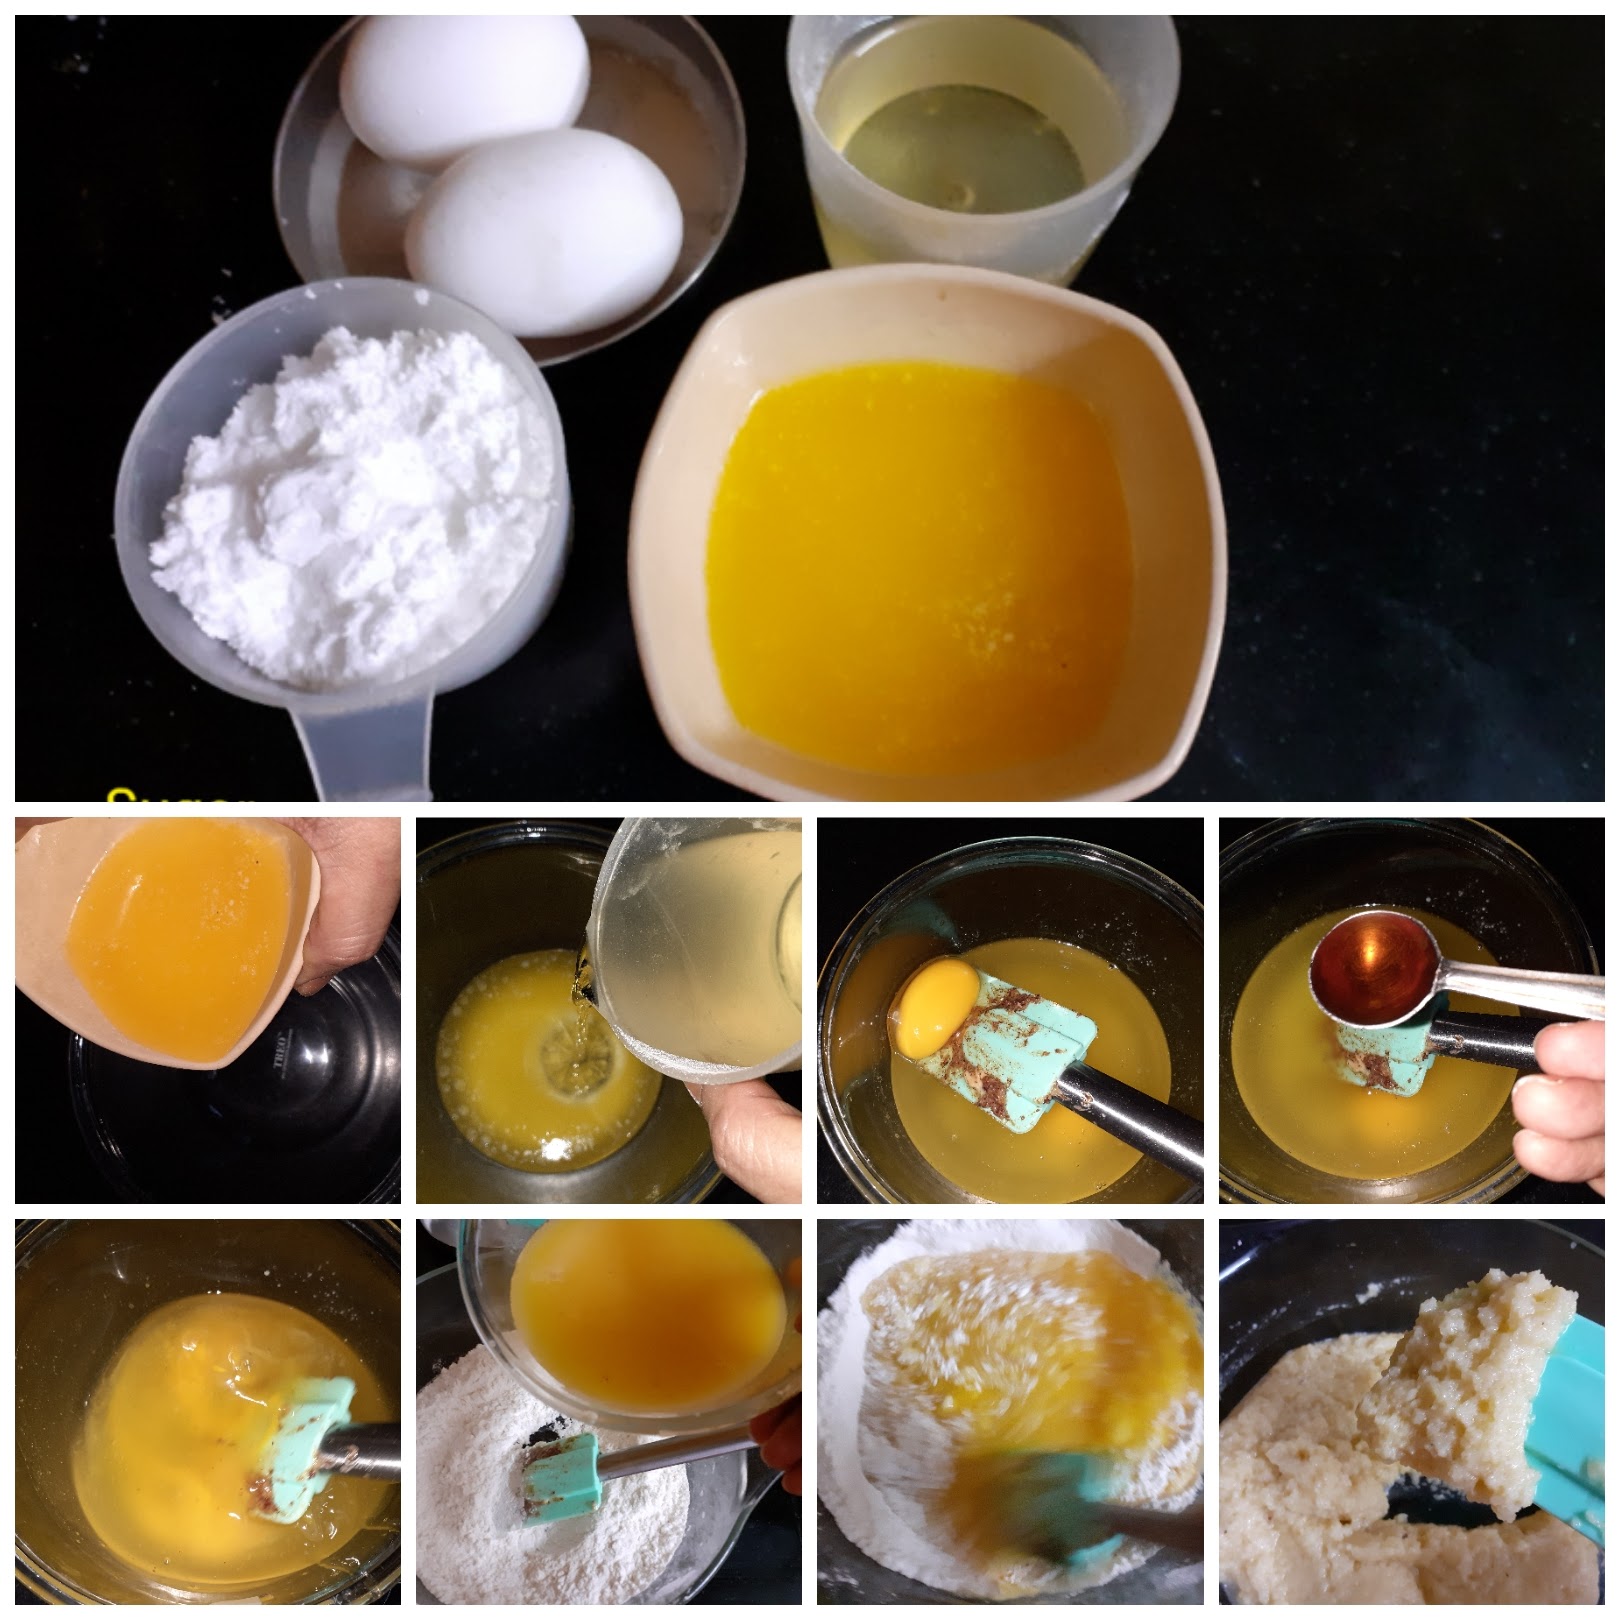
Put all the dry ingredients in one bowl and mix well.
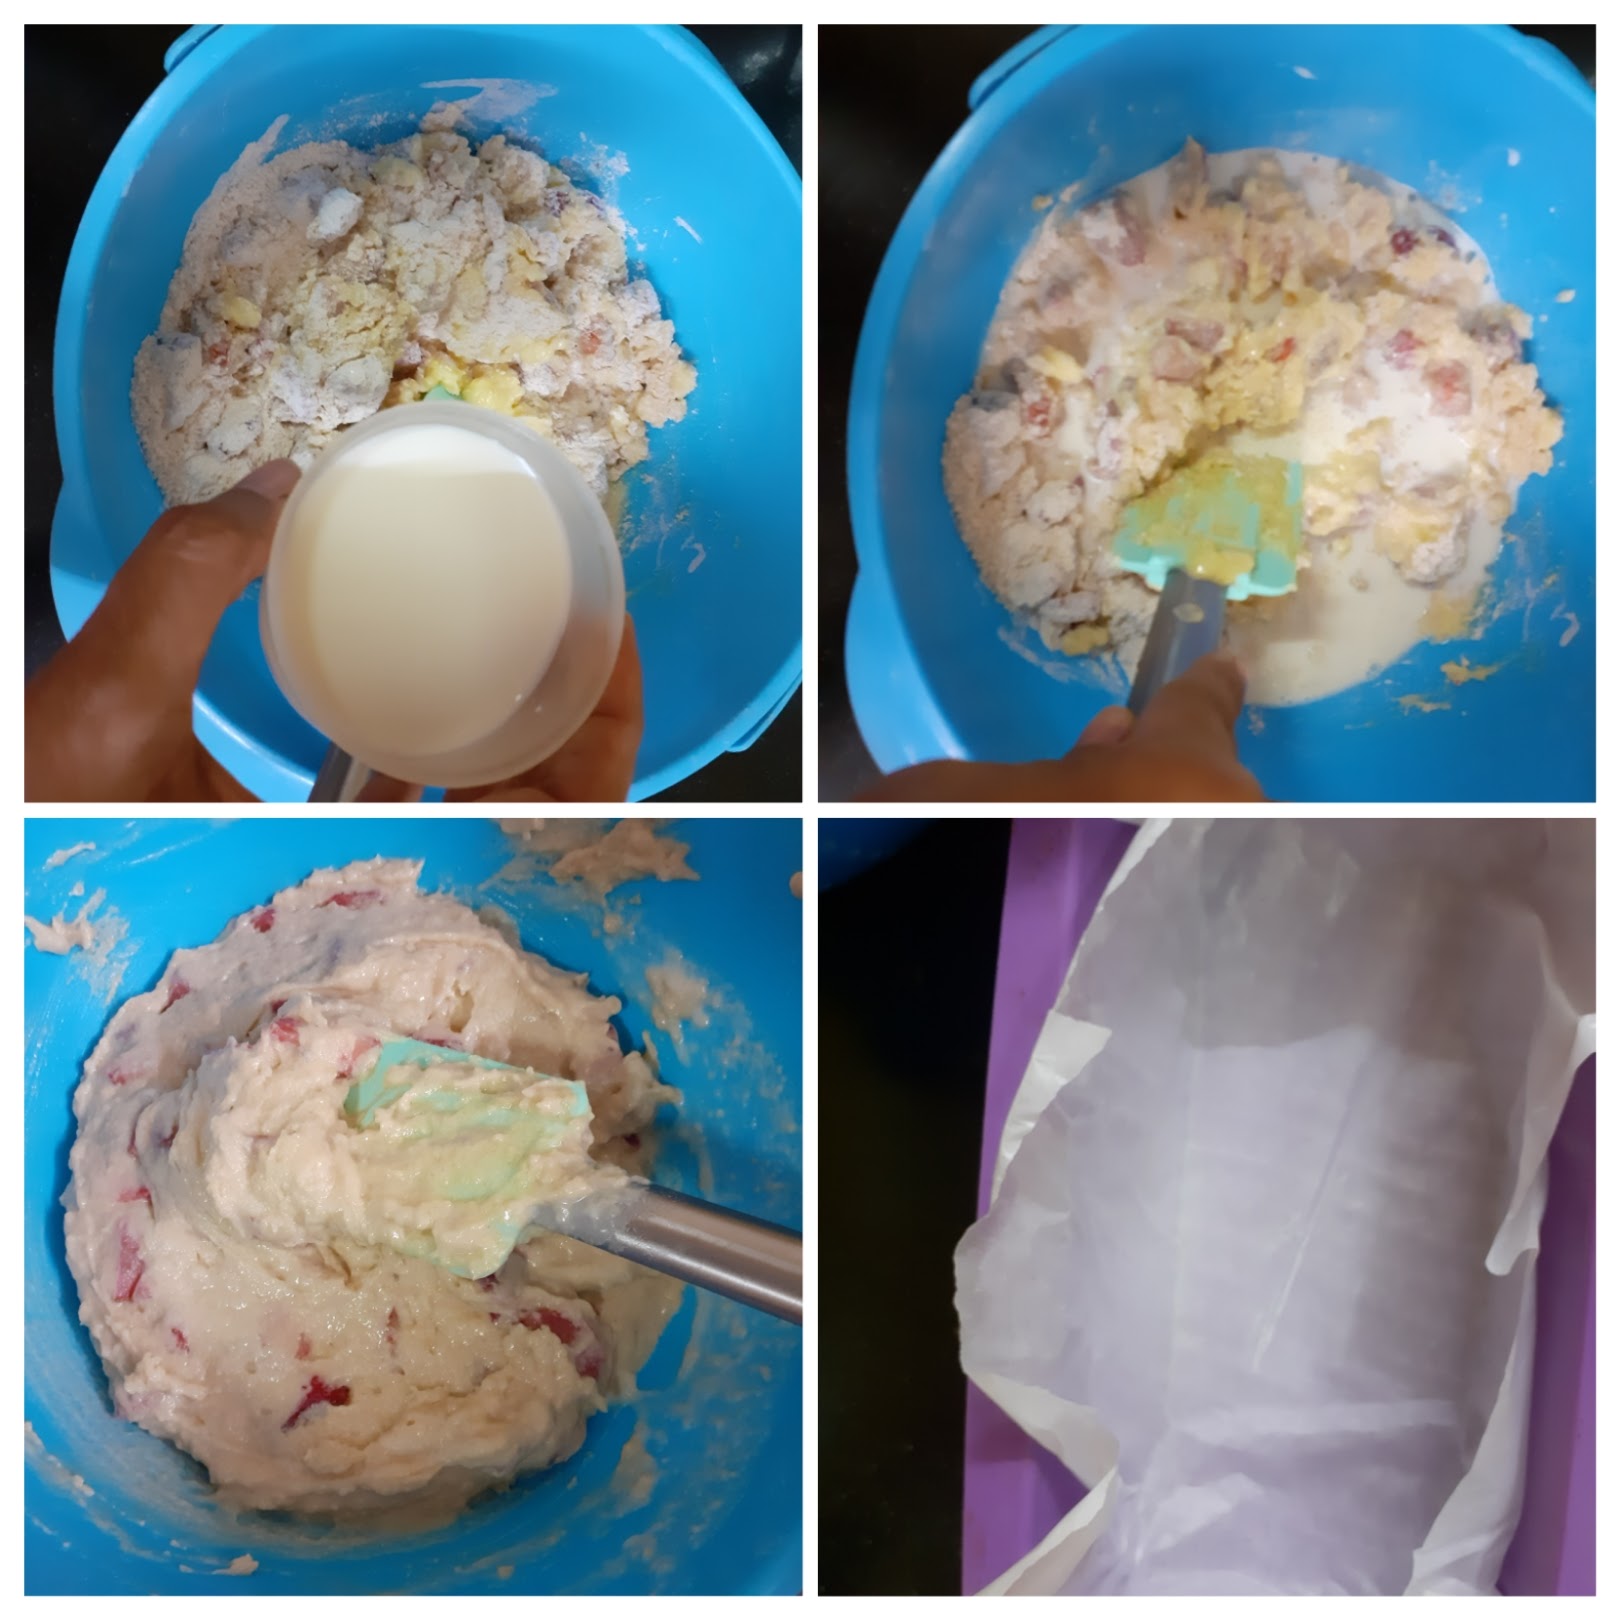
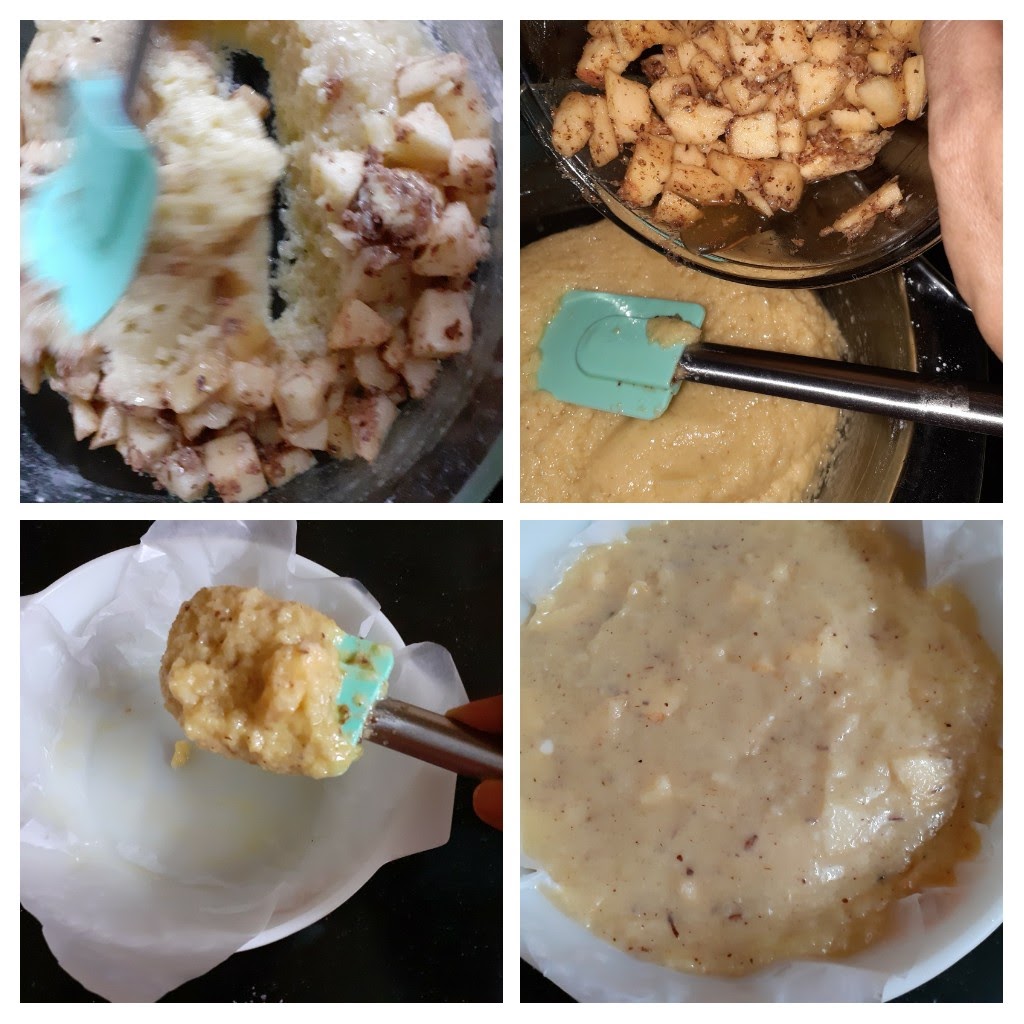
In another bowl combine all wet ingredients( refer to ingredients above)Now add the wet ingredients to the dry ingredients and combine nicely using a spatula. No electric beater required. Once nicely combined, mix in the apples chopped to cubes to the batter and mix gently.
Grease a baking tray and line it with parchment paper/ baking paper. Pour the batter into the tray, tap it once gently and place it in the oven. Bake at 200 C for 50 minutes or until a toothpick comes out clean. Once done remove from oven and leave to cool down a bit. Cut when still warm and serve. The delicious Apple cake is ready to serve.
STEPWISE RECIPE FOLLOWS:
1. Assemble all ingredients. Chop 1 half of the Apples to cubes and the other half to slices. Put them in 2 separate bowls.
2. Divide and add the butter, cinnamon powder, and sugar in both bowls, mix nicely and set aside.
3. Preheat oven to 200 C. Now put all dry ingredients in a separate bowl and mix.

4. Take all wet ingredients in another bowl and combine well. Now mix the wet ingredients to the dry ingredients and combine well.
5. Now add the cubed apples to the batter and fold gently. Grease a circular cake mould and line with parchment/baking paper. Now scoop in the batter into the mould.
6. Take the sliced apples and arrange them like a fan on the batter. Now it is ready to be popped into the oven. Bake at 200C for 50 minutes or until a skewer comes out clean.

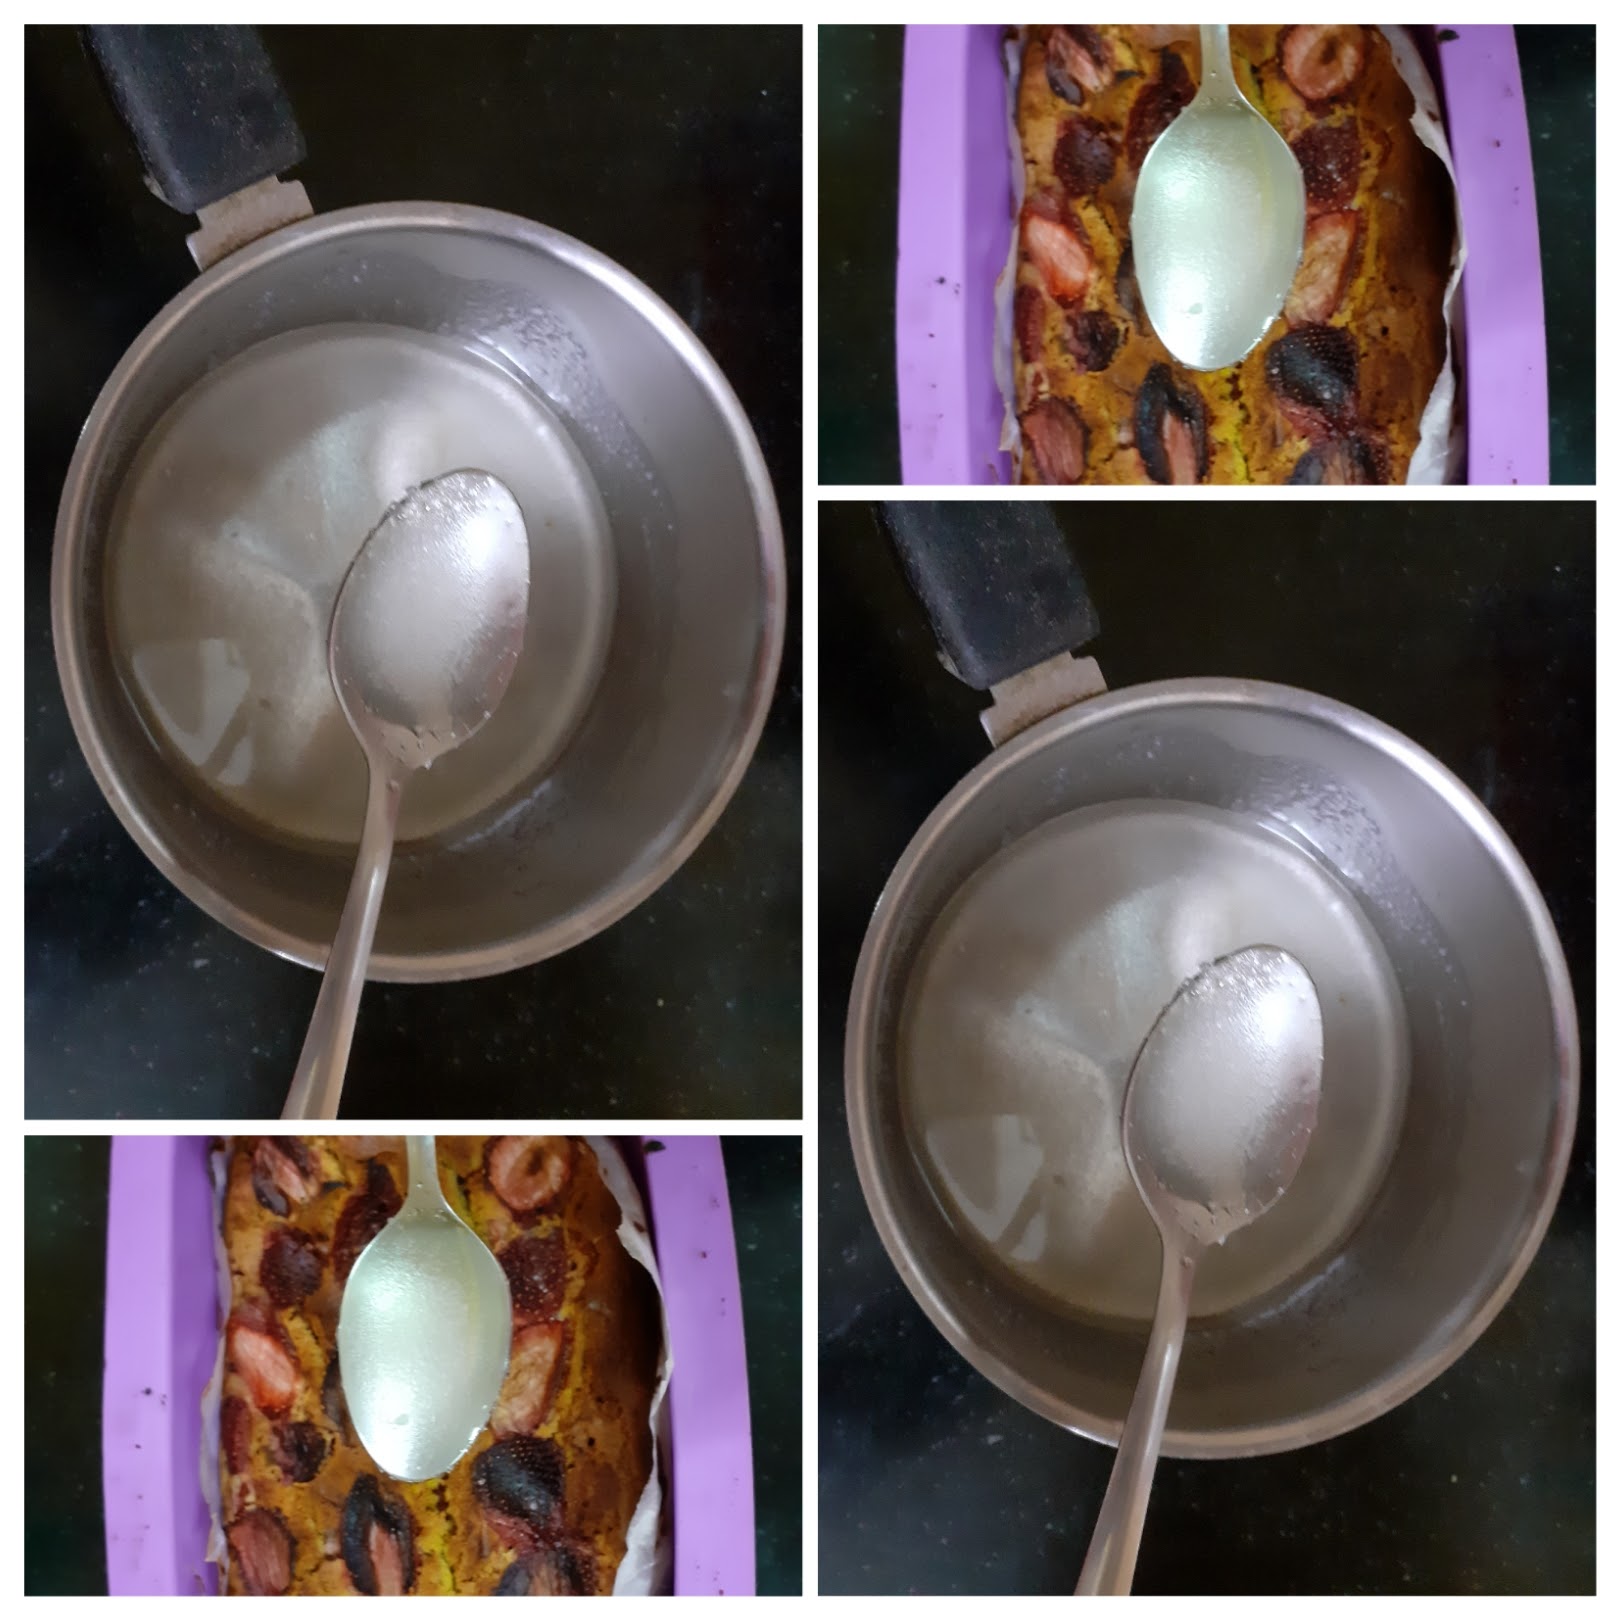
Allow it to cool for 5 minutes and apply the honey over it with a brush and cool it. The honey gives the apples a beautiful glaze. Serve them a little warm.
NOTES:
1. Any variety of apples can be used for this recipe.
2. This cake has a crumbly texture, you will know if you look at the picture. It is super moist.
3. It holds good for 3 days at room temperature, for long storage put it in the fridge and warm just before serving.
4. It is also a good snack box idea for kids as it can be made ahead, just remove from the refrigerator, warm it and allow it to sweat, then pack.
5. This cake can be made without the sliced apples on top too. Just mix the chopped apple and scoop mixture into the baking tin/ tray and bake.
If you tried this recipe and liked it please comment below. I would love to hear from you. If you have a query about the recipe email us and ill respond as soon as I can.
Atte Ka Sheera (Insant Wheat Halwa)
Halwa is a popular dish in the Indian subcontinent and there are many varieties of Halwa like Rava/Suji Halwa, Moong dal halwa, Chana dal halwa, Lauki halwa, Carrot halwa, and many more. This recipe Atte Ka Sheera is very popular in North India during both the Navrathras, as it is offered to little girls on the Ashtami day( day 8 of Navrathri) as Prasad(holy offering).
This Halwa gets done in no time and is healthy and tasty at the same time. My girl loves it and whenever any of us craves sweet at home I make it instantly, like today.


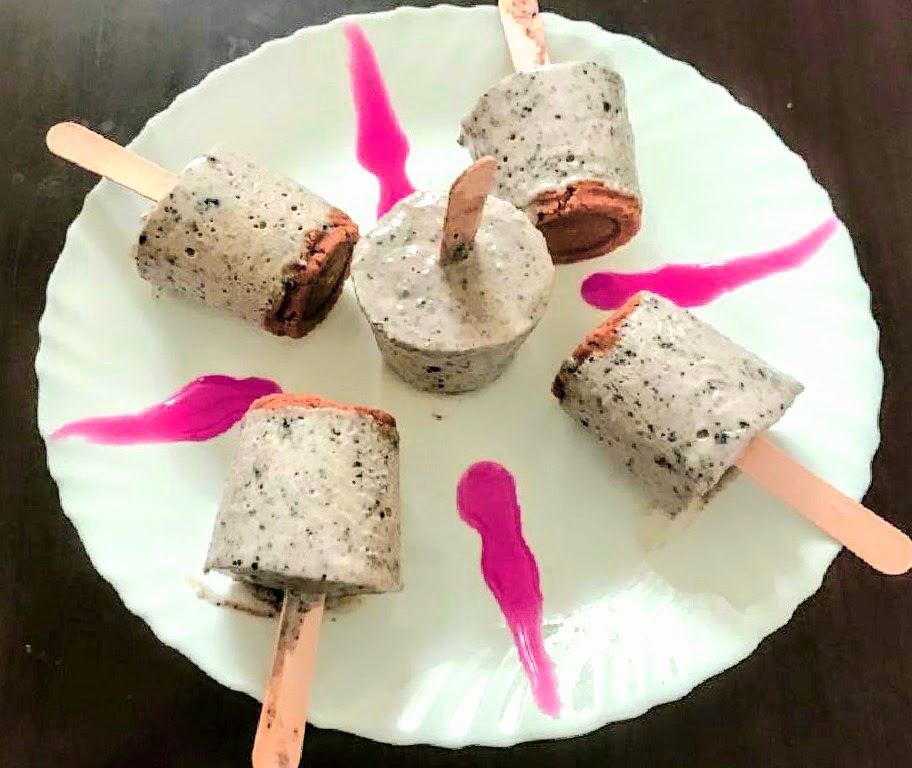
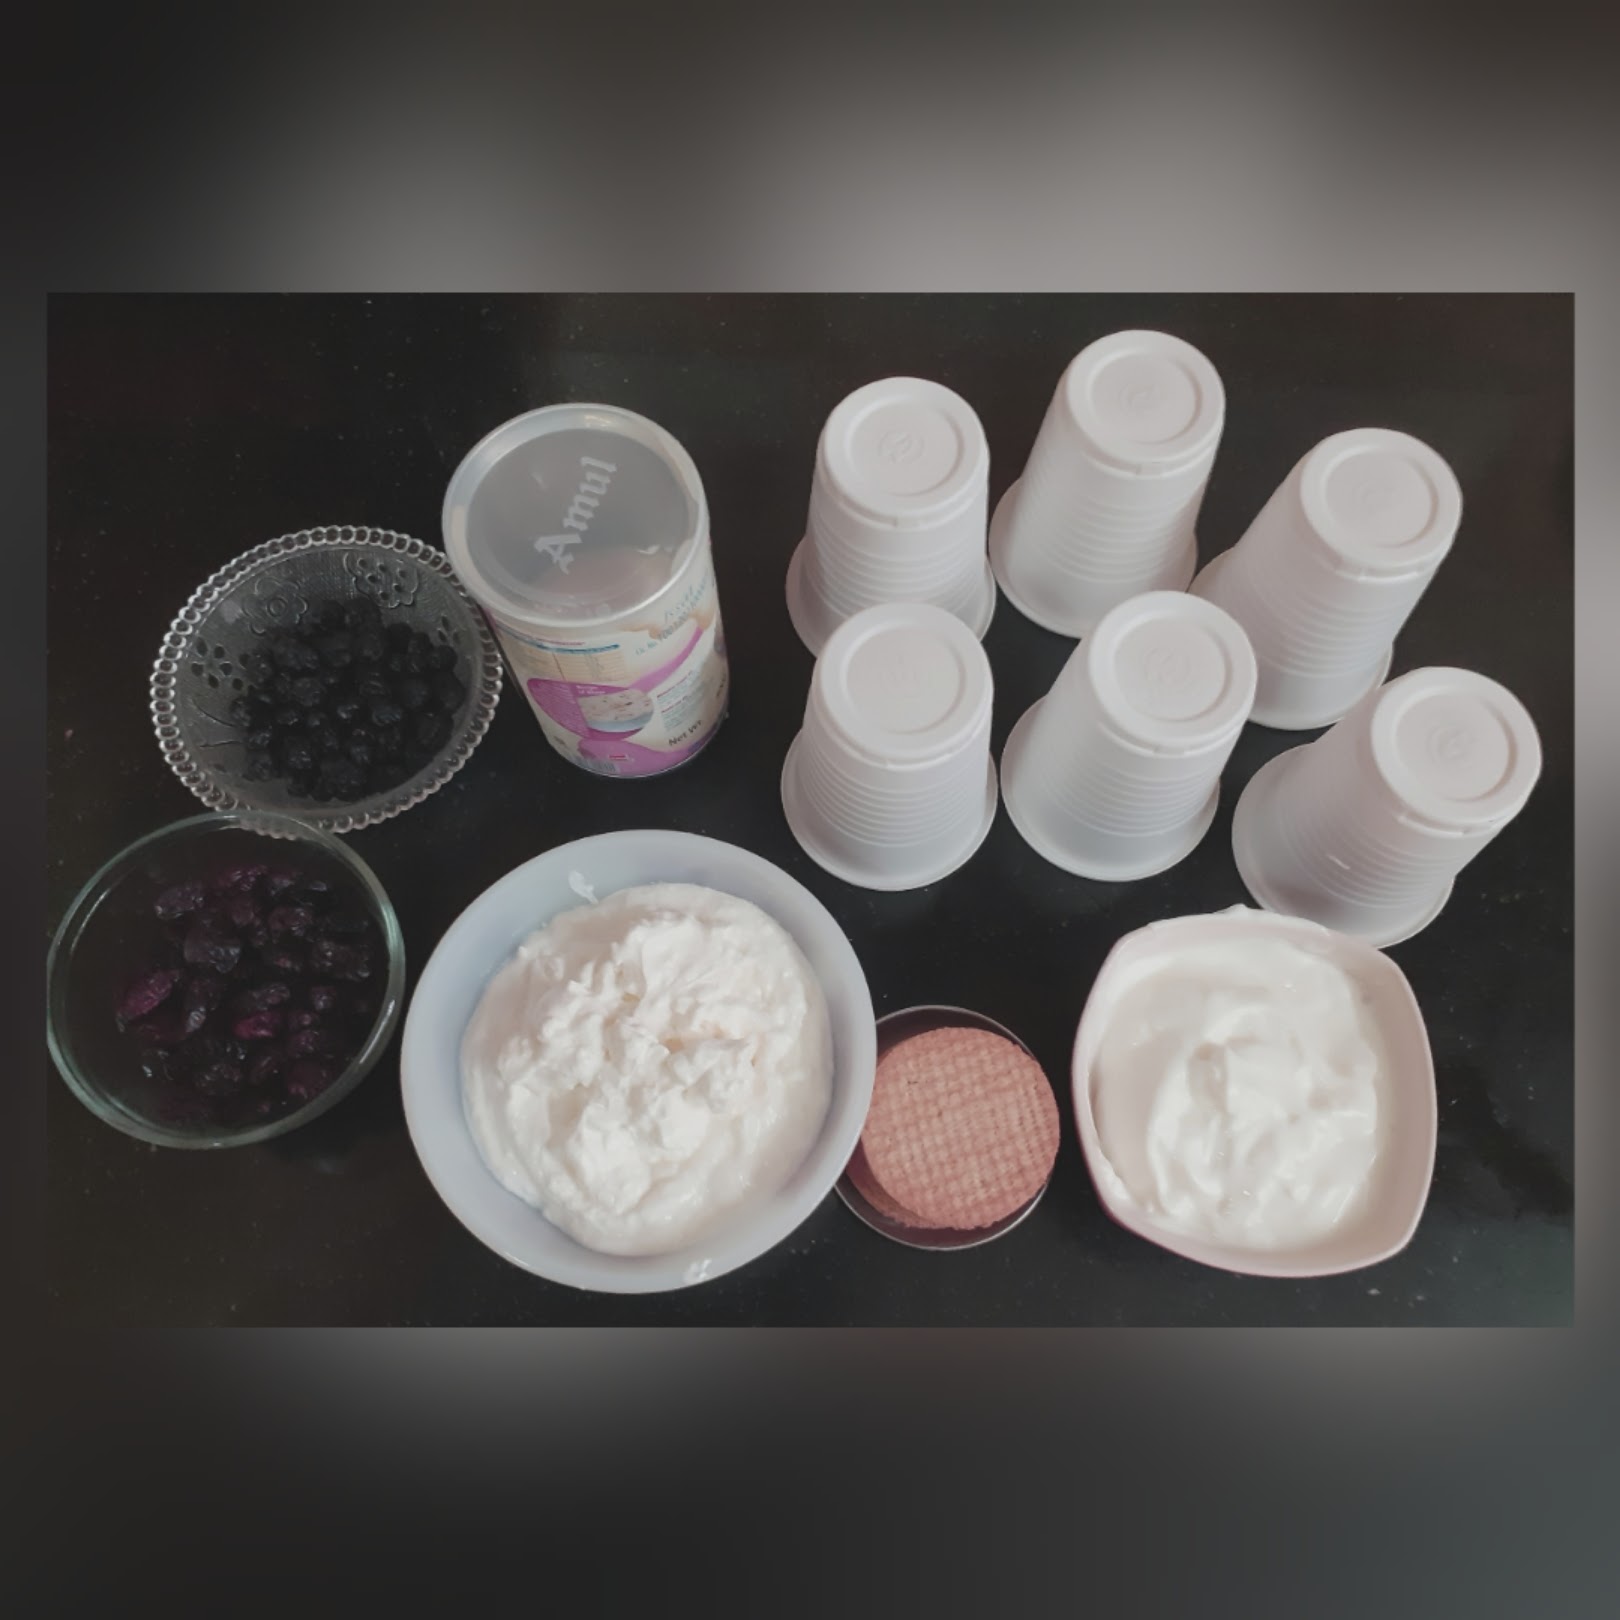
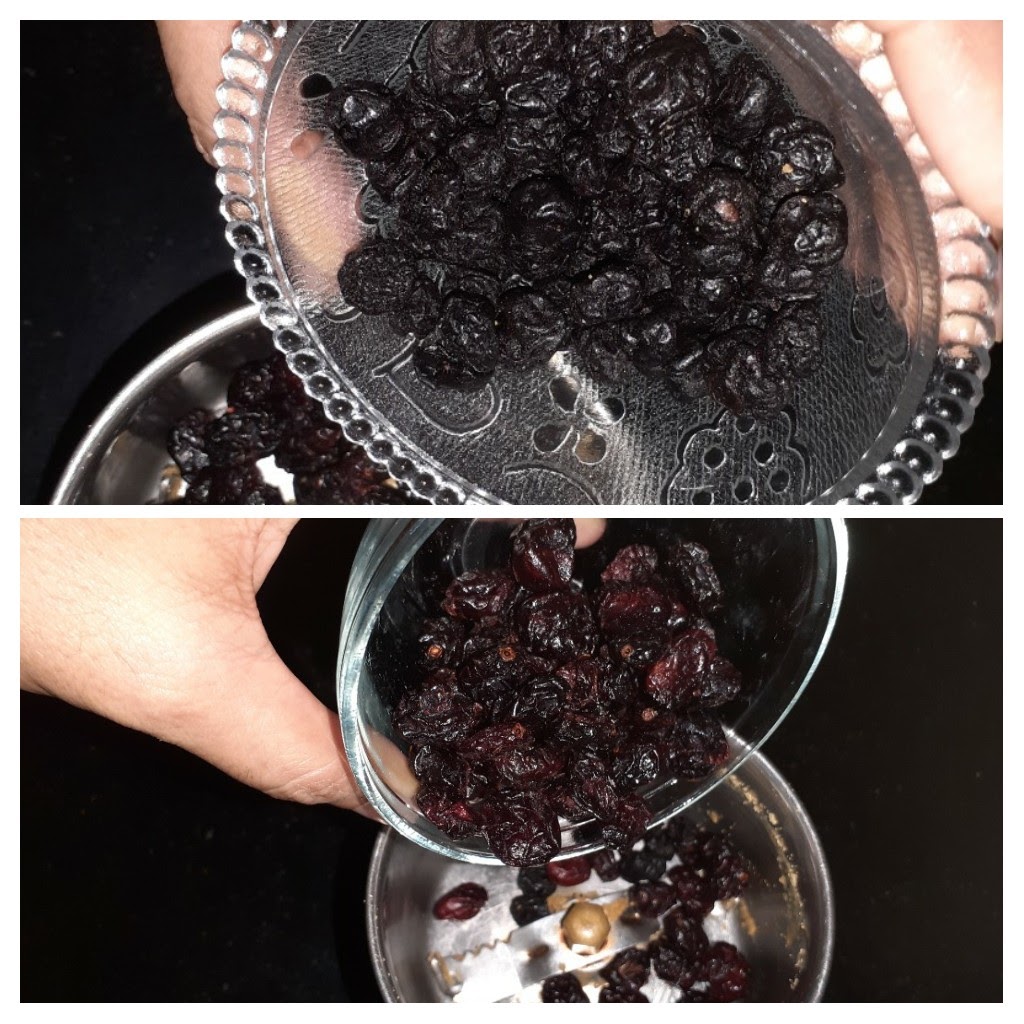
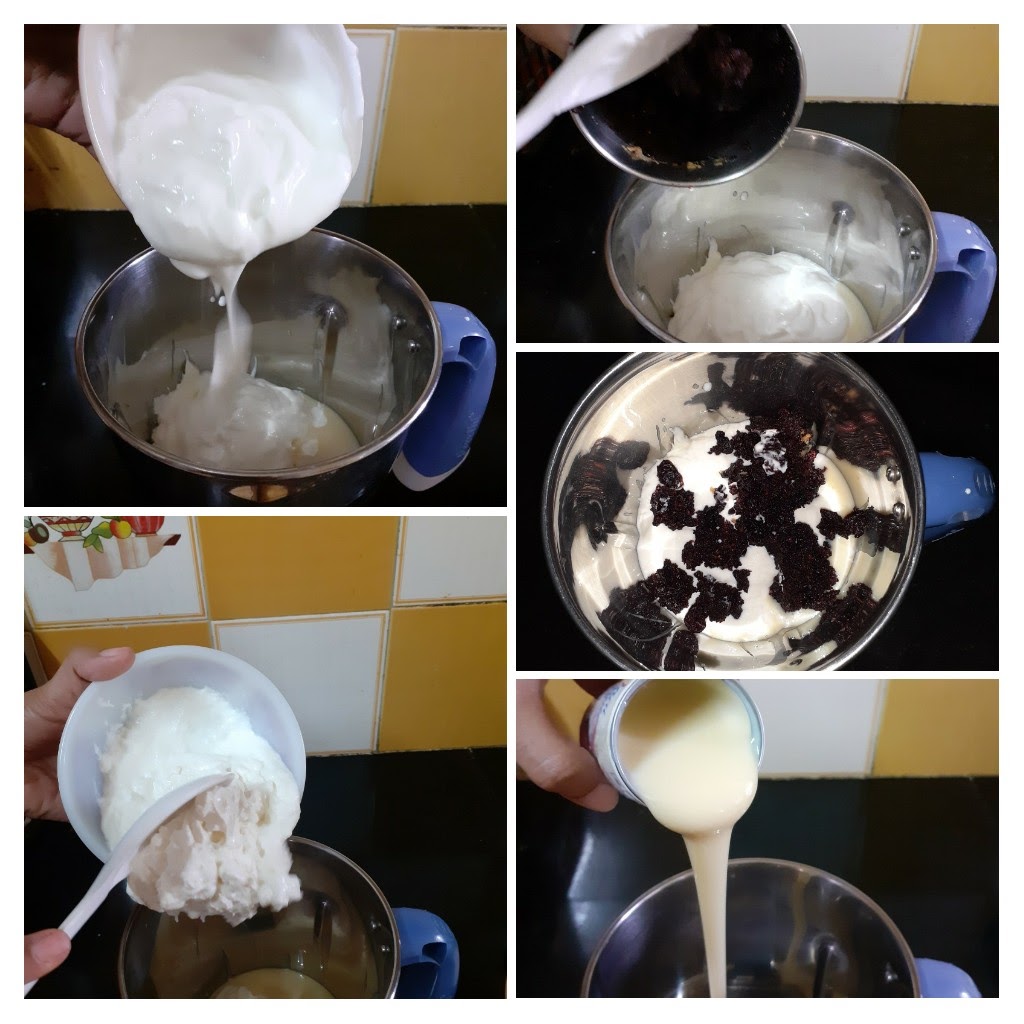
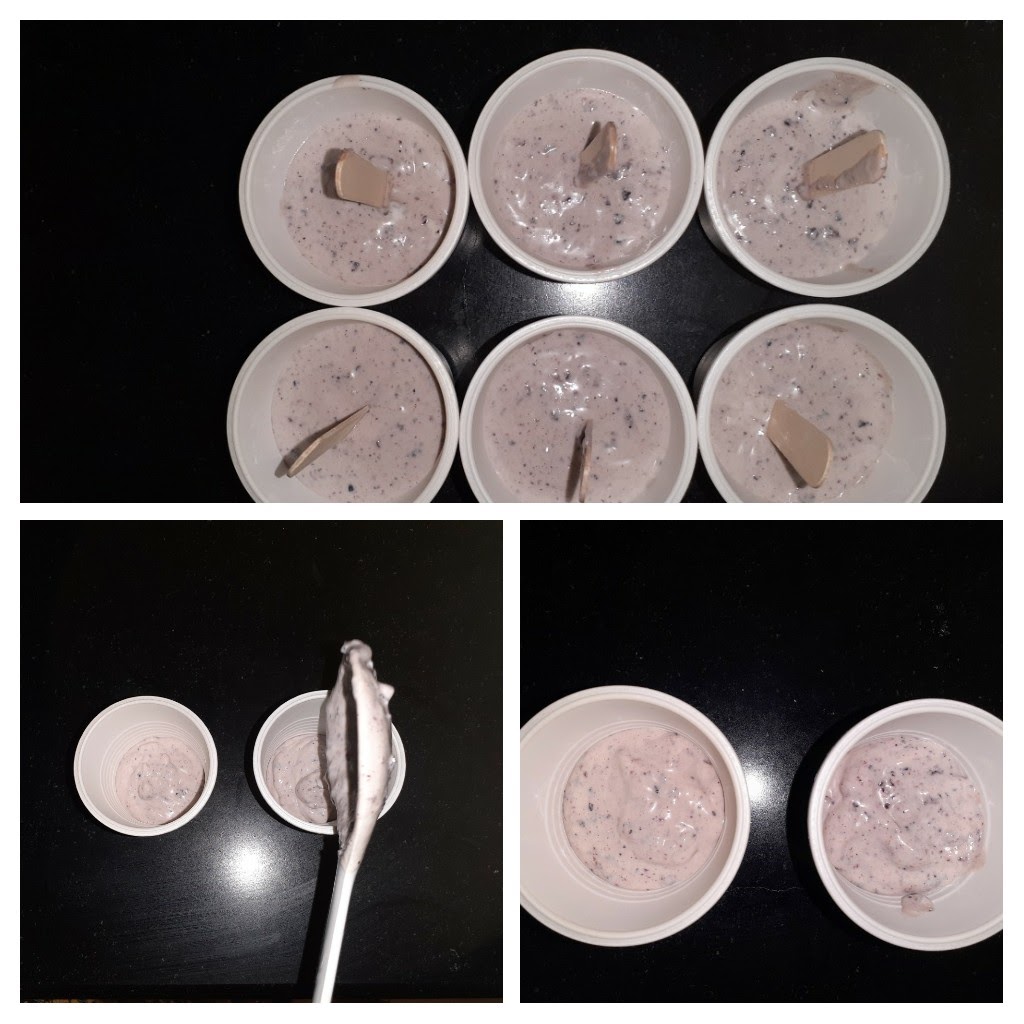
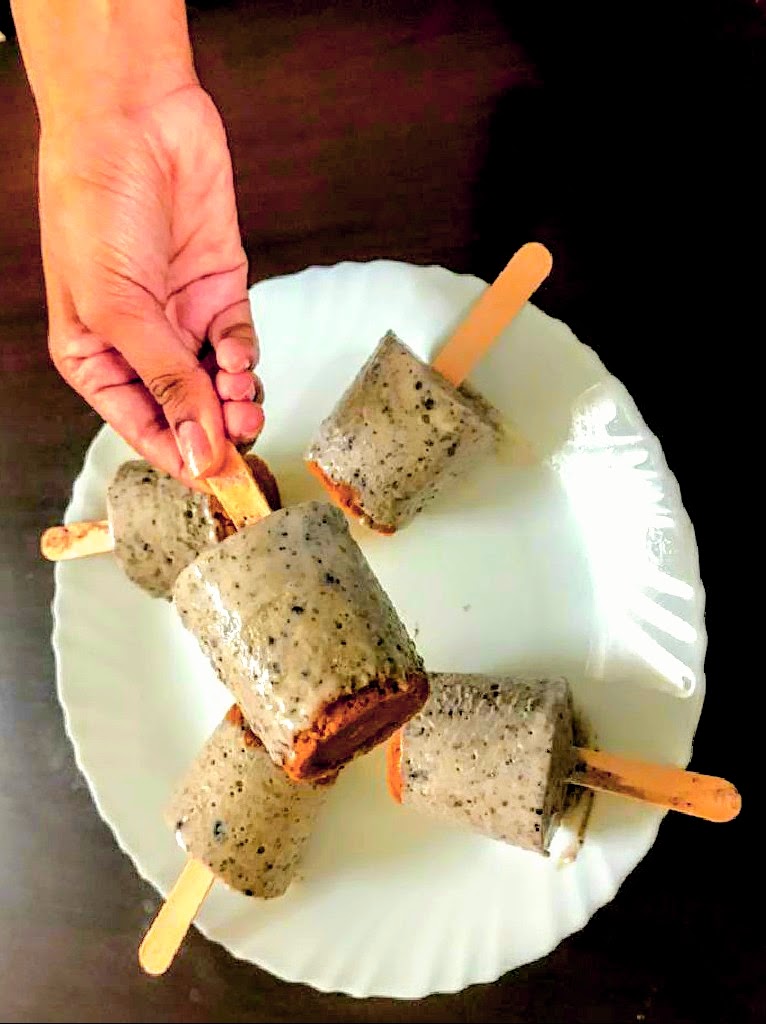
Berry Smoothie Icecream
For all the Berry lovers like me, this Smoothie Icecream is a treat to the taste buds. Made with a mix of Blueberries and Cranberries, Greek yogurt, Hung Curd, and some condensed milk, this is a dessert full of flavour. What’s more, it is healthy too…