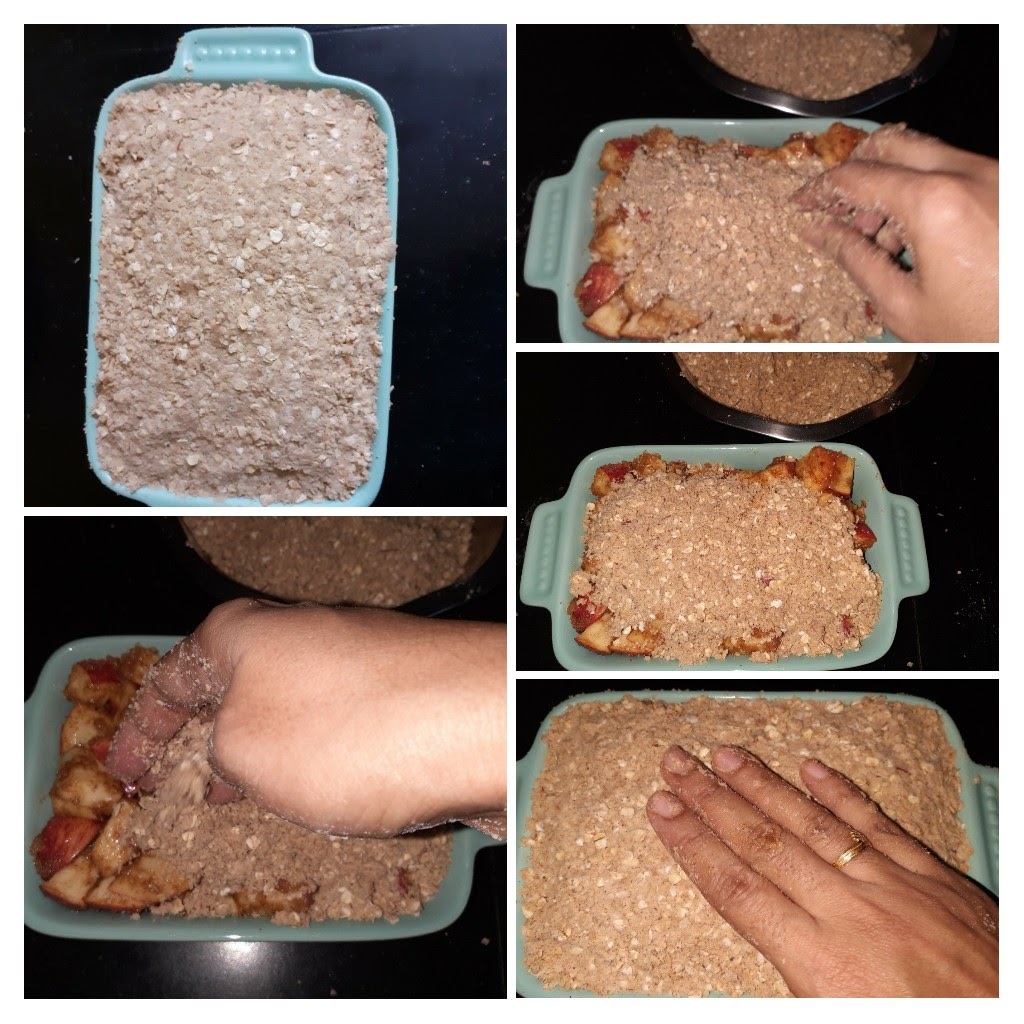
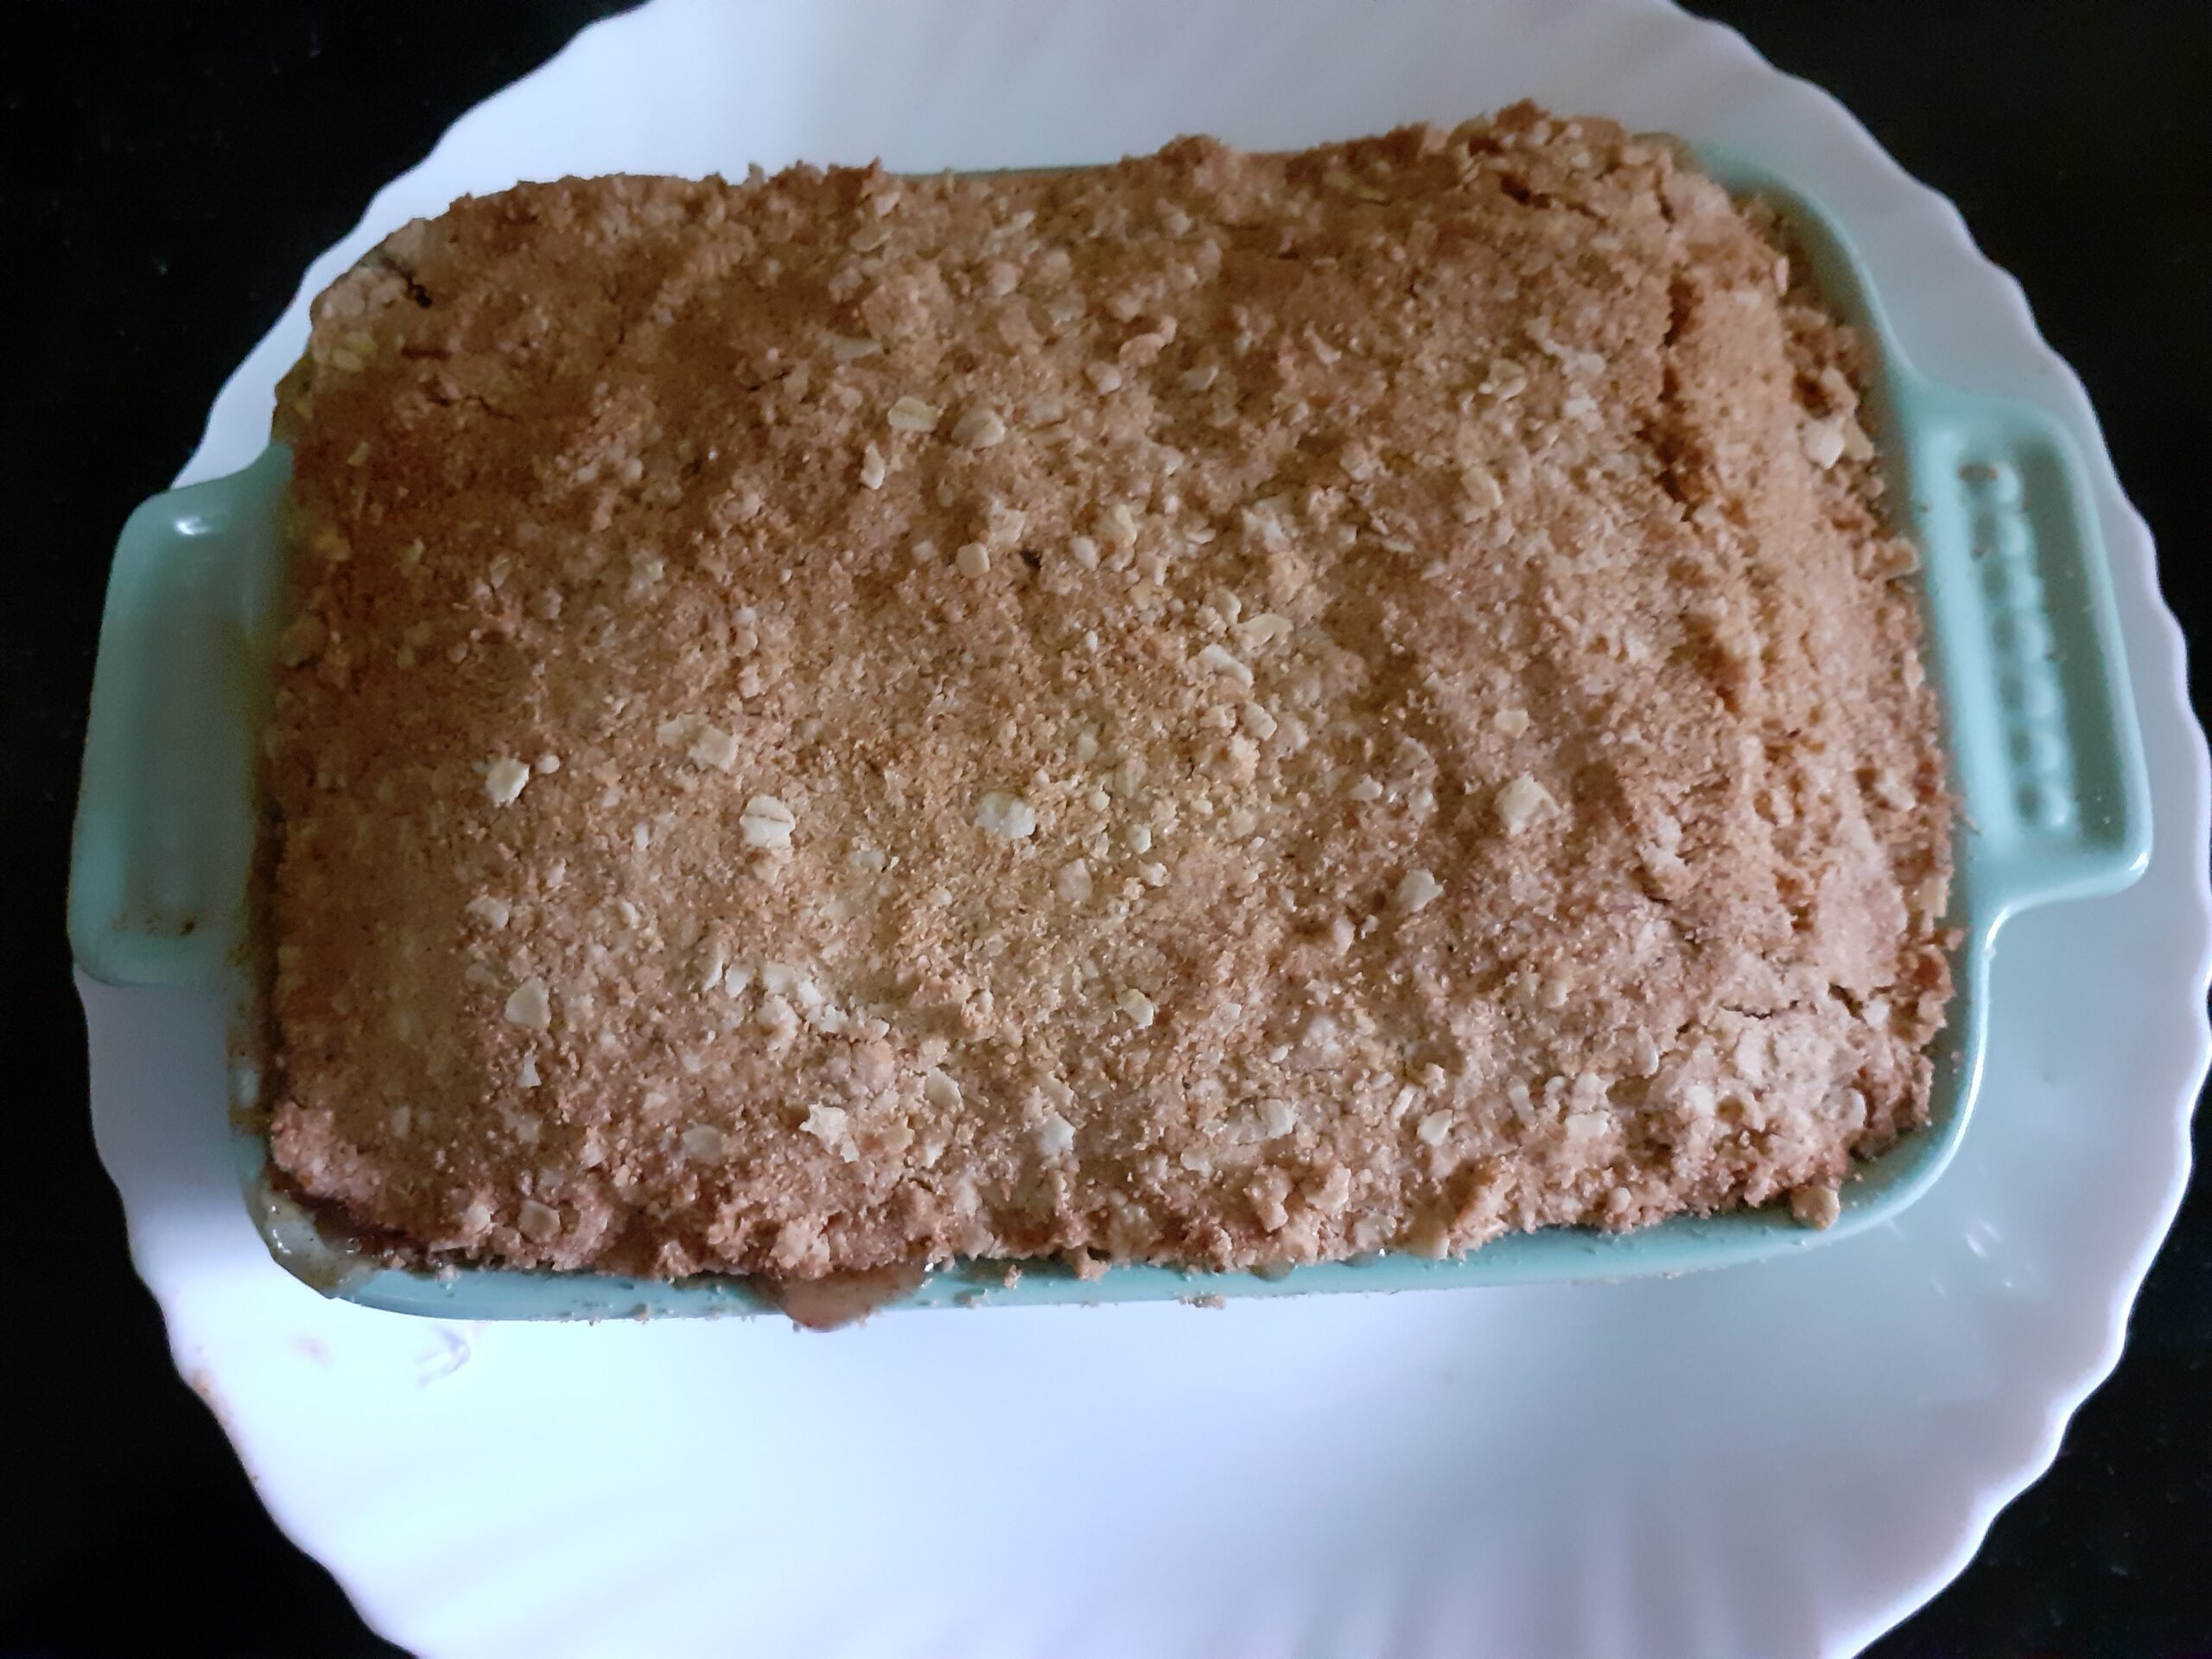
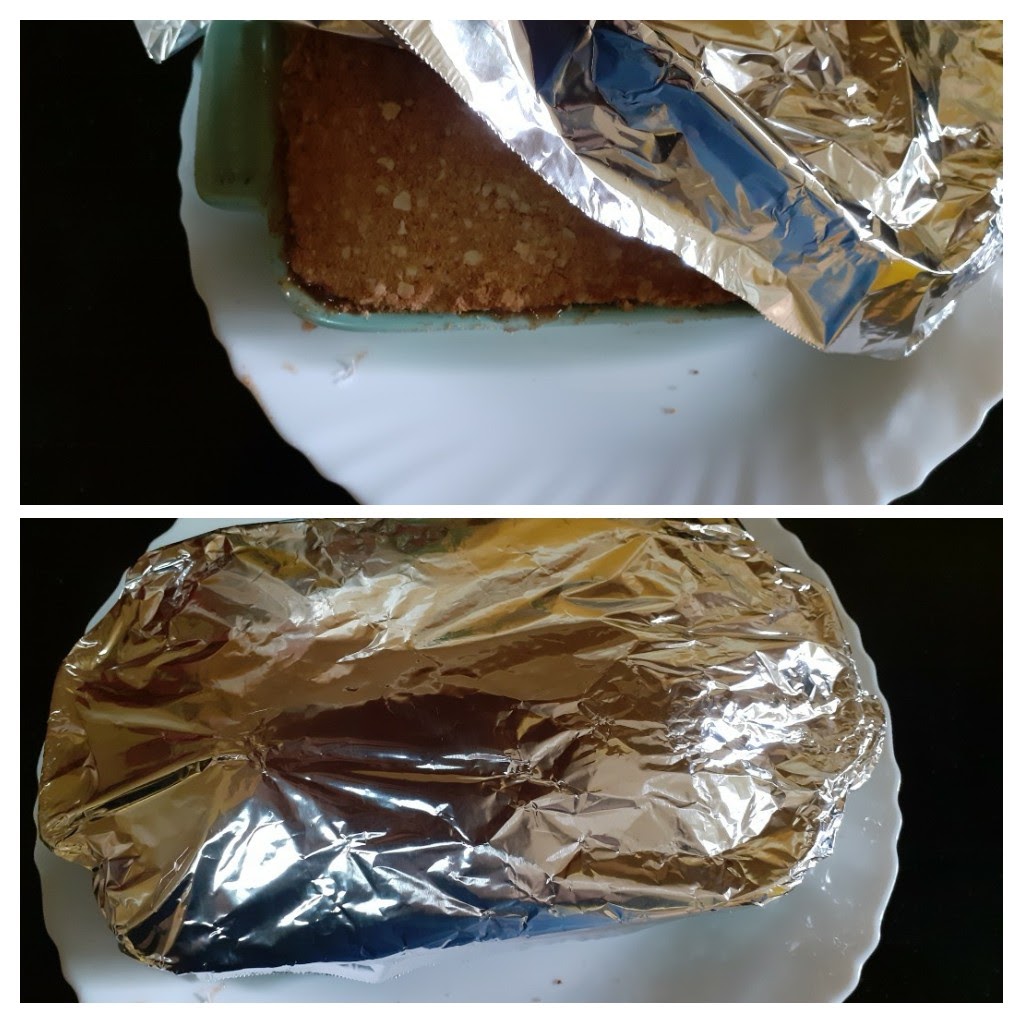
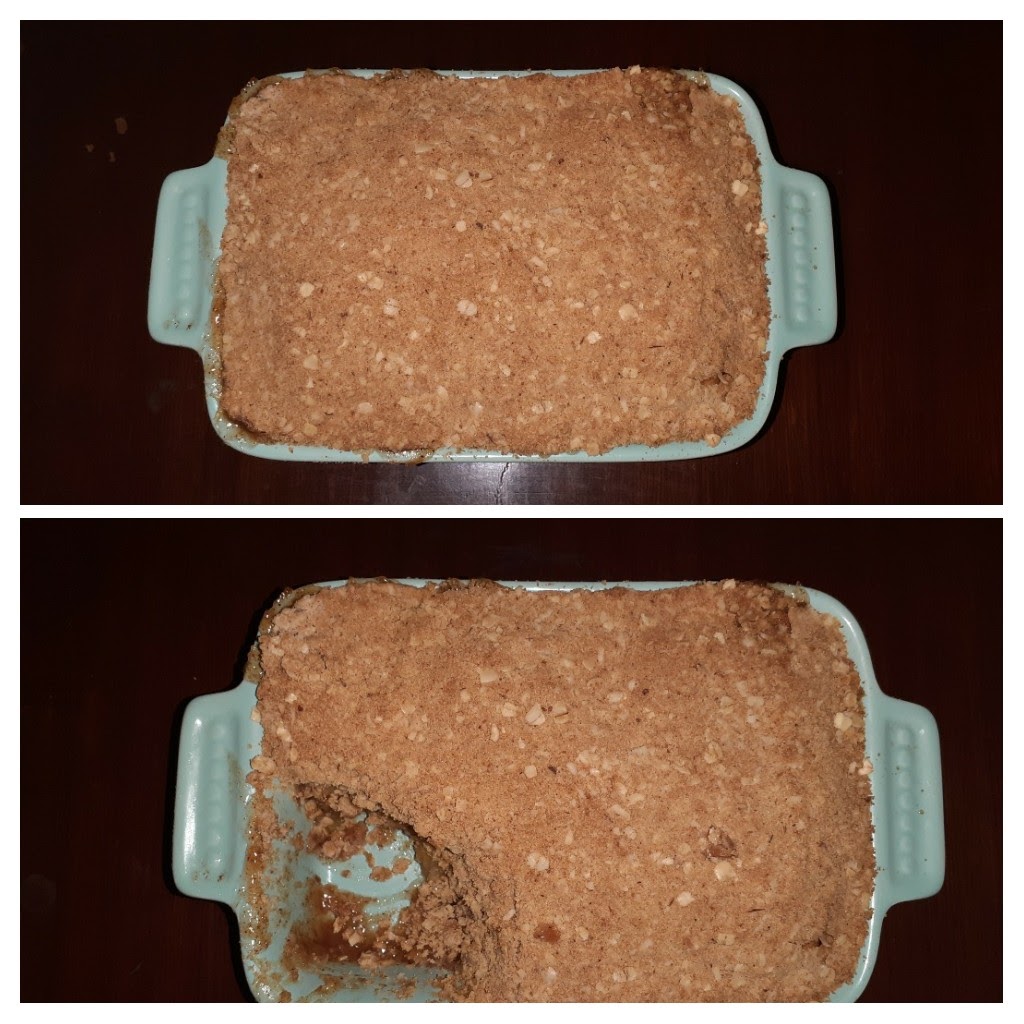
Strawberry Crumble
Vegan Chocolate Pudding
Homemade Blueberry Yogurt
Easy Vegetarian Thai Green Curry
Homemade Authentic Thai Green Curry Paste
Homemade Strawberry Conserve/Jam
Eggless Mava Cake/ Khoya Cake
Creamy Basil Lemongrass Dressing
Chocolate Truffle/Rum Truffle
Eggless Ragi Chocolate Pancakes
Babycorn Lolipop
Stuffed Aubergine Boats
Custard Shahi Toast Pudding
Eggless Mango Cake With Mango Mousse Topping
Tofu Steaks In Peanut Sambol
Green Apple and Sabja Seed Mojito
Cheddar Cheese Cookies/ Cheese Board Cookies
Sweet Corn Seekh Kebab
Apple Cinnamon Oatmeal Porridge
Black Rice Rissoto/Kavuni Arisi Rissoto
Carrot Pumpkin and Almond Soup
Bazlama/Turkish Flatbread
Orange Cauliflower
Stuffed Sweet Peppers
Banana Pan Cake 2 Ways
Broccoli Paneer Rice
Beet Falafel/ Beetroot Falafel
Plum Ice Cream
Moringa-Dal Shorba (Moringa leaves Soup)
Bombay Potatoes
Whole Wheat Banana Bread
Mushroom Soup
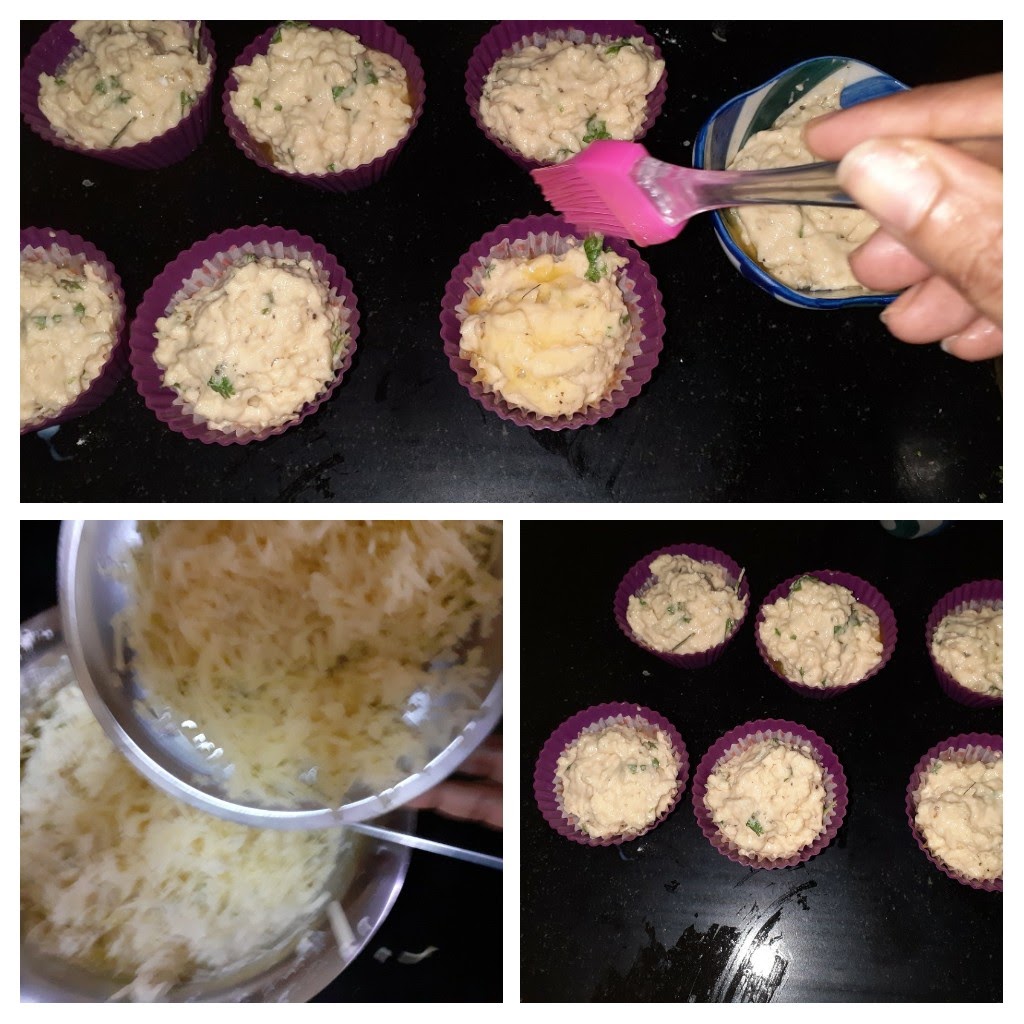
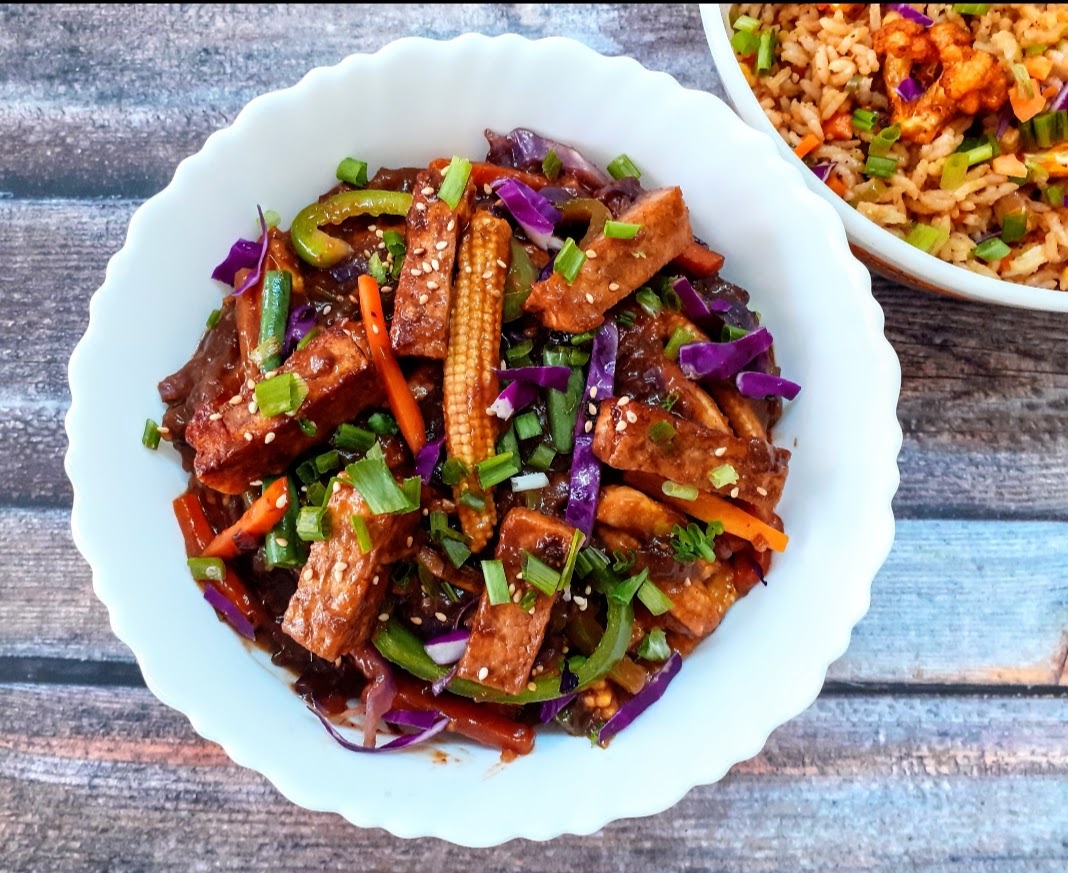
Tofu And Stir Fried Vegetables In Hot Schezwan Sauce
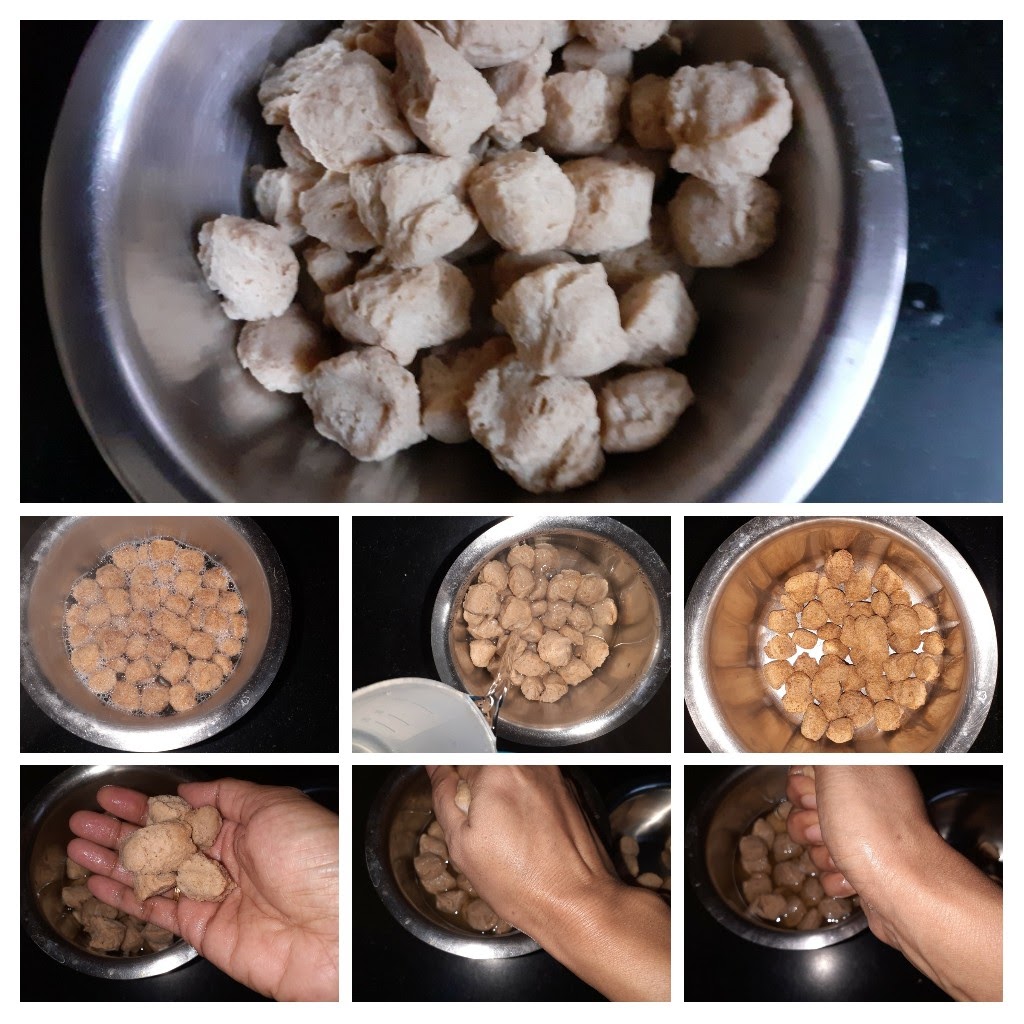
Any Tofu lovers? I agree its an acquired taste,but going by the health benefits it has to offer, I try including it in my diet now and then. People are not very fond of the bland taste, but once that is overcome, Tofu does taste good.
Tofu is a plant based milk product that comes from the milk of Soya beans, it is also called Bean curd. There are different kinds of Tofu based on their texture, such as- silken, soft, firm and extra firm. Depending on the dish we make the tofu is chosen. Popular dishes with Tofu include Soups, stir fry, and curries.
Tofu has zero percent cholesterol and is a weight watchers delight, because it is protein dense and less in carbohydrates. It is also considered to be a good source of iron and calcium.
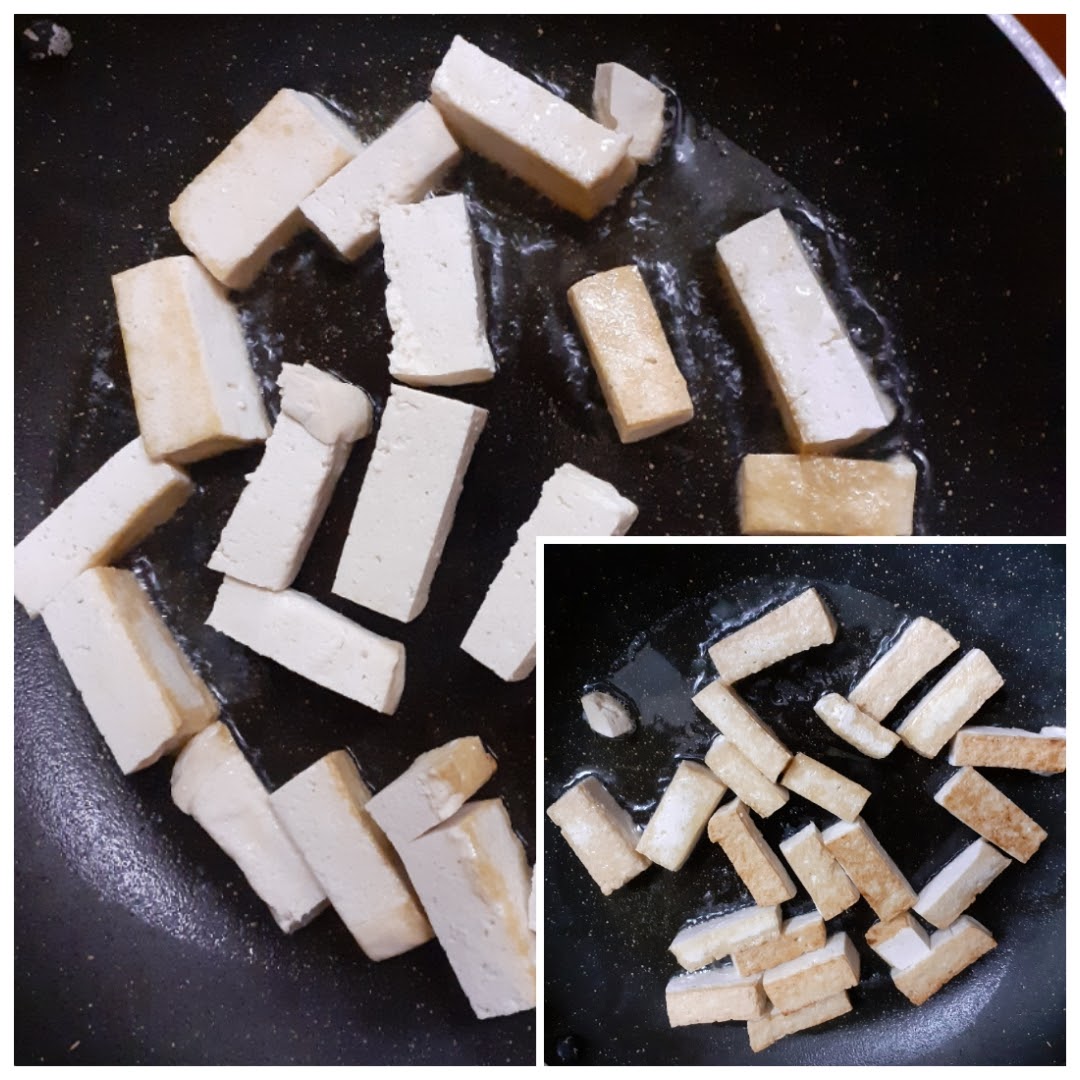
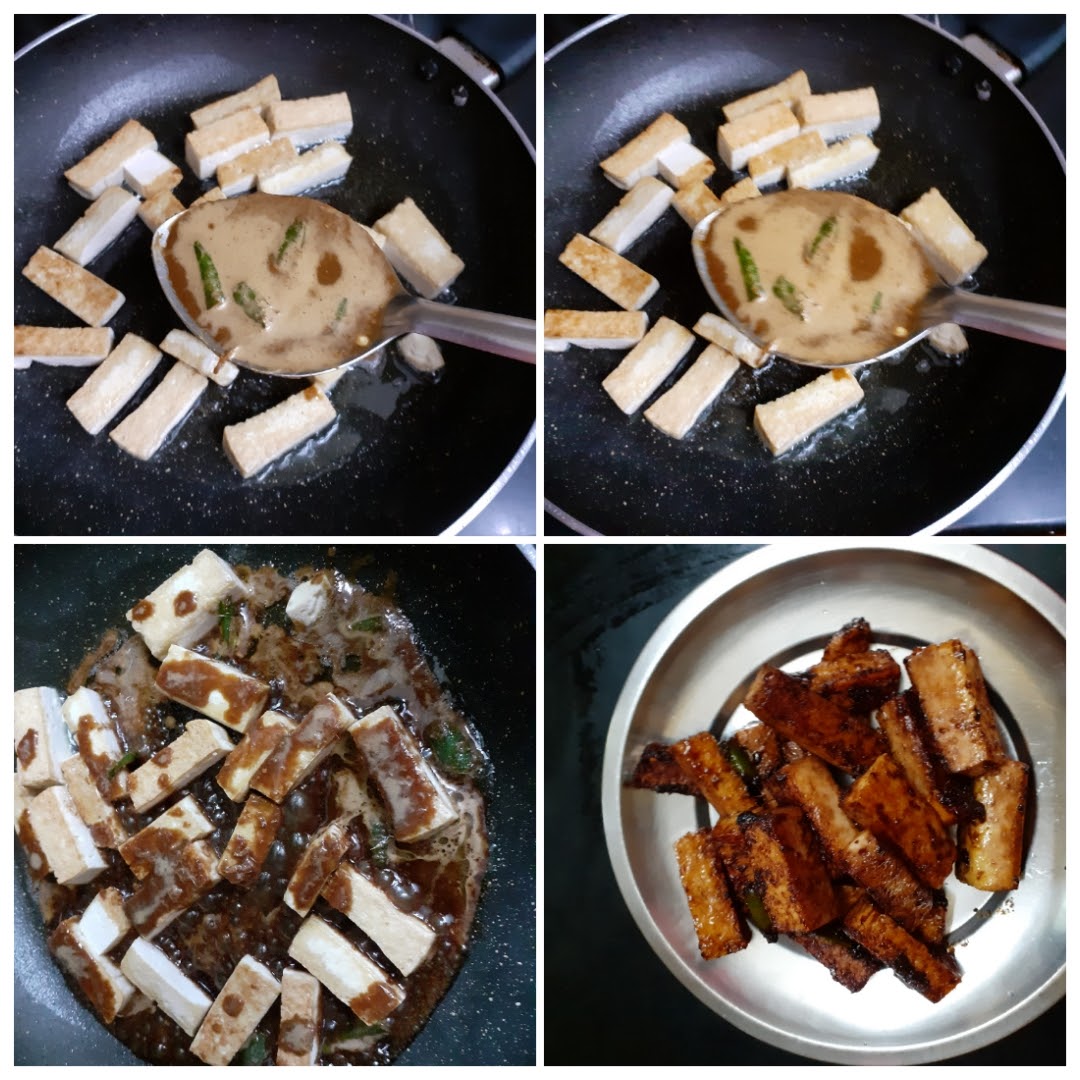
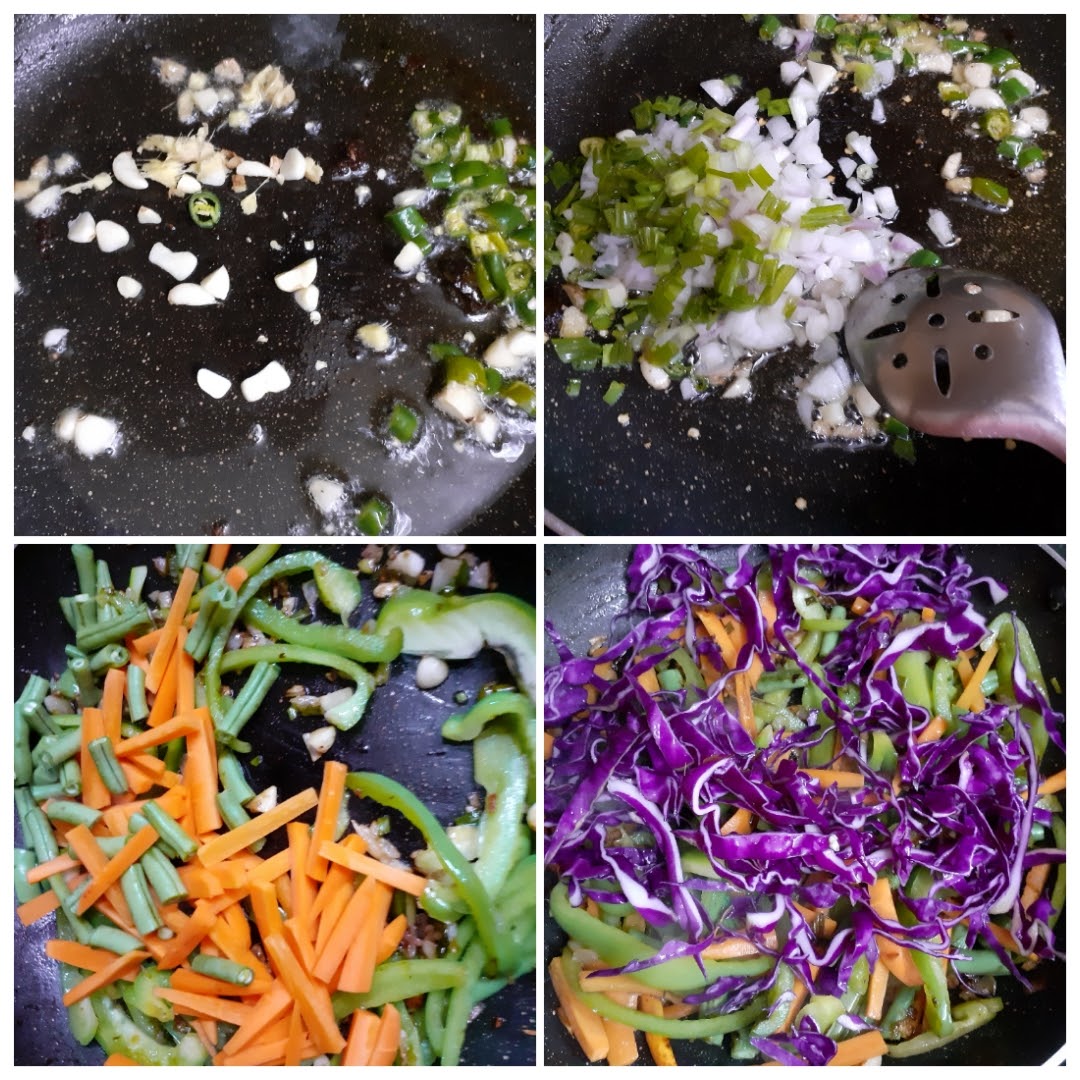
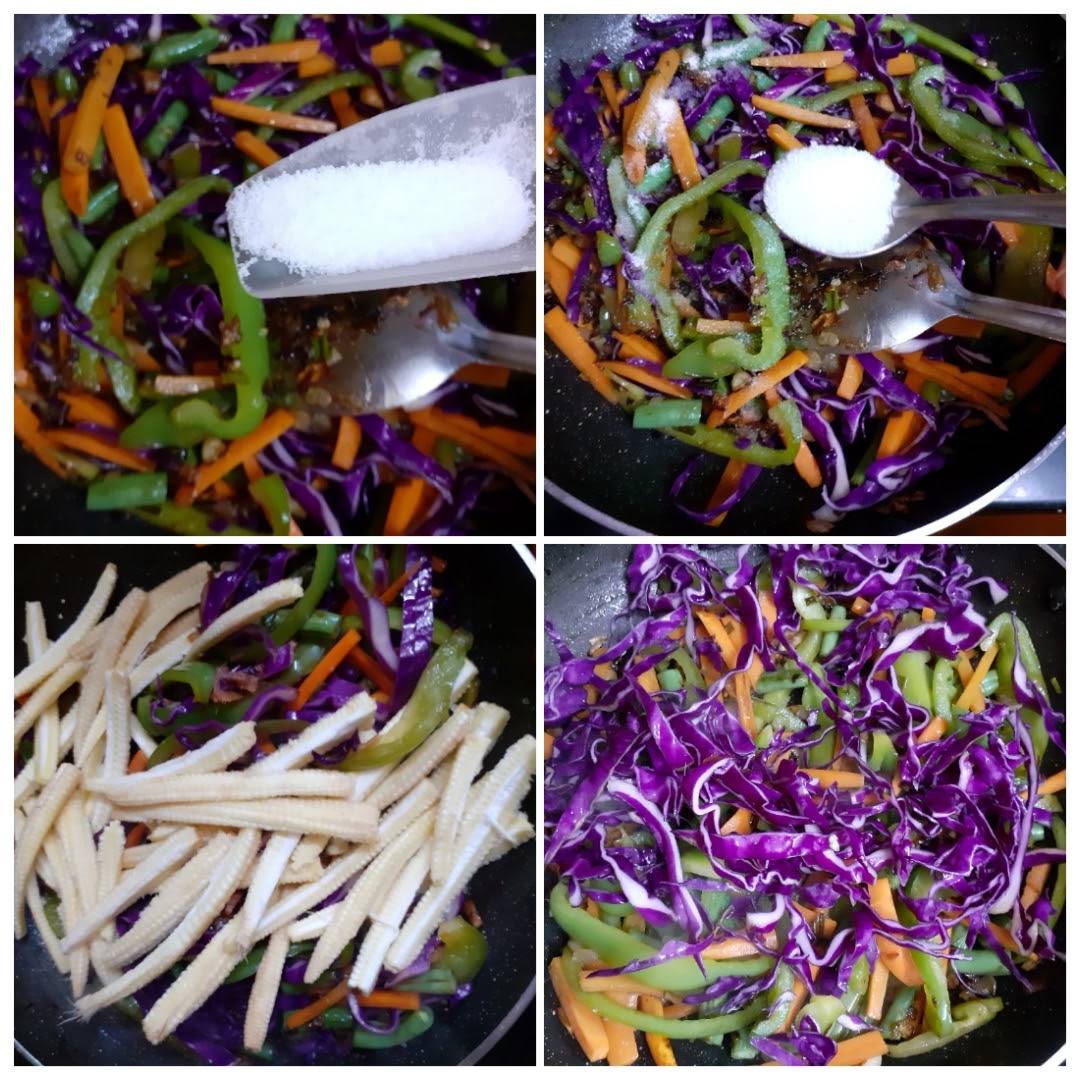
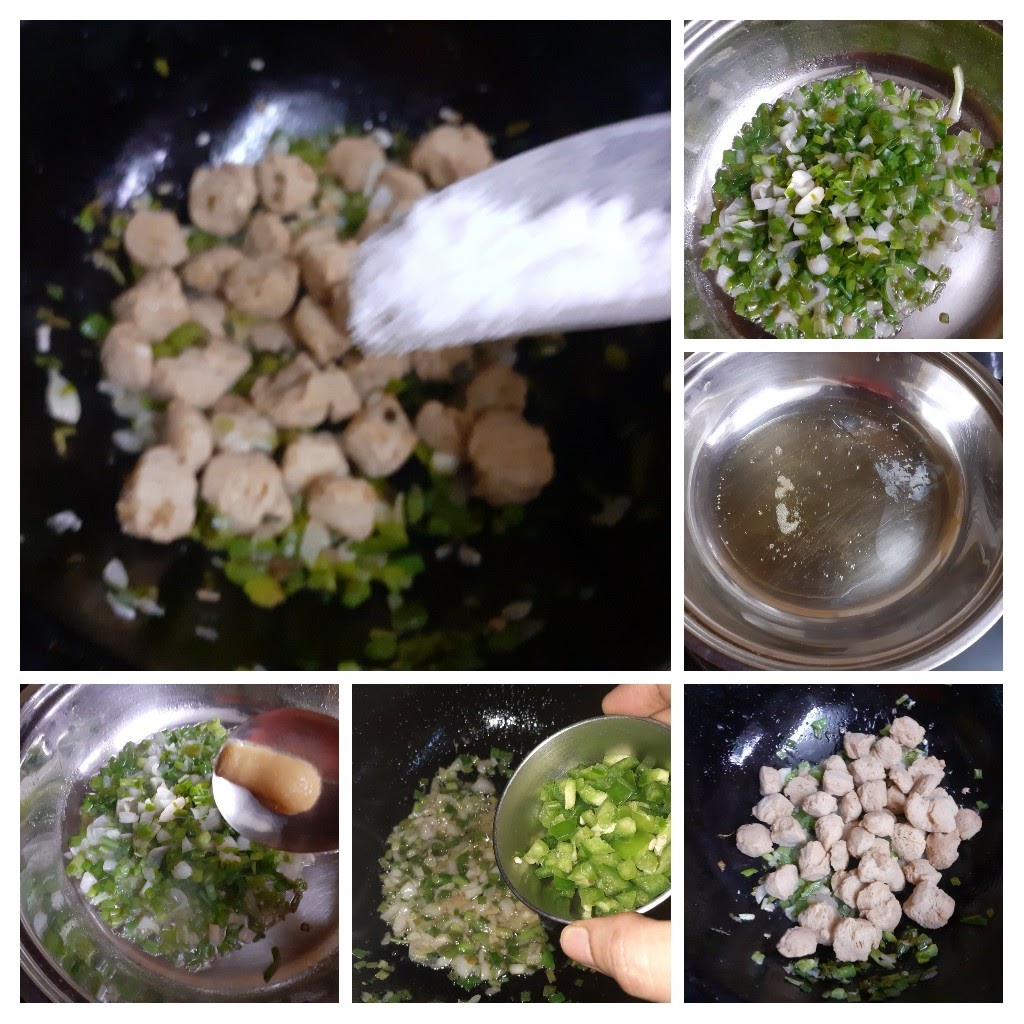
So how do we take away the blandness, obviously by marination. Tofu requires a little more time than paneer to marinate. So, I plan ahead when I want to cook my tofu dish. I prefer Tofu as a stir fry or as part of mixed vegetables in a sauce. So this dish is a combination of a Stir- fry and sauce. In this dish I have infused the sauce while stir frying instead of marination.
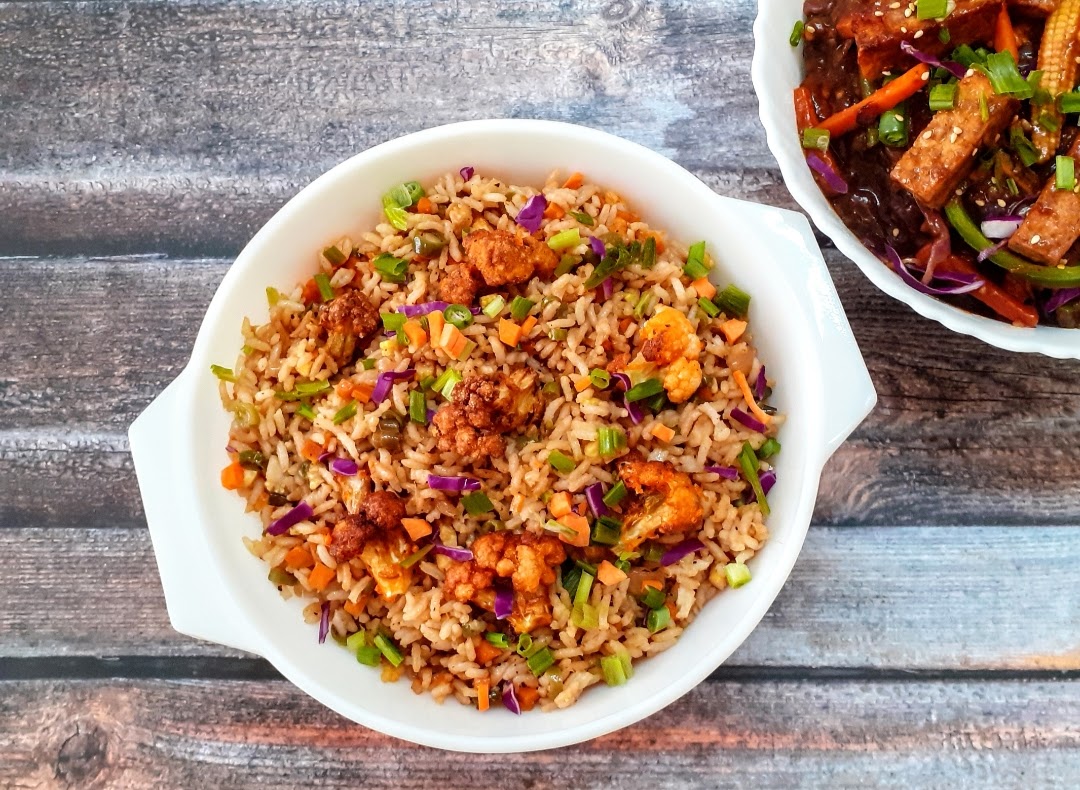
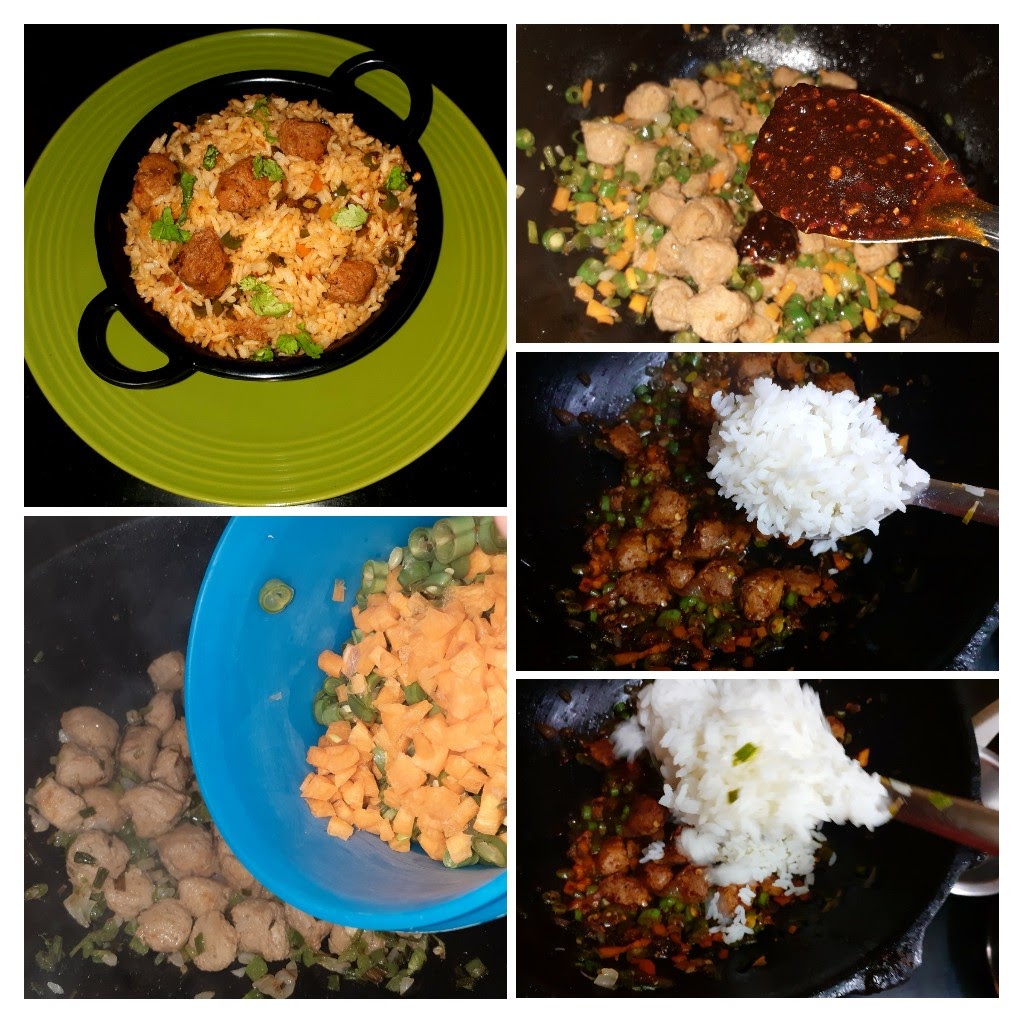
I usually choose to make this with fried rice as the Schezwan sauce base of this dish is the perfect pairing for the fried rice. I usually use a homemade Schezwan sauce made the traditional way using Chinese five spice, but for this particular recipe I have used Ching’s secret Schezwan Rice masala. Since I am using a ready made masala the work gets done a little sooner, so it is perfect for my after work dinners.
While you are here check out other Indo- Chinese recipes on the blog like- Vegetable Manchurian with gravy, Schezwan fried rice with Soya chunks, Cauliflower Fried rice, Chinese Paratha, and more…
Here is the recipe for Tofu and stir fried vegetables in hot Schezwan sauce-

NOTES:
Bishop Nut Bread
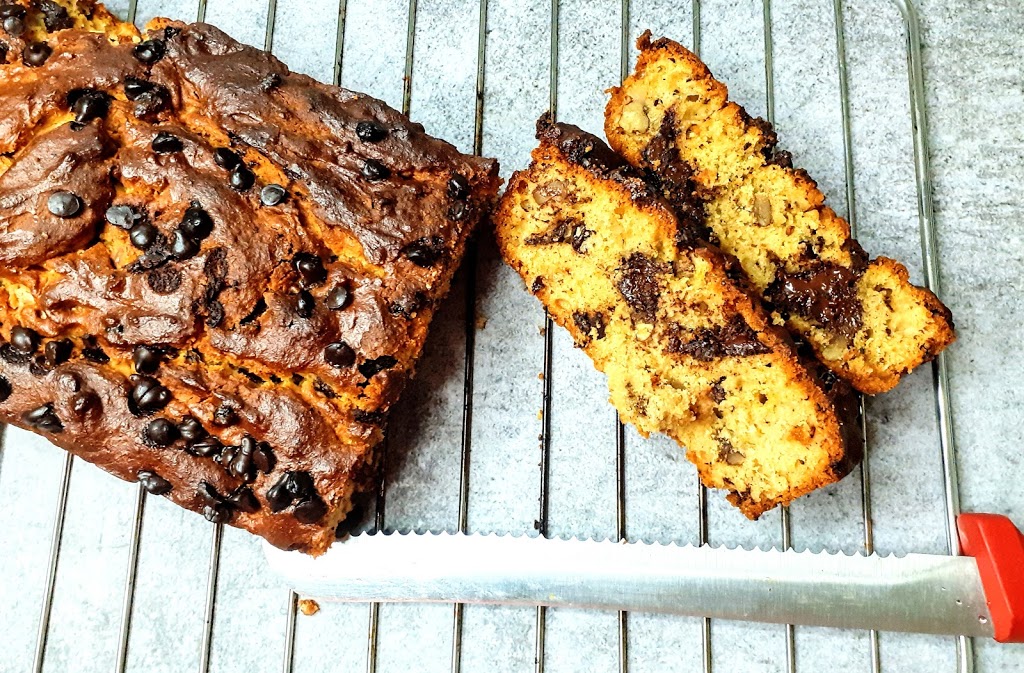
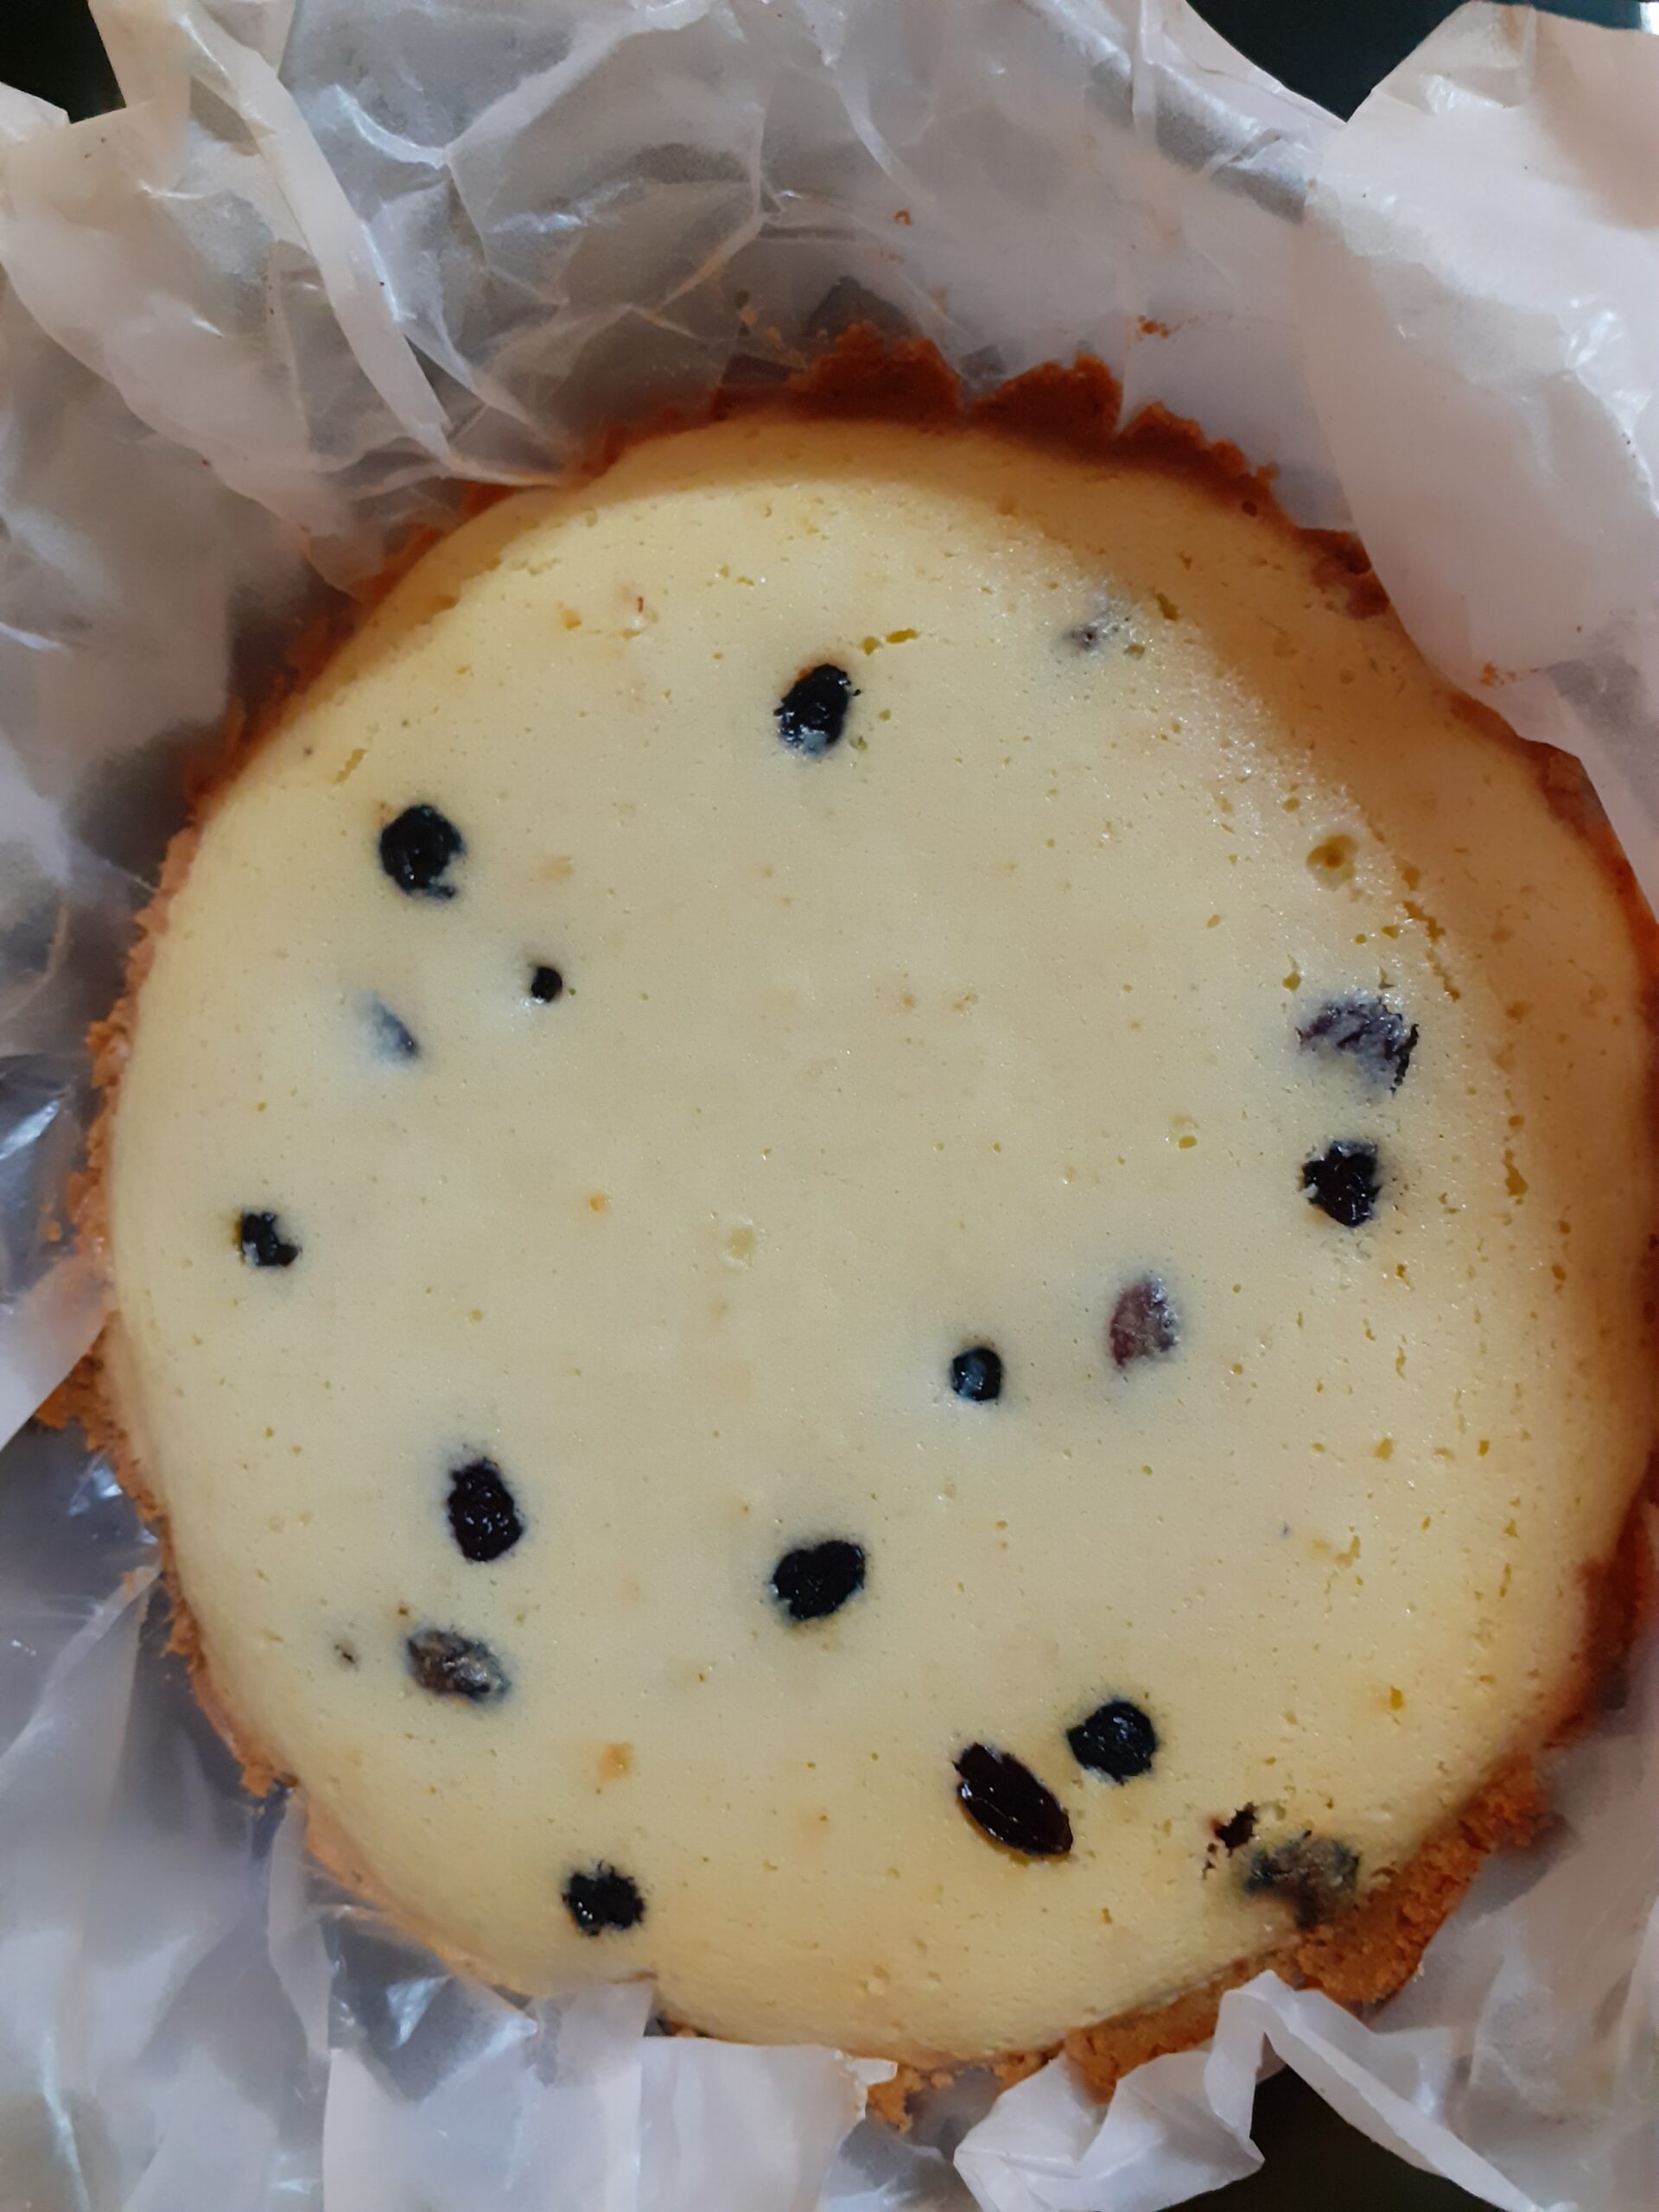
Bishop Nut Bread or Bishops cake as it is popularly called is traditionally served at Christmas time. This cake is full of goodies inside. It gets its name from the stained glass look of each slice. However, I have not replicated that look. The cake mostly uses a lot of Tutti- Fruity, which I have not used. Simply because that’s not how I have eaten this cake. And believe it when I say, I have tasted this from one of the best hotels in India ITC Maurya . I have had the pleasure of enjoying this for 8 long years during our stay in Delhi.
I have loosely adapted this recipe from https://www.allrecipes.com/
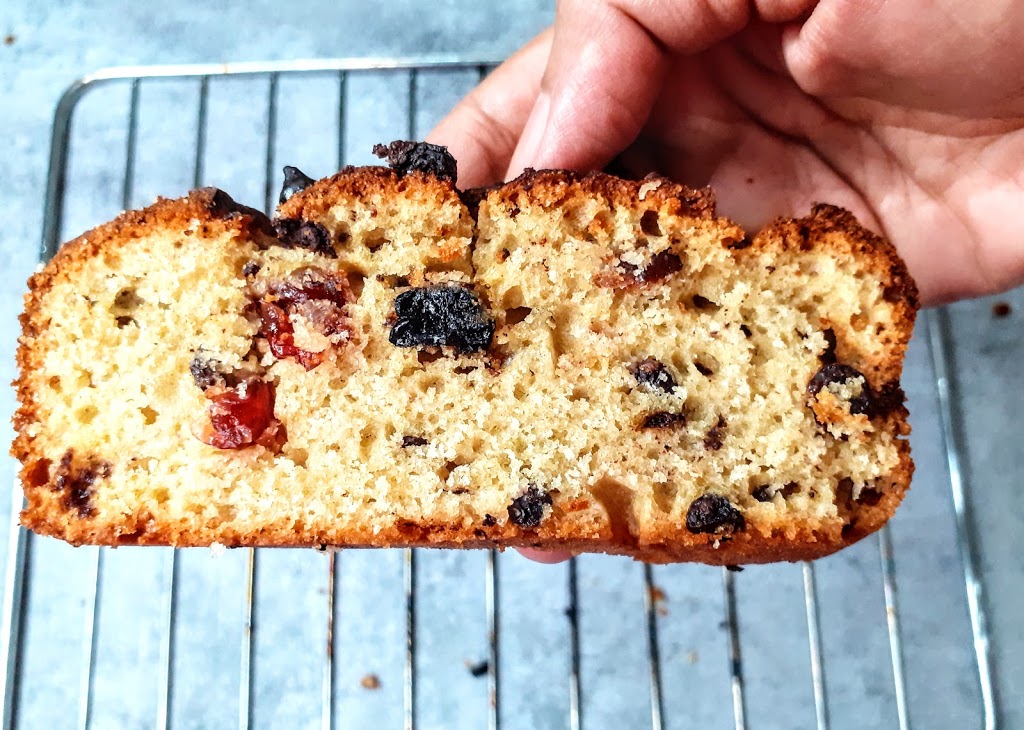
Well, the original recipe calls for refined flour, choco chips, and tutti fruity. You know me by now, I use Maida/refined flour only when I think the recipe will not work well without it. So I used whole wheat flour. But in this case I took a chance, as even I did not know how it would turn out. Needless to say I am so happy with the texture. Well, so without diverging any further, other than the whole wheat flour I substituted the choco chips with chunks of broken chocolate, so that I have pockets of gooey chocolate in between, loaded it with walnuts, cranberries, and, blueberries. I topped it with some homemade ghee, for that divine smell while it bakes. The result is a very decadent cake, which is more like a loaf. Does the description make you drool? then, im happy, as it was intended????????.
While you are here check out other bakes by me like- Blueberry cheesecake, Whole wheat blueberry muffins, Eggless Pineapple cake, Strawberry and lemon loaf, Apple tea cake, Upside down orange vanilla cake(eggless), Pistachio Cake, Bajra and Almond flour cookies, and more…
Here is the recipe of Bishop Nut Bread-
Ingredients:
Egg 1
Whole wheat flour 1 3/4 cups (a little less than 2 cups)
Granulated sugar 1/2 cup
Oil (any neutral oil) 1/4 cup
Buttermilk 1 cup
Baking soda 1/2 tsp
Baking powder 1/2 tsp
Salt 1/2 tsp
Vanilla essence 2 drops
Chocholate chunks (use good eating chocolate, not compounded chocolate)
Chocochips for topping
Blueberries 1/2 cup (dried/dehydrated ones)
Walnuts broken 1 cup
Cranberries 1/4 cup
Black raisins (optional) a handful
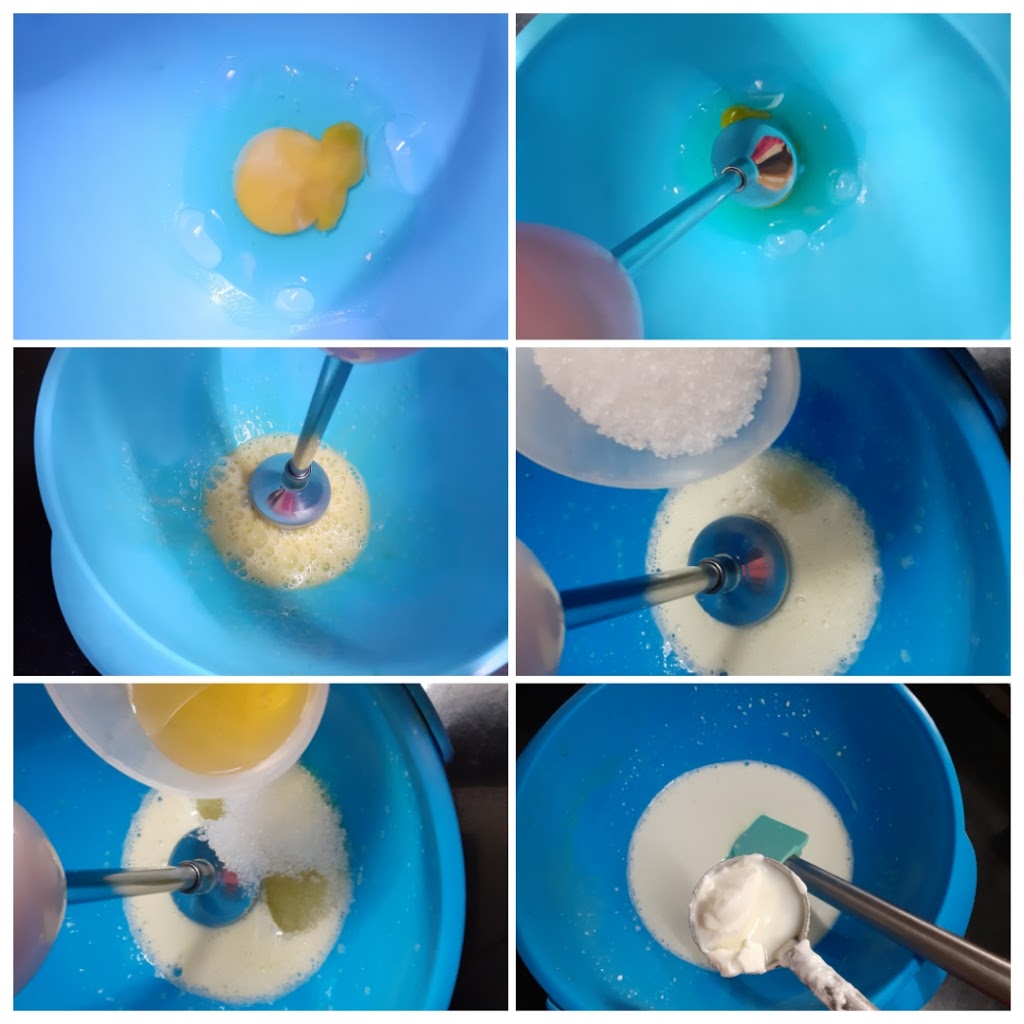
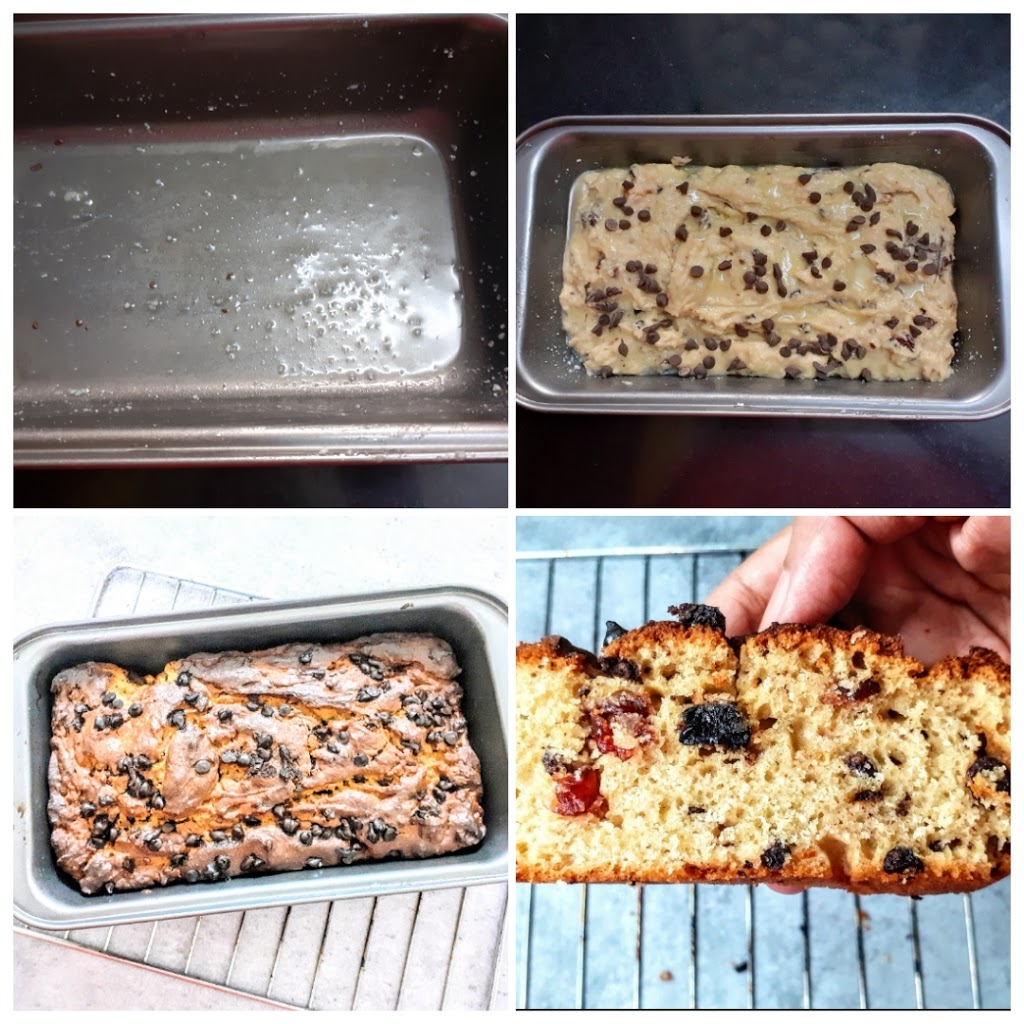
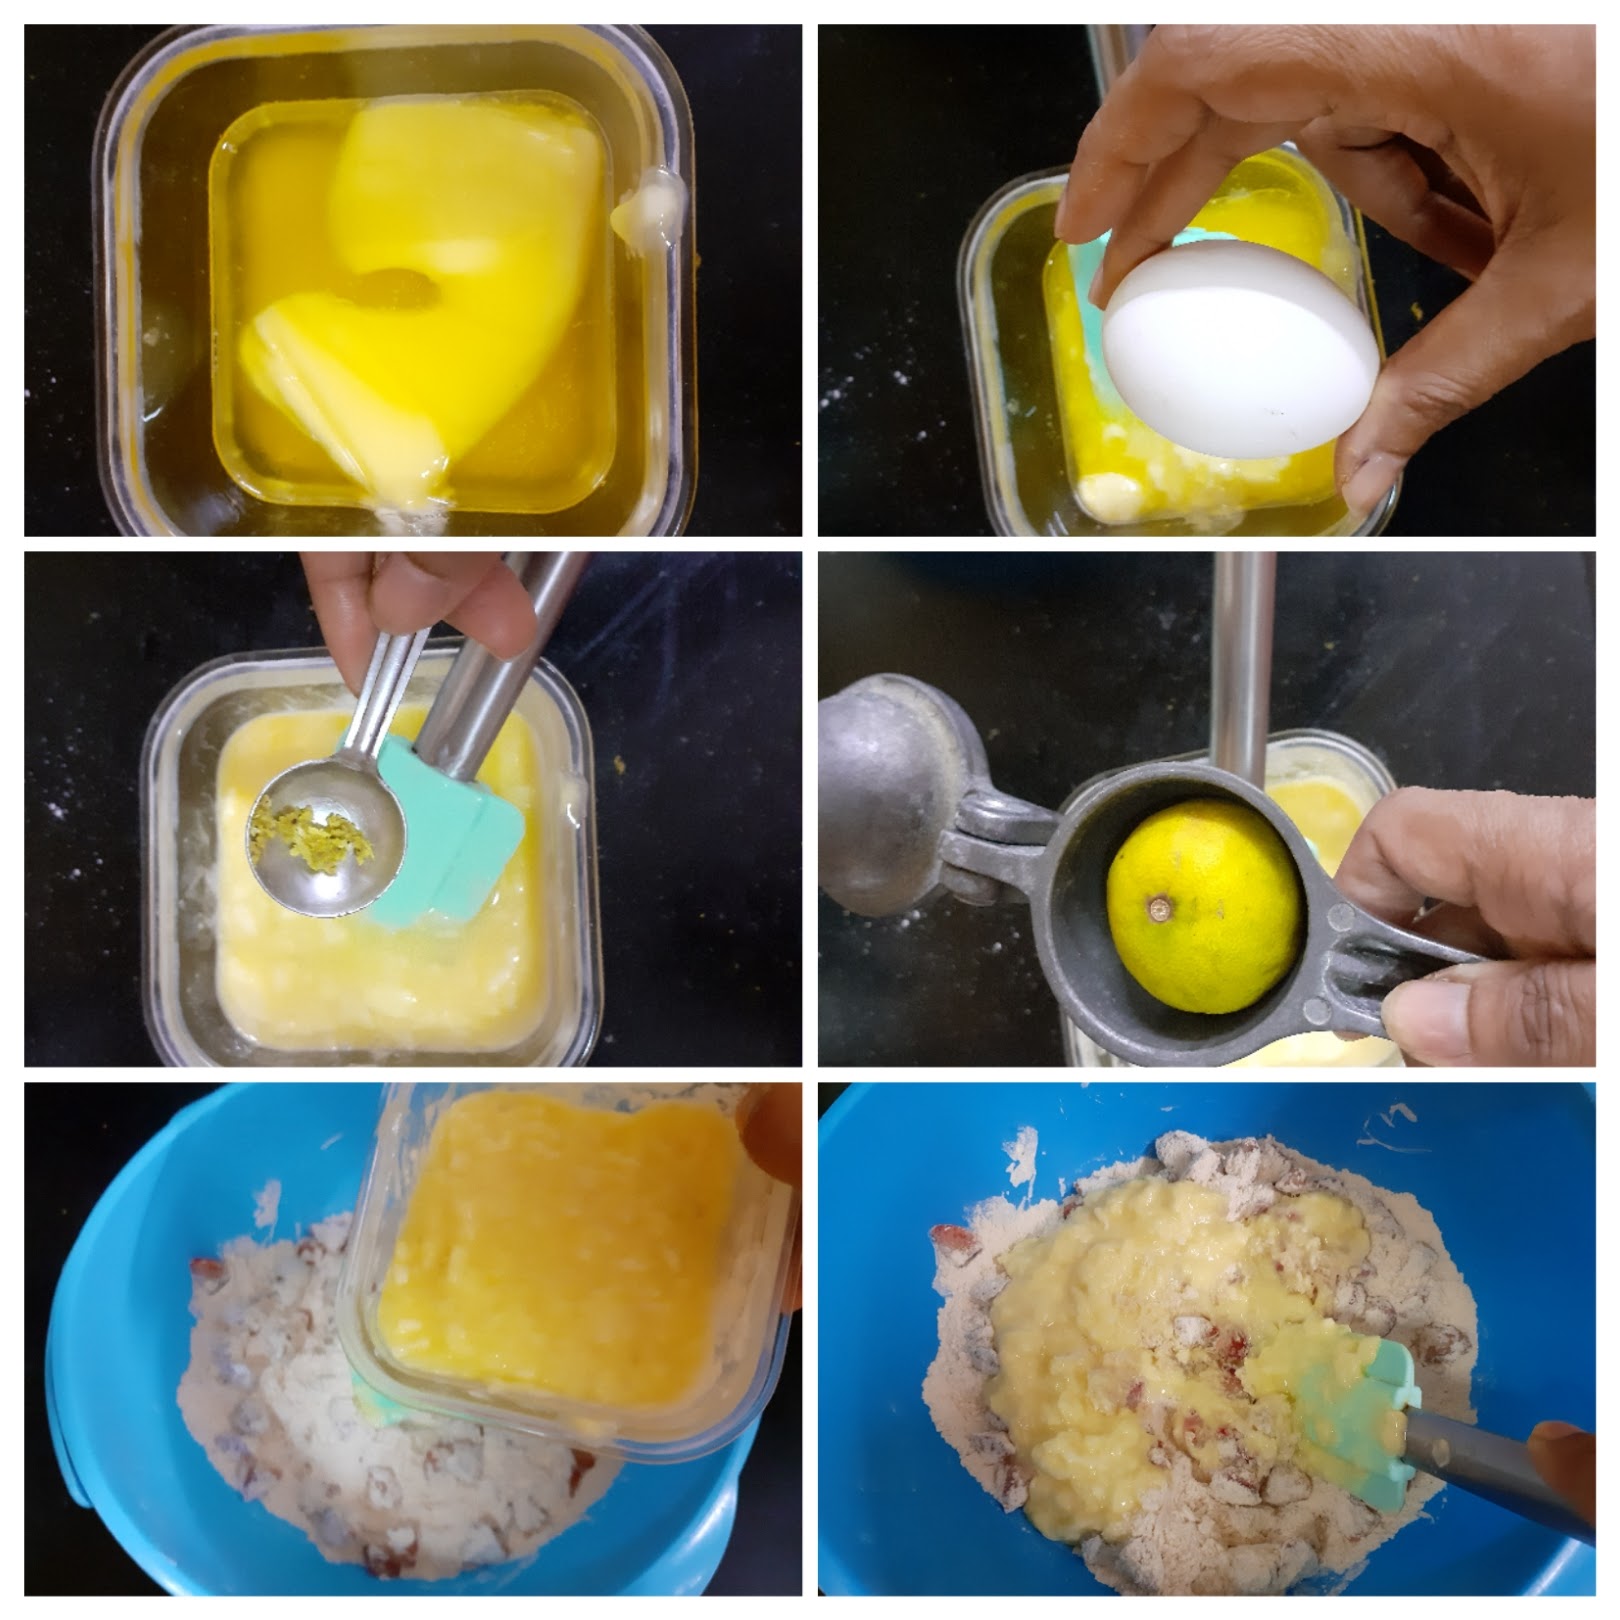
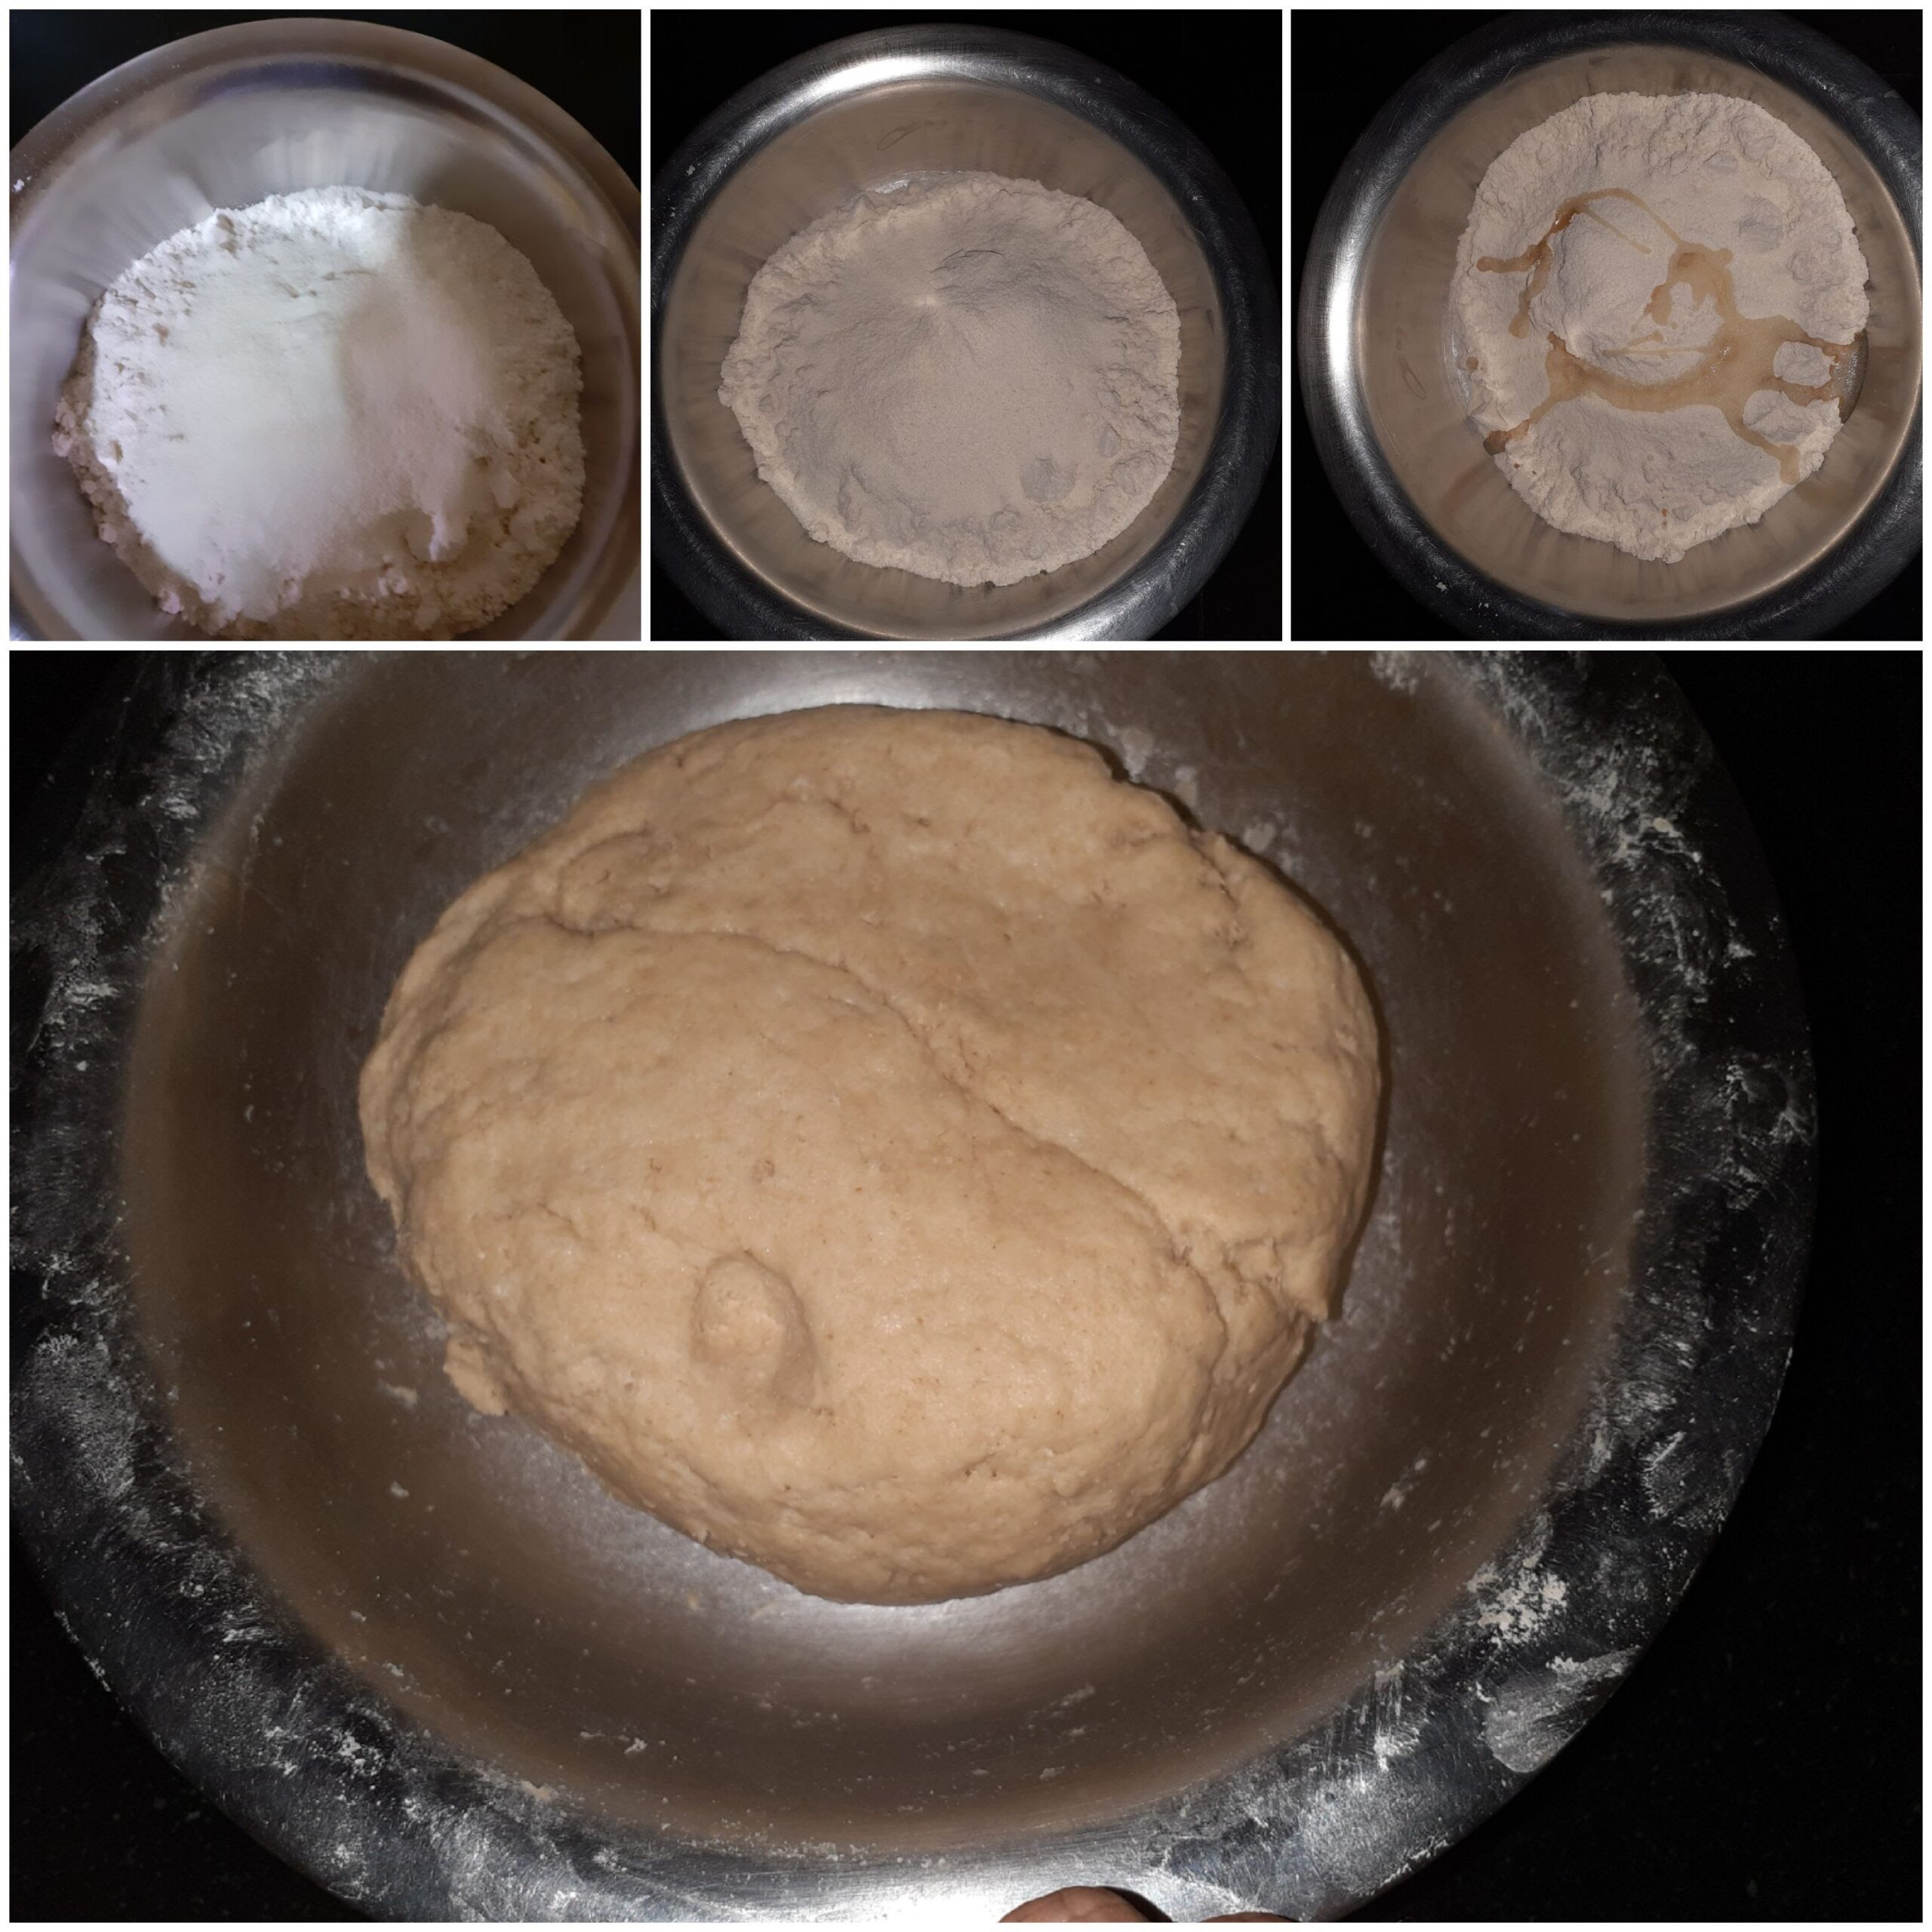
Directions: Preheat oven to 175 C . In a large mixing bowl take an egg and beat until frothy. Add in the sugar, oil and buttermilk(please note, I skipped taking a picture of adding buttermilk, so I have represented it with curd. Please use a cup of buttermilk). Also add Vanilla essence, and beat well again for 2 minutes on medium speed. Now in another bowl take the flour, baking powder, baking soda, salt, blueberries, cranberries, raisins, walnuts, and mix well with spatula. Break the chocolate into chunks, and keep aside. Now add all the flour-nut and berry mixture into the wet mixture, and mix well with a spatula. Do not over mix or mix vigorously. Mix in a single direction until combined. Now add the chocolate chunks and give a gentle mix. Pour the cake batter into a greased 9 inch loaf pan, top with choco chips(optional), and bake at 175 c for 50 minutes. Since all ovens have a different temperature range, start checking from 40 minutes onward. When the cake is brown on top and a tooth pick inserted in the center comes out clean, (please note if you hit a chocolate chunk with the toothpick, it will be gooey, this doesn’t mean the cake is undone, poke again at a different place to ensure). Switch off the oven and let the cake stand in the oven for 10 minutes. Remove, cool completely and then slice the cake.
STEPWISE RECIPE FOLLOWS:
1. Preheat oven to 175 C . In a large mixing bowl take an egg and beat until frothy. Add in the sugar, oil and buttermilk(please note, I skipped taking a picture of adding buttermilk, so I have represented it with curd. Please use a cup of buttermilk). Also add vanilla essence, and beat well again for 2 minutes on medium speed.
2. Now in another bowl take the flour, baking powder, baking soda, salt, blueberries, cranberries, raisins, walnuts, and mix well with spatula. Break the chocolate into chunks, and keep aside.

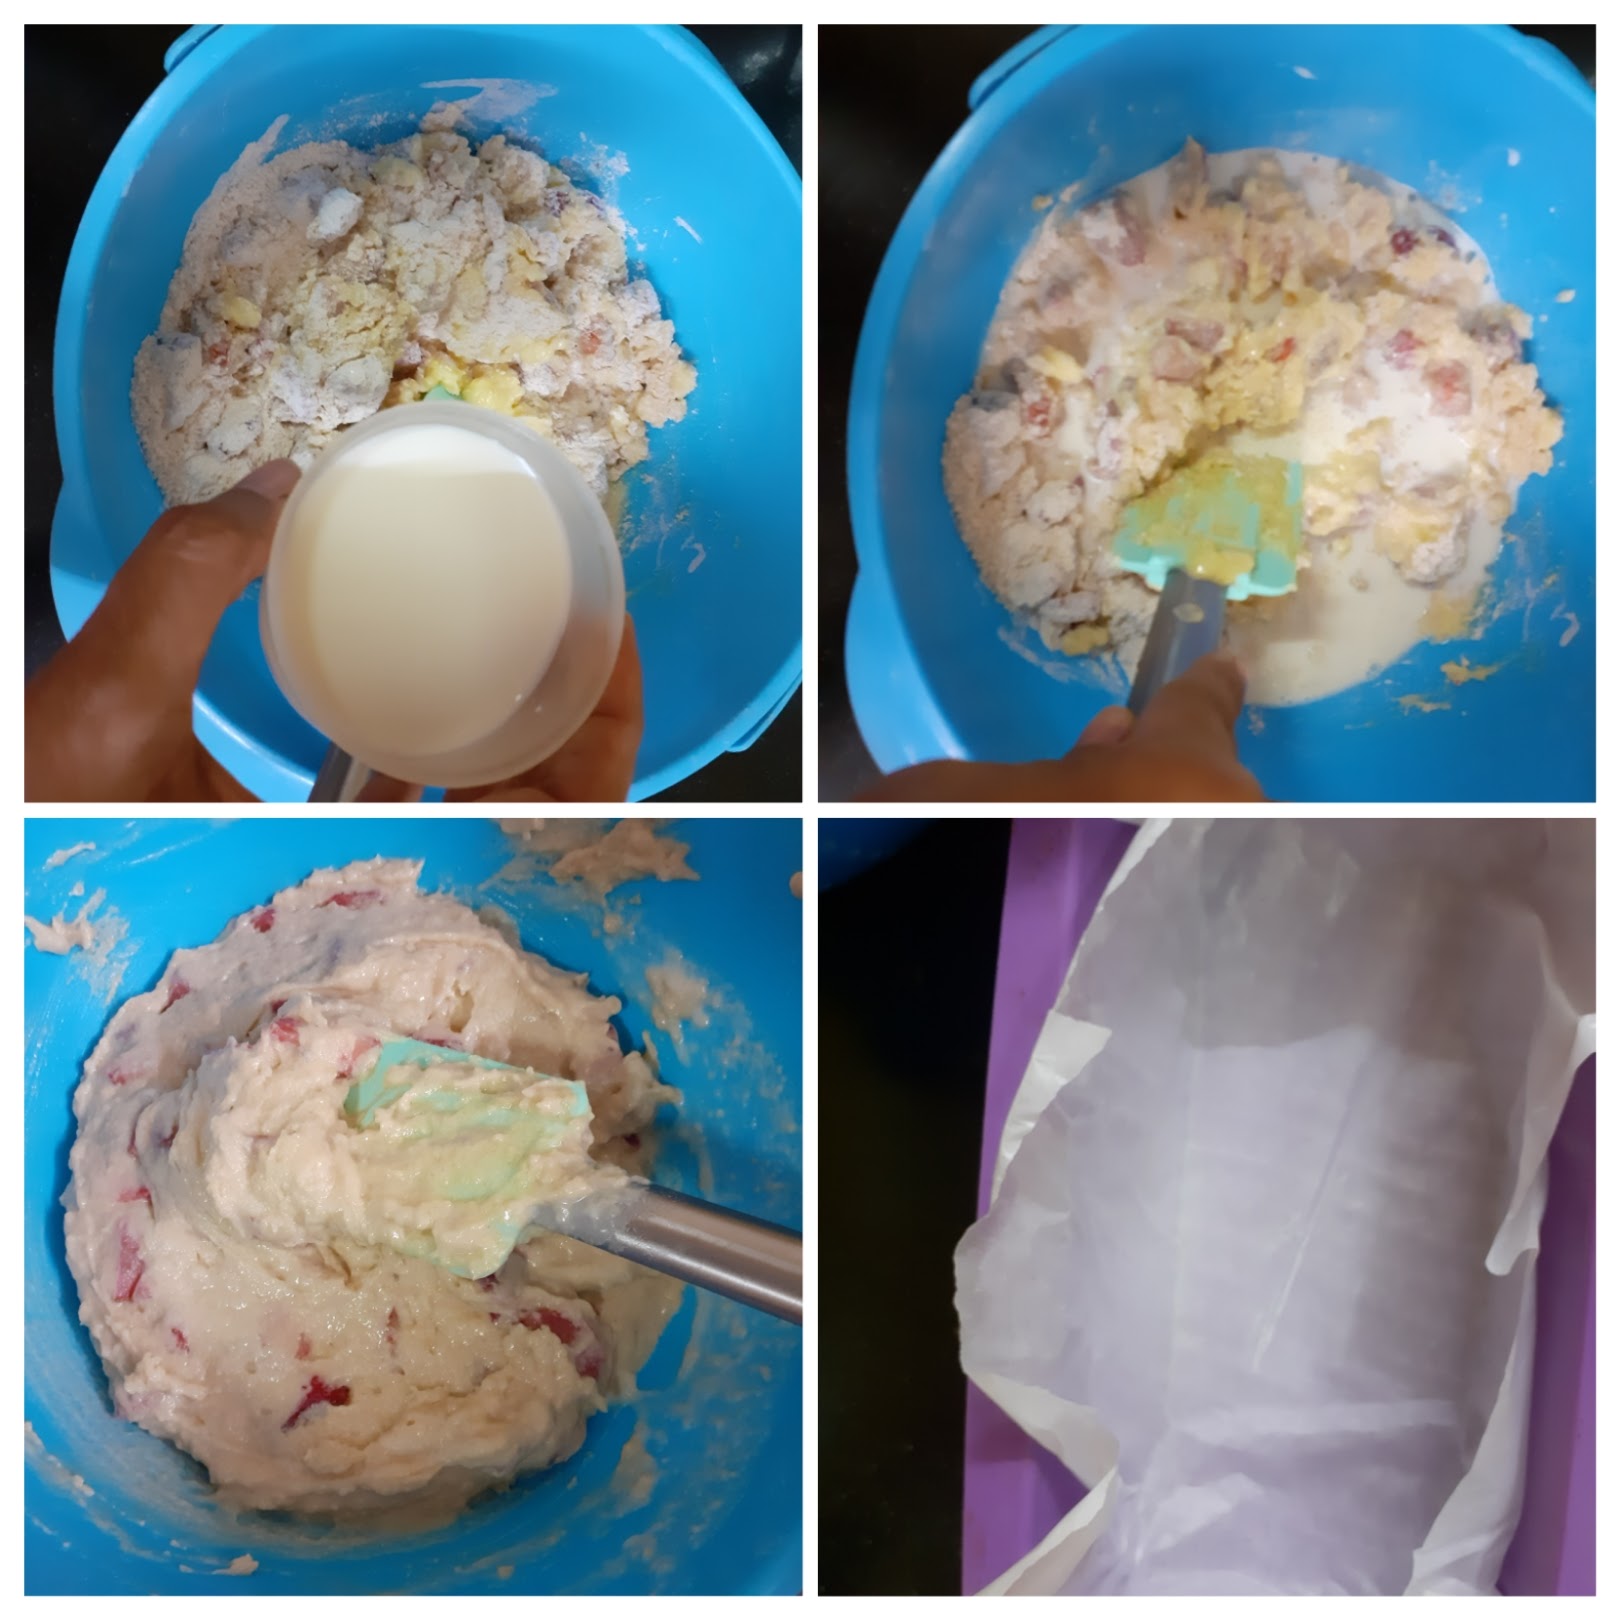
3. Now add all the flour-nut and berry mixture into the wet mixture, and combine well with a spatula. Do not over mix or mix vigorously. Mix in a single direction until combined. Now add the chocolate chunks and give a gentle mix.

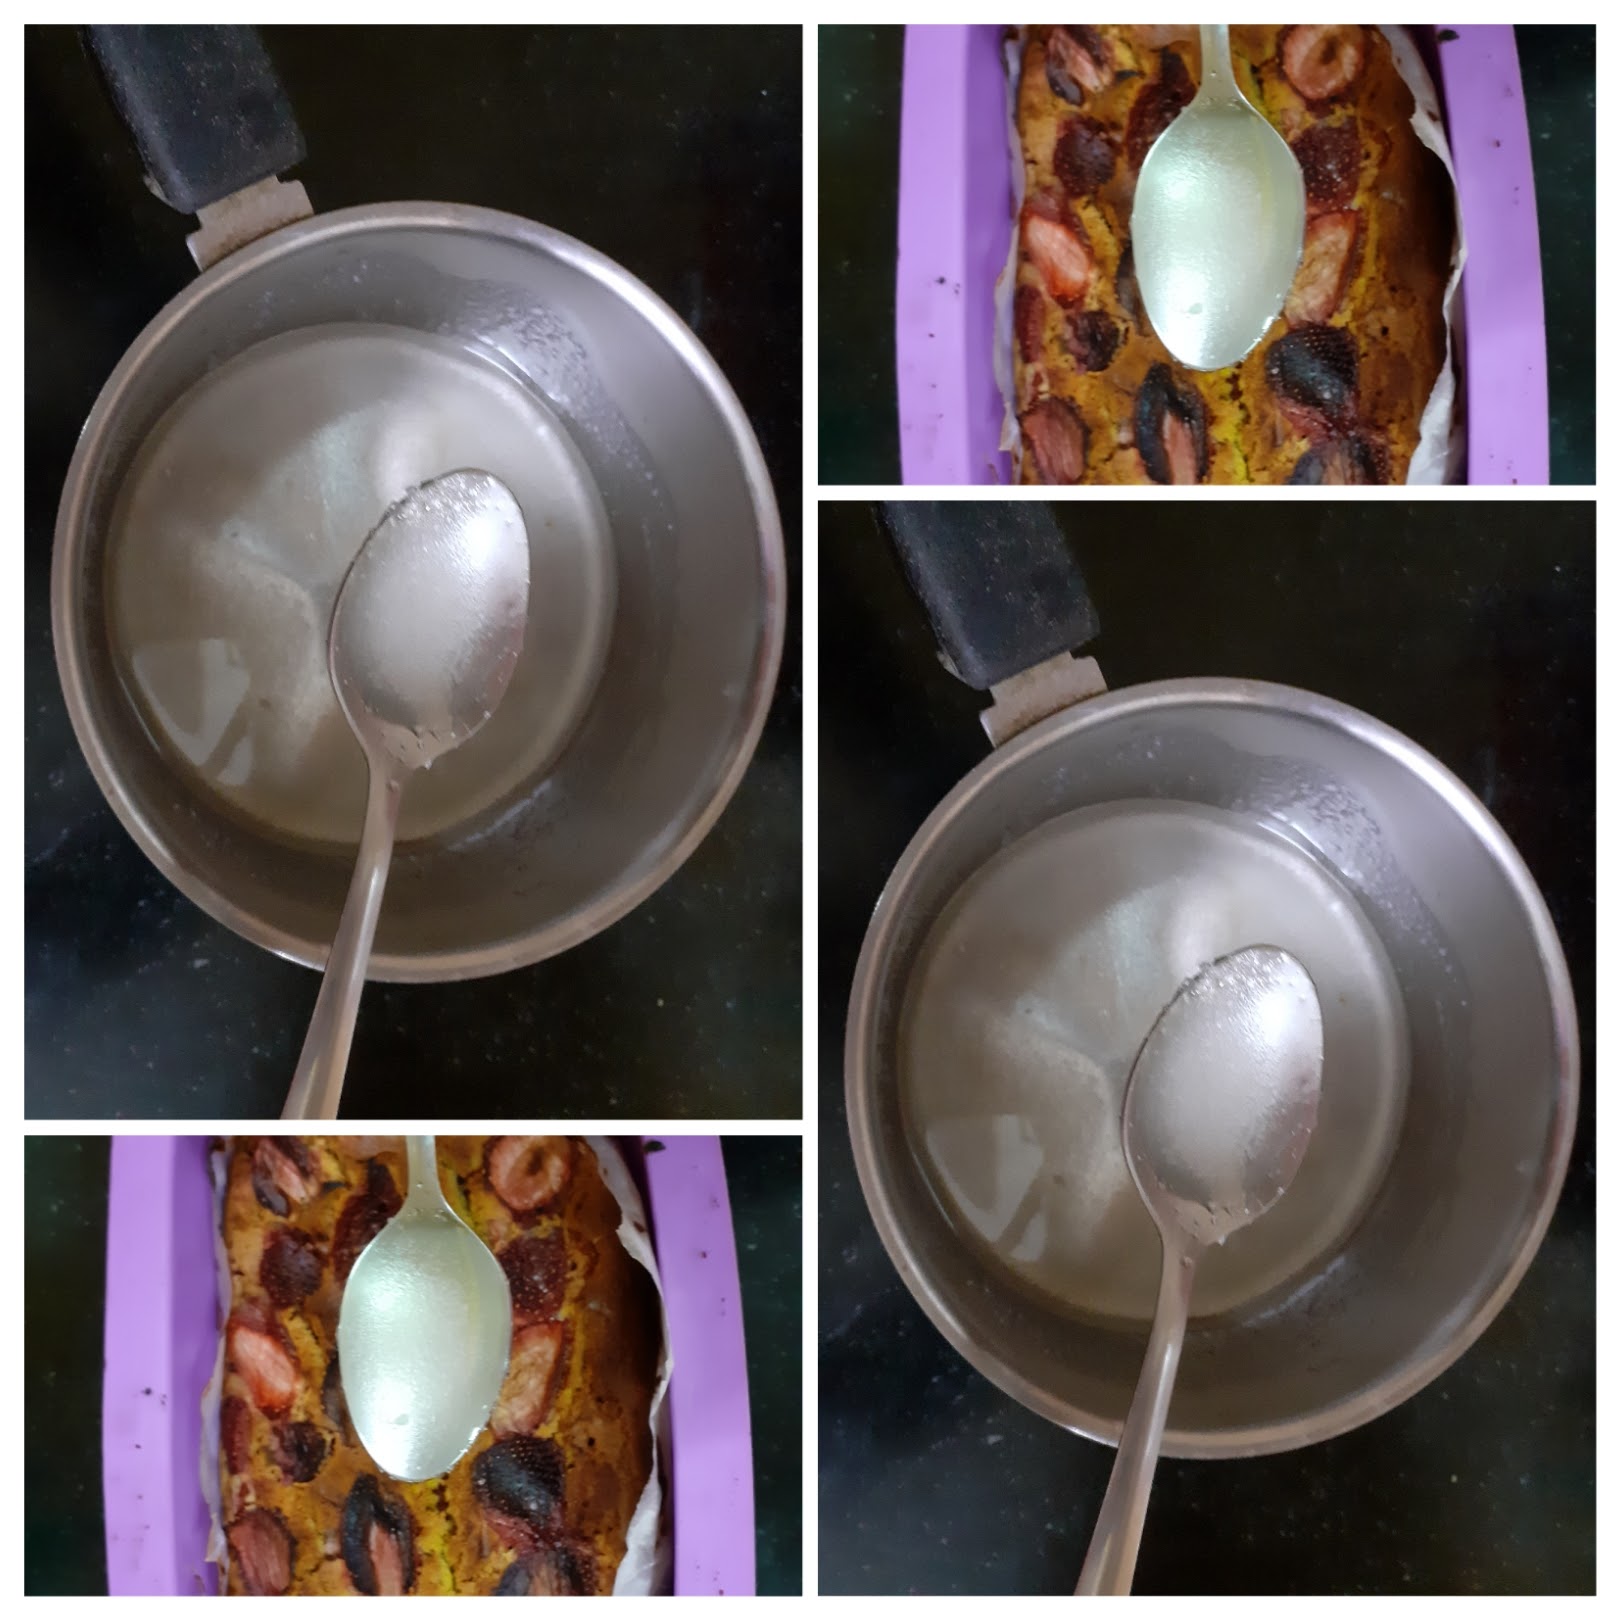
4. Pour the cake batter into a greased 9 inch loaf pan, top with choco chips(optional), and bake at 175 c for 50 minutes. Since all ovens have a different temperature range, start checking from 40 minutes onward. When the cake is brown on top and a tooth pick inserted in the center comes out clean, switch off the oven and let the cake stand in the oven for 10 minutes. Remove, cool completely and then slice the cake.
NOTES:
1. Dates are commonly used in this cake, since I did not have them at the time of baking I have not added. I recommend that you add some.
2. Tutti fruity can also be used, though i have excluded it.
3. While mixing cake batter always mix in the same direction, this helps the cake to rise better.
4. Please note, I skipped taking a picture of adding buttermilk, so I have represented it with curd. Please use a cup of buttermilk. To make 1 cup buttermilk, dilute 2 tbsp thick curd with 3/4 cup of water. Mix well.
5. Since all ovens have a different temperature range, start checking from 40 minutes onward. Please note if you hit a chocolate chunk with the toothpick, it will be gooey, this doesn’t mean the cake is undone, poke again at a different place to ensure.
6. No loaf pan, just use your regular cake dish. It is taste that matters after all.
If you tried this recipe and liked it please comment below. I would love to hear from you. If you have a query about the recipe email us and ill respond as soon as I can.
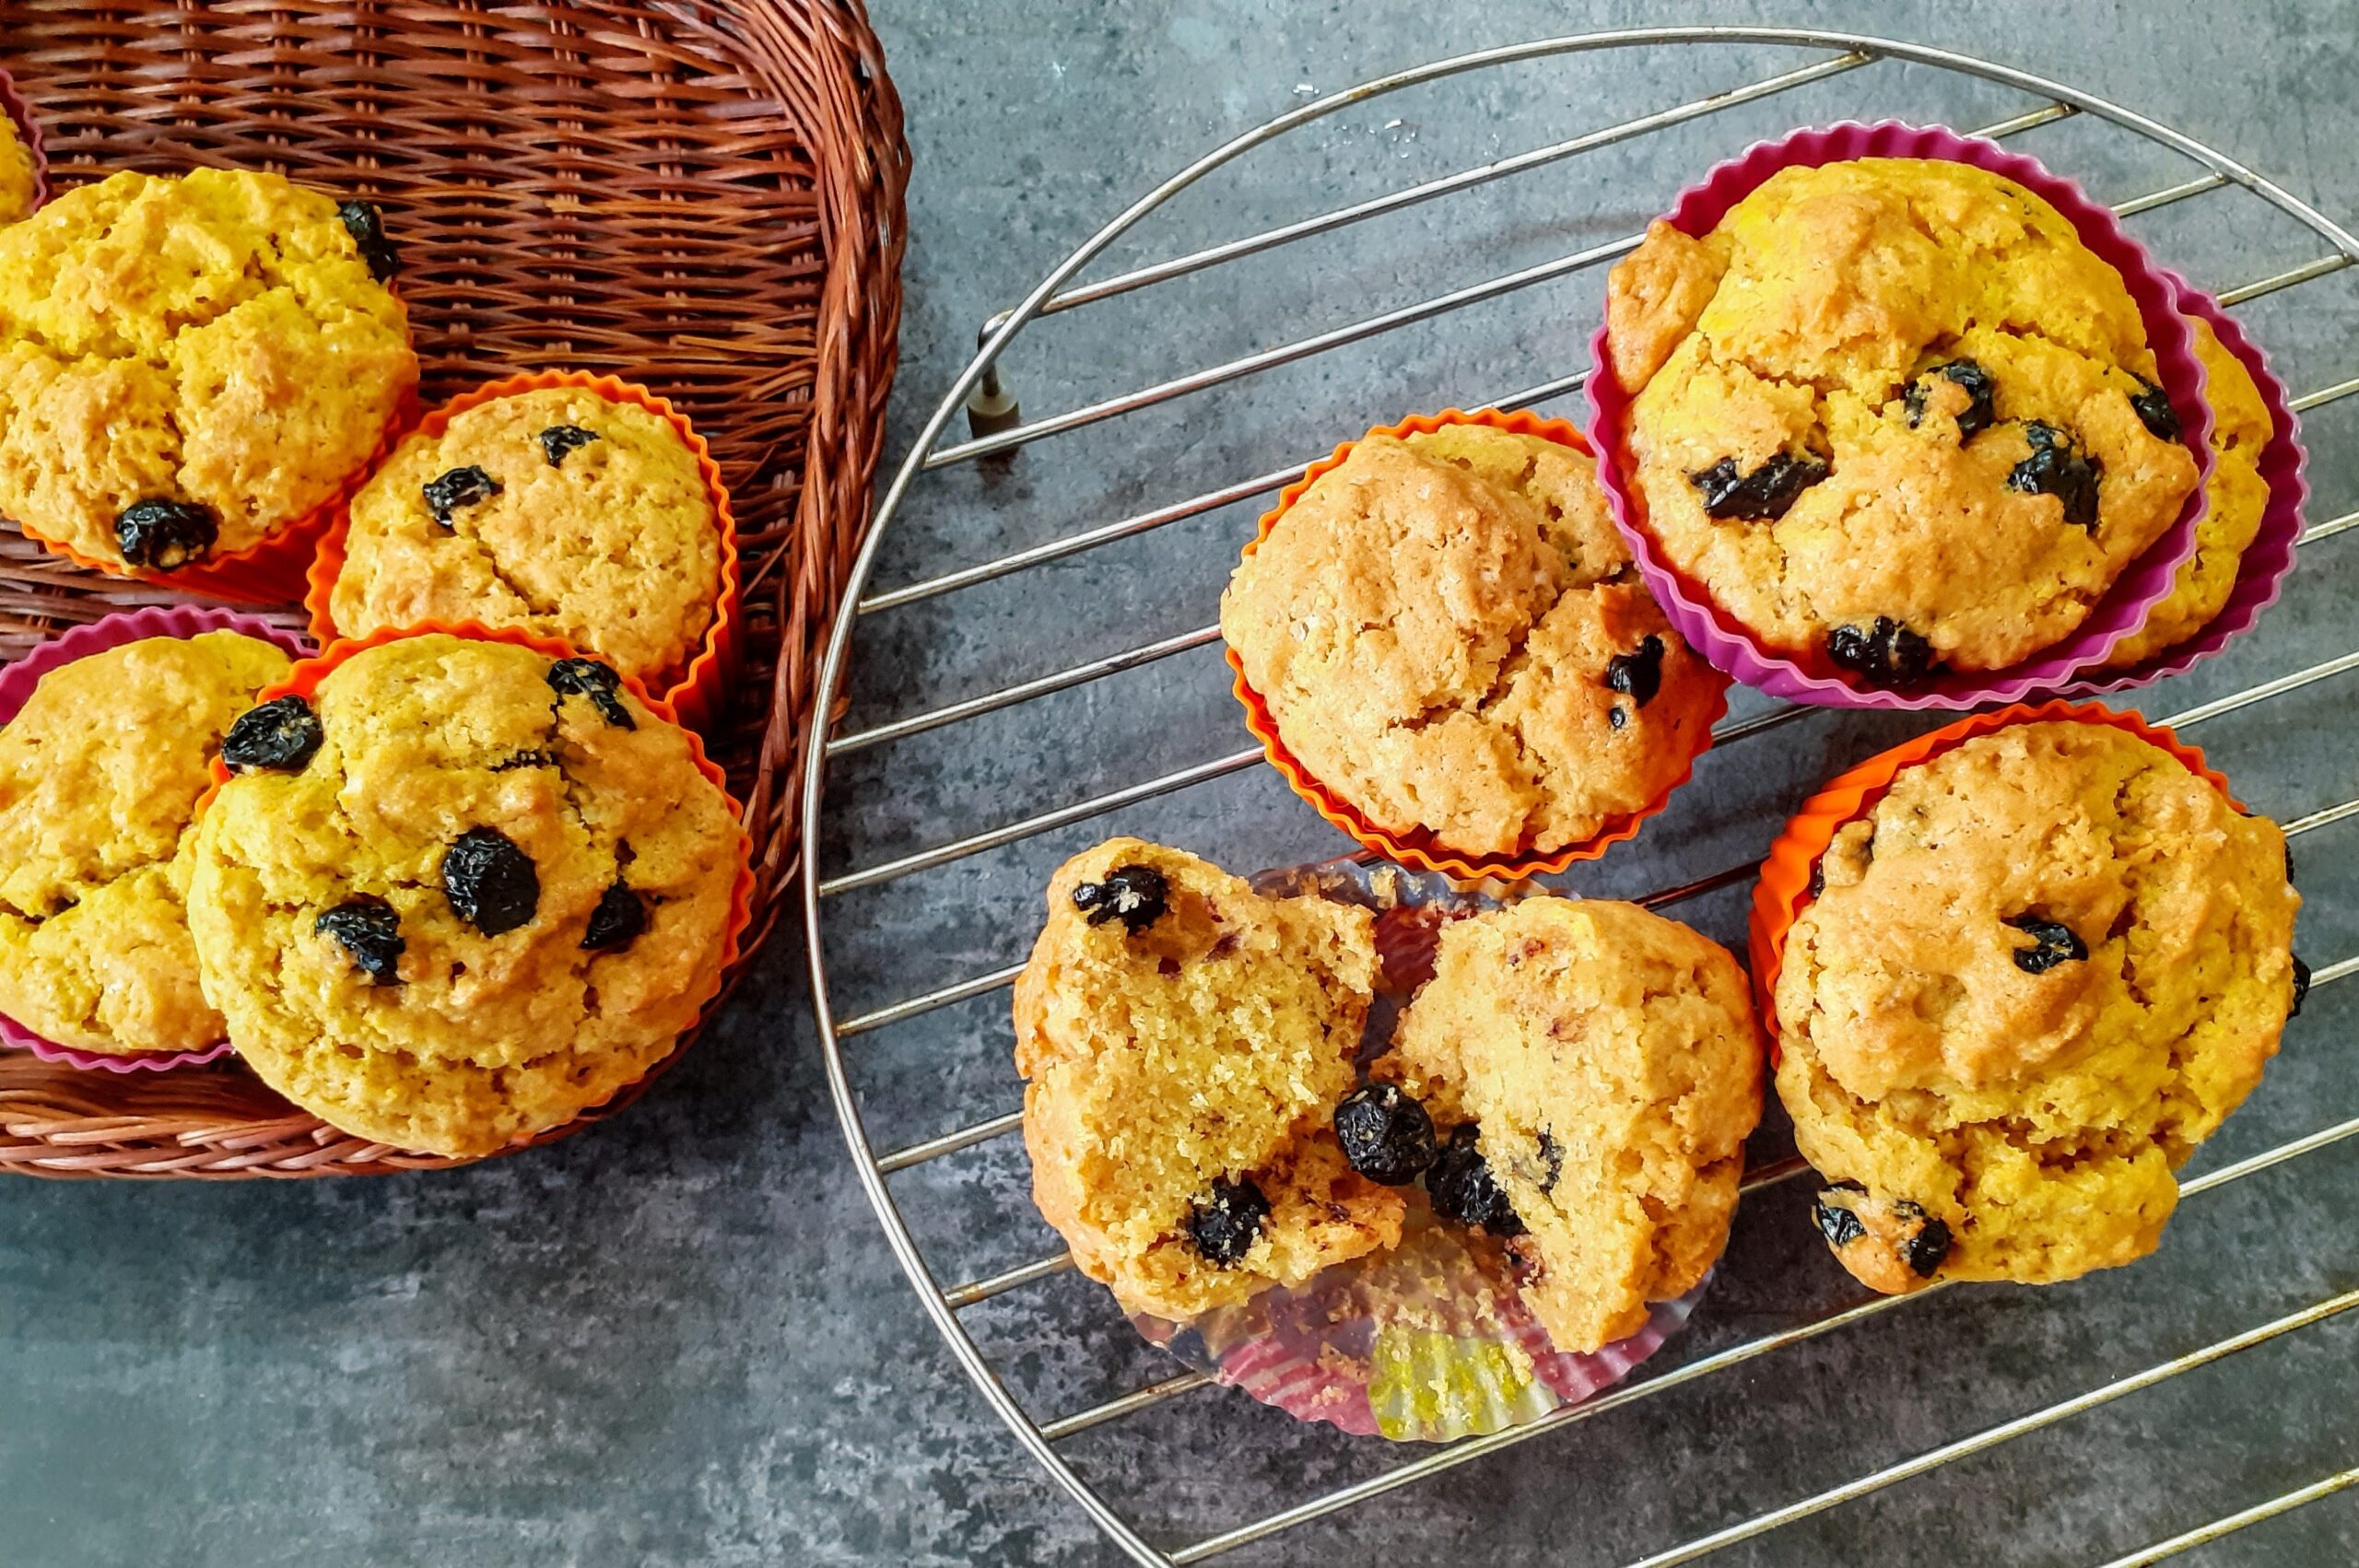
Whole Wheat Blueberry Muffins
If you haven’t realised until now, I am a huge berry fan. Whatever the berry, I will think of a dessert to make. The berry recipes in this blog are proof for it. Berries not only provide our body with antioxidants, but also with micro nutrients, which are essential for a healthy body. so whenever you find berries include them in smoothies, pan cakes, lassi, compote, Jams and more…
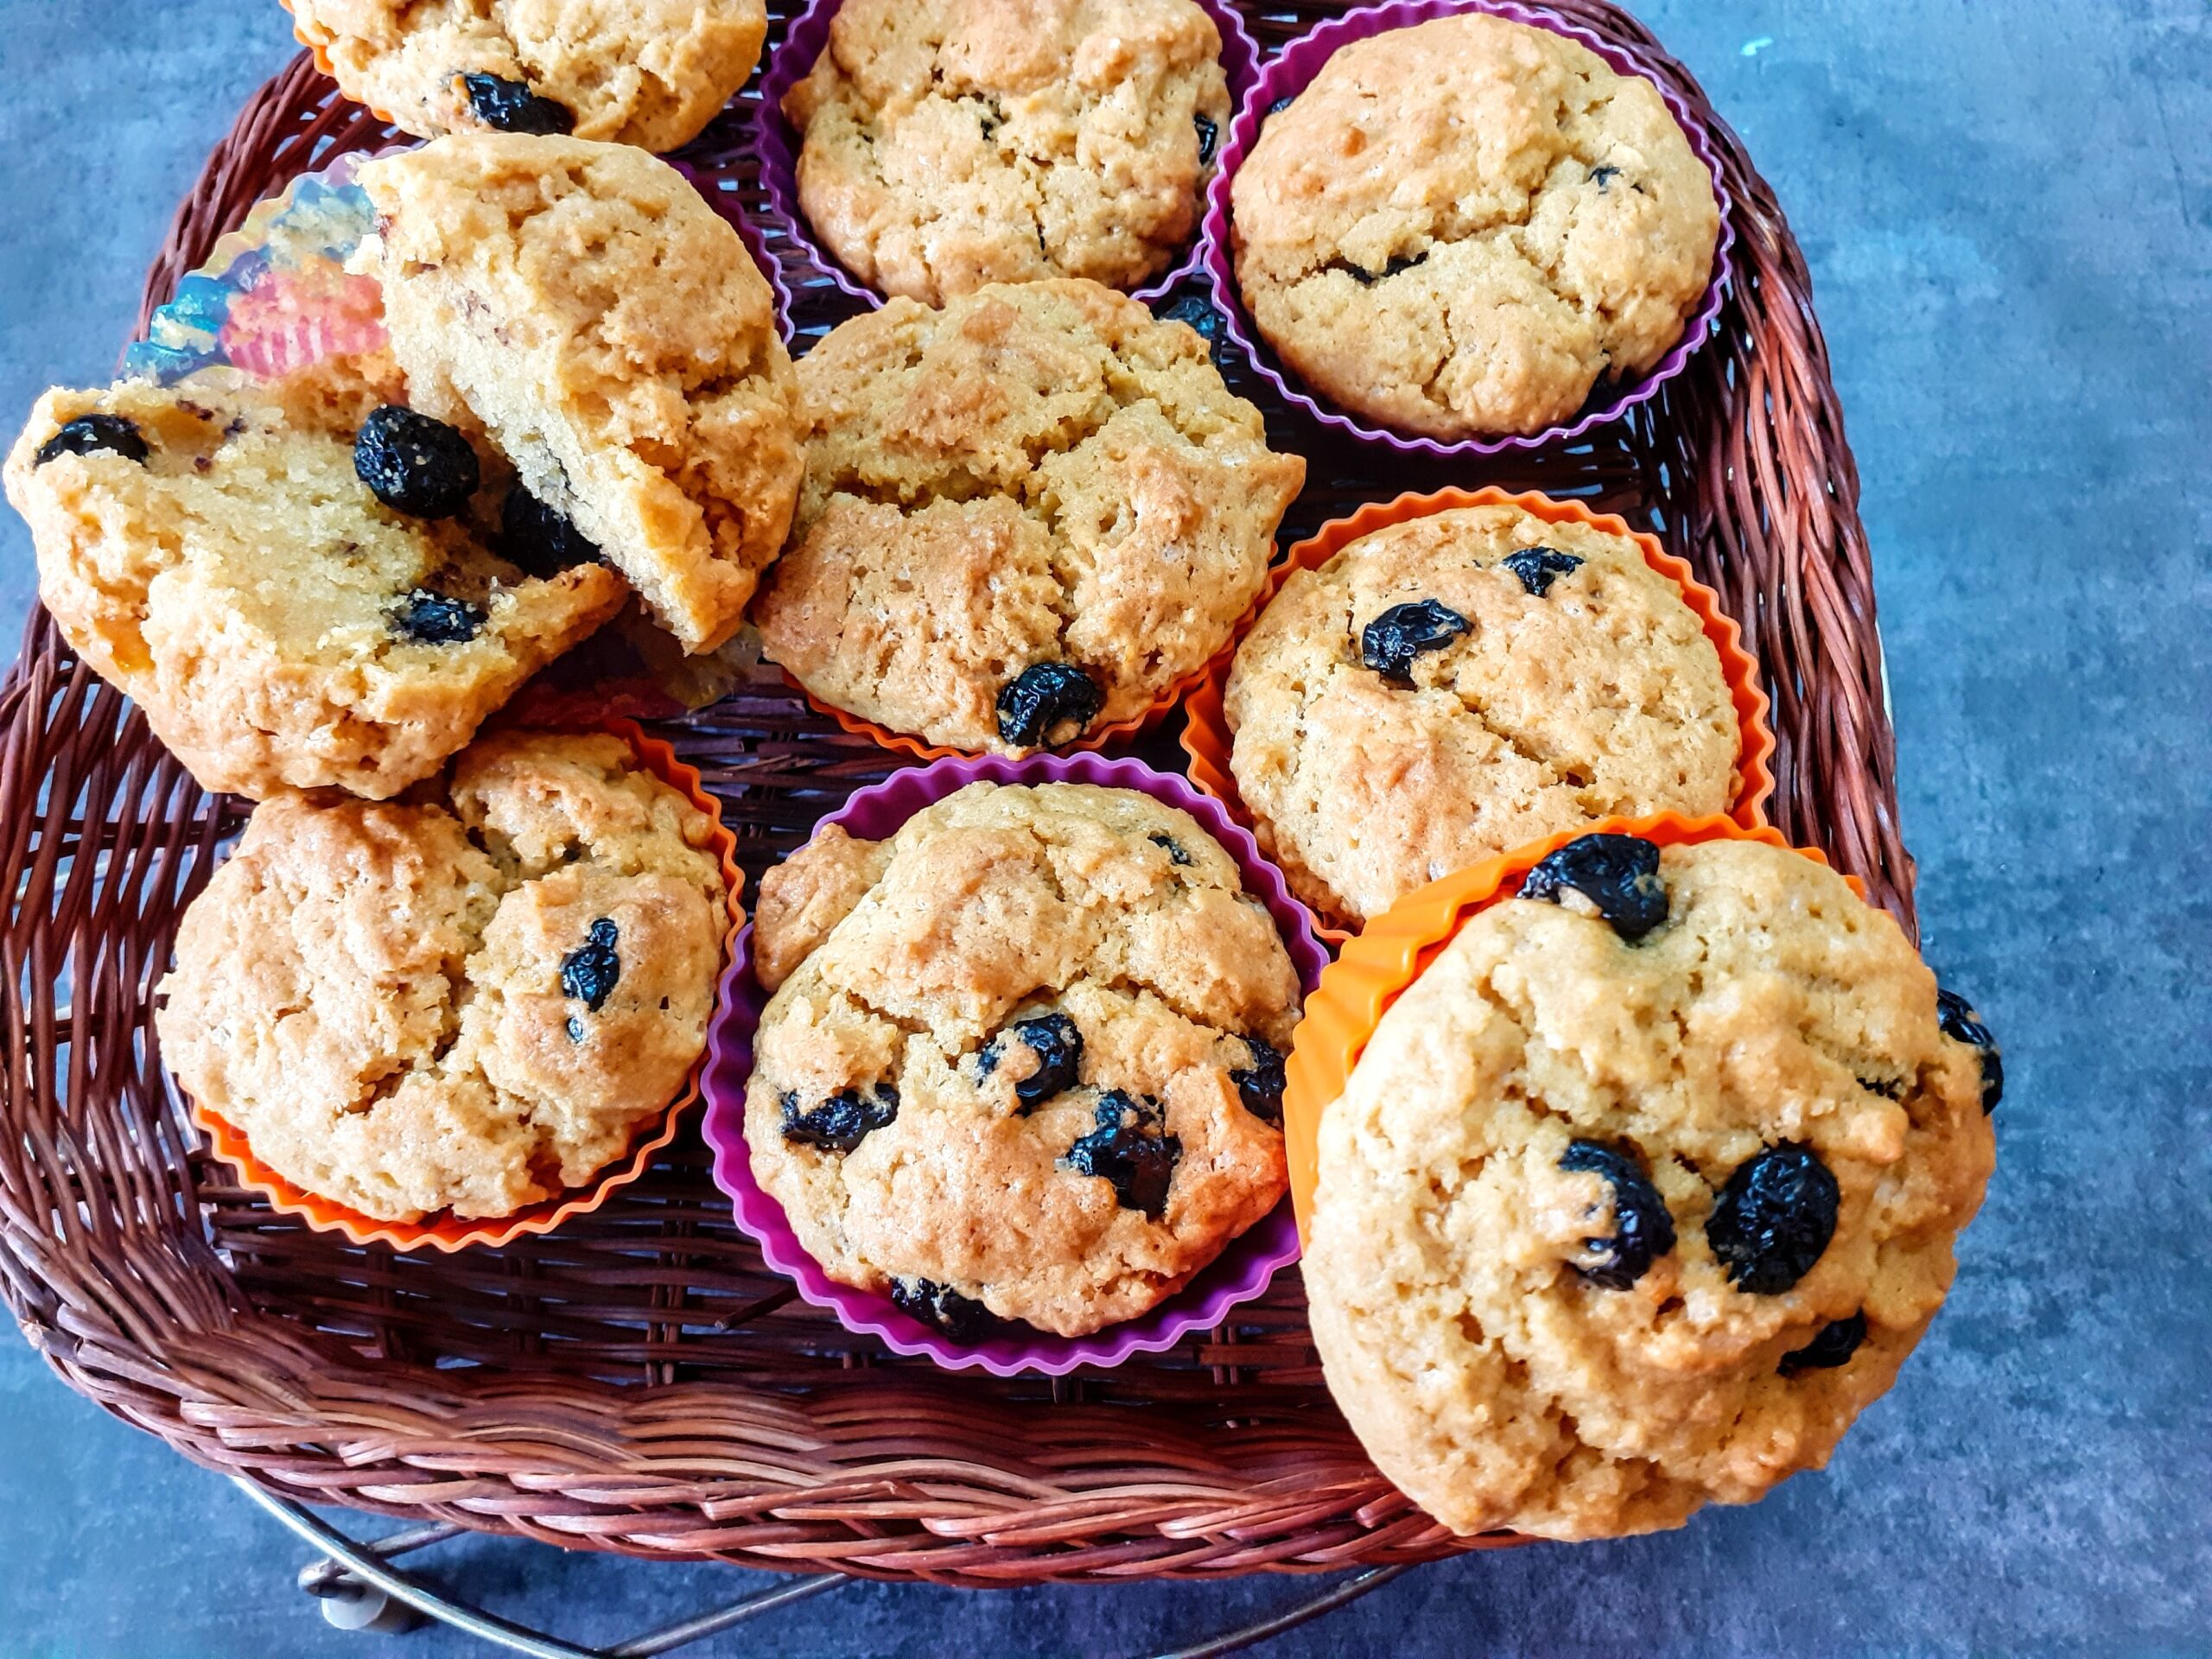
This time they had to be muffins as they can be picked off a box and popped in when hungry????. They stay good in the refrigerator for upto a month. They are easy to pack up on a picnic, road trip and even for hostelers. These are the moistest cup cakes you will find and using good quality berries really enhances the flavour of the cake. I have used dried Blue berries, fresh ones can be used too.
As I say in all my cake recipes, this too is a single bowl recipe, where you mix dry and wet ingredients in one bowl, line up your muffin tins and bake away.
While you are here check out my other very berry desserts like Blueberry Cheesecake, Berry Smoothie Ice cream, Strawberry and Lemon loaf, Easy 2 way muffins, and more…
Here is the recipe for Whole Wheat Blueberry muffins for you-
Ingredients:
Whole wheat flour/ Multigrain flour 2.25 cups
Sugar 1 cup
Baking powder 3 tsp
Baking soda 1 tsp
Salt 2 pinches
Eggs 2
Butter 60 gms
Oil 4 tbsp
Buttermilk 1 cup
Vanilla essence 2 to 3 drops
Blueberries 100 gms
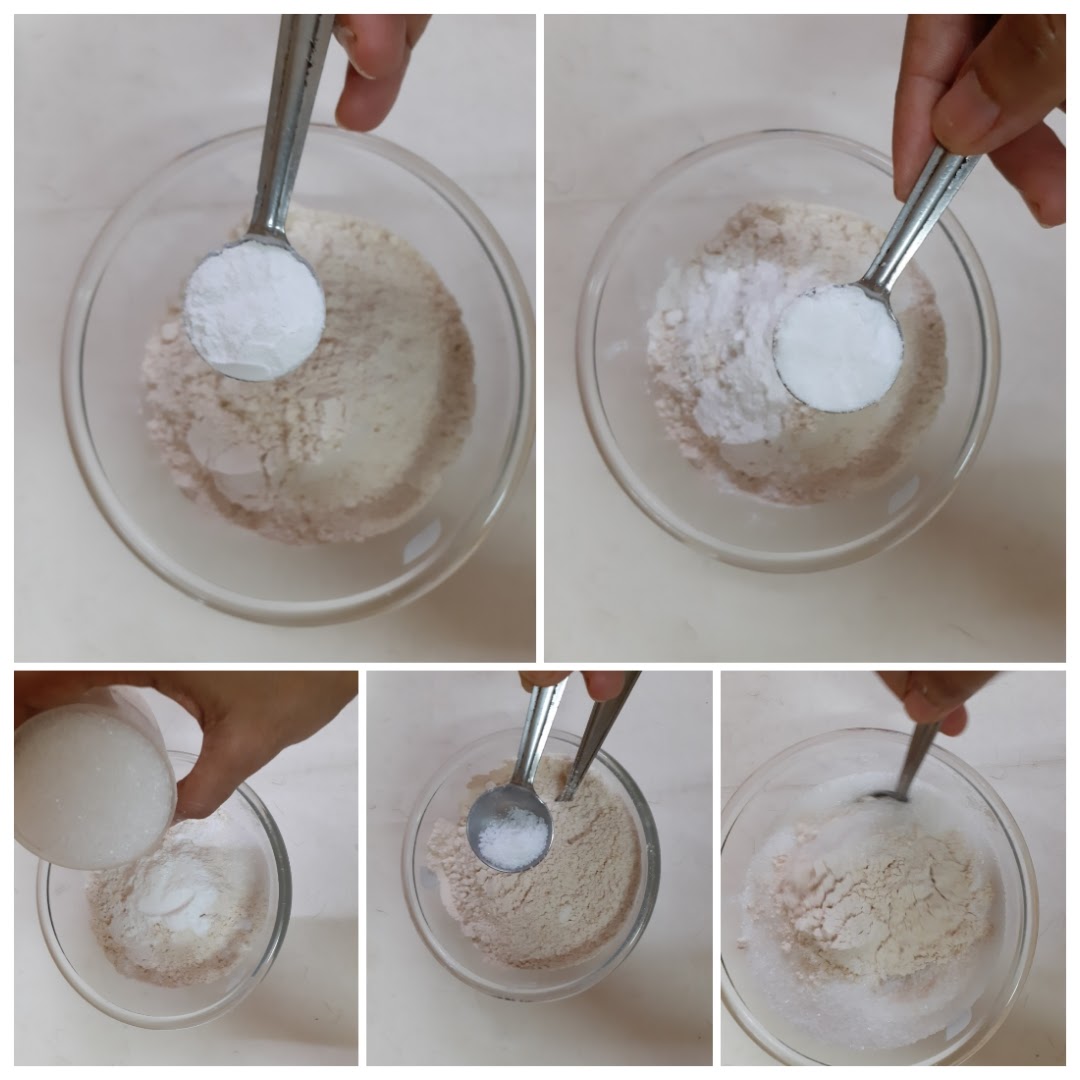
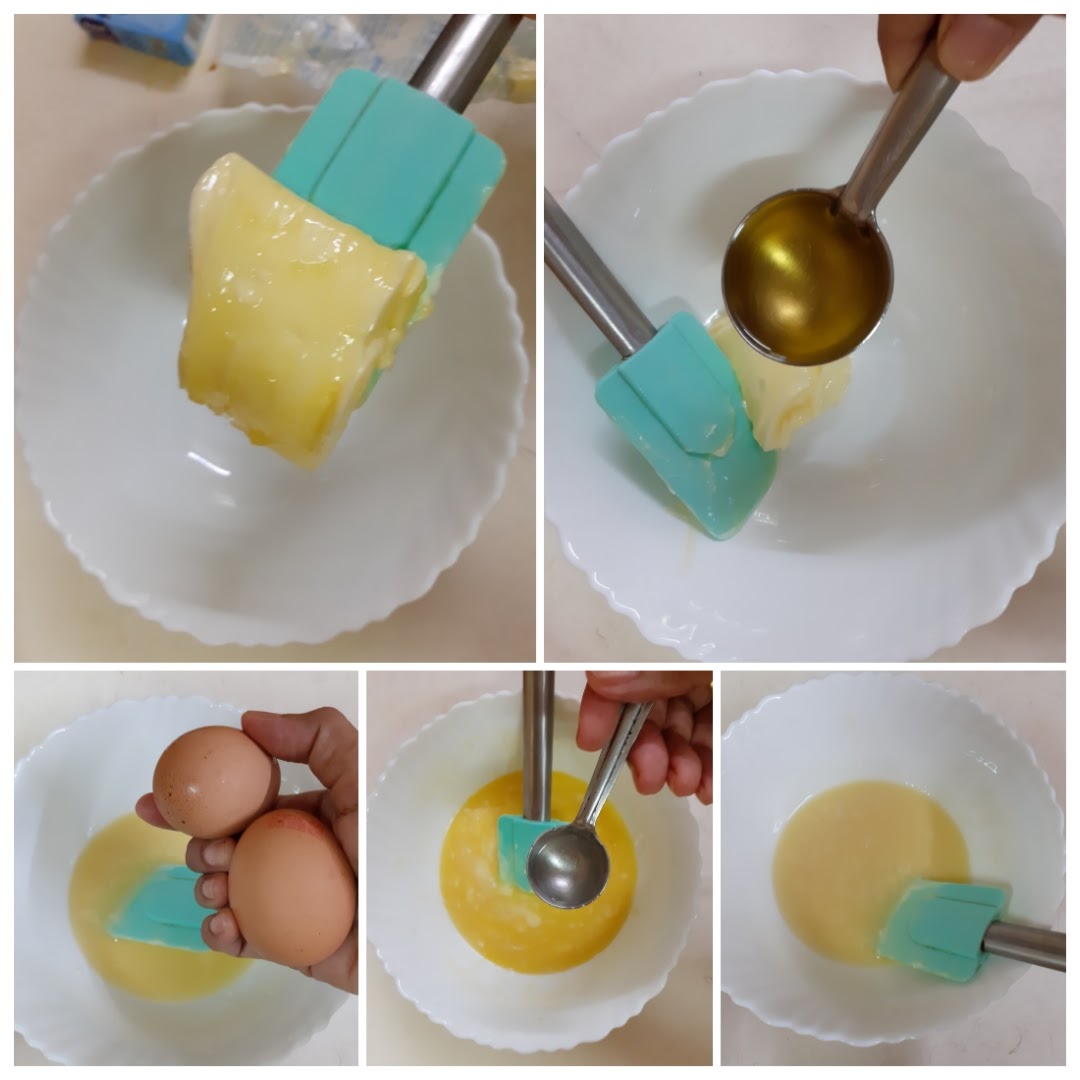
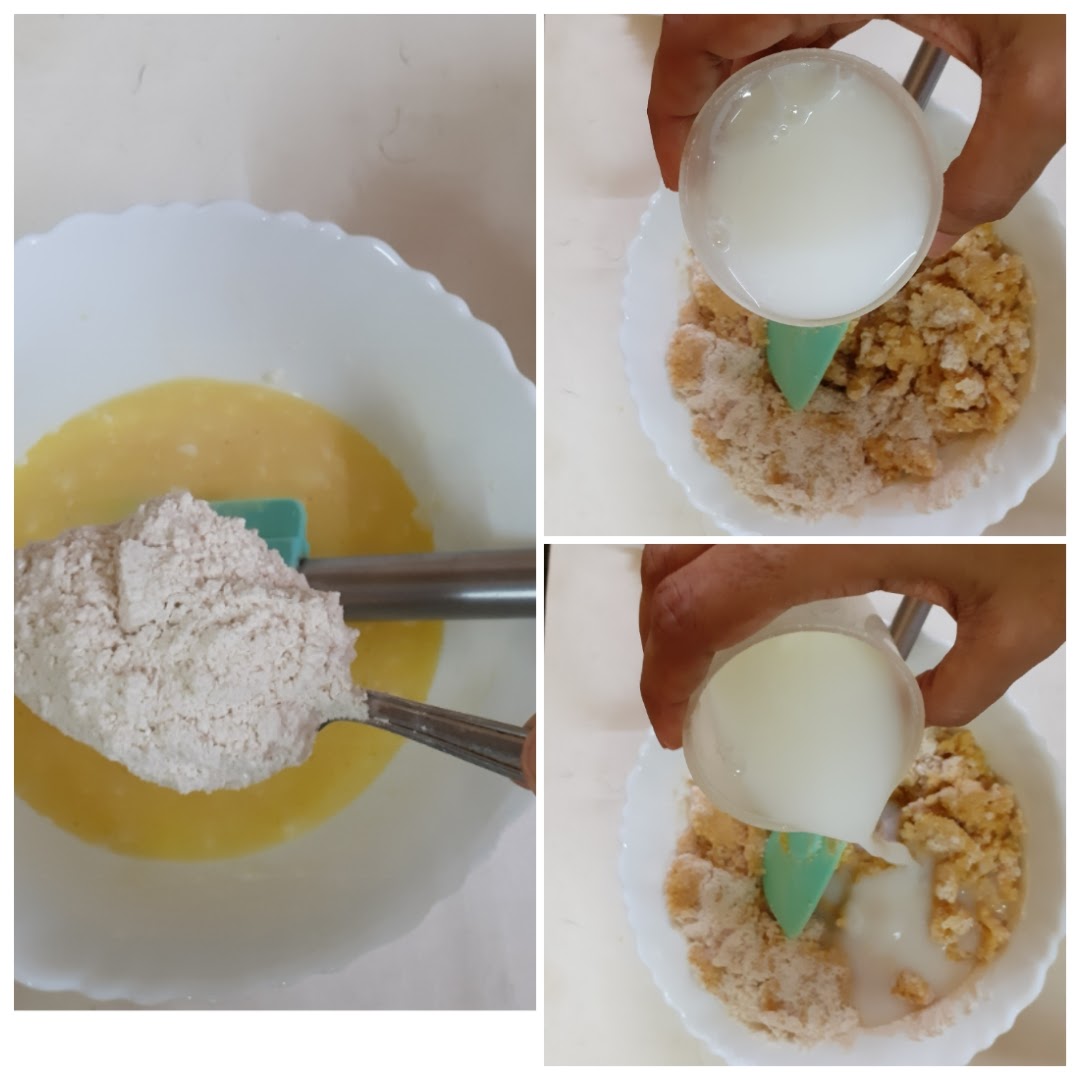
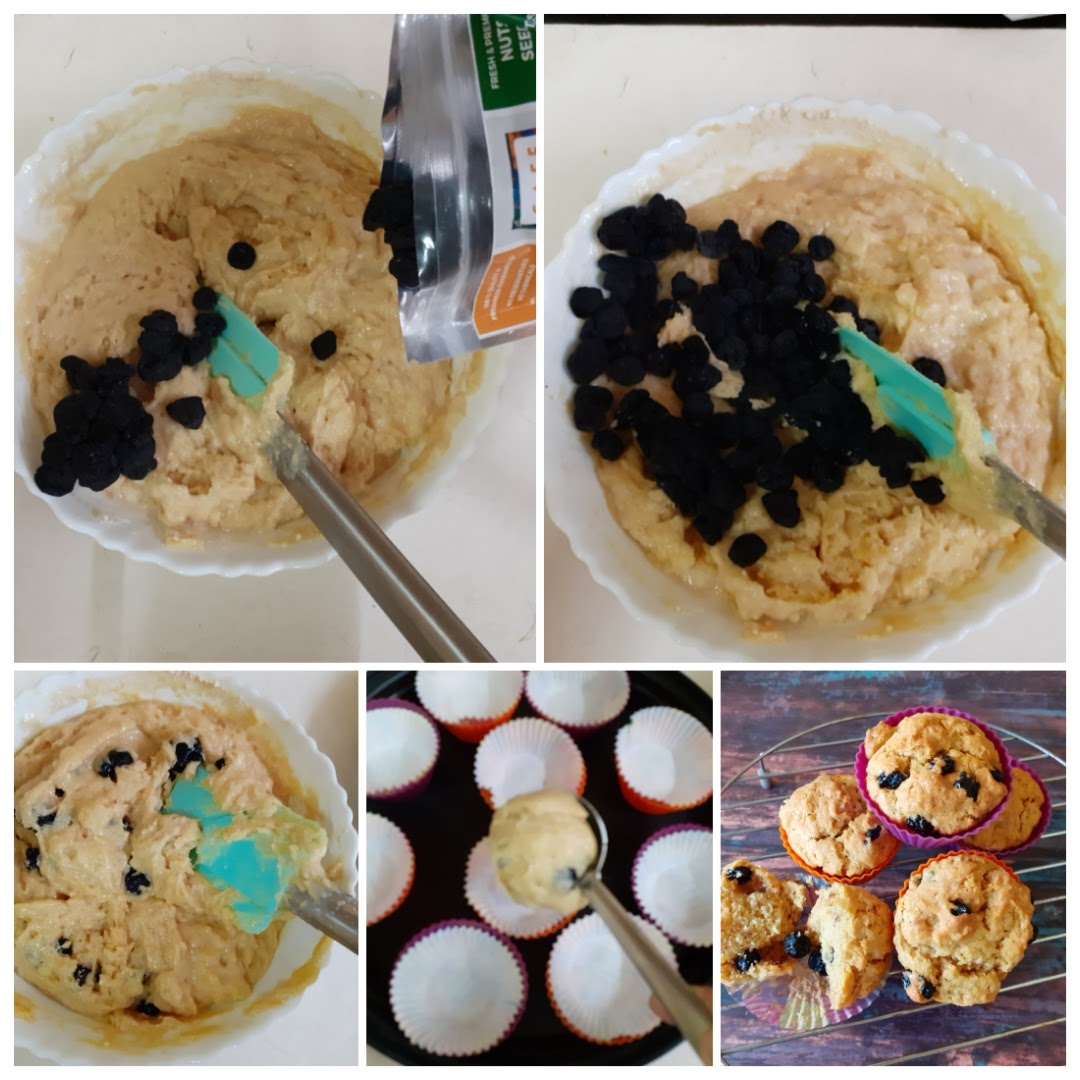
Directions: Firstly put the oven to preheat at 200 C. Now in a bowl mix all the dry ingredients- wheat flour, sugar, baking powder, baking soda and salt. In a larger bowl mix all wet ingredients- butter, eggs, oil, and vanilla essence. Do not mix in the buttermilk and blueberries now. Now slowly add the dry ingredients into the wet ingredients and stir. Stir in circular motion. The wet ingredients will absorb the flour and turn dry. Now add the buttermilk, a little at a time and stir gently. Take care not to over stir. Finally add the Blueberries and give a gentle stir. Now the batter is ready to fill into the muffin tin/cup cake moulds. Bake at 190 C for 15 minutes. Check for doneness by inserting a toothpick in the centre. If a little wet, then bake another 2 minutes. Enjoy the healthy goodness. Serve when warm.
STEPWISE RECIPE FOLLOWS:
1. Firstly put the oven to preheat at 200 C. Now in a bowl mix all the dry ingredients- wheat flour, sugar, baking powder, baking soda and salt.
2. In a larger bowl mix all wet ingredients- butter, eggs, oil, and vanilla essence. Do not mix in the buttermilk and blueberries now.
3. Now slowly add the dry ingredients into the wet ingredients and stir. Stir in circular motion. The wet ingredients will absorb the flour and turn dry. Now add the buttermilk, a little at a time and stir gently. Take care not to over stir.
4. Finally add the Blueberries and give a gentle stir. Now the batter is ready to fill into the muffin tin/cup cake mould. Bake at 190 C for 15 minutes. Check for doneness by inserting a toothpick in the centre. If a little wet, then bake another 2 minutes. Enjoy the healthy goodness. Serve when warm.
NOTES:
1. These cup cakes can be made with any berry.
2. If fresh ones are not available use the dry ones like I have here. If using frozen, then use them directly from the freezer without thawing.
3. You must have noticed that in this recipe I have used both butter and oil. This is to get the super moist texture. If you do not wish to use butter, then use 1/2 cup oil.
4. Since oven settings are different for different oven, start checking for doneness from 13 minutes onward.
5. Whole wheat flour can be substituted with multigrain flour or refined flour if you prefer.
Lemon Poppy Seed/Khus Khus Salad Dressing
This creamy Lemon Poppy Seed/Khus Khus salad dressing is perfect for a veggie loaded salad you would want to have as lunch or dinner. This dressing is a great way to spruce up your salad.


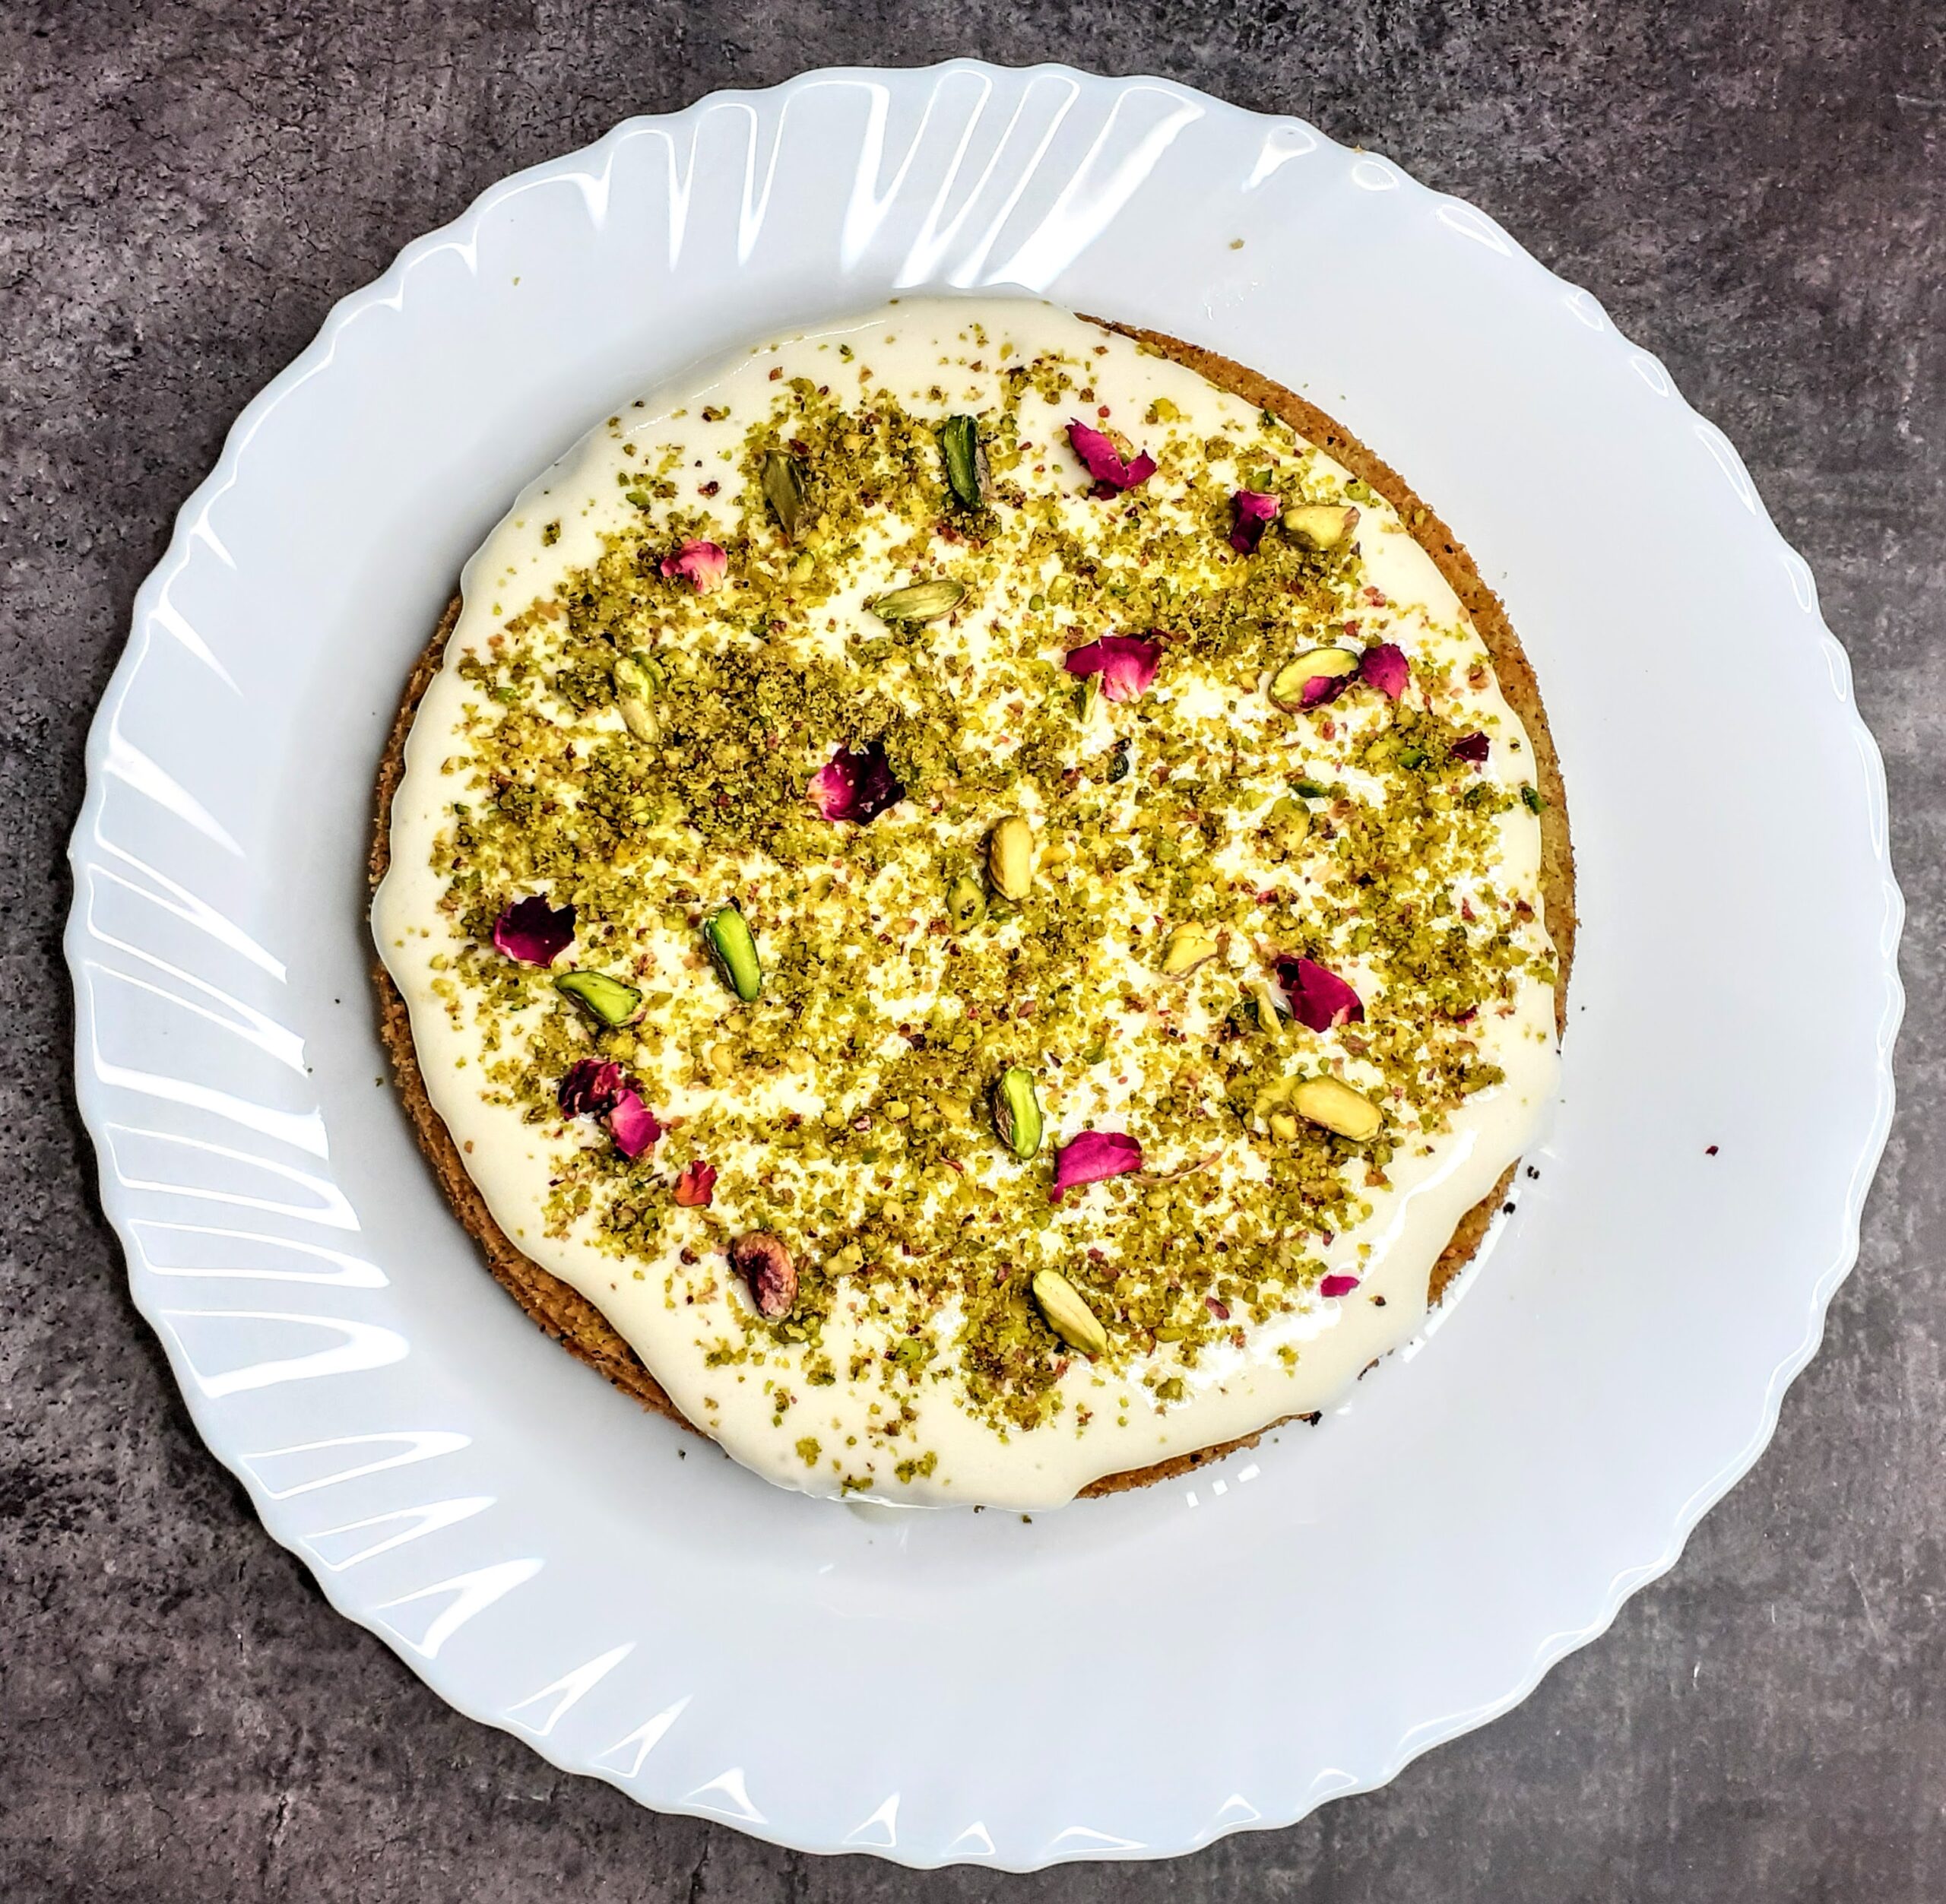
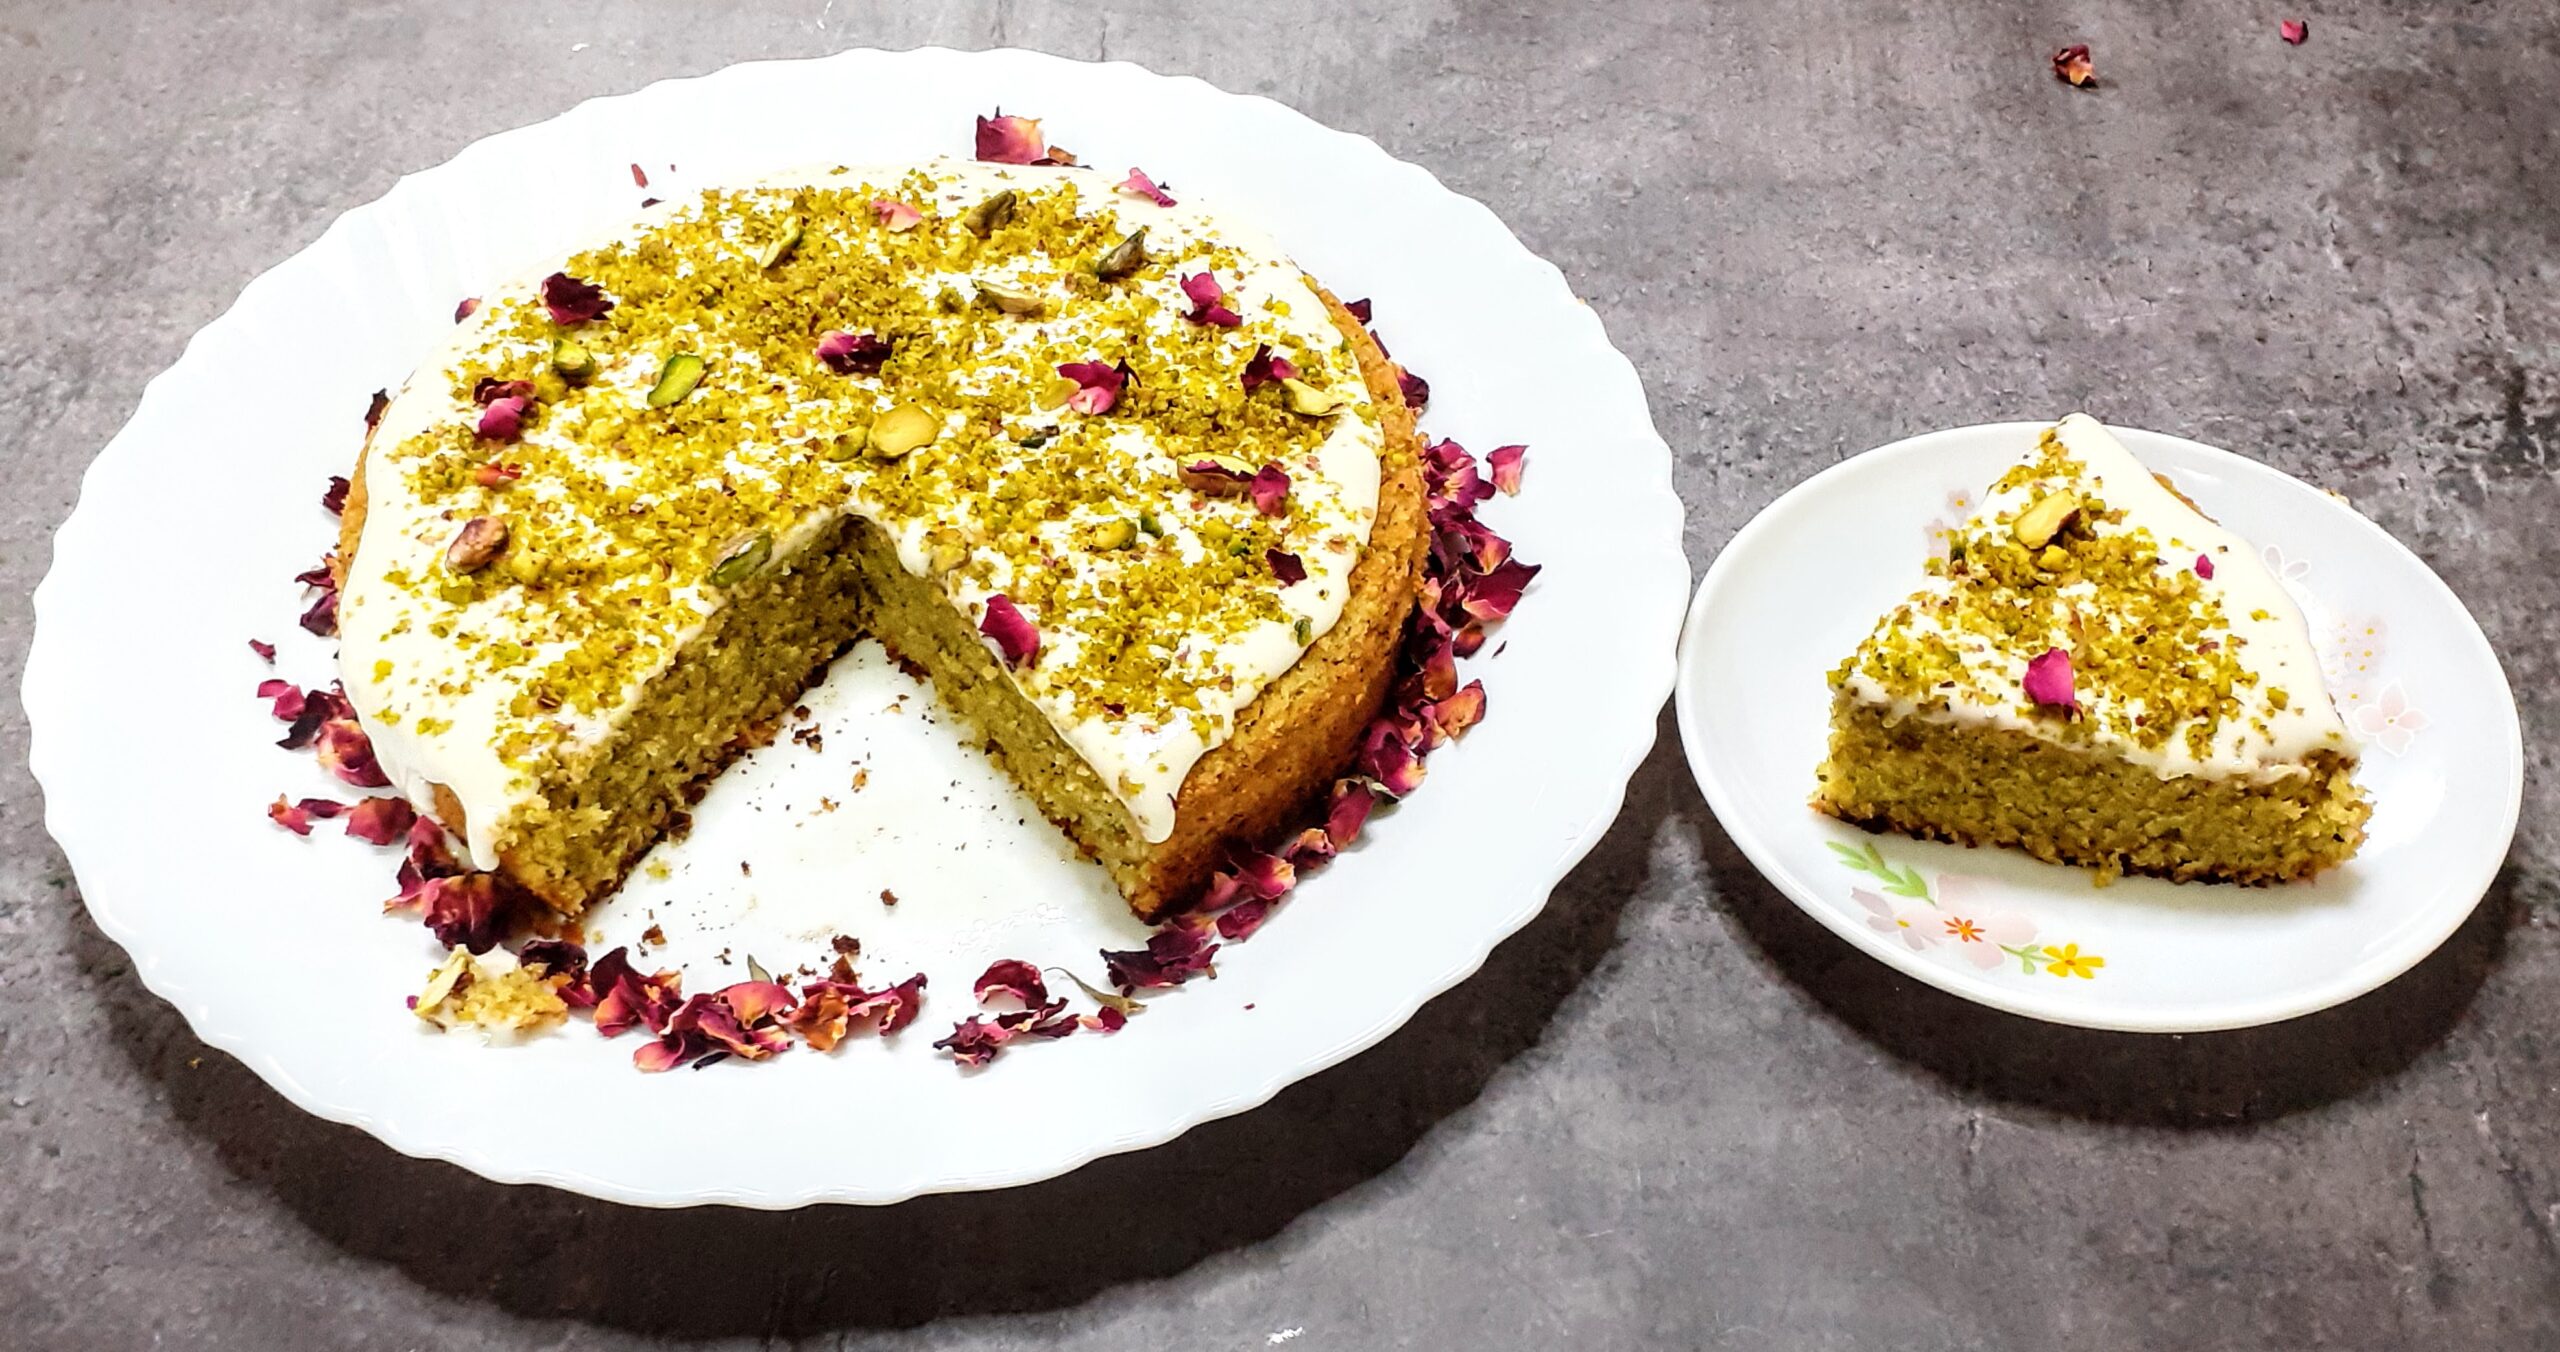
Pistachio Cake / Pista Cake With White Chocolate Glaze
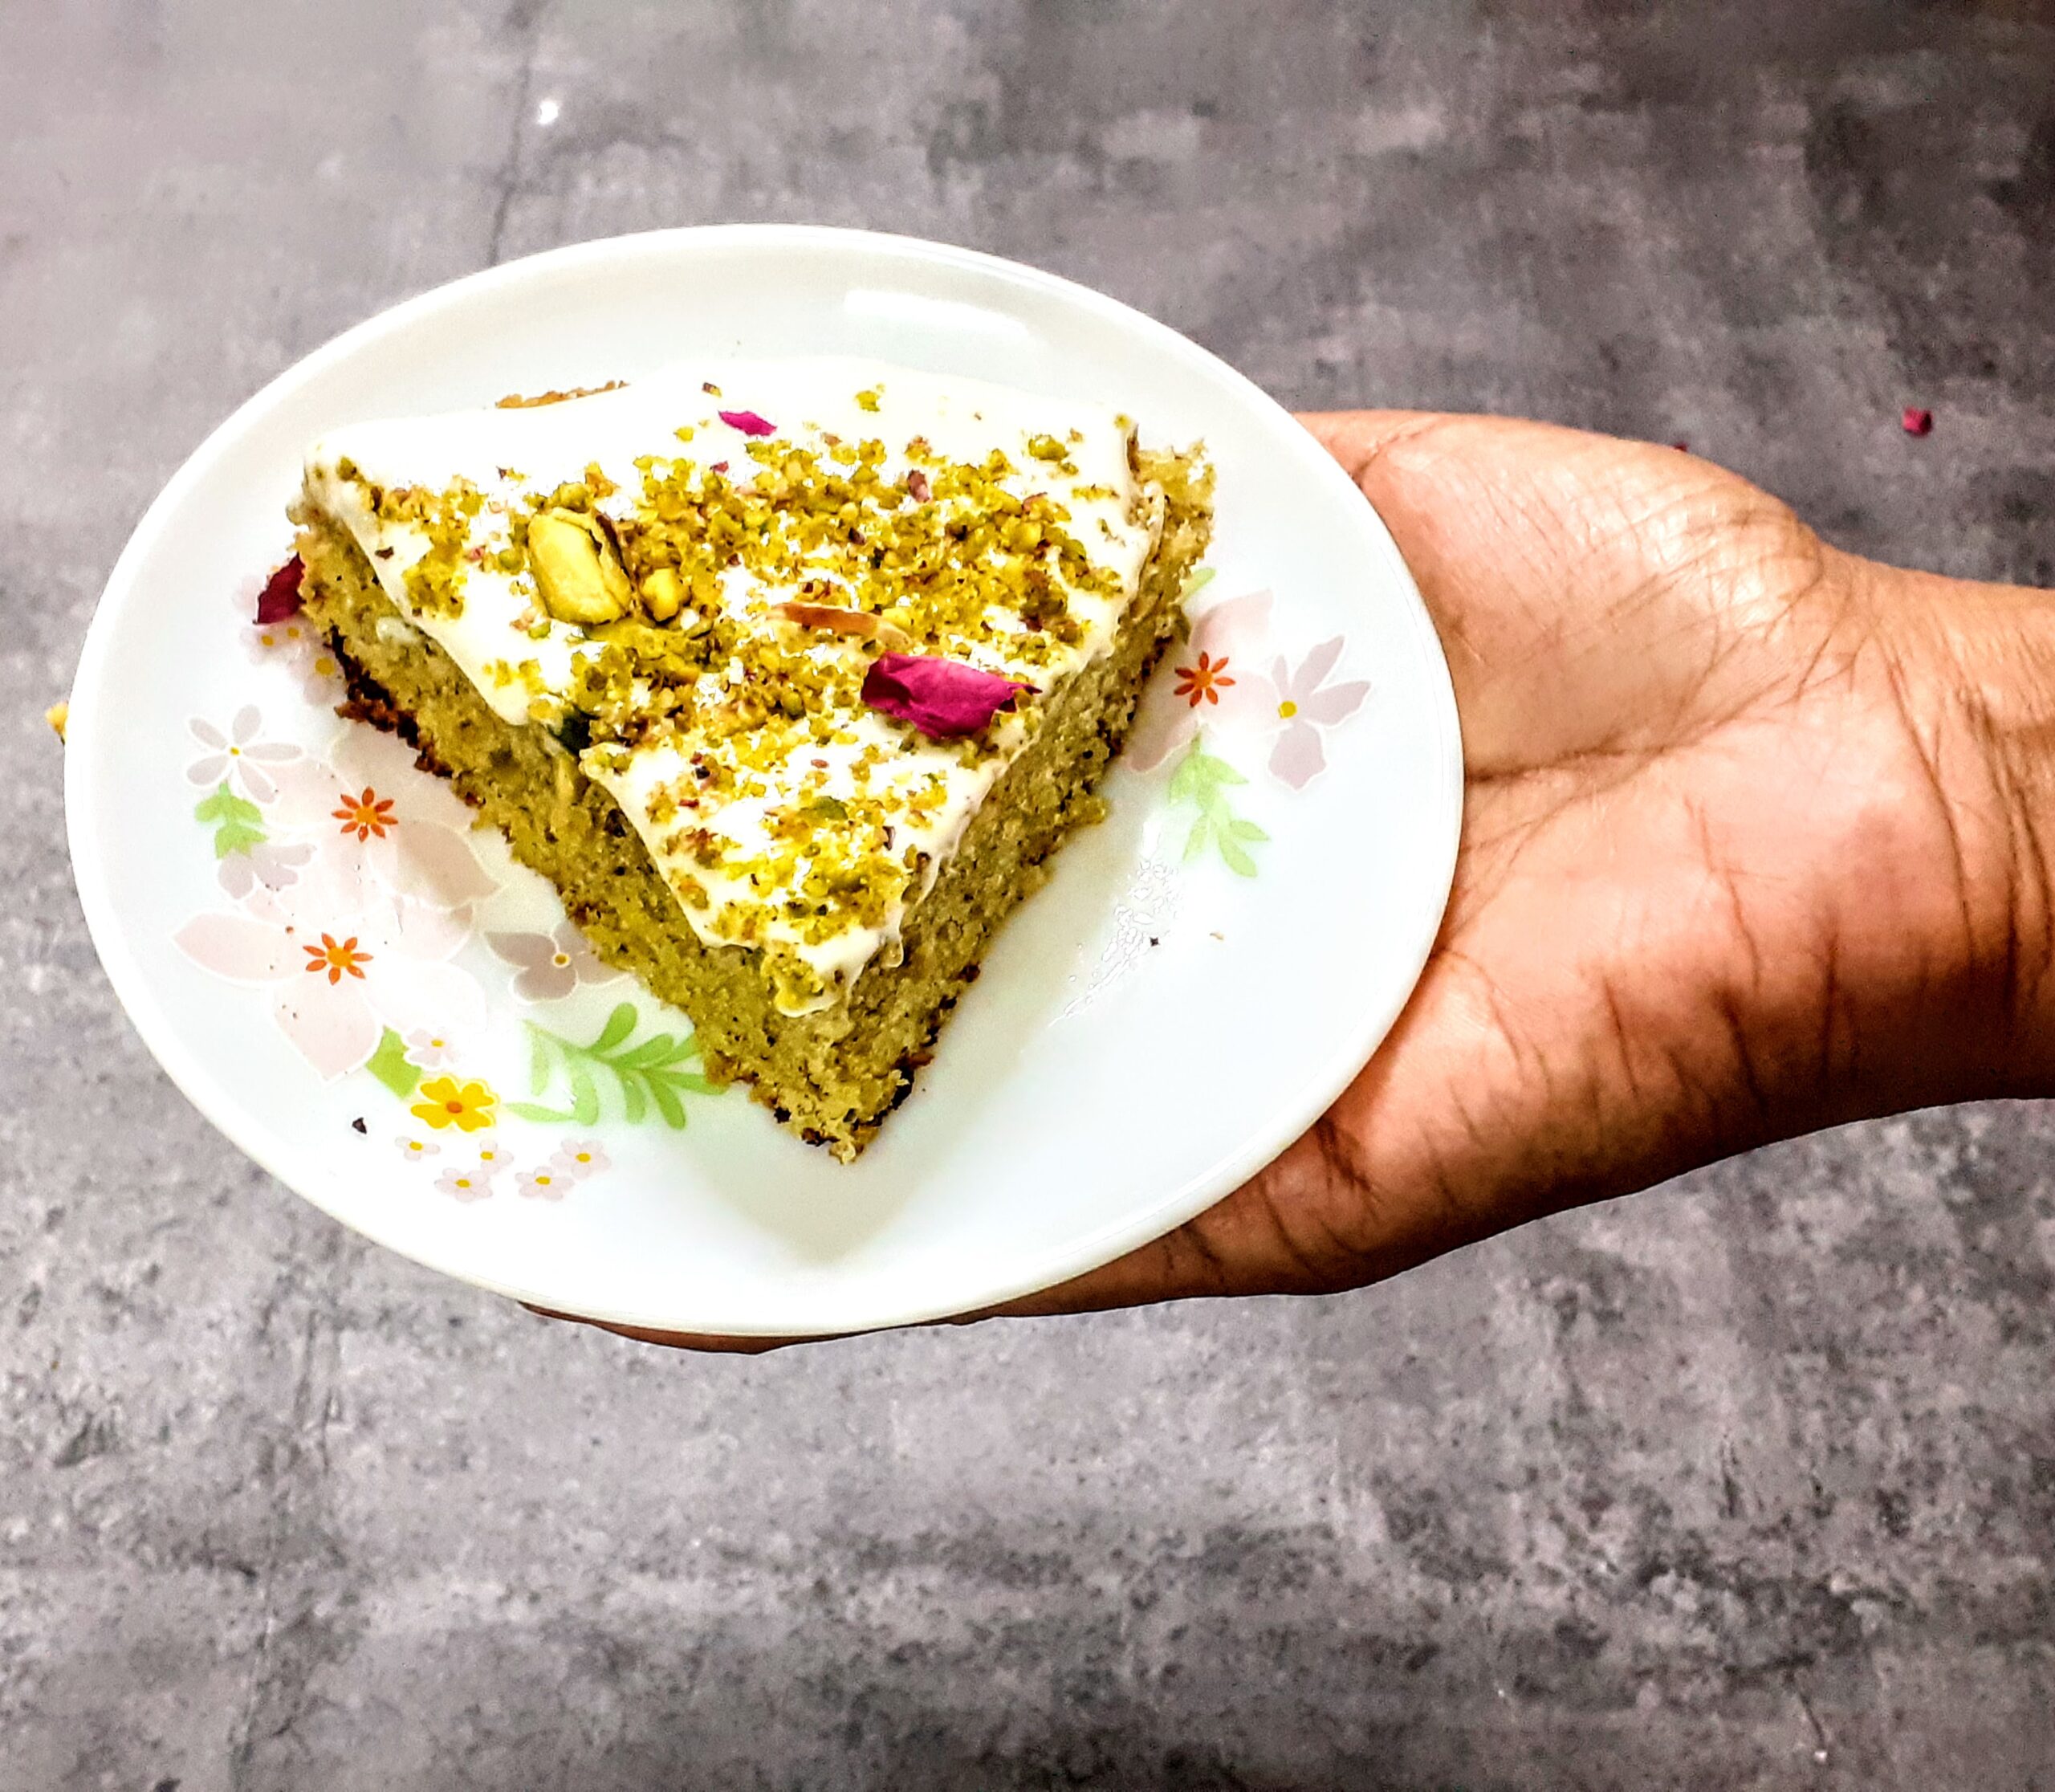
Baking a cake with Pistachio has been on my mind for a long time now, and I recently got to try my hand at it. The result was stunning. But I must say not everyone has a liking for the intense Pista flavour. I must add that I have not used any food colour for the cake and what is see is the natural Pista green, which is a dull green, unlike the bright green store bought ones.
Well, this cake was totally inspired by some wonderful chocolate bars ( both dark and white), that we bought recently from Fabelle by @itcltd . Just imagining the taste of Pista and white chocolate together was making me crave it and so this cake came about. Now when I cook/ bake a new recipe a lot of research goes in. Before I zero in on how I want to go about it.
As I always claim about my baking recipes, this one too is a single bowl recipe. No mess and no extra clean up. Let’s get to the recipe right away.
While you are here check out my other bakes like Apple Crumble, Blueberry Cheese cake, Upside down orange vanilla cake, Oatmeal cookies, Easy two way muffins, Apple Tea Cake, Eggless Pineapple cake and more…
Ingredients:
Pista/ Pistachios unsalted 100 GM
Flour/ Maida 1/2 cup or 70 GM approx.
Unsalted butter 100 GM
Refined oil 1/4 cup
Icing sugar/ castor sugar/ sugar powder 100 GM
Lemon zest of 1 whole Lemon
Eggs 2
Vanilla essence 2 drops
Baking powder 1 tsp
Salt 1/2 tsp
Ghee for greasing the baking mold 2 tsp
Ingredients for White Chocolate glaze:
White chocolate ( invest in a good quality one) 40 GM
Whipping cream 1 cup + 2 tbsp chilled
Castor sugar/ icing sugar 1 tbsp less than 1/2 cup
Directions for cake:
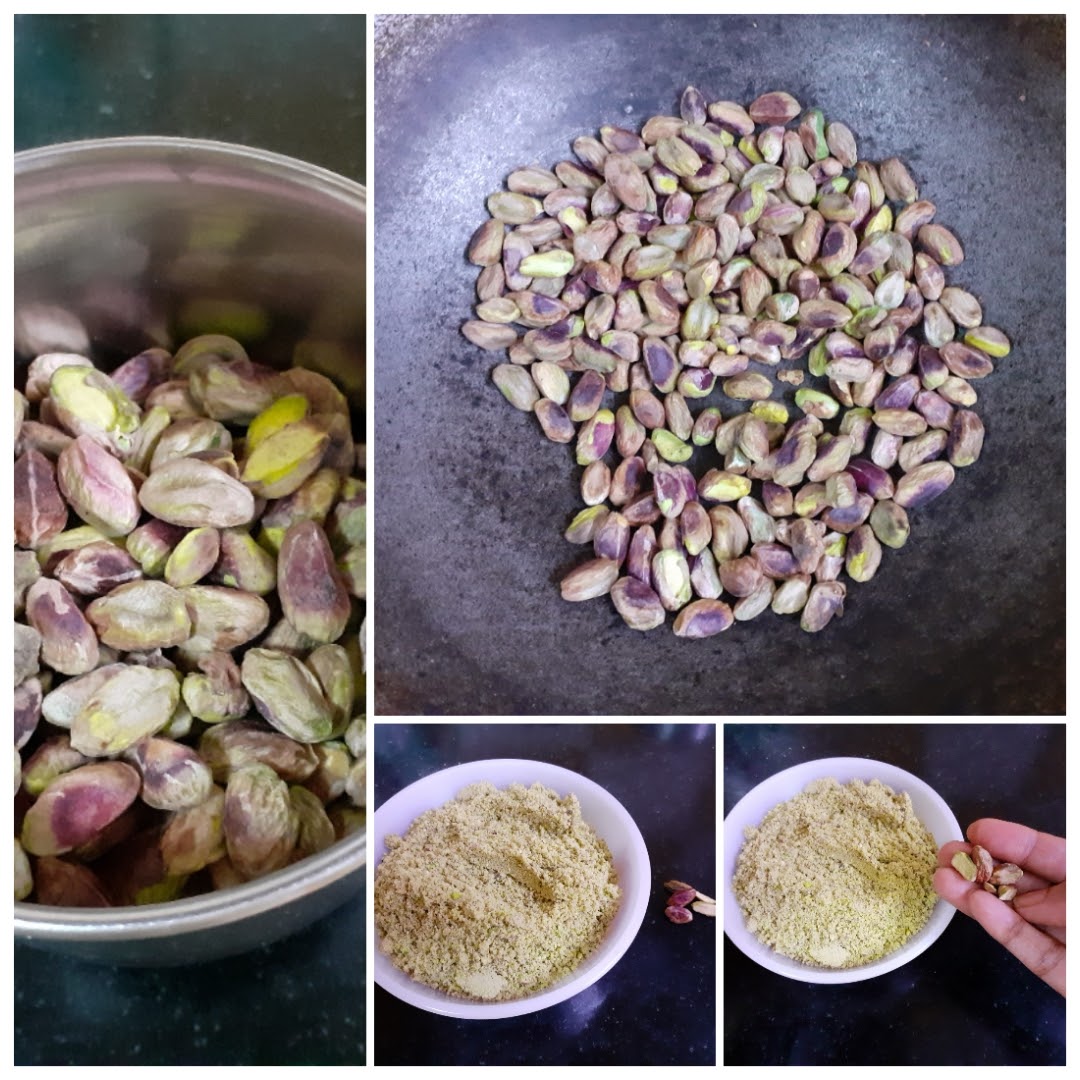
In a pan roast the Pistachios very lightly. They just need to get warm, and not change colour. Cool them and pulse them to a fine powder in a blender. Preheat oven to 200 C for 10 mins. In a bowl cream the butter, oil and sugar with a beater. Now add half the amount of Pistachio powder and half the amount of flour and beat. Add the remaining Pista powder, baking powder, and flour and beat again until combined. The mixture will appear a little dry. Now add one egg at a time and beat to combine. Finally, add the lemon zest and vanilla essence and give a finally spin with the beater. Now using a spatula, scrape the sides and stir just once. The cake batter is ready. Grease a circular cake mold or Loaf pan, and pour the cake batter into it. Tap once gently to remove any air gaps and put it in the oven for 15 to 20 minutes. Since each oven has a different setting, keep checking for fineness from 15 minutes onward. The cake is done when a toothpick inserted in the center comes out clean.
Directions for making glaze.
Bring the White chocolate to room temperature. Take the chocolate in a bowl, add 2 tbsp cream and put it in the microwave for 30 seconds. Bring it out and stir vigorously so that the melted white chocolate combines with the cream evenly. Cool it for 10 minutes. In the meanwhile, take the chilled cream in a bowl, add the castor sugar and start beating until it turns airy and forms soft peaks. Once soft peaks form, don’t whip it any more. Add the white chocolate mixture and gently fold it in with a spatula. Put it in the fridge until further use.
How to assemble ( no pictures)
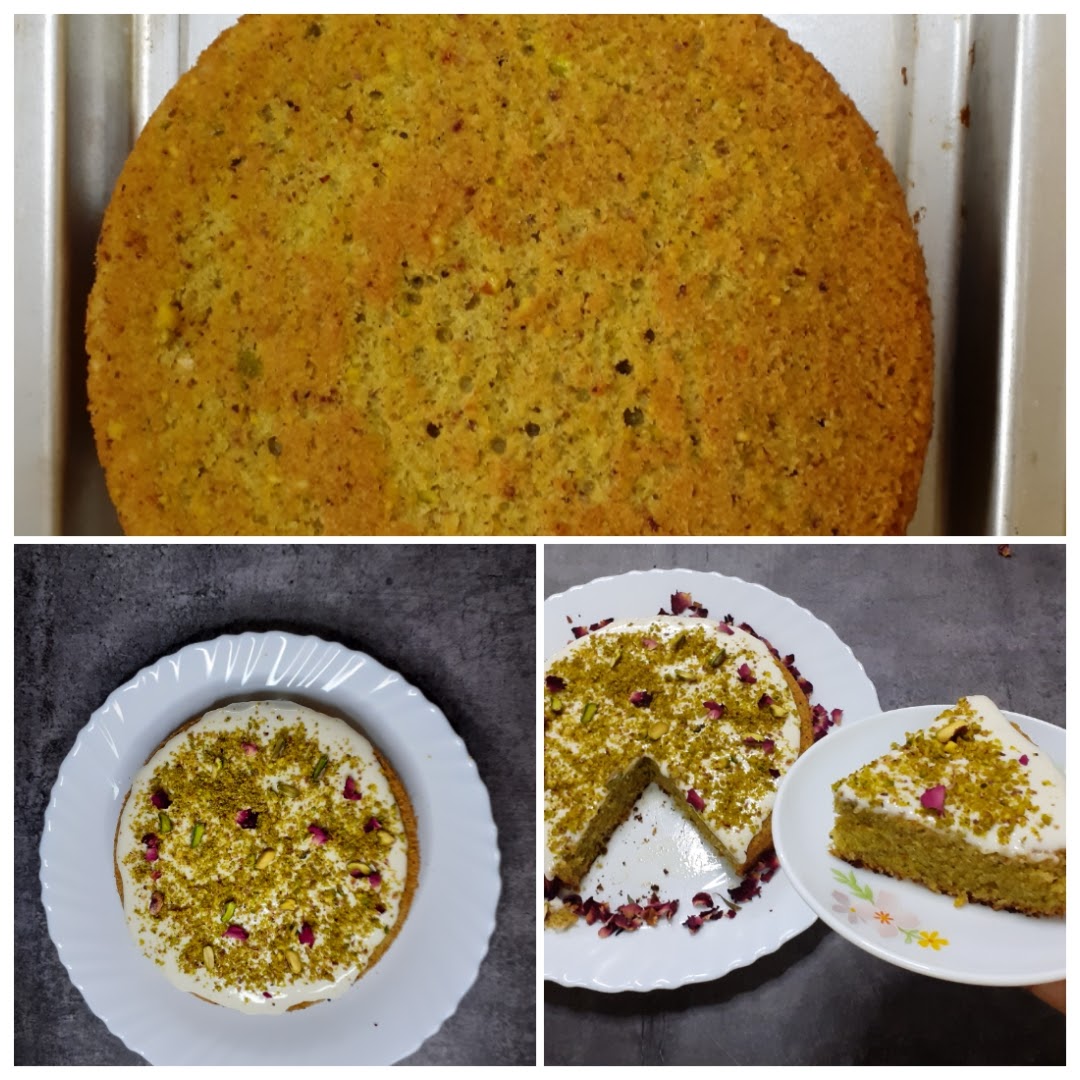
Let the cake cool naturally. Now bring out the white chocolate glaze and using a spatula gently spread it on the cake. I have left the sides uncovered. Spread generously to form a 1 cm coating. Sprinkle some Pistachio powder over the glaze and some split pistachios too. Add a few edible rose petals for contrast. Keep in fridge until it’s ready to serve.
STEPWISE RECIPE FOLLOWS:
1. To make the cake– In a pan roast the Pistachios very lightly. They just need to get warm, and not change colour. Cool them and pulse them to a fine powder in a blender. Preheat oven to 200 C for 10 mins.
2. In a bowl cream the butter, oil and sugar with a beater. Now add half the amount of Pistachio powder and half the amount of flour and beat. Add the remaining Pista powder, baking powder, and flour and beat again until combined. The mixture will appear a little dry.
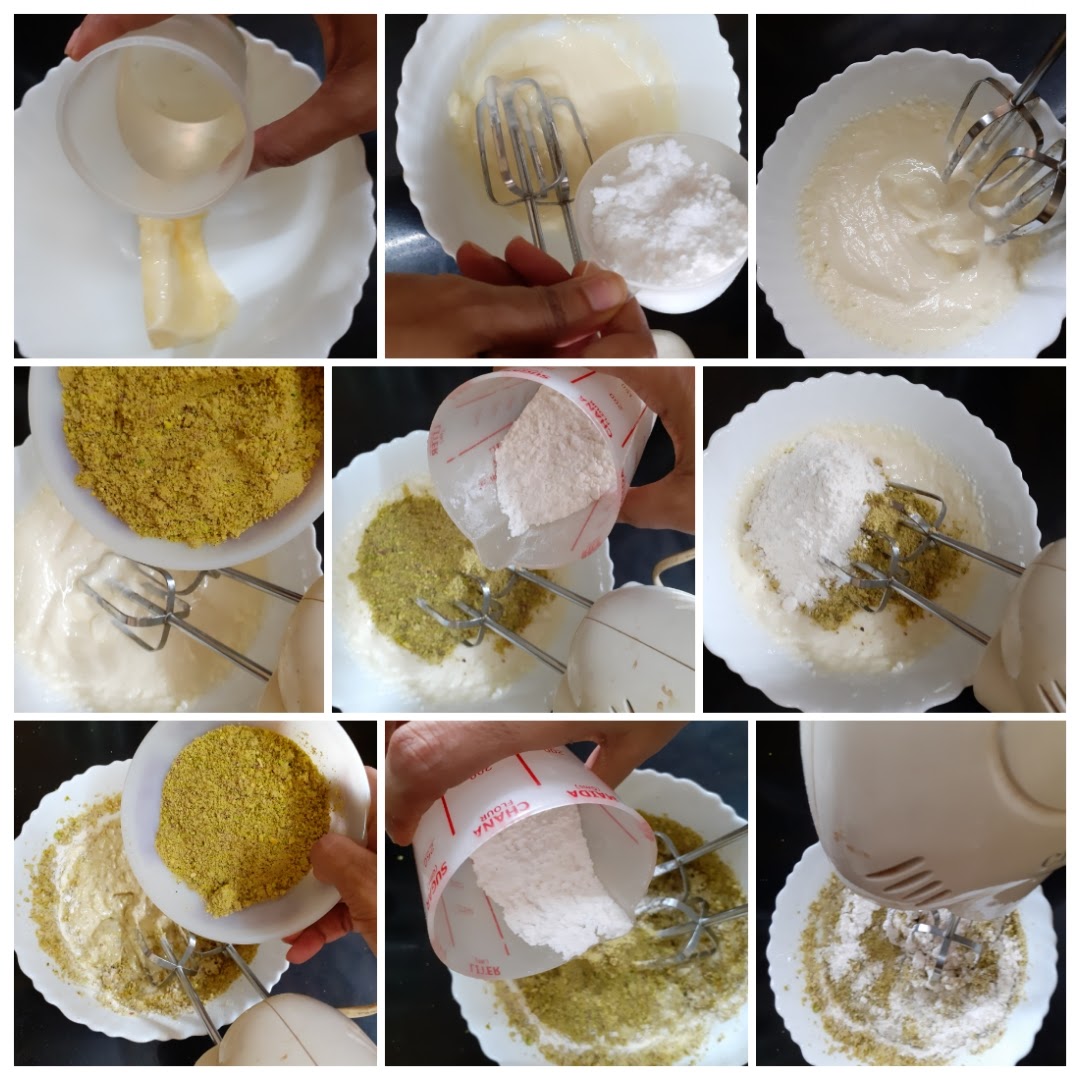
3. Now add one egg at a time and beat to combine. Finally, add the lemon zest and vanilla essence and give a finally spin with the beater. Now using a spatula, scrape the sides and stir just once. The cake batter is ready.
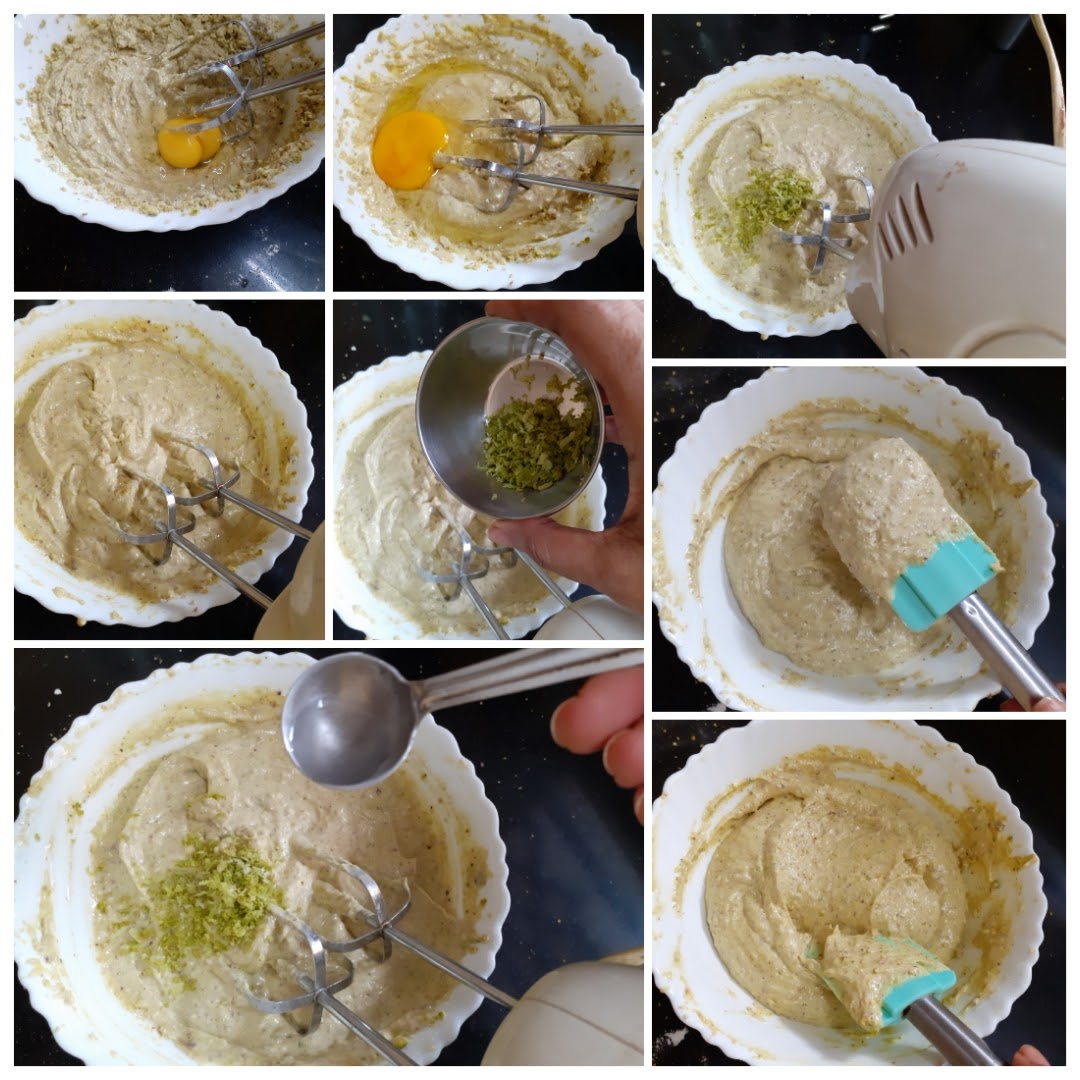
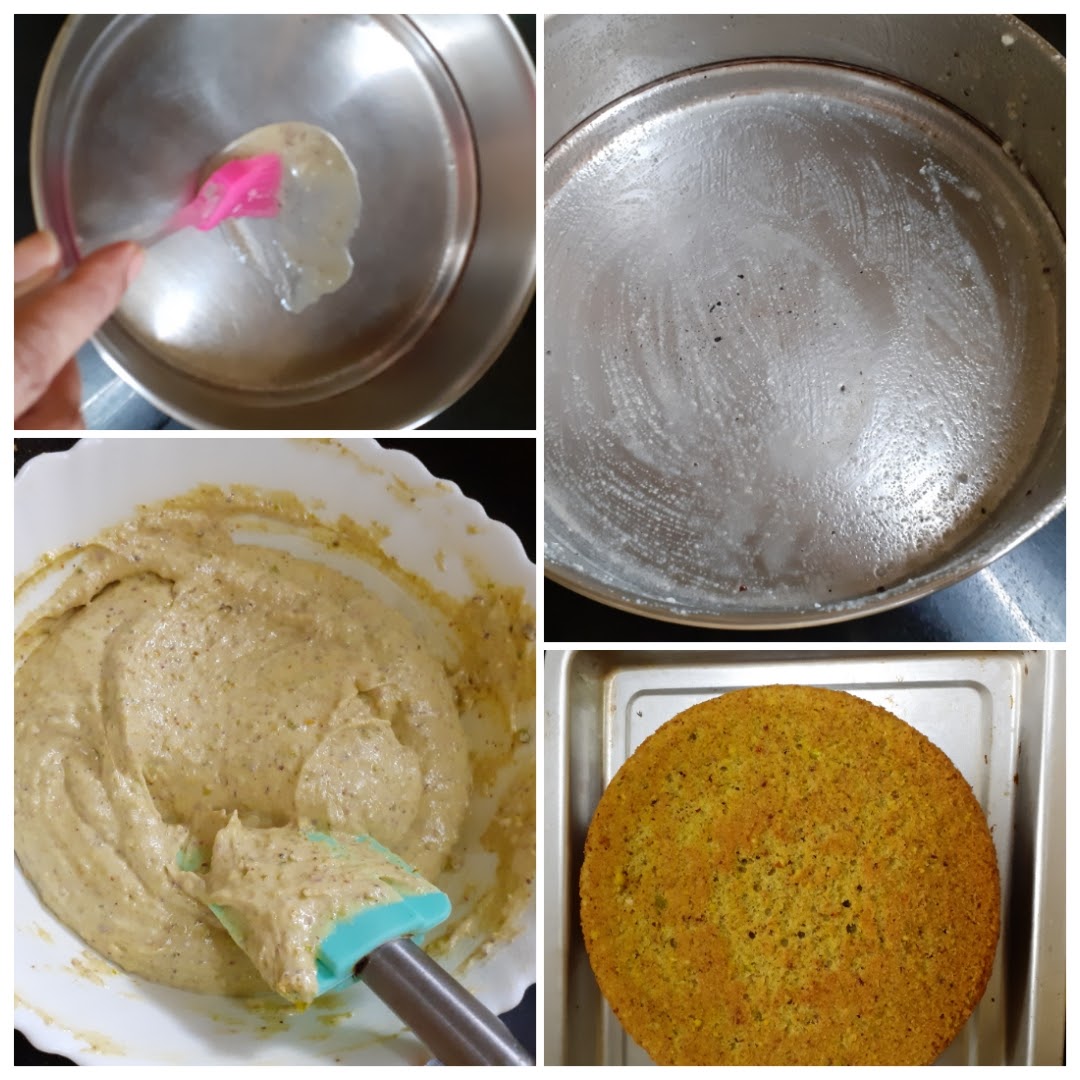
4. Grease a circular cake mold or Loaf pan, and pour the cake batter into it. Tap once gently to remove any air gaps and put it in the oven for 15 to 20 minutes. Since each oven has a different setting, keep checking for fineness from 15 minutes onward. The cake is done when a toothpick inserted in the center comes out clean.
5. To Make the glaze– Bring the White chocolate to room temperature. Take the chocolate in a bowl, add 2 tbsp cream and put it in the microwave for 30 seconds. Bring it out and stir vigorously so that the melted white chocolate combines with the cream evenly. Cool it for 10 minutes.

6. In the meanwhile, take the chilled cream in a bowl, add the castor sugar and start beating until it turns airy and forms soft peaks. Once soft peaks form, don’t whip it any more. Add the white chocolate mixture and gently fold it in with a spatula. Put it in the fridge until further use.

7. To assemble the cake– Let the cake cool naturally. Now bring out the white chocolate glaze and using a spatula gently spread it on the cake. I have left the sides uncovered. Spread generously to form a 1 cm coating. Sprinkle some Pistachio powder over the glaze and some split pistachios too. Add a few edible rose petals for contrast. Keep in fridge until it’s ready to serve. (no pictures)
NOTES:
1. Ensure that all ingredients are at room temperature before baking.
2. Use good quality eating chocolate instead of the cooking chocolate bars available at stores. They are mostly flavoured and not real chocolate.
3. Always use pulse mode in the blender to powder the Pistachio, so that it does not turn oily.
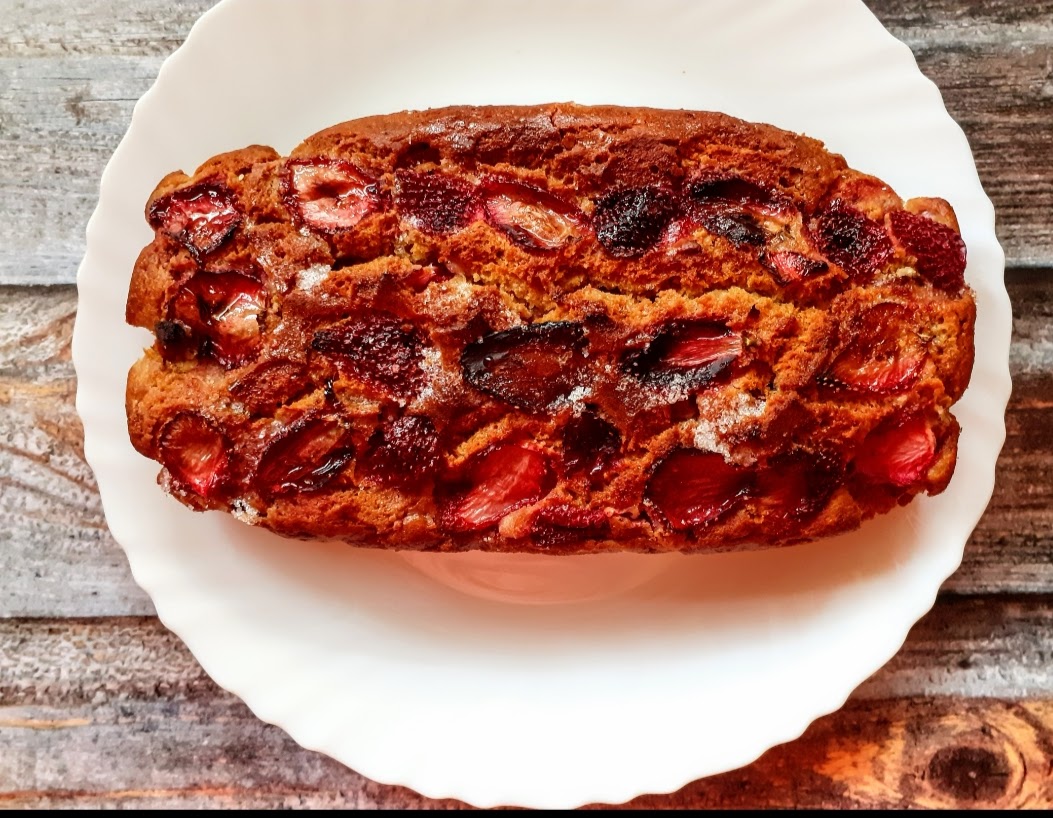
Strawberry & Lemon Loaf
Strawberries are in season now and what better way than storing up on all the goodness on what they have to offer by making, jams, desserts or just eating them fresh. But of course who can refuse a good bowl of Strawberry and cream…are you a berry addict like me? then this dessert/bread is certainly for you. If you are not a fan of berries you shall become one after tasting this????.
This as always is a one bowl recipe and one of the simplest. I have used Whole wheat flour in this recipe, which can be easily swapped with Maida/refined flour if you prefer. A simple dish does not need much of a description I believe, therefore lest get to the recipe directly.
While you are here do check out my other bakes like- Millet Cookies, Easy 2 way Muffins, Upside down Orange Vanilla cake, Oatmeal Cookies, Baked Samosa Pie, Apple Crumble, Pineapple Jam Tart, Blueberry Cheese cake and more…
Here is the recipe for Strawberry Loaf for you-

Bajra And Almond Flour Cookies (Millet Cookies)
I surfed the internet to find the easiest Cookie recipe with Millet’s (that are trending currently), using ingredients that are easily available in our pantries, I scored and scored but couldn’t find anything that interested me. By now those who are following the blog and my social media handles know that when it comes to baking, I choose the most easiest recipes, which can be mixed in a single bowl and stashed in the oven to bake. Zero mess.

If you tried this recipe and liked it please comment below. I would love to hear from you. If you have a query about the recipe email us and ill respond as soon as I can.
Easy 2 Way Muffins (Blueberry – Chocochip)
These Muffins are so easy to bake, the prep is easy too. By now you all know that when I choose to bake, it has to be something that is super easy and fuss free.
So here I am giving you a cup cake dough base which you can customize with your favorite add ins and toppings. These are good for breakfast or as a snack for kids snack box . The muffins can be stored in the refrigerator for upto a week and can be warmed in the oven before serving.
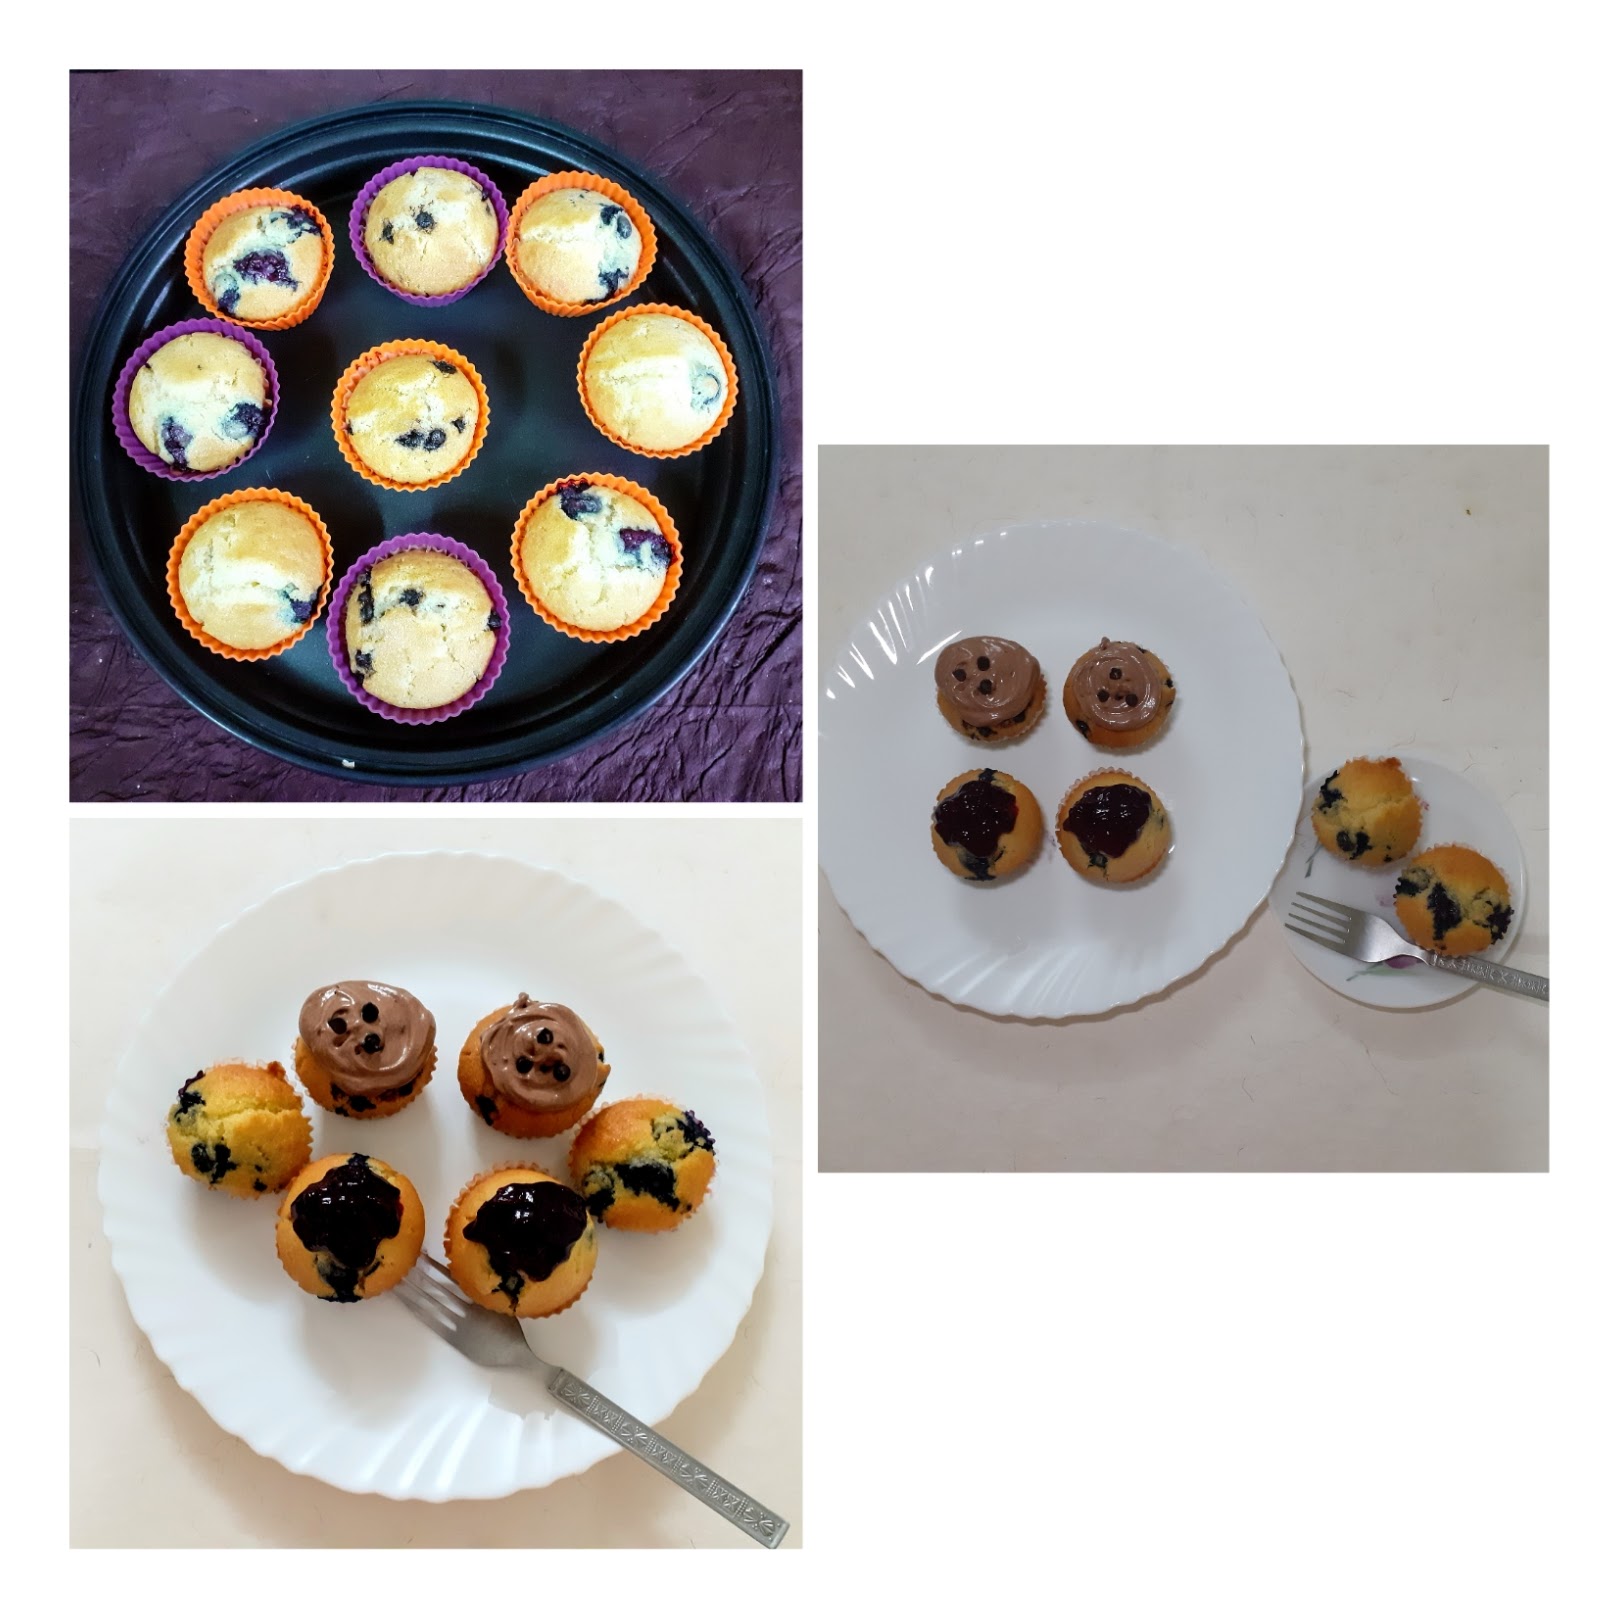
In this recipe I have topped them with my homemade Paneer Grapes conserve for the blueberry muffin and creamcheese-chocolate topping for the chocochip muffins. There are no pictures to them as the topping came as an after thought. However, I will share the procedure for the cream cheese icing without pictures. As for the conserve, a separate post for it will follow soon.
This is one such recipe where I have not added wheat flour and stuck to just refined flour. Usually I do only wheat flour or mix of wheat and refined flour.
While you are here please try out my other super easy cake recipes like Blueberry cheese cake, Upsidedown Orange Vanilla cake, Apple tea cake, Nutella fudge brownies, and more…
PREP TIME: 15MINS COOK TIME: 20MINS
TOTAL TIME: 35 MINS CUISINE: INDIAN
COURSE : DESSERT SERVINGS: 12 nos
AUTHOR: RAJNI RAM

Here is the recipe for the Muffins–
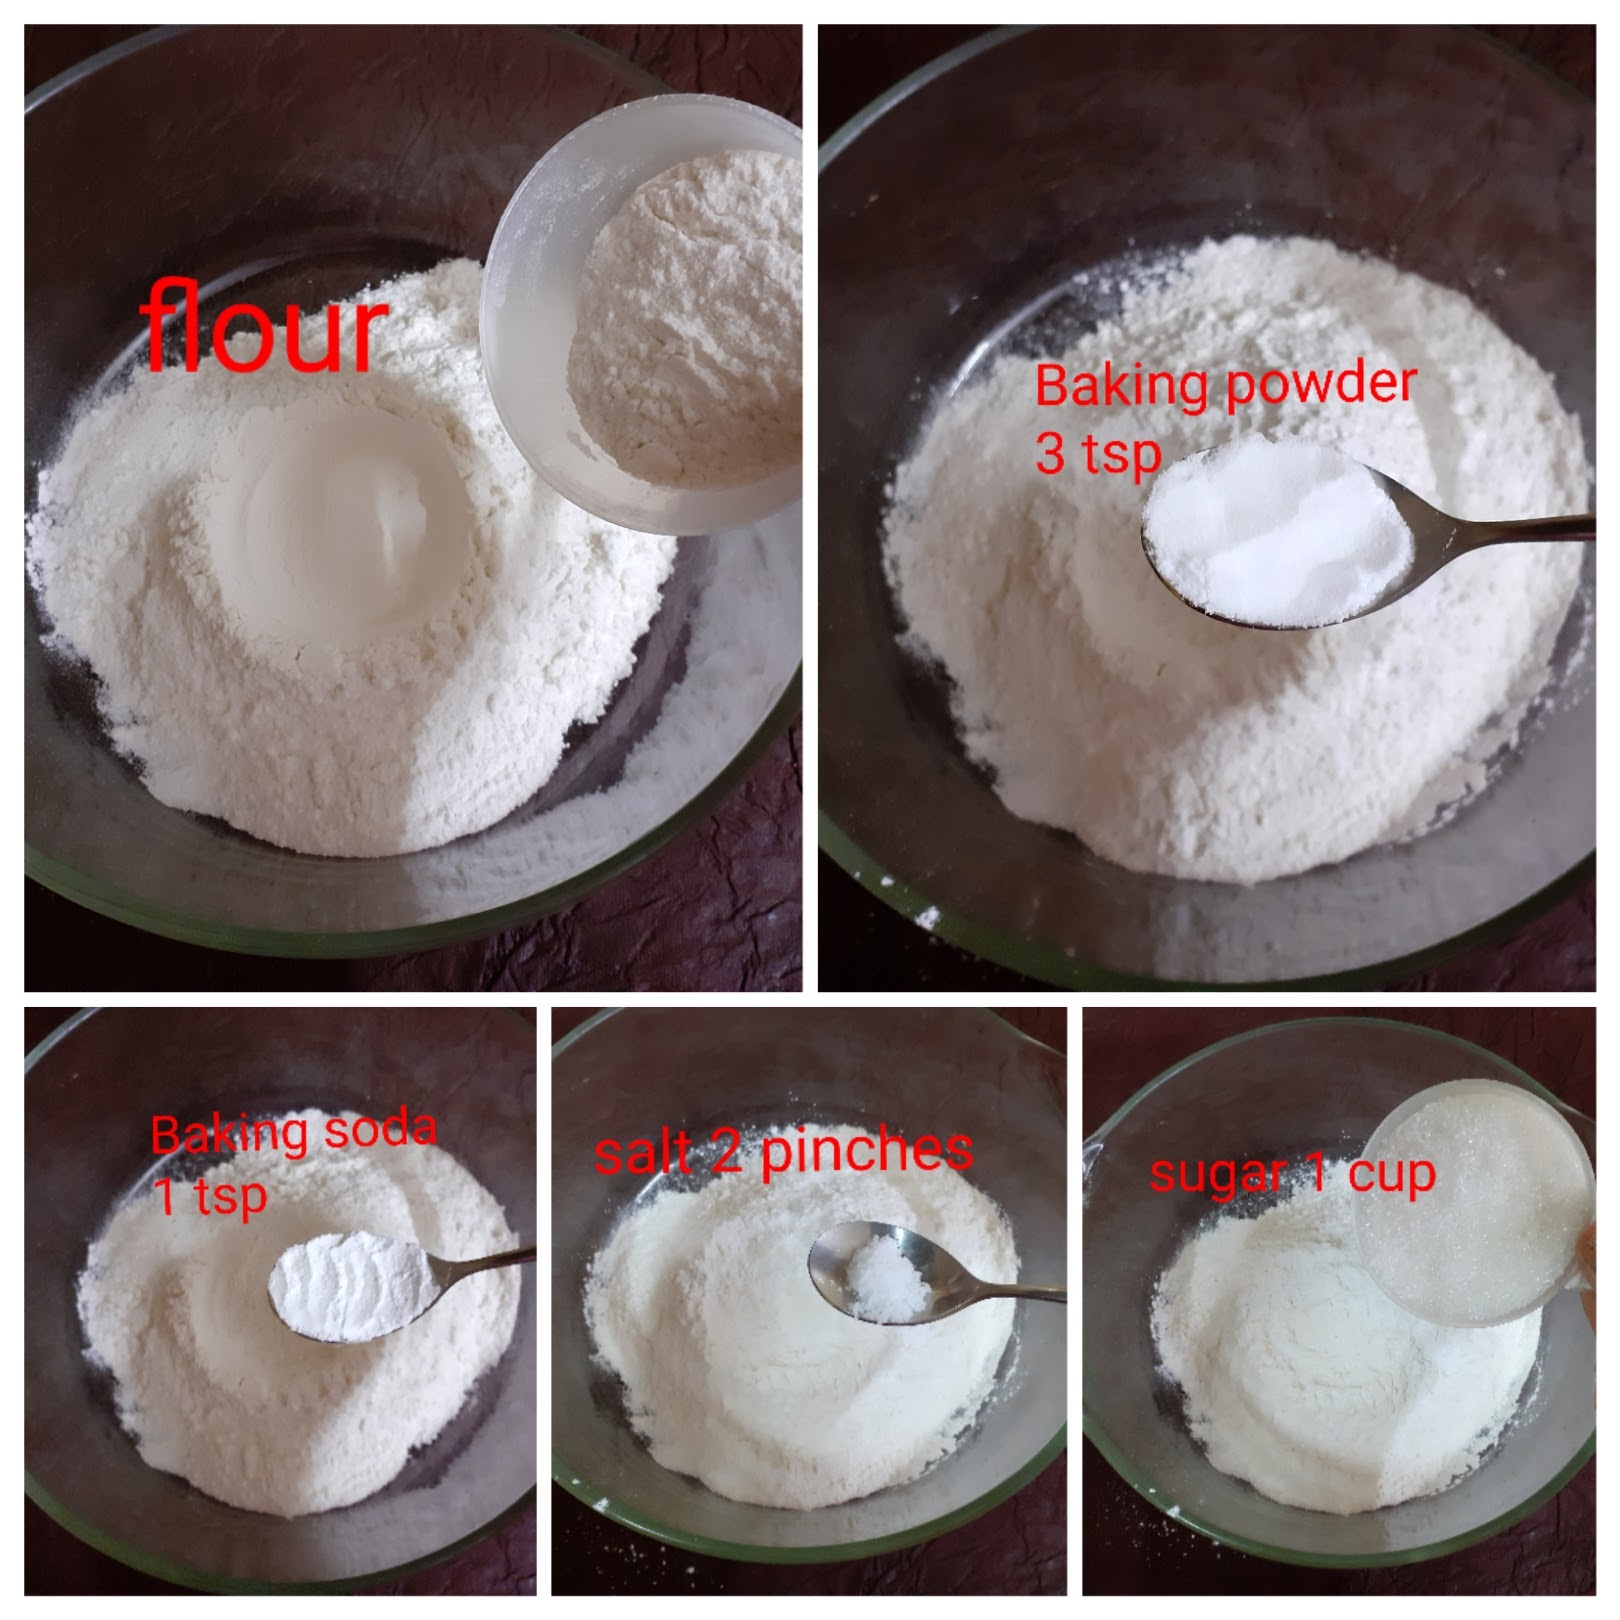
Ingredients :
Plain flour 2.5 cups
Sugar 1 cup
Baking powder 3 tsp
Baking soda 1 tsp
Salt 2 pinches
Buttermilk 1cup
Oil ( any unflavored oil) 4 tbsp
Butter melted 50 gm ( if using salted skip the salt)
Vanilla essence 1 tsp
Eggs 2 ( refer notes)
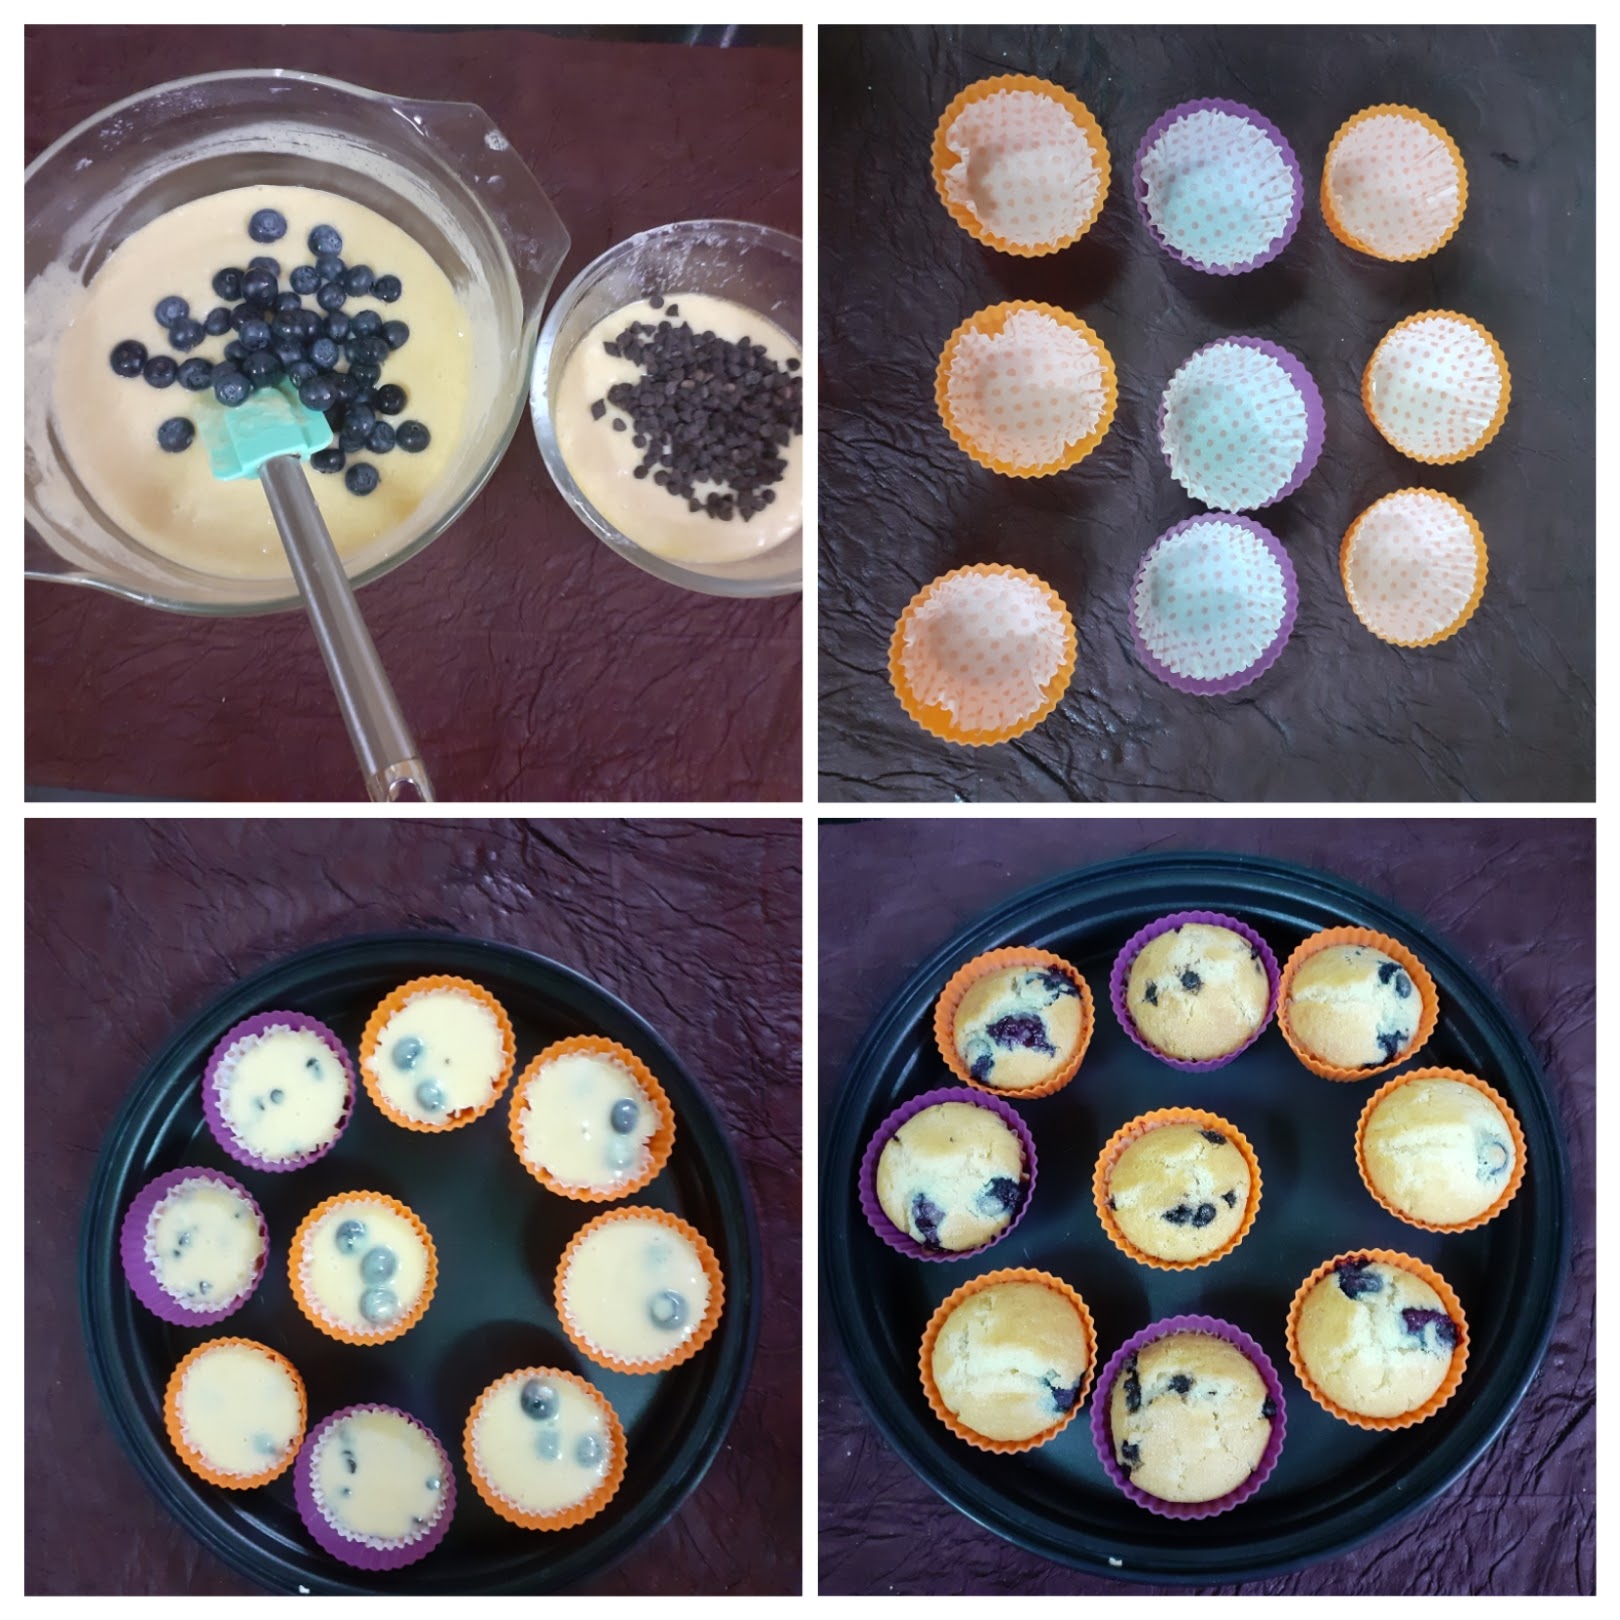
Blueberries 125 gms
Chocochips 50 gm
Directions:
In a bowl put in all the dry ingredients, that is flour, sugar, baking powder, baking soda and salt and whisk.
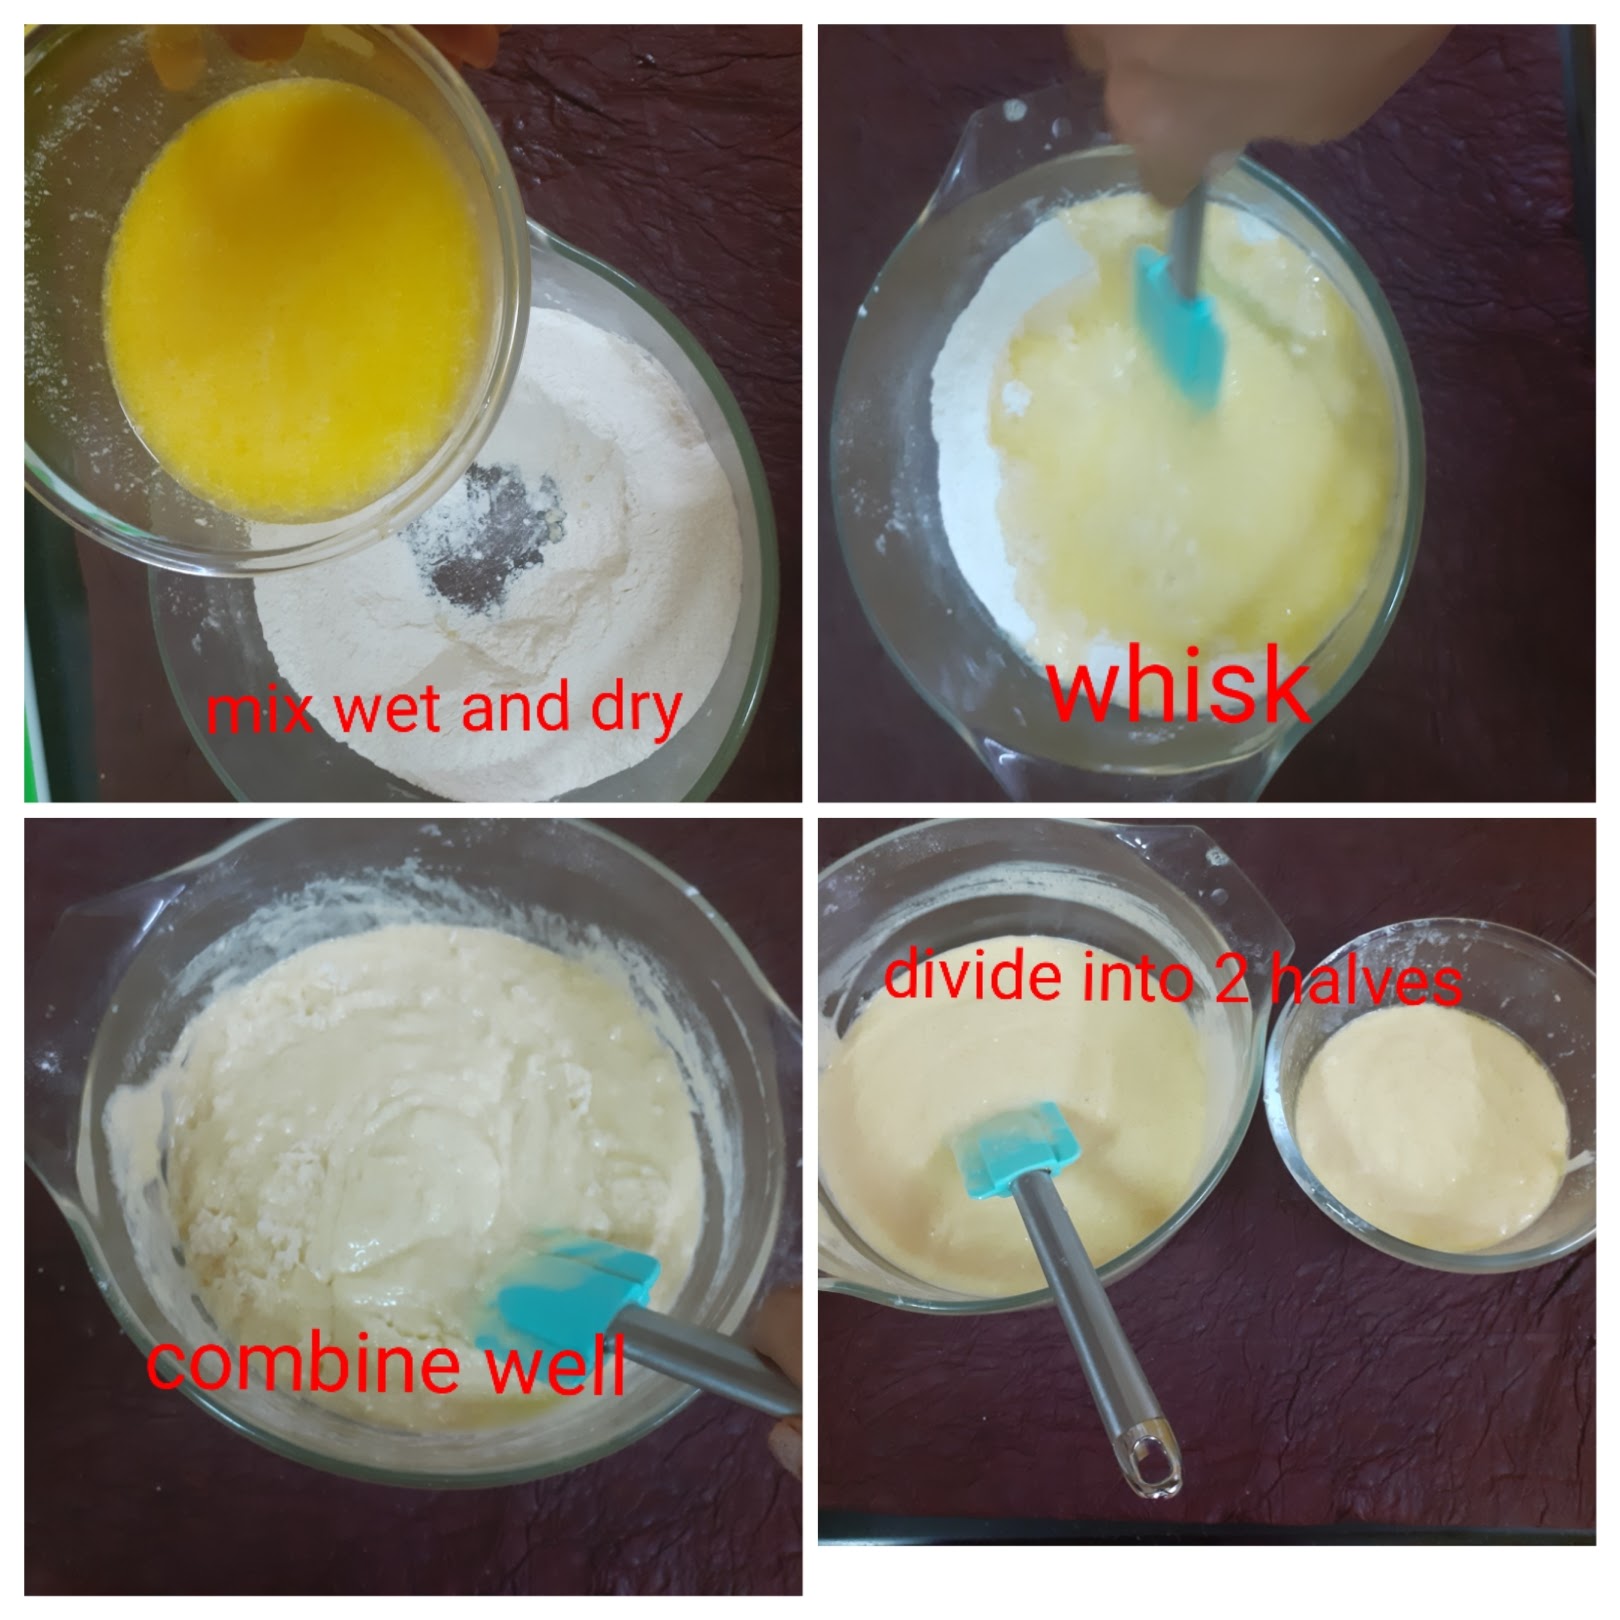
In another bowl put in all the wet ingredients, that is the buttermilk, oil, butter, eggs and the vanilla essence and whisk. Preheat oven to 180 C.
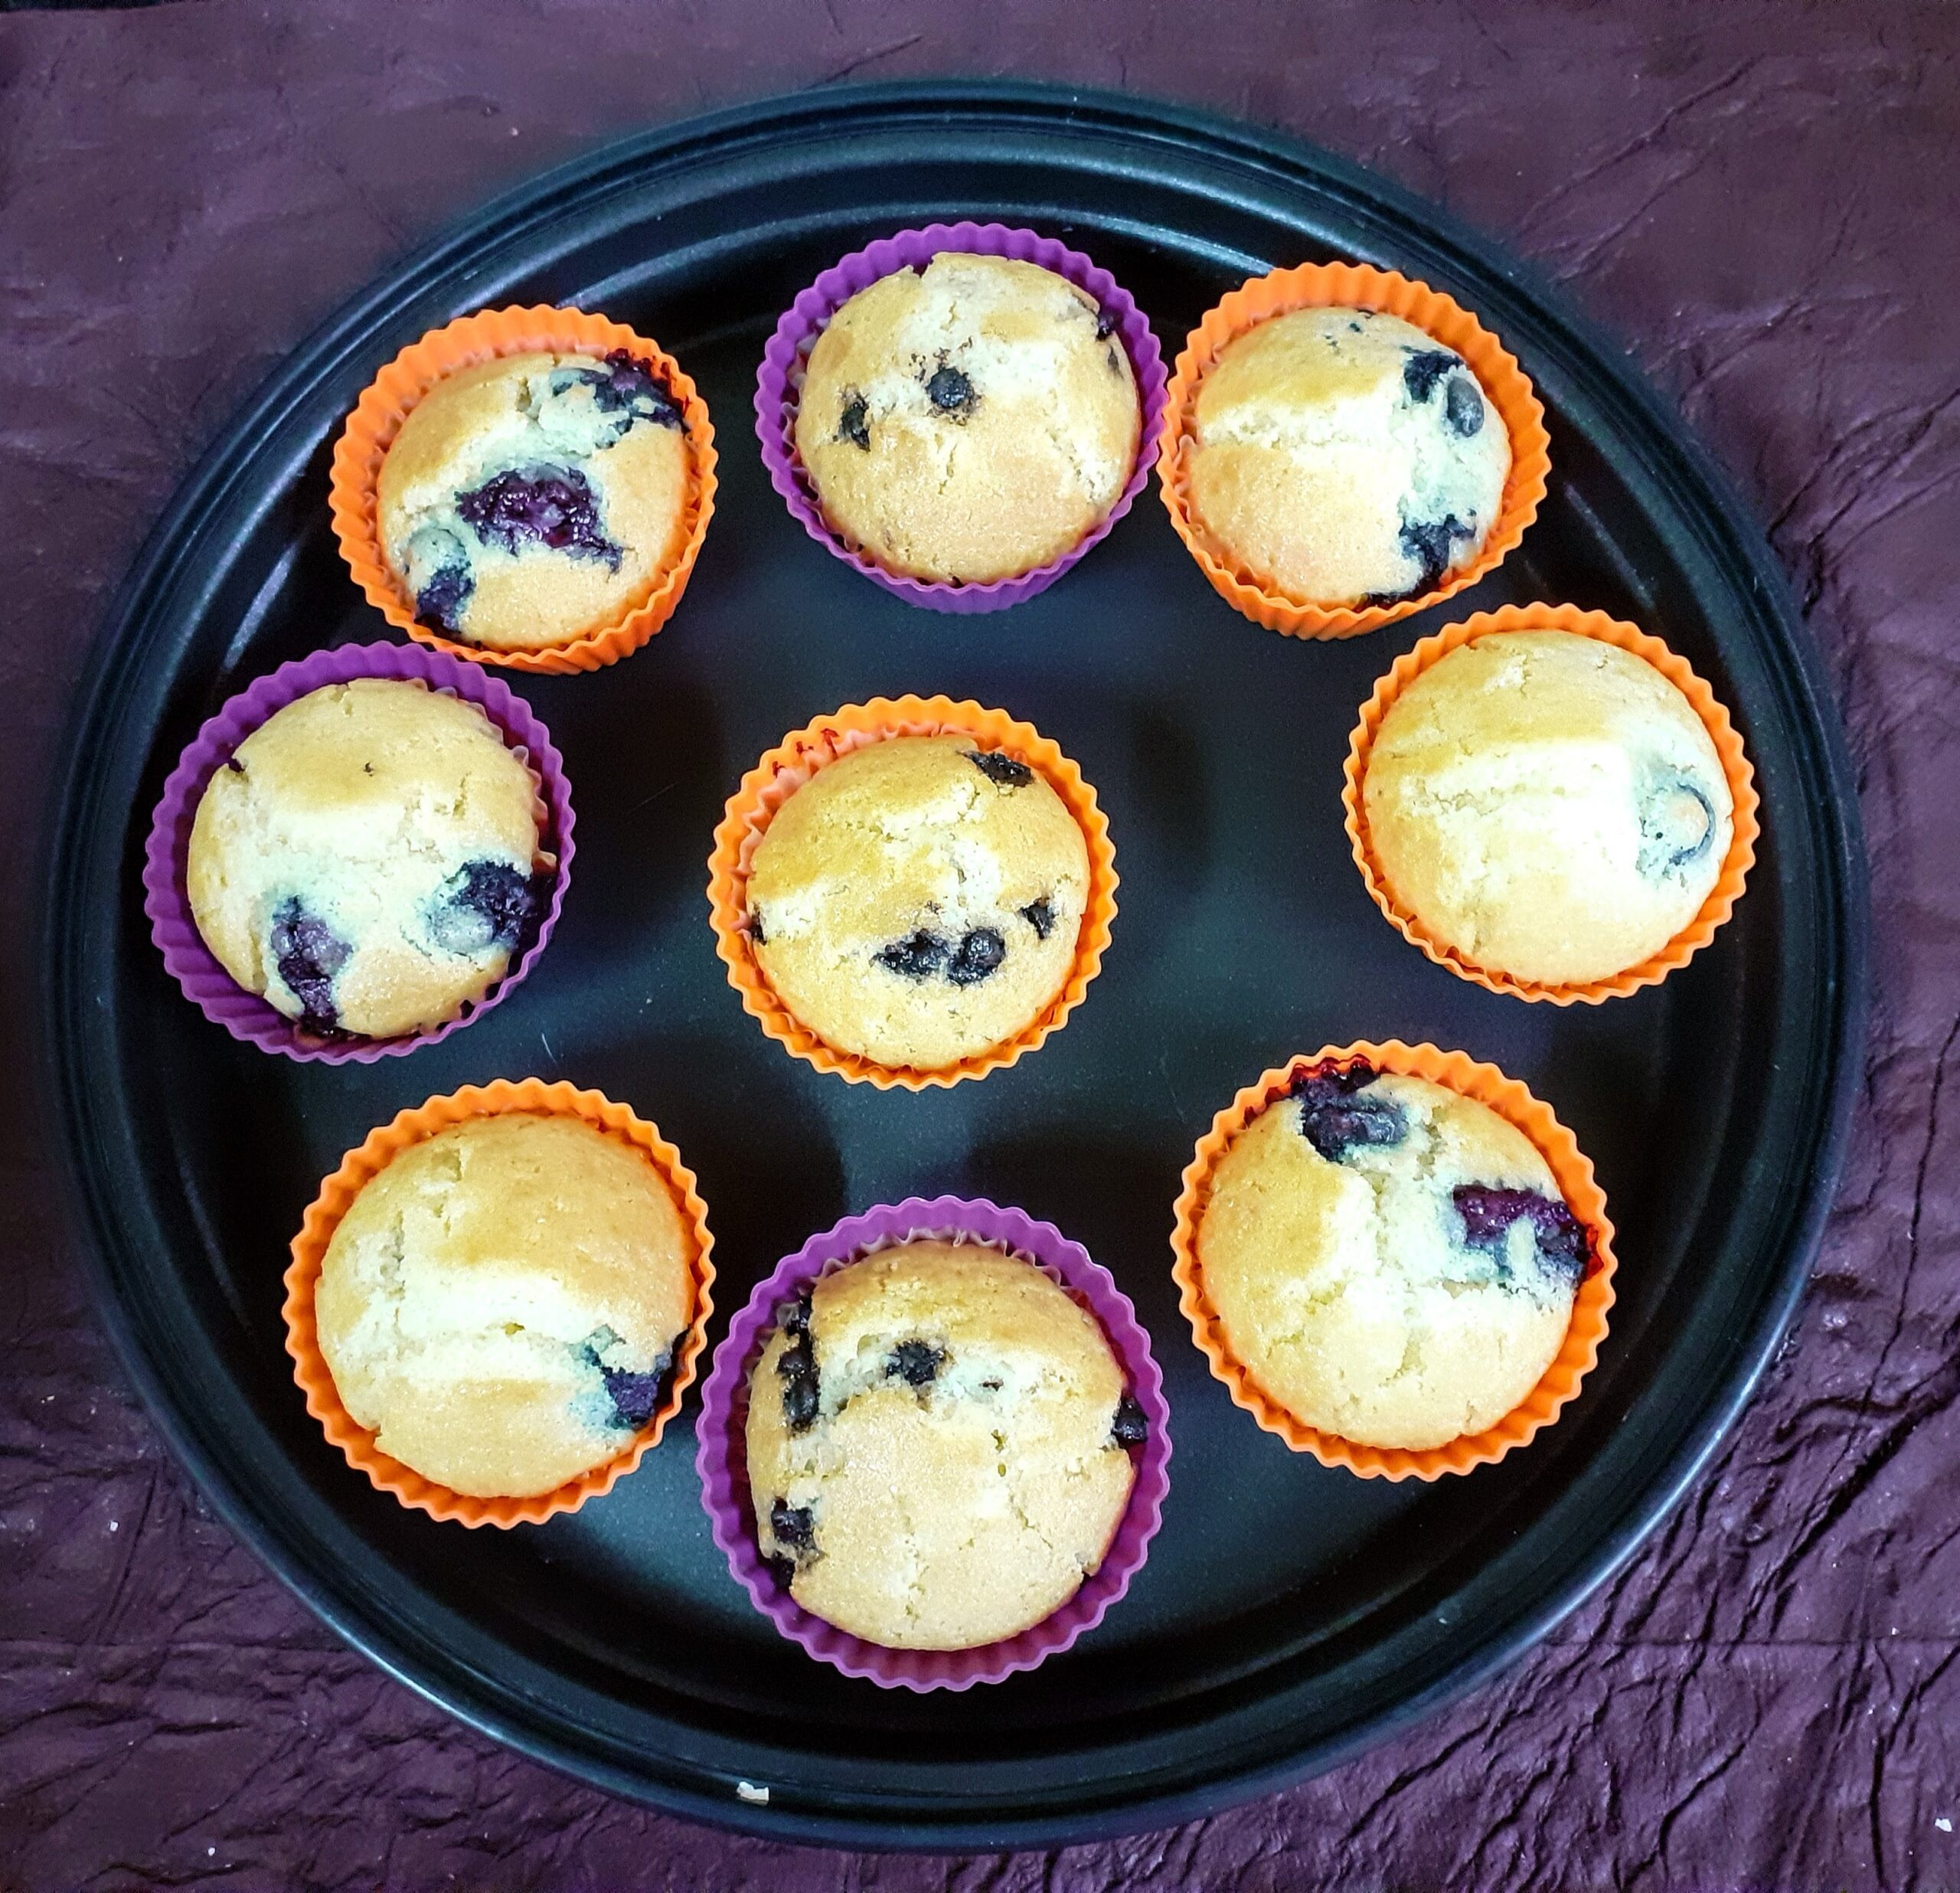
Now slowly add the wet ingredients into the dry ingredients little by little. Combine nicely with a spatula no beater required. Now divide the dough into 2 equal halves. Add Blueberries to one half. Mix it in with very light hands. To another half add chocochip, stir it in light. Scoop the dough into muffin tins lined with muffin liners. Bake at 200 C for 20 minutes. Insert a skewer to check for doneness. Transfer the muffins into a tray to cool. Enjoy these homemade muffins with your favourite beverage.
For Cream cheese icing : in a bowl add 75 gm of cream cheese, 1/2 cup of icing sugar, 2 tbsp cocoa powder, and beat until smooth using an electric beater. The mixture to be smooth and thick and not thin or watery. Use this to top the muffin and enjoy. ( This step is optional and there are no pictures to this step)
STEPWISE RECIPE FOLLOWS:
1. In a bowl put in all the dry ingredients, that is flour, sugar, baking powder, baking soda and salt and whisk.
2. In another bowl put in all the wet ingredients, that is the buttermilk, oil, butter, eggs and the vanilla essence and whisk. Preheat oven to 180 C.

3. Now slowly add the wet ingredients into the dry ingredients little by little. Combine nicely with a spatula no beater required. Now divide the dough into 2 equal halves.
4. Add Blueberries to one half. Mix it in with very light hands. To another half add chocochip, stir it in light. Scoop the dough into muffin tins lined with muffin liners. Bake at 200 C for 20 minutes. Insert a skewer to check for doneness. Transfer the muffins into a tray to cool.
5. To top the Blueberry muffins use a fruit conserve, preferably berryish and for the chocochip muffins any chocolate icing will do. To follow my style procedure for cream cheese chocolate icing is given above. This step is totally options. The muffins taste just as great even without the toppings.
NOTES:
1. I usually use Olive oil for baking, coconut oil or even refined oil work well.
2. While baking the eggs should always be at room temperature. It’s also recommended to have all ingredients at room temperature.
3. Unless a recipe demands chilled butter, always use melted butter for baking.
If you tried this recipe and liked it please comment below. I would love to hear from you. If you have a query about the recipe email us and ill respond as soon as I can.
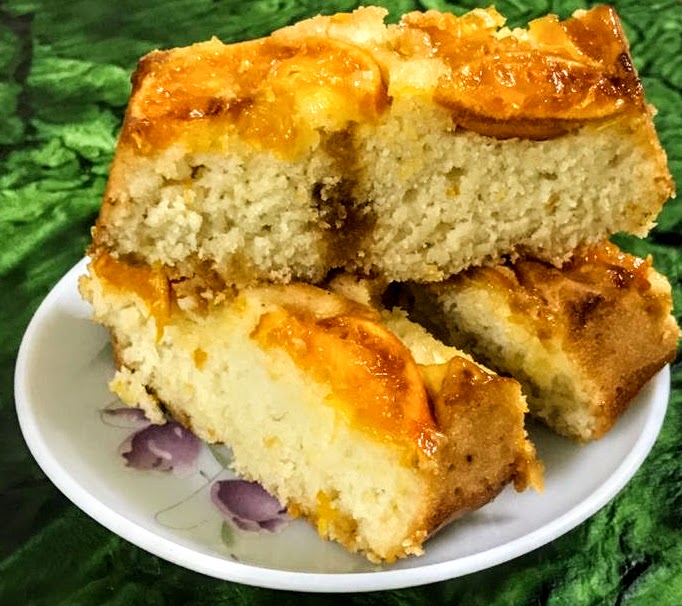
Upside Down Orange Vanilla Cake (Eggless Recipe)
I have imagined creating this cake many times and finally got down to baking it recently. This cake requires small and firm Oranges that can be sliced with the peel. I spotted them at the store I buy my vegetables from and just grabbed them.
This is a simple recipe and an eggless one. Anyone can make this, no beating, no major whisking. You all know by now the recipes I choose to bake are mostly non-messy ones.
I am giving you a base here to which you can add anything you like, be creative, and yet you will have a beautifully moist cake every time. I have not infused the Orange sauce into the cake, but wanted them on top, and so made the upside-down version.
Being an eggless version it is different from other eggless cakes as I have not used condensed milk or flax egg, but one simple ingredient that we have in our refrigerators. Curd/ yogurt. Yes, that’s the base and I assure the cake will not taste of curd.
While you are here check out my other cakes like Blueberry Cheesecake, Nutella fudge brownies, Apple cake, Apple crumble, and more…
Here is the recipe for Upside down Orange Vanilla Cake.
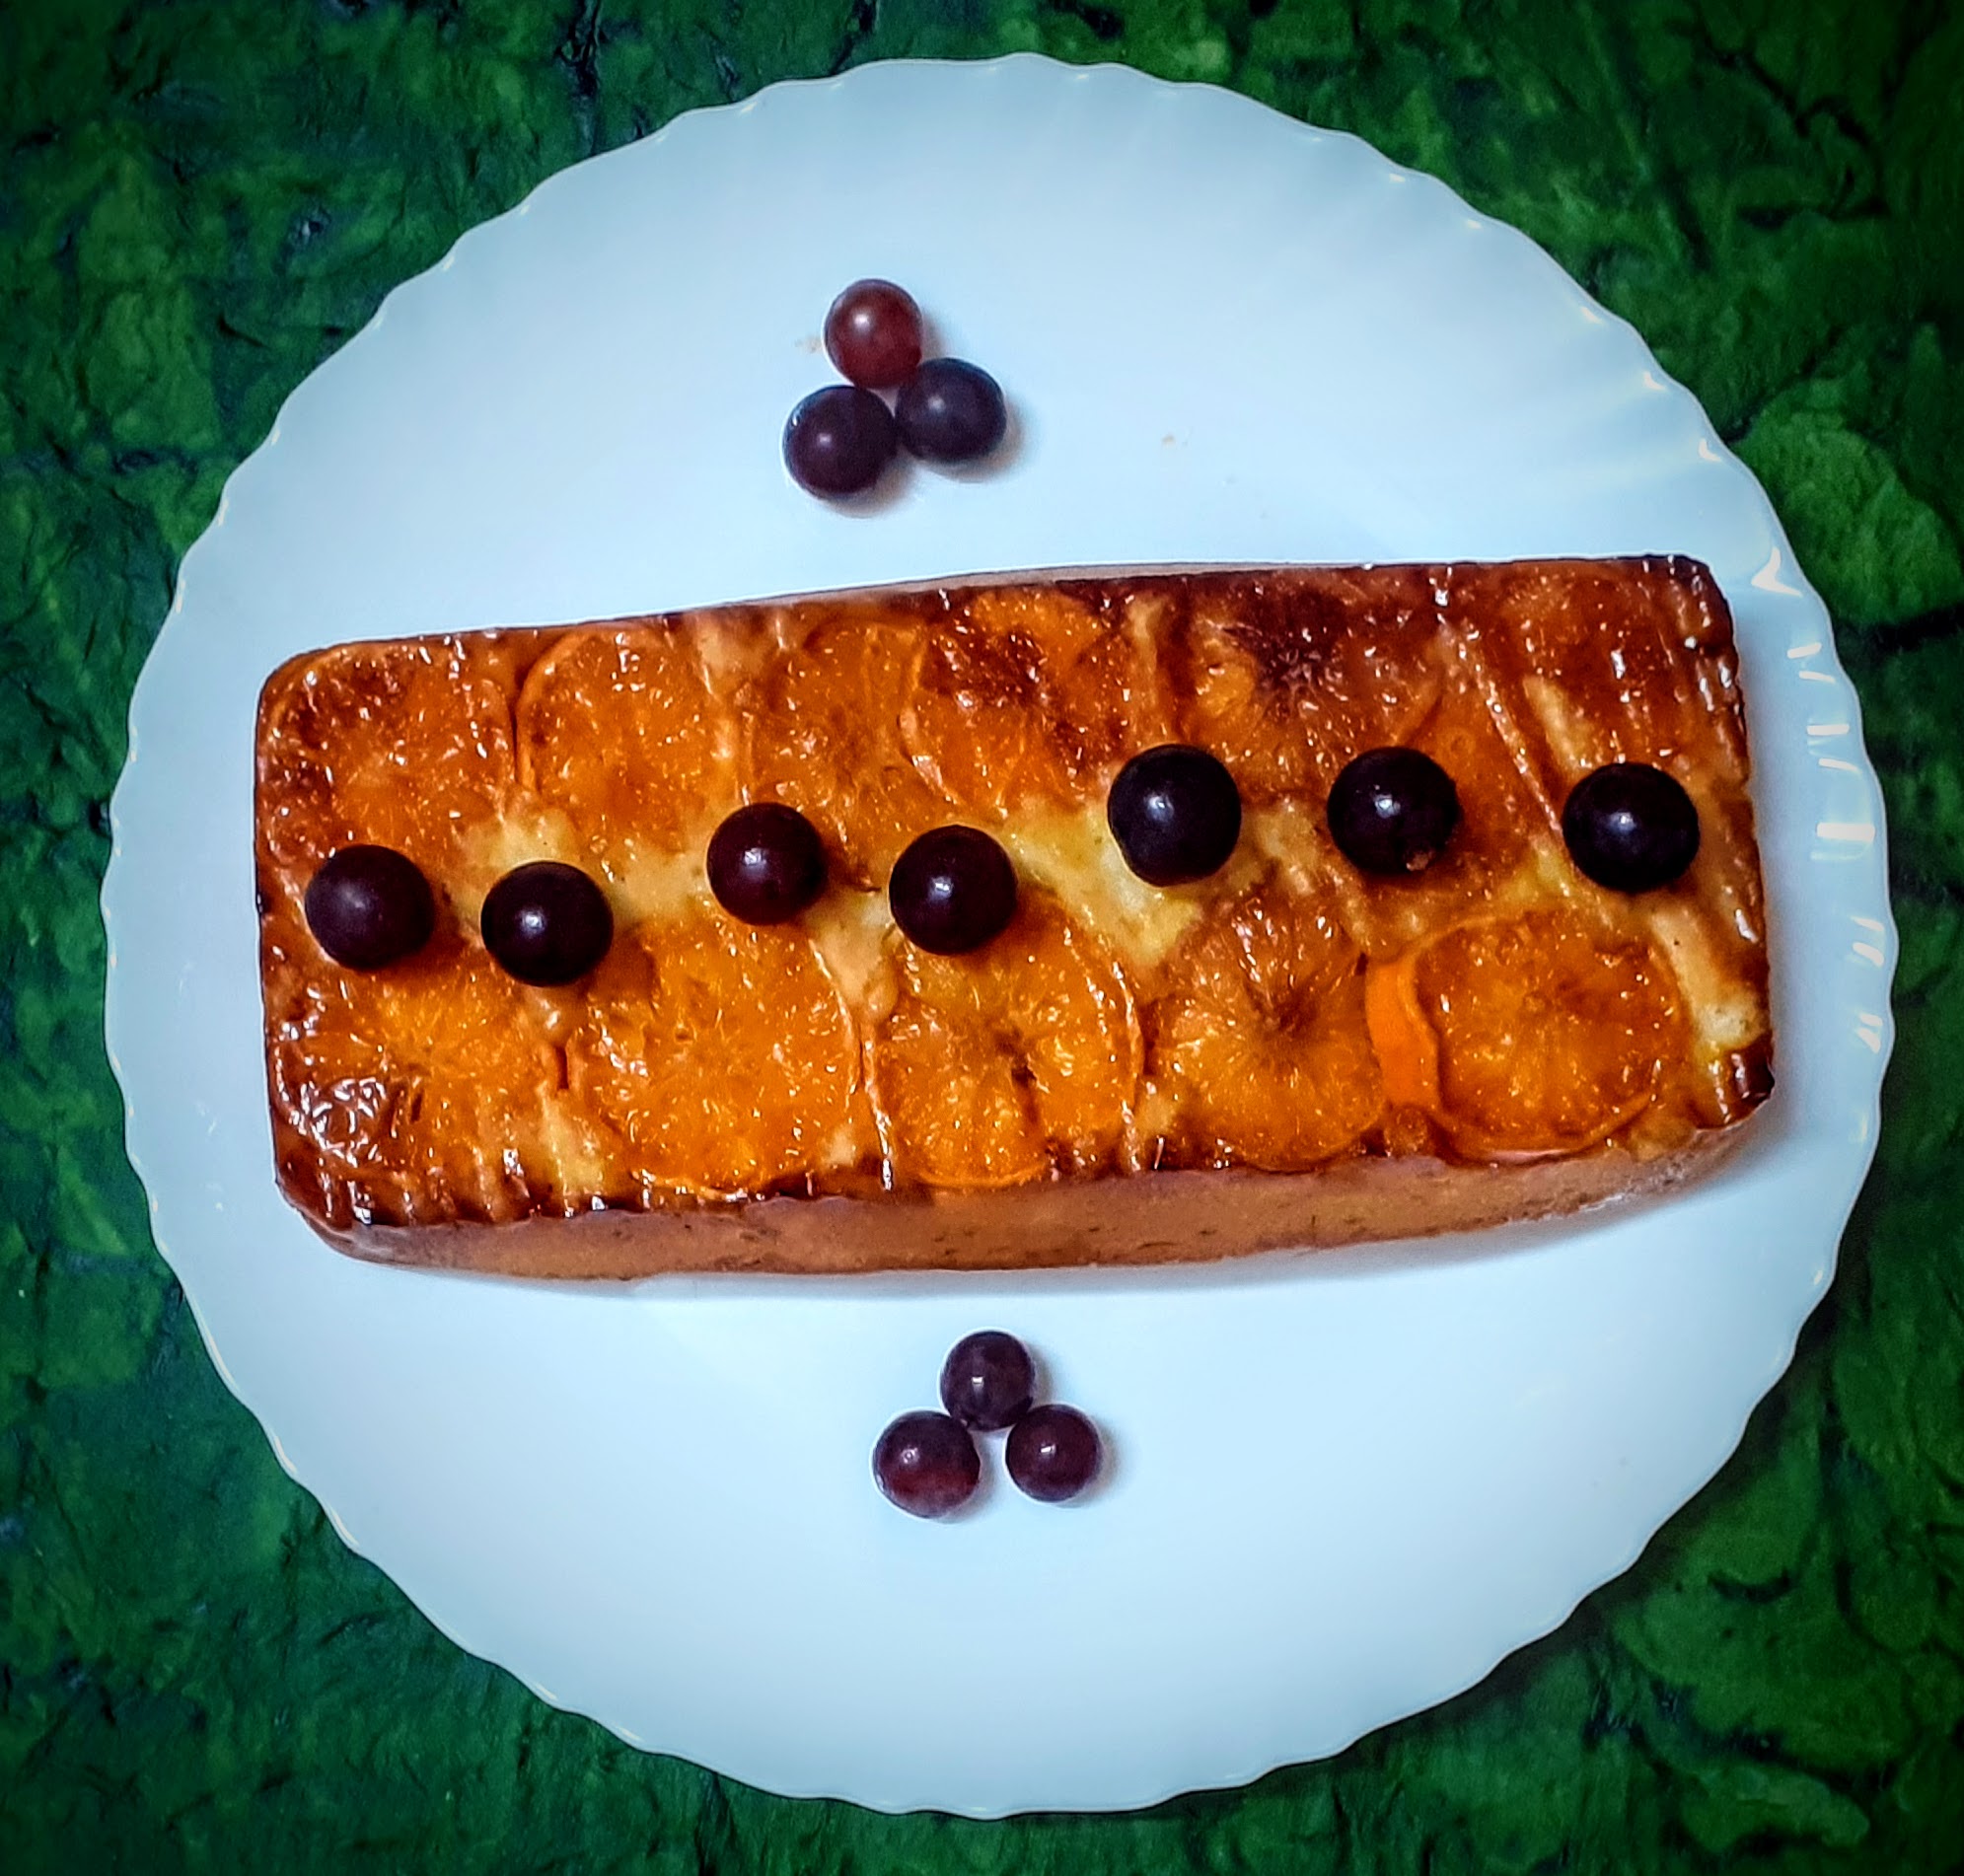
Ingredients for the topping:
Oranges 4 with a taut peel ( baby oranges are the best) sliced in circles.
Honey 3 tbsp
Butter 10 gms or 1 tbsp
Ingredients for Cake:
Maida ( refined flour) 1.5 cups ( 1 cup=150 ml)
Curd/ yogurt 1 cup
Sugar ( white) 3/4 of a cup
Baking powder 1 tsp
Baking soda 1/2 tsp
Oil ( refined oil or coconut oil) 1/2 cup
Vanilla essence 2 drops
The rind of 1 small orange grated (optional)
Requirement: Square or rectangle baking tin/tray
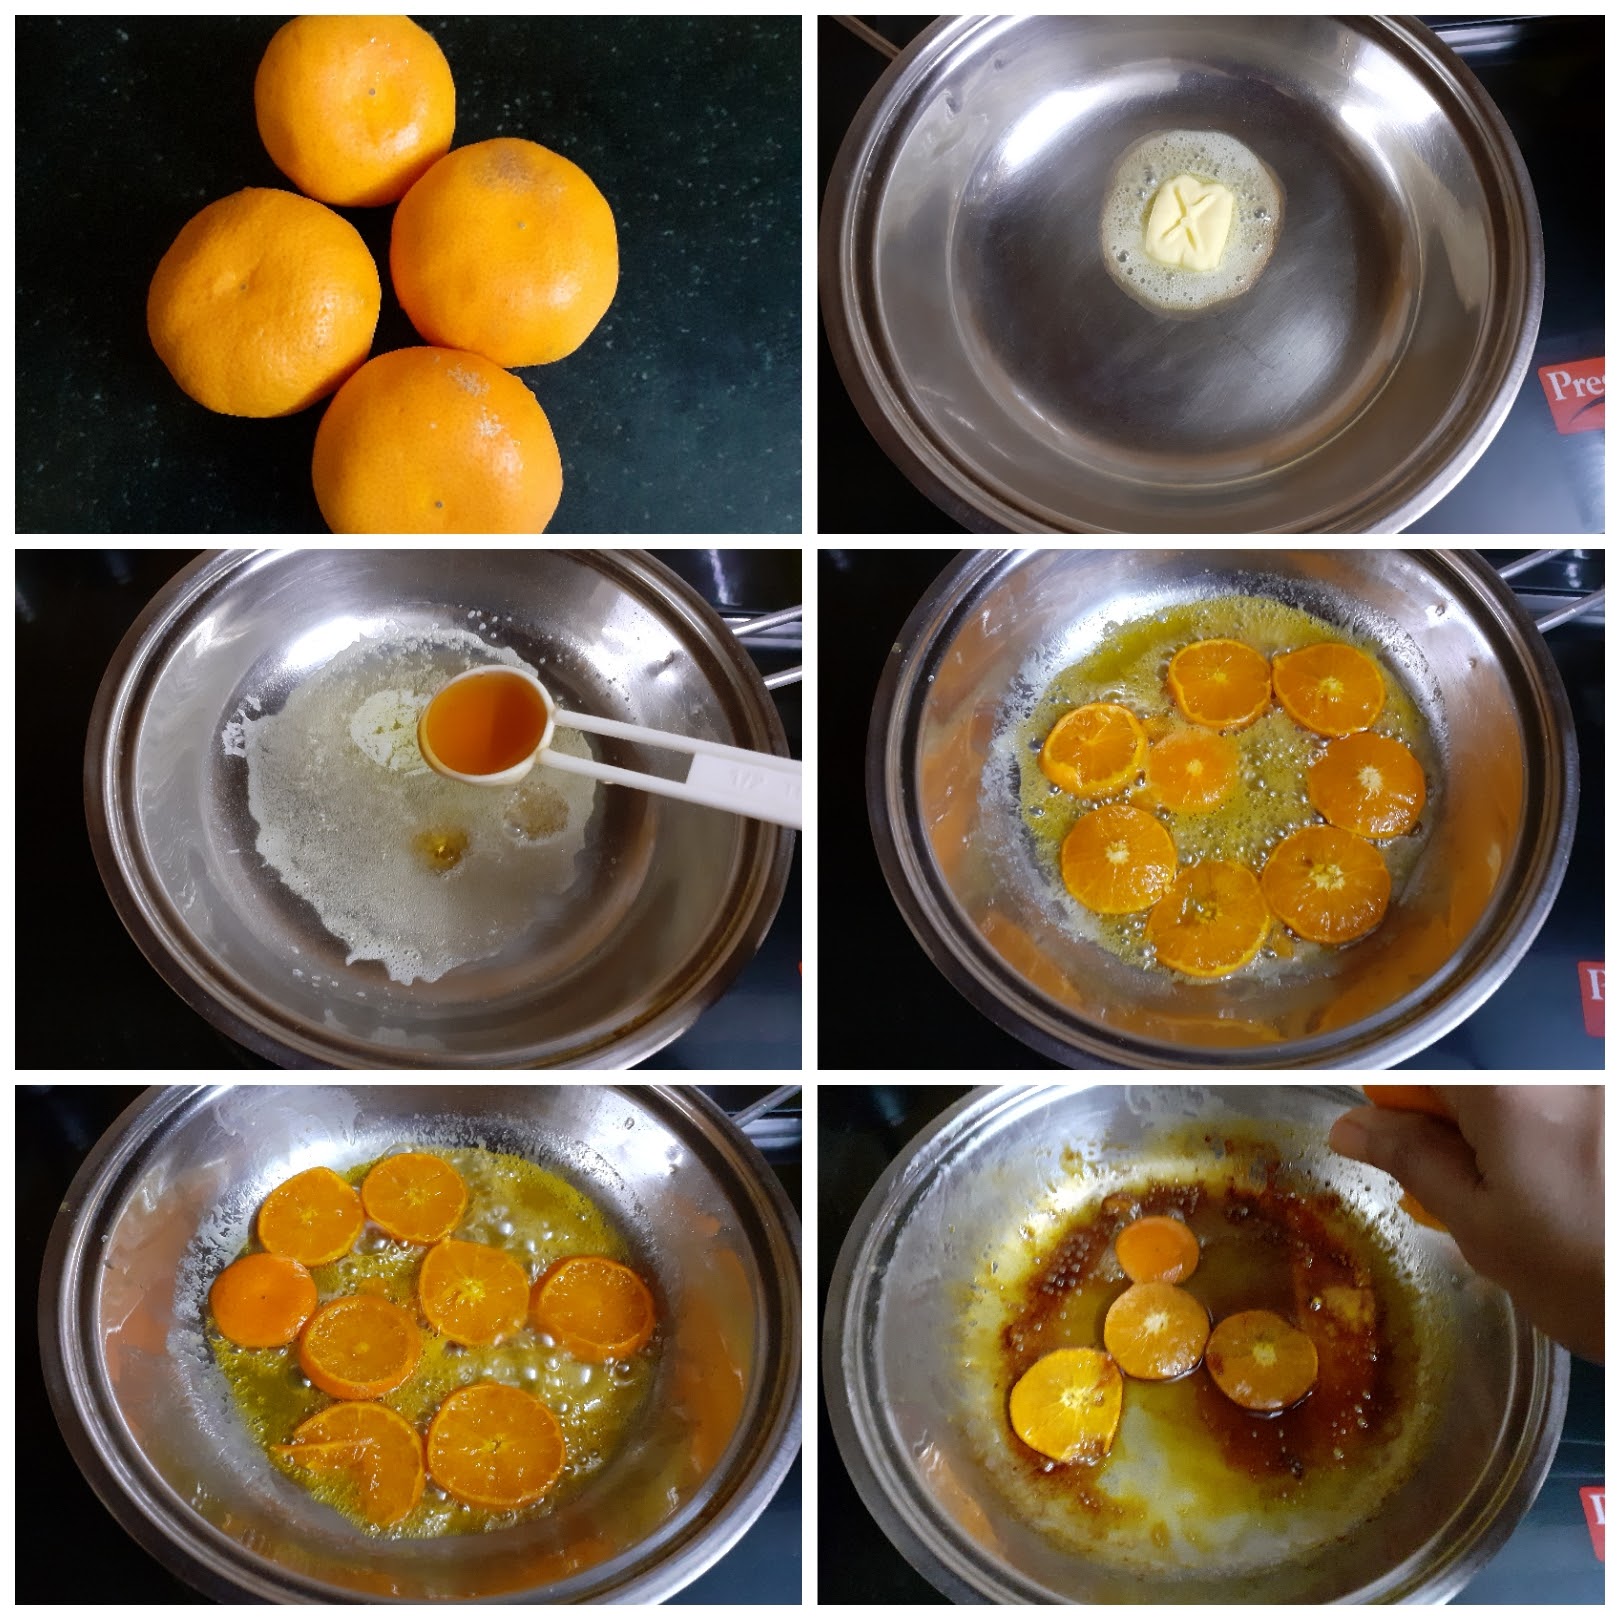
Directions for topping:
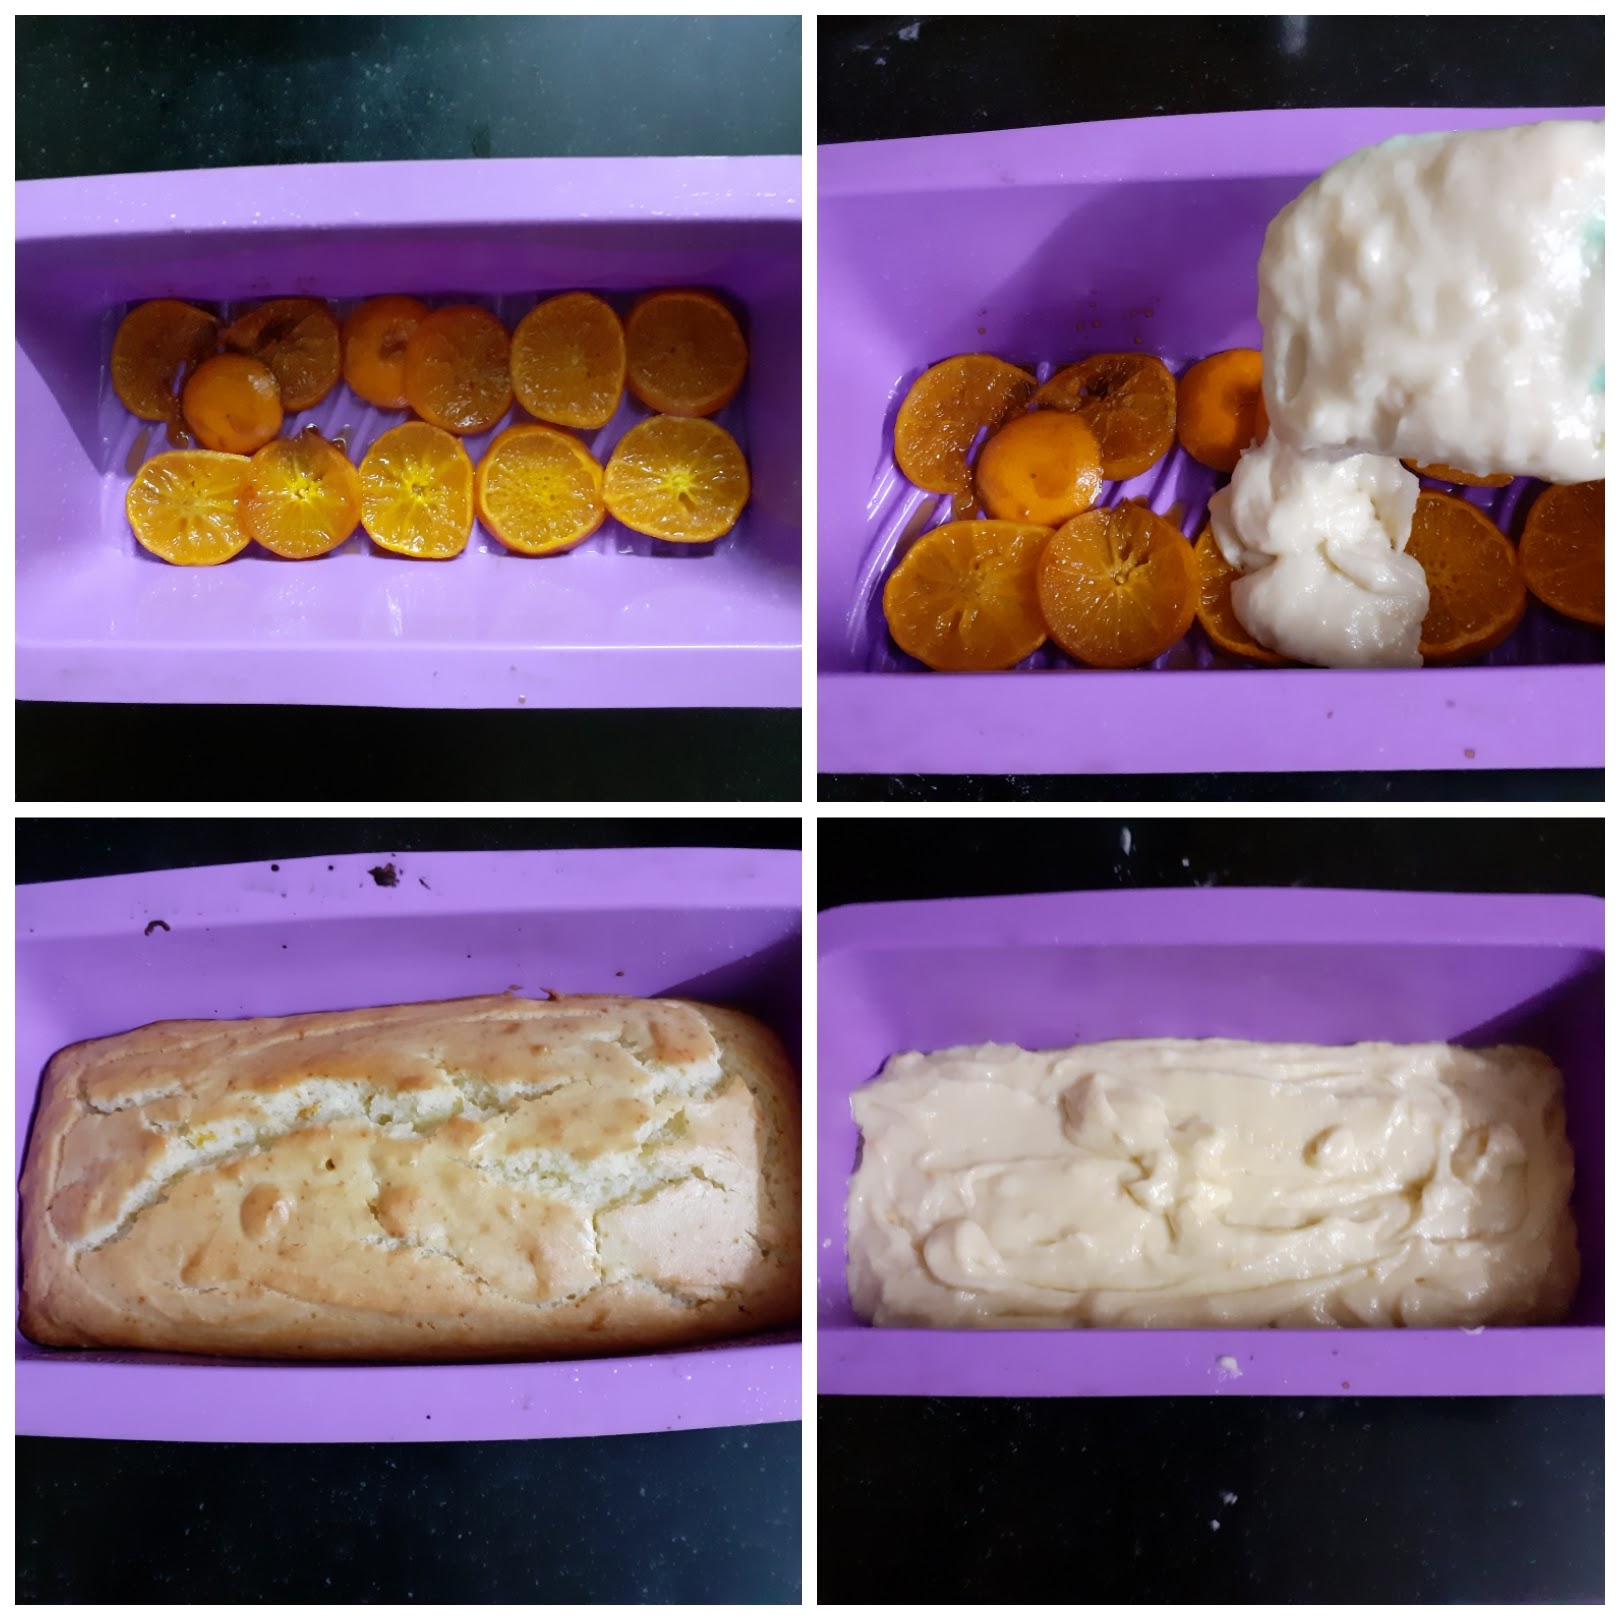
Slice the Oranges into thin circles and keep aside. In a pan place the butter and melt (take care not to overheat the butter). When the butter melts, add the honey and warm it, on low heat. Now place the Orange slices in the pan and cook for 2 minutes, until the oranges absorb the honey. Flip and cook on both sides ( 1 minute each side). We don’t want the Orange to overcook and lose shape. Put off the flame and allow it to cool.
Directions for cake:
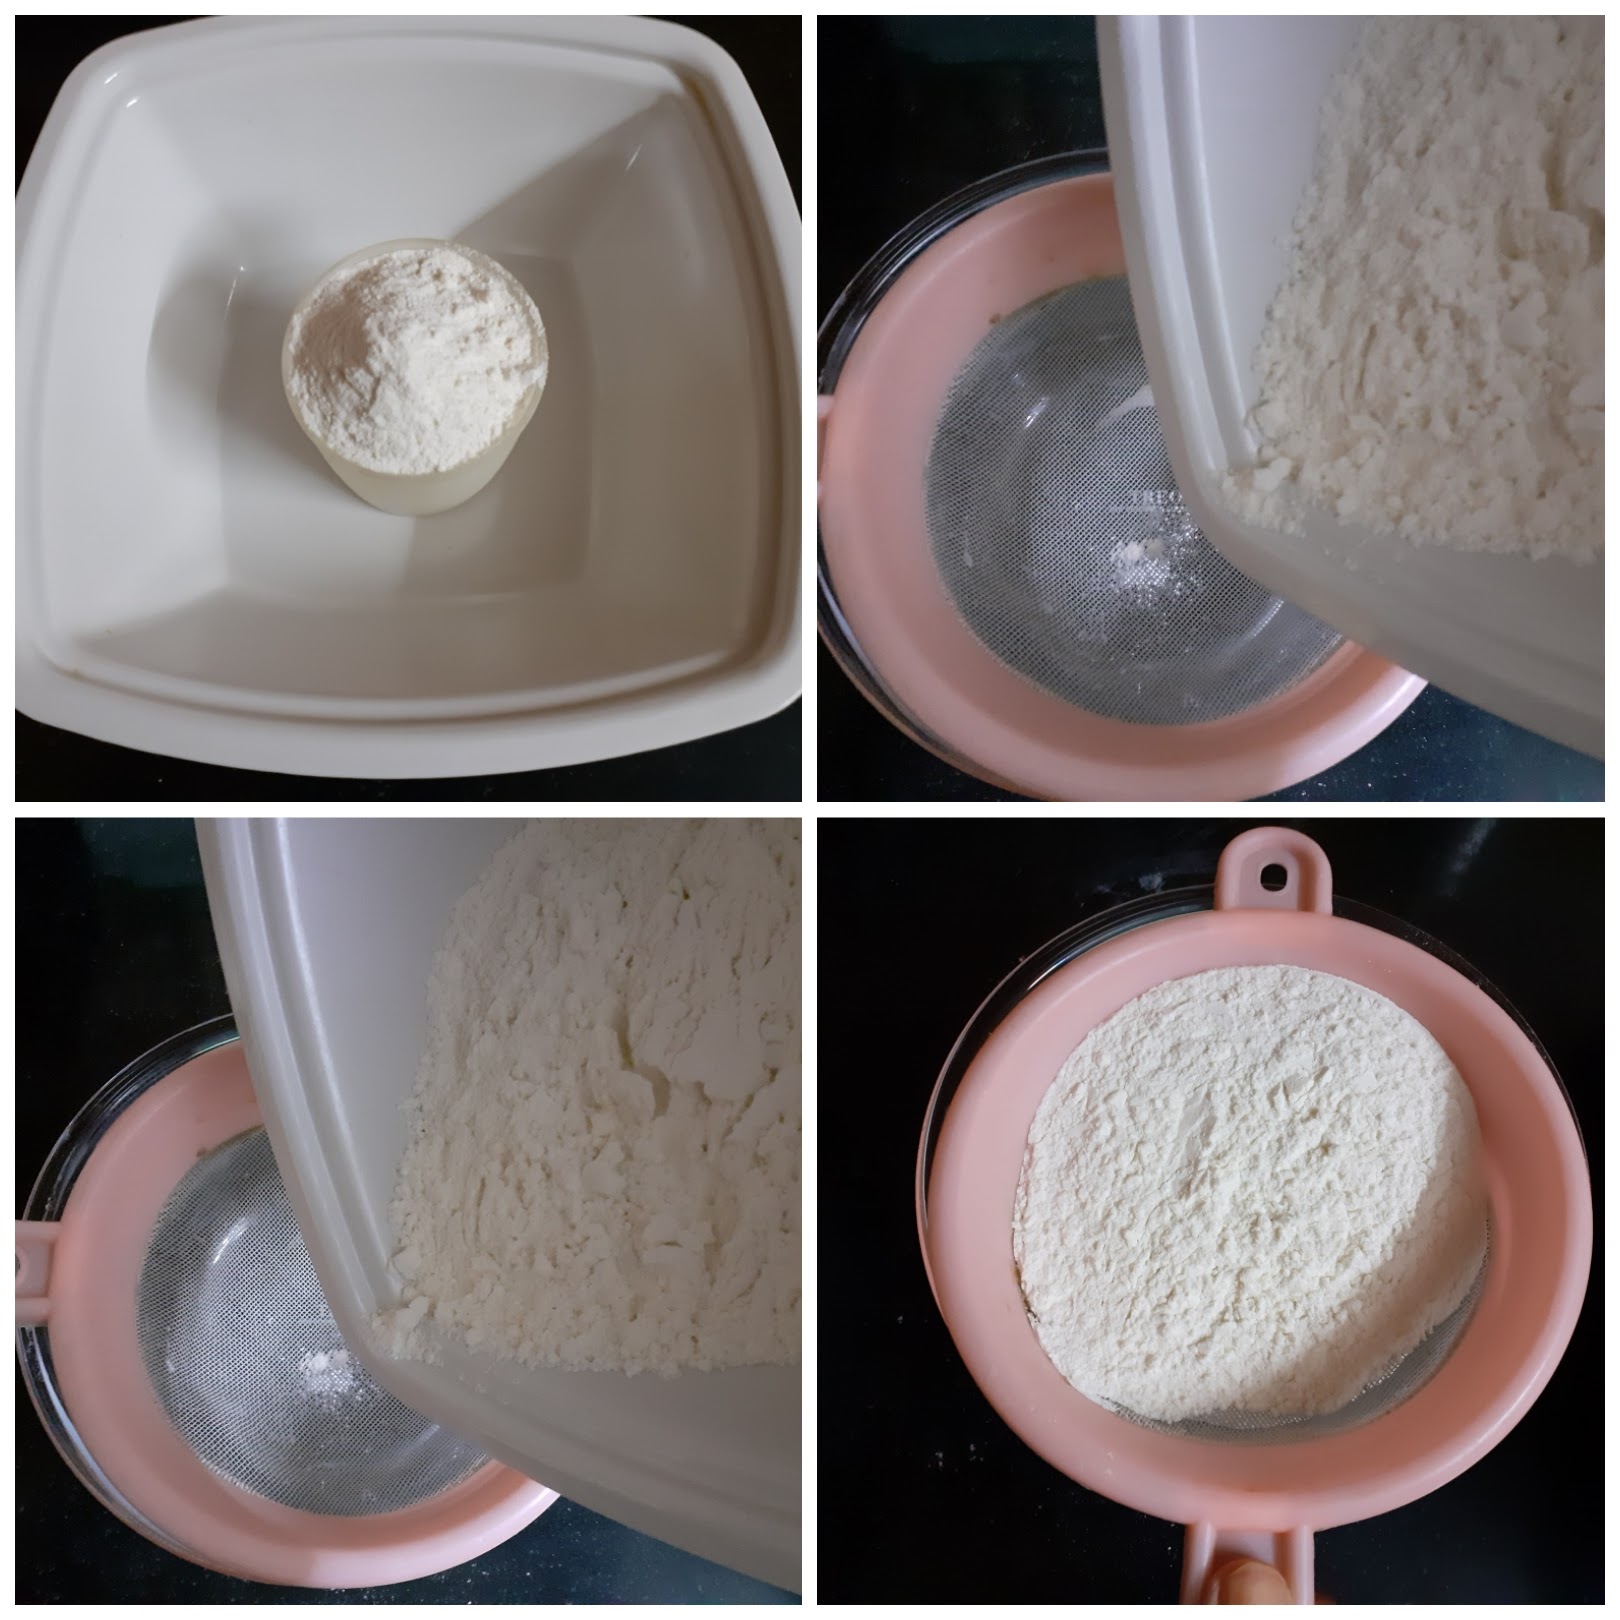
Preheat oven to 180 c for 10 minutes. Sift the flour and keep ready. In a bowl take the curd, add the sugar and combine until the sugar dissolves completely. Now add the baking powder and baking soda and set aside for 5 minutes. This makes the mixture to froth up and double in size.
After 5 minutes add oil to the curd mixture and combine well. Add the sifted flour and with a spatula or wire whisk combine nicely to form a batter. Add in the vanilla essence and grated Orange rind(if using) and combine lightly once again.
In a previously greased tray, arrange the Orange slices such that they cover the bottom of the tray. Now transfer the cake batter into the tray lined with Oranges and tap one gently. Place the tray in the oven and bake for 35 minutes at 180 C. Check for doneness or keep for a couple of minutes more, if a toothpick comes out sticky, don’t go beyond 5 minutes. Cool the cake for 30 minutes. In case you have any sauce from cooking the oranges in honey remaining, you can pour it over the cake as soon as you turn it upside down. let it stand for 10 minutes before slicing. Enjoy this refreshing cake with tea.
STEPWISE RECIPE FOLLOWS:
1. Slice the Oranges into thin circles and keep aside. In a pan place the butter and melt. When the butter melts, add the honey and warm it, on low heat. Now place the Orange slices in the pan and cook for 2 minutes, until the oranges absorb the honey. Flip and cook on both sides.
2. Preheat oven to 180 c for 10 minutes. Sift the flour and keep ready.
3. In a bowl take the curd, add the sugar and combine until the sugar dissolves completely. Now add the baking powder and baking soda and set aside for 5 minutes. This makes the mixture to froth up and double in size.
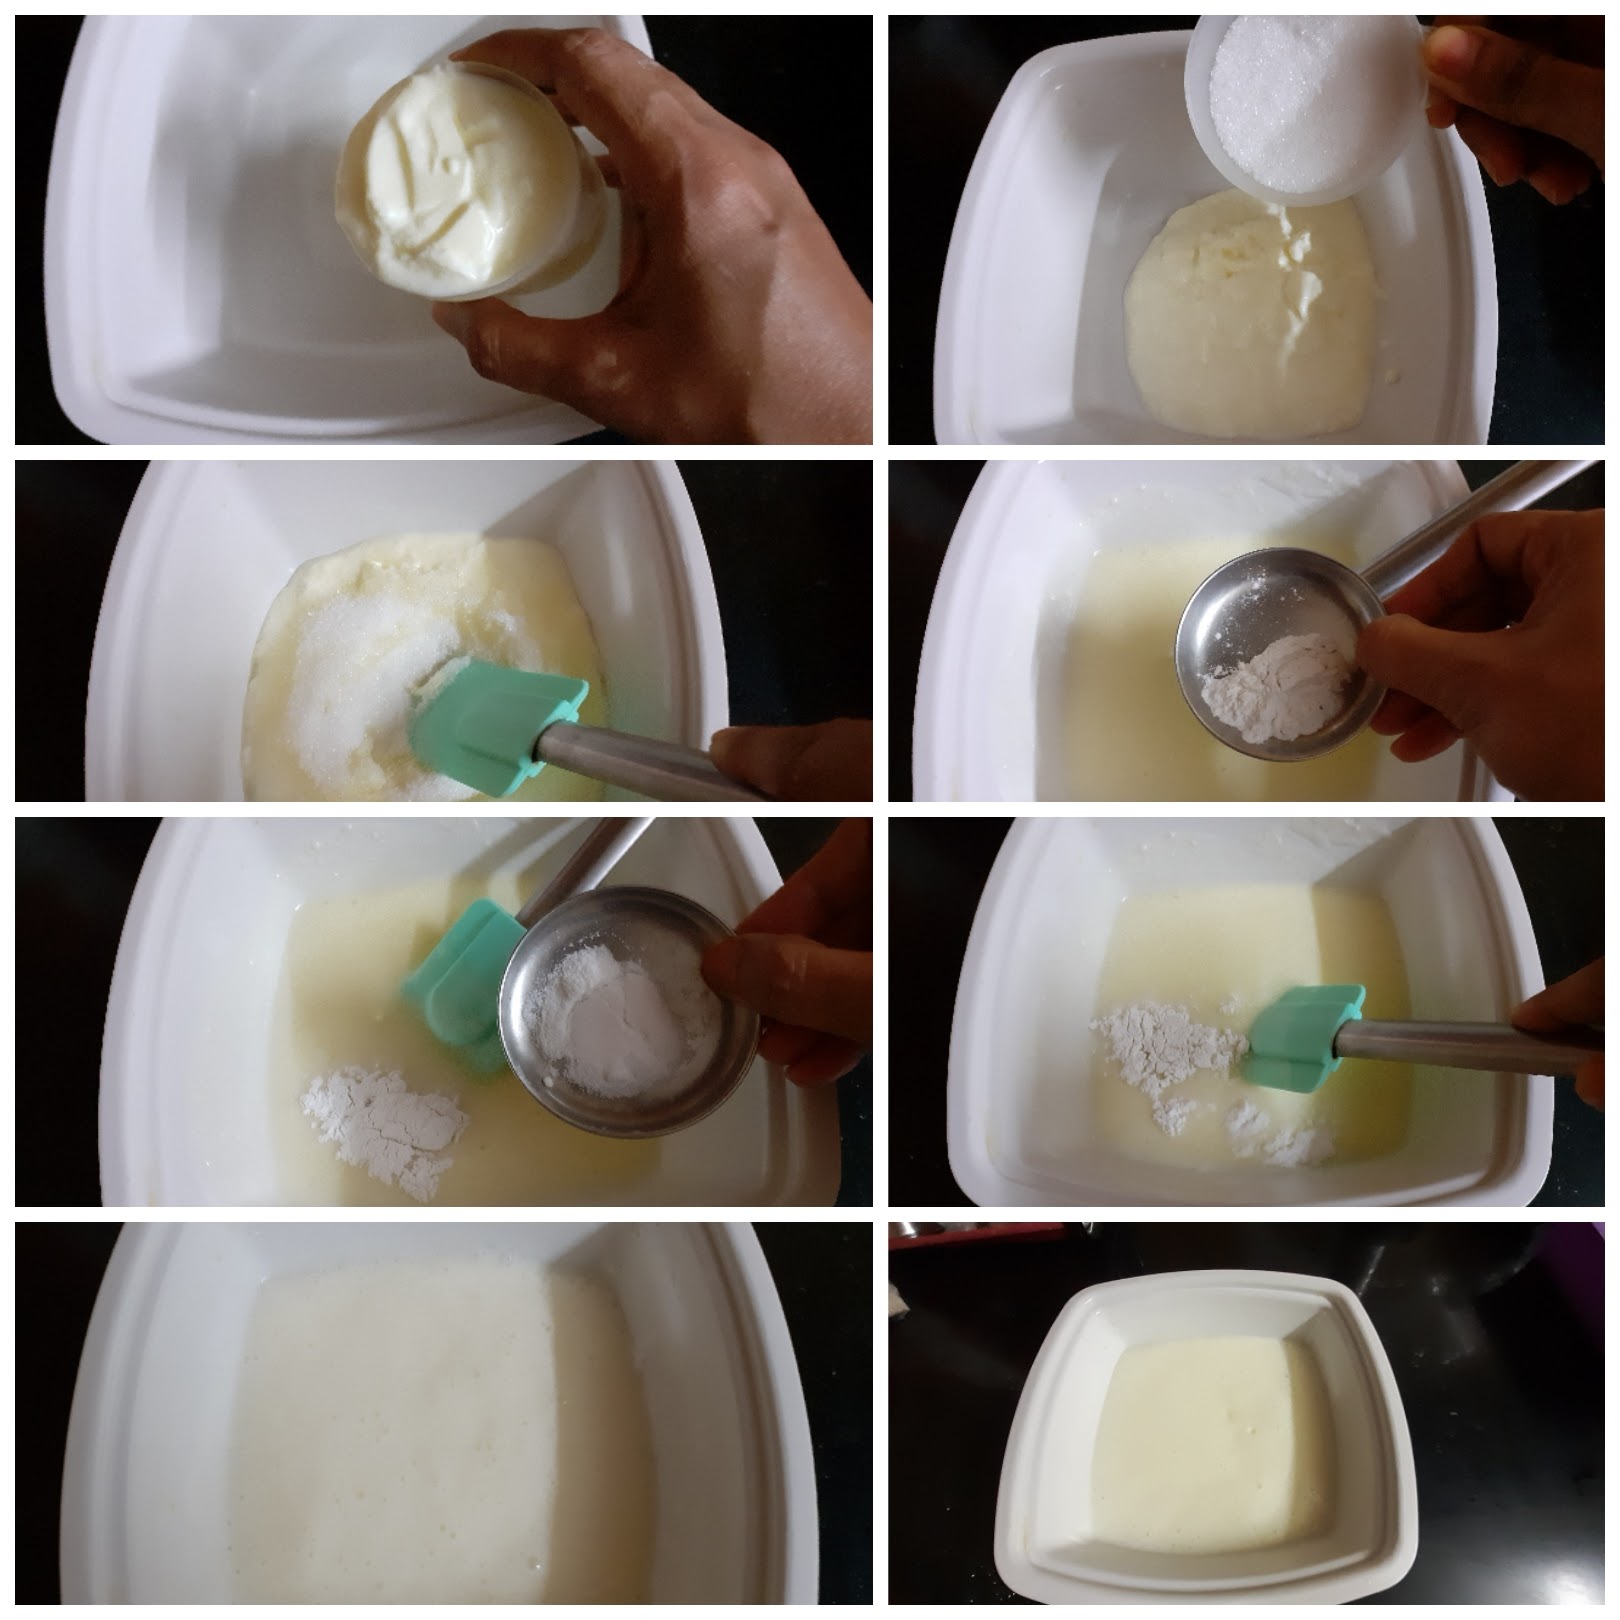
4. After 5 minutes add oil to the curd mixture and combine well. Add the sifted flour and with a spatula or wire whisk combine nicely to form a batter. Add in the vanilla essence and grated Orange rind(if using) and, Vanilla essence and, combine lightly once again. ( I forgot to click a picture of adding the vanilla essence).

5. In a previously greased tray, arrange the Orange slices such that they cover the bottom of the tray. Now transfer the cake batter into the tray lined with Oranges and tap one gently. Place the tray in the oven and bake for 35 minutes at 180 C. Check for doneness. Remove from oven, and cool for 30 minutes. Now when you turn the cake upside down, the Oranges will be on top.

NOTES:
1. The curd should not be very sour.
2. If using Orange rind(peel) gratings add only 1tsp of it, more quantity can make the cake turn bitter.
3. If any butter Orange sauce is remaining after cooking the oranges in butter, set aside. It can be used as a topping for the cake, pour it after you turn the cake upside down, that is on cooling for 30 minutes.
4. If you want to infuse the cake with this sauce then pour it while baking along with the batter.
If you tried this recipe and liked it please comment below. I would love to hear from you. If you have a query about the recipe email us and ill respond as soon as I can.
Oatmeal Cookies
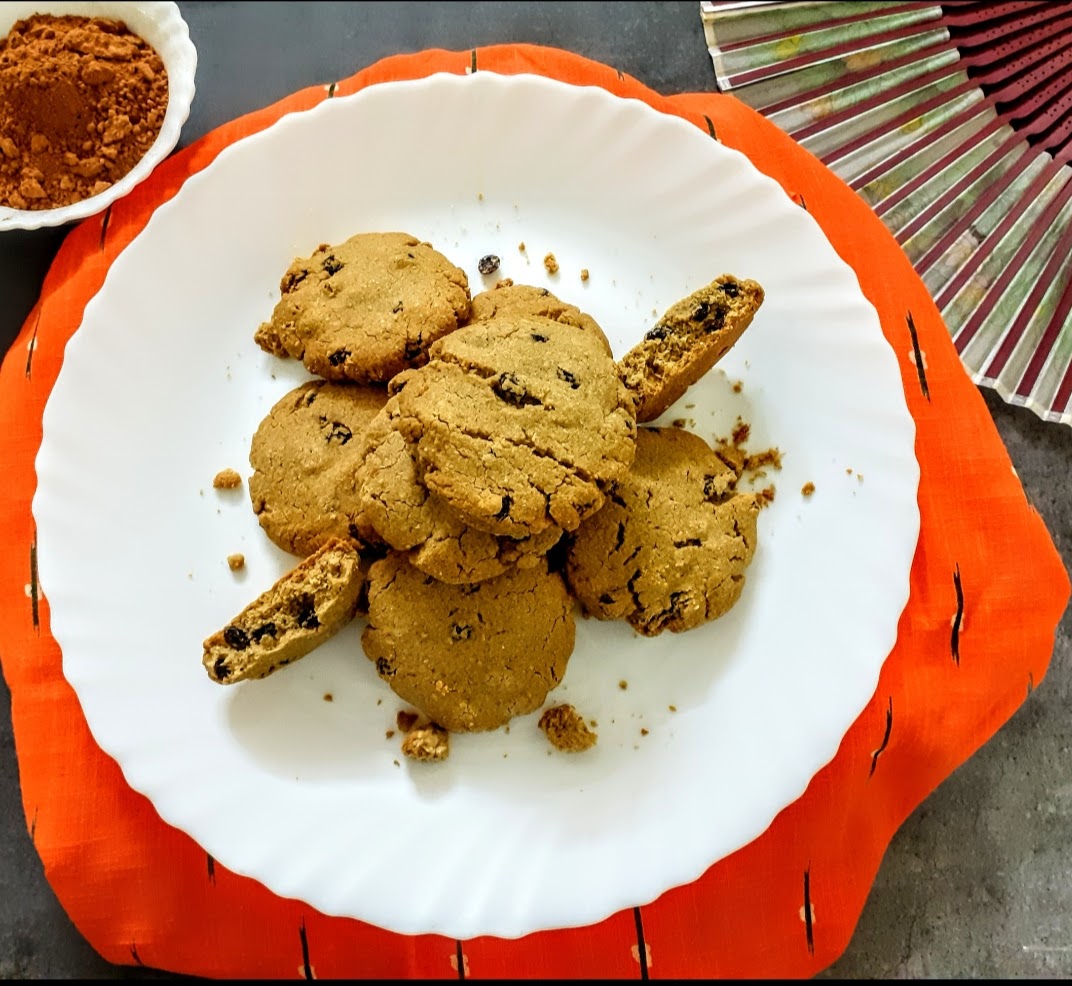
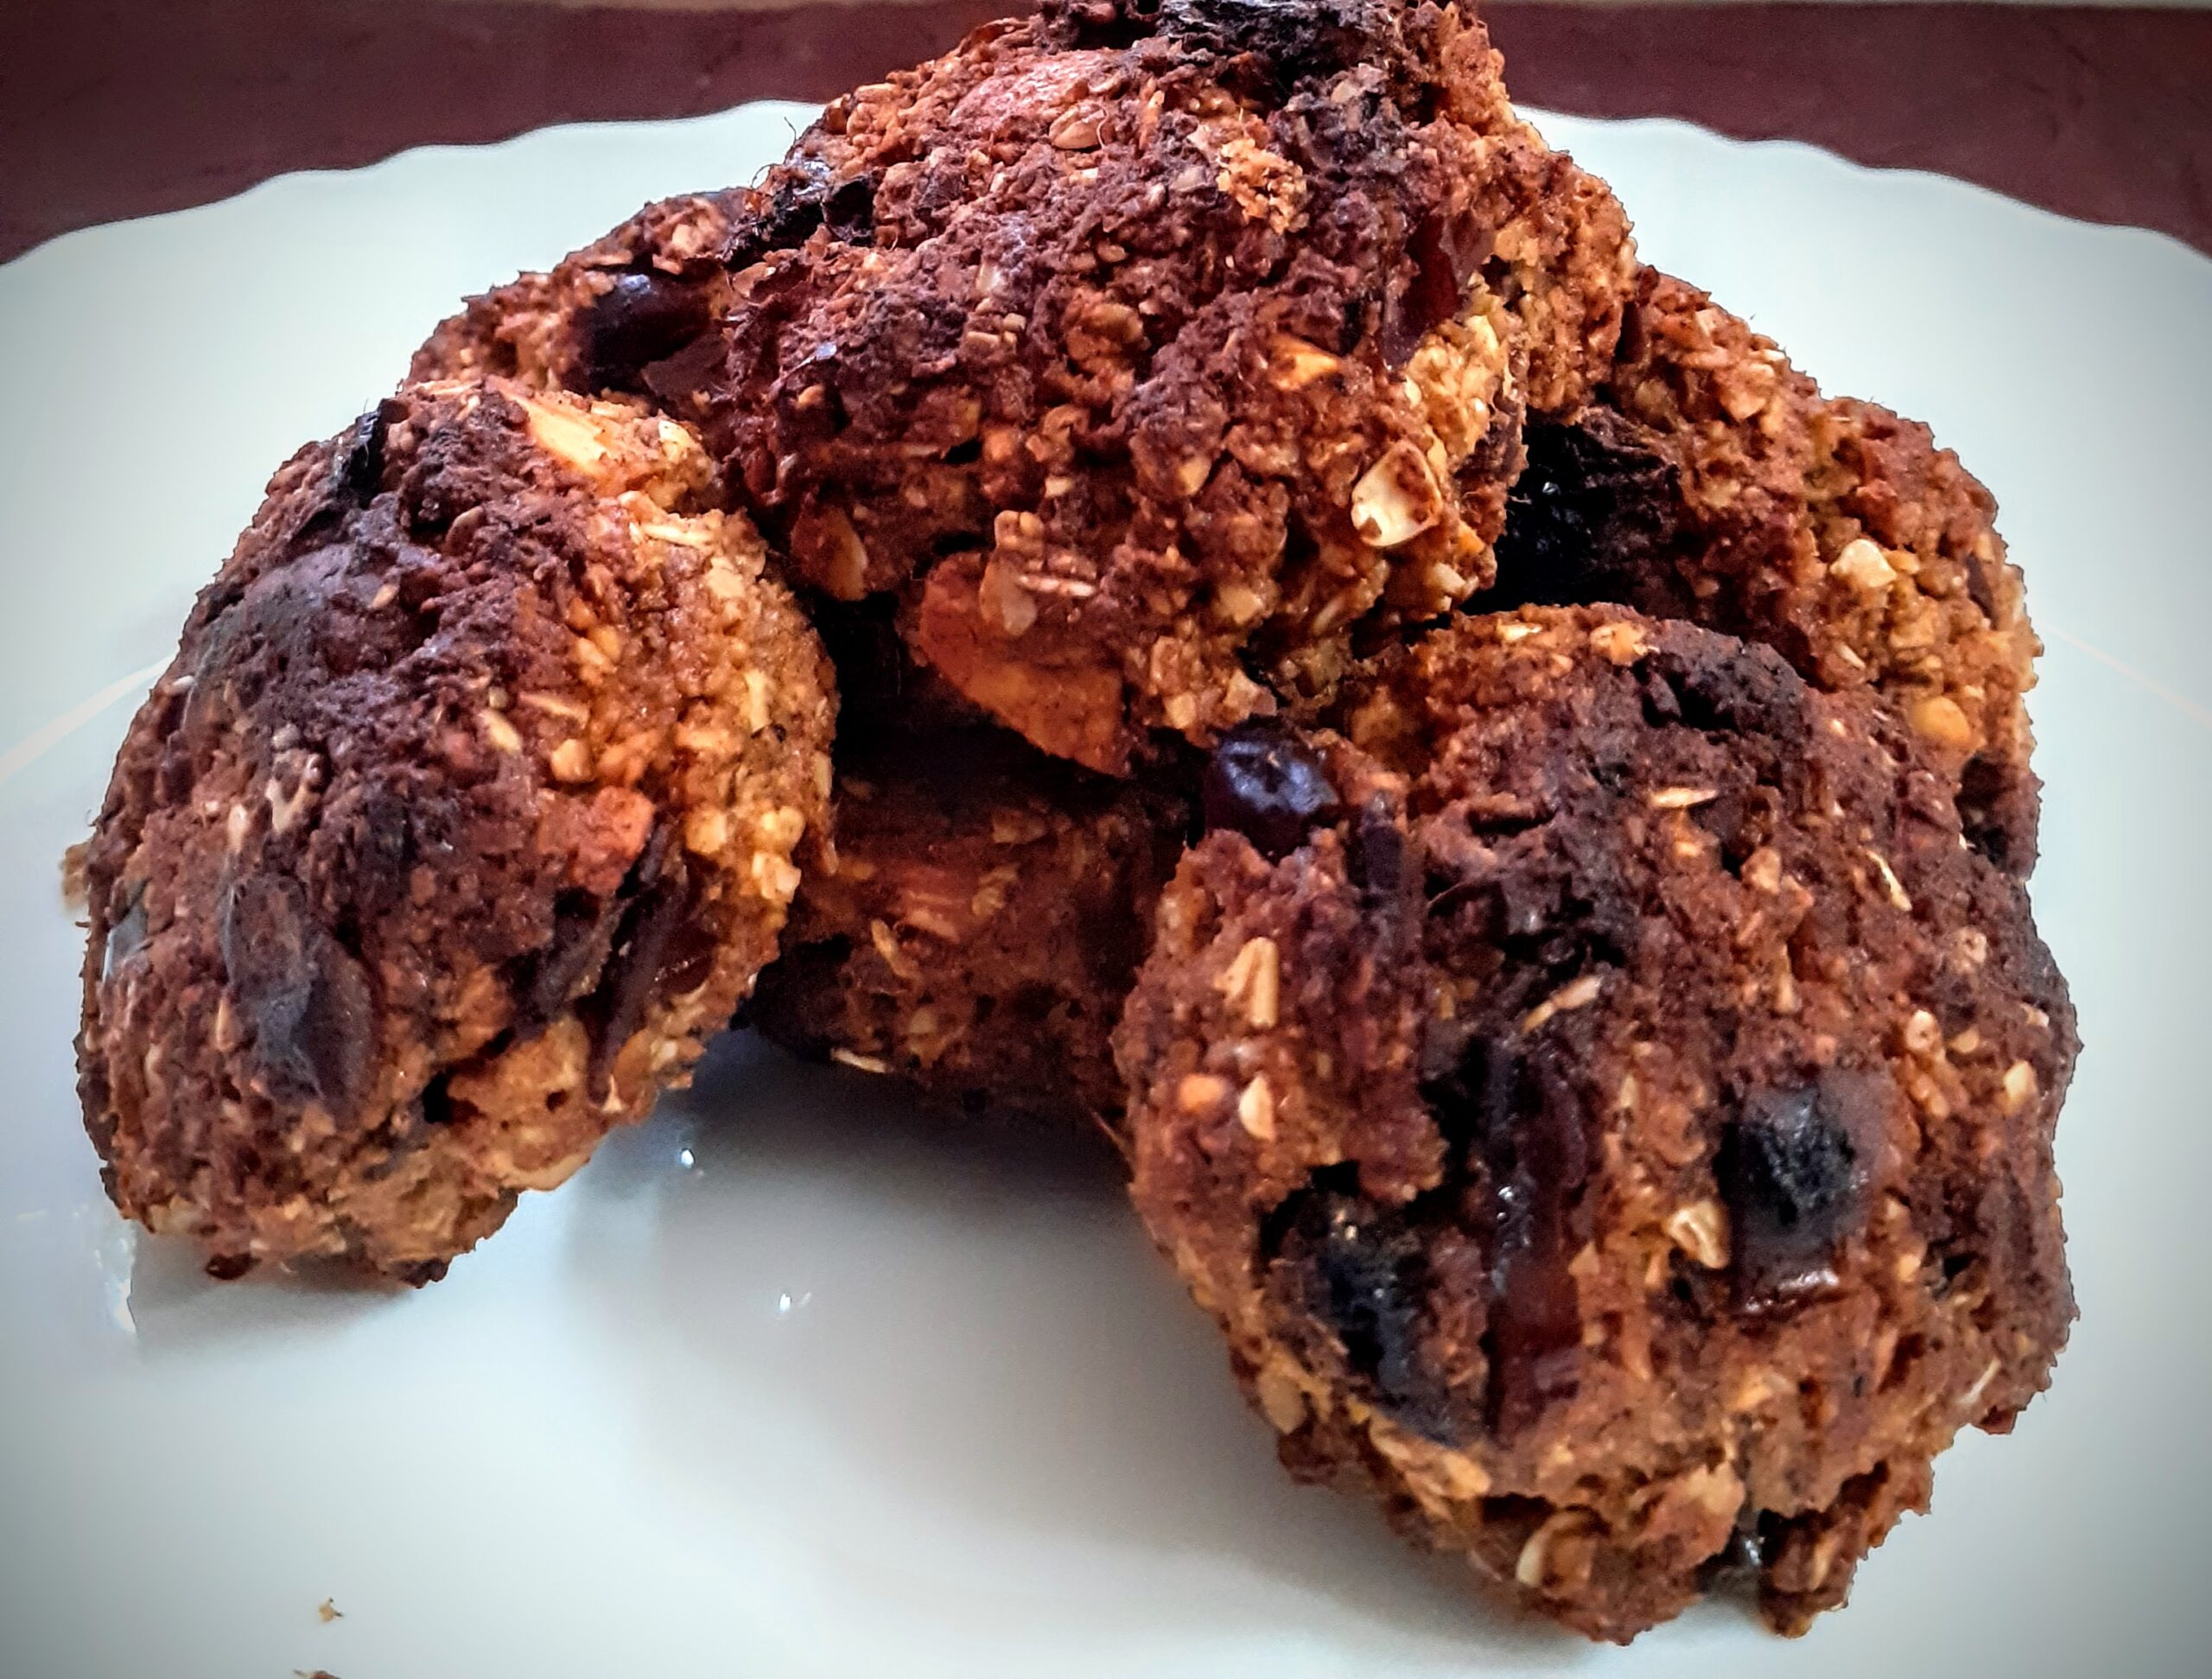
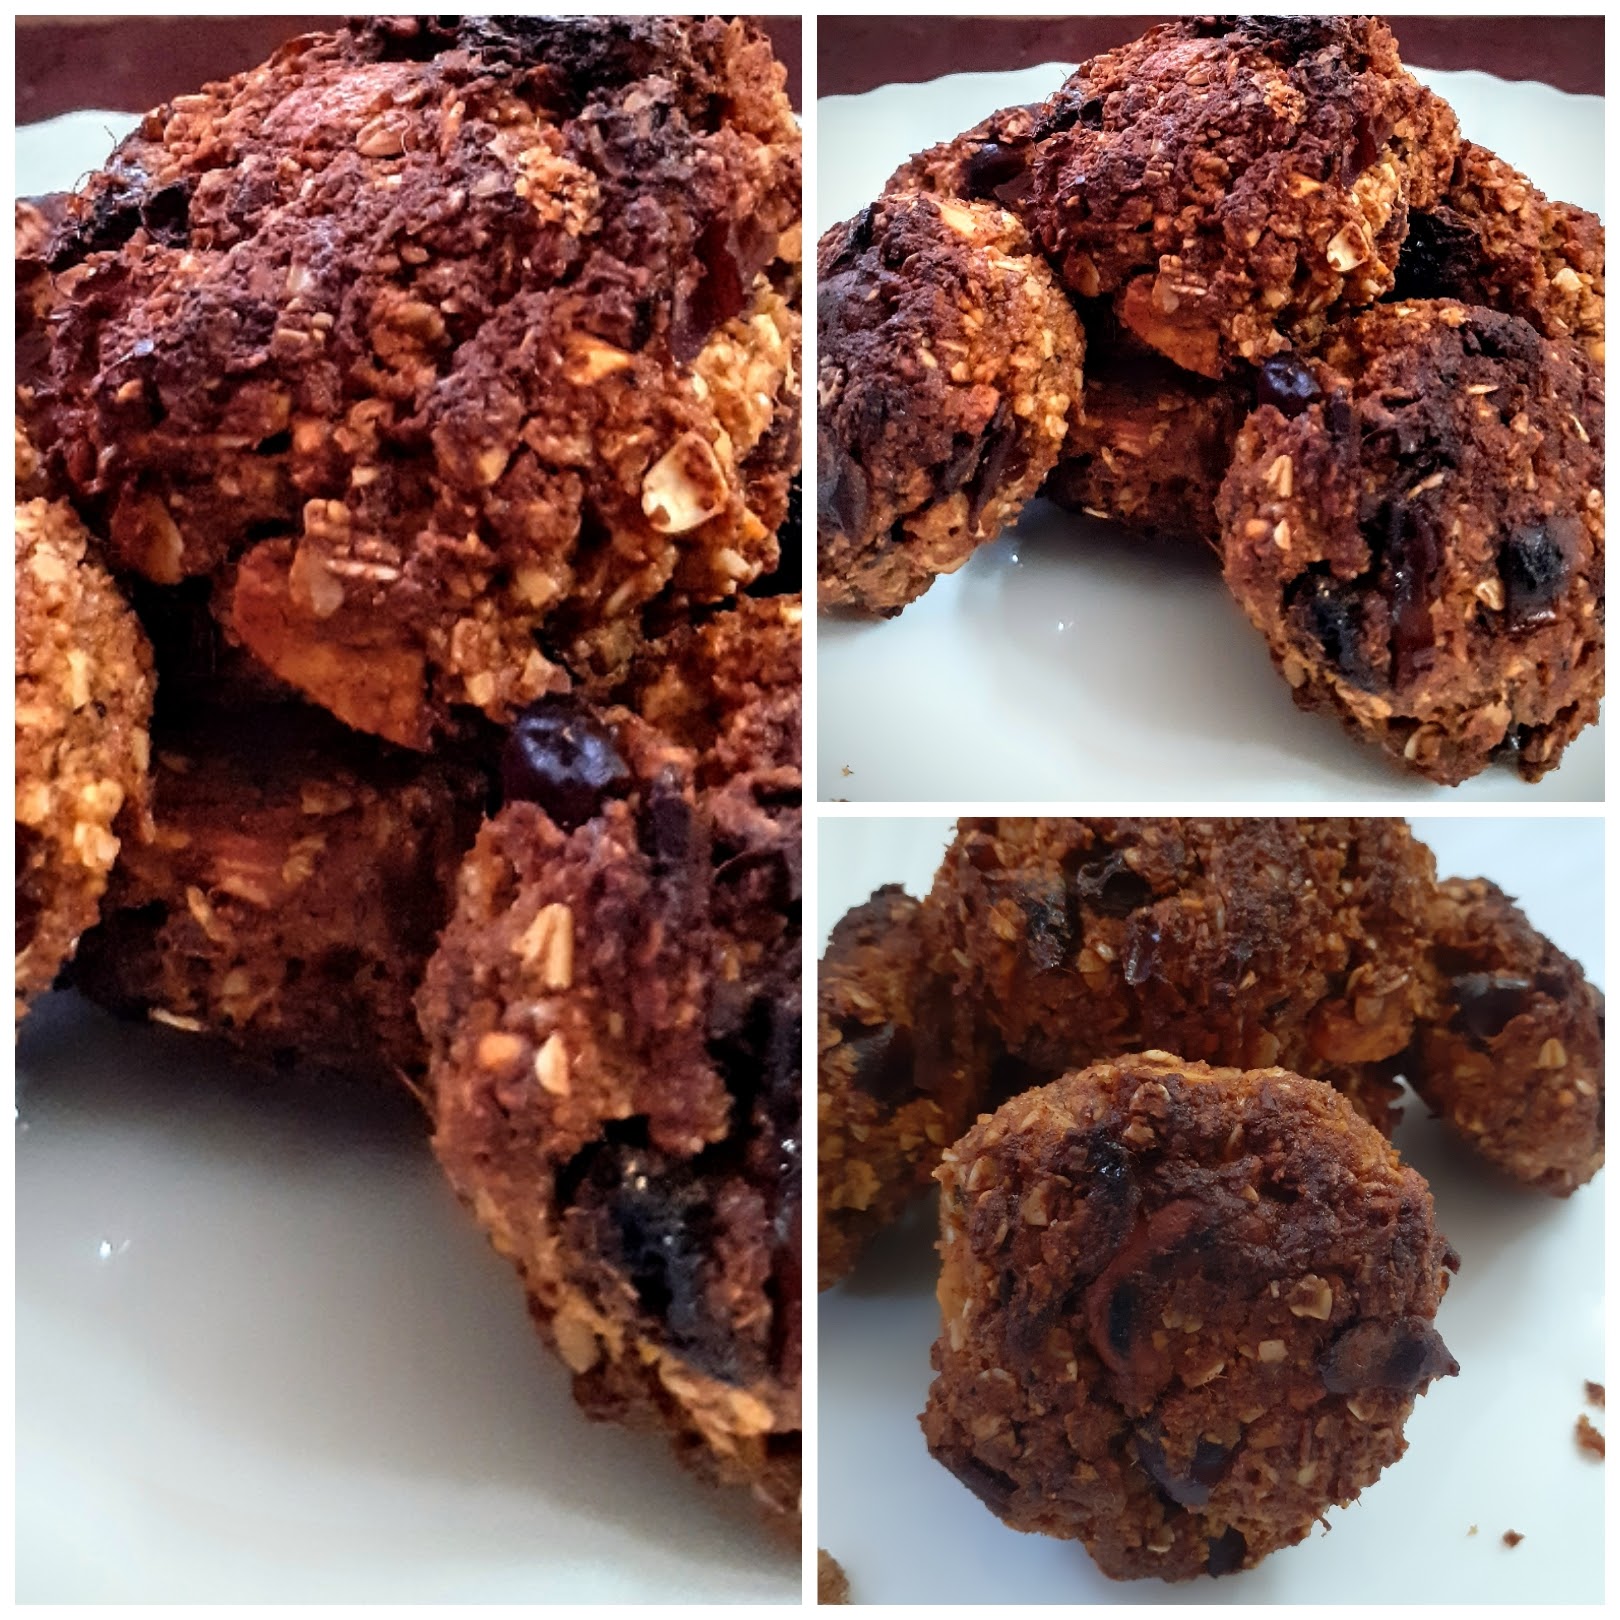
Oatmeal Cookies are hearty and chunky cookies that are like granola bars in cookie form. Some days we are in a hurry or rush to get to work, and most times ignore our hunger pangs. This Cookie comes in handy. For those mid-morning or early evening hunger pangs this a healthy option to eat. Have fussy teenagers at home who skip breakfast for sleep????? Ideal cookie for them.
I am giving you such a simple recipe that one bowl and all the mentioned ingredients are what you need. No mess, mix up everything in a single bowl, scoop the cookie dough into a baking sheet, and done.
These cookies can be stored at room temperature for a week and stay good in the refrigerator for 15 days. I prefer to make them in batches that last me a week or a fortnight. They are very simple to make so I don’t mind the process of making them regularly.
This Cookie requires Almond flour/almond meal, which is not available at all stores. Amazon has it though and I ordered it from there. Regular flour will not work for these cookies and will make them doughy. These cookies are not the crunchy ones but the chewy type.
While you are here please check out my other recipes like Blueberry Cheesecake, Apple tea cake, Apple Crumble, Savoury Muffins, and more…
Here is the recipe for Oatmeal cookie-
Dry Ingredients:
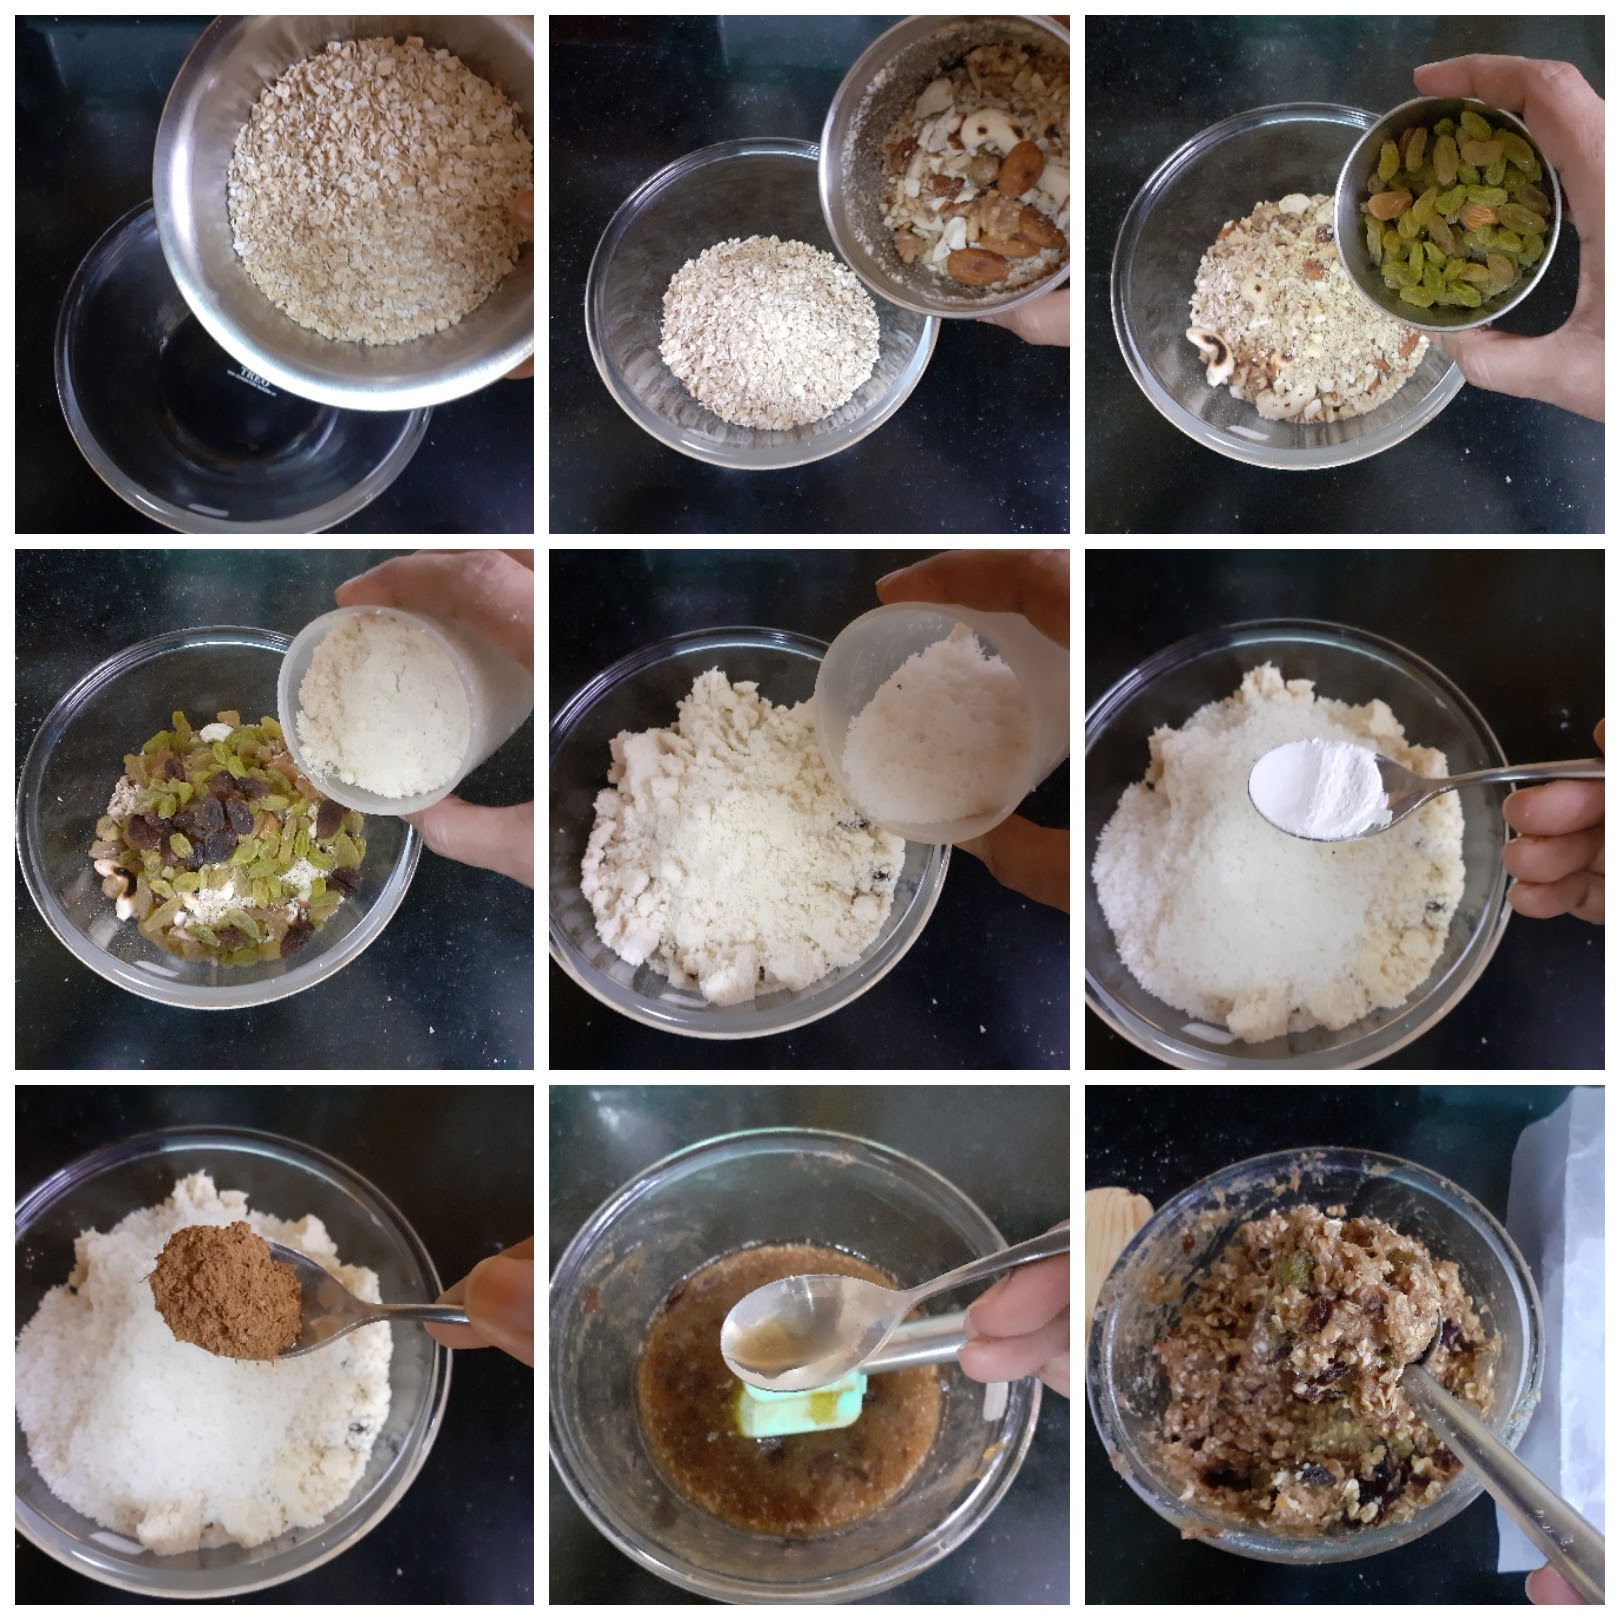
Oats – 1 1/4 cup Instant or rolled (refer note1)
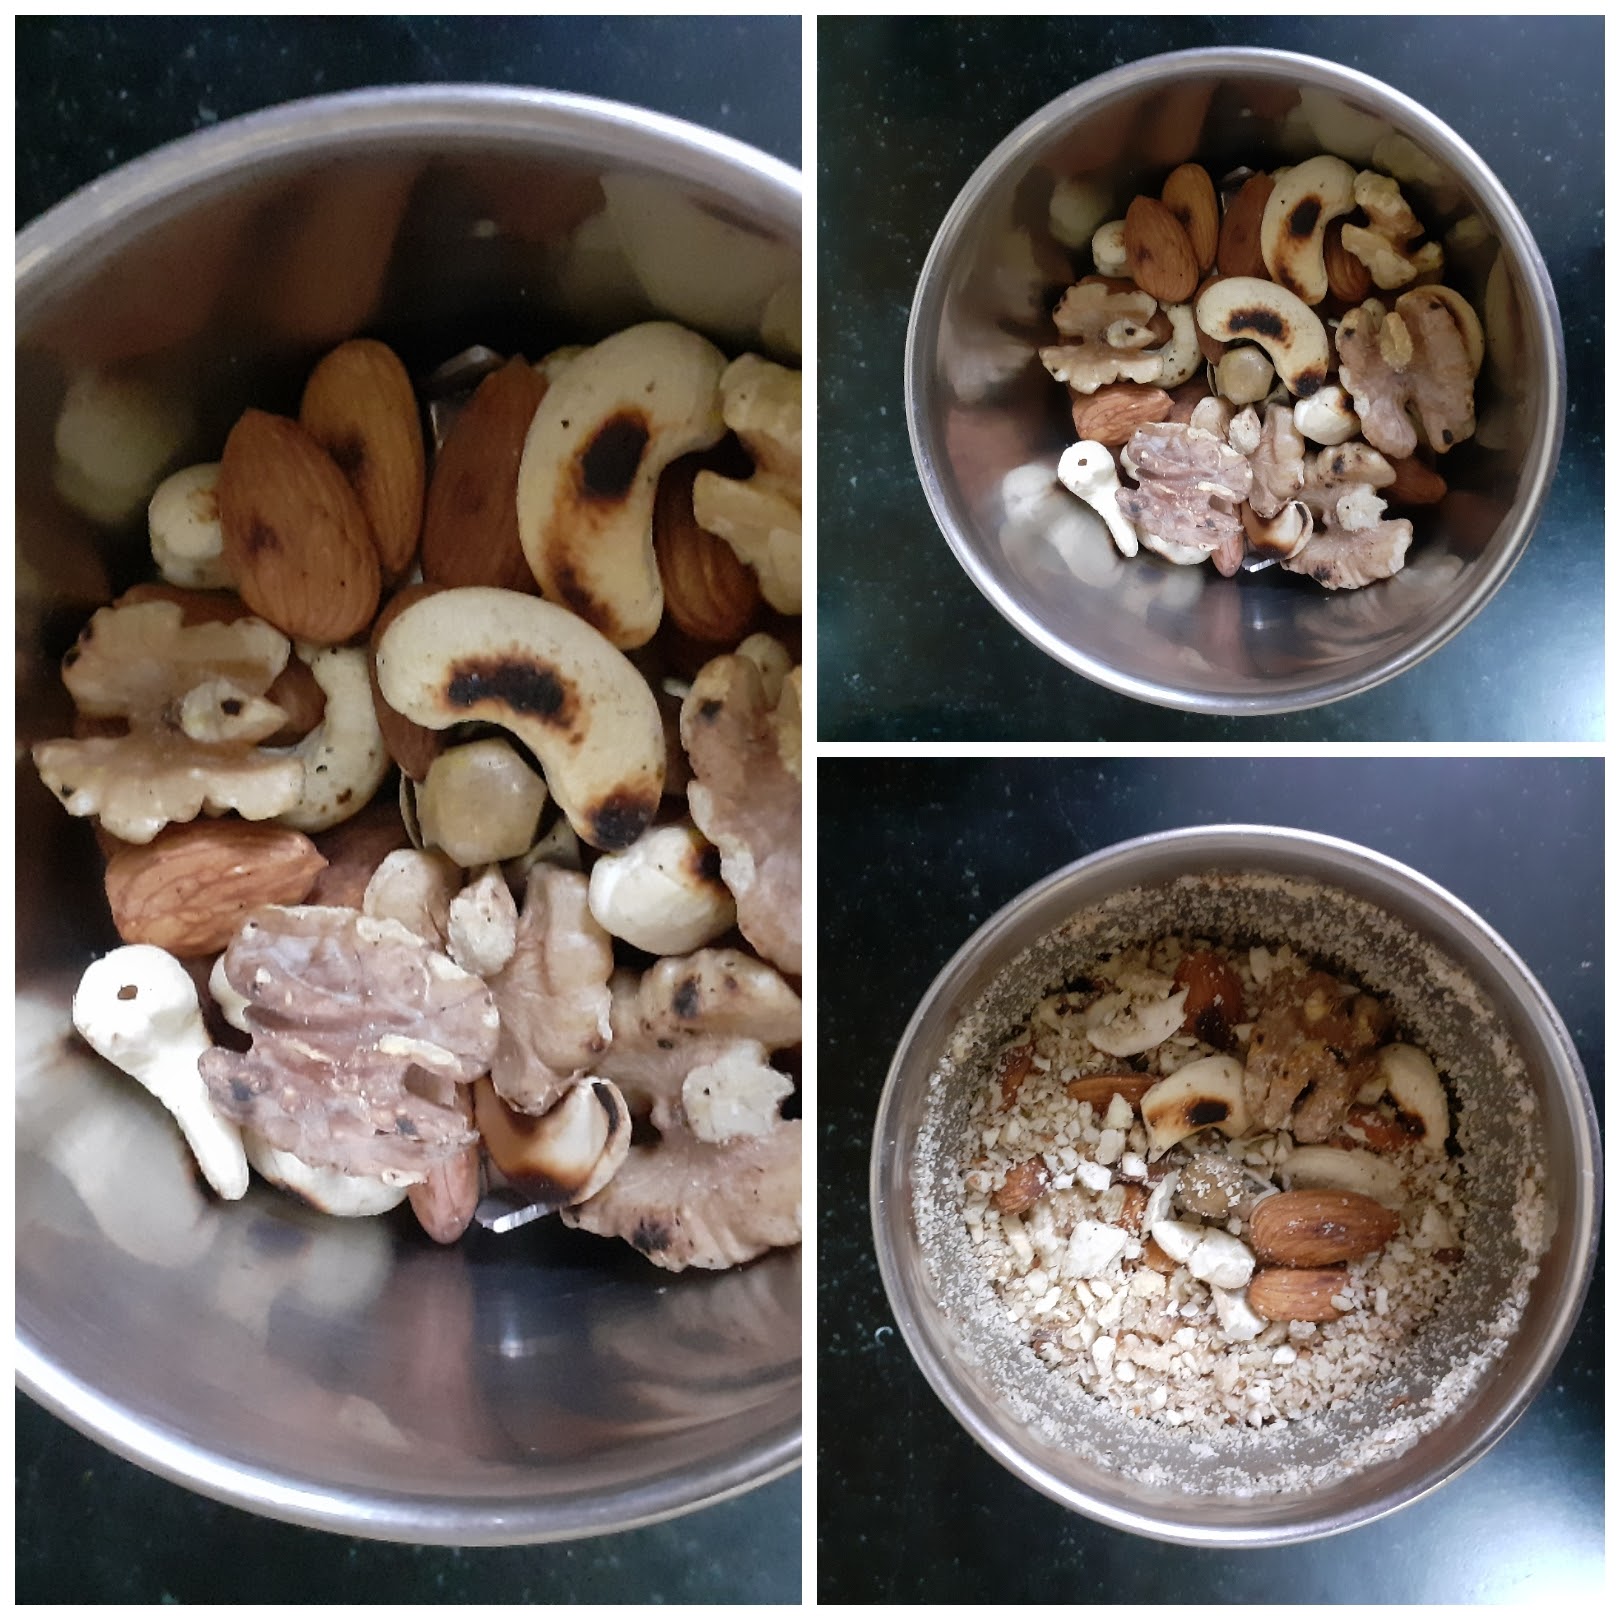
Almonds 1 handful or 50 gm
Cashewnuts 1 handful or 50 gm
Walnuts 1 handful or 50 gm
Raisins 1/2 cup
Almond flour 3/4 cup (refer note2)
Cinnamon powder 1 tsp
Baking powder 1/2 tsp
Desiccated coconut 1/4 cup
Wet Ingredients:
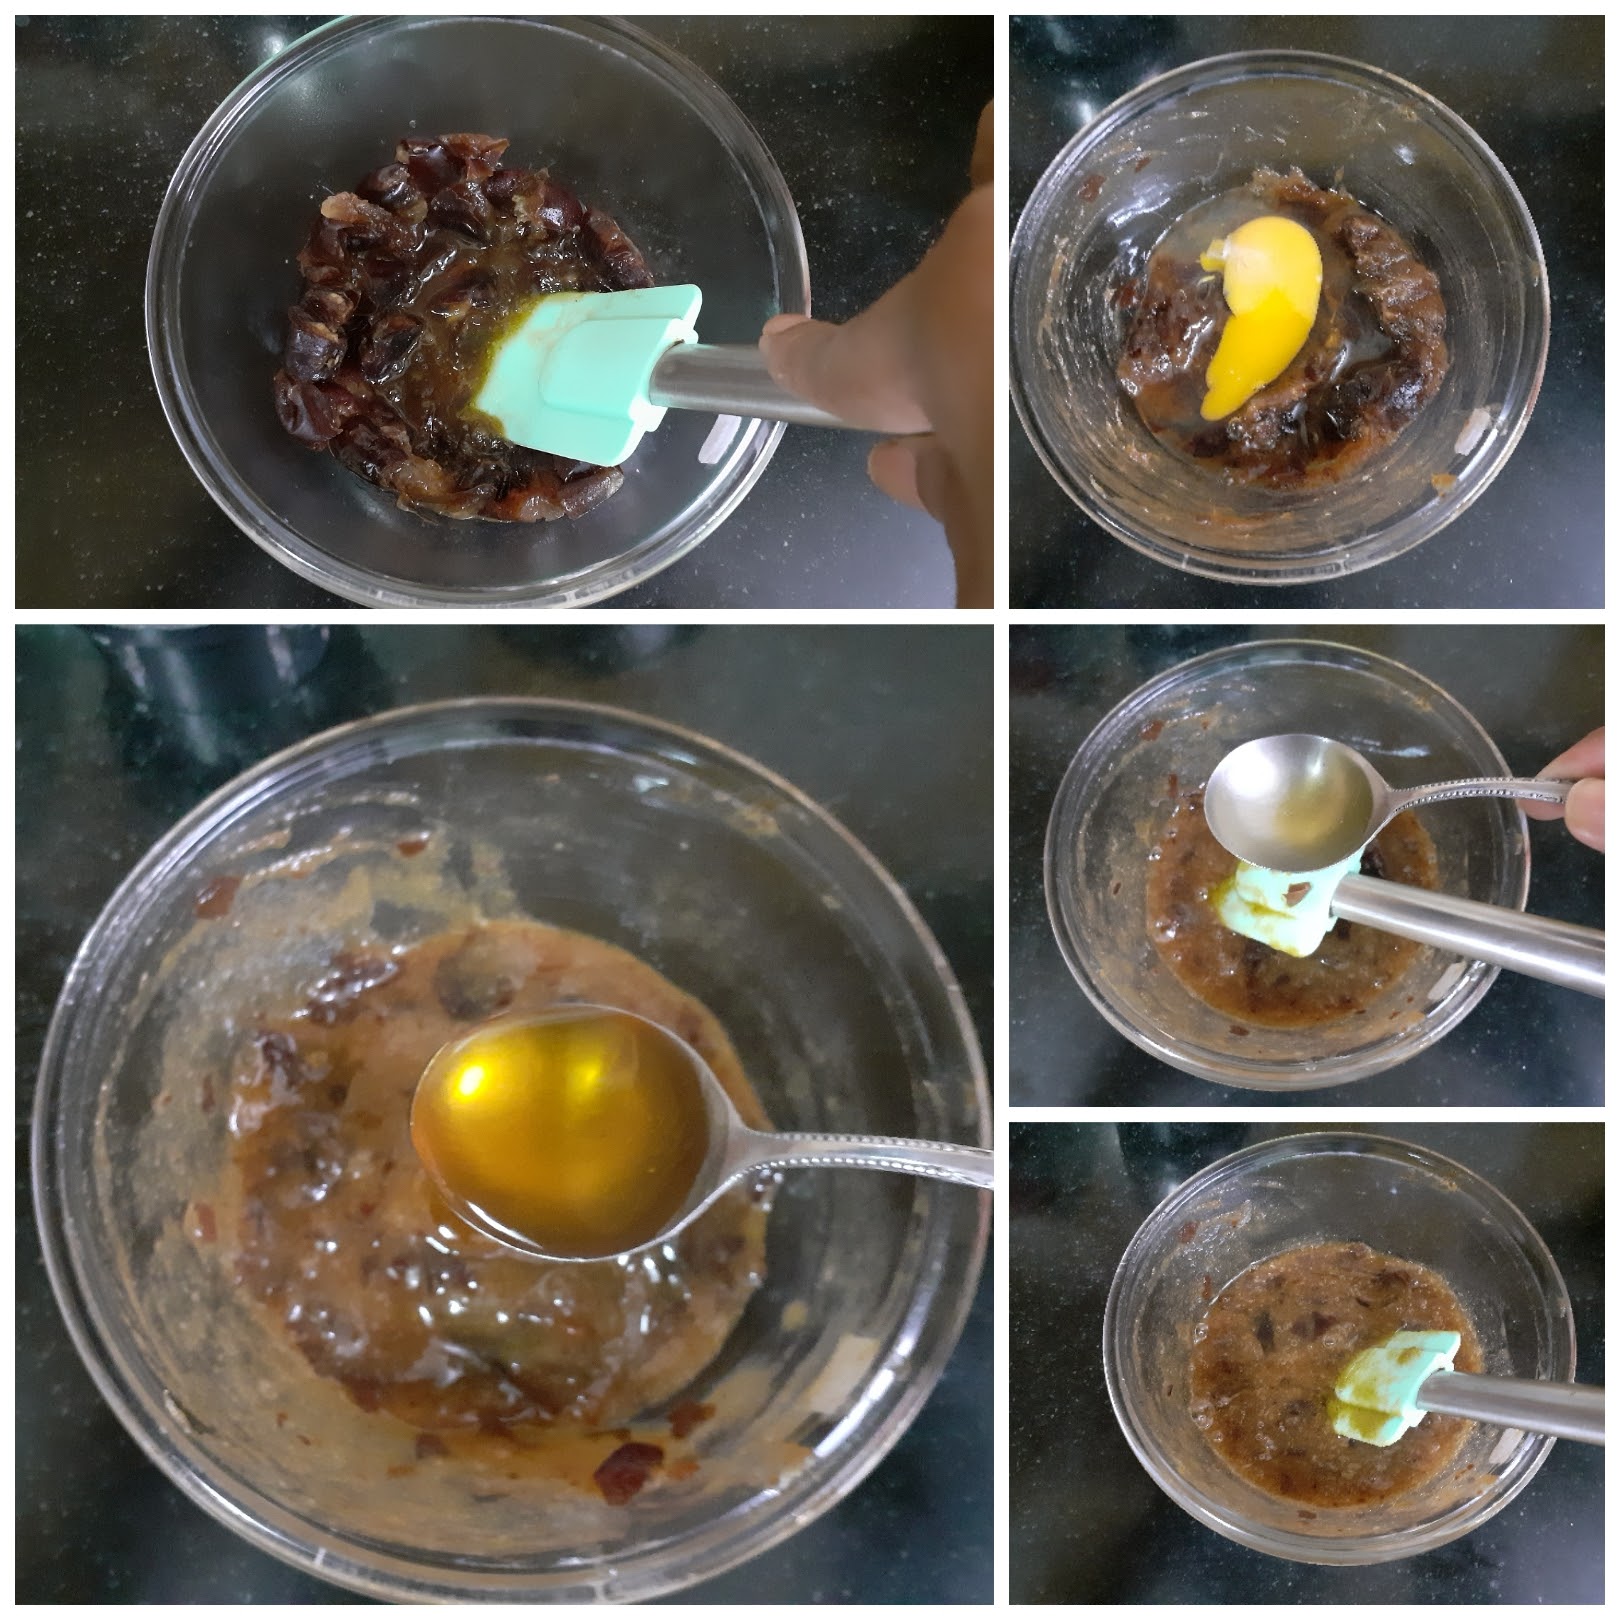
Dates 100 gm pitted or 15 numbers after pitting
Hot water 1/4 cup or just enough to soak the dates
Honey 3 tbsp
Egg 1
Coconut oil or Olive oil 3 tbsp
Vanilla essence (optional)
Directions:
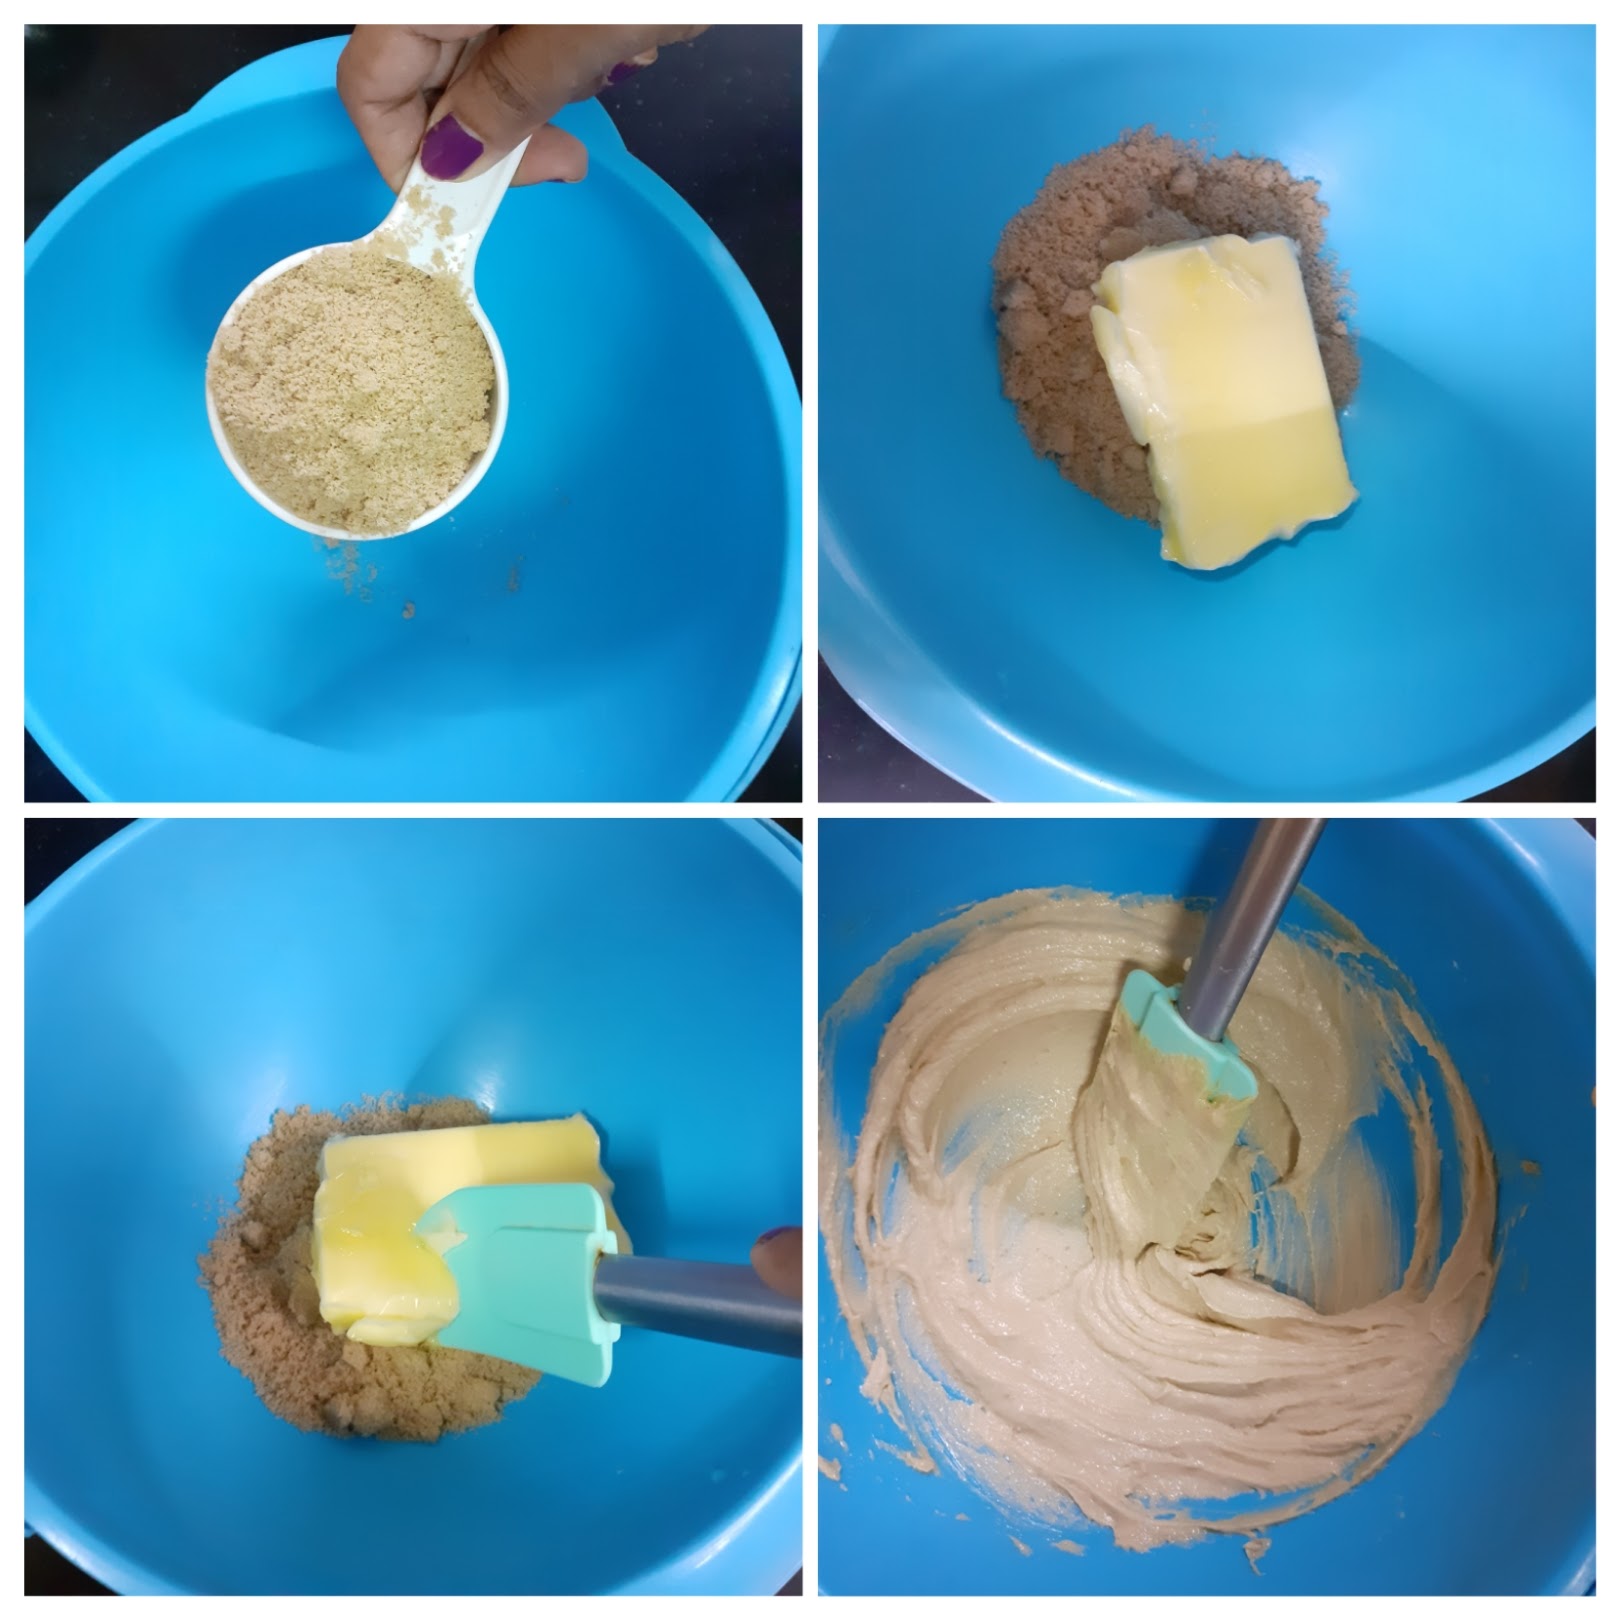
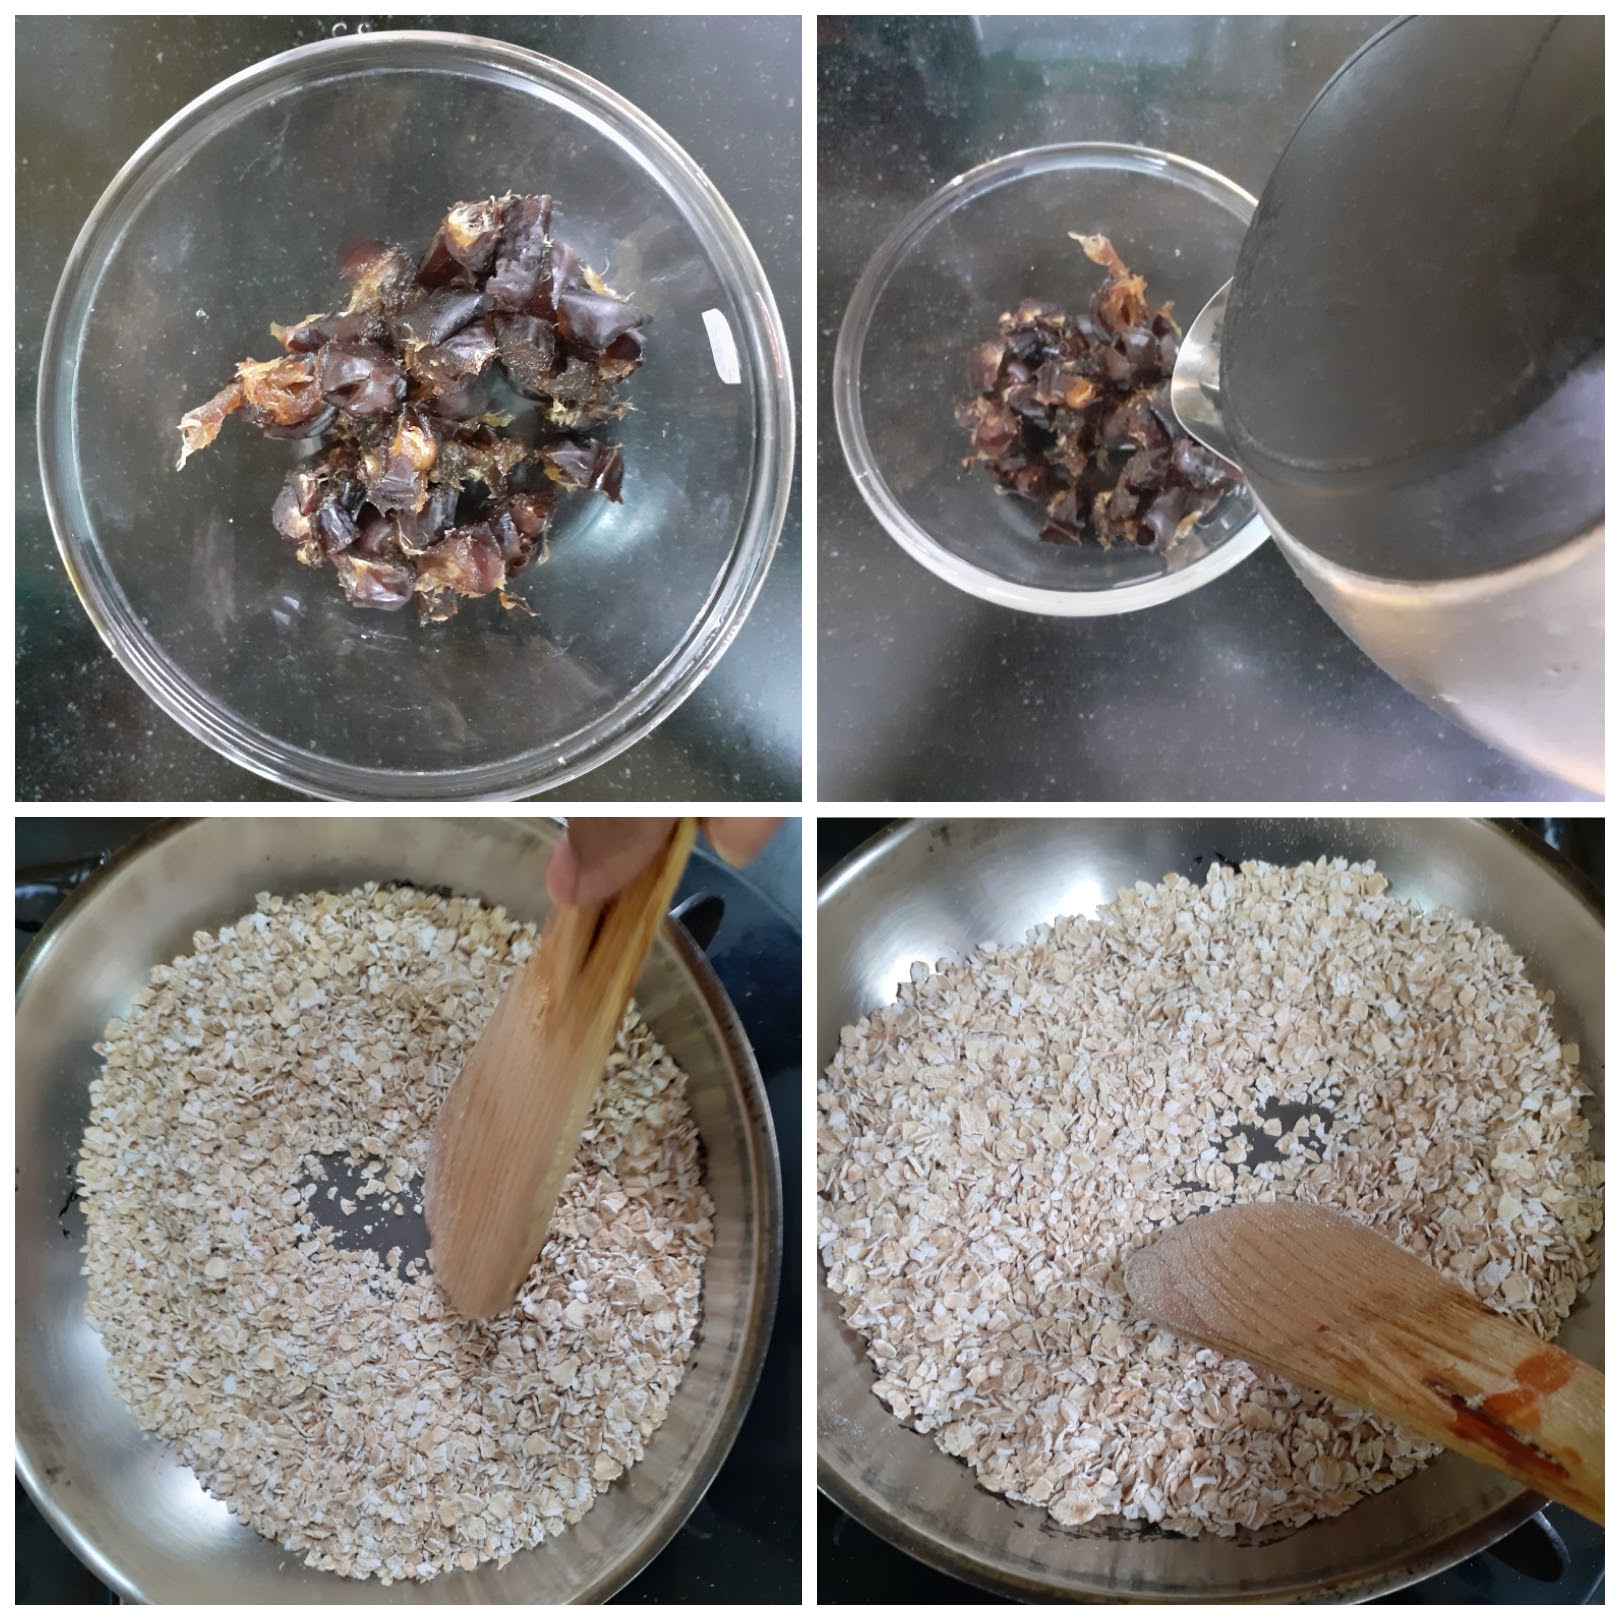
Soak the pitted dates in hot water, just until they are submerged. Preheat oven to 180 degrees for 10 minutes. While the oven is getting hot let’s get the Cookie dough ready. Take the instant Oats and dry roast them on low flame for 3 minutes. We don’t want to brown them, but just make them a little crisp. Keep feeling the oats with your fingers, when they hot enough and your fingers can’t stand the heat, switch off the flame and let it cool while we get other things ready. Dry roast the Almonds, Cashewnuts, and walnuts, cool them slightly, and pulse them a single time in the blender. We want them to be partly broken.
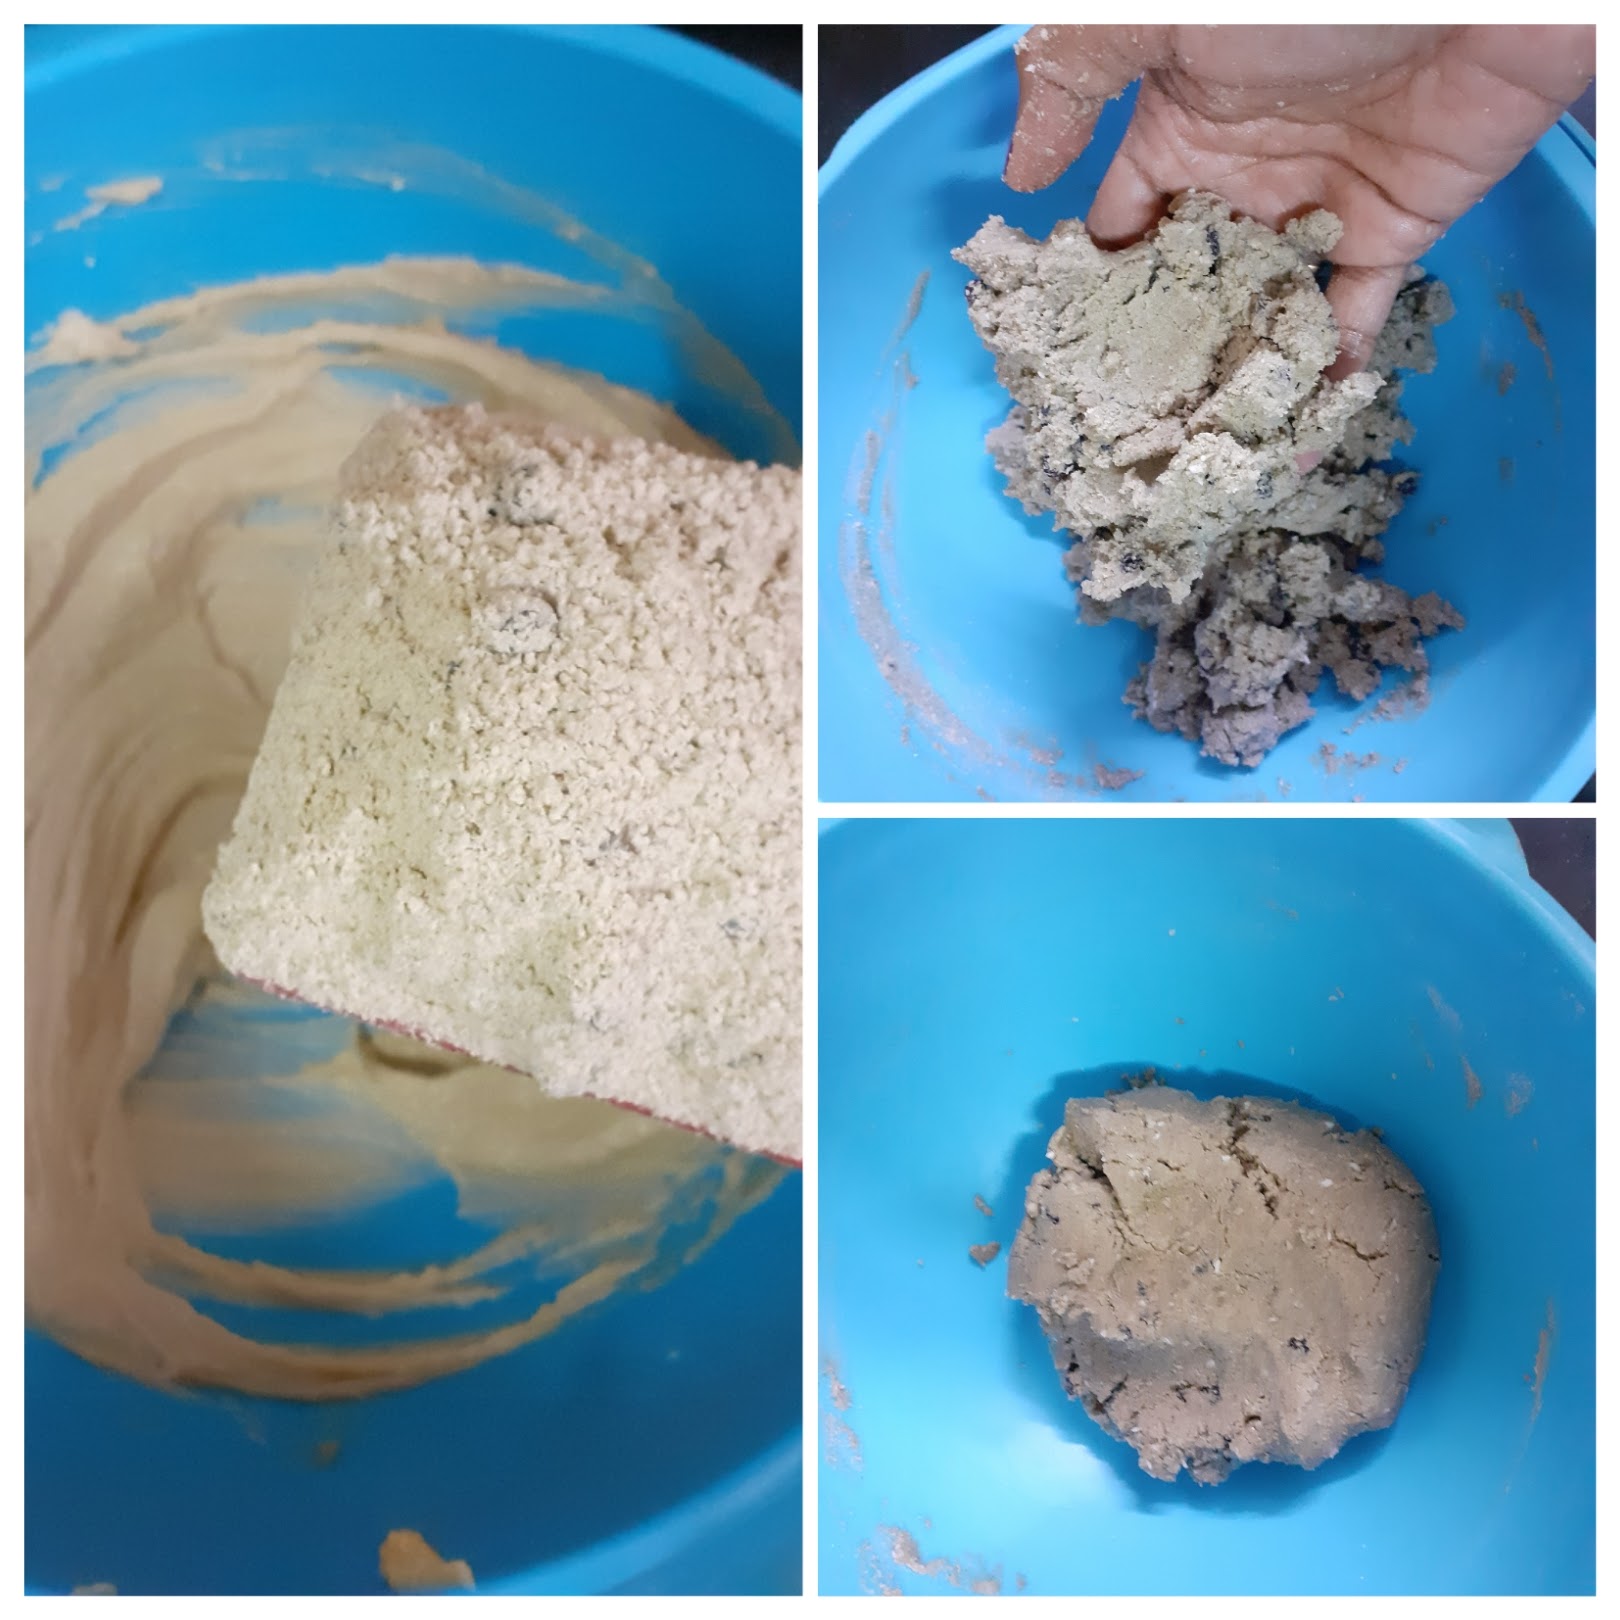
The dates would have softened by now. Take a spatula or wired whisk and mash it to a smooth puree. Add all other ingredients mentioned under wet ingredients and combine well with a spatula. Add the dry ingredients to this mixture and mix well, such that all are well integrated. Now what you have at hand is a thick batter.
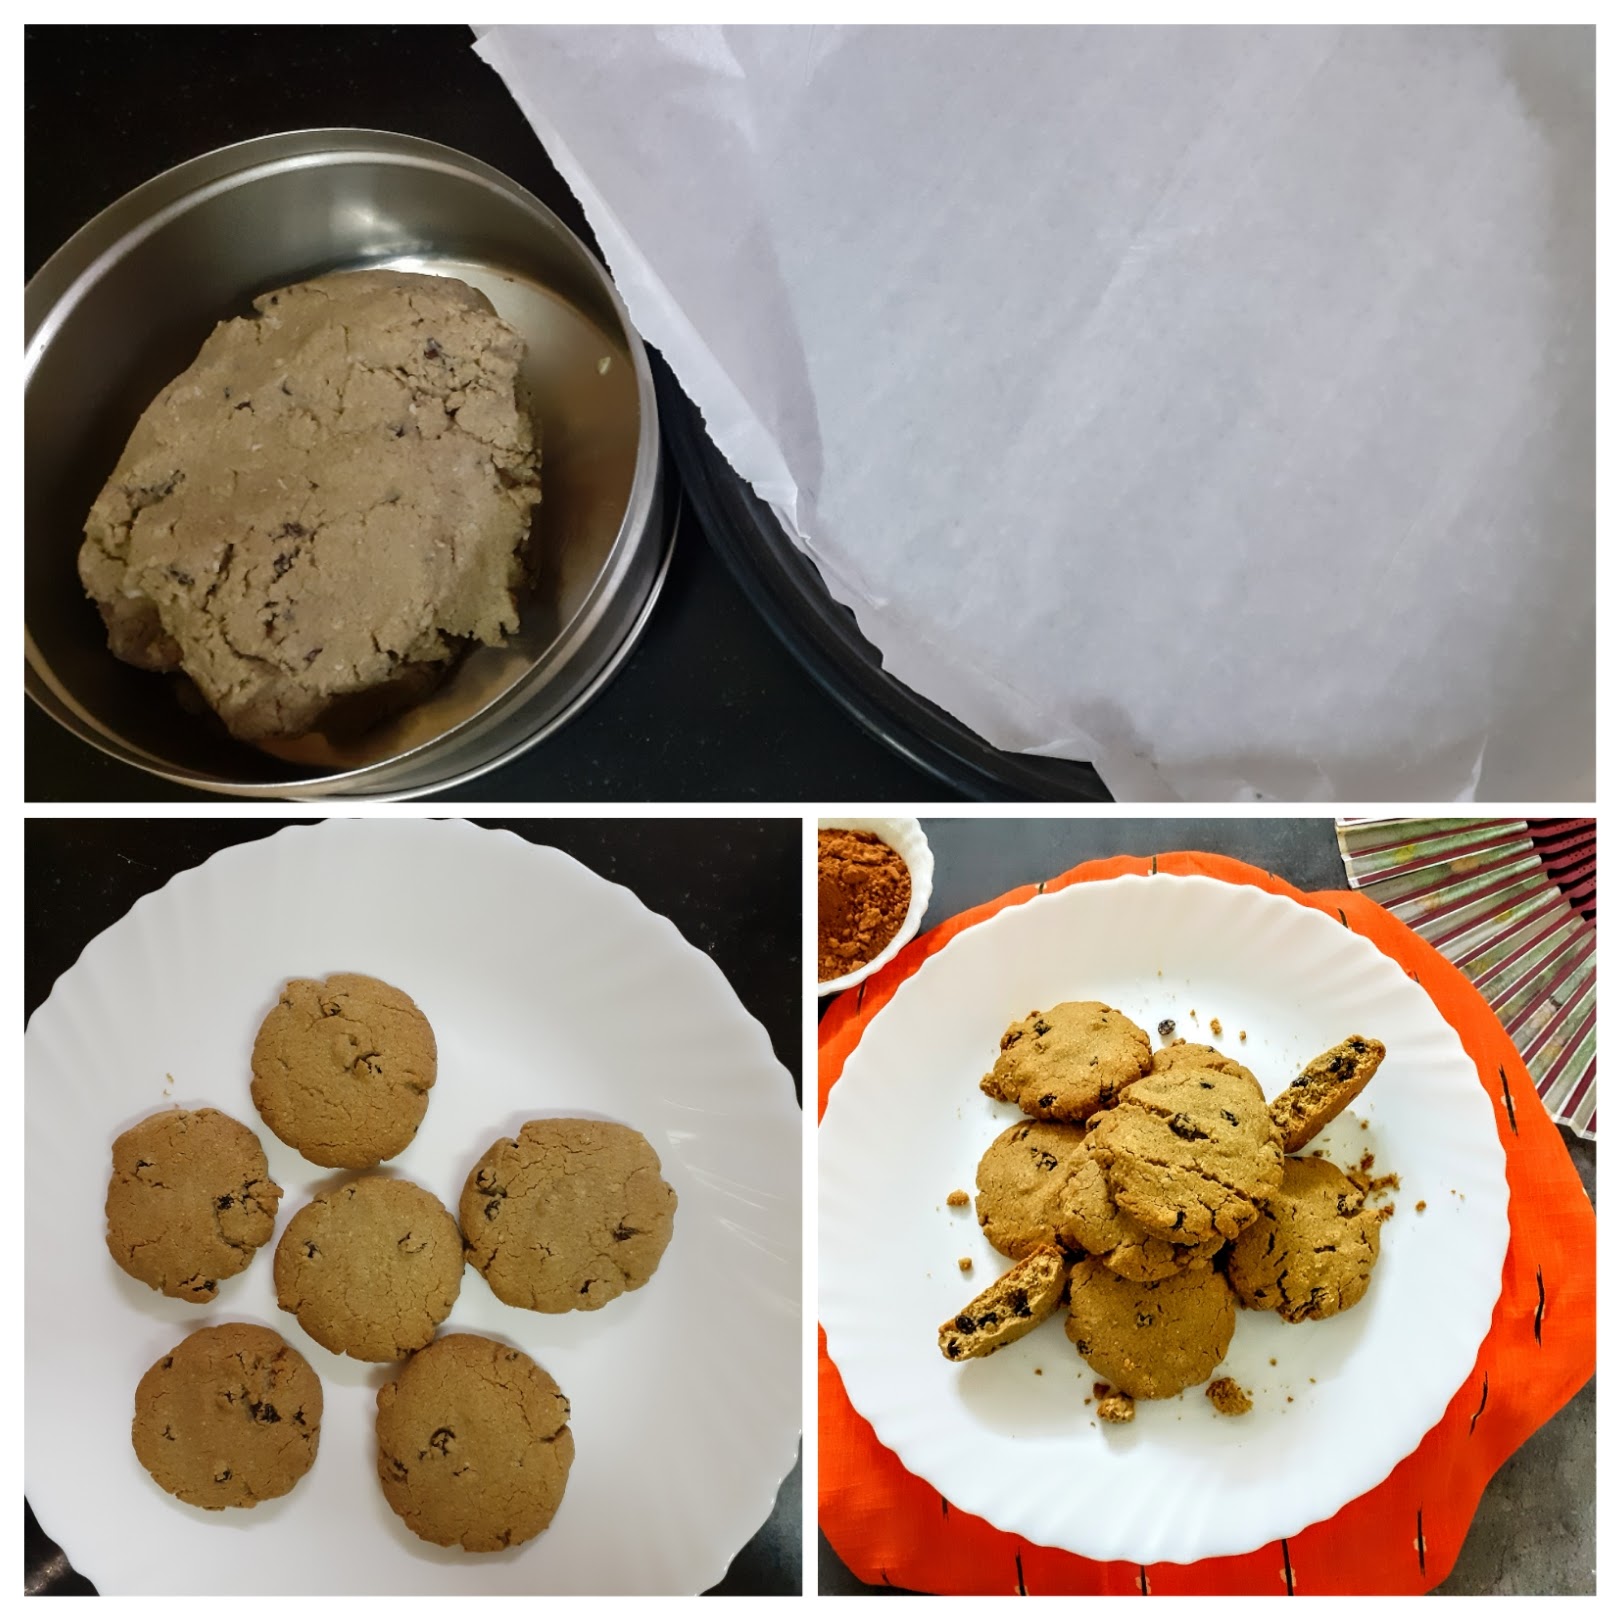
Line a baking tray with parchment paper or baking paper and grease lightly. Now with an ice cream scoop or a deep round spatula scoop the batter and place them on the baking sheet, giving an inch distance(these cookies do not spread much) between them. Bake at 180 degrees for 30 minutes or until they turn golden brown. Do the skewer/toothpick test if in doubt. (prick through the center, if it comes out clean without any batter, the cookie is done). Enjoy the cookies with a hot cup of coffee, tea, or hot chocolate. Bon Appetit.
STEPWISE RECIPE FOLLOWS:
1. Soak the pitted dates in hot water, just until they are submerged. Preheat oven to 180 degrees for 10 minutes. Take the instant Oats and dry roast them on low flame for 3 minutes. Keep feeling the oats with your fingers, when they hot enough and your fingers can’t stand the heat, switch off the flame and let it cool.
2. Dry roast the Almonds, Cashewnuts, and walnuts, cool them slightly and pulse them a single time in the blender. We want them to be partly broken.
3. Now take a spatula or a wired whisk and mash the dates to a smooth puree. Add all other ingredients mentioned under wet ingredients and combine well with a spatula.
4. Mix in the dry ingredients into this mixture and combine well until all are well integrated. We will have a sticky dough.
5. Line a baking tray with parchment paper or baking paper and grease lightly. Now with an ice cream scoop or a deep round spatula scoop the batter and place them on the baking sheet, giving an inch distance(these cookies do not spread much) between them. Flatten the cookies with a spatula slightly. Bake at 180 degrees for 30 minutes or until they turn golden brown.

NOTES:
1. I have dry roasted the Oats as they are the instant ones. If using rolled oats, roasting is not required.
2. Almond flour can be made at home also by blanching almonds, dry them, and then grinding to a fine powder.
3. If one doesn’t mind the skin of the almonds they can be directly ground to a fine powder.
4. I have added the Cinnamon powder at the end along with the dry ingredients.
Vegetable Manchurian (With Gravy)
Who doesn’t like Vegetable Manchurian? This is the most Indianised Chinese dish, that has been customized to the Indian palette. The dry version of this dish aka Vegetable Manchurian dry is one of the most popular Starters offered at all weddings, get-togethers, parties, and the like. This also happens to be my most favourite starter. I also have a recipe on this blog for Fried rice with these dry Manchurians, do check it out. The only difference is that I have used Cauliflowers instead of cabbage in the fried rice recipe. Fried rice and Manchurian with gravy are a match made in heaven, so do try out the combination from the recipes in my blog.
This is a no-fail recipe and turns out well every time that I make it, which is why I make it frequently. In this recipe, I have used 1 whole medium-sized cabbage( oh yes that’s how much we like this dish), one can customize it as per their requirements though.
While you are here please do check out my other Indo Chinese recipes like Schezwan fried rice(with Soya chunks), Cauliflower fried rice and other dessert recipes like Pineapple jam tarts and Apple crumble.
Here is the recipe for Vegetable Manchurian(with gravy) for you-

Ingredients for the Manchurian dough:
Cabbage 1 medium-sized (shredded)
Carrot 1 (shredded)
Spring onions 1 bunch chopped finely
Onion 1 finely chopped
Green chillies 2 finely chopped
Ginger 1/2 inch piece finely chopped
Salt as per taste
Pepper powder 1 tsp
Maida 1/2 to 3/4 of a cup
Rice flour 1/4 cup
Ingredients for the gravy:
Garlic 3 cloves finely chopped(reserve some for garnish)
Ginger 1/2 inch piece
Green chillies 2 finely chopped
Spring onion greens 1 tbsp finely chopped
Onion 1 small finely chopped
Tomato puree 1/4 cup or puree of 1 large Tomato
Green Capsicum 1/4 of a whole chopped medium-sized
Red Bell pepper 1/4 of a whole chopped medium-sized
Tomato sauce 2 tbsp
Chilli sauce 2 tsp(add for more spice)
Soy sauce 1 tbsp
Vinegar 1 tbsp
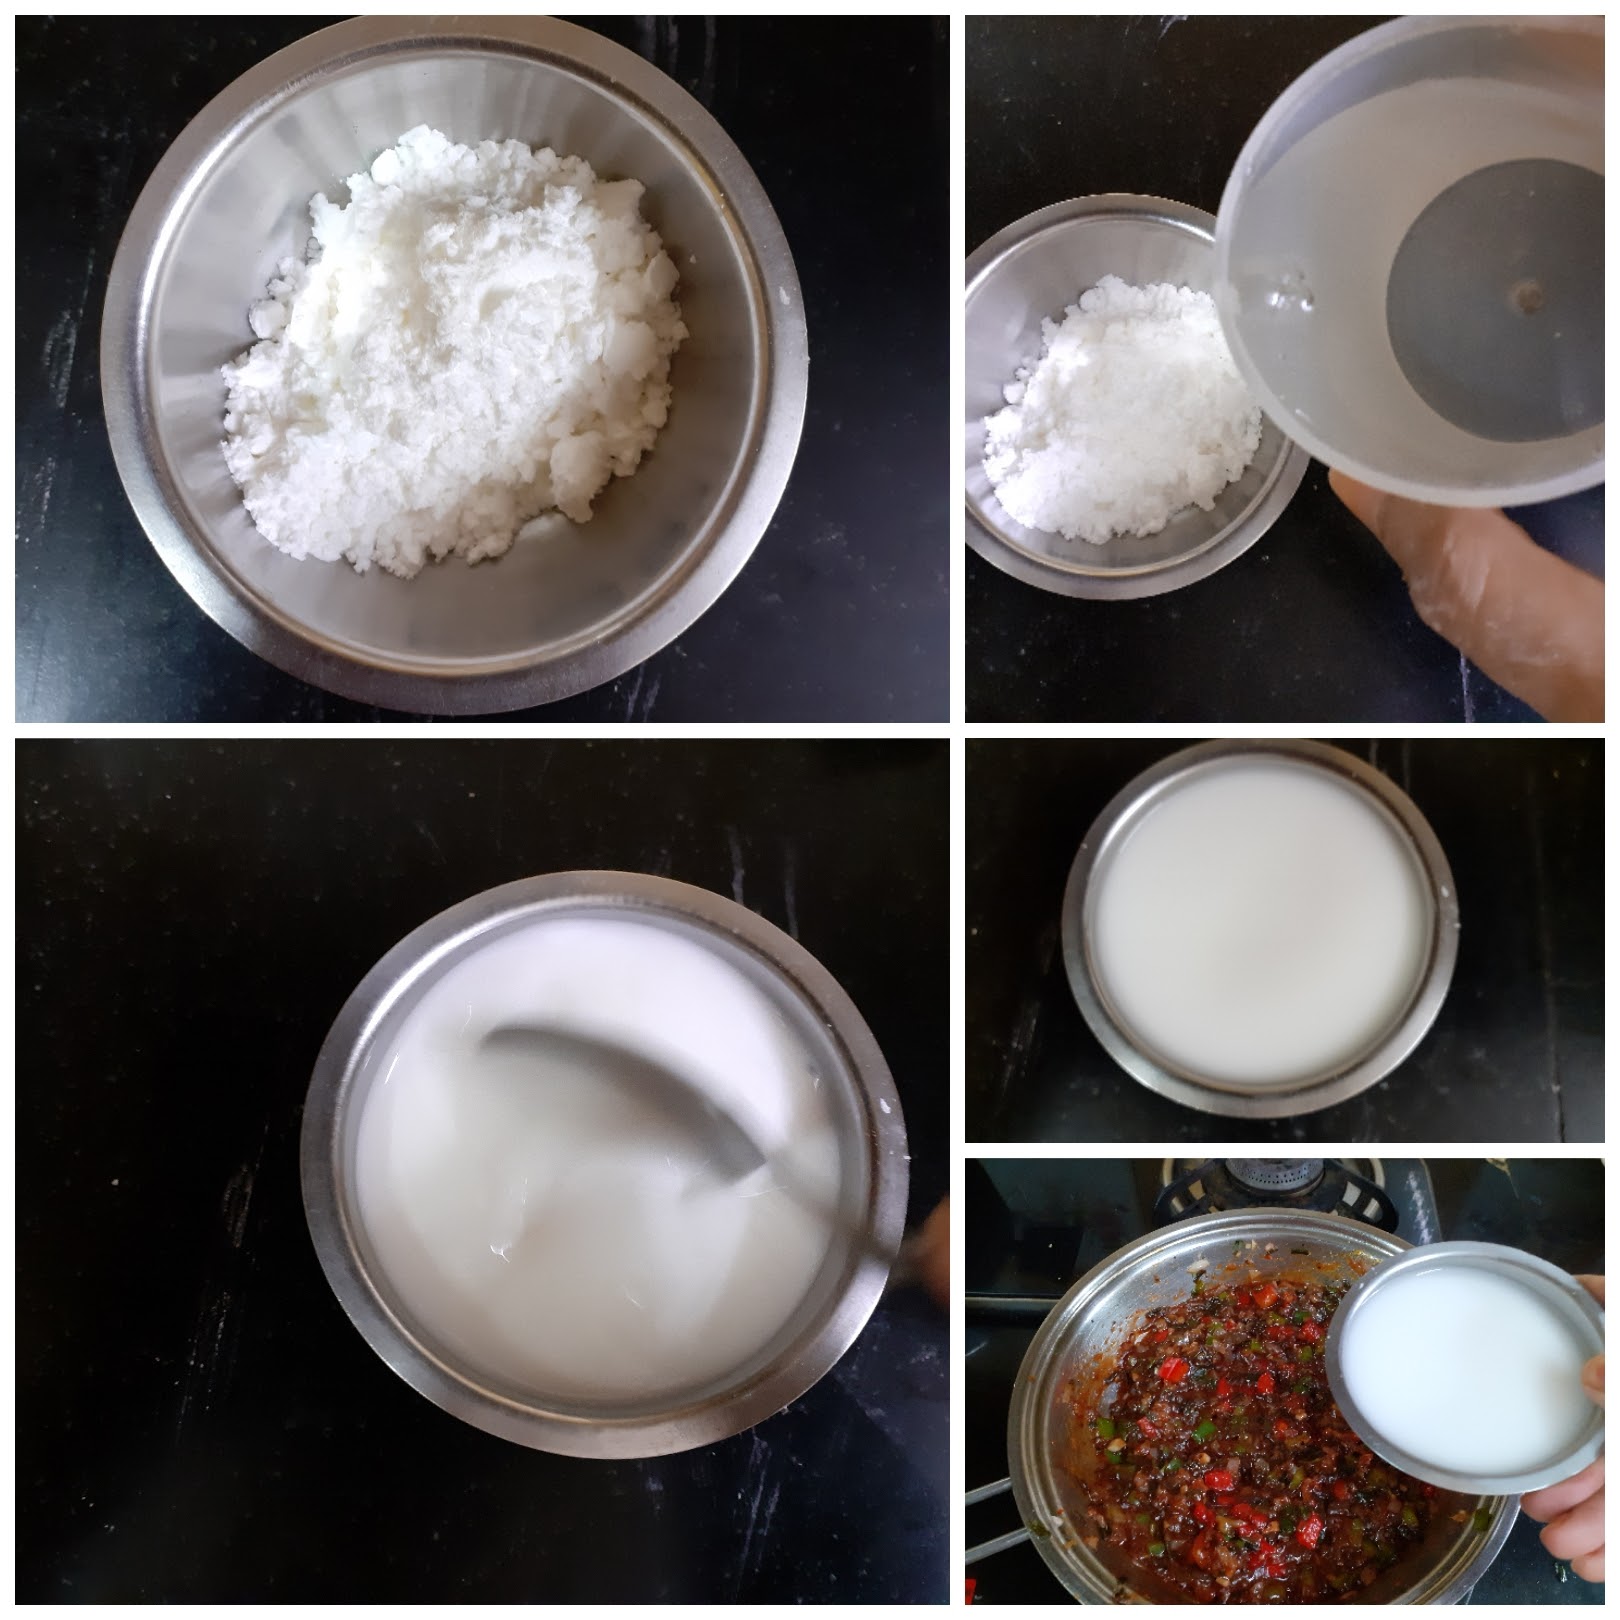
Cornflour 2 tbsp
Salt as required
Pepper powder 1tsp
Oil for frying the Manchurian
Directions to make the Manchurian:
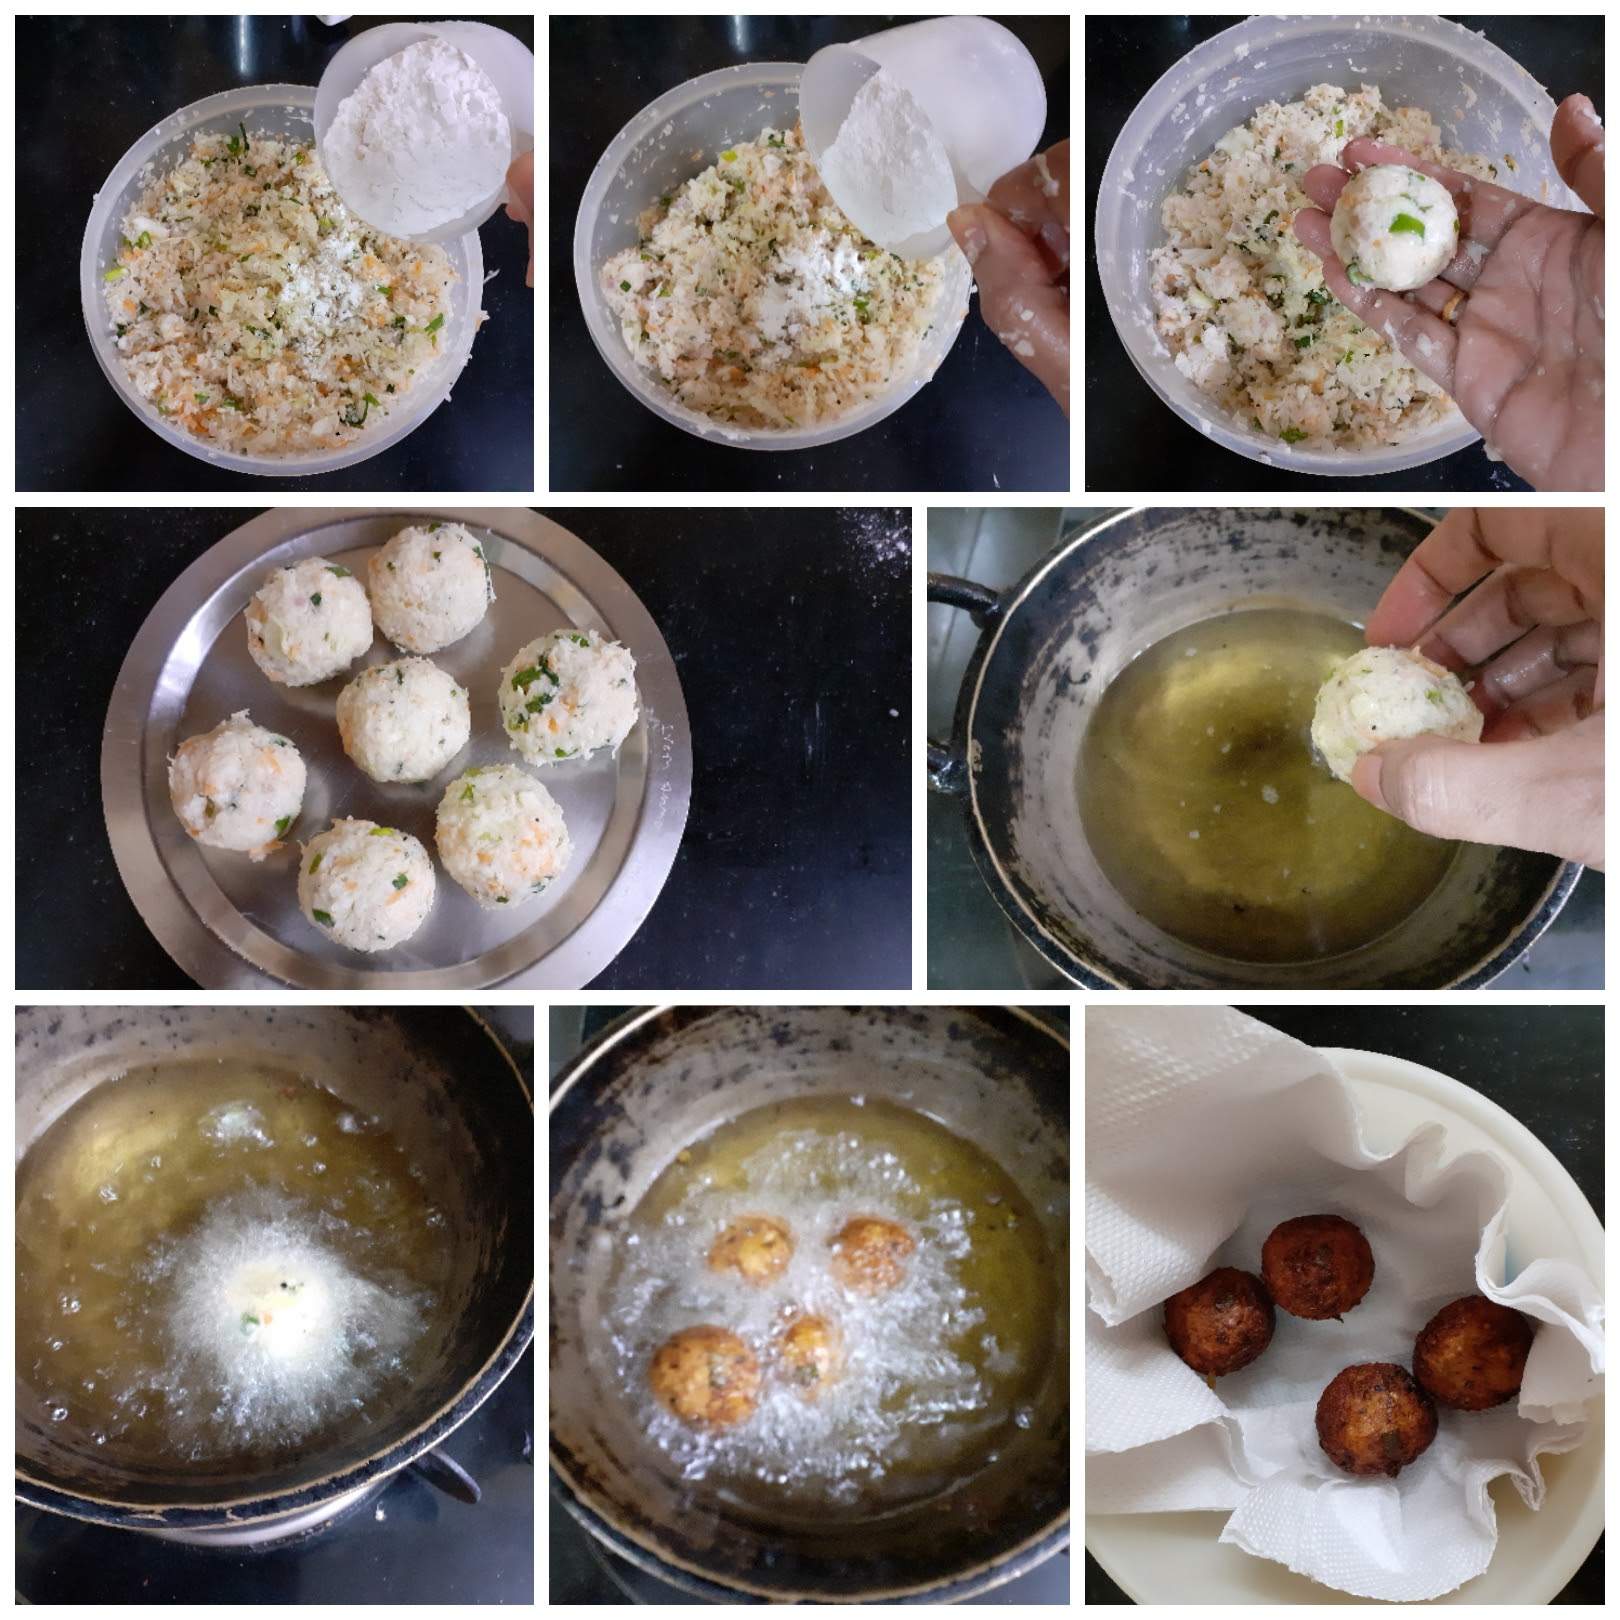
In a bowl take the shredded Cabbage, add to it rest of the vegetables like shredded carrot, spring onions, onions, green chillies and ginger. Add salt and pepper powder and combine well using your fingers. Now add Maida/refined flour, followed by rice flour and combine nicely. It needn’t become a dough, but you should be able to form a ball that doesn’t go flat or break. Now divide the mixture into lemon sized balls( I got around 20 of them with this quality). Heat oil in a wok or Kadai and fry the balls in medium heat until a golden brown. Keep them aside.
Directions for making the gravy:
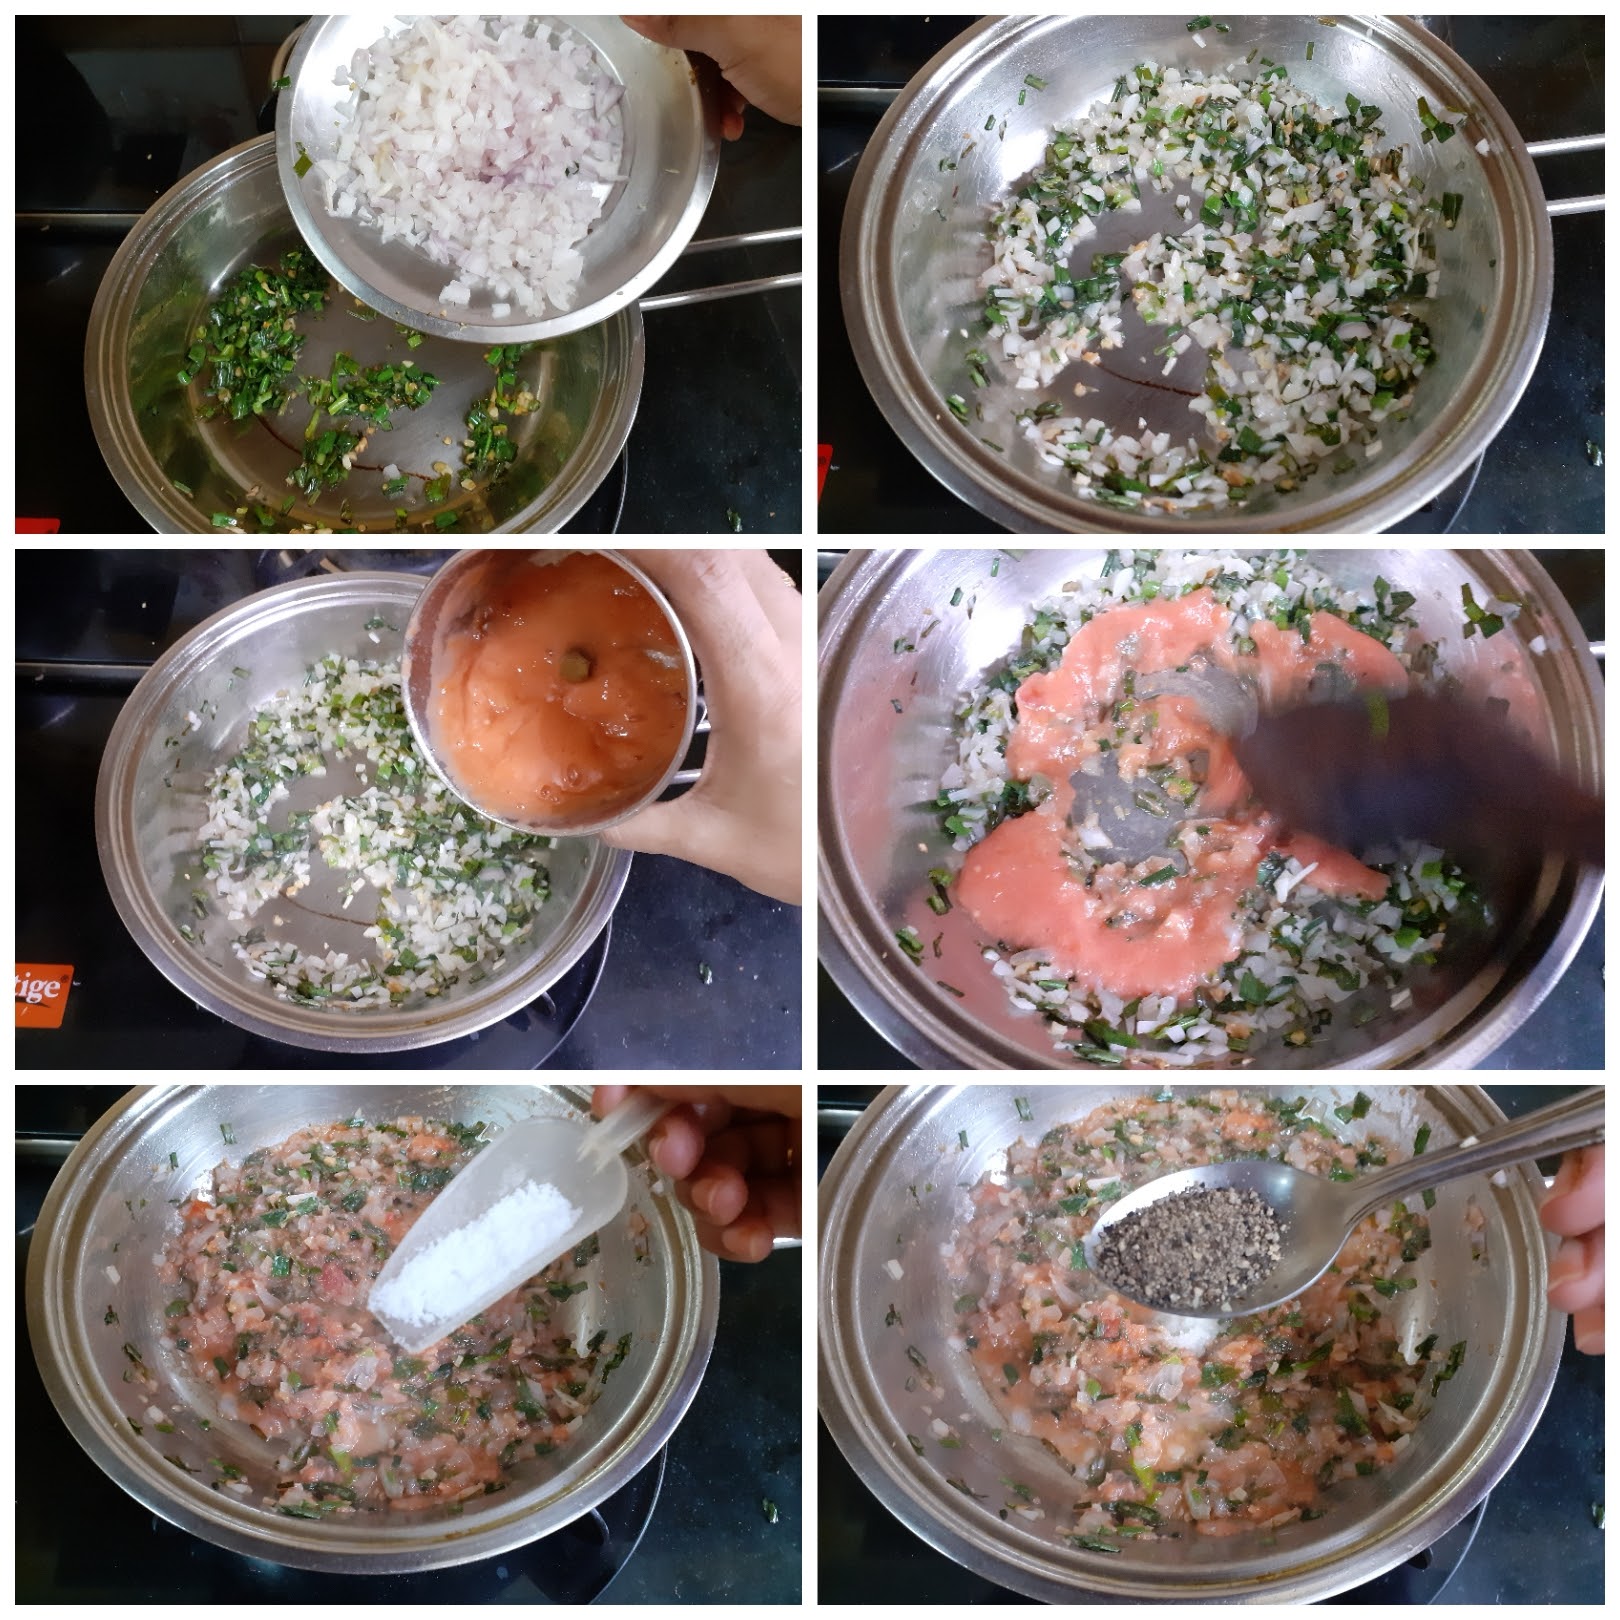
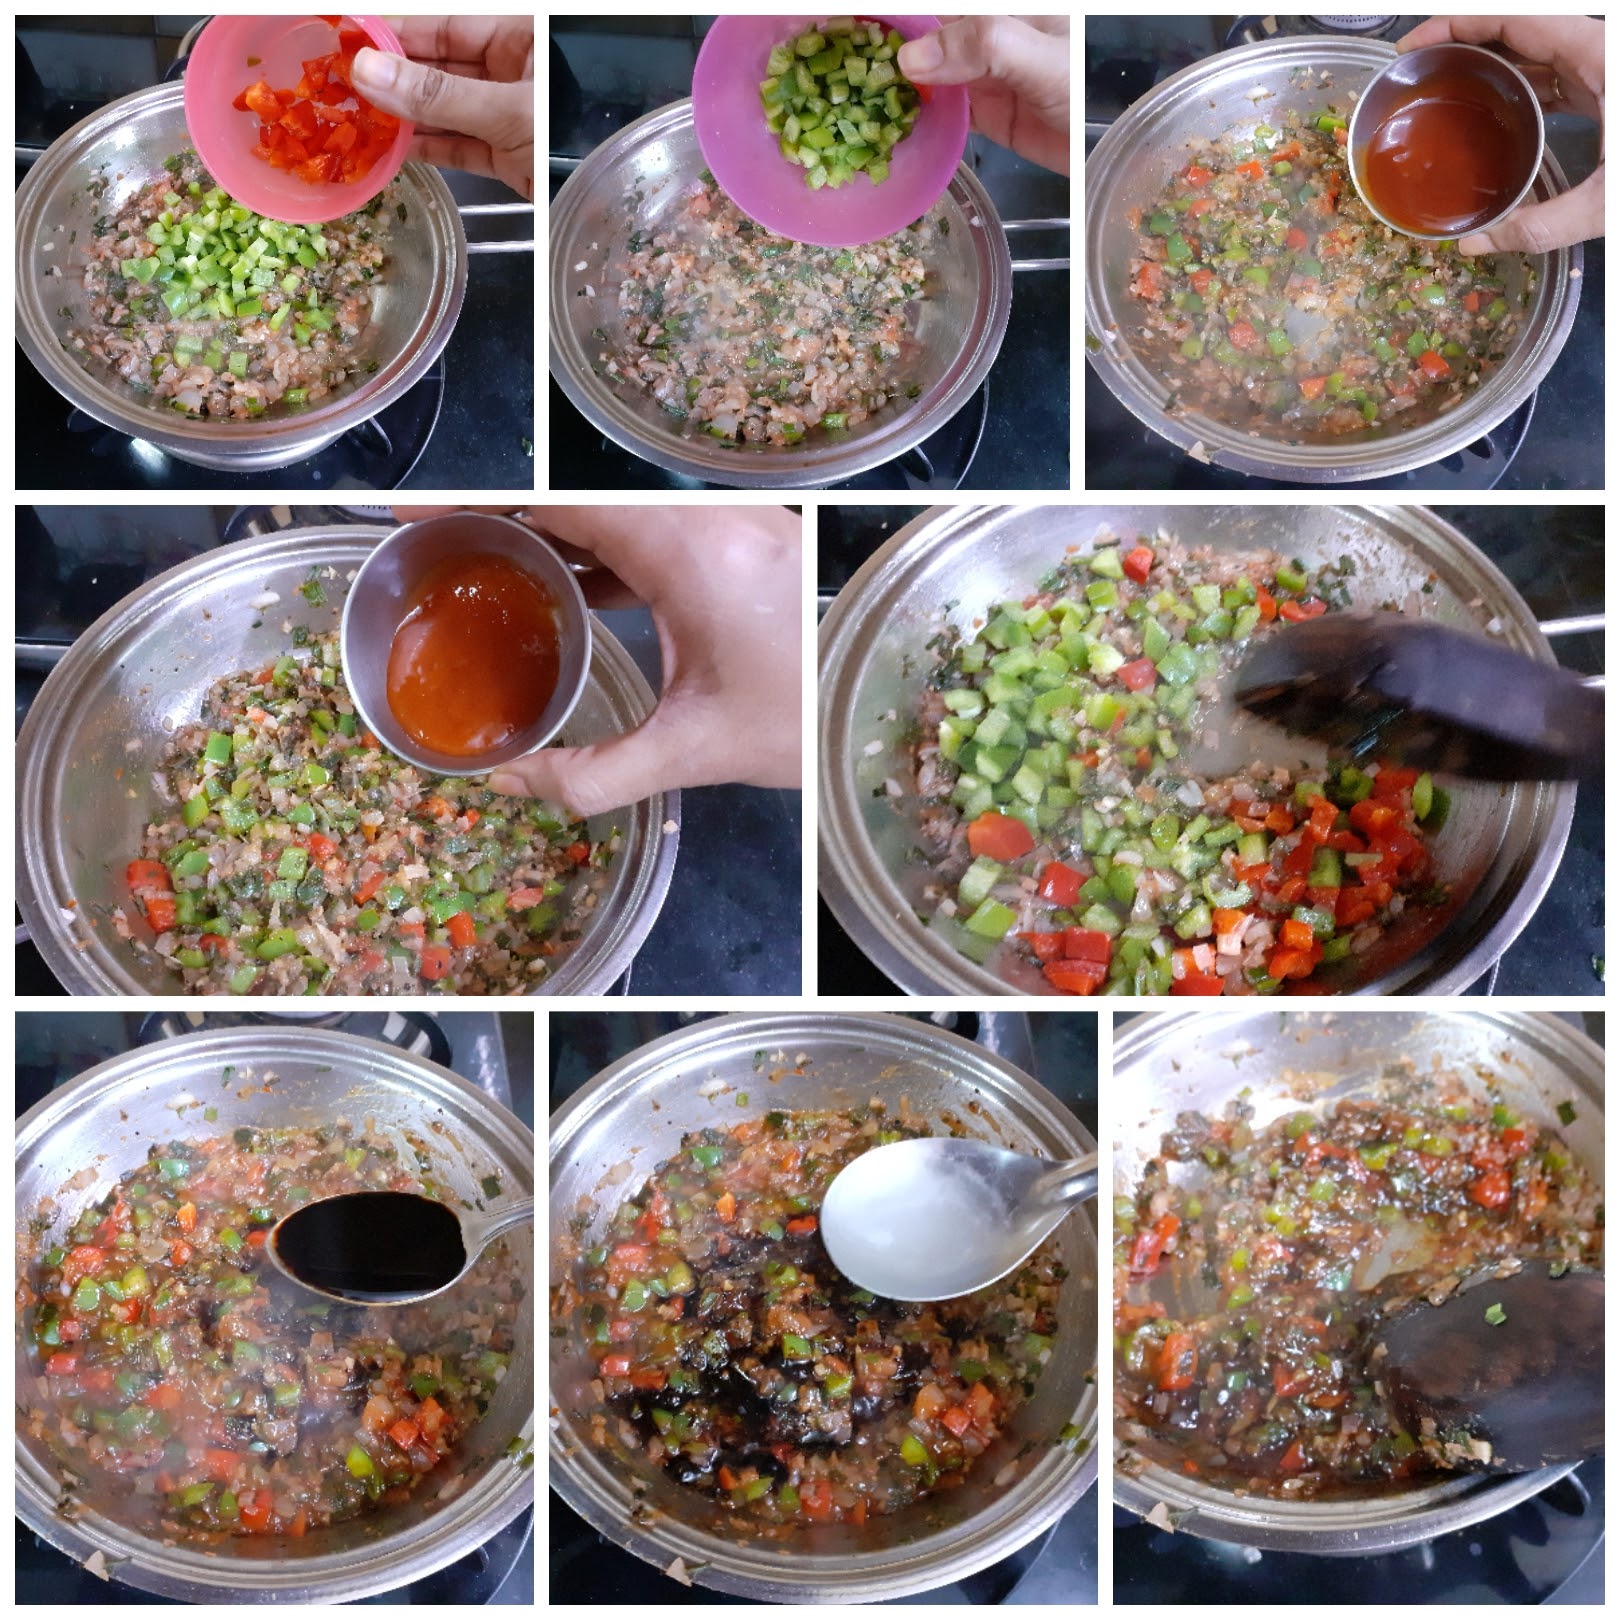
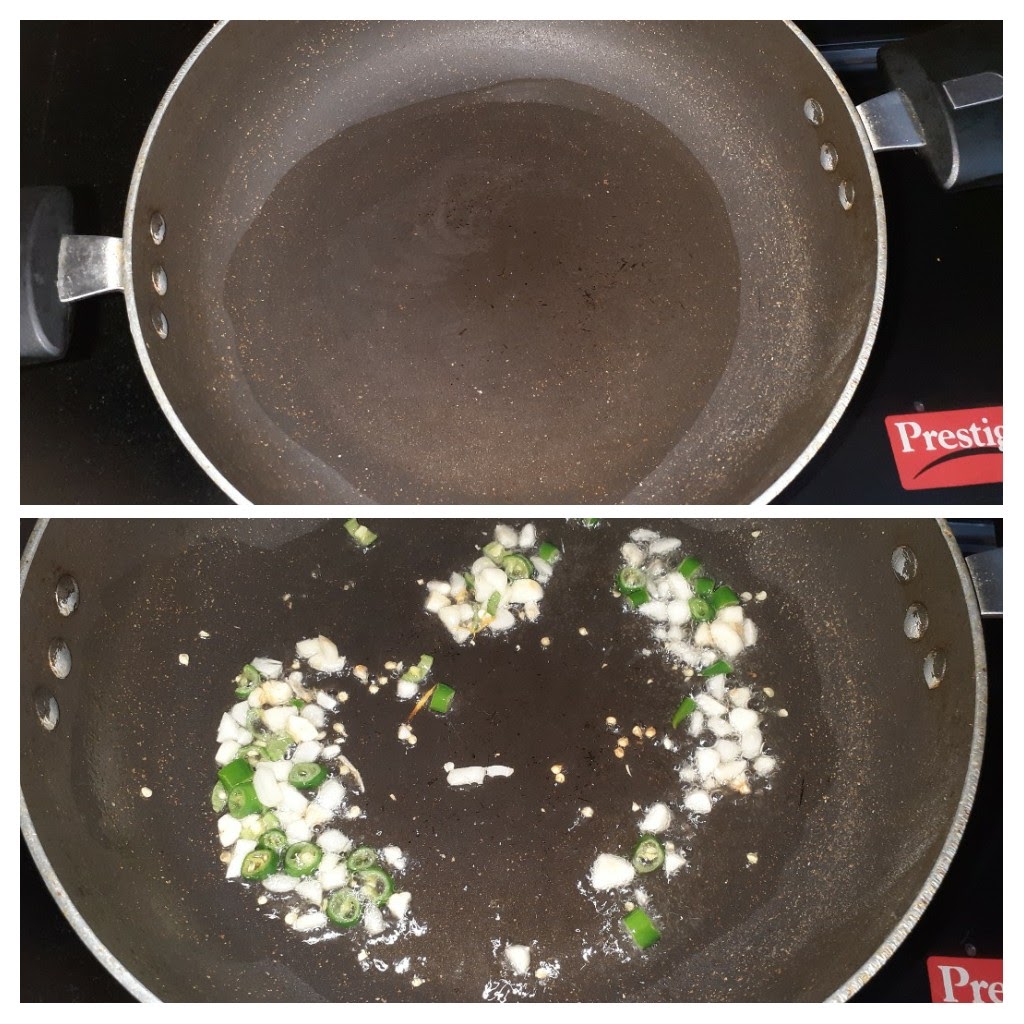
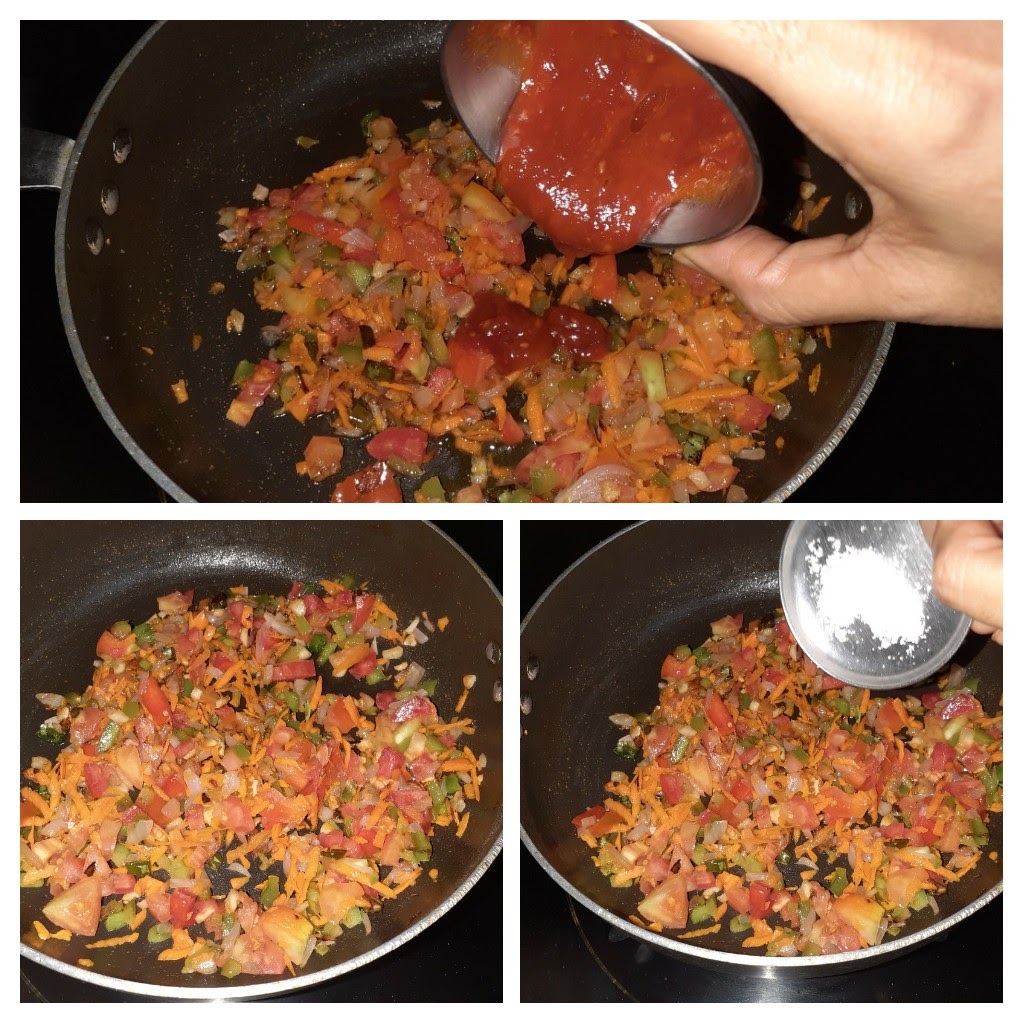
Heat oil in a pan and add the finely chopped green chillies, ginger and garlic to it. Saute for 30 seconds. Now add the spring onion greens and saute. Add the onions and continue to saute, until the sweat a bit. Remember all sauteeing to be done in high heat and with constant stirring. Now add the tomato puree and cook for a minute. Add salt and pepper powder and continue to cook for another minute. When the raw smell from the tomato puree is gone, drop in the both the Red and Green capsicum. Saute for another 30 seconds. You can add a teaspoon of sugar at this stage(optional). Now add the tomato sauce, followed by the red chilli sauce. Stir nicely. Now add the soya sauce followed by Vinegar, stir and cook for a minute. Prepare the cornflour mix by adding 1/2 cup water to 2 tbsp of cornflour. Pour this mix into the prepared sauce and stir continuously for a minute. Now dilute the sauce to the consistency you prefer by adding water. I have added 1 cup as I like a thick gravy. Simmer for 2 minutes on low heat and the gravy is ready. Now arrange the Manchurian balls in a serving dish and pour the gravy over it. Enjoy hot with any Fried rice varieties. Bon Appetit.
STEPWISE RECIPE FOLLOWS:
1. In a bowl take the shredded Cabbage, add to it rest of the vegetables like shredded carrot, spring onions, onions, green chillies and ginger. Add salt and pepper powder and combine well using your fingers.
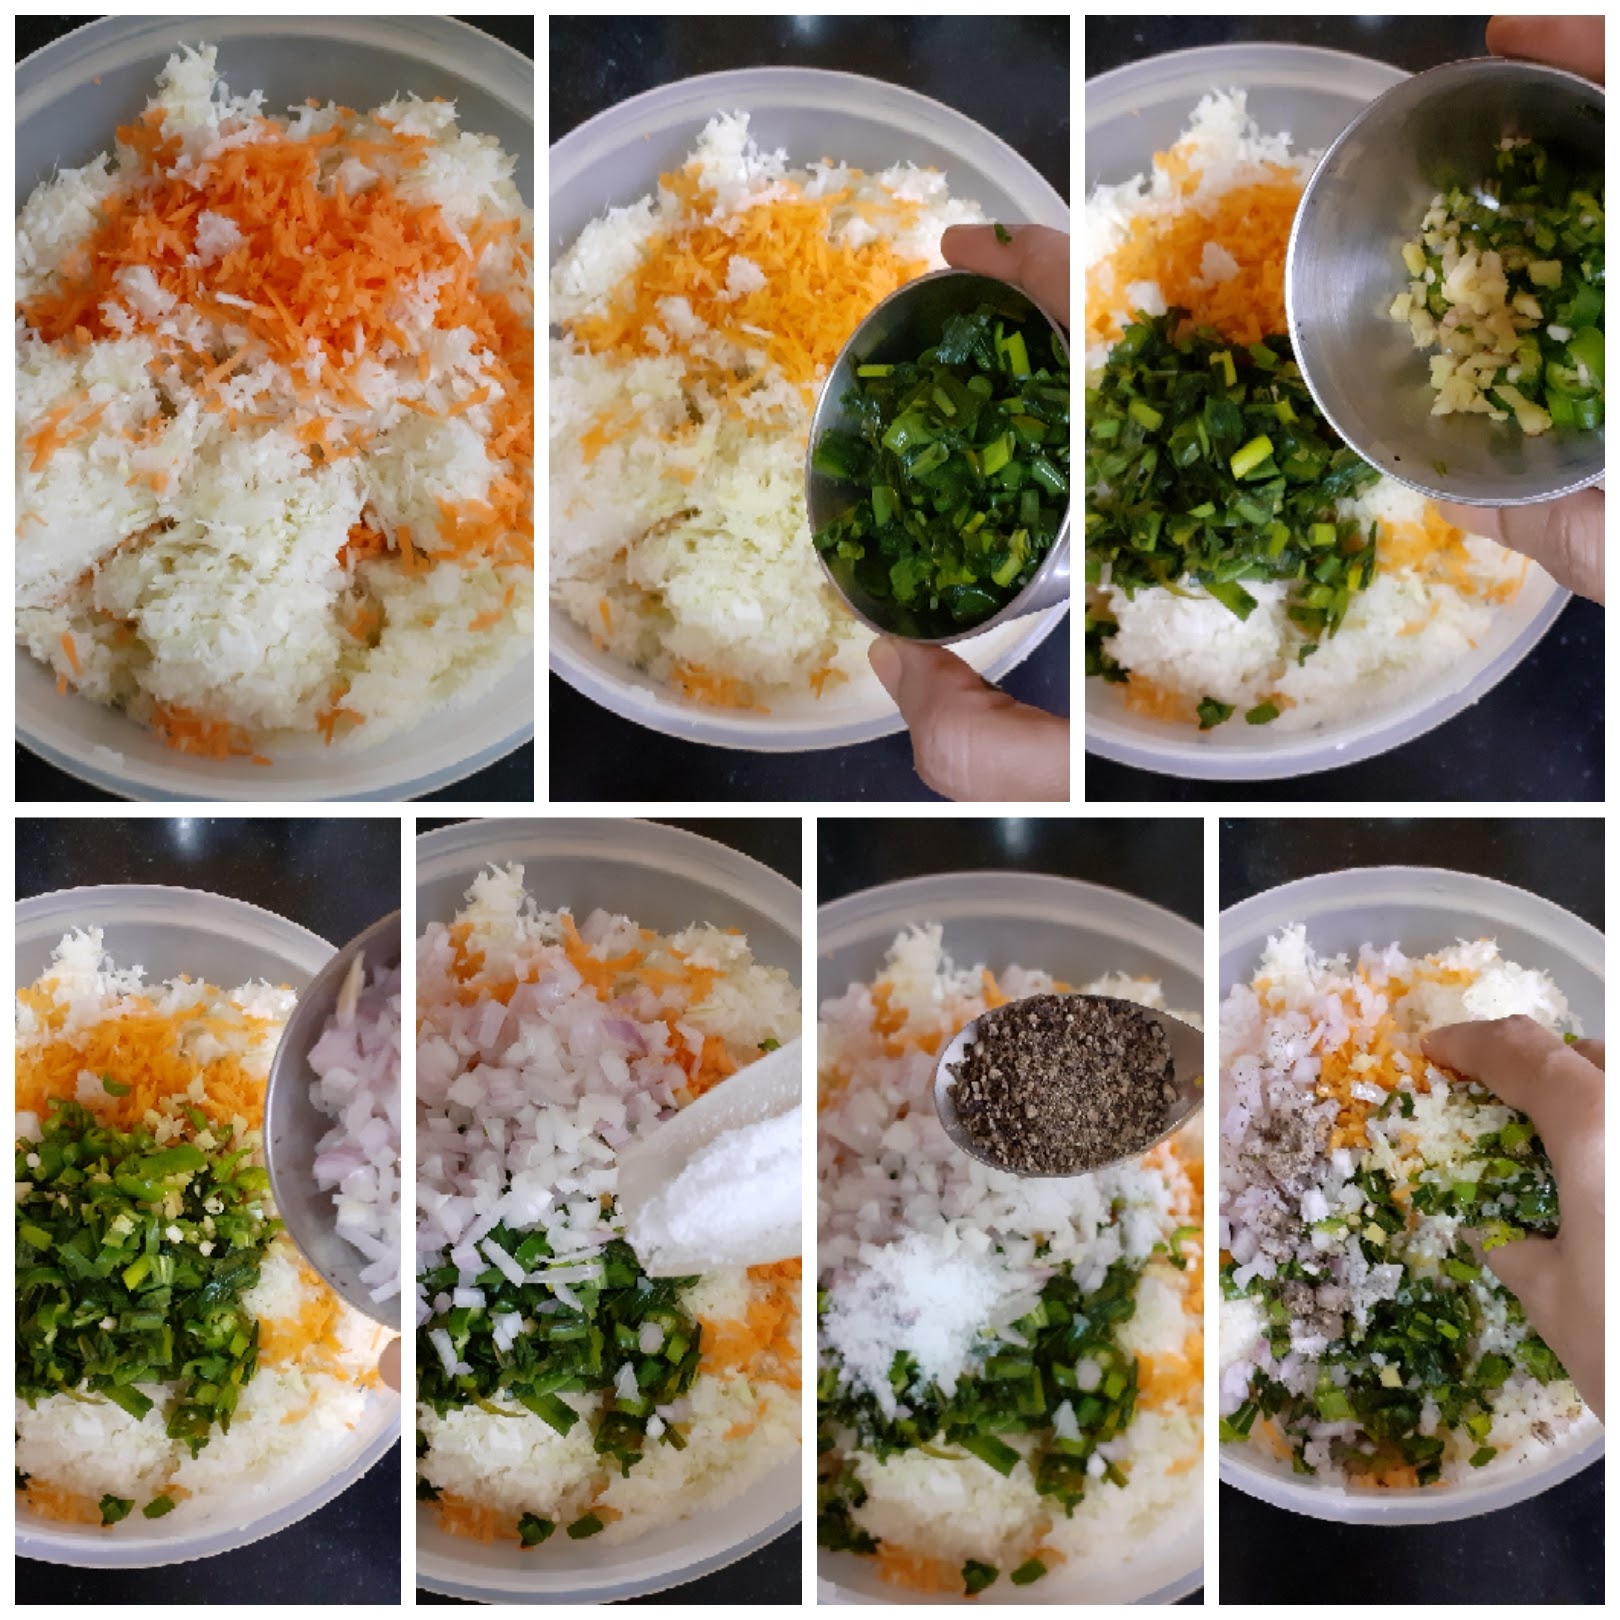
2. Now add Maida/refined flour, followed by rice flour and combine nicely. Now divide the mixture into lemon sized balls( I got around 20 of them with this quality). Heat oil in a wok or Kadai and fry the balls in medium heat until a golden brown. Keep them aside.
3. Heat oil in a pan and add the finely chopped green chillies, ginger and garlic to it. Saute for 30 seconds. Now add the spring onion greens and saute.

4. Add the onions and continue to saute, until the sweat a bit. Remember all sauteeing to be done in high heat and with constant stirring. Now add the tomato puree and cook for a minute. Add salt and pepper powder and continue to cook for another minute.
5. When the raw smell from the tomato puree is gone, drop in the both the Red and Green capsicum. Saute for another 30 seconds. Now add the tomato sauce, followed by the red chilli sauce. Stir nicely. Now add the soya sauce followed by Vinegar, stir and cook for a minute.
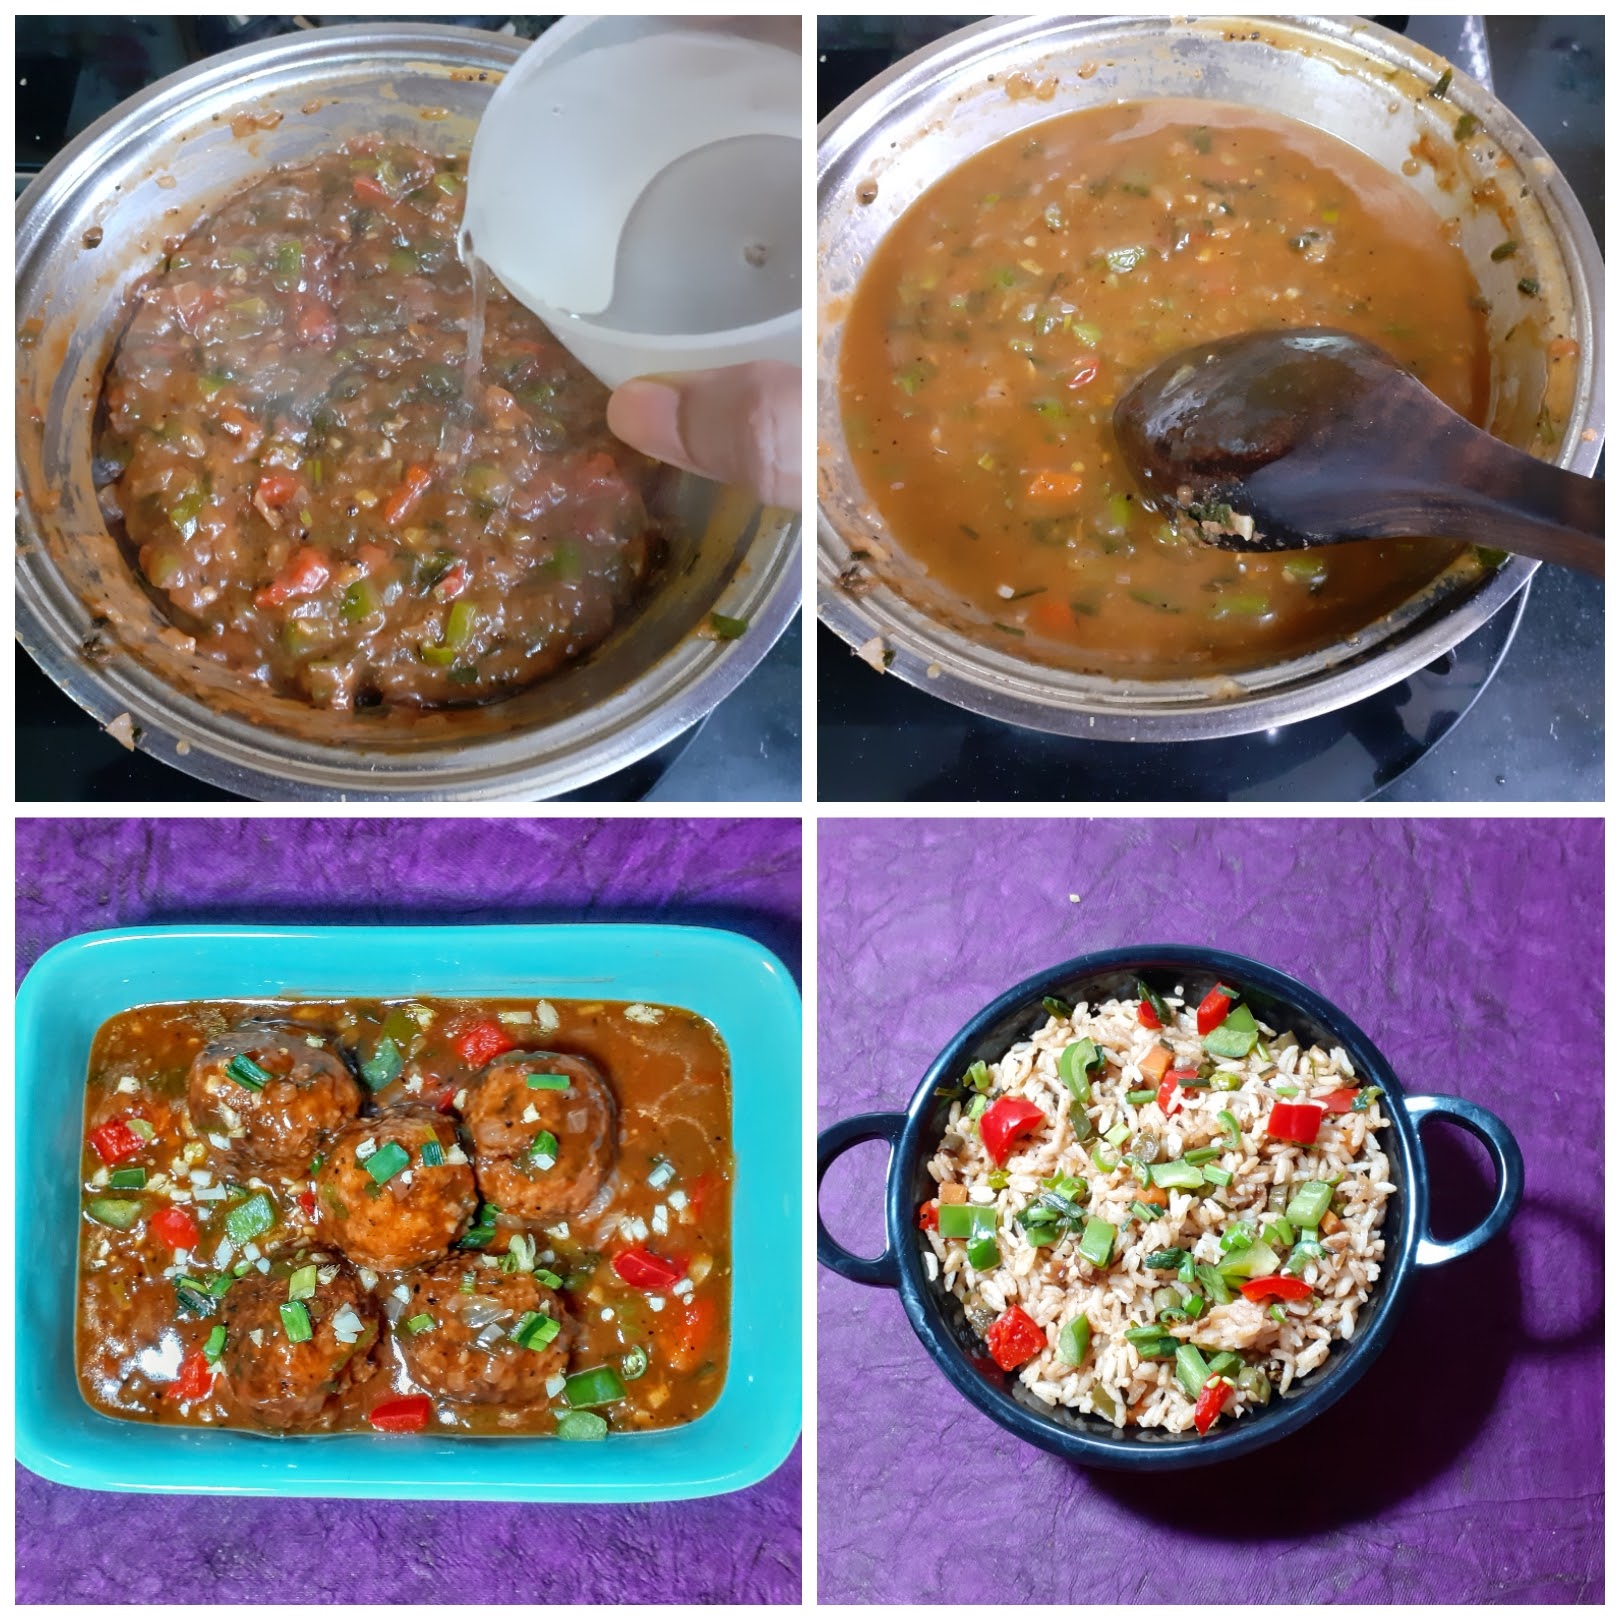
6. Prepare the cornflour mix by adding 1/2 cup water to 2 tbsp of cornflour. Pour this mix into the prepared sauce and stir continuously for a minute.
7. Now dilute the sauce to the consistency you prefer by adding water. Simmer for 2 minutes on low heat and the gravy is ready. Now arrange the Manchurian balls in a serving dish and pour the gravy over it. Enjoy hot with any Fried rice varieties.
Notes:
1. The gravy for any wet Manchurian is the same, so one can experiment with other vegetables like Cauliflower, Potato, Brocolli, Soya Chunks beside others. If you make Manchurian with any other interesting vegetable do let us know. We love learning.
2. I usually make a slightly thick gravy as that’s how we like this dish. If you prefer a lighter one, feel free to dilute the gravy by adding little warm water.
3. If you make an excess of the Manchurian balls, don’t fret, as you can mix them ina onion tomato paste, add some spices, add Schezwan sauce and get it to the consistency of a dry paste. Toss in the balls into this paste, mix nicely and stir fry and you have a dry Manchurian at hand???? to relish.
If you tried this recipe and liked it please comment below. I would love to hear from you. If you have a query about the recipe email us and ill respond as soon as I can.
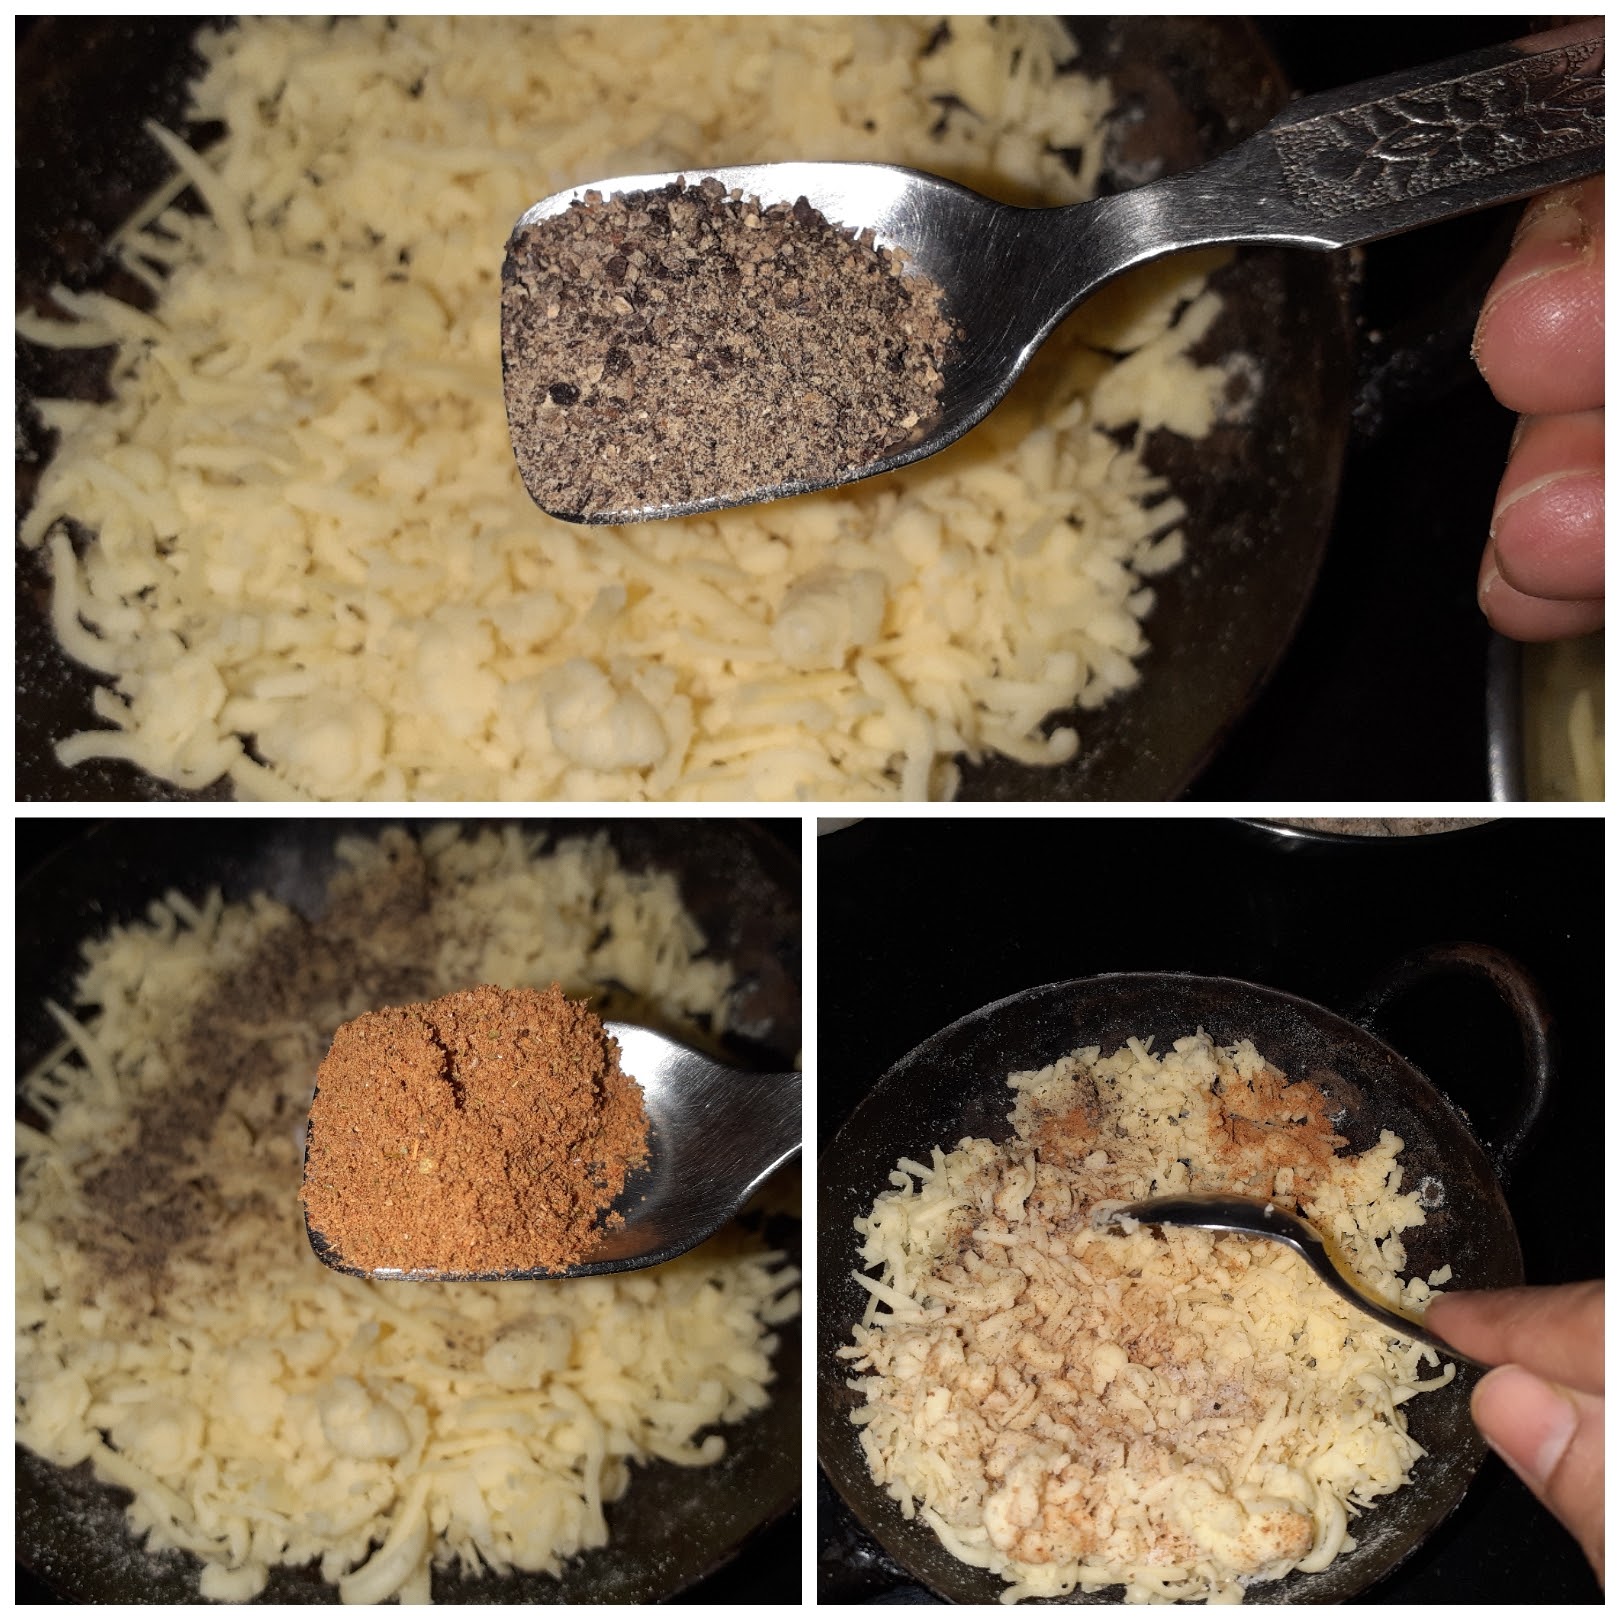
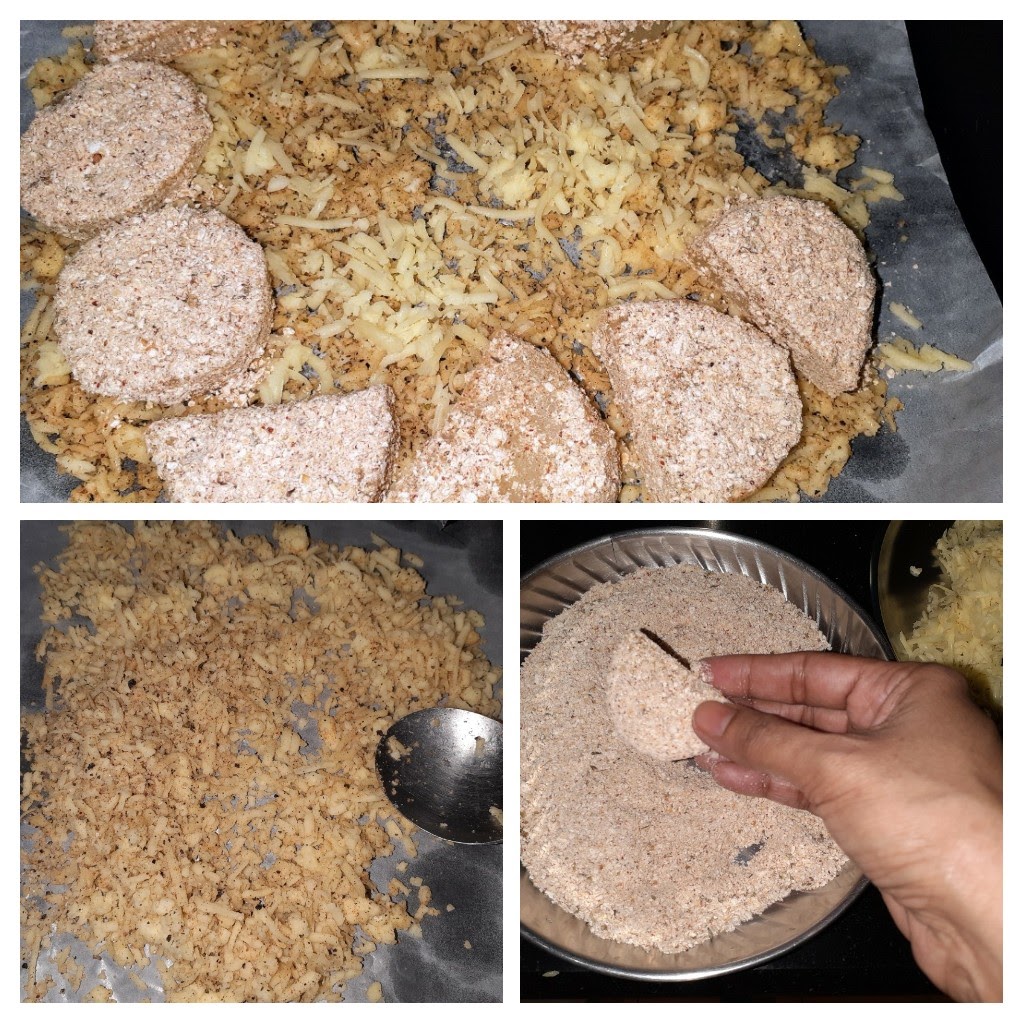
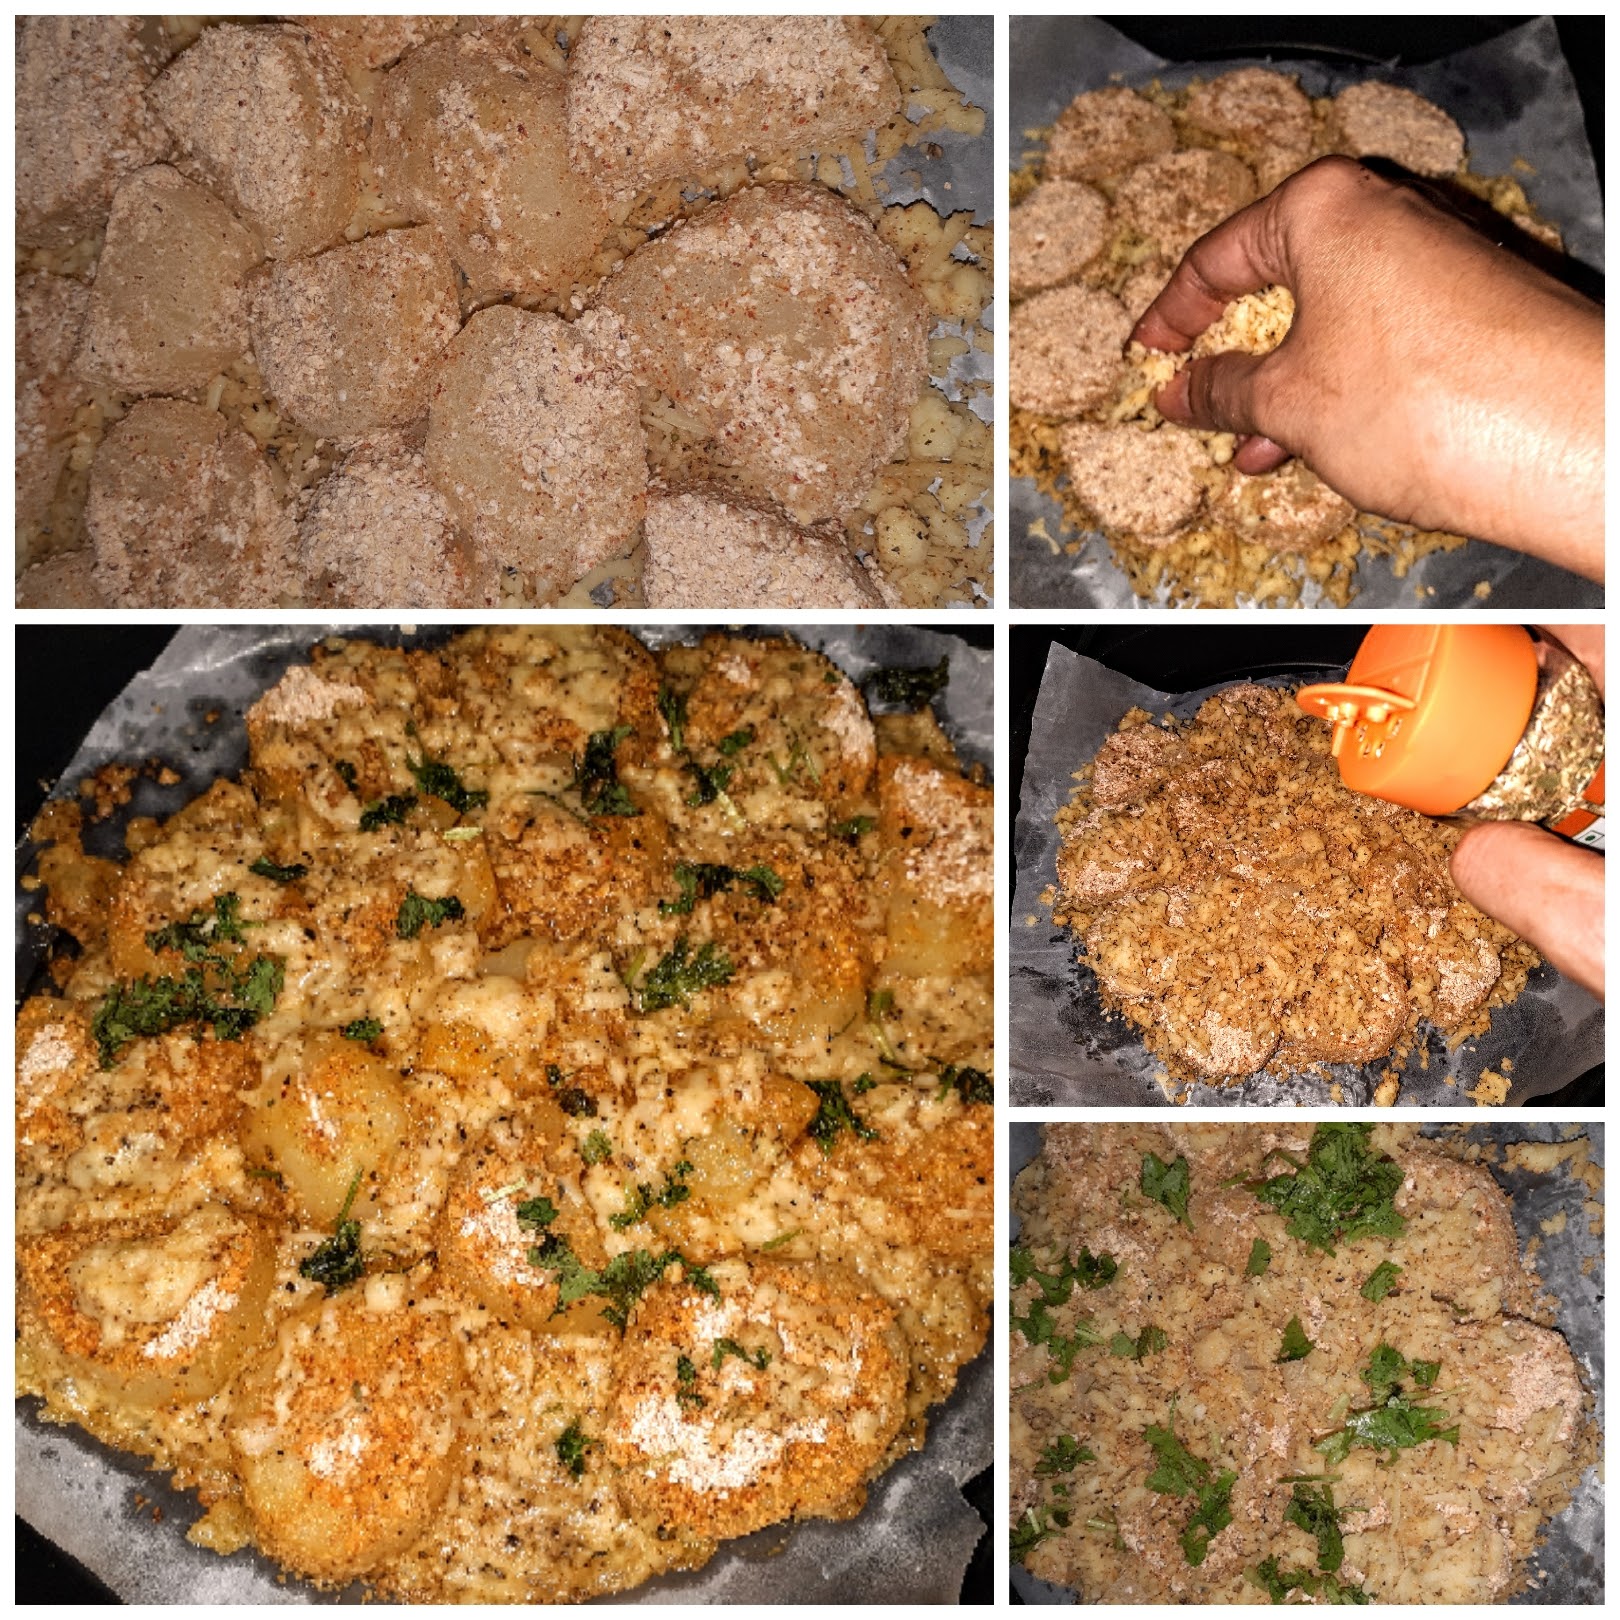
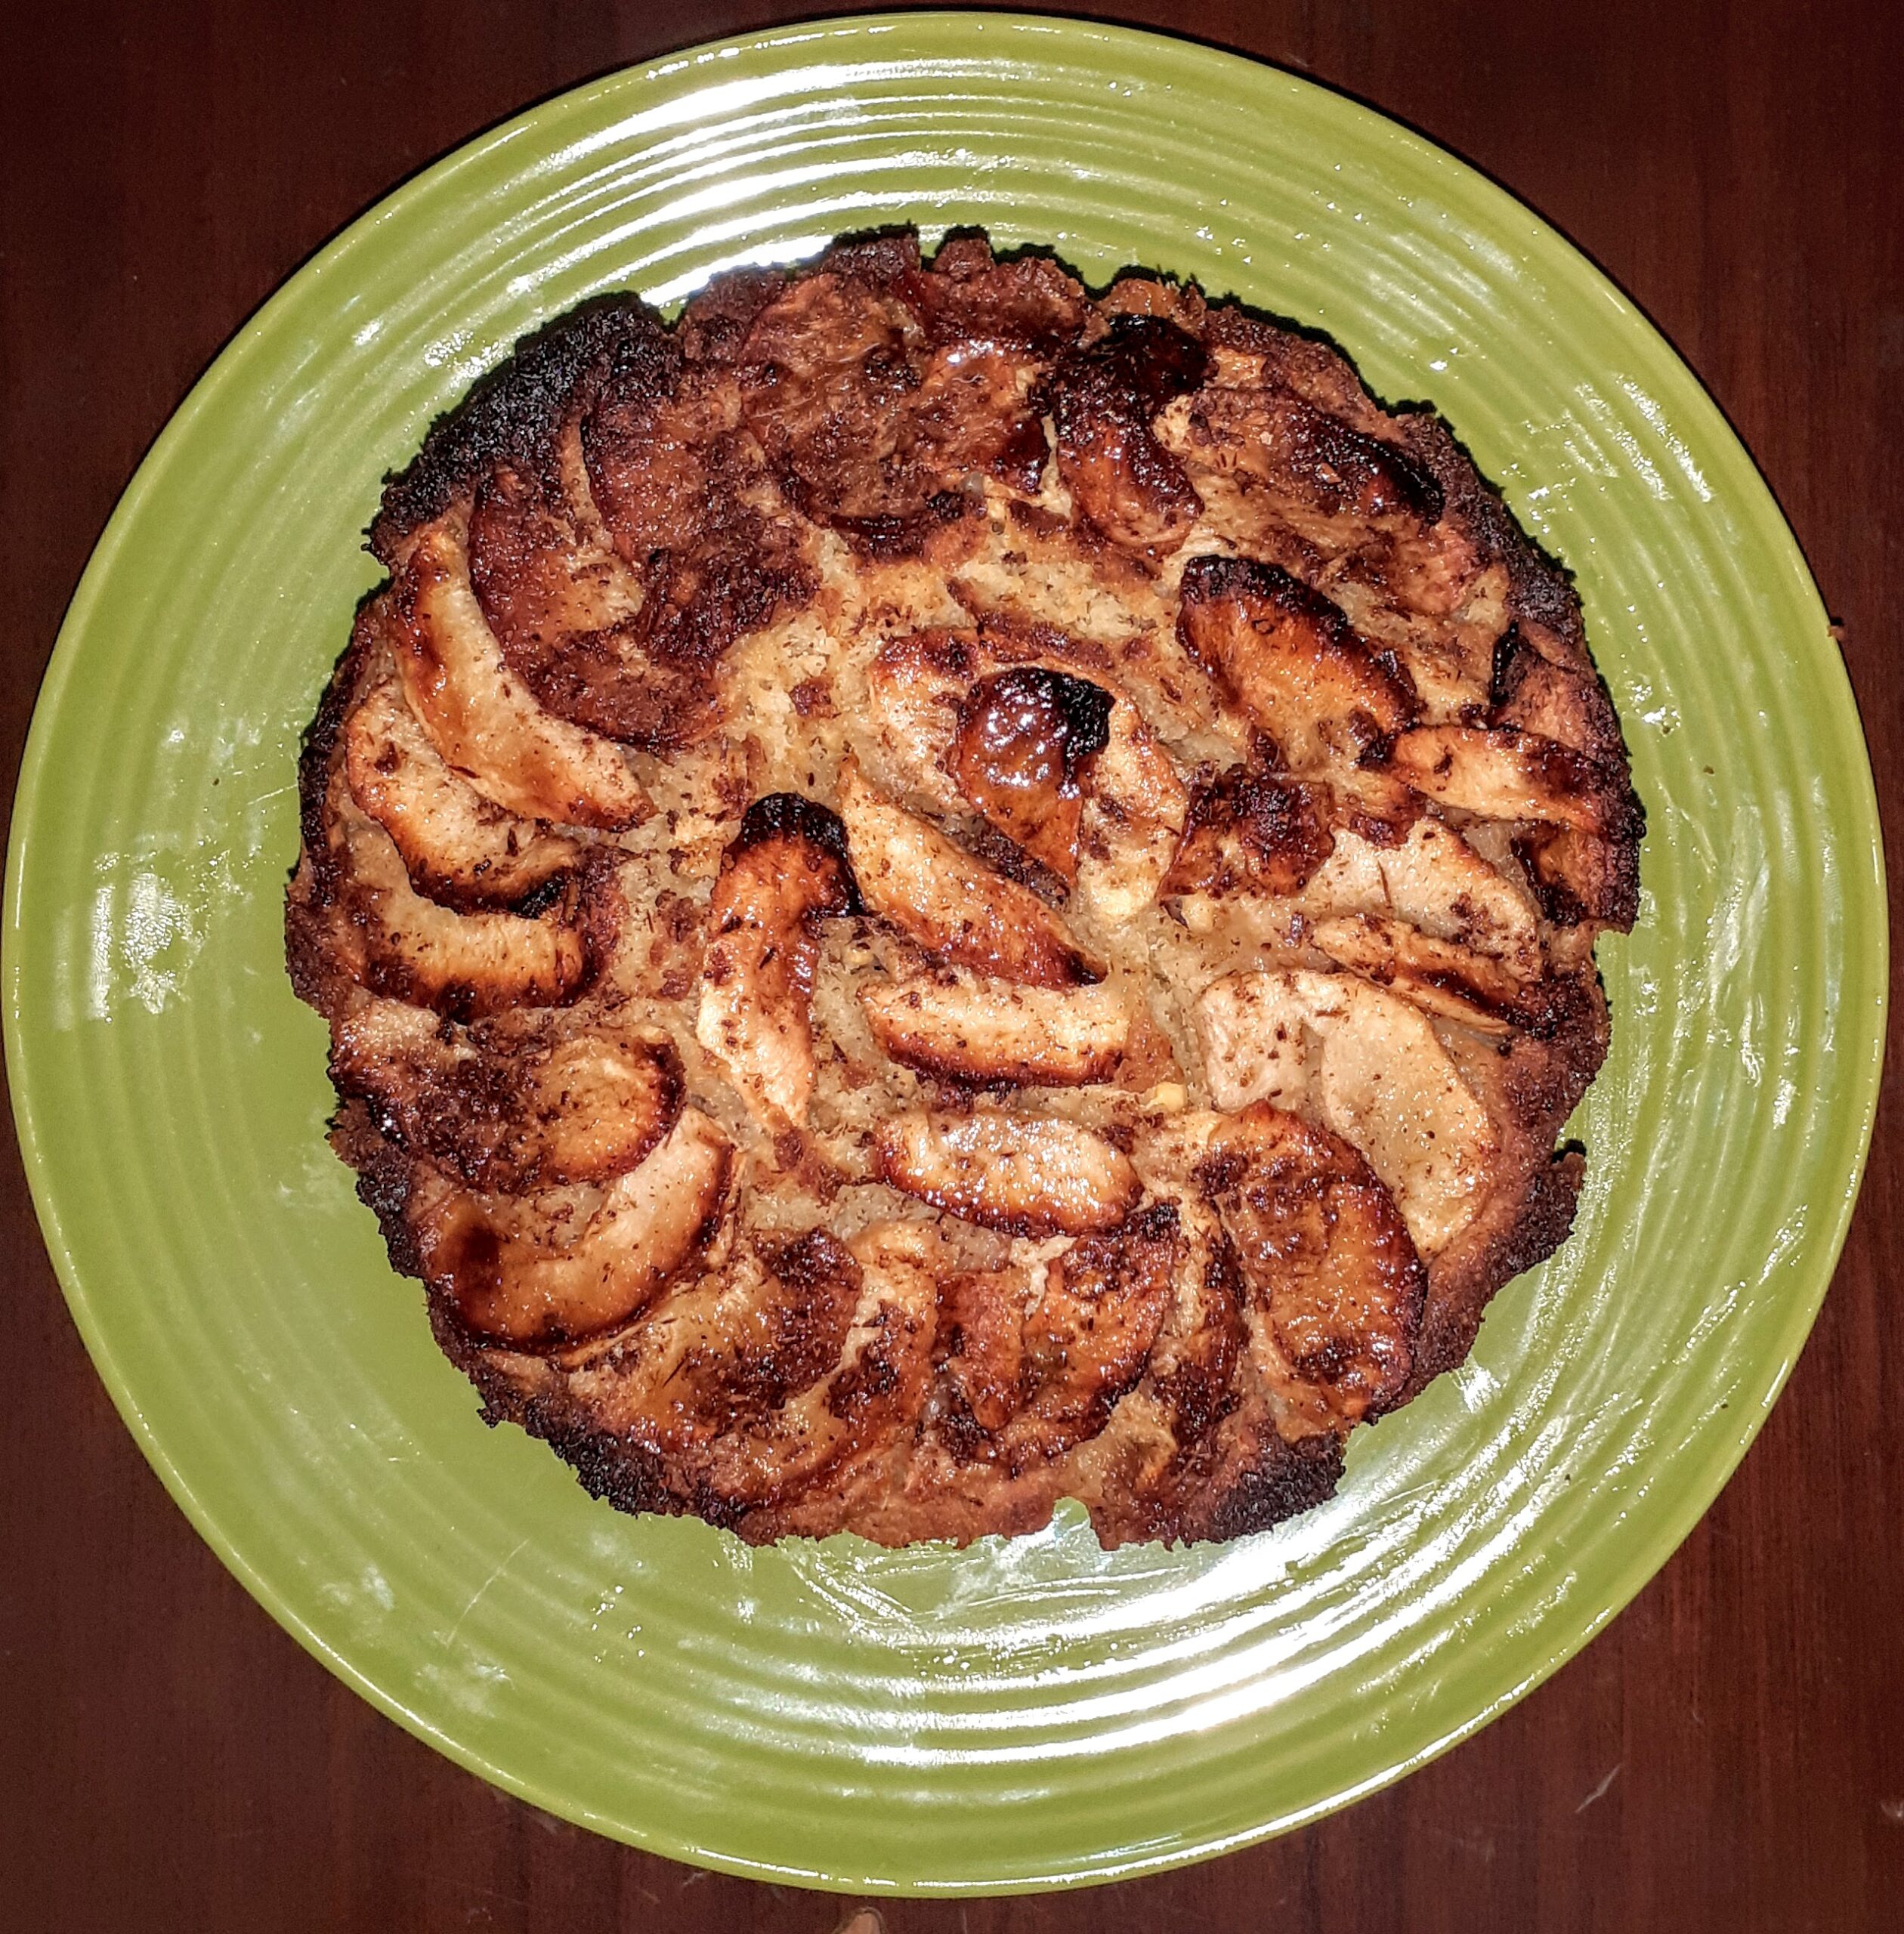
Potato Cheddar Bake
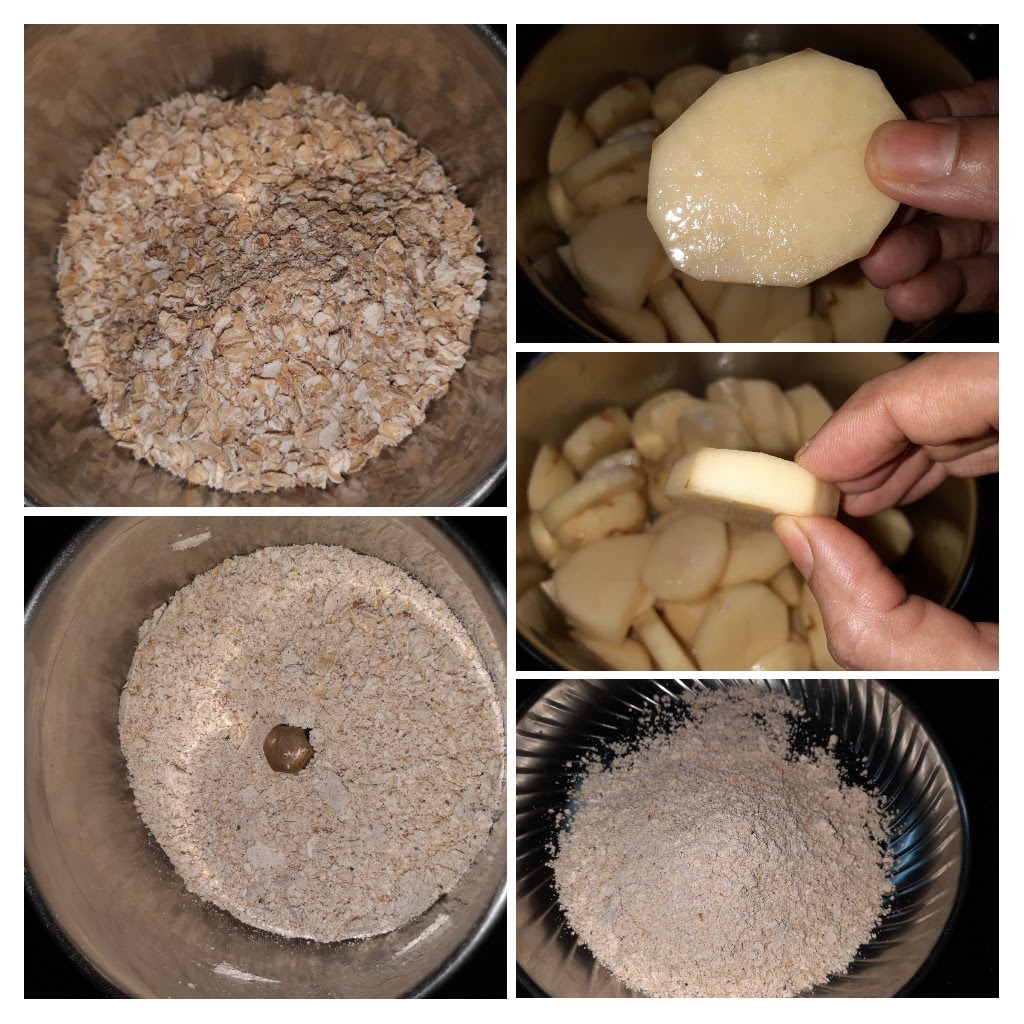
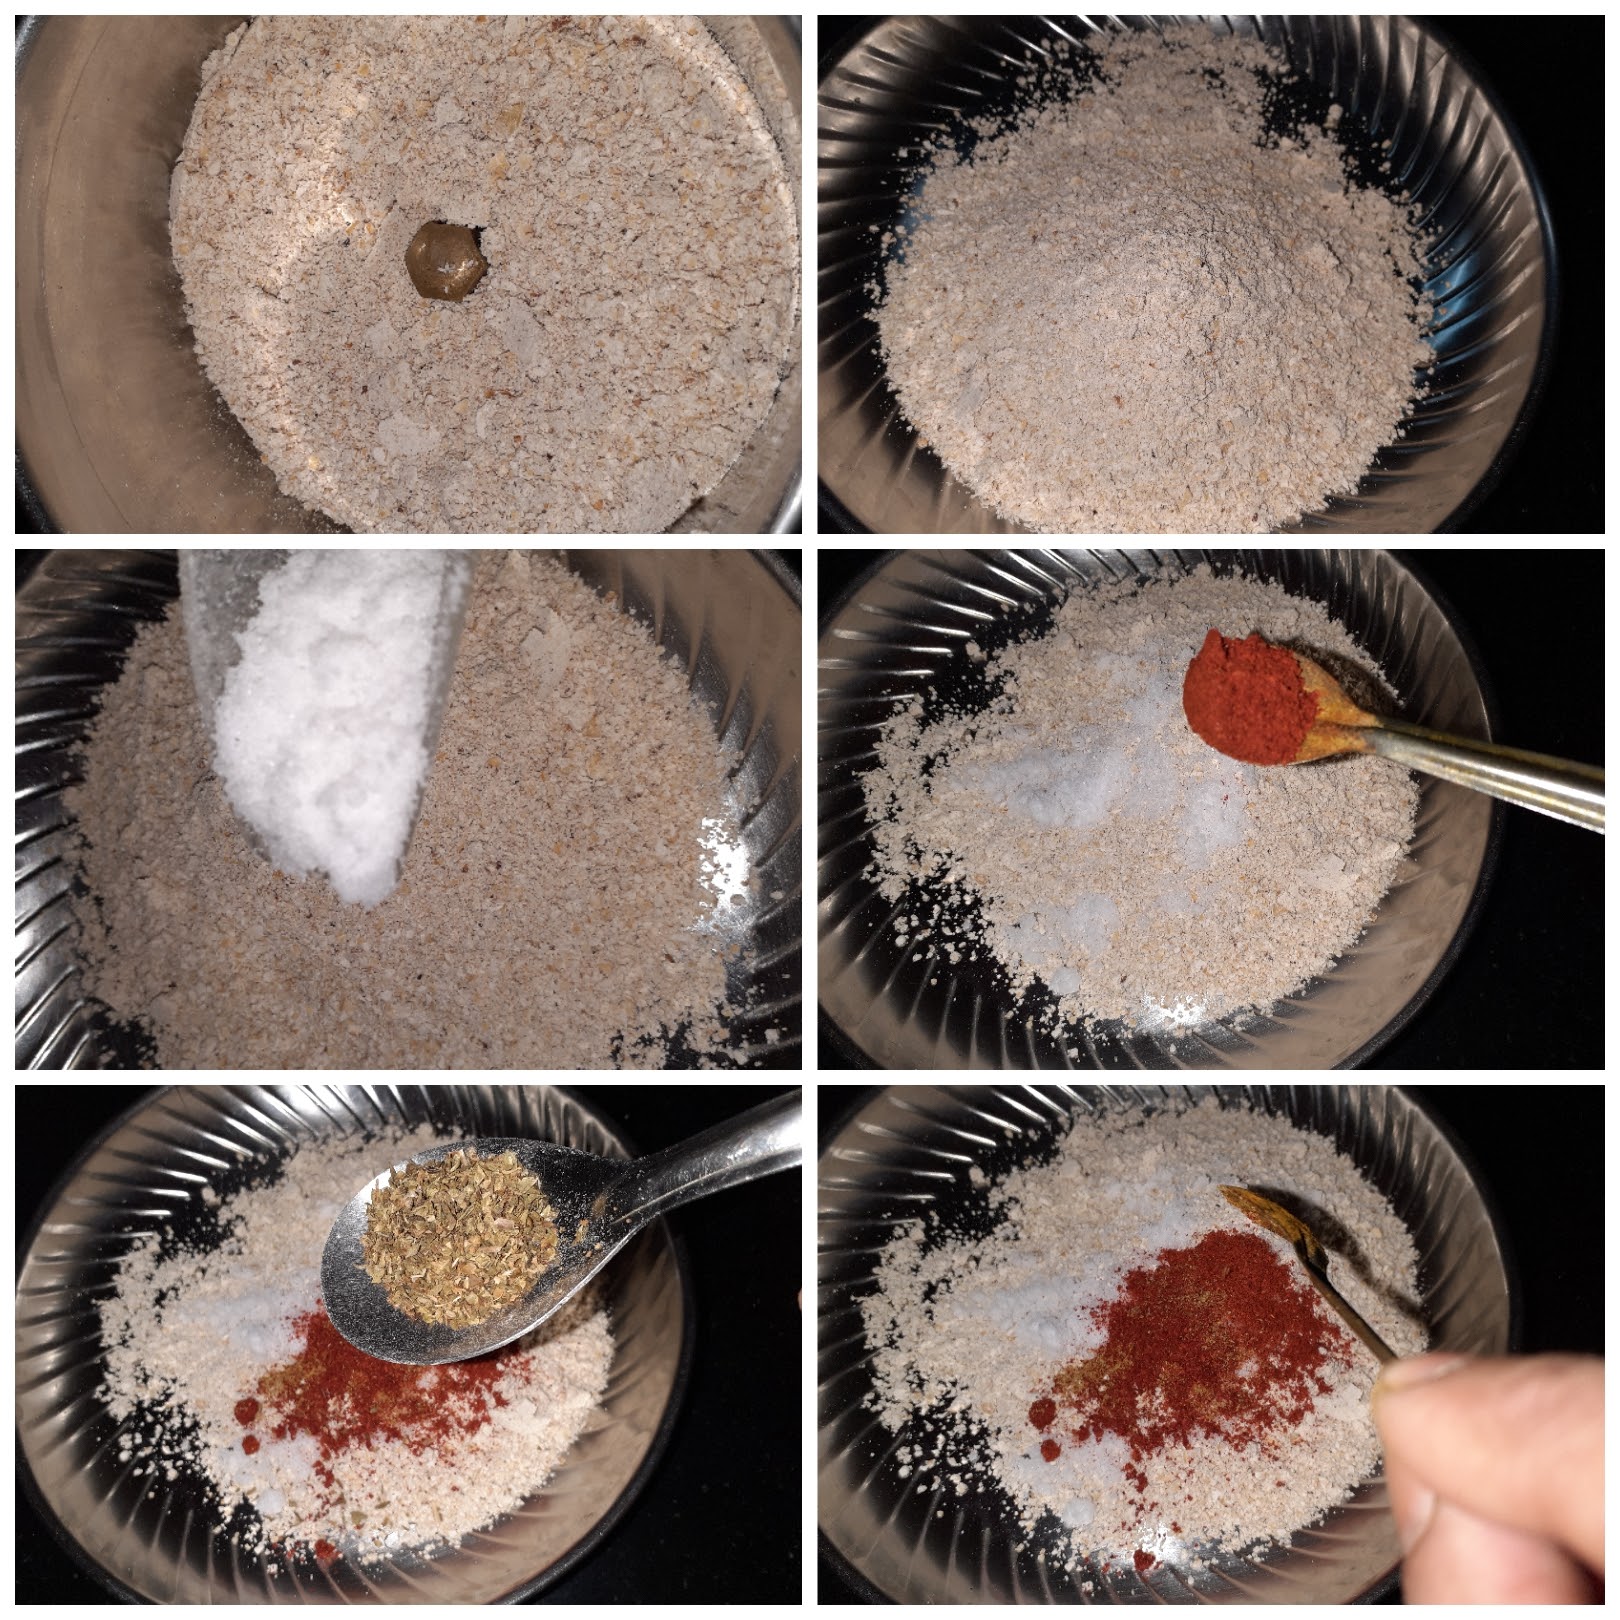
This is a very simple recipe and a great finger food/ starter option at get-togethers. Most of the prep can be done ahead and the baking can be done half an hour before serving. This dish can also be a tea time snack and the kids will love it. To make it healthy I have used roasted oats to coat the potatoes instead of cornflour. The baking can be easily replaced by the grilling method( on a girdle /tava).


If you tried this recipe and liked it please comment below. I would love to hear from you. If you have a query about the recipe email us and ill respond as soon as I can.
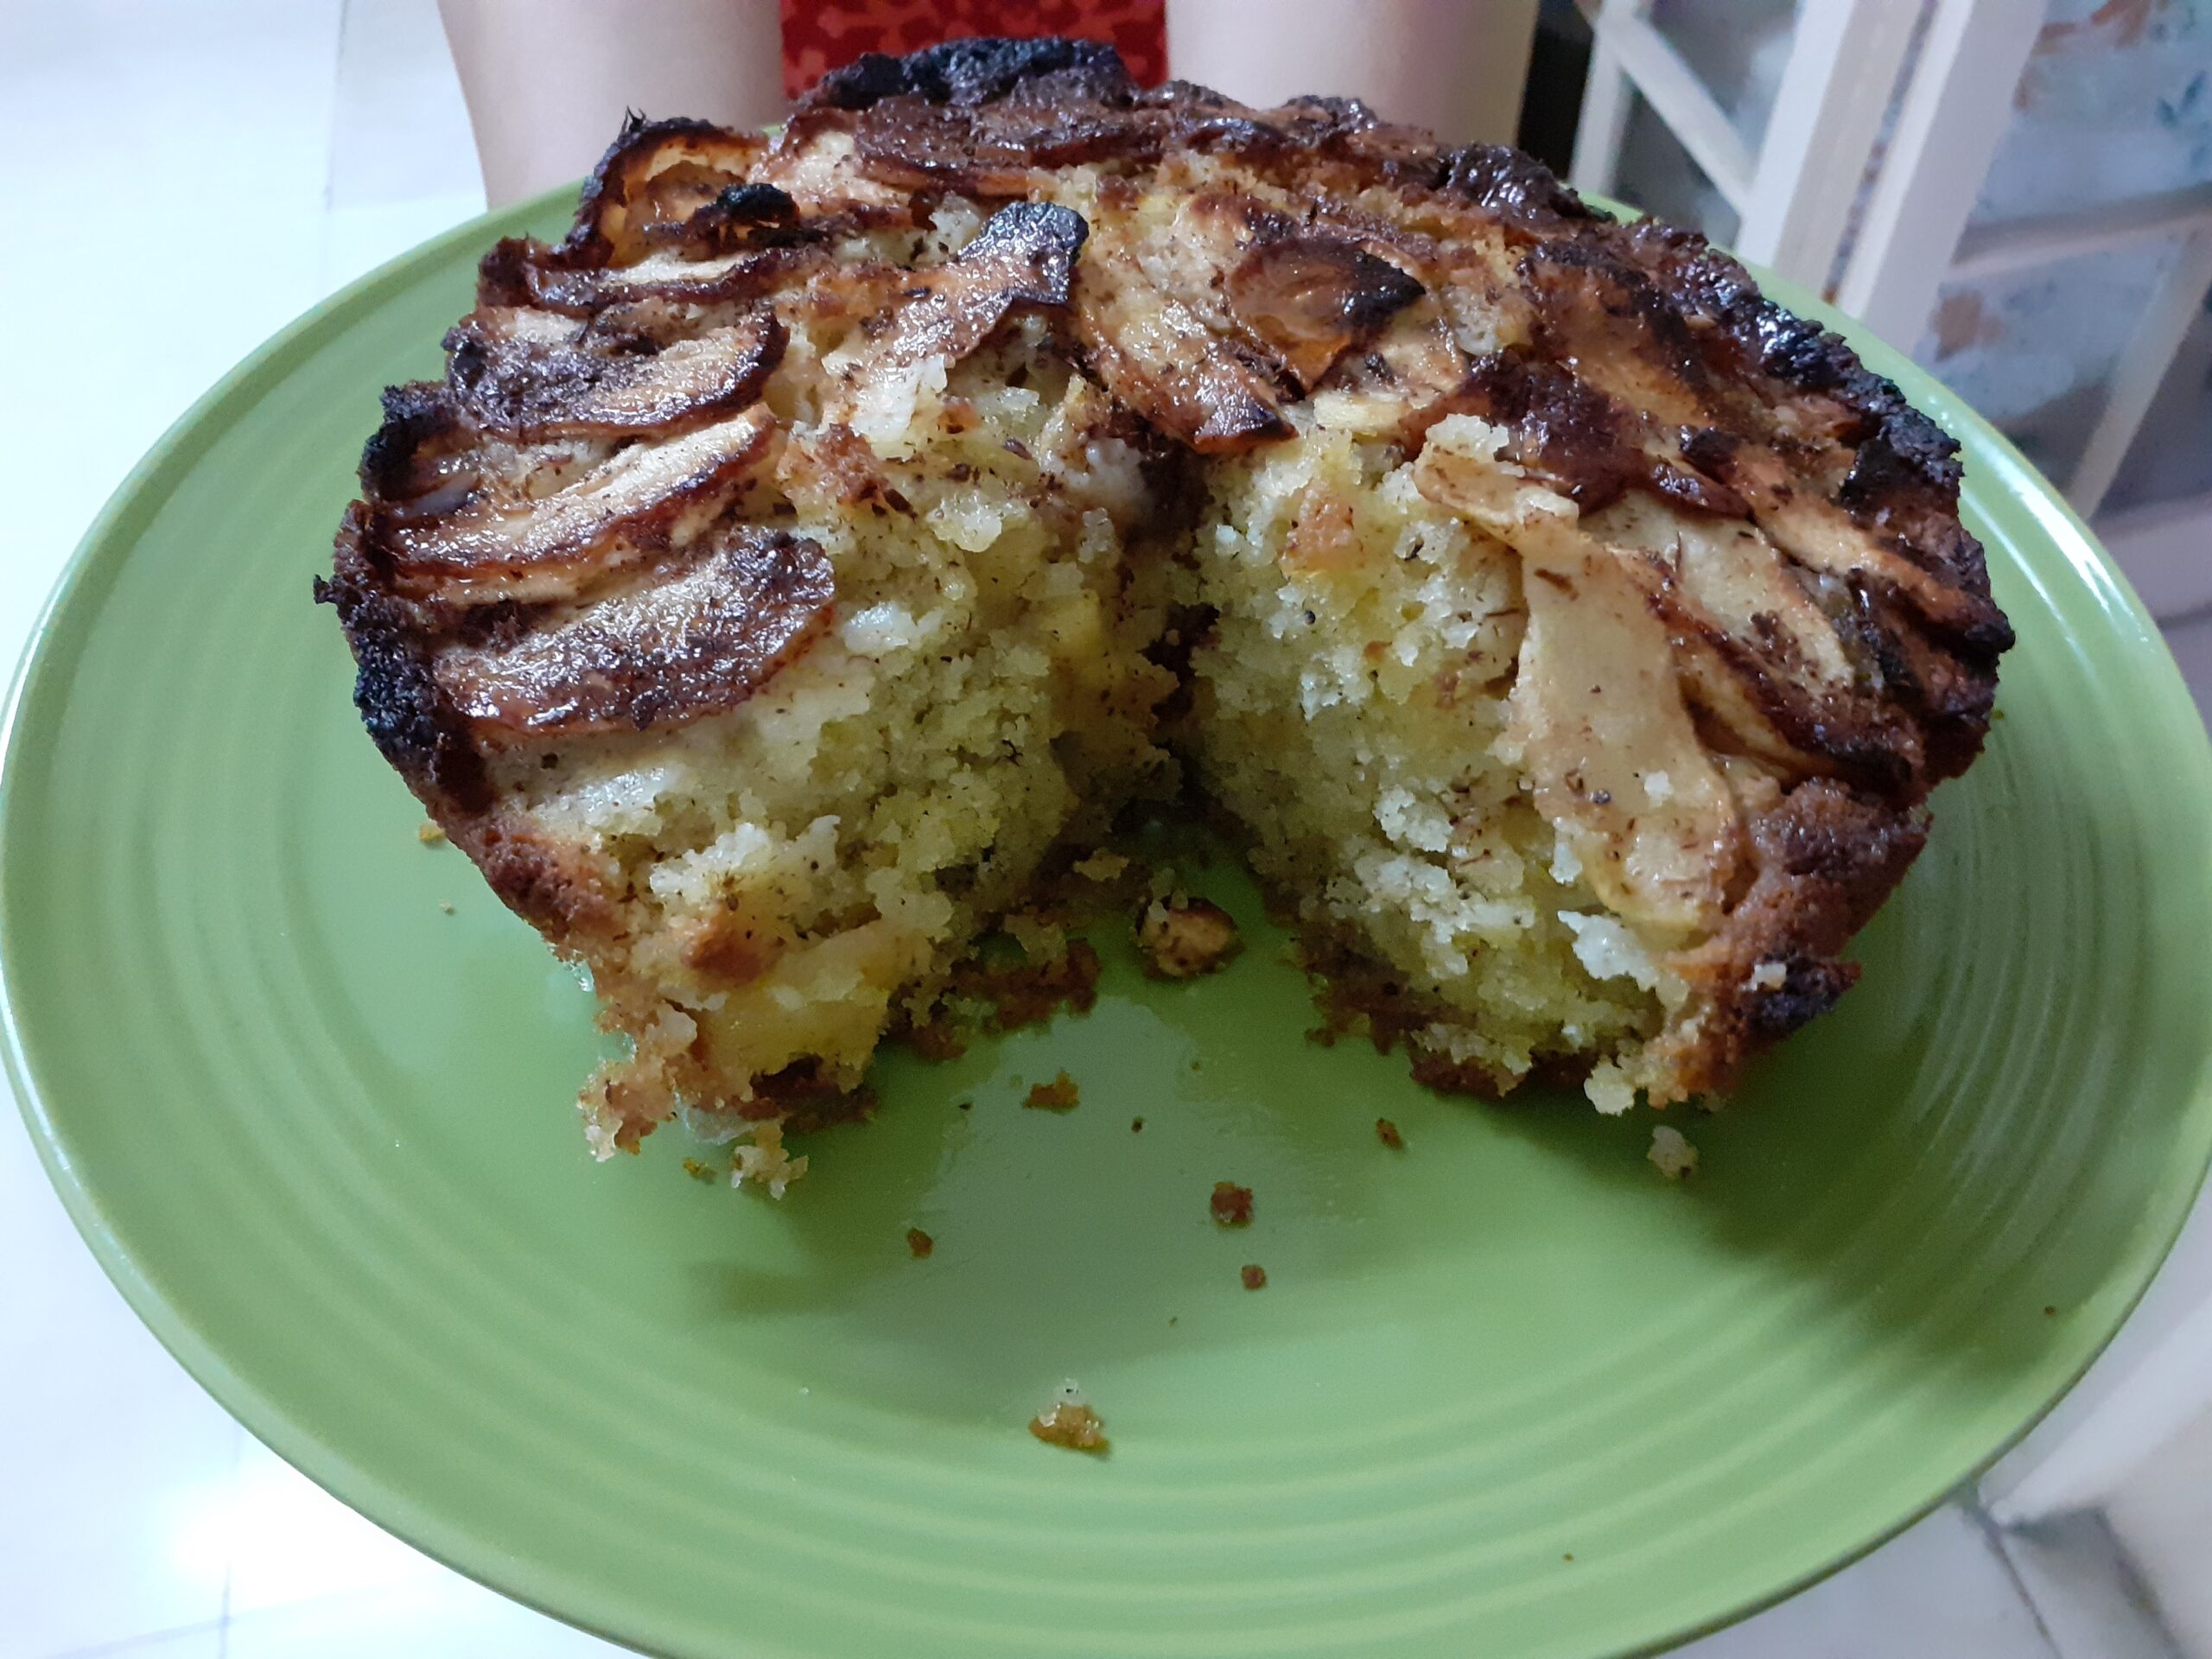
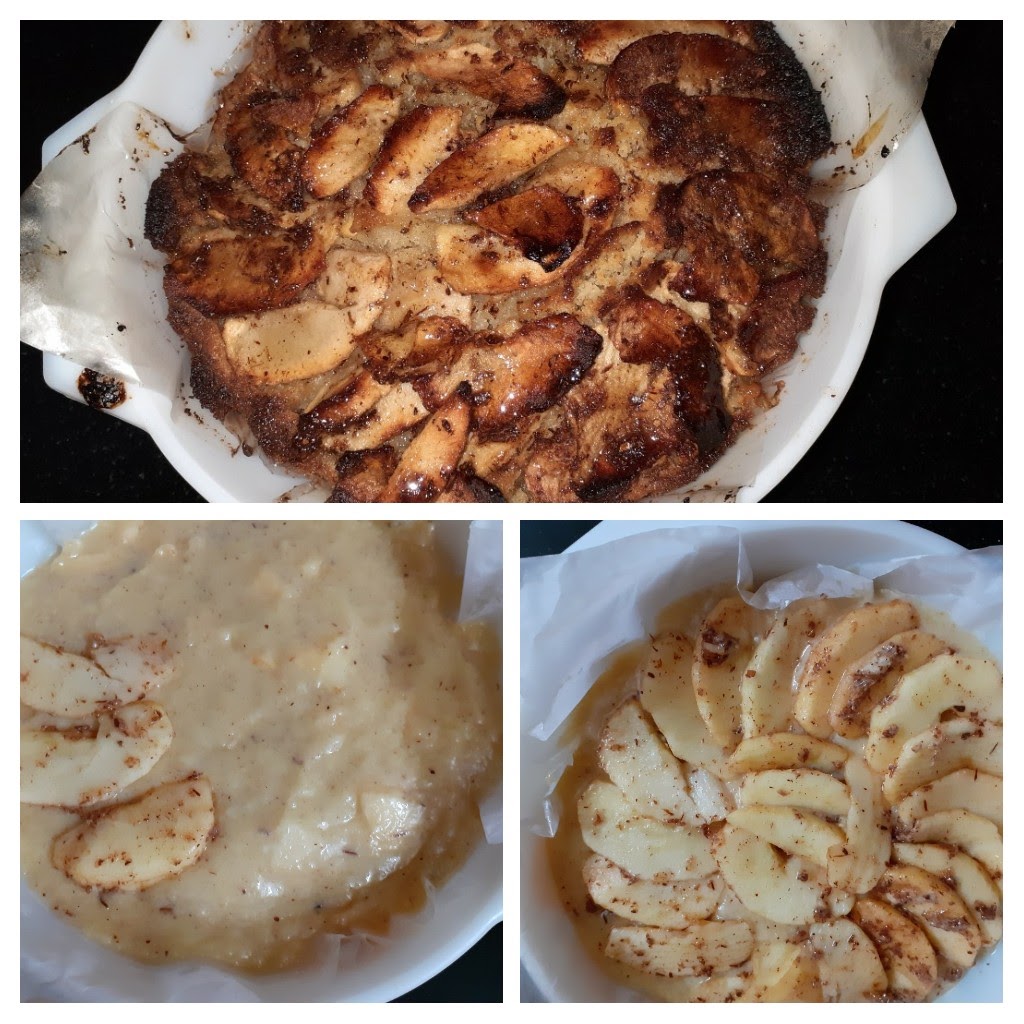
Apple Cake (Tea Cake)
Until recently I did not know that such delicious cakes could be made using Apples. I mostly stuck to making the Apple Crumble. I came across this recipe some time ago, and as you know I have to try it thrice without errors for it to feature on the blog. So here is the recipe that is foolproof, also no whisking, just mixing, so mess at all.
This cake has a very delicate flavour and is a crumbly cake, it is very light and a great tea time cake. What more, it is healthy and kids will love it( you could just drizzle chocolate sauce or Nutella over it for them). It tastes best when warm and keeps good for 2 days at room temperature. Just warm before you serve and it is fresh again.
The apple slices that you see in the picture make it look sophisticated, but it is not such a difficult cake to make. The apple slices on top can be excluded altogether, as the cake batter has them already, but I like them with a lot of apples and the glaze and hence I make it this way.
While you are here please check out my other cake recipes like Blueberry Cheesecake, Nutella Fudge brownies, Apple Crumble and Pineapple Jam Tart.
Here is the recipe of Apple Cake for you-
Ingredients for coating apples:
Apples 3 large( any variety) cut half to cubes and half of them in slices.
Cinnamon powder 3 tsp( divided)
Butter 3 tbsp ( divided)
Sugar 2 tbsp (divided)
Dry Ingredients:
Flour/ Maida 1.5 cups
Baking powder 2 tsp
Salt 1/2 tsp
Wet Ingredients:
Butter 60 gm melted
Oil ( refined) 1/2 cup
Eggs 2
Sugar ( white) 3/4 cup
Vanilla essence 1 tsp
Glaze:
Honey 2 tbsp.
Directions:
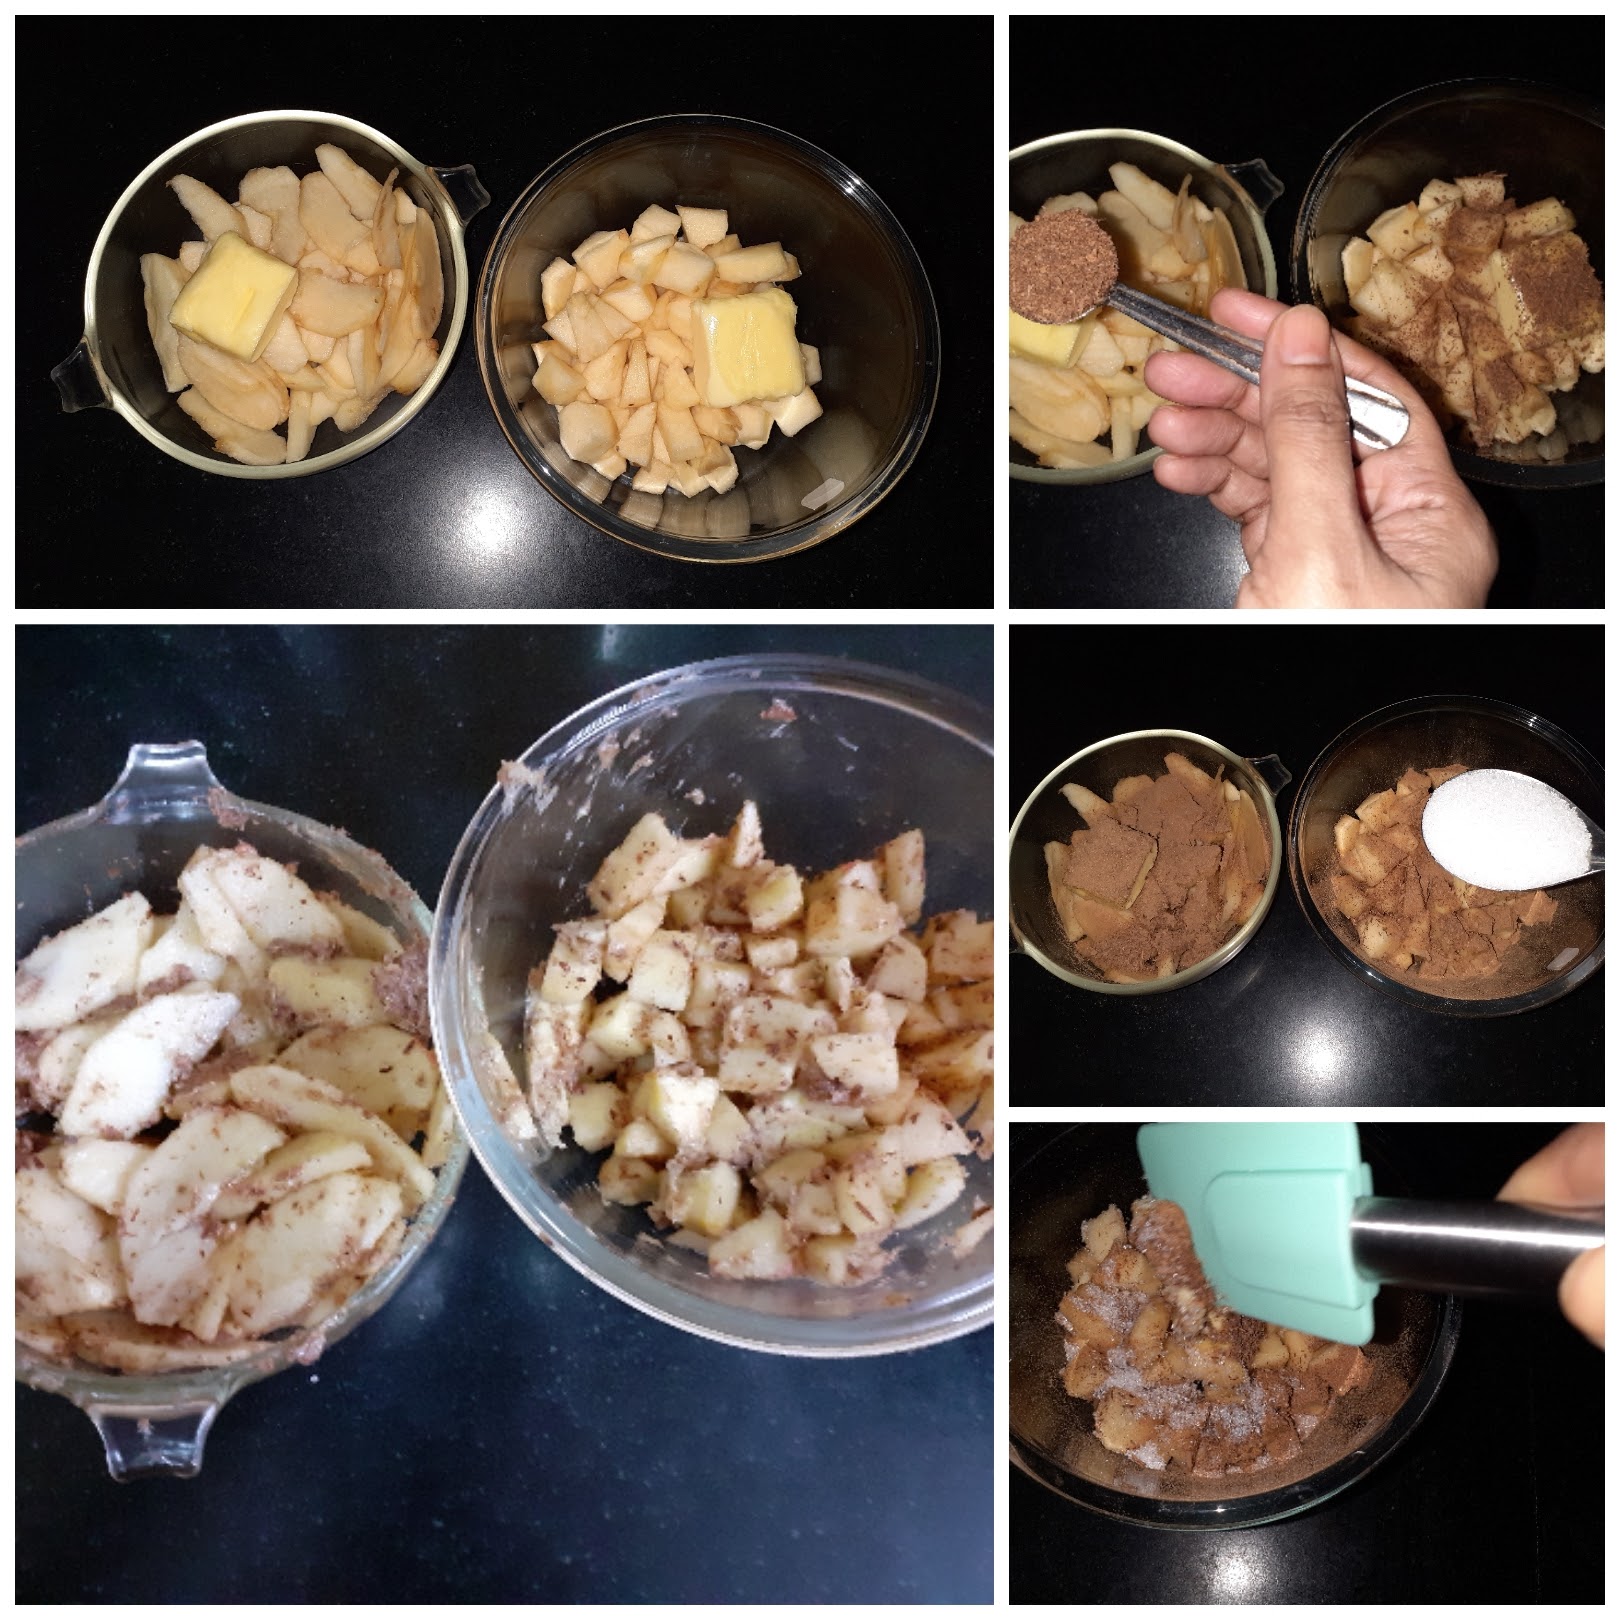
First, peel the apples and chop 1 1/2 apples to small cubes and another 1 1/2 to slices. Pug them in two separate bowls.
Divide and add the cinnamon powder, butter, and sugar between both the bowls equally and mix. Set aside.
Preheat the oven to 200 c and start preparing the cake batter.
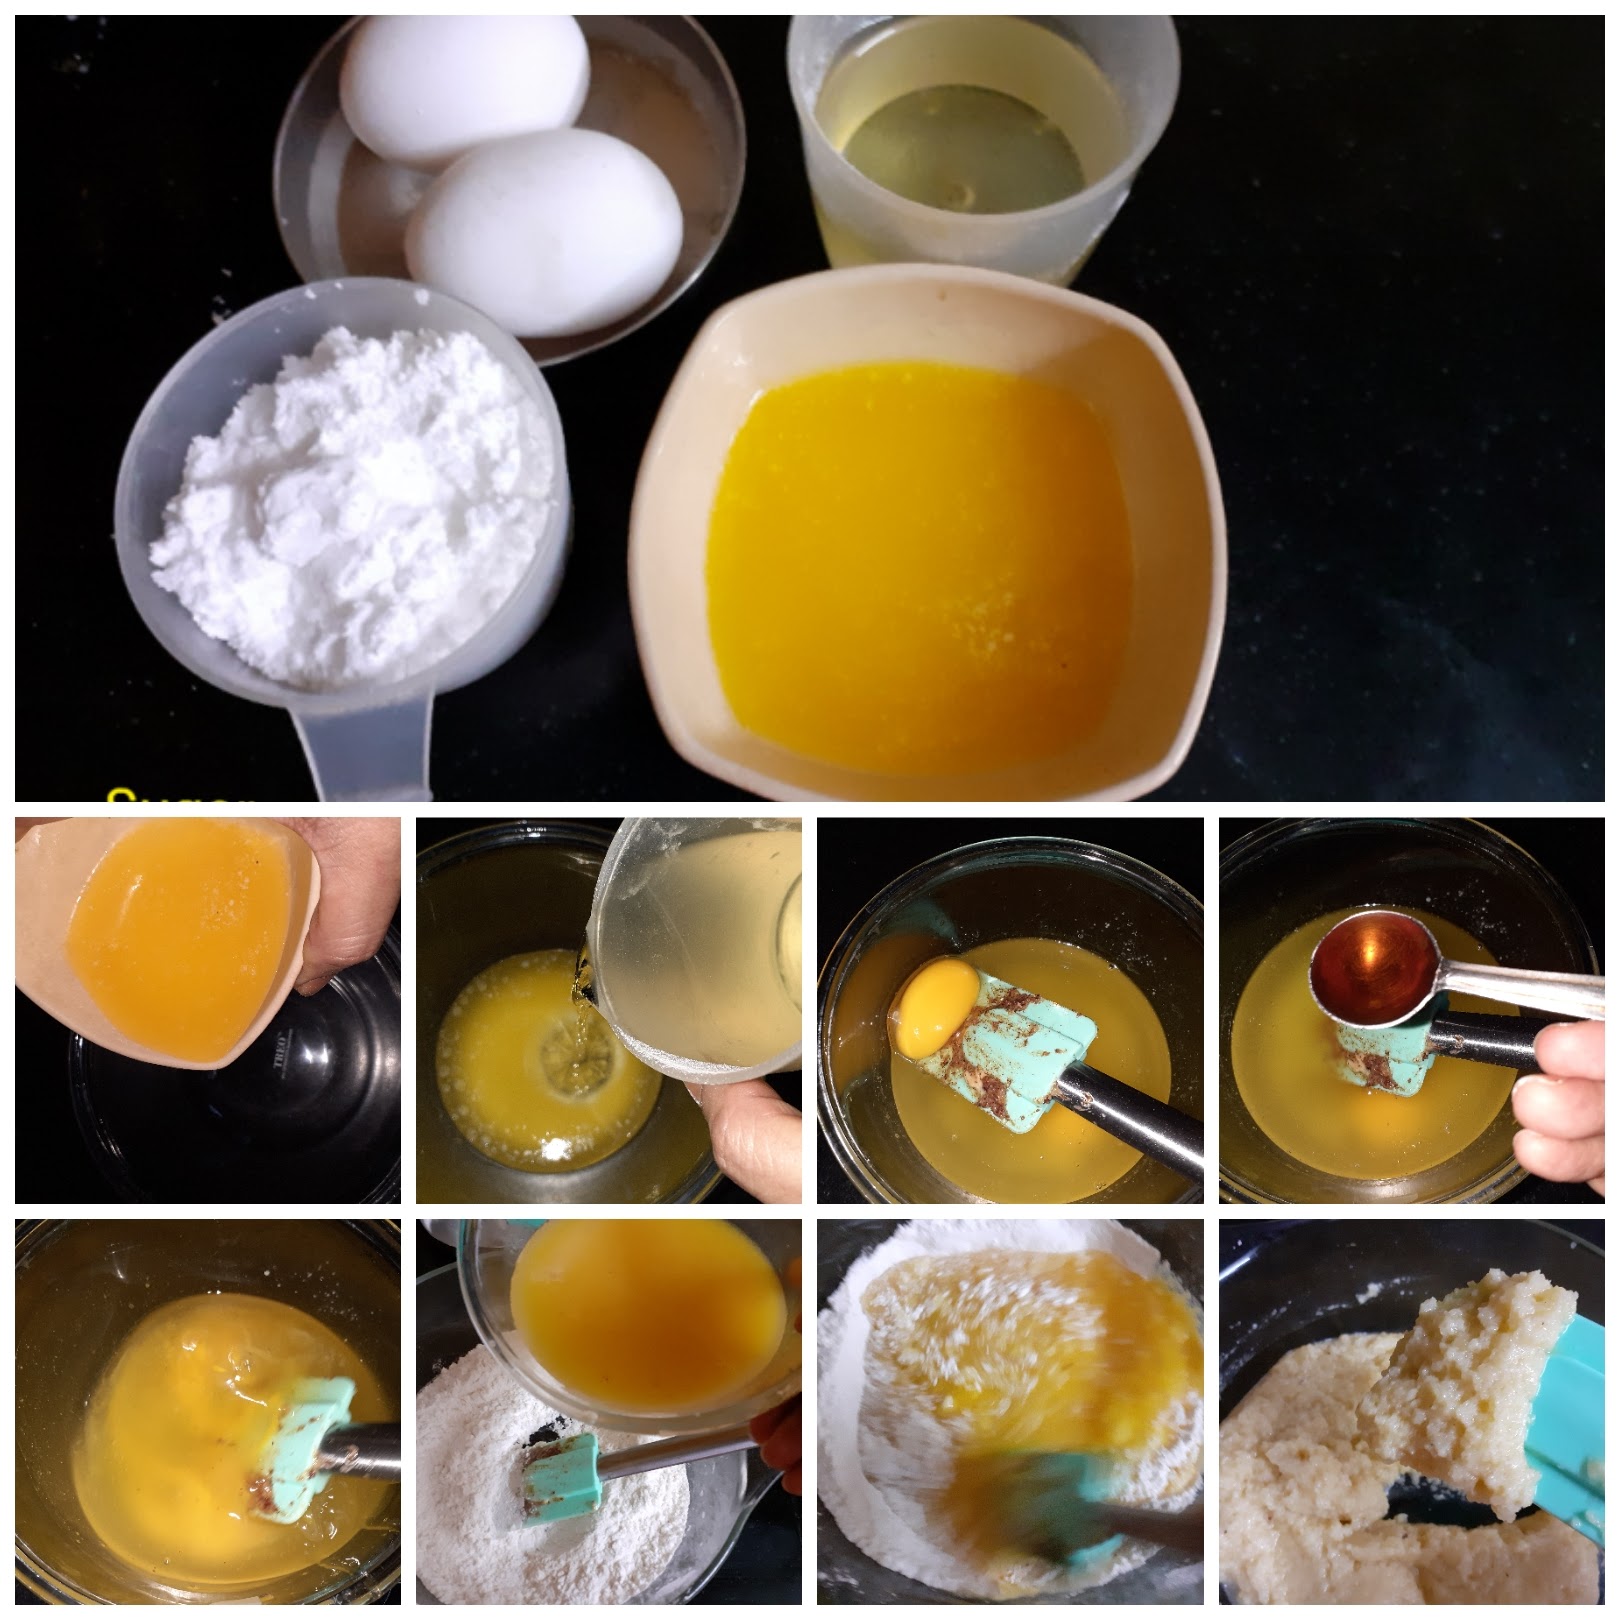
Put all the dry ingredients in one bowl and mix well.
In another bowl combine all wet ingredients( refer to ingredients above)Now add the wet ingredients to the dry ingredients and combine nicely using a spatula. No electric beater required. Once nicely combined, mix in the apples chopped to cubes to the batter and mix gently.
Grease a baking tray and line it with parchment paper/ baking paper. Pour the batter into the tray, tap it once gently and place it in the oven. Bake at 200 C for 50 minutes or until a toothpick comes out clean. Once done remove from oven and leave to cool down a bit. Cut when still warm and serve. The delicious Apple cake is ready to serve.
STEPWISE RECIPE FOLLOWS:
1. Assemble all ingredients. Chop 1 half of the Apples to cubes and the other half to slices. Put them in 2 separate bowls.
2. Divide and add the butter, cinnamon powder, and sugar in both bowls, mix nicely and set aside.
3. Preheat oven to 200 C. Now put all dry ingredients in a separate bowl and mix.

4. Take all wet ingredients in another bowl and combine well. Now mix the wet ingredients to the dry ingredients and combine well.
5. Now add the cubed apples to the batter and fold gently. Grease a circular cake mould and line with parchment/baking paper. Now scoop in the batter into the mould.
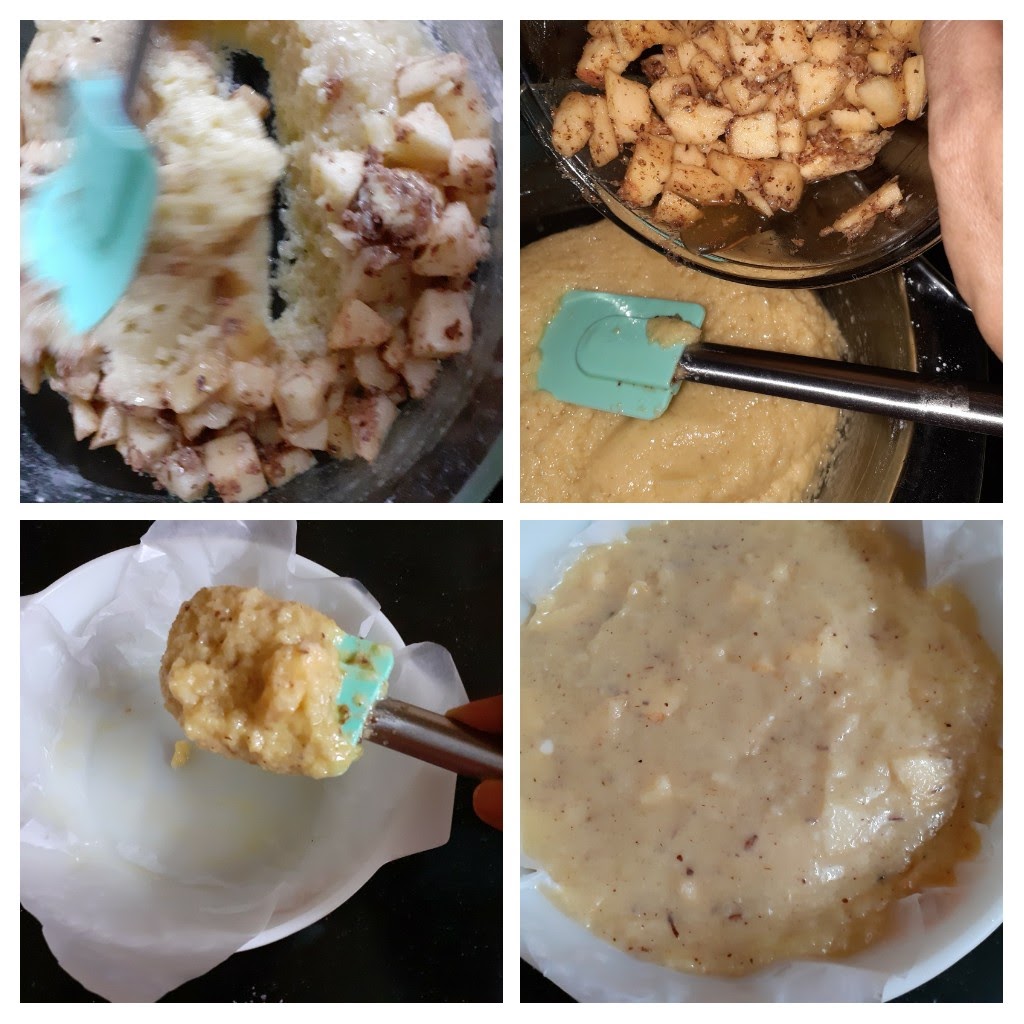
6. Take the sliced apples and arrange them like a fan on the batter. Now it is ready to be popped into the oven. Bake at 200C for 50 minutes or until a skewer comes out clean.

Allow it to cool for 5 minutes and apply the honey over it with a brush and cool it. The honey gives the apples a beautiful glaze. Serve them a little warm.
NOTES:
1. Any variety of apples can be used for this recipe.
2. This cake has a crumbly texture, you will know if you look at the picture. It is super moist.
3. It holds good for 3 days at room temperature, for long storage put it in the fridge and warm just before serving.
4. It is also a good snack box idea for kids as it can be made ahead, just remove from the refrigerator, warm it and allow it to sweat, then pack.
5. This cake can be made without the sliced apples on top too. Just mix the chopped apple and scoop mixture into the baking tin/ tray and bake.
If you tried this recipe and liked it please comment below. I would love to hear from you. If you have a query about the recipe email us and ill respond as soon as I can.
Gobi/Cauliflower Fried Rice
This is a fusion recipe and I usually make it by stir-frying the Cauliflower, but this time I tweaked my own version of the recipe a little and first made a dry Manchurian of the cauliflower and then incorporated it into the fried rice. This is a complete meal and you won’t have to make any accompaniments to go with, as the cauliflower is curried. Usually, a wet Manchurian is served with Fried rice, but here the Manchurian is incorporated into the rice, so just by itself it is a meal.
Apart from the cauliflower Manchurian, I have added the usual Fried rice vegetables as well like Carrots, French Beans, Capsicum etc, had to skip the Spring onions as I couldn’t get hold of it when I planned to make this dish. Never the less, the rice tastes just as good.
I have used regular rice and not Basmathi as I find that Basmathi and Chinese flavours do not go very well. Jasmine rice can be used in place of regular rice if you prefer. Fried rice varieties like this one and Schezwan Fried rice with Soya chunks are my go-to food during weekends as just one dish makes everyone happy, and I get time to do some baking.
While you are here I request you to check out my other recipes such as Schezwan Fried Rice, Schezwan Sauce, Creamy Tomato Pasta, Nutella fudge Brownies, Apple Crumble and more…
Here is the recipe of Gobi Fried Rice for you—

Ingredients for Manchurian:
Cauliflower 1 medium-sized, cut into florets
Rice flour ½ cup
Corn flour ¼ cup
Salt as required
Red chilli powder 1 tap
Pepper powder 1 tsp
Water 1 tbsp approx.
Onion 1 large
Tomato 1 medium
Tomato sauce 1 tbsp
Red chilli sauce ½ Tbsp
Garlic 5 cloves finely chopped
Green chillies 3 finely chopped(divided)
Oil for frying
Ingredients for Fried Rice:
Rice precooked and cooled (spread and cool on a plate, drizzle little oil)
Carrot 1 chopped finely
French Beans a few chopped finely
Capsicum 1 small chopped finely
Salt as required
Sugar 1 tsp
Soya sauce 1 tbsp
Pepper powder ½ tsp
Directions for Manchurian:
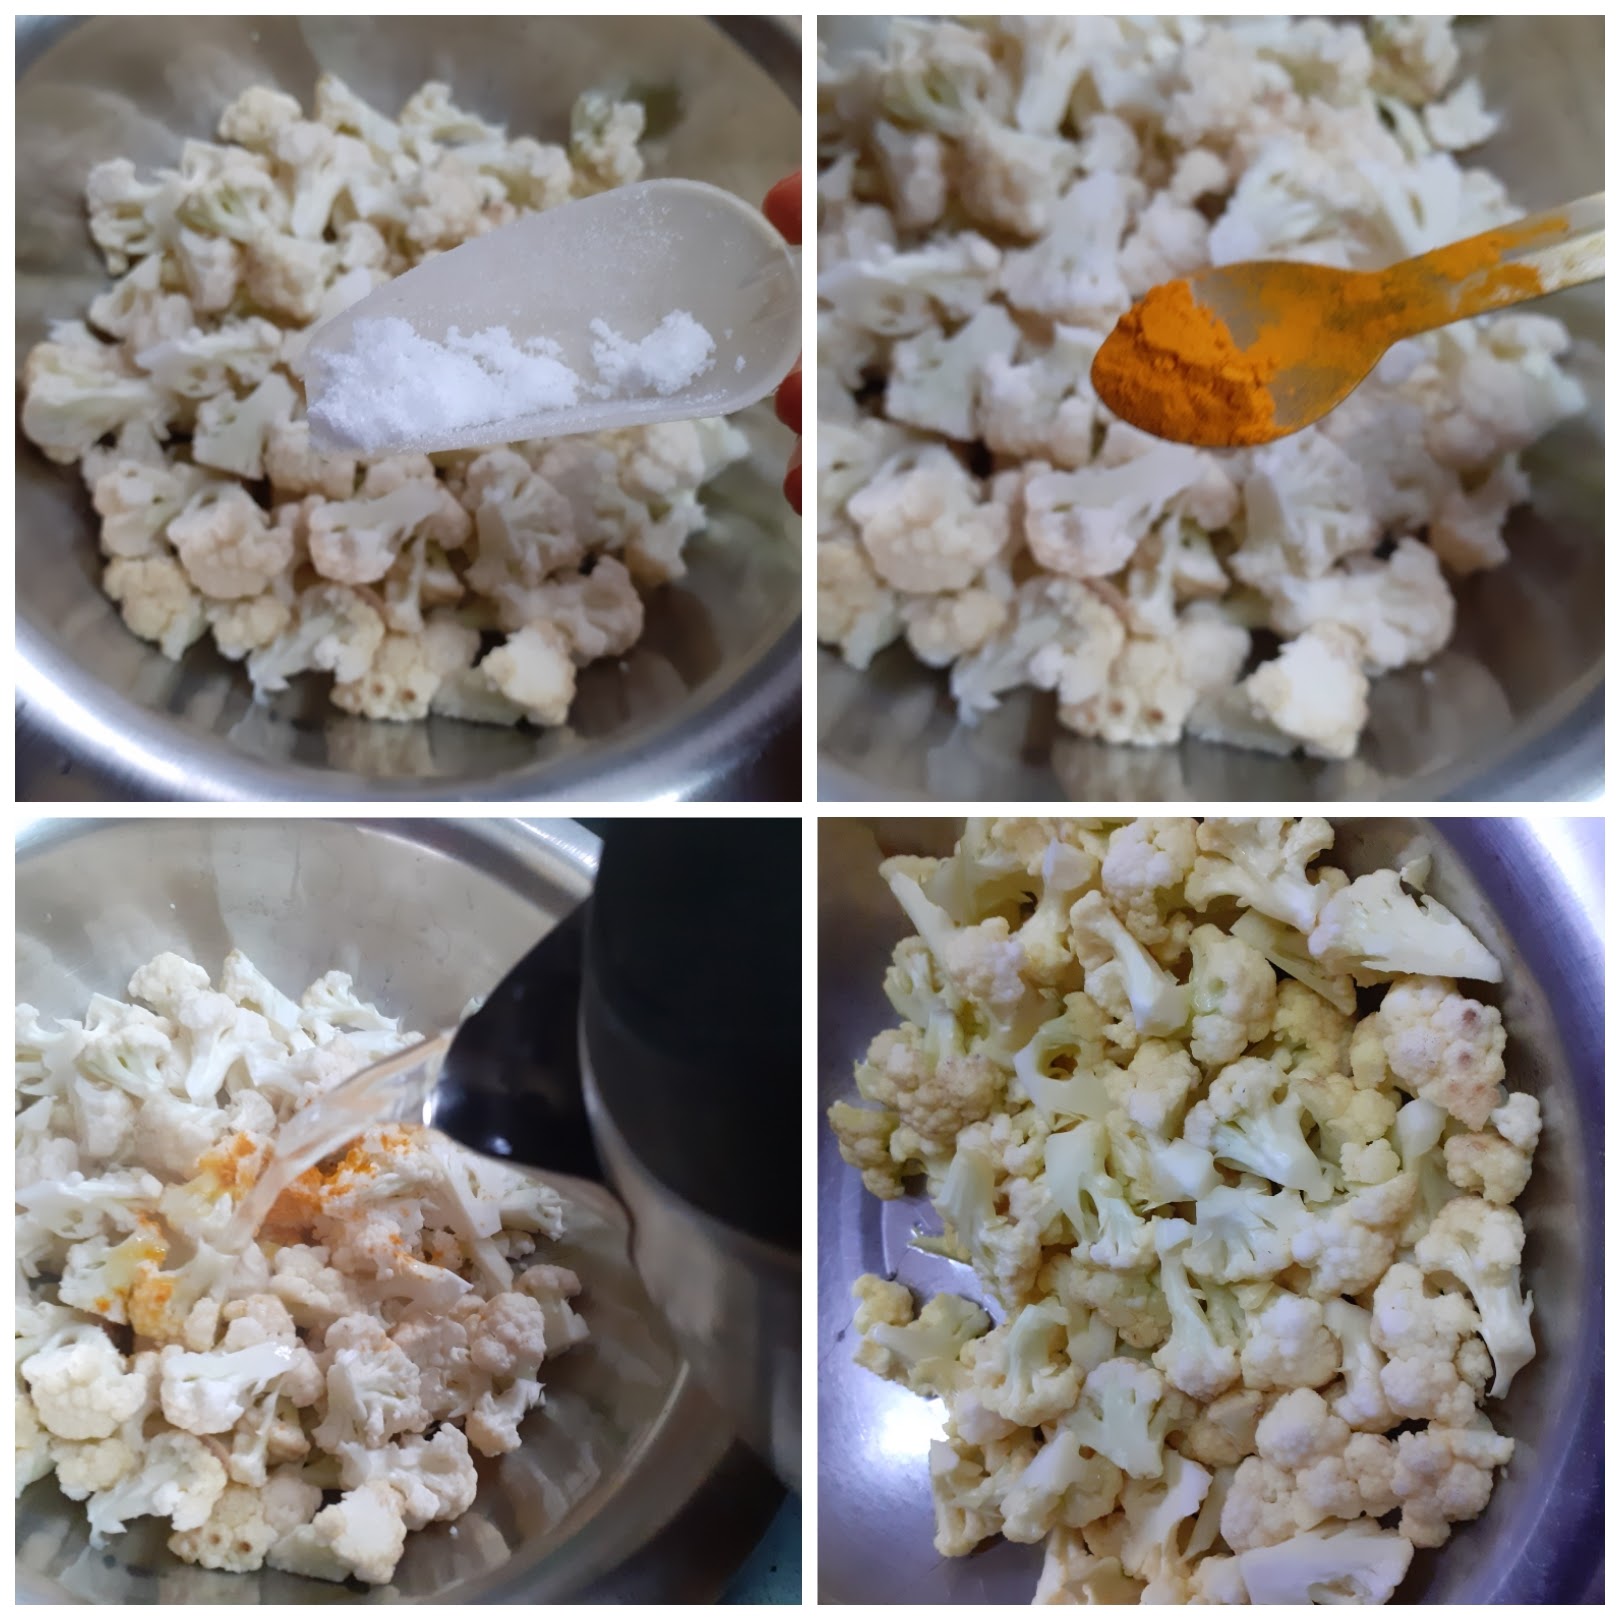
Boil 1litre water. Take the cauliflower florets in a large vessel, add 1 tsp st and ½ tsp turmeric powder and pour the boiling water over it. Cover the vessel and let it stand for 10minutes. Now drain all water and cool the florets. On cooling add the Rice flour, followed by Corn flour, add salt, red chilli powder, pepper powder and toss nicely with a spatula or using your fingers. Take approximately 1 tablespoon water and sprinkle it over the flour and cauliflower mixture. Now nicely mix them all together. Adding 1 tbsp water helps the flours to stick to the Cauliflower. Heat oil for frying in a Karahi and fry the Cauliflowers nice and crisp. Drain in absorbent paper and keep aside.
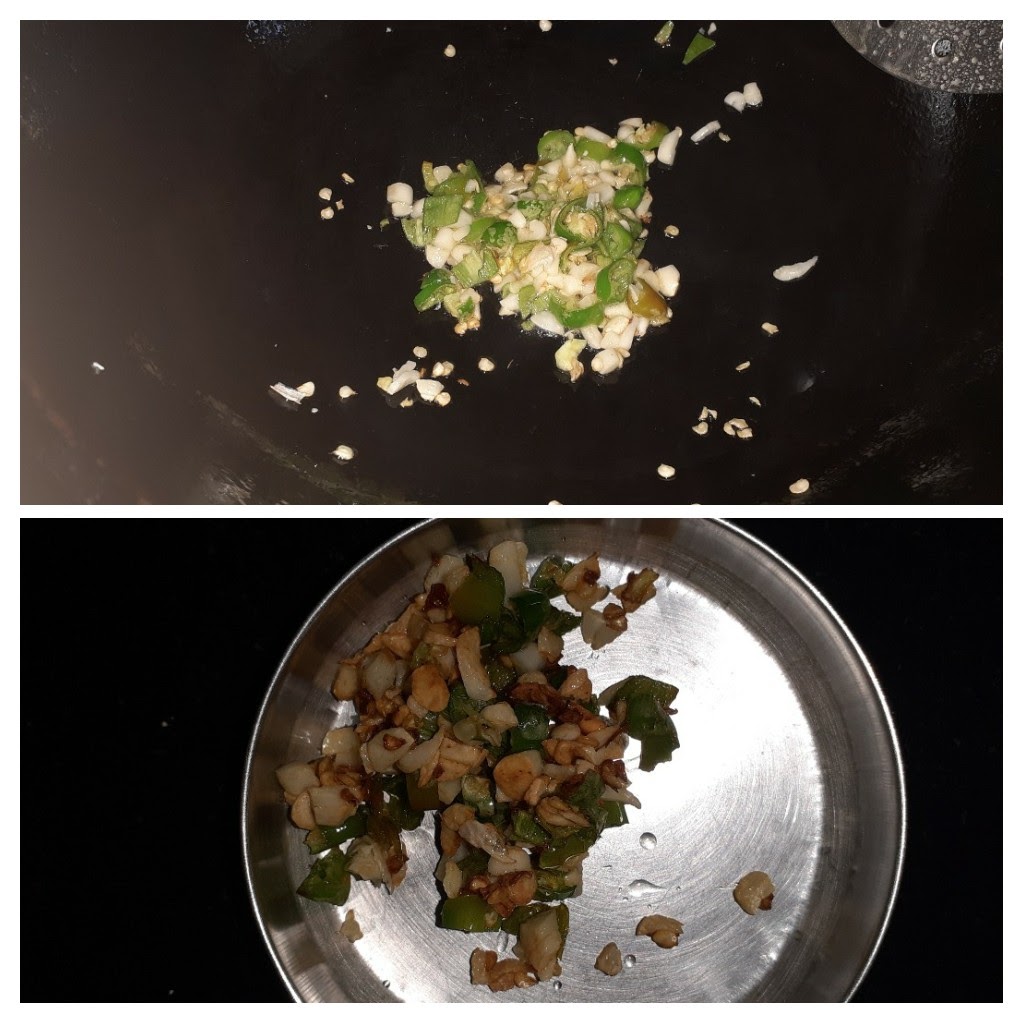
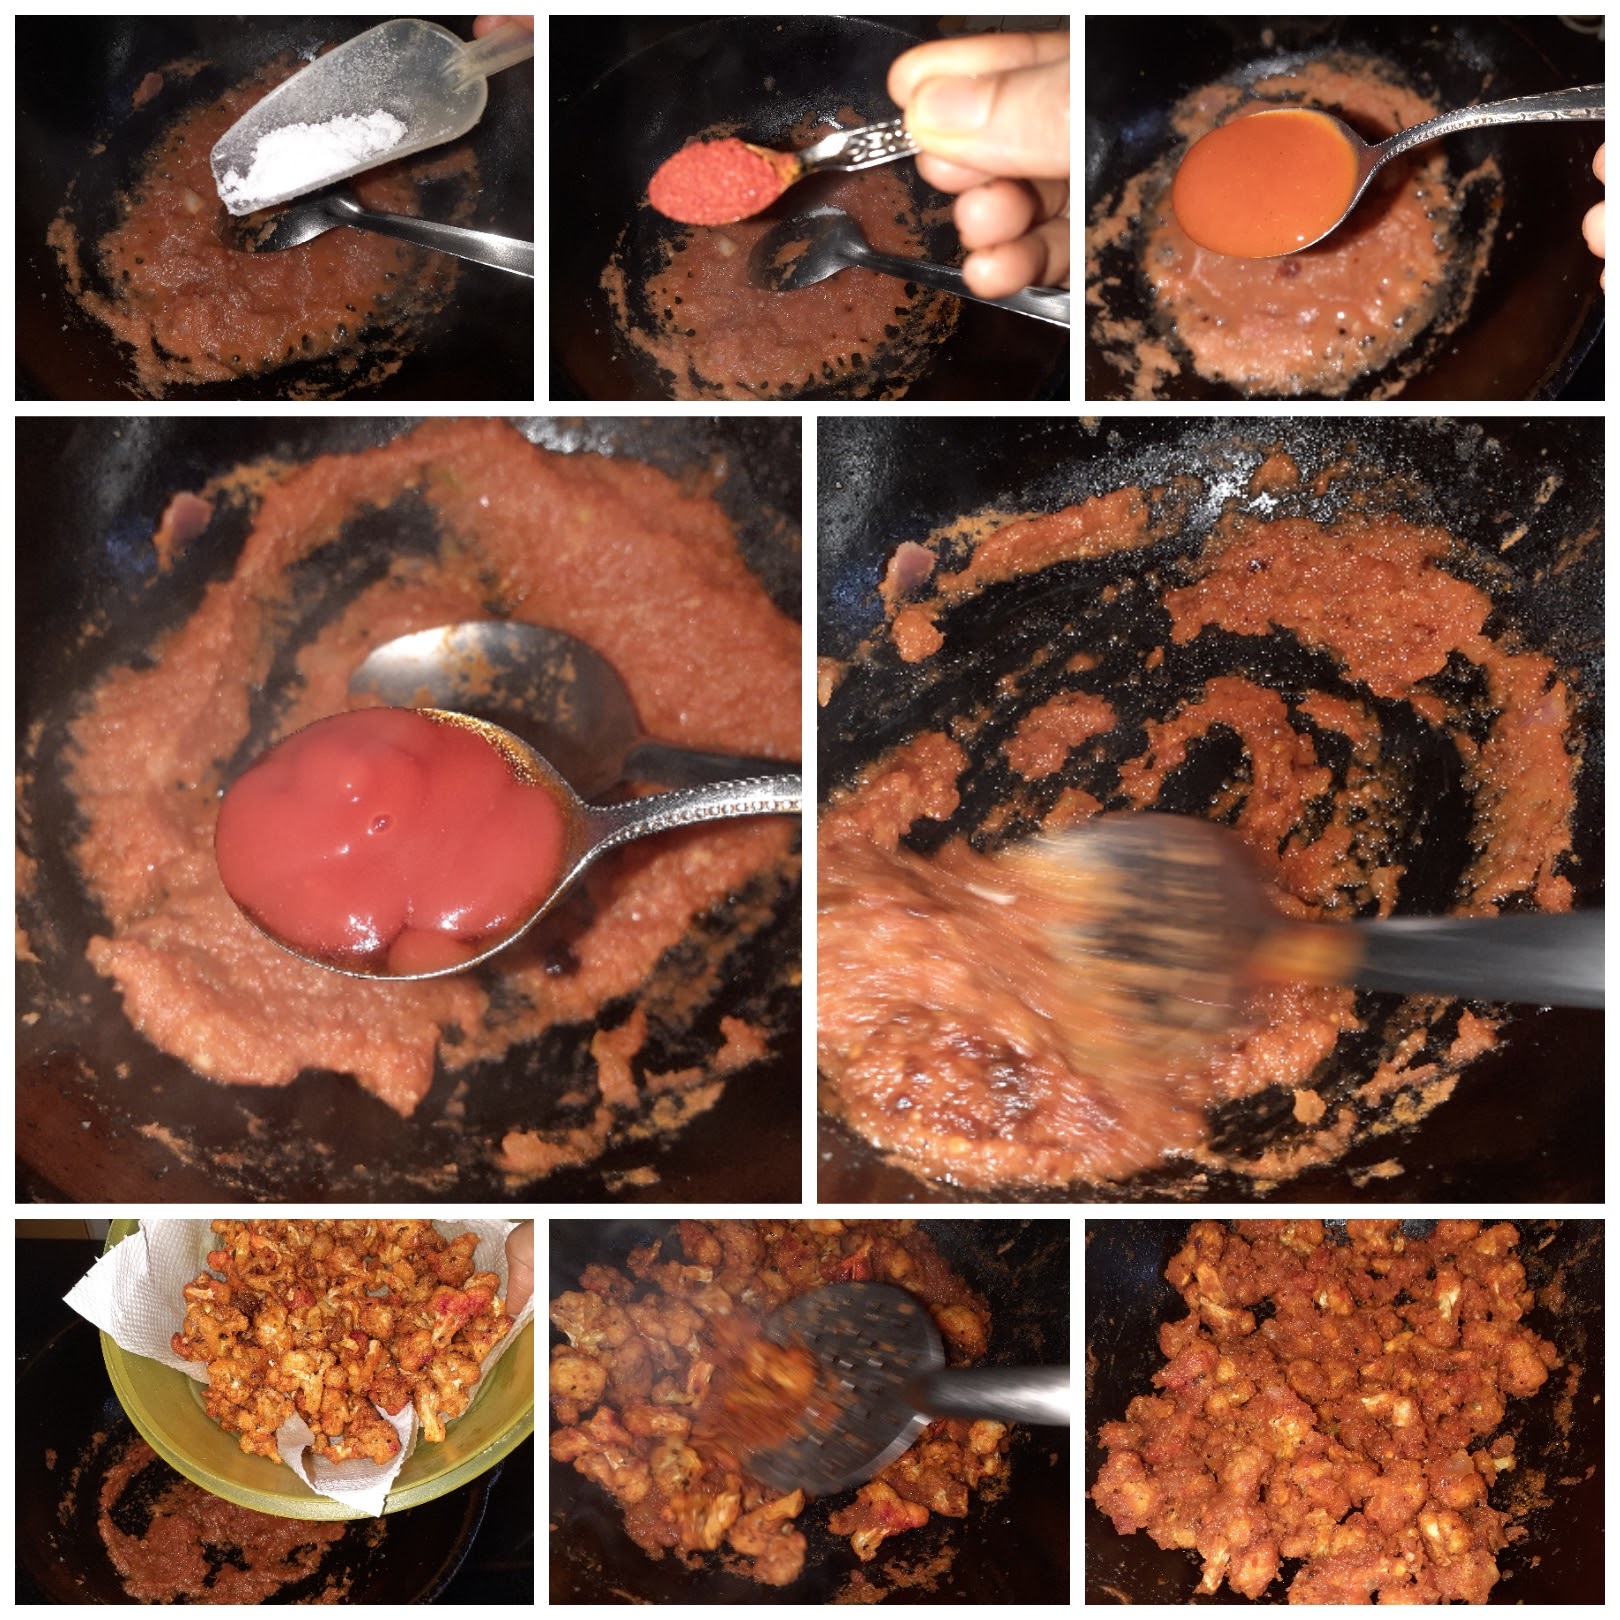
In a wok/karahi take some oil and heat. Put in the finely chopped garlic and saute for 30 seconds. Add the green chillies and saute for another 30 seconds. Transfer the sauteed garlic and chilli to a plate. Now put the onion and 1 green chilli into a blender and grind to a smooth paste. Remove and blend the tomato into a smooth puree. Now in the same wok heat the oil and drop in the onion paste. Fry nicely until light brown. Now add the tomato puree and mix well. Cook the onion tomato paste on high flame and start drying out the moisture. When most of the moisture has evaporated add the Tomato sauce, Red chilli sauce, salt and red chilli powder and stir nicely. The sauce should be semi-dry. Now add the fried cauliflower florets to this sauce and toss nicely, such that the sauce coats the cauliflower well. The Manchurian is ready. Set it aside.
Directions for Fried Rice:
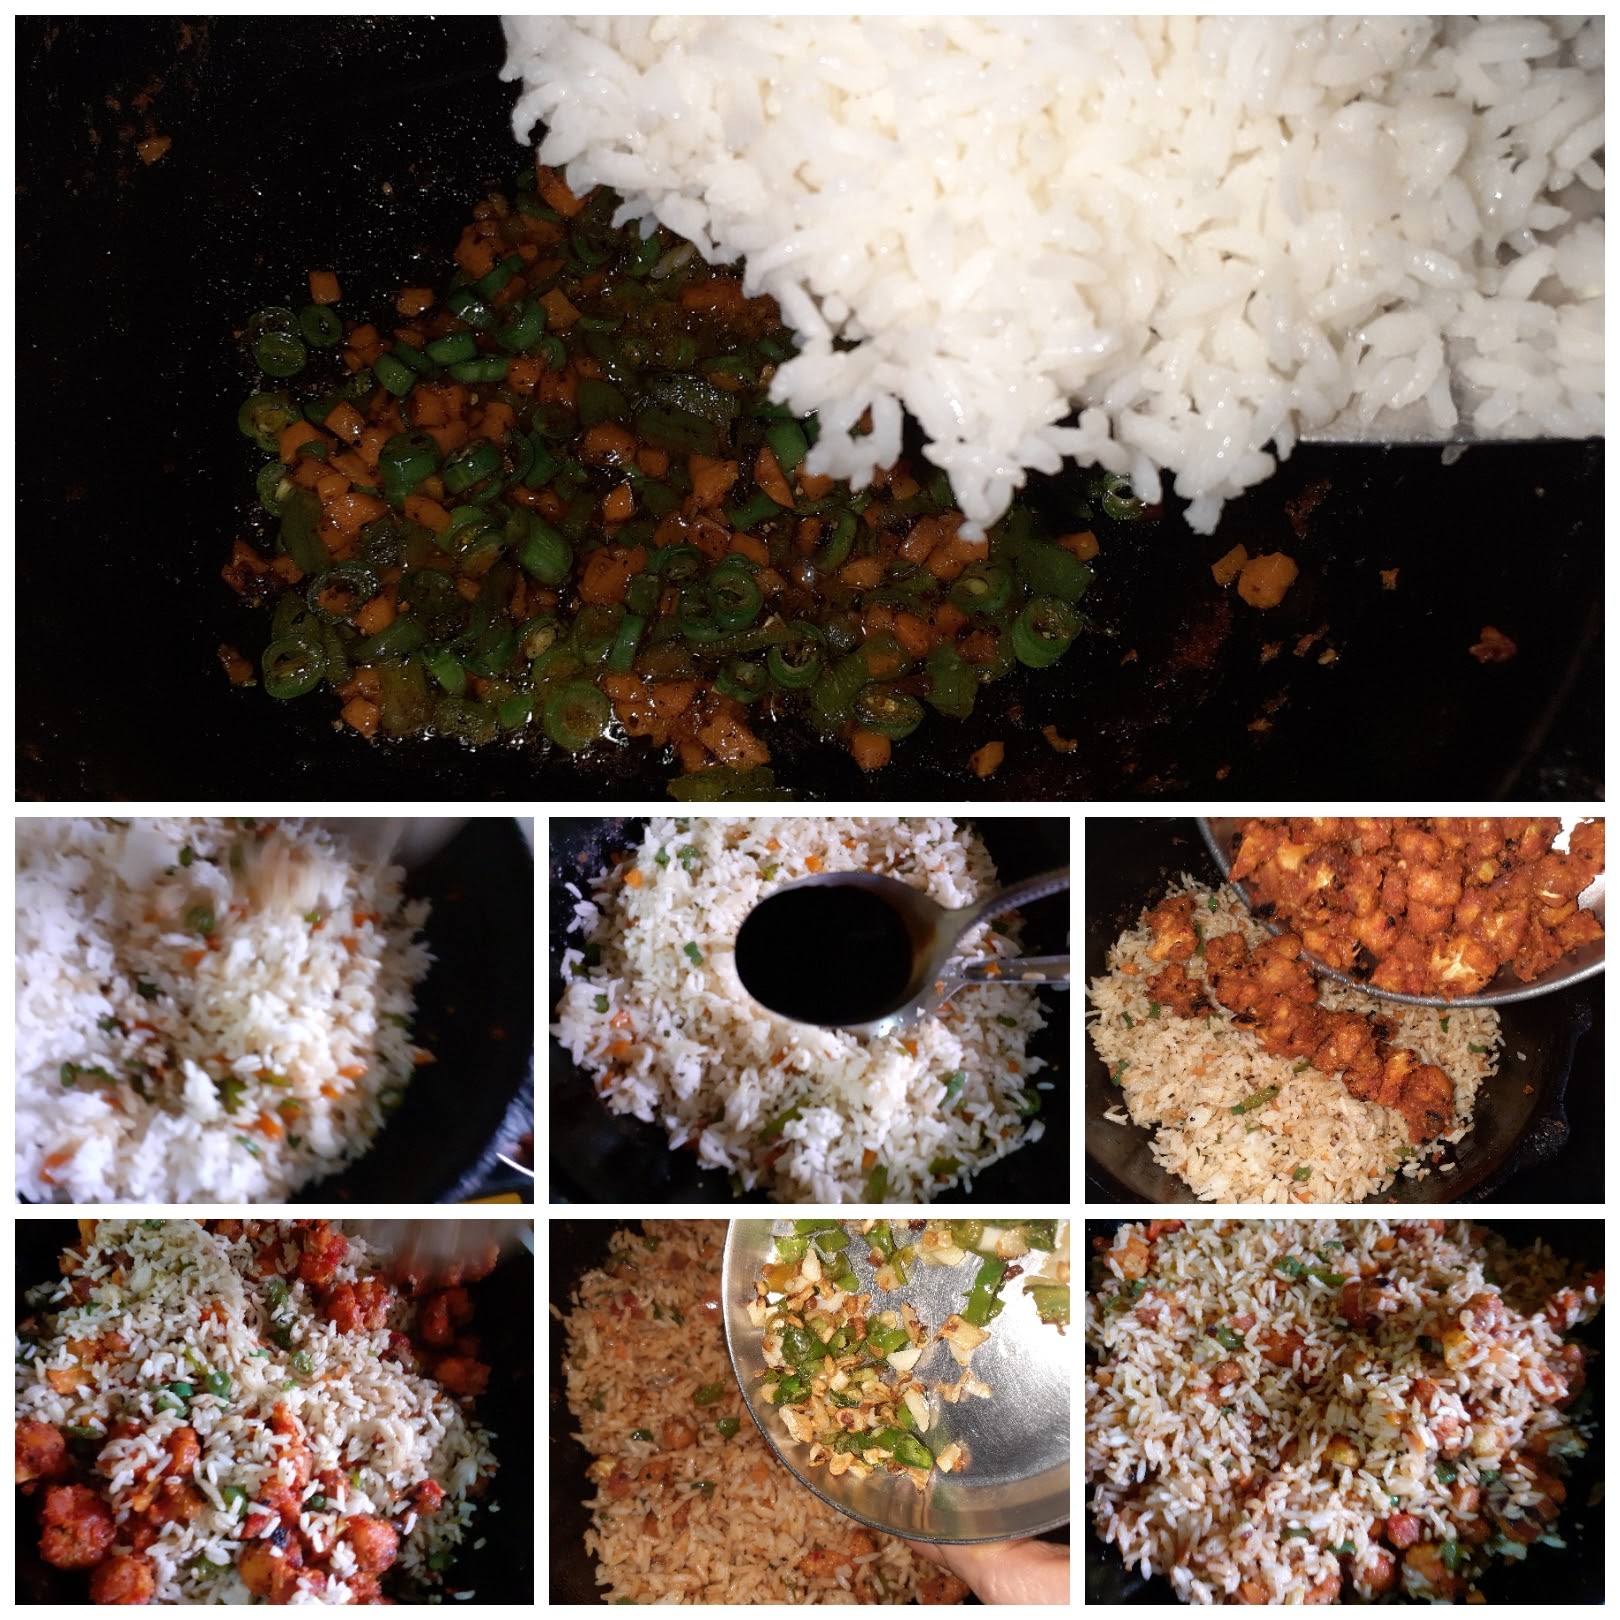
Pre-cook rice. Spread it on a plate, drizzle some oil and cool. Now in a wok heat some oil. Over a high flame saute the capsicums first for 1 minute. Now add the chopped beans and carrot and stir fry for a minute. Add a teaspoon of sugar while stir-frying. Now add the salt, pepper powder and saute for another minute. Now its time to add the cooked and cooled rice. Add it little by little and mix nicely. Add a tablespoon of Soya sauce and give everything a nice stir, so that the Soya sauce mixes in. Now add the Manchurian to rice and toss well. Finally, mix in the sauteed chillies and garlic to the Fried rice. The Gobi fried rice is ready to serve.
STEPWISE RECIPE FOLLOWS:
1. Assemble all ingredients. Chop cauliflower to florets, cook rice and cool as directed. Take the cauliflower florets in a large vessel, add 1 tsp st and ½ tsp turmeric powder and pour the boiling water over it. Cover the vessel and let it stand for 10minutes. Drain the water and cool the florets.
2. Add the rice flour and cornflour along with salt, red chilli powder, pepper powder and toss well. Add a tablespoon of water and mix nicely. It should be a dry mixture, the flours must stick to the florets.
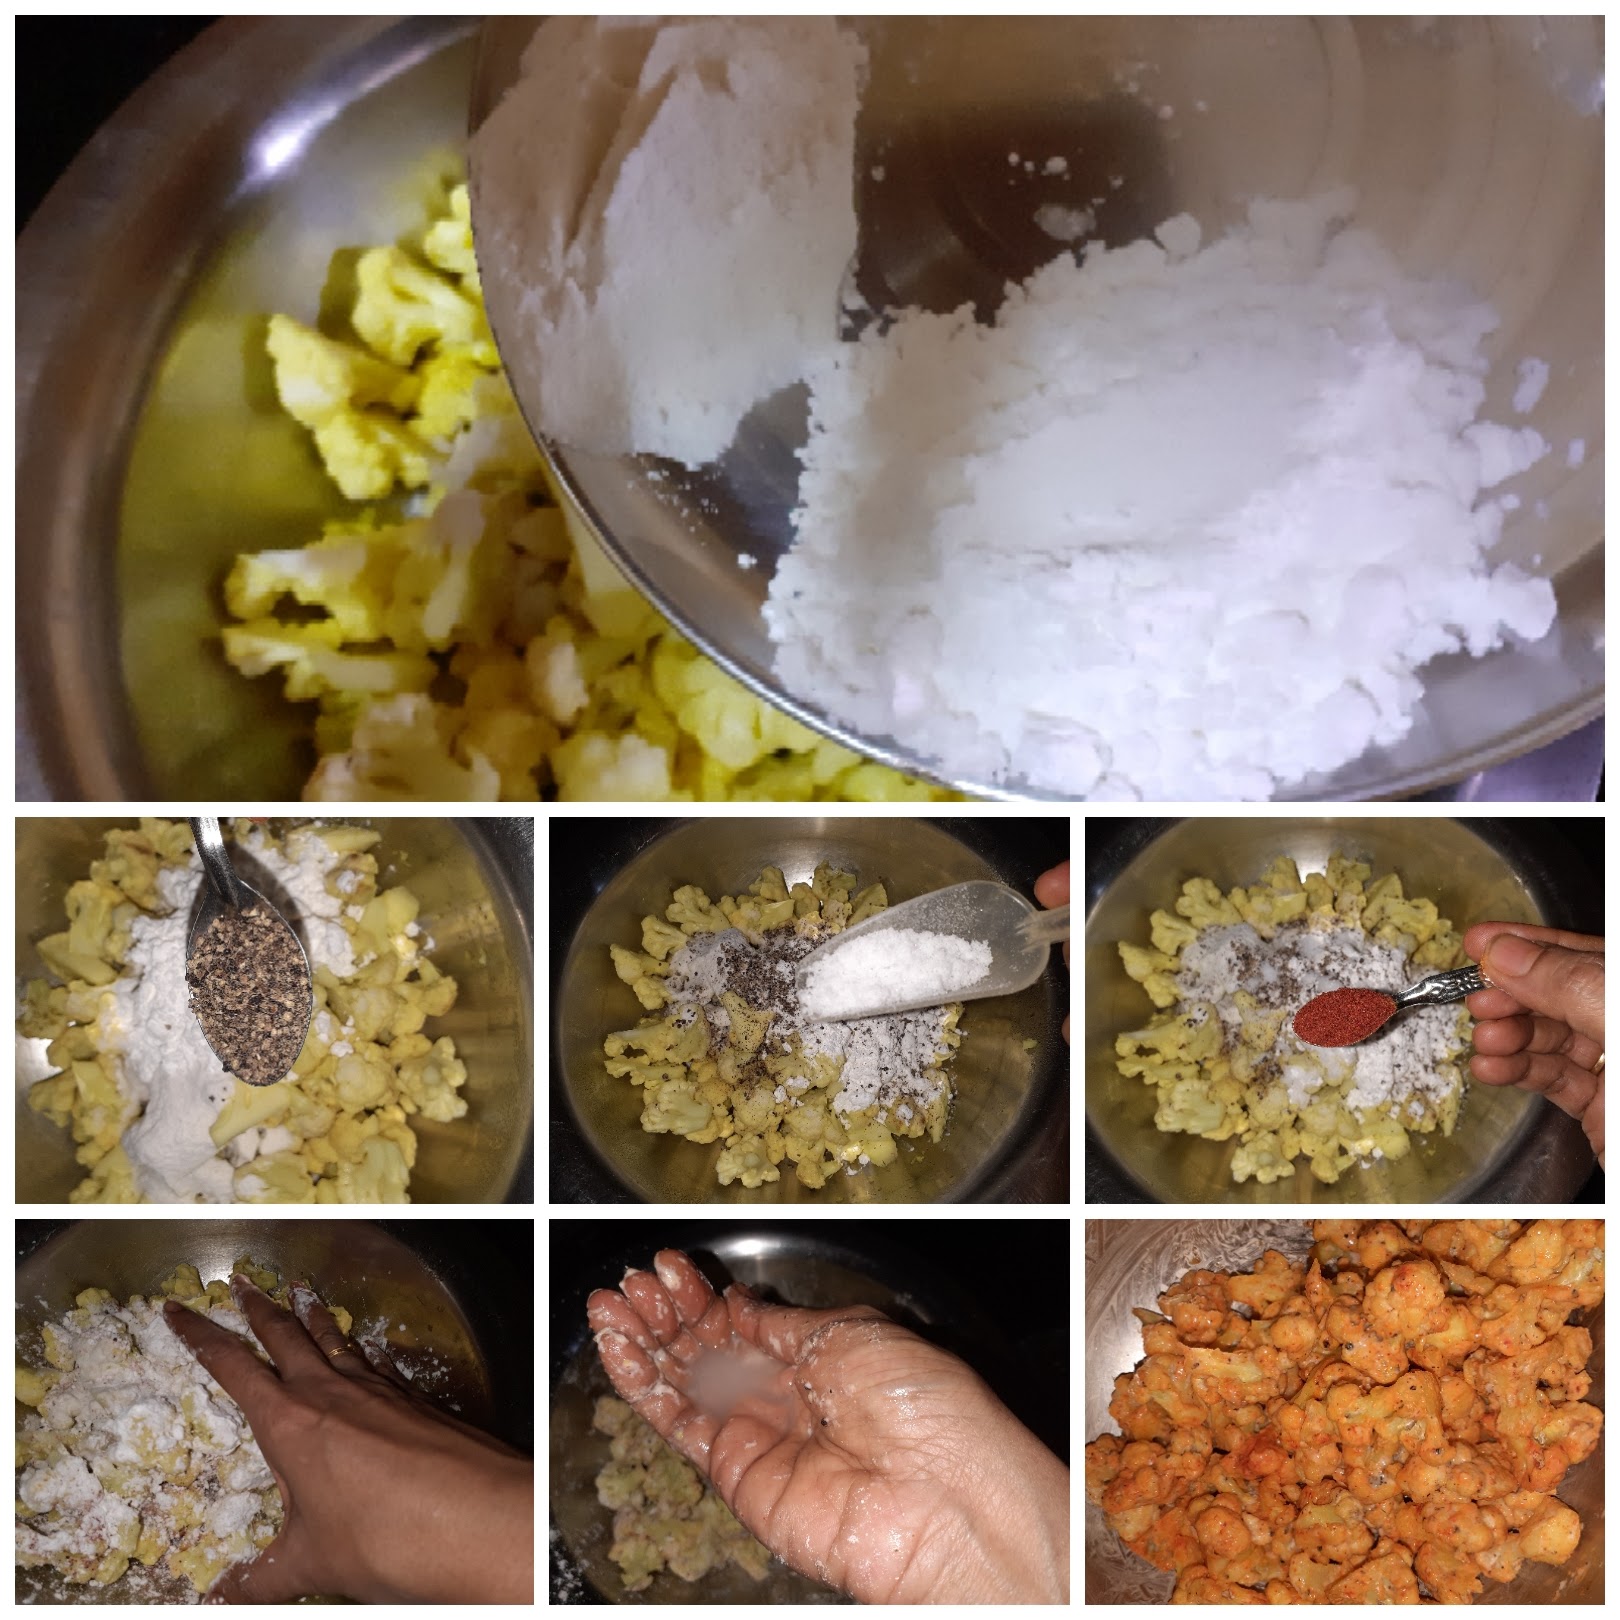
3. Heat oil in a wok/karahi for deep frying and fry the cauliflower florets until crisp. Drain excess oil on an absorbent paper and set aside.

4. In a wok/karahi take some oil and heat. Put in the finely chopped garlic and saute for 30 seconds. Add the green chillies and saute for another 30 seconds. Transfer the sauteed garlic and chilli to a plate.
5. Put the onion and 1 green chilli into a blender and grind to a smooth paste. Remove the paste, and blend the tomato into a smooth puree. Now in the same wok heat the oil and drop in the onion paste. Fry nicely until light brown. Now add the tomato puree and mix well. Cook the onion tomato paste on high flame and start drying out the moisture.
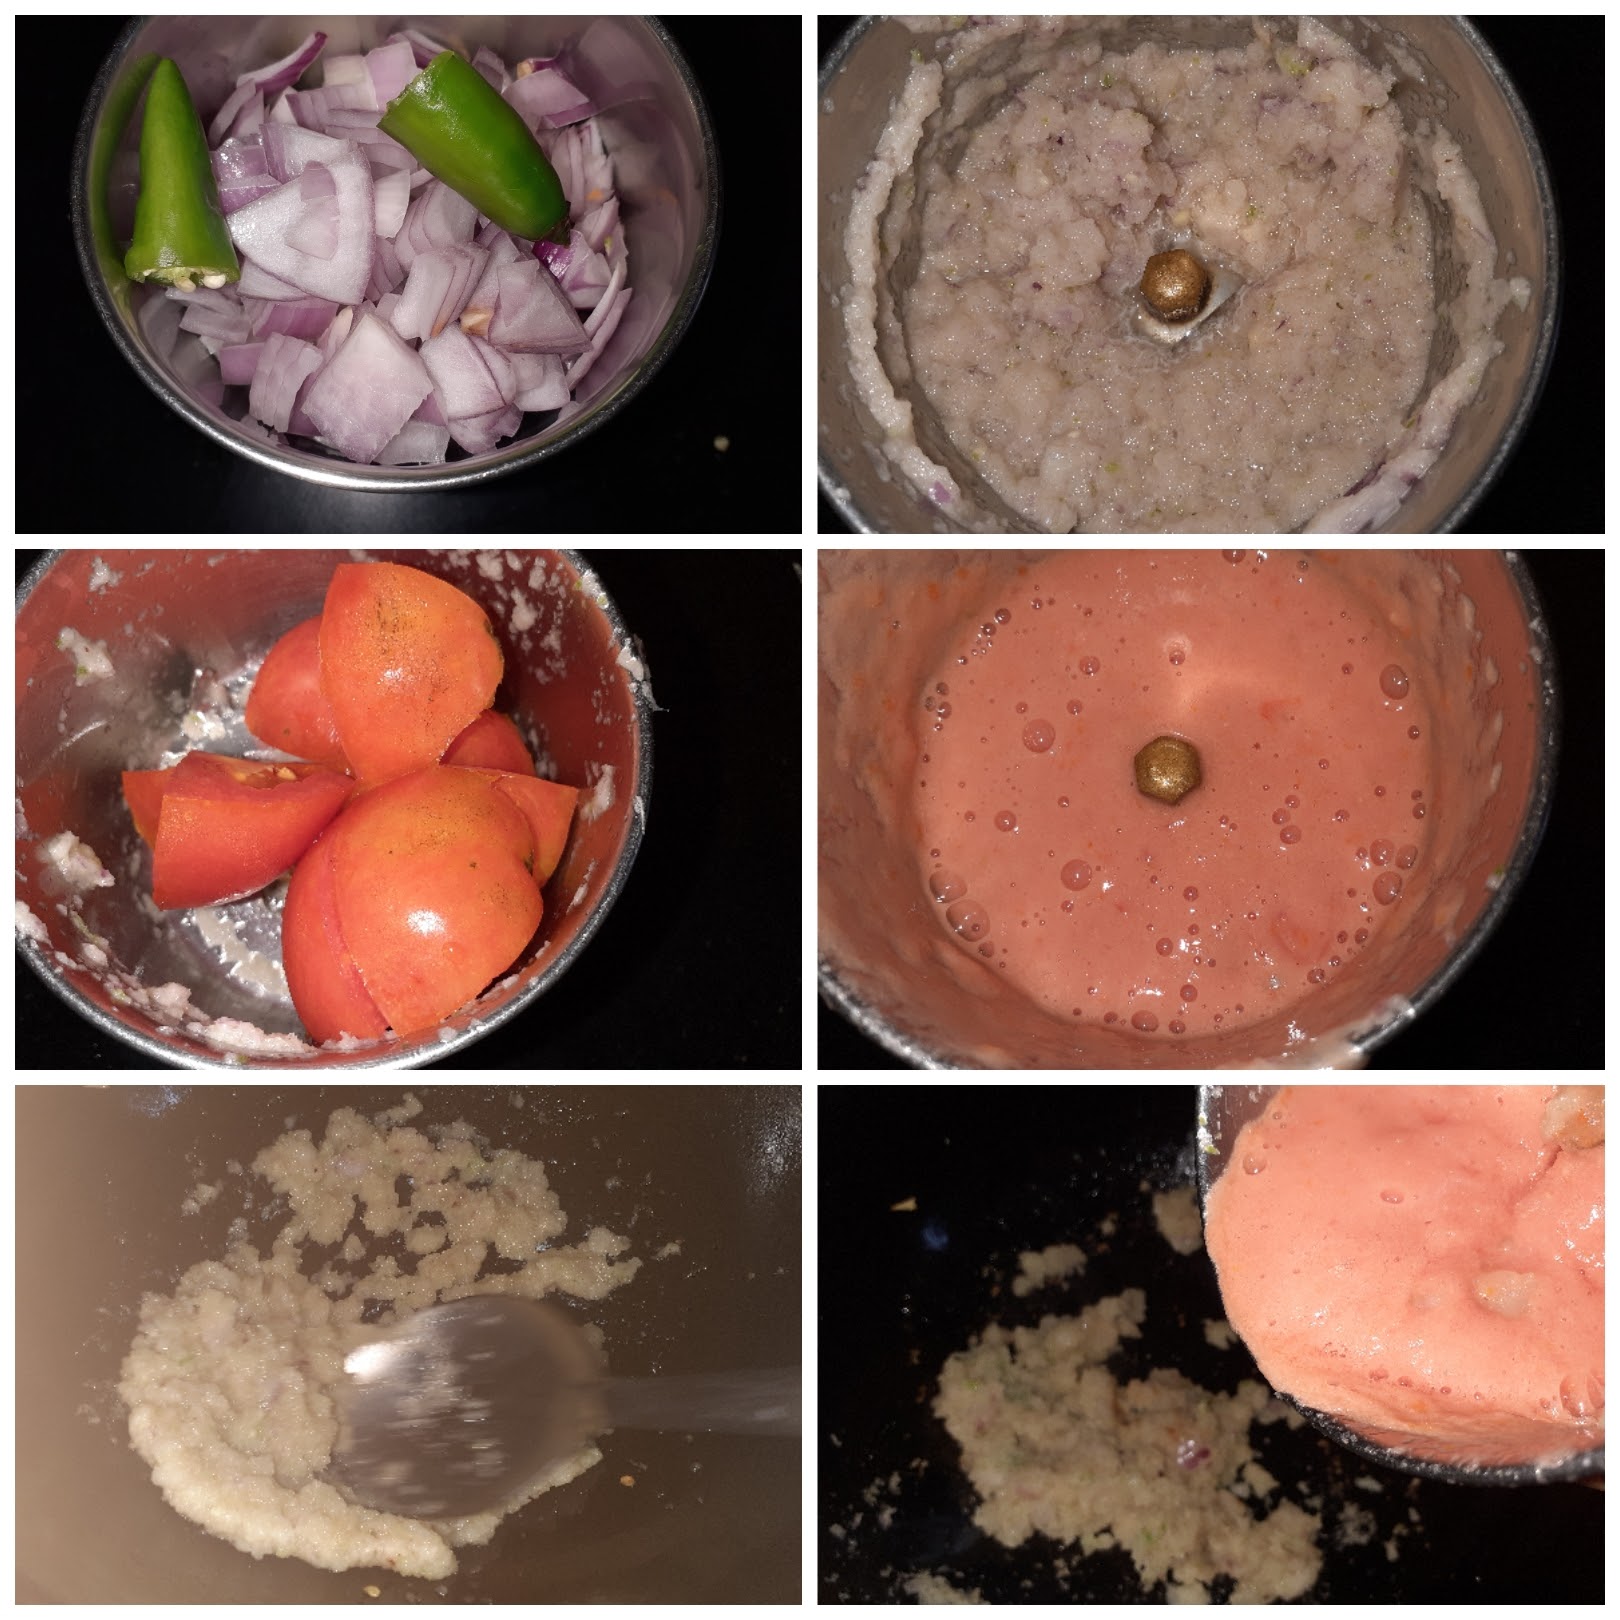
6. When the mixture is almost dry, add the Tomato sauce, Red chilli sauce, salt and red chilli powder and stir nicely. The sauce should be semi-dry. Now add the fried cauliflower florets to this sauce and toss nicely, such that the sauce coats the cauliflower well. Set the Manchurian aside.
7. In a wok, heat oil and add the chopped beans and carrot and stir fry for a minute. Add a teaspoon of sugar while stir-frying. Now add the salt, pepper powder and saute for another minute.

8. Now add the rice little by little and mix well. To this add the soya sauce and mix again, such that all the contents are well integrated. Now add the Manchurian to the rice and toss nicely. Follow this up by adding the sauteed green chilli and garlic. Toss again. The Gobi Fried rice is ready to devour.
1. The same recipe of Manchurian works well if you want to make dry Gobi Manchurian. If using the recipe only for Manchurian then add the sauteed chillies and garlic after to have mixed the florets with the sauce.
2. In case you add more water while mixing the flours with the florets and the flour is not sticking to the florets add in extra flour.
3. While making the fried rice I have not added any chilli powder. Only pepper powder has been added, as all other spices are there in the Manchurian. If you prefer more spice, feel free to add more.
4. Sugar is added while sauteeing vegetables so that they retain the colour and cook well.
If you tried this recipe and liked it please comment below. I would love to hear from you. If you have a query about the recipe email us and ill respond as soon as I can.

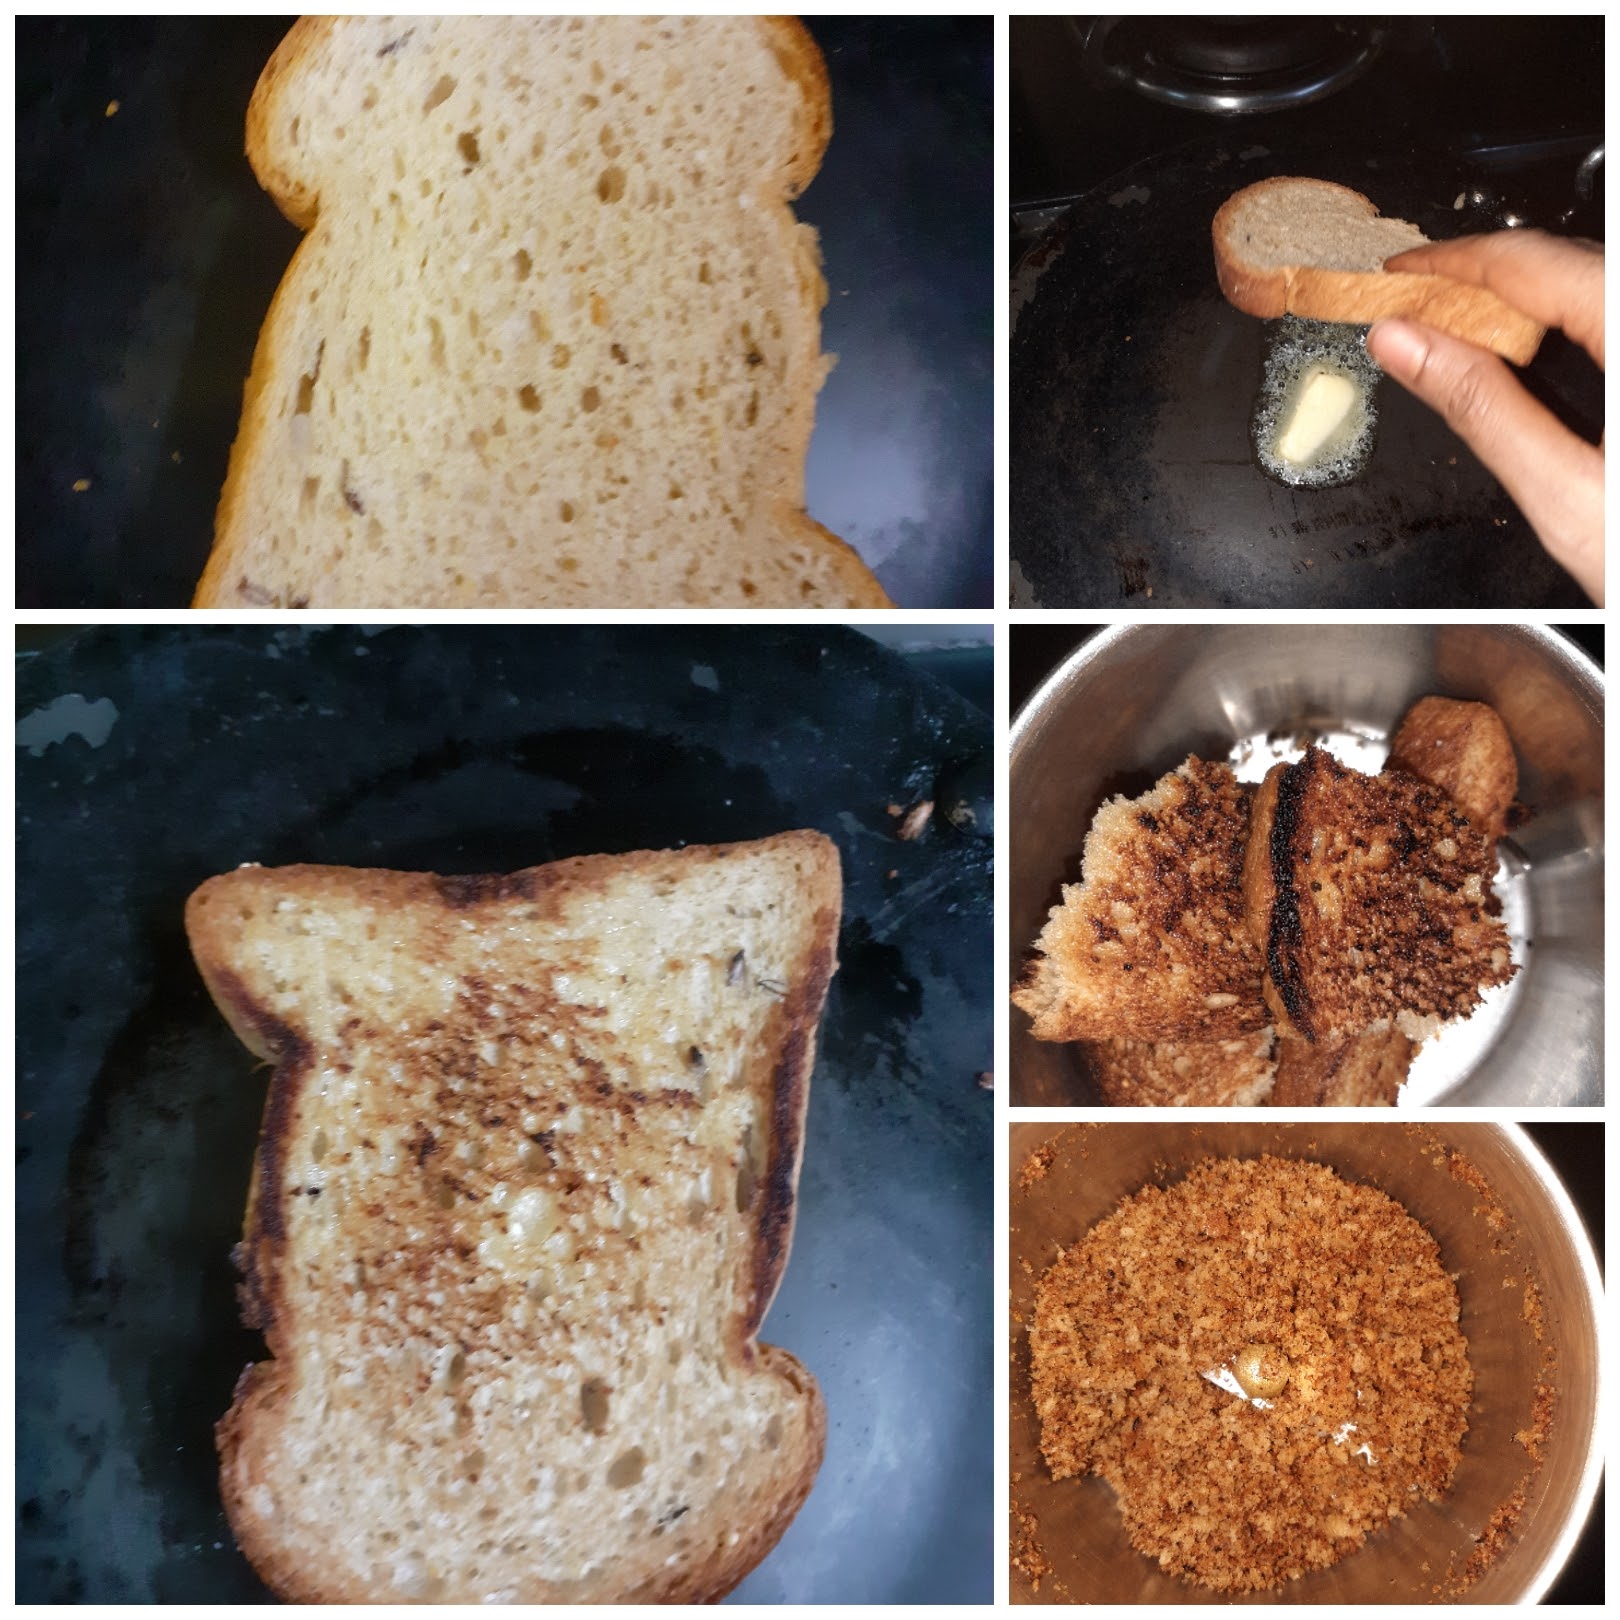
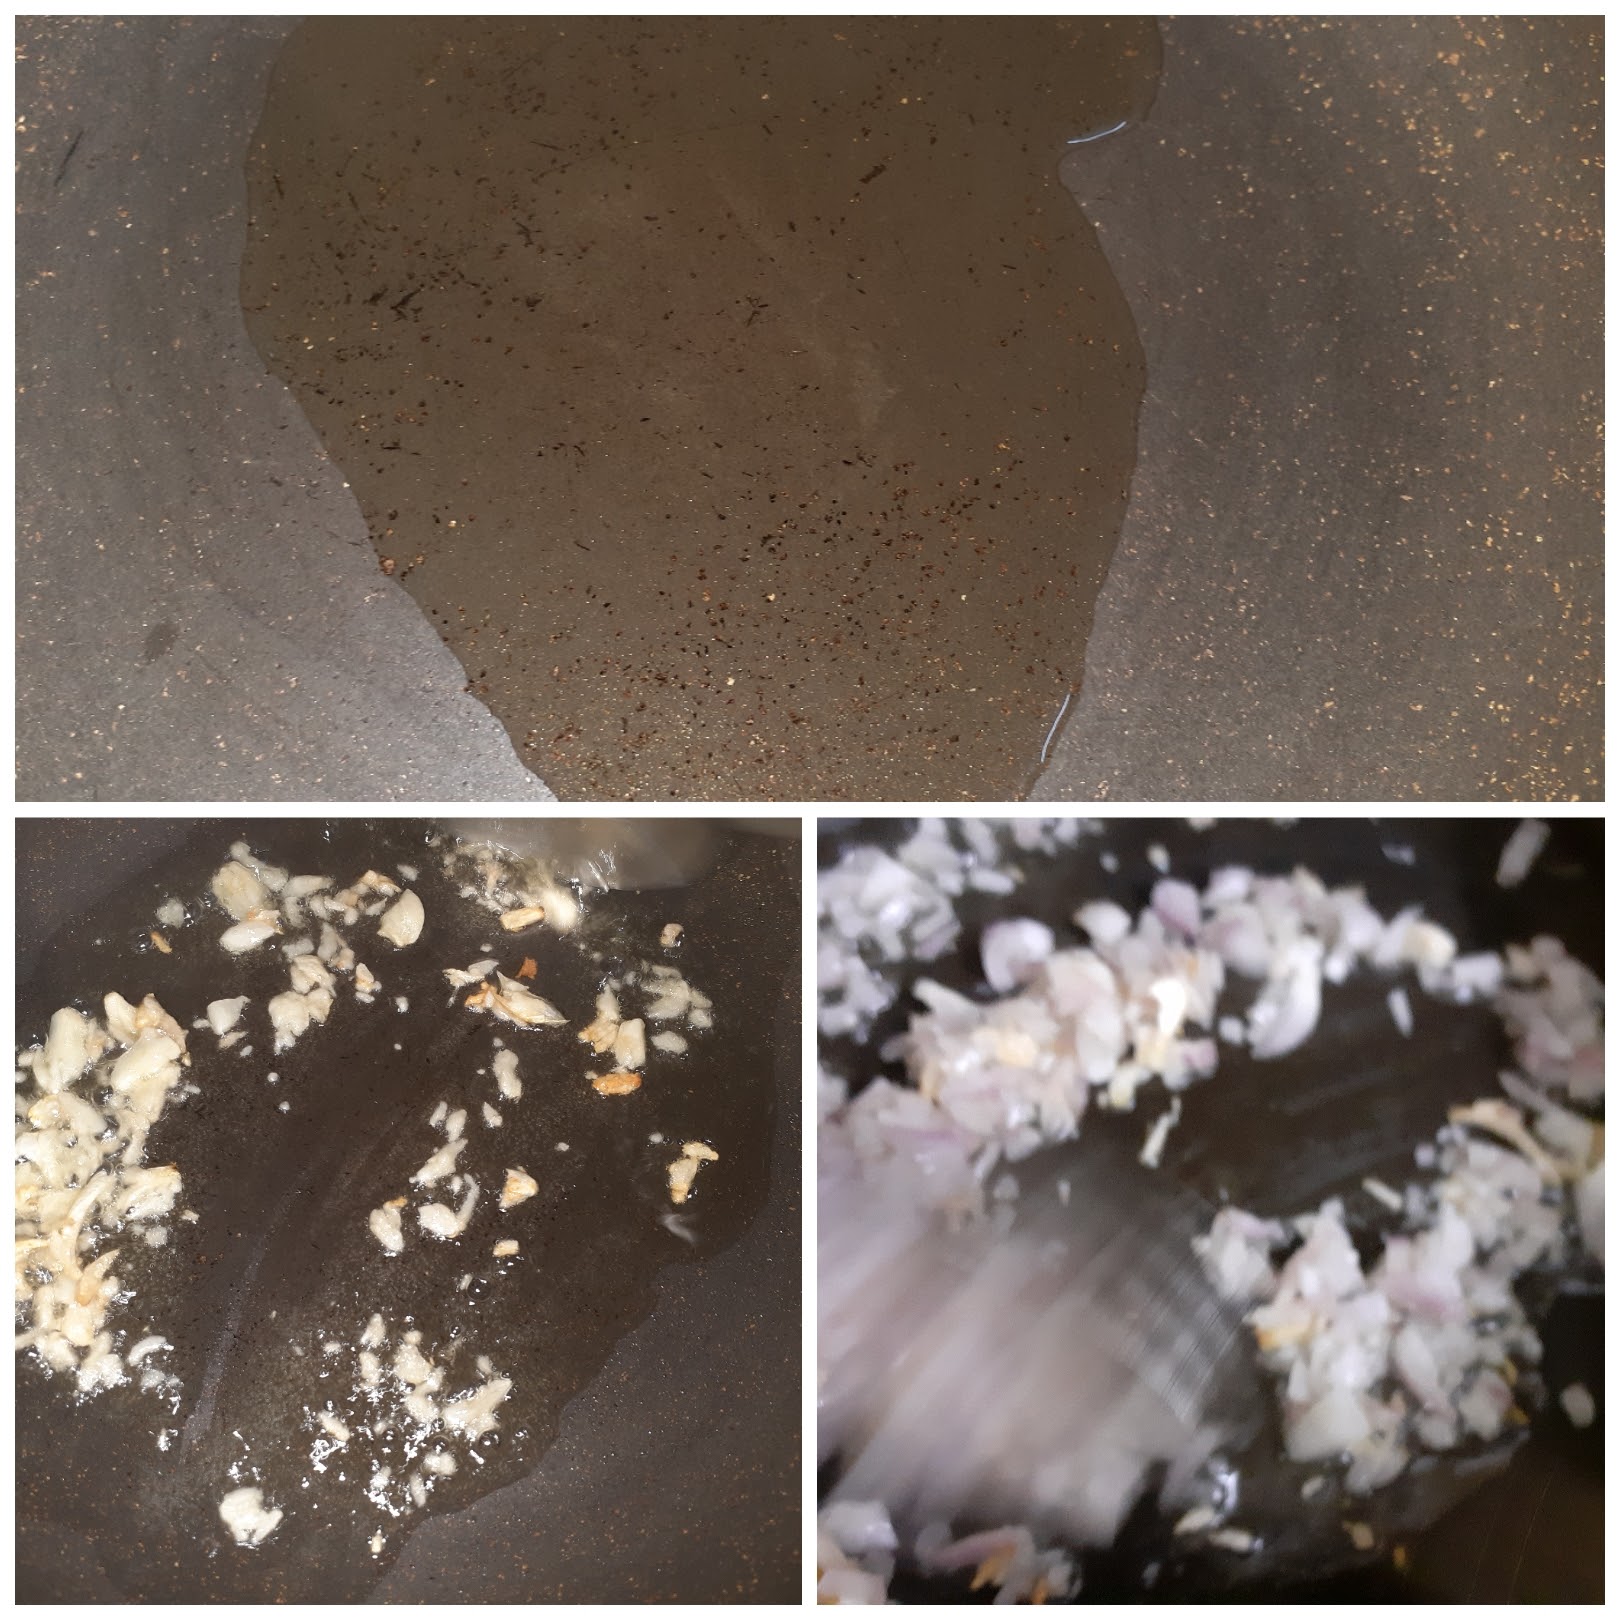
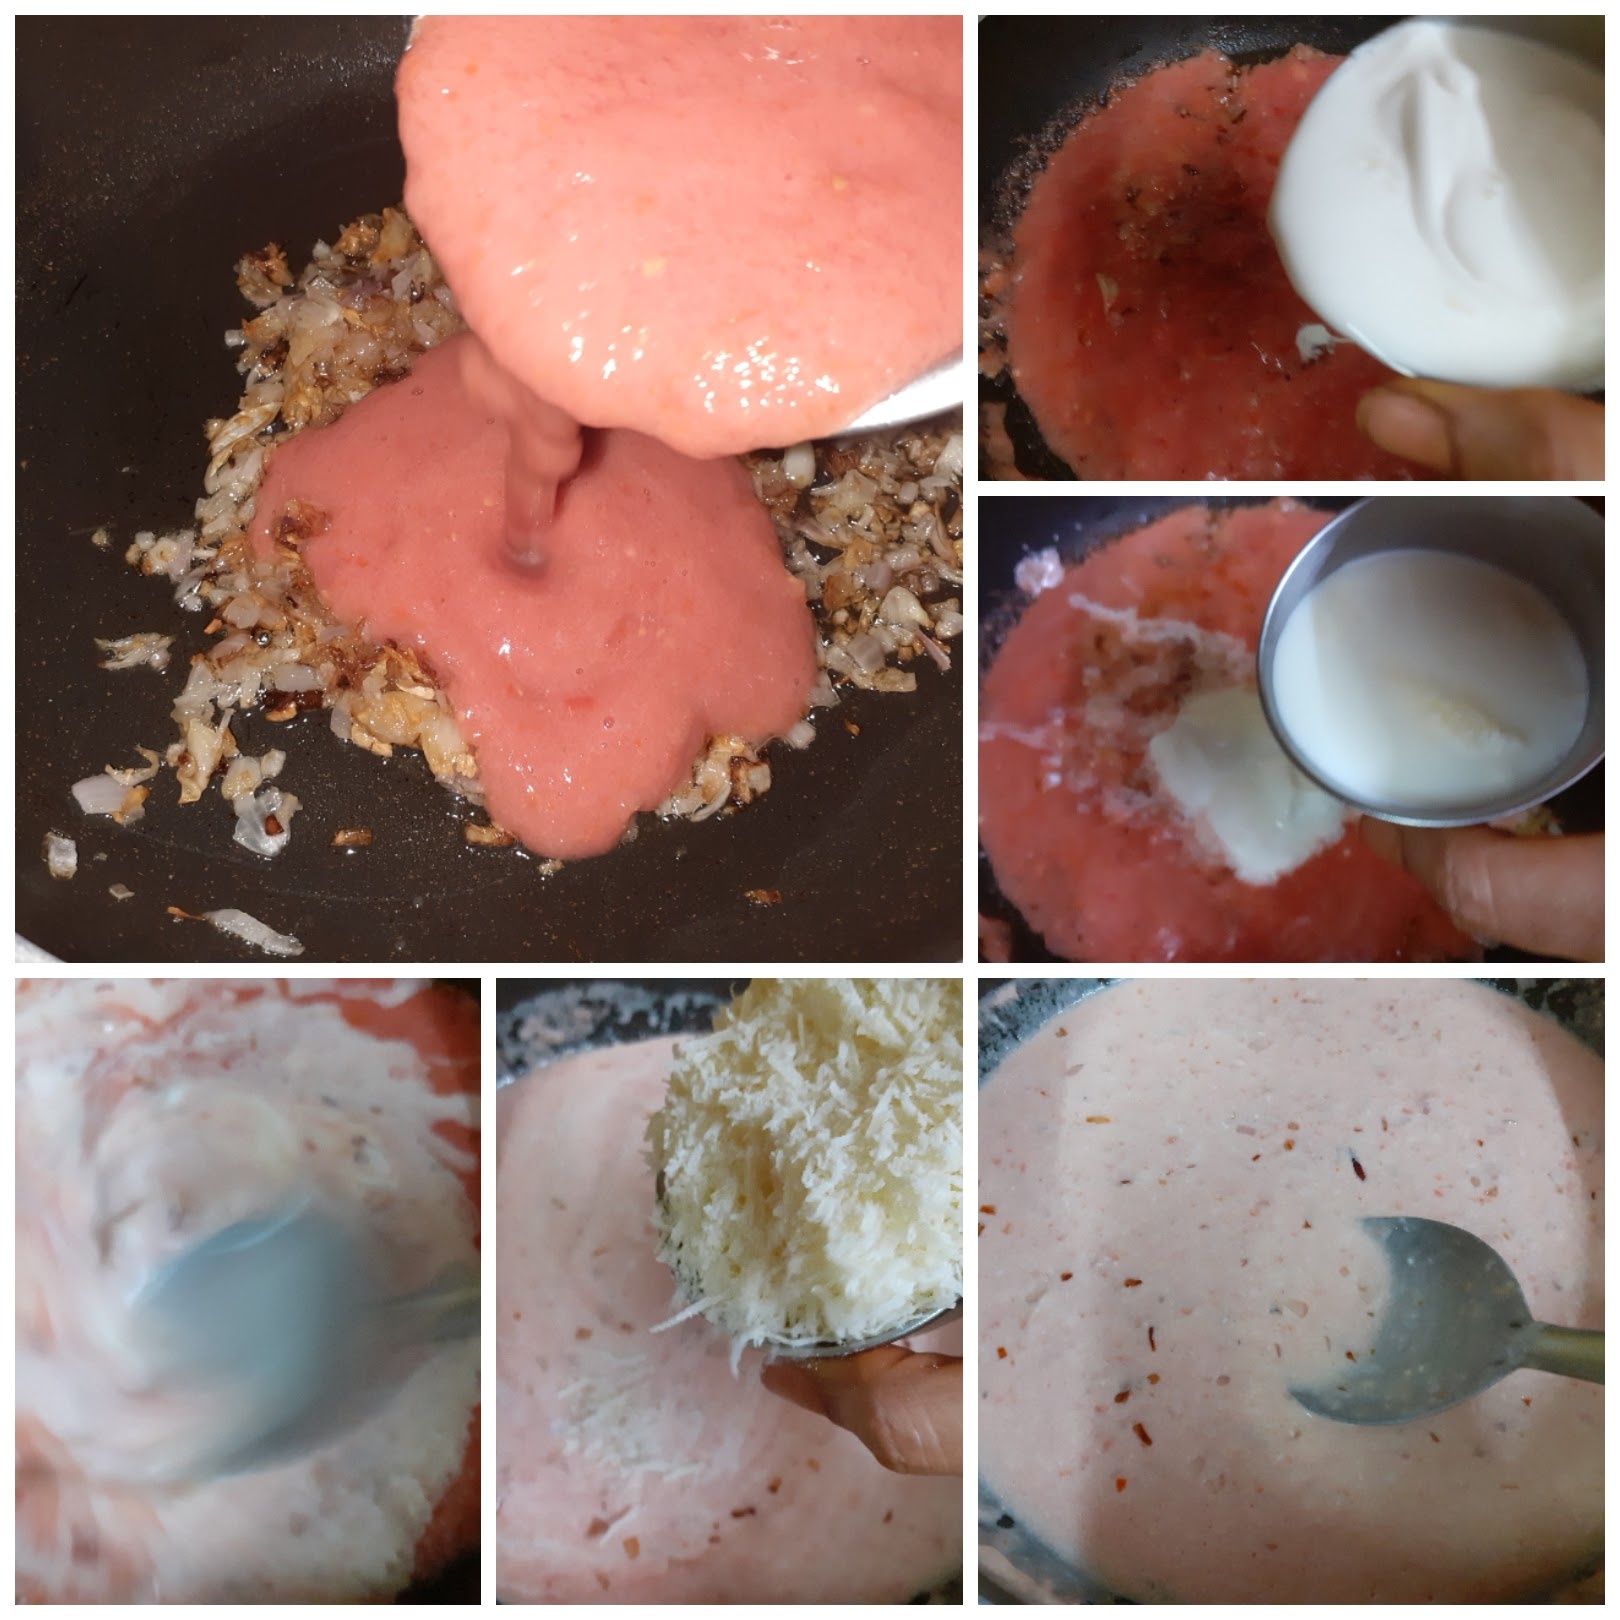
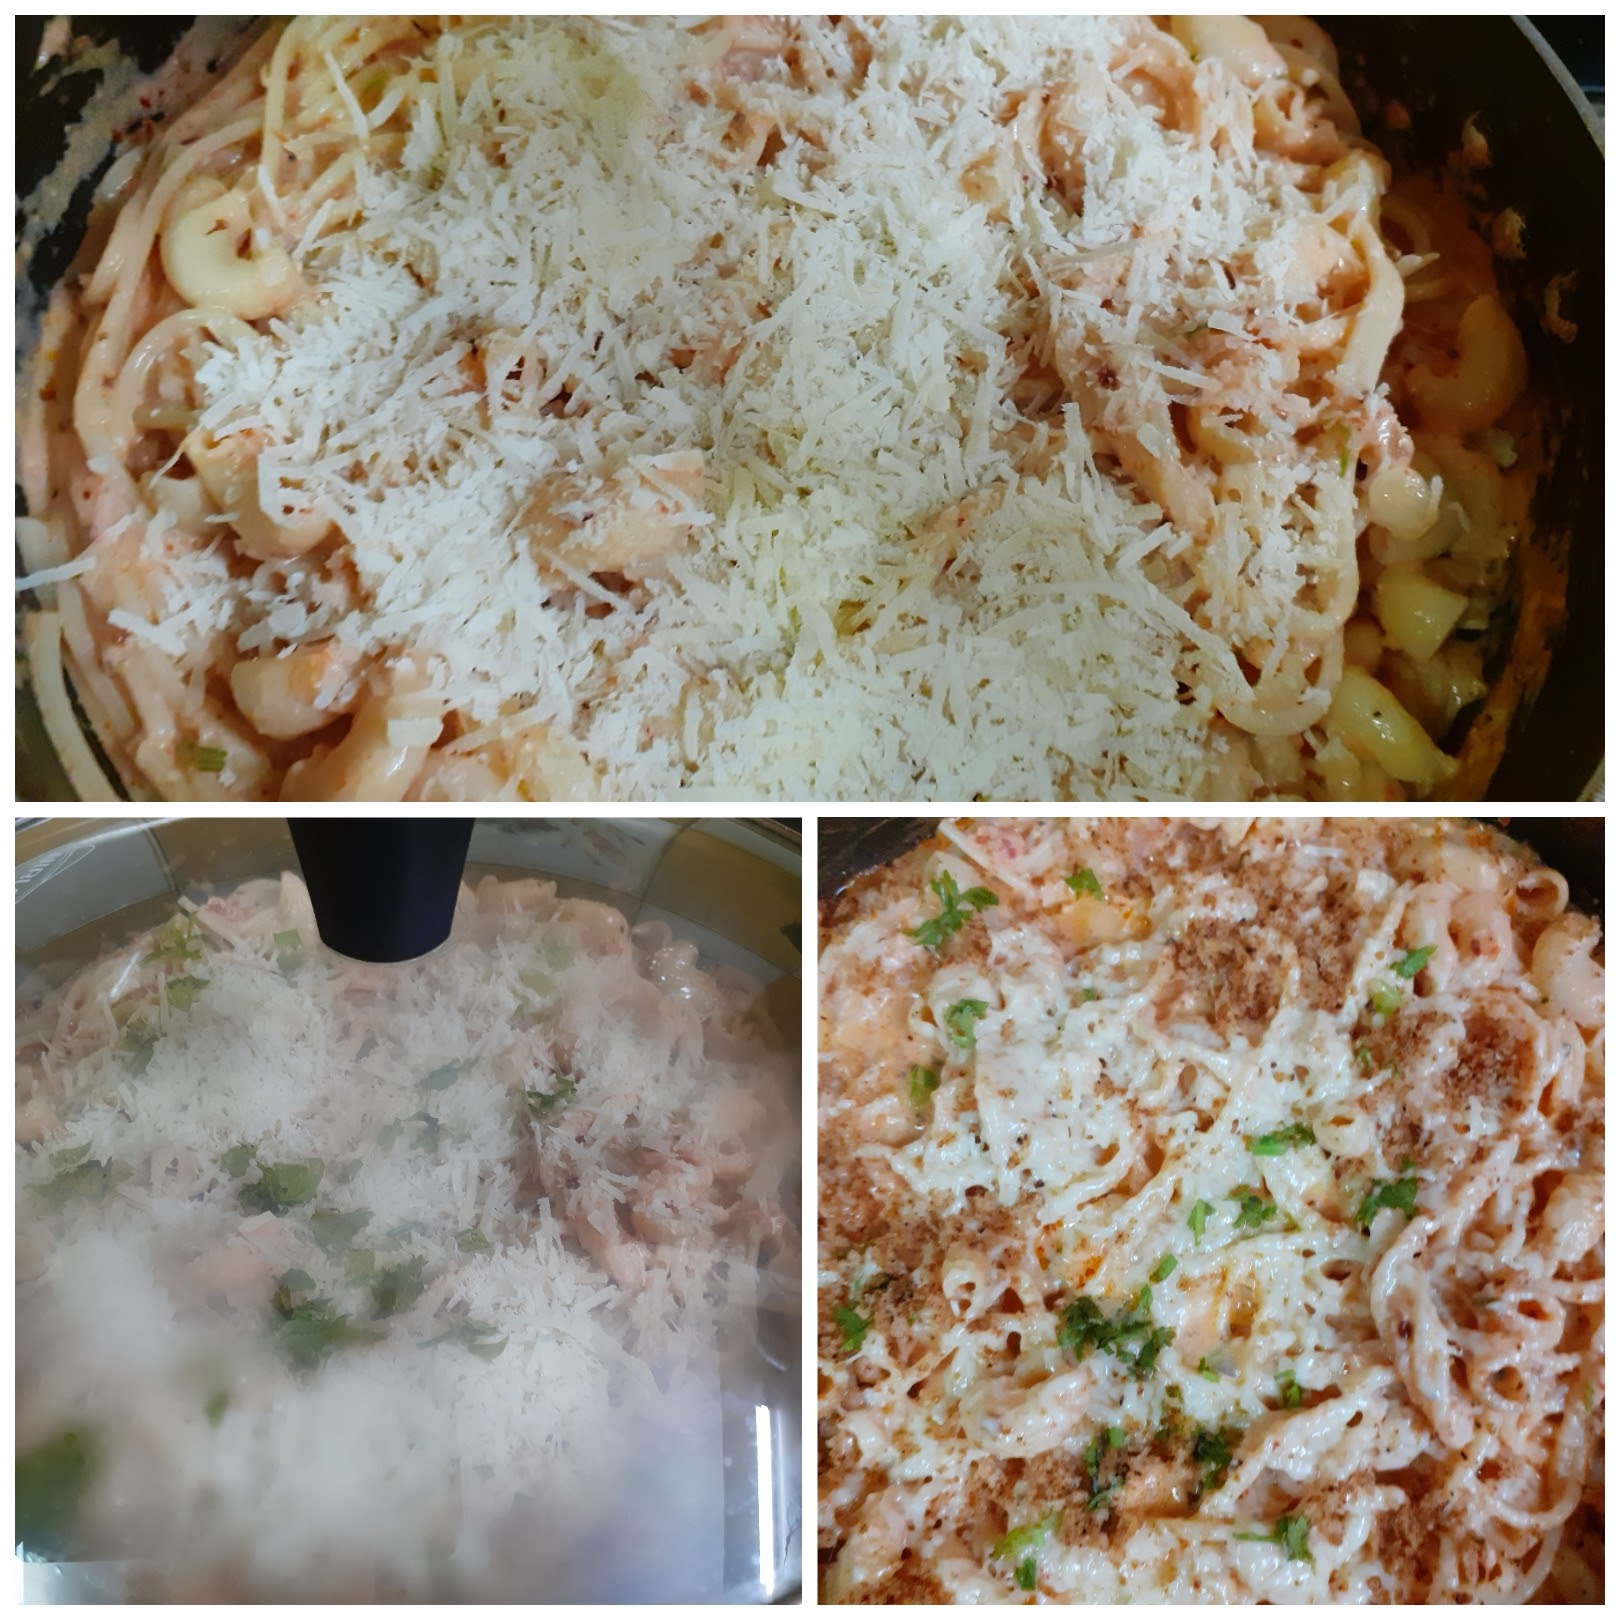
Creamy Pink Sauce Pasta
Well, who doesn’t love pink Pasta? Yes, pink pasta. Usually, pink pasta is made with a combination of white sauce and tomato pasta sauce. In this recipe, I have used a lot of tomato puree and milk, some cream, and loads of Parmesan cheese. The sauce is extremely slurpy and delicious. The sauce can be used as it is or one can add-in as per their preference.


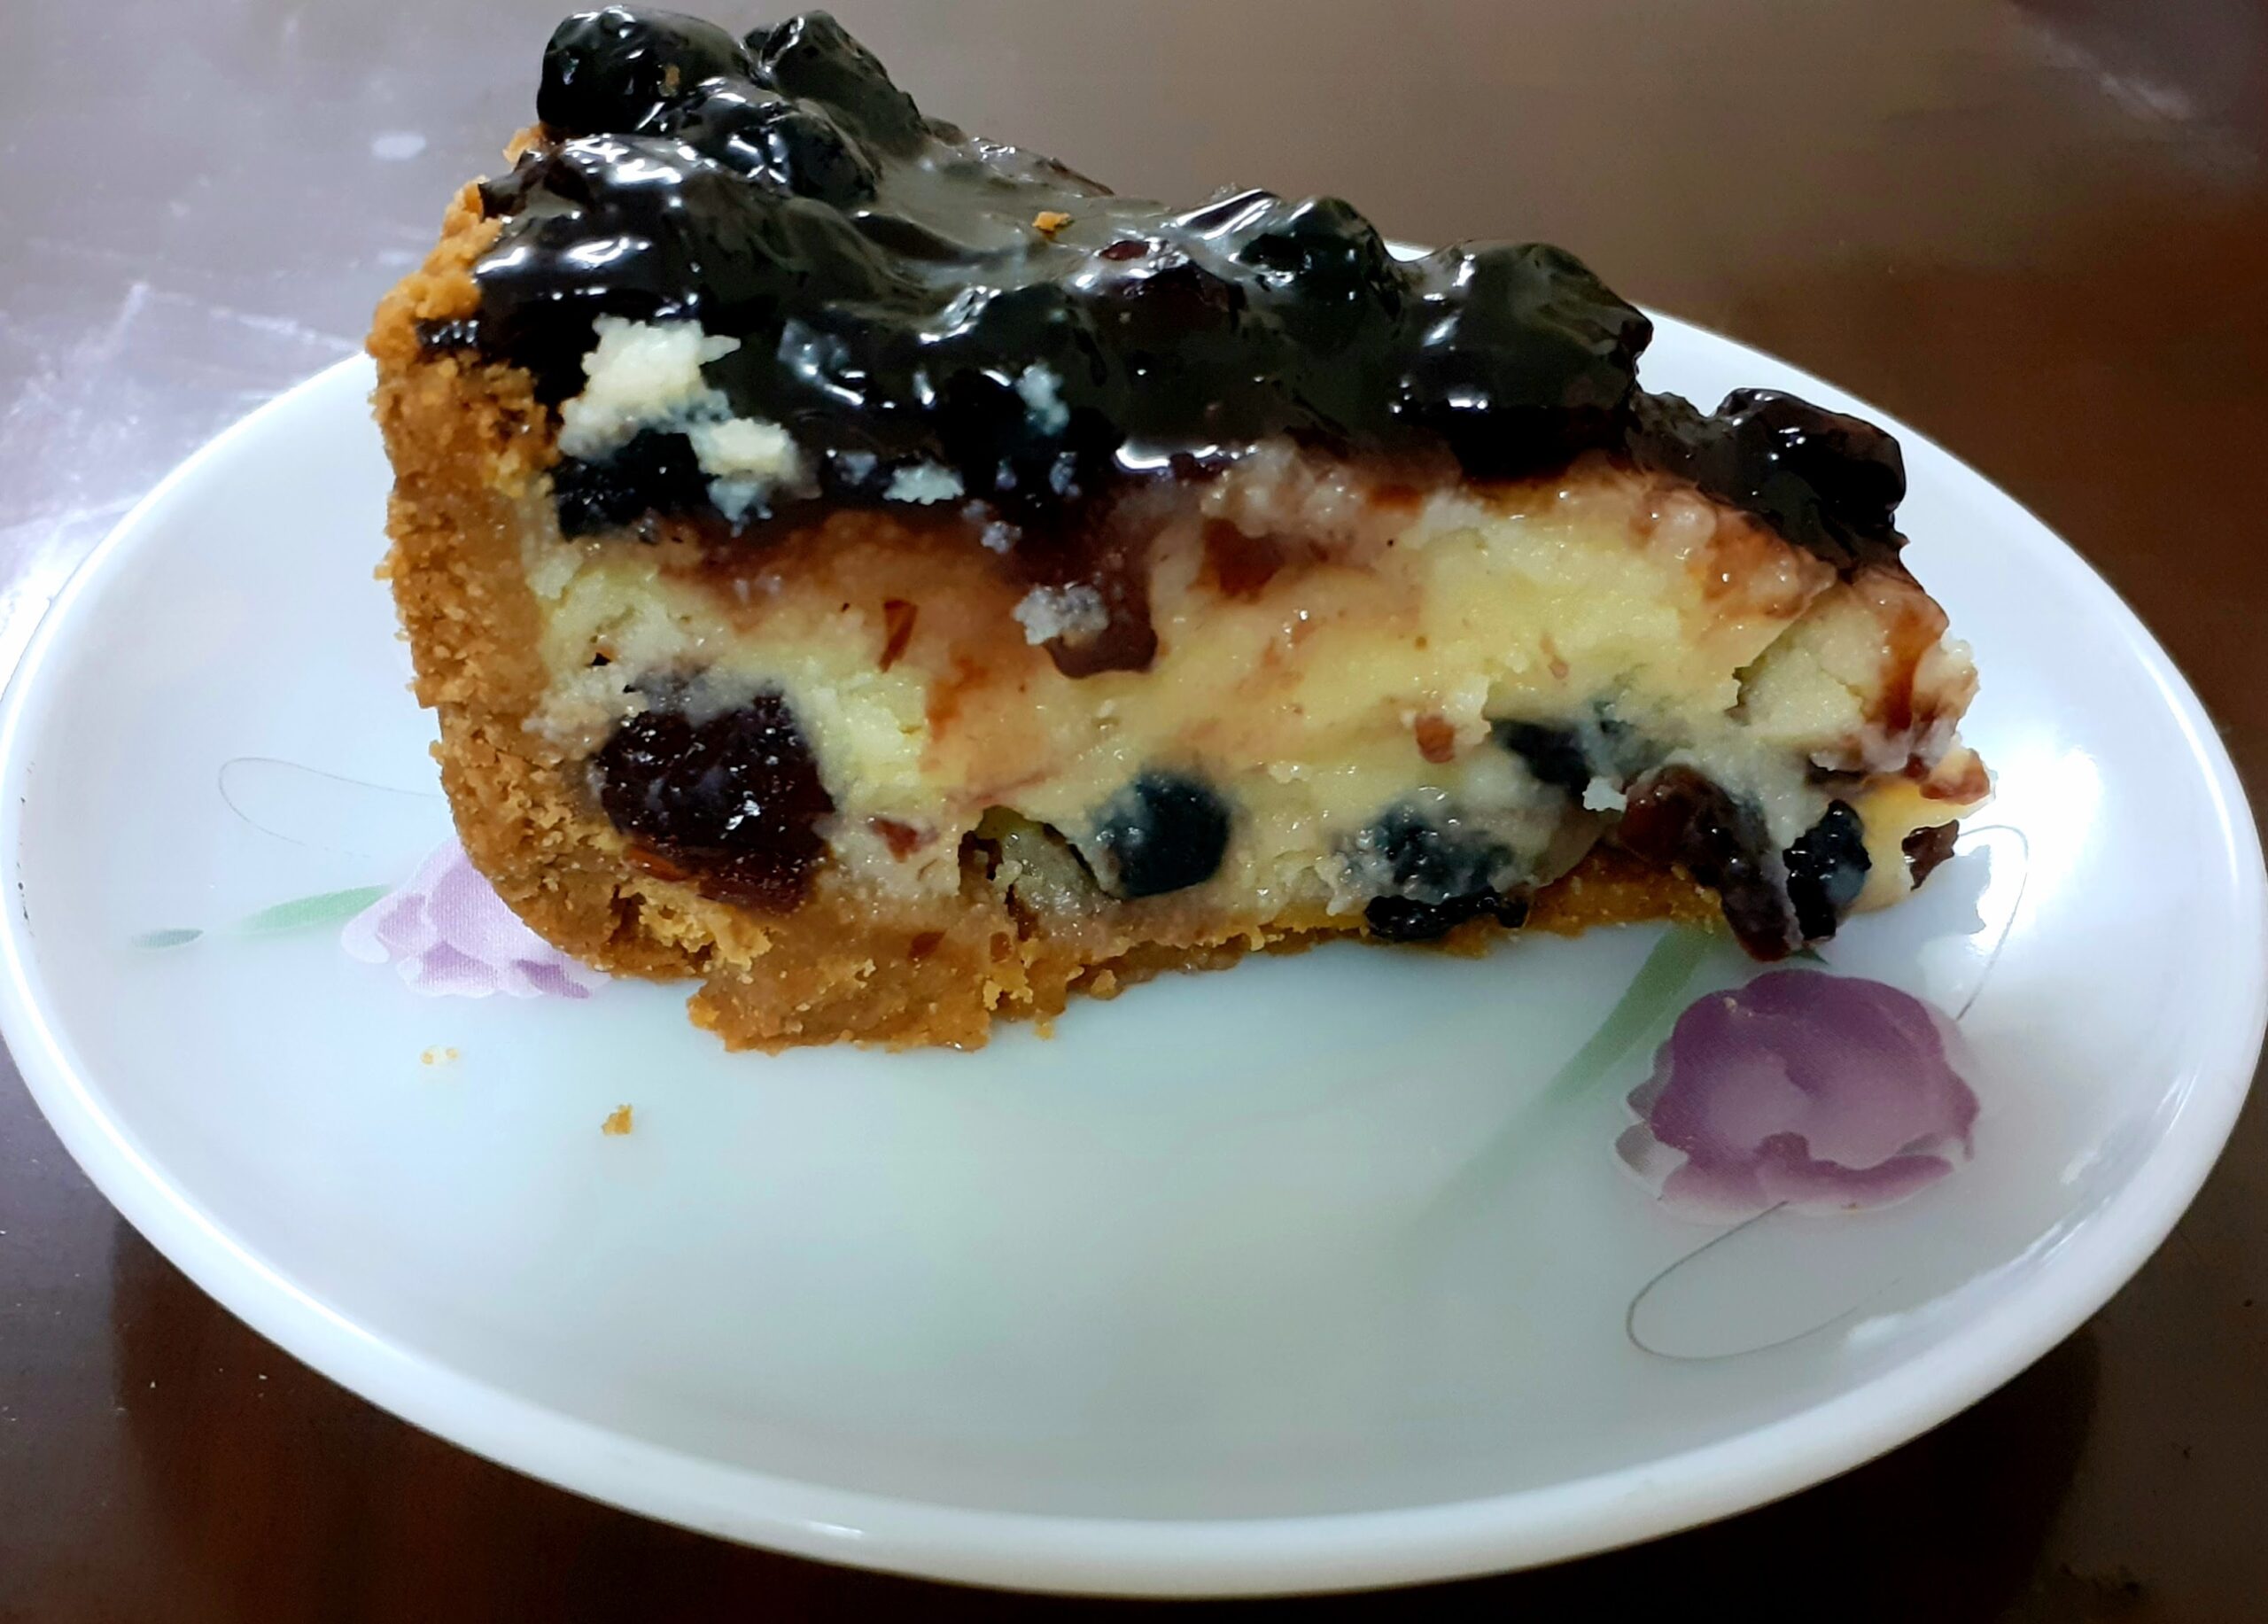
Blueberry Cheesecake (Baked)
This is an epic post because I love Blueberries(any berry for that matter) and I have perfected this Blueberry cheesecake finally. And for a recipe to feature on my blog, I should have perfected it before I put it out before you, and that is when I have tried it out 3 times without any mishaps.


Schezwan Fried Rice (Soya Chunks)
Schezwan fried rice is an Indo Chinese recipe and is similar to Chinese Fried Rice. Schezwan Sauce imparts a lovely flavour to this dish.

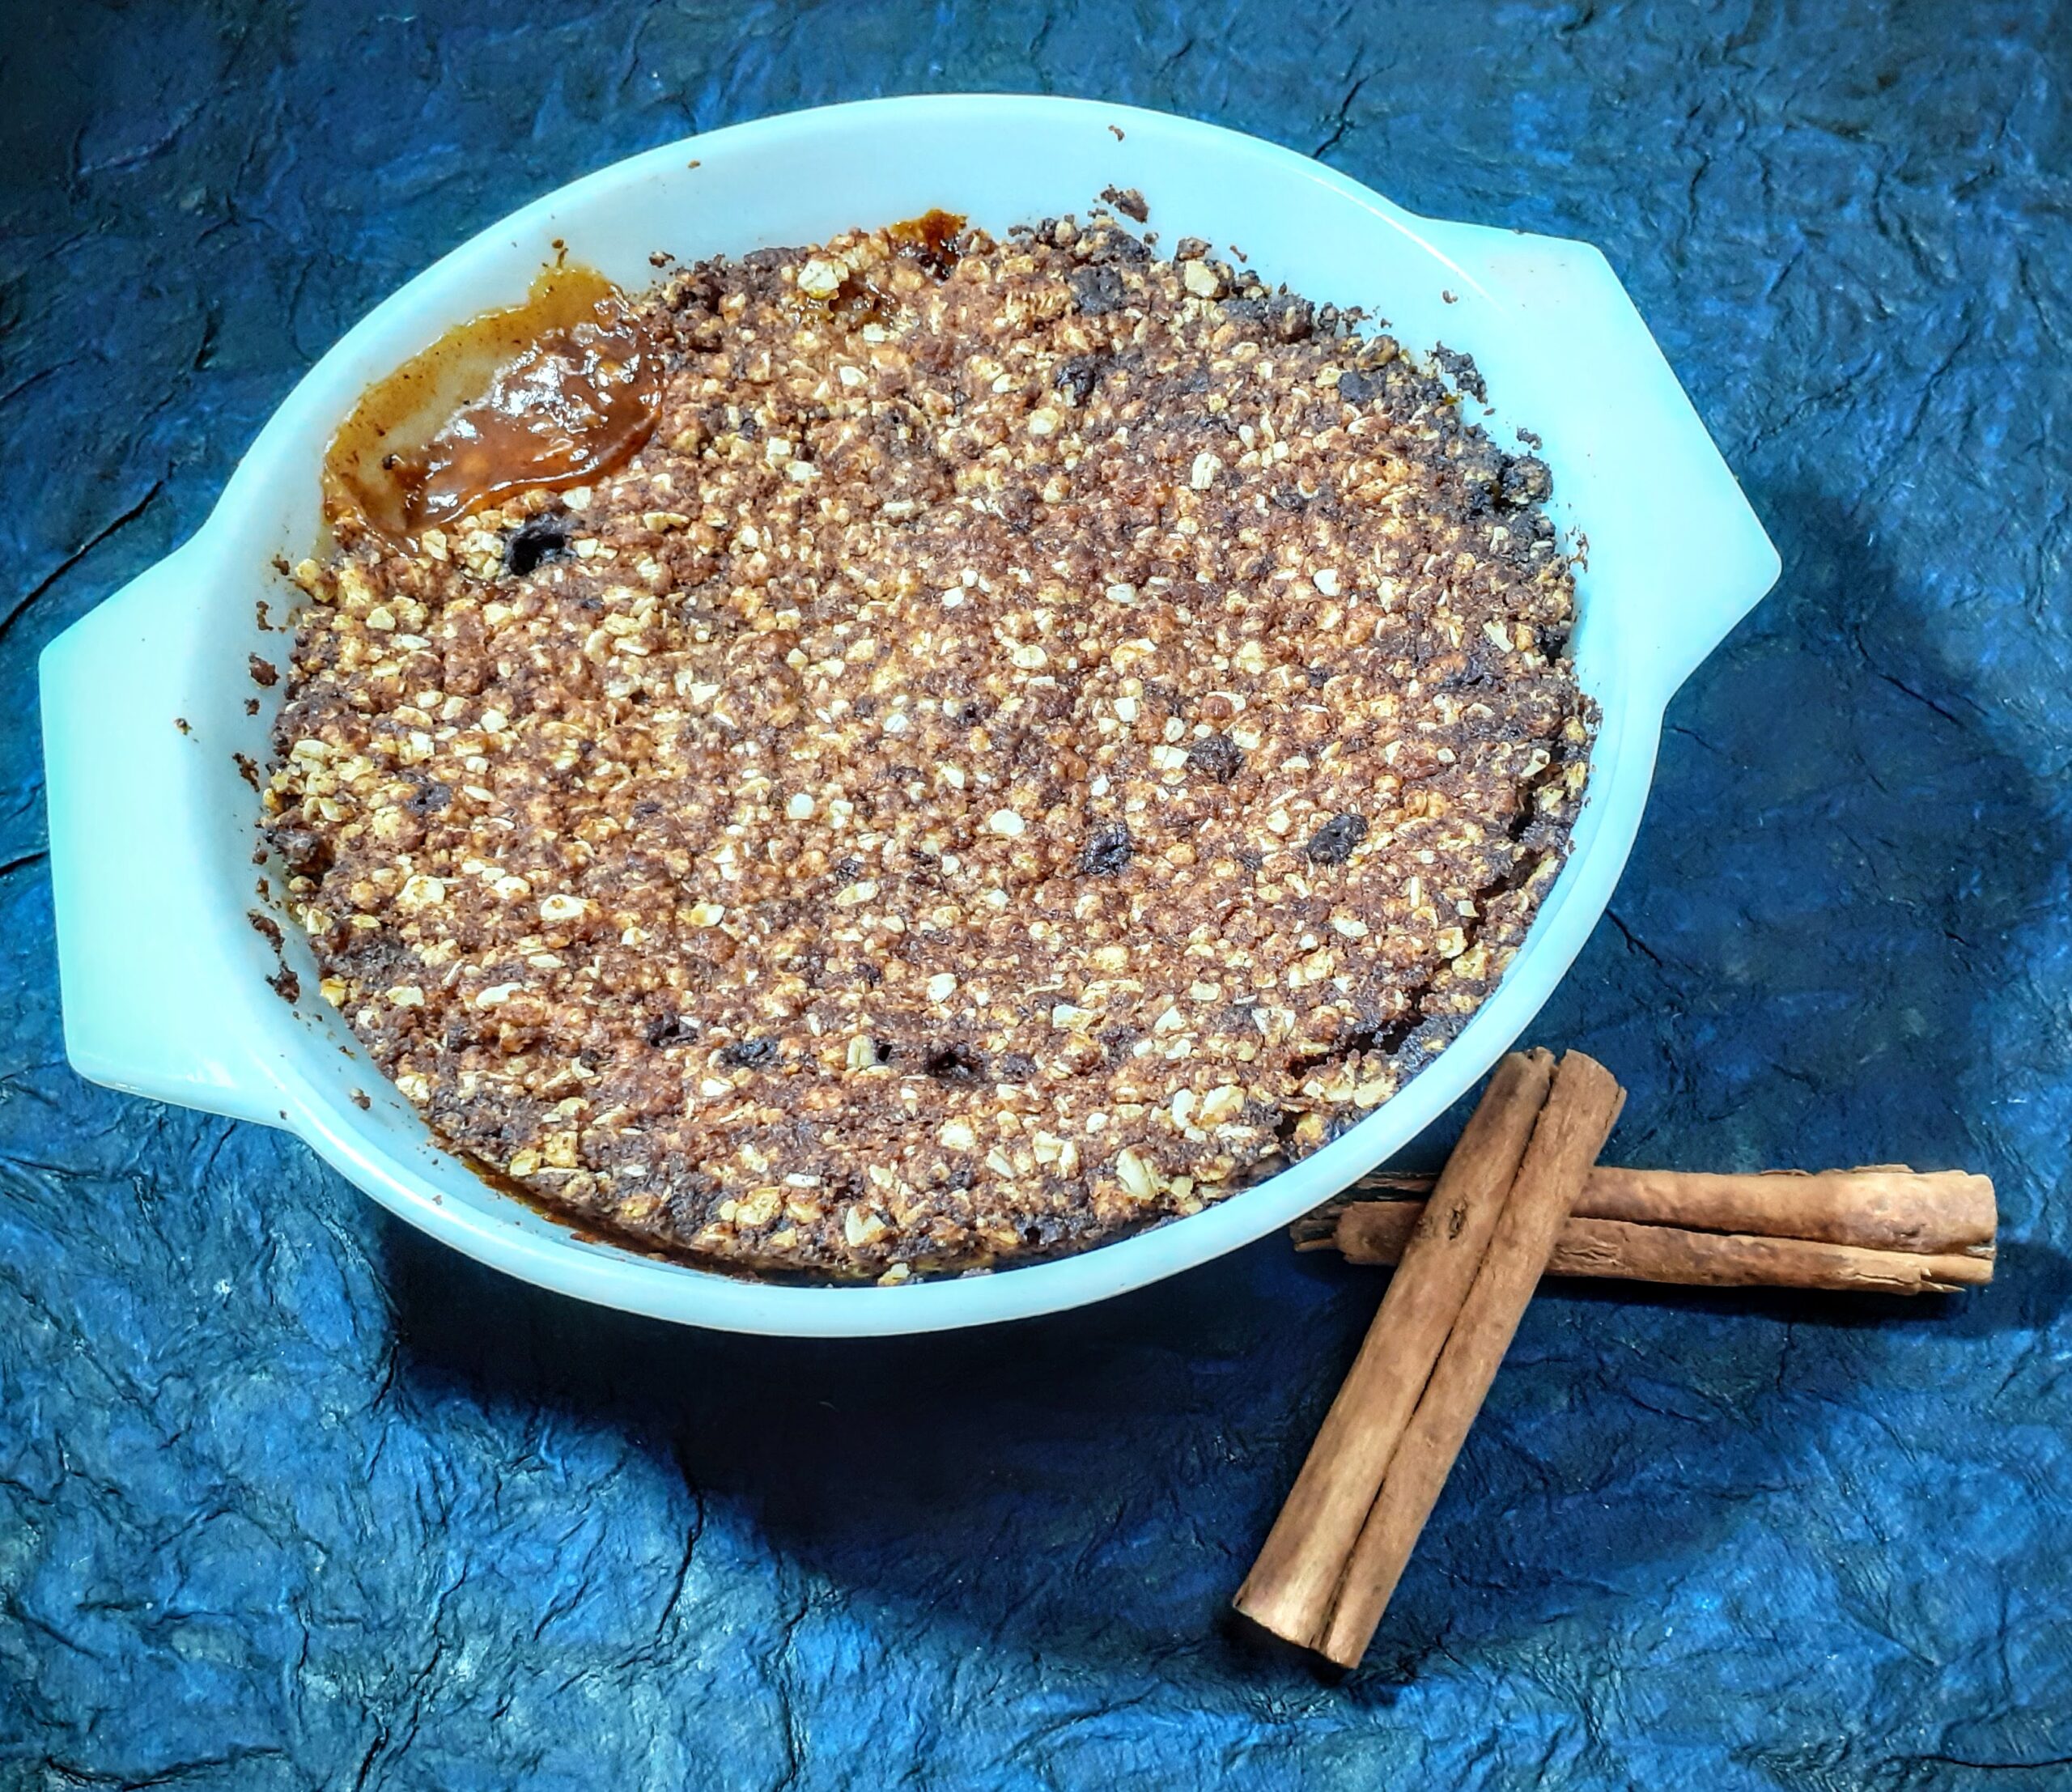
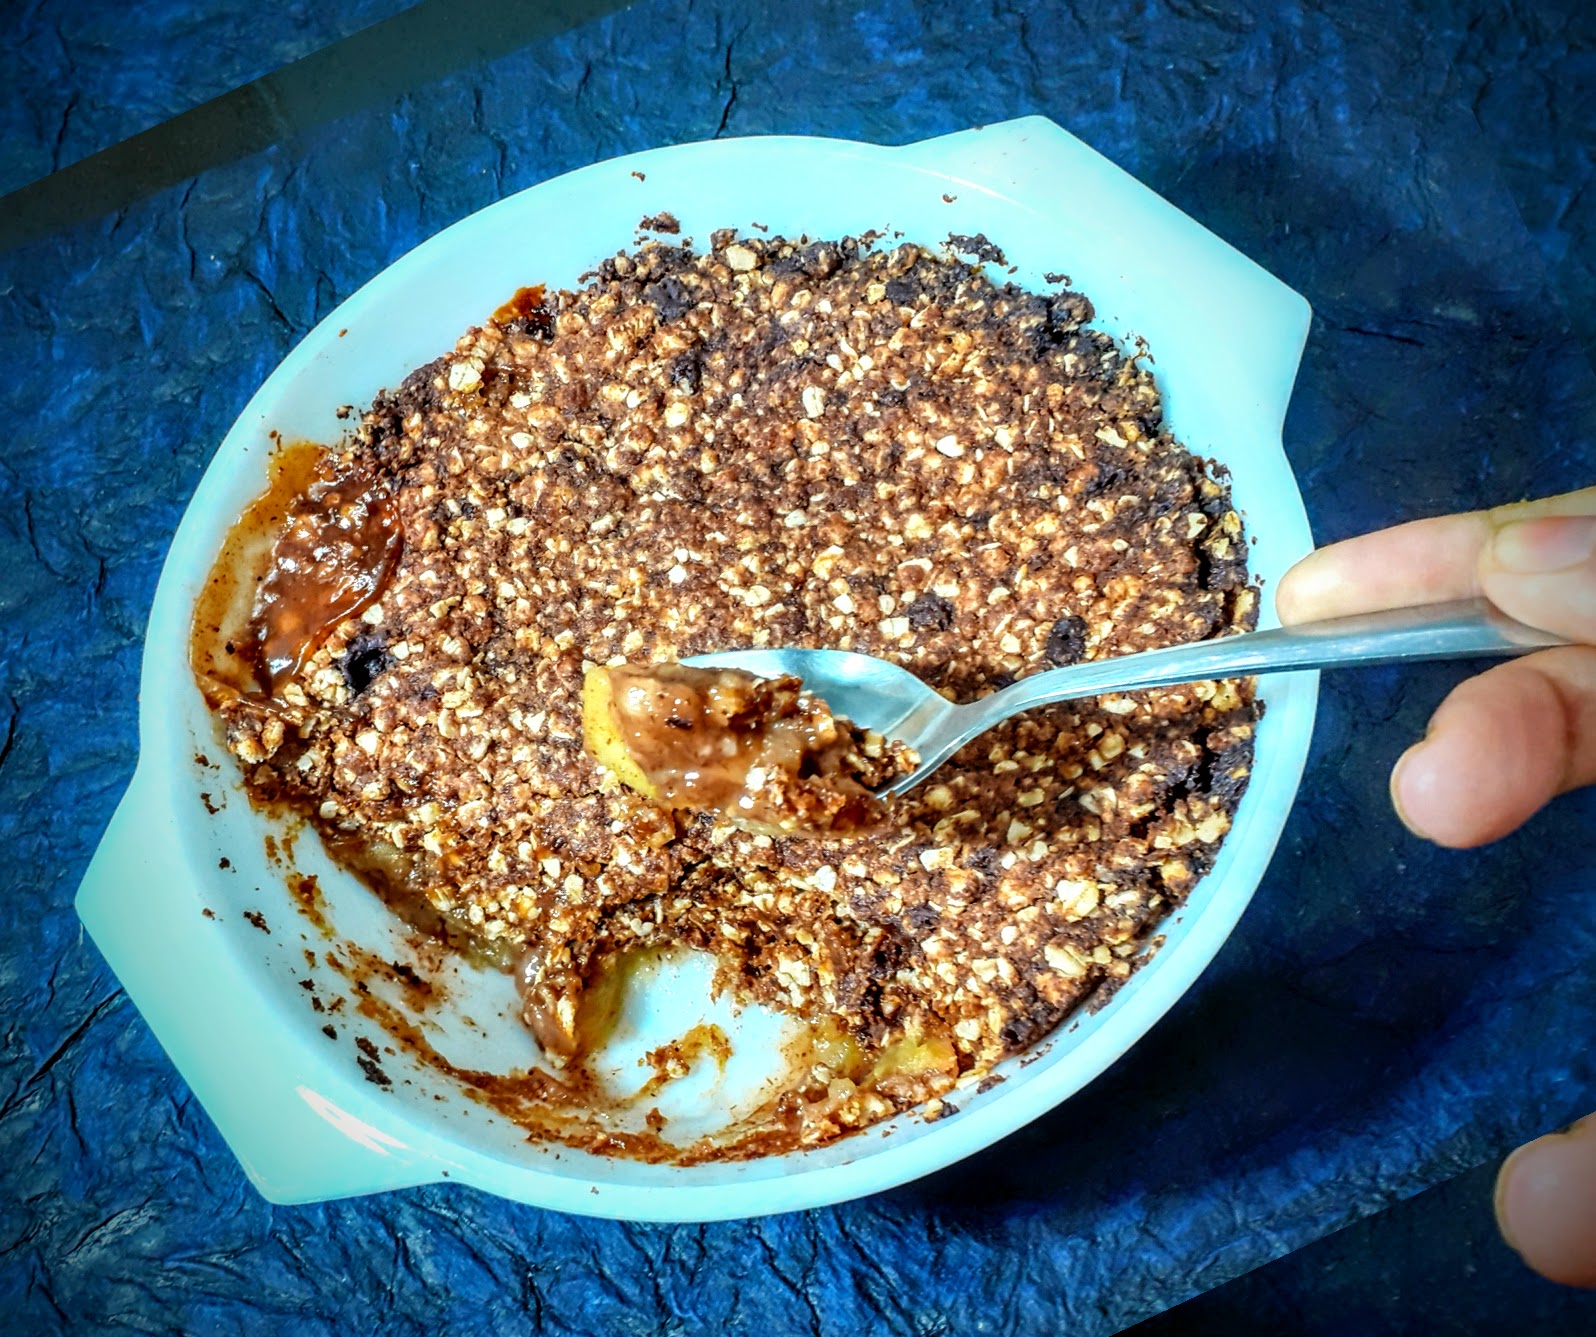
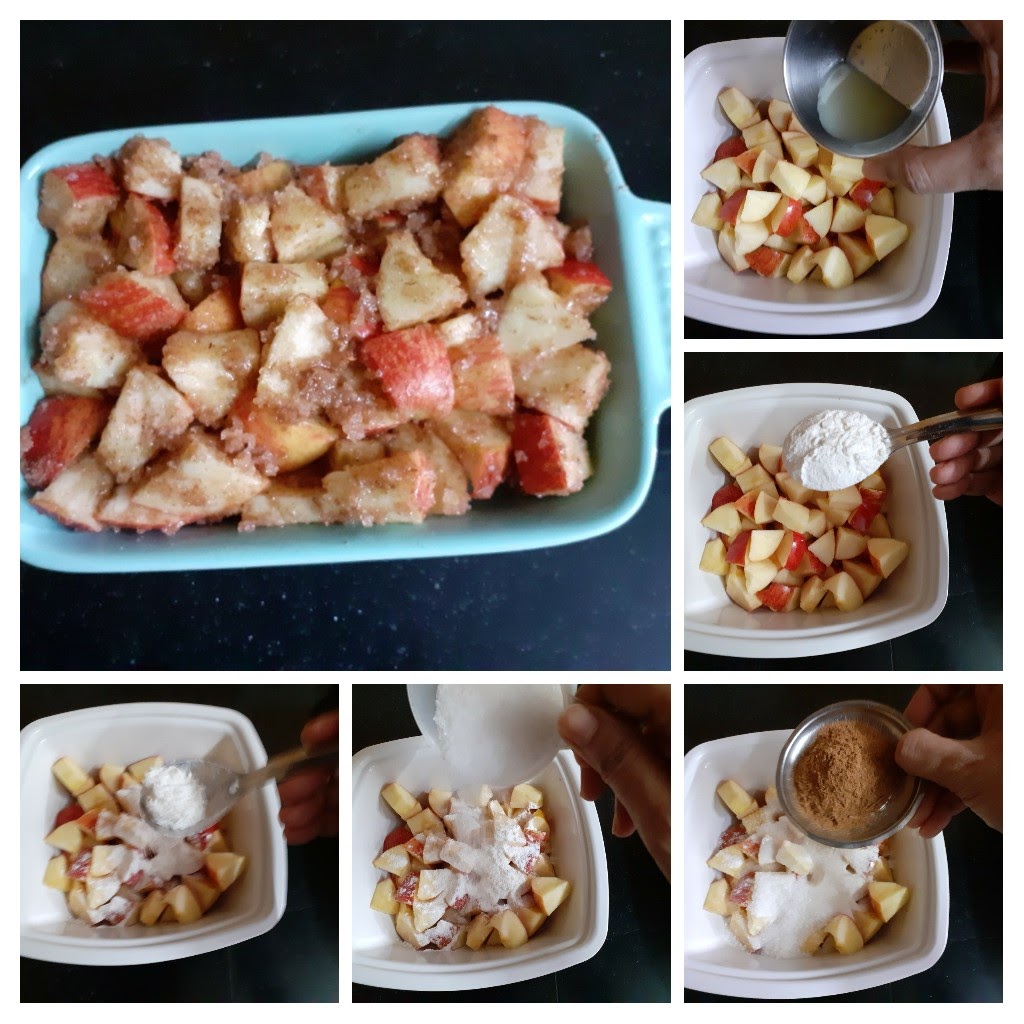
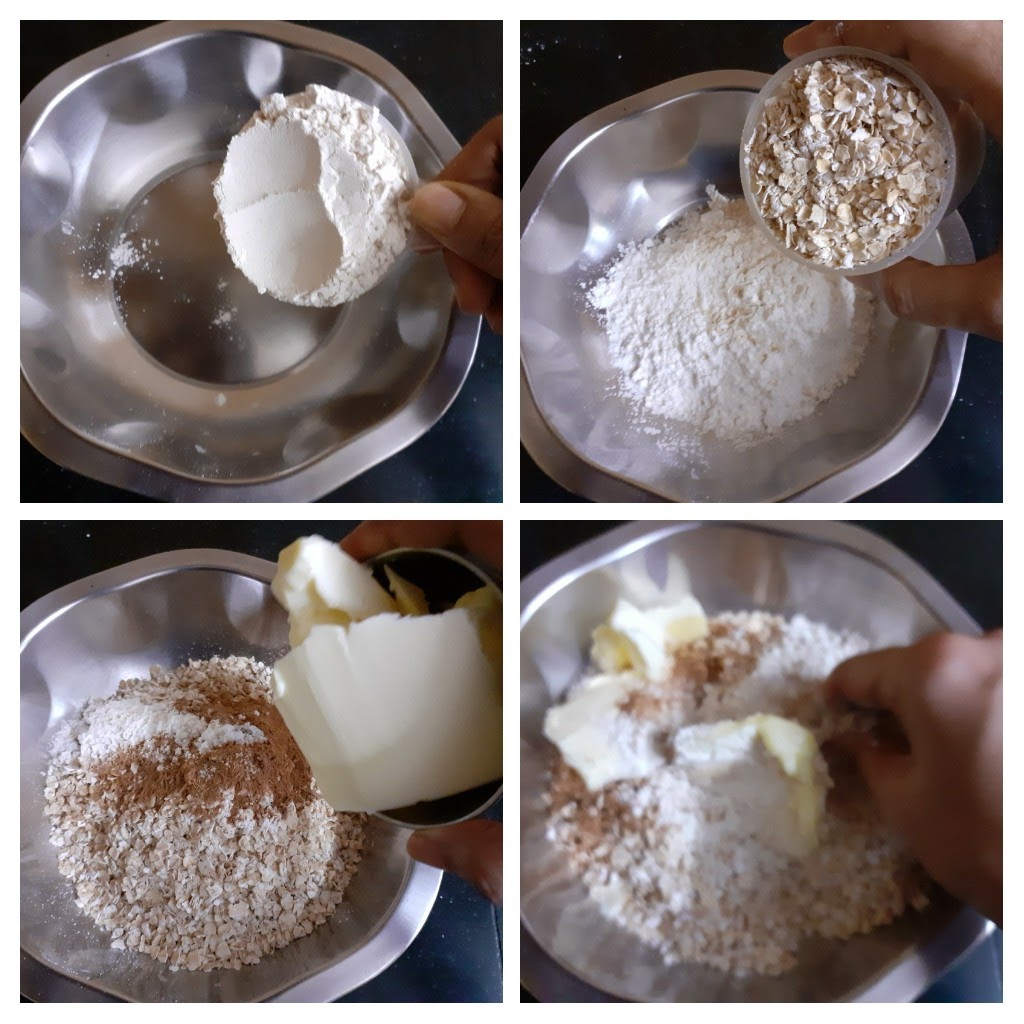
Apple Crumble (Eggless Dessert)


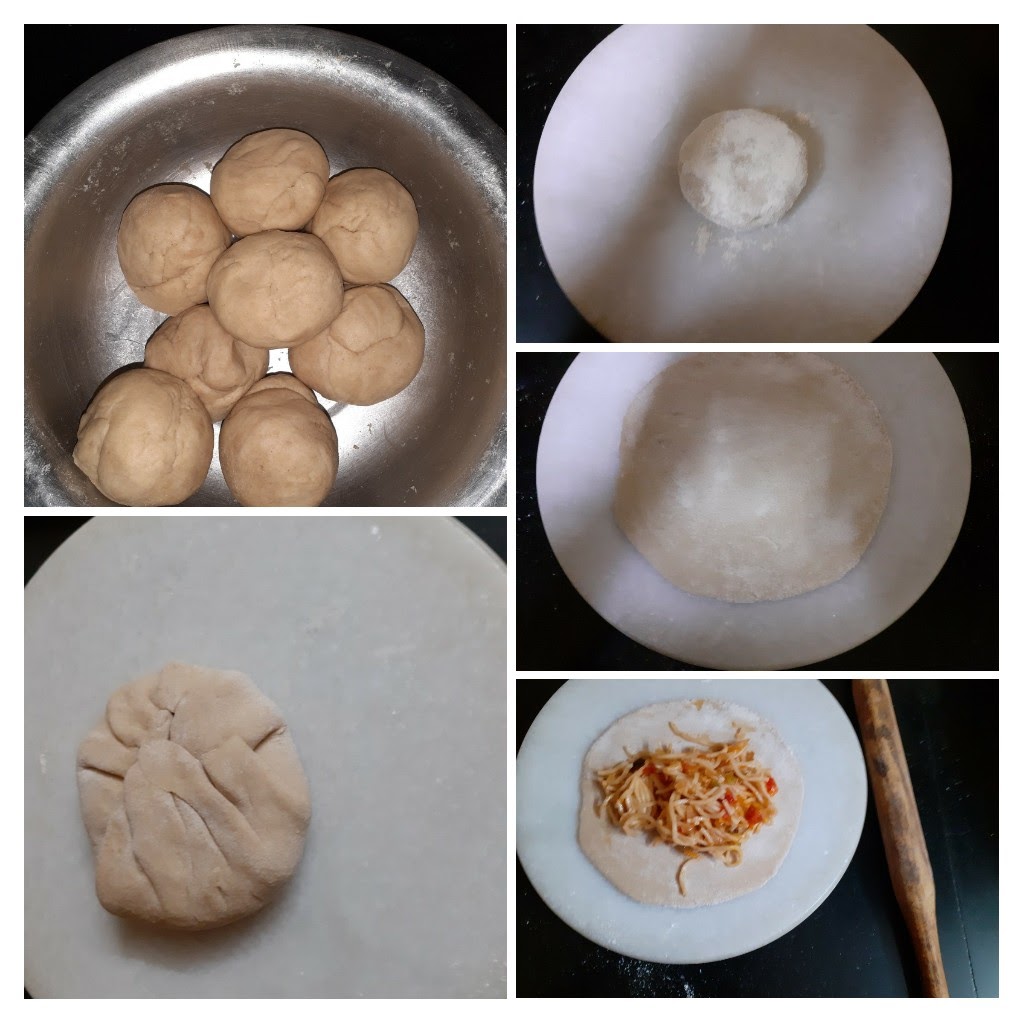
Chinese Paratha
This recipe is one that has been sitting in my recipe book for the past 20 years. I made this as a young mother, with no success at making Veg Hakka noodles, as I did not understand what aldente meant.


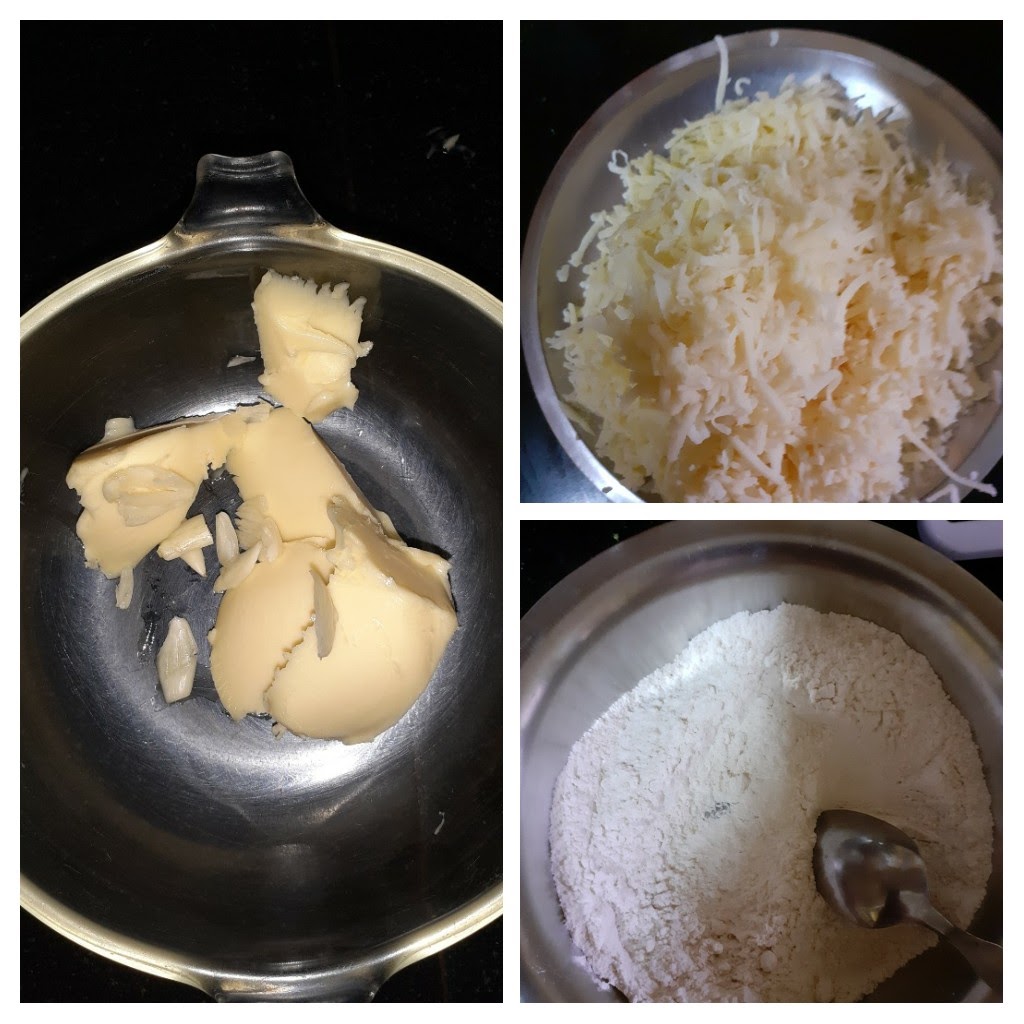
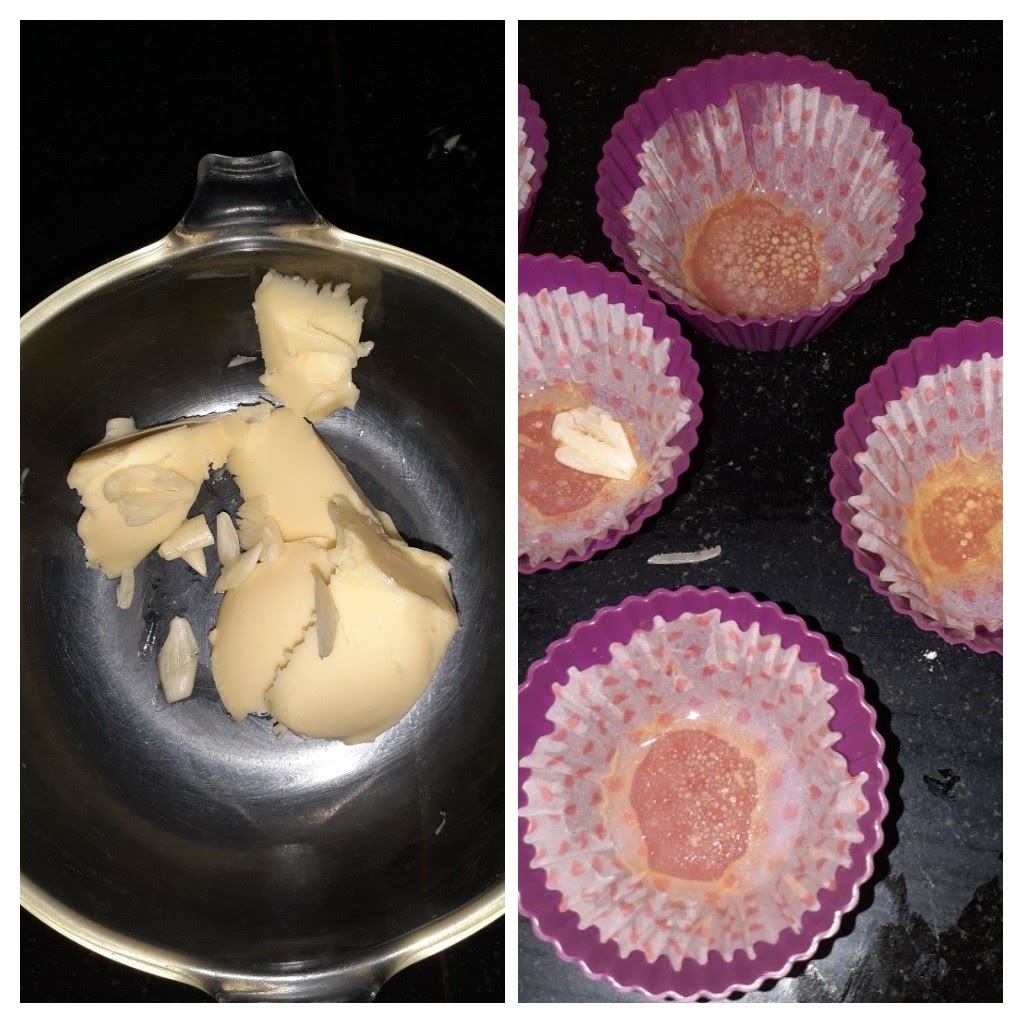
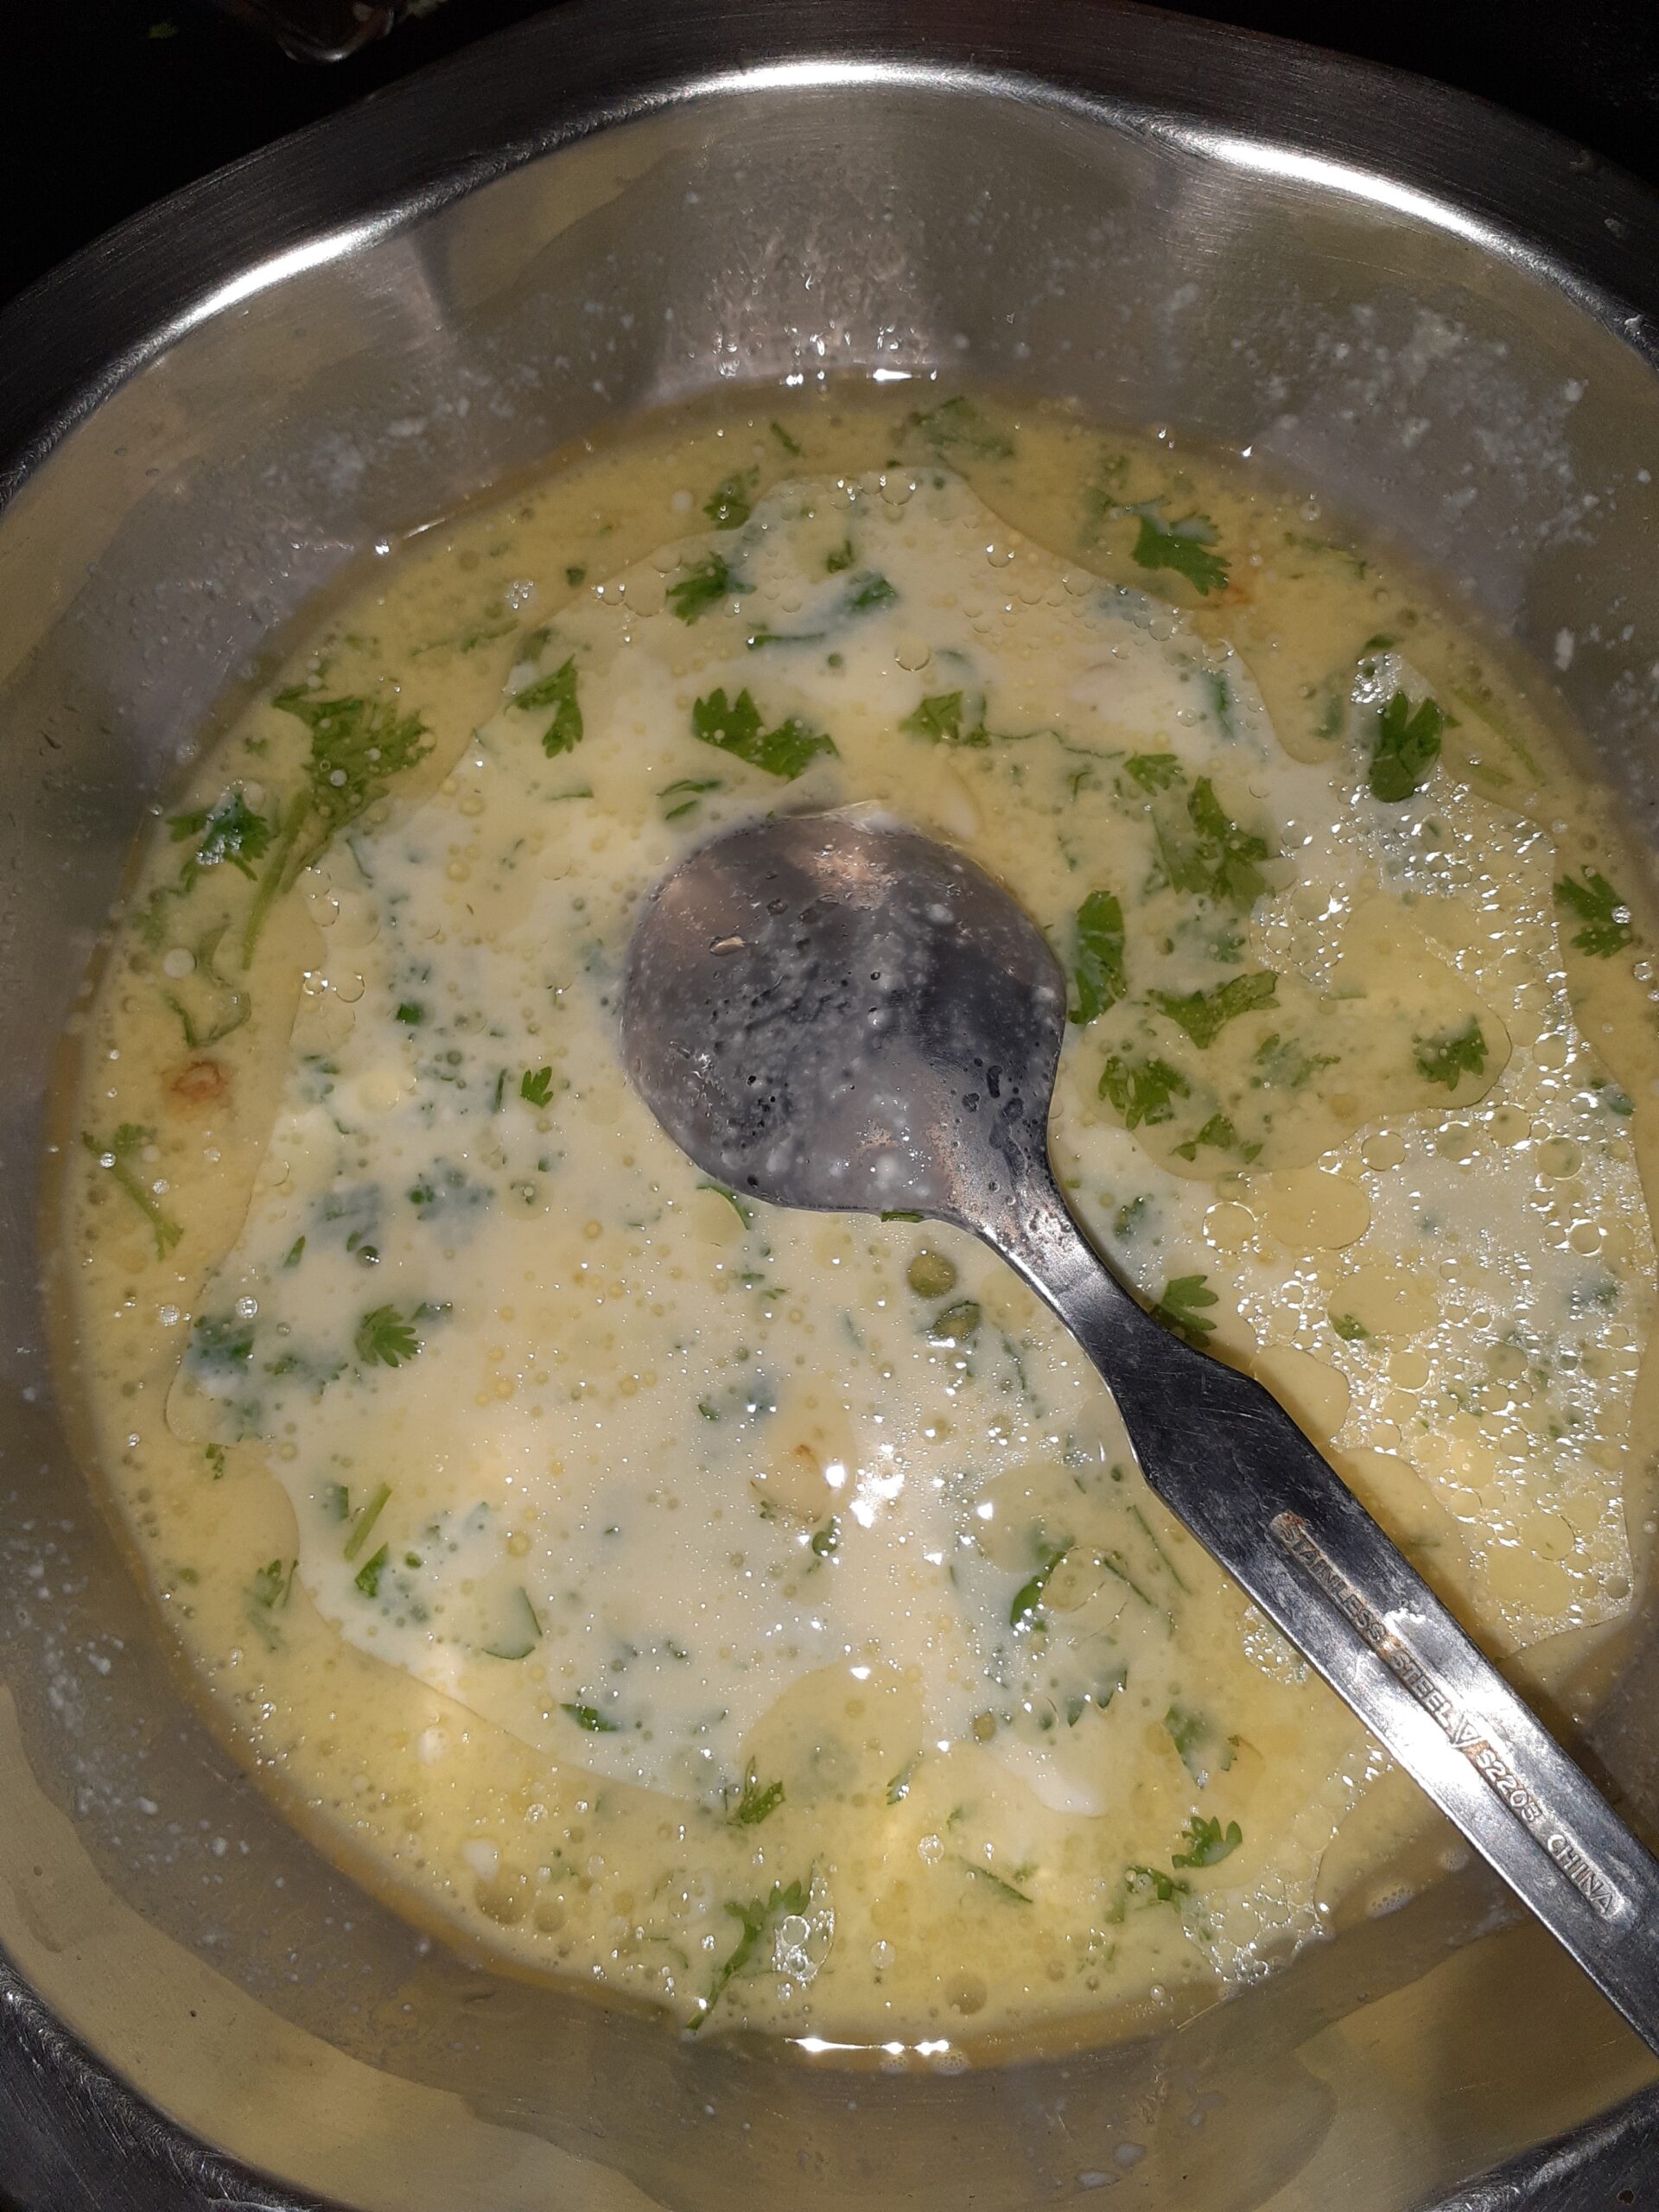
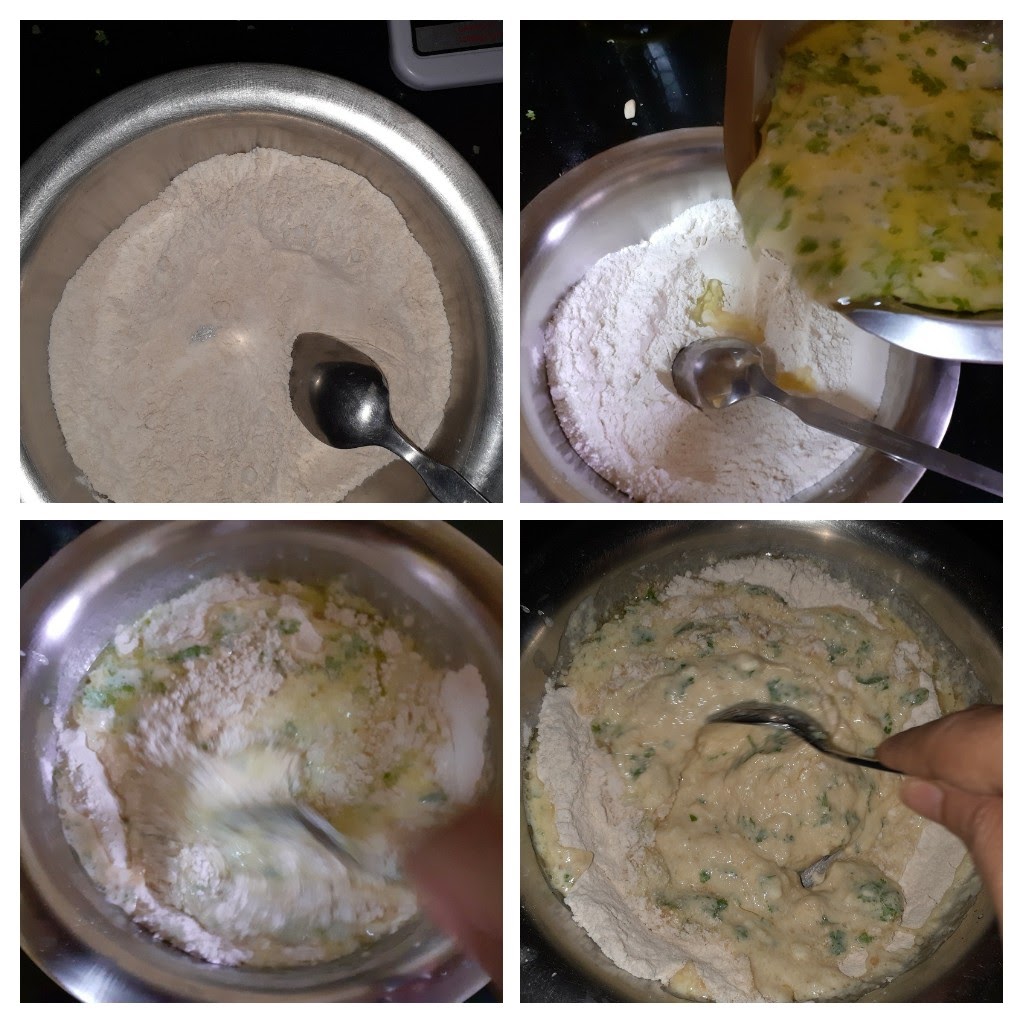
Savory Muffins
These Muffins are so buttery and cheesy with a melt in the mouth texture. They taste almost like a Quiche and are very simple to make. You can mix in vegetables if you want, I have just kept them plain. They are a great option for snack time or good to go in children’s snack boxes. They keep good up to a week in the refrigerator. I have used plain flour/ Maida here, but as I mentioned earlier that I’m partial to wheat flour, I will be trying these muffins with wheat flour soon and blog the result with the recipe. In the meanwhile let’s get to the recipe right away.