Risotto is an Italian dish made of rice. It is cooked in a broth until creamy and combined with sauteed onions, other vegetables, and cheese.
This recipe of Mushroom Risotto is tasty and healthy at the same time. This recipe was spotted by my girl while browsing the internet and she had been asking me to make it for her. So decided to give it a try, and it really tastes delicious and therefore it gets to feature on my blog. I do make the regular Risotto once in a while but the use of Daliya seemed very novel and different to me.
In this recipe, I have replaced the rice with Daliya(broken Wheat that is coarse). Lapsi or Wheat Rava also can be used. The key to a good Risotto lies in the broth and the Parmesan cheese. A large variety of vegetables can be used in making the broth.
If you are a regular at making Risotto follow the same process as with rice. Beginners may want to follow the recipe carefully. I have put in a video too for guidance.
The Risotto made with rice makes use of wine to enhance the taste. I have kept this wheat Risotto very simple with everyday ingredients. Simple ingredients make for great flavour always.
This recipe requires about 1 litre of vegetable broth. I made the broth at home, if you use broth cubes, that is fine too.
In this recipe, I have not given the stepwise instructions, but I have included a video of the whole process instead. Hope you find the video helpful.
Here is the recipe of Mushroom Risotto with Daliya for you-
PREP TIME: 20 Mins COOK TIME: 40 Mins
TOTAL TIME:60Mins COURSE: MAIN
CUISINE: WORLD FOOD SERVINGS: 3
AUTHOR: Rajni Ram
Ingredients for Broth:
Carrot 1
Cucumber 1
Onion 1 large
Broccoli 4 to 5 florets
French Beans a few
Garlic 4 to 5 cloves
Coriander/ Cilantro few sprigs
Salt as per taste
Ingredients for Risotto
Mushrooms 200 gm
Daliya (broken Wheat) 1 cup washed
Garlic 8 cloves (divided)
Onion 1 cup (chopped)
Vegetable broth 4 to 5 cups approx.
Salt as required
Pepper powder 1 to 1.5 tsp
Parmesan Cheese 3 tbsp (add more if you prefer)
Directions for broth:
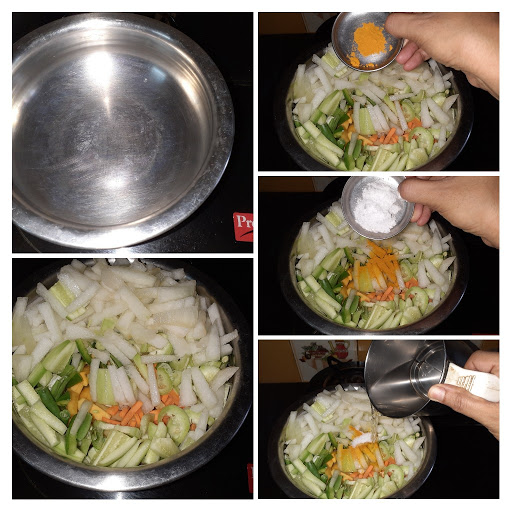
Chop all the vegetables mentioned under Broth, put them in a saucepan, add 1 litre + 1 cup water and salt and boil for 10 minutes. Cool completely and use as required. Other vegetables that you may like can also be added to make the broth.
Directions for Risotto:
In a pan take 1 tablespoon butter and heat, add the garlic and saute on high for 30 seconds, now add the chopped mushrooms and saute for a minute. Flame to be on high throughout sauteeing. Add the salt and continue to saute. The mushroom will release a lot of moisture, continue to saute, and let the moisture dry. When the moisture is almost dry add the pepper powder and continue to saute until all the moisture has evaporated. Transfer the sauteed mushrooms to another vessel.
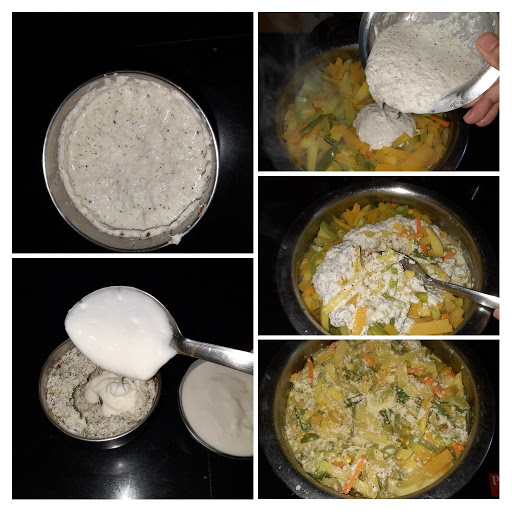
Now in the same pan add 1 tablespoon butter and heat. Add the crushed garlic and saute for 30 seconds. Now add the finely chopped onions and continue to saute. Saute on high flame. When the onion turns translucent add the Daliya and stir nicely. Add 1 cup of broth, stir, and cover the pan and cook for 5 minutes on low flame. Open the lid after 5 minutes, pour 1 more cup of broth, stir well and cover and cook again on low flame for 5 minutes. Now when you open the pan, the Daliya would be cooked, now we only have to get it soft. Add another cup of broth, and salt, stir and cook on low flame. The pan need not be covered now. As you cook the Daliya keep mashing with the back of a ladle to get a creamy texture. Now add pepper powder and stir well. add another cup of broth, stir and continue cook on low flame. Once all the water is absorbed, add in the sauteed mushrooms and give it a stir. Add the last cup of broth now and cook on a low flame. Now when the water gets absorbed, add 3 tablespoons of Parmesan Cheese, stir nicely, so that the cheese melts and gives the Risotto its gooey and creamy texture. Put off the flame. If you like cheese you can add more than 3 tablespoons too. In all 4 to 5 cups of broth is required to get that creamy texture.
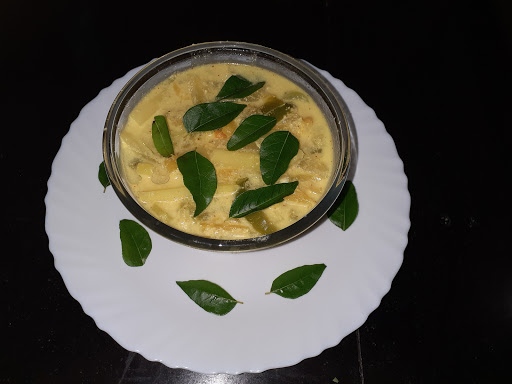
The healthy and delicious Mushroom Risotto is ready. Enjoy hot. Bon Appetit.
SHORT VIDEO OF THE METHOD HERE????
NOTES:
1. Any variety of vegetables can be added to the broth, in addition to the mentioned ones.
2. Around 4 to 5 cups of broth is required for this recipe. If in case the broth gets over, and you still have to add a cup, plain water can be added.
3. Parmesan is the most recommended cheese for this recipe, as cheddar will become tough and stretchy once cooked, whereas Parmesan is a softer one.
4. In place of, or in addition to mushrooms, Broccoli also can be used.
If you tried this recipe and liked it please comment below. I would love to hear from you. If you have a query about the recipe email us and ill respond as soon as I can.
If you would like to receive our recipes on your mail please leave your mail id at the homepage. Every time Rajjo’s Kitchen has a new post we will mail the recipe to you.
Baigan Raita/Kathrikai Thair Pachchadi
Raita is a yogurt-based condiment. It usually contains cooked or raw vegetables/fruits/pulses, mixed with the Yogurt/Dahi and tempered with Mustard and Jeera. The Raita is usually served with Biriyani, Pulav, Parathas, Naans, or can be served as a dip for Kebabs too.
Raitas are a regular feature at my house. Whenever I make Parathas I usually pair it with a Raita instead of plain curd, and it goes without saying that Biriyani is almost always served with raita. I use raitas such as Mint raita as a dip for Kebabs too.
This recipe of Baigan raita is a very simple one, gets done in 15 minutes, at the end of a tiring working day when one wants to eat veggies but isn’t up to cooking a proper subji, is when this Raita comes in. I have used the Big Bharta Baigan(Kathrikai) in this recipe. The small ones will work fine too, but the big ones give it a special taste.
This method of making the Raita really gives a very nice flavour and taste.
In South India this Raita is usually made by roasting the Eggplant over a flame, mashing it, and then adding it to curd along with a tempering of green chilies and ginger.
The big Baigans get mushy too soon, so the trick lies in cutting them appropriately(mentioned in the recipe), the rest is just whisking the curd and adding the masala and the raita is ready.
While you are here please visit other Raita recipes of mine like Bhindi Raita and Mint Raita more Raita recipes will be uploaded soon.
Here is the recipe of Baigan Raita for you–
PREP TIME: 10 Mins COOK TIME: 5 Mins
TOTAL TIME: 15Mins COURSE: MAIN
CUISINE: SOUTH INDIAN/ SERVINGS: 4
NORTH INDIAN
Ingredients:
Baigan/Kathrikai(big one/Bharta Baigan) 1 medium-sized Curd 500 ml Salt as per taste Red chilli powder 1 tsp( for more spice can add more) Roasted Cumin/Jeera powder 1 tsp Sugar 1 tsp
Directions:
Cutting of the Baigan: Big Eggplants/Baigan tend to get very mushy when cooked. So it is important to cut the Baigan such that every piece retains the peel(skin). The Baigan must be cubed into small pieces. Cutting in a way that every cube has the peel ensures that they don’t get mushy, and cubed Baigan must be fried in 1 tablespoon oil on high flame until they get a light brown tint. Add a small amount of salt while frying them. The Baigan/ eggplant must not lose shape. It should have cooked, but remain firm. Set these fried pieces aside to cool.
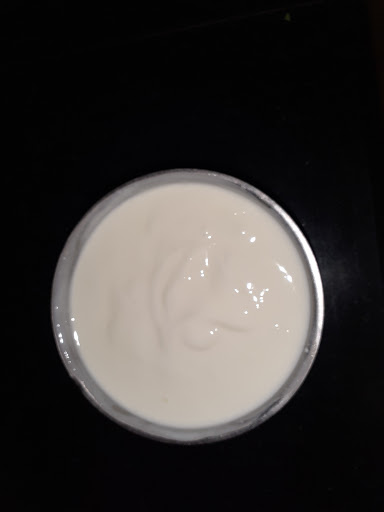
Now take the curd in a bowl and lightly whisk it, just smoothening it will also do, as too much whisking will make the curd runny. Add the salt, red chilli powder and roasted cumin powder, sugar and mix well. Now add the cooled and cooked Baigan pieces to the curd and spice mix and put it in the refrigerator until you serve. The delicious Baigan Raita is ready.
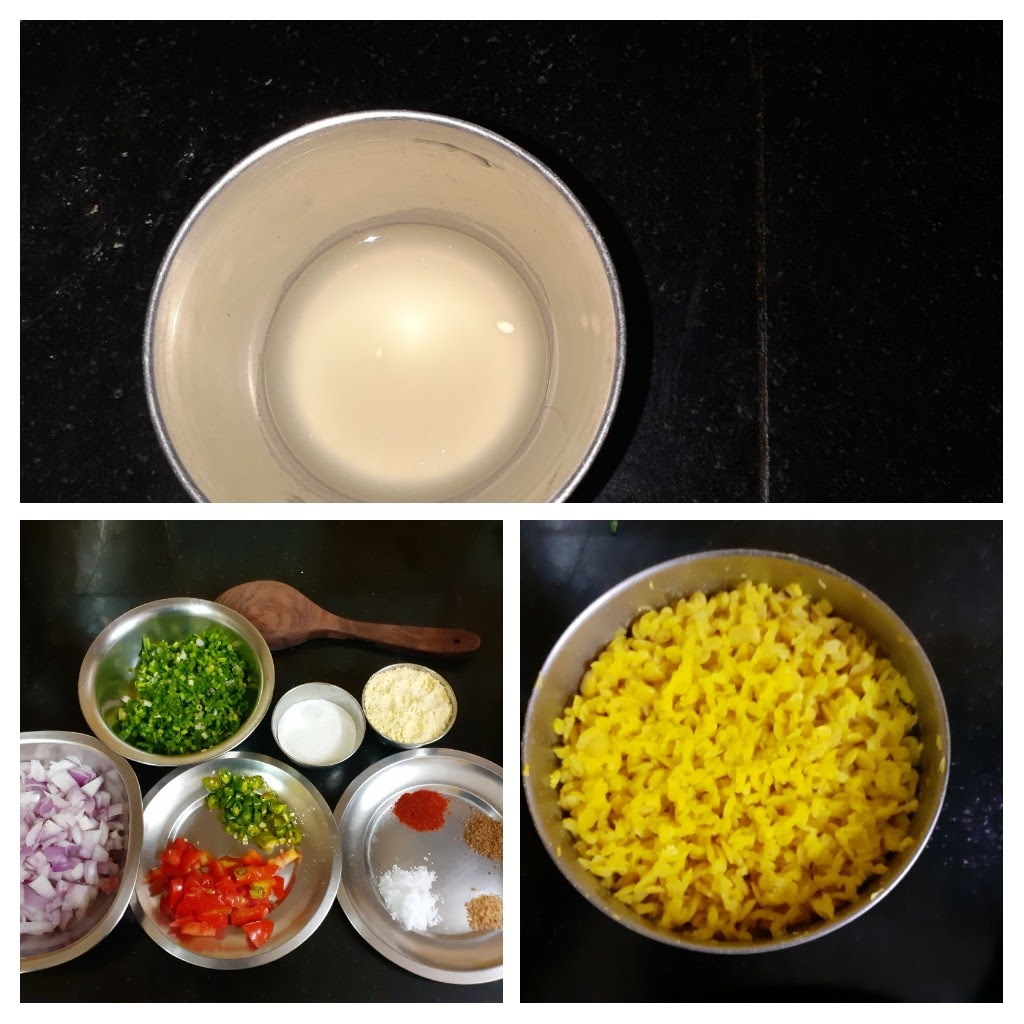
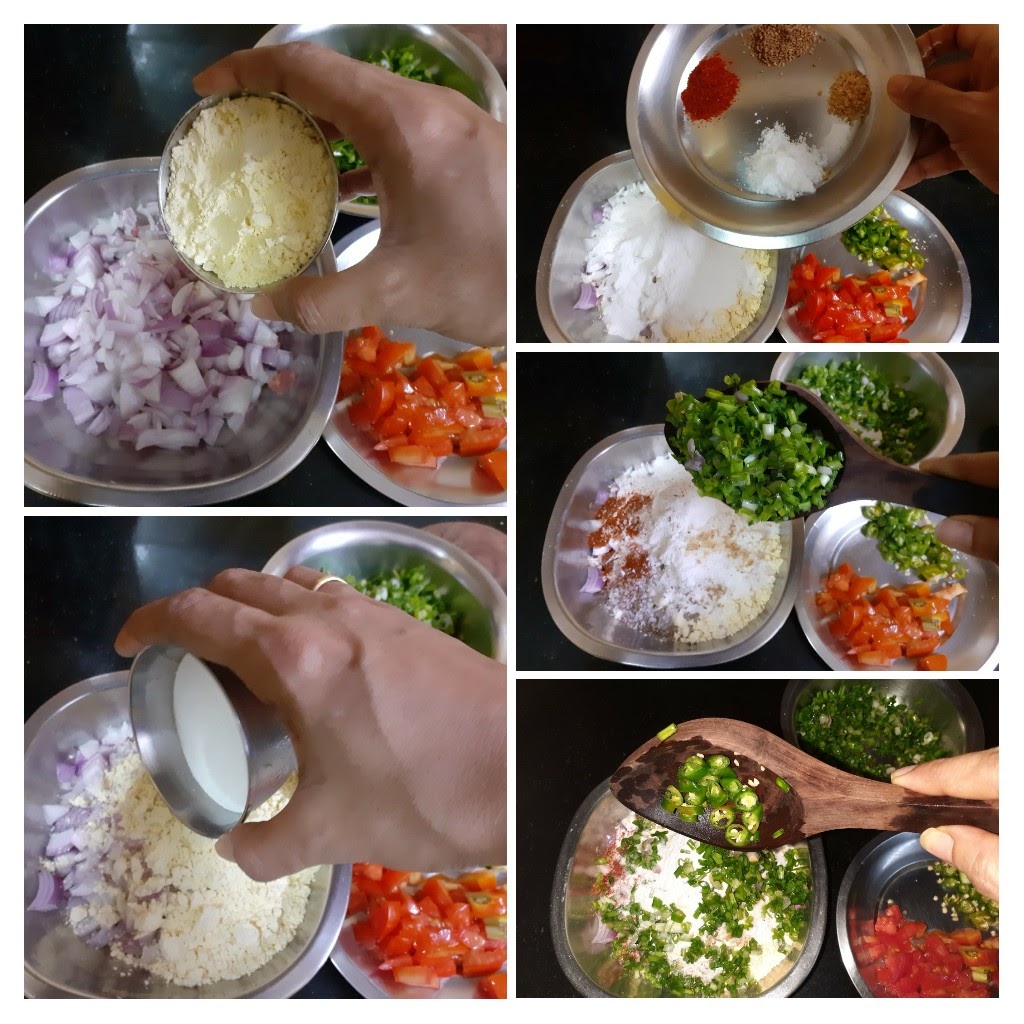
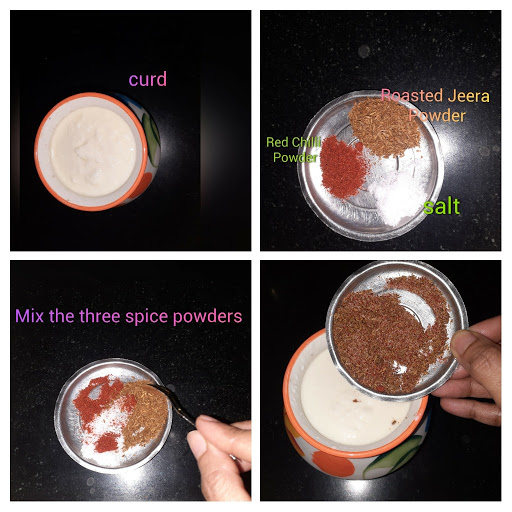
1. Assemble all ingredients. Cut the eggplants/Baigan as stated in the directions for cutting above.
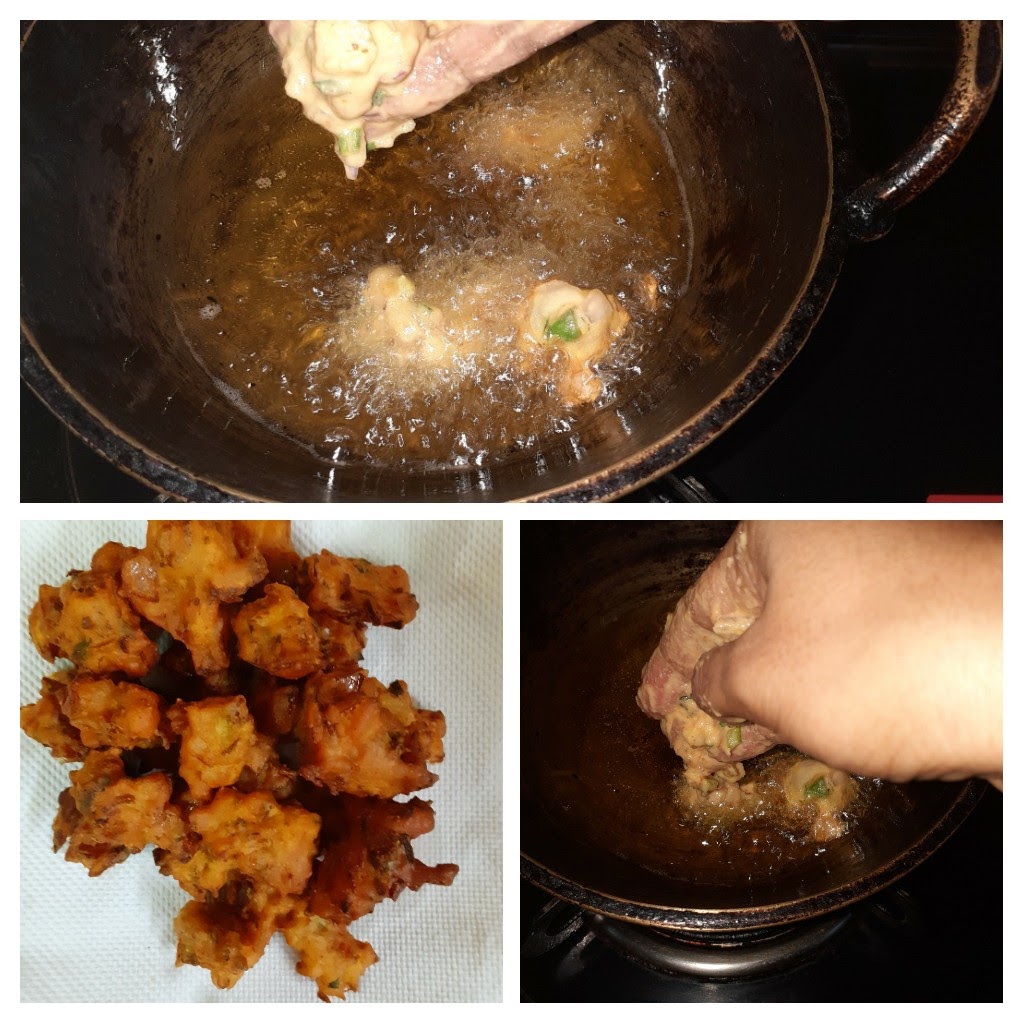
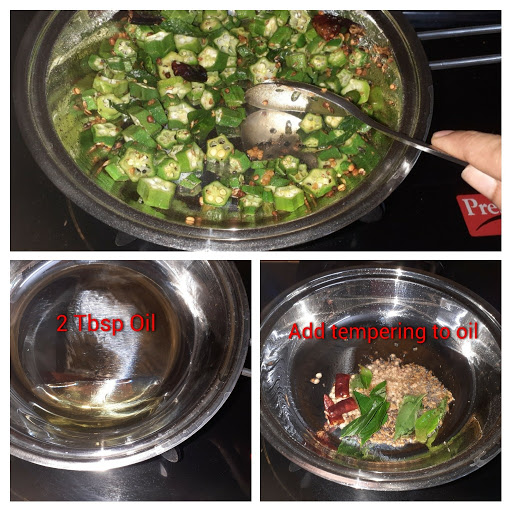
2. Now in a Kadai or pan take 1 tbsp oil and heat. Put in the Cubed Baigan and fry on high flame adding a minute amount of salt. Do not add too much salt. The Baigan should get a light brown tint, should be cooked, and yet retain its shape and not turn limp.
3. Now lightly whisk the curd. Add the salt, red chilli powder, roasted cumin powder, sugar and stir nicely.
4. Add the cooled and cooked Baigan pieces to the curd mix and refrigerate until ready to serve.
NOTES:
1. If using the big Eggplants cutting them as recommended is a crucial step.
2. Adding sugar gives a very nice taste to the Raita, so try not skipping this step.
If you tried this recipe and liked it please comment below. I would love to hear from you.
If you want the recipes emailed to you, leave your id in the homepage near the????
icon. Whenever we have a new post, the recipe will be mailed to you. Thank you for showing interest in Rajjo’s Kitchen.
Thengai Therattipal/ Palkova (Coconut Infused)
Therattipal or Palkova is a dehydrated milk sweet, made with only two ingredients-Milk and Sugar. Therattipal is a traditional recipe made for festivals like Janmashtami and Deepawali. In our house, Therattipal is the main offering to Krishna apart from Sweet Appam and for Deepawali too we start the festival with a spoon of the Therattipal immediately after Ganga Snanam.
This time I have given a twist to the Therattipal and added roasted coconut gratings to it, which enhances the taste of this sweet dish. Anyway until we add the coconut the method of the recipe is the same. Usually, no cardamom powder is added to this sweet as the milk taste is what should pervade, but if one does prefer, it can always be added.
The coconut flavour is mild and not very intense. The milk and the coconut combine really well to give a different taste which is a welcome change from the regular Therattipal.
This recipe if made with pure organic cows milk tastes divine, as while the milk reduces you can see the natural fat bubbling out. And it tastes as though ghee has been added to it. These days since we all use milk packets or tetra pack cartons of milk we don’t see this process happening naturally and so we add a teaspoon of ghee at the end. its an optional step and the sweet will still taste the same, if not added.
While you are here please check out my other Sweet dish recipes like –
The same recipe can be followed for regular Therattipal/Palkova too. Only the coconut doesn’t have to be added.
Here is the recipe for Thengai Therattipal/Palkova(coconut-infused)-
PREP TIME: 5Mins COOK TIME: 1 hr
TOTAL TIME: 1 hr 05Mins COURSE: DESSERT
CUISINE: SOUTH INDIAN SERVINGS: 4
AUTHOR: Rajni Ram
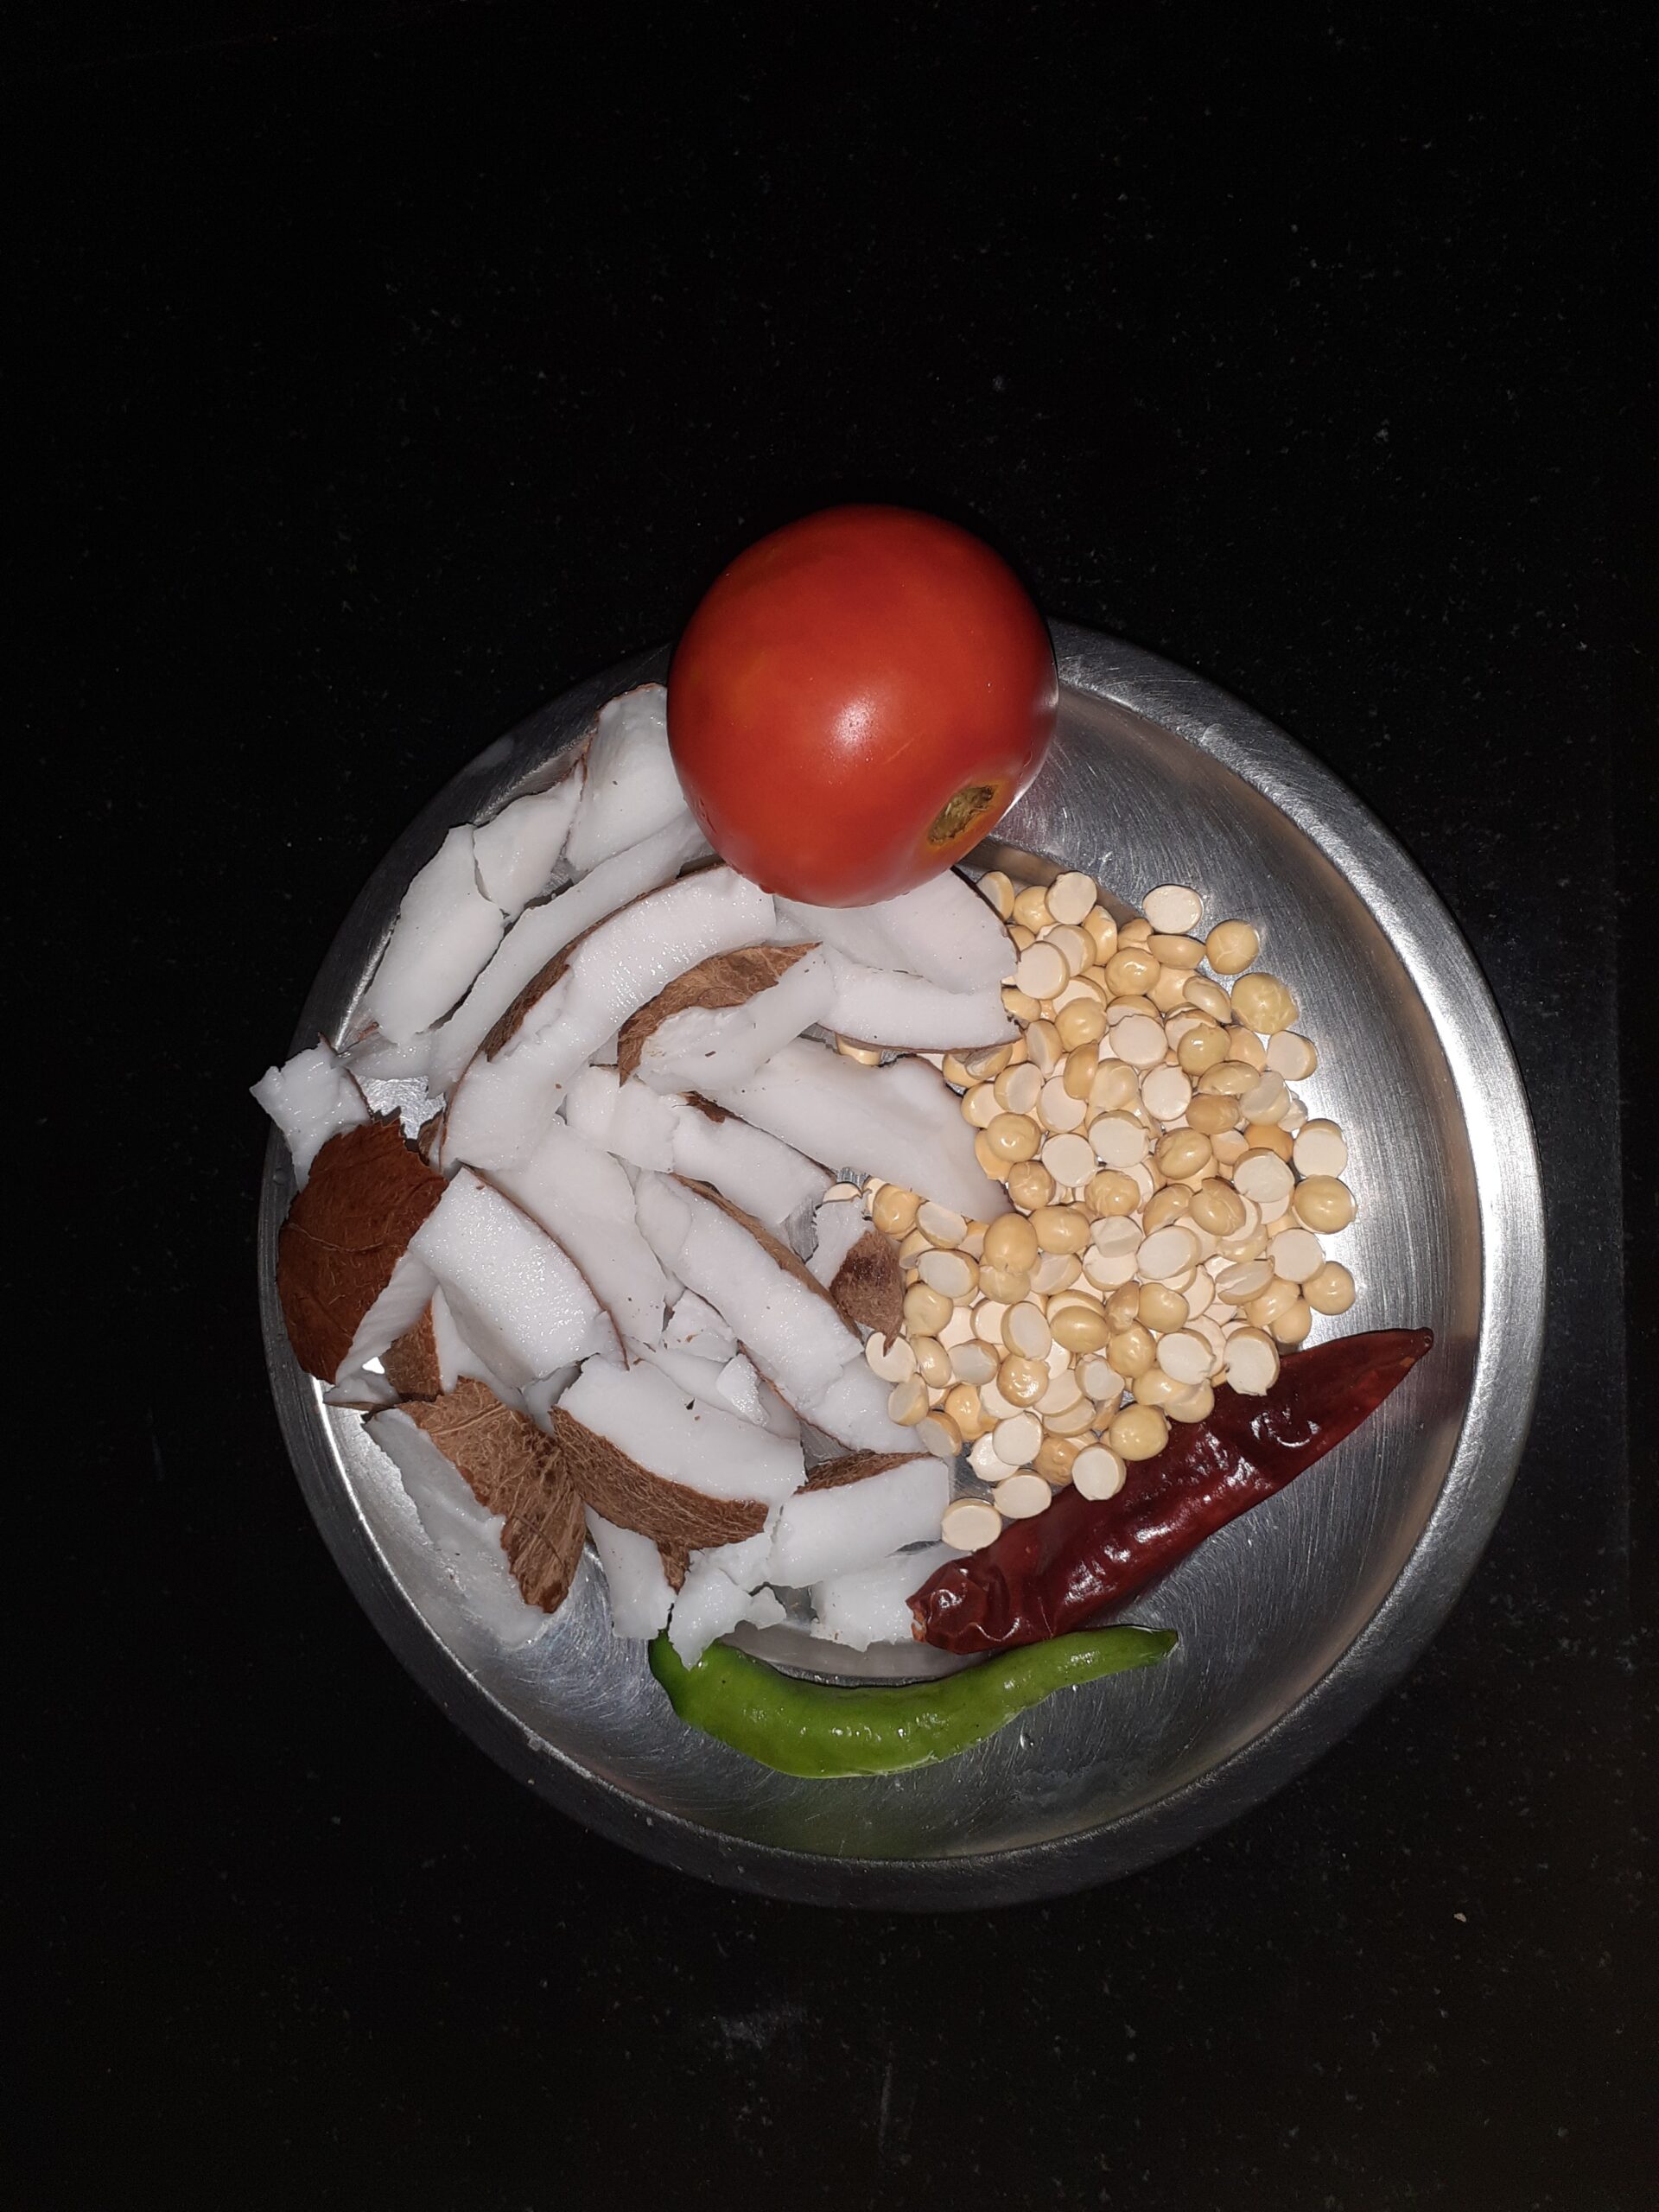
Ingredients:
Milk (toned milk) 1.5 litres (refer to note1) Sugar 140 gm approx (reduce if you prefer less) Coconut (grated) 1 cup
Directions:
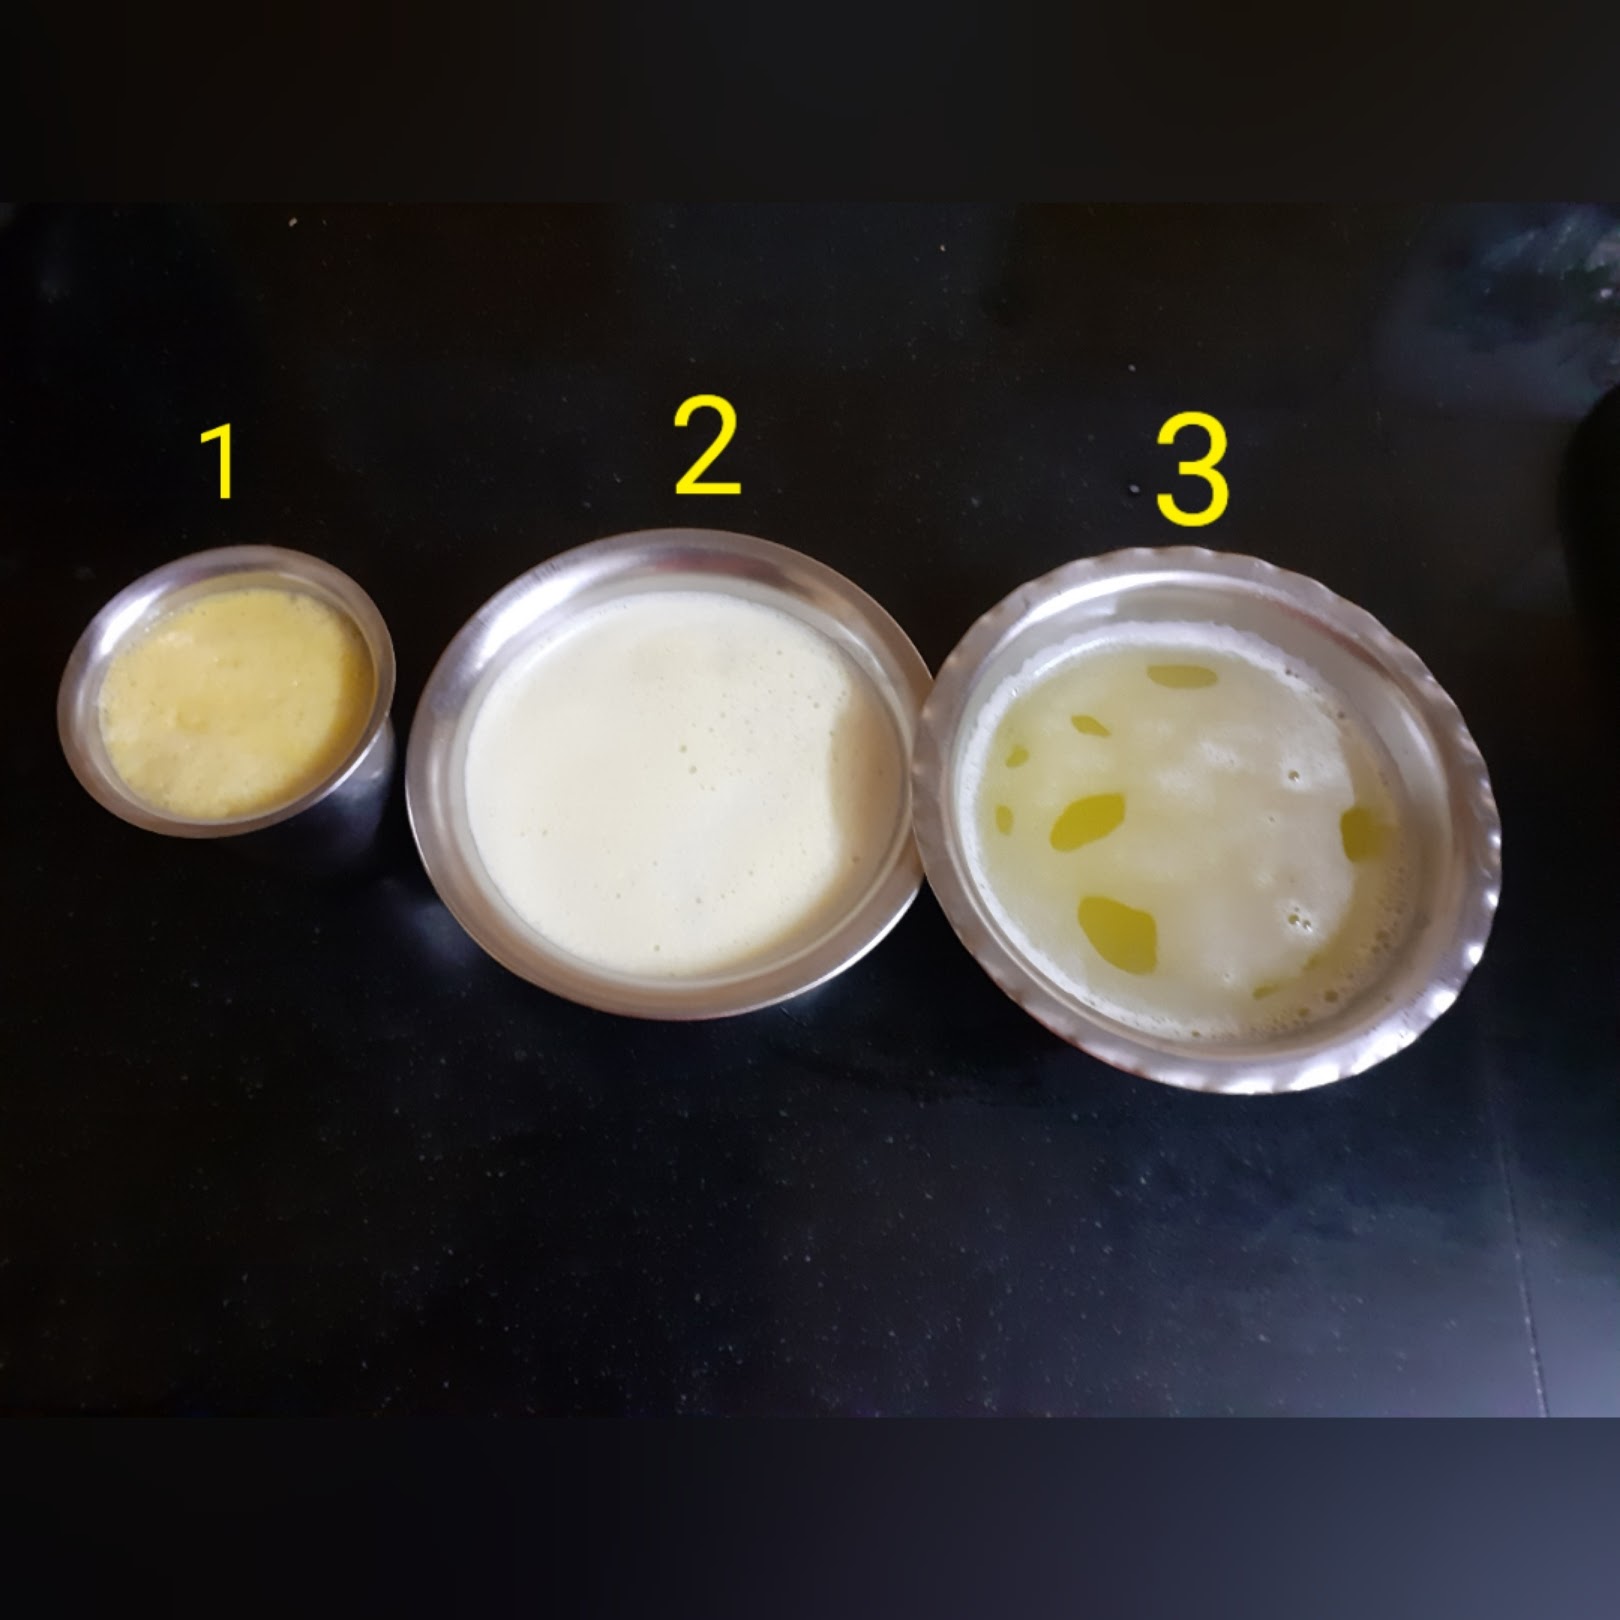
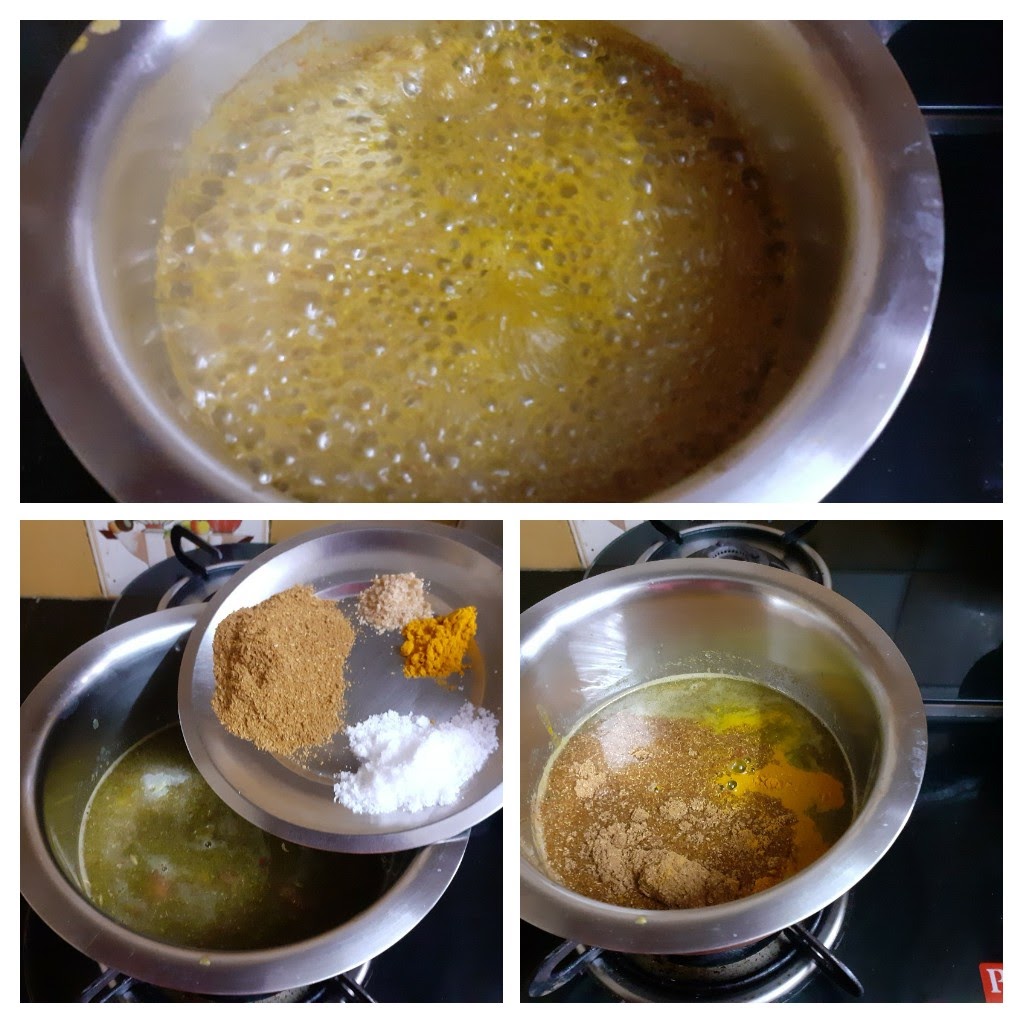
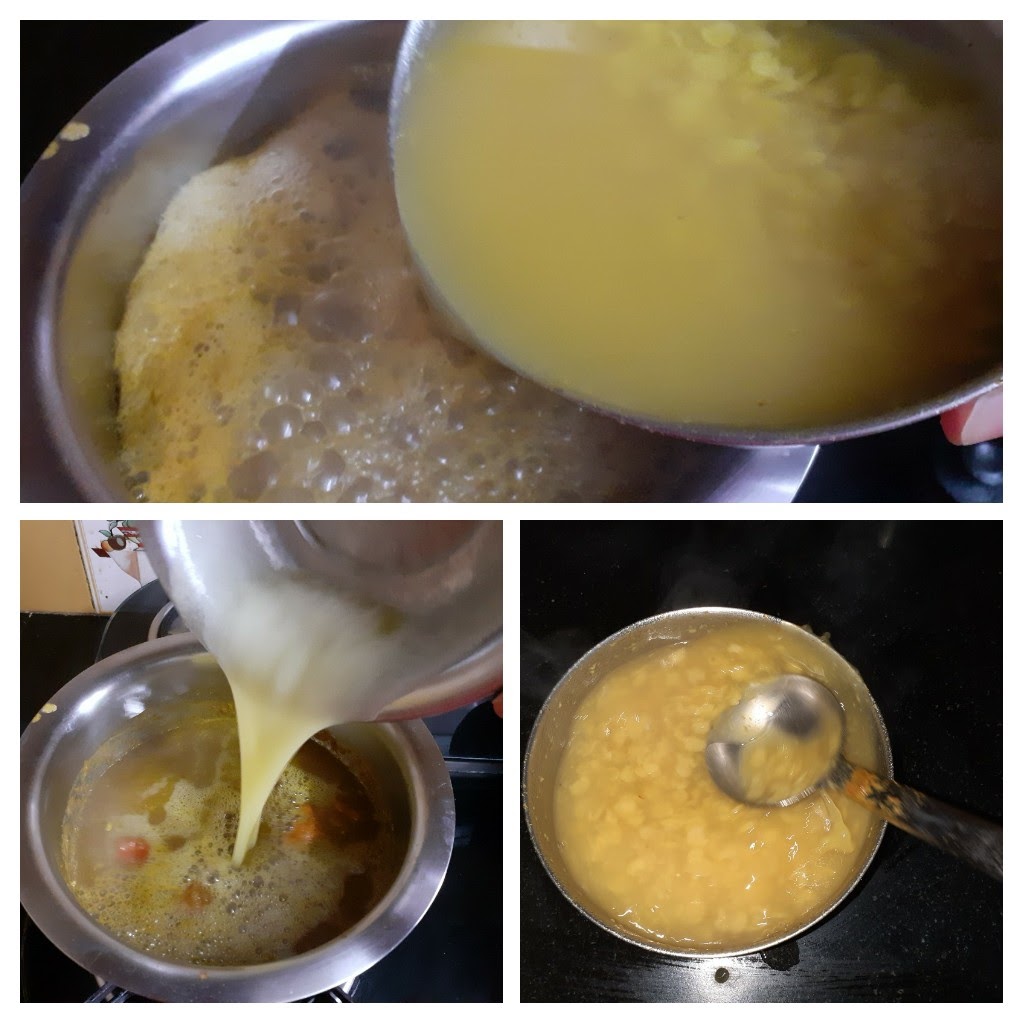
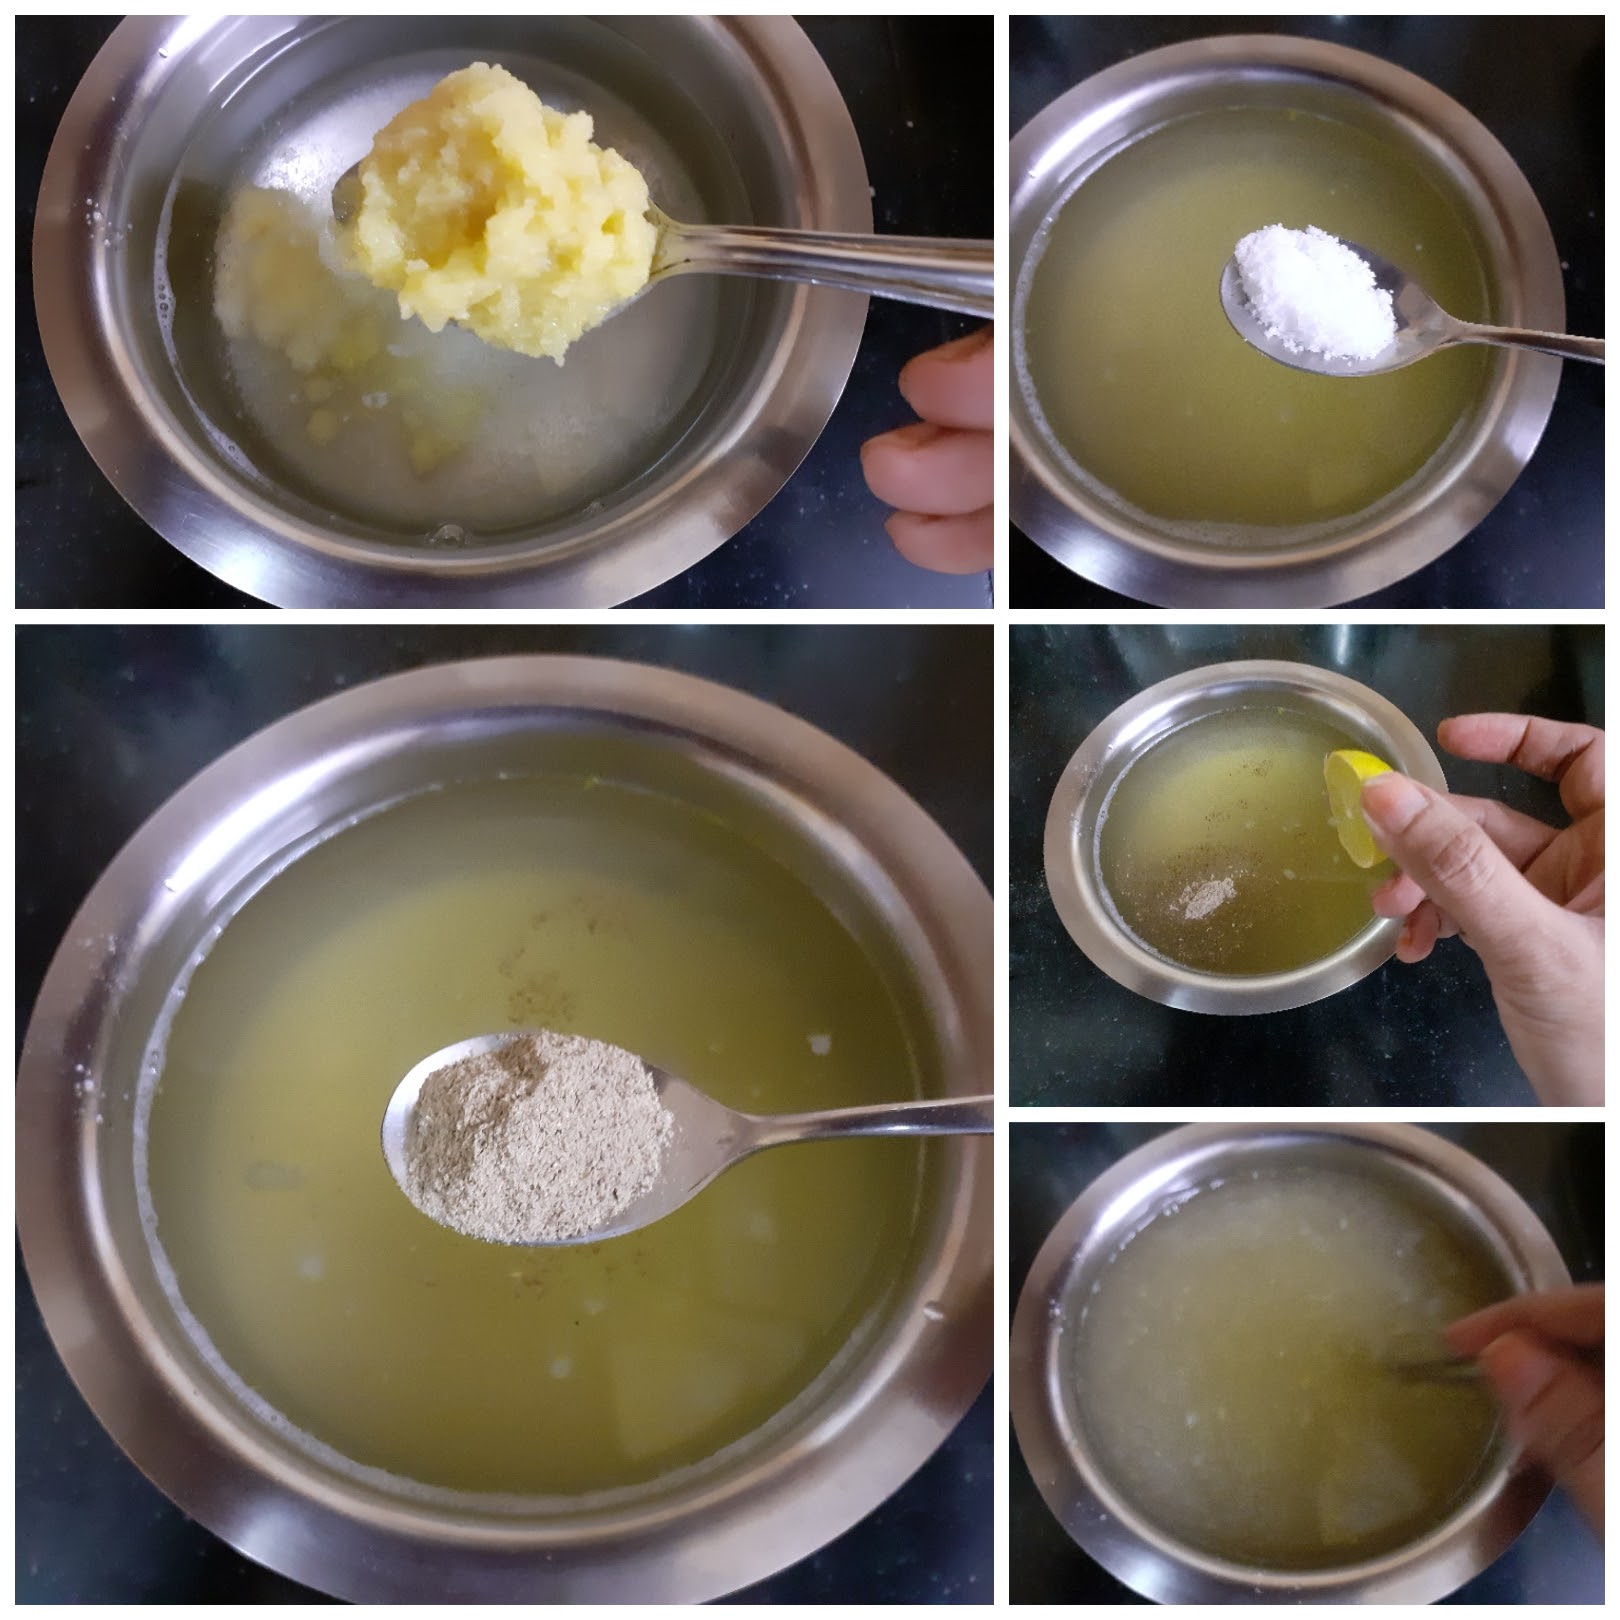
Pour the milk into a heavy-bottomed vessel or Kadai and begin to boil. It has to be reduced by almost 3/4 of the quantity by stirring constantly. For the first 10-15 minutes, constant stirring is required, thereafter keep flame on medium heat and keep stirring from time to time. As the moisture from the milk evaporates the consistency of the milk becomes denser and the texture also starts becoming granular/thready. Keep stirring until the milk has lost almost all moisture(check picture for reference) and now add in the sugar and start stirring again. Once the sugar is added the reduced milk mixture liquifies a little, it is normal and nothing to worry about. Continue stirring until the mixture loses all the moisture al does not stick to the bottom of the pan anymore. Another way to check is to put a little Palkova in a plate, just wet your hands with water, and try to take a small bit of the Palkova and shape it to a mini ball. If the ball forms, you can turn off the flame. Now in In another Kadai, put 1/2 tsp ghee and drop in the coconut gratings and start roasting it until it becomes dry and it is a nice brown in colour. Transfer it to a plate and cool it. Once cooled, add to the Palakova/Therattipal, switch on the flame and mix nicely until the coconut and the Therattipal are well integrated and switch off the flame. After adding the coconut the mixture turns a little drier. It is natural so nothing to worry. Offer it to Krishna or just have it as dessert. Enjoy. Bon Appetit. If you want just regular Therattipal stop the procedure after adding sugar and reducing it again. Add a teaspoon of ghee for a nice sheen.
STEPWISE RECIPE FOLLOWS:
1. Start by boiling the milk in a heavy-bottomed vessel or Kadai.
2. Keep stirring constantly for the first 10 to 15 minutes and keep scraping the sides of the vessel as the milk solids keep depositing there.
3. Now on medium heat and stirring every once in awhile reduce the milk until almost all moisture gets evaporated.
4. Now add in the sugar and start stirring again. The mixture liquified a little again but it is natural and again will solidify.
5. Keep stirring until the mixture does not stick to the bottom of the vessel any more. Another method to check for doneness is to take a little amount of the Therattipal and put it on a plate. Wet your fingers and take a small quantity and try to form a ball. If you are able to form a ball, that is the right consistency. Put off the flame.
6. In a small Kadai take little ghee and add a cup of grated coconut and start roasting until it becomes dry and turns a nice brown in colour. When the coconut is dry, it will not stick to the Kadai anymore. Transfer it to a plate and cool.
7. After it cools completely add it to the Therattipal, switch on the flame and stir nicely until the coconut is well integrated with the Therattipal. Once the coconut is absorbed, the mixture will become drier, this is natural and there is no need to worry. Add a teaspoon of ghee finally, just for some sheen. The Thengai Therattipal is now ready.
QUICK VIDEO OF METHOD HERE:
NOTES:
1. I have used Tetrapack toned milk. The more fat content in the milk the lesser the evaporation time. You can use full cream milk too.
2. It took around 1 hour to reduce 1.5 litres of milk.
3. If you don’t wish to add the coconut, the process can be stopped after adding sugar, reducing further and performing the test to see if a ball is formed.
4. If one prefers less sugar, it can be reduced a little.
5. There are many short cut methods to evaporate milk by adding milk powder etc; I use this method for making small amounts of Rabri for jalebis and other such dishes, but I don’t recommend the shortcut method for Therattipal, as this whole sweet dish is about the texture and taste.
6. Cheese too is used for quick evaporation, but again it changes the taste and texture.
Masala Wheat Flour Papdis (Baked)
Masala Wheat Flour Papdis are crunchy crisps made of wheat flour. The wheat flour here can be easily replaced with maida/refined flour or multigrain flour. I usually fry these Papdis, but this time I have baked them as per the request of friends and followers as they wanted something that was not deep-fried. That said, these Papdis can be fried too and I have given both options in this recipe.
When we bake a snack that is traditionally deep- fried there is always a difference in texture. It would be wrong to say that they taste almost like fried ones. The taste is the same, the papdis are crunchy too, but there is a difference in their textures. I also believe that when we prefer a baked snack over a fried one we are willing to adjust to the minute differences that are bound to be there because the technique used is different. Therefore you will not find phrases like “baked but almost like fried” or “baked but as good as fried”, on this blog. Baked is baked and fried is fried, and somewhere there is a compromise in either, shape, colour, texture, taste of the dish. I am not saying this only about the current recipe but in general. When a deep-fried dish is baked there are differences.
This is why I try to keep the fried ones fried, but sometimes I do give in to a little experimenting. I won’t do something because it is a trend, but if I do experiment and the result is blog-worthy I will certainly share it with you all.
Now, these Papdis can be served with tea, they last for a long time when stored in an airtight container. I also make Papdi Chat(street food delicacy) with these, and since they are firm than the Maida papdis, they hold up the sweet curd and chutneys of the Chaat well.
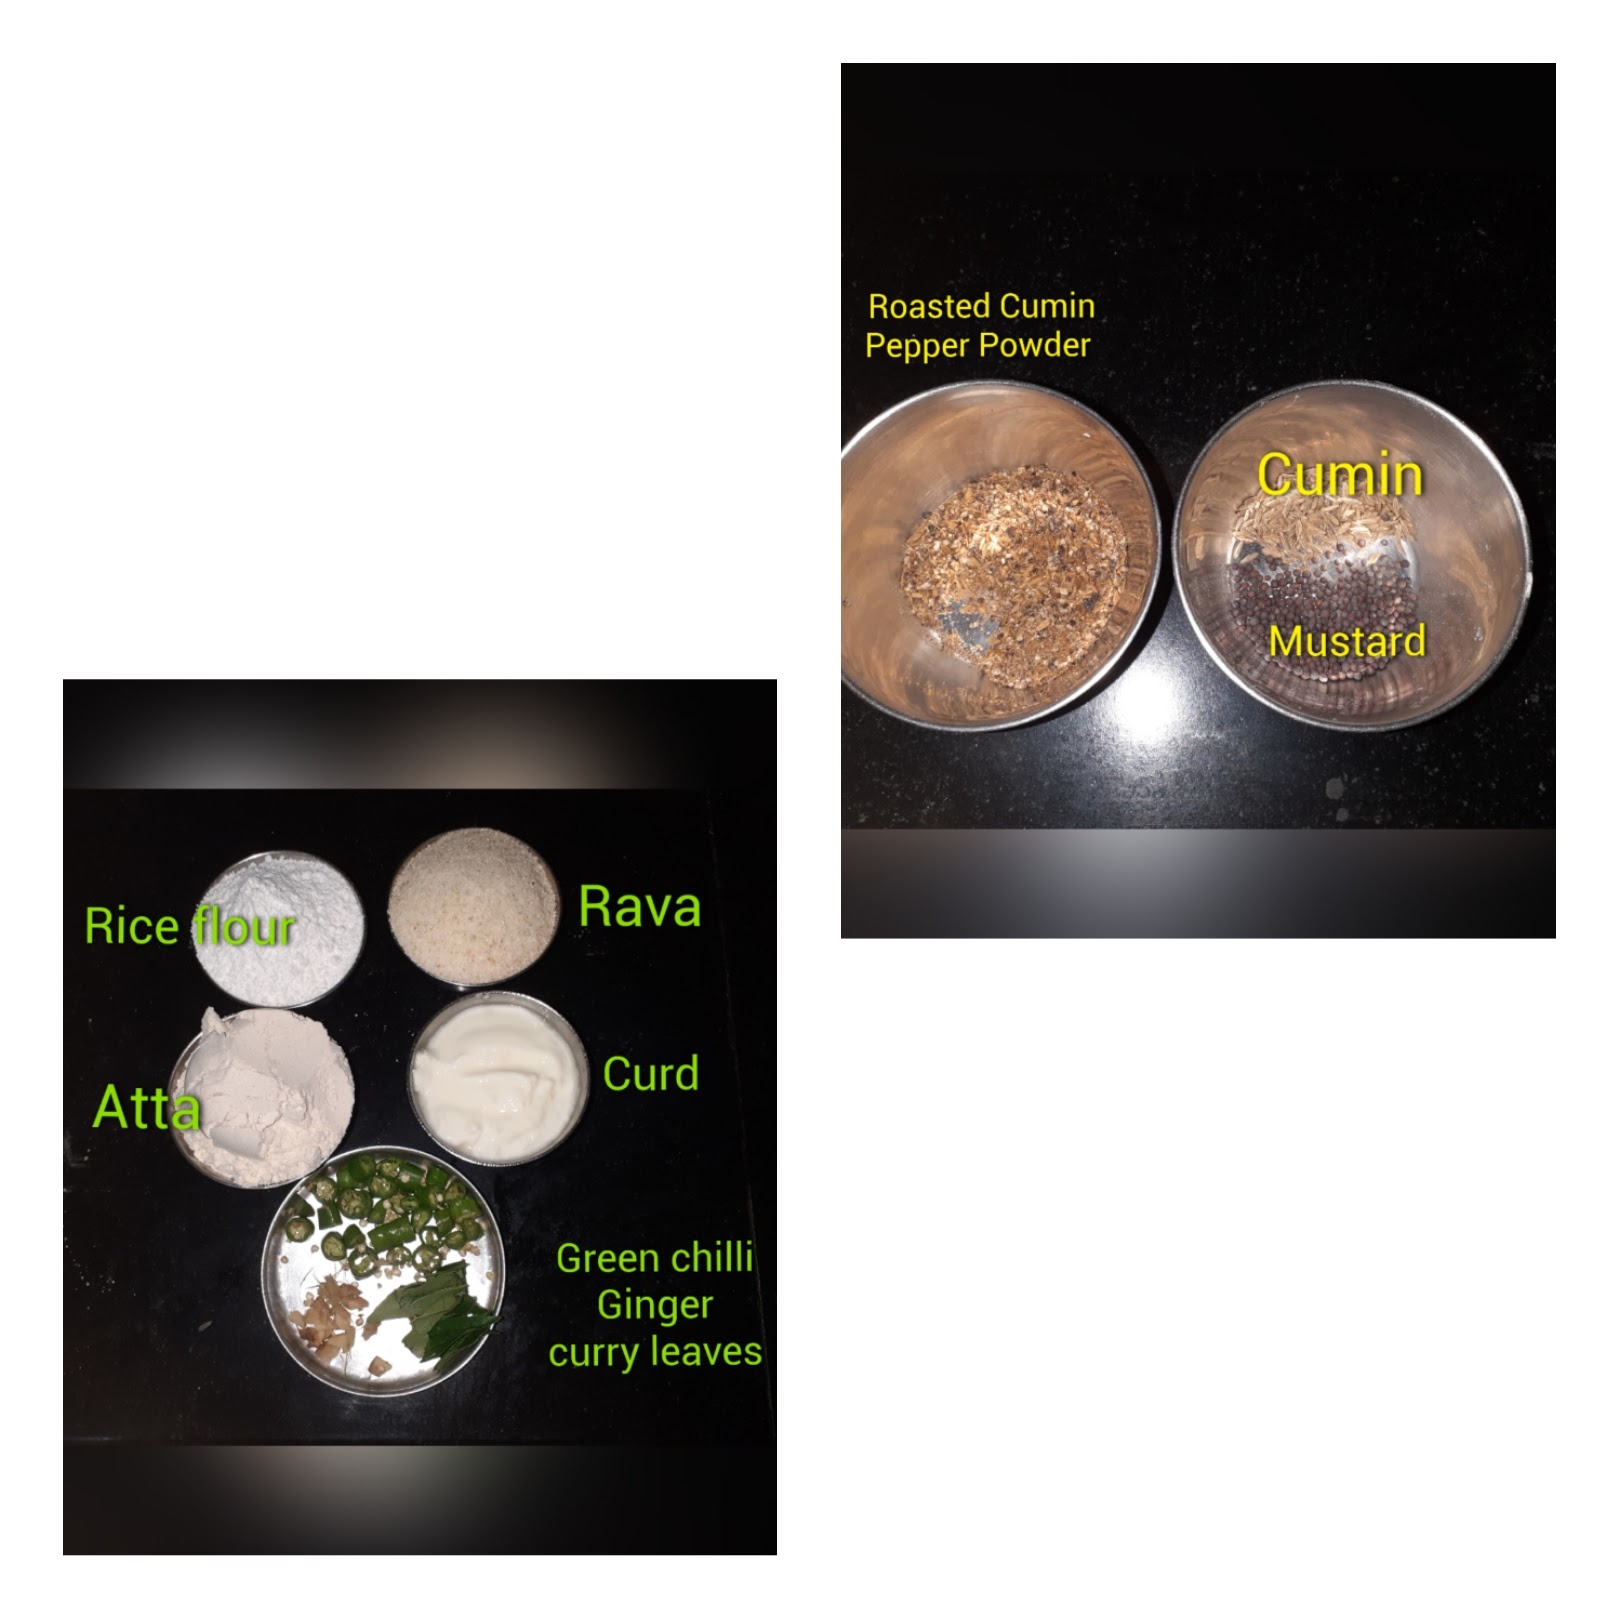
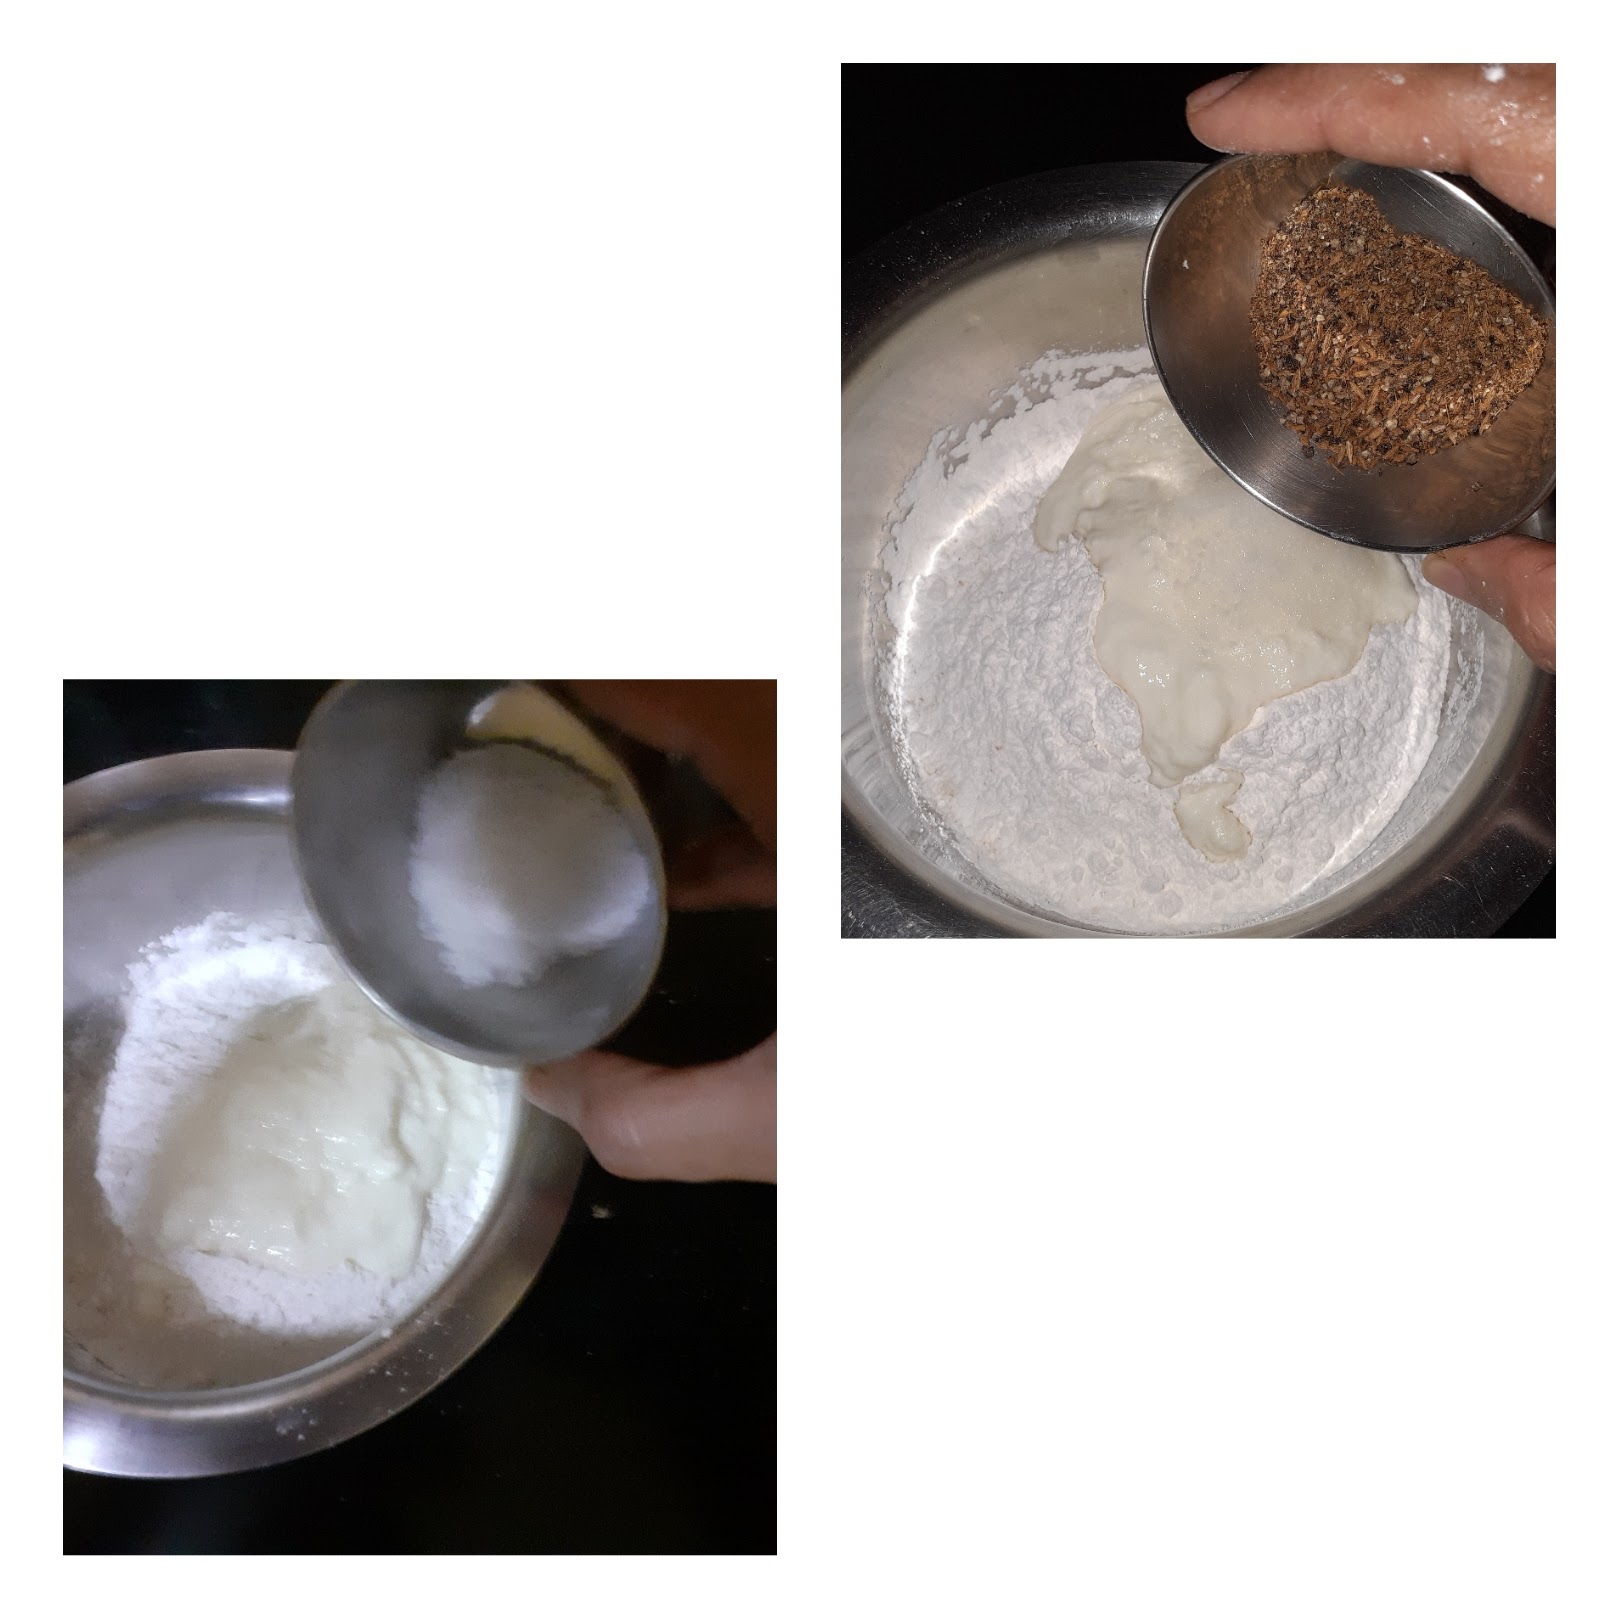
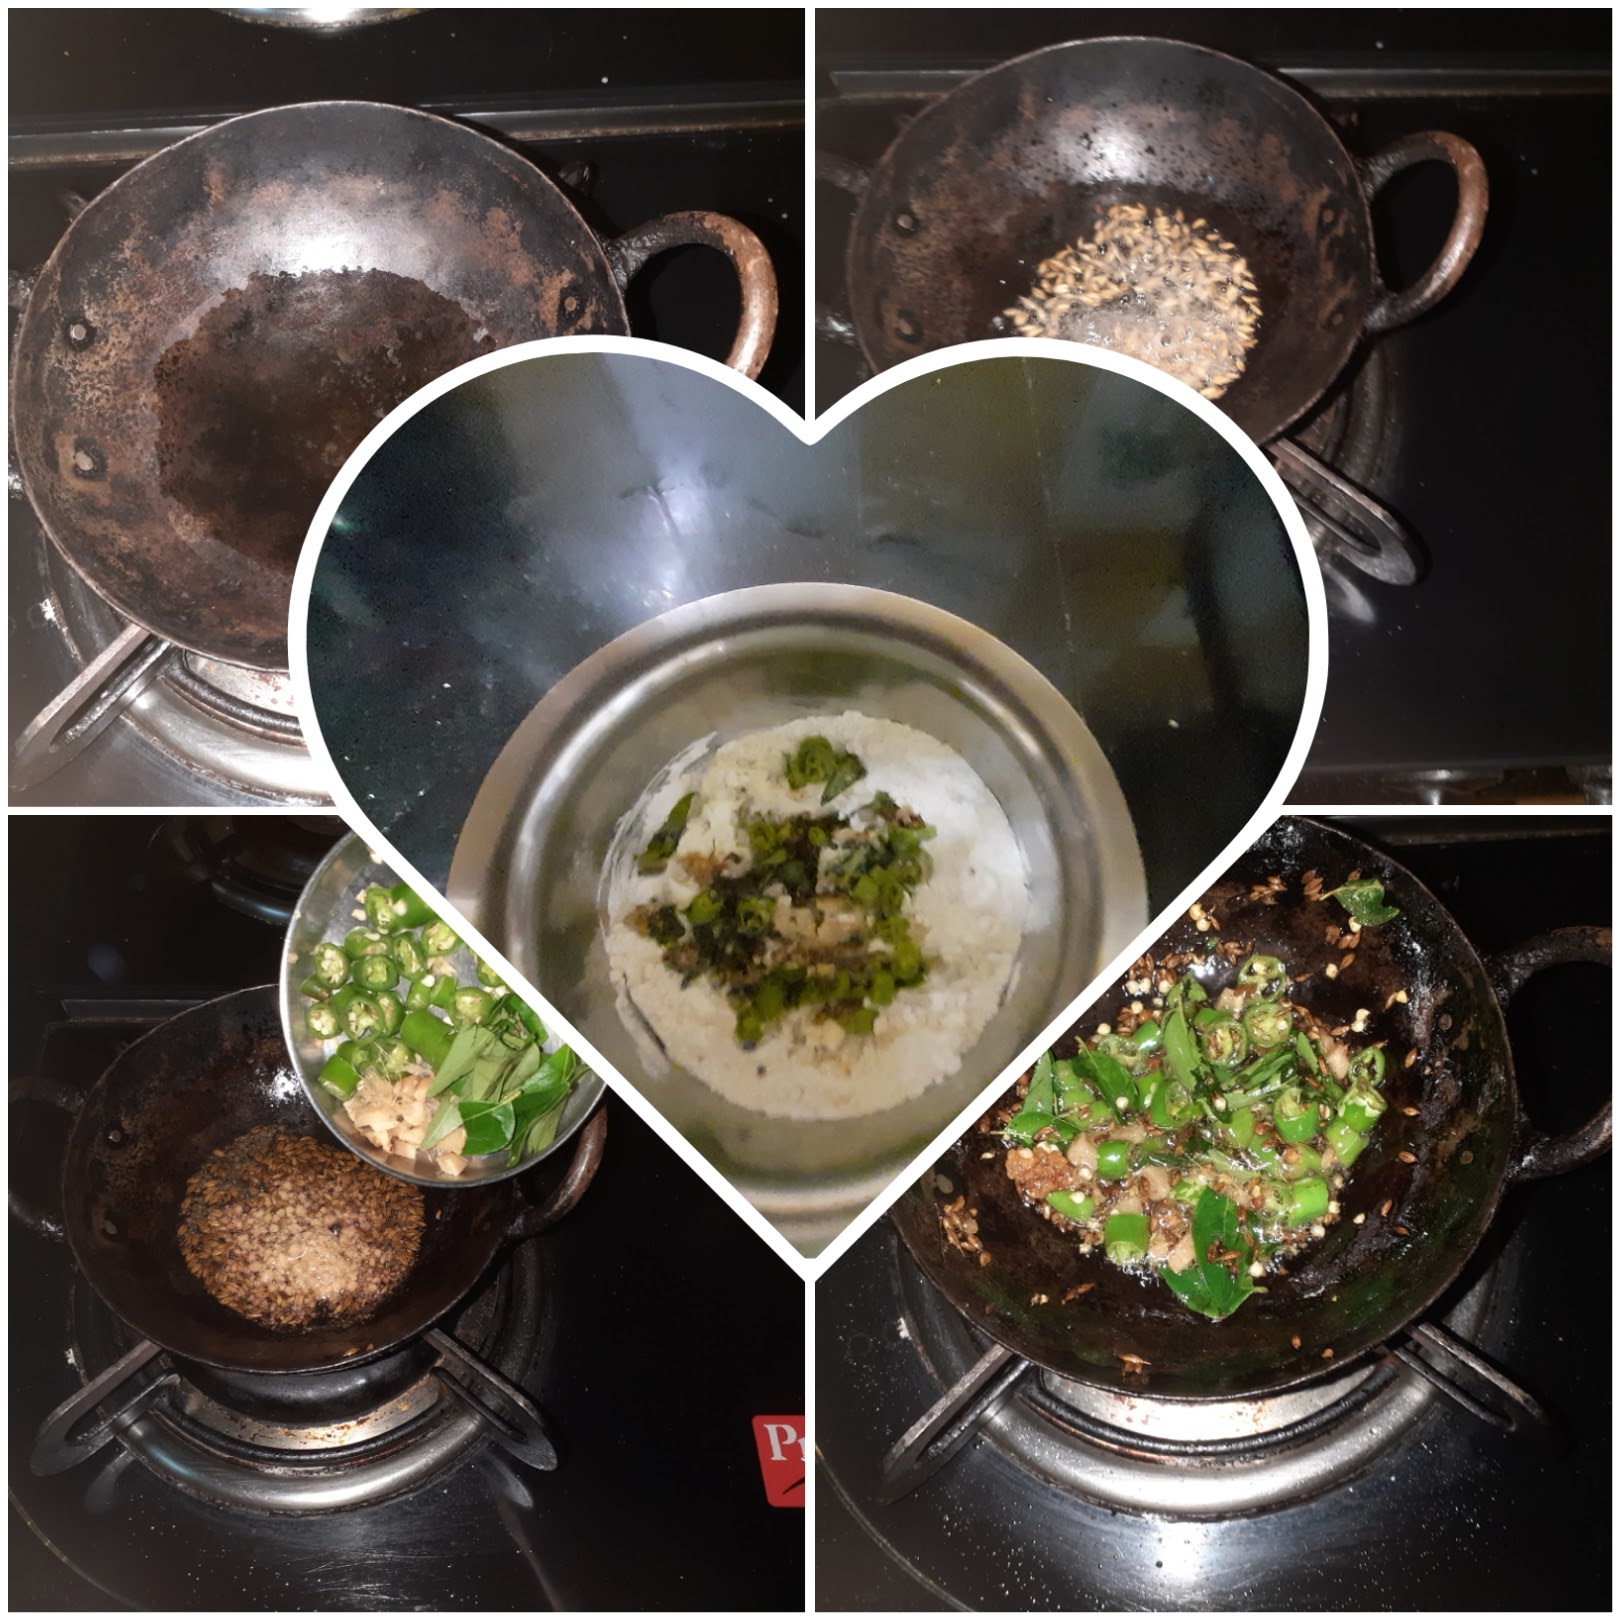
Wheat flour 2 cups (1 cup =150 ml) Suji(semolina) 1/2 cup Salt as per taste Red chilli powder 1 tsp Ajwain(Omam/Carrom seeds) 1 tsp Oil 3 tbsp for flour (refer note1) Fresh Coriander or Methi(fenugreek)leaves 1/2 cup finely chopped White sesame 1 tsp (optional) Water as required
Directions:
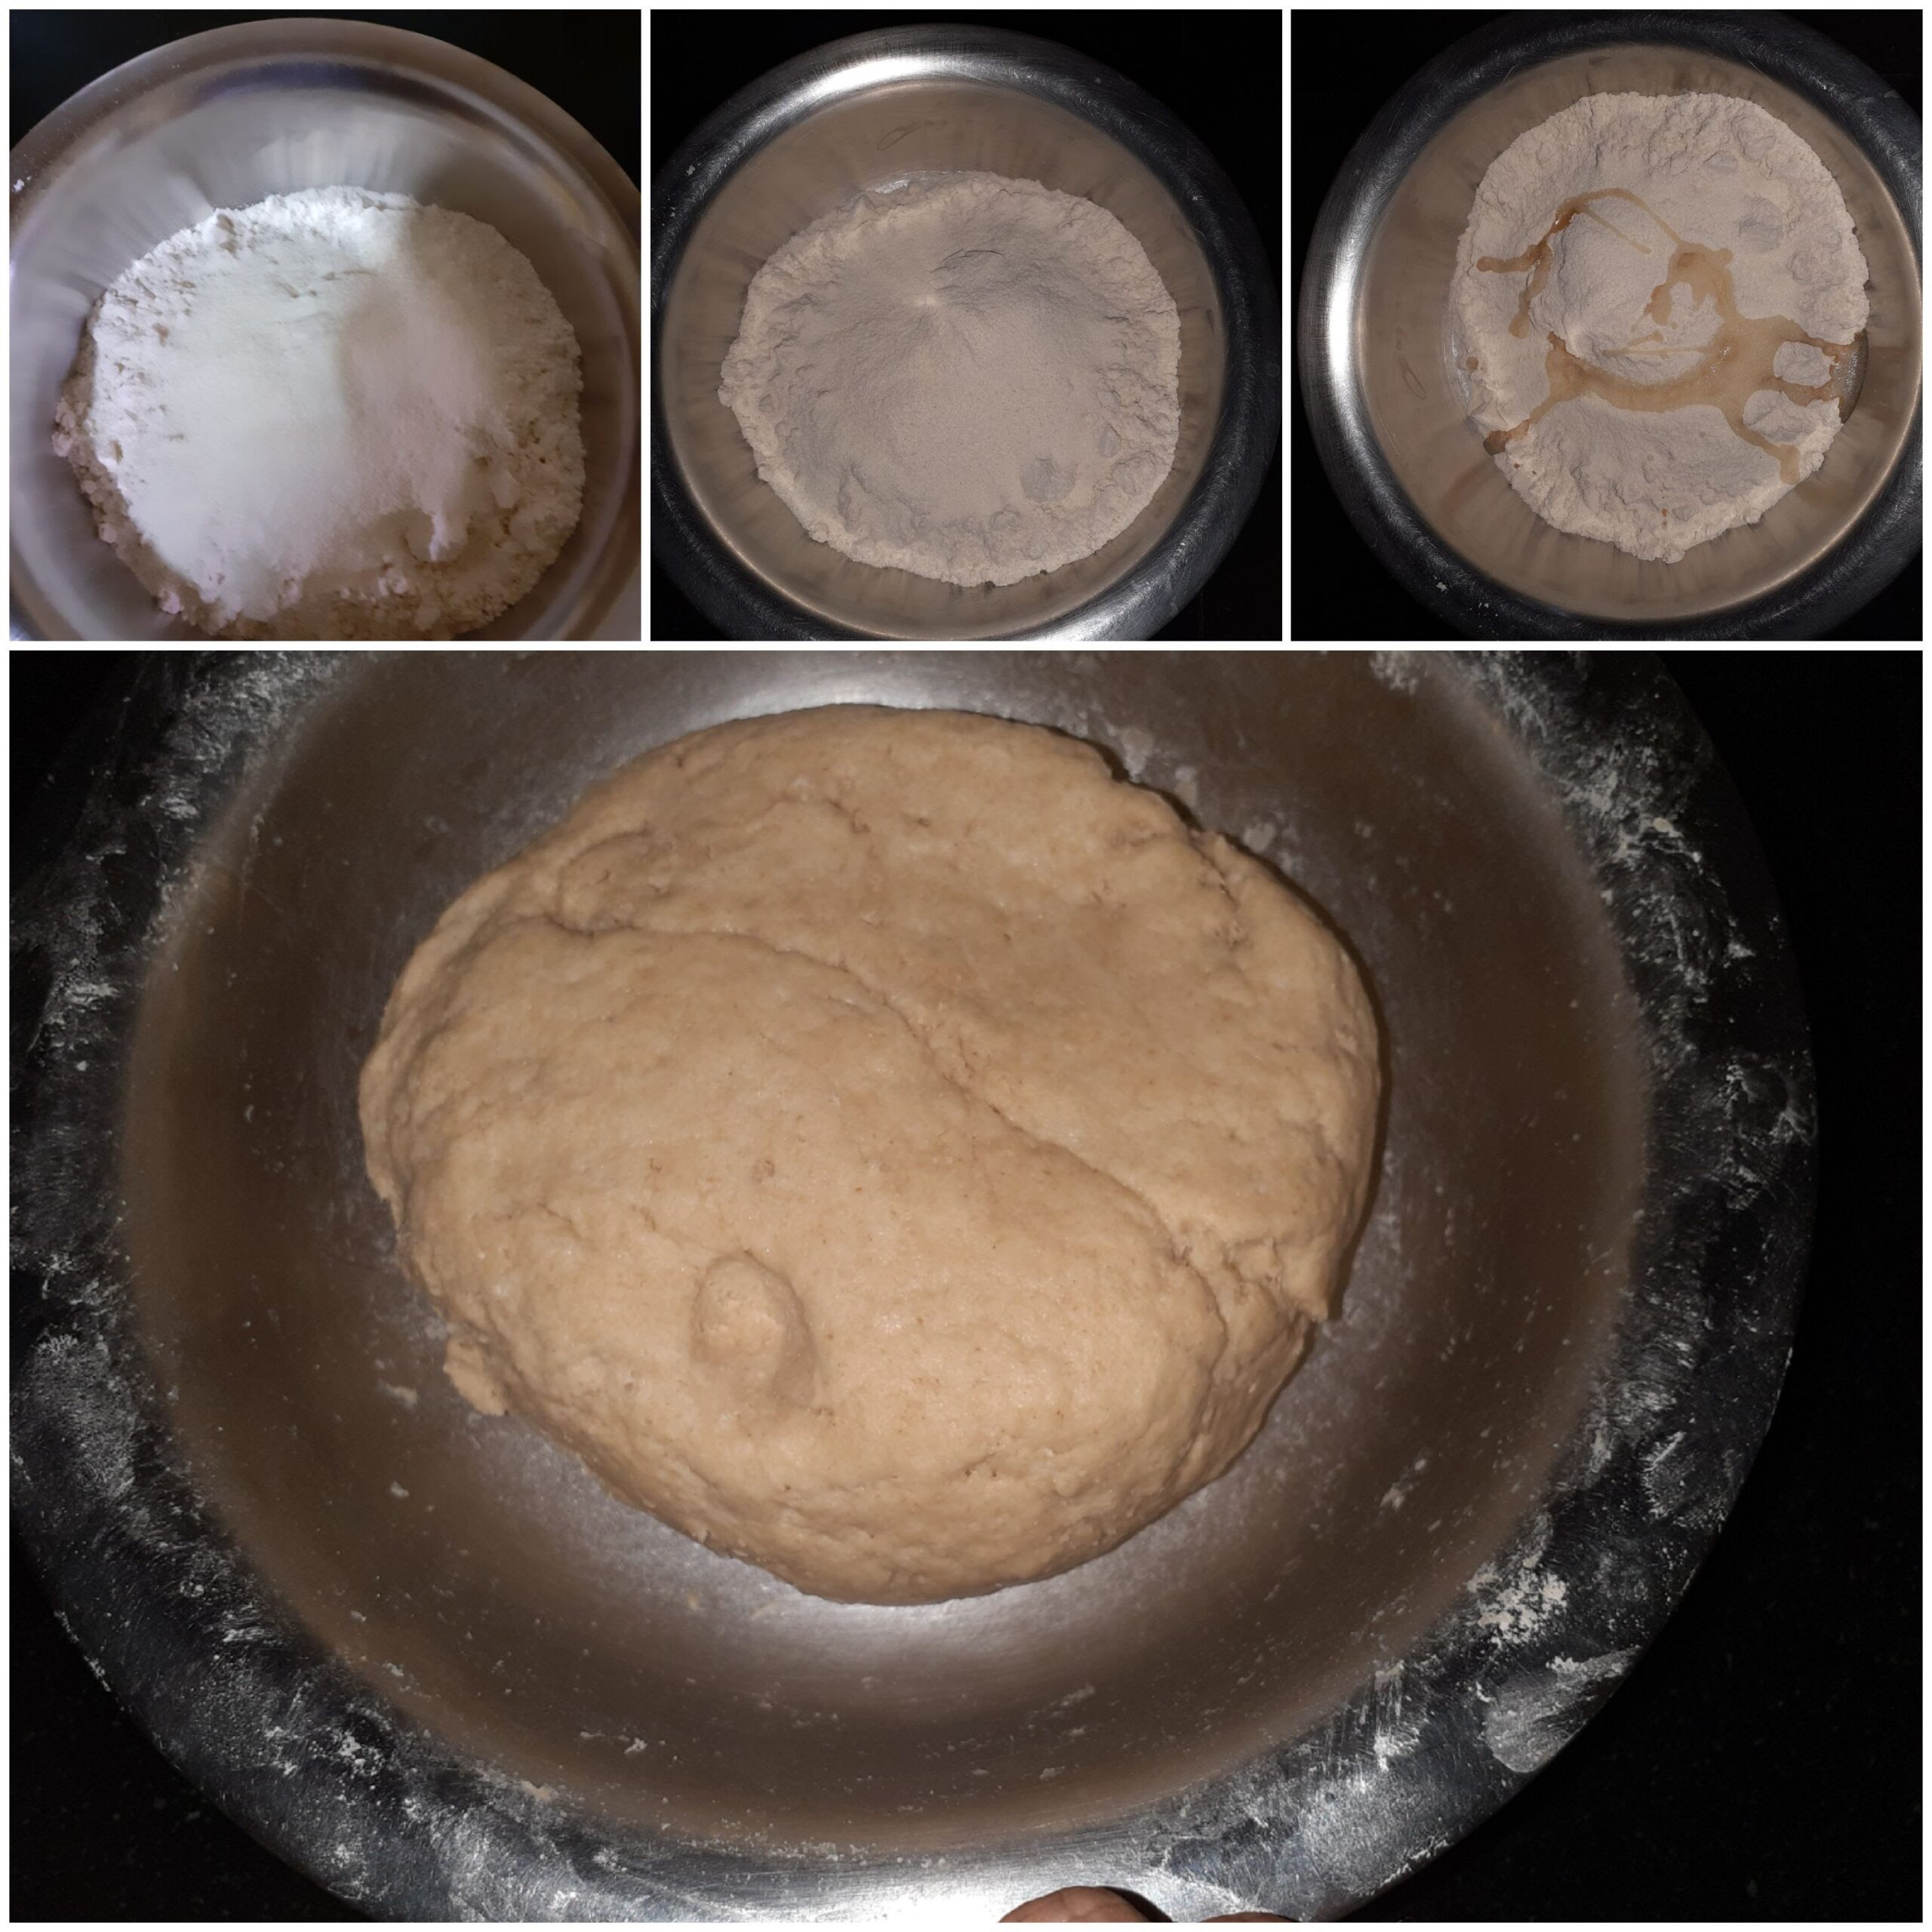
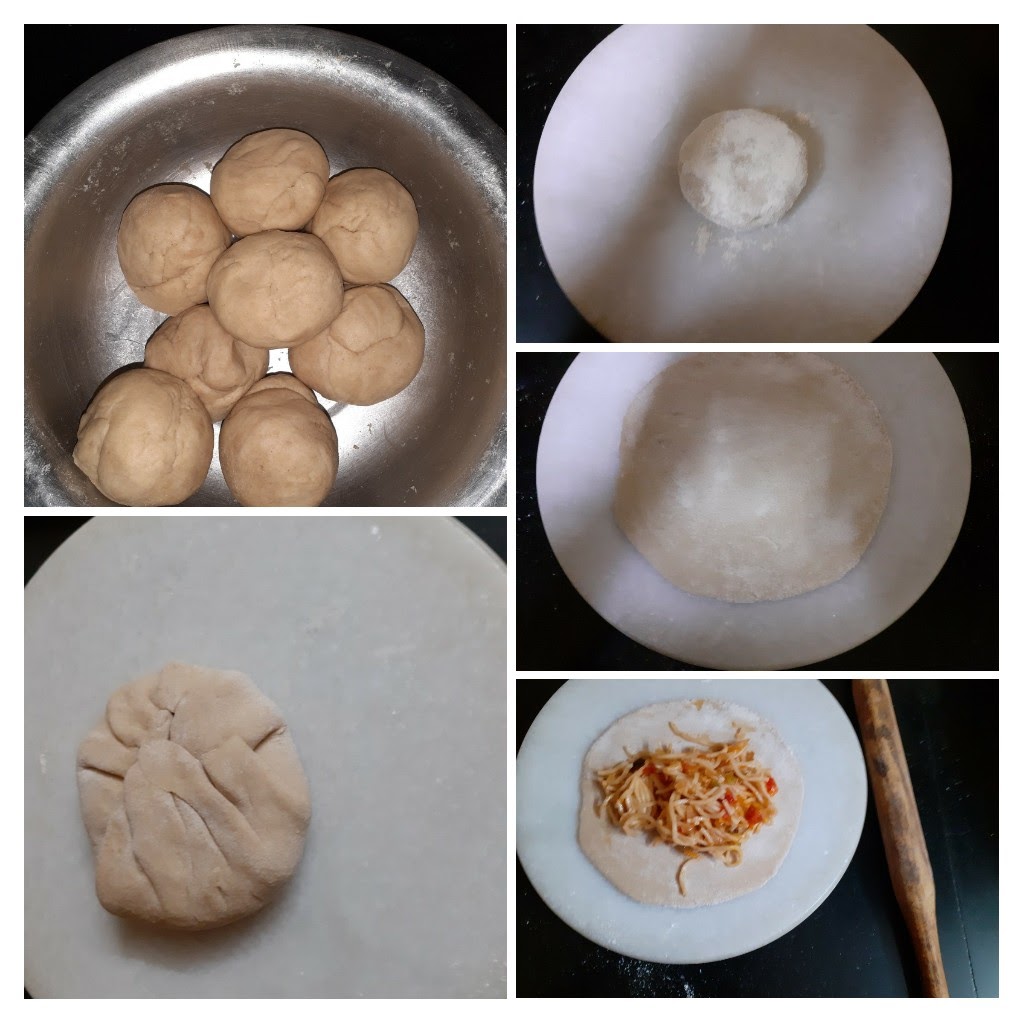
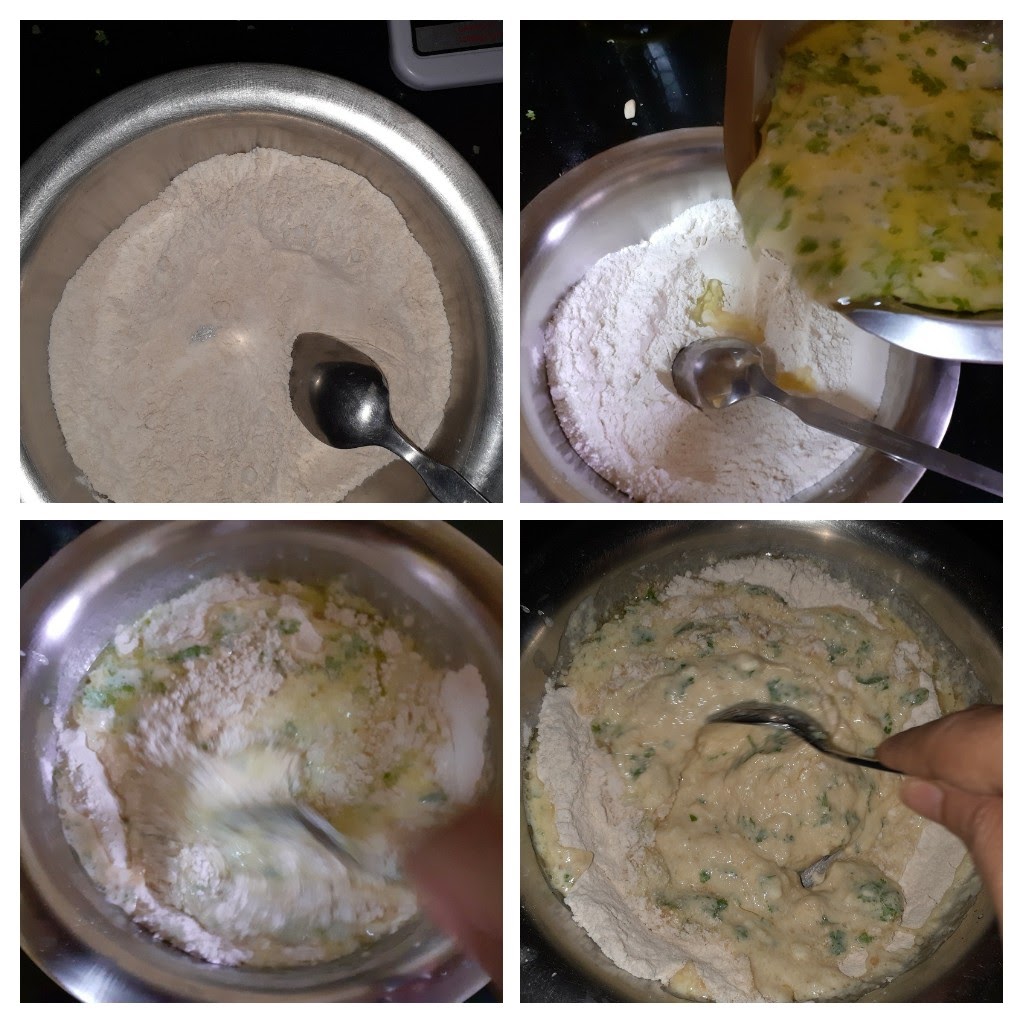
In a dish take the wheat flour and add the suji/semolina to it. Now add the salt, red chilli powder, ajwain followed by the 3 tbsp oil. Start mixing the flour with your fingers, such that the spice powders and oil are well mixed with the flour. Now take some flour in your palm and clamp it together with your fingers. If the flour holds shape, water can be added little by little now. But before that add the chopped coriander/methi leaves, mix it with the flour well and now start adding water little by little. We want a stiff dough here. The consistency should be like the dough for Poorie. Now apply very little oil on the dough and rest it or 15 minutes. Now divide the dough into 4 or 5 balls. Roll out each ball into a thin circle, flour for dusting if required. Sprinkle some sesame seeds on the rolled and flattened dough and roll again so that the sesame seeds stick to the dough. Now with a cookie cutter or lid of a bottle cut into a circle. Remove excess dough from sides. prick holes with a fork on the little papdis.
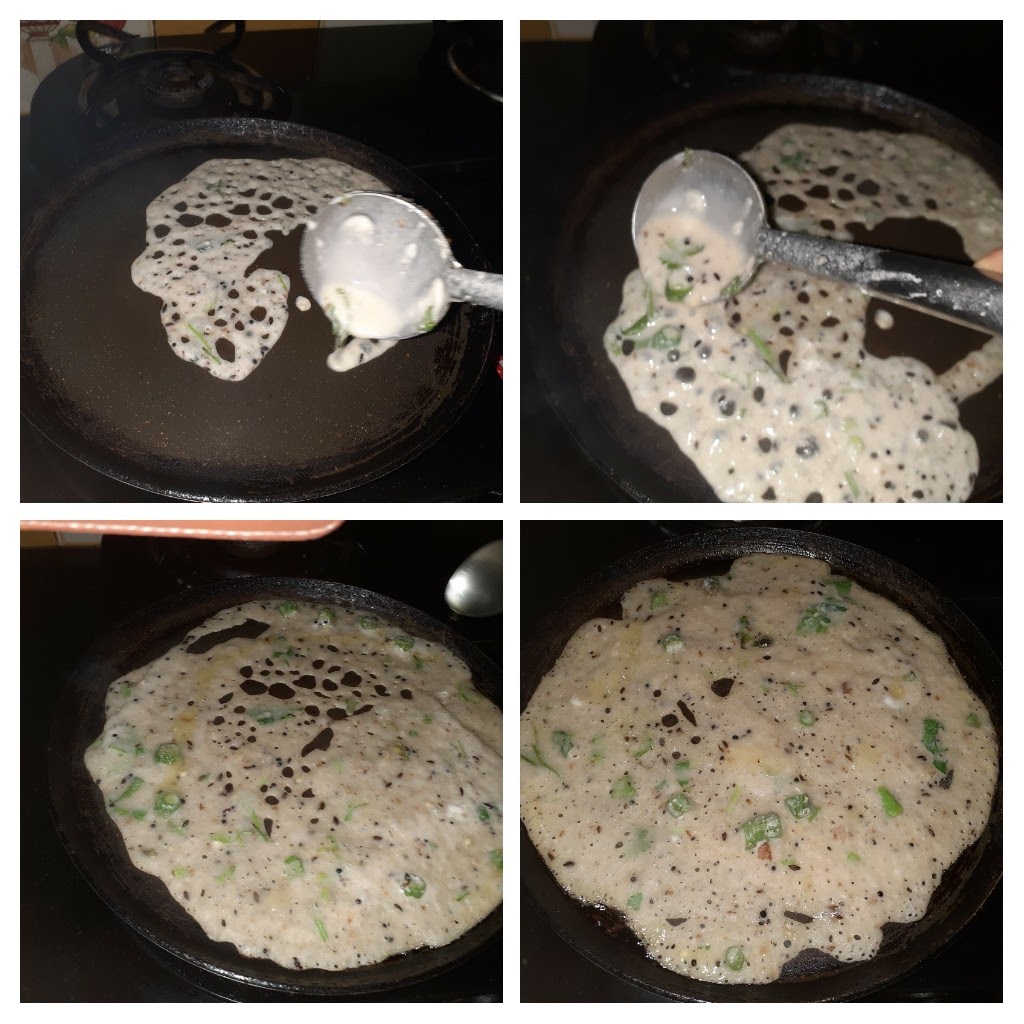
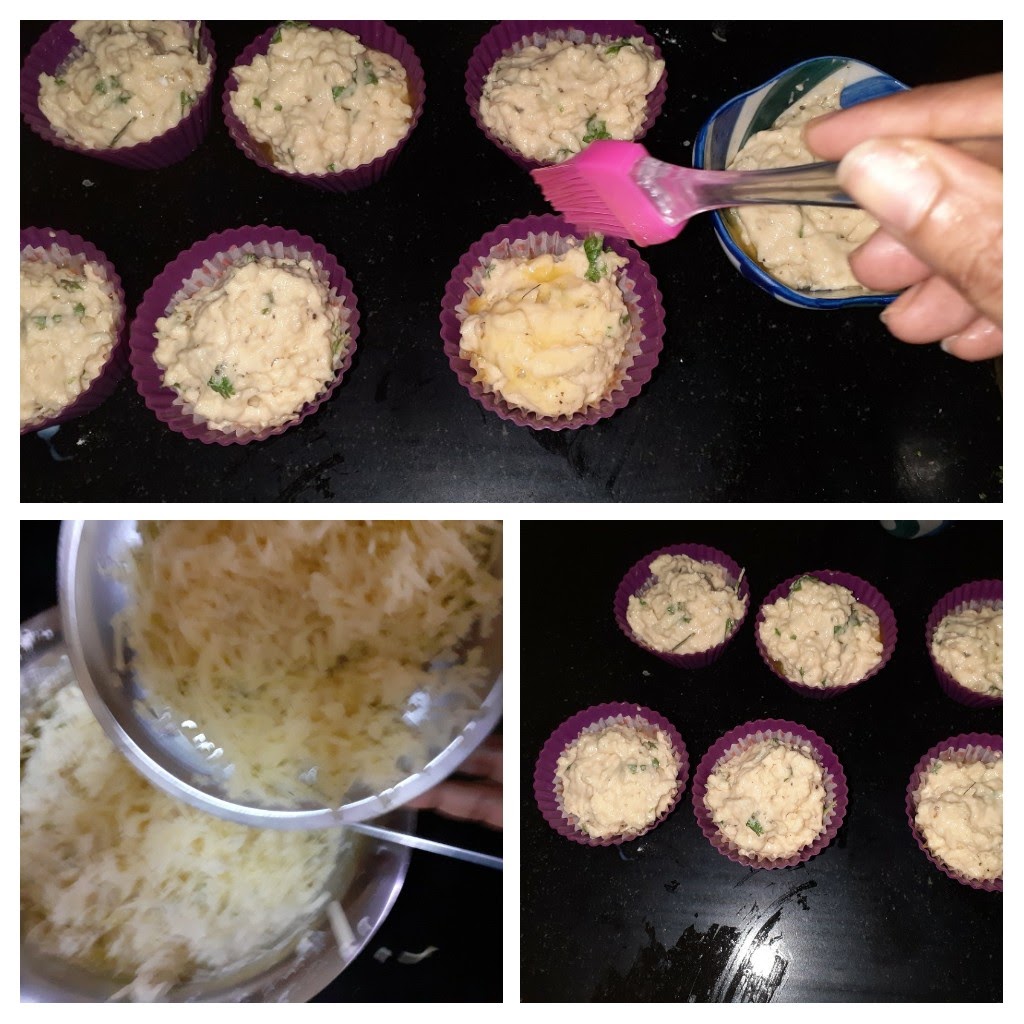
To bake them: Preheat oven to 180 C for 10 minutes. Place the little circles into a baking tray after pricking holes, brush with a little oil(this step is optional), and bake at 180 C for 8 minutes on one side, flip them after 8 minutes and bake again for 8 minutes. Remove from oven, let them cool and store in an airtight container. Repeat this process for the whole amount of dough.
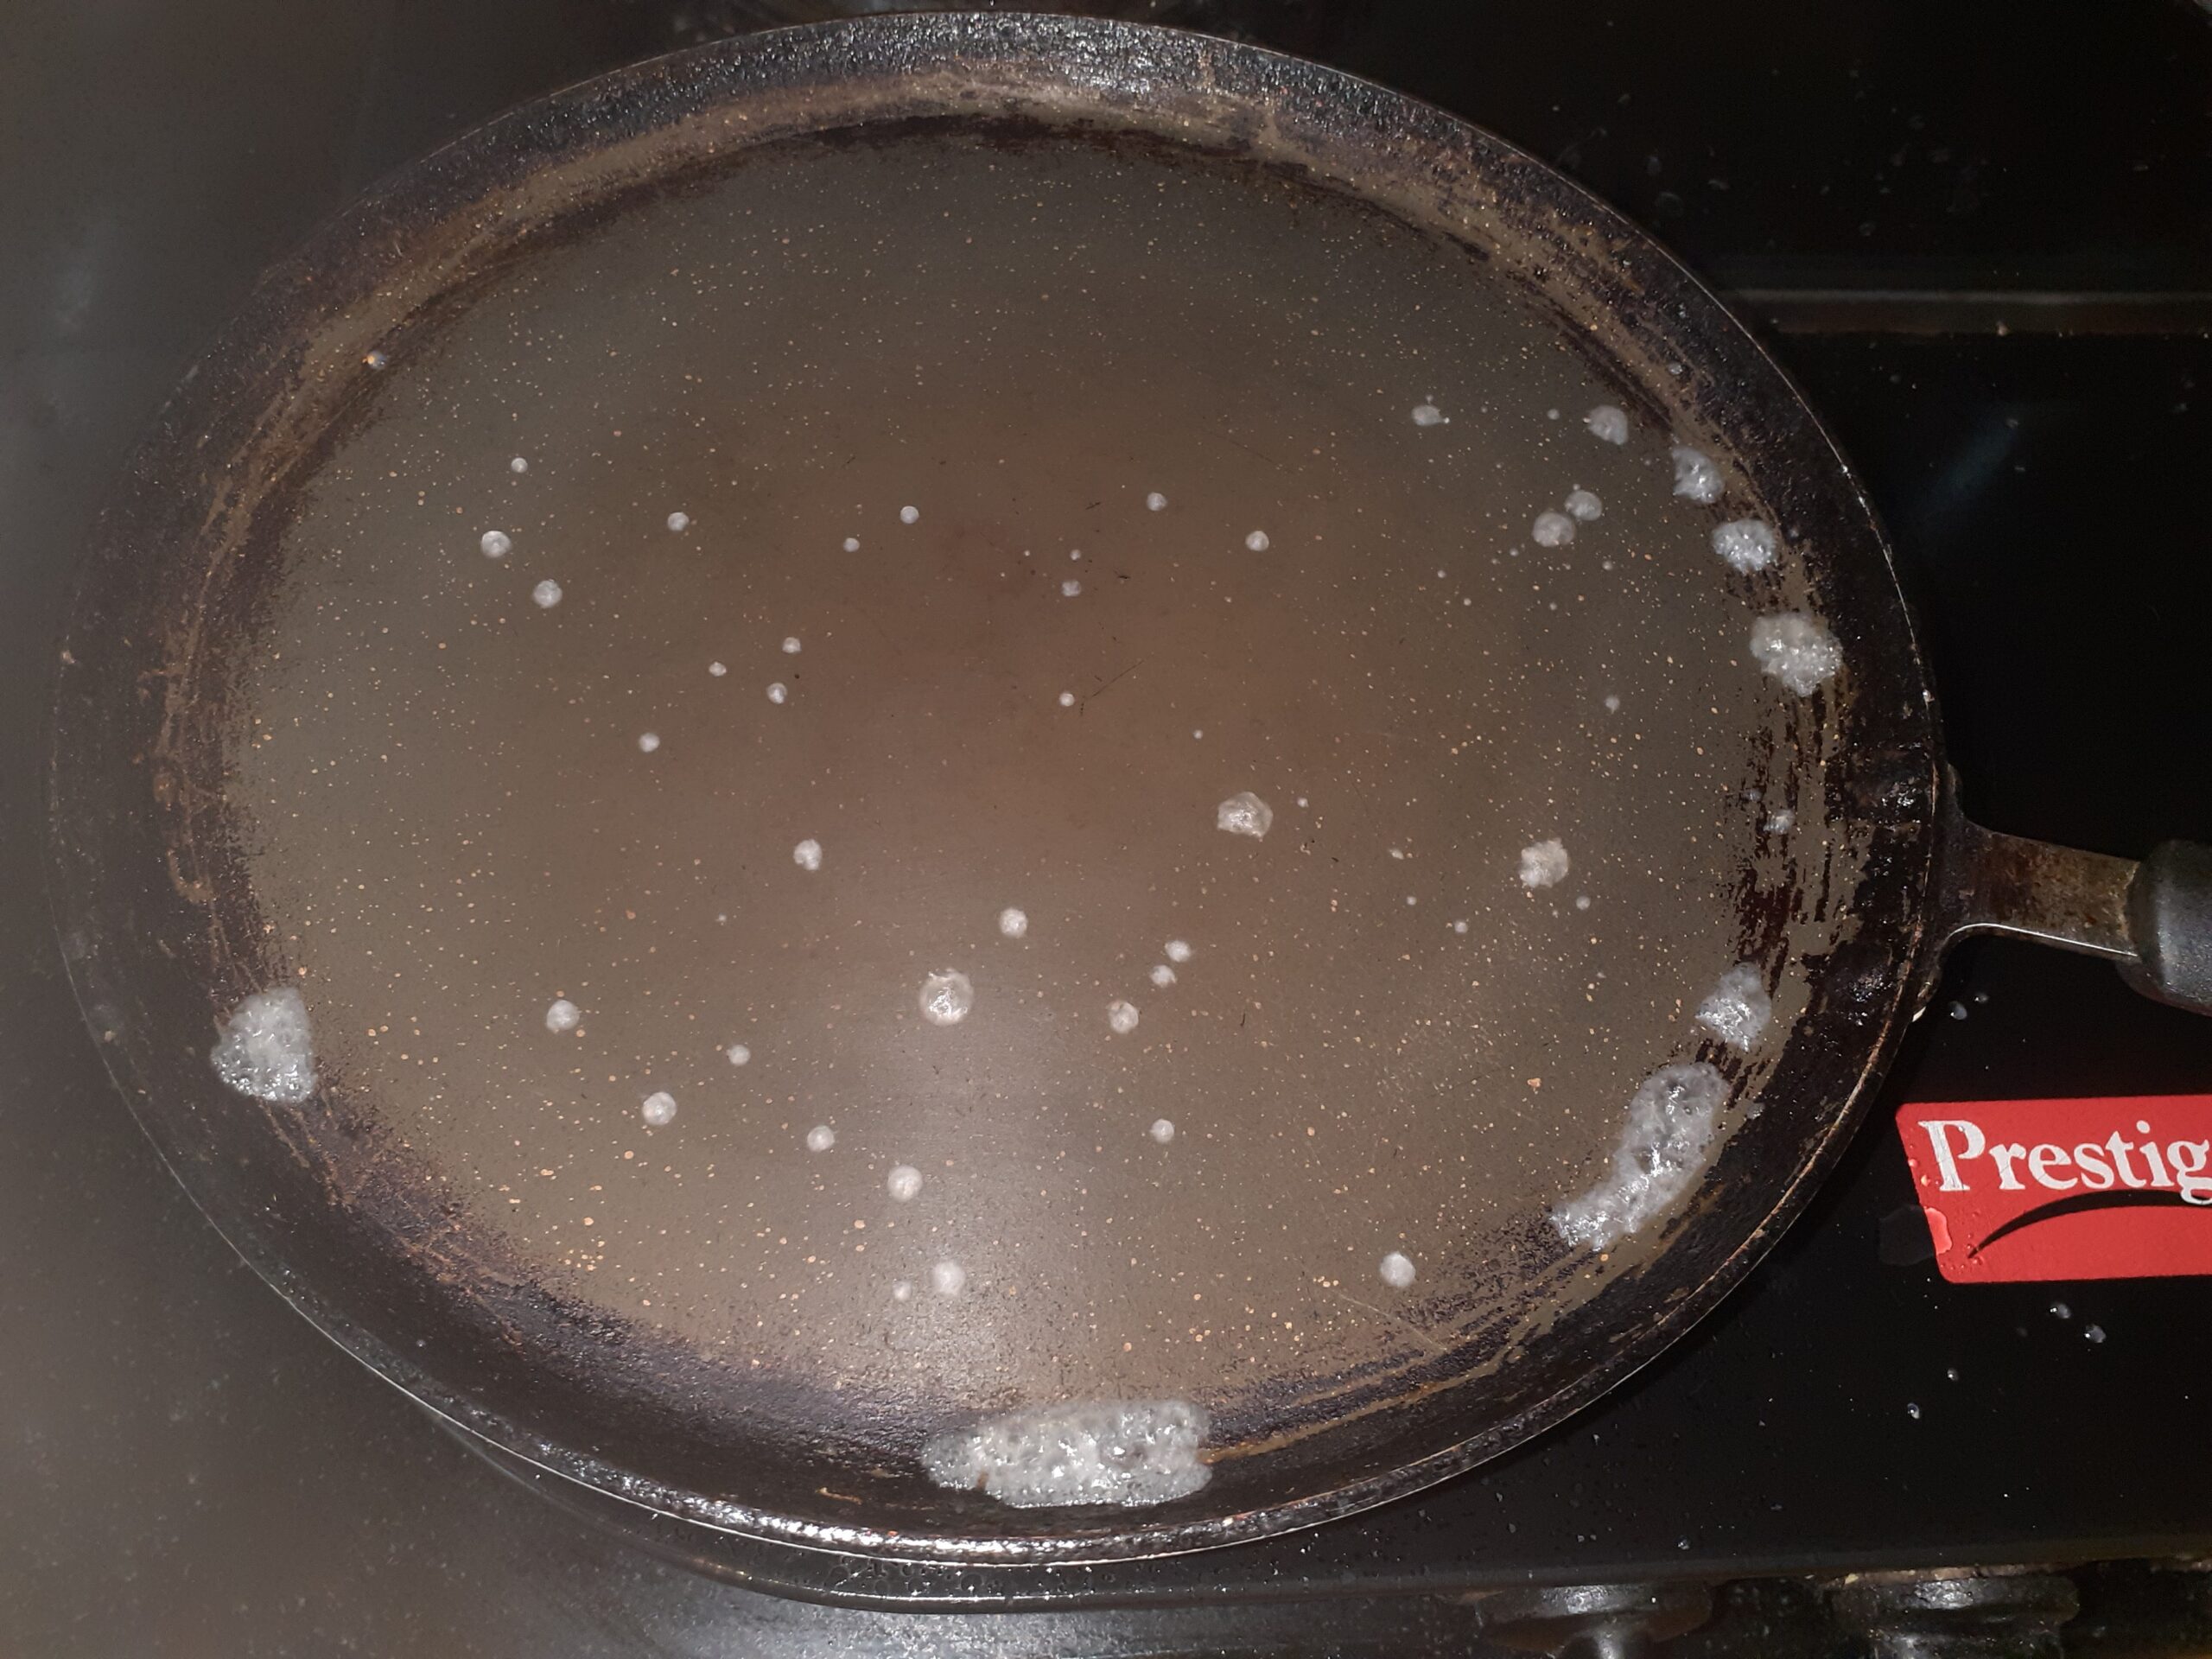
To fry them: Take oil in a Kadai and heat. The oil should be medium hot. The dough when put should sizzle and rise up immediately. This is the right temperature. Prick the papdis with a fork and gently drop them into the oil and fry until all bubbles have subsided and the papdis are light brown in colour. Cool and store in an airtight container.
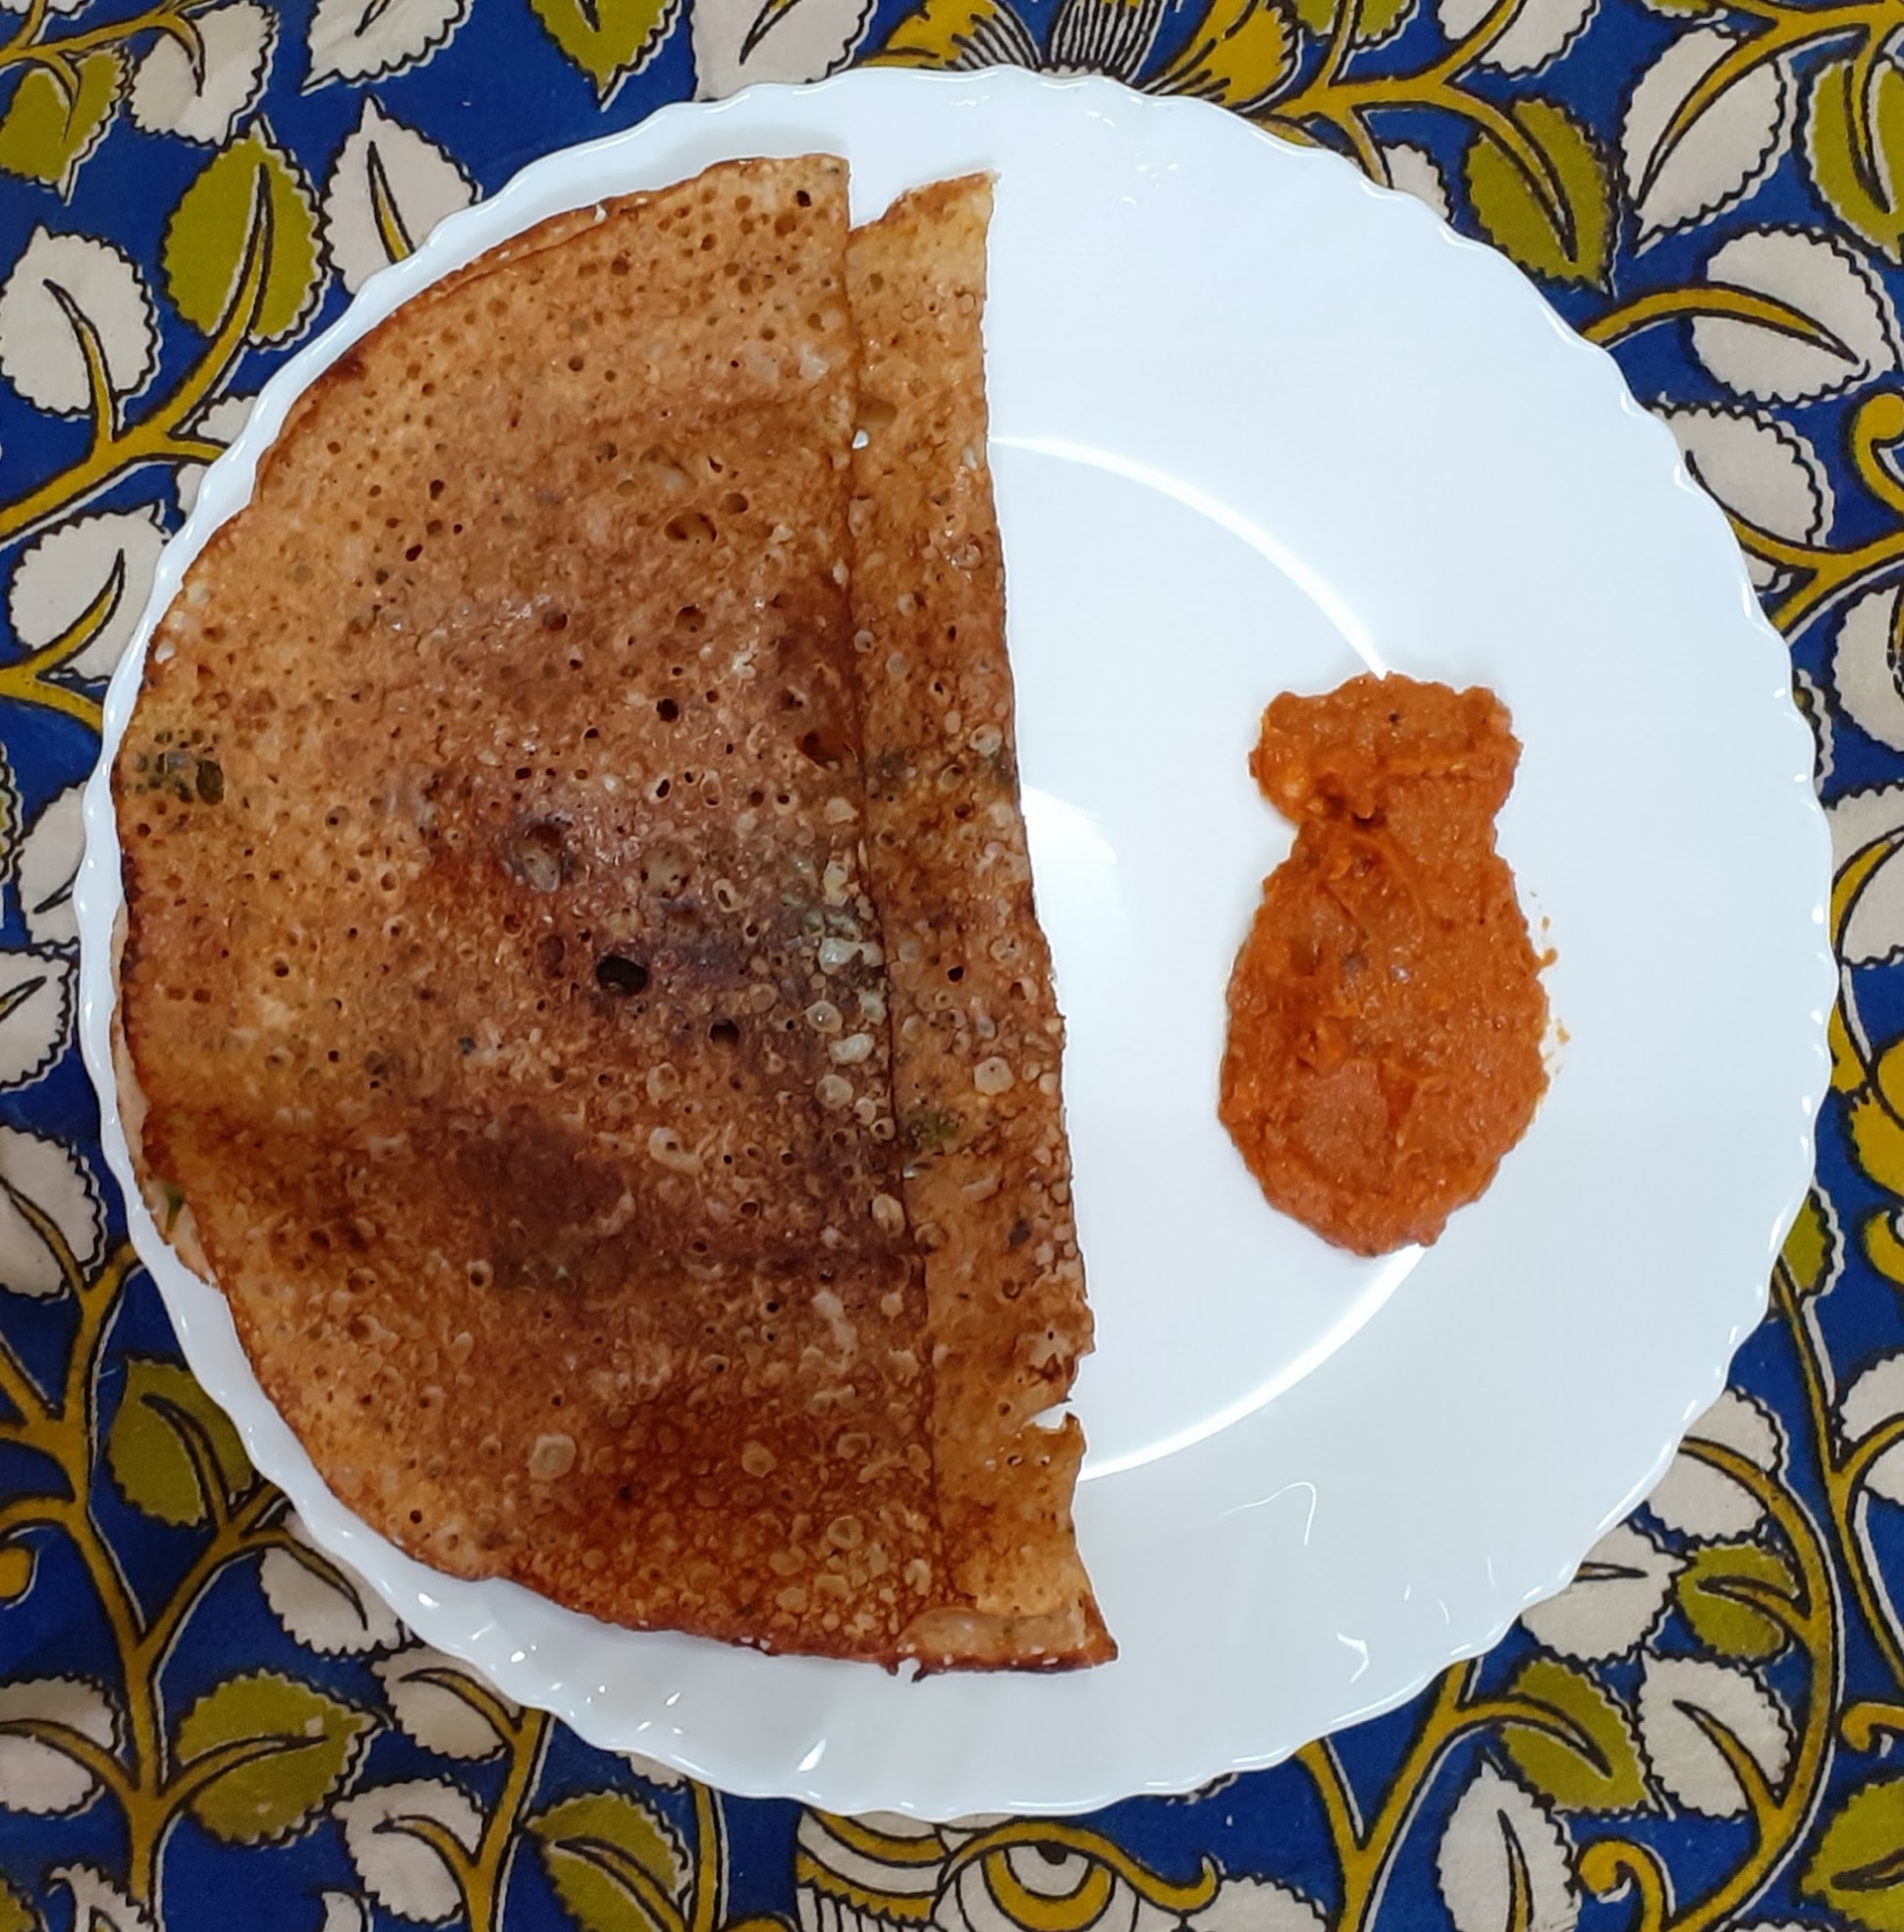
The crunchy and spicy Masala Wheat Flour Papdis are ready to serve with tea or to be made to a Chaat item. Enjoy. Bon Appetit.
STEPWISE RECIPE FOLLOWS:
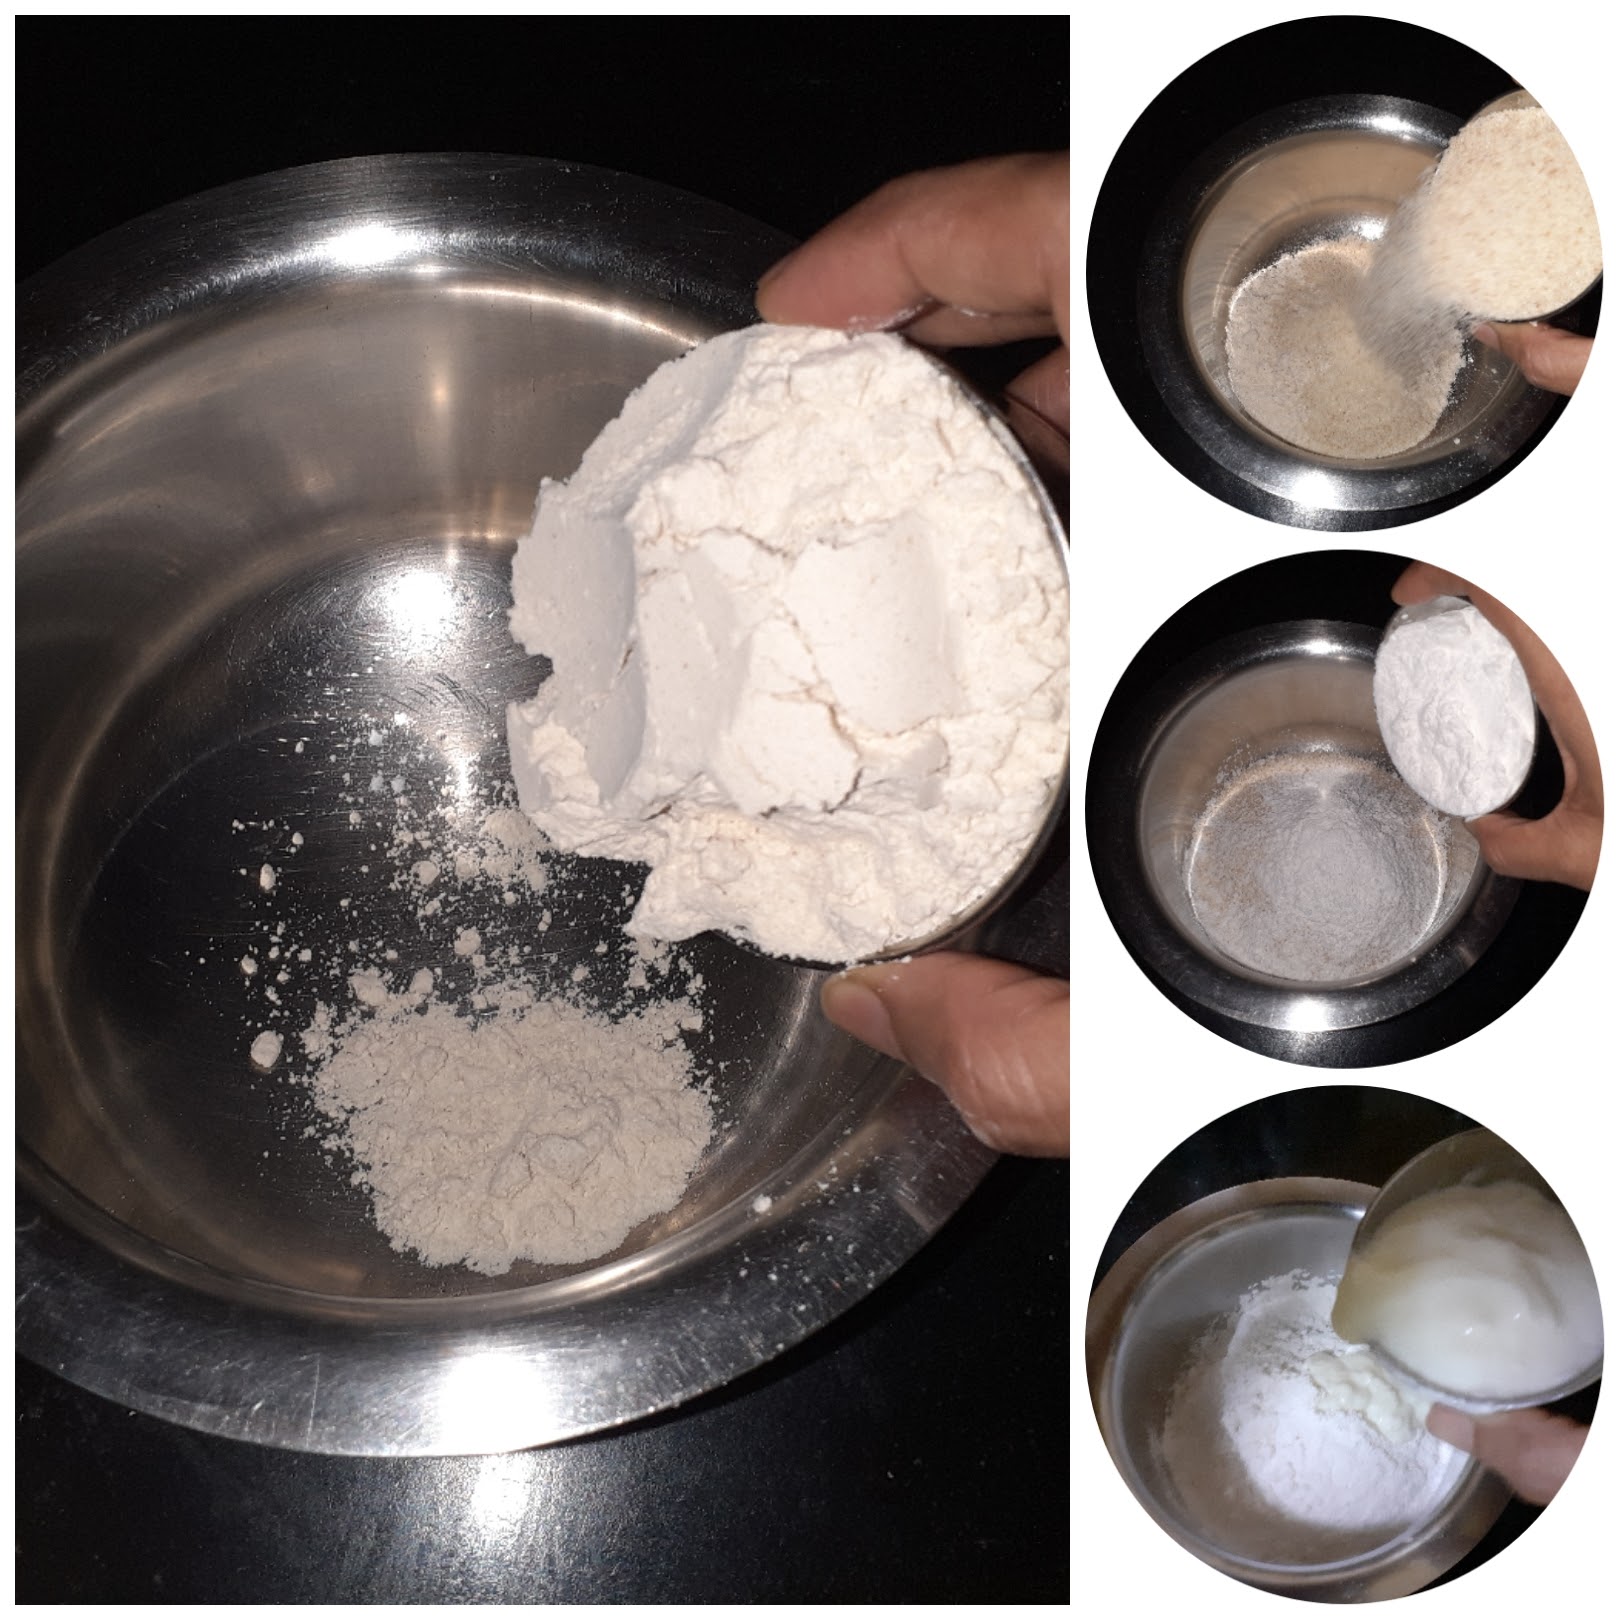
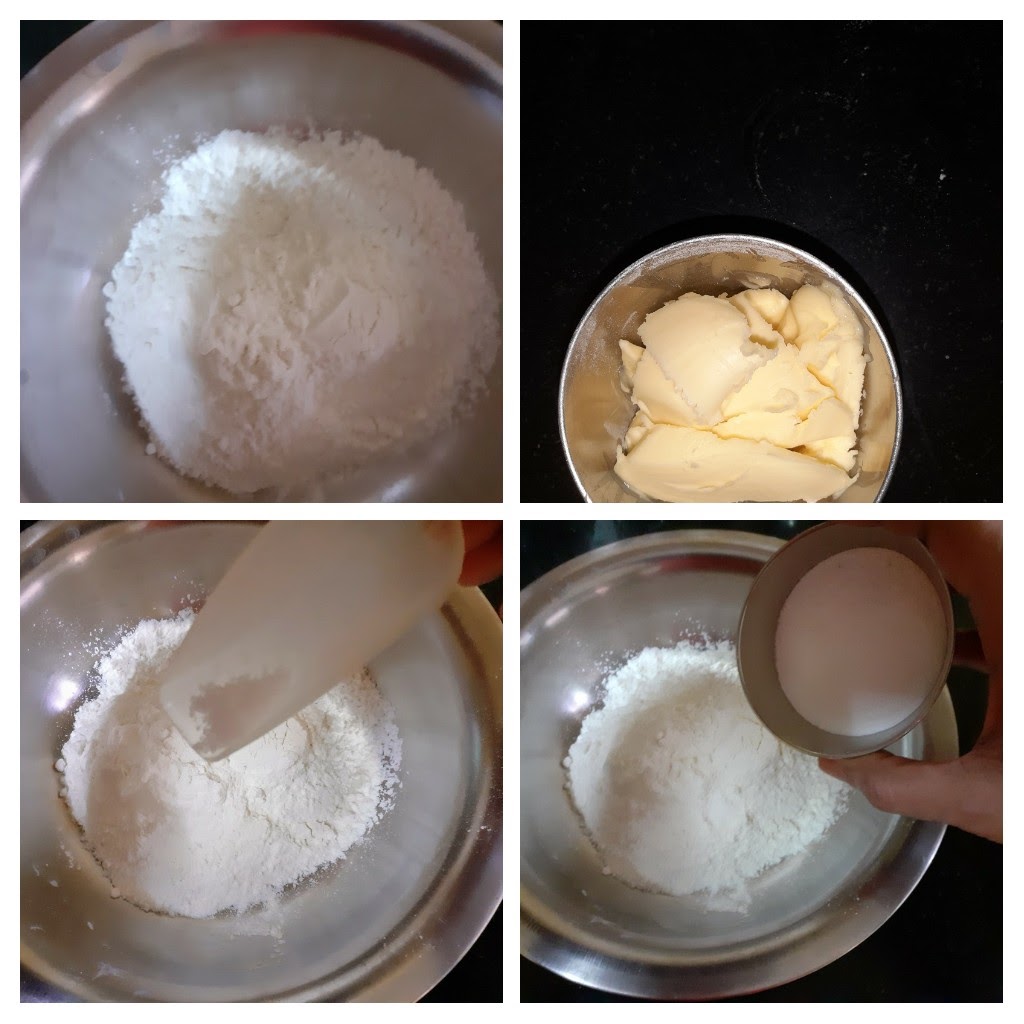
1. Assemble all ingredients. Take the Wheat flour in a dish and add the Semolina/Suji to it.
2. Now add the salt, red chilli powder, ajwain, and oil to the flour.
3. Start mixing the flour with your fingers(without adding any water at this stage). The spice powders and salt must mix evenly with the flour. Take some flour in your palm and try to clamp it within your fist. When you open your fist the flour should hold shape and not break away.
4. Now add the finely chopped fresh coriander or Methi leaves, and adding water little by little form a stiff dough. The consistency should be like Poori dough. Rest the dough for 15 minutes.
5. Now divide the dough into 4 or 5 equal parts. Take one ball at a time, dust it with flour and roll it out like a chapati, sprinkle some sesame seeds and roll again lightly, so that the seeds stick to the dough.
6. Now with a cookie cutter or lid of a bottle make small circles. Take away the excess dough. Prick the circles all over with a fork.
7. To bake- preheat oven to 180 c for 10 minutes. Brush some oil over the Papdis, place them on a baking tray and bake at 180C for 8 minutes on one side. Remove the tray, flip over the papdis and bake again for 8 minutes. Remove from oven and cool. Store in an airtight container.
8. To fry them- heat oil in a Kadai. Oil should be medium hot. Check the temperature by gently dropping a small bit of dough into the oil. If it sizzles and rises immediately, this is the right temperature. Now fry the papdis in oil at medium heat until all the bubbles subside and the papdis are light brown in colour.
NOTES: 1. Adding adequate oil to the flour is a crucial step, the oil is the one that imparts the crunch to the Papdis. After step 3 if the flour is still not holding shape, then add another teaspoon or two of oil to the flour, rub it into the flour and check if it holds shape now by claiming it in your fist. If it does, start mixing water.
2. It is important to prick the Papdis with a fork before baking or frying as otherwise, they will rise/puff up thereby losing the crunch. So pricking holes is a crucial step.
3. The temperature of the oil is important, the method to check the temperature is given in step 8, which should be followed.
4. The timing in each oven may vary to bake, so 2 to 3 minutes less or extra time may be required.
Maa Ladoo/ Maa Laddu
Maa Ladoo/ Maa Urundai or fried gram Laddu is one of the most nutritious, simple, healthy, quick Laddus that one can make. It is made of fried gram (Pottukadali/Porikadalai) powder, Sugar, Ghee, Nutmeg powder, and Cardamom powder. The taste is simply delicious and it has a melt in the mouth texture. Simple ingredients make this sweet taste heavenly.
In South India especially Tamil Nadu festivals like Janmashtami, Navarathri, and Deepawali are incomplete without this sweet. I learnt the recipe of this sweet from my mother in law and she made them very well. During Navarathri what she would do is grind mix all the dry ingredients and store them in an airtight jar, so whenever guests dropped in, she would melt a little ghee and mix it with the Fried gram flour and offer it to them fresh. The taste of freshly prepared Maa Urundai is simply out of the world. To this day I follow her method of instantly mixing the flour with ghee when guests visit during Navarathri.
Fried Gram/ Pottukadalai/Chutney chana 1 cup (1 cup=150ml)
Sugar 1 cup
Cardamom 7 pods
Nutmeg a tiny piece
Cashewnuts 8-10 broken to bits
Ghee around 3/4 cup or as required
Directions:
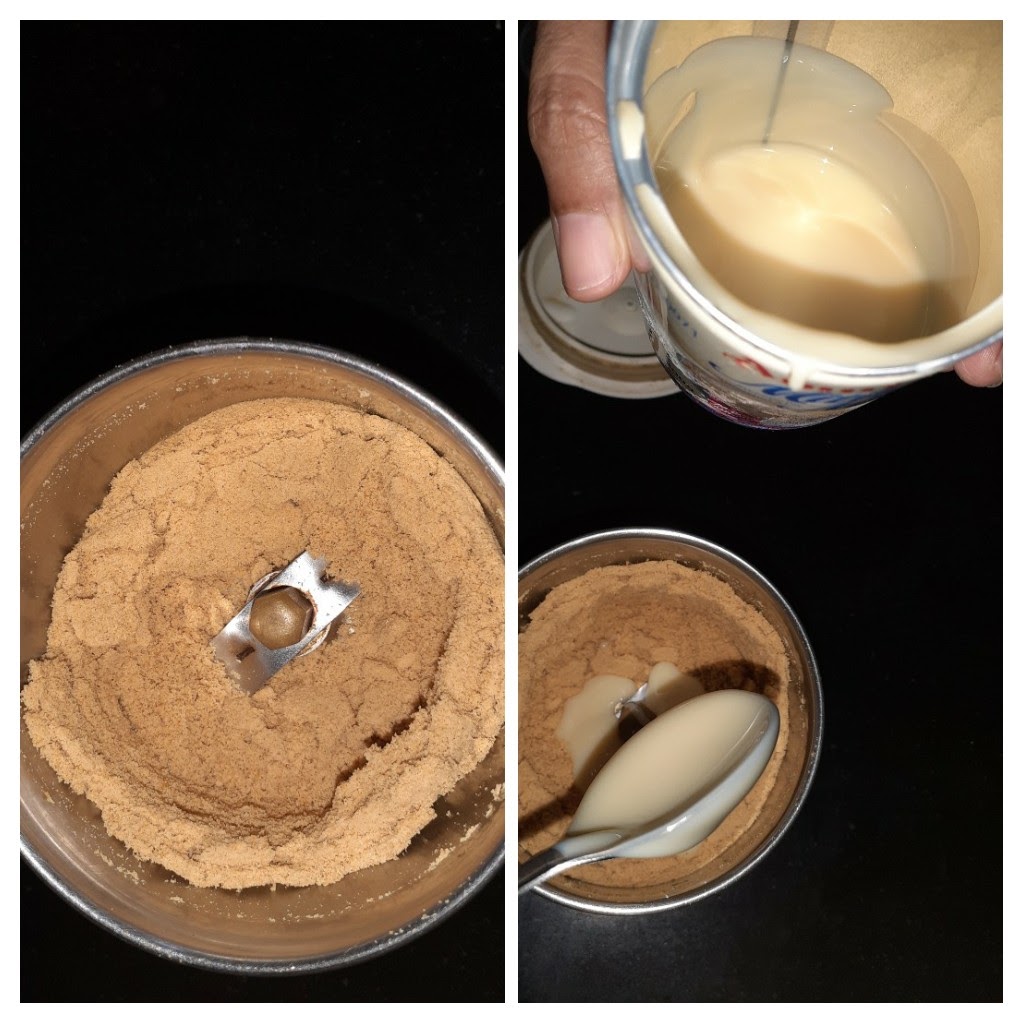
Take 1 cup of fried Gram/Pottukadalai/Chutney Chana in a dry grinder and grind it to a fine powder. Pass this through a sieve and discard the residue. Now take 1 cup sugar in the dry grinder, add the cardamom and nutmeg and grind it to a fine powder. Add this powder to the fried gram powder. Now in a small Kadai melt 1 tbsp ghee and fry the brown cashewnut bits until light brown. Pour the ghee along with the fried cashewnuts into the flour and sugar mix. Now mix the contents in the dish nicely with your hands. Now melt the 3/4 cup ghee in the small Kadai. Now pour around 2-3 tsp of ghee each time with a spoon into the flour, mix nicely with your fingers and form small balls of them. For each 2-3 teaspoon of ghee, you can make around 2 laddus. Repeat this process until you form Laddus of all the flour. I am adding a small video of the Laddu forming procedure in the stepwise recipe. Hope it is helpful. The delicious Laddus are ready to gobble. Kids and adults alike will love the taste. Enjoy. Bon Appetit.
STEPWISE RECIPE FOLLOWS:
1. Assemble all ingredients. Take the fried gram/Pottukadali in a dry grinder and grind it to a fine powder. Pass the powder through a sieve and discard the residue.
2. Now put the sugar along with the cardamom and nutmeg into the dry grinder and powder them finely.
3. Add the sugar powder to the fried gram flour and mix well. Now melt 1 tbsp ghee in a small Kadai and fry the Cashewnuts until light brown. Add the ghee along with the fried cashewnuts to the flour and using your fingers mix well.
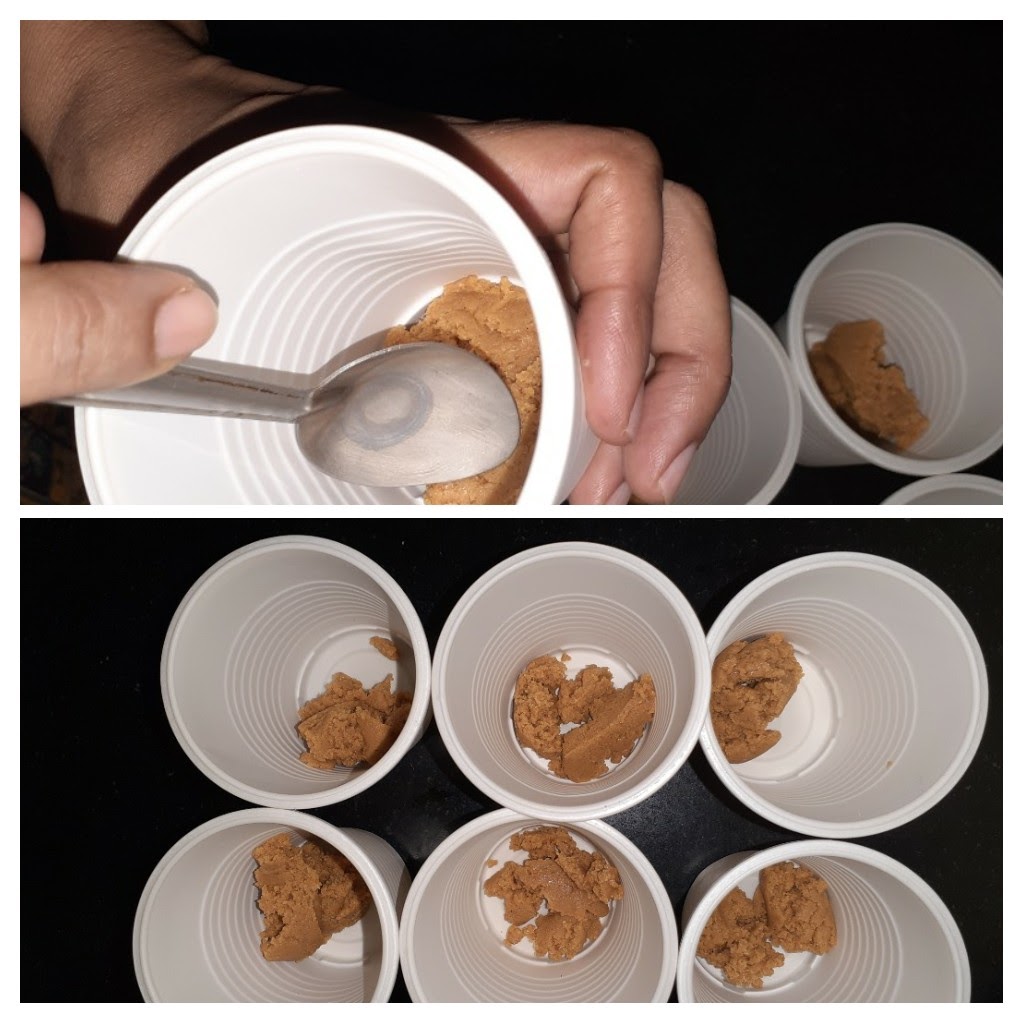
4. Now in the same small Kadai melt 3/4 cup of ghee. Let it become warm. Now pouring 2-3 teaspoons at a time mix the ghee with a small amount of the flour and shape into a ball. With 2-3 teaspoons of ghee, you will be able to make 2-3 ladoos at a time, depending on the size. Posting a video below to show the procedure.
5. Repeat this process for the entire flour and store the ladoos in a container. The delicious ladoos are ready to gobble up.
WATCH VIDEO
NOTE:
1. Sieving the fried gram powder after grinding is important as it gives the Ladoo a smooth texture and also tastes better that way.
2. I have mentioned Sugar as 1 cup and not sugar powder, so take care of that. 1 cup of sugar will yield about 11/4 cup of sugar powder and I recommend you use this entire amount. 1 cup of sugar powder will be a little less for the Ladoo.
3. Further elaborating on note 2 if using store-bought sugar powder you can add between 11/4 to 1.5 cups of sugar powder.
4. Sugar and Ghee are the binding agents of this sweet to better not to add less. Sugar also gives the shine to the Ladoo. Adding very little sugar will result in brittle ladoos which will break on touching as they would not have bonded properly.
5. Note 4 holds good for ghee also. Using very little ghee will also result in the ladoos not retaining form and will break. This said using too much ghee will also result in the ladoo slumping and not retaining form.
6. This is why I have recommended pouring ghee as required, which is 2-3 teaspoons at a time so that we don’t end up adding too much, at the same time we will also know the required amount.
Thattai/Nippatu
This savory recipe is a popular South Indian snack and is made during festivals like Janmashtami and Deepawali. In South India festivals are incomplete without making rice-flour based snacks and homemade sweets.
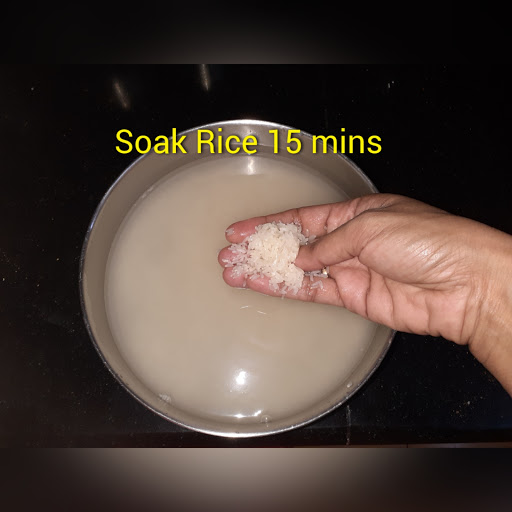
Usually, the rice is soaked, the water drained, dried on a cloth, and then ground to a flour. Nowadays since most of us are busy both at home and work, I have used store-bought rice flour for this recipe, as it saves time. The most important step in this recipe is the proportion of rice flour and Urad dal flour, which I have shared below in the recipe. Regarding the use of Butter and its substitutes please refer to the notes.
In this recipe, Rice flour, Urad dal flour, butter, and spices are combined to form a dough, which is flattened and deep-fried in oil.
To give this recipe my twist I have added another ingredient- a little Pottukadalai/Chutney chana(fried gram)flour. This makes the Thattai crunchy. Grated or sliced coconut can be added, but in this recipe, I have not used them.
While you are here please have a look at my other recipes like
For Urad dal flour–Take a handful of urad dal and dry roast them in a Kadai until light brown and you get a nice aroma. Cool them and grind them to a fine powder and also pass it through a sieve, discard the residue.
For fried Gram flour/Pottukadalai flour- Put a handful in a blender and grind them to a fine powder. Pass it through a sieve and discard residue if any.
Now in a dish take the rice flour and add the urad dal flour and fried gram flour. Add the butter, salt, chilli powder, asafoetida, coarsely broken peanuts, fried gram, curry leaves, white Sesame, and mix nicely. The flours, spice powders, and butter should combine well. Now add water little by little to make a stiff dough.
Now in a Karahi take oil for deep frying and heat. While the oil heats up start shaping the Thattai. Take a plastic sheet or Aluminium foil and grease it with oil well. Grease your palms also with oil. Now pinch a small amount of dough(little bigger than lemon) and place it on the plastic/aluminum sheet and using your fingers flatten the ball to a thin circle. Take a fork or toothpick and prick holes all over the dough. Check if the oil is hot enough. To test take a small piece of dough and put it in the oil. If it sizzles and rises immediately then the oil is ready for frying. Now gently lift the foil in your left hand and ease the flattened dough into your right hand by reversing the foil and gently peeling it away. Now gently drop the flattened dough into the oil and fry flipping both sides. Keep flipping and frying until all bubbles in the oil subside and the Thattai is golden in colour. The Spicy and crunchy Thattai is ready to munch as it is or serve as a tea time snack or to offer guests during festivals. Enjoy. Bon Appetit.
STEPWISE RECIPE FOLLOWS:
1. Assemble all ingredients. Follow the method given above for Urad dal flour and fried gram/Porikadalai flour. Coarsely pulse the peanuts too.
2. In a dish take the rice flour, Urad dal flour, fried gram flour, butter, and all other ingredients excluding water and combine nicely.
3. Now add water little by little and form a stiff dough. Take oil ina Karahi to deep fry and heat. heat should be medium-high.
4. To form the Thattai, take a plastic sheet or aluminium foil and grease it with oil. Grease your palms also with oil. Pinch a small portion of dough, form a ball, and place it on the sheet. Flatten it with your fingers to form a thin circle. Take a fork and prick all over the Thattai.
5. To check if the oil is hot enough drop a small bit of dough in the oil if it rises immediately then the oil is ready for frying. Using your left hand lift the foil and reverse it on your right palm and gently peel away the foil in a backward motion.
Now gently release the flattened dough into the oil and fry flipping both sides, until all the bubbles in the oil subside and the Thattai is a golden colour. Repeat this process for all the dough and store the Thattai/ Nippatu/Chekkalu in an airtight container.
NOTES:
1. Butter is one ingredient that gives the Thattai its crunch and also it’s colour. So do not exclude it. Some recipes suggest using Ghee or hot oil in the dough. I recommend sticking to butter as ghee and hot oil turn the Thattai hard and also the colour turns too brown.
2. Any butter unsalted or salted is fine.
3. Using Pottukadalai/ fried gram powder gives a nice taste and crunch. If you don’t have it handy, carryon with other ingredients. The Thattai will still turn out fine.
4. Using white sesame also gives a nice taste to the recipe. If you have it handy add some for sure
5. Coconut gratings or small bits of coconut are also added, but this time I have not added them.
If you tried this recipe and liked it please comment below. I would love to hear from you.
If you want the recipes emailed to you leave your id in the homepage near the????
icon. Whenever we have a new post the recipe will be mailed to you. Thank you for showing interest in Rajjo’s Kitchen.
Sweet Poha/Vella Aval
This recipe of the humble Poha(beaten rice flakes)/Aval cooked in Jaggery syrup is one of my favourites. I make it whenever I have a sweet craving or as an offering(Prasad) for Pujas at home. Healthy and filling at the same time. It makes for a good mid-evening snack(Tiffin) option. Sometimes I make with a combination of other Pohe recipes, to serve during Navarathri when guests visit home.
Poha is also one of the main offerings during Janmashtami and Ganesh Chaturthi. Lord Krishna is known to have loved them and Pohe is what his friend Sudama got him as a gift.
Usually, during these two festivals, people just offer the Pohe and jaggery with coconut scraping as a dry mixture for Prasad. I have observed that though there are few who like it this way, many don’t enjoy it dry. So what I prefer doing is putting it in a jaggery syrup and stirring it dry, with a dash of ghee, cardamom powder and coconut scrapings it tastes just like Sweet Pongal, but it is dry in texture.
There are many variations of the Pohe like Kanda Poha(onion Poha), Masala Poha(tomatoes and onions), Lemon Poha, Puli Aval(tamarind Poha), Vella Aval(Sweet Poha) and Dahi Pohe/Moru Aval. The Poha can be either thick or thin. For this recipe, I have used the thin one, but the same can be done with the thick one too, just that the soak time will vary. Thick Poha is used for recipes where the Poha is going to cook in a sauce so that it doesn’t become soggy. The Sweet Pohe makes for a good and healthy recipe for kids too.
While you are here please visit my other Indian sweet recipes such as
This Janmashtami or Ganesh Chaturthi try out this recipe of Sweet Poha or Vella Aval.
PREP TIME: 10Mins COOK TIME: 15 Mins
TOTAL TIME: 25Mins COURSE: DESSERT/SWEET
CUISINE: SOUTH INDIAN SERVINGS: 4
AUTHOR: Rajni Ram
Ingredients:
Poha/Aval( Thin ) 1 cup
Jaggery 1 cup
Coconut gratings 1 tbsp
Ghee 1tbsp
Cardamom powder 1/2 tsp
Cashewnuts around 5 broken to bits
Raisins around 8
Directions:
Pass the Poha through a sieve that has medium-sized perforations, such that the Poha remains in the sieve and the dust and small flakes fall away. Now wash the Poha just once(may become soggy if done more than once)and drain all the water. Let the Poha rest for 10 minutes.
In a thick bottomed vessel put in the jaggery and 1/4 cup water and place it on the flame. Stirring continuously dissolve the jaggery. The syrup should boil for about 2 minutes. Now strain this syrup into a Kadai or thick bottomed pan and add a teaspoon of sugar and add the washed Poha. Turn on the flame and mix the jaggery and Poha well, such that the jaggery syrup has evenly coated the poha. Cook on low flame until all the moisture is absorbed. Now add the cardamom powder and put off the flame. In a small tadka, Kadai heat the ghee and fry the nuts and raisins and drop them into the Sweet Poha and give it a stir. The Sweet Poha/Vella Aval is ready to offer as Prasad or to your guests. This can be made ahead and warmed just before you serve. Enjoy.
STEPWISE RECIPE FOLLOWS:
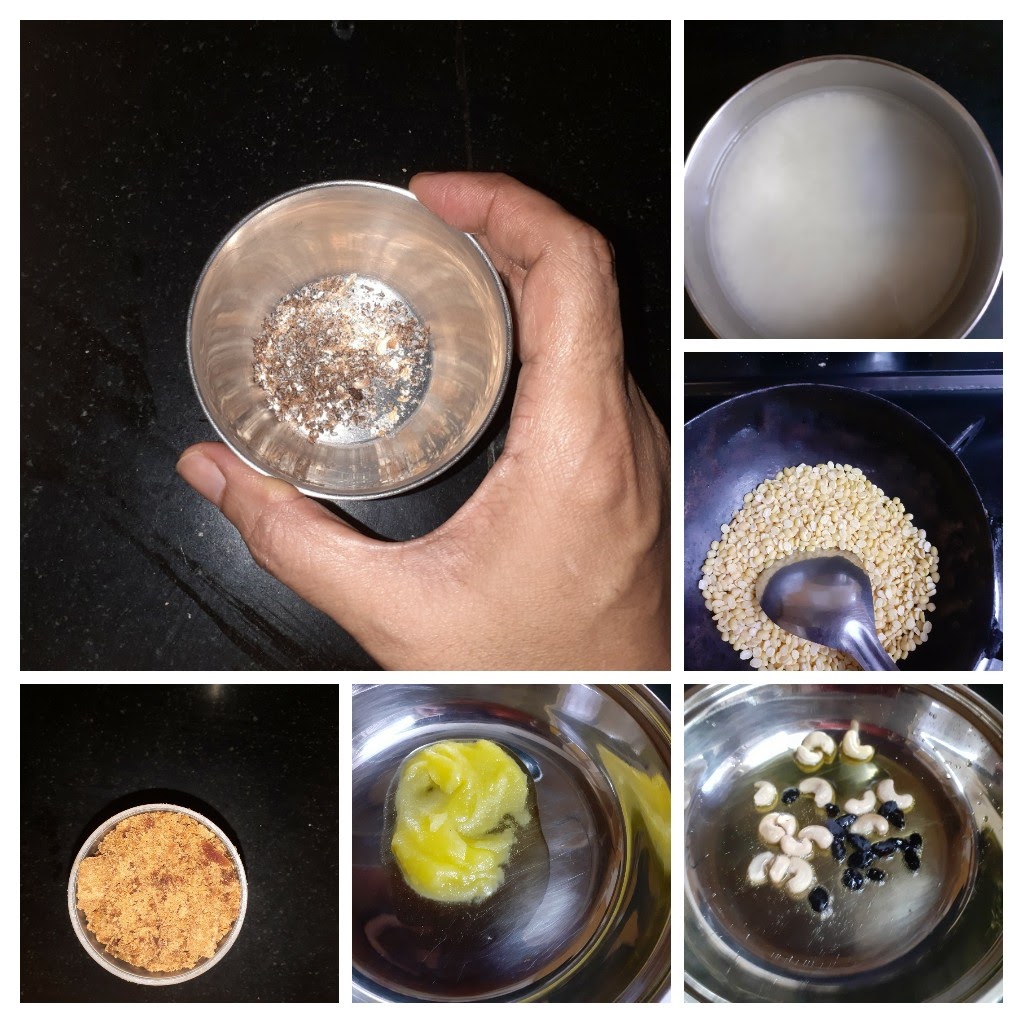
1. Assemble all ingredients. Powder the jaggery and cardamom and keep ready. Break the Cashewnuts to bits.
2. Sieve, wash the Poha twice drain the water and let it rest for 10 minutes.
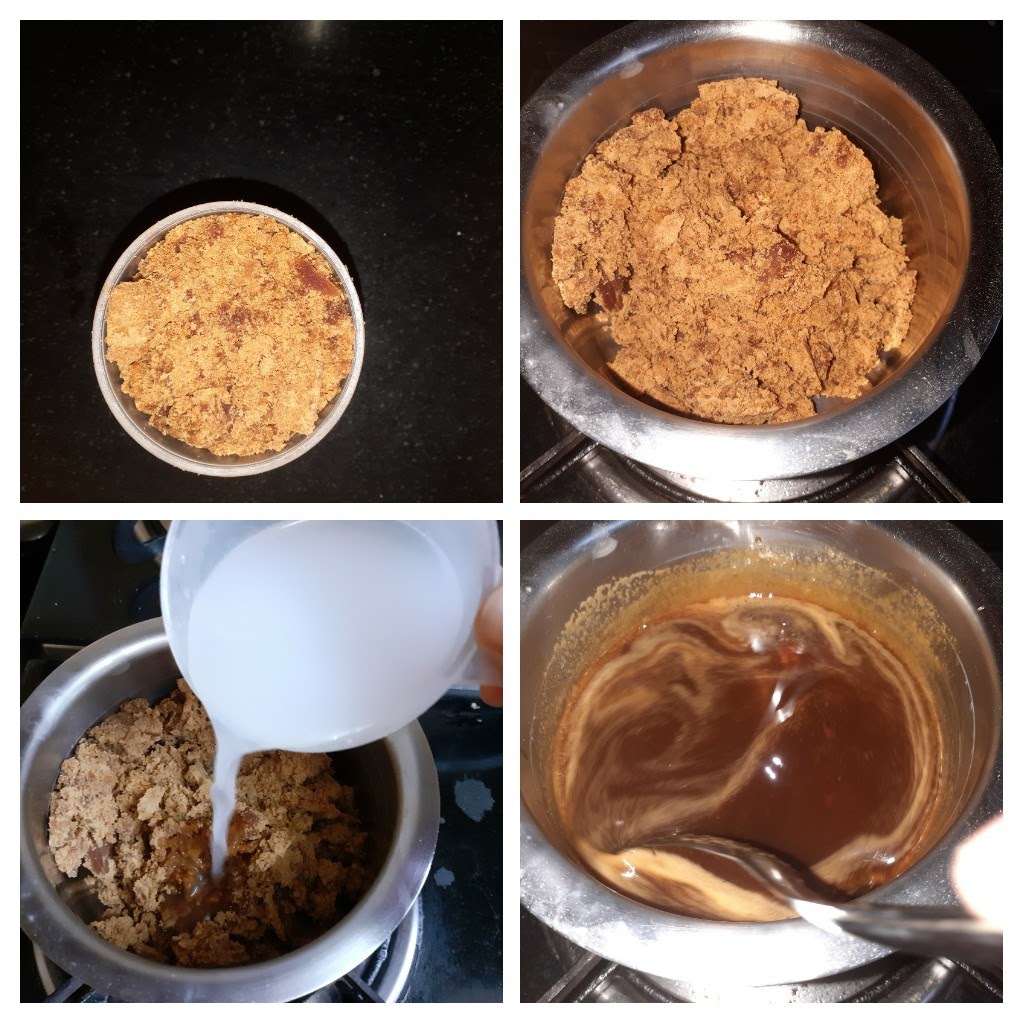
3. Now in a thick bottomed vessel put in the jaggery, add 1/4 cup water and switch on the flame. Stirring continuously dissolve the jaggery. The syrup should cook for 2 minutes on low flame.
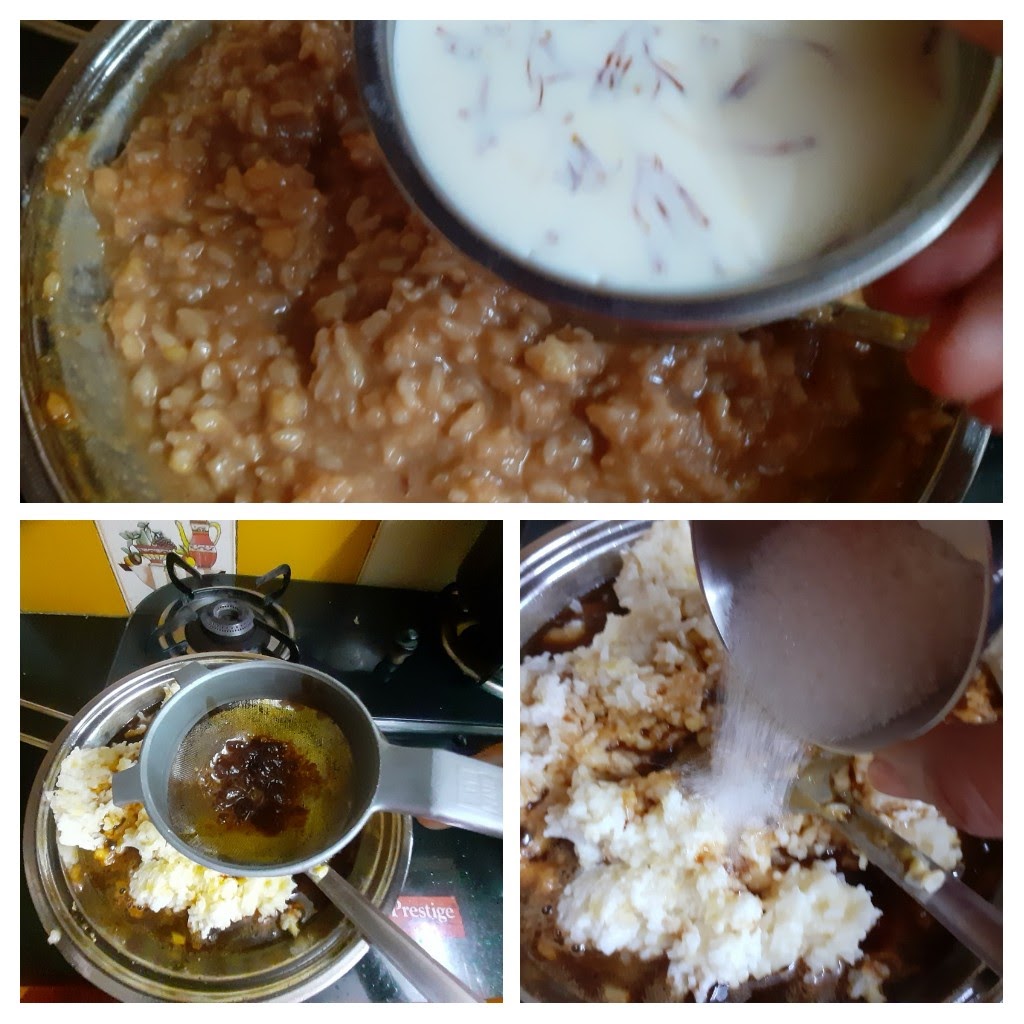
4. Now strain this syrup into the Kadai or pan in which you are going to make the Poha. Add a teaspoon of sugar. Add the washed and soaked Poha to the syrup in the Kadai, and switch on the flame. Start stirring and cooking this mixture until the jaggery syrup coats the poha well. Continue to stir until the moisture dries up and the Poha is almost dry. Add the cardamom powder and switch off the flame.
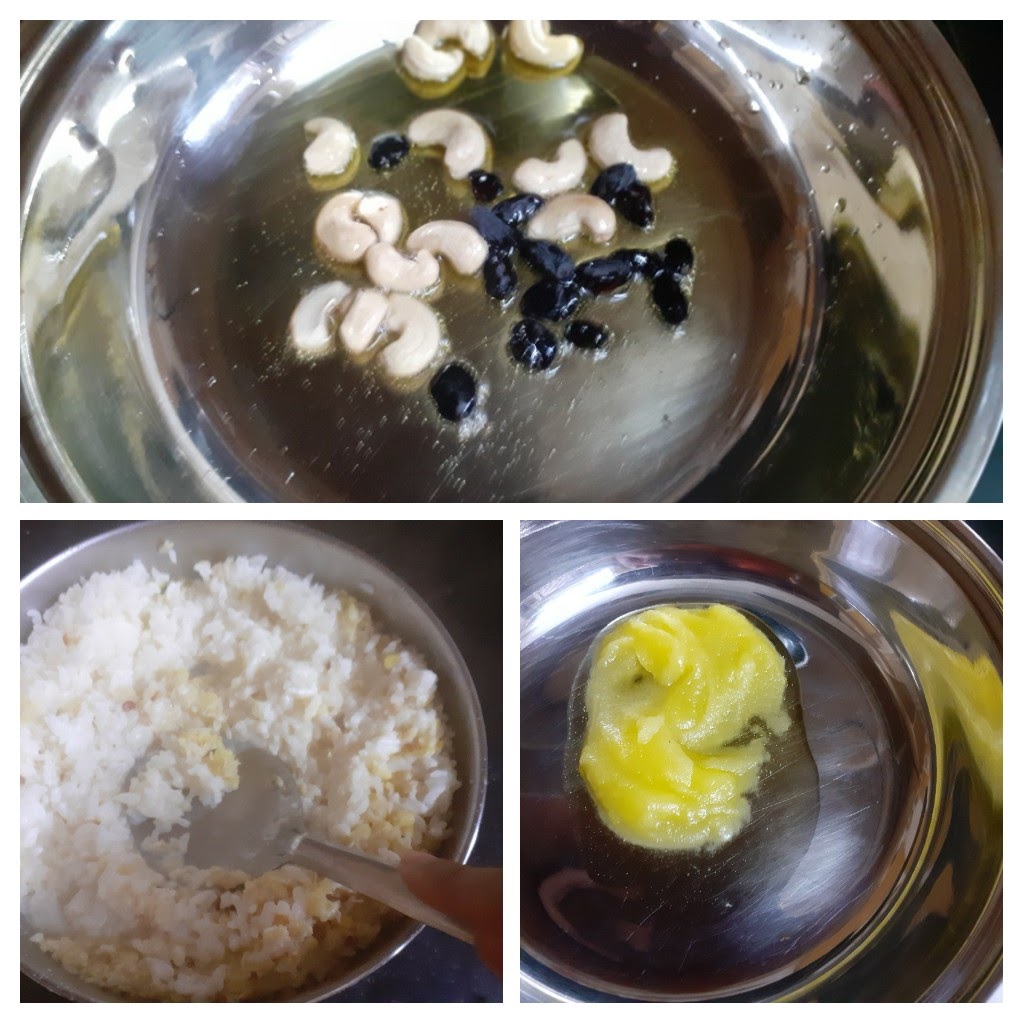
5. In a small tadka, Kadai dry roast the grated coconut gratings until light brown. One has to stir continuously as the coconut will burn if left unattended. Add the roasted coconut to the Sweet Poha and mix well.
6. Now in the same Kadai, the coconut was roasted, add the ghee and fry the nuts and raisins. Put this into the Sweet Poha. The dish is now ready to offer for Puja or to serve guests.
NOTES:
1. If using thick Poha there is no need to sieve the Poha, just wash it around 3 times and then rest it for 10 minutes.
2. Sometimes this recipe I also made by soaking the poha in jaggery water, but I personally do not recommend this as the dish does not last long. The jaggery water is not cooked like unlike the recipe above, so the chances are the Poha will give out a fermented smell in a short time.
3. Since in this recipe, I have boiled the jaggery and made a syrup the Poha can be made ahead, if you have made extra, it can be put in the refrigerator and warmed up the next day. So this method stays good longer.
4. Adding a teaspoon or two of sugar accentuates the taste of jaggery. I always follow this in my jaggery based recipes.
5. More grated coconut can be added if you like the flavour.
If you tried this recipe and liked it please comment below. I would love to hear from you.
If you want the recipes emailed to you leave your id in the homepage near the????
icon. Whenever we have a new post the recipe will be mailed to you. Thank you for showing interest in Rajjo’s Kitchen.
Creamy Pink Sauce Pasta
Well, who doesn’t love pink Pasta? Yes, pink pasta. Usually, pink pasta is made with a combination of white sauce and tomato pasta sauce. In this recipe, I have used a lot of tomato puree and milk, some cream, and loads of Parmesan cheese. The sauce is extremely slurpy and delicious. The sauce can be used as it is or one can add-in as per their preference.
I am also letting you into a little secret of how restaurants get that creamy texture. I have also used Pangritato(toasted bread crumbs) which takes this dish to a completely different level. This Pasta sauce is very easy to make and the dish gets done very quickly.
I have used Spaghetti and a few pieces of Macaroni just for some aesthetic effect and nothing else. You can avoid it completely, or use only Macaroni instead of Spaghetti or use both like I did. Children are sure to love this recipe and adults too and the bowl will be clean.
The use of parmesan cheese gives a nice sharp taste to the sauce. Feel free to add other herbs like Basil, I have used only Italian seasoning.
Here is the recipe of Creamy Tomato pasta for you–
PREP TIME: 20 MINS COOK TIME: 20 MINS
TOTAL TIME: 40 MINS SERVINGS: 4
CUISINE: WORLD FOOD AUTHOR: Rajni Ram
Ingredients:
Spaghetti 1 packet (300 gm)
Macaroni 1 handful(optional)
Tomato puree 200 to 250 ml
Cream (medium or high fat) 1/2 cup
Milk 1 cup
Parmesan cheese 1 cup and a little more
Bread slice 1(for the Pangritato)
Pepper powder 1 tsp
Red chilli powder 1 tsp
Garlic 5 pods crushed
Onion 1 finely chopped
Chilli flakes 2 tsp(divided)
Oregano or Italian seasoning 2 tsp(divided)
Cilantro/Coriander leaves finely chopped 2 tsp
Olive oil/butter 2 tbsp
Directions:
Cook the pasta aldente( a little undone- just put off the flame 2 minutes than the recommended time on the pasta packet). Reserve 2 cup of the water in which the pasta cooked and drain the remaining. Pour cold water over pasta, drain it completely and place the pasta in a colander.
Put 1 tsp of chilli flakes and Italian seasoning in 1 cup of the reserved pasta water and pour this water over the pasta in the colander, the water will drain away but the flakes and the seasoning will stick to the pasta. This step is what gives that flavouring in restaurants( 1 secret revealed).
Now in a wok or pan add 2 tbsp Olive oil/butter and heat. add the crushed garlic and saute for 30 seconds and add the onion. Continue to saute until the onions turn transparent. Now reduce the heat and pour in all other ingredients into the pan, like tomato puree, cream, milk and 3/4 cup of parmesan cheese. Stir the contents nicely over a medium flame until the cheese melts completely and the sauce starts bubbling. Add the reserved cup of pasta water to the sauce and dilute it, this is what gives the sauciness when the sauce becomes thick again( secret 2 revealed????). Now add the pepper powder, red chilli powder and salt to the sauce and continue to cook. The sauce will now become dense ad thick if it’s too thick then dilute again by adding 1/4 cup water. The sauce should be thick and stick to the pasta and not run all over it. Now add the cooked pasta to the sauce and mix nicely. The sauce should have covered all the pasta nicely. Now add the chopped Cilantro, Italian seasoning and top up with the remaining Parmesan cheese, cover and cook for a minute. Put off the flame and serve immediately. Yummy saucy pasta is ready. Enjoy. Bon Appetit.
For the Pangritato: Toast one bread slice with a little butter until crisp and powder it. this powder is Pangritato, basically toasted bread crumbs.
They are used a lot in Italian cooking.
STEPWISE RECIPE FOLLOWS:
1. Assemble all ingredients.
Cooking the pasta perfectly- Take about 2 litres of water in a big vessel( I prefer a flat and broad one) and boil it. When it begins to boil add a teaspoon of salt(reduce heat before you add salt or the boiling water will overflow), a teaspoon of oil and add the pasta. Keep stirring and cooking it and keep checking in between if it is done. Remember that you have put off the flame while it’s still a little undone or let’s say when it is 3/4 done. Remember to reserve 2 cups of this water and drain the rest. Immediately pour some cold water over the pasta and drain it. Place the pasta in a colander. Add 1 tsp of red chilli flakes and oregano seasoning to 1 cup of the reserved pasta water, a pinch of salt and pour it over the pasta that is cooling. This step ensures that the pasta is full of flavours.
2. In a wok/pan add 2 tbsp butter or olive oil and heat. Add the crushed garlic and saute for 30 seconds. Now add the onions and saute until they turn translucent.
3. Now reduce the flame to low and add the tomato puree, cream, milk and 3/4 of the Parmesan cheese and cook until the cheese melts. Keep stirring. The sauce will thicken. Now pour the remaining pasta water or regular water is fine too if you don’t have enough pasta water and dilute the sauce.
4. Now add the salt, red chilli powder, pepper powder, chilli flakes and simmer the sauce until it thickens again. Now put in the pasta into the sauce and mix it nicely, the movement should be from bottom to top so that the sauce spreads evenly over the pasta.
5. Finally, reduce the flame and top up the pasta with the remaining cheese and cook covered for a minute until the cheese melts. Now put off the flame and add the Pangritato. Enjoy this yummy pasta piping hot.
NOTES:
1. For any pasta recipe to turn out well, cooking the pasta carefully is very important.
2. Zucchini, Broccoli, Red onions etc can be added to the sauce. if adding them, add after sauteeing the onions and saute them also for 3 minutes.
3. If Parmesan is not available Cheddar also can be used, but definitely, there will be a difference in taste.
4. The sauce I made was just enough to put the pasta in, you can make more if you like it very saucy.
5. If you forget to reserve the pasta water, it is fine. Just continue with regular water or vegetable broth if you have.
6. I have added Macaroni only for the aesthetics, it fine if the recipe is made without it too.
If you tried this recipe and liked it please comment below. I would love to hear from you.
If you want the recipes emailed to you leave your id in the homepage near the????
icon. Whenever we have a new post the recipe will be mailed to you. Thank you for showing interest in Rajjo’s Kitchen.
Beetroot Paratha
Parathas are flatbreads stuffed with grated or mashed vegetables. Sometimes the vegetables are not stuffed but mixed in with the dough. This Paratha is one such recipe.
I resisted making these parathas for a whole month. I like Beetroot Poriyal( dry subji) a lot and I love Beetroot Halwa, but the thought of Beetroot in paratha sounded a little off track. My girl kept trying to convince me that I should give it a try and I kept dodging, saying I couldn’t imagine a sweetish paratha. The internet has a quite many beetroot paratha recipes, but I refused to look at them. Then one day when I ran out of options to cook dinner, I thought why not give it a try. But the challenge was to balance the sweetness with some spice and at the same time the beetroot is a mild vegetable and also spices do not go very well with it, so I decided to keep it simple.
I am more than willing to say I don’t regret making the Beetroot Paratha at all. It tasted so good and the lovely aroma while cooking the parathas was difficult to resist. So much so RK who isn’t a beetroot liker at all gave the parathas a thumbs up. Beetroot paratha is definitely becoming a regular at my house.
While you are here please check out other recipes on Rajjo’s Kitchen like
Grate the Beetroot and keep ready. In a mixer grind the green chillies and ginger to a fine paste without adding water. Now in a bowl/dish take 3 cups of wheat flour, salt as required, red chilli powder, coriander powder and the green chilli- ginger paste. Now add in the grated beetroot and start combining with your hand. Do not add any water at this stage. The beetroot also will release some moisture. So once you have combined the flour, spices and the wheat flour nicely, then start adding water little by little. The consistency should be like that of Chapati dough. Rest the dough for 15 minutes and then pinch small portions of the dough and form balls. This quantity yields 12 Parathas. Now dust each ball with flour and roll out to form a medium-sized Paratha. The dough must be rolled out a little thick. The colourful and delicious Beetroot Paratha is ready. Enjoy this colourful and flavourful Paratha. Bon Appetit.
Serving Suggestions: Usually parathas are served with pickle, butter and raita or curd. For this particular paratha, I suggest excluding the pickle as they will be very diverse in taste.
STEPWISE RECIPE FOLLOWS:
1. Assemble all ingredients. Grate the Beetroot, make a paste of the green chillies and ginger and keep ready.
2. In a bowl or dish take 3 cups of whole wheat flour. Add the red chilli powder coriander powder, salt plus the chilli- ginger paste to this.
3. Now add the grated beetroot and mix well. Don’t add any water at this stage keep mixing it with your hands until all the moisture of the beetroot is absorbed by the wheat flour.
4. Now add water a little at a time and start combining to form a dough. The dough should neither be stiff not too loose. It should resemble the Chapati dough in consistency.
5. Now pinch small portions of the dough and shape them to balls. This quantity gives around 12 of them. Now dust each ball with flour and roll it out into a thick Paratha. Cook both sides on a hot girdle drizzling some oil, until tiny light brown dots appear. The yummy beetroot paratha is ready to tuck in.
NOTES:
1. The flavour of this Paratha is very subtle, so the spice powders should be used minimally.
2. This is a no onion- no garlic paratha, it is best kept that way as the pungency of garlic may not go with the taste.
3. Coriander leaves could be added if you prefer, but I have not used them in this recipe.
If you tried this recipe and liked it please comment below. I would love to hear from you.
If you want the recipes emailed to you leave your id in the homepage near the????
icon. Whenever we have a new post the recipe will be mailed to you. Thank you for showing interest in Rajjo’s Kitchen.
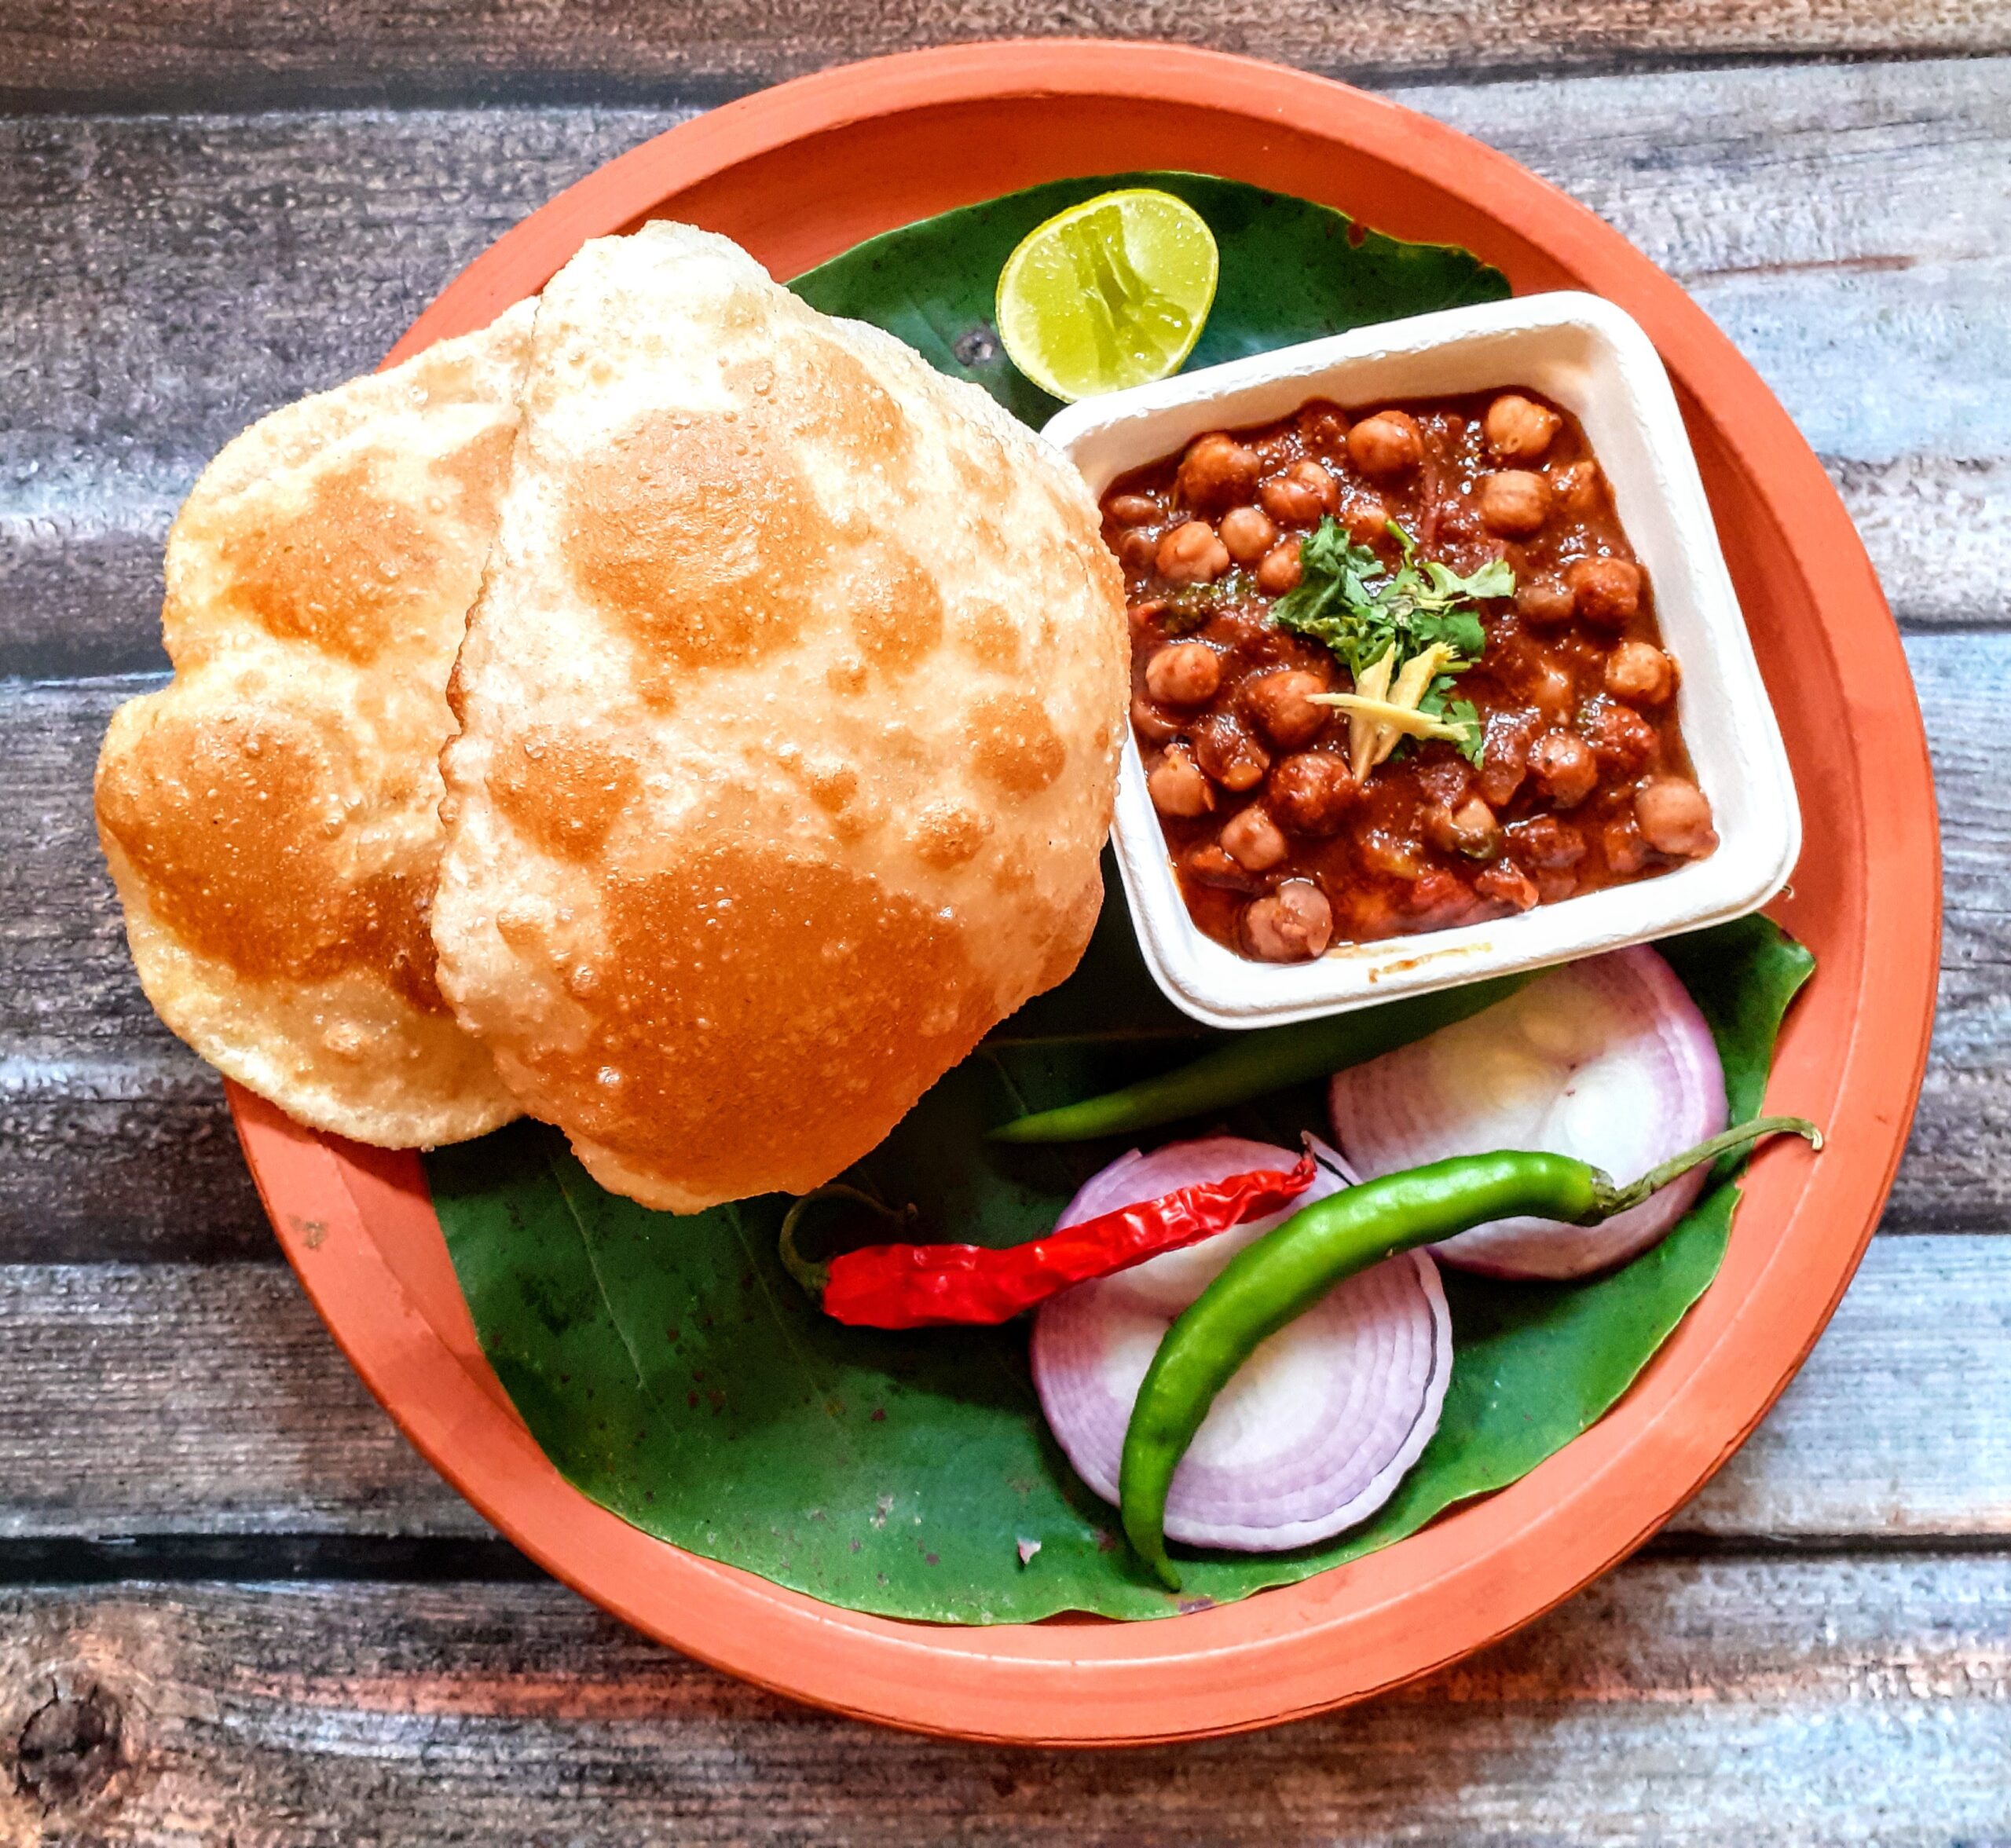
Pav Bhaji
Pav Bhaji the popular food from Maharashtra is everyone’s favourite. It is also the most popular street food. Everyone has their favourite outlet for this yummy street food variety. Mine is Elco Arcade in Mumbai and Gangotree in Chennai. If you visit these places please try them out.
The bread also called the Pav has to be fresh and the Bhaji the Maharashtrian word for Subji, tangy and spicy. Pav is a term that fills me with warmth because I have many childhood memories associated with it. When in Mumbai my aunt would decide to make us her yummy Pav Bhaji, we kids would be sent to these narrow bylanes in Bandra where the Pav was made fresh. here was this whole colony of Pav(bread) bakers and the whole area would smell so good. Just for this fact we kids would never refuse to go. This place was very close to my aunt’s house and we would take a morning walk to this place and would be handed over a fresh and hot batch of Pav for our evening Pav Bhaji. I just cannot forget the aroma of fresh bread just out of the oven.
In this dish, mashed potatoes are the main ingredient along with a tomato base. Onions and spices are also added which gives it the iconic taste. Topped with a dollop of butter a squeeze of some lime, this is could the best food ever.
I like to add more vegetables apart from the Potatoes and so I add a tiny carrot, few finely chopped pieces of cauliflower, peas, and capsicum. I also like to add a puree of tomato instead of chopped tomato.
So when the demand at home is to make something special yet simple I mostly opt for Pav Bhaji.
While you are here please do check out my other recipes like Pakode wali Dal, Semolina Cheese balls, Dahi Pohe, Pineapple rasam, Chinese paratha, and more…
Here is the recipe of Pav Bhaji for you-
PREP TIME: 20 Mins COOK TIME: 20 Mins
TOTAL TIME: 40 Mins COURSE: SNACK
CUISINE: MAHARASHTRIAN SERVINGS: 4
AUTHOR: Rajni Ram
Ingredients:
Pav- Store-bought
Potatoes 4 medium boiled and mashed
Tomatoes 2 large(pureed) used the local variety(desi) if available
Onion 1 large finely chopped
Green chillies 3 finely chopped
Cauliflower 3 florets finely chopped
Carrot 1 medium finely chopped
Capsicum 1 medium finely chopped
Green peas 1/2 cup ( I have not used here as could not find fresh ones)
Ginger -garlic paste 1/2 tsp
Cumin seeds 1 tsp
Turmeric powder 1/2 tsp
Red chilli powder 1 tsp(or more if you prefer)
Coriander powder 1 tsp
Fennel powder 1 tsp
Amchur powder 1 tsp
Salt as required
Garam masala powder 1/2 tsp
Oil for sauteeing
Butter for toasting the pav and a dollop for the bhaji
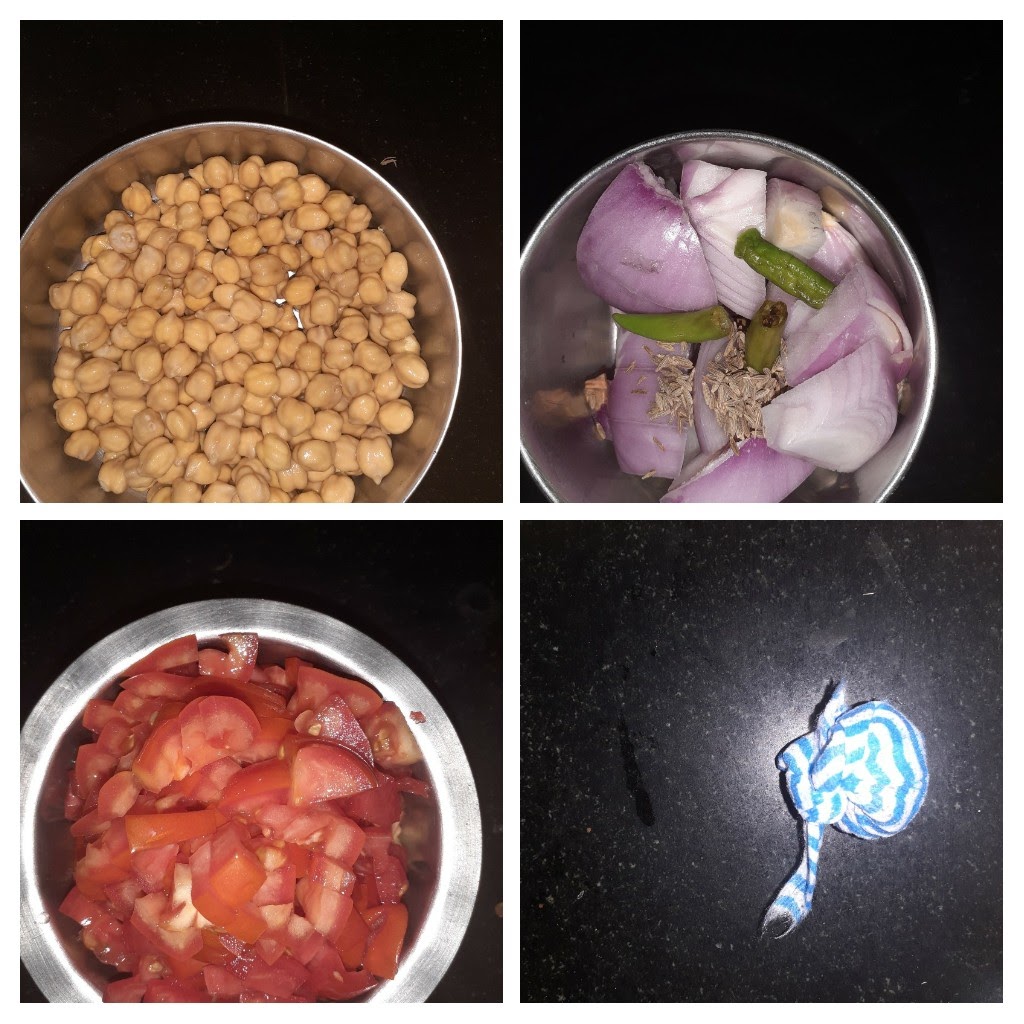
Directions:
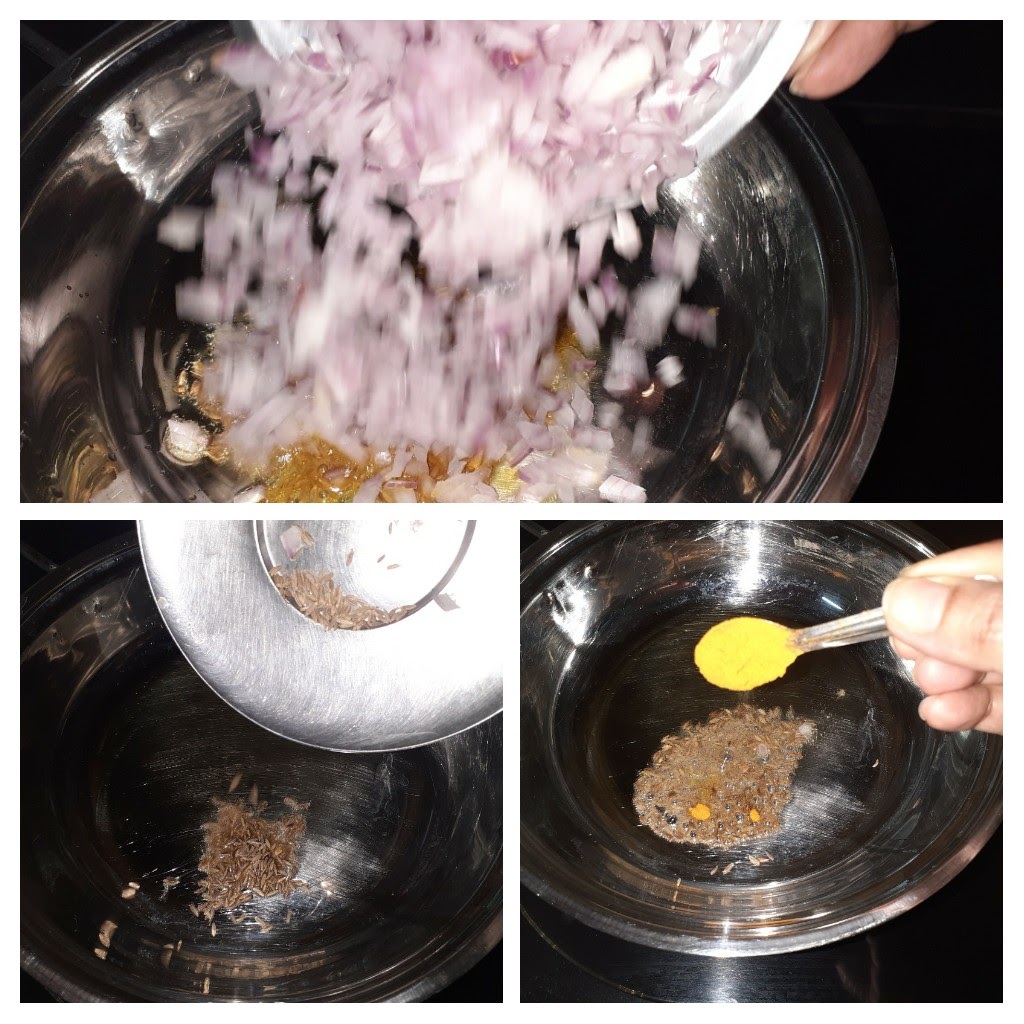
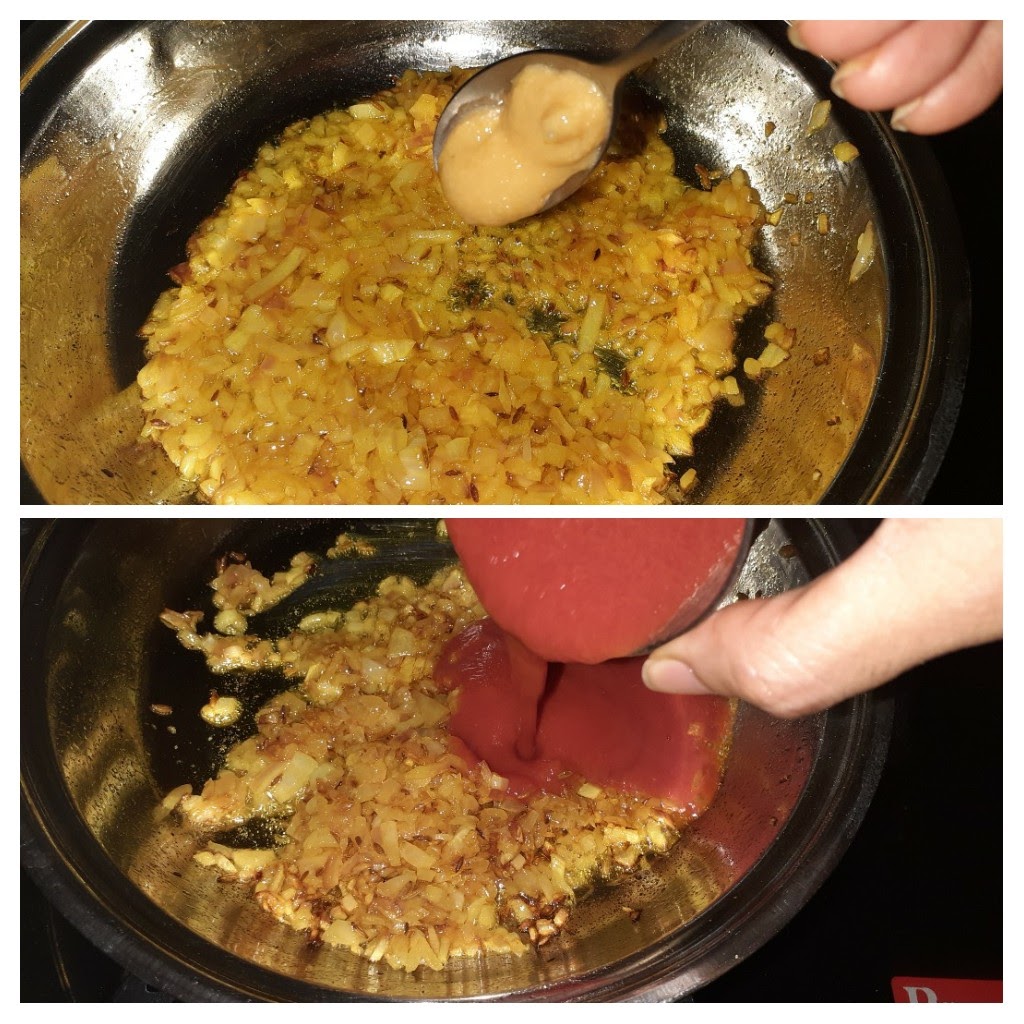
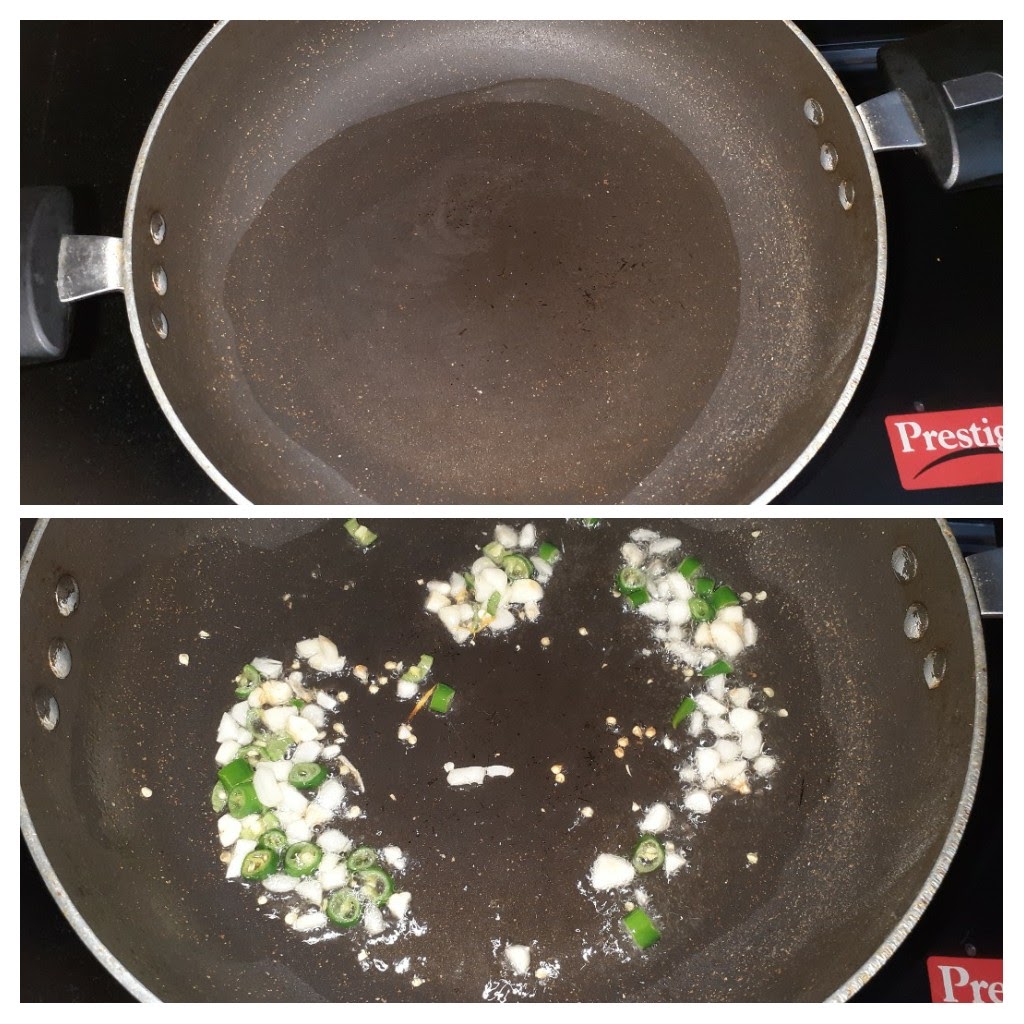
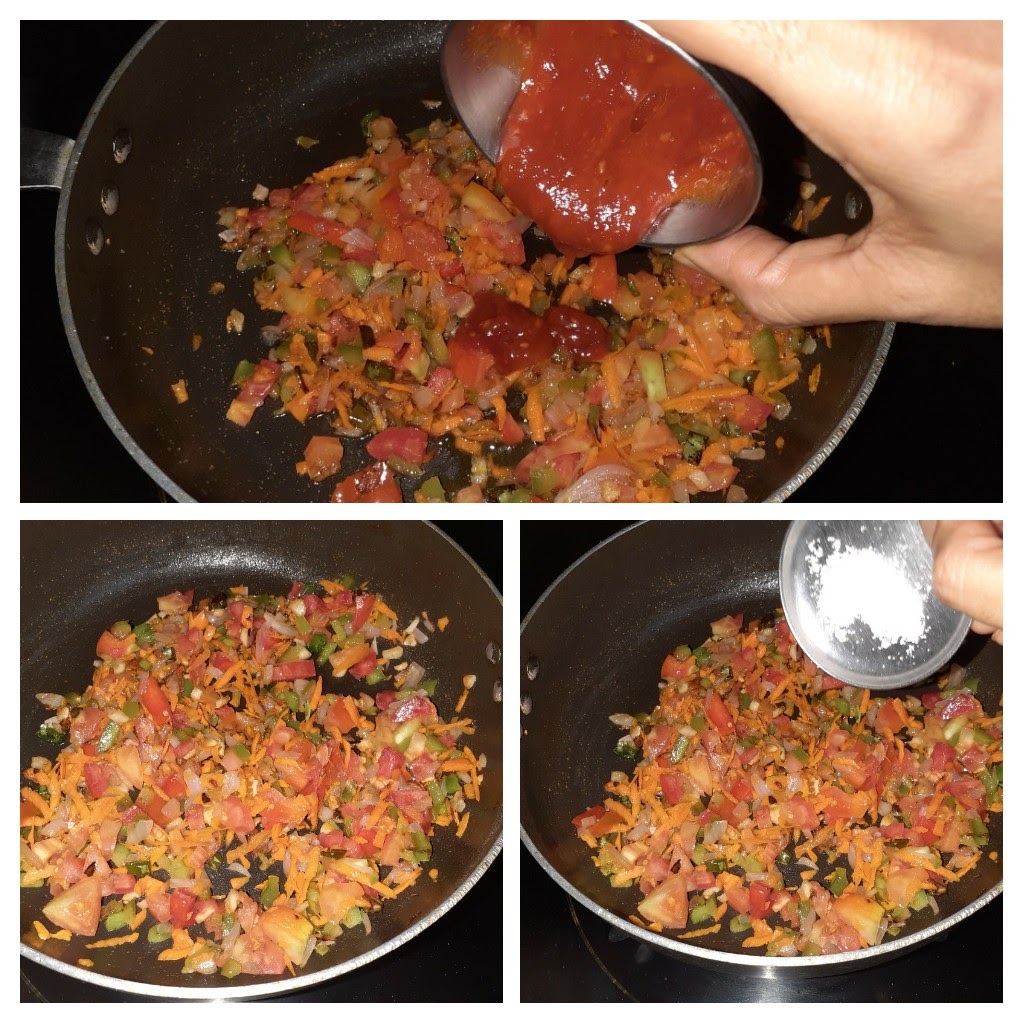
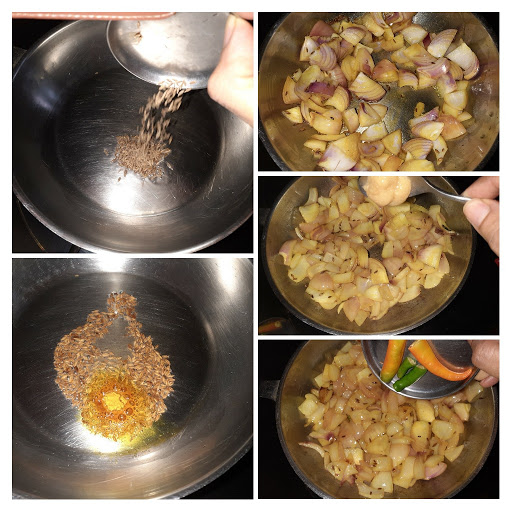
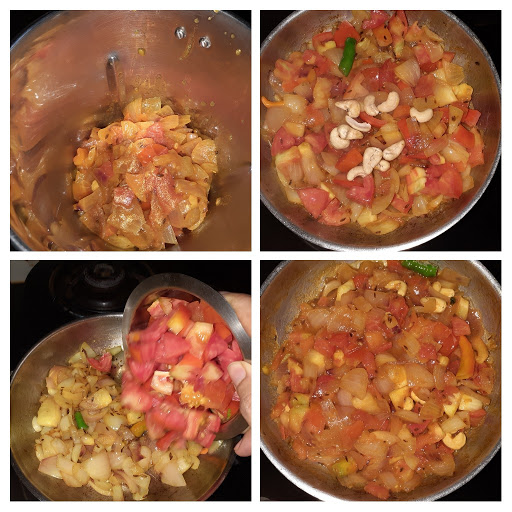
Boil the potatoes and mash them. Puree the tomatoes in a blender. In a karahi/pan take 1 tbsp oil and heat. Add the cumin seeds and as they crackle add the green chillies and saute for 30 seconds. Now add the onions and saute for a minute. Add the turmeric powder and continue to saute for 30 seconds, now add the ginger-garlic paste and saute until the onions start turning light brown. Now add in the capsicum and saute for a 1 minute. Remember that all sauteeing to be done on high flame. Now add the cauliflower and carrot and saute for 2 minutes. Now add the tomato puree, followed by red chilli powder, coriander powder, fennel powder, and salt and stir nicely. Cook for a minute. Now add the mashed potato and using a masher keep mashing and mixing all the veggies in the pan. Repeat the process until all are well combined. Now add 1 cup(can add up to 1.5 cups) of water and cook for 2 minutes on low flame. Now add Garam masala powder and turn off the flame. Garnish with finely chopped coriander leaves, finely chopped onions and a dollop of butter. Toast the fresh Pav with a liberal amount of butter and serve hot with the Bhaji. Enjoy. Bon Appetit.
STEPWISE RECIPE FOLLOWS:
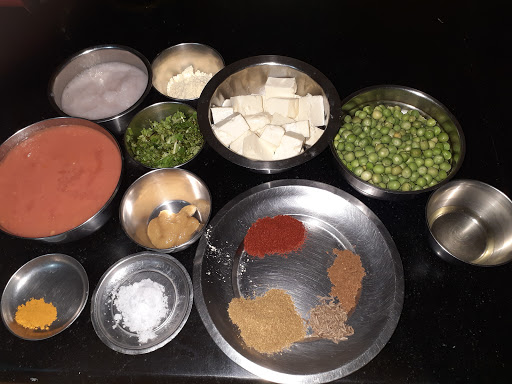
1. Assemble all ingredients. Boil and mash Potatoes, puree the tomatoes. Chop onions and green chillies.
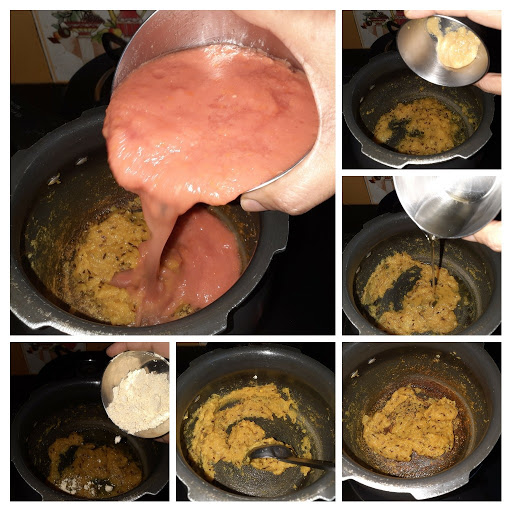
2. In a pan take 1 tbsp oil and heat. Add in the cumin seeds and as they crackle add the green chillies and saute for 30 seconds.
3. Now add the onions and saute on high flame for 30 seconds followed by turmeric powder, ginger-garlic paste and saute for 1 minute. Now add in the capsicum and saute for a minute. Add in the cauliflower and carrots and green peas(if using), add salt and continue to saute for 2 minutes.
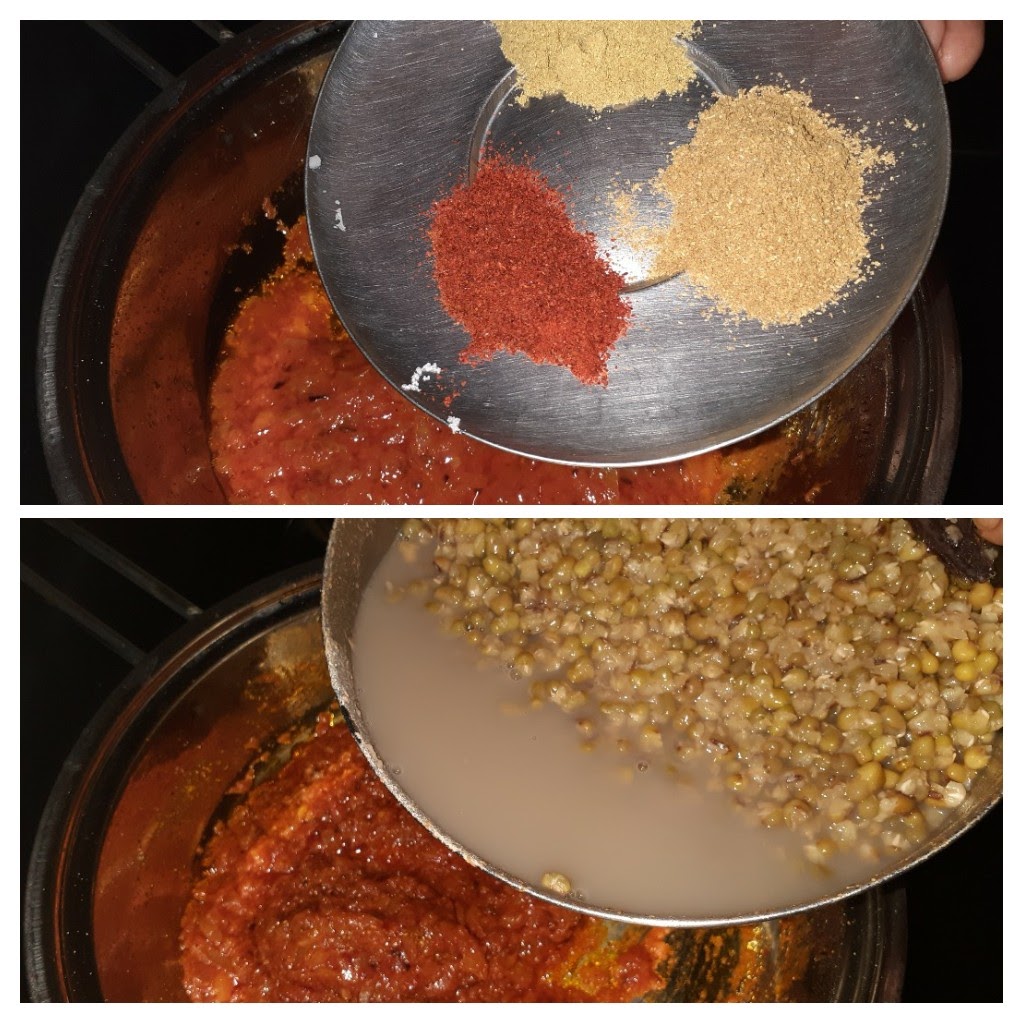
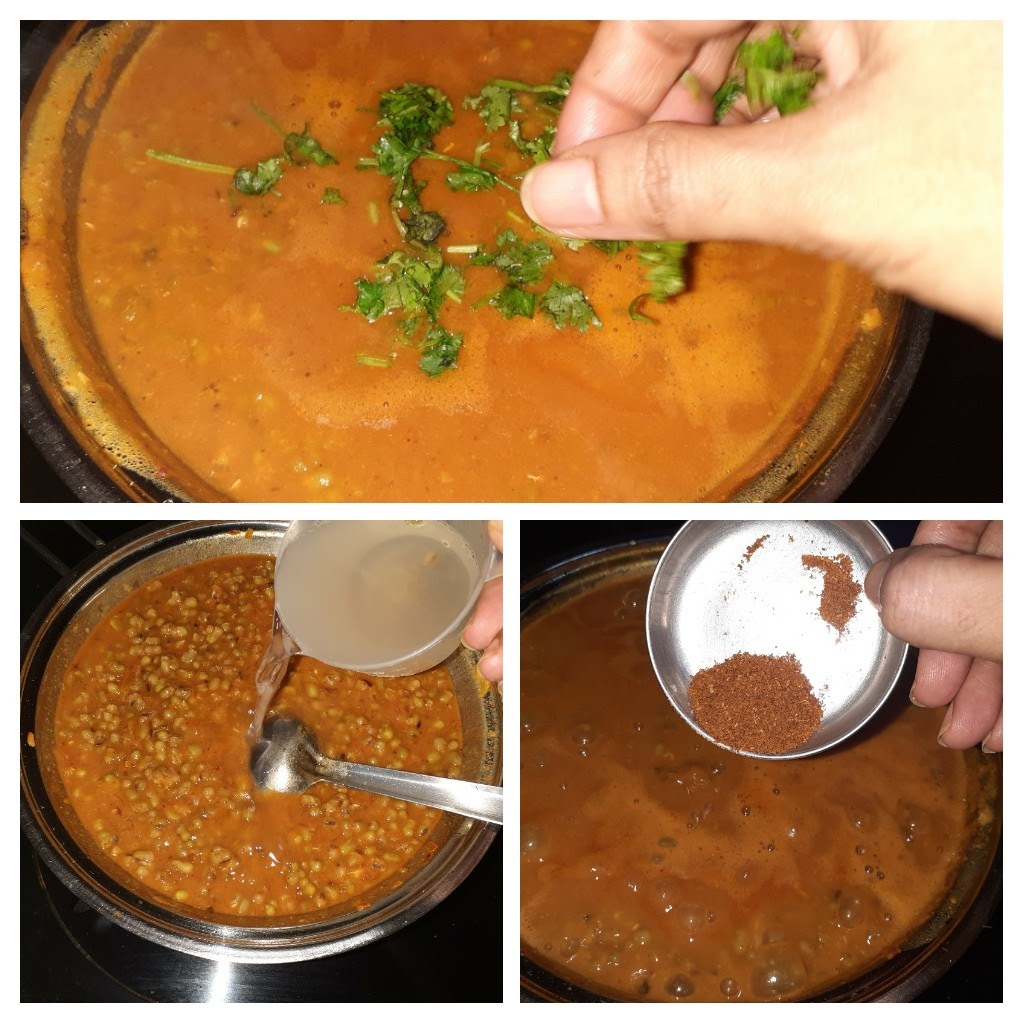
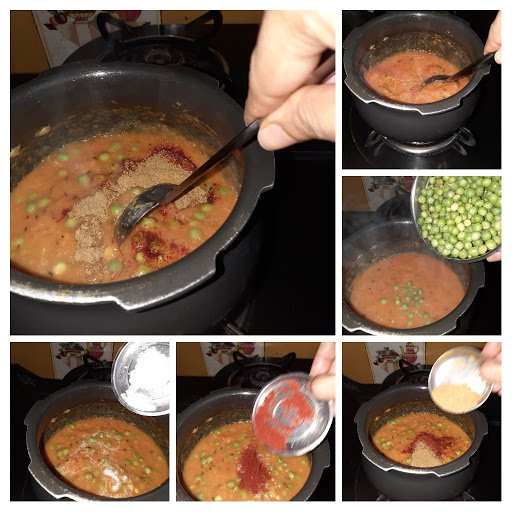
4. Now pour the tomato puree, followed by red chilli powder, coriander powder, fennel powder, amchur powder and stir nicely. Cook for 1 minute and add in the mashed potatoes and mix well. Using a masher mash the potato-veggie mixture in the pan until all are well combined. Now add about 1 cup water and continue to cook for 2 minutes. Check for salt and spice and if less add at this stage.
5. Finally, add the garam masala powder and turn off the flame. The bhaji should not be lumpy nor should it be runny. The spicy and tangy Pav Bhaji is ready to feast on. Toast some fresh Pav with a liberal amount of butter and serve the bhaji topped with finely chopped onion, coriander and a dollop of butter.
NOTES:
1. I recommend you use some green peas. As I could not find any on that said day I have made my Bhaji without it. If using boil them ahead.
2. Be liberal with the butter it really enhances the taste.
3. one can also sprinkle some grated cheese over the Bhaji, to make Cheese pav bhaji.
4. If you don’t want to add other vegetables it is fine and the dish will still taste the same.
If you tried this recipe and liked it please comment below. I would love to hear from you.
If you want the recipes emailed to you leave your id in the homepage near the????
icon. Whenever we have a new post the recipe will be mailed to you. Thank you for showing interest in Rajjo’s Kitchen.
Blueberry Cheesecake (Baked)
This is an epic post because I love Blueberries(any berry for that matter) and I have perfected this Blueberry cheesecake finally. And for a recipe to feature on my blog, I should have perfected it before I put it out before you, and that is when I have tried it out 3 times without any mishaps.
Over the years I have tried this recipe quite many times and it would taste fine but, consistency wise there would be some glitch or the other. Also in India, we don’t get fresh Blueberries very often, and even if we do they are expensive. So in this recipe, I have used dried Blueberries that are available in all departmental stores. I wanted to give you a recipe in which things are accessible. The Cream Cheese I have used here is also available at all outlets with a Chiller isle. The recommended one is Philadelphia Cream cheese but I have not used that, just to try if other brands work fine, and yes they do.
This Cheesecake turning out so well is a dream come true for me, as its always been my wish to make one. Since I love berries I have loaded my Cheesecake with a lot of them, one can reduce the quantity too if they desire.
This recipe is a no-mess, one-bowl recipe so not much of clean up is required. It is light and creamy with a blueberry topping. The thing about them being baked is that they hold well at room temperature, but since I am using a blueberry topping I had to refrigerate for 2 hours. The topping is just an option and is not at all mandatory.
I have simplified the recipe quite a bit. In this recipe, I’m giving stepwise instructions directly.
while you are here please try my other recipes like Apple Crumble,
Pineapple Jam tarts, Nutella fudge brownies, Berry Smoothie Icecream, and more…
Here is the recipe of Blueberry Cheesecake for you-
PREP TIME: 20 Mins COOK TIME: 40 Mins
TOTAL TIME:60Mins COURSE: DESSERT
CUISINE: WORLD FOOD SERVINGS: 6
AUTHOR: Rajni Ram
Ingredients for Base:
Marie Biscuit 1 sheet(20 nos)
Unsalted butter 100 gm
Sugar 2 tbsp(powdered or fine sugar)
Ingredients for Filling:
Creamcheese 320 gm softened(keep out of the refrigerator for 1 hour)
Plain flour/Maida 1 tbsp
Sourcream/Curd 1/3 cup
White Sugar 1/2 cup
Vanilla extract 1.5 tsp
Zest of Lemon- Grate the rind of one whole lemon
Eggs 2
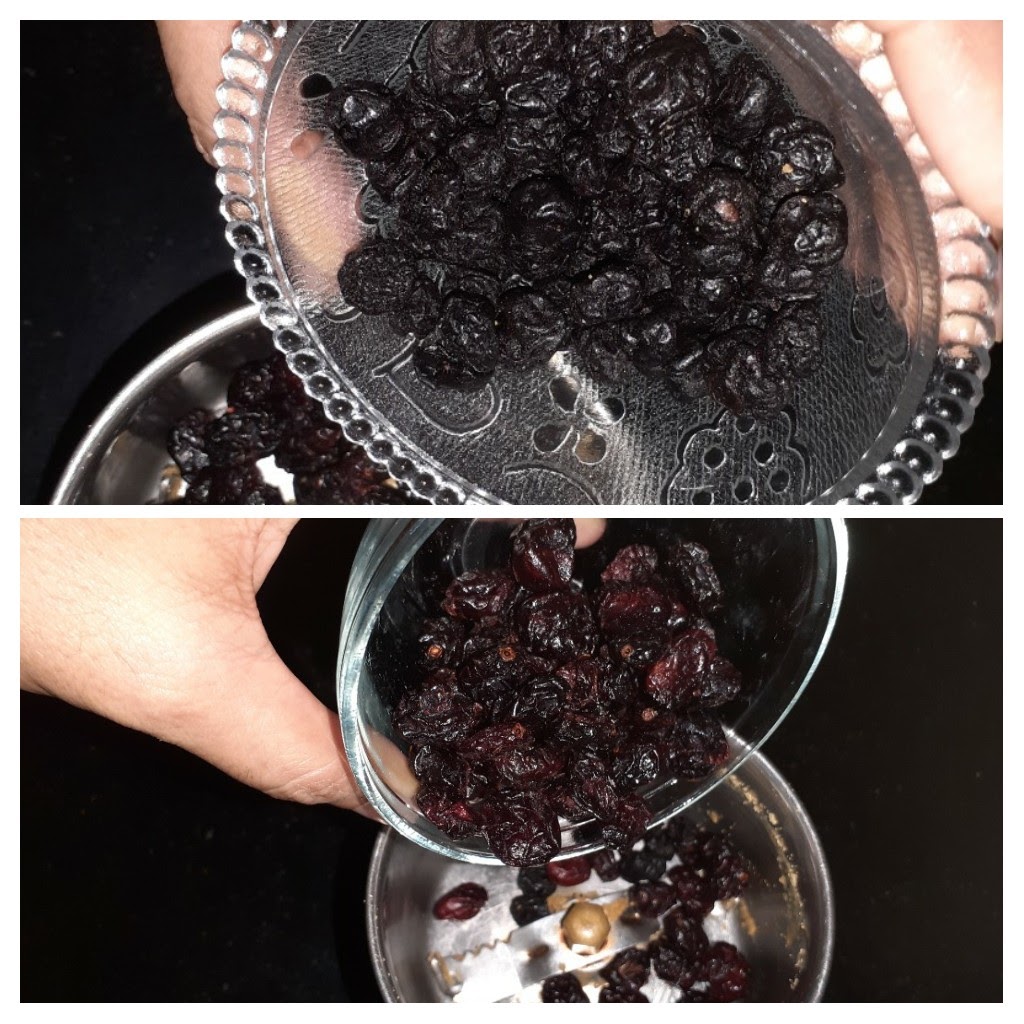
Blueberries(dried) 250 gm (soak in warm water for 30 mins and drain the water)
Icing Sugar for dusting(optional) (refer note2)
* Reserve some blueberries(unsoaked) for later.
Ingredients for Blueberry topping/Sauce:
Blueberries(dried) 1 cup (soaked for 30 mins in warm water and drain water)
Sugar1/4 cup
Cornflour 1 tbsp
Lemon Juice 1 tbsp
Butter 1 tbsp
Blueberry preserve 3/4 of a 240 gm bottle(around 180 gm)
Directions for Sauce:
Place the Blueberries and remaining ingredients(except the preserve) in a saucepan and cook over medium flame. Bring them to a simmer and cook until few of the blueberries burst, around 3 minutes. Keep stirring. Now add the preserve ad stir again. The sauce will come together and become jammy. Remove from flame and cool completely.
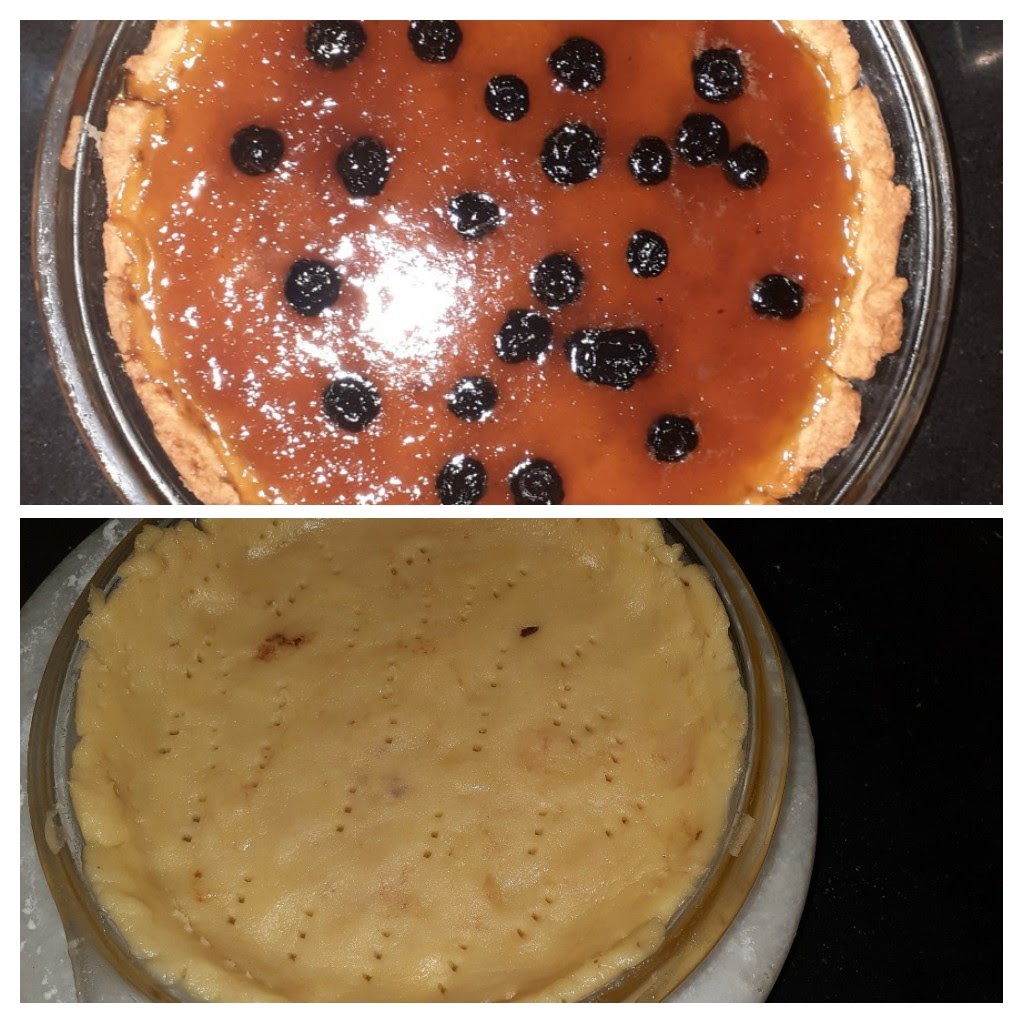
Directions for Base:
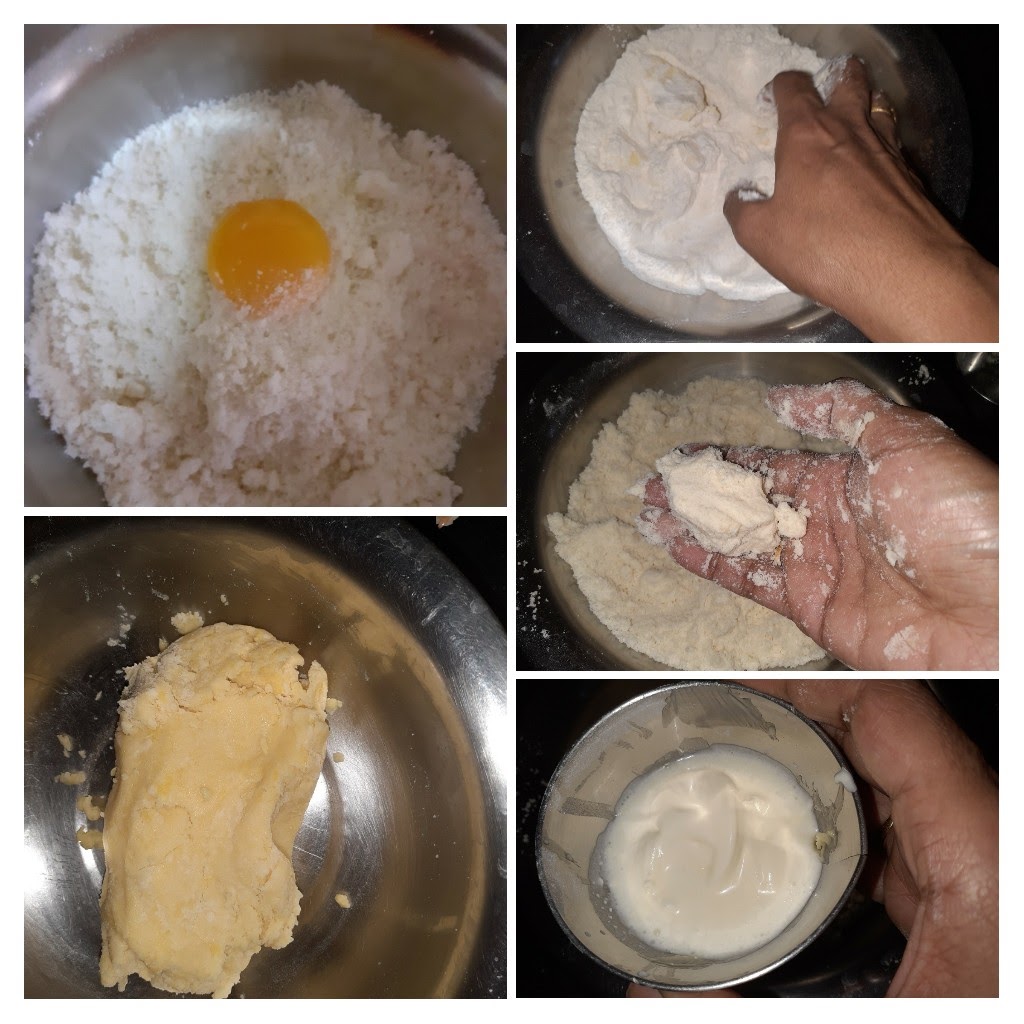
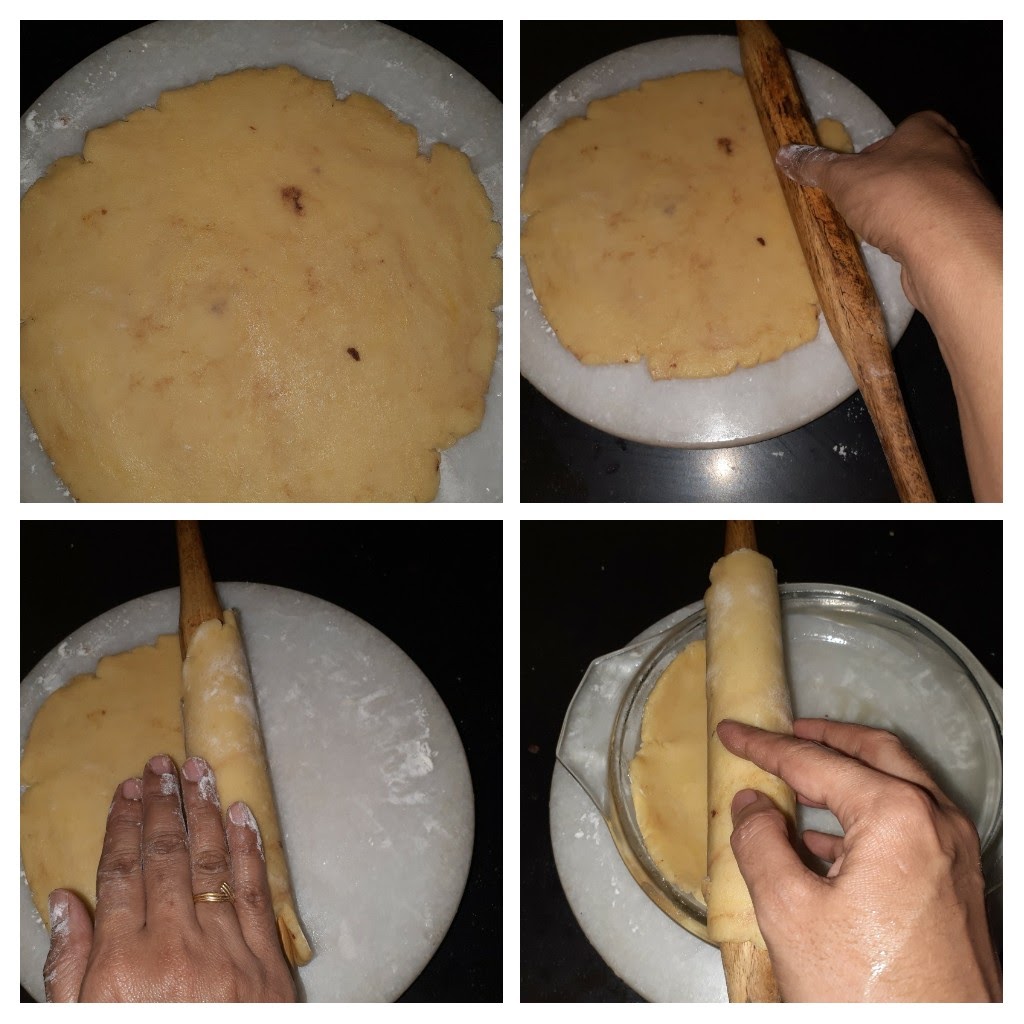
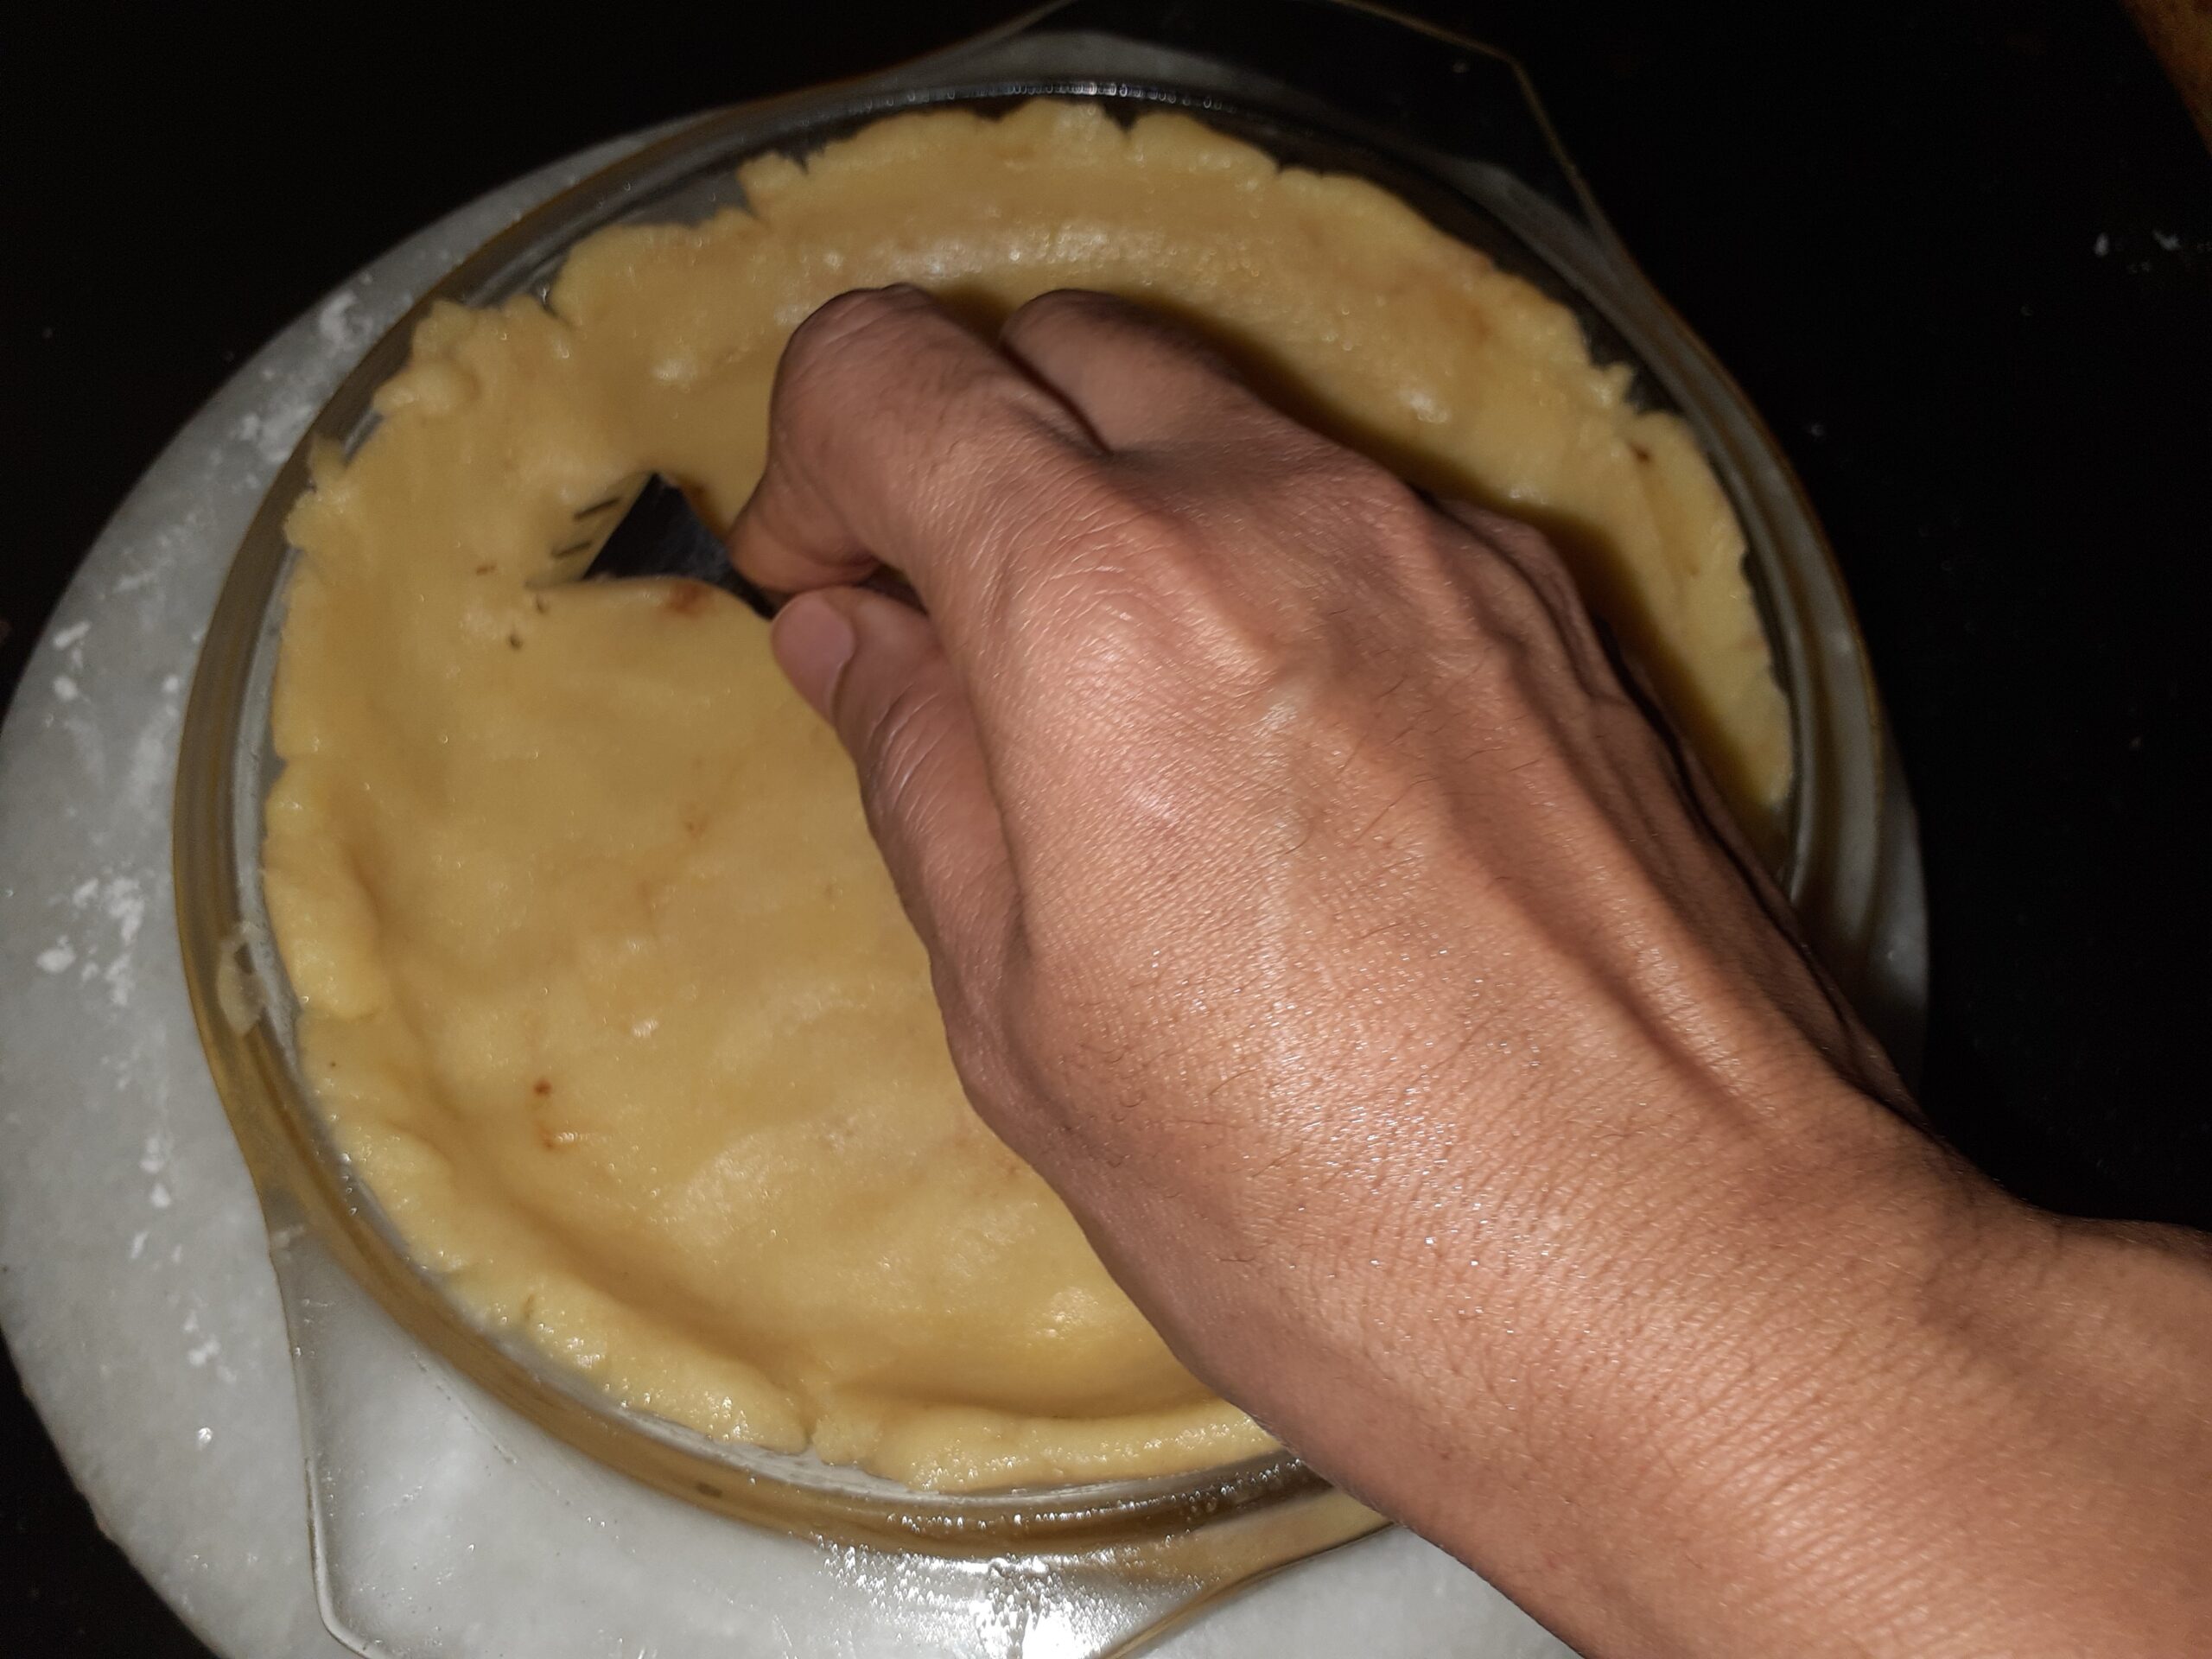
1.Grease or spray a round baking tray/mould with oil and line with parchment paper/butter paper. Place the biscuits in a blender and powder them. Add the butter and sugar to the powdered biscuits and blitz again. It should look like wet sand.
2. Put this mixture into the baking mould and using something flat press it down into the base and also rise in the sides, as this is going to hold the filling and topping, it needs some height. See pictures for reference.
Directions for filling:
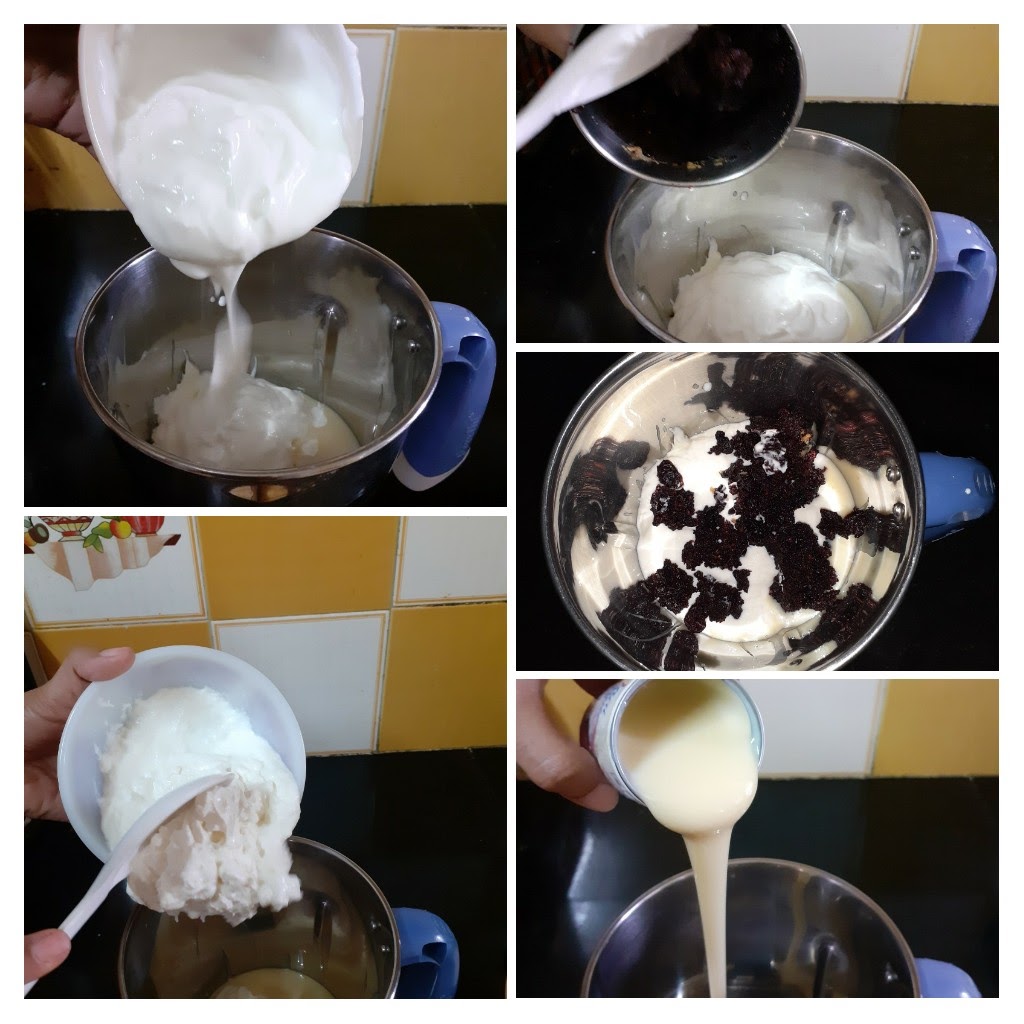
1. Firstly preheat the oven to 160 C or 320F. Now start making the filling. Beat Creamcheese(just a spatula will do, stand mixer or electric beater not required, remember I said it a one-bowl recipe????) until smooth, it need not become fluffy. Now add the flour and beat again until just combined.
2. Add sour cream/curd, sugar, vanilla and the lemon zest and beat until combined. Add the eggs one by one beating in between, until just combined. Do not overbeat.
3. Now ensure you have drained all water from the soaked blueberries and add the berries to the cream cheese batter and fold gently. Now pour this batter into the prepared base and top with the reserved unsoaked blueberries.
4. Bake for 40 minutes at 180 C or until the cheesecake is set, but the middle of the cake should wobble when you shake it and when you stick in a toothpick it should come out clean. There can be little cracks on the cake, so don’t worry.
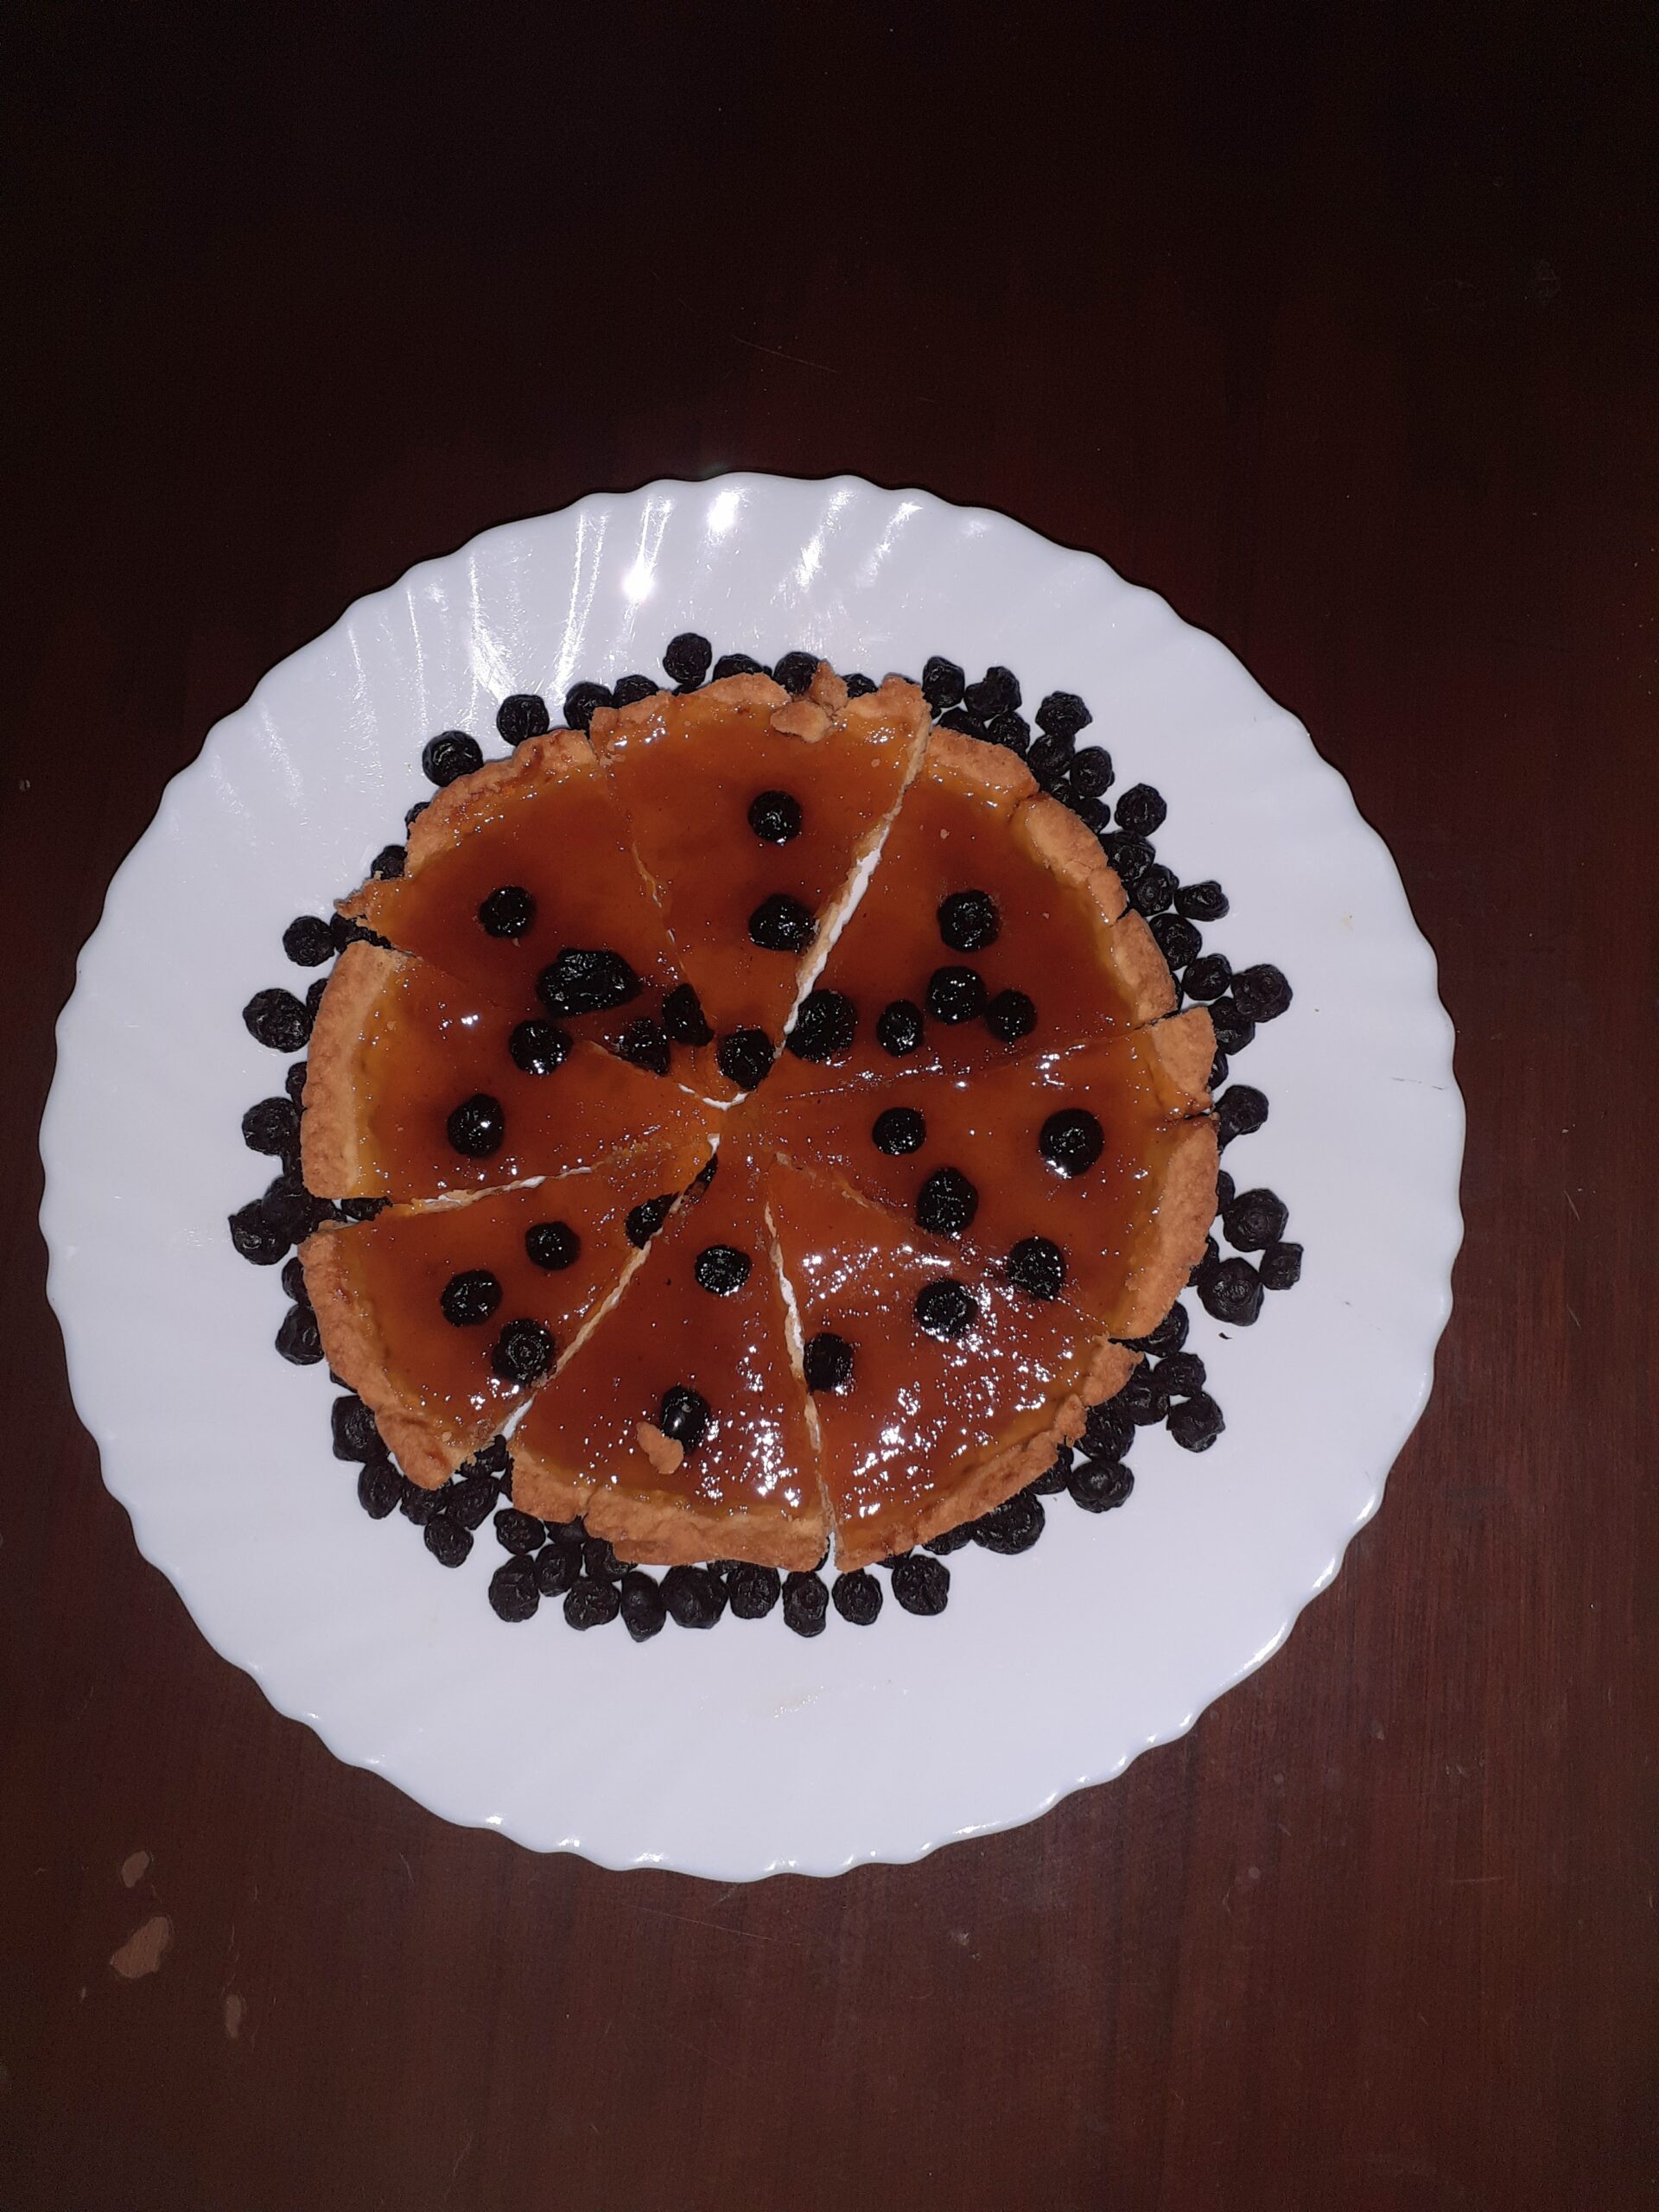
5. Cool the cake completely and spread the Blueberry sauce over it( the sauce might have thickened, just microwave it for 20 seconds and it will be spreadable again). Refrigerate for 2 hours and its ready. Enjoy the Berrilicious flavour. Bon Appetit.
NOTES:
1. If using Fresh Blueberries use 1/2 cup sugar for the filling and the entire bottle of the preserve.
2. Topping the cake with Blueberry sauce is optional. If not topping it dust icing sugar over the cake before storing.
3. Try using a spatula for beating as we don’t want the batter to air up and rise. If the batter becomes fluffy, the cake will rise while baking and then go limp on removing it from the oven.
4. If topping the cake with sauce, don’t forget to refrigerate it, only then the topping will set, otherwise when you cut the cake it will drop everywhere.
If you tried this recipe and liked it please comment below. I would love to hear from you. If you have a query about the recipe email us and ill respond as soon as I can.
If you would like to receive our recipes on your mail please leave your mail id at the homepage. Every time Rajjo’s Kitchen has a new post we will mail the recipe to you.
Stuffed Karela/Bitter Gourd
I have realized that people either like Karela/Pavakkai/Bittergourd or don’t like it at all. There is no in-between here. Those who like it, love it. So here I bring to you an everyday subzi that is made in most houses, does that sound boring? Then read ahead and you will realize that I’m not going to stuff it with the regular Amchur powder, coriander, and red chilli powders. Ok, I’m using Coriander seeds and I shall make the stuffing from scratch, which makes it aromatic, and yes my favourite word flavourful.
Actually, before deciding to blog this recipe I was in two minds as to whether you all will be interested in a bitter gourd recipe and then thought even if half my Karela eating followers try the dish, it would be worth it. In this recipe, I slow-roast coriander seeds and lentils and spices along with tamarind to form a powder and fill the karelas with it. After stuffing them saute over a low fire until done and they get a beautiful glaze on them.
I am using the small Bitter gourds as then the filling is intact. But believe me, if you like this dish you are going to make it with the big ones too, and I will tell you how to by the end of the recipe.
Here is the recipe of stuffed karela/Bitter gourd for you–
9
PREP TIME: 15 Mins COOK TIME: 20 Mins
TOTAL TIME: 35Mins COURSE: MAIN
CUISINE: NORTH INDIAN SERVINGS: 4
AUTHOR: Rajni Ram
Ingredients:
Small Bitter gourd 20 pcs
Coriander seeds 2 tbsp
Urad dal 1 tbsp
Chana dal 1/2 tbsp
Tamarind gooseberry size ball
Dry red chillies( whole) 5
Jaggery 1 tsp(optional)
Asafoetida 1/2 tsp
Turmeric powder 1/2 tsp
Salt as per taste
Oil for sauteeing
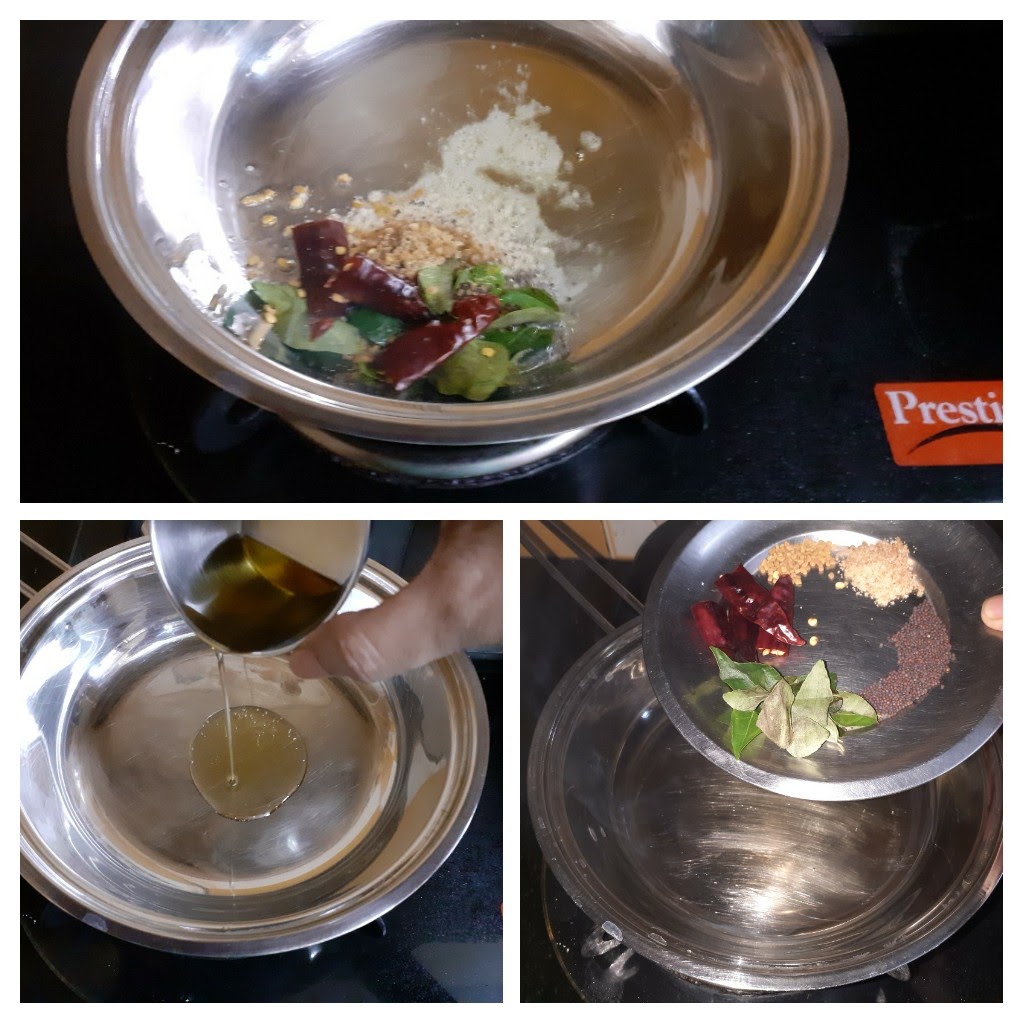
Directions:
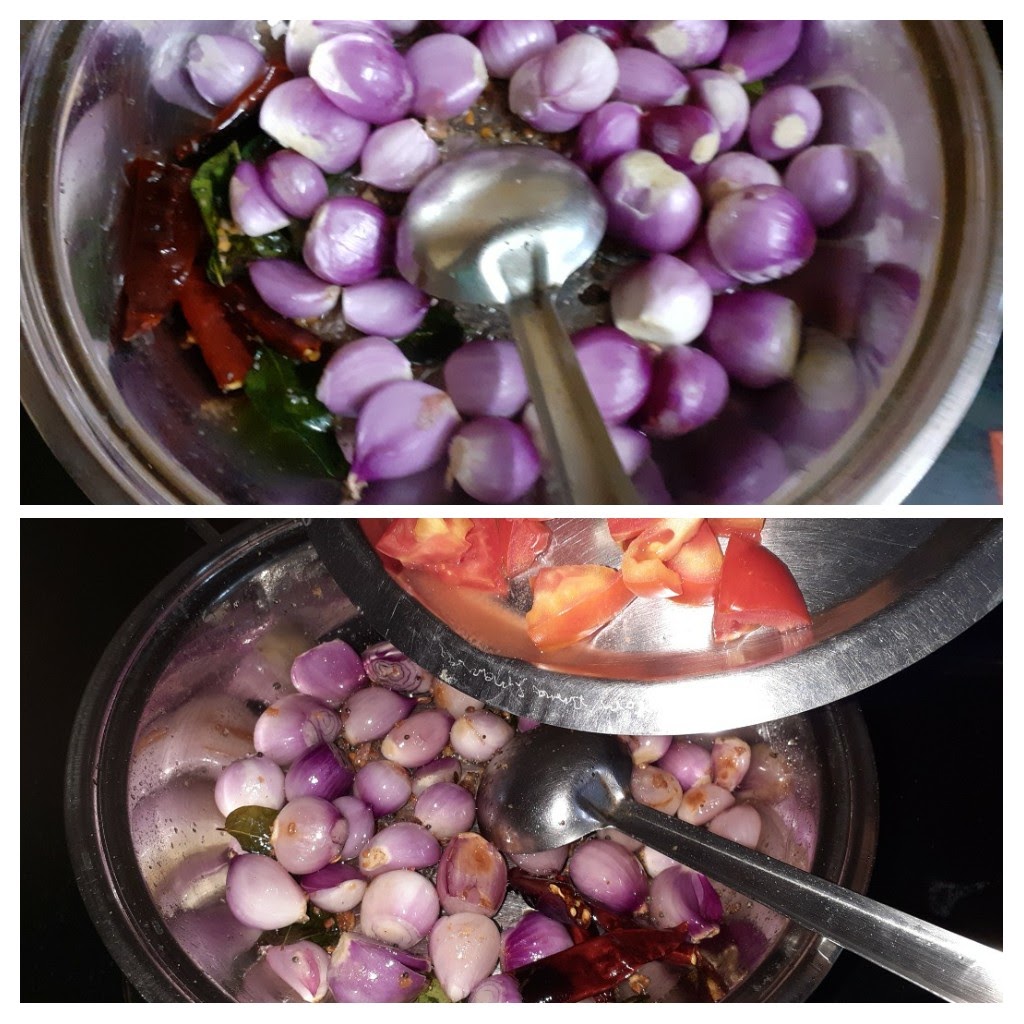
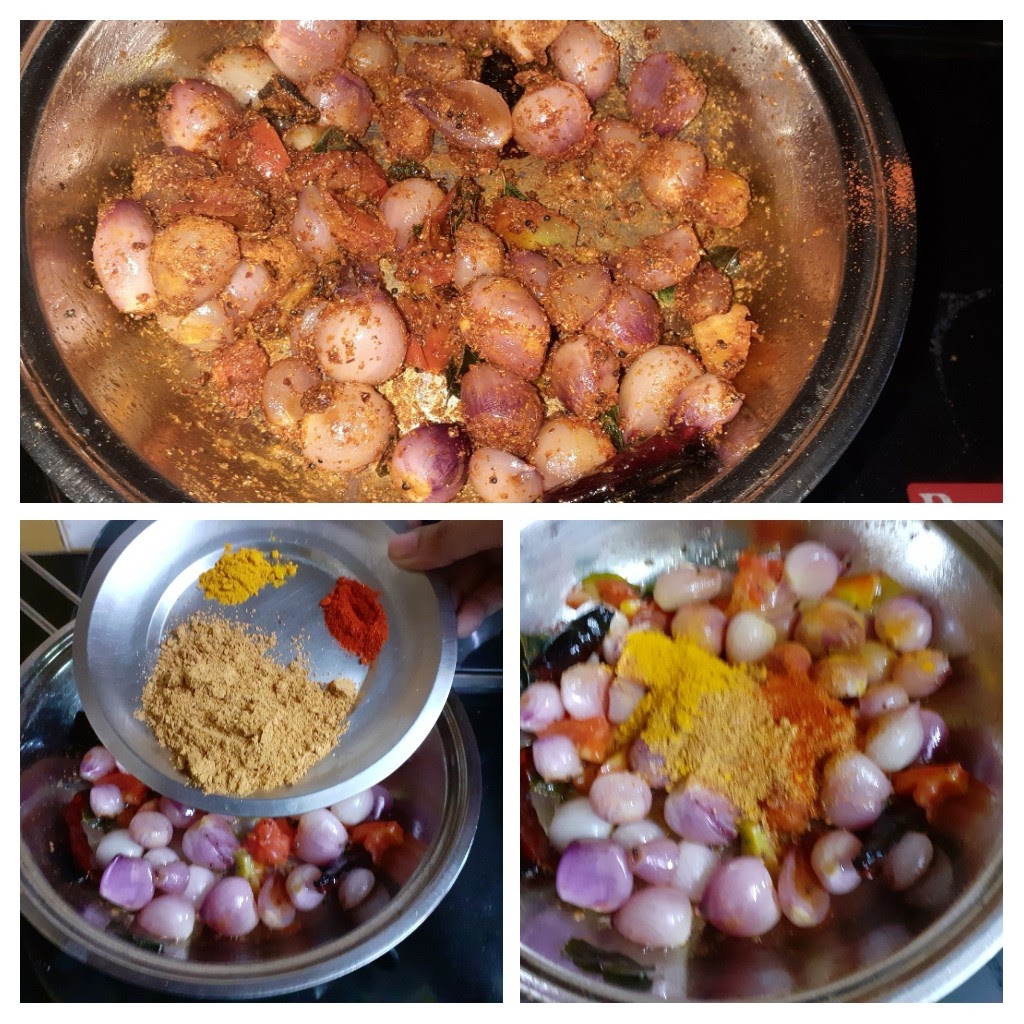
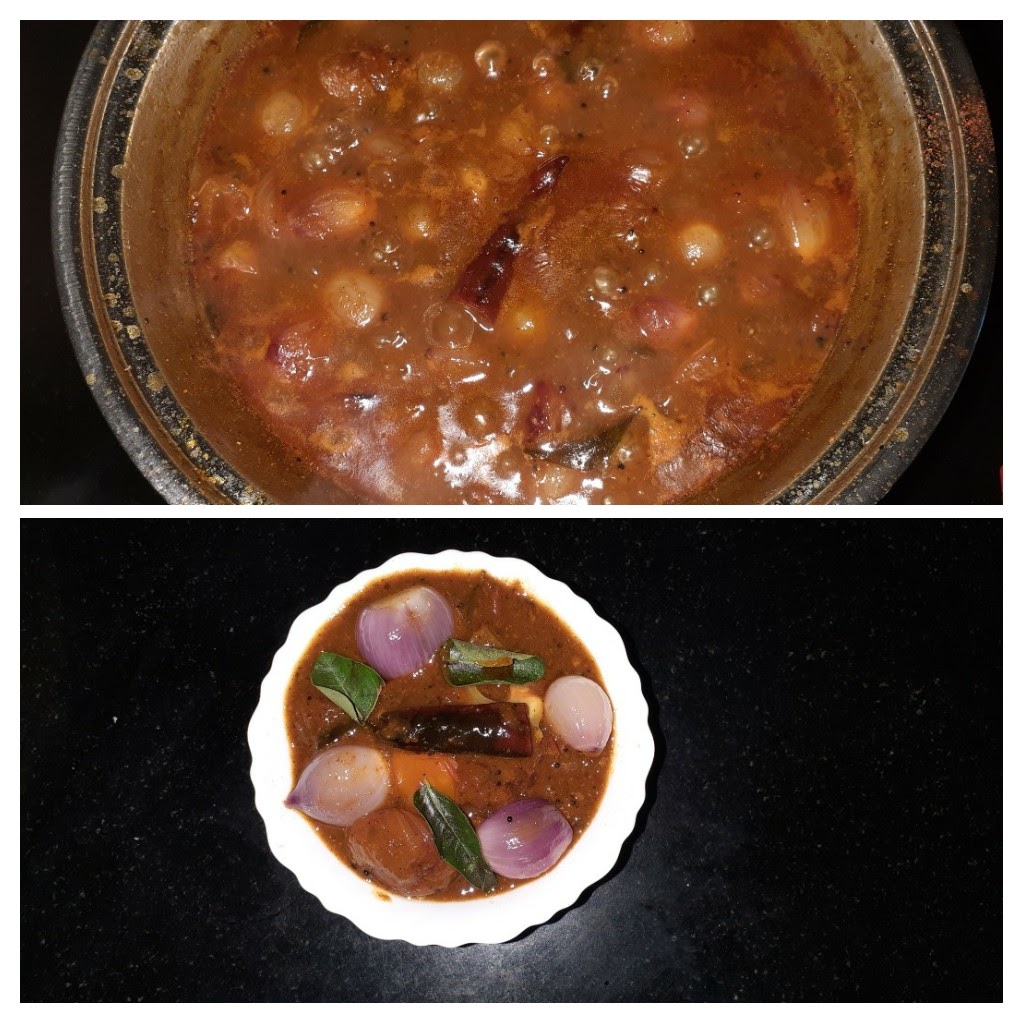
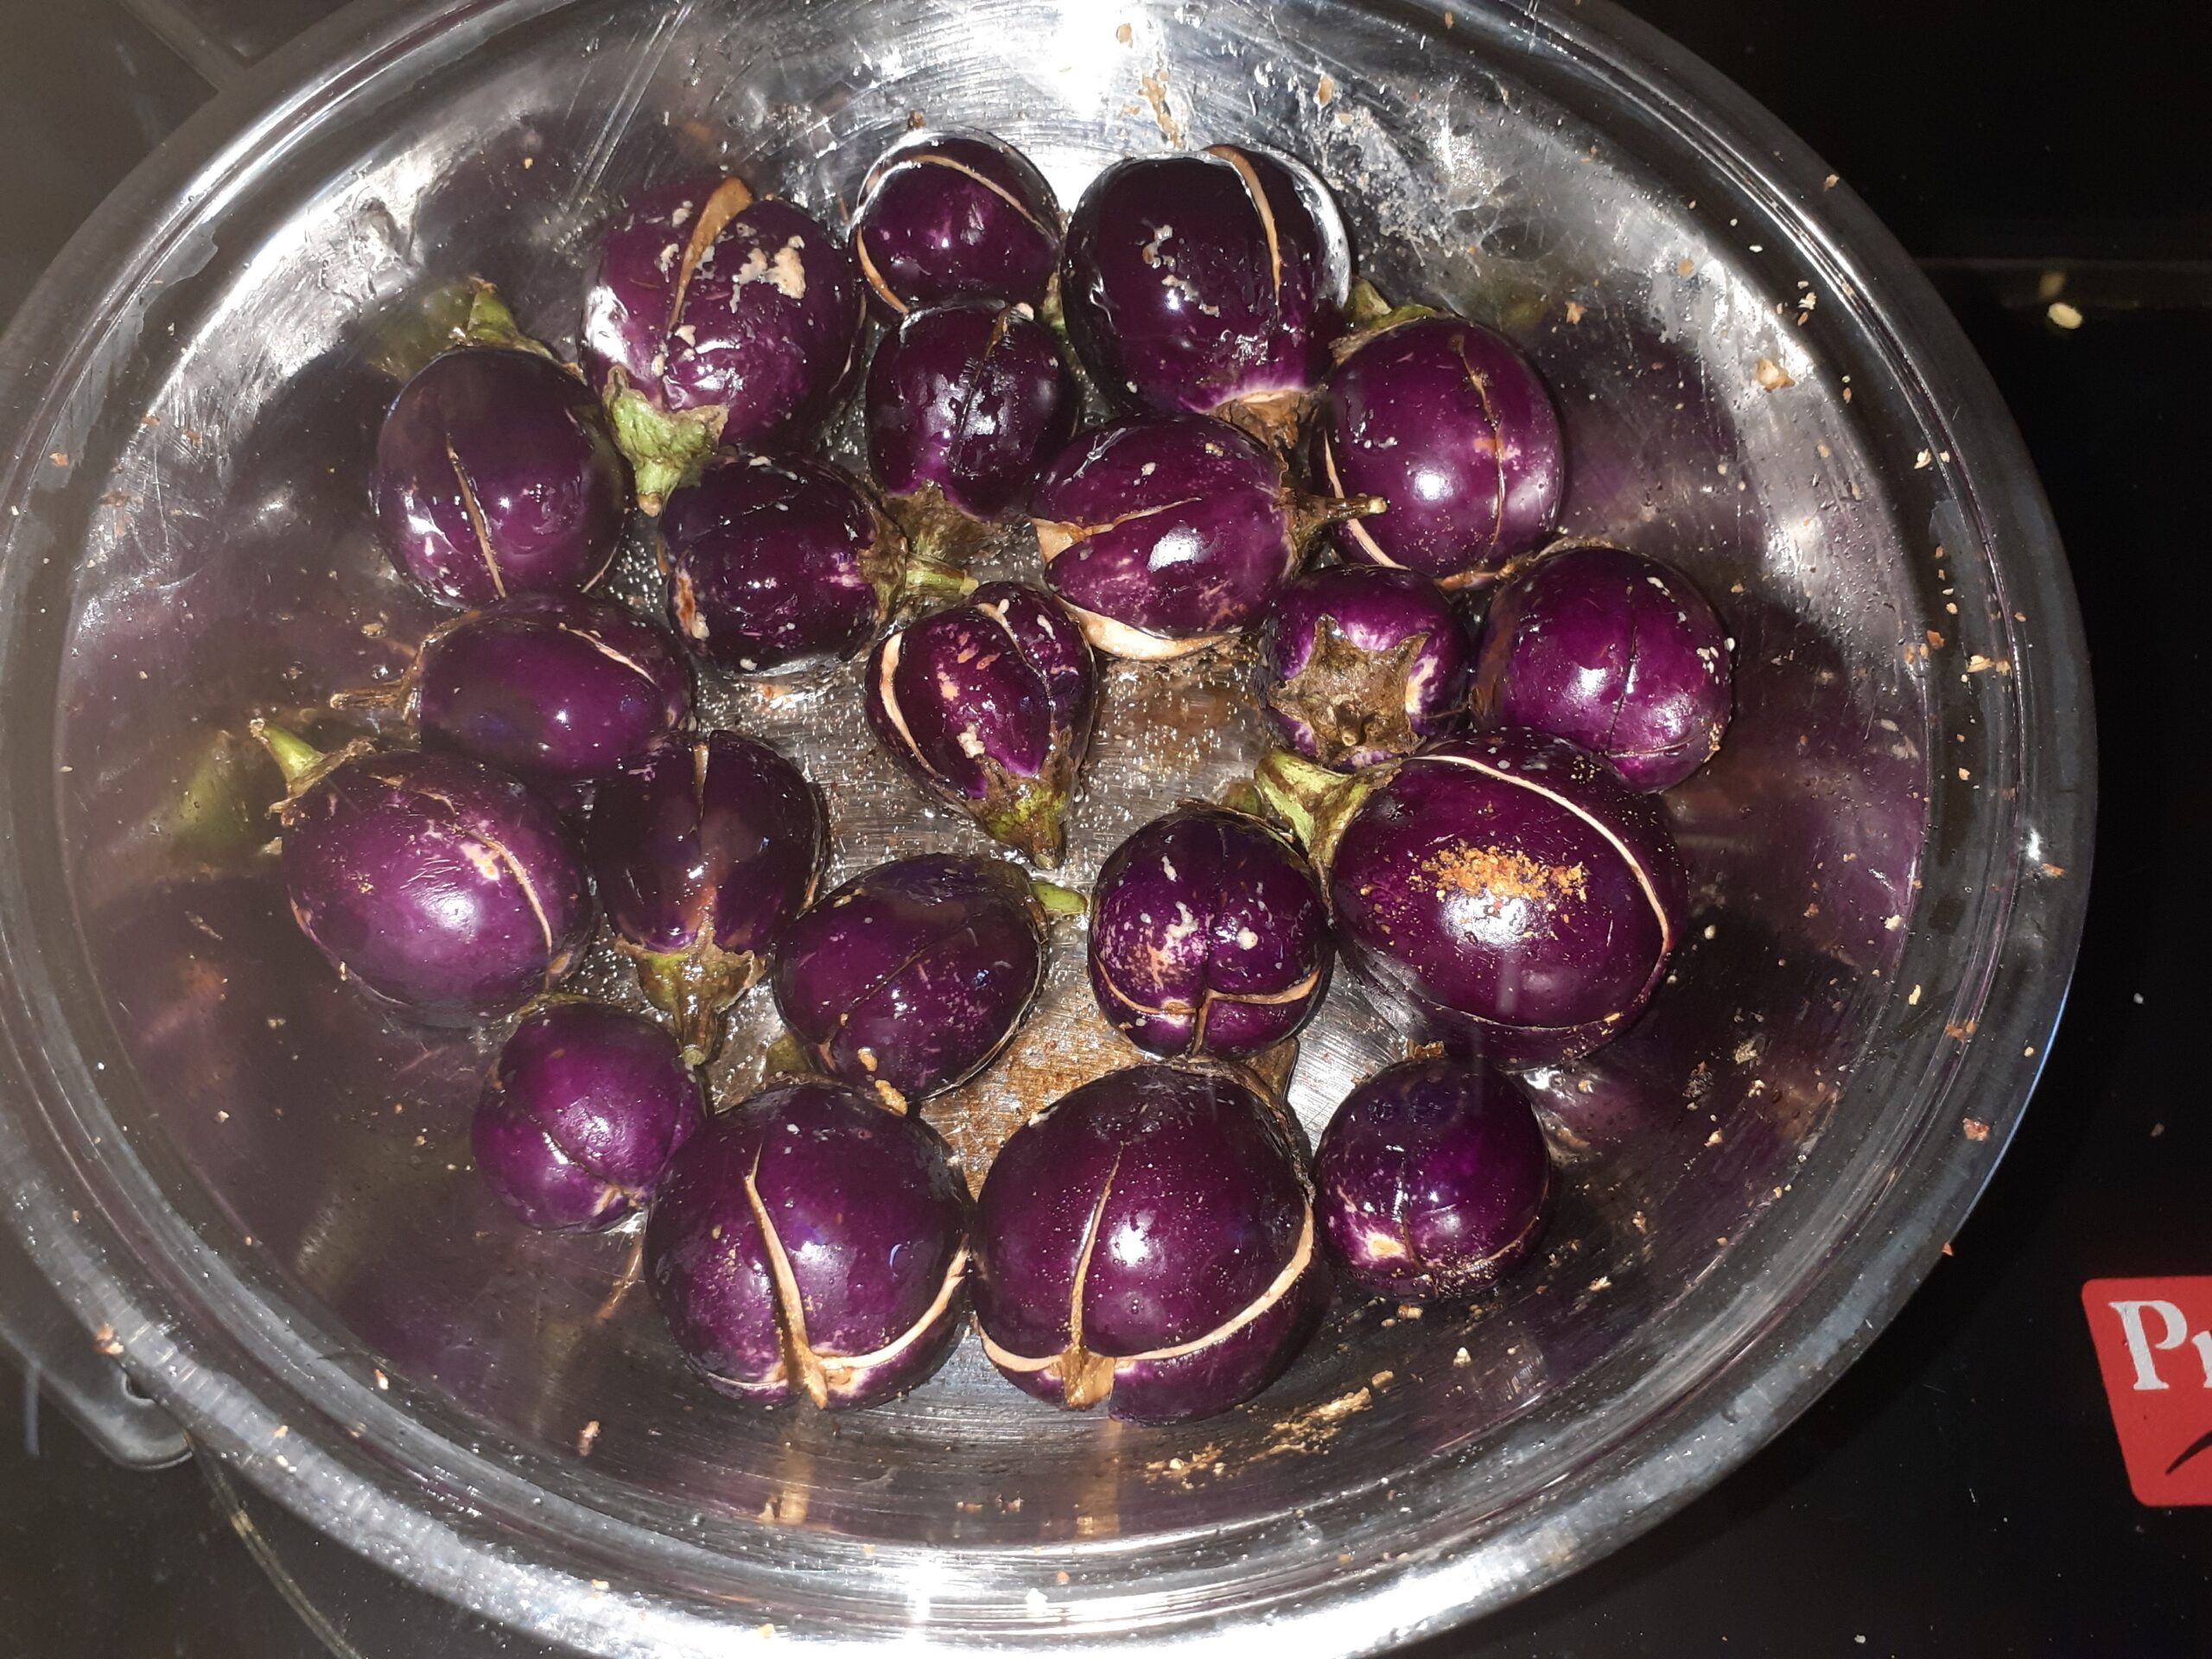
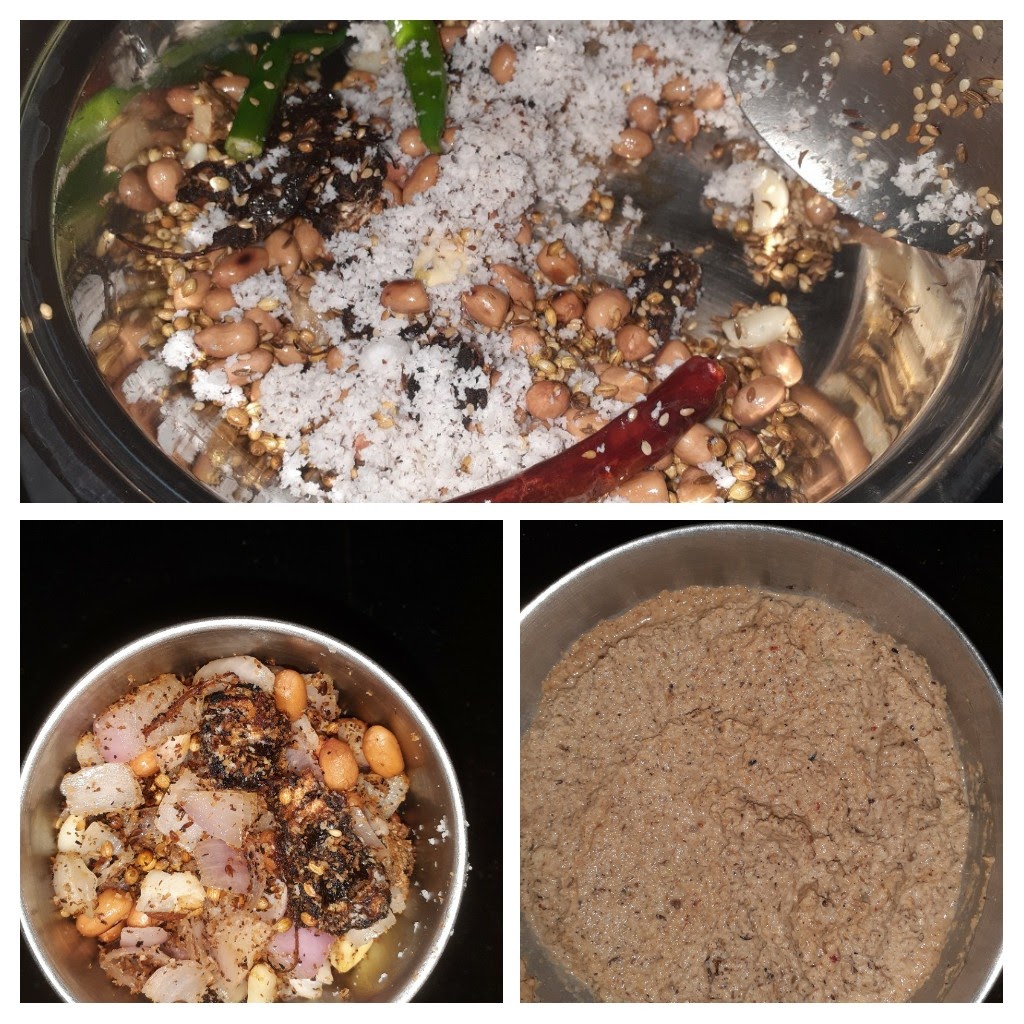
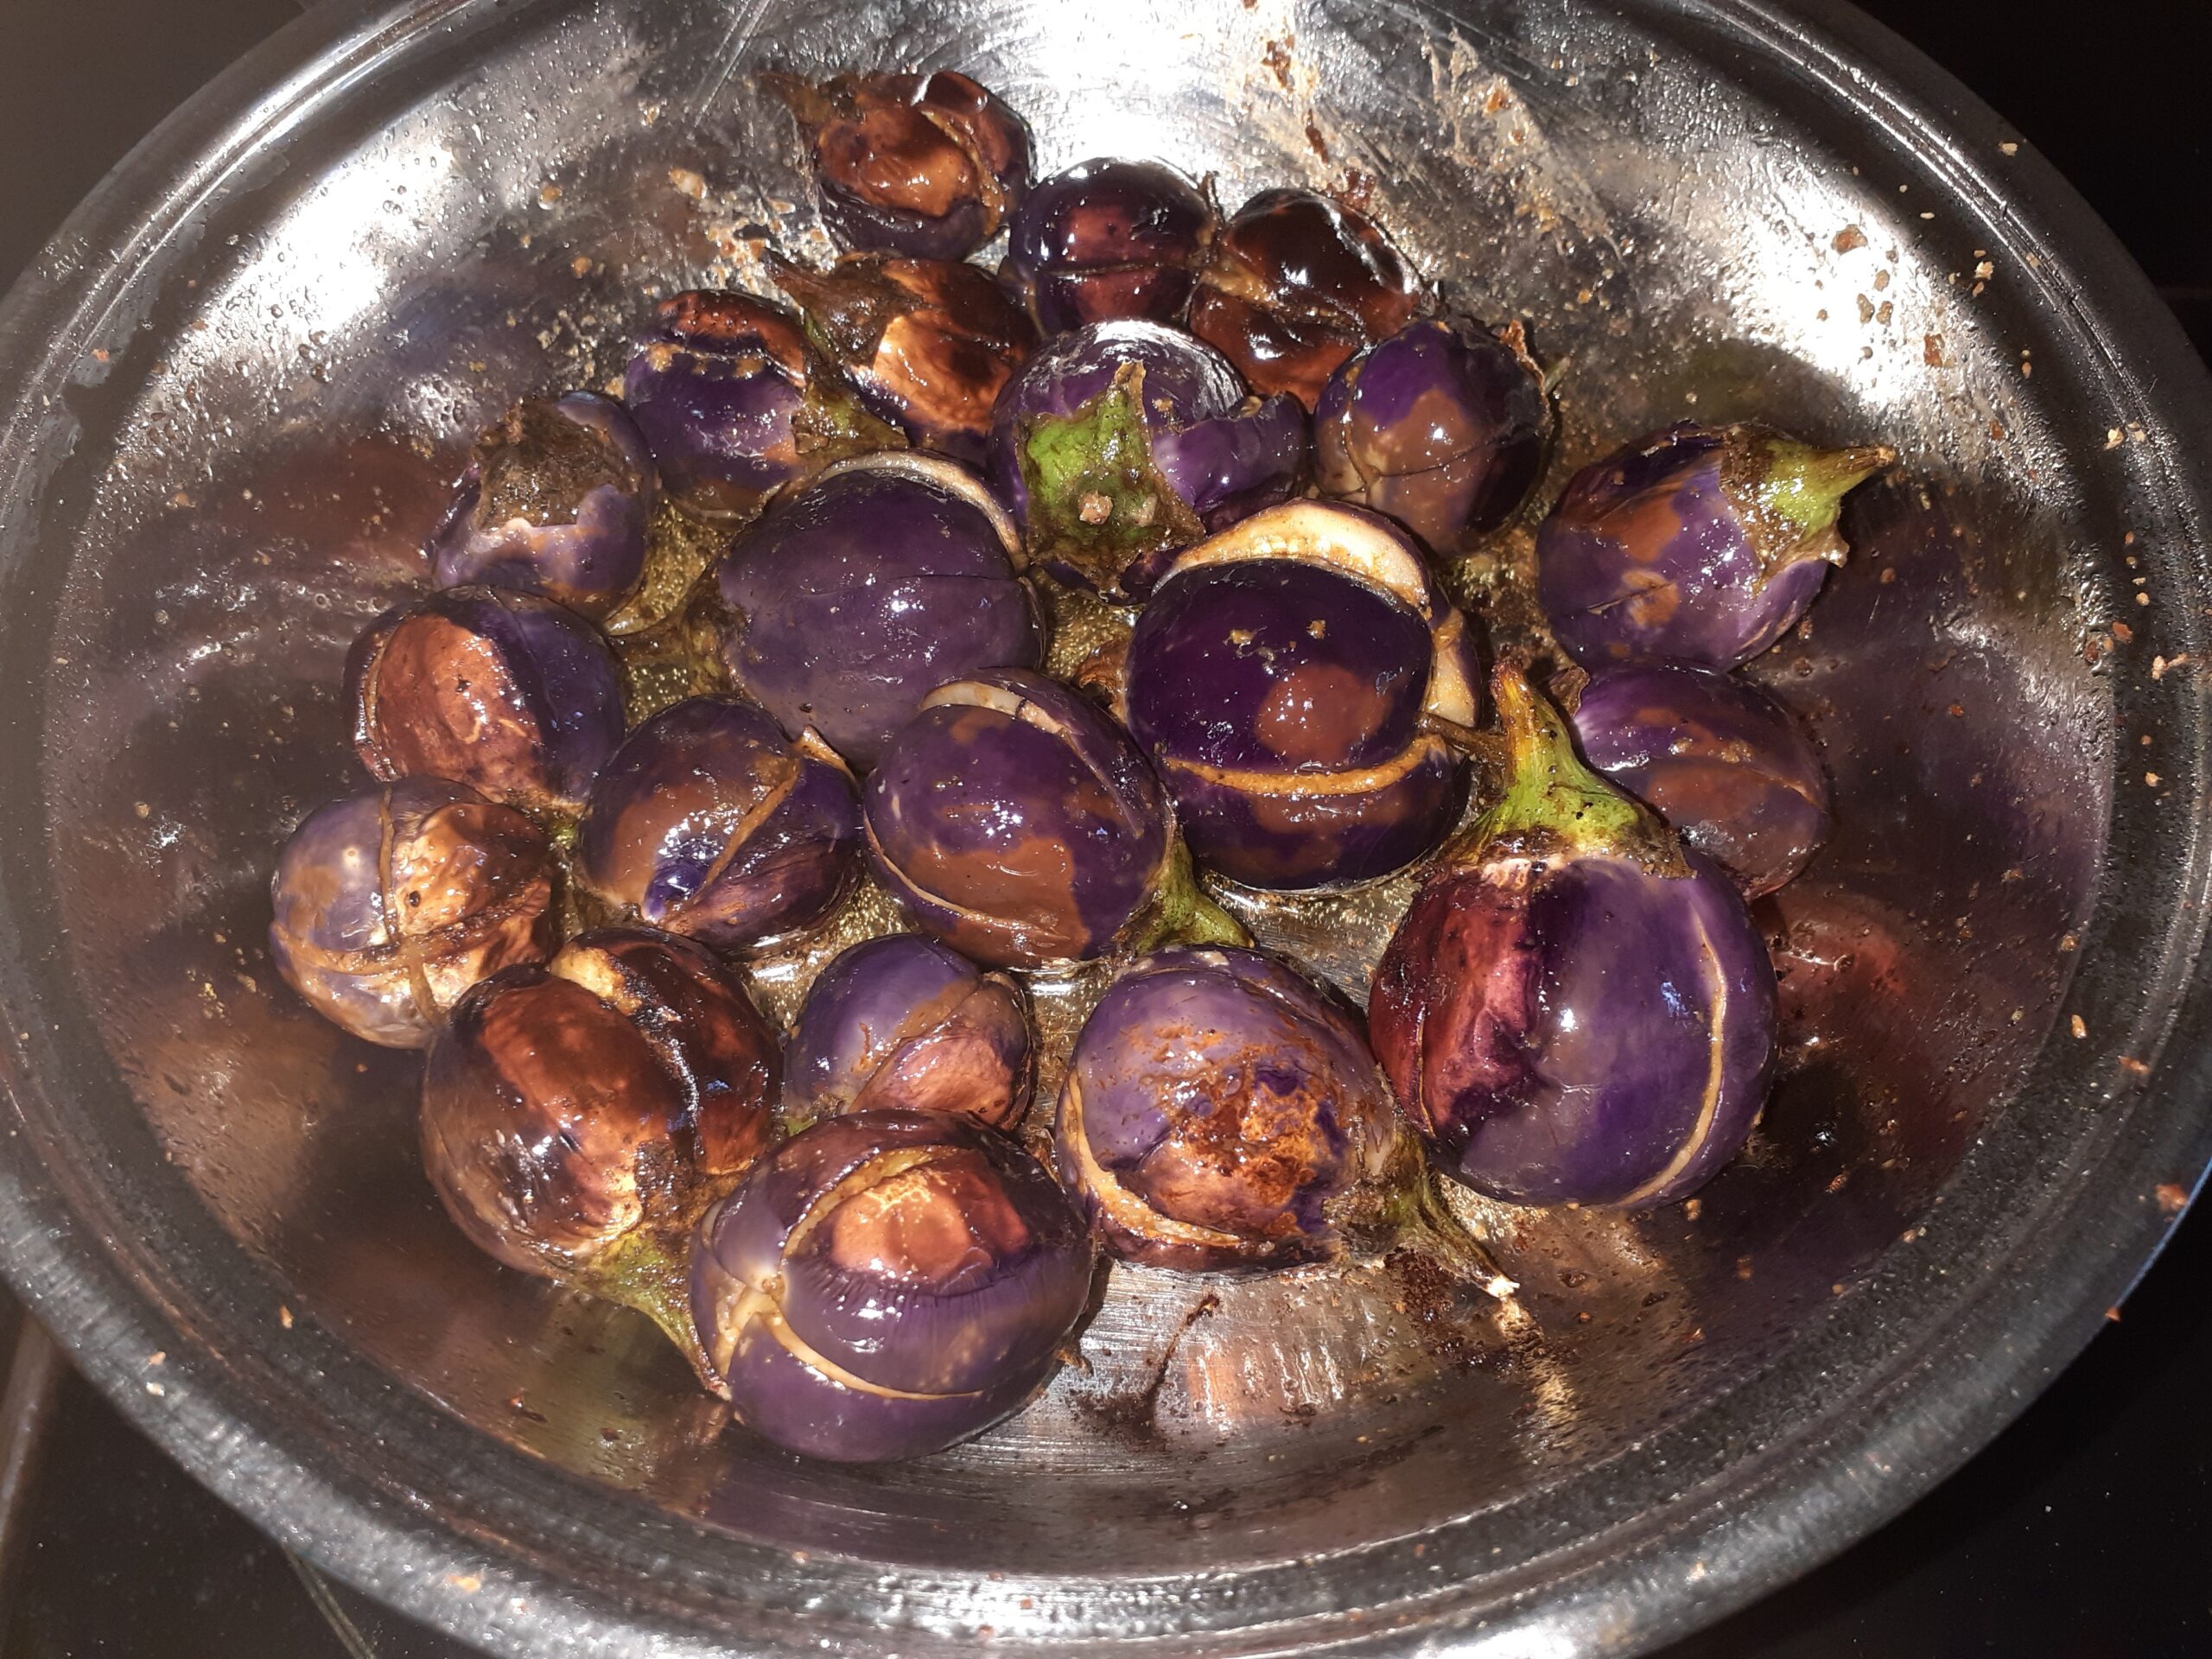
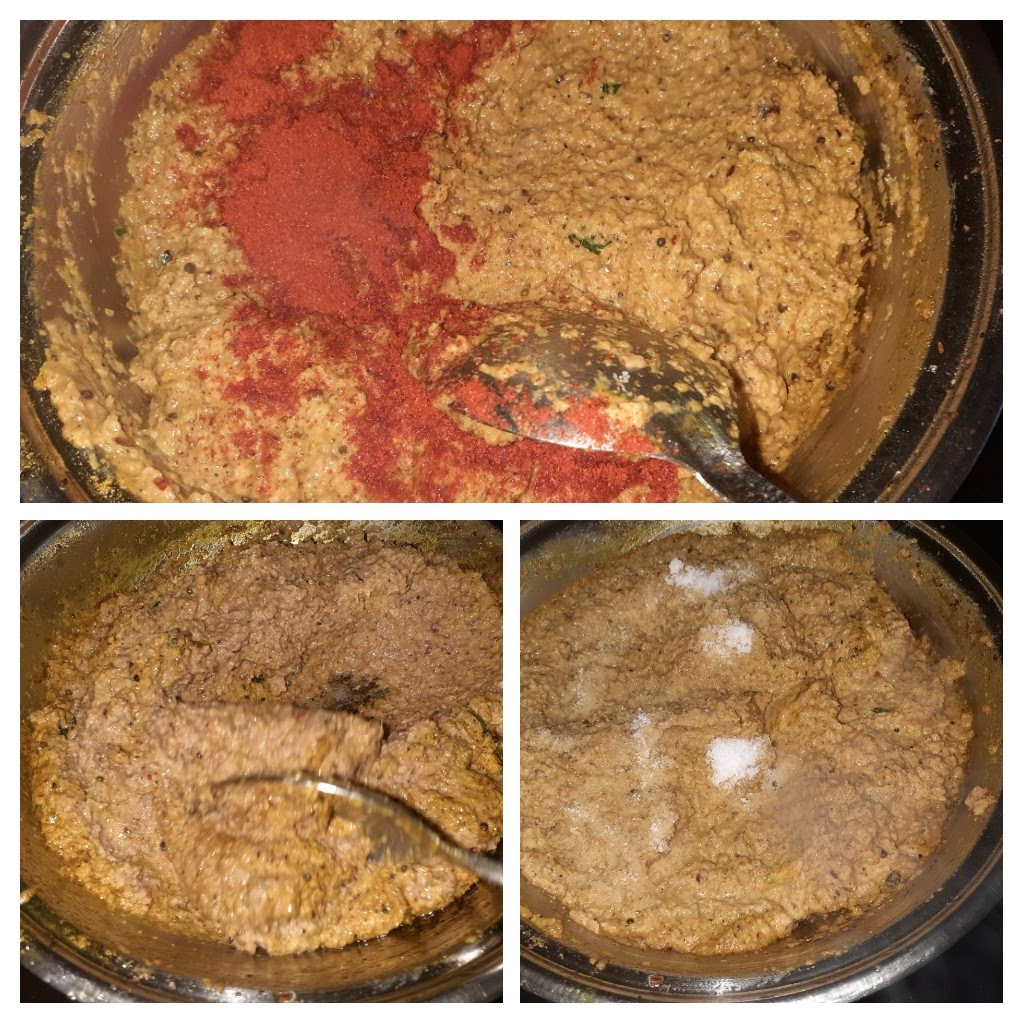
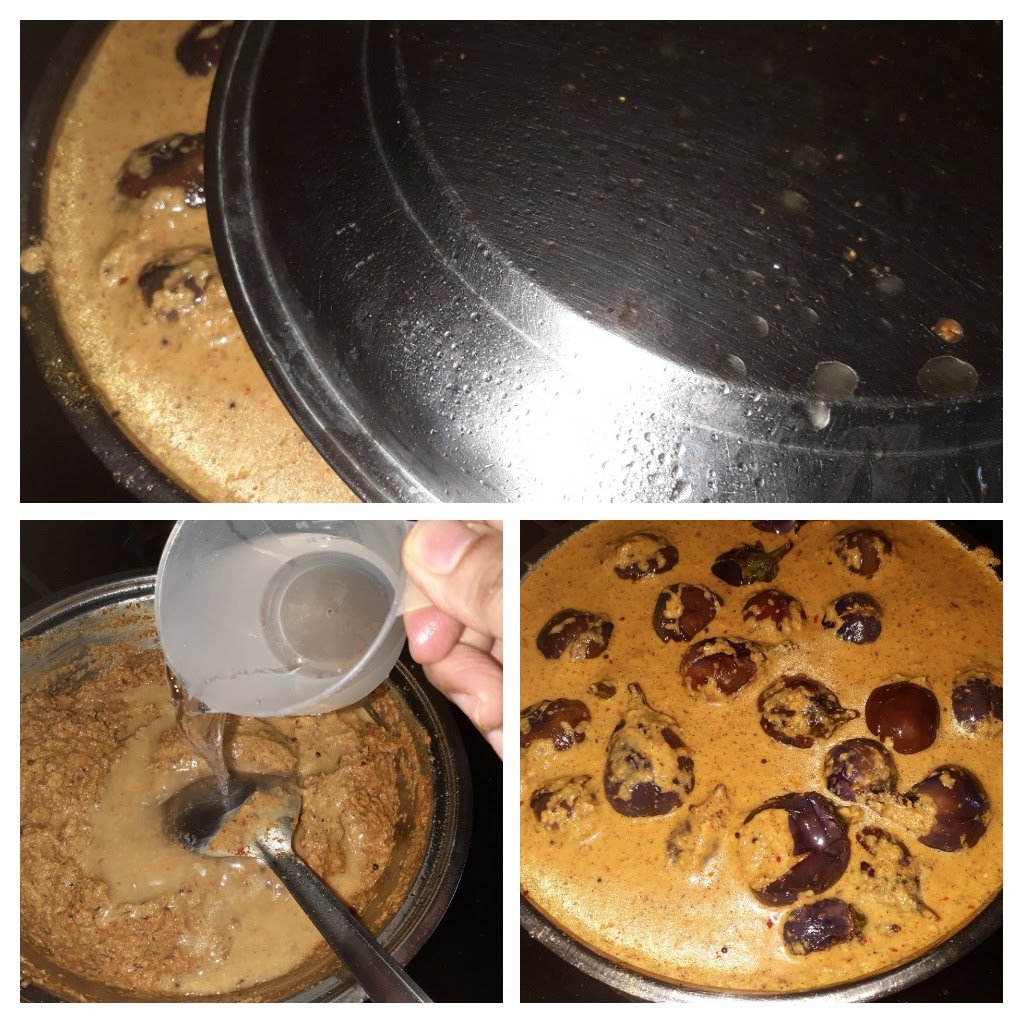
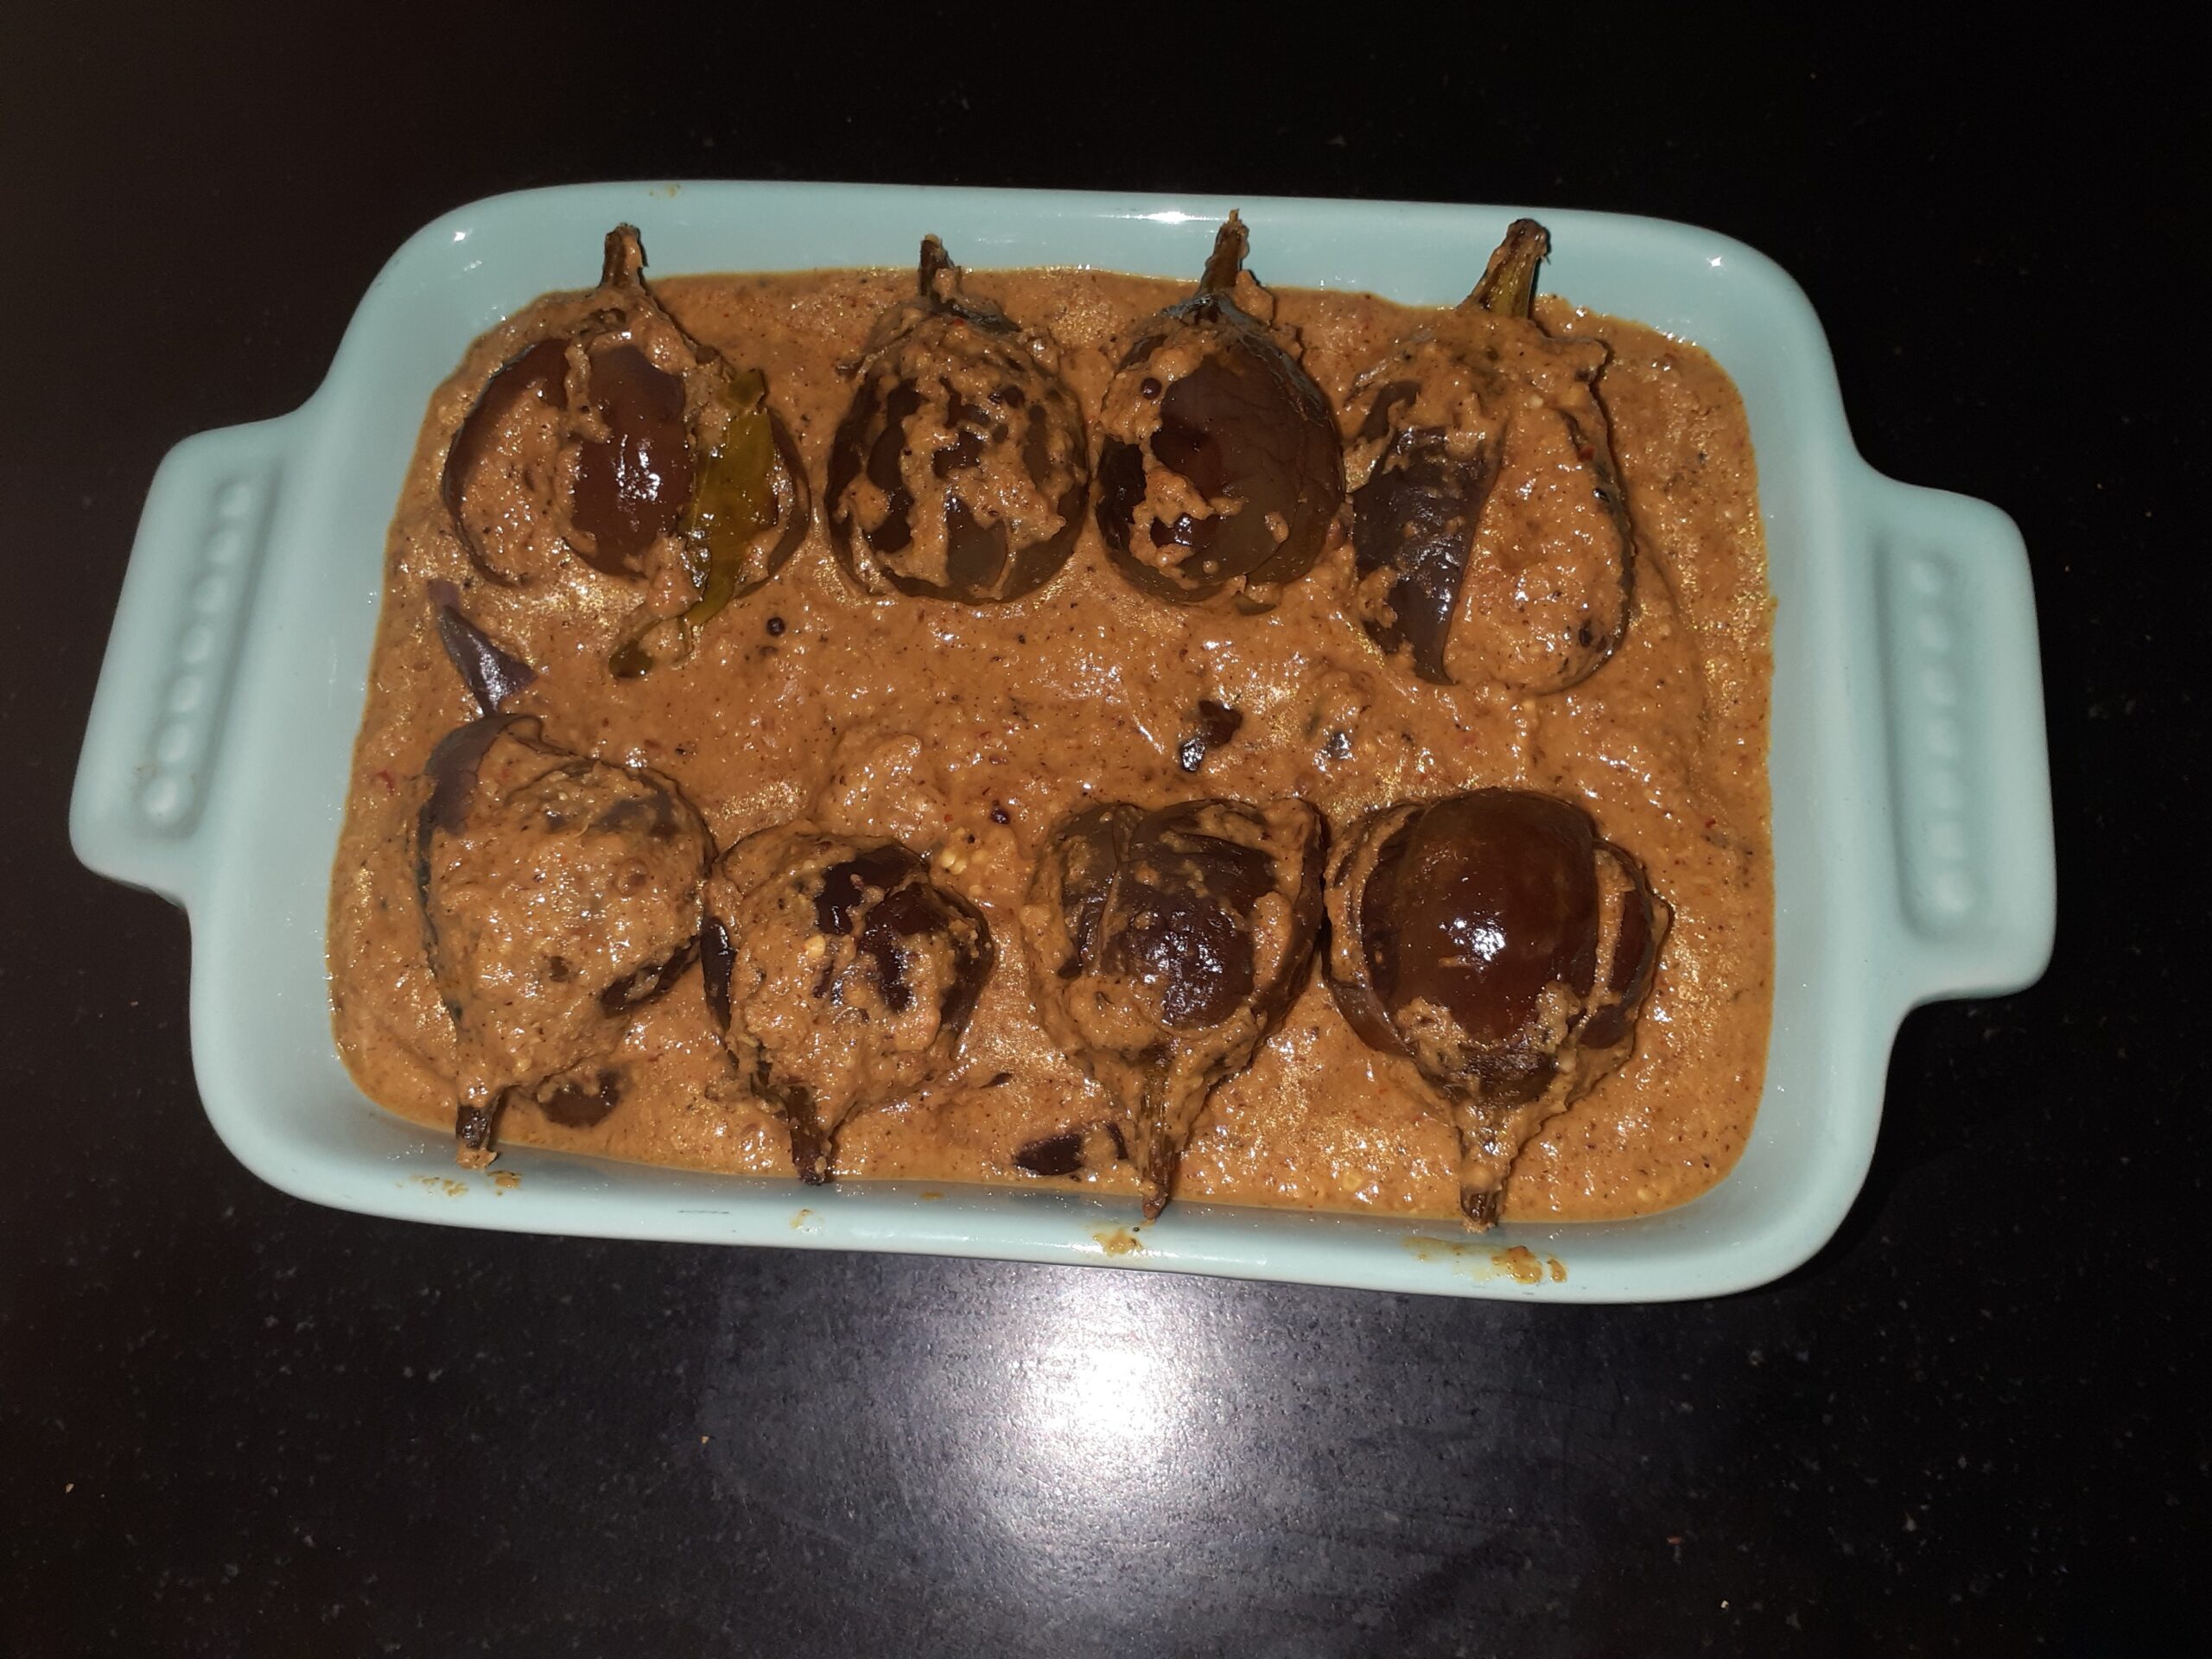
Slit the Bitter gourd midway to form a +. Now put the slit Bitter gourds in hot water, add some salt and keep covered for 5 minutes. After 5 mins drain the water and cool the bitter gourds. Now in a pan add 1 tsp oil and heat. First, add the coriander seeds and fry for half a minute. Now add both the dals and fry until golden brown. Add the dry red chillies and fry until crisp, add tamarind and fry for 30 seconds and put off the flame( roasting of all these ingredients should be done only on low flame and take care not to burn them). Cool the roasted spices and grind to an almost fine powder. Add the turmeric powder, salt and jaggery(if using) and give another spin in the blender. Now fill this mixture in all the Karelas and set aside( if the filling is left, reserve it to add in the end for that lovely glaze, or better make a little extra of this powder). Heat oil in a Karahi/ pan, pour 1 tbsp oil and heat. Now slowly add the stuffed Karelas to the Karahi one by one and start sauteeing over a low flame. Cover for 2 minutes and stir again. Cover the karahi, let it cook for 2 minutes, then again open and stir. Repeat this until Karela are cooked well but not limp. They should retain shape. Finally, add the reserved stuffing to the Cooked Karelas and cover and cook for a minute on low flame. Put off the stove and its ready to serve.
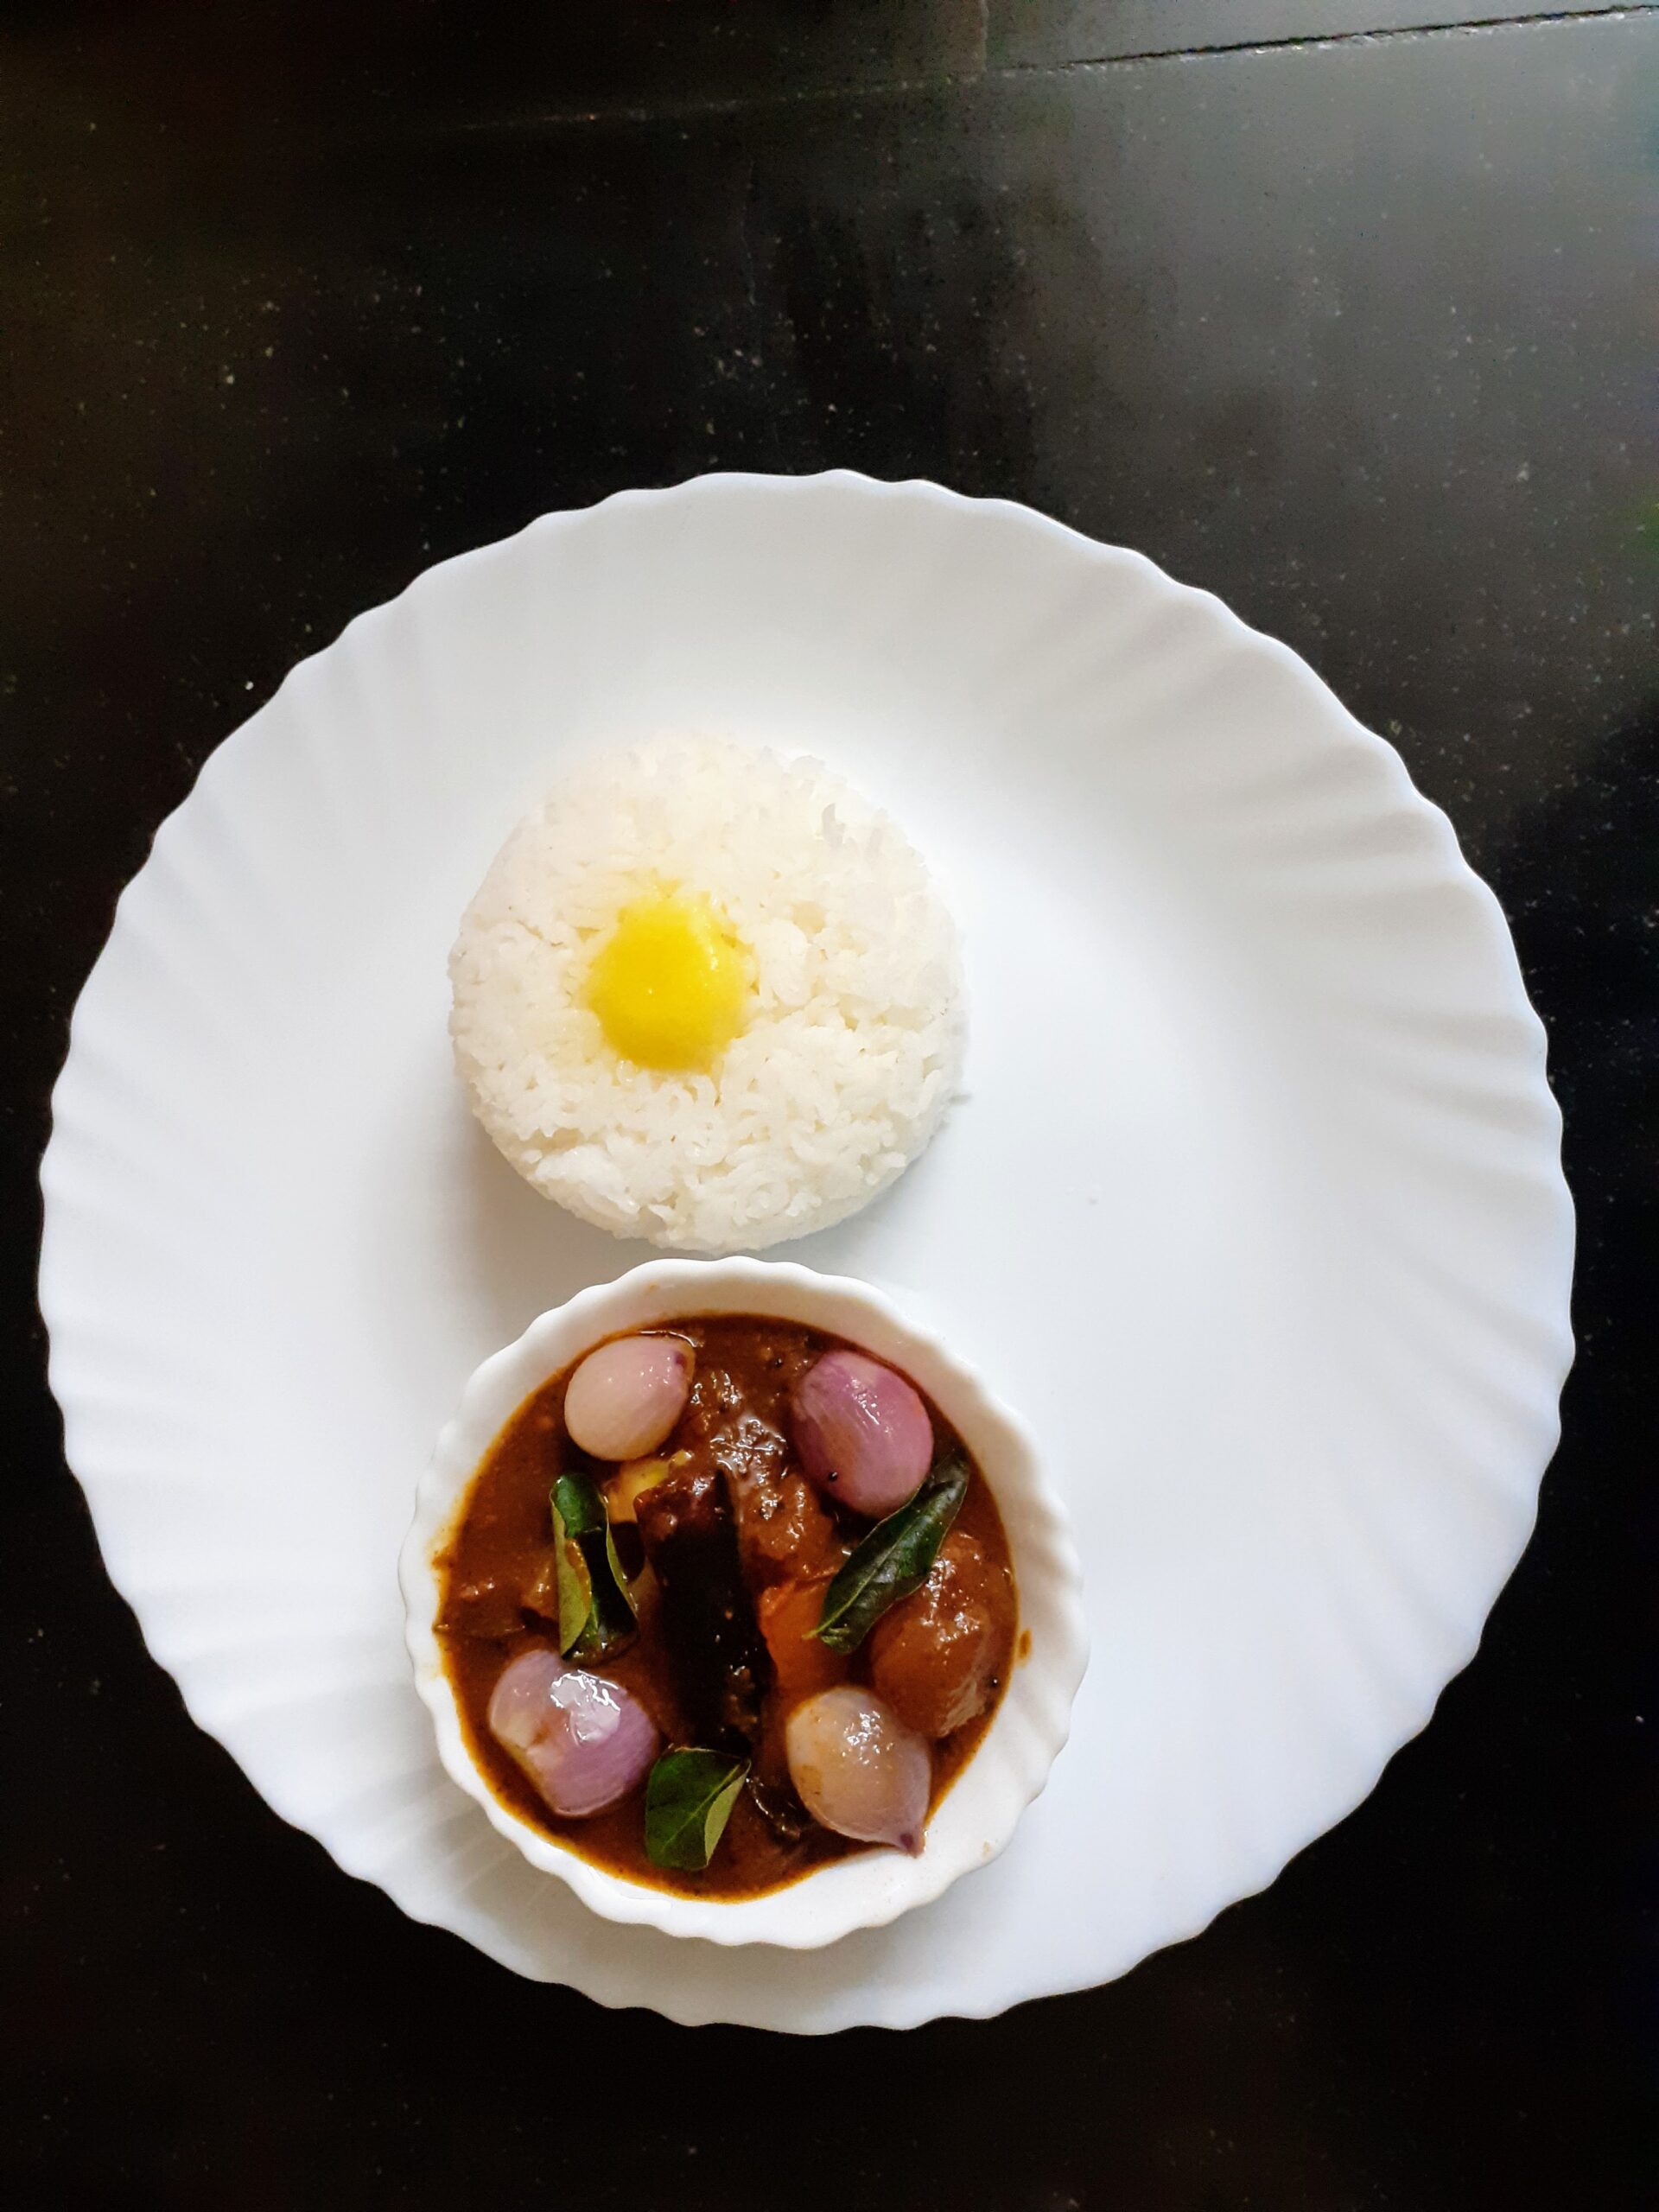
Serving Suggestions: Serve hot with Rotis, Plain Parathas, Dal Chawal, Kadi Chawal and more…
STEPWISE RECIPE FOLLOWS:
1. Assemble all ingredients. Slit the Karela/Bitterourd as shown in the picture, put in salted hot water and keep covered for 5 minutes. Drain the water and cool the bitter gourds.
2. In a pan add 1 tsp oil and on slow flame roast coriander seeds until you get a nice aroma or until it turns light brown. Now add the Urad dal and chana dal and roast until they turn light brown. Follow up with dry red chillies and roast until crisp. Finally, add the tamarind and fry for 30 seconds. Cool. Grind to almost fine powder, add turmeric powder, salt and jaggery if using) and give it a final spin in the blender.
3. Fill this stuffing(masala) into the bitter gourds. Reserve some stuffing.
4. Now in a Karahi take 1 tbsp oil and heat. Now drop the bitter gourds one by one into the oil and fry on a low flame. Keep covered to 2 minutes, open, give a stir and cover and cook again. Repeat this process until all the Karelas are cooked, but not limp and mushy.
5. Finally, add the reserved stuffing powder to the Karelas, stir and cook covered for a minute or two on low flame, to get that nice brown glaze.
NOTES:
1. To make the same recipe with the big ones, cut them in halves and then slit then midway and fill. In this procedure, some stuffing will fall into the oil, but it is fine as long as you keep stirring it every now and then and don’t allow it to burn.
2. The dish will taste good even without adding jaggery, so you can skip it entirely.
3. Once you grind the spices you can always check the taste and balance it, by adding red chilli powder or salt.
If you tried this recipe and liked it please comment below. I would love to hear from you.
In case you wish to receive recipes as an email, please leave your id on the homepage near the mail icon. Whenever Rajjo’s Kitchen has a new post the recipe will be mailed to you.
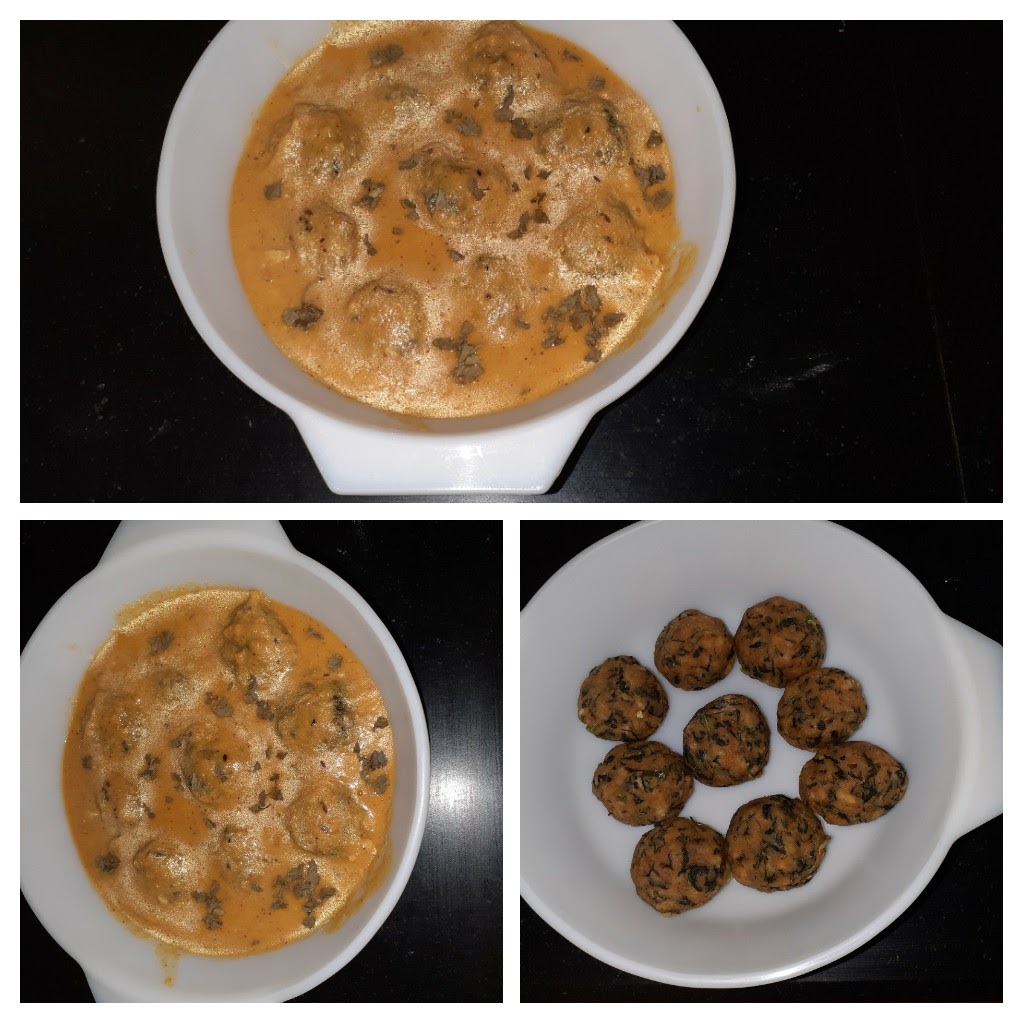
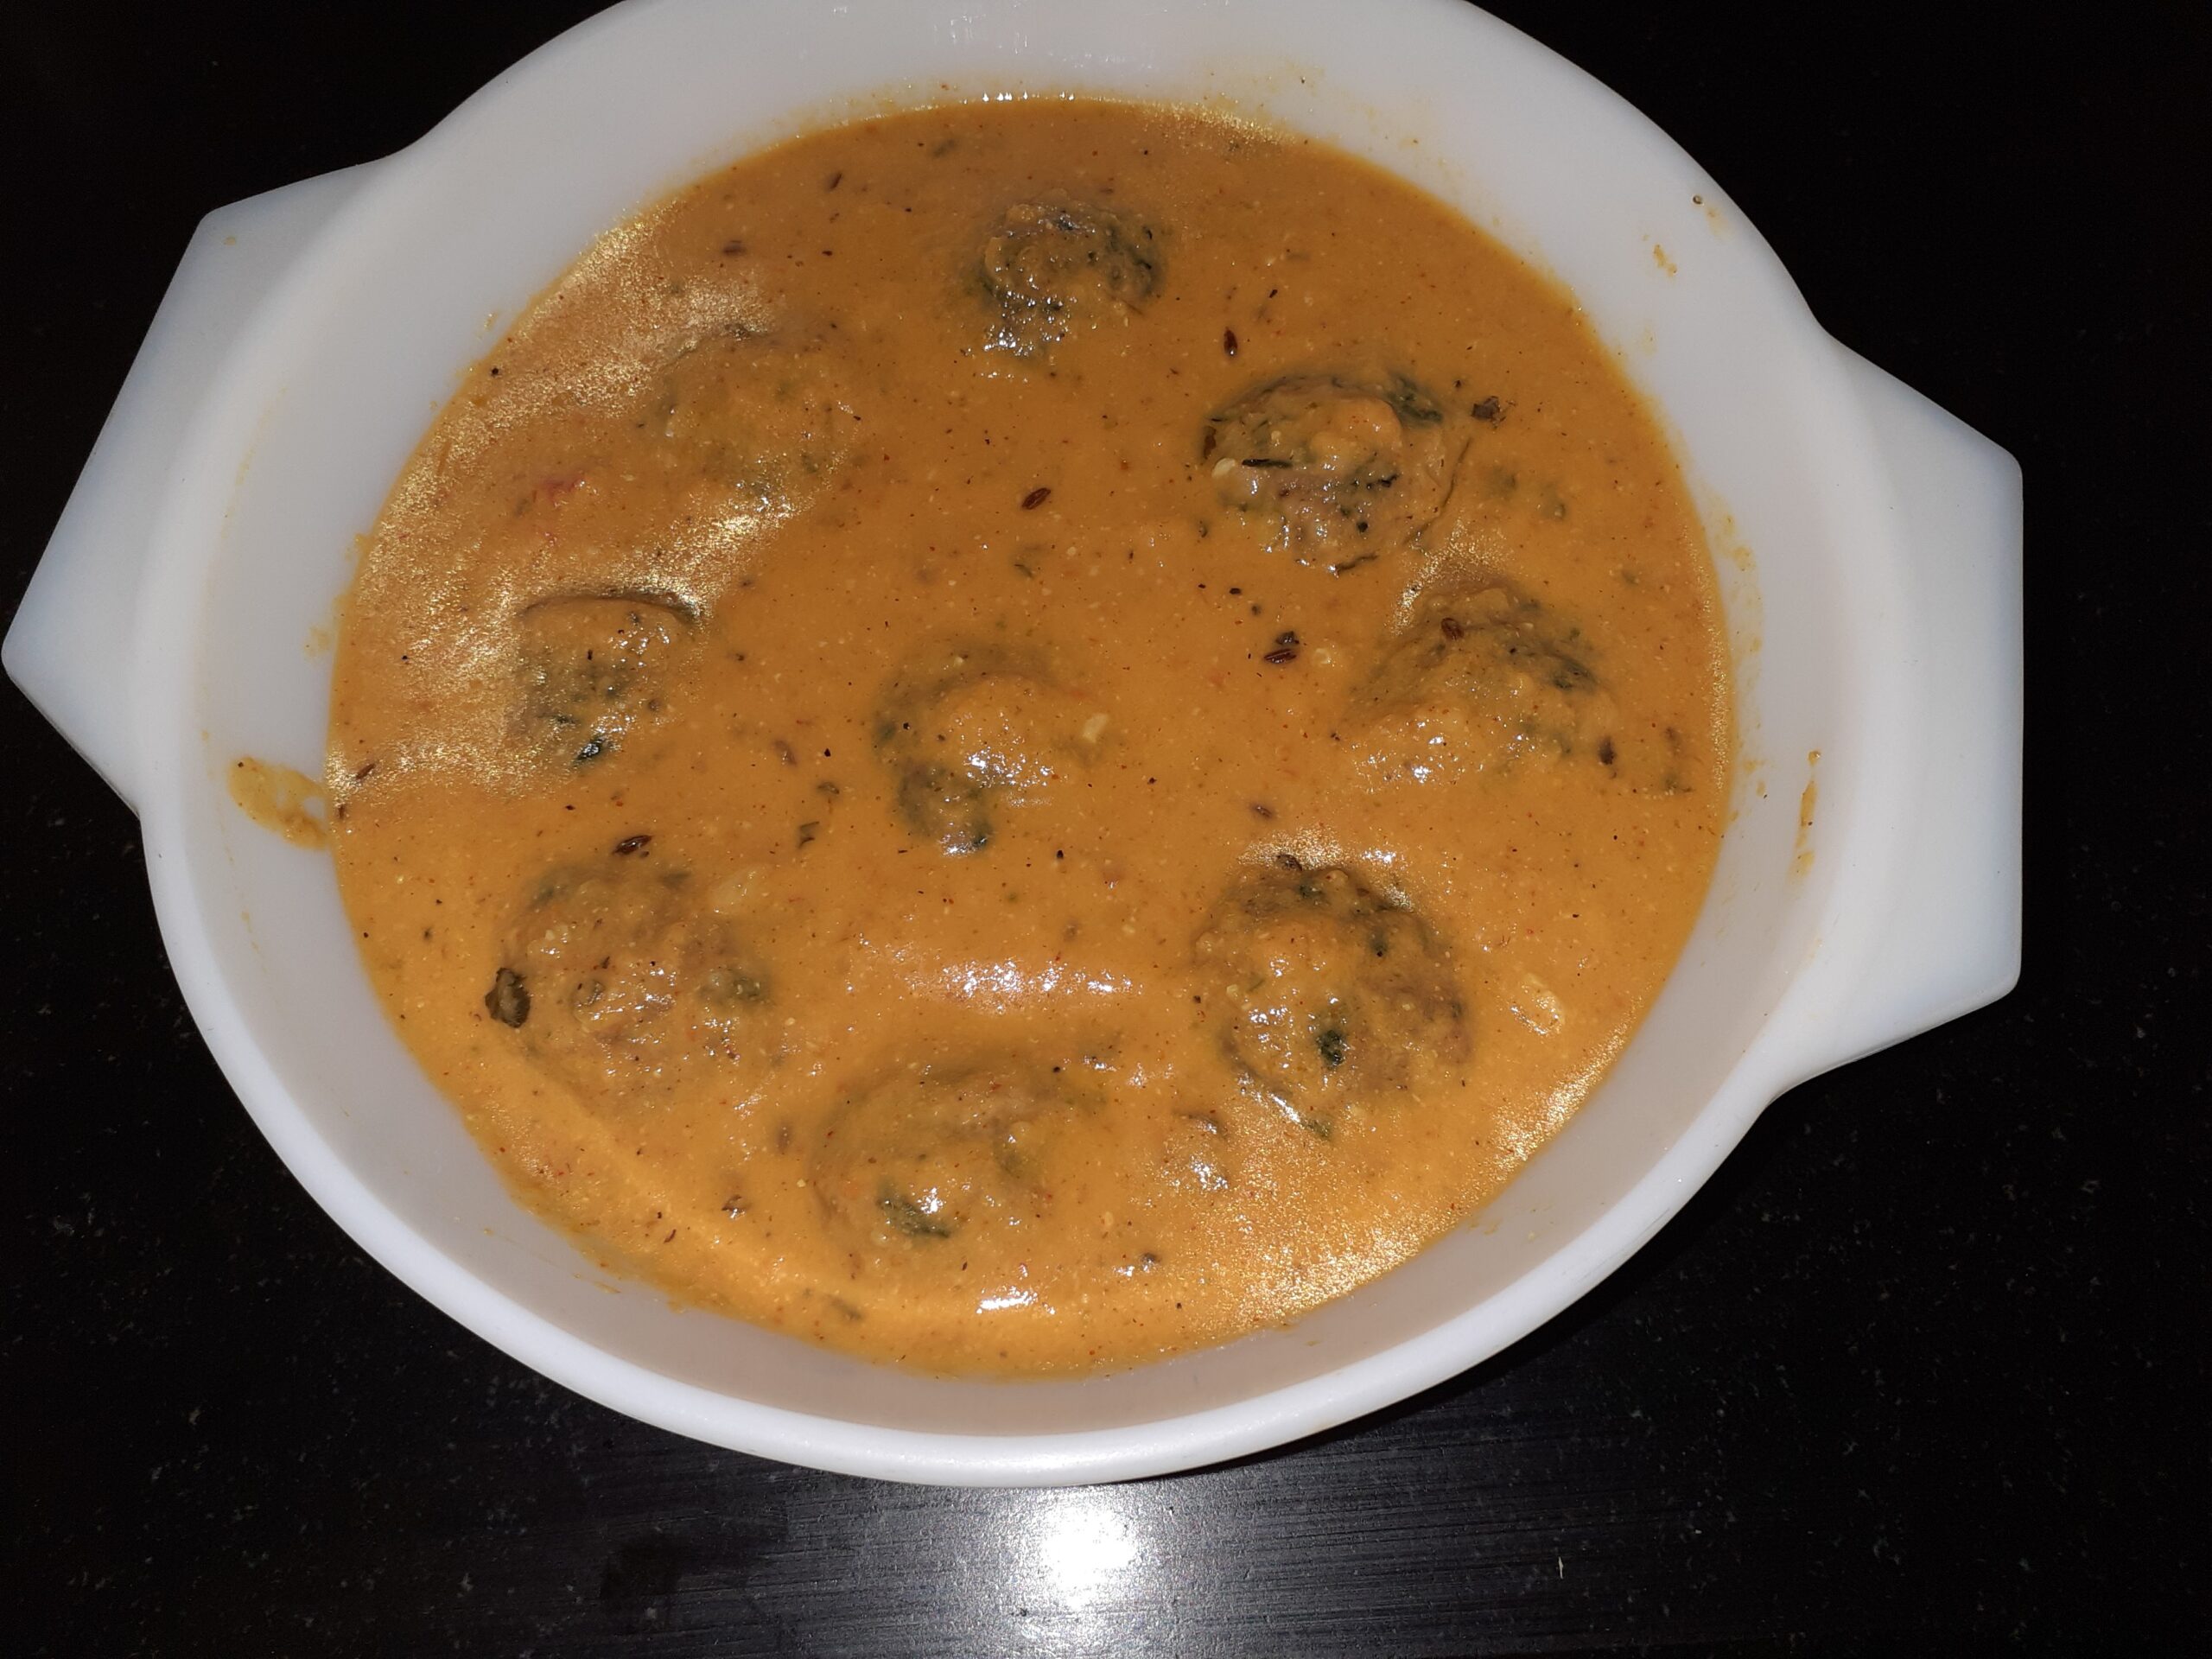
Mushroom Do Pyaza
Mushroom Do Pyaza is a simple recipe made predominantly of Mushrooms and onions. At our home, I make it frequently to go with Rotis or pulav. Well, this dish is usually semi-dry but I prefer it with a little gravy, so you will find that my recipe is a little different from the other Mushroom Do Pyaz recipes. That said, it still is a very simple one. I have just included 2 ingredients that make it a little creamy.
Mushrooms by nature are a little bland so making this dish with a little gravy gives some texture and flavour to the dish. Even though the Mushrooms are bland they blend really well in Indian gravies and spices. Especially in this recipe of Mushroom Do Pyaza, you will see how surprisingly yummy they can be.
This recipe gets its name “Do Pyaza” from a cooking technique that requires adding Onion in two different stages.
Red chilli powder 1 tsp (1/2 tsp if sensitive to spice)
salt as required
turmeric powder 1/2 tsp
Directions:
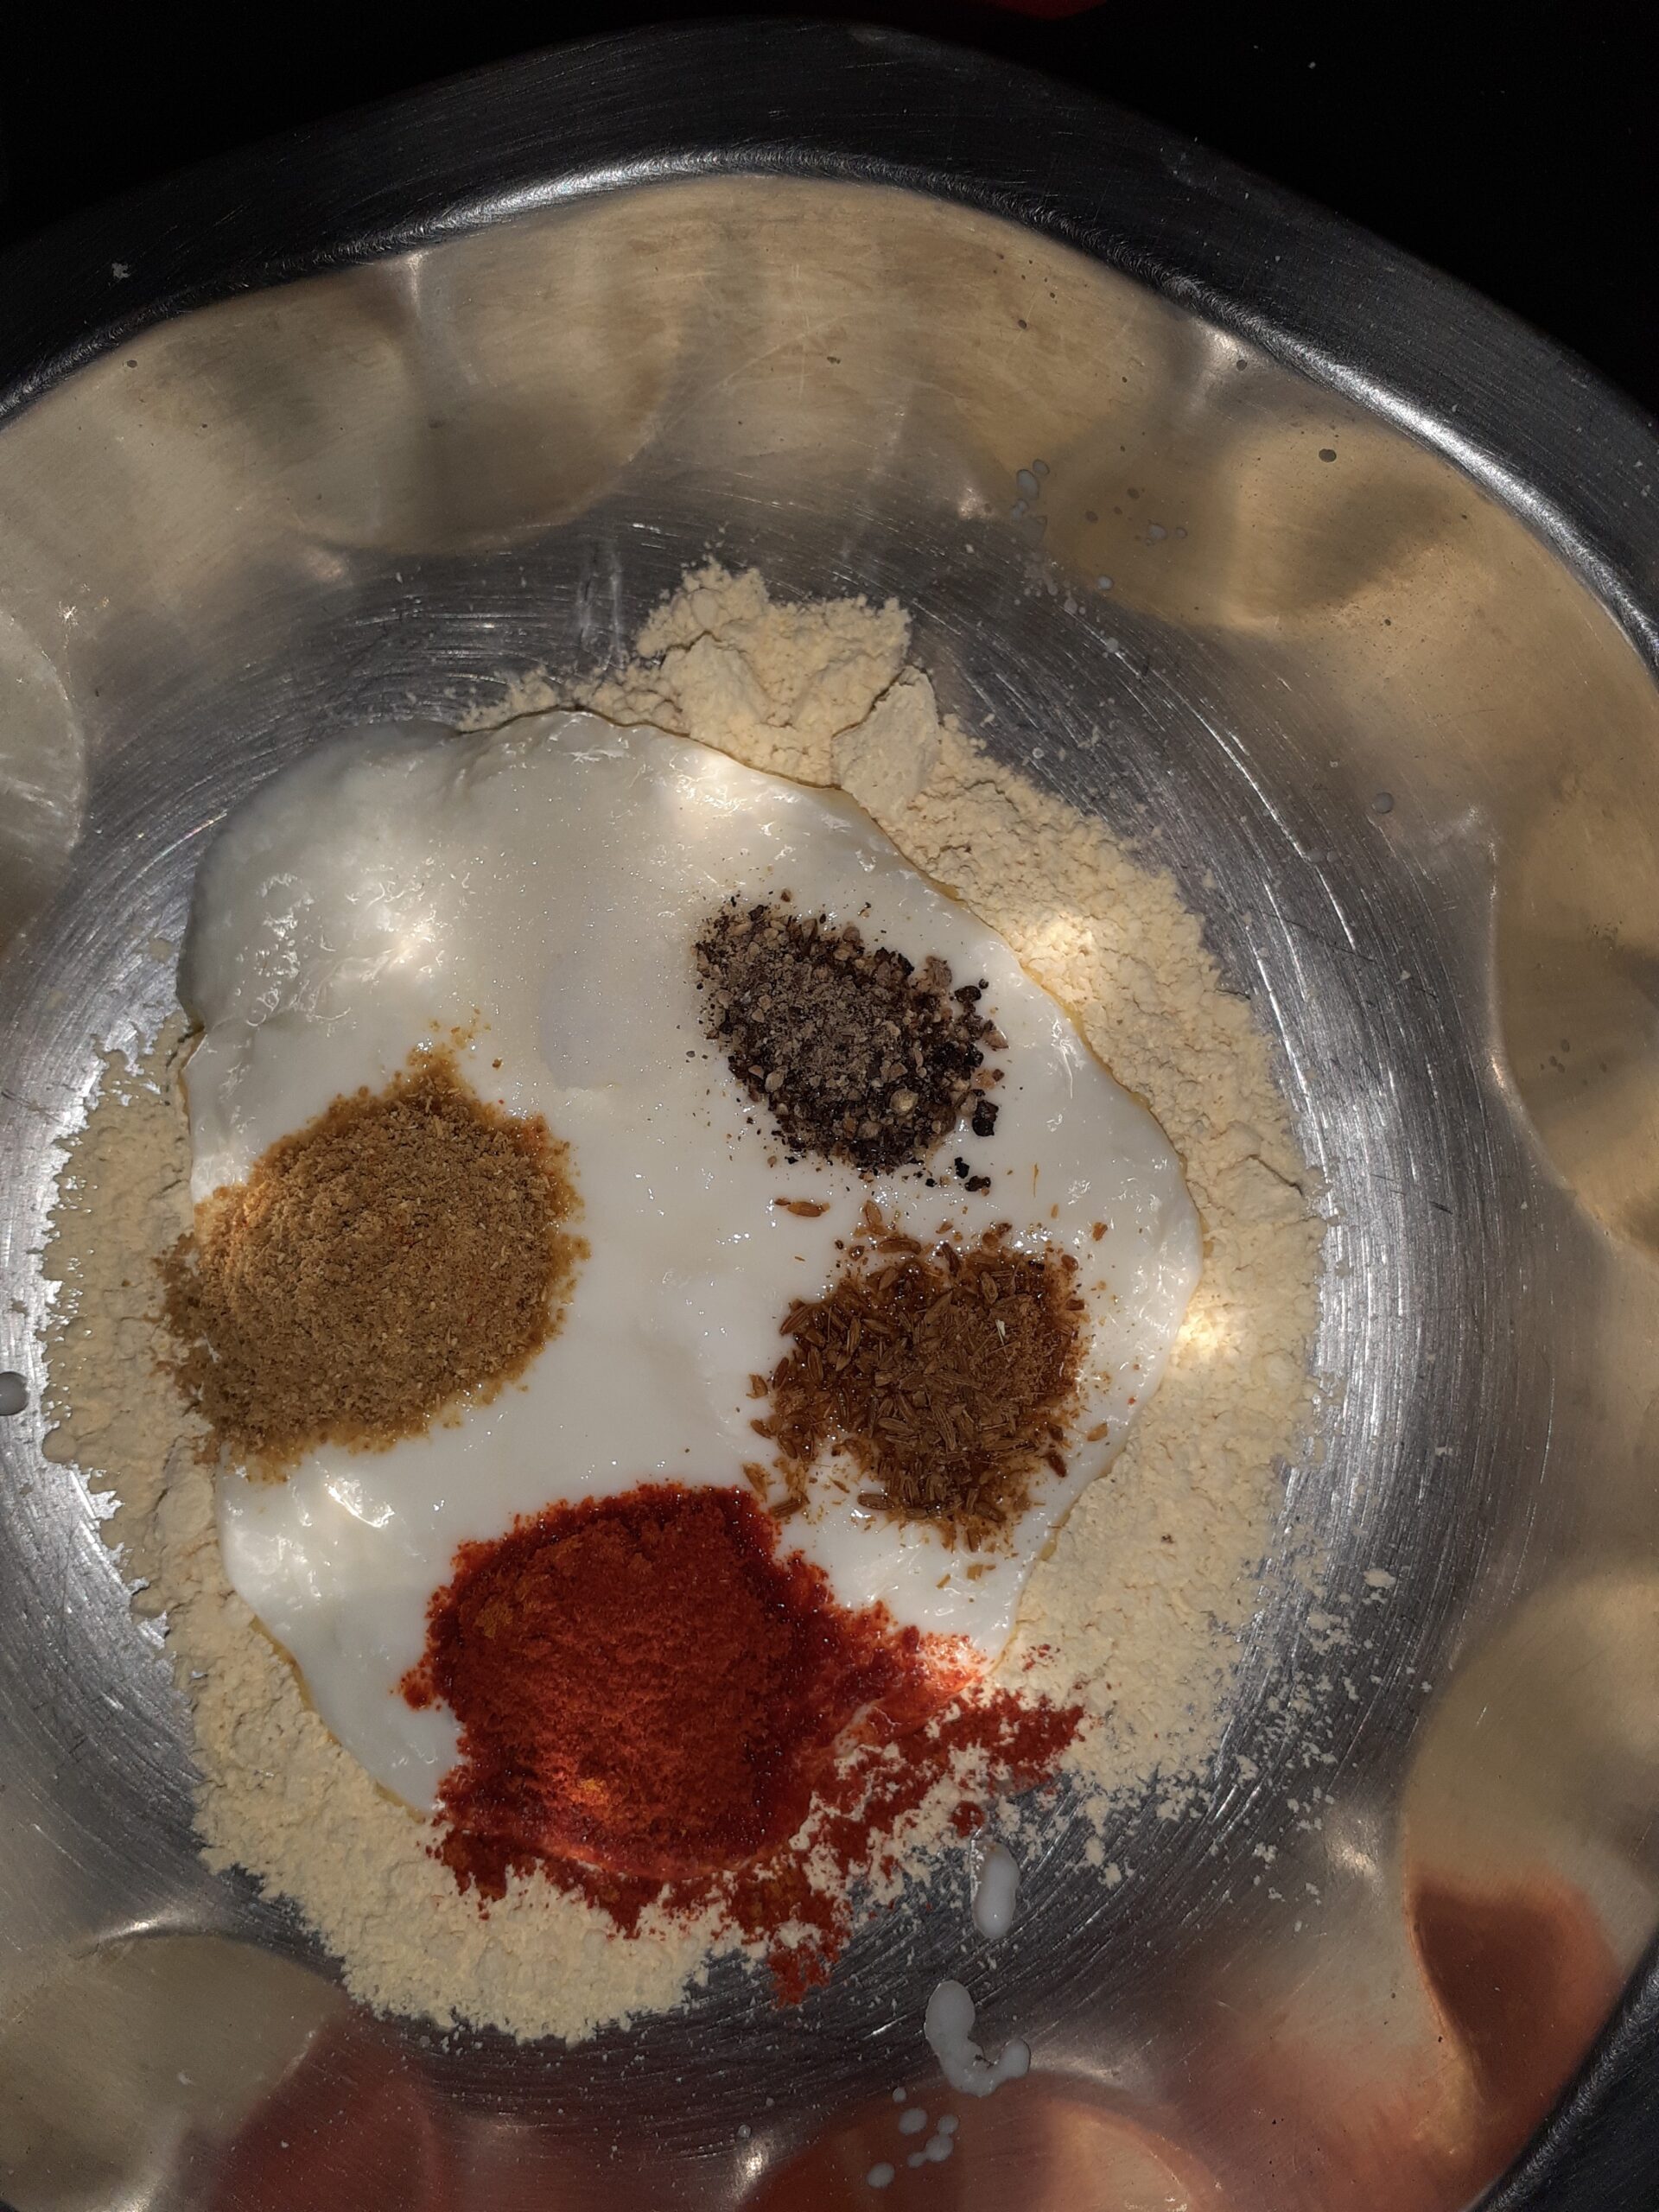
Dry roast the gram flour until light brown and a nice aroma emanates. Cool the roasted flour. Now in the blender put in half the amount of chopped onions and the roasted gram flour and blend to a smooth paste. Now add the tomato puree to this onion- gram flour paste and blend again. Add the curd to the paste and blend it again. So now you will have a smooth puree of onion, roasted gram flour, tomato puree, and curd. Keep this aside and heat oil in a Karahi. When the oil is hot drop in the onion petals and saute them until light brown. Now add the Capsicum cubes and continue to saute for 1 to 2 minutes until a light brown tint appears. Remove them on to a plate. Now to the same kadai add the mushrooms and saute on high flame, until all the moisture escapes and it becomes dry. (refer picture). Remember to saute all these vegetables over a high flame or else they will start releasing moisture. Transfer the sauteed vegetables to a separate plate/vessel. Now in the same Kadai pour some more oil and heat it. Put in the cumin seeds and as they splutter add in the puree from the blender jar and stir continuously for a minute so that it doesn’t stick to the pan/karahi. Now add the coriander powder, followed by red chilli powder and turmeric powder and salt, and stir nicely. Let it cook for 2 minutes on medium flame. Now add the sauteed vegetables to the sauce and cook for 2 minutes. Add the cream and stir constantly for 30 seconds so that it doesn’t split. Now put off the flame and add Garam Masala powder if you prefer. Garnish with chopped coriander leaves and its ready to relish. Happy cooking, Enjoy, and Bon Appetit.
STEPWISE RECIPE FOLLOWS:
1. Assemble all the ingredients. Chop the mushrooms in 4, Chop the opinion into petals, and the capsicum to cubes. Dry roast the gram flour, puree the tomatoes.
In addition to the above vegetables, Red Bell peppers/ capsicum and green peas can also be added. However, these are optional and hence have not been mentioned in ingredients.
2. In a blender put in half the amount of chopped onions and the roasted gram flour and blend to a paste. Add the tomato puree and blend again. Now add the cuts and blend once again. You should have a smooth puree of all the above ingredients now. Set it aside.
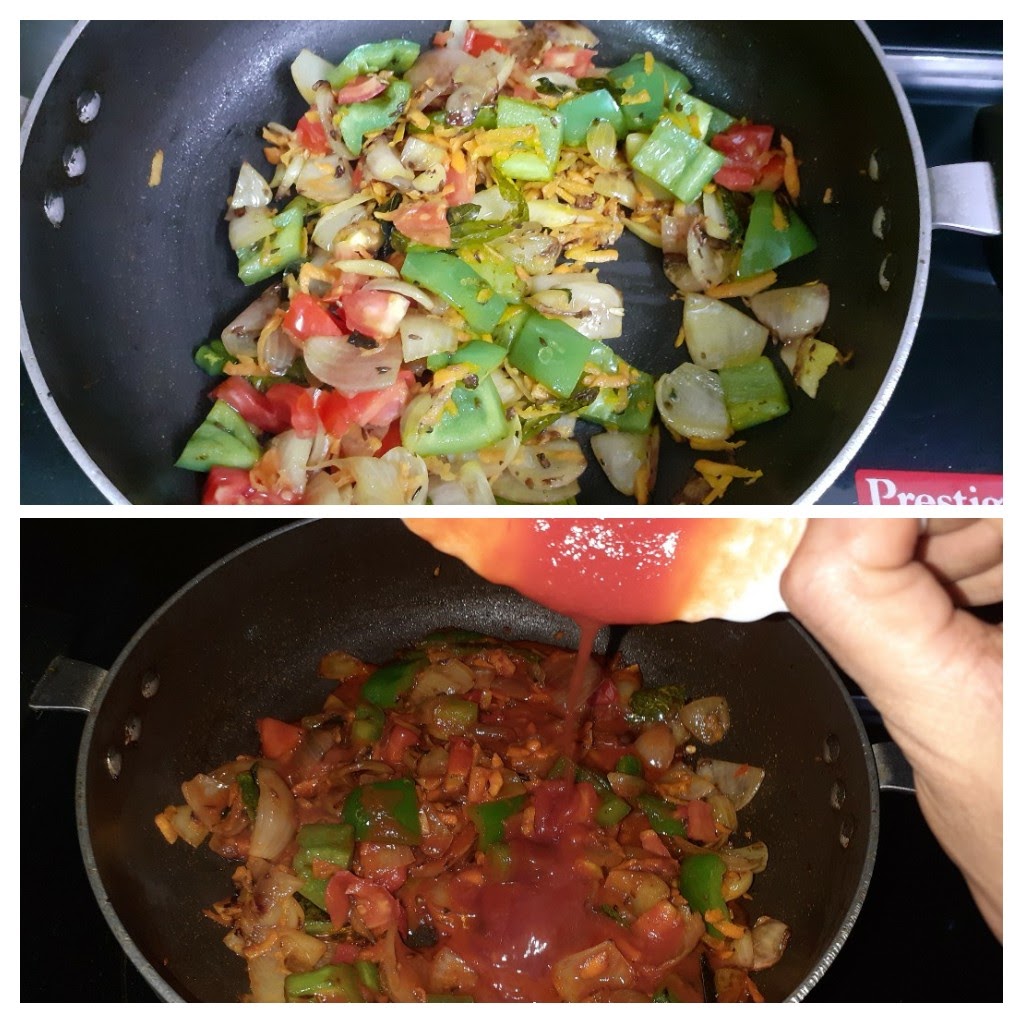
3. In a pan/Karahi heat, some oil and saute the onion for 1 minute or until it gets a light brown colour, on high flame. Add the Capsicum and continue to saute until they get a light brown tint on them. Remove them on to a plate. Now to the same kadai add the mushrooms and saute on high flame, until all the moisture escapes and it becomes dry. (refer picture).
Sauteed vegetables
4. In the same Pan/karahi Take some more oil and heat. Add the cumin seeds and when they splutter pour the prepared paste into it and stir continuously for a minute.
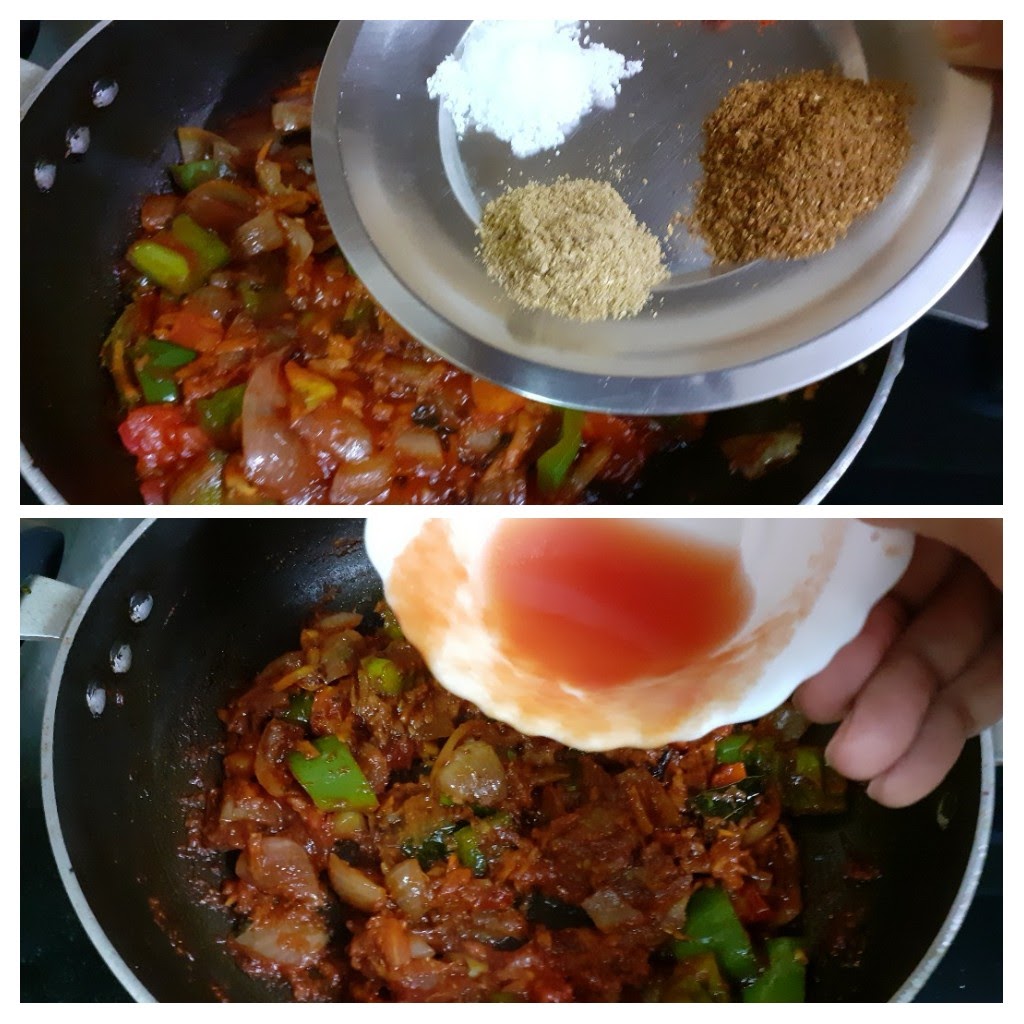
5. Add the salt, coriander powder, fennel powder, red chilli powder, and turmeric powder, stir and cook for 2 minutes on medium flame. Add little water if the sauce is too thick. Now add the sauteed vegetables and cook for another 2 minutes. If adding green peas, cook them and add at this stage.
6. Finally, add the cream and stir nicely and put off the flame. Add garam masala powder. Garnish with coriander leaves and the Mushroom Do Pyaza is ready to serve.
NOTES:
1. Always saute vegetables such as onions, capsicum, mushroom, etc on high flame or they release a lot of moisture. Mushrooms should be added at the end as they don’t withstand too much heat and become limp quickly.
2. You can add more cream if you prefer.
3. You can add or skip Garam masala powder if you prefer.
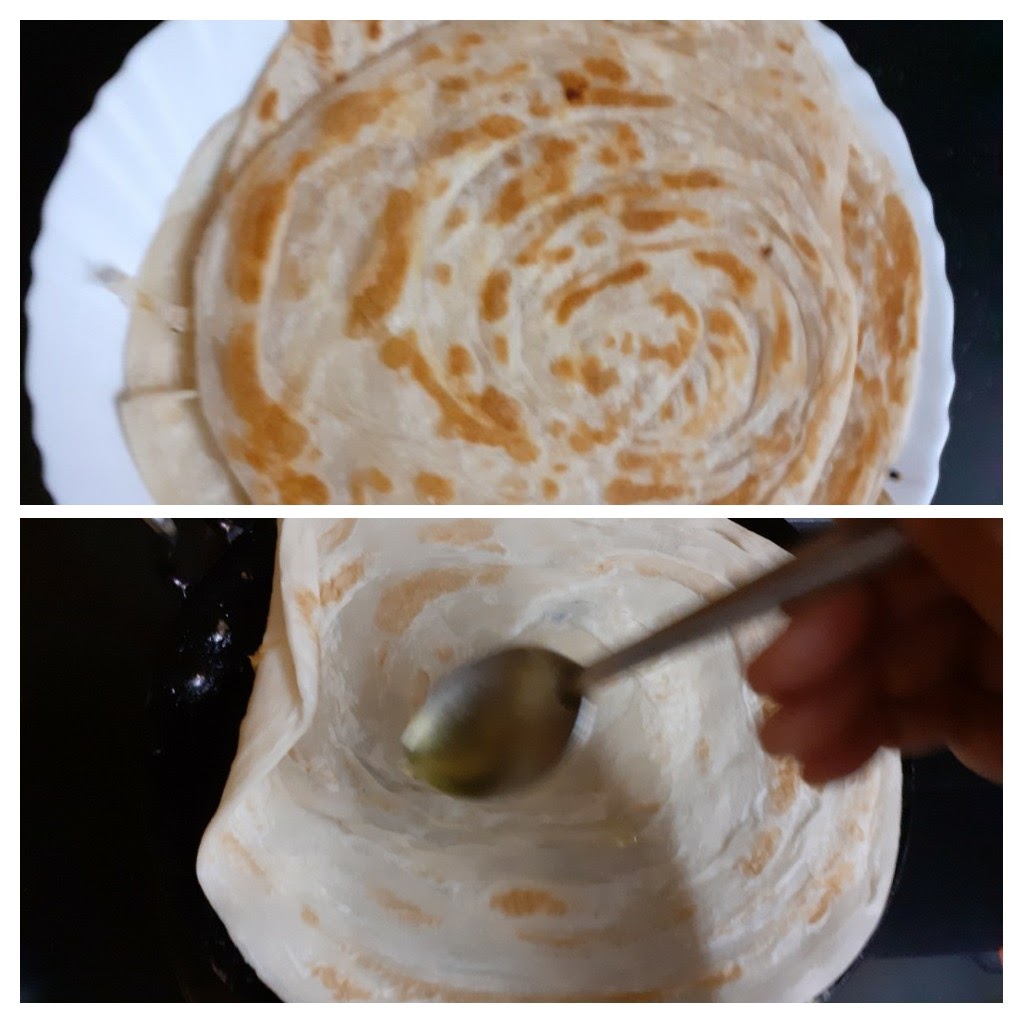
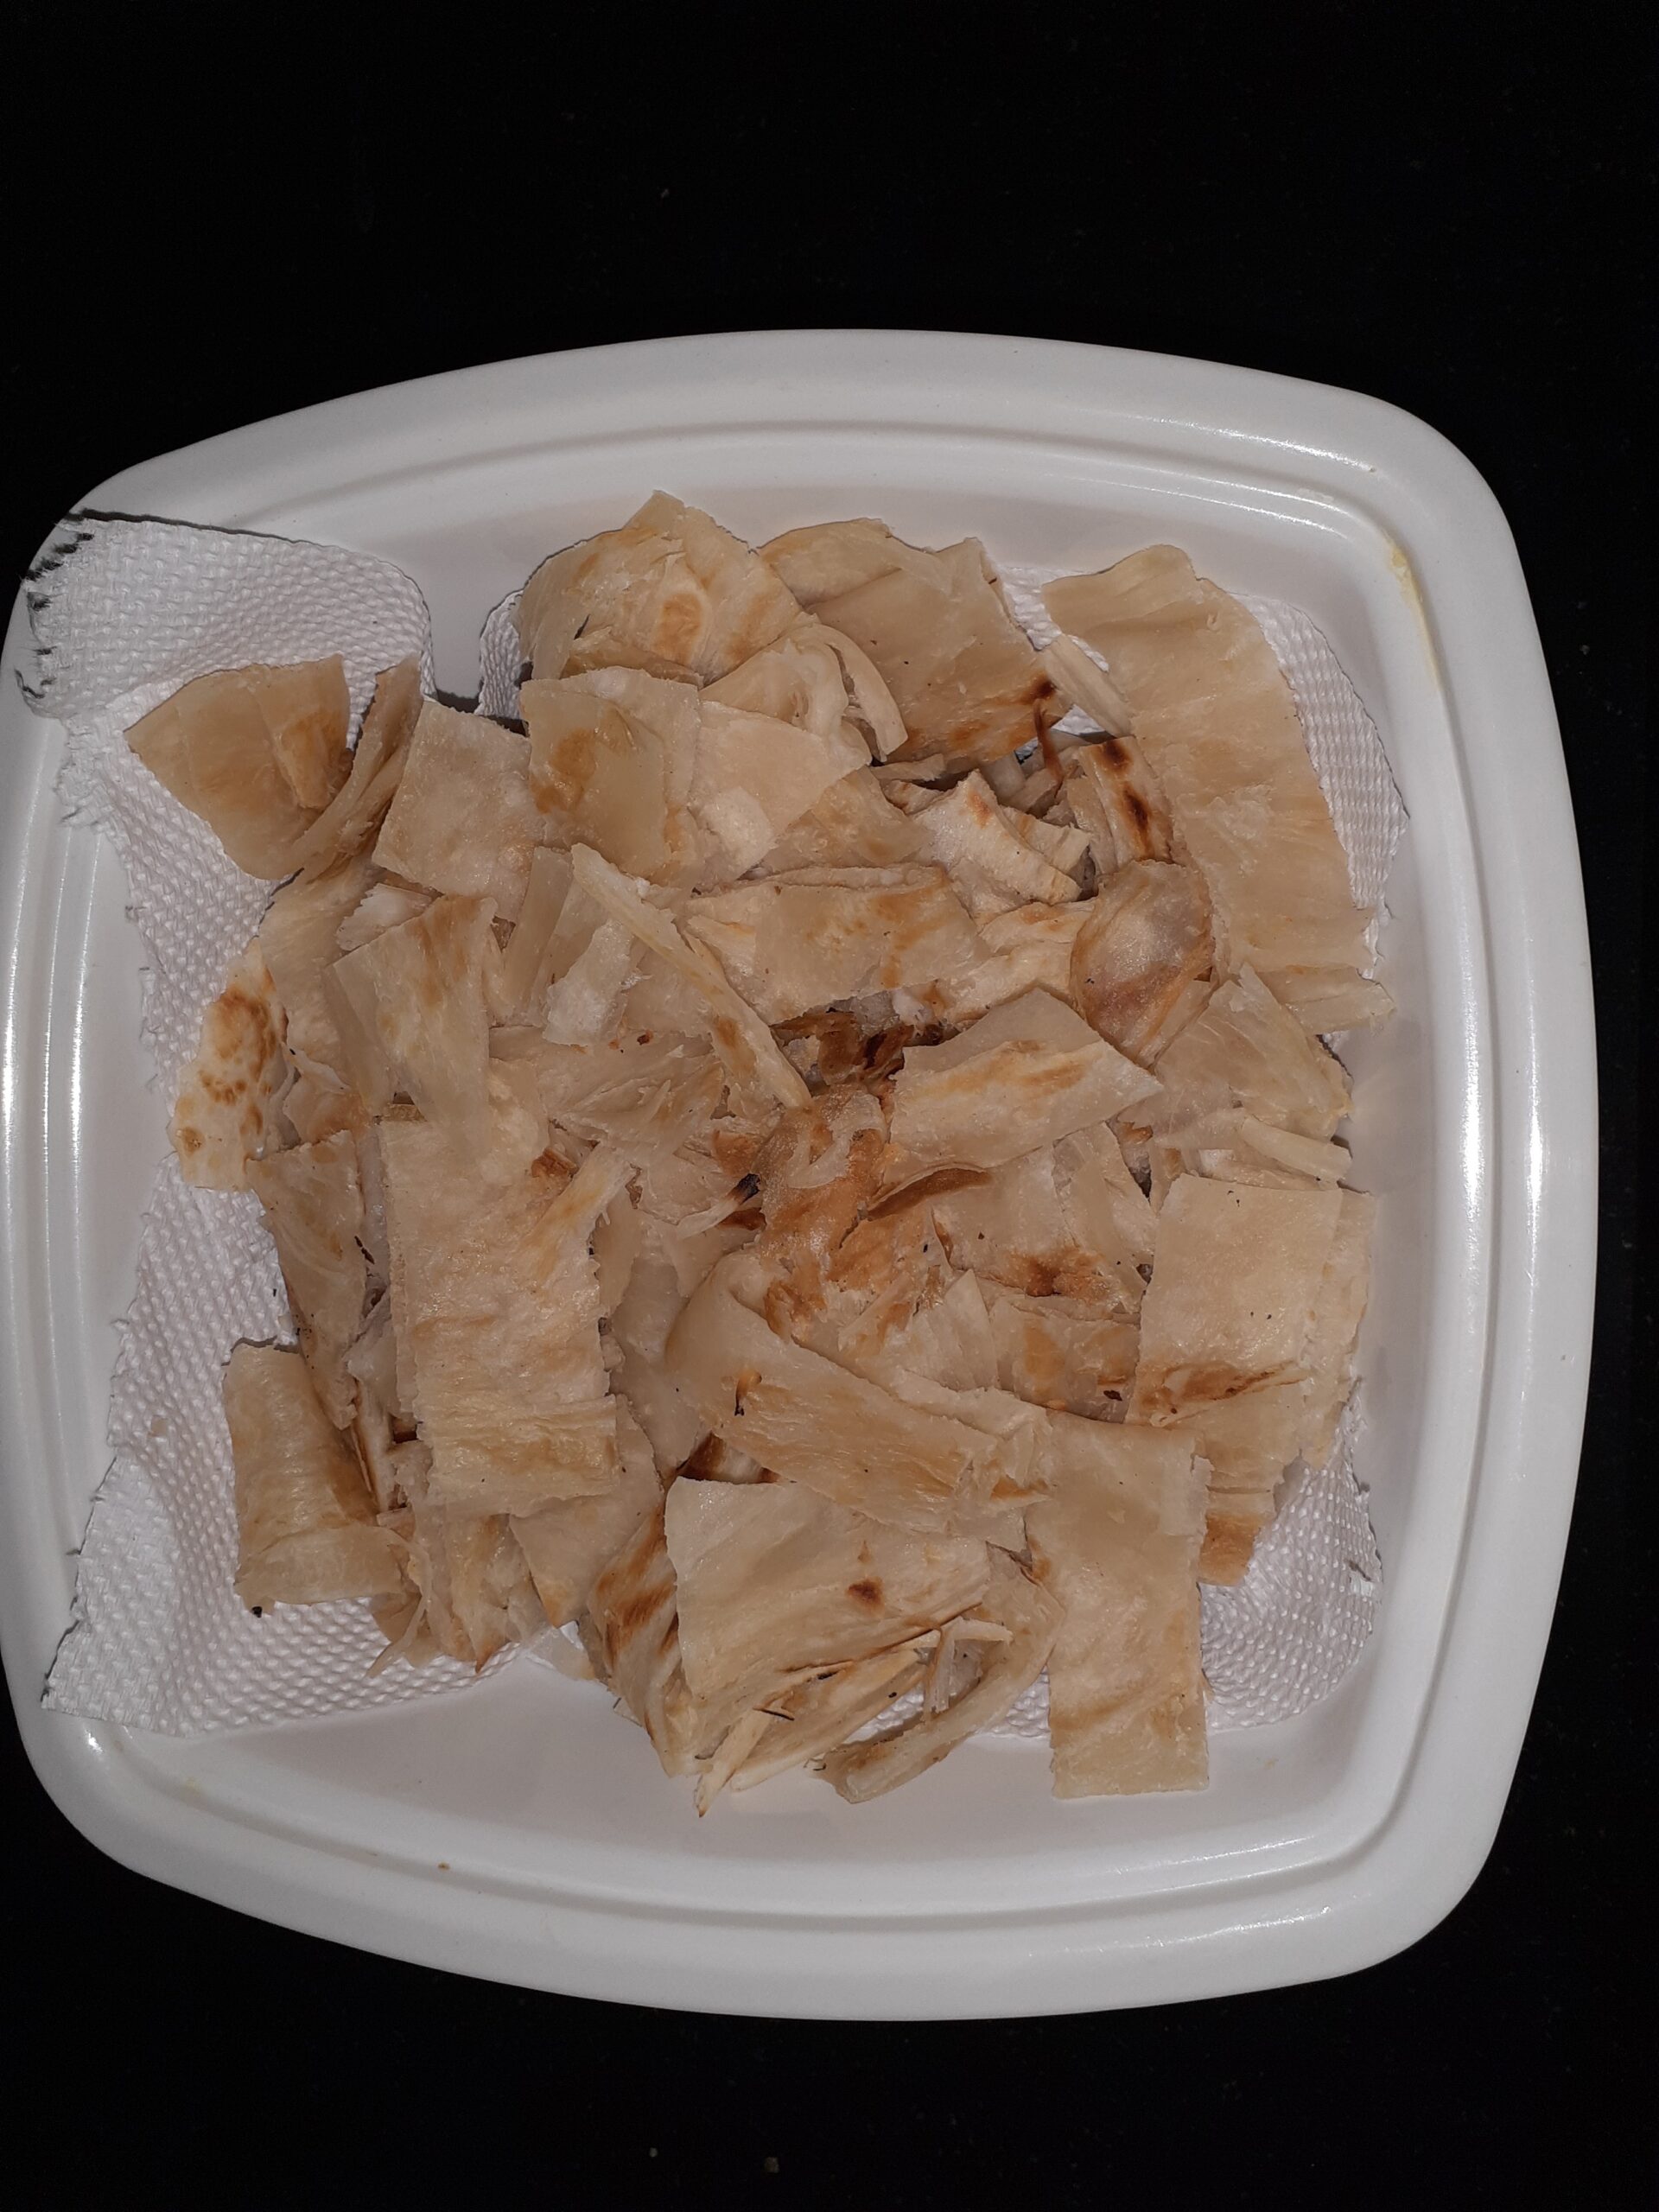
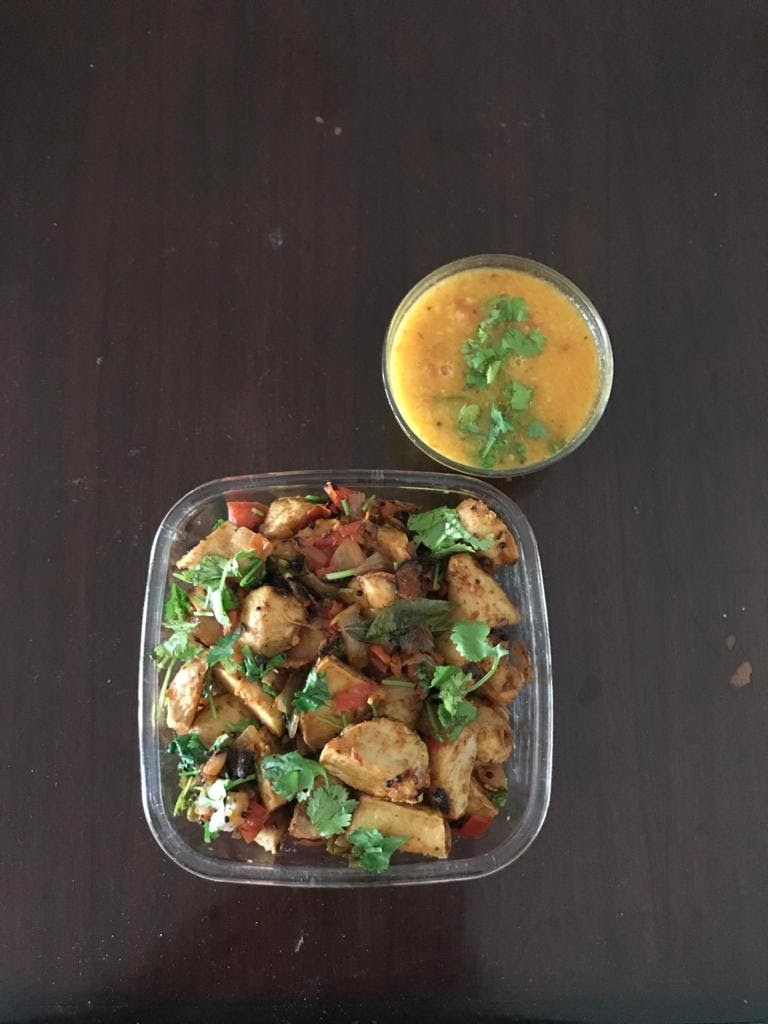
This is my meal with Mushroom Do Pyaza. I served it with Warqi Parathas and Mango Chundo.
If you tried this recipe and liked it please comment below. I would love to hear from you.
In case you wish to receive recipes as an email, please leave your id on the homepage near the mail icon. Whenever Rajjo’s Kitchen has a new post the recipe will be mailed to you.
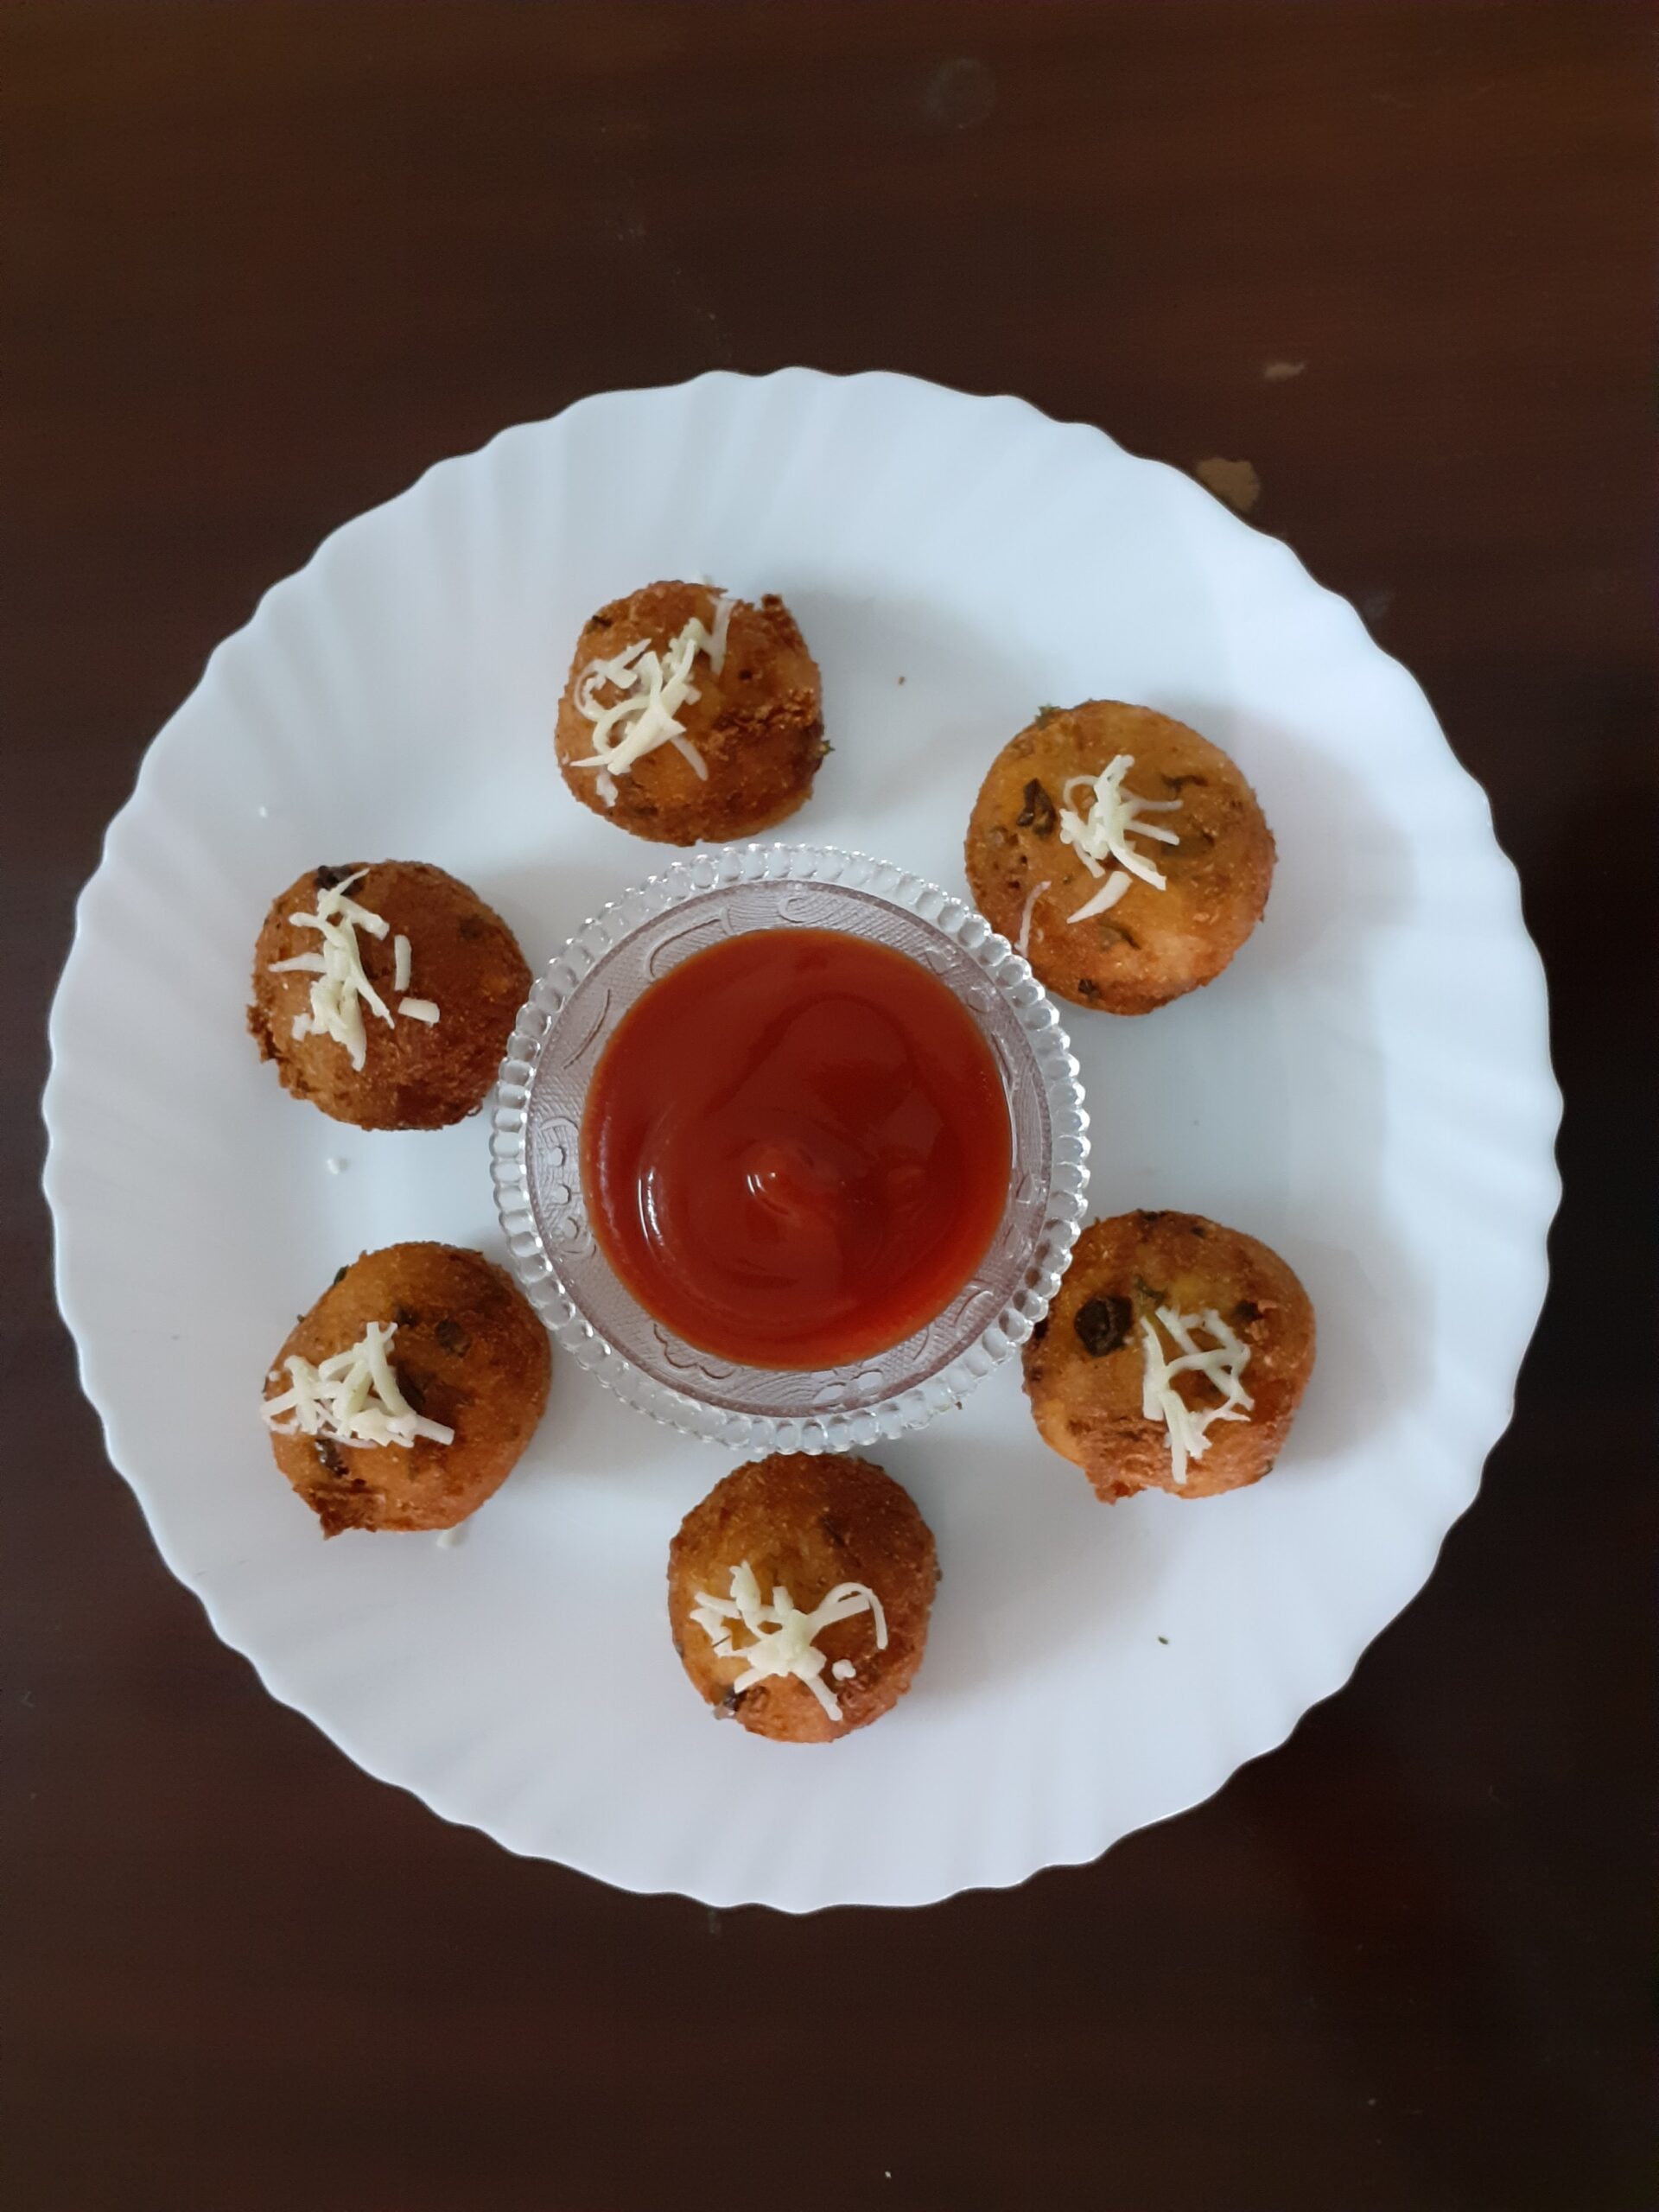
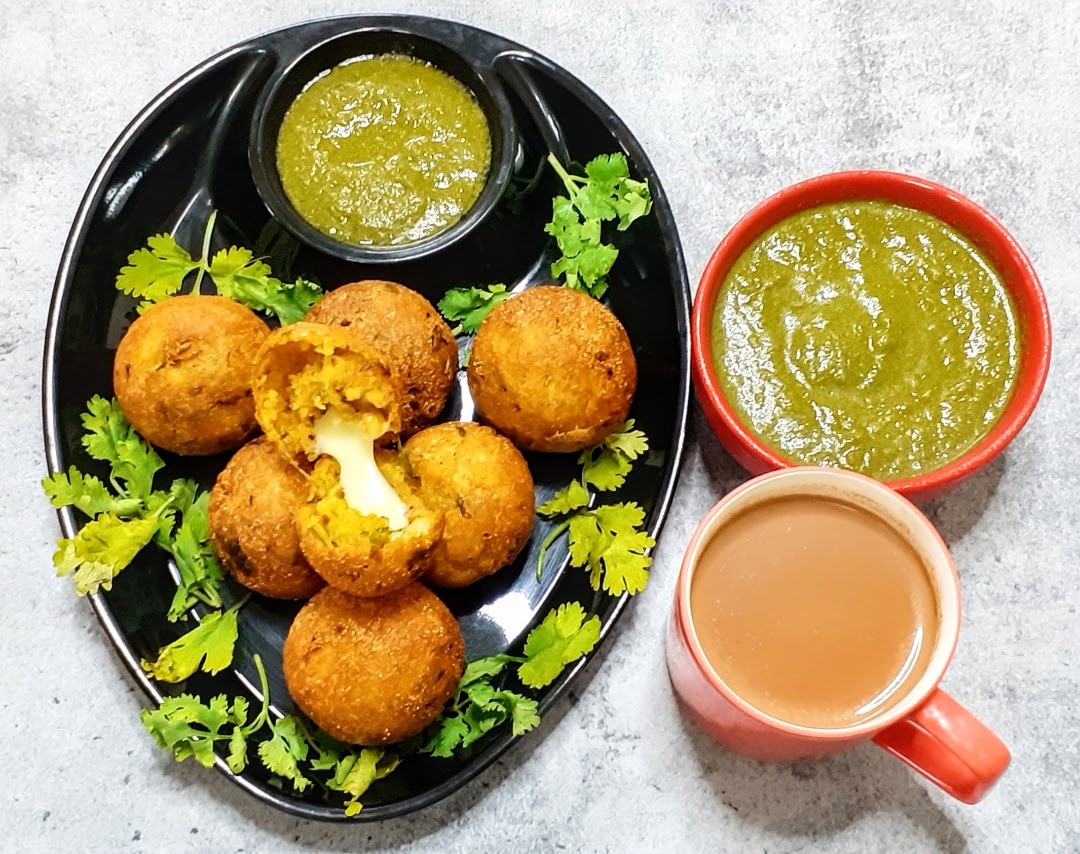
Sugiyan
Sugiyan or Sukhiyan as it is called is a traditional snack in Kerala and Tamilnadu. It is also made in Andhra Pradesh and is called Boorelu. This snack is like a sweet version of the Aloo Bonda where the Aloo is replaced with a sweet Chana dal or Moong dal and Jaggery filling and instead of Besan Urad dal and rice flour are used as a batter to cover the filling(Poornam). Coconut is also added to the filling that enhances the taste. This is also a snack that people make for festivals. As the festival time is nearing blogging this recipe may be helpful. I usually make it around Navarathri and Diwali to serve it to guests who visit home.
As I had mentioned that the poornam (filling) is made with Moong dal too, but I personally feel the chana dal filling is tastier. Some also use whole moong(payaru) to make the filling.
I use this filling of Sugiyan to make Puran Poli(Boli/Bobbatlu/Hoolige) also. So what I usually do is make them both simultaneously. I use wheat flour majorly with a hint of maida to make Puran Poli, the Sugiyan is had the same day as it doesn’t taste fresh or hold good the next day, it is like an instant snack, whereas Puran Poli can be consumed with 2-3 days if stored properly.
One needs to grind the batter carefully and the rest of the recipe is quite easy. In this recipe, I will also show you an easy way to make the filling.
While you are here check out my other dessert recipes like Pineapple Rabdi,
Carrot Kheer, Chakkara Pongal, Atte Ka Sheera, Akkara vadisal, and more.
Here is the recipe of Sugiyan for you–
PREP TIME: 20 Mins(1 hr soak) COOK TIME: 40 Mins
TOTAL TIME: 60 Mins COURSE: SNACK
CUISINE: SOUTH INDIAN SERVINGS: 6
AUTHOR: Rajni Ram
Ingredients:
Urad dal 1 cup soaked for 1-hour
Chana dal 1 cup roasted to light brown
Turmeric powder 1/2 tsp
Rice flour 2 tbsp
Jaggery 1 cup powdered
Coconut grated 1/2 cup
Cardamom powder 1 tsp
Oil for frying
Directions: for the filling:
Dry roast the Chana dal to a light brown, you will get a nice aroma of the dal. Switch off the flame, remove and cook in a pressure cooker with 1/2 tsp turmeric powder and adequate water for 2-3 whistles(not more), as we want the dal to be rightly cooked, not mushy. Once the dal is cooked and the pressure in the cooker has subsided, remove the dal and put it in a strainer for all the water to drain off for about 5 minutes. Now put the dal into the dry grinding unit of the processor and blitz. Open stir the contents well and blitz again to a fine powder. After grinding it will resemble wet sand. Now in a Karahi put in the jaggery and the ground dal, followed by grated coconut( add no water) and keep stirring, in low flame. The jaggery will start melting and within 5 minutes of stirring the filling will become well combined. Even if it seems a little dry, don’t be tempted to add water. The jaggery will be enough to bind it. Add the Cardamom powder and keep stirring and when it forms a lump, put off the flame and let it cool. Once the filling has cooled, make small balls of them and keep aside.
Directions for the outer crust:
Soak the Urad dal for 1 hour and grind. Don’t allow it to soak for a long time, as then it soaks up a lot of oil while frying. The dal has to be ground to a smooth and thick batter, with water as required. The batter should stick to the filling and not roll off it, that should be the consistency. A runny or flowy batter will not stick to the filling. After grinding transfer to a dish, add 2 tablespoons of rice flour and 1/2 tsp salt. Now add little water if required as the rice flour would have absorbed all moisture from the urad dal paste.
Directions to make Sugiyan:
Heat oil for frying to medium-high. Now take one ball at a time, roll it in the batter, or smear the batter all over the filling, it should be a thick coating or it will split in the oil and, drop them gently into the oil. Fry 4-5 of them at a time. Remove when golden brown in colour. Drain them on an absorbent paper. Repeat for the entire lot of filling. The delicious Sugiyan is ready. Serve with tea or make it as Prasad(offering) for Puja and enjoy it. Bon Appetit.
STEPWISE RECIPE FOLLOWS:
1. Assemble all ingredients. Soak the dal for an hour. Dry roast the Chana dal and pressure cook for 2 -3 whistles and no more.
2. For the Outer crust(cover)- Grind the soaked Urad dal by adding little water to a smooth but thick paste(idli batter consistency or a little thicker also is fine). Stir in 1.5 to 2 tablespoons of rice flour. If the batter gets too thick, add a little amount of water to get it back to the right consistency, given above. ( I forgot to take a picture of adding Rice flour, so please keep in mind and ad it).
3. For filling- Dry roast the Chana dal until light brown in colour, you will get a nice sweet aroma when you are getting to that stage. Pour required water and add turmeric powder and pressure cook it for 2-3 whistles, and not more. Once the pressure reduces, take the dal and drain it completely of all the water and allow it to cool for 5 minutes.
4. Now put the warm Dal into the dry grinding jar and blend to a powdery texture, without any water. Give it a mix and spin again, the mixture should be fine and should resemble wet sand.
5. Put this ground Dal mixture in a Kadai and add the jaggery and grated coconut to it. Switch on the flame on low and start stirring this mixture. Do not add any water, the jaggery will start melting in the heat and help in combining. Add the cardamom and keep stirring until the mixture comes together and forms a lump. Put off the flame and cool the mixture.
6. To make the Sugiyan- Heat oil in a karahi for frying. Heat should be medium-high. Now make lemon sized(or a little bigger too is ok) balls of the filling and keep it aside. Check if the oil is hot by dropping little of the batter into it. If it sizzles and rises immediately, it is ready for frying.
7. Now take the Urad dal – Rice flour batter and dunk each ball into it gently, use your hands to smear the batter on the filling if required ad cover the ball. Gently drop it into the oil and fry to a golden brown colour. 4-5 Sugiyans can be fried at a time. Drain them on absorbent paper. Repeat for the entire filling and enjoy them hot.
NOTE:
1. I recommend not soaking the Urad dal for more than an hour as it soaks in lot of oil while frying.
2. The jaggery can be reduced to 3/4 cup depending on how sweet it is.
3. I forgot to take a picture of adding the rice flour, so don’t forget to add it if following only the pictures.
If you tried this recipe and liked it please comment/ tag Rajjo’s kitchen on Facebook and Instagram and please follow us on my blog https://rajnirams.blogspot.com/
If you wish to receive the recipes as an email please leave your id on the homepage near the mail icon. Whenever Rajjo’s Kitchen has a new post it will be mailed to you.
Palak Paneer
Palak Paneer is a dish I have relished since childhood, as I love Palak and Paneer both. This dish is popular in North India and is one of the most popular Paneer dishes. It is usually served with Roti, Parathas, and other Indian Bread. It goes really well with Plain Rice, Jeera rice and Pulav too. In this dish, the Palak is pureed and made into a thick gravy with spices and the Paneer pieces are cooked in it. This dish is a great way to add Palak to your diet.
Spinach/Palak is loaded with Iron and fibre and the Paneer is rich in proteins and so this makes it a healthy recipe.
Well, there are loads of Palak Paneer recipes that recommend using cashewnuts or cream for a thicker or creamier gravy, I feel that this makes the dish heavy. Palak by itself when pureed after blanching has volume, plus the onions and tomatoes sauteed and ground also adds body to the dish, so adding cashew paste or cream is not absolutely necessary, though if one likes the taste of it, then no harm in adding them too. That said it does not make much of a difference to the dish. I usually use the cream only as a garnish, that too around 1 tsp.
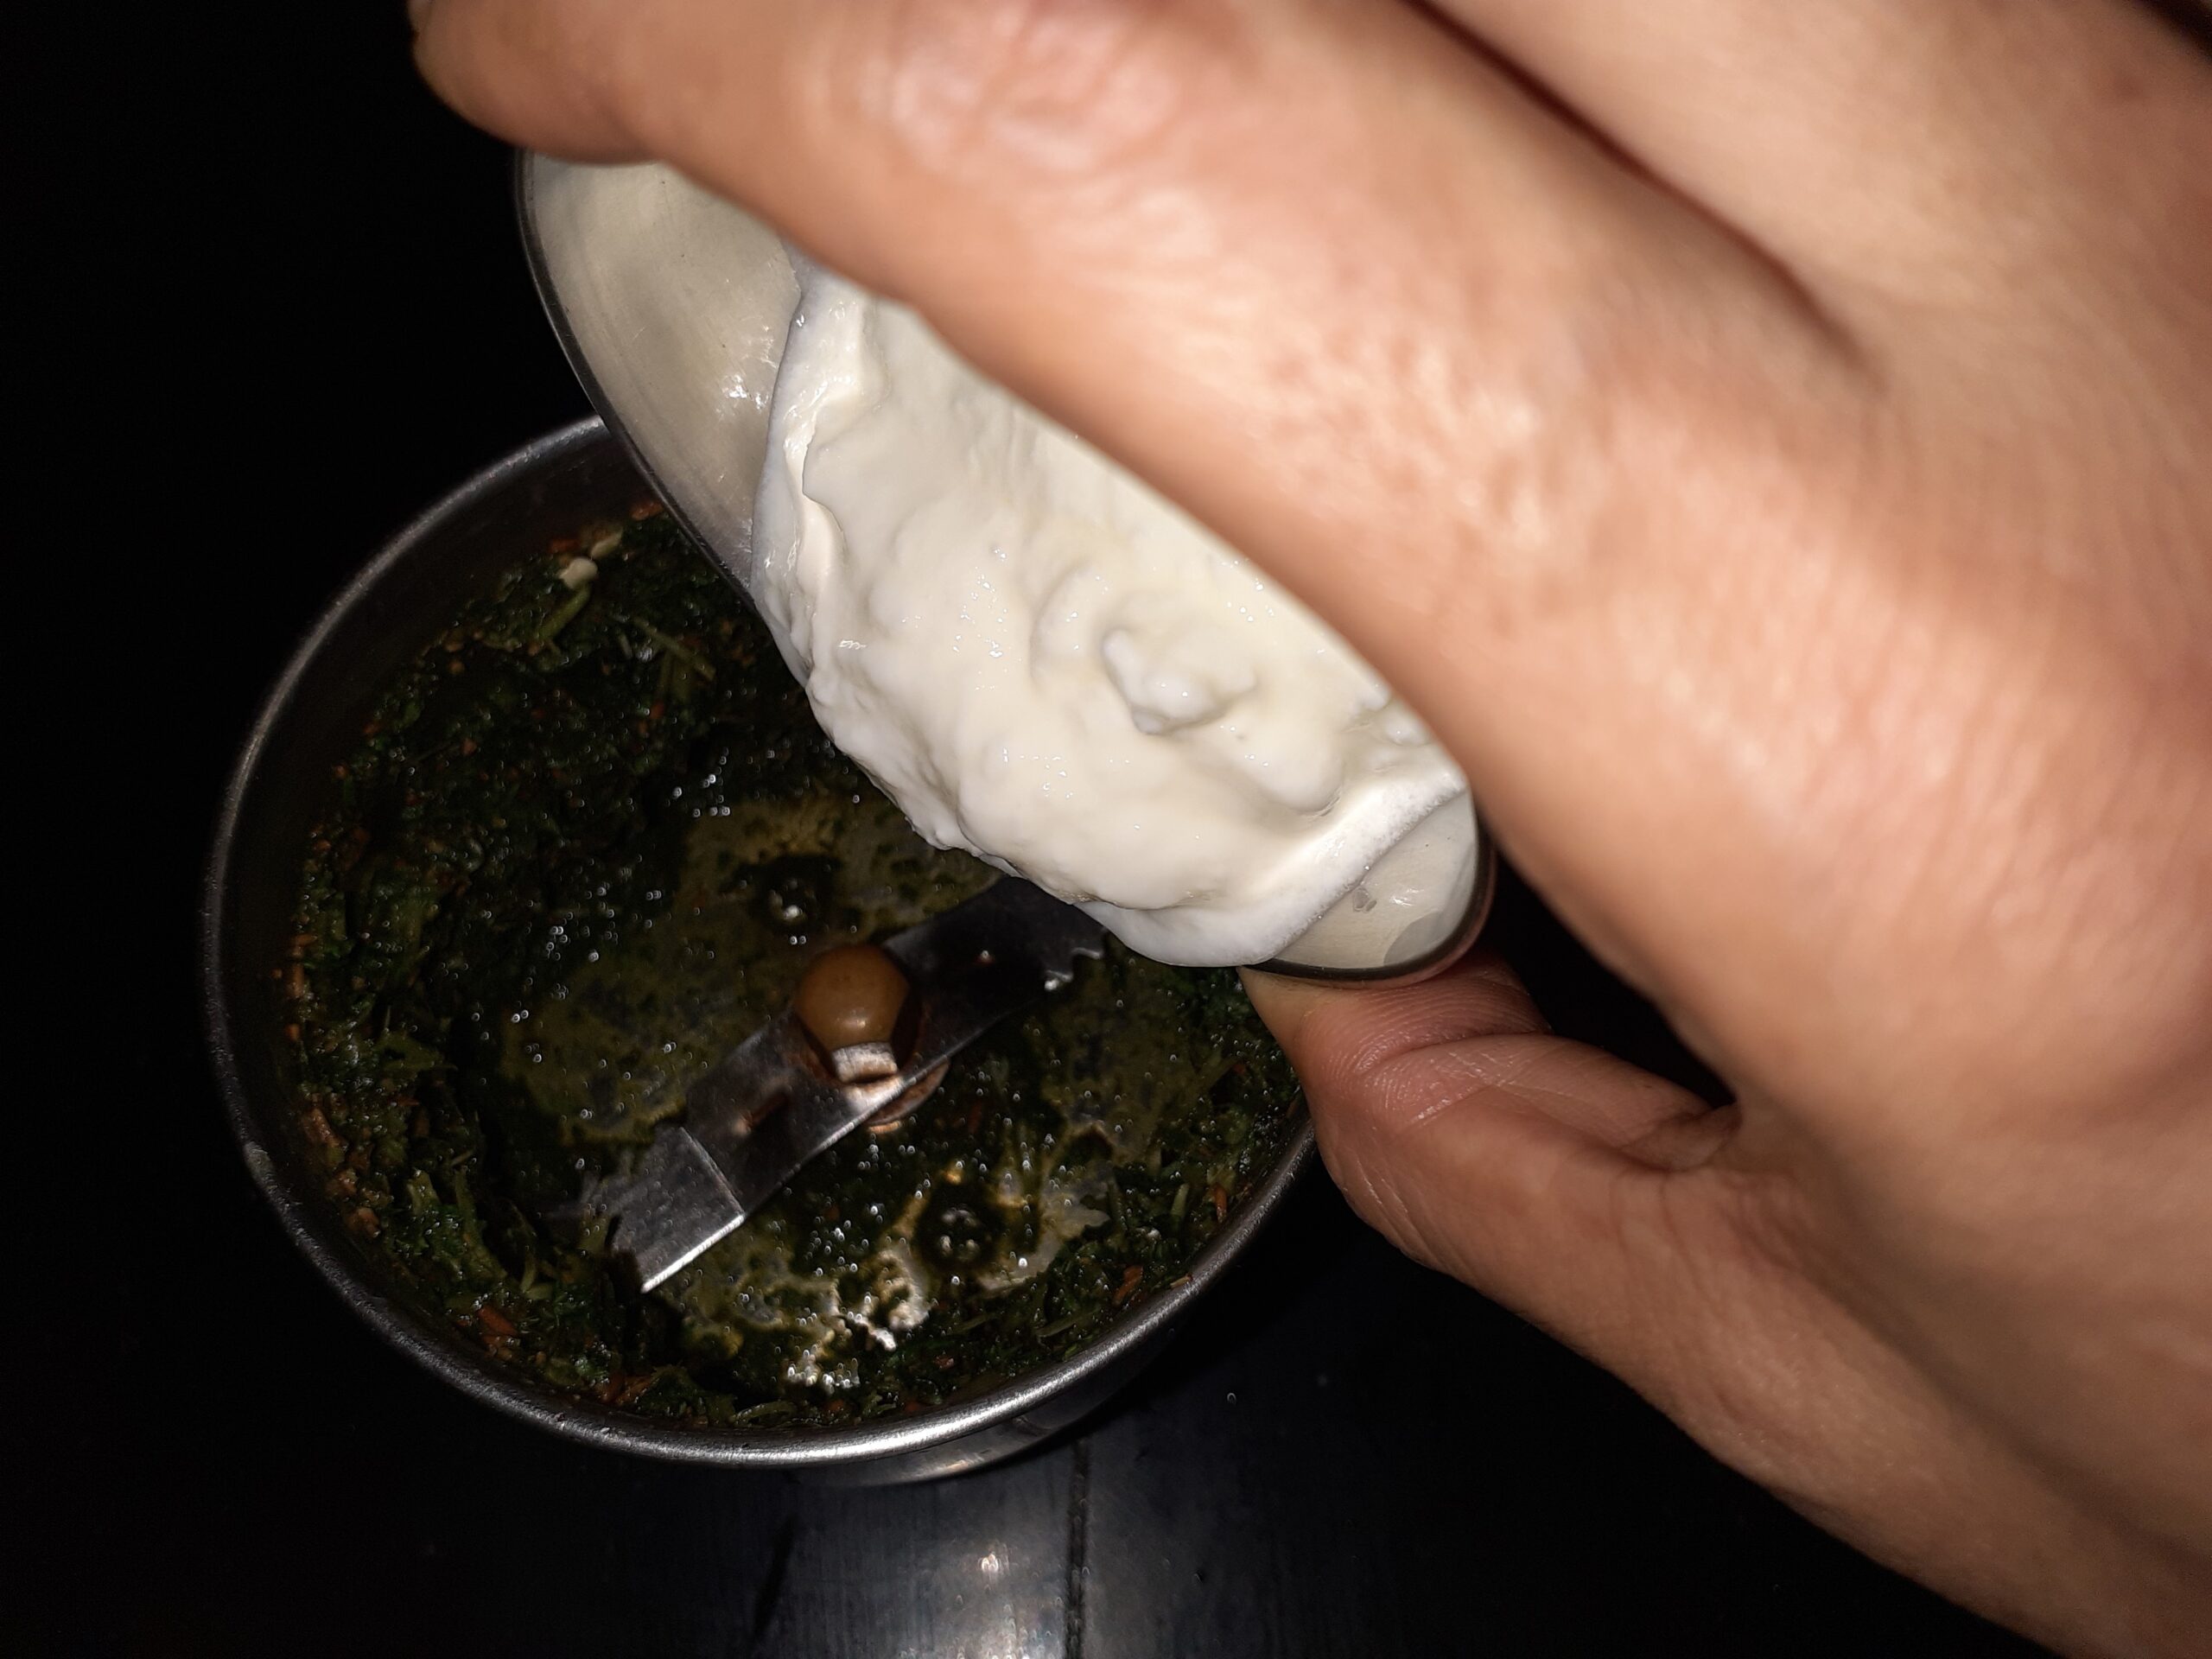
Chop the Palak roughly and blanch them, I usually put them in the microwave for 2 mins. Alternately just put them in boiling water for 5 minutes. Drain the water and pour cold water over the Palak, this helps in keeping the green colour intact. Puree the Palak and keep ready.
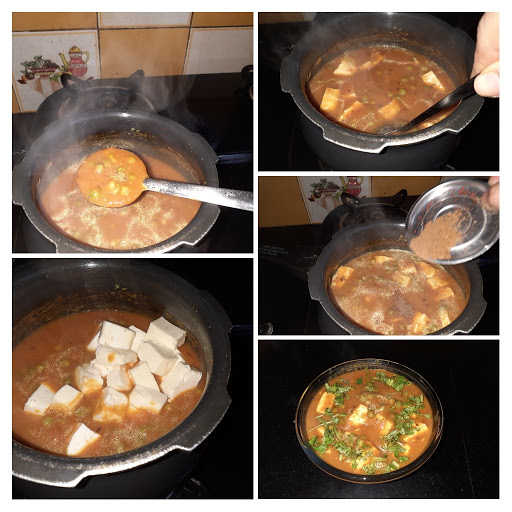
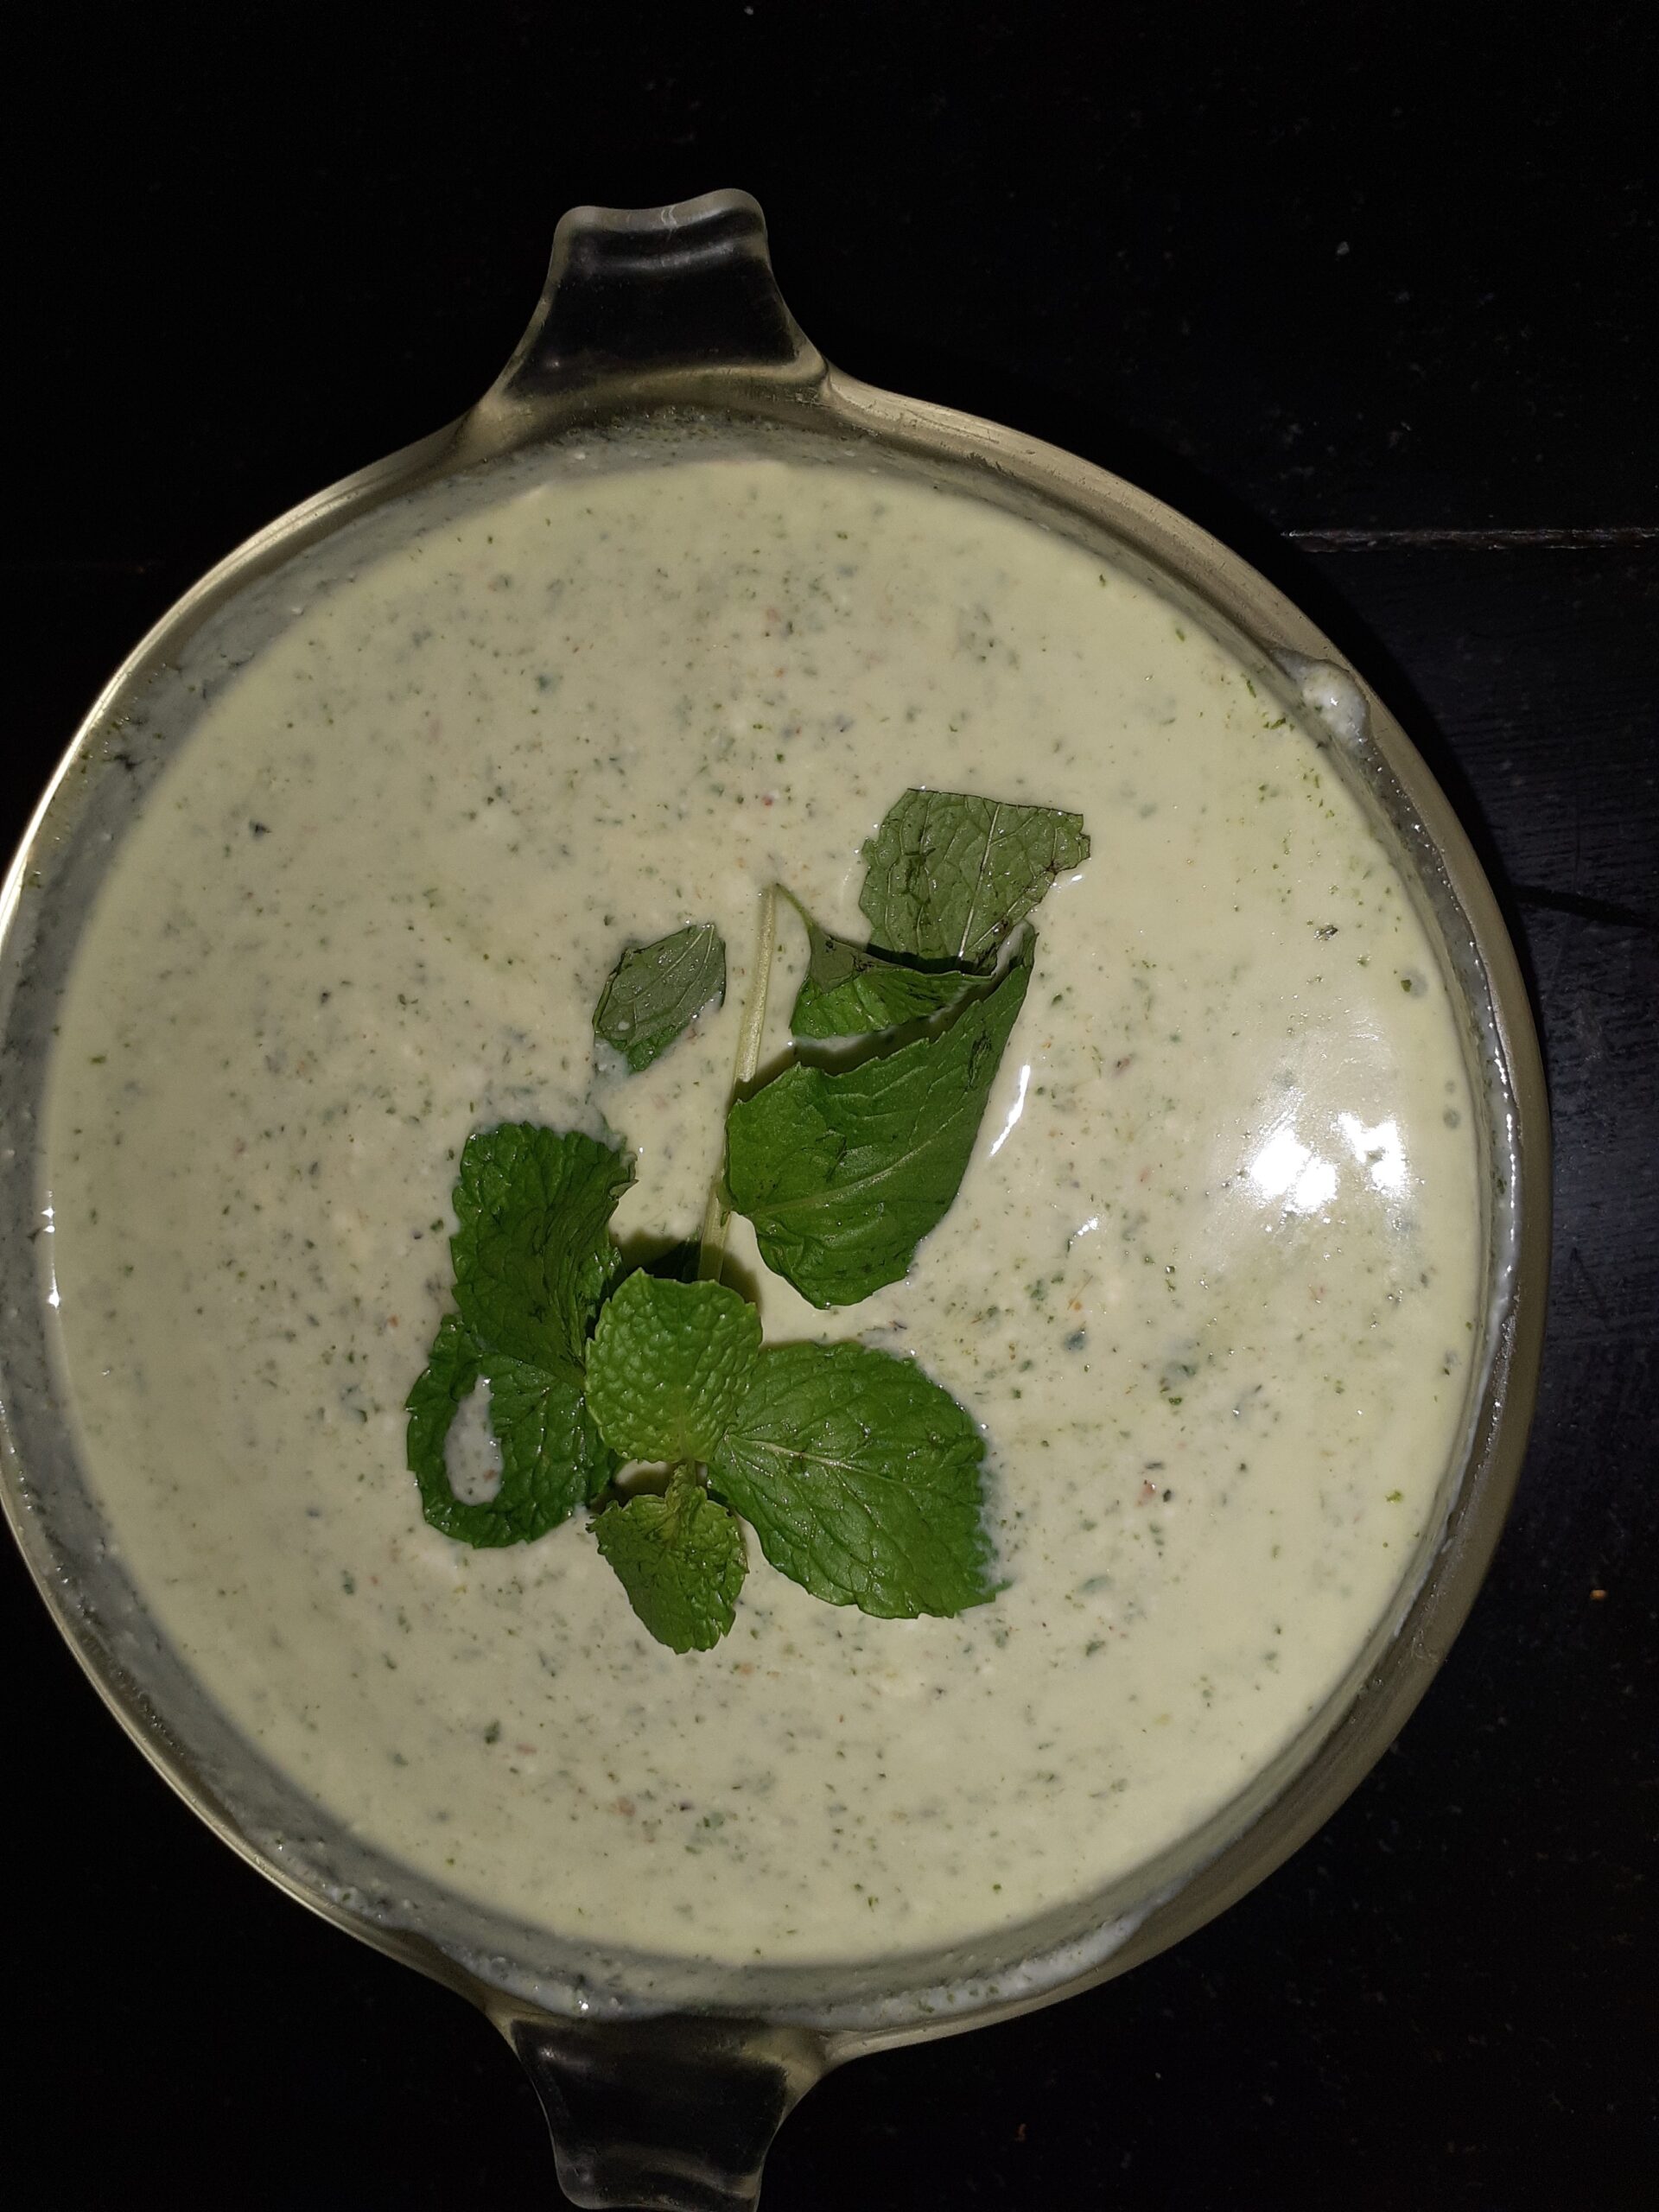
Now in a karahi pour some oil and heat. Add 2 cloves followed by Cumin seeds and drop in the chopped onions. Saute for a minute, add the green chillies and continue to saute for 30 seconds, finally add the tomatoes and cook until the tomatoes turn mushy. Cool them. Now blend the onion-tomato mixture to a puree. In the same karahi take another 2 tsp of oil and heat. Add the cumin seeds followed by turmeric powder and pour the onion-tomato mixture. Fry it nicely in the oil, now add the Palak puree and stir. Cook for about 3 minutes on medium flame and add salt, followed by coriander powder, red chilli powder, fennel powder and continue to cook. Be careful as the palak splutters a lot while cooking, you can keep the karahi partially covered. After about 3-4 minutes of cooking the Palak and tomato mixture will come together, at that stage add the cubed paneer and cook for another 2 minutes on medium flame so that the Paneer absorbs the masala. The delicious Palak Paneer is ready to serve.
Serving suggestions: with Rotis, Parathas, Kulcha, with rice varieties like Jeera rice, Mayar Pulav,
Flavoured rice, vegetable pilaf etc;
STEPWISE RECIPE FOLLOWS:
1. Assemble all ingredients. Blanch the Palak, cube the Paneer, chop onion and tomatoes.
2. Puree the Palak and set aside. In a karahi take oil and heat. Put in the cloves and cumin seeds, and as the cumin splutters add turmeric powder followed by onions and sauté for a minute. Add the green chillies and sauté for 30 seconds and now add the tomatoes and sauté until mushy. Cool and grind to a purée, along with 1 tsp ginger garlic paste.
3. In the same karahi take 2 tsp oil and heat. Now add the cumin seeds and pour in the tomato and onion paste and fry nicely in the oil.
4. Now pour the Palak purée and stir nicely. Add the salt, red chilli powder, coriander powder, fennel powder and stir. Cook on medium flame until combined, approximately 4 minutes.
5. Now add the cubed Paneer pieces to the gravy and cook covered for 2 minutes. Finally, add garam masala powder and turn off the flame. The delicious Palak Paneer is ready.
NOTES:
1. Blanching ( putting the Palak in hot water) is a critical step followed by dipping it in cold water.
2. I don’t usually fry the paneer before adding it to a subji or gravy unless the recipe demands it. While you are readying the gravy just put the cubed paneer in fresh water until it’s time to put it in the gravy. It will absorb the flavours better.
3. Don’t overcook the Palak, it loses its colour and taste.
If you tried this recipe and liked it please comment below. I would love to hear from you.
In case you wish to receive recipes as email, please leave your id in the homepage near the mail icon. Whenever Rajjo’s Kitchen has a new post the recipe will be mailed to you. Your privacy is important to us and we will not share your id with anyone.
Kothimbir Vadi
Kothimbir Vadi is a savory Maharashtrian snack. It is made of Fresh coriander leaves and Besan/gram flour. Coriander as I have mentioned in my previous posts is my favourite herb. So when there is a recipe predominantly with coriander leaves how could I let it go and hence the post.
This recipe is very simple, flavourful( this word is used many times across this blog if you notice, as I believe the flavour is a very important entity to any food.) and healthy. This snack has a strong resemblance to Gujarath’s Muthias( will blog this soon).
Traditionally this snack is deep-fried, but now one can shallow fry or saute in a small amount of oil too. This dish is cooked twice as it is steamed first and then shallow fried. It is soft and moist when steamed and develops a nice crunch when fried. It goes very well with the sweet chutney and garlic chutney and makes for a great tea time snack. Made to bite-size pieces can be served as a starter in get-togethers. I have really wanted to try this recipe for a long while and I’m happy I did. Everyone at home was pleased by this dish????.
While you are here please view other recipes by Rajjos kitchen like
Get the steamer/ pressure cooker ready for steaming. By the time the batter gets ready, the water would have heated and the batter can be steamed immediately, after mixing.
Make a coarse paste of green chillies, ginger, and garlic(if using).In a dish take the Gram flour/besan, add the ginger-green chilli paste, followed by salt, turmeric powder, red chilli powder, jaggery, tamarind pulp. Mix nicely. Now add the curd and stir with a spatula. It will be a semi-wet mixture. Add in the chopped coriander leaves followed by a little water( around 1/2 cup) and make a thick batter. The batter should not be runny, so add water little at a time. Grease a plate or flat vessel with oil and before pouring the batter into the greased plate/ vessel add the cooking soda and stir nicely so that the soda combines well with the batter. Immediately pour the batter into the greased plates, tap the plate lightly, so that the batter settles evenly and place it into the steamer. Steam for 15 minutes. After steaming, remove and cool completely. Cut them into squared or diamonds and keep aside. Heat sufficient oil in a flat pan and put in the tempering of mustard and cumin seeds. As they splutter, add asafoetida and place the cut vadi pieces and fry until they turn brown. Keep turning sides for equal cooking. Remove when all sides are lightly brown and crisp. In the same pan drop the grated coconut and seame and roast until they turn light brown. Now scatter this on the fried Kothimbir Vadi for nice flavour. Kothimbir Vadi is ready to serve with garam chai…Enjoy. Bon Appetit.
STEPWISE RECIPE FOLLOWS:
1. Assemble all ingredients. Wash the coriander leaves well and drain all moisture, chop them finely.
2. Pour water into a steamer and get it going, so that by the time the batter is ready the steamer is ready. Make a coarse paste of the chilli and ginger(and garlic too if using) and keep ready.
3. Now in a dish take the besan and add the green chilli and ginger paste, salt, followed by turmeric powder, red chilli powder, jaggery, tamarind pulp. Add the curd and mix well with a spatula. It should be a semi-wet mixture.
4. Now put in the chopped coriander and mix well. Add water little at a time to make a smooth, yet thick batter. The batter should not be runny. Grease a plate or a flat dish with oil.
5. Now just before pouring the batter into the plate, add the cooking soda and mix well. Pour the batter into the greased plate and set it in the steamer for 15 minutes.
6. After steaming, remove the plate and cool completely. Cut into squares or diamonds and set aside. In a flat pan, pour sufficient oil for shallow frying. Add the mustard seeds, cumin seeds and asafoetida and place the cut Vadi pieces into the oil. Fry each side until light brown and crisp. Remove from pan. Repeat for all the pieces.
7. Now in the same pan put in the grated coconut and Sesame seeds and saute until light brown. Put this on tempering on the vadi for a nice flavour. The Kothimbir Vadi is ready.
NOTES:
1. The ratio of coriander leaf to Besan is 2:1, stick to that. More quantity scale up the measures in the same proportion.
2. Wash and drain the coriander leaves well before chopping.
3. I have not used garlic, but it can be added.
4. If you like the Vadis deep-fried, go ahead and fry them.
If you tried this recipe and liked it please comment below. I would love to hear from you.
If you want the recipes emailed to you leave your id in the homepage near the????
icon. Whenever we have a new post the recipe will be mailed to you. Thank you for showing interest in Rajjo’s Kitchen.
Stuffed Kuzhi Paniyaram (Savory)
Kuzhi Paniyarams are basically Lentil and rice batter dumplings. The batter is fermented and then poured into a Paniyaram pan which gives them the shape. Most often in South Indian homes the Kuzhi Paniyaram or Kuzhi appam as we call it is made from the Idli batter itself. When the batter becomes a little sour it is made into Paniyaram. That is because the Idli/Dosa batter is made for a whole week as a quick breakfast or dinner option. So day 1 is Idli, day 2 Dosa and day 3 onwards its Paniyaram and dosa with the batter, as sour Idlis are not that great to taste. However, when I have guests over I prefer making the batter especially for this as it makes the crust crisp and enhances the taste of the Paniyaram to a different level and the texture on the inside of the Paniyaram is lovely.
There are many variations of the Paniyaram batter. It is usually made with Urad dal and rice, Raagi(Finger millet)flour, Jowar(Sorghum) flour, Bajra(Pearl millet) flour, etc can also be used in the batter. The proportions of the Dal and rice also vary from home to home. The Paniyaram batter is used as it is or sometimes, finely chopped Onion, grated Carrots, and other vegetables can also be added.
I have stuffed the Paniyaram with a mashed potato spicy stuffing which tastes wonderful, I have also added finely chopped onions, green chillies, ginger and curry leaves to the batter. This combination of onion in the batter and the Potato stuffing within is a perfect one.
I personally don’t like using the non-stick Paniyaram pan for this dish, as the traditional brass or iron ones give the Paniyaram its crispy exterior. If you have only the non-stick one with you, that’s fine too.
Kuzhi Paniyarams can be served as Breakfast, starters or even for dinner with any chutney.
While you are here please check out other recipes of mine like Dahi Pohe, Adai,
PREP TIME: 20 Mins(+4 hrs soak) COOK TIME: 40 Mins
TOTAL TIME: 60 Mins COURSE: SNACK/TIFFIN
CUISINE: SOUTH INDIAN SERVINGS: 4
AUTHOR: Rajni Ram
Here is the recipe of Stuffed Kuzhi Paniyaram–
Ingredients for batter:
Urad dal/black gram(whole without skin) 1 cup
Idli Rice/Boiled rice 1.5 cup
Raw rice(any variety except Basmathi) 1.5 cup
Methi seeds/fenugreek seeds 1 tsp
Ingredients for stuffing:
Potatoes 4 medium(boiled)
Turmeric powder 1/2 tsp
Red chilli powder 1 tsp
Mustard seeds/Rai 1 tsp
Cumin seeds/jeera 1 tsp
Asafoetida 1/4 tsp
Curry leaves a few (finely chopped)
Salt as per taste
oil for tempering and for greasing the Paniyaram pan.
Directions for Batter:
Soak the dal and both rice varieties along with a teaspoon of methi seeds in a huge vessel for 3-4 hours and grind to a smooth paste to a batter of medium consistency(should resemble Idli batter). Add salt, and leave to ferment for 6-8 hours for a perfect texture of the Paniyaram. While grinding add little water at a time, the batter should be a smooth one, but not runny.
Directions for Stuffing:
Boil the potatoes, peel the skin and mash them well. Now in a pan pour some oil and heat. Add the mustard seeds, as they crackle, add the Cumin followed by turmeric powder, red chilli powder, salt, asafoetida and curry leaves. Nicely fry the masala in the oil for 30 seconds and drop the mashed potato into the tempering and mix nicely, so that the tempering is evenly distributed. Cool the mixture.
After it ferments temper the batter with mustard seeds and asafoetida.
Directions for Paniyaram:
Chop Onions, green chillies, ginger and curry leaves finely and add them to the fermented batter and stir well.
Put the Paniyaram pan on the flame and let it heat up. Pour oil into the moulds(if using a traditional metal pan, only the first round will need 1 tsp oil per mould, rest of the batches will need only a few drops). Wait for 1/2 a minute, let the oil heat up, now reduce the flame and with a small round ladle pour 1 scoop of batter into each mould, now take the stuffing little at a time with a spoon and drop it in the centre of the batter. Now cover up the stuffing with 1/2 scoop of batter and increase heat. Drizzle little oil around the corners of each mould, reduce the flame and slowly loosen them from the sides. Now flip each Paniyaram and cook the other side. When done loosen it from the mould and remove it. The crispy and tasty Kuzhi Paniyarams are ready..serve them with Tomato Coconut chutney or Tomato onion chutney. Enjoy. Bon Appetit.
STEPWISE RECIPE FOLLOWS:
1. Soak the dal and rice along with 1 tsp methi seeds for 3 hours minimum and grind to a smooth paste of medium consistency(Idli batter consistency). Add the salt, mix and allow to ferment for 6 to 8 hours.
2. Preparation of stuffing–Boil Potatoes, peel and mash them. In a pan take 1 tbsp oil and heat. Now add the mustard, followed by cumin, turmeric powder, salt, red chilli powder, asafoetida and curry leaves. Fry the masala for 30 seconds and add the mashed potato to the tempering and mix well. The tempering should have coated the potatoes well. Check for salt and spice. The stuffing should be a little spicy.
3. To the fermented batter add finely chopped onions, ginger, green chillies and curry leaves and stir nicely. Temper the batter with mustard seeds, cumin seeds and asafoetida.
4. Now put the Paniyaram pan on the flame and heat. Pour 1 tsp oil in each mould. Once the oil is heated, using a small round ladle, pour 1 scoop of batter into each mould. Now with a spoon drop little of the stuffing in the centre of the batter, now pour more batter to cover the stuffing. Drizzle some oil in the corners and cook for 1/2 a minute. Now loosen the edges of the paniyaram using a fork/ spoon or thin metal wire to flip them around, cook them and remove them from the pan when done. For doneness when you stick the metal wire or toothpick in the centre of the paniyaram, it should come out clean.
(I have included a short video so that you understand the process of cooking the Paniyaram in the pan.)
5. Repeat this process for the entire batter or how many ever you wish to serve, the remaining batter can be stored in the fridge and used to make uthappam.
The Paniyaram is ready to serve. It goes well with all chutneys or just by itself as it has a stuffing. It can be served with Sambar too.
How do make this recipe without a Paniyaram pan?
well, make a thicker batter, and also make small balls of the stuffing. Now take the stuffing and drop it in the batter, use your hands to coat the stuffing with batter and deep fry them in a Kadai of oil.
NOTES:
1. As the recipe involves soaking and fermentation, plan your time. In winters give more time for fermentation.
2. The onion, green chillies, ginger and curry leaves can also be sauteed in oil and added to the batter.
3. If using a nonstick paniyaram pan, I recommend drizzling it with some oil for a crunchy exterior.
4. Only small amounts of the stuffing as to put in the center of the batter, not too much of it.
If you tried this recipe and liked it please comment below. I would love to hear from you.
Nutella Fudge Brownies
Well, this is one of those recipes where the intent was to make the Brownies a certain way, ended up forgetting an ingredient and remembered it only after tossing the batter in the oven, and waited out the bake time to find out the result of my blunder, and guess what, forgetting the ingredient was well worth it as I stumbled on to something so so yummy????. I found it blog-worthy and hence the post.
There are many Brownie recipes and various proportions out there if you browse, but what one actually wants is an easy one, which is non-messy and not much washing up to do later. Agree? This is one of those recipes where I combine everything in a single bowl, stir or whisk with a hand whisk(no electric mixer mind you), pour it into the baking tray and pop it in the oven. Wait 27 to 30 minutes and there you get a platter of such gooey goodness.
All that fudge came from bits of chocolate I threw into the batter, before popping it into the oven. The chocolate bits melt and make it fudgy. I prefer a fudgy moist Brownie to a cakey one, and a warm Brownie is always welcome. This recipe takes about 12 minutes to prep and around 27 to 30 minutes in the oven and its done.
Another recommendation is to use dark eating chocolate and not baking ones.
I leave you all to guess what ingredient did I miss out?????
While you are here please check out my other dessert recipes like
Here is the recipe of Nutella Fudge Brownie for you–
PREP TIME: 15 Mins COOK TIME: 30 Mins
TOTAL TIME: 45Mins COURSE: DESSERT
CUISINE: WORLD FOOD SERVINGS: 5
AUTHOR: Rajni Ram
Ingredients:
Dark choco chips 50 gm
Nutella 150 gm
Unsalted butter 200 gm chopped
Refined flour/Maida 3/4 cup
Eggs 3
Brown sugar 1 cup loosely packed
Vanilla essence 1/2 tsp
Dark chocolate 50 gm chopped
Directions:
In a deep heat resistant dish put in the choco chips, the Nutella and the butter and microwave in short spurts of 30 seconds each removing the dish and stirring each time until the butter and chocolate melt completely and you have a smooth mixture. It takes around 3 rounds of 30 seconds for the chocolate and butter to melt. Preheat the oven to 160 degrees. Now while the mixture is still warm put in the sugar and stir. Now add in the eggs one by one and stir nicely until they are well combined. Next comes the flour, put it in, and combine nicely without any lumps. Add the vanilla essence, followed by the chopped dark chocolate. Stir very lightly, grease a baking tray/Brownie tin, and pour the batter into it. Give 2 taps lightly to the tray and put it in the oven. Bake at 180 degrees for 27 minutes. Stick a toothpick in the center of the brownie and check for doneness. If it comes out with a little smear of the chocolate, it is fudgy enough. If there is too much smear on the toothpick then bake for another 3 to 5 minutes and don’t go beyond that.
Let it cool completely, cut into bars or squares, and devour them. Yummy Nutella fudge Brownies are ready. Enjoy them warm. Bon Appetit.
STEPWISE RECIPE FOLLOWS:
1. Assemble all ingredients.
2. In a deep heat resistant dish put in the dark chocolate chips, Nutella and the butter. Place it in the microwave for 30 seconds, remove stir and place it again for 30 seconds and repeat the process once more. In all 3 times to get a smooth mixture. Every time you remove it from the microwave be sure to stir. Once this is done, start preheating the oven. Preheat to 160 degrees.
3. Now while the mixture is still warm add the sugar and stir nicely until it dissolves.
4. Add the eggs and combine well with a whisk or spatula. Now slowly add in the flour and combine well to form a smooth batter.
5. Now add the vanilla essence followed by the chopped chocolate(use any dark eating chocolate and not the baking one). Grease a baking tray or Brownie tin and pour the batter in. Tap it lightly twice and place it in the oven and bake at 180 degrees for 27 minutes.
when you stick n a toothpick it should come out with a slight smear. That’s the consistency we want. If there is a lot of smear bake for another 3 minutes or so.
NOTES:
1. Dark chocolate works best for this recipe. Buy good quality ones for best results.
2. In case you go beyond 27 minutes, don’t worry, it may a little less fudgy that’s all.
3. As soon as microwaving the chocolate and butter mixture is done, remember to preheat the oven.
4. If not using a microwave melting of butter and chocolate has to be done in a double boiler.
5. Adding the sugar when the butter-chocolate mixture is still warm is what gives the brownie its paper-thin crust and glaze. This is a crucial step.
if you tried this recipe and liked it please comment below. I would love to hear from you.
Moong Dal Kachori (Khasta Kachori)
Kachori is a savory snack with stuffing that has lip-smacking flavours. It is a very popular dish in North India. It can be served as it is with green chutney or can be made into a chaat and served topped with curd, green and sweet chutney and some crisps.
The Kachori has many variants of stuffing the outer cover remaining the same. Khasta Kachori, Aloo Kachori, Pyaaz Kachori, Matar Kachori, and Mawa Kachori are some of its variants.
I have made Khasta Kachori with Moong dal stuffing. It can be made with an Urad dal stuffing too and some use a combination of both Urad and Moong dals to make this kachori.
I have used only Moong dal as I like the texture of this stuffing and find this tastier. A perfect Kachori is one which is crisp and flaky on the outside and well puffed and hollow on the inside and with the stuffing stuck to the crust.
In some regions, the Kachori is served with an Aloo subji, like I did today. Kachoris keep well up to 4 to 5 days if kept in an airtight container. I have wanted to make these Kachoris for a long time now and as dal Kachoris are my favorite, decided to start with them.
Whenever we visit Jaipur there is a particular sweet shop we visit and no one makes Kachoris as good as them. Tried recreating the magic, as creating the perfect crust and flakiness is a truly technical job, and believe me, it improves with practice because then you start understanding how each element behaves.
While you are here please check out my other snack recipes like——
PREP TIME: 20 Mins(1 hr soaking) COOK TIME: 40 Mins
TOTAL TIME: 40Mins COURSE: SNACK
CUISINE: NORTH INDIAN SERVINGS: 6(12 Pcs)
AUTHOR: Rajni Ram
Ingredients for Dough:
Maida/ refined flour 1.5 cups
Butter/ghee 3 tbsp
Salt 1/4 tsp
Baking powder 1/2 tsp
Lemon juice 1 tsp
Coldwater(refrigerated) as required
Oil for frying
Ingredients for Stuffing:
Moong dal 1 cup soaked for 1 hr
Salt as per taste
Coriander powder/dhania powder 2 tsp
Red chilli powder 1.5 tsp
Fennel Powder/Saunf powder 1 tsp
Tamarind paste 1 tbsp
Jaggery 1/2 tsp
Asafoetida 1 tsp
Jeera powder 1/2 tsp
Mustard seeds 1 tsp
Cumin seeds 1 tsp
Ginger 1 inch finely chopped
Oil 1 tbsp
Coriander leaves finely chopped 1 tbsp
Oil for frying
Directions for dough:
Take the Maida/ refined flour in a dish and add the salt, pour the butter/ghee and mix well. When you take the flour and close it in your fist, it should hold shape without breaking. Now start adding the water little by little and combining to form the dough. Form a Roti kind of dough, not very stiff. Cover and let it rest for a minimum of 15 minutes.
Directions for stuffing:
Drain all water from the soaked moon dal and put it ina blender. Give it 2 small spins in the mixer so that it forms a coarse mixture. Take oil in a Karahi and put in the mustard seeds and the cumin seeds, as they crackle add the ginger and fry. Now add all the spice powder to the oil and fry for 30 seconds. keep stirring, they should not burn. Ensure there is sufficient oil for frying the masalas. Now add the coarse moong dal mixture to the oil and mix well. Add the tamarind paste and Jaggery. Keep mixing until the masalas have evenly mixed with the dal stuffing. Remove from flame and cool.
Directions for Kachori:
Pinch the dough into small balls. This quantity will yield around 12 balls. Now take one ball at a time, dust with some flour and roll it into a small Puri. Put in a little of the stuffing in the center of the ball, you can also make small balls of the stuffing and keep ready if that’s convenient. Now bring together the edges of the rolled puri and seal nicely. remove excess flour and seal well. After sealing the roll out the stuffed ball into a small puri and deep fry in oil that is heated to a medium-high. Fry until nicely browned and remove from oil. Kachoris should be fried in medium heated oil for best results, only then will they turn crisp and flaky. The Khasta Kachori is ready to serve.
Serving suggestions:
Serve with sweet and green chutney, or with Aloo Rassedar subzi, or as chaat with sweetened curd and combination of chutney and Sev. Kachoris can be relished just by themselves too and can be stored in an airtight container for 4 to 5 days. Enjoy. Bon Appetit.
STEPWISE RECIPE FOLLOWS:
1. Assemble all ingredients. Soak Moong dal for 1 hour.
2. For the dough–take the Maida, salt, baking powder and ghee in a dish and combine well. When you clump the mixture in your fist, it shouldn’t break. Now add cold water little by little and knead to form a dough. Leave to rest for 15 minutes.
3. For the stuffing — drain all water from the Moong dal and put it in a blender along with some salt and grind coarse such that some dals are whole.
4. Take oil in a pan and add the mustard and cumin seeds, add the chopped ginger followed by all dry masalas. Fry the masalas in oil for 30 seconds. Now add the ground Dal and mix nicely such that the masala coats the dal mixture, now add the tamarind pulp, jaggery and cook for 2 minutes. Any moisture in the mixture should evaporate. leave the mixture to cool.
5. To form the Kachoris knead the dough again and pinch small portions and make small balls of them. Take one ball at a time and dust with some flour and roll it into a small puri. Put the filling in the center and bring the edges together and seal well. Roll out the puris a little thick with put much pressure or the covering may break in oil spreading the stuffing in the oil. Repeat for all balls likewise and keep aside.
6. Now heat oil for frying the kachoris. The oil should be medium hot. Take one flattened puri at a time and drop it in the oil gently. fry in low- medium heat until the Kachoris puff up, turn crisp and brown. Remove from oil and drain on absorbent paper. The hot Kachoris are ready to serve.
NOTE:
1. Use cold water to knead the dough, it results in a nice flaky crust.
2. The ghee for the dough can also be heated and poured into the flour before kneading as it gives a crunchy crust. Be sure to allow the oil to become warm before you knead or you might burn your hand.
3. The temperature of the oil is very important as very hot oil will result in soft crust. Low to medium oil gives a crunchy crust. To test the oil, drop a small bead sized ball of flour in the oil. It should sizzle but not rise on top immediately. This is the right temperature for the oil.
4. If you wish you can shape the stuffing into small balls too for filling, so that it is not messy or if you are comfortable;le using a spoon to fill that is fine too.
If you tried this recipe and liked it please comment below. I would love to hear from you.
Rasam Powder
Rasam South India’s most popular food often served with rice, had as a soup or beverage, or also served as a welcome drink in some restaurants, is one most the simple preparations. Comes to the rescue when one has a Cold as the pepper in the Rasam powder gives relief from the symptoms.
Talking about rasam powder, it is, in fact, the one that gives the Rasam its flavour. In South India, every household has its own recipe of the Rasam powder which is passed on sometimes from generation to generation. Just 5 everyday ingredients make this powder so rich in flavour and it is the proportion of these ingredients that matters the most.
I am sharing with you my version of the Rasam powder and can assure you that it makes a really good pot of Rasam. While you are here please check out my recipes of Pineapple Rasam and Vetrilai/Betel Leaf Rasam. I will shortly add different variations of the Rasam too for which this powder is the same.
Here is the recipe of Rasam Powder–
PREP TIME: 5Mins COOK TIME: 25Mins
TOTAL TIME: 30 Mins COURSE: MAIN
CUISINE: SOUTH INDIAN QUANTITY: 250 GM APPROX
AUTHOR: Rajni Ram
Ingredients:
Dhania seeds/Coriander seeds 1 cup ( approx 150-200gm)
Jeera/Cumin seeds 1 tbsp
Peppercorns 1 -1.5 tbsp
Tuvar dal 1 tbsp
Dry Red chillies 10
Asafoetida 2 tsp
Curry leaves 3 sprigs( leaves separated)
Directions:
Dry roast the Dhania, Tuvar dal and Jeera separately in a karahi until light brown.
Dry roast the peppercorns until a few start popping. Dry roast the dry red chillies until they become crisp, take care not to burn them. Cool all roasted ingredients and transfer to a blender. Add the asafoetida to this and grind them to a fine powder. The curry leaves must be washed and dried and should have no moisture. After roasting all other ingredients put off the flame and put washed and dried curry leaves into the Kadai and roast it for a few minutes. Add this to the ground powder. Cool the powder and bottle it in an airtight container. This quantity yields about 200 to 250 gms of powder.
NOTES:
I am not giving step by step photos for this recipe as the steps are quite easy to follow.
1. Wash and dry the curry leaves quiet in advance as they should not retain any moisture.
2. Dry roasting to be done on low flame only and keep stirring constantly so that there is even roasting.
Vetrilai Rasam/Betle Leaf Rasam
Rasam is a popular South Indian dish prepared with tamarind, tomatoes, and Rasam powder. There are many variations of this dish, and each South Indian household has its own recipe for the proportions of the ingredients of the rasam powder. Therefore though Rasam is almost a regular feature in all South Indian households its taste is unique to each. No two Rasam recipes taste the same. Rasam is also a sought after comfort food in South Indian households when one has a Cold(Common Cold) or is a little under the weather because it is made of simple ingredients that are easily digestible and pepper that helps in combating the cold.
Earlier the Rasam was an everyday feature in most South Indian households along with Sambar or Vatha Kozhambu or Moru Kozhambu and a part of the Main course. Some households follow it to this day, but as the eating patterns of people has changed and is now more global the humble Rasam has taken a back seat or is made on a festival day where there is a feast(Elai Sapadu) or sometimes is also being served as a soup in elite gatherings.
There are different types of Rasam Like the Pepper Rasam, Tomato Rasam, Lemon Rasam, Garlic Rasam, Neem Flower (Vepampoo) Rasam, Drumstick Rasam, Pineapple Rasam and the Vetrilai(Betel leaf) Rasam. I have already posted the recipe of pineapple Rasam and slowly over a period of time plan to cover all the Rasam varieties mentioned here.
The Vetrilai also called Vethalai Rasam is has Betel leaves, Tomatoes, and the Rasam Powder as the main ingredients. This Rasam is a very mildly flavoured rasam. For more intense flavour add more Betel leaves.I am posting the recipe of the Rasam powder as the powder used makes a great impact on the flavour of the Rasam. This is also the reason why I said that the Rasam of no two households tastes the same as each has its own proportion. That said Rasam in any form is Comfort food????.
While you are here please check out the recipe of Pineapple Rasam.
Here is the recipe of Vetrilai Rasam for you–
PREP TIME: 10 Mins COOK TIME: 20 Mins
TOTAL TIME: 30 Mins COURSE: MAIN / APPETISER
CUISINE: SOUTH INDIAN SERVINGS: 4
AUTHOR: Rajni Ram
Ingredients:
Betel leaves/Vetrilai 10-12 leaves(refer note 1)
Tomatoes 5 (note 3)
Tuvar dal/ Yellow lentils 1/4 cup cooked in a pressure cooker
Rasam powder 3 tsp
Green chilli 1
Lemon 1
Coriander leaves finely chopped
Garlic(optional) (refer note 2)
Asafoetida 1 tsp (split 1/2 while boiling and 1/2 for tempering)
Turmeric powder 1 tsp
Salt as per taste
Roasted Pepper & Cumin powder 1 tsp( dry roast in the ratio 2:1 and grind coarse)
Directions:
Put the dal in a vessel and cook it in the pressure cooker. I used pot in pot method, you can use whichever is convenient. The dal should have cooked well. Remove the stalks from Betel leaves, reserve one leaf for garnish and put the remaining in a blender, put 2 chopped tomatoes and the green chilli into the blender too, and grind them to a smooth puree. Chop the remaining 3 tomatoes into big cubes and put them in a 1-litre vessel. Add the Betel leaf-tomato puree also to this vessel and pour 3 cups water(1 cup =150 ml). Put the vessel on a medium flame and add the Rasam Powder, followed by turmeric powder, asafoetida and salt. Boil the mixture until the raw smell of the Betel leaves and tomatoes is gone(around 7 minutes from boiling on medium flame). Now separate the water from the cooked dal and reserve. Mash the dal nicely with the back of a ladle. Pour the dal into the boiling mixture followed by the reserved water and add 2 to 3 cups of more plain water. Now continue to boil the mixture on a low flame until the Rasam froths up and boils and starts rising in the vessel( around 10 minutes on low flame). Don’t let it to overflow. When it rises up squeeze the juice of 1 lemon and put off the flame immediately. Now take 2 tsp ghee in a small tempering Kadai and heat. Add mustard seeds, as they crackle add the Asafoetida powder, roasted pepper-cumin powder and put off the stove. Now add the curry leaves to the ghee, and pour the tempering into the Rasam. Garnish with finely cut Betel leaves(only 1 leaf will do) and coriander leaves. The yummy Vetrilai Rasam is ready to slurp. Enjoy and Bon Appetit.
Serving suggestions: Just as a soup, with hot rice and ghee, with Oats porridge(try this it tastes yummy).
Sometimes I also pour it on my chapatis while hot.????
STEPWISE RECIPE FOLLOWS:
1. Assemble all ingredients. Cook the dal and keep ready. Remove the stalks from the Betel leaves, cut them to big bits, chop the tomatoes and keep aside.
2. In a blender put in the cut Betel leaves(reserve 1 for garnish), 2 chopped tomatoes, and green chilli and puree them smooth.
3. In a 1 litre vessel put the remaining 3 chopped tomatoes and the Betel-tomato puree and pour 3 cups of water. Put the vessel on the flame. Now add Rasam powder, Salt, turmeric powder, asafoetida and bring to a boil on medium flame. Keep boiling until the raw smell of the rasam powder and the Betel leaves goes away. This takes approximately 7 minutes on medium flame.
4. Now mash the dal nicely, if the dal has retained water, reserve it. Pour the dal into the boiling Rasam mixture, follow it up with the reserved dal water and add 2-3 more cups of plain water, and start boiling again on low flame.
5. Around about 10 minutes of boiling on a low flame the Rasam should start frothing up and rising in the vessel. When it starts coming towards the brim, add lemon juice and put off the stove immediately.
6. In a tempering Kadai heat 2 tsp of ghee. when it heats up put the mustard seeds into it, as they crackle add the asafoetida and the roasted cumin-pepper powder. Put off the flame and then add the curry leaves. Drop this tempering into the Rasam and serve hot with hot rice and ghee or follow any of the serving suggestions given above.
NOTES:
1. Betel leaves come in many varieties, but 2 of them are popular and in common use. One is light green and thin(the one I have used and you see in my pictures) another is a little deeper shade of green and the leaves are thick. So if using the light green ones use 10 to 12 leaves. If using the darker ones then reduce the quantity by half, use about 6-8 leaves as their flavour is more intense.
2. If using garlic grind it along with the Betel tomato puree. Around 2 pods should be enough or it will overpower the Betel taste.
3. I have used the sweeter hybrid variety of tomatoes(Bangalore ones) which I usually don’t, hence I used 5 of them. If using the country variety(Naatu thakkali) then 3 should be enough. Two to grind and two to put chopped.
4. If you serve Rasam with something unusual do let us, know..we love learning and trying new combinations.
If you tried this recipe and liked it please comment below. I would love to hear from you.
Schezwan Fried Rice (Soya Chunks)
Schezwan fried rice is an Indo Chinese recipe and is similar to Chinese Fried Rice. Schezwan Sauce imparts a lovely flavour to this dish.
Well, I had this dish a couple of years ago at a Chinese Restaurant near our house, where they served amazing Indo Chinese food. It was our monthly haunt and their flavours were so rustic. I loved their Phad Thai Noodles and can still remember the flavour when I think of it. But for some reason, this jaunt shutdown and we( my daughter and I) were so disappointed. This is what prompted me to learn this recipe.
Well for years I made it using store-bought Schezwan sauce and one day I thought why not give the Sauce a try. Well, it turned out so amazing and it’s the simplest thing to make. Once you taste this you’ll never go back to the store ones again.
What’s more, this Schezwan Sauce(for recipe click here) can be used for stir fry vegetables too. I have used Chinese five-spice powder, which I made at home too. So this dish is an out and out “from the scratch” dish.
I have used regular rice and not Basmathi. I feel that Chinese flavours and Basmathi do not go well. Instead of regular rice Jasmine rice can be used too. In this recipe I have used Soya chunks majorly and little vegetables. Soya bean is high in fibre and protein. In all, it makes this dish a”meal in a bowl” sort where you don’t need to make anything else to go with. If the Schezwan Sauce is ready this dish can get done in 15 minutes excluding the rice cooking time.
On a lazy day, this is a good option as once the rice is cooked(which you can put in a cooker for 3 whistles if using pot in pot method or separately too), just stir fry the veggies, is the sauce and add the rice and it’s done. The Schezwan sauce once made stays good for 10 to 12 days in a refrigerator, so can be made ahead.
This dish can also be given to kids in the lunch box, and please be sure to send more and all other kids at school are going to demand some????.
Here is the recipe of Schezwan Soya chunks fried rice:
PREP TIME: 15Mins COOK TIME: 15 Mins
TOTAL TIME: 30Mins COURSE: MAIN
CUISINE: FUSION SERVINGS: 5
AUTHOR: Rajni Ram
Ingredients:
Rice 1 cup
Soya chunks 100 gm or around 15 pcs
carrot 1/2 of 1 whole finely chopped
Spring onions 1/2 of 1 bunch(onions included) finely chopped
Beans 5 finely chopped
Capsicum 1/2 of 1 whole finely chopped.
Ginger Garlic paste 1 tsp ( or crush fresh ones)
Schezwan sauce 1.5 tbsp
Oil for Sauteeing. Sesame oil/refined oil
Directions:
Pre-cook the rice. The rice should be nicely done but grainy. So as I say in all my rice recipes, cook and spread out the rice, drizzle some oil over it.
Take water in a saucepan and bring it to a boil. Once the water starts boiling put off the flame and drop the Soya chunks in it and cover for 3 mins. The water should cover all the chunks. After 3 minutes drain the water and cool the soya chunks. Once they cool rinse them in cold water and squeeze out the water. Repeat this process 3 times to remove all processed impurities from the chunks, and set aside.
Now take oil in wok/karahi and heat. Increase the flame to high and drop in the spring onion and saute, after 30 seconds add the ginger garlic paste and fry for 30 seconds. Now add the capsicum and saute for a minute. Sauteing should be on high flame throughout. Now add the soya chunks into the Kadai after squeezing out any remaining water and saute well for 2 minutes. Add salt and put in the chopped carrots and beans and saute for a minute. Now put 1.5 tablespoons of the prepared Schezwan sauce into sauteed vegetable and mix well. Stir fry for 30 seconds. If you find the mixture to be very dry, add 1 tbsp of water and stir. Now add the pre-cooked rice little by little and mix well. Taste and adjust salt and spice. If sensitive to spice use only 1 tbsp of the sauce. Yummy Schezwan fried rice is ready. If using store-bought Sauce add 2 tablespoons. Enjoy the flavours…Bon Appetit.
Serving Suggestions: I served it with stir-fried vegetables in Schezwan sauce. You could do the same or serve it Vegetable Manchurian(gravy), Gobi Manchurian(gravy) or it is so good to have by itself too. It is convenient to pack ina lunch box too.
STEPWISE RECIPE FOLLOWS:
1. Assemble all ingredients. Pre-cook the rice and cool. Make the Schezwan sauce(if making at home).
2. Take the Soya chunks in a vessel and pour hot water over them and keep covered for 3 minutes. After 3 minutes drain the water and pour cold water over the chunks and let stand until completely cooled. Once cooled squeeze out all water and pour fresh water again and nicely squeeze the water again. Repeat this process 2 to 3 times.
3. Take oil in a wok/Karahi( I used Sesame oil as it gives a good flavouring) and heat. Add the Spring Onions and saute on high flame for 30 seconds. Add the ginger-garlic paste and saute for another 30 seconds. Now add the Capsicum and saute for 1 minute. The flame should be on high throughout. Add the Soya chunks followed by salt and saute for a minute.
4. Add the chopped Carrot and Beans and saute for 2 minutes. Now add the Schezwan sauce and stir well. If the mixture is too dry add a tablespoon of water. Now put in the rice little by little and mix it well with the Sauce, such that the sauce evenly coats all the rice. Check for salt and spice and adjust. The delicious Soya Chunk Fried Rice is ready.
NOTES:
1. While stir-frying vegetables the flame should always be high and one has to keep stirring constantly to enable even cooking. If cooked on a low flame the vegetable will release water and turn limp.
2. If using the store-bought Sauce use 2 tbsp. If sensitive to spice use only 1 tbsp of the homemade Schezwan Sauce as the flavour is intense.
3. Follow the procedure for cooking and cleaning the Soya chunks as they irritate the stomach if not properly rinsed.
4. If using Schezwan Masala powder sprinkle it after sauteing all vegetables.
5. For the Schezwan sauce recipe click here.
Tried this recipe? Comment below, send a picture or send your version of it. I would love to hear from you.
Schezwan Sauce (Homemade)
Schezwan Sauce the high on flavour sauce which gives many dishes like Schezwan Rice, Schezwan Noodles, Schezwan Stir-fried vegetables etc; their distinct flavour. I was happy making Schezwa rice with the store-bought sauce until I chanced upon this recipe while surfing browsing the internet. It seemed so easy and I wondered at its simplicity and high flavour. I learnt to make it so that I could make the Schezwan rice and other such recipes mentioned above with it. The outcome was so so good that I’m not buying store-bought sauce again. It is so simple and most of them are simple home ingredients. Chinese Five spice was mentioned and I wondered what it would be. I checked out that too and so I made the 5 spice powder at home too. It is made with everyday masalas we use at home. So here first I will take you through the process of the Chinese Five-spice powder followed by the Schezwan sauce.
While you are here please check out my other spice powders like Sambar Powder.
I am posting the step by step process directly without the initial directions that I usually give. I have adapted the recipe from “feasting at home”https://www.feastingathome.com/szechuan-sauce/ as per the Indian Palate and substituted with locally available items.
PREP TIME: 5 MINS (30Mins SOAK) COOK TIME: 5 Mins
TOTAL TIME: 40 Mins COURSE: SAUCE
CUISINE: WORLD FOOD QUANTITY: 100 GM APPROX
AUTHOR: Rajni Ram
STEP1 Chinese Five Spice Powder- Assemble 6 Star Anise pods, 1 stick Cinnamon(3-inch piece), 2 tbsp Fennel seeds, 1.5 tsp cloves(whole), 3 tsp regular Peppercorns. Put them in a mixed at and grind to a fine powder. Store in an airtight jar. (can be used in all Indian Subjis, so make more????).
STEP2: SCHEZWAN SAUCE INGREDIENTS:
Black pepper powder 1/2 tsp
Soy sauce 1/4 cup
Honey 3 tbsp (or) substitute with brown sugar
Sesame oil 1 tbsp
White Vinegar 1 tbsp
Garlic cloves 8 to 10 Indian (or) 3 Chinese pods
Ginger paste 2 tsp
Chilli Paste 1 tbsp
Chinese 5 spice 1/2 tsp
Directions for chilli paste:
Soak Indian Red chillies in warm water for 30 minutes and grind to a paste without adding water at first and adding up to 2 tsp water later.
Directions for the Sauce:
In a bowl add all ingredients and nicely mix for a minute using a whisk until all ingredients are well combined. The sauce is ready. Bottle it up and store in the refrigerator. Use when required.
NOTE:
This quantity makes about 1 cup of Schezwan Sauce.
Do not forget to Store in the refrigerator.
If you tried this recipe and liked it please comment below, would love to hear from you. Also, like and share the link.
Missi Roti
Missi Roti is a simple Indian flatbread made from Besan(gram flour) and Atta(wheat flour), Spices and onions give this an amazing flavour. It is a popular dish in North India. Served with a dollop of butter and some pickle, it is a meal by itself. It can be served with curry varieties like Mixed Vegetable Curry, Drumstick Curry,Matar Paneer, Palak Paneer Koftas, and Lauki Kaddu Ke Kofthey.
I had this Roti for the first time about 18 years ago in a remote township in Andhra, where the cook at the official guest house was from Bihar and had prepared this for a get-together. I liked this Roti so much that I asked him to teach it to me(as there was no internet those days and we learnt cooking from cookery books or a cookery show on television). The cook(Maharaj as they are called)obliged and I learnt this lovely flatbread recipe. I made it a couple of times after that and until recently it was forgotten I my recipe book(in which I enter recipes after they have been tried and tested a couple of times). I chanced upon it while searching for another recipe in my book and the memories came flooding. So here is the recipe as it is really blog-worthy.
I have seen many versions of this recipe, but I am sticking to the way I was taught.
Serving Suggestion: Missi Roti with pickle and butter, Missi Roti with Paneer Butter Masala, Missi Roti with Kadai vegetable or Missi Roti with Dal Makhni/Choley etc;
My favourite combination is with pickle and butter.
Here’s the recipe of Missi Roti…
PREP TIME: 20 Mins COOK TIME: 20 Mins
TOTAL TIME: 40Mins COURSE: BREADS
CUISINE: INDIAN SERVINGS: 4(8 Pcs)
AUTHOR: Rajni Ram
Ingredients:
Besan/gram flour 1.5 cups
Atta/wheat flour 3/4 cup
Onion 1 finely chopped
Coriander leaves 1 tbsp finely chopped
Green chillies 3 finely chopped
Ginger 1/2 inch finely chopped
Salt as per taste
Oil 1 tsp for dough
Red chilli powder 1.5 tsp
Amchur powder/dry mango powder 1 tsp
Black pepper powder 1/2 tsp
Ajwain 1 tsp
Turmeric powder 1/2 tsp
Oil for roasting the Rotis
Directions:
In a dish take the Besan and Atta and add all ingredients one by one into it. Mix nicely until the onion’s moisture is absorbed by the flour. Now pour water little by little and combine to form a pliable dough, not very stiff. Keep covered for 15 minutes. Now pinch small portions of the dough to form roundels. You will get about 8 from this quantity. Now roll them out into Rotis gently. Since I have used more of Besan, it cannot be spread much unlike Roti. This bread is usually rolled small only.
Now heat a Tava/girdle and smear some oil on it. Put the roti on the tava and cook, drizzle some oil and flip over and cook the other side too. small brownish dots should appear on the Roti. Remove from heat and repeat the same for all roundels.
The aromatic Missi Roti is ready…some pickle and butter and it is ready to tuck in…Enjoy. Bon Appetit.
STEPWISE RECIPE FOLLOWS:
1. Assemble all ingredients.
2. Take the Atta and Besan in a dish.
3. Add all ingredients one by one and mix nicely with hand so that the moisture of the onion is absorbed by the flour.
4. Now pour water little by little and combine to form a pliable dough. It should not be too stiff. Cover and let it rest for 15 minutes.
5. Now pinch the dough into 8 portions to form roundels. Dust each with flour and roll them out into Rotis.
6. Put on hot Tava/girdle and cook one side, drizzle oil, flip and cook on the other side. Keep flipping until light brown spots are formed on the Rotis. Repeat for all roundels. Missi Roti is ready…Enjoy with any curry of your choice or pickle and butter.
NOTES:
1. I have stuck to the proportion of more Besan that Atta because in Missi Roti the Besan Taste should dominate. More atta is used to make it pliable but the flavour gets compensated.
2. Usually, people are little reluctant to use Besan because of its gassy nature. That is why we have used Ajwain(carrom seeds) here. Little asafoetida can be added to the water that we are going to mix the dough with. This also aids in better digestion.
3. These Rotis can be made ahead and keep and they just need to be warmed before serving. The besan keeps the rotis soft.
If you tried this recipe and liked it please comment below. I would love to hear from you.
Chakkara Pongal/Sweet Pongal
The month of Aadi(as per Tamil calender) or Aashad is a very auspicious one in South India as it marks the beginning of festivals which begin with Ganesh Chaturthi and Janmashtami and goes up to Pongal in January which is the month of Thai(Tamil) or Paush. The Chakkara Pongal is considered to be the prime offering to the Mother Goddess. This sweet Pongal is also the offering to the Sun God on the Makara Shankranti day/Pongal festival.
This being the Aadi month I made Chakkara Pongal too and it came out well as always. But there is a lot to tell about the proportions and how I arrived at the current one after a lot of hit and trial methods. Is it that tough you may ask? Certainly not. In fact, it is the most simple one provided the right proportions of Rice, Dal, and jaggery is used.
Chakkara Pongal was my favourite sweet dish as a child(the only one I liked as I was not fond of sweets, now I like most of them) and I would get my mom to make it frequently. As I grew older I learnt to make it from my mother and eventually my mother in law. I believed our’s was the best Chakkara Pongal as compared to most South Indian households(as it is very common to make it here often) until I had it as prasad(offering) in a temple around 10 years ago and that Chakkara Pongal wowed me. I so fell in love with that taste and it was unlike any other Sweet Pongal I had tasted before. From then on started my quest for the right proportions to make this recipe. I asked a lot many people of the proportions they used, I browsed many websites to check out the best recipe, and also tried all these whenever I made the Sweet Pongal but “that” one recipe always eluded me. It is not even that this recipe has many ingredients, whatever it is we have to play around the proportions of Rice, dal(moong dal/ Chana dal) and Jaggery. So I tried many permutations and combinations until I arrived at the current one. I have used the one-pot method, but the same recipe works well for pot in pot method too. Hope you all will find it easy to prepare and also delicious. Looking forward to your comments.
Dry roast the Moong dal until light brown on a low flame. In a vessel take the rice and add the roasted moong dal to it. Wash the rice and dal together and put them in the cooker. Pour 4 cups water and cook for 5 to 6 whistles. Once the pressure releases mash the rice and dal nicely with the back of a ladle or masher. Set aside. Take the jaggery in a vessel or pan and add 1/4 cup water. Switch on the flame to low and dissolve the jaggery until it froths up. switch off and cool for 5 minutes(the jaggery mixture can be prepared when the rice is cooking, it will save time later). Now strain the liquid jaggery directly into the mashed rice-dal mixture in the cooker. Switch on the flame, add 1/4 cup milk and 1/4 cup water. Stir the mixture nicely and cook on low fire for 5 minutes or until the Pongal comes together and the jaggery is not runny anymore. Switch off the flame. In a tempering Kadai take 1 tbsp ghee and heat. Add the Cashewnuts and fry, followed by raisins. Pour this mixture on the cooked Pongal and also add the cardamom powder, raw camphor and the nutmeg powder(optional). Pour the remaining ghee over the Pongal. The delicious Pongal is ready. Enjoy. Bon Appetit.
STEPWISE RECIPE FOLLOWS:
1. Assemble all ingredients.
2. Dry roast moong dal over a low flame until light brown.
3. Take the rice and roasted dal in a vessel and wash nicely and put them in the cooker.
Add caption
4. Add 4 cups water and cook for 5 to 6 whistles. While the rice is cooking take the jaggery in another pan/vessel and add 1/4 cup water and put it on the flame. On low flame dissolve the jaggery and allow to boil until it froths around 2 minutes from dissolving. Switch off the flame.
5. Once the pressure in the cooker releases, strain the liquid jaggery over the rice – dal mixture in the cooker. Pour 1/4 cup milk and 1/4 cup water(warm) and stir nicely such that the jaggery is well mixed with the contents in the cooker, add 1 tbsp sugar. Let it cook for 5 minutes on low flame. The Pongal will come together as a nice gooey mixture. Switch off the flame.
6. In a tempering Kadai or pan add 1 tbsp of ghee and heat. Add in the halved cashew nuts and fry, followed by raisins until they fluff up. Add the cardamom powder, and a pinch of raw camphor(a mini pinch of nutmeg powder too if using). Drop the ghee with nuts and raisins into the Pongal. Top up with remaining ghee. The delicious Chakkara Pongal is ready to serve.
NOTES:
1. I have used 1 cup jaggery, but depending on the sweetness of the jaggery the amount may vary by 1/4 cup.
2. Adding a spoon of sugar to any jaggery based sweet dish they say helps in the jaggery getting integrated into the dish and raises the taste they say. So I have always followed this.
3. Edible Camphor and Nutmeg powder should be used sparingly and only the mentioned amounts. Using more makes the dish bitter.
4. A trick I learnt from my mother in law is to always pour the ghee in the end on top of the sweet dish while it is hot and to not stir it in completely. So when you scoop out the sweet dish the ghee on top will automatically flow down, so you actually won’t have to flood the dish with a lot of ghee.
5. Adding the ghee while it is still hot helps in even spread of the ghee on the dish. Don’t mix the ghee after pouring on the Sweet dish, it makes it heavy and also the dish will keep absorbing how much ever you pour.
If you tried my method of the Chakkara Pongal and liked it please comment below. I would love to hear from you.
Sambar Powder
Sambar, South India’s most popular food often served with rice and also as an accompaniment for Dosa, Idli, Paniyaram, Pongal and many such recipes. What gives the Sambar its flavour and taste? But of course the Sambar Powder. Every South Indian household has its own proportions of the ingredients for the Sambar Powder. The main ingredients being the same, there may be some differences based on the region.
This recipe of Sambar powder can also be used to make Vatha Kozhambu a traditional South Indian preparation. You can check out the recipe of Vatha Kozhambu here.
Sambar powder is used to make Rasam too in some households, but I strongly recommend not to use Sambar powder for Rasam, as though most ingredients are same the addition of pepper gives the Rasam powder a different taste and flavour altogether. I will post the Rasam powder recipe soon.
This recipe yields about 250 gm of powder, which can be stored in an airtight container as used when required.
Here is the recipe for Sambar Powder which makes delicious and flavourful Sambar.
PREP TIME: 5Mins COOK TIME: 25Mins
TOTAL TIME: 30 Mins COURSE: MAIN
CUISINE: SOUTH INDIAN QUANTITY: 250 GM APPROX
AUTHOR: Rajni Ram
Ingredients:
Coriander seeds/ Dhania seeds 2 cups
Urad dal 3/4 cup
Chana dal 1/2 cup
Tuvar dal 1/4 cup
Fenugreek seeds/ Methi seeds 1 tbsp
Dry red chillies 150 GM
Turmeric powder 1 tbsp
Red chilli powder 1 cup
Directions:
Each ingredient except turmeric powder and red chilli powder should be fried in a karahi separately to golden brown colour. Dry roast, no need of oil. The red chillies should turn crisp. Cool all of them after frying and grind them to a fine powder. Now add the turmeric powder and red chilli powder to the ground powder and mix well. Store in an airtight container.
2 tbsp of this powder will make Sambar to serve 5 people. The powder will last 6 months or more when stored in a cool dry place.
During peak summer you can also keep all ingredients except turmeric and red chilli powder directly in the hot sun for 2 hours and grind when still crisp.
NOTE:
I am not giving step by step photos for this recipe as it is quite easy to follow. Each ingredient to be slow-roasted in a Kadai separately, or to be kept in the sun, each in a separate flat plate so that they are even heated.
If you tried making Sambar with this proportion of Sambar powder please comment below. I would love to hear from you.
Dahi Pohe/Moru Aval
This recipe of the humble Poha(beaten rice flakes)/Aval soaked in curd is one of my favourites. I make it whenever I have a lot of sour curd. Healthy and filling at the same time. It makes for a good breakfast or mid-evening snack(Tiffin) option. I make it for dinner too when lunch is heavy. There are many variations of the Pohe like Kanda Poha(onion Poha), Masala Poha(tomatoes and onions), Lemon Poha, Puli Aval(tamarind Poha), Vella Aval(Sweet Poha) and Dahi Pohe/Moru Aval. The Poha can be either thick or thin. For this recipe, I have used the thin one, but the same can be done with the thick one too, just that the soak time will vary. Thick Poha is used for recipes where the Poha is going to cook in a sauce so that it doesn’t become soggy. The Dahi Pohe makes for a good and healthy lunchbox recipe for kids. While you are here please have a look at other recipes by Rajjo’s Kitchen like Semolina Cheese Balls, Rava Dosa, Savoury Muffins and more…
Here is the recipe for Dahi Pohe/Moru Aval.
PREP TIME: 10Mins COOK TIME: 15 Mins
TOTAL TIME: 25Mins COURSE: BREAKFAST/TIFFIN
CUISINE: INDIAN SERVINGS: 4
AUTHOR: Rajni Ram
Ingredients:
Poha (thin) 250 gms
Sour curd 1 to 1.5 cups
Salt as per taste
Grated Coconut 2 tbsp
Peanuts 1 tbsp
Green chillies 2 finely chopped
Ginger 1 inch piece finely chopped
Dry red chillies 2 broken
Mustard seeds 1 tsp
Chana dal(gram dal) 2 tsp
Urad dal(black gram)2 tsp
Curry leaves a few
Asafoetida 1/2 tsp
Oil for tempering
Directions:
Pass the Poha through a sieve that has medium-sized perforations, such that the Poha remains in the sieve and the dust and small flakes fall away. Now wash the Poha just once(may become soggy if done more than once)and drain all the water. Put it into a flat bowl and add the sour curd and salt to it. Mix gently but evenly so that all the Poha are coated with the curd. Set aside for 10 to 15 minutes.
Now using your hands separate the soaked Poha gently and set aside. Take a Pan or Karahi and pour the oil. Once it heats up add the peanuts and fry them. Once they are golden in colour remove and set aside. Now to the oil add the mustard seeds, as they crackle add the chana dal, urad dal, dry red chillies, ginger, green chillies, curry leaves and asafoetida and fry them until golden in colour. Now add the Poha to the tempering and mix nicely. Check and adjust the salt. Keep stirring the Poha on a low to medium flame for 3 minutes. Now add the grated coconut and stir for another 2 minutes on low flame. Add in the fried peanuts and put off the flame. Enjoy the simple, healthy, tasty Dahi Pohe. Bon Appetit.
STEPWISE RECIPE FOLLOWS:
1. Assemble all ingredients.
2. Sieve, wash and soak the Poha in Curd. Add salt to poha before pouring the curd. Dilute the curd with little water(1/4 cup) if required. Rest the soaked Poha for 10 to 15 minutes. After the poha have soaked, separate them gently with your hands.
3. In a pan/karahi pour oil for tempering, around 2 tbsp and heat. Drop in the peanuts and fry until golden in colour. Now add the mustard seeds, as they crackle add the chana dal, urad dal, dry red chillies, ginger, green chillies and asafoetida and fry until golden in colour.
4.. Now add the Poha little by little and mix nicely so that the tempering is mixed evenly. Stir on a medium flame for 3minutes. Check salt and adjust if required. Add the grated coconut and stir for another 3 minutes over a medium to low flame.
5.. The Dahi Pohe are ready to pack in the lunch box or to serve.
NOTES:
1. If using thick Poha there is no need to sieve the Poha, just wash it around 3 times and then soak it in curd.
2. Fresh curd can also be used, but the recipe tastes best with slightly sour curd.
3. More grated coconut can be added if you like the flavour.
If you tried this recipe and liked it, please comment below. I would love to hear from you.
Carrot Kheer/Payasam
Kheer/Payasam is a popular part of Indian cuisine as a sweet dish. It is sometimes served at the beginning of a meal or as a finish off to the meal. Whenever there are festivities there is always kheer. There are many variations to the payasam, the popular ones being Rice Kheer, Semiya Payasam, Chana dal payasam, and many more.
Carrot Kheer is a dessert I have made time and again for friends and family on popular demand. I will also let you into my little secret that turns this recipe a stunner.
A simple dessert that tastes good both chilled and warm. This is a great recipe to make all the fussy about carrots and milk kids to get to eat both, as it a delicious way to have them. Any variety of carrot can be used for this kheer either Delhi Carrots or the English Carrots.
This kheer or payasam is not a very popular one as generally carrots are not on the favourite list of many, but that’s exactly why it should be popularised. Only when you have this kheer you will understand what I mean. It has a beautiful texture, can be had chilled right out of a glass-like juice or can be had warm on those cosy winter nights. It is also a great after school healthy drink. I can keep singing more praises of its goodness and delicious, but then one has to drink this kheer to experience it.
Chop the carrots to small cubes and put them in a heavy-bottomed vessel. Pour 1.5 cups of milk and cook. This should be done in a low to medium flame and the carrots should cook in the milk until the milk is almost evaporated and the milk sticks to the carrot pieces. Put off the flame and cool completely. Now put them in a blender and grind to a smooth paste. Add around 1/2 cup milk if required while grinding. Now pour the pureed Carrot into the same heavy bottomed vessel and switch on the flame. Dilute the puree with 1 cup milk and start boiling again. As it froths up and starts rising in the vessel add the sugar and reduce the flame. Continue to cook for 2 minutes. Now add another cup of milk and continue to boil on a low flame. Now when the mixture starts rising in the vessel switch off the flame and add the cardamom powder. Take a small tempering Kadai and add 2 teaspoons of ghee to it. when the ghee is warm add the broken Cashewnuts and fry to a light brown colour. The delicious Carrot Kheer is ready to serve. Enjoy the healthy goodness. Bon Appetit.
STEPWISE RECIPE FOLLOWS:
1. Assemble all ingredients. Chop Carrots, cut the Cashewnuts to pieces, make a powder of the Cardamom pods.
2. Put the chopped carrots in a thick bottomed vessel, pour 11/2 cups milk and cook.
3. The milk should evaporate completely while cooking the carrots and should stick to the carrots. The mixture should resemble like Rabdi sticking to carrots. Put off the flame at this stage and cool the mixture.
4. Now put the mixture in a blender and grind it to a smooth puree, add 1/2 cup milk if required while pureeing.
5. Pour the puree into the same heavy bottomed vessel and switch on the flame. Add 1 cup of milk and bring to a boil on a low flame. Ad the puree froths and rises up in the vessel put in the sugar and stir nicely to dissolve.
6. Cook for 2 minutes and pour another cup of milk and continue to cook over a low flame for another 5 minutes. When the mixture starts rising again in the vessel, put off the flame and sprinkle the Cardamom powder over the kheer and mix gently.
7. Fry the Cashewnuts to a golden colour and add them to the kheer. The delicious Carrot Kheer/payasam is ready.
NOTES:
1. Cooking the carrots in the milk until the milk is fully evaporated is critical to recreating this taste( that’s the secret). I find cooking carrots in milk only until the carrots are tender and then putting them in the blender as most recipes recommend, to leave a raw taste of the carrot in the dish. Which finally mars the flavour of the dish.
2. The milk and carrot have to cook over a low to medium flame. Don’t be tempted to raise the flame as the milk can get burnt and leave an after taste.
3. The beauty of this dish is that it needs no artificial colouring as its natural colour is bt itself very inviting.
4. Not much sugar is required for this recipe as carrots are naturally sweet.
5. Condensed milk can also be added instead of sugar, but in a lesser quantity, maybe 1/4 cup first and more if required. I have not tested this method of using condensed milk.
If you tried this recipe and liked it please comment below. I would love to hear from you.
Coriander Rice/Chutney Rice
My love for this herb is perennial. I love adding it to Subjis not just as a garnish but a few springs just as one of the ingredients. There are many condiments made of this humble herb like Chutneys, Dips, Raitas, Pickle, etc; Coriander rice is a simple and healthy rice variety and a great lunch box option for kids. It is healthy too as Coriander is rich in fiber and essential nutrients. It aids in digestion too. So why leave out such a beneficial herb from main course cooking and limit it to just being a condiment. Therefore I thought of adding this Coriander rice recipe to my blog post.
Try adding a few sprigs of it to any subji, not in the end but while cooking and see how the dish gets elevated in taste and flavour.
I’m calling this chutney rice as these are almost the same ingredients we use for green chutney, barring the chutney Chana. Well, tamarind/raw mango is added in green chutney though, I will try that version shortly and post. Here is the recipe for Coriander Rice…
PREP TIME: 10Mins COOK TIME: 30 Mins
TOTAL TIME: 40 Mins COURSE: MAIN
CUISINE: SOUTH INDIAN SERVINGS: 4
AUTHOR: Rajni Ram
Ingredients:
Coriander leaves 1 bunch finely chopped
Rice(regular) 1 cup precooked
Peanuts 1 tbsp
Cashewnuts a few
Green chillies 2
Cumin seeds 1 tsp
Fried gram dal(chutney chana)/Pottukadalai 1 tbsp
Turmeric powder 1 tsp
Mustard seeds1 tsp
Chana Dal(Bengal gram) 1 tsp
Urad dal(black gram) 1 tsp
Dry red chillies 1-2 broken
Oil for tempering 1 tbsp
Directions:
Cook 1 cup rice in a pressure cooker( I used pot in pot method, you can cook directly too) adding 3 cups water for 3-4 whistles. Once pressure releases spread out the rice on a plate to cool and also drizzle 2 tsp oil over the rice so that the grains do not stick together. Put the chopped coriander, cumin seeds, green chillies and the fried chana/ Pottukadalai and grind at first without water, then after a spin or two add little water and grind to a smooth paste. In a karahi or pan pour some oil and heat. Add the mustard seeds, chana dal, urad dal, dry red chilli and fry until golden brown. Now add the turmeric powder, followed by the ground Coriander puree and nicely fry the paste in oil on low heat. The paste will get a little dense. Add salt and fry for another 2 minutes. Now start mixing in the cooled rice little by little into the cooked paste, and mix nicely so that the rice is nicely coated with the paste. Put off flame and garnish with peanuts and cashewnuts. The flavourful Coriander Rice is ready to serve. Enjoy the lovely green of the rice. Bon Appetit.
Serving suggestions: Raita, Potato fry, or Cauliflower roast or Colaccasia(Arbi/Sepankezhangu) roast and papad.
STEPWISE RECIPE FOLLOWS:
1. Assemble all ingredients. Chop coriander leaves finely, Cook the rice for 3 to 4 whistles, cool on a plate and set aside.
2. Put the chopped coriander into the blender along with the green chillies, cumin seeds and fried chana/pottukadalai. Without adding water pulse them once or twice. Now add some water and grind to a smooth paste. Set aside.
3. In a karahi or pan pour some oil for tempering. Fry the peanuts to a golden colour and the cashew too and keep aside. In the same oil put in the mustard seeds. Let them crackle then add Chana dal, urad dal followed by dry red chillies. Fry until golden brown and add the turmeric powder.
4. Now pour the coriander paste into the oil and fry the paste nicely for 2 minutes. Add salt and continue to fry for another 2 minutes. The moisture should evaporate and the paste should become a little dense.
5. Add the cooked and cooled rice little by little to the paste. Mix well and switch off the flame. The flavourful Coriander rice is ready to serve.
NOTES:
1. While frying the paste in oil be careful not to evaporate it completely. The consistency should resemble sauce consistency.
2. Spread out the rice on a plate and drizzle oil or the rice will turn soft and lumpy once added to the paste.
If you tried this recipe and liked it then please comment below. I would love to hear from you.
Drumstick Curry
Moringa is the latest buzz word everywhere. What with Moringa leaves powder trending the healthy list. Well, the Moringa tree and dishes cooked from its fruit, flowers and leaves have been in India for ages. We have used its fruit, the drumstick in Subjis, Sambar, dal, etc; the leaves too are very aromatic and used as an add-in in Dosas, chilas, and more. The flowers too when added while making ghee, give the ghee a nice flavour and make it aromatic. My grandmother always added a few flowers just before putting off the flame while making ghee and would remove the flowers later, while bottling the ghee. My mother makes a pickle of it too, which is just as wonderful.
Here I bring to you a simple curry made from Drumsticks in curd and cashew-based gravy which absorbs all the flavours of the drumstick. A very quick recipe that gets done in 30 minutes. While you are here please have a look at my other Subjis like Mixed vegetable curry, Brinjal Pepper Masala, Kadai Paneer dry and many more
Here is the recipe of Drumstick curry–
PREP TIME: 15 Mins COOK TIME: 15 Mins
TOTAL TIME: 30 Mins COURSE: MAIN
CUISINE: NORTH INDIAN SERVINGS: 4
AUTHOR: Rajni Ram
Ingredients:
Drumsticks 5 long ones cut into pieces
Cashewnuts 15(soaked in warm water)
Poppy seeds 2 tsp(soaked in warm water)
Tomatoes 2 large or 3 medium
Curd 1 cup
Red chilli powder 1.5 tsp
Turmeric powder 1 tsp
cloves 3
Cinnamon 1 small stick
Garam masala powder 1/2 tsp
Directions:
Soak the Cashewnuts and poppy seeds in a little warm after for 10 minutes. Cut the drumsticks to 3 inch long pieces and set aside. Chop the tomatoes. After 10 minutes drain the water off the Cashewnuts and poppy seeds and put them in a blender, add the Cloves and Cinnamon stick and grind without water to a coarse paste. 2 spins in the blender will do. Add the chopped tomatoes to this and blend to a fine paste now. Keep aside. Heat 1 tbsp oil in a karahi, the oil should not be smoking hot. Lower the flame and add 1 tsp turmeric powder the chilli powder and stir immediately, or the masala powders will get burnt. To this add the ground paste and fry it in the oil for a minute nicely, until the rawness of the tomatoes goes away. Now add the curd and stir continuously for 30 seconds, add the salt and 1.5 cups water and put in all the drum stick pieces, cover and cook until the drumsticks are well cooked and the gravy becomes thicker. Test the drumsticks for doneness. If they are cooked, the flame can be turned oof and sprinkle little garam masala powder on top. The Drumstick curry is ready to serve. Enjoy the flavours. I’m sure you will cook this dish whenever you have Drumsticks at home. Bon Appetit.
STEPWISE RECIPE FOLLOWS:
1. Assemble all ingredients. Cut the drumsticks to pieces, soak the cashewnuts and poppy seeds for 10 minutes in warm water, chop the tomatoes.
2. After 10 minutes put the whole spices(cloves and cinnamon) in the blender, drain water from the cashewnuts and poppy seeds and put them in the blender at too and grind them coarse, without adding any water.
3. Now add the tomatoes to the blender and grind all together to a smooth paste.
4. Heat oil in a Karahi(medium hot) and add the turmeric powder, followed by red chilli powder. Oil in the karahi should be sufficient or the spice powders will burn.
Now add the ground paste immediately and fry the paste in oil for a minute, until the rawness of tomatoes is gone.
5. Now add the curd and start stirring continuously for 30 seconds. Now add the salt, and put in the cut drumsticks. Add 1.5 cups water and cover and cook for 10 minutes on medium heat. The drumsticks should have cooked well and the gravy should thicken up, at this stage add 1/2 tsp garam masala and put off the flame.
The drumstick curry is ready. Serve with Rotis, Parathas or even Rice.
NOTES:
1. If the curd is a little sour it adds taste to the curry.
2. Stirring constantly after pouring the curd is crucial or the curd will leave out the moisture and the gravy will be too thin.
3. Check the doneness of the drumsticks before switching off the flame.
4. In case the drumsticks are still raw but the gravy has thickened, add 1/2 cup water, cover and cook until done.
5. Pick tender and fleshy Drumsticks while buying, they will cook faster.
If you tried this recipe and liked it please comment below. I would love to hear from you.
Brinjal Pepper Masala (No Onion-No Garlic Recipe)
An everyday subji made from Brinjals and very simple gravy. Brinjals combined in a tomato and coconut gravy with some black peppers for spice. A very mildly flavoured dish, it has some Cashewnuts and Raisins too which enhance its taste. As I mentioned in one of my earlier posts Brinjals are very versatile vegetables and a large variety of recipes can be made with them from different cuisines. There are many types of Brinjal too and some recipes are specific to the Brinjal.
In this recipe, you can use any variety except the Bhara Baigan( the large fleshy one), as we want the Brinjal pieces to be firm and not mushy.
I learnt this subji from one of the guest house cooks where we stayed during our transfers from city to city. The gravy is of the South Indian style but believe me, it goes perfectly well with any of the rice varieties like Pulav or vegetable rice or even plain rice. It can also be served with Rotis. The Cashews and especially the raisins are like surprise packages in this dish which keep popping every 1 or 2 scoops. If you don’t like nuts or Raisins in your subjis(like I did until I tasted this) then you can always omit their use.
While you are here take a look at Gutti Vankaya Kura, which is also a Brinjal dish with Andhra flavours. Also check out, Methi Wale Baingan, Please look up other subjis too under the label Subjis while you are here.
PREP TIME: 20 Mins COOK TIME: 20 Mins
TOTAL TIME: 40 Mins COURSE: MAIN
CUISINE: SOUTH INDIAN SERVINGS: 4
AUTHOR: Rajni Ram
Here is the recipe of Brinjal Pepper Masala-
Ingredients:
Brinjal (any variety except Bharta Baigan) 250 gm diced medium
Tomatoes 3 large finely chopped
Curry leaves a few
Oil for sauteeing
Turmeric powder
Red chilli powder
Ingredients for paste:
Pepper 1 tsp(add more for more spice)
Cumin 1 tsp
Dry red chillies 3
Grated coconut 2-3 tbsp
Directions for making paste:
Heat a karahi with 1 tsp oil and put in all ingredients mentioned under paste, in the same order and roast them until light brown. Cool it and grind it in a blender to a smooth paste.
Directions:
Dice the brinjals to medium size and put them in some water. Chop tomatoes very fine and set aside. In a Karahi pour some oil-around a tablespoon, let it heat up and put in the Cashewnuts, fry them until they are golden brown, remove them and put in the Raisins. Fry them too until they puff up and remove from oil. Now add the diced Brinjals to the same karahi and add 1/2 tsp turmeric powder, 1/2 tsp salt, stir well and cover it and cook for 3 minutes. Stir again and cover for another 2 minutes. The brinjal should have turned a little tender but still retain shape. Transfer the brinjals to another vessel and set aside. Now in the same karahi take 2 tsp oil and heat. Add the mustard seeds, let them crackle. Add the cumin seeds followed by turmeric powder and curry leaves. Give it a stir and add the chopped tomatoes. Now add some salt followed by red chilli powder and fry nicely in the oil. Let the tomatoes break, keep mashing them with the back of the spatula. When it turns pulpy, add the ground paste, sauteed Brinjals followed by 1 cup of water, cover and cook for 7 minutes. When you open the lid, the brinjals should have cooked fully, but retain shape and the curry should have come together. Now switch off the flame and add in the fried nuts and Raisins. Brinjal Pepper masala is ready to serve. I served it with some Pulav, any rice or Indian bread varieties will go well with it. Enjoy. Bon Appetit.
STEPWISE RECIPE FOLLOWS:
1. Assemble all ingredients. Dice the Brinjals, chop the tomatoes, grate the coconut and keep ready.
2. In a karahi take around 1 tbsp oil, add the nuts and the raisins one after the other and fry. The cashew nuts should turn golden brown and the raisins should fluff up. Remove them into a separate plate.
3. Now to the same karahi add the diced Brinjals followed by salt 1/2 tsp and turmeric powder 1/2 tsp. Stir them and cover the karahi for 3 minutes. Open the lid, stir again and cover and cook for 2 minutes. Open and check the brinjals, they should have turned a little tender but should have retained the shape. Remove them to another vessel. If still undone, then cover and cook for another 2 minutes.
4. Now pour a little oil into the karahi, about 1 tsp and heat. Roast all the masalas , mentioned under paste in the same order. Pepper being first, followed by cumin seeds, dry red chillies and finally add the coconut and fry until they get a nice brown colour. Cool, transfer to a blender and grind to a fine paste.
5. In the same karahi pour 2 tsp oil and heat. Add the mustard seeds followed by cumin seeds, turmeric powder and curry leaves. Fry and put in the tomatoes followed by salt and red chilli powder. Stir and cook the tomatoes. Keep mashing them with the back of the spatula so that they turn mushy.
6. Now add the ground paste, followed by 1 cup water and put in the sauteed brinjals and cover the karahi and cook the brinjals in the paste for 7 minutes approximately, stirring once in between.
7. The Brinjals should be completely cooked by now, but not limp. the gravy too should have come together and should not be runny. Switch off the flame and drop in the fried nuts and raisins. Brinjal pepper masala is now ready. Serve hot with plain rice, Pulavs or with hot Chapatis.
NOTES:
1. Any variety of brinjal can be used except for the big fleshy one(Bharta Baingan).
2. Coriander seeds have been excluded from the paste, to get the same taste as mentioned in the recipe do not add them as they change the flavour of the dish completely.
3. More pepper can be added depending upon your spice levels. Be sure to reduce the red chillies or red chilli powder if increasing the pepper quantity.
4. The Cashewnuts and enhance the taste of the dish but if you don’t like the nuts coming in the way, they can be excluded altogether.
5. Kashmiri red chilli powder can be used instead of the regular one for colour.
If you tried this recipe and liked it please comment below. I would love to hear from you.
Pruppu Urundai Kozhambu (Dal Dumplings In Tamarind Sauce)
I love cooking this dish though it involves some amount of preparation and detail. Paruppu Urundai Kozhambu is a delicious traditional South Indian recipe. I learnt this from my mother in law and she was an expert at it. In this preparation, dumplings of Dal/ lentils are cooked in a tangy tamarind sauce. This dish is served with rice but goes well as a side dish for Dosas, Idli, Pongal etc. As in all recipes, there are different methods of making the dumplings. Some steam the dumplings before adding it to the sauce, while some cook it directly in the tamarind sauce. I prefer and follow the second method. The dumplings are able to absorb the flavours this way. I also love using fresh coriander in the dumplings as it realove cooking this dish though it involves some amount of preparation and detail. Paruppu Urundai Kozhambu is a delicious traditionaand add them to the sauce, whereas other recipes suggest cooking it lly elevates the dish to a different level. So when there are no coriander leaves at home I don’t make the dish. Whether coriander is added or not, this dish is just amazingly tasty. So don’t wait for the coriander, just cook on. While you are here check out the recipe of Vatha Kozhambu A similar recipe with Shallots cooked in a tangy tamarind sauce.
Here is the recipe of Paruppu Urundai Kozhambu.
PREP TIME: 20 Mins+ soak time COOK TIME: 30 Mins
TOTAL TIME: 60 Mins COURSE: MAIN
CUISINE: SOUTH INDIAN SERVINGS: 5
AUTHOR: Rajni Ram
Ingredients:
Tuvar dal/ Pigeon peas 2 cups soaked for 1 hour
Tamarind 2 lemon sized balls( pulp extracted)
Grated Coconut 3 tbsp
Sambar powder 2 tbsp
Dry red chillies 5
Mustard seeds 2 tsp
Asafoetida 2 tsp
Methi seeds/ fenugreek seeds
Curry leaves few
Coriander leaves(optional)
Salt as required
Directions to make Urundai( dumplings)
Drain out the water from the soaked dal and put it in the blender. Add 1 tsp asafoetida, dry red chillies 3, salt ( as per preference) and grind to a coarse mixture. Now in a karahi or pan add 1 tbsp oil to temper and sauté the mixture. As the oil heats up add 1 tsp mustard seeds, as they crackle add a few Methi seeds, broken dry red chillies, asafoetida1 tsp, curry leaves and fry them. Once they are golden brown add the coarsely ground dal mixture and salt and sauté nicely over a medium flame for 5 minutes. Add the grated coconut and keep stirring constantly as the mixture may stick to the pan/karahi bottom. This step is just to take away the moisture, the dal need not be crumbled, just stirred. After sautéing transfer the sautéed dal to another vessel and cool. Once cooled shape them into dumplings. I could make around 13 dumplings from this mixture. The dumplings should be a little bigger than a Lemon. Set the dumplings aside.
Directions for the Kozhambu( gravy/ sauce)
Extract the pulp from the tamarind and dilute it. You should have about 700 ml of tamarind juice if it’s too sour dilute with another 100 ml. Pour this diluted extract into a deep thick bottomed dish and switch on the flame. Add salt, turmeric powder, Sambar powder, asafoetida and boil. As it starts boiling and the raw smell of the masalas is gone( around 7 minutes into the process on medium flame), add one Urundai( dumpling) and test. If it doesn’t break while cooking on medium heat in the next 1 minutes, reserve 1 dumpling and all the other dumplings can be put into the tamarind water one by one after reducing the heat to low. If the first Urundai disintegrates in the water, put off the flame, undo all the dumplings and add 1 tablespoon rice flour and shape them to dumplings again and continue the process mentioned above. Cook the Urundais(dumplings) in low to medium flame while stirring gently every now and then until they start rising to the top. Once cooked the dumplings will float above. Now add about 1 cup water to the reserved dumpling and break it up. Pour this paste into the kozhambu( gravy) after the dumplings have risen and cook for 2 minutes or until the gravy has thickened to a Sambar like consistency. Switch off the flame and temper the Kozhambu with a little oil in a Kadai and put mustard seeds, followed by Asafoetida and curry leaves. The delicious Paruppu Urundai Kozhambu is ready.
Serving Suggestions: with hot rice and ghee, Dosas, Idlis, Ven Pongal, Kuthiravali Pongal( millet Pongal) etc.
STEPWISE RECIPE FOLLOWS:
1. Assemble all ingredients. Soak the Tuvar dal for 1 hour, soak the tamarind in warm water and extract the pulp, dilute pulp, grate the coconut, and keep ready.
2. Drain water from the soaked dal and put it into the blender, followed by red chillies, turmeric powder, salt and asafoetida. Grind them to a coarse paste, without adding water.
3. Now in a karahi pour oil for tempering and heat. Put in mustard seeds. As they crackle add the methi seeds, turmeric powder, broken dry red chillies, asafoetida 1 tsp and curry leaves and fry. Now add in the dal mixture to this and start sauteeing, so that the moisture from the dal gets evaporated. Add the grated coconut, saute for another minute and switch off the flame. Finally, add some finely chopped coriander to the dal mixture. Leave the mixture to cool.
4. In a deep vessel, preferably flat one pour the tamarind extract. It should be a dilute extract of 700 ml. Add turmeric powder 1tsp, asafoetida 1 tsp, Sambar powder 3 tbsp, salt and boil the extract on medium flame.
5. After the extract is put to boil, shape the dumplings of the Dal mixture and keep aside.
6. When the mixture bubbles up and froths( about 5 mins from boiling) and all the raw smell of the powders is gone drop one dumpling gently into the boiling mixture. Flame on medium, wait for 2 minutes. If the dumpling does not disintegrate in this time, retain 1 dumpling and put in all the other dumplings one by one. Reduce flame to low and continue to boil.
7. As the dumplings cook in the tamarind extract they will slowly start rising to the top(I have added a short video). When all have risen, break the single reserved dumpling and add 1 cup water to it. Give it a stir so that it becomes a paste. Add this paste into the boiling tamarind gravy to thicken the gravy. Cook for 2 minutes and switch off the flame.
8. Take a small tempering Kadai and add little oil. heat and add mustard seeds, asafoetida 1/2 tsp and curry leaves. Pour the tempering into the Kozhambu.
The tasty Paruppu Urundai Kozhambu is ready to serve.
NOTES:
1. Definitely soak the dal, helps in binding.
2. Sometimes depending on the dal quality the dumplings can break/disintegrate in the extract while boiling. That is why I have recommended putting only a single one to test.
3. If the tester dumpling disintegrates, break up all the other dumplings and add 1 tbsp rice flour to it. Mix well and shape into dumplings again. Before you do this do not forget to switch off the flame in which the extract is cooking as we dont want it to evaporate now.
4. Some recipes recommend adding rice flour to the dal mixture while shaping them itself. I prefer not doing this as it makes the dumplings tougher or hard. So I prefer adding rice flour only if required.
If you tried this recipe and liked it please comment below. I would love to hear from you.
Kadai Paneer (Semi Dry)
Kadai Paneer is a popular North Indian dish made from Paneer( Cottage Cheese) and Capsicum in a spicy tomato sauce. The taste and flavour of this recipe lie in the masala( spice) powder that is very simple to make and can be made instantly while cooking. As I keep making this dish regularly I make a larger quantity of the masala and put it in an airtight container, so that it is handy when I want it. You can also sprinkle small amounts of this masala on other stir-fries. In this recipe I have given a dry version, the gravy version is coming up soon. The dry version gets done quickly and is very easy to make if you have the mentioned masala powder ready.
This dish even better with fresh homemade paneer. I’m coming out with a Homemade Paneer recipe soon.
Serving suggestions: Serve Dry Kadai Vegetable with Rotis, Parathas, Puri, Naan or with Rice.
Heat a wok/karahi. Put the coriander seeds, cumin seeds, dry red chillies into it and fry until light brown(without oil). Transfer to a blender, let it cool and then grind it coarse. Now add 1 tsp oil to the wok/karahi and heat. Add the onions and saute on high heat until light brown. Add in the capsicum and continue to saute on high heat until the capsicum also gets a light brown colour. Transfer the sauteed onion and capsicum to another vessel and set aside. In the same wok add more oil and add the crushed garlic and saute, keep stirring at it can stick to the pan bottom. Now reduce heat and add in the prepared masala powder and fry nicely. If the mixture becomes dry, add another teaspoon of oil and fry the masala until the rawness is gone. Add in the tomatoes and saute for a minute. Add half cup of water and cook the tomatoes well. Keep mashing the tomatoes in between so that we get a pulpy mixture. Now add the methi dana and ginger julienne and cook for 30 seconds, add Kashmiri red chilli powder 1/2 and cook for 30 seconds. Now add the capsicum and onions to the tomato paste and continue cooking. When the mixture becomes semi-dry add in the Paneer cubes and stir for 2 minutes, add some crushed Kasoori methi and put off the flame. The Kadai Paneer is ready to serve. Enjoy. Bon Appetit.
STEPWISE RECIPE FOLLOWS:
1. Assemble all ingredients. Crush garlic, cube the paneer, chop onion, capsicum and tomatoes, julienne the ginger.
2. Roast the Coriander seeds, Cumin seeds and the dry red chillies on a low flame until crisp and light brown in a karahi and cool. Grind to a coarse powder.
3. Now in the same karahi add 2 tsp oil and heat. Add the onions and saute on high heat for 2 minutes or until they start turning light brown. Then add the capsicum and continue to saute on high heat until the capsicum starts turning light brown. Transfer to another vessel.
4. In the same karahi add 2 tsp oil, reduce the flame and put in the crushed garlic and fry. As they start turning brown add the prepared masala powder and continue to fry. If the masala becomes too dry add another teaspoon of oil and fry.
5. Now add in the tomatoes and saute. Add salt and half cup of water and cook the tomatoes well. Keep mashing the tomatoes while cooking so that we get a pulpy mixture.
6. Now put the Methi seeds and ginger julienne and cook for 30 seconds. Now add the sauteed onion and capsicum, mix well and cook until the mixture becomes semi-dry.
7. Add in the Paneer and cook for 5 minutes on low heat. add some crushed Kasoori Mathi, garnish with finely chopped coriander leaves. Kadai Paneer is ready to serve.
NOTES:
1. While frying the masala powder add adequate oil so that the masala doesn’t burn.
2. The methi dana and julienned ginger give a very nice flavouring to the subji.
3. More garlic can be added if you prefer.
For more Paneer recipes keep looking up this page.
If you tried this recipe and liked it please comment below. I would love to hear from you.
Follow, like and share the pages too.
Beans Paruppu Usli
Paruppu Usli is a South Indian(Tamilian) dish made by crumbling dal. The crumbled dal is then added to cooked vegetables. A wide variety of vegetables like Banana flowers, Cabbage, Capsicum, Radish greens, and Beans can be added to the Usli.
This is a dry(without gravy)side dish which can be served to go with Rasam rice, Vatha Kozhambu rice, More Kozhambu(Kadi)rice, and other varieties.
There are many versions of making the Usli. Some use just a single dal to make the Usli(dal crumble) and some use a combination of dals. I prefer Chana dal(split peas) to make the Usili. It is very easy to crumble this dal and is tastier than the other dals.
The Usli tastes amazing just by itself too. Here’s the recipe of Beans Paruppu Usli.
PREP TIME: 20 Mins COOK TIME: 20 Mins
TOTAL TIME: 40 Mins COURSE: MAIN
CUISINE: SOUTH INDIAN SERVINGS: 4
AUTHOR: Rajni Ram
Ingredients:
French Beans 250 gms chopped fine.
Carrot 1 (just for colour)
Chana dal 1cup soaked for 1/2 an hour
Cumin seeds 1 tsp
Dry red chillies 3
Asafoetida 1/2 tsp
Turmeric powder
Curry leaves a few finely chopped
Oil(refined) for crumbling the dal 2tbsp
Directions:
Chop the French Beans, and carrot and add some salt and turmeric powder and cook them in sufficient water. When you can crush the Beans-carrot between your index and thumb finger, stop cooking. Drain the water and cool. Now put the soaked Chana dal after draining out the water in a blender, add the dry red chillies, cumin seeds, turmeric powder, salt and asafoetida and grind to a coarse paste. Add very little water to grind. Now take oil in a heavy-bottomed Karahi(preferably NOT nonstick) and heat. Add the finely chopped curry leaves and pour the dal mixture into karahi immediately. Start scrambling the dal. A Dosa flipper works best for this while you are scrambling the dal, keep breaking the bigger lumps for them to crumble further. The finer you are able to crumble the better. This takes between 10 to 15 minutes. Once you have fully crumbled the dal it should look like a coarse powder. Transfer the crumbled dal to another vessel from the karahi. Now add the cooked Beans-Carrot to the Karahi and start evaporating any remaining moisture in it, by sautéing it well. When there is no more moisture in the Beans add the crumbled dal mixture to the Beans-Carrot and mix well. Check for salt and adjust if required. The yummy Beans Usli is now ready to serve. Serve it with some Vatha Kuzhambu rice, Rasam rice or More Kozhambu rice. I love it with Rotis too. Enjoy. Bon Appetit.
STEPWISE RECIPE FOLLOWS:
1. Assemble all ingredients. Chop and cook the Beans and Carrot( take care, not to overcook)and soak the Chana dal for 1/2 an hour.
2. Now in a blender put the soaked Chana dal after draining the water, the cumin seeds, dry red chillies, turmeric and asafoetida and grind to a coarse paste. Add as little water as possible.
3. Take a Karahi and pour in oil around 2 tablespoons and heat. Add the chopped curry leaves to the oil and add the ground Chana dal mixture.
4. Start scrambling the mixture using a Dosa flipper( makes the process easier). Keep breaking the bigger lumps into smaller ones and crumble the mixture. It should start becoming dry. By the end of the crumbling procedure, the dal should look like a coarse powder. This takes 10 to 15 minutes and some patience. Flame to be medium to low throughout.
A quick video to show you how to crumble the dal????
5. Once the dal is crumbled, transfer it from the Karahi to another vessel. In the same karahi put in the cooked Beans and Carrot and evaporate any remaining moisture.
6. Once the vegetables become dry add the crumbled dal to them and stir. Mix them nicely so that the vegetables and dal are well combined. The Beans Paruppu Usli is now ready to serve.
NOTES:
1. The dal has to soak at least for half an hour.
2. I have not tempered the Usli while or after making it, anyway no harm in tempering too.
3. The vegetable should be nicely stir-fried and all water evaporated before adding the dal crumble because if there is any moisture it will all turn lumpy.
4. Instead of Beans, any other vegetable given above can also be used. The crumble procedure will be the same.
If you tried this recipe and liked it then please comment below. I would love to hear from you.
Adai
Adai is a traditional protein-packed South Indian Tiffin recipe. It is made from soaked lentils and rice ground to a paste with a spice mix and roasted on the pan like a dosa. Its an equivalent to the North Indian Moong Chila(with more variety of lentils). What’s more its a healthy option for breakfast or dinner. Some prefer the Adai made with fresh batter, while some prefer it fermented( with a slight sourness to the batter). I like both so make some immediately and ferment some batter for the next day.
There can be many add-ins to the batter like- Onions, Drumstick leaves, grated Coconut, etc;. In restaurants, it is usually served with Avial(South Indian mixed vegetables in yogurt ) and white butter. Some have it with Jaggery and white butter, while some may prefer it with sugar or Molagapodi(South Indian gun powder to go with Idli and Dosa). It can be served with Coconut Tomato chutney or onion tomato chutney too. Whatever the accompaniment maybe it is a simple and healthy meal in itself. Here’s the recipe for Adai
PREP TIME: 4 hr COOK TIME: 30 Min
TOTAL TIME: 4.5 hr COURSE: MAIN
CUISINE: SOUTH INDIAN SERVINGS: 4
AUTHOR: Rajni Ram
Ingredients for Adai batter:
Whole Urad dal black( Black gram) 2 cups
Whole Urad dal white(black gram with the husk removed) 1 cup
Chana dal(Chickpea pulse) 1 cup
Tuvar dal(yellow gram) 1/2 cup
Idli rice/boiled rice 1 cup
Ingredients for spice mix:
Black pepper 1 tbsp
Cumin seeds 3/4 of a tablespoon
Curry leaves about 10 leaves
Dry Red chillies 3 big ones
Asafoetida 1 tsp
Salt as per taste
Directions for batter:
Soak all the dals for a minimum of 4 hrs and grind to a smooth paste. Drain the water from the dals and put them in the blender a little at a time( in 2 batches). Do not add too much water while grinding. Consistency can be adjusted after grinding. Grind to a nice smooth mixture. keep aside.
Directions for spice mix:
Put all ingredients mentioned under ingredients for the spice mix in the dry grinder jar and pulse to a coarse powder.
Add-ins to the batter(these are optional)- Finely chopped onions or drumstick leaves or grated coconut.
Directions for making Adai:
Mix the spice mix powder with the ground batter and adjust the consistency by adding more water. The batter should neither be too thick nor too thin. it should resemble the dosa batter in its consistency or a little thicker. Add some curry leaves and give a good mix and the batter is ready to spread on the girdle.
To make Adai put the non-stick Tava/girdle on the flame and heat it. Don’t get it too hot, or spreading the batter will be tough. Put a little oil on the Tava and spread it all over with a kitchen tissue. Put 2 ladle fulls of batter in the center of the Tava and spread as you would a Dosa, but a little thick. Make a hole in the center of the Adai with a flipper and pour oil all over the Adai and cook for 2 minutes in medium flame. Now flip over the Adai and cook the other side too, drizzling some oil. Cook the Adais on medium flame. You can make them crisp or soft depending on your preference. To make them crisp, be patient and keep flipping to both sides until crisp. This batter proportion makes a really crisp Adai without much cook time. Serve with White butter and Jaggery for this is a deadly combination to enjoy the Adais. Bon Appetit.
STEPWISE RECIPE FOLLOWS:
1. Assemble all ingredients. Soak all dals(mixed) for minimum fo 4 hours at least.
2. Put the soaked dal in 2 batches into the blender and grind to a smooth batter. Do not add too much water at a time. Grind smooth.
3. Make the spice mix by coarsely grinding all the ingredients mentioned under the spice mix and adding it to the batter. Note, the spices have not been roasted before grinding. They have to be ground raw.
4. Now adjust the consistency by adding more water if required. The batter should resemble the Dosa batter in its consistency.
5. The Adai batter is now ready to cook. Heat up a girdle to medium heat. Pour little oil and grease the tava well with a kitchen tissue. Pou 2 ladle fulls of batter in the center of the Tava and spread it like how you would a Dosa.
6. The Adai batter should be spread a little thick and not thin like Dosa. Make a hole in the center with the flipper pour little oil in it and drizzle more oil all around the Adai and cook for 2 minutes in medium flame or until nicely brown
7. Flip it over and cook for few more minutes drizzling more oil. For a crisp Adai be liberal with oil and alternately keep flipping sides until it turns crisp.
8. Serve with white butter and jaggery.
NOTES:
1. While grinding the dals don’t add too much water in the beginning.
2. The add-ins mentioned here are optional, you can try them some time though for added flavour.
3. The hole in the center of the Adai is made so that the batter cooks through evenly because the Adai batter is spread a little thick as compared to Dosa.
4. No White butter at home, just have it with yellow butter. It tastes just as good or even better.
5. Enjoy this traditional South Indian delicacy with any of the accompaniments suggested by me above.
If you tried this recipe and liked it please comment below. I would love to hear from you.
Apple Crumble (Eggless Dessert)
A Crumble is a dessert with all the goodness of a pie sans the effort of making a pie crust. They are very easy to make and can be made with a large variety or combination of fruits. Berry crumble, Pear Crumble, a combination of pear and almond can also be done. Today I decided to make the Crumble as I have been craving it for long, and so I gave in to temptation.
As I think of Apple Crumble a feeling of warmth always spreads over, as this also is a dessert that is served warm, usually with icecream. But believe me when I say, by itself, it is too good to resist. Apple Crumble is a dessert with cinnamon apple filling with a crumbly crunchy crust. As it bakes the apple filling gets jammy and saucy and the aroma that fills the house while this is cooking is so inviting. It’s a very simple dessert and has no eggs. Usually, plain flour is used for this recipe, but I have used half of the plain flour and half of wheat flour, and since this dessert turned out quite well, next time I’m trying out a full wheat flour one..my love for wheat flour is unbeatable.
I’m soon planning to make the Berry Crumble and you, my dear friends will get the first preview I promise. In the meanwhile, as you look up my website check out my recipe for Pineapple Tart and Savoury Muffin recipes.
Here is the Apple Crumble recipe for you—
PREP TIME: 15 MINS COOK TIME: 40 MINS
TOTAL TIME: 55 MINS SERVINGS: 5
CUISINE: WORLD FOOD AUTHOR: Rajni Ram
Ingredients for filling:
Apples 2 any variety( firm ones preferred) chopped
Cinnamon powder 2 tsp
Plain flour/refined flour 1 tbsp
White sugar 1/4 cup
Lemon juice 1 tsp
Ingredients for the Crumble:
Wheat flour 1/2 cup
Plain flour 1/2 cup
Oats 1 cup rolled or instant
Butter 120 gms chilled, cut to pieces( refer note 4)
Brown sugar 1 cup
Cinnamon powder 2 tsp
Baking powder 1/2 tsp
Salt 1/4 tsp
Requirement: 1to 1.5 litre Pie dish
Before making the crumble mixture put the oven to preheat at 180 degrees.
Directions for filling:
In a bowl put in the chopped apples(skin intact), add 1 tbsp flour, lemon juice, sugar and cinnamon powder and mix well. Spread this mixture into the Pie dish and keep aside.
Directions for the Crumble crust:
In a bowl take both the flours, oats and add the cubed butter and start rubbing the butter into the oat-flour mixture. As the butter mixes with the flour its appearance becomes crumbly. After all the butter is rubbed in add the baking powder, salt, sugar and cinnamon powder and combine. The mixture should look like wet sand. Now take this flour mixture little by little and start covering the filling in the pie dish. Cover the whole filling compactly and press it down with you palm a bit. Put in the Crumble into a preheated oven and bake at 180 C for 40 minutes. After the oven beeps, get it out, cover with aluminium foil for around 15 minutes and serve warm. Serve with Icecream or just plain. Nutella lovers can drizzle some on top. Enjoy…I’m already craving dessert. Bon Appetit.
STEPWISE RECIPE FOLLOWS:
1. Assemble all ingredients. Chop the apples, powder the cinnamon, put the oven to preheat at 180 degrees.
2. In a bowl combine all the ingredients given under filling put it in the Pie dish and arrange evenly and set aside.
3. In another bowl add the flours( you can stick to a single variety too), the Oats, cinnamon powder and the chilled butter and start rubbing in the butter into the flour oats mixture. By the time the butter combines with the flour, it should appear crumbly.
4. Now add in the baking powder, salt, brown sugar, to the flour-butter mixture and combine again. Now it starts resembling wet sand.
5. Start covering the apple filling with the crumble mixture and gently press down with your palm.
6. Put it in the preheated oven and bake at 180 C or 350 F for 40 minutes, until the crust turns golden brown.
7. Remove from oven and wrap the dish with aluminium foil to retain the heat for 15 minutes. Serve warm as it is or with ice cream.
NOTES:
1. I have mixed atta/ wheat flour and Maida/plain flour, you can use only the Maida too.
2. White sugar can be used in both filling and crumble top and so can the brown sugar in both.
3. Preheating the oven is critical for any baking recipe as this can affect the quality of the dish.
4. For a crisp/ crunchy crust use chilled butter as per recipe. For a chewy crust use melted butter at room temperature. Rest of the recipe remains the same.
YouTube video available for this recipe. Link below ????
https://youtu.be/3AGZCqEI-Qk
If you tried this recipe and liked it please comment below. I would love to hear from you.
Coconut Rice/Thengai Sadam
This is an easy and delicious South Indian Rice variety. The South Indian cuisine has a number of Rice varieties which are all very easy to make. This recipe of Coconut Rice is flavoured with freshly grated coconut and tempered with whole spices in coconut oil. The spices used here are very minimal. It makes for a good lunch box recipe. Served with Potato fry and some Vadams(fries), and Raita it makes for a wholesome lunch idea. Leftover rice can also be given a makeover by making coconut rice.
Chana Dal ( gram dal) 1tbsp( soaked in a little water for few minutes)
Urad dal 1 tsp( black gram)
Dry Red chillies 3 broken to bits
Mustard Seeds 1tsp
Curry leaves a few
Asafoetida 1 tsp
Salt as per taste
Directions:
Cook the rice in a pressure cooker. The Rice should be cooked but not lumpy or soggy. The grains should be separate. So once pressure from the cooker settles, transfer the rice to a big flat plate and spread the rice. Drizzle a little oil on it and leave it to cool completely. While it is cooling heat oil ( coconut oil in this recipe for the flavour) and add the peanuts and fry them. As they brown add the mustard seeds, Chana dal ( after draining the water), Urad dal, and asafoetida and curry leaves and start frying the tempering until they become light brown. Add the grated coconut now and continue until they are a little light brown in colour. Add salt mix and the cooked rice to the tempering and mix nicely so that the tempering gets evenly mixed with the rice and there the yummy and simple Coconut Rice is ready to serve. I usually serve it with Potato curry( Urulaikazhangu Karacurry) and some Vadams( rice crisps). Enjoy. Bon Appetite.
STEPWISE RECIPE FOLLOWS:
1. Assemble all ingredients. Precook the rice, spread it on a plate to cool and drizzle some oil over it.
2. Take some oil ( I have used coconut oil as it enhances the flavour of the rice) in a wok/ karahi and heat. Add peanuts and roast until they are a nice brown in colour.
3. Now add the mustard seeds, Chana dal( water drained) urad dal, dry red chillies broken to bits, asafoetida, curry leaves and fry them nicely until they are light brown in colour.
4. Add the grated coconut and continue to stir. Add a little salt and continue to stir until it turns light brown.
5. Add the cooked and cooled rice to this and mix well so that the tempering spreads evenly although the rice. The Coconut Rice/ Thengai Sadam is ready to relish.
NOTES:
1. Coconut oil enhances and brings out the flavour in this rice, so I highly recommend using it either to drizzle over the rice while cooking or in the tempering or both.
2. Oil is drizzled over the rice while cooling so that the grains are separated and don’t stick together while combining with the tempering,
3. This dish goes really well with Avial( South Indian mixed veg curry) you can check out the recipe here.
4. You can either grate the coconut in a grater or process it in the food processor, don’t grind it too fine or the flavour will be lost.
5. To cook rice, I used the pot in pot method, you can cook directly in a pressure cooker too, but ensure it is dry and not starchy.
If you tried this recipe and liked it please comment below. I would love to hear from you.
Mixed Vegetable Curry (No Onion, No Garlic Recipe)
This recipe is absolute comfort food. On those, no masala days or on days when you are off onion and garlic, or even otherwise this Subji is a great option for Rotis and Rice. It’s a colourful subji that will encourage children to eat vegetables and is also not very spicy. Since I have not used onions or garlic, milk cream forms the base of the subji. A wide variety of vegetables can be used, excluding the high water content ones. I have used vegetables that are easily available and popularly come under the mixed vegetable category. please do visit my other subjis and dals while you are here.
Here’s the recipe for Mixed Vegetable Curry.
PREP TIME: 15Mins COOK TIME: 15 Mins
TOTAL TIME: 30Mins COURSE: MAIN
CUISINE: NORTH INDIAN SERVINGS: 4
AUTHOR: Rajni Ram
Ingredients:
Cauliflower 10-15 florets
Carrot 1 diced
Potato 1 large or 2 small
Capsicum 1 medium diced and seeds removed
Beans 10 approx cut into 1/2 inch pieces
Tomatoes 4 ( 2 chopped & 2 pureed)
Peas shelled( fresh/frozen) 50 gm
Fresh cream 1.5 cups
Salt as per taste
Cumin seeds 1tsp
Red chilli powder 1 tsp
Turmeric powder 1tsp
Fennel/saunf powder
Coriander powder 1 tsp
Garam Masala powder 1/2 tsp
Oil for sauteeing
Directions:
Dice all vegetables and keep ready. Put all the vegetables except Capsicum and tomatoes, in a vessel, pour enough water, salt and turmeric powder and cook. The vegetables should get tender but not turn limp. Switch off flame at this stage and cool the vegetables completely. If any water is remaining drain and keep it aside, it can be used if required later on. Now in a pan heat 1 tbsp oil, add cumin seeds, turmeric powder and put in the diced capsicum and saute on high flame for few minutes. Reduce flame to low and add in the tomatoes. Saute on low flame for a minute. The tomatoes should just get a little tender and not break and release the juice. Now add in the tomato puree and all the dry spice powders and cook for 3 minutes on medium flame. Put in the boiled vegetables now(after draining the water) and cook for another 3 minutes. Ensure that not much water is remaining in the pan, if there is, then drain out some or else the subji will turn too watery. Now pour the fresh cream into the pan and immediately turn off the flame. Once the cream is added the flame should not be on, or the gravy will thin out completely. Stir nicely, add the garam masala powder and garnish with chopped coriander leaves and the Mixed Veg subji is ready to be served with Rotis or rice. Enjoy. Bon Appetit.
STEPWISE RECIPE FOLLOWS:
1. Assemble all ingredients. Chop and boil all vegetables and puree 2 tomatoes.
2. In a pan take 1 tbsp oil and heat it. Add the cumin seeds and once they splutter, add the turmeric powder and capsicum and saute on high flame for few minutes.
3. Lower the flame and add in the chopped tomatoes and saute on low to medium flame for a minute. The tomatoes should not break and become limp.
4. Now add the tomato puree followed by salt and all the dry spice powders except the garam masala powder, stir nicely and cook for 3 minutes or until the raw smell goes away.
5. Now add the boiled vegetables and cook for another 3 minutes. If there is too much water, drain it. A little water is ok and required.
6. Finally, add the cream and switch off the flame immediately. Add the garam masala powder now and mix. Garnish with coriander leaves. The mixed vegetable curry is ready to serve.
NOTES:
1. Any store-bought fresh cream is good enough for the subji. It need not necessarily be full or medium fat. Low fat cream is fine too.
2. Once the cream is added put off flame right away, or the gravy will thin down and the moisture from the cream will separate, making the subji too runny.
3. Saute the capsicum on high flame so that it doesn’t release too much moisture and cooks crisp.
If you tried this recipe and liked it comment below. I would love to hear from you.
Atte Ka Sheera (Insant Wheat Halwa)
Halwa is a popular dish in the Indian subcontinent and there are many varieties of Halwa like Rava/Suji Halwa, Moong dal halwa, Chana dal halwa, Lauki halwa, Carrot halwa, and many more. This recipe Atte Ka Sheera is very popular in North India during both the Navrathras, as it is offered to little girls on the Ashtami day( day 8 of Navrathri) as Prasad(holy offering).
This Halwa gets done in no time and is healthy and tasty at the same time. My girl loves it and whenever any of us craves sweet at home I make it instantly, like today.
The smooth texture of the Halwa lies in roasting the Wheat flour correctly, as an under roasted flour can make the halwa lumpy. There are many variations to making this Halwa and I chanced upon this one in an old recipe book and have always made it that way ever since. Do check out my other sweet and dessert recipes.
PREP TIME: 10 Mins COOK TIME: 20Mins
TOTAL TIME: 30Mins COURSE: DESSERT
CUISINE: NORTH INDIAN SERVINGS: 4
AUTHOR: Rajni Ram
Ingredients:
Wheat flour 1 cup( any size is fine, but use the same cup for all measures in this recipe).
Sugar 1 cup
water 2 cups
Ghee 1/2 cup
Cardamom powder 1/4 tsp
Directions:
Take a heavy-bottomed pan /Karahi/Urli and heat it. Add 1 tbsp ghee and add in the wheat flour and start roasting it, stirring continuously. after 5 minutes add another tablespoon of ghee and continue to roast. Don’t forget to keep stirring, as the flour can get burnt. as the roasting continues the atta/wheat flour will give a nice aroma, keep roasting until the flour turns golden brown. Once it is nicely browned turn off the flame. In another saucepan heat water, and drop the sugar into it, dissolve it and allow it to boil. Once the sugar is dissolved switch off the flame. Now slowly pour the sugar water into the roasted wheat flour and keep stirring continuously(remember to keep the flame off while pouring the sugar water). Once you have poured all the water, switch on the flame and continue to stir, until the halwa starts leaving the bottom of the pan/karahi. turn off the flame add the nuts and remaining ghee. Atte Ka Sheera is ready. Enjoy this wholesome goodness. Bon Appetit.
STEPWISE RECIPE FOLLOWS:
1. Assemble all ingredients.
2. In a heavy-bottomed pan/karahi pour 1 tablespoon ghee, add the wheat flour and start roasting. Keep stirring continuously.
3. After 5 minutes of roasting add another tablespoon of ghee and continue to roast. The flour starts turning brown and also starts giving out a nice aroma. Continue to roast until the flour turns golden brown. (Remember to keep flame at low or medium). Once browned switch off the flame.
4. Now in a saucepan pour the water and drop in the sugar and boil, add a few pods of cardamom to this(later it can be fished out). Once the water starts boiling and the sugar has completely dissolved put off the flame.
5. Now slowly pour the sugar water into the roasted wheat flour, while stirring simultaneously. Remember to keep the flame of while pouring the water into the Atta. If the flame is not switched off the water can splutter on the hand, and the halwa can get lumpy too.
6. Once you have poured in all the water, switch on the flame and continue stirring, until the halwa starts leaving the pan bottom and swirls along with the ladle. At this stage add the remaining ghee and garnish with some dry nuts.
Atte Ka Sheera is ready to serve.
NOTES:
1. Roasting the flour is the most critical step to get a smooth and creamy Halwa.
2. Roasting must be done in low to medium flame and not high as this could burn the flour.
3. After roasting the flour and while preparing the sugar water, keep the flame of the flour off.
4. While pouring the sugar water into the Ata also the flame must be off. Switch on after pouring all the water.
5. I have used only 1/2 a cup of ghee, more can be added if required.
If you tried this recipe and liked it please comment below. I would love to hear from you.
Rajma (Kidney Beans) Masala
This is a simple dish from North India in which Kidney Beans/Rajma are cooked and simmered in a flavourful tomato sauce. This dish is a hit with everyone whenever I serve it at home and also when I make it for friends. I learnt this recipe from a Kashmiri friend around 18 years back and have cooked it the same way since then.
I usually use finely chopped tomatoes, but in this recipe, I have used tomato puree. This recipe goes very well with Rice varieties like Jeera Rice, Matar Pulao, Flavoured rice, Ghee rice, Masala Rice and with Rotis, Chapatis and Naan too.
Let’s get to the recipe right away.
PREP TIME: 10Mins+(soak time 6-8 hrs) COOK TIME: 30 Mins
Soak the Rajma overnight. Put it in a pressure cooker along with a stick of Cinnamon and cook for 8 whistles on medium flame. Now put the onions, green chilli and cumin seeds in a blender and blend smooth. In a pan or karahi heat the oil. Add 1 tsp cumin seeds and as it splutters, add in the onion paste and fry, add the turmeric powder and ginger-garlic paste and continue stirring. Keep frying until it turns light brown. Keep stirring continuously as it can stick to the pan base. Once you get the brown colour pour in the tomato puree and give it a stir. Cook for a minute and add all the dry spices-coriander powder, fennel powder, red chilli powder, stir and cook for 2 minutes. Now lightly mash the cooked Rajma and pour it into the pan along with the water(in which it cooked). Stir well and bring the dal to a boil. Cook for another 7 minutes the gravy will come together. The consistency should neither be too thick nor too watery. Add the Garam Masala powder now and switch off the flame. Garnish with some finely chopped fresh coriander leaves. The yummy Rajma Masala is ready to serve. I served it with Jeera rice. Indian breads go very well with this dish too.
STEPWISE RECIPE FOLLOWS:
1. Assemble all ingredients. Soak Rajma overnight and pressure cook for 8 whistles and keep ready.
2. Put the chopped onions, green chillies and 1 tsp cumin in a blender and grind to a fine paste.
3. Pour some oil in a pan/karahi and heat. Add 1 tsp cumin seeds and as they splutter add in the onion paste, Fry for 2 mins and add the turmeric powder and ginger-garlic paste. Fry until the mixture turns light brown.
4. Now add the tomato puree, stir and cook for a minute. Add all the dry spice powders except Garam masala powder and cook the mixture on a medium flame for 2 minutes.
5. Squish the cooked Rajma very lightly(with the back of a ladle just once)and add the Rajma along with the water(in which it cooked) to the onion tomato paste.
6. Stir nicely add 1 to 1.5 cups water and salt and allow it to boil on a medium flame for 5-7 minutes. The gravy will come together. Don’t dry it up too much. The gravy should neither be too watery nor too dry. Add the garam masala at this stage and put off the stove. The Rajma masala is ready to serve. Garnish with finely chopped coriander leaves or mint leaves and serve with any of the rice varieties or with Roti, Chapati, Naan etc.
NOTES:
1. If the Rajma is well soaked the cooking time in the pressure cooker will be shorter.
2. The Rajma splitting in the pressure cooker is a good sign, it means it has cooked through completely and there are no undercooked ones.
3. After pressure cooking always crush one Rajma between your index and thumb finger and check. It should crush easily. If you are having to put pressure, then put it back in the cooker again and cook for a few more whistles.
4. There are many varieties of Rajma, this recipe can be followed with all.
5. If using chopped tomatoes, then chop them really fine and add them in step 4 as mentioned, but cook them longer. You may also have to add little water to cook the tomatoes, as they should turn mushy for a nice gravy.
6. Alternately while cooking the tomatoes keep mashing them with a masher simultaneously.
If you tried this recipe and liked it please do comment below. I would love to hear from you.
Kuthiraivali (Barnyard Millet) Pongal
Pongal is a savory dish of rice and lentils in South India similar to the Khichdi in the North. I have supplemented the rice with Barnyard Millet, called Kuthiraivali in Tamilnadu. These millets are high in fibre and are gluten-free. So for all the health freaks, here’s the recipe for you. This is a simple one-pot recipe. It makes a great breakfast option as compared to the rice Pongal, as it is lighter.
PREP TIME: 20 Mins COOK TIME: 15 Mins
TOTAL TIME: 35 Mins COURSE: MAIN
CUISINE: NORTH INDIAN SERVINGS: 4
AUTHOR: Rajni Ram
Ingredients:
Kuthiraivali(Barnyard Millet) 1.5 cups
Moong dal/ split green gram 1/2 cup lightly roasted
Pepper-Cumin powder 2 tsp (dry roast in the ratio 2:1 cool and grind coarse)
Salt as per taste
Cashewnuts 6-7
Ghee 1 tbsp
Curry leaves a few
Ginger 1 tsp finely chopped
Asafoetida 1 tsp
Turmeric powder
Directions :
Roast the moong dal to a light brown. Put the Millet in a vessel add the roasted dal to it and wash them nicely. Now put them into a pressure cooker and add 4 cups water, the salt, and turmeric powder and cook for 5 whistles. Let the pressure release. Now open the lid and give a light mash to the millet- dal mixture. It would have absorbed all the water while cooking, so pour another 1 to 1.5 cups of water and stir nicely. Now in a small tadka kadai put in 1 tbsp of Ghee and heat. Put the Cashewnuts in and fry them to a light brown. Remove them from the ghee and set aside. Now to the same ghee add Cumin seeds, let them splutter add-in the ginger, pepper- cumin powder, asafoetida, and curry leaves and fry them well in the ghee. Transfer this into the cooker. The Kuthiraivali Pongal is ready. Serve with some coconut-coriander chutney.
STEPWISE RECIPE FOLLOWS:
1. Assemble all ingredients. Roast the moong dal and keep it ready.
2. Wash the Kuthiraivali/Barnyard millet and moong dal and transfer them to a small pressure cooker. If using big cooker follow pot in pot method( that is putting the contents into a vessel and putting that vessel into the cooker). Pour 4 cups water and pressure for 5 whistles. Once the pressure releases check if the mixture is well cooked. They should be quiet soft, If not put back in the cooker for another 2 whistles.
3. The mixture will be a little solid, add around 1 to 1.5 cups of water, and loosen up the mixture.
4. In a tadka, Kadai, or small tempering pan add the ghee and let it heat. Add the cashews and fry to a light brown. Remove from ghee. To the same ghee add the cumin. Once they splutter add in the ginger, pepper-cumin powder, curry leaves, and asafoetida. fry nicely for a minute and pour it into the dal-millet mixture. The Kuthiraivali Pongal is ready
Notes:
1. If using pot in pot method then after pressure cooking, you can make the tempering in a bigger pan and add the rice dal mixture to the pan.
2. While adding water to the Pongal after pressure cooking to loosen it, you can add hot water instead of room temperature one.
3.Pepper -cumin powder direction pictures below–
If you tried this recipe and liked it please do comment below. I would love to hear from you.
Pineapple Rabri
Rabri is a sweet-dish made by boiling and reducing milk until it gets a thready texture and becomes dense. It is flavoured with cardamom and nuts and served chilled. In this recipe, I have added fruit to the Rabri instead of dry nuts. Usually, Rabri is served as an accompaniment for Jalebi or Malpua, but this recipe of Pineapple Rabri can be relished just by itself. Let’s get to the recipe right away.
PREP TIME: 20 Mins COOK TIME:1 hr 30 Mins
TOTAL TIME: 1 hr 50 Mins COURSE: DESSERT
CUISINE: NORTH INDIAN SERVINGS: 4
AUTHOR: Rajni Ram
Ingredients:
Pineapple 4 slices chopped fine
Milk 1.5 litres
Brown sugar or unrefined sugar 1/4 cup
white sugar 1/2 cup
Cardamom powder of 3 pods
Milk Powder 1/2 cup(optional)
Saffron strands a few(optional)
Directions to make Rabri:
Cut the pineapple into fine cubes, put them in a pan add 1.5 to 2 cups water and cook them on slow fire. The pineapple should be just cooked and not mushy. The water should have dried up, it takes about 15 minutes. After the water dries up add 1/2 cup brown sugar/unrefined sugar and saute. Keep stirring once you add sugar as there are chances of the sugar burning. Let the mixture become dry. Put off the flame and cool it. Now in a thick bottomed vessel pour the 1.5 litres of milk and boil. Keep stirring continuously, otherwise the milk we stick to the bottom of the vessel and burn. Add the Saffron strands now. Keep stirring until the milk reduces to half the quantity. It will start getting denser. The texture also changes. Add 1/2 cup milk powder(if using, at this stage) continue to stir, add the white sugar and continue stirring until the milk becomes semi-dry, that is, it should not be of flowing consistency but a little denser. At this stage put off the flame. Cool the Rabri and put it in the refrigerator. To serve add the candied pineapple pieces to the Rabri, mix, put some pieces on top and the desert is ready.
STEPWISE RECIPE FOLLOWS:
1. Assemble all ingredients. Please note that the pineapple can be cooked a day ahead and put in the refrigerator.
2. To cook the pineapples, cut them into small cubes, put them in a pan add around 2 cups water and cook. They should become soft, but not mushy. Add the brown sugar and continue to cook. Once the mixture dries up, put off the flame and let it cool.
3. Pour the milk into a wide-mouthed, thick-bottomed vessel and begin to boil. Keep stirring constantly as the milk should not stick to the bottom of the pan. Add the saffron strands now.
4. Continue stirring until the milk reduces to half, it will become denser and the texture will start getting thread. Add in the milk powder(this is optional) and continue to reduce the milk.
5. Add the sugar when the threadiness increases and continue to stir. Put in the cardamom powder. Put off the flame when the mixture is no longer in pouring consistency, it has to be scooped out. Cool the mixture and put it in the refrigerator.
6. To serve add the candied Pineapple into the Rabri and mix. Reserve some for putting on top. Decorate with cherries or berries and the refreshing Pineapple Rabri is ready to serve.
NOTES:
1. It takes about 1.5 hrs to make this dish. But don’t be disappointed, it will be worth the effort.
2. The time taken will depend on the fat content in the milk used. I have used toned milk, so it took me more than an hour to reduce the milk. If full cream milk is used the time will be lesser.
3. If making this for a get-together or party, you can make this the previous day and put it in the refrigerator in an airtight container. If doing this keep the fruit separate and add before serving.
4. I have used white sugar for Rabri, unlike the pineapple, as adding brown sugar to the Rabri will change its colour.
If you tried this recipe and liked it pls do comment below. I would love to hear from you.
Semolina (Suji) Cheese Balls
This is a desi version of American Corn Cheese balls sans the corn. It’s a no Maida recipe. I made this recipe the first time today and they turned out very well, and hence decided to blog them. They are the perfect tea time snack. I have stuffed the Sooji balls with a seasoned cheese mixture. The cheese mixture is enclosed in a Suji and potato jacket. The use of Suji has made the balls very light and crisp at the same time. Here’s the recipe…
PREP TIME: 25 Mins COOK TIME: 15 Mins
TOTAL TIME: 35 Mins COURSE: STARTERS/ SNACKS
CUISINE: NORTH INDIAN SERVINGS: 4
AUTHOR: RAJNI RAM
Ingredients:
Semolina( Suji) 1 cup
Potatoes 3 medium size boiled and grated
Cheddar cheese 1 cup grated
Coriander leaves 1tbsp finely chopped
Green chillies 3 finely chopped
Salt as per taste
Coriander powder 2 tsp
Fennel powder 1 tsp
Red chilli 1 tsp
Garam masala powder 1/2 tsp
Pepper powder 1/4 tsp
Red chilli flakes 1/2 tsp
Directions for filling: Grate the Cheddar cheese, add chilli flakes and pepper and mix well. Make tiny balls of them for stuffing and keep aside.
Directions for Suji balls:
In a pan take 1.5 cups water and put it to boil. As it starts boiling slowly start pouring the roasted Suji into
the water( like making Upma) and keep stirring simultaneously. Stir until all water is absorbed and it becomes dry. Boil the potatoes mash them. In a big bowl put in the cooked Suji, the grated potatoes, green chillies, coriander leaves and all dry masalas- red chilli powder, coriander powder, fennel powder, salt and garam masala and combine all together such that all masalas are well mixed well. Form into a big ball. Divide this into 12 medium-sized balls and keep aside. Take one ball at a time and make a cavity into it with your thumb and widen it, put it the cheese mixture and nicely seal the ball well. Repeat with all balls. Now heat oil for deep frying in a karahi. It should not be too hot. When it is medium hot drop the balls gently into the oil a few at a time and fry them on medium heat until they are nicely brown and crisp. Drain the oil on absorbent paper and serve hot with a bowl of tomato ketchup. The yummy Suji Cheese Balls are ready. A cup of tea to go with it makes for a monsoon time snack. Children too will like this snack.
STEPWISE RECIPE FOLLOWS:
1. Assemble all ingredients. Boil and grate potatoes and grate the cheese.
2. Make the filling by adding Red chilli flakes and pepper powder to the cheese and diving the cheese mixture into 12 tiny balls which will fit into the Suji balls.
3. In a small pan or vessel boil 1.5 cups of water with 1/4 tsp of salt. Once it starts bubbling slowly pour the Suji little by little and stir simultaneously ( like cooking Upma). Once the water absorbs all the Suji and dries up( it should be cooked- colour changes and it becomes pale) put off the stove and cool. This step can be done ahead and kept.
4. In a big bowl put it the cooked Suji, grated potato followed by green chillies, chopped coriander, and all dry masalas and salt and combine all of them well to form a big ball. Divide the ball into 12 smaller portions.
5. Now take one Suji ball at a time and make a cavity( hole) in the centre with your thumb and widen it. Put in the tiny cheese ball into this cavity and seal well. Likewise, repeat for all the 12 portions. ( please check point 5 in notes, as I have updated it recently).
6. Heat oil for frying in a karahi and get it medium hot. Now drop the cheese-filled Suji balls gently into the oil and fry. You can fry a few of them at a time. Get them to a nice brown colour and remove from oil and drain on absorbent towels. Repeat for all 12 portions. Serve. hot with some tomato ketchup. ( please refer to note 6 here).
6
NOTES:
1. The Suji can be cooked well in advance. The potatoes too can be boiled and grated much ahead.
2. Do season the cheese with chilli flakes and pepper or it may taste bland.
3. Don’t overheat the oil or the insides will remain raw. At the same time, the oil should not be under heated, or the Suji will absorb more oil. To test drop a tiny bit of the mixture, if it rises up gradually it is the right temperature.
4. These Suji balls can be made into bite-sized balls and served as starters for a party or get together.
5. When I made these the next time, I quartered a cheese cube and dusted it with pepper powder, and stuffed it into the Suji balls . If you don’t want to grate cheese, this is an alternate. And the cheese was more melty this way.
6. Instead of deep frying I tried using a Appe pan ( Appa chatty/ Paniyaram mould) and the outcome was very good. For a less oil option, one can do that too.
If you made this recipe and liked it please comment below. I would love to hear from you.
Vatha Kozhambu (Shallots In A Spicy Tamarind Gravy)
This is a traditional South Indian recipe. There are many variations to this recipe and a large variety of vegetables or dehydrated berries(Turkey berry, cluster beans, etc;) are simmered in a spicy tamarind sauce. Usually served with hot rice and ghee, but goes well with Dosas and Idlis too. I have used Sambar powder here, though Vatha Kozhambu powder is also used, there is not much difference in the taste and Sambar powder works well. For the recipe of Sambar Powder click here. Let’s get to the recipe without much ado.
PREP TIME: 20 Mins COOK TIME: 15 Mins
TOTAL TIME: 35 Mins COURSE: MAIN
CUISINE: SOUTH INDIAN SERVINGS: 4
AUTHOR: Rajni Ram
Ingredients:
Shallots 200 gm skinned
Tomato 1 large
Tamarind lemon sized ball( soaked in water and pulped)
Salt as per taste
Sambar powder 1 tbsp
Red chilli powder 1 tsp
Turmeric powder 1 tsp
Asafoetida 1 tsp
Mustard seeds 1 tsp
Fenugreek seeds 1/2 tsp
Dry red chillies 2 broken
Curry leaves a few
Sesame oil/ Til oil 1 tbsp( can use more if you prefer)
Directions:
Peel the skin off the Shallots and keep ready. Chop the tomatoes. Soak a lemon sized ball of tamarind in a little warm water, let it cool and extract the pulp. Now in a pan or karahi take a tablespoon of Sesame/Til oil and heat. Add the mustard seeds, fenugreek seeds, asafoetida, dry red chillies, and curry leaves and saute for a minute. Add the Shallots and saute until they start turning translucent. Now add the tomatoes and continue to saute for a minute. Add the dry spices- Sambar powder, turmeric powder, and red chilli powder and continue to stir fry. If the mixture is too dry add another 2 teaspoons of oil, otherwise the masala may burn. Saute for another minute and pour the tamarind pulp and add the salt. Stir well and allow it to simmer on low flame until it thickens and reduces a bit. The oil will form a layer on top and the mixture will reduce, at this stage put off the stove. The Shallot Vatha Kozhambu is ready to serve with hot rice, Dosas, Idlis etc.
Direction to make Sambar powder is given under the label powders.
STEPWISE RECIPE FOLLOWS:
1. Assemble all ingredients. Shallots skinned and tomatoes chopped. Soak tamarind(lemon sized ball) and get the pulp.
2. In a pan/karahi heat some Til oil(preferable, if not continue with refined oil). Add mustard seeds, fenugreek seeds, dry red chillies, asafoetida, curry leaves, and fry.
3. Add the shallots and stir well so that the oil coats all the shallots. Fry until they turn translucent. Add the tomatoes and continue to stir fry for another minute.
4. Now add in all the dry spices- Sambar powder, red chilli powder, turmeric powder, and continue to fry. If the mixture is too dry after adding the powders, then add 2 tsp of oil and fry, until the raw taste of the masalas is gone.
5. Pour the tamarind pulp and in the salt and stir well and allow the mixture to boil. Let it simmer until the mixture thickens and reduces in quantity. The oil will form a layer on top. At this stage put off the stove. The Shallot Vatha Kozhambu is ready to serve with hot rice and ghee.
NOTES:
1. I have used Shallots here, other vegetables that can be used are Drumsticks, Ladies finger, Onions, dehydrated berries like Turkey berry(Sundakai), and even dehydrated vegetables like Cluster beans, Bitter gourd, etc.
2. Sesame oil enhances the flavour of the dish, so I highly recommend it.
3. Frying the dry masalas in the oil well(step4), gives the dish the perfect flavour.
4. The fenugreek seeds also impart the aroma a lovely flavour to this dish, but they should be used in the quantity mentioned and not more, as they can turn the dish bitter.
If you tried this recipe and liked it please comment below. I would love to hear from you.
Veg Kothu Parotta
This is a south Indian street food recipe, made form Parathas(called Parotta in the South) and sauteed vegetables in a spicy tomato base. The Parottas are shredded(minced)and added to the gravy and further stir-fried to a crispy flaky dish. There are many variations to this dish, but I am keeping it simple. This dish can be served with sauce or raita. Usually, leftover parathas or chapatis can be used for making this dish. Store-bought Parathas can be used too. Let’s get to the recipe.
PREP TIME: 20 Mins COOK TIME: 25Mins
TOTAL TIME: 45 Mins COURSE: MAIN
CUISINE: SOUTH INDIAN SERVINGS: 4
AUTHOR: Rajni Ram
Ingredients:
Parathas 5
Onion 2 medium diced and petals separated
Carrot 1 grated coarse
Capsicum 1 diced to cubes
Tomato 1 diced
Tomato puree 1 cup
Cashewnuts 10
Cloves 4
Cinnamon 1 small stick
Green chillies 3 split lengthwise
ginger-garlic paste 1 tsp
Cumin seeds 1 tsp
Curry leaves few
Turmeric powder 1/2 tsp
Red chilli powder 1 tsp
Coriander powder 1 tsp
Biriyani masala(powder) 1.5 tsp
Garam masala 1/2 tsp
Salt as per taste
Oil for stir fry
Directions:
If the Parathas are store-bought, heat them on the tava/girdle with a little oil, cooking both sides. Cool them and using kitchen scissors tear them to pieces or use your fingers to tear them into 1 inch long pieces. keep this aside. In a pan/ Karahi take 4 tsp oil, heat and add the cumin seeds. Put in the turmeric powder and drop the green chillies and curry leaves into the oil, followed by the onions and fry at high heat for 1 minute. Now add the capsicum and continue to fry on high heat. Add the carrot, reduce heat and fry for 30 seconds. Now add the tomatoes, fry for another 30 seconds and pour the tomato puree and give a good stir. Now add the masalas- coriander powder, red chilli powder, Biriyani masala and salt. Stir well and cook for a few minutes, grind the cashew nuts to a loose paste and add it to the gravy. Continue to cook until the gravy thickens and starts getting dry, add the garam masala powder and put off the heat and let the mixture cool a bit. After 5 minutes add in the minced paratha pieces, switch on the stove and mix the parathas well with the gravy. The gravy should coat all the pieces and not turn them soggy. While mixing keep mashing the paratha will a flat spatula so that the parathas can further get minced. Stop once you have a dry mixture. The Kothu Parotta is ready to serve. Tastes best when served immediately. Any variety of Raita is a good accompaniment for this. Enjoy. Bon Appetit.
STEPWISE RECIPE FOLLOWS:
1. Assemble all ingredients and cook the parathas ahead if store bough, as they have to cool.
2. Tear the parathas into 1-inch pieces.
3. In a pan/karahi take 4 tsp oil and heat. Put in the cumin seeds and allow to splutter. Add in the green chillies and curry leaves. Also add 3 Cloves and 1 small stick Cinnamon.
4. Add in the onions and saute at high heat. Add the ginger-garlic paste, put in the capsicum and continue to stir fry, follow up with carrots. Reduce heat.
5. Add the chopped tomatoes, fry for 30 seconds and the tomato puree. Stir and cook for a few minutes.
6. Add all the masalas(dry spice powders), add 2 tbsp water and continue to cook.
7. Powder the cashew nuts then add 2 tbsp water and grind them to a loose paste. Add this to the tomato gravy. Cook until the mixture thickens. the consistency should be like tomato sauce. Put off at this stage. Add chopped coriander and garam masala powder.
8. Let this cool for 5 minutes. Now add the paratha pieces and switch on the stove and mix the contents well. while mixing keep mashing the parathas with a flipper, so that they get minced further. When the paratha resembles a mince and the mixture is dry, put off the stove. the Kothu Paratha is now ready to serve.
NOTES:
1. The consistency of the gravy should neither be too thick nor too thin. It should resemble tomato sauce in consistency.
2. ou can other vegetables too if you like.
3. If you have ready-made biriyani mix paste you can use that too, but add a lesser quantity.
4. This recipe should be served immediately or else the paratha will turn chewy.
5. If you want to make it ahead, you can make the gravy ahead and add the paratha pieces just before you serve.
If you tried this recipe and liked it please do comment below. I would love to hear from you.
Pineapple Rasam
Rasam is a popular South Indian dish prepared with tamarind, tomatoes, and Rasam powder. There are many variations of this dish, and each South Indian household has its own recipe for the proportions of the ingredients of the rasam powder. Therefore though Rasam is almost a regular feature in all South Indian households its taste is unique to each. No two Rasam recipes taste the same.
The following recipe has Pineapples along with tomatoes and is very flavourful. It makes for a good soup/ appetizer, for wintertime get-togethers. As you make the Pineapple Rasam the aroma of the pineapple fills the house and you’ll have people at home making trips to the kitchen. The secret of a good Pineapple rasam rests in the extraction of the juice in 3 stages. Follow the recipe closely for instruction on juicing the Pineapples. Let’s get to the recipe right away
PREP TIME: 20 Mins COOK TIME: 20 Mins
TOTAL TIME: 35 Mins COURSE: MAIN / APPETISER
CUISINE: SOUTH INDIAN SERVINGS: 4
AUTHOR: Rajni Ram
Ingredients:
Pineapple 3/4 of a medium-sized one
Tomatoes 2 medium chopped
Tuvar dal 1/2 cup( 1 cup= 150 gm)
Fresh coriander sprigs few
Green chilies 2
Ginger 1 inch piece
Fennel seeds 1 tsp
Turmeric powder 1/2 tsp
Rasam powder 3 tsp
Salt as per taste
Asafoetida 1 tsp
Mustard seeds 1 tsp
Roasted Pepper & Cumin powder 1 tsp( dry roast in the ratio 2:1 and grind coarse)
Curry leaves few
Ghee/ clarified butter for tempering
Sugar 2 tsp(optional)
Directions for Pineapple Juice:
Stage 1: chop the pineapples and put them in a liquidizer/juicer and extract juice. It should be a concentrate. Add no water at all at this stage. This is extract 1.
Stage 2: Add 1 to 1.5 cups of water and juice again to get the second extract.
Stage 3: Add 2 cups of water and juice again to get the 3rd extract. Strain the pulp at this stage into the 3rd extract and discard the fiber.
Directions for Pineapple Rasam:
Wash the Tuvar dal and pressure cook for 5 whistles, set aside. Now put the chopped tomatoes, coriander leaves, green chillies and ginger in a blender and puree them. Take a 1.5-litre vessel and pour this tomato coriander puree into it. Now add the 3rd extract juice to the above puree. Also add in the salt, Rasam powder, 1/2 tsp asafoetida, turmeric powder, and boil this mixture. Allow it to boil for some time until it reduces to 1/2( Please note that 3rd extract had 2 cups water so that plus the tomato puree, has to boil and reduce to half). At this stage add the cooked dal ( mash lightly) along with the water. If there is no water remaining in the dal add up to a cup to the dal, mix nicely and add to the reduced extract. Now add the 2nd extract juice and continue to boil. Boil until the rasam starts frothing in the vessel and starts brimming up. Keep stirring in between. Now add another 1.5 cups of plain water and continue to boil for another 2 minutes. Finally, add the 1st extract juice, 2 tsp sugar( optional), and put off the stove immediately. The rasam should not be allowed to boil after adding the first extract, as it will lose all flavour. Now temper the Rasam in ghee. Take 2 tsp ghee in a small tadka kadai and heat it. Add mustard seeds and as they crackle add the cumin-pepper powder, 1/2 tsp asafoetida, switch off the stove, and drop in the curry leaves. Pour the tempering into the rasam. Garnish with finely chopped fresh coriander leaves. The flavourful Pineapple Rasam is ready to serve. Serve it as an appetizer/soup or with rice for some yummy comfort food.
STEPWISE RECIPE FOLLOWS:
1. Extract the Pineapple juice following the method mentioned above and keep ready.
2. Gather all other ingredients and keep ready.
3. In a blender put in the tomatoes, coriander leaves, green chilies, ginger, and fennel seeds and blend to a smooth puree.
4. Take a big vessel that can fit around 1.5 litres of liquid. Put the 3rd extract of juice into the vessel and add in the tomato puree. Switch on the stove.
5. Add the salt, turmeric powder, asafoetida, Rasam powder, and boil. Continue to boil until it reduces to 1/2 the quantity.
6. Now add the cooked dal along with the water into the boiling soup and also add the 2nd extract juice now. Continue to boil until it froths and begins rising. Keep heat at medium throughout.
7. Now add another 1.5 cups of plain water and continue to boil. When it brims up, add the 1st extract juice, add sugar(optional) and put off the stove immediately. Avoid boiling the Rasam once you add the 1st extract as flavour will be lost.
8. Now in a small tempering pan/tadka kadai, add 2 tsp ghee and heat. Add the mustard seeds, when they crackle, add the roasted pepper-cumin powder, asafoetida, and put off the stove. Finally, add the curry leaves to the tempering and pour the tempering into the Pineapple Rasam. Serve hot as a soup or along with hot rice and a dollop of ghee.
NOTES:
1. Follow instructions for Pineapple juice carefully as it affects the flavour of the Rasam.
2. You can increase or decrease the Rasam powder as per your spice preference. But don’t go below 2 tsp for 1.5 litres of Rasam.
3. Sugar is optional, add only if the pineapples are not sweet enough.
4. The roasted cumin -pepper powder is common to all Rasam varieties. You can store this powder in an airtight jar to add to Rasam, Pongal, etc;
Berry Smoothie Icecream
For all the Berry lovers like me, this Smoothie Icecream is a treat to the taste buds. Made with a mix of Blueberries and Cranberries, Greek yogurt, Hung Curd, and some condensed milk, this is a dessert full of flavour. What’s more, it is healthy too…
Getting to the recipe right away.
PREP TIME: 15Mins+ 2hrs( hung curd) PROCESSING TIME: 5 Mins
TOTAL TIME: 35 Mins COURSE: DESSERT
CUISINE: WORLD SERVINGS: 6
AUTHOR: Rajni Ram
Ingredients:
Digestive biscuits 6 numbers
Condensed Milk 250 gm
Cranberries 100 gm
Blueberries 100 gm
Plain Greek yogurt 250 gm
Hung Curd 250 gm
Paper cups 6
Icecream sticks 6
Directions :
Take the Digestive biscuits in a dry mixer and powder them. To this add 2 tbsp condensed milk and give another spin in the mixer. Distribute this mixture evenly into the 6 cups and press it down into the cup base with a spoon. Now put the berries into the dry mixer and give it a spin. Grind it coarse and keep aside. In a liquidizer pour the Condensed milk, followed by Greek yogurt and hung curd, mix in the coarsely ground berries and blitz them for a minute. Pour the mixture into the 6 cups filling 3/4 of the cup and insert the ice cream stick until it touches the biscuit base. Repeat for all cups and freeze them for 8 hrs. The Berry Smoothie Icecream is ready for an after-dinner treat. Enjoy. Bon Appetit.
STEPWISE RECIPE FOLLOWS:
1. Assemble are ingredients. Keep the paper cups and icecream sticks ready.
2. In the dry mixer put in the Digestive biscuits and powder them. Add 2 tbsp Condensed milk and spin in the mixer again.
3. Distribute evenly in the 6 cups and press it down to the cup base. Keep aside.
4. Put the Berries in the dry mixer and coarsely grind them. Keep aside.
5. Now in the liquidizer pour the Condensed milk, Greek yogurt, and hung curd, followed by the berries and blitz the contents for a minute.
6. Distribute evenly into the 6 cups and insert the icecream sticks such that they touch the biscuit base. Put the cups into the freezer to set for 8 hrs.
7. After 8 hrs remove from freezer and unmould the Smoothie Icecream by gently squeezing the cup from the base until the icecream slides out.
I tried this recipe yesterday with fresh Strawberry, as it’s the Berry season now in India and the Berry Smoothie ice cream turned out very delicious with the fresh ones. I have used 2 packs of strawberries around 300 gms, rest of the measurements and recipe remain the same. Try it out this season and make the best of the goodness the berries have to offer.
NOTES:
1. Any mix of berries can be used.
2. I have used dry berries, you can use the fresh ones too in the season, but you will have to add sugar to the mixture as the berries can be a little sour. That said the fresh berries do give a more intense flavour.
3. The base is a little hard when set, but the base cannot be done away with, as the base allows for an easier unmoulding of the icecream.
4. You can use 2 tsp chilled butter instead of the condensed milk to set the digestive biscuit base. It might turn out a little softer than the condensed milk one. I have not tried this in this recipe.
5. As you can see fresh berries to dried berries the colour does make a difference. Taste and flavour are the same. But then fresh berries are irresistible to me .????
If you make this recipe and like it pls comment below. I would love to hear from you.
Pakode Wali Dal
Last week I made some Pakodas to go with Kadi(More kozhambu). I had some left after lunch, so saved them for dinner. I had made Dal that night and happened to add those Pakodas to Dal, and the result was rather unique and tasty. After some research on the internet for similar recipes, I realized that I couldn’t find anything that combined Dal and Pakoda. Hence, I thought I’d share my take on it with you. In this recipe, deep-fried Onion Pakodas have been dunked in a flavourful Dal. Let’s get to the recipe right away.
PREP TIME: 20 Mins COOK TIME: 15 Mins
TOTAL TIME: 35 Mins COURSE: MAIN
CUISINE: SOUTH INDIAN SERVINGS: 4
AUTHOR: Rajni Ram
Ingredients for the Dal:
Tuvar Dal(yellow lentils) 1 cup( pressure cooked)
Moong dal 1/2 cup (pressure cooked)
Spring onion greens(optional) finely chopped 1/2 cup
Tomato 1 medium
Green chilli 2 finely chopped
Asafoetida 1/2 tsp
Ginger- garlic paste 1 tsp
Red chilli powder 1 tsp
Turmeric powder
Garam masala 1/2 tsp
Lemon juice 2tsp
Salt as per taste
Mustard seeds 1 tsp
Cumin 1 tsp
Oil for tempering
Ingredients for the Pakodas:
Onion 1 large or 2 medium roughly chopped
spring onion greens(optional) 1/2 cup
Besan/ gram flour 1 cup
Rice flour 1 cup
Ajwain/carrom seeds 1/2 tsp
Asafoetida 1 tsp
Green chilli 2 finely chopped
Red chilli powder 1 tsp
Salt as per taste
water for making batter 1 cup approx.
Oil for frying
Directions for Pakodas:
Take the Onions and spring onion greens in a dish and add the Besan and Rice flour followed by all dry masalas and mix well. Do not add water immediately. Start mixing the mixture, the onion will release some moisture, depending on that the water can be added a little at a time. We do not want a runny batter, it should be slightly dry, you should be able to form a lump with it. Now heat some oil in a Karahi for frying the pakodas. When the oil is quite hot, pour about 1 tbsp hot oil into the pakoda batter. This gives crispy pakodas. Mix with a spoon/ladle after adding the hot oil and now start dropping bits of the batter very gently into the oil to make Pakodas. Drain the oil from pakodas on absorbent paper and set aside.
Directions for dal:
In a pan heat some oil. Add mustard seeds and as they crackle add the cumin seeds, turmeric and green chillies. Fry well. Now add the asafoetida and the finely chopped spring onion greens and saute. After a minute add the chopped tomatoes, salt and all the spice powders, except garam masala. Cook for a few minutes. The tomatoes should turn mushy. Now add in the cooked dals and mix well. Add about 2 cups water to the dal and bring to a boil. Put off the stove and add the lemon juice now. The Dal Tadka is ready. Garnish with some chopped coriander.
To plate, put the dal in a Katori/cup and drop in the pakodas just before you serve, or you can even arrange the pakodas in a dish and pour the hot dal over it. Serve immediately if doing this. Pakode Wali Dal is ready to serve. Enjoy. Bon Appetit.
STEPWISE RECIPE FOLLOWS:
1. Assemble all ingredients. Mix both Dals together and pressure for 5 whistles.
2. In a dish put in the Onions, spring onion greens, green chillies and all the dry spices mentioned under ingredients for pakodas add salt and mix well.
3. Now add water a little at a time to form a little lumpy batter. Heat oil in a karahi and when it is quite hot add 1 tbsp of the oil into the pakoda batter.
4. Start dropping small portions of the pakoda batter into the oil, a few at a time. Drain pakodas on absorbent paper.
5. In a pan heat some oil and add the mustard seeds. When they crackle add the cumin and green chillies and fry. Now add the spring onion greens and tomatoes and cook for a minute. Add salt and other spices mentioned under dal ingredients, except Garam masala and lemon juice.
6. When the tomatoes get mushy, add the cooked dal and stir well. Now add 2 cups water and bring the dal to a boil. Put off the stove and add the lemon juice and the garam masala and stir. Garnish with coriander leaves. The Dal Tadka is ready.
7. To plate the Pakode Wali Dal, pour the Dal into a bowl and add in the fried Pakodas just before serving. This recipe goes well with and all Indian breads.
NOTES:
1. The Pakodas can be of your choice-Onion/ Spinach.
2. Don’t skip the step of adding hot oil to the pakoda batter, it makes the pakodas crisp on the outside and soft inside. Some people add cooking sods for the same, but I recommend this option.
3. The dal too can be of any variety.
4. The spring onion is optional, the dal and pakodas will taste just as fine without them. I love making dal with spring onion when in season as it gives a nice flavour to the dal.
5. These pakodas can be had as a snack too with some tomato sauce or green chutney, so do save some to munch on.
If you made this recipe and liked it please comment below, I would love to hear from you.
Sabut Moong Dal/ Green Moong Dal
This is a wholesome dal for the days you want a simple yet nutritious meal. It is ideal for those days you want to be off masala’s and give your taste buds a break. I have kept the dal very simple. With a little planning ahead(soaking the dal), you can get this done in just 30 minutes. After a busy day at work, when you want to spend minimum time in the kitchen, just soak the lentils before you leave home for work. Once back, 10 minutes in the cooker, 10 minutes for the pressure to settle, and 10 minutes to temper the dal, and it’s done. Side by side cook rice and you can have a wholesome dinner. Those 10 minutes for the pressure to settle can be put to good use, brew yourself some tea and just chop an onion and some tomatoes and we are ready to temper the dal. Let’s get to some wholesome goodness.
PREPTIME: 5Mins +soak time( 4 hrs) COOK TIME: 30 Mins
TOTAL TIME: 35 Mins COURSE: MAIN
CUISINE: NORTH INDIAN SERVINGS: 4
AUTHOR: Rajni Ram
Ingredients:
Green Moong(lentils) 1 cup soaked at least 4 hrs
Onion 1 small
Tomatoes 2 pureed
Cinnamon 1 small stick
Cumin 1 tsp
Ginger garlic paste 1 tsp
Red chilli powder 1 tsp
Turmeric powder 1/2 tsp
Amchur/dry mango powder 1/2 tsp
Coriander powder 2 tsp
Garam masala powder 1/2 tsp
Coriander leaves 2 tsp finely chopped
Oil for tempering
Directions:
Cook Moong dal/lentils with 1 piece Cinnamon stick for 5 whistles. Wait for the pressure to release. While you wait, cut 1 small onion finely and puree 2 tomatoes in the blender. In a karahi heat 2 tsp oil. Add the cumin seeds and let them crackle. Put in the onion and fry nicely for a minute. Now add the ginger-garlic paste and continue to fry. When the onion starts turning light brown add in the tomato puree, cook for 1 minute, and add in the cooked Moong dal. Stir well and add salt followed by all the spice powders except garam masala. Simmer for 5 minutes, add in the garam masala and turn off the stove. Garnish with finely chopped coriander leaves. Simple and flavourful Hari Moong ki Dal is ready to serve. Enjoy. Bon Appetit.
STEPWISE RECIPE FOLLOWS:
1. Assemble all ingredients. Soak the Green Moong for 4 hours at least.
2. Pressure cook the dal for 5 whistles.
3. Take oil in a karahi and heat. Add the cumin seeds and allow to splutter. Add the turmeric powder and the chopped onion.
4. Fry nicely, until the onion starts turning slightly brown. Now add in the ginger-garlic paste. Fry for a minute and add the tomato puree. Cook for a minute.
5. Add in the spice powders, except garam masala, followed by the cooked dal.
6. Add one cup of water( add more if required to adjust consistency. Stir well and allow to simmer for 5 minutes. Add in the garam masala now and switch off the stove. Garnish with coriander leaves and the Green Moong dal is ready to serve.
It goes well with Roti and Rice varieties.
NOTES:
1. Tomatoes can be chopped and added too instead of pureeing, but in this recipe particularly I prefer to add the pure, as the Green moong is a little bland and the pureed tomatoes impart a little sourness to the dish than chopped and cooked ones.
2. If you don’t give much soak time, you can still make the dal, but with a longer pressure cooking time.
Gutti Vankaya Kura (Baby Brinjals In Gravy)
Brinjal/Eggplant, a vegetable so versatile that a number of recipes can be made/created with it. Gutti Vakaya Kura is a speciality from the Andhra region in South India. Baby brinjals simmered in a peanut sauce. There are many ways of making this dish. Sometimes it is made with gravy, like this recipe or is stuffed and roasted. I prefer the gravy version for the taste of peanuts and the tartness of the tamarind. Baby brinjals are the preferred variety for this recipe. Let’s get to the recipe right away.
PREPTIME: 20 Mins COOK TIME: 30 Mins
TOTAL TIME: 50 Mins COURSE: MAIN
CUISINE: SOUTH INDIAN SERVINGS: 4
Ingredients:
Baby brinjals 400 gm
Turmeric powder 2 tsp (split)
Salt as per taste
Red chilli powder 3 tsp(split)
Oil for roasting and tempering
Mustard seeds 1 tsp
Curry leaves a few
Jaggery a small bit(optional)
For paste
Peanuts/ groundnuts 2 tbsp
Coriander seeds 1 tbsp
Ginger 1 inch piece
Garlic around 6 pods
White Sesame 2 tsp
Green chilli 2
Grated coconut 1 tbsp
Tamarind 1 lemon sized ball( deseeded)
Directions: Slit the baby Brinjals midway into a cross. Keep the green stalk intact and do not cut it away. Mix1tsp turmeric powder, salt, and 2 tsp chilli powder. Apply a little of this powder inside each brinjal and set aside. Roast all the ingredients mentioned under paste in 1 tsp oil and allow it to cool. Once cool, grind them to a fine paste in a blender. Now in a Karahi or pan heat 1 tbsp oil, put in the brinjals a few at a time and roast for few minutes( approx 5 min). The brinjals should not turn limp but should start getting s little soft. They will start changing colour to brown. At this stage remove them from the pan and set aside. In the same pan/karahi take 1 tbsp oil and heat. add in the mustard seeds and as they crackle add the curry leaves and turmeric powder. fry for 30 seconds and add the ground peanut paste to the oil and stir continuously. Reduce flame before adding the paste, as the paste can stick to the pan. Add salt, red chilli powder( only if you need more spice, remember we have already added green and red chilli to the paste). Fry the paste nicely for 2 minutes. The raw taste of the peanuts must not remain. At this stage add 2 cups water and drop the baby brinjals into the sauce. Add the jaggery at this stage if you are using it( this is optional). Cover and simmer on low fire for 15 minutes. Open the lid and stir the contents every now and then. At the end of 15 minutes, the sauce should have reduced and the brinjals should have cooked, but yet stiff. The spicy Gutti Vankaya Kura is ready to serve. This dish goes well will Pulav, vegetable rice(Brinji), or even Roti, Parathas and other bread. Enjoy. Bon Appetit.
STEPWISE RECIPE FOLLOWS:
1. Assemble all ingredients.
2. Slit the Baby Brinjals midway as shown in the picture. Mix 1 tsp turmeric powder, 2 tsp red chilli powder and salt as per taste. Apply this powder into each brinjal. Set aside.
3. Take 1 tsp oil in a karahi and fry all ingredients mentioned under paste. Cool it and grind to a smooth paste.
4. In the same karahi take 1 tbsp oil and roast the brinjals a few at a time. They should change colour and get a little tender, but not limp. Remove from the karahi and set aside.
5. In the same karahi add another tablespoon oil and heat. Put in the mustard seeds and curry leaves. as the mustard splutters add the turmeric powder and fry for 1/2 a minute.
6. Now add the ground paste and stir constantly and don’t allow it to stick to the pan. Fry for 2 minutes and add salt, red chilli powder( only if you want it spicier)and continue frying. The raw taste of the peanuts should subside.
7. Now add 2 cups of water and mix. Drop the brinjals slowly into the sauce and cover and cook for 15 minutes, stirring in between every now and then. If using jaggery, add now.
8. When done, the sauce should have thickened, and the brinjals should have cooked and retained the shape. The Gutti Vankaya Kura is ready to serve.
NOTES:
1. Peanuts without the skin can be used. Skin need not be removed.
2. Jaggery is usually used to break the complex proteins of the peanut. You can choose not to add.
3. Do not cut the green stalk of the brinjal. It helps in retaining the shape after cooking. Some people love chewing on the cooked stalk. It tastes really good.
4. If you don’t wish to roast the tamarind with the other paste ingredients, you can make pulp and add it while the sauce is simmering.
Akkaravadisal
This is a very traditional South Indian sweet dish. Lord Mahavishnu is offered this sweet as prasad(holy offering). The main ingredients are Rice, moong dal, jaggery, milk and ghee. The ingredients are similar to the Sweet Pongal but both taste very different. It tastes heavenly when served a little warm. Without much ado let’s get to the recipe right away.
PREP TIME: 10Mins COOK TIME:30Mins
TOTAL TIME: 40 Mins COURSE: MAIN
CUISINE: SOUTH INDIAN SERVINGS: 4
AUTHOR: Rajni Ram
Ingredients:
Rice 1 cup
Moong dal/ green gram 1/4 cup
Milk 6 cups
Jaggery 1 cup
Water 1/4 cup
Sugar ( optional) 1 tbsp
Ghee 3/4 cup
Cardamom/ elaichi powder 1 tsp
Saffron ( optional) 2 pinches, soaked in warm milk
Raw camphor( optional) 1 pinch powdered
Cashewnuts 8 to 10
Raisins 8 to 10
Directions:
Dry roast the Moong dal to a light brown colour. Stir constantly and take care not to burn the dal. It will give out a nice aroma. Put the jaggery in a separate vessel, add water and bring to a boil. Put off the heat and stir to dissolve the jaggery. Keep aside. Take a vessel that fits inside your pressure cooker and transfer the rice into it. Add in the roasted Moong dal and wash both the rice and dal together. Pour 4 cups milk and arrange the vessel in the cooker. Close lid and cook for around 5 to 6 whistles. After pressure releases open lid, the rice should be well cooked and not grainy. Mash the cooked rice and dal while it’s hot, keep aside. In a pan or Urli( heavy-bottomed brass vessel ) pour 1 tbsp ghee and heat. Fry the cashew nuts and raisins in the ghee to a nice golden colour and keep them aside. To the same pan add the cooked rice and dal. Strain the liquid jaggery into the rice directly and the sugar and the remaining milk( 2cups, to which saffron was added). Stir nicely. Add the cardamom powder and raw camphor powder and stir. Put off the stove and add the ghee finally. The divine tasting Akkaravadisal is ready. Tastes best when hot/ warm. Enjoy. Bone Appetite.
STEPWISE RECIPE FOLLOWS:
1. Assemble all ingredients.
2. Dry roast the Moong dal to a light brown colour. Take rice in a vessel that fits inside the cooker and add the roasted dal to it. Wash them a few times, add 4 cups milk and place the vessel inside the cooker with sufficient water at the bottom. Cook until 5 to 6 whistles. To the remaining 2 cups of milk add saffron and let soak.
3. Until the pressure releases let’s get the jaggery ready. In a small vessel take the jaggery, add 1/4 cup water and bring to a boil, put out the stove and stir the jaggery to dissolve it.
4. Once you open the cooker mash the contents while they are hot as it’s easier to do it then. Set aside.
In a pan/ Urli take a tablespoon of ghee and heat, fry the nuts and raisins in it and keep aside.
5. In the same pan/ Urli transfer the cooked rice and dal and strain the liquid jaggery on it directly. Pour the saffron added milk to the mixture and stir. Add in the cardamom and raw camphor and turn off the stove. Lastly, add the ghee, garnish with the fried nuts and raisins and the Akkaravadisal is ready.
NOTES:
1. We strained the jaggery to remove the impurities from it.
2. Do not cook rice directly in the cooker as we are coking with milk, the milk may stick to the bottom and the dish will give a burnt taste and odour. That’s why we are cooking with a vessel inside the cooker.( to make directly checkout One pot Akkaravadisal recipe)
3. Saffron and raw camphor are optional, they give added flavour.
4. Be liberal with ghee. Cook the rice soft. If grainy add more milk and pressure cook again.
5. I have used normal rice( Sona Masoori/ Ponni). If using Basmathi avoid the raw camphor as both aroma and flavouring of both may clash.
If you made this recipe and liked it, please comment below. I would love to hear from you.
Amla Sherbat
Amla or Indian Gooseberry is a superfood and is an immunity booster. A dose of this every day during the season, which is from December, keeps colds and other infections at bay. Amla is a versatile citrus fruit of which pickles, murabba(candy form), Supari( digestive) and many other versions are made. I tried this sherbet and everyone at home loves it and they look forward to a daily dose of this refreshing drink.
This year the Gooseberries have been in the market non-stop and one should store all the goodness they have to give. A dose of this Amla Sherbat every day certainly keeps the doctor and diseases at bay!
While you are here please do check out other recipes by Rajjo’s Kitchenn by scrolling down the contents in homepage.
PREPTIME: 5 Mins (1/2 hour to blanch Amla) COOK TIME: 5
TOTAL TIME: 10 Mins COURSE: BEVERAGE
CUISINE: INDIAN SERVINGS: 5 AUTHOR: RAJNI RAM
Amla/Indian Gooseberry 200 gm
Salt 1/2 tsp
Grated ginger 1/2 tsp(optional)
Jal jeera powder 1 tsp
Lemon 1/2 of one whole
Water 1/2 litre (ingredients can be doubled up for 1 litre)
Directions:
Take the Amlas in a bowl, add salt and turmeric powder and pour hot water over them and keep covered for half an hour. After half an hour drain water and cool. Cut them to small pieces and puree them in a blender using little water. We want a thick puree and not a watery one. The puree can be stored in the refrigerator for 1 week. Add some salt before storing in the fridge. When required take 1/2 litre water in a vessel/jug, put 3 tbsp Amla/ Gooseberry puree, add thof salt, Jal jeera powder, squeeze a lemon and put it in the refrigerator to chill. Alternately Add all ingredients to chilled water and enjoy instantly. Cheers to a drink of good health and immunity.
STEPWISE RECIPE FOLLOWS
1. Assemble all ingredients. Pour hot water over the Amlas/ Gooseberry add salt and turmeric powder and keep covered for half an hour.
2. Drain the water and cut them to small pieces and blend them to a puree. The puree can be stored in the refrigerator for up to a week and used as required. If storing in refrigerator add a little salt and store.
3. Take water in a 1/2 litre vessel or jug and put 3 tbsp of the Amla/ Gooseberry puree. Add required amount of salt followed by Jal Jeera powder and squeeze half a lemon.
4. Put it in the refrigerator to chill and enjoy. Alternately one can add chilled water to the puree and enjoy it instantly.
NOTES:
1. If storing the Amla Puree for a week then add little salt and store.
2. If you prefer the Sherbat a little sweet honey can be added.
3. I have not added ginger here, but a little bit of grated ginger does a world of good for the flavour.
If you tried out this recipe, please comment below. I would love to hear from you.
Avial
AVIAL( South Indian Mix Veg recipe)
Avial is a mixed vegetable dish popular in Kerala. Curd forms the base of the gravy. The coconut gives it body and coconut oil the flavour. A very simple yet healthy option for weight watchers, people on the move who want a quick dish to make that doesn’t involve a lot of time.
Let’s get to the recipe right away
PREP TIME: 20 Mins COOK TIME: 15Mins
TOTAL TIME: 35 Mins COURSE: MAIN
CUISINE: SOUTH INDIAN SERVINGS: 4
AUTHOR: Rajni Ram
Ingredients
Ash Gourd 100 gm
Pumpkin 100 gm
Cucumber 100 gm
Carrot 1 medium
Beans 6 numbers
potato 1 large
yam (elephants foot) 50 gm
Raw Banana 1/2 a piece of 1 large one
Drumstick 2 not too thick ones
Capsicum 1/2
Green chillies 4( slit 2 lengthwise and add while veggies are cooking, 2 for grinding)
Coconut 1 half of a medium-sized one(grated)
Coconut oil 2 tsp
Curry leaves 10 leaves
Curd(slightly sour) 250 gms
Turmeric Powder 1 tsp
Salt to taste
Water 1.5 cups to vegetables
Directions:
Cut all vegetables lengthwise, preferably to the same size so that they cook equally. Boil the veggies in a little water, add salt and turmeric while boiling. Once veggies are cooked, drain excess water(do not throw) and keep it aside. In the dry grinder of your mixie or processor, put in the grated coconut and green chillies and give it a nice turn, now add 3 Tbsp of curd and blend the contents well to form a smooth paste. Pour this paste into the boiled veggies and switch on the stove, stir it well and let cook for a few minutes. In the meanwhile just smoothen the curd with a spoon. Add this curd to veggies, give a good stir, cook for exactly 2 mins on low heat, do not bring the mixture to a boil and put off the stove. Check for salt and spice at this stage. Drizzle the coconut oil over the dish and add the curry leaves. Voila, the Avial is ready. Goes with hot rice and ghee.
STEPWISE RECIPE FOLLOWS:
1. Assemble all ingredients.
2. Take a flat bottomed vessel and transfer all veggies, add salt, turmeric powder and water.
3. Let the veggies boil, takes about 10 minutes, keep stirring from bottom to top so that they cook equally. After 10 mins check for doneness. They should be cooked, yet be stiff and not become limp. Put off the stove, drain excess water and keep aside( do not discard the water)
4. While the veggies are cooking make your coconut, green chilli and curd paste. Grind it fine, add a little of the saved broth if required to make a smooth paste. Add this paste to the cooked vegetable and allow to cook for 2 mins. Keep stirring while it cools.
5. Lower the heat of the stove and add the remaining curd( remember we used only 2 Tbsp for grinding), at this stage, you can check for salt and spice and add more if required. Stir nicely and put off the stove. Pour 2 tsp of coconut oil and garnish with few curry leaves.
6. Your Avial is ready…enjoy with hot rice and ghee…Bon Appetite!
NOTES:
1. This recipe has a balance between vegetables with moisture like Ash gourd, cucumber etc and tubers like Potato and Yam, so feel free to add veggies of your choice while belong to these two categories. During Mango season add a few pieces of raw mango. The possibilities are endless, just don’t add onion and garlic.
2. Avoid overcooking the vegetables. You can add more coconut if required, it only enhances the flavour.
3. This recipe tastes best with sour curd instead of fresh, as it gives that mild sourness to the dish and helps in absorbing the spice and salt. Do not whip or beat the curd, just smoothen it with a spoon.
4. Once the second batch of curd is added, do not bring it to boil. Just stir and blend well and put off the stove.
5. I have not added Drumstick and Raw bananas, as I couldn’t get them, ( as it was the lockdown time), but do use them when you make it as the Drumsticks make the Avial really flavorful and aromatic.
If you tried this recipe and liked it, comment below. Would love to hear from you.
I served Avial with Coconut Rice…do try the combination
Bhindi Raita
Raita is a yoghurt-based condiment. It usually contains cooked or raw vegetables/fruits/pulses, mixed with the Yogurt/Dahi and tempered with Mustard and Jeera. The Raita is usually served with Biriyani, Pulav, Parathas, Naans or can be served as a dip for Kebabs too.
Today I chose to make Bhindi(Lady’s Finger) Raita as an accompaniment for Masala Rice( recipe given in Rice section), as the crisply cooked Bhindi combines beautifully with the spiced curd and imparts a lovely texture and flavour to the Yoghurt. This Raita goes well with both North Indian and South Indian dishes.
Let’s get to the recipe right away.
PREP TIME: 5 Mins COOK TIME: 15 Mins
TOTAL TIME: 20 COURSE:ACCOMPANIMET CUISINE: NORTH / SOUTH INDIAN AUTHOR: RAJNI RAM
Ingredients:
Curd /Yogurt 400 gm(fresh not sour)
Bhindi /Okra/Lady’s Finger 6 to 8 big ones
Jeera /Cumin powder 1.5 tsp
Red chilli powder 1/2 tsp, for more spice, add 1 tsp
Salt as per taste( some will be added while cooking Bhindi too)
Mustard 1 tsp
Jeera / Cumin whole 1 tsp
Urad dal split 1 tsp
Dry red chilli 1 big broken to bits
Curry leaves few
Asafoetida powder/ Hing 1/2 tsp
Oil 2 tbsp
Directions:
Take 400 gm curd, smoothen it with a ladle, do not whip or churn it. Add the spice powders- red chilli powder, Jeera powder and salt to the curd. Mix gently and keep in the refrigerator to chill. Next, take 2 Tbsp oil in a Karahi/ Pan and heat. Add the tempering of Mustard, Jeera, Urad dal, dry Red chilli, Curry leaves and Hing ( asafoetida), fry to a golden colour and add in the Bhindi. On high flame saute by stirring continuously for 2 mins, add salt and continue to saute. Keep stirring from time to time until the Bhindi is cooked and turns crisp. Put off the stove and cool it. Once cooled it can now be added to the chilled spiced curd. Yummy Bhindi Raita is ready to serve.
STEPWISE RECIPE FOLLOWS:
1. Assemble all ingredients.
2. Take 400 gm Curd and smoothen it out with a ladle, don’t beat or whip it vigorously. To this add the spice mix of cumin powder, red chilli powder and add salt. Stir nicely and put it in the refrigerator to chill
3.In a Karahi/ Pan heat 2 Tbsp oil and add in the tempering of mustard, jeera, hing, urad dal, dry red chilli and fry until golden in colour. Add in the Bhindi.
4. Fry the Bhindi on high flame for 2 mins, add salt and continue to saute. Keep at it until the Bhindi turns crisp(will shrink in size). Put off the stove and cool the Bhindi. Once cool the bhindi can be added to the chilled spiced curd.
5. Bhindi Raita is ready to serve. Serve it will Parathas, Biriyanis, Pulav’s or serve with Masala Rice( recipe in Rice section). Enjoy!
Notes:
1. Ensure you cool the fried Bhindi before you add it to the spiced curd mixture. If it is hot the curd will thin down.
2. Always fry Bhindi on high heat and constant stirring or else it can turn slimy.
3. If in case the Bhindi does turn slimy, then add either Idli Podi( gunpowder that’s used as an accompaniment for Idlis, Check recipes under Masala Powders) or Dal powder(check recipe under powders).
another tip is to cut Bhindi few hours prior and put it in the refrigerator for an hour or two. Remove it from the refrigerator and don’t thaw, put it in the Karahi directly.
3. why am I giving so many instructions on cooking the Bhindi?, because a crunchy Bhindi makes a good Raita.
If you tried this recipe and liked it, comment below. Would love to hear from you.
Lemon Rice
Lemon Rice is one such recipe which is easy to make with minimum ingredients. It doesn’t need any specific accompaniment. It can be had just like that or with Papad. It’s the perfect lunchbox item. The zing and freshness of lemon is enough to bring everyone to your table for their share.
My Grandmom was an expert at making it( not that its rocket science), but her lemon rice always had that freshness of the lemon intact. So over the years I have tried and perfected it, her way and by hit and trial have found her secret of that fresh lemon flavour. I’m stressing on the flavour here because I have seen many a time the lemon flavour fails to standout the sourness is there, but the flavour is missing. This is because of cooking the lemon juice with the tempering. As the recipe proceeds, you’ll understand what I mean.
I usually don’t write so much of an introduction, but this recipe is just so close to my heart that I had to.
Let’s get to the recipe right away.
PREP TIME: 10Mins COOK TIME: 40Mins
TOTAL TIME: 50 Mins COURSE: MAIN
CUISINE: SOUTH INDIAN SERVINGS: 4
Ingredients:
Rice 1 cup ( regular rice not Basmati)
Lemon 2 medium size
Green chillies 2
Red chillies 2
Ginger 1 inch piece
Curry leaves a few
Turmeric powder 1 tsp
Asafoetida powder 1/2 tsp
Salt as per taste
Urad dal 1 tsp
Chana dal soaked in water( for 1/2 an hour) 1 Tbsp.
Mustard 1 tsp
Peanuts 1 Tbsp
Oil 3 Tbsp( refined or sesame) for tempering and 3 tsp for drizzling on cooked rice.
Directions:
Cook the rice in a pressure cooker. You can use 2.5 to 3 cups water for 1 cup of rice. As soon as pressure releases transfer the rice to a large plate/ tray and spread it. Drizzle little refined oil or sesame oil on it, so that the rice doesn’t stick together. Allow it to cool.
In the meanwhile take 3 Tbsp oil in a Karahi/ pan and heat it. Drop the peanuts gently into the oil and fry until you see a nice golden colour. Add the mustard, as it crackles add the green and red chillies, ginger, asafoetida, urad dal, soaked chana Dal after straining the water, curry leaves and fry them till the dals are a nice golden colour. Add the turmeric powder and salt and put off the stove. Now add the juice of 1 lemon to it and mix well. Now add the rice little by little to this tempering. Mix well so that the tempering is evenly distributed. Now squeeze the juice of another lemon on the rice and mix gently( my secret to the freshness). There the yellow beauty is ready to serve…Bon Appetit.
STEPWISE RECIPE FOLLOWS:
1. Assemble all ingredients.
2. Cook the rice in a pressure cooker. After pressure settles, transfer the rice to a large plate and spread it. Drizzle some oil on it. Allow it to cool.
3. In a Karahi take oil for tempering and heat it. Put in the peanuts and fry until golden brown.
Add all tempering ingredients- mustard, soaked chana dal( water strained), urad dal, green chillies, red chillies, ginger, Asafoetida, curry leaves. Fry until they get a nice brown.
4. Add the turmeric powder and salt and put off the stove. Squeeze juice of one lemon. Mix well.
5. Mix the cooked rice little by little to the tempering. Finally, squeeze the juice of another lemon on the rice and mix gently but thoroughly. Lemon rice is ready. Enjoy with some Papads.
NOTES:1. Usually, Lemon rice recipes state adding the lemon juice to the tempering, which gives the taste but not the flavour. some other recipes recommend squeezing the lemon directly over the rice. This ensures the flavour, but not the taste as the juice will not get evenly mixed.
2. In this recipe I have divided the juice into 2 halves and added one half to tempering and another half to the rice, this gave me the perfect balance of flavour and taste.
3. Potato fry(south Indian style) goes very well with the lemon rice too, just in case you aren’t the papad person.
4. You could serve the Rice with Raita too.
If you tried this recipe and liked it please comment below. Would love to hear from you.
Chinese Paratha
This recipe is one that has been sitting in my recipe book for the past 20 years. I made this as a young mother, with no success at making Veg Hakka noodles, as I did not understand what aldente meant.
Over the years as my journey as a budding home cook begun, I mastered the Veg Hakka part, but yet hadn’t tried the fusion recipe, until I started this blog and as I was going through all my recipe collections( a manuscript from the days when digitalization was unknown) with my daughter, she said: “why not try this now”? and I gave in to the idea and don’t regret it at all. That said, this fusion recipe is a Paratha(Indian bread) with stuffed Veg Hakka noodles. Let’s get to the recipe right away.
Onion- 1 medium-sized( can use spring onions too, finely chopped)
Carrot –1 small grated coarsely
Capsicum- 1 finely chopped
Garlic- 5 cloves finely chopped
Green Chillies- 2 finely chopped
Tomato- 1 large finely chopped
Schezwan sauce 3 tsp
Tomato sauce 2 tsp
salt as per taste
Red chilli powder 1 tsp
Directions for Parathas:
Take the wheat flour in a deep dish or a large plate. Add salt and the oil. Mix well and add water little by little as you knead to form a stiff dough. The dough must be stiffer than the Chapati dough. If the dough is loose, add a little more flour and knead again. Form a ball of the dough. Apply a little oil to your palms and spread it on the dough. Cover and rest it for half an hour.
Directions for the Veg Hakka noodles:
Boil around 1.5 litres of water in a wide-mouthed vessel. As the water comes to a boil add the uncooked Hakka noodles( broken to small bits around a fingers length) and a tsp of salt and cook. The noodles must be cooked aldente meaning a little undone( this comes with some practise). Keep stirring so that you know when to switch off the heat. Remove a few strands of noodles from the pot and do the cook test, that is, use a spatula to cut the noodles. If it cuts through easily, put off the heat, drain water from the noodles immediately and rinse the noodles in plain water(room temperature) 2 to 3 times, and drain the water. apply a little oil to the noodles and let it cool a bit.
As the noodles cool off let’s get the vegetables ready. In a wok or Karahi, take the oil and heat. Add the finely chopped garlic and green chillies and fry till you get a good garlicky aroma. Add the finely chopped onions, followed by the capsicum and saute well. Next, add in the grated carrots and cook for a minute. Now add the tomatoes followed by salt and red chilli powder and cook for a few minutes. Once the tomatoes turn mushy add both the sauces( you can mix them ahead in the said ratio) and cook until semi-dry. Add in the cooked Hakka noodles and mix well. Veg Hakka is ready. allow it to cool. This can be made ahead and kept.
Method to stuff the parathas:
Take the resting dough and divide it into 10 equal parts. If you want bigger parathas to divide into 8 portions. Take one ball, dust it with flour and roll out into a small circle. Fill it with the noodles stuffing and seal the ends nicely. Dust it with flour again place it on the counter and flatten it with your palm, so that the stuffing spreads evenly. Now roll it out with a light hand without applying pressure into a little thick circle. Put a girdle on the stove and heat it. Place the paratha on the girdle and cook it, apply a tsp of oil and flip it, apply another tsp oil, and cook both sides well, until you see small brown dots. Repeat for all the 10 balls. The Chinese Parathas are ready, Bon Appetit.
STEPWISE RECIPE FOLLOWS:
1. Assemble all ingredients.
2. For Parathas, Take the flour in a deep dish or big plate. Add the salt and oil. Pour water little by little and start combining the flour. Don’t use too much water as we want a tough but pliable dough. As you combine the flour knead it well. It has to be smooth. Smear a little oil on the dough, cover it and let it rest for half an hour.
2. For the Hakka noodles, boil water in a widemouthed vessel. Break the noodles into finger length pieces and keep ready. When water begins to boil, drop the noodles gently into the water add a little salt and let it cook.
3. Keep stirring as we don’t want the noodles sticking together. Also, we have to cook it aldente( not cook it all the way through). Once done, drain the water and rinse the noodles in plain water(room temperature), smear little oil and let it cool.
4. Prepare the vegetable mixture by heating oil in a wok/ Karahi. Add finely cut garlic to the oil and the green chillies too. Fry nicely.
5. Add the finely chopped onions to this and saute. Add in the capsicum, cook for a minute and, add in the grated carrot. Cook for 2mins on low heat.
6. Add the tomatoes, salt, red chilli powder, and both sauces( i have combined them both in the said ratio) and cook until the mixture is semi-dry.
7. Add the cooked noodles little at a time and combine well. Put off the stove and cool the filling.
8. To make the parathas, divide the dough into 10 equal parts. Take one ball from that and dust it with dry flour. Roll this into a small circle a little smaller than your palm. fill in the filling with a spoon, about 2 tbsp into each circle. bring the edges together and seal them.
9. Dust with flour again and roll it out into a bigger and thick circle. Put a girdle to heat and place the rolled out paratha on the girdle. smear oil on the side facing up and flip it. smear oil again after flipping and cook both sides until brown spots appear.
10. The Chinese Paratha is ready to serve with some raita.
NOTES:
1. I have used only a few vegetables here, you can add spring onion too, but it’s better to not go over the top with vegetables here as rolling the Paratha may become tough.
2. The filling has to be quiet dry or else it will start oozing out of the bread while rolling.
3. Cooking the noodles as mentioned is better, as overcooked noodles will clam together, and rolling the Paratha will be difficult.
4. I have served the paratha with Raita and tomato ketchup and not pickle as most parathas, as this Chinese Paratha being a fusion may not go with pickle. But if you prefer it that way, do go ahead as what the palate demands is what it should get.
If you tried this recipe and liked it please comment below. Would love to hear from you.
Rava Dosa
Dosas come in many varieties and these Rava Dosas are full of flavour and are crisp too. This is a foolproof recipe. In my family, we have made it this way for years and what’s more, just add any healthy millet flour to this and it will still come out well. In restaurants, this Dosa is made with Maida instead of the wheat flour. You can do that too. I’m partial to what flour so have replaced Maida/ refined flour with it.
Let’s get to the recipe right away.
PREP TIME: 10Mins COOK TIME: 40Mins
TOTAL TIME: 50 Mins COURSE: MAIN
CUISINE: SOUTH INDIAN SERVINGS: 4
AUTHOR: Rajni Ram
Ingredients:
Rava/ Sooji 1 cup( roasting Rava is optional, but I would recommend it) Rice flour 1 cup
Wheat flour 1 cup
Curd 1 cup
Water -around 1 litre or a little more
Roasted cumin and pepper powder
Green chillies 2
Ginger 1 inch piece
Curry leaves- few leaves cut fine
Coriander leaves finely chopped.
Salt as per taste( I used 1.5 tsp)
Directions:
Take a 1-litre vessel. Put in all the three flours.
Add the curd to it. Add in the salt and the roasted cumin pepper powder. Add a little of the water from 1 litre and mix well forming a paste without lumps. Once that’s done mix in the remaining water little by little and stirring every now and then so lumps don’t form. Don’t pour all the water at a time. Depending on the quality of the Sooji, you might use, less too. The batter should neither be too thick nor too watery. It should be a little loose than the normal Dosa batter. Take 3 tsp oil in a small tadka karahi and heat. Add the mustard and Cumin and once they crackle put in the finely cut green chillies, ginger and curry leaves. Also, add 1/2 tsp of Hing/ Asafoetida and turn off the stove. Add this tempering to the batter. Let the batter stand for 10 mins and you are ready to pour the Dosa on the girdle. There your crispy Rava Dosa is ready. Enjoy. Bon Appetit!
STEPWISE RECIPE FOLLOWS:
1. Assemble all ingredients.
2. Take a 1-litre vessel and add in Rava/ Sooji, wheat flour and Rice flour. Add in the curd.
3. Add the salt and the roasted cumin- pepper powder( to make powder take 2 tsp Jeera and 1 tsp pepper and roast on low fire to get the aroma of the spices. Cool and grind coarse).
4. Add water( up to 1 litre) little at a time and stirring constantly so that no lumps are formed. Pour the remaining water until you achieve the consistency shown in the picture( a little thinner than the regular Dosa).
5. Take oil in a small tadka karahi. Add the mustard and cumin seeds. When they crackle add the cut green chillies, ginger and curry leaves. Add Asafoetida too and crush a little. Pour this tempering into the batter. Add the chopped coriander and let the batter stand for 10 mins atleast. There your batter is ready.
6. To make crispy Dosas, put a girdle on the Tava( I used a non-stick one). The girdle has to be really hot or else your dosa will be lumpy.
7. Now pour the batter on the girdle forming a circle. You cannot spread the batter like the regular dosa, you’ll have to pour it as shown in the picture. Drizzle oil over the Dosa and cook.
8. Cook until it becomes crisp and is a golden brown, then flip over and cook again. If you want it crisper be generous with the oil.
Your crisp Rava Dosa is ready. Enjoy with chutney( check out the recipe in chutney section) and idli podi ( check out the recipe in powders section).
NOTES:
1. As said earlier it’s a foolproof batter and won’t let you down. Just stick to the measurements.
2. Rava Dosa is usually made with Maida in restaurants as it gives that extra crispy edge, feel free to use that too. Since I am partial to wheat flour have replaced Maida with it.
3. Instead of wheat flour or Maida, you can use Ragi flour, Jowar flour or any other millet flour and the Dosa will still come out well.
4. If you are sceptical of replacing the wheat flour with any millet flour, just add a cup of millet flour along with the other flours. That works too.
5. Be generous with the oil for crisp Dosas and be patient. Unlike the regular Dosas, they take a little longer to cook and get crisp, and the patience will be worth it.
6. It’s important to get the girdle quite hot. Do the little test of sprinkling water on your girdle when it’s hot. If the water evaporates very quickly, that’s the right heat. You can start pouring the batter on the girdle.
If you tried this recipe and liked it please comment below. Would love to hear from you.
Dal Makhni 2 ways
Dal Makhni or Dal Makhani is one of the all-time favourite dishes of my family, whenever we are at a North Indian joint. So I have tasted many versions of it and used to make this recipe at one point in time with cream, as most recipes suggest. I found the dal to be heavy when made this way and then I chanced upon the recipe for Dal Makhni that I’m blogging now on a spice packet, I tried it and it tasted almost like the restaurant ones, so have been following this recipe for a long time now.
Dal Makhni is a dish from Punjab and the main ingredients are black lentils( Black Urad dal whole) Rajma, butter and other spices and condiments. It gets the creamy texture and taste from butter and slow cooking. The longer you cook it on low fire, the tastier. That said, this dal can be made without butter/ cream too. And it tastes all the same.
While you are here please checkout my other recipes like Choley, Pakode wali Dal,
Black Whole Urad 200 gm ( black lentils) Soaked overnight
Rajma 1 handful (soaked overnight)
Chana dal 1 tbsp.
Garlic 8 pods (finely chopped)
ginger 1-inch piece chopped
Butter 2 tbsp
Tomato 3 medium pureed
Salt as per taste
Red chilli powder 1 tsp( more if you like it spicy)
Dal makhani masala 1.5 tbsp
Kasoori Methi 1 tsp crushed
Directions: Soak the Black Urad, Rajma and Chana dal overnight. Once soaked put them in a pressure cooker with 2 pods of garlic and the ginger and cook for 6 to 8 whistles. Heat 1 tbsp butter in a pan and heat. Put in the Cinnamon stick and garlic and fry don’t brown them. Add in the Kasoori Methi and fry for half a minute. Now add the tomato puree and cook for 3 minutes. Add in the Dal Makhni masala, Red chilli powder, salt and cook until the butter floats. Lightly mash the cooked dals and add them to the tomato mixture. Stir nicely and add 2 cups water and reduce the heat and cook on low fire for about 25 to 30 minutes. Switch off the stove and add another tablespoon of butter and garnish with finely chopped coriander. Creamy Dal Makhni is ready to serve. This Dal goes really well with Parathas, Roti, Jeera rice and other Indian bread. Enjoy and Bon Appetit.
STEPWISE RECIPE FOLLOWS:
1. Assemble all ingredients. Soak the dals overnight.
2. Cook the soaked dal in a pressure cooker along with some garlic and the ginger and a piece of cinnamon stick for 8 to 10 whistles.
3. Take some butter in a pan and heat. Put in the Cinnamon stick and garlic and fry for 1/2 a minute. The garlic must not turn brown. Add in the crushed Kasoori Methi and fry for a minute.
4. Now add in the pureed tomatoes followed by salt, red chilli powder and Dal Makhani masala and cook. Cook until the butter floats/ forms a layer on top.
5. Now add the cooked dal, stir nicely and add 2 cups of water and cook on low fire for 25 to 30 minutes.
6. After 30 mins put off the stove and add a tablespoon( or more)of butter to the dal and garnish with chopped coriander.
NOTES:
1. The Chana dal gives the creaminess to this dish, so don’t do away with it, at the same time don’t put too much of it or the taste may vary.
2. If you don’t have Dal Makhni Masala, use a small quantity of garam masala. For the measures that are given above 2 tsp garam masala should be sufficient.
3. Adding Kashmiri red chilli powder will give the dish a good colour. I have added a mix of both regular red chilli powder and Kashmiri red chilli powder, so that spice and colour are balanced.
If you tried this recipe and liked it please comment below. I would love to hear from you.
Masala Rice
Masala Rice is flavourful rice with vegetables and a ground paste. The aroma that fills your home while making it will bring in everyone to the kitchen. It is a very simple Rice and wholesome too. Just serve it with Raita and papad and all hungry souls will be content.
Let’s get to the recipe right away.
PREPTIME: 15 Mins COOK TIME: 25Mins
TOTAL TIME: 40 Mins COURSE: MAIN
CUISINE: SOUTH INDIAN SERVINGS: 4
Ingredients: AUTHOR: RAJNI RAM
Uncooked Rice 1 cup (Regular/ Basmathi, both are fine)
Water( to cook rice, 2.5 cups for regular rice and 2 cups for Basmati)
Carrot 1 small
Potato 1 medium
Beans 4 long
Brinjal/Eggplant(any variety other than globe)
Red chilli powder 1 tsp
Garam masala powder 1/2 tsp
Coriander/ Dhaniya powder 1 tsp
cloves 3
Cardamom/ Elaichi 3
Cinnamon 1 inch stick
Saunf/ fennel seeds 1/2 tsp
Star anise 1
Peppercorns a few
Fresh Coriander leaves finely chopped
Oil for tempering
Cashewnuts 5 to 6
Raisins 5 to 6
Paste ingredients:
Coconut 3 Tbsp
Green chillies 2
Garlic 5 to 6 cloves
Ginger 1 inch piece
Directions:
Wash rice and soak for 15 minutes. Cut vegetables into cubes and keep ready.
In a deep Karahi take about 2 Tbsp oil . Once it’s hot, add all whole masalas like Cardamom, Star anise, Cinnamon, Fennel, Peppercorns, and Cloves. Fry until they turn aromatic. To this, add the cut vegetables and saute for a few minutes. Now add in the soaked rice after draining the water. Saute all of them for a few minutes. Add all the masala powders like coriander powder, red chilli powder, garam masala powder and mix well. Add water and put the stove on low. Now put the coconut, ginger, garlic and green chillies into the blender and give it a nice turn. Add some water and grind it to a smooth paste. Add the paste to the Karahi, stir all the contents well and close the Karahi with a lid. The rice takes up to 15 mins to cook. Keep stirring the rice every now and then so that it doesn’t stick to the bottom of the Karahi. The Masala Rice is ready. Enjoy with Bhindi Raira( recipe in Raitas section). Bon Appetit.
STEPWISE RECIPE FOLLOWS:
1. Assemble all ingredients.
2. Wash the rice and soak it for 15 minutes.
3. Take a deep Karahi, you can use a cooker too. Pour in 2 Tbsp oil and heat. Add the Cashewnuts and Raisins, fry and set aside. To the same oil as all whole masalas and fry until aromatic.
4. Add in the Vegetables and saute for 2 mins. Add the soaked rice after draining the water and saute all of them together.
5. Add all masala powders to this and mix well. Add the water now, give it a nice stir and lower the heat of the stove.
6. Grind a smooth paste with all the paste ingredients and add the paste to the rice. Now increase the heat and cover the Karahi/ cooker and cook the rice. Takes up to 15 mins. If using cooker put off the stove after 3 whistles.
7. Masala rice is ready, garnish with some coriander leaves and the Cashewnuts and Raisins kept aside.
Notes:
1. You can cook the Masala rice in either a Karahi or Cooker. If using cooker put off in exactly 3 whistles, otherwise, rice may get soft.
2. You can use regular rice or Basmati. I have used the regular one.
3. Don’t hesitate to add vegetables of your choice.
4. Serve Masala rice with Bhindi Raita( recipe in Raita section) and papad.
5. You can roast the nuts and Raisins in ghee too.
If you tried this recipe and liked it, comment below. Would love to hear from you.
Coconut Tomato Chutney
This chutney is very easy to make. I have added Tomato for the freshness and tang and so you don’t have to add either tamarind or lemon as in the regular coconut chutney. Goes really well with Idli, Dosa, Pongal, Paniyaram etc.
In a blender put in the fresh coconut, fried chana dal, green chillies and dry grind to a coarse paste. Add some salt as per taste and add in the chopped tomatoes and now grind to a fine paste. Add in some water to adjust consistency and give it a nice spin in the blender. The Coconut tomato chutney is ready to be served with Idli, Dosas, Pongal, etc. Enjoy. Bon Appetit.
STEPWISE RECIPE FOLLOWS:
1. Assemble all ingredients.
2. In a blender put in the coconut and grind coarse. Add the fried chana, green chillies and red chillies and grind without water.
3. Add the chopped tomato and salt and to grind smooth. Add little water to adjust consistency, add salt and give a single spin in the blender.
4. Take 2 tsp oil in small tempering Kadai and add in the mustard seeds, after they splutter add the asafoetida, and curry leaves. Pour the tempering into the chutney.
NOTES:
1. Since we have added tomato there is no need to add any other form of sour ingredients like tamarind or lemon.
2. First, dry grind all ingredients and then only add in the chopped tomato, otherwise, they won’t get ground evenly.
We would love to hear what you think of this recipe. Let us know in the comments.
Matar Paneer (One Pot)
Matar Paneer is an everyday dish made of Green Peas and cottage cheese in a tomato gravy. Usually had with any Indian flatbread or with rice. The sweetness of the Peas, the tanginess of the tomatoes, the texture of the Paneer, and the flavors of the spices all gel so well. It can be directly made in a pressure cooker( which I have done today) or can be made in a karahi.
In Rajjo’s Kitchen whenever I say tomatoes its mostly the local one( desi) and not the hybrid tomatoes ones which are sweeter. When I’m using the Hybrid ones will always specify.
Let’s get to the recipe right away.
PREP TIME: 15 COOK TIME: 15Mins
TOTAL TIME:30Mins COURSE: MAIN
CUISINE: NORTH INDIAN SERVINGS: 6
AUTHOR: Rajni Ram
Ingredients:
Green Peas 100 gm
Paneer 200 gm cut into cubes
Tomatoes 2 large or 3 medium(pureed)
Onions 1 large pureed
Ginger-garlic paste 1 tsp
Refined oil 6 tsp( 3 tsp first and 3 later, follow the recipe)
Besan or Gram flour 1 Tbsp(or) Cashew nuts 6( pre-soaked)
Fresh coriander leaves finely chopped 2 tsp
Salt to taste
Jeera/ Cumin 1/2 tsp
Turmeric powder 1/2 tsp
Red chilli powder 1 tsp ( can add 1/2 tsp more if you need more spice)
Coriander powder
Garam Masala powder
Directions:
If using a pressure cooker you don’t have to precook the peas. If using the Karahi method, precook the peas( they should be cooked soft, but not mushy).
Put the cooker on the stove, heat on medium. once hot, pour oil 3 tsp.
once the oil is hot, add the cumin seeds, as they crackle add the turmeric powder.
Now add the onions puree and cook until transparent, don’t brown them. Add in the Ginger Garlic paste and saute well. The onion and Ginger Garlic paste will start releasing oil once they are cooked. Add another 3 tsp oil, reduce the flame of the stove and put in the Besan, and nicely saute it in the oil. Take care to not burn it. As the Besan browns, add the tomato puree and drop in the peas, add salt followed by all the spice powders( except Garam Masala powder). add about 1.5 cups water, close the cooker, and put on the whistle. cook for 6 whistles and put off the stove. While the pressure reduces in the cooker, let’s get our Paneer ready. Cut them into cubes, and drop them in boiling water with a pinch of salt for 2 minutes. Remove immediately and transfer to a plate. Once the pressure in the cooker releases, open the cooker and drop in the cubed Paneer and switch on the stove on low. check for salt and spices at this stage and adjust it. Add the Garam Masala powder now and put off the stove. Transfer the contents to a bowl and garnish with fresh coriander leaves. You can decorate it with a little grated cheese, for the restaurant effect. Voila, your Matar Paneer is ready. Enjoy!
STEPWISE RECIPE FOLLOWS:
1. Assemble all ingredients.
2. Put the pressure cooker on the stove and let it heat up. Once hot, pour 3 tsp oil and heat. Add Jeera and as it splutters add the onion paste and saute nicely.
3. Add the ginger-garlic paste and saute further until the oil is released. At this stage add the remaining 3 tsp oil and add the besan to this and roast on low flame till it becomes a little brown. It may appear as a paste, keep stirring this paste continuously till you see a light brown color. Add the tomato puree and stir nicely so that no lumps of the paste remain.
4. Let a slight boil come and add the Green Peas followed by all the masala powders( except Garam Masala). Add salt and stir.
5. Add 1 cup water, give a nice stir close the lid of cooker and let 6 whistles come.
6. After the pressure comes down open the cooker. Switch on the stove and add the paneer cubes and let it boil on low heat for two minutes. Add the Garam Masala powder, give it a stir and empty into a bowl. Garnish with fresh coriander. You can also sprinkle some shredded cheese to decorate( I forgot to do so).
Your tasty Matar Paneer is ready. Enjoy with Phulkas, Rotis, or Naan on the side or just rice.
Bon appetit…
NOTES
1. As it’s a simple everyday subji ( side dish) I did not add the whole masala in the beginning. If you are cooking it for a get-together or party, you can add the whole masala like 1 or 2 cloves, 1 Tej Patha( Bay leaf), few Peppercorns along with Jeera.
2. If you want to use cashew nuts instead of the Besan then, after adding Jeera saute onion, ginger garlic paste and cut tomatoes until they turn soft. Cool and blend in mixie. Pour this paste into the cooker and continue from step 4.
3. I usually don’t fry the Paneer in oil, instead, I put it in boiling water for exactly 2 mins, don’t let it stay in hot water for more than that, they may stick to each other.
If following the karahi method, pre-cook the peas and follow the same method.
If you tried this recipe and liked it, comment below. I would love to hear from you.
Paneer-Palak Koftas (Steamed)
If you are thinking about what is new about these koftas, well they are a healthier version of the fried koftas. These dumplings are steamed and not fried, unlike the other koftas. The all-time favourite combination of palak and paneer from the steamed dumplings and of course the usual tomato onion gravy works well with this. It’s a quick recipe if you have all ingredients ready at hand. Let’s get to the recipe right away.
PREP TIME: 20 Mins COOK TIME: 40Mins
TOTAL TIME: 1 Hour COURSE: MAIN
CUISINE: SOUTH INDIAN SERVINGS: 4
AUTHOR: Rajni Ram
Ingredients:
Palak/Spinach 1/2 a bunch or 2 cup fulls when chopped
Paneer 200 gm crumbled
Onion 2 medium, chopped
Tomatoes 2 large chopped
Cashewnuts 8 to 10
Melon seeds( optional) 1 tsp
Rice flour 1 cup
Besan roasted 1/2 cup
Cardamom/ Elaichi 2
Cloves/Laung 2
Peppercorns 4
Cinnamon stick a small piece
Ginger garlic paste 1 tsp
Green chillies 4 ( 2 for koftas and 2 for gravy)
Ginger 1/2 an inch finely chopped
Cumin 1 tsp
Cumin powder 1 tsp
Coriander powder 2 tsp( 1 tsp for koftas and 1tsp for gravy)
Red chilli powder 2 tsp ( 1tsp for kofta and 1tsp for gravy)
Garam masala powder 2tsp( 1tsp for kofta and 1tsp for gravy)
Oil 2 tbsp
Directions for Koftas:
Chop the palak fine and blanch( put it in hot water) it for 5 mins. Drain the water and rinse the palak with cold water( this is done to retain the colour and crispness). Dry roast the Gram flour/ Besan until it turns aromatic and light brown. Keep stirring continuously while roasting to avoid burning the besan. Now squeeze all the water from the palak and put it in a dish. Add the crumbled Paneer. Add the roasted besan and rice flour. Add in the chopped green chillies, ginger and all dry spices and salt. Combine all together and make it like a dough. Divide the mixture into 8 or 10 equal-sized balls(koftas). Put these balls in a steamer/idli cooker and steam for 10 mins. If using a microwave for steaming 4 minutes will do. Cool the koftas.
Directions for Gravy:
In a wok heat some oil. Add the whole masalas- cardamom, peppercorns, cinnamon, and cloves. When they turn aromatic, add the onion and ginger-garlic paste, green chillies and saute well. When the onions turn translucent add the cashew nuts, tomatoes, salt and cook until the tomatoes turn mushy. Put off the stove and cool the mixture. Once cooled, put it in a blender and make a fine paste. In the same wok heat more oil and add the cumin. Add in the ground paste. Stir well continuously for a few minutes so that it doesn’t stick to the bottom of the wok. Add all the dry masalas now, except garam masala. Pour about a cup of water to the paste and bring it to a boil, cook until it thickens a little, put off the stove. The gravy is ready. You can add little Kasoori Methi for flavour, but it is optional.
Pour the gravy over the koftas and its ready to serve. The Paneer Palak koftas go well with Parathas, Rotis, Pulav or with plain rice. Enjoy Bon Appetit.
STEPWISE RECIPE FOLLOWS:
1. Assemble all ingredients.
2. Blanch the chopped palak, cool, squeeze the water and set aside. Dry Roast the Besan until its light brown and aromatic. Stir constantly and don’t allow to burn.
3. To the blanched and cooled palak add the paneer, green chillies, ginger, roasted Besan, Rice flour and all the dry spice powders, salt and combine well. Divide the mixture into 8 or 10 Koftas/balls. Steam them in an Idli steamer for 10 minutes. If steaming in a microwave then set on high for 4 minutes.
4. In a wok heat some oil. Add the whole masalas and fry until aromatic. Put in the onions, green chillies, ginger garlic paste and saute until onions turn transparent. Add the tomatoes and salt. Cook until the tomatoes turn mushy. Cool and blend the mixture to a fine paste.
5. In the same wok pour oil and heat. Add the cumin seeds and pour in the ground paste. Stir continuously for few minutes so that the paste doesn’t stick to the wok. Add all the dry spice powders now. Adda cup of water and allow it to boil until the oil separates on top. The gravy is ready.
6. Arrange the koftas in a serving dish and pour the gravy over it. Serve hot.
NOTES:
1. Squeeze the water from the blanched palak thoroughly.
2. Roast the besan well, otherwise, the raw flavour will dampen the taste.
3. The gravy should not thicken too much, it should be neither too thick, nor too thin. If very thick, add some hot water and dilute.
4. Melon seeds used here are optional. The gravy will still taste the same if not added.
5. Adding a little Kasoori Mathi to the gravy after cooking, will give a nice flavour to the dish.
6. If you wish, you can drizzle a little cream over the dish while serving. This is totally optional.
7. This dish can be made ahead and the koftas and gravy kept separate. Just before serving, warm up the gravy, pour over the koftas and serve.
8. For those who prefer soft koftas, allow the koftas to cook in the gravy for a minute.
If you tried this recipe and liked it please comment below. I would love to hear from you.
Choley/Chana Masala
Choley/ Chana Masala is one of the most popular dishes from North Indian cuisine. Made of Chickpeas it is a healthy vegetarian dish. It goes well with Rice and Indian bread alike. Everyone has their own recipe for Choley and there are many variations of it too. Some make use of tomatoes and some don’t use them at all. To go with rice the gravy is made a little lose in its consistency, as compared to the Choley had with Bhaturas or other bread. This recipe is one I have come to follow after trying various versions. I’m sure you’ll find it easy to make. Let’s get to the recipe right away.
PREP TIME: 10 Mins+Soak time 8Hrs COOK TIME: 45 Mins
TOTAL TIME: 35 Mins COURSE: MAIN
CUISINE: NORTH INDIAN SERVINGS: 4
AUTHOR: Rajni Ram
Ingredients:
Chick Peas 200 gm soaked overnight, and pressure cooked.
Teabag 1(black tea, not green)
Onion 2
Green chillies 2
Ginger garlic paste 1 tsp
Tomatoes( local variety) 2 large
Turmeric powder 1/2 tsp
Salt as per taste
Cumin 2 tsp
Red chilli powder 1 tsp
Choley Masala 1 tbsp or Garam masala 2 tsp
Amchur/dry mango powder 1 tsp
fresh coriander 1 tbsp finely chopped
Directions:
Soak the Chickpeas overnight or at least 6 hrs. Drain the water and put them into the pressure cooker, pour sufficient water, put the tea bag along with the water and cook for up to 8 to 10 whistles on low heat. Let the pressure come down. Open the cooker and drain water from chickpeas into a separate vessel. Put the onion, green chillies and cumin into the blender and grind to a smooth paste, without any water. Heat oil in a pan and add the Cumin, as they splutter add the onion paste and fry well for a minute. Add the ginger-garlic paste and continue to fry until the paste turns light brown. Keep stirring constantly or else the paste may get stuck to the pan. Add the chopped tomatoes to the browned onion paste. Add the salt and cover and cook for about 3 to 4 minutes. Open the lid, the tomatoes must have turned mushy. Mash the tomatoes well with the back of the ladle and continue to cook for a minute. Add in the dry spices- red chilli powder, Choley masala and amchur/ dry mango powder and mix well. Now add the cooked chickpeas to the onion tomato paste, cover and cook for about 3 minutes. Now add the reserved chickpea water and let it cook on low heat for about 10 minutes. Pan need not be covered now. Keep stirring every now and then. Finally, add some garam masala, put off the stove and garnish with some chopped coriander. The Choley is ready to serve. You can serve them with Rice, Rotis or Bhaturas.
STEPWISE RECIPE FOLLOWS:
1. Assemble all ingredients.
2. Chickpeas should be soaked overnight and pressure cooked with a teabag( this is done for the colour, it’s optional).
3. In a blender put in the onion, cumin and green chillies and grind to a fine paste. In a pan heat oil and put in the cumin. Once they crackle add the ground paste and fry.
4. Add the ginger-garlic paste and fry constantly until the onions turn light brown. At this stage add the tomatoes and salt. Cover and cook for 3 minutes.
5. Now add in the spice powders, mix well and add the cooked chickpeas to this. Cover the pan and cook for about 3 minutes. Now pour the chickpea water( aquafaba) to adjust consistency and continue to cook for 10 minutes on low heat.
6. The Choley aka Channa masala is ready to serve. I served them with Flavoured rice( recipe in Rice section).
NOTES:
1. Always drain out the water in which the peas were soaked. And do not throw away the water in which they were cooked. The chickpea water( aqua faba) can be stored in the refrigerator and used as broth and can be whisked with a beater to make the cream for frosting cakes.
2. Cooking with a teabag is optional, it’s done to give the colouring to the Chana / Chickpea. Since I did not have a teabag I made a potli ( packet) with tea leaves.
3. You can replace the Choley masala with garam masala powder, but the quantity should be lesser than the Choley masala. About 2 tsp will be enough.
4. Adding garam masala at the end is optional.
5. I have numbered a few pictures to avoid confusion in steps.
If you tried this recipe and liked it, please comment below. Would love to hear from you.
Stuffed Mushroom Tikka
I have always struggled with cooking Mushrooms in the initial years of my cooking. Every time I made a subji ( side dish), it would run watery and I had almost given up on making the vegetable at home. Then I chanced upon an article on the right way of cooking Mushrooms and I got back to making them again at home, and that too with near perfection. That said, this recipe is a starter and though a lot of steps are involved, they are pretty simple. Serve it at home to make a simple meal special, or serve it at a party for friends asking you the recipe. You can bake, Tava roast or deep fry the tikkas. Let’s get to the recipe right away.
Red chilli powder 2 tsp( 1 tsp each for filling and tikka mix)
Coriander Powder 2 tsp( 1 tsp each for filling and tikka mix)
Turmeric 1/2 tsp
Chat Masala 1/2 tsp
Garam Masala 1/2 tsp
Green Chilli 2 finely chopped
Mushroom stalks finely chopped
Mushroom Preparation:
Wash the Mushrooms well under running water and pat them dry with an absorbent towel. Gently break away the stalks from the mushroom. Chop the stalks finely and keep them aside( we will use it for the filling).
Directions for the tikka mix:
In a dish take the curd and add all the dry spices- salt, red chilli powder, coriander powder, garam masala( don’t add the chat masala), and mix nicely. Add the gram flour little by little and make a thick batter. Don’t add any water the curd will be enough. You can add 1 tsp lemon juice if you like a little sourness, this is totally optional. Don’t add the lemon juice if the curd is sour. Keep aside.
Directions for filling:
Crumble the paneer or grate it. In a Karahi or pan take 1 tbsp oil and heat it. To this add turmeric and chopped green chillies and saute. Put in the chopped Mushroom stalks and saute on high flame. The mushroom will release water and dry out again. Now add the crumbled paneer to this and mix. Add salt, red chilli powder, coriander powder, and chat masala. Saute well. Add the finely chopped coriander and turn off the stove. Allow the mixture to cool.
Overall directions:
Fill the mixture into the mushroom caps. Fill up to the brim and gently press so that they get packed. Coat each mushroom with the prepared batter nicely and arrange on a plate filling side up. If not serving immediately you can refrigerate it and then either bake it, Tava roast it or deep fry it.
If BAKING, Preheat oven to 180 degrees, grease a tray and bake at 180 degrees for 30 minutes. Since microwaves have temperature variations, look out for doneness between 20 to 30 minutes. Arrange mushroom on a baking tray, facing the filling side up. Midway stop and turn over the mushroom to the other side and continue baking. When the mushrooms turn a golden brown and the batter is not raw, the mushrooms are done.
If TAVA ROASTING, drizzle oil on the Tava and heat. Arrange the mushrooms Filling side down. For this method, you should have coated the mushrooms well with the batter. Once a side is done flip it over and cook the other side.
If DEEP FRYING, take a small quantity of oil in a Karahi and heat it. Drop the mushrooms gently a few at a time, the filling side facing up. In a few seconds gently turn over and cook the other side. Once they are golden in colour, remove from oil and place on kitchen tissues. This method needs the batter to be coated well on the mushrooms or the filling could spill into the oil. Arrange the Mushrooms In a tray/ plate and decorate with cheese shreddings. sprinkle some chat masala and the Mushroom Tikkas are ready to pop in. Enjoy. Bon Appetit.
STEPWISE RECIPE FOLLOWS:
1. Assemble all ingredients for the filling, batter and Mushrooms stalk removed.
2. For the filling crumble the paneer. Heat a karahi, pour oil and heat. Put in the green chillies, turmeric, and the mushroom stalks and fry on high heat until mushrooms release water and become dry again. now add the crumbled paneer and all the dry spices, and mix well. Add the finely chopped fresh coriander and put off the stove. allow the mixture to cool.
3. For the batter take the curd in a dish and add all dry spices mentioned in ingredients, add salt, and mix. Add the gram flour/ Besan little by little until you have a thick batter.
4. Fill the mushroom caps with the filling and set aside. Now coat each mushroom well with the batter. Place them Filling side facing up in a tray.
5. To bake them preheat oven to 180 degrees, grease a tray and arrange the mushrooms, filling side up and bake at 180 degrees for approximately 30 mins. Midway turn around the mushrooms and continue to bake until they are done. They will turn golden brown.
You can also cook them on a Tava or deep fry them. The method is mentioned above. I have baked them in this recipe.
Notes:
1. If the mushrooms are large, it’s better so that you can fill them up well.
2. This recipe is good to prepare ahead and bake or fry just before serving.
3. In case you prepare it ahead, then keep them refrigerated until half an hour to serve. From the refrigerator, they can directly be popped into the oven.
4. Serve it as a snack with some green chutney or as a starter with mint curd dip.
5. Garnish with grated cheese.
If you tried this recipe and liked it please comment below. I would love to hear from you.
Arbi Masala (Spicy Colacassia)
A simple everyday subji. I make the Arbi/Arvi as a roast, sometimes a simple fry and it can also be added while making Sambhar or Kadi. This tuber is a little slimy, but that can be managed by dusting the Arbi with a little Besan/ Gram flour or rice flour. In this recipe, I have pre-cooked the Arbi in a pressure cooker and then baked it for the extra crispiness. You can also deep fry it. I do that quite often too. Let’s get to the recipe right away.
PREP TIME: 10Mins COOK TIME: 40Mins
TOTAL TIME: 50 Mins COURSE: MAIN
CUISINE: SOUTH INDIAN SERVINGS: 4
AUTHOR: RAJNI RAM
Ingredients:
Arbi/Colaccasia 250 gm( boiled and skin peeled)
Onions 2 roughly chopped
Tomatoes 2 large finely chopped
Green chilli 2 chopped
Fresh coriander 1 tbsp finely chopped
Salt to taste
Red chilli powder 1 tsp
Coriander powder 1.5 tsp
Fennel powder(optional) 1 tsp
Garam masala powder 1/2 tsp
oil for frying and making the masala.
Cumin 1 tsp
Curry leaves a few
Directions:
Boil the Arbi in a pressure cooker, with a little salt for 2 whistles. Stick to 2 whistles or it will turn soggy and lose the crispness in the subji. Cool it, Peel the skin cut it into medium size pieces( if very small, use as it is), and set aside. To deep-fry, take oil in a Karahi and heat it. drop the cut Arbi gently into the oil and fry until they are a nice brown and crisp.
If baking, then place them on a greased tray, drizzle a little oil over them, or you could use a brush to apply the oil and bake at 180 degrees for half an hour, turning over the Arbi midway, say around 15 mins. Bake until brown and crisp. Set aside.
Now in a pan or Karahi heat 1 tbsp oil. Add the cumin and turmeric and add the green chilli and chopped onion to this and saute well. Fry them well, but don’t get them brown. Now add in the tomatoes, salt, and all the dry spices. cook until the tomatoes break and release water and the mixture looks like a thick paste. Add the garam masala and fresh coriander and mix. Finally, add in the fried/baked Arbi and mix nicely, so that the masala paste coats it evenly. Serve hot with Parathas, Roti, or Dal Chawal.
STEPWISE RECIPE FOLLOWS
1. Assemble all ingredients. Cook Arbi in a pressure cooker for 2 whistles. cool. Peel skin, cut into cubes, and set aside.
2. Fry the cooked and cut Arbi in oil or bake in the oven at 180 degrees for 1/2 an hour. They should be nicely browned and crisp.
3. In a pan or karahi heat oil. Add the cumin and turmeric powder. Add in the green chillies and onion and fry well.
4. Add the tomatoes, salt, and all dry spices mentioned under ingredients. Saute the mixture well. The tomatoes should become soft and the mixture should resemble a semi-dry paste.
5. Add in the garam masala and chopped coriander and finally add the fried/baked Arbi and give a good stir. The masala paste should coat all the Arbi’s well. Sprinkle some more chopped coriander and we are ready to serve.
6. Serve with Rotis, Parathas, or just Dal Chawal. Enjoy. Bon Appetit.
Notes: 1. Amchur/ dry mango powder can be used along with other dry masalas if you prefer a little more tanginess. I have not added as I almost always use the country tomatoes/desi tomatoes/Naatu thakkali. They are naturally sour than the hybrid tomatoes or the Bangalore ones.
2. A little gram flour can be mixed with the dry spices and sprinkled over the Arbi before frying them. I have added besan as the Arbi is going to be mixed into the paste, and so will not taste bland.
If you tried this recipe and liked it please comment below. I would love to hear from you.
Savory Muffins
These Muffins are so buttery and cheesy with a melt in the mouth texture. They taste almost like a Quiche and are very simple to make. You can mix in vegetables if you want, I have just kept them plain. They are a great option for snack time or good to go in children’s snack boxes. They keep good up to a week in the refrigerator. I have used plain flour/ Maida here, but as I mentioned earlier that I’m partial to wheat flour, I will be trying these muffins with wheat flour soon and blog the result with the recipe. In the meanwhile let’s get to the recipe right away.
PREPTIME: 20 Mins COOK TIME: 35Mins
TOTAL TIME: 55 Mins COURSE: SNACK
CUISINE: WORLD SERVINGS: 4
AUTHOR: Rajni Ram
Ingredients:
Plain flour 2 Cups
Baking powder 1.5 tsp
baking soda 1/2 tsp
Cheddar cheese 1.5 cups
Egg 1
Curd/yogurt 1/4 cup
Milk 1 cup
Refined oil 1/4 cup
Garlic clove 3 crushed
Butter 2 Tbsp
salt as per taste( remember the cheese has salt too)
Black pepper powder 1/2 tsp
Chilli flakes 1/2 tsp
Coriander leaves finely chopped or Parsley 1 Tbsp
Directions:
Crush the garlic, put in a microwave-safe bowl or a small pan. Add the butter to this and melt in microwave/ stove. With this butter garlic mixture brush the muffin tins and keep ready. Reserve some butter- garlic mixture for brushing the muffin tops. Preheat oven to 180 degrees while you make the muffin batter.
In a dish put in the milk, egg, curd, and oil, and mix well. Don’t beat or whip it. Just stir well and make it a homogenous mixture. In another dish mix all the dry ingredients- the flour, baking powder, baking soda, salt, chilli flakes, black pepper powder and mix them all together well. Add these dry ingredients into the wet ingredients, little by little. Add the finely chopped coriander/parsley. Finally, mix in the cheddar cheese. Don’t mix in the cheese vigorously, just fold it in with very light hands. Now in they go into the muffin tin( I have used silicone muffin cups). Brush the muffin tops with the butter- garlic mixture. Your oven should be hot by now. Place the muffin cups/tins in the oven and bake at 180 degrees for 25 to 30 minutes. Test for doneness by pricking with a toothpick in the center of the muffin. If it comes out clean, remove the muffins and allow to cool completely.
STEPWISE RECIPE FOLLOWS:
1. Assemble all ingredients.
2. In a microwave-safe dish put in the crushed garlic and butter and melt or put it in a small pan and melt over the stove. Grease the muffin cups with this mixture.
3. Preheat oven at 180 degrees.
4. Mix all the wet ingredients in a dish- milk, egg, curd/yogurt, oil. Combine well and make it a homogenous mixture.
5. Mix all dry ingredients in another dish- flour, baking powder, baking soda, salt, red chilli flakes, black pepper powder. Mix them well and add them to the wet mixture, little by little.
6. Mix nicely with light hands. Finally, add in the cheese and gently fold it in. Scoop the mixture in a spoon and fill in the muffin cups. Brush the muffin tops with butter garlic mixture.
7. Bake in a preheated oven at 180 degrees for 25 to 30 minutes. Check for doneness by inserting a toothpick in the center of the muffin. If it comes out clean remove the muffins and cool completely. If a little undone, bake for a few more minutes.
NOTES:
1. Feel free to add vegetables of your choice to the muffin dough, I have not added any as I love the cheesy taste.
2. Cheddar cheese is recommended as Mozzarella doesn’t add much flavor to the muffin.
3. These muffins stay good up to a month in the refrigerator and are a healthy option for kids’ lunch boxes. Just warm them up and they are good to pack.
Pineapple Jam Tart
Initially, my experiments with baking always meant baking a cake and being happy with just that. Well, then the baking bug caught on and I am experimenting with different kinds of bakes. I found baking tarts to be easy if your measurements and procedure are accurate. I’m a fan of Sally’s Baking addiction and All recipes(for baking).
Take the flour and powdered sugar in a dish and add the butter right from the refrigerator. Use your fingertips to rub the butter into the flour, the mixture should resemble crumbs, now add in the egg yolk, cream and combine to form a dough.
1. If making chocolate tart base mix 1 Tbsp Drinking chocolate powder to the above dough and combine well.
2. If making plain Tart shells carry on with the above dough without adding chocolate powder.
Once the dough is ready, wrap in a cling film tightly and cool in the refrigerator for at least an hour.
After an hour the dough is ready to be worked on. Grease cupcake tins if making tartlets, or grease a pie tin if making a single tart. Preheat oven at 180 degrees.
DIRECTIONS TO BAKE THE TART:
Take the plain dough, roll it into a big circle, neither too thin nor too thick. Gently collect the rolled dough in the rolling pin and place it in the greased pie dish. Spread the edges along the side of the pie dish and pat evenly. Prick the entire tart with a fork so that the dough doesn’t puff while baking. Fill the Tart with Pineapple conserve or Jam( I prefer the conserve as its low on sugar). Place the deseeded blueberries on the filling, put the pie dish in the preheated oven, and bake at 180 degrees for 30 minutes. After 30 minutes, bring out the tart from the oven carefully, cool fully, and put in the refrigerator for about 2 hrs to chill and set. The Pineapple Tart is ready to dig in. Bon Appetit.
STEPWISE RECIPE FOLLOWS:
1. Assemble all ingredients.
2. Take a dish and put in the flour, sugar powder, salt, and butter. Rub in the butter into the flour until it resembles crumbs. When you hold the dough tight in your fist, it should hold shape. At this stage mix in the egg yolk and cream and combine to form a dough. There is no need for water in this dough.
3. Wrap the dough in a cling wrap and put it in the refrigerator for an hour.
4. Preheat the oven to 180 degrees. Remove the dough from the refrigerator and roll it out into a big circle, grease a pie dish and place the rolled out dough into the pie dish gently and press the edges and the center.
5. Using a fork prick both the doughs completely, so that they don’t puff up while baking.
6. For Pineapple Jam filling set 3/4 of a bottle of Pineapple preserve/Jam aside, and deseeded Blueberries too.
7. Fill in the Pineapple preserve into the tart shell, and decorate it with Blueberries.
8. Put the Tart into the preheated oven and bake them for 25 to 30 minutes.
9. The pineapple tart has to be put in the refrigerator for 2 hours after cooling completely so that it sets. The chocolate tarts need not be chilled.
10. The pineapple tart is ready to serve.
NOTES:
1. I haven’t blind baked the tart, as the filling needed to cook too.
2. The butter should be chill, so as to get a flaky crust. so use it straight from the refrigerator.
3. The same crust recipe can be used for blind baking if the filling is precooked and doesn’t involve baking again.
Mint/Pudina Raita
Mint by itself is such a flavourful herb, it heightens the taste of everything else. Since it has a strong flavour it should be used in moderation. Here I have made a Raita(curd sauce) with Mint, which goes well with Parathas, Naans, Kebabs and with any mixed rice variety. The lovely green colour and the minty freshness gets the salivary buds in action. This is a simple recipe and takes under 7 minutes to make if you have all ingredients ready.
Well, one may think why am I blogging something so simple, something that anyone can make. Well, its just to establish the fact that something as simple as a well made Raita can lift the effect of a recipe gone wrong. People trying their hand at cooking for the first time will be encouraged by its simplicity to try cooking more often.
Let’s get to the recipe right away.
PREP TIME: 10 Mins COOK TIME: 5 Mins
TOTAL TIME: 15Mins COURSE: MAIN
CUISINE: SOUTH INDIAN/ SERVINGS: 4
NORTH INDIAN
Ingredients: Author: Rajni Ram
Mint leaves 1/2 a bunch
Green chilli 1(if not hot enough can add one more)
Curd 400 gms
Roasted Jeera powder 1/2 tsp
Salt as per taste.
Directions:
Wash the Mint leaves well and let the water drain. Smoothen the curd( do not beat or whip). Put the Mint leaves, Green chillies, roasted Jeera powder and salt in a blender and give it a good spin. Add about a cup of curd from the 400 gms to the blender and grind to a smooth paste. Now add this paste to the remaining curd and mix well. Put it in the refrigerator until ready to serve. Enjoy the Mint Raita with your meal. Bon Appetit.
STEPWISE RECIPE FOLLOWS:
1. Assemble all ingredients. Wash Mint leaves and drain the water.
2. Put the mint leaves(you can put the tender stems too), green chillies, roasted Jeera powder and salt in a blender and blend.
3. Now add a cup of curd to the ground mix and give it a good spin. It should become a fine paste.
4. Add this paste to the remaining curd and mix well. The Mint Raita is ready. Put it in the refrigerator until ready to serve.
Notes:
1. You can temper the raita with mustard and jeera if you wish. I haven’t done it, as I think the Mint by itself is enough.
2. You can add grated Cucumbers, Carrot or finely chopped onion or Boondi to this raita.
3. This Raita can also be used to soak Dahi Vadas.
If you tried this recipe and liked it, comment below. Would love to hear from you.
Flavoured Rice
A very simple yet flavourful rice. You can make it on the days when you want no masalas. Since there are no pungent spices this Rice goes well with a lot of accompaniments like dal fry, raita, Rajma, Choley and more. Flavoured rice and simple dal fry make for soul food. Let’s get to the recipe right away.
PREPTIME: 15Mins COOK TIME: 20 Mins
TOTAL TIME: 35 Mins COURSE: MAIN
CUISINE: NORTH INDIAN SERVINGS: 4
Ingredients:
Basmathi rice 1 cup
Raisins( preferably black) around 10
Cashewnuts around 6 to 8
Walnuts( broken)around 6 to 8
Almonds around 5
Cloves 5
Cinnamon 1 inch stick
Milk 1/4 cup
Saffron 2 pinches
Ghee 2 tbsp
Onion 1 medium cut to thin slices
Directions:
Soak the rice for 15 minutes, drain water and set aside. In a Karahi take ghee and heat. Add the dry nuts and raisins and fry until the nuts are light brown. Remove the nuts from the oil and add in the onion slices and fry until nicely browned. Remove them and set aside. Add little oil to the karahi and put in the whole masalas, fry until aromatic. Add 2 cups water and the milk along with saffron, add some salt and the dry fruits and boil. When it starts boiling transfer the soaked rice, cover and cook, keep stirring every now and then and cover and cook again until the rice is done. Takes about 15 minutes on low fire. Once done, put off the stove, add in the browned onions and mix well. Flavoured rice is ready to serve. Enjoy. Bone Appetite.
STEPWISE RECIPE FOLLOWS:
1. Assemble all ingredients. Soak the Basmathi rice for 15 minutes and drain water.
2. Heat the ghee in a karahi and add the nuts and raisins and fry. Remove when lightly browned. Add in the onion to the same ghee and fry them until they are well browned. Remove onions and set aside.
3. Add a little oil to the karahi and drop the whole masalas into it when hot. Fry until aromatic, add two cups water, the saffron soaked milk, fried nuts and salt and bring the water to a boil,
4. As it boils, transfer the soaked rice and mix well. Cover and cook for few minutes, stir in between and cover and cook again until done. Takes about 15 minutes for the rice to cook on low fire. The water should have evaporated completely.
5. Once done, put off the stove and add the browned onions, mix nicely and the flavoured rice is ready to serve.
NOTES:
1. Other whole masalas like cardamom, peppercorns, fennel, cumin etc have not been added on purpose, as then the Pulav taste will come in. This rice has a very subtle flavour.
2. Saffron is optional, but if added gives a good flavour to the dish.
3. Cook rice on low fire, as high heat cooking will evaporate the water fast and the rice won’t cook well and may remain raw.
4. Water to cook rice can be adjusted as per your preference, but rice must be grainy and not mushy.
5. I have numbered a few pictures to avoid confusion in steps.
If you made this recipe and liked it, please do comment below. I would love to hear from you.
Lauki Kaddu Ke Kofte
LAUKI-KADDU KOFTA’S(BOTTLE GOURD AND PUMPKIN KOFTAS)
Usually, these Koftas are made individually as either Lauki Koftas or Pumpkin Koftas. In a moment of experimentation, I thought why not combine the two, and I don’t regret the result at all. The sweetness of the Pumpkin was well balanced by the Lauki, and I must say it was an ideal wedding between the two.
Let’s get to the recipe right away.
PREPTIME: 20 Mins COOK TIME: 15Mins
TOTAL TIME: 35 Mins COURSE: MAIN
CUISINE: North Indian SERVINGS: 4
Ingredients for Koftas AUTHOR: Rajni Ram
Lauki( Bottle gourd) shredded 2 cups
Kaddu(Pumpkin) shredded 1 cup
Besan(Gram flour) 1/2 cup (You can add more Gram flour for tougher Koftas)
Coriander(dhania) powder 1.5 tsp
Turmeric powder 1tsp
Red chilli powder 1tsp
Salt as per taste
Green chillies 2 finely chopped
Ginger 1 inch piece finely chopped
Coriander leaves few sprigs finely chopped
Oil for frying Koftas
Ingredients for the gravy:
Onion 2 large chopped
Tomatoes 4 medium-sized chopped
Ginger garlic paste 1/2 tsp
Green chillies 2
Cashewnuts 8-10
Salt as per taste
Red chilli powder 1.tsp
Coriander(dhania) powder 2 tsp
Fennel(saunf) powder
Turmeric powder 1 tsp
Jeera/Cumin 1tsp
Elaichi/Cardamom 2-3 pods
Bay leaf(Tej patha) 1
Cloves 2
Garam Masala Powder 1/2 tsp
Oil for deep frying Koftas
1 Tbsp oil for sauteing the onions and tomato
Cream 1 Tbsp(optional)
Method for making Koftas:
Combine the grated Lauki and Pumpkin and add all the dry ingredients including the Besan. The moisture in the vegetables is enough for formating the Koftas. Try not to add any water. Heat oil in a Karahi and when hot, reduce the flame to medium and drop the batter with a spoon, or shape them with hand and drop it in oil carefully. Fry until golden brown and repeat the same for all the batter. Put the fried koftas on absorbent paper for the oil to blot. Set aside.
Method for gravy:
In a Karahi take 1 tbsp oil and heat it. Add all whole masalas one by one, fry for a minute and add onion and saute until a nice brown, add the Tomatoes, cashew nuts, and salt and saute further until the tomatoes turn mushy.
Cool the onion-tomato mixture and grind it in a processor until smooth.
In the same Karahi add 1 Tbsp oil and heat, pour the paste when the oil is hot, and stir nicely. Add all the powdered spices and mix well. Cook until oil is released. Now add 1 cup water, adjust consistency, and let it boil. When it starts getting thick again, sprinkle the Garam masala and put off the stove and add the cream(this step is totally optional). To serve arrange the Koftas in a dish and pour the prepared gravy over it, decorate with finely chopped coriander leaves and enjoy with Rotis, Chapati, Naan, Phulkas.
Bon Appetite!
STEPWISE RECIPE FOR KOFTAS FOLLOWS:
1. Assemble ingredients.
2. To the grated Lauki and Kaddu add salt followed by all the spice powders mentioned in Kofta Ingredients.
Add the Besan/ Gram flour too and combine nicely. Don’t add any water, the moisture in the vegetables will do.
3. Heat oil in a Karahi, shape the Koftas or drop them with a spoon carefully into the oil and fry them to a golden colour.
4. Put them on an absorbent paper and keep aside.
STEPWISE RECIPE FOR GRAVY FOLLOWS.
1. Heat oil in a Karahi and add Jeera/ Cumin. As they splutter add the chopped onions and ginger-garlic paste. ( you can add the whole spices too in the oil if you don’t want to chew on them while eating) . Add the 2 whole chillies too.
2. Saute well until the Onions start turning brown and add the chopped Tomatoes and Cashewnuts to this. Stir well and cook until Tomatoes break and turn mushy. Leave to cool.
Transfer to a blender and puree it.
3. Now take 1 Tbsp oil in a karahi and add the Jeera and whole spices mentioned in Gravy preparation.
( please don’t add again if you had while sauteing the Onion tomato mixture). Once they turn aromatic put in the onion-tomato puree and stir well. Keep stirring for a few minutes.
4. Stir the gravy nicely and add all the spice powders mentioned in the Gravy ingredients. Cook for 2 mins and add 1.5 cups of water. Let it come to a boil and the gravy will start thickening. At this stage add Garam masala powder and put off the stove. Add the cream now and give a gentle stir( this step is optional).
5. Assembly of Koftas and Gravy- In a flat dish arrange the Koftas and pour the gravy over them. Decorate with finely chopped coriander leaves and serve with Rotis, Phulkas, Naan.
I have served them with hot phulkas.
NOTES: 1. The moisture in the vegetables is enough for forming the Koftas.
2. If you choose to add the whole spices to the onion-tomato mix, you can consider straining the puree, to get rid of any unground spice.
3. If you are adding all whole-spices together to the oil directly, after making the gravy you can fish them out with a spoon if you don’t want to chew on them.
If you try out this recipe, please comment below. I would love to hear from you.
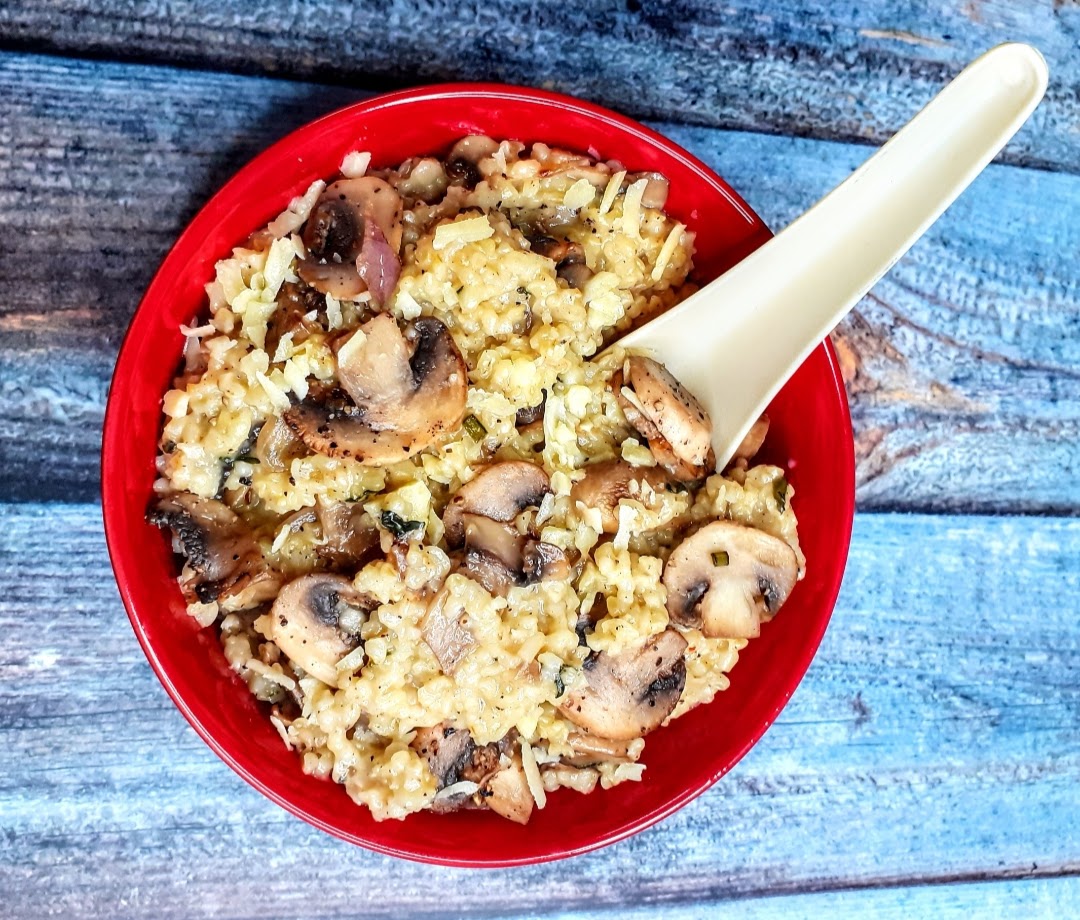
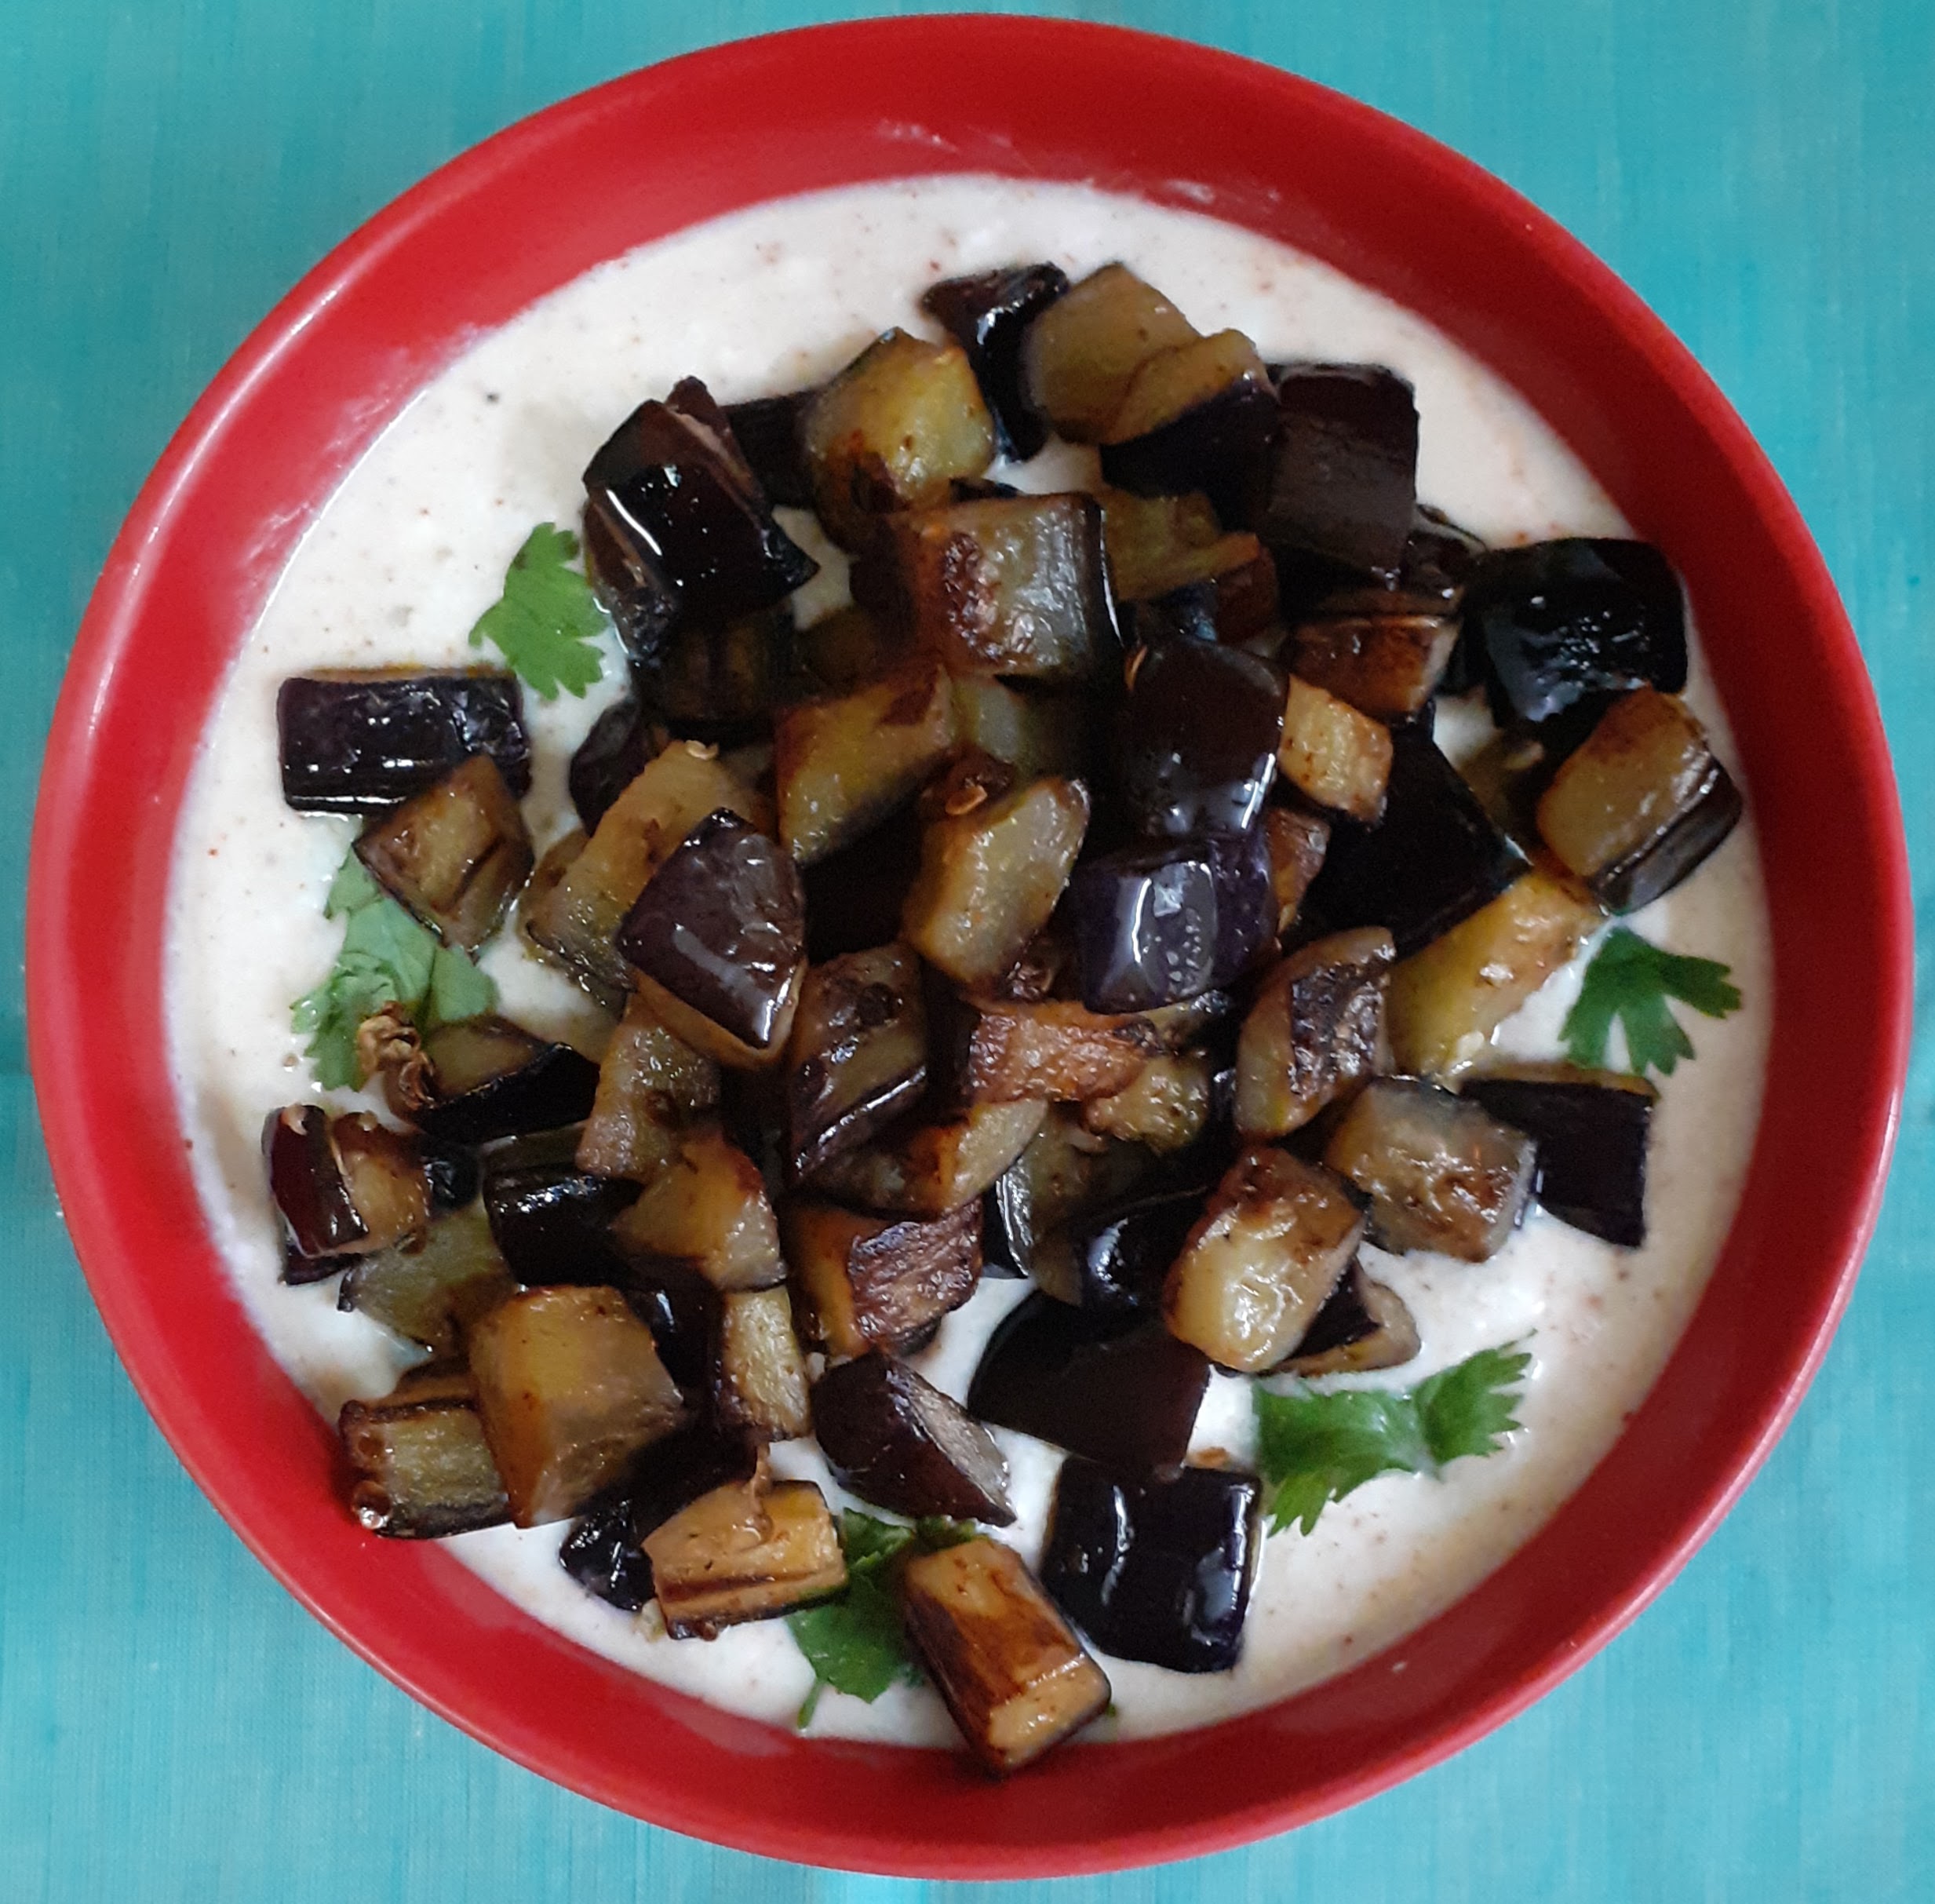
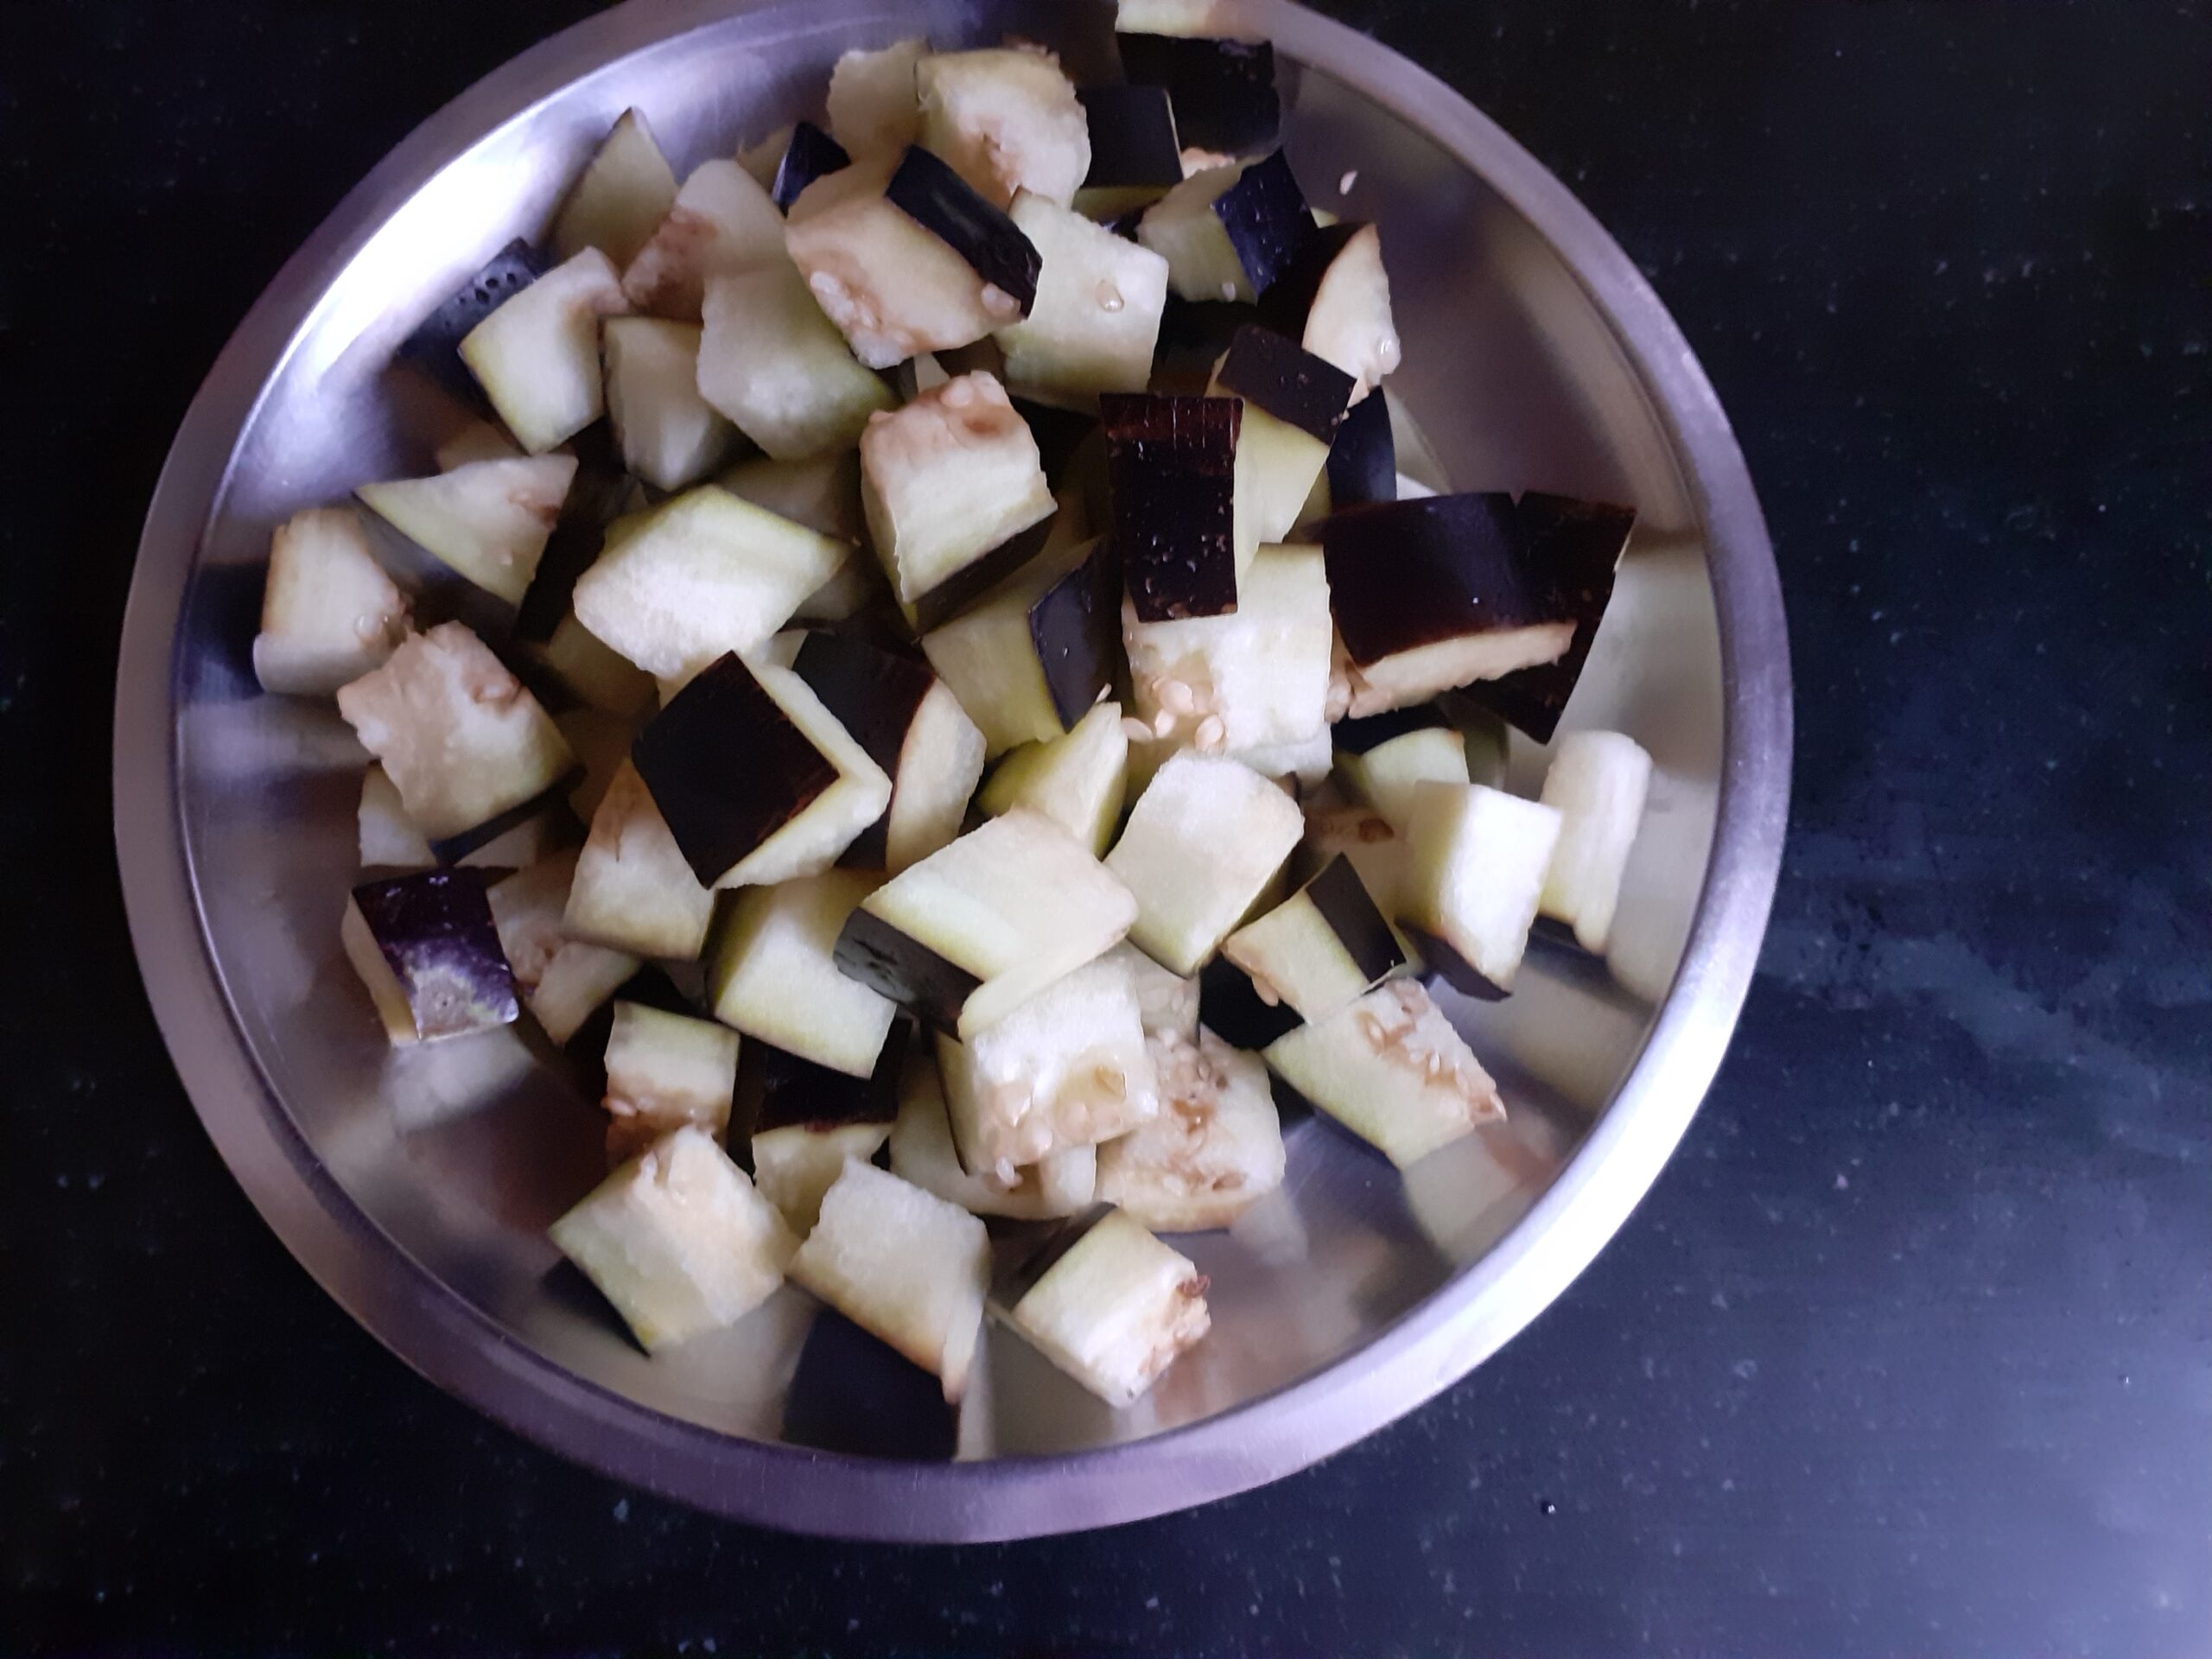
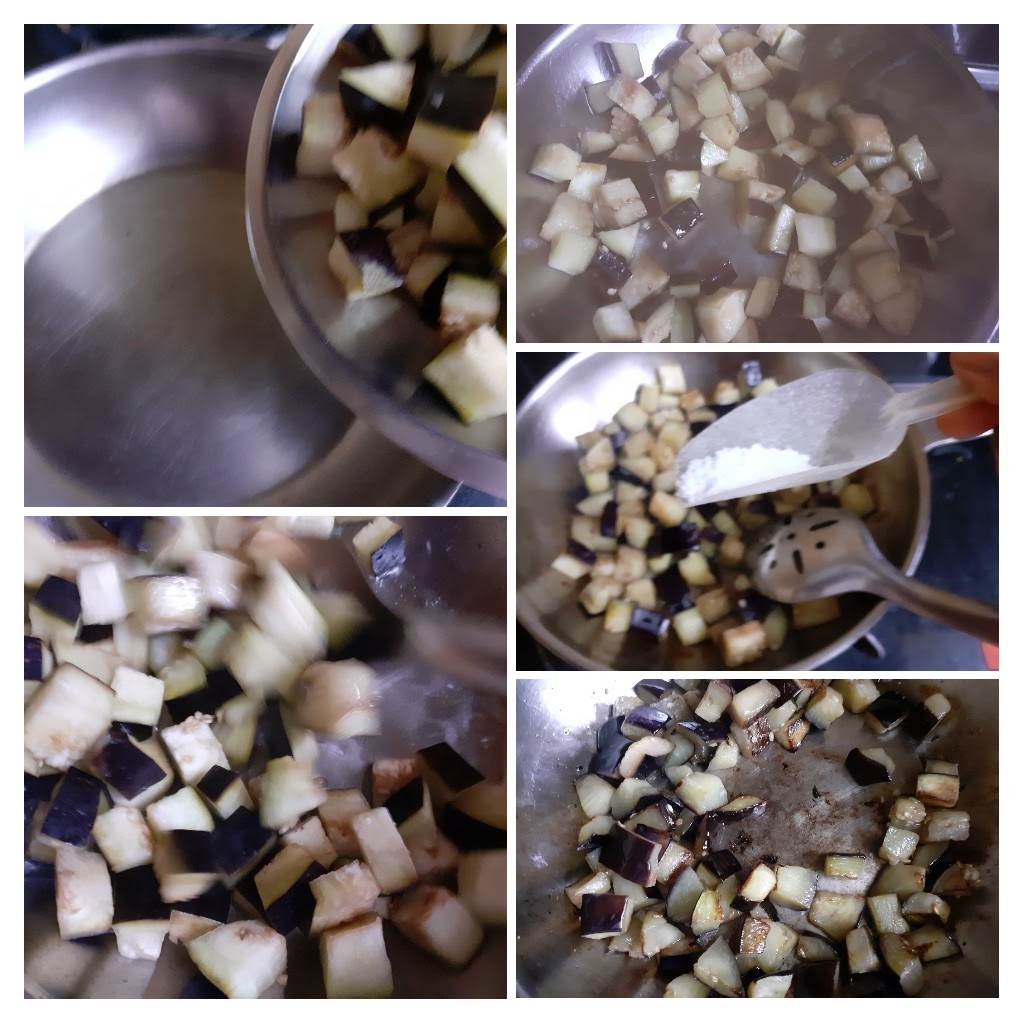
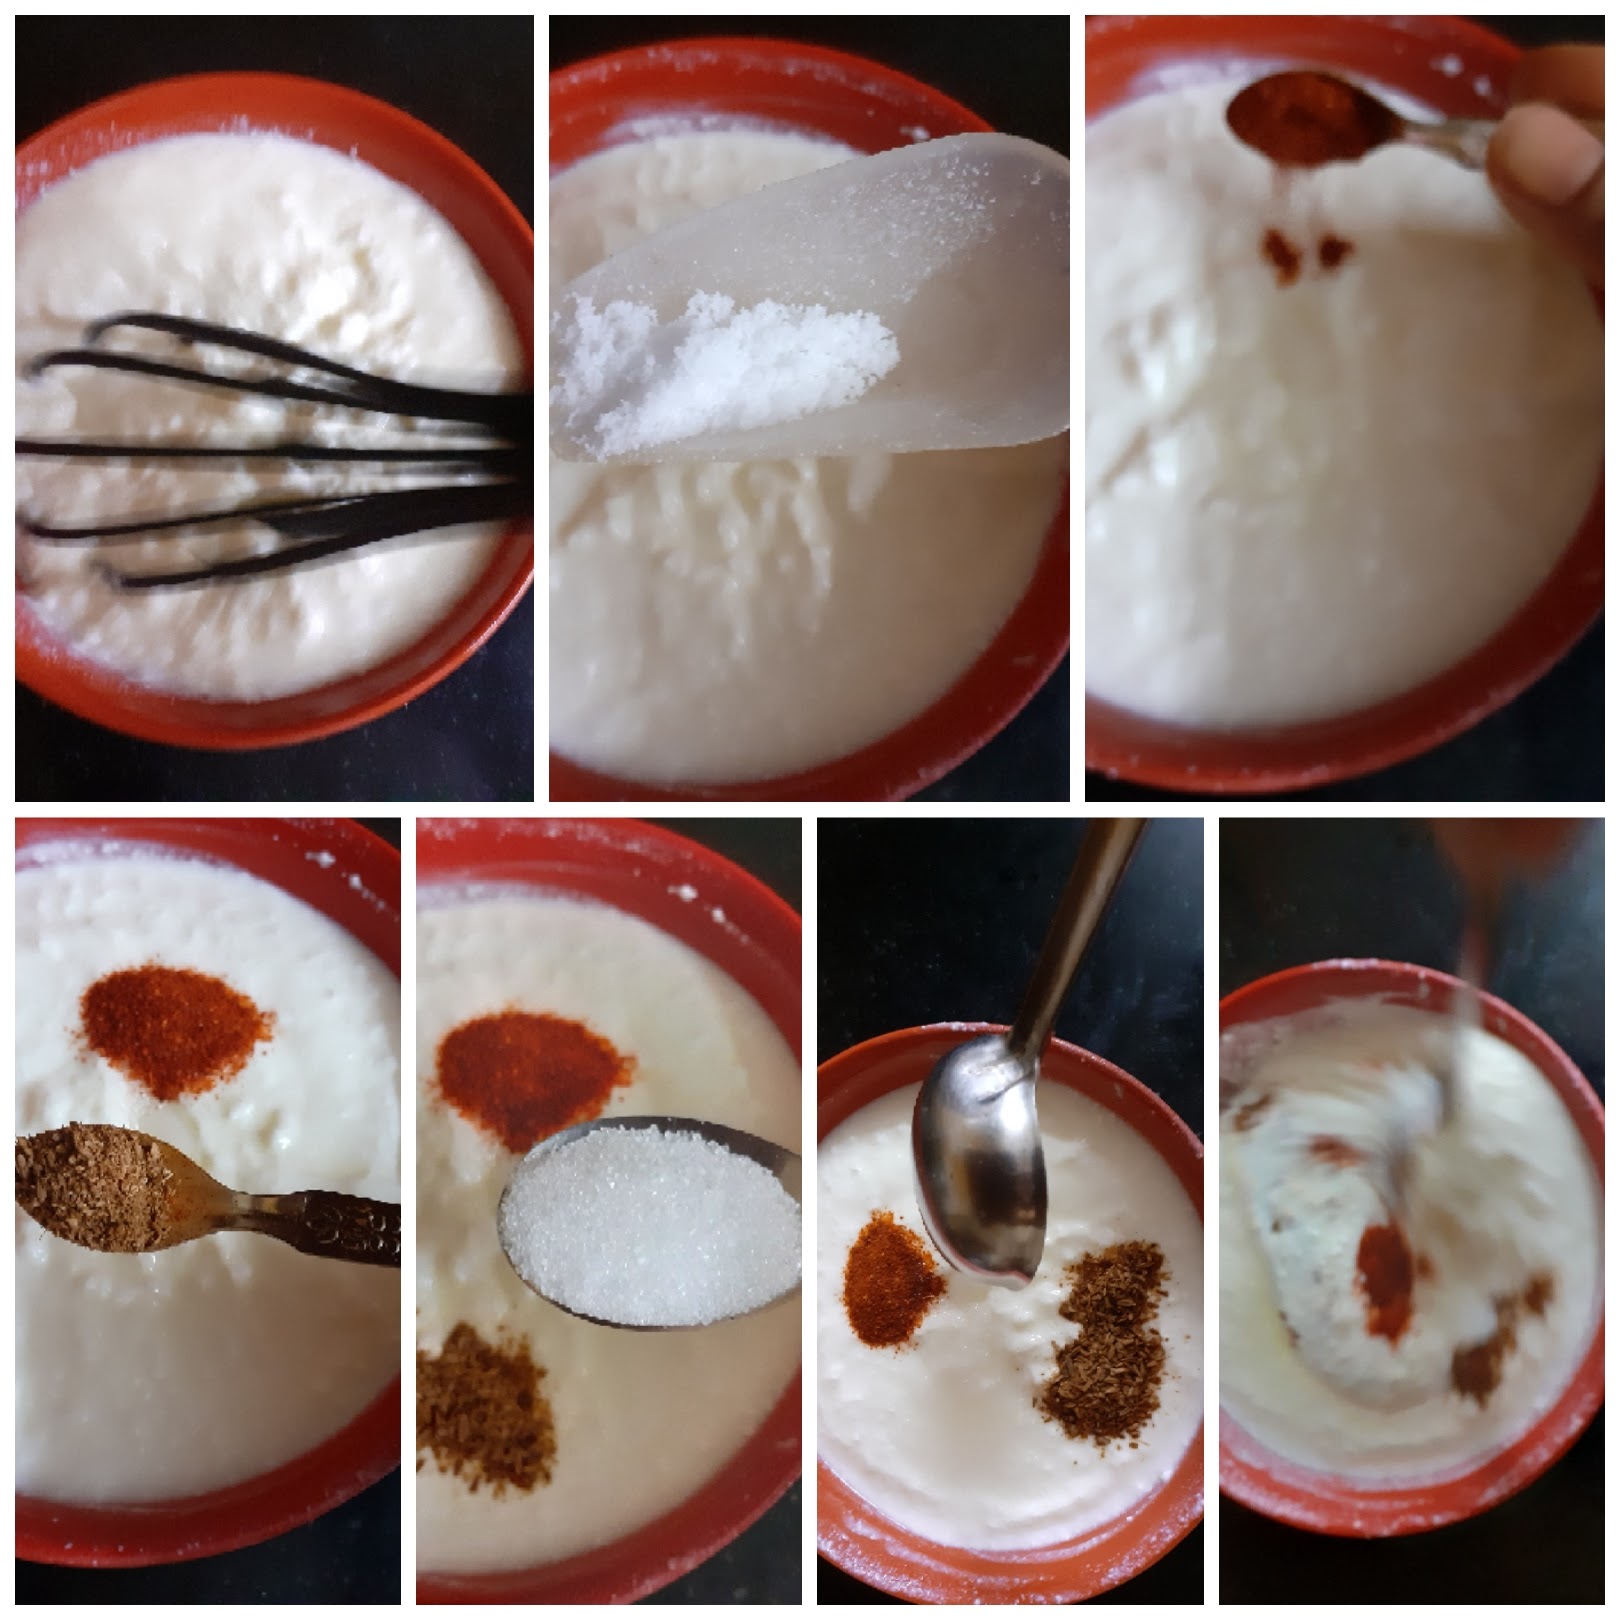
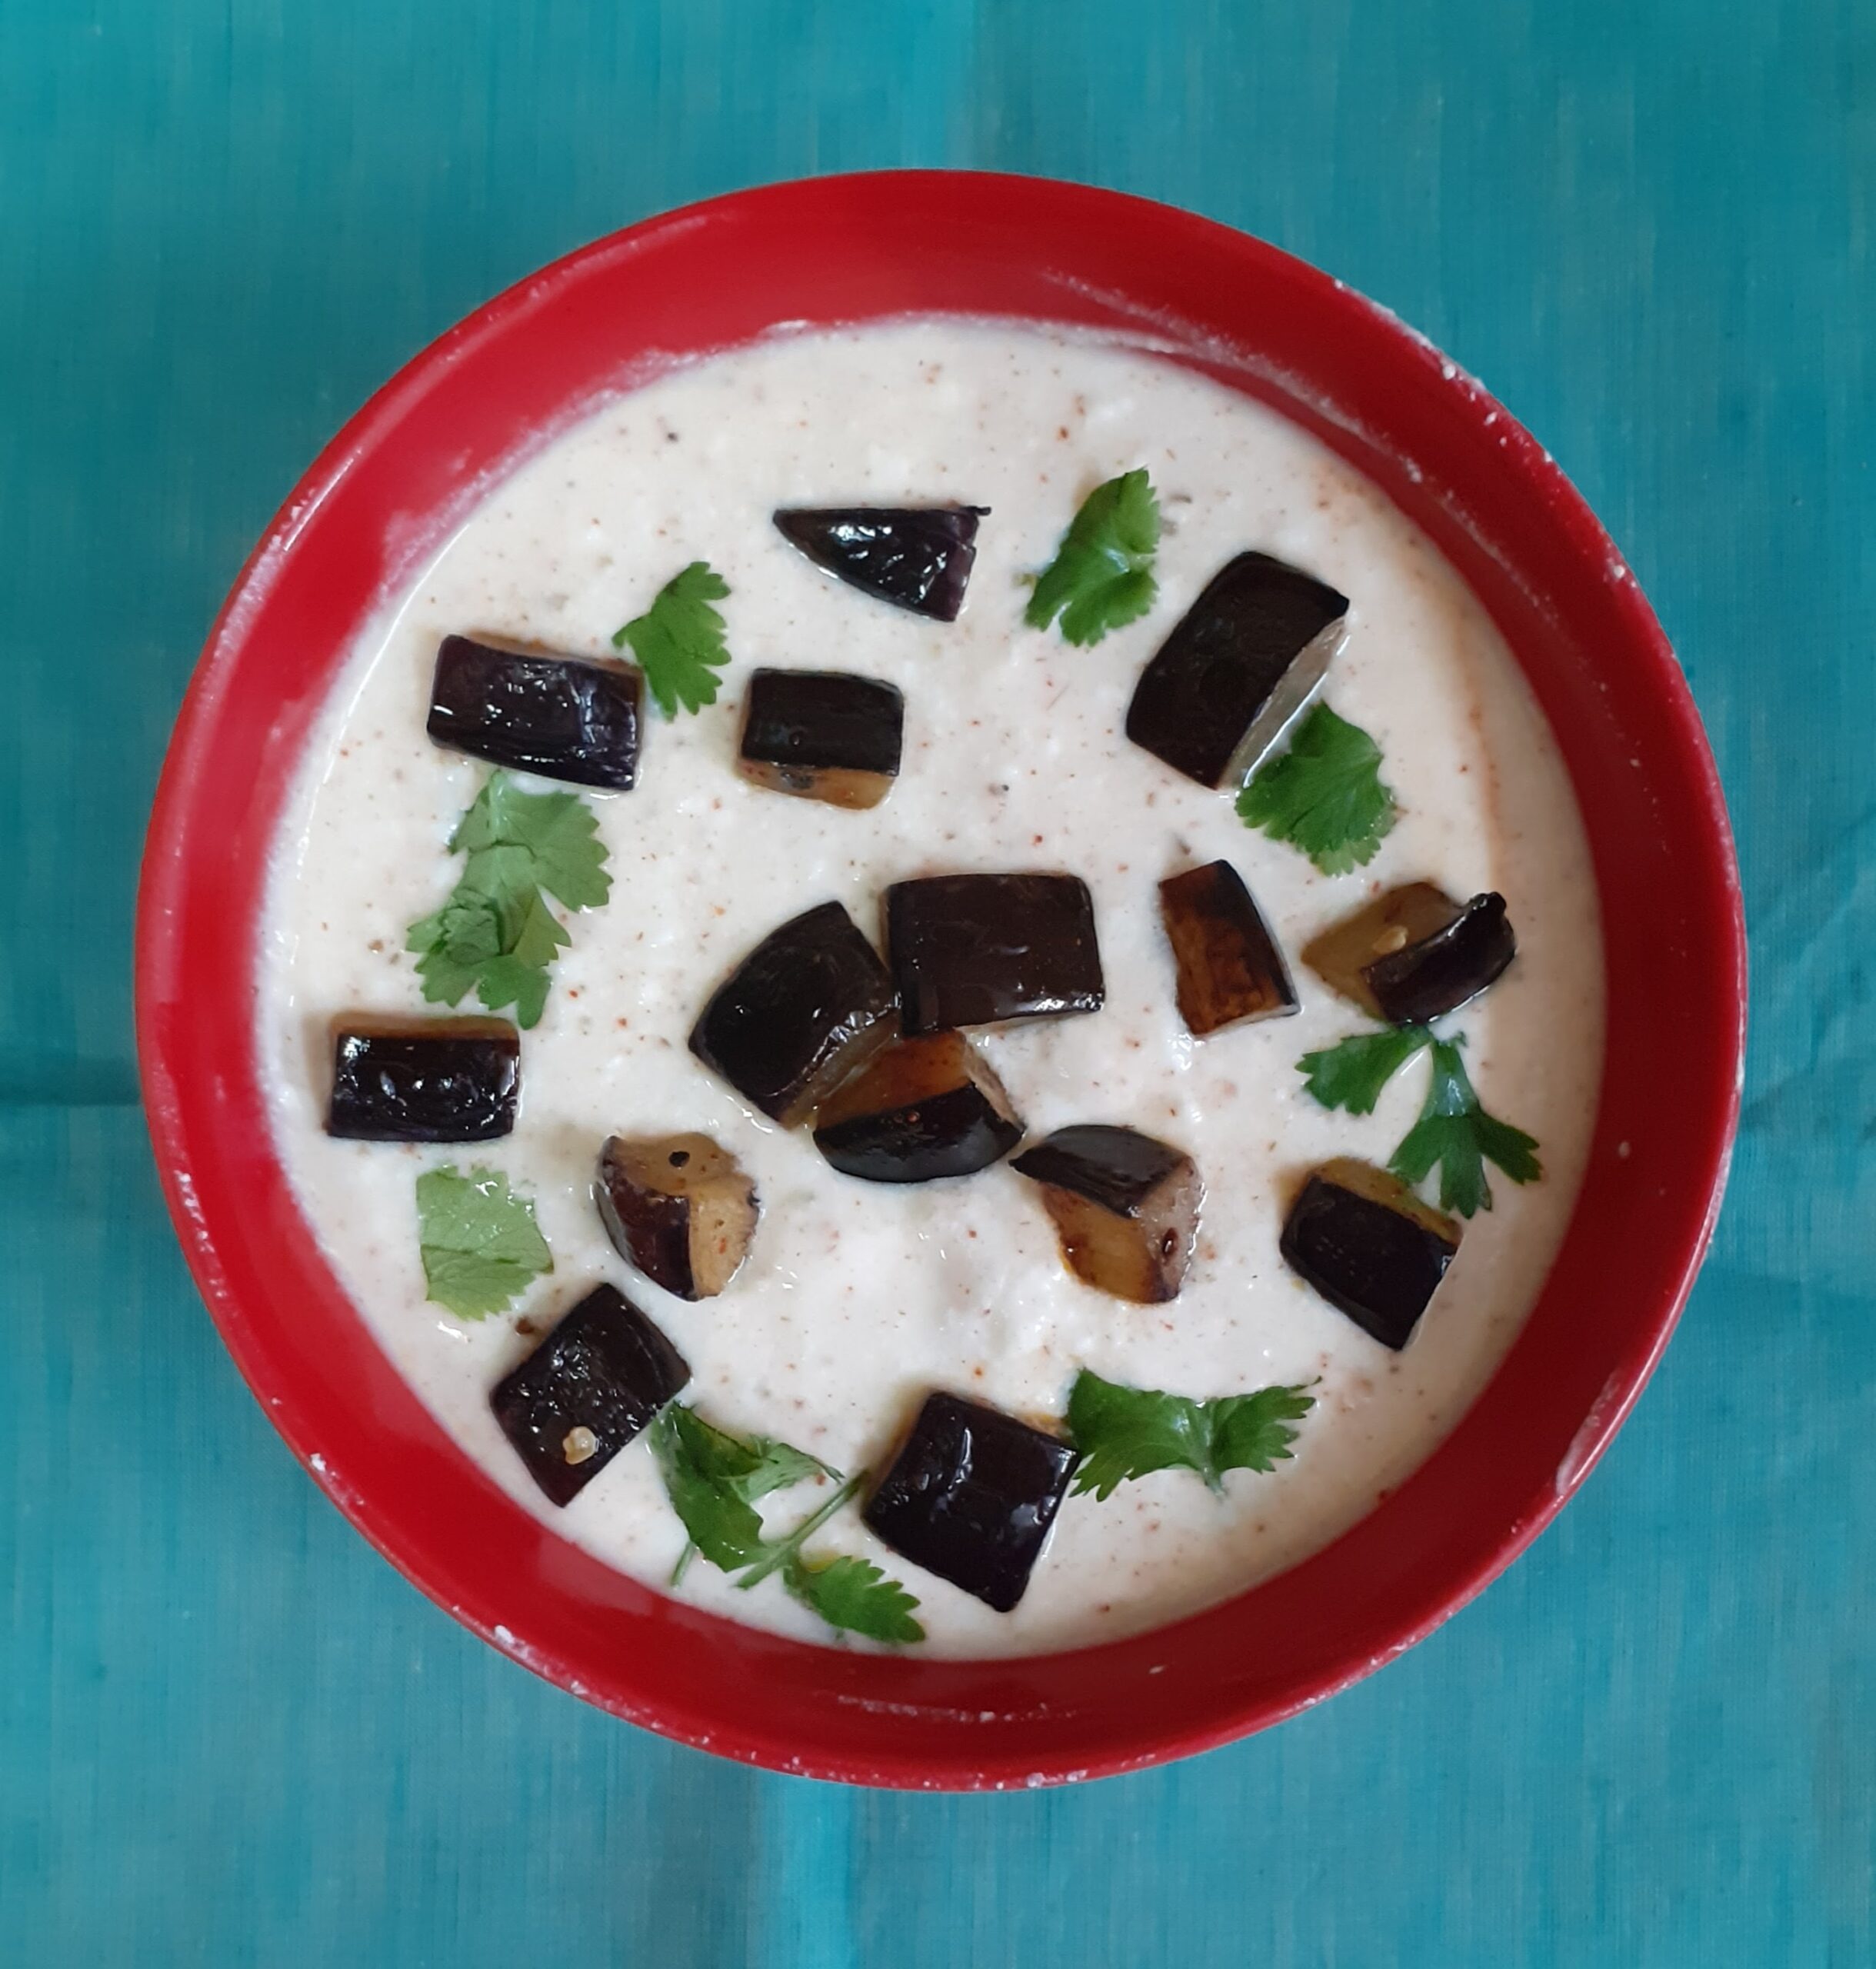
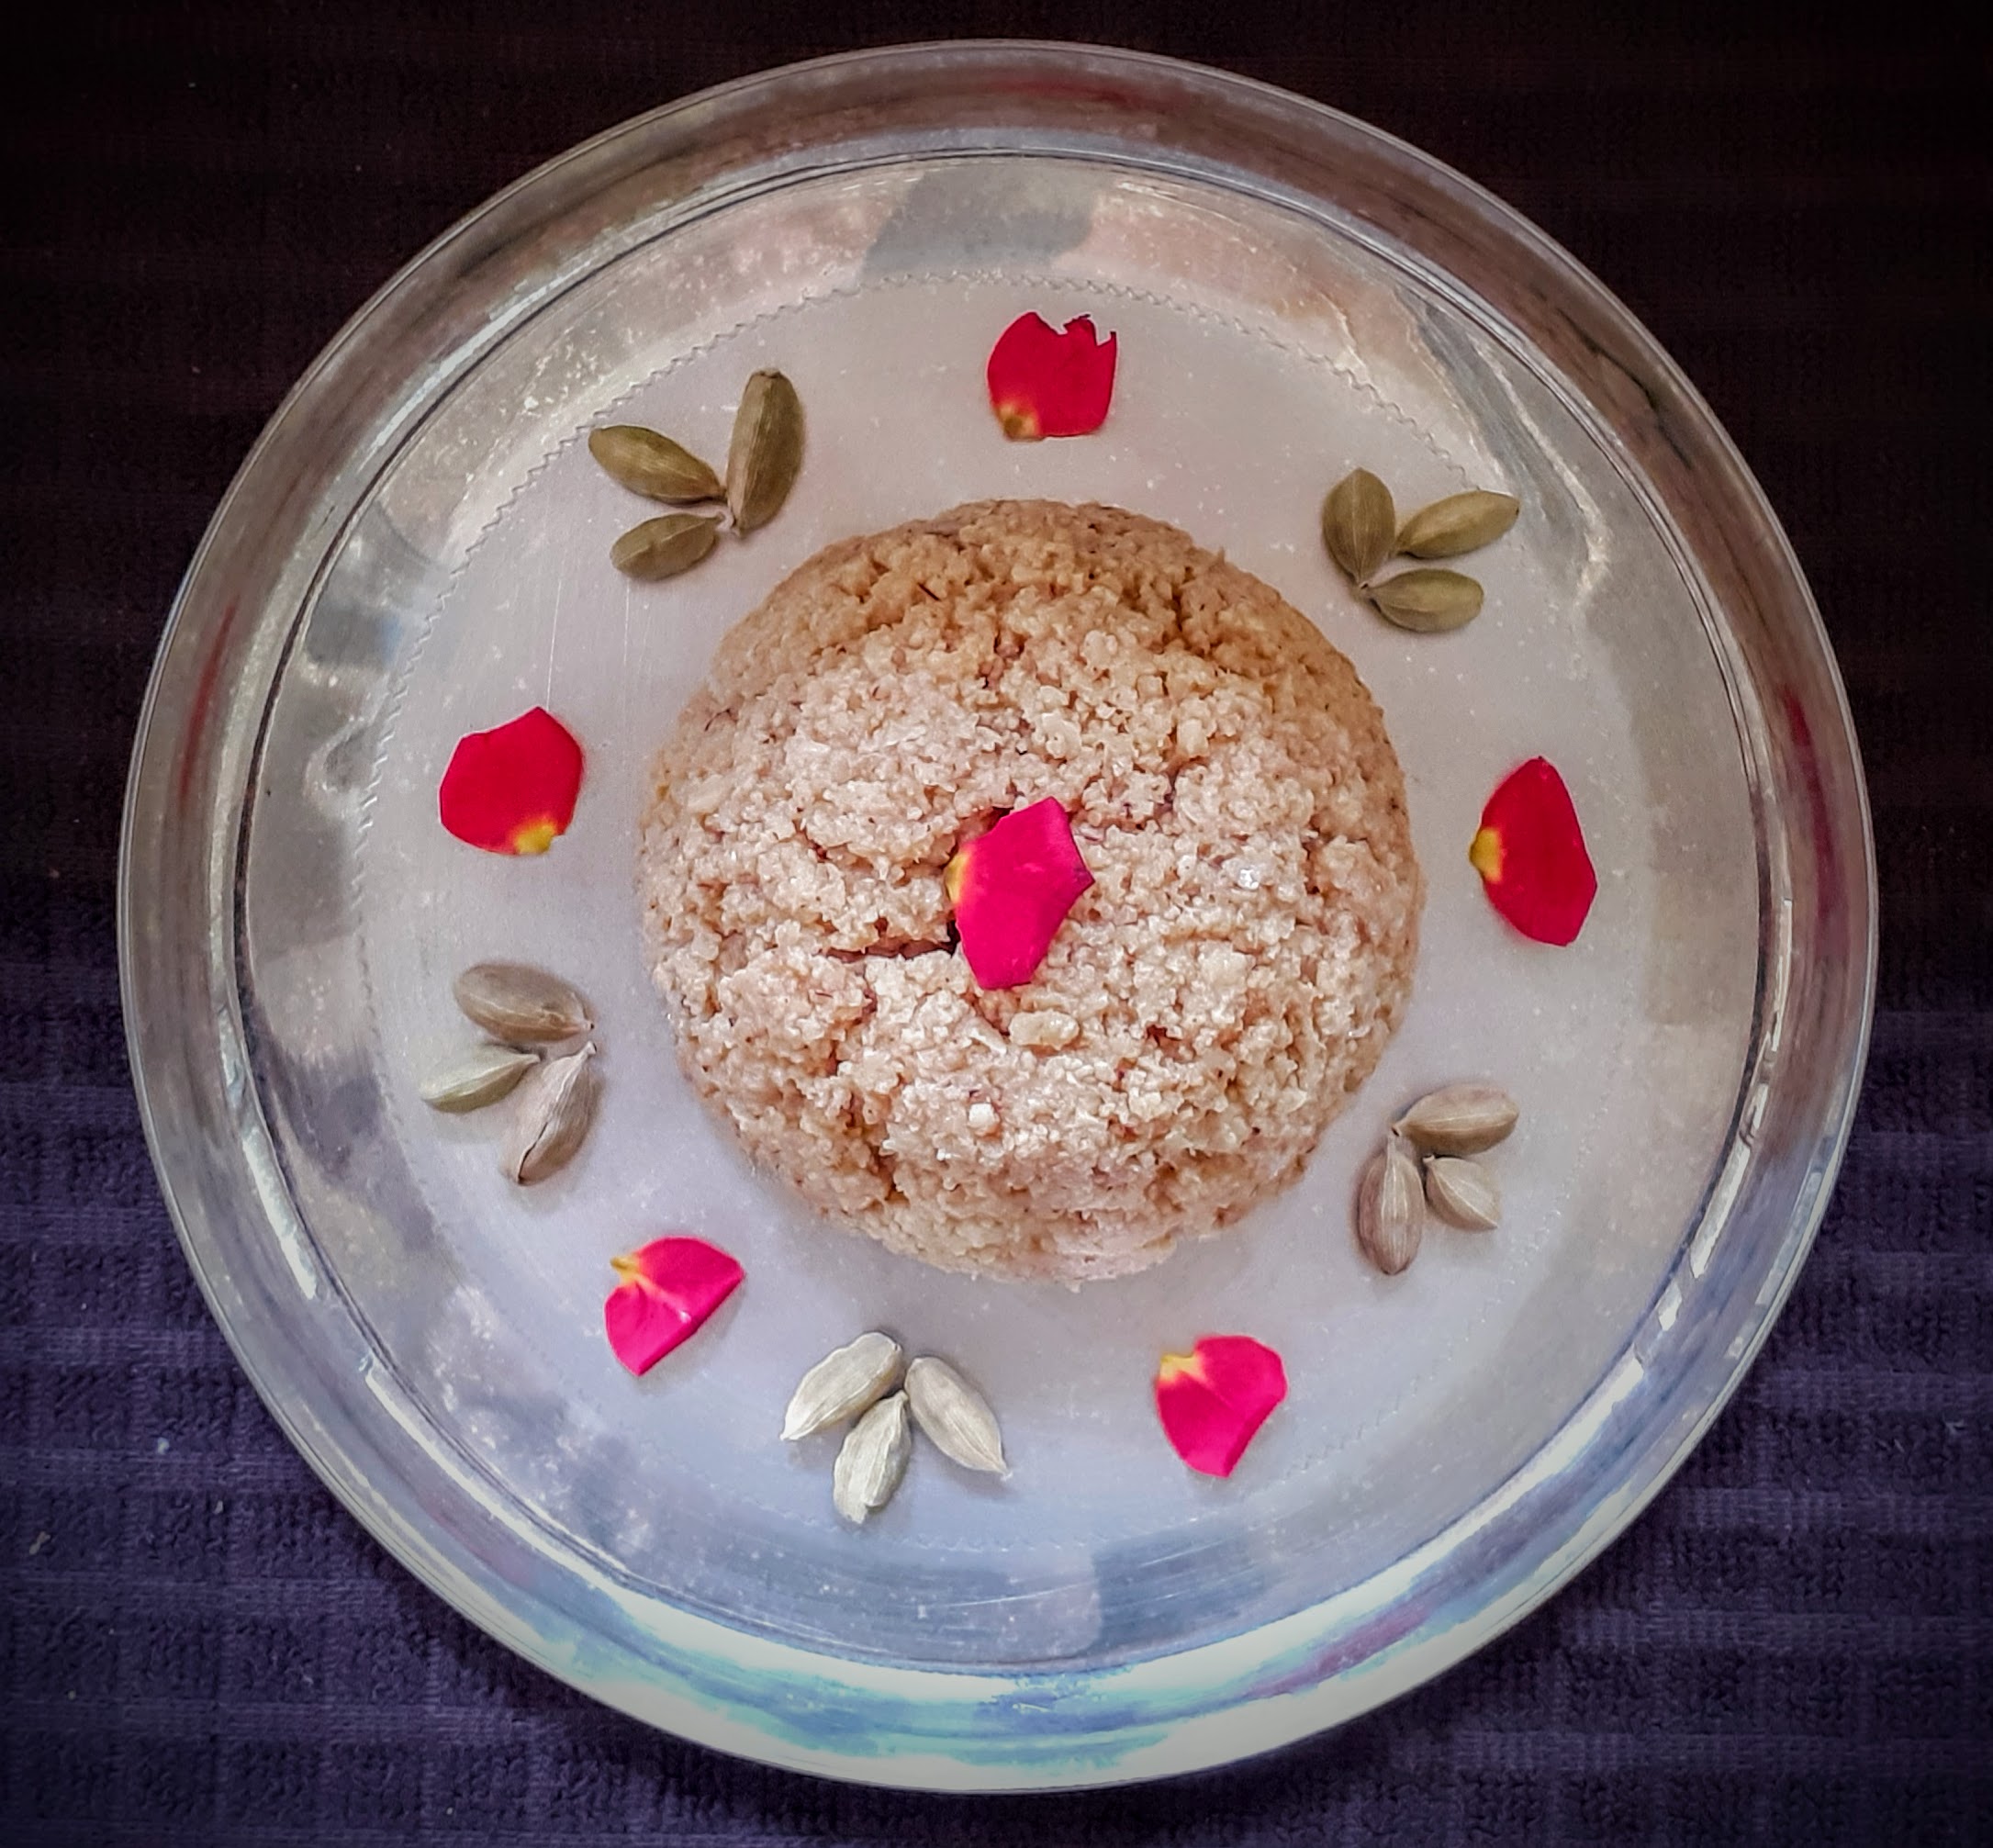

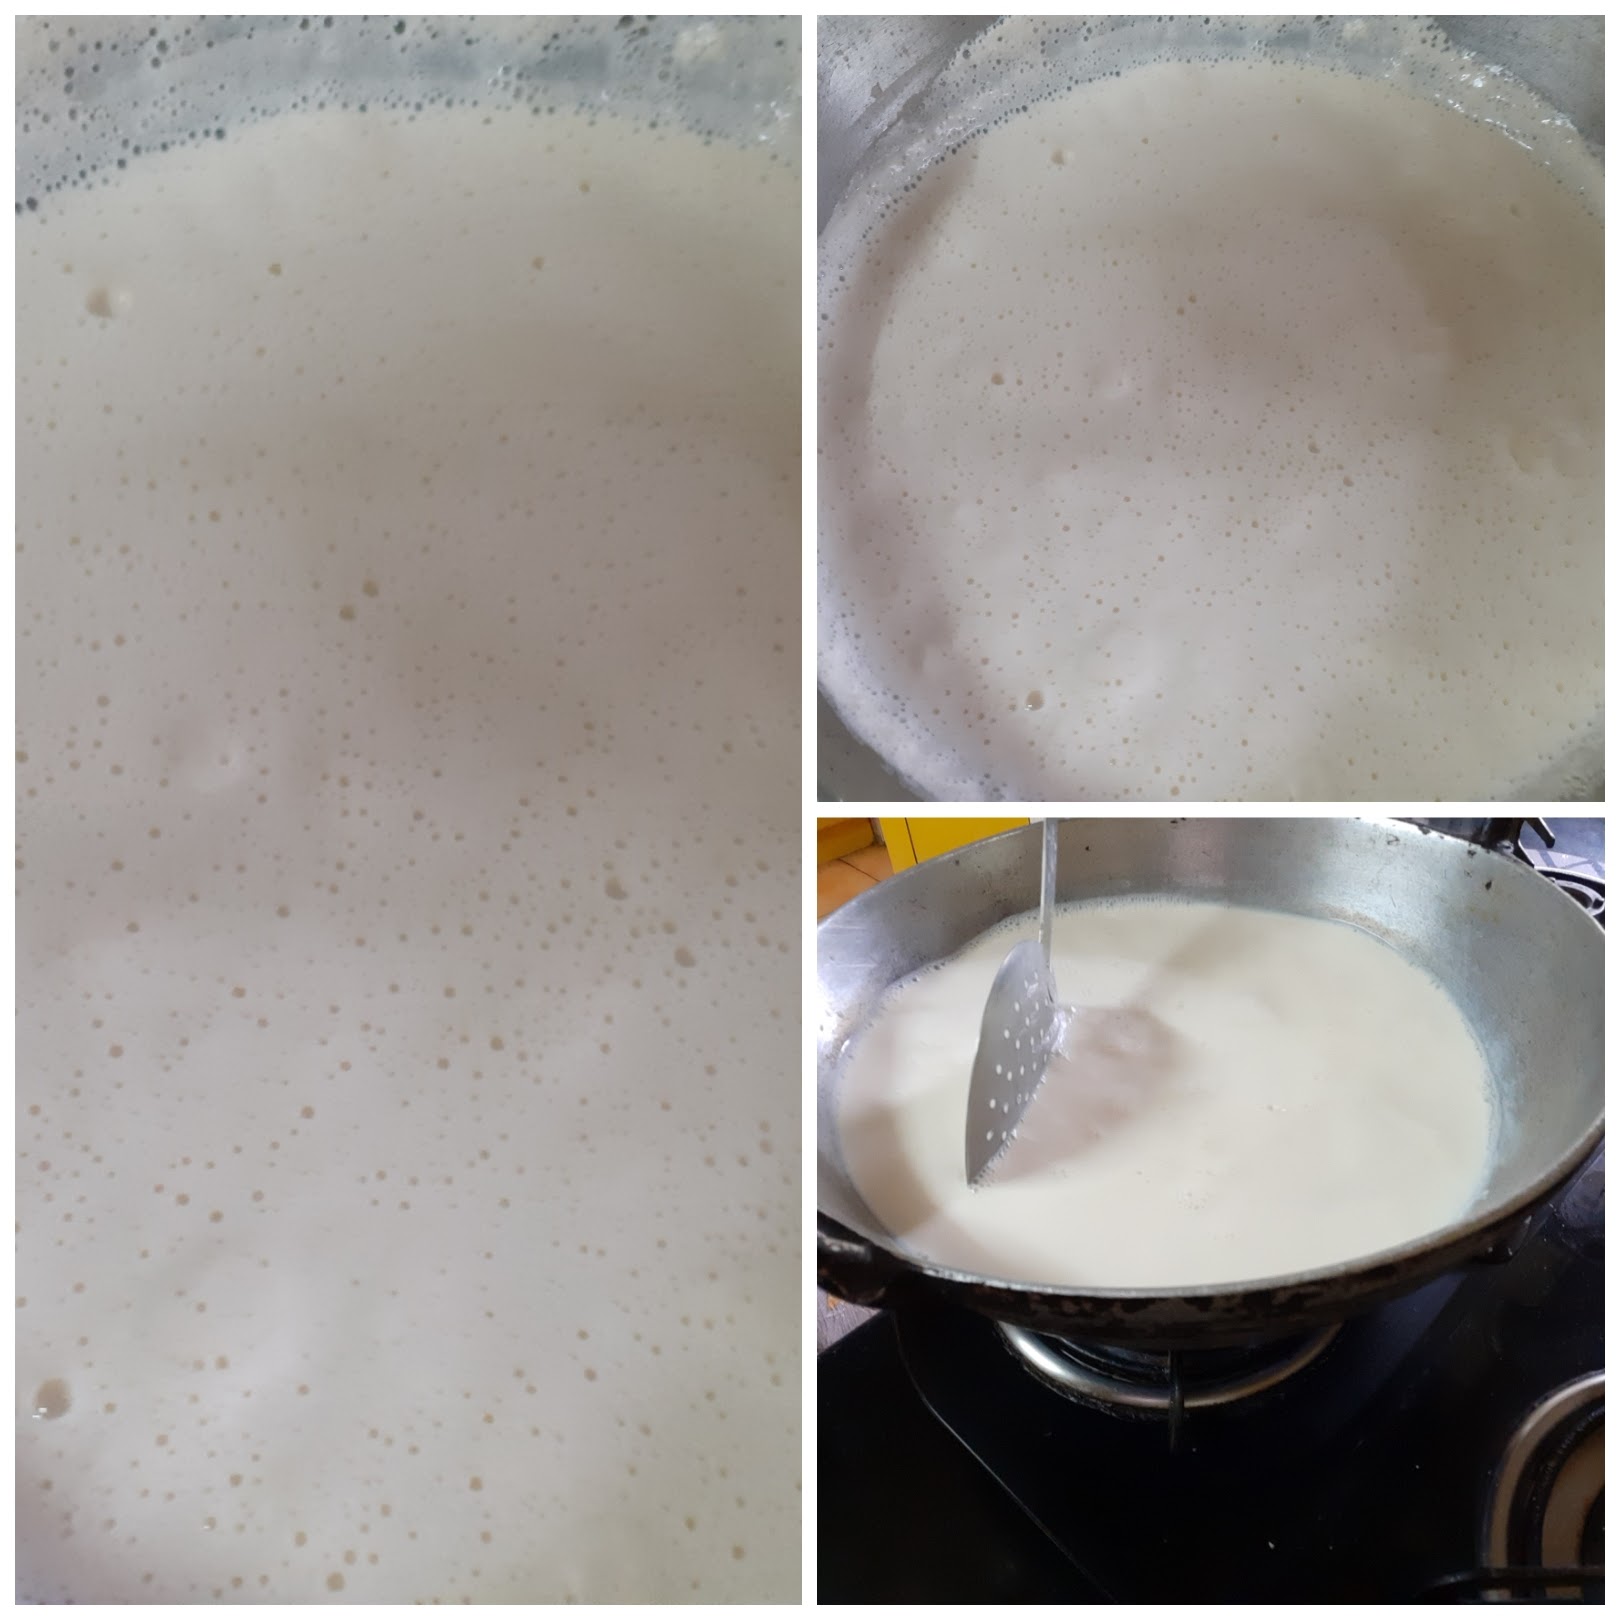
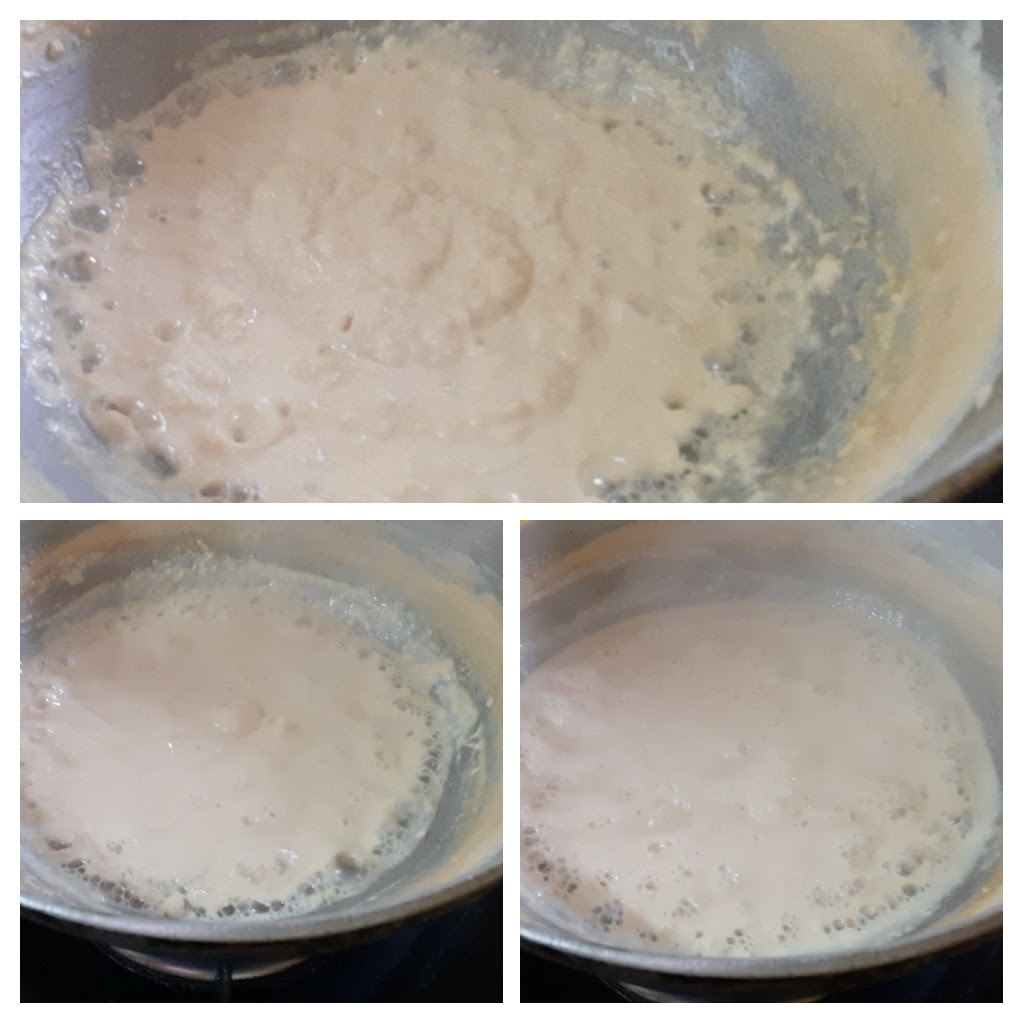
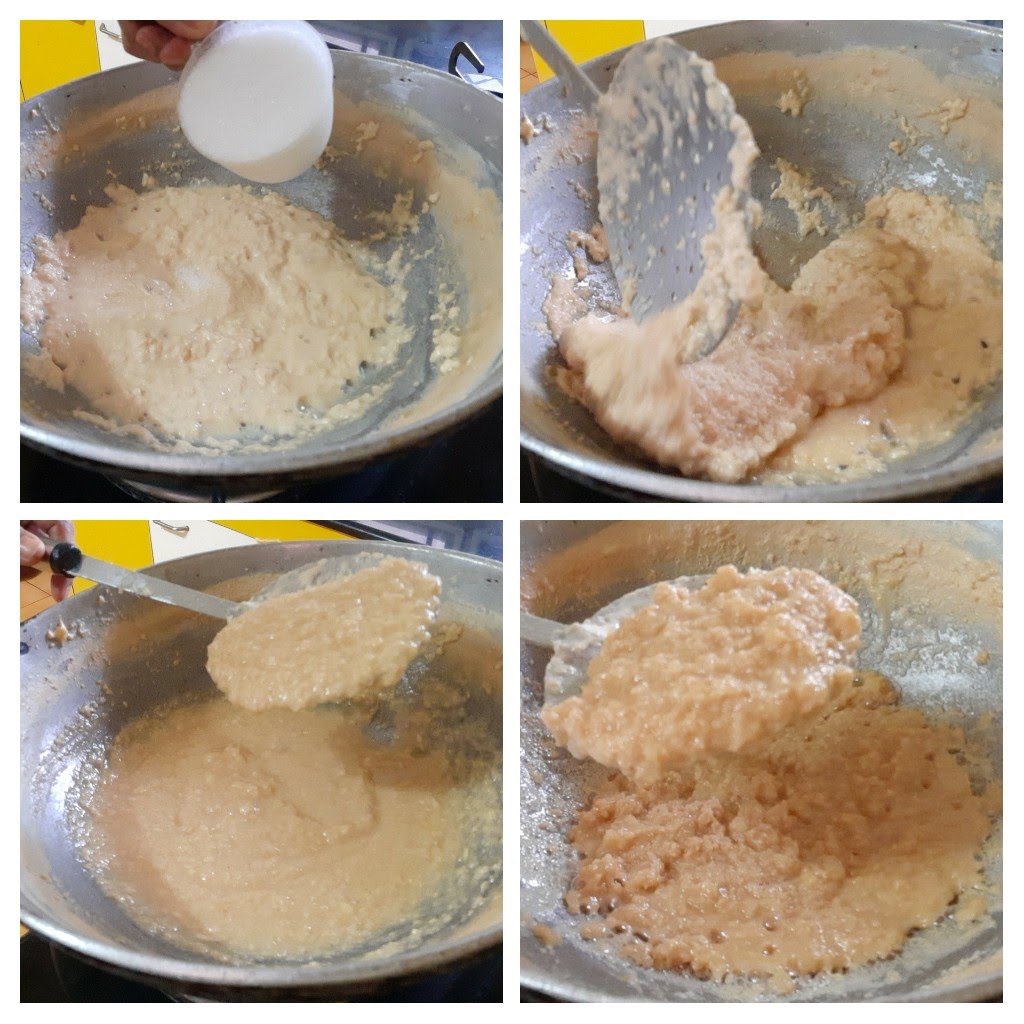
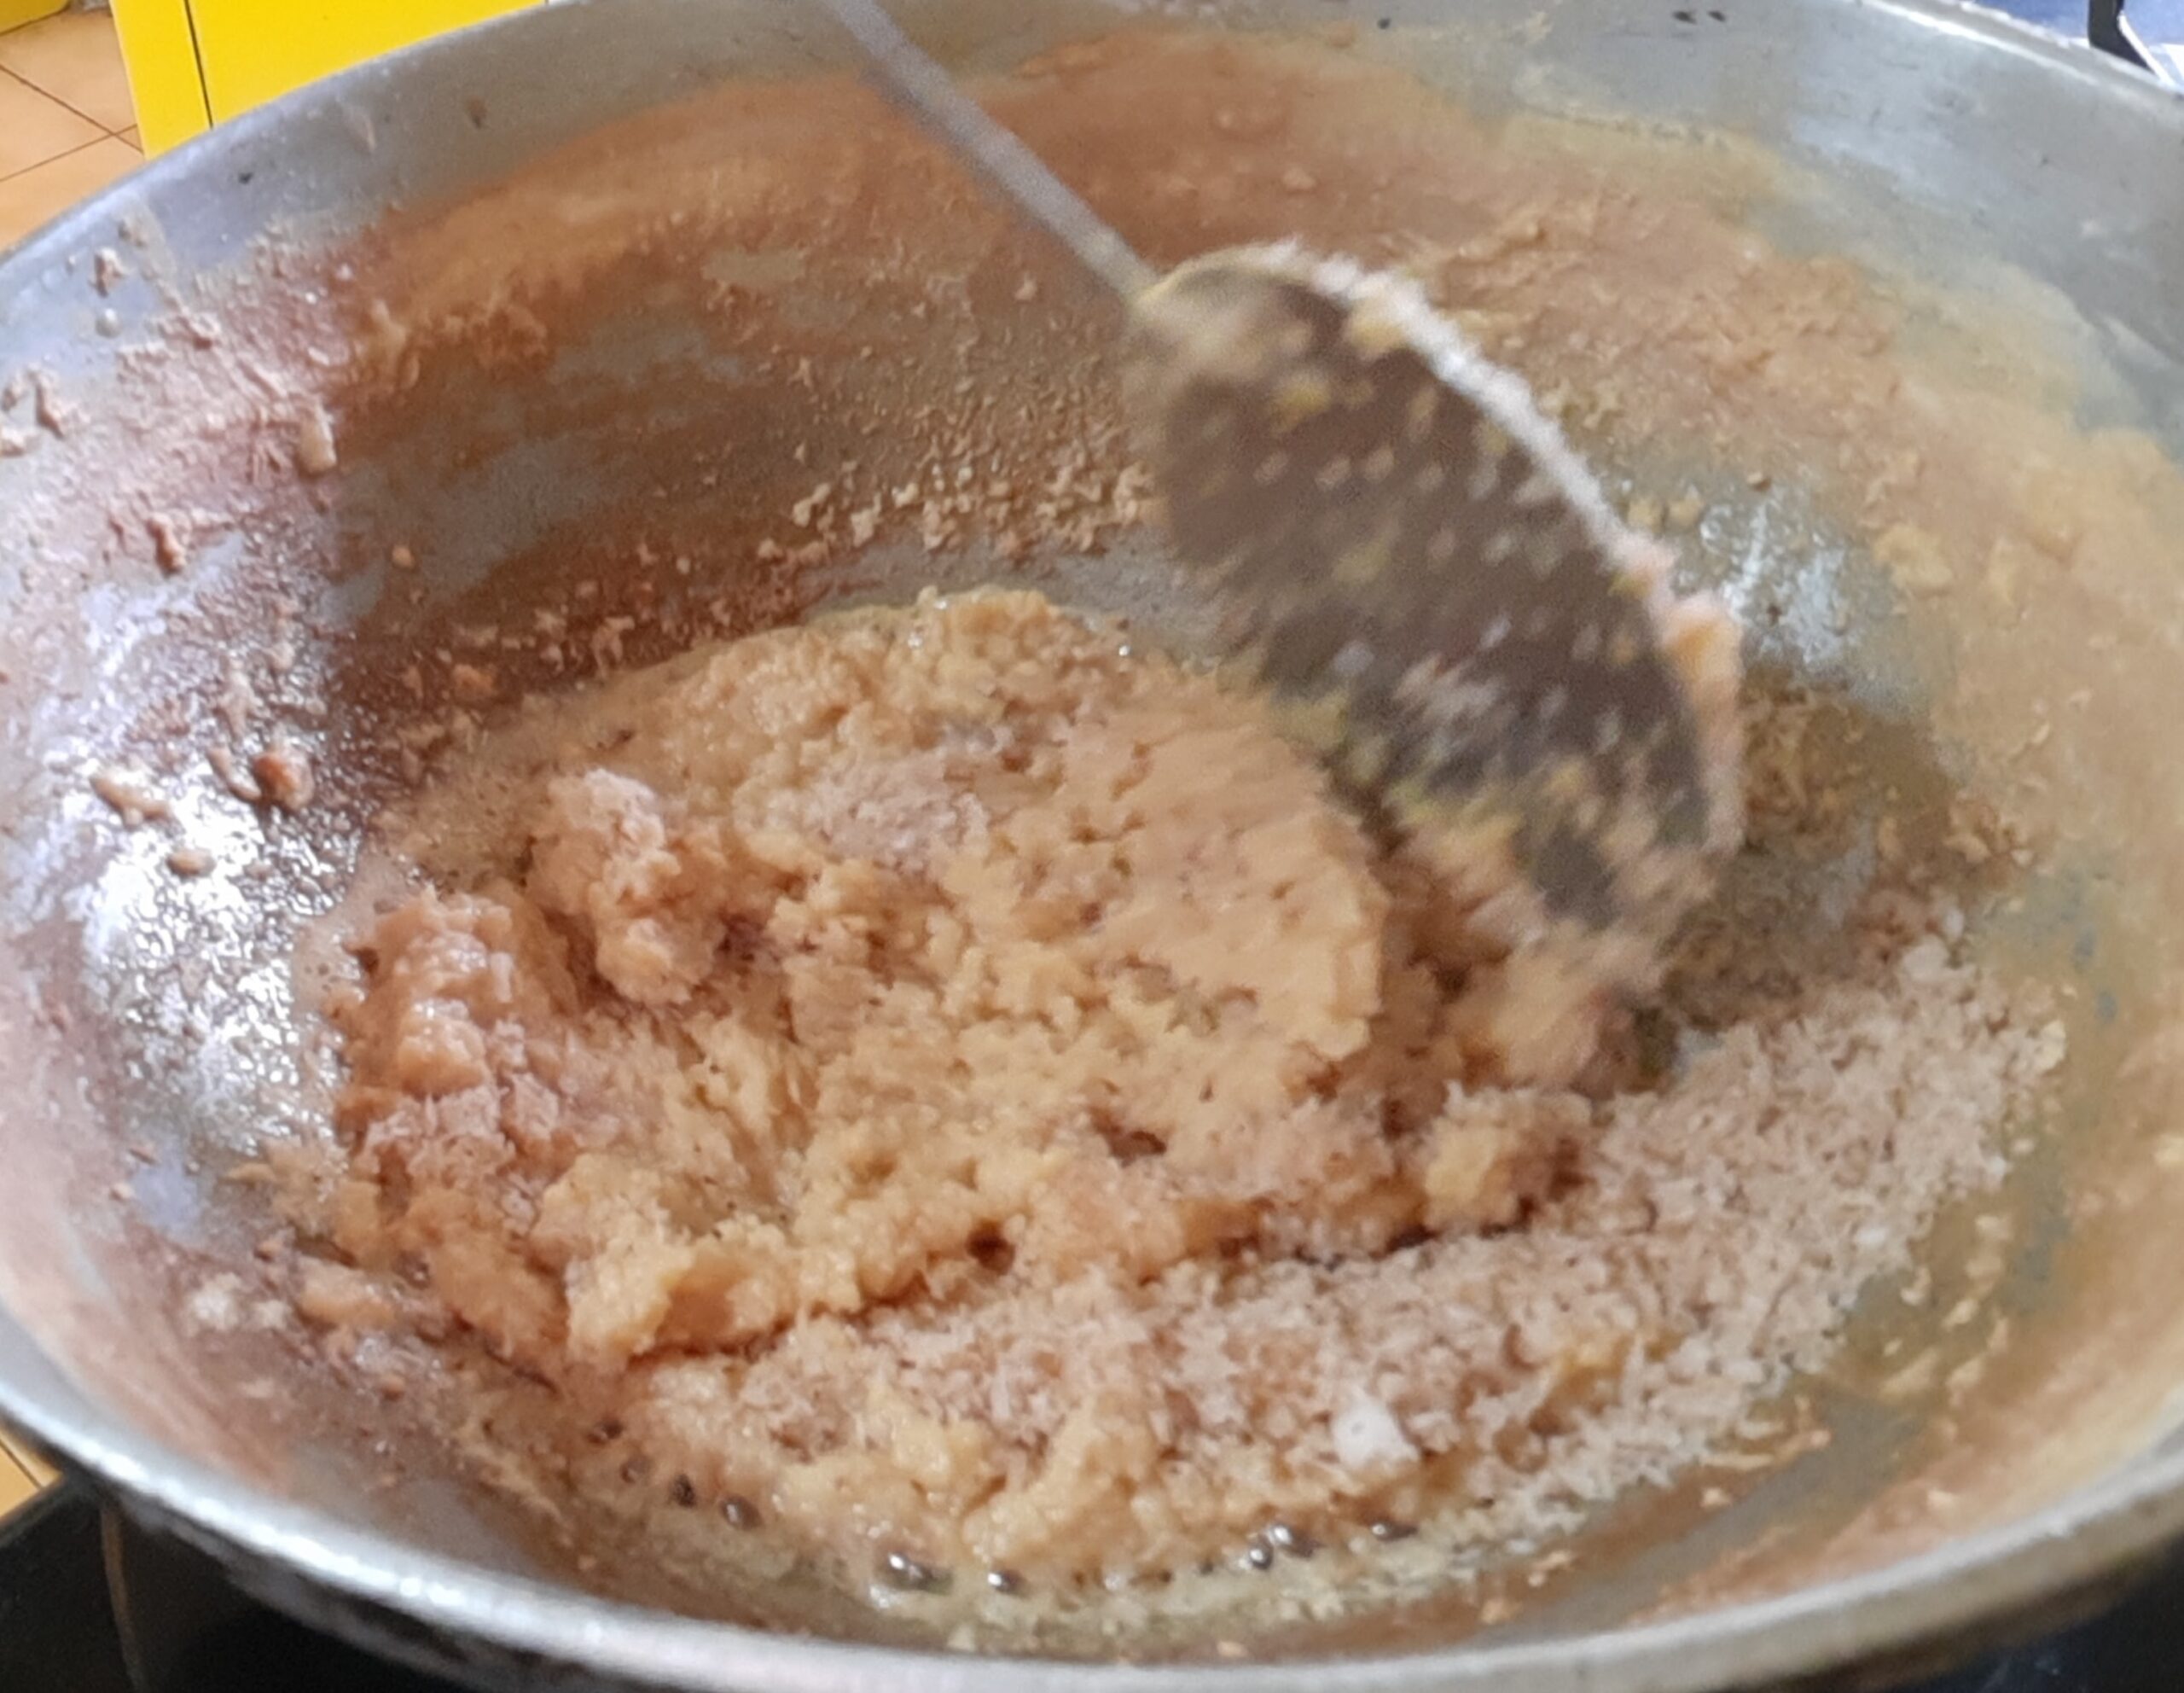

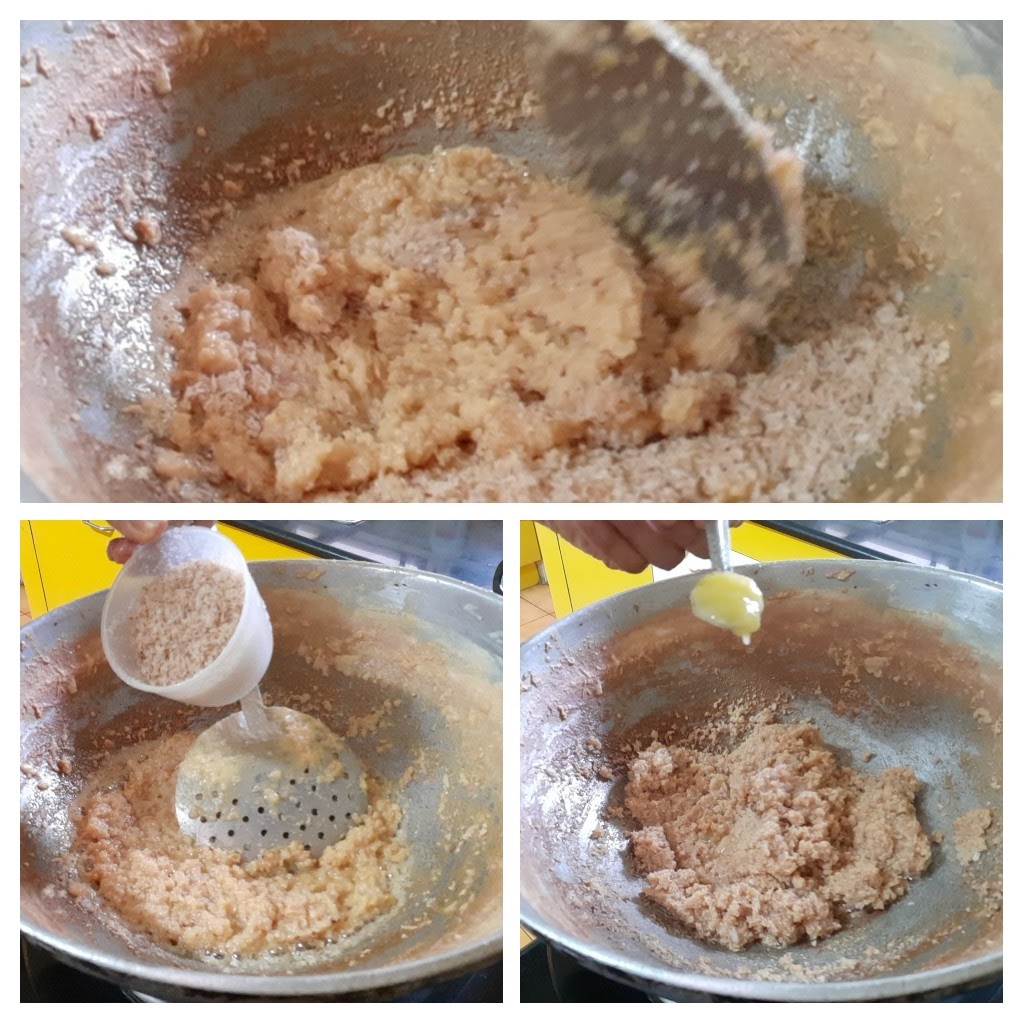
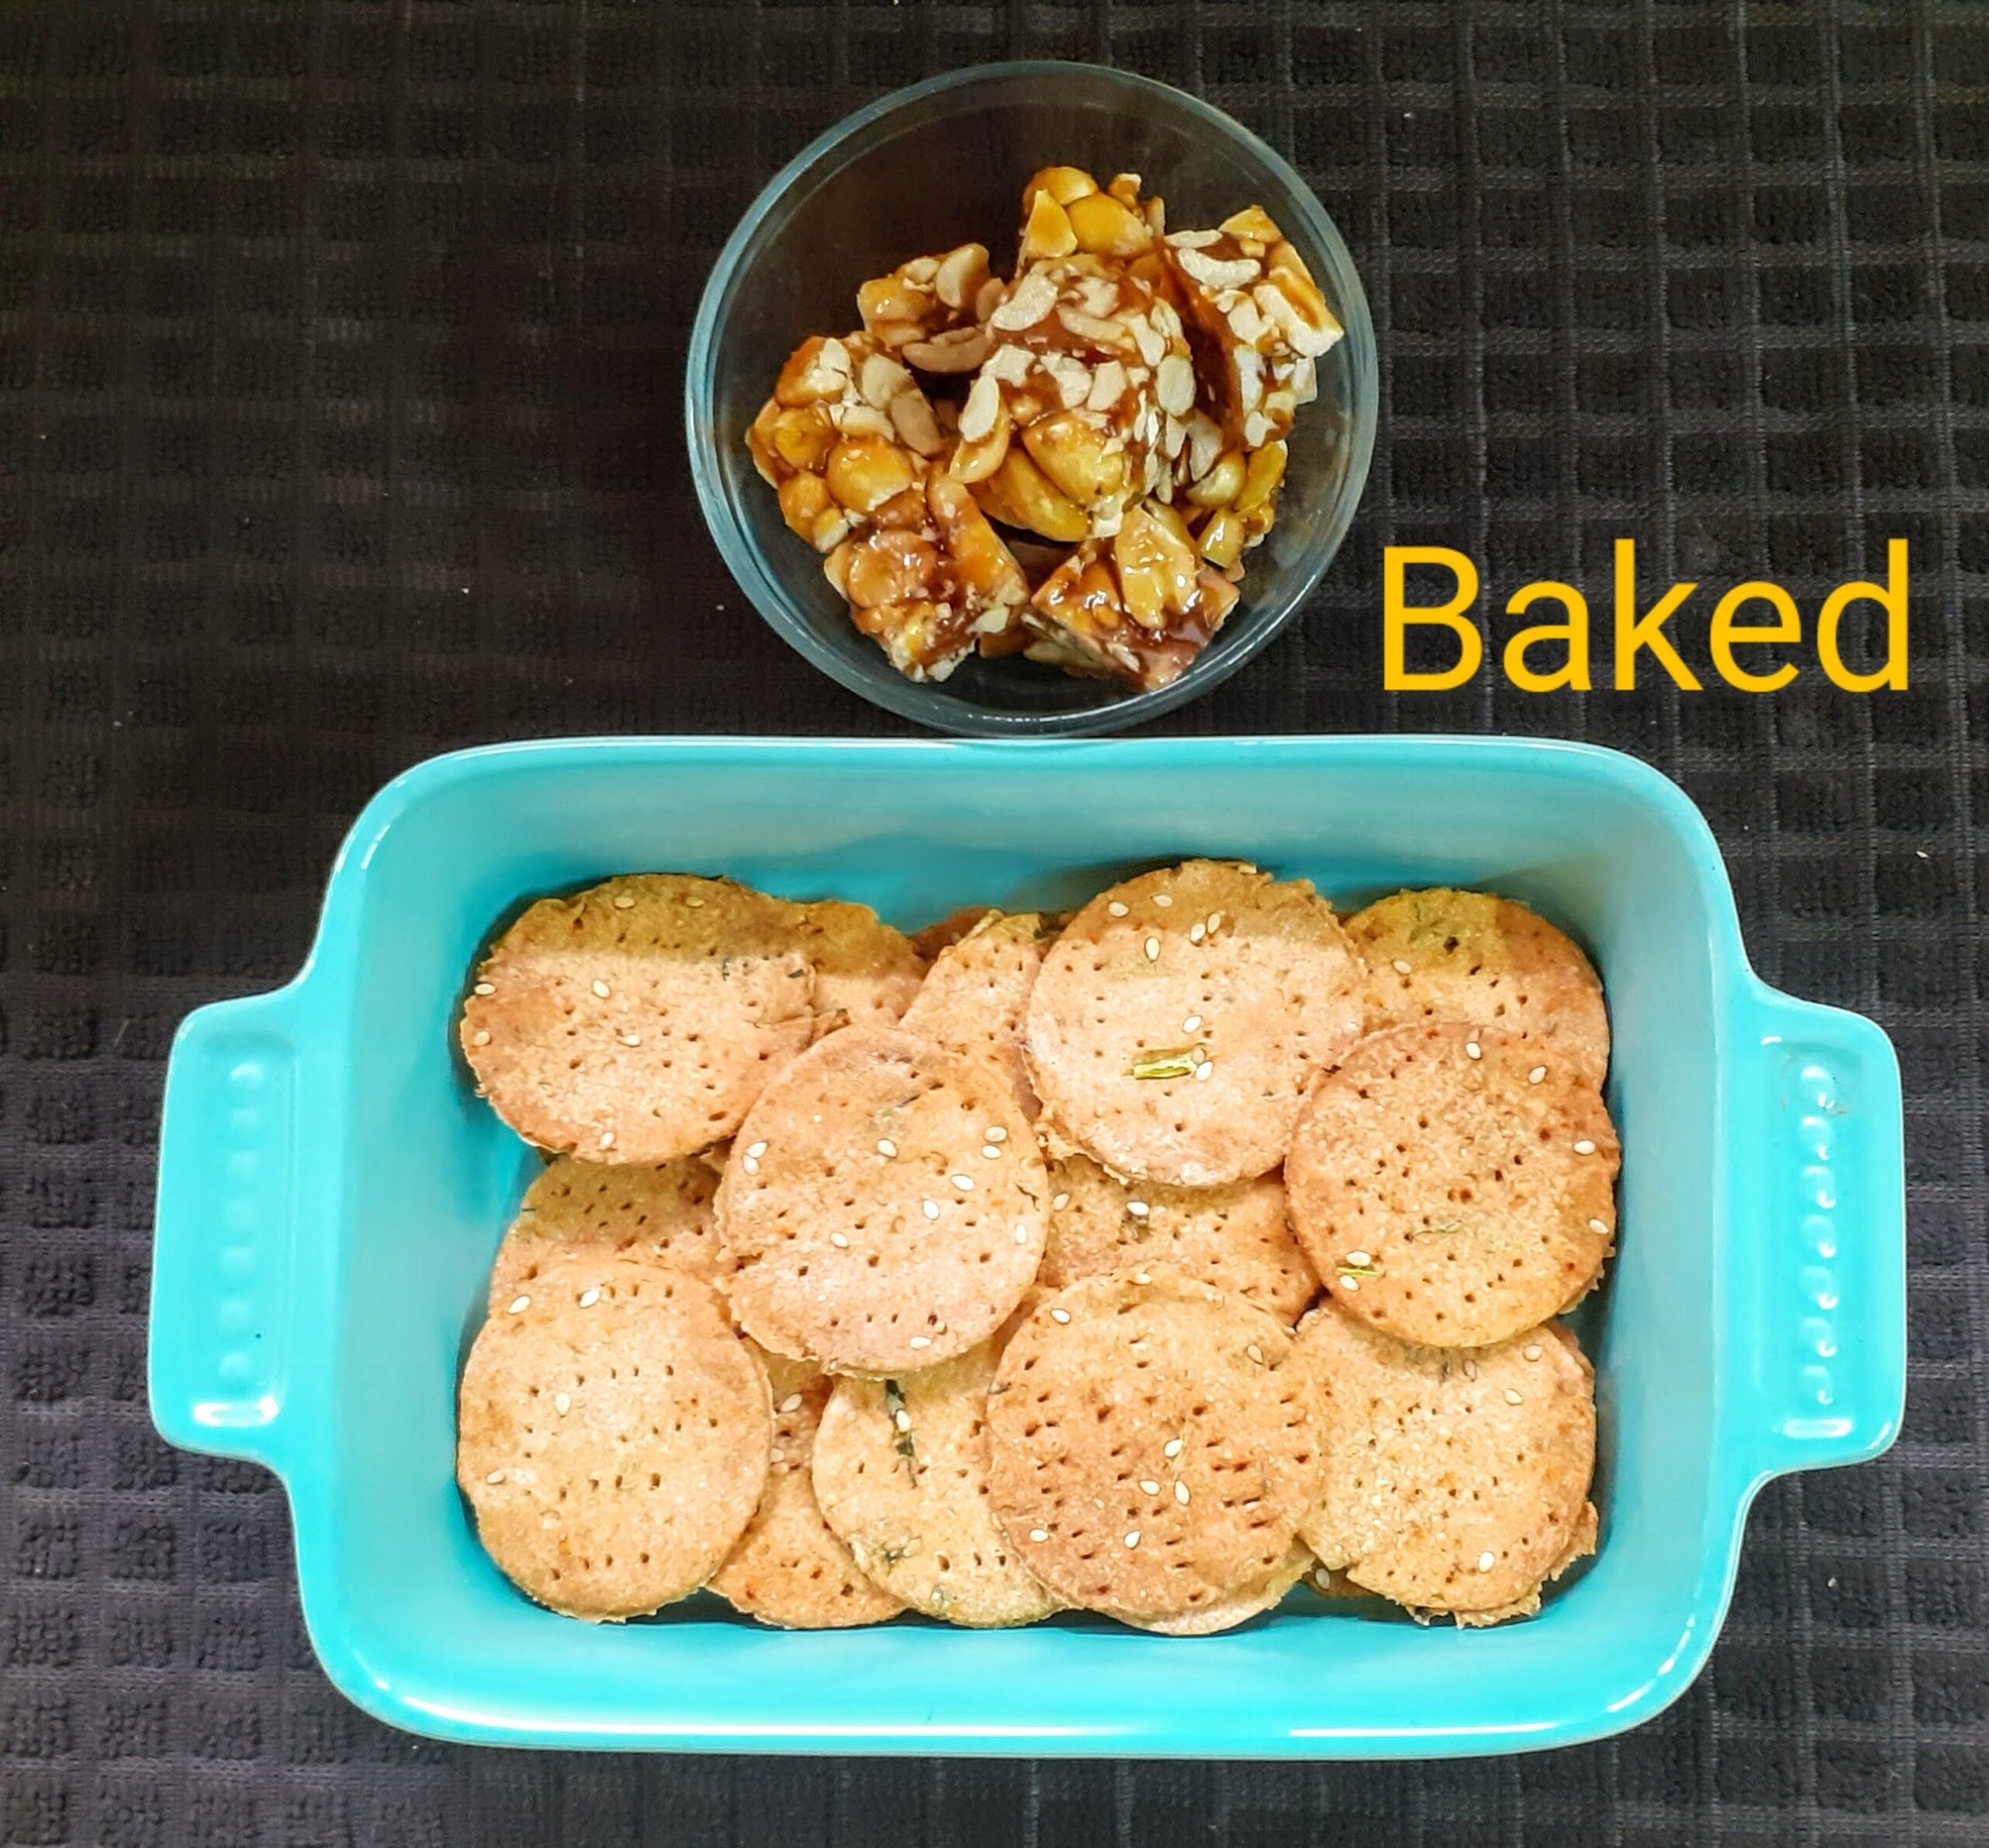
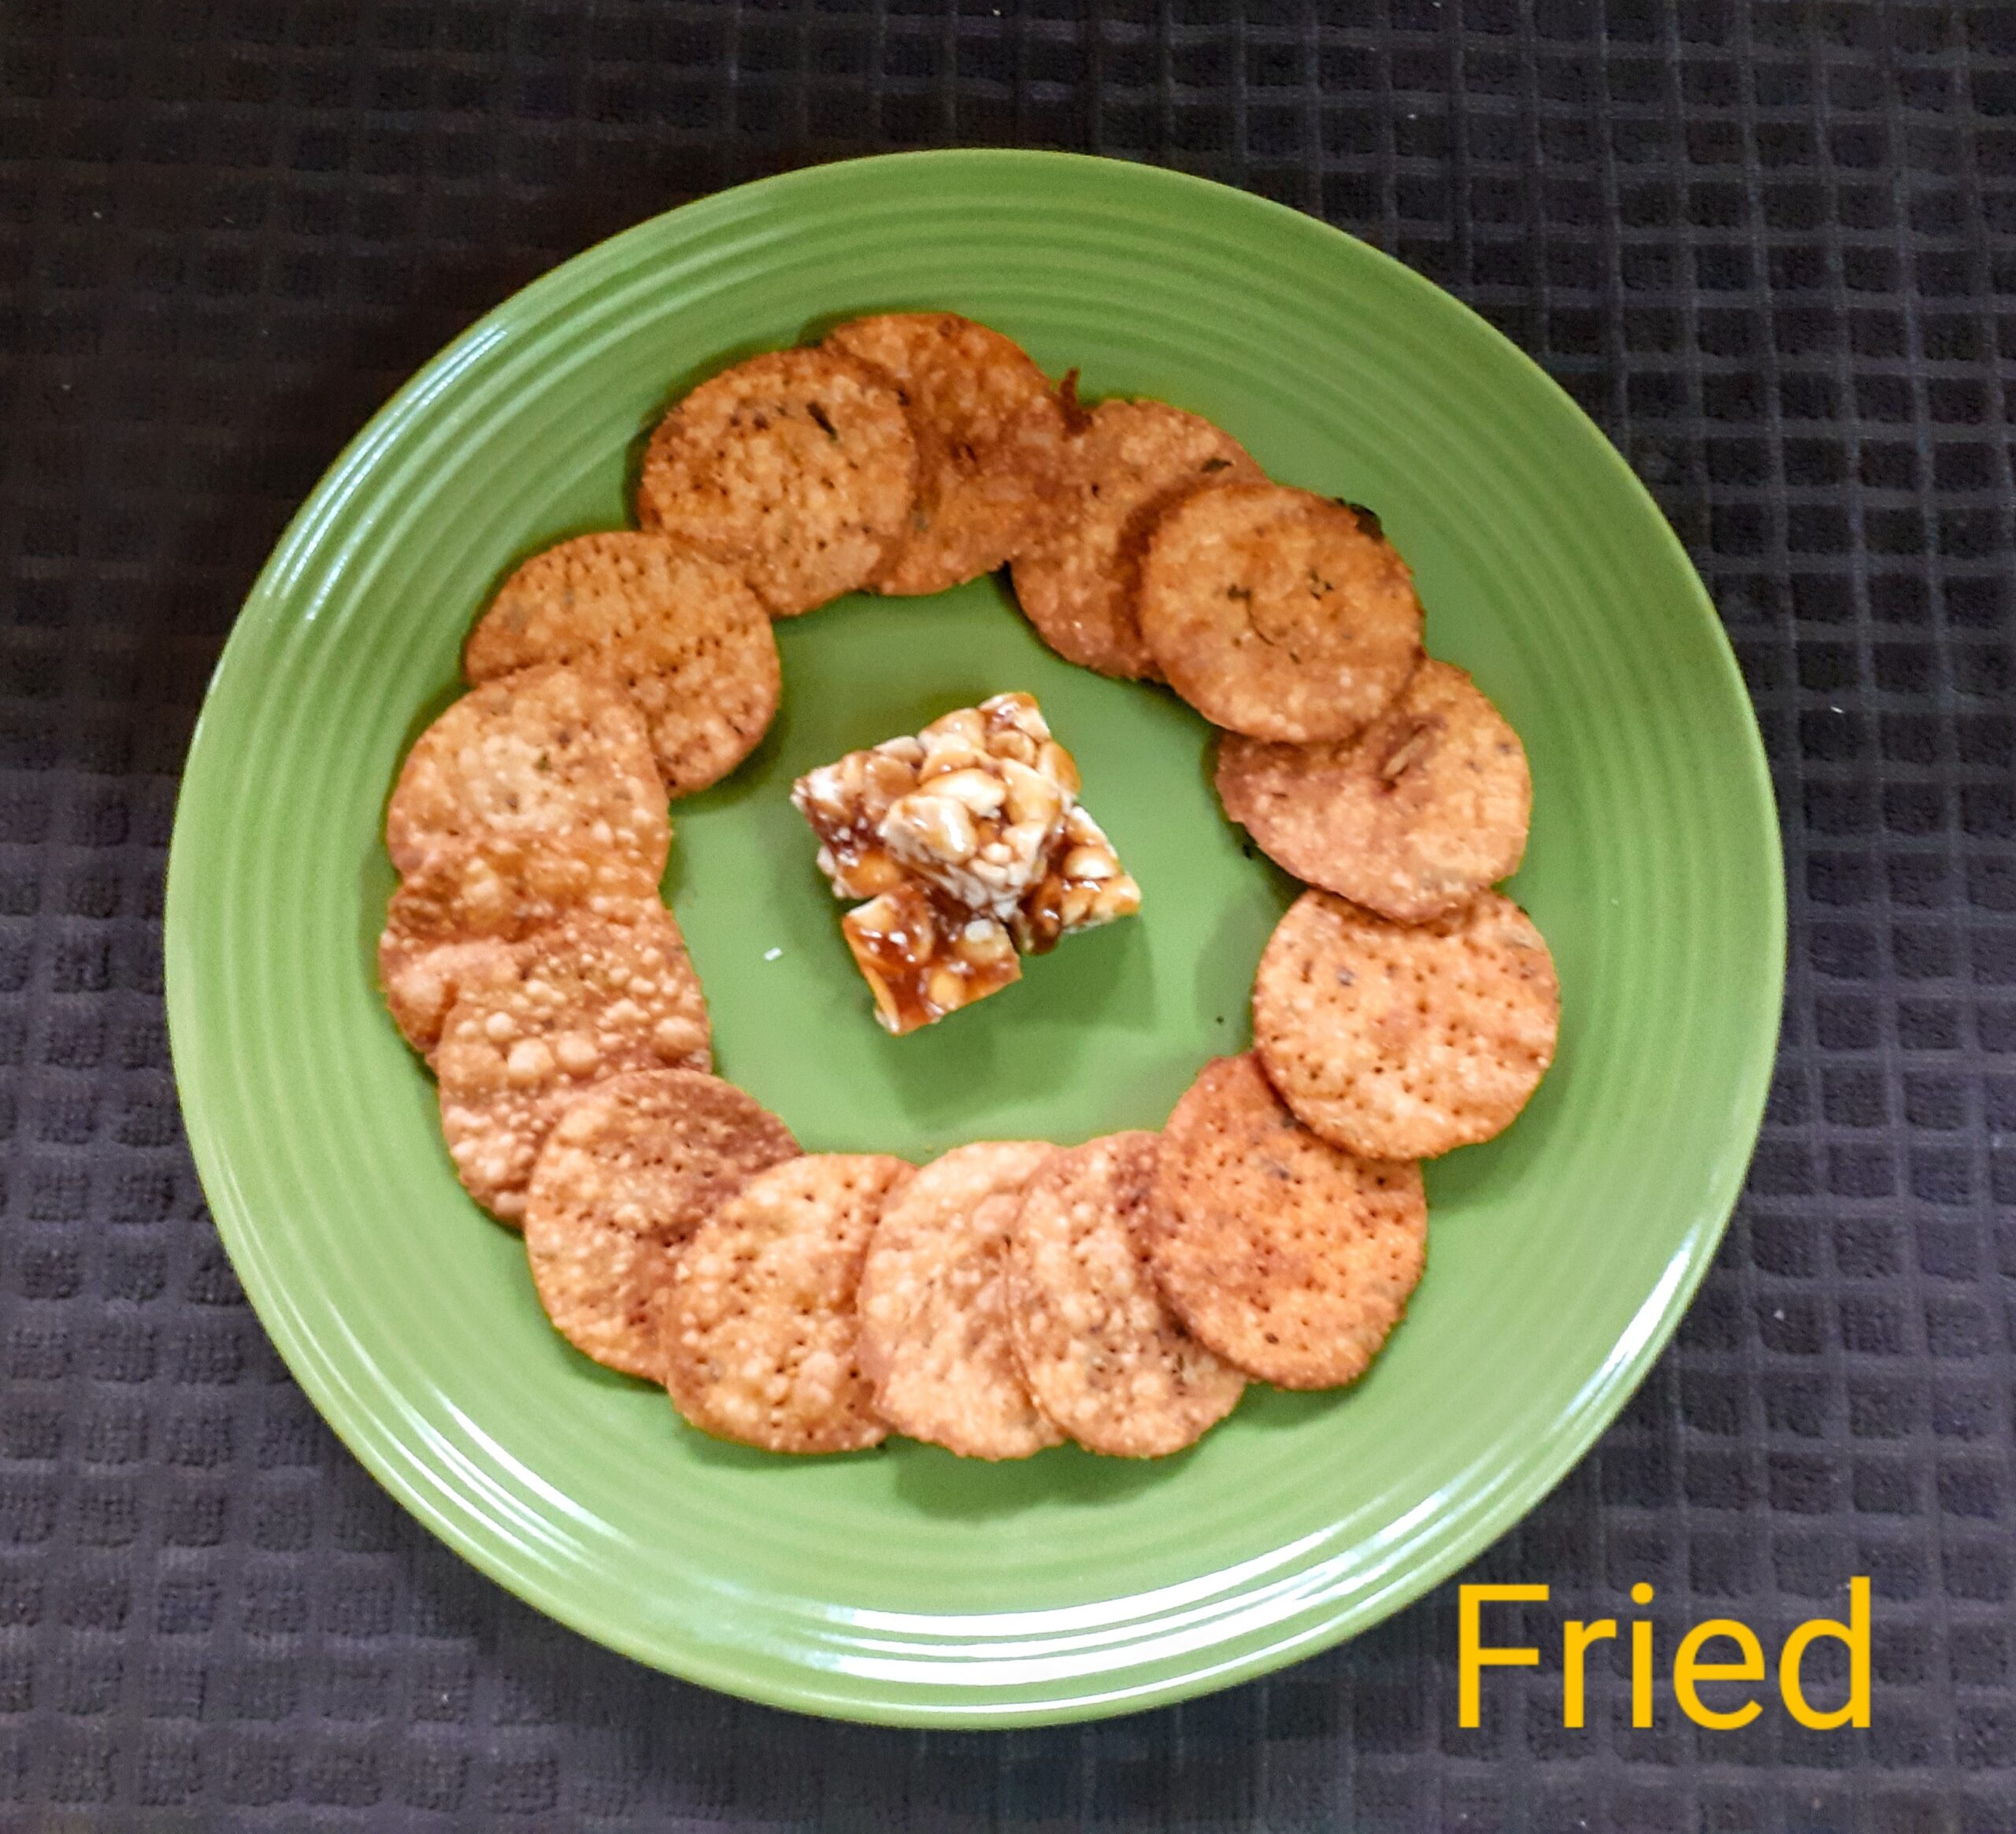
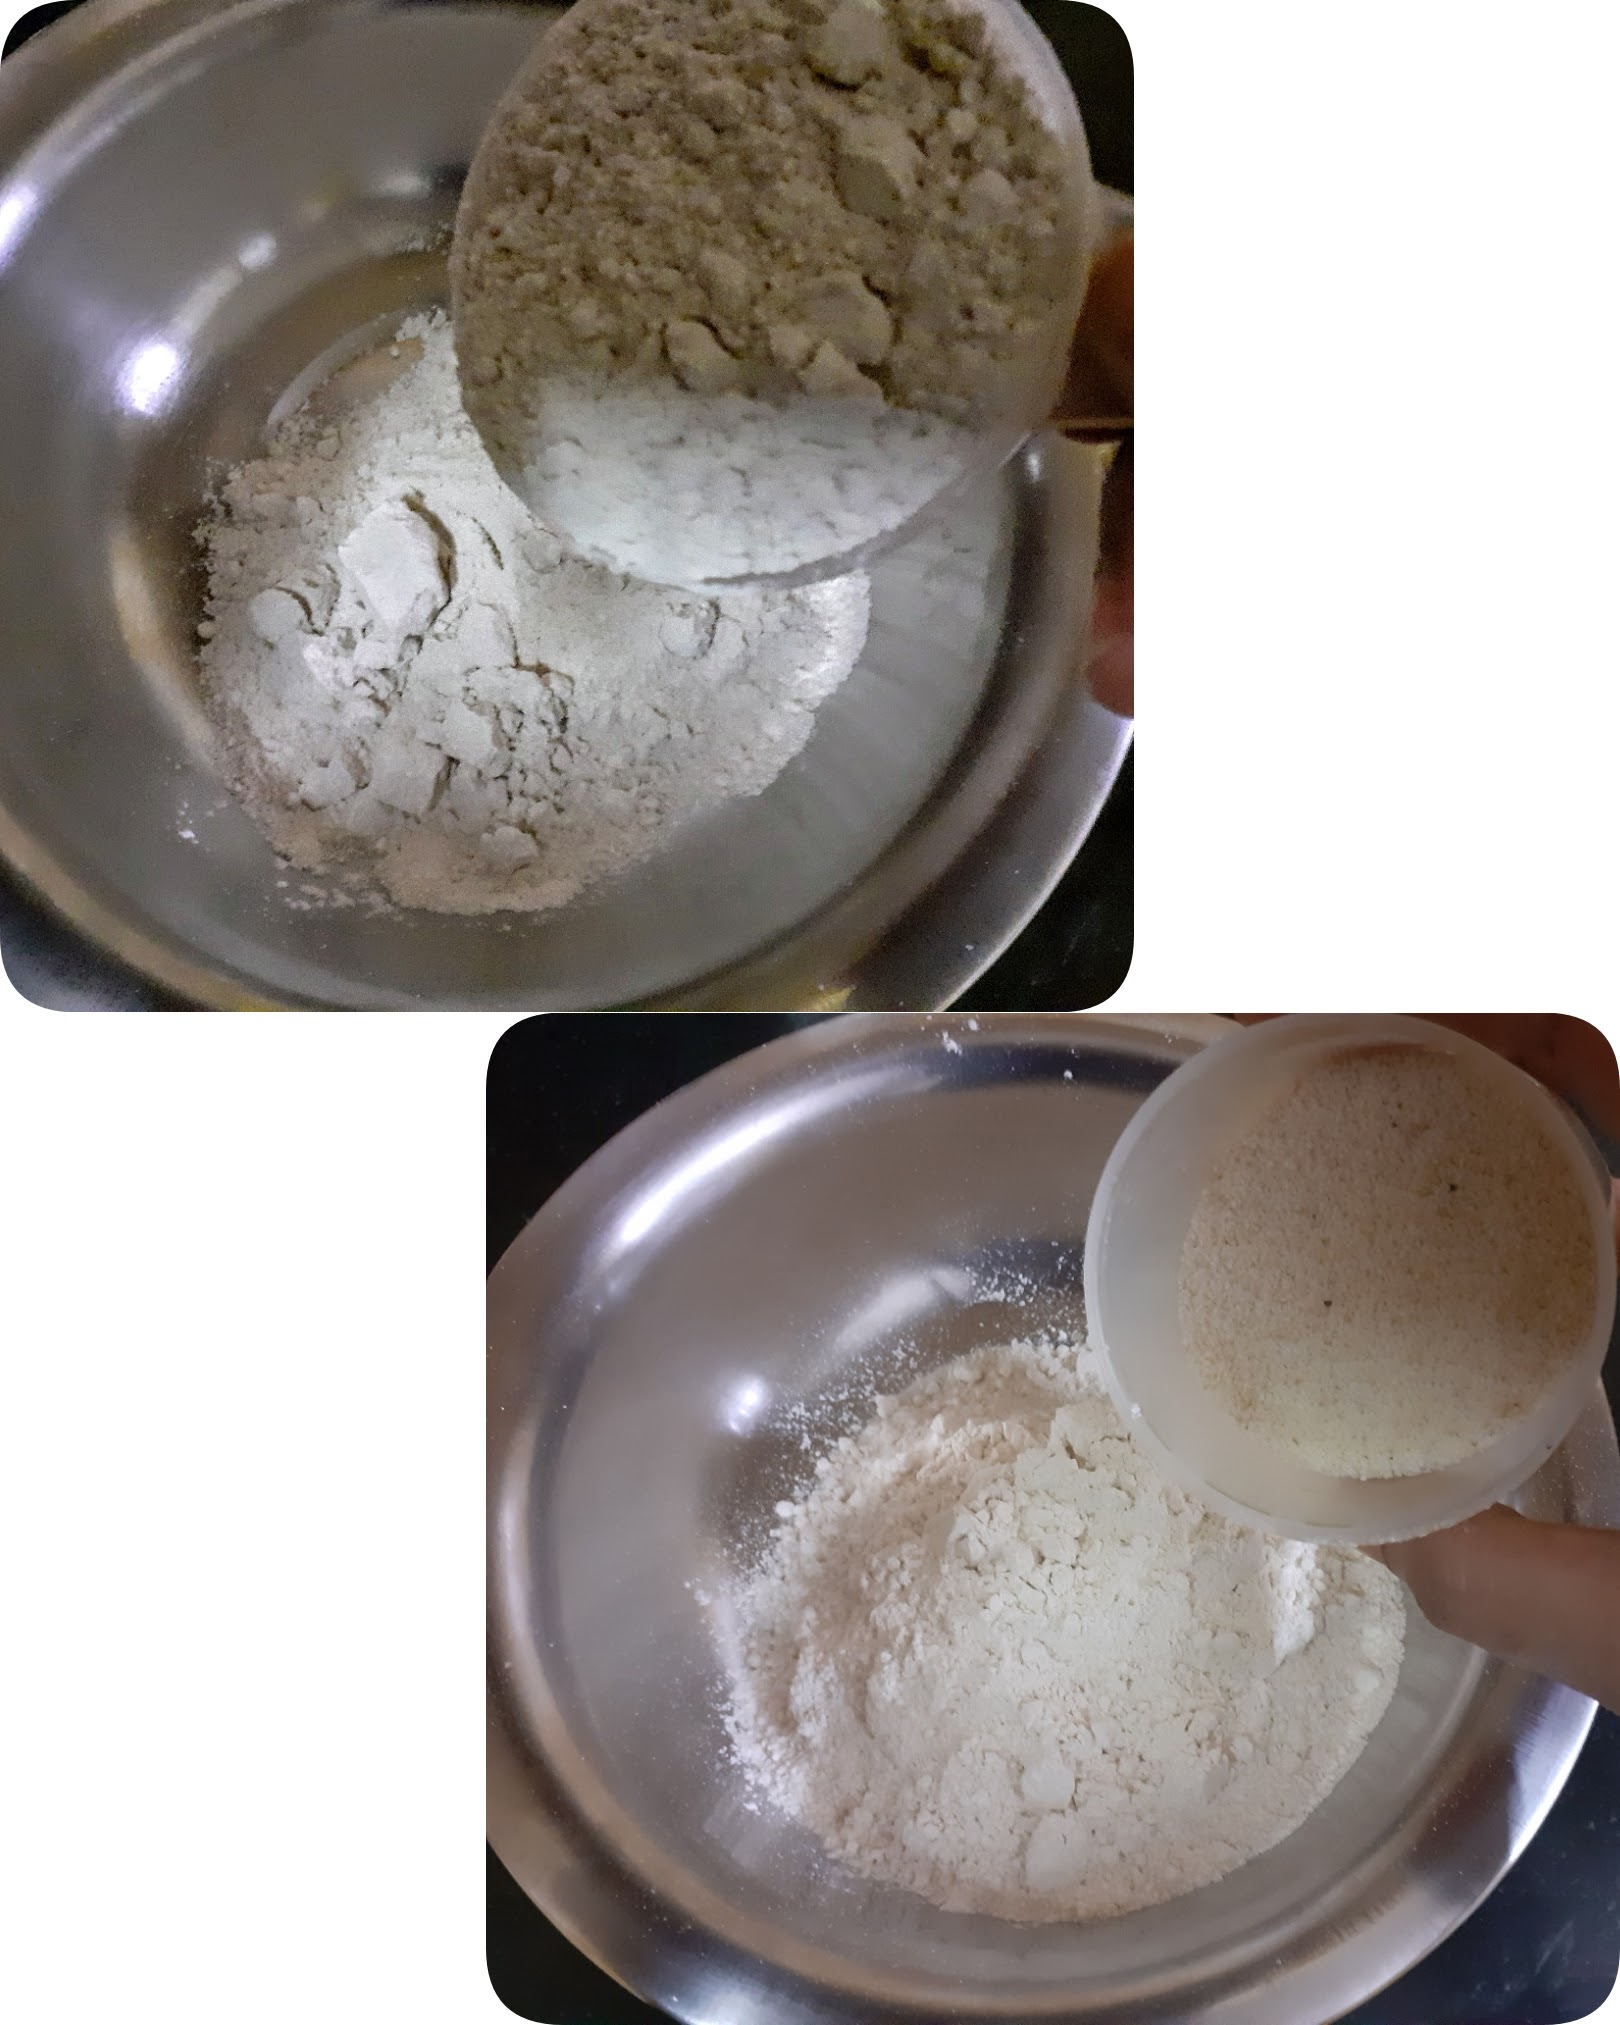
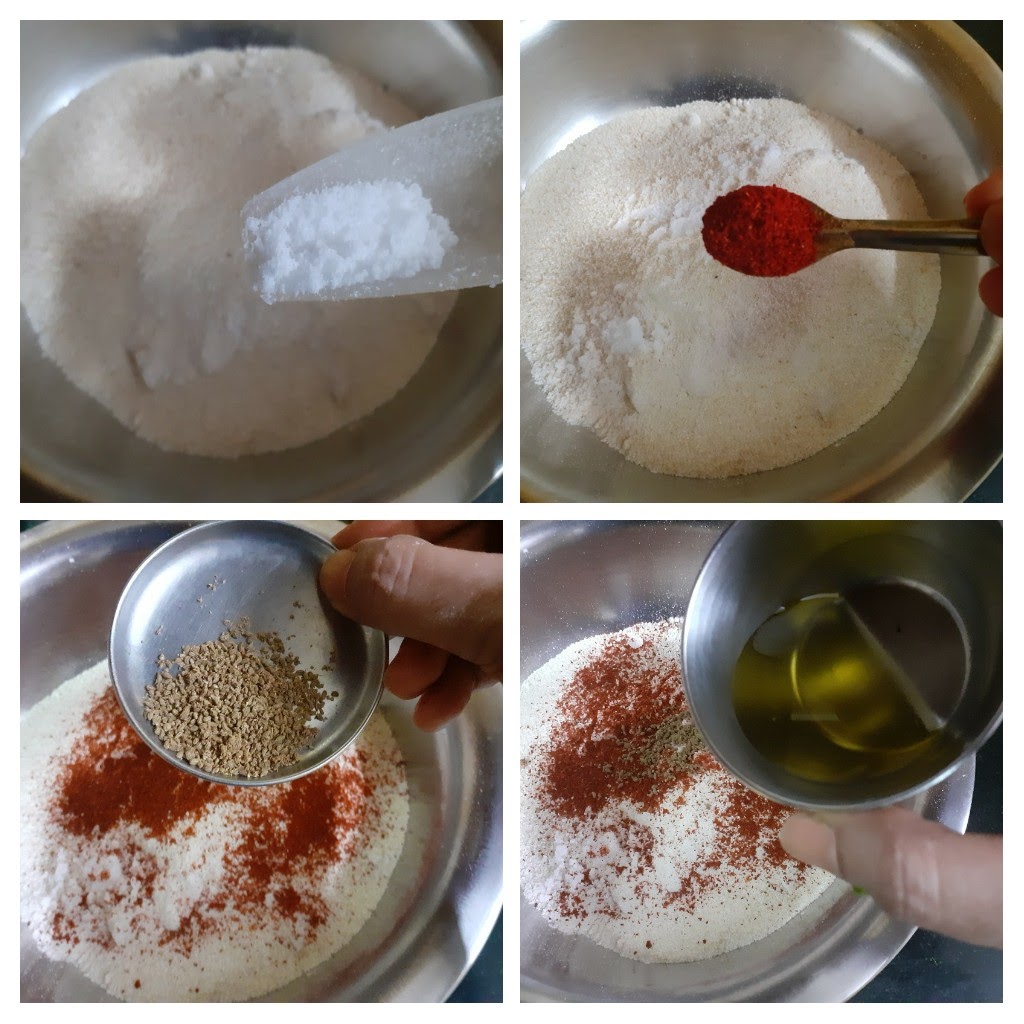
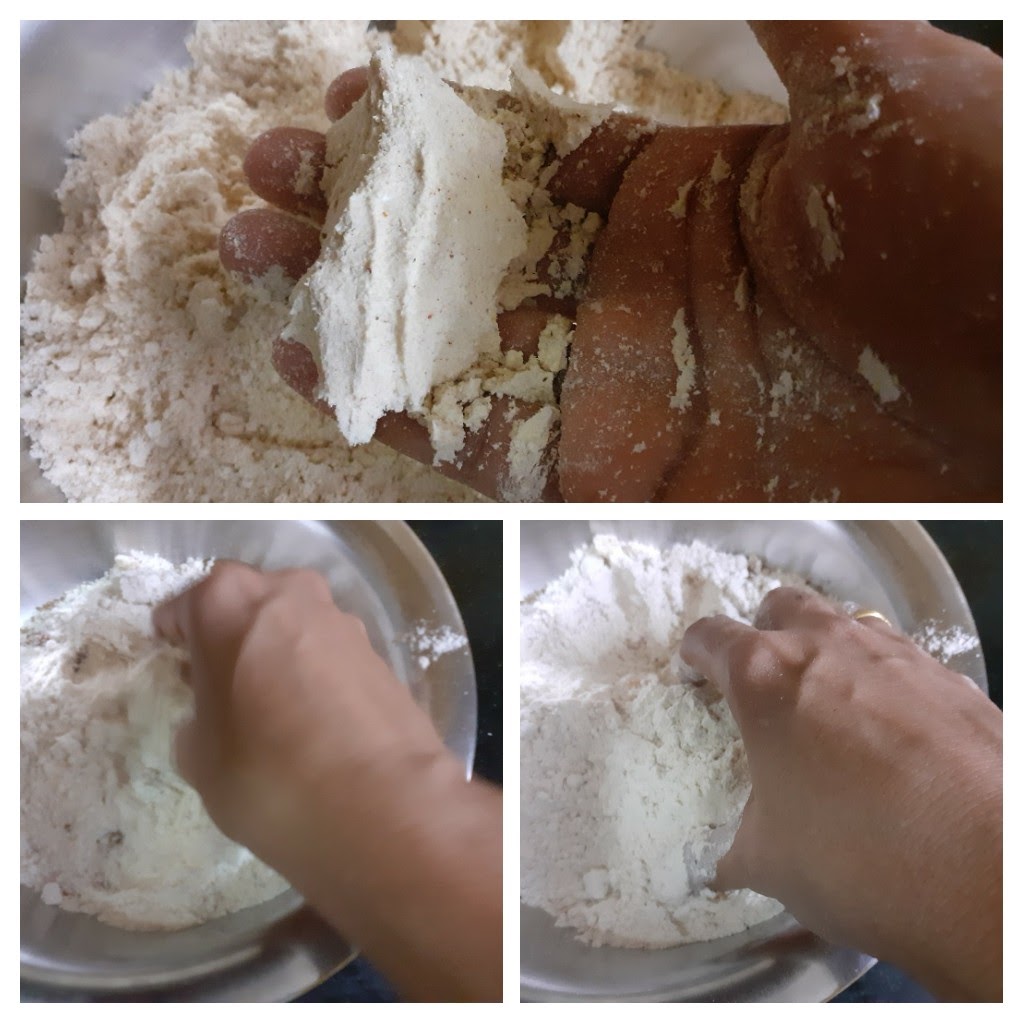
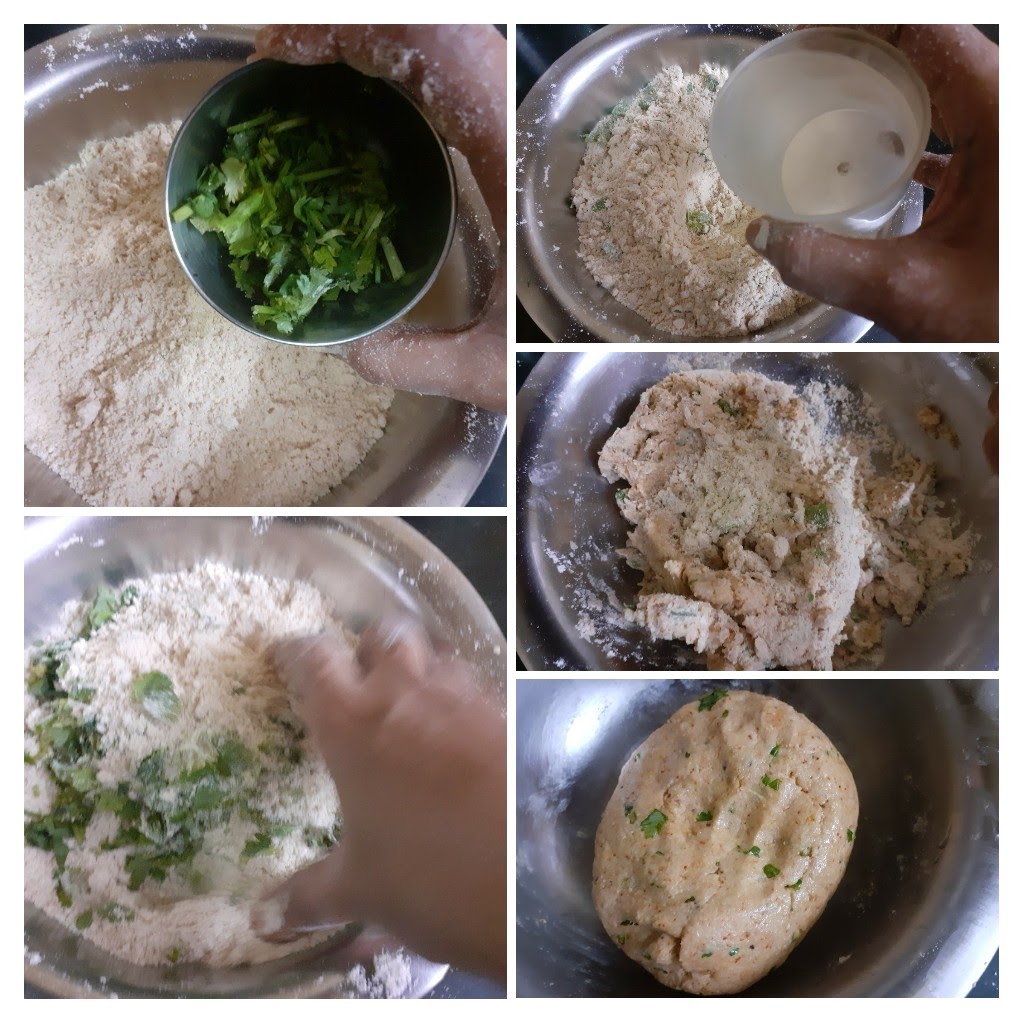
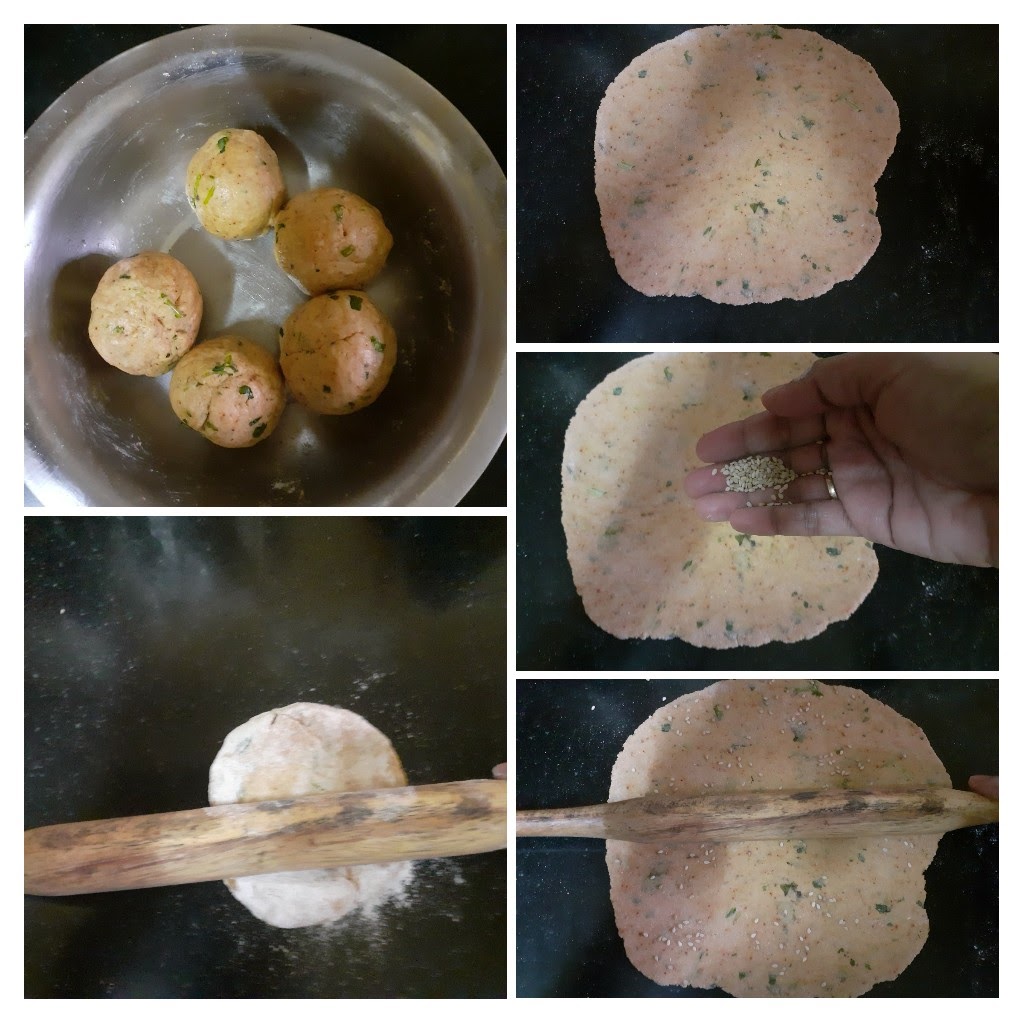
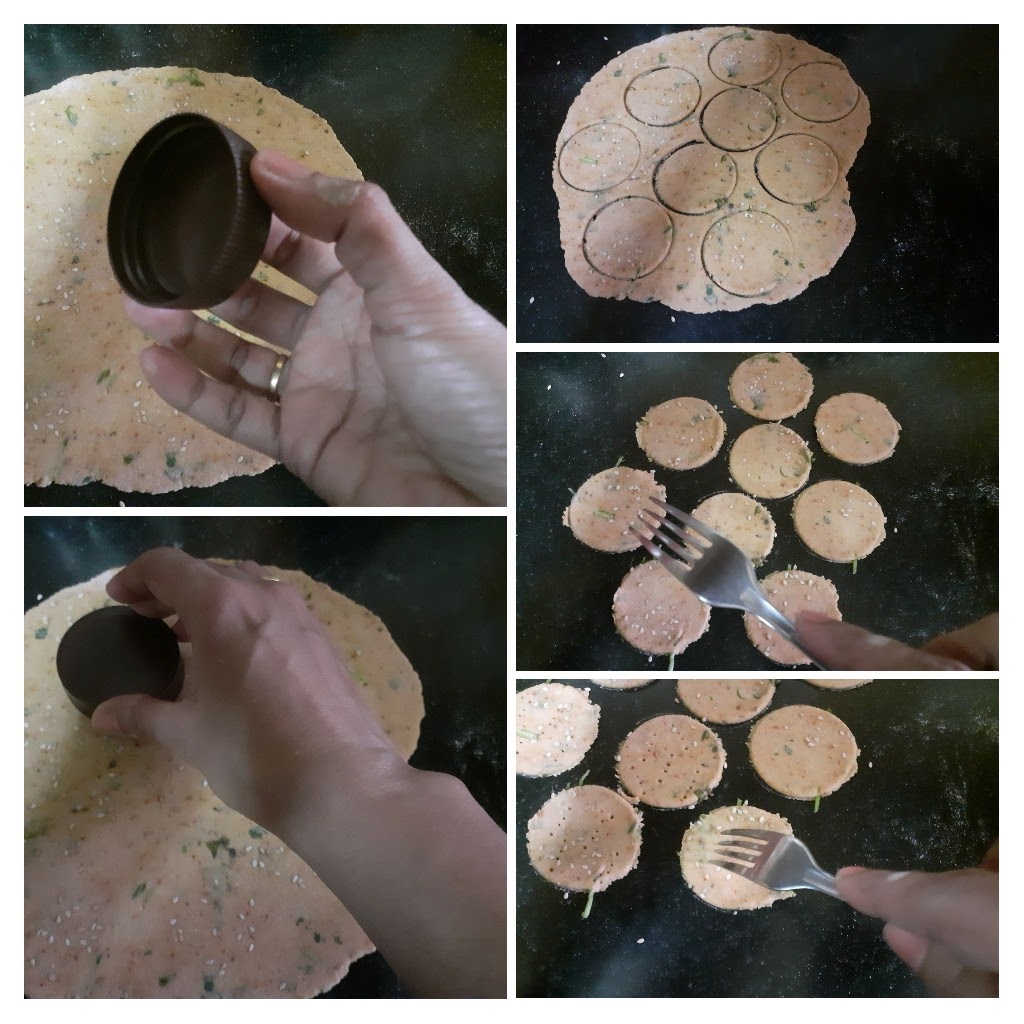
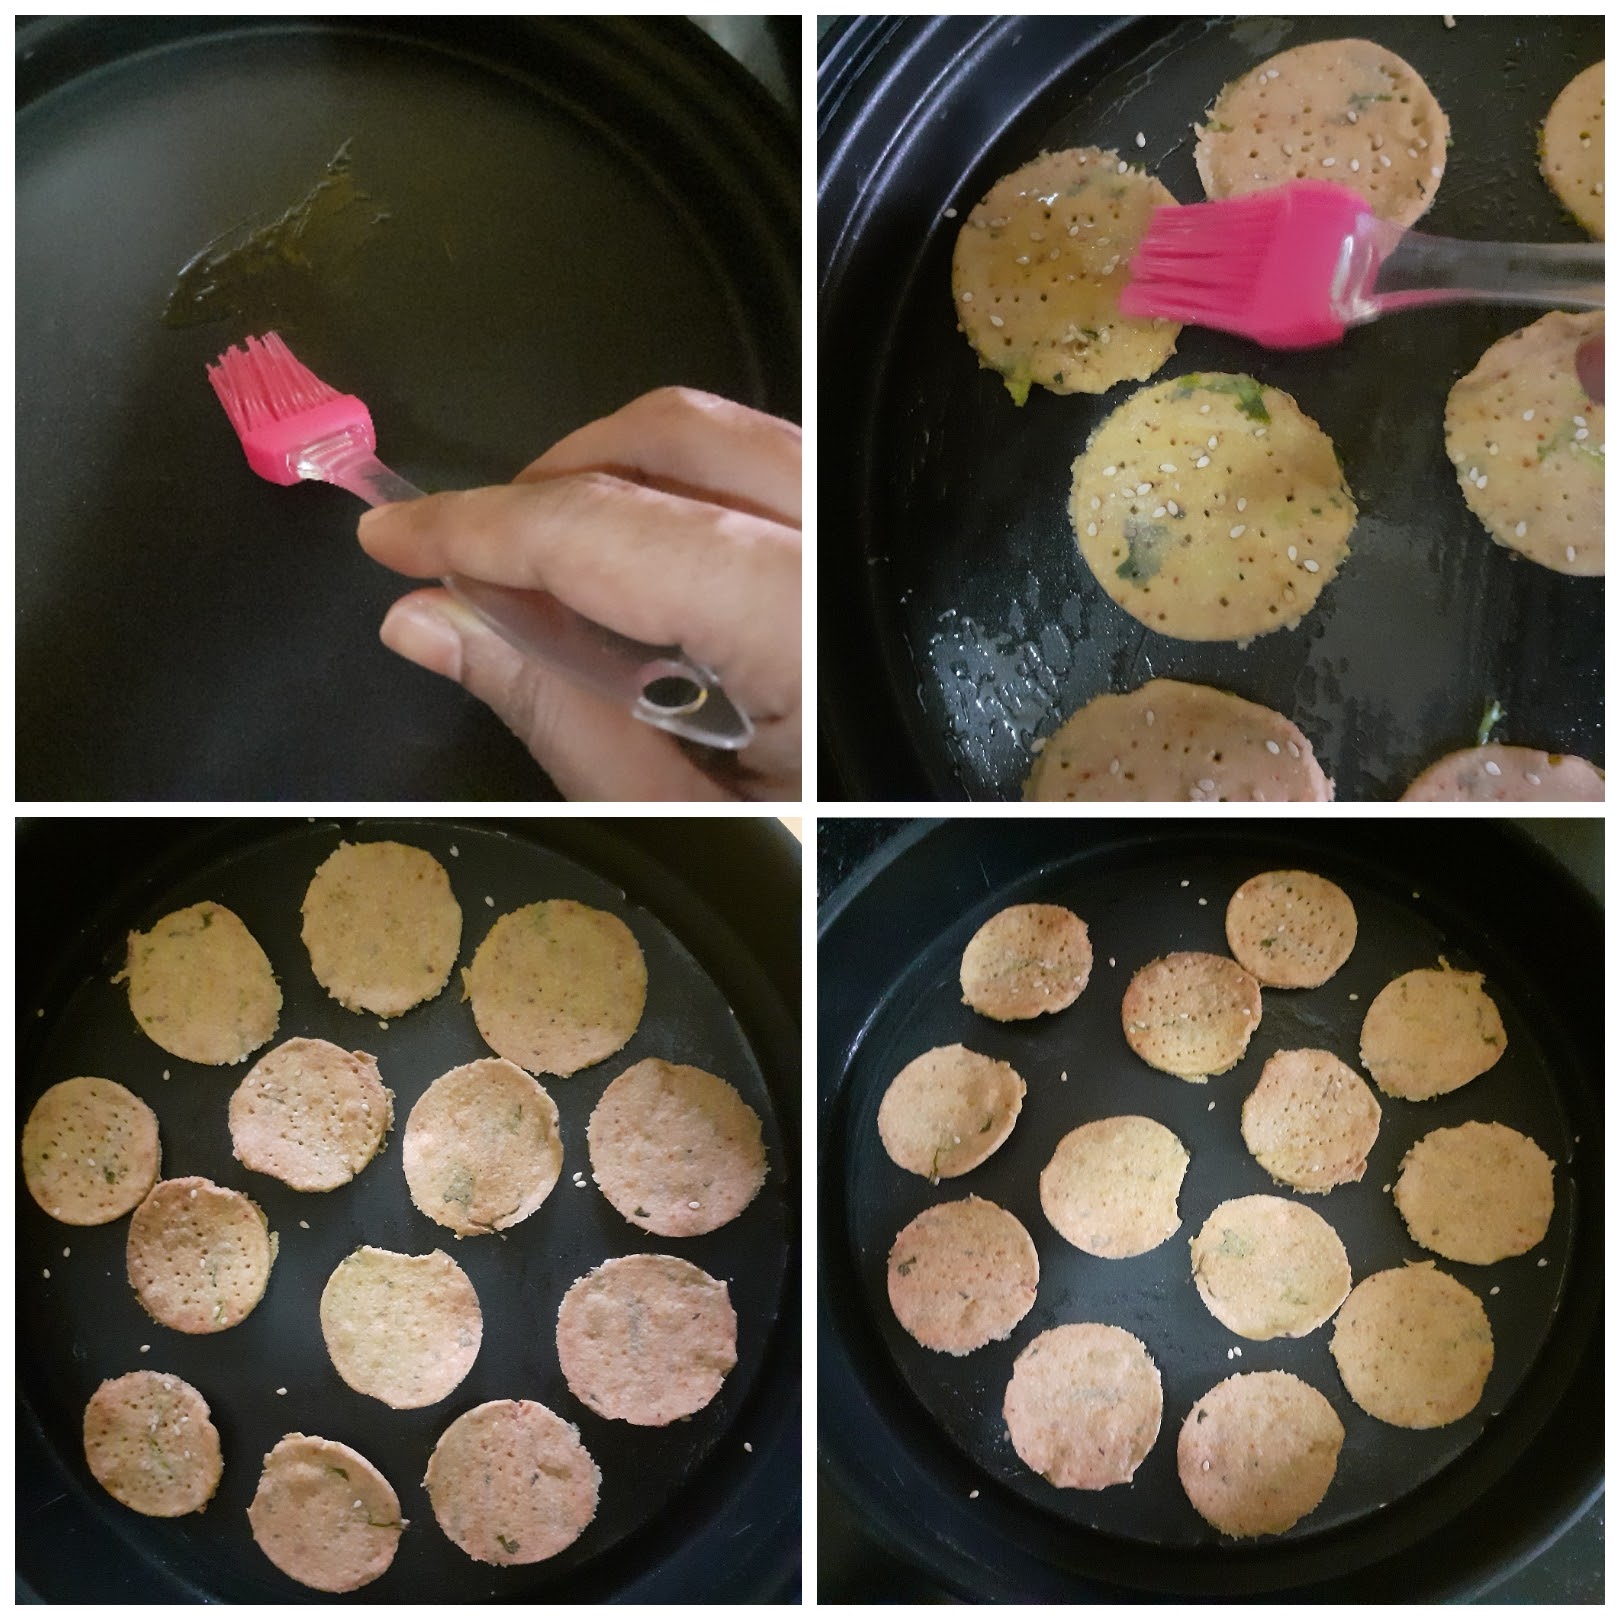

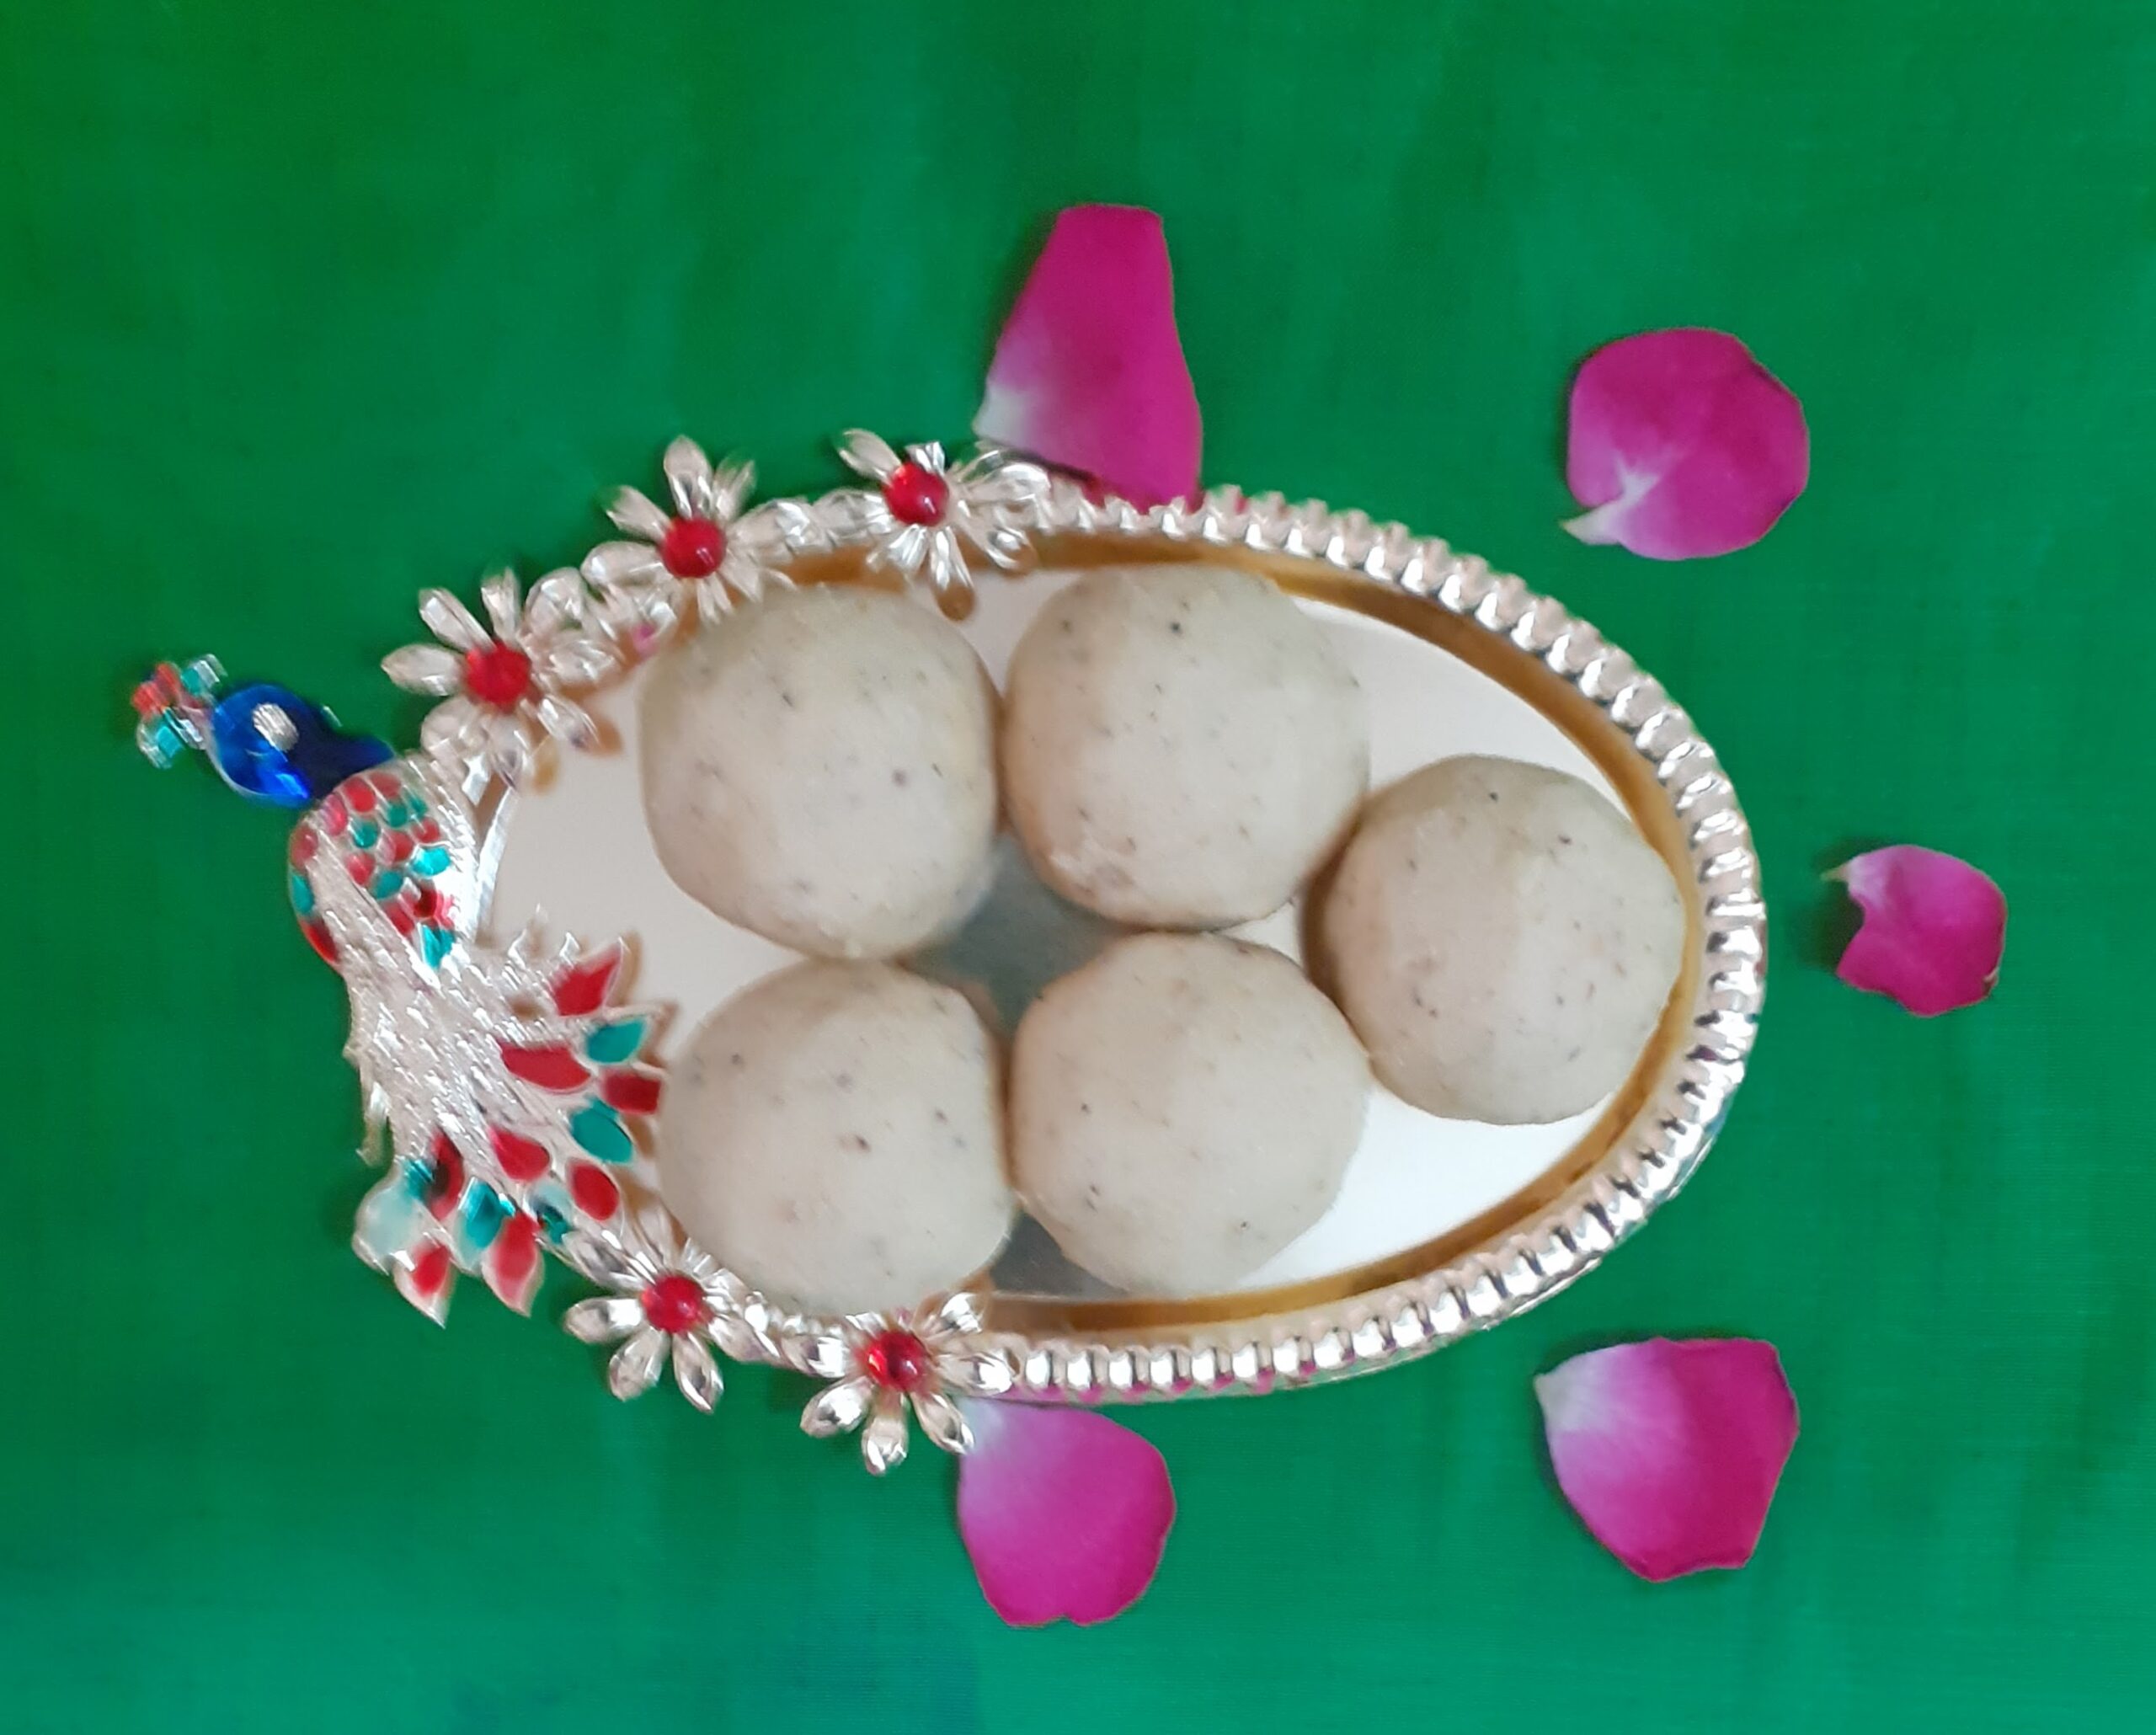
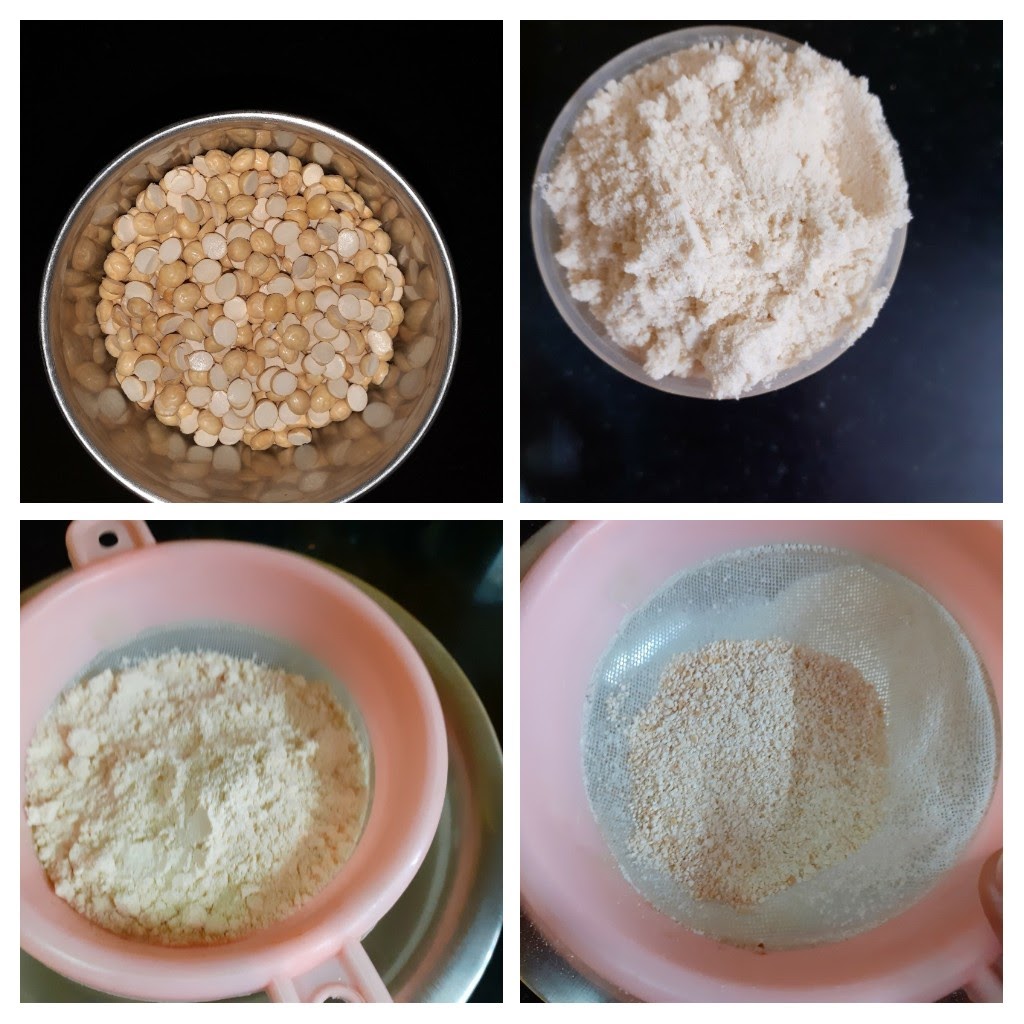
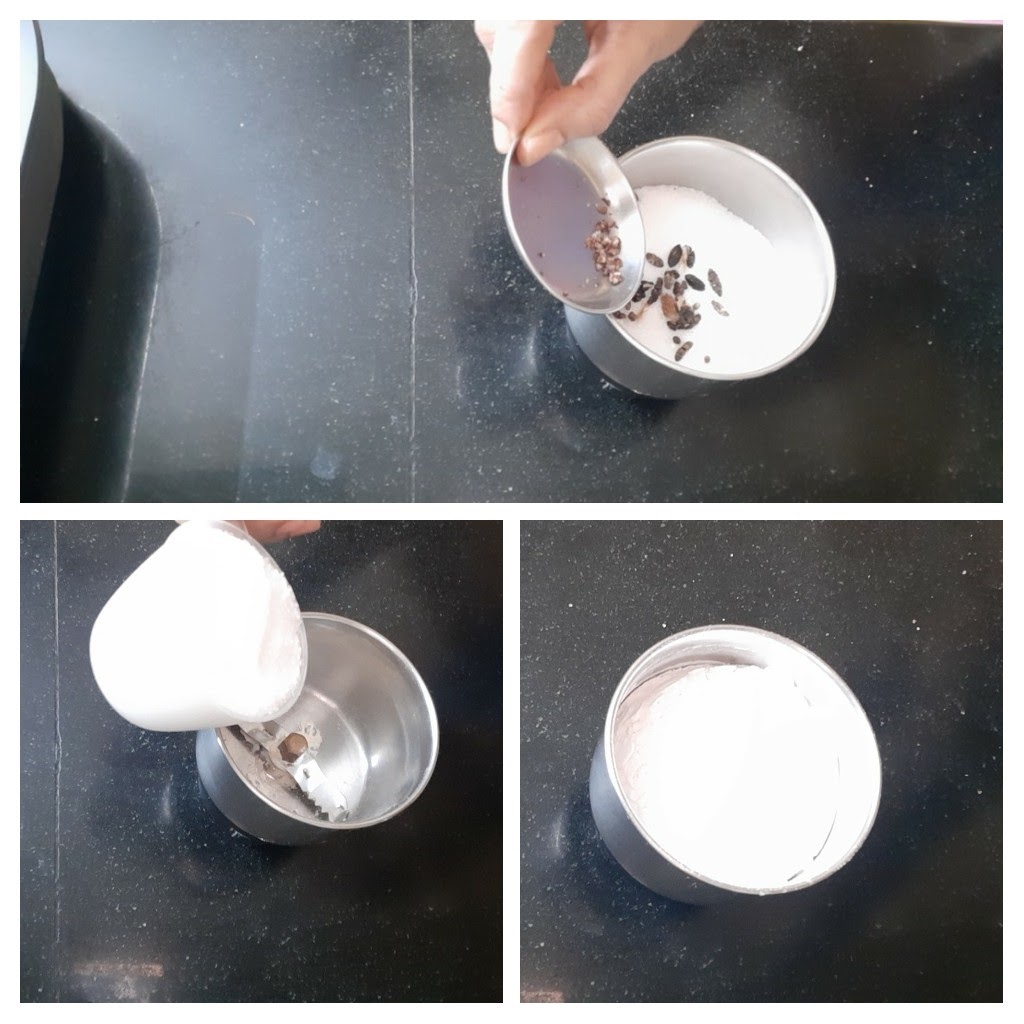
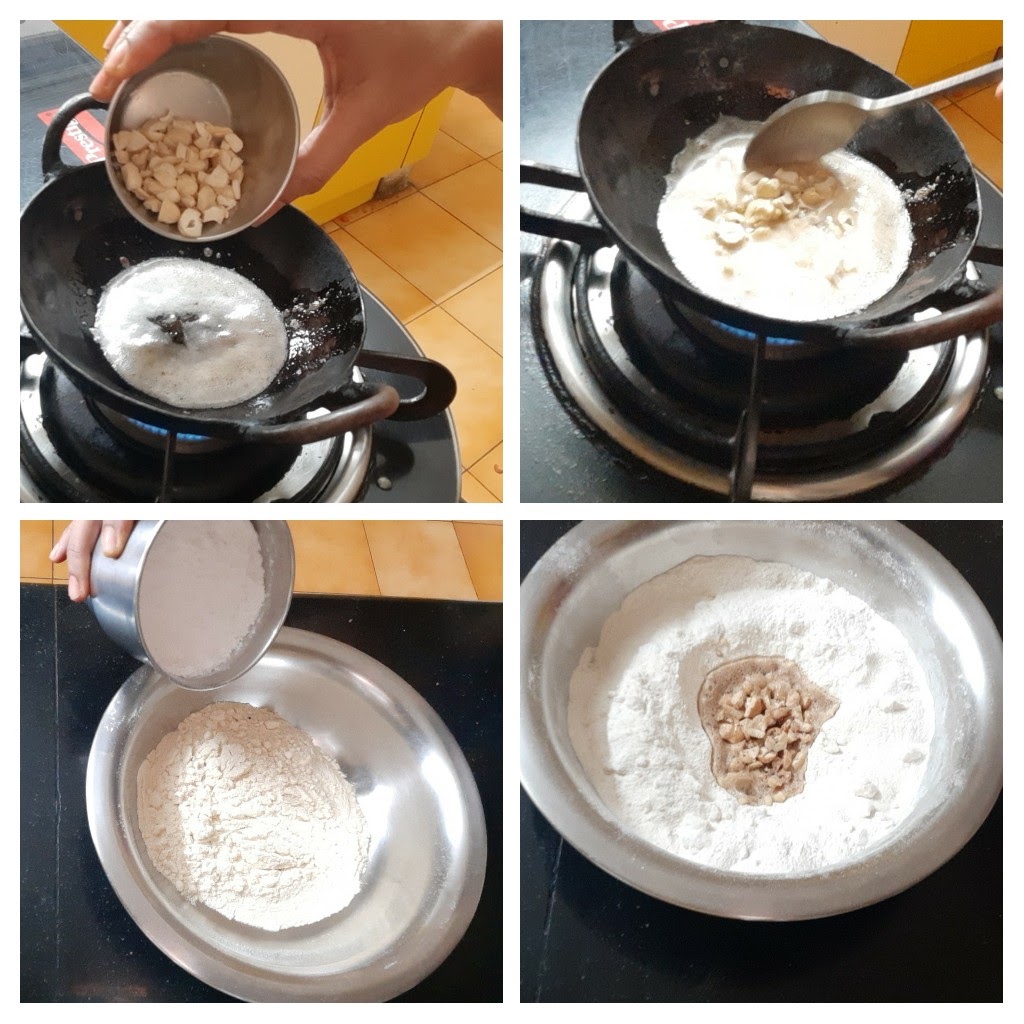
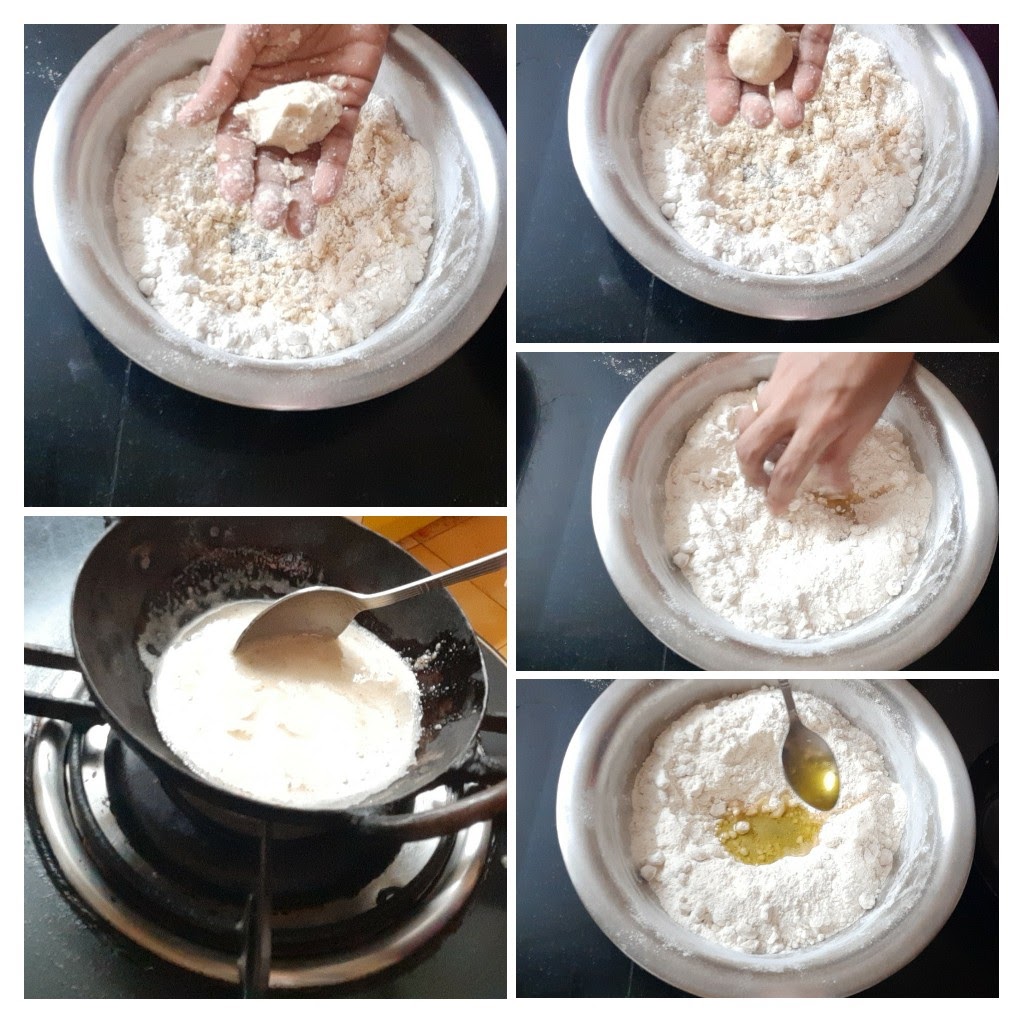
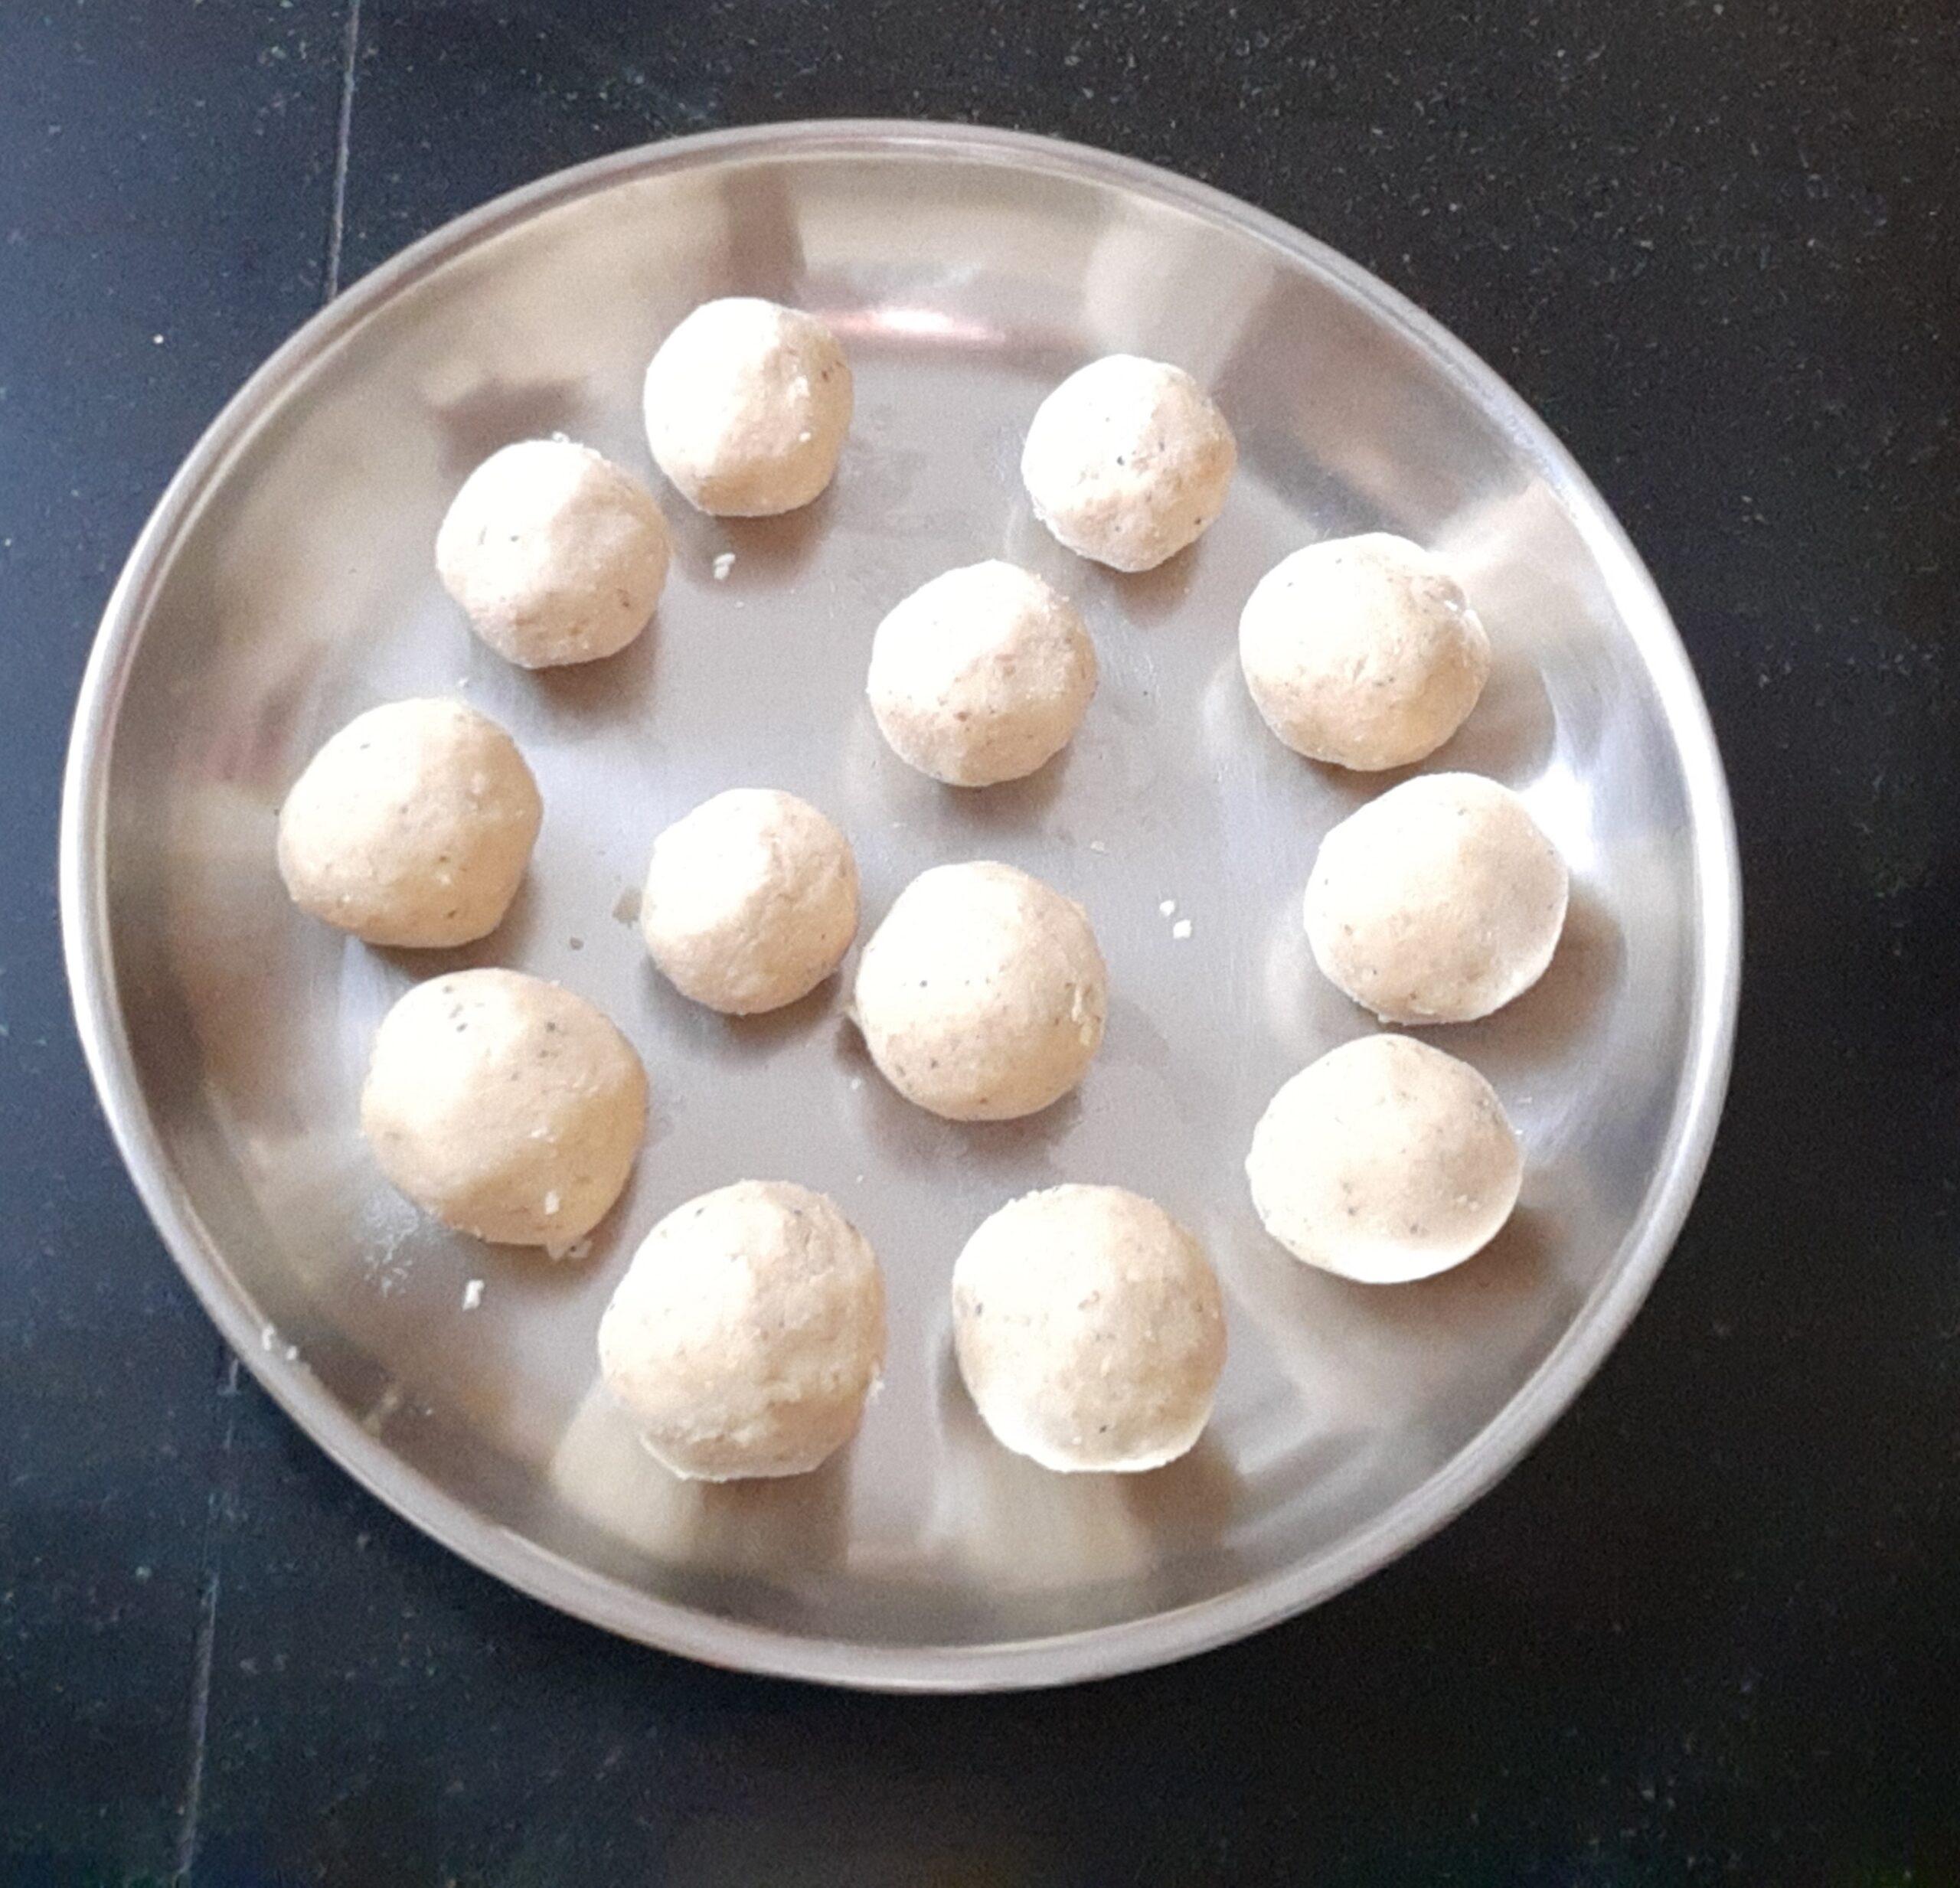
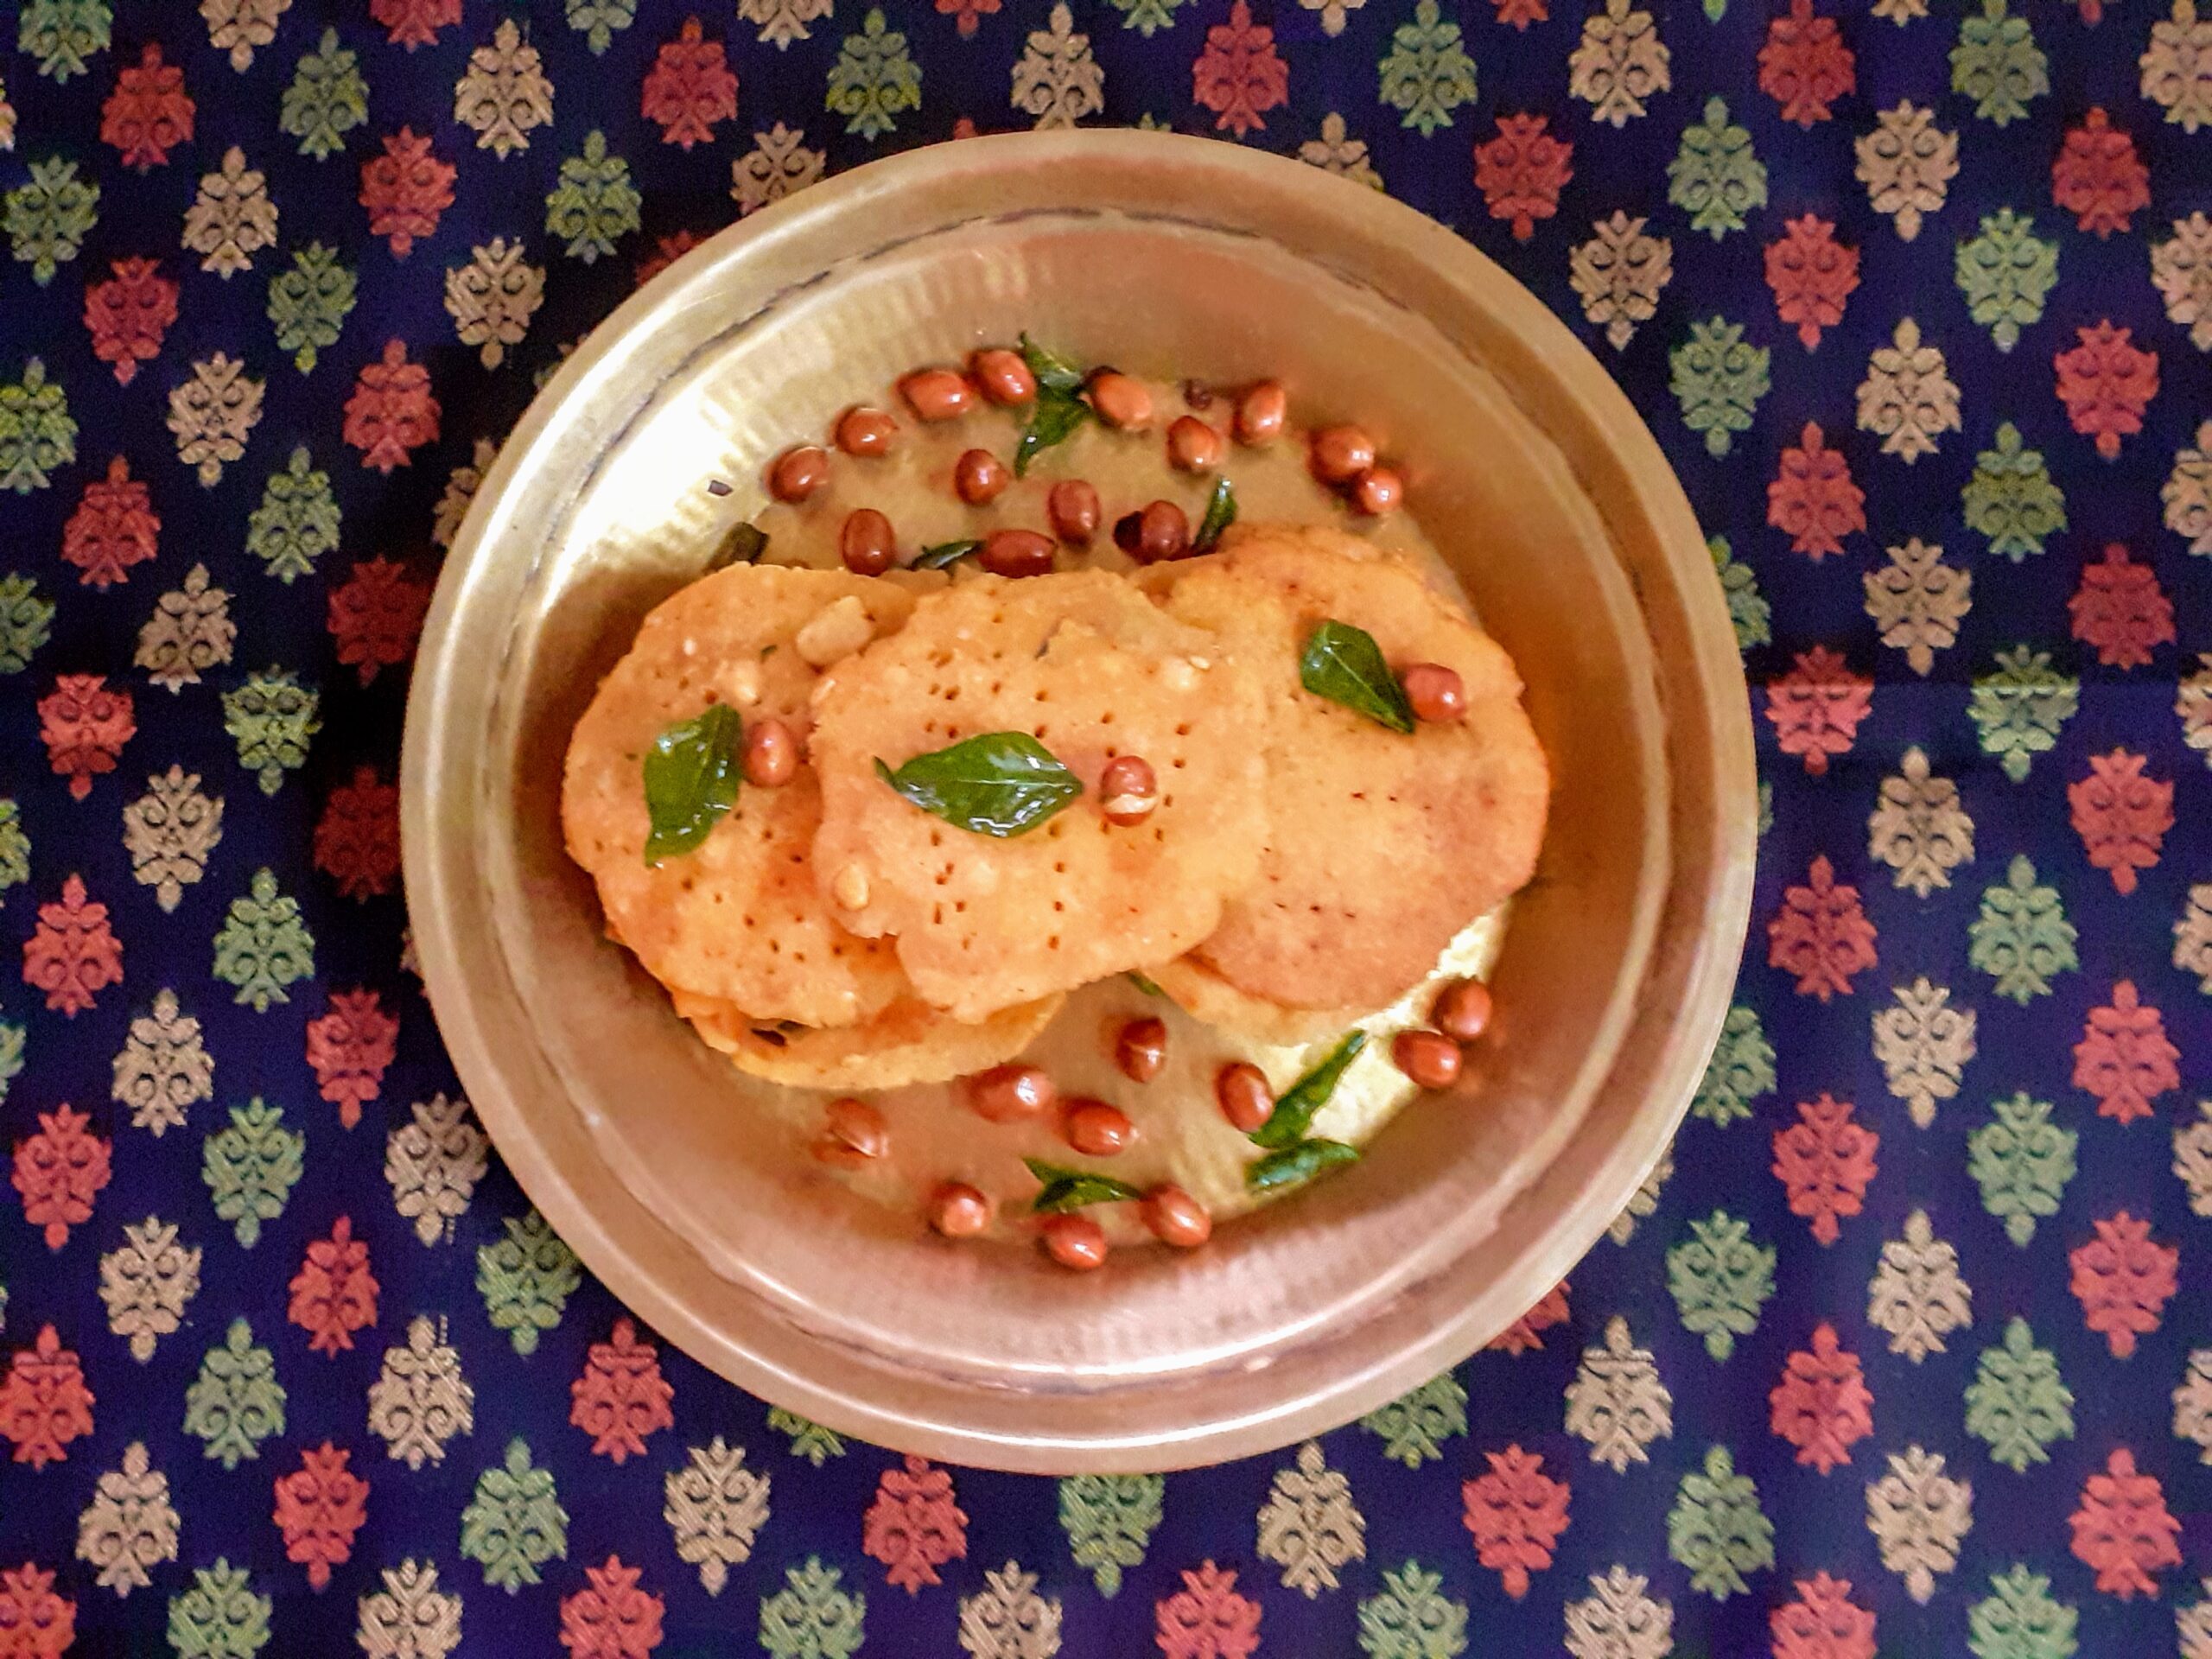

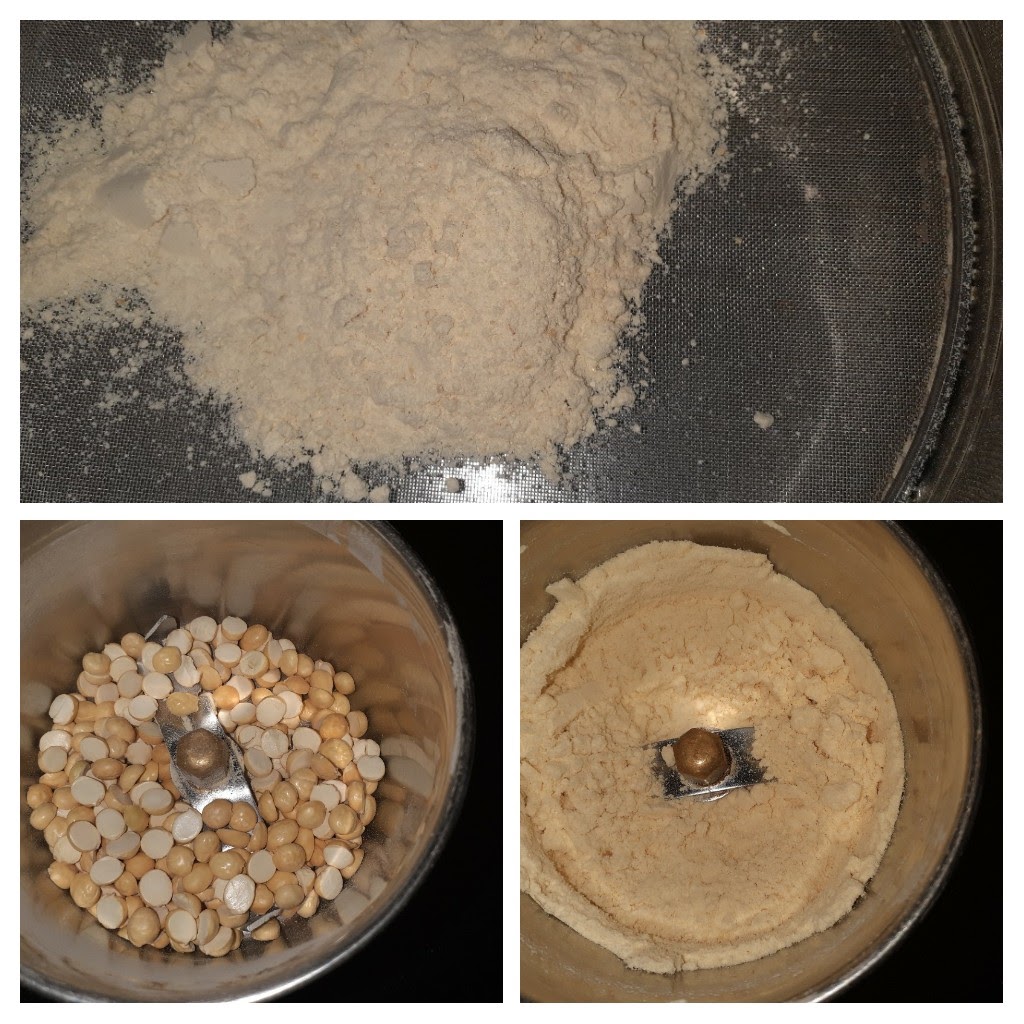
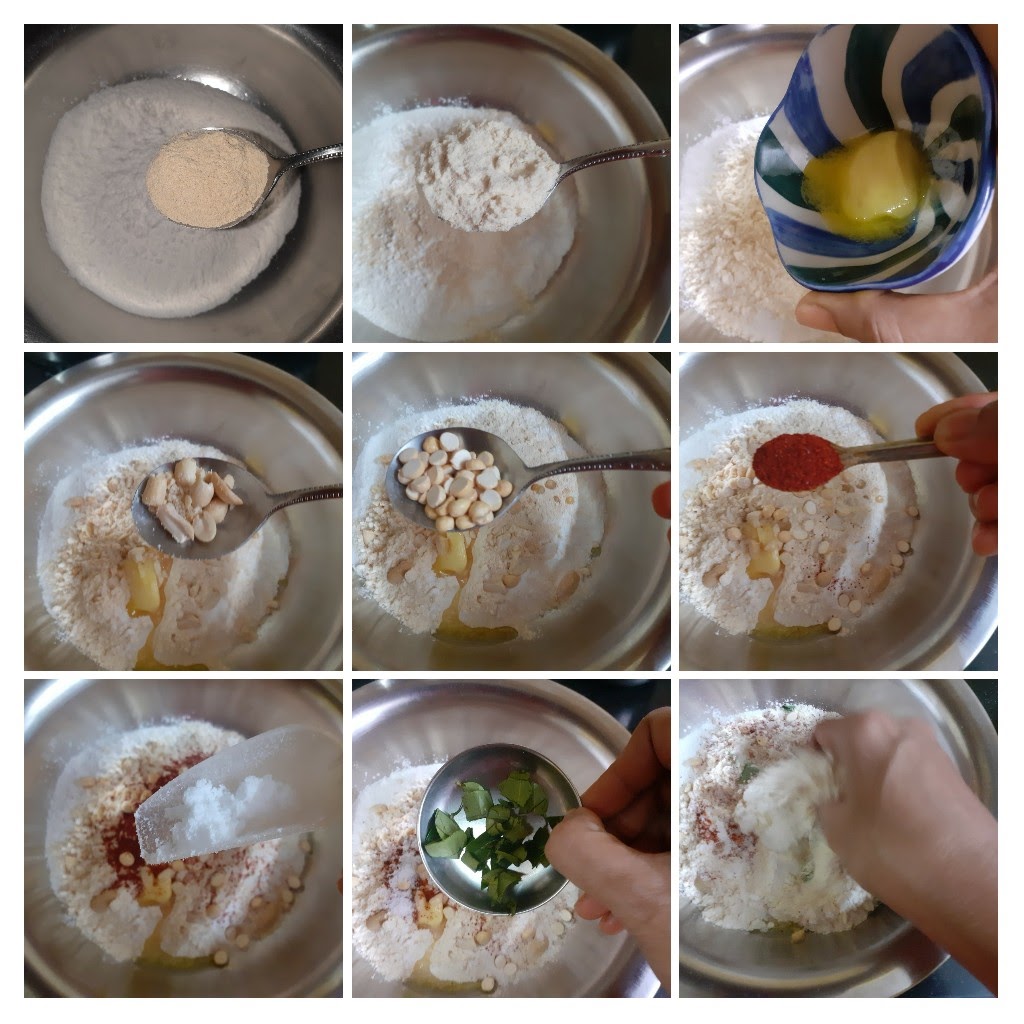
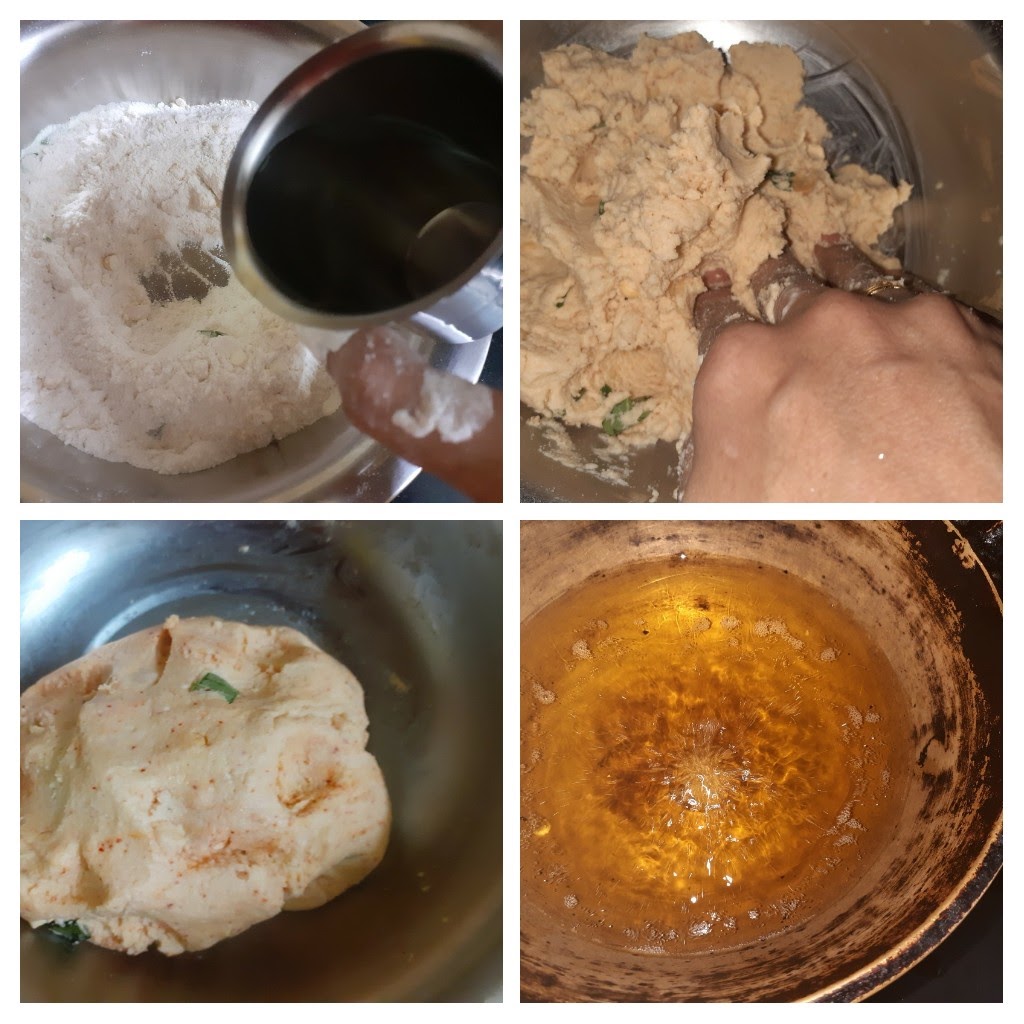
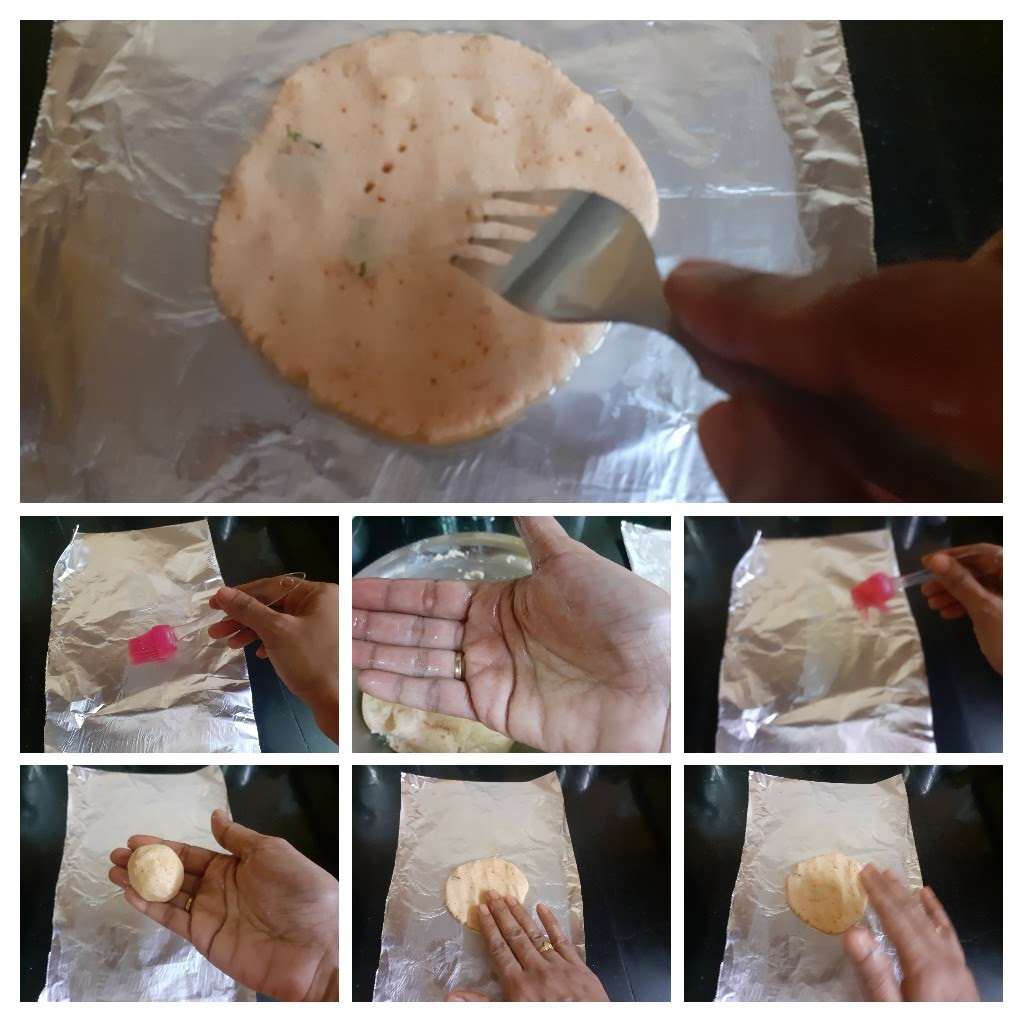
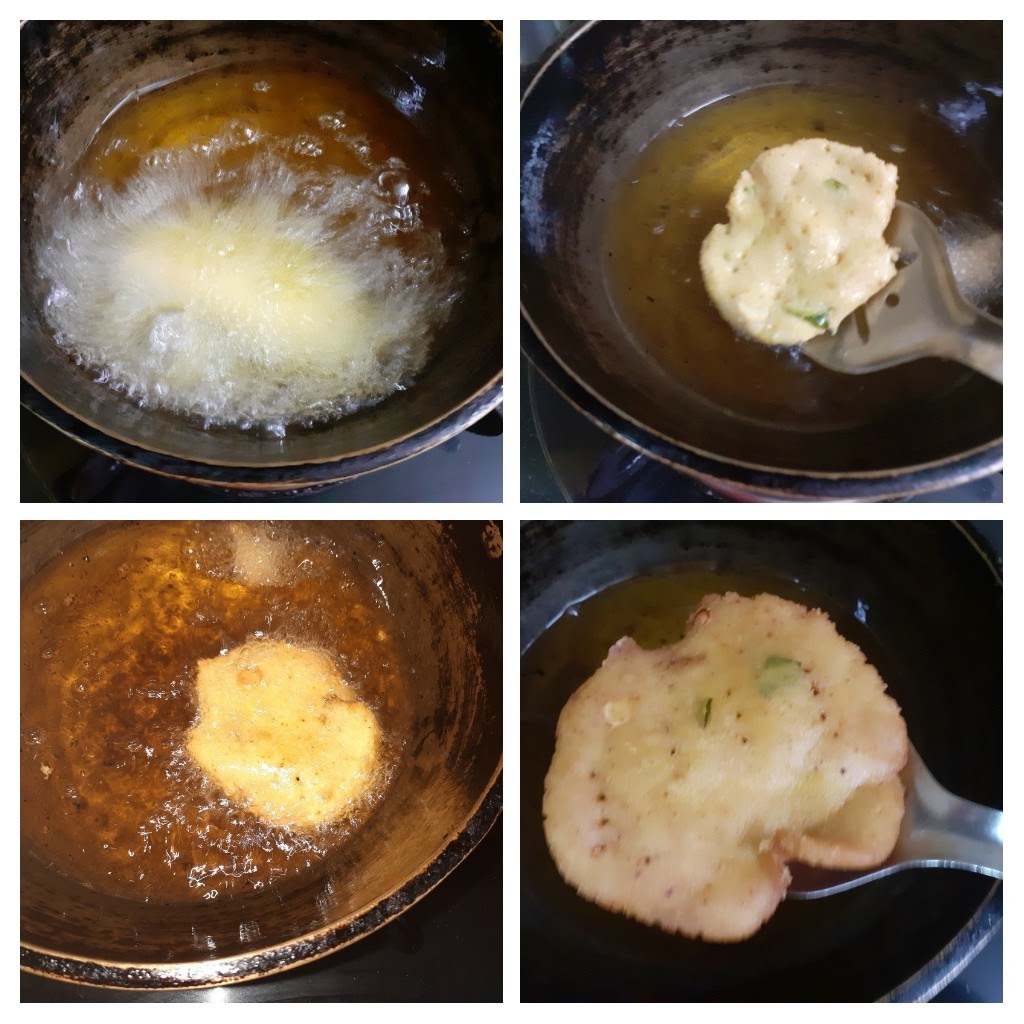
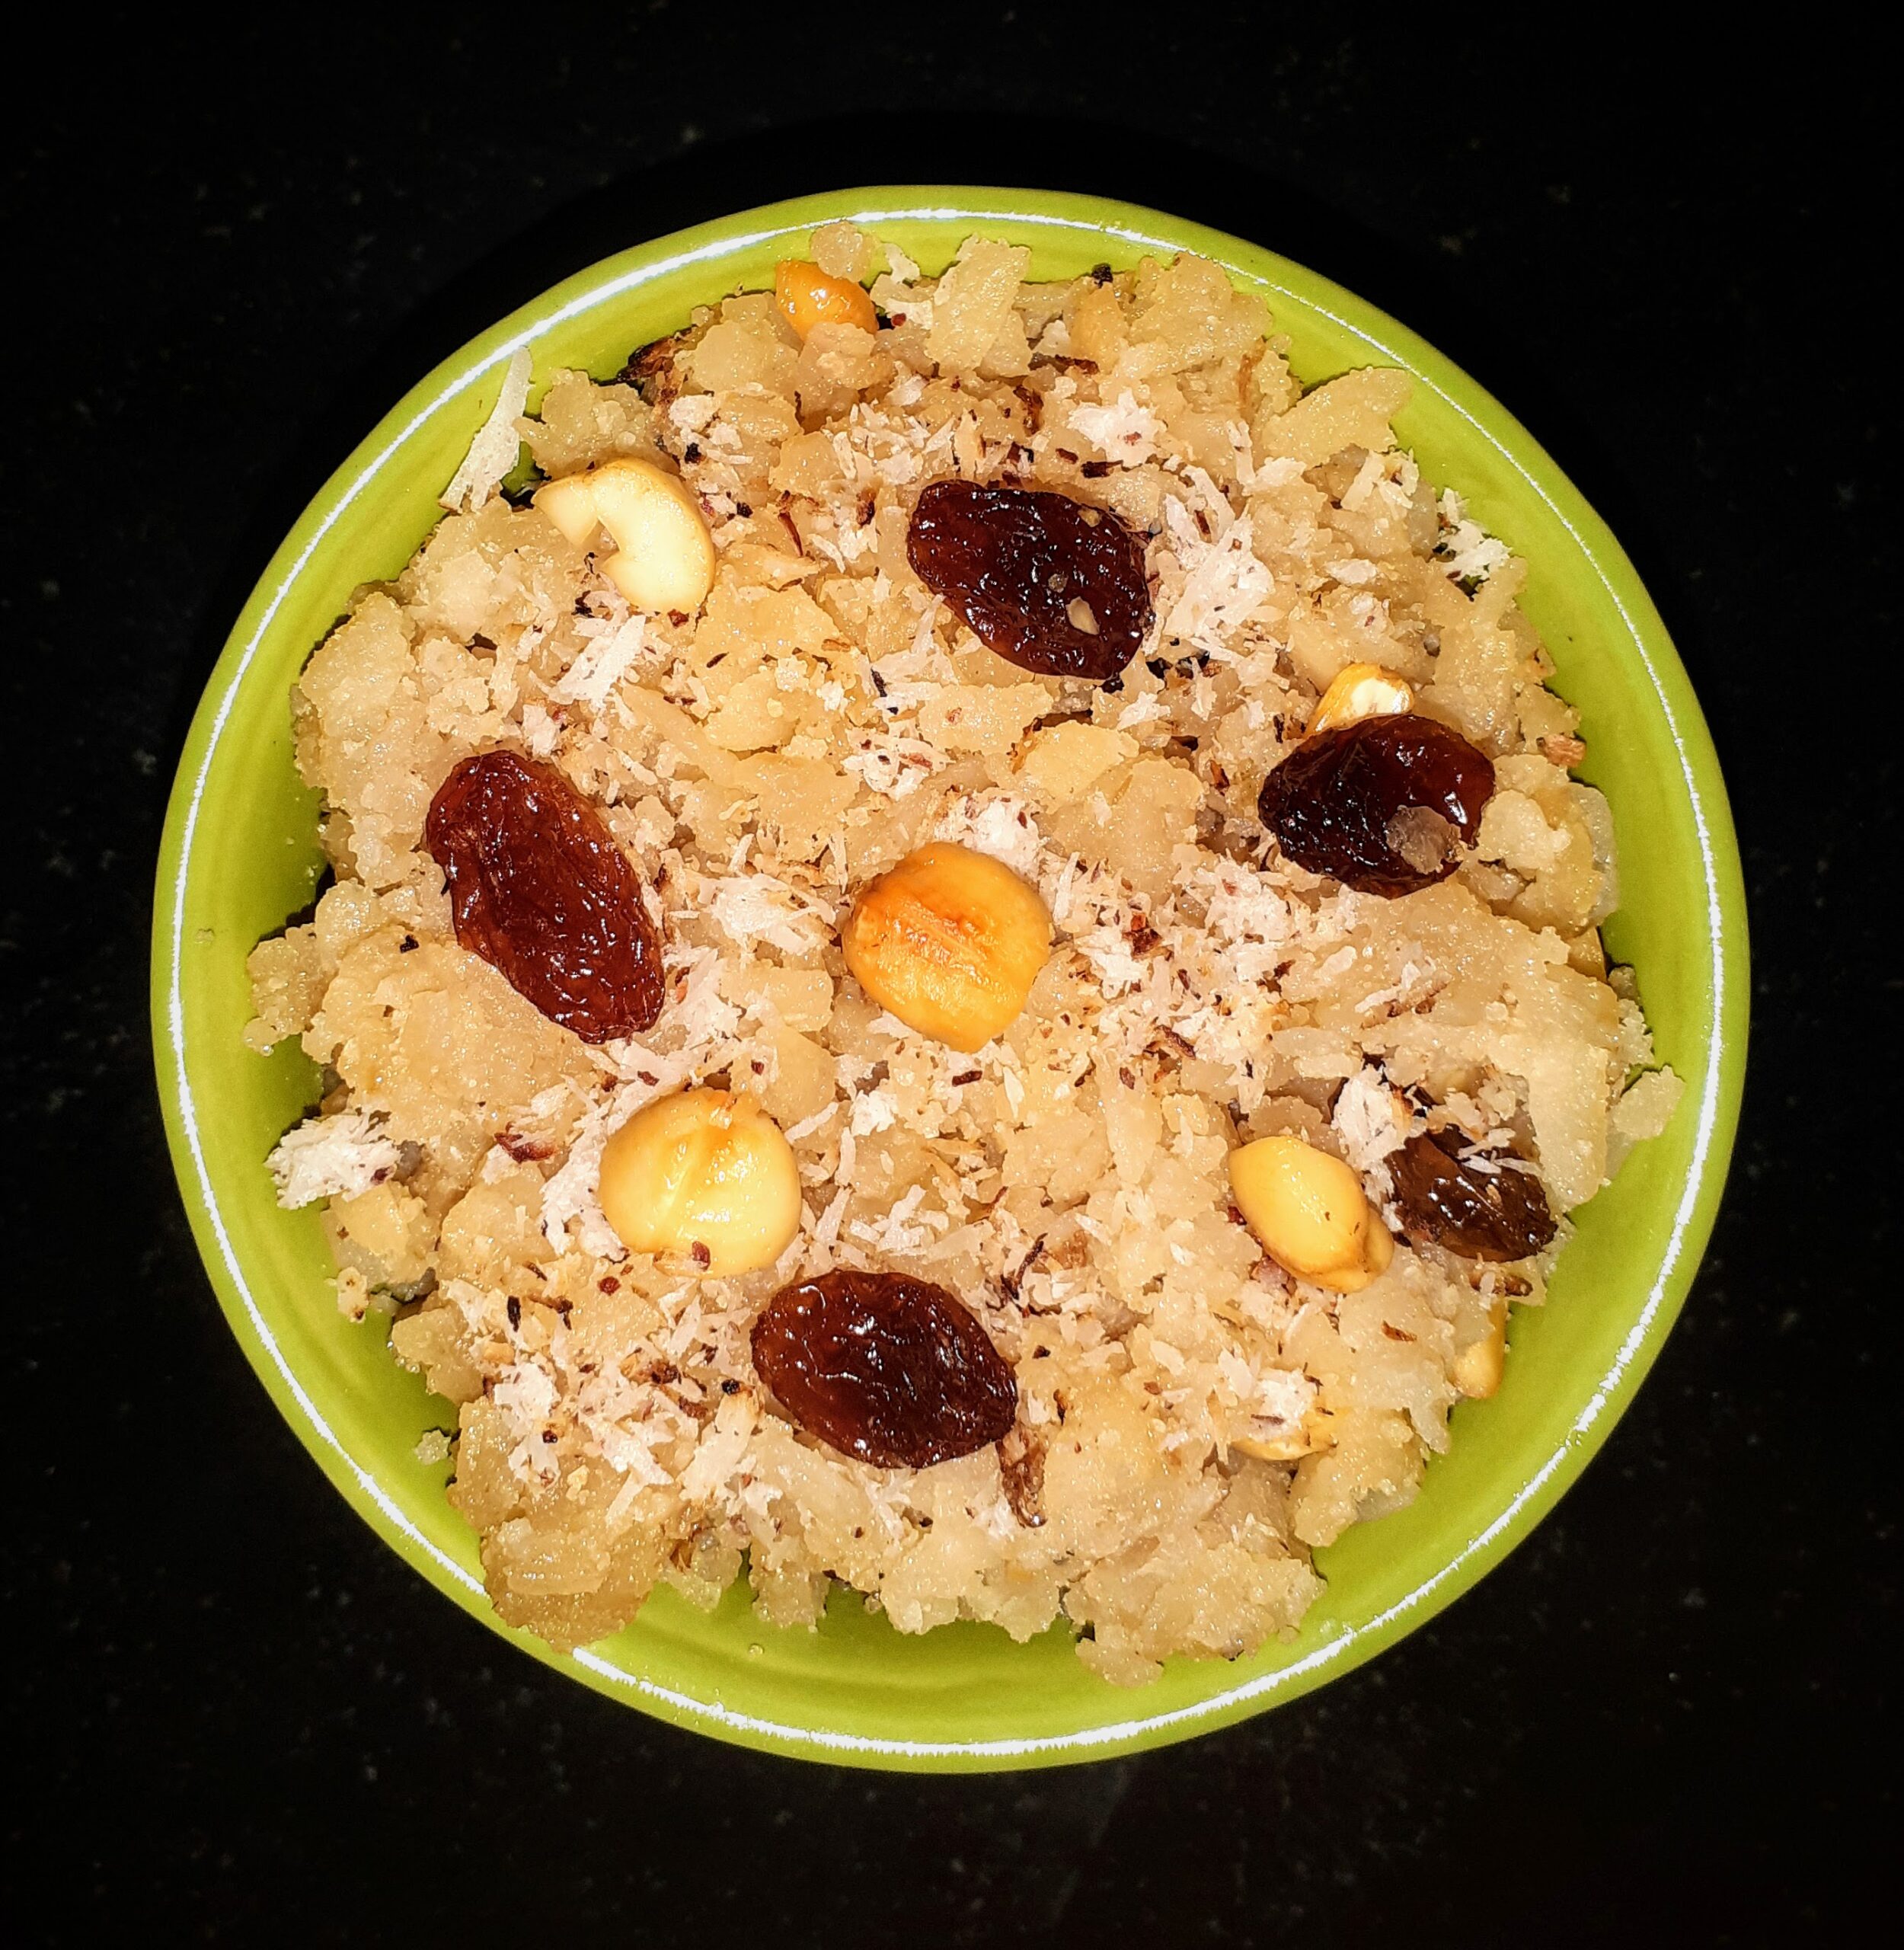
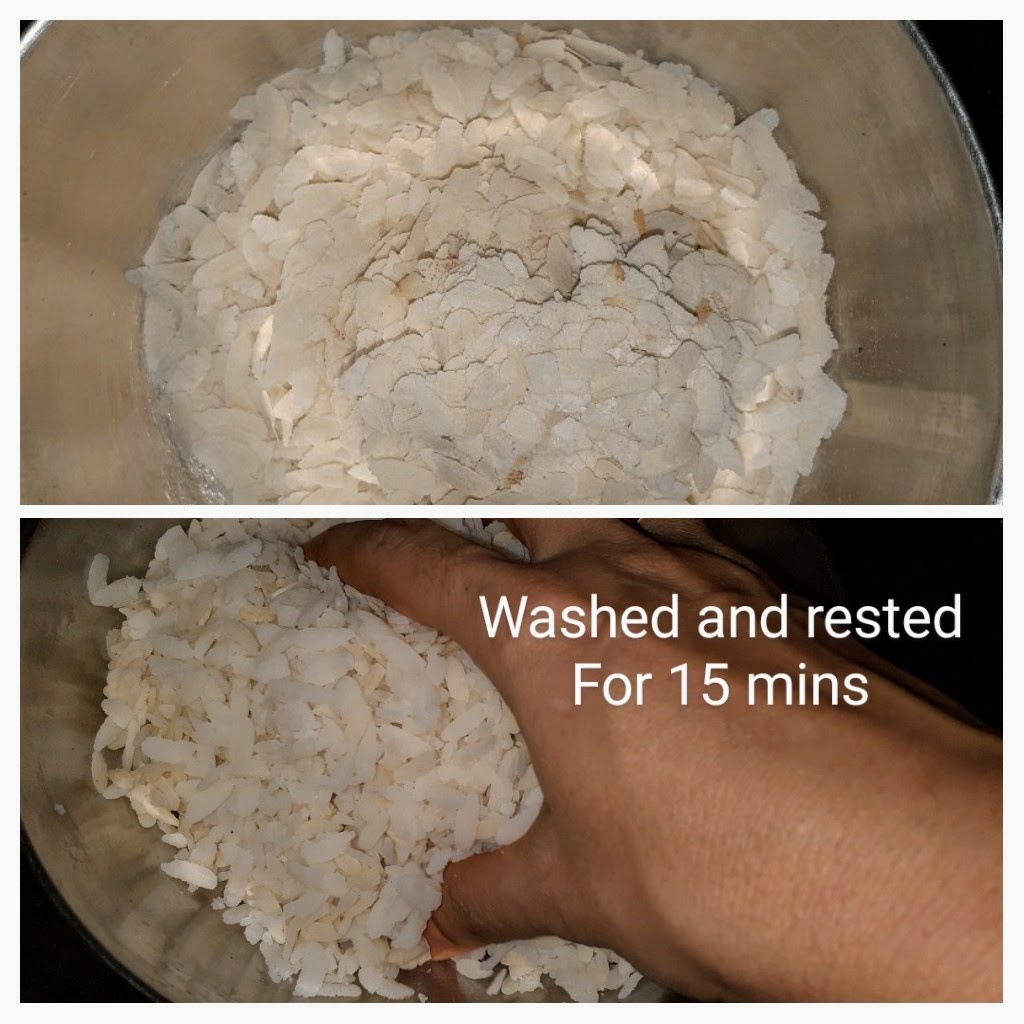
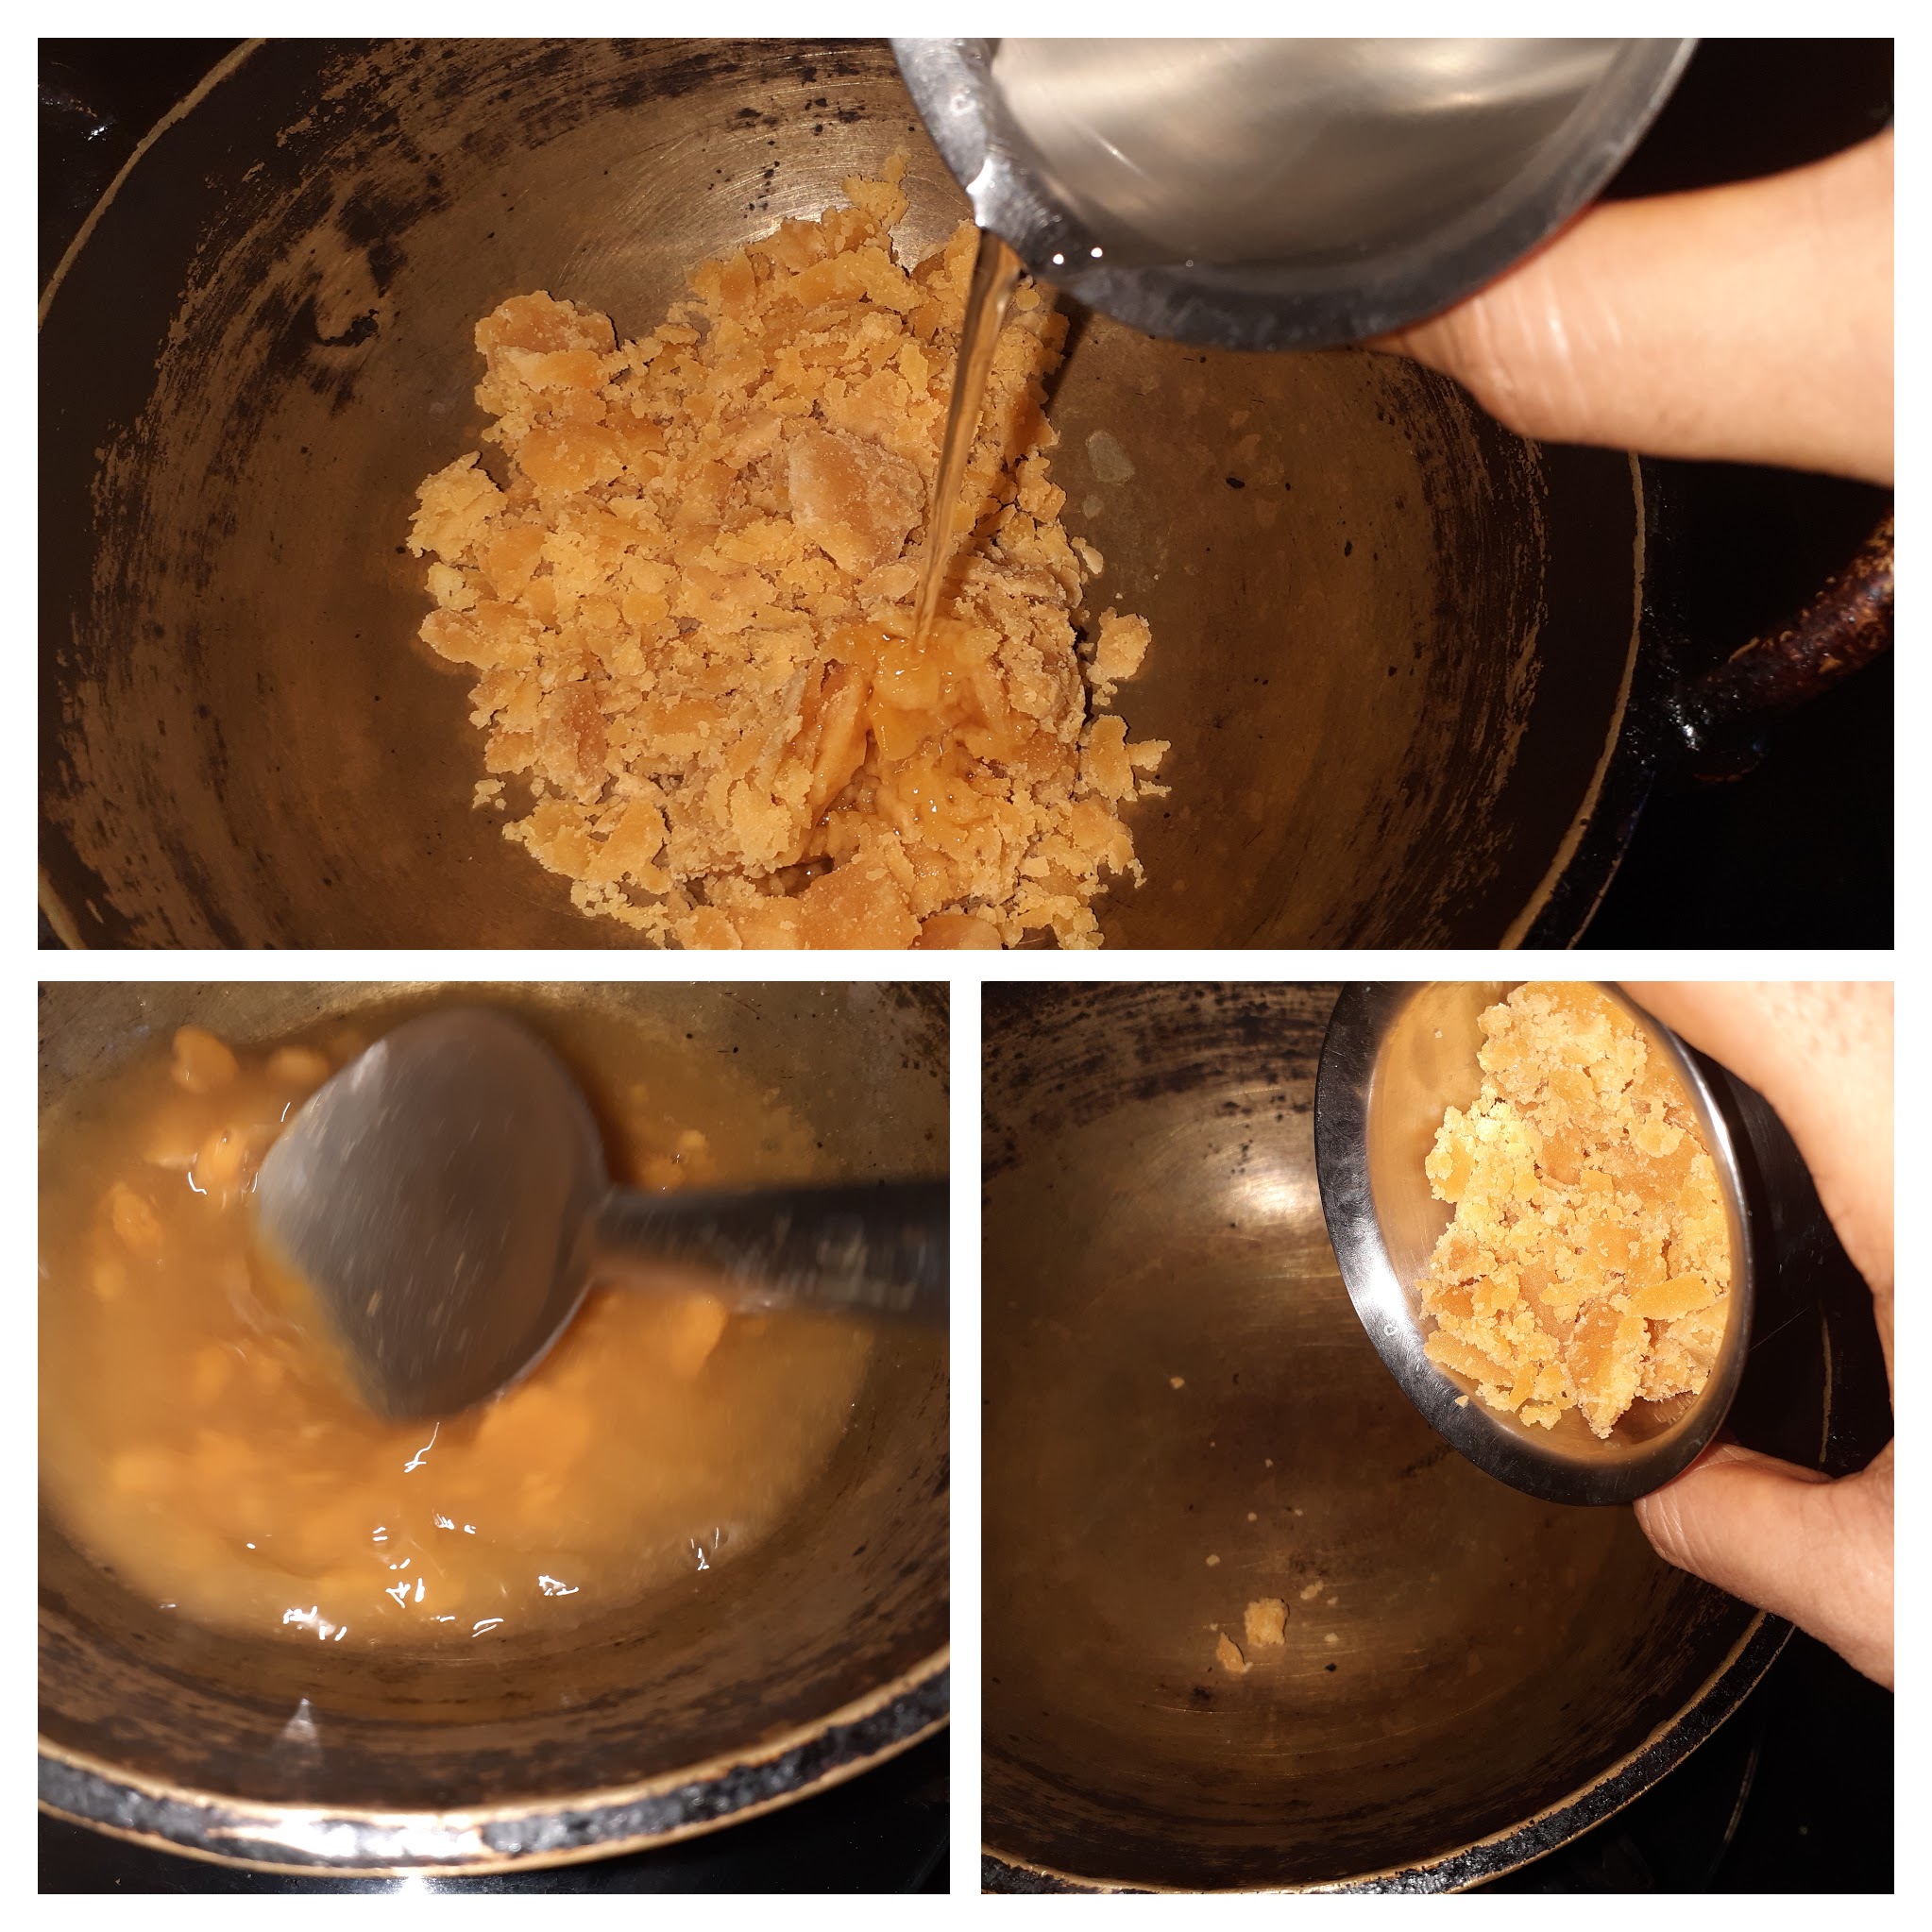
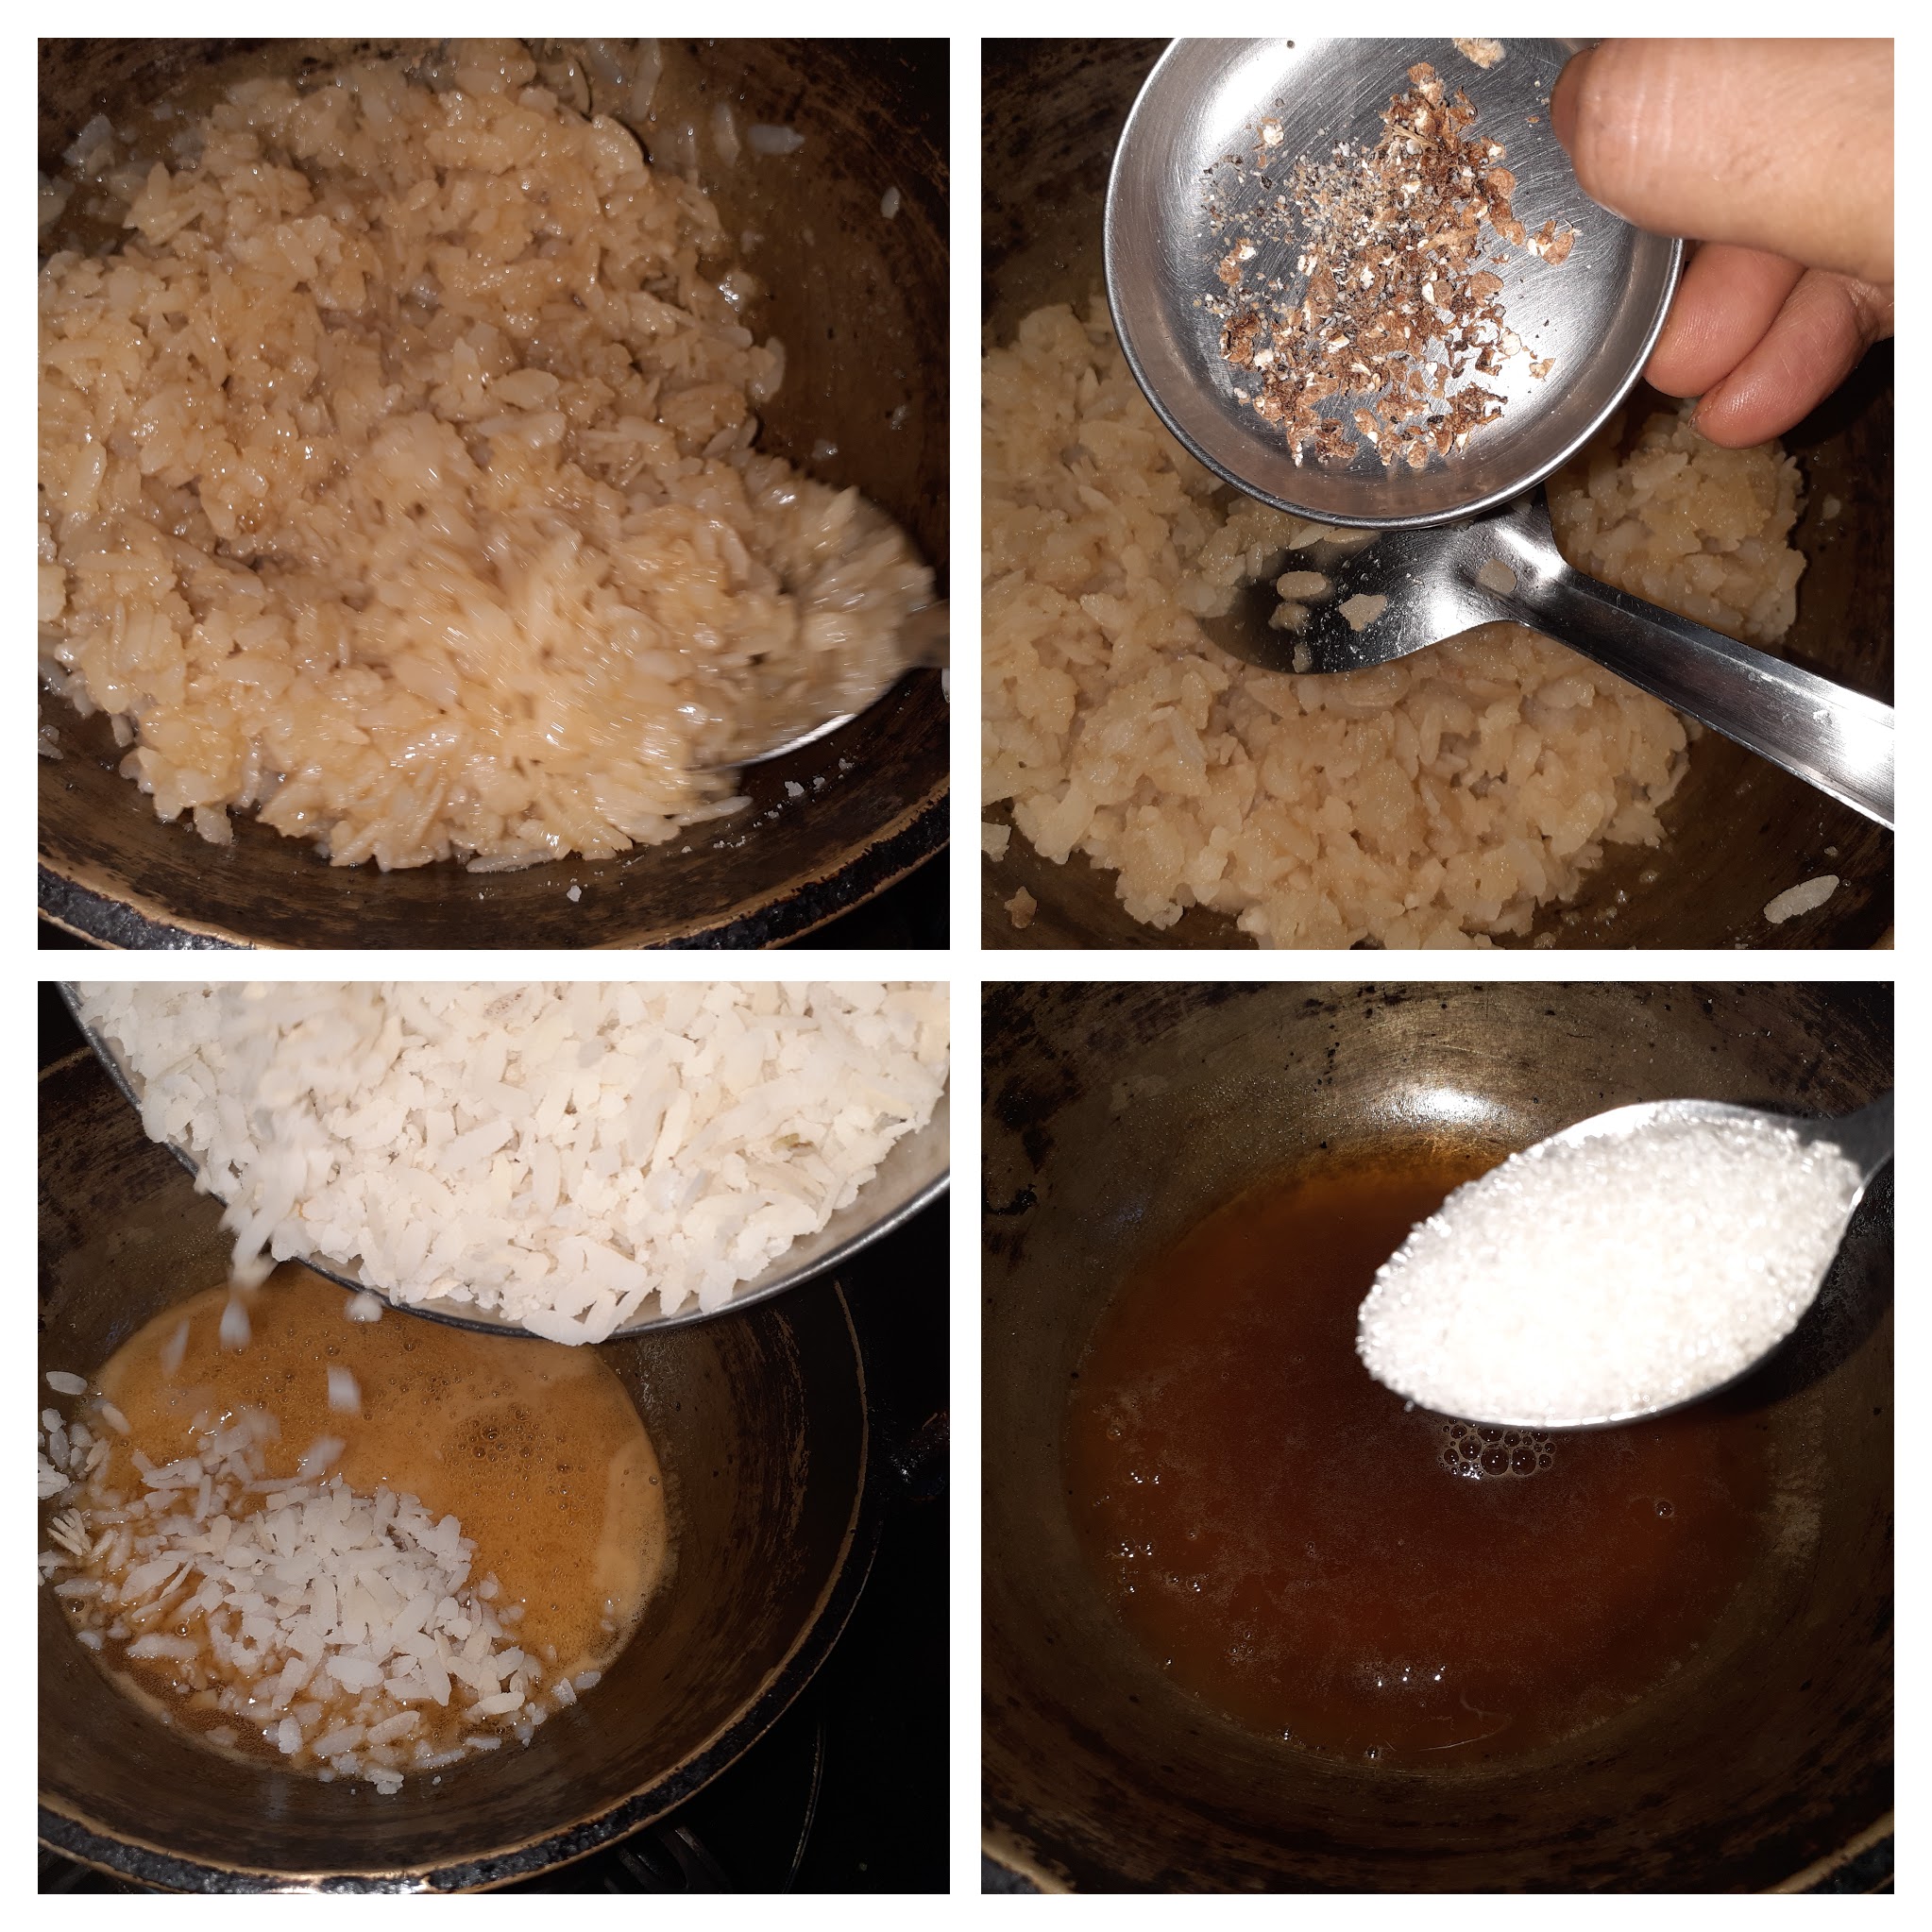
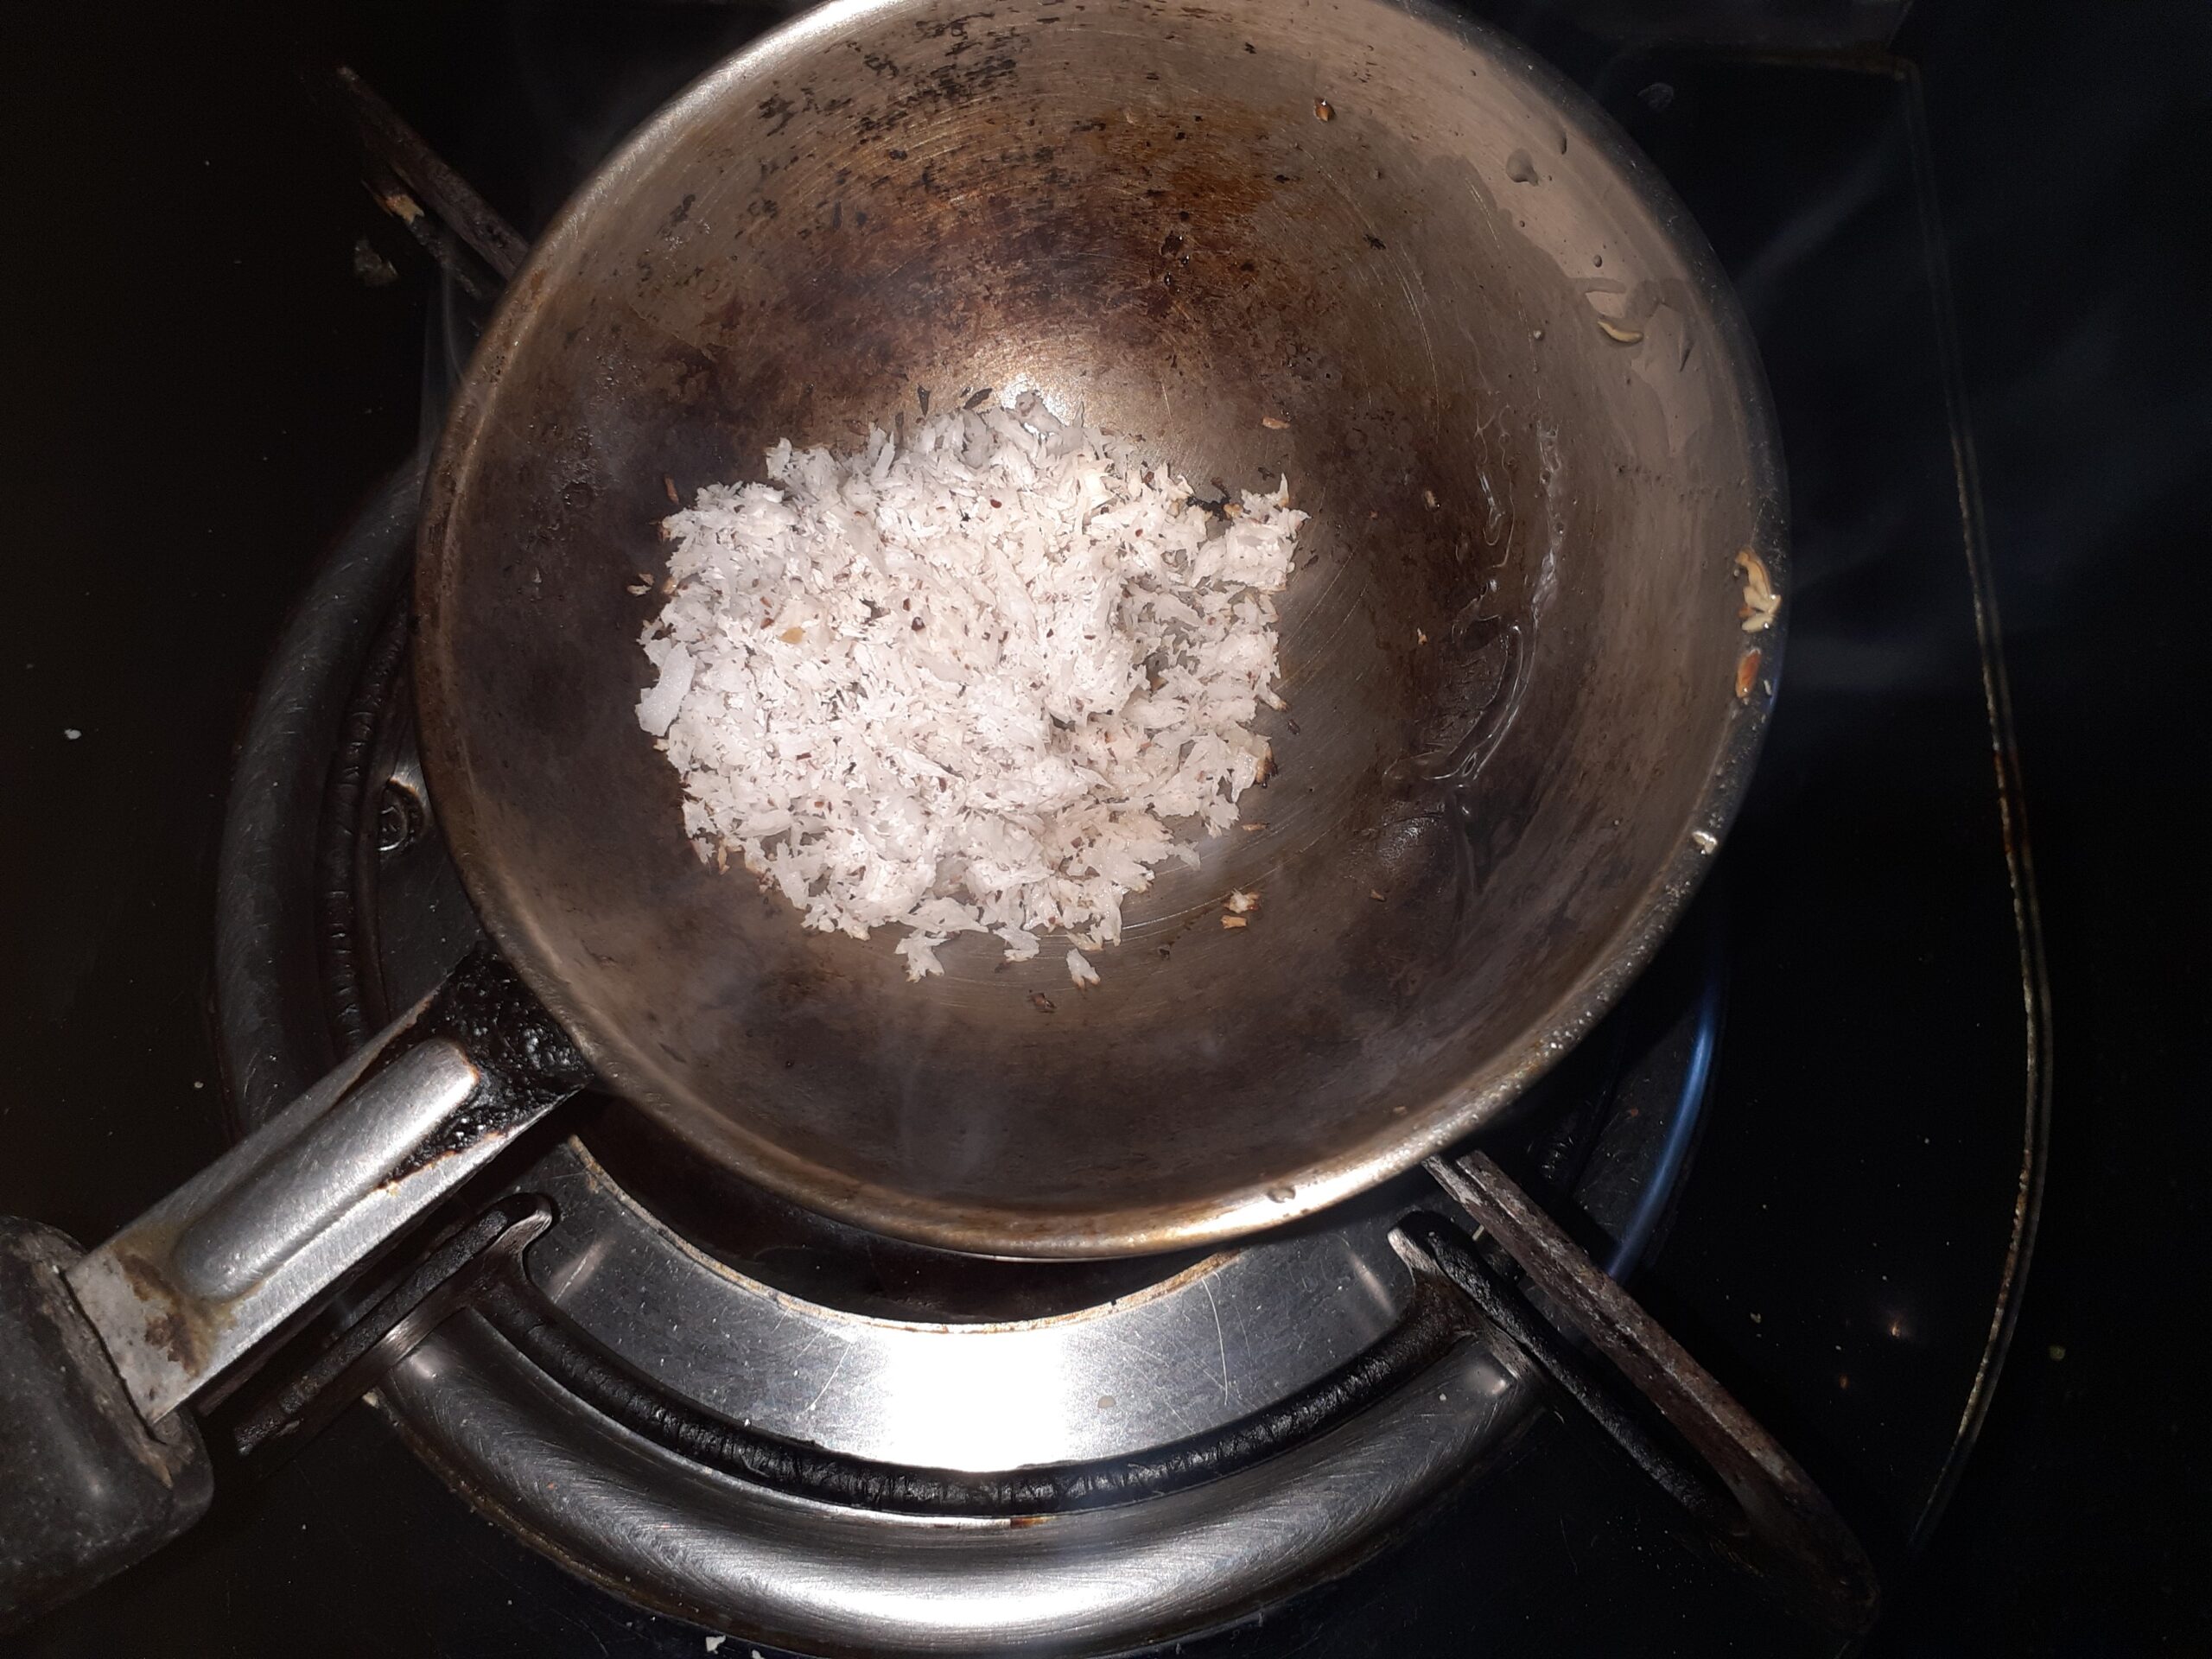
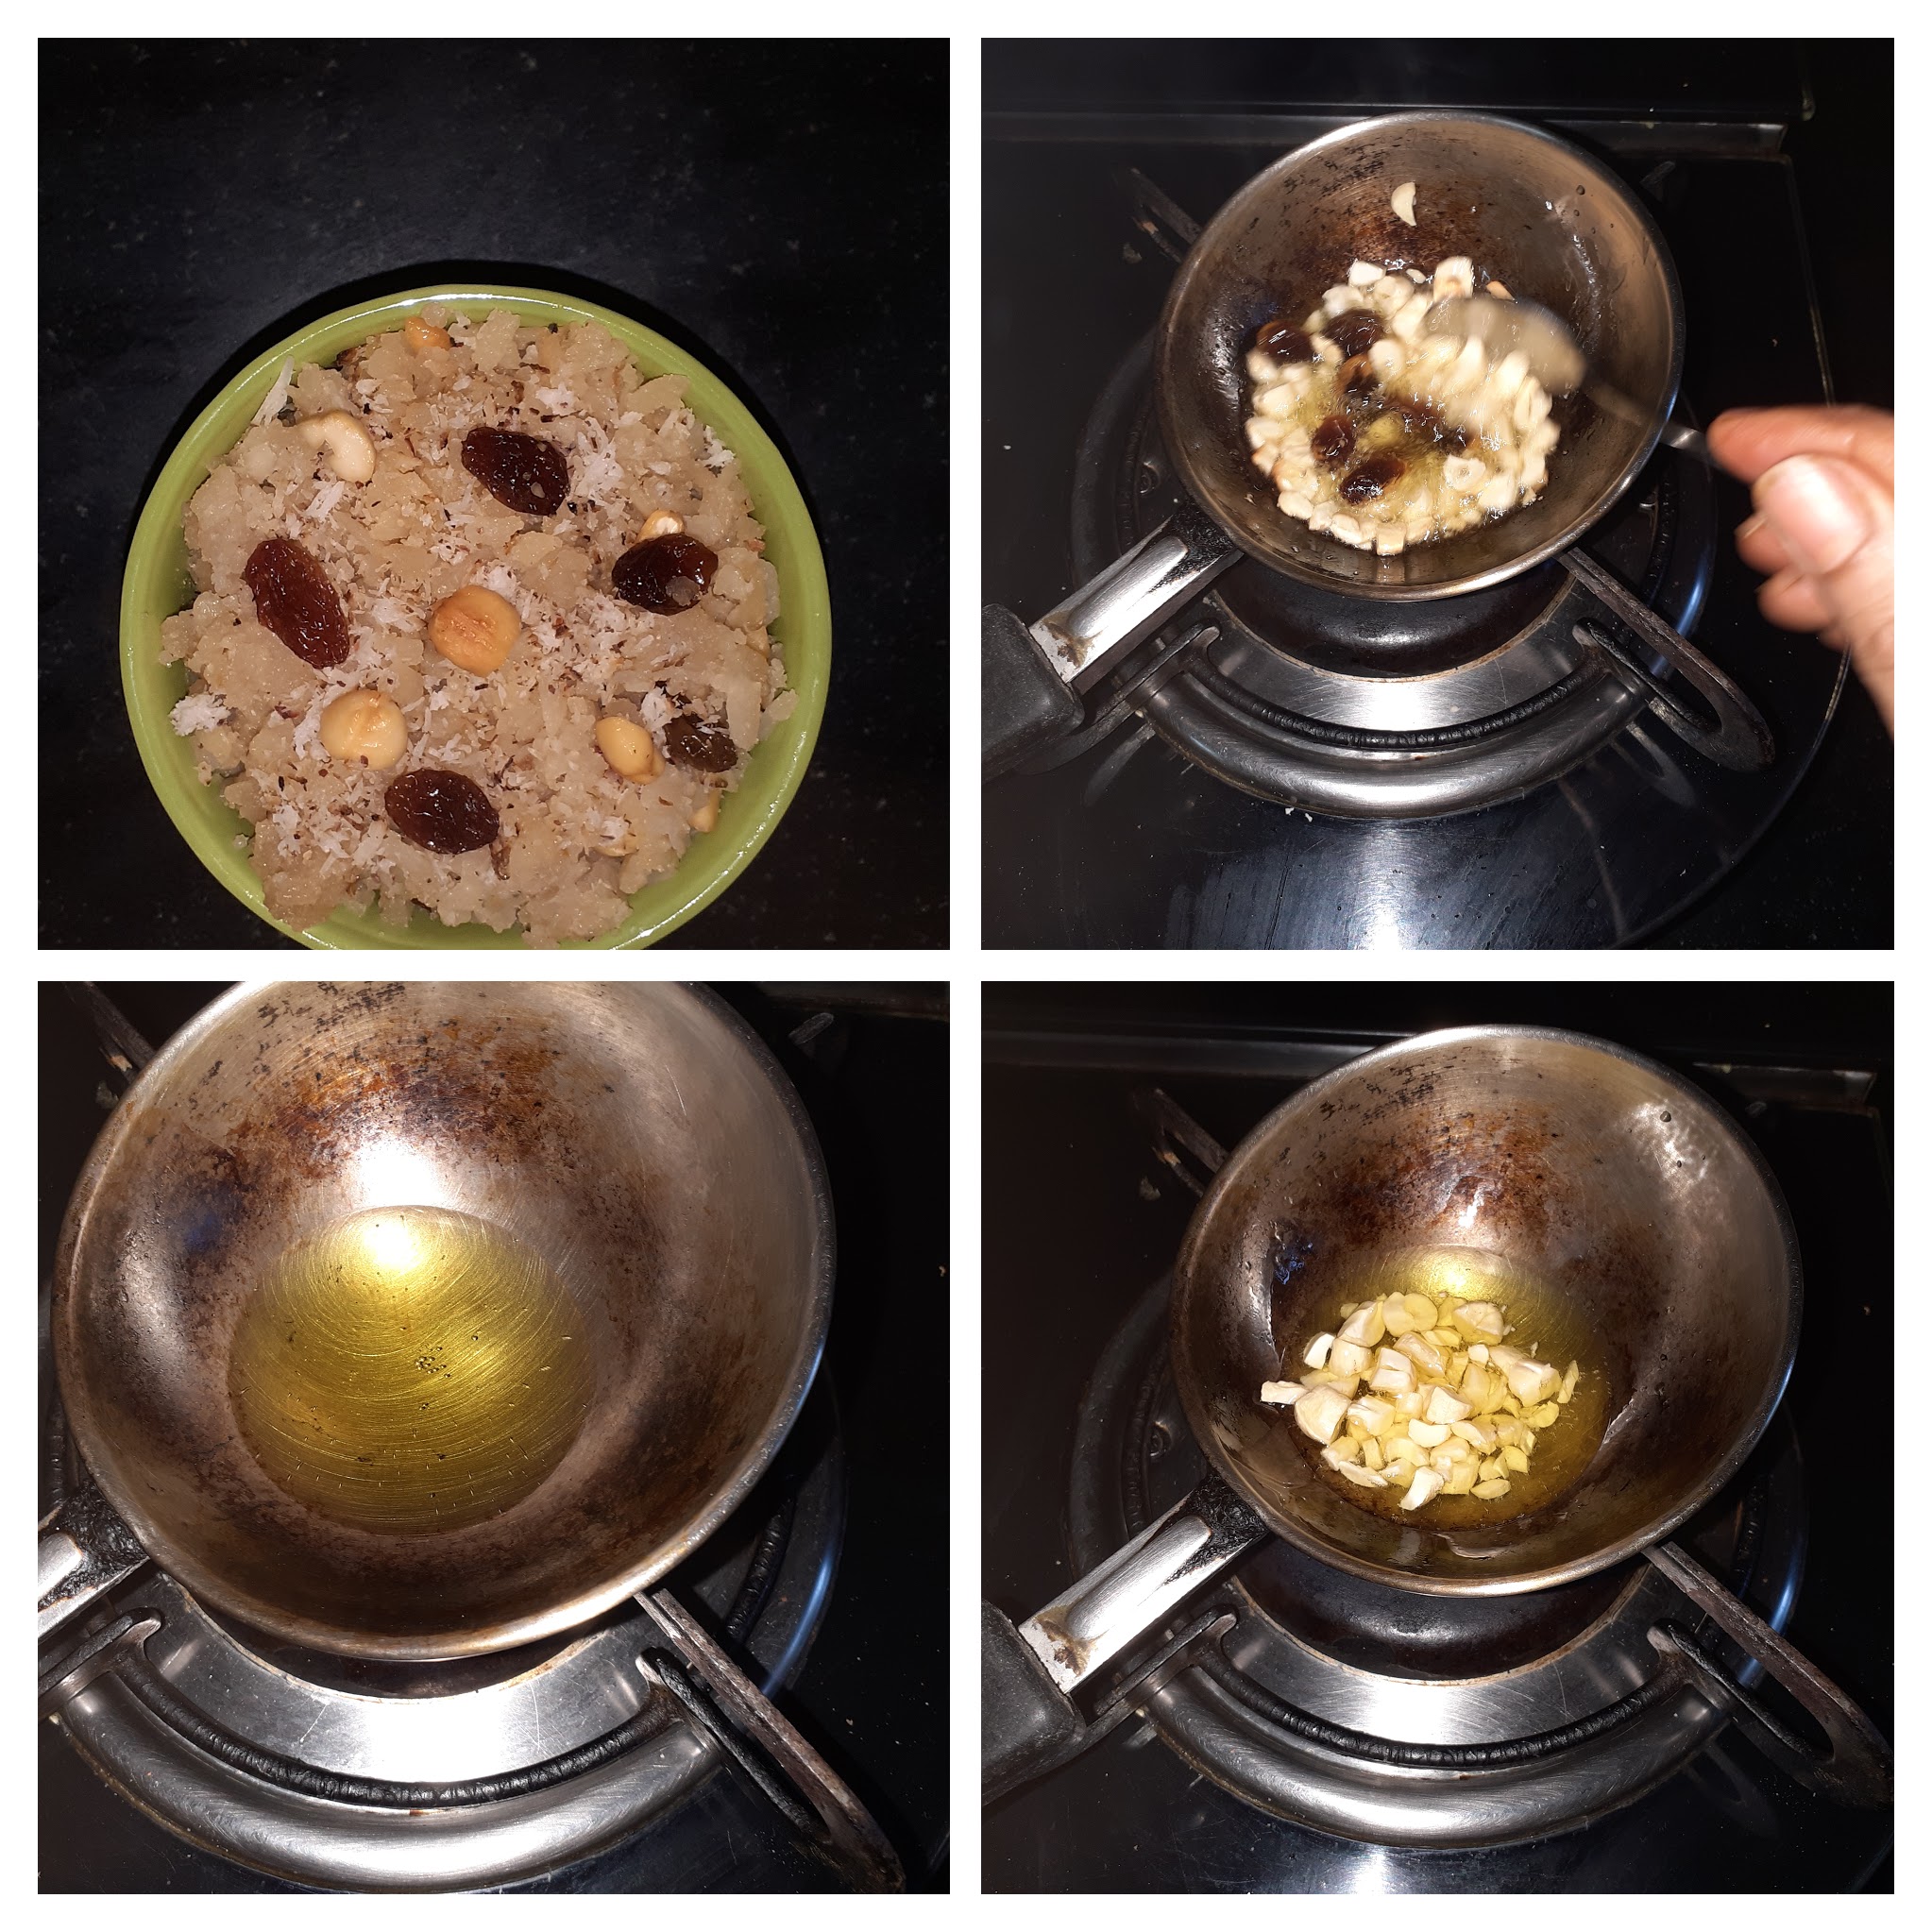
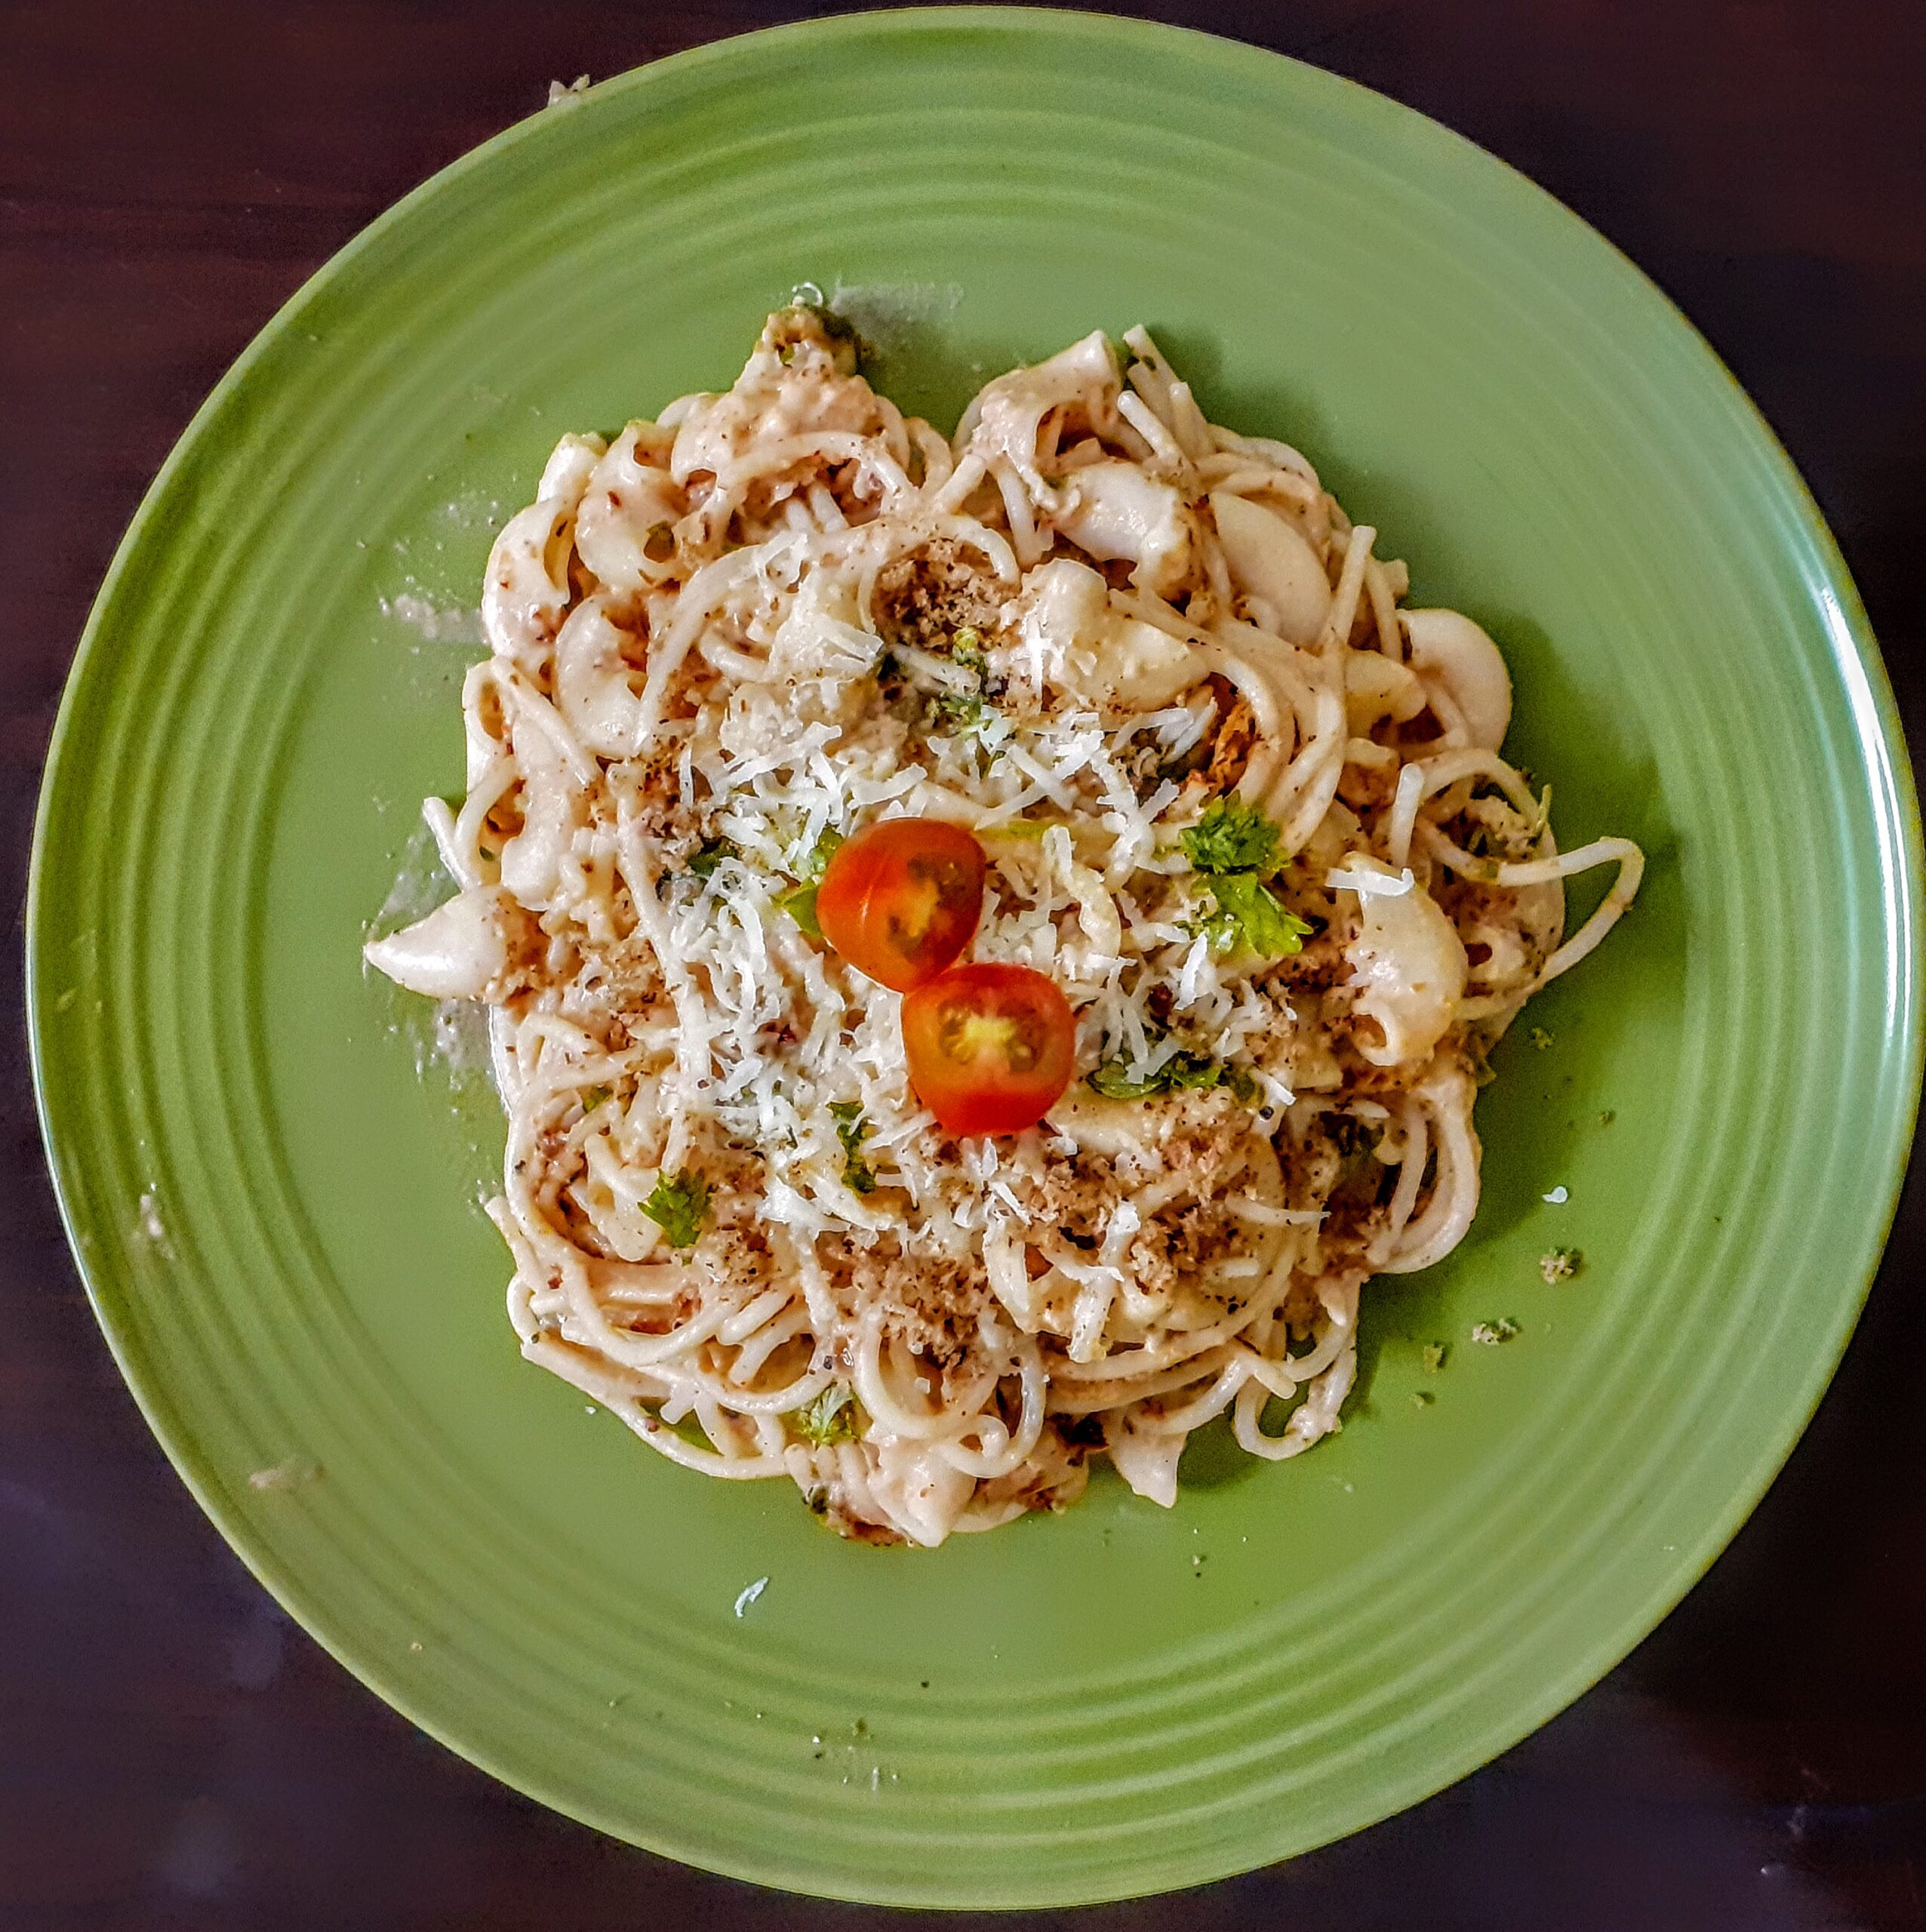
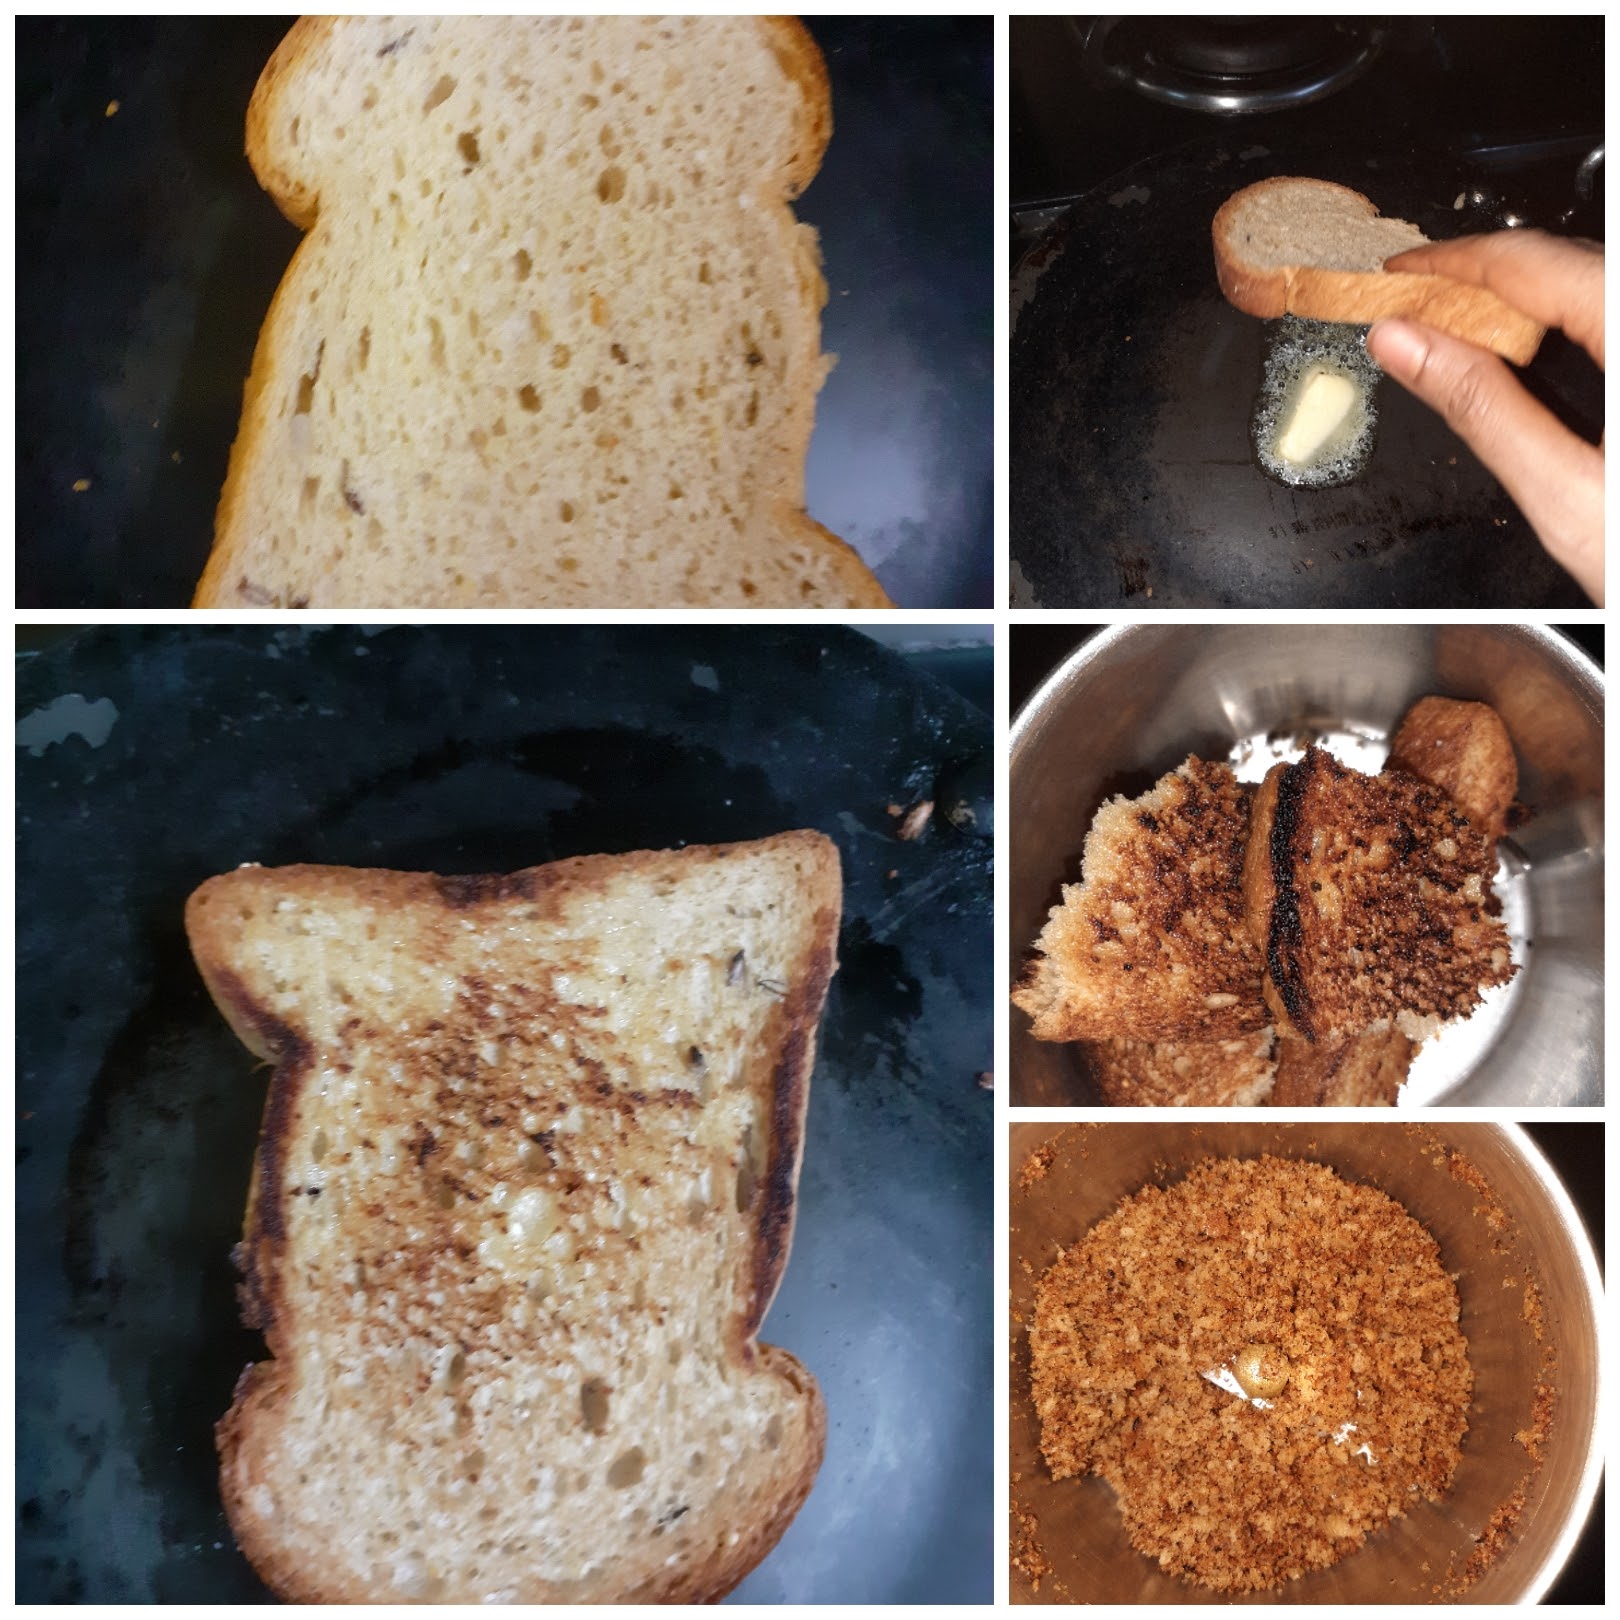


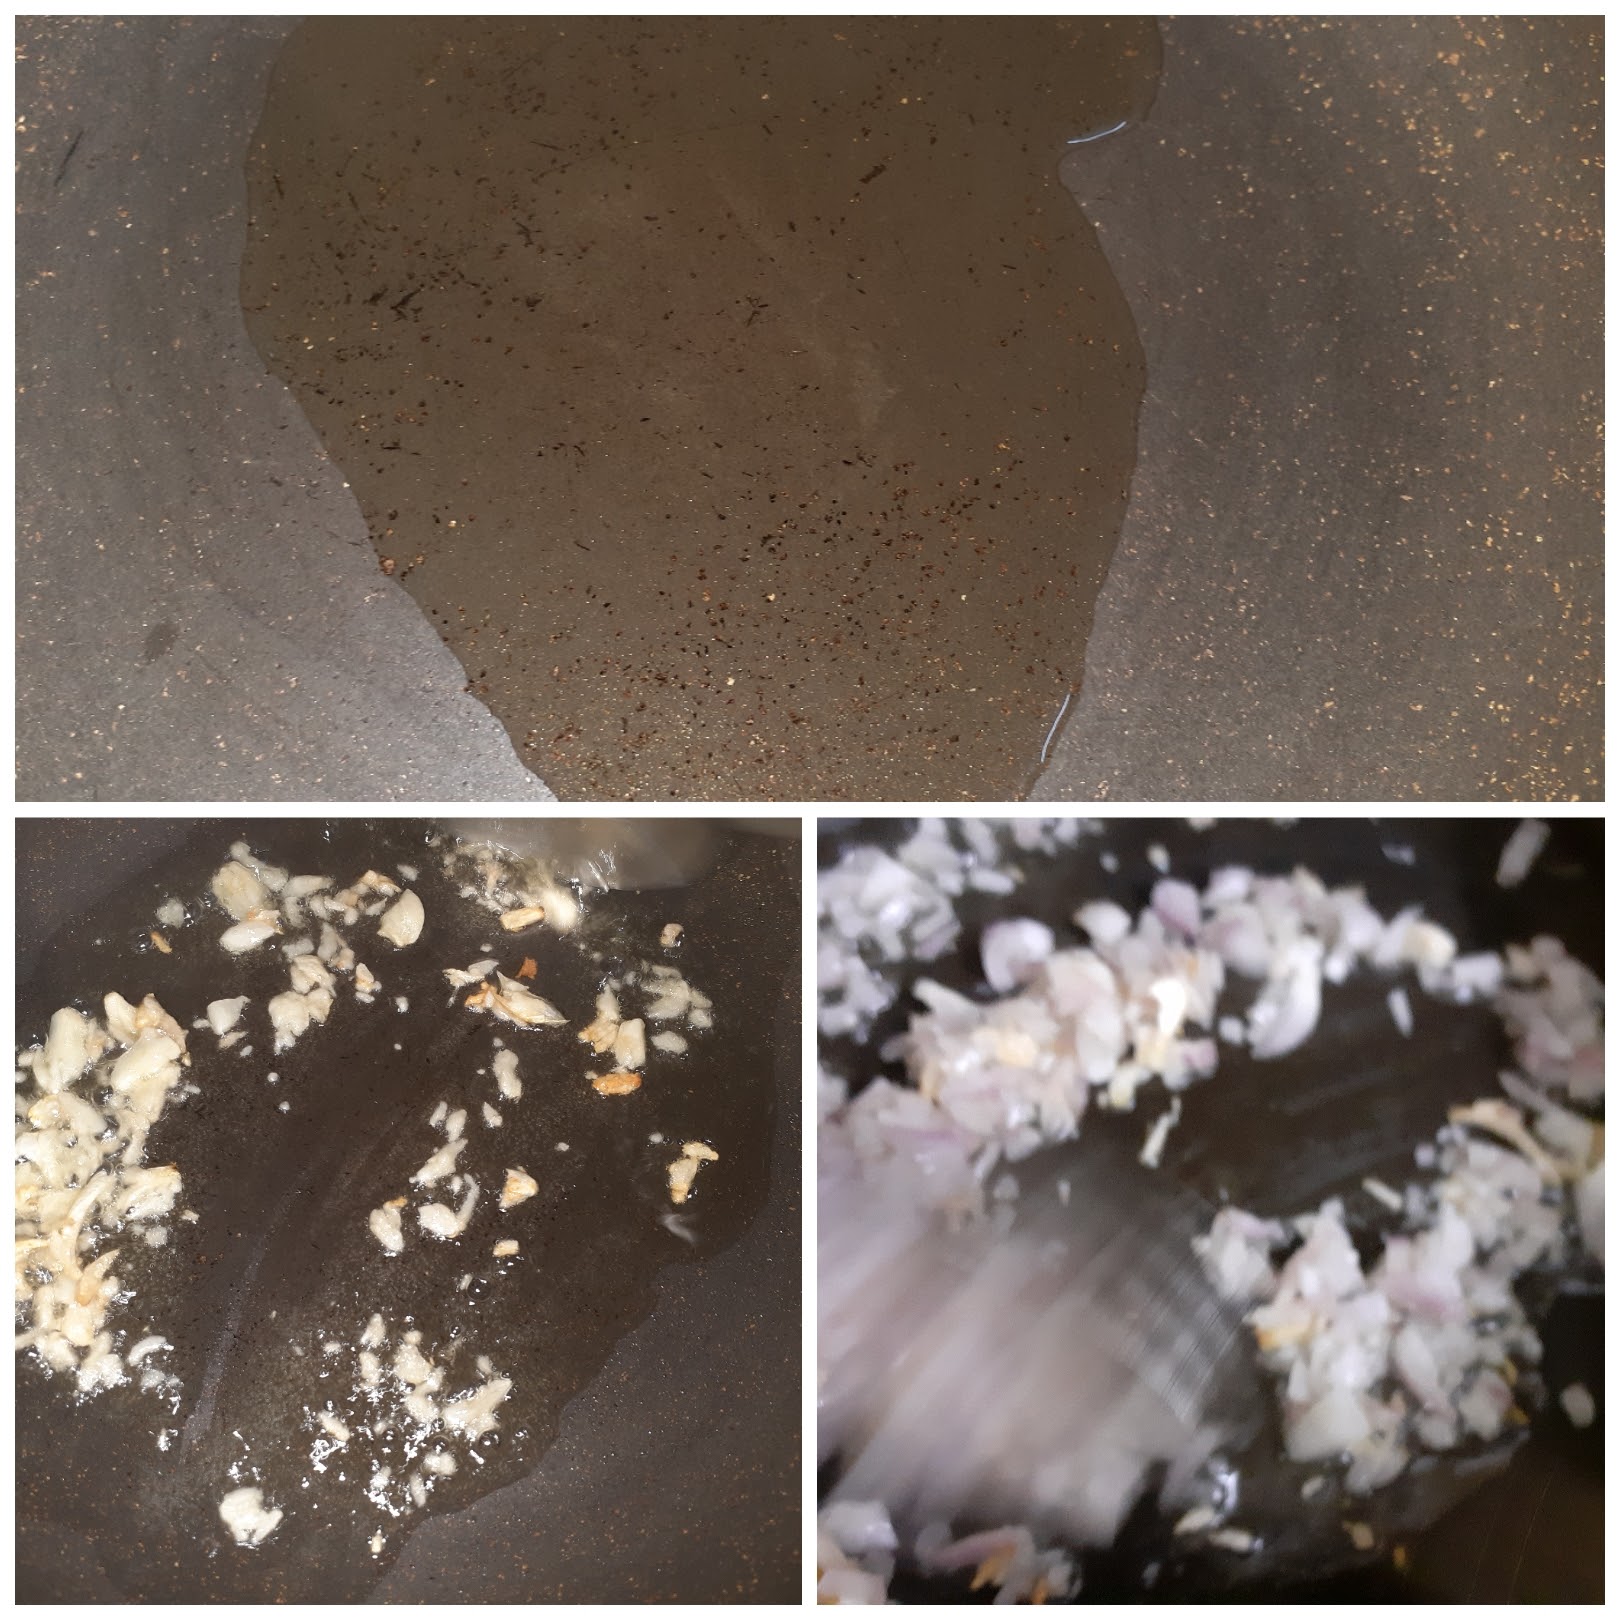
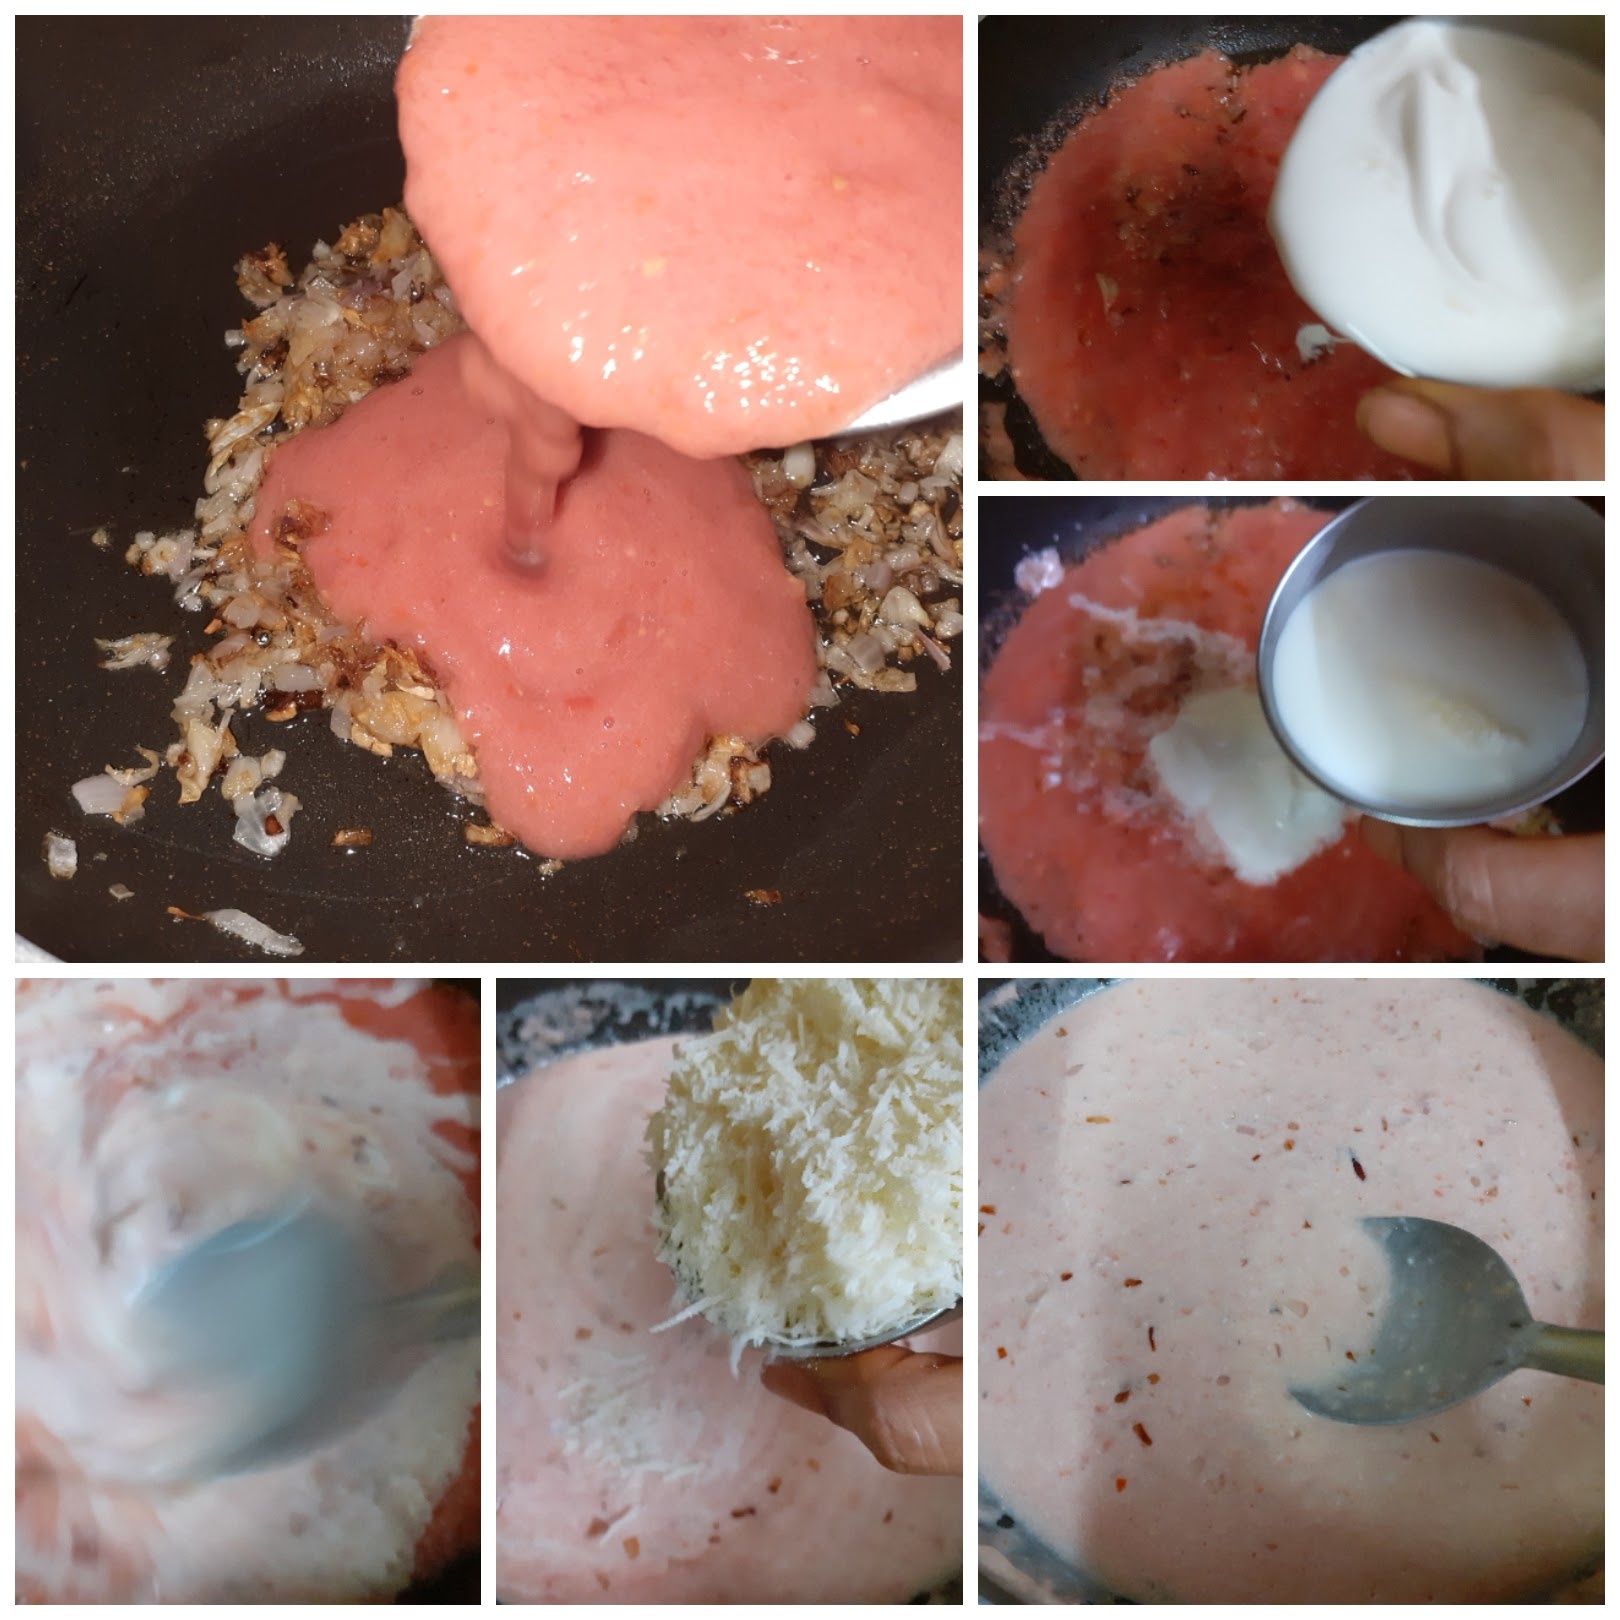

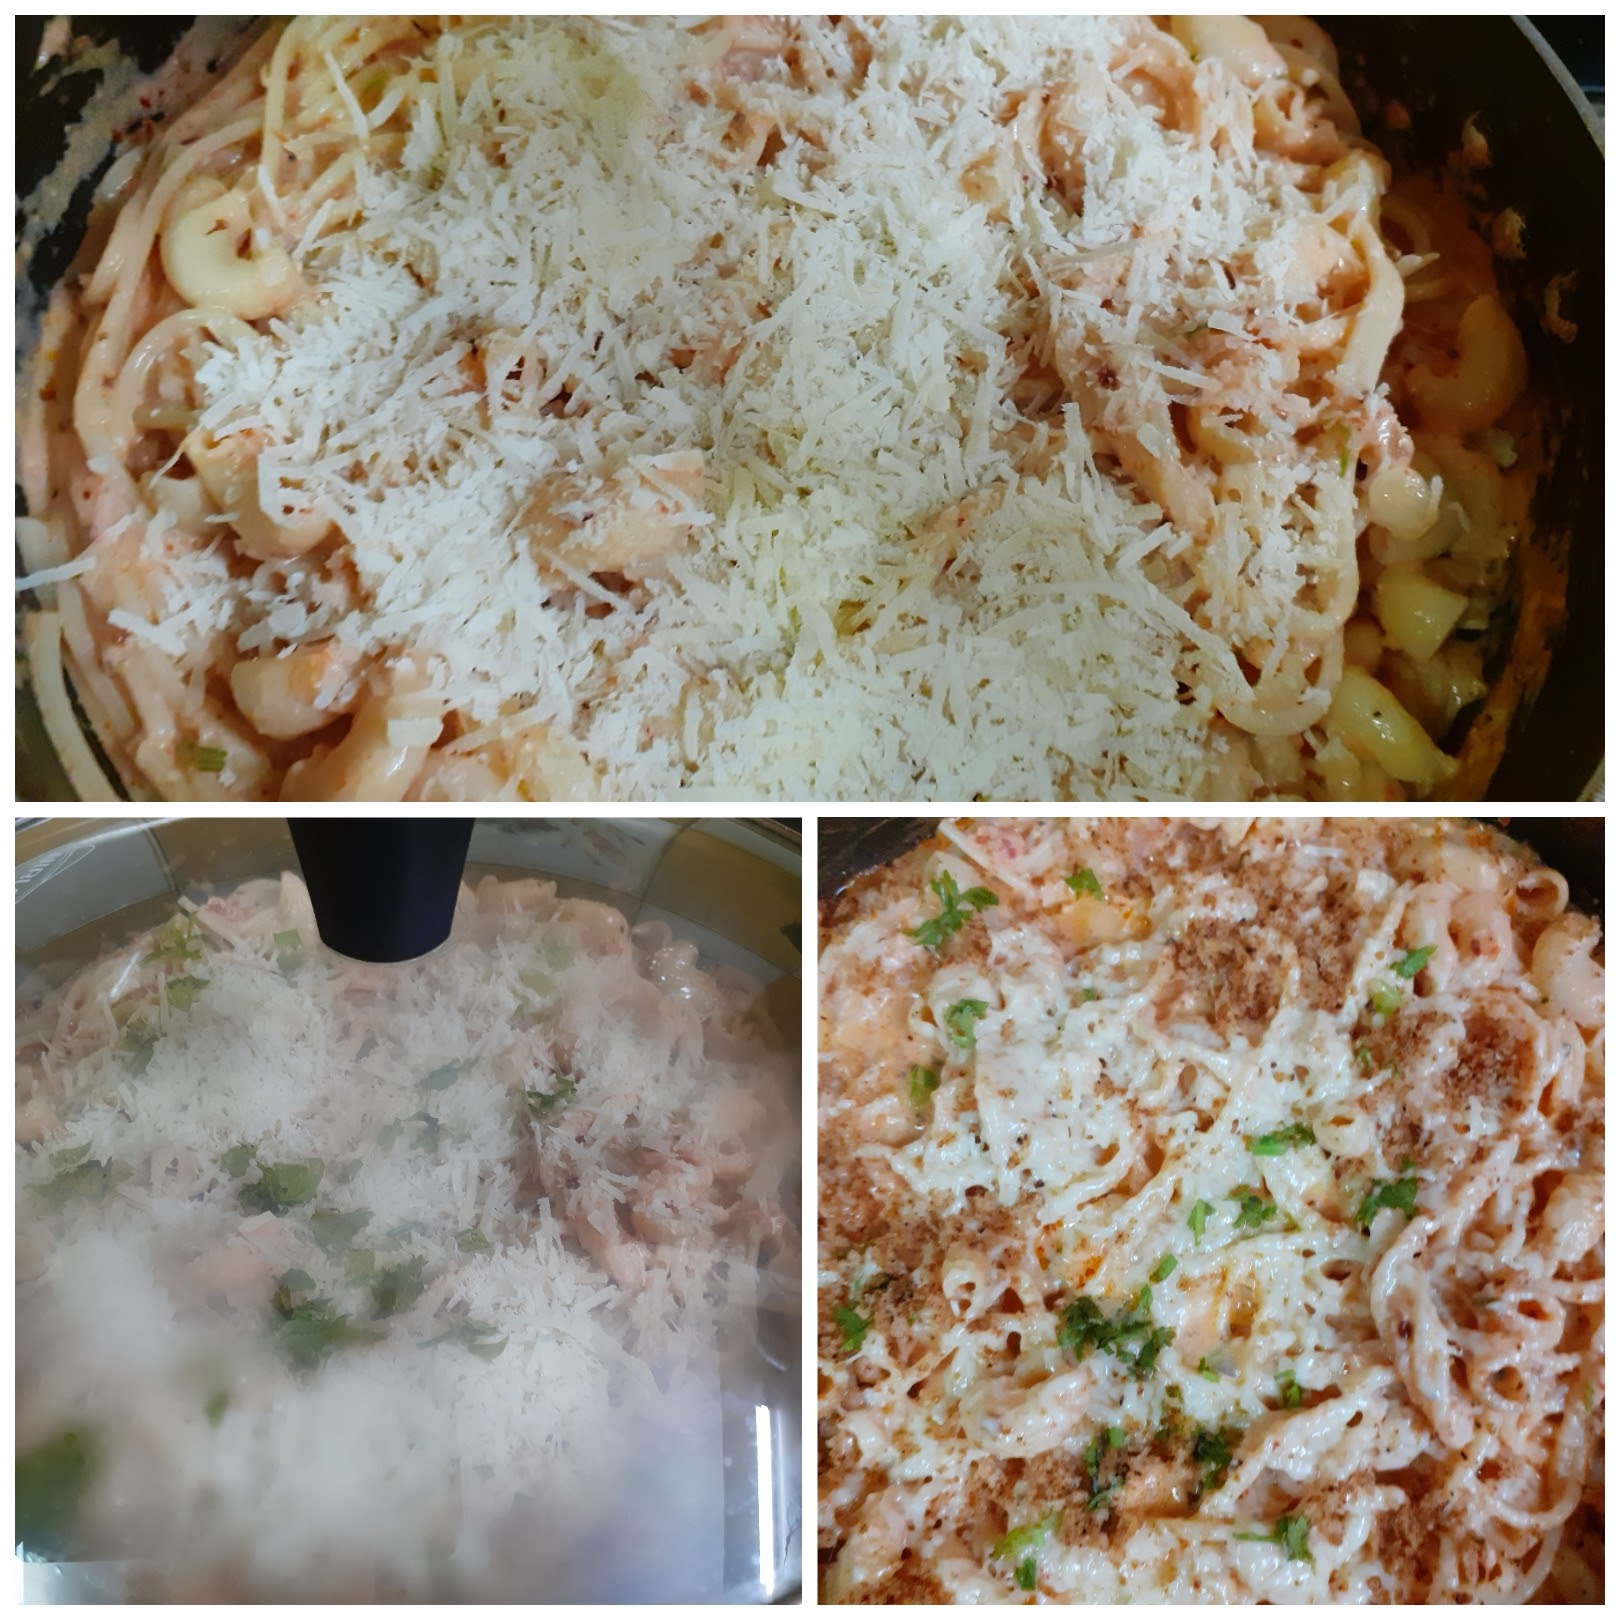
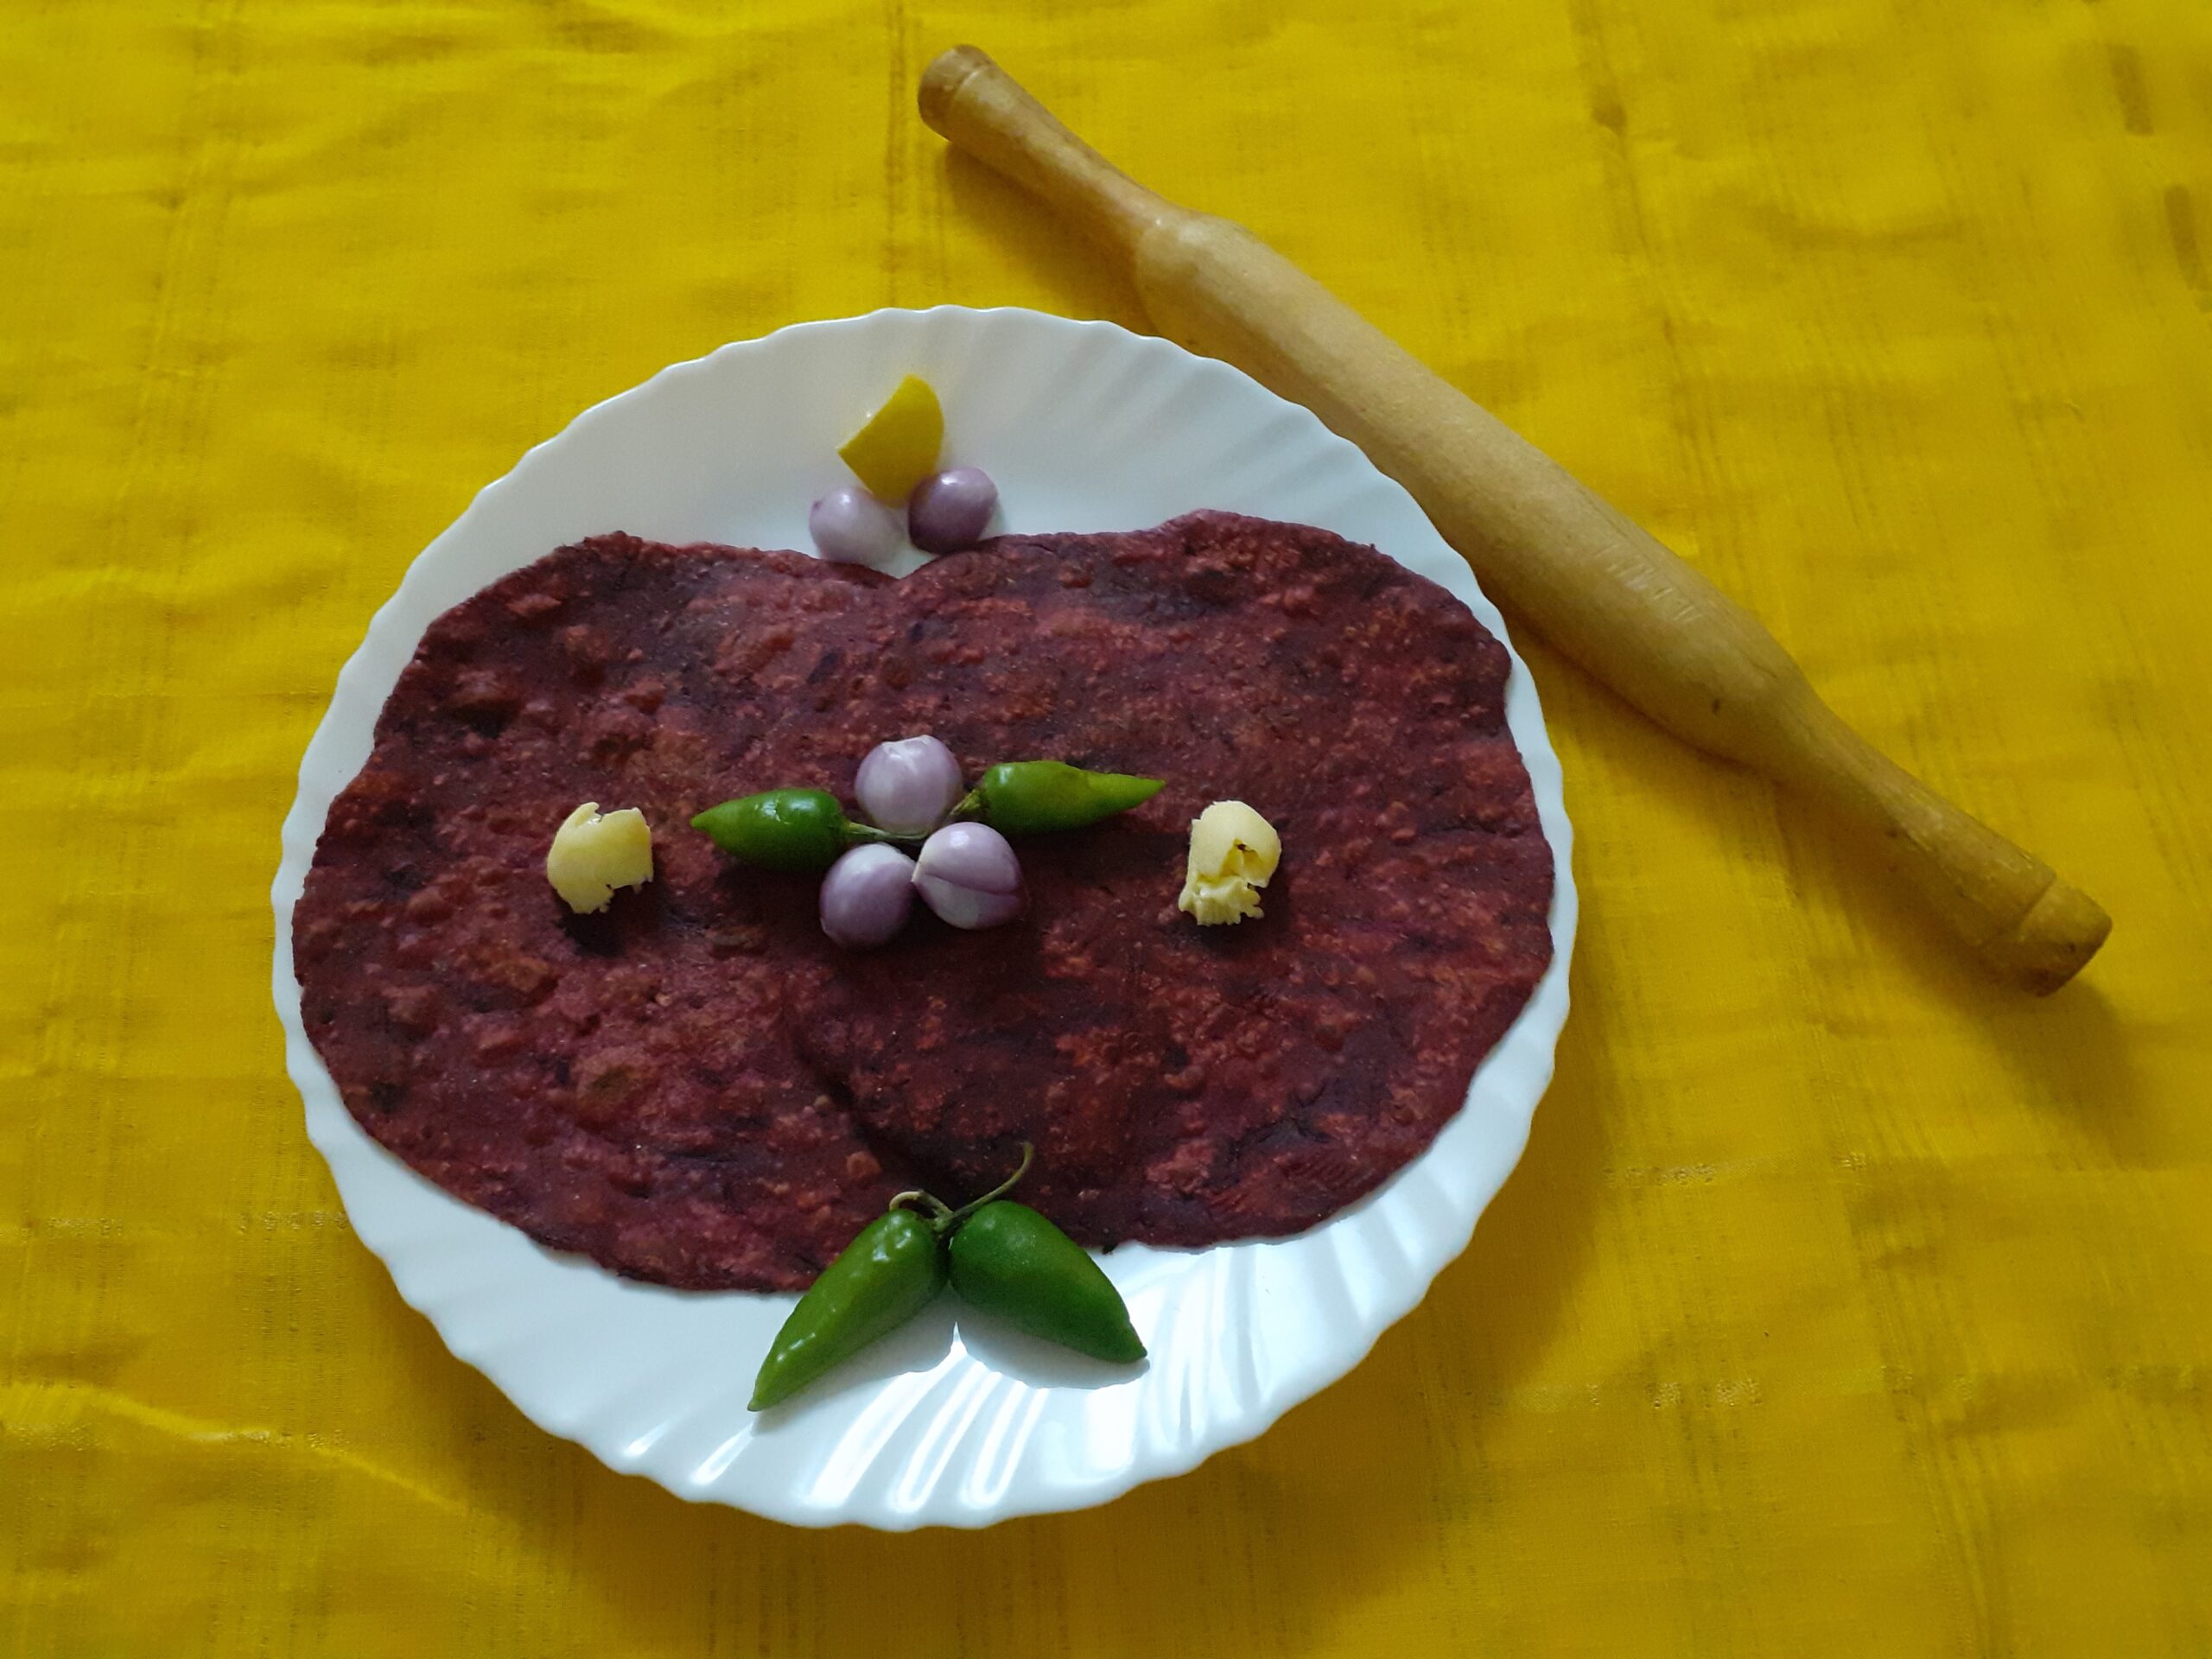
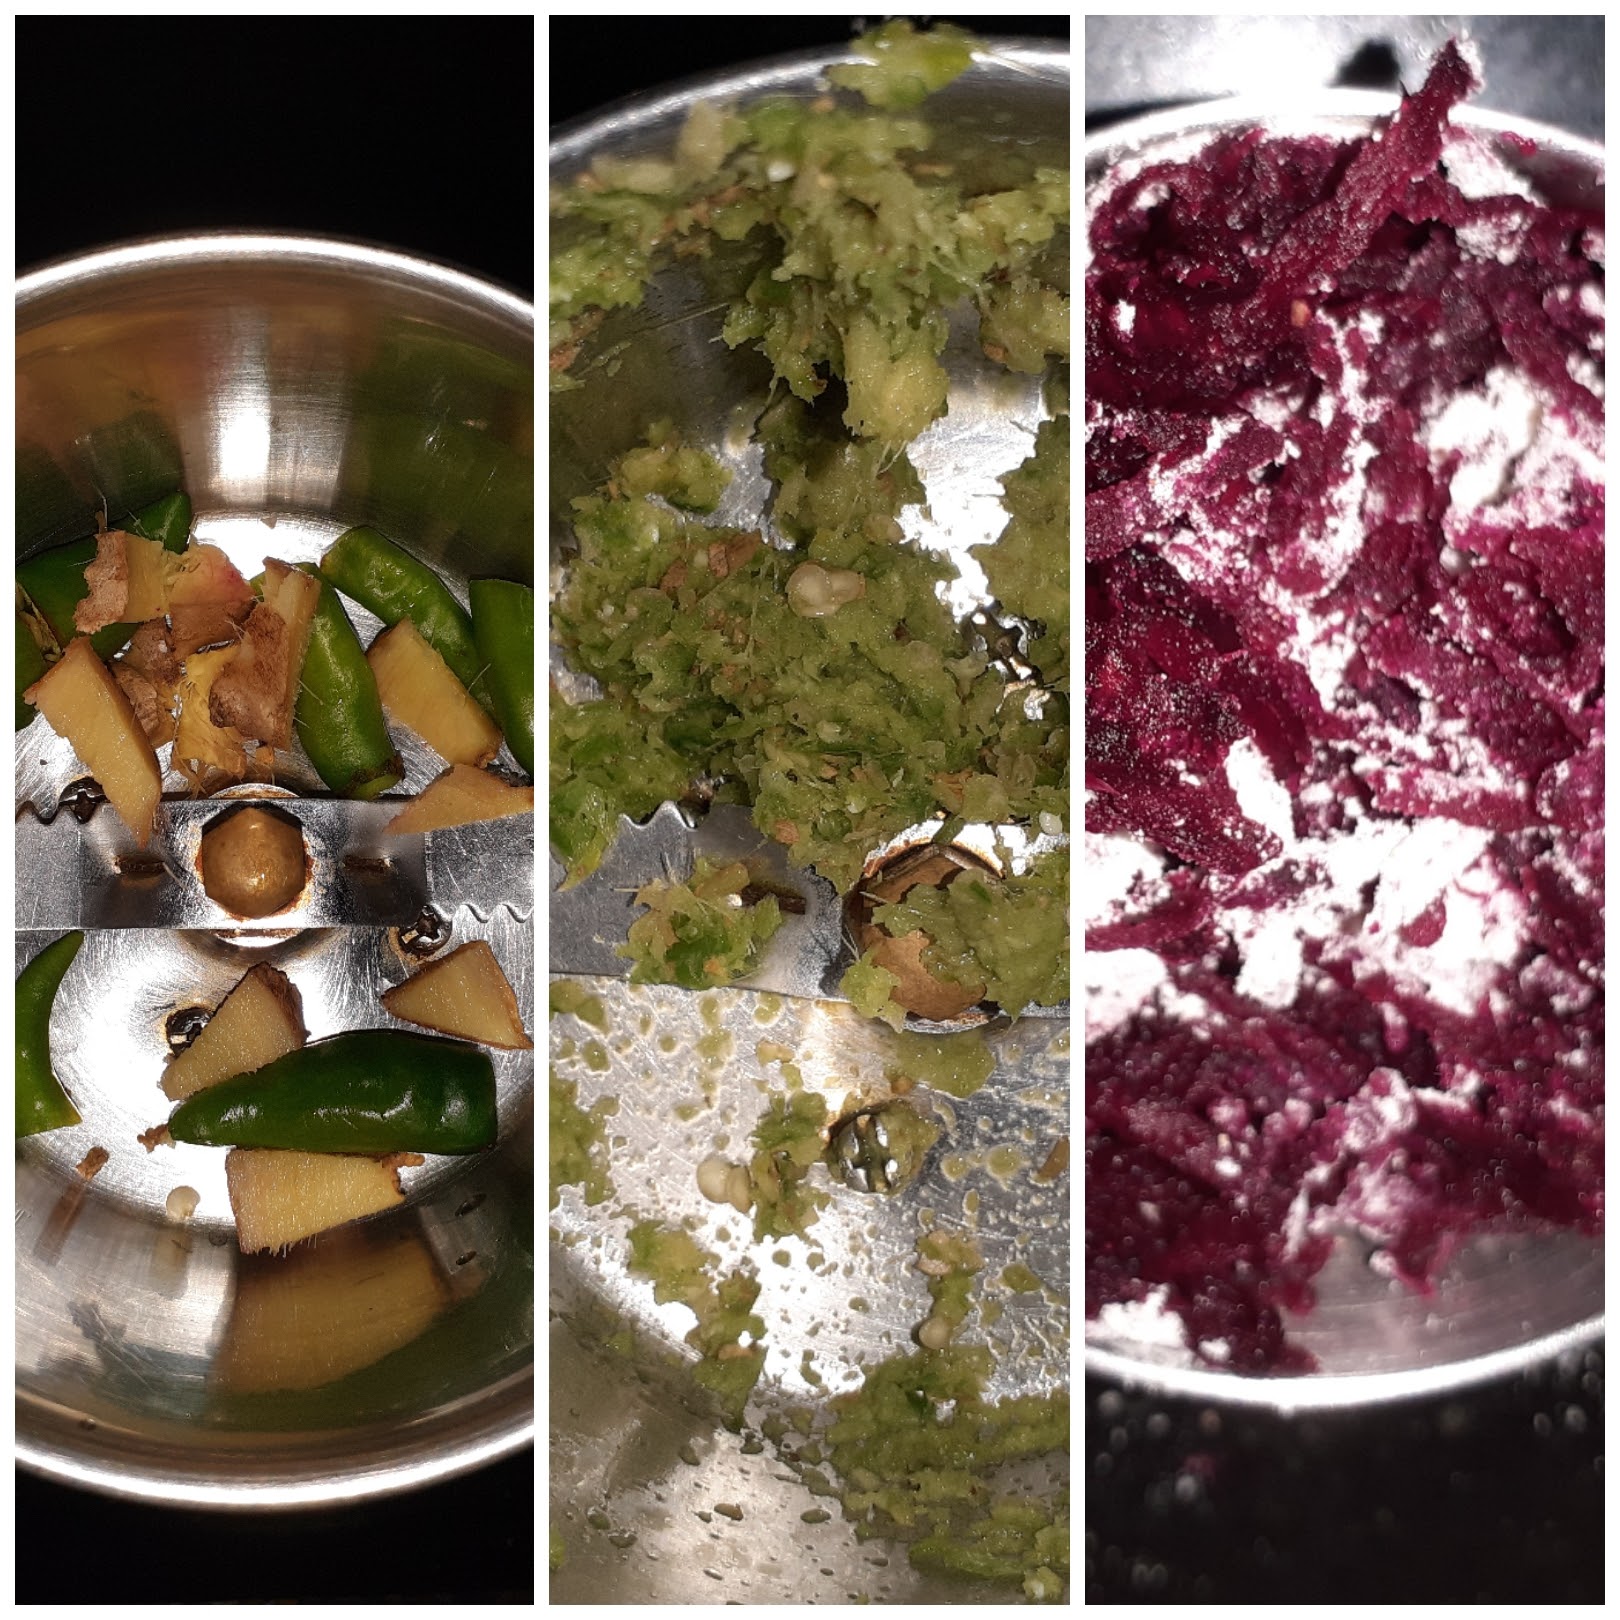
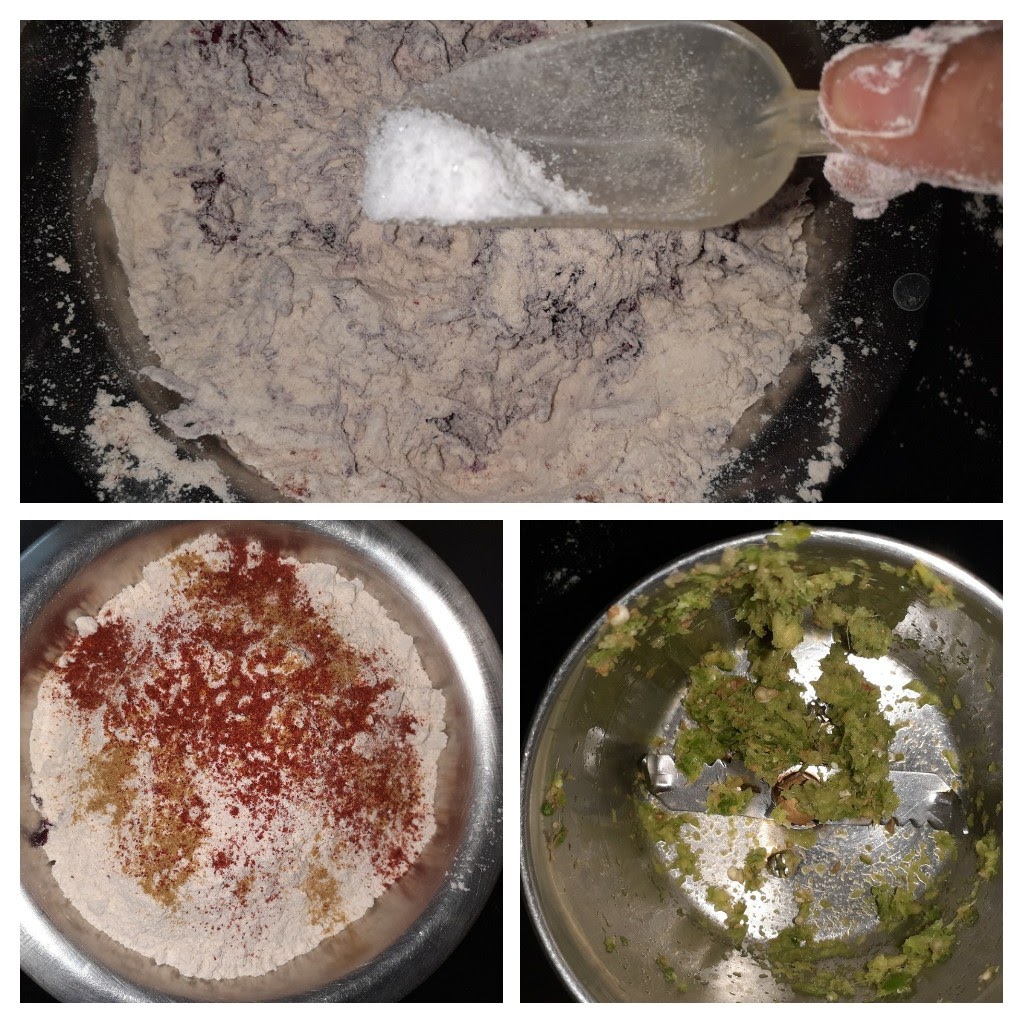
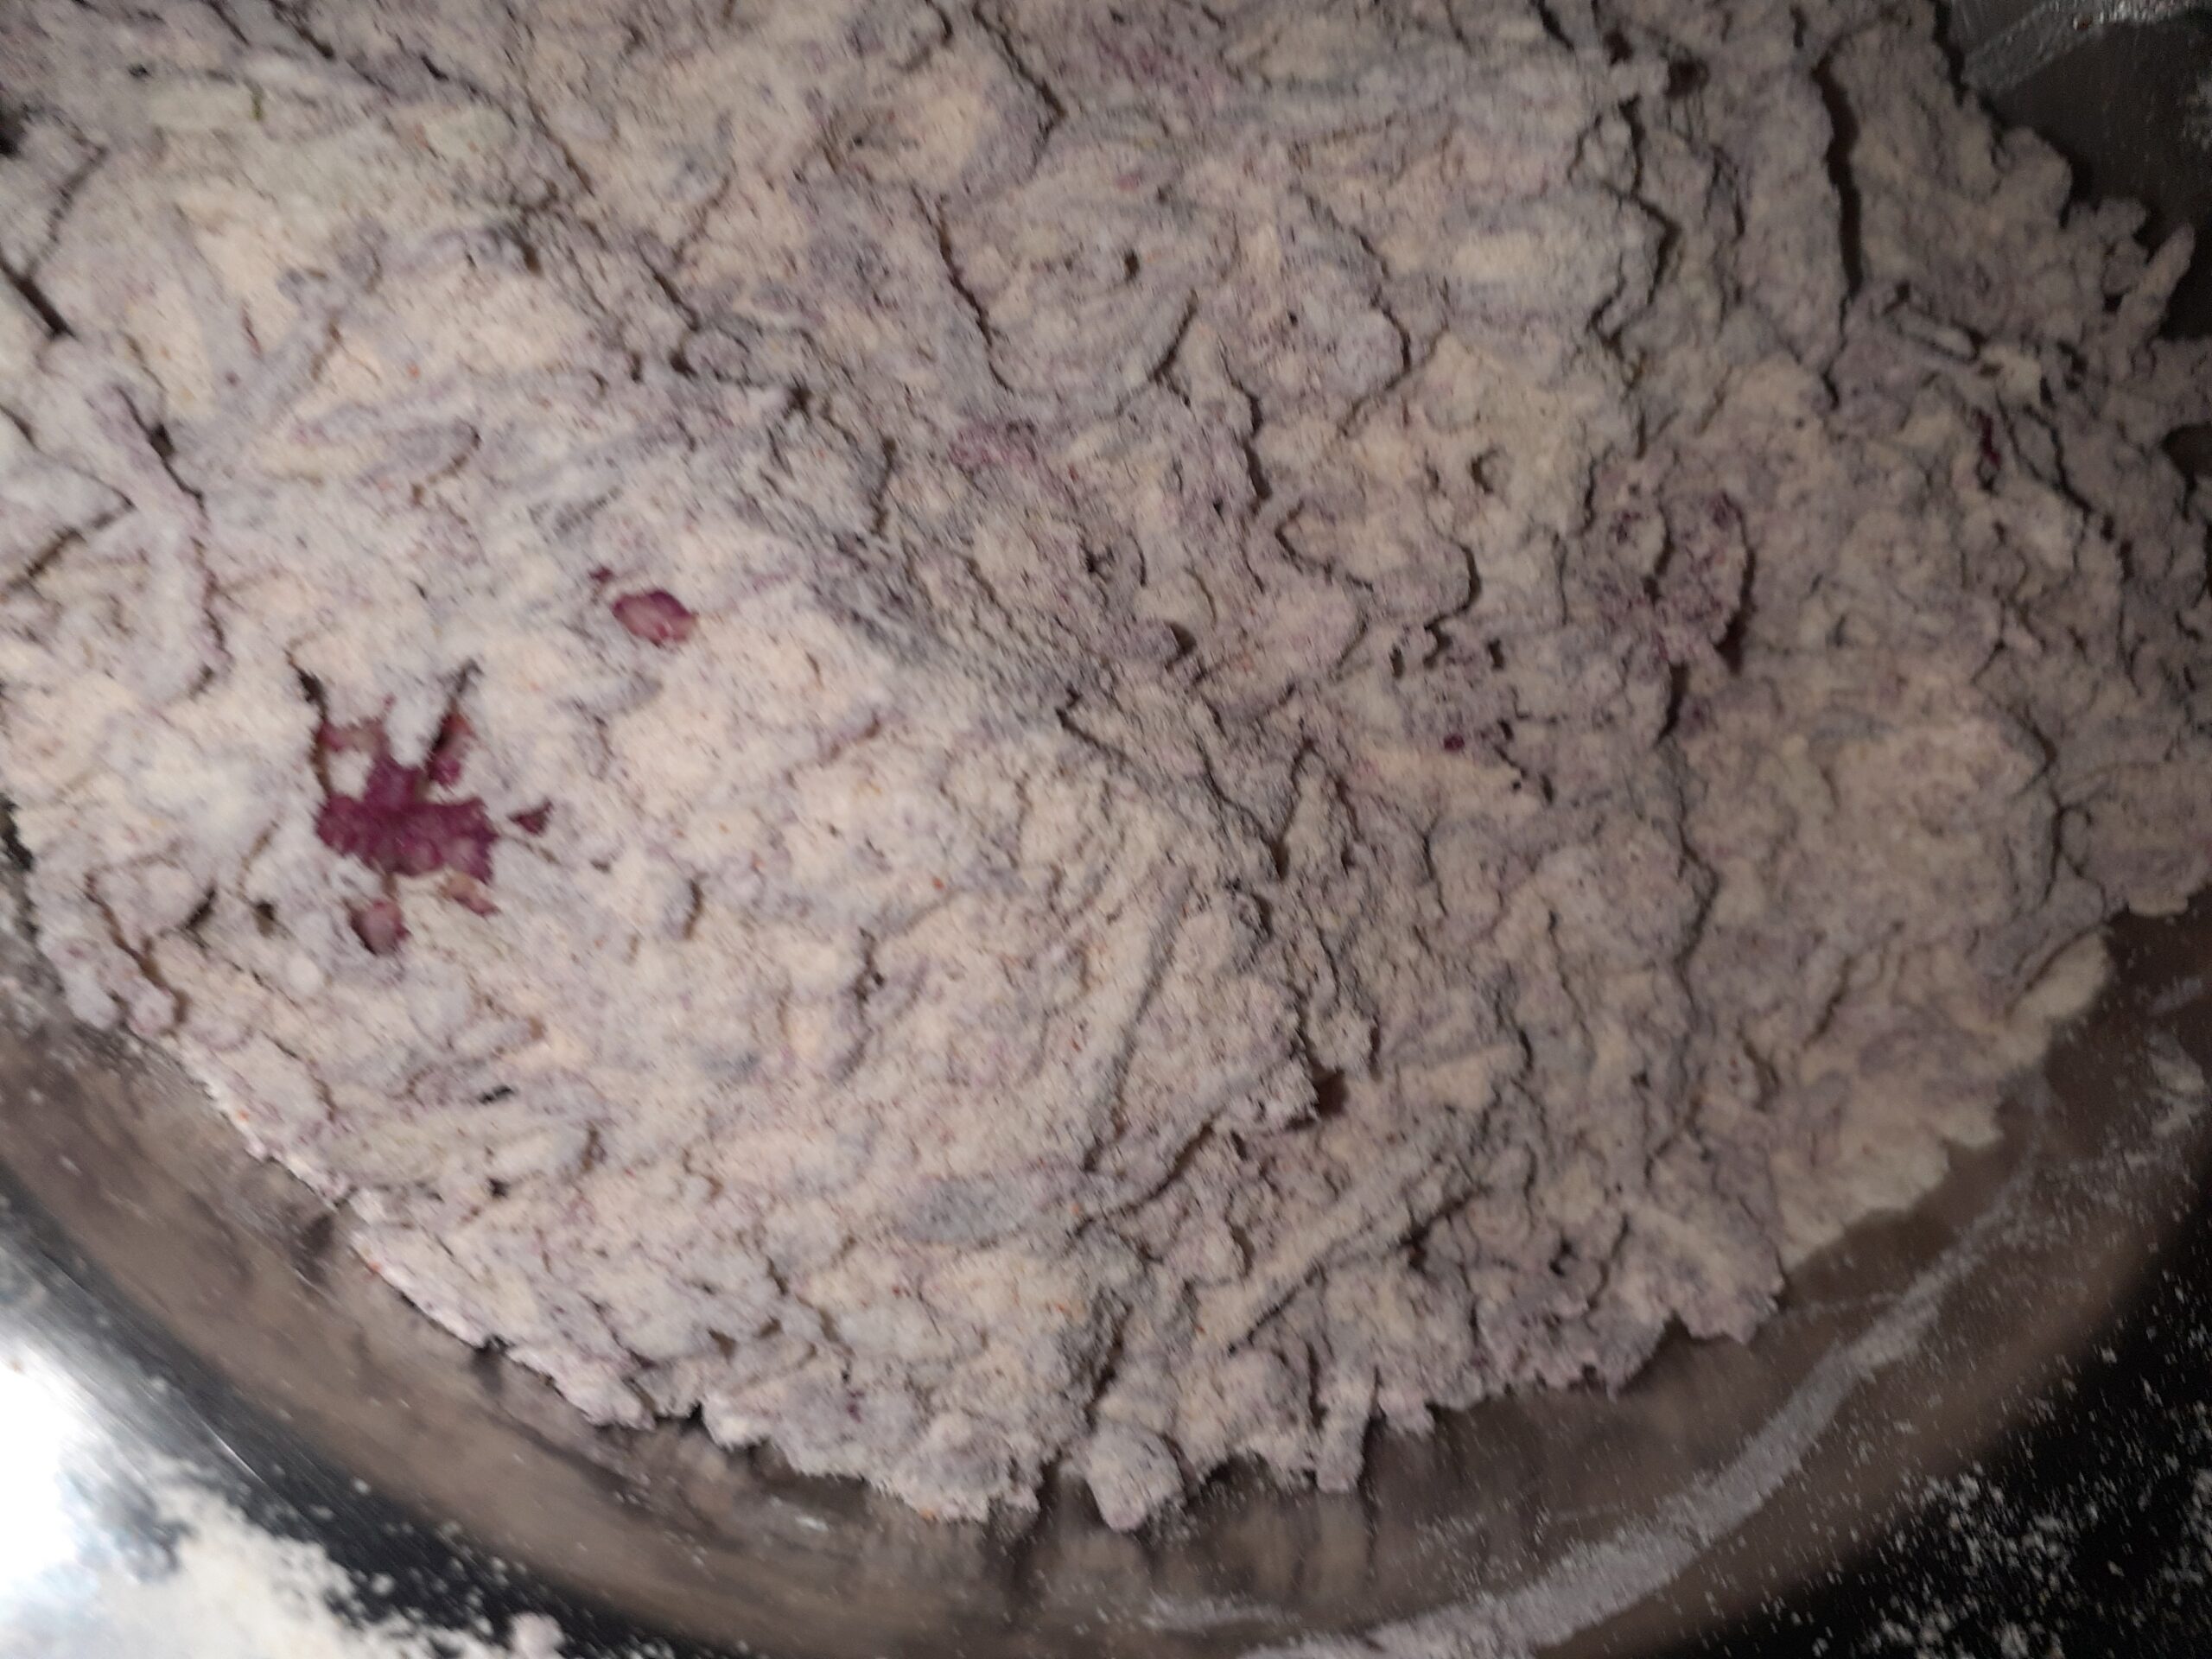
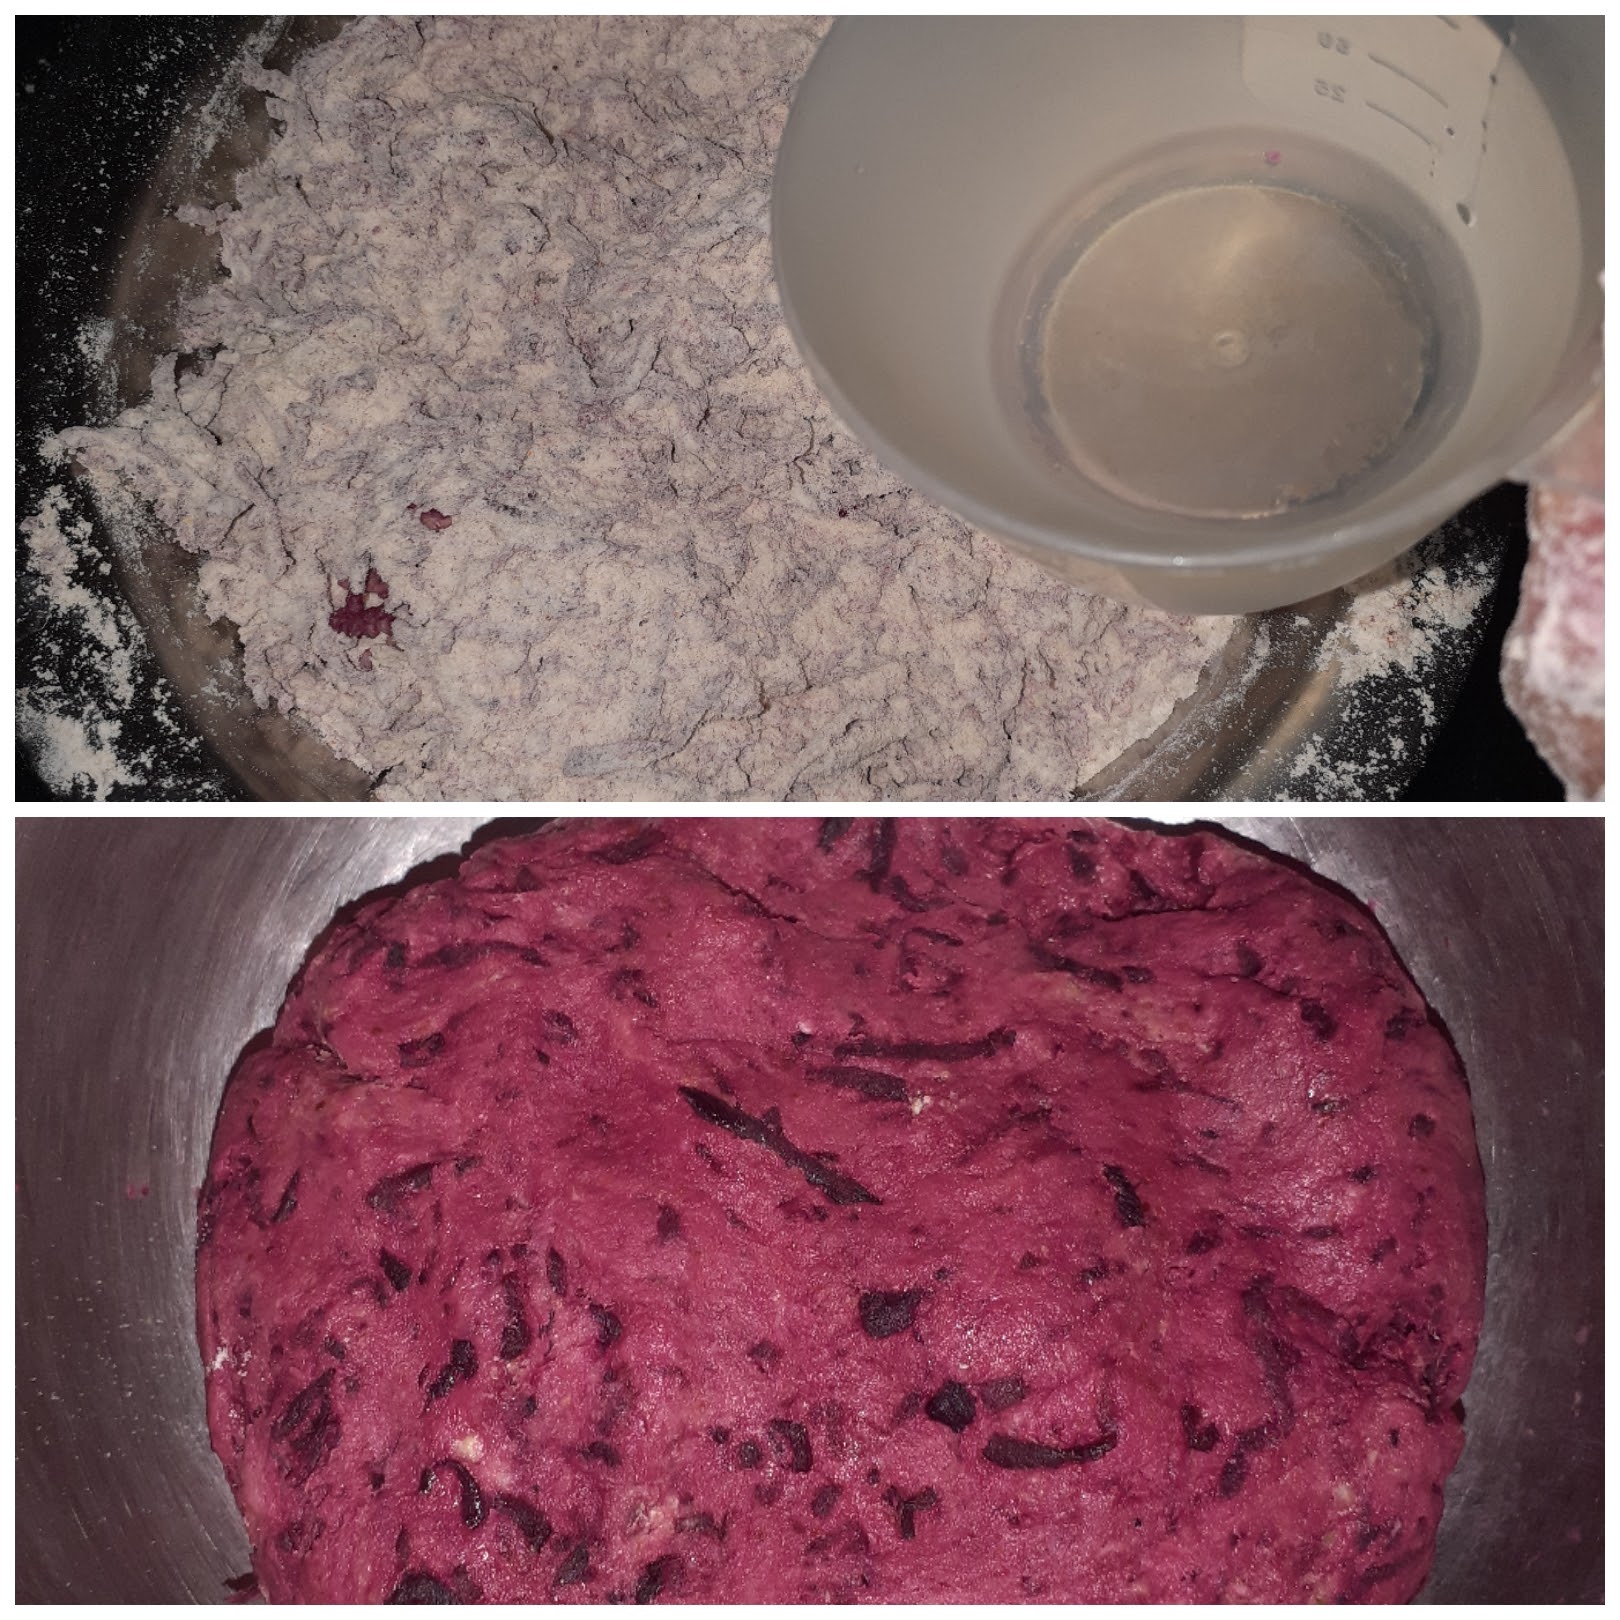
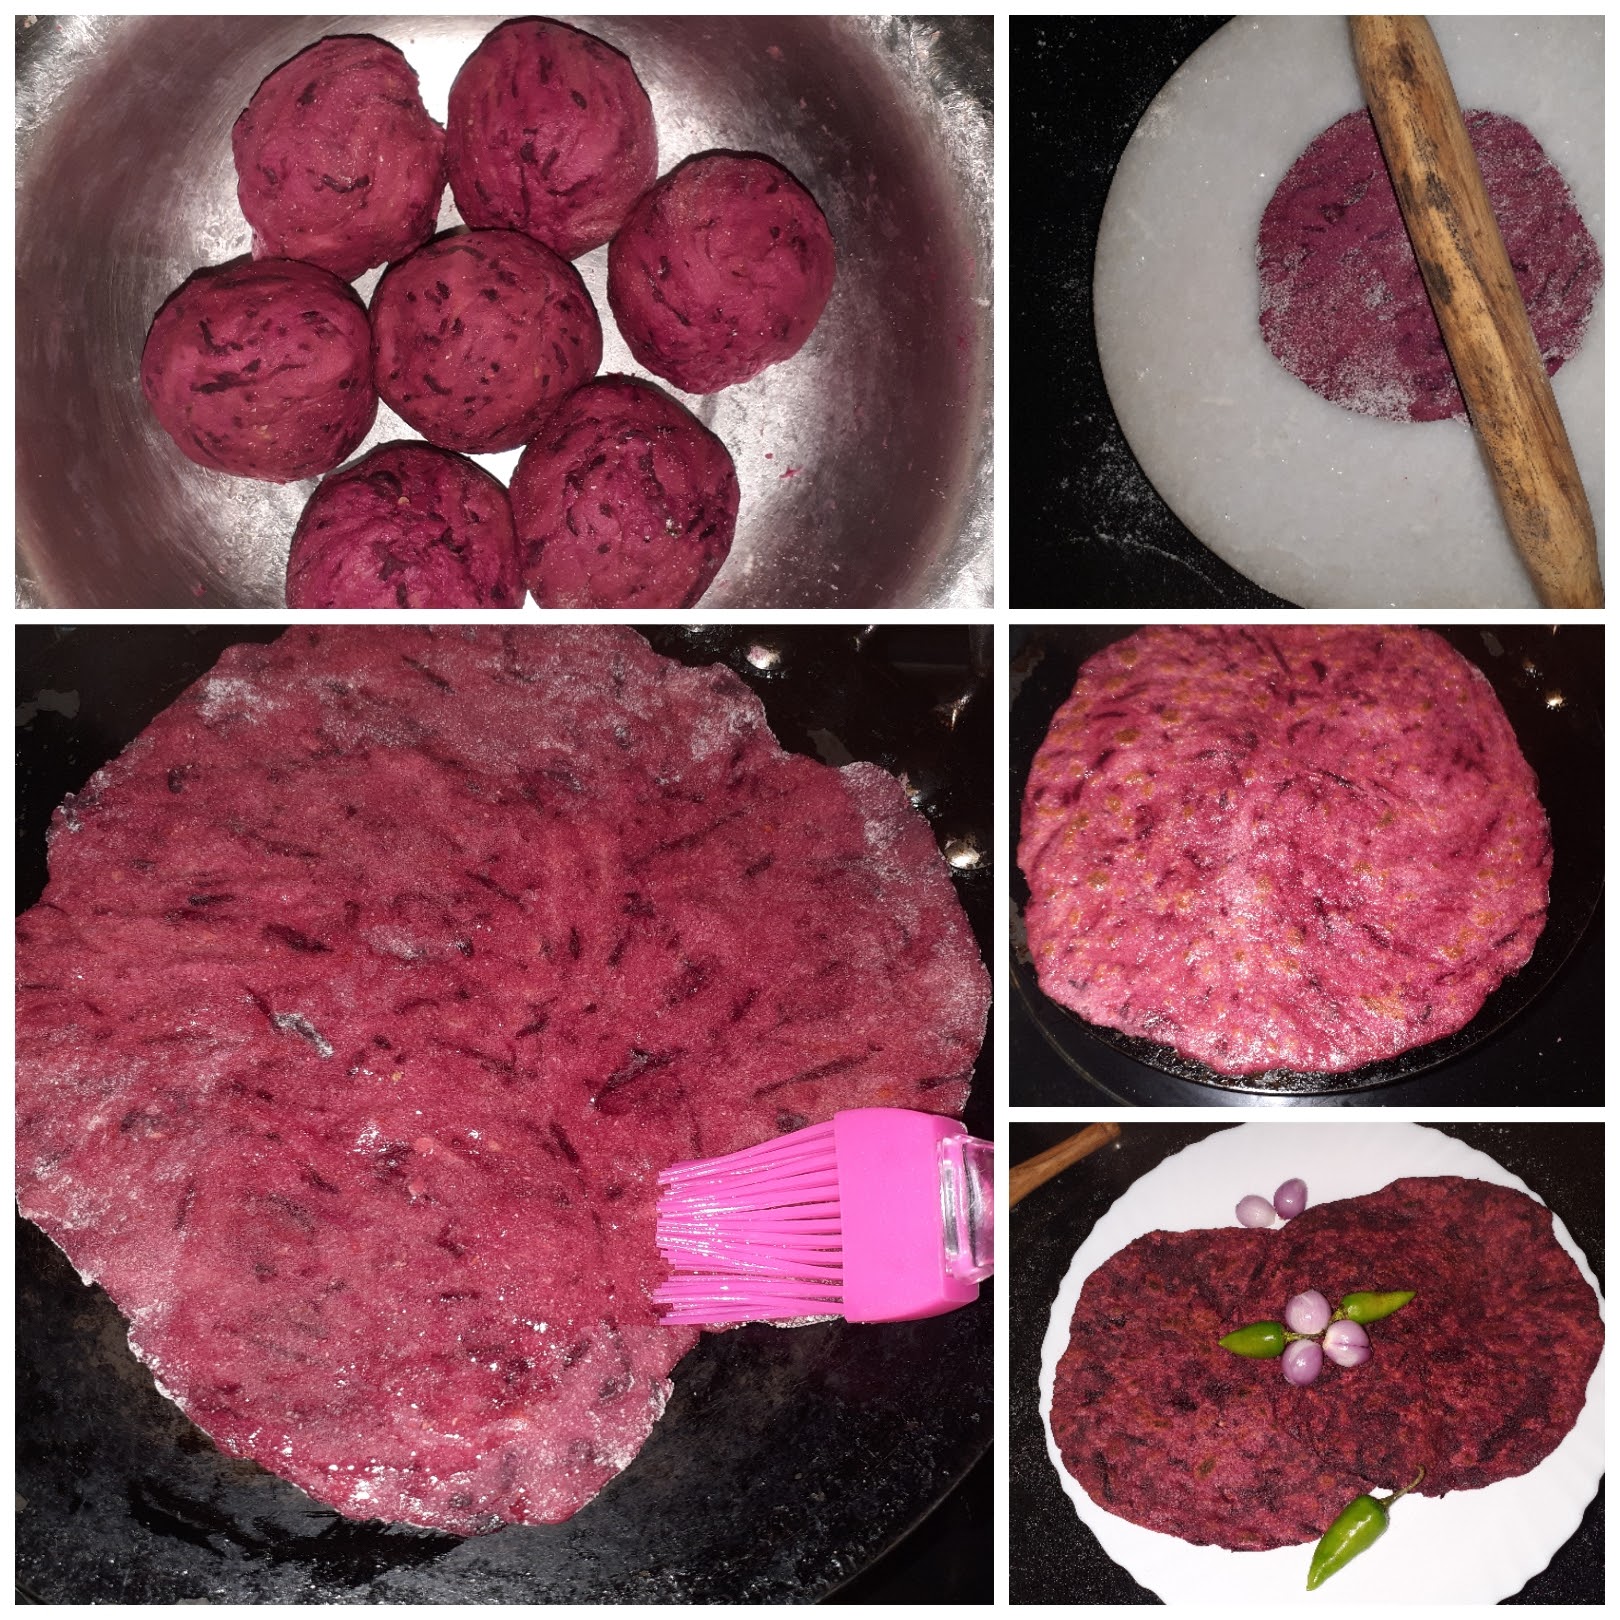
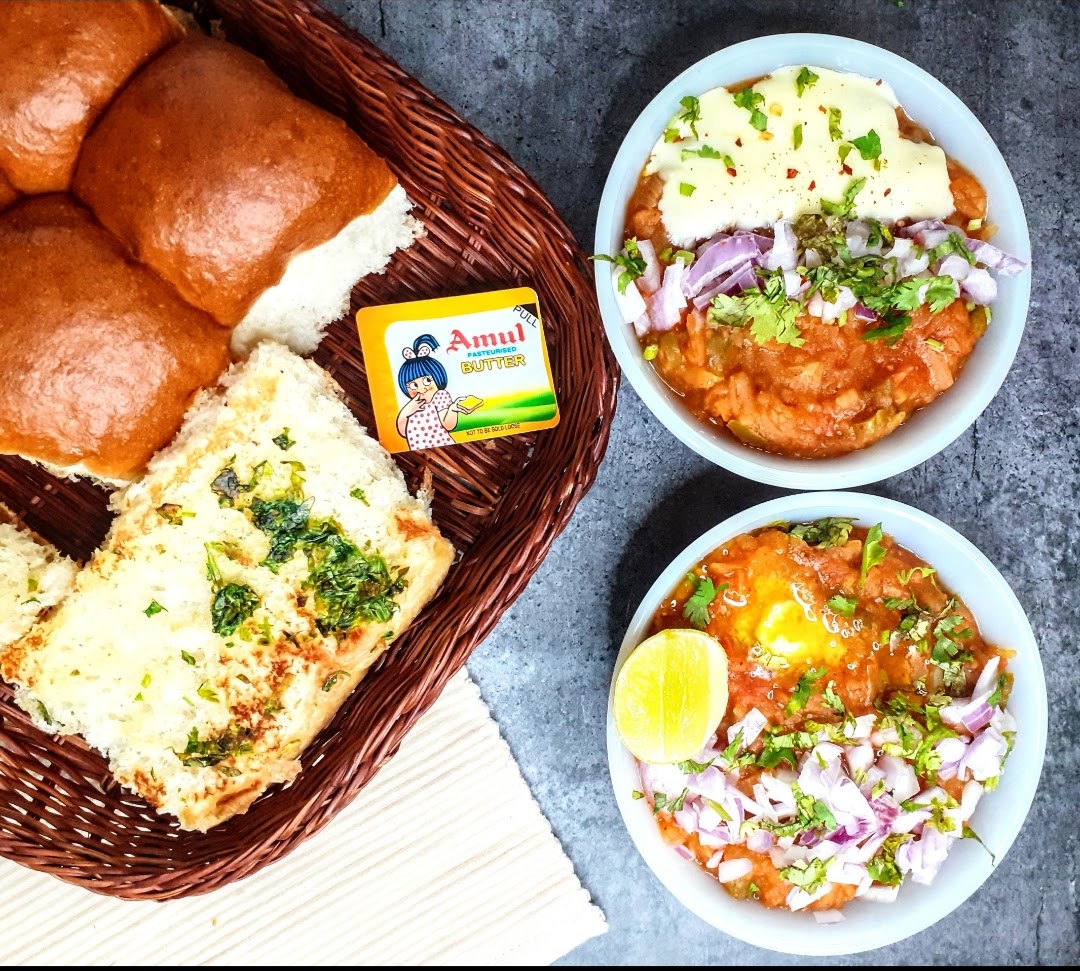
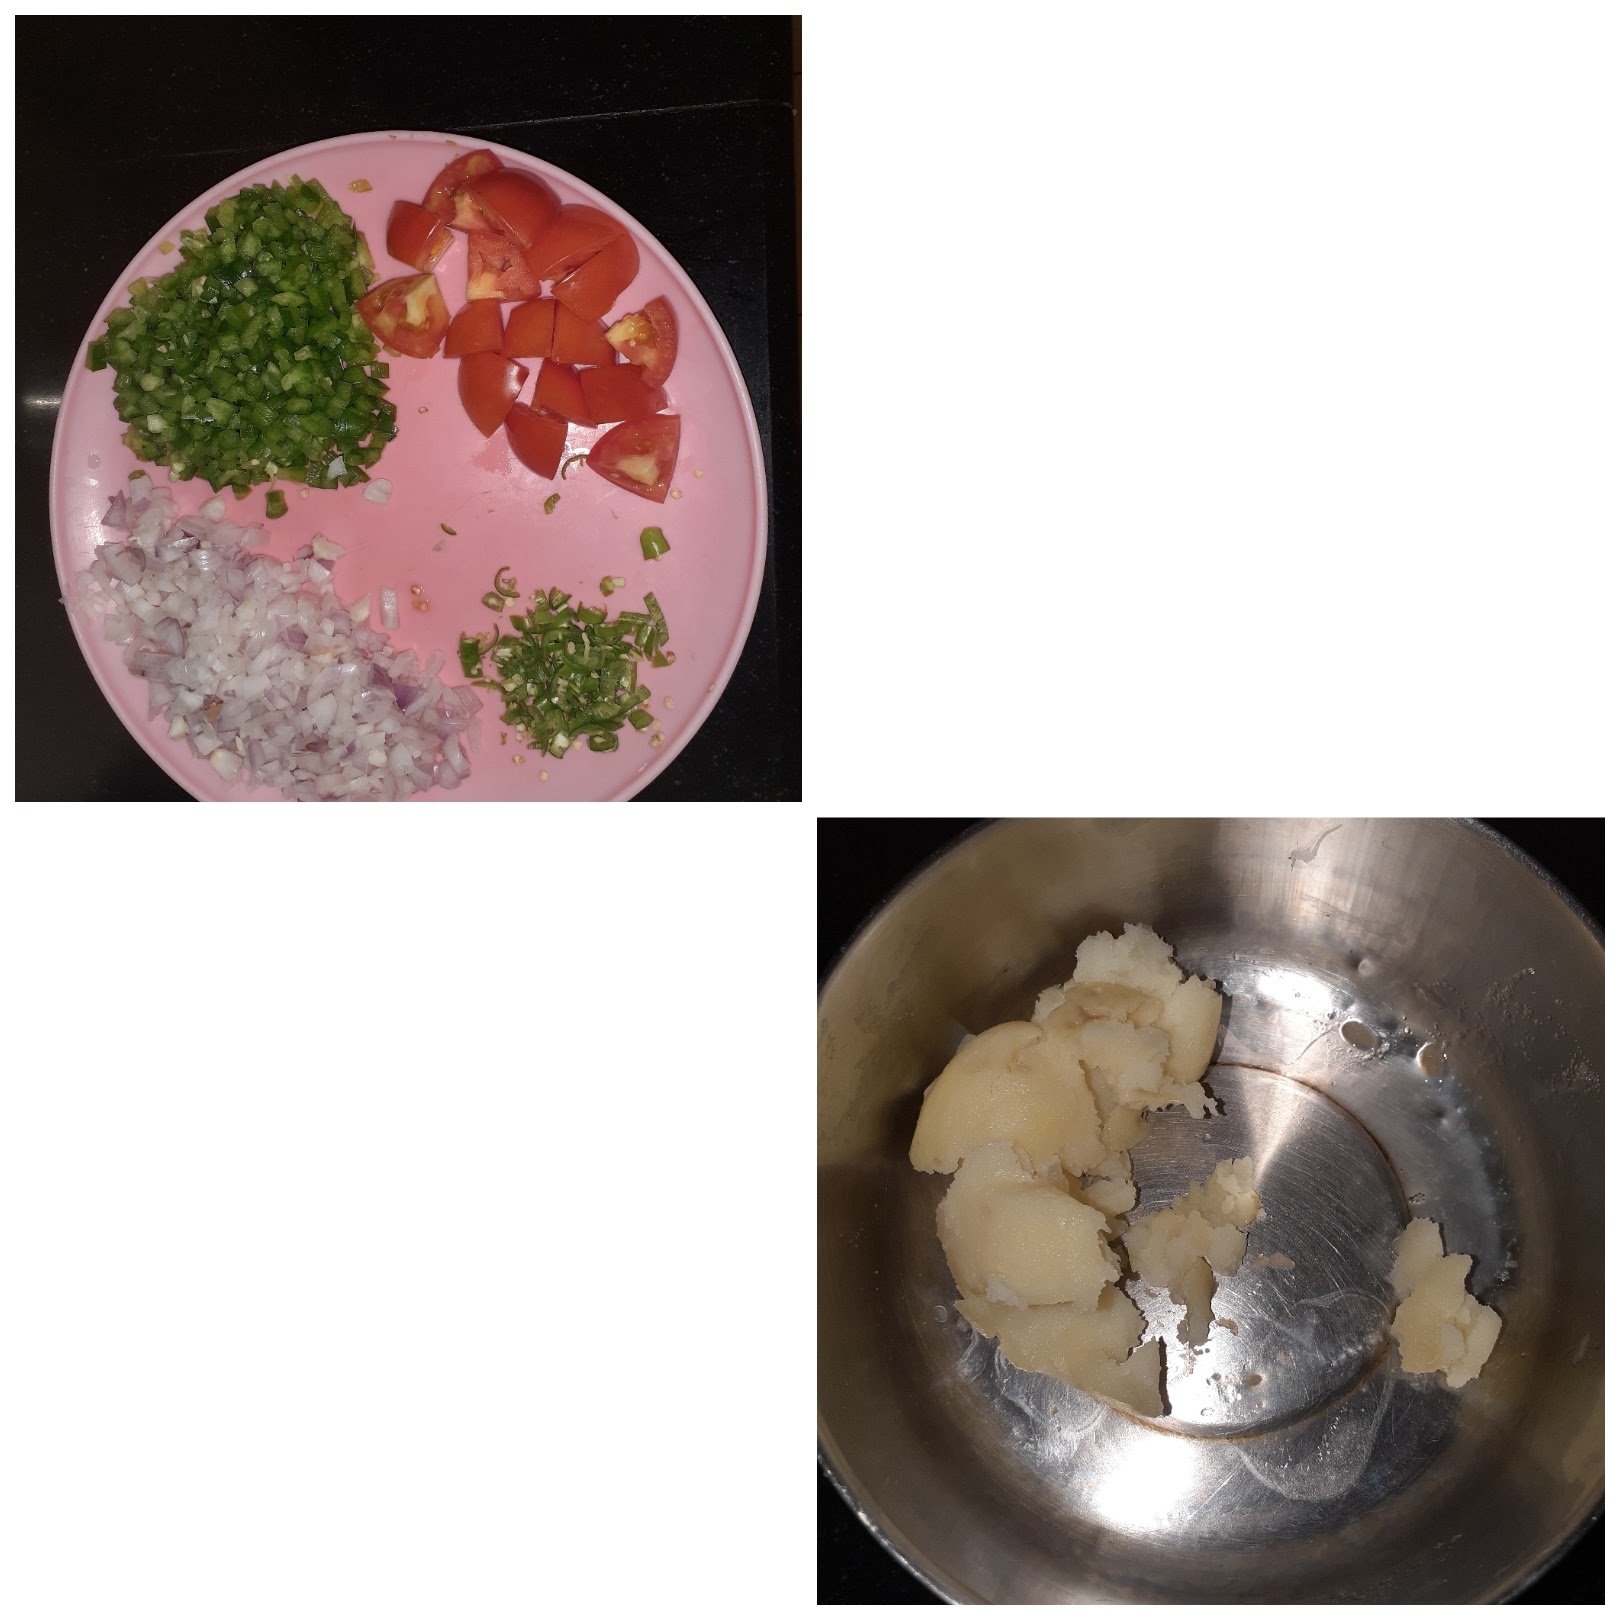
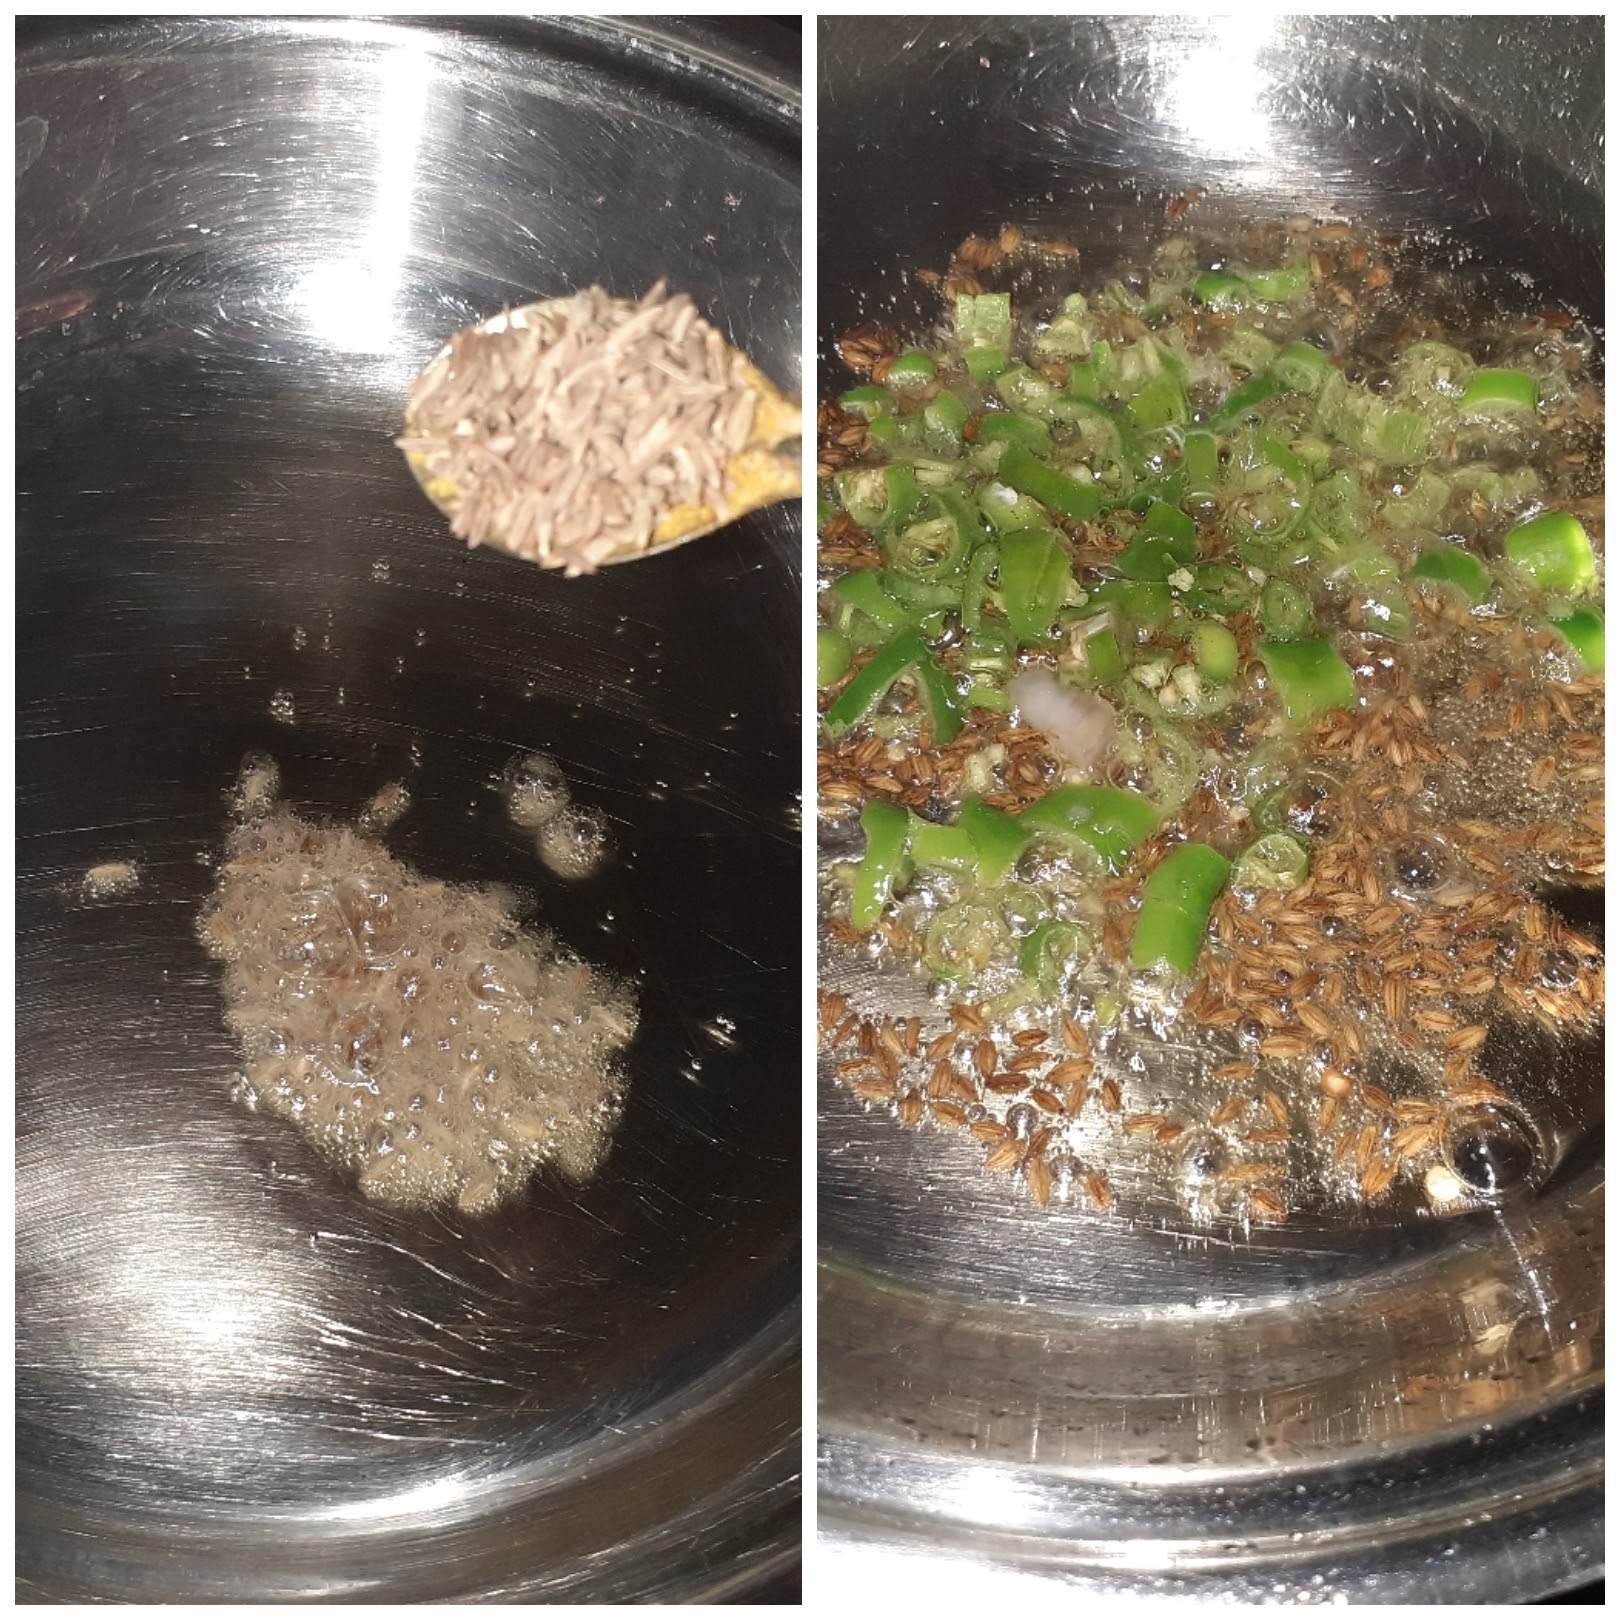
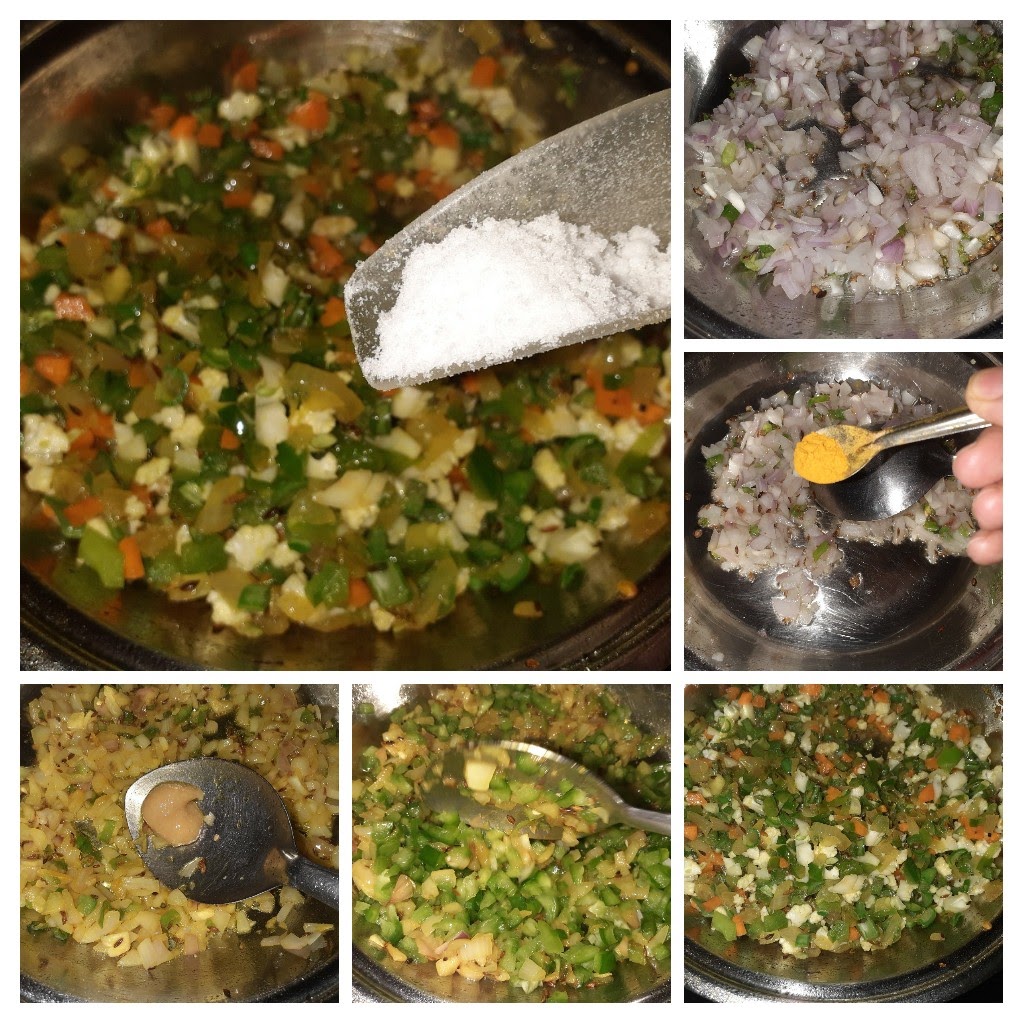
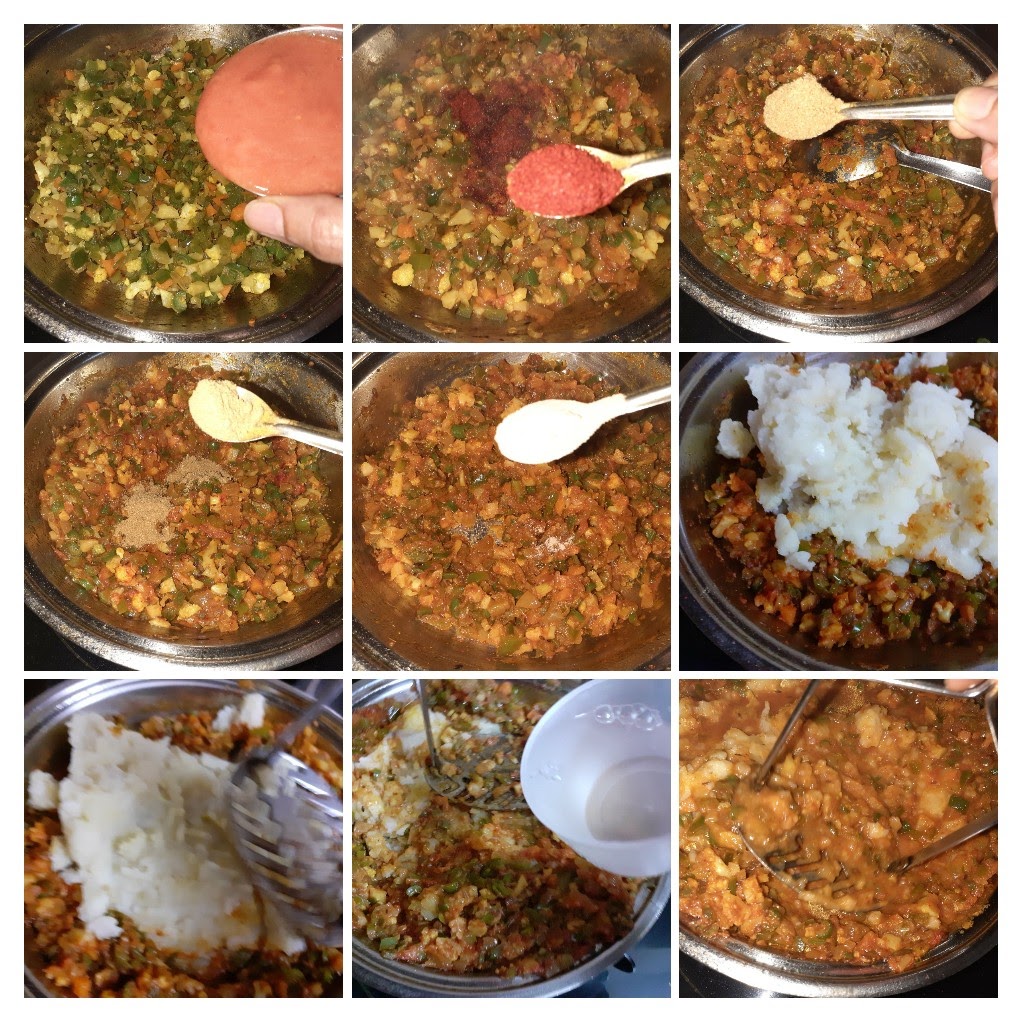

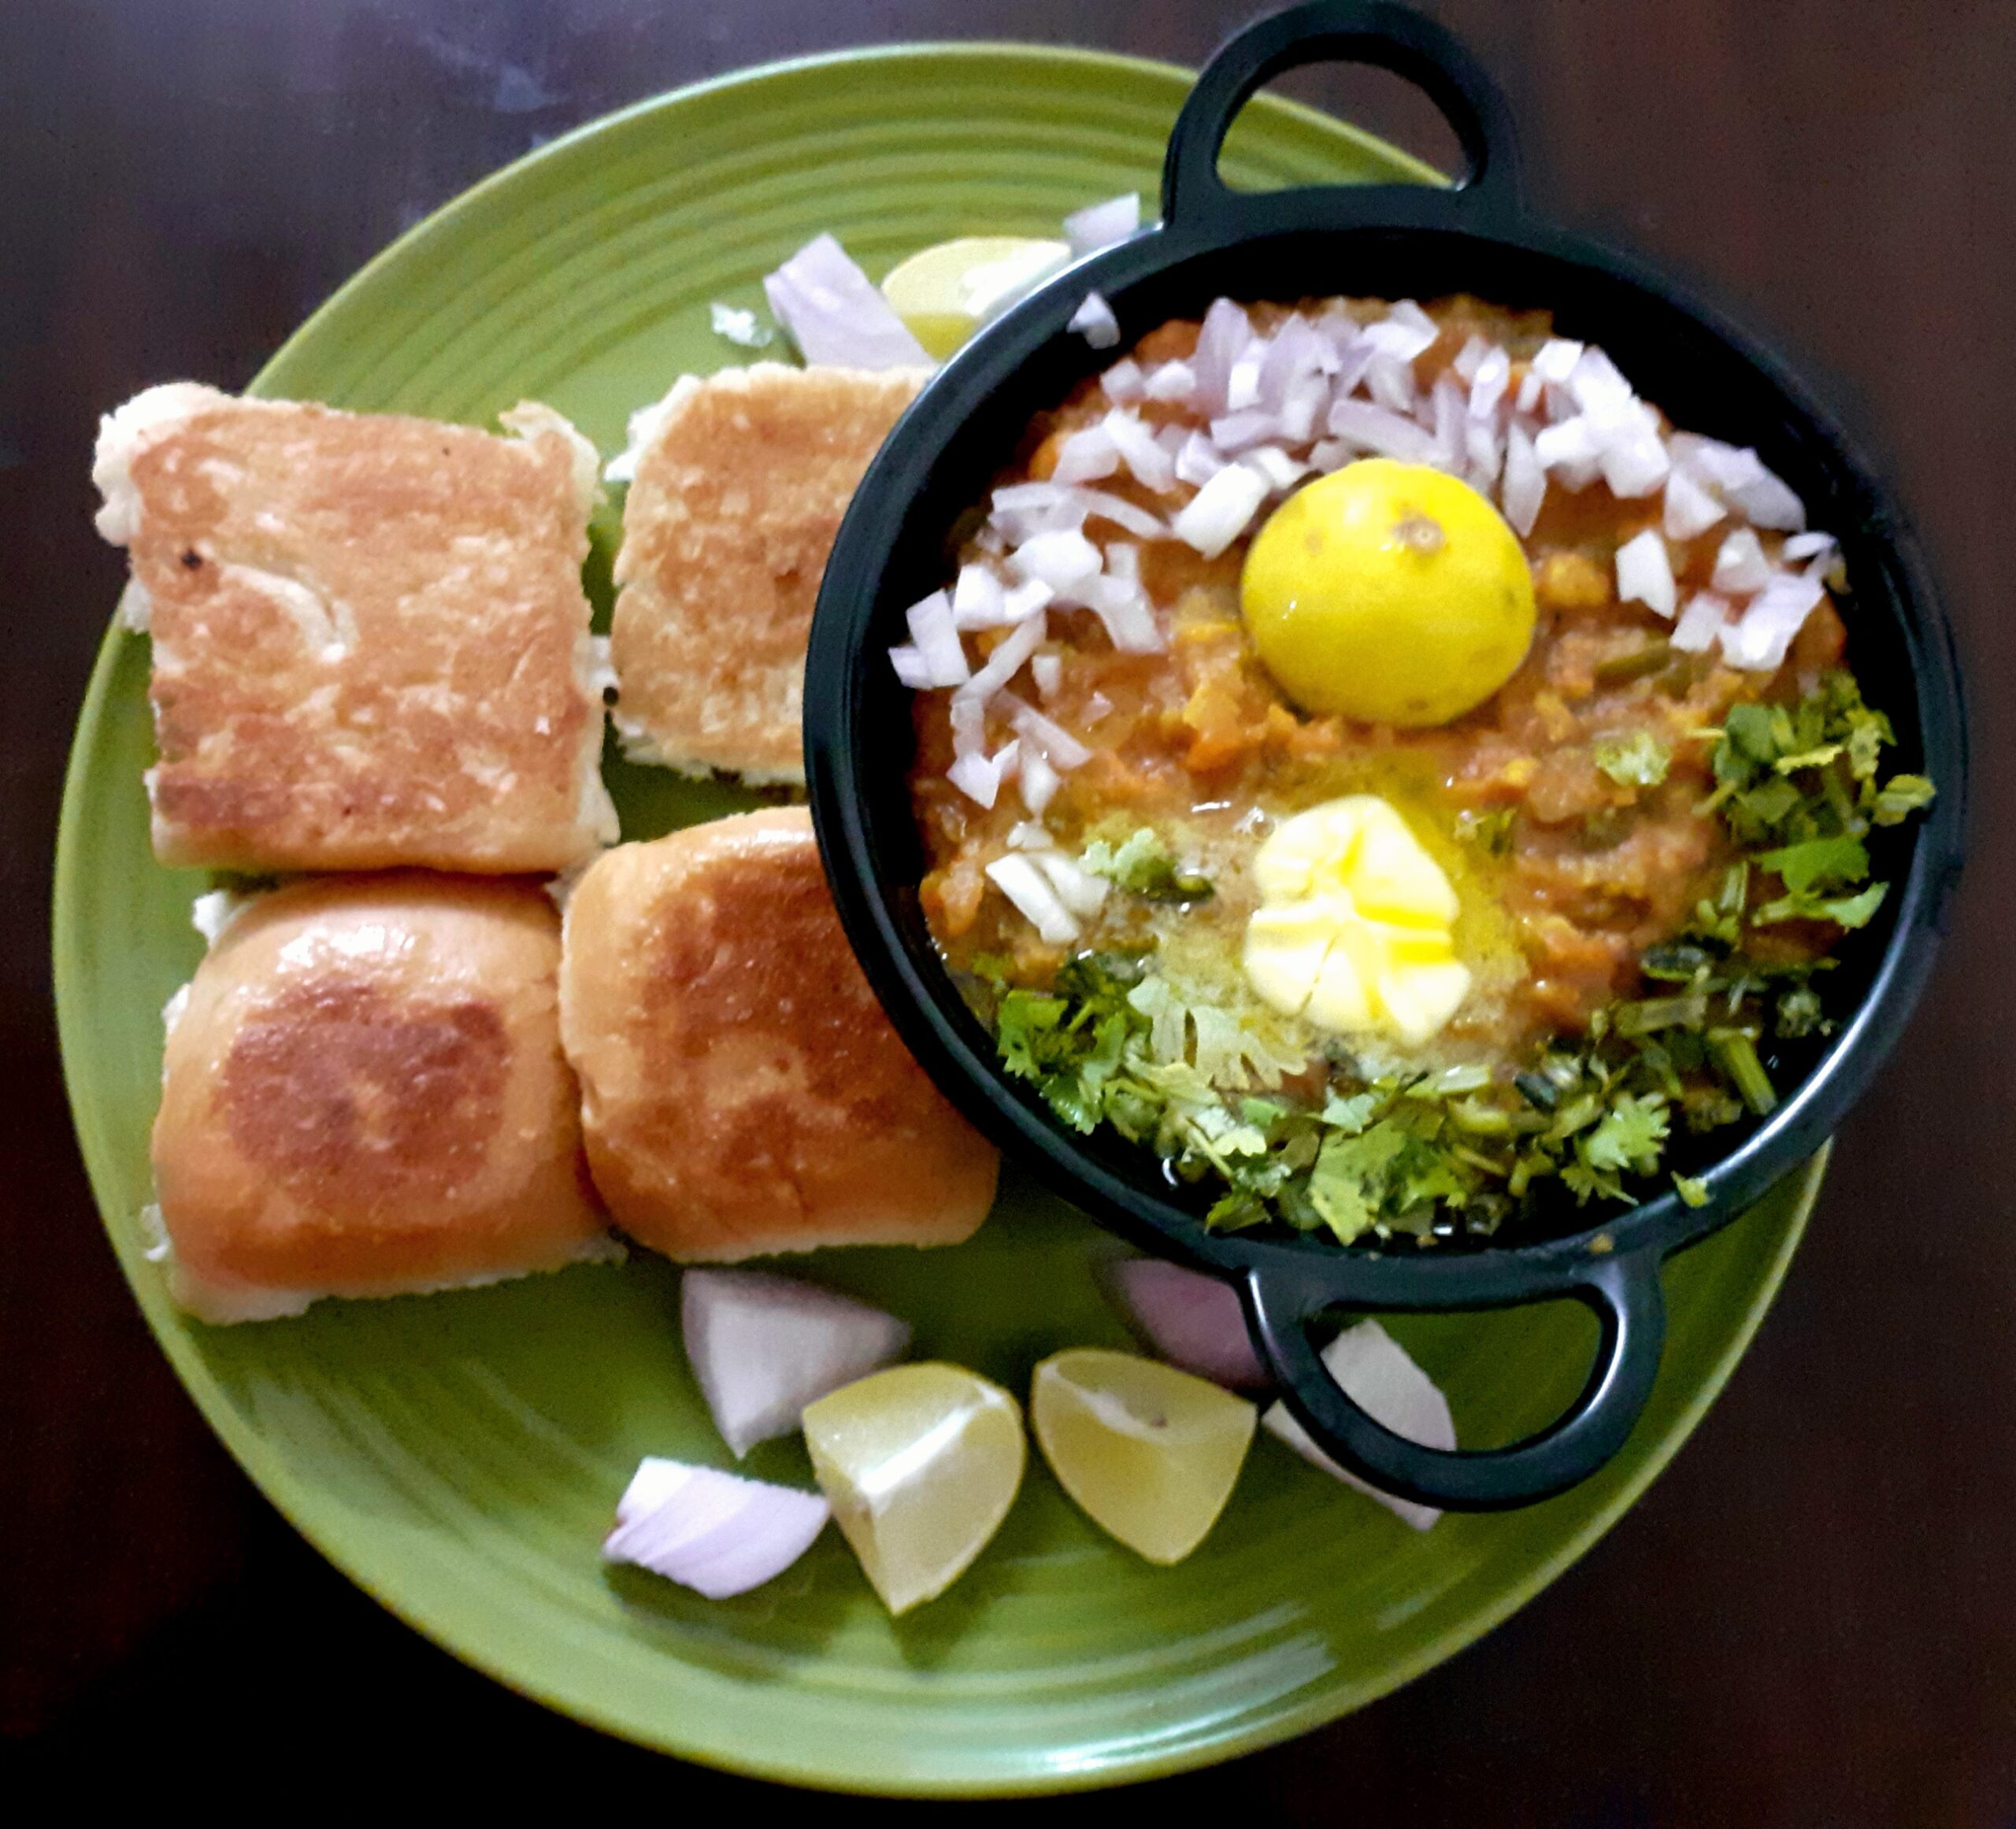


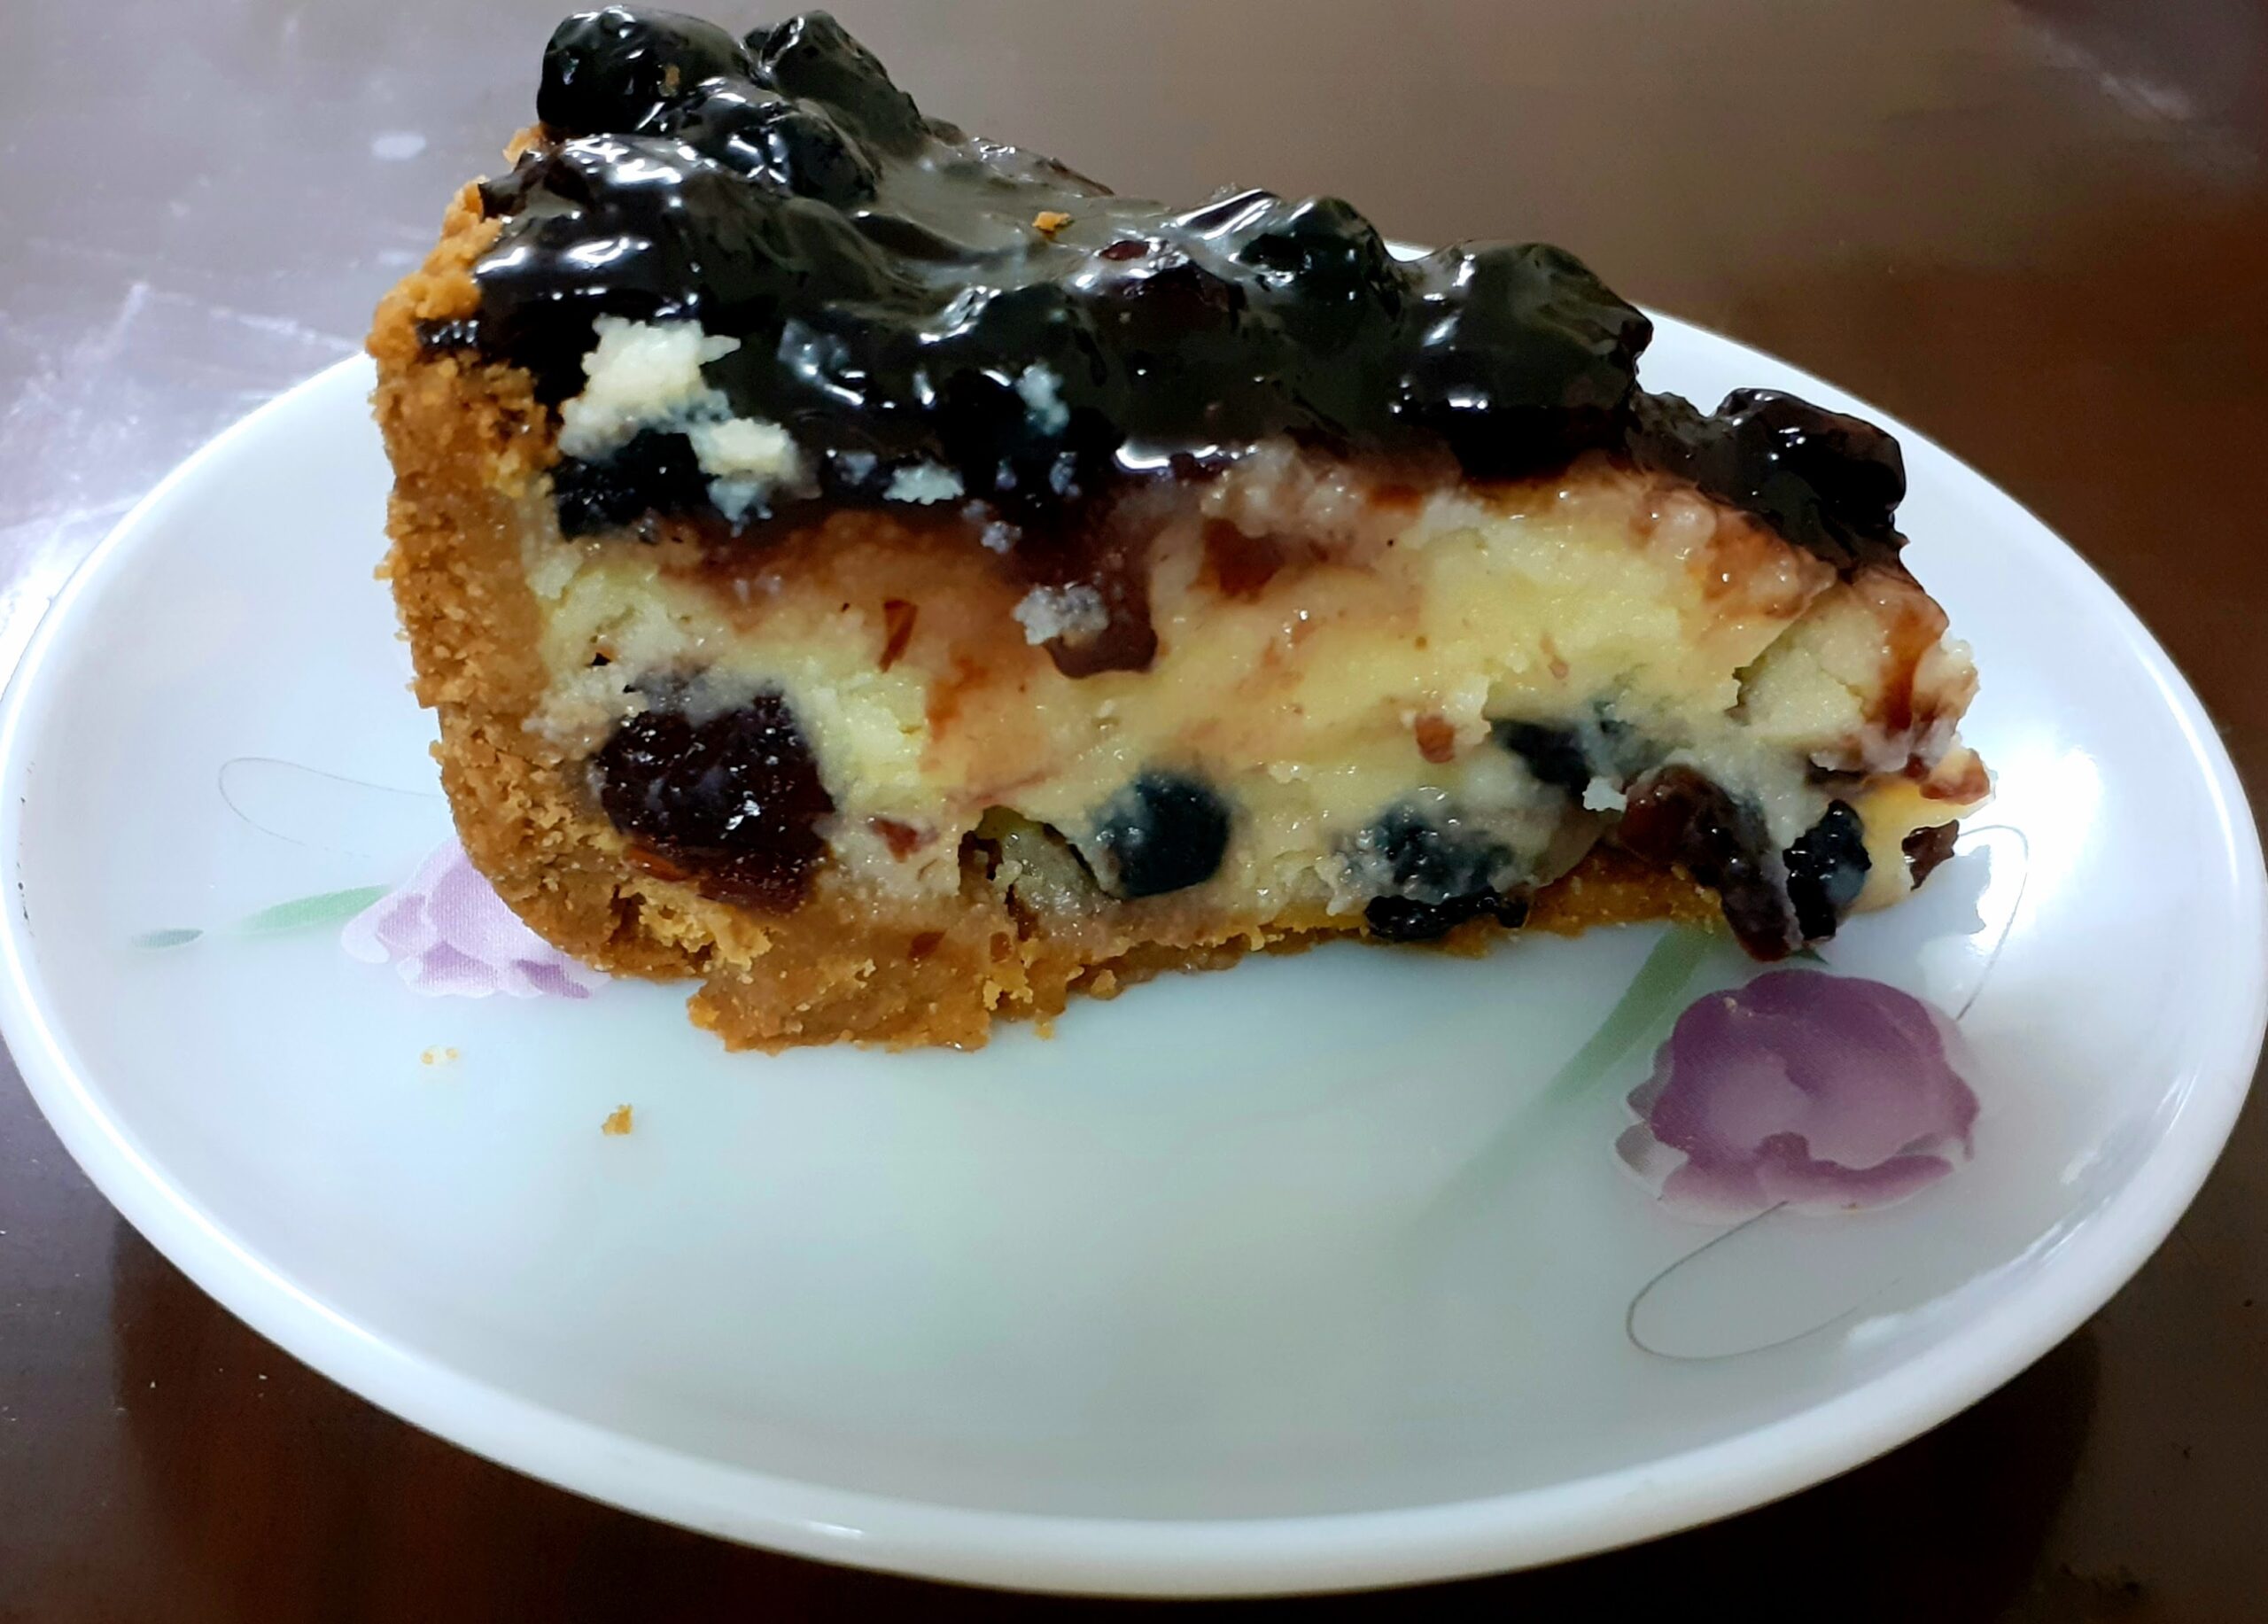

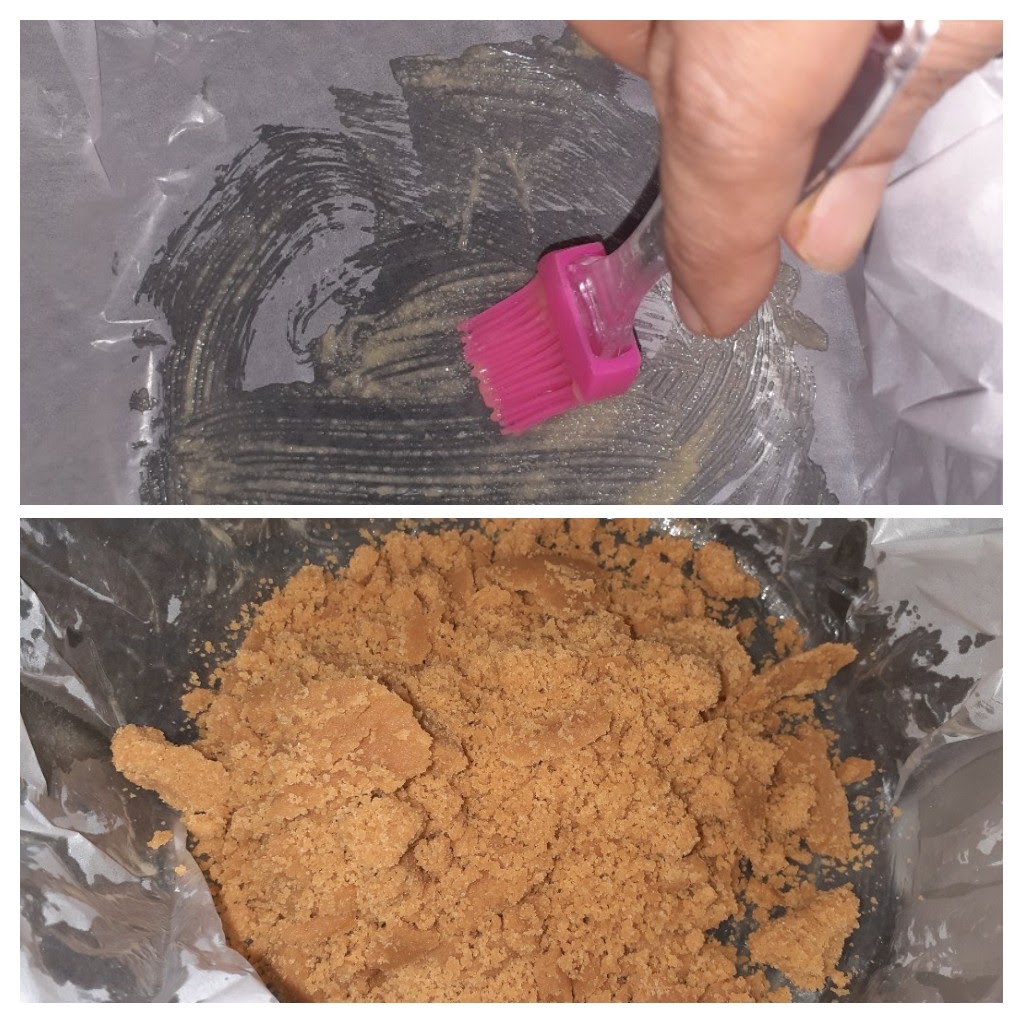
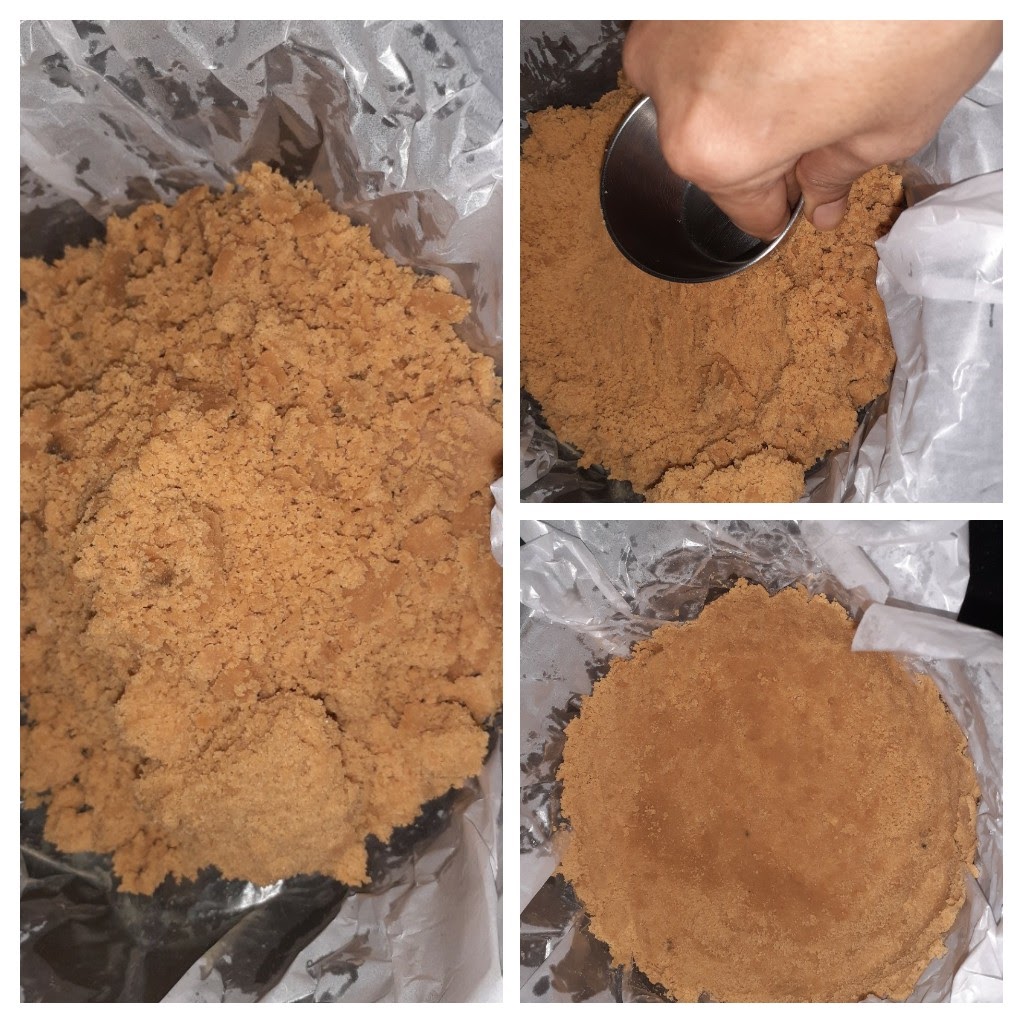
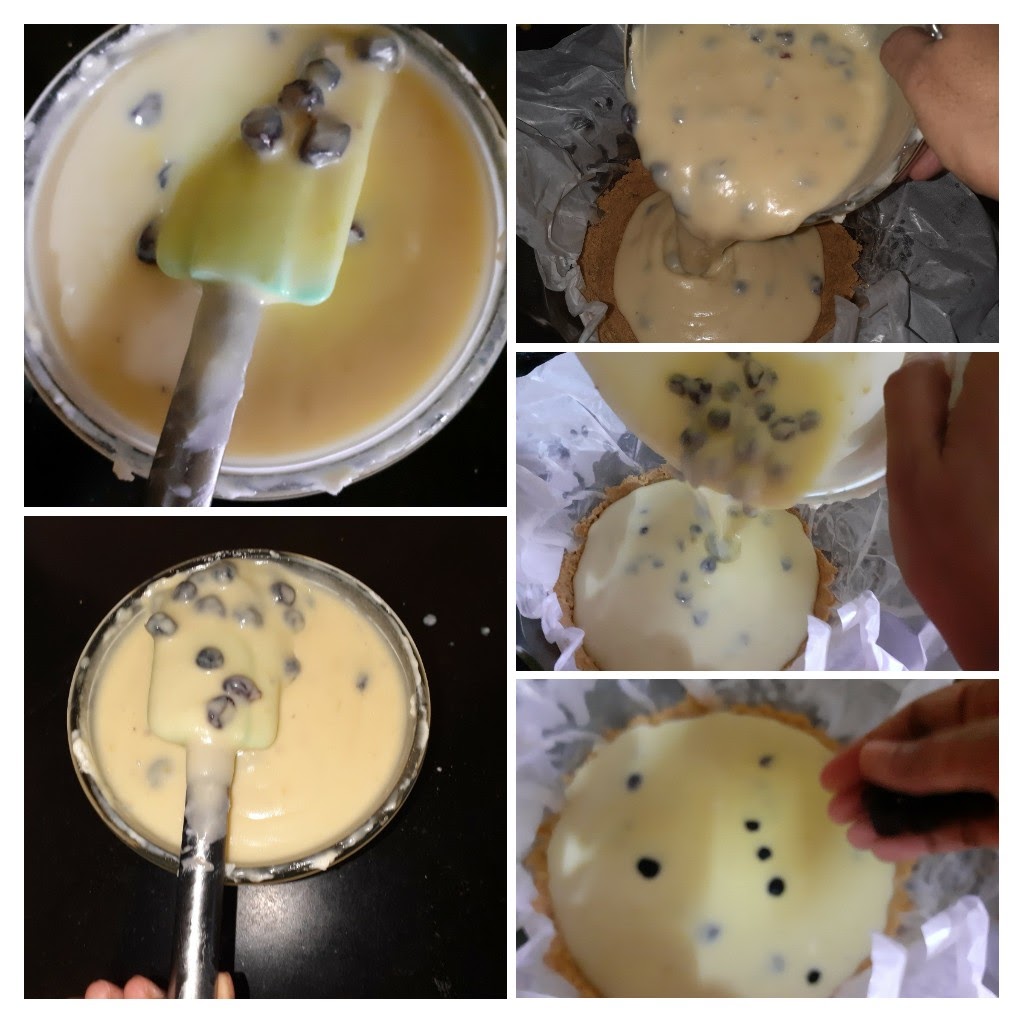
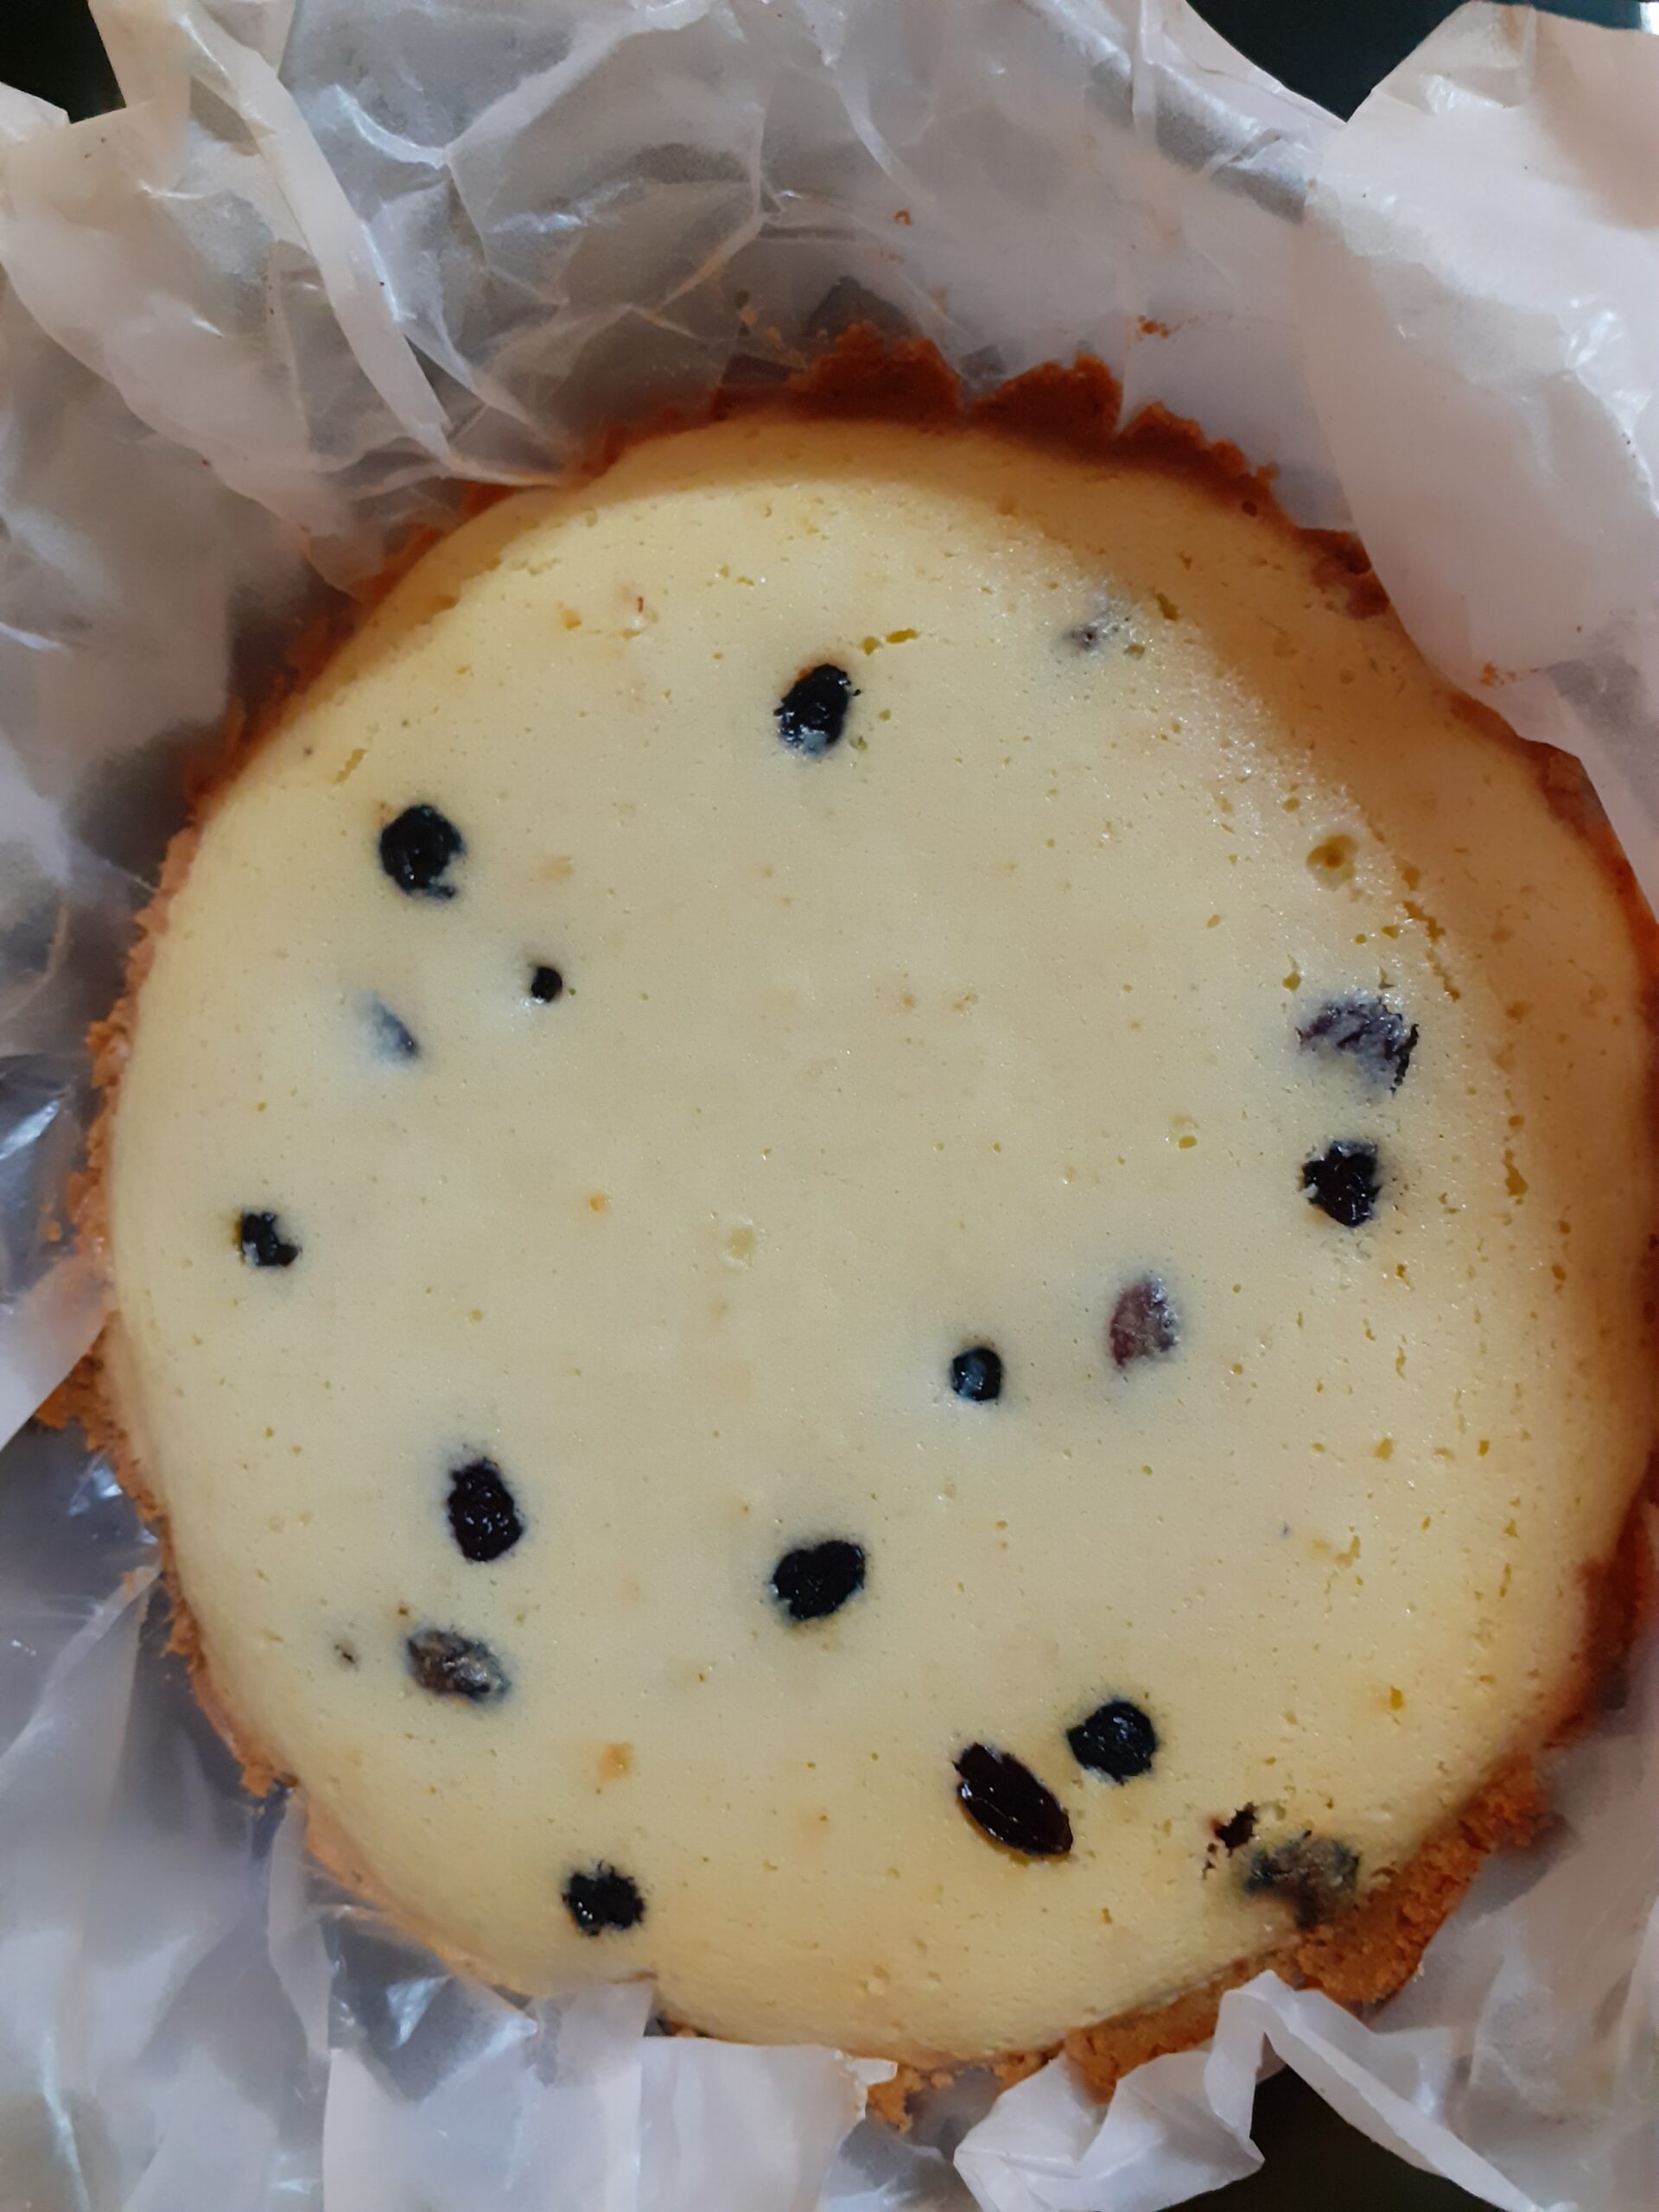
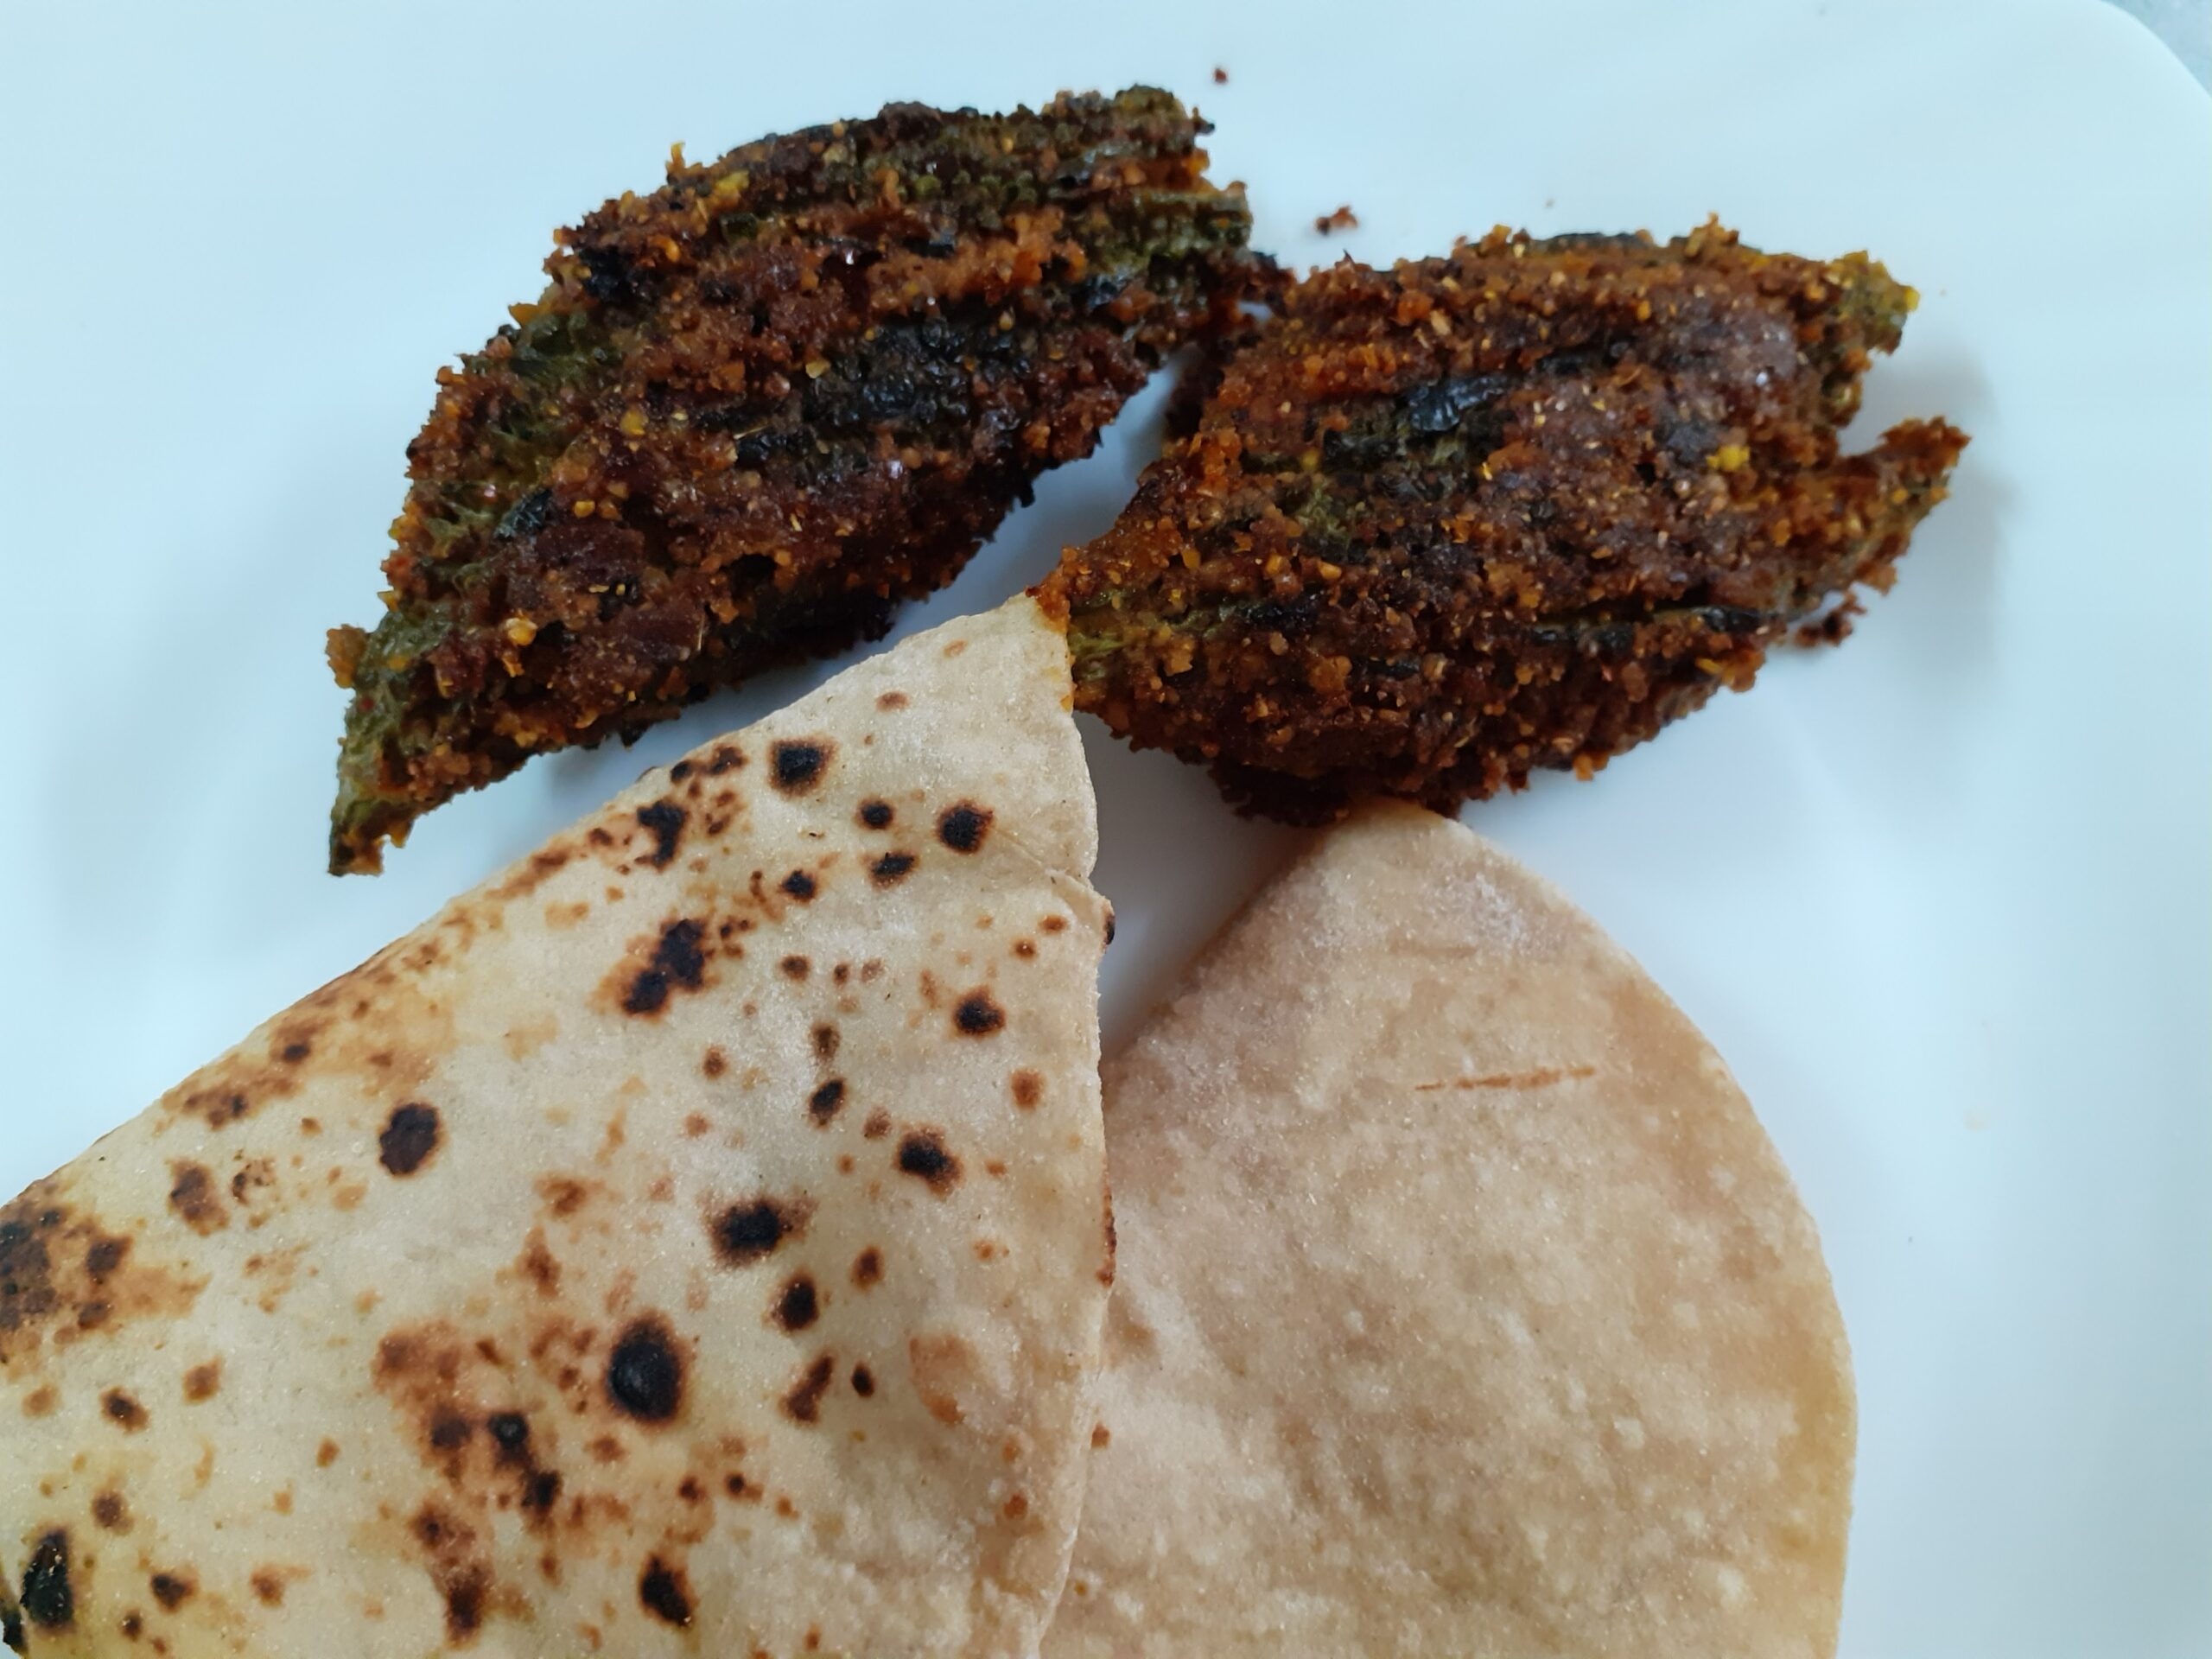
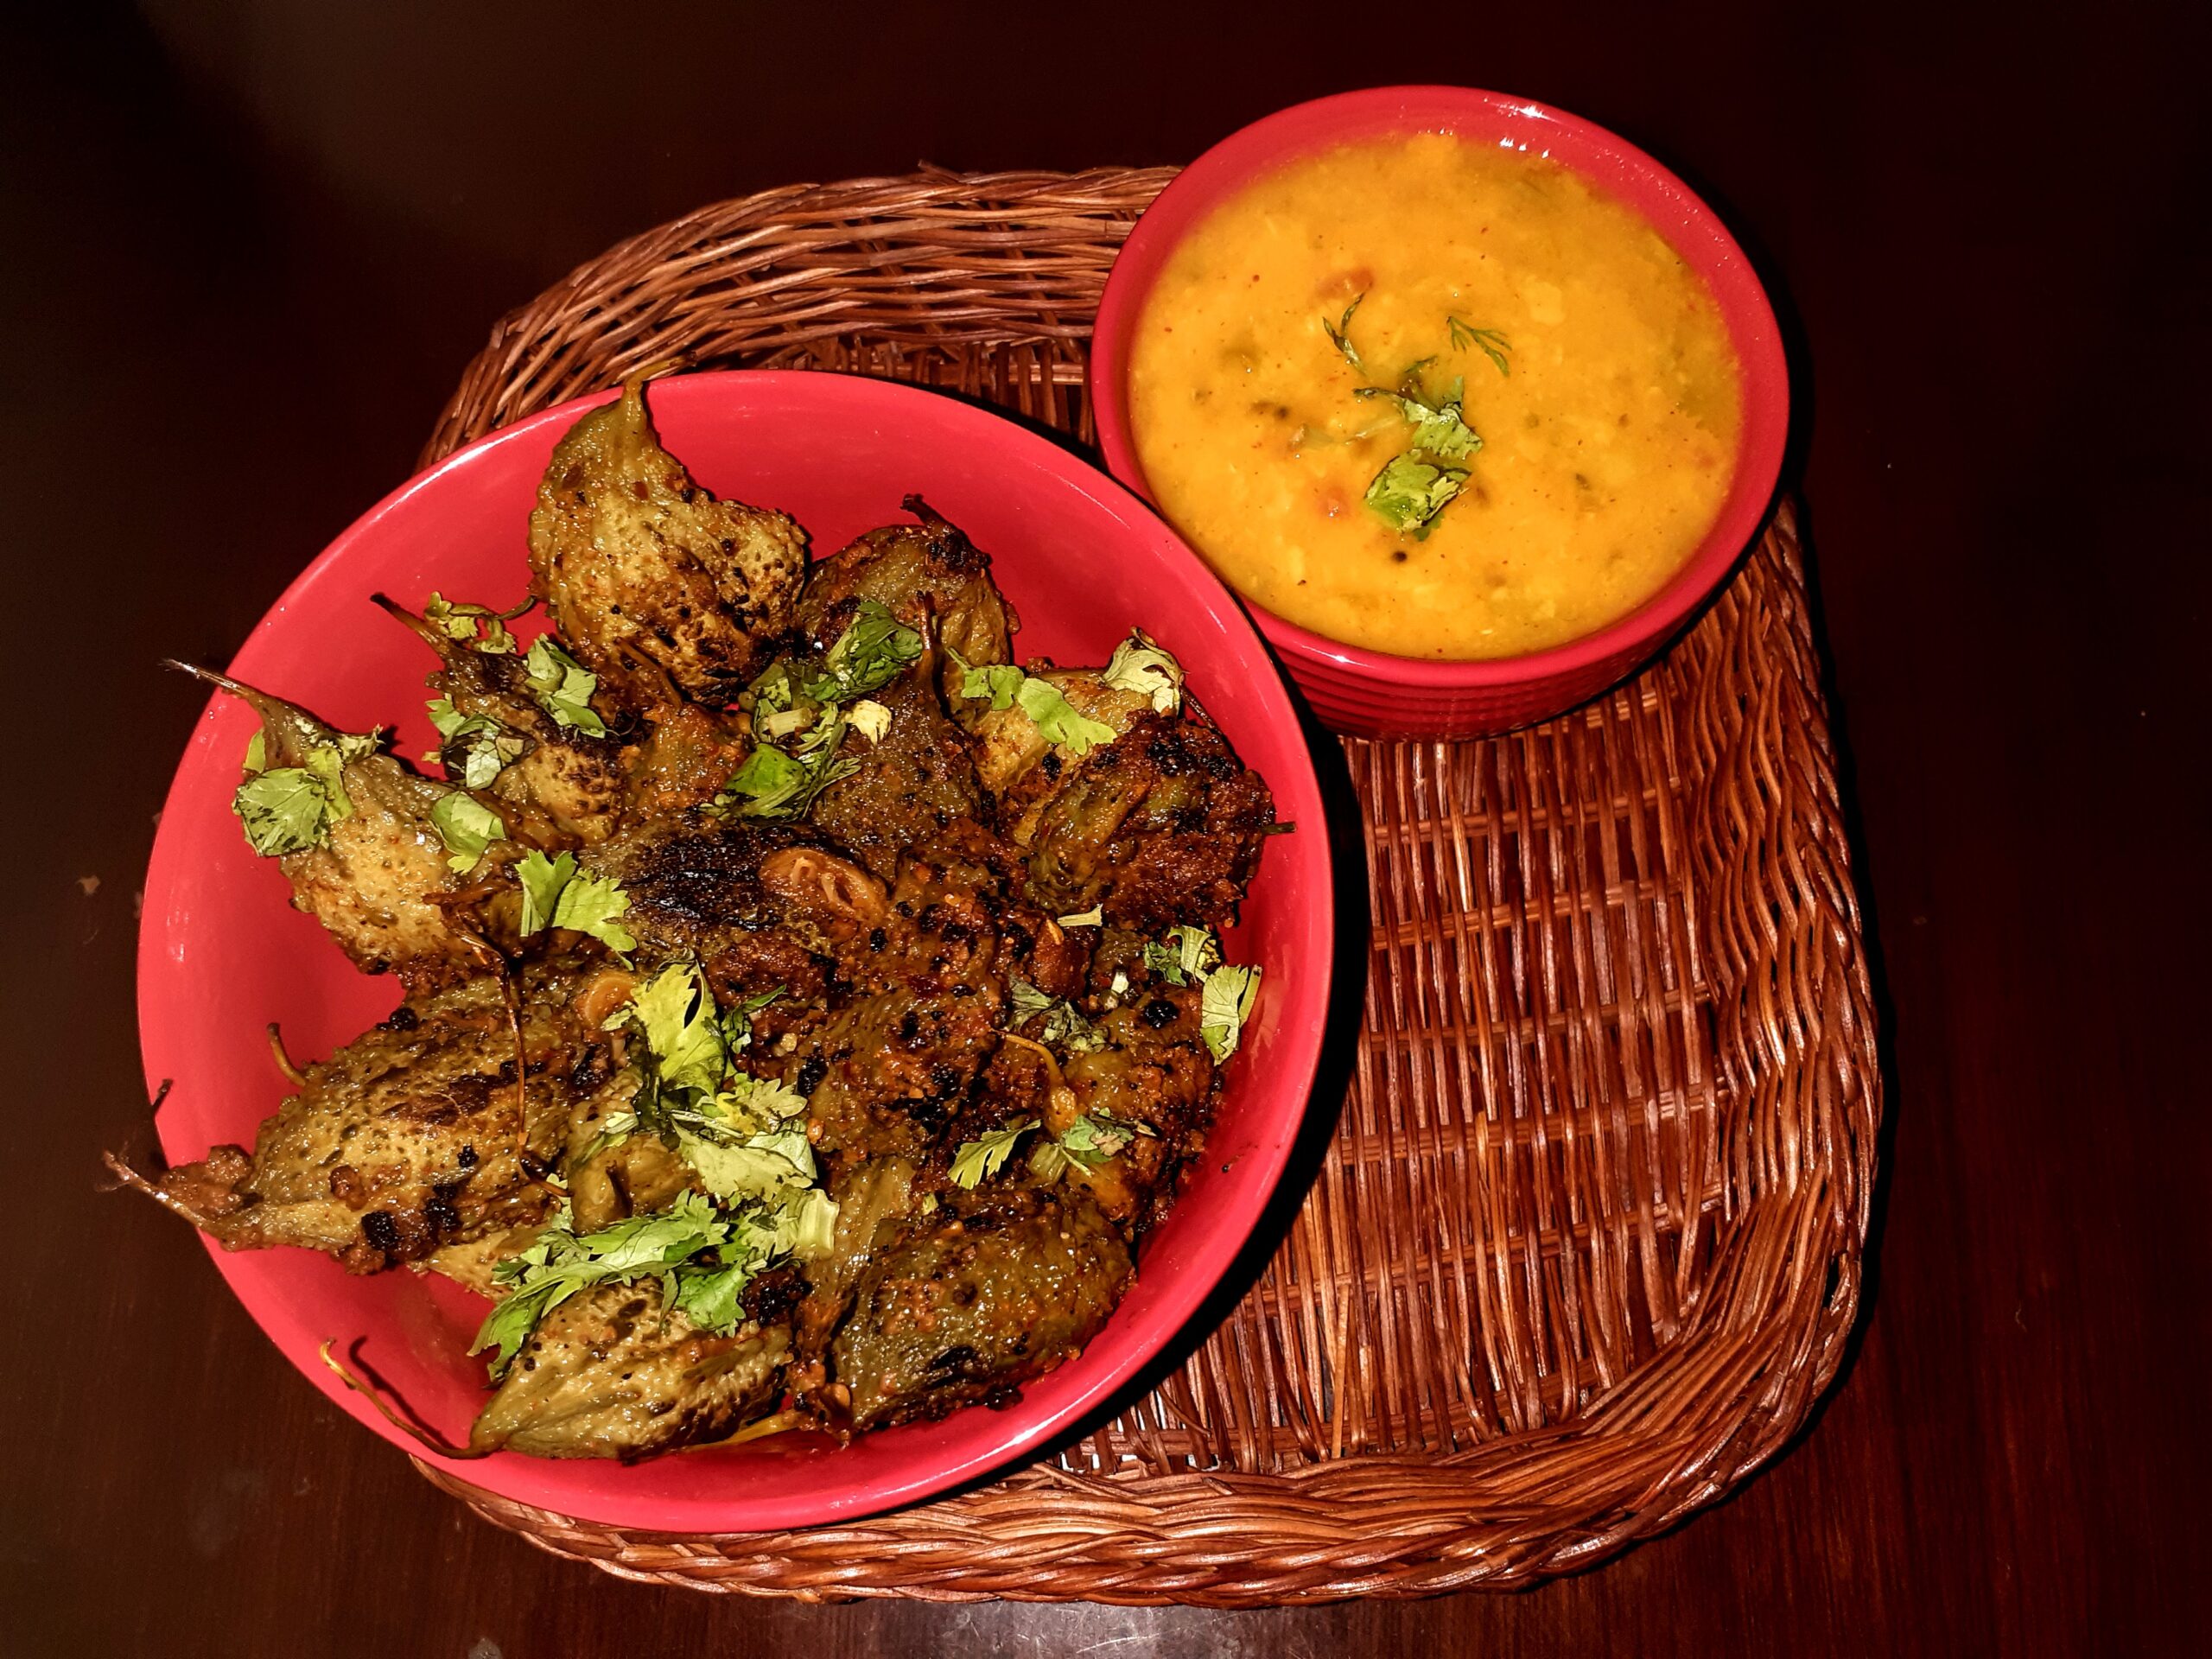
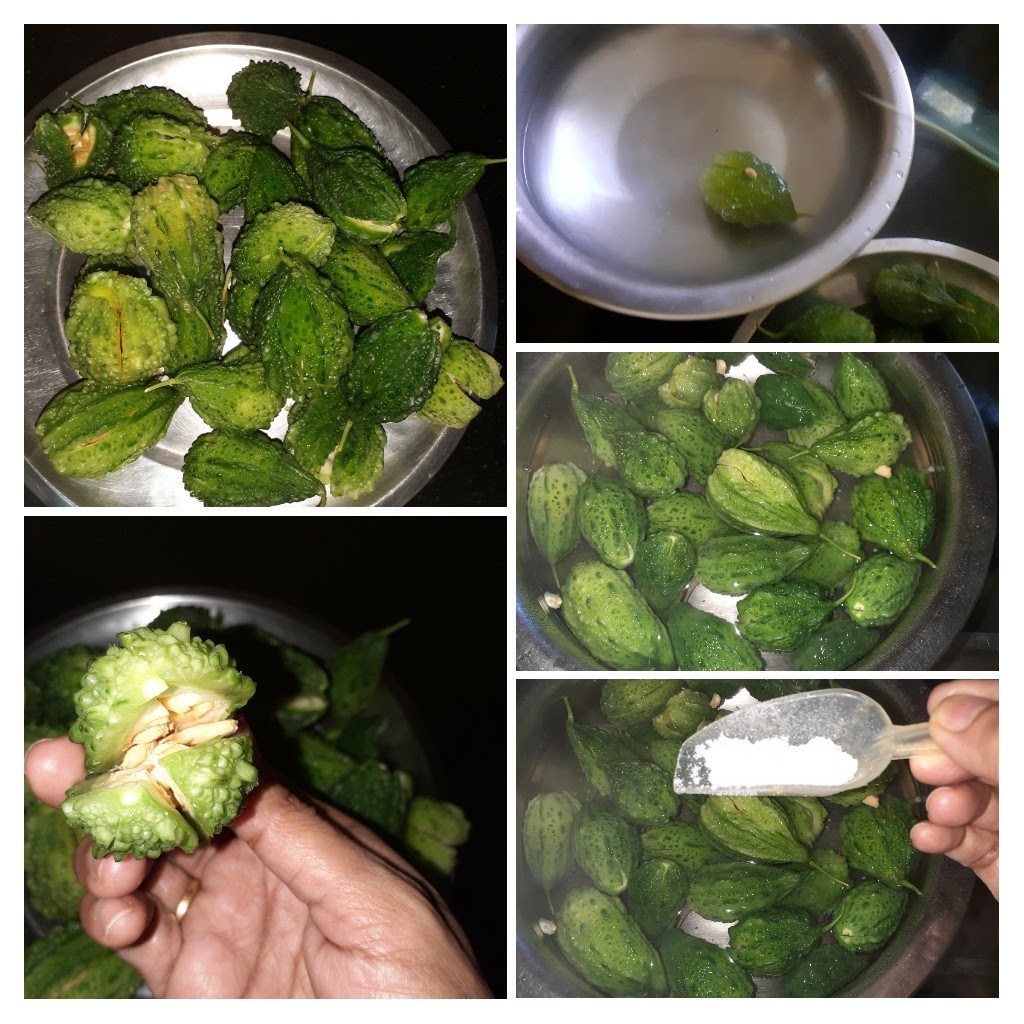
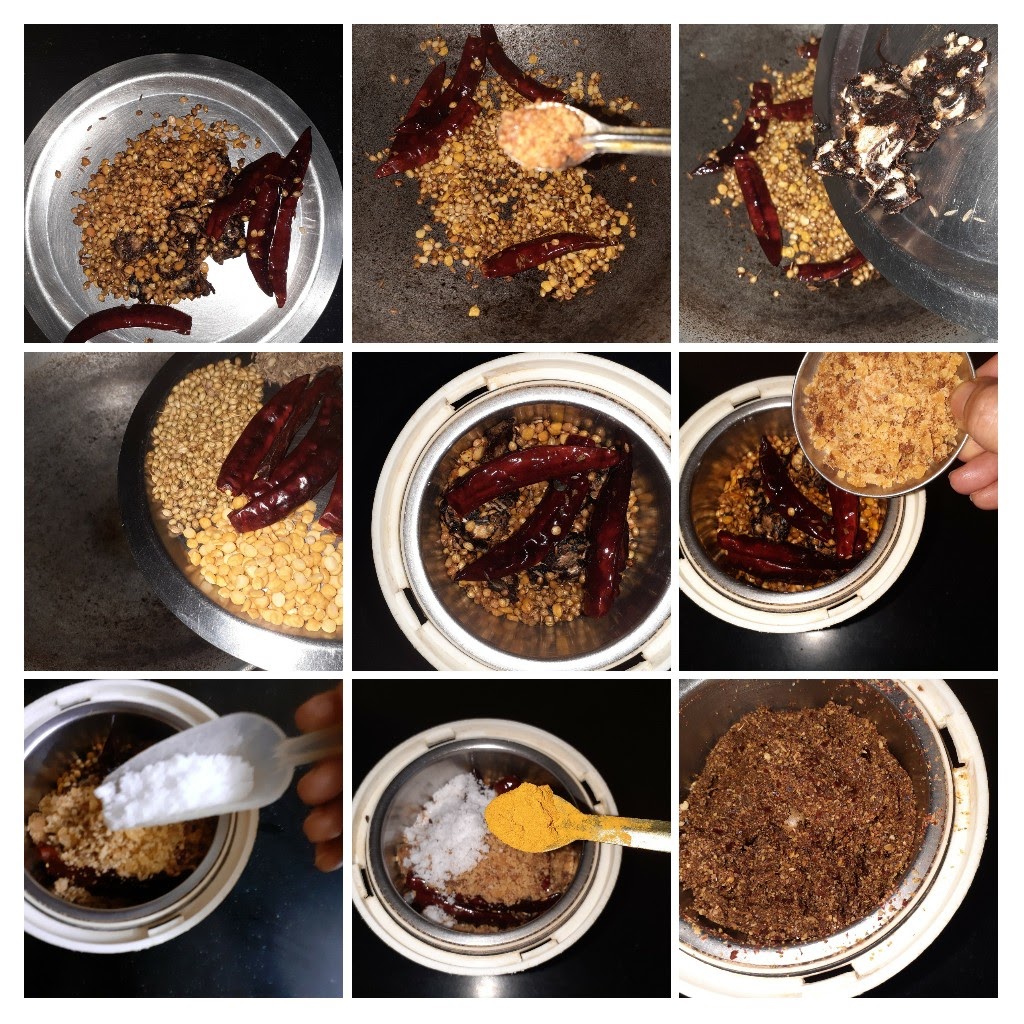
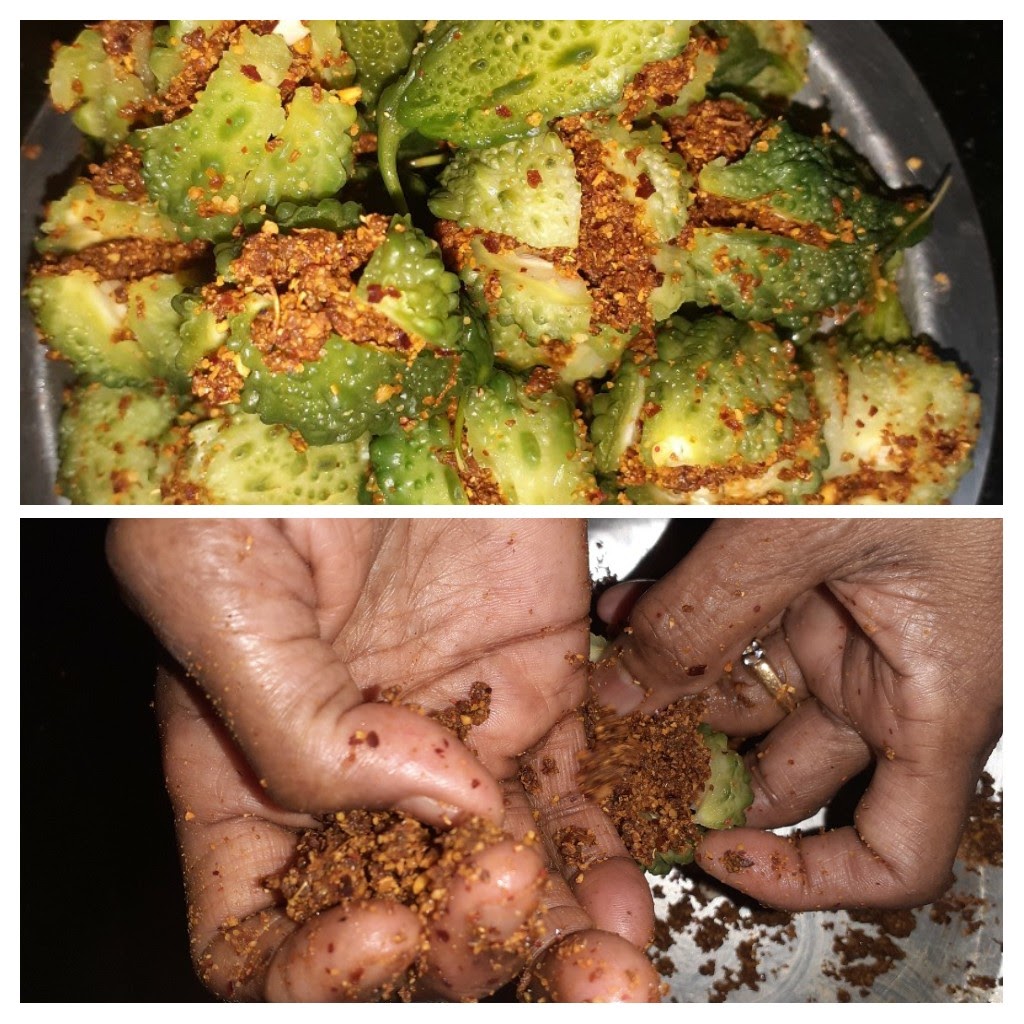
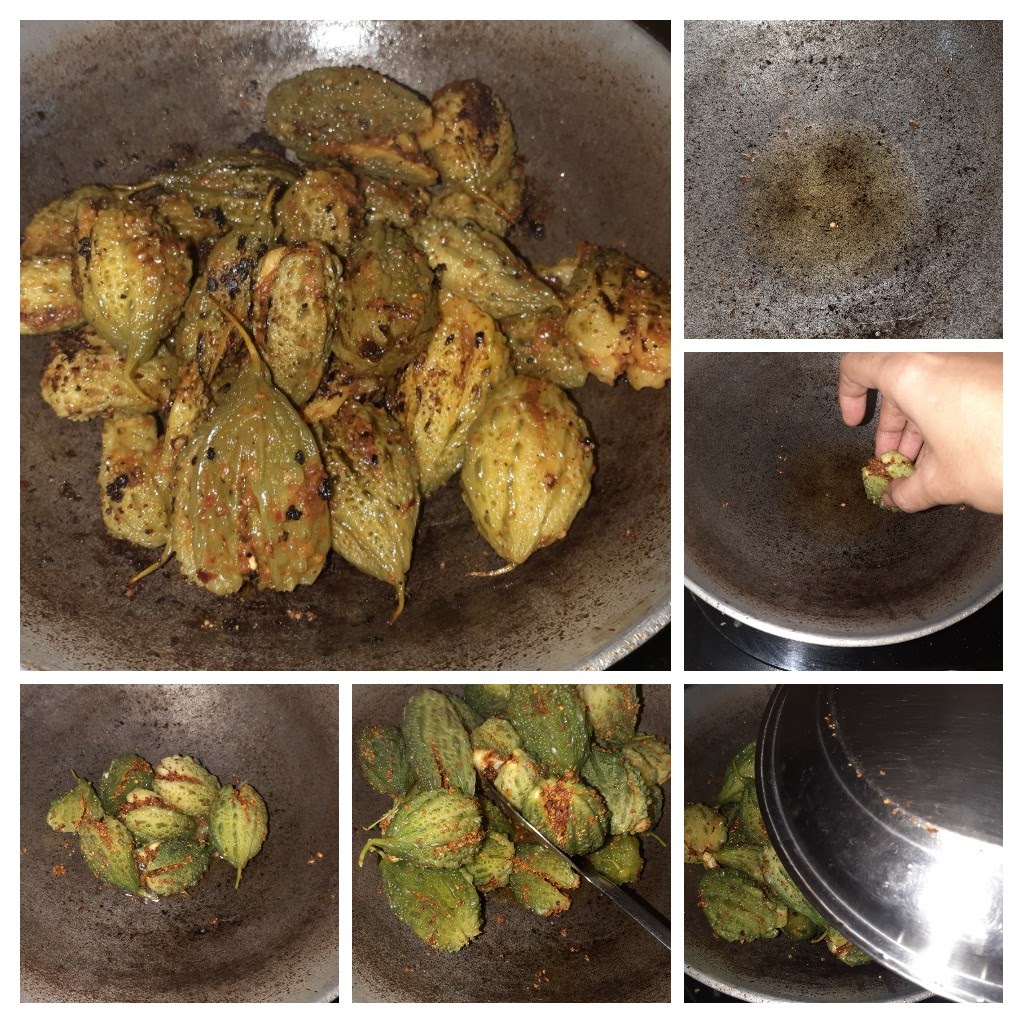
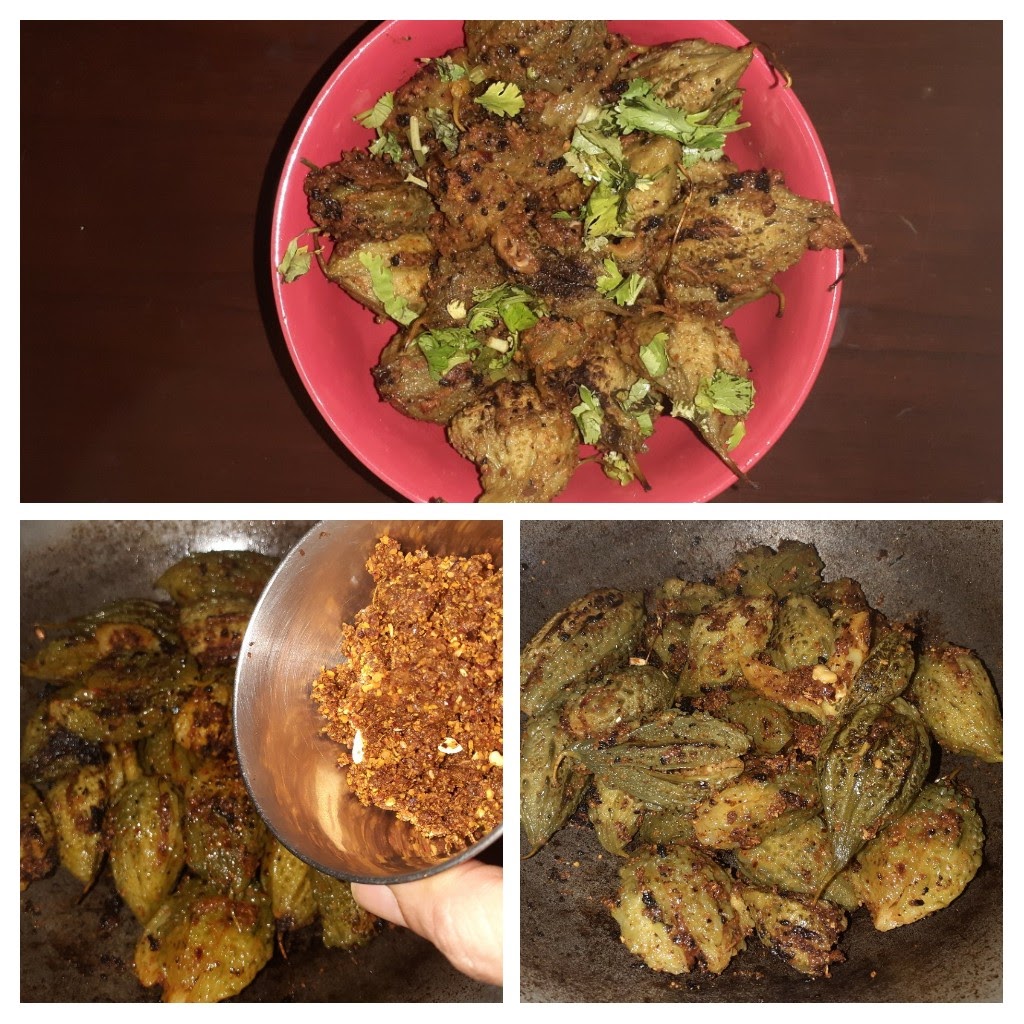
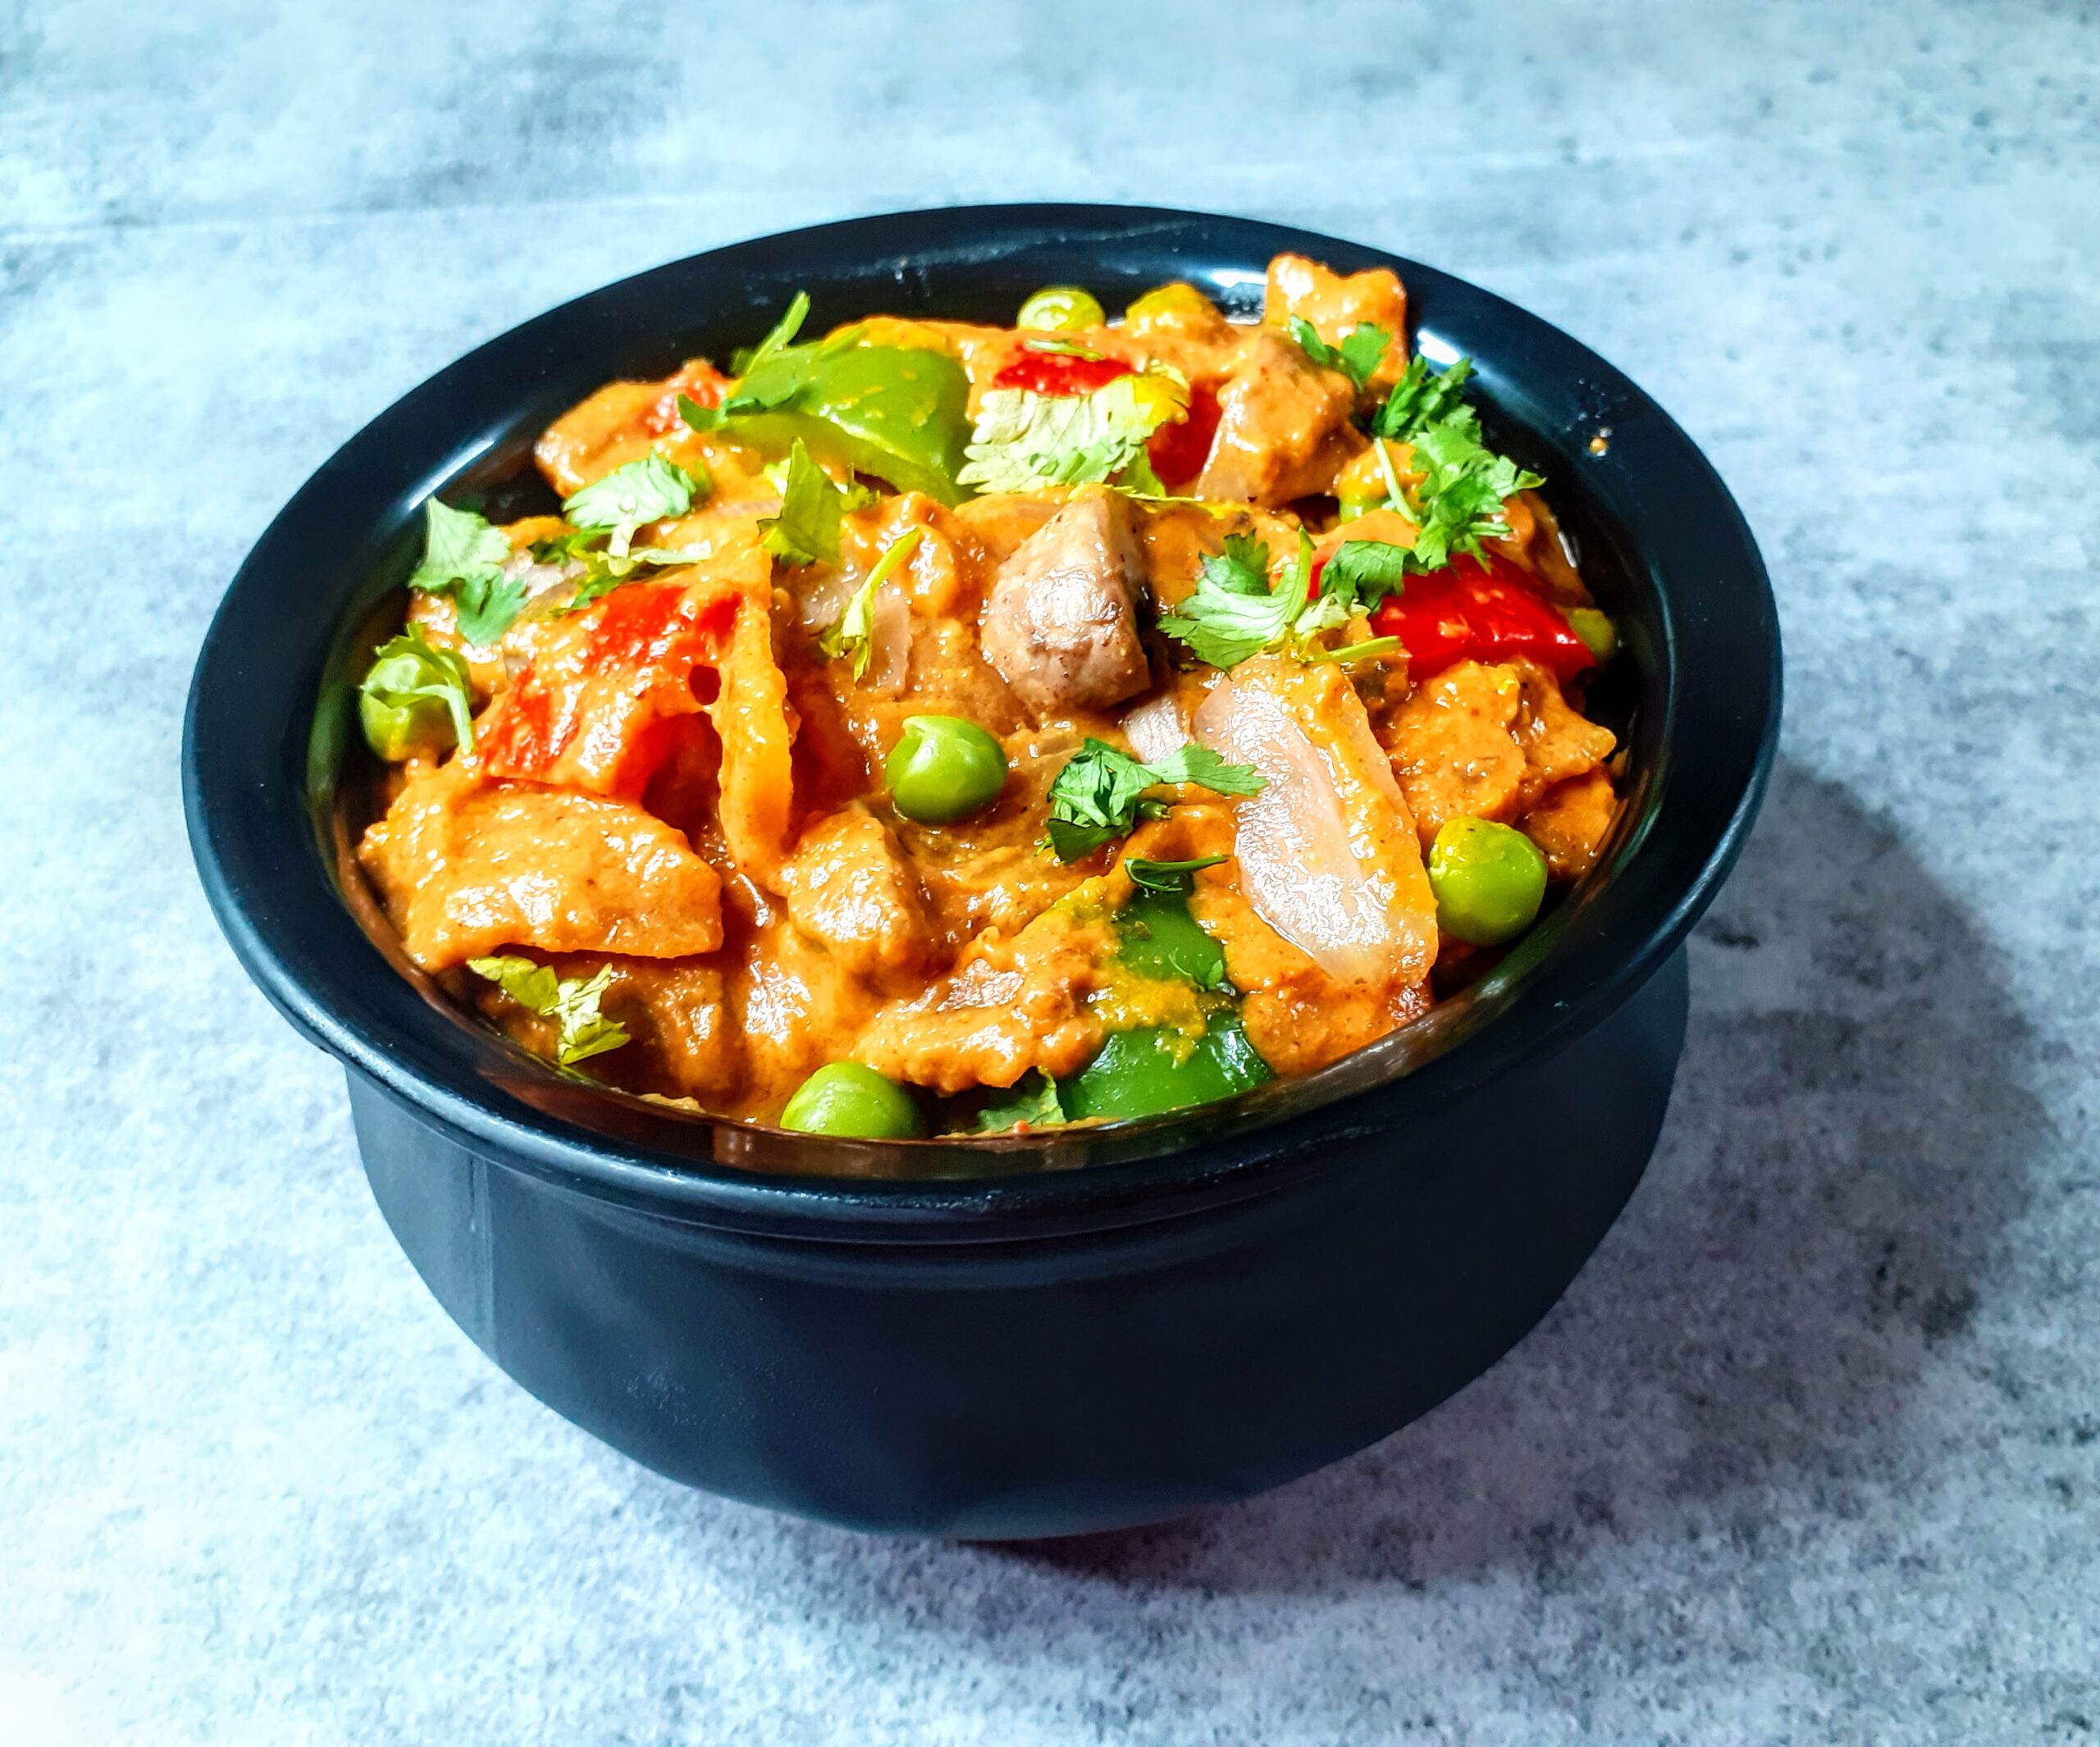
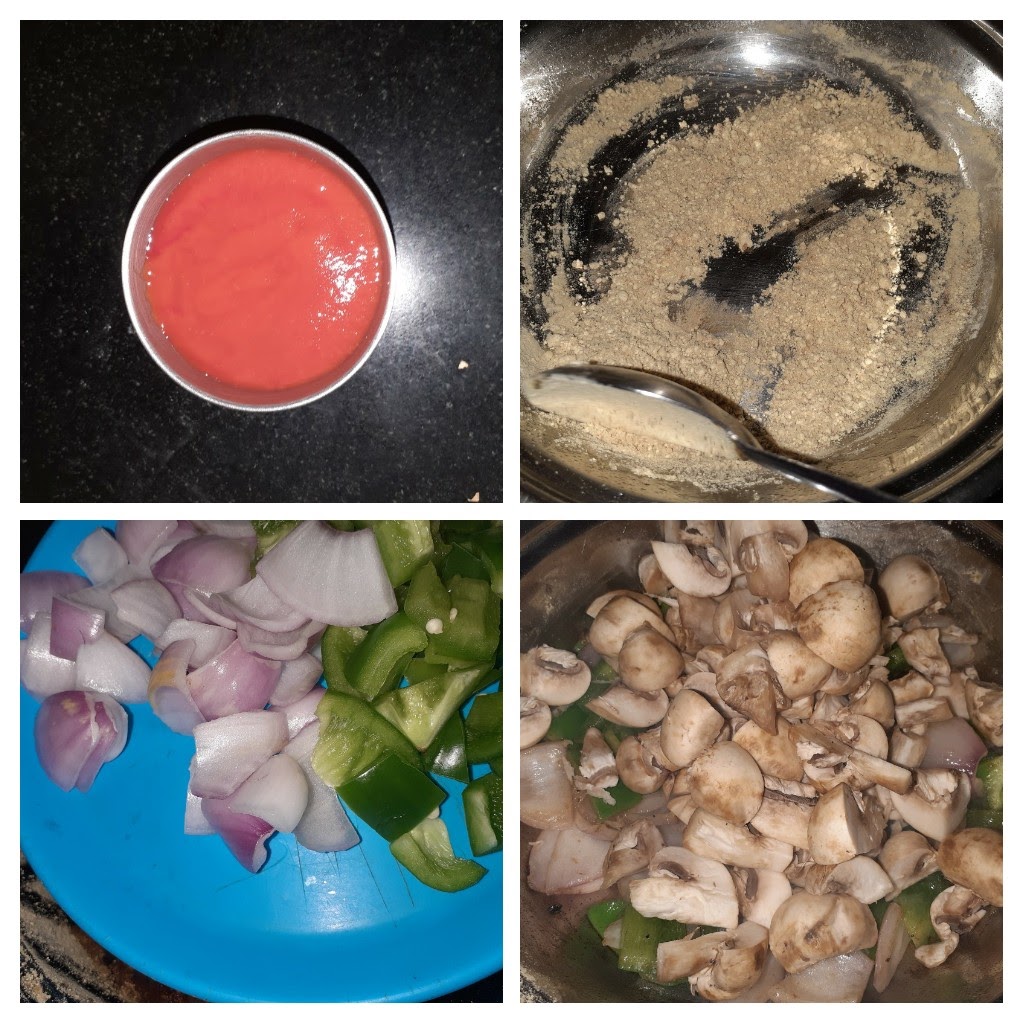

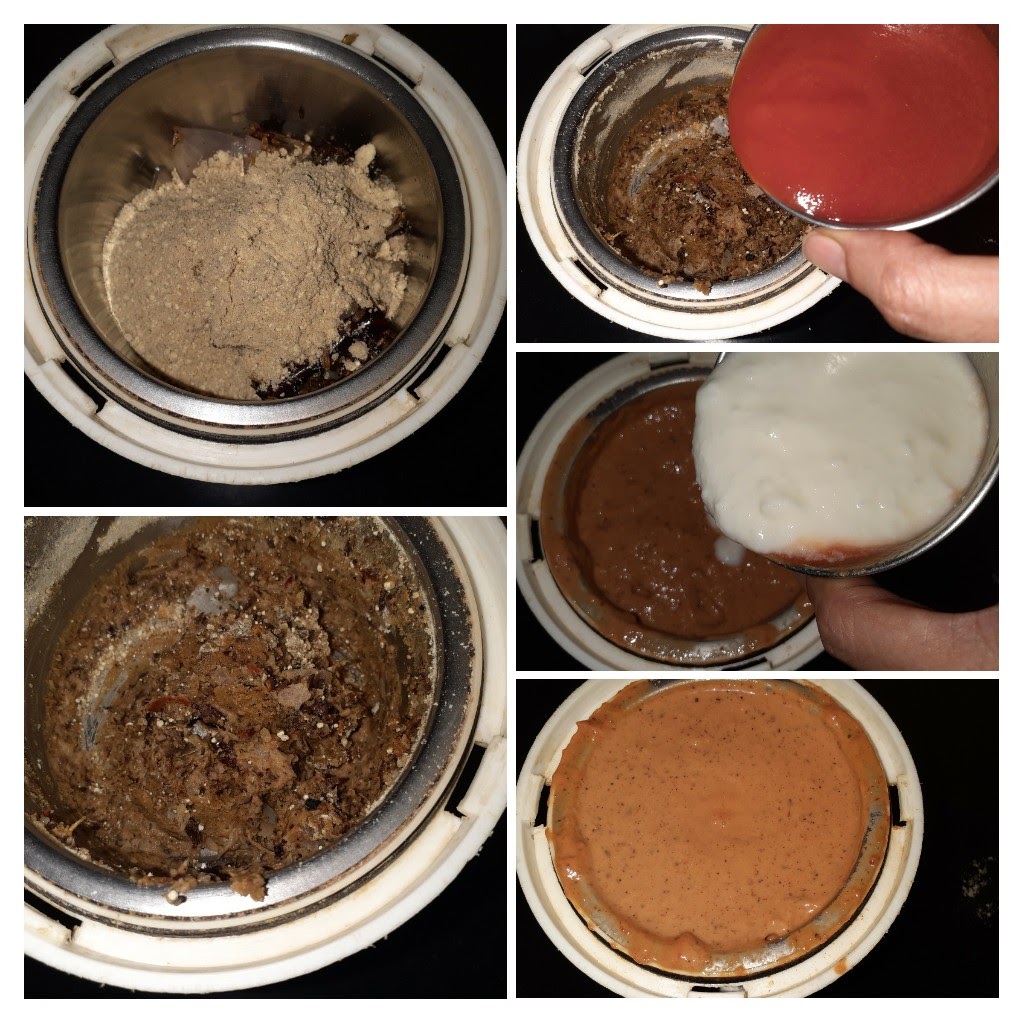
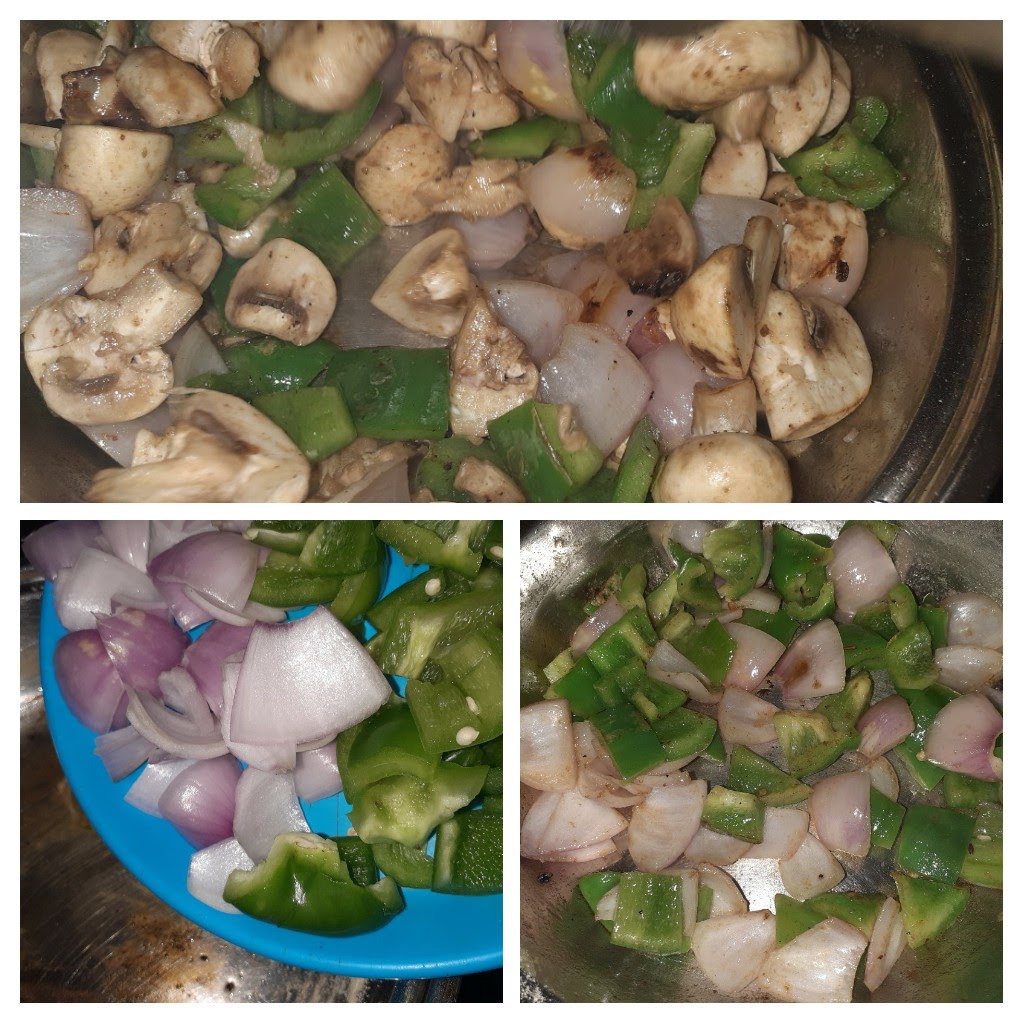
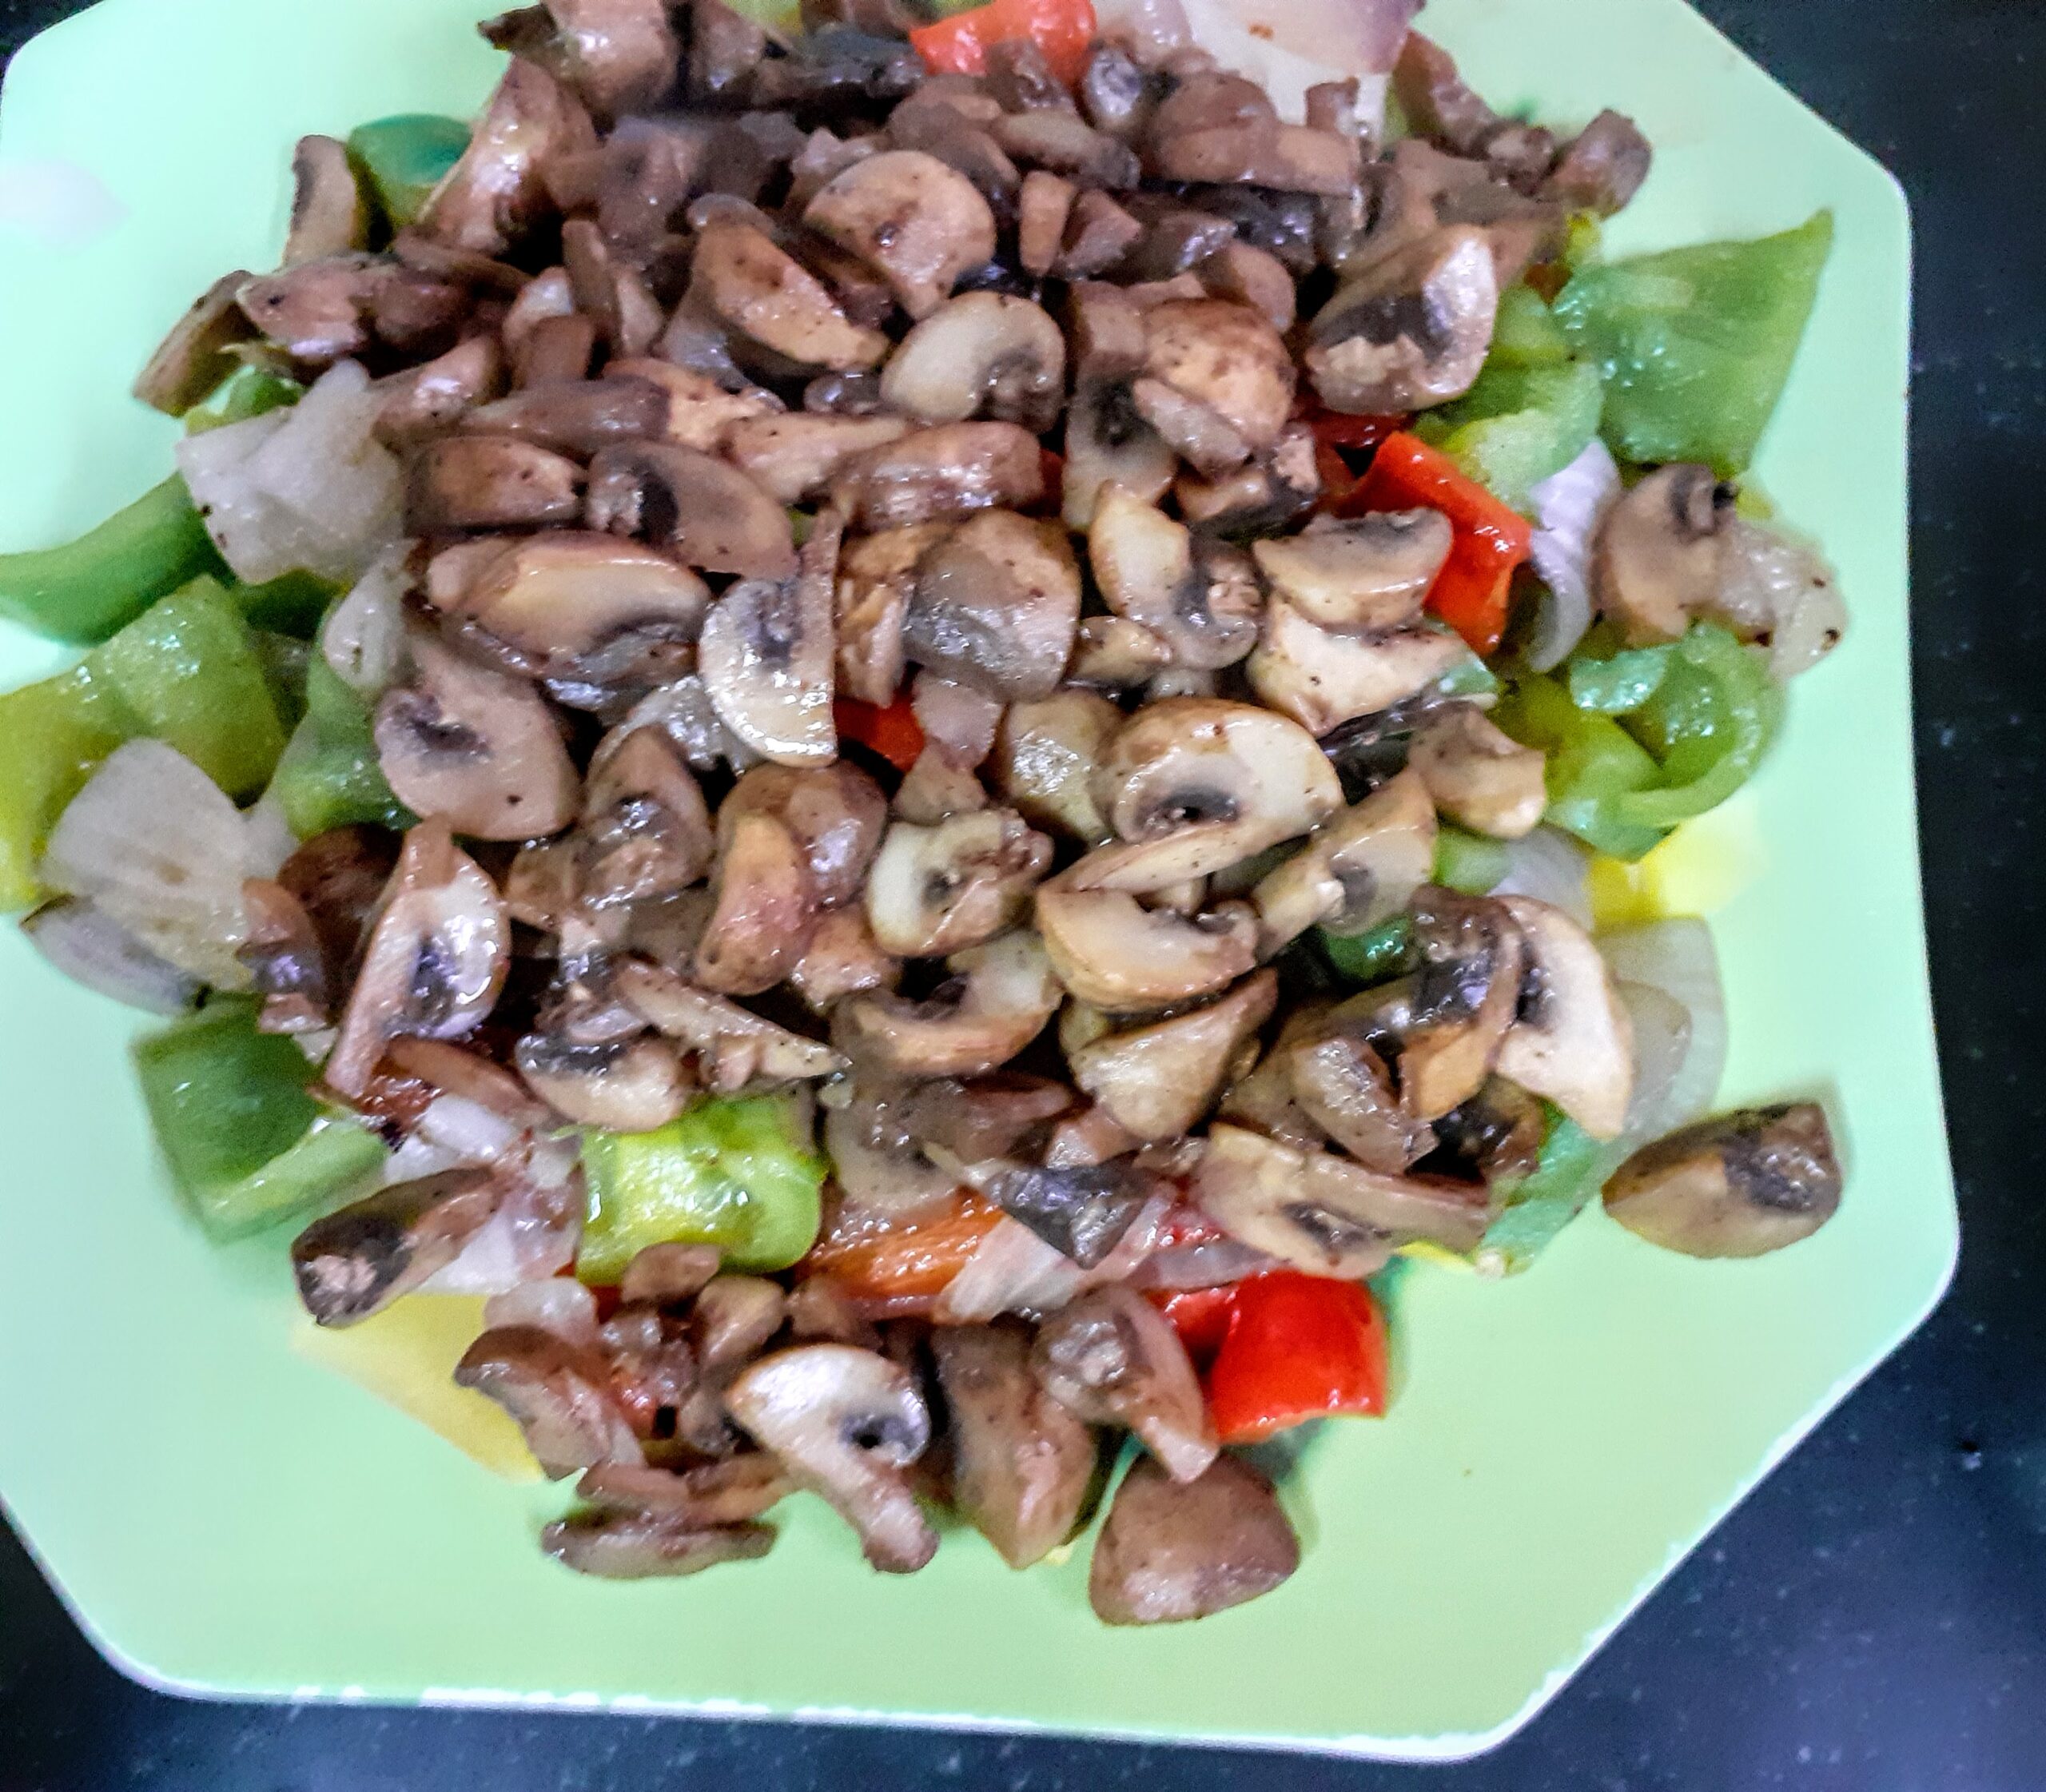
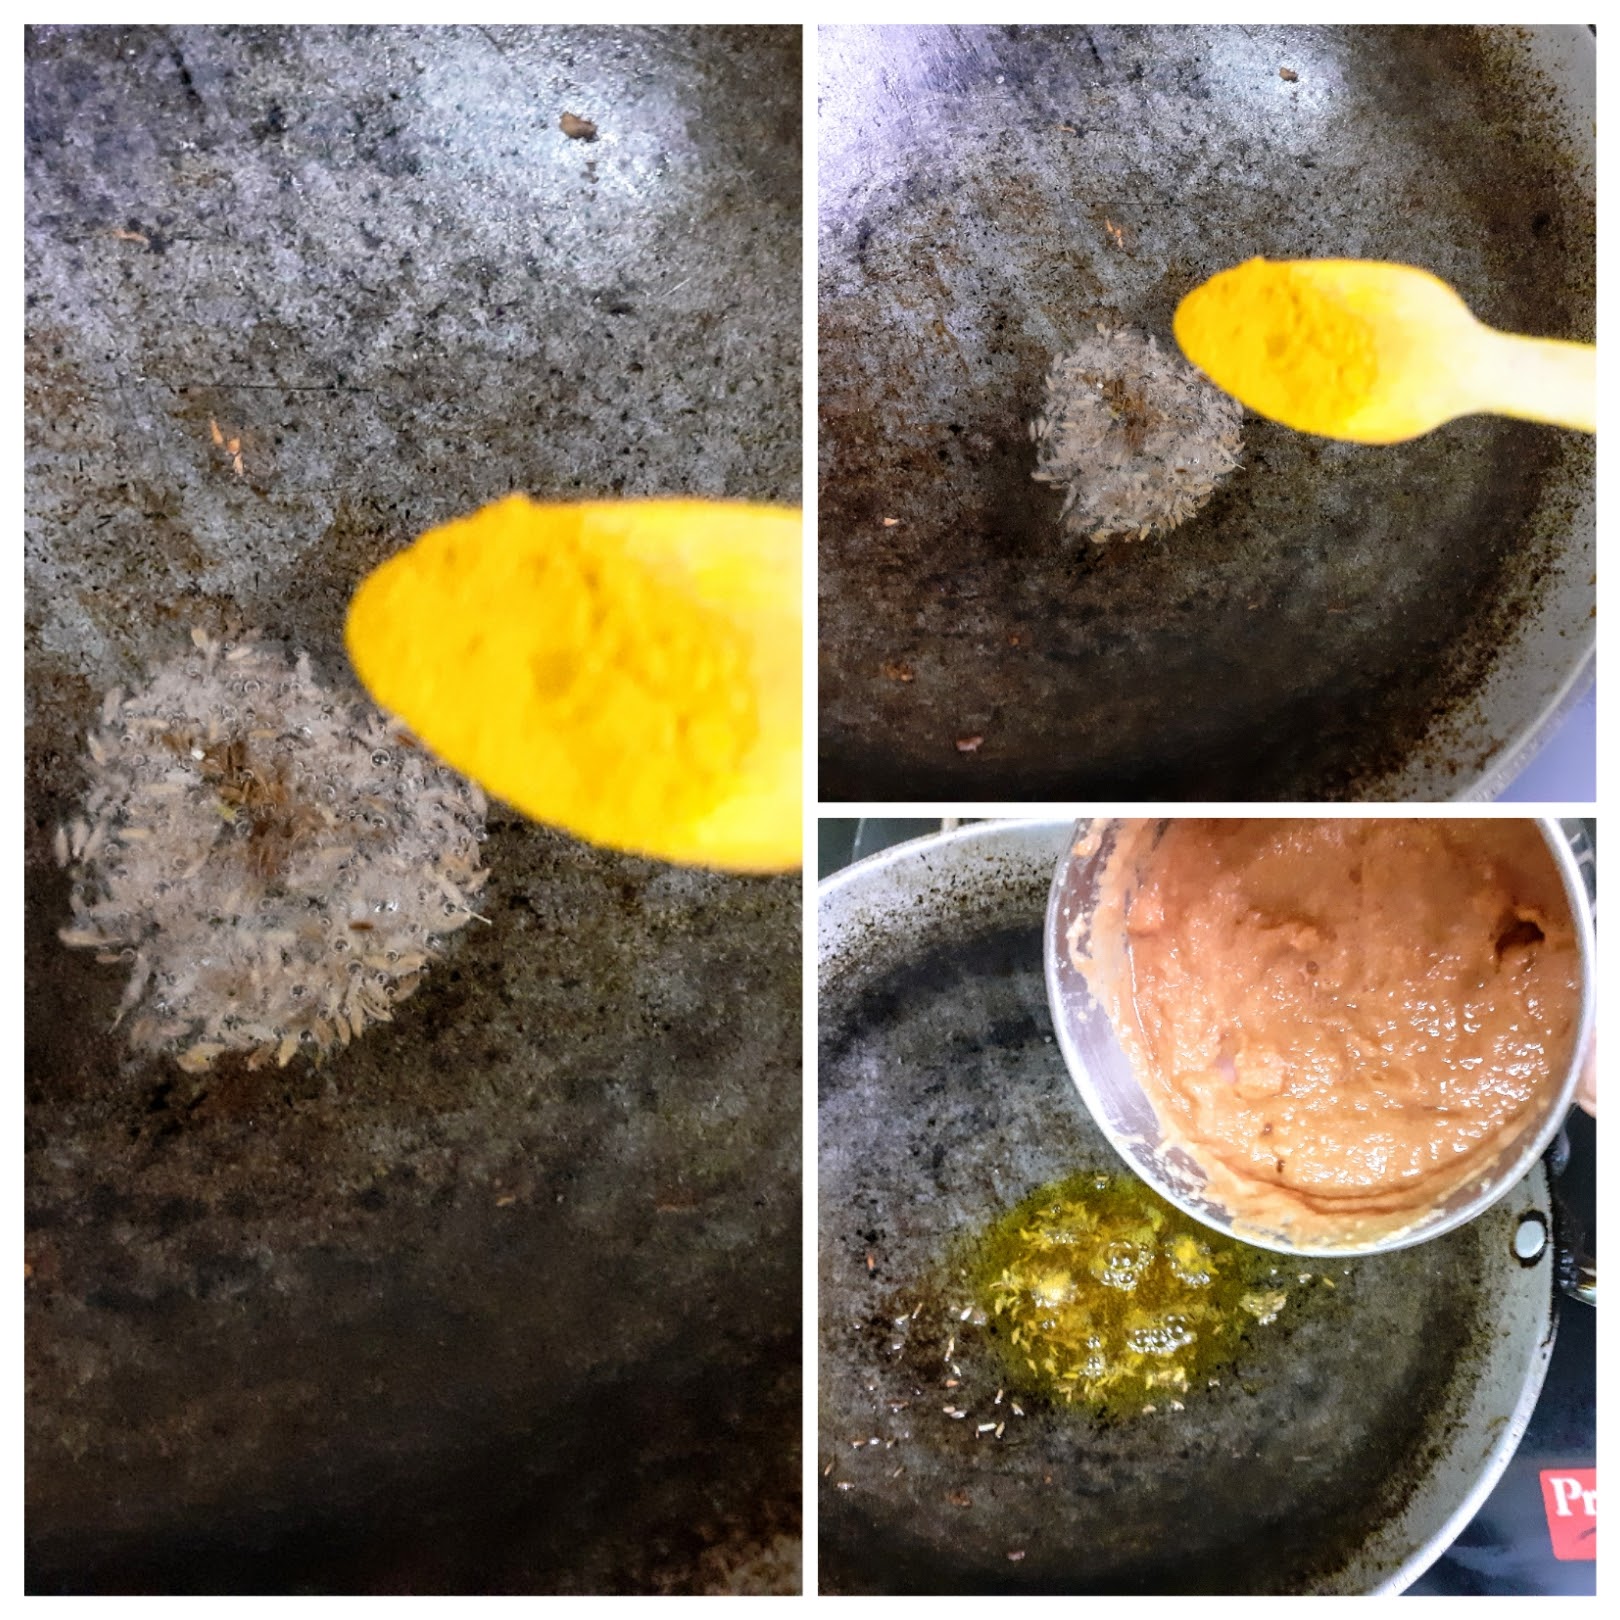
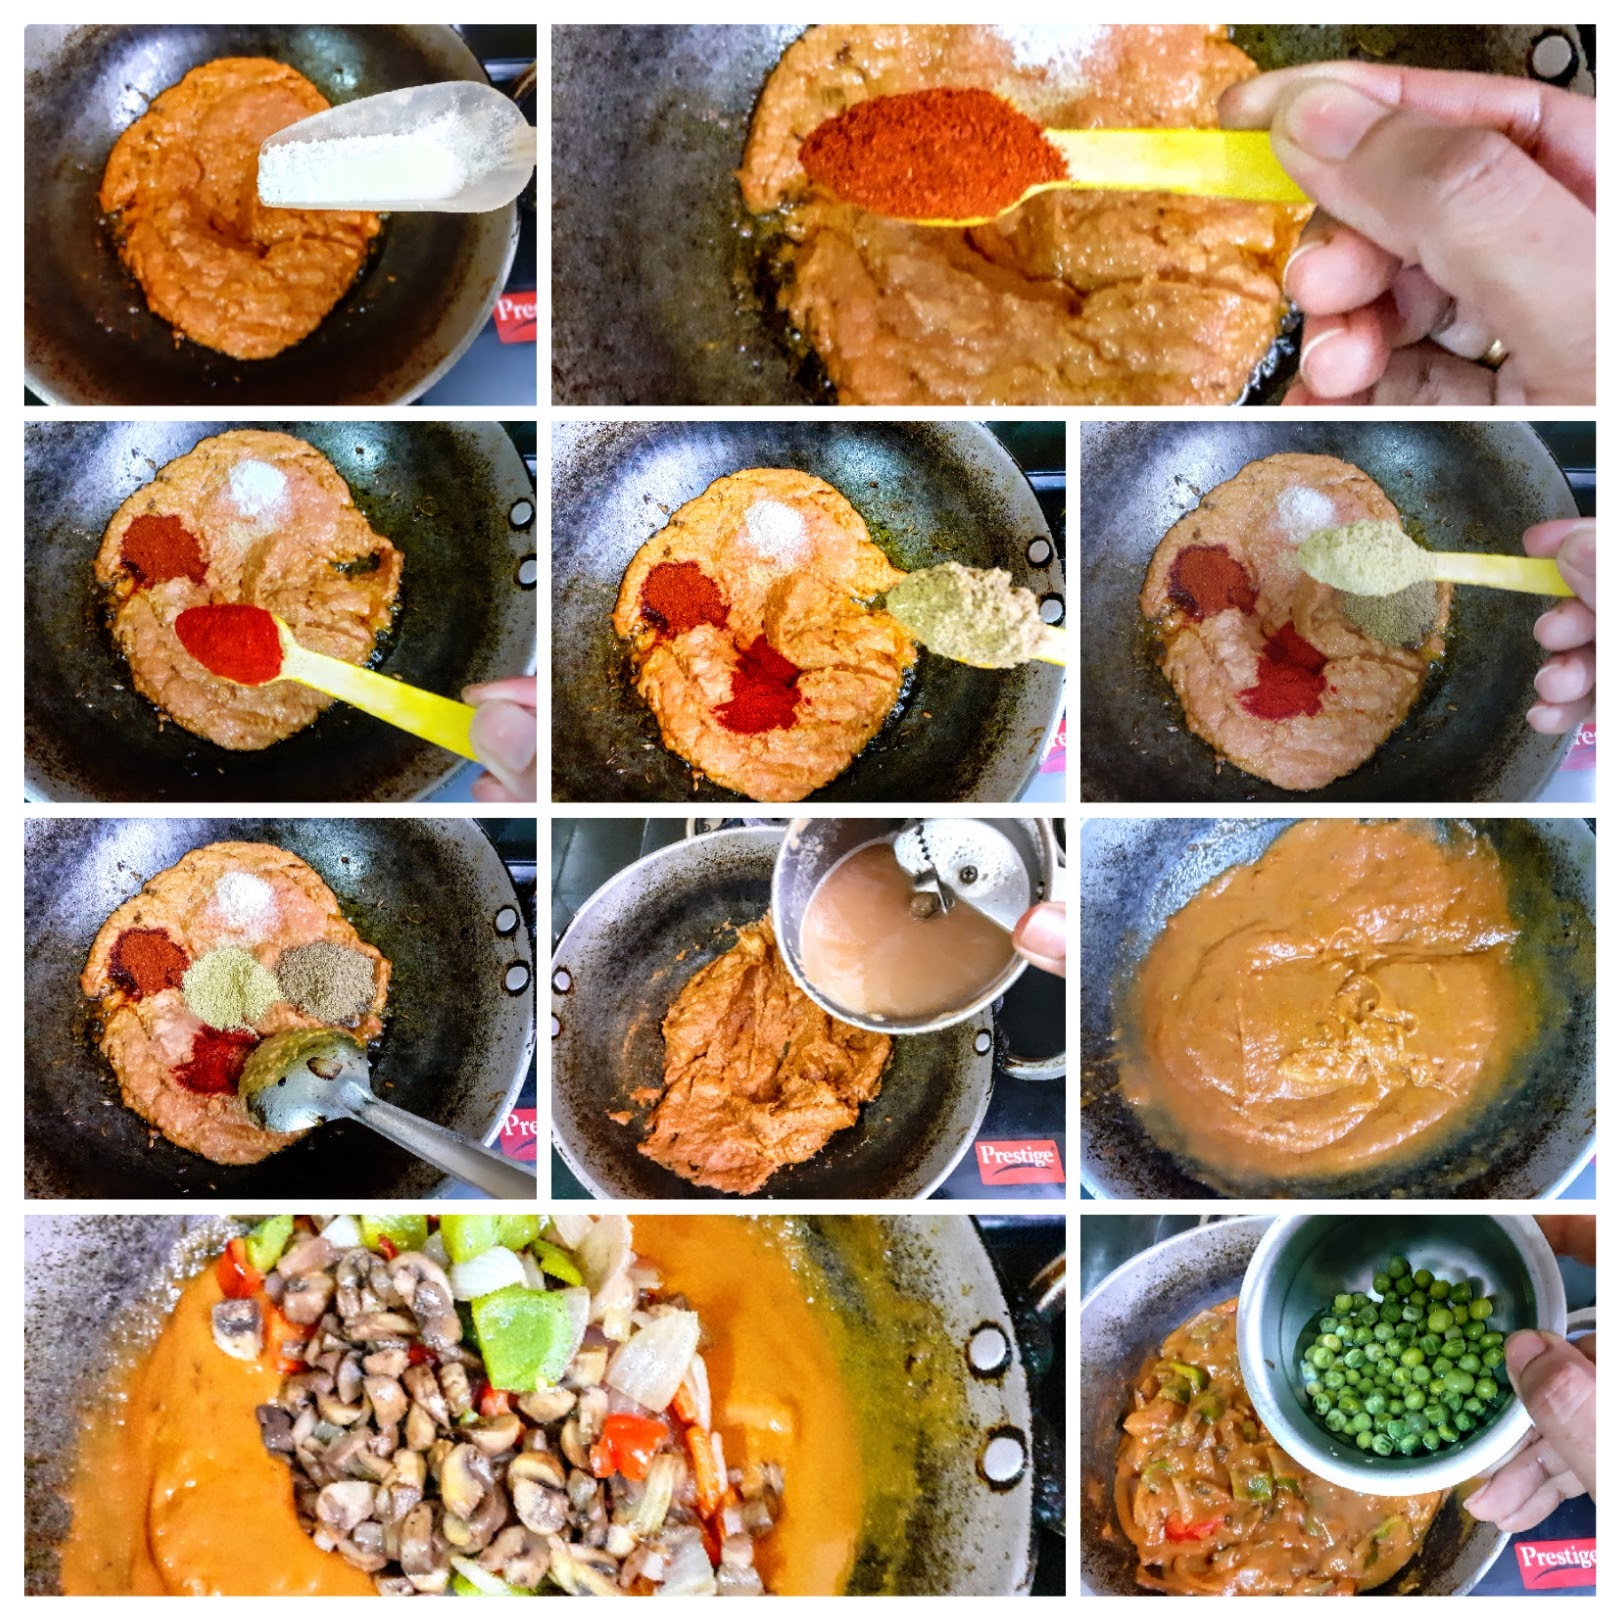
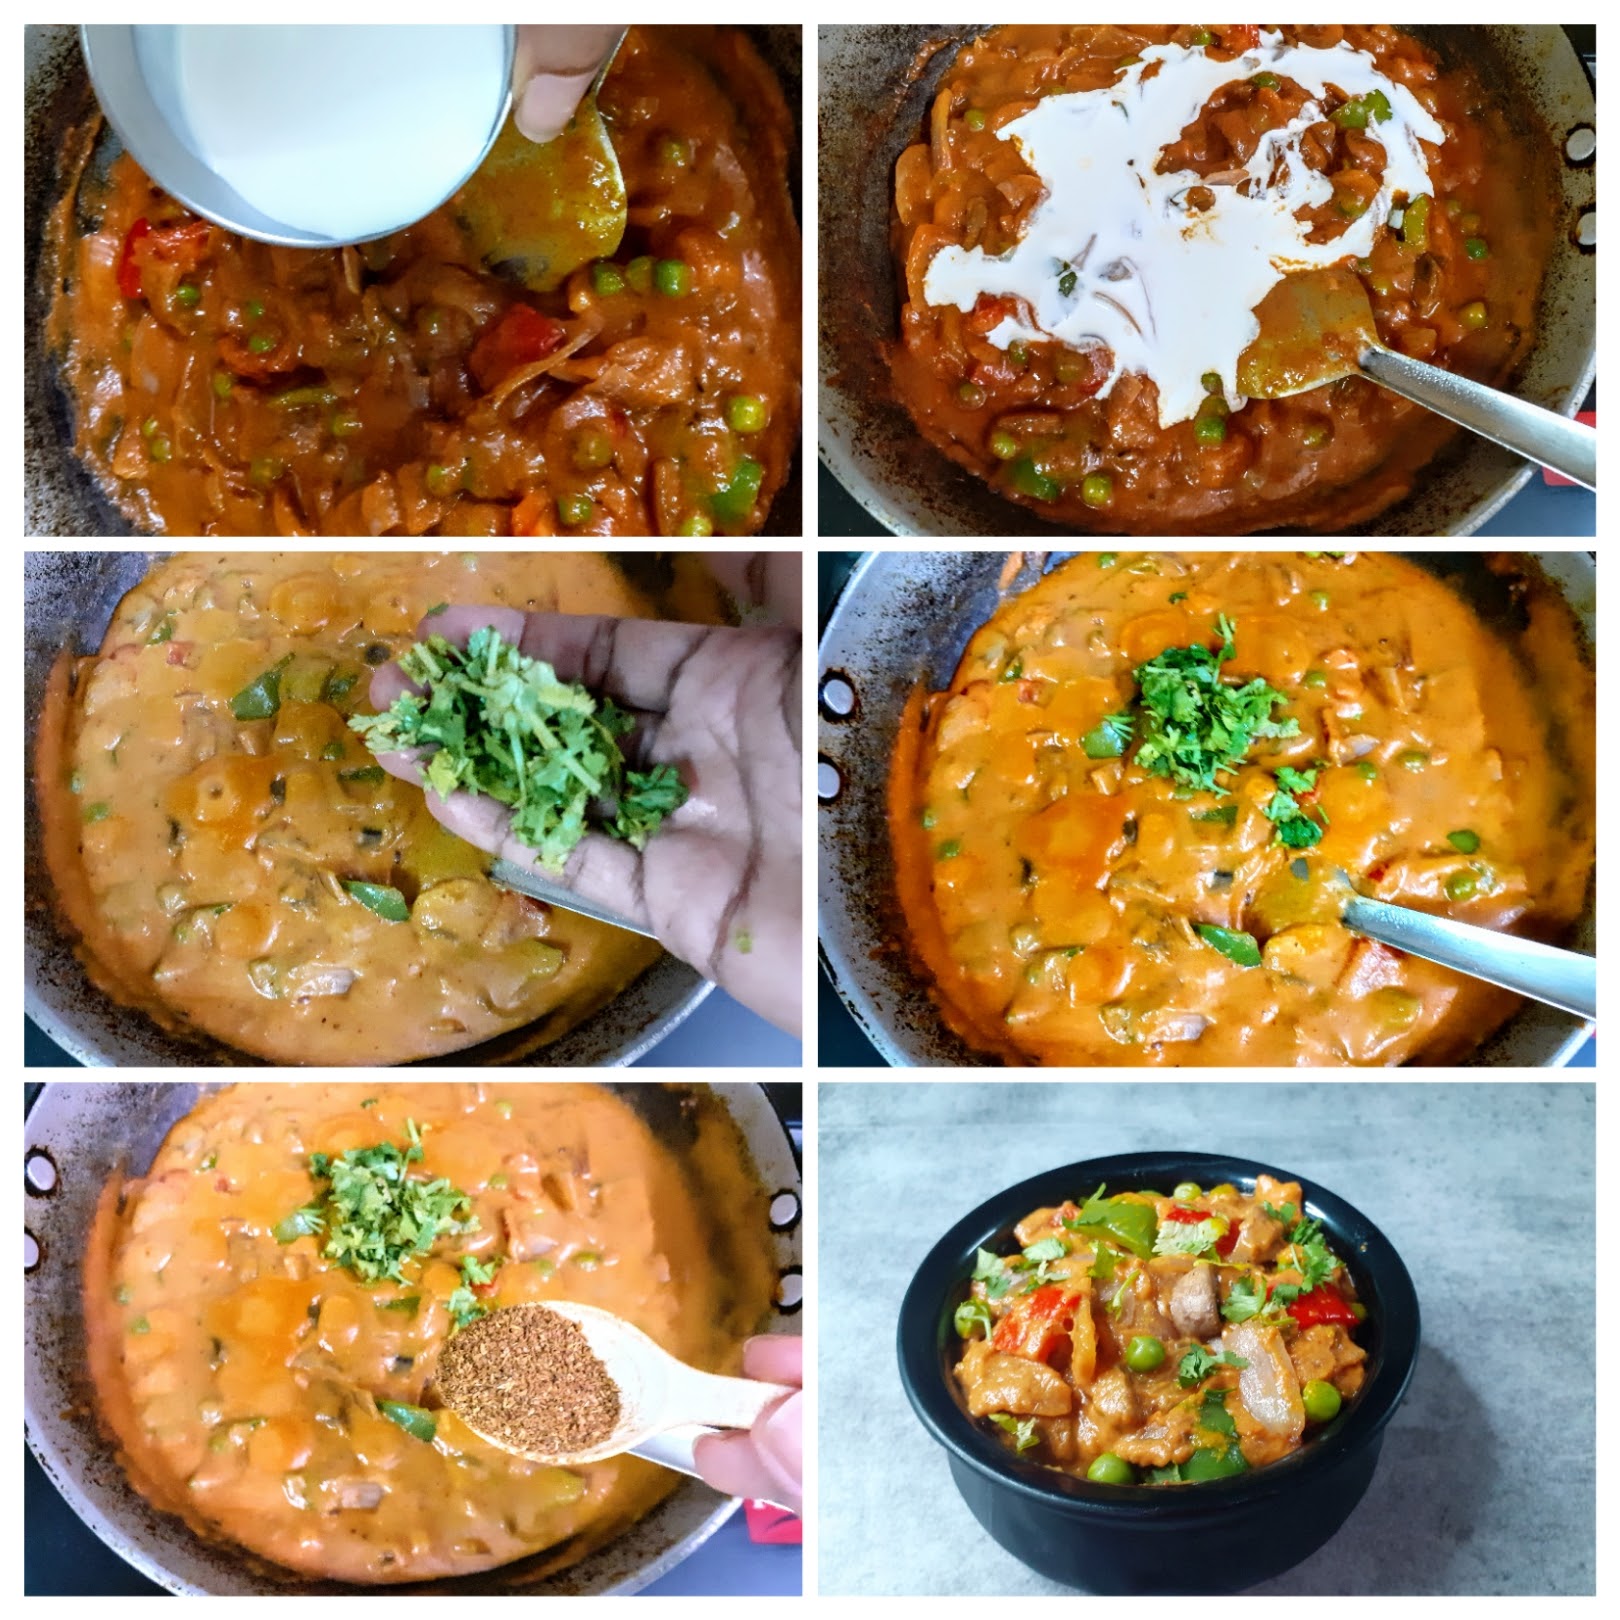


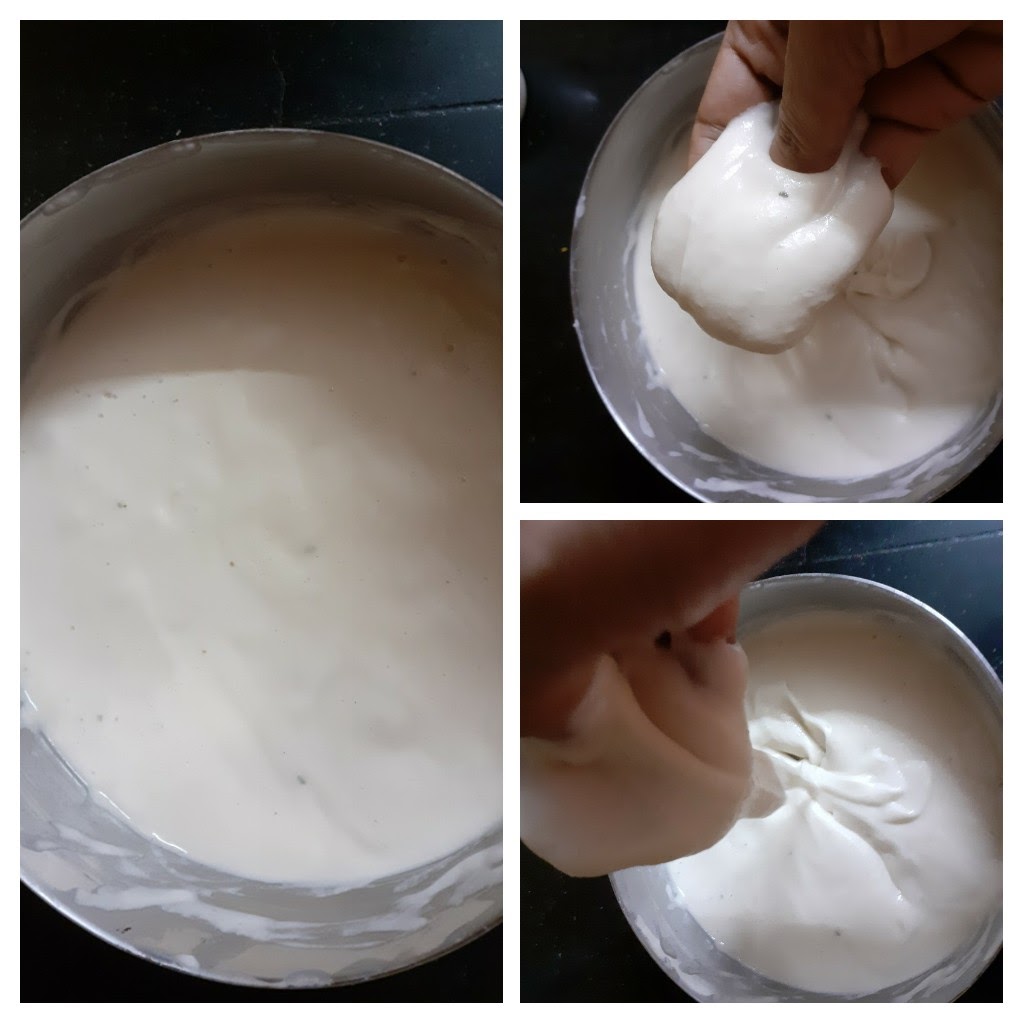
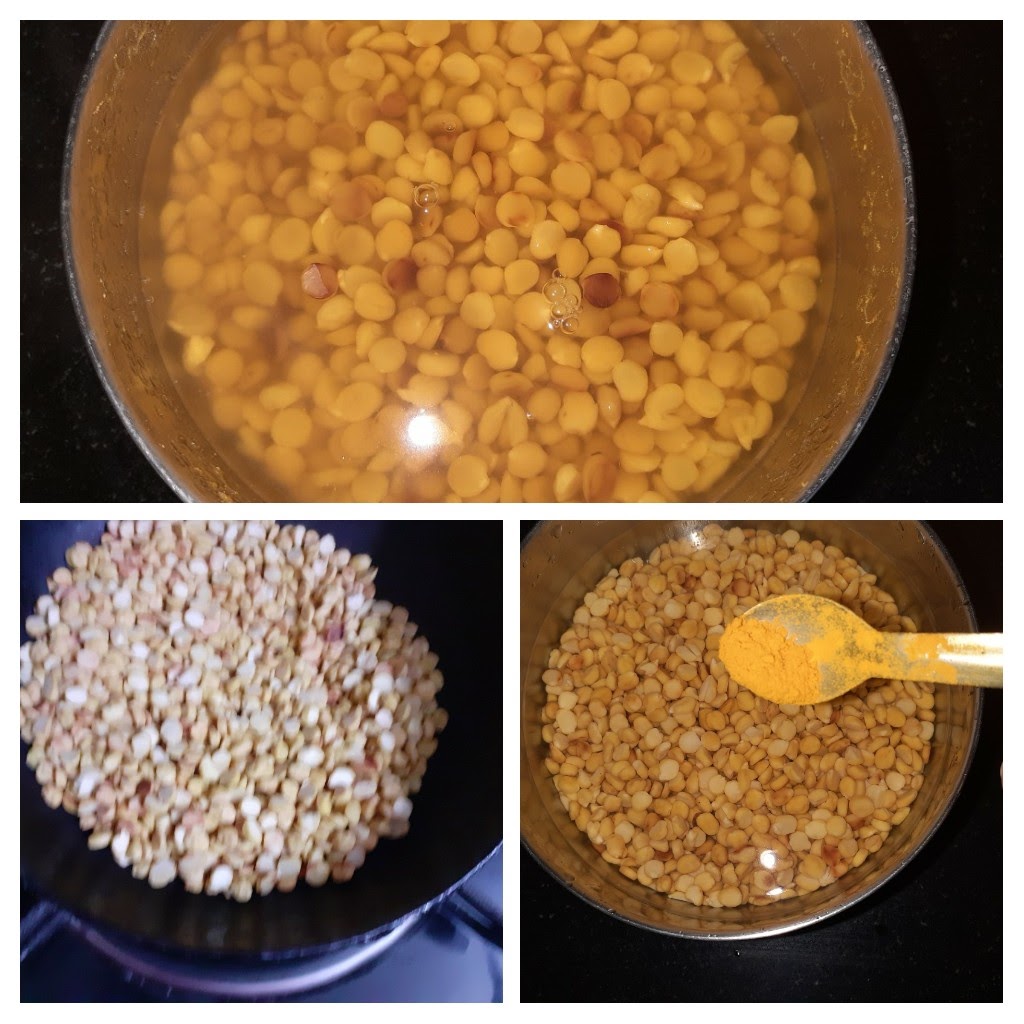
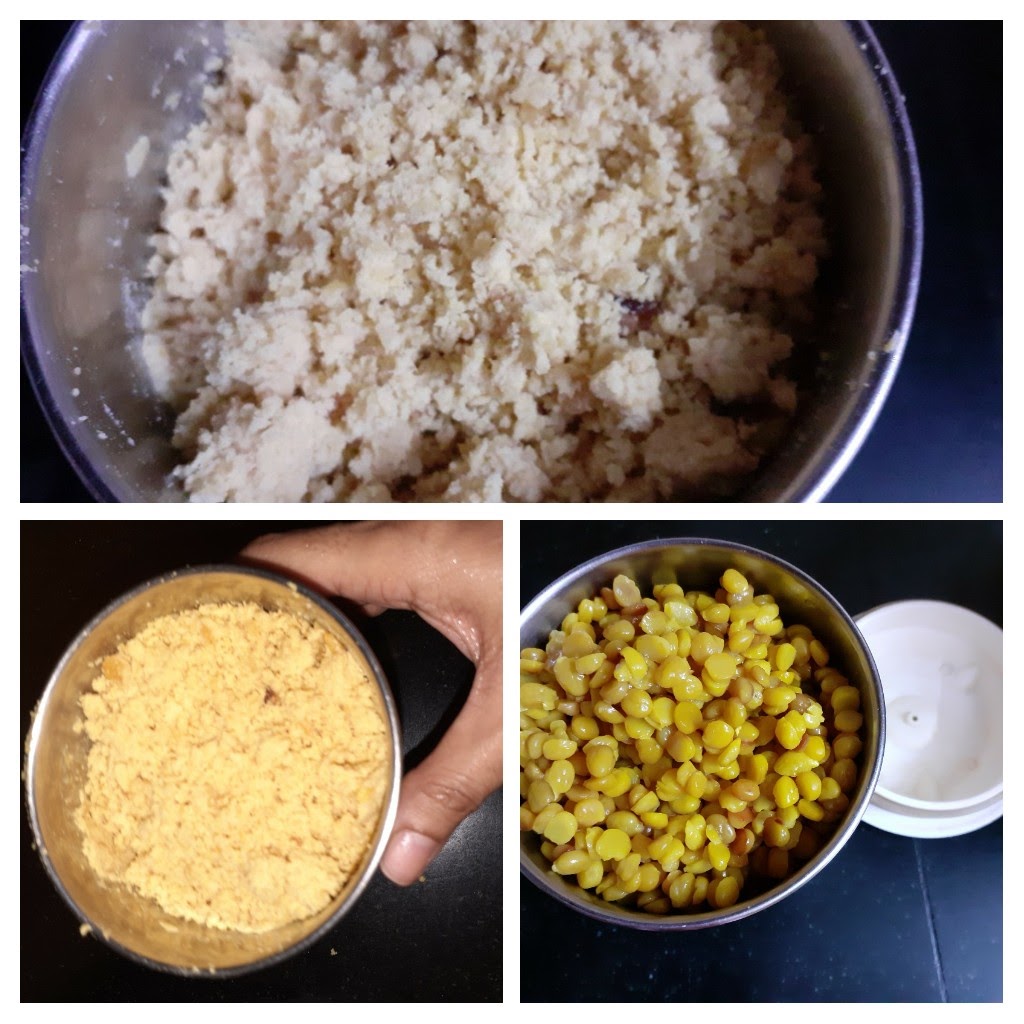
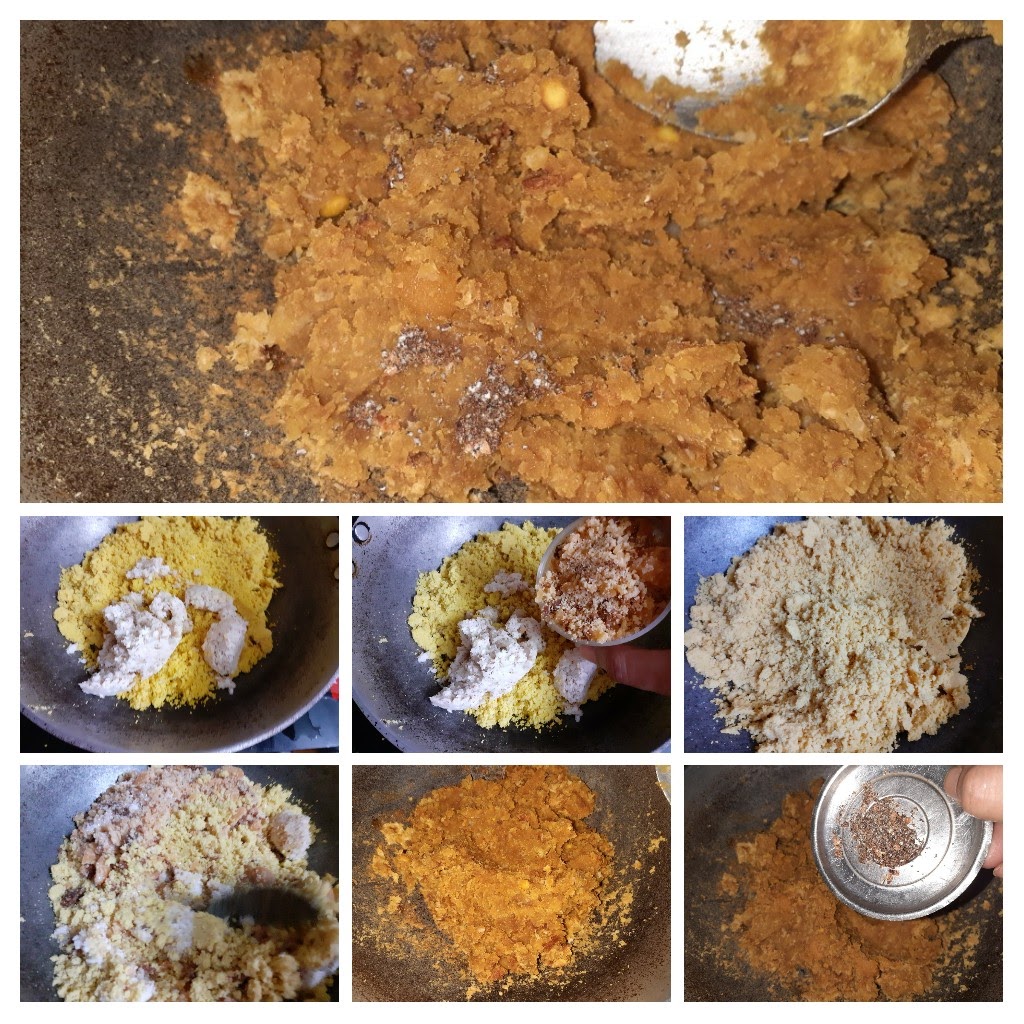


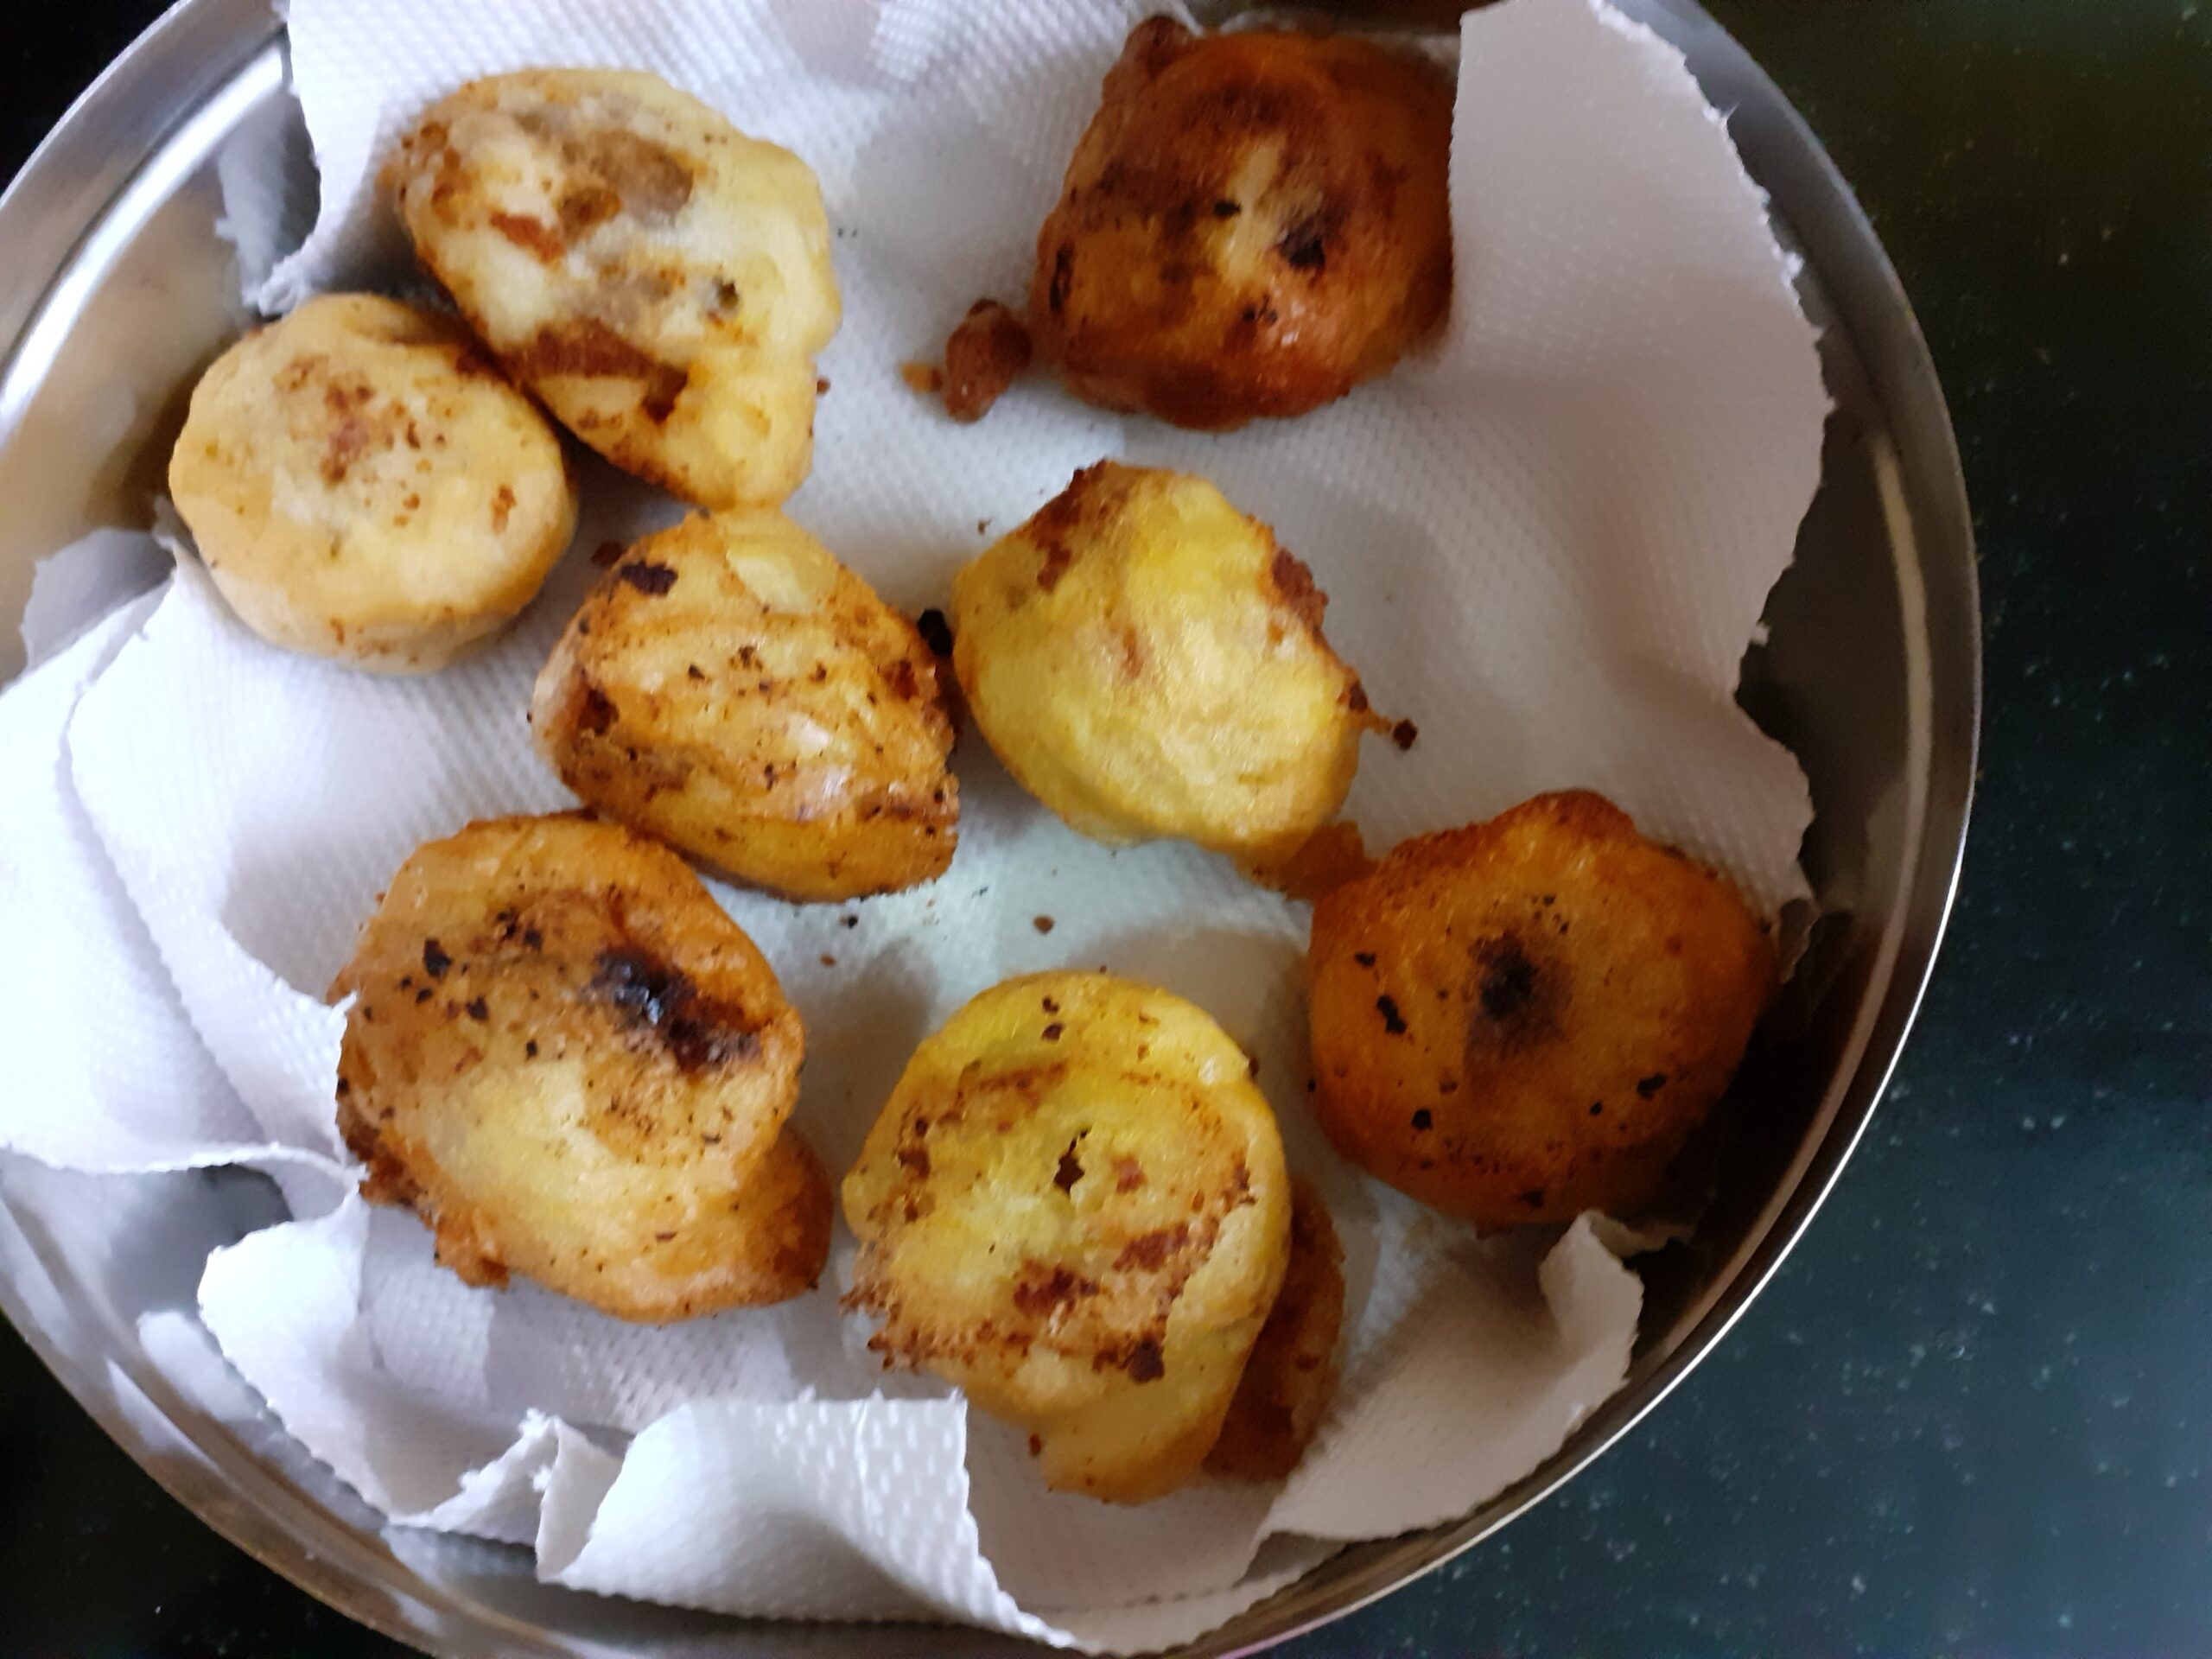
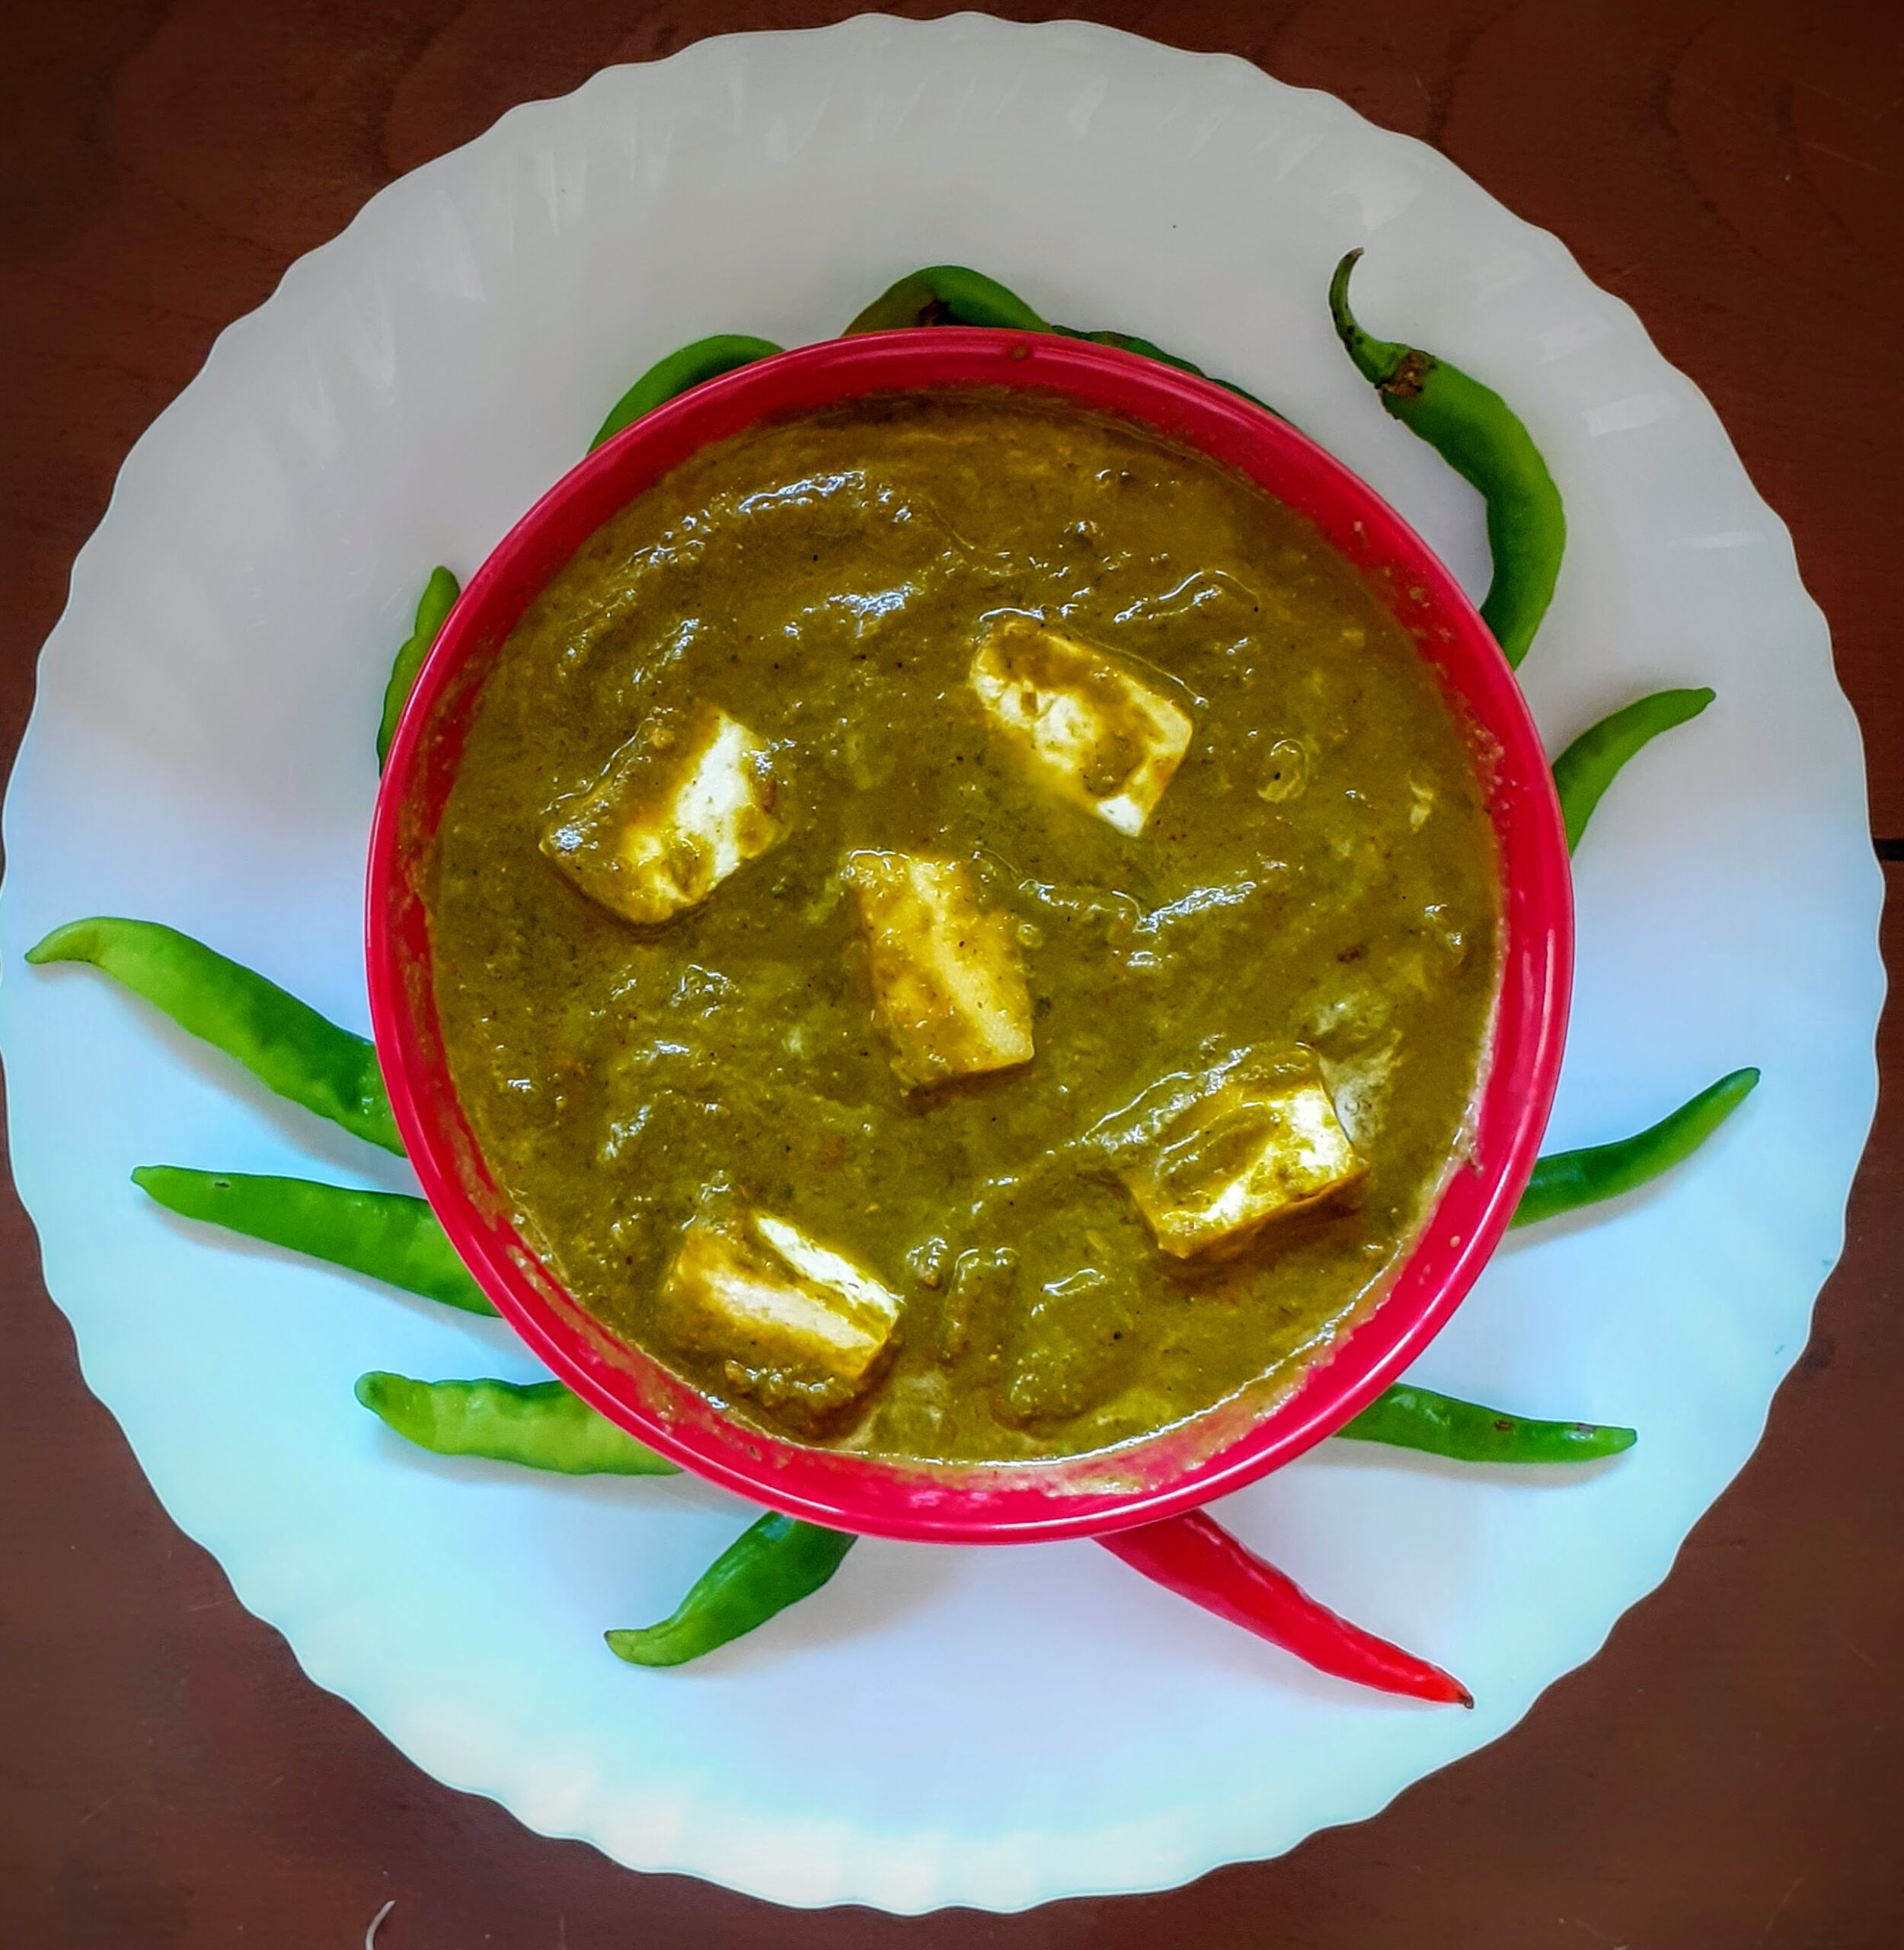
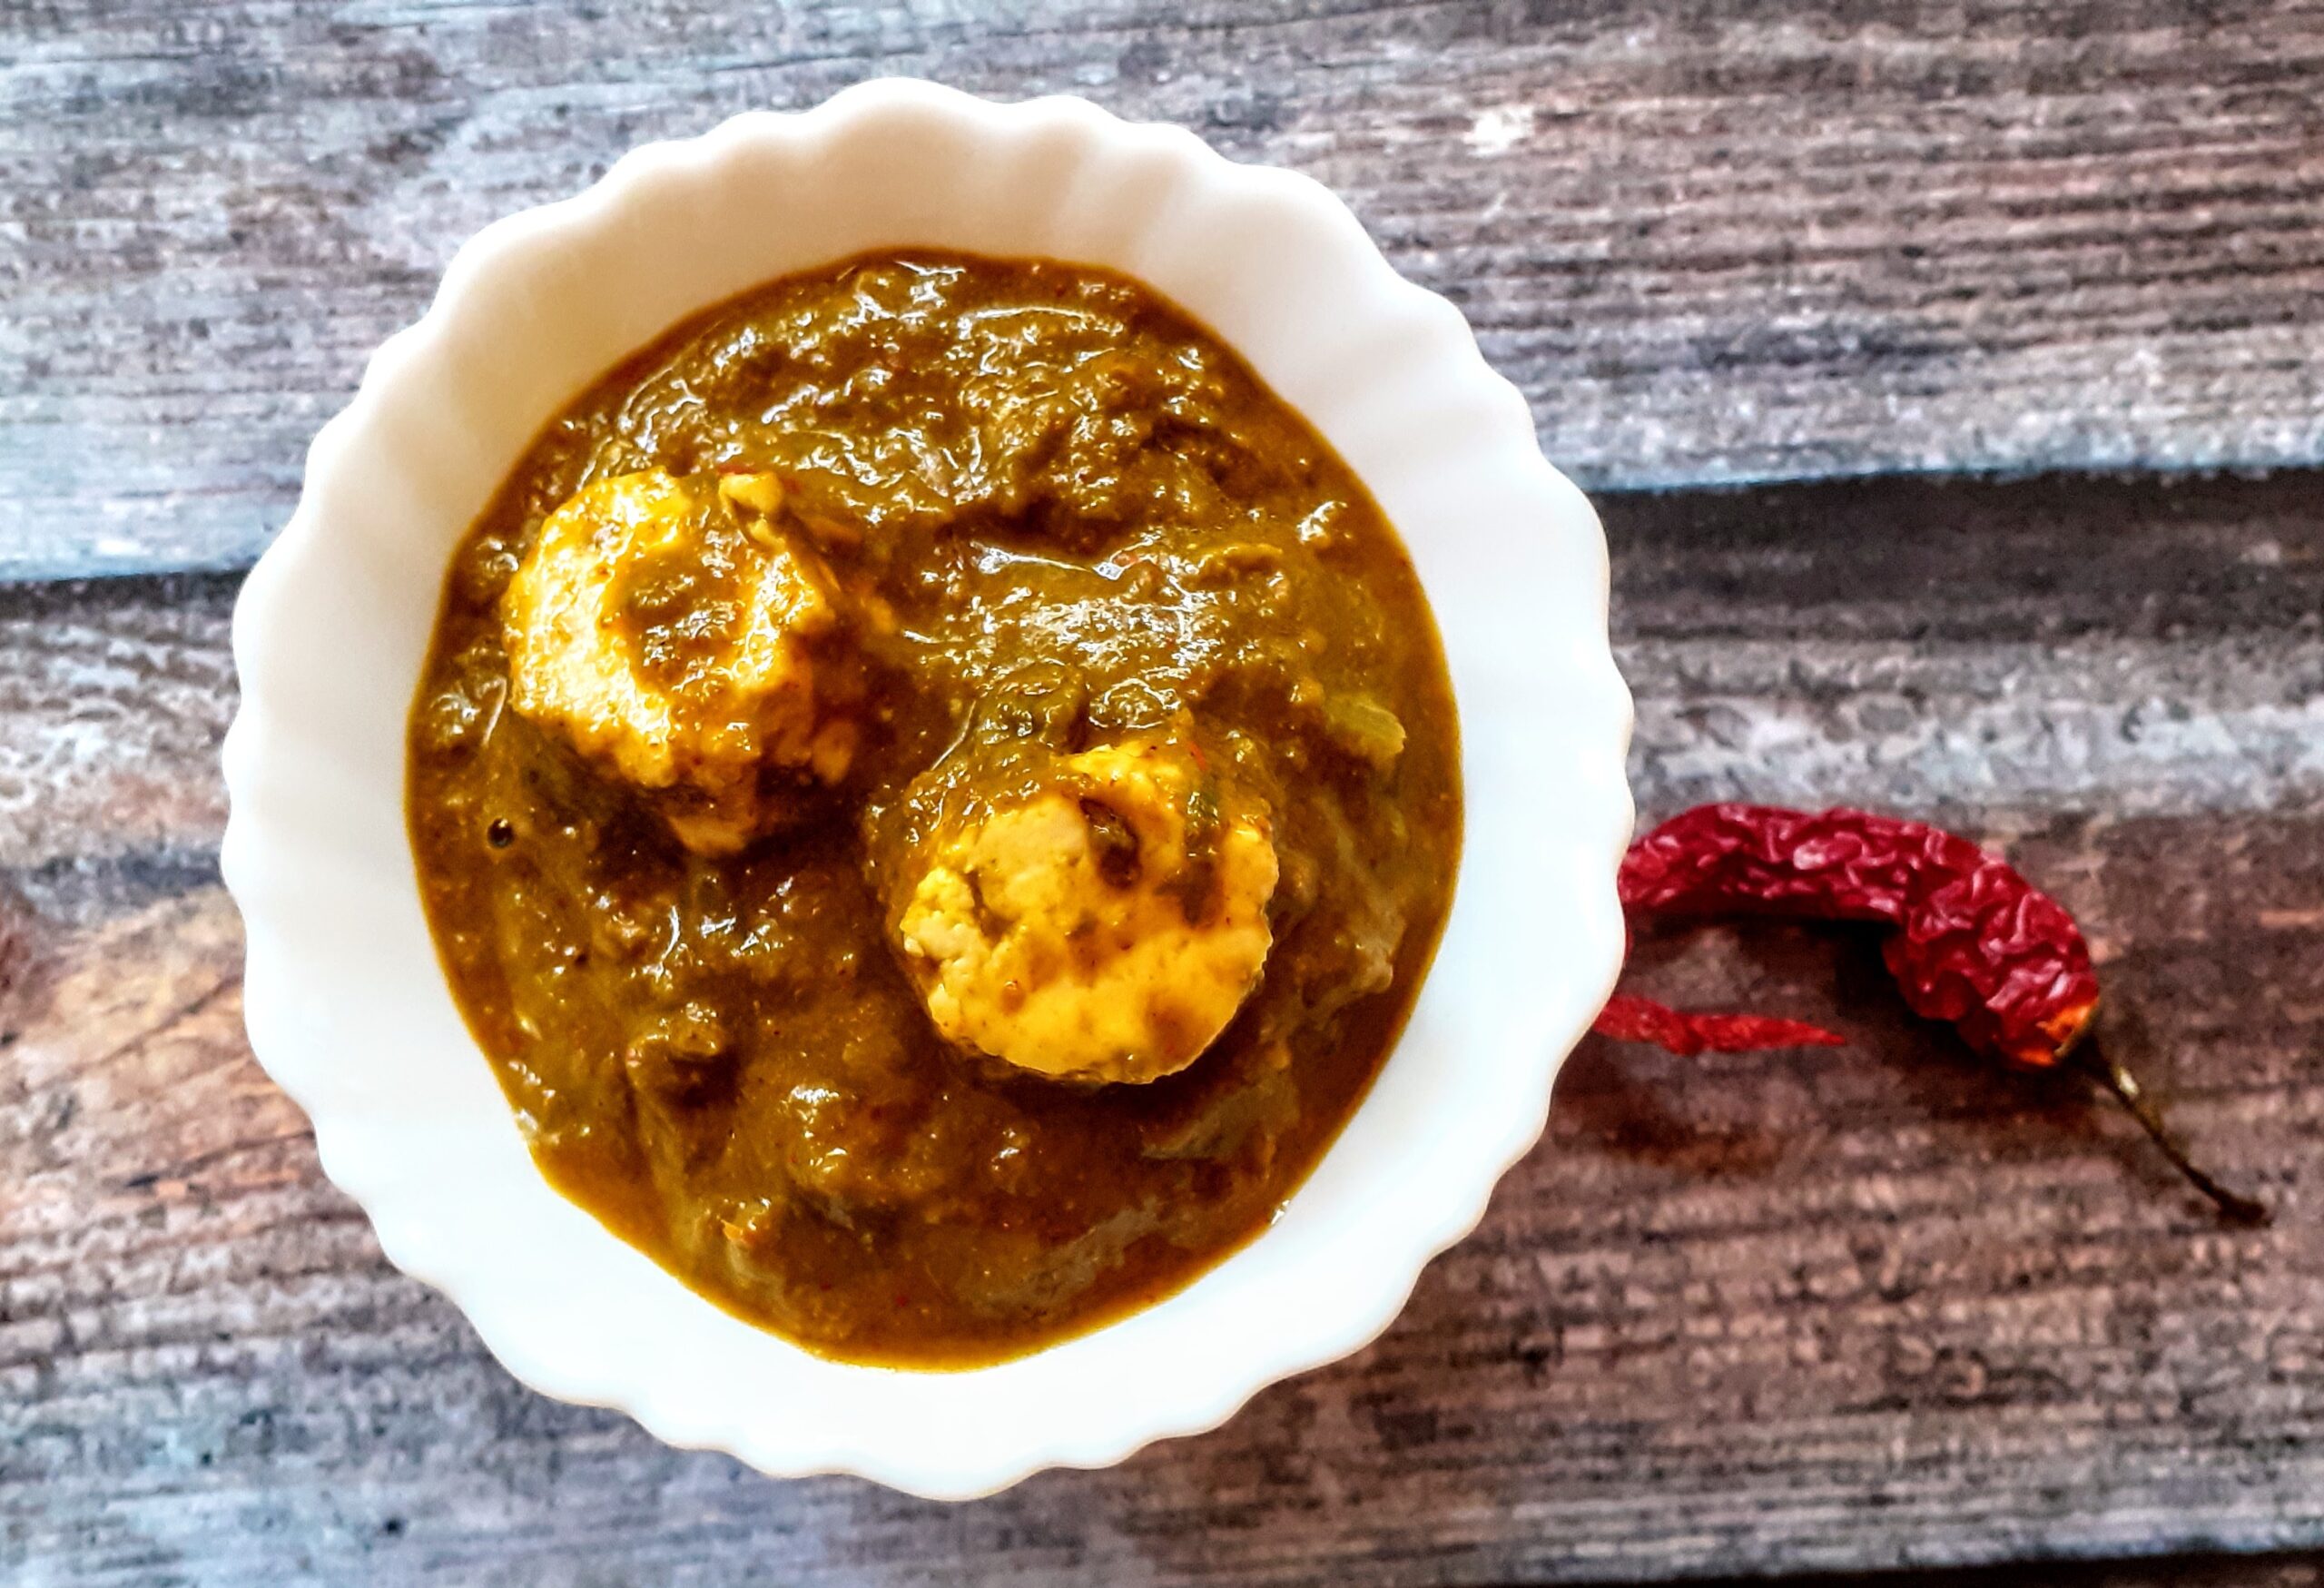
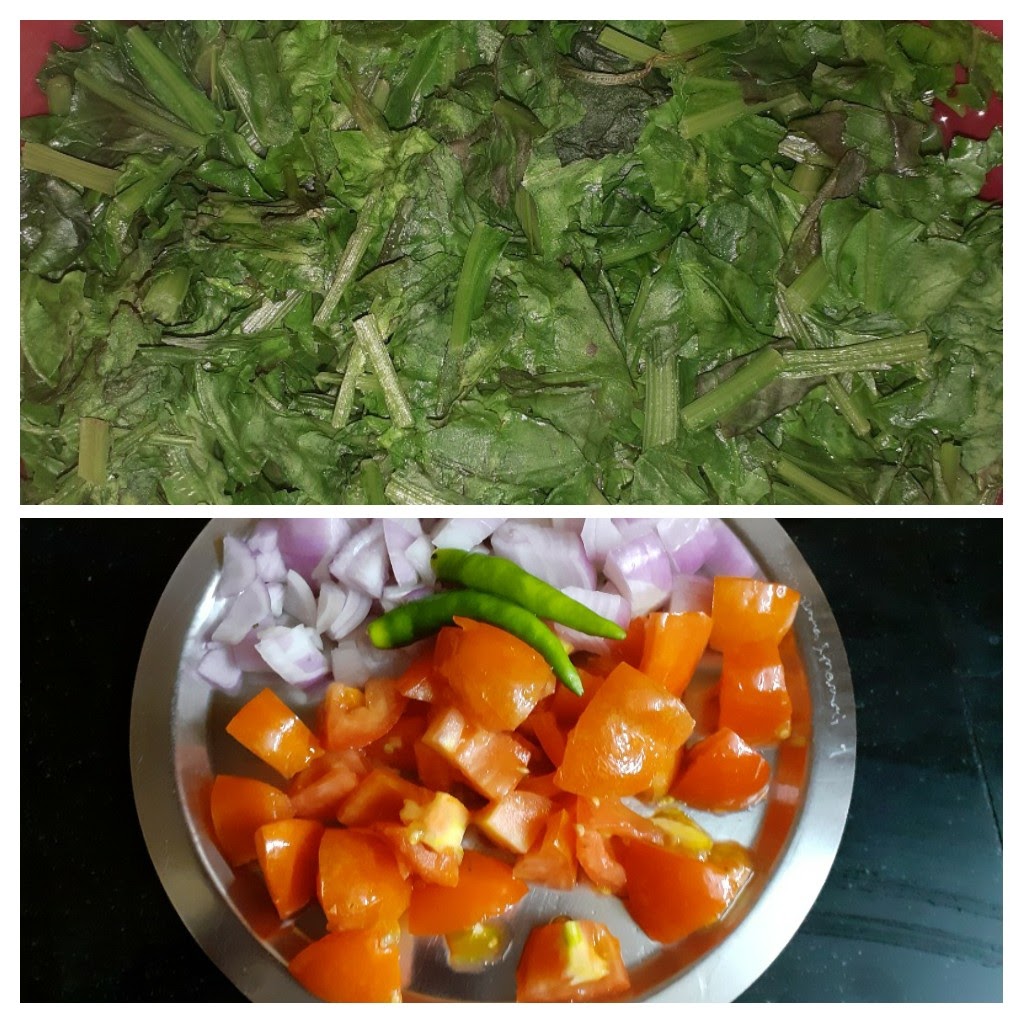

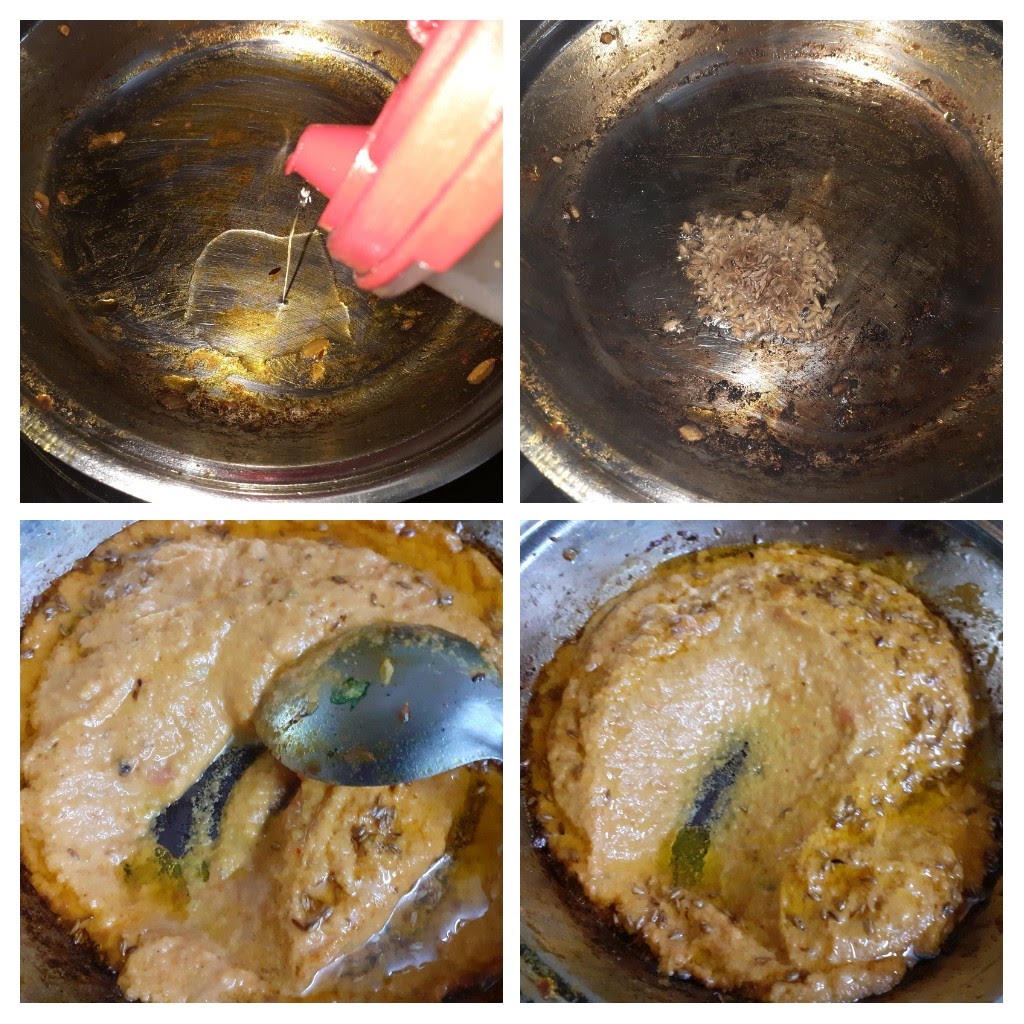


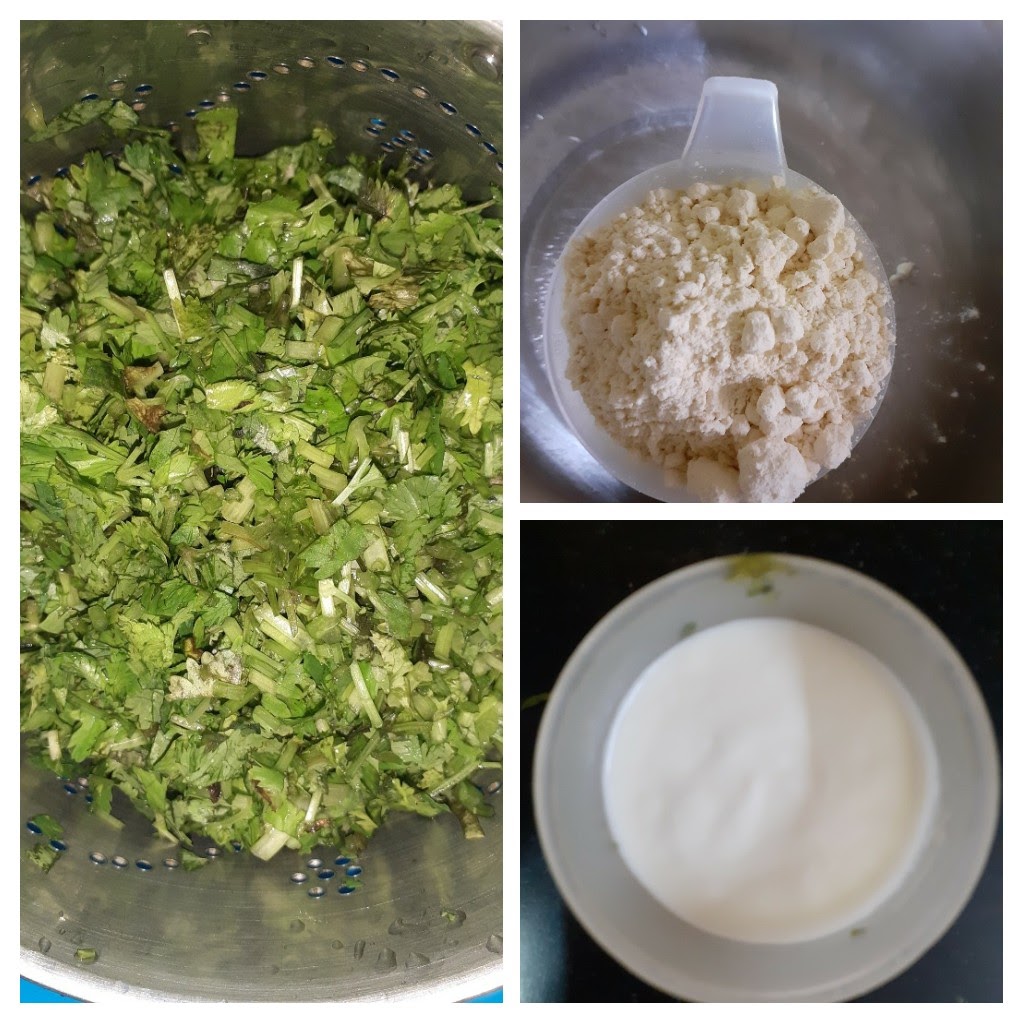
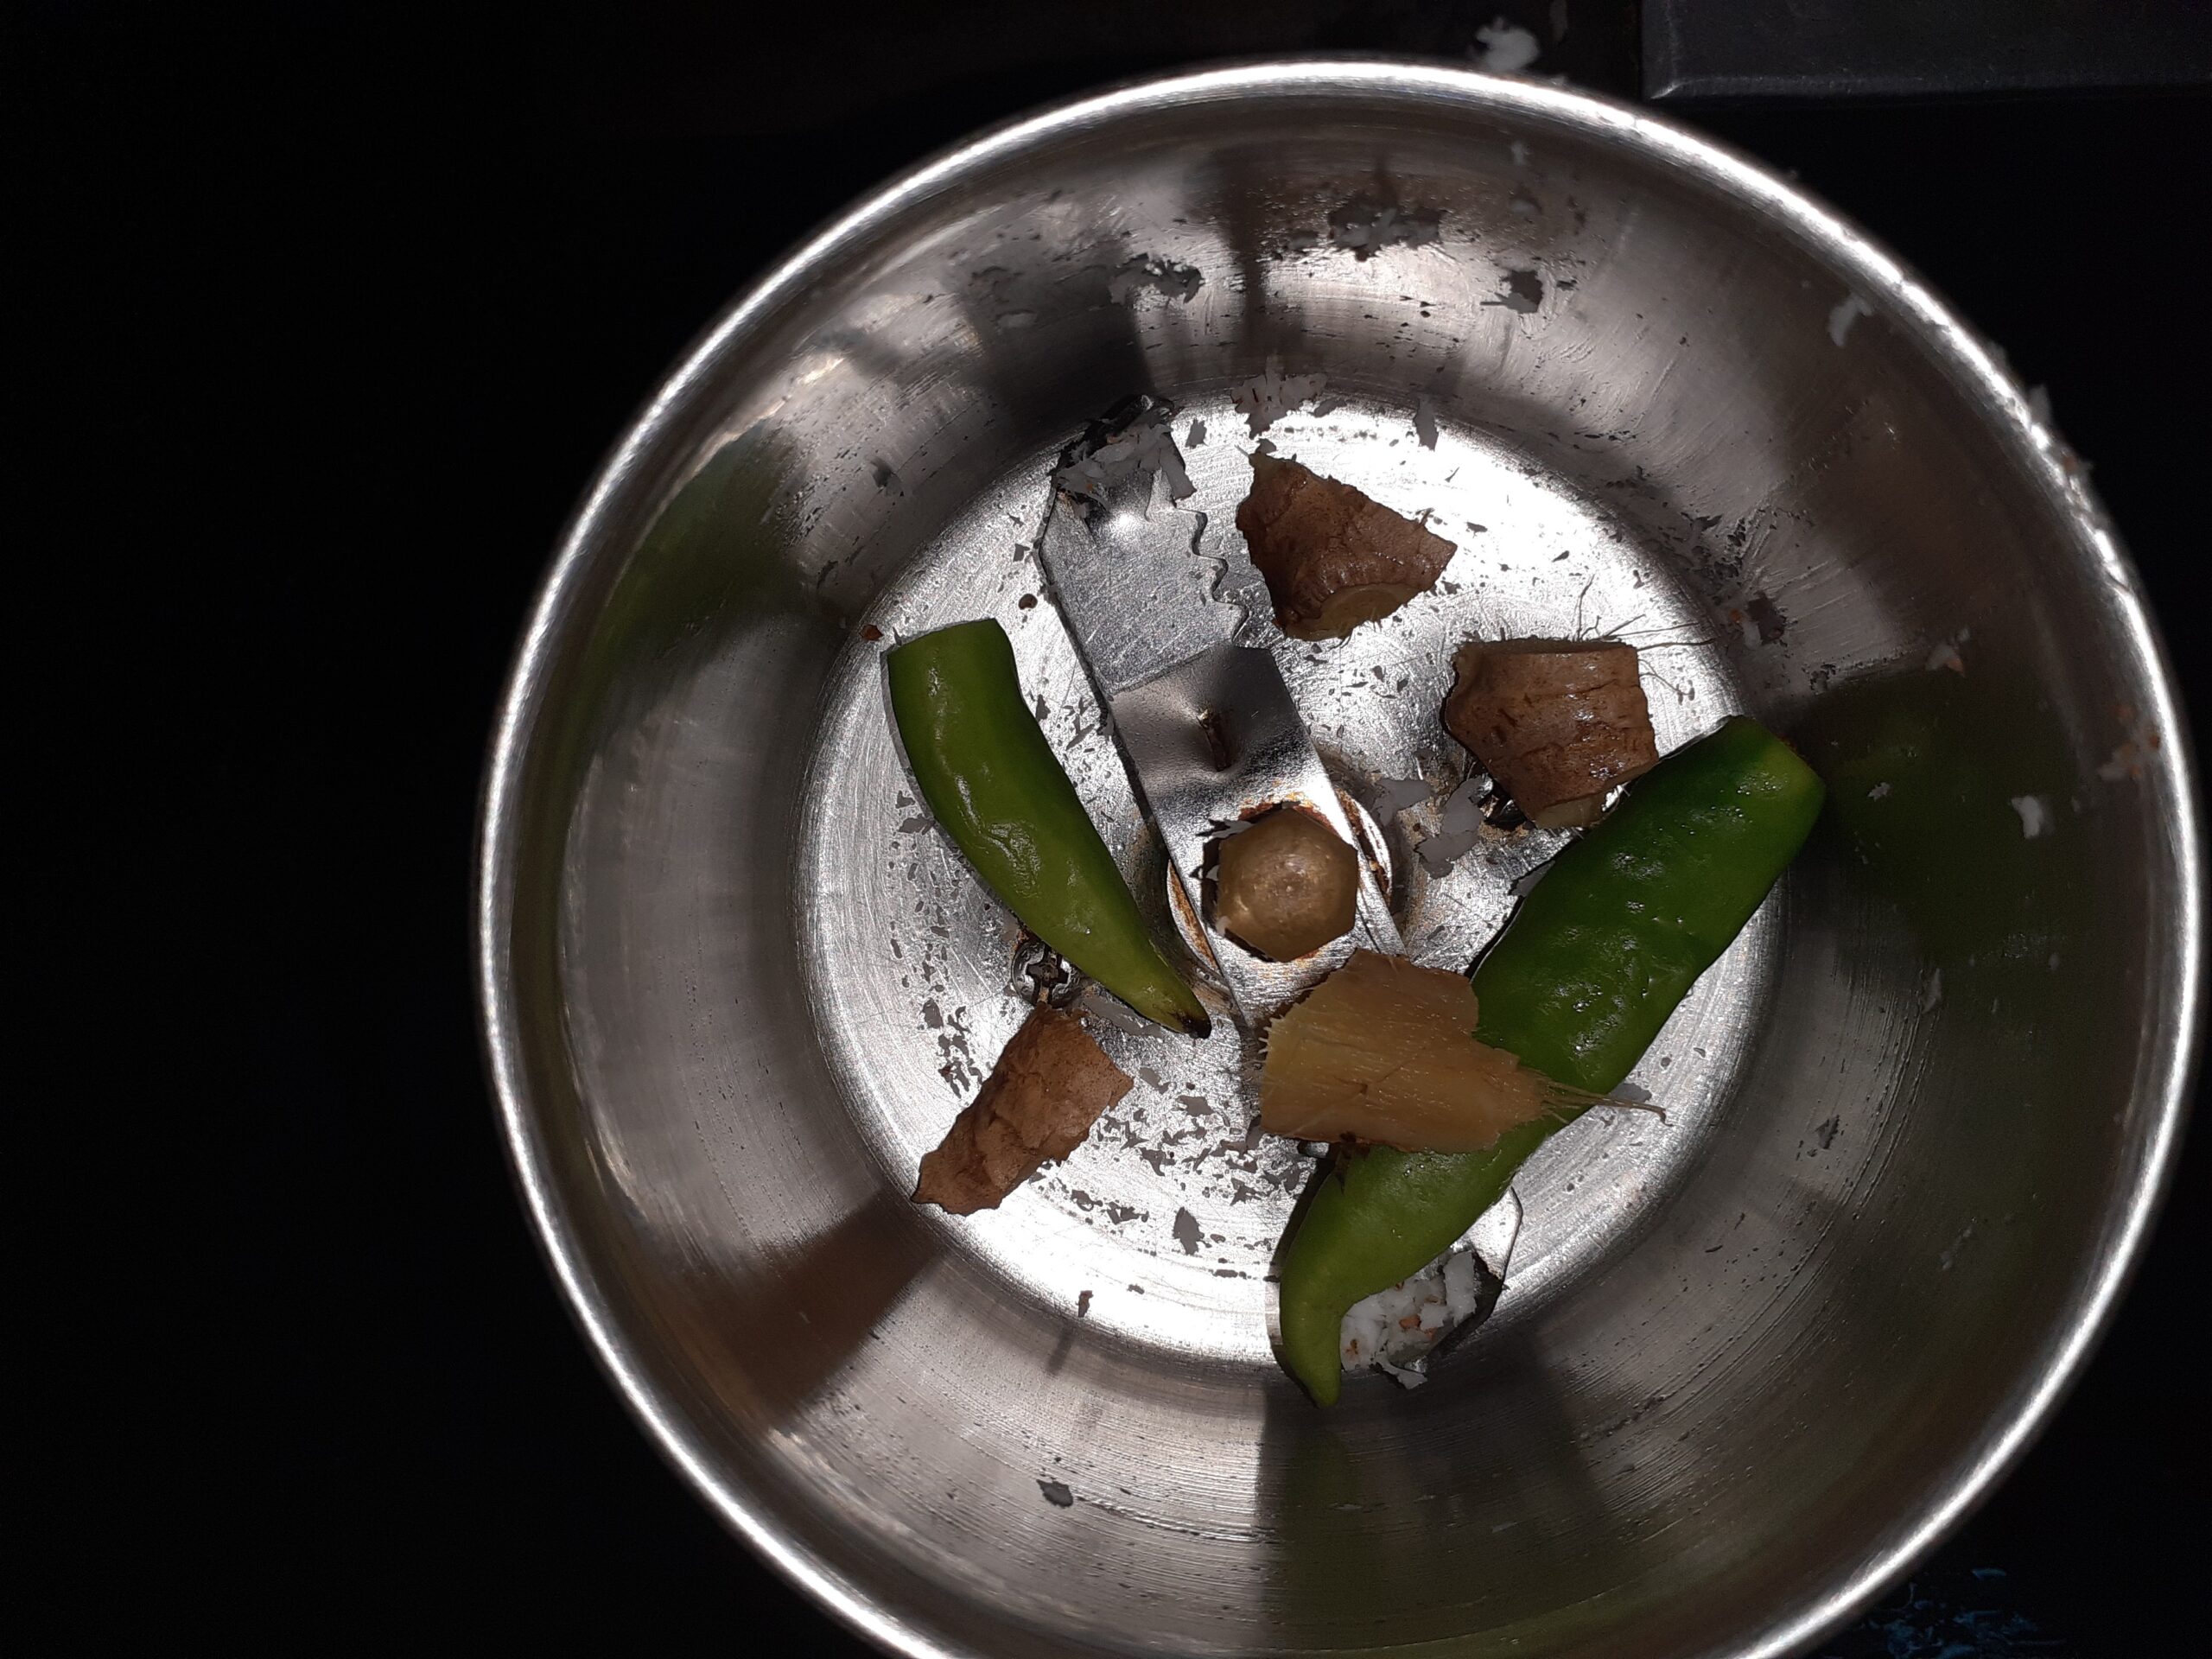
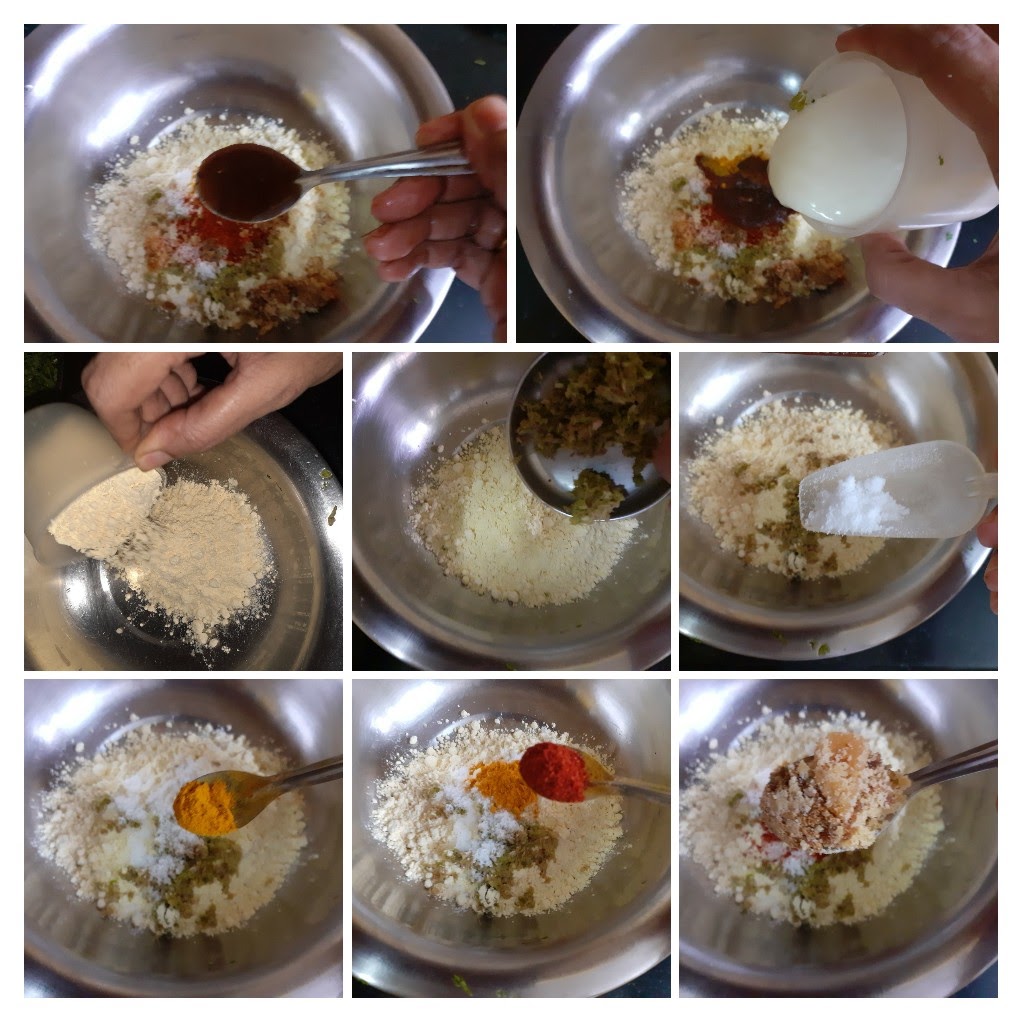
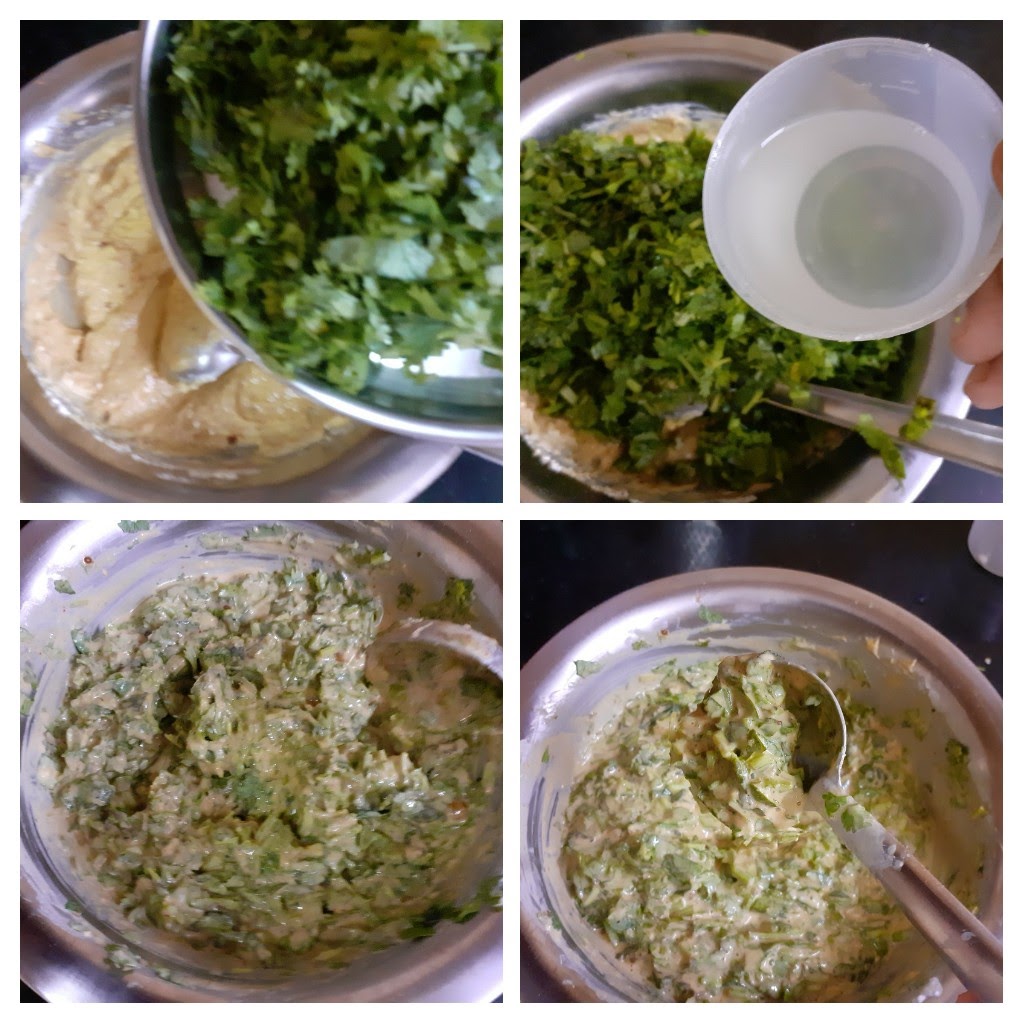

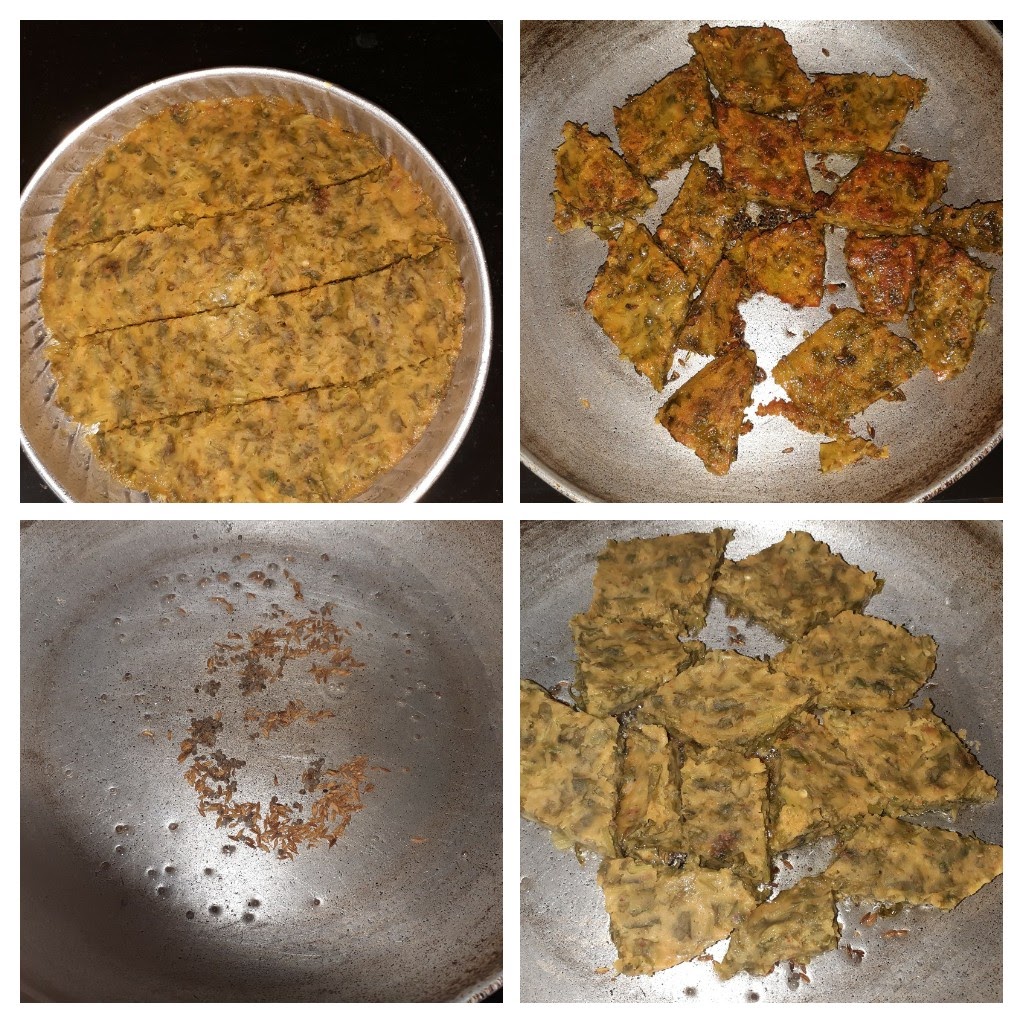
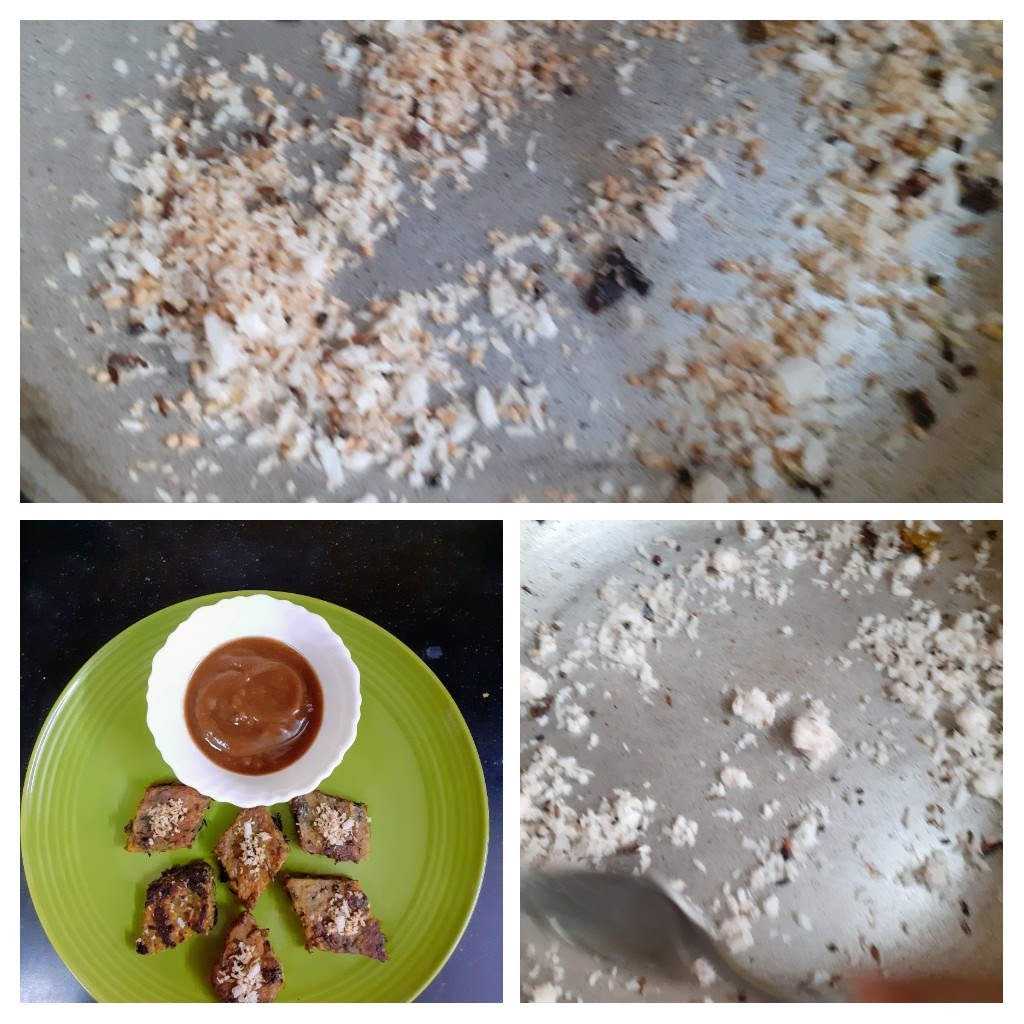
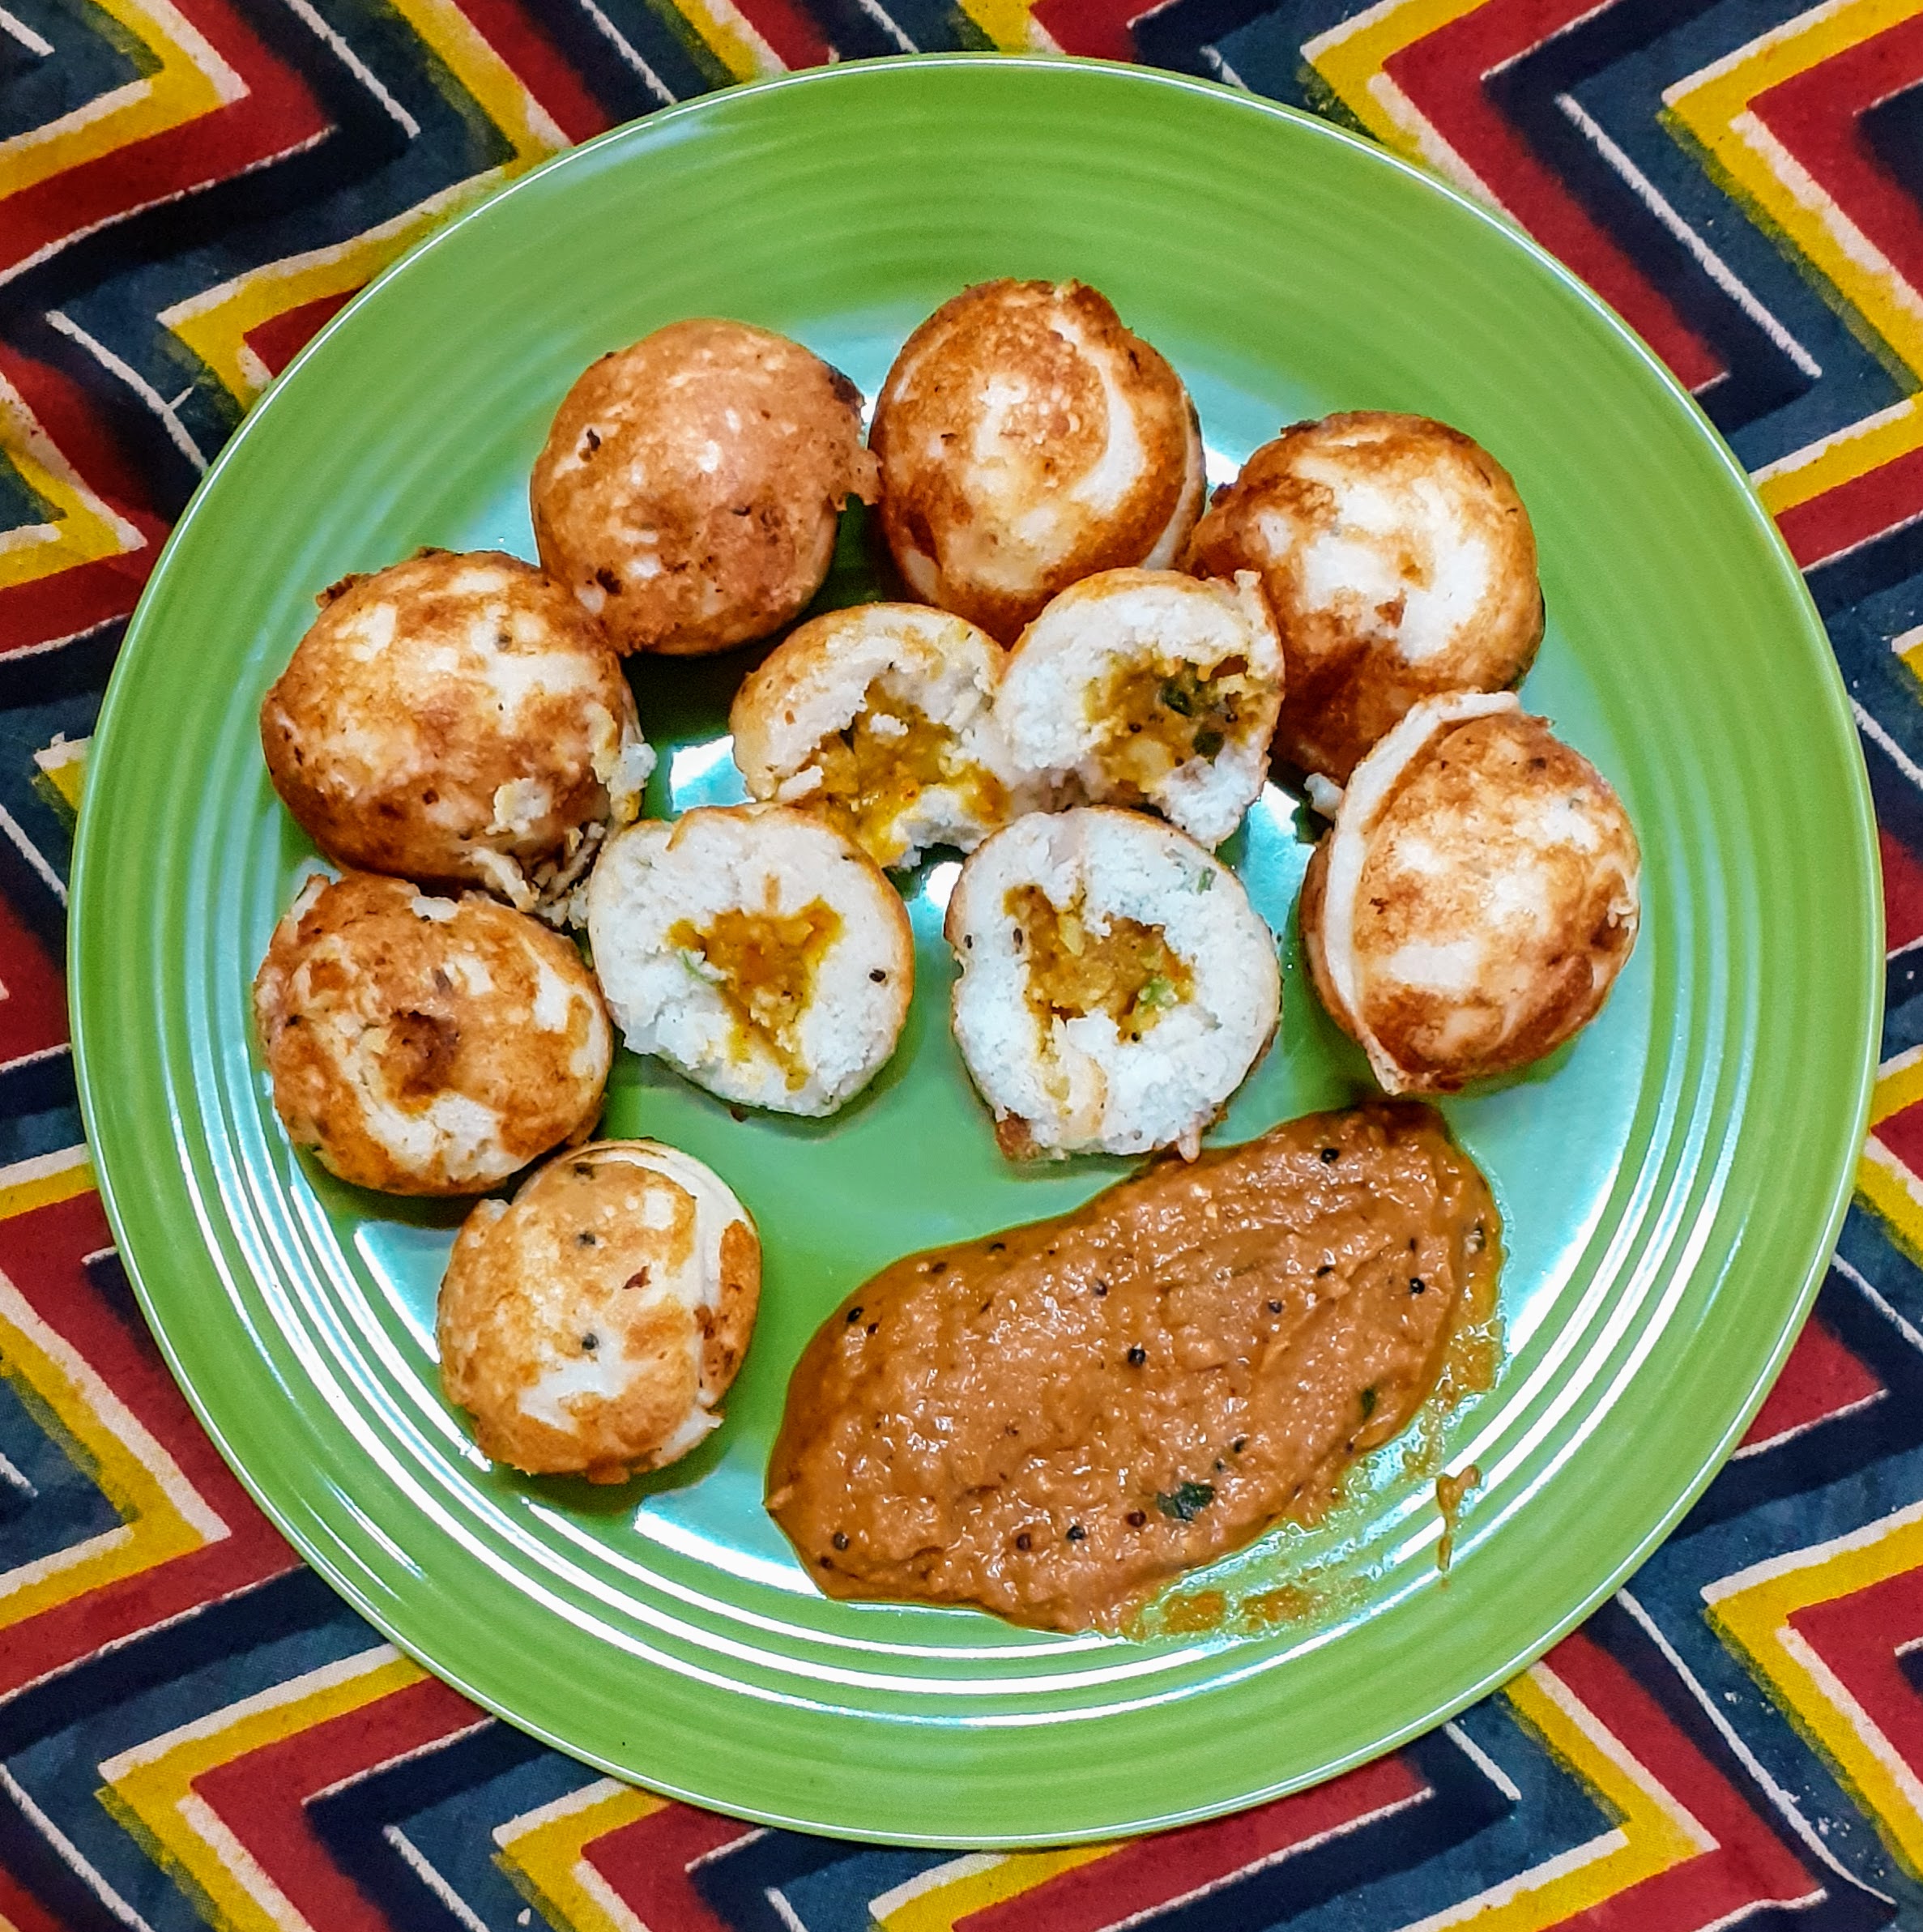
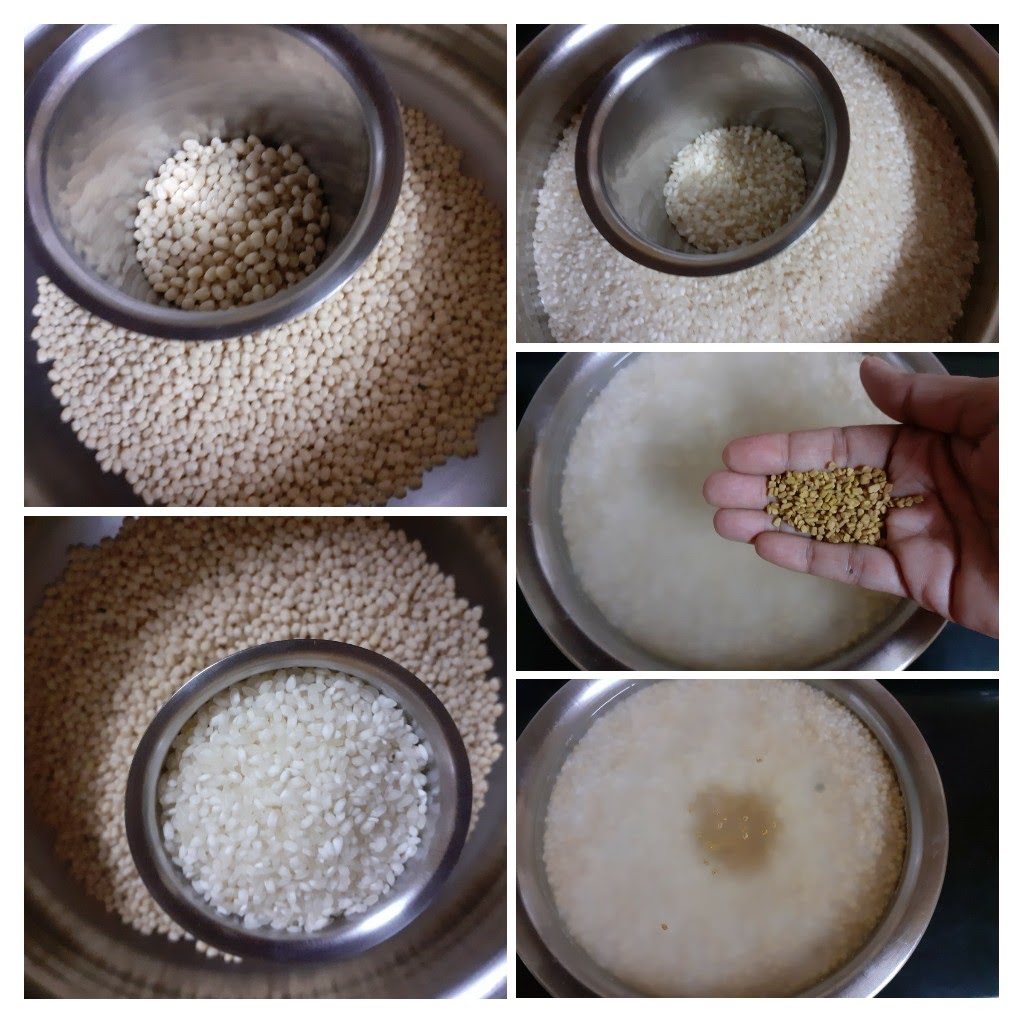
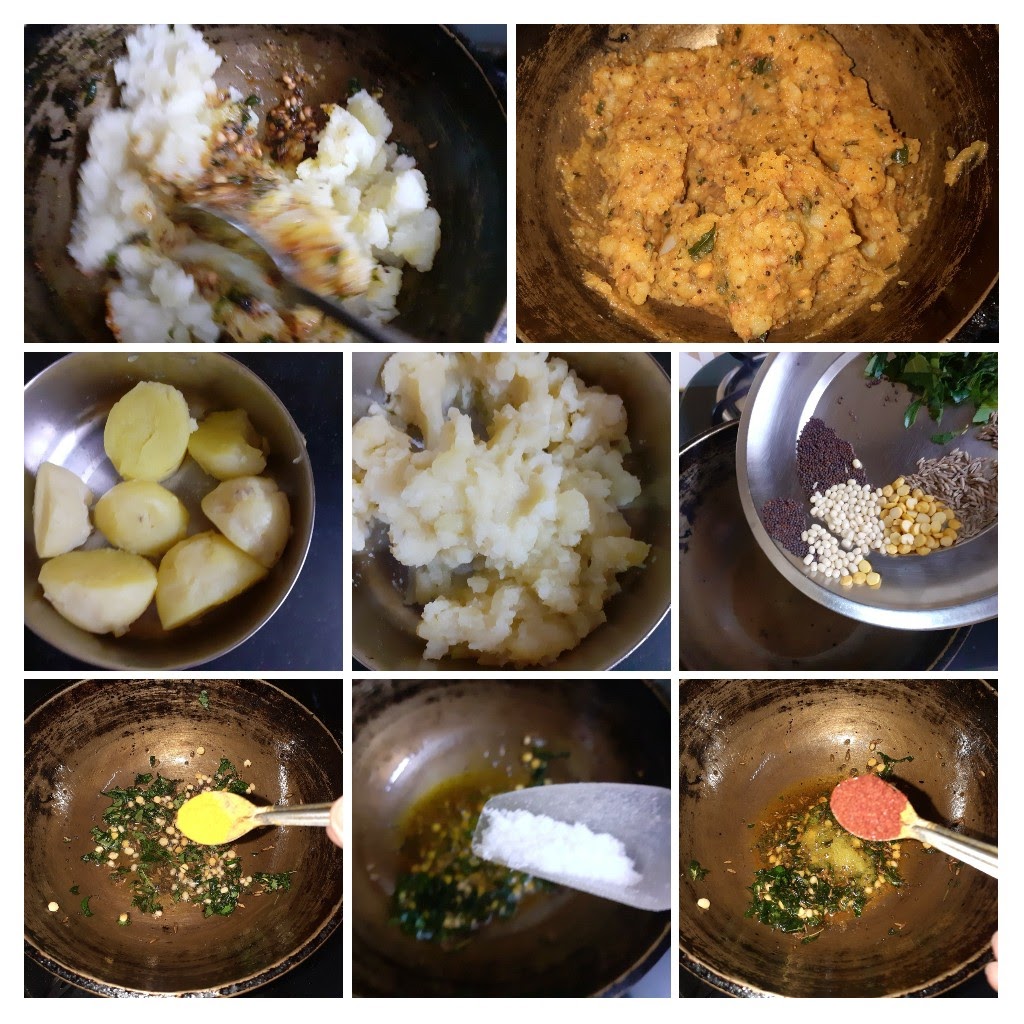

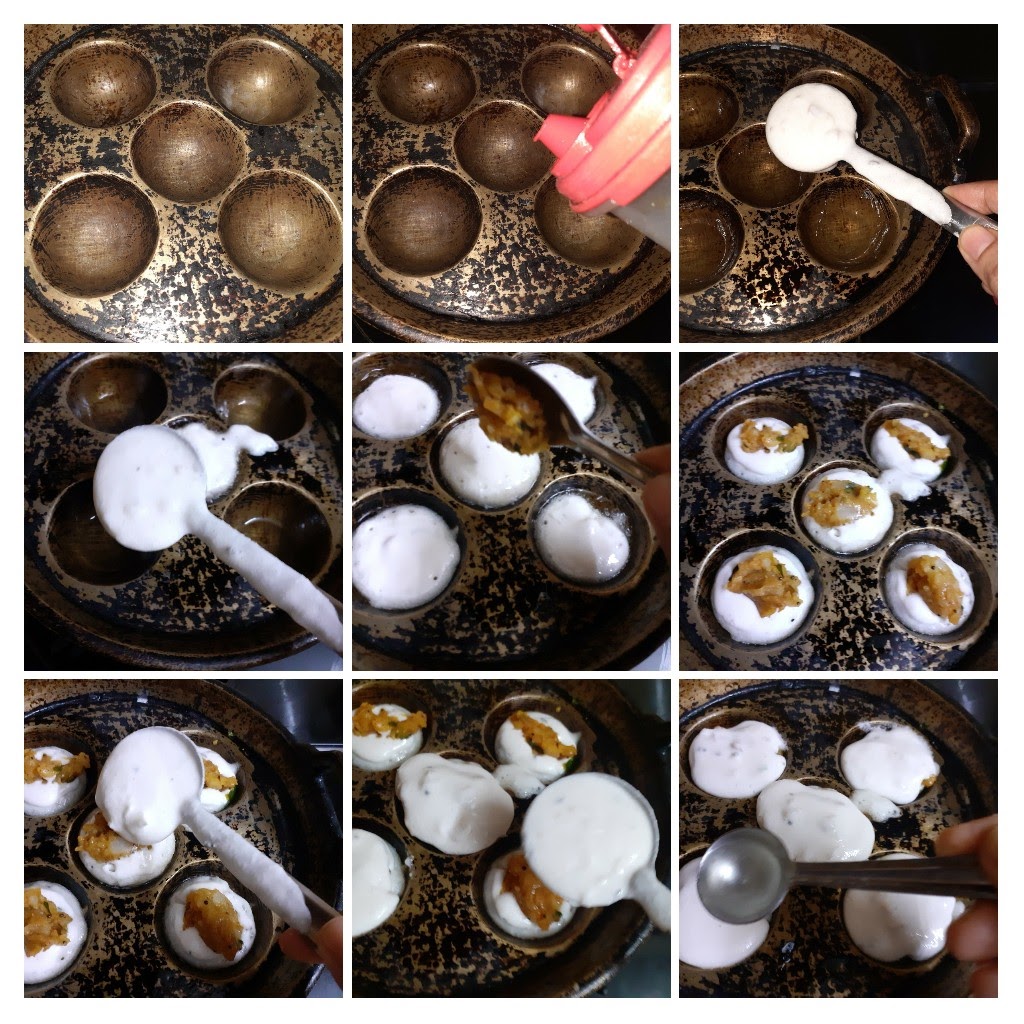
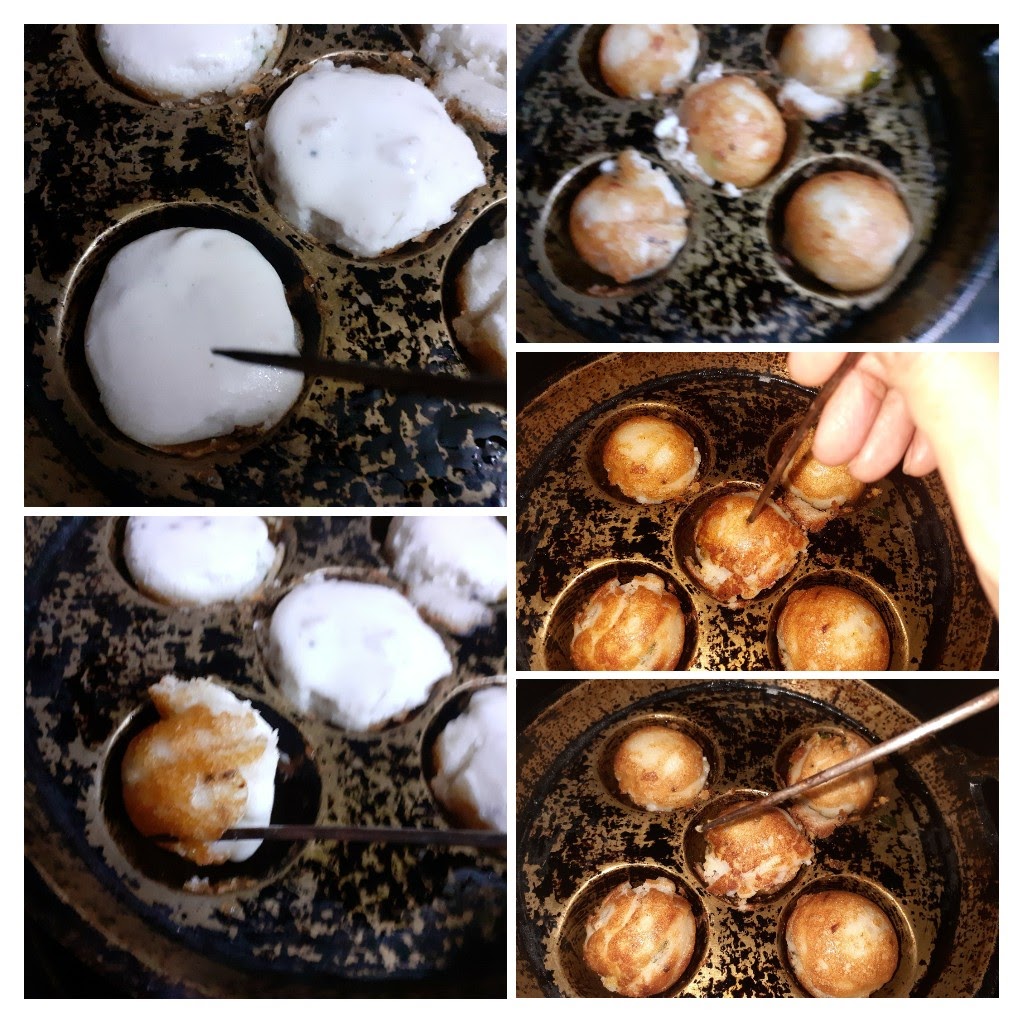
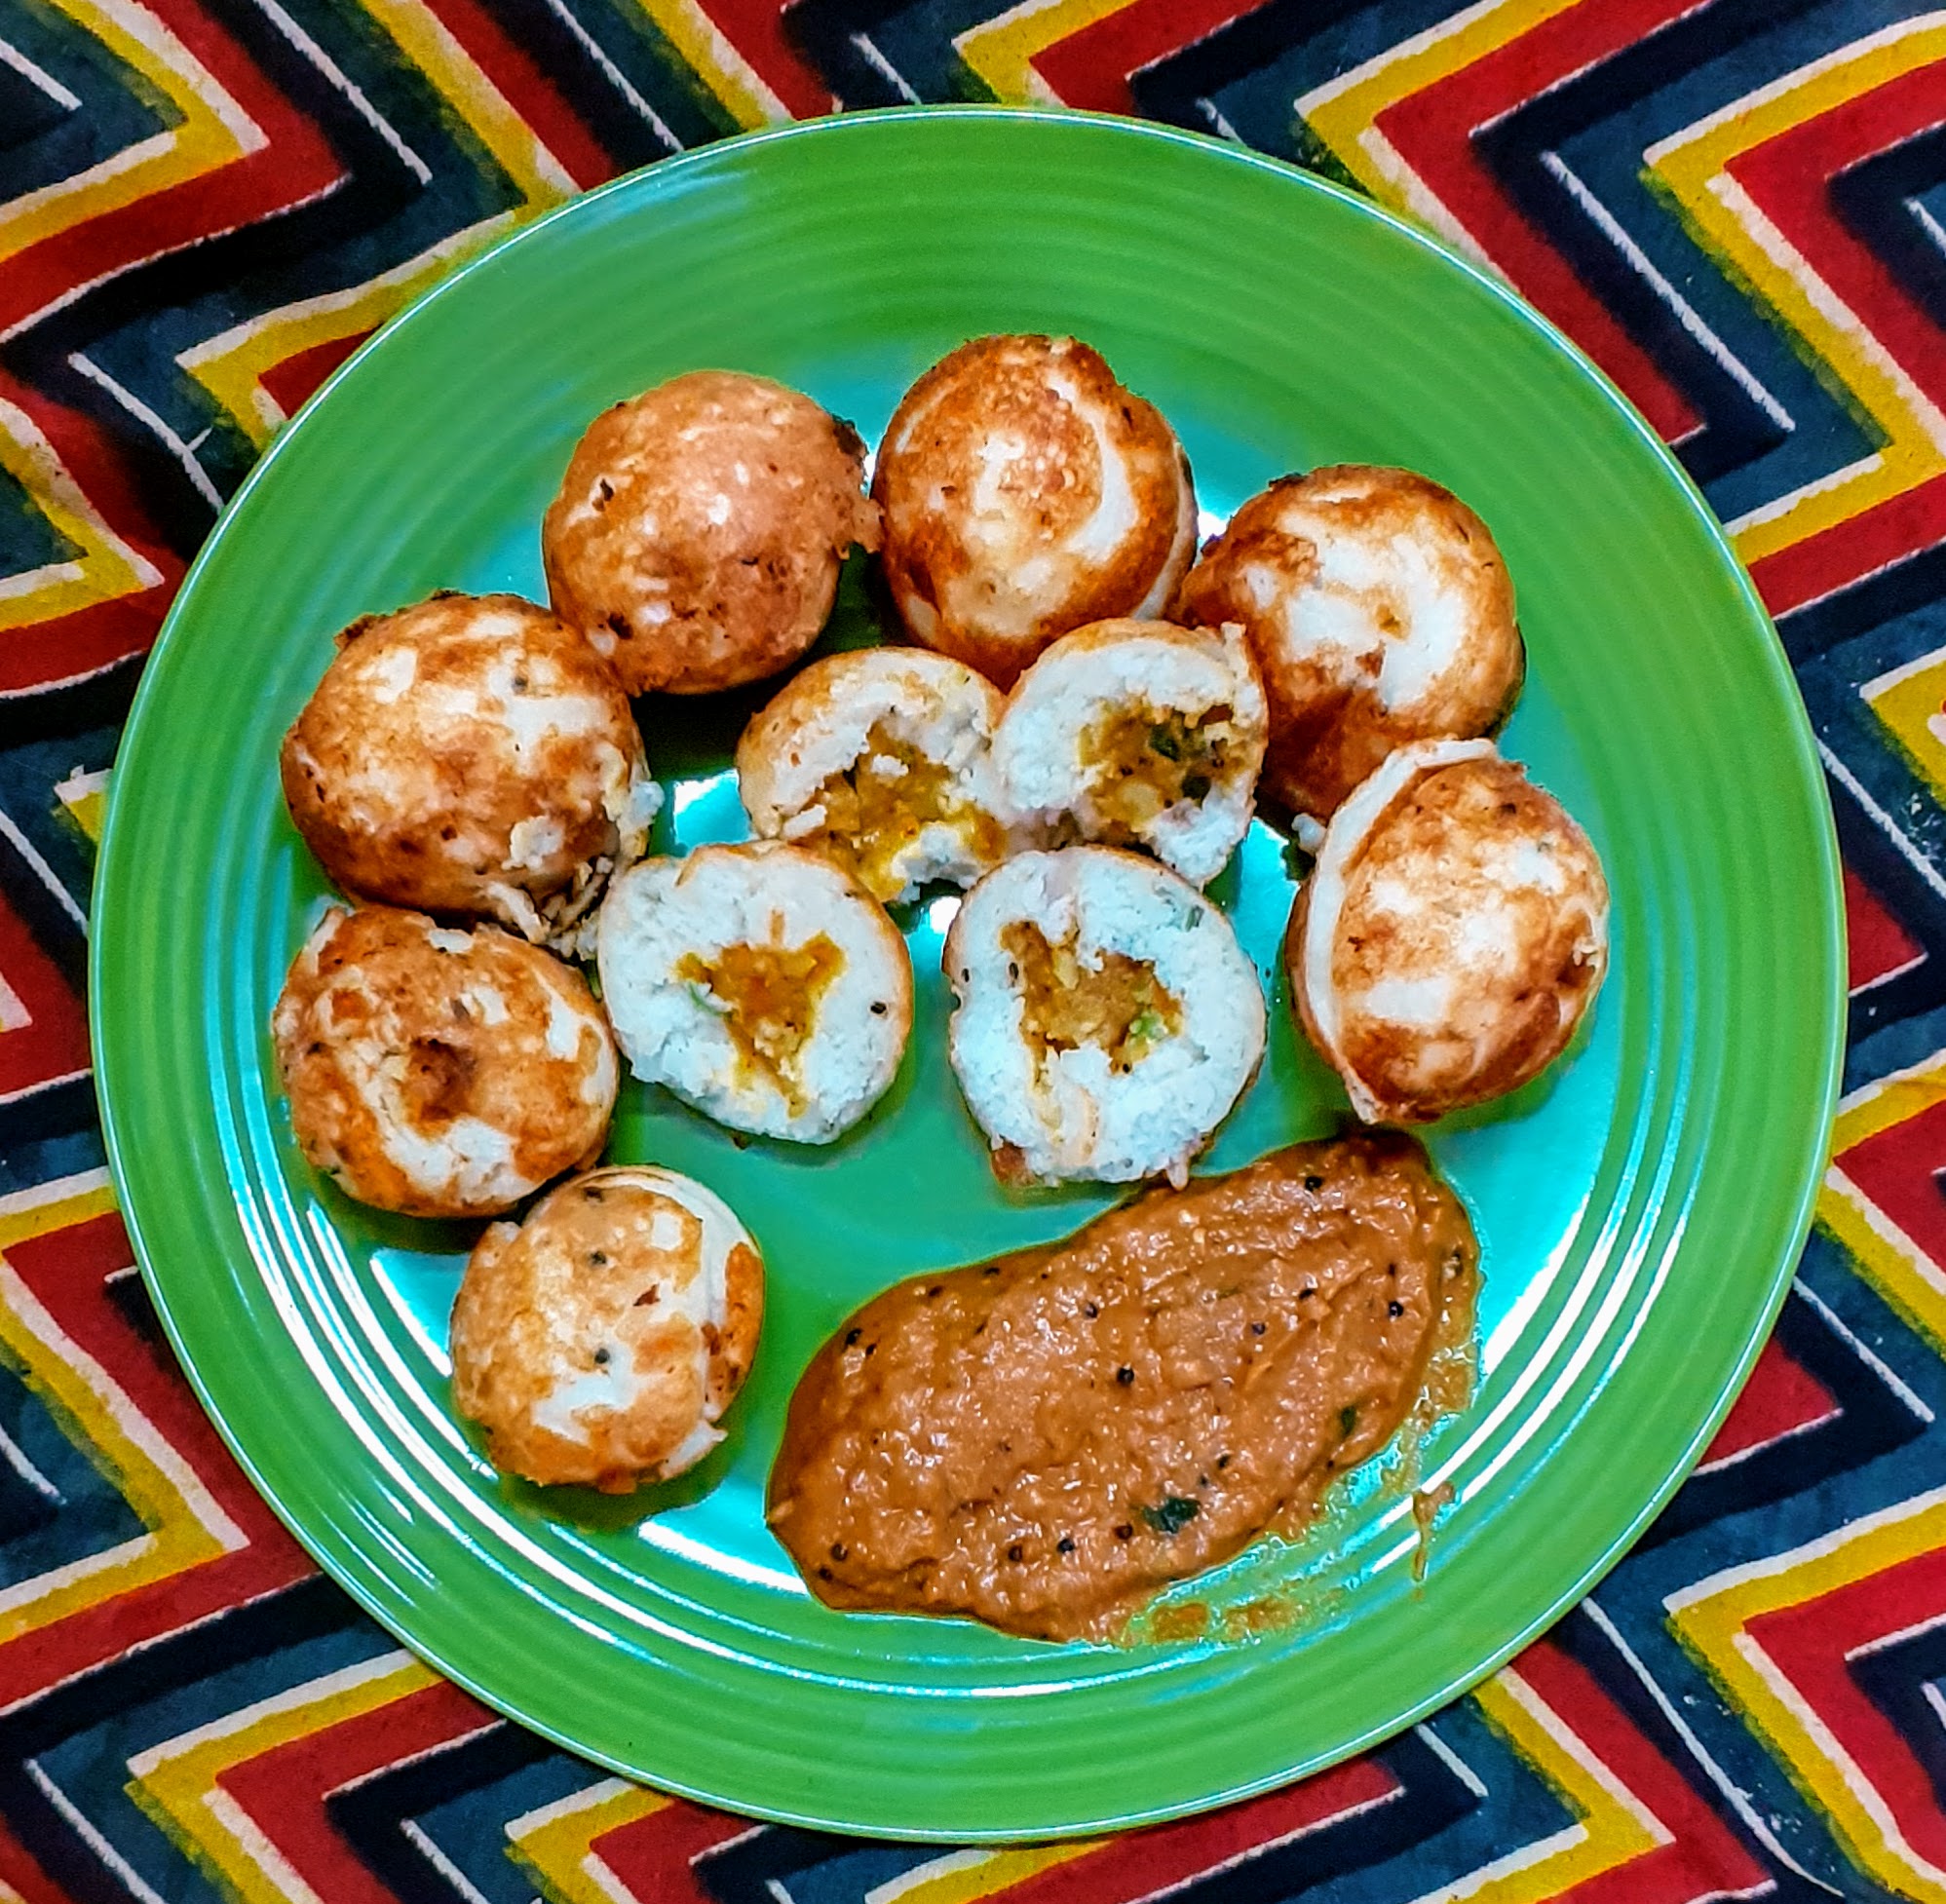
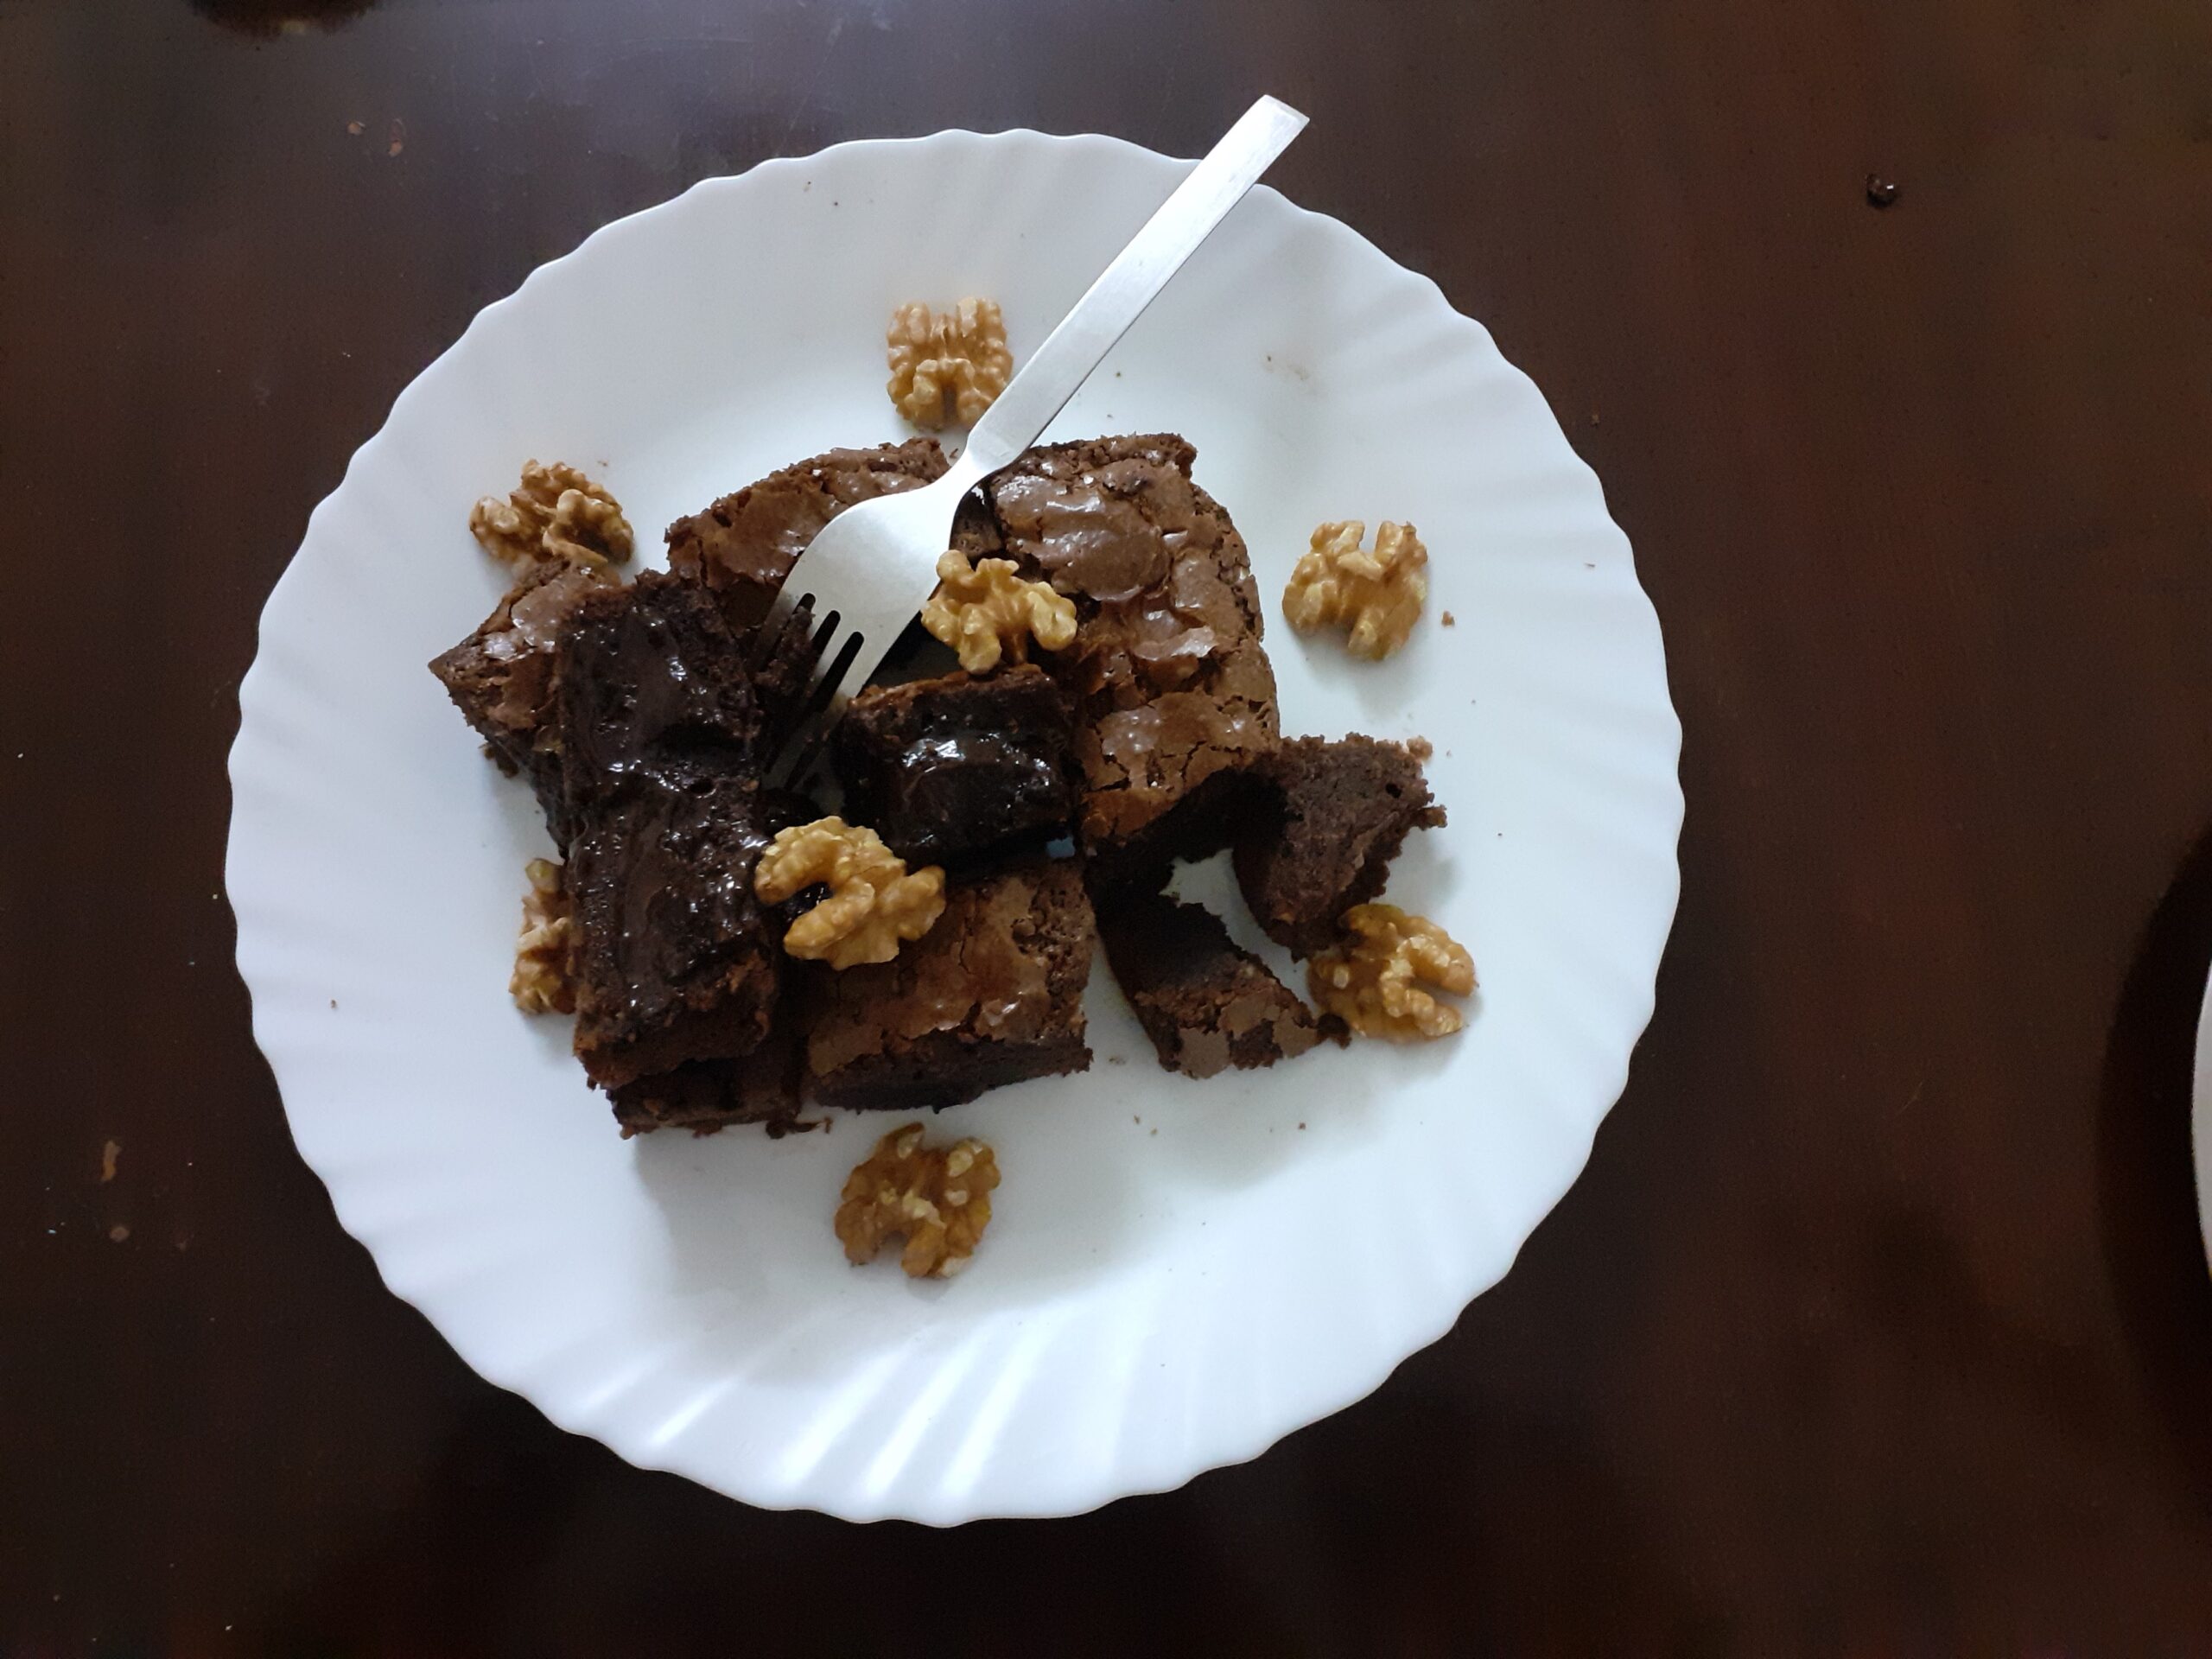
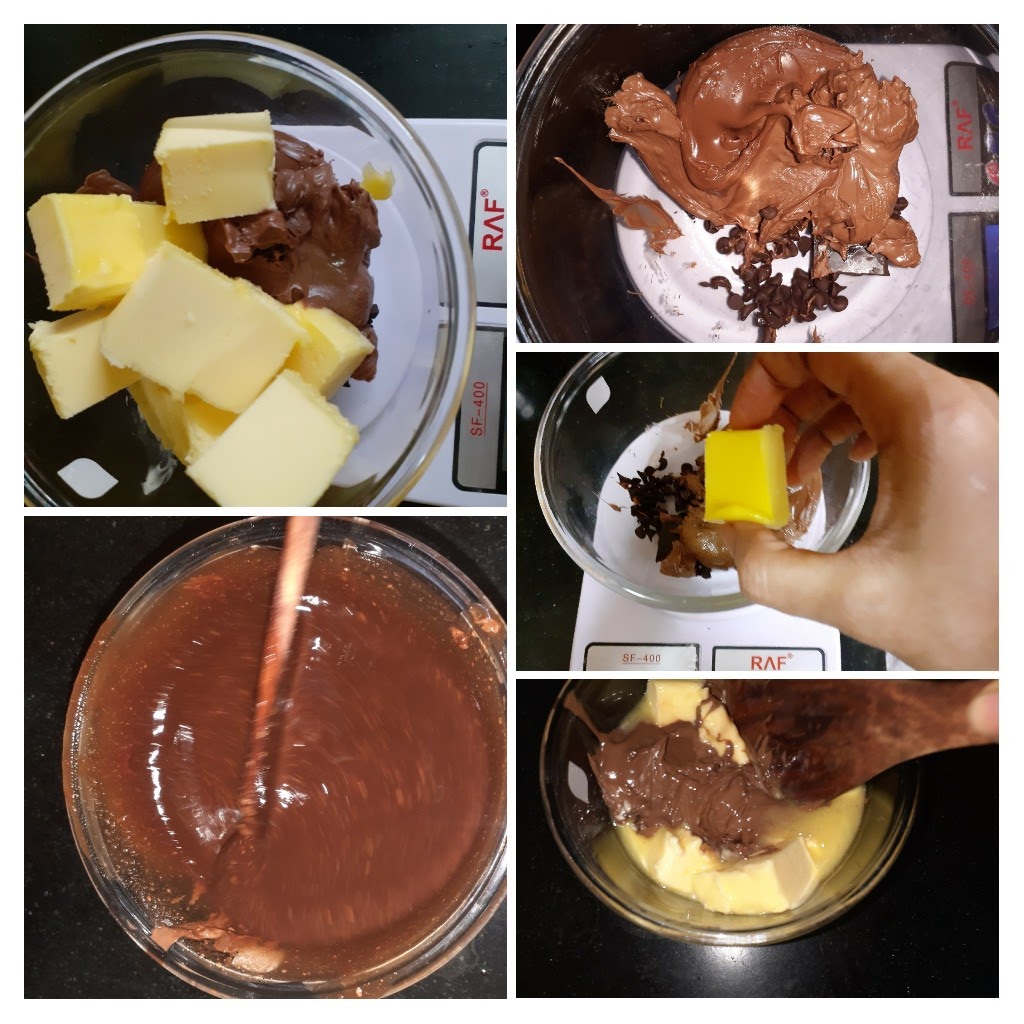
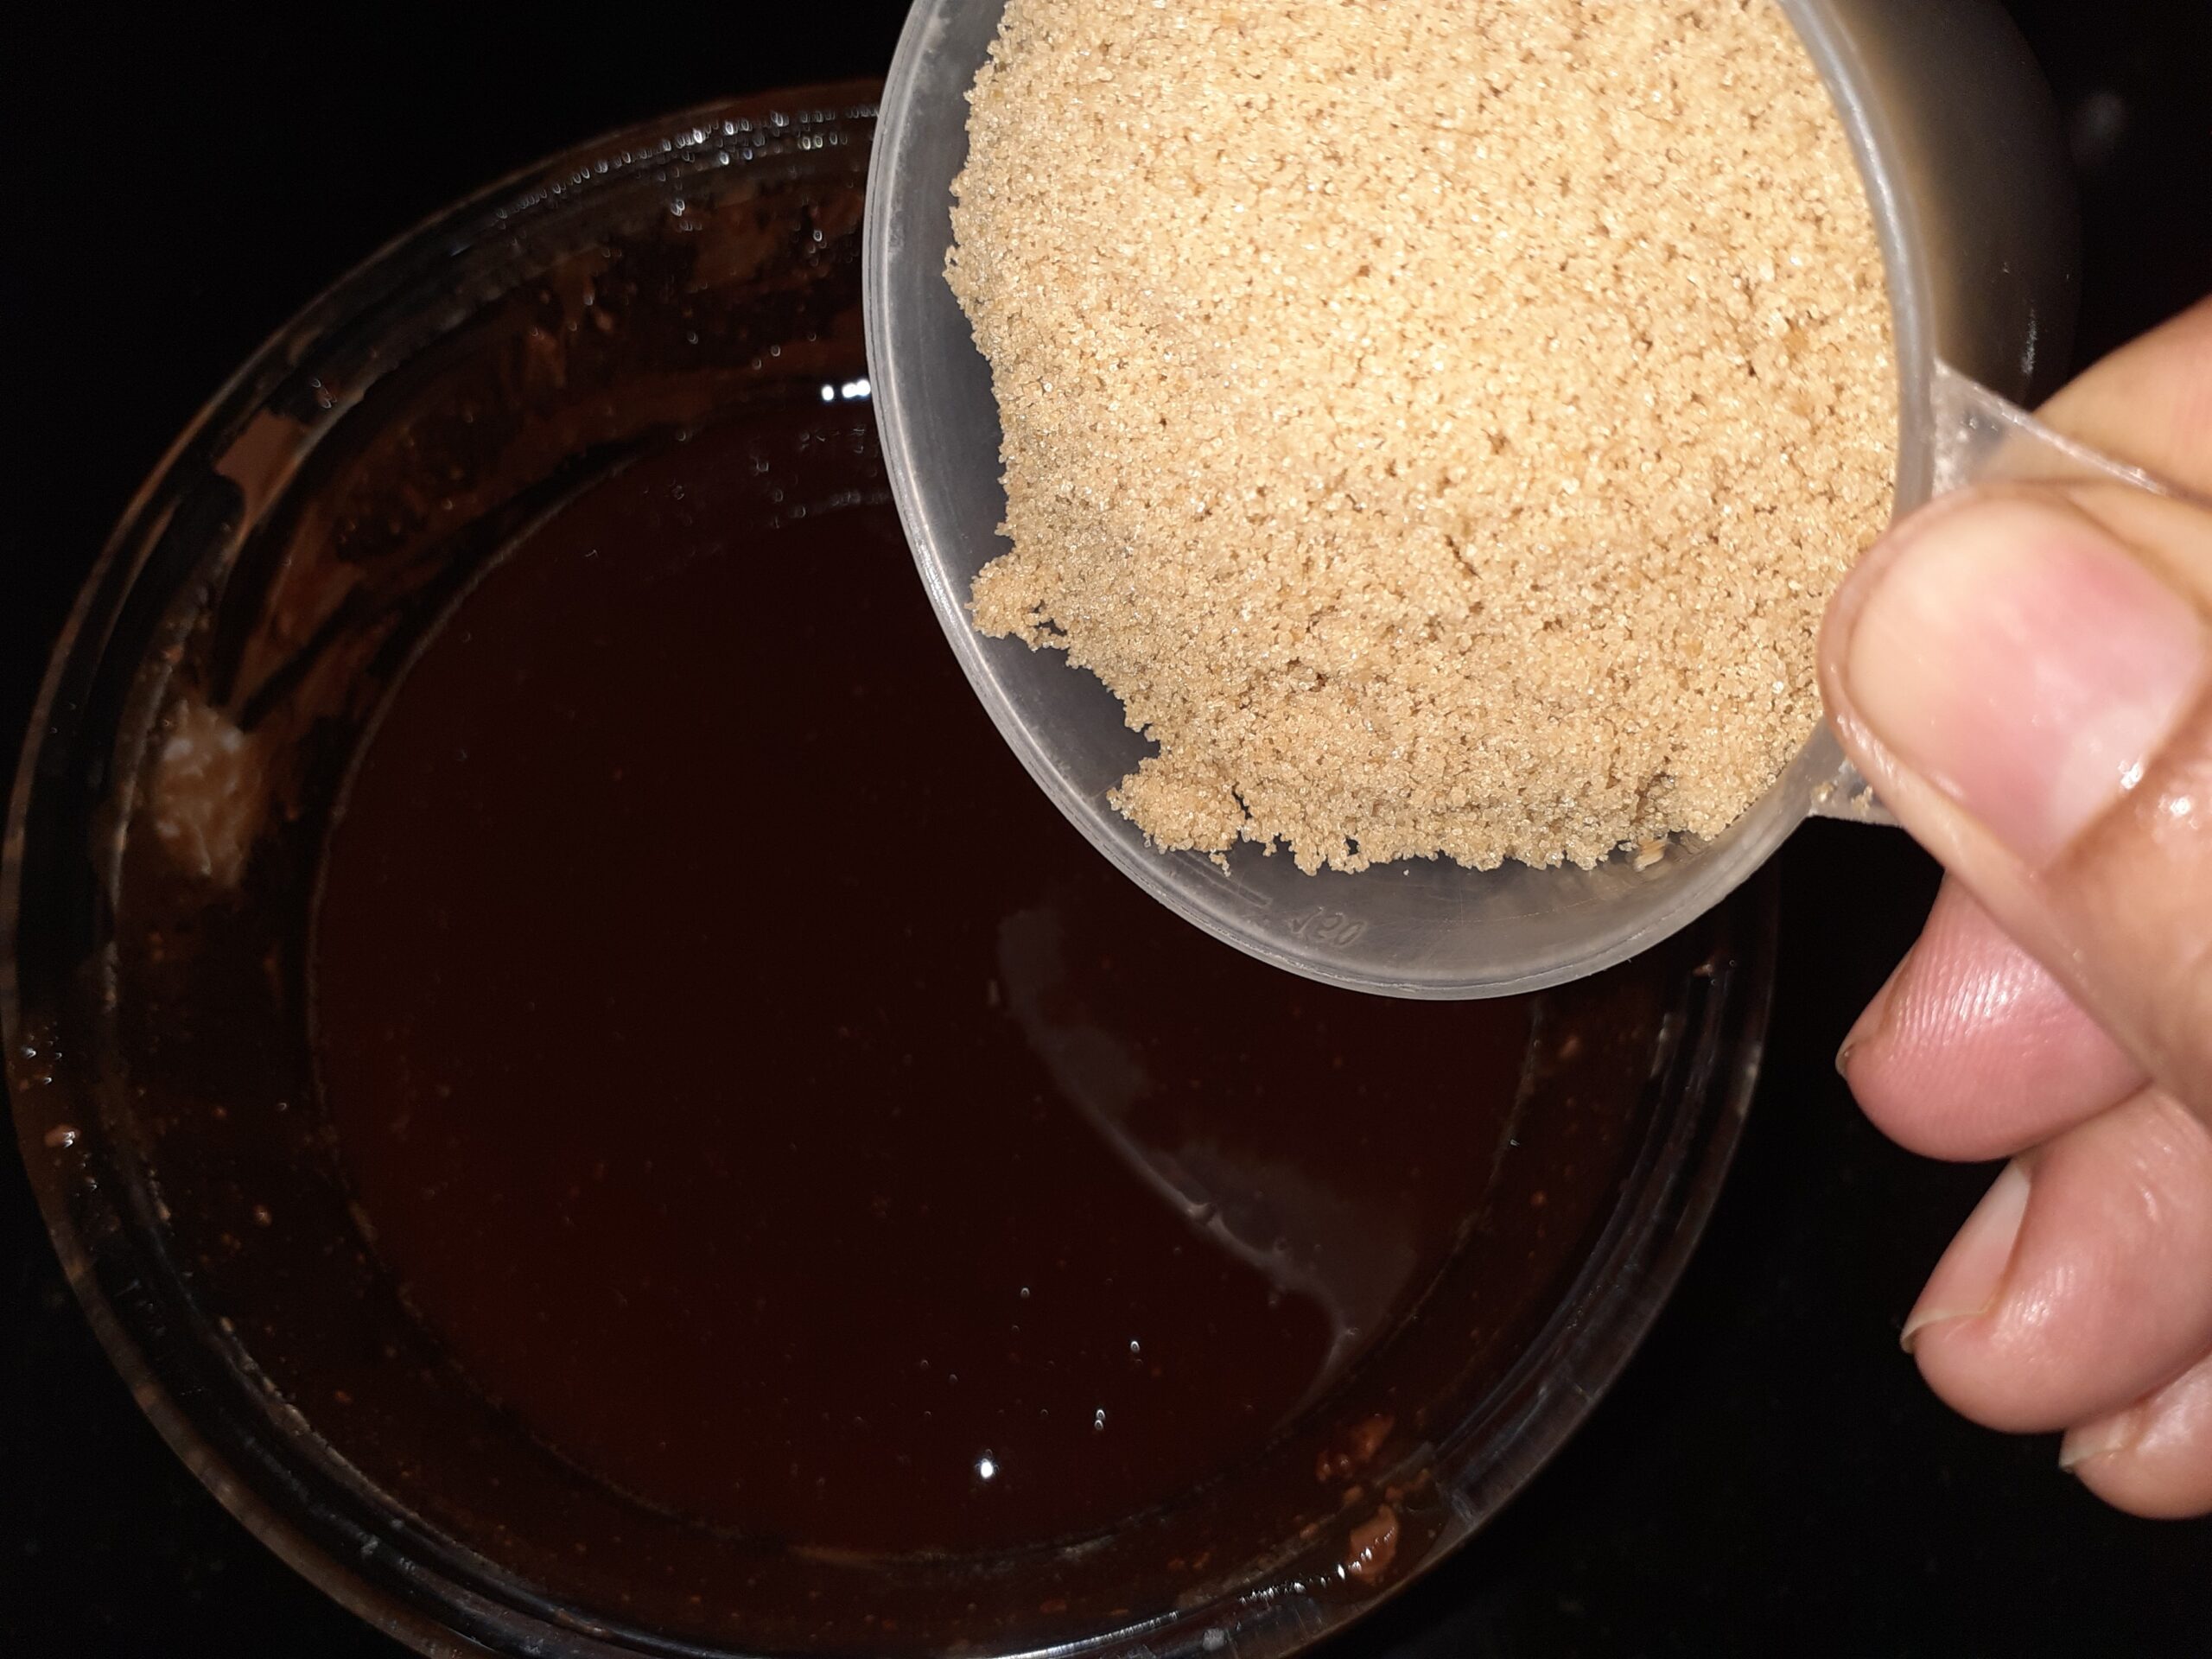

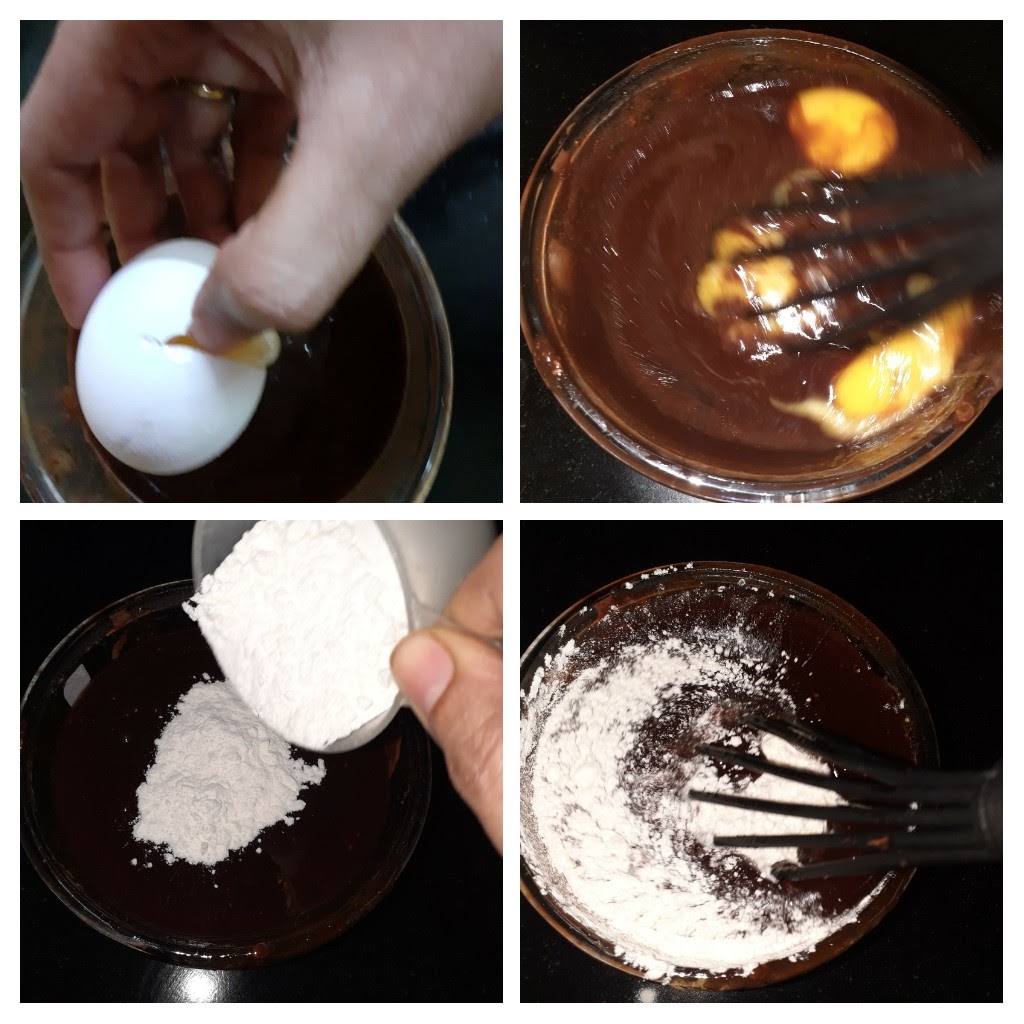
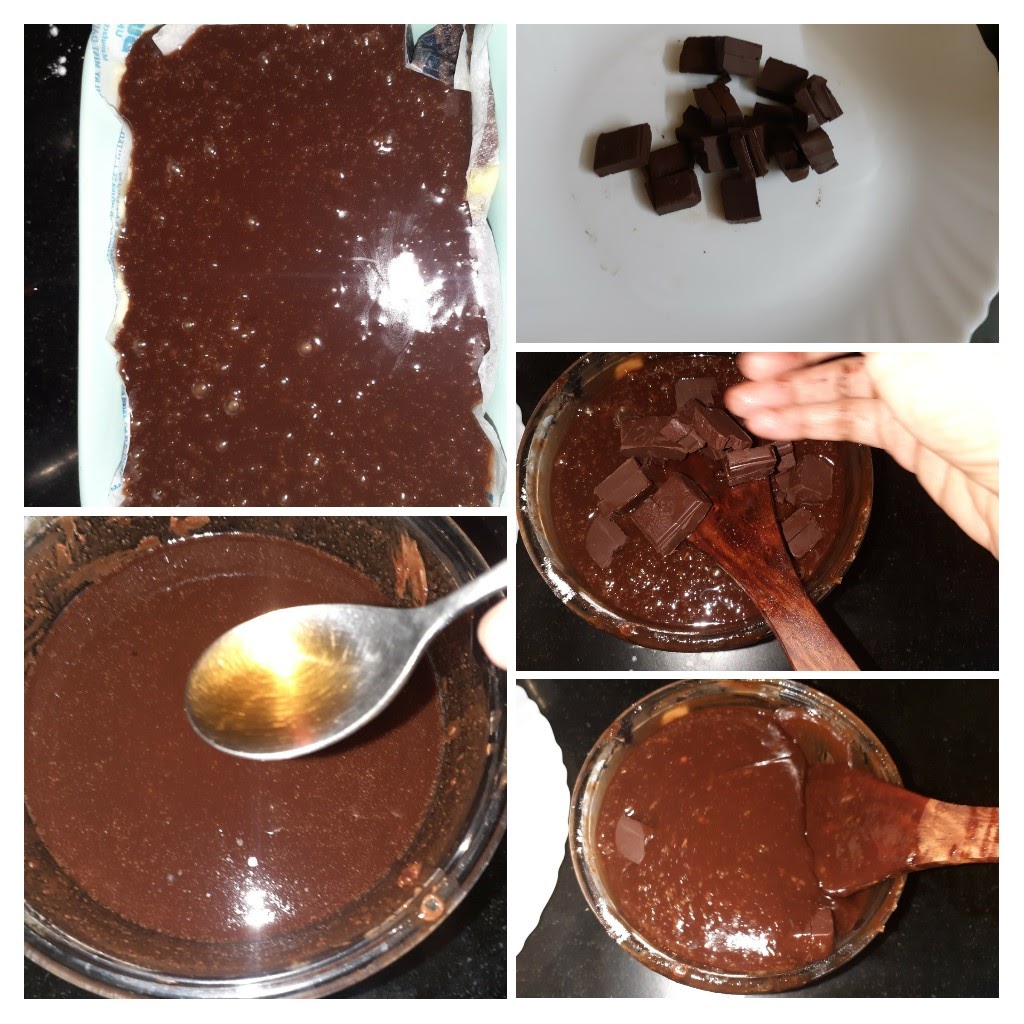
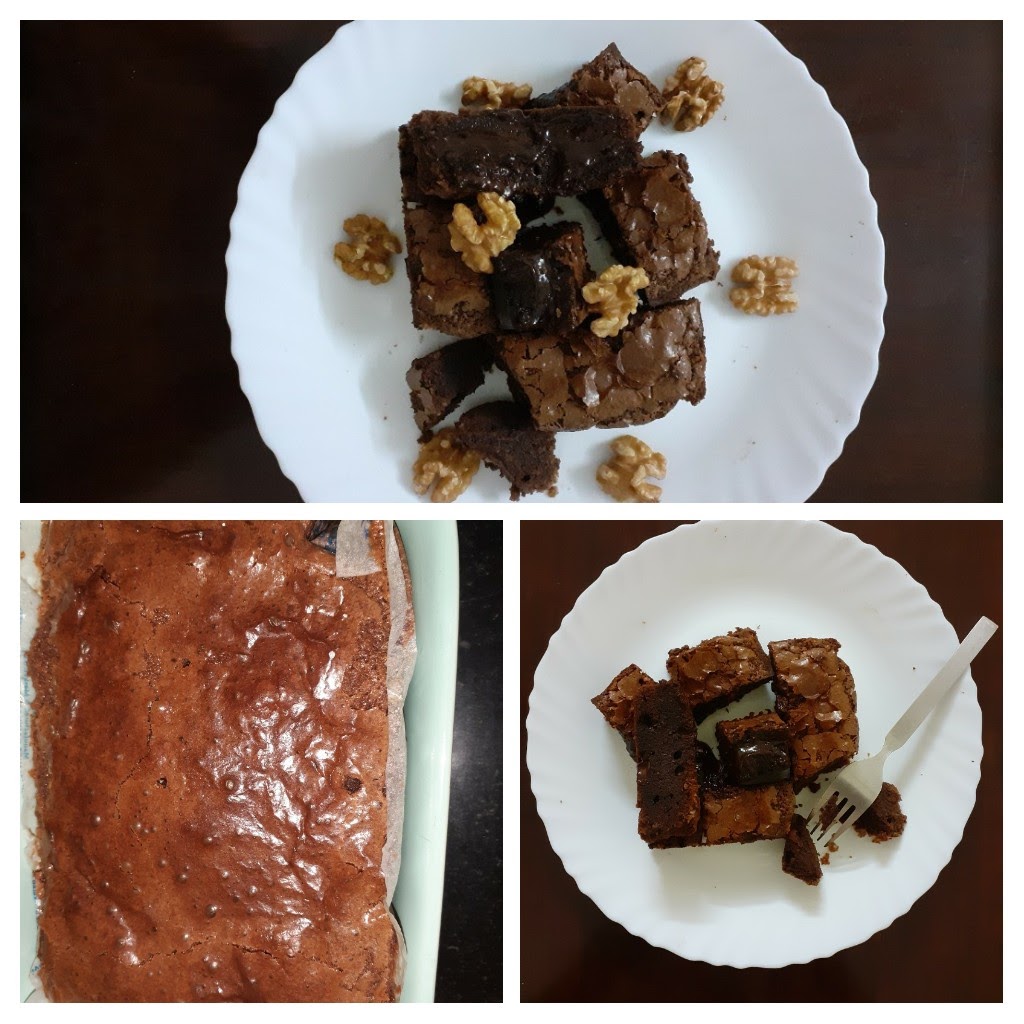
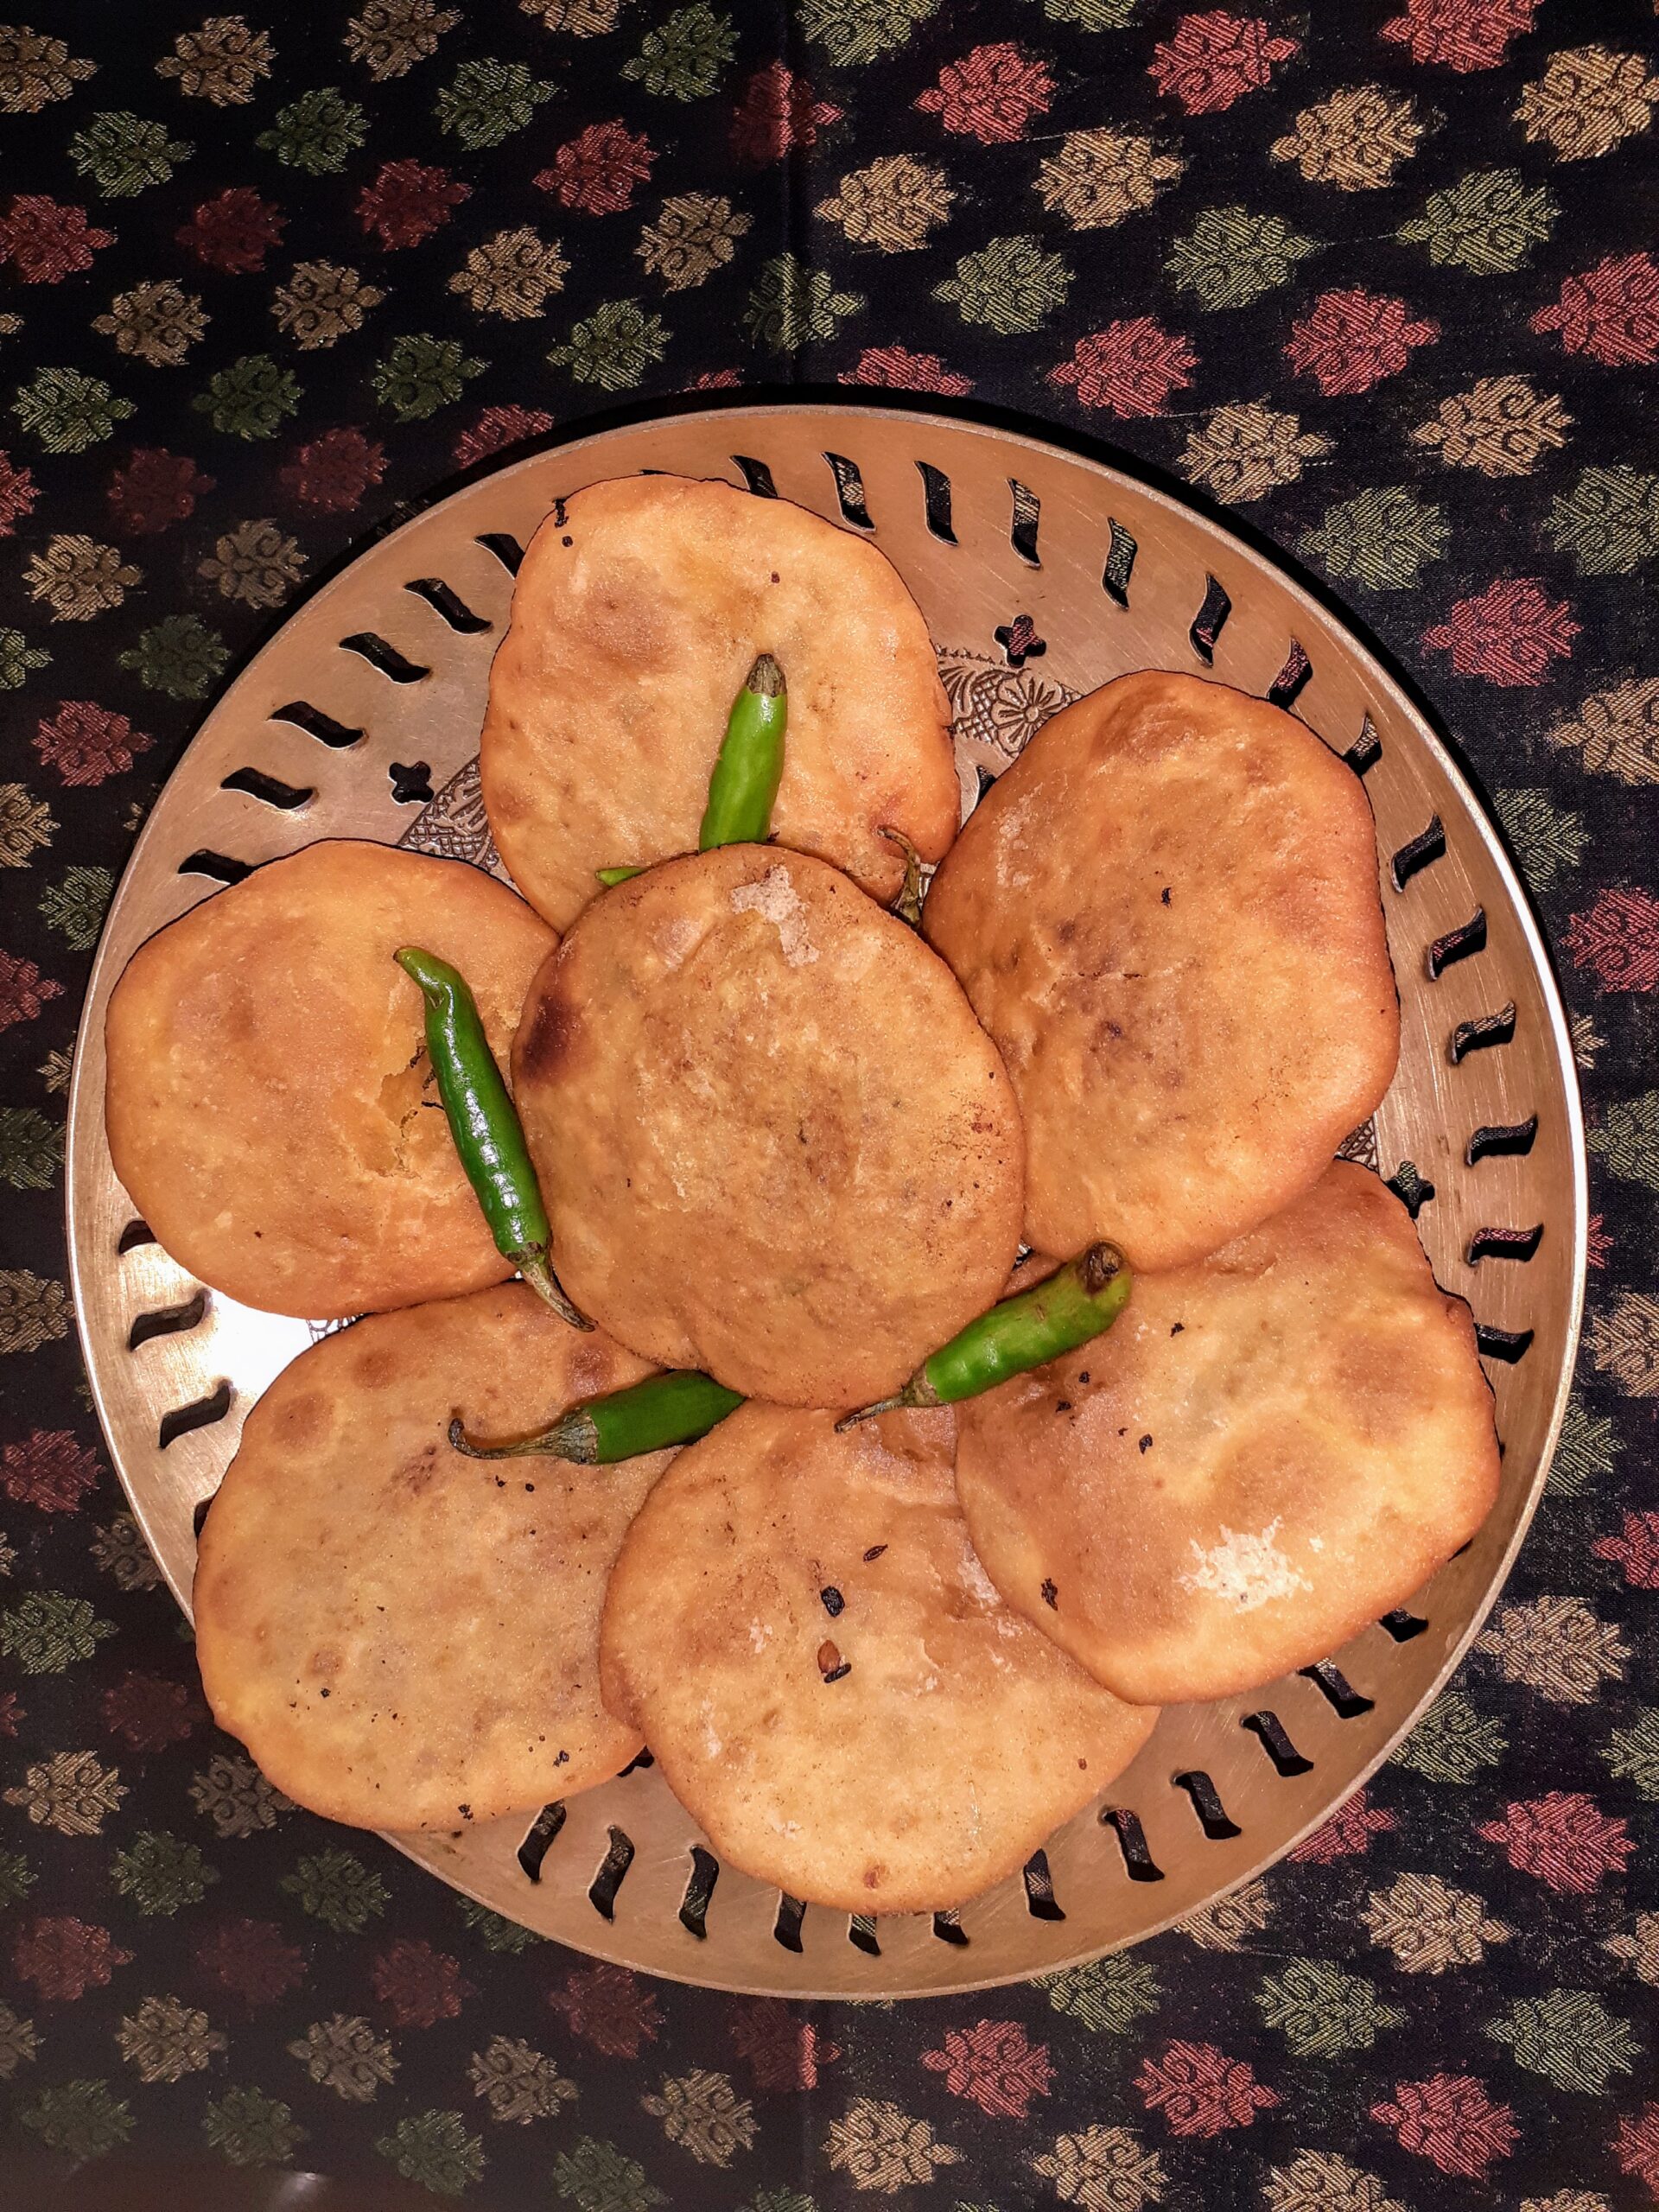
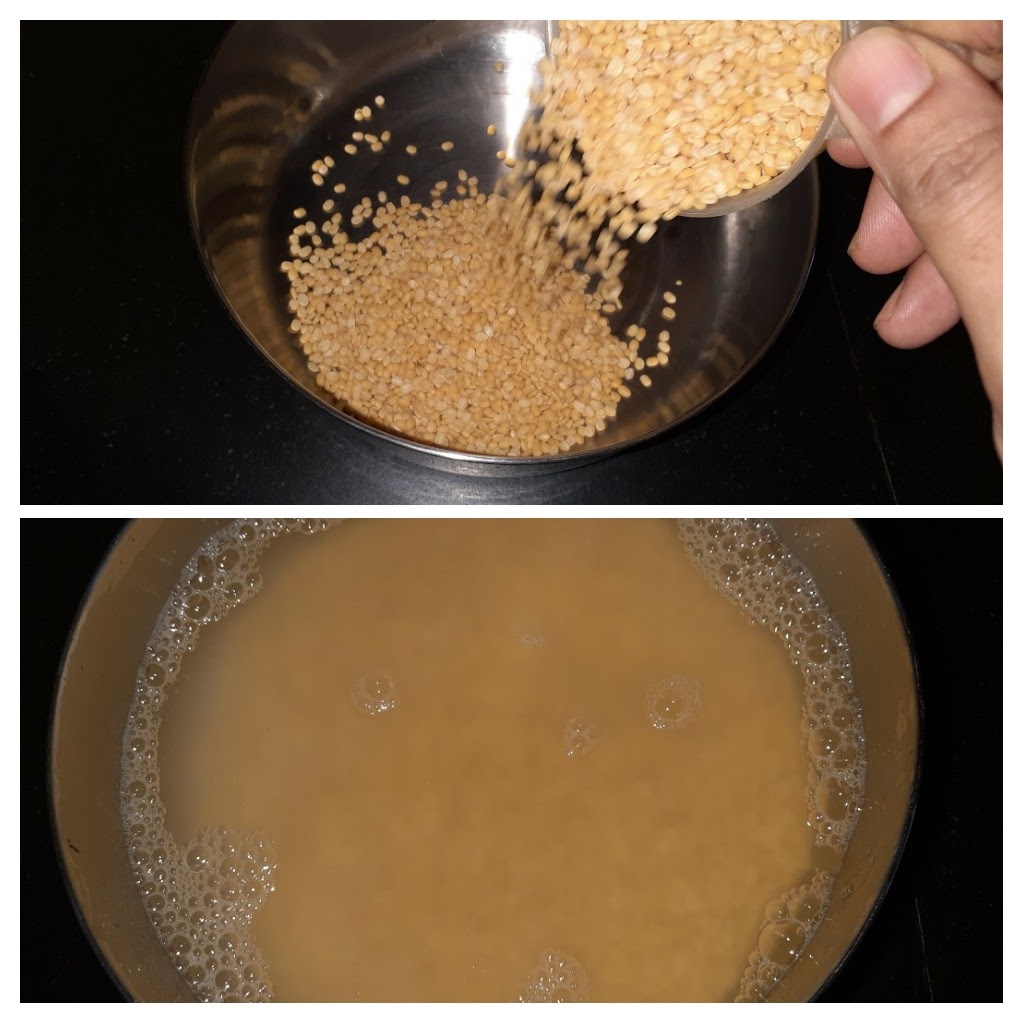
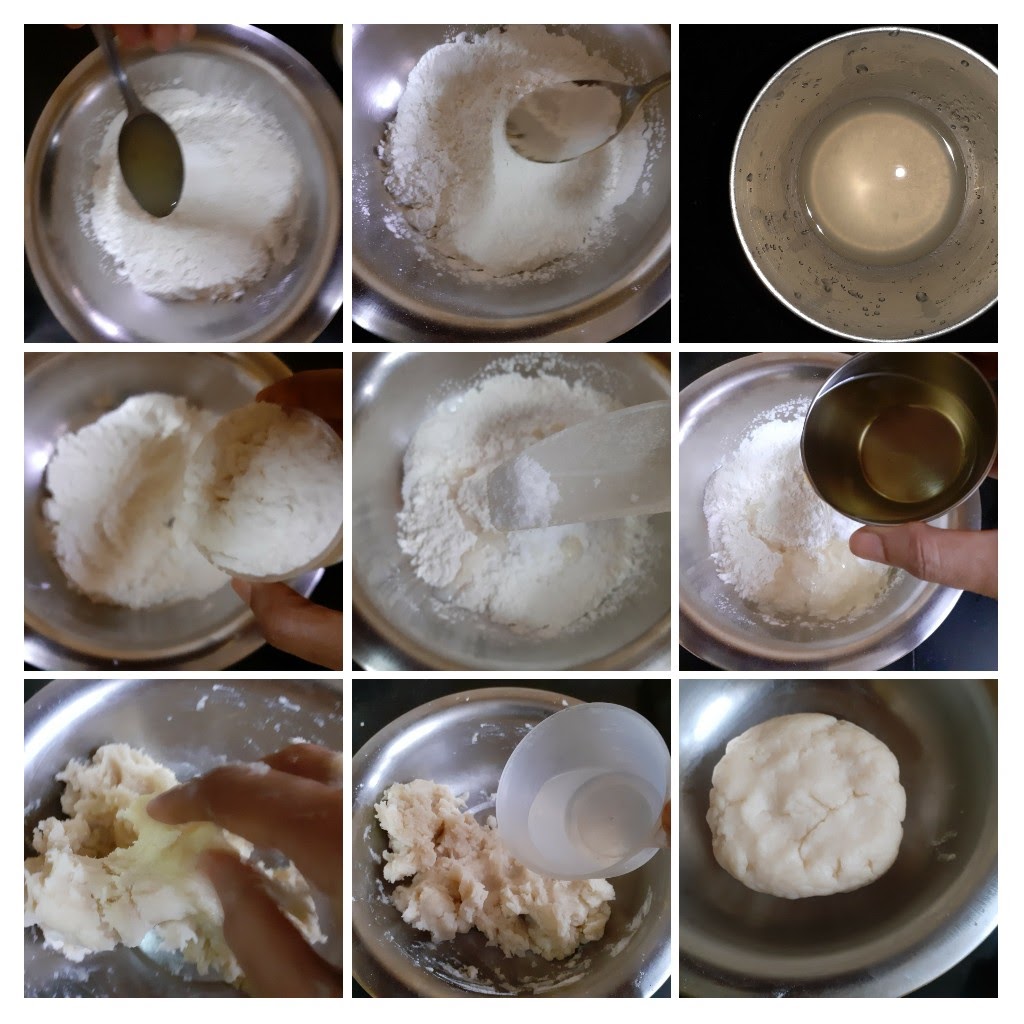
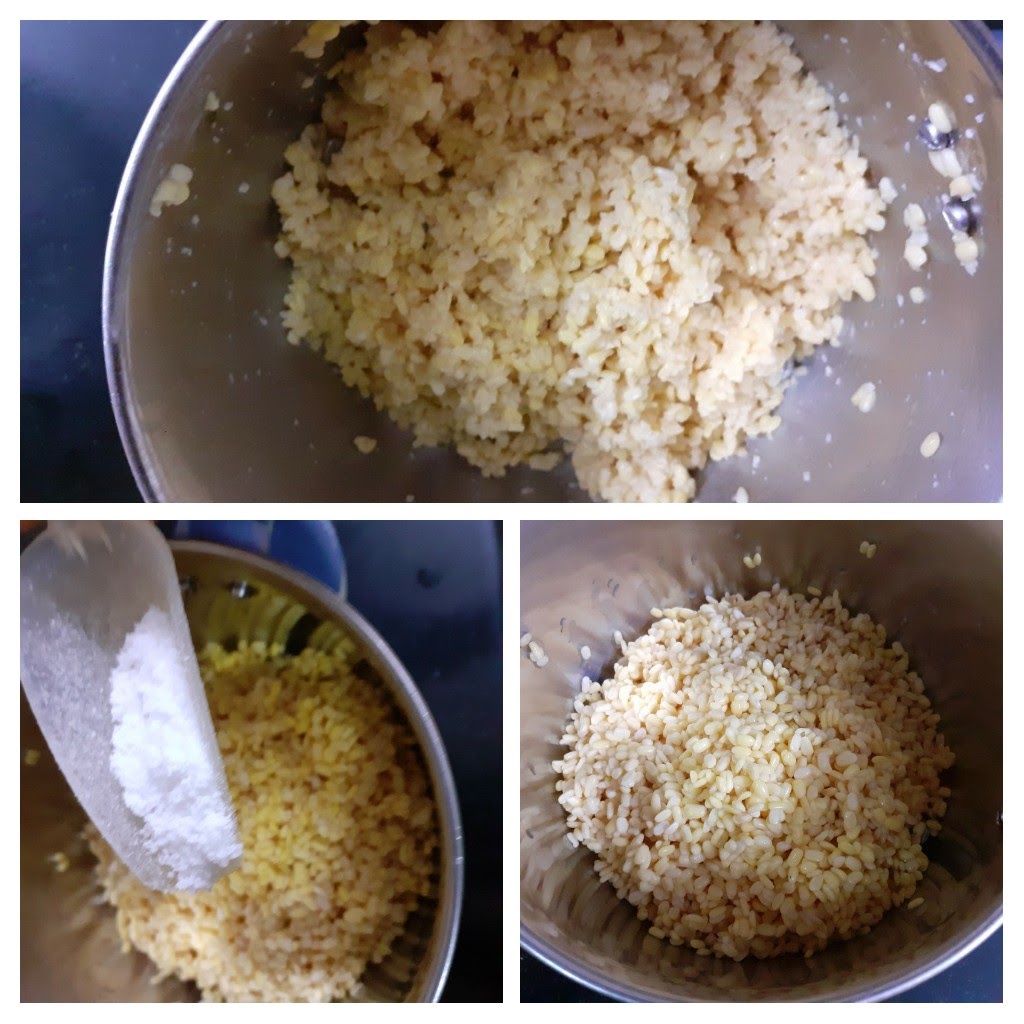

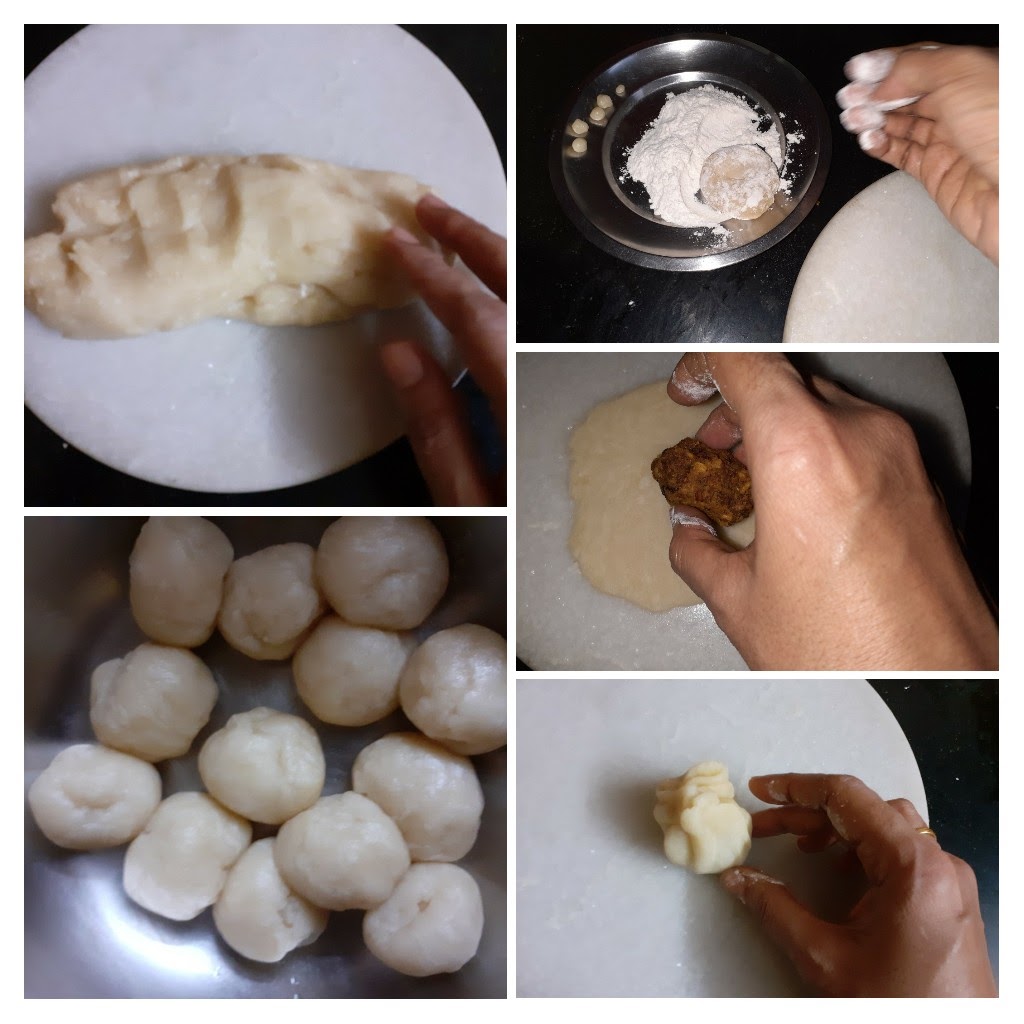
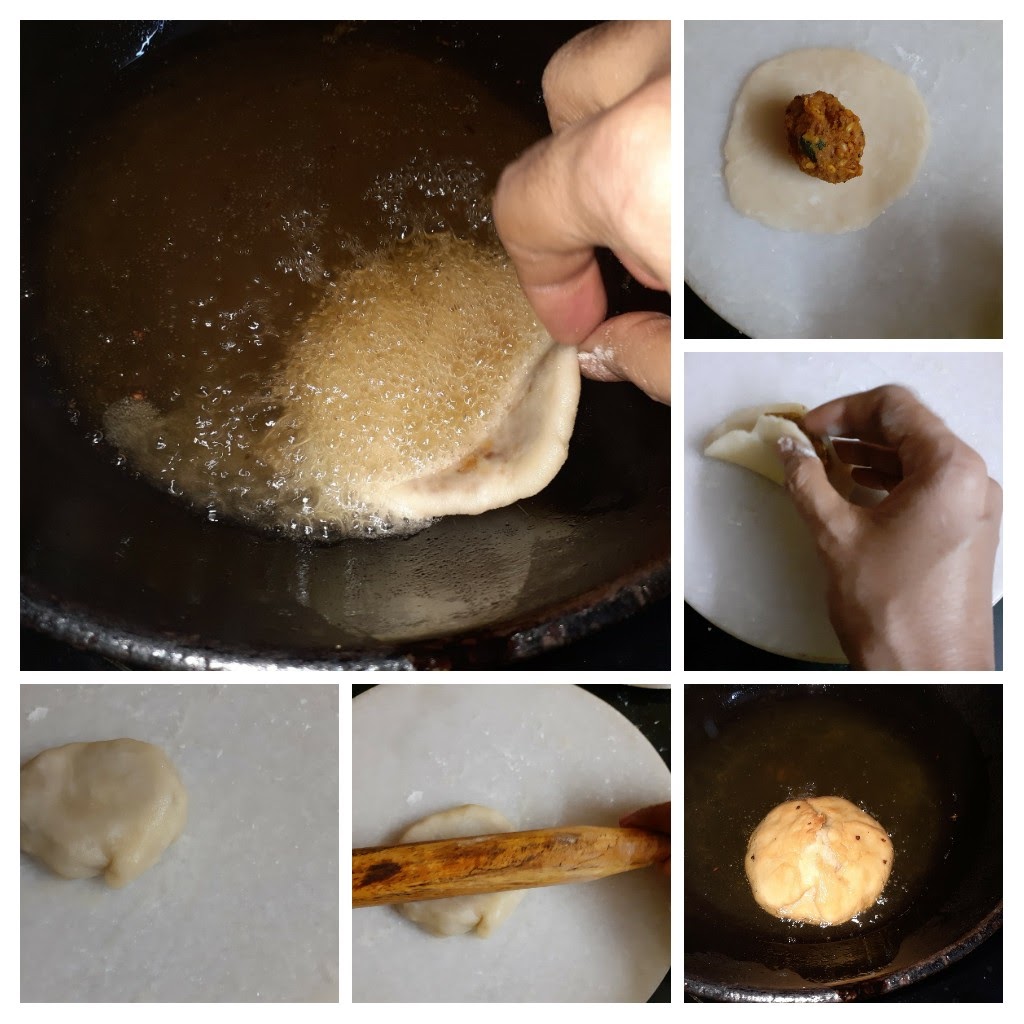
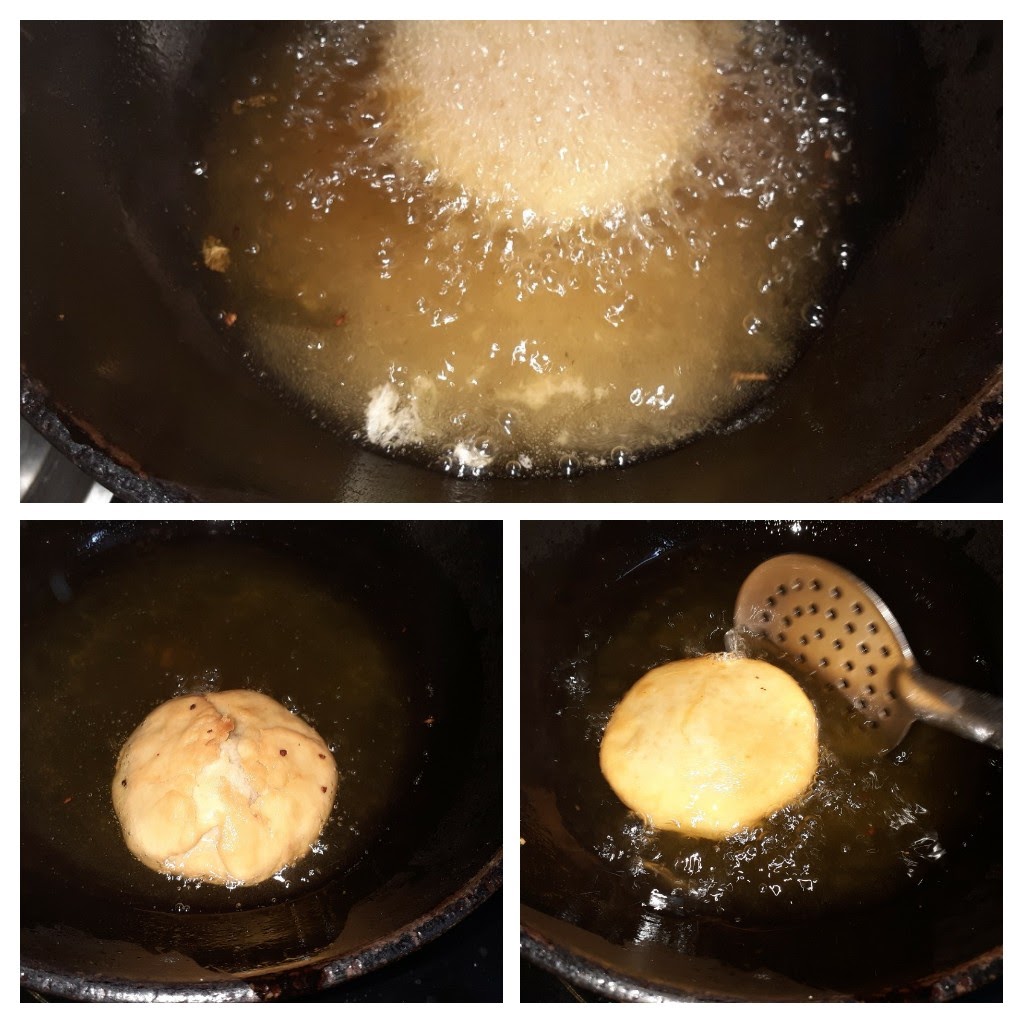

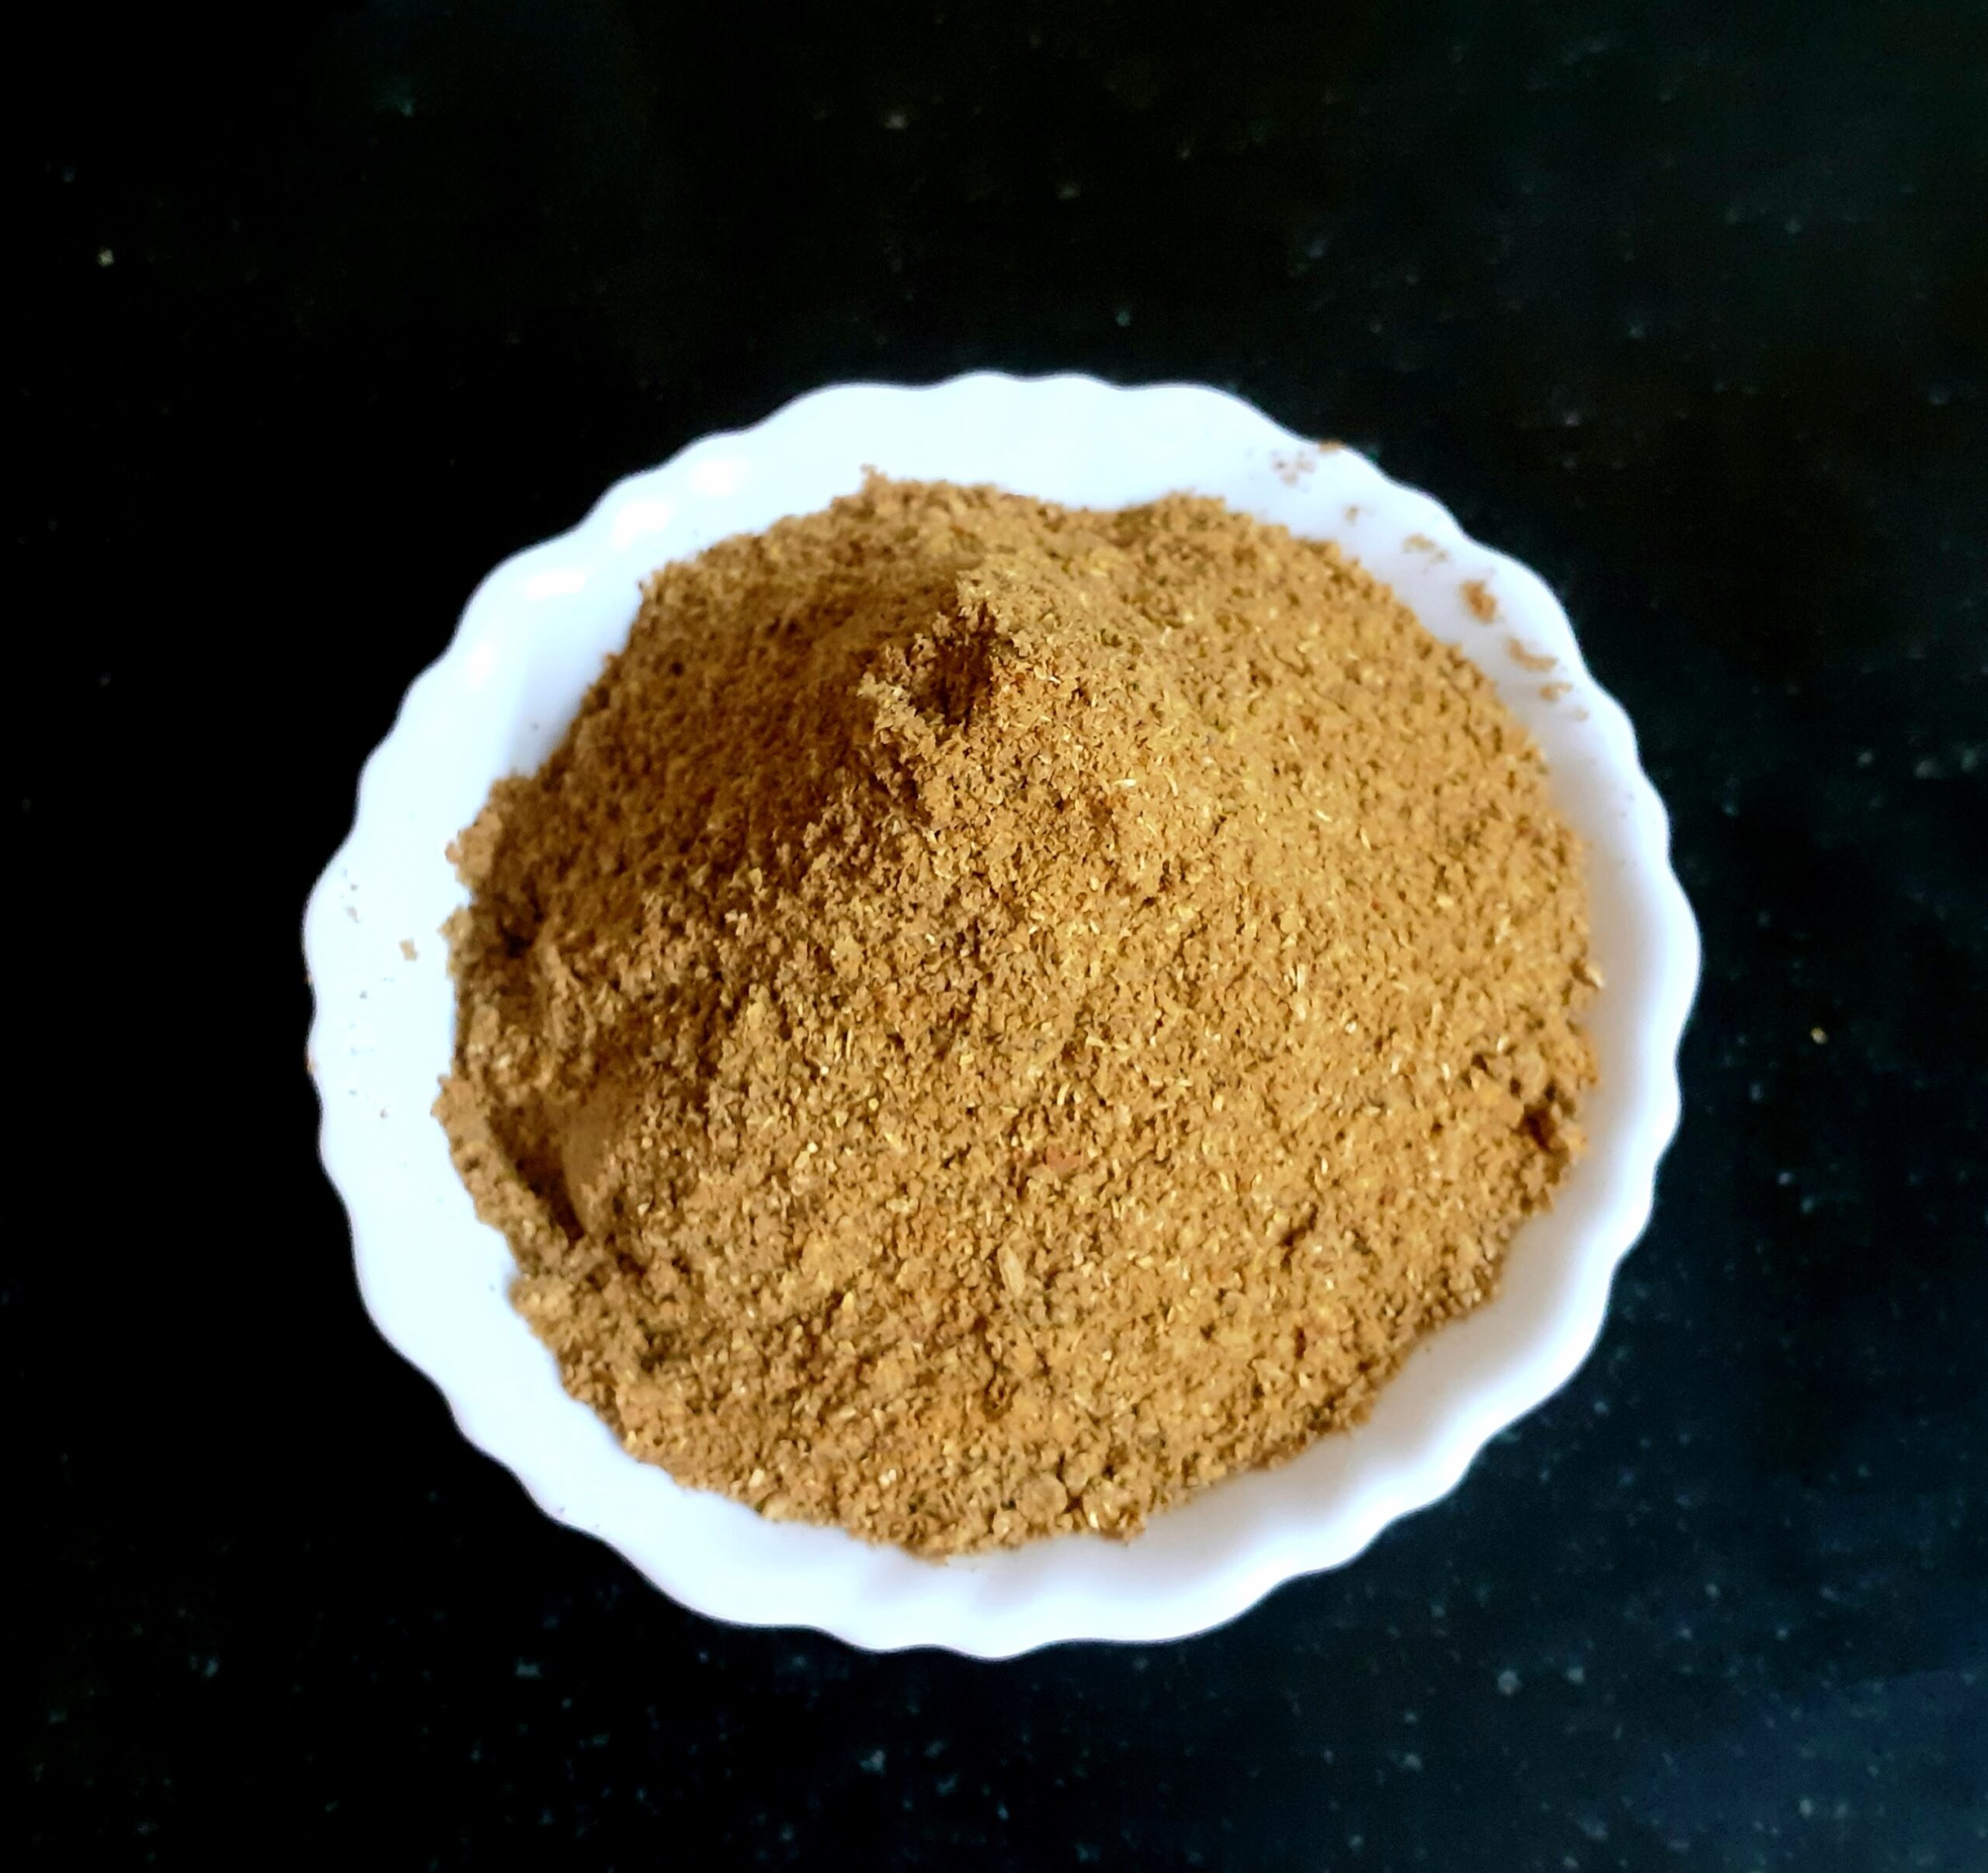
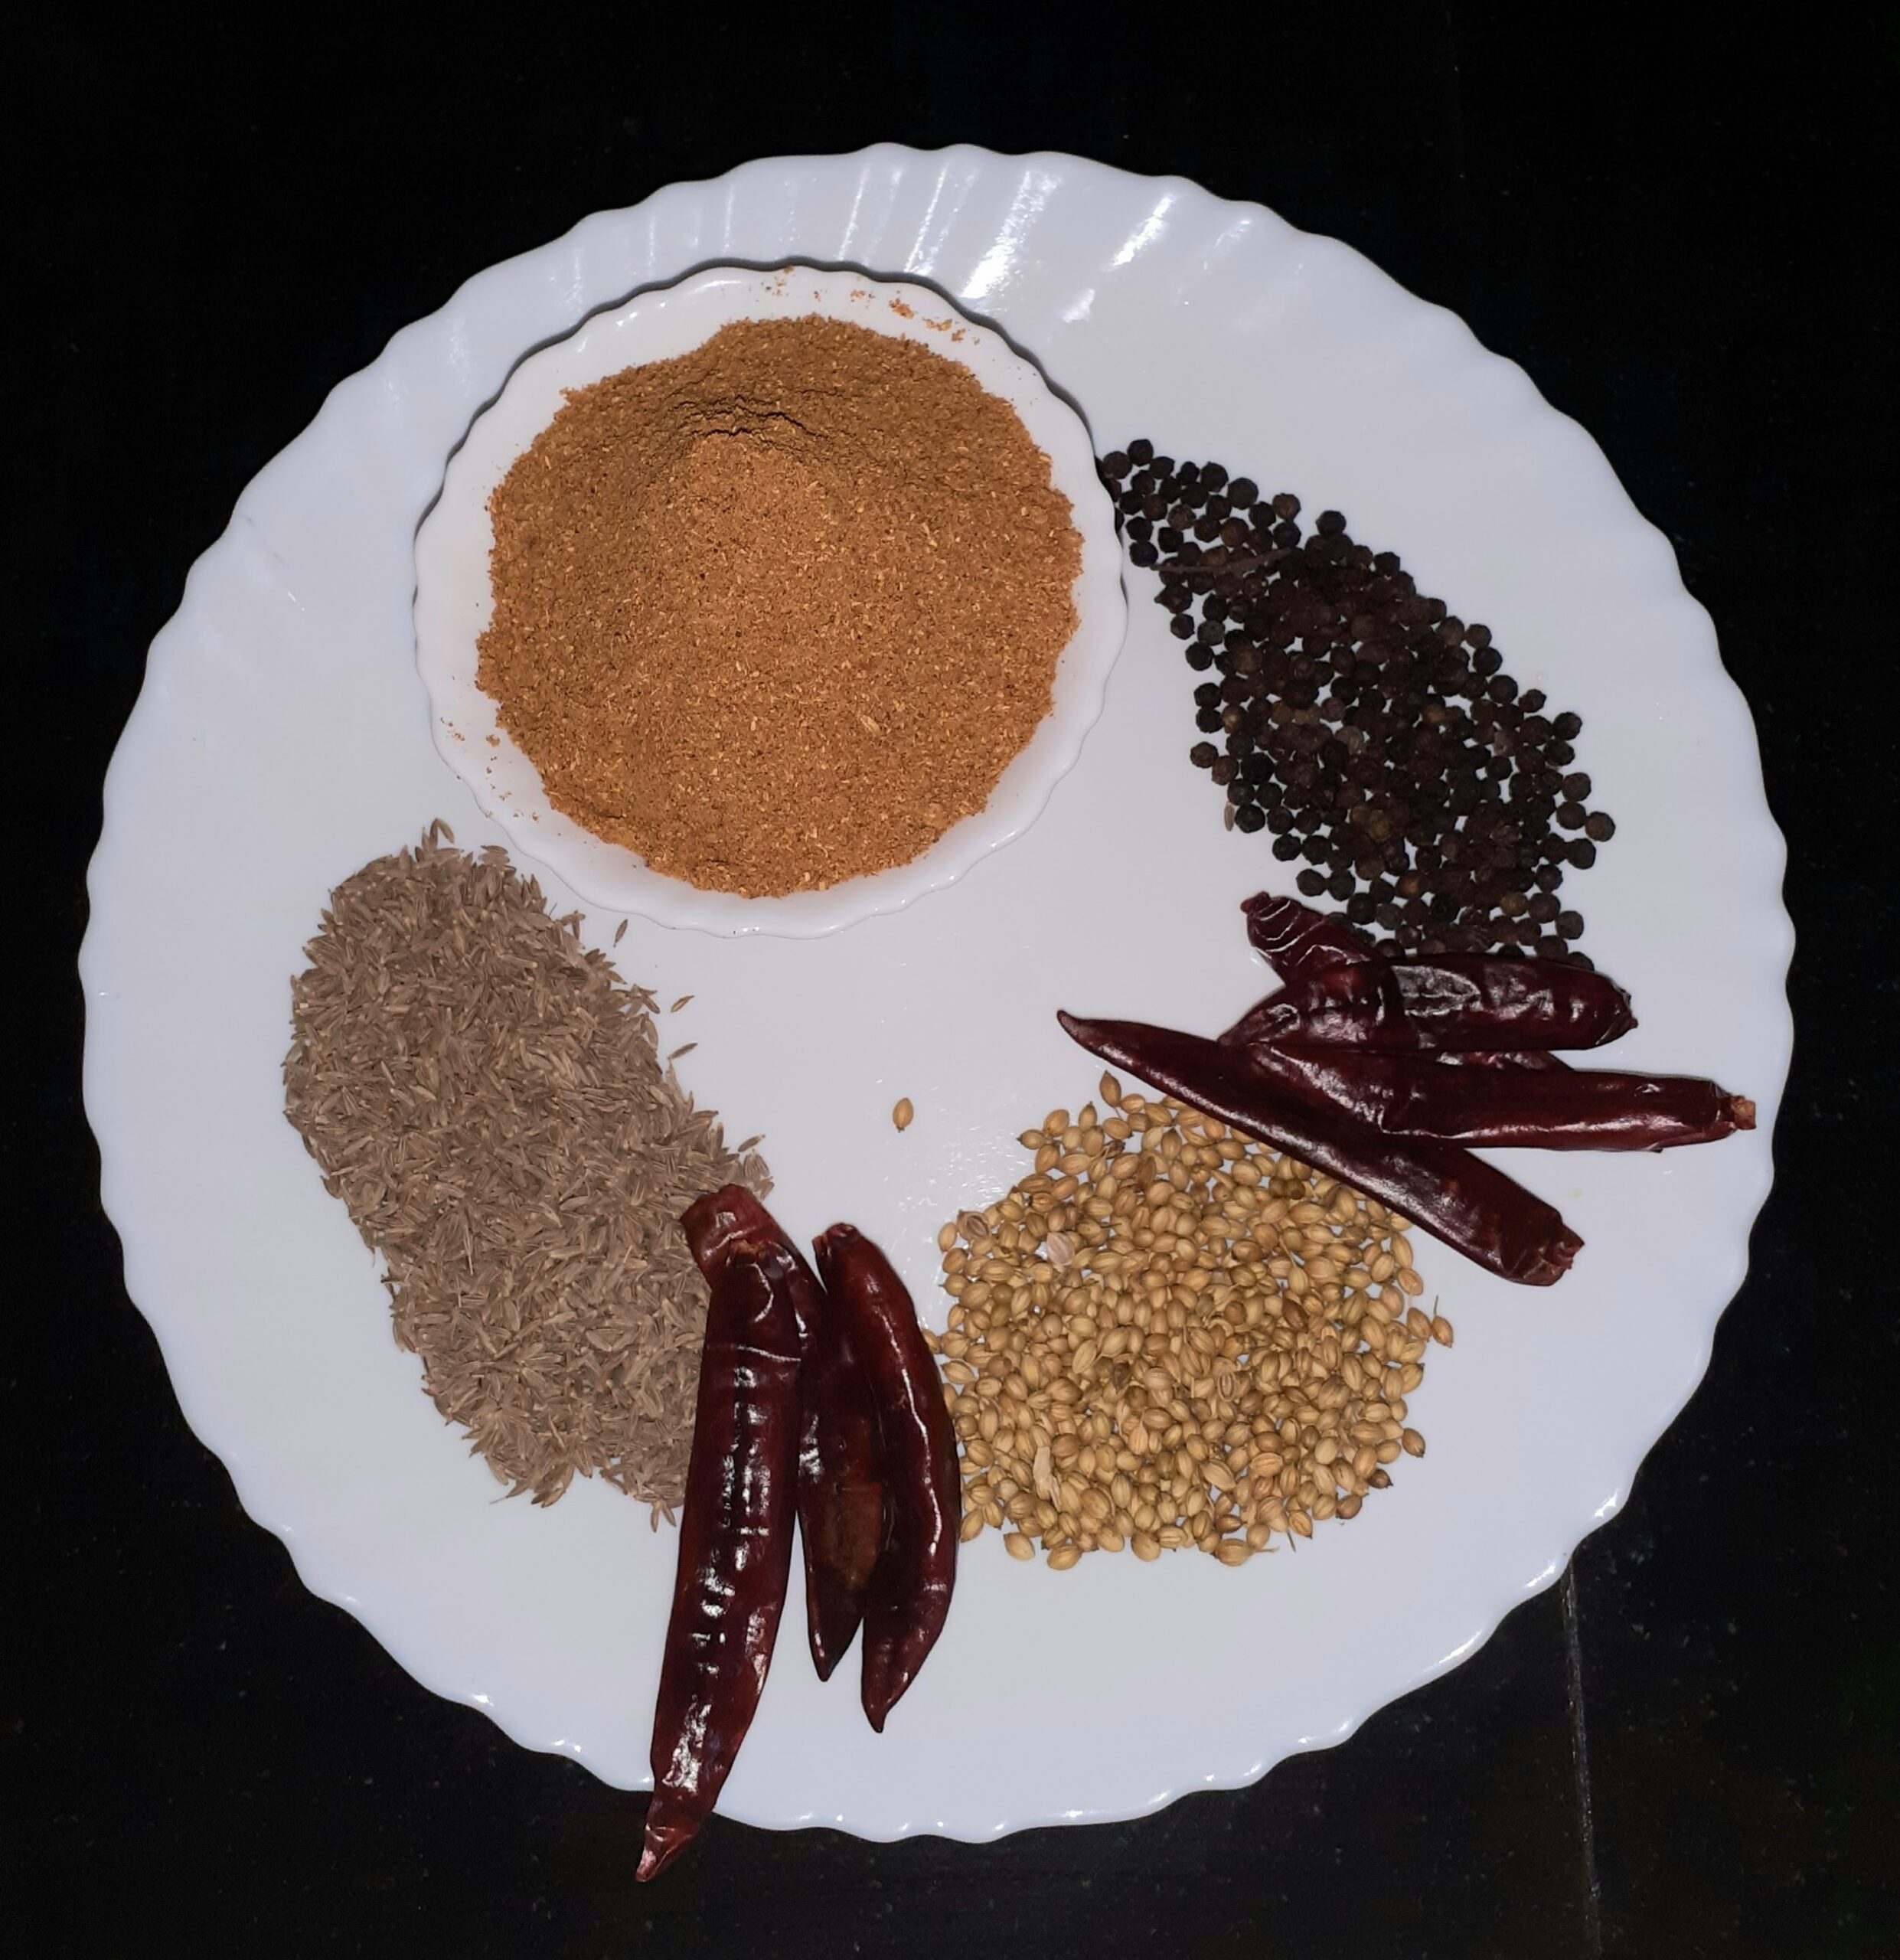
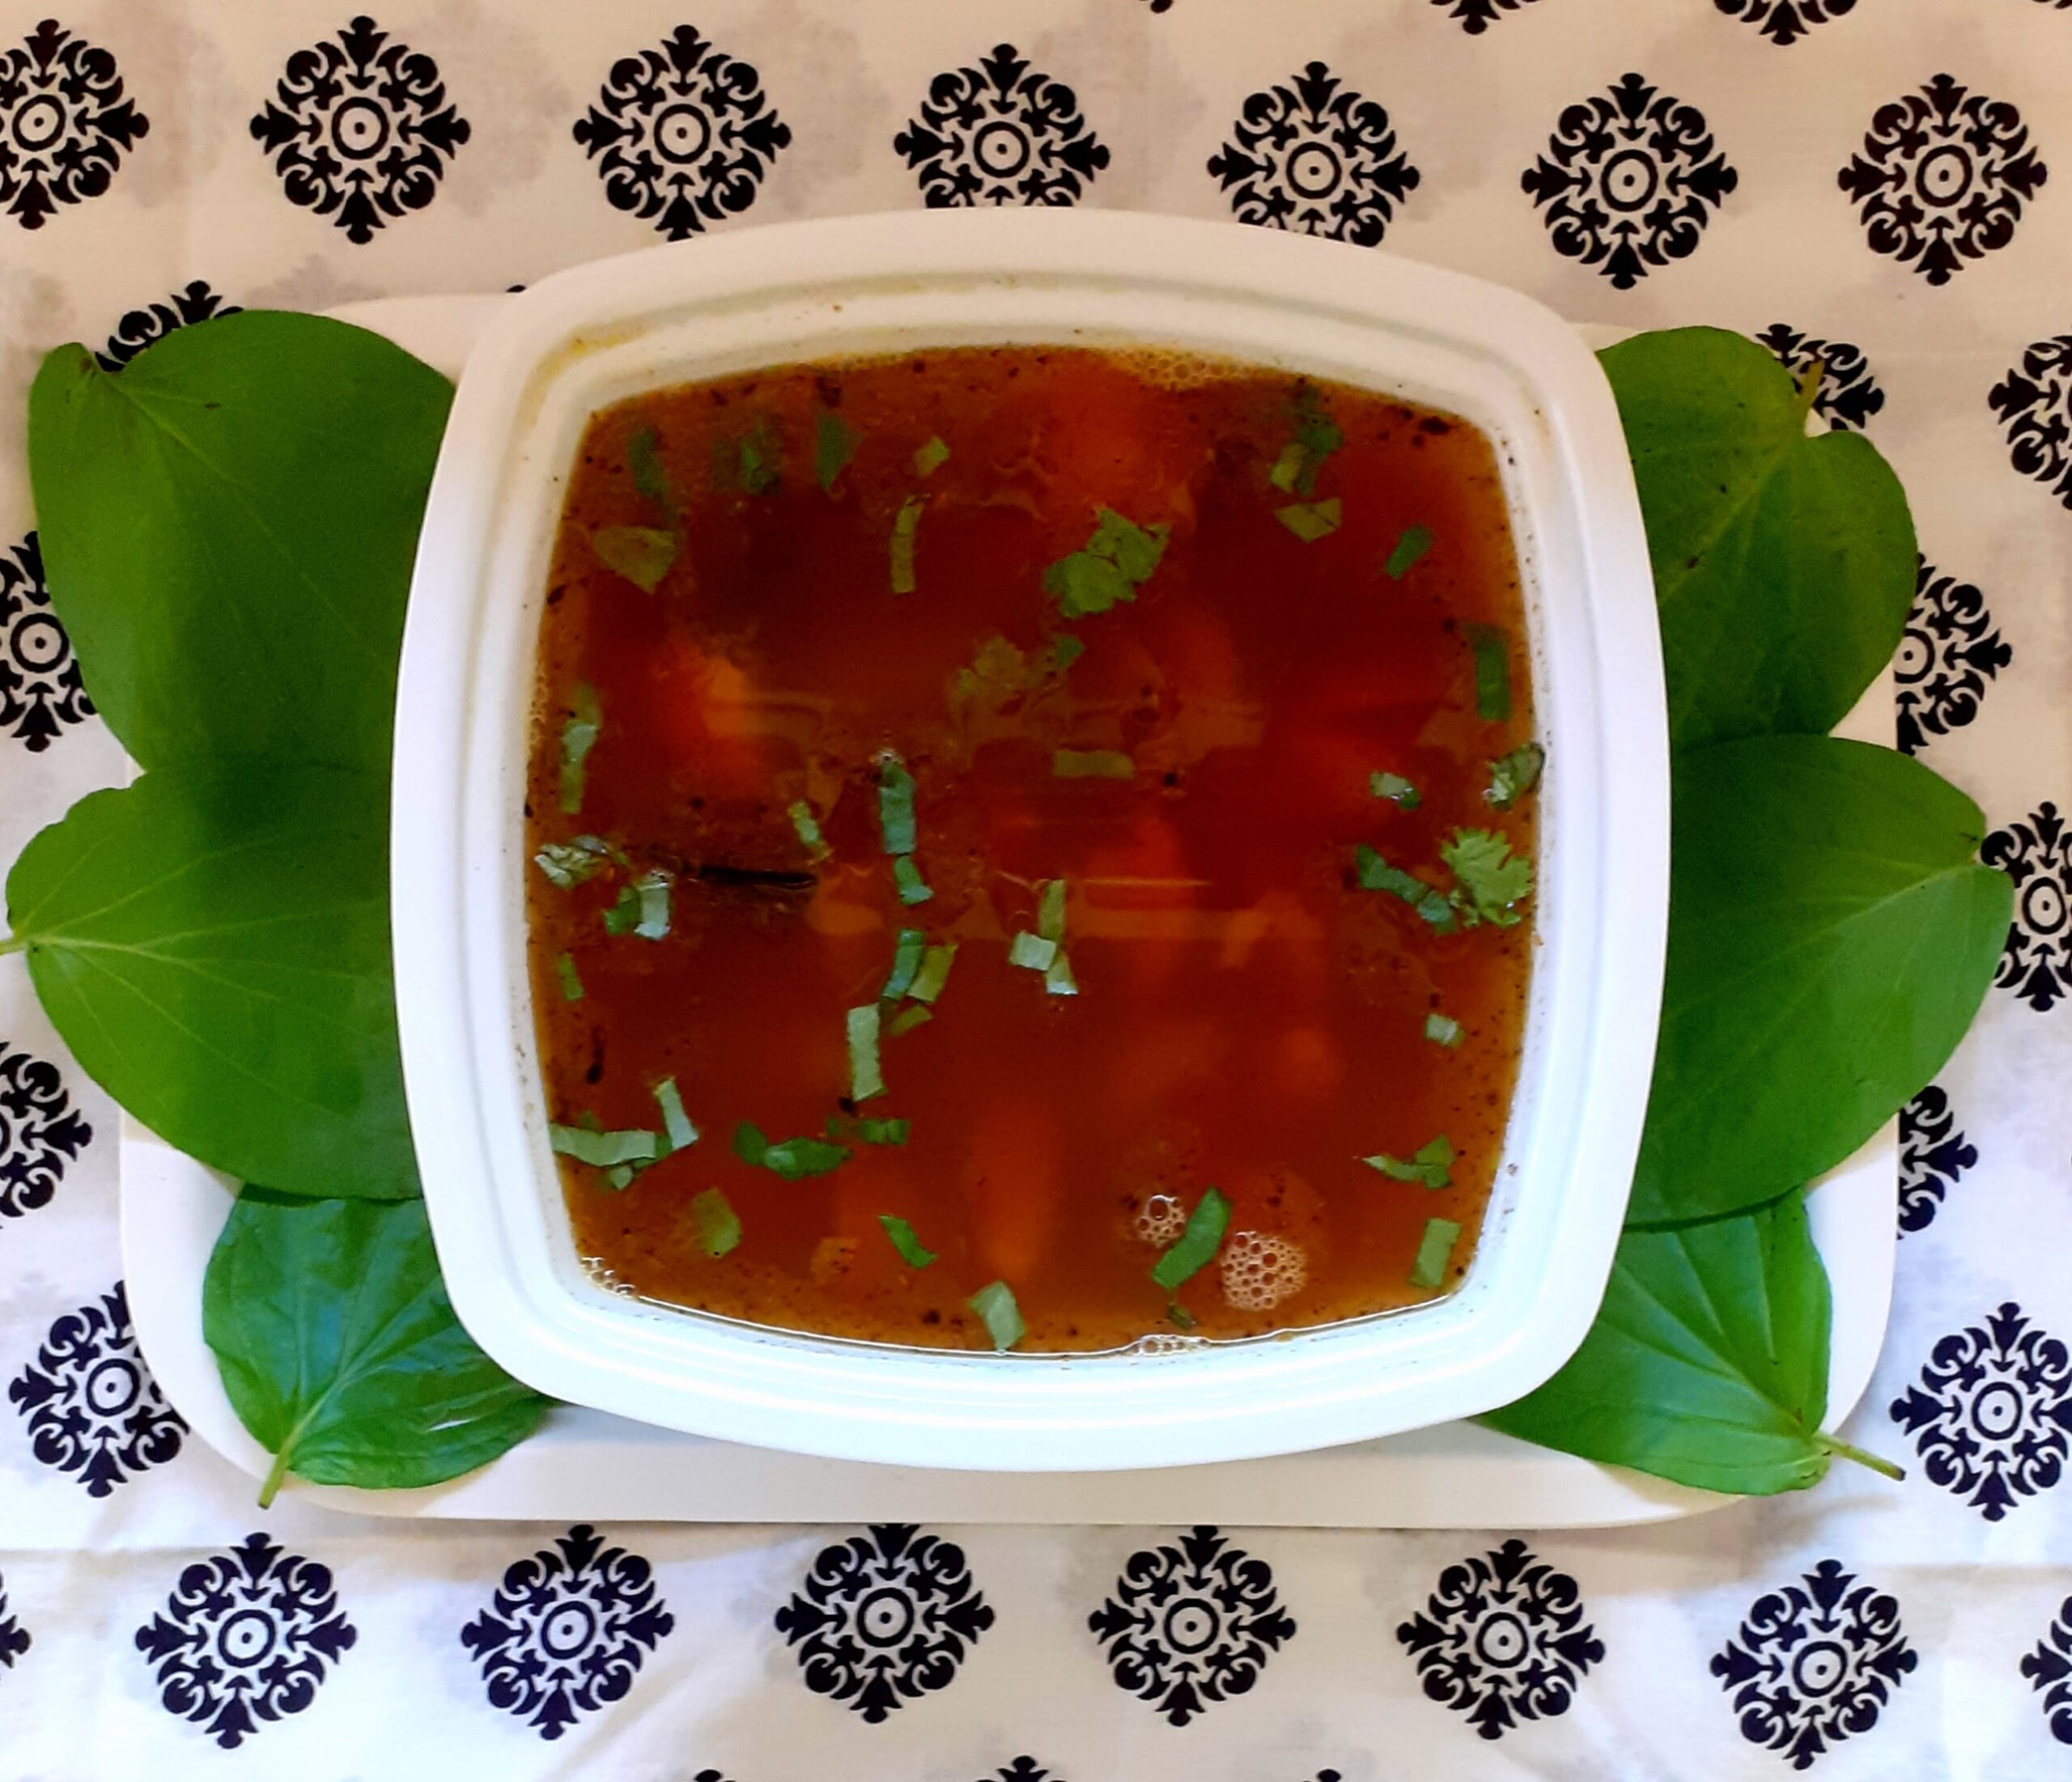

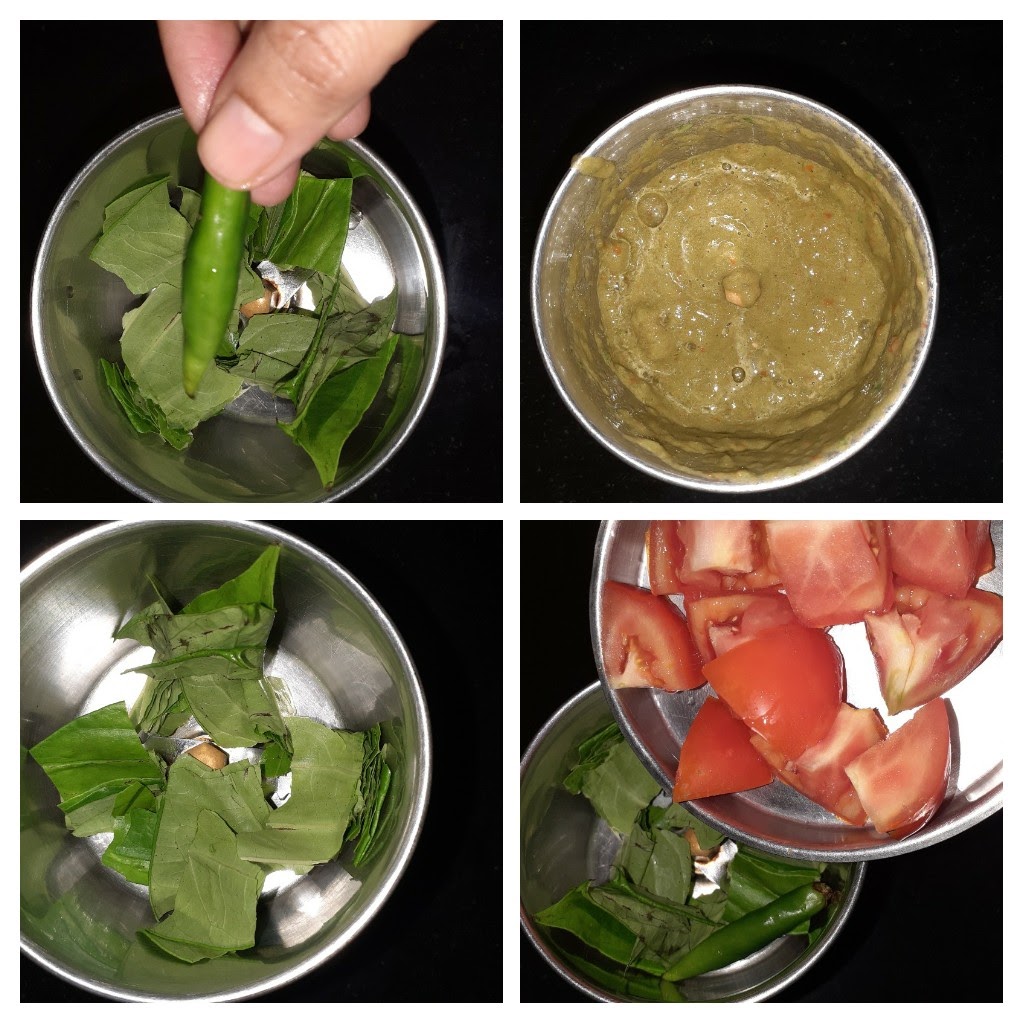

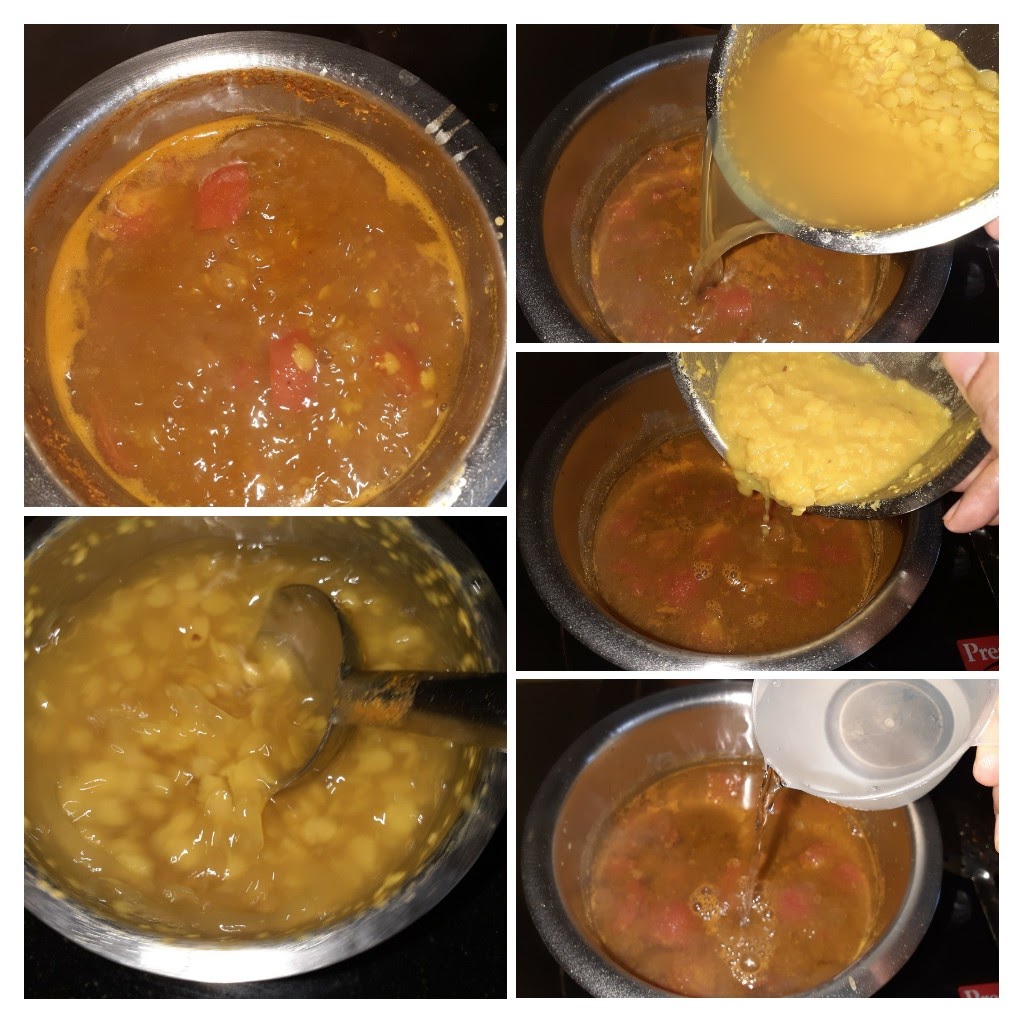

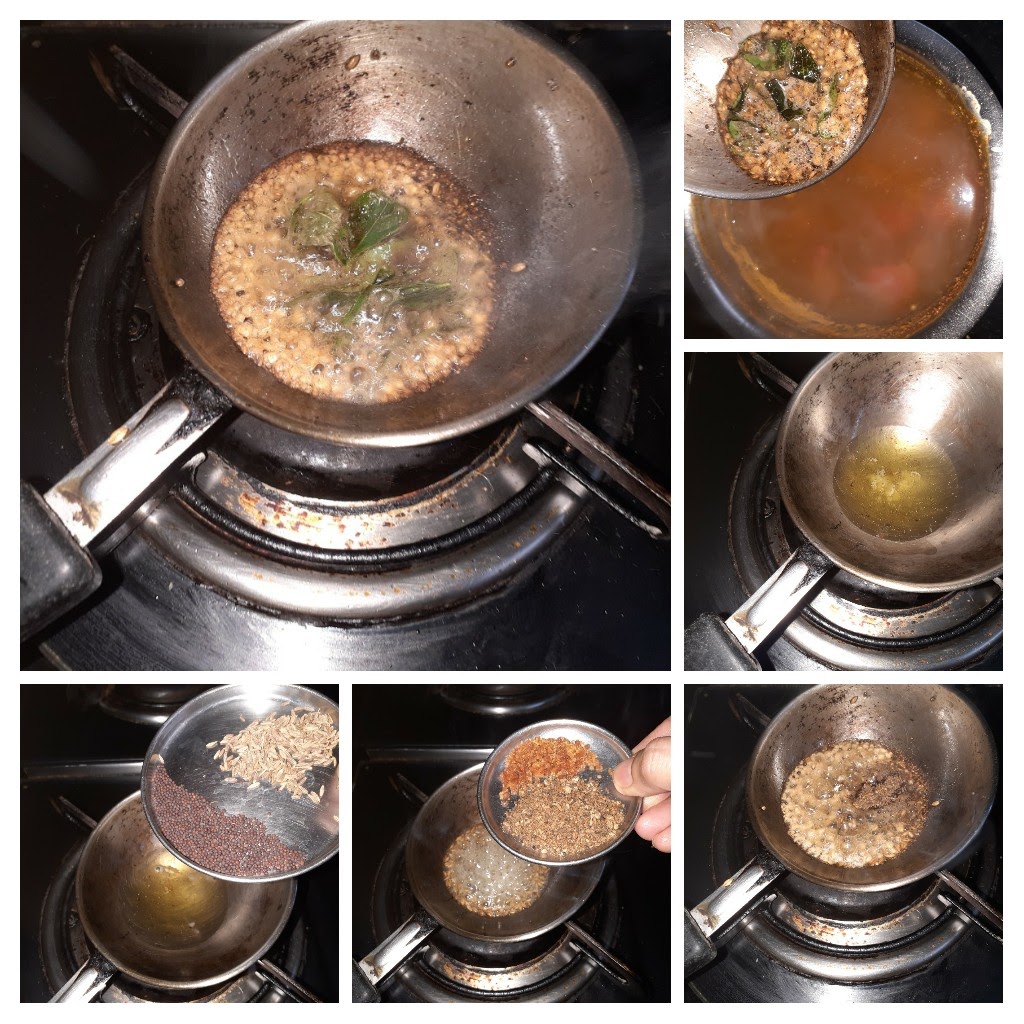

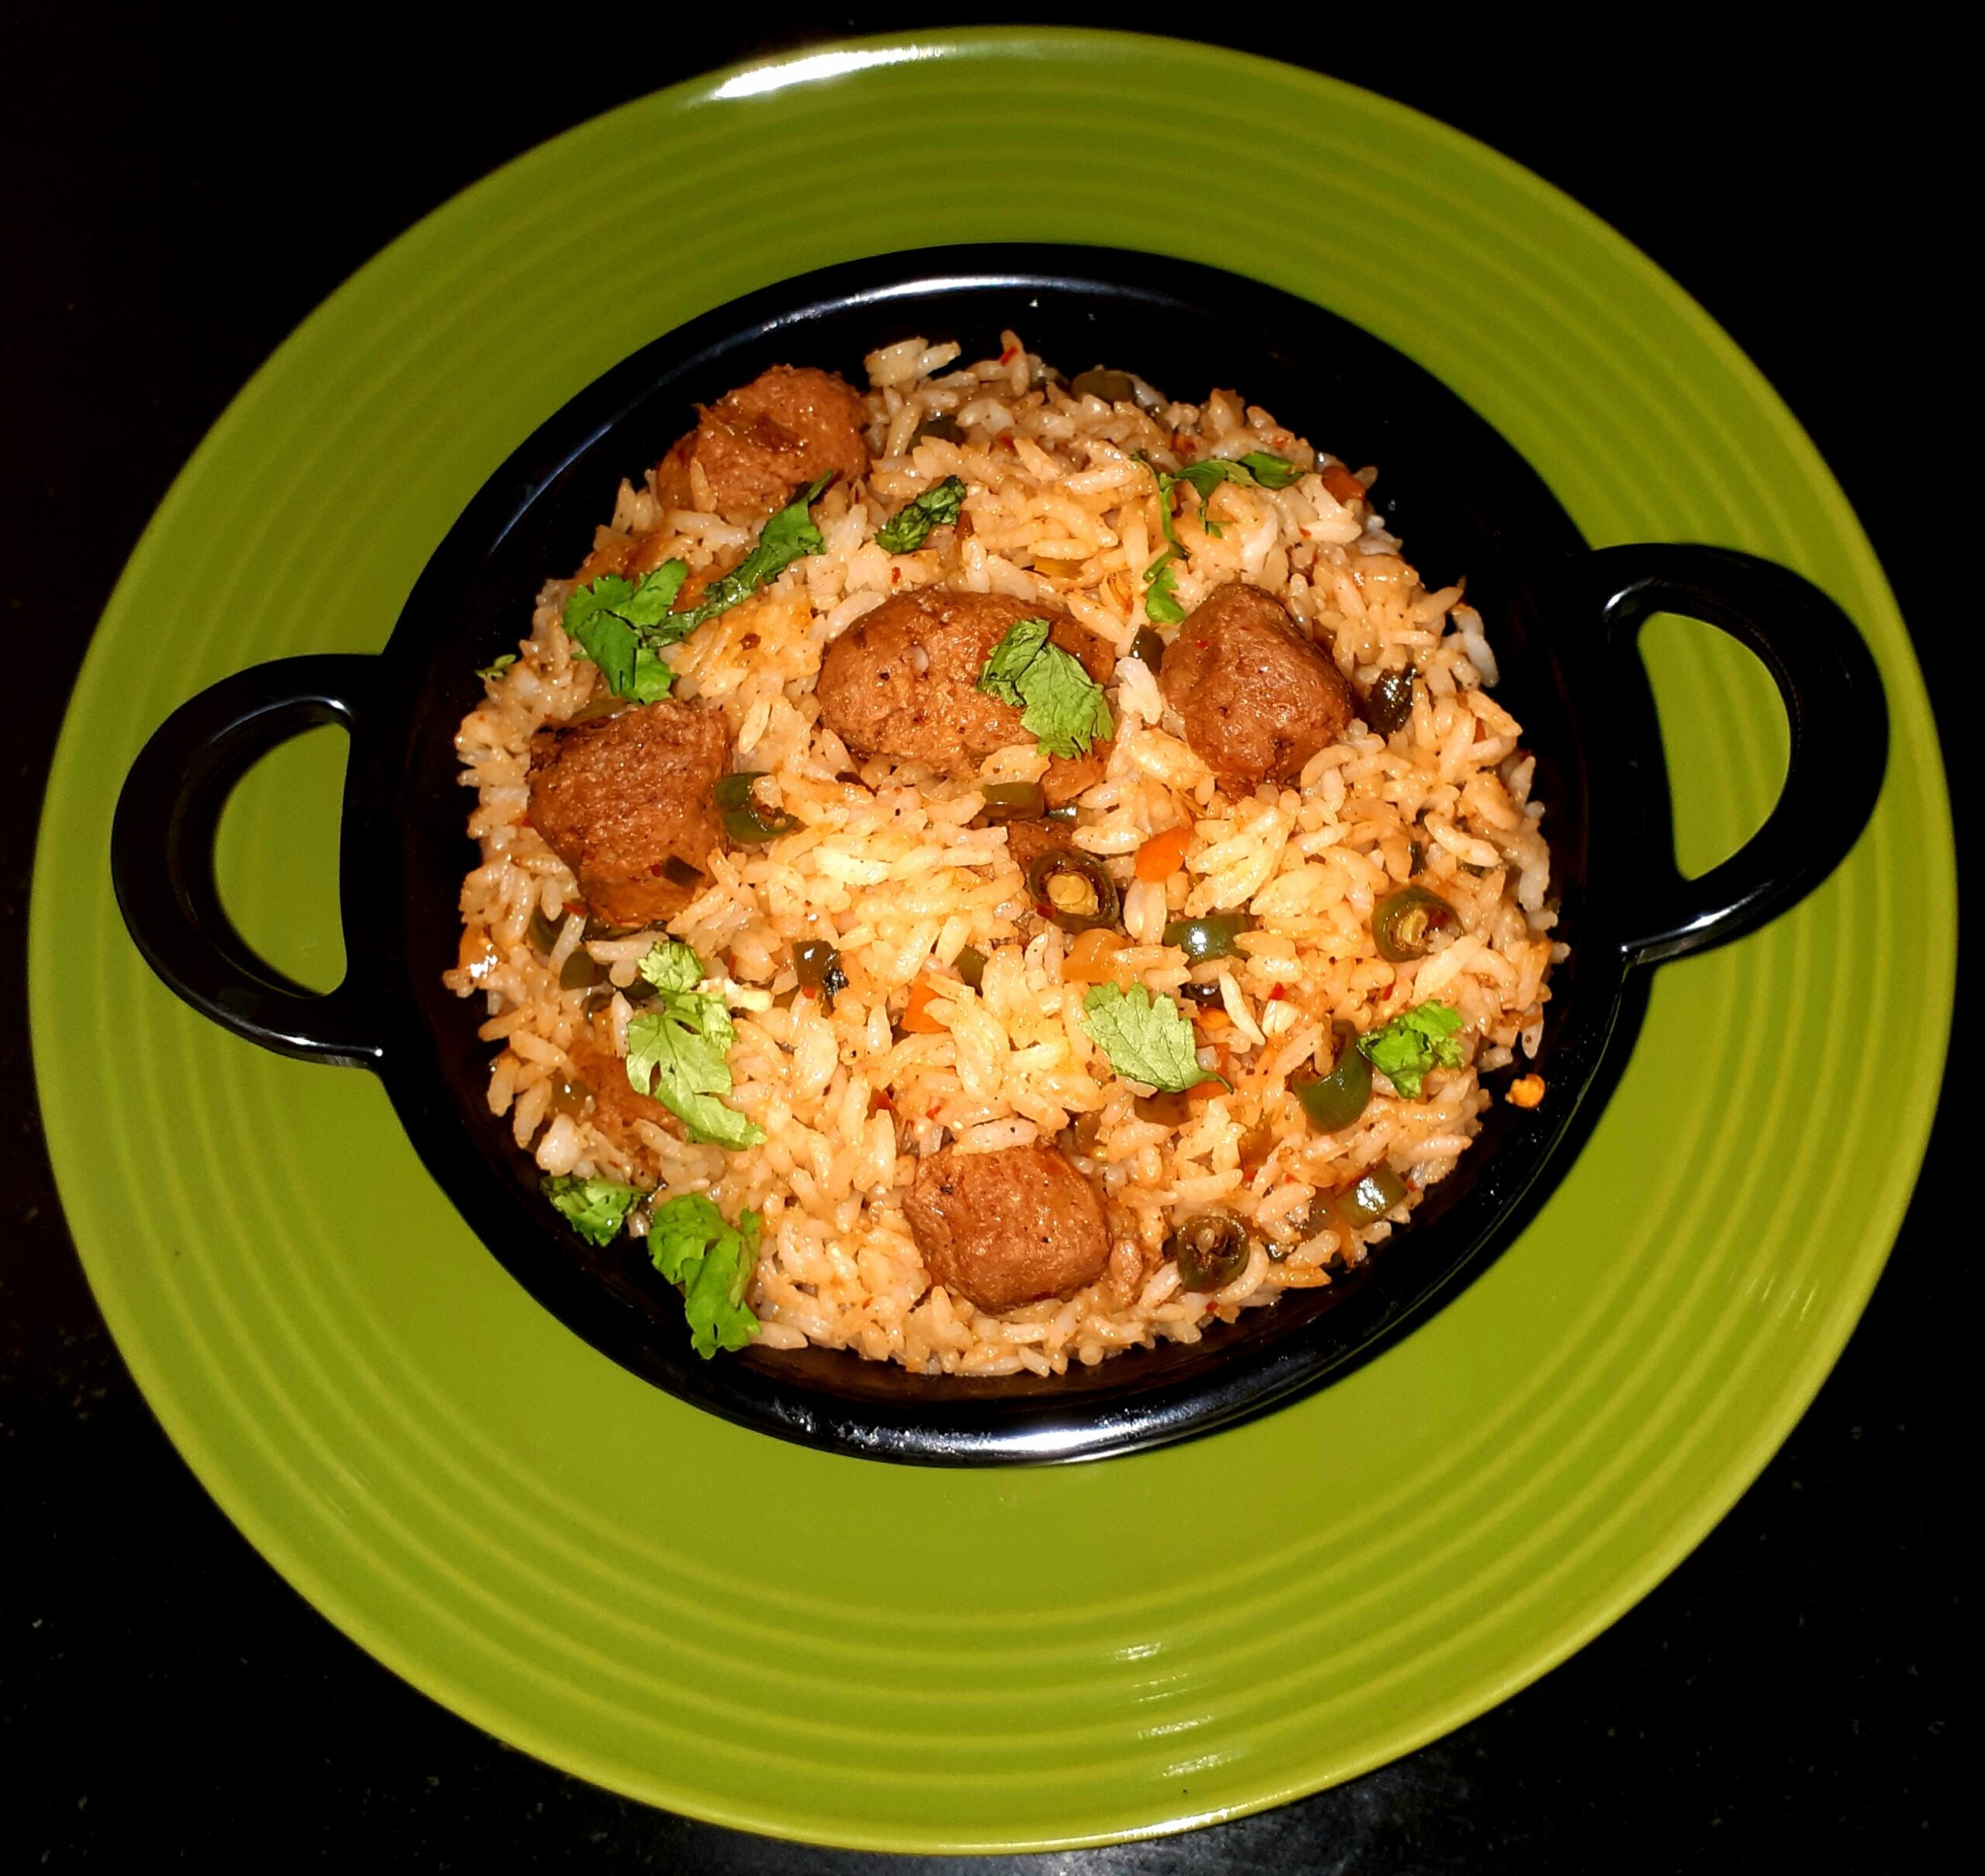
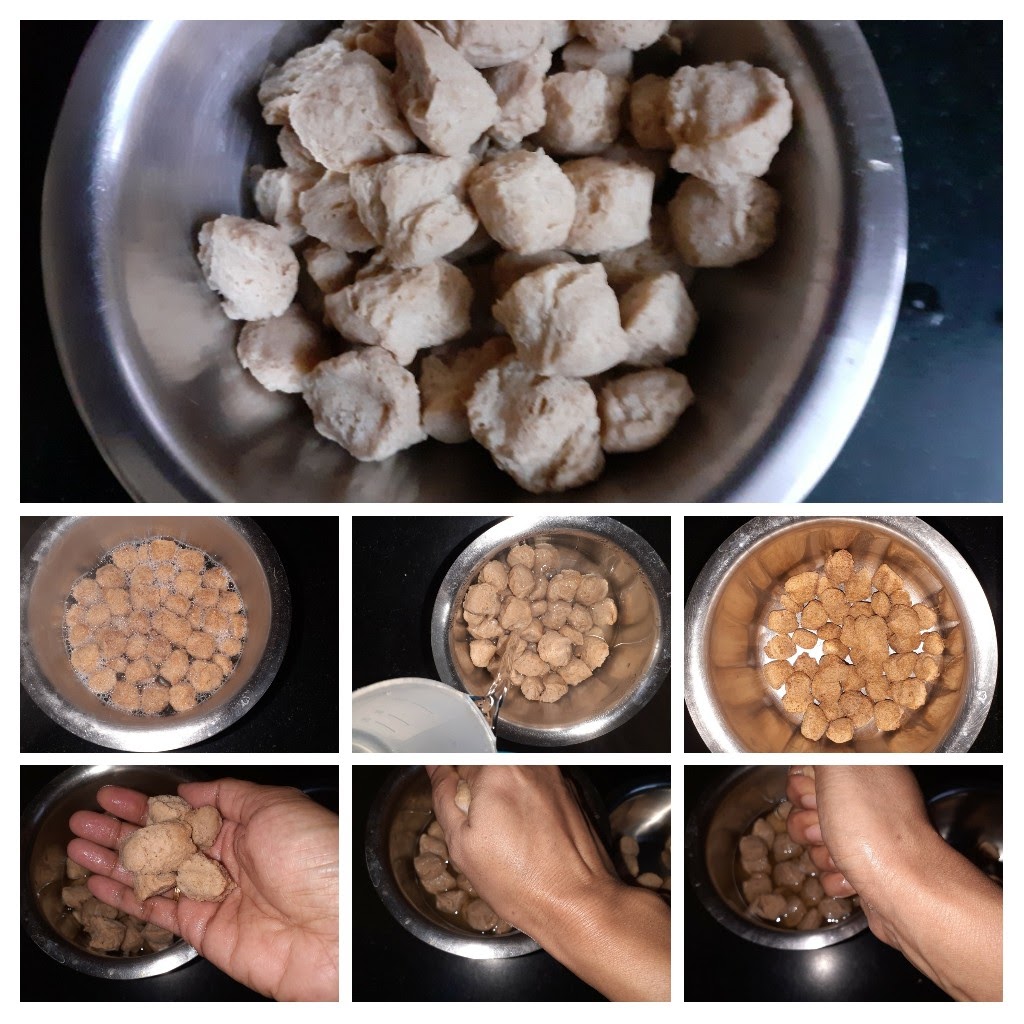
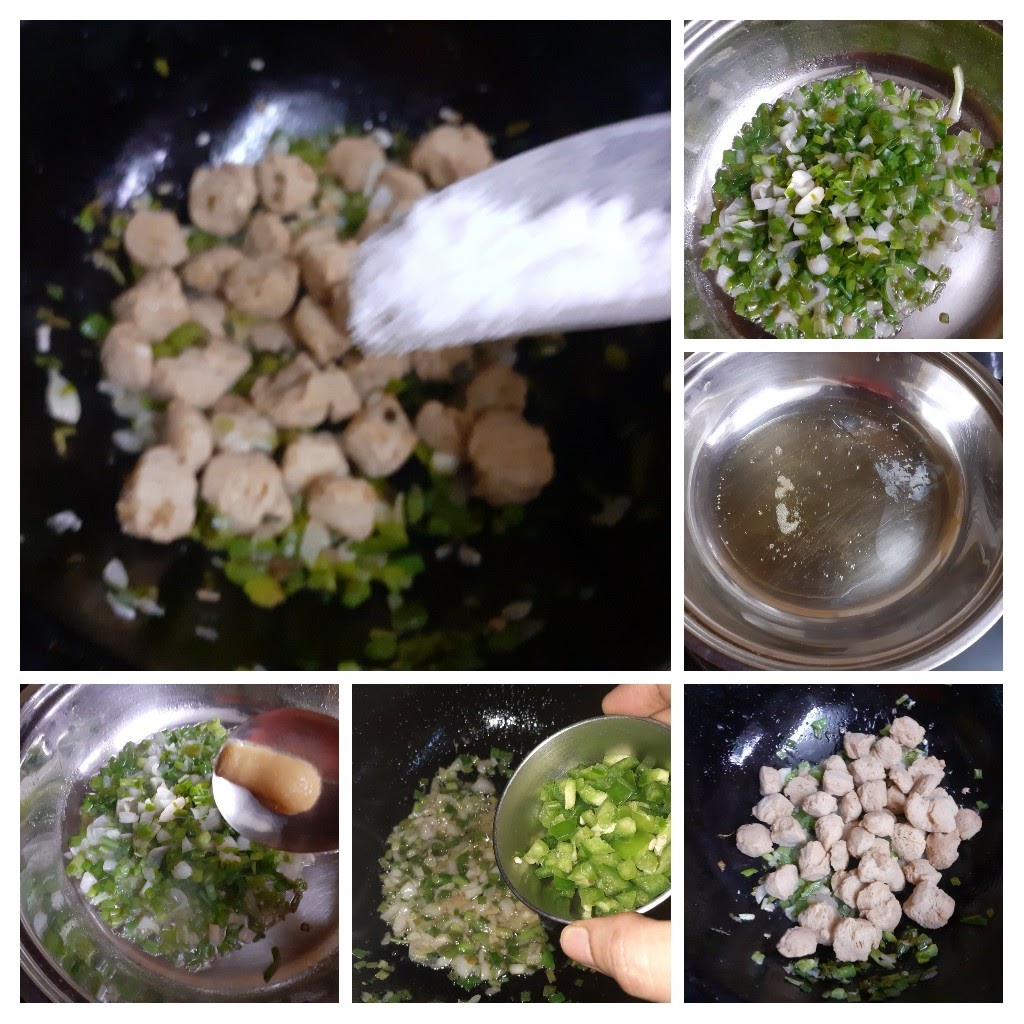
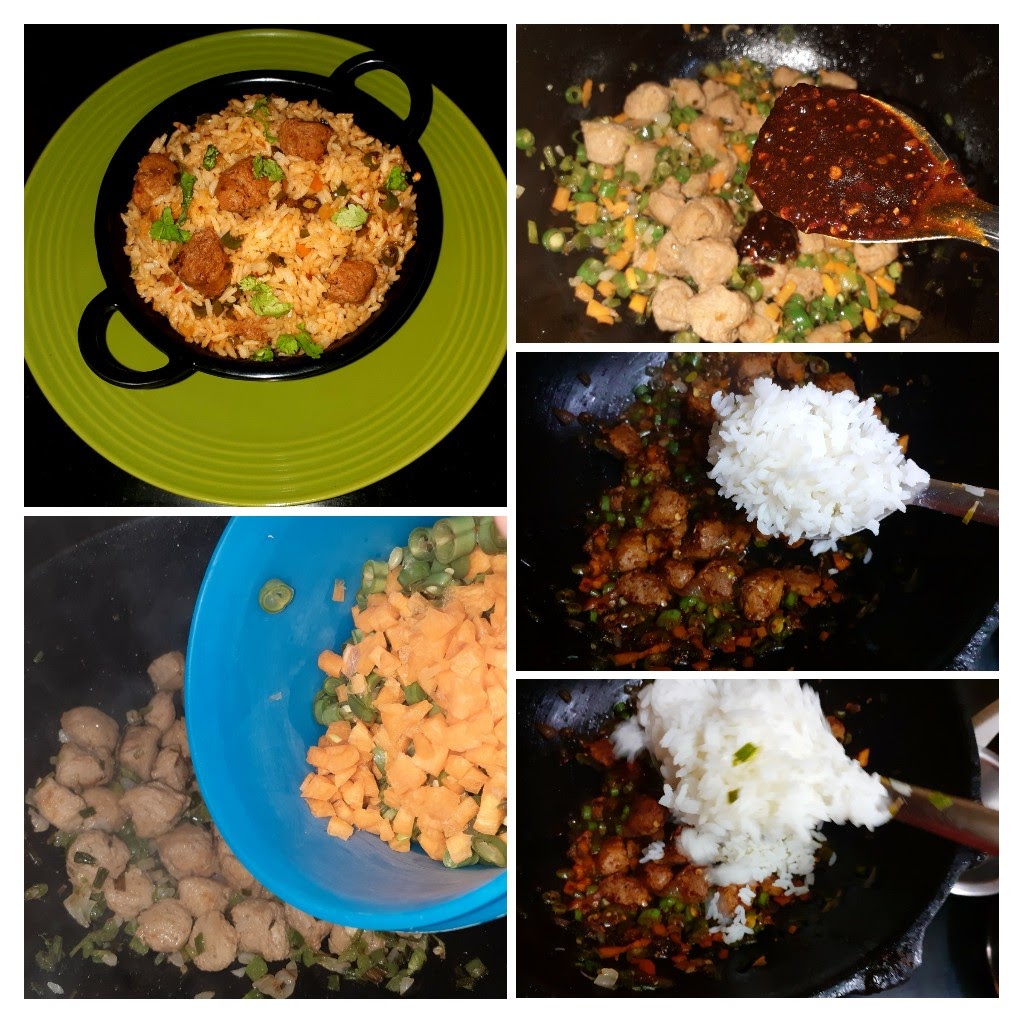
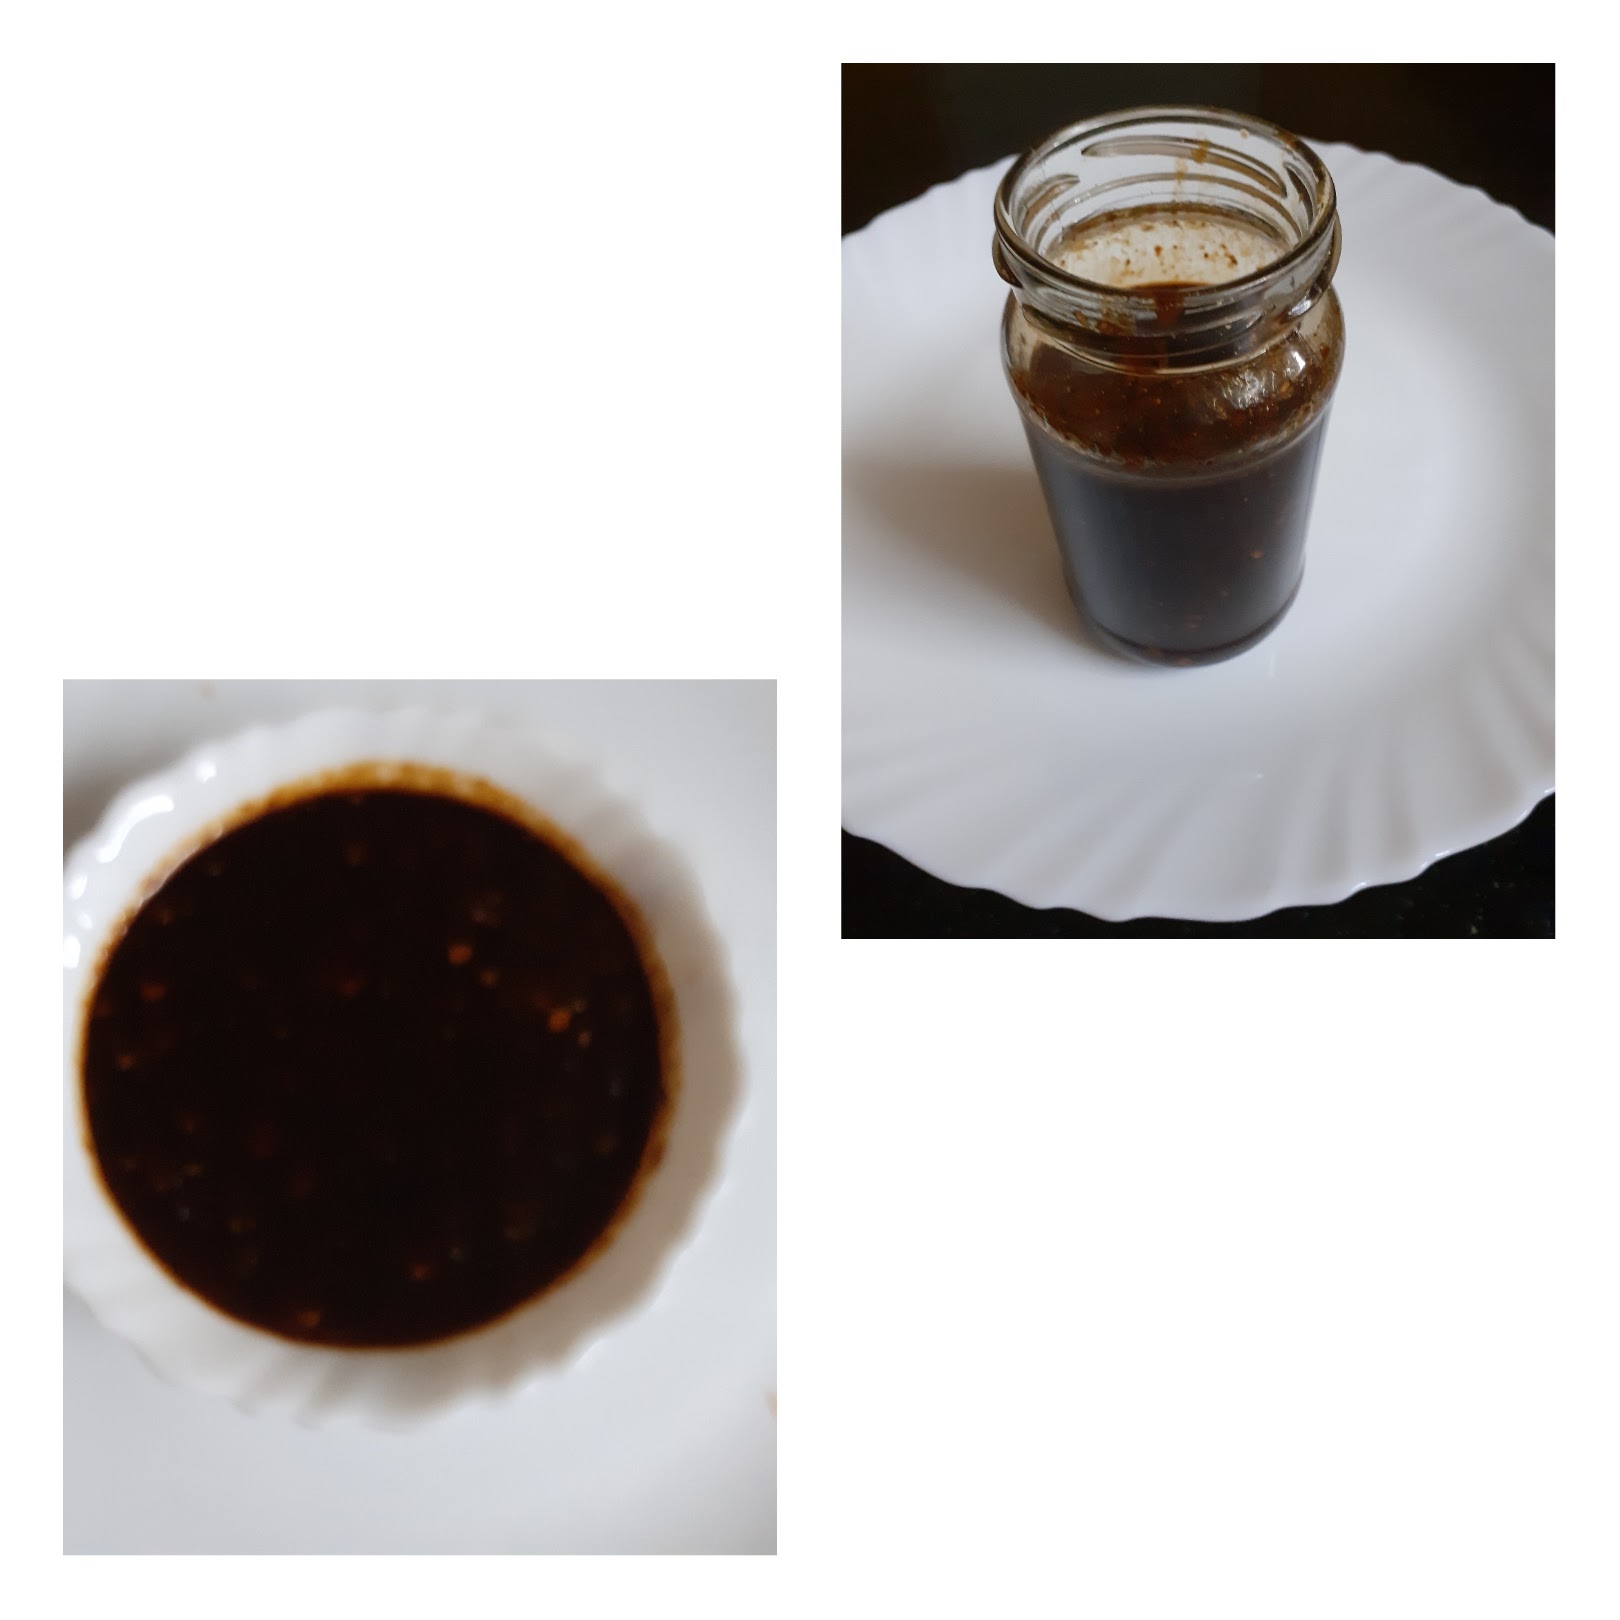
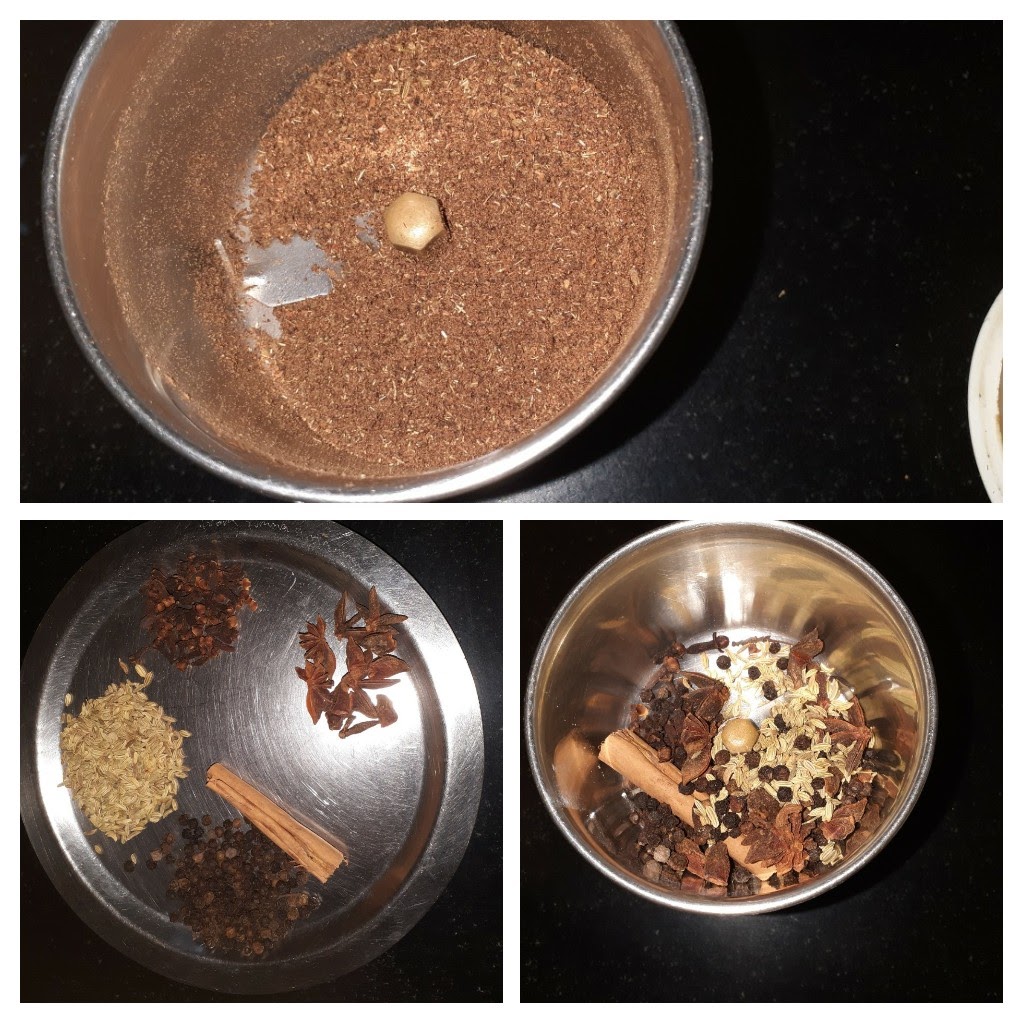
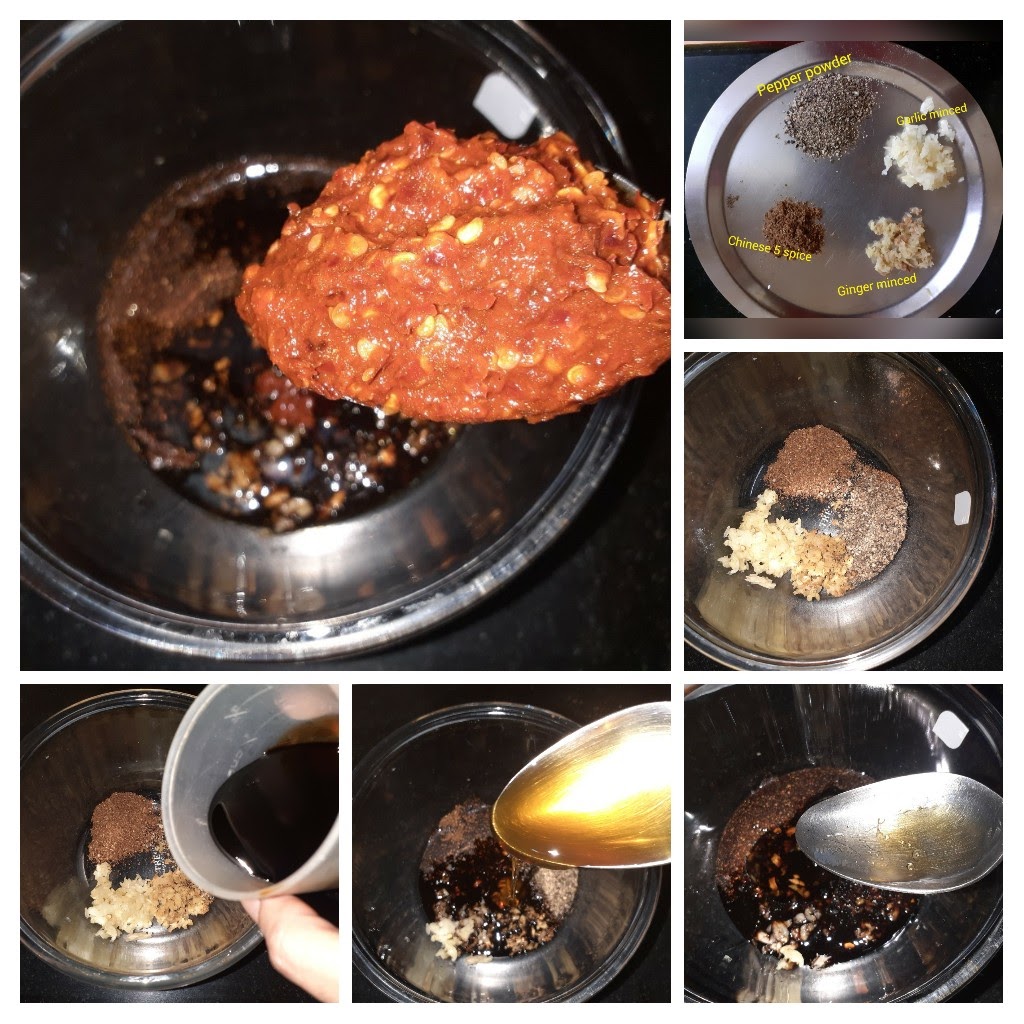
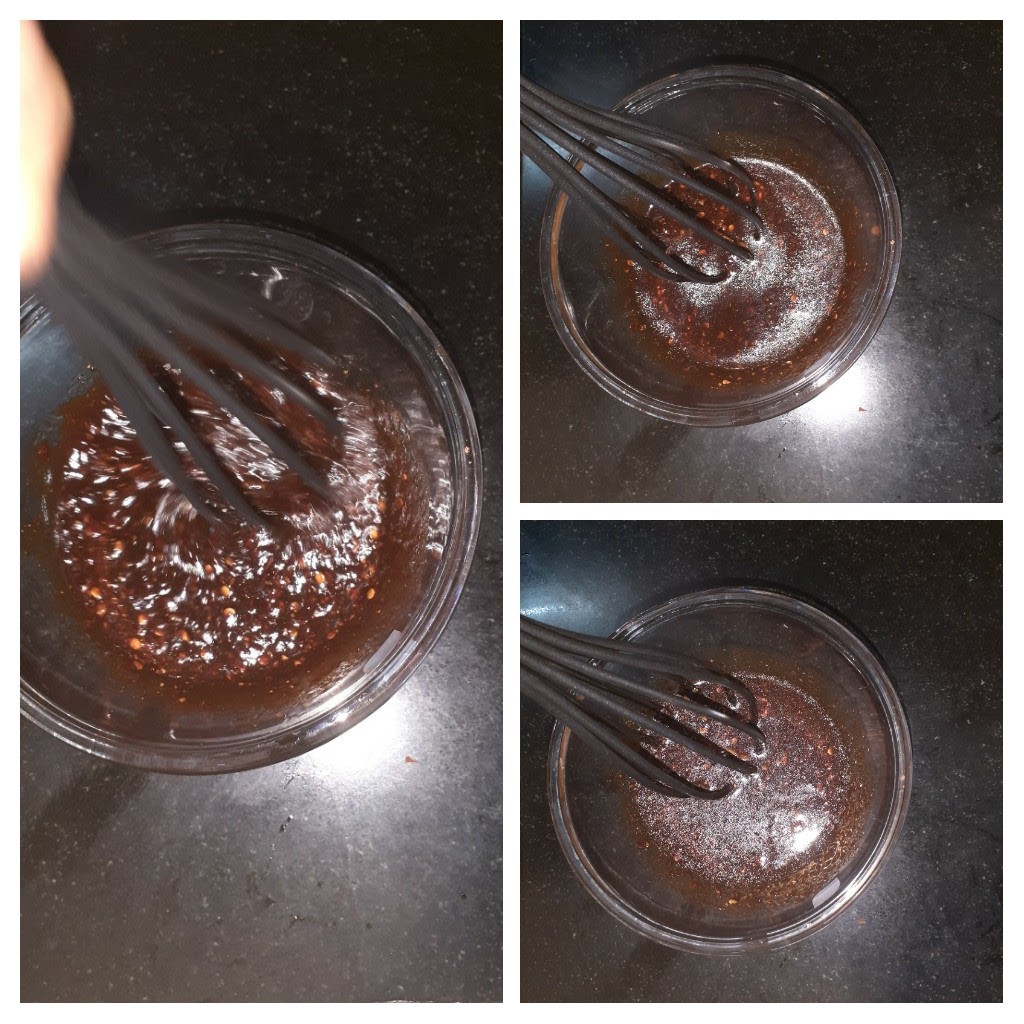

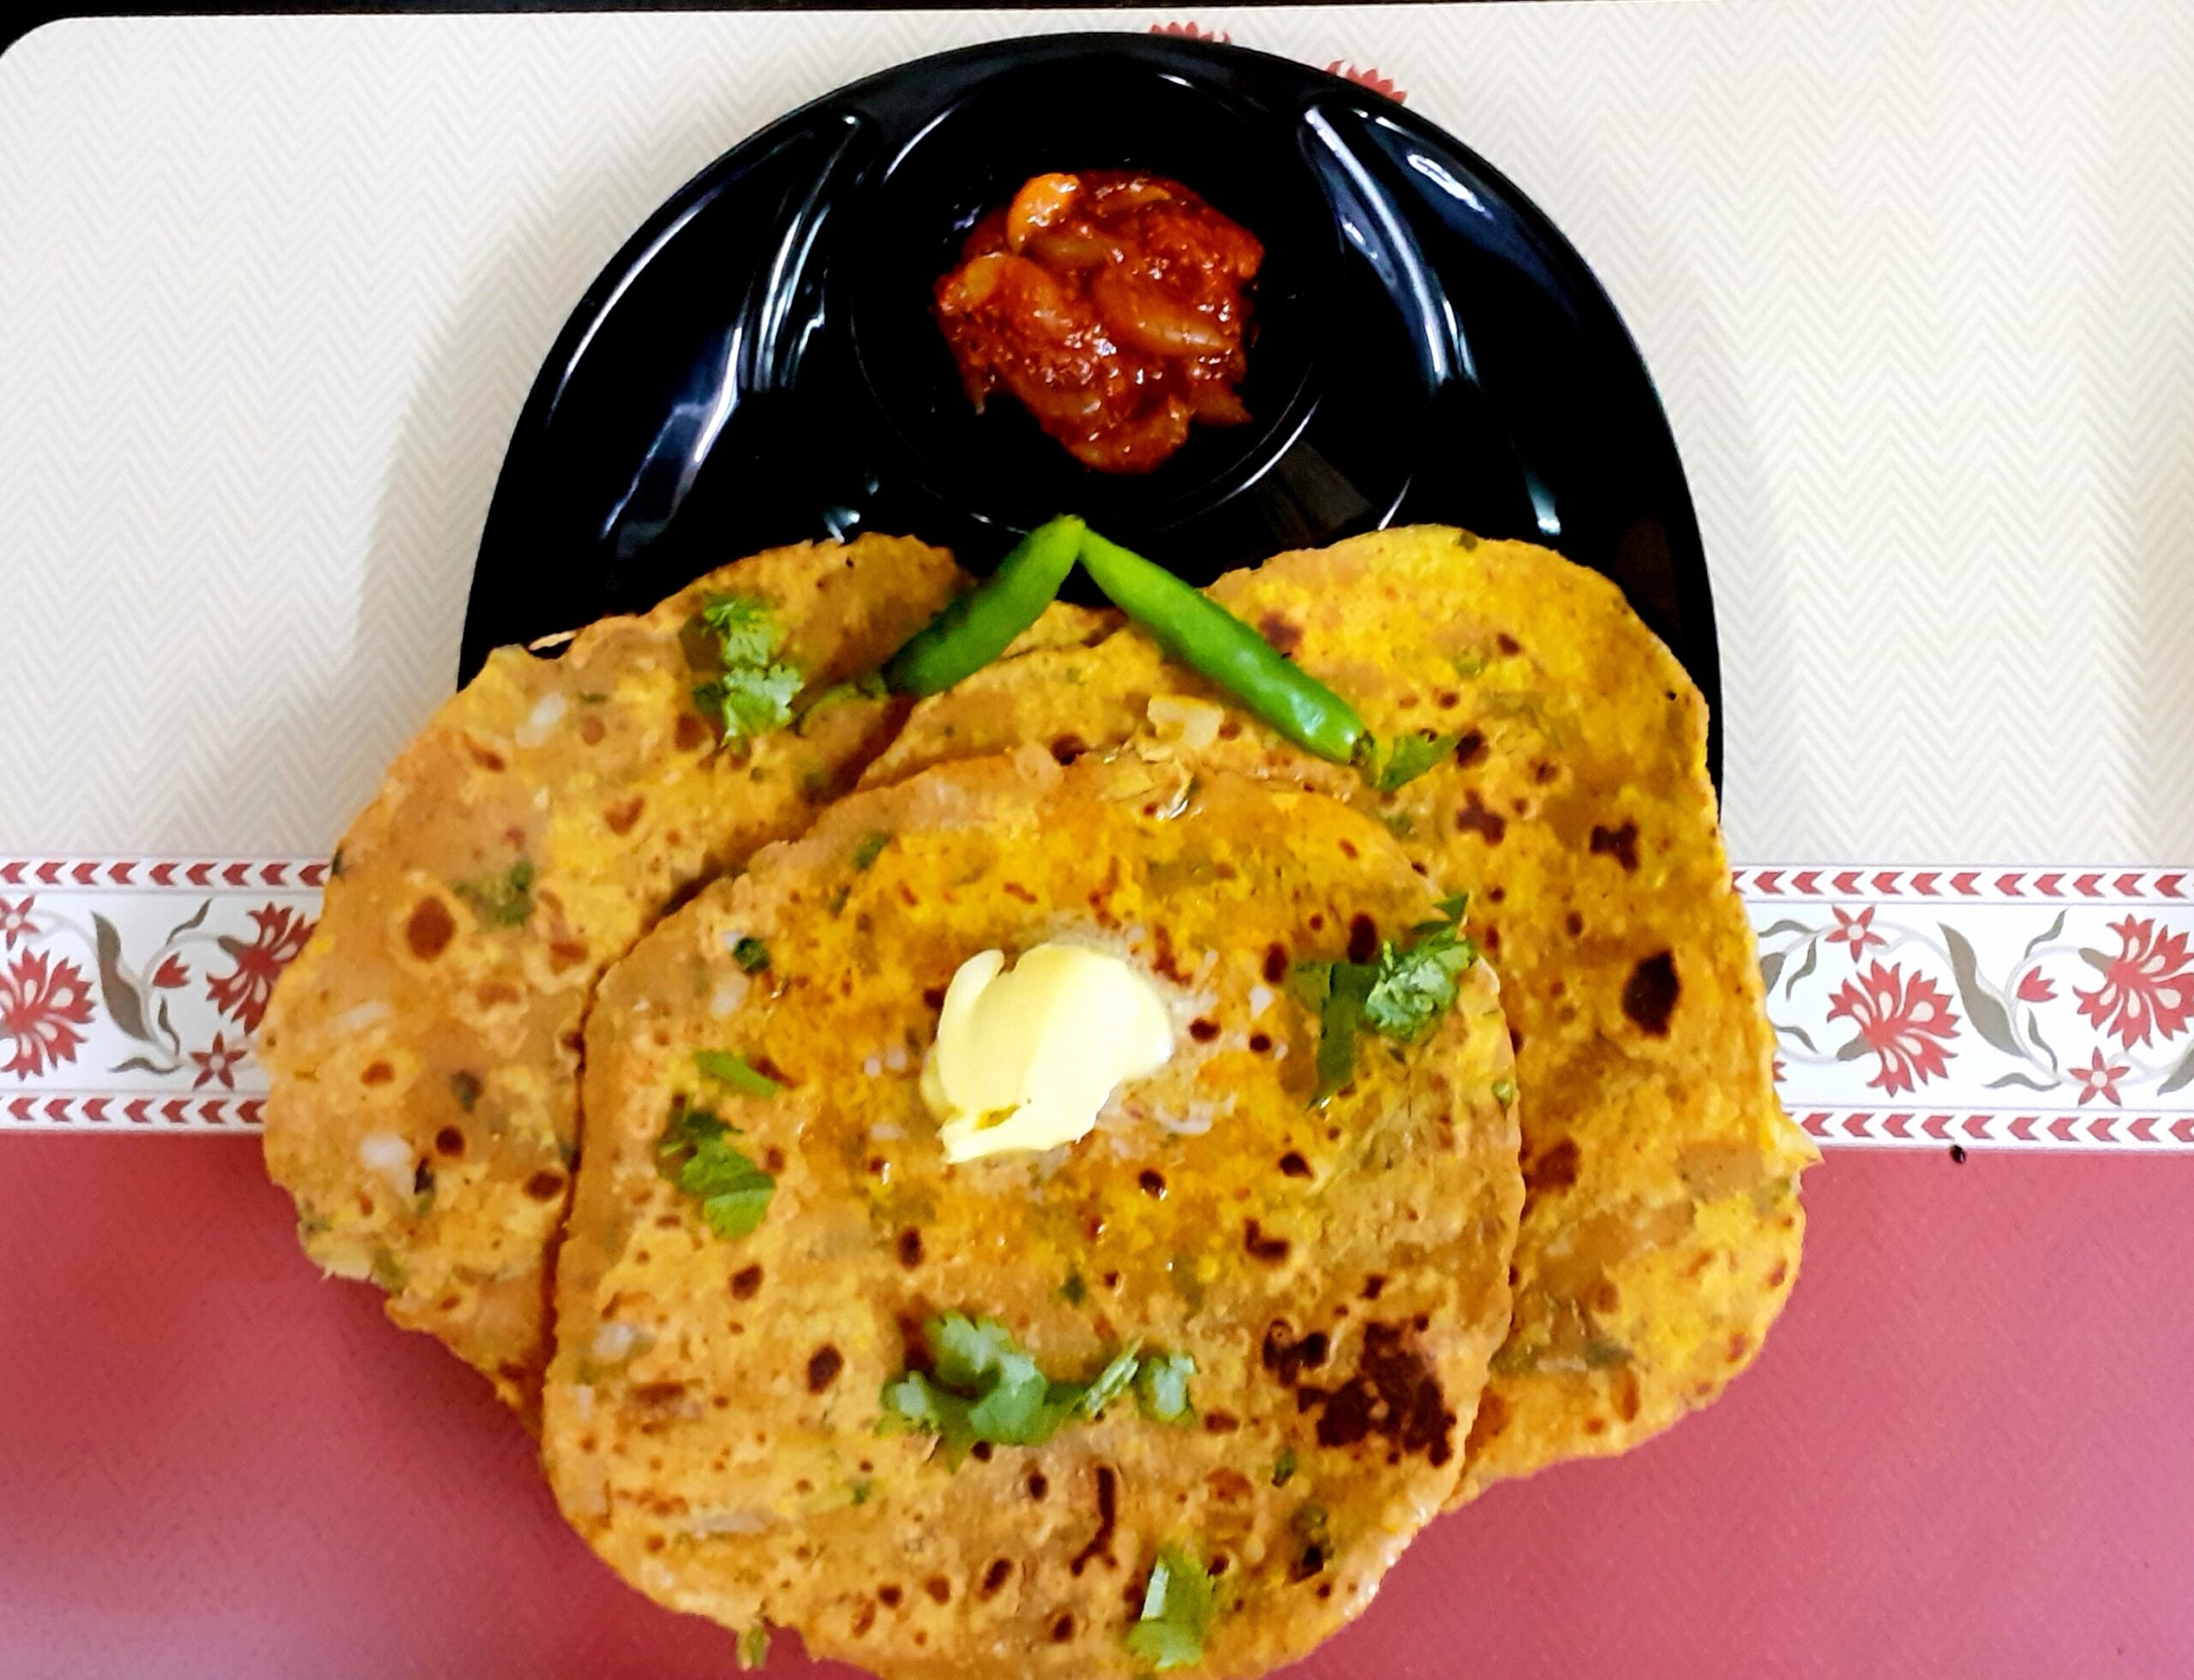
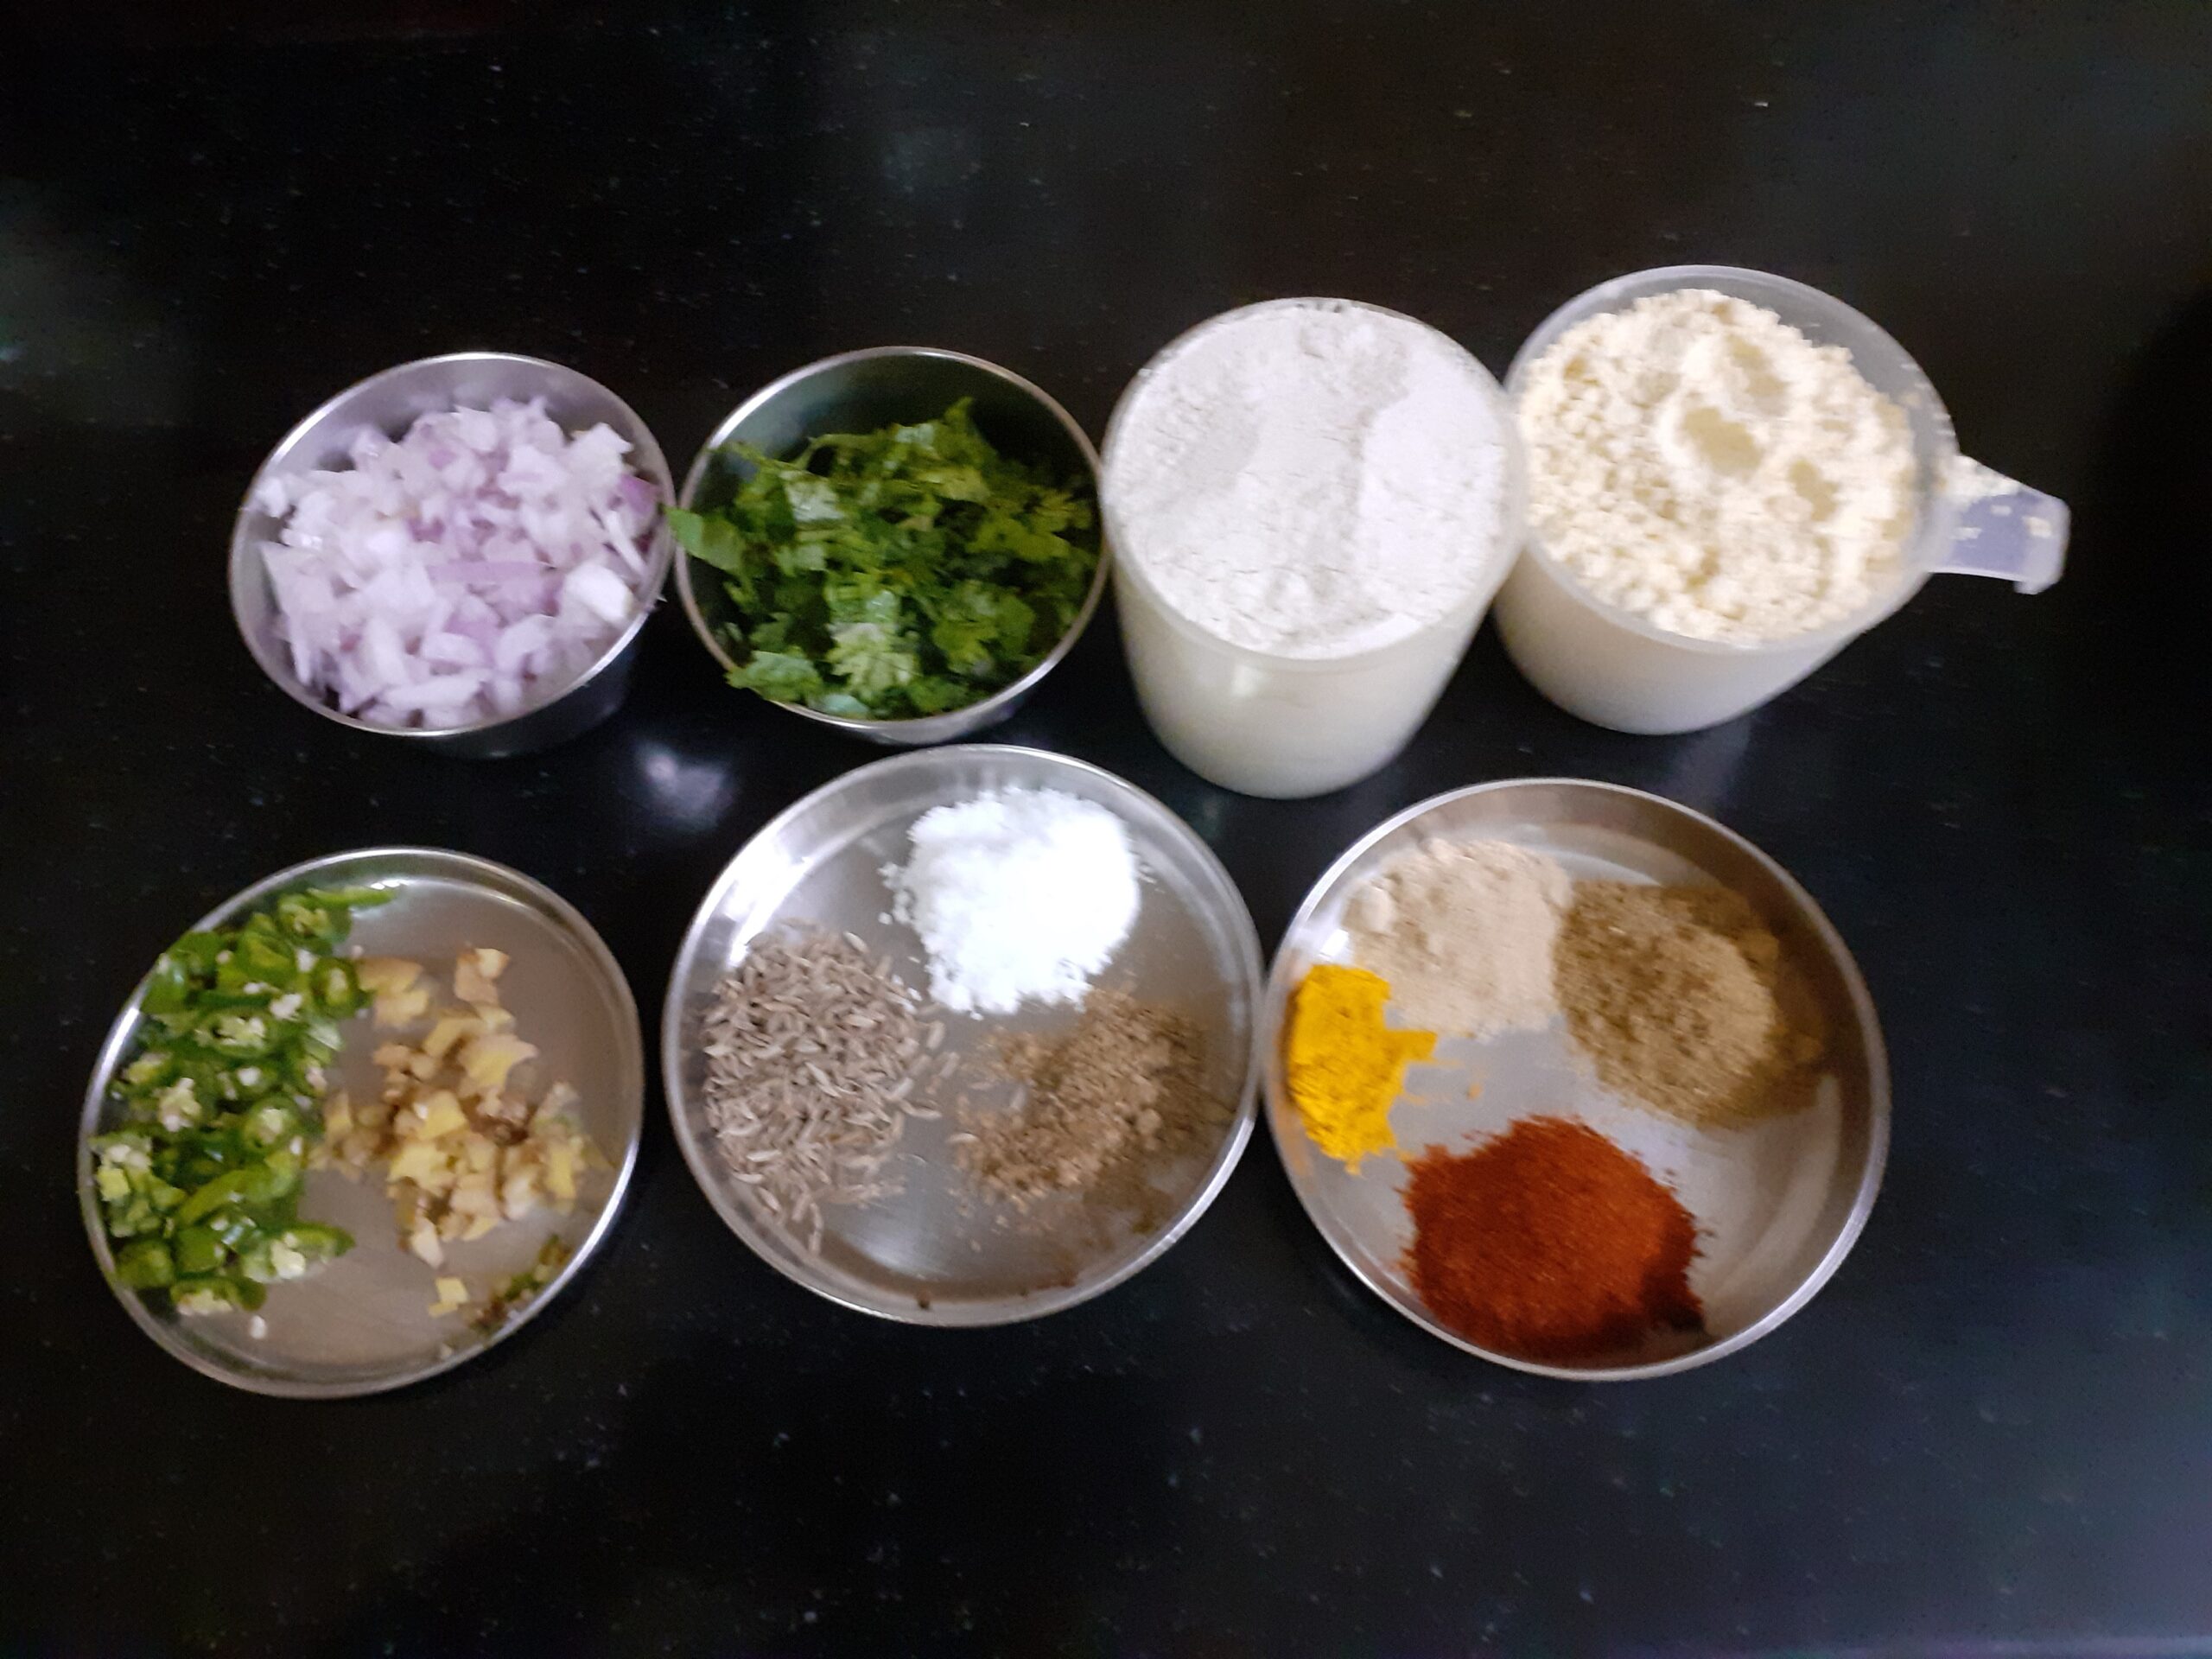
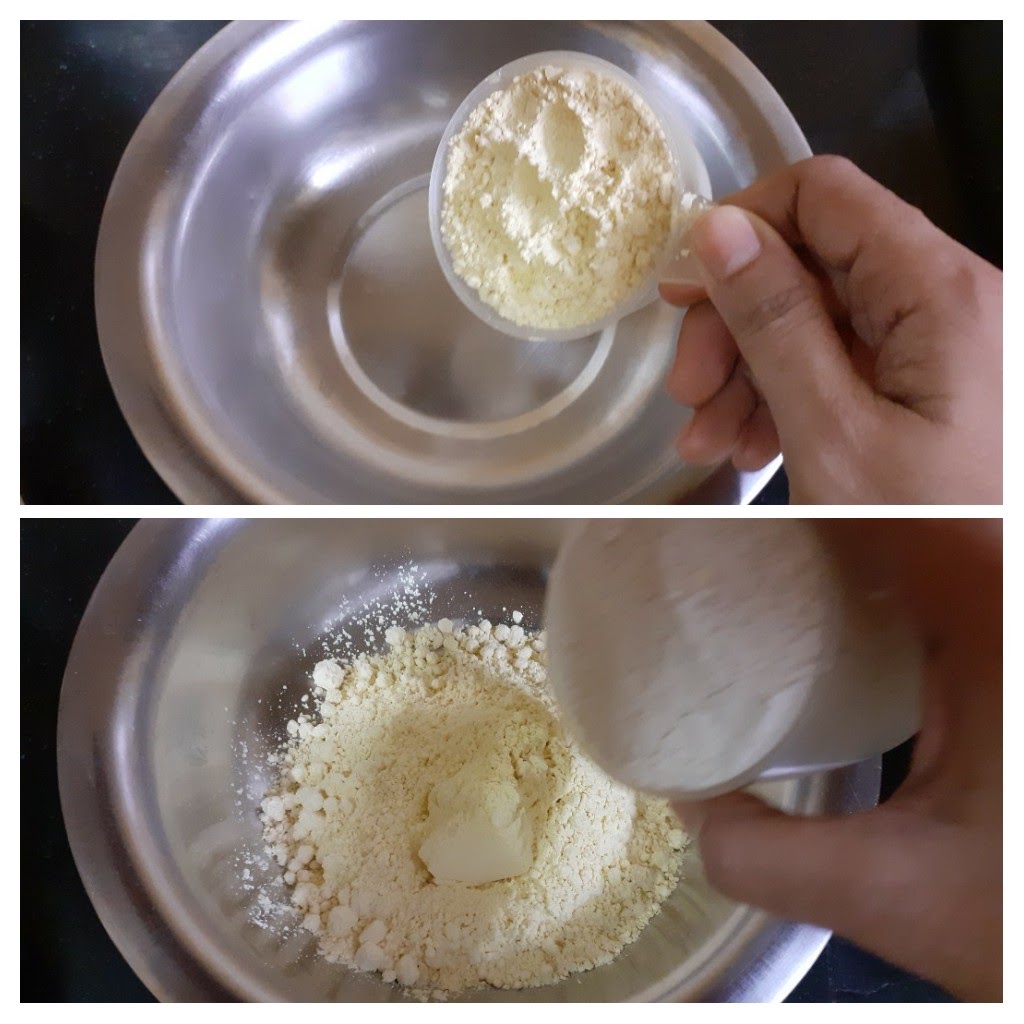
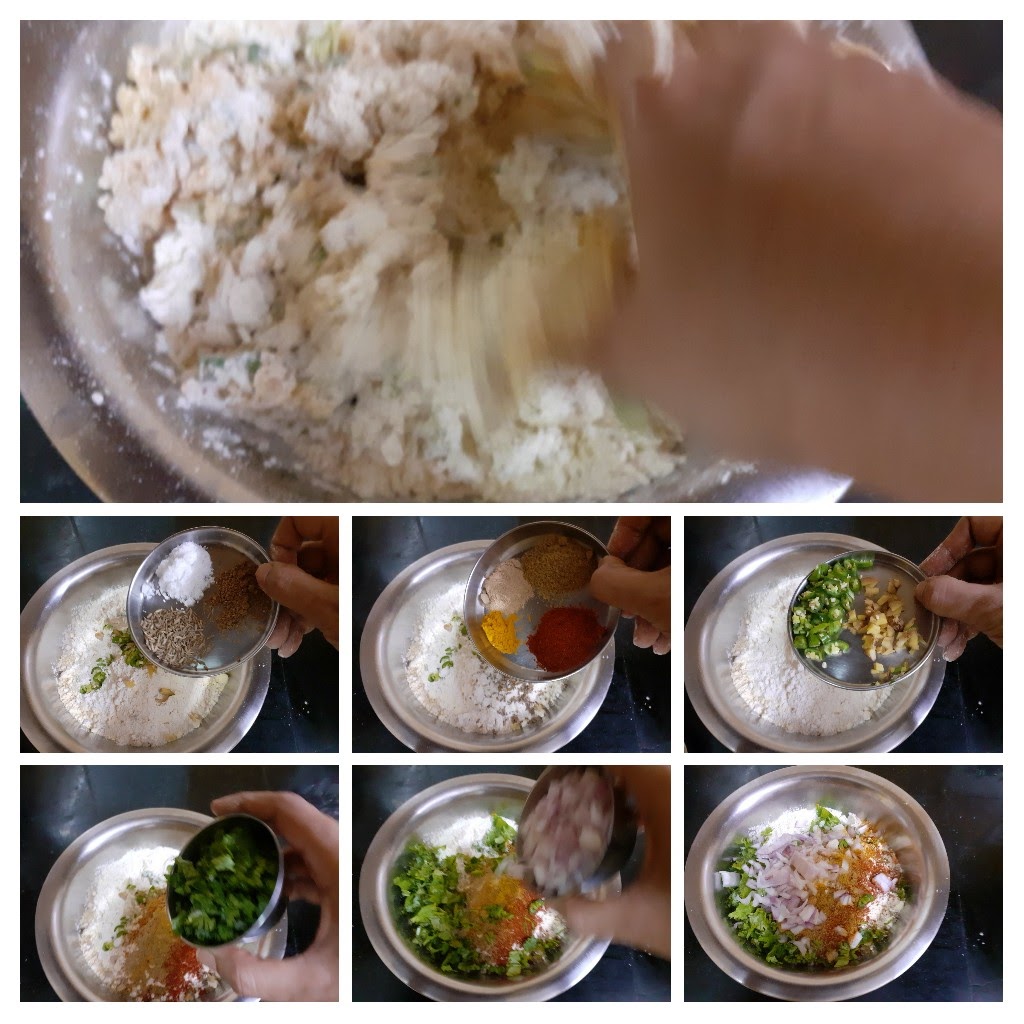

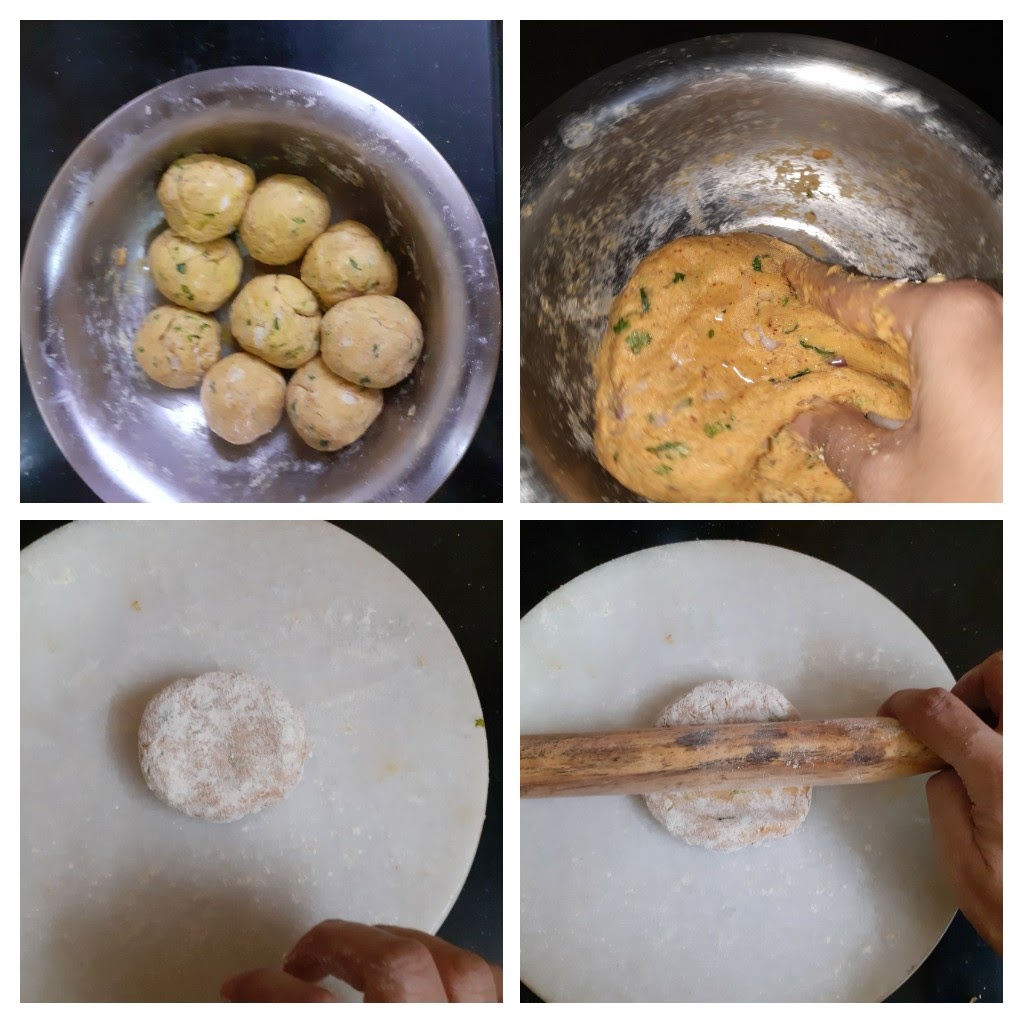
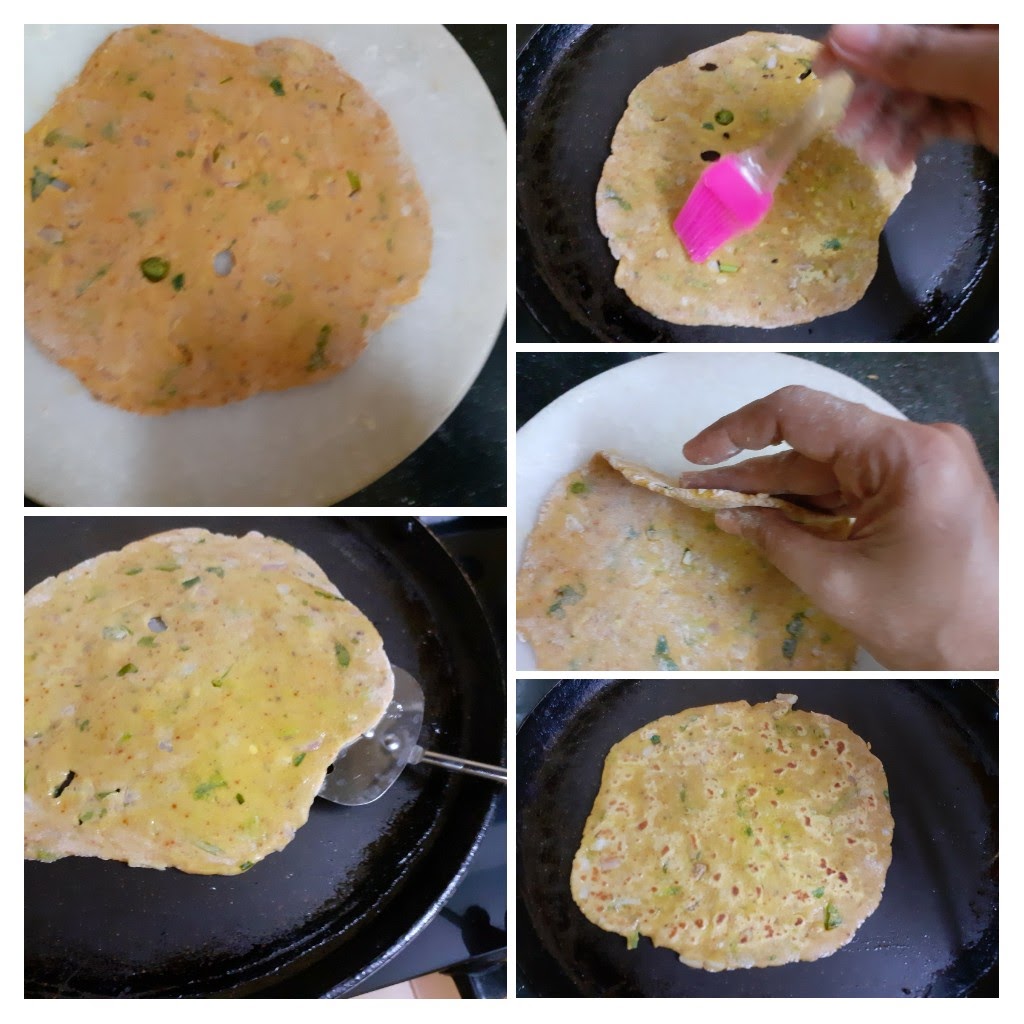
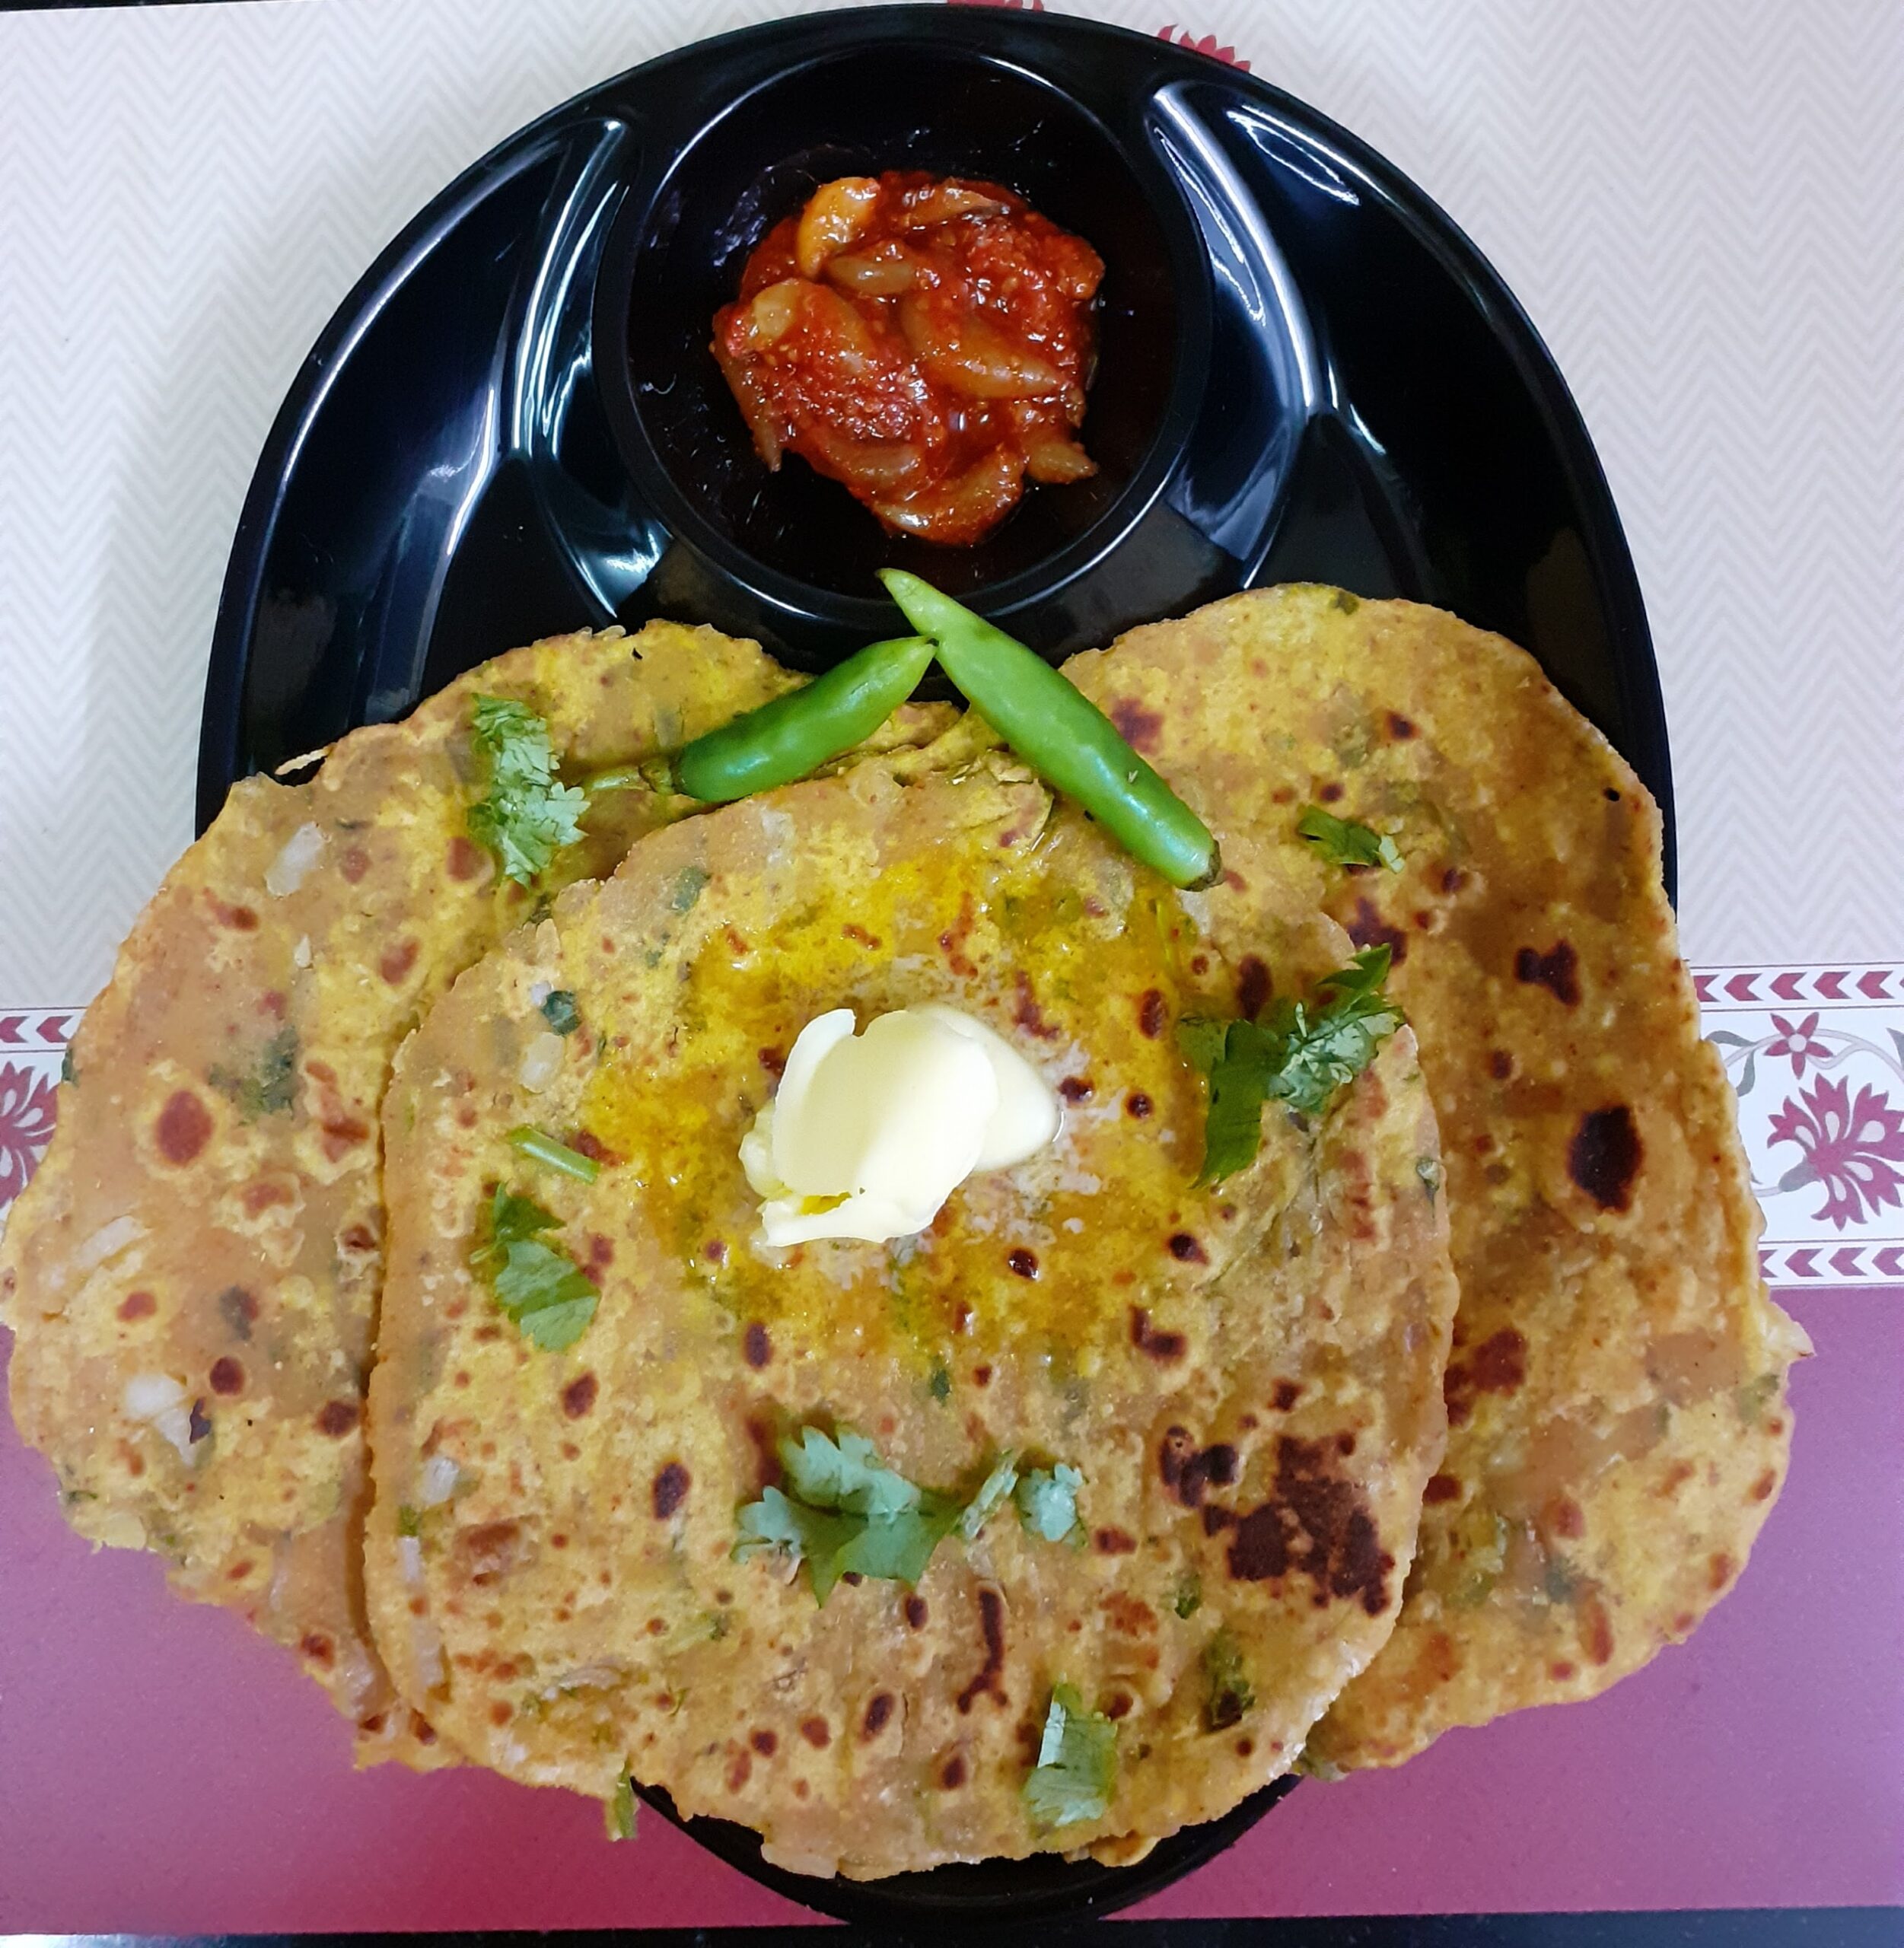
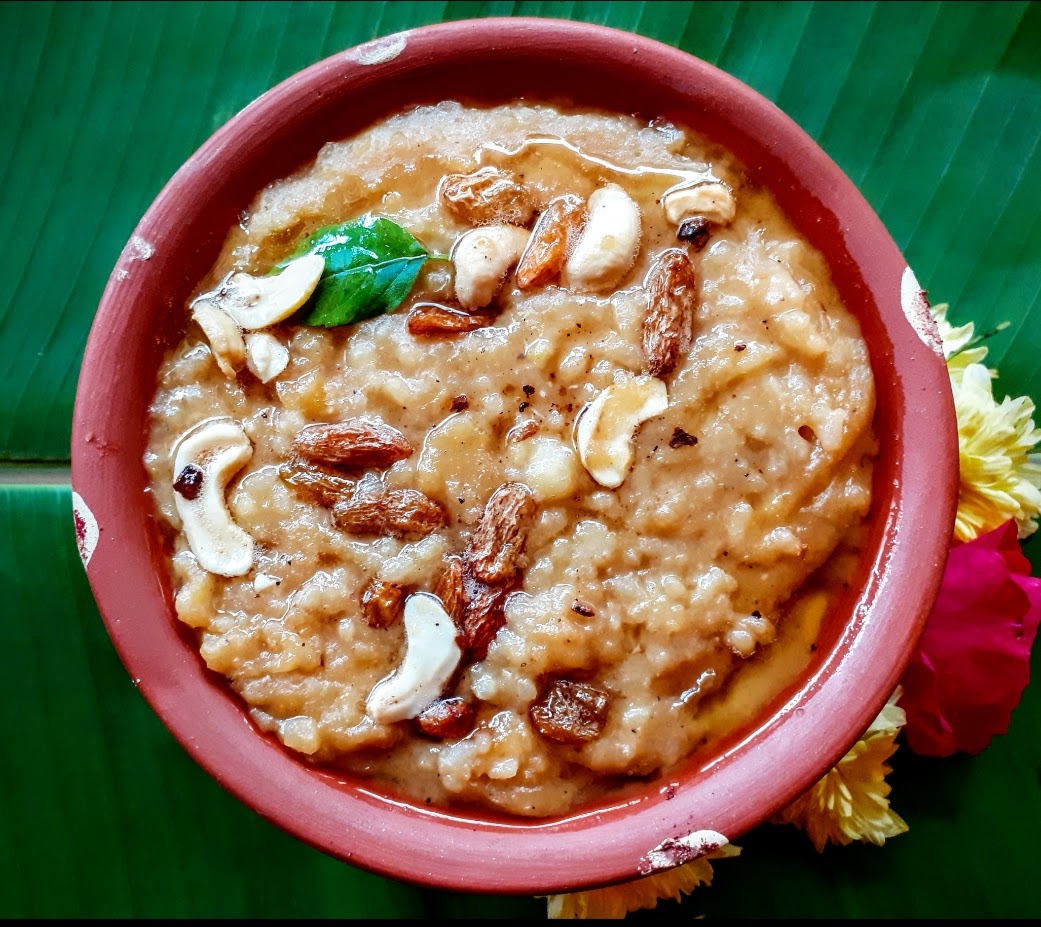
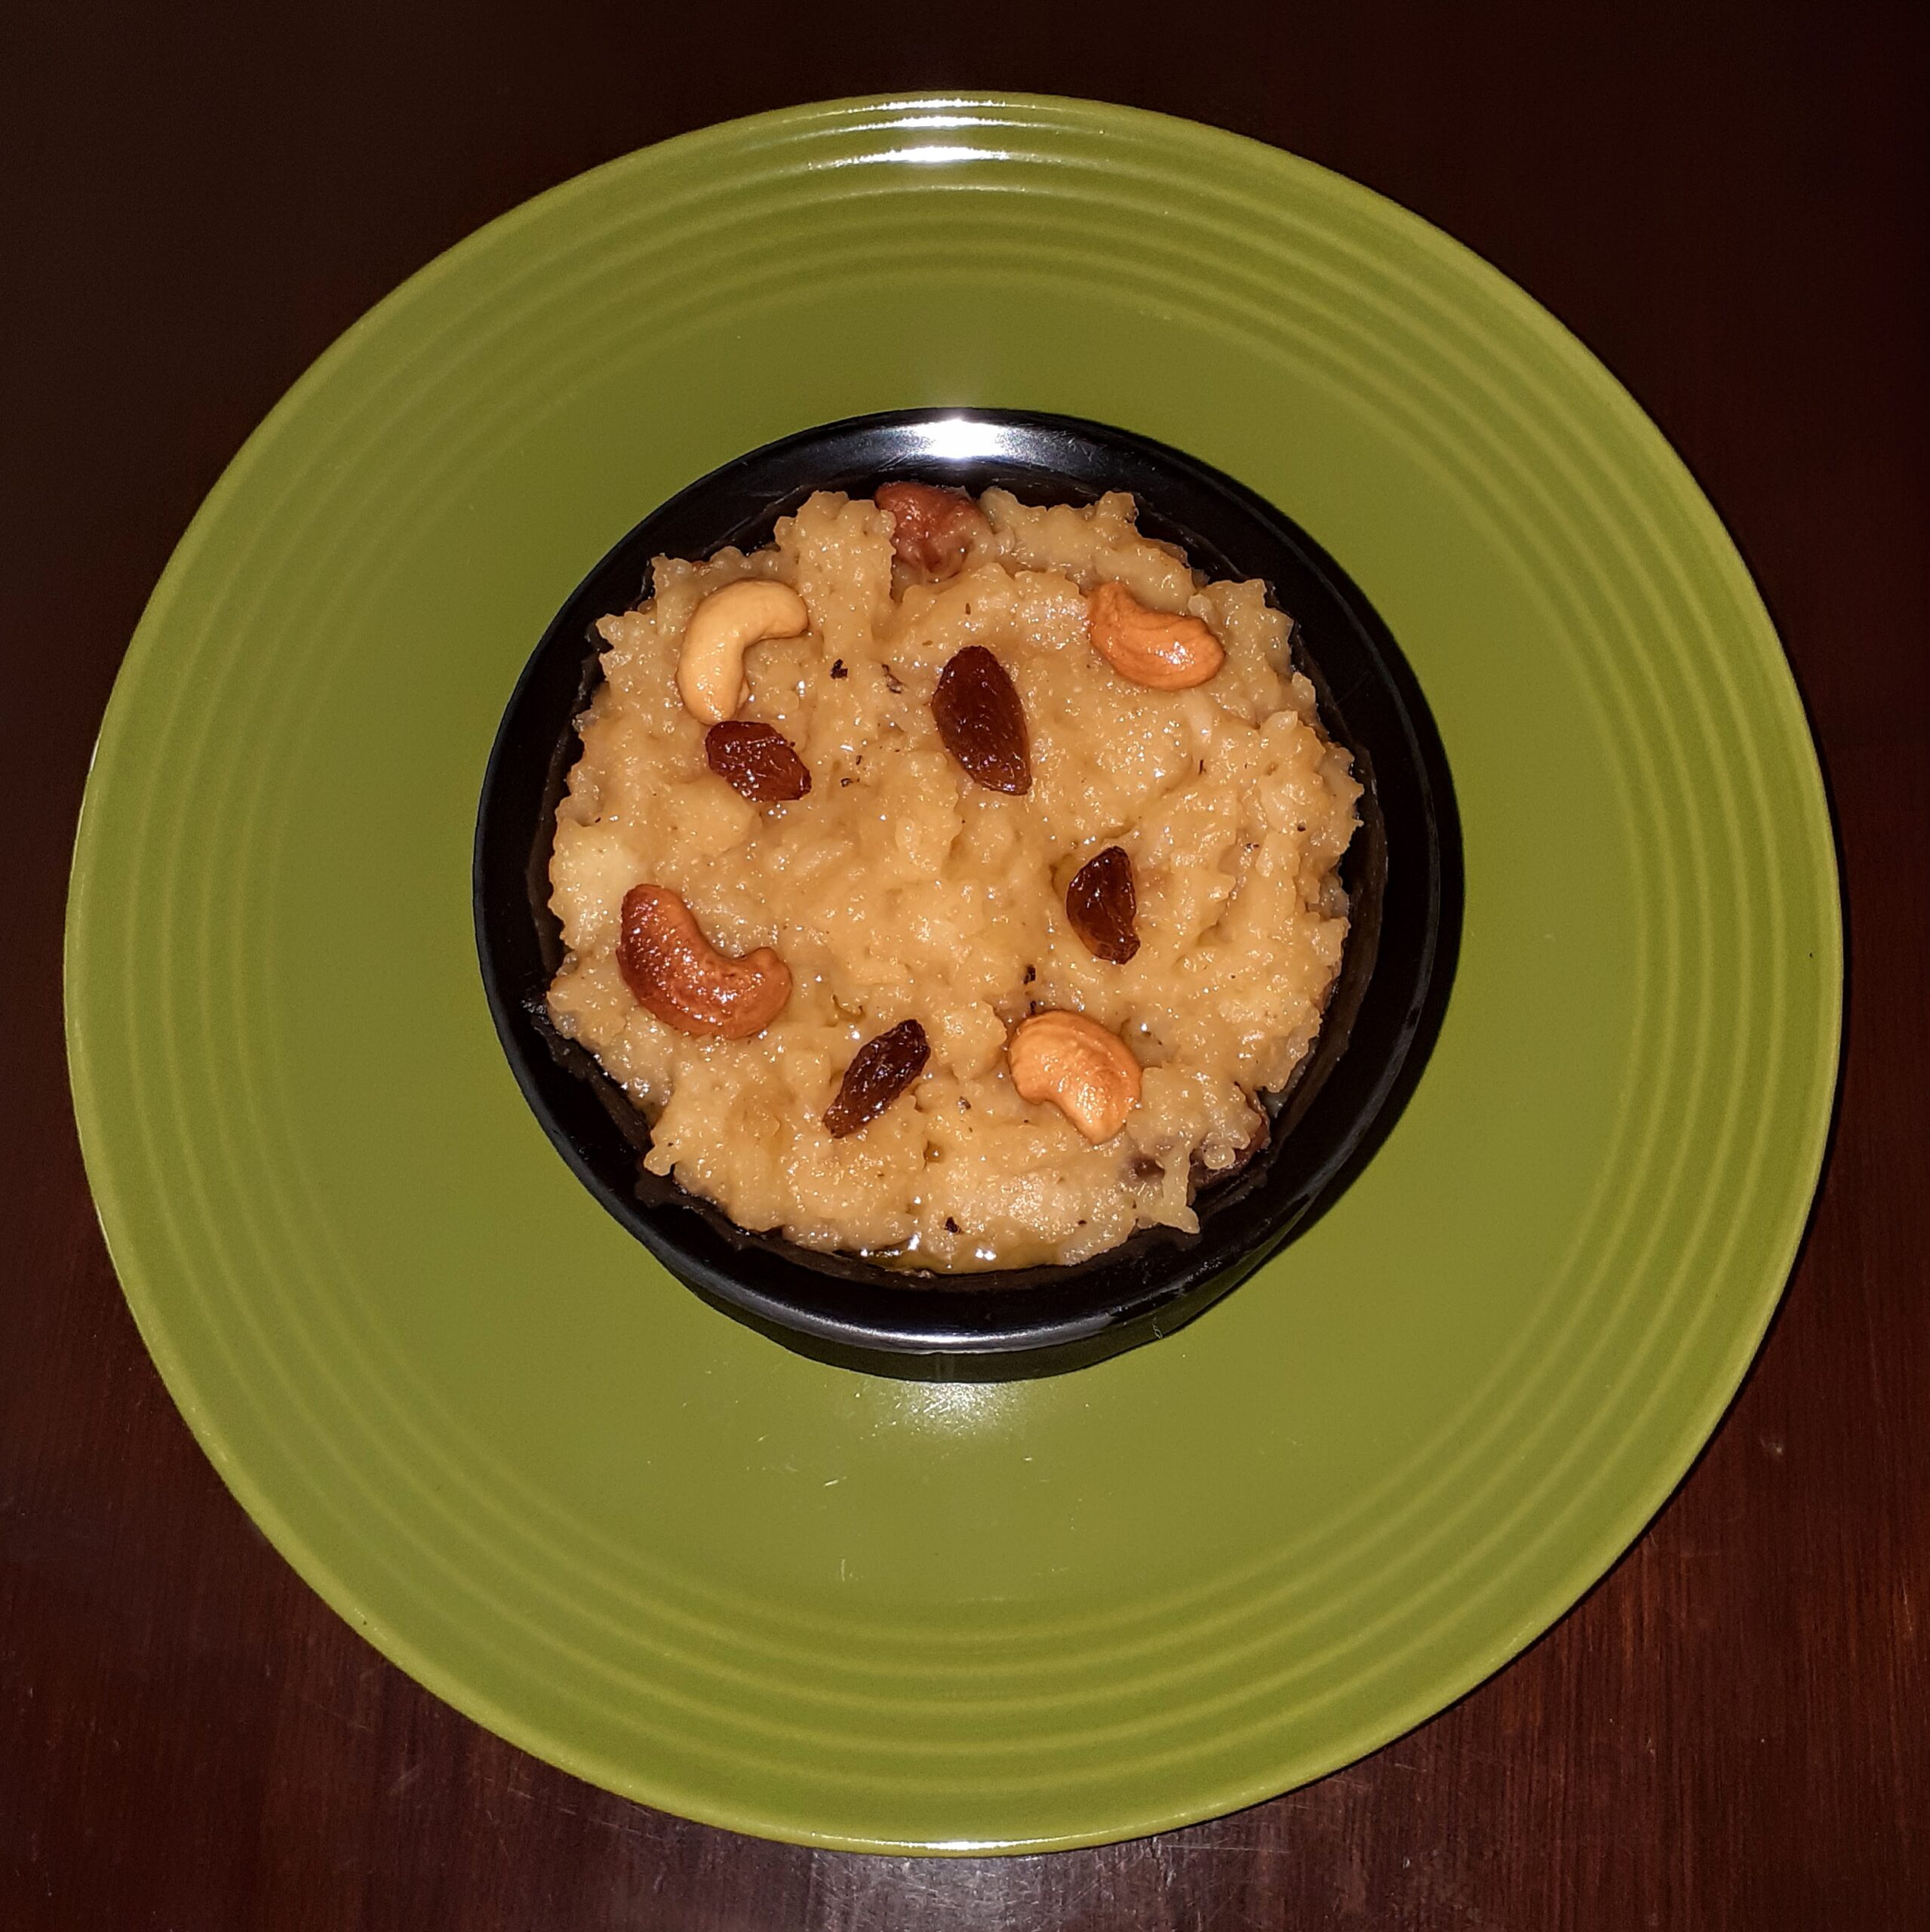
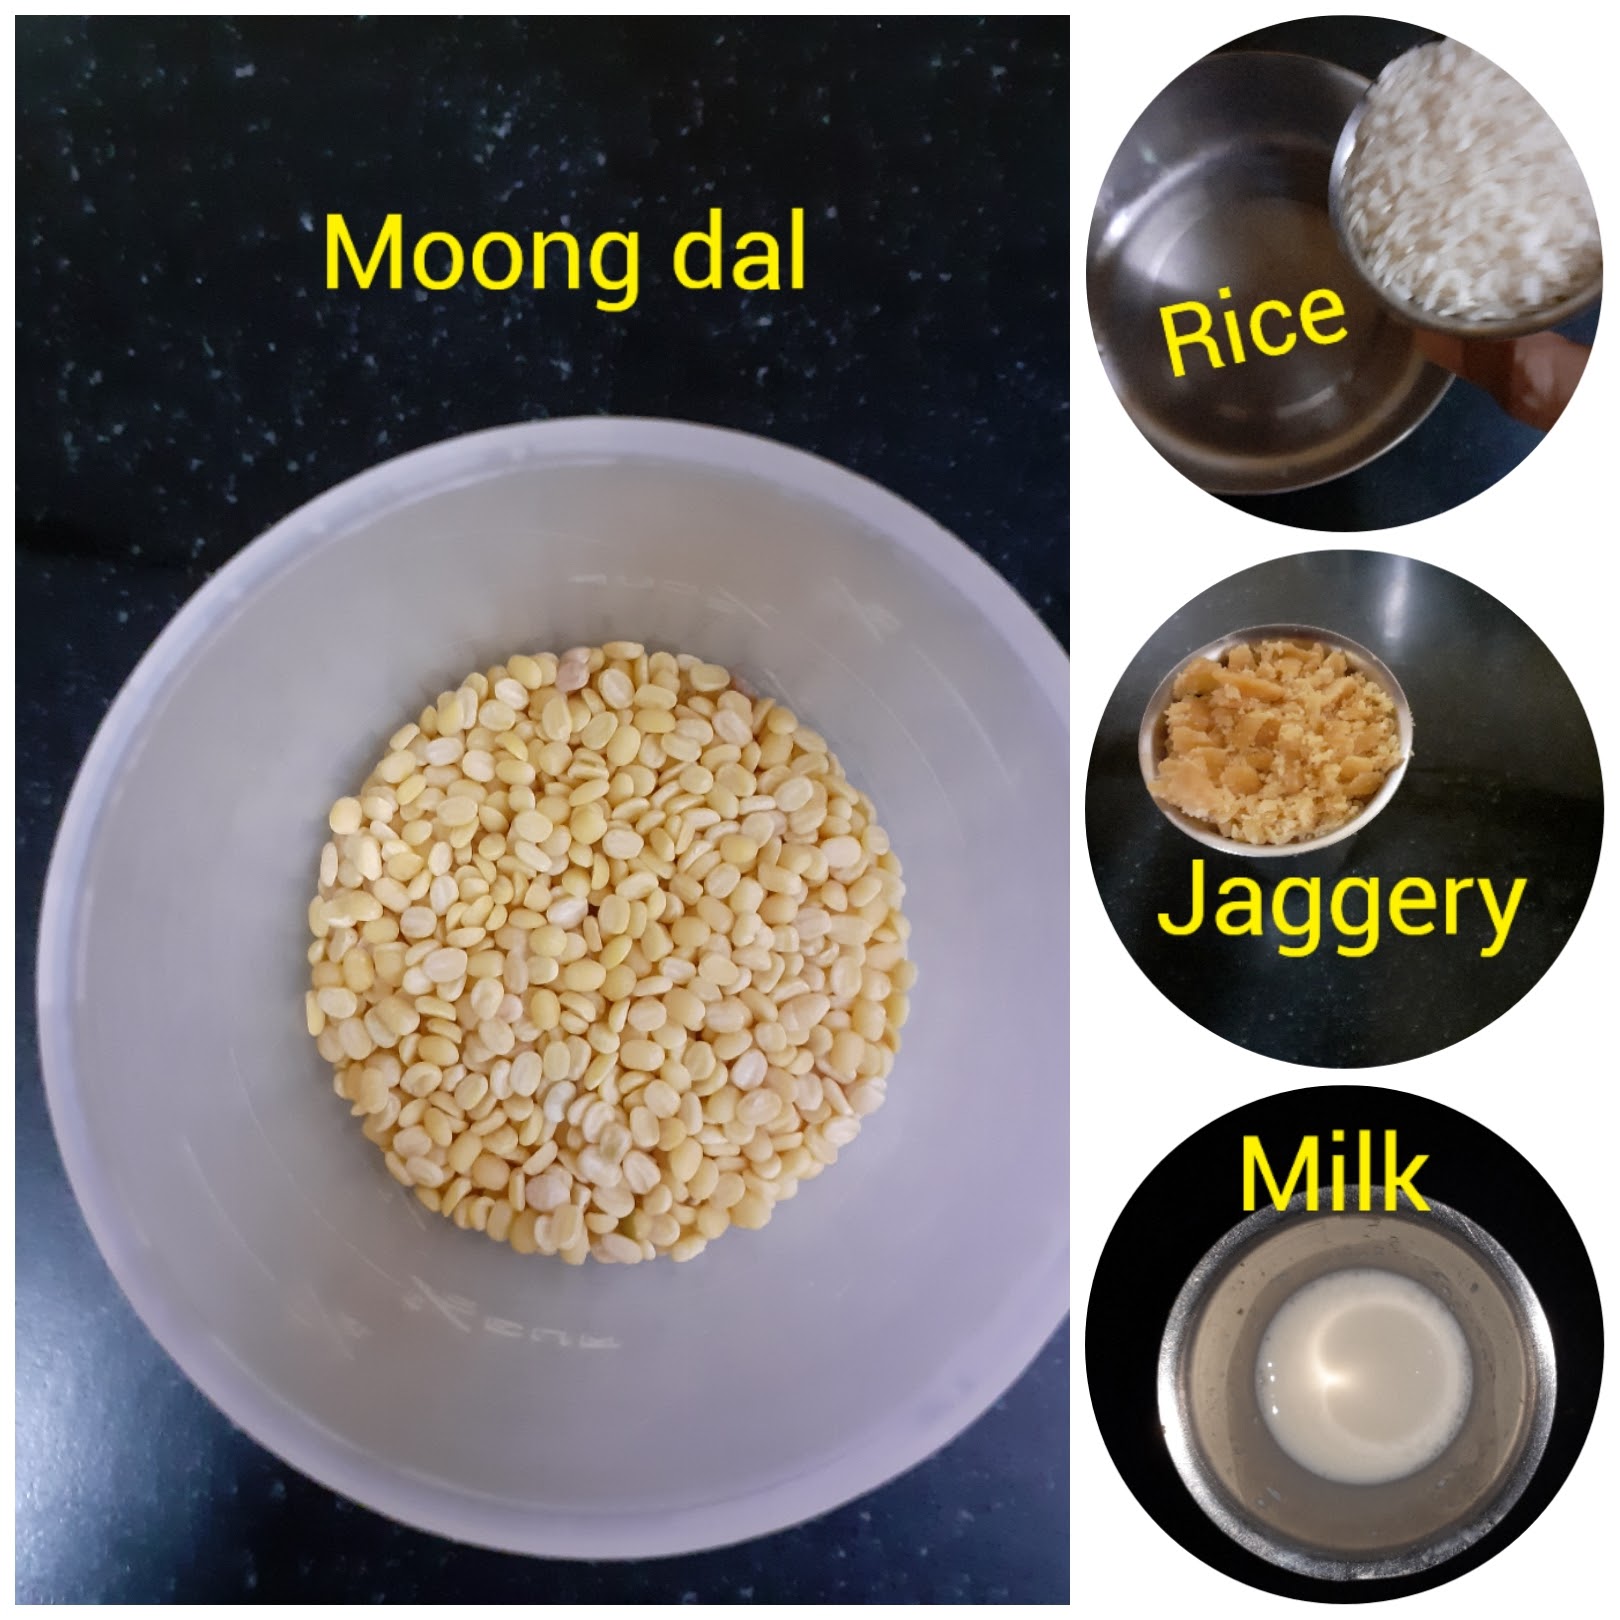
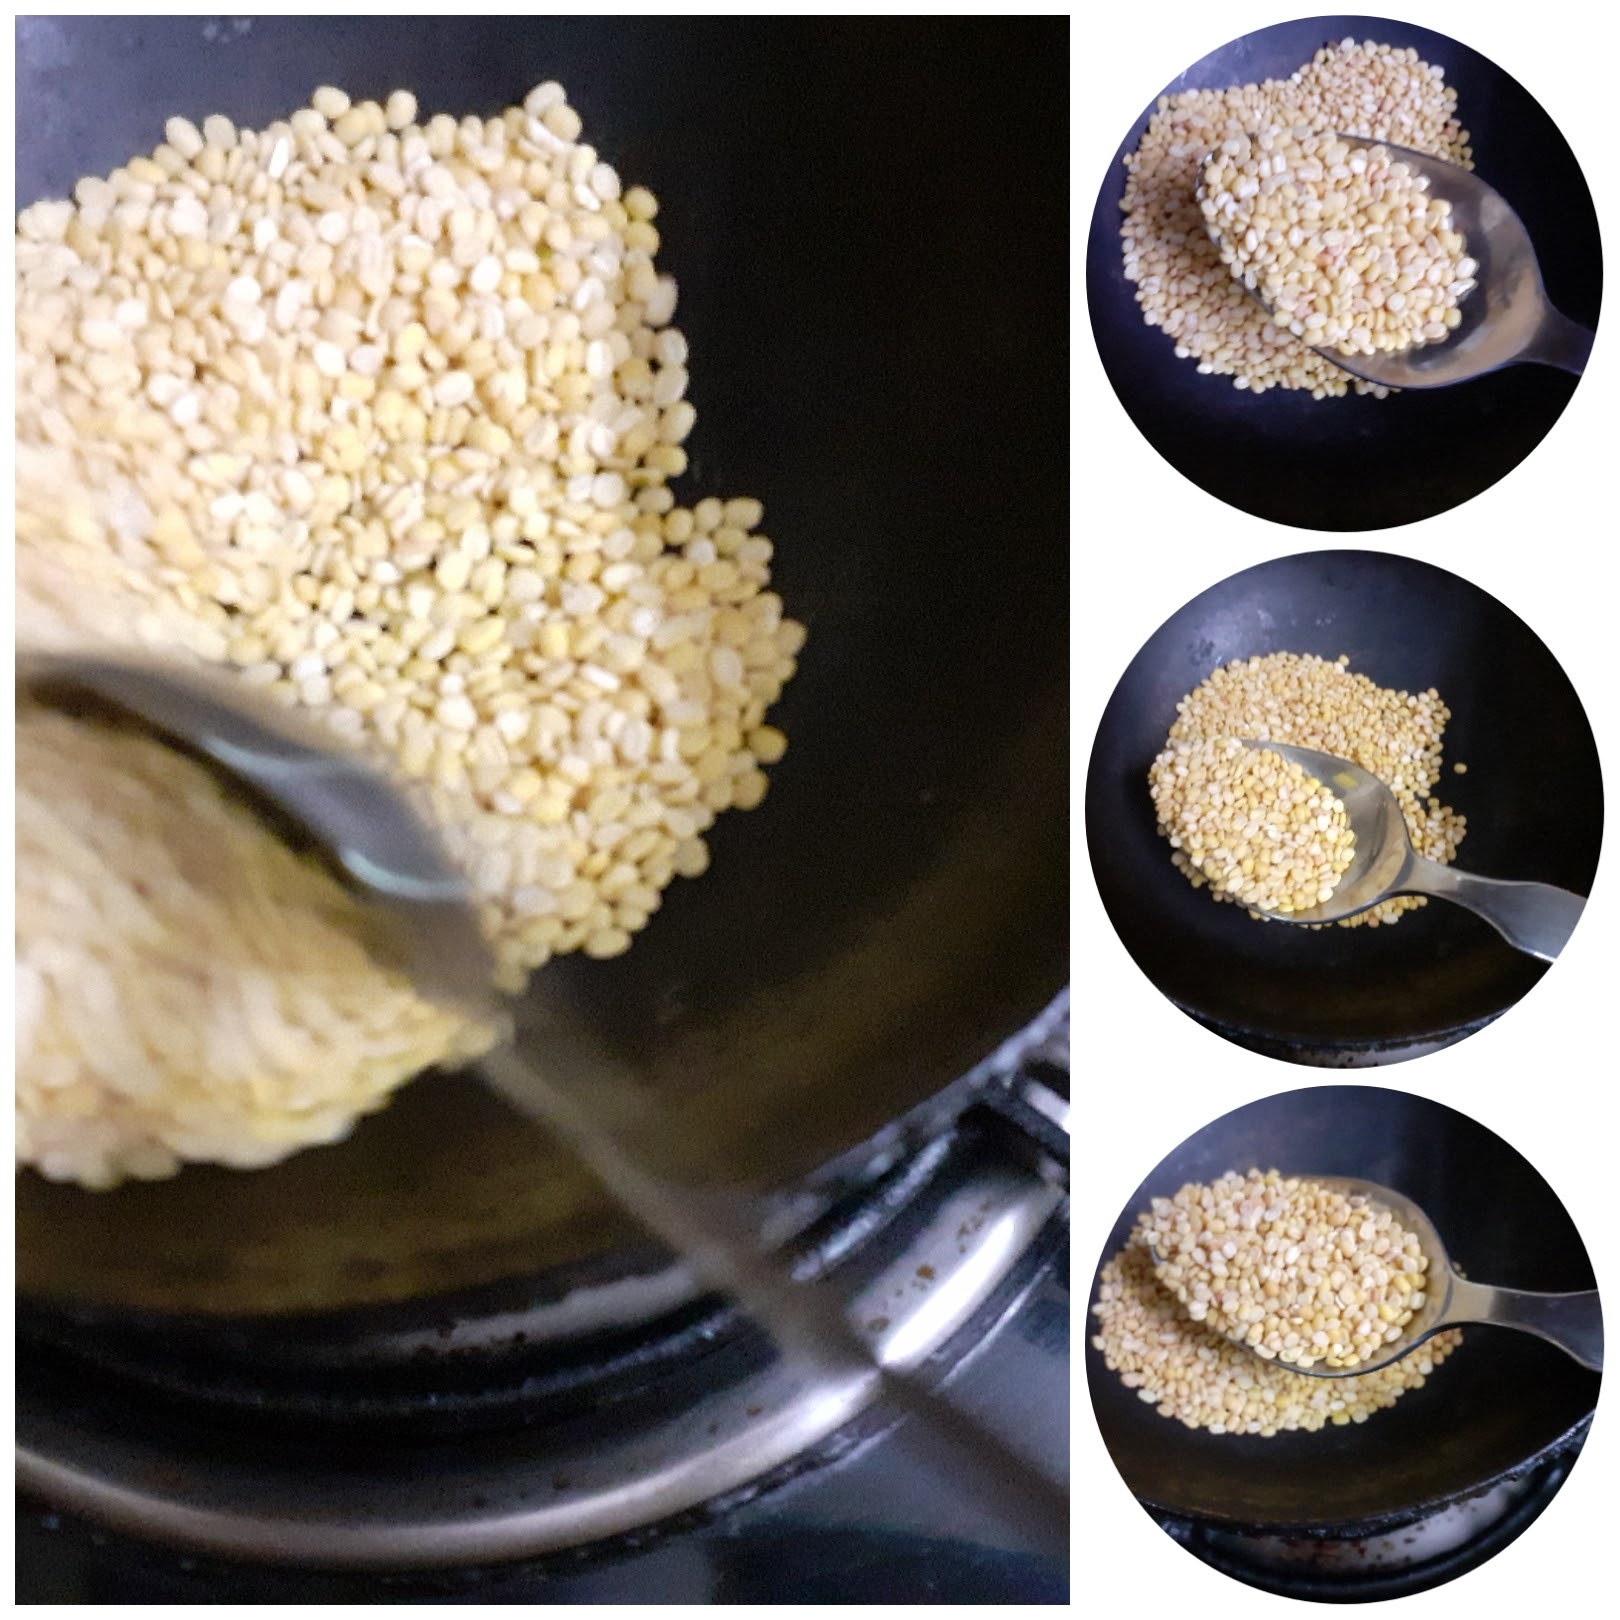

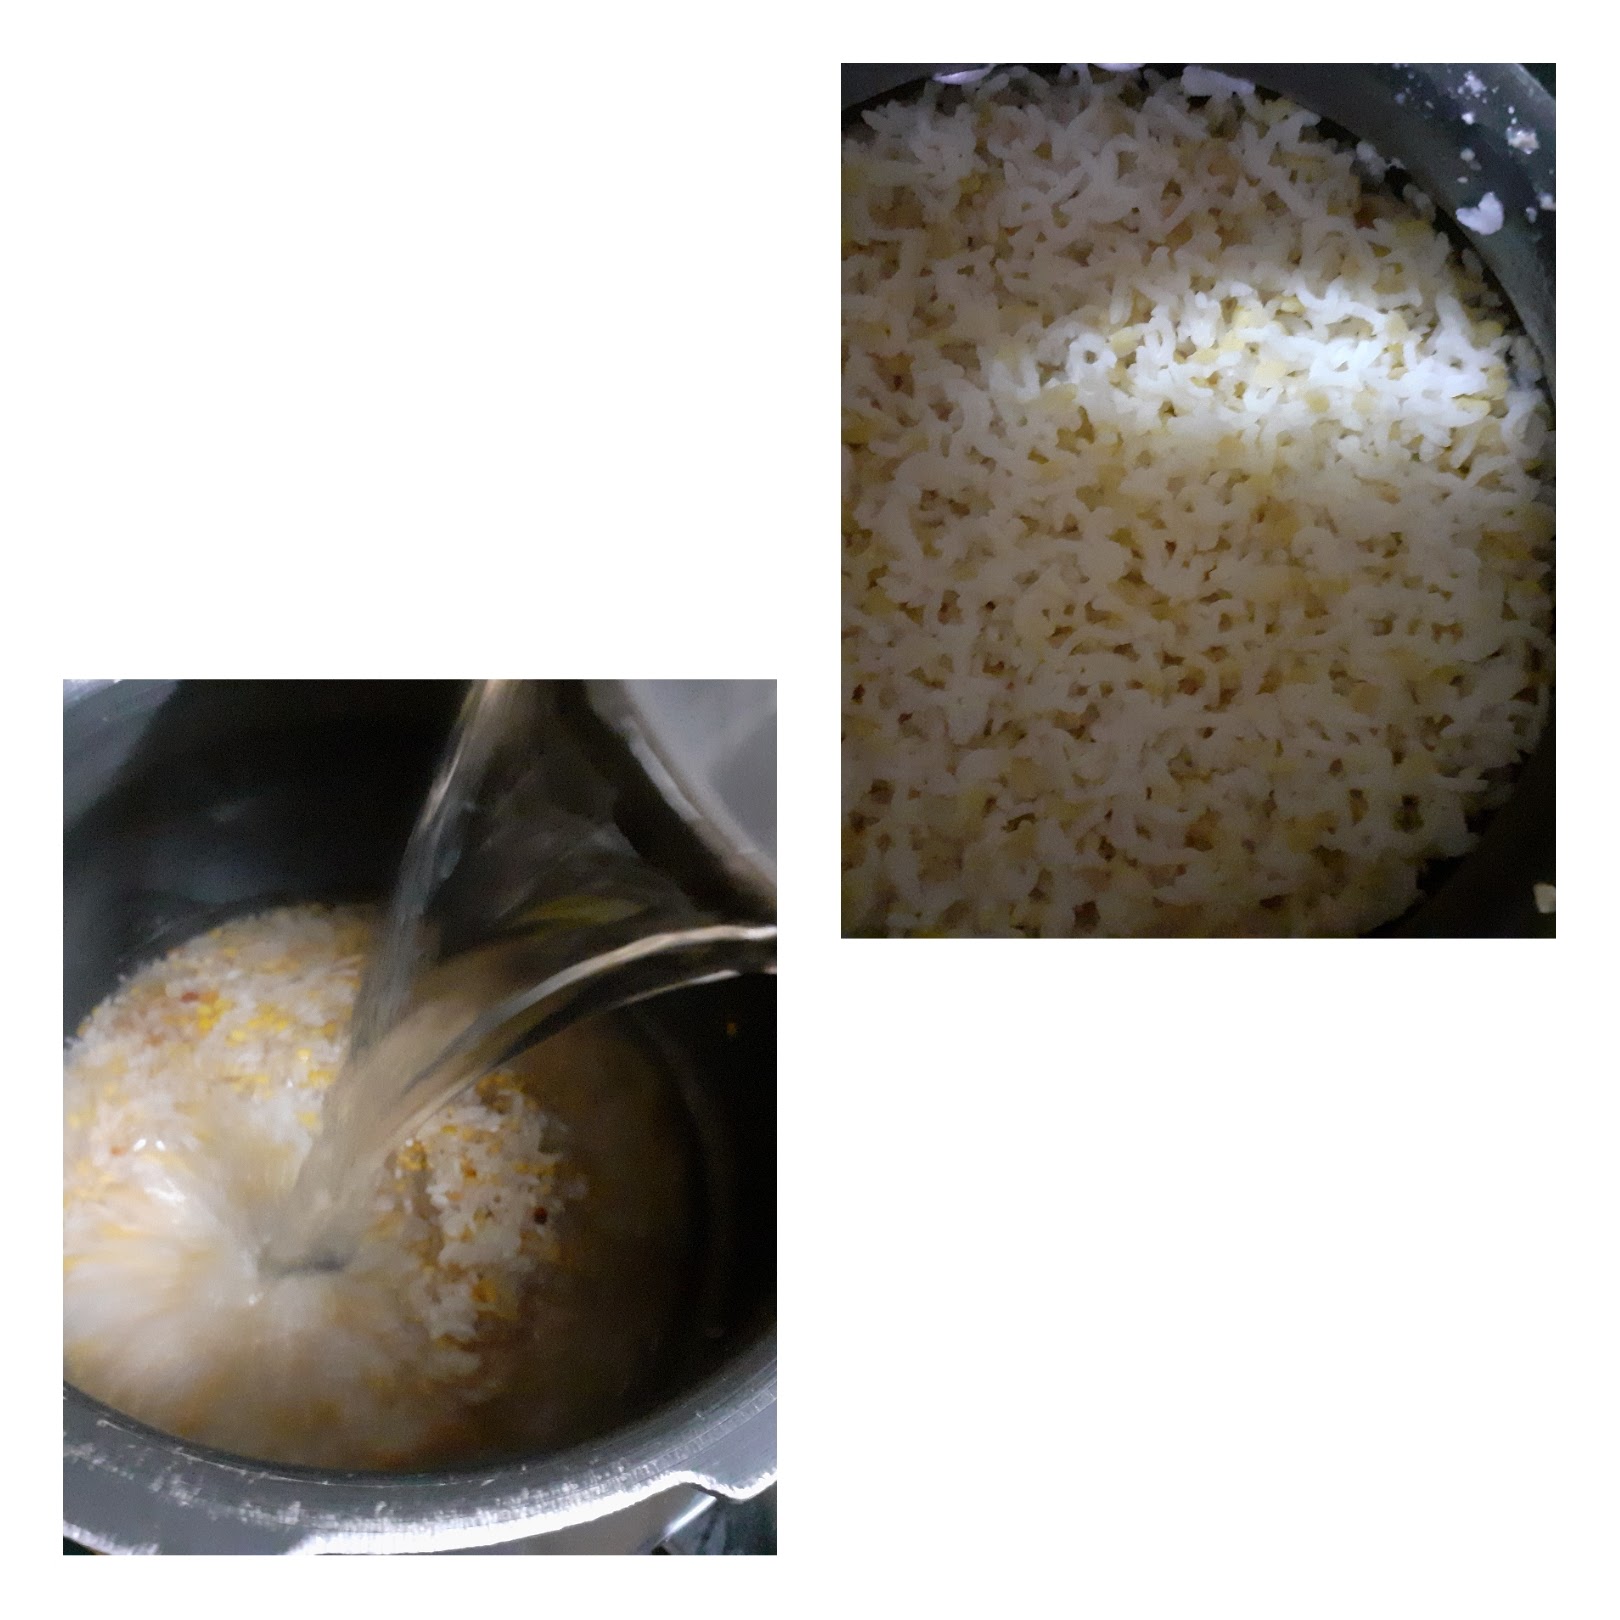


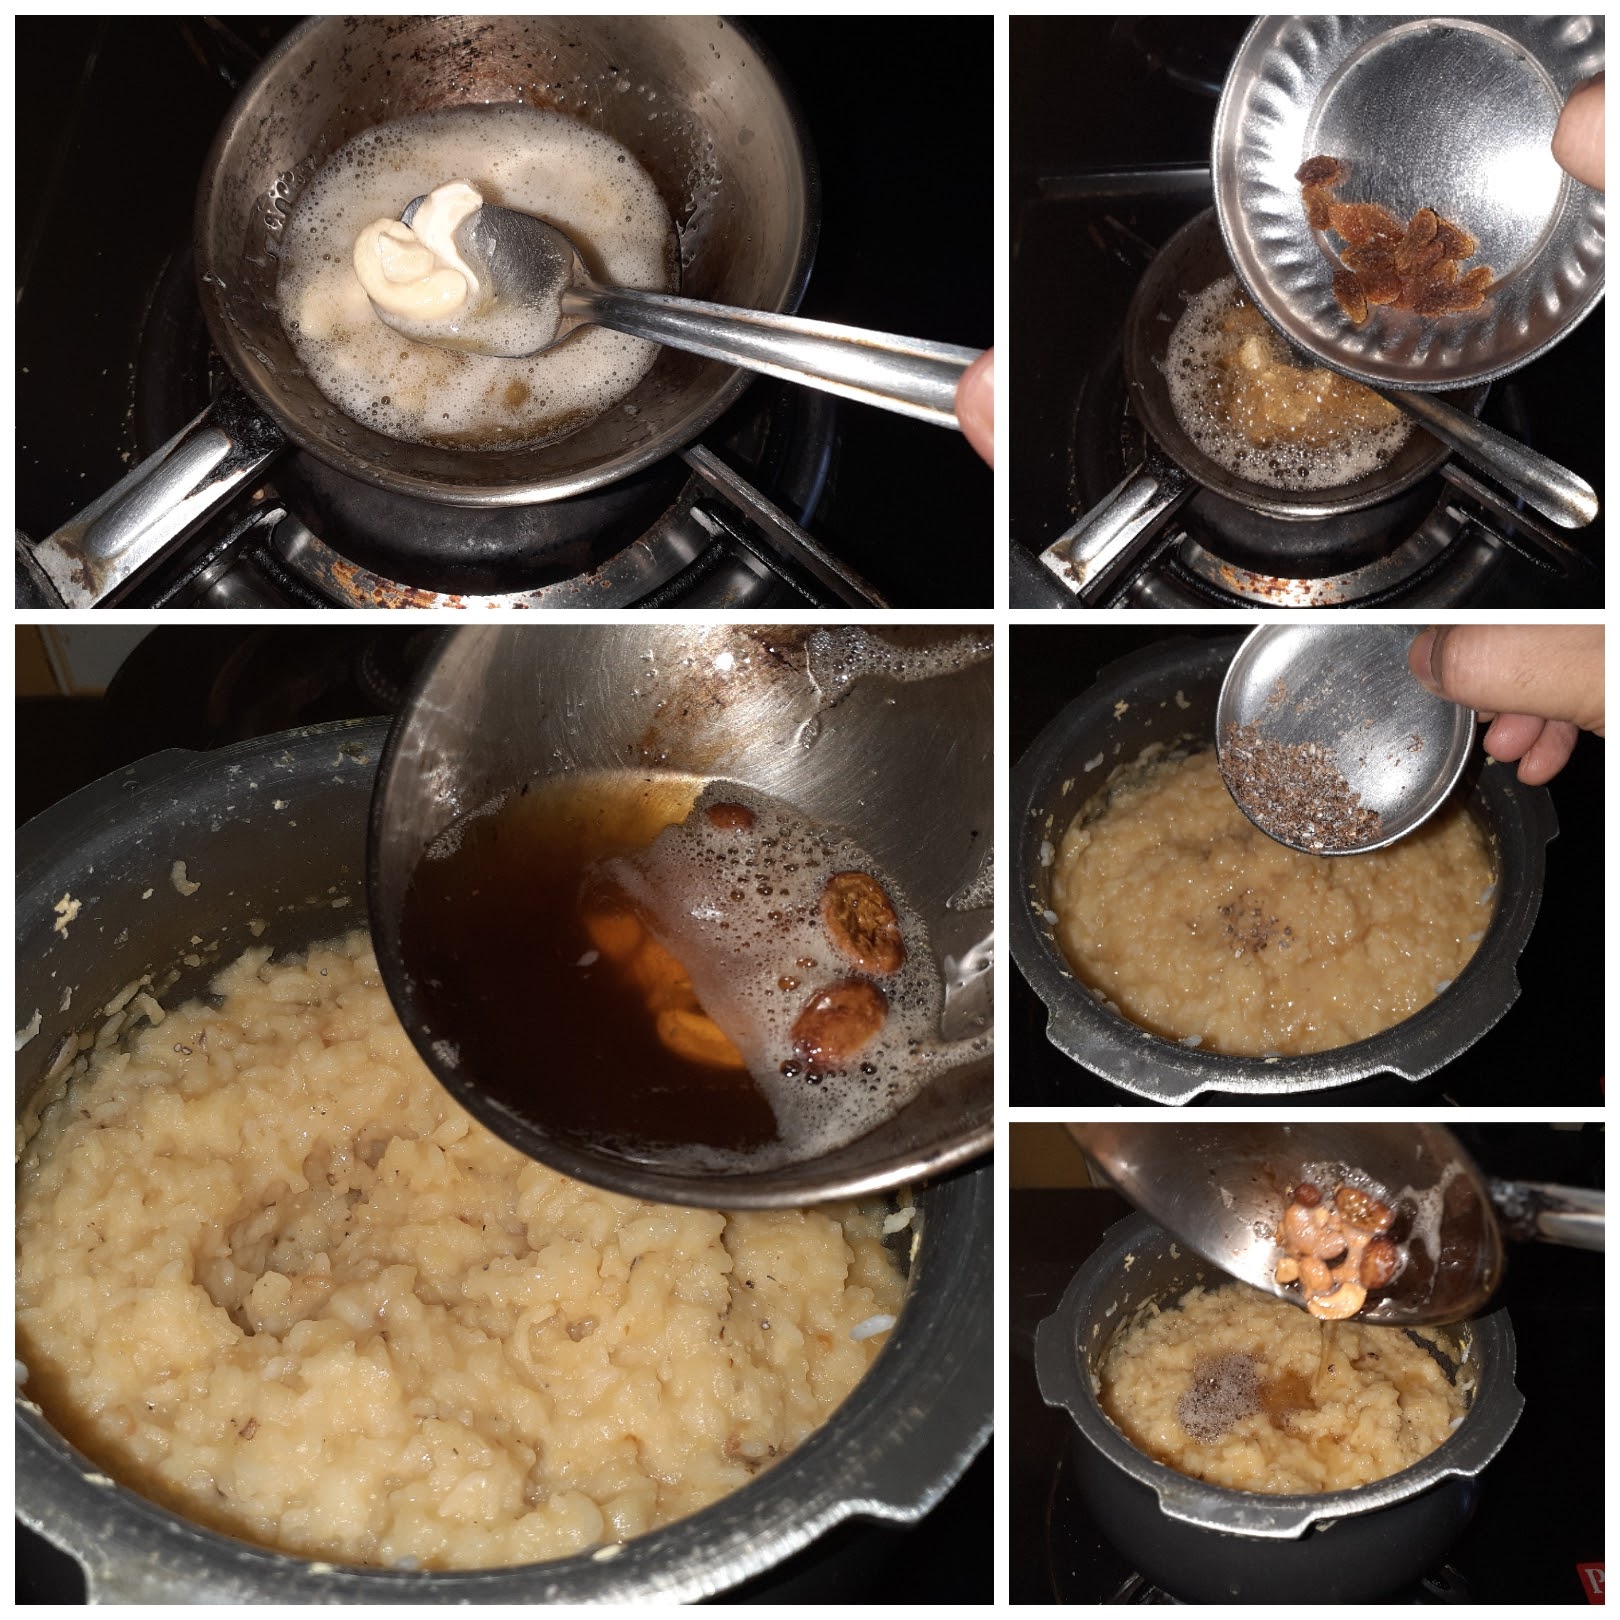
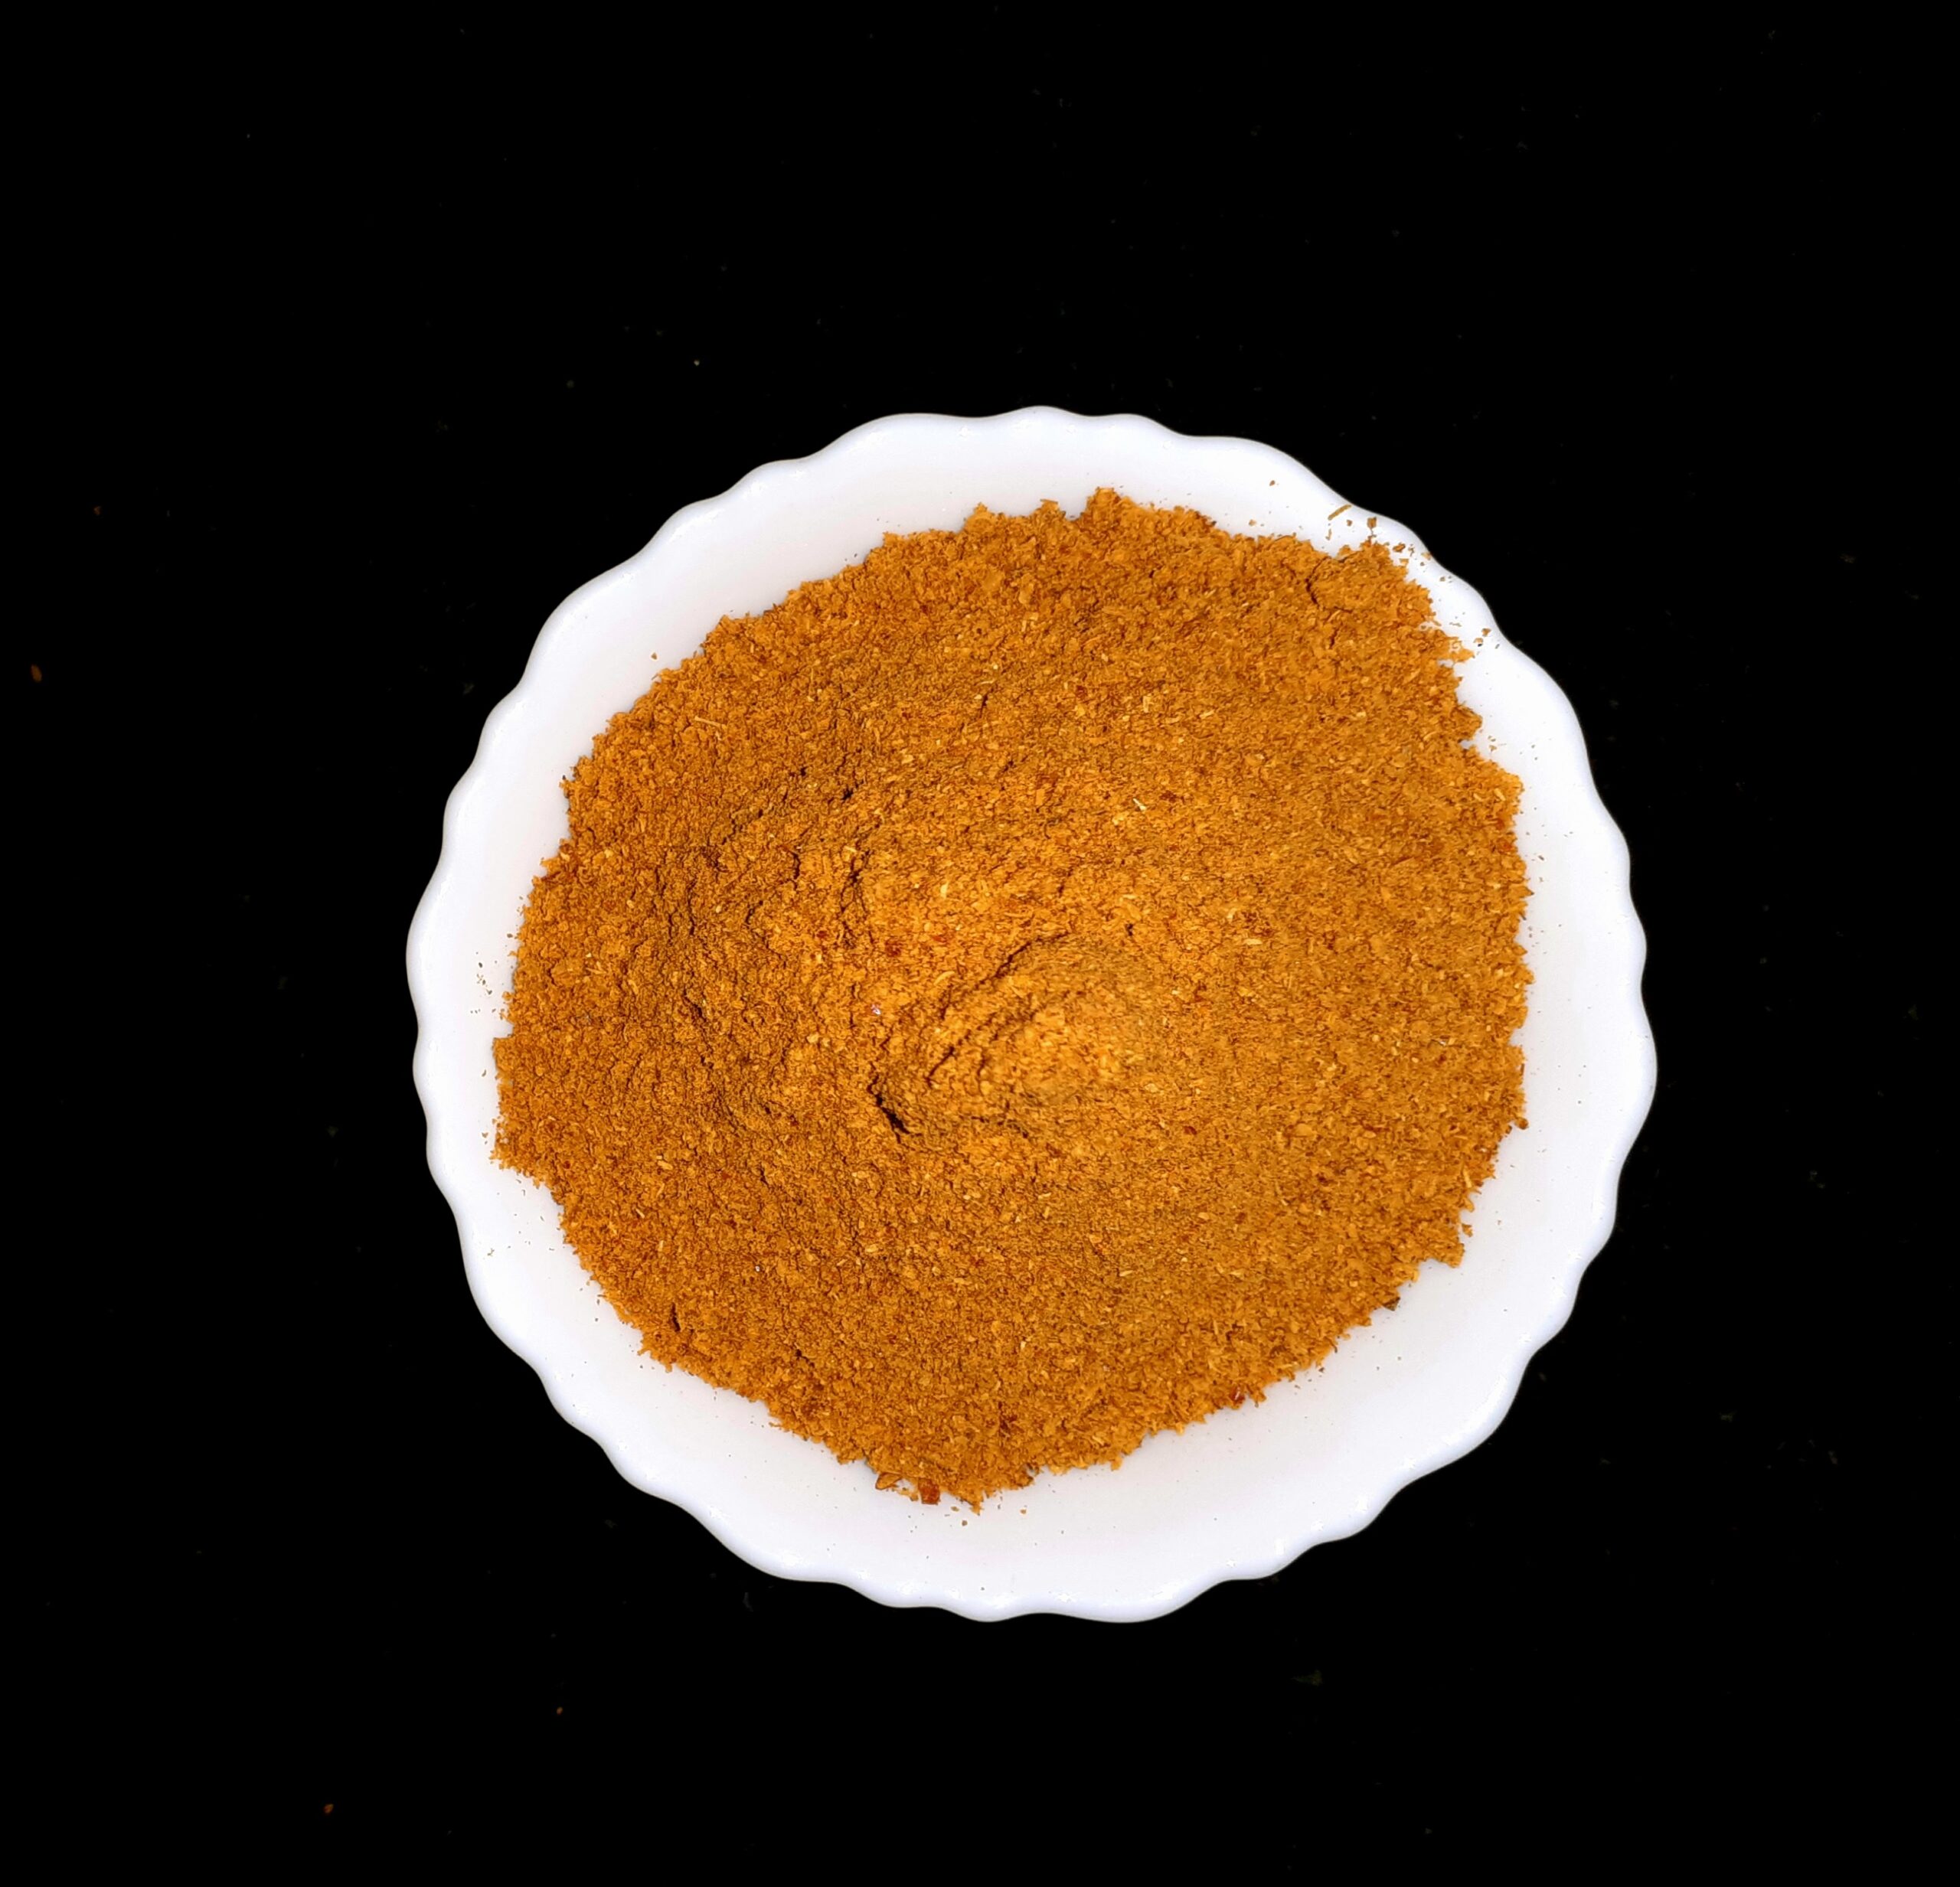
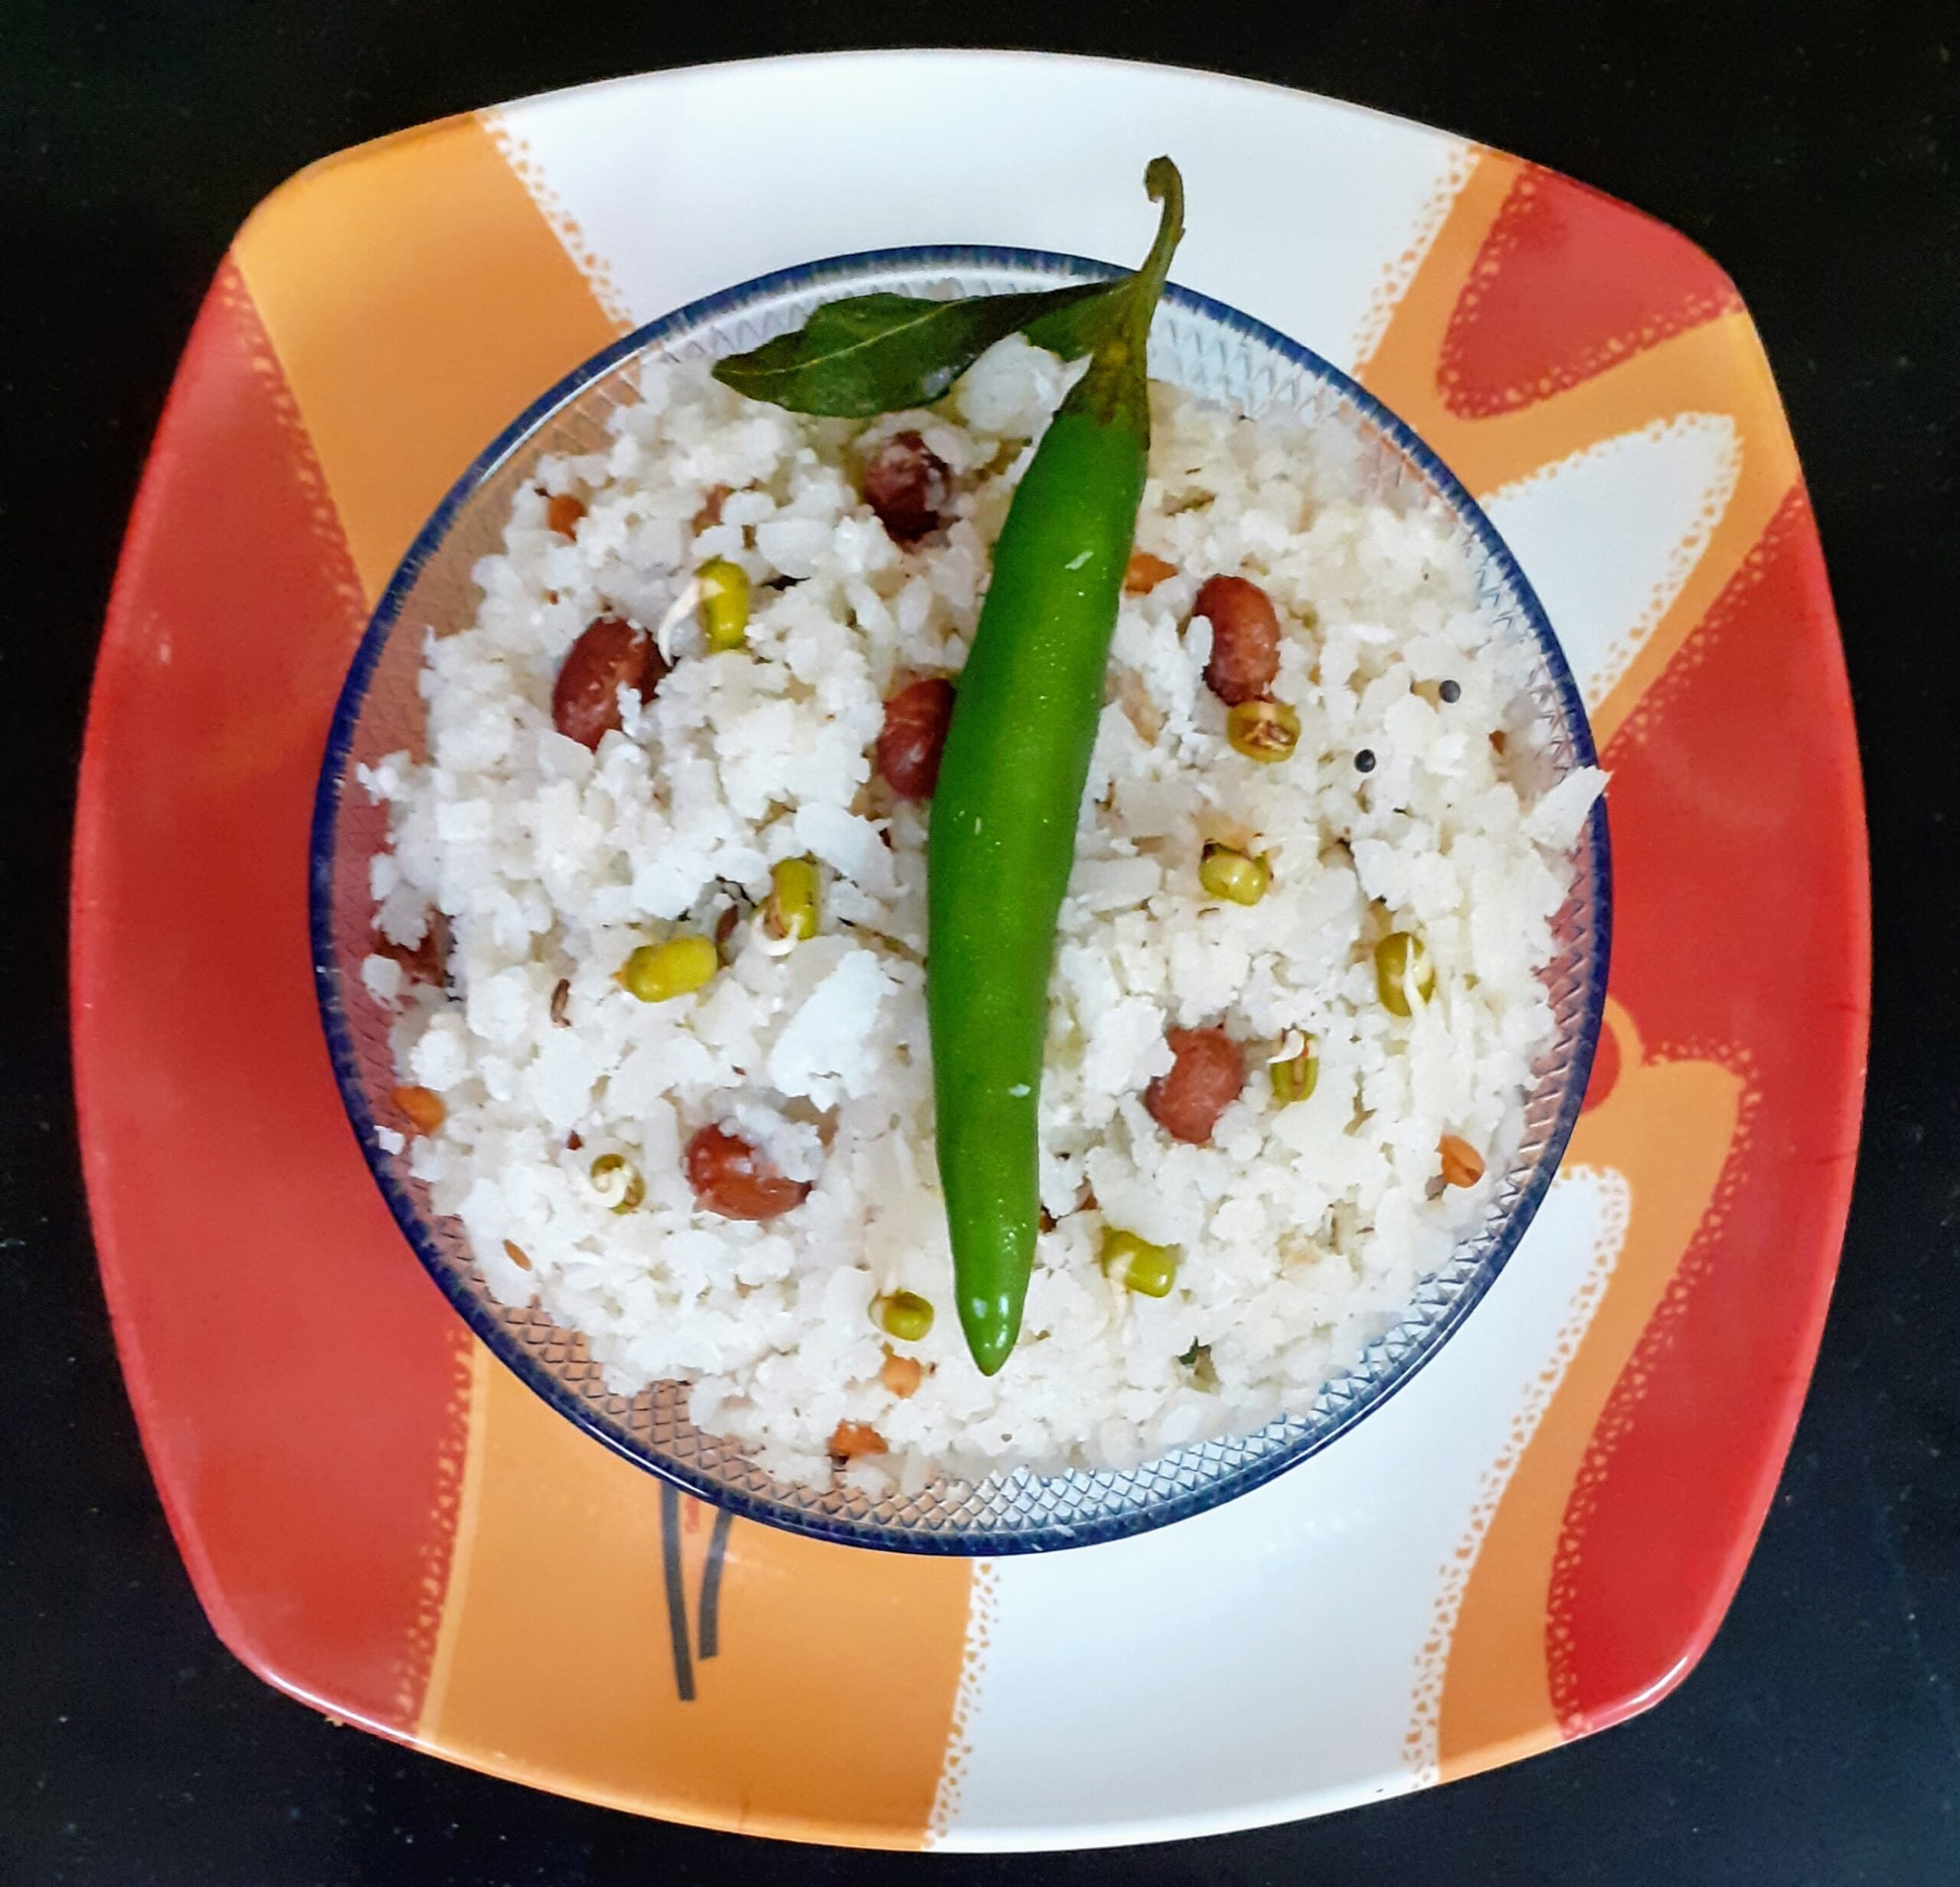
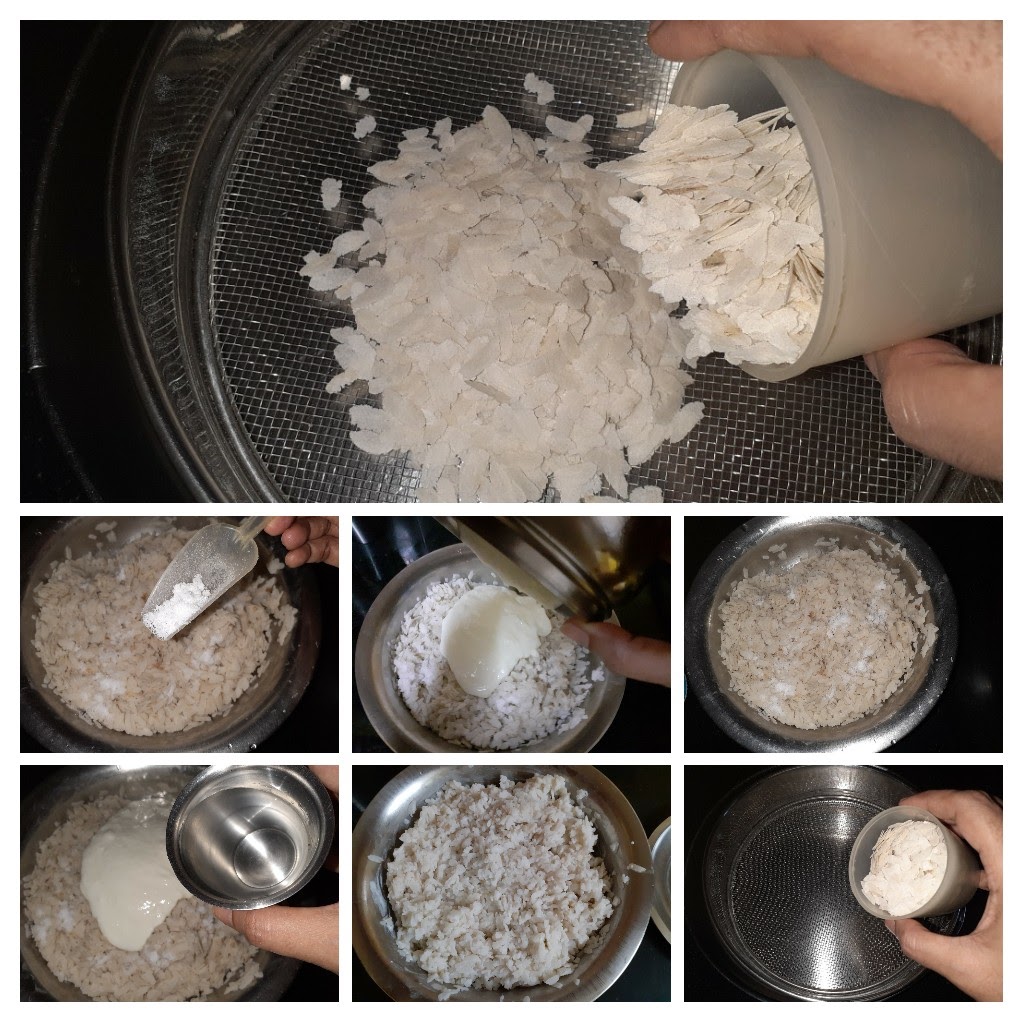
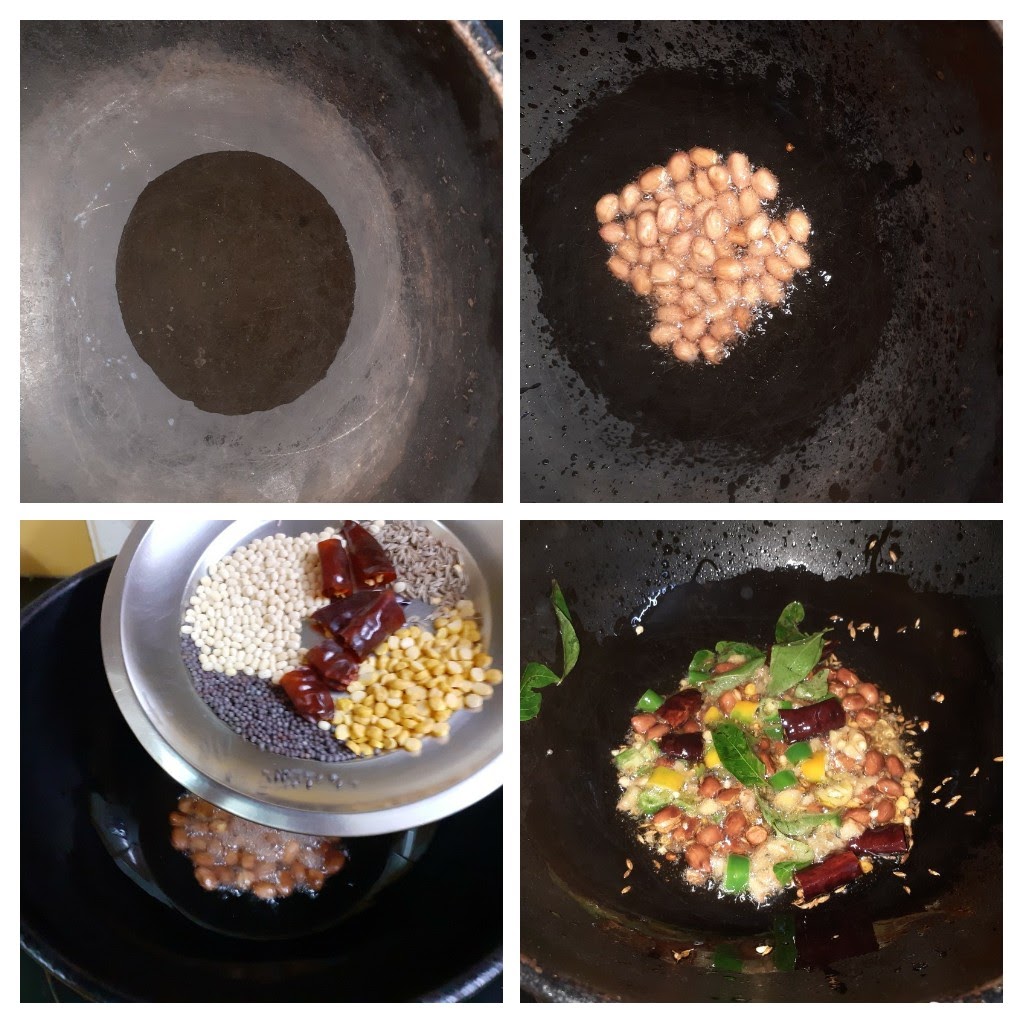
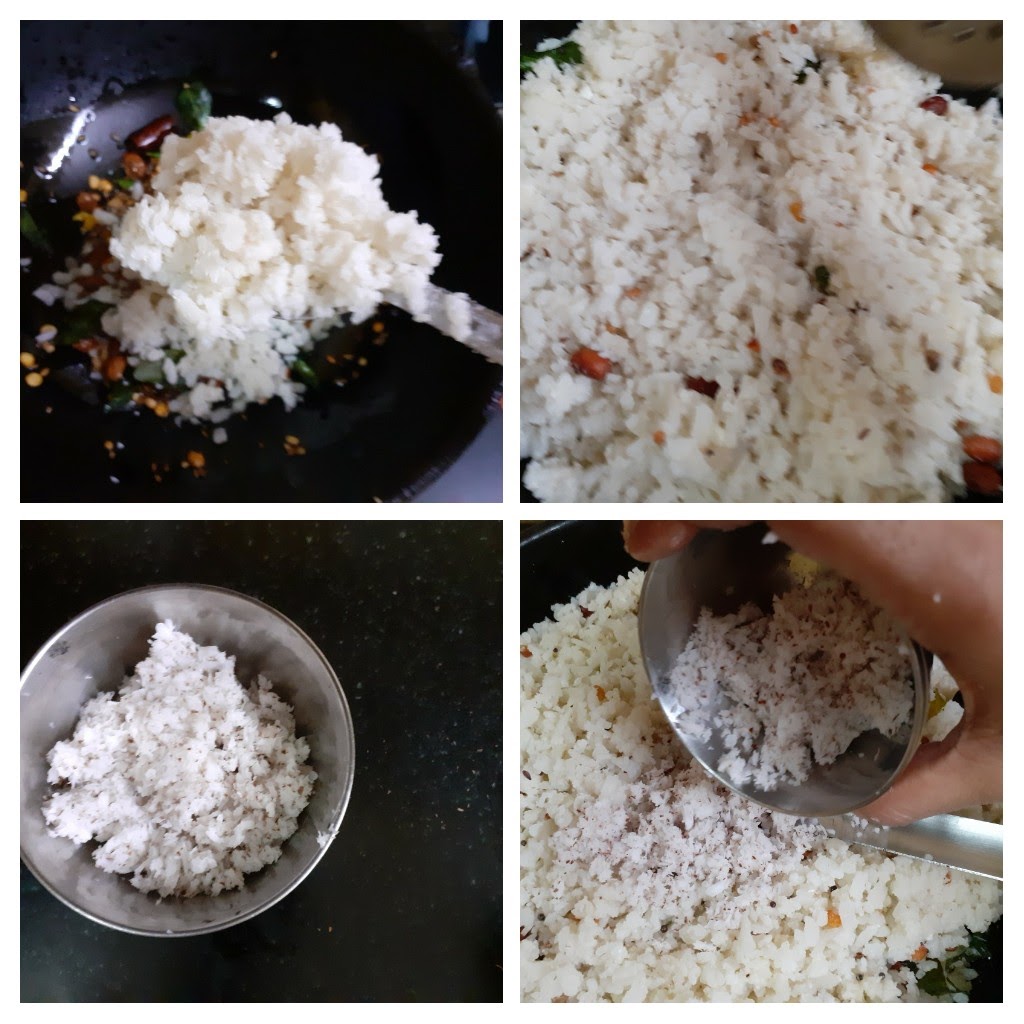
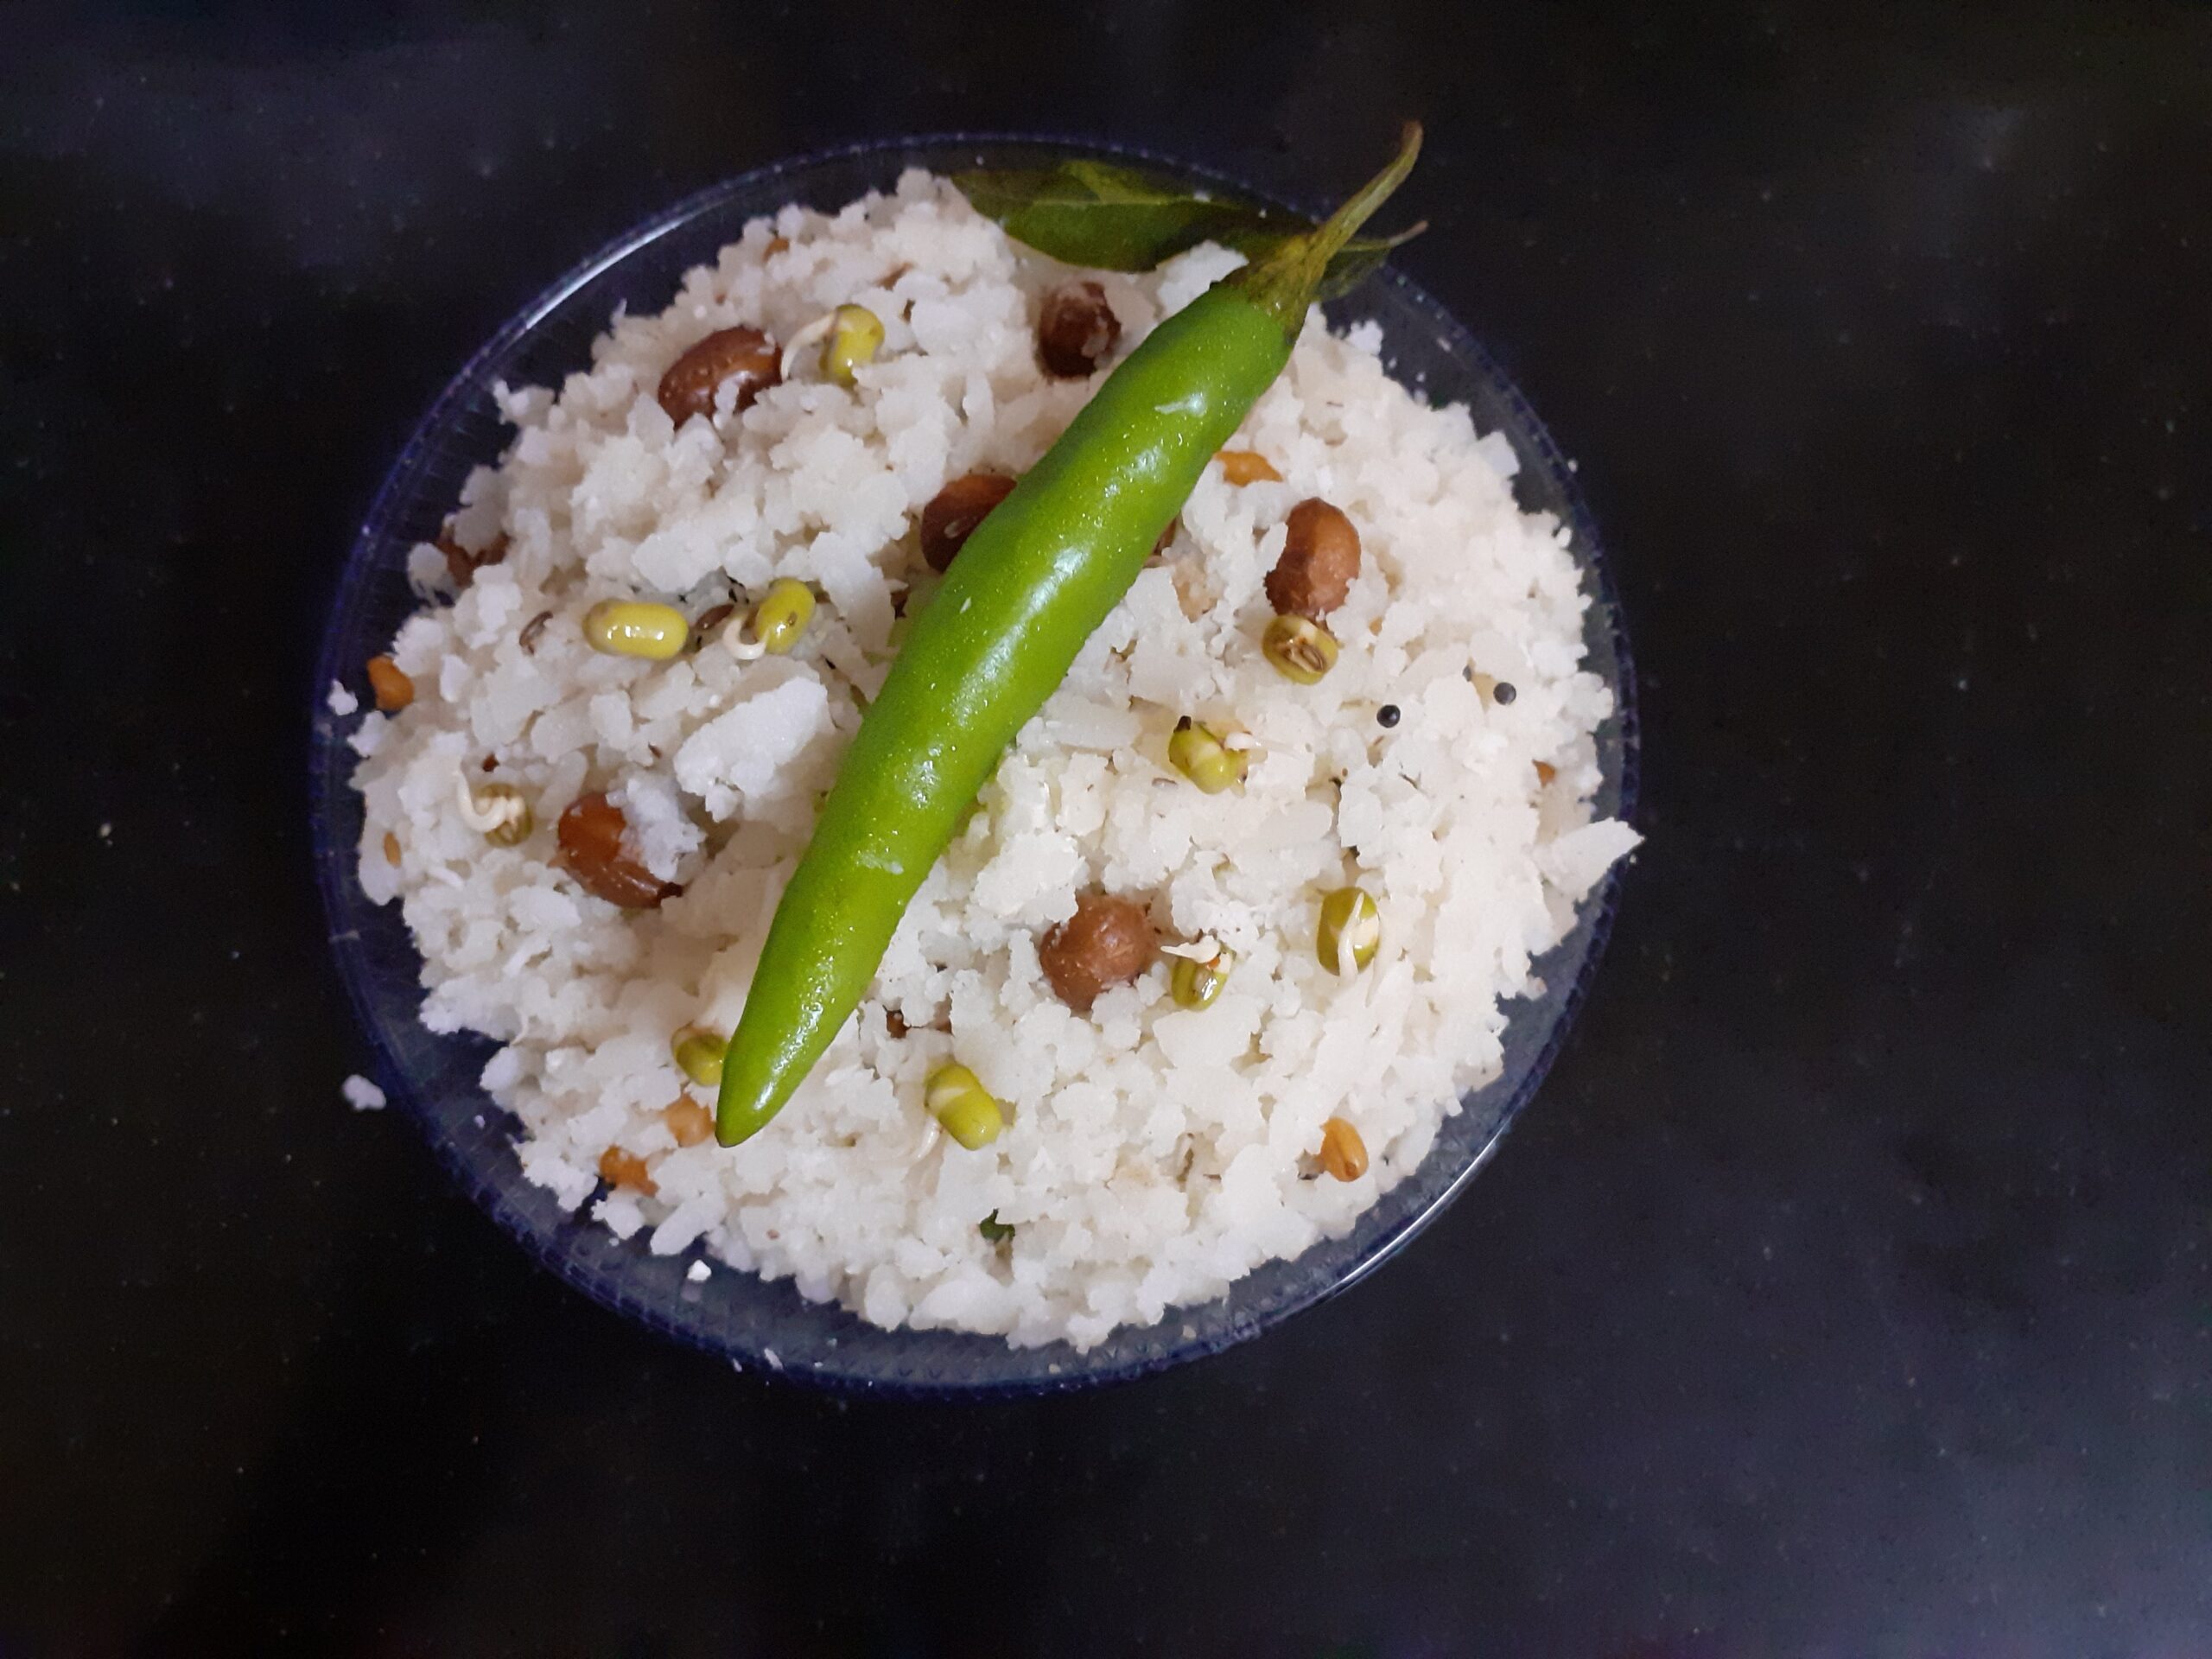


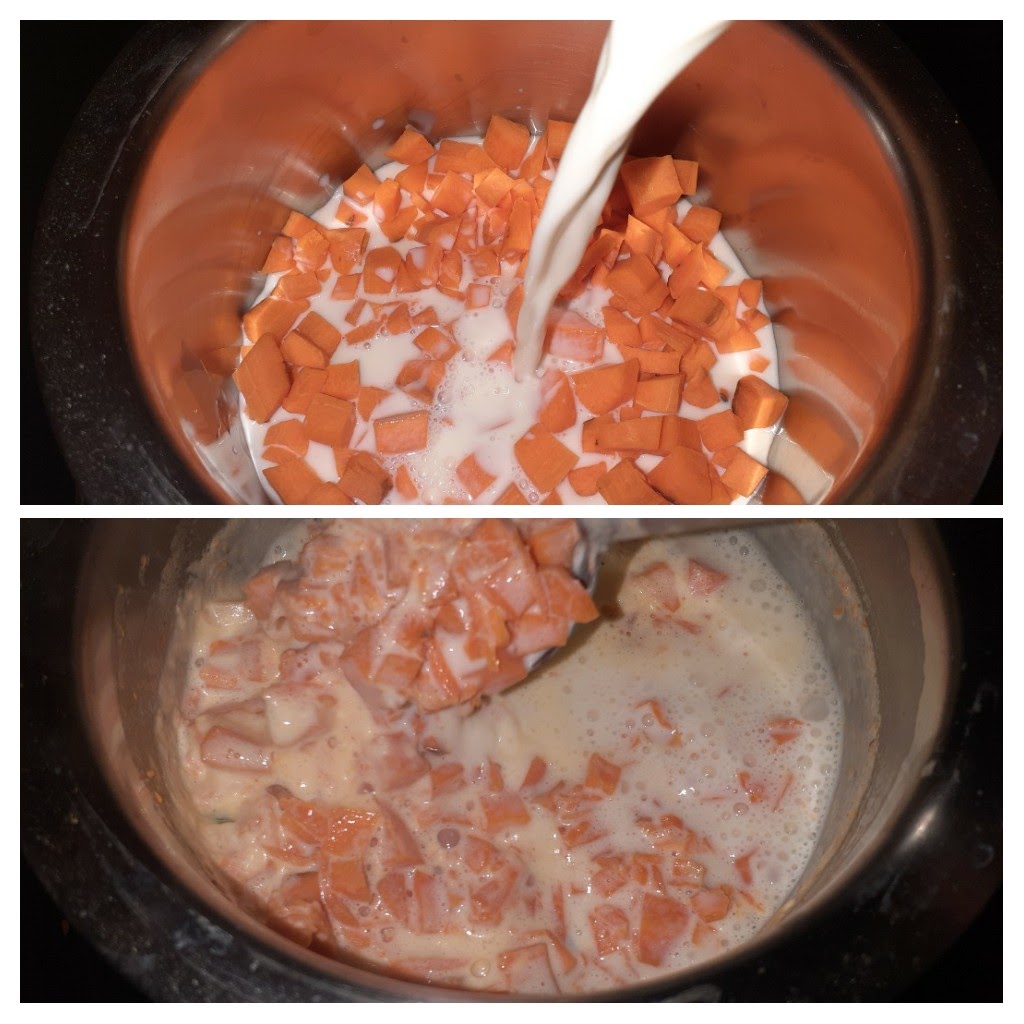
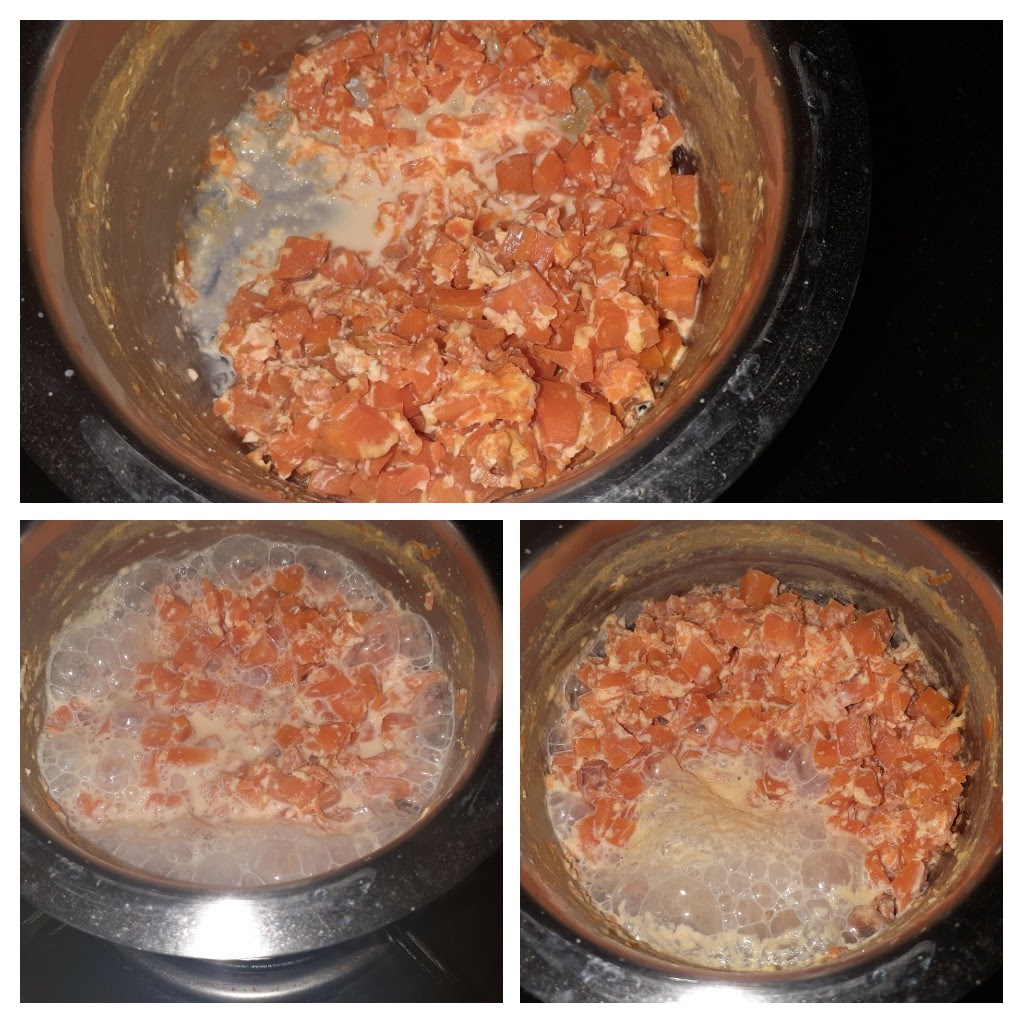
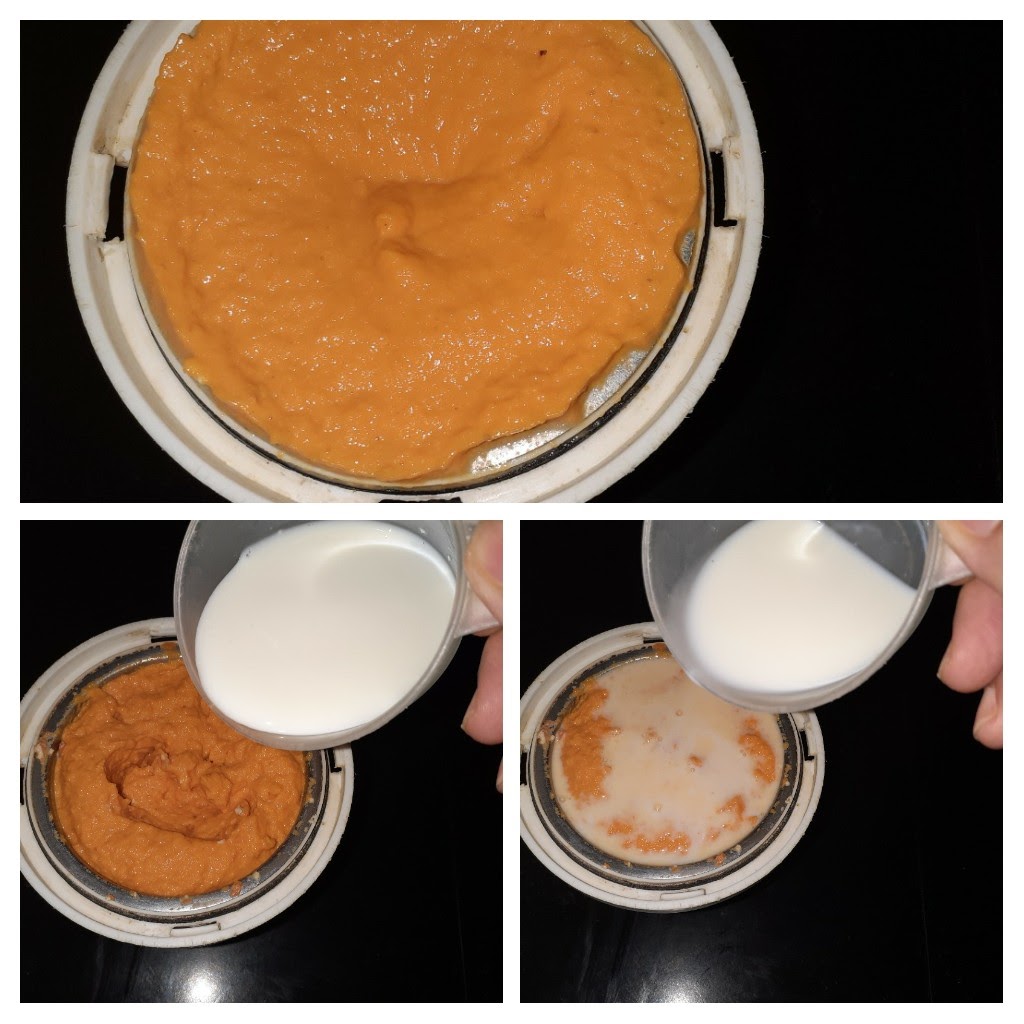

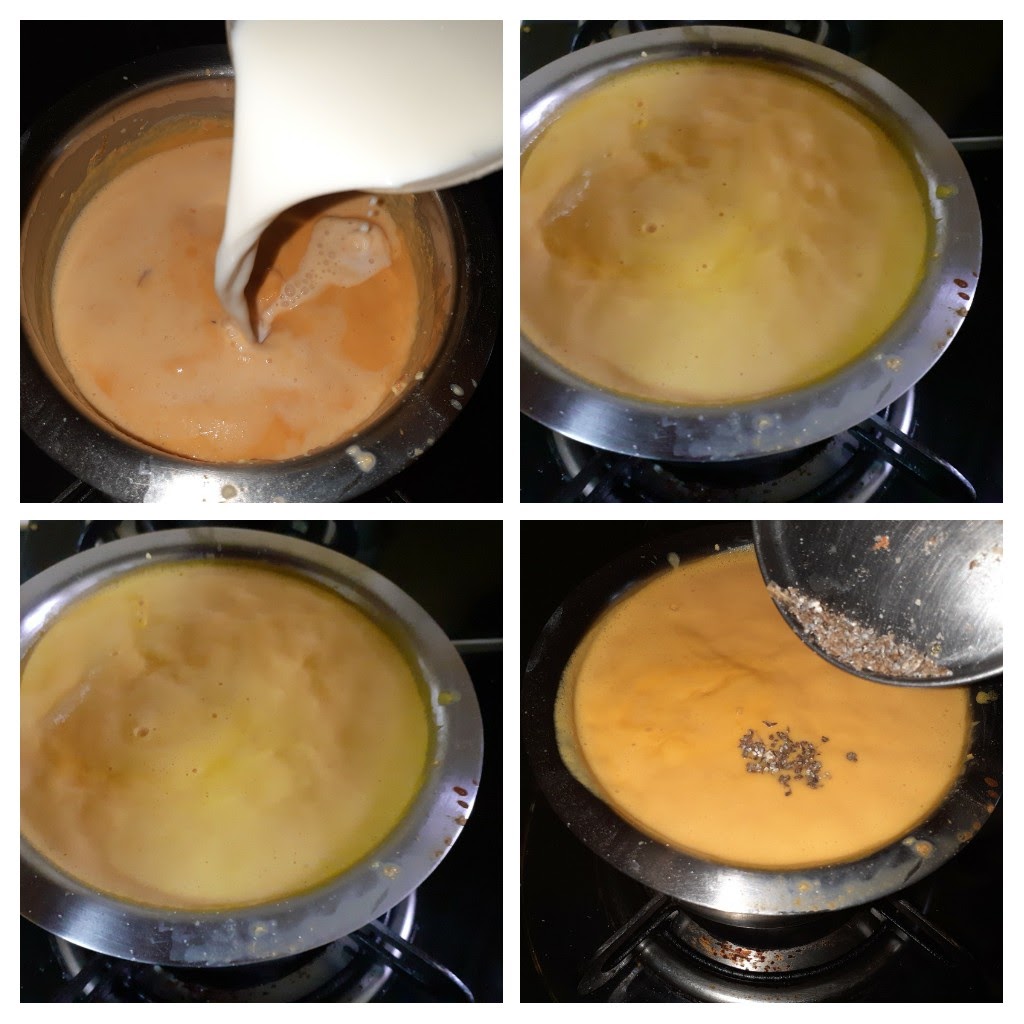
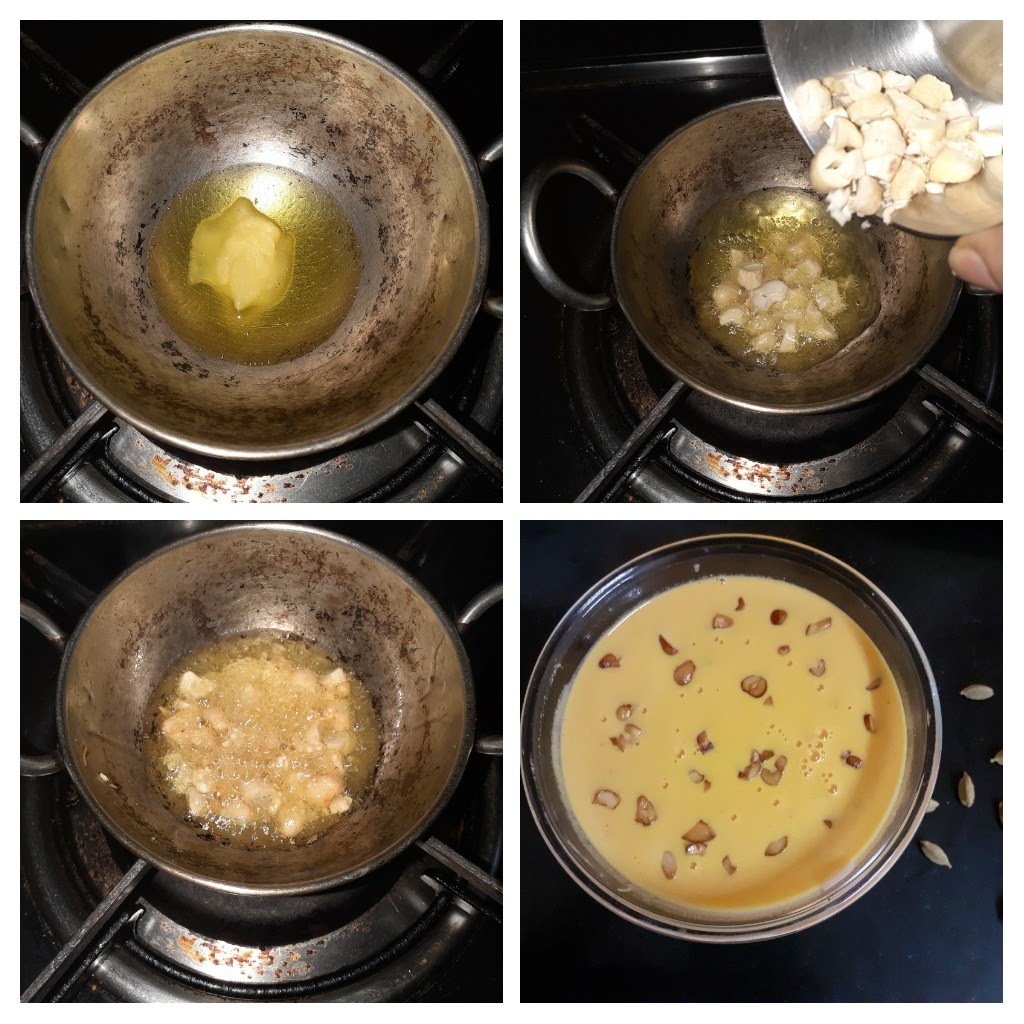
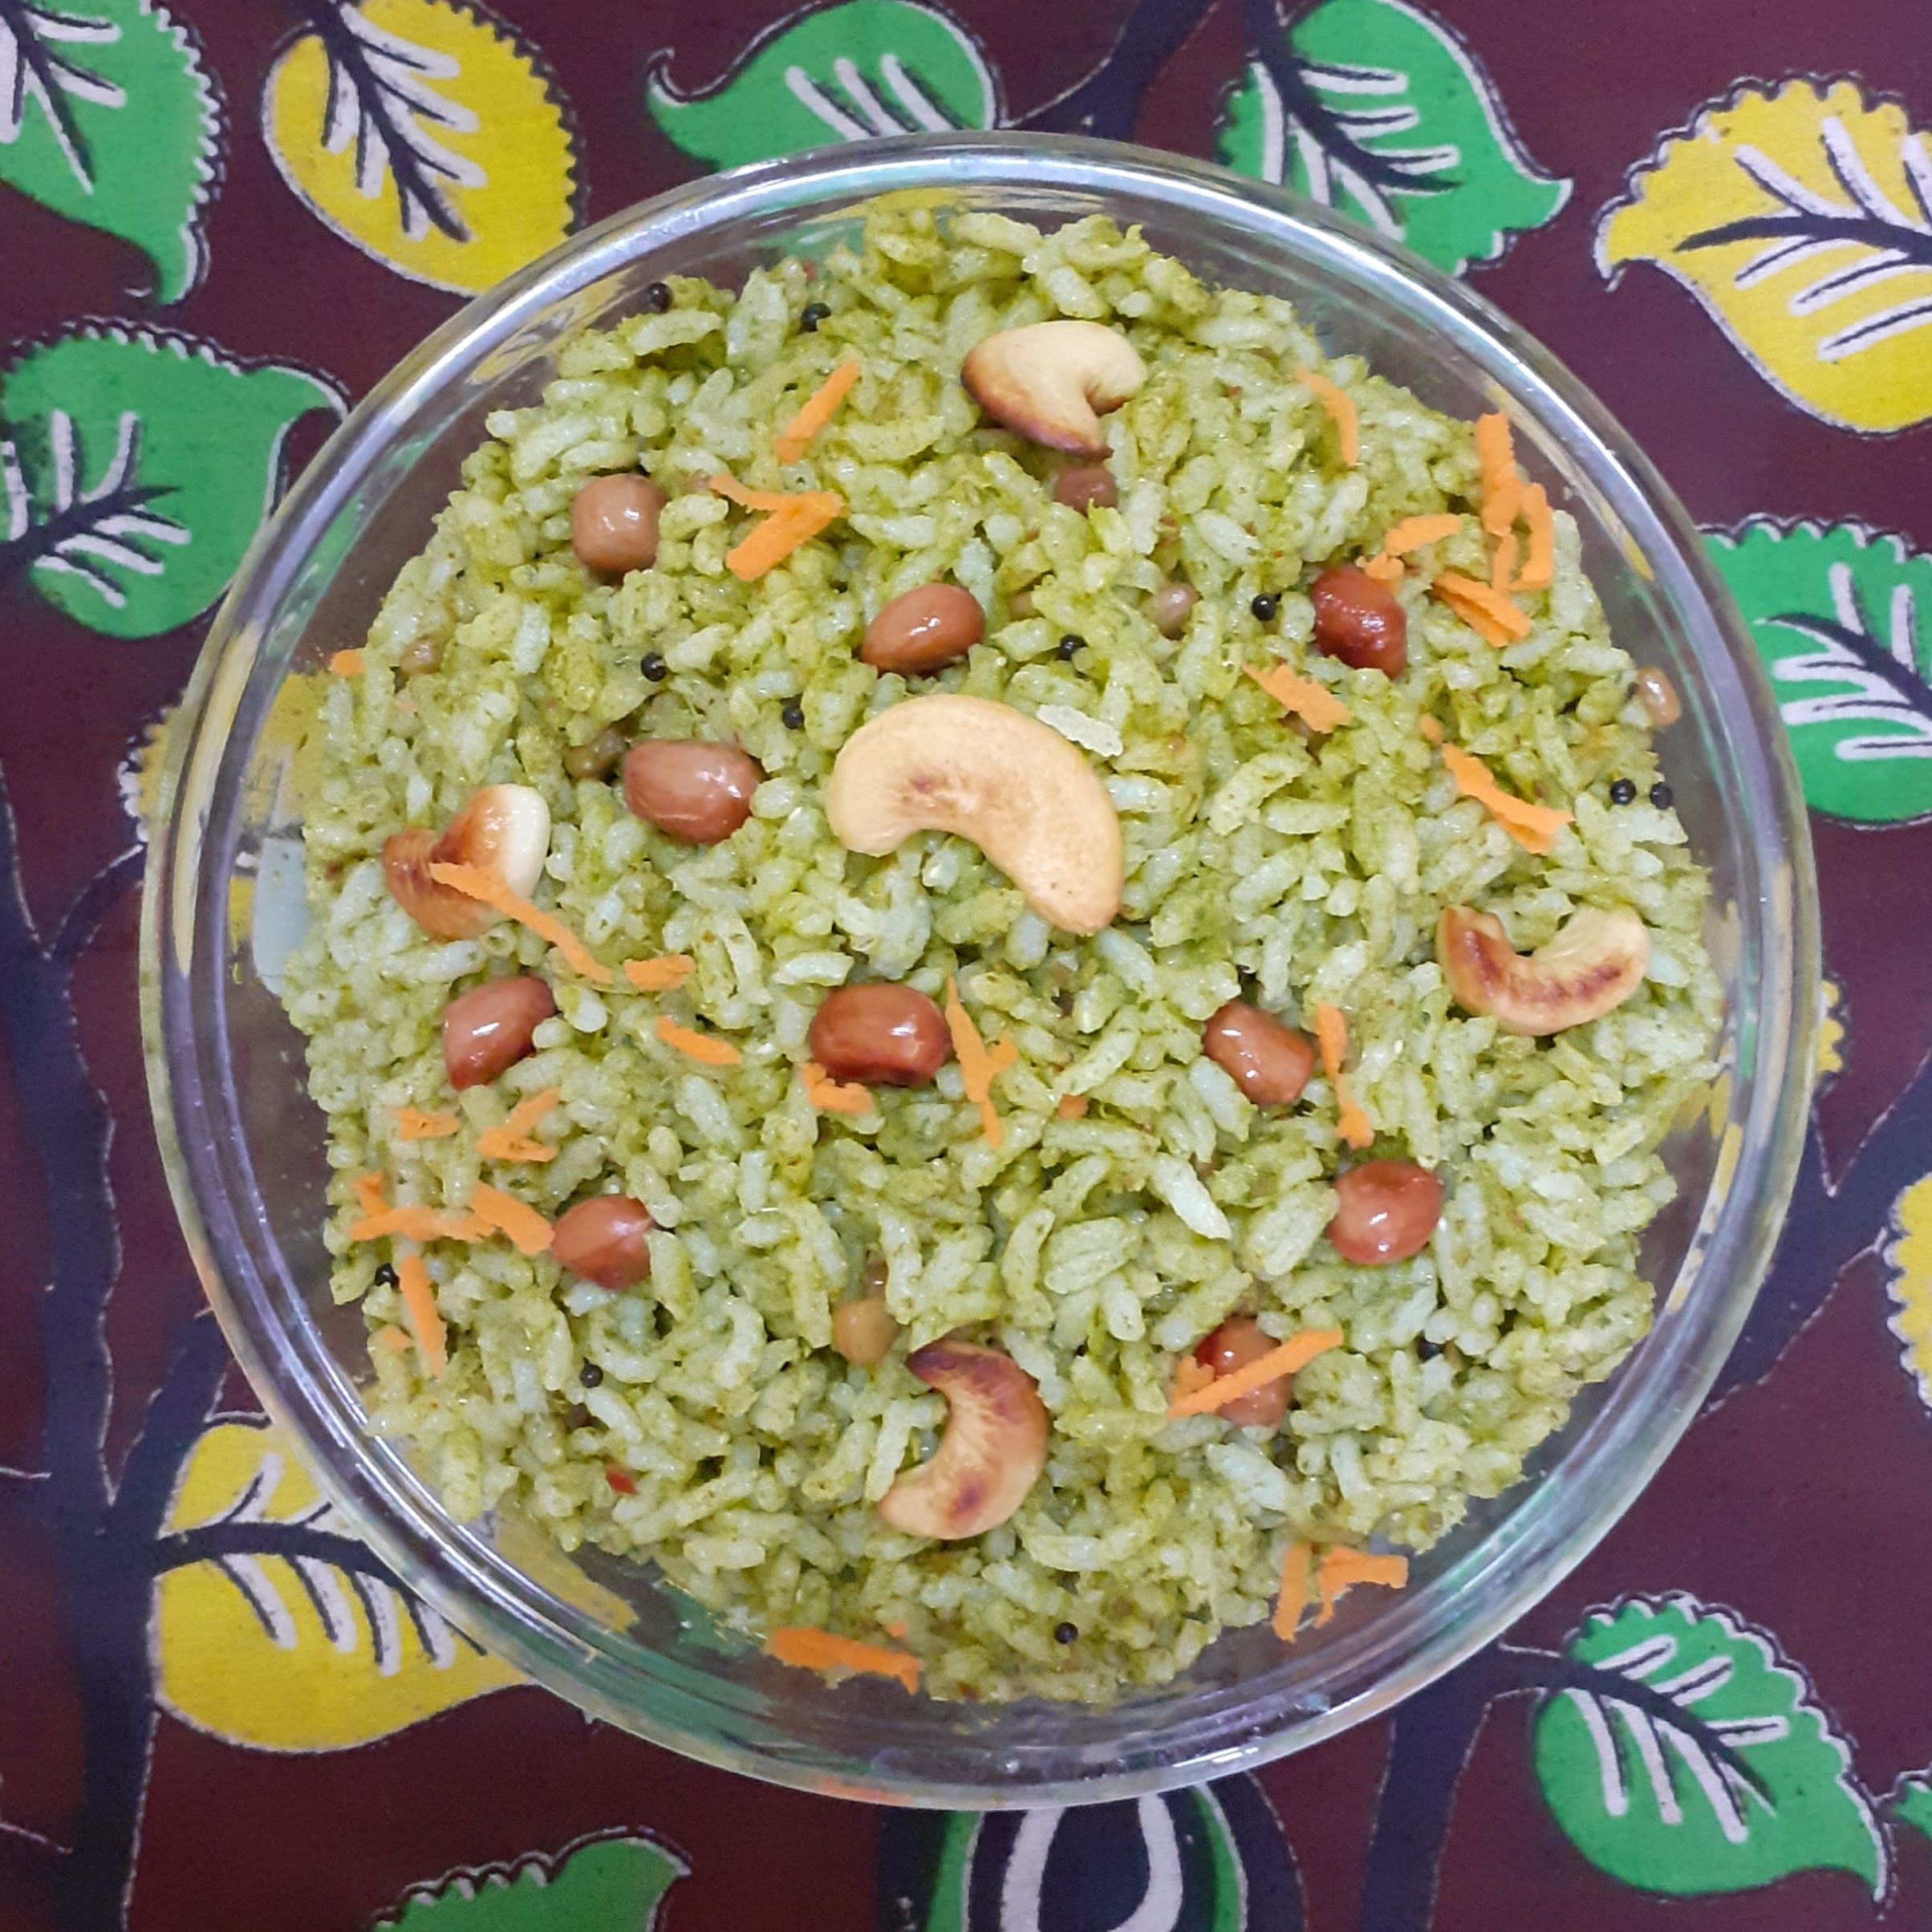
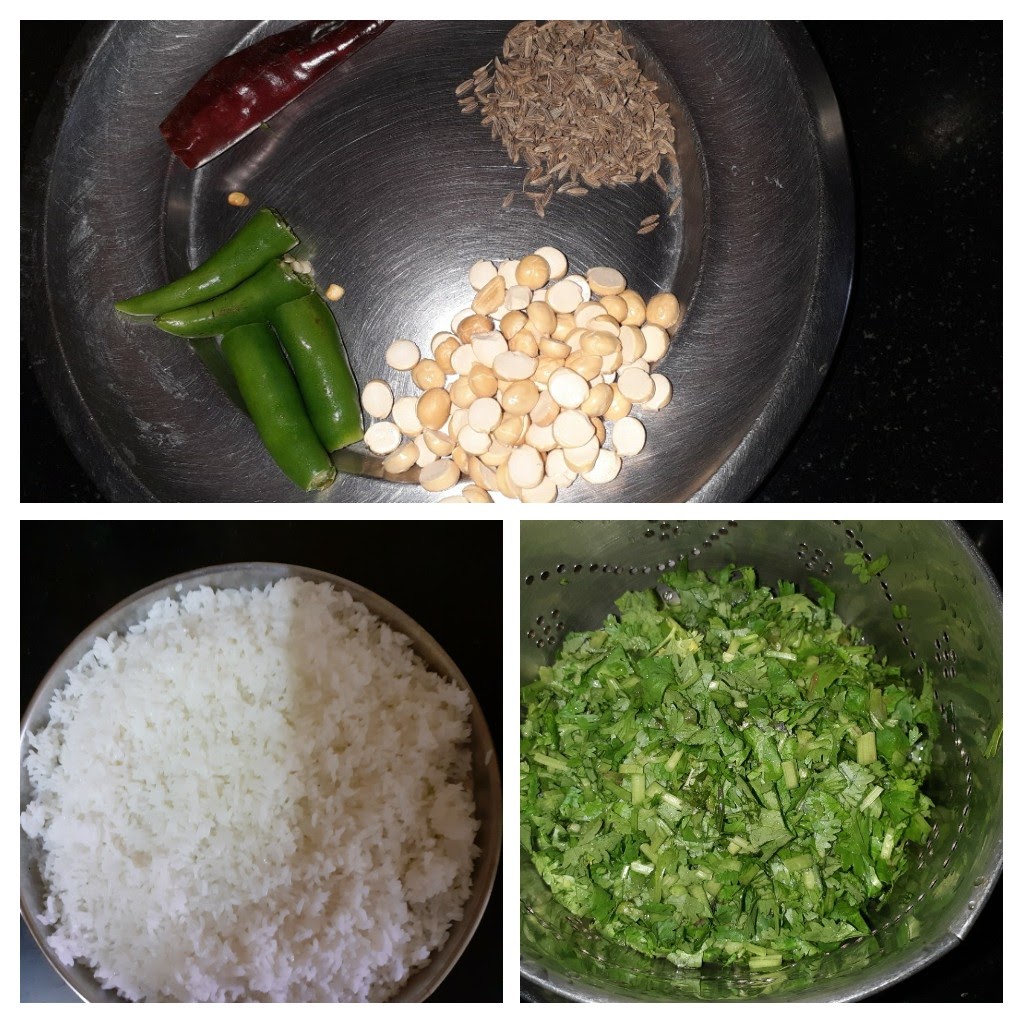

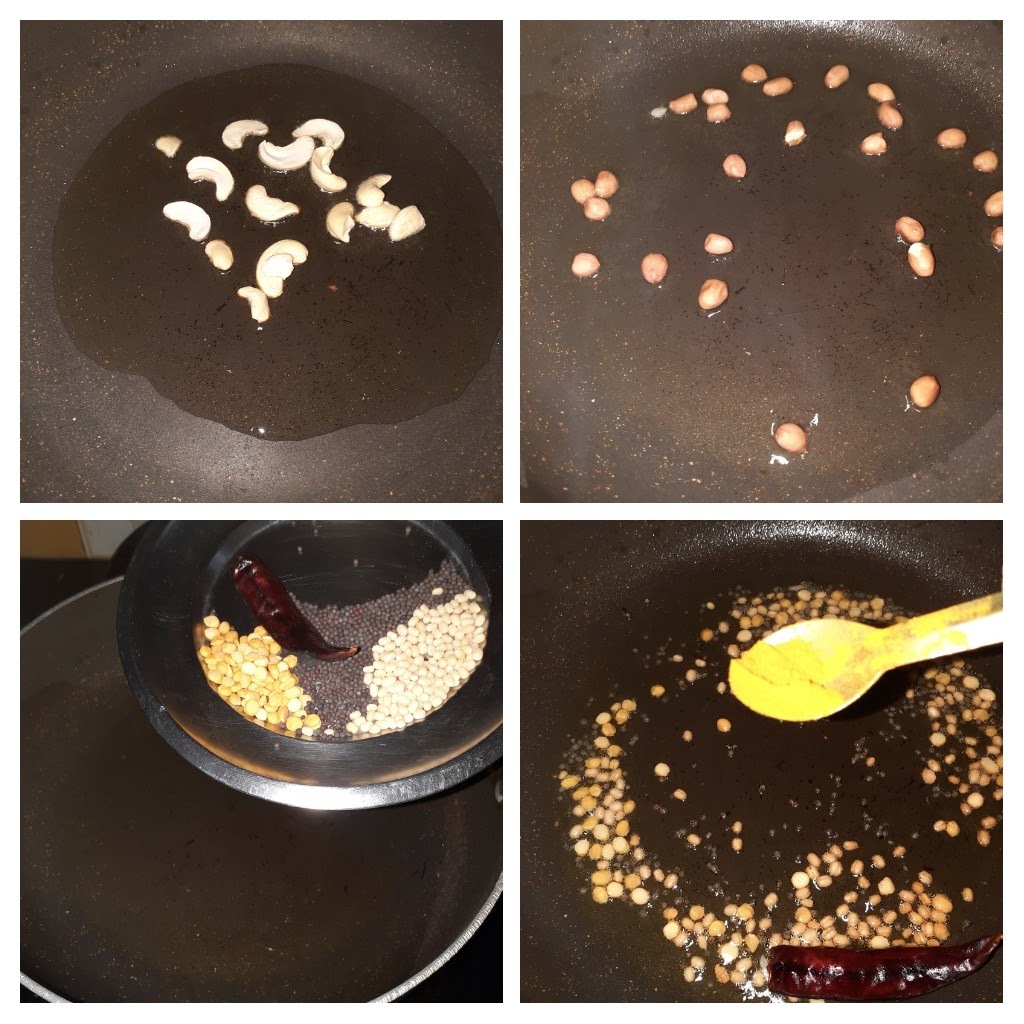

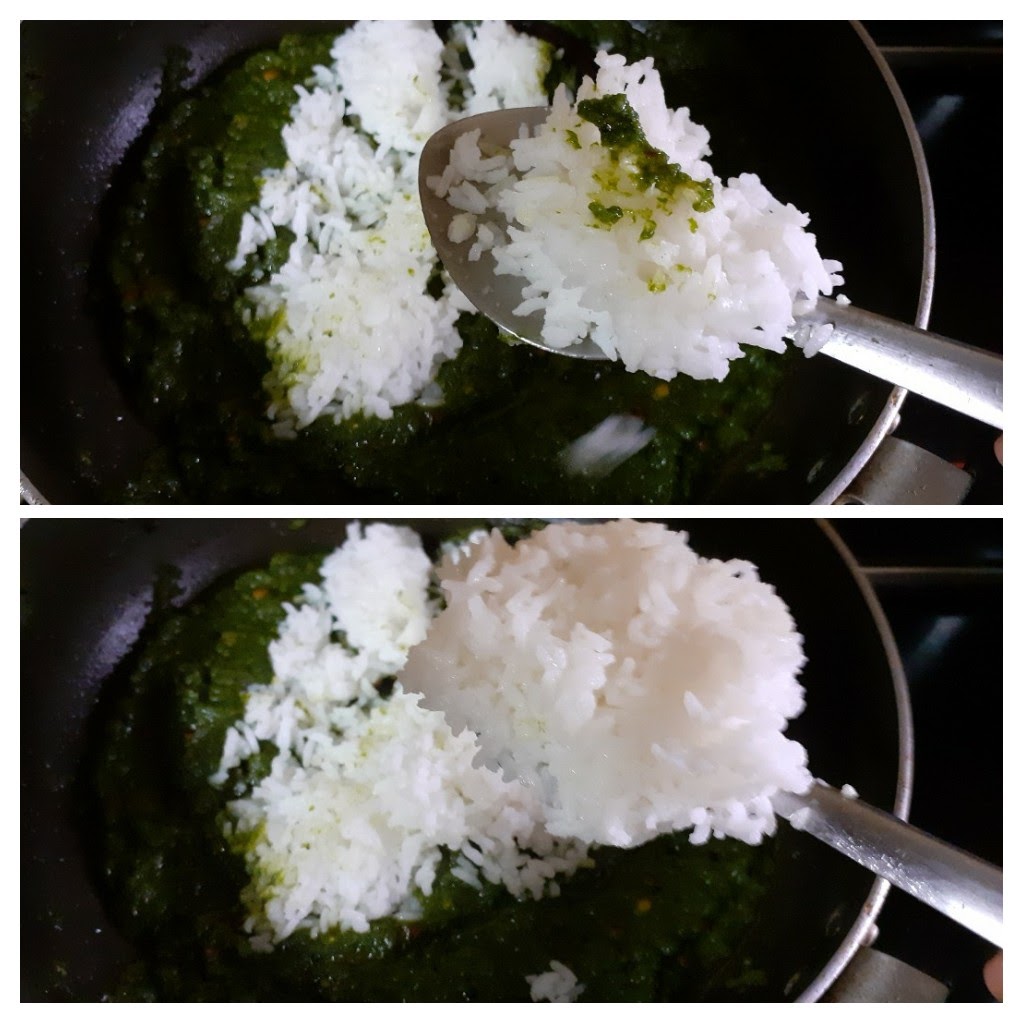

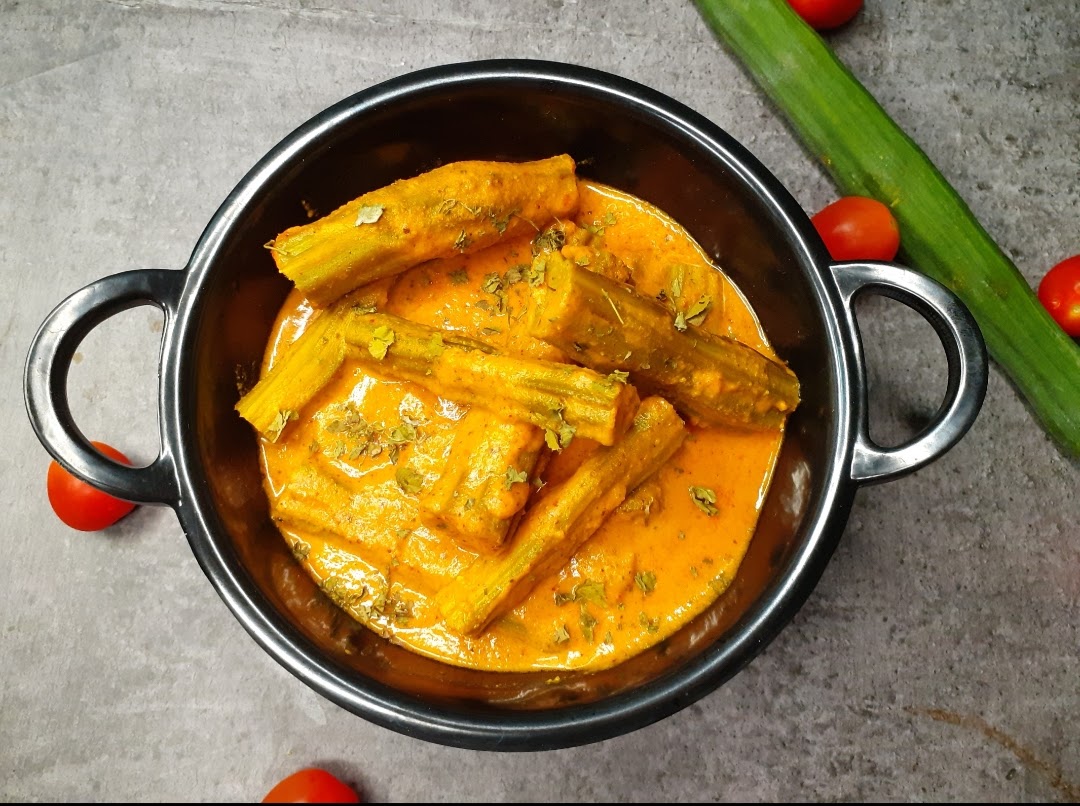
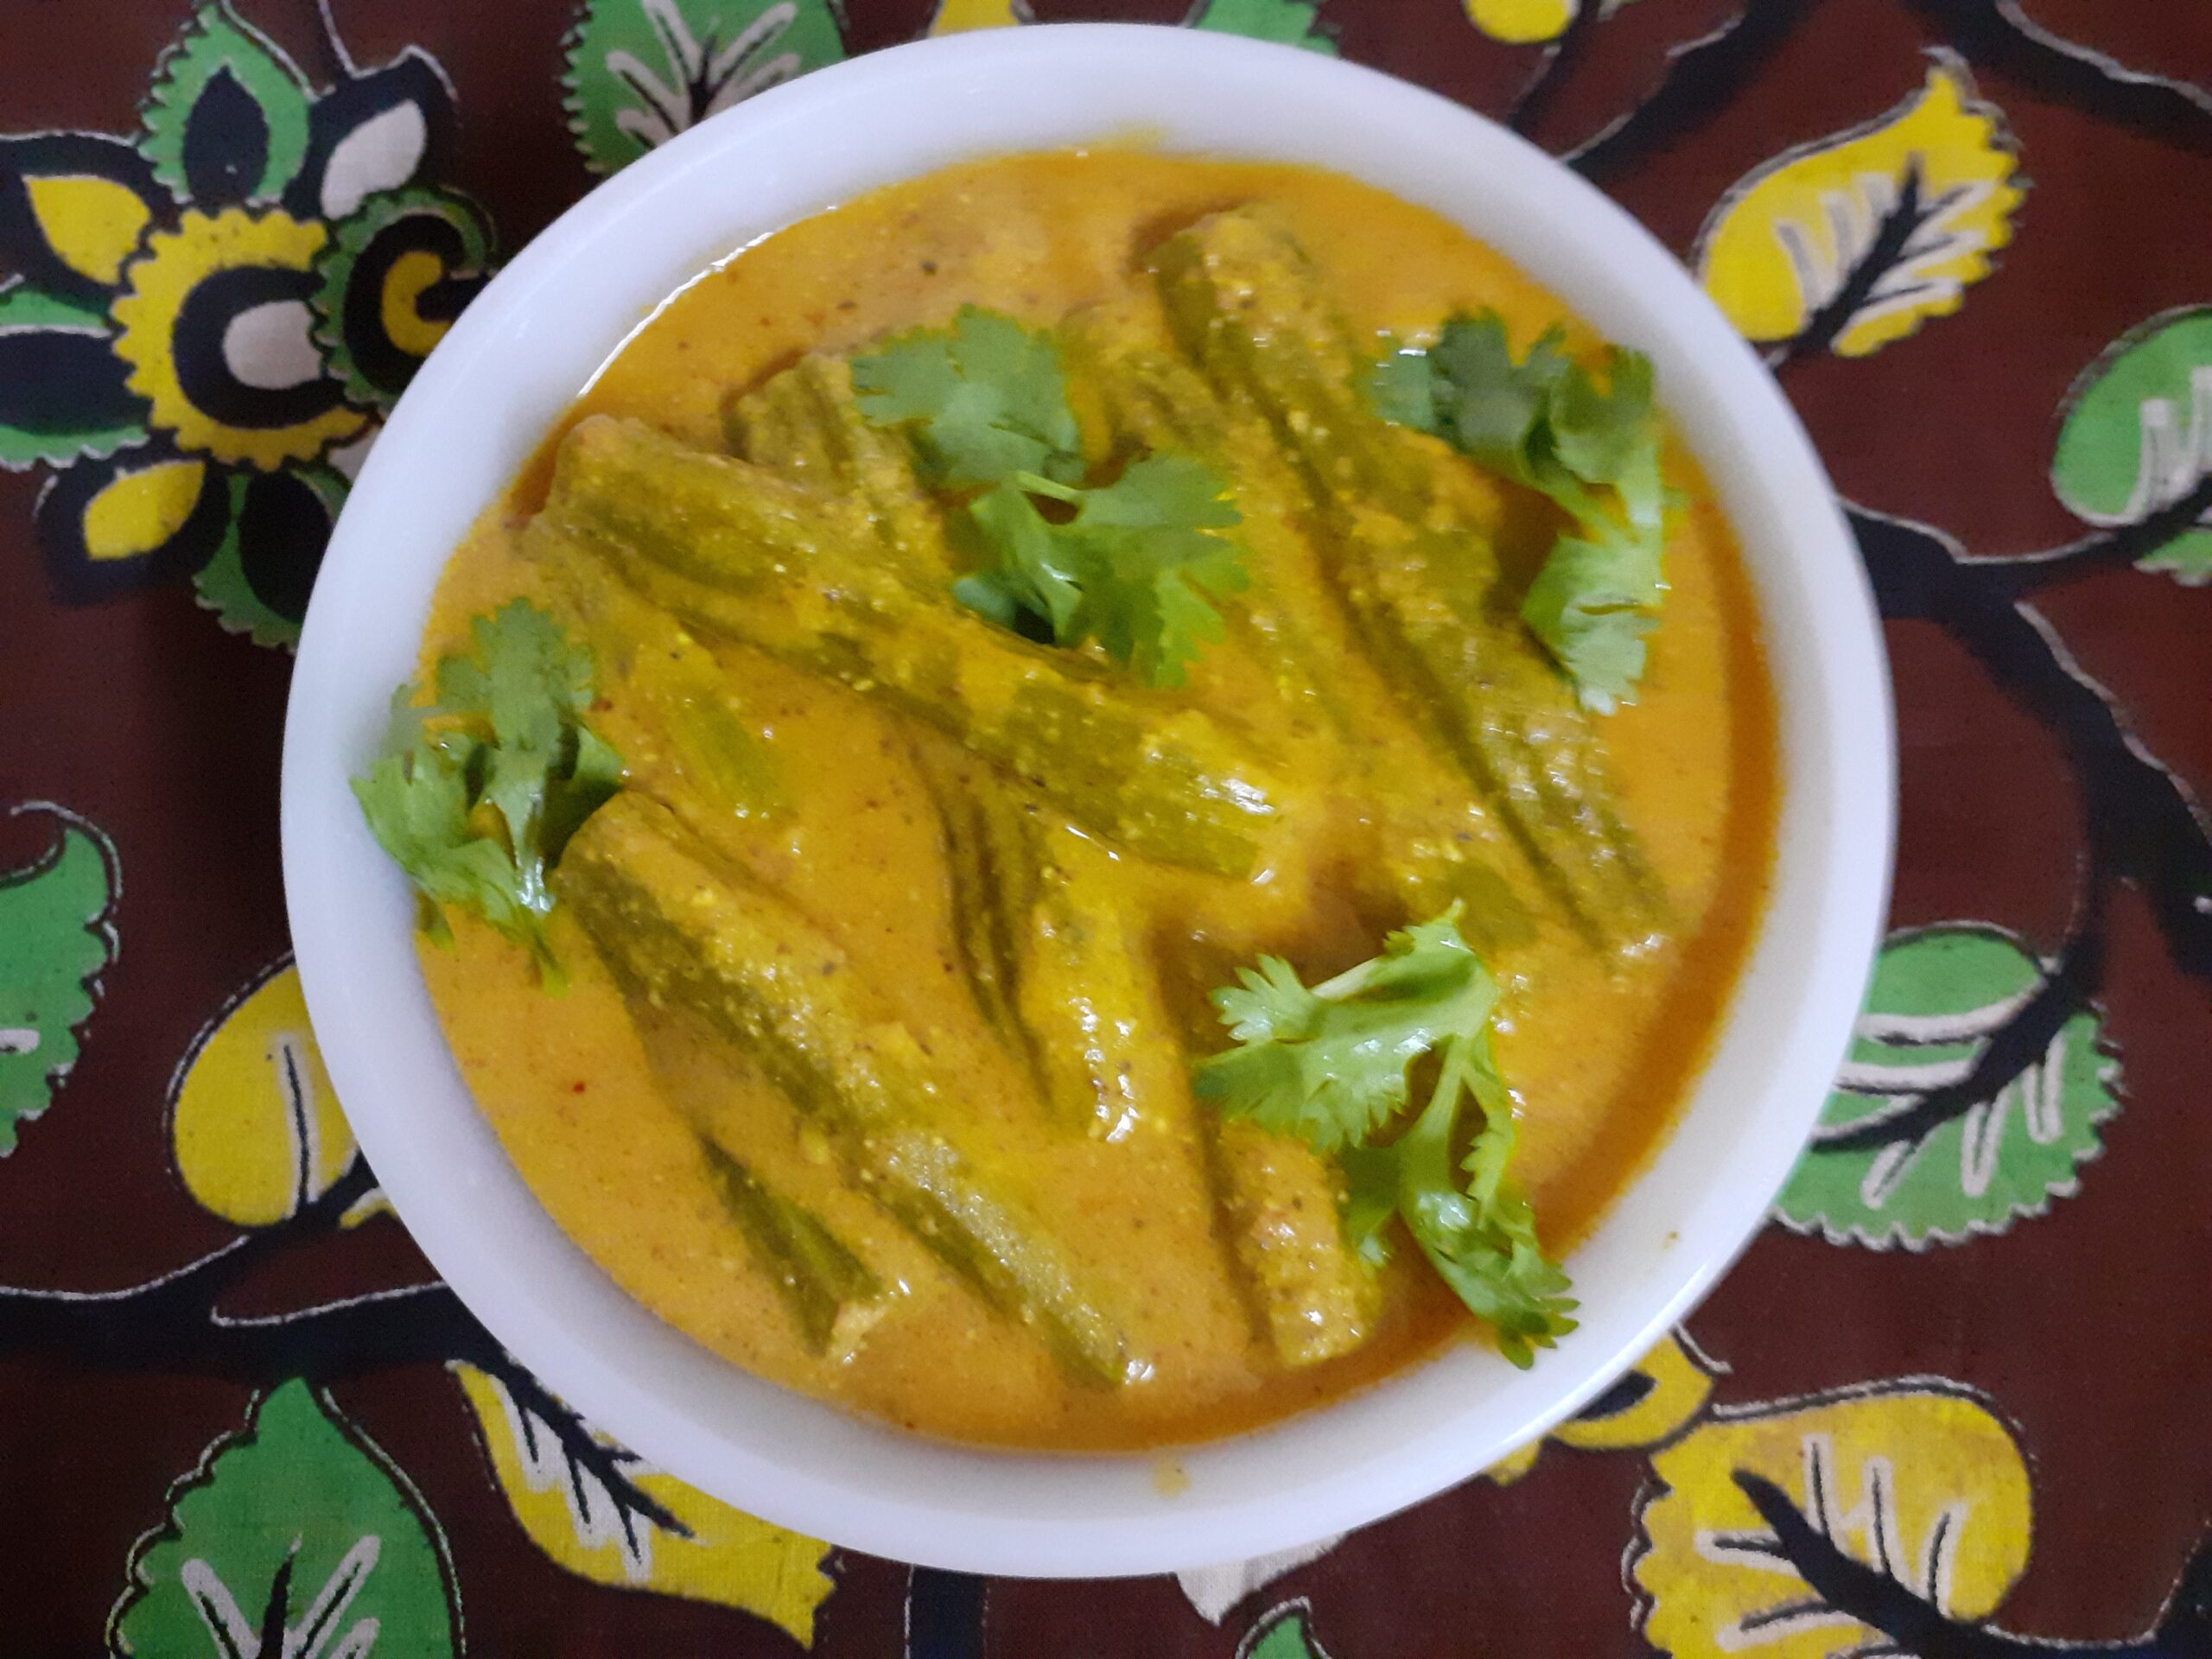
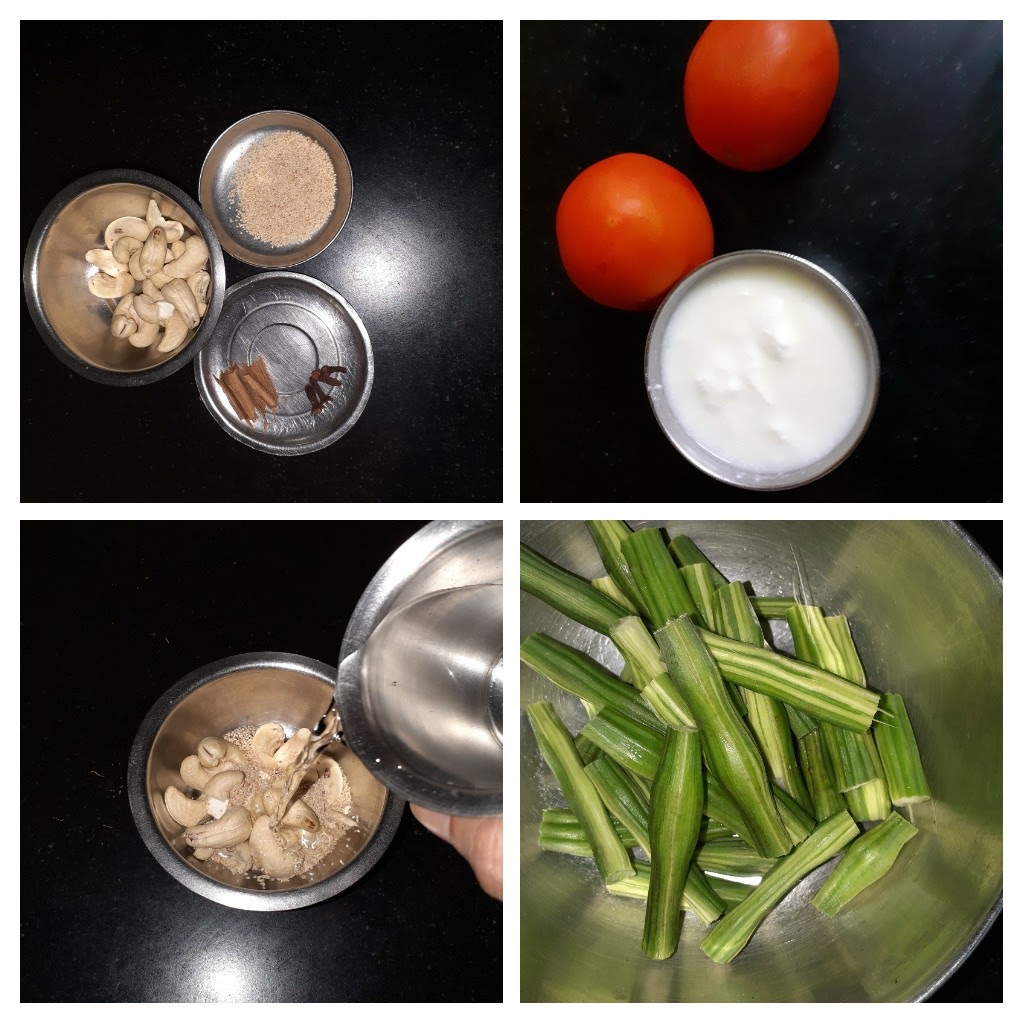

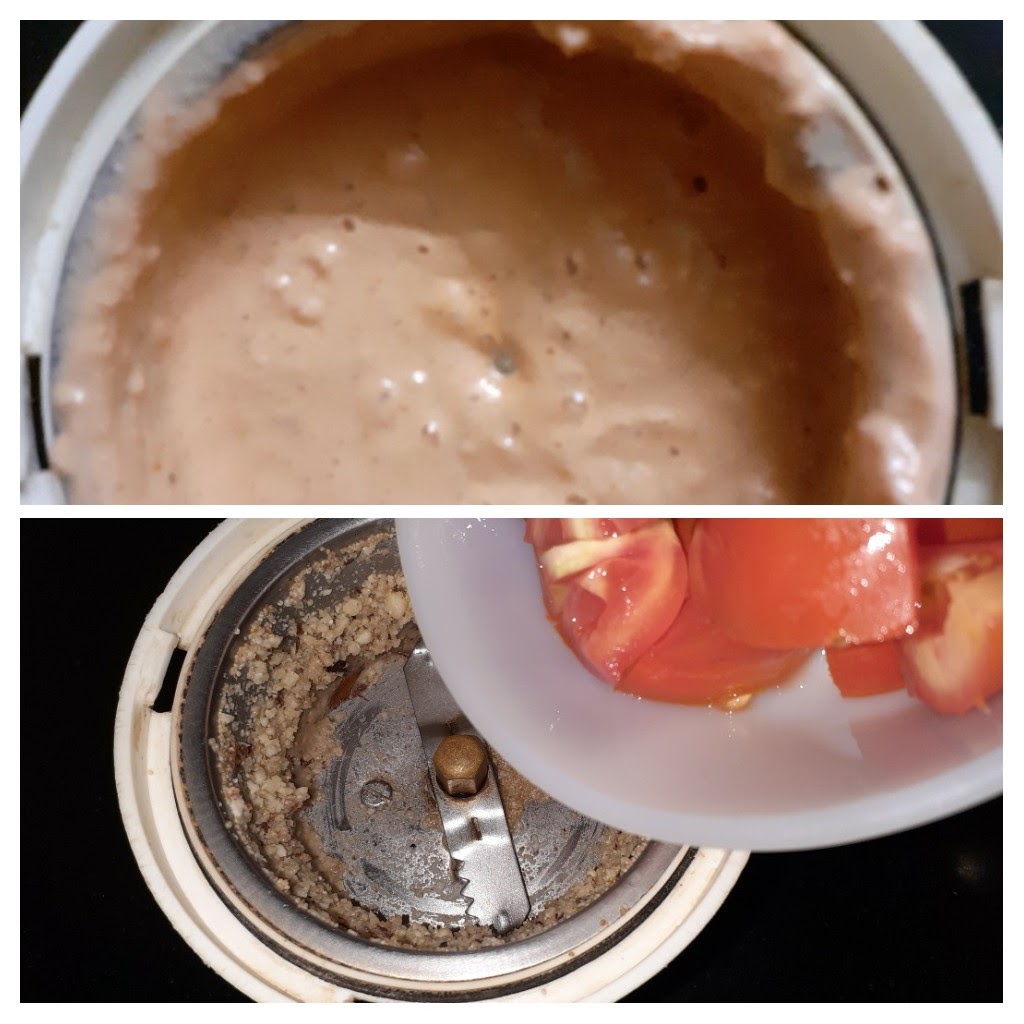

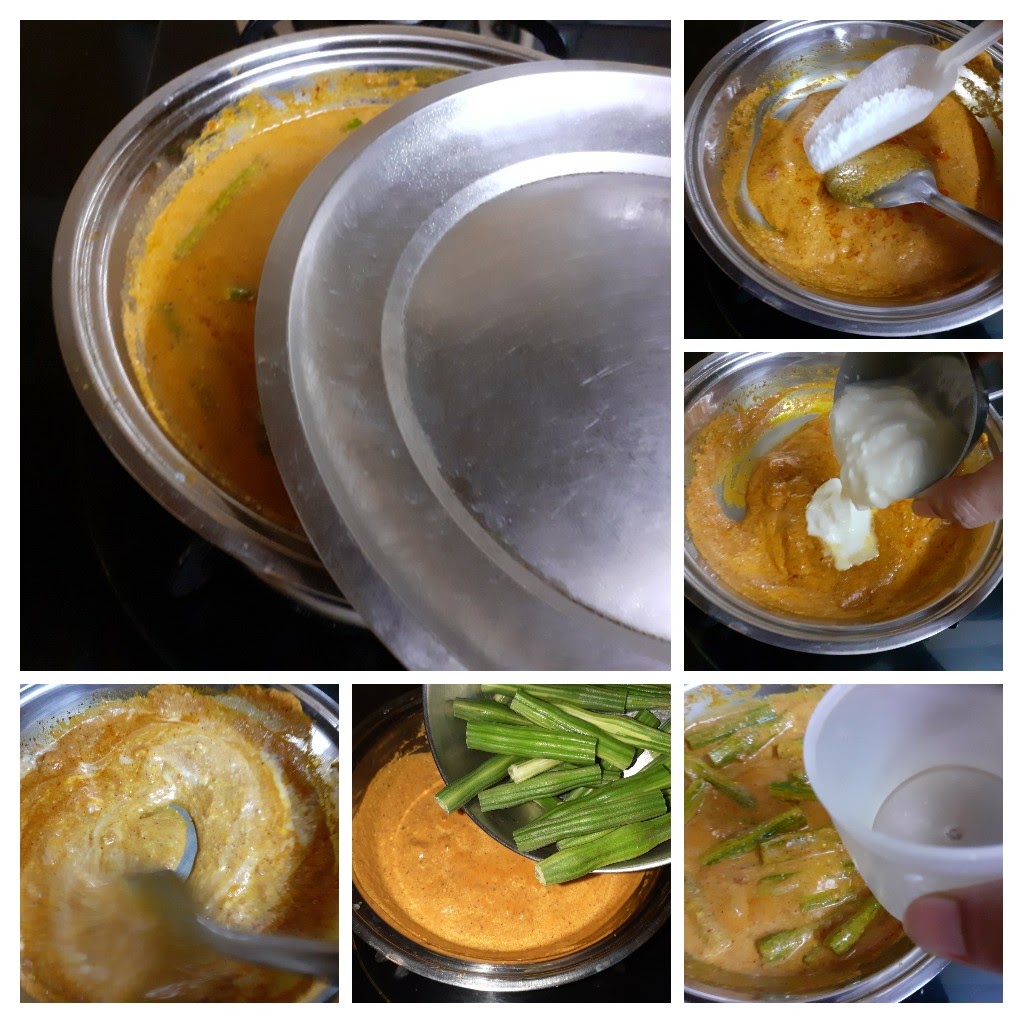
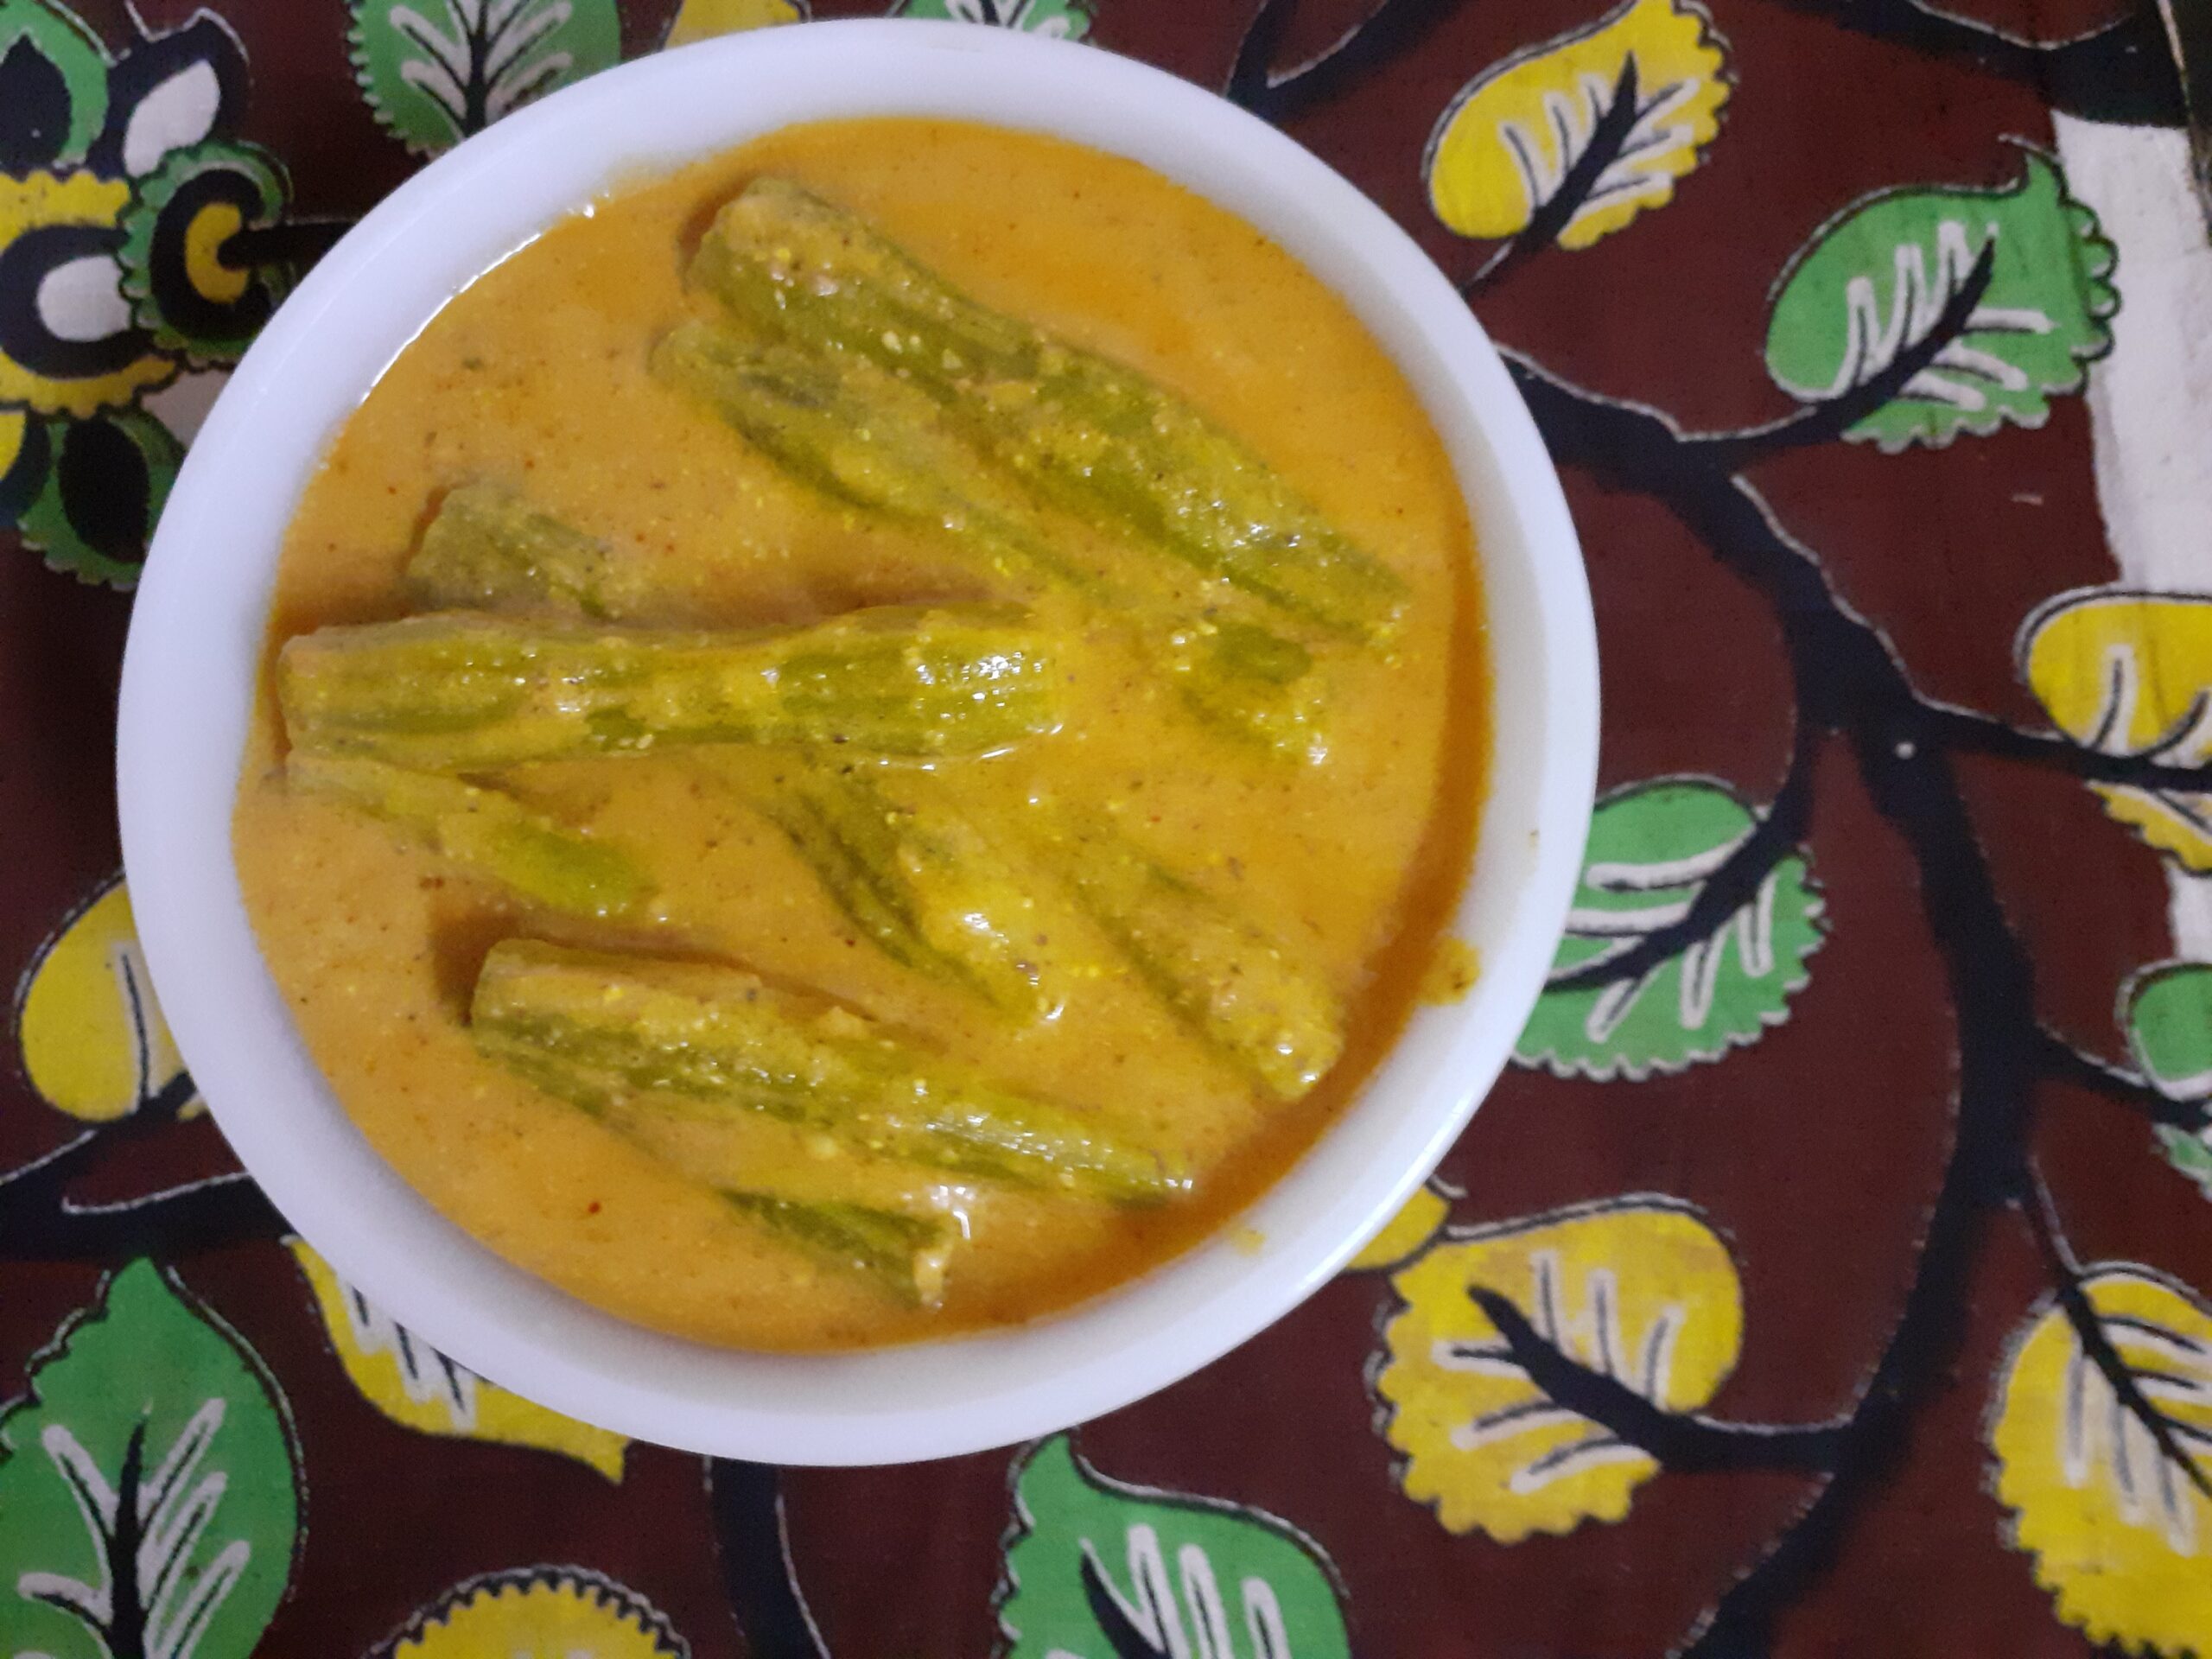
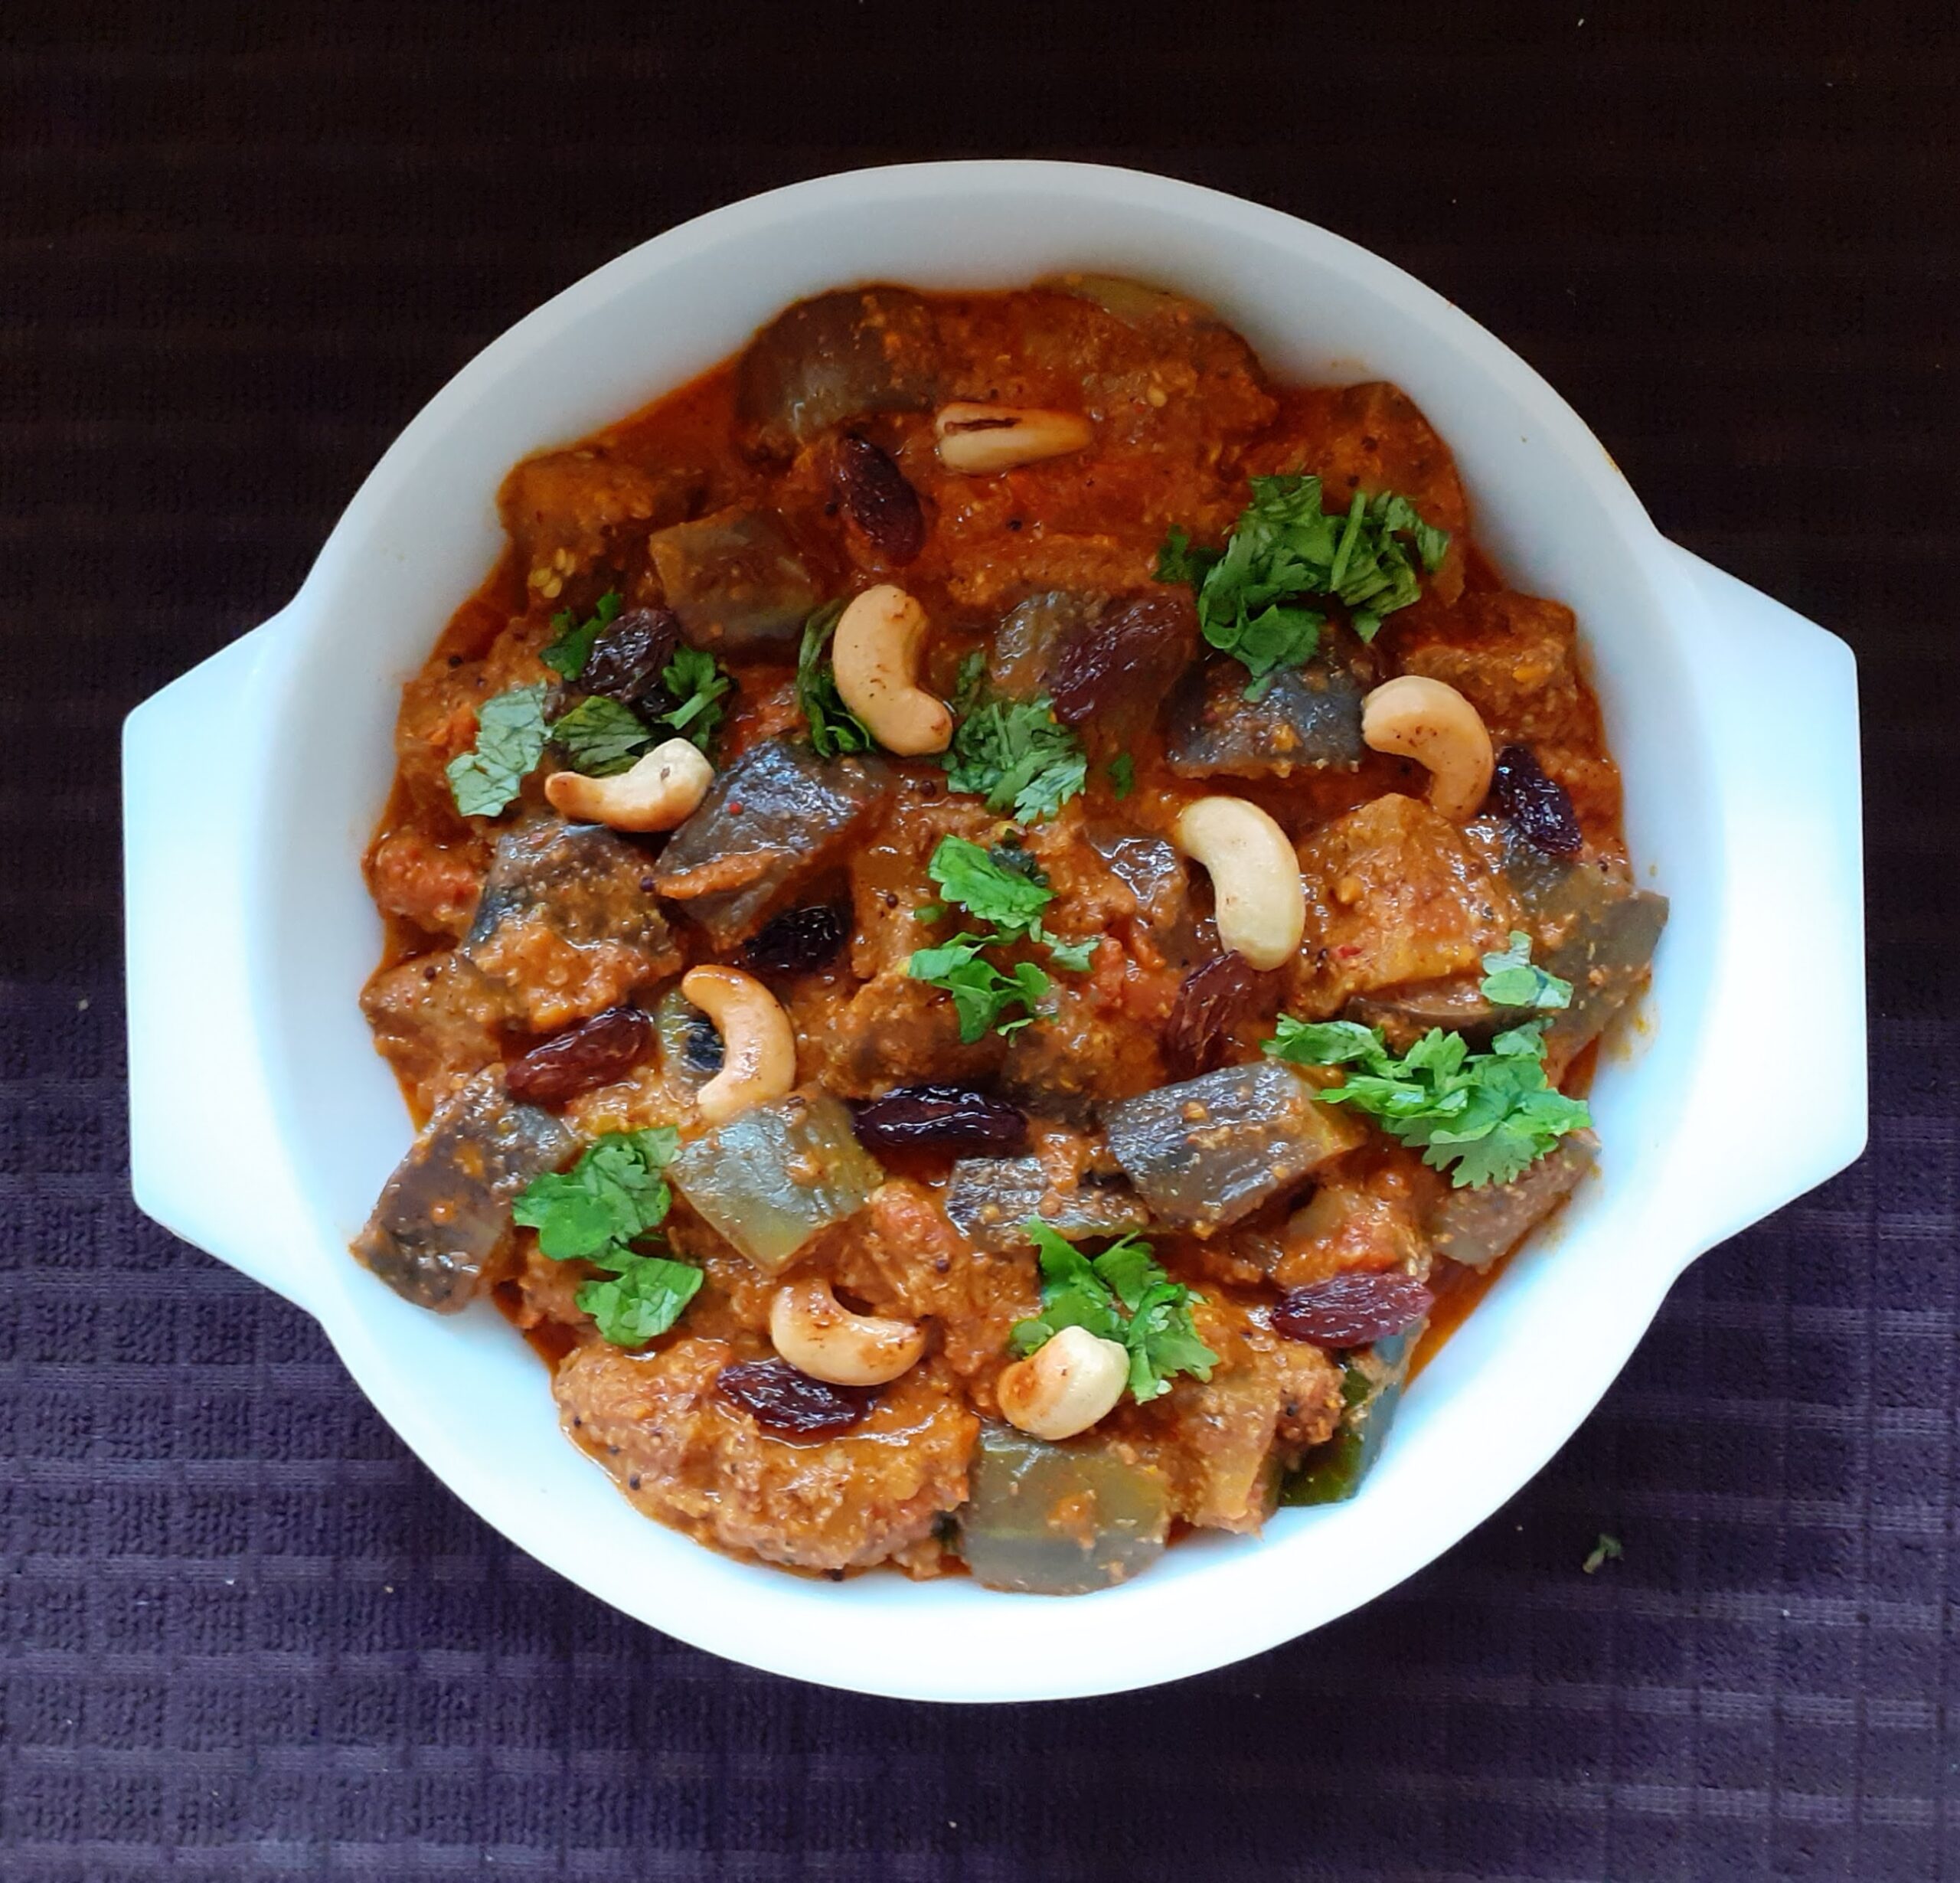
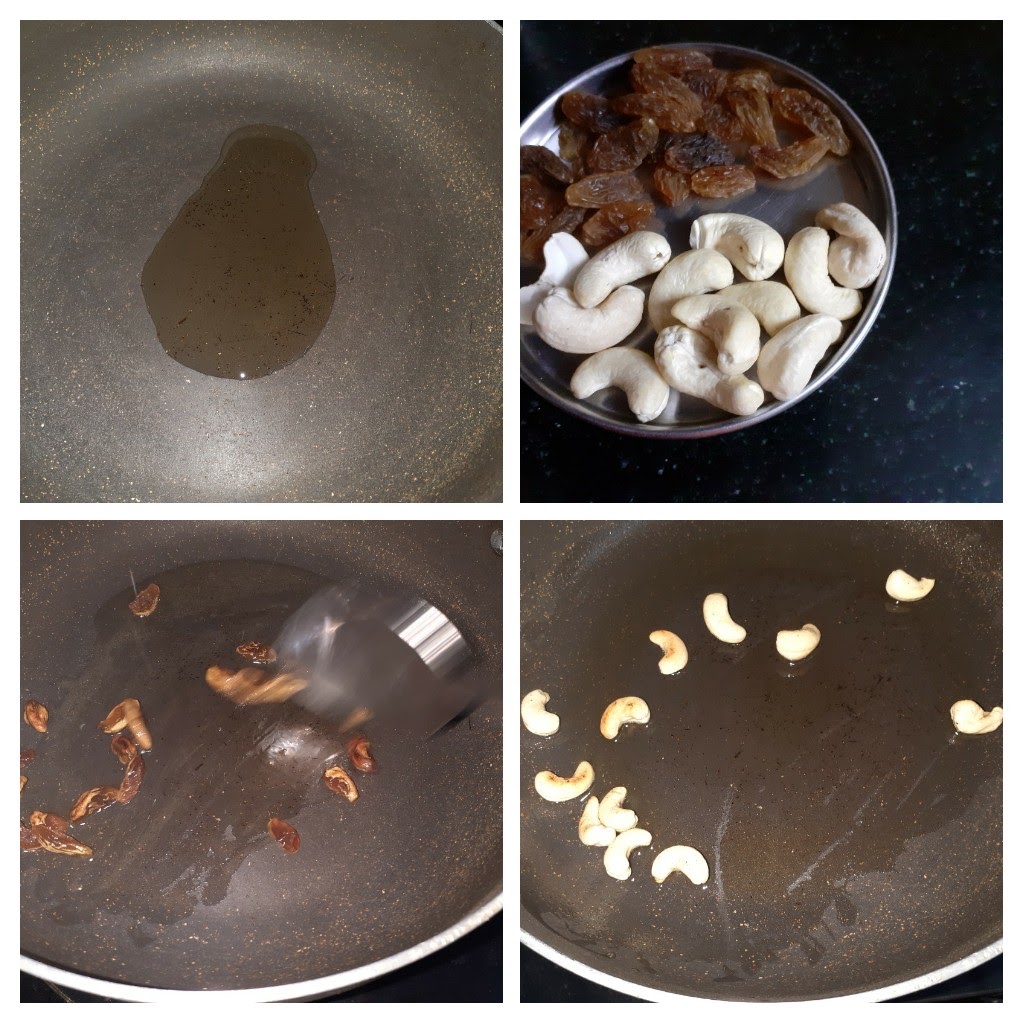
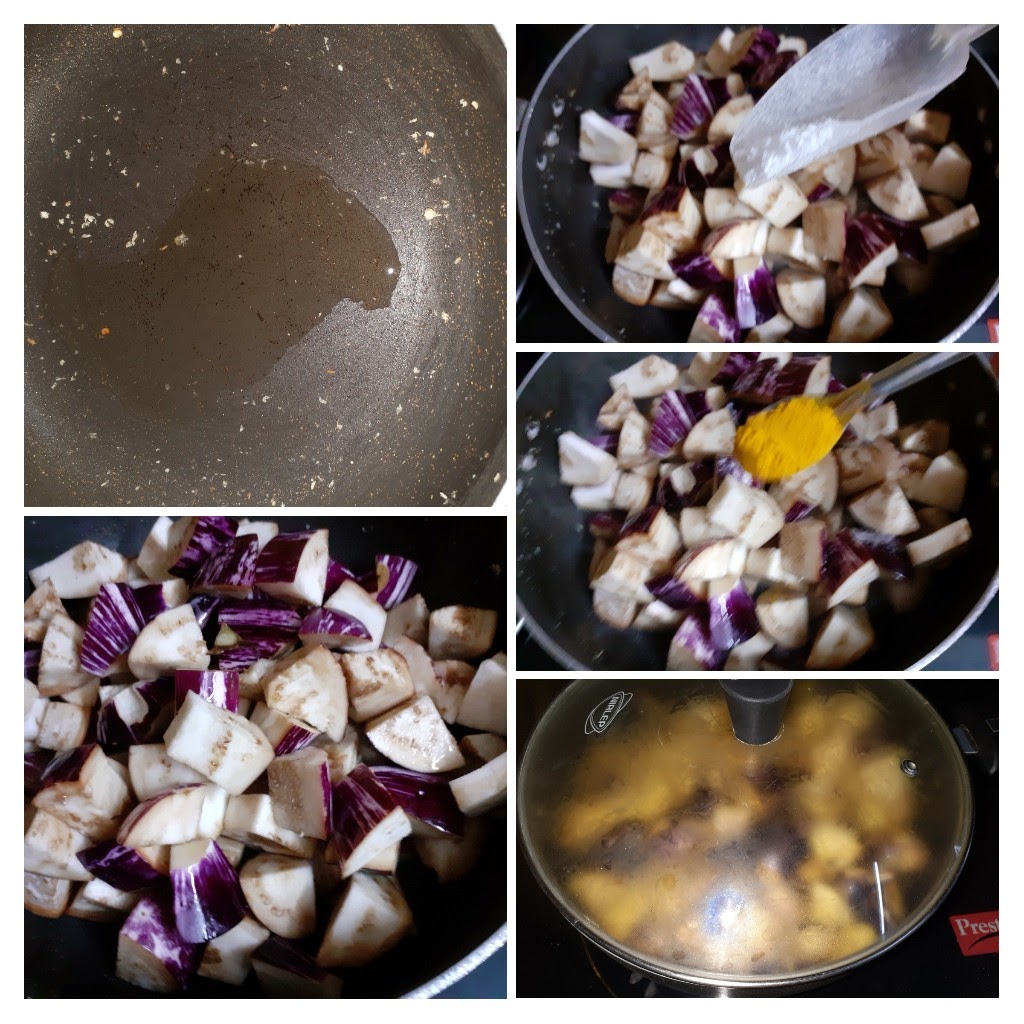
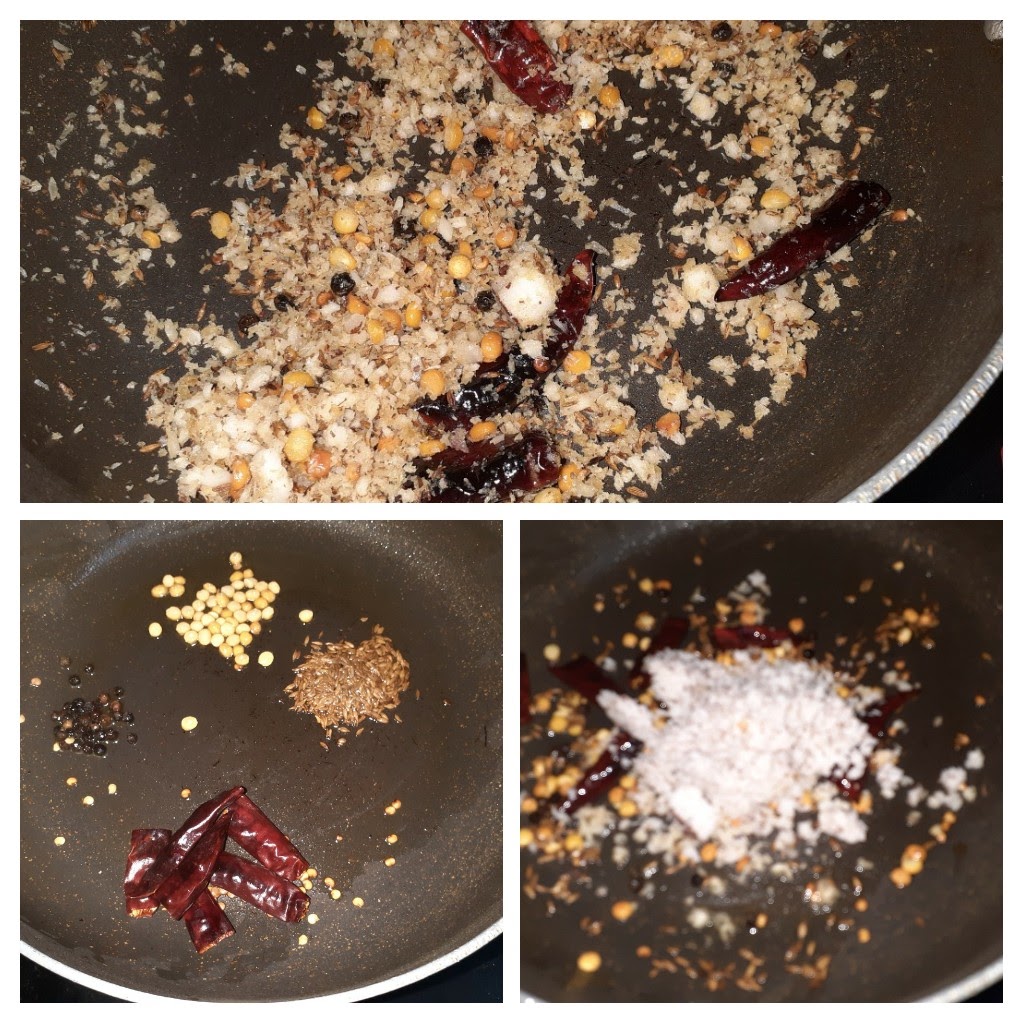
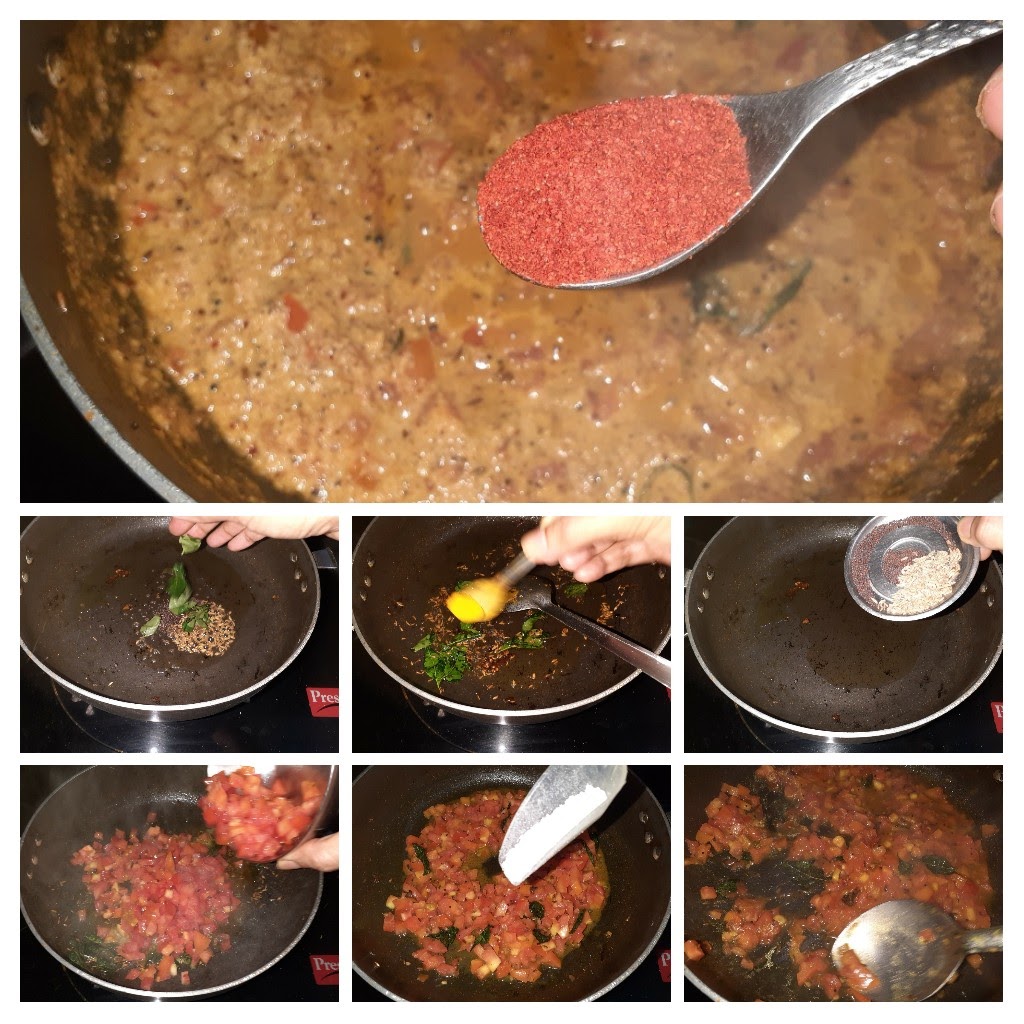

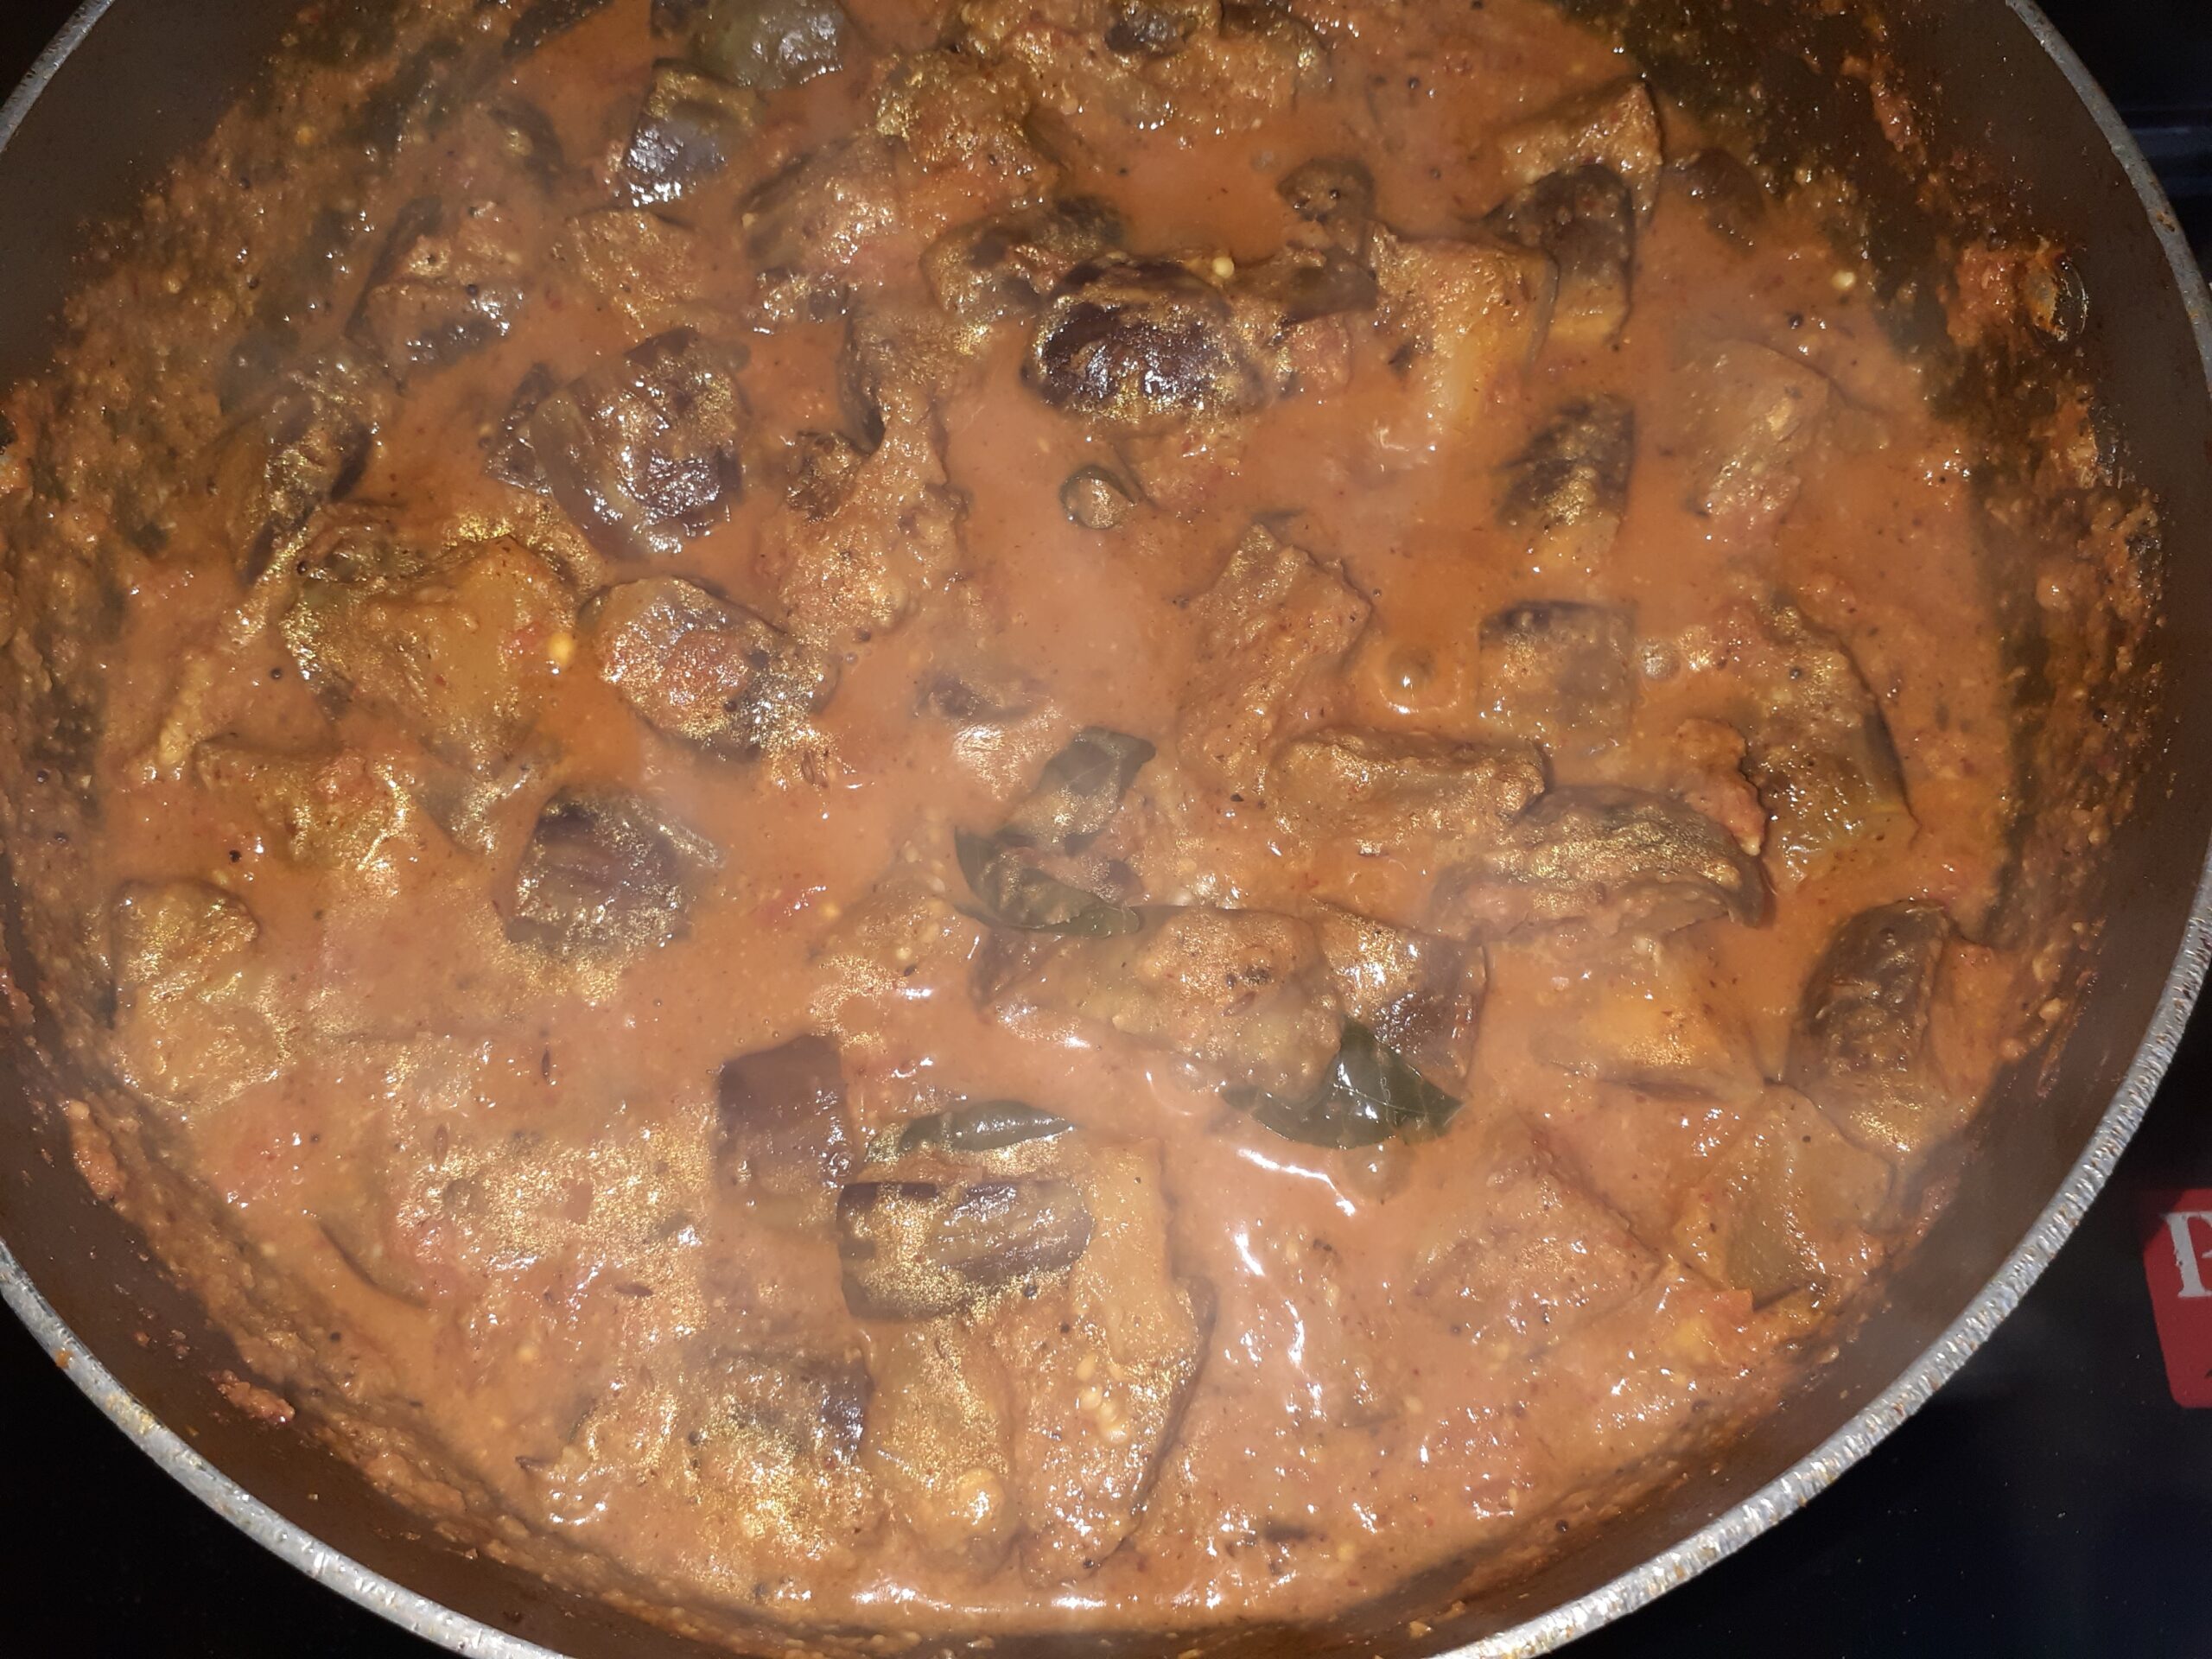
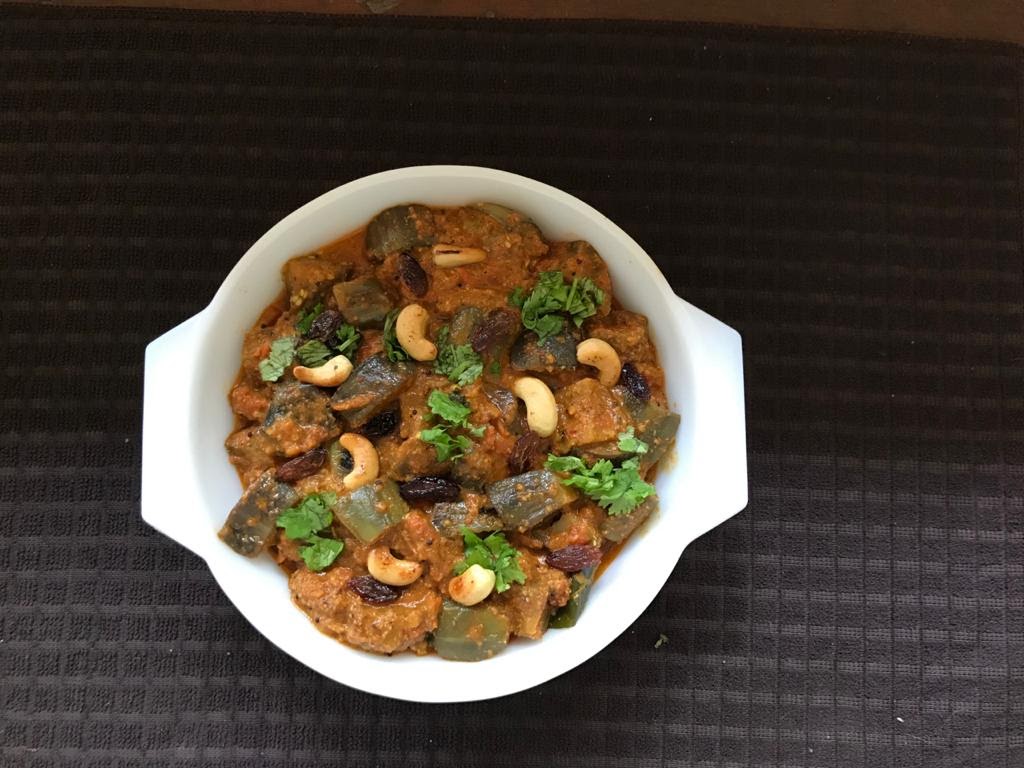


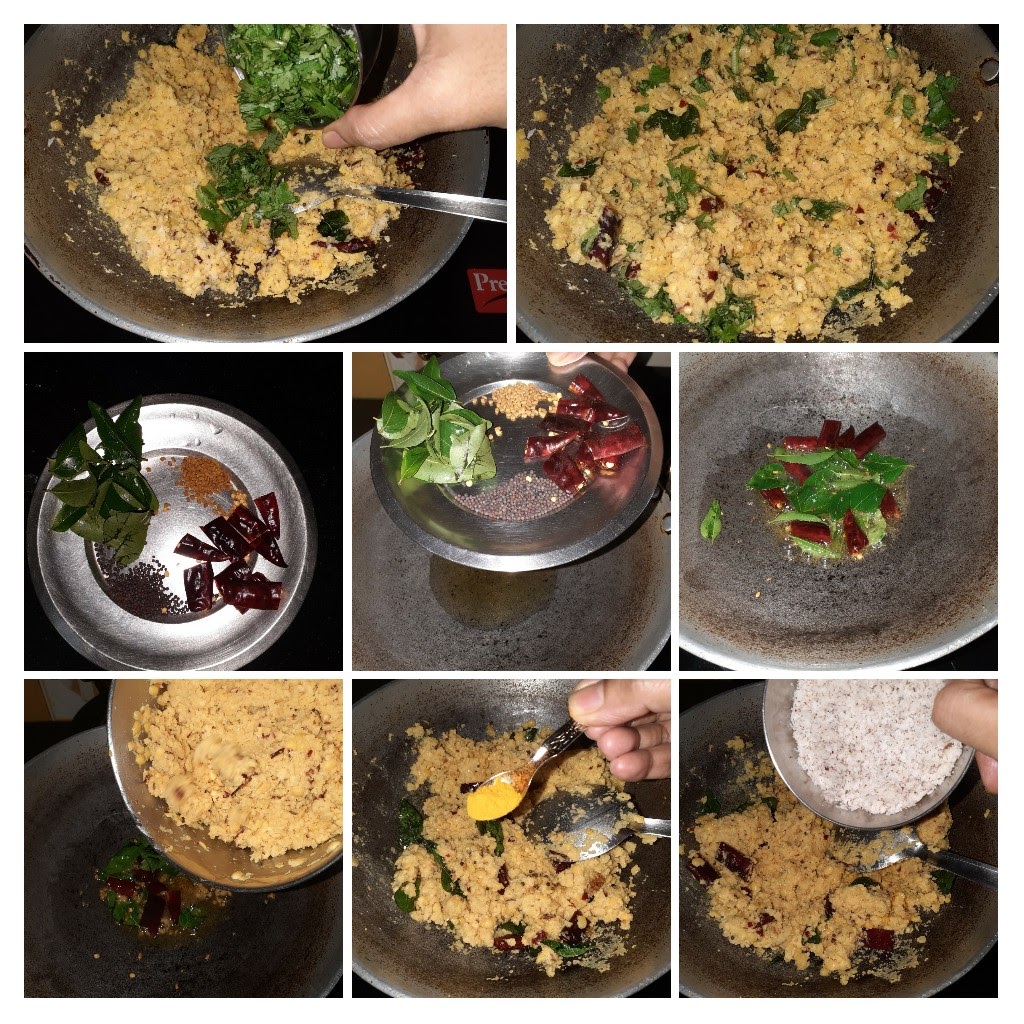
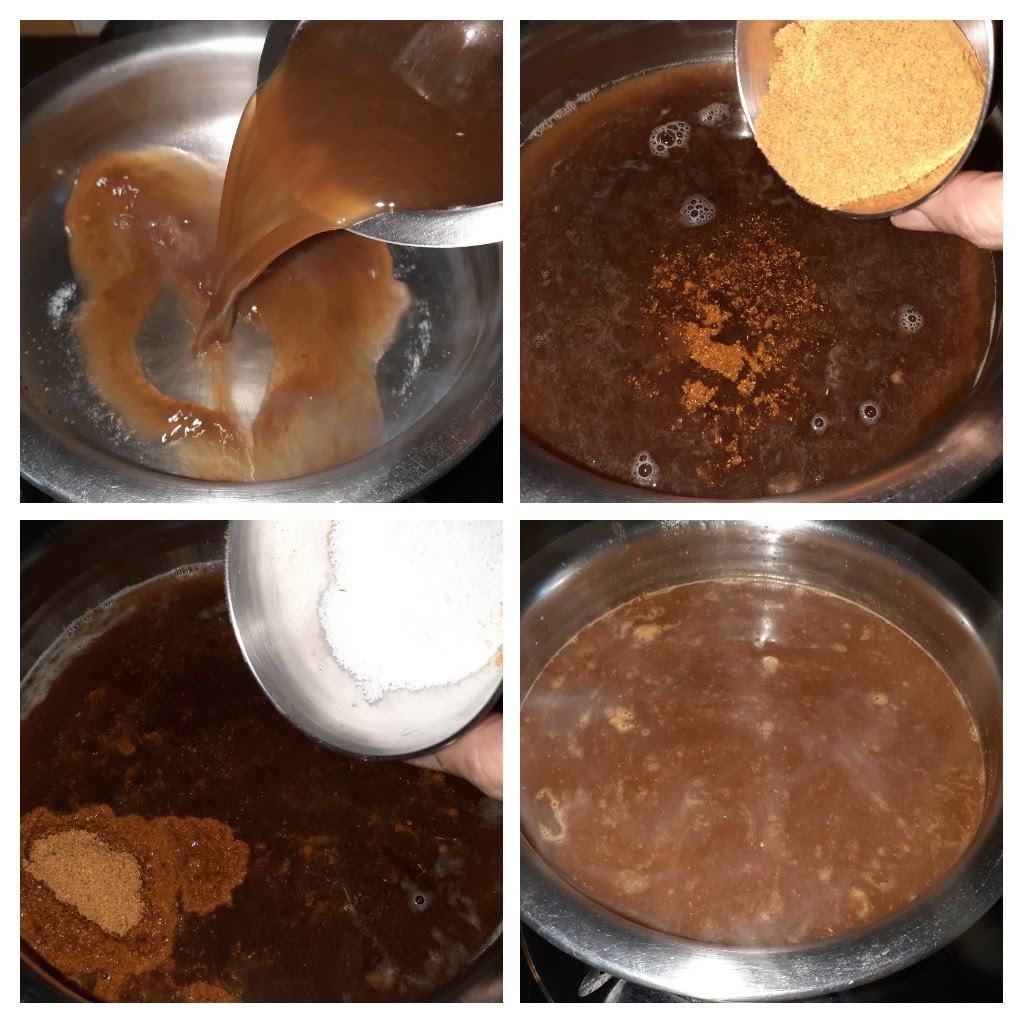
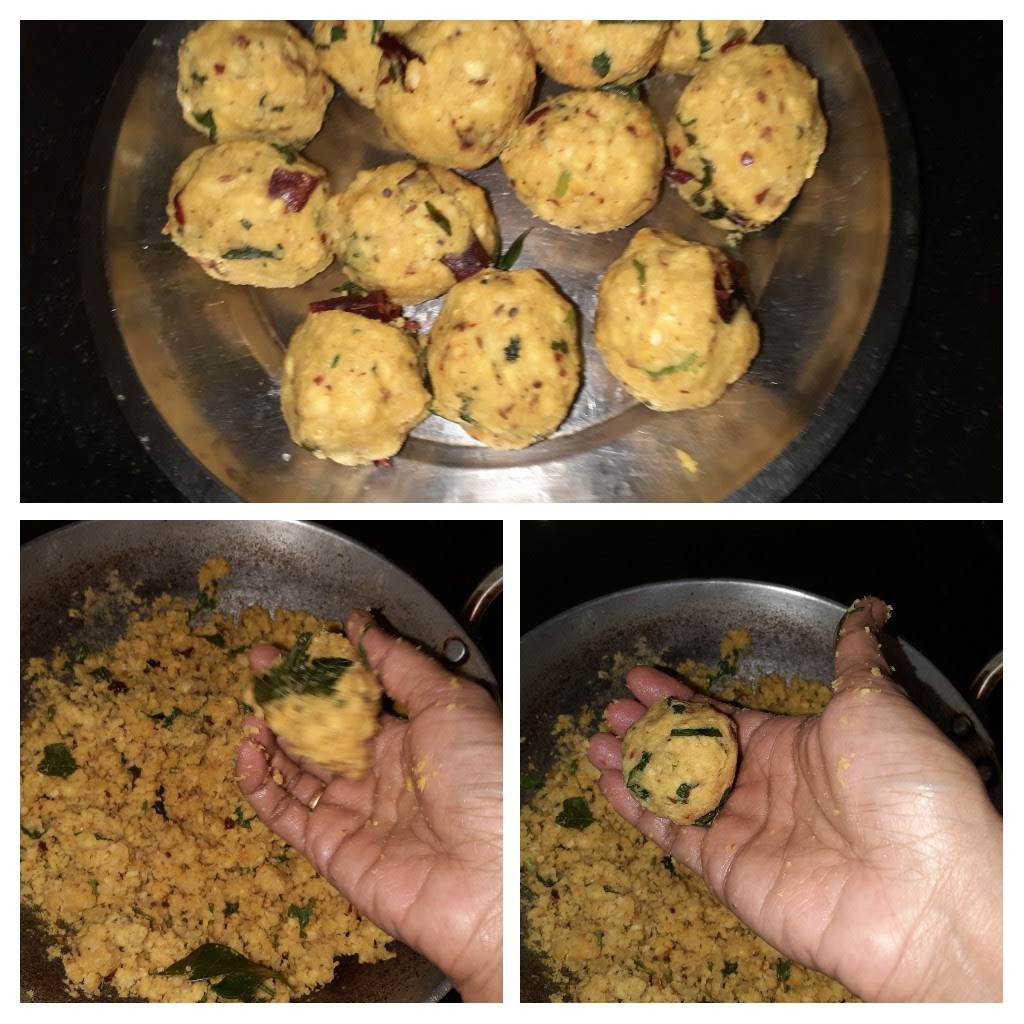
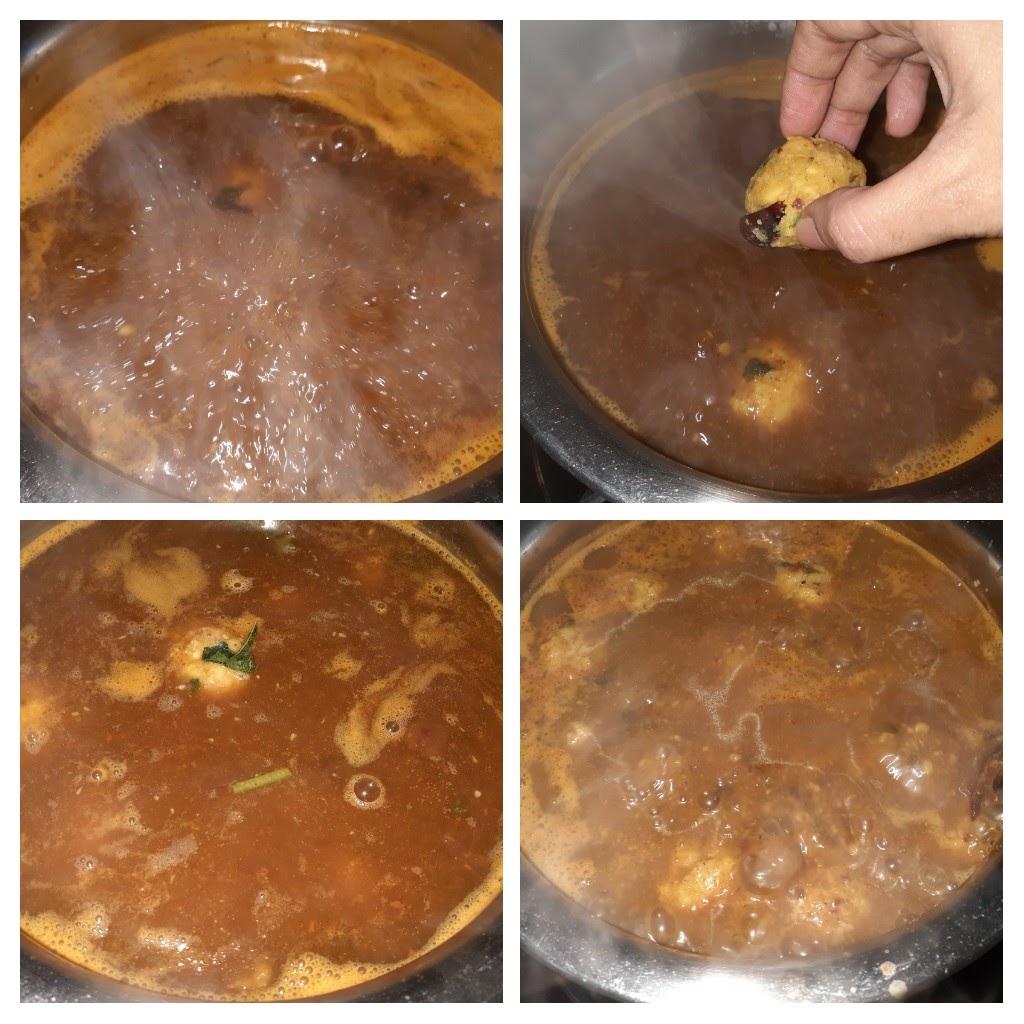


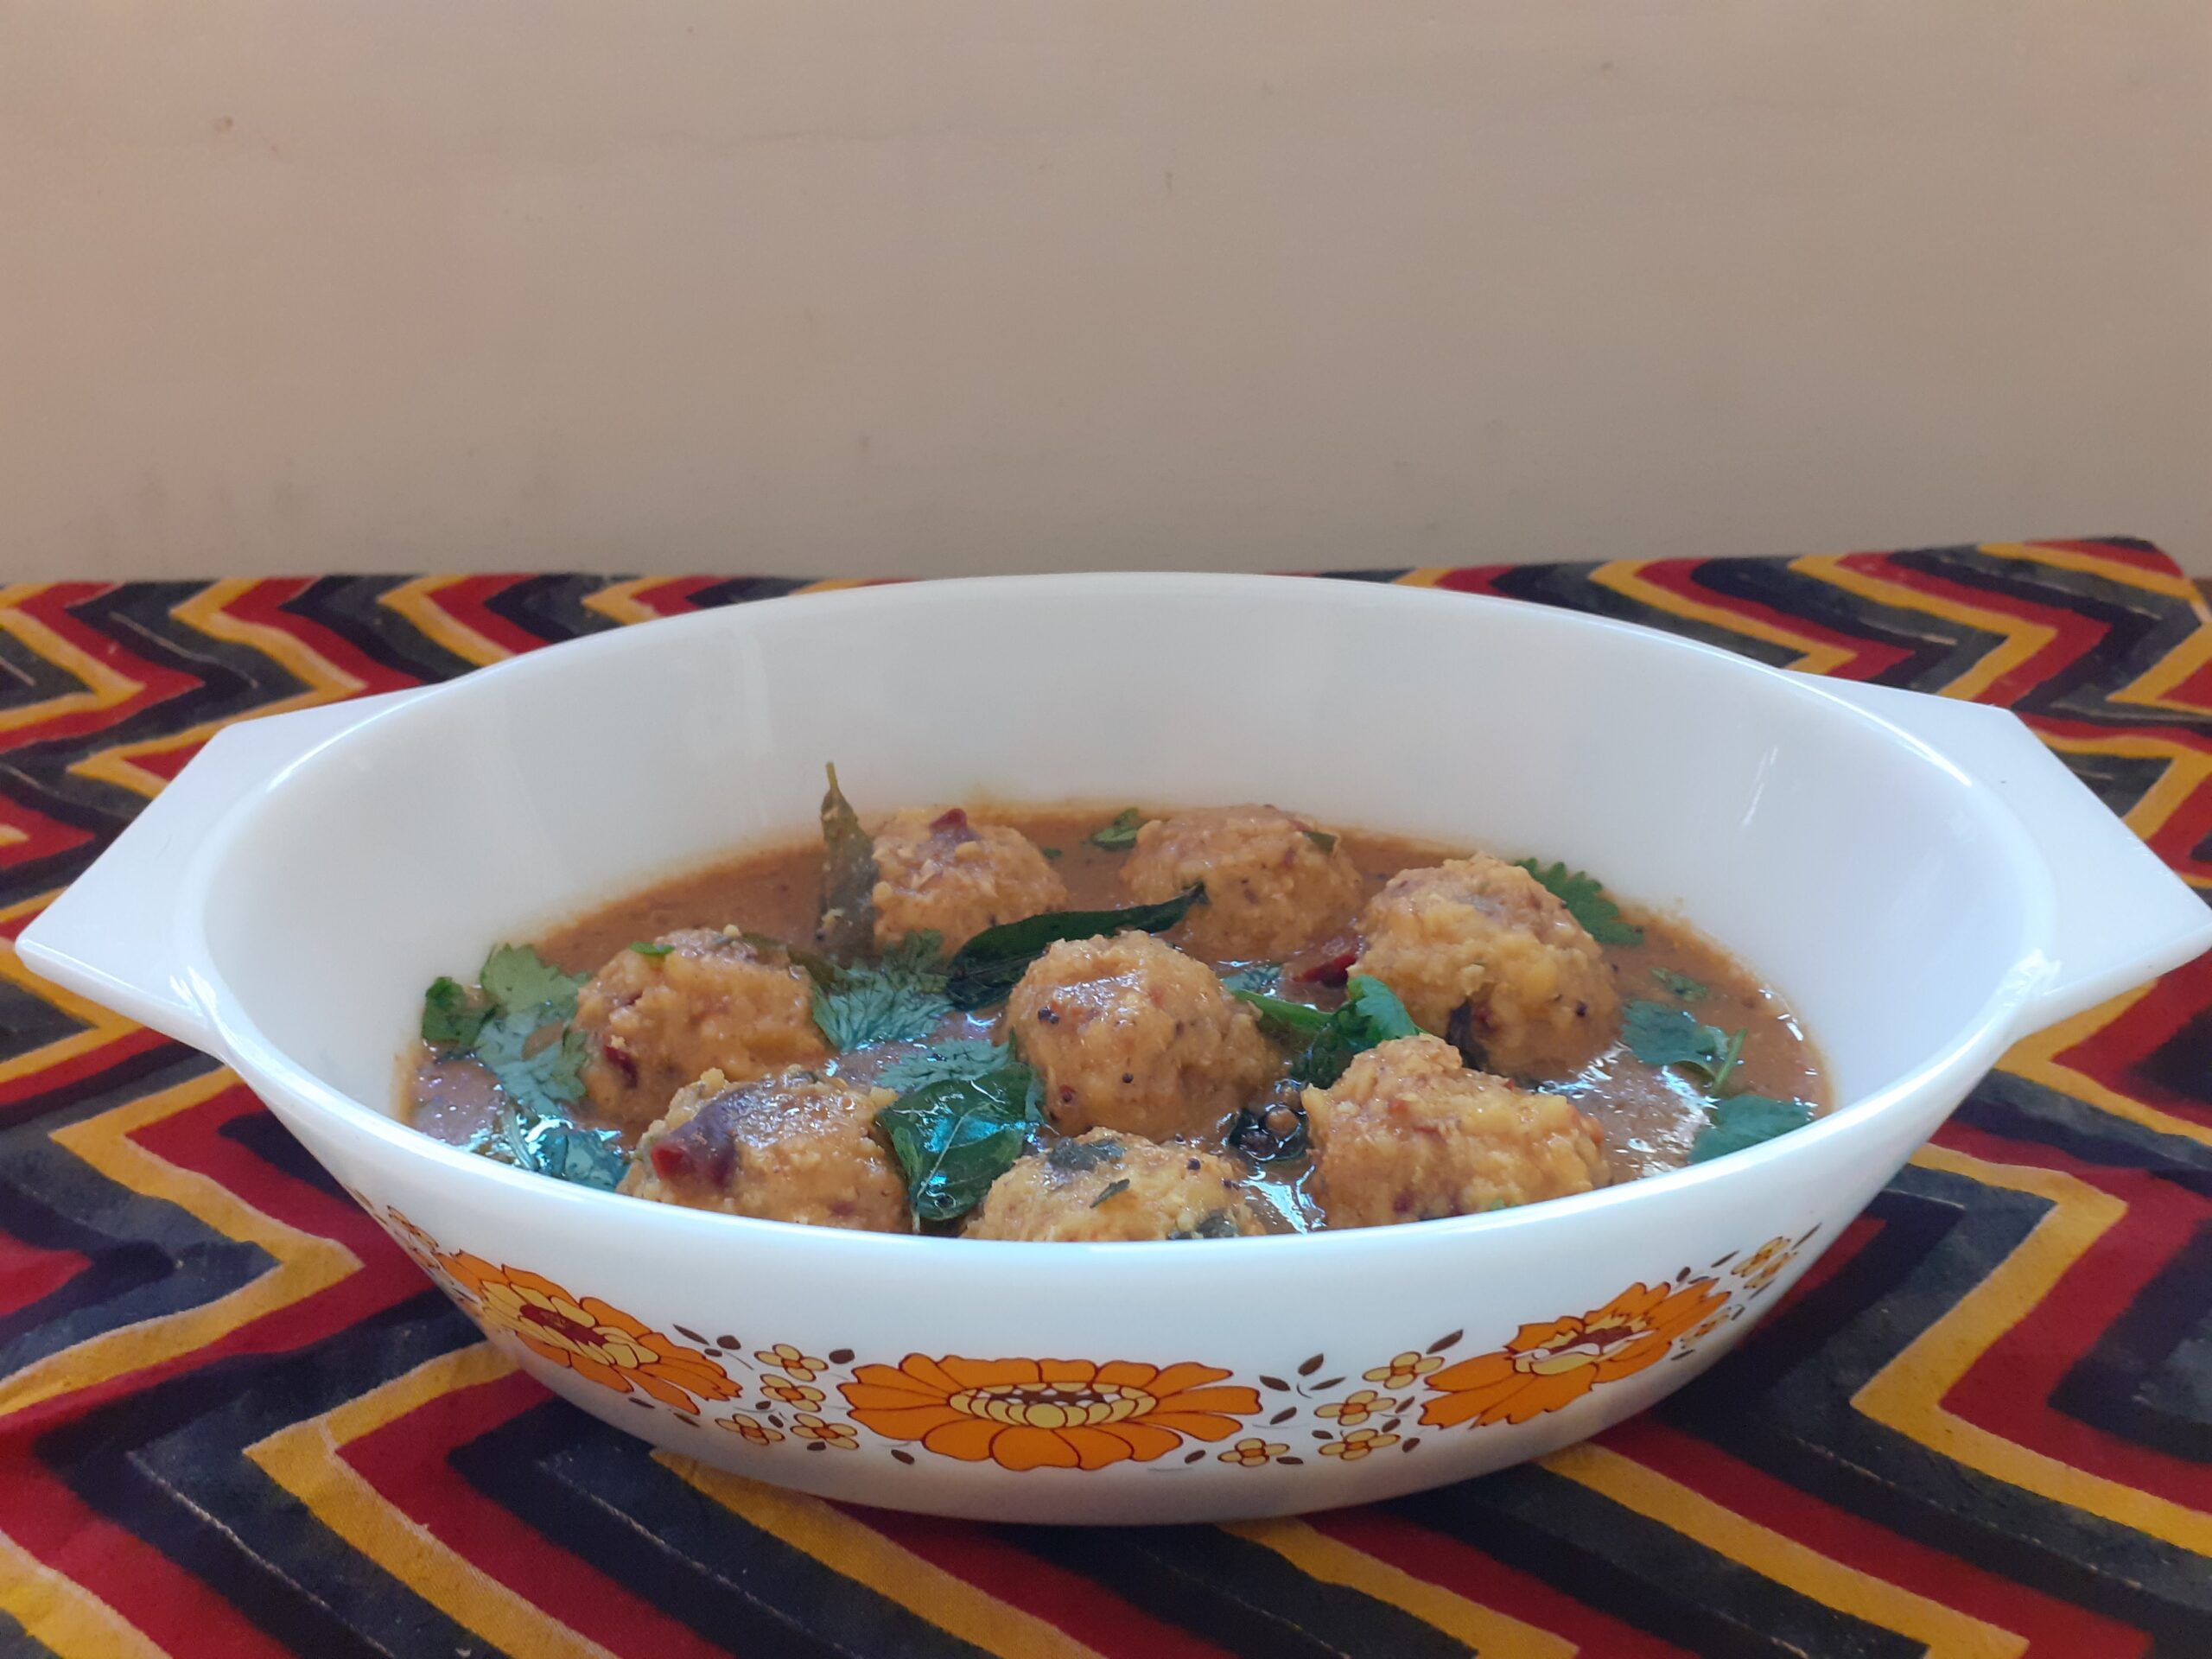
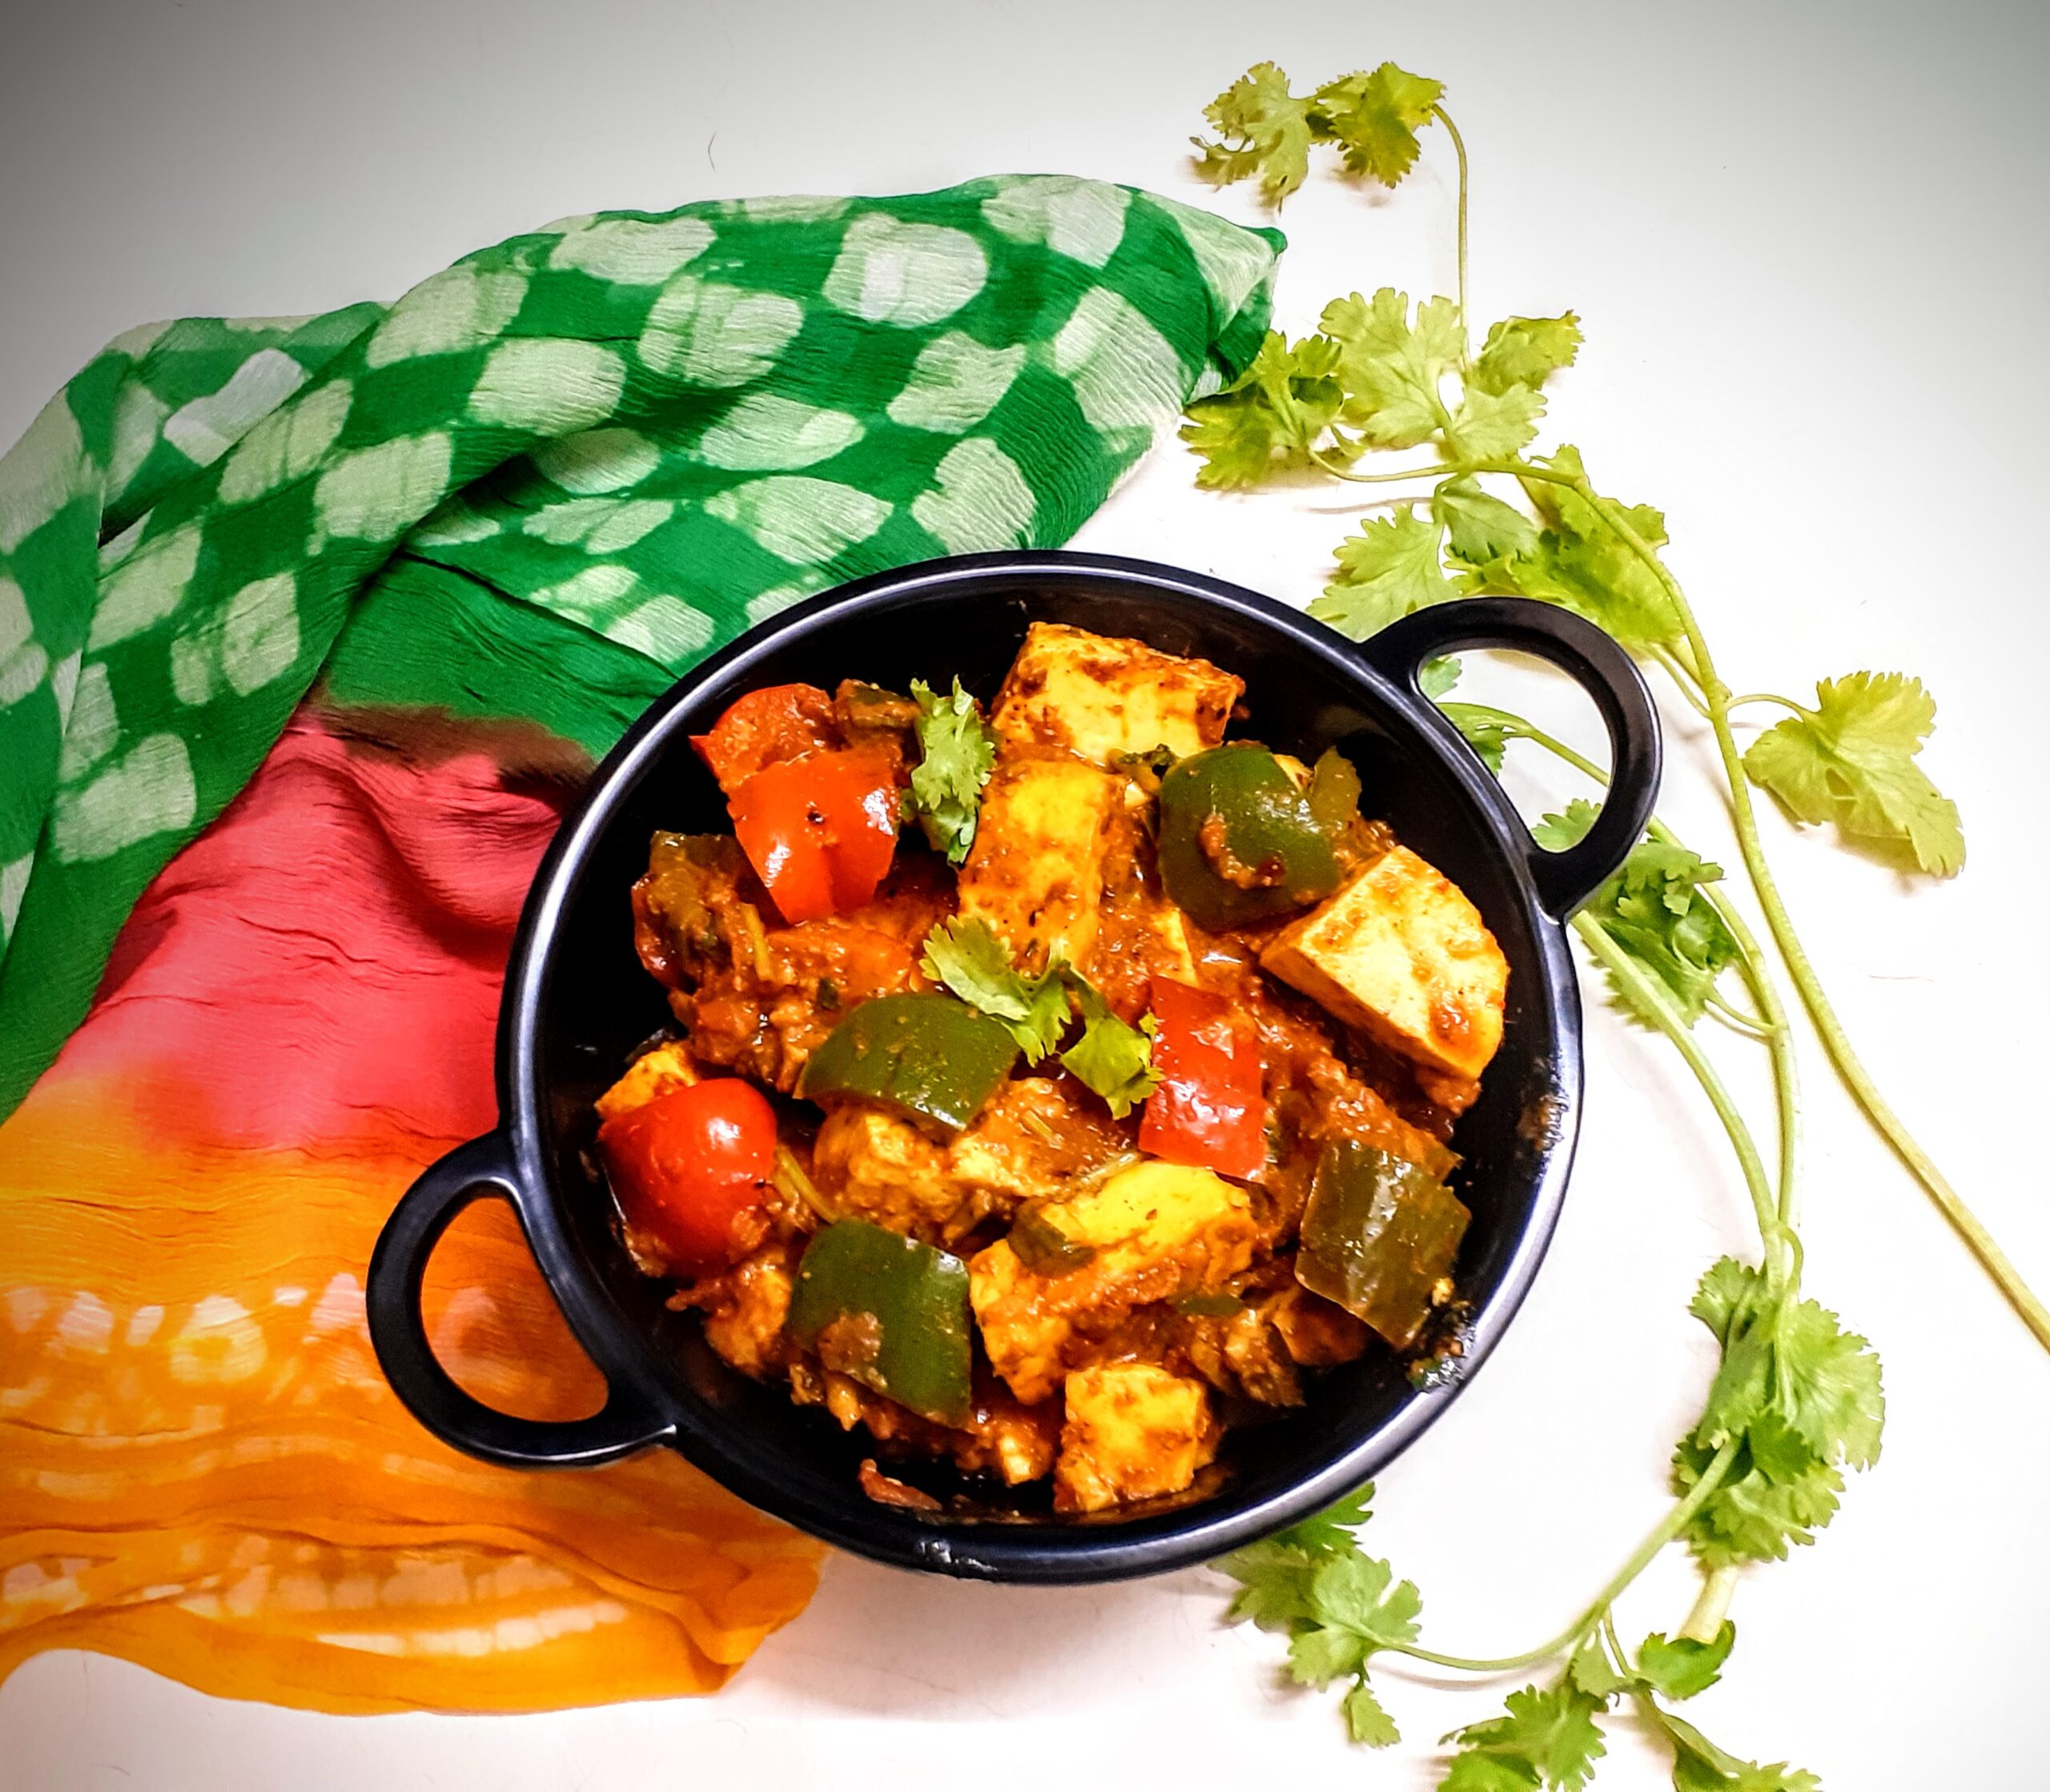
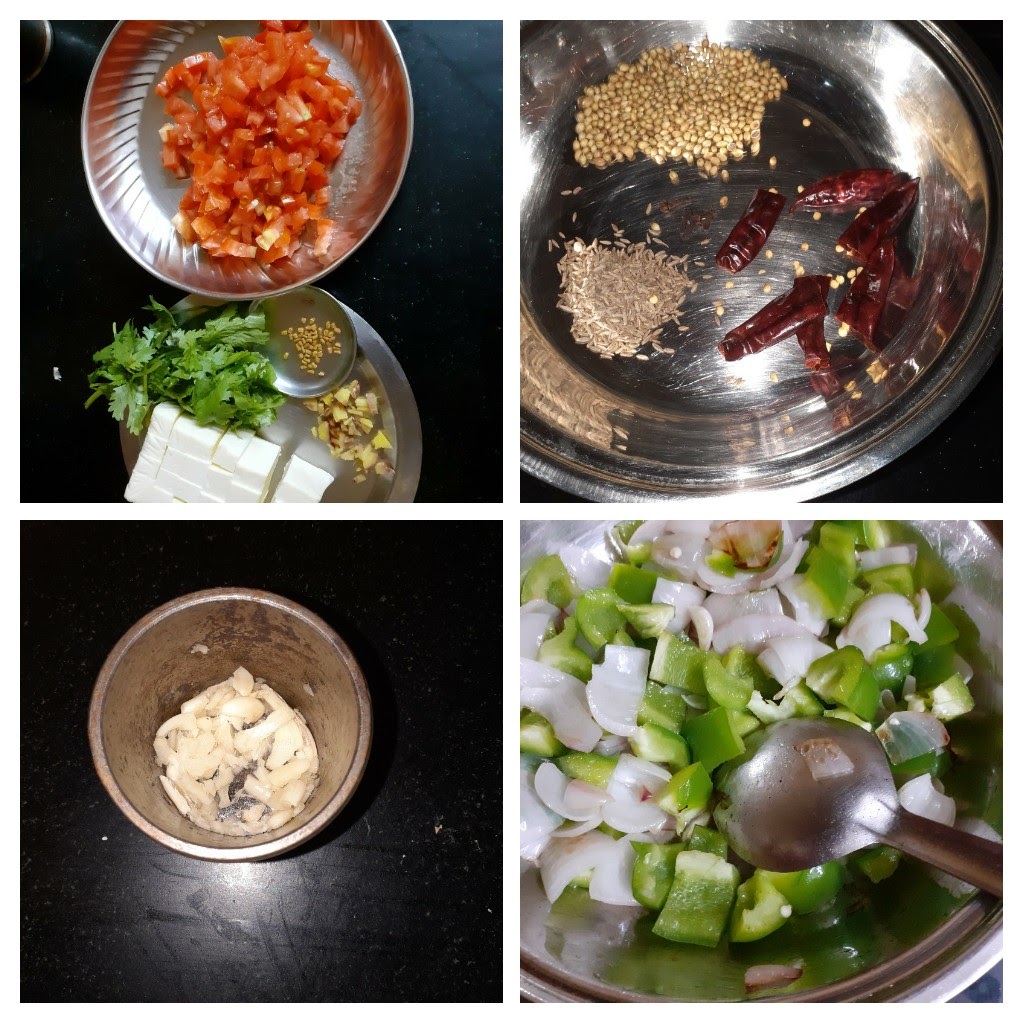
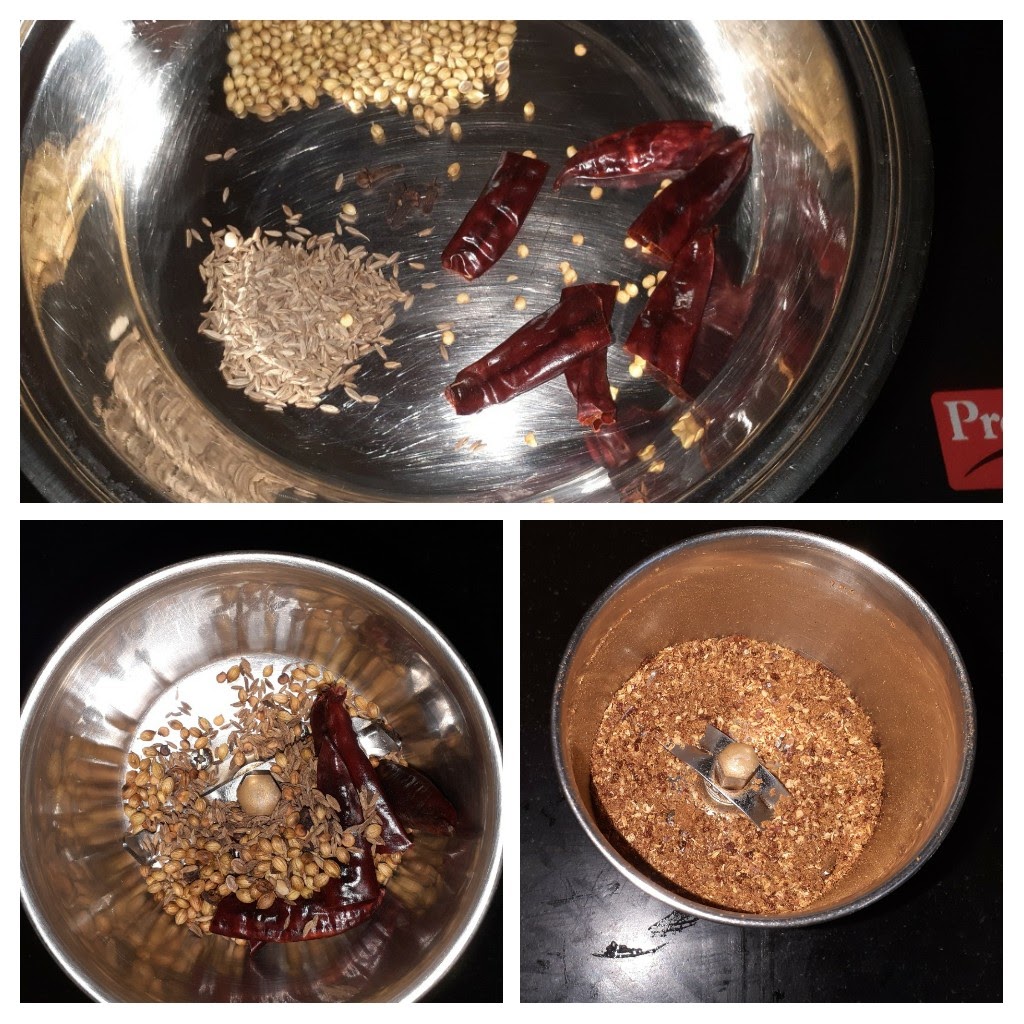
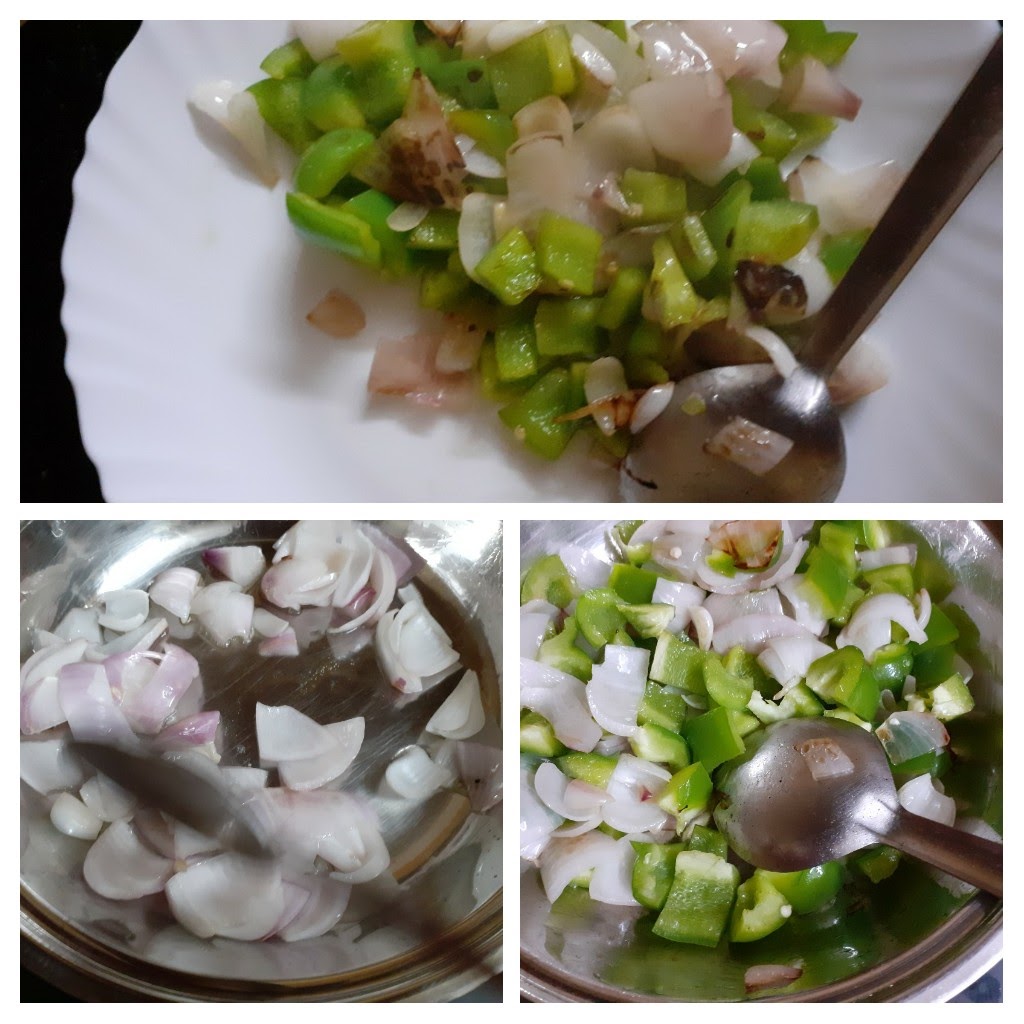
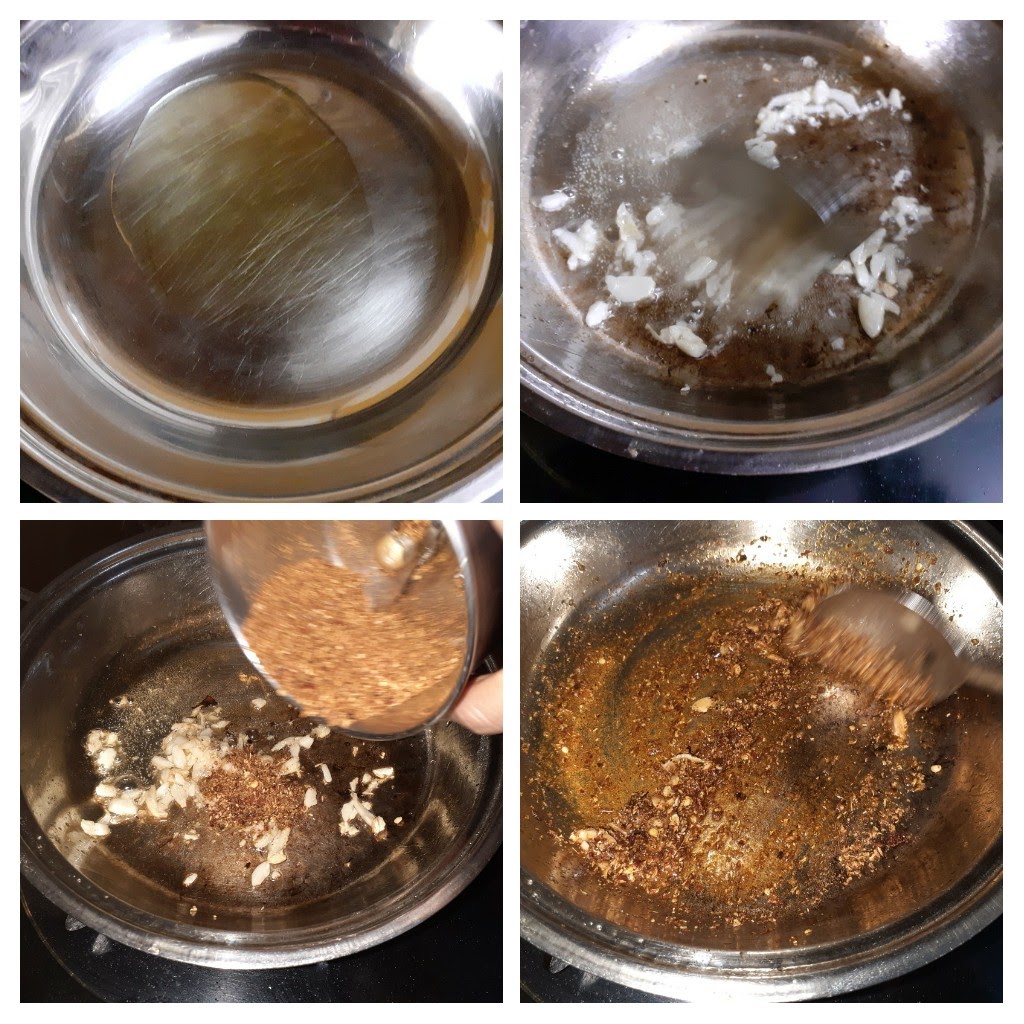

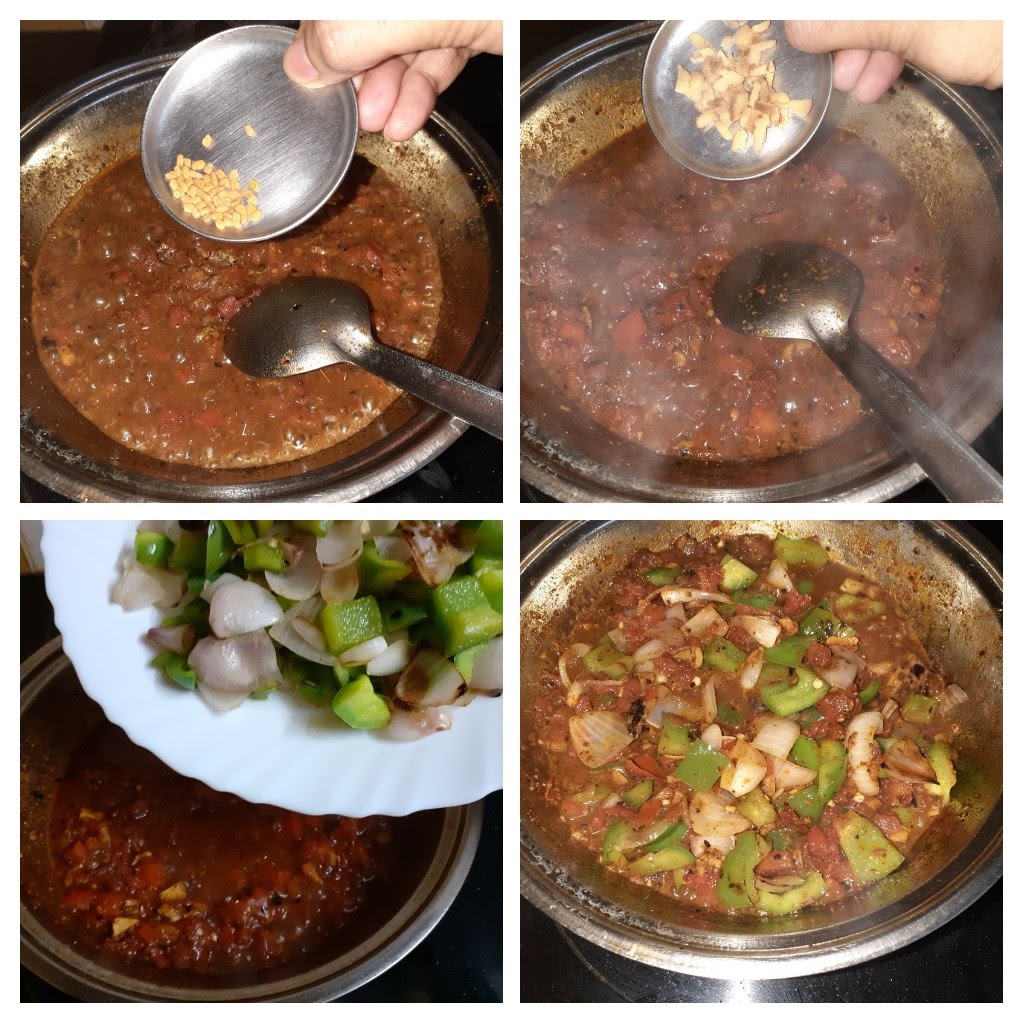
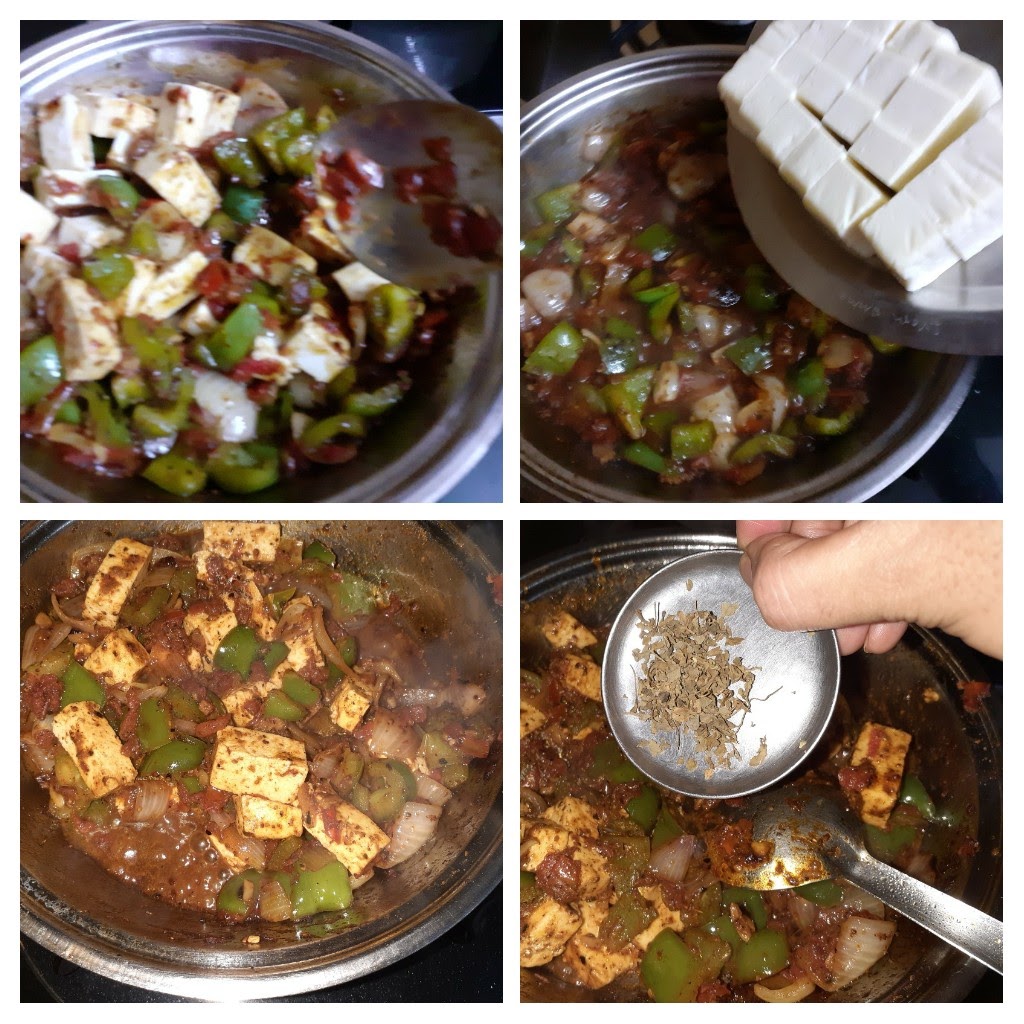
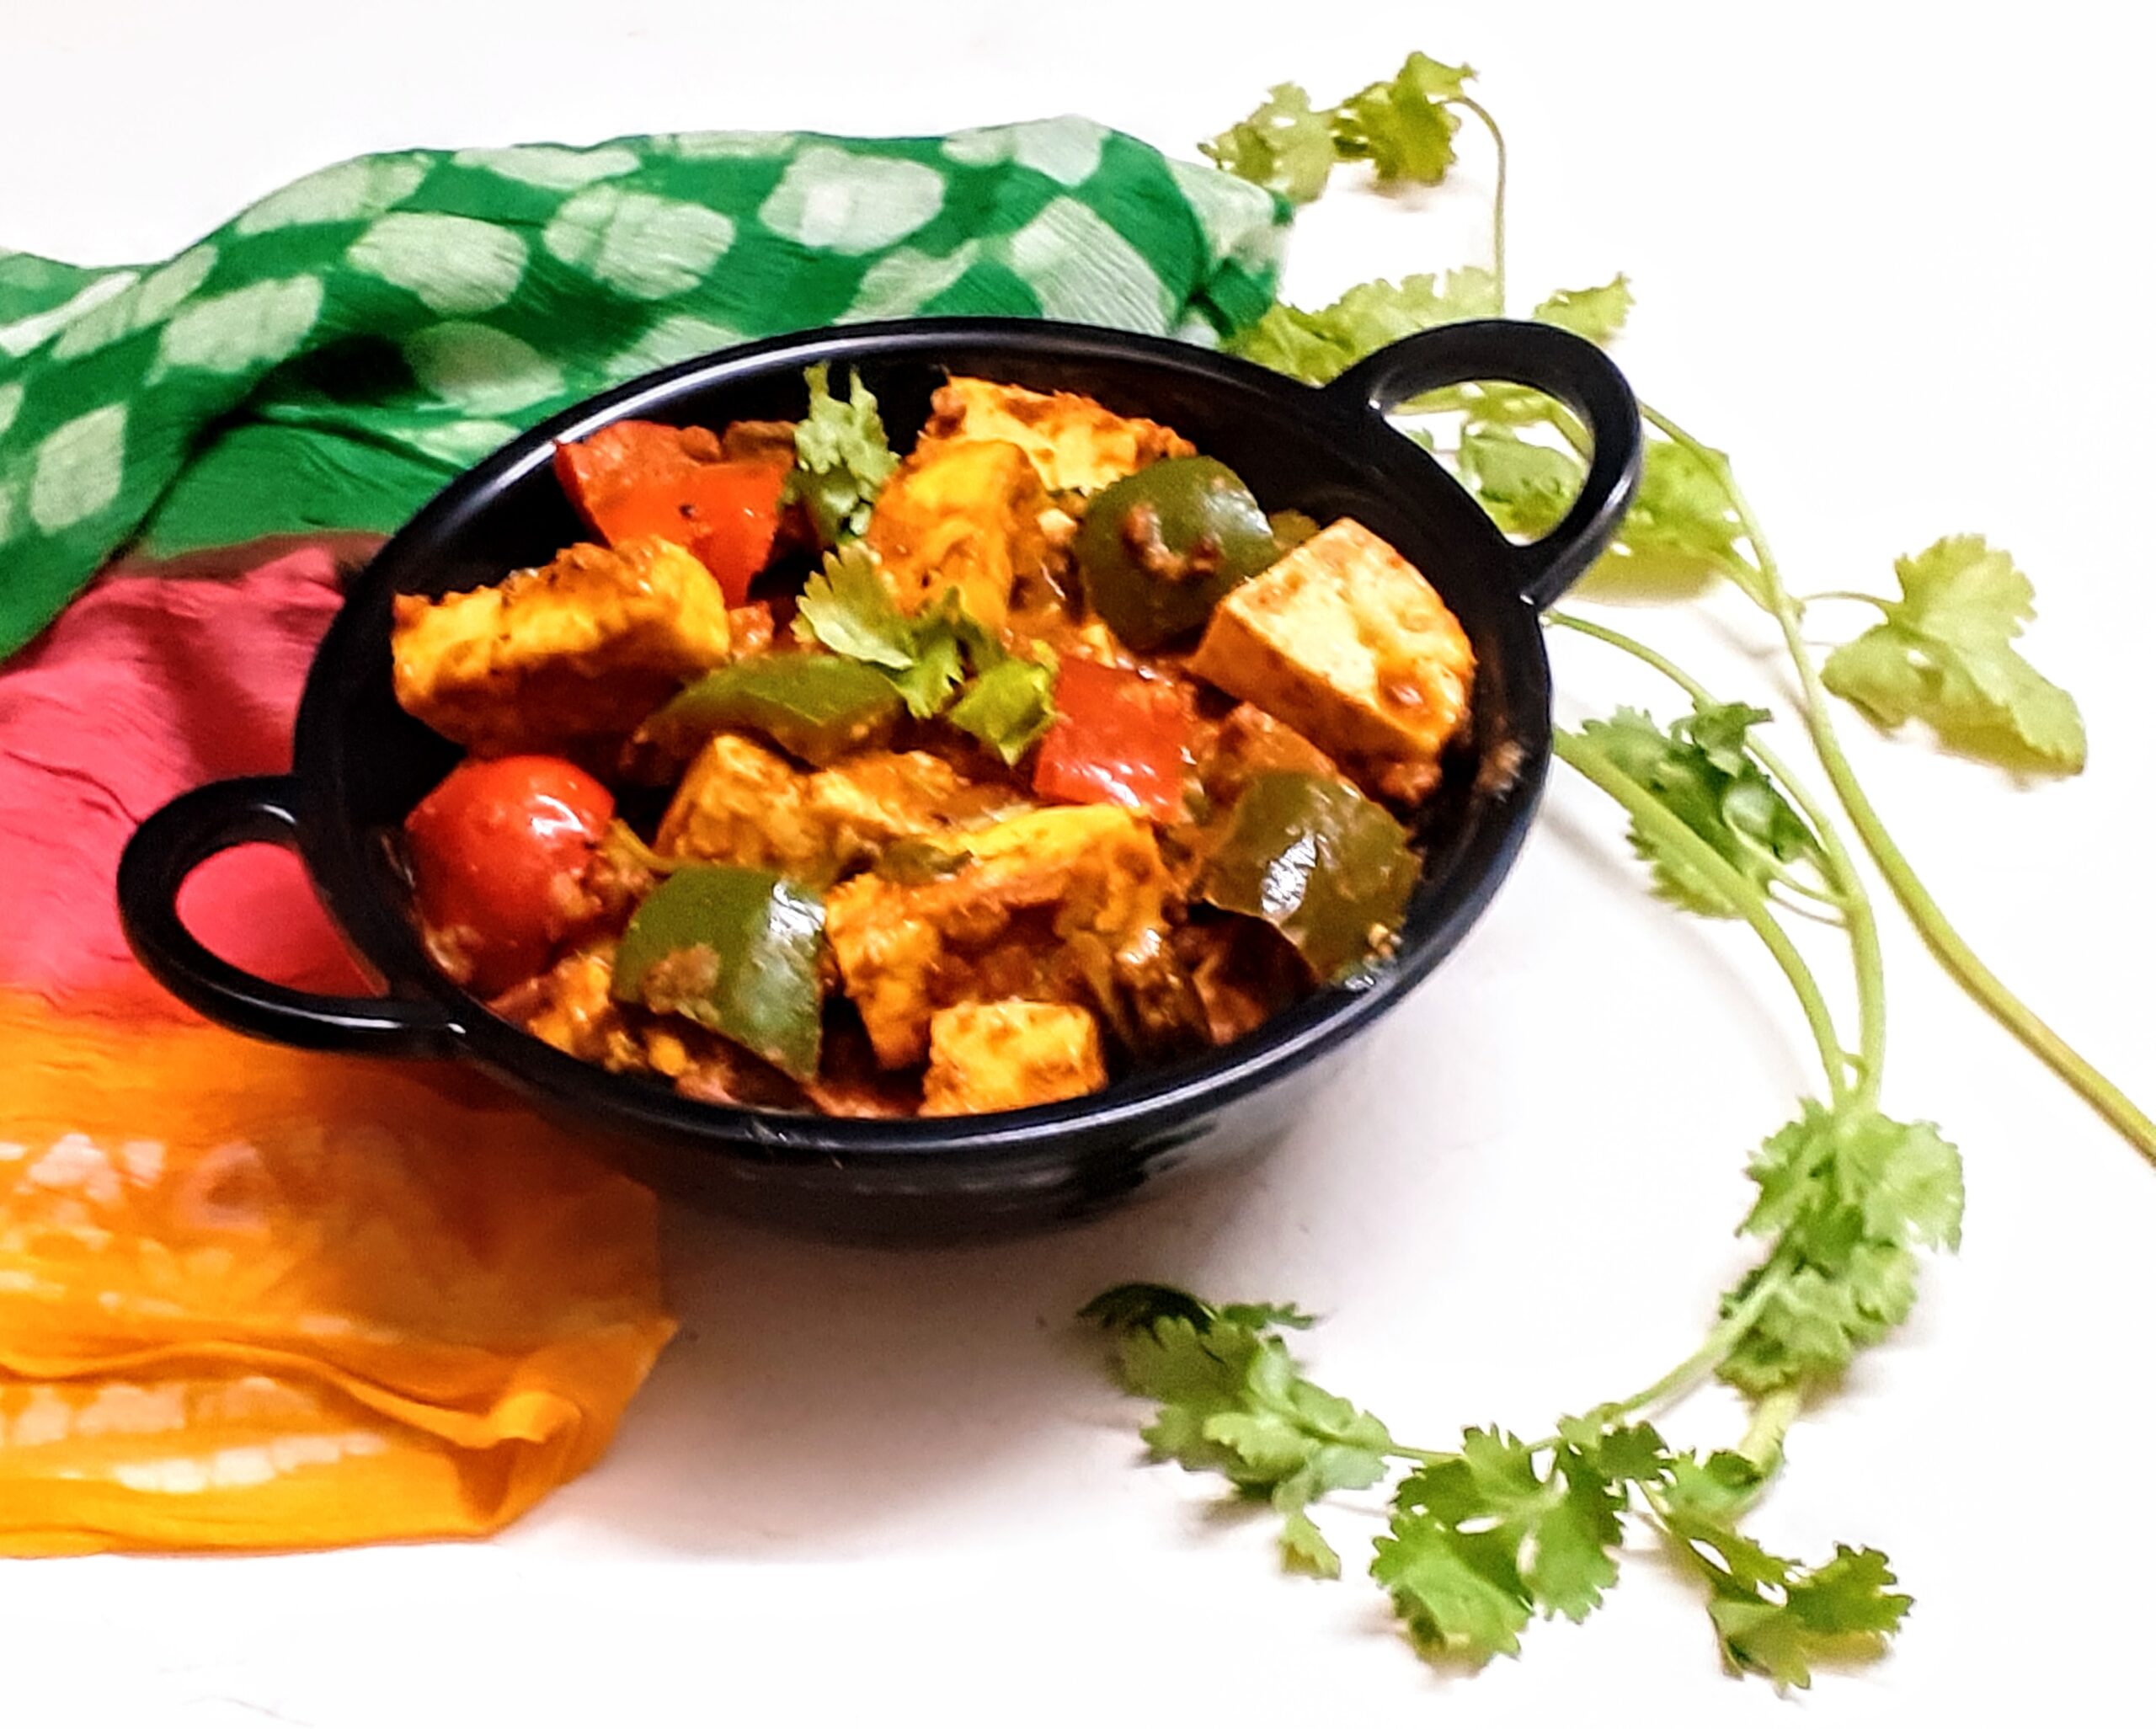

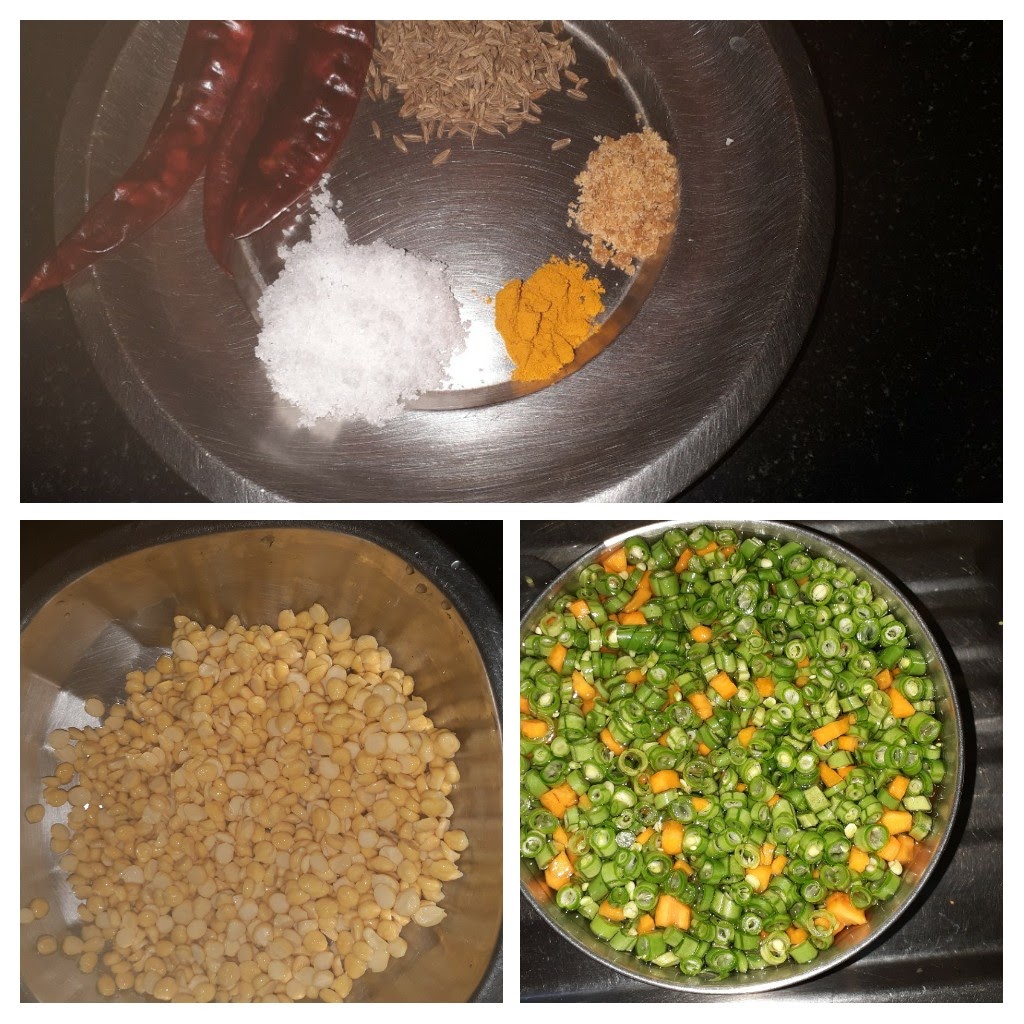

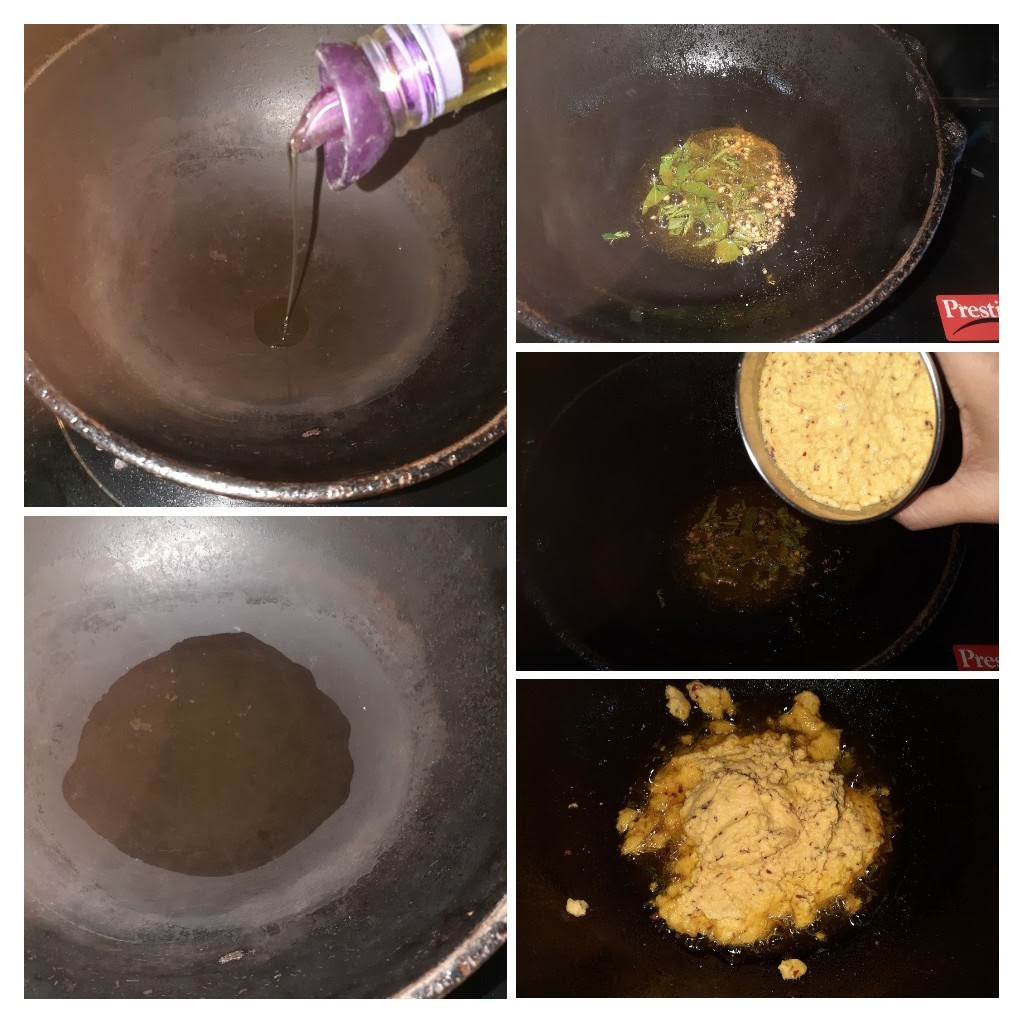
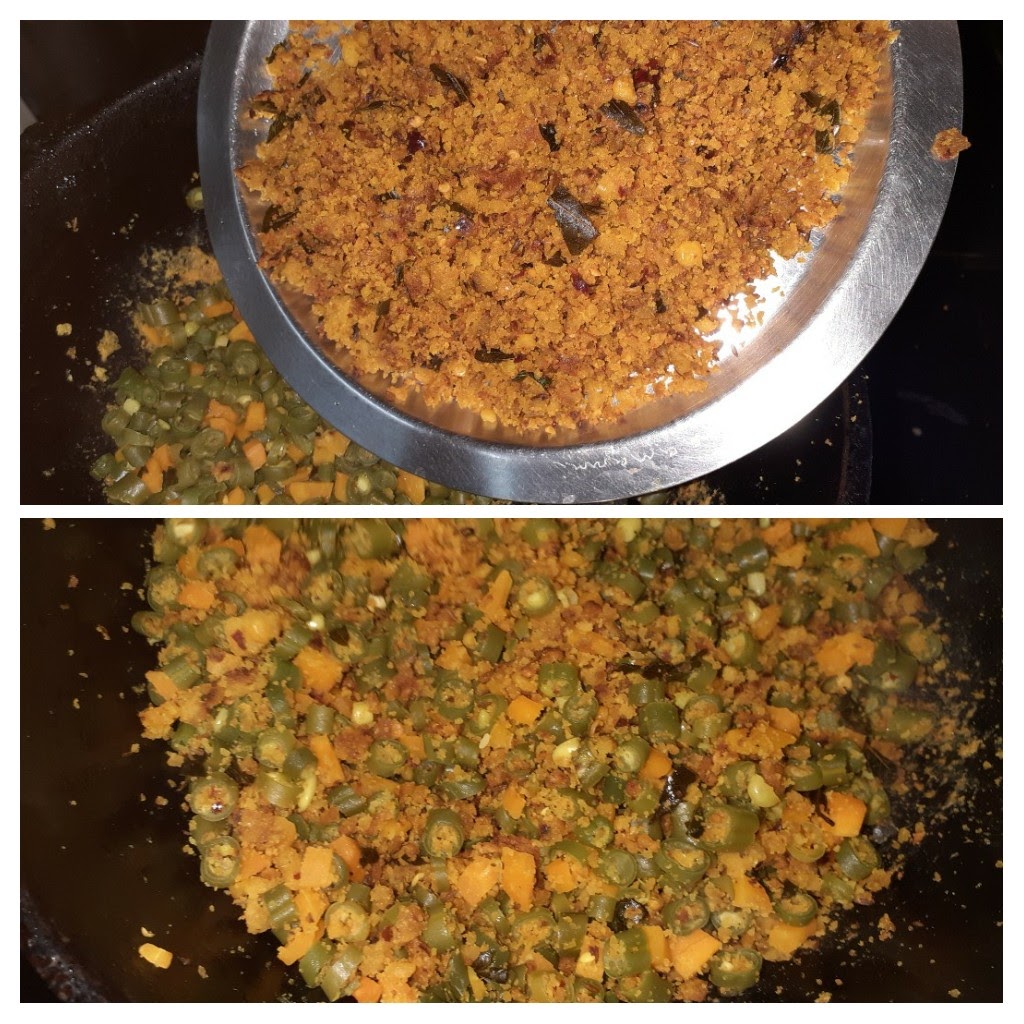
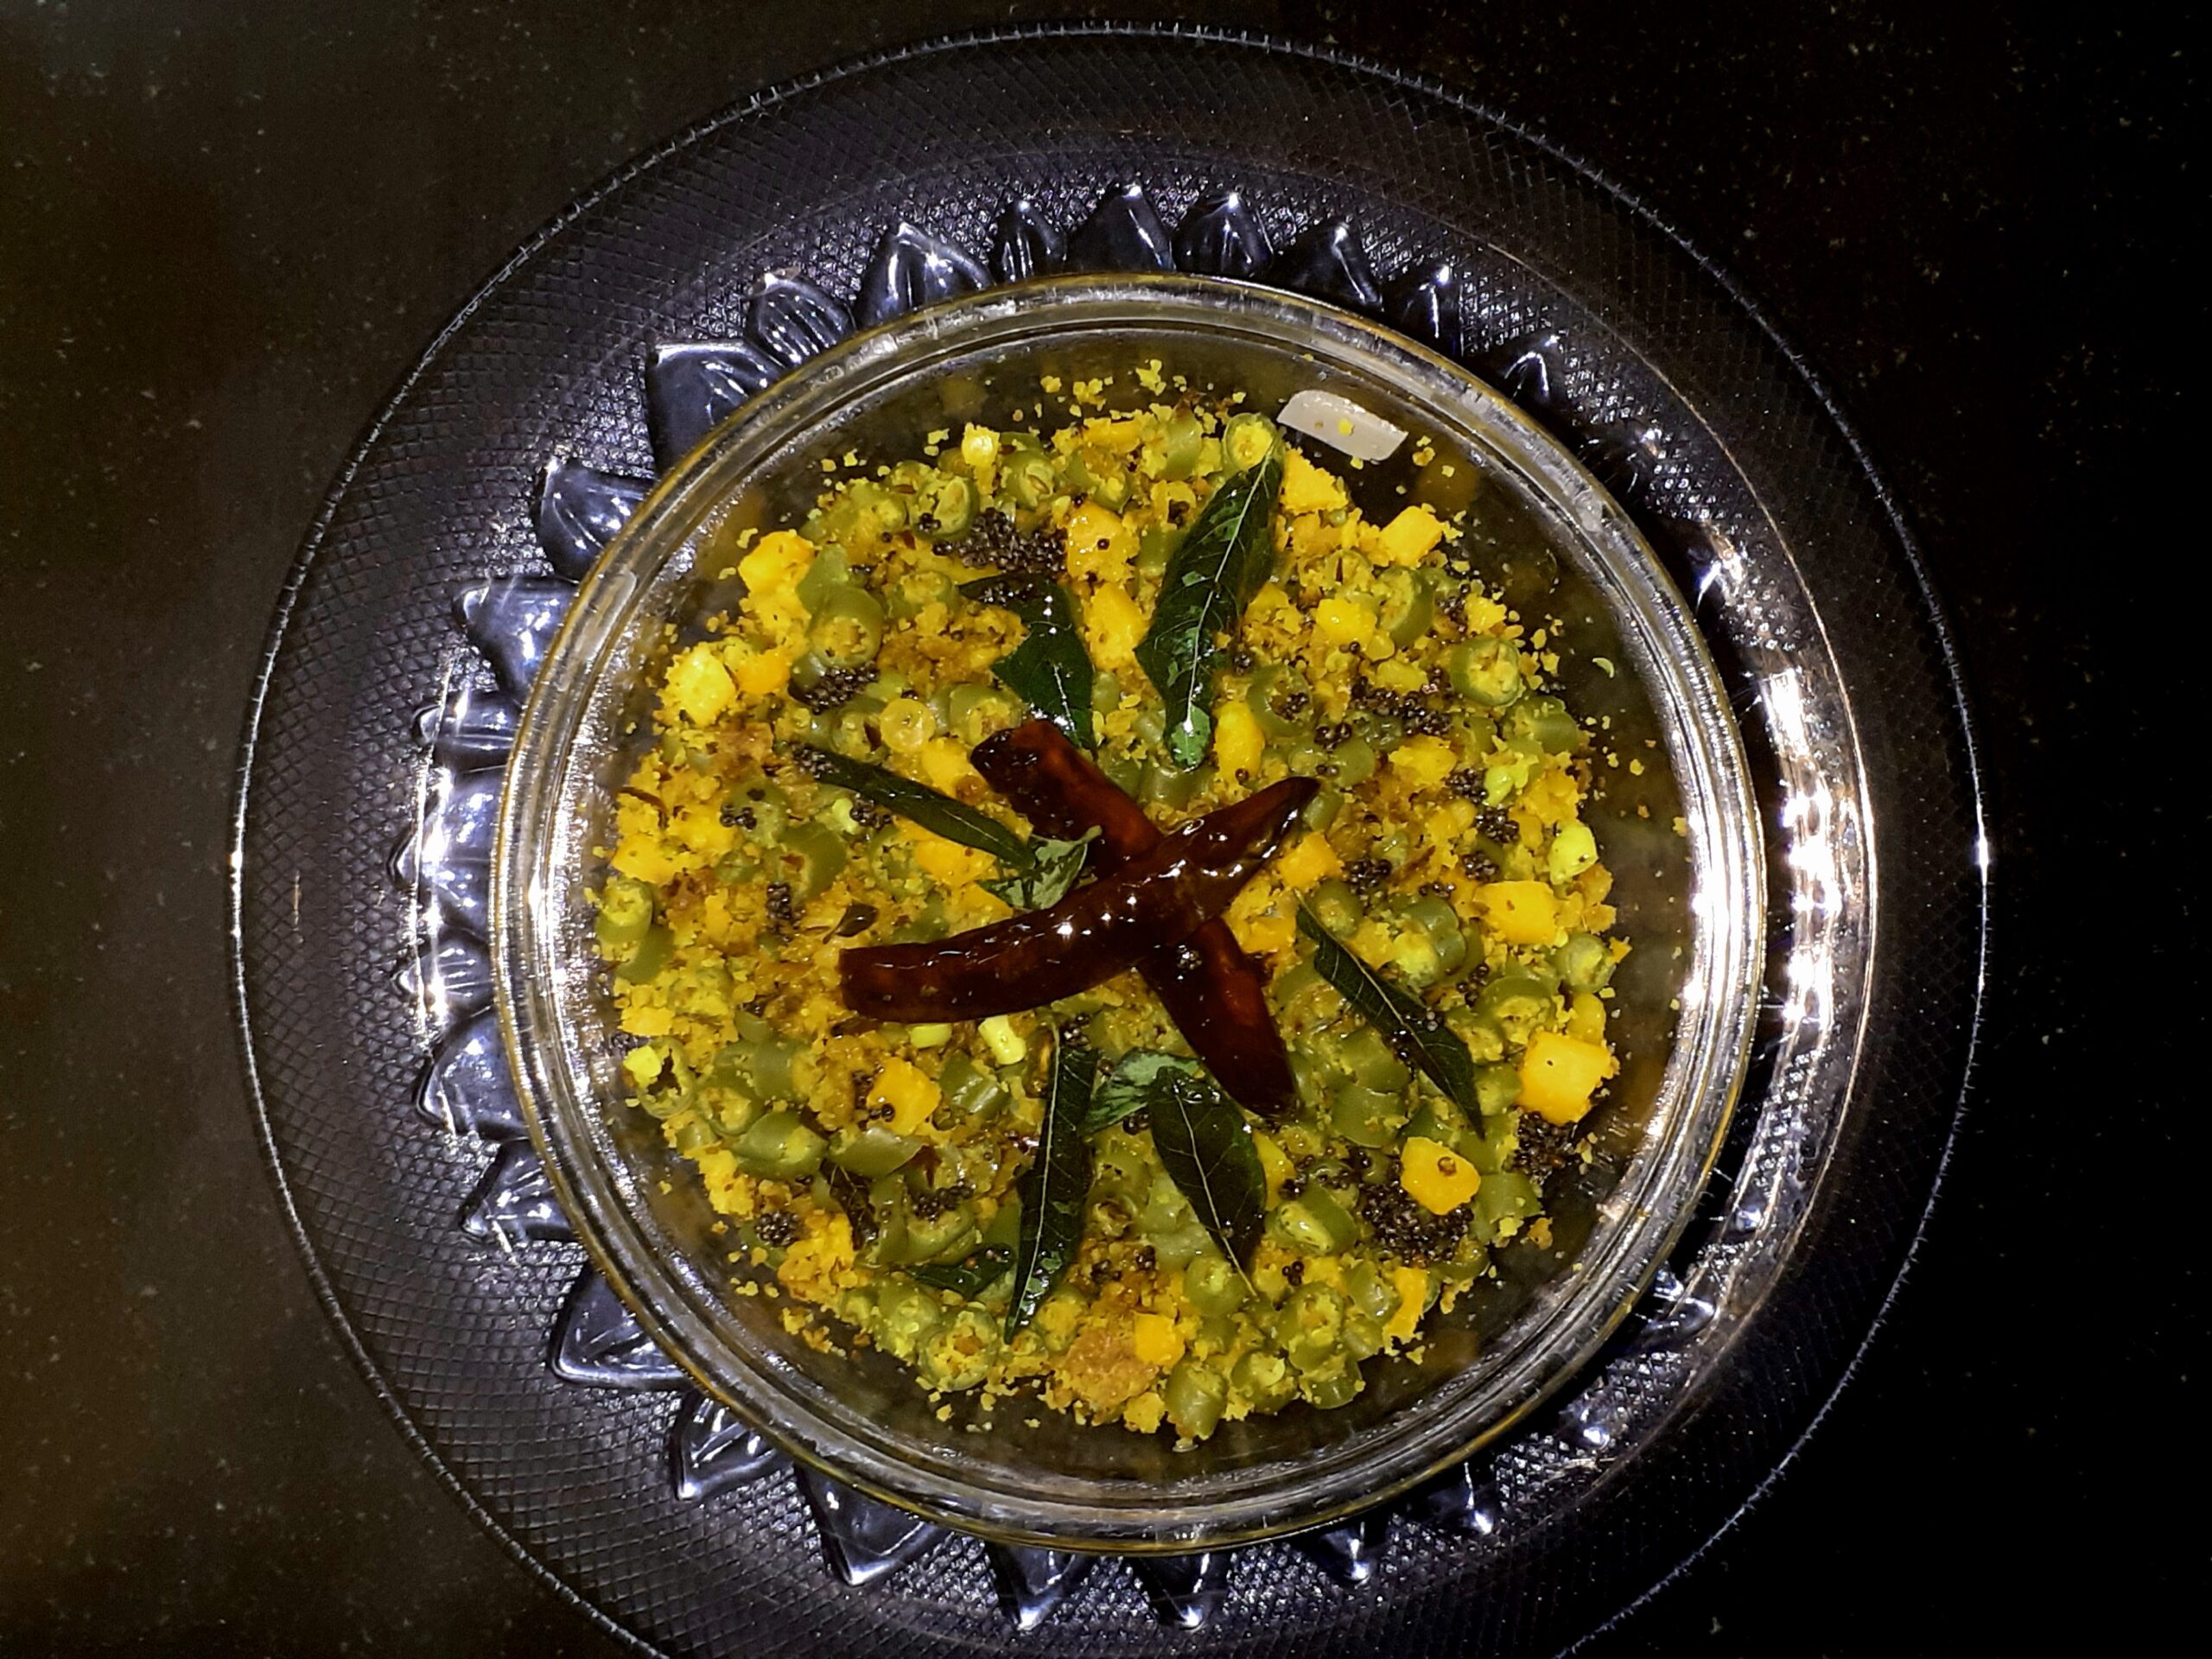

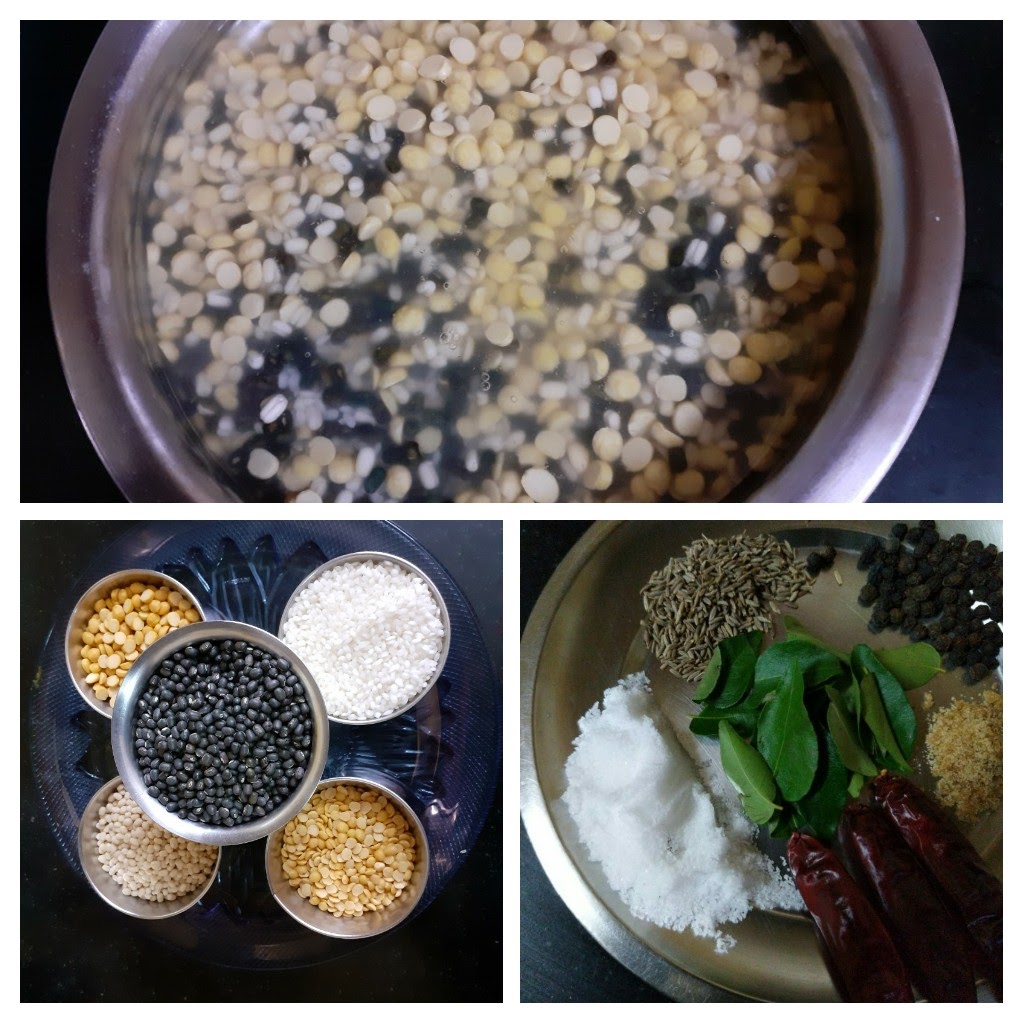
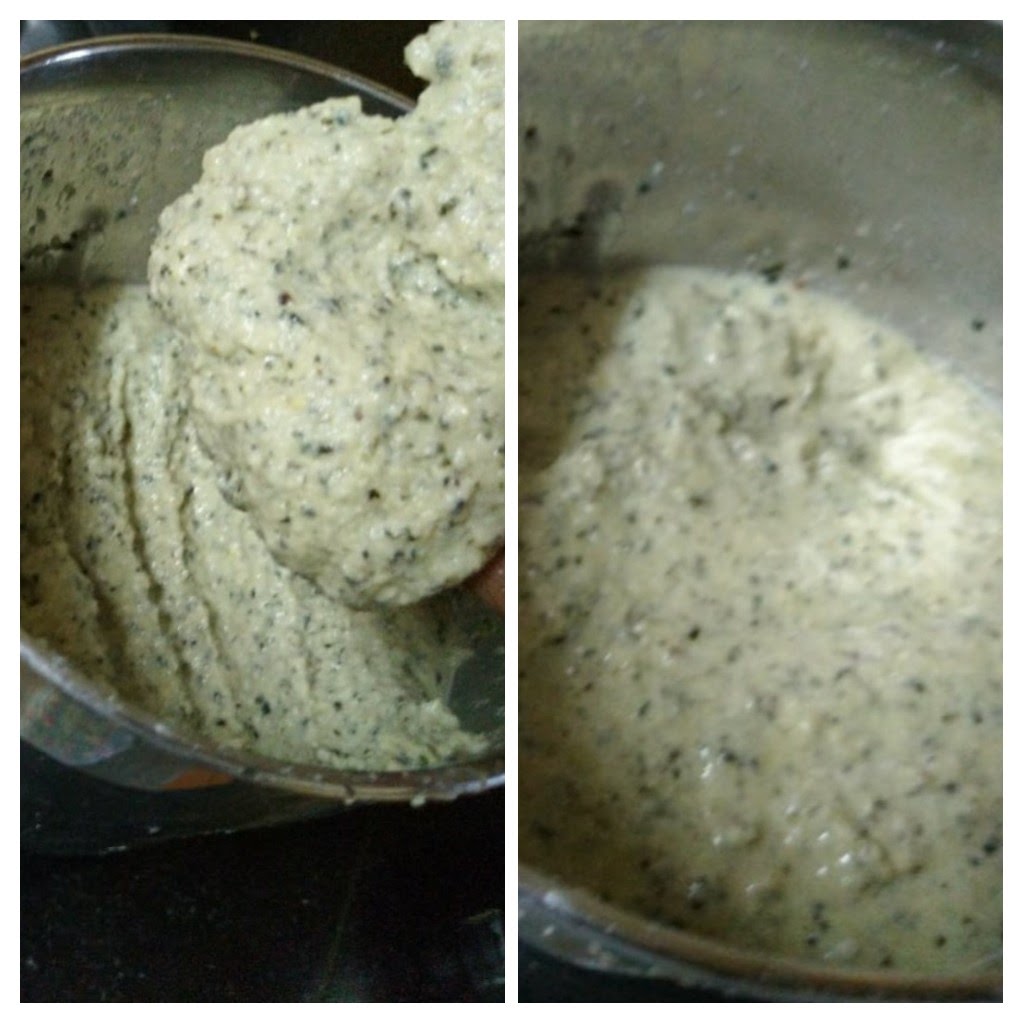
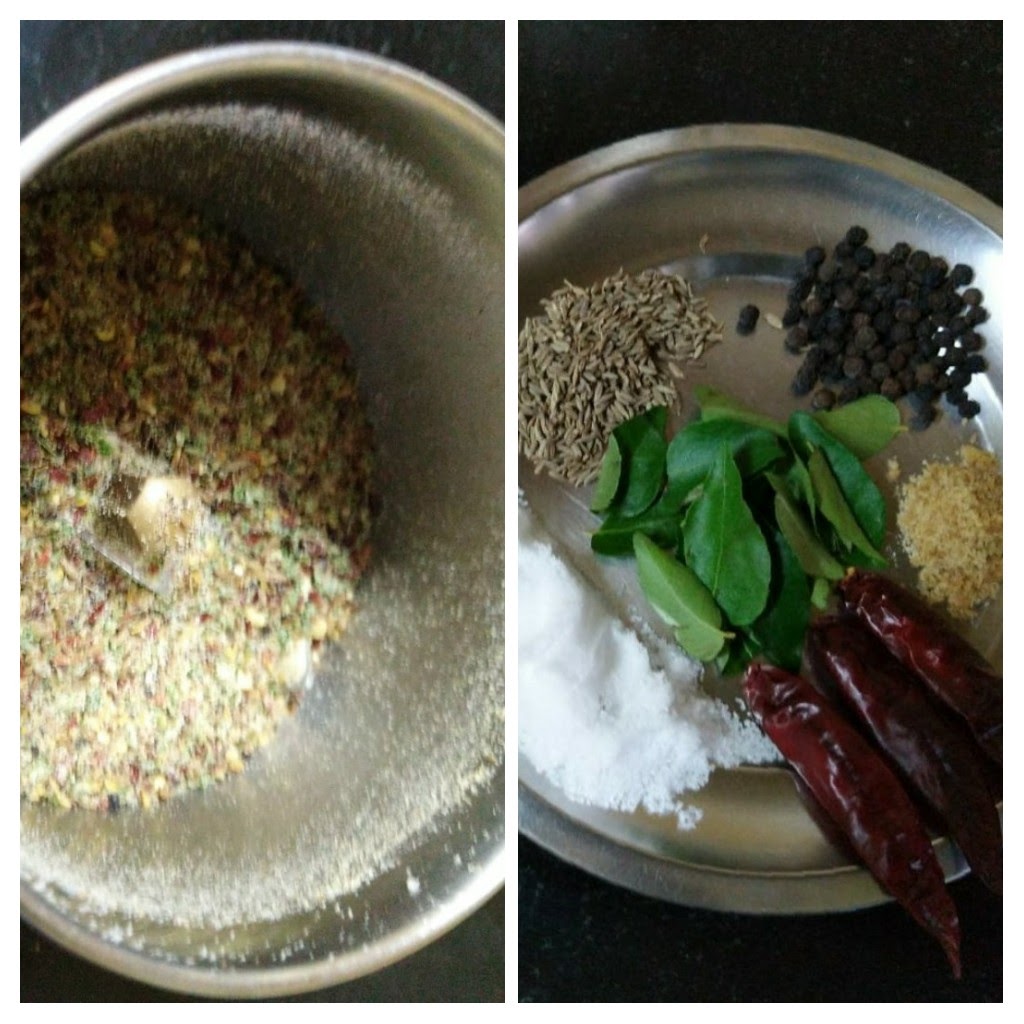
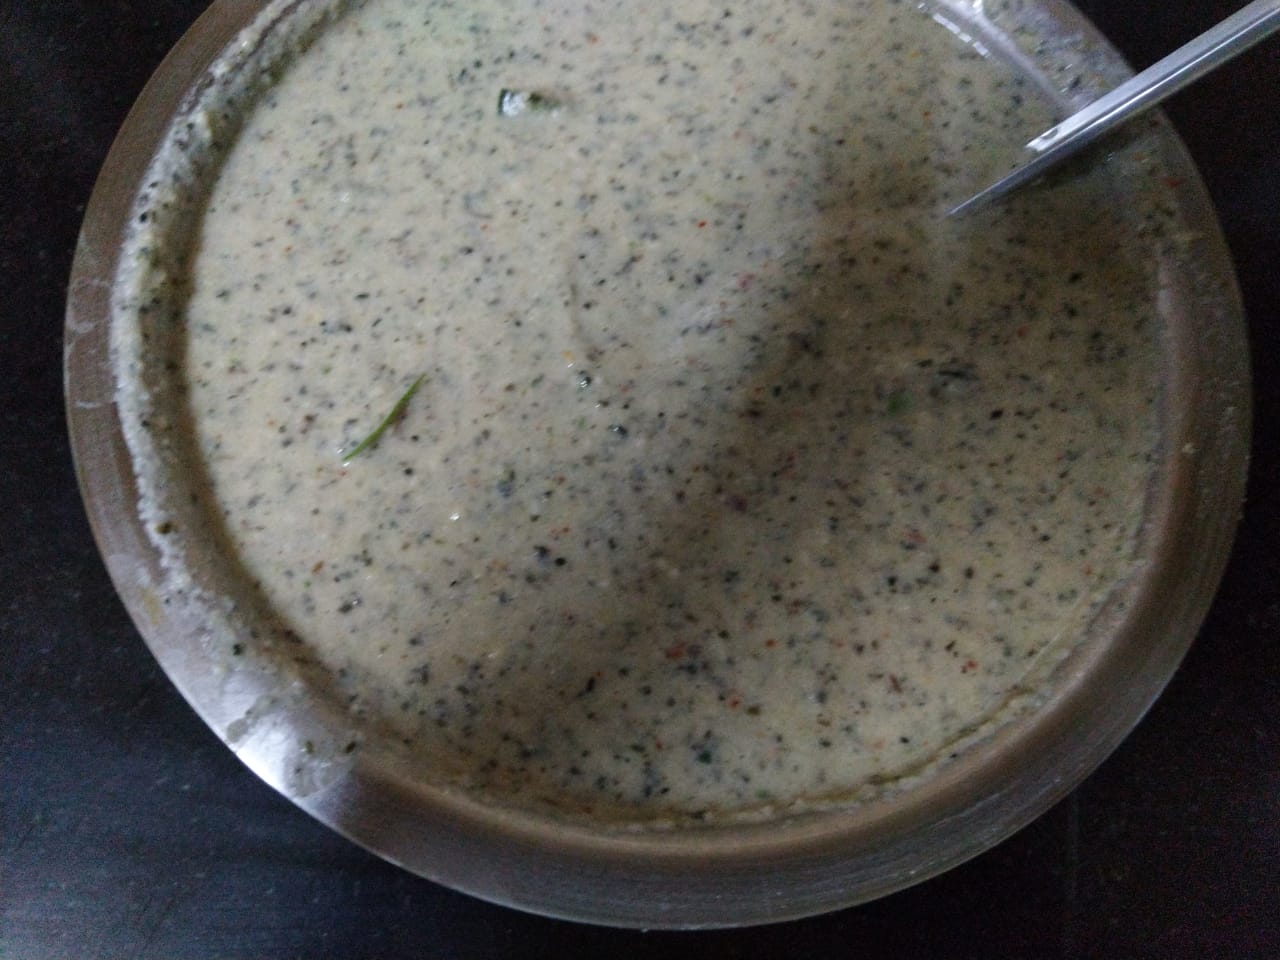
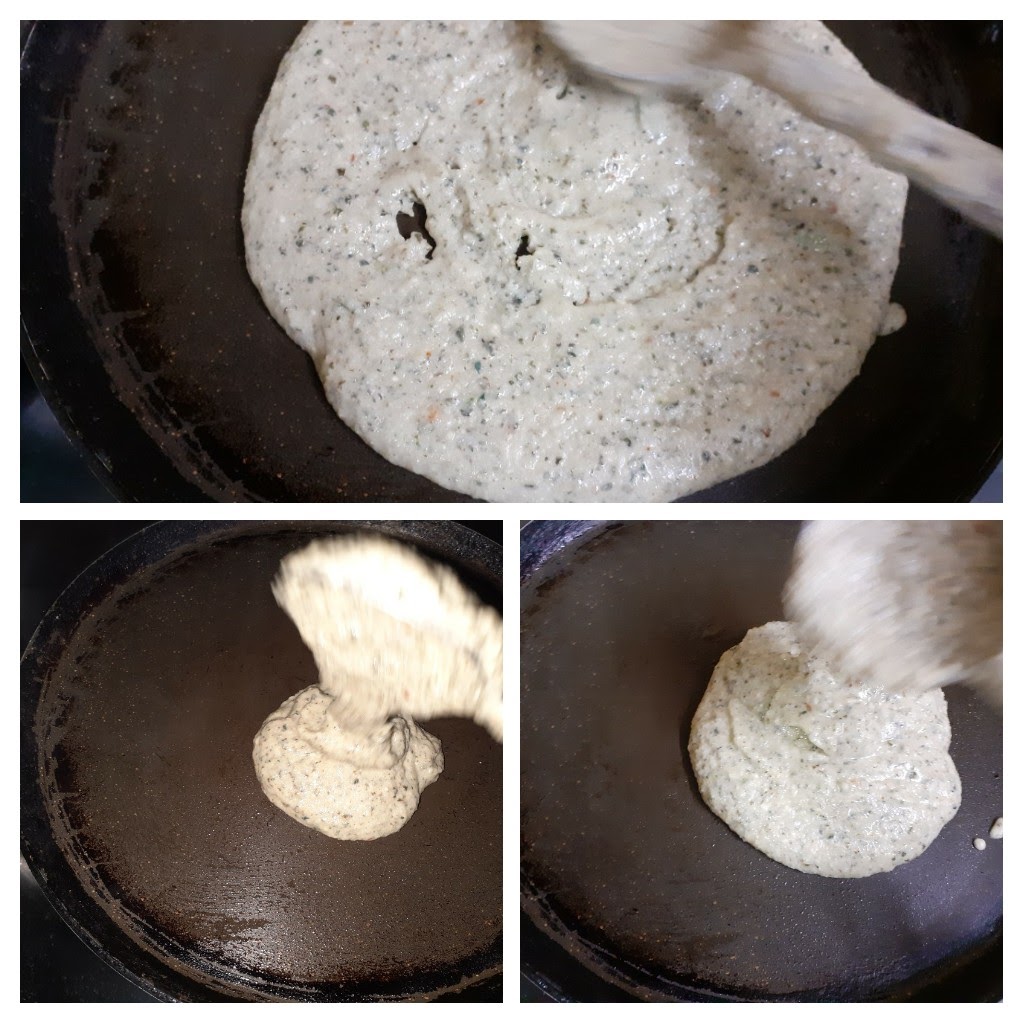
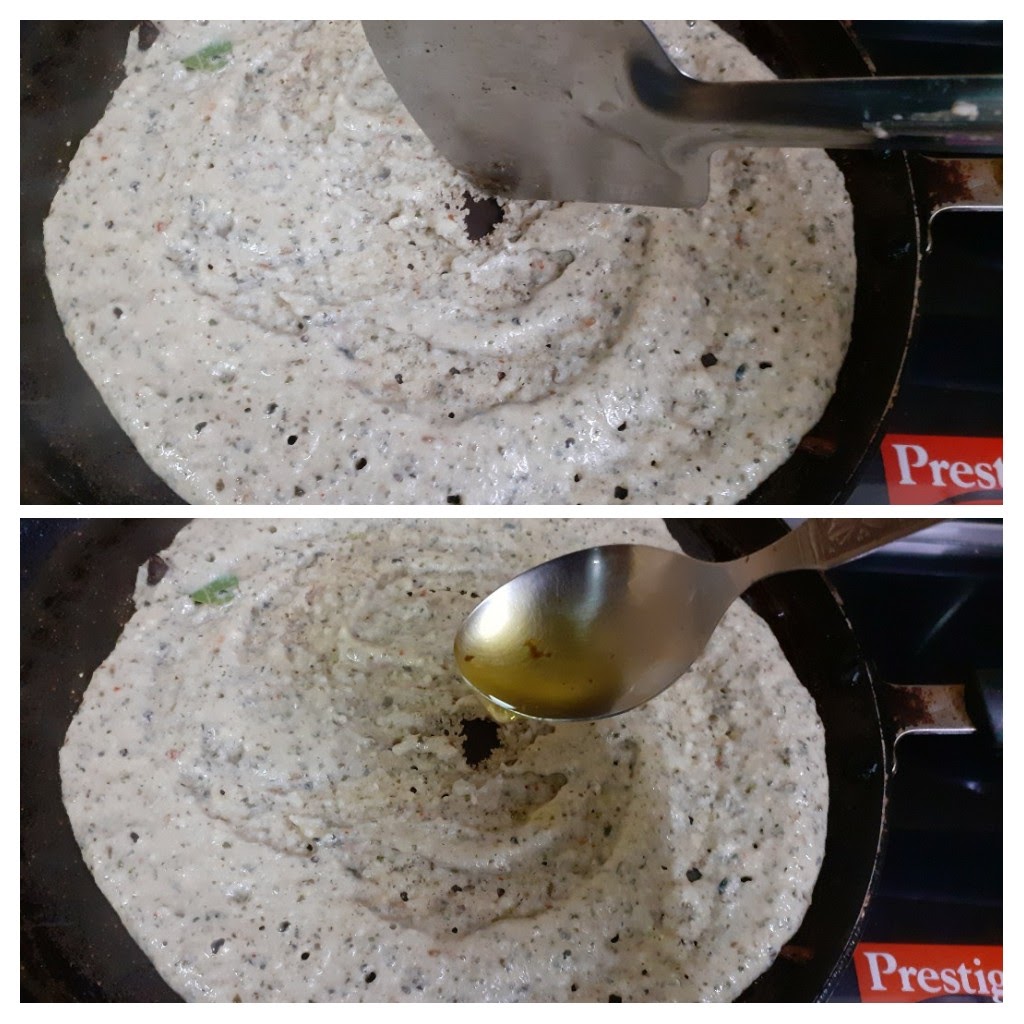
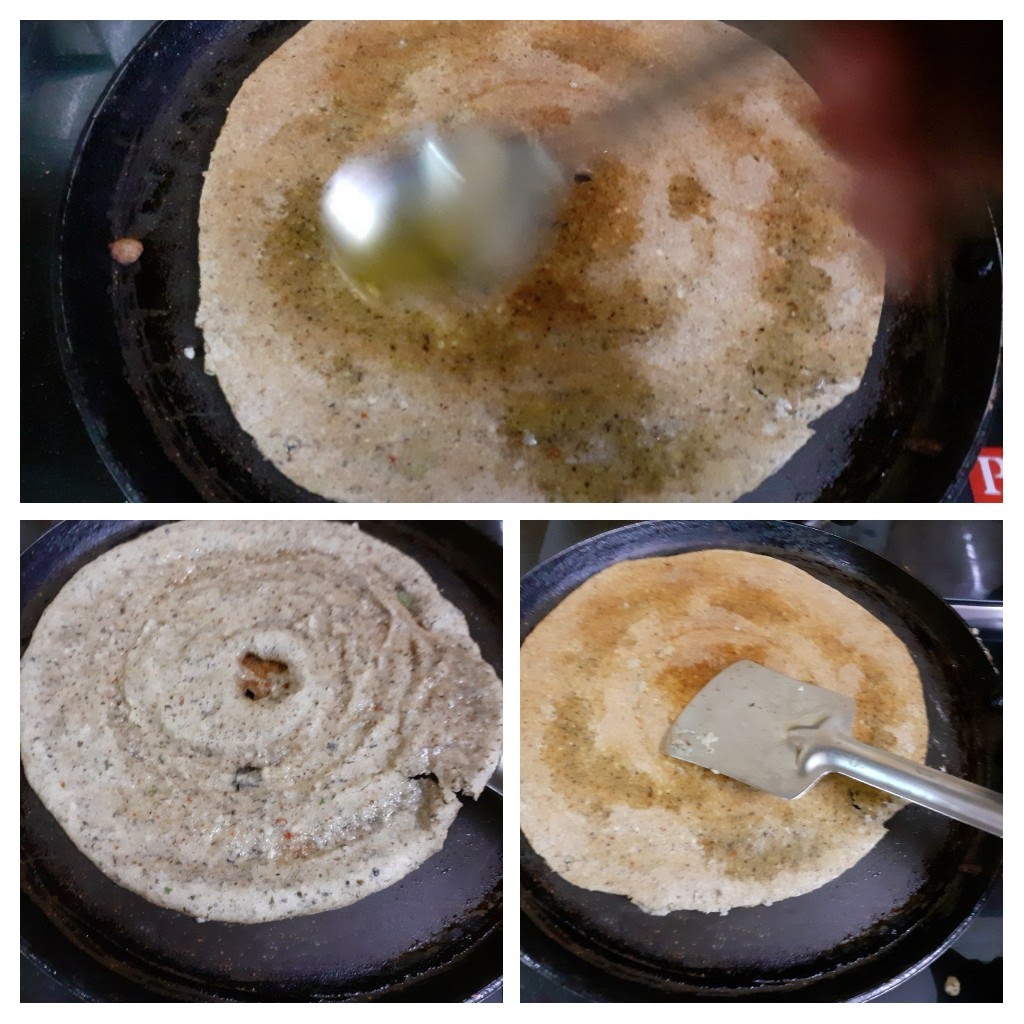
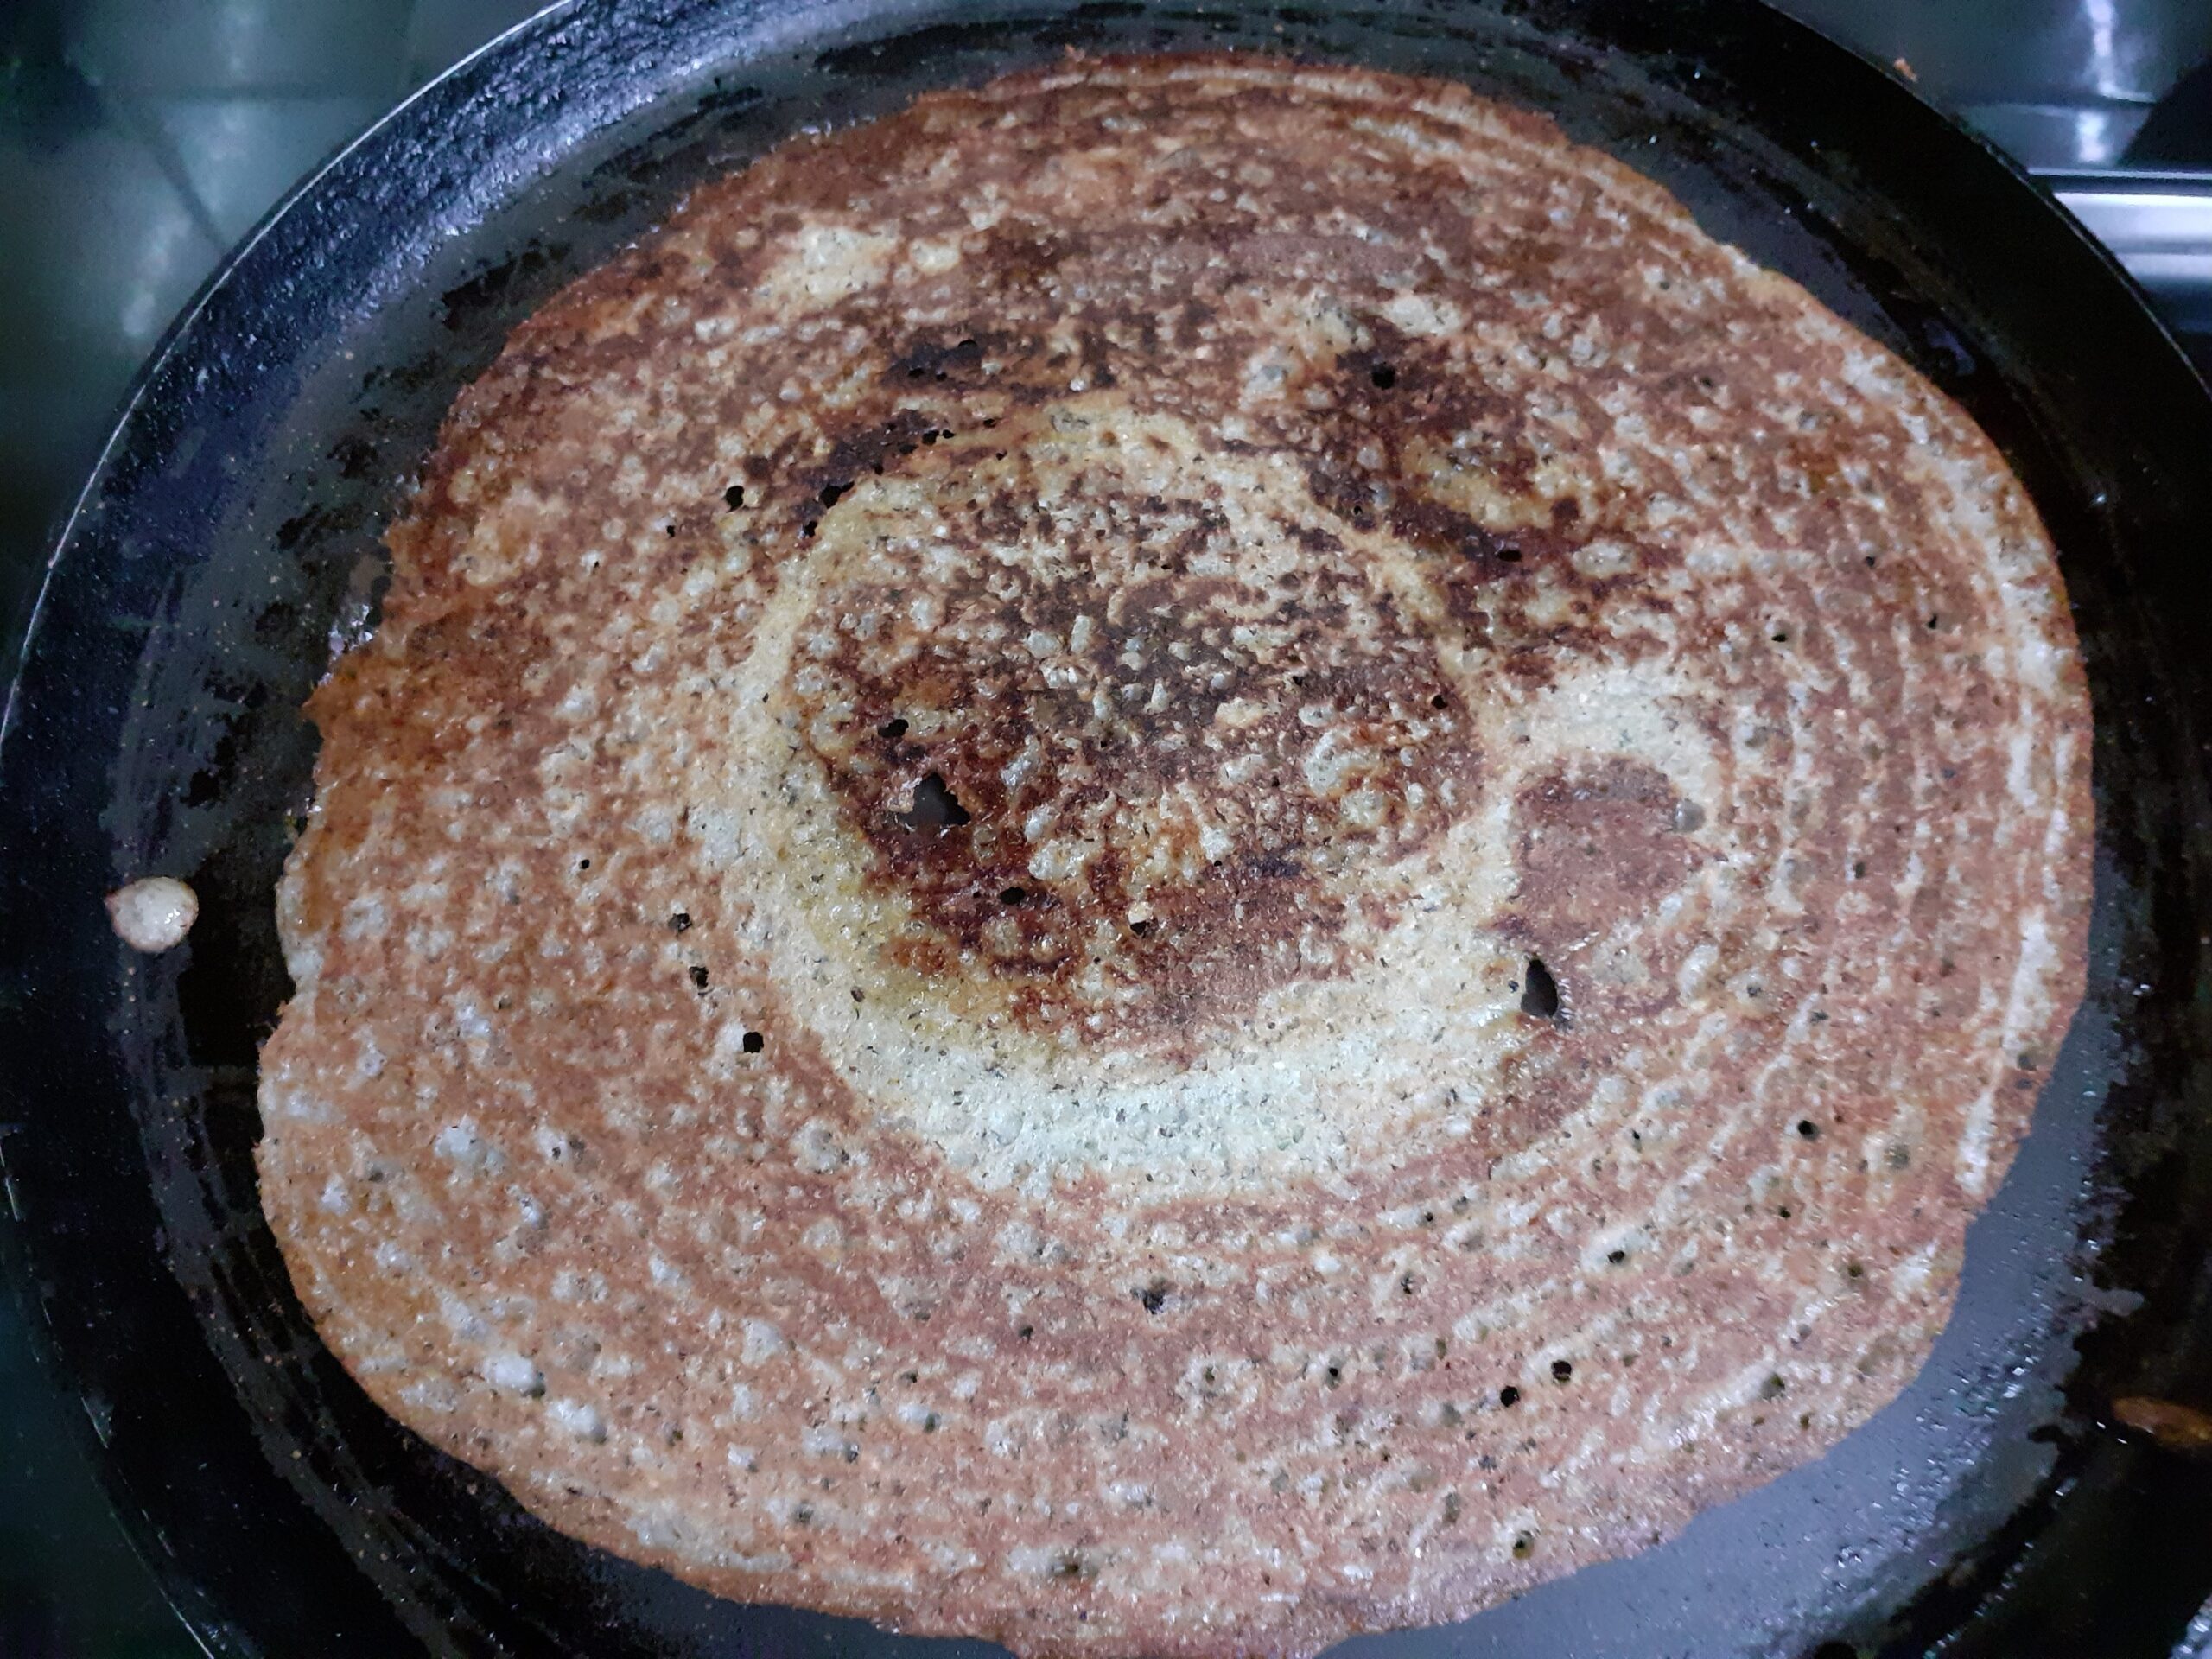
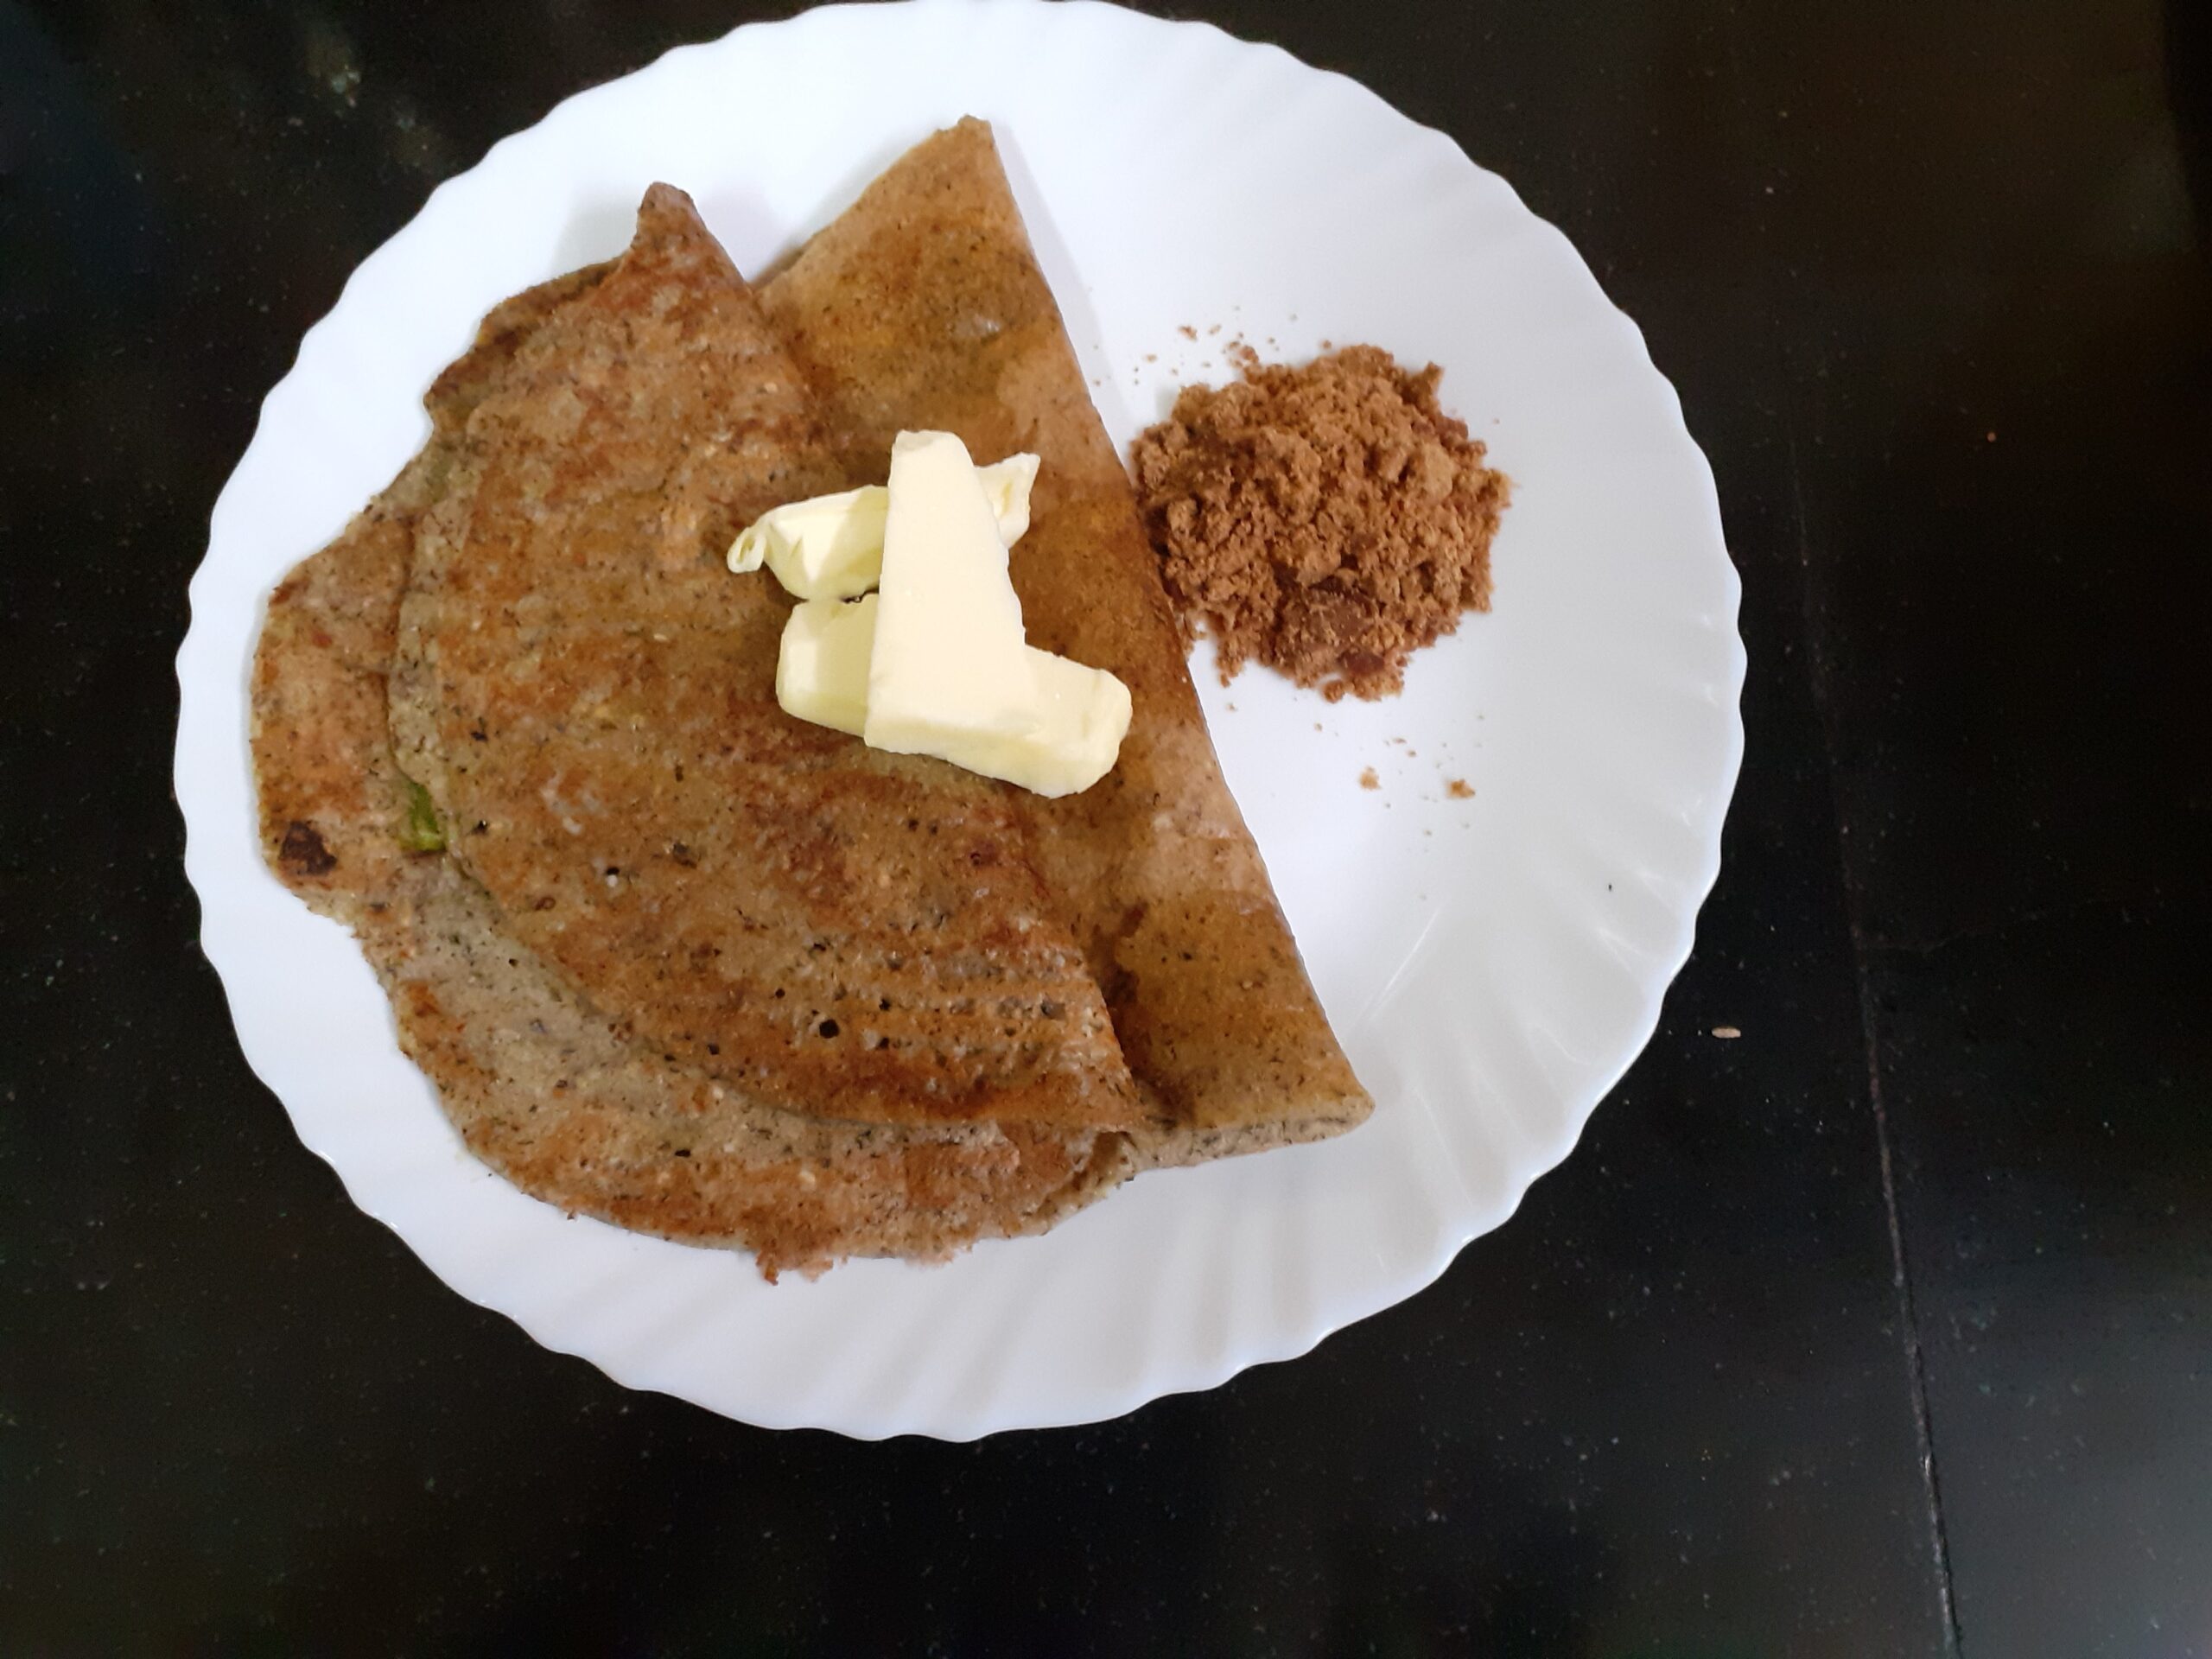
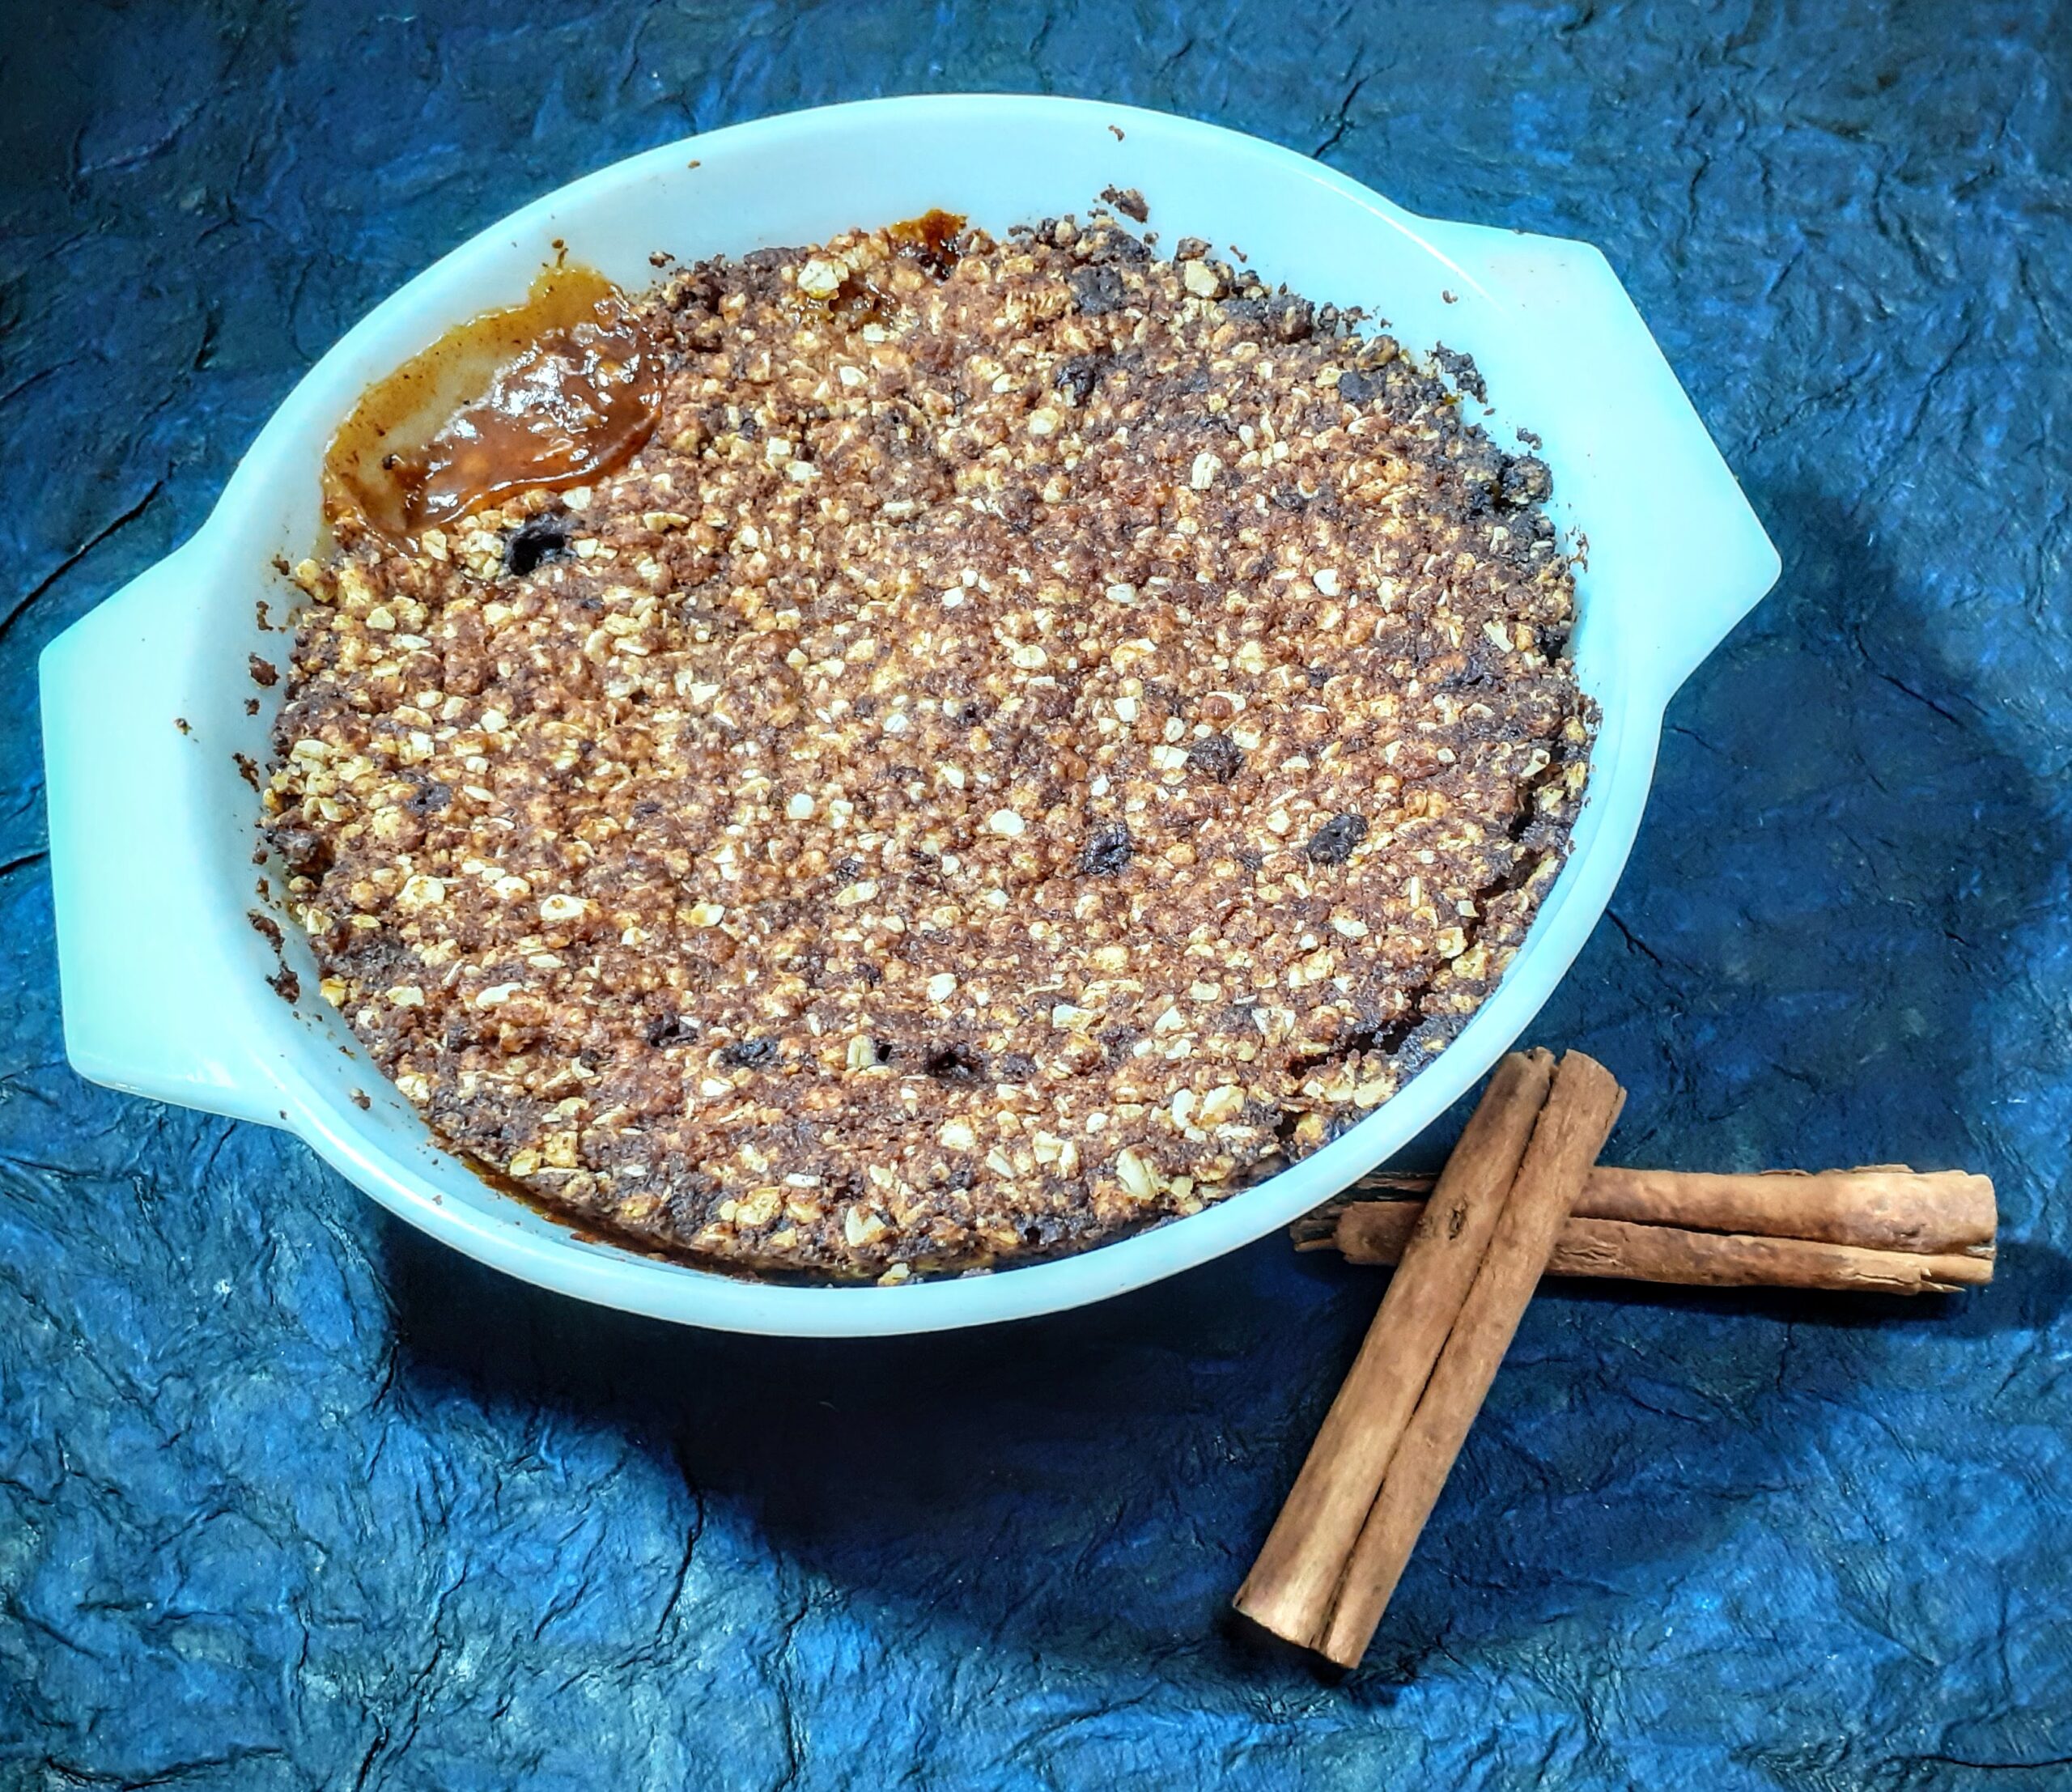
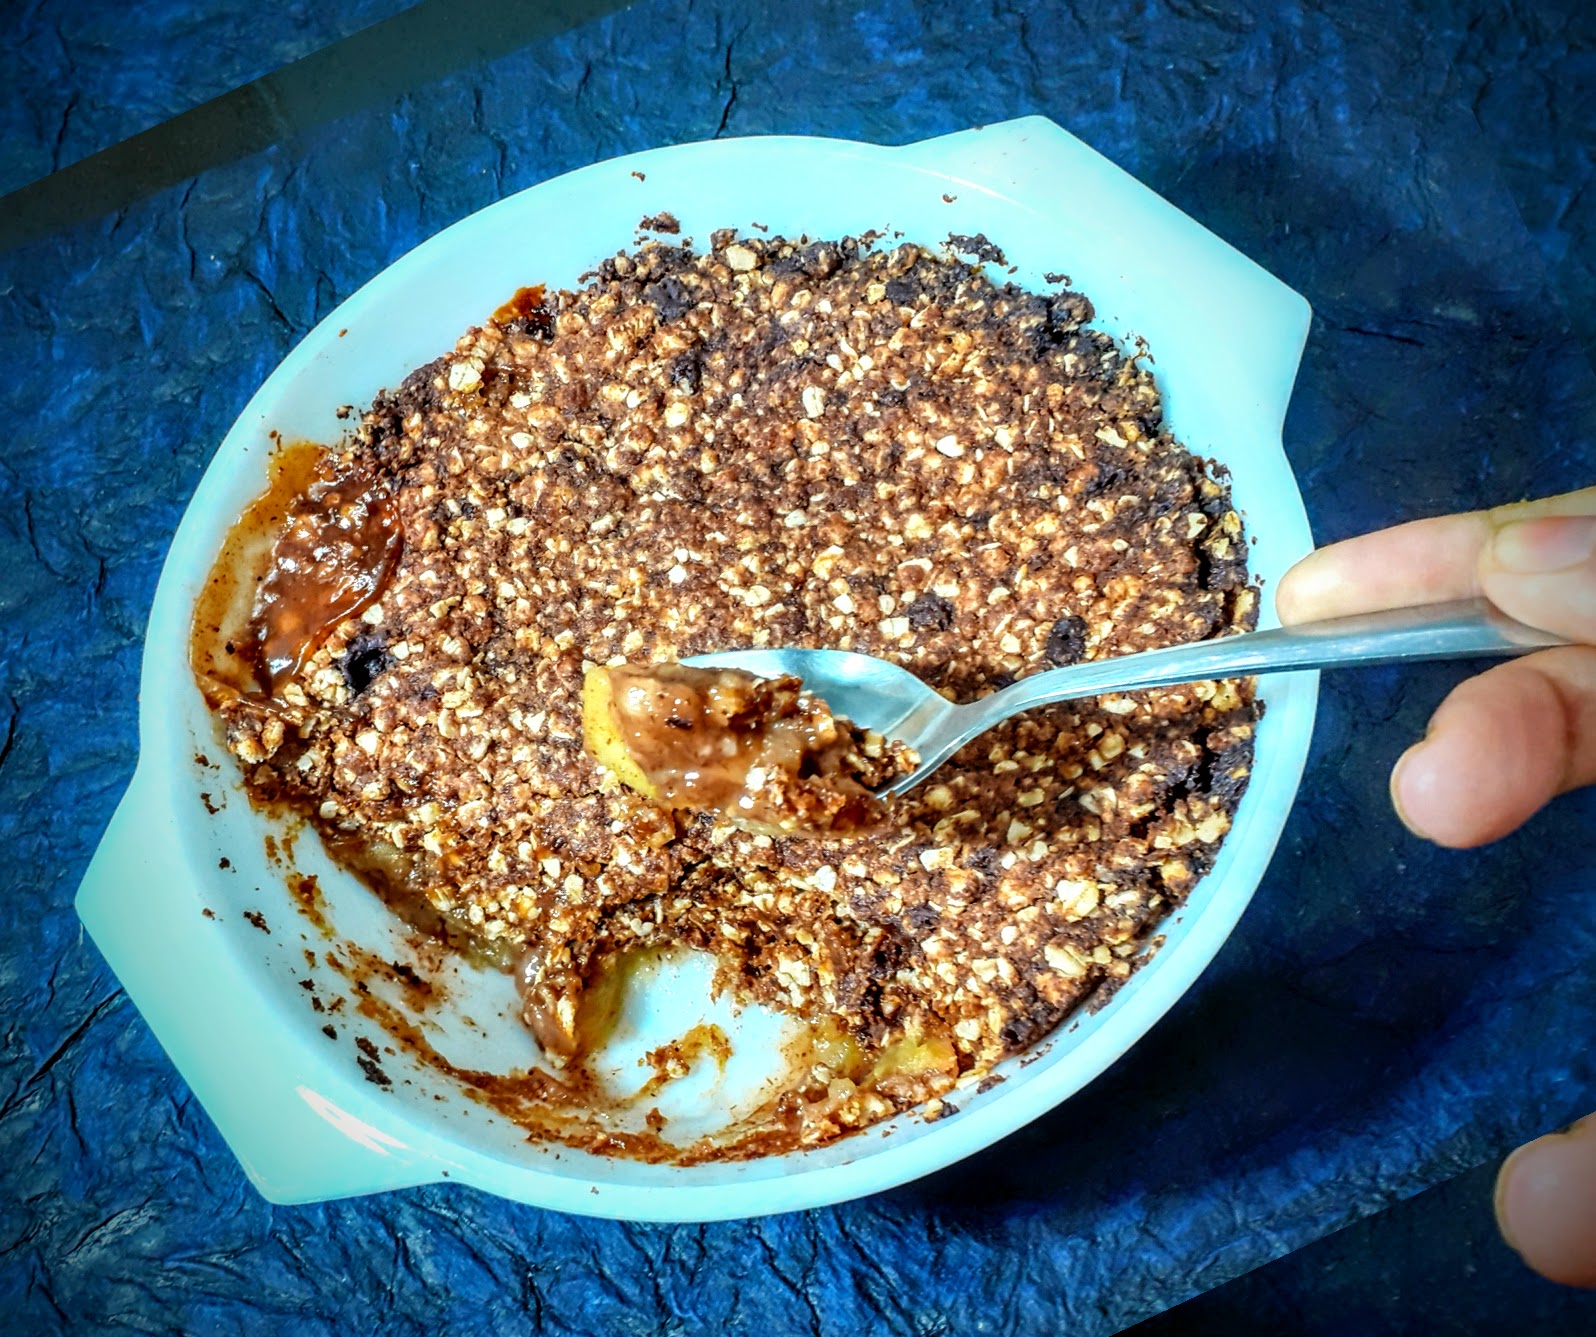

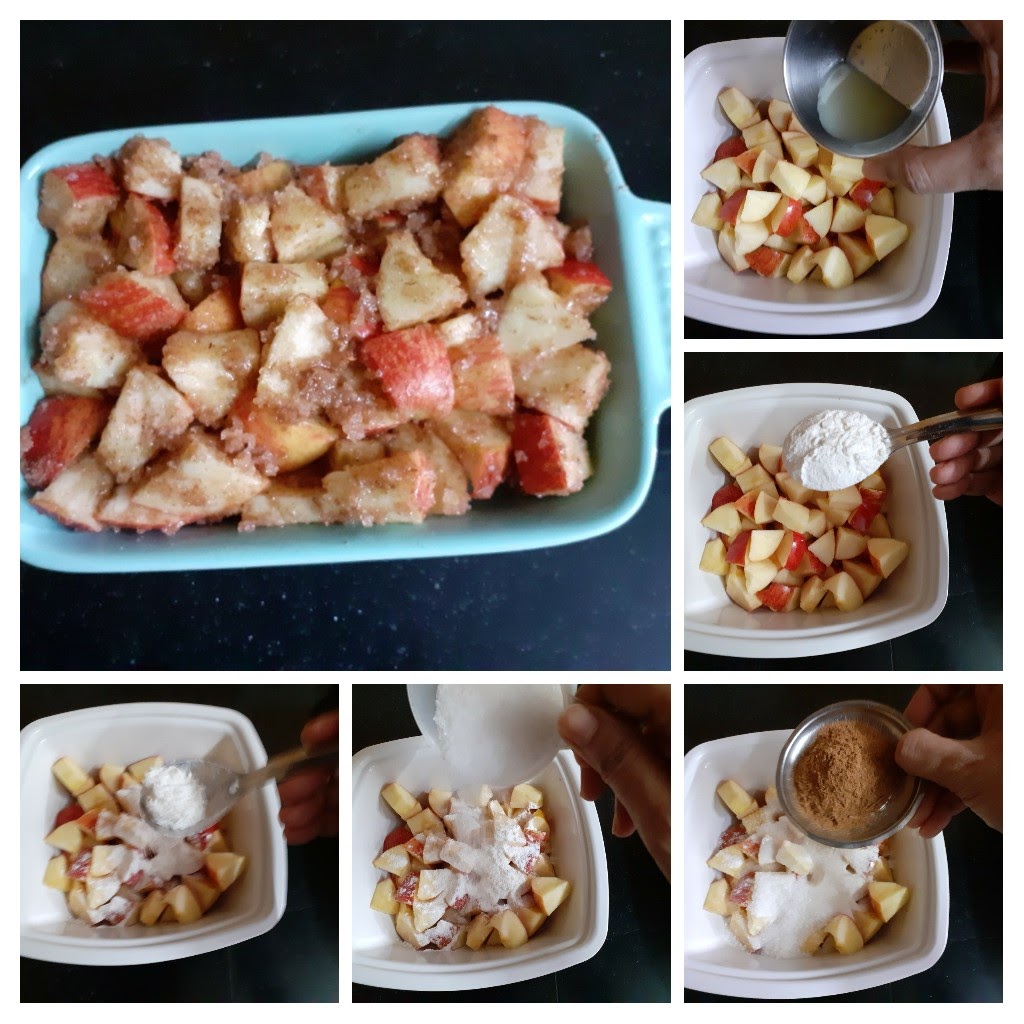
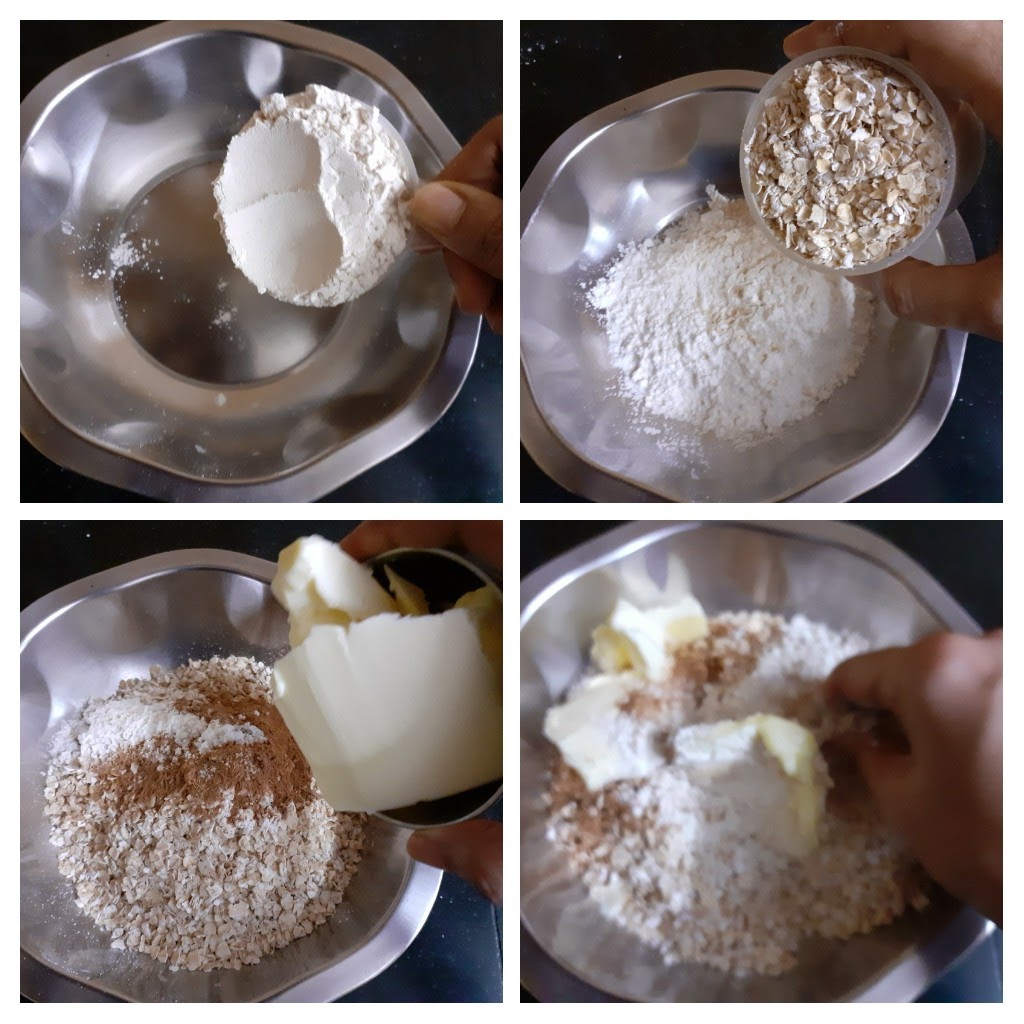

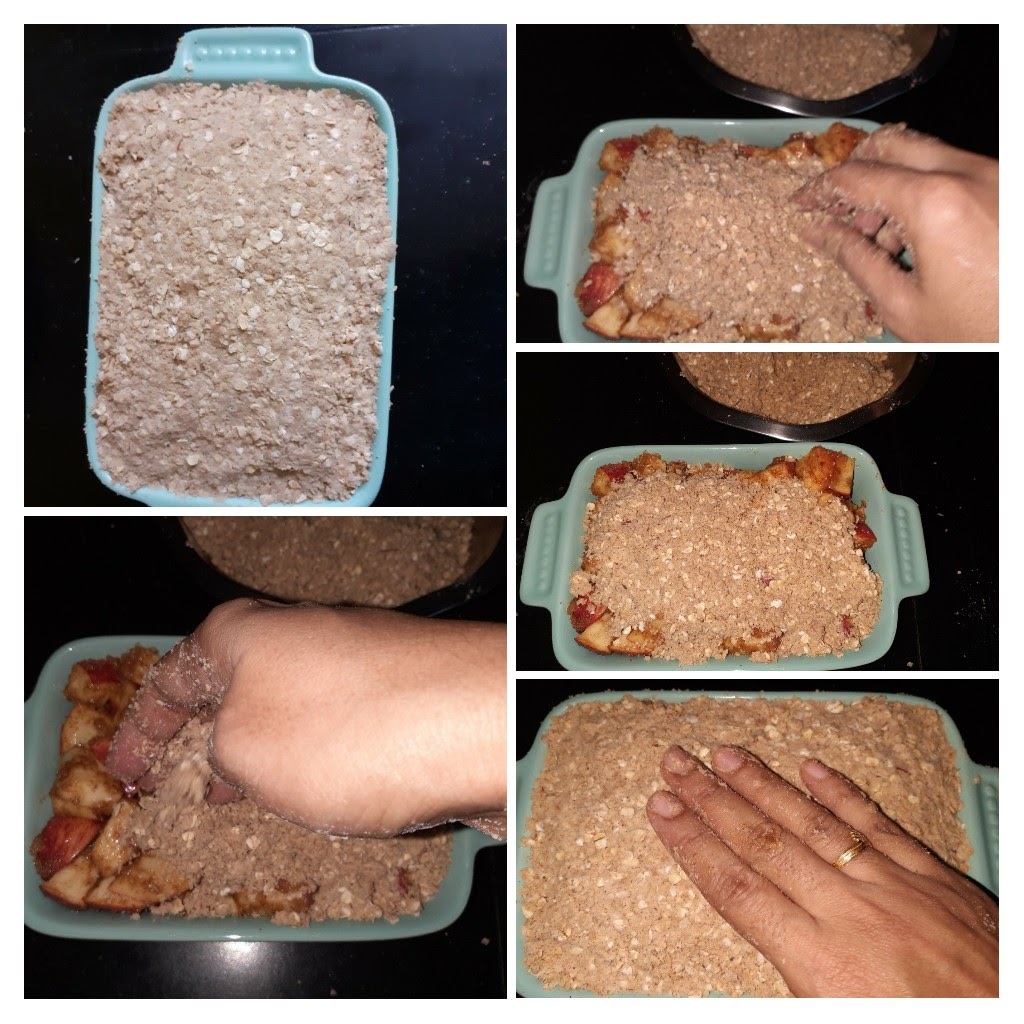
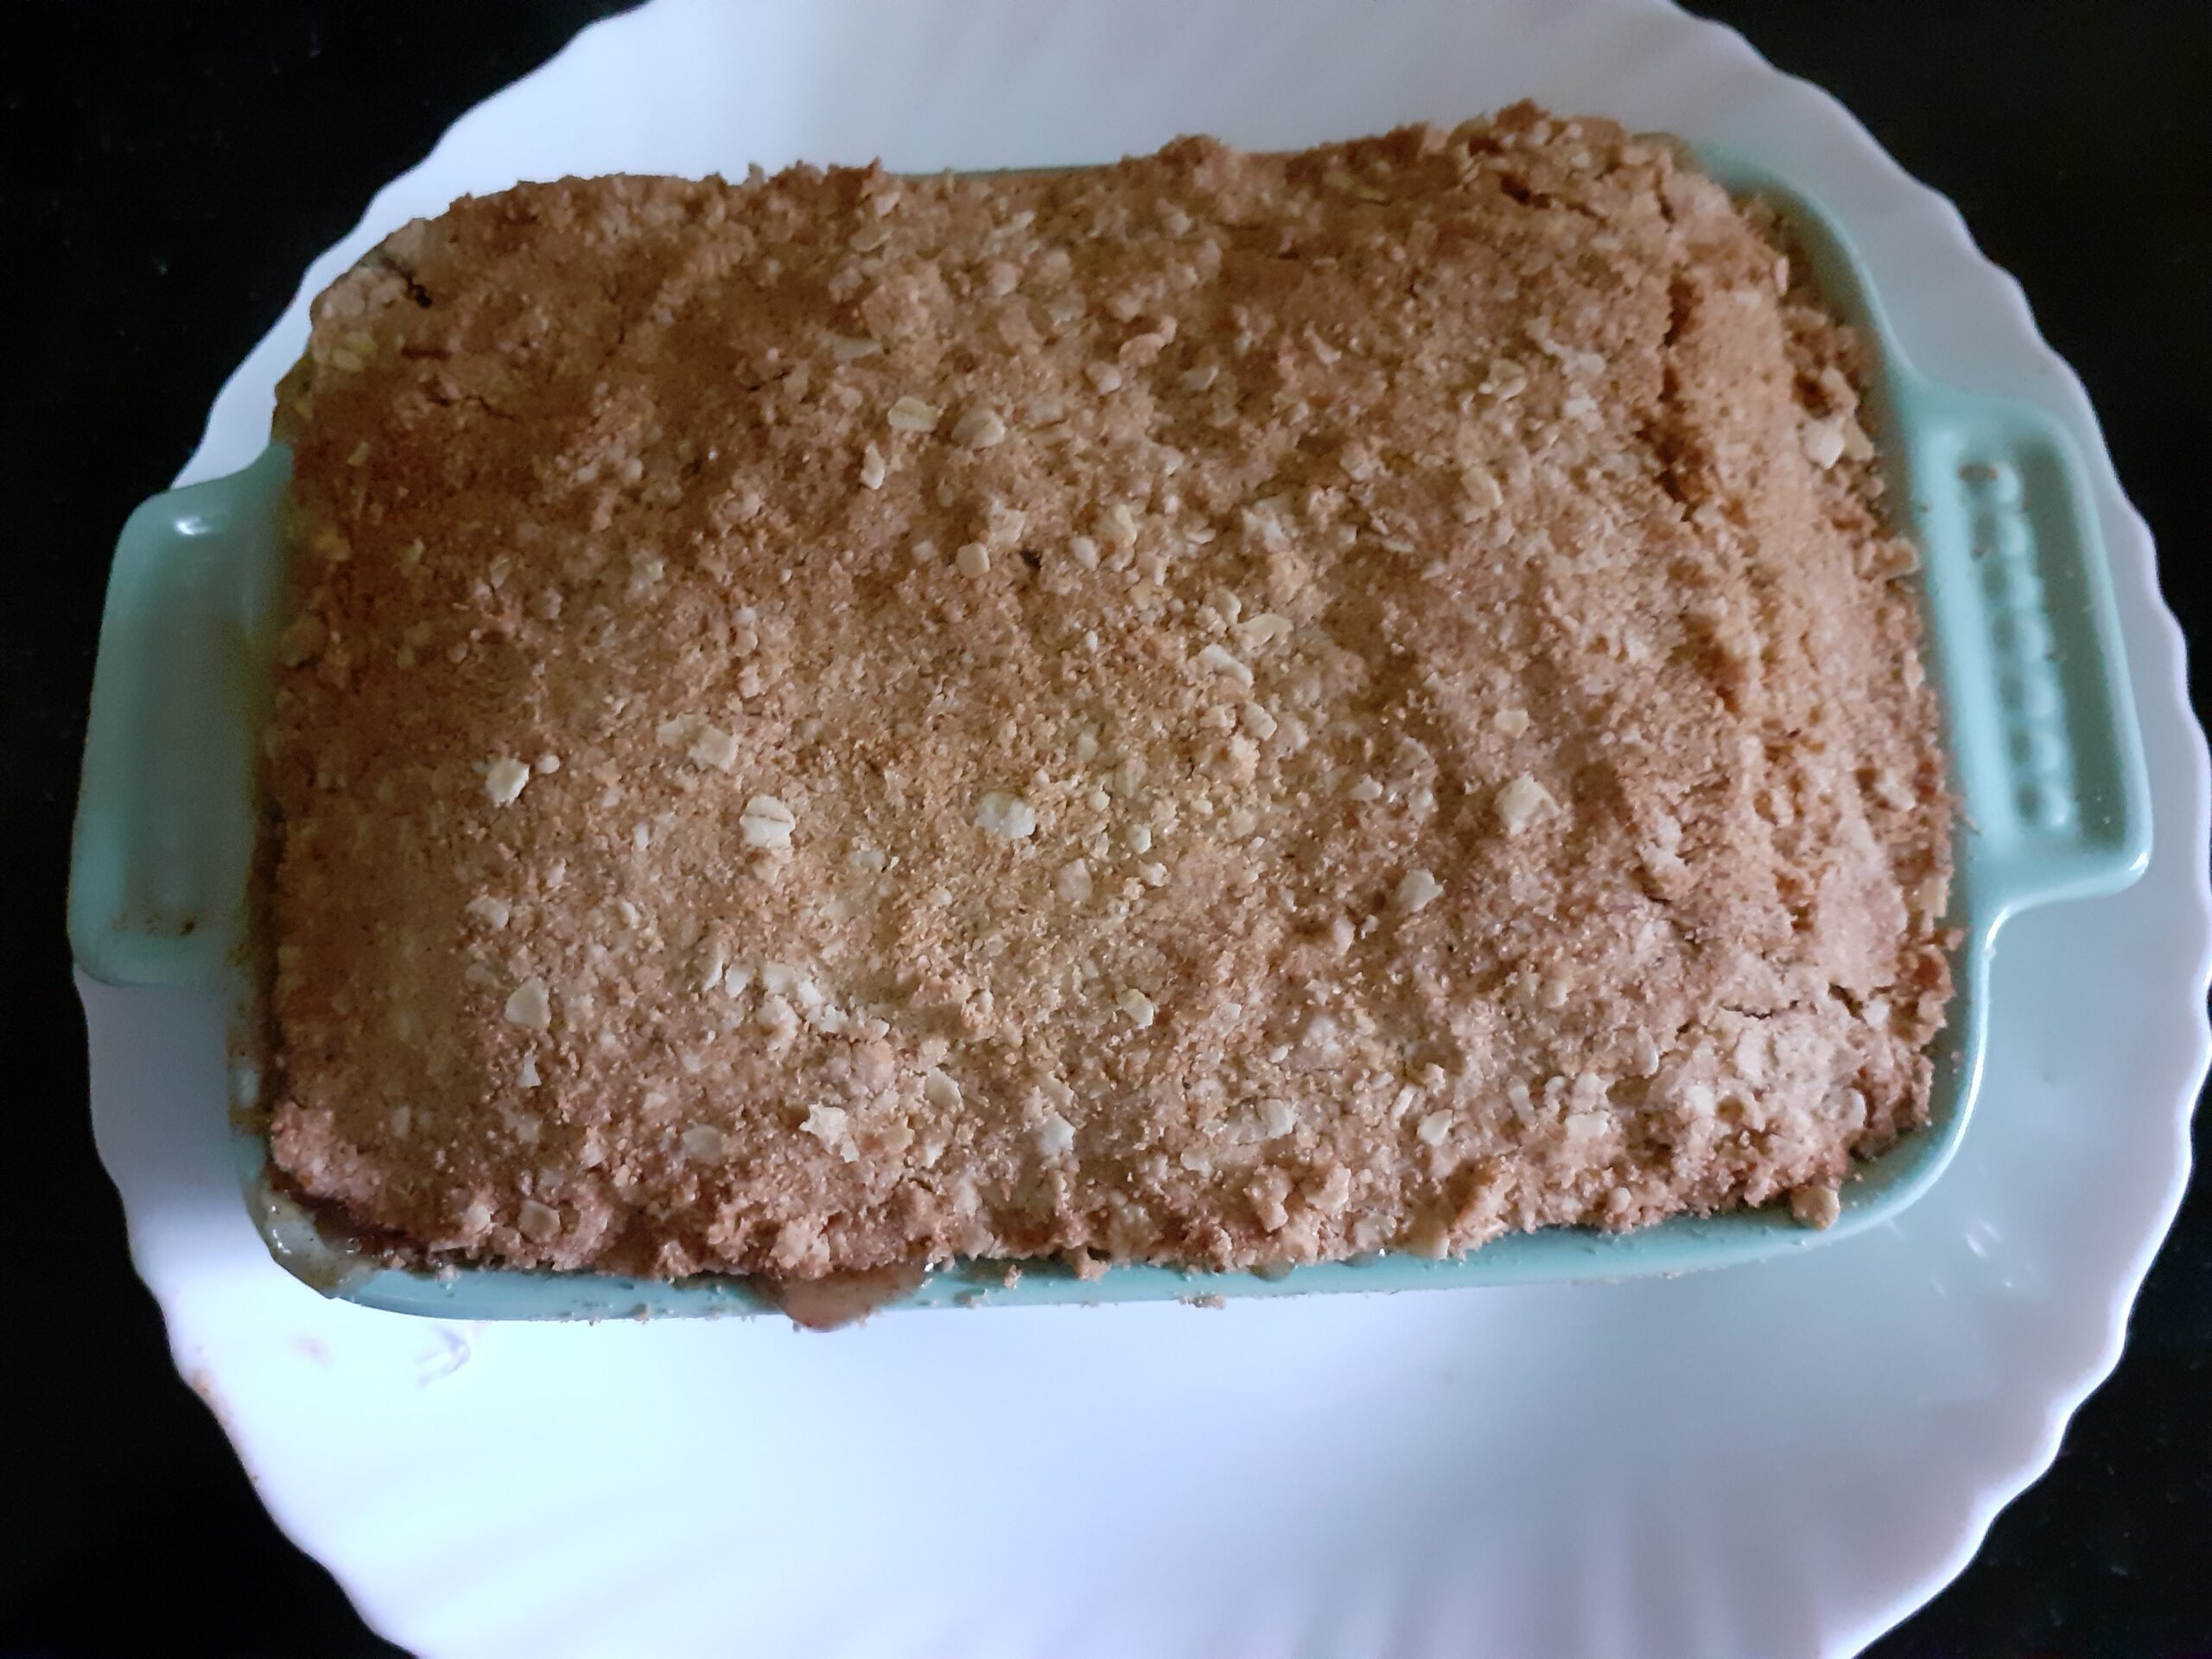
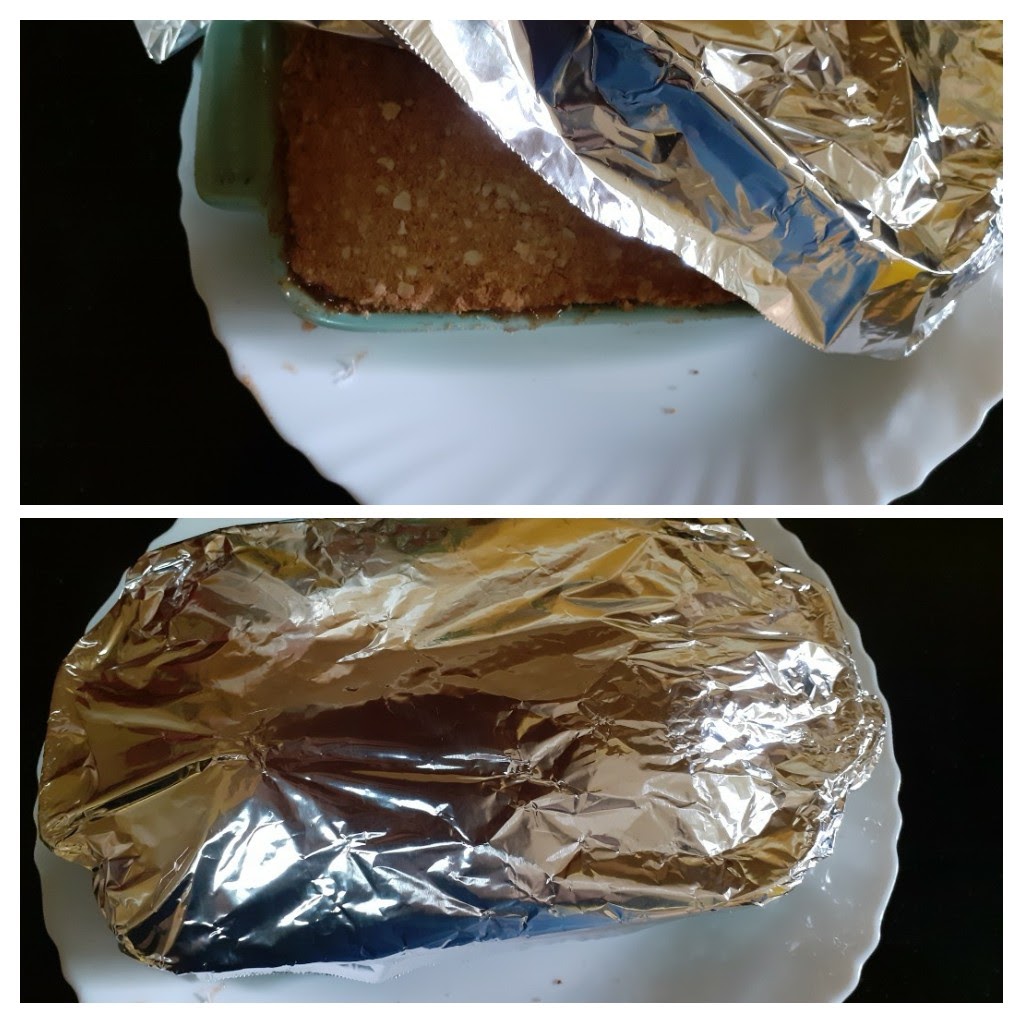
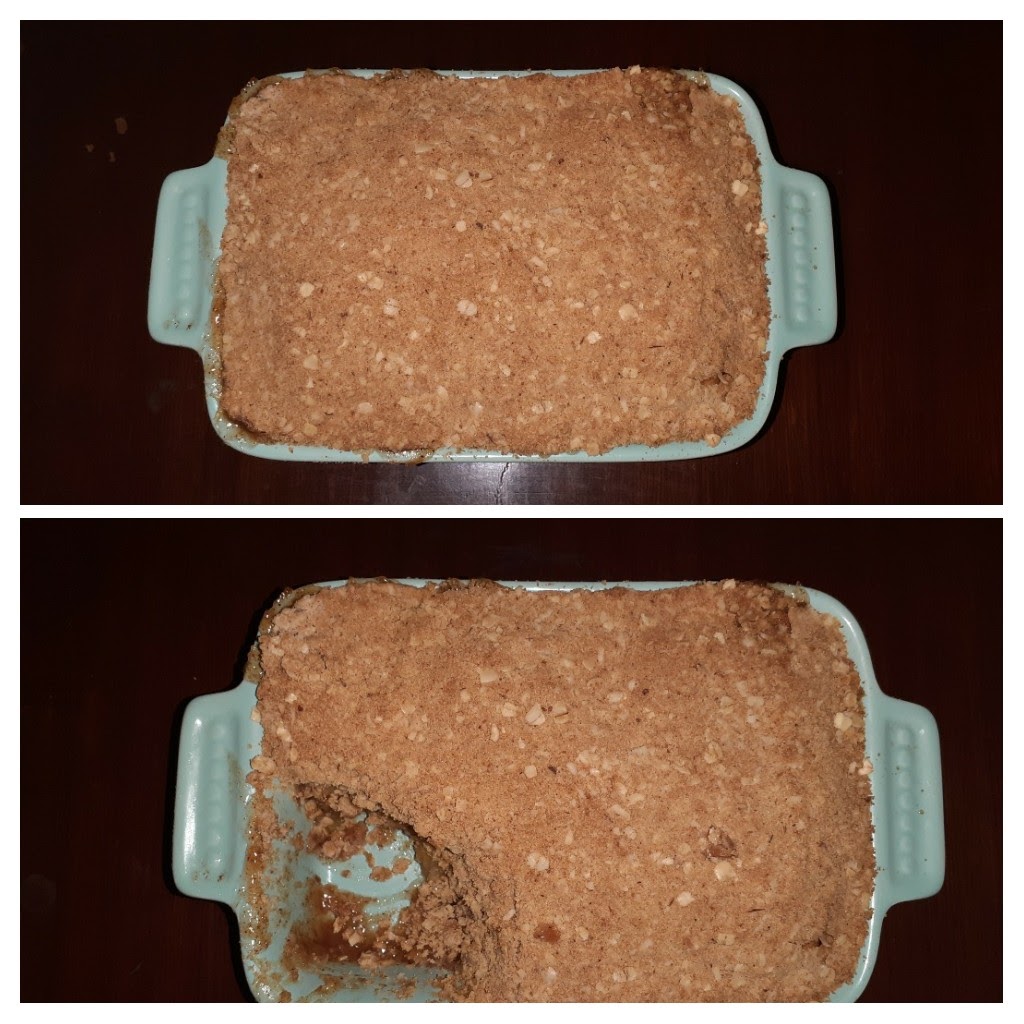
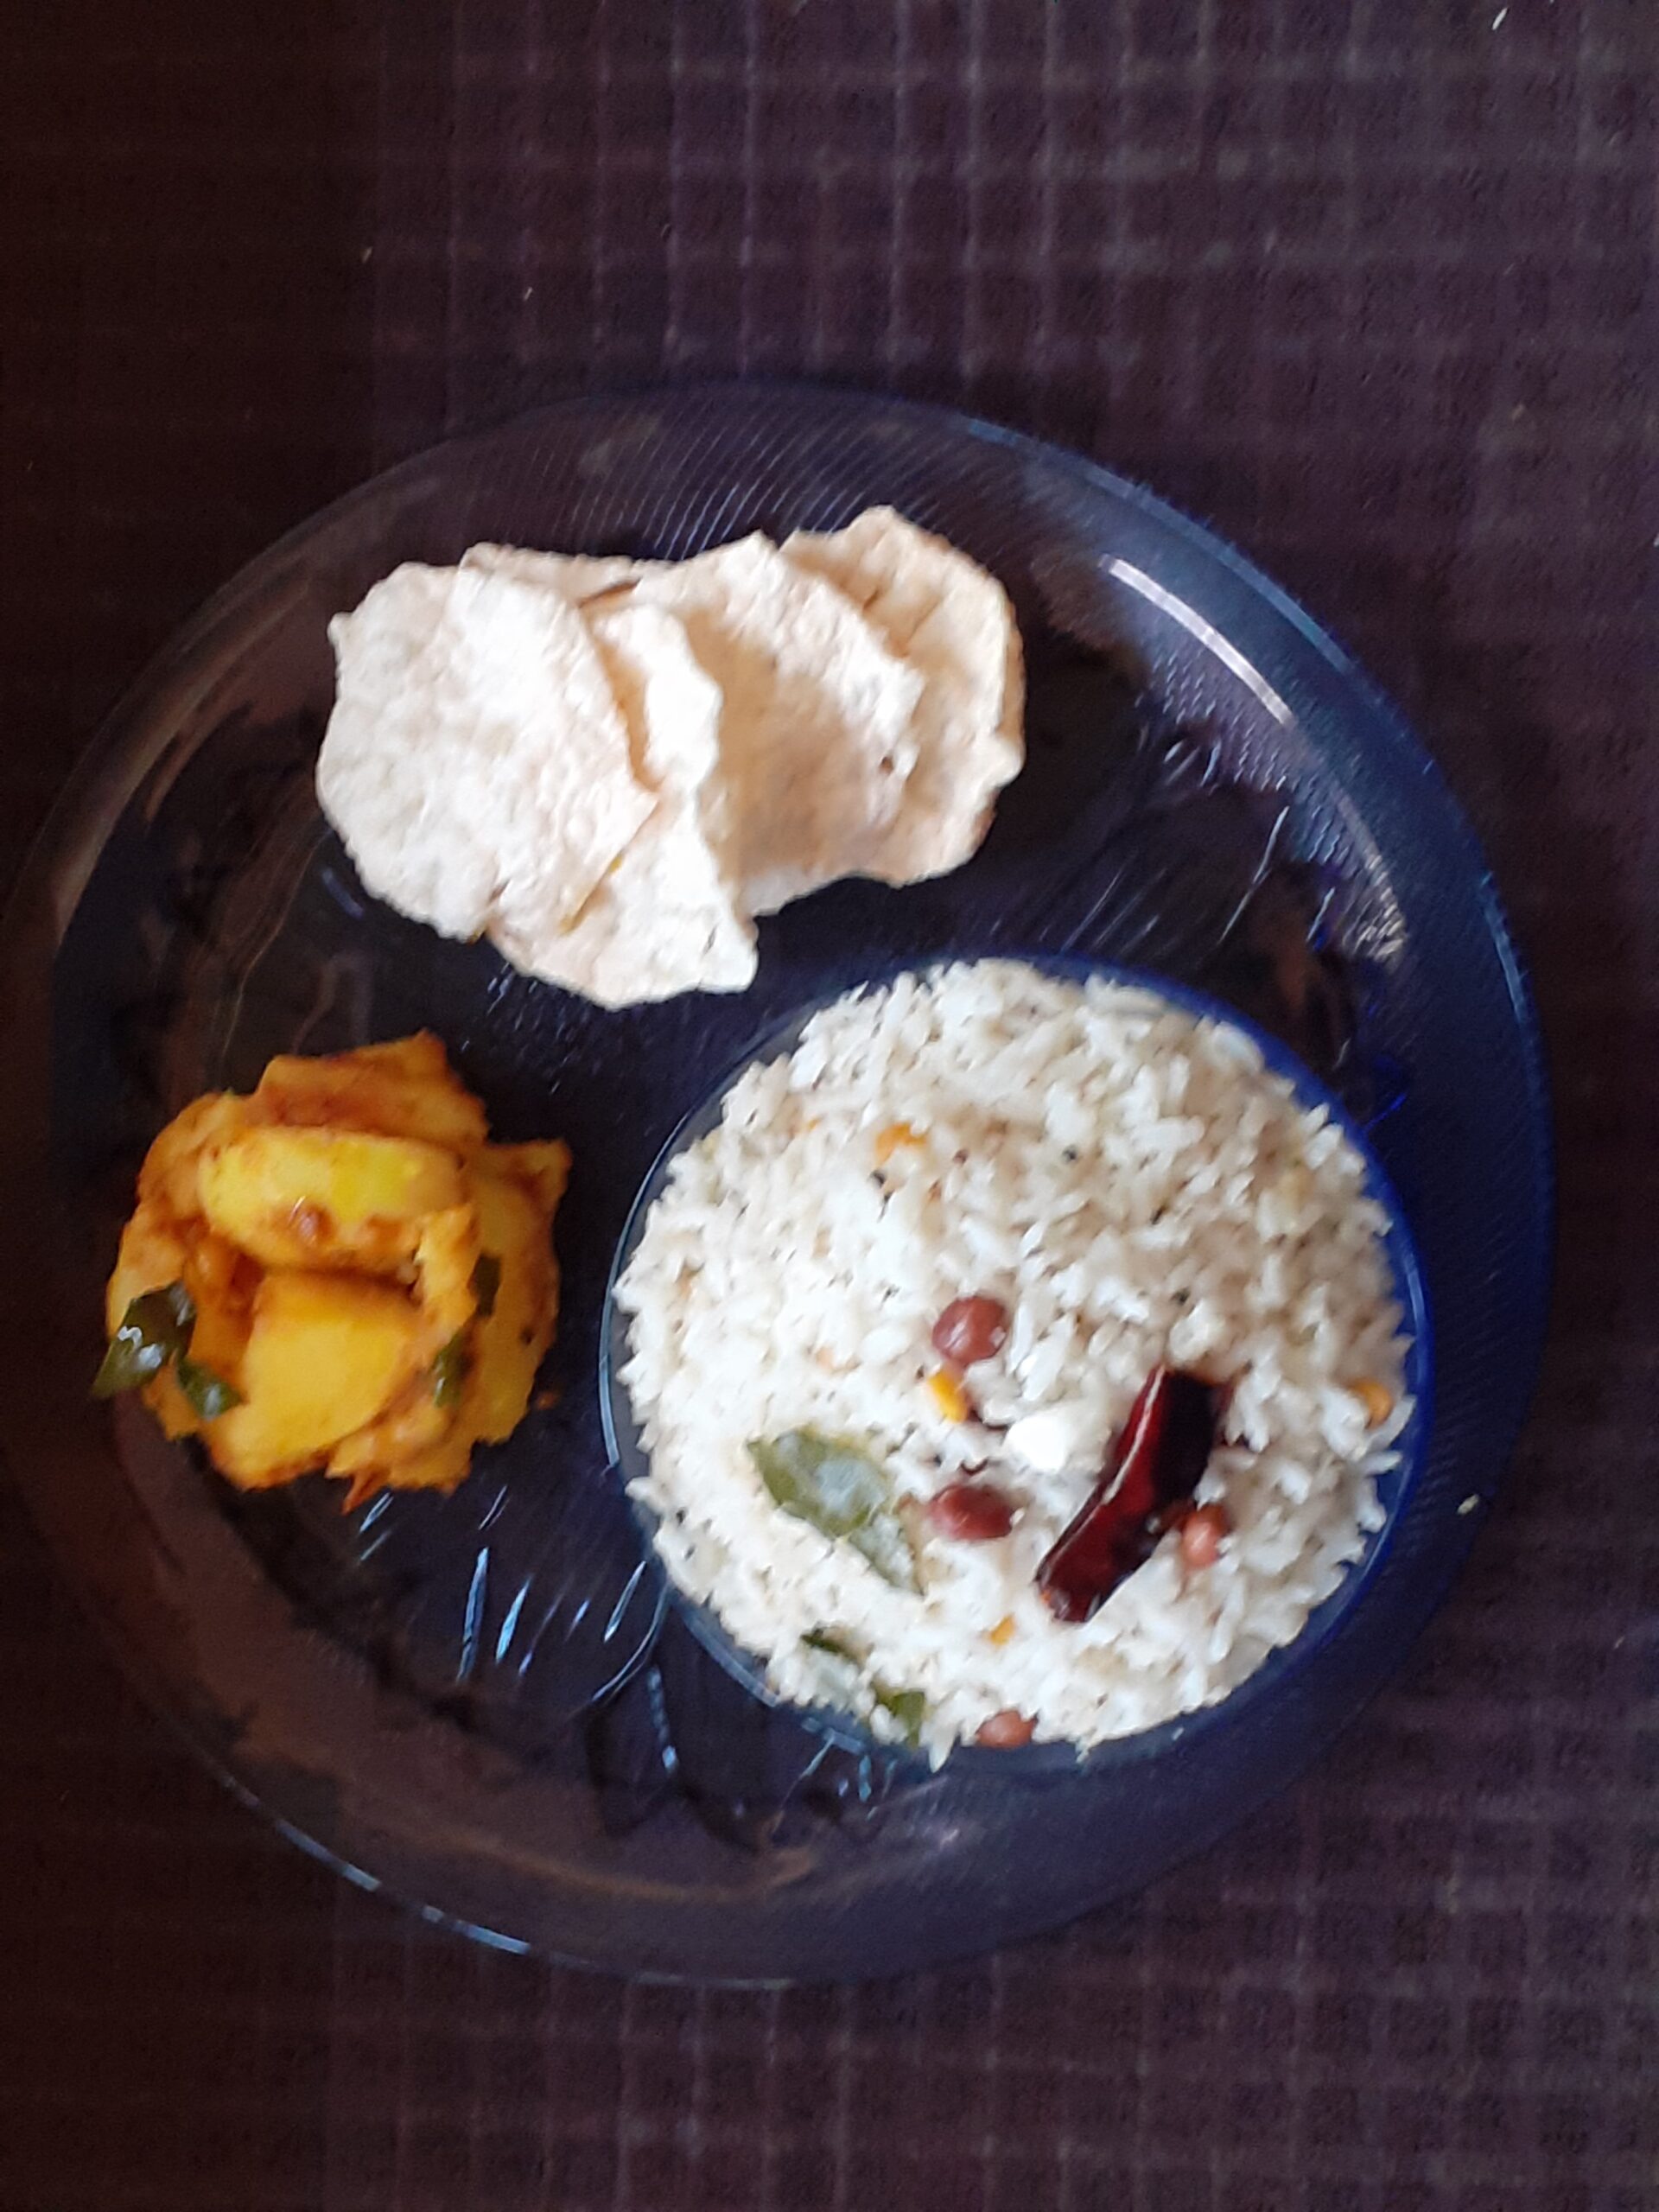
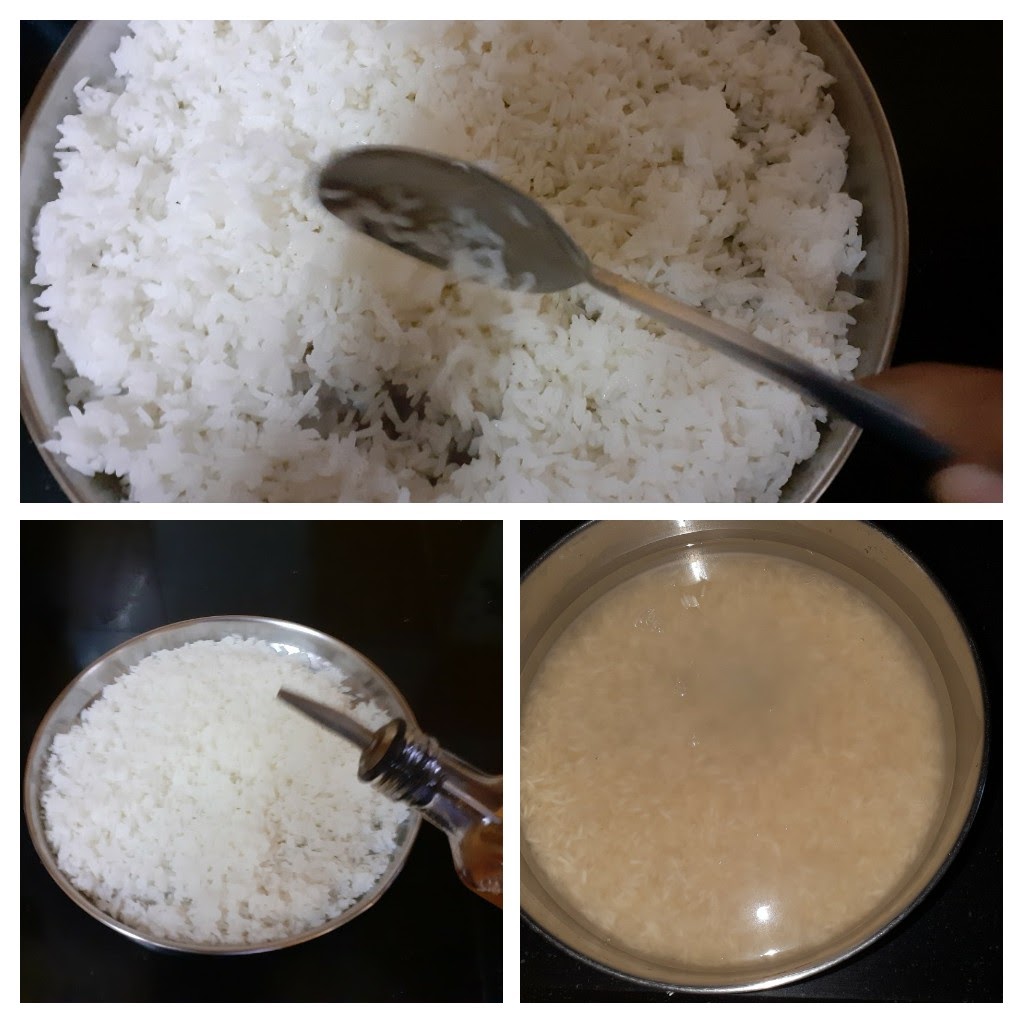
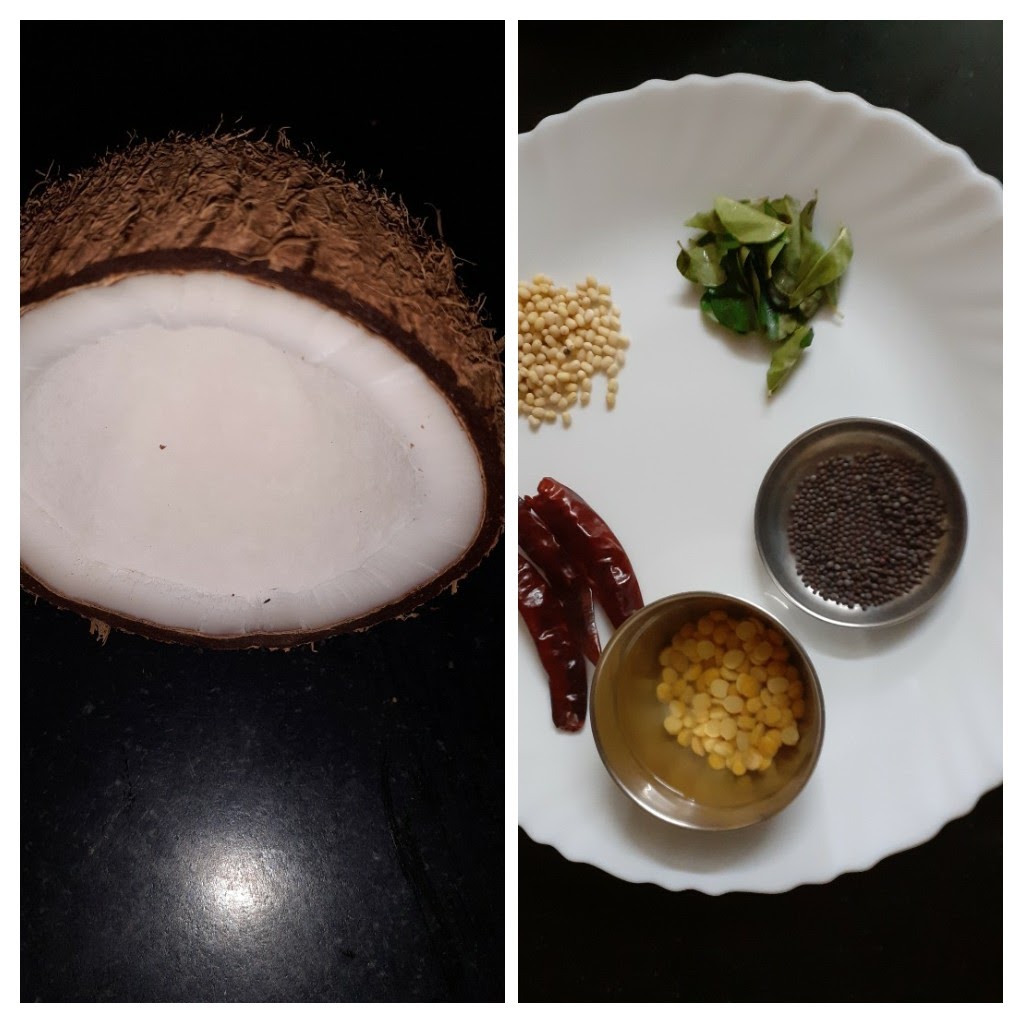
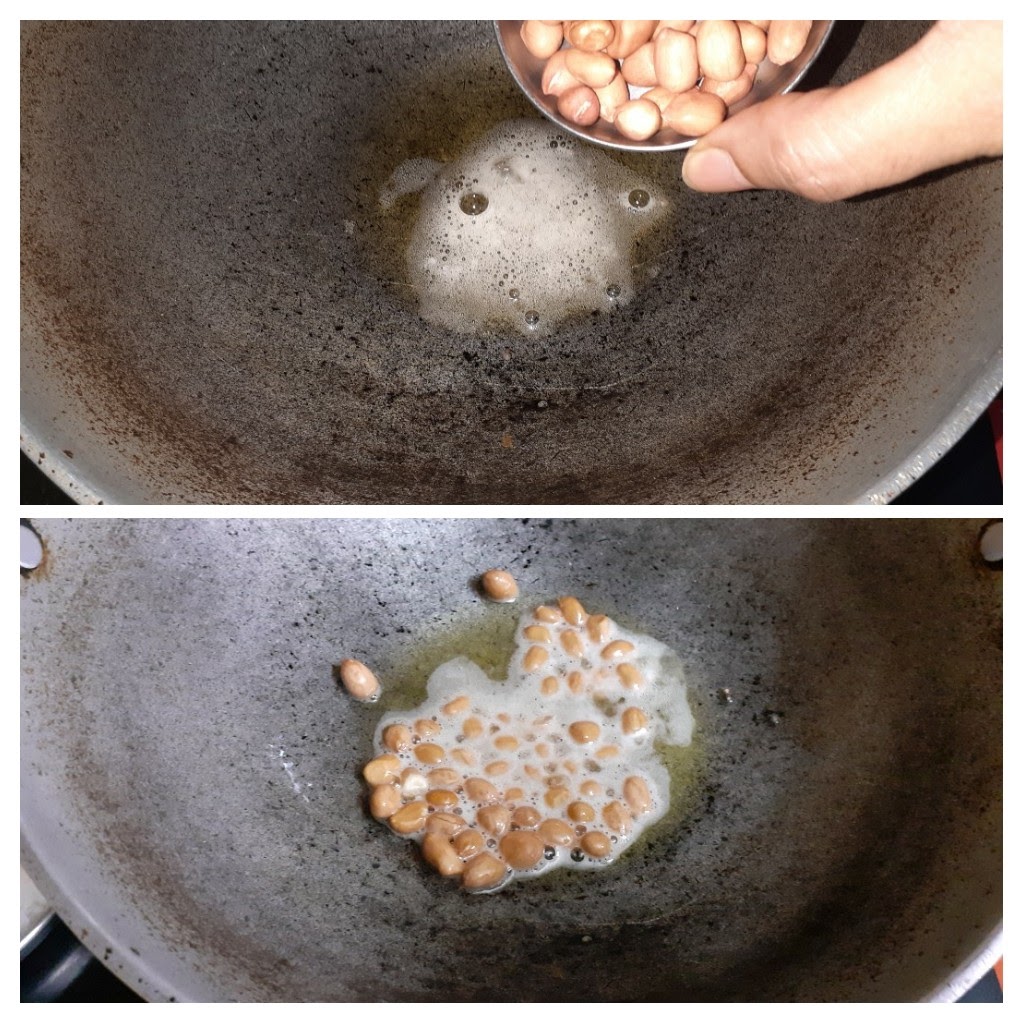
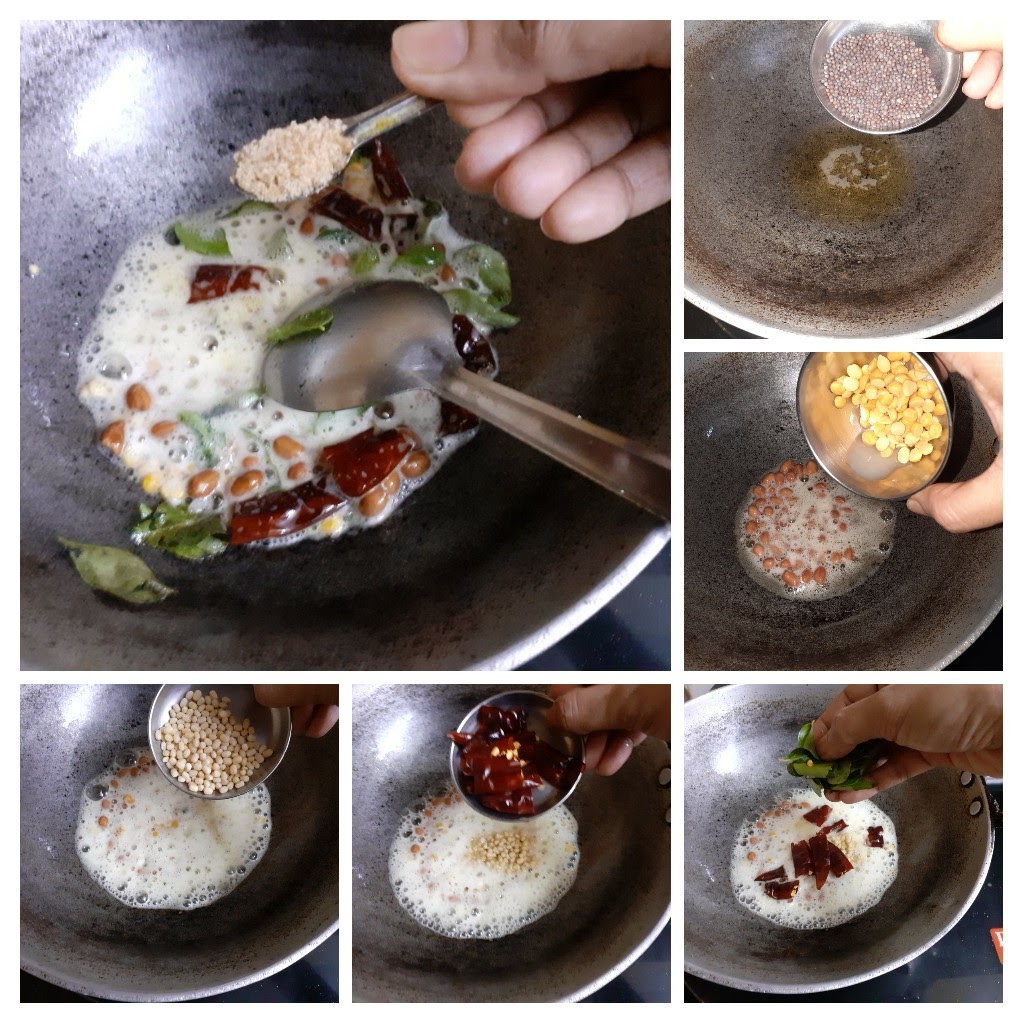
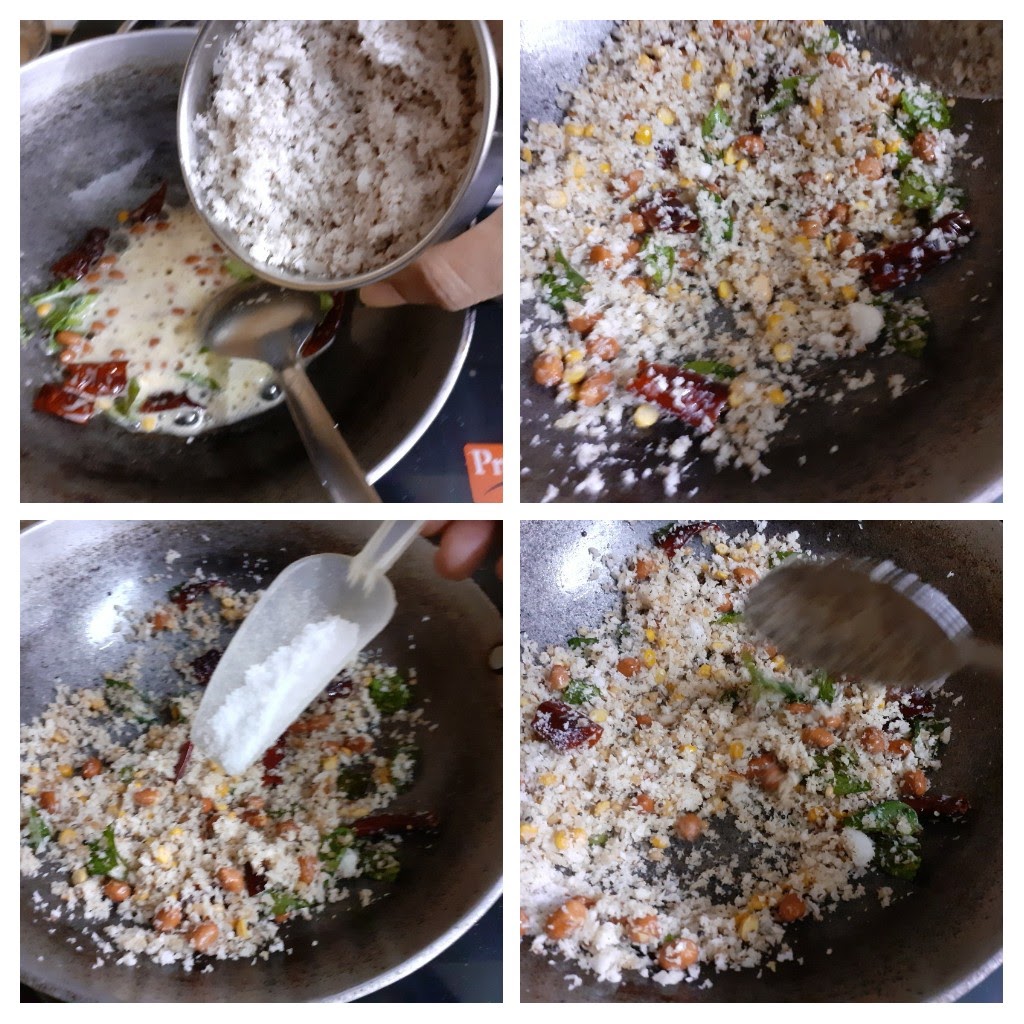
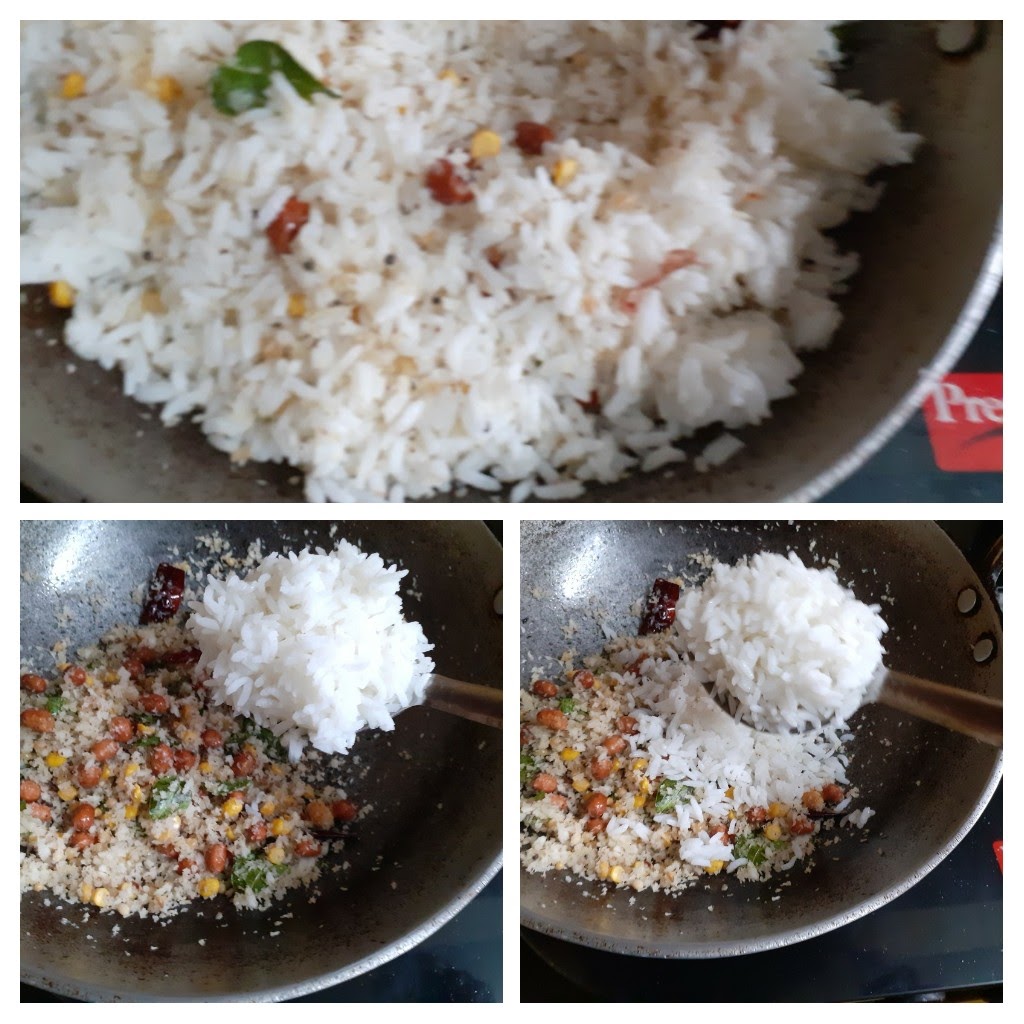

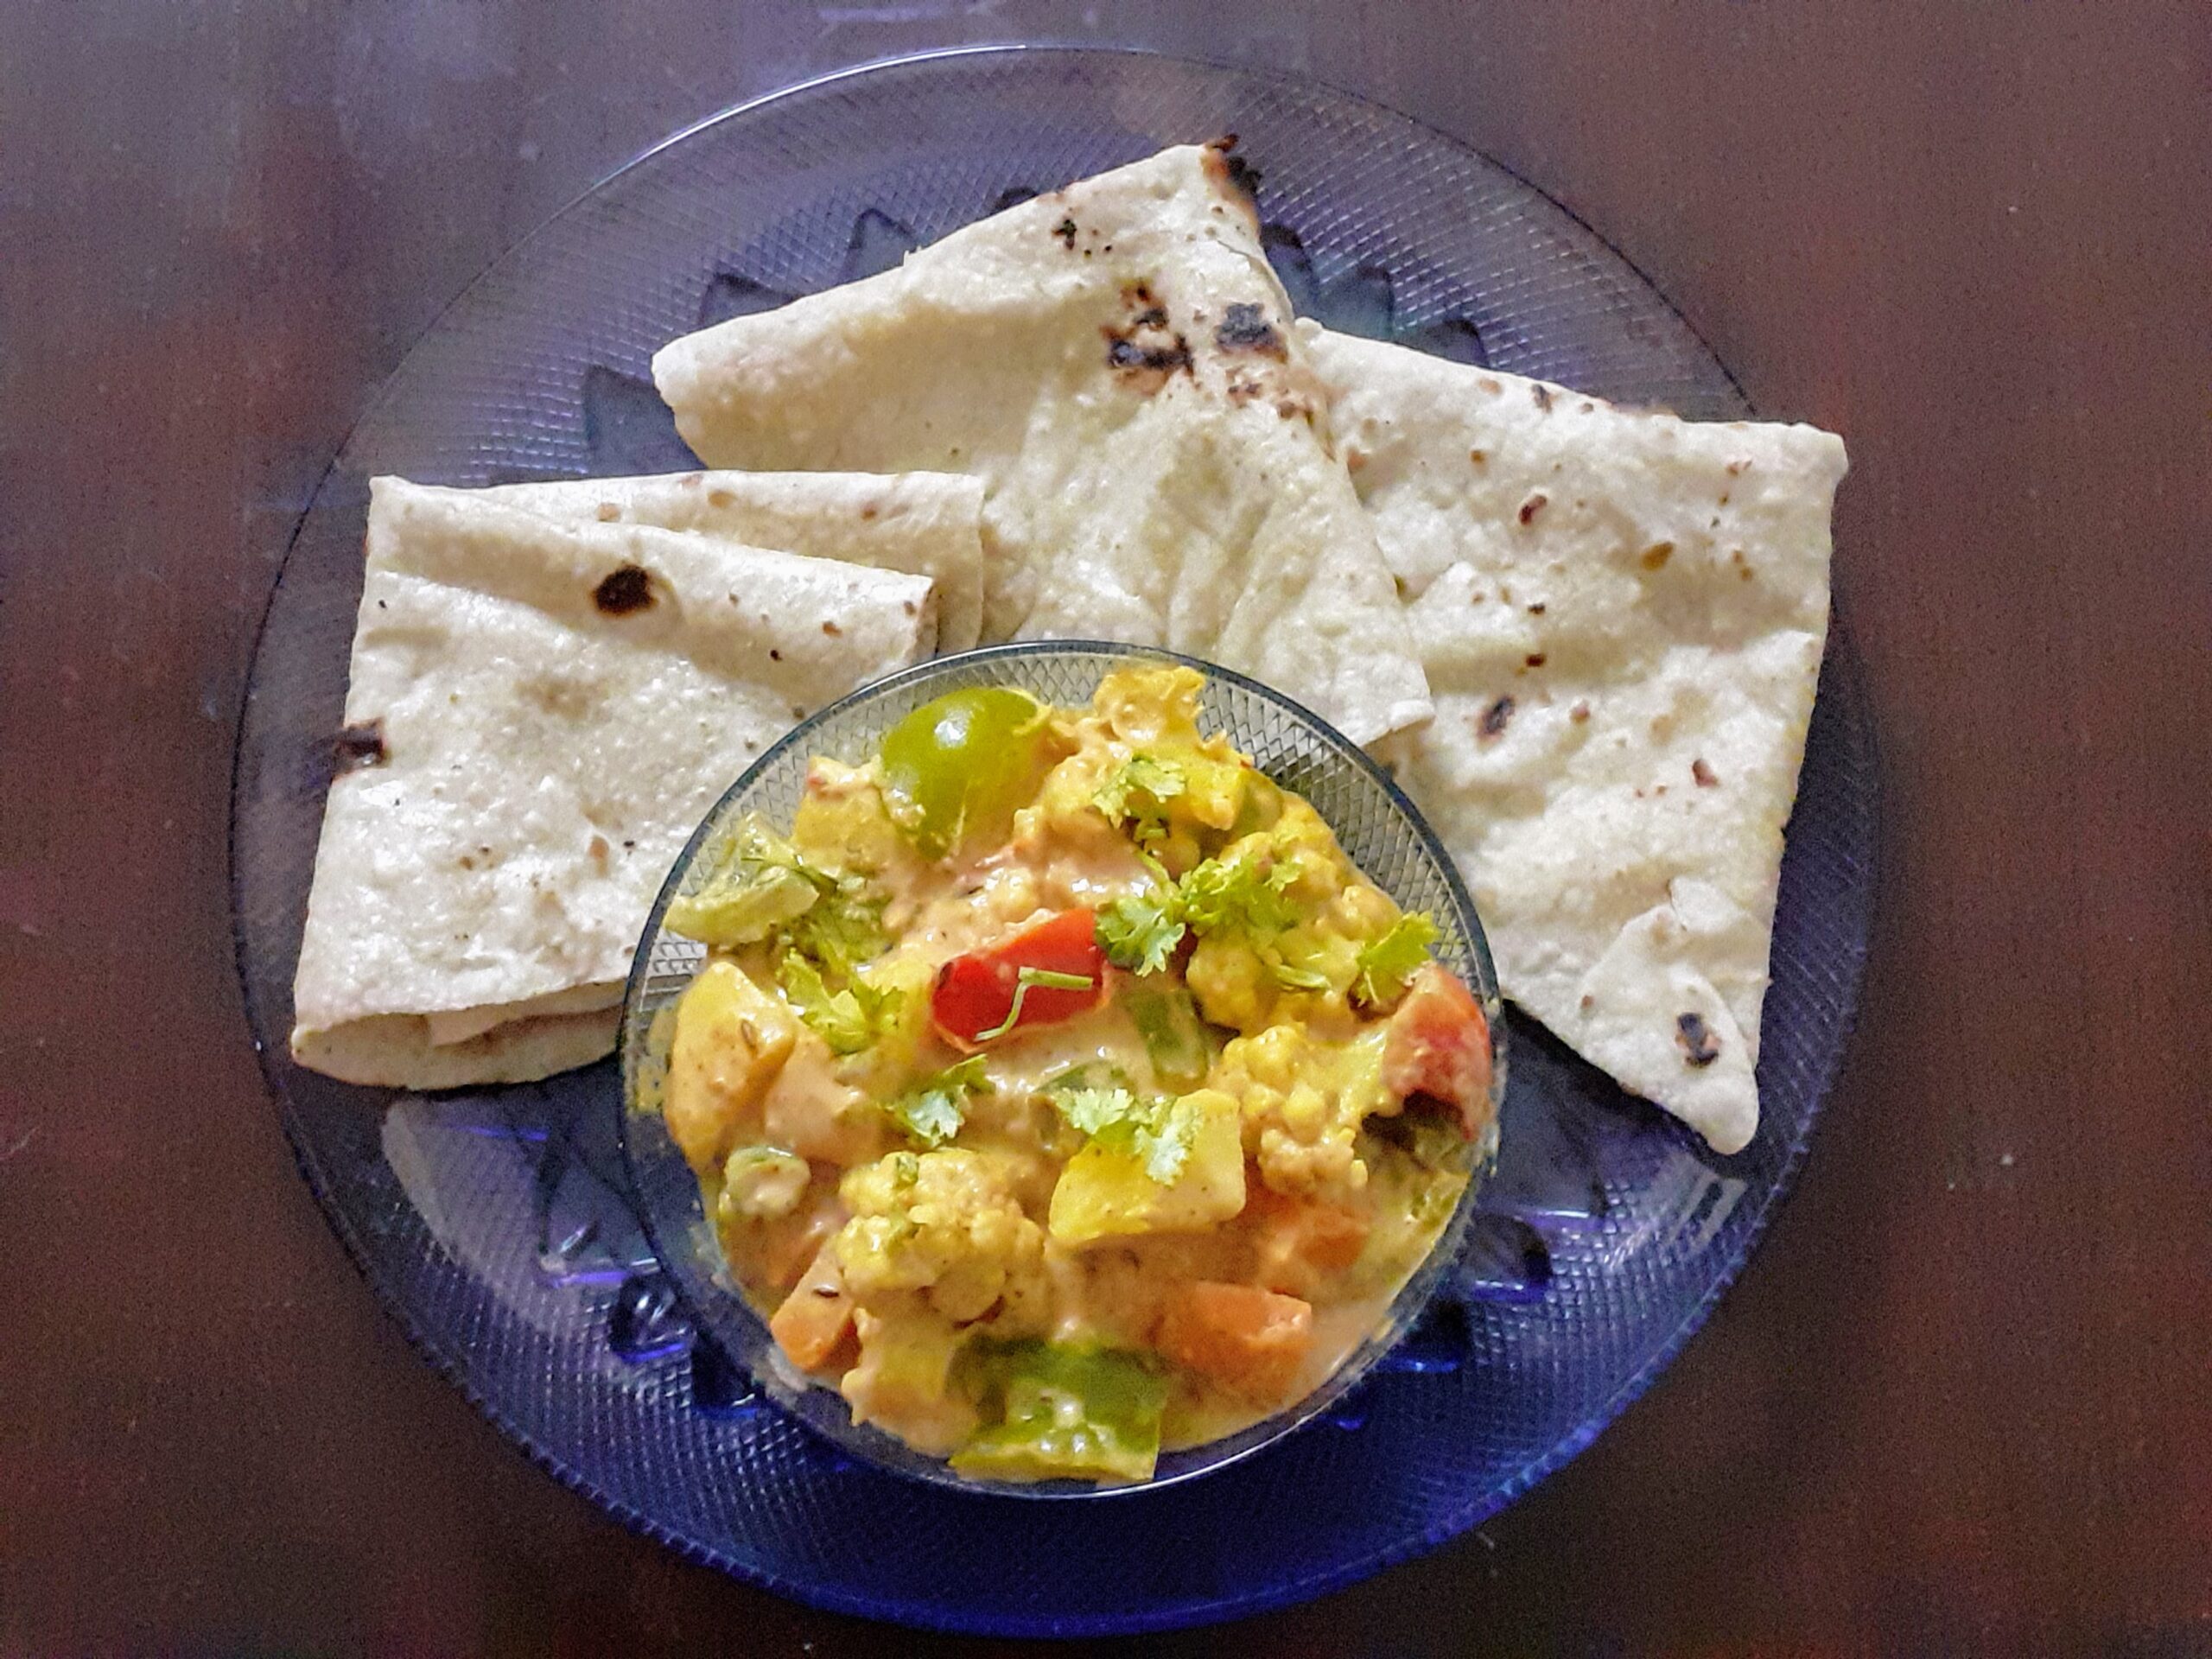
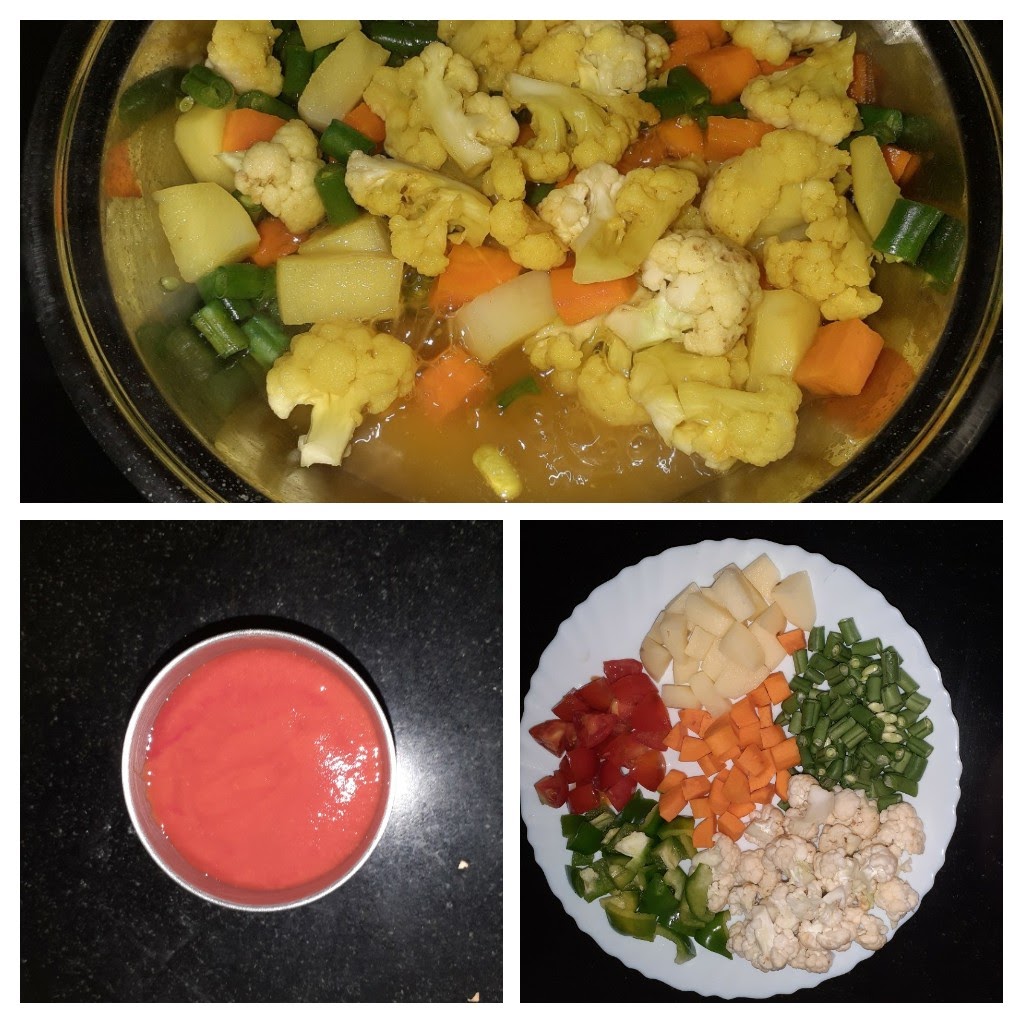
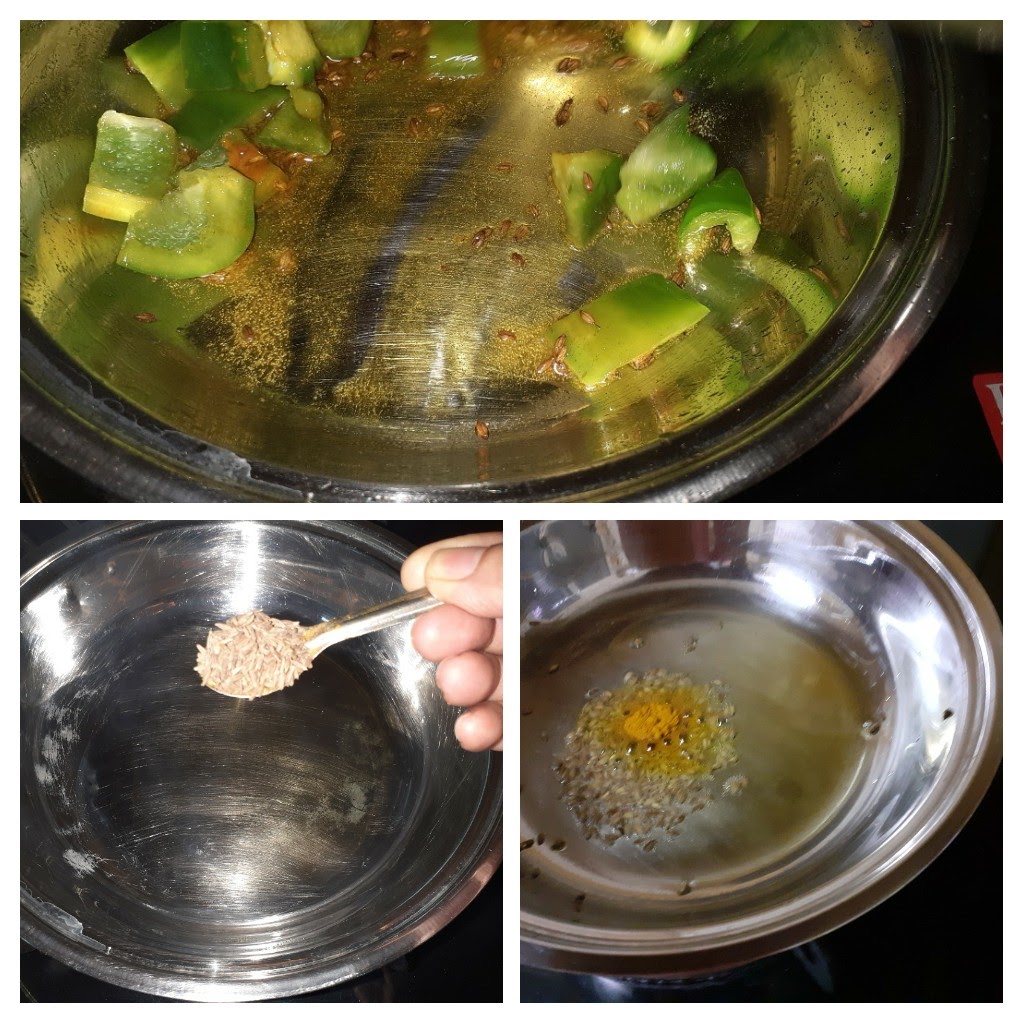
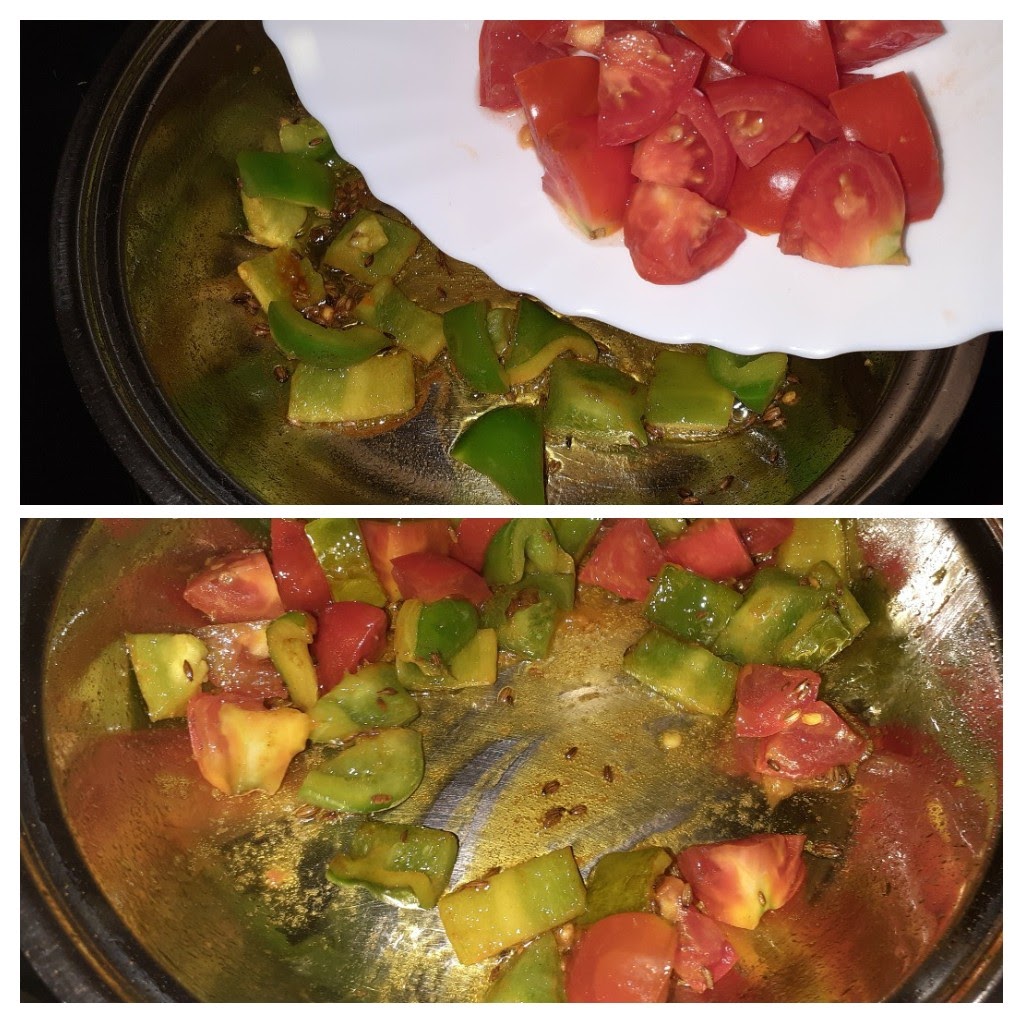

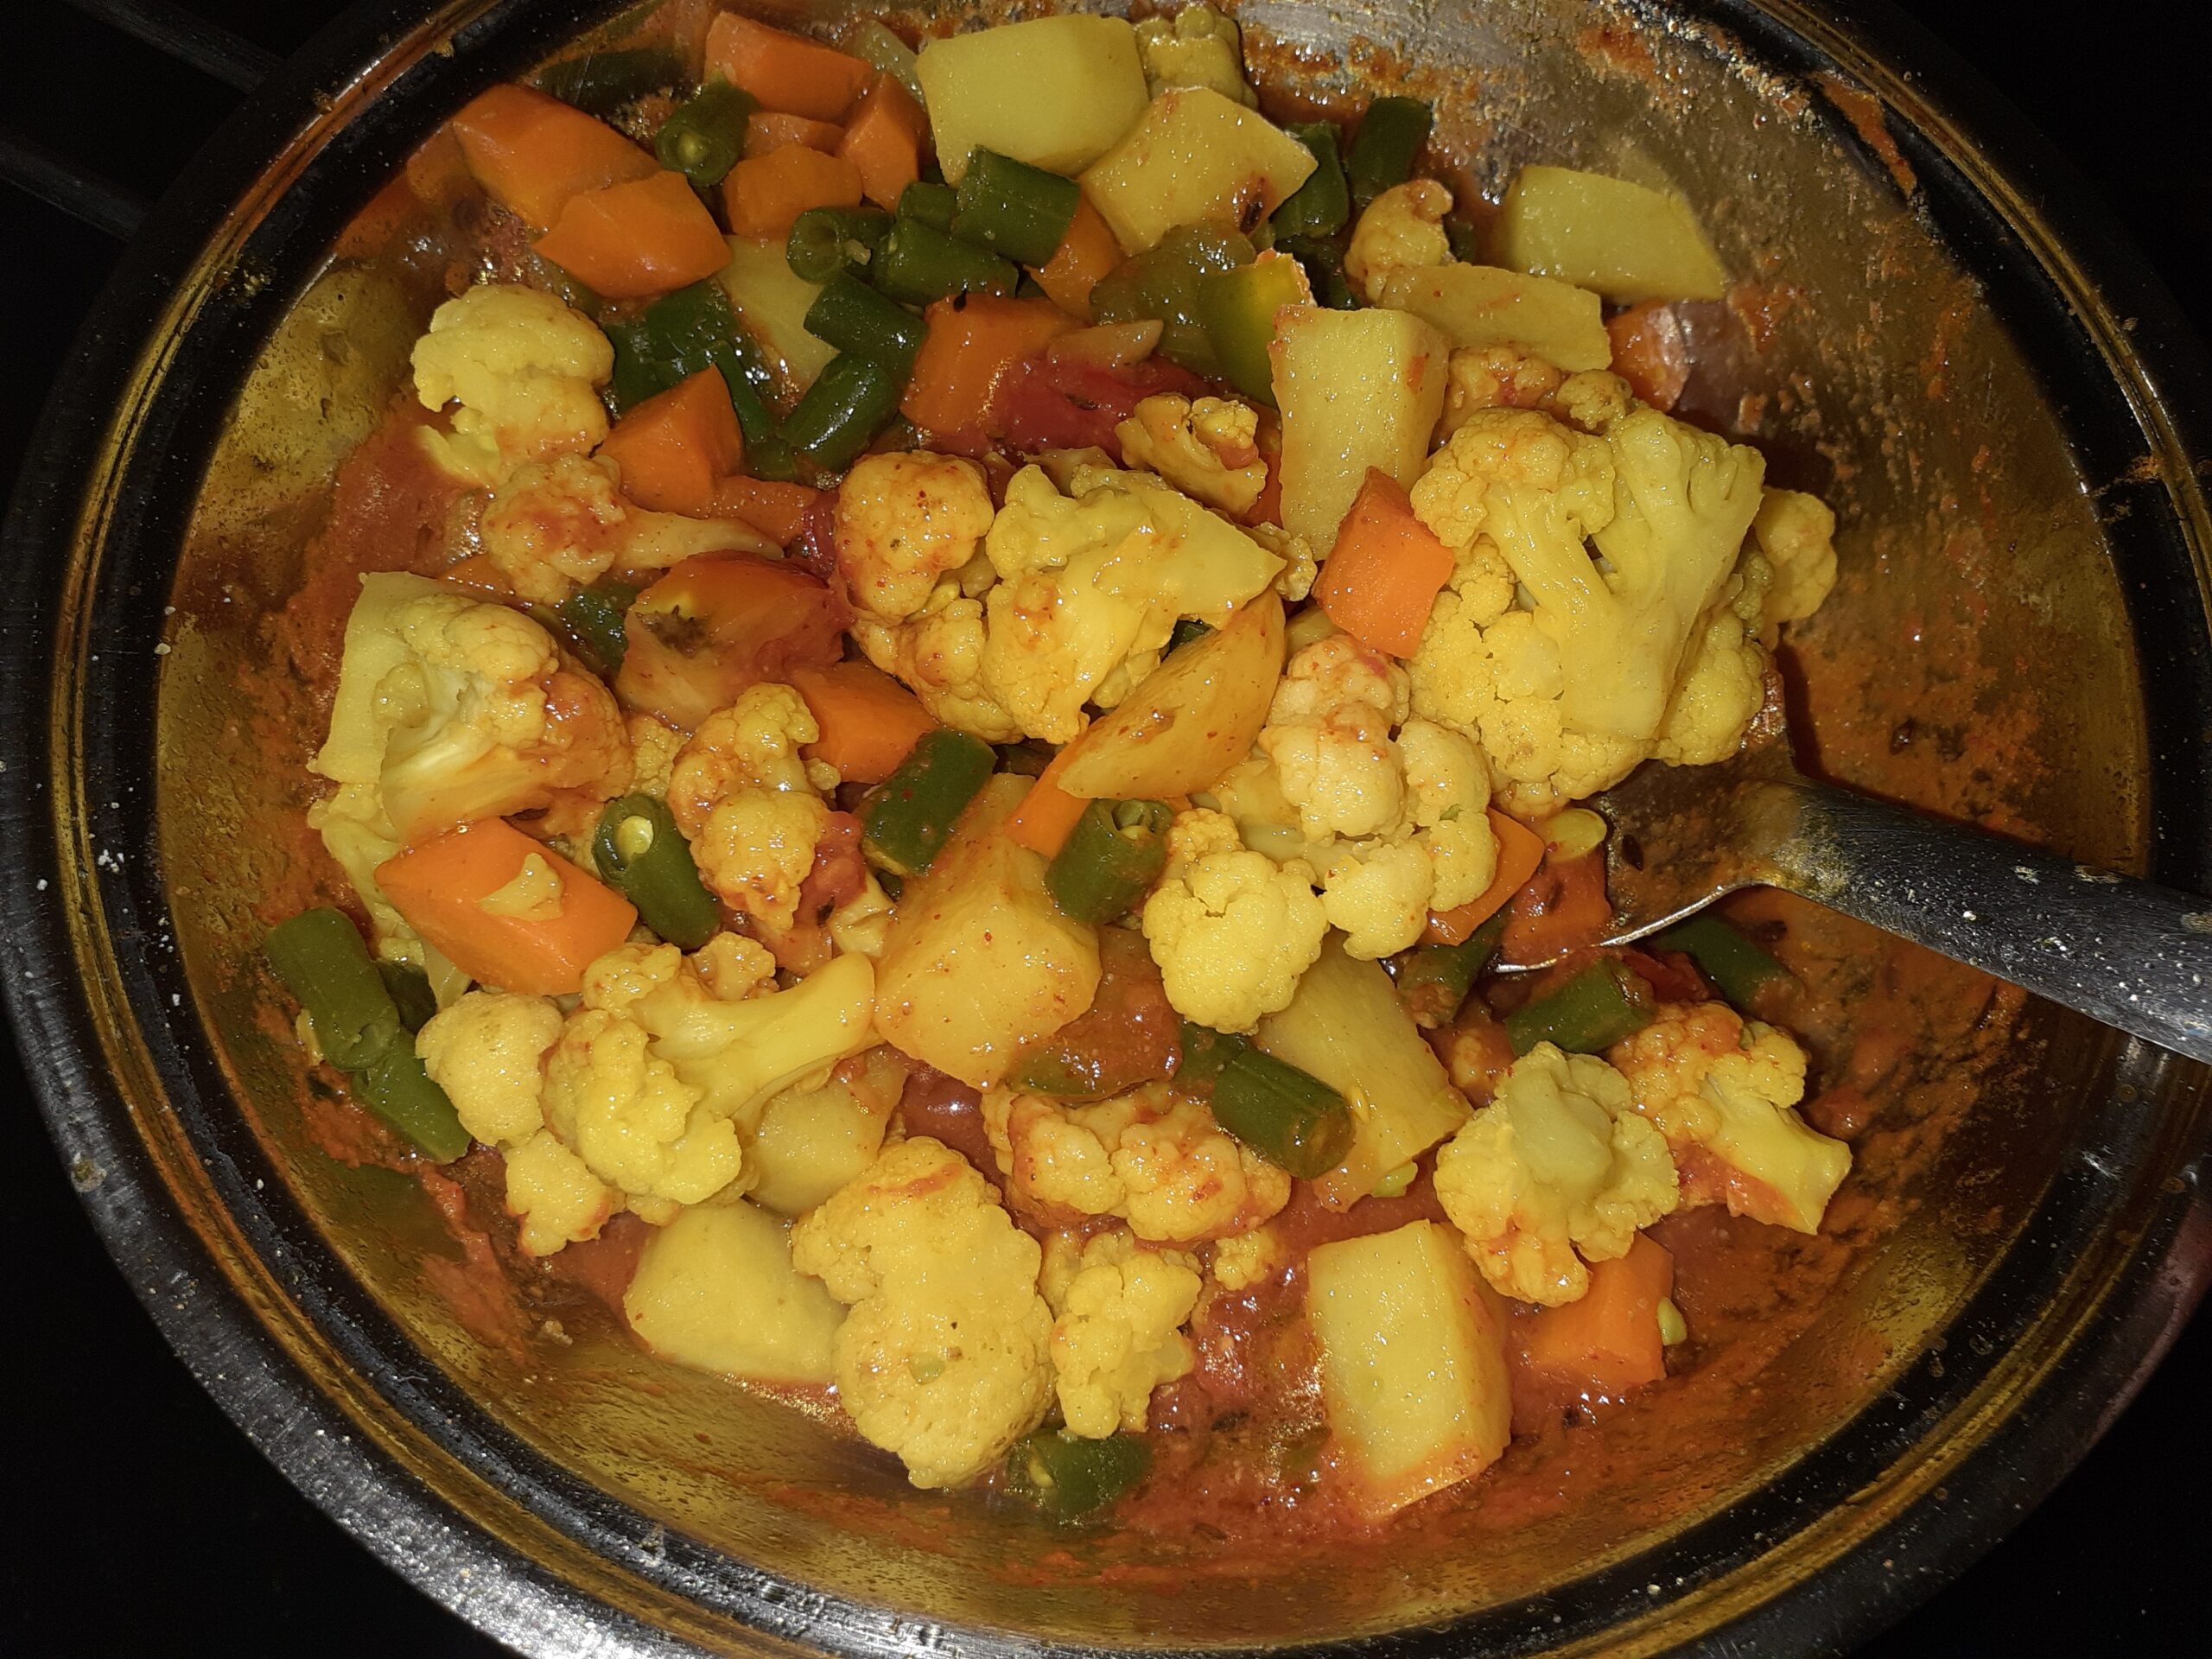

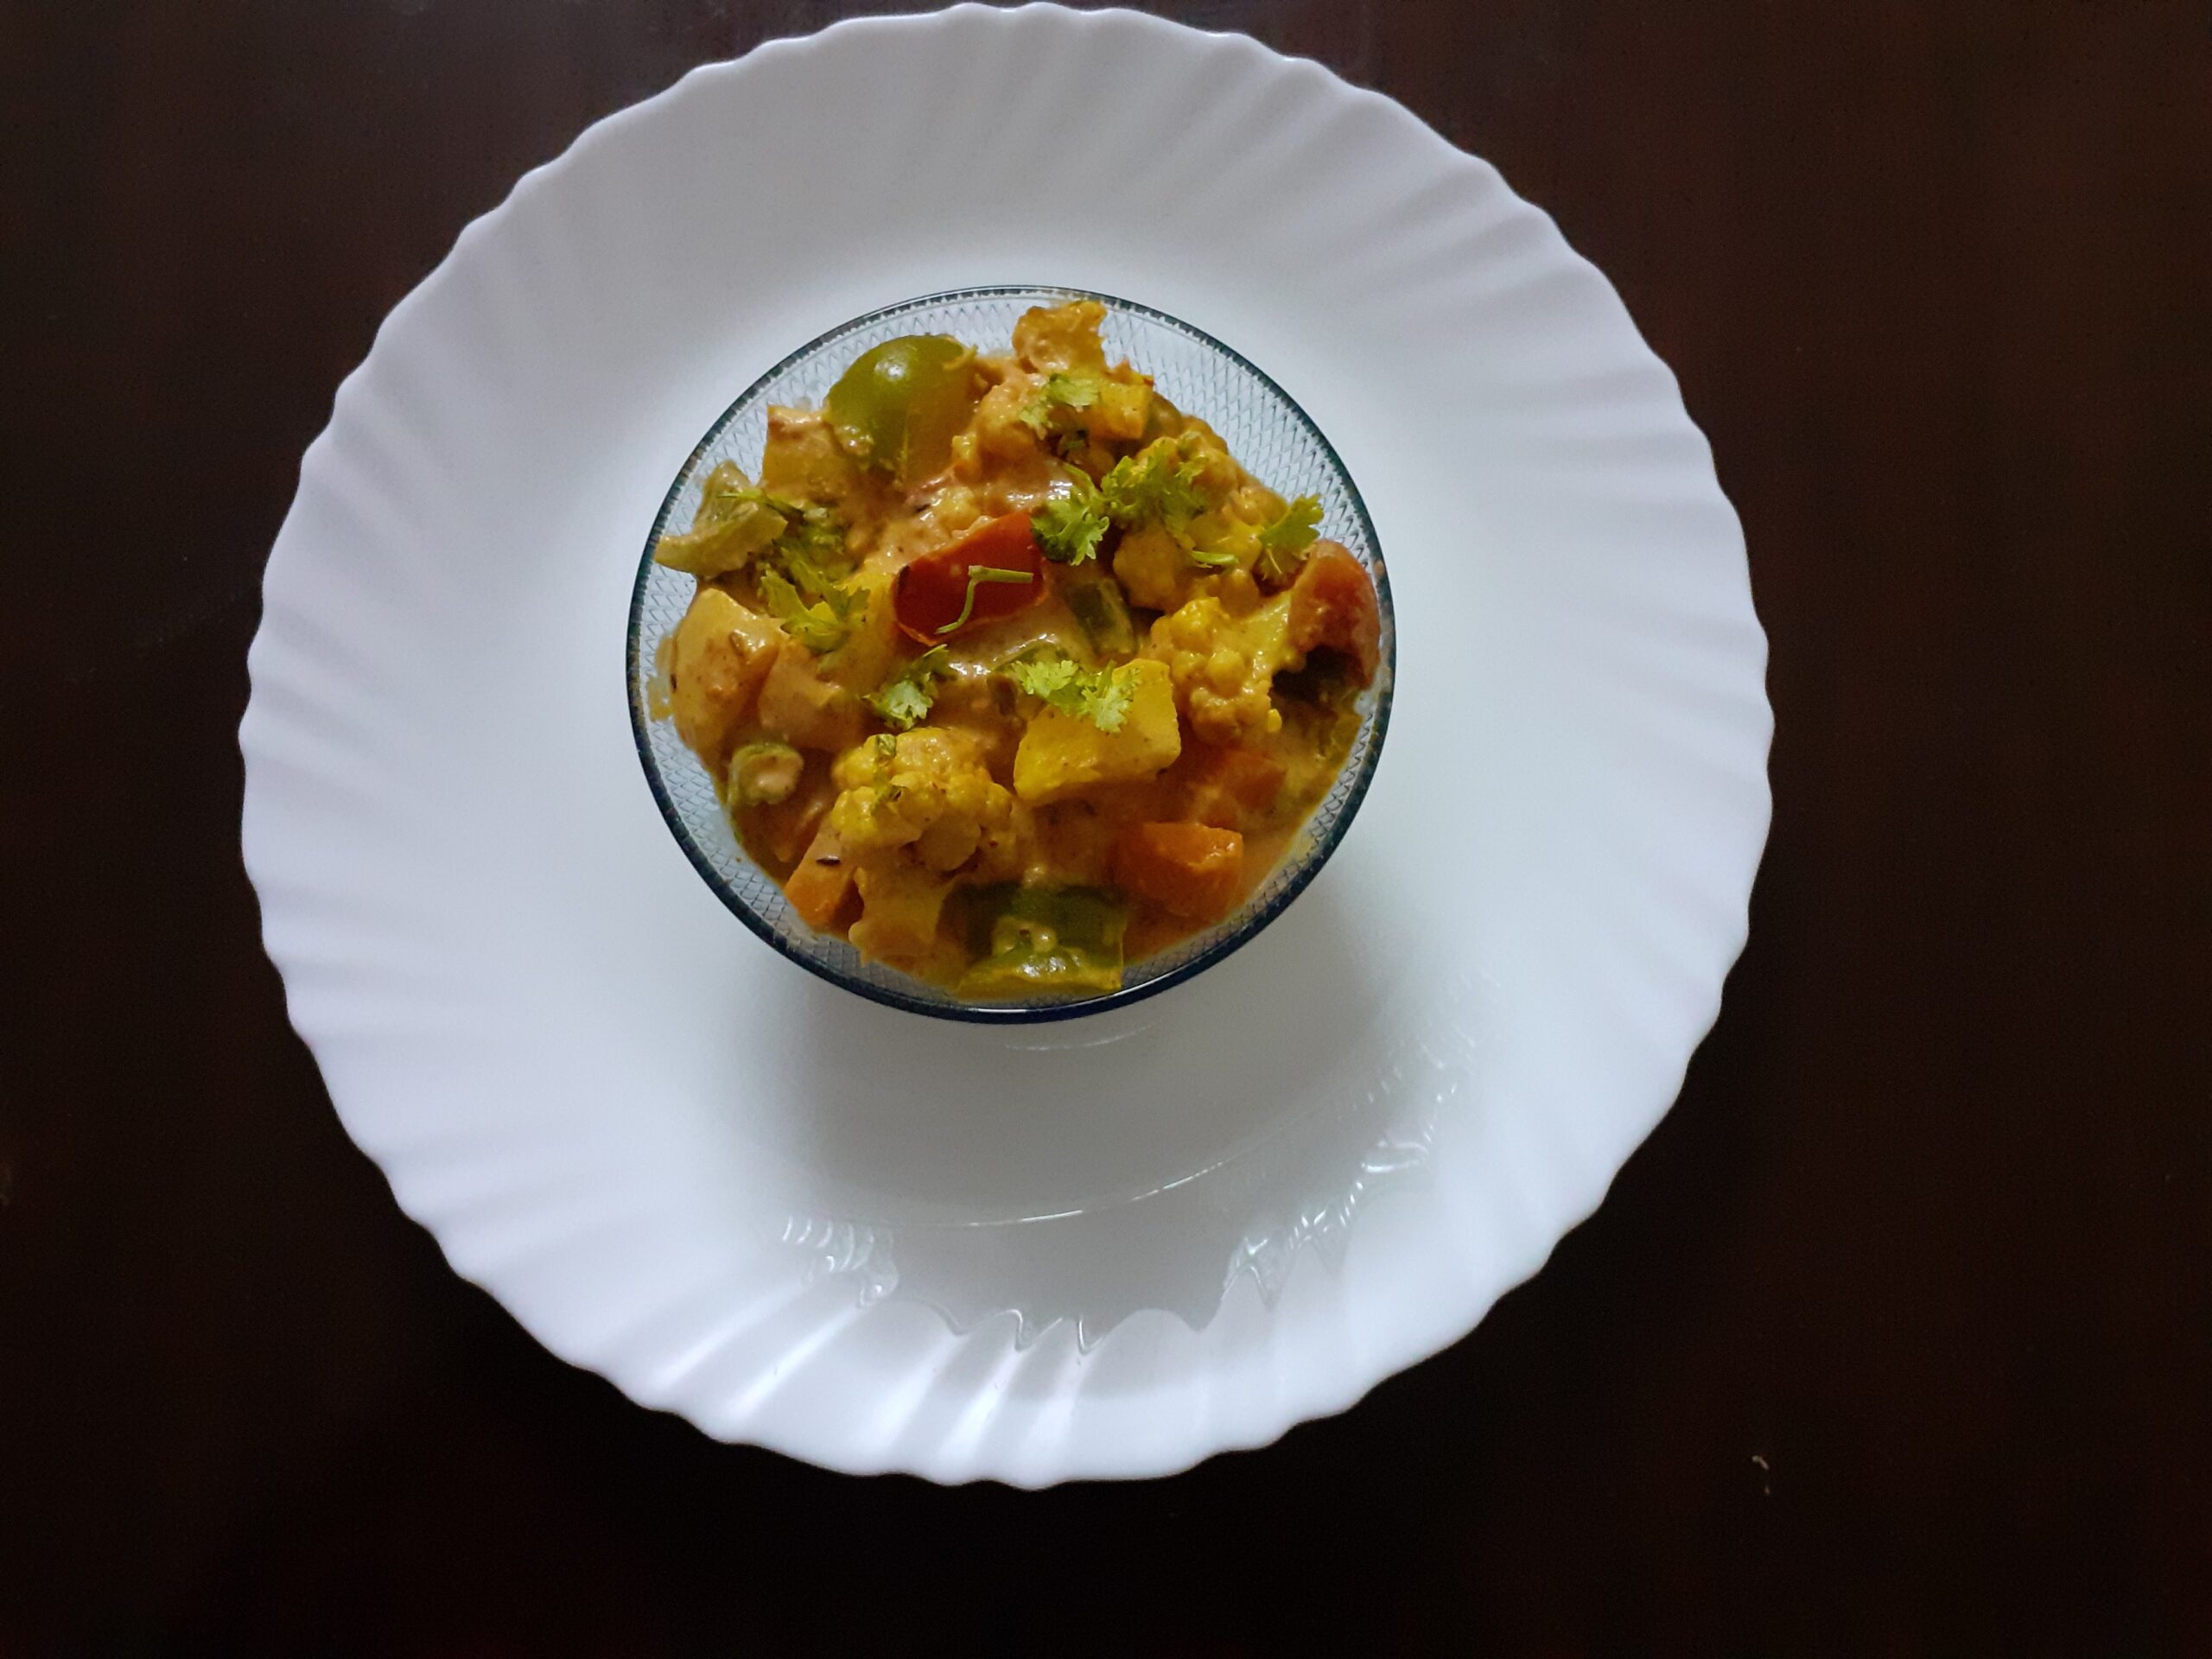

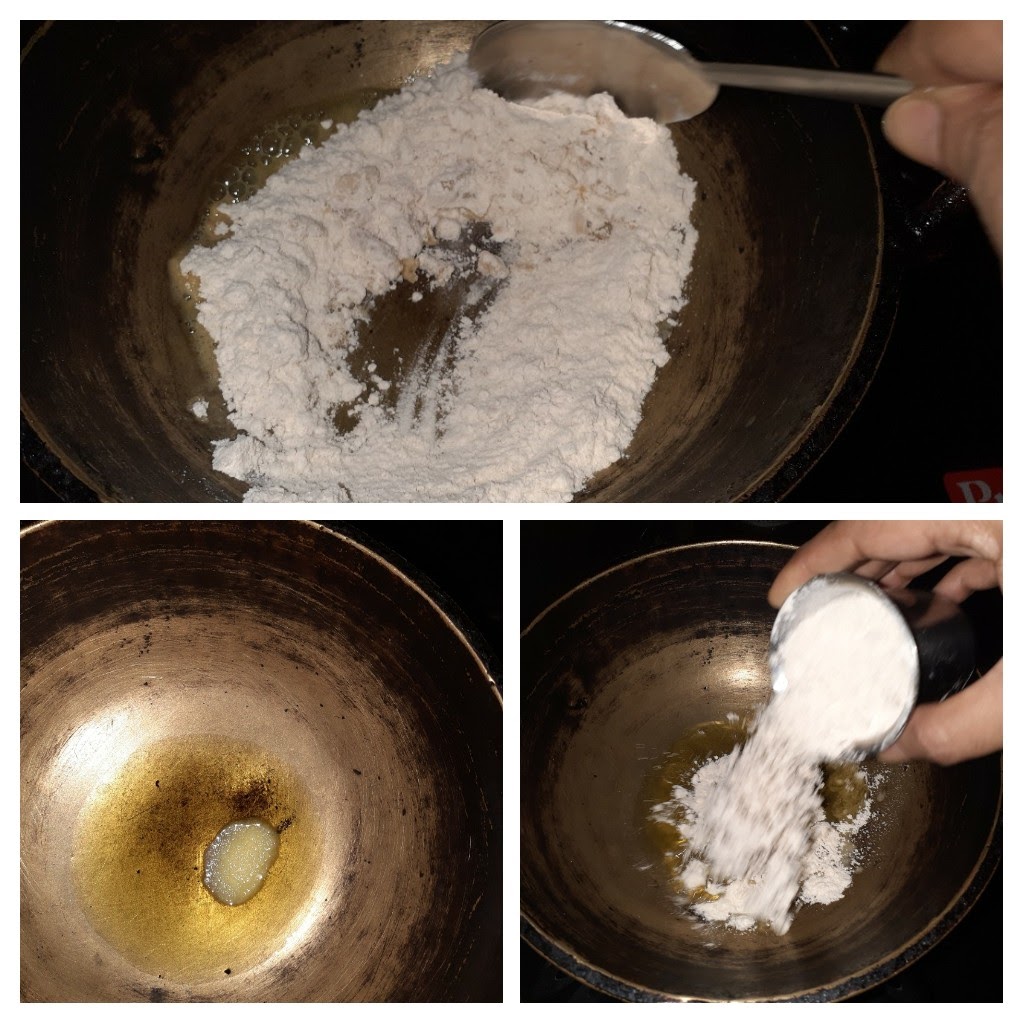


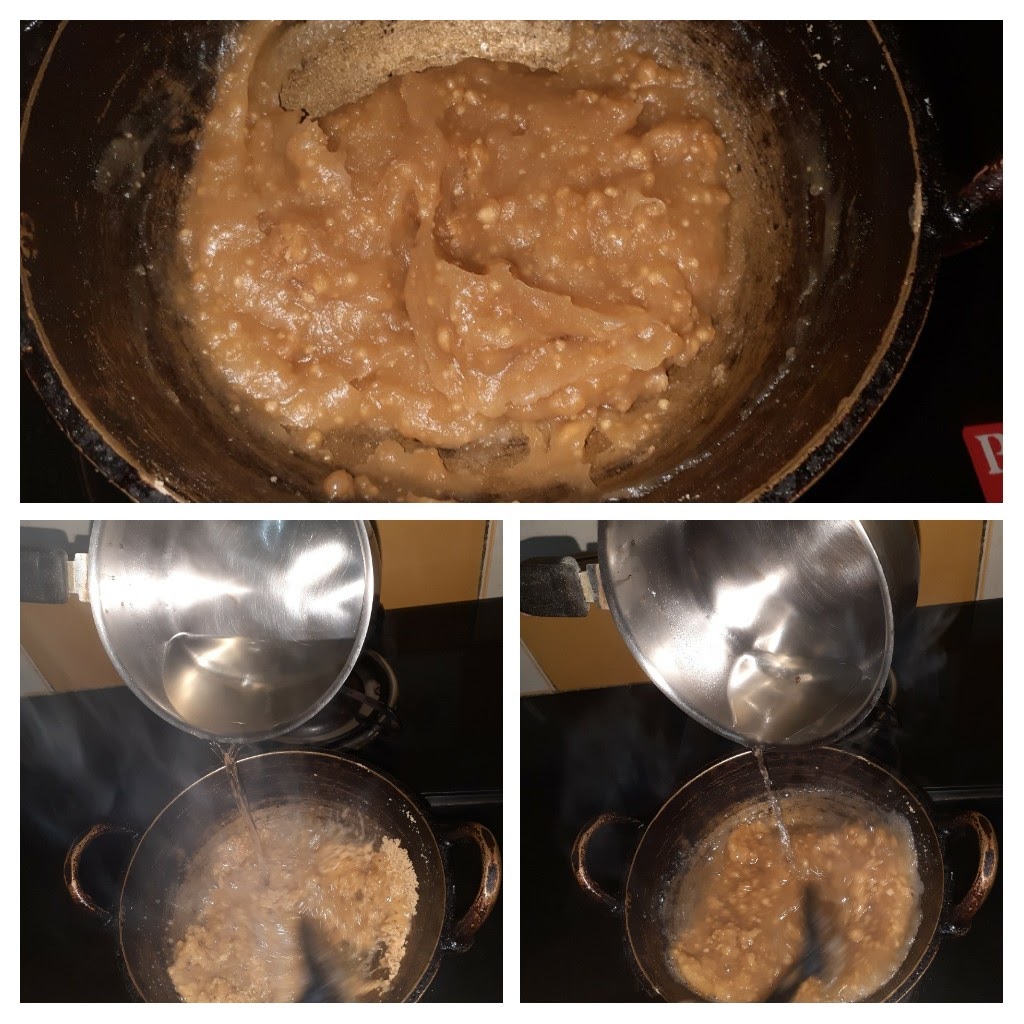
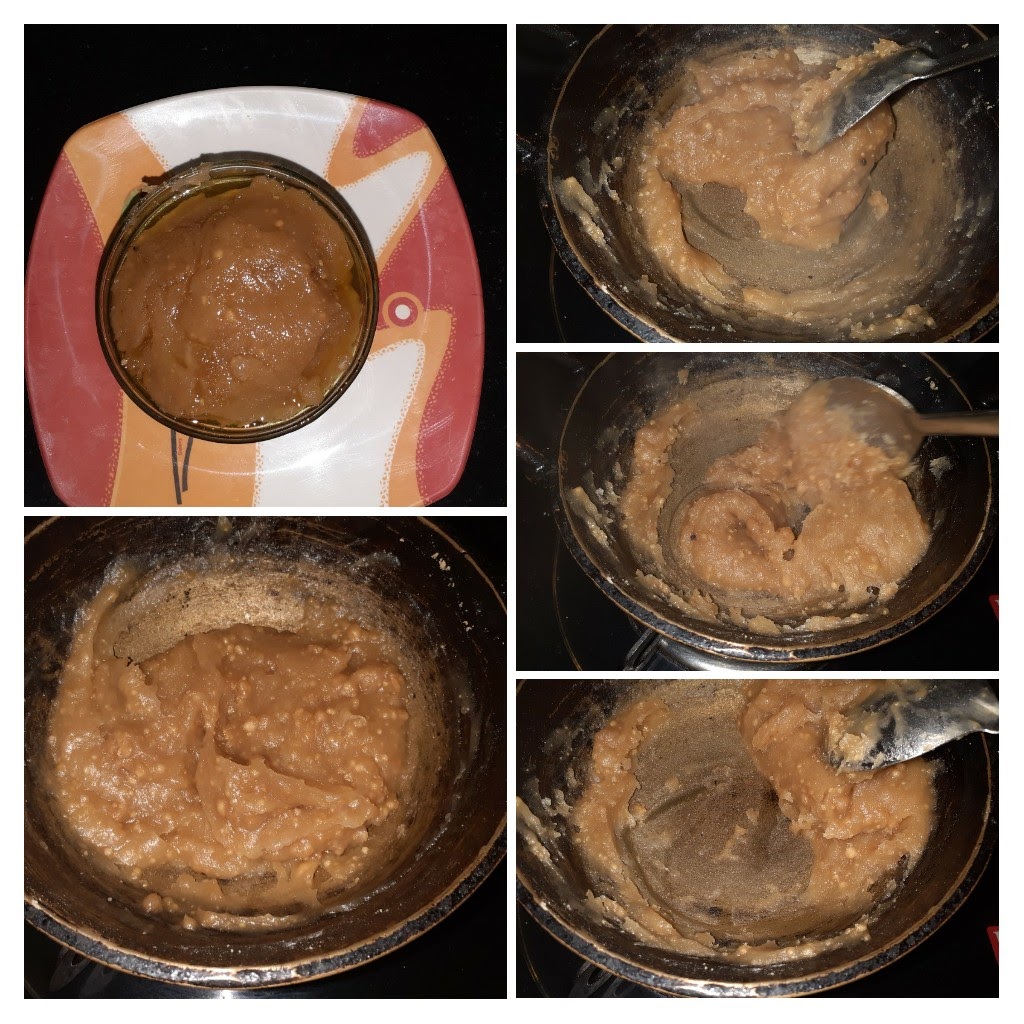
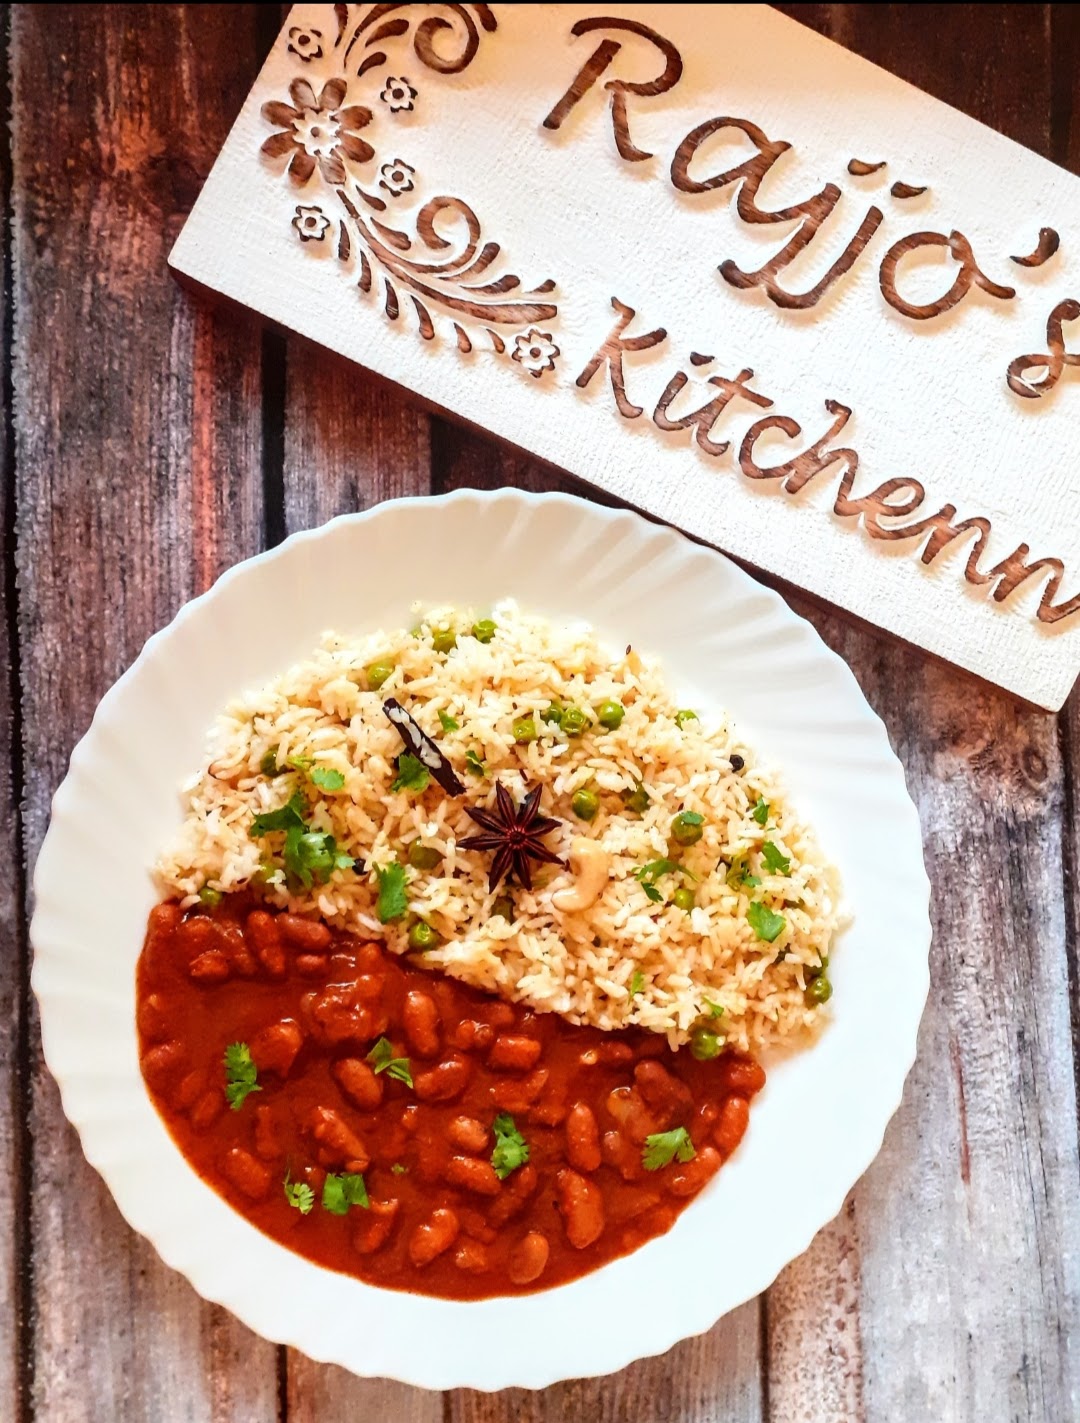

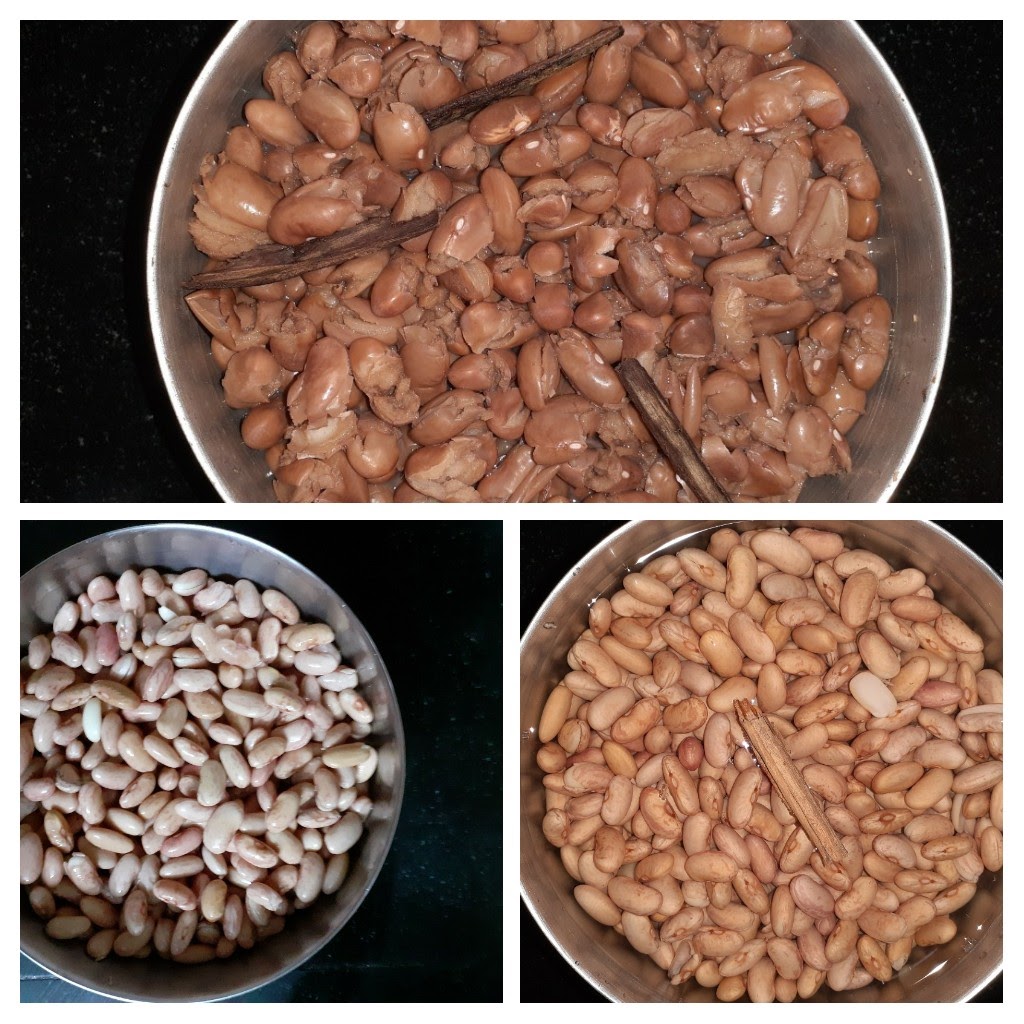
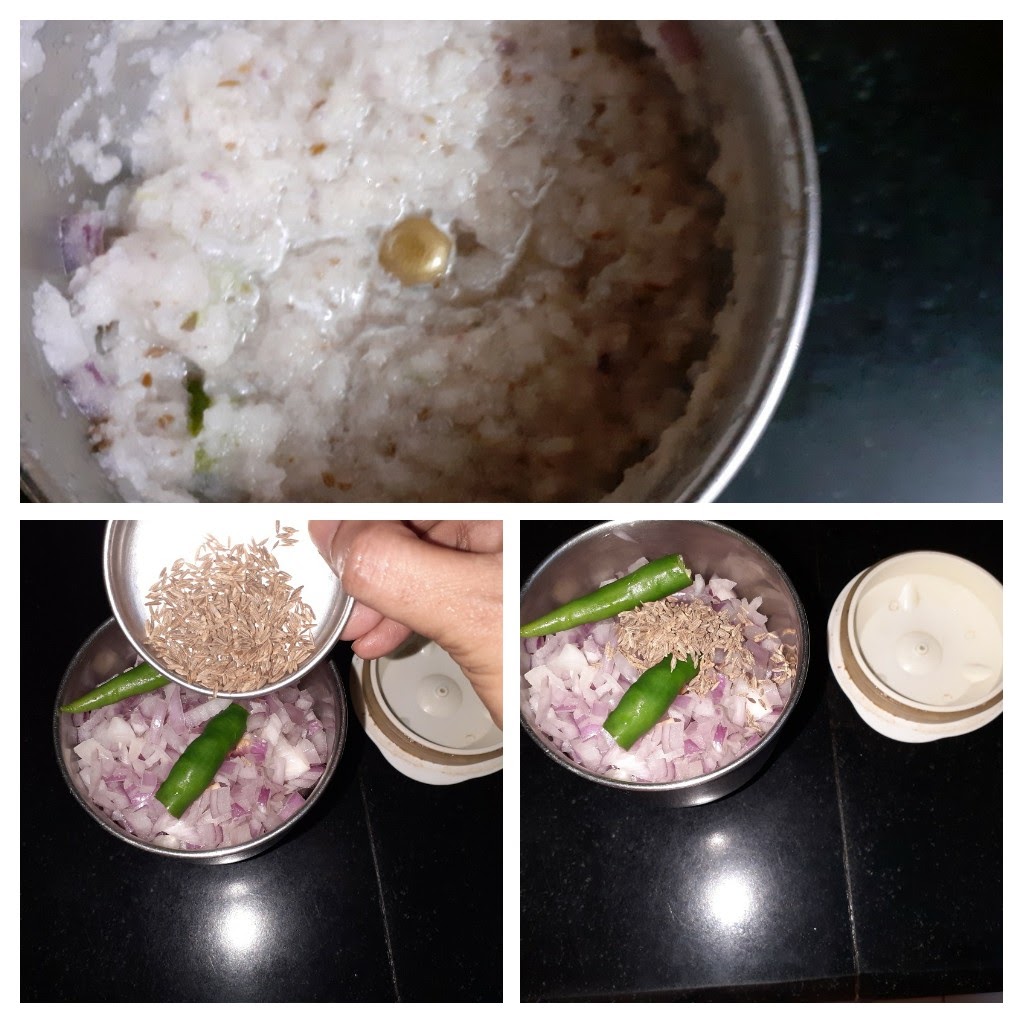
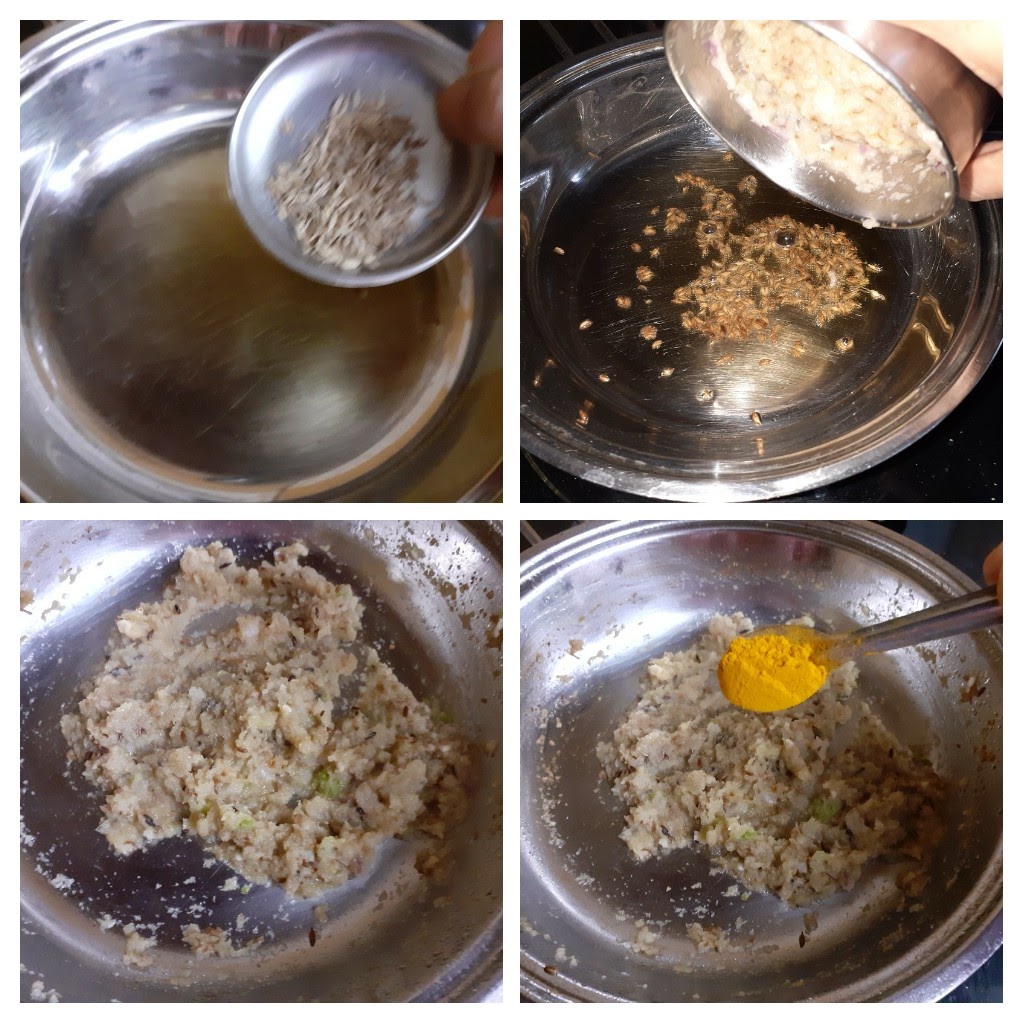
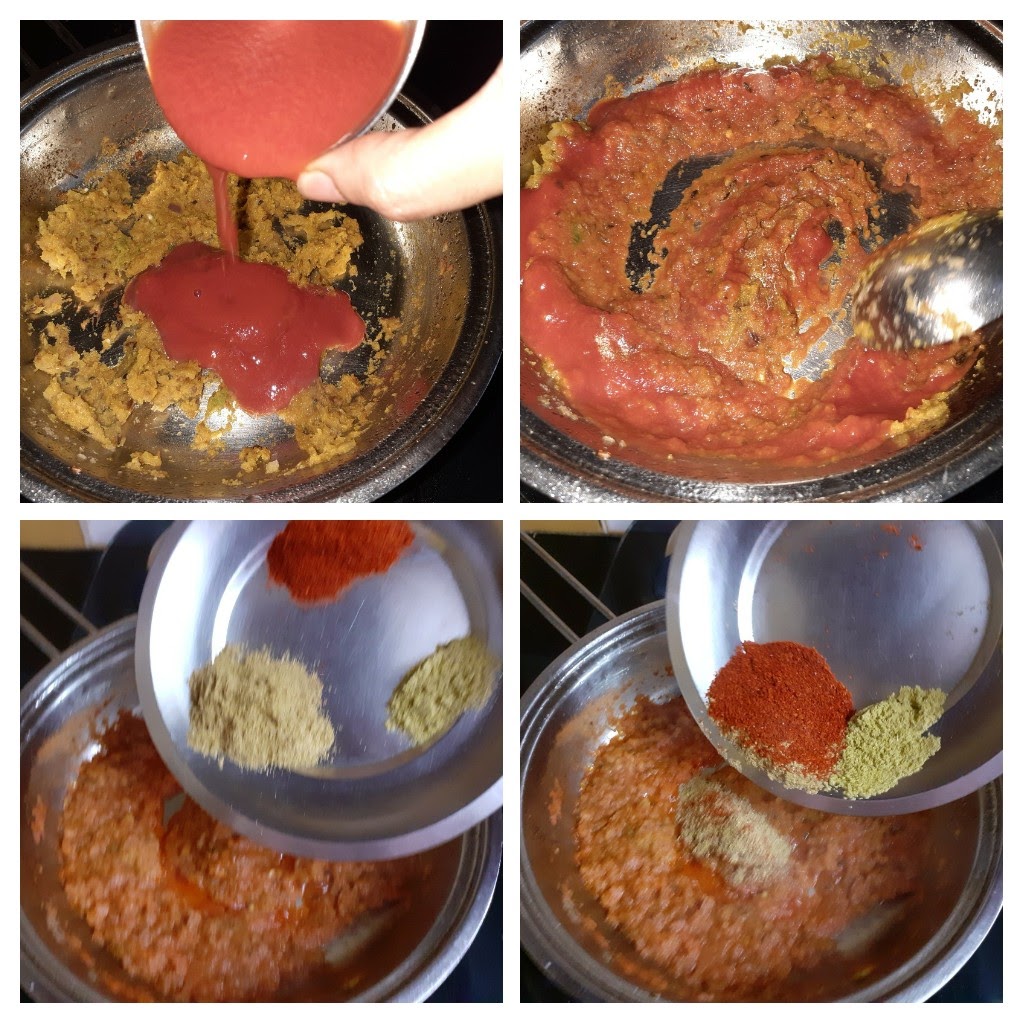
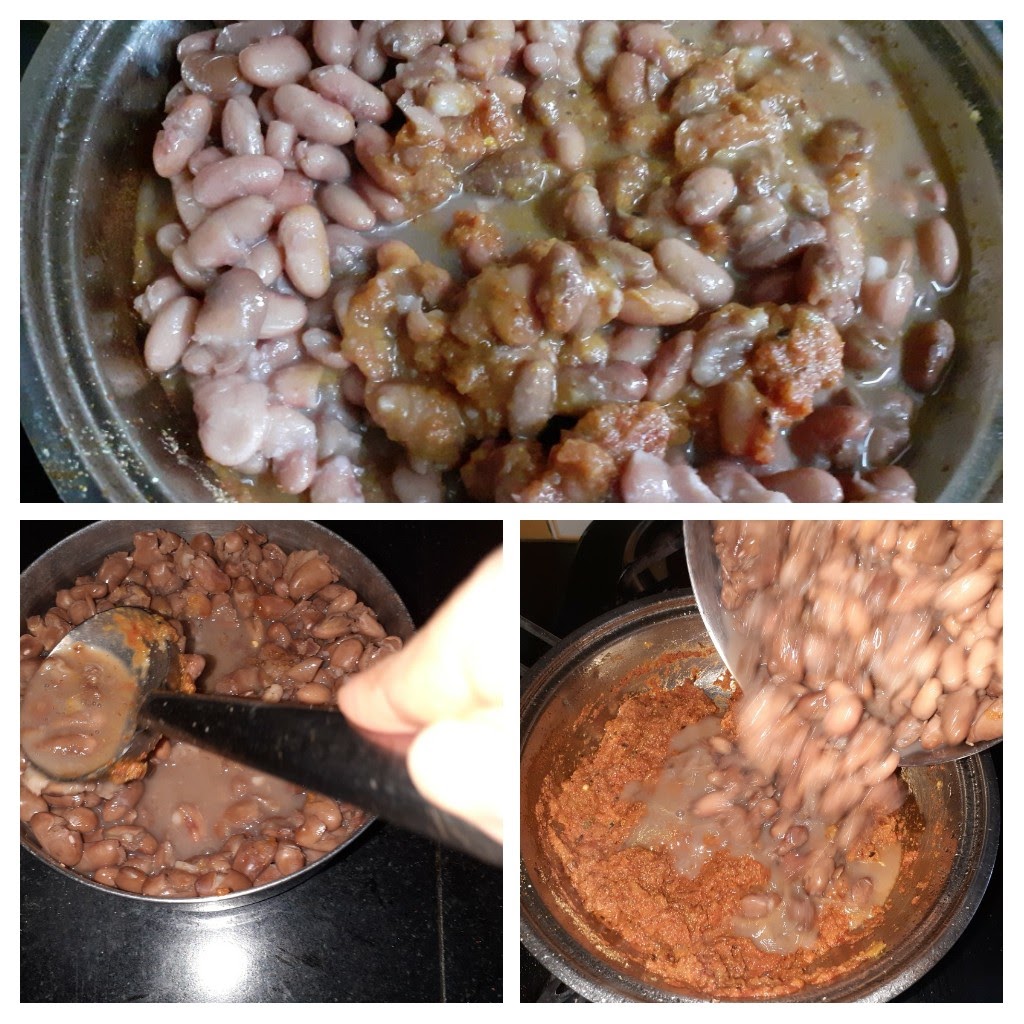
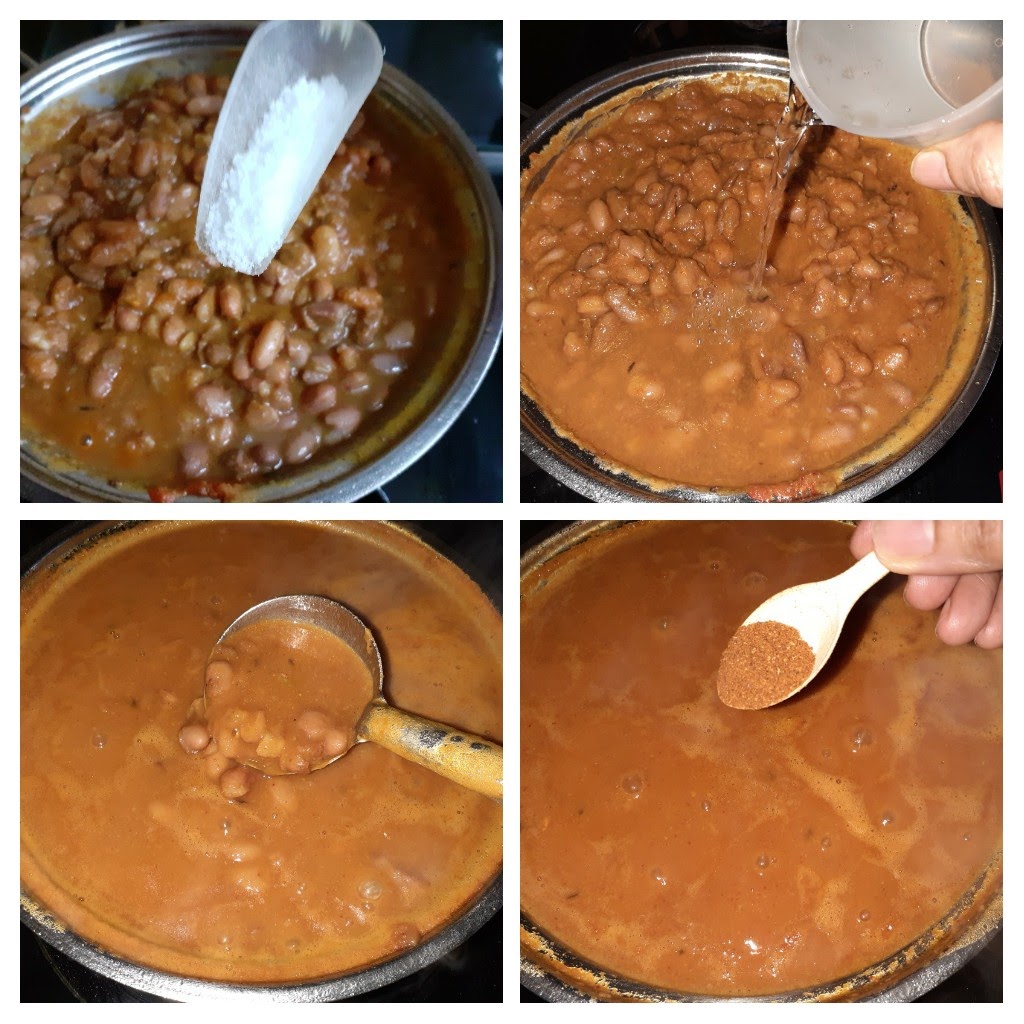
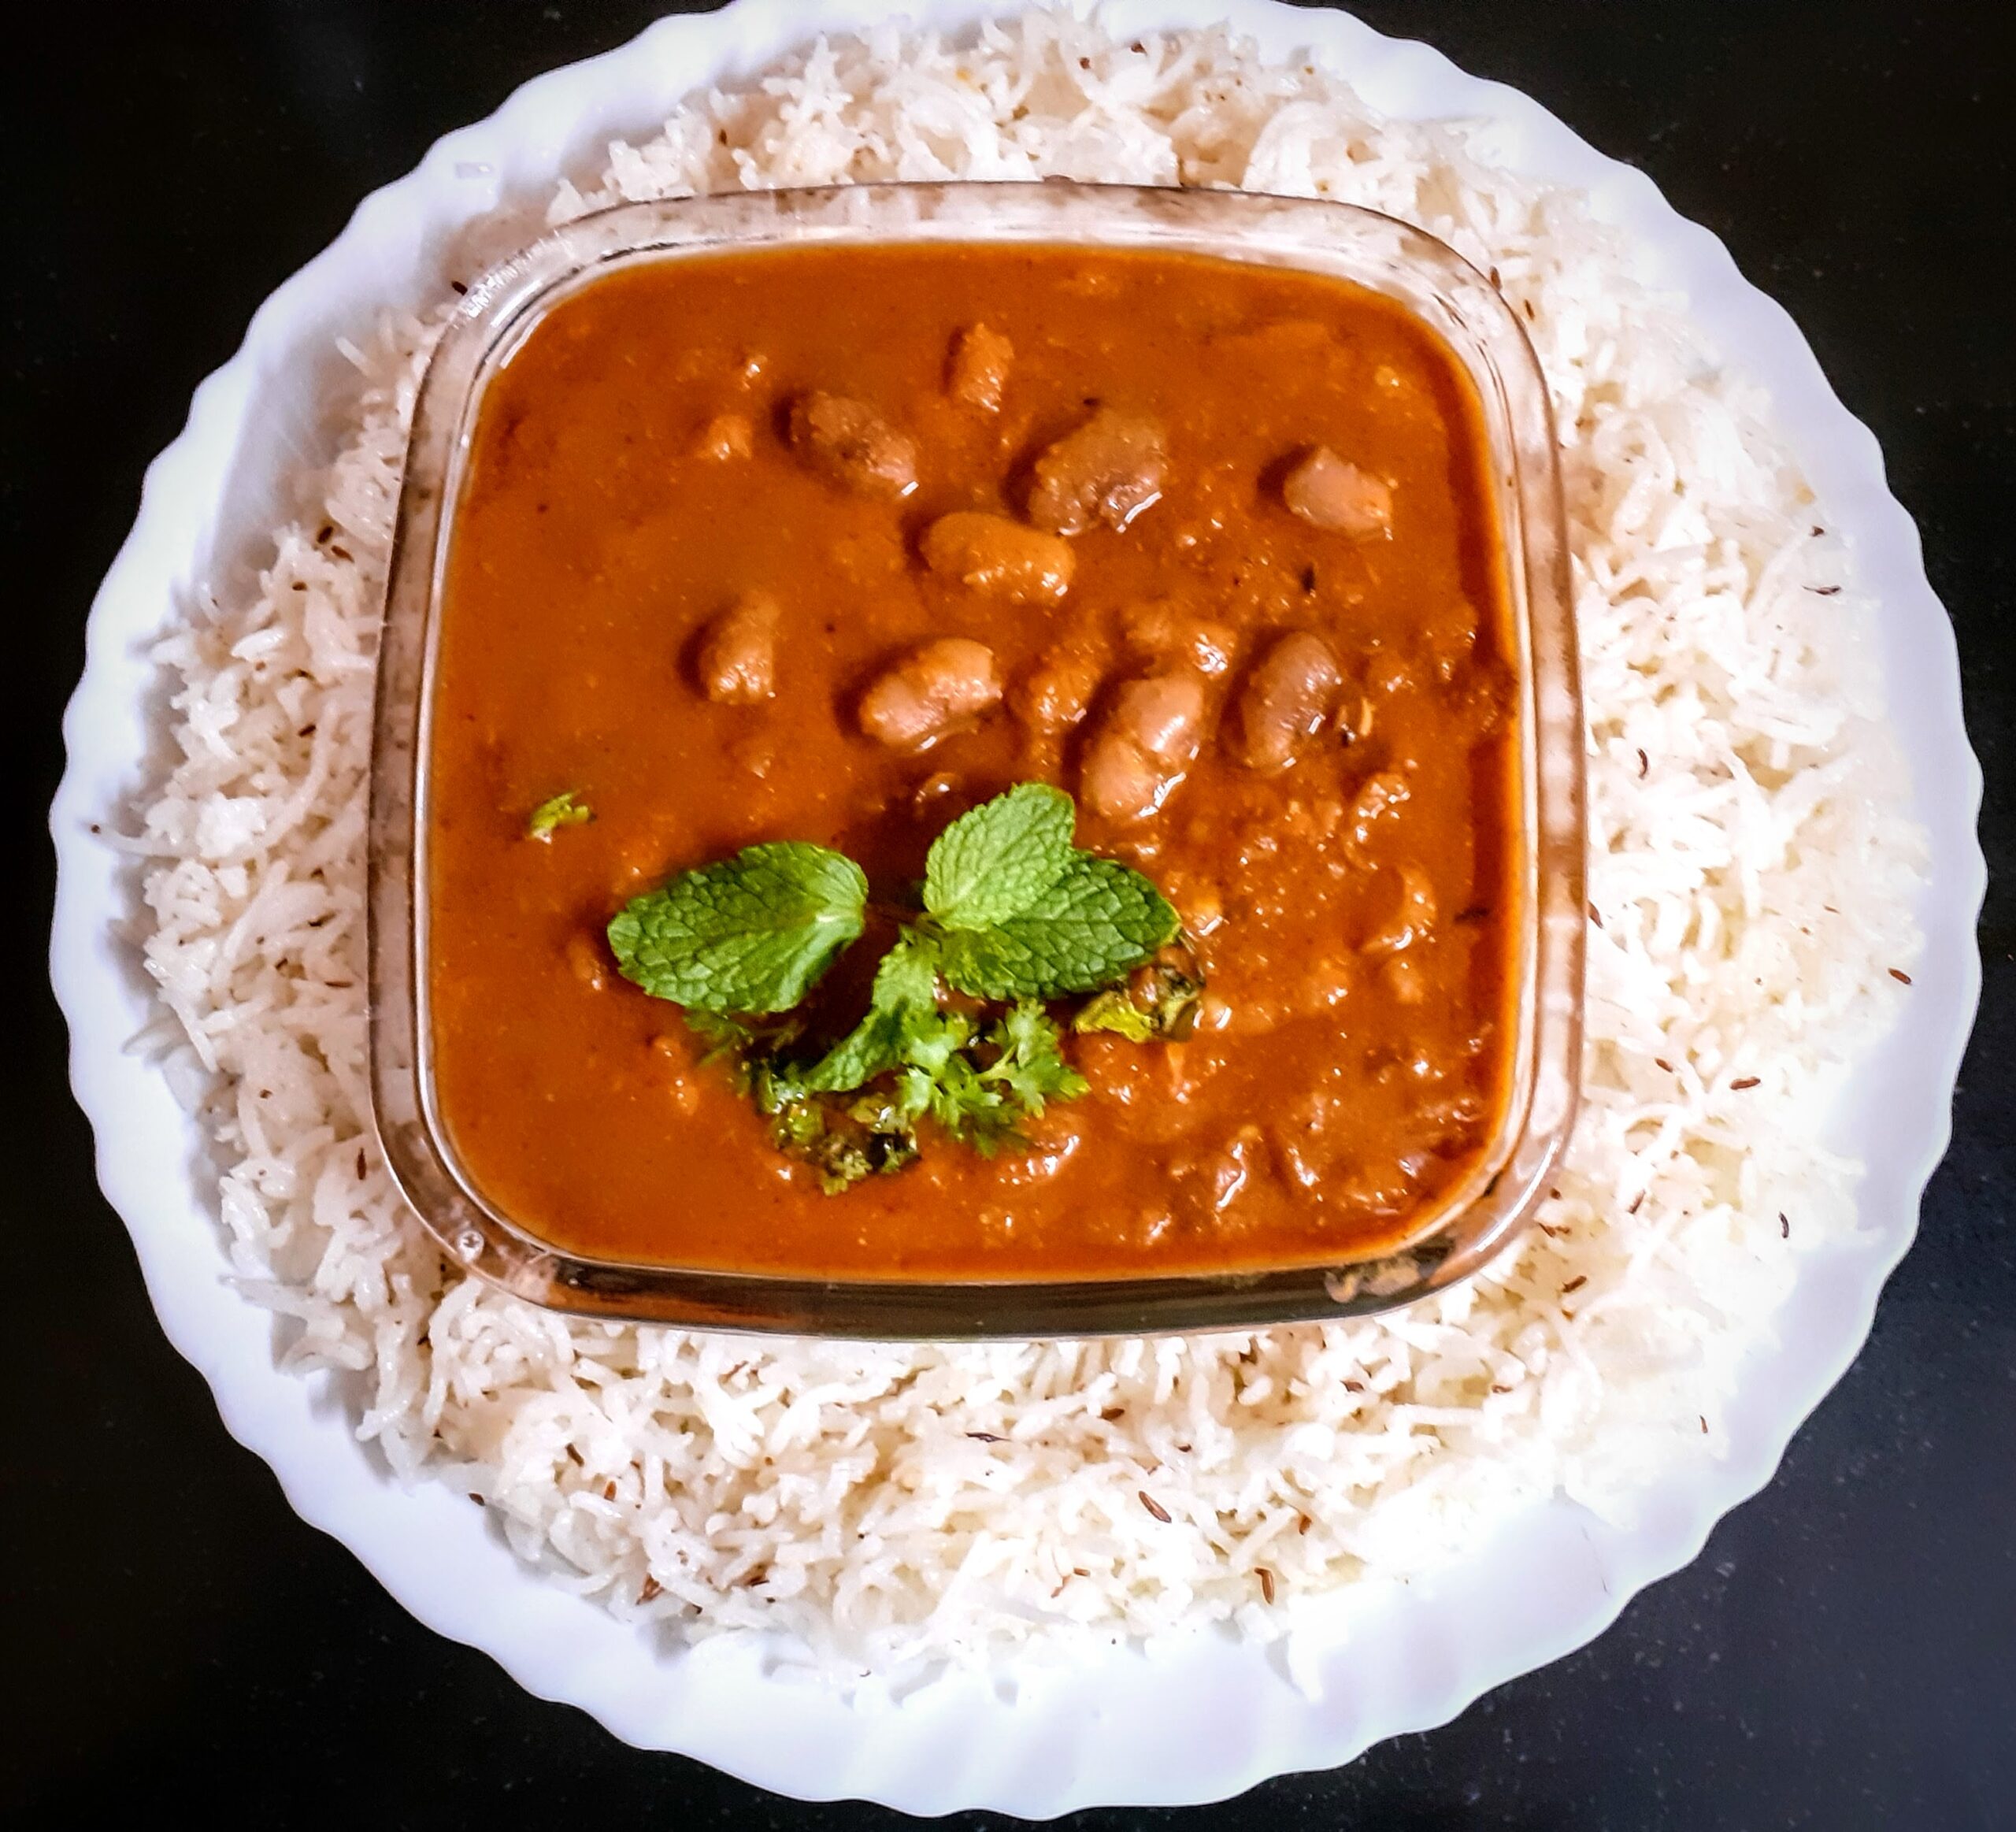


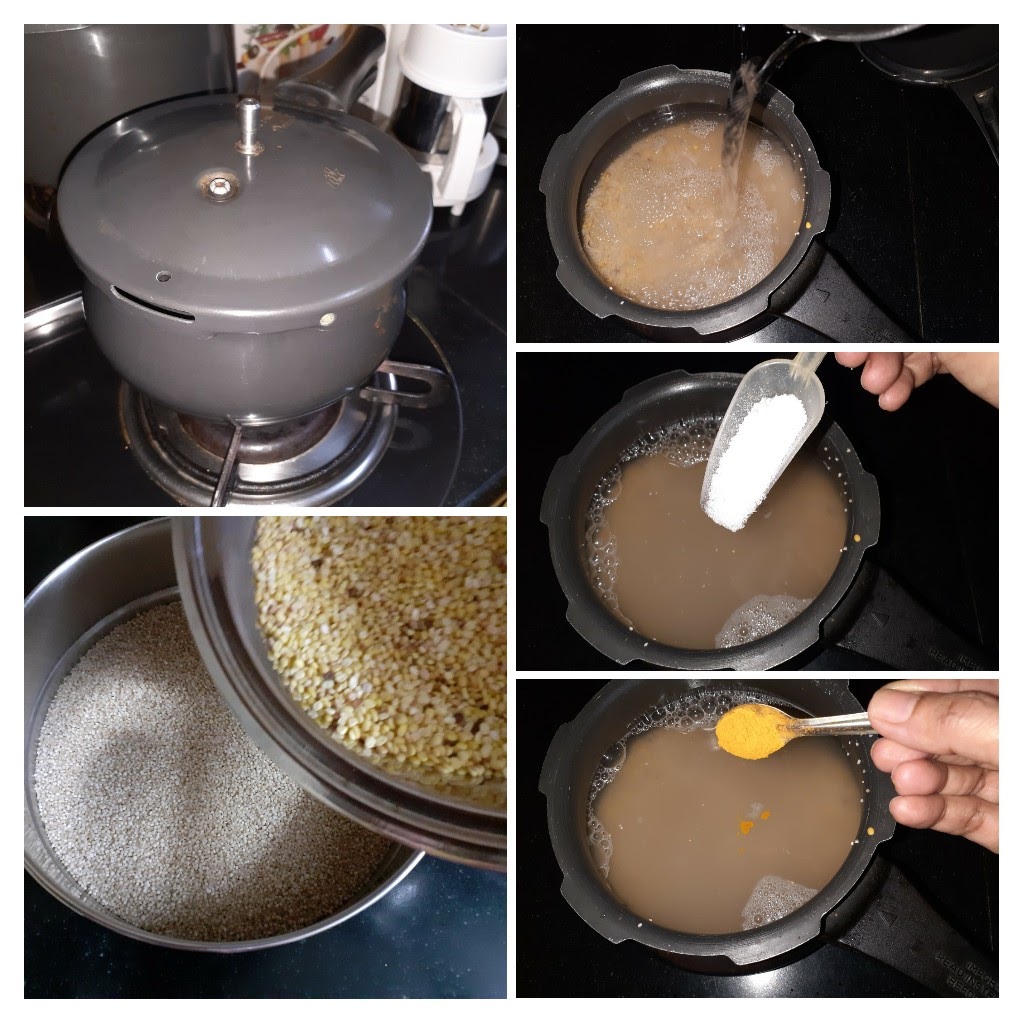
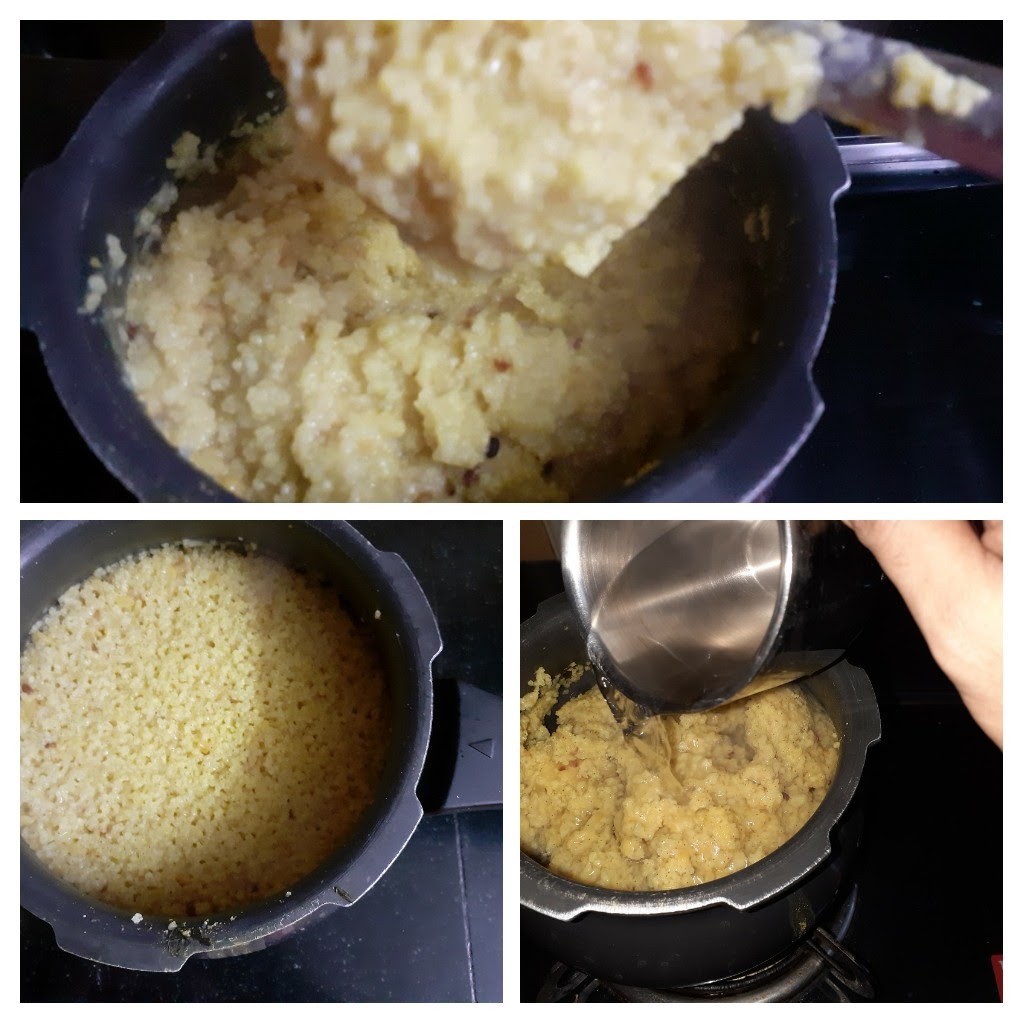
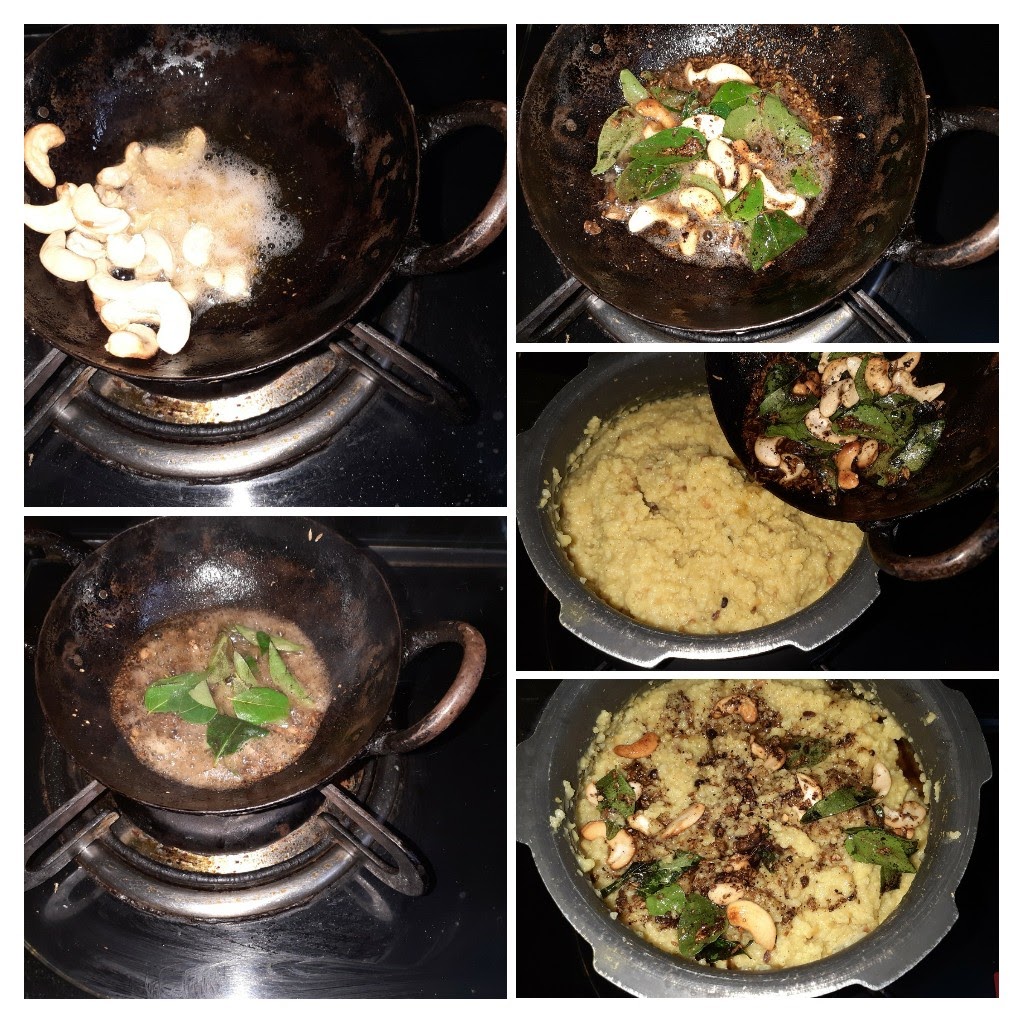
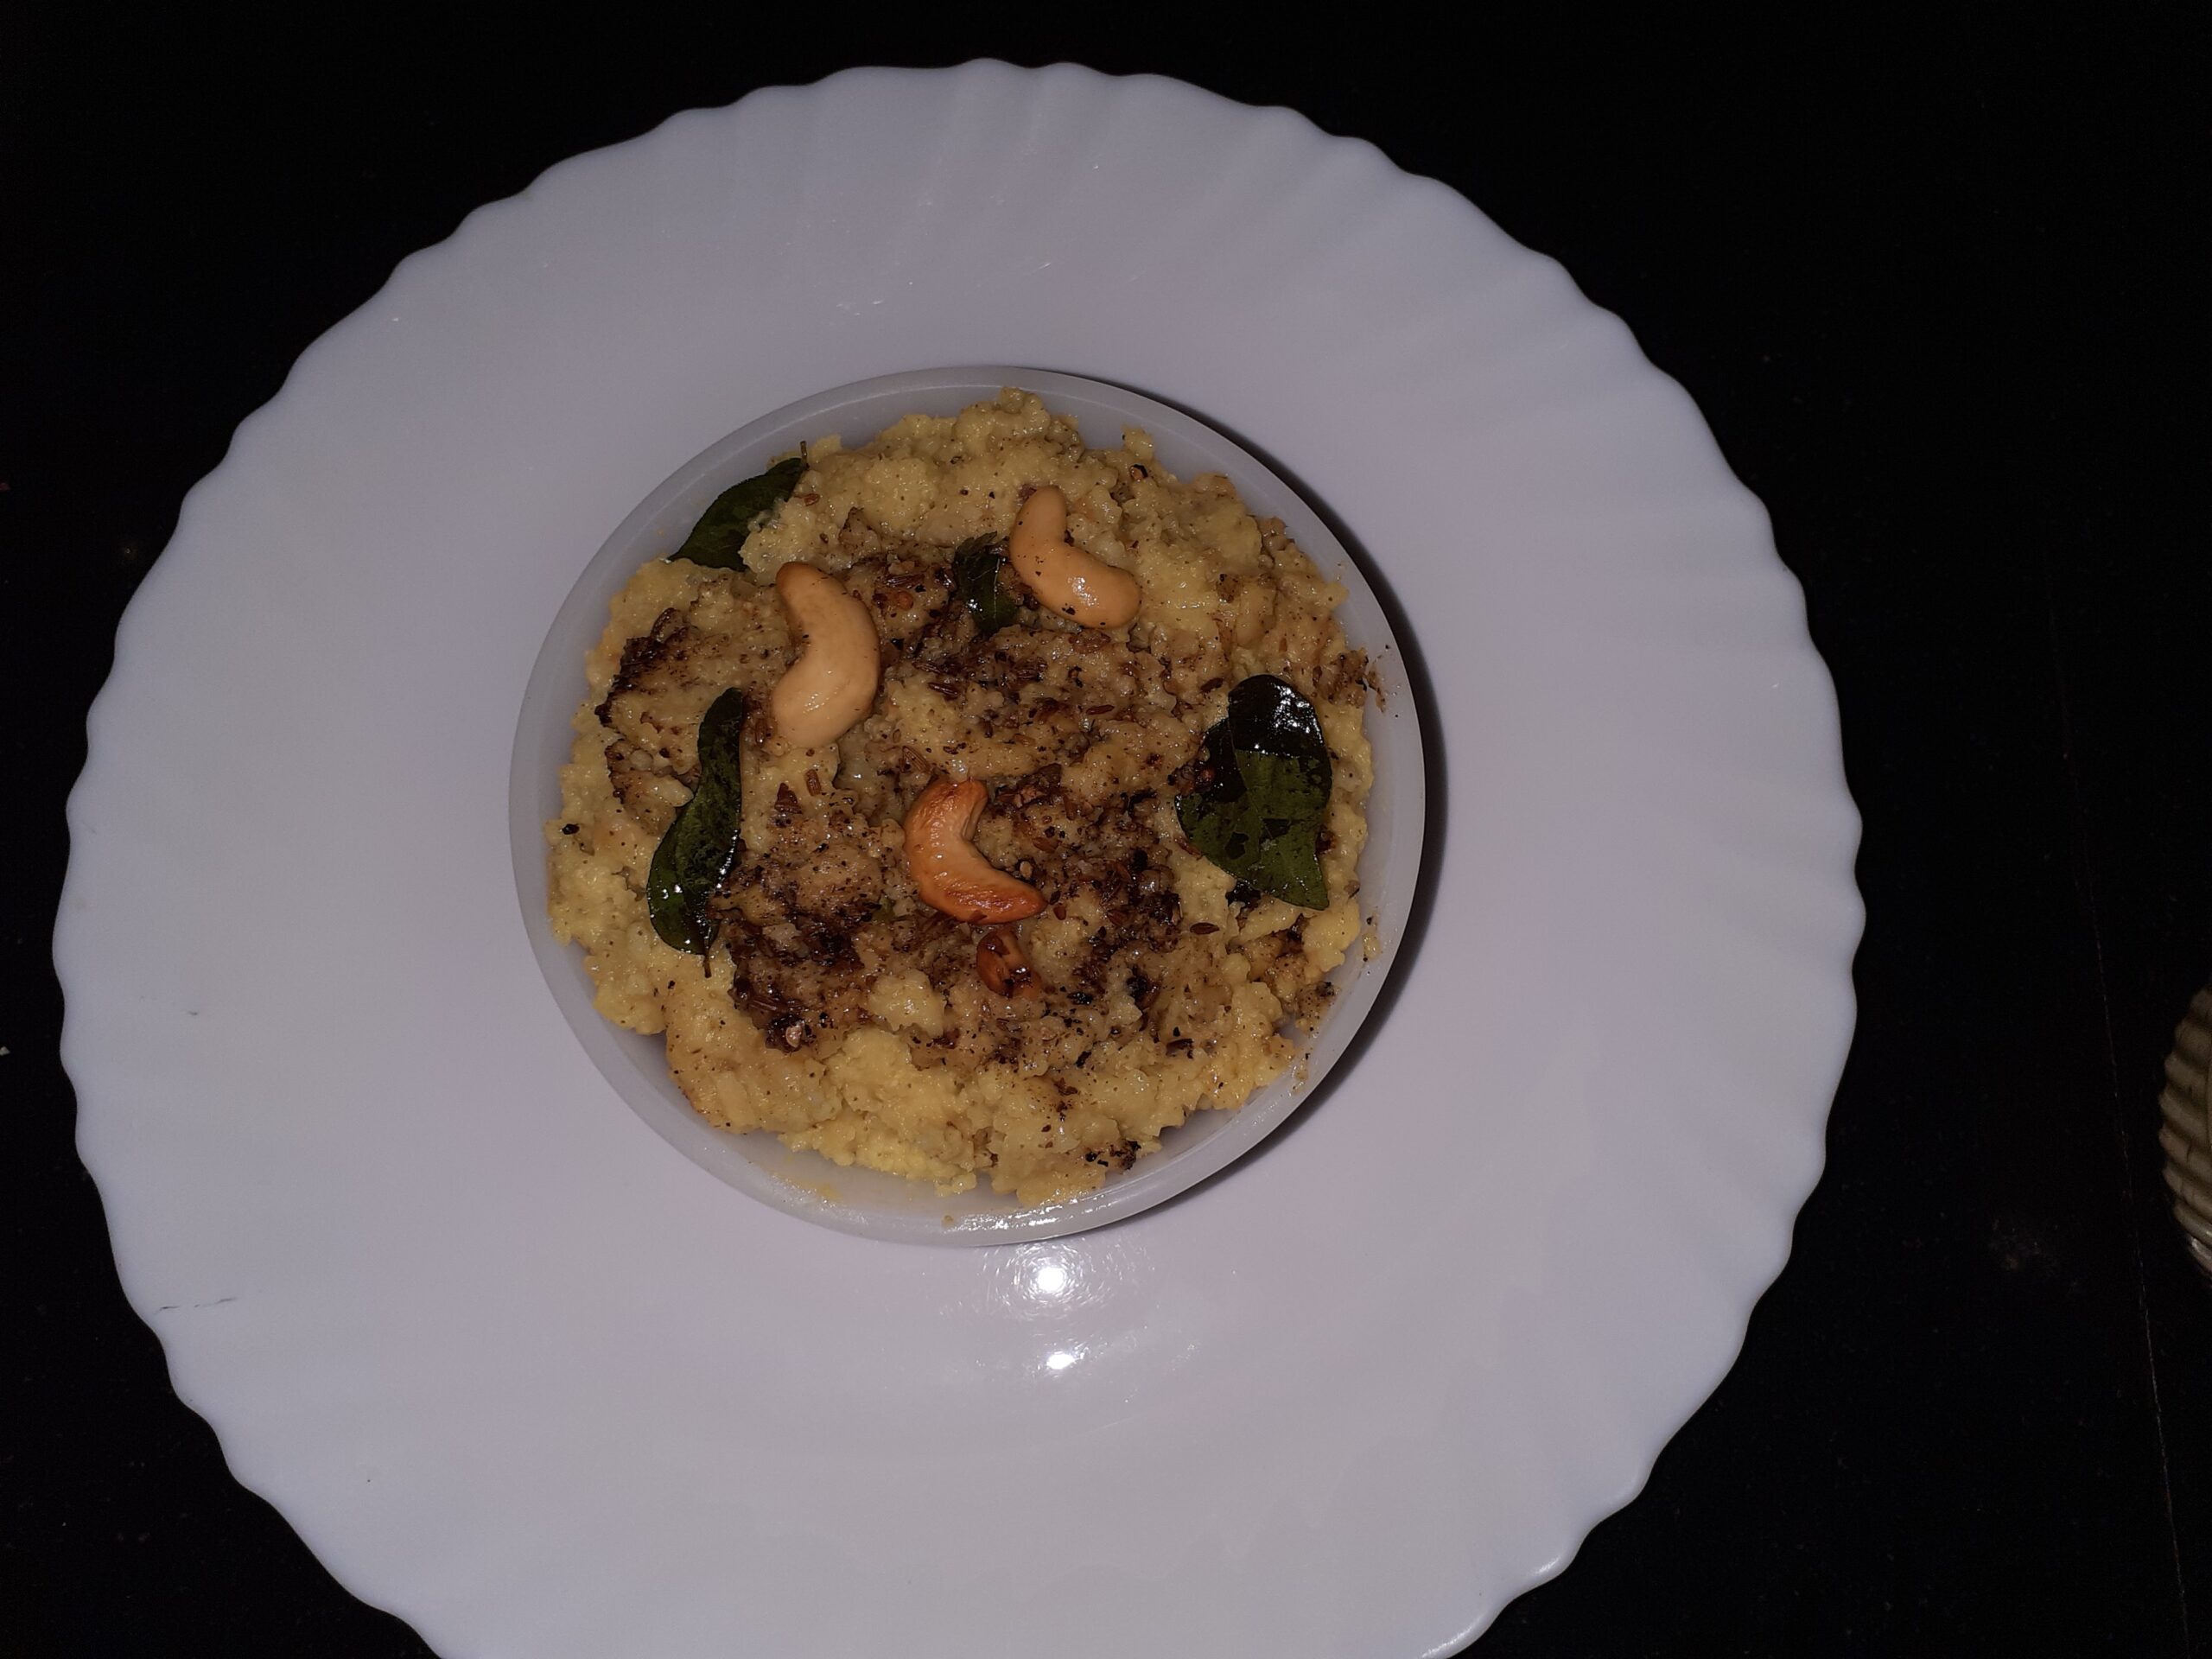
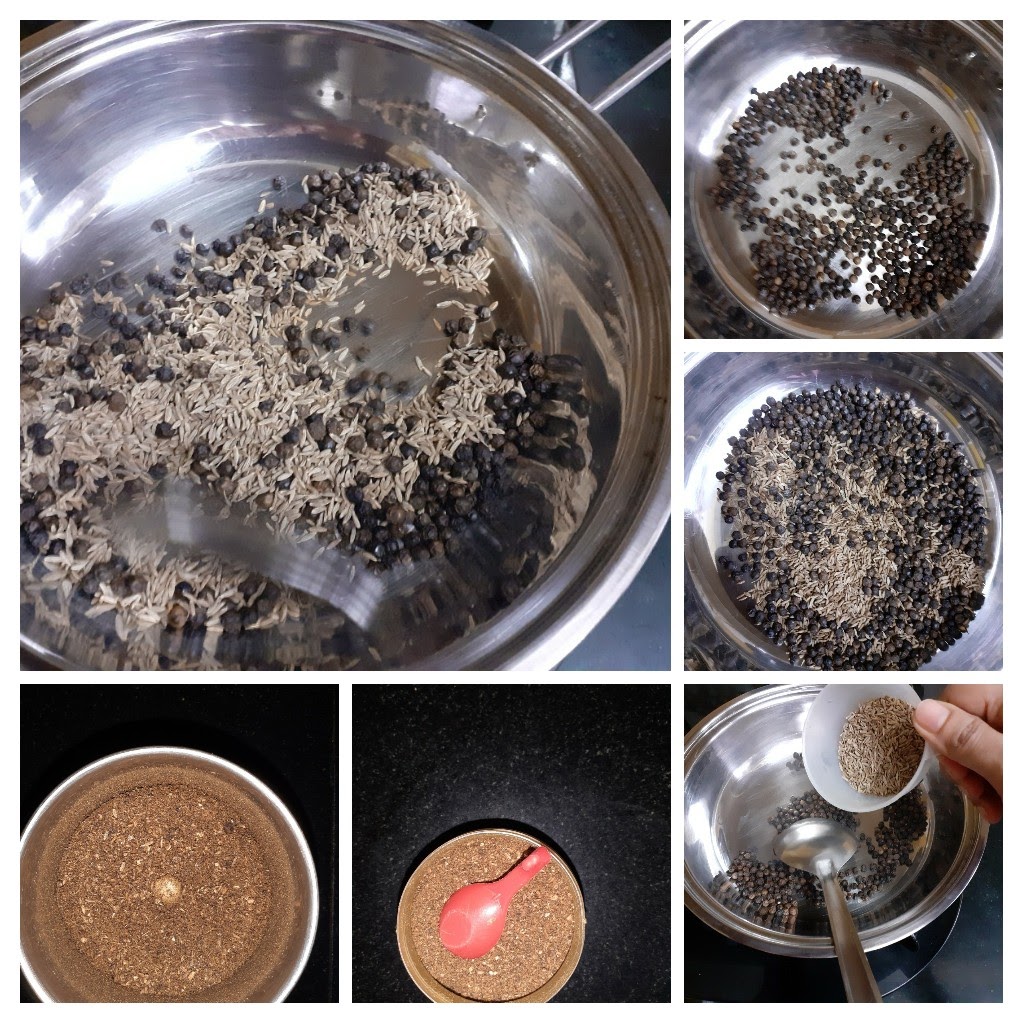
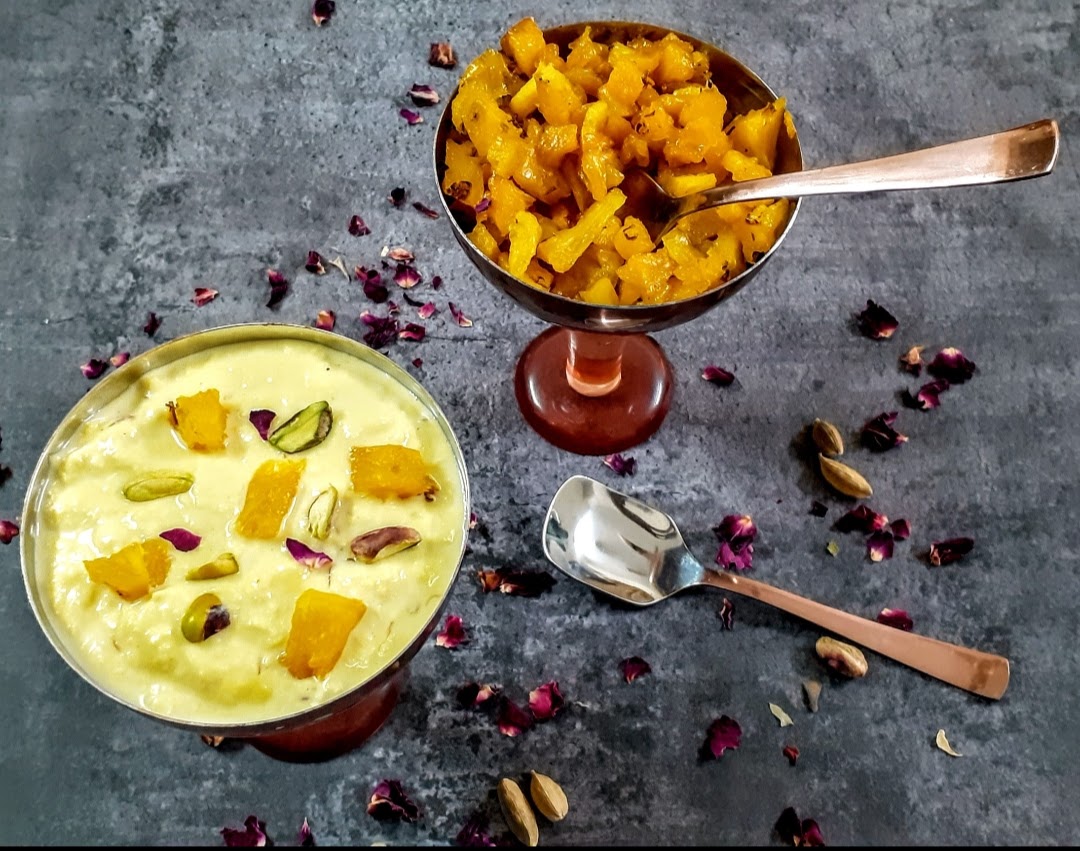
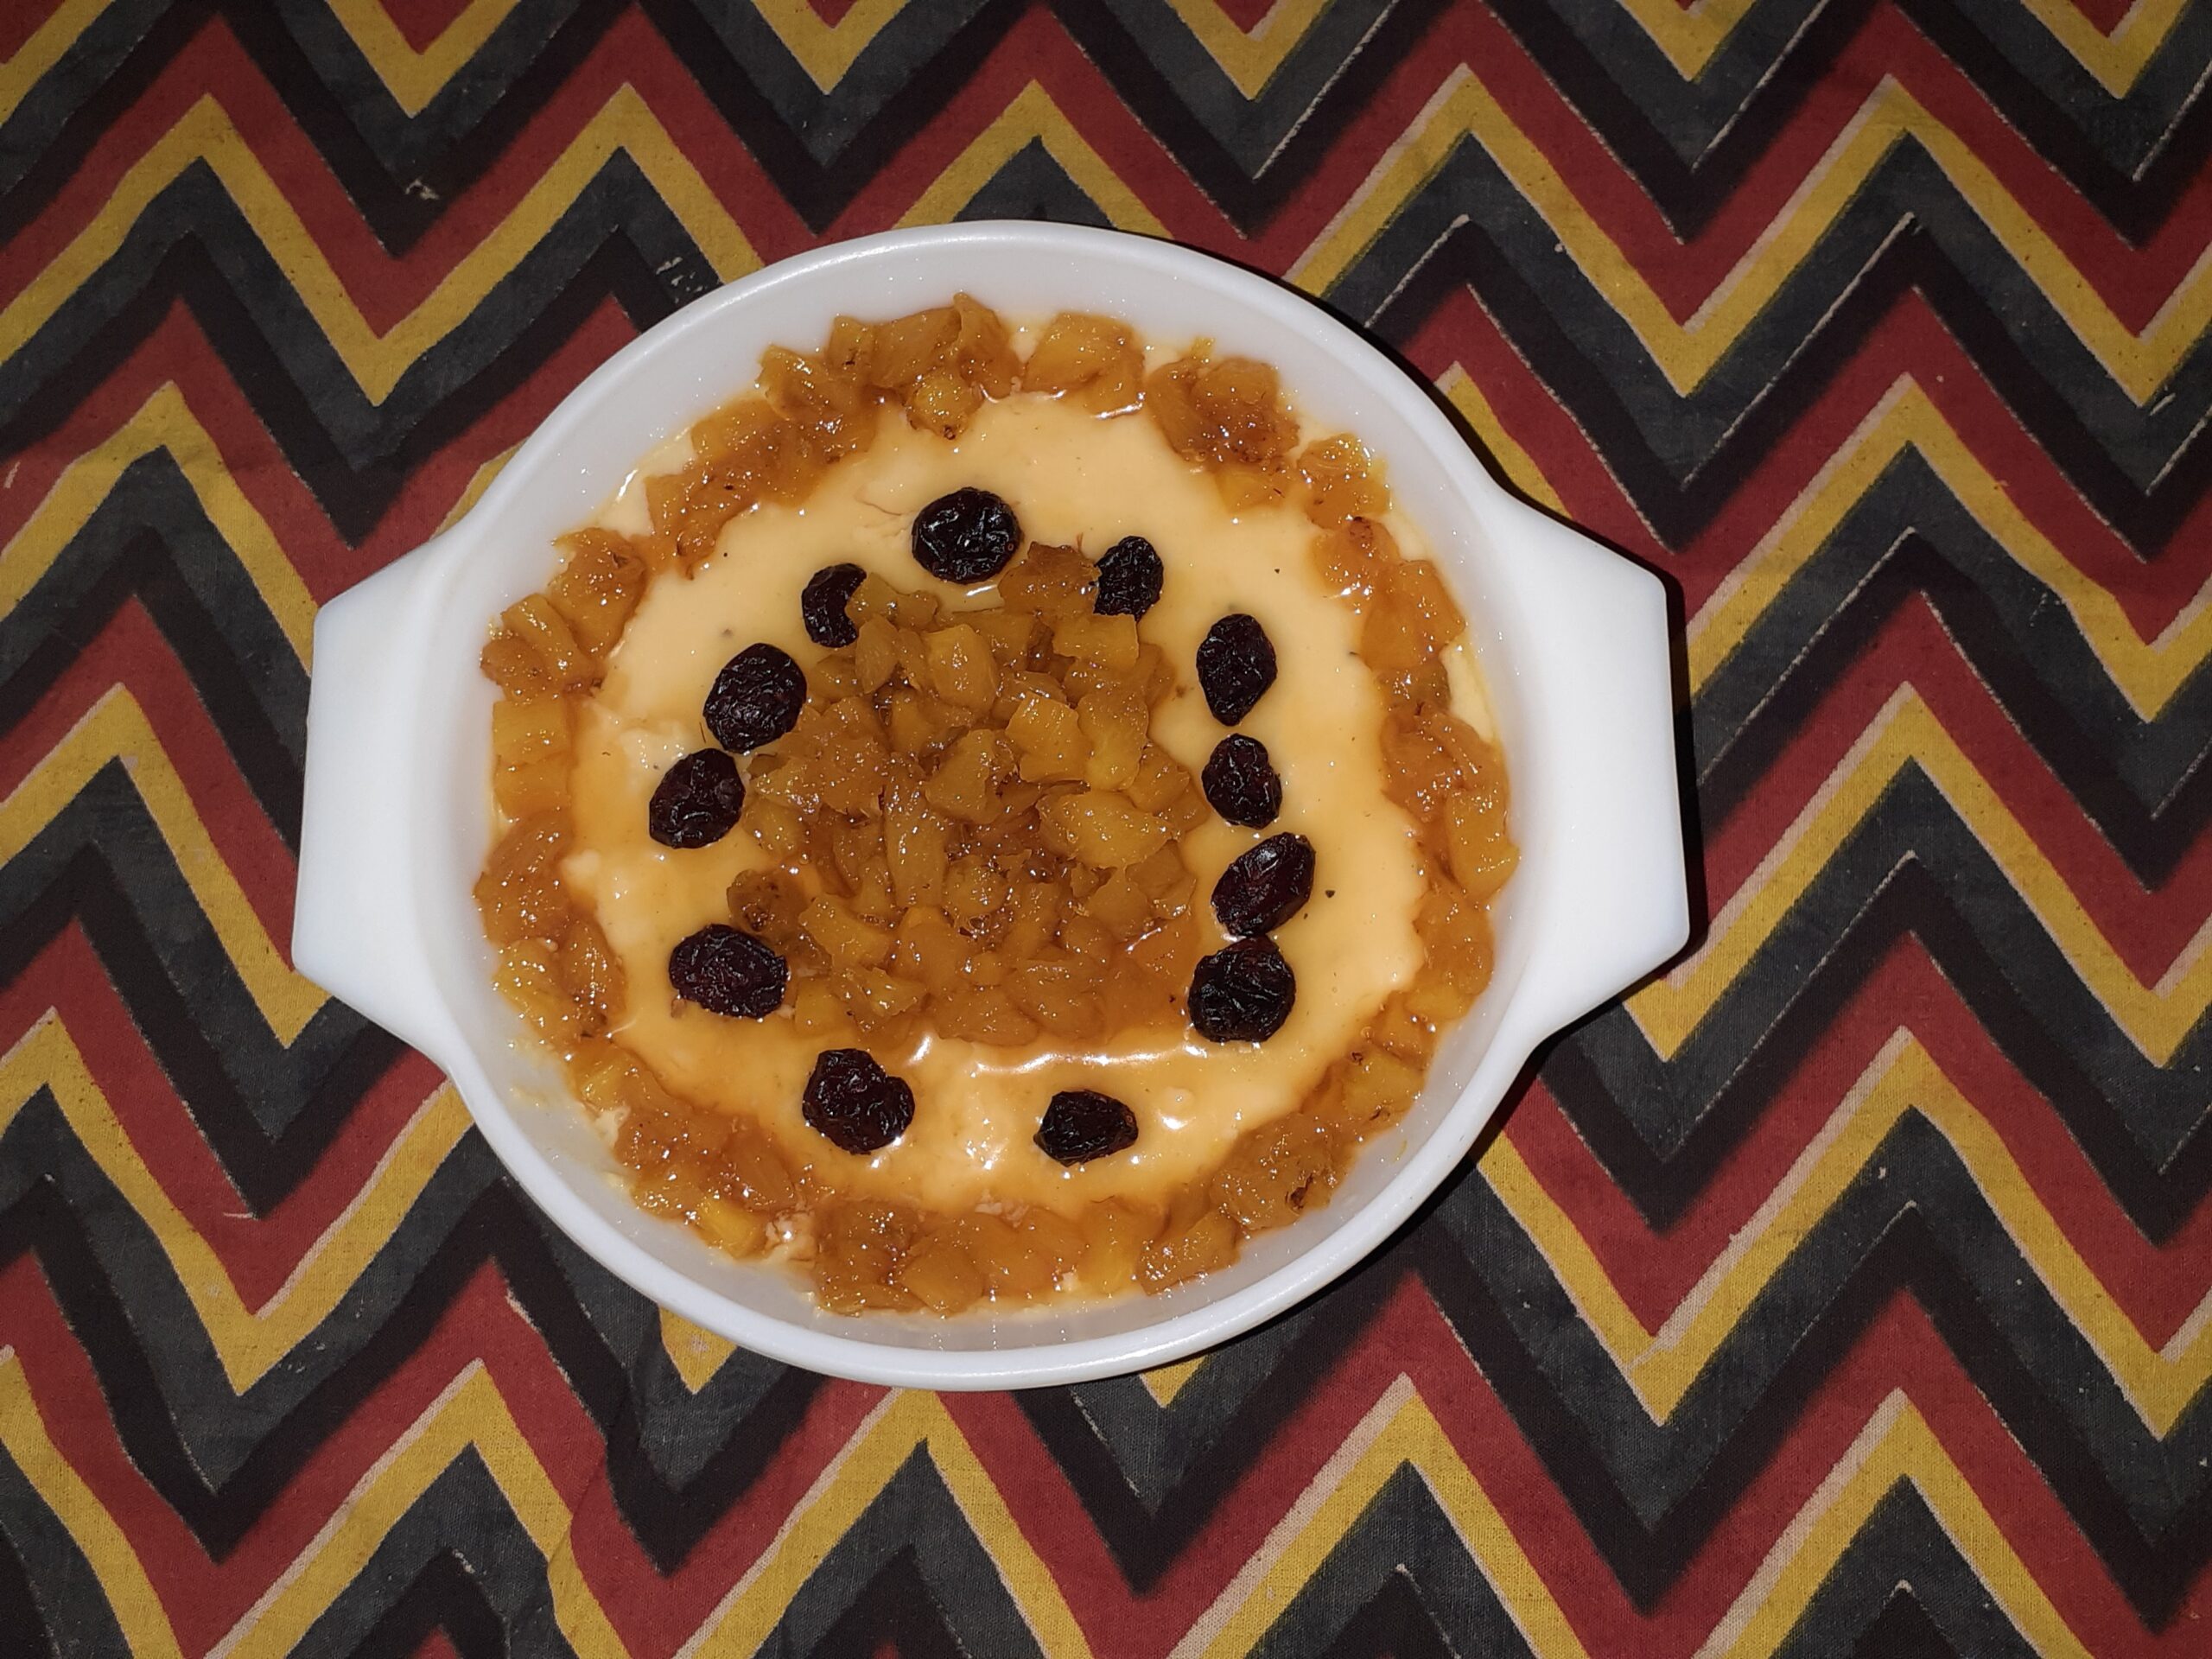
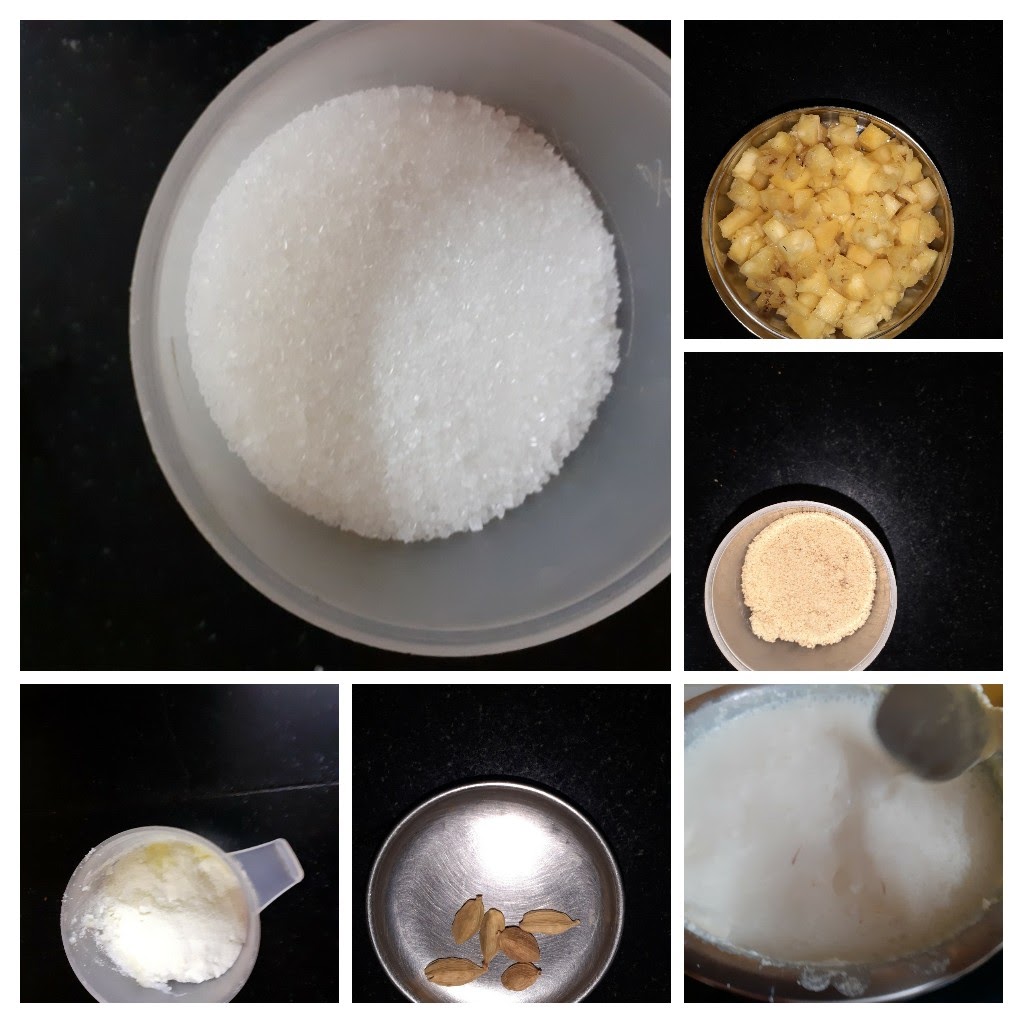
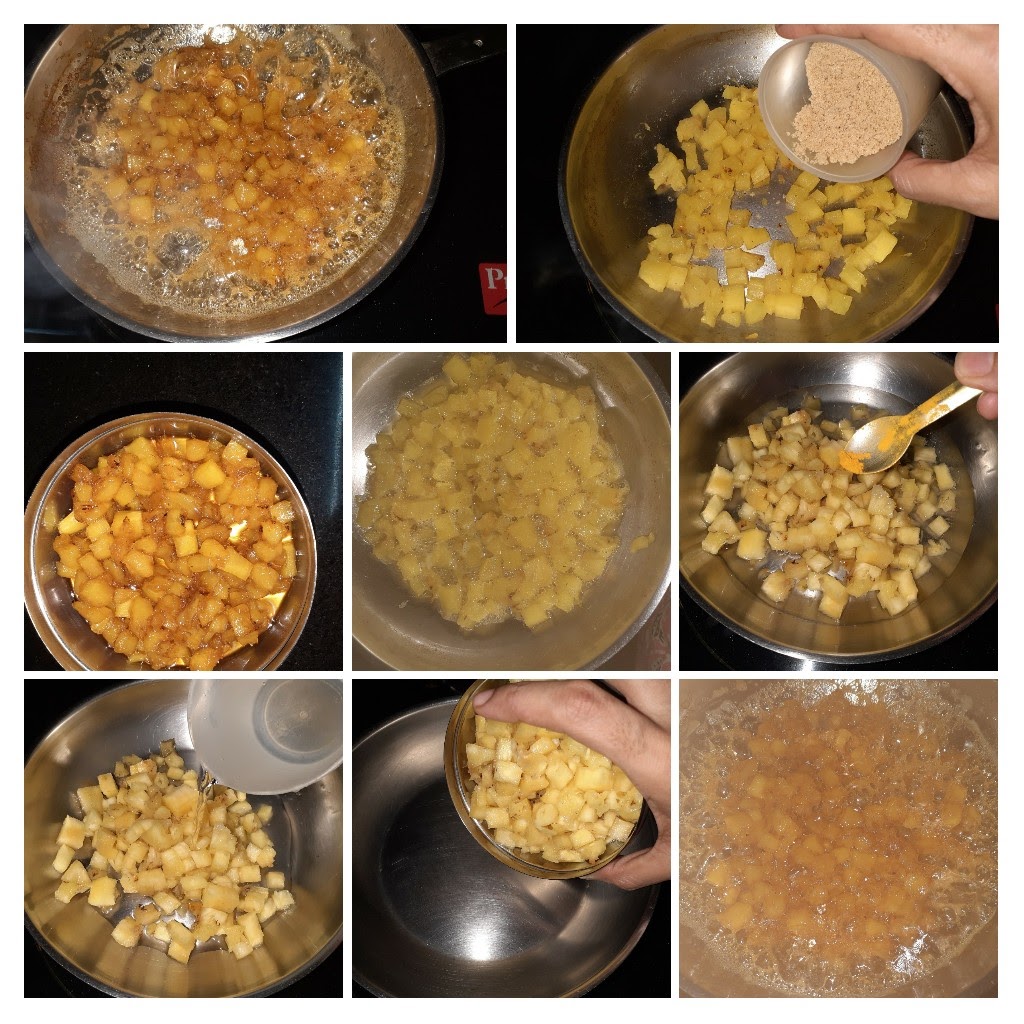
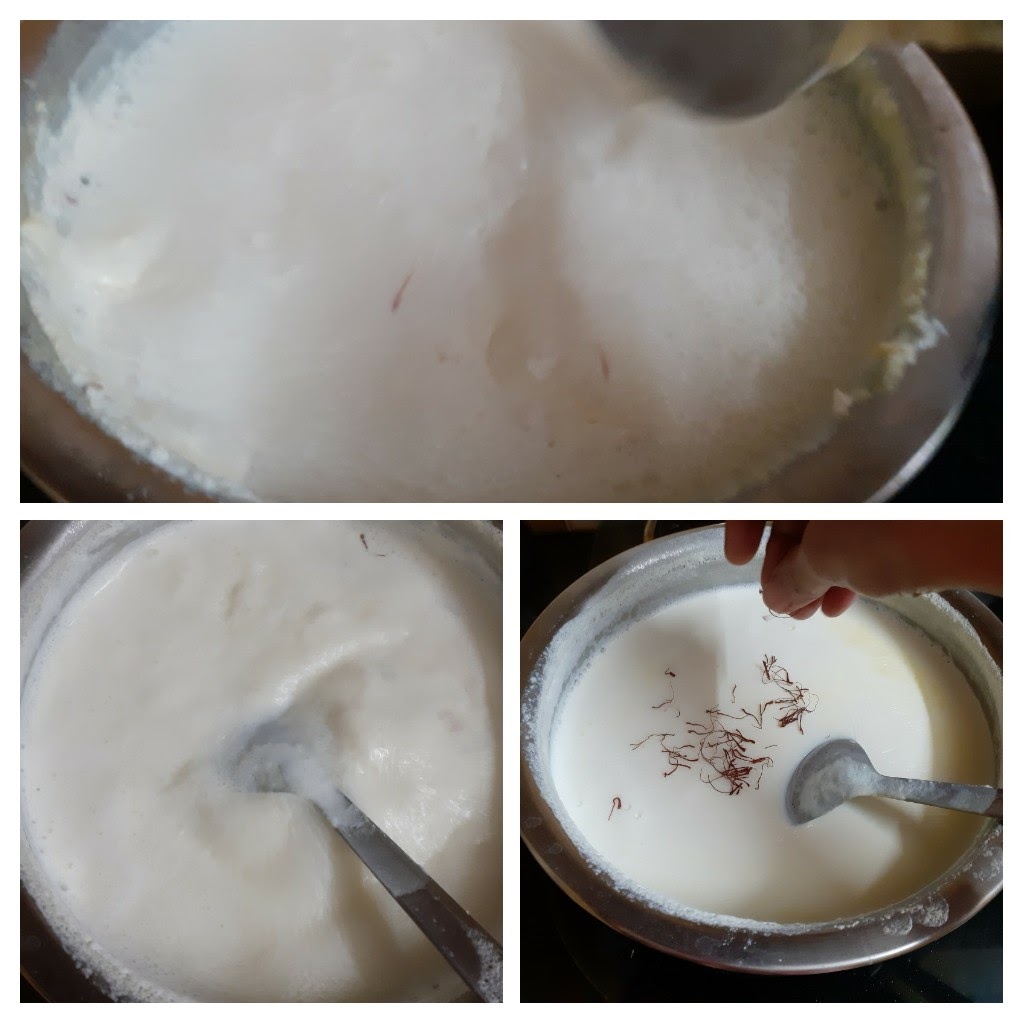
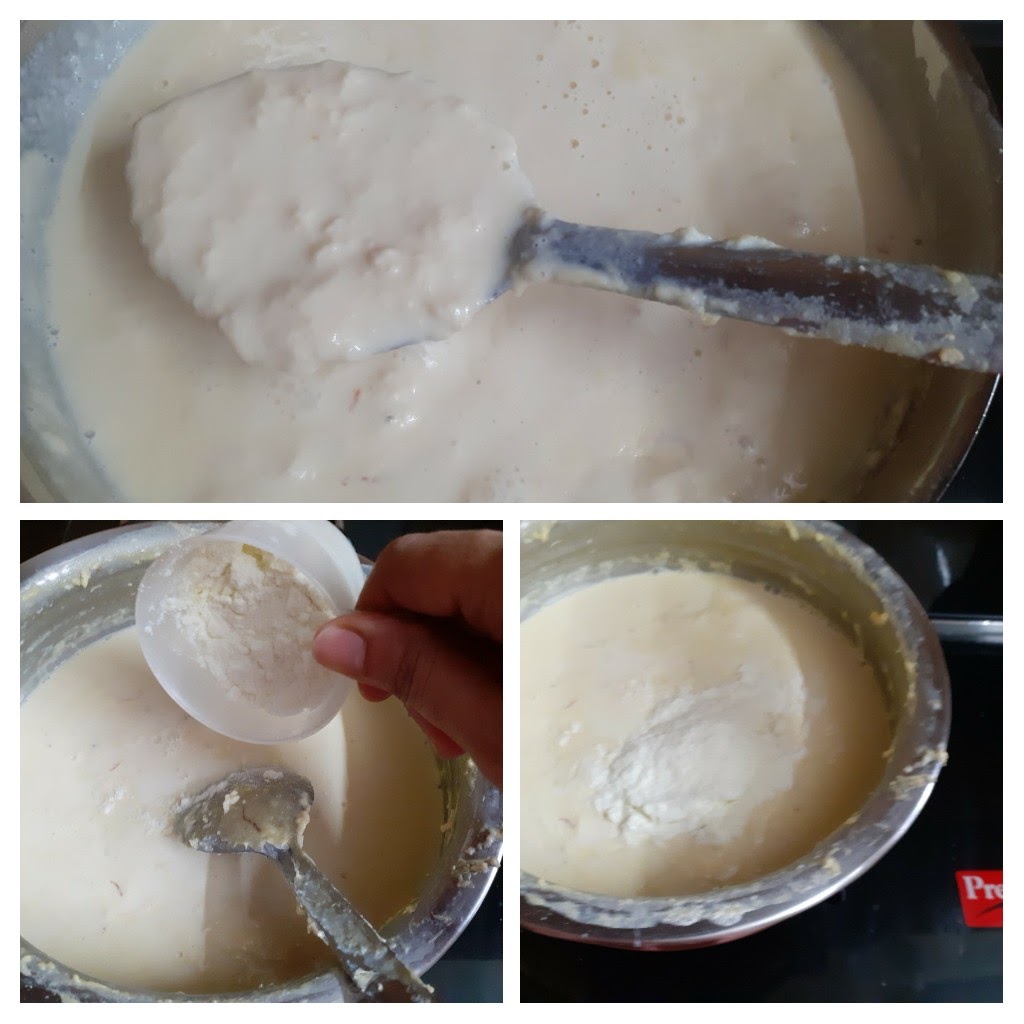

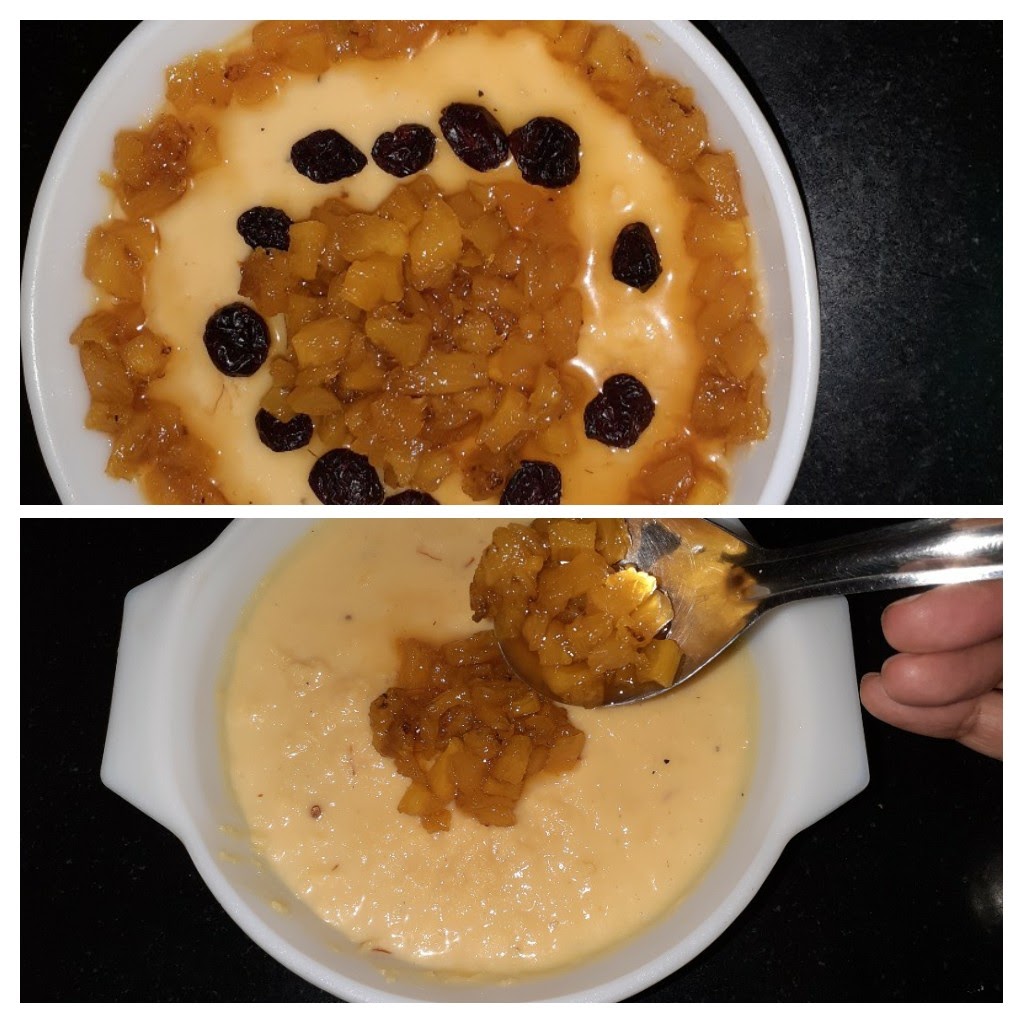

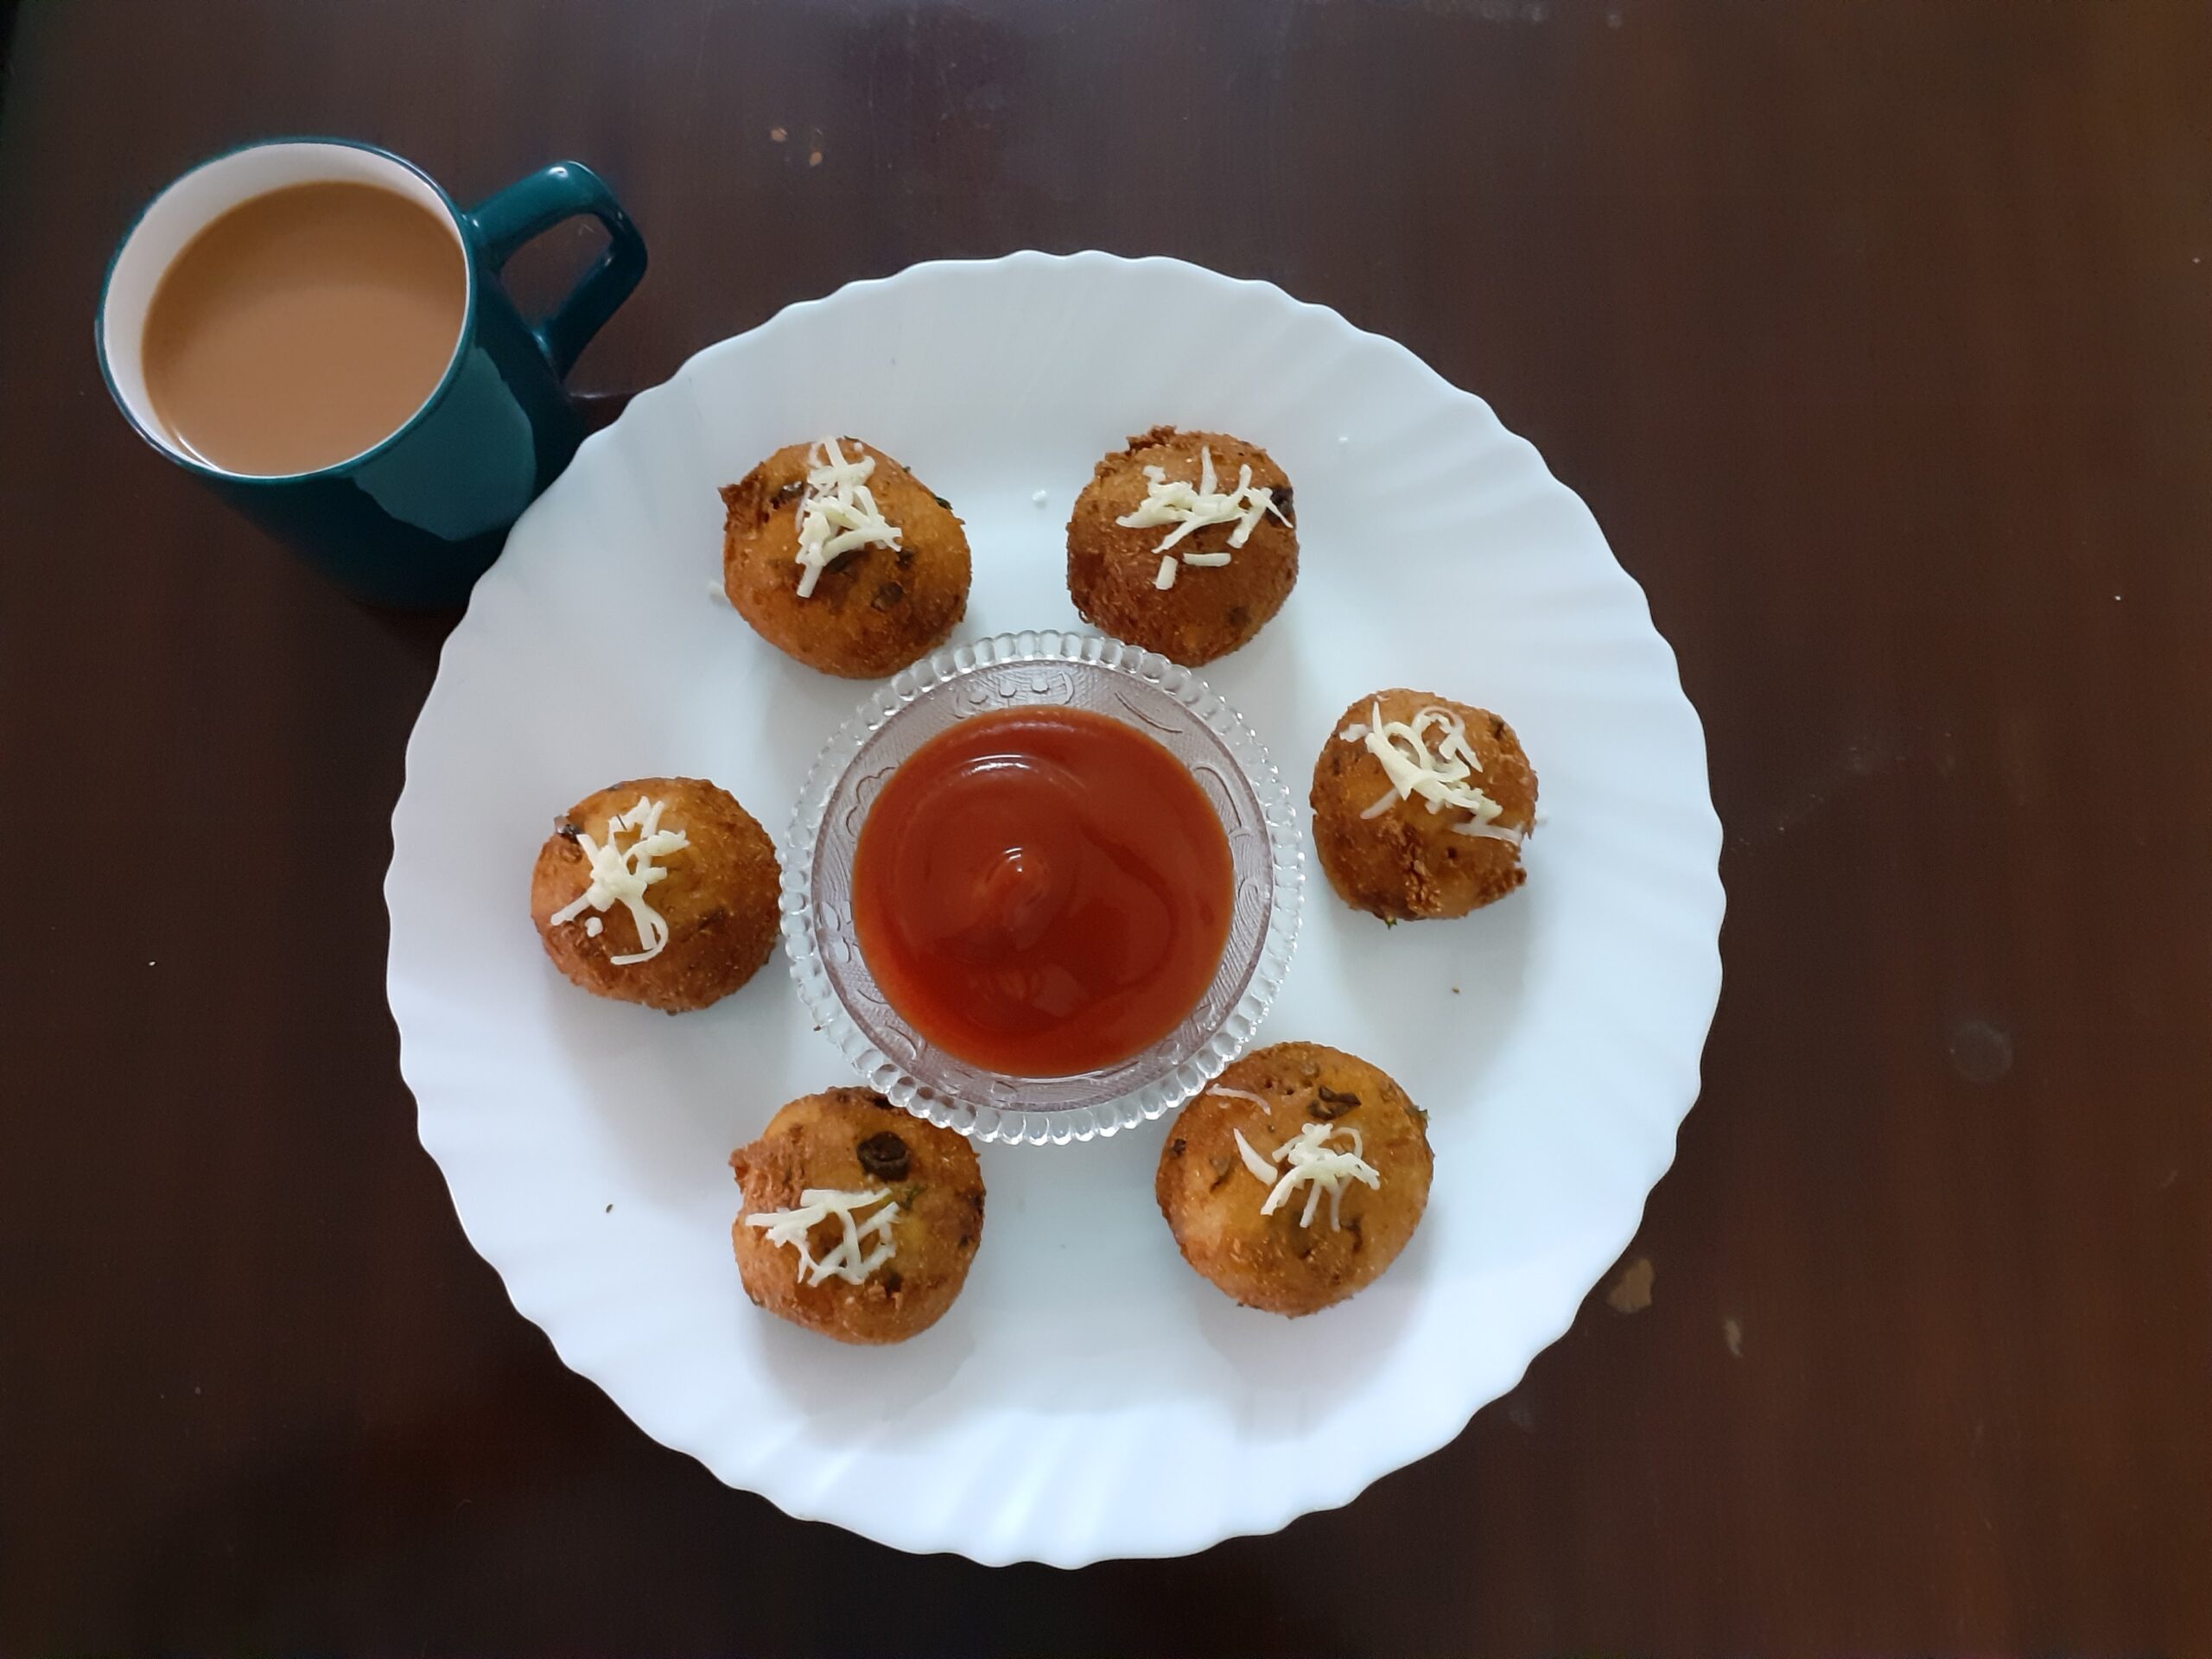

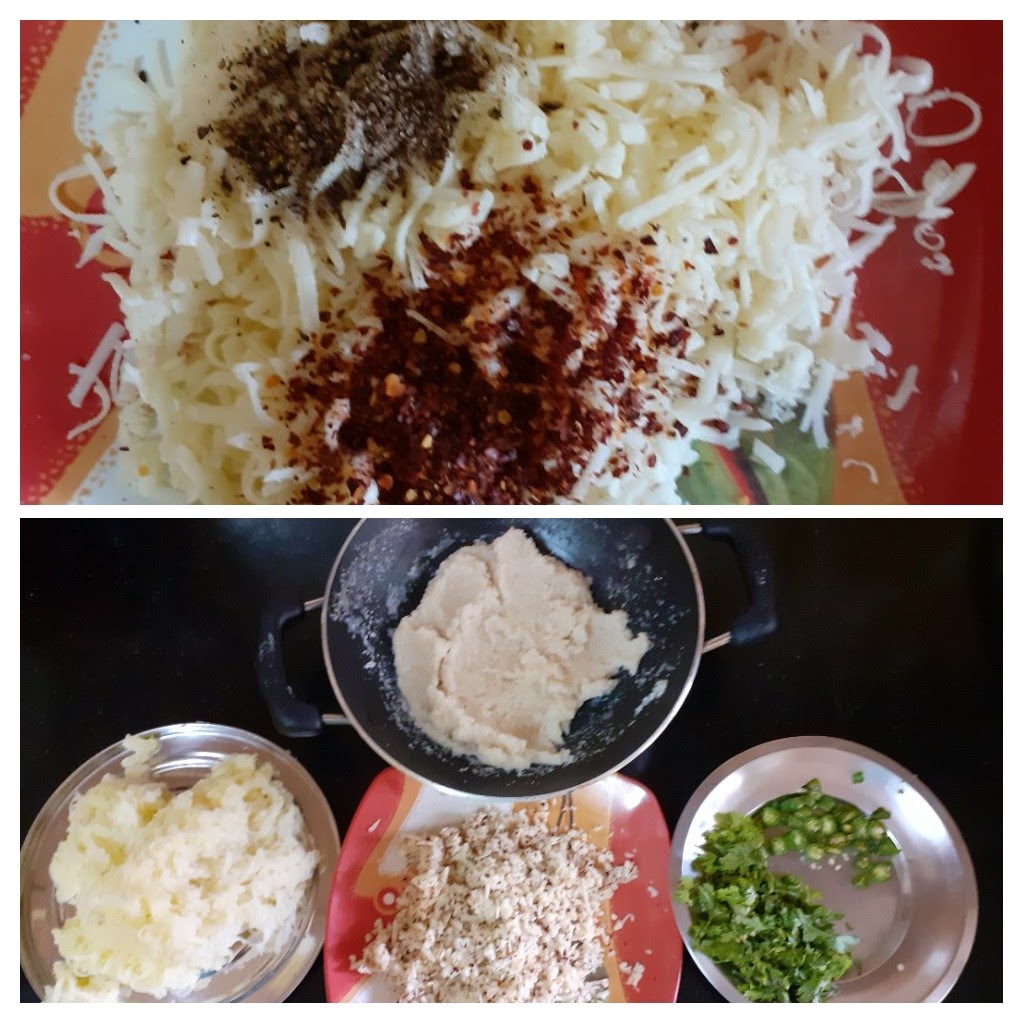
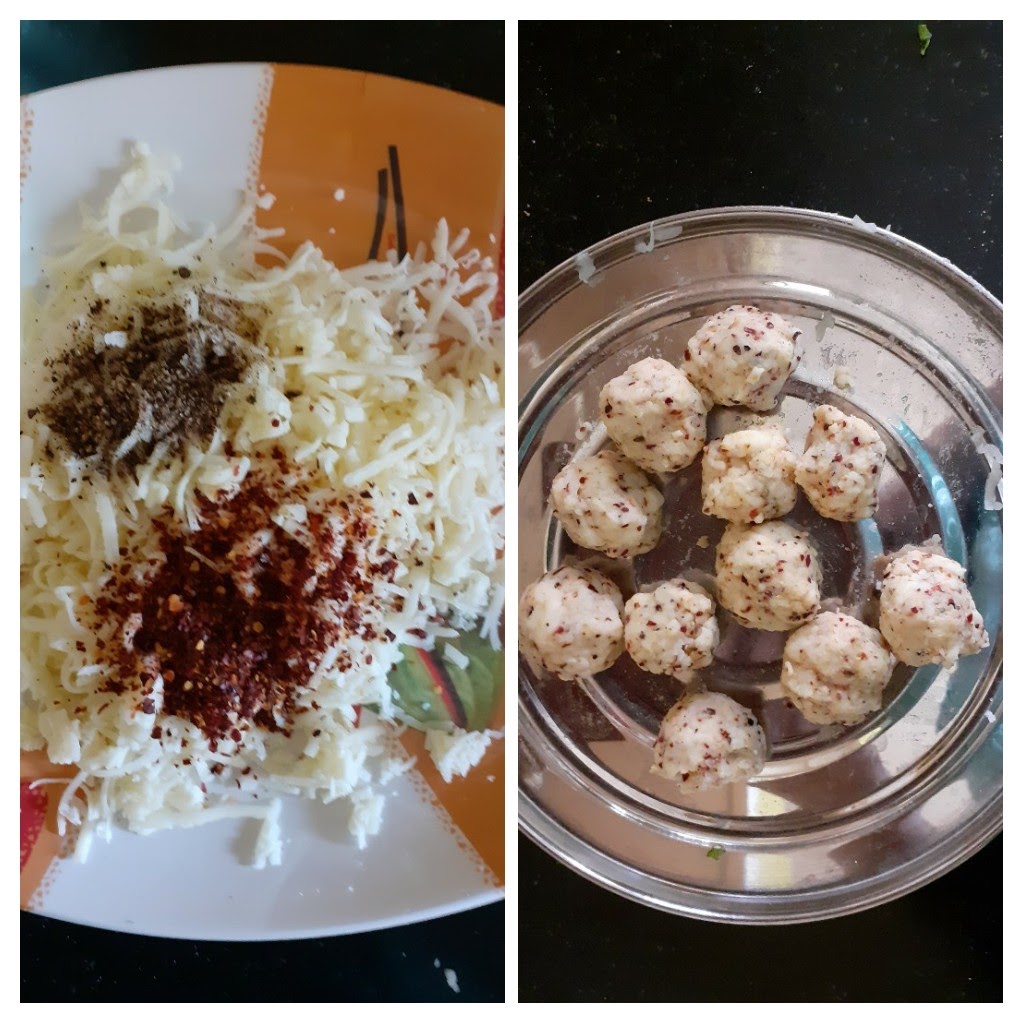
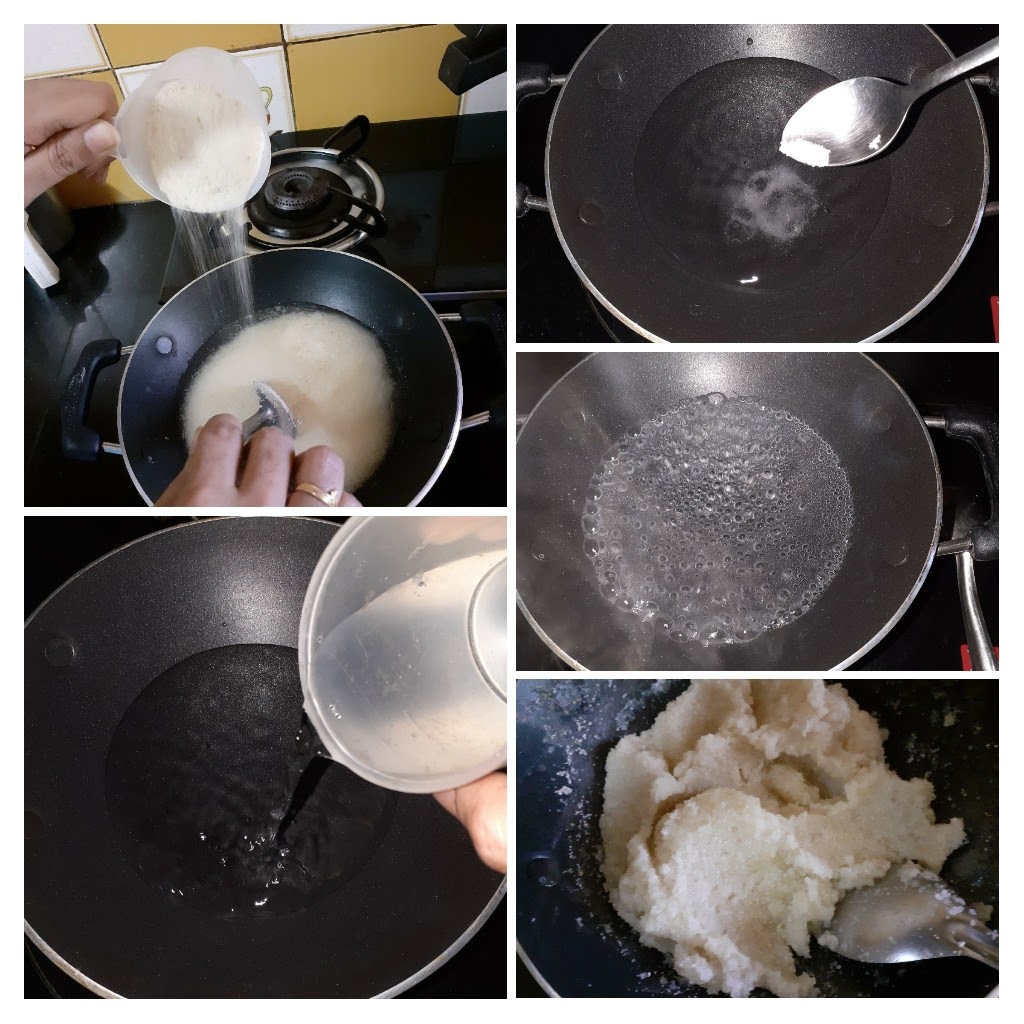
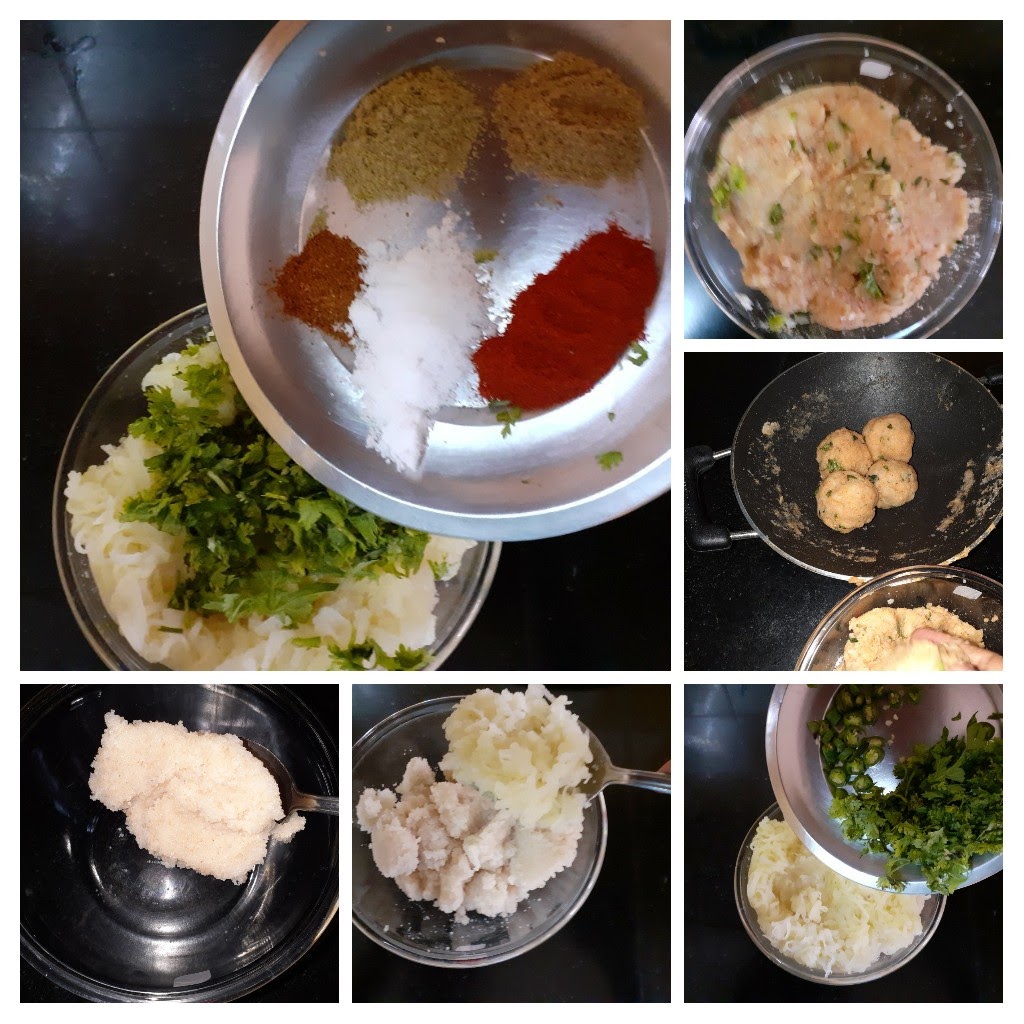
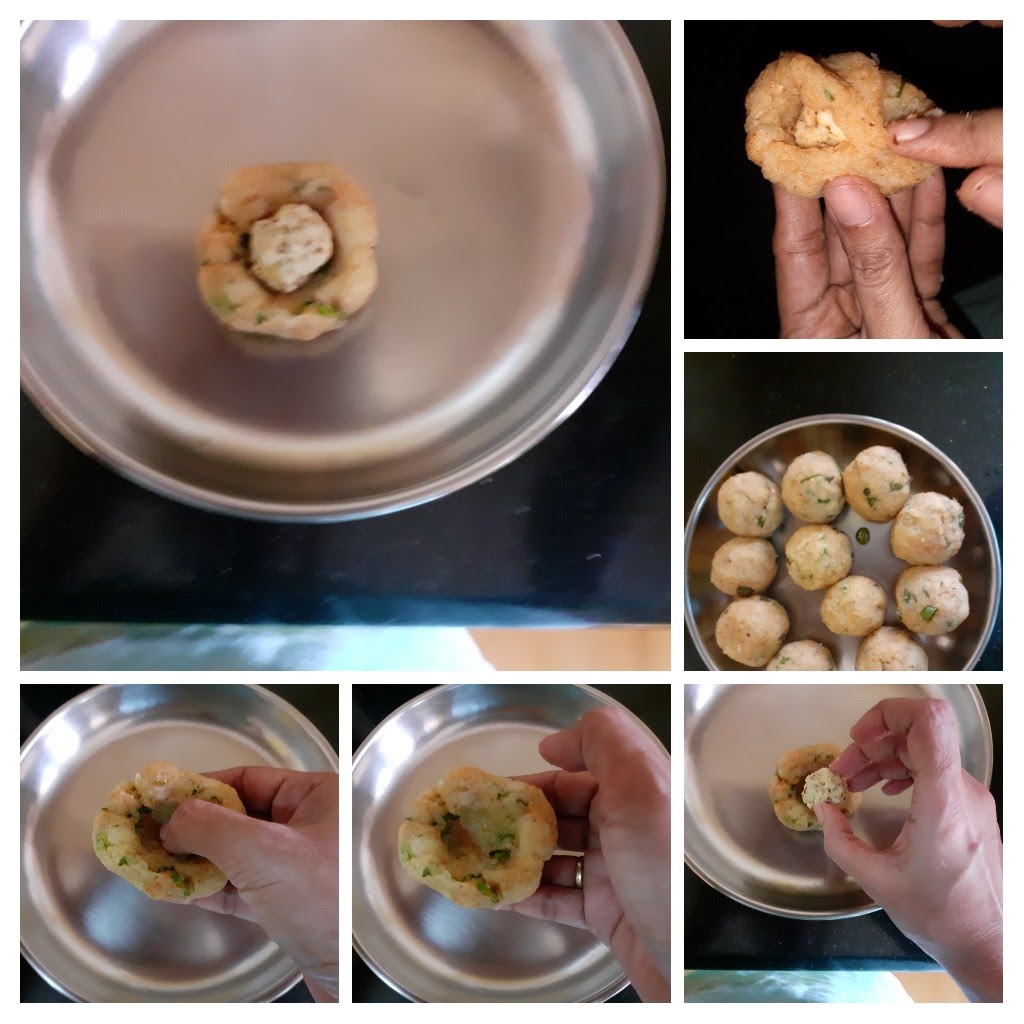
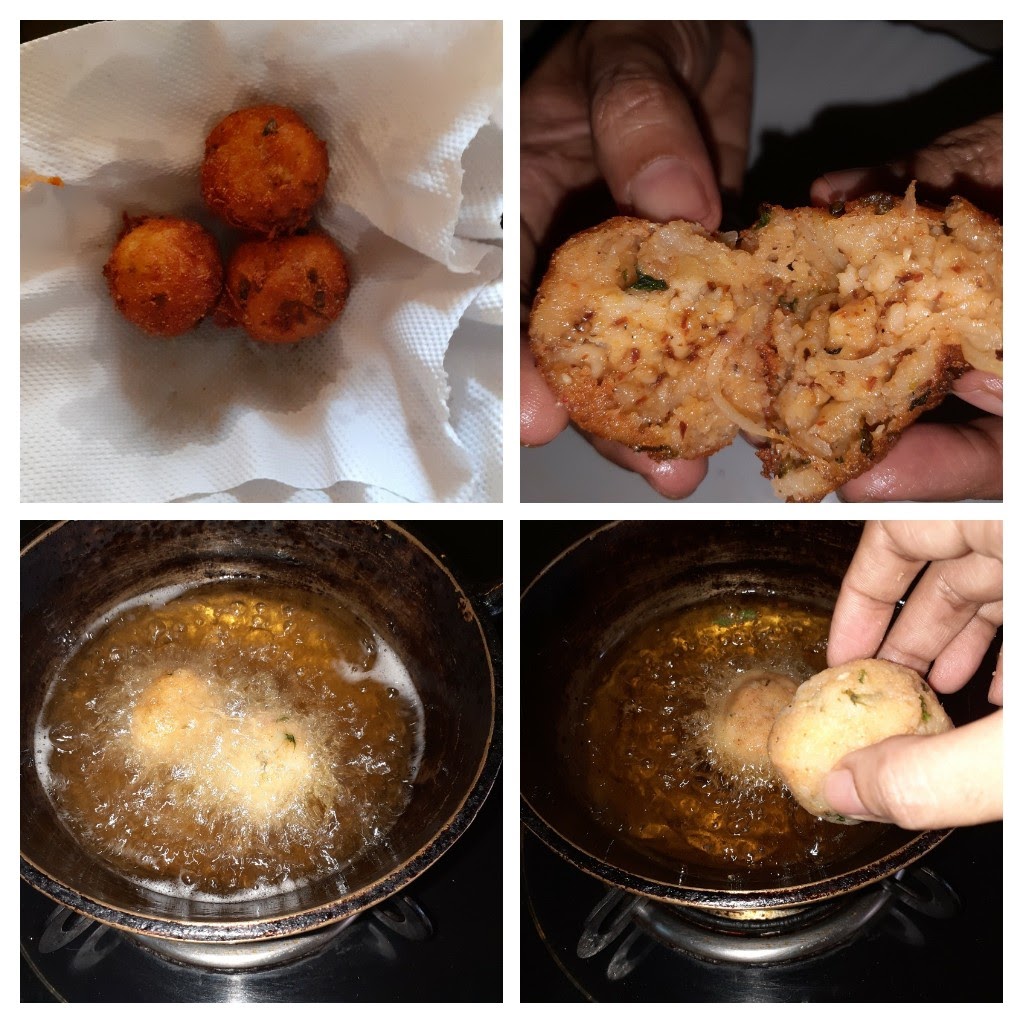 6
6