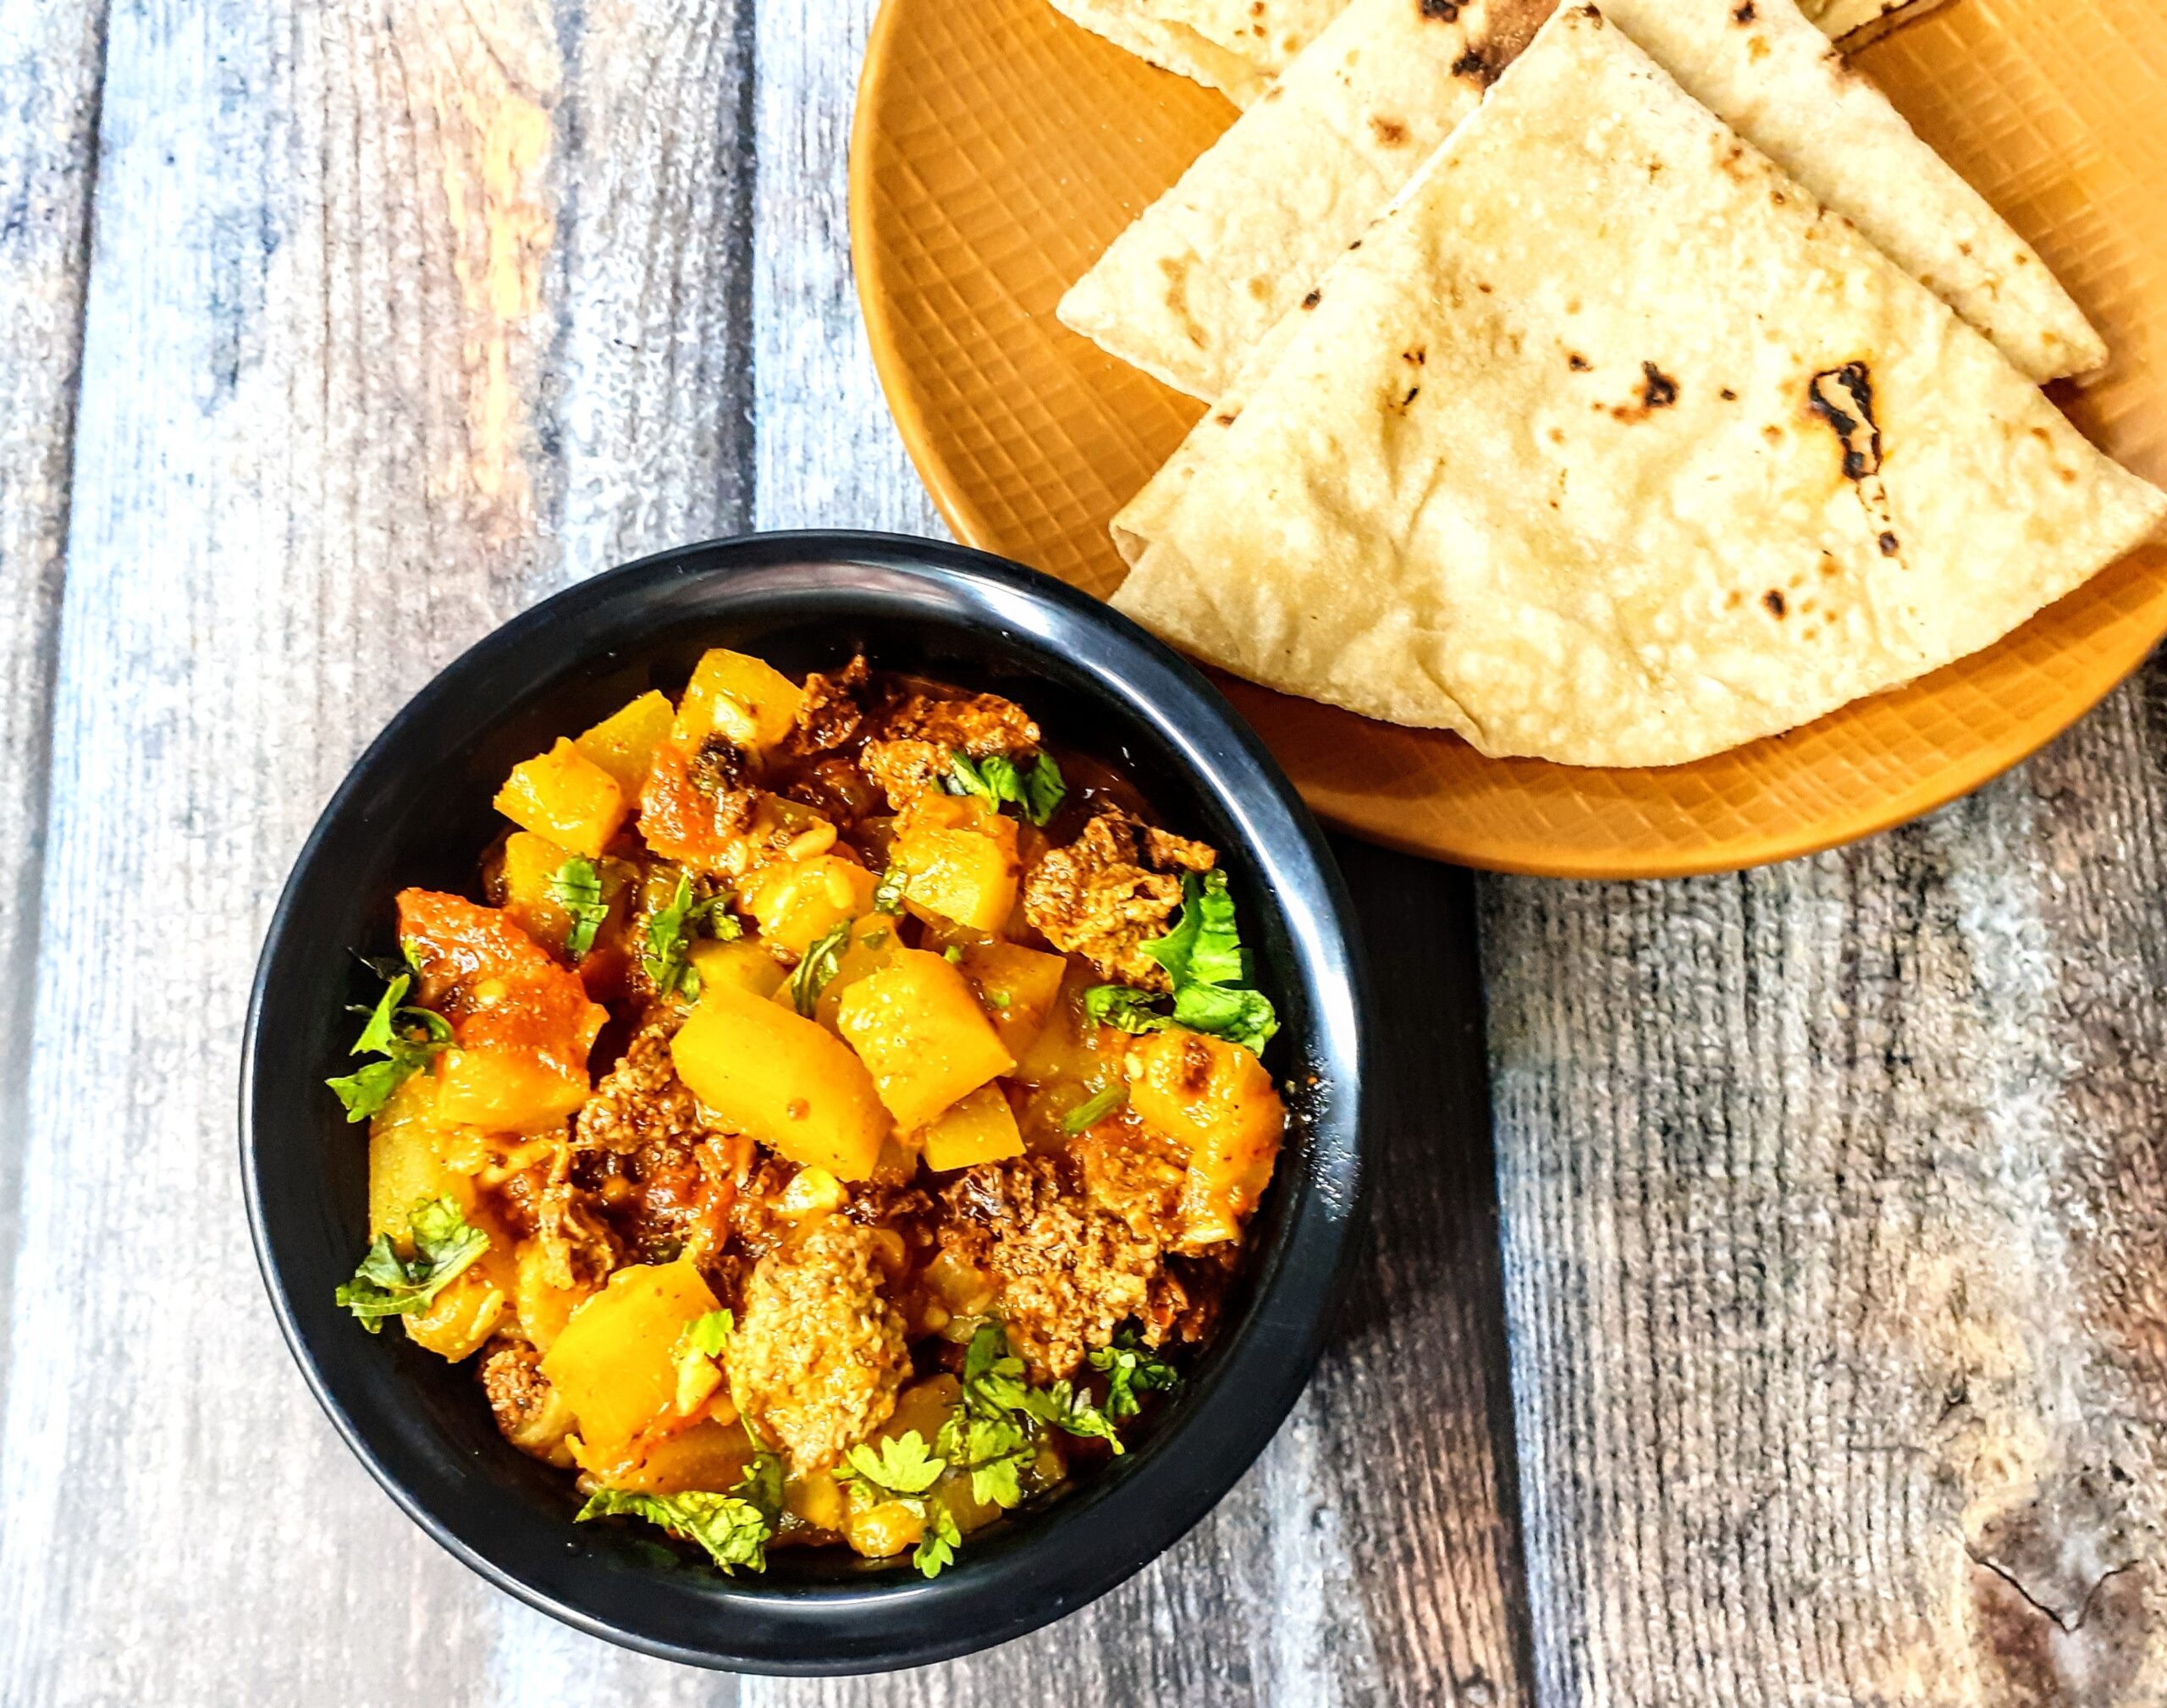
Bombay Potatoes
Aam Ras ( Mango Pulp)
Palak Paratha ( Spinach Paratha)
Bisi Bele Bath Masala (Powder)
Bisi Bele Bath/ Bisi Bele Huli Anna
Whole Wheat Banana Bread
Mushroom Soup
Tandoori Peanut Salad
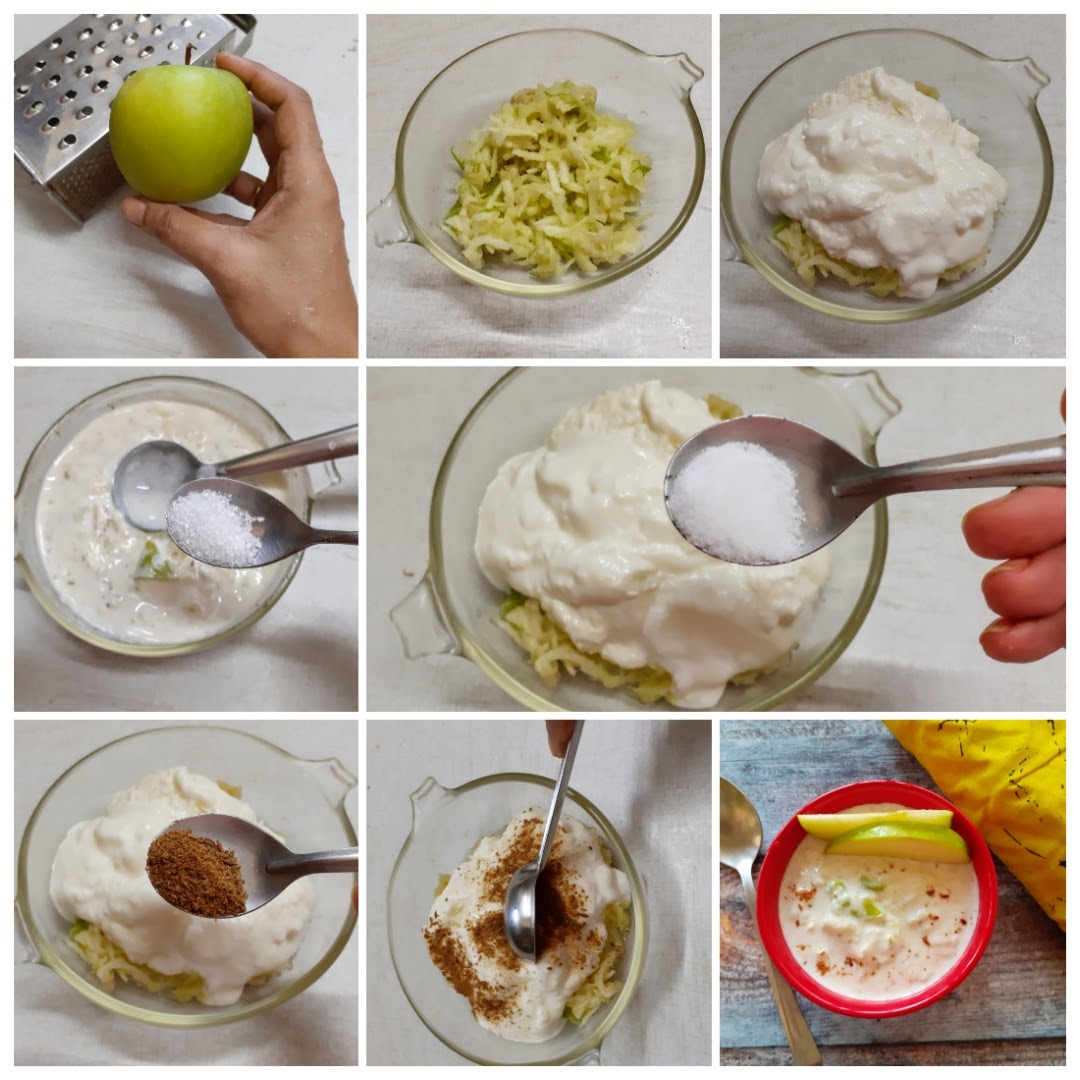
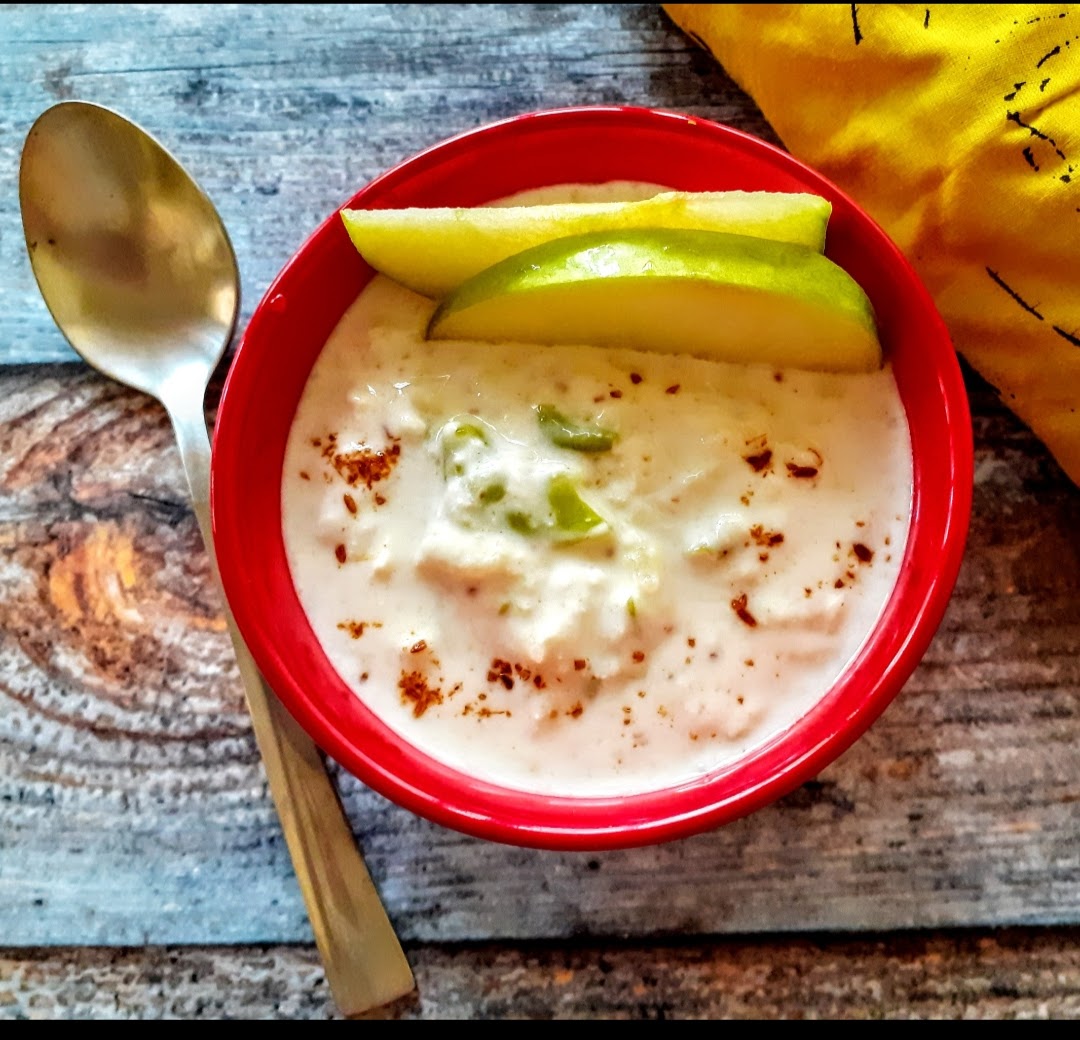
Cool Tempered Curd Rice With Cumumber
Curd rice is a south Indian dish prepared with pre cooked rice, yougurt, milk, and some tempering. South Indian food especially the Tamil Brahmin culture considers Curd Rice aka Thayir Sadam as a full stop to their meal. This is a simple meal in itself which can be paired with your choice of pickle to beat the heat of the summer.
The tempering and the add-ins to the curd rice are totally customizable to our preferences. Anything from grated carrots, shallots, curd chillies, green chillies, mango-ginger, grapes, pomegranate etc; can be added. In the current recipe I have used finely chopped cucumbers.
Yogurt/ curd is a prebiotic and most houses make homemade curds which is far more better as compared to
Rice Flour Rotis/Chawal Ki Roti
Roti is a flat bread made with whole wheat flour or refined flour. The dough is unleavened. Rotis form the staple food of most Indians on the northern side. Rotis can be of different kinds like, Chapati, Phulka, Tandoori roti, Roomali roti, Missi roti and more. In all the mentioned varieties differ in either the flour proportions or the method how they are cooked.
Rice Rotis are the softest and are made with steamed rice flour. Unlike the Akki Roti these rotis do not have chopped onions and other spices added to them. If made correctly, they also fluff up like a phulka. Since they are made with rice flour these Rotis are gluten free and perfect for people with gluten resistance.
As I am on a series creating Thaalis from all around India and also documenting the variations to them based on ingredients used or not used, I cooked this Rotis as part of the Gluten free thaali.
The dough for these Rotis is like the one made for Modak/kozhakattai. Having said this, it is important to make the dough well. I have cooked the Rotis with store bough rice flour, so some cracks towards the edge are seen. A smooth flour will ensure no cracks at all. The flour can also be made by pounding rice to a fine flour at home itself in a mixie.
Follow the directions as mentioned to get the best out of the recipe. While you are here also checkout other Roti/Paratha recipes on the blog like- Missi Roti, Garlic Naan, Sweet potato puran poli, Aloo Methi Paratha, Garlic Lachcha paratha, Beetroot Paratha, Chinese Paratha, and more…
Here is the recipe of Rice Roti or Chawal Ki Roti-


Gluten Free Thaali
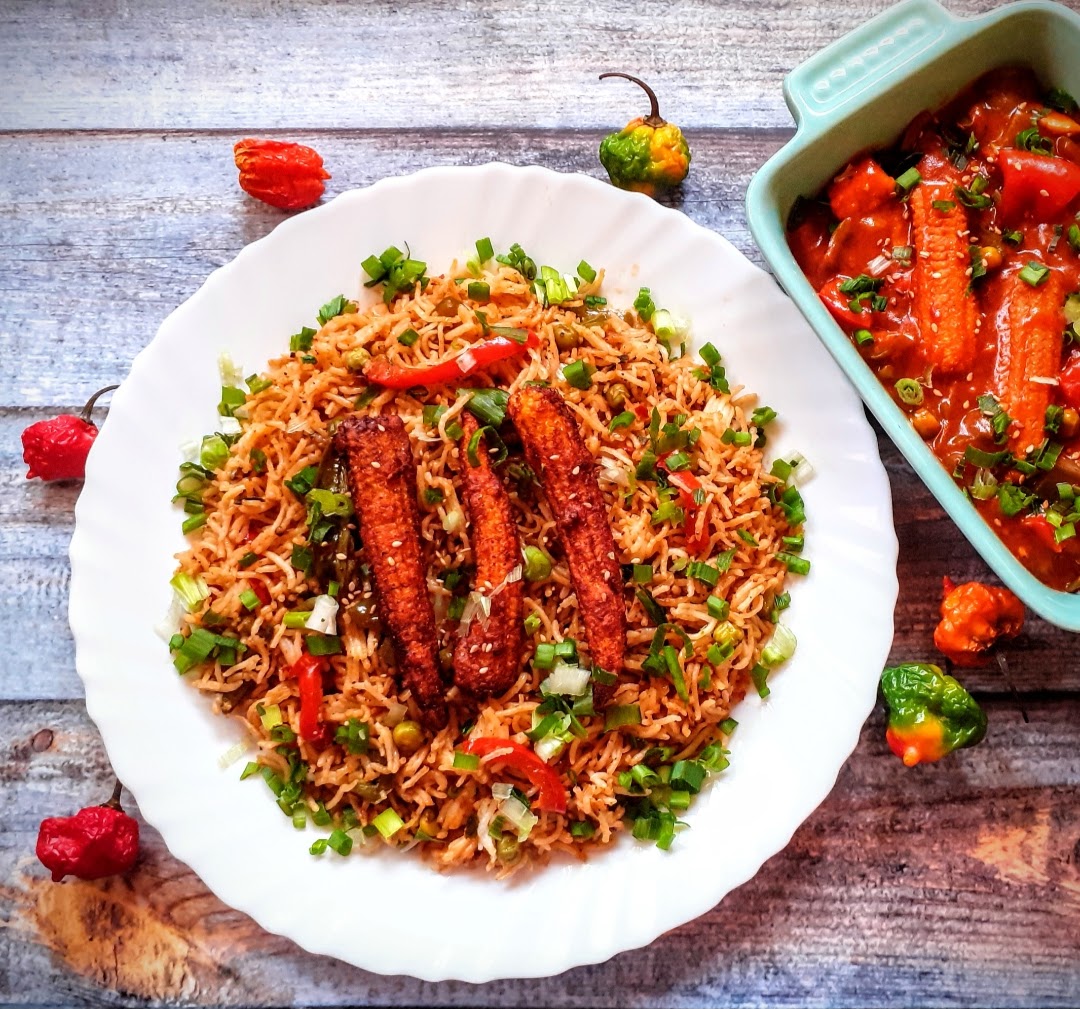
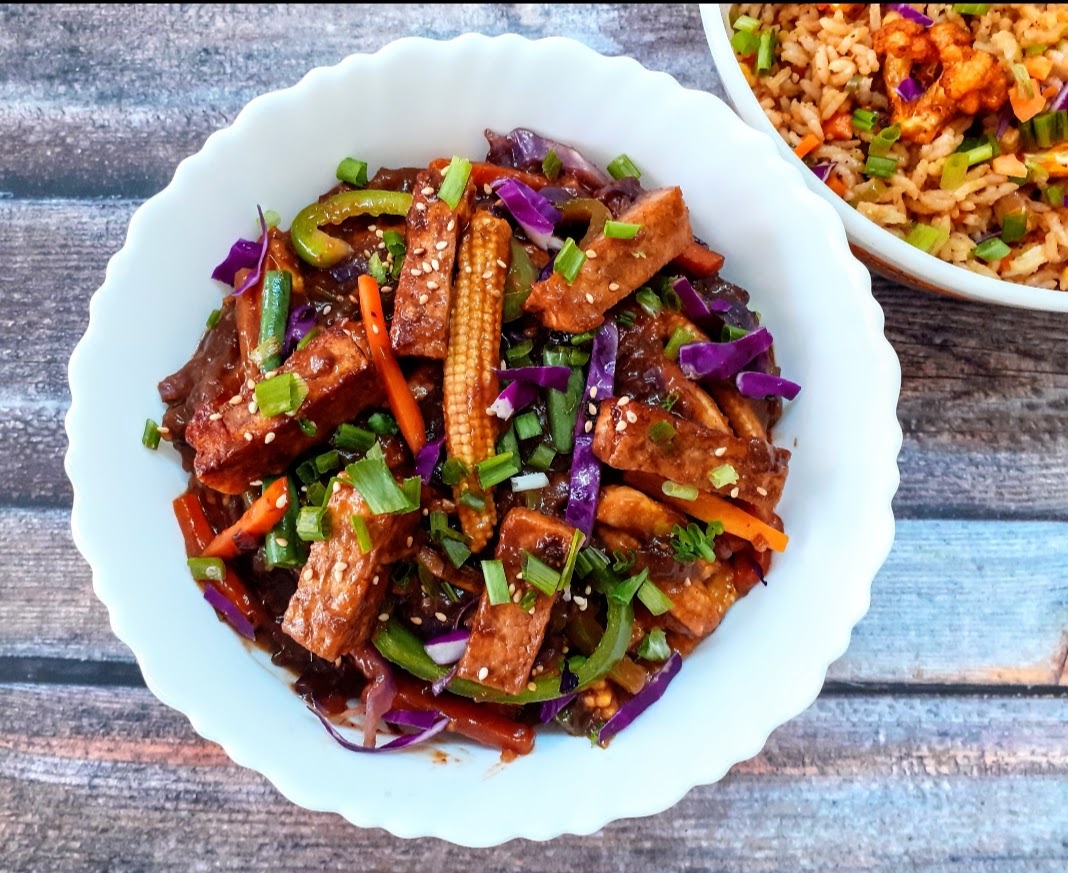
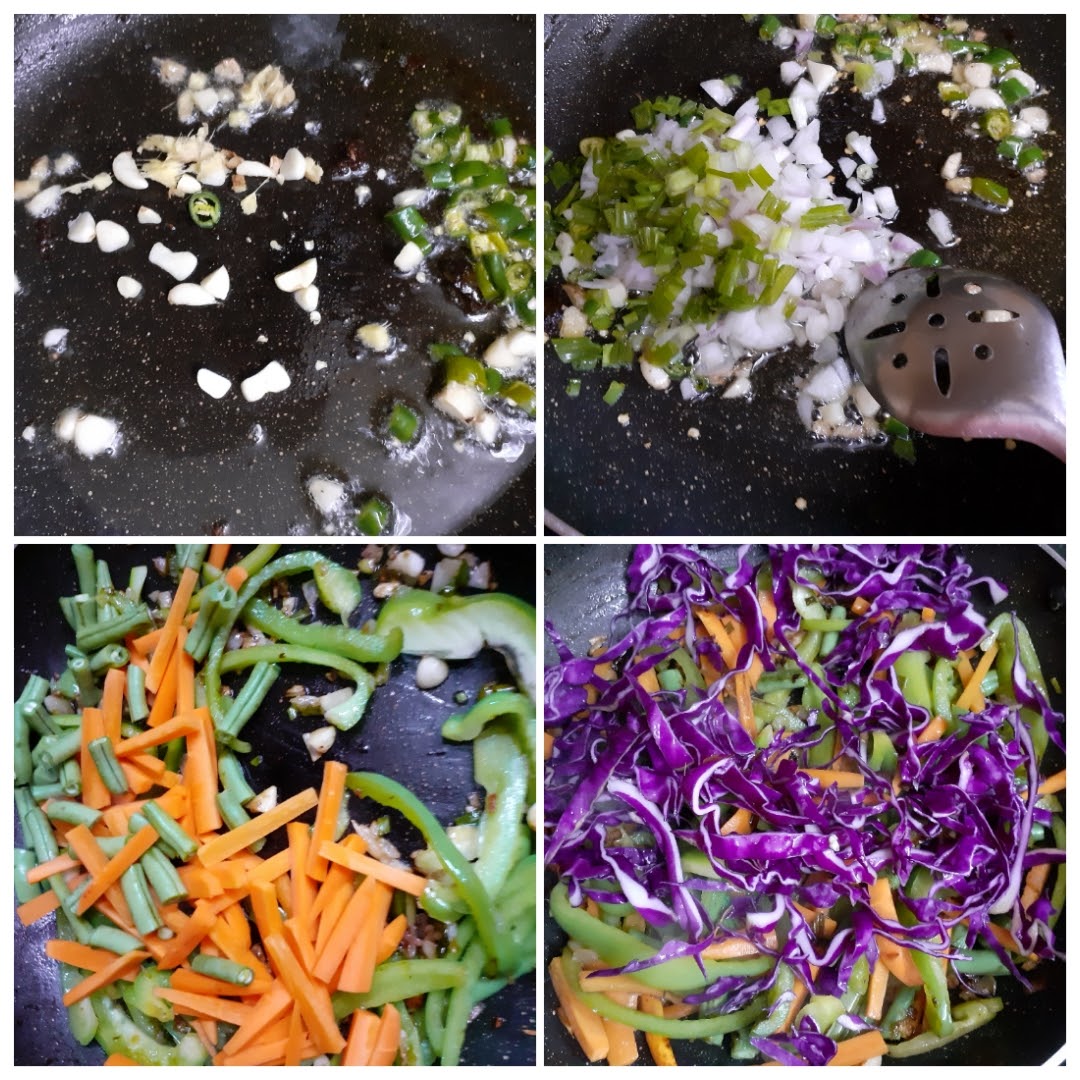
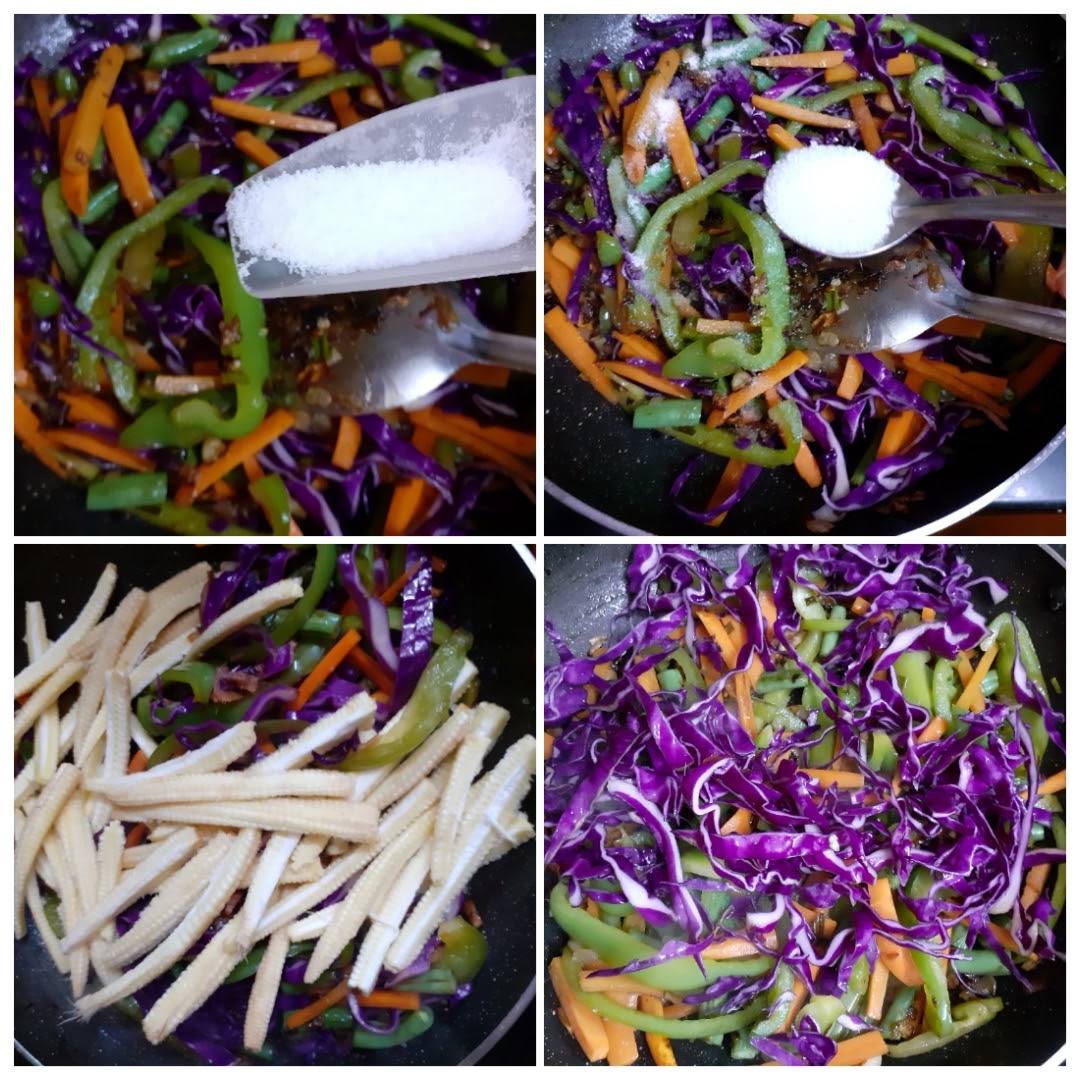
Tofu And Stir Fried Vegetables In Hot Schezwan Sauce
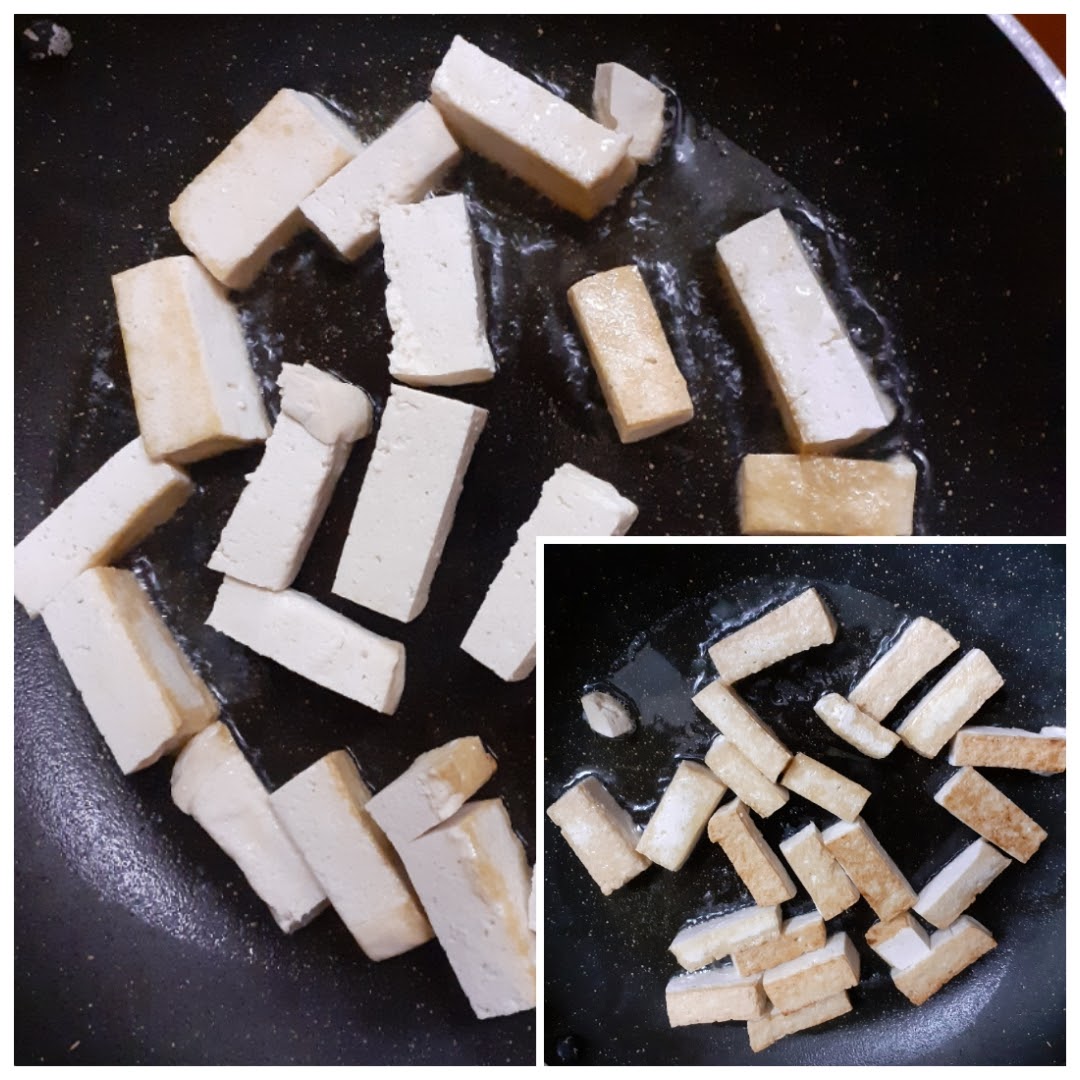
Any Tofu lovers? I agree its an acquired taste,but going by the health benefits it has to offer, I try including it in my diet now and then. People are not very fond of the bland taste, but once that is overcome, Tofu does taste good.
Tofu is a plant based milk product that comes from the milk of Soya beans, it is also called Bean curd. There are different kinds of Tofu based on their texture, such as- silken, soft, firm and extra firm. Depending on the dish we make the tofu is chosen. Popular dishes with Tofu include Soups, stir fry, and curries.
Tofu has zero percent cholesterol and is a weight watchers delight, because it is protein dense and less in carbohydrates. It is also considered to be a good source of iron and calcium.
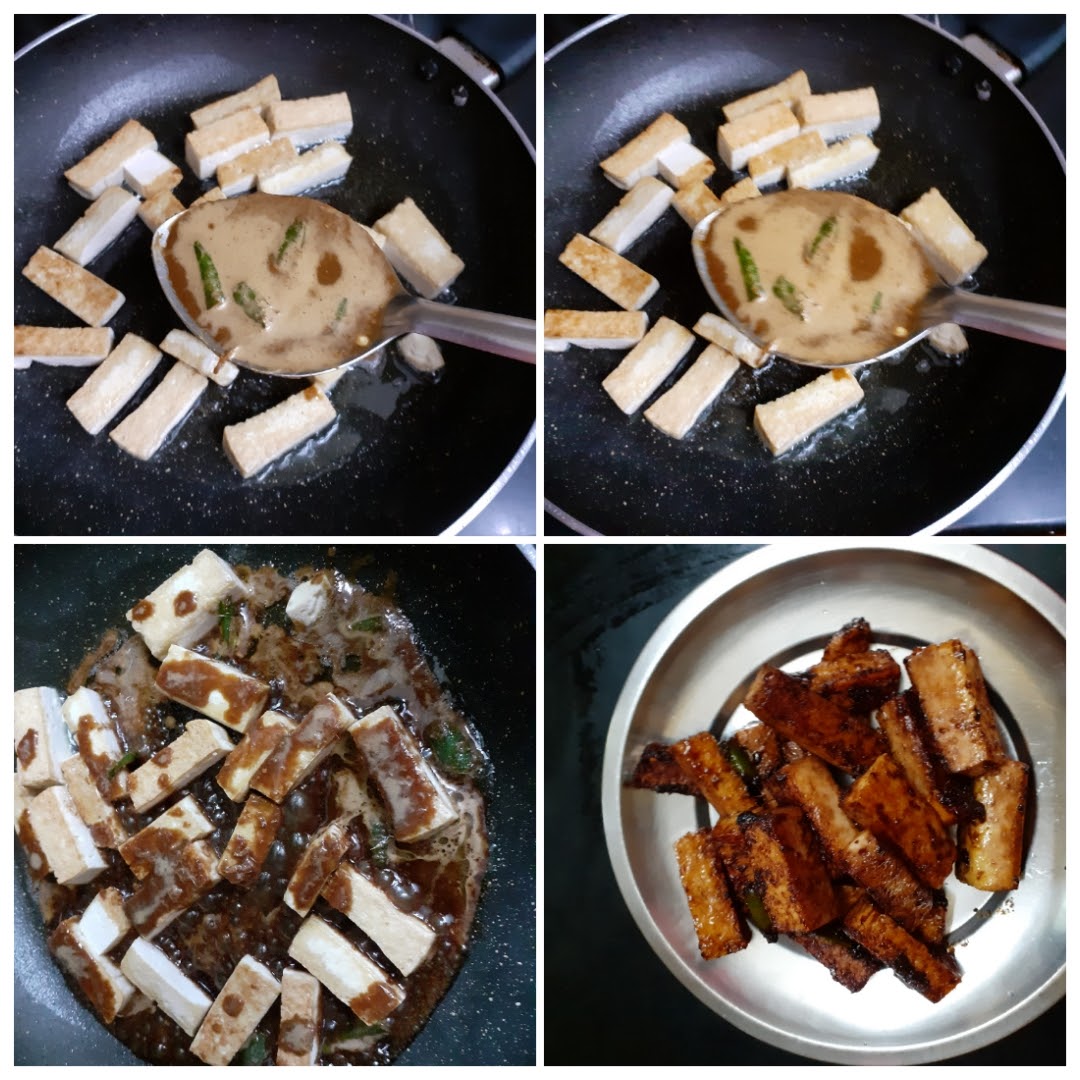
So how do we take away the blandness, obviously by marination. Tofu requires a little more time than paneer to marinate. So, I plan ahead when I want to cook my tofu dish. I prefer Tofu as a stir fry or as part of mixed vegetables in a sauce. So this dish is a combination of a Stir- fry and sauce. In this dish I have infused the sauce while stir frying instead of marination.
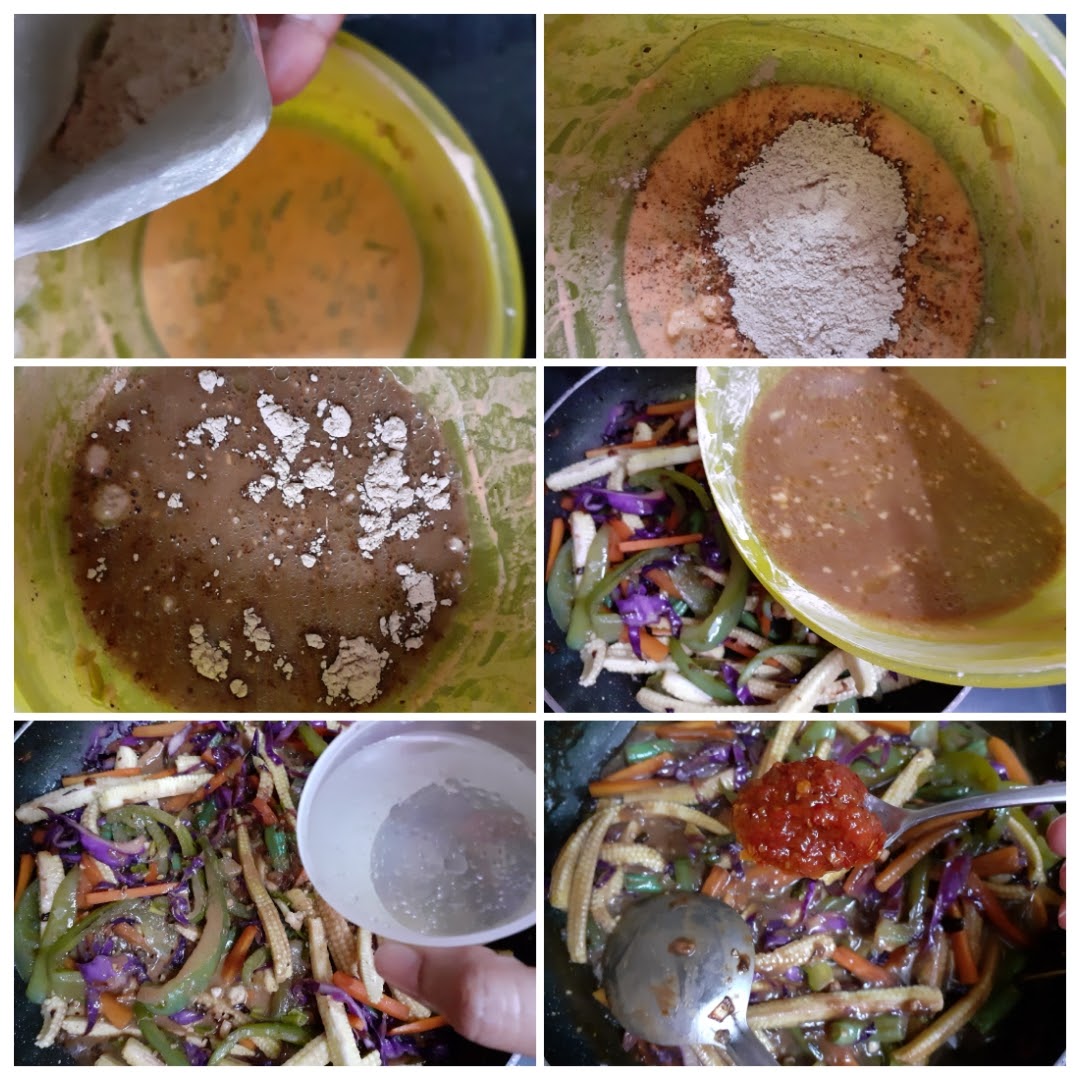
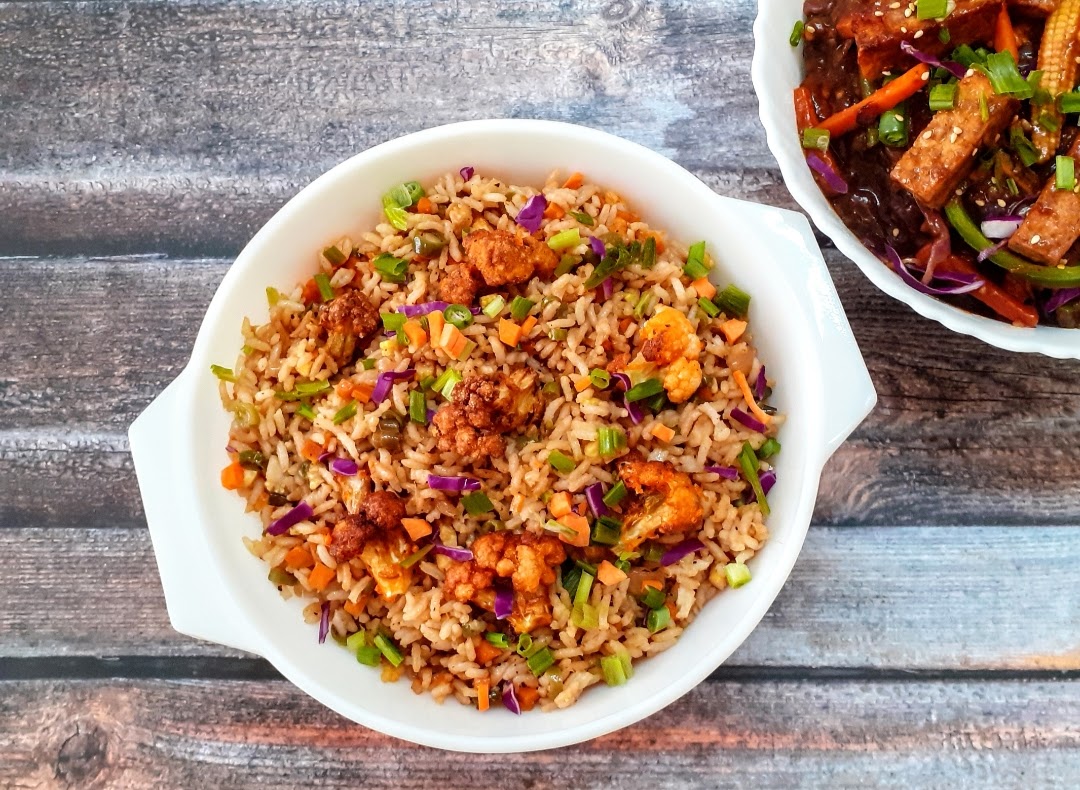
I usually choose to make this with fried rice as the Schezwan sauce base of this dish is the perfect pairing for the fried rice. I usually use a homemade Schezwan sauce made the traditional way using Chinese five spice, but for this particular recipe I have used Ching’s secret Schezwan Rice masala. Since I am using a ready made masala the work gets done a little sooner, so it is perfect for my after work dinners.
While you are here check out other Indo- Chinese recipes on the blog like- Vegetable Manchurian with gravy, Schezwan fried rice with Soya chunks, Cauliflower Fried rice, Chinese Paratha, and more…
Here is the recipe for Tofu and stir fried vegetables in hot Schezwan sauce-

NOTES:
Thaali Ideas (North Indian Mini Thaali #1)
A Thaali is a 3 course(and above) Indian meal which features a combination of dishes that are wholesome, mix and match with each other in terms of texture and flavour, and are balanced. India being a country with a huge food culture and heritage there are a great number of thaalis which can be cooked, either within a single cuisine, or a mixture of cuisines that match well.
This is an attempt by me to bring here as many Thaali ideas as possible for you all to create. We all want an balanced meal which takes very little time to create, and this is just that. The Thaalis in this series will range from simple to complex, and festive to on the go.
The below Thaali took me under 60 mins to create. All the recipes mentioned here are also available separately. But here I am giving the whole process of how I went about creating it, and also giving the recipes side by side.
Do let me know in the comment section if I should create more Thaalis like this for you to try. This current one is a simple working day thaali, which one can create before leaving for work(can pack this as lunch as well), or once back home, or any day.
Planning goes a long way in creating a wholesome, and delicious meal. Please go though all recipes to check if you have all ingredients mentioned.
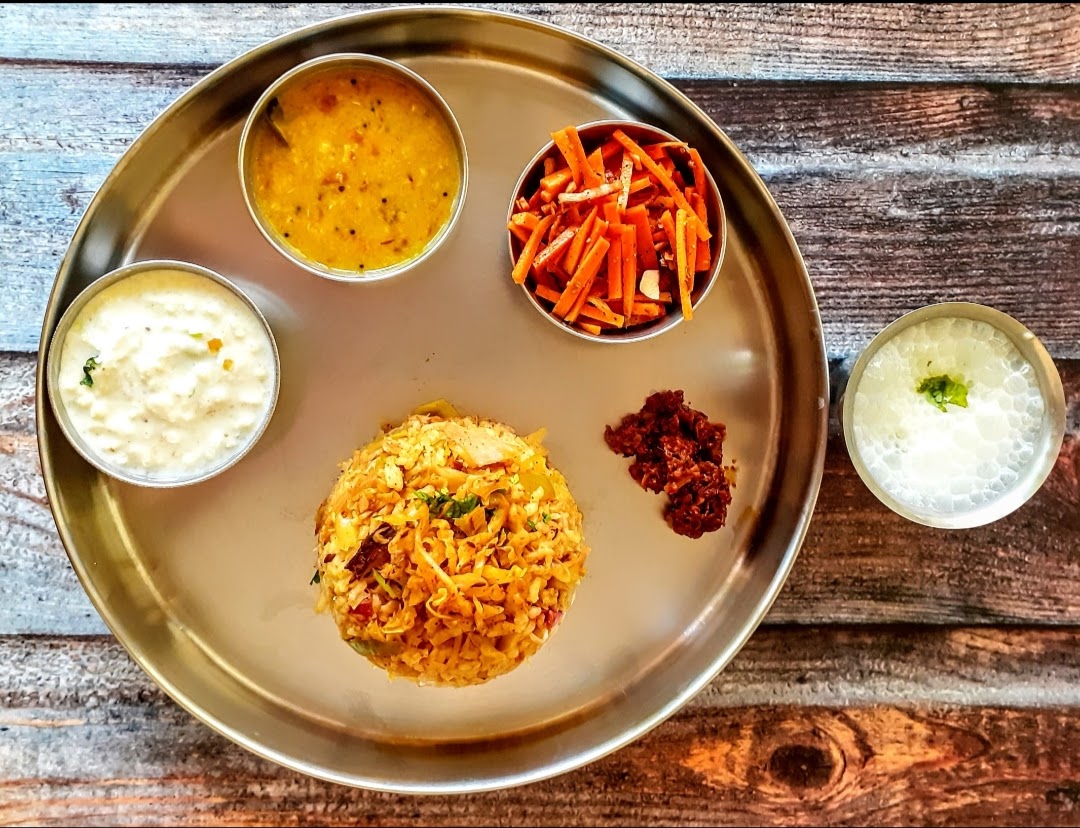
Elements of this Thaali:
*Korean Carrot Salad, *Cabbage Pulav, *One Pot Tadke wali Dal, *Green Apple Raita, *Pickle, and *Chaach(buttermilk)
Pre prep: All Vegetables were cut the previous day ( Julienne or Grate the carrot for salad. Chop the cabbage into strips, wash, drain, chop Onions, Capsicum, tomatoes, and store in fridge.)
Preperation and cooking:
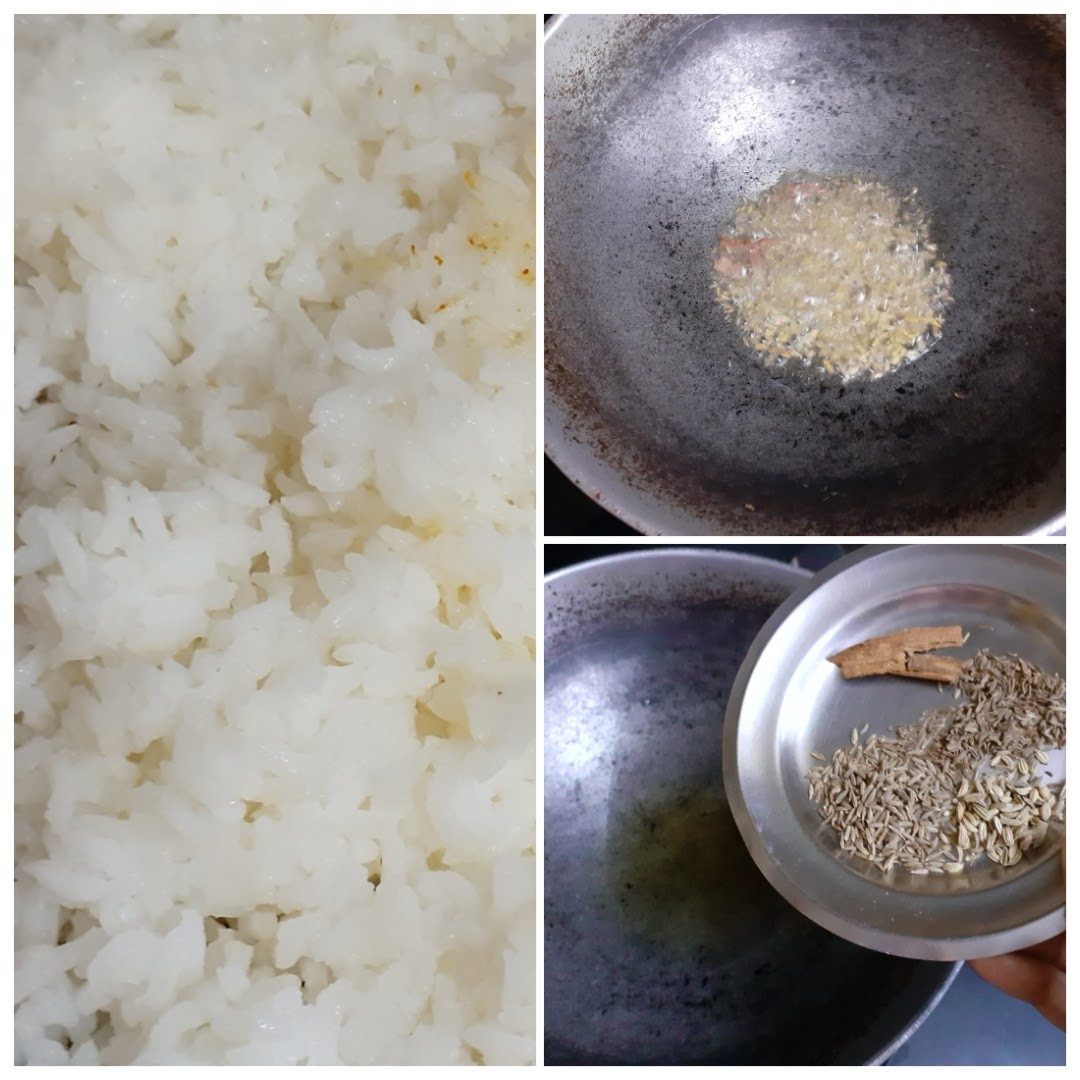
STEP 1 : Wash the rice for the Pulav, add adequate water, and pressure cook. (details in recipe). (15 mins approx to cook)
STEP 2: Wash the dal, drain and rest for 10 minutes.(10 min approx)
STEP 3: Within the 10 minutes of the resting time for Dal, complete the carrot salad.
STEP 4: Start cooking the dal as per recipe.(20 mins from start to end)
STEP 5 : The pressure must have settled in the rice, open cooker and spread out the rice on a plate to cool.
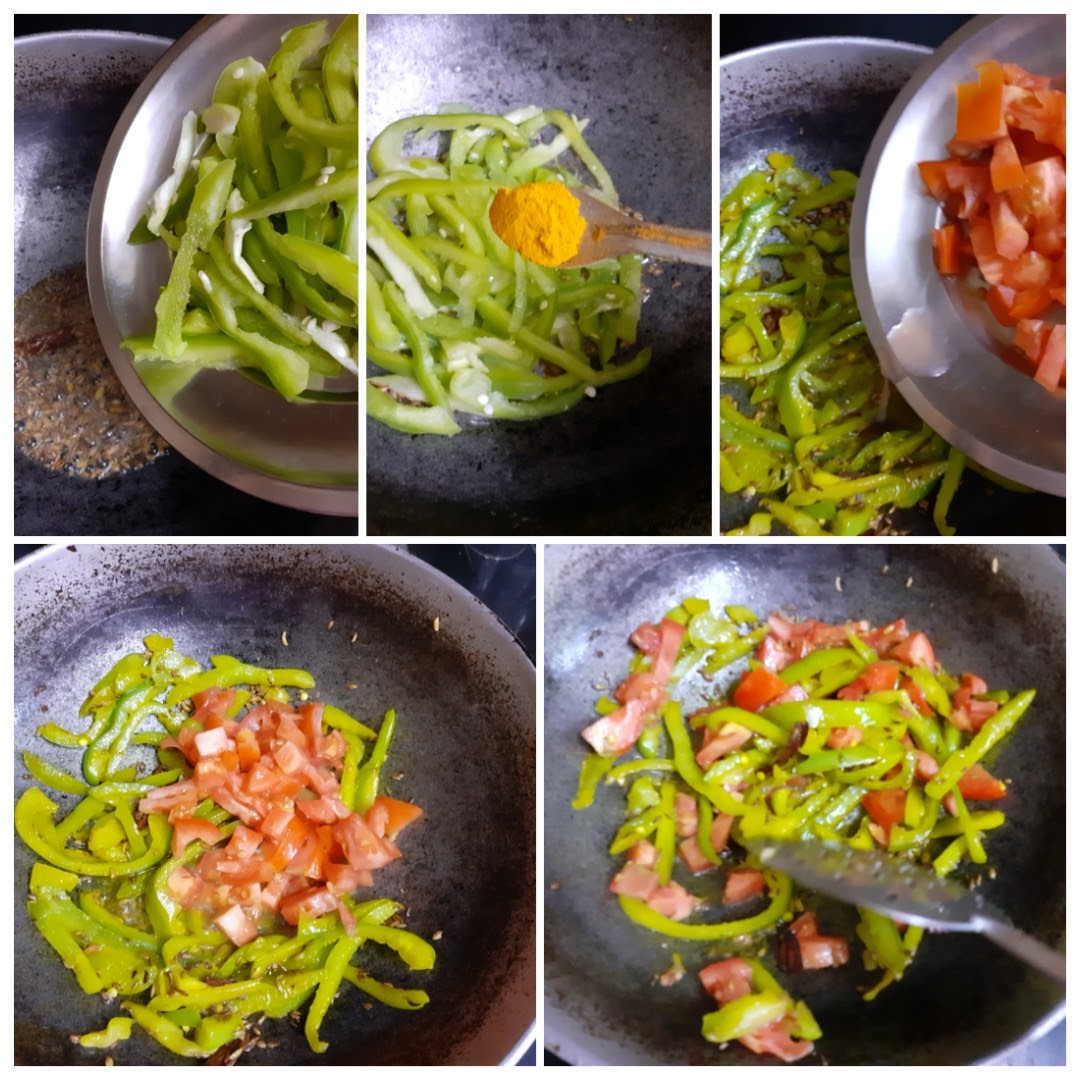
STEP 6: Start cooking the pulav as per recipe.( 15 min approx)
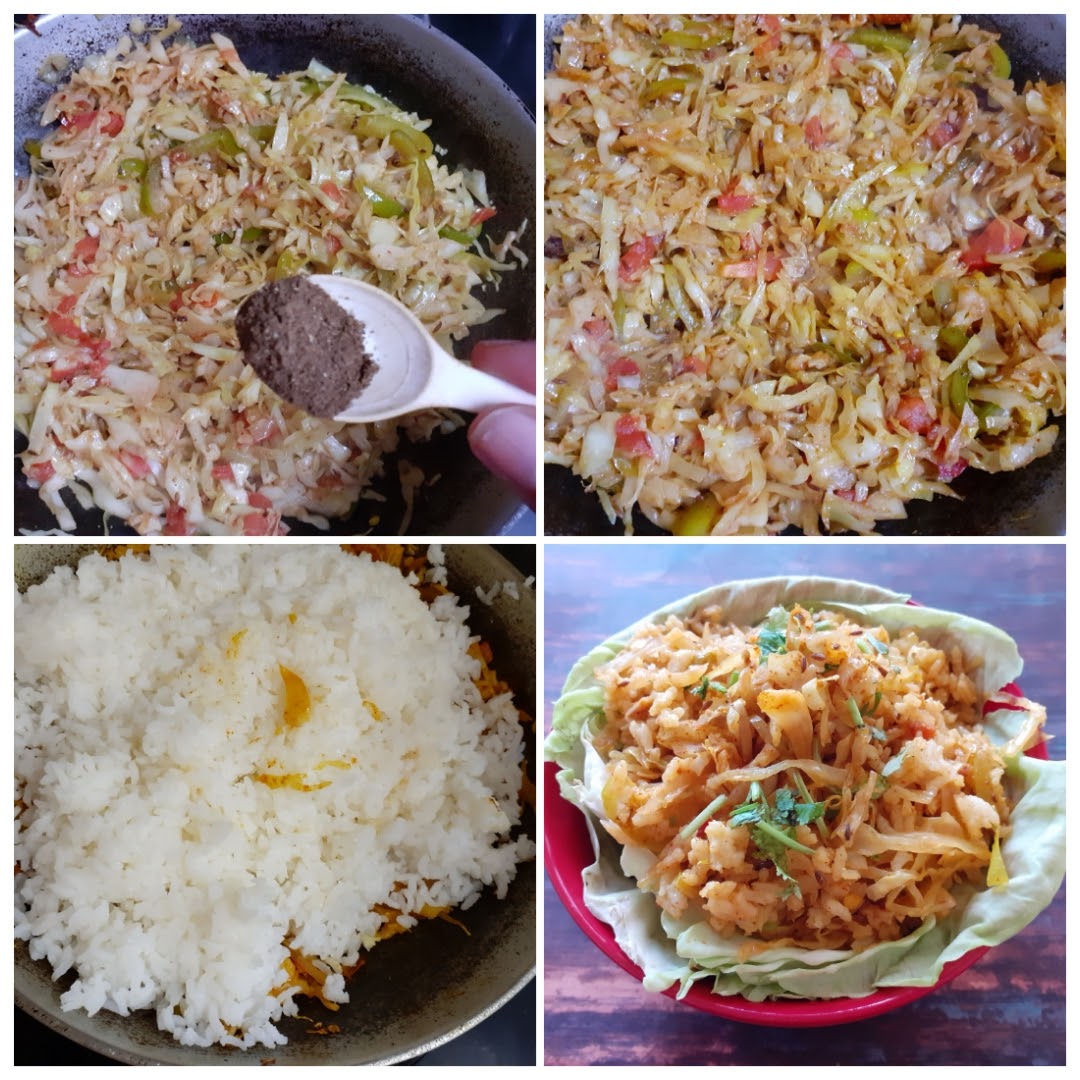
STEP 7: While the cabbage is getting cooked(sauteing) grate the Green apple for Raita and complete the raita.
STEP 8: The cooled rice will now be ready to add to the Cabbage mix. Complete the Pulav
RECIPES FOLLOW:
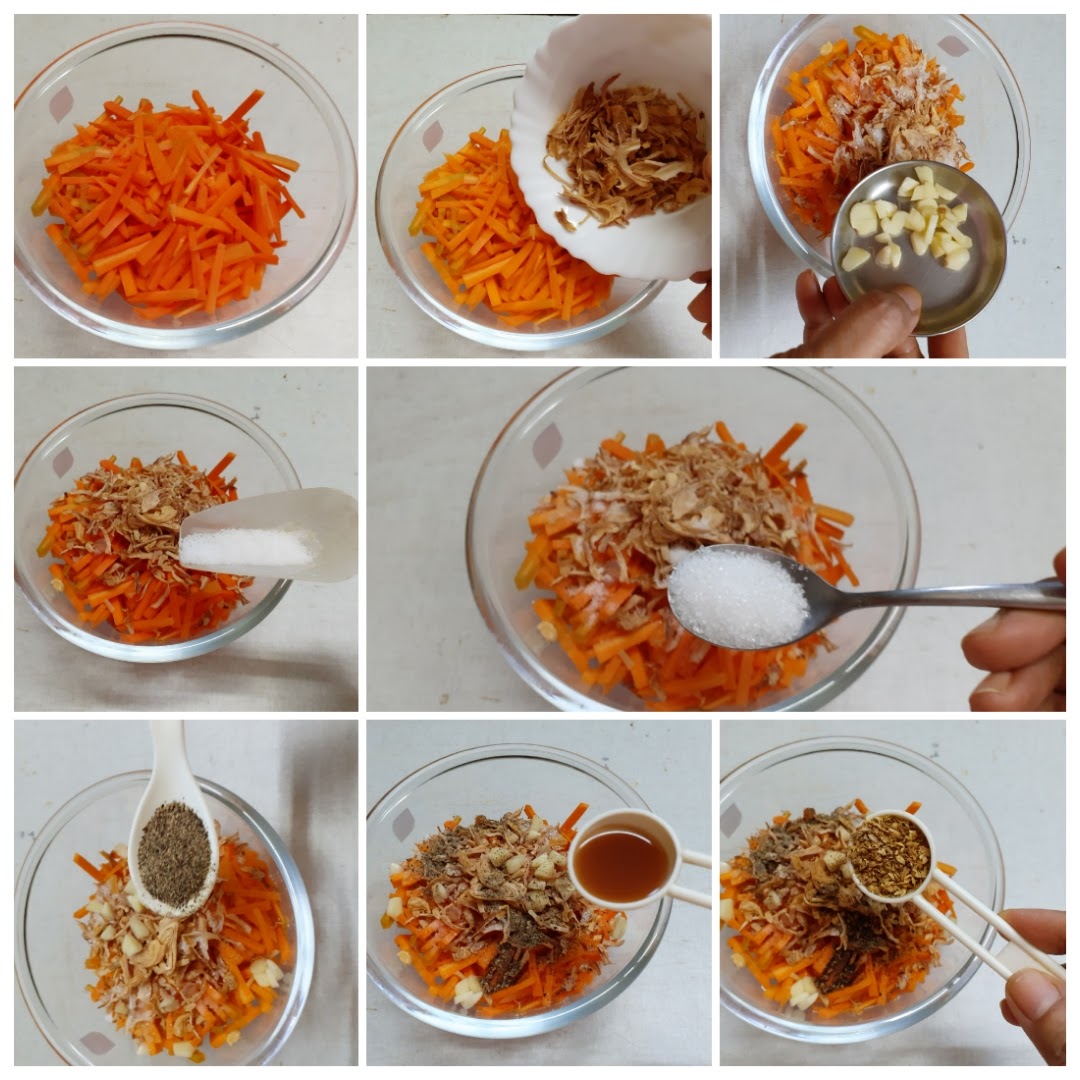
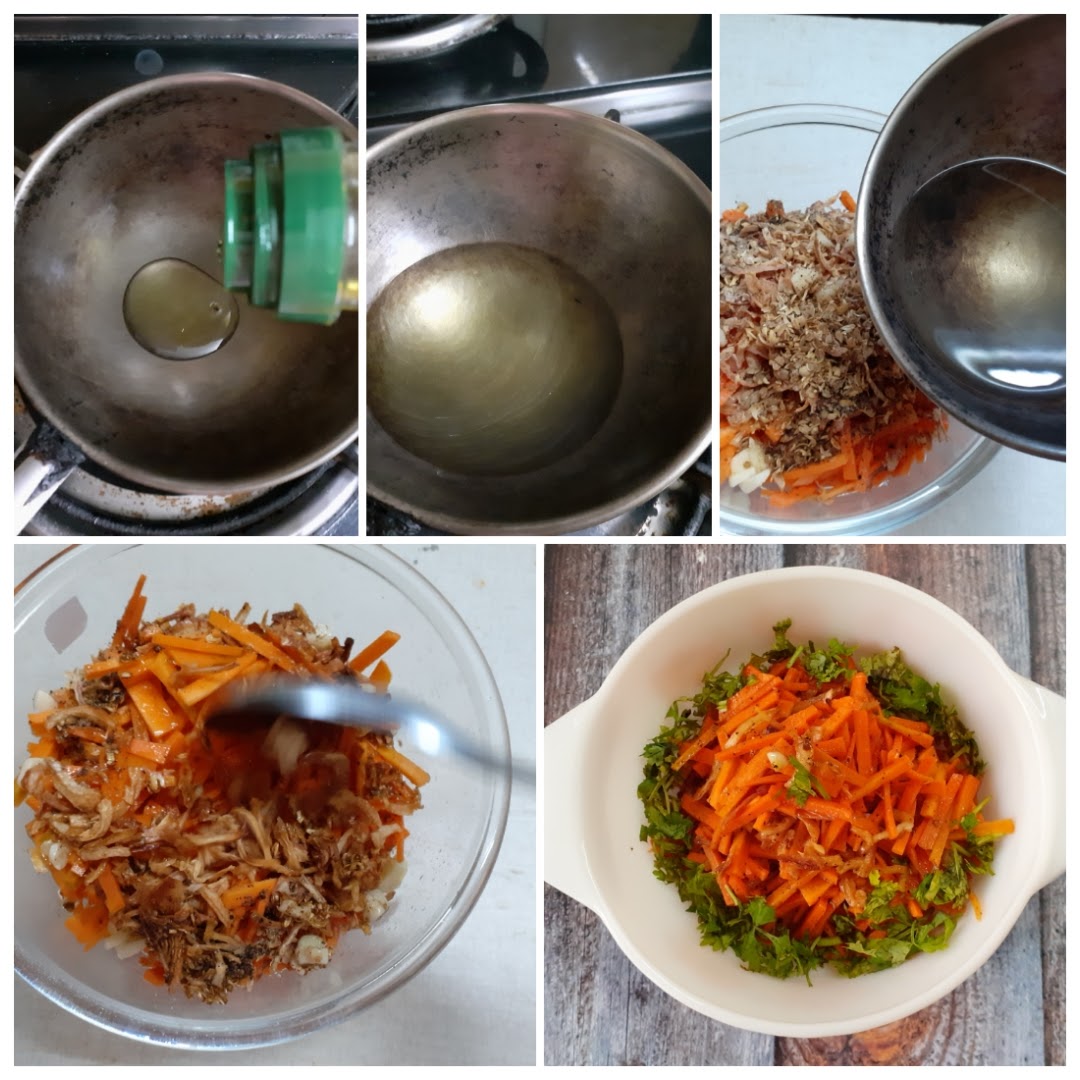
1. Korean Carrot Salad:

NOTES:


Ingredients:
Moong dal 1/2 cup washed and soaked for 15 minutes
Tomato 1 chopped
Mustard seeds 1 tsp
Cumin seeds 1 tsp
Turmeric powder 1/2 tsp
Curry leaves a few
Green chilli 1 chopped
Ginger -garlic paste 1/2 tsp
Salt as required
Oil for sauteing
Ghee 1 tsp
Lemon juice 1 tsp (optional)
STEPWISE RECIPE FOLLOWS:
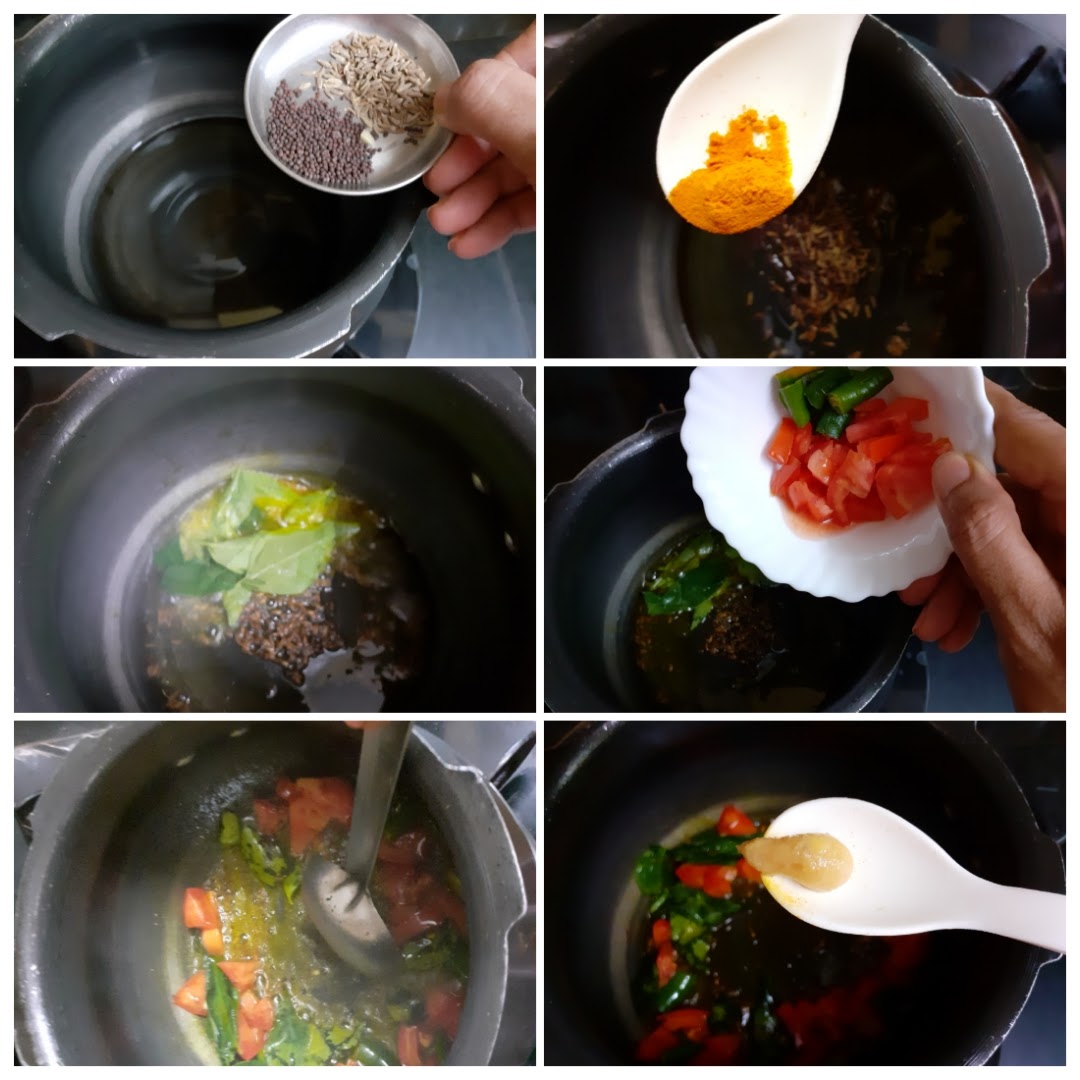
1. Rinse and soak the Moong Dal for 15 minutes. Now in a small cooker heat some oil. To this add the mustard and cumin seeds. When the seeds crackle add the turmeric powder, followed by curry leaves, chopped tomatoes and green chilli. Saute this well until the tomatoes start turning a little tender. Add the ginger -garlic paste and fry for 10 seconds.
2. Now drain water from the dal and add the Moong dal to the cooker. Mix everything together nicely, and add 1.5 cups water. Close the cooker and allow 5 to 6 whistles to come. Put off the flame and wait for the pressure to release. Now open the cooker. The water must have been absorbed and dal cooked. The mixture may appear dry.

3. Add 1 cup water and stir everything well. Switch on the flame, add salt and stir again. cook for 1 minute. Switch off the flame, if using lemon juice(optional), add now, pour the ghee and its ready to serve.

NOTES:
1. This recipe can be followed with Tuvar dal(pigeon pea), Chana dal(Bengal gram) or the mix of all three grams together. The cook time will vary.
2. To make this dal in a pan instead of cooker. To pre cooked dal add all the above tempering ingredients and saute tomatoes in the tempering, and pour it into the dal.

Green Apple Raita
Raita is a yogurt-based condiment. It usually contains cooked or raw vegetables/fruits/pulses, mixed with the Yogurt/Dahi and tempered with Mustard and Jeera. The Raita is usually served with Biriyani, Pulav, Parathas, Naan, or can be served as a dip for Kebabs too.
Raitas are a regular feature at my house. Whenever I make Parathas I usually pair it with a Raita instead of plain curd, and it goes without saying that Biriyani is almost always served with raita. I use raitas such as Mint raita as a dip for Kebabs too. I have different Raita varieties like Bhindi/Okra Raita, Mint Raita, Baigan/Eggplant Raita, Pineapple Raita, to my repertoire, please check them out while you are here.
This recipe of Green Apple Raita Is a very simple one and takes around 15 minutes to assemble. During the apple season, I make this raita very frequently. It tastes good just by itself too, and I usually pair it with Parathas or Jeera Rice.
This recipe does not have step wise instructions as it is very simple to put together
Here is this simple recipe for you-

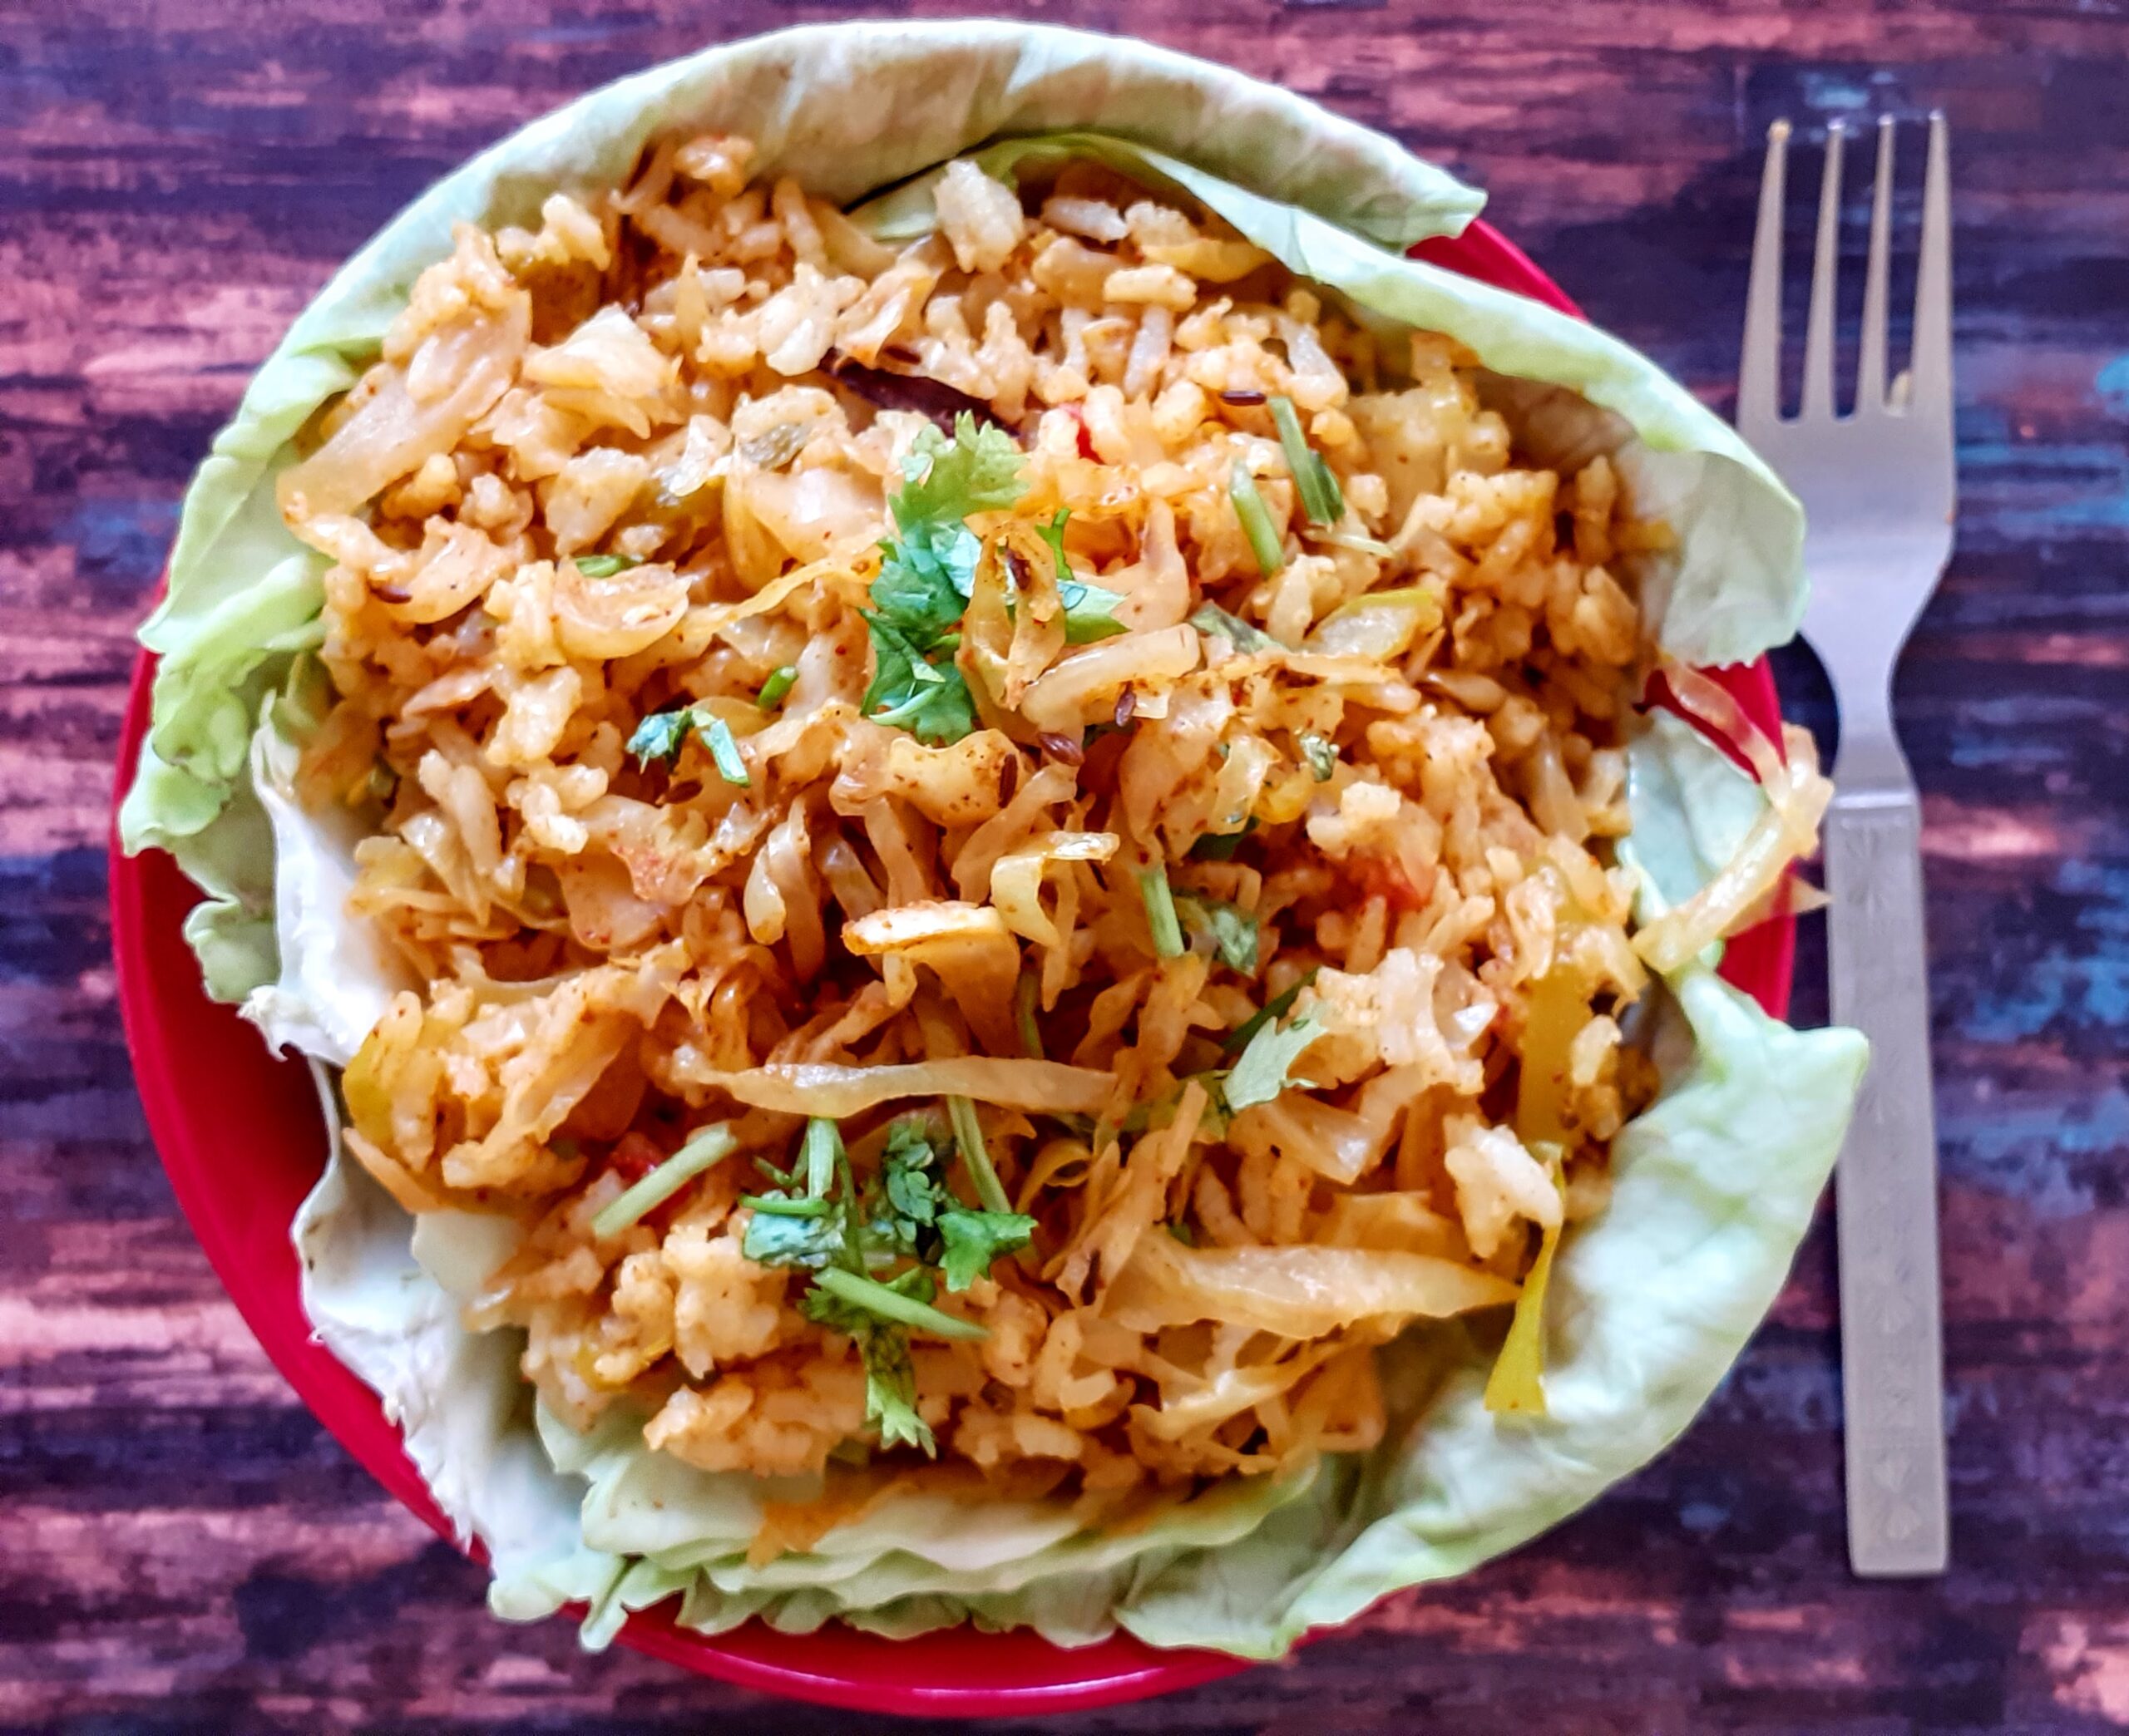
Cabbage Pulav/Cabbage Rice
Cabbage is one of the most underrated vegetable I feel, which remains unexplored beyond the Vegetable Manchurian, Kimchi and Poriyal(stir fry) or Subji and in salads. Thanks to the colourful varieties(read red and purple cabbage), this vegetable is gaining popularity again. Many don’t like its smell when cooked. The best way to tackle this is by open pan cooking.
Weight watchers speak about Bottle gourd, Broccoli and Cauliflower, but the cabbage always takes a back seat, never gets its due. This probably may be because, other than the everyday Kootu/subjis or the special occasion Manchurian, we don’t think about it much. I have been a Cabbage lover right from childhood. A simple Cabbage and coconut stir fry (aka Poriyal) is enough to make me happy. I have also taken to trying other recipes from this vegetable, which can be cooked on a regular everyday basis and the health benefits this vegetable has to offer can be enjoyed.
To state a few benefits of this simple and highly nutritive vegetable- It is nutrient dense. Low on calories and high on micro nutrients and vitamins. It is said to keep a check on inflammation, High on Vitamin C, Helps improve digestion, It is an excellent source of Vitamin K, easy to cook and quite inexpensive as compared to the gourmet vegetables. (source-health line). So, we should reap the benefits of this vegetable, what say?
I have come up with this simple cabbage pulav, which is tasty and easy to cook. Even your fussy and picky eaters will lap this up. I have kept the recipe and Masalas very simple here, as this is planed as a simple everyday dish, and a whole meal in itself, which can be relished with just a Raita.
While you are here check out other everyday recipes like- One Pot Tadke wali Dal, Zucchini and Potato wheat Dosa, Goan style Lobia curry, Watermelon rind Kootu, Menthiya Keerai Kootu, Corn Palak subji, Dosakaya Chutney, and more…
Here goes the Cabbage pulav recipe-


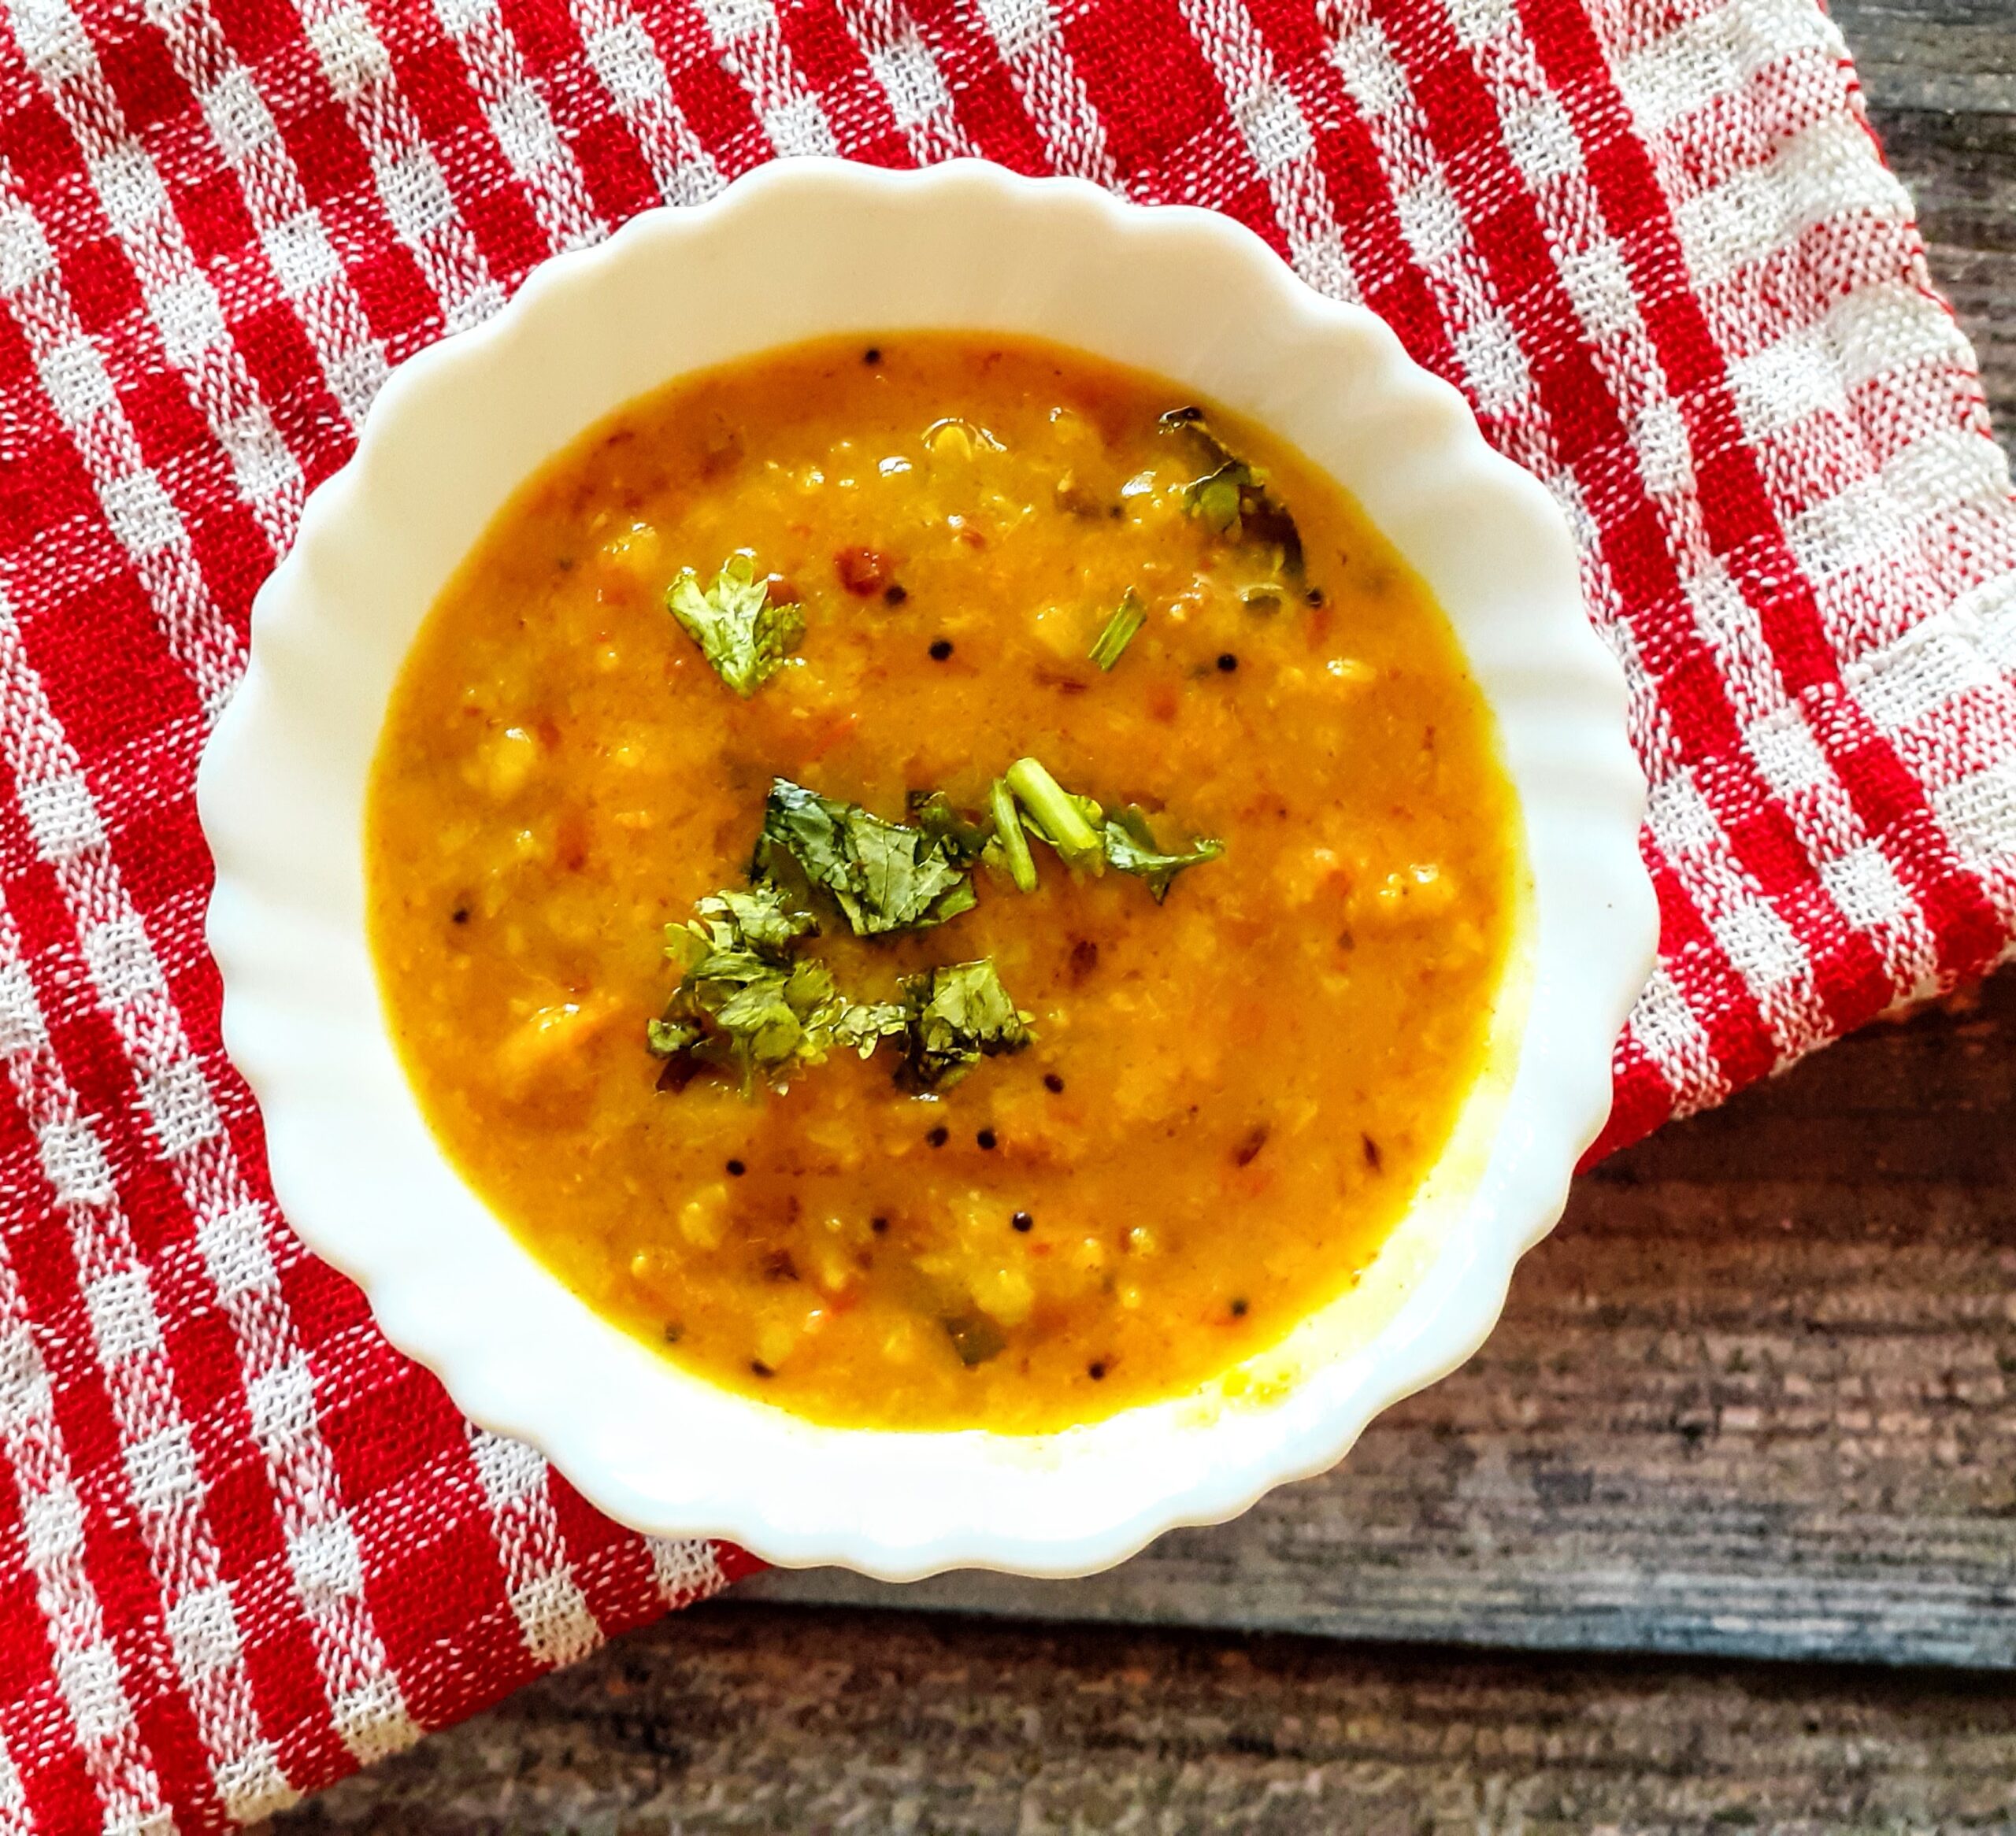
One Pot Tadke Wali Dal
Dal is always such a comforting meal. Dal is basically lentils that are cooked and tempered, or in this case, tempered and then cooked. Dal is made in most Indian homes everyday in different forms. There are a number of lentils and also as many Dal varieties. Dal Makhni, Hari Moong ki dal, Rajma, Goan style Lobia curry, Mudda Pappu, are all different varieties of dal.
This recipe is so basic that even beginners can make it in a jiffy. Little children can be fed this without any qualms. In most Indian homes, dal is the first food given to infants after they are waned from milk. This present recipe of one pot tadke wali dal is so simple and perfect for those days when one is in a hurry, or is too tired to cook something elaborate. What is more, the dal is ever so nourishing.
This same recipe can be followed with Arhar/Tuvar dal (Pigeon peas) also. I taught my daughter to make this type of dal right when she was in class 8, so that she need not depend on anyone in case I am travelling. It is important for children to,learn basic cooking, which will help them in the long run, from depending on takeaways. Home cooked is always best.
Here is the recipe for the simple one pot Tadke Wali Dal-
Ingredients:
Moong dal 1/2 cup washed and soaked for 15 minutes
Tomato 1 chopped
Mustard seeds 1 tsp
Cumin seeds 1 tsp
Turmeric powder 1/2 tsp
Curry leaves a few
Green chilli 1 chopped
Ginger -garlic paste 1/2 tsp
Salt as required
Oil for sauteing
Ghee 1 tsp
Lemon juice 1 tsp (optional)
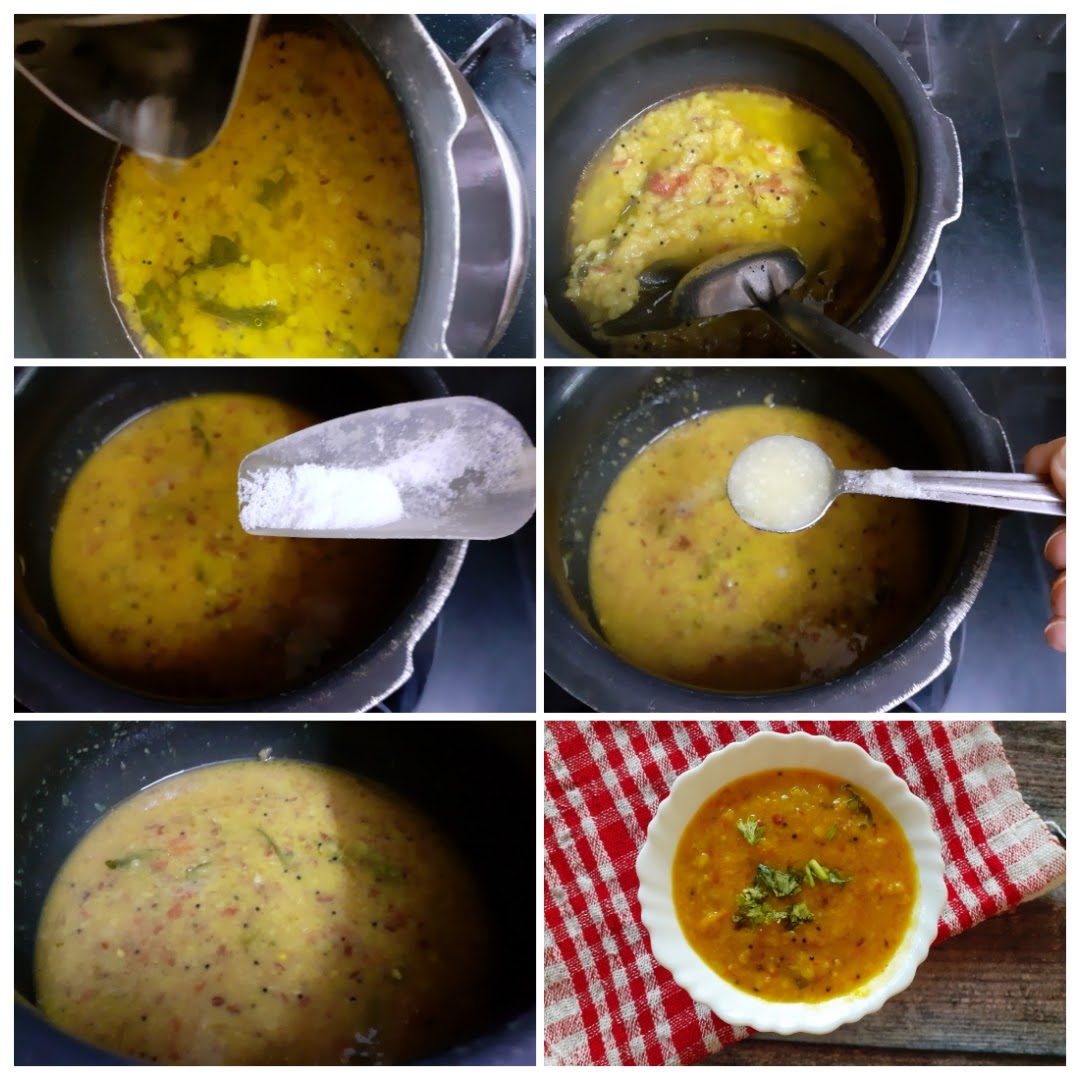
Directions: Rinse and soak the Moong Dal for 5 minutes. Now in a small cooker heat some oil. To this add the mustard and cumin seeds. When the seeds crackle add the turmeric powder, followed by curry leaves, chopped tomatoes and green chilli. Saute this well until the tomatoes start turning a little tender. Add the ginger -garlic paste and fry for 10 seconds. Now drain water from the dal and add the moong dal to the cooker. Mix everything together nicely, and add 1.5 cups water. Close the cooker and allow 5 to 6 whistles to come. Put off the flame and wait for the pressure to release. Now open the cooker. The water must have been absorbed and dal cooked. The mixture may appear dry. Add 1 cup water and stir everything well. Switch on the flame, add salt and stir again. cook for 1 minute. Switch off the flame, if using lemon juice(optional), add now, pour the ghee and its ready to serve. Enjoy with hot phulkas, rotis or rice.
STEPWISE RECIPE FOLLOWS:
1. Rinse and soak the Moong Dal for 15 minutes. Now in a small cooker heat some oil. To this add the mustard and cumin seeds. When the seeds crackle add the turmeric powder, followed by curry leaves, chopped tomatoes and green chilli. Saute this well until the tomatoes start turning a little tender. Add the ginger -garlic paste and fry for 10 seconds.

2. Now drain water from the dal and add the Moong dal to the cooker. Mix everything together nicely, and add 1.5 cups water. Close the cooker and allow 5 to 6 whistles to come. Put off the flame and wait for the pressure to release. Now open the cooker. The water must have been absorbed and dal cooked. The mixture may appear dry.
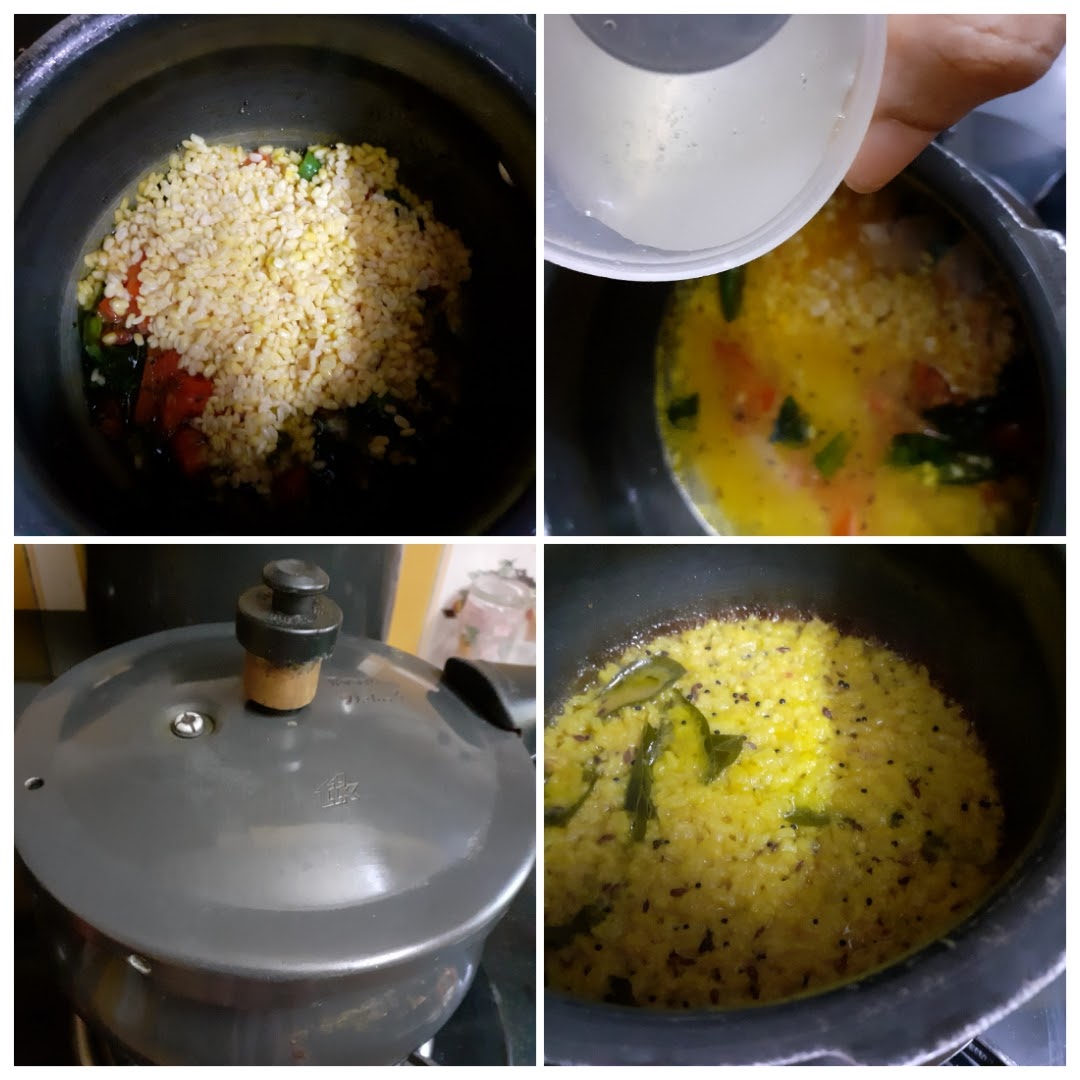
3. Add 1 cup water and stir everything well. Switch on the flame, add salt and stir again. cook for 1 minute. Switch off the flame, if using lemon juice(optional), add now, pour the ghee and its ready to serve.
NOTES:
1. This recipe can be followed with Tuvar dal(pigeon pea), Chana dal(Bengal gram) or the mix of all three grams together. The cook time will vary.
2. To make this dal in a pan instead of cooker. To pre cooked dal add all the above tempering ingredients and saute tomatoes in the tempering, and pour it into the dal.
If you tried this recipe and liked it please comment below. I would love to hear from you. If you have a query about the recipe email us and ill respond as soon as I can.
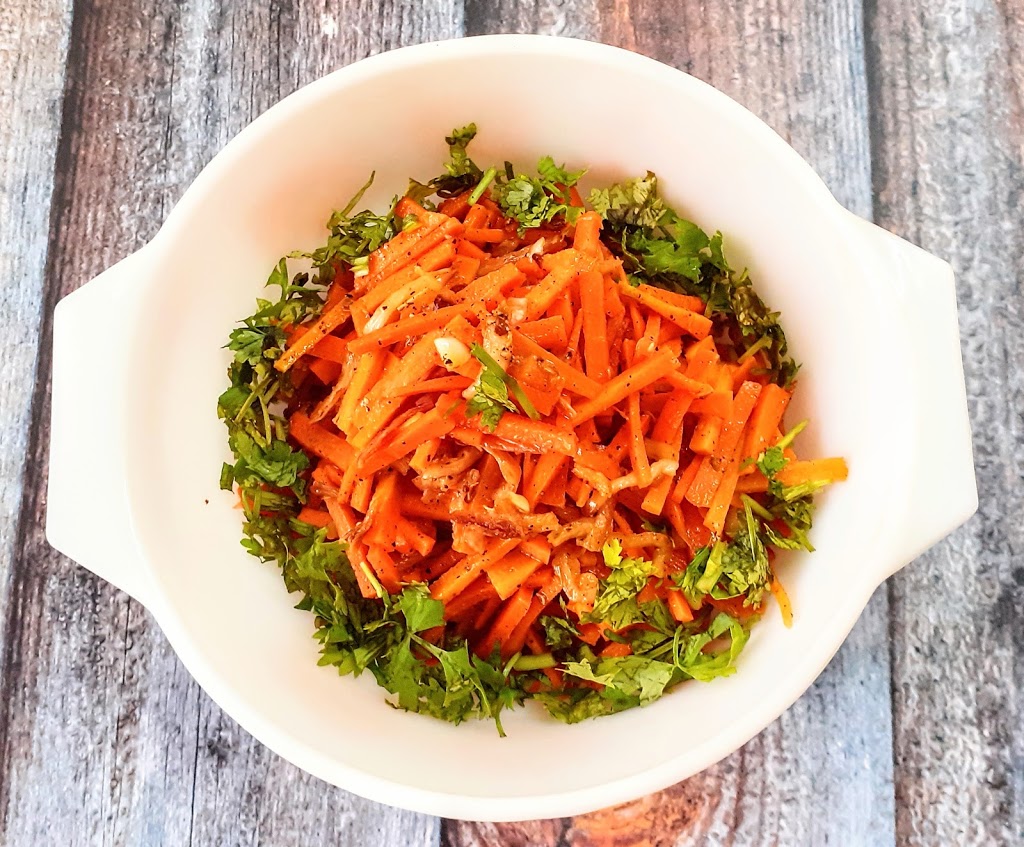
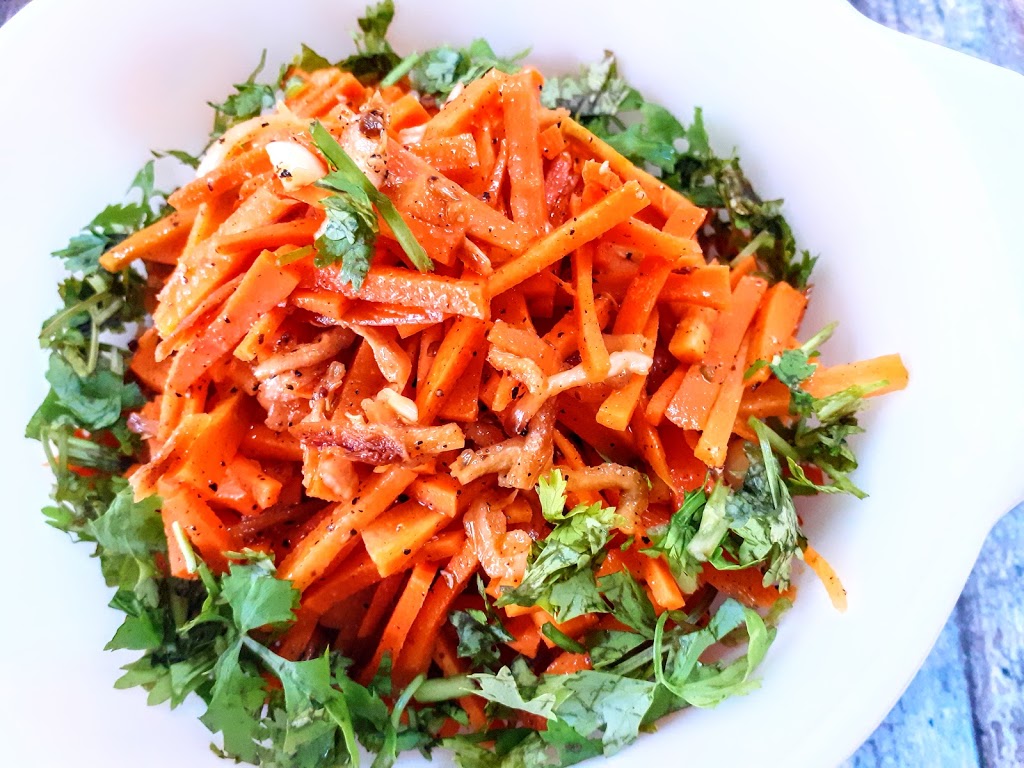
Korean Carrot Salad/Morkovcha
Spicy Korean Carrot salad or Morkovcha is a simple salad that is high on flavours. The combination of simple ingredients brings out the best flavours in the sweet carrot. Well, first let’s talk about the salads name. Contrary to the name this salad has nothing to do with Korea or Korean cuisine, for that matter. It is believed that Korean immigrants to the then Soviet Union, were trying to create the Kimchi with what ever they could find, and that’s how the Morkovcha or Korean carrot salad came to be.
When I tried out this salad recently, I wasn’t sure how it would turn out and so the pictures taken were not in the least intended to be on the blog. But this salad turned out to be a hit in my home with everyone wanting more, the Mister wanted more acidity and that was easily managed,but it turned out yum. So the family said I must blog it, and here it goes.
Why and where I found this recipe? I had just bought some juicy carrots, but was so bored of the regular salad I made, which is to add lime juice and salt to grated carrots and temper with some green chillies, mustard seeds and asafoetida. As I scored the internet for a Carrot salad recipe that interested me, I found the current one on letthebakingbegin.com , from which I have taken inspiration and made some modifications.
While you are here check out other recipes on the blog like- Lemon poppy seed salad dressing, Zucchini and Potato wheat Dosa, Goan style Lobia curry, Broccoli and zucchini fritters, Watermelon rind kootu, Vegetable oats kichdi, and more…
Here goes the carrot salad recipe-


NOTES:
If you tried this recipe and liked it please comment below. I would love to hear from you. If you have a query about the recipe email us and ill respond as soon as I can.
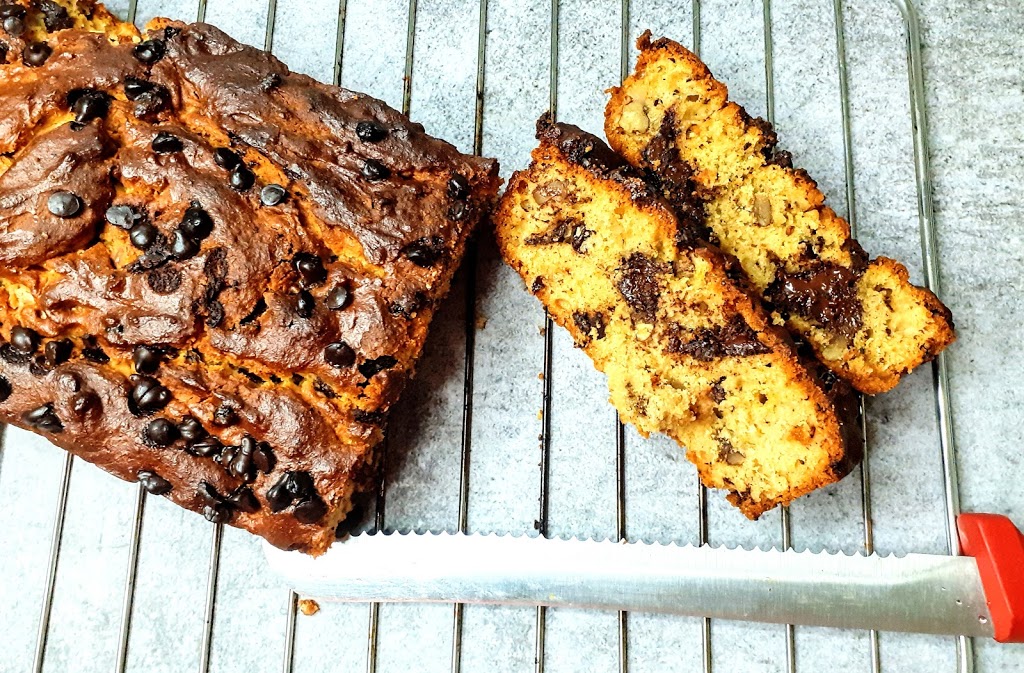
Bishop Nut Bread
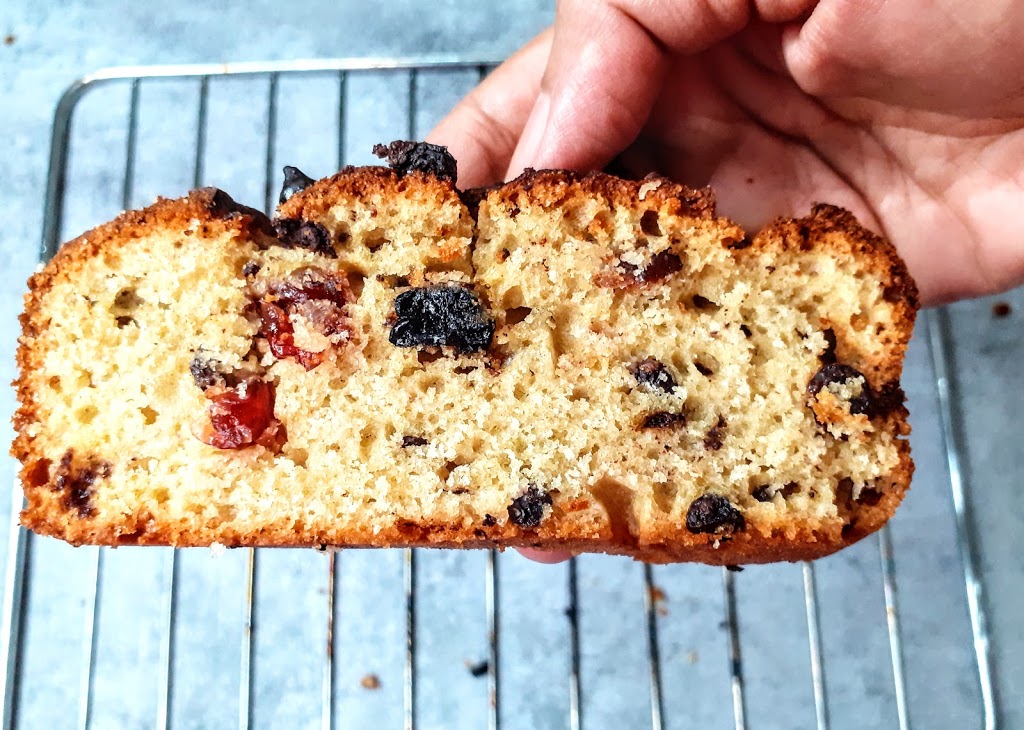
Bishop Nut Bread or Bishops cake as it is popularly called is traditionally served at Christmas time. This cake is full of goodies inside. It gets its name from the stained glass look of each slice. However, I have not replicated that look. The cake mostly uses a lot of Tutti- Fruity, which I have not used. Simply because that’s not how I have eaten this cake. And believe it when I say, I have tasted this from one of the best hotels in India ITC Maurya . I have had the pleasure of enjoying this for 8 long years during our stay in Delhi.
I have loosely adapted this recipe from https://www.allrecipes.com/
Well, the original recipe calls for refined flour, choco chips, and tutti fruity. You know me by now, I use Maida/refined flour only when I think the recipe will not work well without it. So I used whole wheat flour. But in this case I took a chance, as even I did not know how it would turn out. Needless to say I am so happy with the texture. Well, so without diverging any further, other than the whole wheat flour I substituted the choco chips with chunks of broken chocolate, so that I have pockets of gooey chocolate in between, loaded it with walnuts, cranberries, and, blueberries. I topped it with some homemade ghee, for that divine smell while it bakes. The result is a very decadent cake, which is more like a loaf. Does the description make you drool? then, im happy, as it was intended????????.
While you are here check out other bakes by me like- Blueberry cheesecake, Whole wheat blueberry muffins, Eggless Pineapple cake, Strawberry and lemon loaf, Apple tea cake, Upside down orange vanilla cake(eggless), Pistachio Cake, Bajra and Almond flour cookies, and more…
Here is the recipe of Bishop Nut Bread-
Ingredients:
Egg 1
Whole wheat flour 1 3/4 cups (a little less than 2 cups)
Granulated sugar 1/2 cup
Oil (any neutral oil) 1/4 cup
Buttermilk 1 cup
Baking soda 1/2 tsp
Baking powder 1/2 tsp
Salt 1/2 tsp
Vanilla essence 2 drops
Chocholate chunks (use good eating chocolate, not compounded chocolate)
Chocochips for topping
Blueberries 1/2 cup (dried/dehydrated ones)
Walnuts broken 1 cup
Cranberries 1/4 cup
Black raisins (optional) a handful
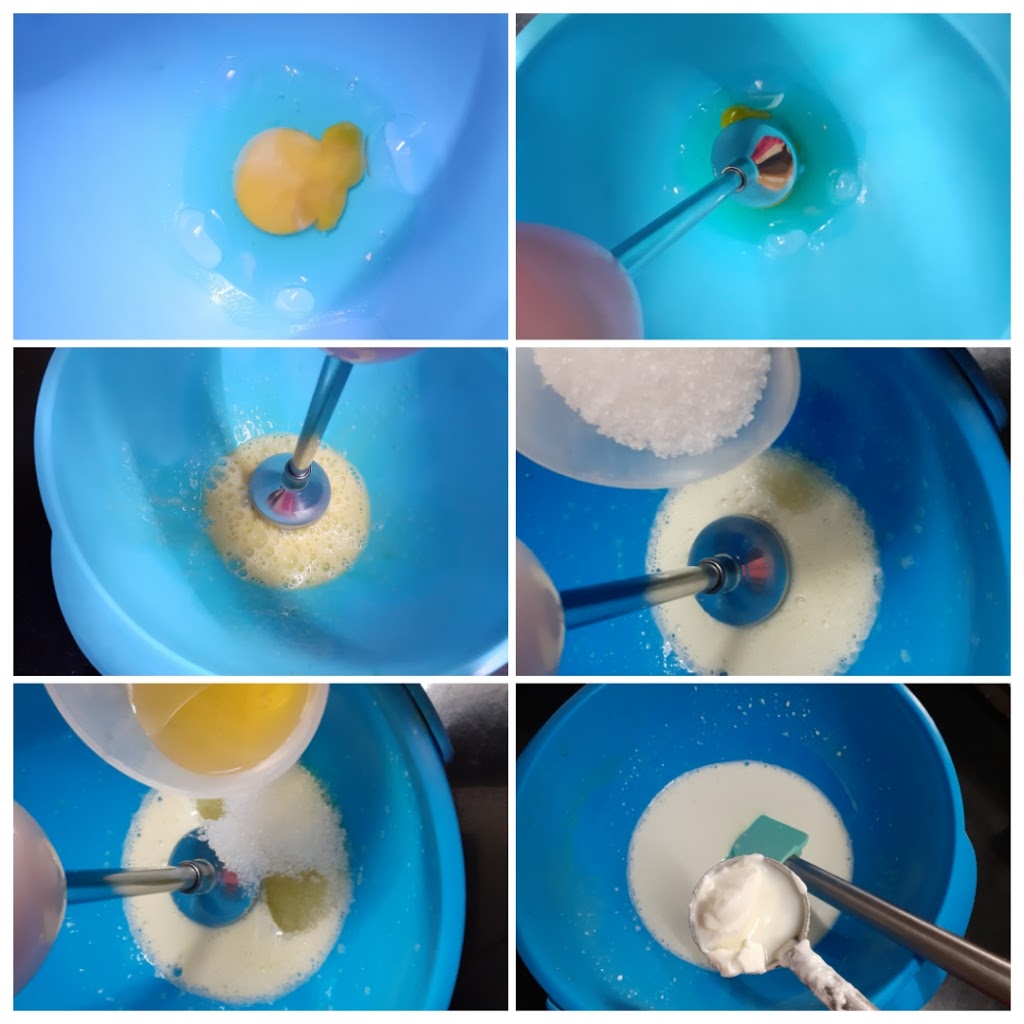
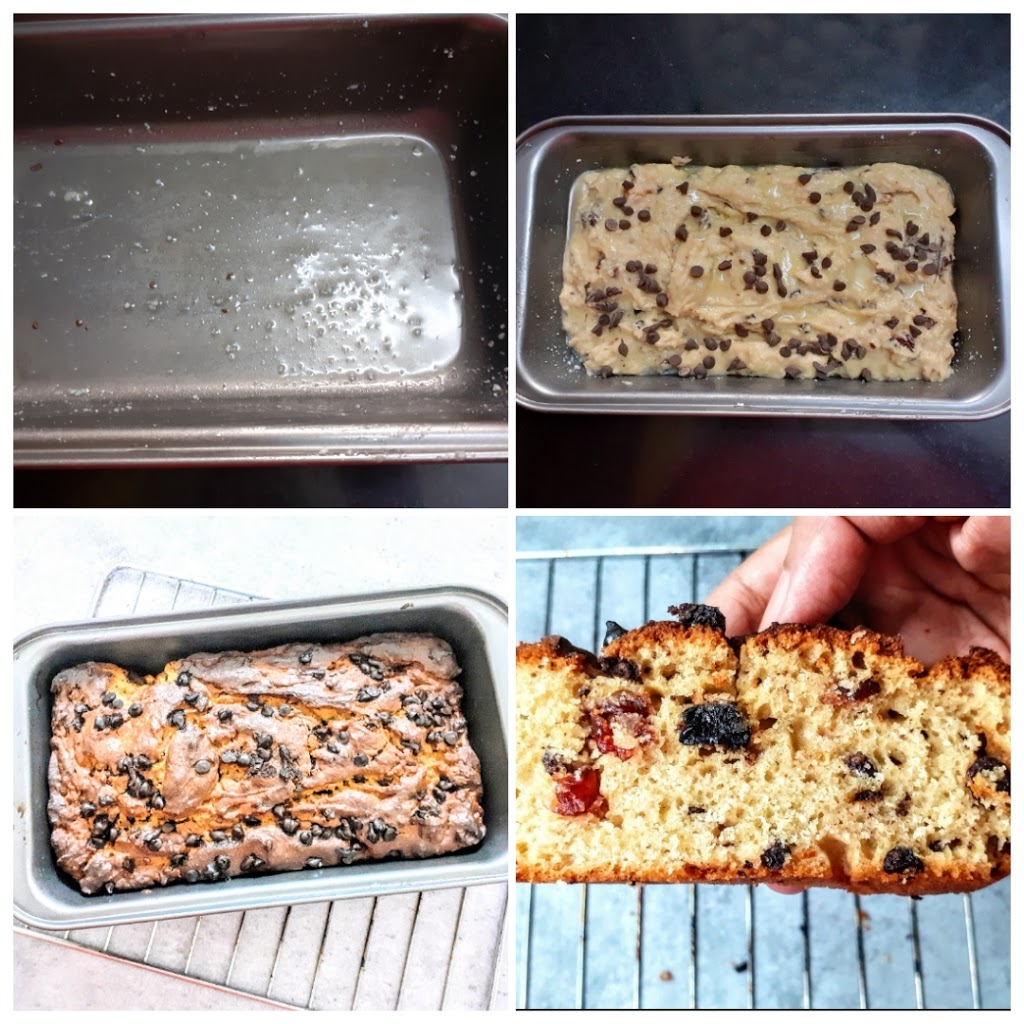
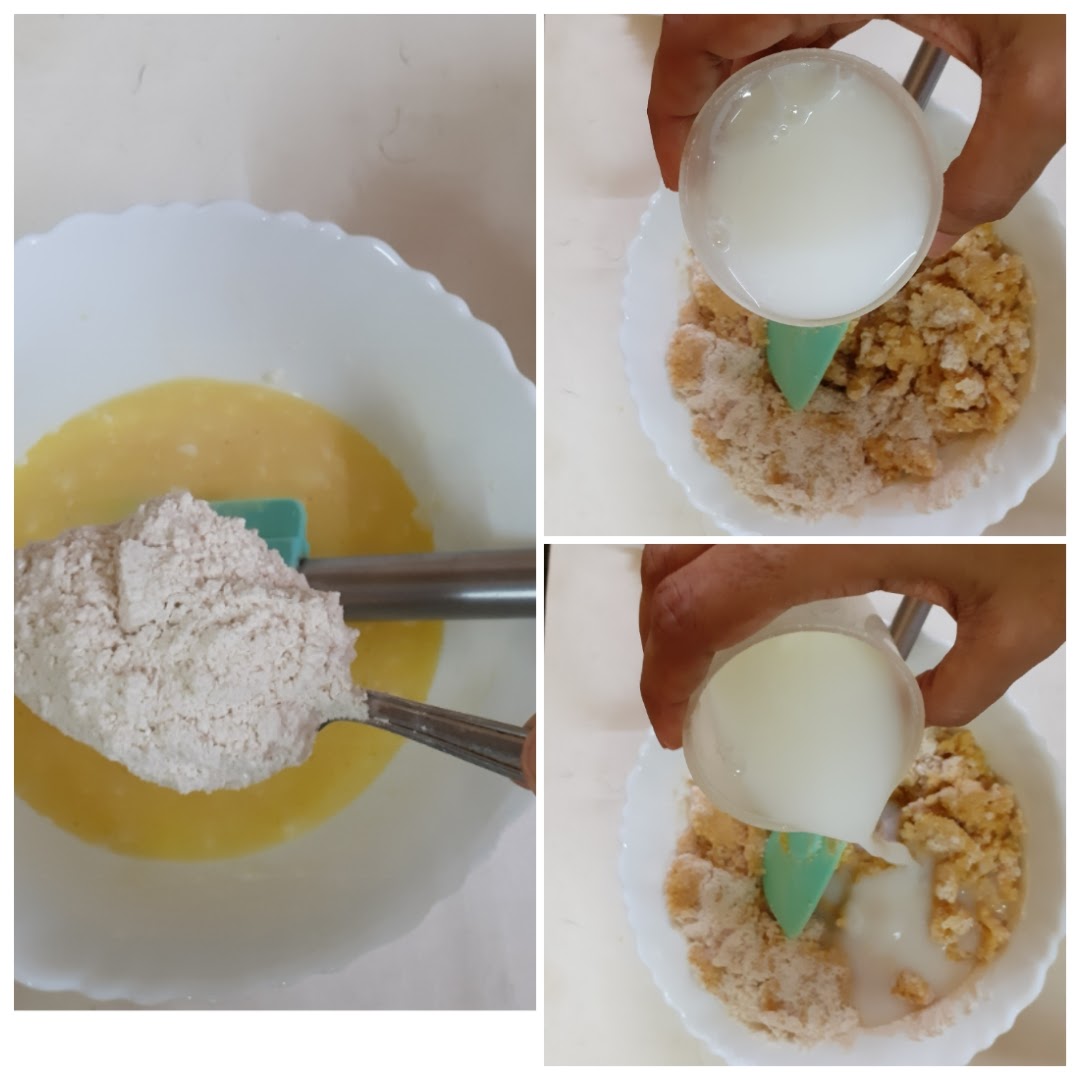
Directions: Preheat oven to 175 C . In a large mixing bowl take an egg and beat until frothy. Add in the sugar, oil and buttermilk(please note, I skipped taking a picture of adding buttermilk, so I have represented it with curd. Please use a cup of buttermilk). Also add Vanilla essence, and beat well again for 2 minutes on medium speed. Now in another bowl take the flour, baking powder, baking soda, salt, blueberries, cranberries, raisins, walnuts, and mix well with spatula. Break the chocolate into chunks, and keep aside. Now add all the flour-nut and berry mixture into the wet mixture, and mix well with a spatula. Do not over mix or mix vigorously. Mix in a single direction until combined. Now add the chocolate chunks and give a gentle mix. Pour the cake batter into a greased 9 inch loaf pan, top with choco chips(optional), and bake at 175 c for 50 minutes. Since all ovens have a different temperature range, start checking from 40 minutes onward. When the cake is brown on top and a tooth pick inserted in the center comes out clean, (please note if you hit a chocolate chunk with the toothpick, it will be gooey, this doesn’t mean the cake is undone, poke again at a different place to ensure). Switch off the oven and let the cake stand in the oven for 10 minutes. Remove, cool completely and then slice the cake.
STEPWISE RECIPE FOLLOWS:
1. Preheat oven to 175 C . In a large mixing bowl take an egg and beat until frothy. Add in the sugar, oil and buttermilk(please note, I skipped taking a picture of adding buttermilk, so I have represented it with curd. Please use a cup of buttermilk). Also add vanilla essence, and beat well again for 2 minutes on medium speed.
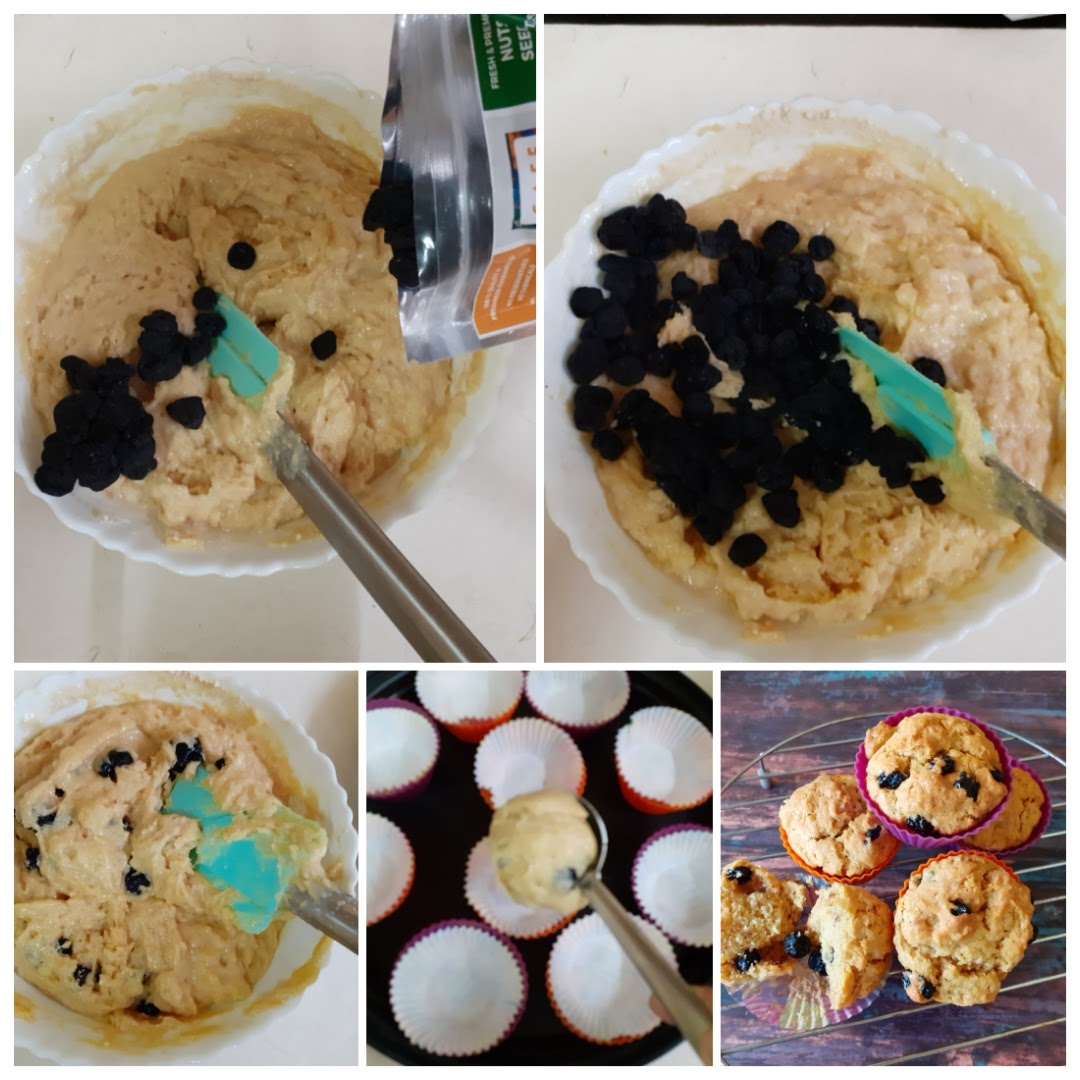
2. Now in another bowl take the flour, baking powder, baking soda, salt, blueberries, cranberries, raisins, walnuts, and mix well with spatula. Break the chocolate into chunks, and keep aside.

3. Now add all the flour-nut and berry mixture into the wet mixture, and combine well with a spatula. Do not over mix or mix vigorously. Mix in a single direction until combined. Now add the chocolate chunks and give a gentle mix.

4. Pour the cake batter into a greased 9 inch loaf pan, top with choco chips(optional), and bake at 175 c for 50 minutes. Since all ovens have a different temperature range, start checking from 40 minutes onward. When the cake is brown on top and a tooth pick inserted in the center comes out clean, switch off the oven and let the cake stand in the oven for 10 minutes. Remove, cool completely and then slice the cake.
NOTES:
1. Dates are commonly used in this cake, since I did not have them at the time of baking I have not added. I recommend that you add some.
2. Tutti fruity can also be used, though i have excluded it.
3. While mixing cake batter always mix in the same direction, this helps the cake to rise better.
4. Please note, I skipped taking a picture of adding buttermilk, so I have represented it with curd. Please use a cup of buttermilk. To make 1 cup buttermilk, dilute 2 tbsp thick curd with 3/4 cup of water. Mix well.
5. Since all ovens have a different temperature range, start checking from 40 minutes onward. Please note if you hit a chocolate chunk with the toothpick, it will be gooey, this doesn’t mean the cake is undone, poke again at a different place to ensure.
6. No loaf pan, just use your regular cake dish. It is taste that matters after all.
If you tried this recipe and liked it please comment below. I would love to hear from you. If you have a query about the recipe email us and ill respond as soon as I can.
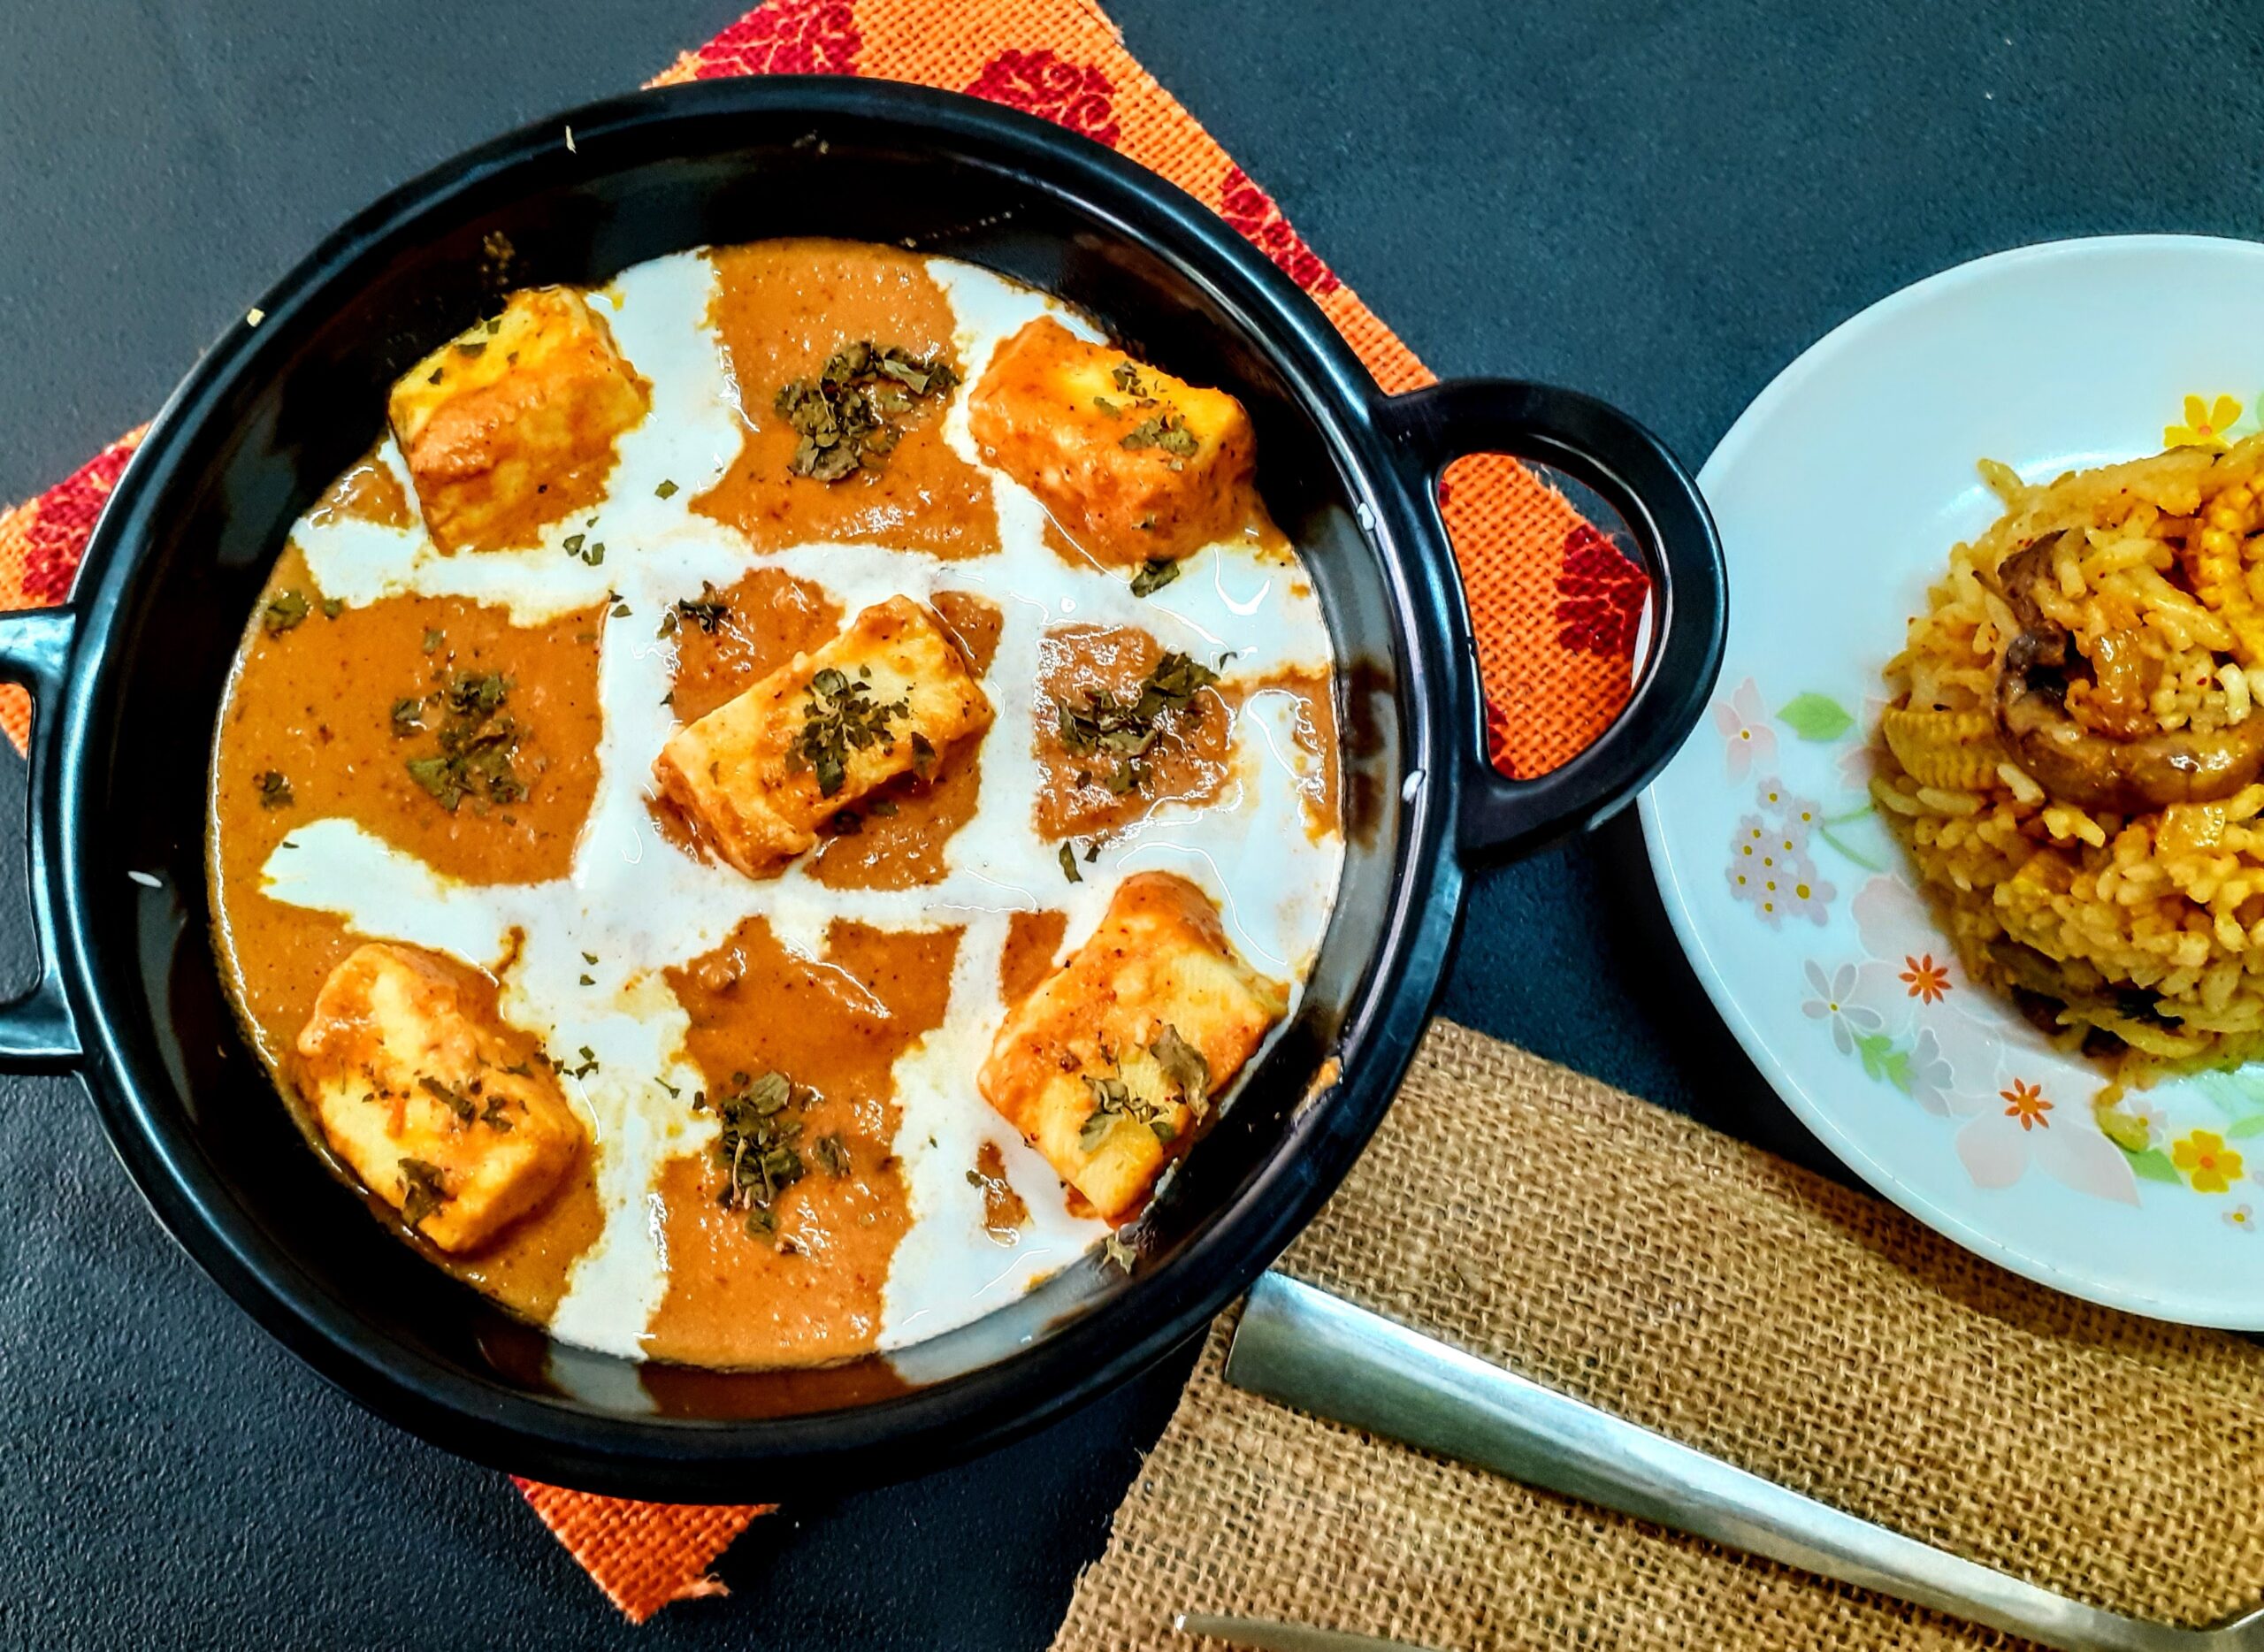
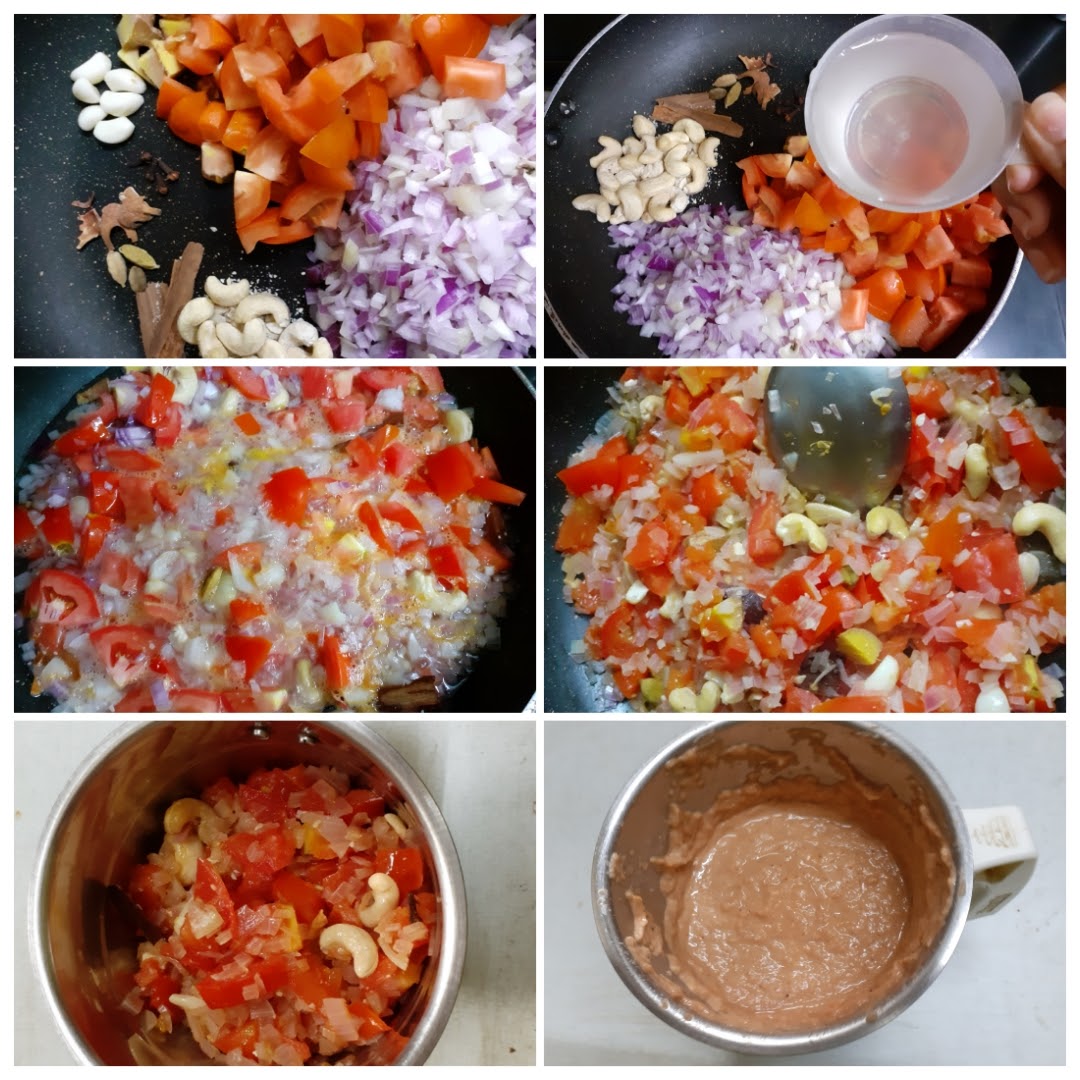
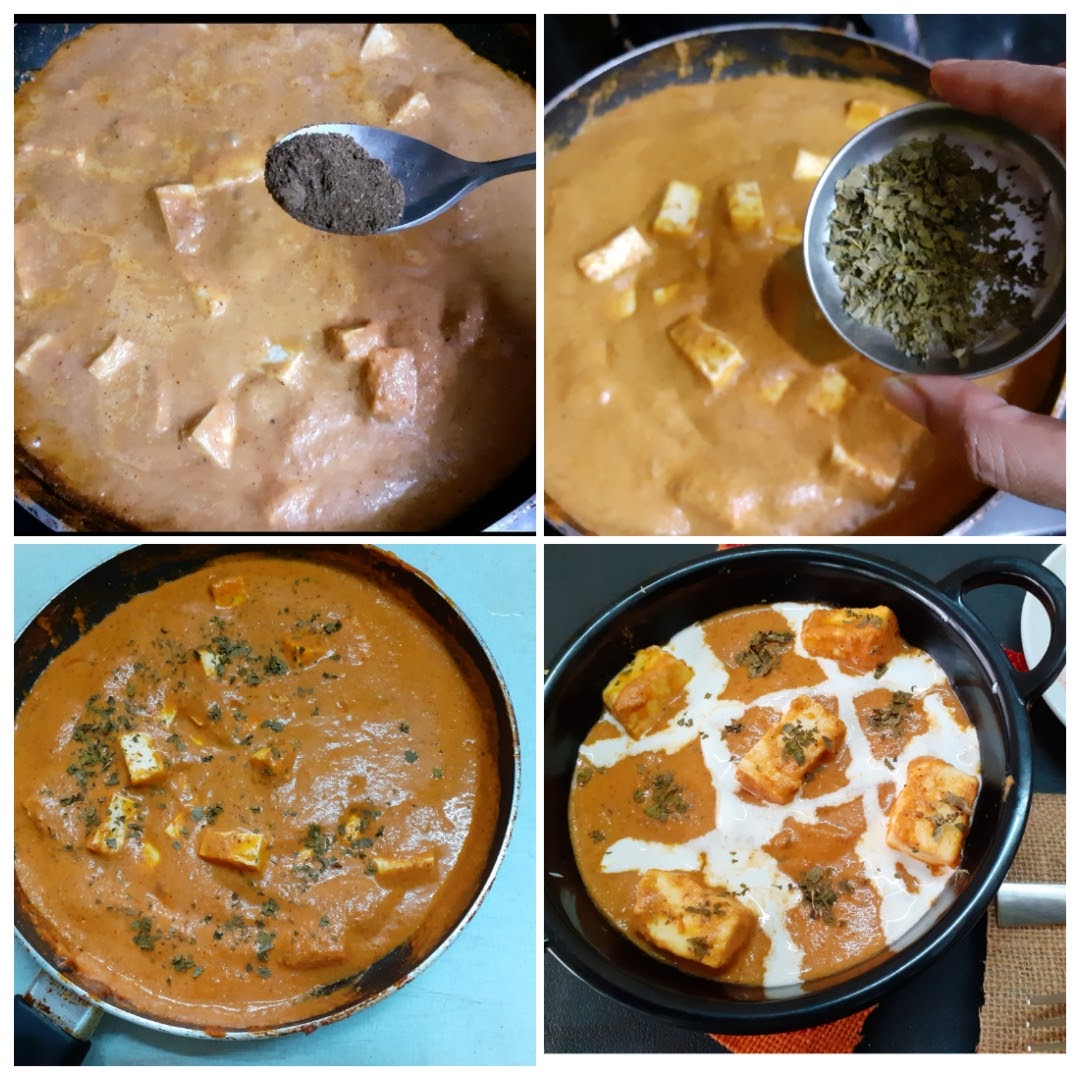
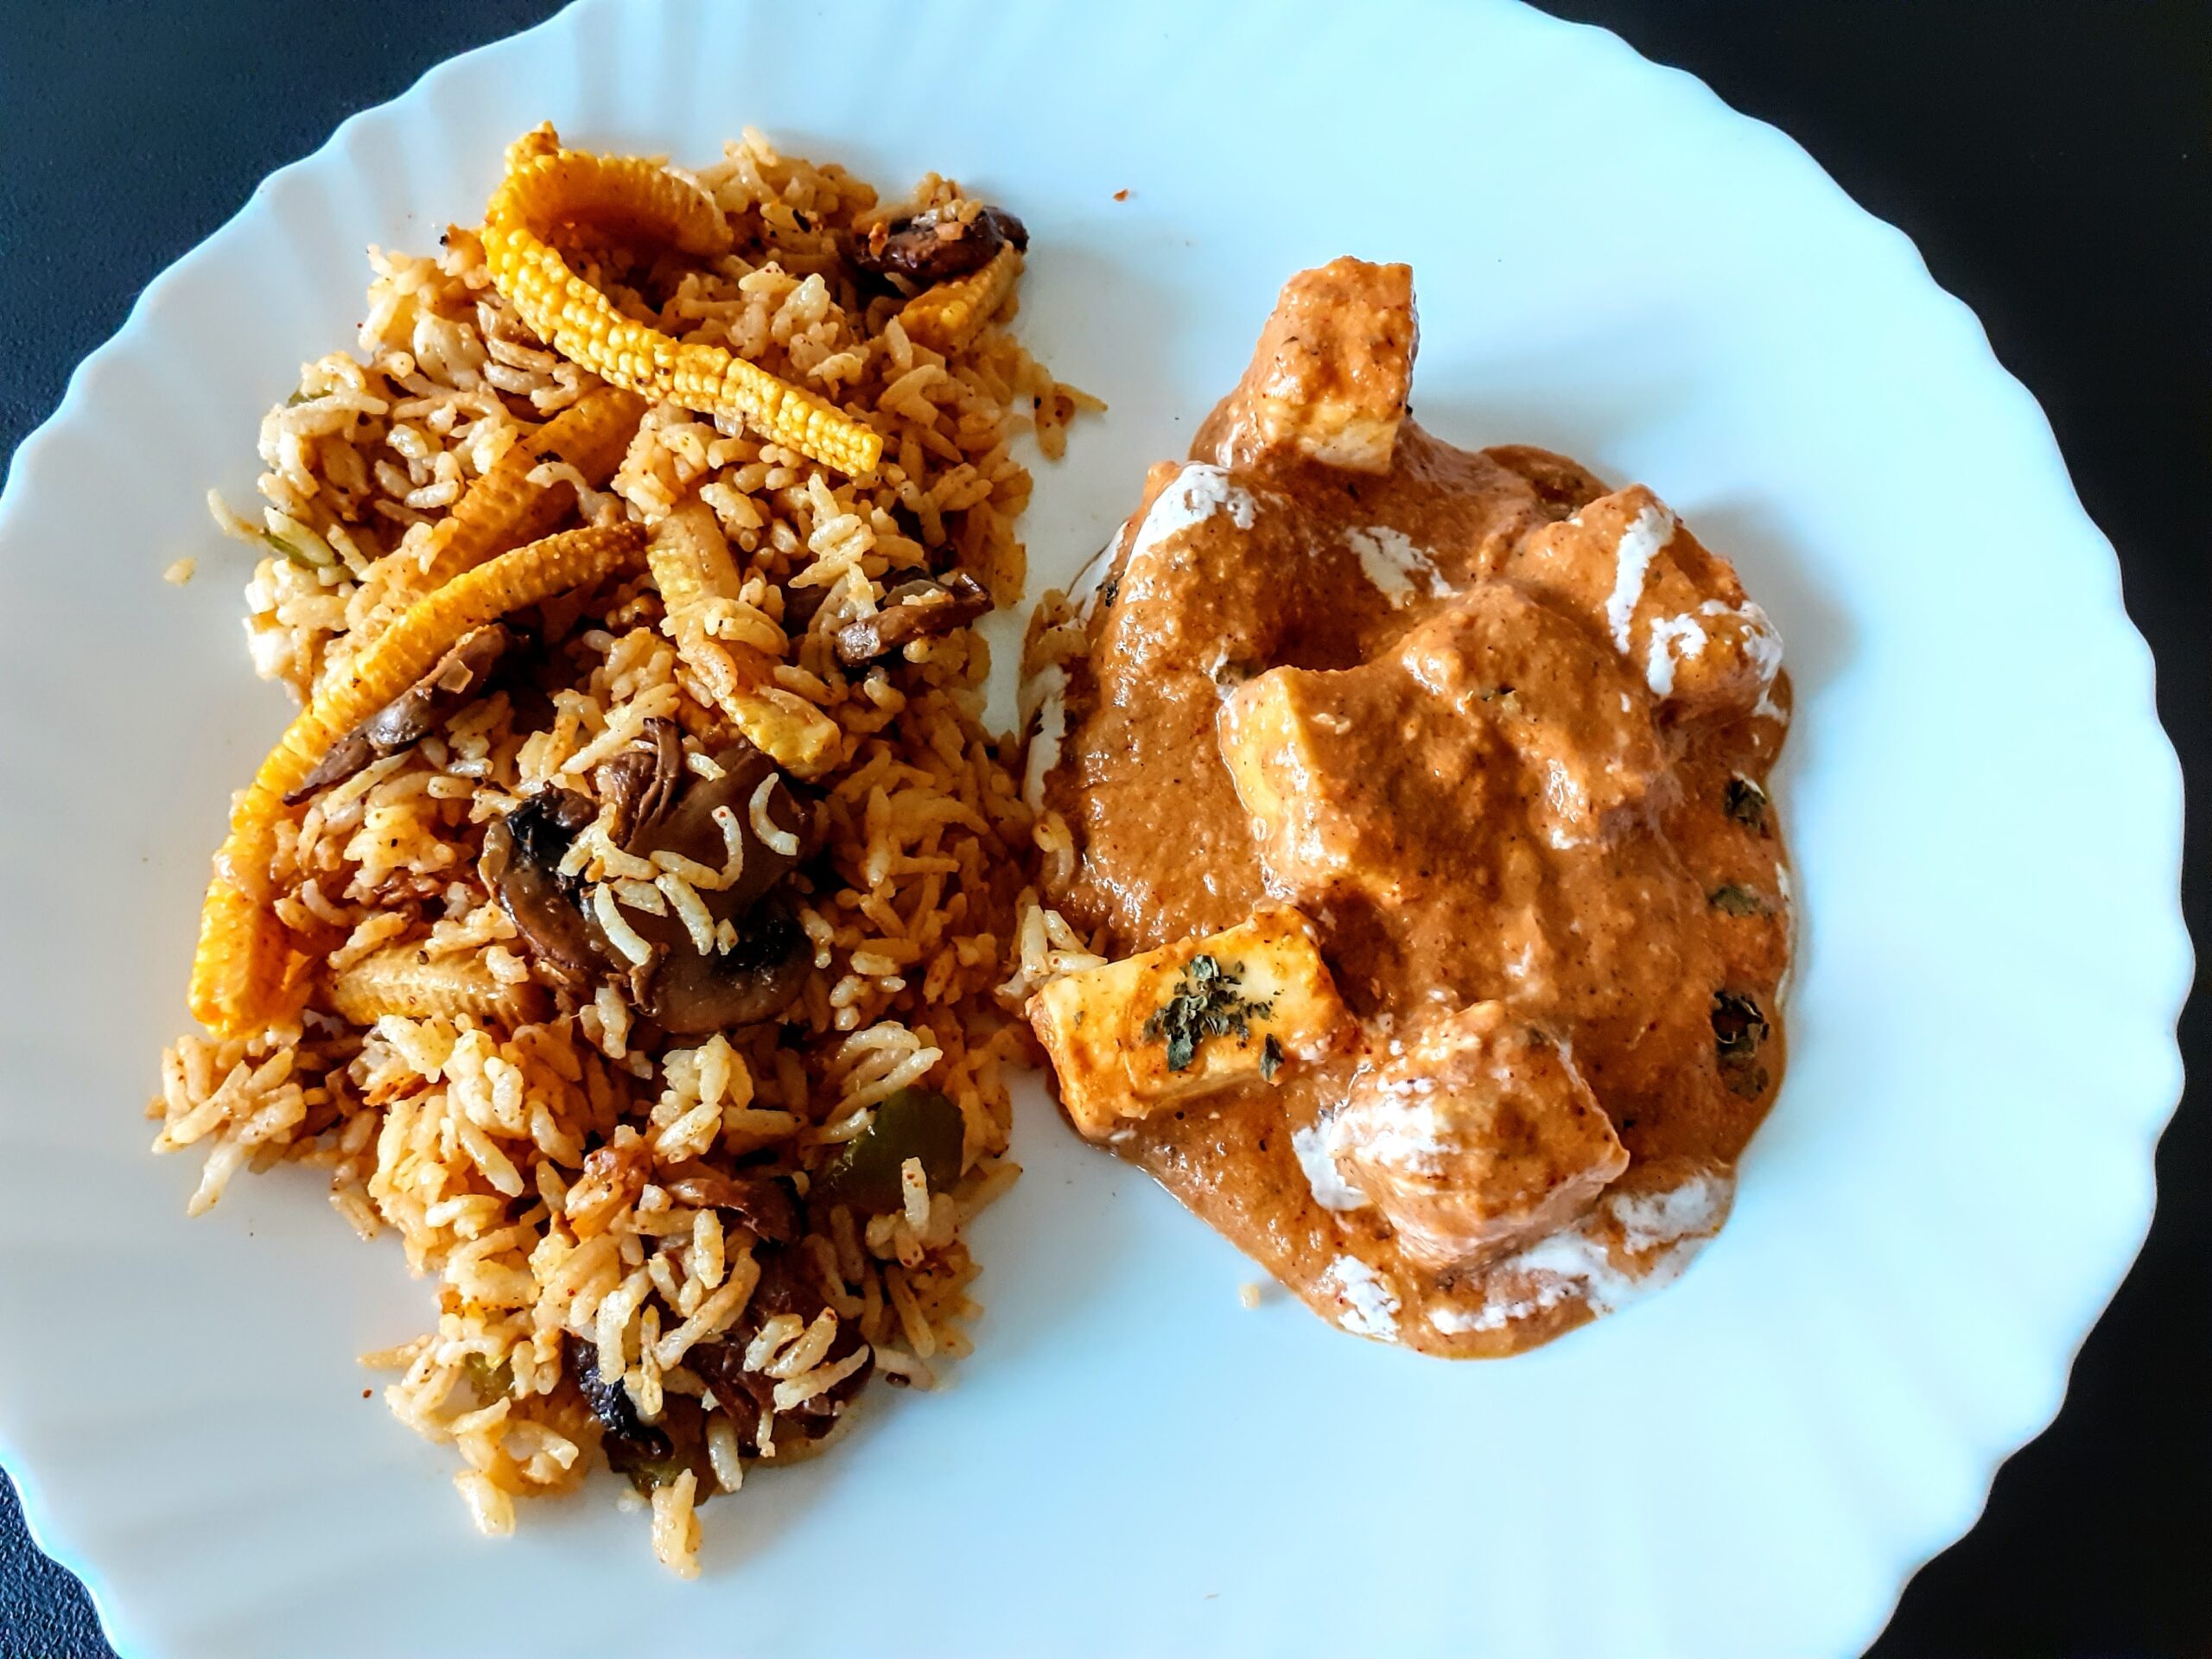
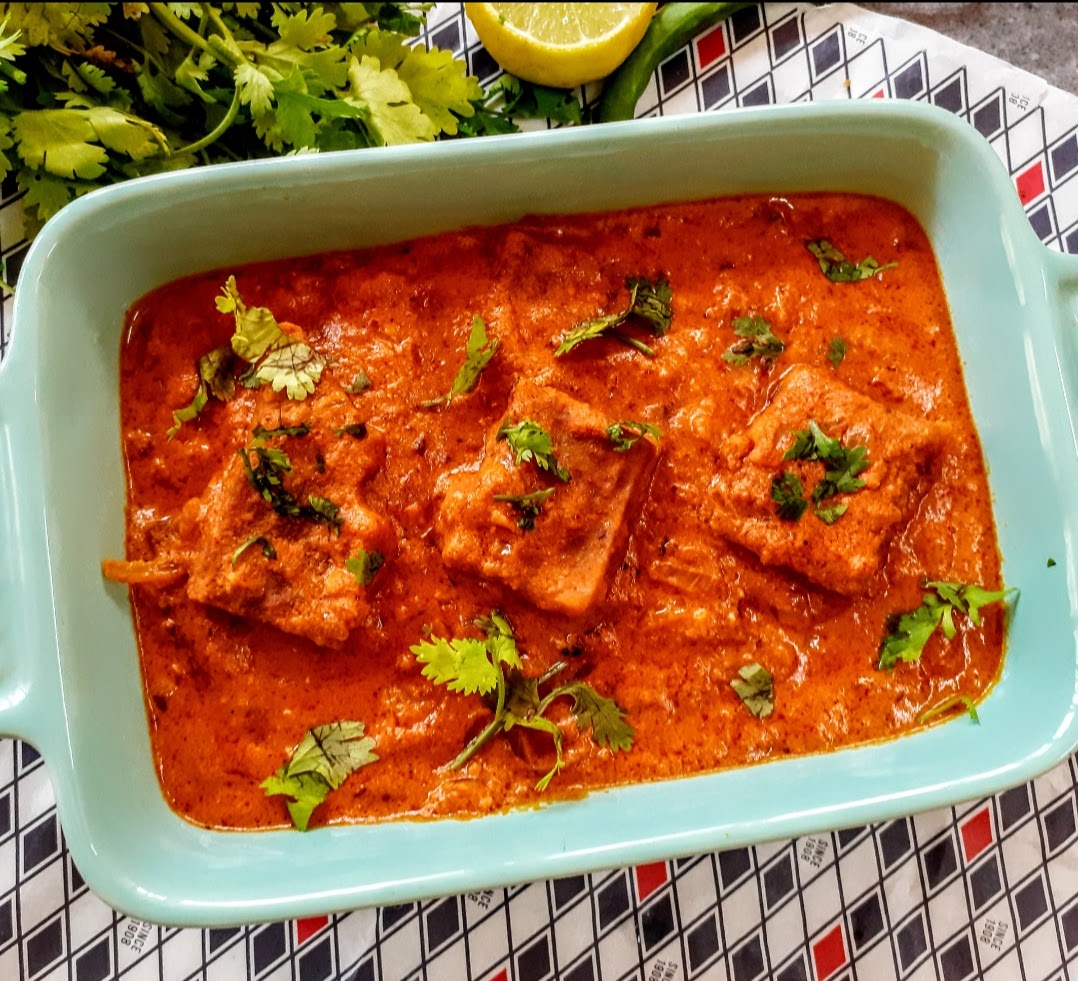
Paneer Makhni
Paneer or Cottage cheese is a acid set cheese got from cow or buffalo milk. It is a non- aged cheese made by curdling milk, disposing the whey, and collecting the fat, which is paneer. It is a rich source of milk protein. Paneer was introduced to India by the Persian and Afghan rulers in the 16th century, it is said. Paneer is a rich source of Calcium, iron, Mangesium, and also makes one feel full for longer.
Paneer is a savior in many ways than one. Do you agree? You want something easy-paneer to the rescue, or want something special for a get together-paneer to the rescue. Paneer is a regularly stocked item in my fridge. Sometimes I do make Paneer at home also, but that is not very frequent. Makhni gravy is a very subtly flavoured base, and while I have a Dal Makhni on the blog, it is but a must to have a Paneer Makhni or Paneer Makhanwala. A few whole spices make a world of difference in terms of flavour and you get the restaurant effect in the gravy.
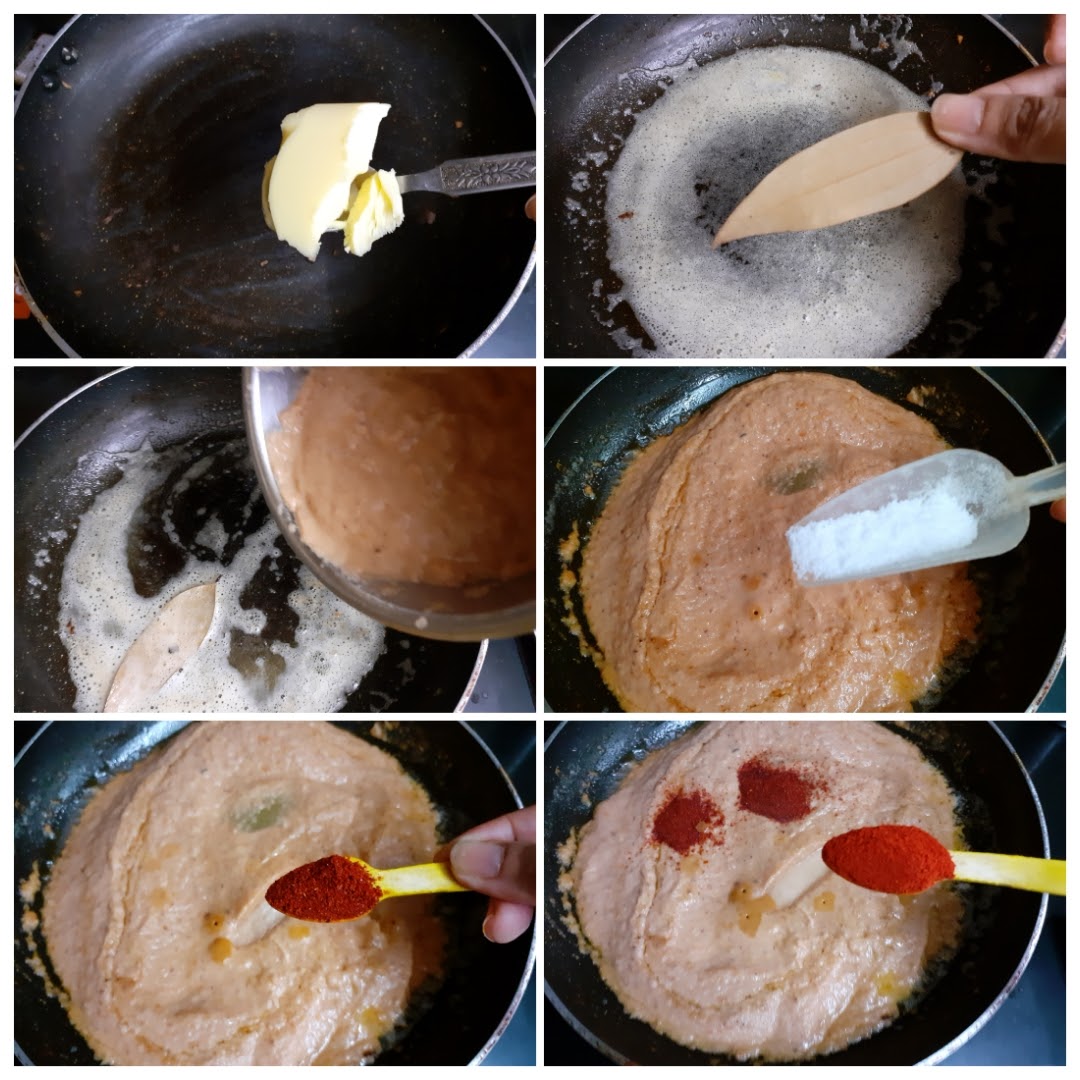
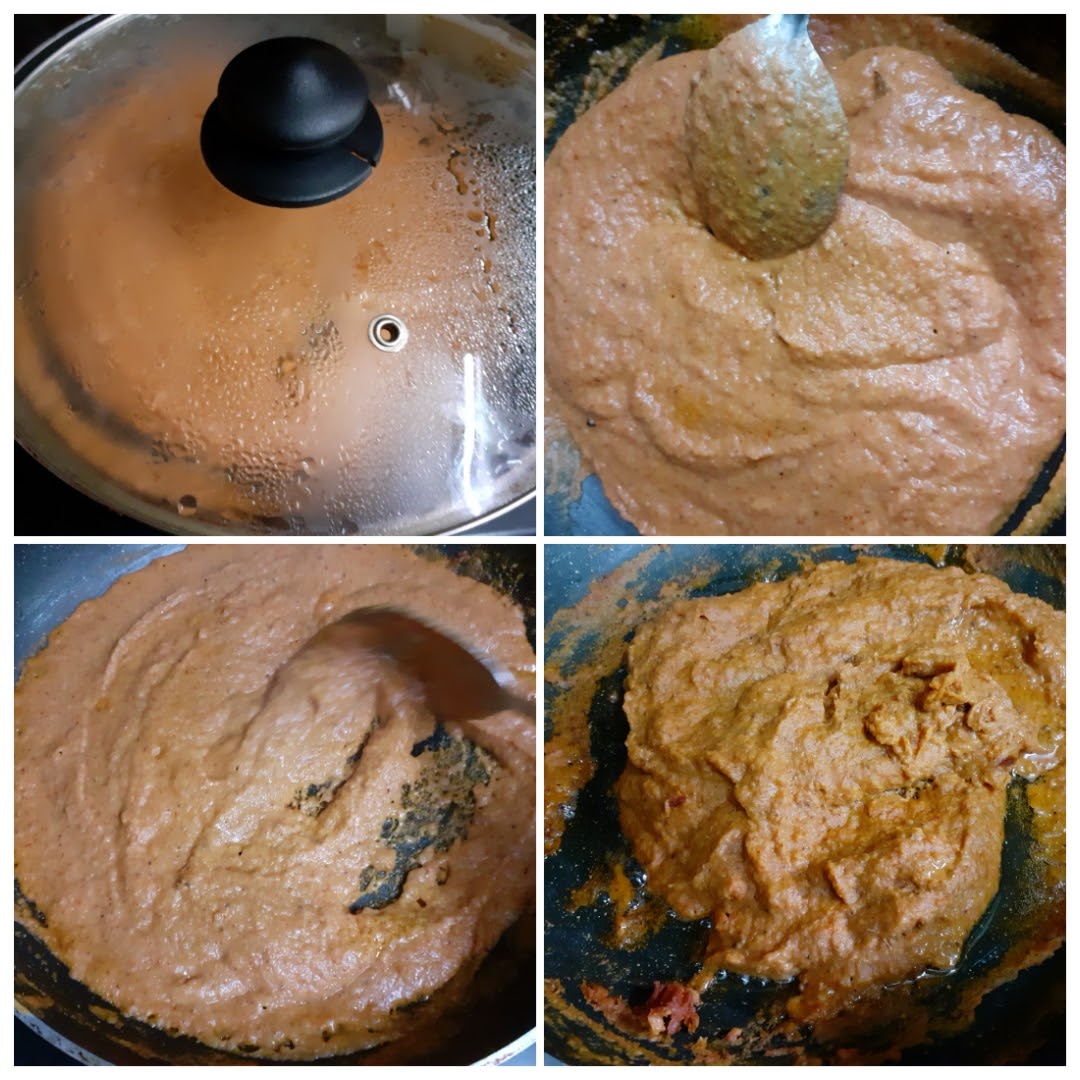
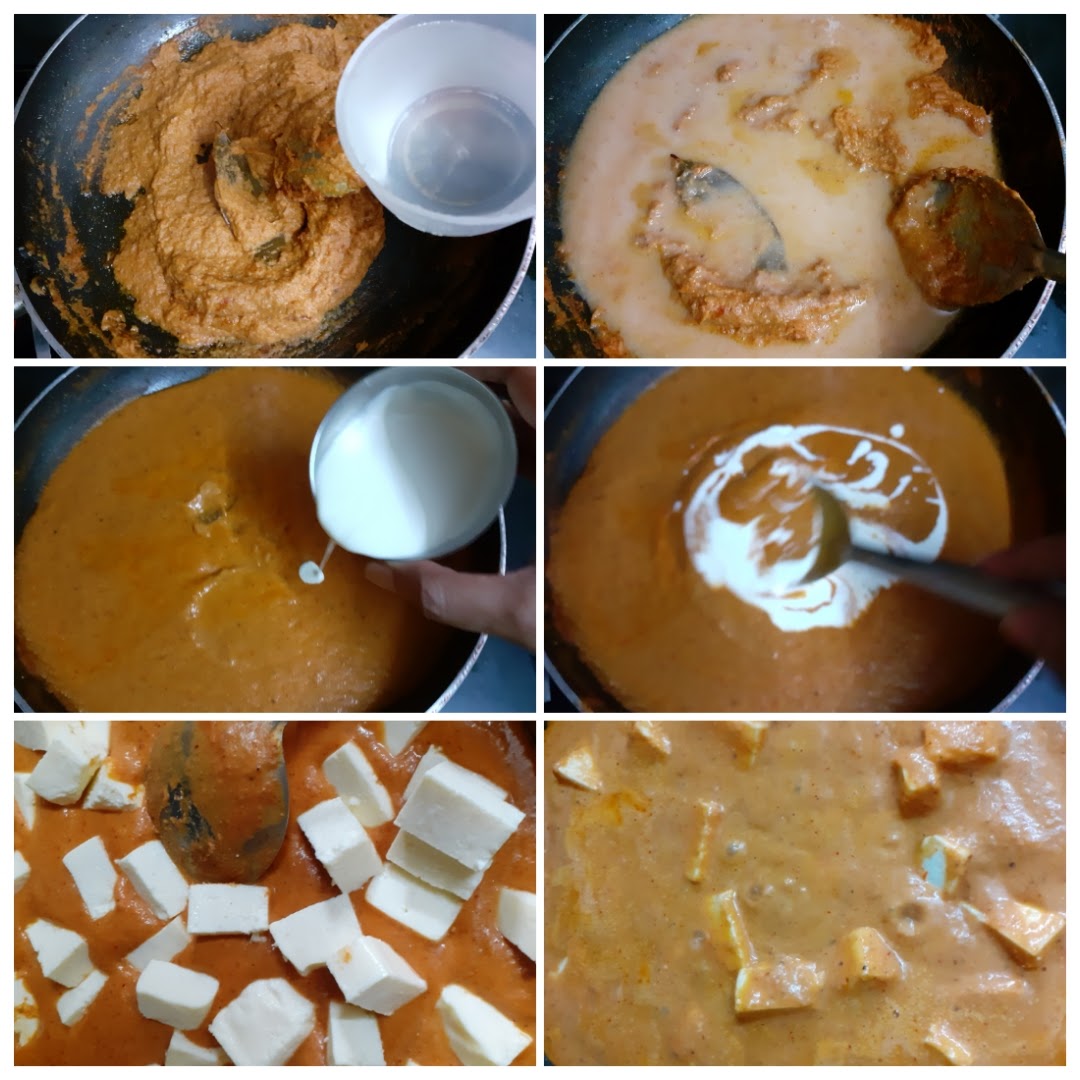
In this recipe the idea is to go liberal on the butter to get the perfect taste. In my usual paneer recipes you will find that I would have used either cashewnuts or cream, or even none at all. But this dish has both cream and cashewnuts thus making it special and rich. Something you will want to make for an occasion, or to cook for a loved one.
Since I am a paneer lover you will find many paneer recipes on the blog. Do check them out here– Paneer Khurchan, Palak Paneer, Mava Paneer Curry, Malpua with Gulab jamun mix, Kadai Paneer semi-dry, Matar Paneer, Steamed Paneer Palak Koftas, Kadai Paneer gravy, and more…
Here is the recipe for Paneer Makhanwala-
Ingredients to be ground:
If you tried this recipe and liked it please comment below. I would love to hear from you. If you have a query about the recipe email us and ill respond as soon as I can.
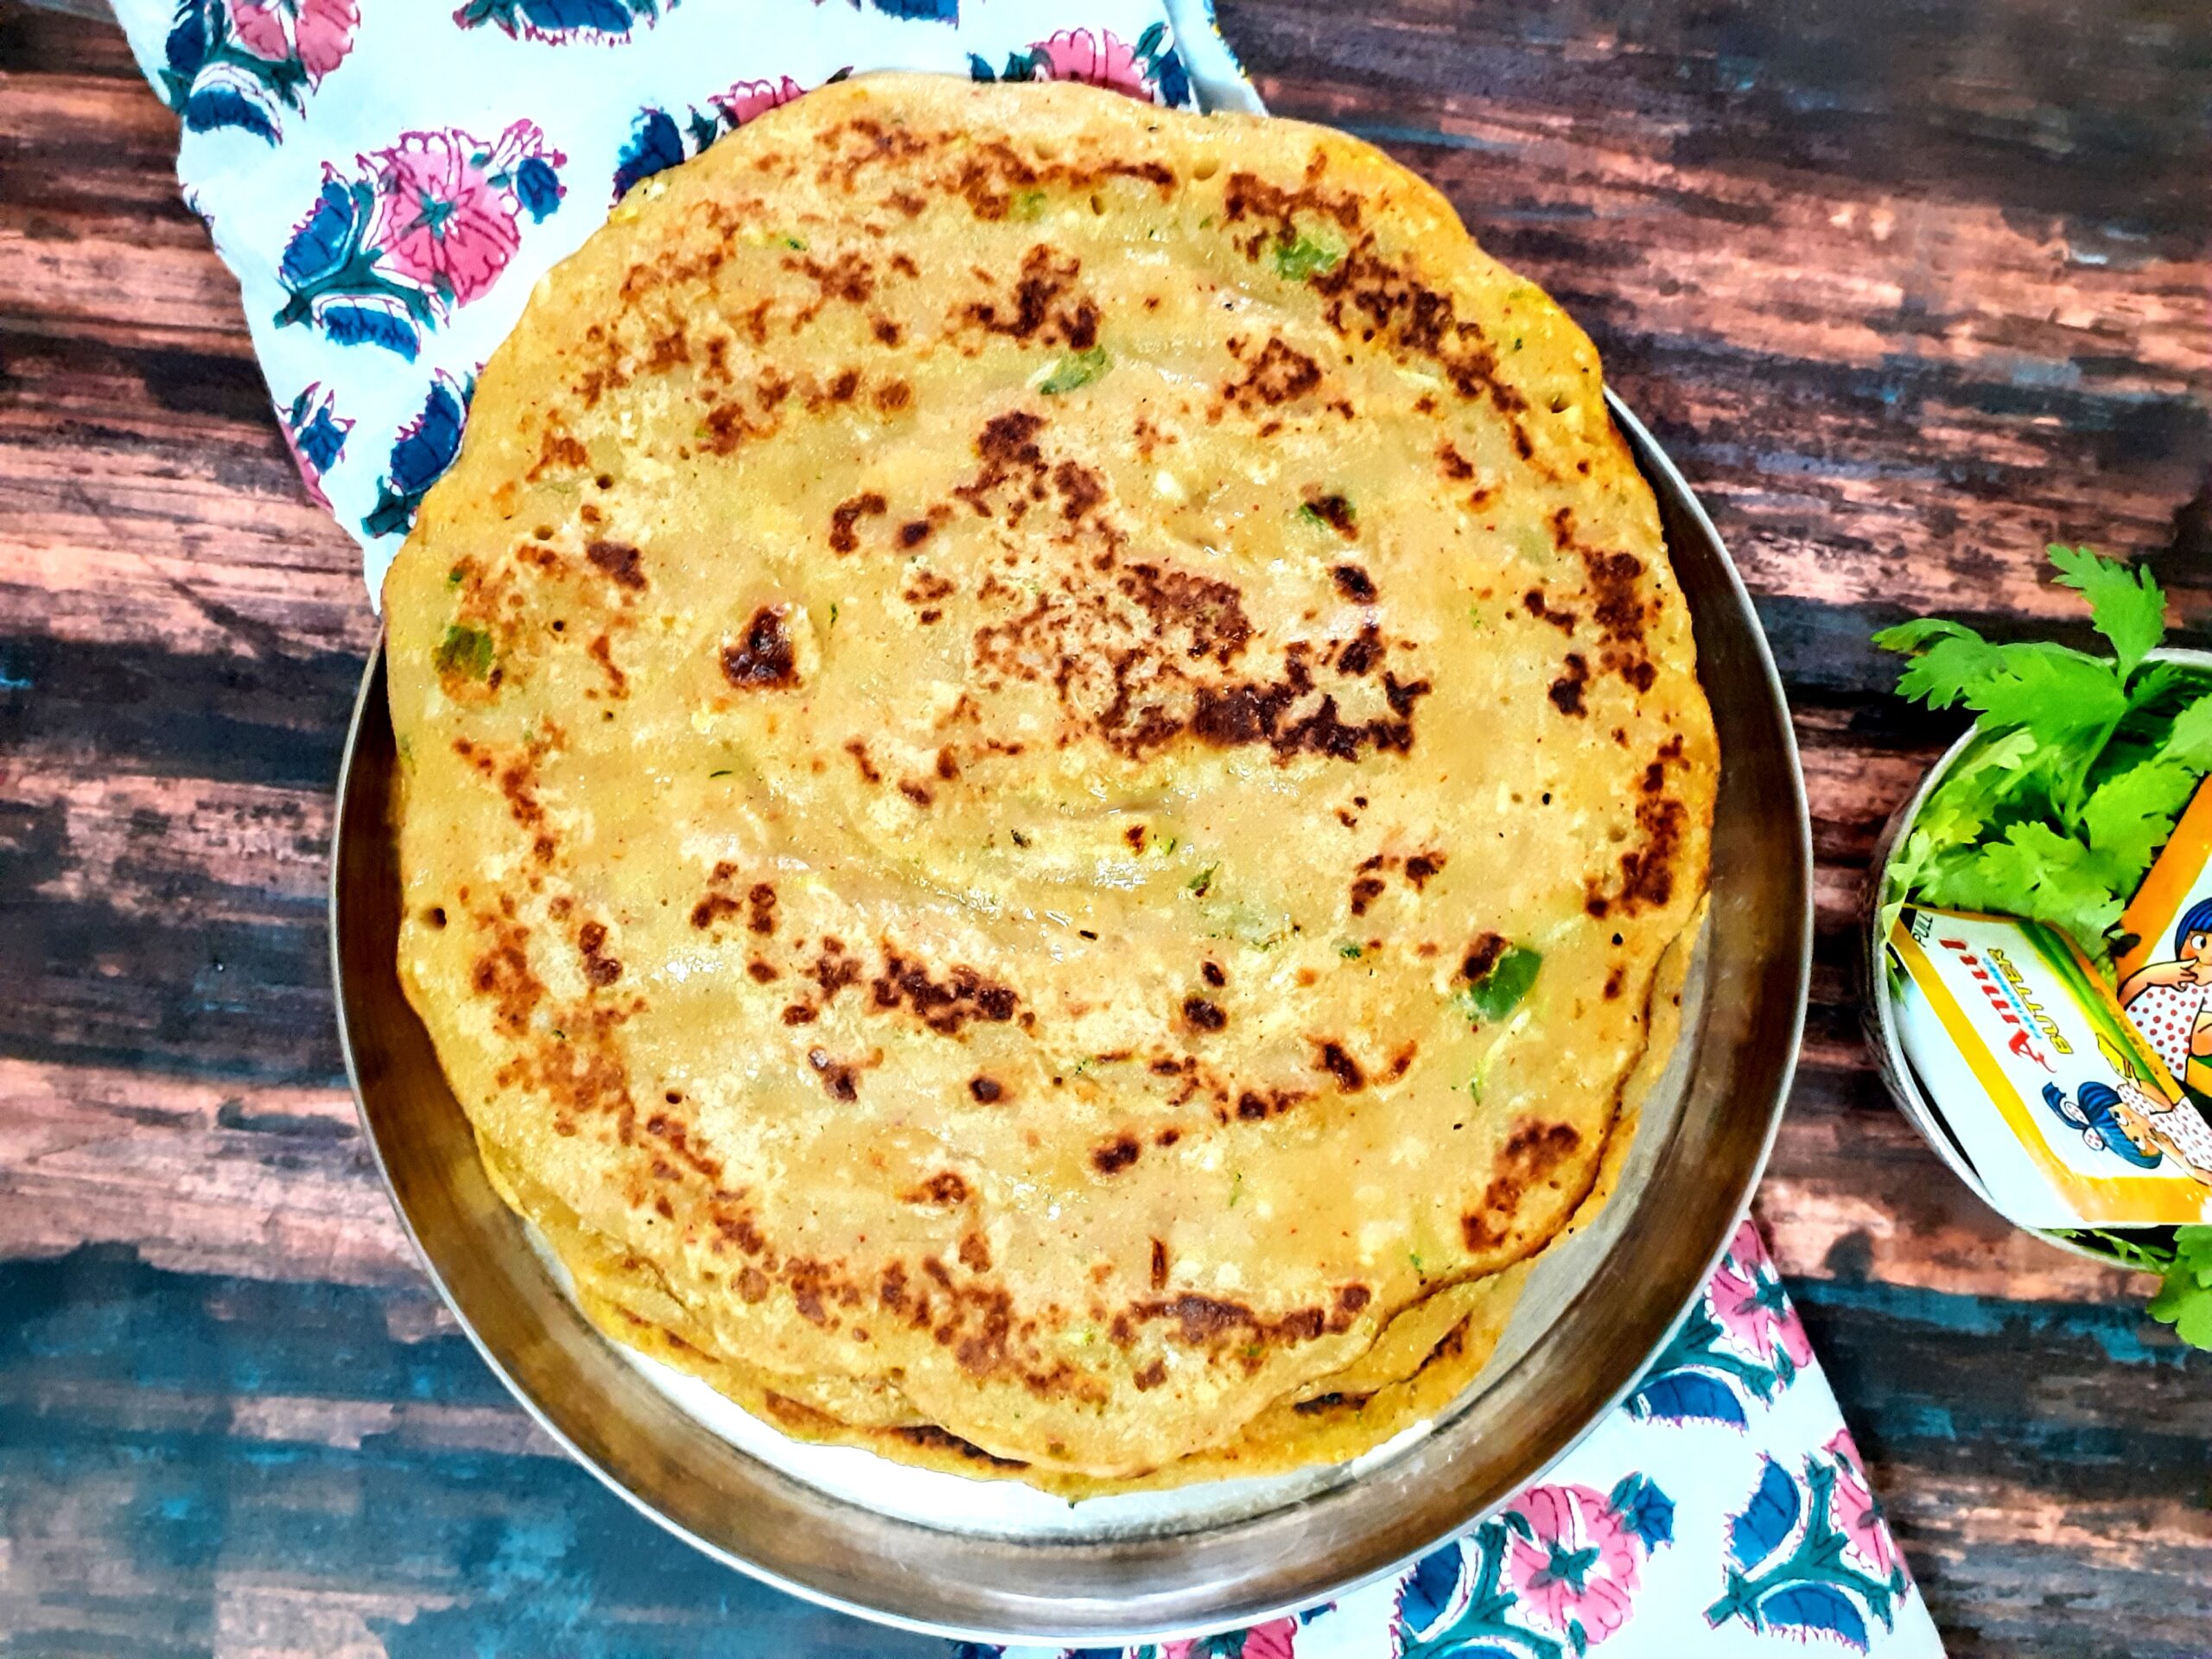
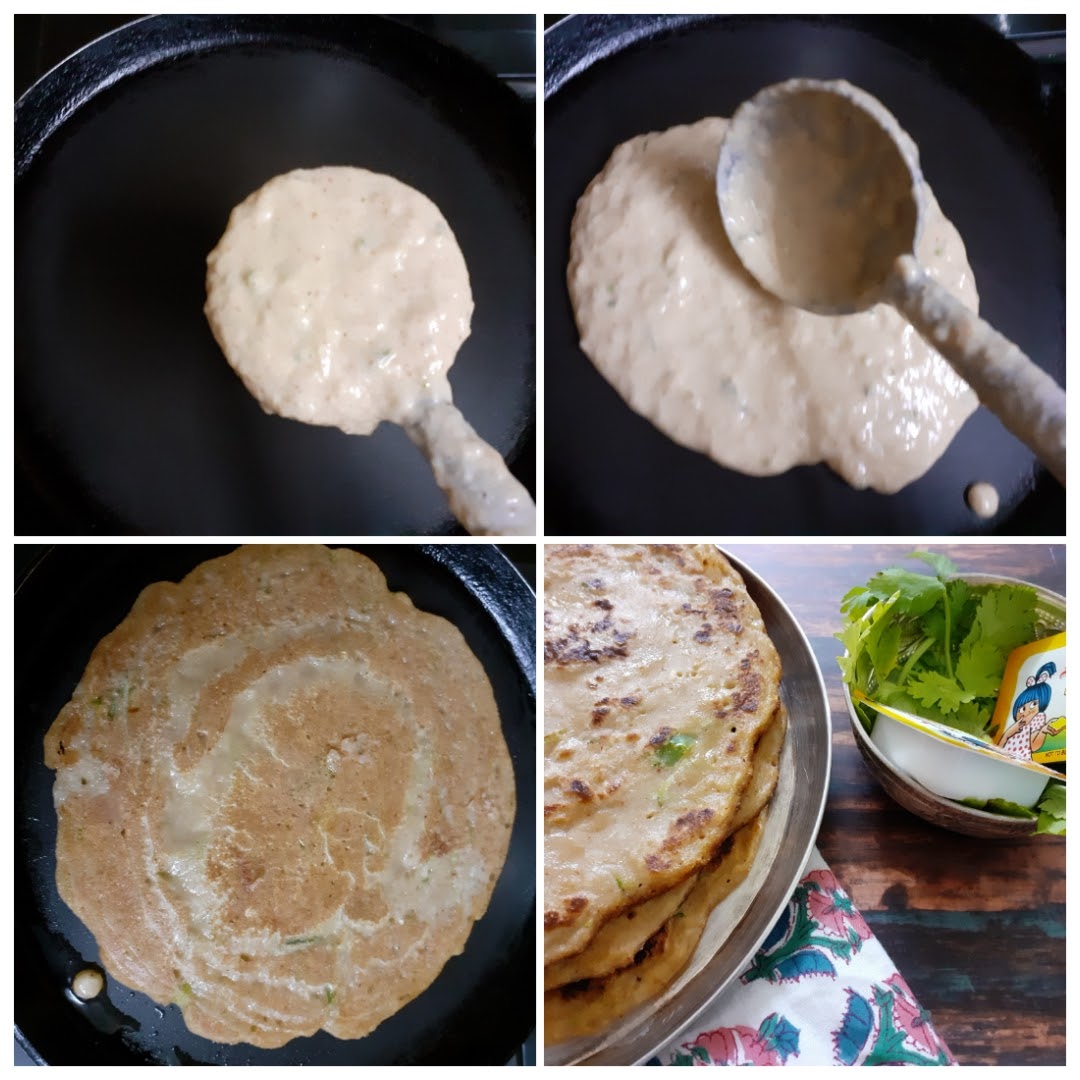
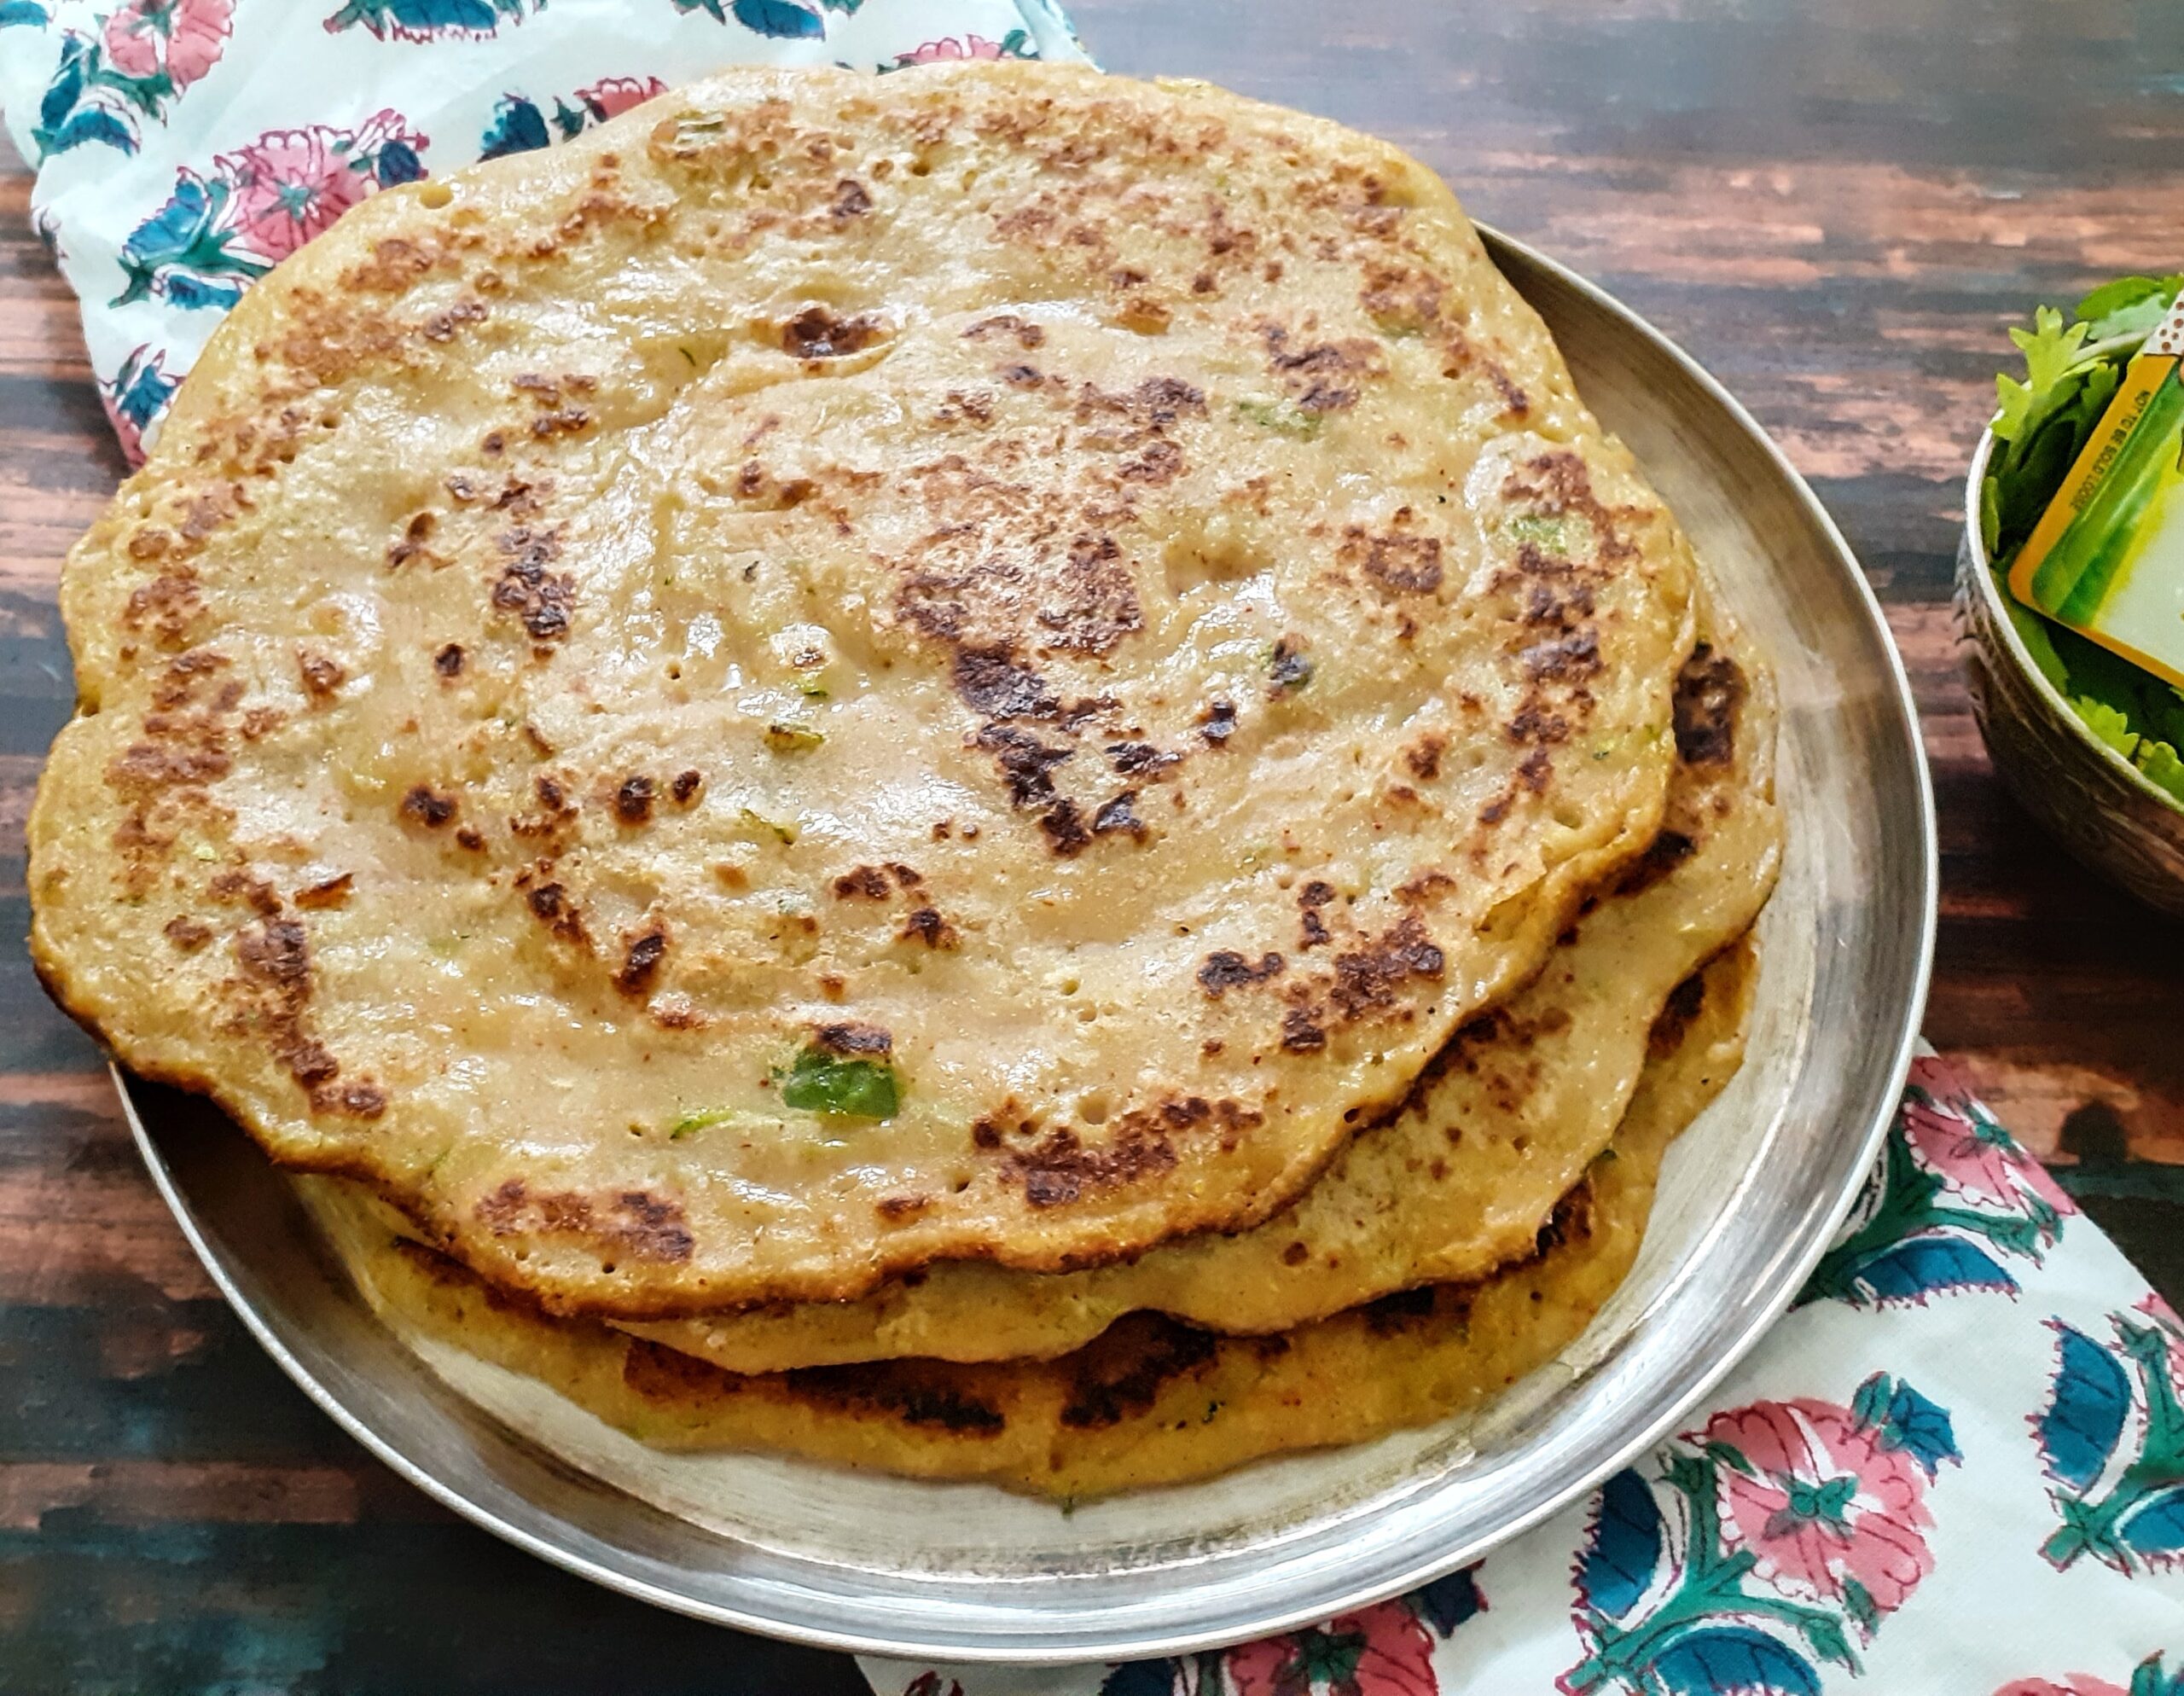
Zucchini And Potato Wheat Dosa
Wheat Dosa is very common in south Indian homes. Most of the times jaggery is added to it and we call it Vella Dosai, meaning jaggery Dosa or sweet Dosa. In recent times I have seen this as liquid dough Roti and I wonder how one calls it a Roti. In my understanding, what we knead is a dough, and what we pour is a batter, right? So, I console my self saying this name has stuck probably because it tastes more like a Roti/Paratha , but the texture is that of Dosa. Whatever it is Dosa or Roti it tastes good, it is healthy as it is made of wheat, I have included vegetables and the best part, because of all these reasons it could be served as breakfast, lunch or dinner????.
The vegetables used here are entirely customizable, but I would recommend adding a small potato, as I found it gives a good texture and softness to the Dosa. This dish is wholesome, no mess and quick fix, especially in these days where we are all working from home. When the work is endless, we all need quick fixes and this dish/Dosa is just that.
While you are here check out other recipes like Bajra and Ragi Cheela, Rava Dosa, Samosa pie , and more…
Giving below the recipe of Zucchini Potato wheat Dosa-
Ingredients:
Wheat Flour 2 cups
Zucchini 1 medium grated
Potato 1 medium boiled and grated
Green chillies 2 chopped fine
Salt as required
Red chillies 1 to 2 tsp as per taste
Coriander powder 1 tsp
Fennel powder 1 tsp
Water as required
Directions: In a big vessel take the grated Zucchini and grated Potato, add the green chillies, salt, red chilli powder, coriander powder, fennel powder. Now add the whole wheat flour and mix well using a spatula or your hand. Now pour water gradually to form a dosa consistency batter. The batter should be lump free. Let the batter rest for 20-30 minutes. Now heat a Tava on medium flame, grease it a little and pour the batter on it evenly. The dosa must be thick. Drizzle oil and cook on both sides. Serve with pickle, butter or chutney.
STEPWISE RECIPE FOLLOWS:
1. In a big vessel take the grated Zucchini and grated Potato, add the green chillies, salt, red chilli powder, coriander powder, fennel powder.
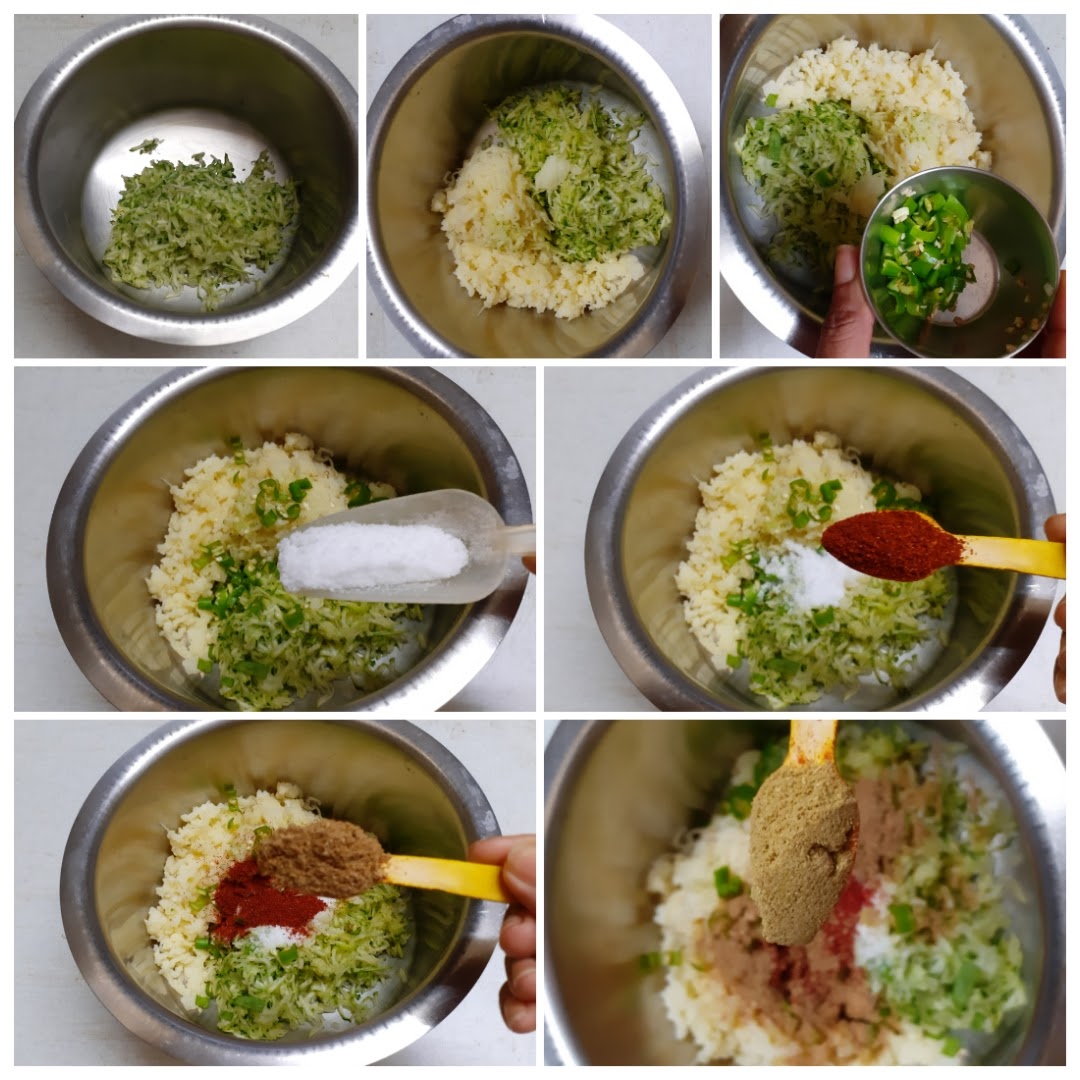
2. Now add the whole wheat flour and mix well using a spatula or your hand. Now pour water gradually to form a dosa consistency batter. The batter should be lump free. Let the batter rest for 20-30 minutes.
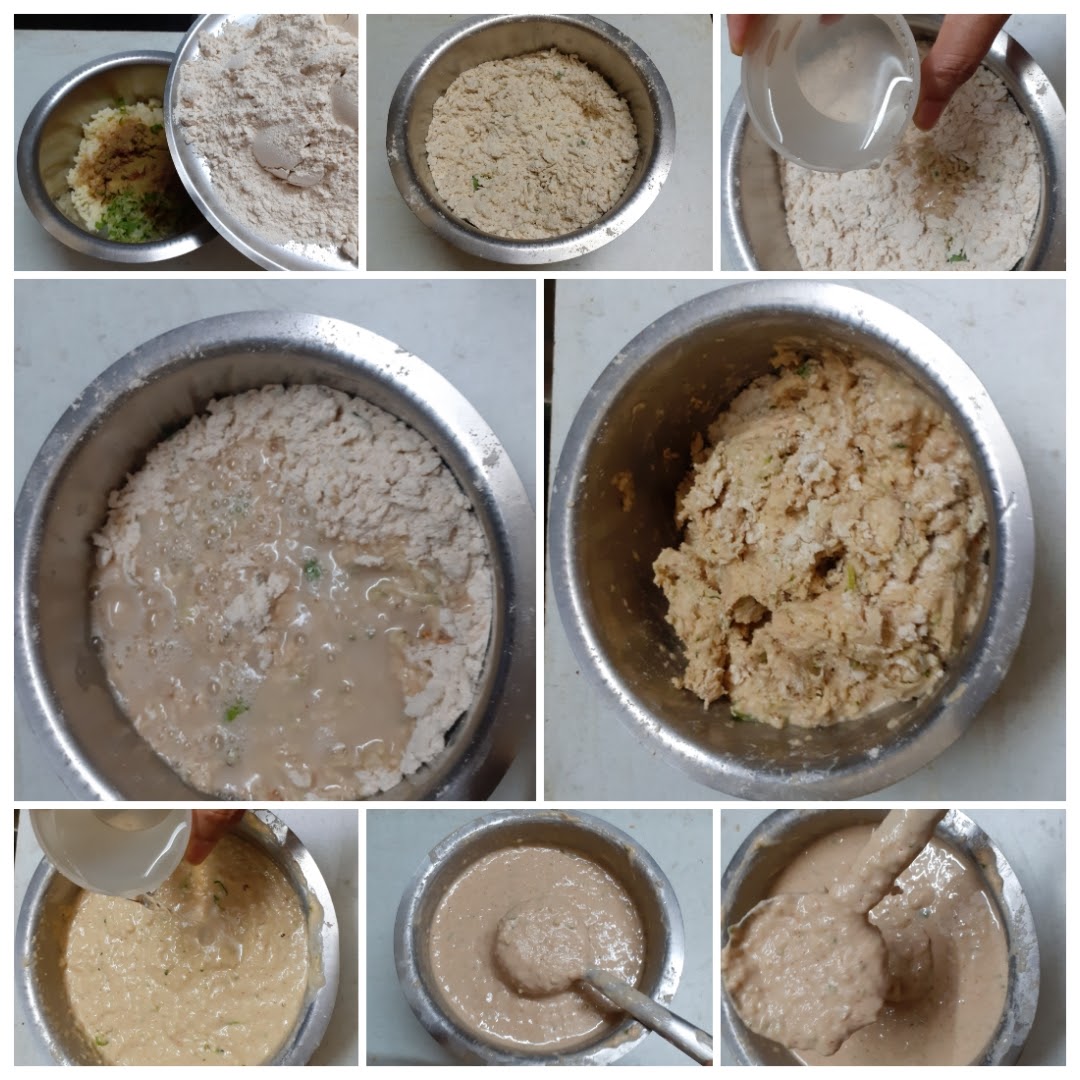
3. Now heat a Tava on medium flame, grease it a little and pour the batter on it evenly. The dosa must be thick. Drizzle oil and cook on both sides. Serve with pickle, butter or chutney.
If you tried this recipe and liked it please comment below. I would love to hear from you. If you have a query about the recipe email us and ill respond as soon as I can.
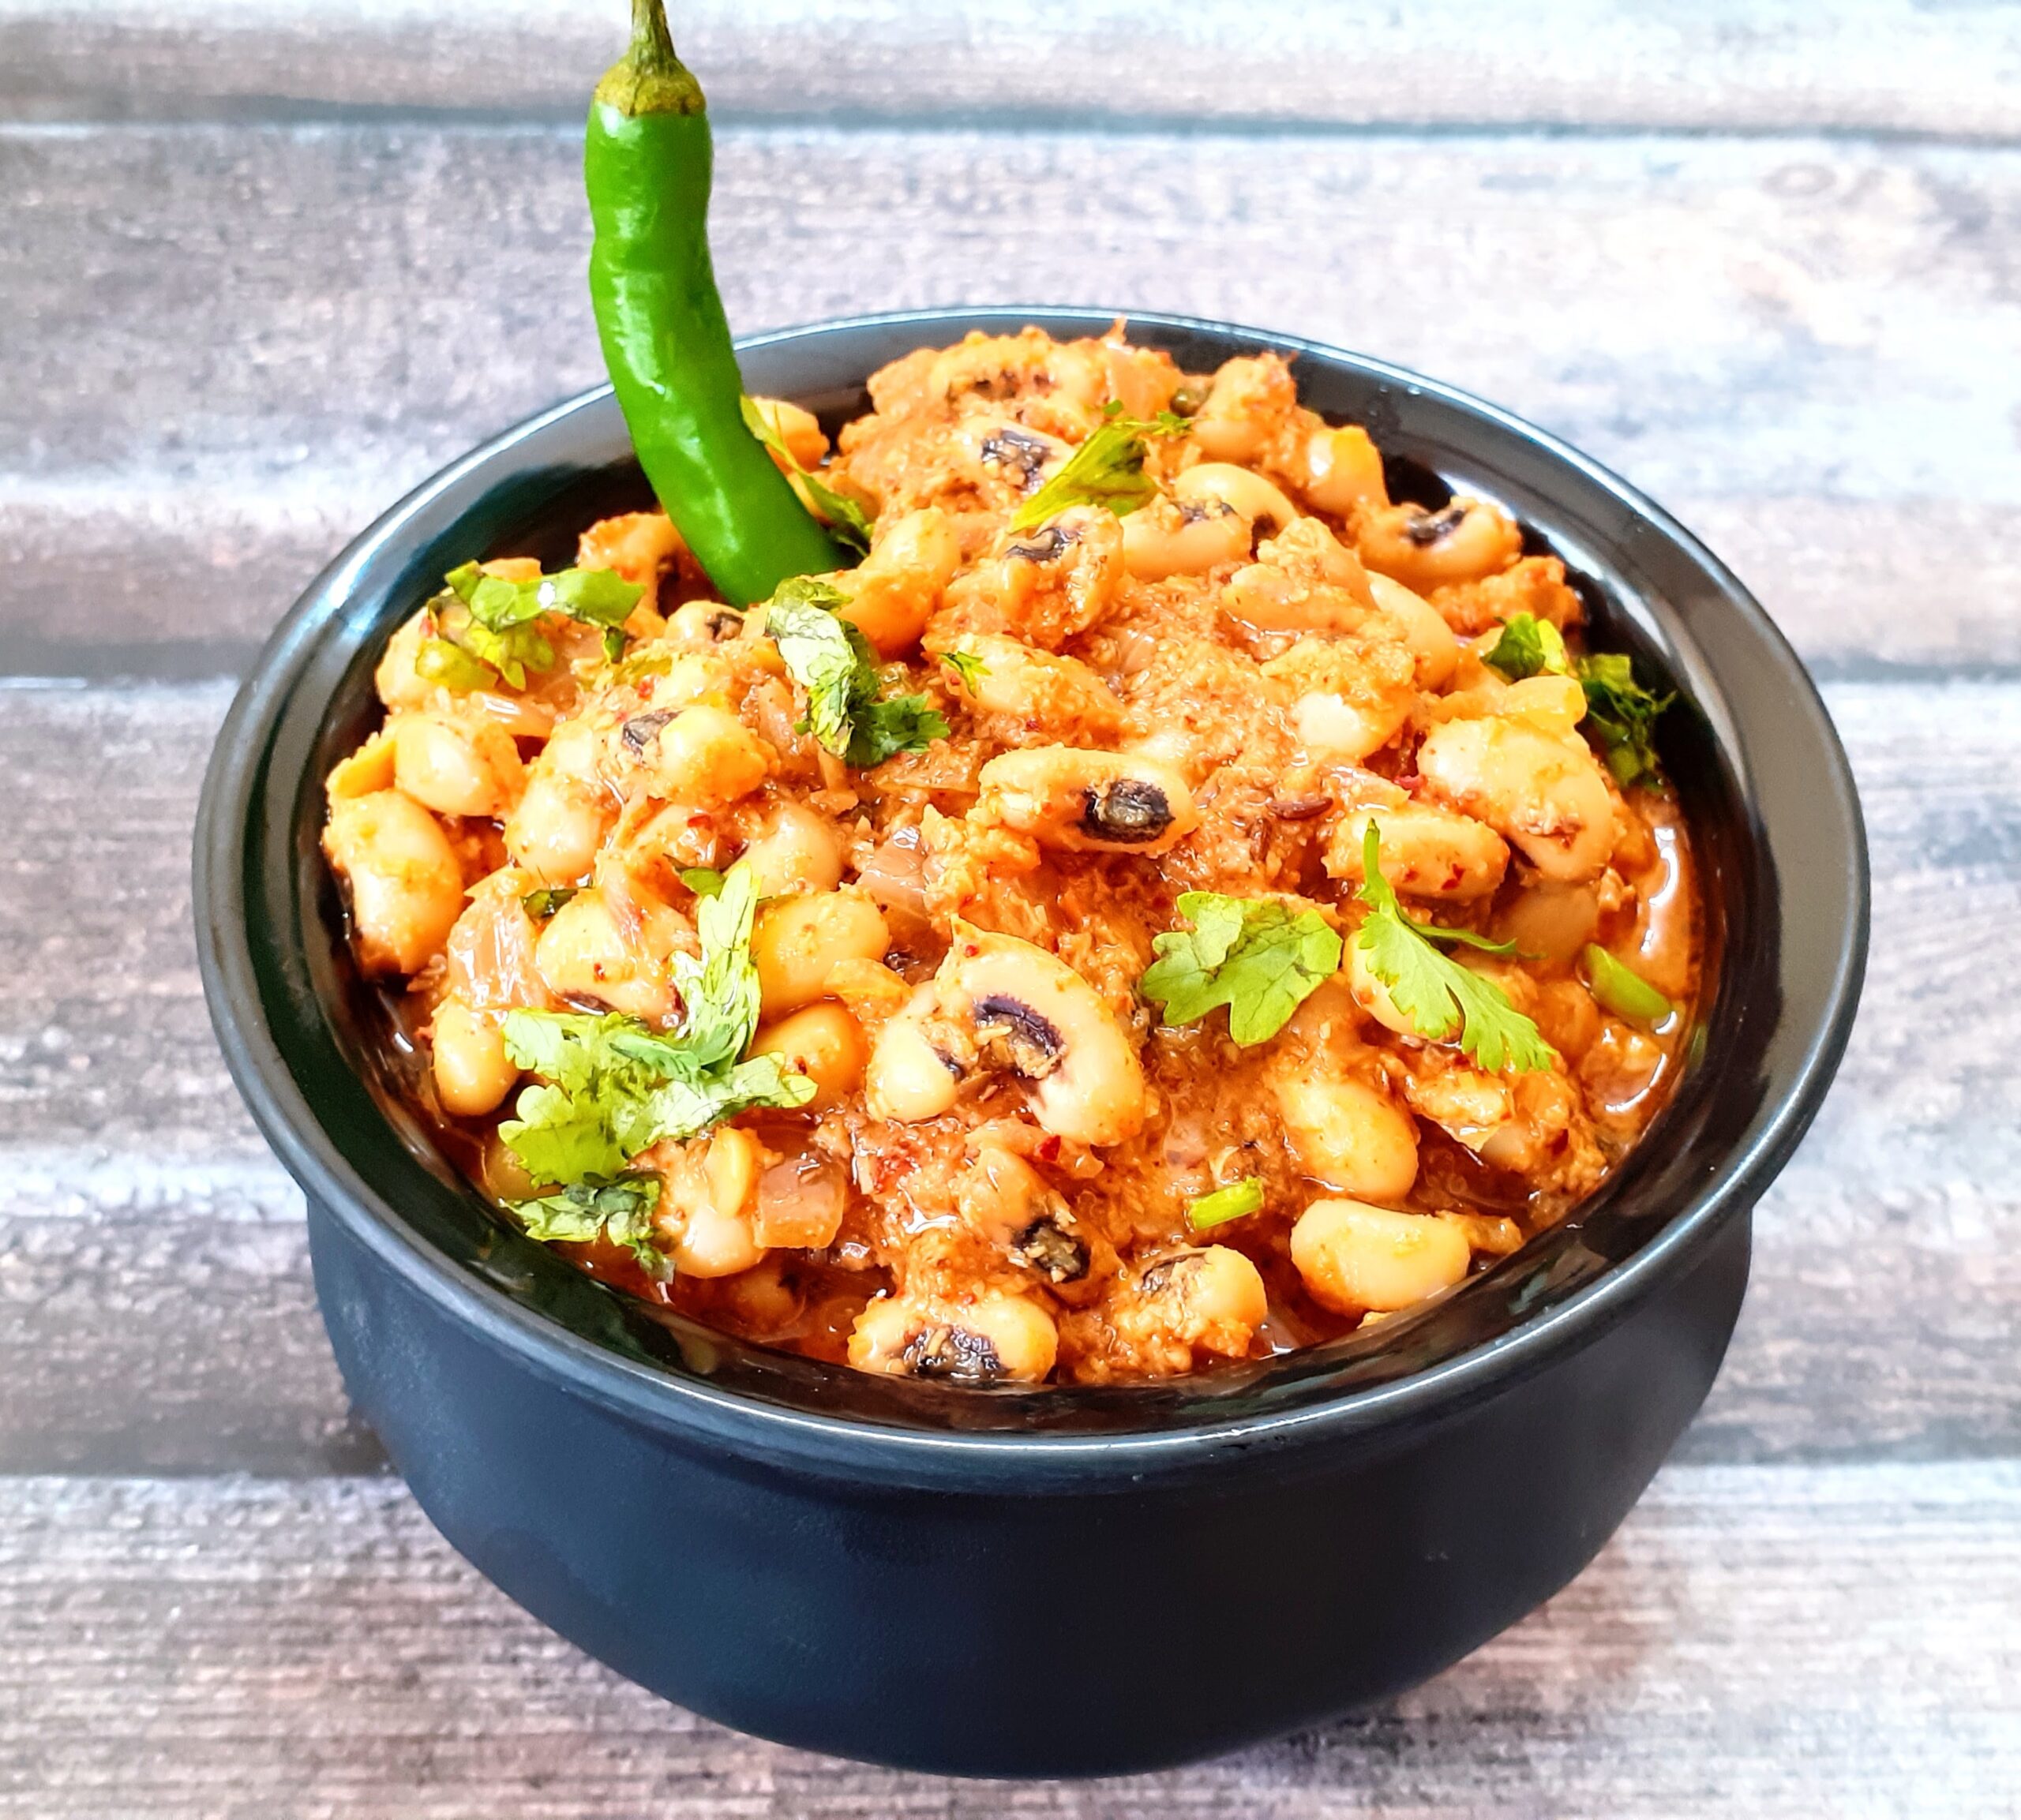
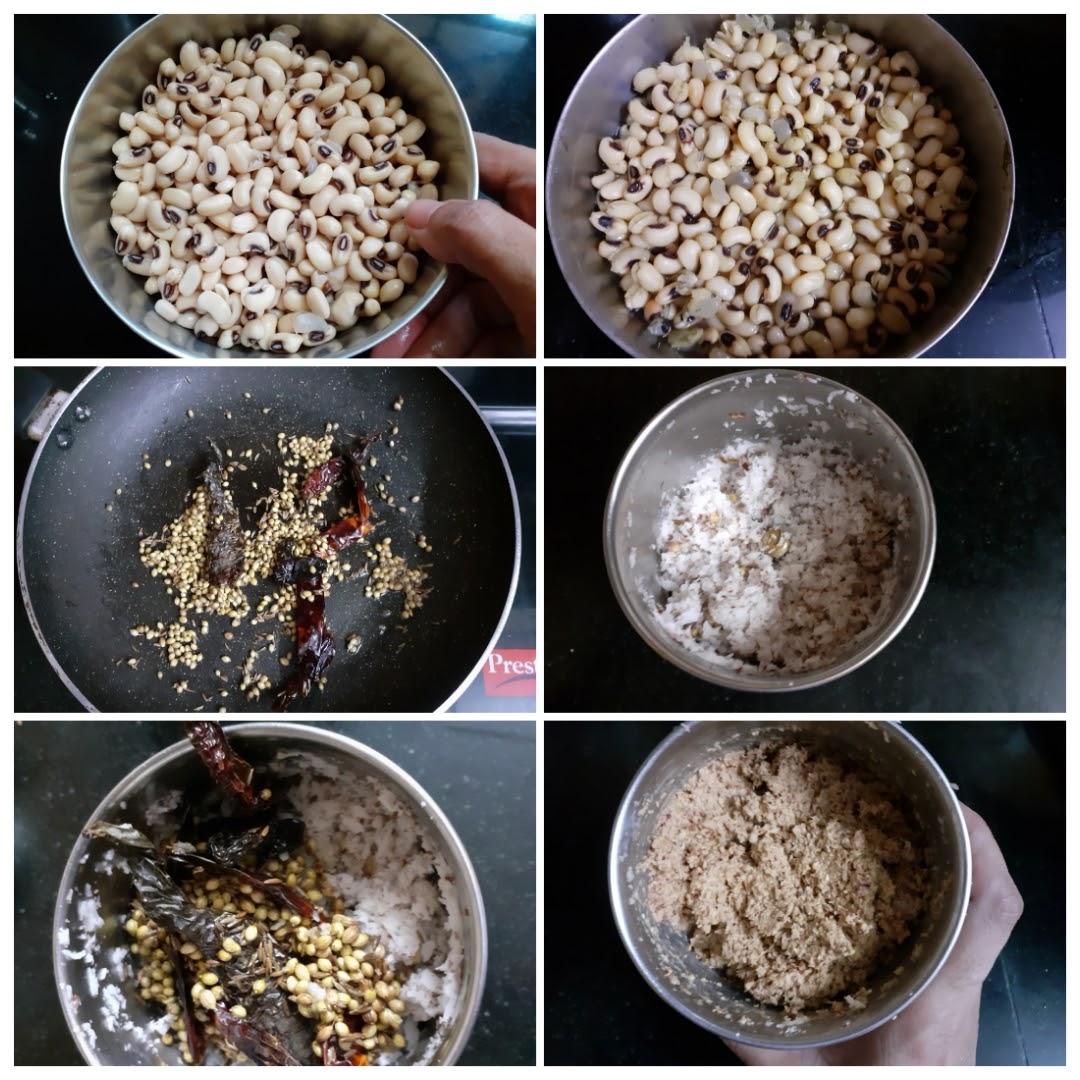
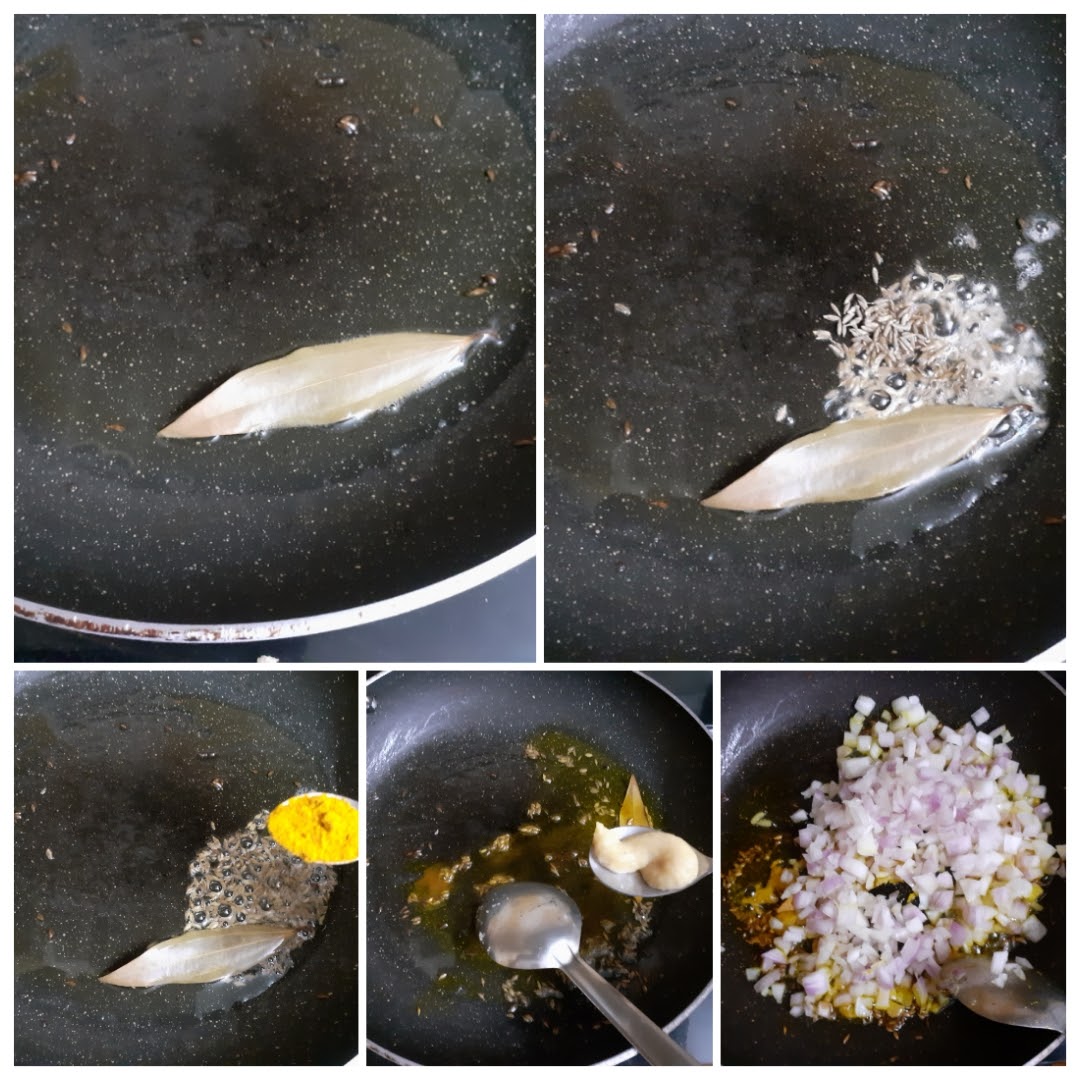
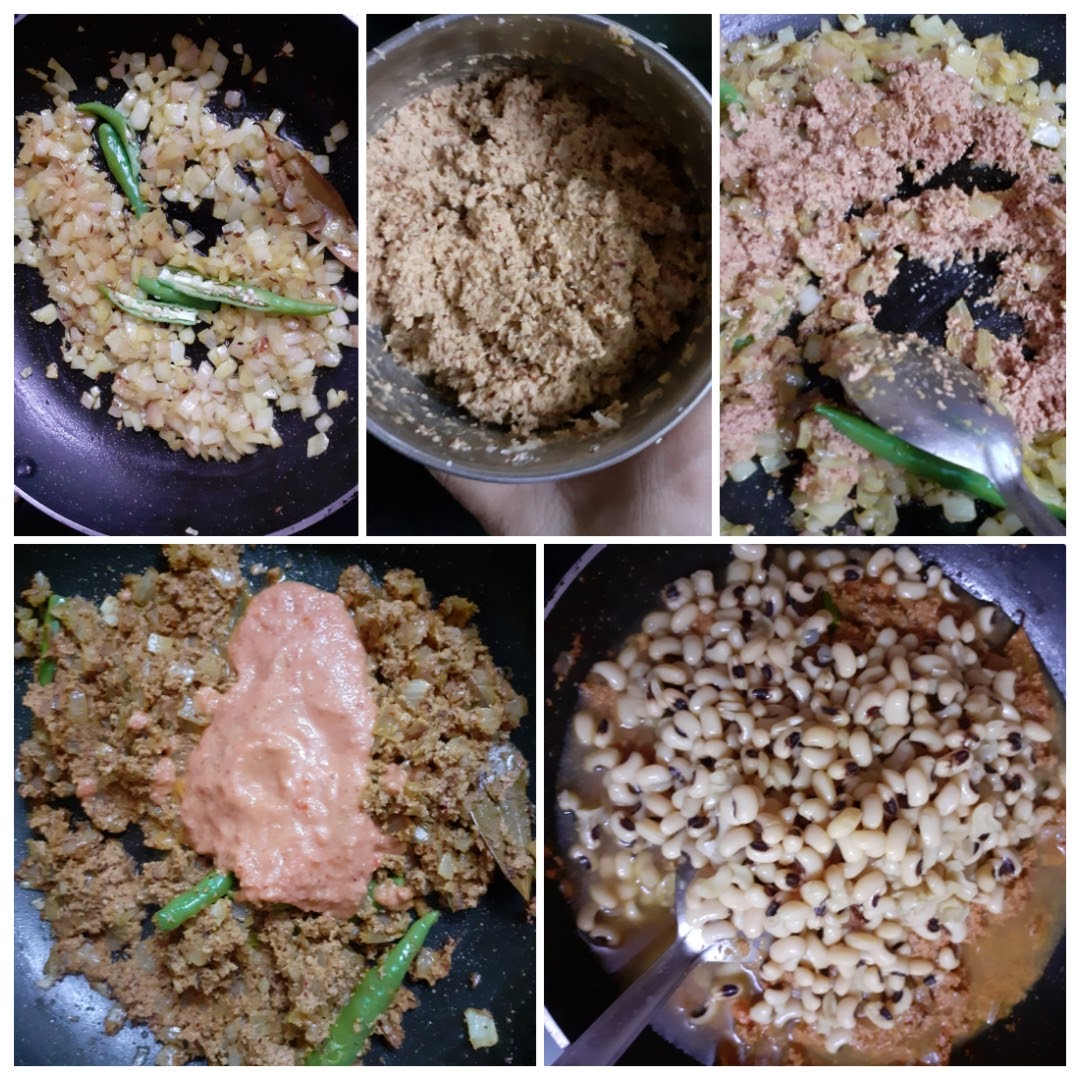
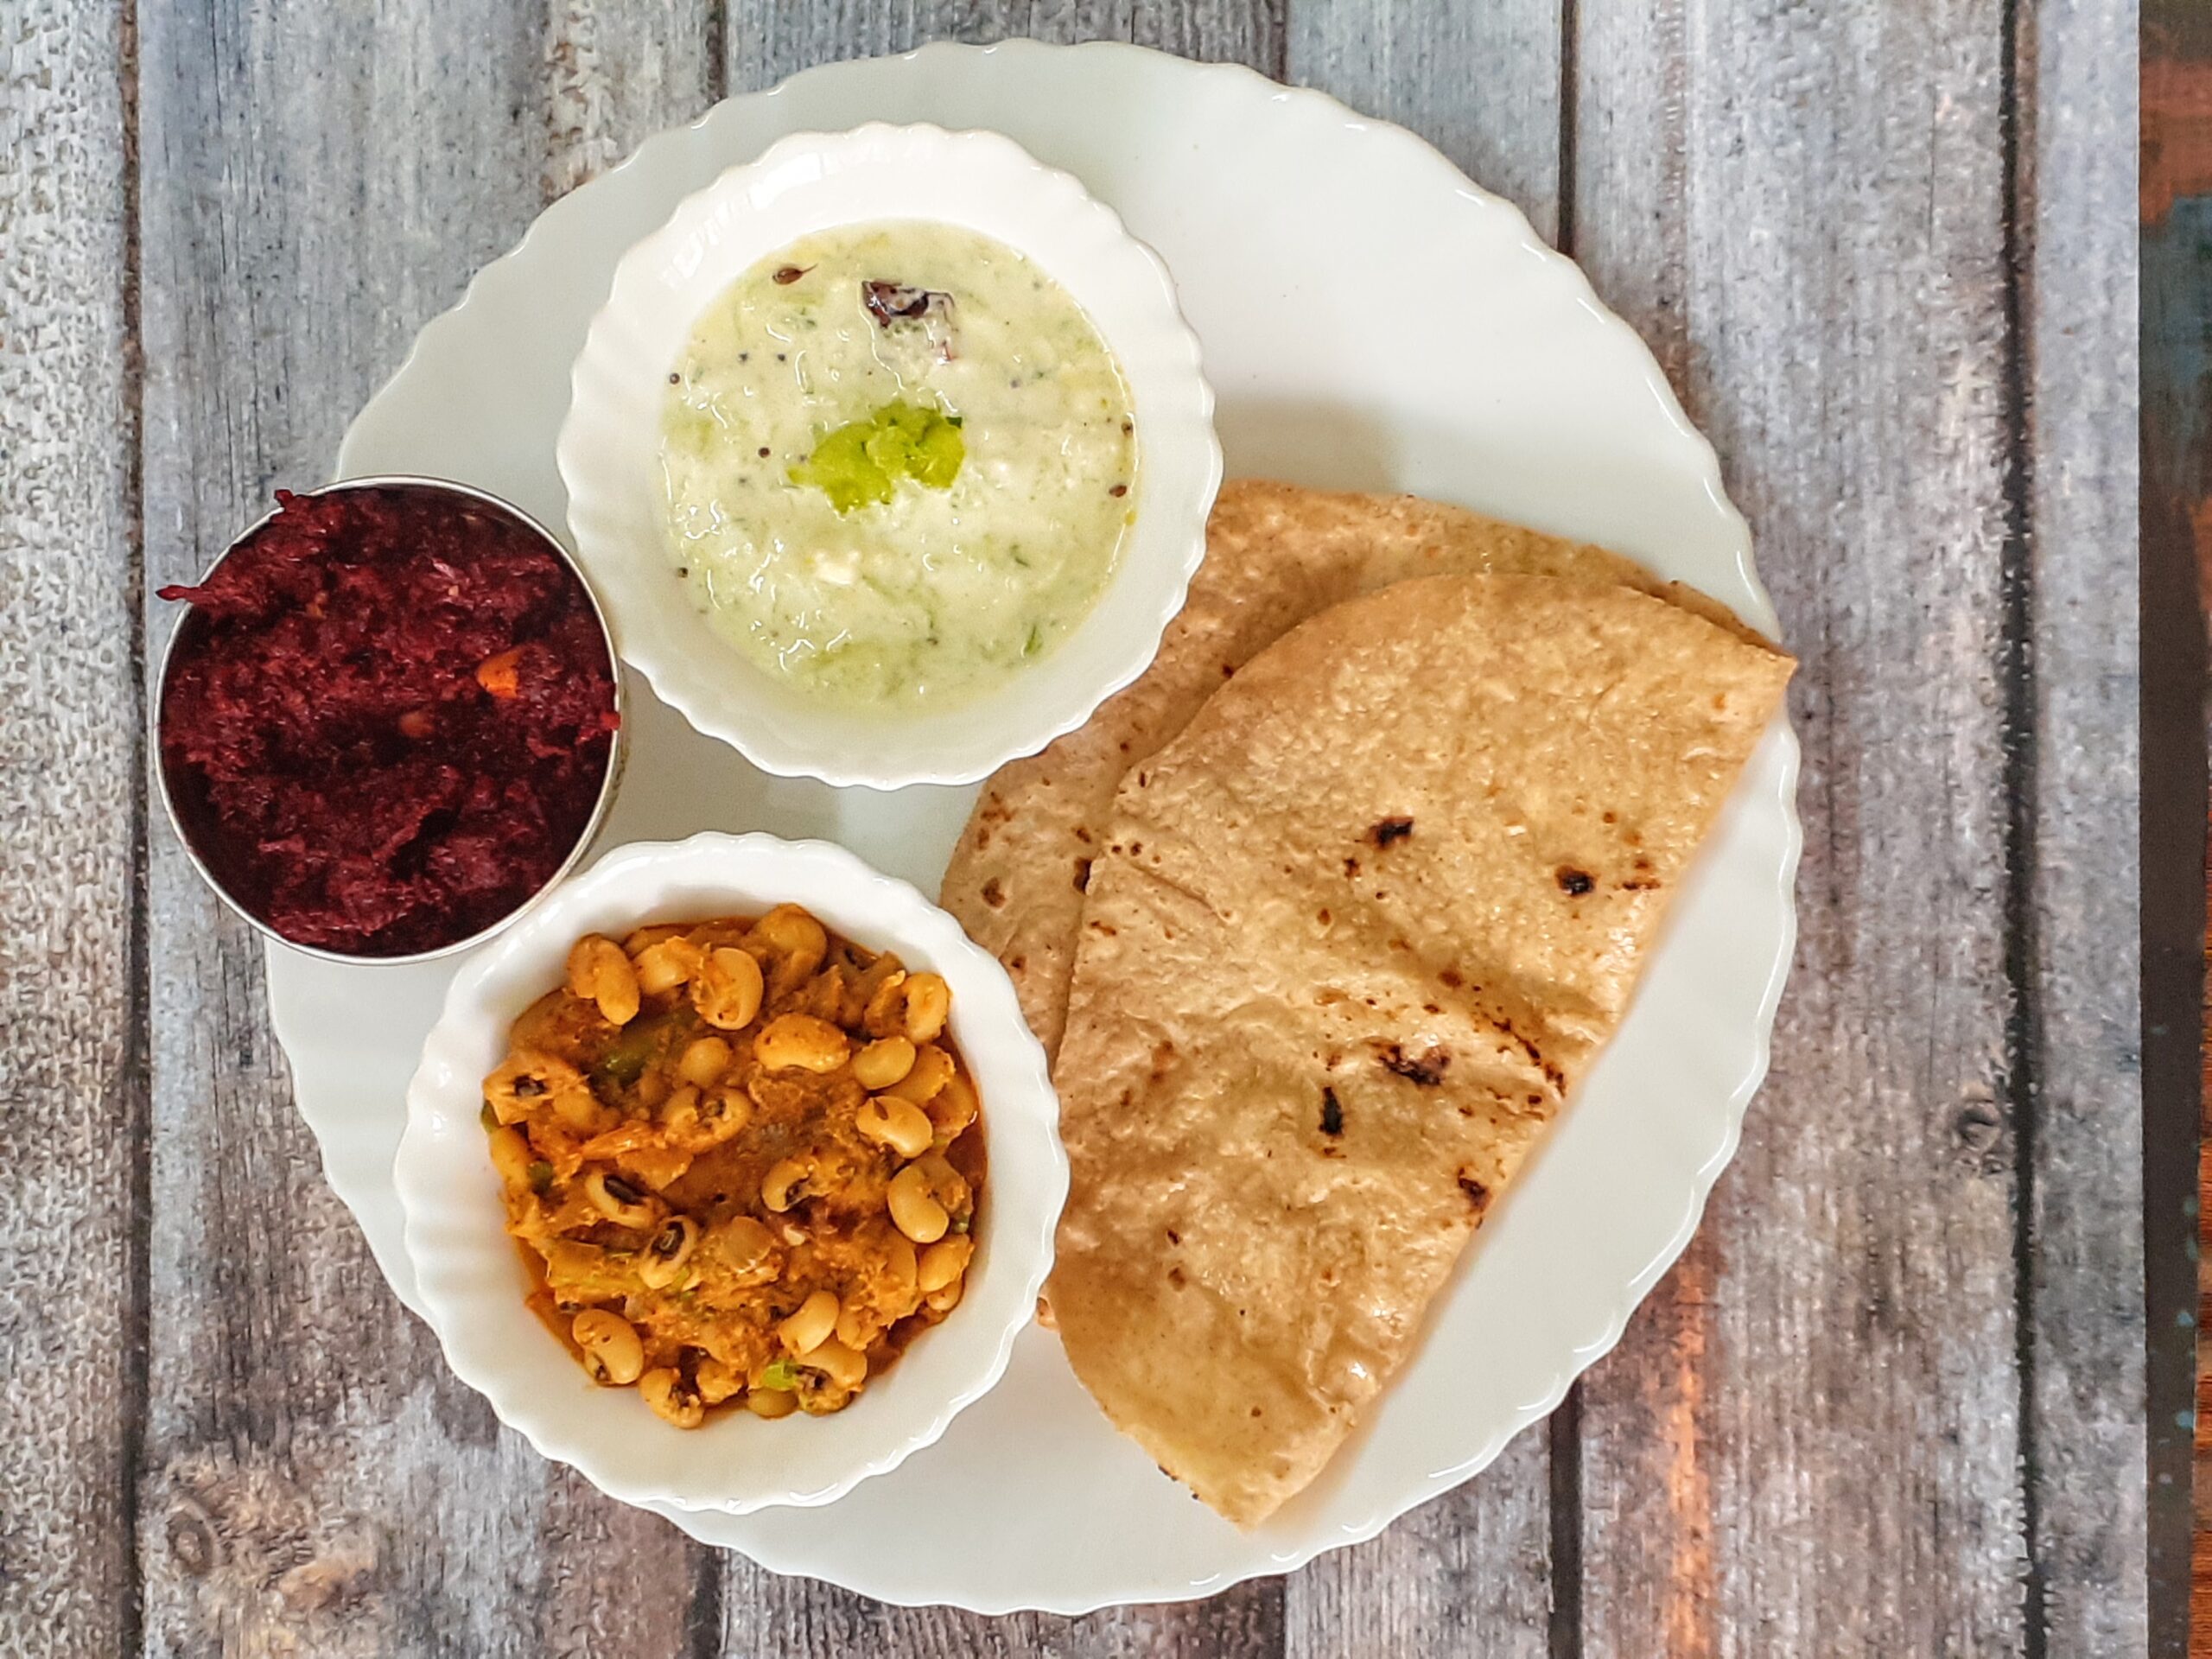
Goan Style Lobia Curry/Goan Style Black Eyed Bean Curry
Black eyed beans or Cow peas as they are called, are legumes that are available all over the globe. In India they are used in many regional cuisines. The Lobia masala is a popular dish in north India, and so is the Eriserry from Kerala cuisine that uses the legume along with Ash gourd and Yam. In Tamilnadu is it made into a Sundal(salad), or used with other vegetables to make a curry. In the Andhra cuisine It is made into a Vada (fritter), the Gujarati cuisine also has its version of the Lobia curry, called Chawli masala. That’s how wide the usage of these beans is across India.
Cow Peas/ black eyed beans have a soluble fibre that helps in reducing cholesterol, it is said. These are nutrient dense legumes with the richness of Vitamins- A, B1, B2, B3, B6, C , that helps in healthy cell development. They also are rich in micro nutrients like Magnesium, zinc, iron, and copper(source net.med). These legumes also support weight loss and boost digestive health. That I guess is reason enough to include them in your diet, if you haven’t already.
Though the Lobia Sundal (salad) is a regular feature in my house, and so is the Erissery, and Lobia masala, I recently tried a Goan style Lobia curry and it turned out so good. The Goan spice combination of Coriander seeds, Cumin seeds and coconut, gave a very good dimension to the dish, and it tasted different from the regular Lobia masala. Hence documenting this recipe for you all to try.
There is also a Lobia Pulav recipe on the blog, do check it out here. Some other interesting and healthy recipes for you to try are- Daliya Mushroom Risotto, Drumstick Rasam, Curry leaves Powder, Dry fruit ladoo, Vegetable Oats Kichdi, Rajma Masala, and more…
Here is the recipe of Goan style Lobia curry-

If you tried this recipe and liked it please comment below. I would love to hear from you. If you have a query about the recipe email us and ill respond as soon as I can.
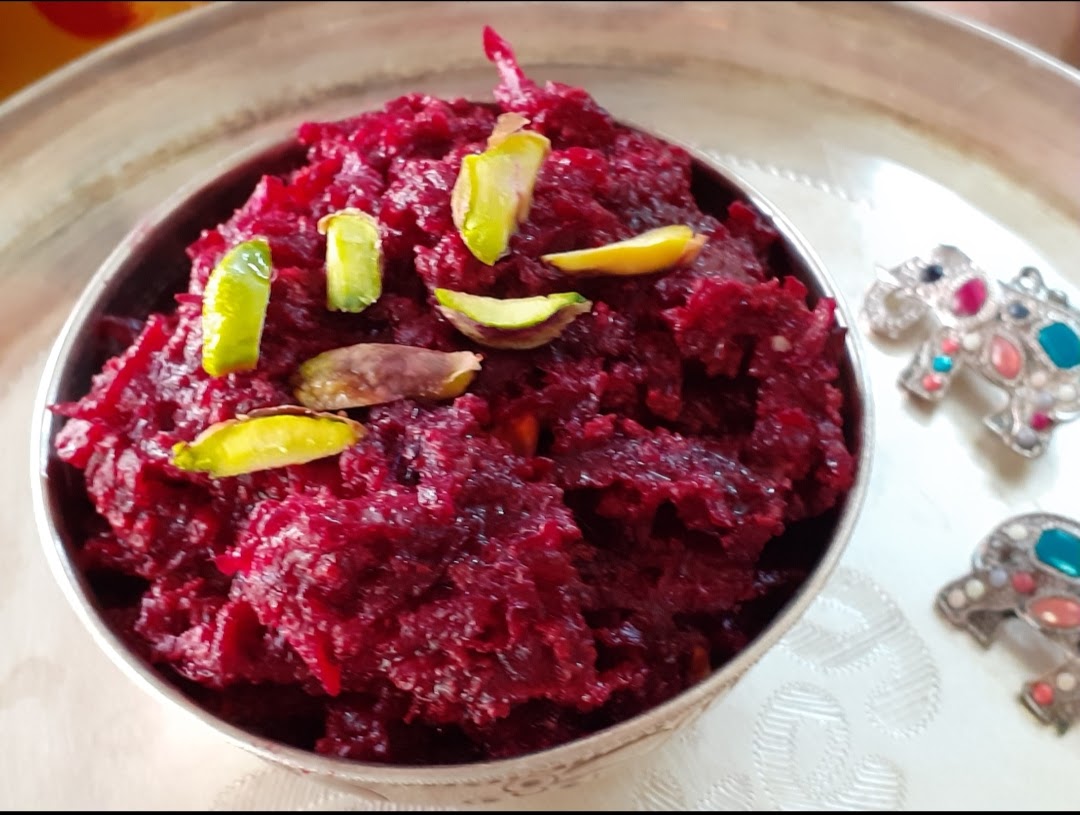
Beetroot Halwa
I have a long standing relationship with Beetroot. I have liked it as a child and continue to do so. What I meant by long standing relationship is that, when I was anemic for a certain period, I was advised to eat Beetroot and Pomegranate regularly. And yes Dates too. These three are always part of my diet even now. I cook Beetroot in many forms. Stir fry, Falafel, Paratha, Salad and more. But my most favourite version is of this dessert, Beetroot Halwa. In fact I prefer Beetroot halwa to Carrot Halwa.
If you have followed my Carrot halwa recipe you will see that I have followed the same method. These root vegetables have an earthy taste and smell. So to make a dessert with them, it is necessary to get rid of the earthy taste. That’s done by boiling them in milk( a good amount of it). This not only removes that raw taste, but add that nice milkiness that we require for a Halwa or any fudge kind of recipe.
If not boiling them in milk, you need something like unsweetened Mava or Khoya, which is dehydrated milk to get rid of the taste. This version I have done in my Gajar Halwa Barfi recipe. It is a very quick version of the Carrot Halwa itself. Finally, this halwa is such a guilt free dish because a lot of sugar is not needed owing to the natural sweetness of the beets, and ghee has been used only for frying the nuts.
Coming to the vegetable itself and why one must include it in their diet is because they are packed with essential vitamins, minerals, some of which have medicinal properties. Another popular reason is that they have any nutrients, and fewer calories, so it is good for weight watchers. It helps keep blood pressure in check. They also have a decent amount of Fiber, folate and Vitamin C. Isn’t this reason enough for it to be a part of our meal plan?
I am cooking this Halwa on a day I have excess milk, so you will see me using my regular milk vessel, instead of my Kadai or Pan which I usually prefer. This is also Pandemic time, so no house help around. The more vessels I use, the more clean up I end up doing… getting the drift?????
While you are here check out other dessert recipes of mine like- Carrot Kheer, Gajar/Carrot Halwa, Moong Dal Halwa, Dry fruit ladoo, Red Poha Ladoo, Sweet Potato Puranpoli, and more…
Here is the recipe for Beet root Halwa.

Ingredients:
Beetroot 2 medium around 250 gm grated
Milk 500 ml
Sugar 3/4 cup
Cardamom powder 2 pinches
Cashewnuts few broken to bits
Pistachio a few (optional)
Ghee for frying nuts
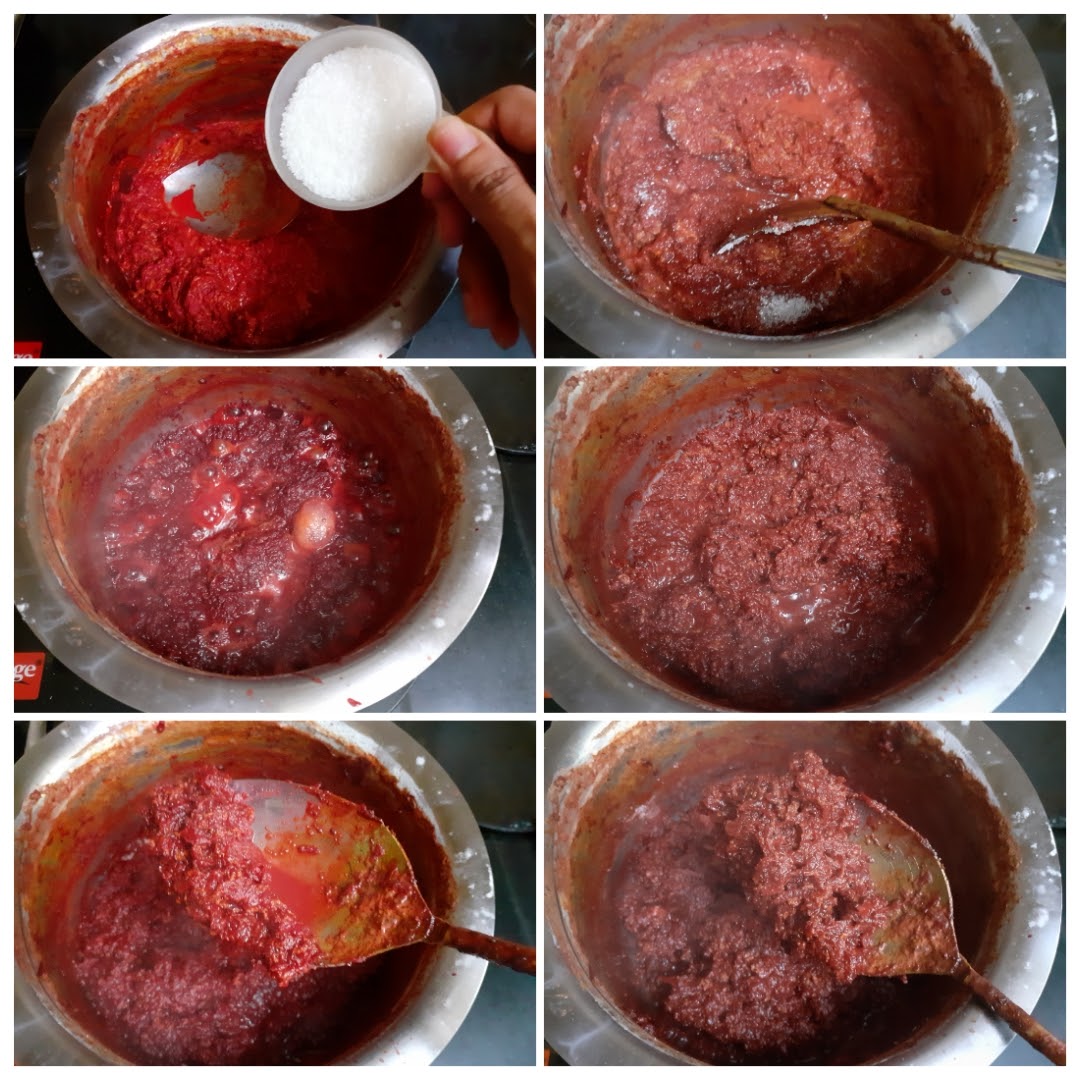
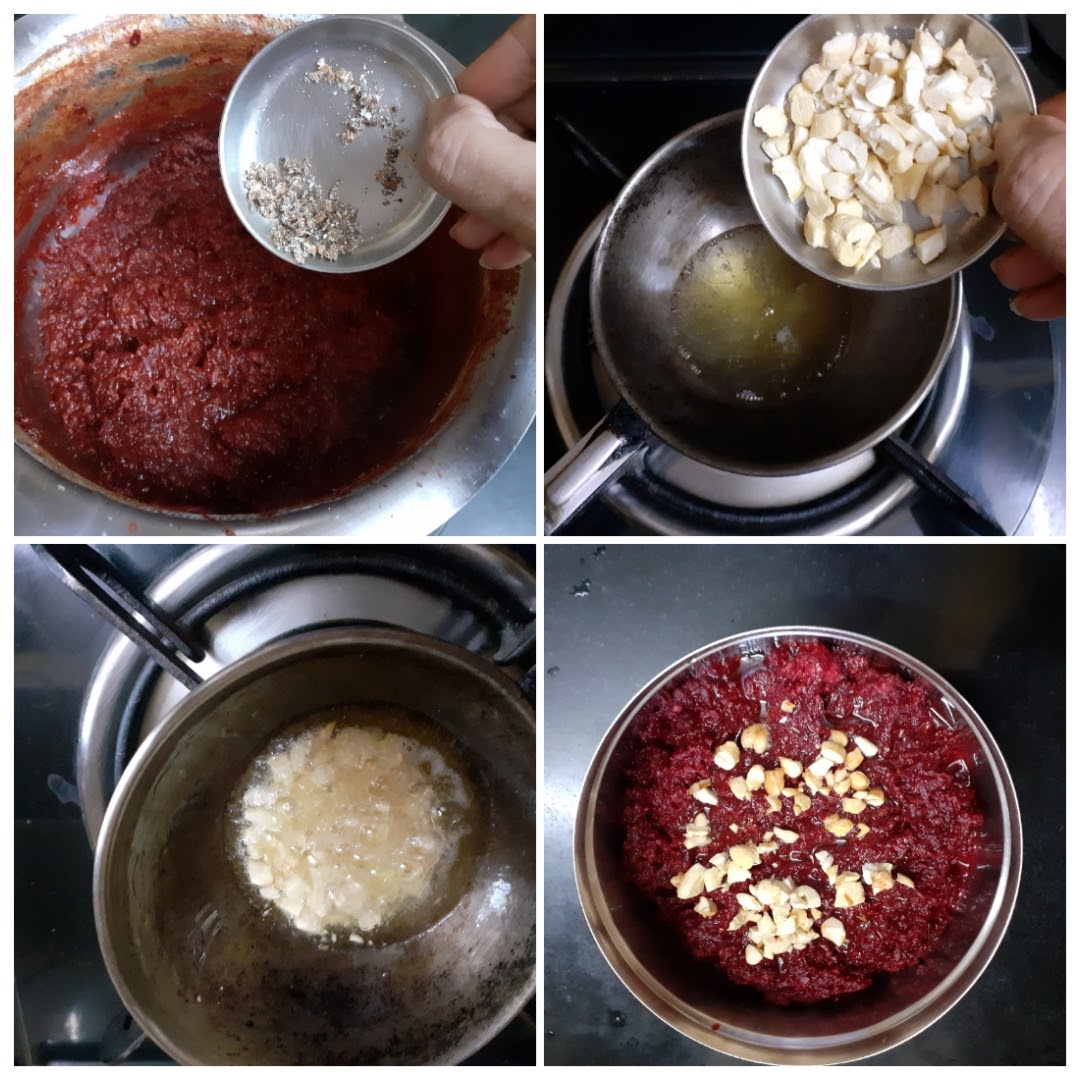
Directions: Boil Milk in a Pan/Kadai or heavy bottomed vessel. Once boiled, add the grated beetroot and cook. Keep stirring continuously, so that the milk doesn’t get burnt. This is an important step. If the milk sticks to the bottom of the vessel and burns, the dessert will not taste good any more. The stirring and cooking process has to continue until the mixture becomes almost dry. This takes about 40 to 45 minutes, if done on medium flame, while stirring constantly. I have indicated the steps of evaporation of milk in the mixture, in my pictures. When the mixture is almost dry, it is time to add the sugar. Keep stirring again. The mixture will liquefy. Not to worry. Keep stirring, and it will start solidifying again. Keep stirring until the mixture no more sticks to the bottom of the pan. This is the right consistency. Switch off the flame and, add cardamom powder. Now in a small tadka Kadai heat some ghee, drop in the broken cashew pieces and fry until golden brown. Pour this over the Halwa and enjoy warm. Garnish with Pistachios if you prefer.
STEPWISE RECIPE FOLLOWS:
1. Boil Milk in a Pan/Kadai or heavy bottomed vessel. Once boiled, add the grated beetroot and cook. Keep stirring continuously, so that the milk doesn’t get burnt. This is an important step. If the milk sticks to the bottom of the vessel and burns, the dessert will not taste good any more.
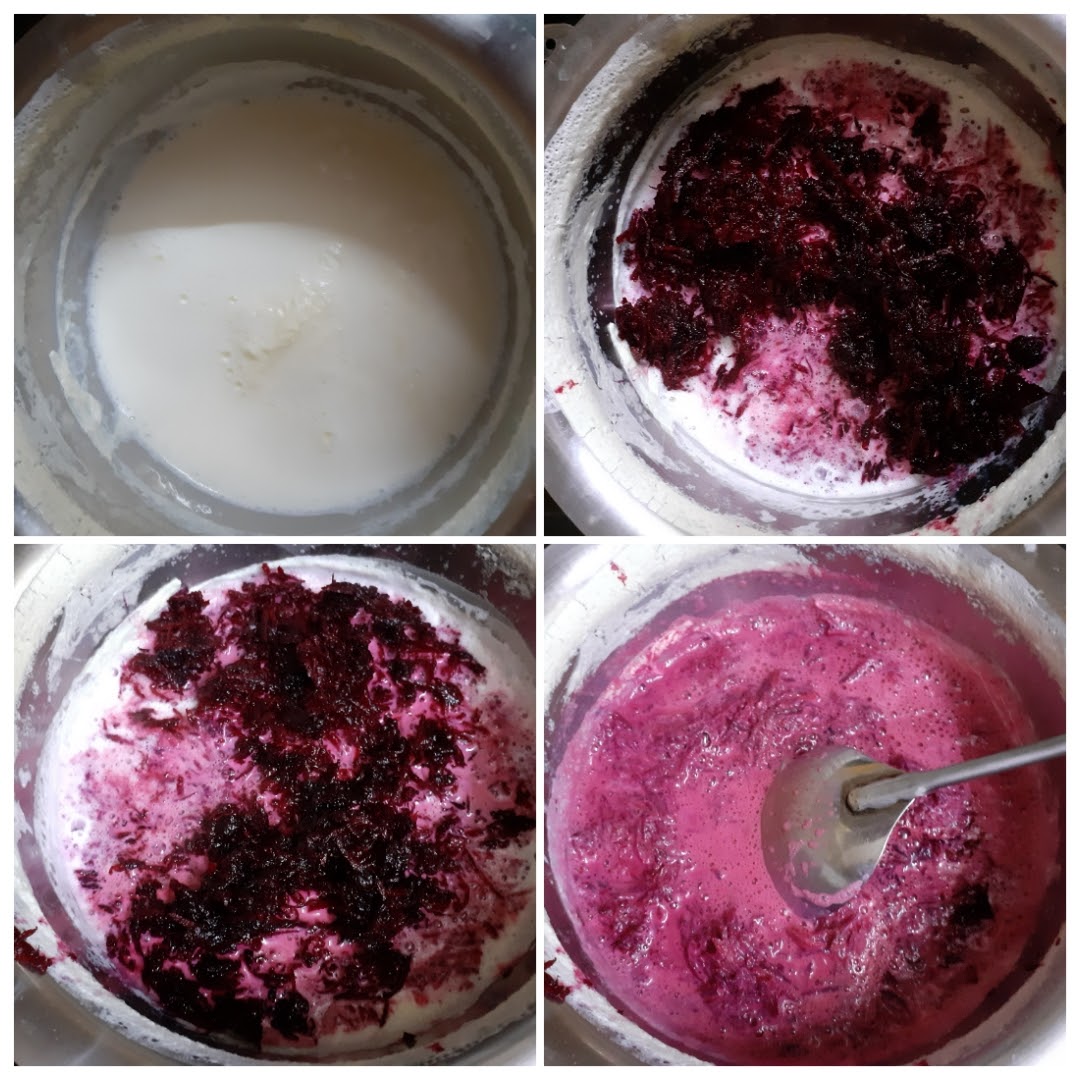
2. The stirring and cooking process has to continue until the mixture becomes almost dry. This takes about 40 to 45 minutes, if done on medium flame, while stirring constantly. I have indicated the steps of evaporation of milk in the mixture, in my pictures.
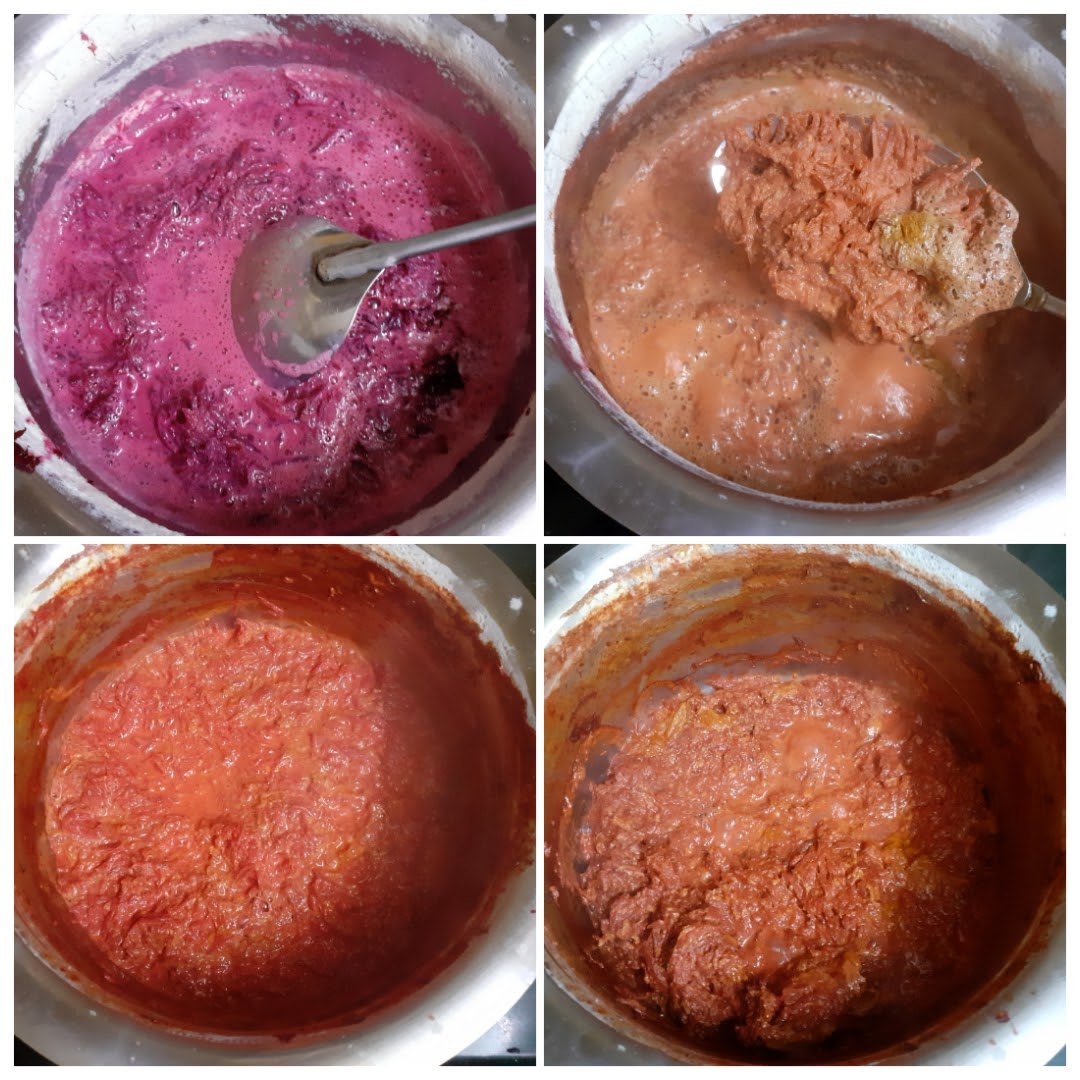
3. When the mixture is almost dry, it is time to add the sugar. Keep stirring again. The mixture will liquefy. Not to worry. Keep stirring, and it will start solidifying again. Keep stirring until the mixture no more sticks to the bottom of the pan. This is the right consistency.
4. Switch off the flame and, add cardamom powder. Now in a small tadka Kadai heat some ghee, drop in the broken cashew pieces and fry until golden brown. Pour this over the Halwa and enjoy warm. Garnish with Pistachios if you prefer.
If you tried this recipe and liked it please comment below. I would love to hear from you. If you have a query about the recipe email us and ill respond as soon as I can.
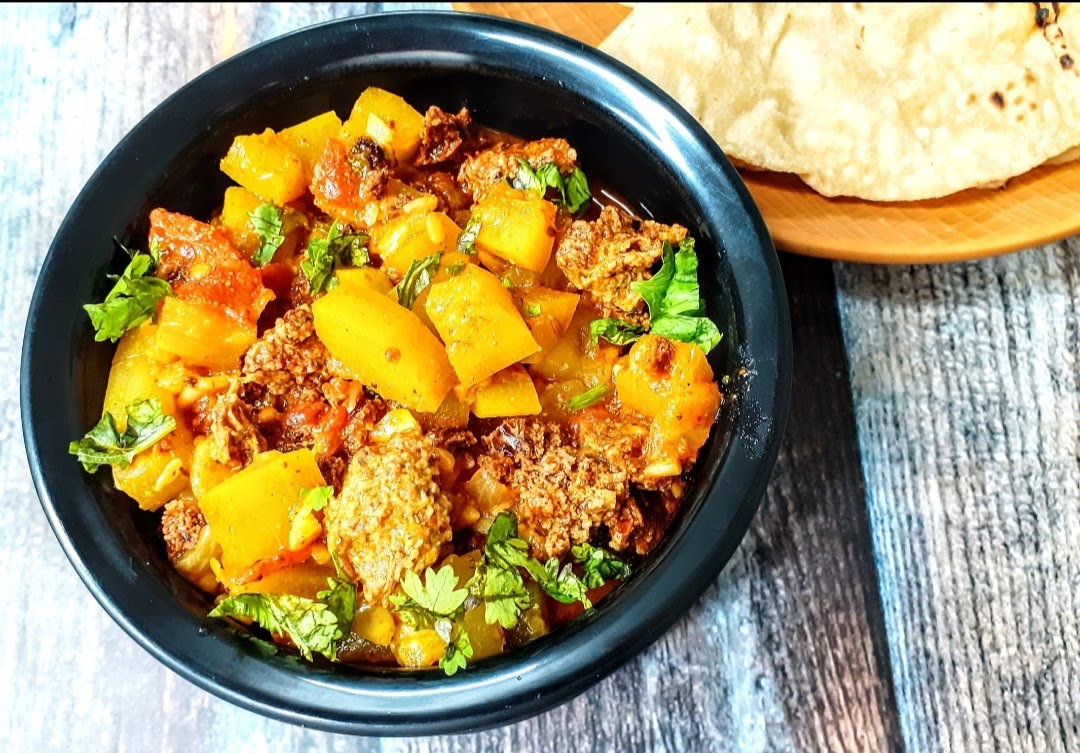
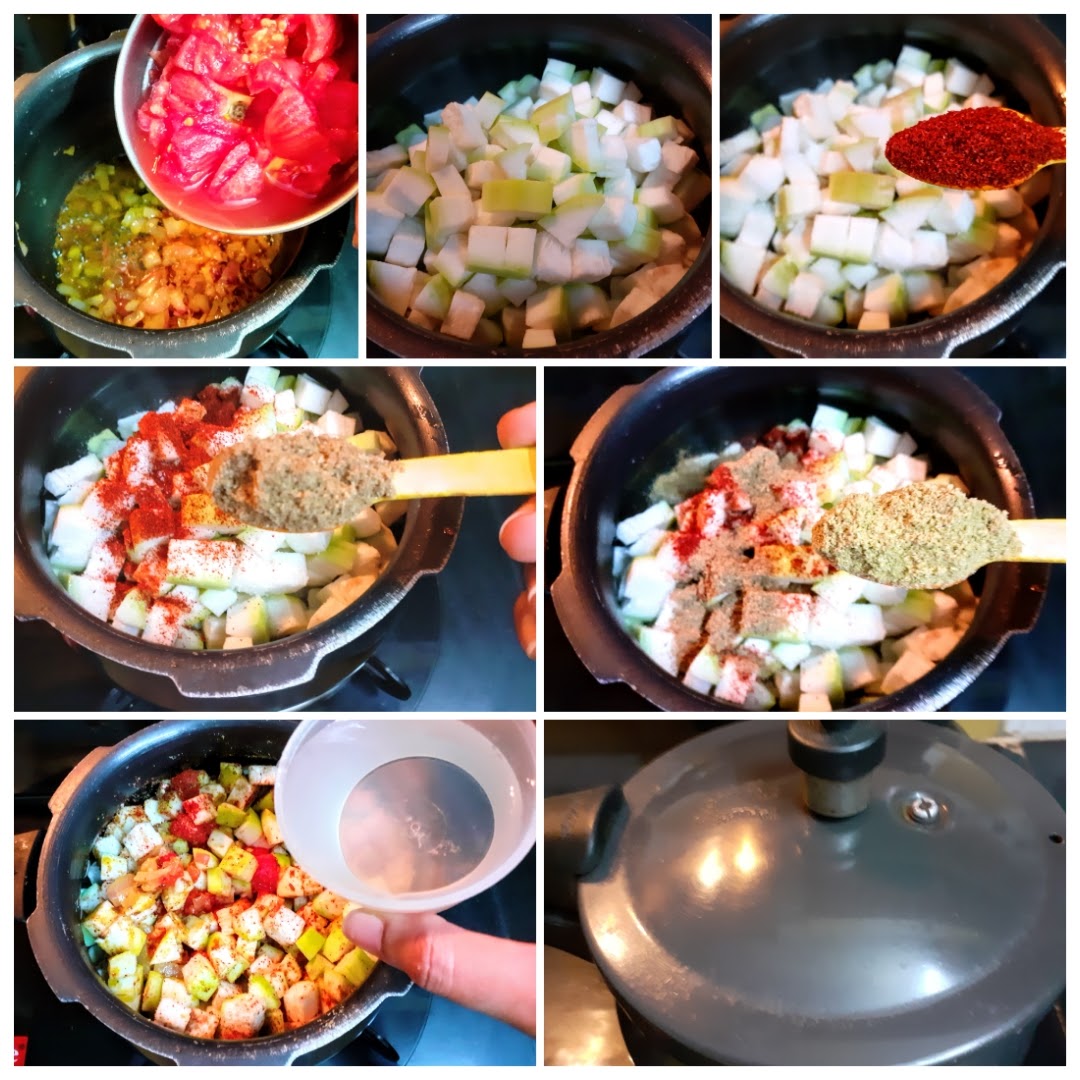
One Pot Lauki Wadiyan Curry
Lauki or Bottle gourd is a healthy summer vegetable, available perennially. It has many health benefits, but many don’t prefer it because of its bland taste. How many times would an elder at home or our mother have tried to feed it to us on the sly ????? All for a good cause though. Lauki belongs to the cucumber family, and is very light on the tummy. That’s one of the reasons it is summers most preferred vegetable.
This vegetable is also called by several other names all over India like Doodhi, Ghiya, Sorakkai, to name a few. This vegetable packs a lot of Vitamins like- Vitamin A, Vitamin B, Vitamin C, Vitanin E, Vitamin K and minerals like – Potassium, Iron and Manganese. Lauki has many electrolytes which makes it the ideal summer vegetable, that replenishes the water lost in sweating. All these advantages make Lauki a wholesome vegetable that fights off infections and helps in detoxification.
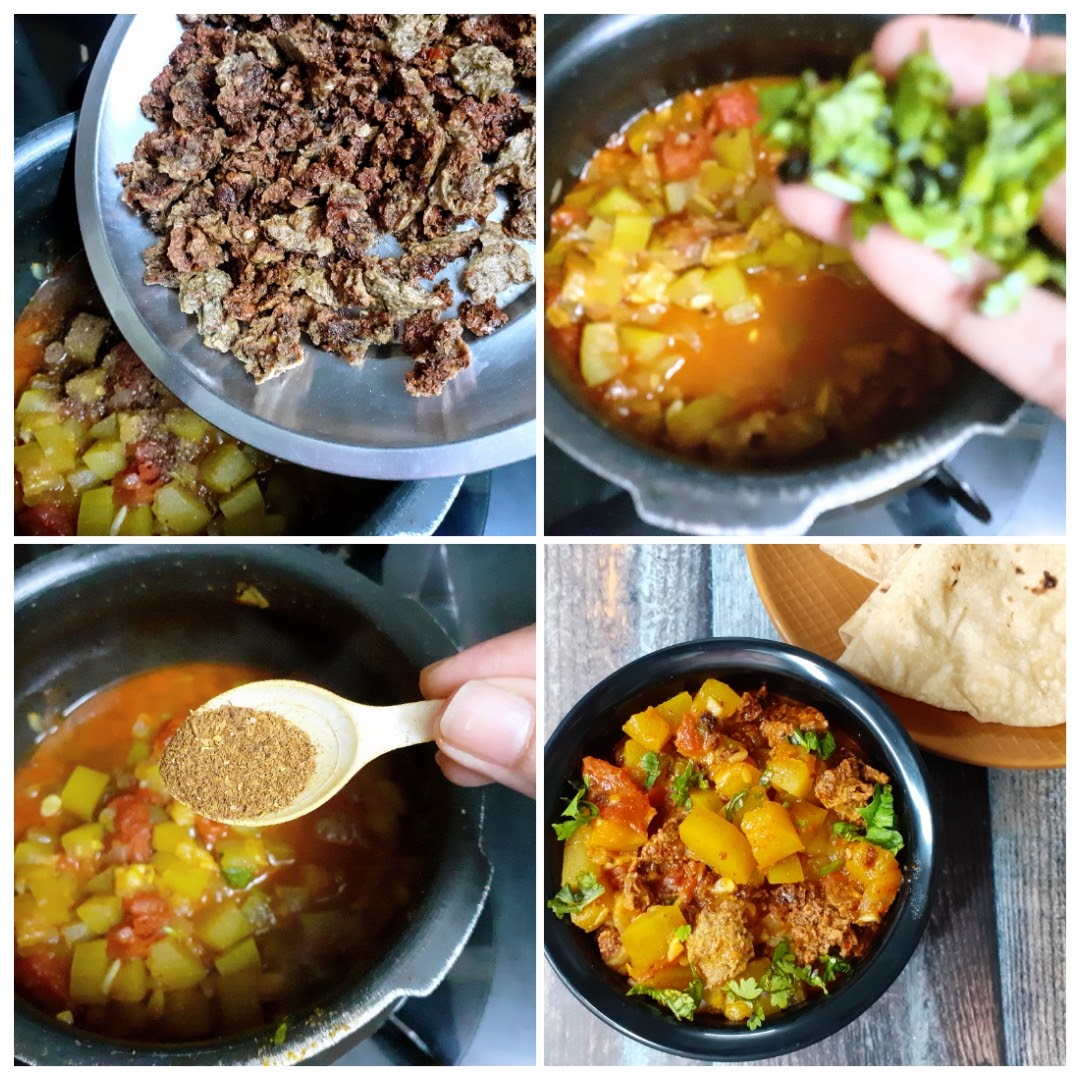
Coming to the next element in the recipe which is Urad dal Wadi, which are basically sun dried lentil dumplings. They can be broken to bits and fried, then added to subjis to pack in that extra flavour and crunch. They are also a nice way to add proteins to diet, when you want a break from the usual dal.
In this recipe, I have combined the goodness these both have to offer and what I have is a super delicious curry. I have cooked this in the one pot method, which makes it very easy, and also a work day lunch or dinner option. It can be paired with rice or Rotis and you have amazing lunch/dinner ready in a jiffy. The Wadiyan or the lentil dumplings are just an add on, which can be done away with altogether if you prefer having just Lauki Ki Subji, or can be swapped with Soya chunks. For the fussy Lauki eaters, adding Wadiyan or Soya chunks is a good idea.
Last but not the least, requesting readers to not judge the pictures taken this time. As I finished all prep for the curry, the tube light in my kitchen got fused. Our kitchen doesn’t get enough natural light, so I depend on two tube lights for lighting while I click pictures for the blog. With one gone, the light from one was not adequate. Since we are in the midst of the Pandemic, we were unable to step out to buy one immediately, and my husband has created a kind of bio bubble at home????
While you are here check out other curry and subji recipes like- Corn Palak Subji, Chakki ki Shak, Miloni Babycorn and Bell Peppers curry, Bhindi Aloo, Paneer Khurchan, and more…
Let’s get to the recipe right away.


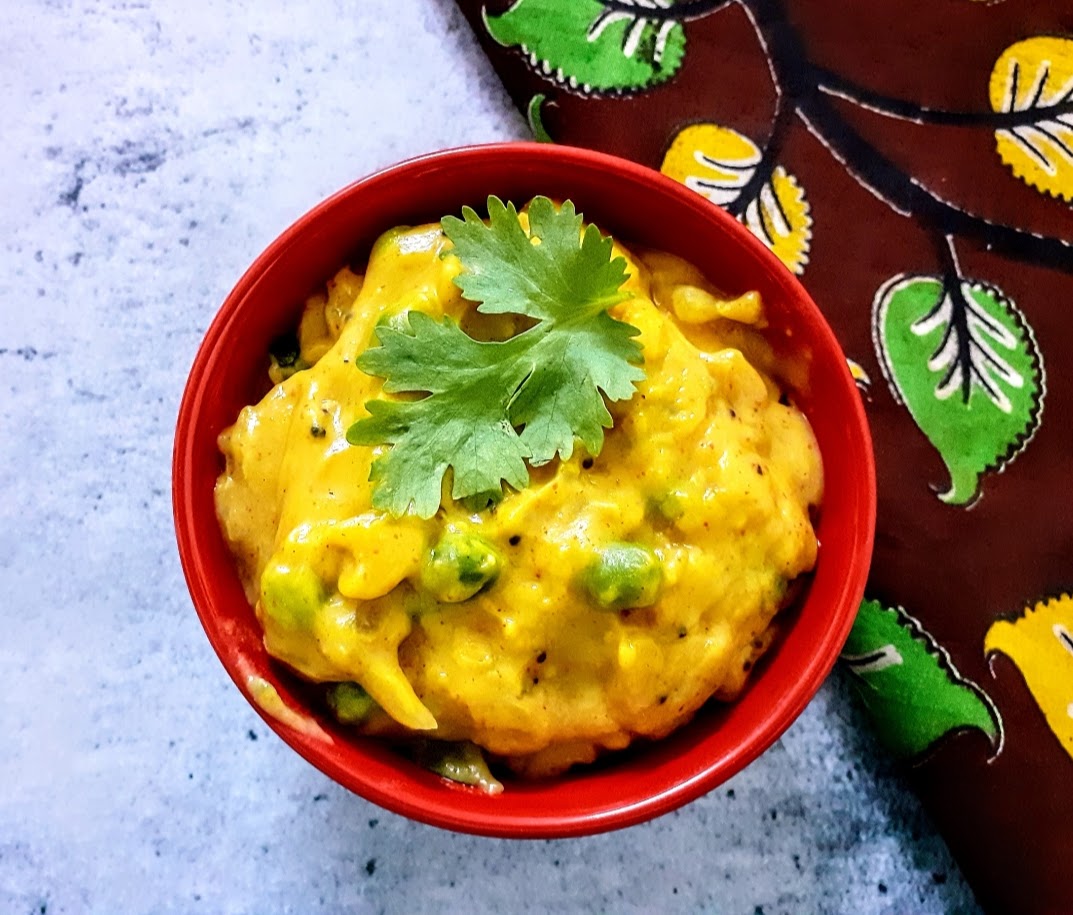
Bombay Chutney/Besan Chutney/Kadalamaavu Chutney
Bombay chutney/ kadalama chutney/ Besan chutney. This dish holds a lot of significance for me.
Will you believe me if I said I have never cooked this in 22 years? It’s TRUE. In my mind I have known how to make it, but had never practically done it. I have had a mental block about this dish/ chutney because I have tasted this always during family functions when a Samayal Mami ( cook ) is called to help. And they usually make it so unpalatable, watery and tasteless that I never ate it. And they always make this with Roti or Dosa because it gets done in few minutes. So until a few days back I had this view. Now let me tell you, most South Indians have a dislike for Besan( oh except when they make Mysorepak). Meaning we use it in our sweets and savories and Bajjis but not in regular cooking. If a main course item like Gatte is Subji is made our folks will say “Kadalamava?”( meaning “oh Besan). But since I was brought up in a Cosmopolitan environment I never had the aversion towards Besan. In fact I know its rich in proteins and fiber.
Funny fact, inspiration to break the jinx of not making this dish until now is a movie scene that my hubby and I were watching and the hero makes this chutney in such mouthwatering way that I ended up letting go of my mental block.
My daughter, thanks to my mental block, had never tasted this dish ever. She loved it????, and said it tastes like south Indian potato masala that we make for Puris and rightly so because we do add little diluted Besan flour there. People who make this regular will know I have made it as a thicker version of the chutney with lots of ginger, green chillies, curry leaves, onions, and peas. That’s my #breakfree story.
Coming to why Besan chutney is called Bombay chutney in the south, well I could not find a satisfactory answer to this. But may be because Maharashtra has its own version of this chutney called “Pitla”, though the consistency of Pitla is more on the runny side and the spices used a little different, so I think from Maharashtra this dish trickled down south and got a makeover with different spices and Bombay chutney came to being. Gujarat also has its version of this chutney, which is a slightly sweet version called “Kadi Chutney”, and so does the Andhra region, cal “Senaga Pindi Pachadi”.
Let’s make this simple chutney, and while you are here check out other recipes like – Chakki Ki Shak, Vegetable Oats Kichdi, Methi Wale Baingan, Roasted Bell Peppers chutney, Ragi and Besan Chila , and many more…
Ingredients:
Besan 1 cup
Water 3 cups approx added in parts
Salt as required
Turmeric powder 1 tsp divided
Red chilli powder 1 tsp
Mustard seeds 1 tsp
Chana dal 1 tsp
Urad dal 1tsp
Onion 1 large finely chopped
Ginger 1 inch piece finely chopped
Green chillies 2 finely chopped
Curry leaves a few
Asafoetida 1/2 tsp
Green peas ( optional) if using per cook.
Oil for tempering
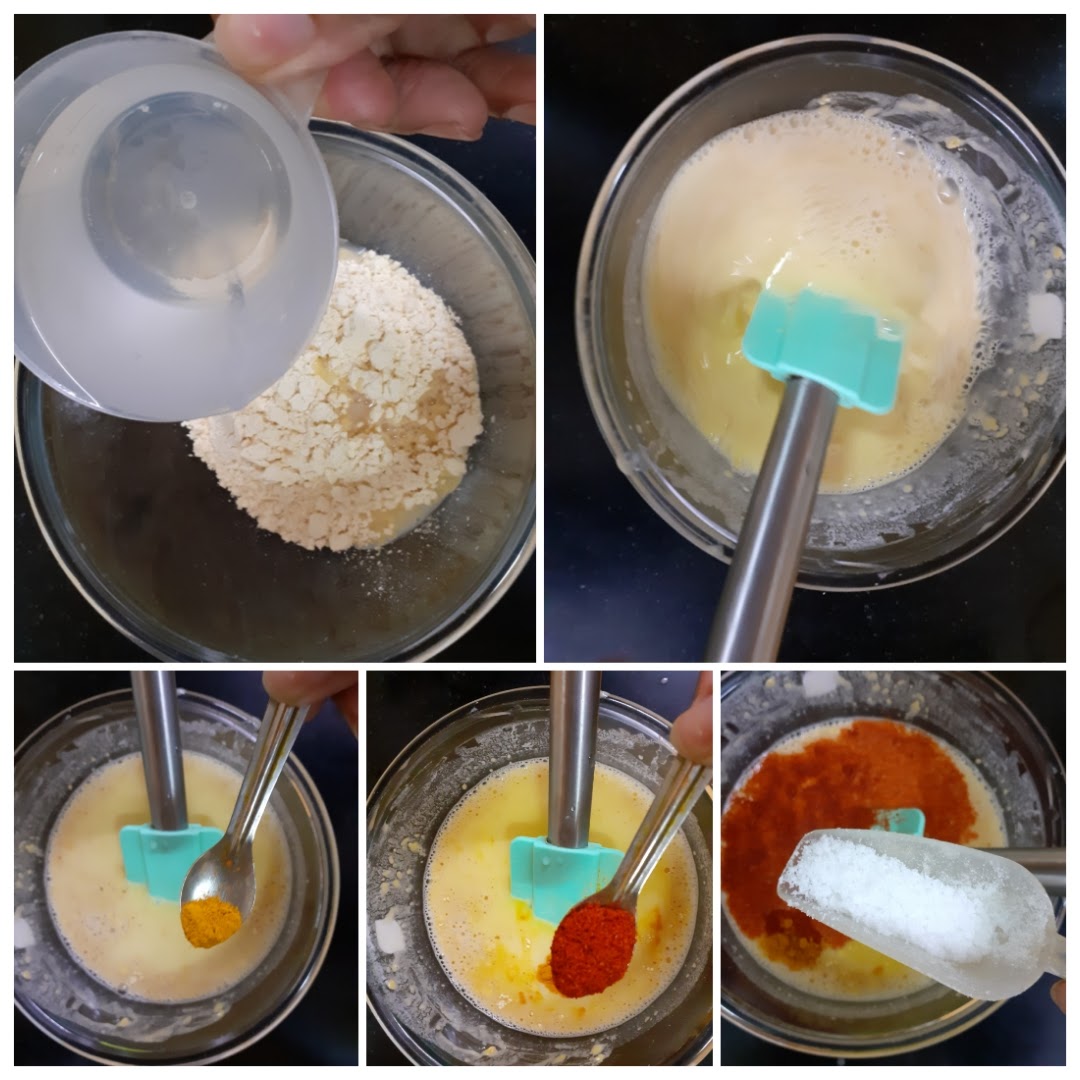
Directions: In a bowl take besan, add 1 cup water to it and form a lump free paste. To this add, salt, red chilli powder, turmeric powder and set aside. Now take oil in a kadai or pan and heat. First add the mustard seeds, Chana dal and urad dal. When the mustard seeds splutter add 1/2 tsp turmeric powder, followed by chopped onions, green chilli, ginger and curry leaves. Fry these nicely until the onions start browning a bit. Add the green peas if using now. Now give the Besan paste in the bowl a mix and slowly pour it into the kadai with tempering. This should be done while stirring continuously. Pour one more cup water and stir constantly so that no lumps are formed. Stir over low fire, this will ensure the besan cooks well and does not have a raw taste. Now check for salt and spices and adjust if required. If the besan still has a raw taste, pour another half cup water and stir until the raw taste is gone. You can customise the consistency as per your requirement. Squeeze a lemon if you like( this is totally optional). Enjoy the chutney while hot with Idli, Dosa, Rotis, Puri and more.
STEPWISE RECIPE FOLLOWS:
1. In a bowl take besan, add 1 cup water to it and form a lump free paste. To this add, salt, red chilli powder, turmeric powder and set aside.
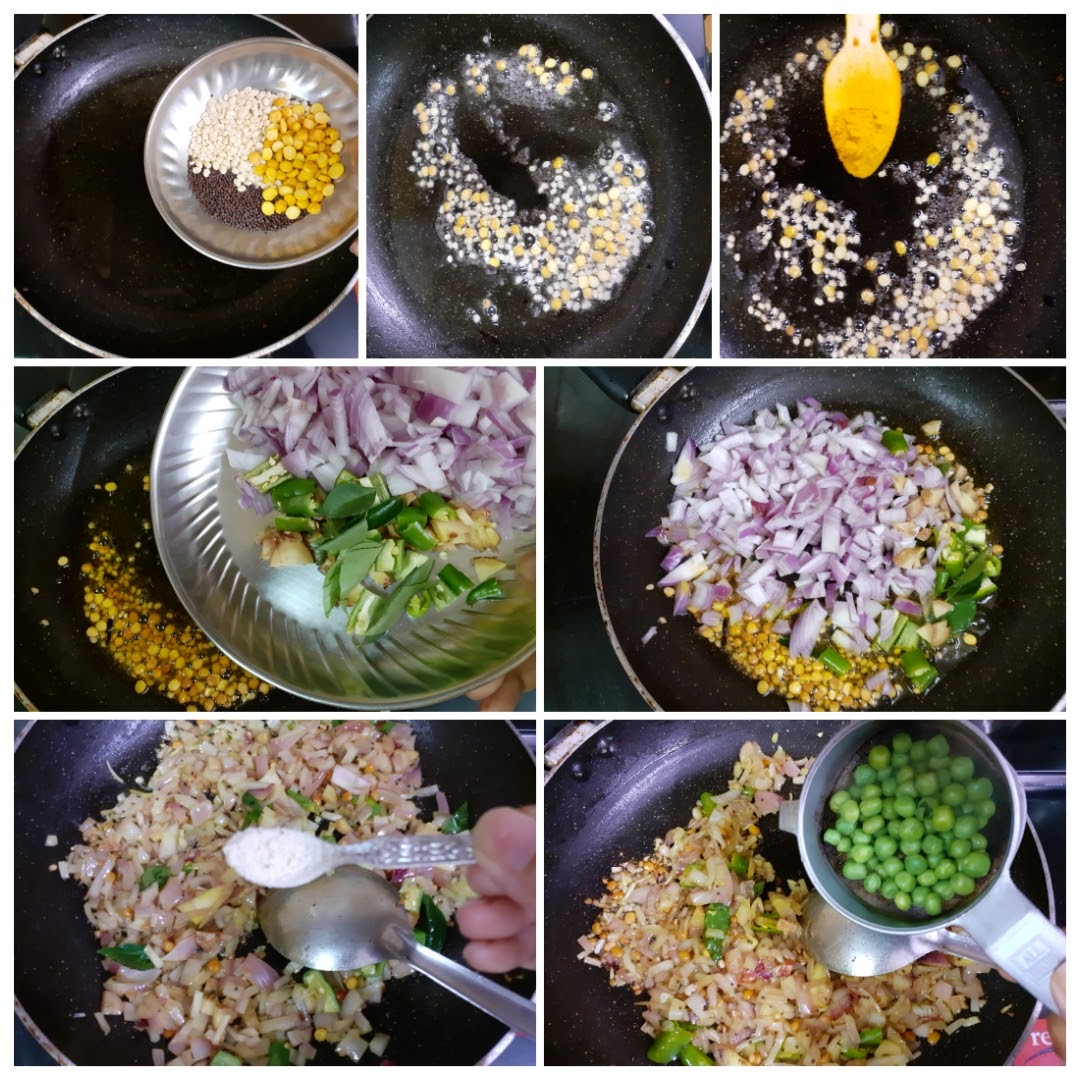
2. Now take oil in a kadai or pan and heat. First add the mustard seeds, Chana dal and urad dal. When the mustard seeds splutter add 1/2 tsp turmeric powder, followed by chopped onions, green chilli, ginger and curry leaves. Fry these nicely until the onions start browning a bit. Add the green peas if using now.
3. Now give the Besan paste in the bowl a mix and slowly pour it into the kadai with tempering. This should be done while stirring continuously. Pour one more cup water and stir constantly so that no lumps are formed. Stir over low fire, this will ensure the besan cooks well and does not have a raw taste.
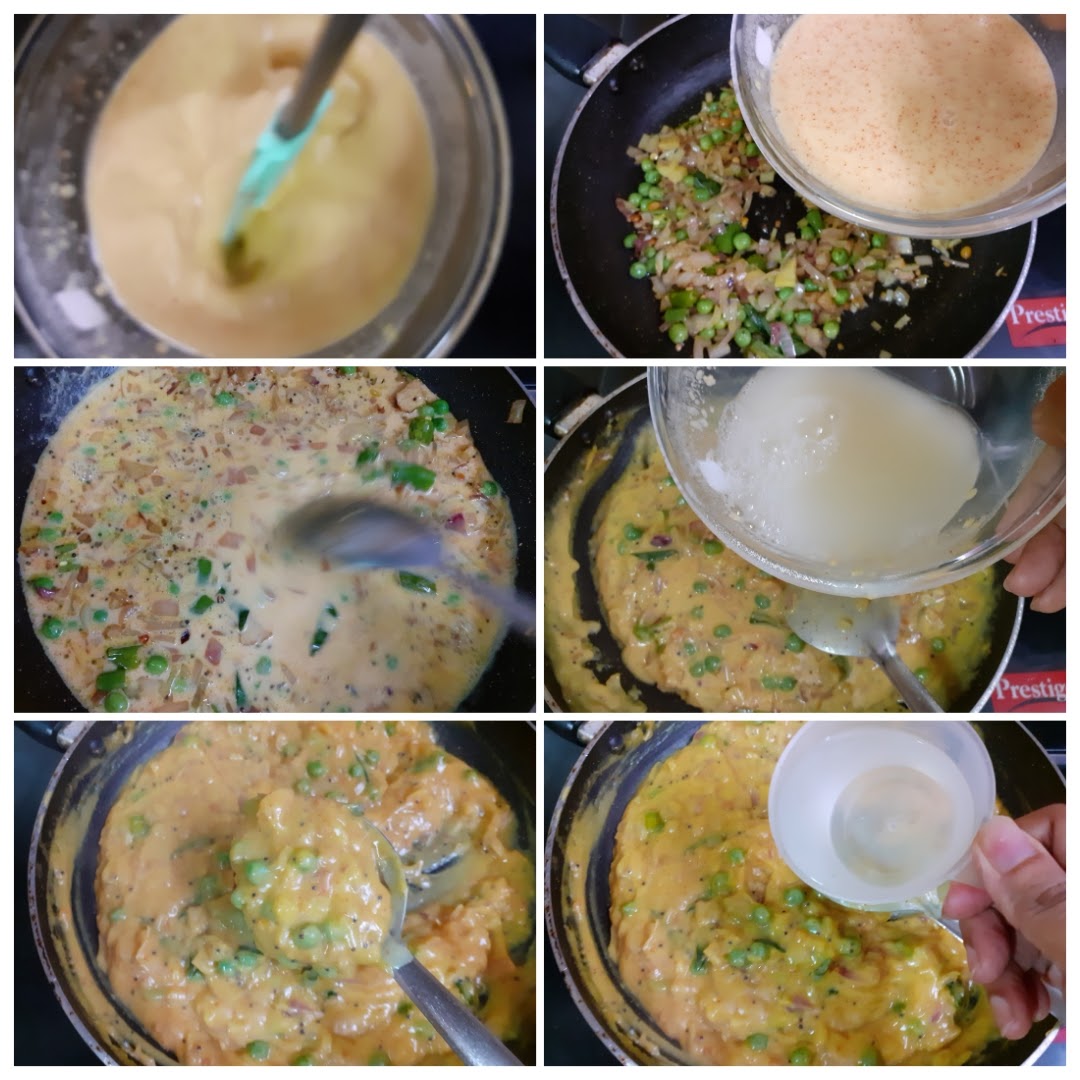
4. Now check for salt and spices and adjust if required. If the besan still has a raw taste, pour another half cup water and stir until the raw taste is gone. You can customise the consistency as per your requirement. Squeeze a lemon if you like( this is totally optional). Enjoy the chutney while hot with Idli, Dosa, Rotis, Puri and more.

NOTES:
1. This tastes best when the Besan is fully cooked. When nicely cooked the besan becomes duller in appearance.
2. Veggies like capsicum and carrot can also be added to the recipe along with peas.
3. I have kept the consistency thick, it was be diluted by adding 1/4 cup warm water if you prefer.
4. Cooking the besan paste on low flame ensures perfection of taste and flavour.
If you tried this recipe and liked it please comment below. I would love to hear from you. If you have a query about the recipe email us and ill respond as soon as I can.
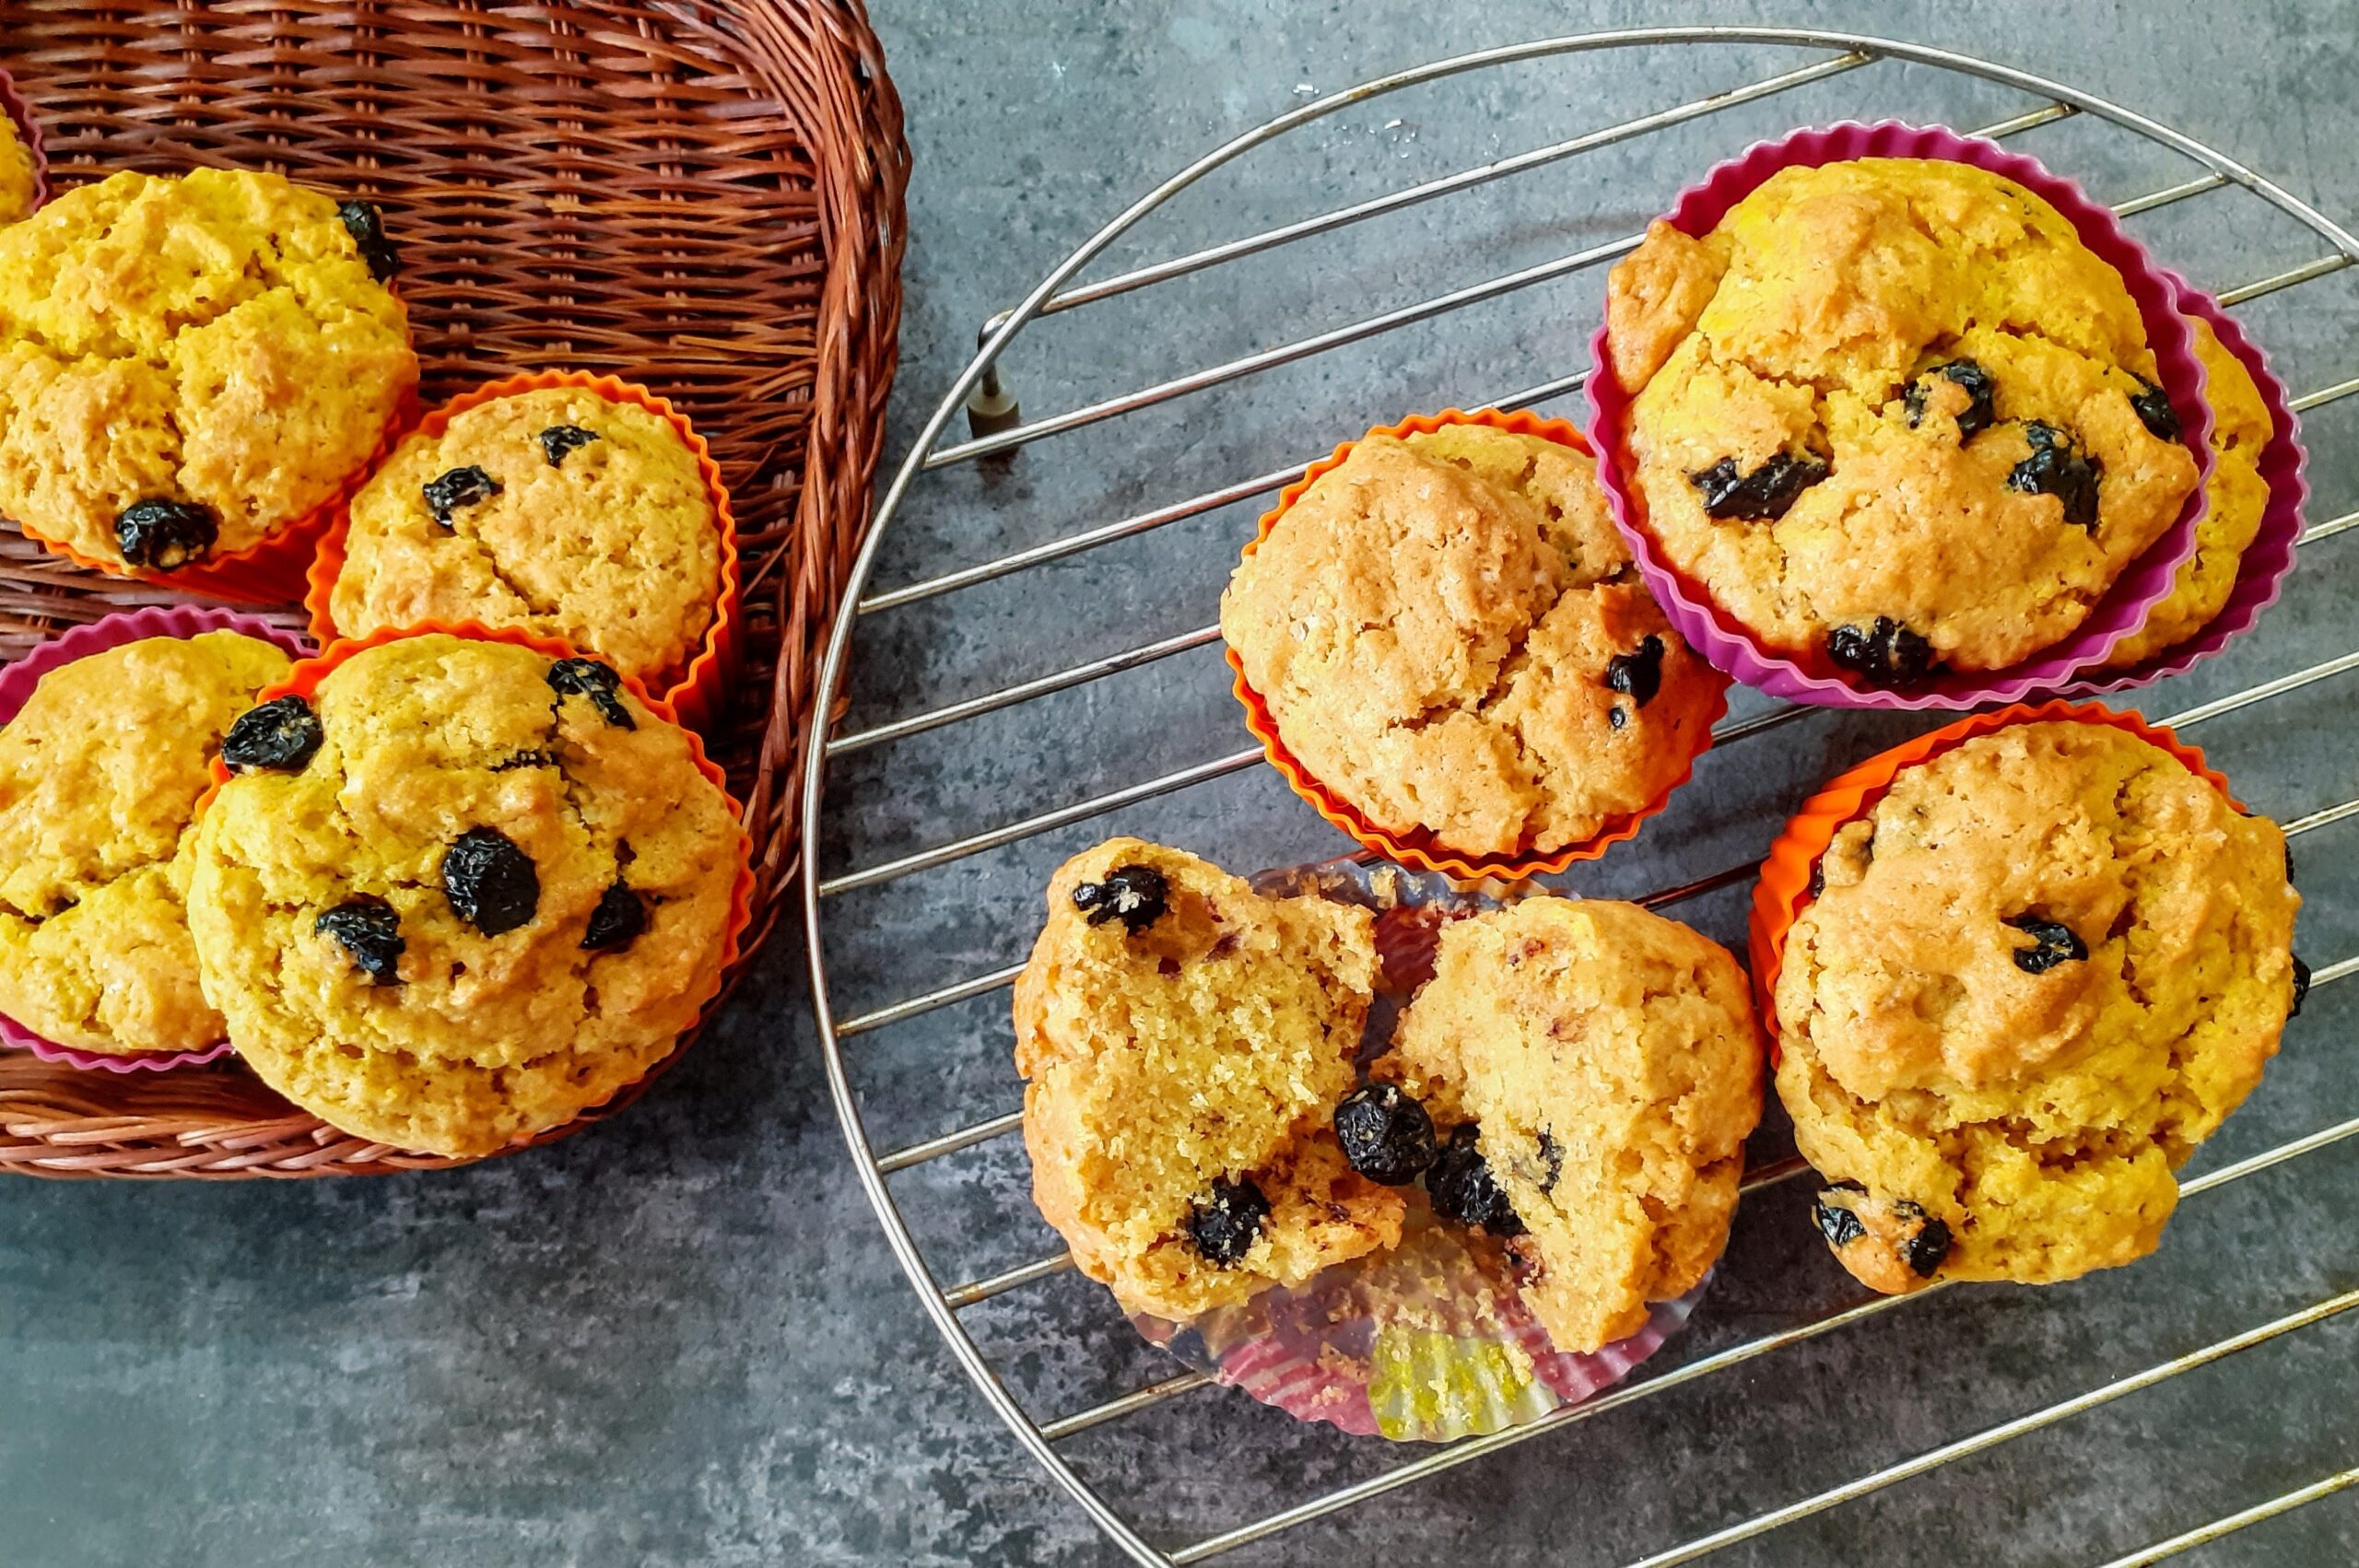
Whole Wheat Blueberry Muffins
If you haven’t realised until now, I am a huge berry fan. Whatever the berry, I will think of a dessert to make. The berry recipes in this blog are proof for it. Berries not only provide our body with antioxidants, but also with micro nutrients, which are essential for a healthy body. so whenever you find berries include them in smoothies, pan cakes, lassi, compote, Jams and more…
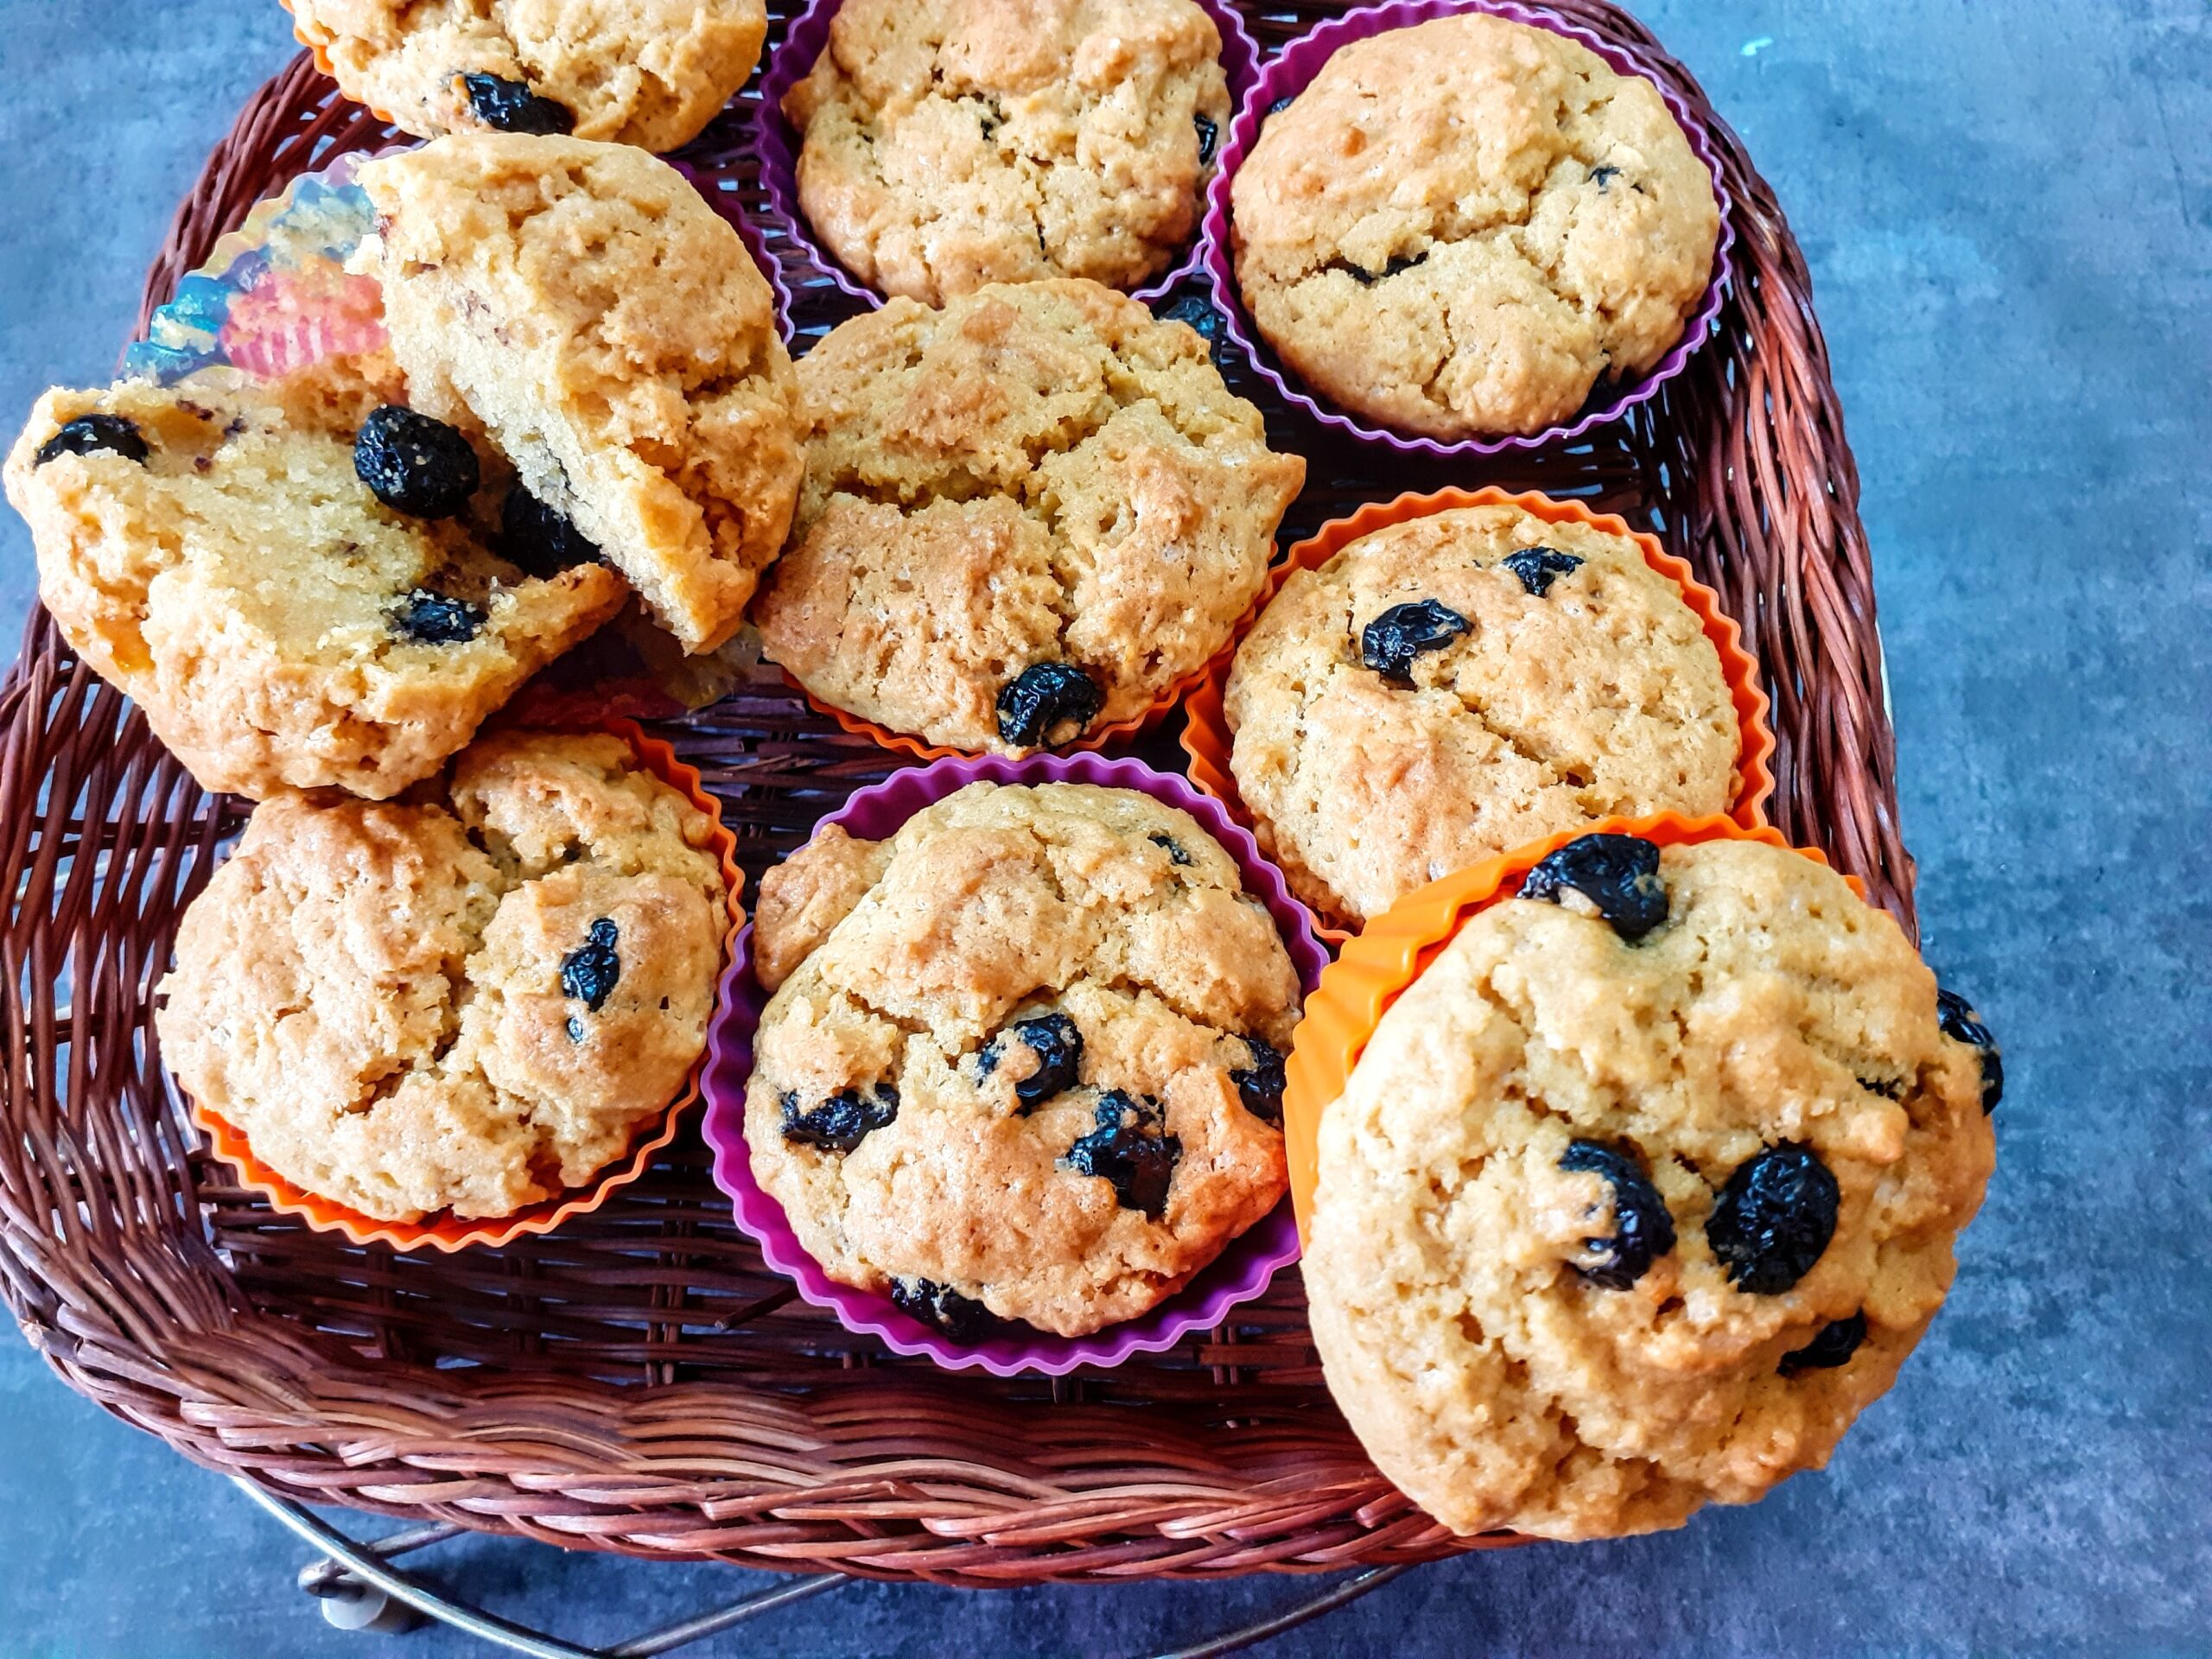
This time they had to be muffins as they can be picked off a box and popped in when hungry????. They stay good in the refrigerator for upto a month. They are easy to pack up on a picnic, road trip and even for hostelers. These are the moistest cup cakes you will find and using good quality berries really enhances the flavour of the cake. I have used dried Blue berries, fresh ones can be used too.
As I say in all my cake recipes, this too is a single bowl recipe, where you mix dry and wet ingredients in one bowl, line up your muffin tins and bake away.
While you are here check out my other very berry desserts like Blueberry Cheesecake, Berry Smoothie Ice cream, Strawberry and Lemon loaf, Easy 2 way muffins, and more…
Here is the recipe for Whole Wheat Blueberry muffins for you-
Ingredients:
Whole wheat flour/ Multigrain flour 2.25 cups
Sugar 1 cup
Baking powder 3 tsp
Baking soda 1 tsp
Salt 2 pinches
Eggs 2
Butter 60 gms
Oil 4 tbsp
Buttermilk 1 cup
Vanilla essence 2 to 3 drops
Blueberries 100 gms
Directions: Firstly put the oven to preheat at 200 C. Now in a bowl mix all the dry ingredients- wheat flour, sugar, baking powder, baking soda and salt. In a larger bowl mix all wet ingredients- butter, eggs, oil, and vanilla essence. Do not mix in the buttermilk and blueberries now. Now slowly add the dry ingredients into the wet ingredients and stir. Stir in circular motion. The wet ingredients will absorb the flour and turn dry. Now add the buttermilk, a little at a time and stir gently. Take care not to over stir. Finally add the Blueberries and give a gentle stir. Now the batter is ready to fill into the muffin tin/cup cake moulds. Bake at 190 C for 15 minutes. Check for doneness by inserting a toothpick in the centre. If a little wet, then bake another 2 minutes. Enjoy the healthy goodness. Serve when warm.
STEPWISE RECIPE FOLLOWS:
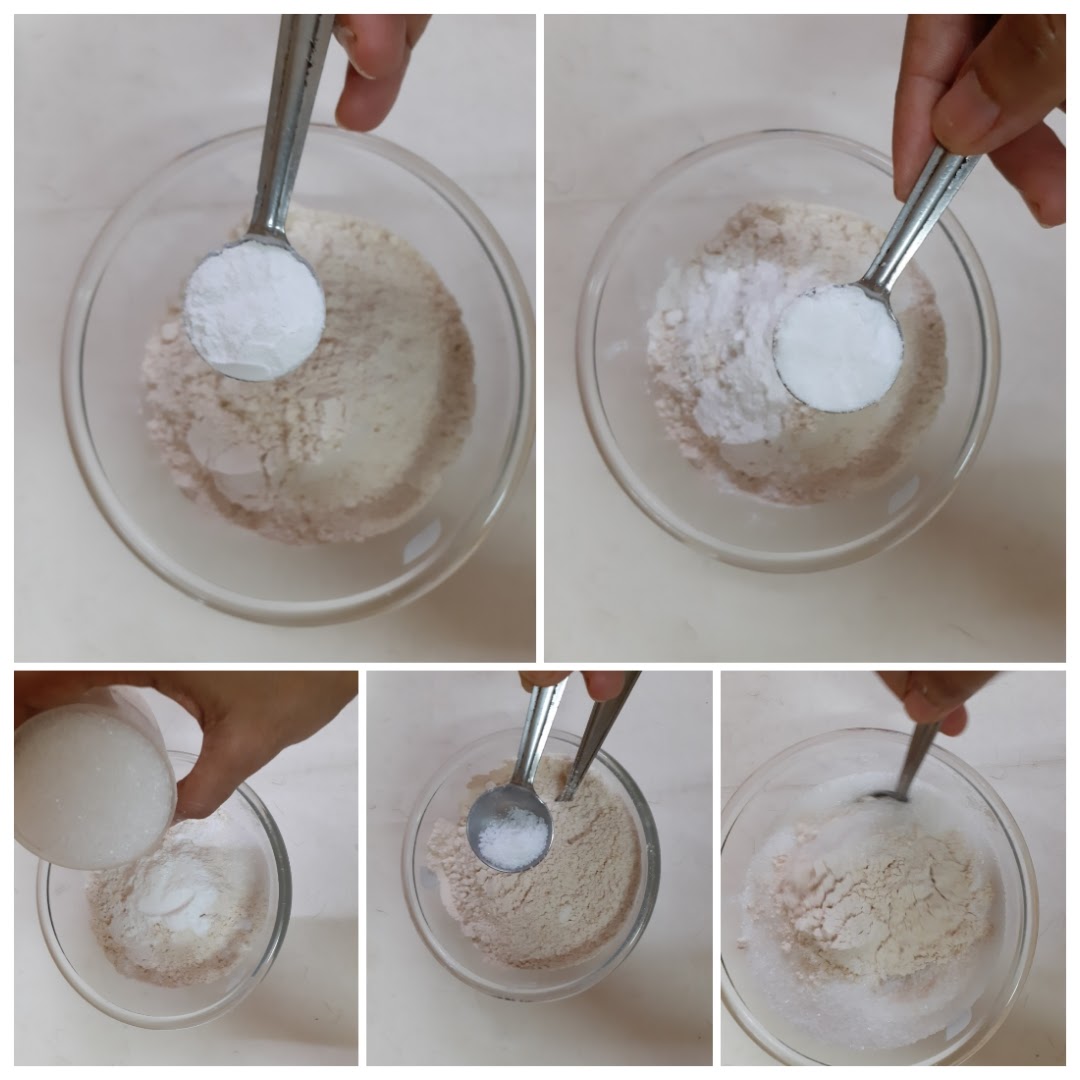
1. Firstly put the oven to preheat at 200 C. Now in a bowl mix all the dry ingredients- wheat flour, sugar, baking powder, baking soda and salt.
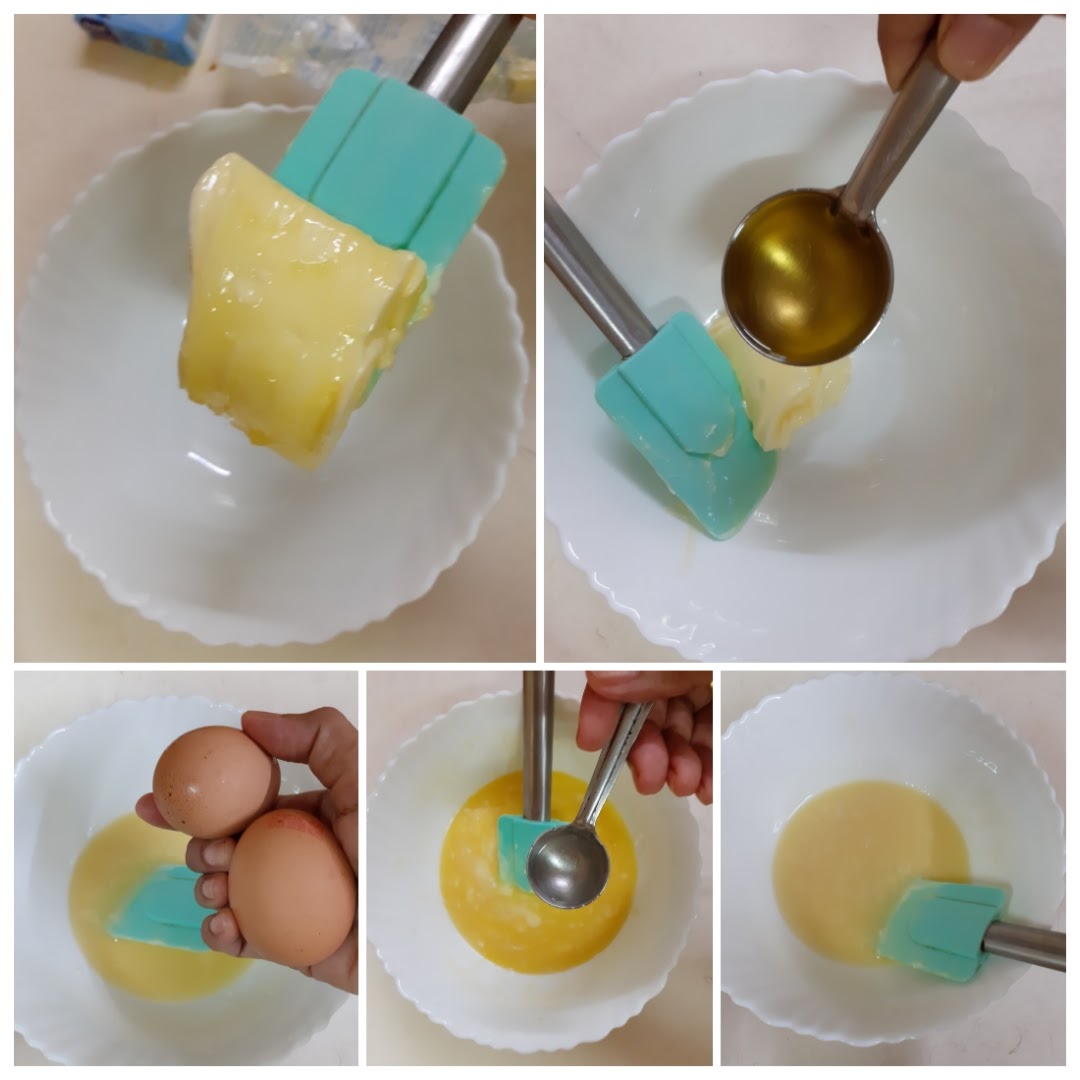
2. In a larger bowl mix all wet ingredients- butter, eggs, oil, and vanilla essence. Do not mix in the buttermilk and blueberries now.
3. Now slowly add the dry ingredients into the wet ingredients and stir. Stir in circular motion. The wet ingredients will absorb the flour and turn dry. Now add the buttermilk, a little at a time and stir gently. Take care not to over stir.
4. Finally add the Blueberries and give a gentle stir. Now the batter is ready to fill into the muffin tin/cup cake mould. Bake at 190 C for 15 minutes. Check for doneness by inserting a toothpick in the centre. If a little wet, then bake another 2 minutes. Enjoy the healthy goodness. Serve when warm.
NOTES:
1. These cup cakes can be made with any berry.
2. If fresh ones are not available use the dry ones like I have here. If using frozen, then use them directly from the freezer without thawing.
3. You must have noticed that in this recipe I have used both butter and oil. This is to get the super moist texture. If you do not wish to use butter, then use 1/2 cup oil.
4. Since oven settings are different for different oven, start checking for doneness from 13 minutes onward.
5. Whole wheat flour can be substituted with multigrain flour or refined flour if you prefer.
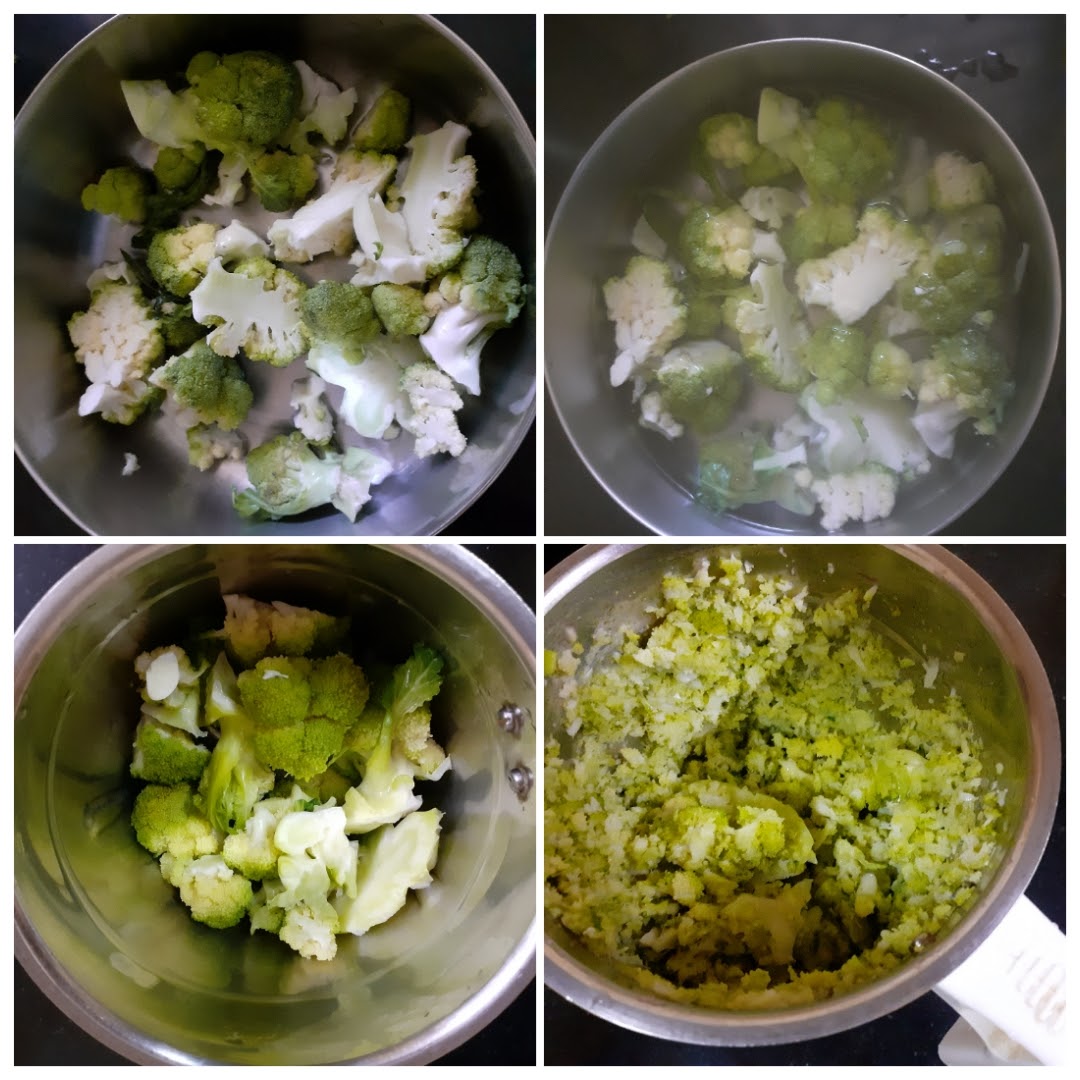
Broccoli And Zucchini Fritters With Hung Curd Dip
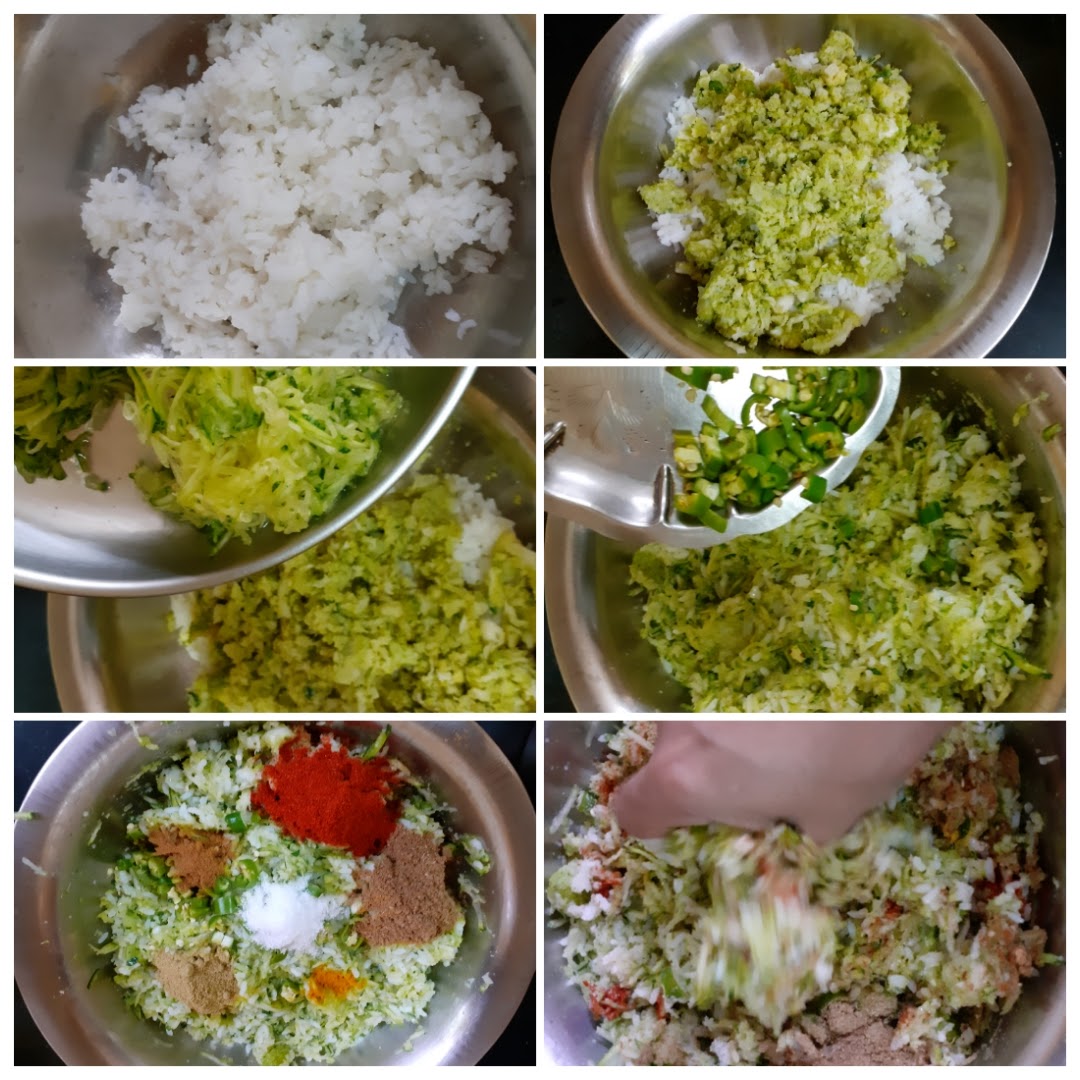
A combination of Zucchini and Broccoli is a match made in heaven. These two have been used in many dishes from Pastas, Pizzas, Salads and fritters.
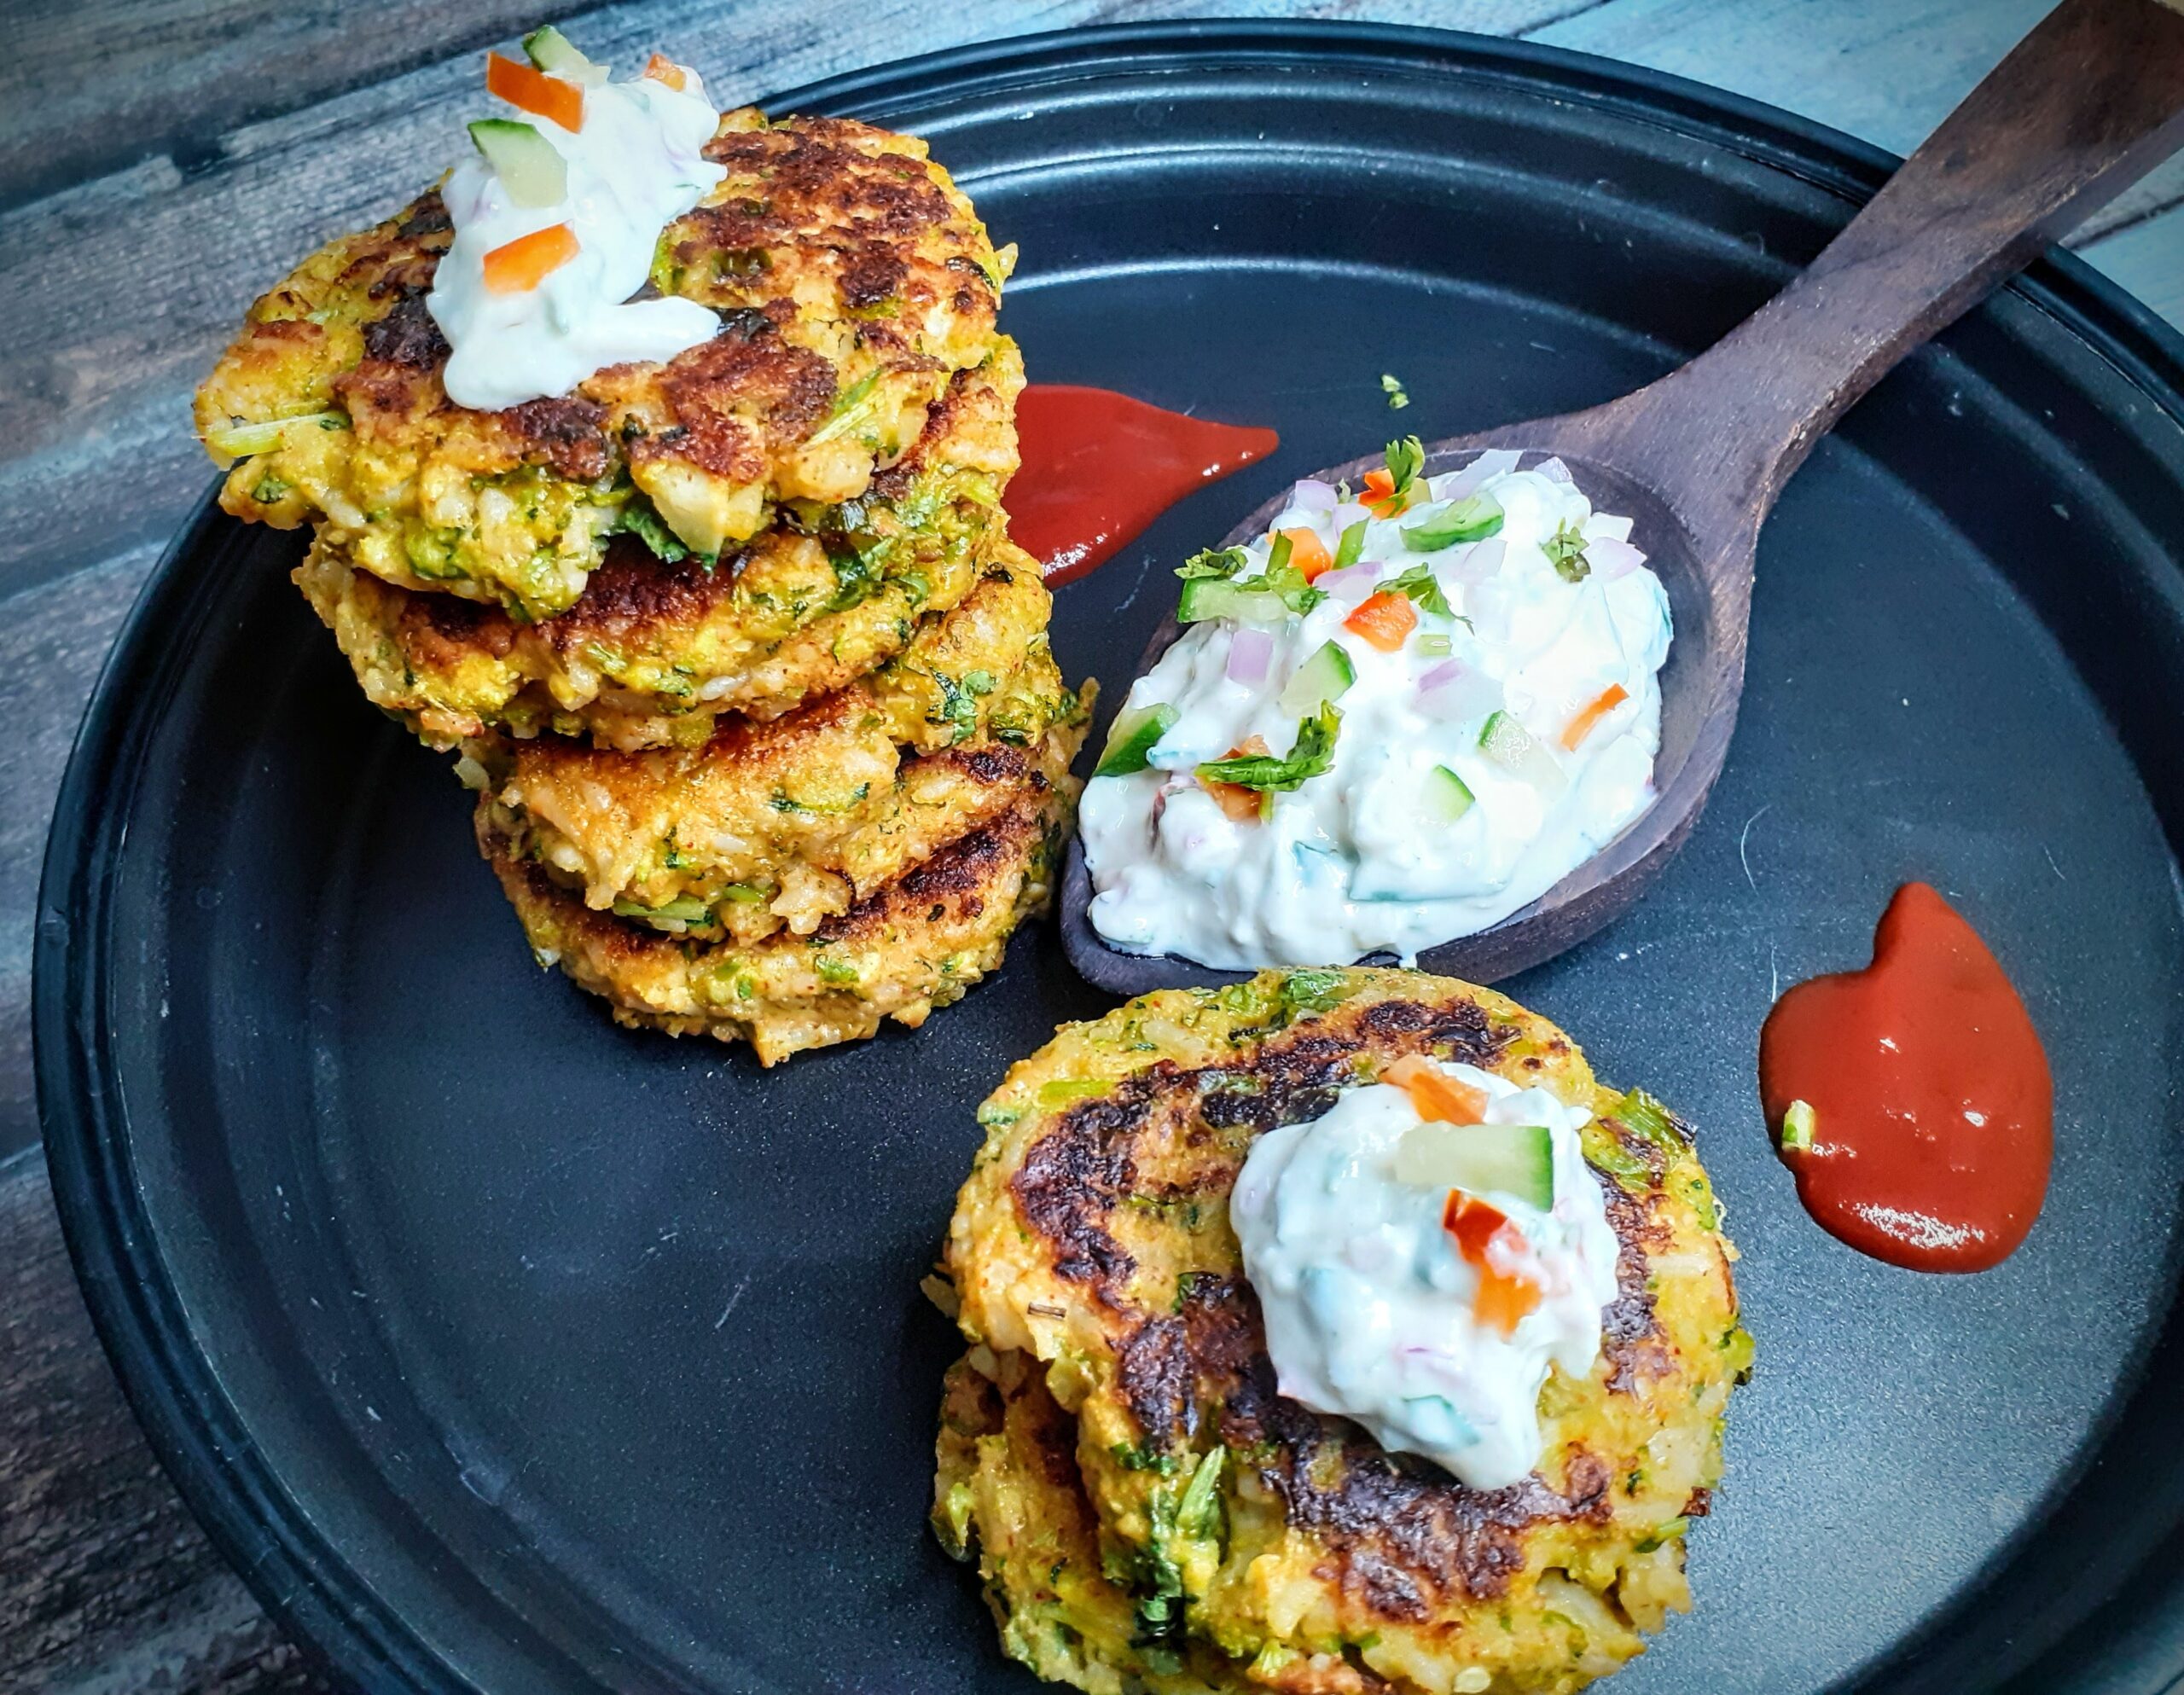
The current recipe is of fritters, which are very melt in the mouth and bursting with flavours. Usually fritters have egg added to the batter, but these are eggless fritters. They need not be deep fried at all, but just grilled on the Tava, which makes them healthy too. I had some leftover rice and added it to the batter to make them chunky and give a slightly crisp exterior, whereas the insides are soft.
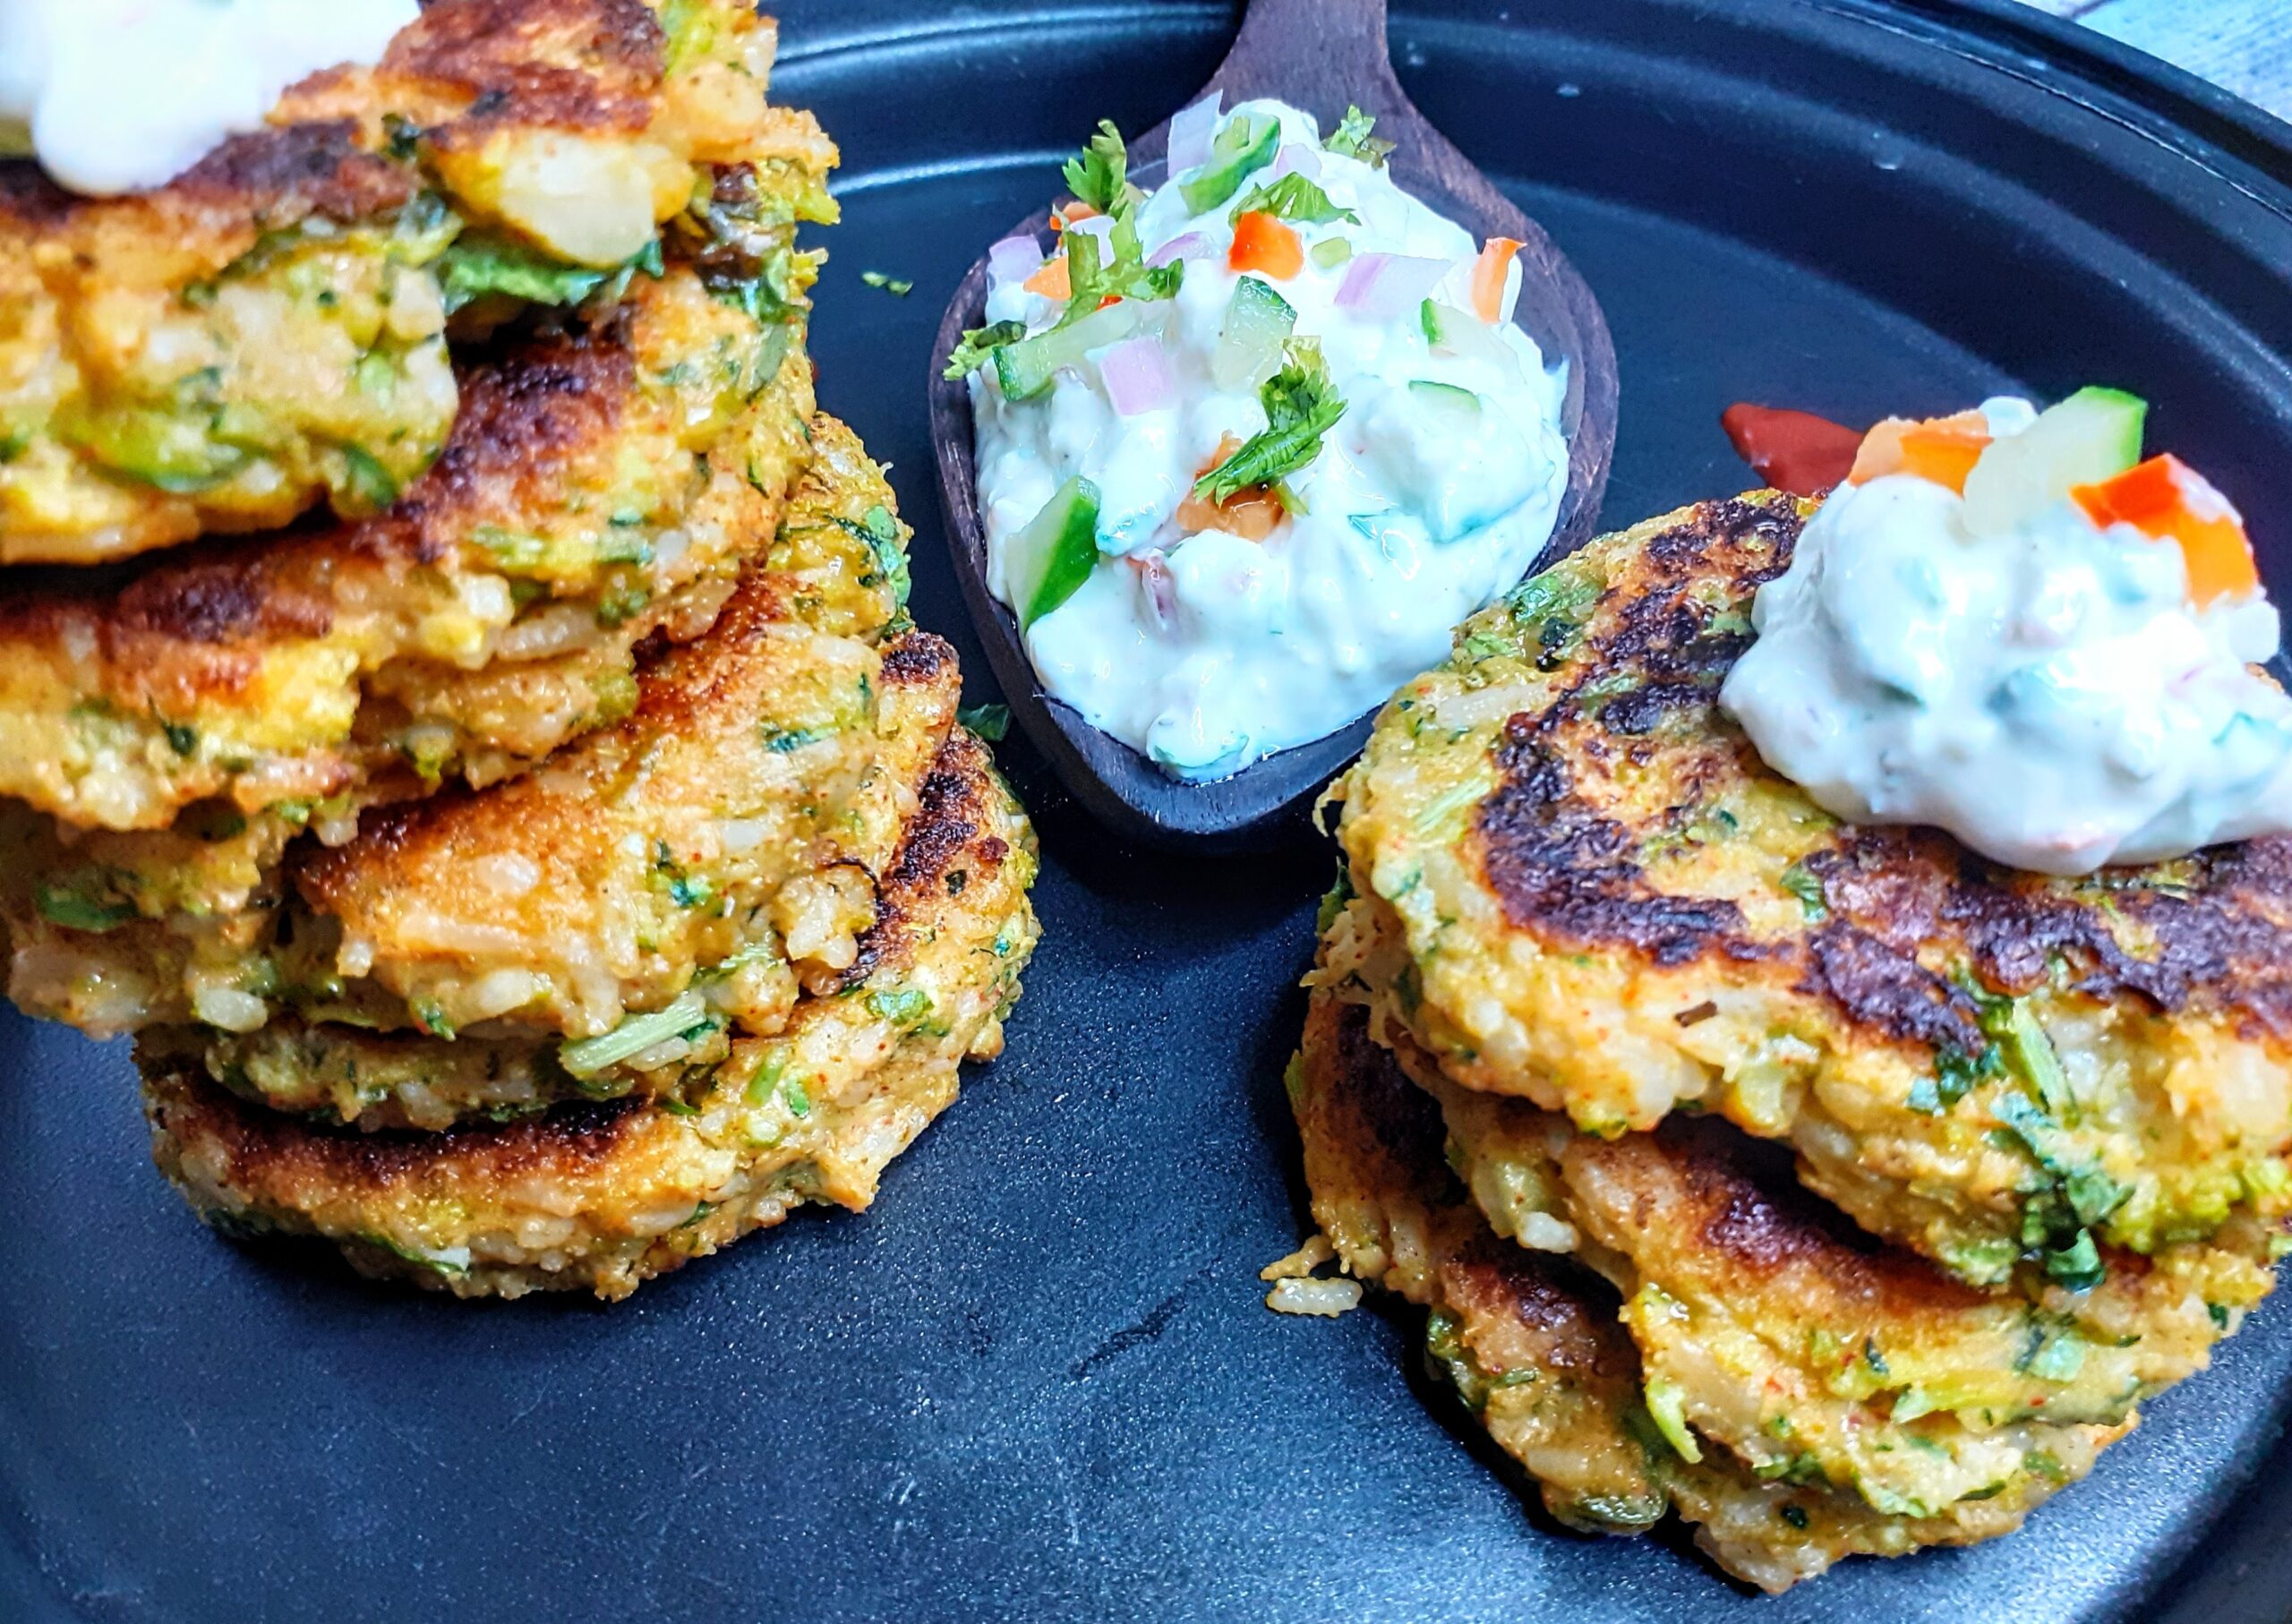
The hung curd dip goes extremely well with these fritters and is so simple to put together. The fritters and dip are a combination that can be served as snack or starters.
While you are here check out other snack recipes on the blog like- Easy Corn Fritters, Medu Vada, Milagu Vadai/Pepper Vadai, Patra, Easy 2 way Muffins, Mirchi Bajji, and more…
Here is the recipe of Broccoli and Zucchini fritters with Hung Curd Dip-

If you tried this recipe and liked it please comment below. I would love to hear from you. If you have a query about the recipe email us and ill respond as soon as I can.
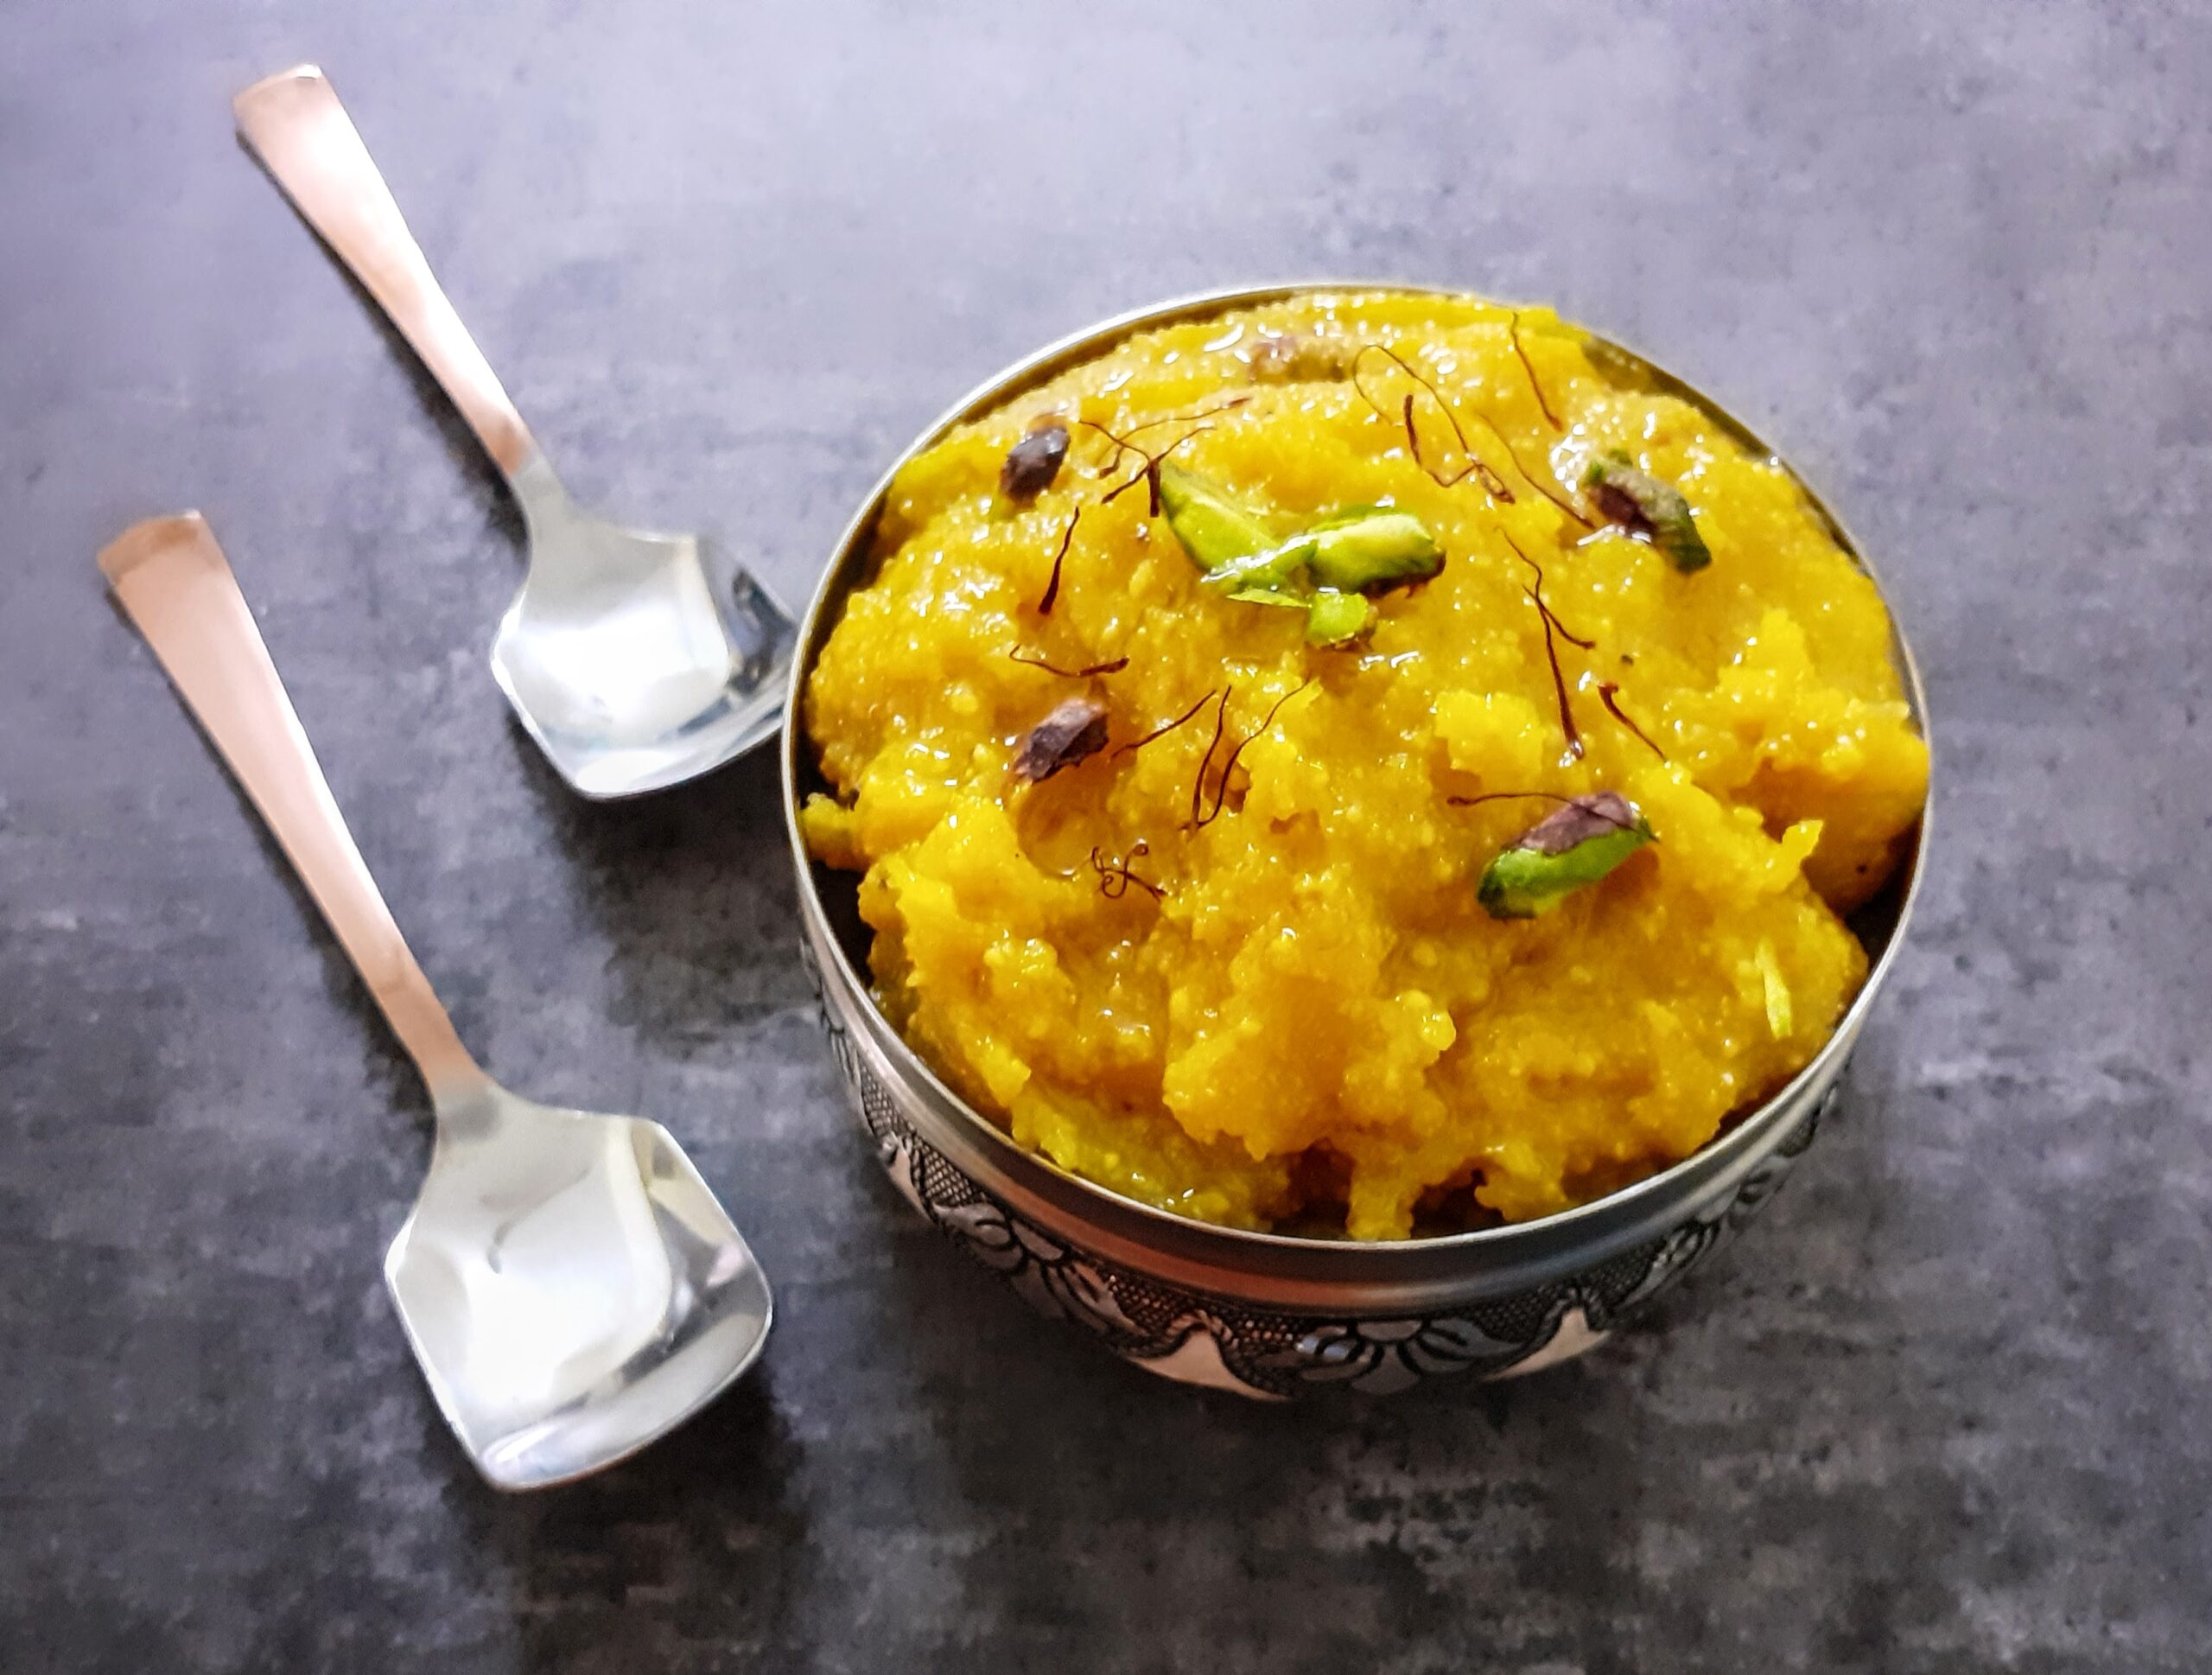
Moong Dal Halwa
Moong dal Halwa is an Indian dessert made from yellow lentils. It is basically a fudge and is very rich because of the amount ghee/ clarified butter added to it. Though I make many sweet varieties and desserts, I’m not generally the one who will stay until dessert. I’m immensely intuitive while I create sweet dishes, but I don’t crave sweets much. But this halwa is very close to my heart because it probably is the first sweet dish I ever liked. Thanks to our stint in Delhi, I have got to taste the best ones.
Infact, I liked this sweet dish so much that I have attempted to make it in the past, failed miserably and had given up on ever trying it again. But last year during the pandemic lockdown I was craving it badly, and as you know “ when you want something very badly, the universe conspires to make it happen” ????. So I had a viola moment during Diwali, while I was documenting the sweets and savoury prepared by me, when a simple method to make this halwa struck m
If you have attempted making this halwa any time or have searched the net for the recipe, all of them will tell you it takes 3 to 4 hours to get this sweet dish done. The actual recipe asks to soak and grind the lentils and them cook it in milk/ water and then add the sweetening agent. As I have claimed here on the blog before, I will take a short cut as long as it does not alter the taste, flavour and texture of the dish. And I took a short cut to this recipe and I don’t regret it because the outcome was just like the original.
If you follow the procedure as given here by me without altering I’m sure it’s a no fail recipe. And why stand by the stove for hours when you can get the same taste and flavour in an hour’s time? Having failed at this recipe many times, and knowing what went wrong each time, this time the recipe was made with so much conviction of technique that it turned out wonderfully.
While you are here do check out other dessert recipes like Carrot kheer, Strawberry and Lemon loaf, Red Poha Ladoo, Shrikhand, Malpua with Gulab Jamun mix, Akkaravadisal, Sweet Poha, and more…
Here is the recipe of Moong Dal Halwa-
Ingredients:
Moong dal split ( yellow lentils) 1 cup
Milk 1 cup
Water 2 cups
Sugar 1 cup
Saffron strands a few (optional)
Yellow food colour/turmeric powder for colour 2 pinches
Ghee 100 GM approx
Cardamom/ Elaichi powder 1/4 tsp
Almonds and Pistachio chopped a few
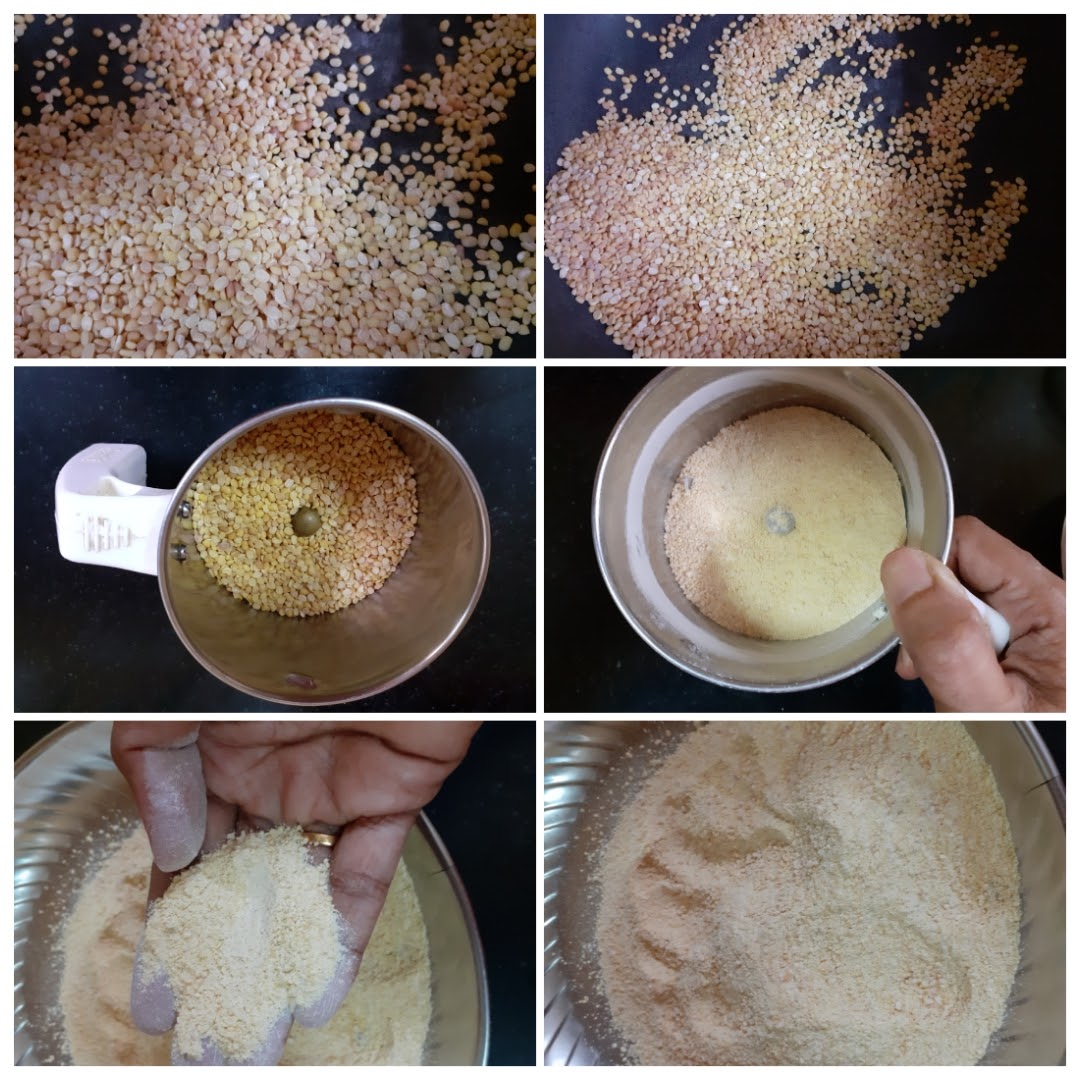
Directions:
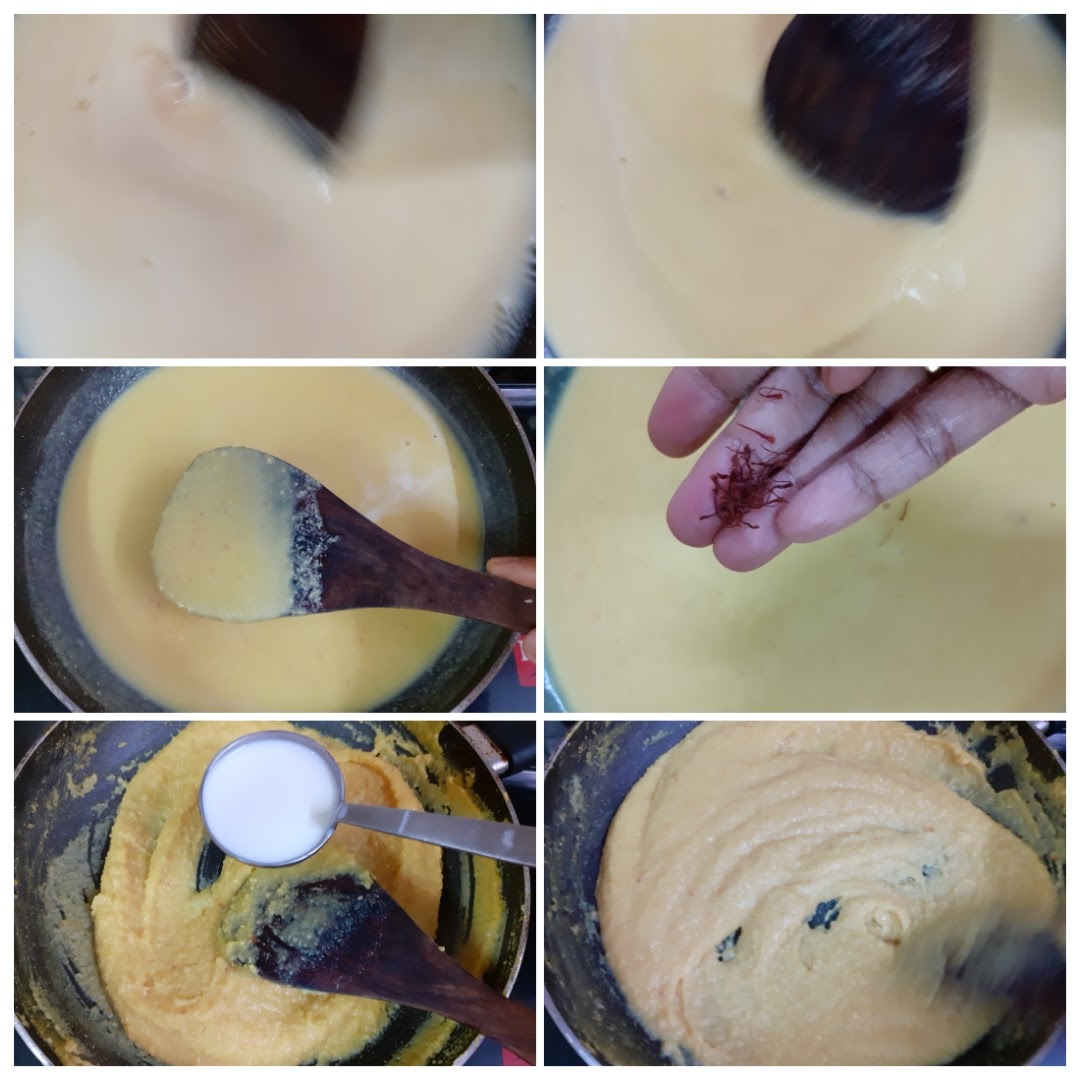
The foremost and important step is dry roasting the dal to a light brown colour. This has to be done patiently on low heat. On this depends the entire recipe. First put a pan/ kadai on flame and warm it. Now put the dal and start the roasting procedure by stirring constantly. This step can be done ahead. Cool the roasted dal and grind it in a blender. For a smooth texture of halwa grind it finely, for a grainy texture grind it coarse. Whole dal should not be visible. Now put this ground dal powder in a pan, add one cup milk, followed by 2 cups water, and stir to make it lump free. Now put the pan on the flame, add the food colour/turmeric powder, and start cooking the mixture on medium flame. Slowly the mixture will start thickening. If adding saffron strands, add now. Keep stirring gently, scraping the sides of the pan from time to time. Once the mixture thickens, check if there is any rawness in the smell. That is, if the dal smell/ taste is still coming. If yes, add another ladle of milk and continue to stir again. If your mixture has thickened and there is no raw smell or taste, add the sugar gently and start stirring again. As the sugar melts the dal mixture will liquefy. Don’t worry and continue to stir. The mixture will start thickening again. Now is the time to start pouring the ghee. Pour one ladle at a time and stir until the ghee is absorbed. Continue this process until no more ghee gets absorbed, but remains on the halwa. You will also notice that at this stage your mixture/ halwa no longer sticks to the pan/ kadai bottom, but comes out clean while stirring. Another way to tell the Halwa is done, is when you take a little of it in your fingers and try to form a ball, you should be able to do it. Add the cardamom powder and nuts and transfer the halwa to a container. The delicious Moong dal halwa is ready to relish .
STEPWISE RECIPE FOLLOWS:
1. First out a pan/ kadai on flame and warm it. Now put the dal and start the roasting procedure by stirring constantly. This step can be done ahead. Cool the roasted dal and grind it in a blender. For a smooth texture of halwa grind it finely, for a grainy texture grind it coarse.
2. Now put this ground dal powder in a pan, add one cup milk, followed by 2 cups water, and stir to make it lump free. Now put the pan on the flame, add the food colour/turmeric powder, and start cooking the mixture on medium flame.

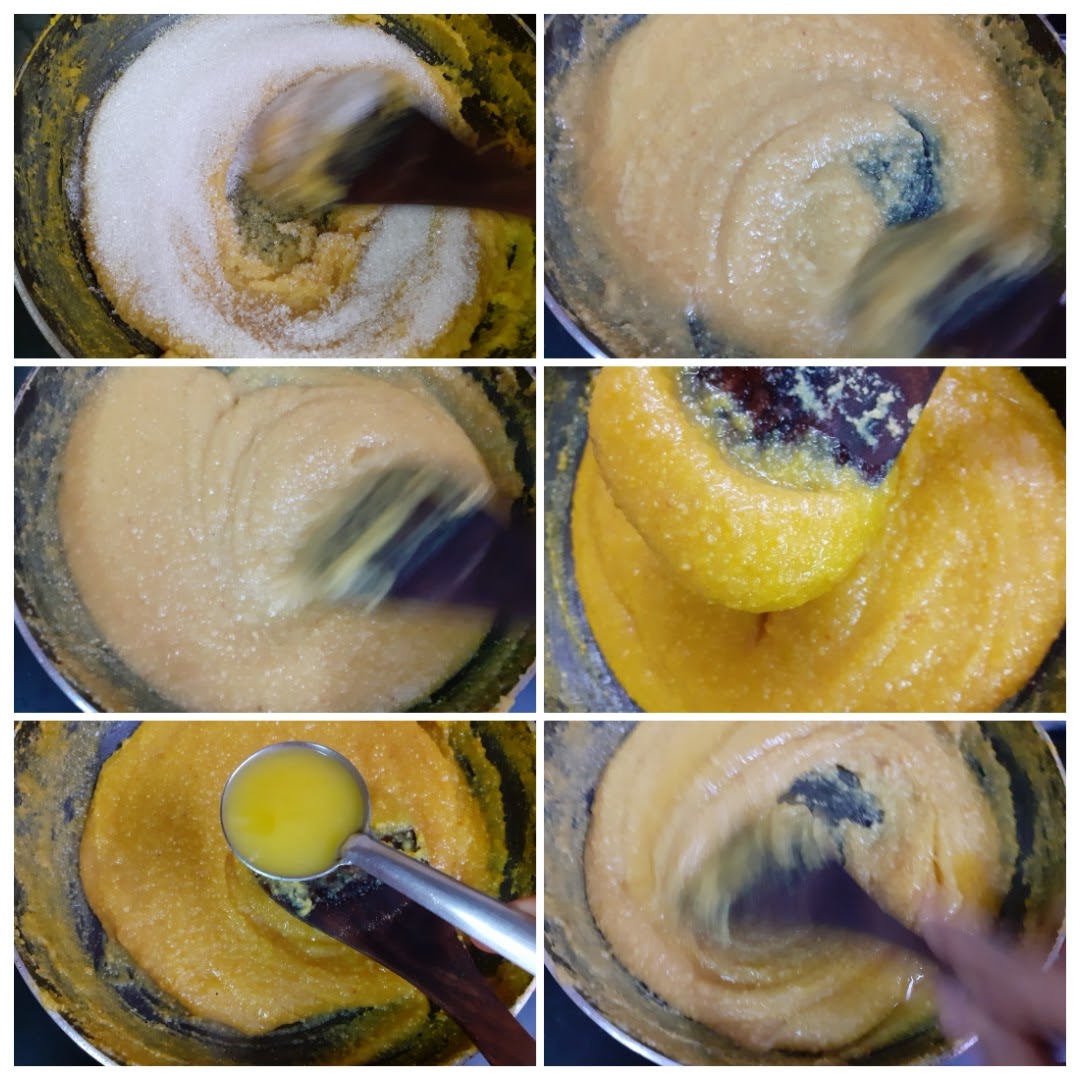
3. Slowly the mixture will start thickening. Keep stirring gently, scraping the sides of the pan from time to time. If adding saffron strands, add now. Once the mixture thickens, check if there is any rawness in the smell. That is, if the dal smell/ taste is still coming. If yes, add another ladle of milk and continue to stir again. If your mixture has thickened and there is no raw smell or taste, add the sugar gently and start stirring again.
4. As the sugar melts the dal mixture will liquefy. Don’t worry and continue to stir. The mixture will start thickening again. Now is the time to start pouring the ghee. Pour one ladle at a time and stir until the ghee is absorbed. Continue this process until no more ghee gets absorbed, but remains on the halwa.
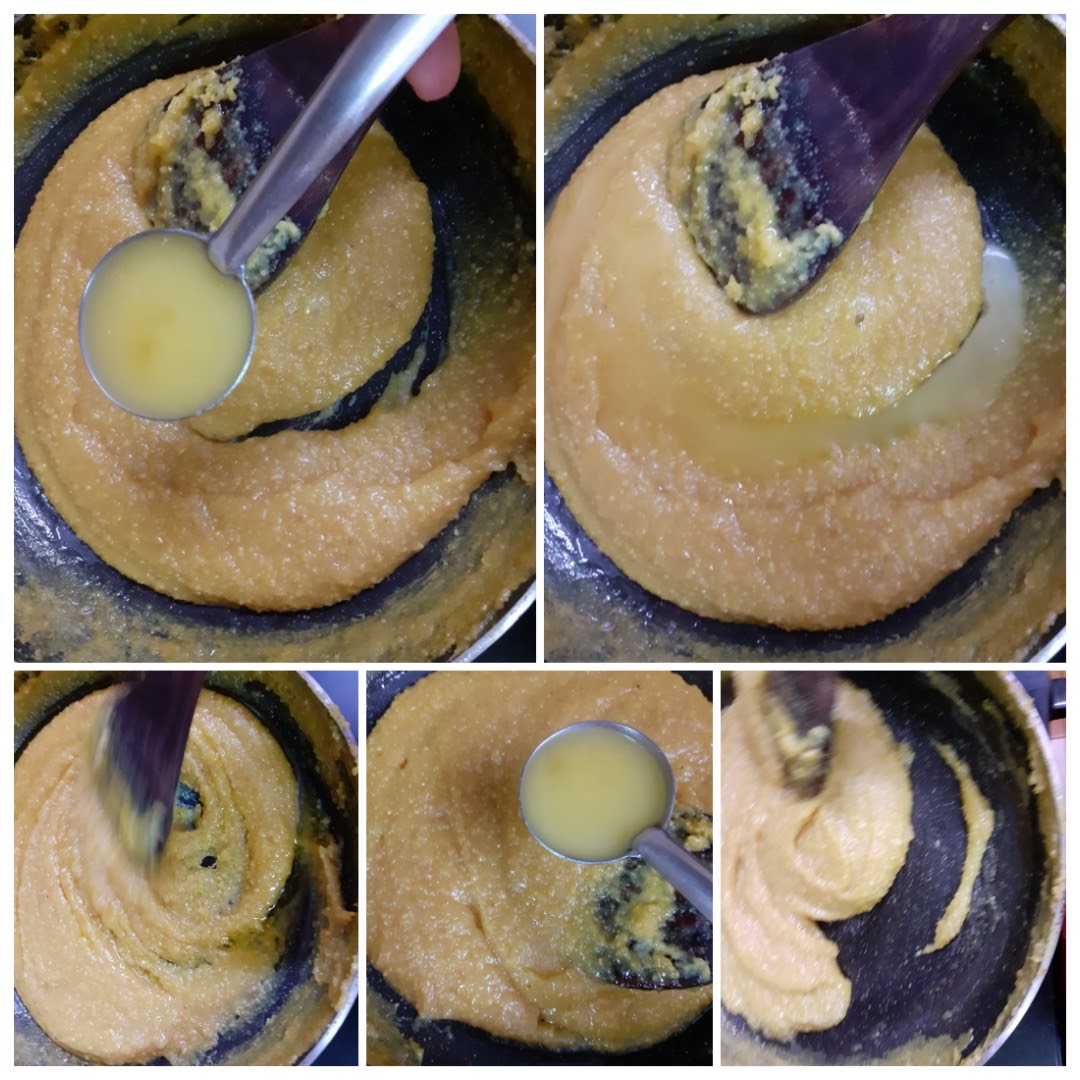
5. You will also notice that at this stage your mixture/ halwa no longer sticks to the pan/ kadai bottom, but comes out clean while stirring. Another way to tell the Halwa is done, is when you take a little of it in your fingers and try to form a ball, you should be able to do it. Add the cardamom powder and nuts and transfer the halwa to a container. The delicious Moong dal halwa is ready to relish .

If you tried this recipe and liked it please comment below. I would love to hear from you. If you have a query about the recipe email us and ill respond as soon as I can.
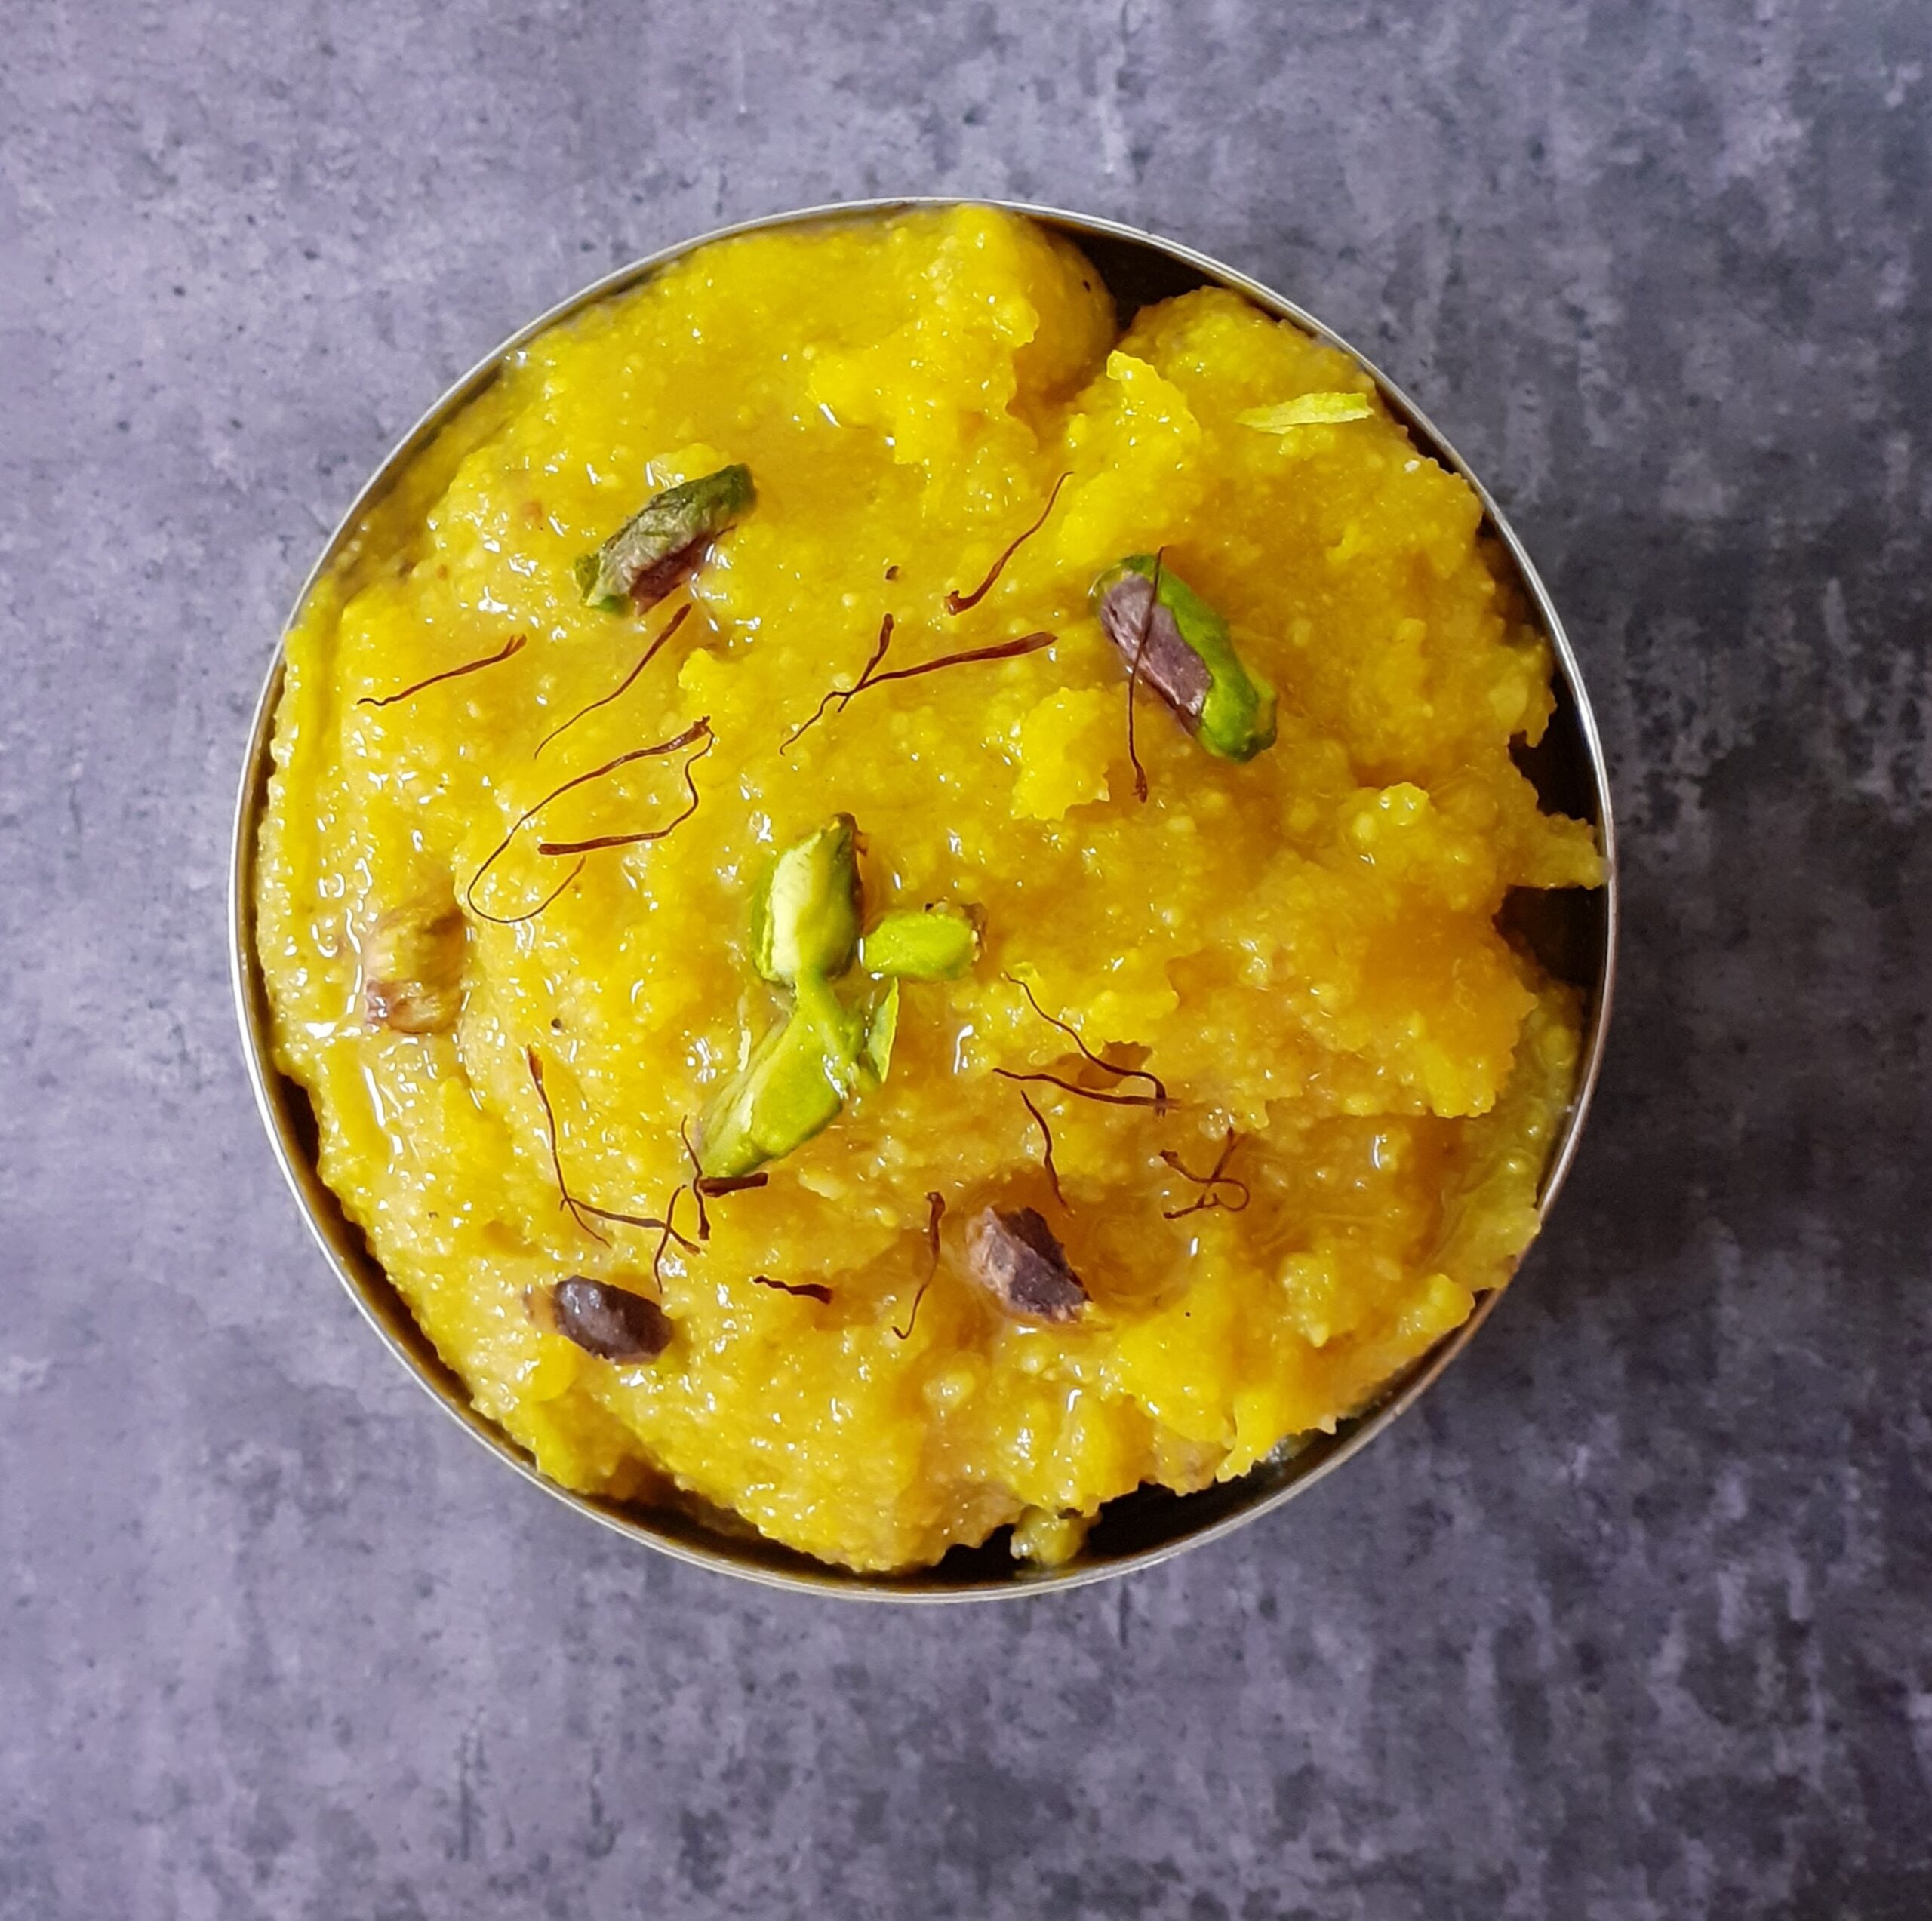
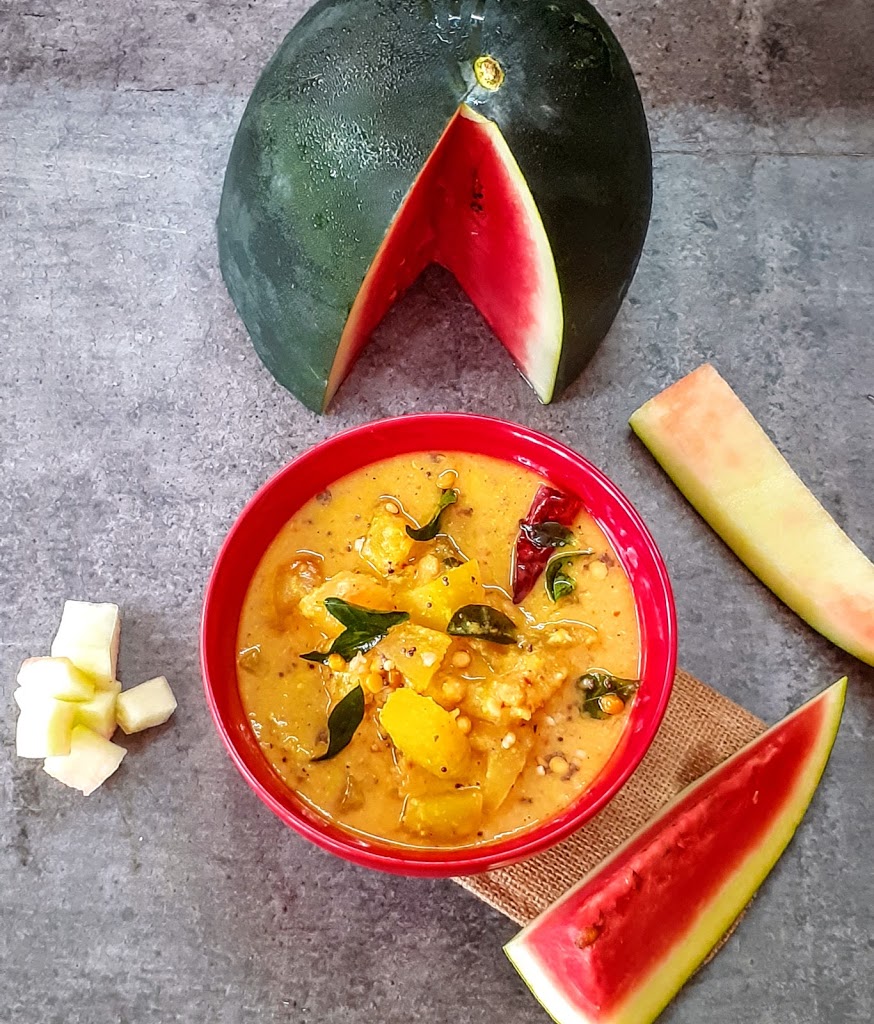
Watermelon Rind Kootu / Watermelon Rind Lentil Curry
In south India, especially the Tamilnadu region, Kootu refers to any lentil based curry. There are many versions of Kootu cooked with a variety of lentils. Some are tamarind based(puli kootu), some milk based(pal kootu), some with spices and coconut gratings(poricha kootu).
This Watermelon rind kootu came about when I saw an contest alert in one of my social media pages, asking to contribute recipes towards sustainable living. Traditionally, India is a country where we have had the practice of using things without wasting them. This tradition lost its value with globalization , and the “use and throw” phase. Now in the millennium as the world faces so many issues, “sustainable living” has become the mantra.
In my house, I have seen my grand mother and mother use the peel of many vegetables like Ridge gourd, Bitter gourd etc to make chutneys. And we prepare Kootu using vegetables from the Cucumber familiy like, Ash Gourd, Pumpkin, Country Cucumber etc. As Watermelon also belongs to this family, I thought, why not give it a try, and believe me this kootu turned out so delicious.
So, I no more waste the rind of the Watermelon. I use it to make this Kootu, grind the rind and add it to Dosa batter, and also grind the rind into a chutney.
While you are here check out other recipes here like, Menthiya Keerai Kootu, Vatha Kuzhambu, Bonda Morkuzhambu, Dosakaya Chutney, Pachai Mochai Kuzhambu and more…
Here is the recipe for Watermelon rind Kootu —
Ingredients:
Watermelon rind of half a watermelon, cut into cubes
Moong dal (yellow split dal) 1/2 cup cooked soft in pressure cooker
Green Chilli 1 split
Turmeric powder 1/2 tsp
Coconut gratings 1 tbsp
Dry red chillies 2
Peppercorns 4-5
Cumin seeds 1 tsp
Salt as required
For tempering:
Oil 2 tsp (coconut/ refined oil)
Mustard seeds 1/2 tsp
Urad dal 1 tsp
Chana dal 1 tsp
Curry leaves a few
Dry red chilli broken 1
Asafoetida 1/4 tsp
Directions:
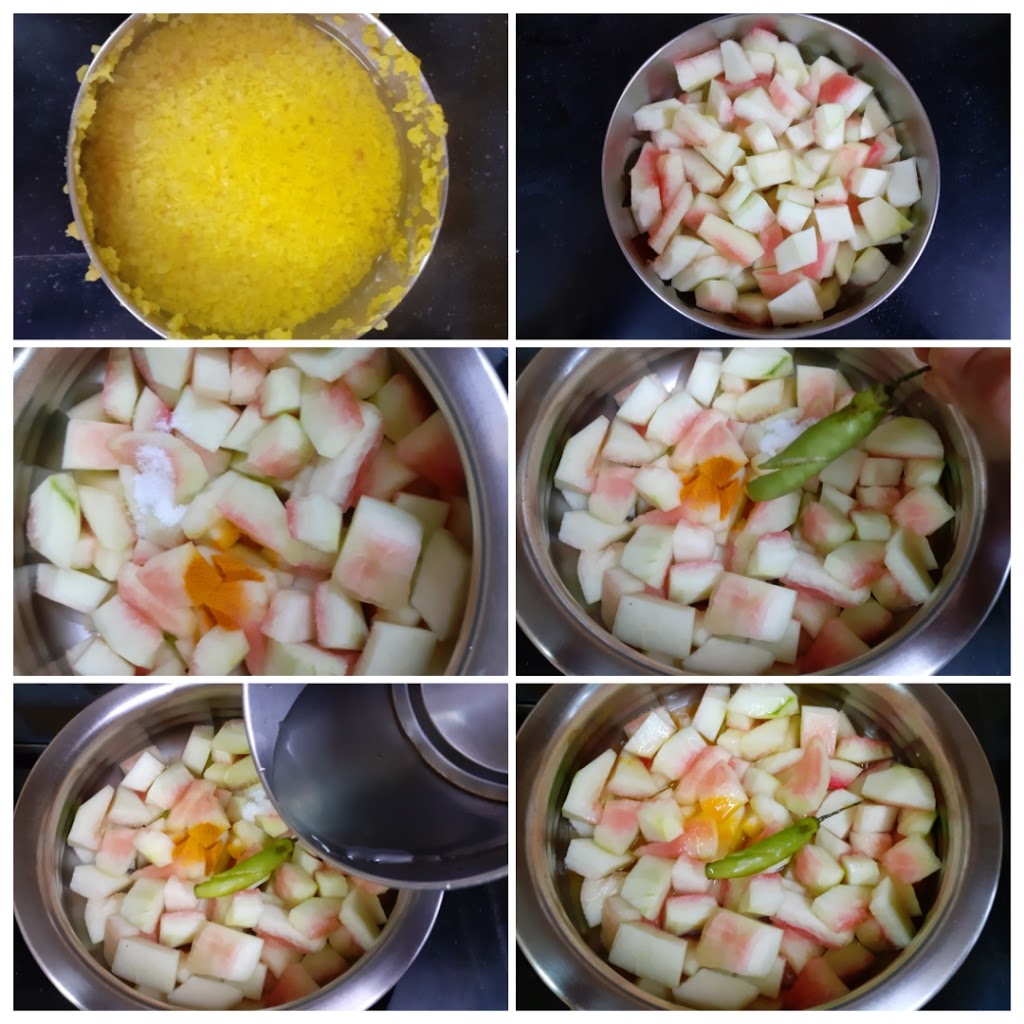
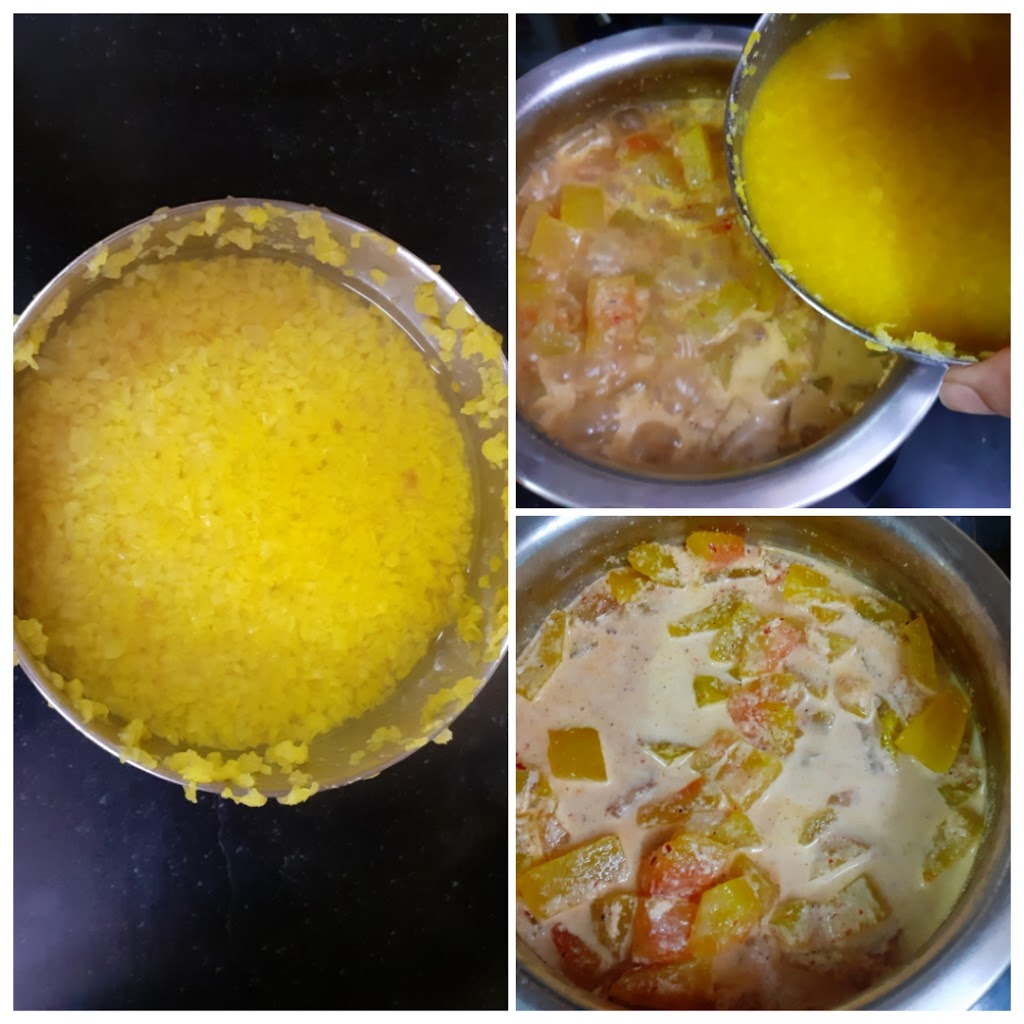
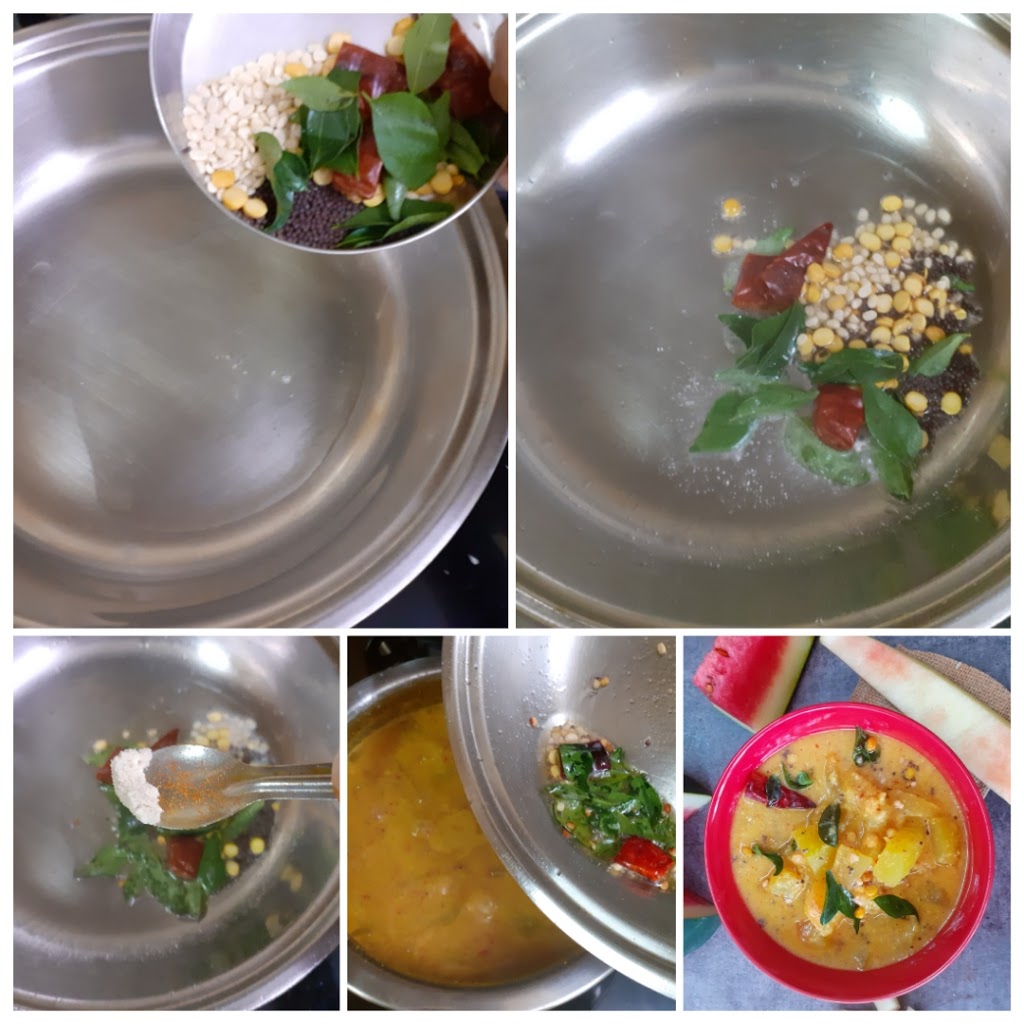
Pressure cook the Moong dal for 4 whistles, and keep aside. After using up the pulp of watermelon, remove/peel the dark green skin and discard. Cube the lighter portion as shown in the picture. Put the cubed rind pieces in a vessel, add the split green chilli, salt, and turmeric powder, pour water(about 1.5 cups), and cook the water melon rind until soft, but not mushy. Now in a blender add the coconut gratings, peppercorns, dry red chilli, and cumin seeds and grind to a smooth paste adding little water. Pour this paste into the cook watermelon rind and bring to a boil. Now, nicely mash the cooked dal with the back of a ladle and pour it into the vessel having watermelon rind and coconut paste. Stir nicely to mix the spices evenly. Cook for 2 minutes on low flames and put off the flame. Now in a tadka/tempering kadai take oil and heat. Add mustard seeds and remaining ingredients mentioned under tempering and fry for 30 seconds. Pour this tempering into the cook rind and dal mixture. The healthy and delicious Watermelon rind kootu is ready. This can be served with rice or Rotis.
STEPWISE RECIPE FOLLOWS:
1. Pressure cook the Moong dal for 4 whistles, and keep aside. After using up the pulp of watermelon, remove/peel the dark green skin and discard. Cube the lighter portion as shown in the picture. Put the cubed rind pieces in a vessel, add the split green chilli, salt, and turmeric powder, pour water(about 1.5 cups), and cook the water melon rind until soft, but not mushy.
2. Now in a blender add the coconut gratings, peppercorns, dry red chilli, and cumin seeds and grind to a smooth paste adding little water. Pour this paste into the cook watermelon rind and bring to a boil.
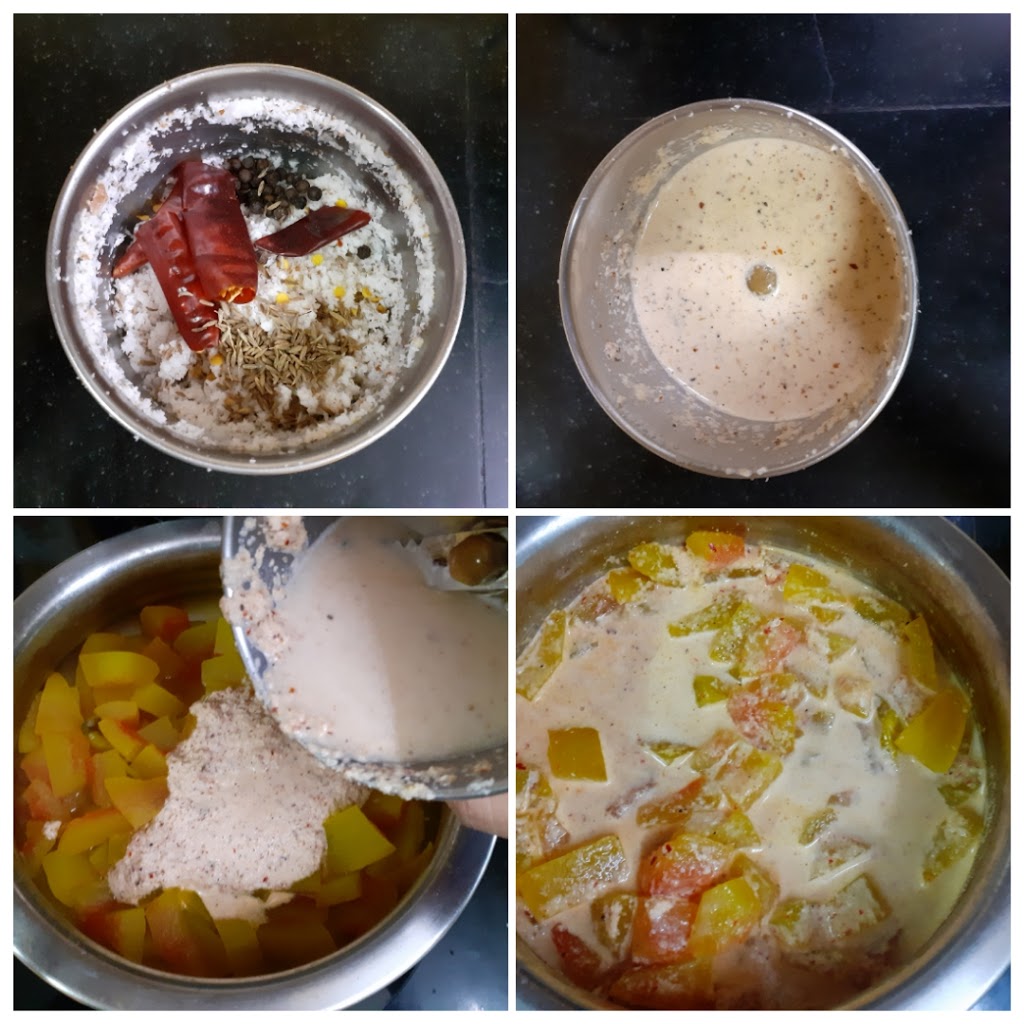
3. Now, nicely mash the cooked dal with the back of a ladle and pour it into the vessel having watermelon rind and coconut paste. Stir nicely to mix the spices evenly. Cook for 2 minutes on low flames and put off the flame.
4. Now in a tadka/tempering kadai take oil and heat. Add mustard seeds and remaining ingredients mentioned under tempering and fry for 30 seconds. Pour this tempering into the cook rind and dal mixture. The healthy and delicious Watermelon rind kootu is ready.
NOTES:
1. This Kootu can be made with most vegetables like Snake gourd, Ash gourd, Cabbage, Bottle gourd and more.
2. If one prefers the taste of pepper, more can be added while grinding.
3. Tempering in coconut oil works best, but vegetable oil can also be used.

Lemon Poppy Seed/Khus Khus Salad Dressing
This creamy Lemon Poppy Seed/Khus Khus salad dressing is perfect for a veggie loaded salad you would want to have as lunch or dinner. This dressing is a great way to spruce up your salad.


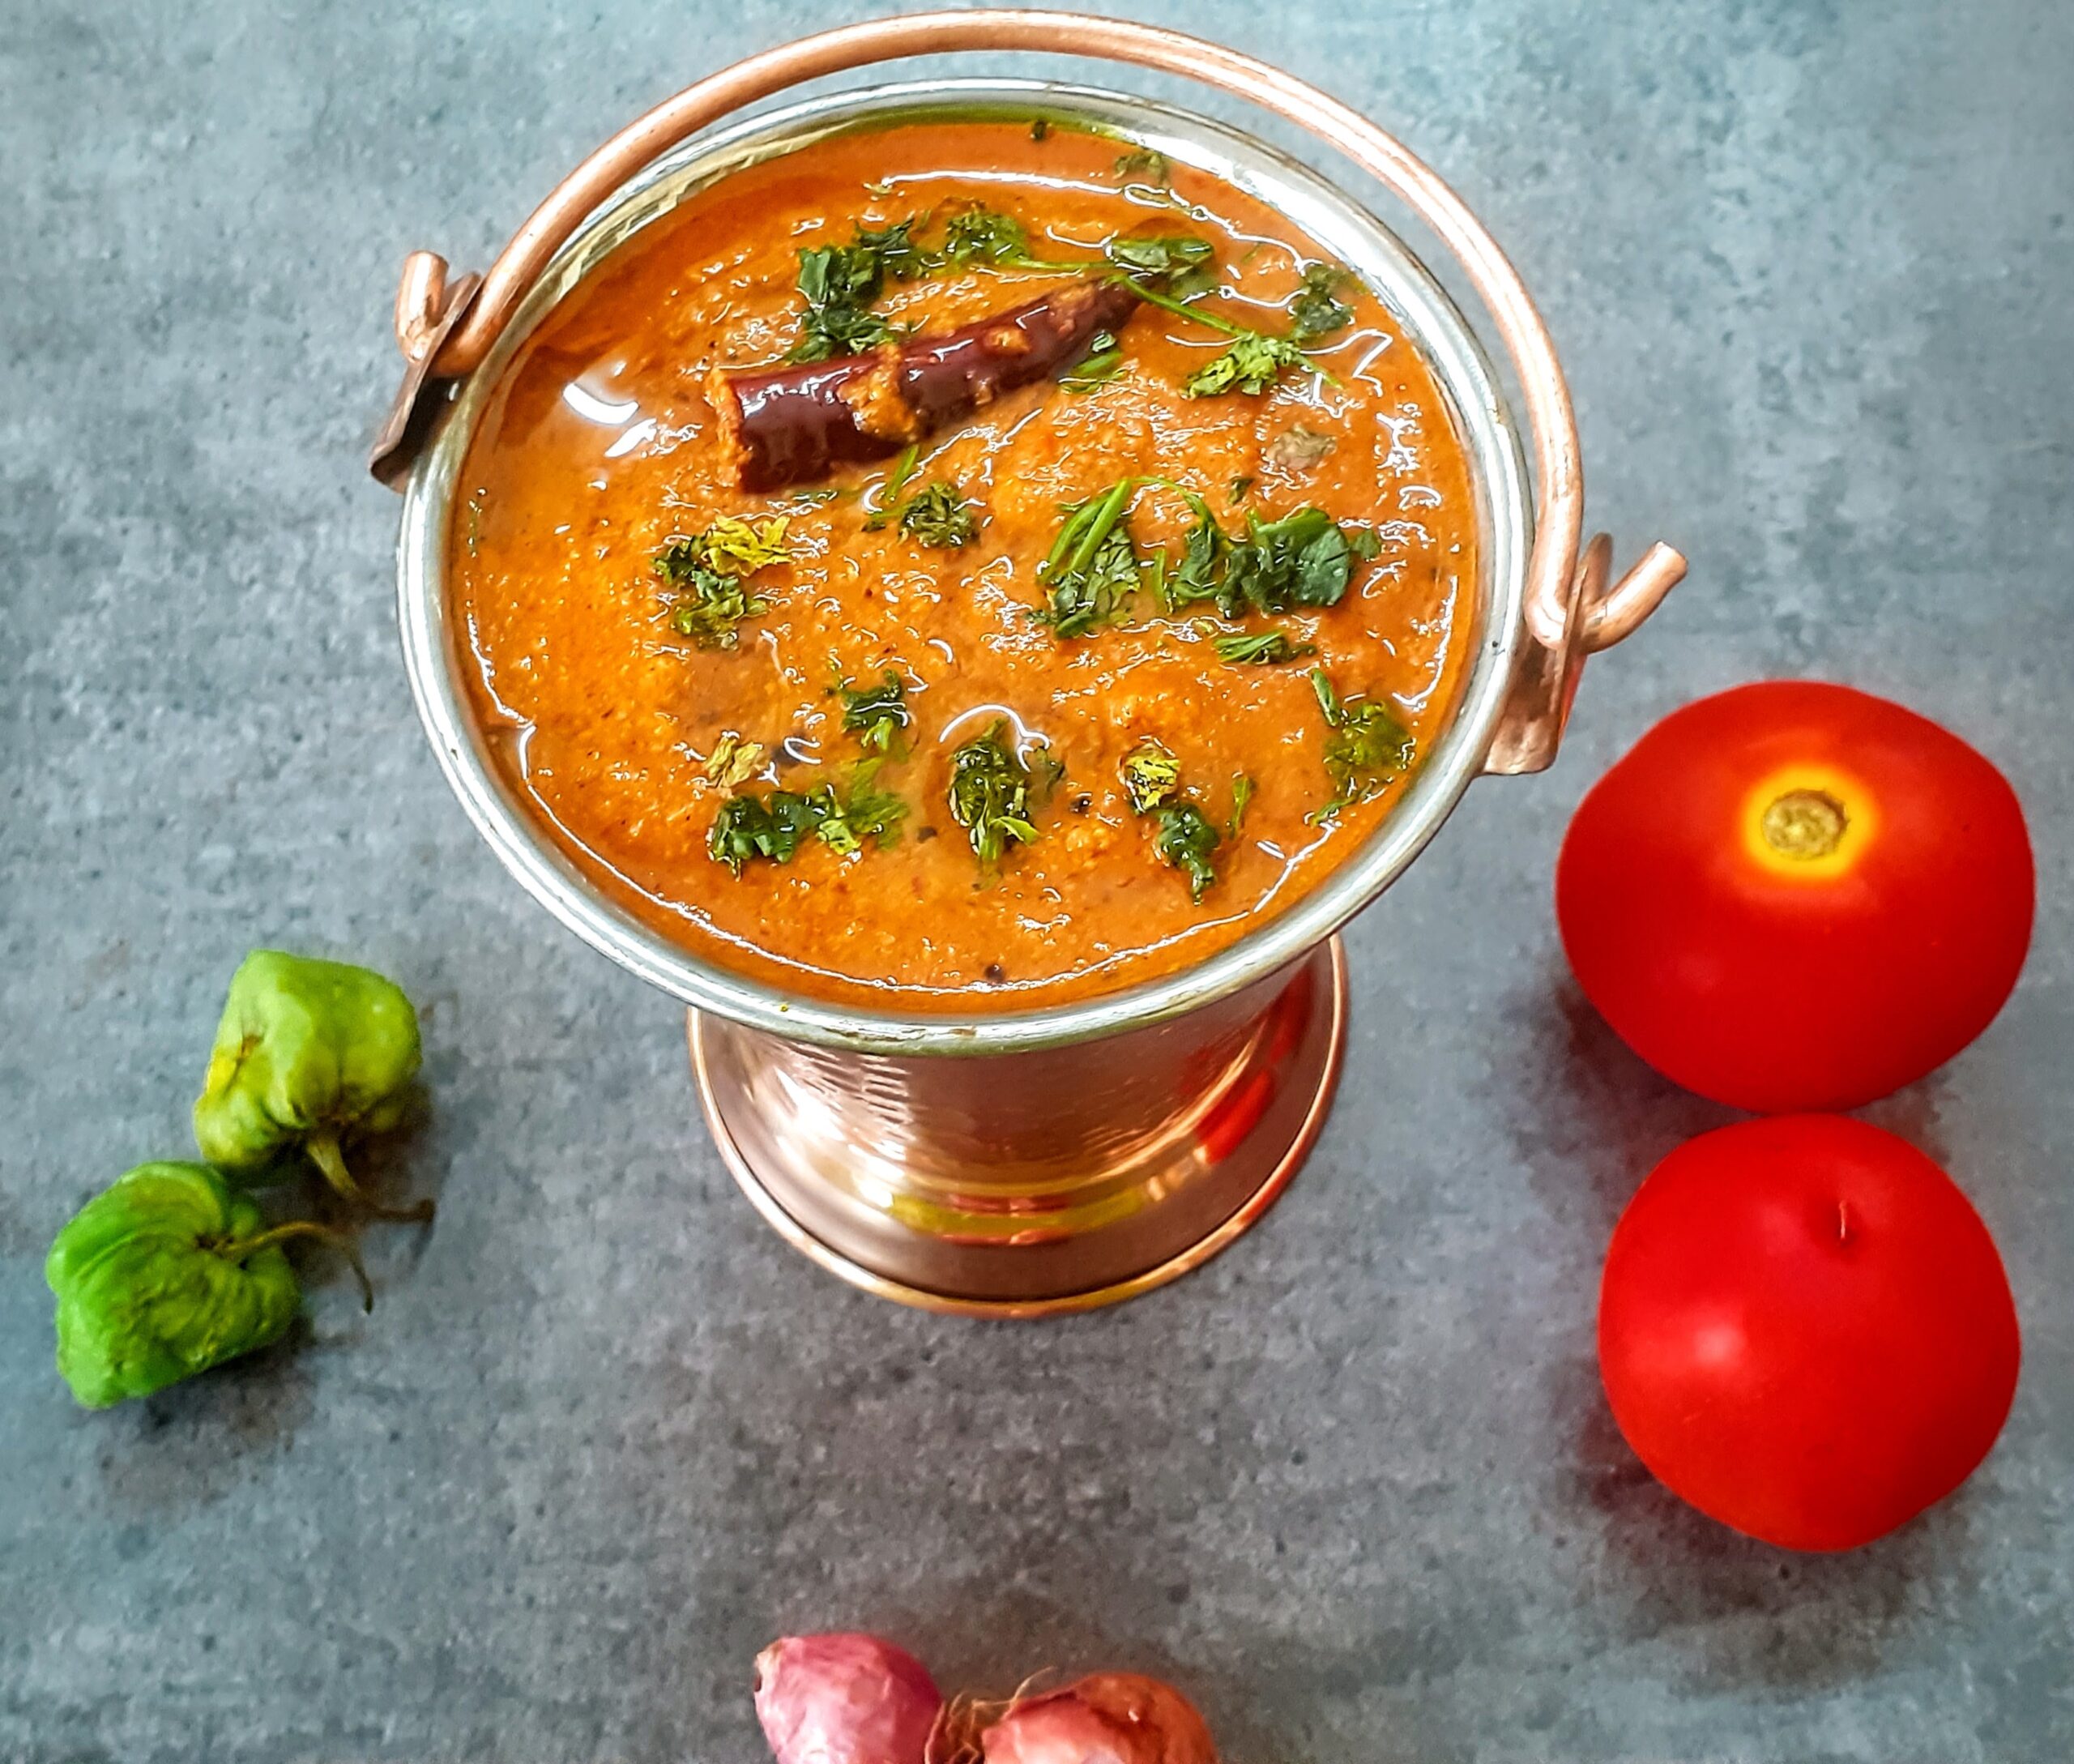
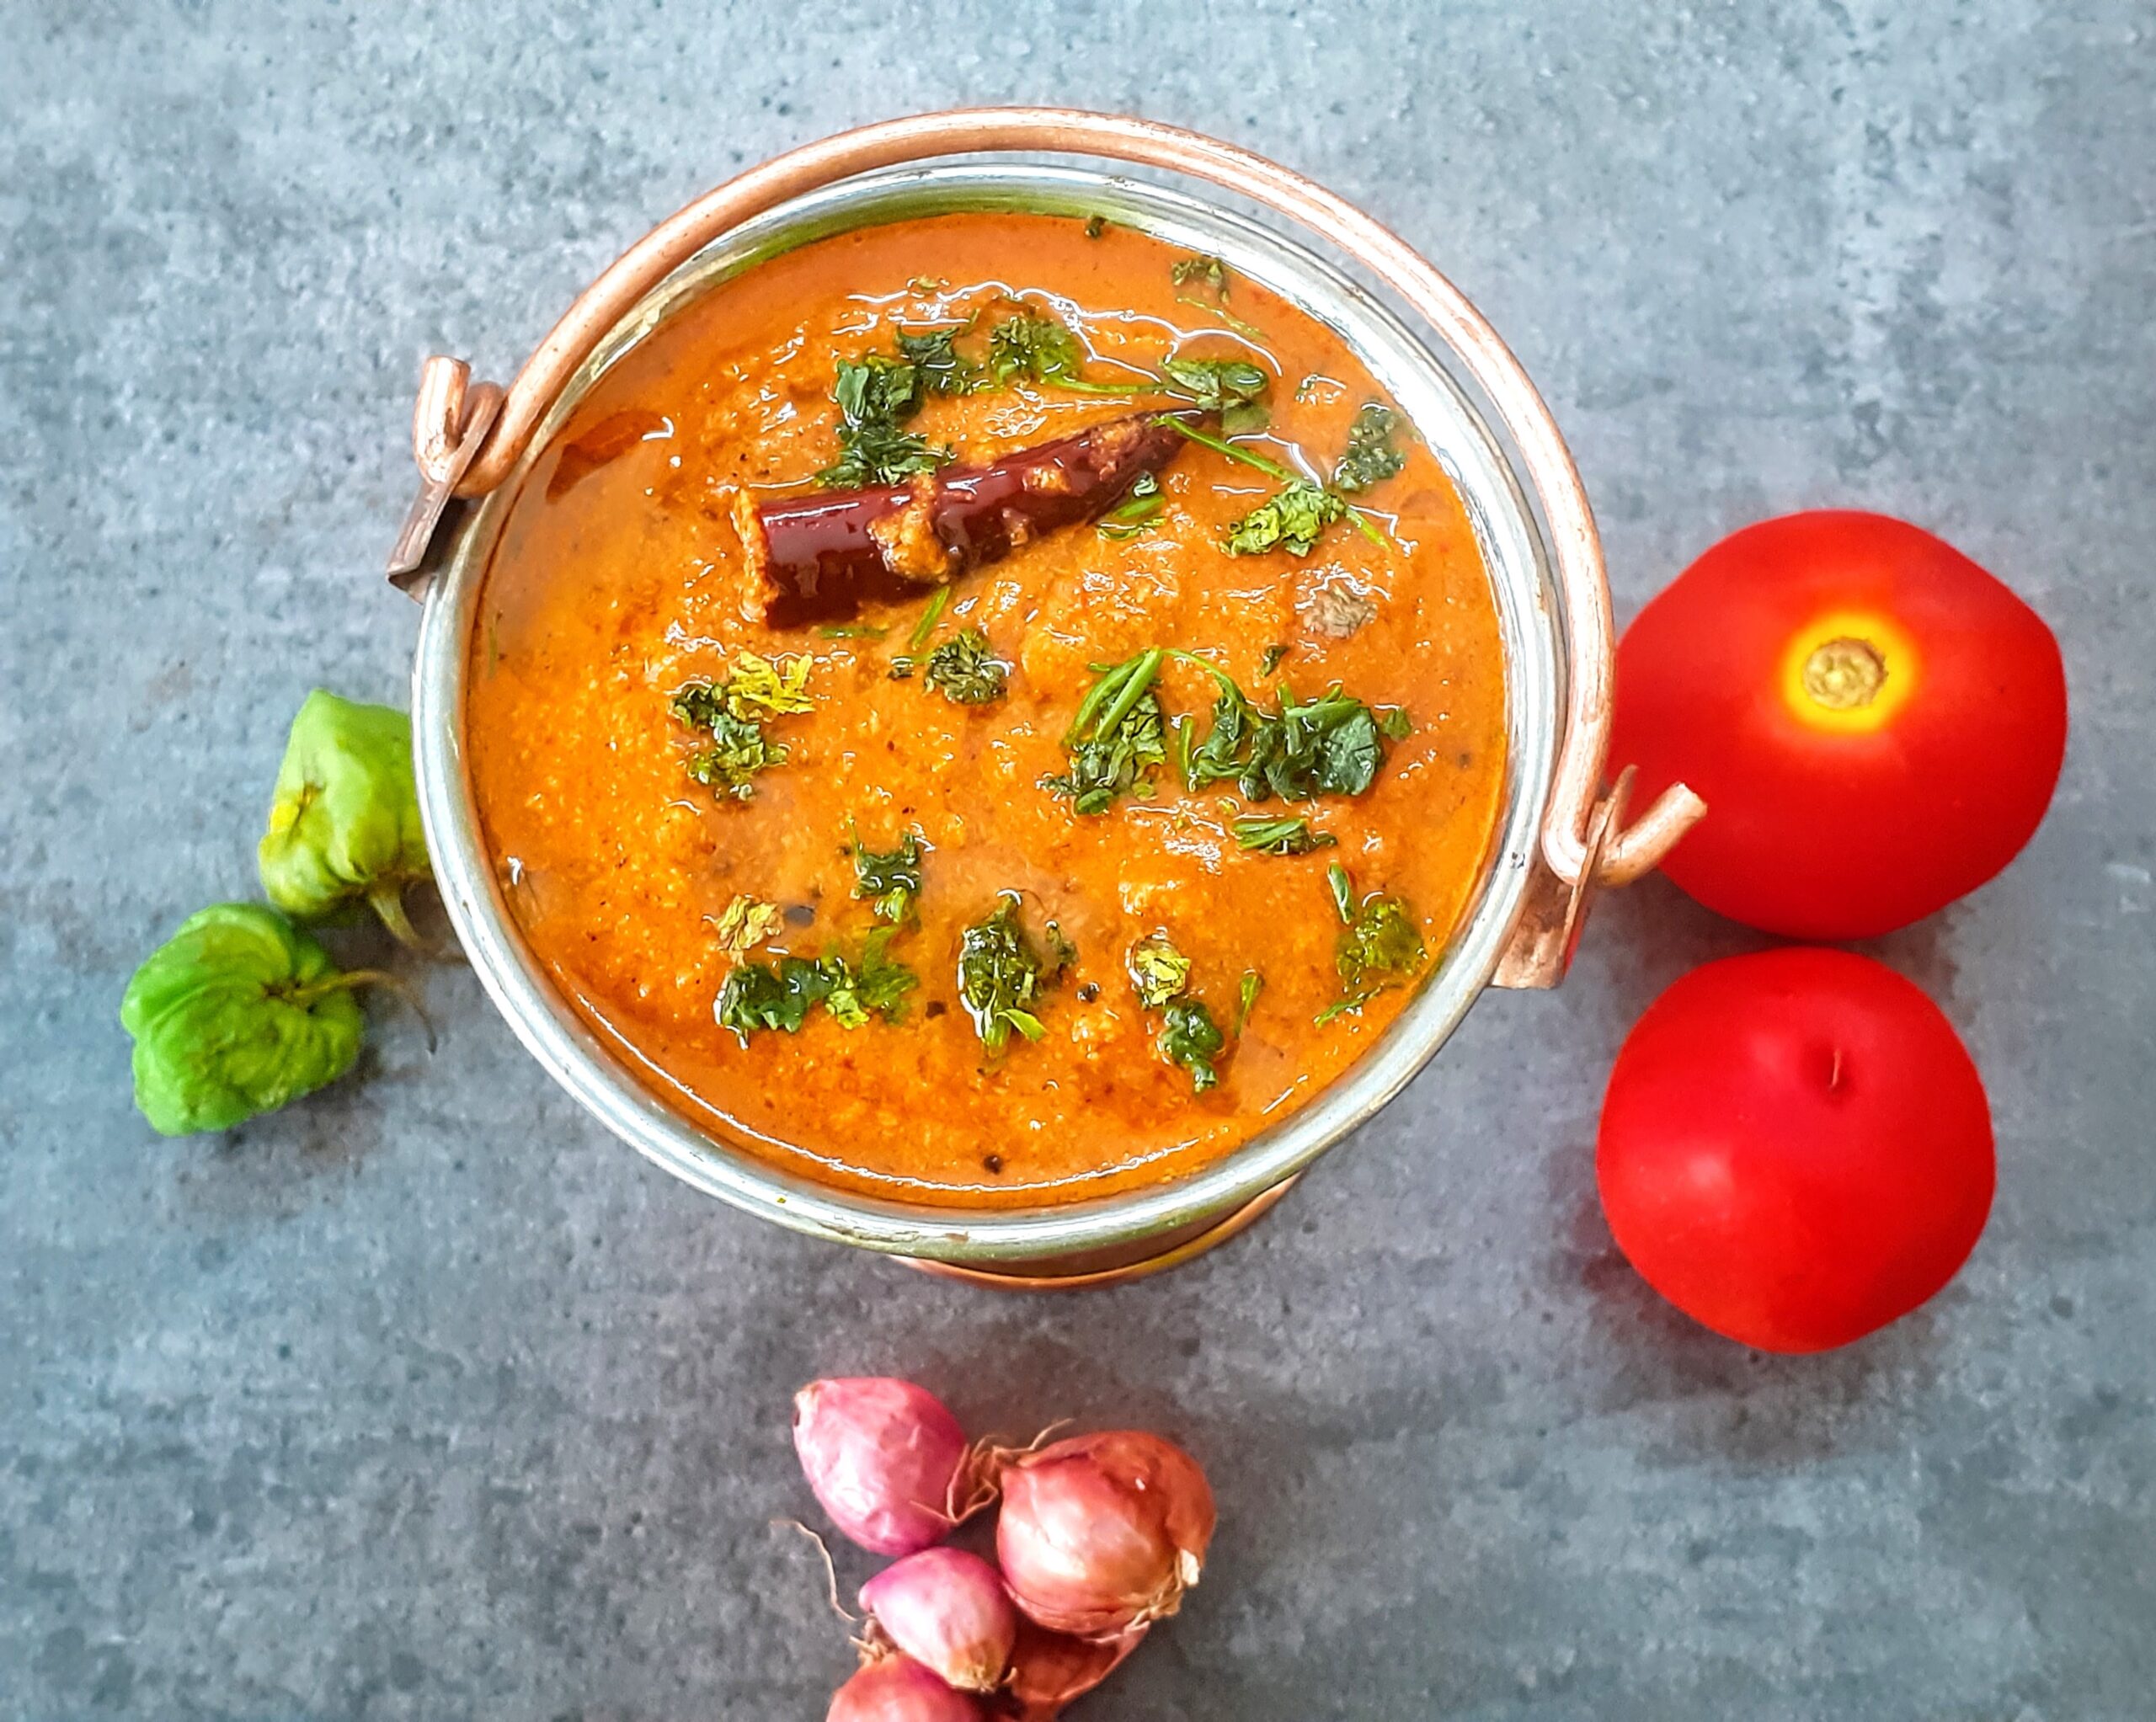
Thakkali Aati Kachina Kuzhambu
Thakkali Aati Kachina Kuzhambu is basically a Tomato curry, that goes on the sides with pretty much anything. Idli, Dosa, Parathas and Rice, all taste great with this. This a traditional recipe from the Kongunaad region of Tamil Nadu. I have deviated a little from the original recipe, a few addition/deletion of spices and condiments. The rich taste and flavour of tomatoes and the texture given by coconut, makes this curry a winner.
This curry is different from a chutney or sambar, in its basic ingredients. The consistency may be that of Sambar, but there is no dal used in this curry. Just three ingredients Shallots(Sambar onions), Tomatoes,Coconut, apart from other spices. Even better is the fact that you can store it in the fridge for a couple of days, and use as required.
If you have been following the blog, then you know by now what a tomato addict I am, and I just can’t cook without them. Anyone on the same page as me? Infact, in my social media handle I have spoken many times about my insecurity of tomatoes getting over. So much that i keep stocking excess of them. And this stocking has become excess during the pandemic lockdown. So every now and then such Tomato gravies and chutney’s are made at my place to keep consuming them????.
While you are here check out other curry recipes on the blog like Chakki Ki Shak, Rasakalan, Miloni Baby Corn and Bell peppers Curry, Menthiya keerai Kootu, Mirch Ka salan, Dum Aloo Ajwaini, and more…
Here is the recipe for Thakkali Aati Kachina Kuzhambu-
Ingredients:
STEPWISE RECIPE FOLLOWS:
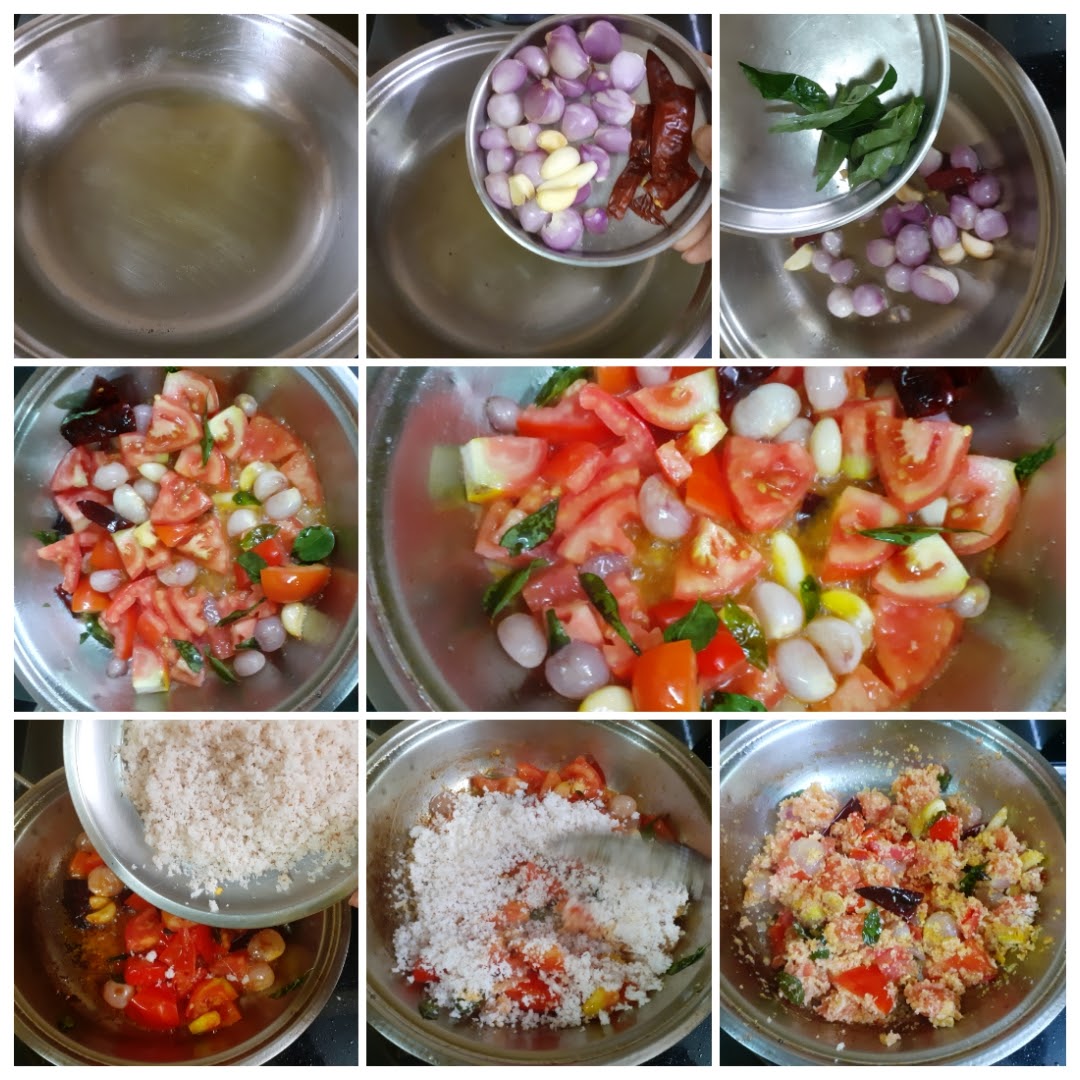
1. In a Pan/Kadai heat some oil for sauteing. Gently drop the shallots(half of them), garlic and red chillies and saute. Add curry leaves and continue to saute. When the onions start turning a light brown, add the tomatoes and saute until they turn mushy. Now add the coconut and saute for a minute or two. Put off the flame and cool the mixture.
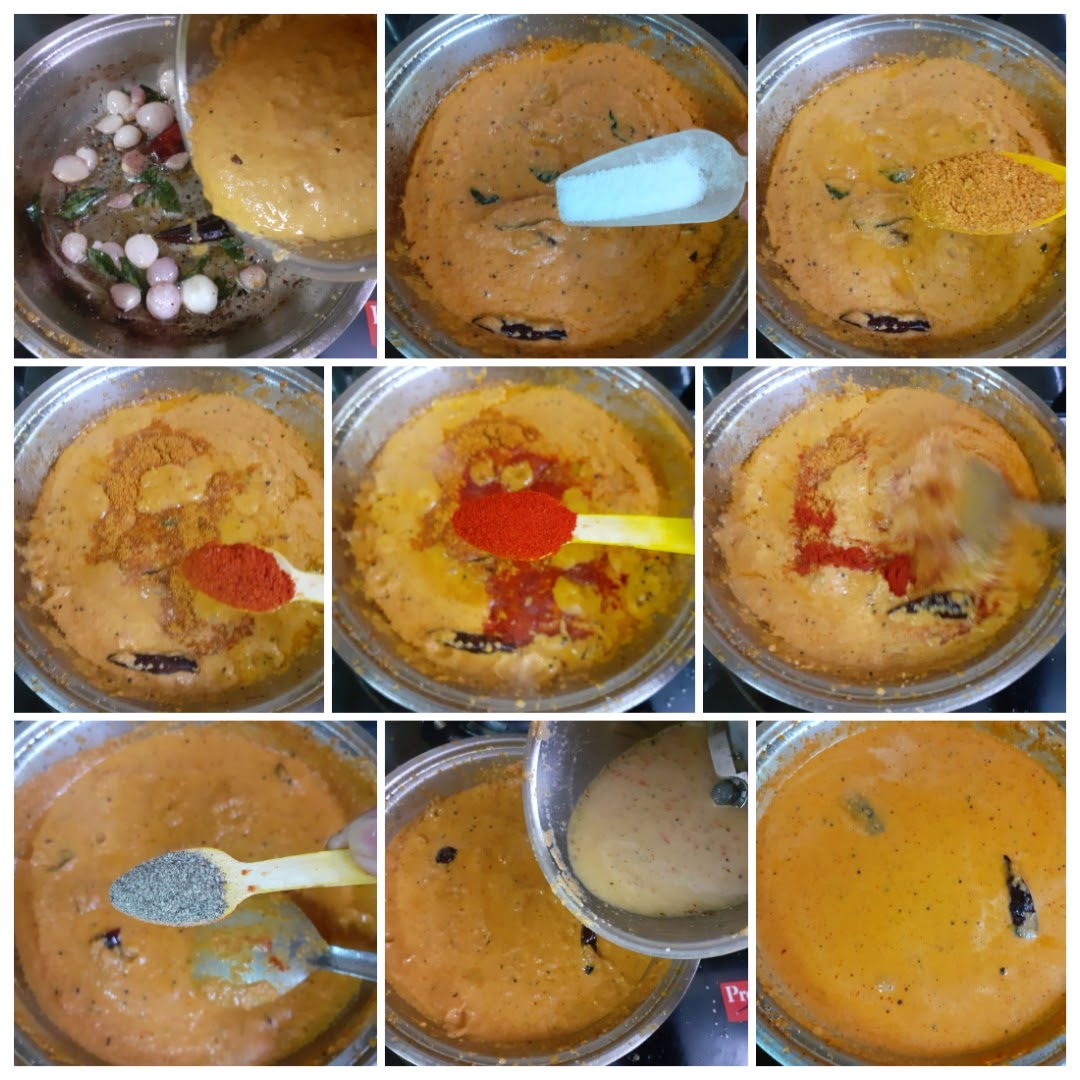
2. Once cool, grind this mixture to a smooth paste and keep aside. Now to the same kadai, add a little more oil and heat. Add mustard seeds, fenugreek seeds, dry red chilli and curry leaves. Add some asafoetida. Now add the remaining shallots and saute until light brown.

3. Now add the prepared tomato paste. Also add salt, sambar powder, red chilli powder(regular), kashmiri red chilli powder, and mix well. Now add some pepper powder. Add about 2 cups water and allow the gravy to thicken. The final consistency of the gravy should be like Sambar.
NOTES:
1. Country tomatoes are the best variety for this recipe, as they are a little sour.
2. Instead of adding pepper powder later, once can add whole peppercorns while sauteing the onion and tomatoes.
3. This curry can be kept in the refrigerator for 3 days and warmed up as required.
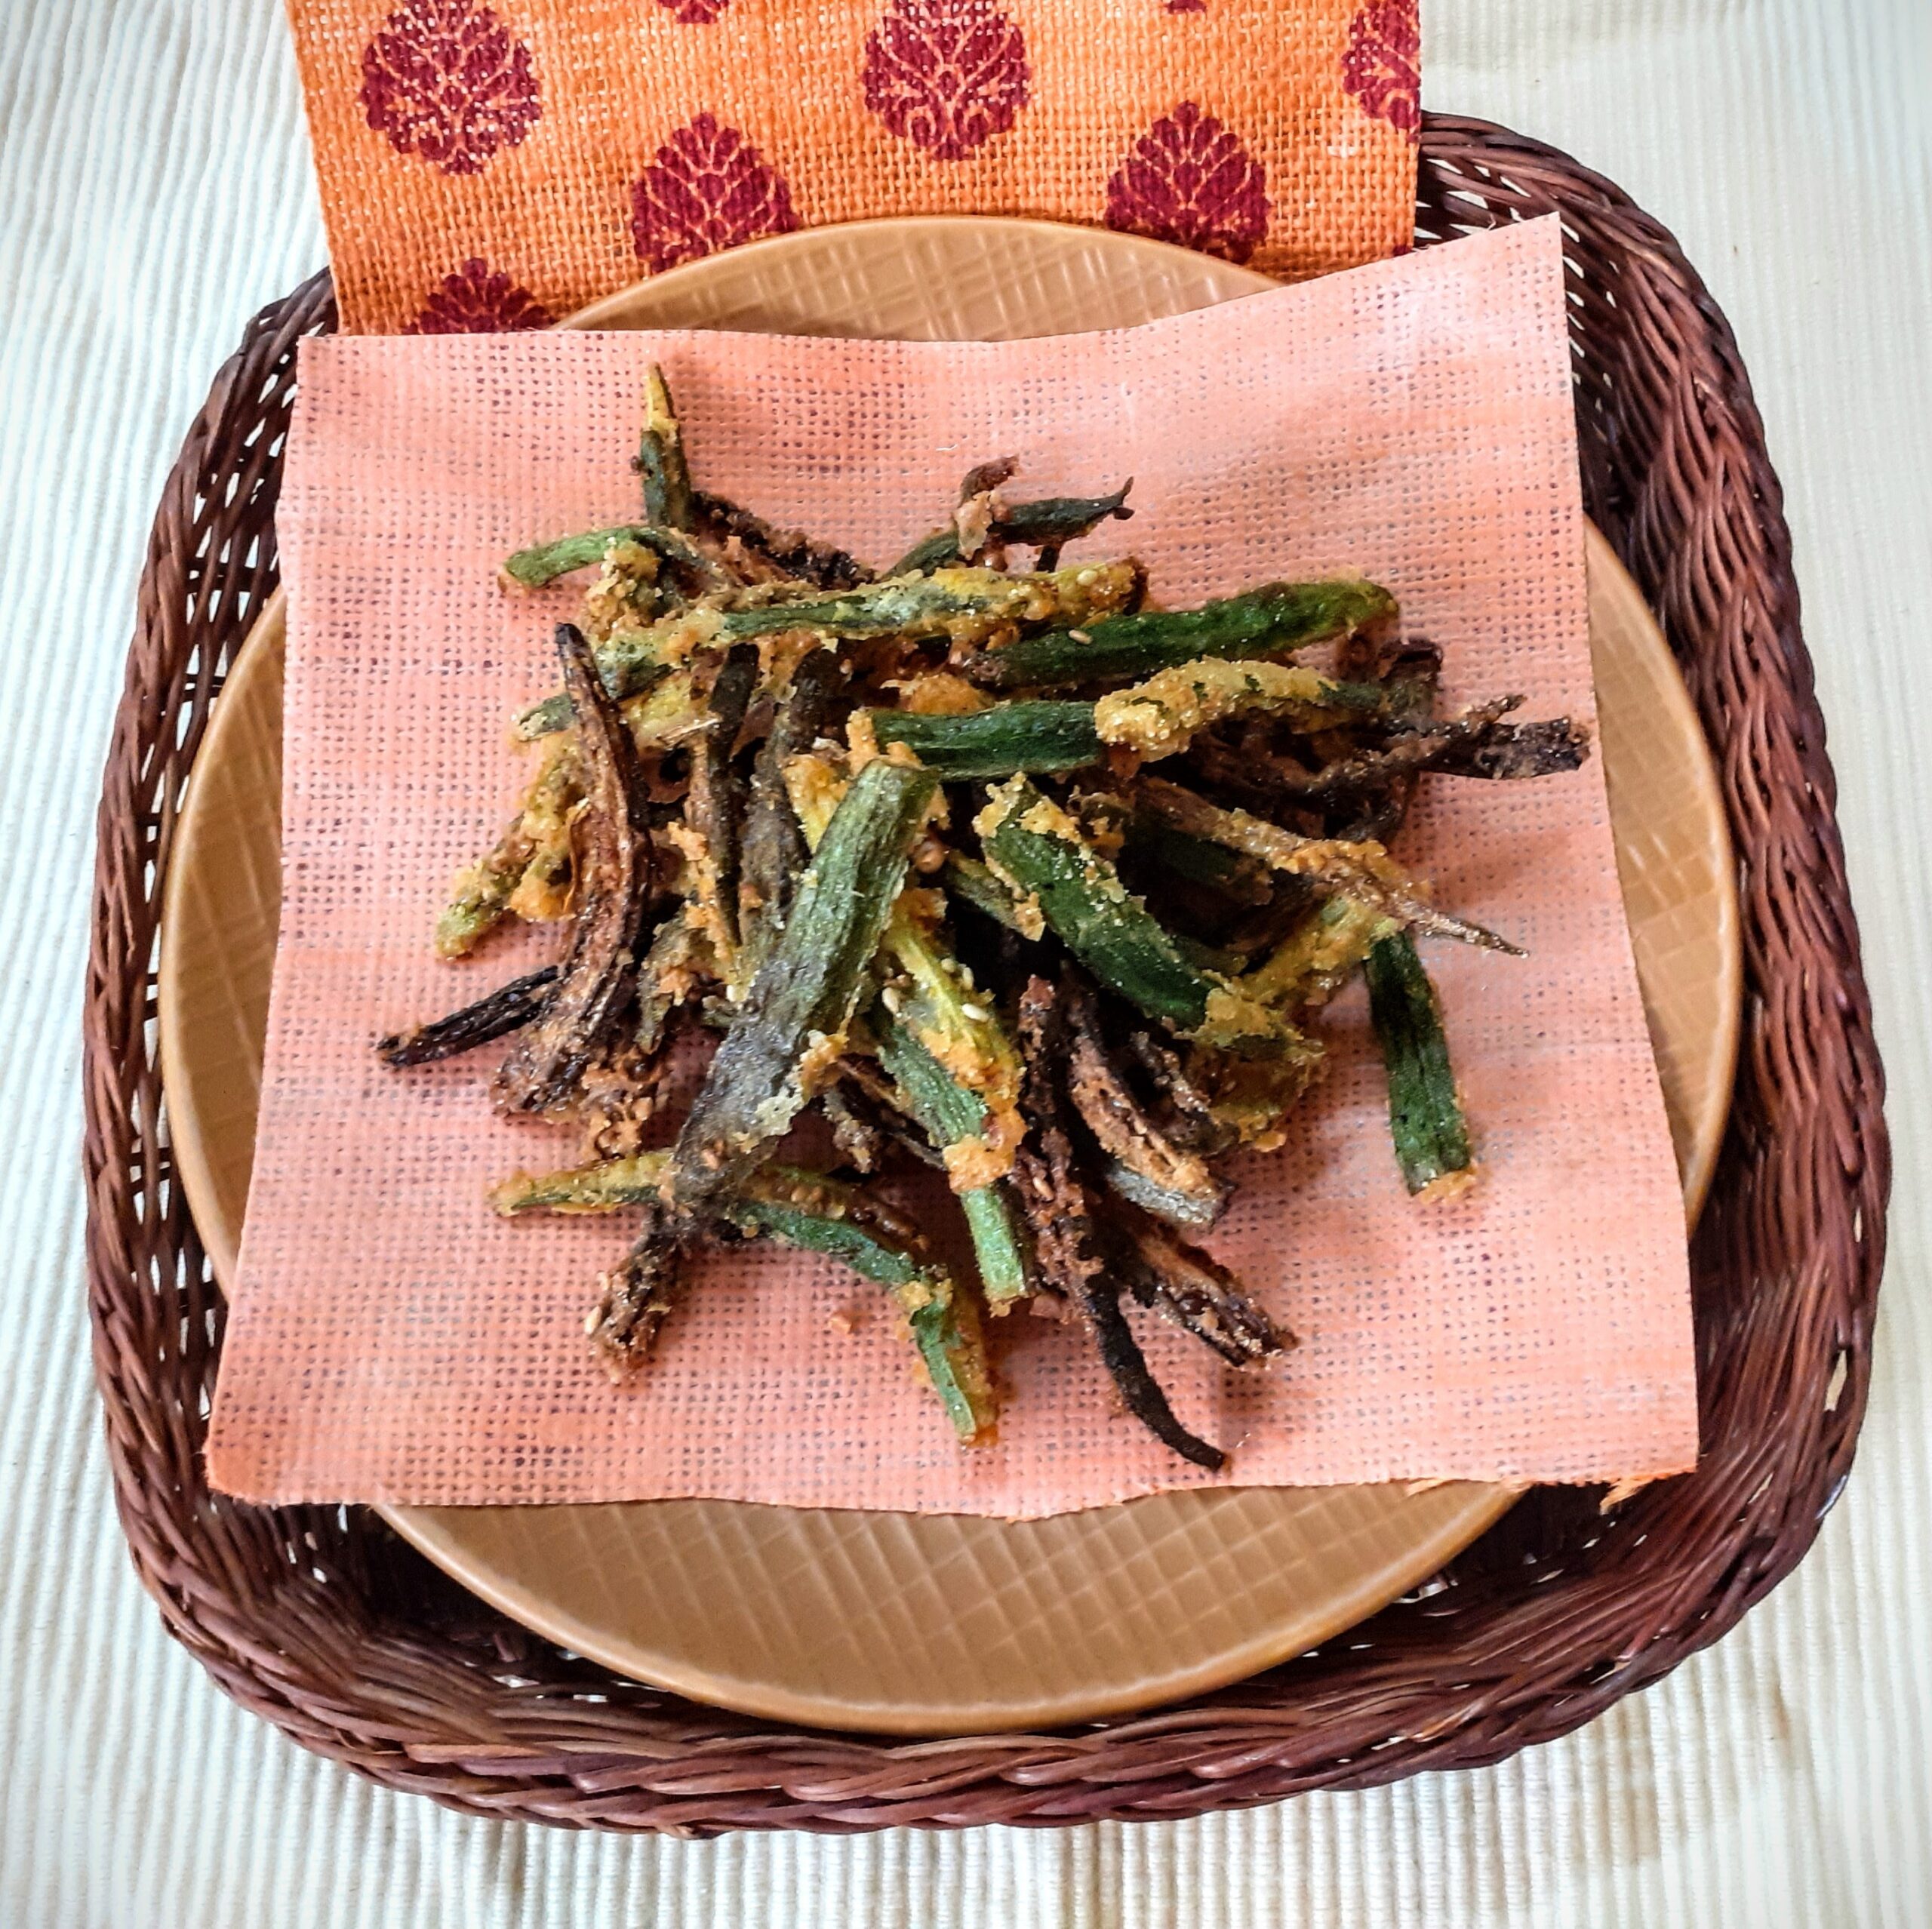
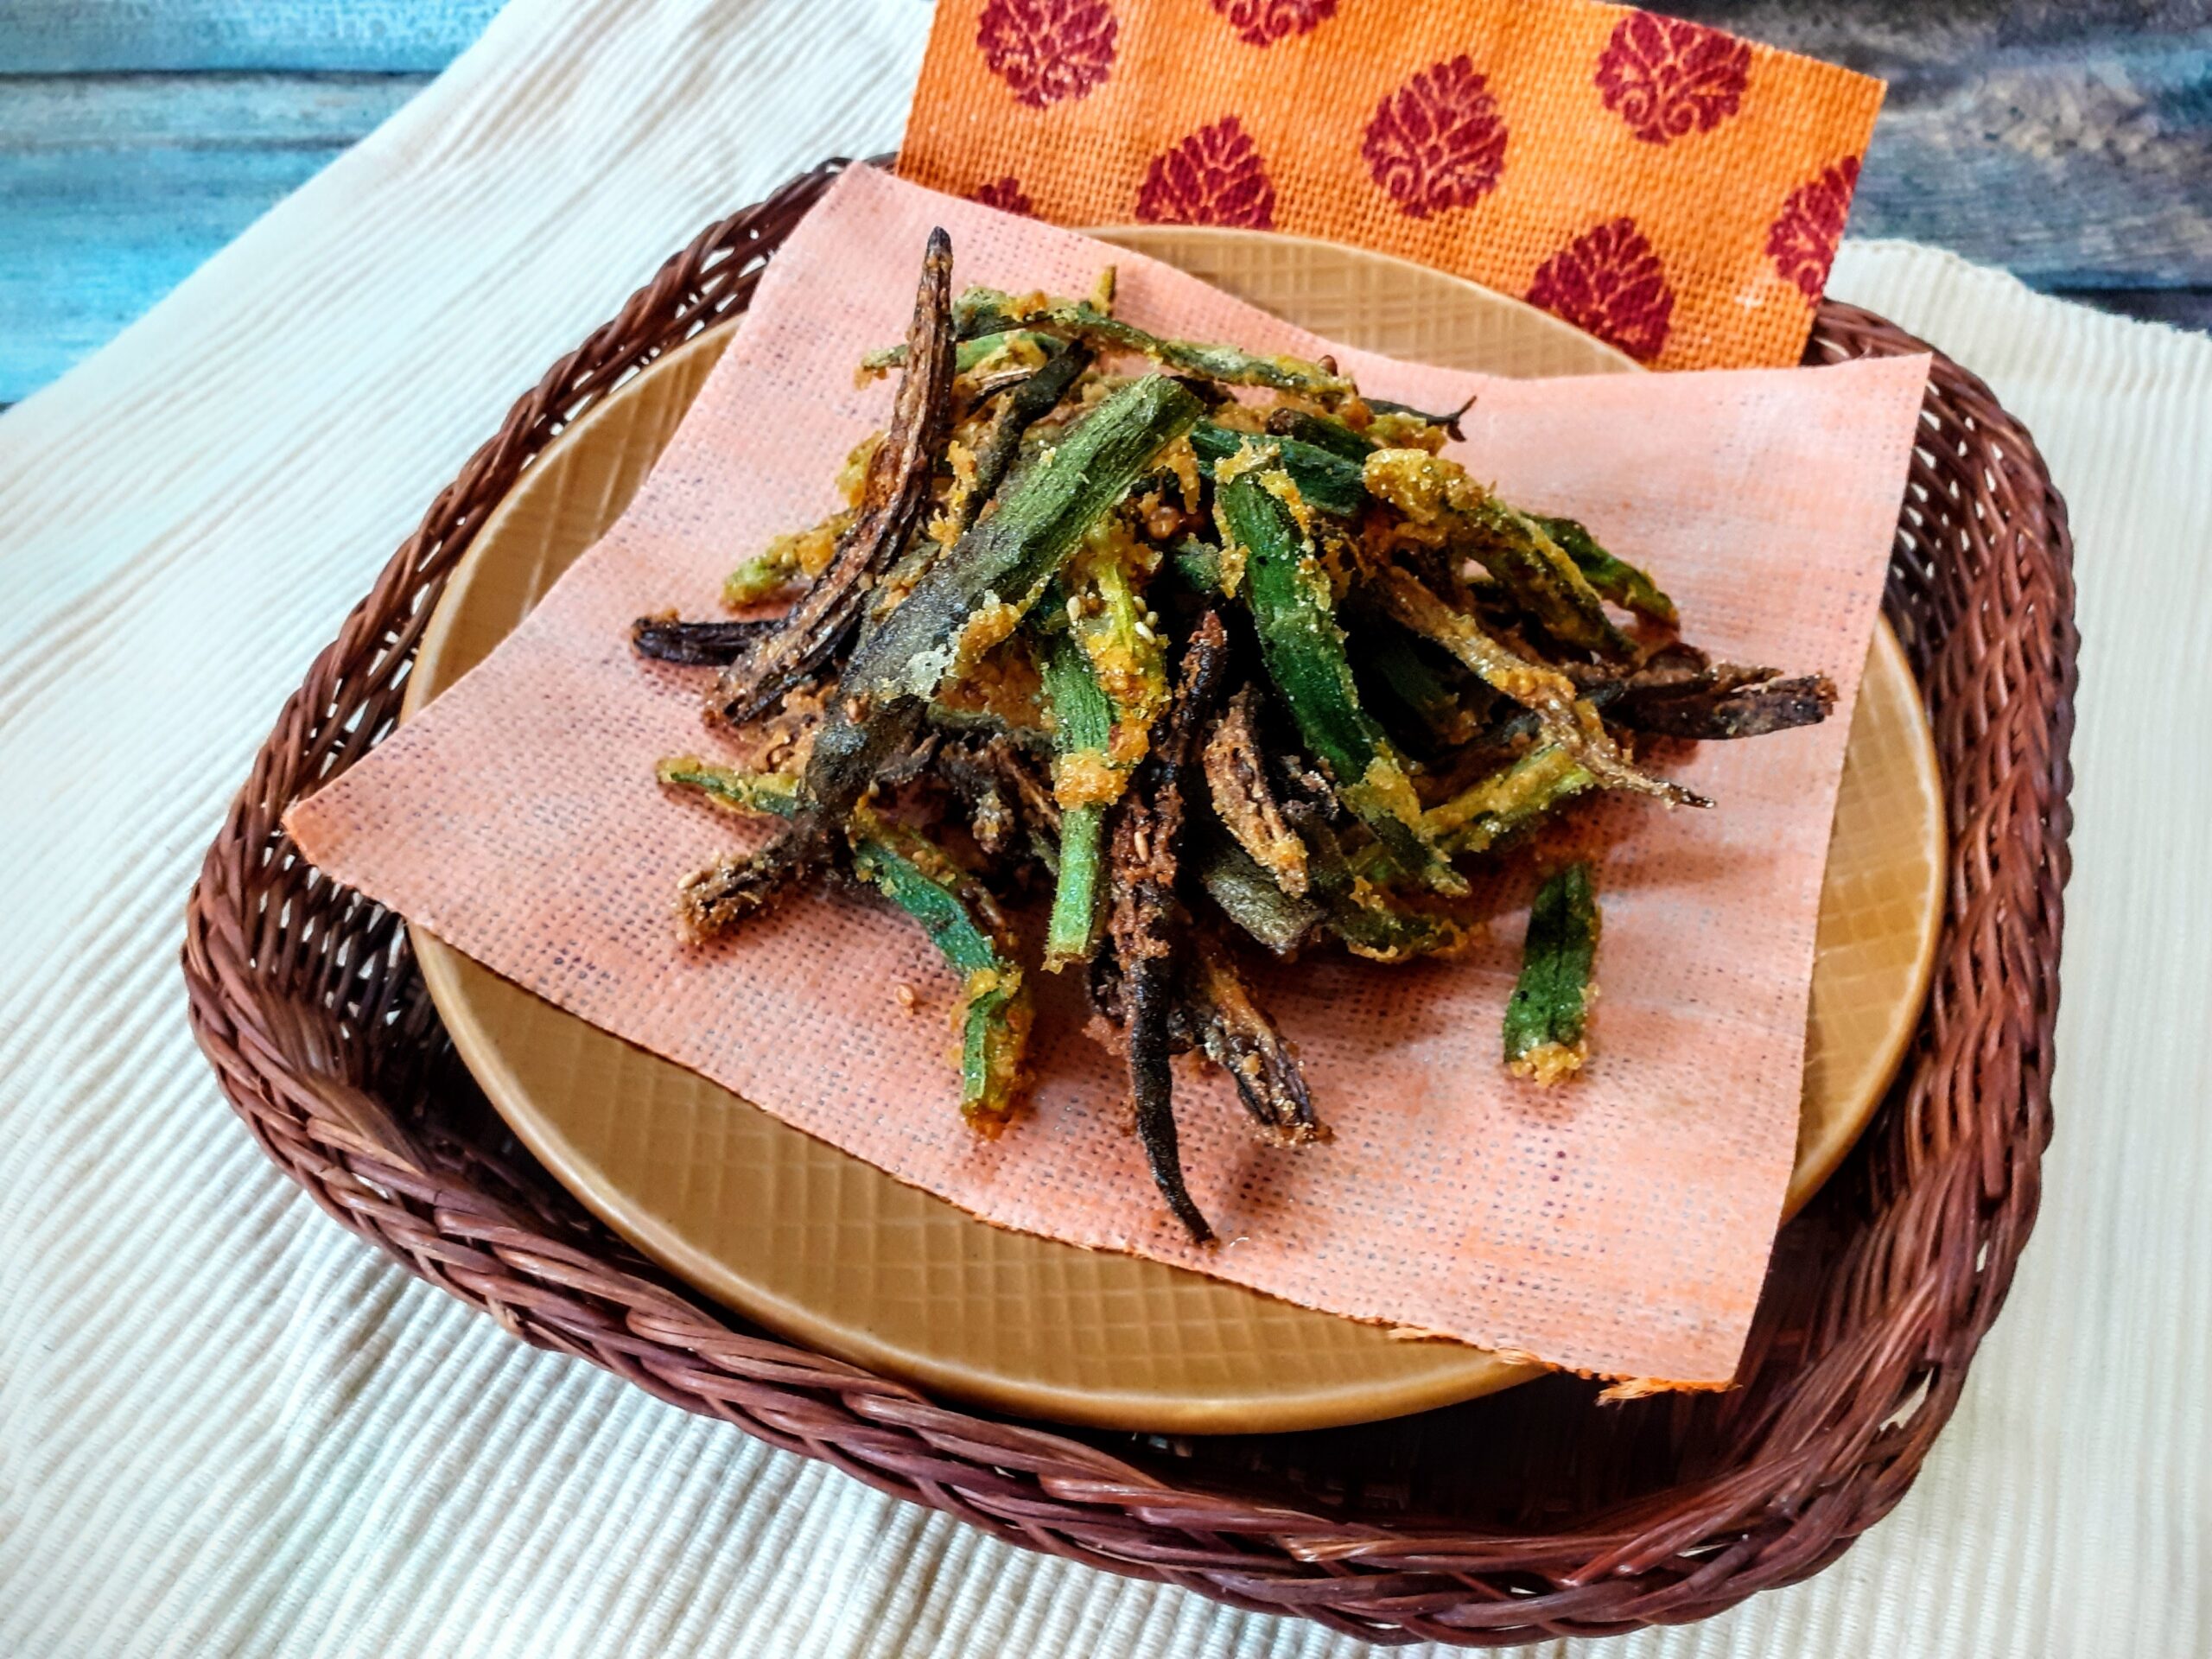
Kurkuri Bhindi/Karari Bhindi/Okra Fritters
Kurkuri Bhindi Or Karari Bhindi is an accompaniment served in most North Indian Thali’s and Buffet. It adds some crunch to the food, can be a starter or even a side dish. A south Indian version of this is available in most south Indian sweet and savory shops. The difference between the North and South Indian recipes is mainly the batter. The south Indian version uses far too much batter, whereas the North Indian version just about coats it. So mine is a fusion of both. While I have opted for less flour and North Indian Masala I have added Till/Sesame from the south Indian version, which gives a extra crunch and flavour. And why I like this version of bhindi/okra is that though it takes a long time to cut the Ladysfinger this way, this can stay fresh for a few days. Before serving just microwave it for 30 seconds and it become crunchy again. So people on the move and ones who love a hot meal after coming back from work, just invest sometime on a week day to make these crunchy fritters, and on a work day just make your self some Dal and Rice, for which the Kurkuri Bhindi is the perfect side dish. As I said, just microwave it for 30 seconds.
Without much detailing getting in to the recipe directly. While you are here check out my other Subji and curry recipes like Paneer Khurchan, South Indian Kurma, Methi wale Baingan, Roasted Eggplant 2 ways, Paneer Mava Curry, Corn Palak Subji, Chakki Ki Shak, Rasakalan and more…
Here’s the recipe for Kurkuri Bhindi–
Ingredients:
Bhindi/Okra 400 gm slit lengthwise ( refer picture)
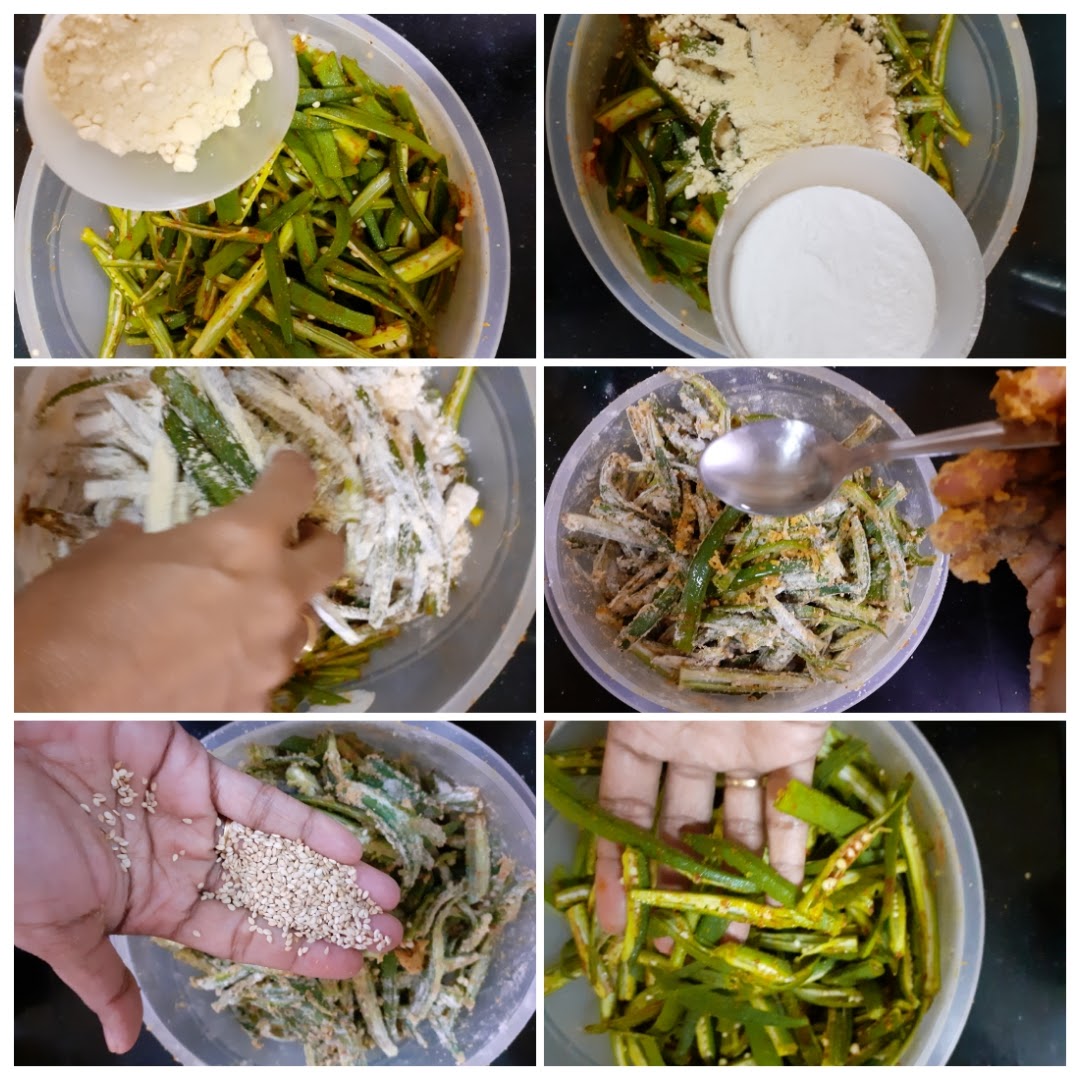
Rice flour 1/2 cup
Besan/ Chickpea flour 1/2 cup
Salt as required
Turmeric powder 1/2 tsp
Red Chilli Powder regular 1 tsp
Red chilli powder Kashmiri 1 tsp
Coriander powder 1 tsp
Fennel Powder 1 tsp
Chaat masala 1/2 tsp
Sesame seeds 1 tsp
Lemon juice 2 tbsp
Oil for the batter 1 tbsp
Oil for deep frying
Directions:
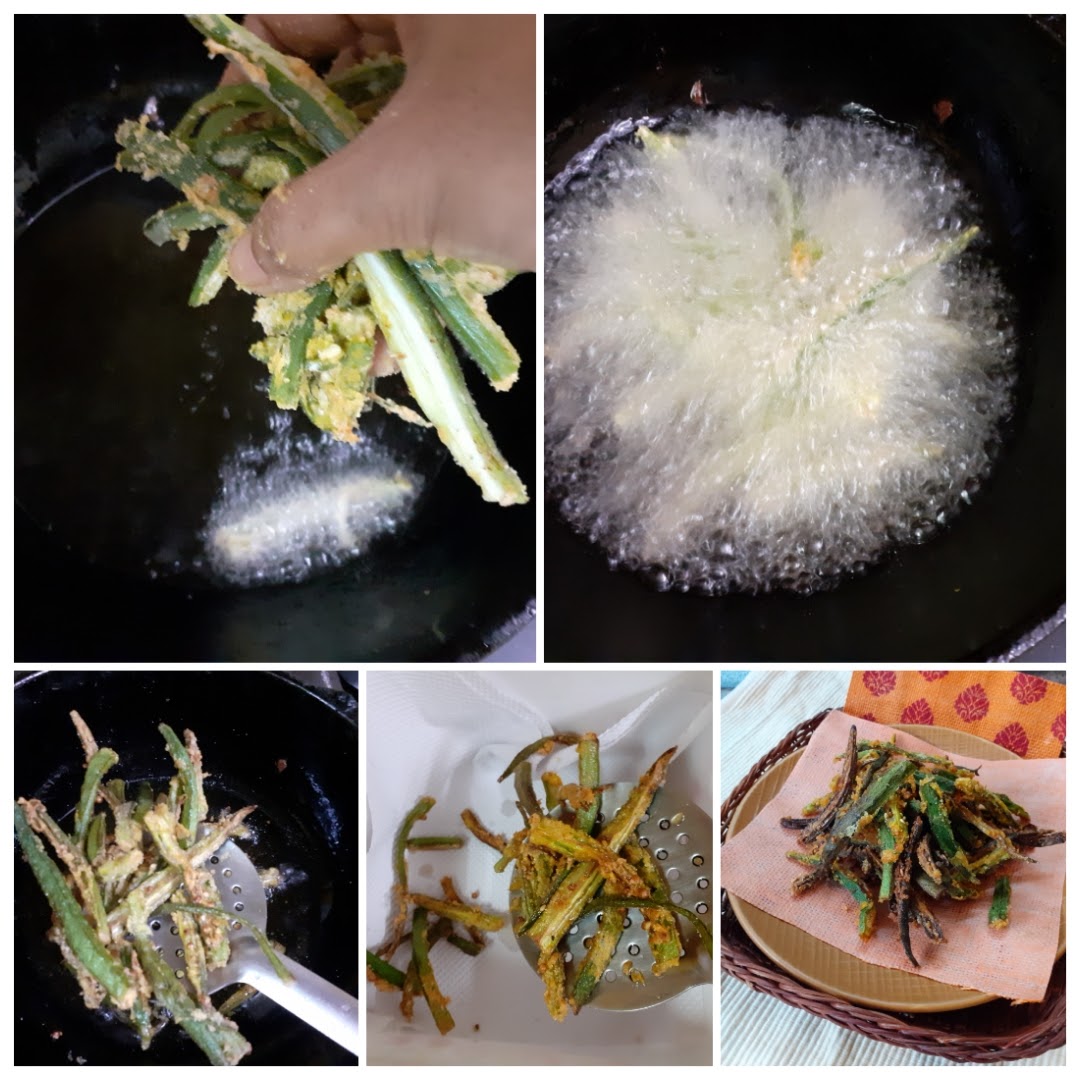
Take the split Okra/Bhindi/Ladysfinger in a large bowl and add all the dry spice powders. Add the lemon juice and mix well with your fingers to spread the masalas evenly. Allow to marinate for 30 minutes. Now add both the flours and mix well. Drizzle 1 tbsp oil and mix again nicely with fingers. Heat oil in a Kadai. When a little batter dropped in the oil sizzles immediately, the oil is ready for frying. Take a few pieces of Okra at a time and drop them gently into the oil. Fry until the Bhindi turn light brown. The may seem limp, but as they cool they firm up and become crunchy. The Kurkuri Bhindi is ready to serve with your favourite comfort food, or just as a snack.
STEPWISE RECIPE FOLLOWS:
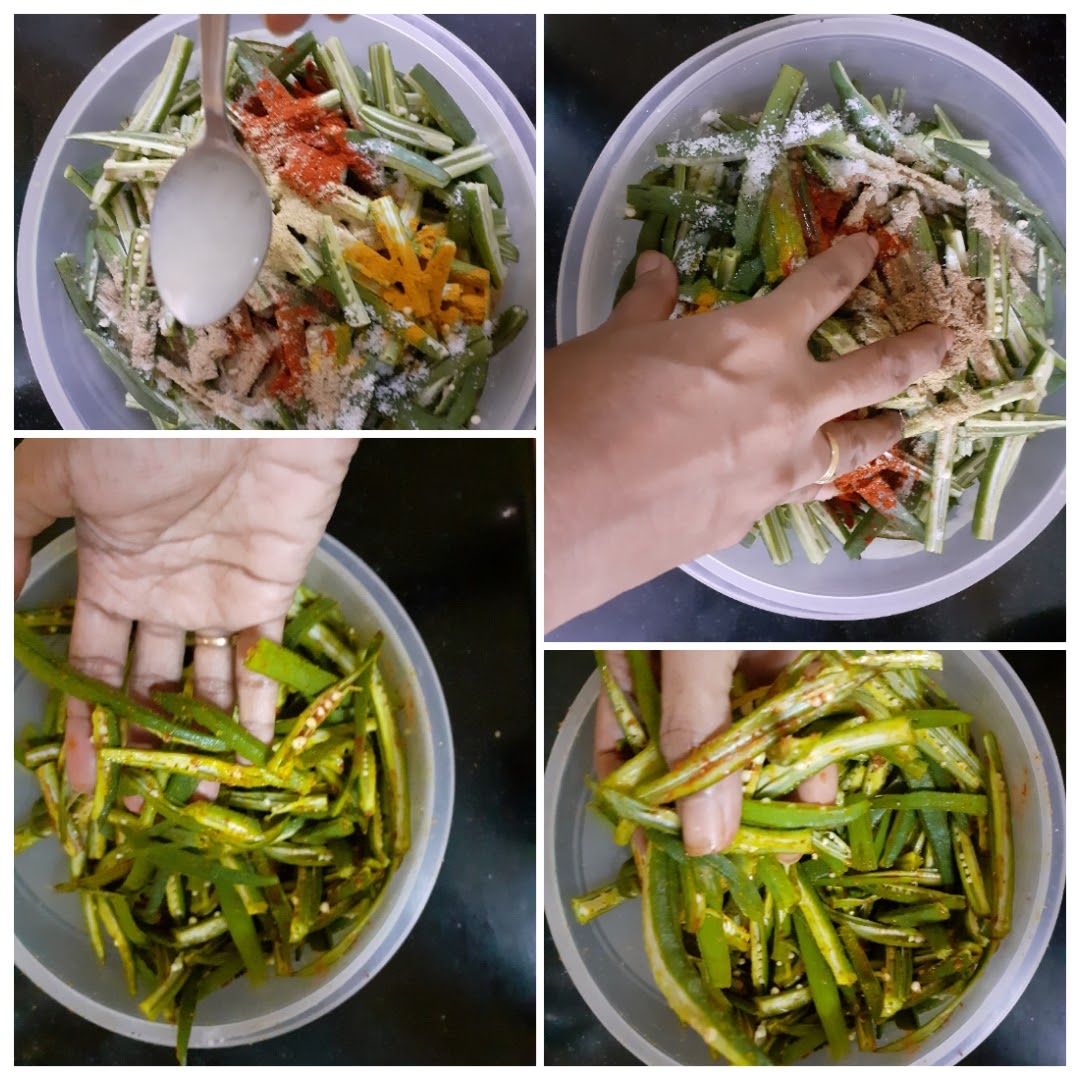
1. Take the split Okra/Bhindi/Ladysfinger in a large bowl and add all the dry spice powders.
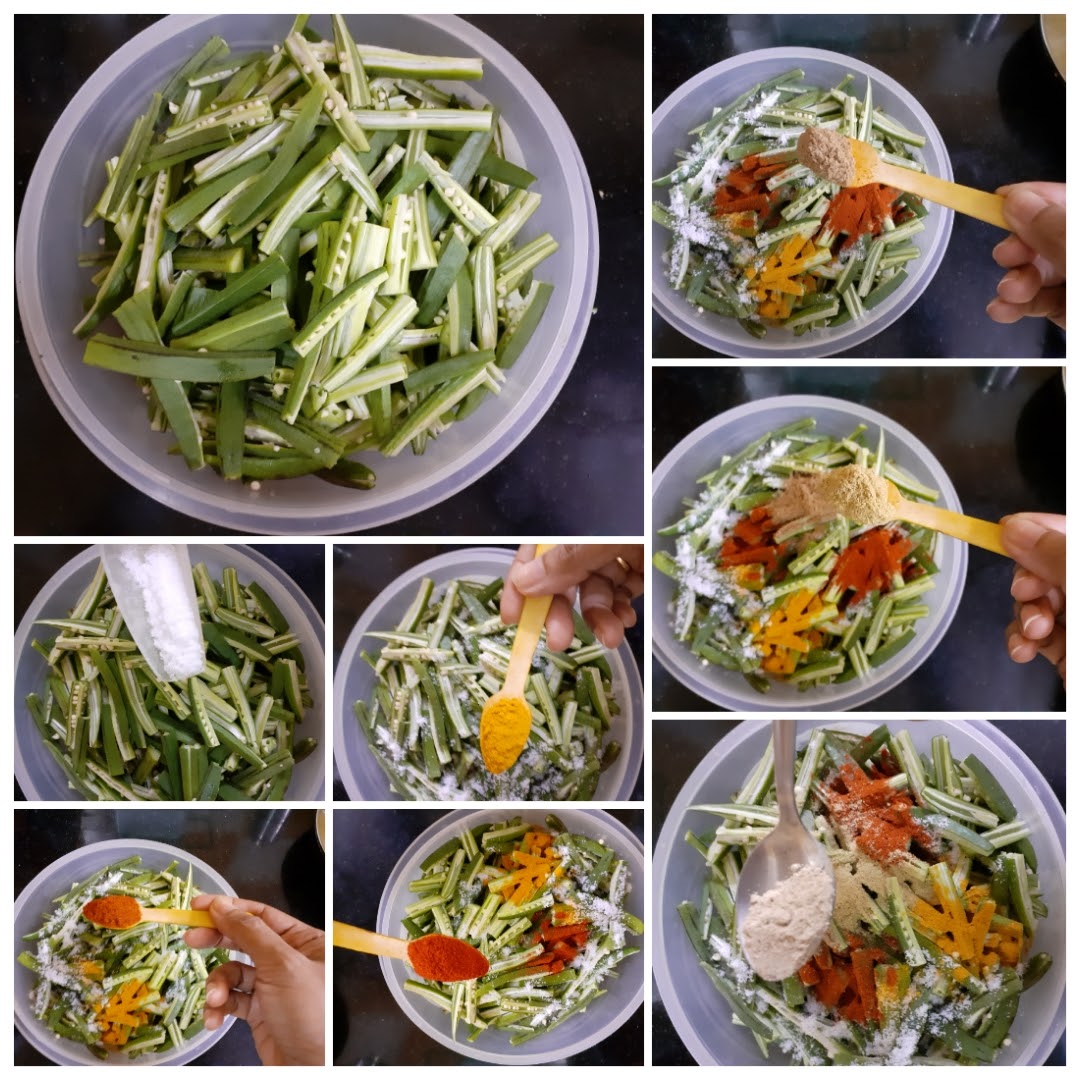
2. Add the lemon juice and mix well with your fingers to spread the masalas evenly. Allow to marinate for 30 minutes.
3. Now add both the flours and mix well. Add Sesame seeds. Drizzle 1 tbsp oil and mix again nicely with fingers.
4. Heat oil in a Kadai. When a little batter dropped in the oil sizzles immediately, the oil is ready for frying. Take a few pieces of Okra at a time and drop them gently into the oil. Fry until the Bhindi turn light brown. The may seem limp, but as they cool they firm up and become crunchy. The Kurkuri Bhindi is ready to serve with your favourite comfort food, or just as a snack.
NOTES:
1. Some recipes recommend removing the seeds from the Bhindi. I have skipped it. If the seeds are tender, they can be retained. Few that may remain in the oil after frying can be filtered and removed.
2. While selecting the Okra’s choose tiny to middle sized ones and not the huge ones.
3. Always check the heat of the oil by gently dropping some batter into it. When a little batter dropped in the oil sizzles immediately, the oil is ready for frying.
If you tried this recipe and liked it please comment below. I would love to hear from you. If you have a query about the recipe email us and ill respond as soon as I can.
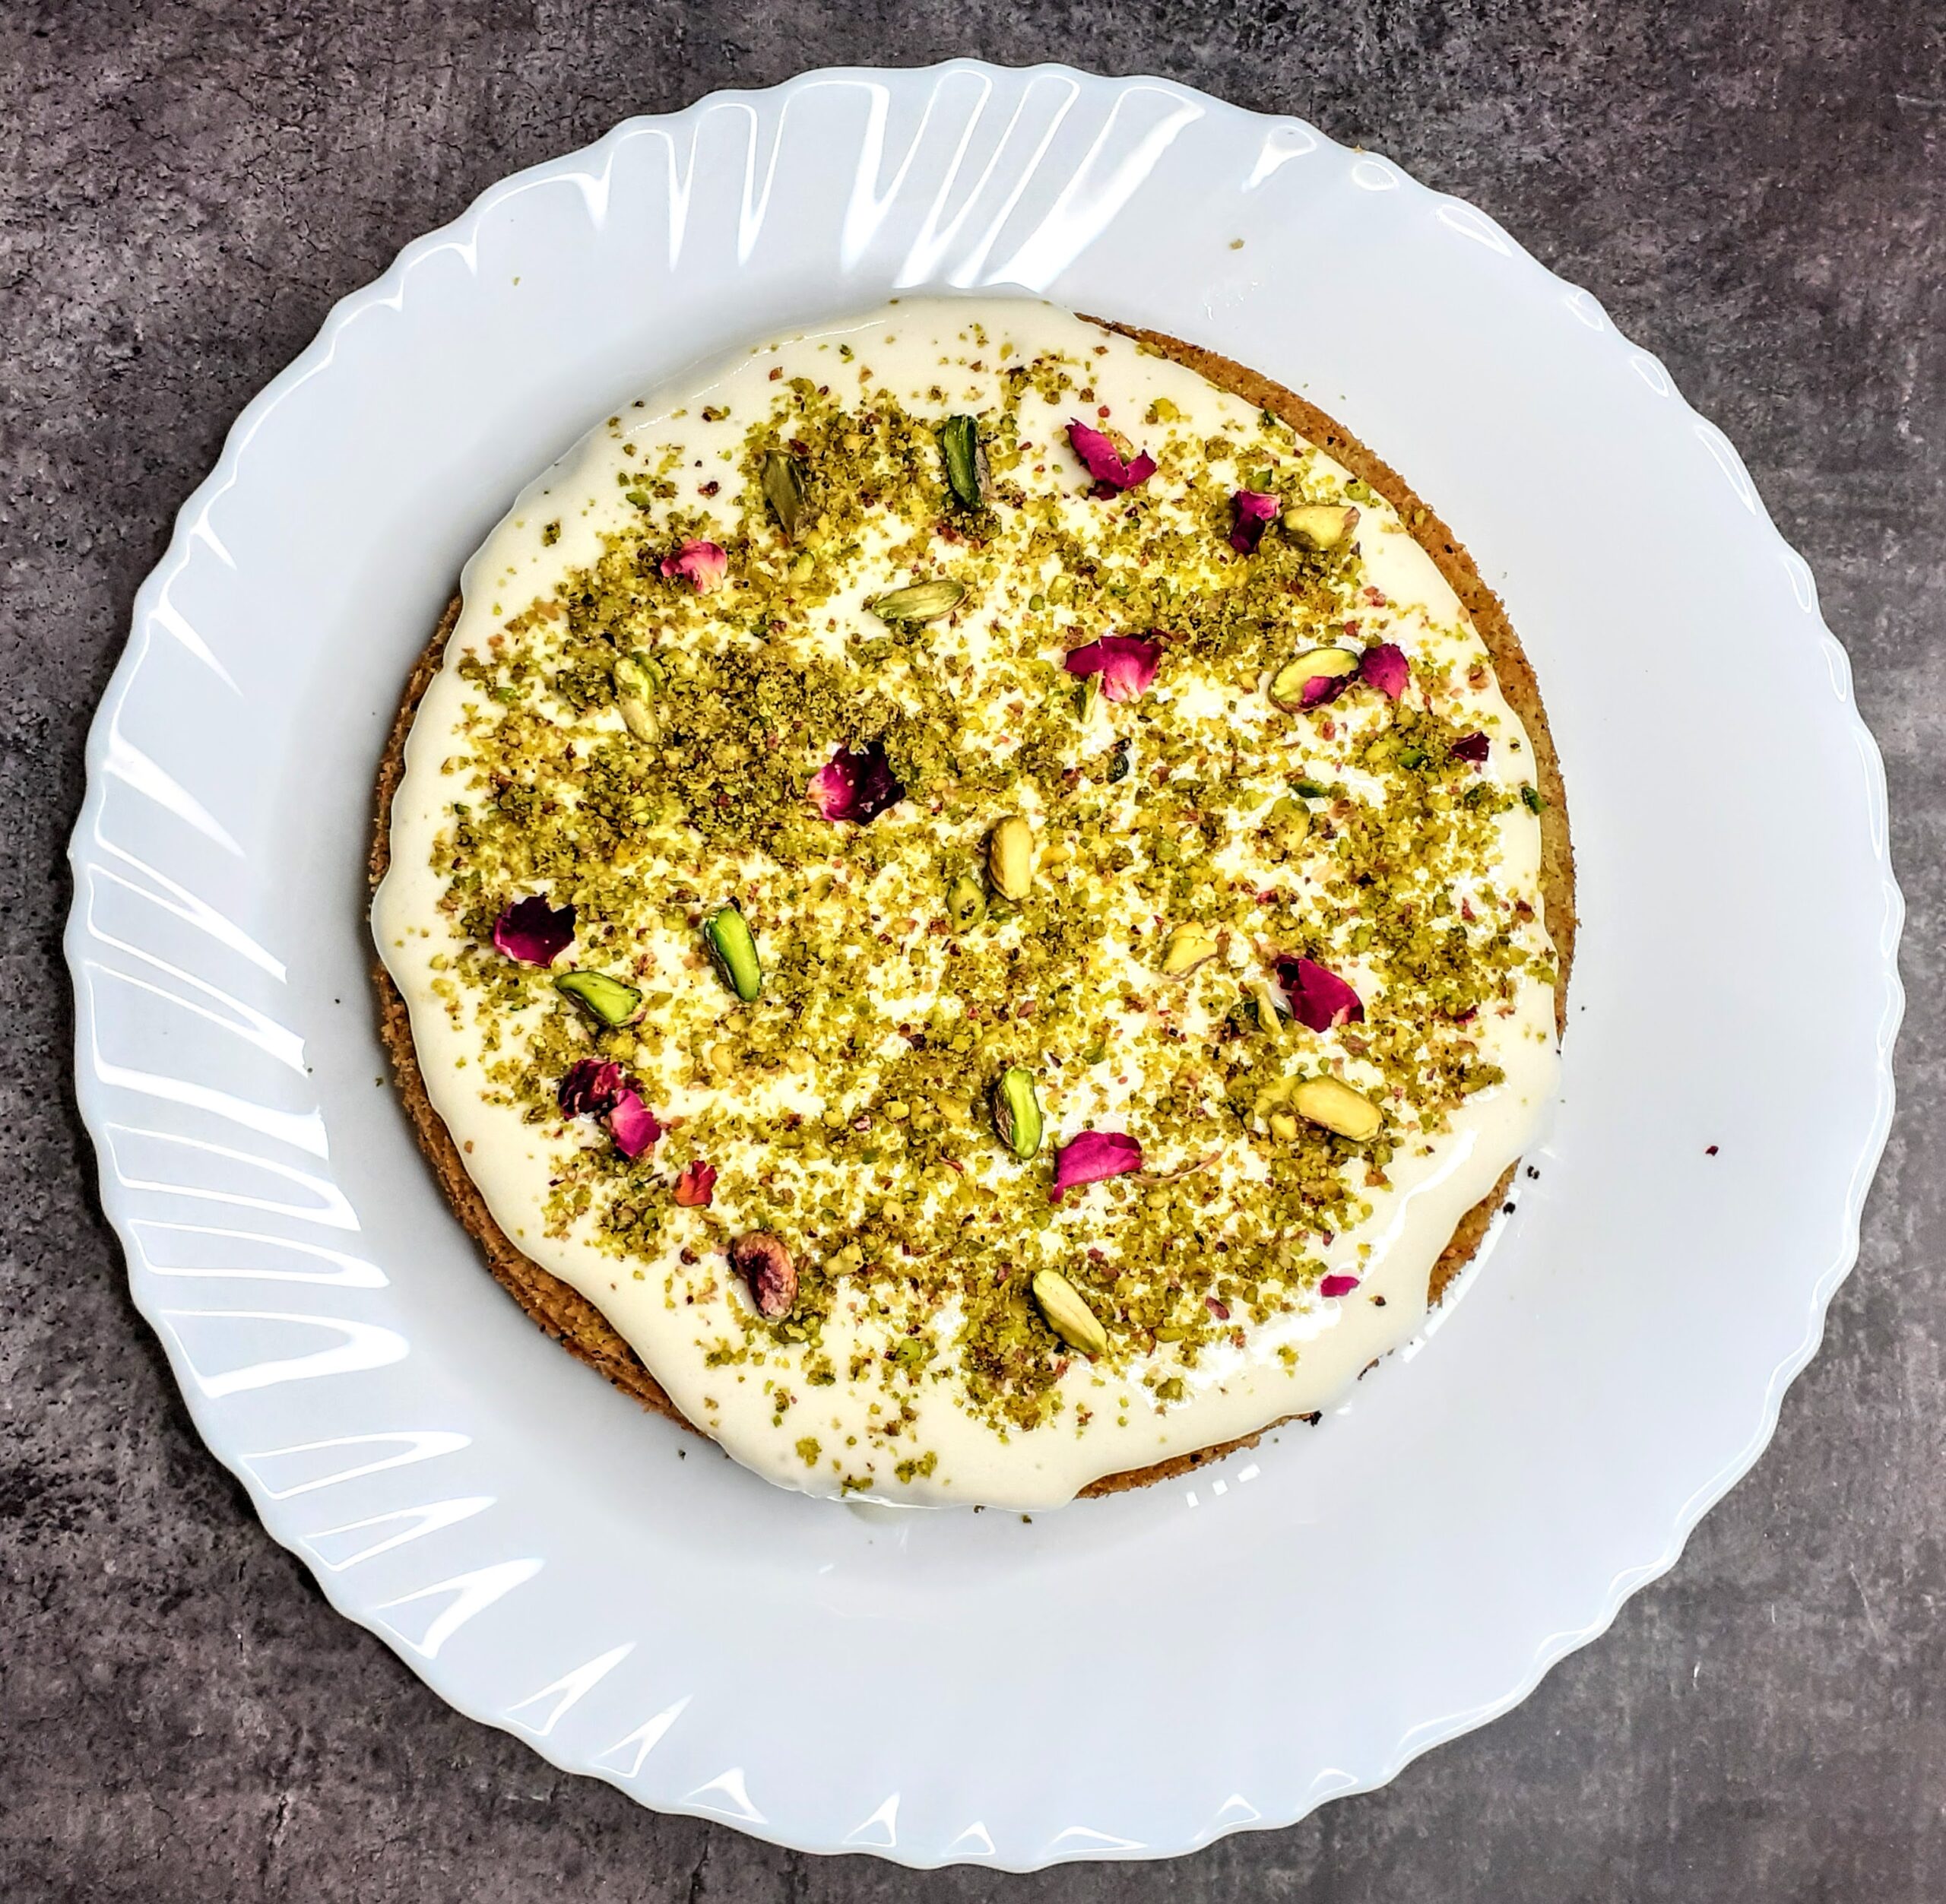
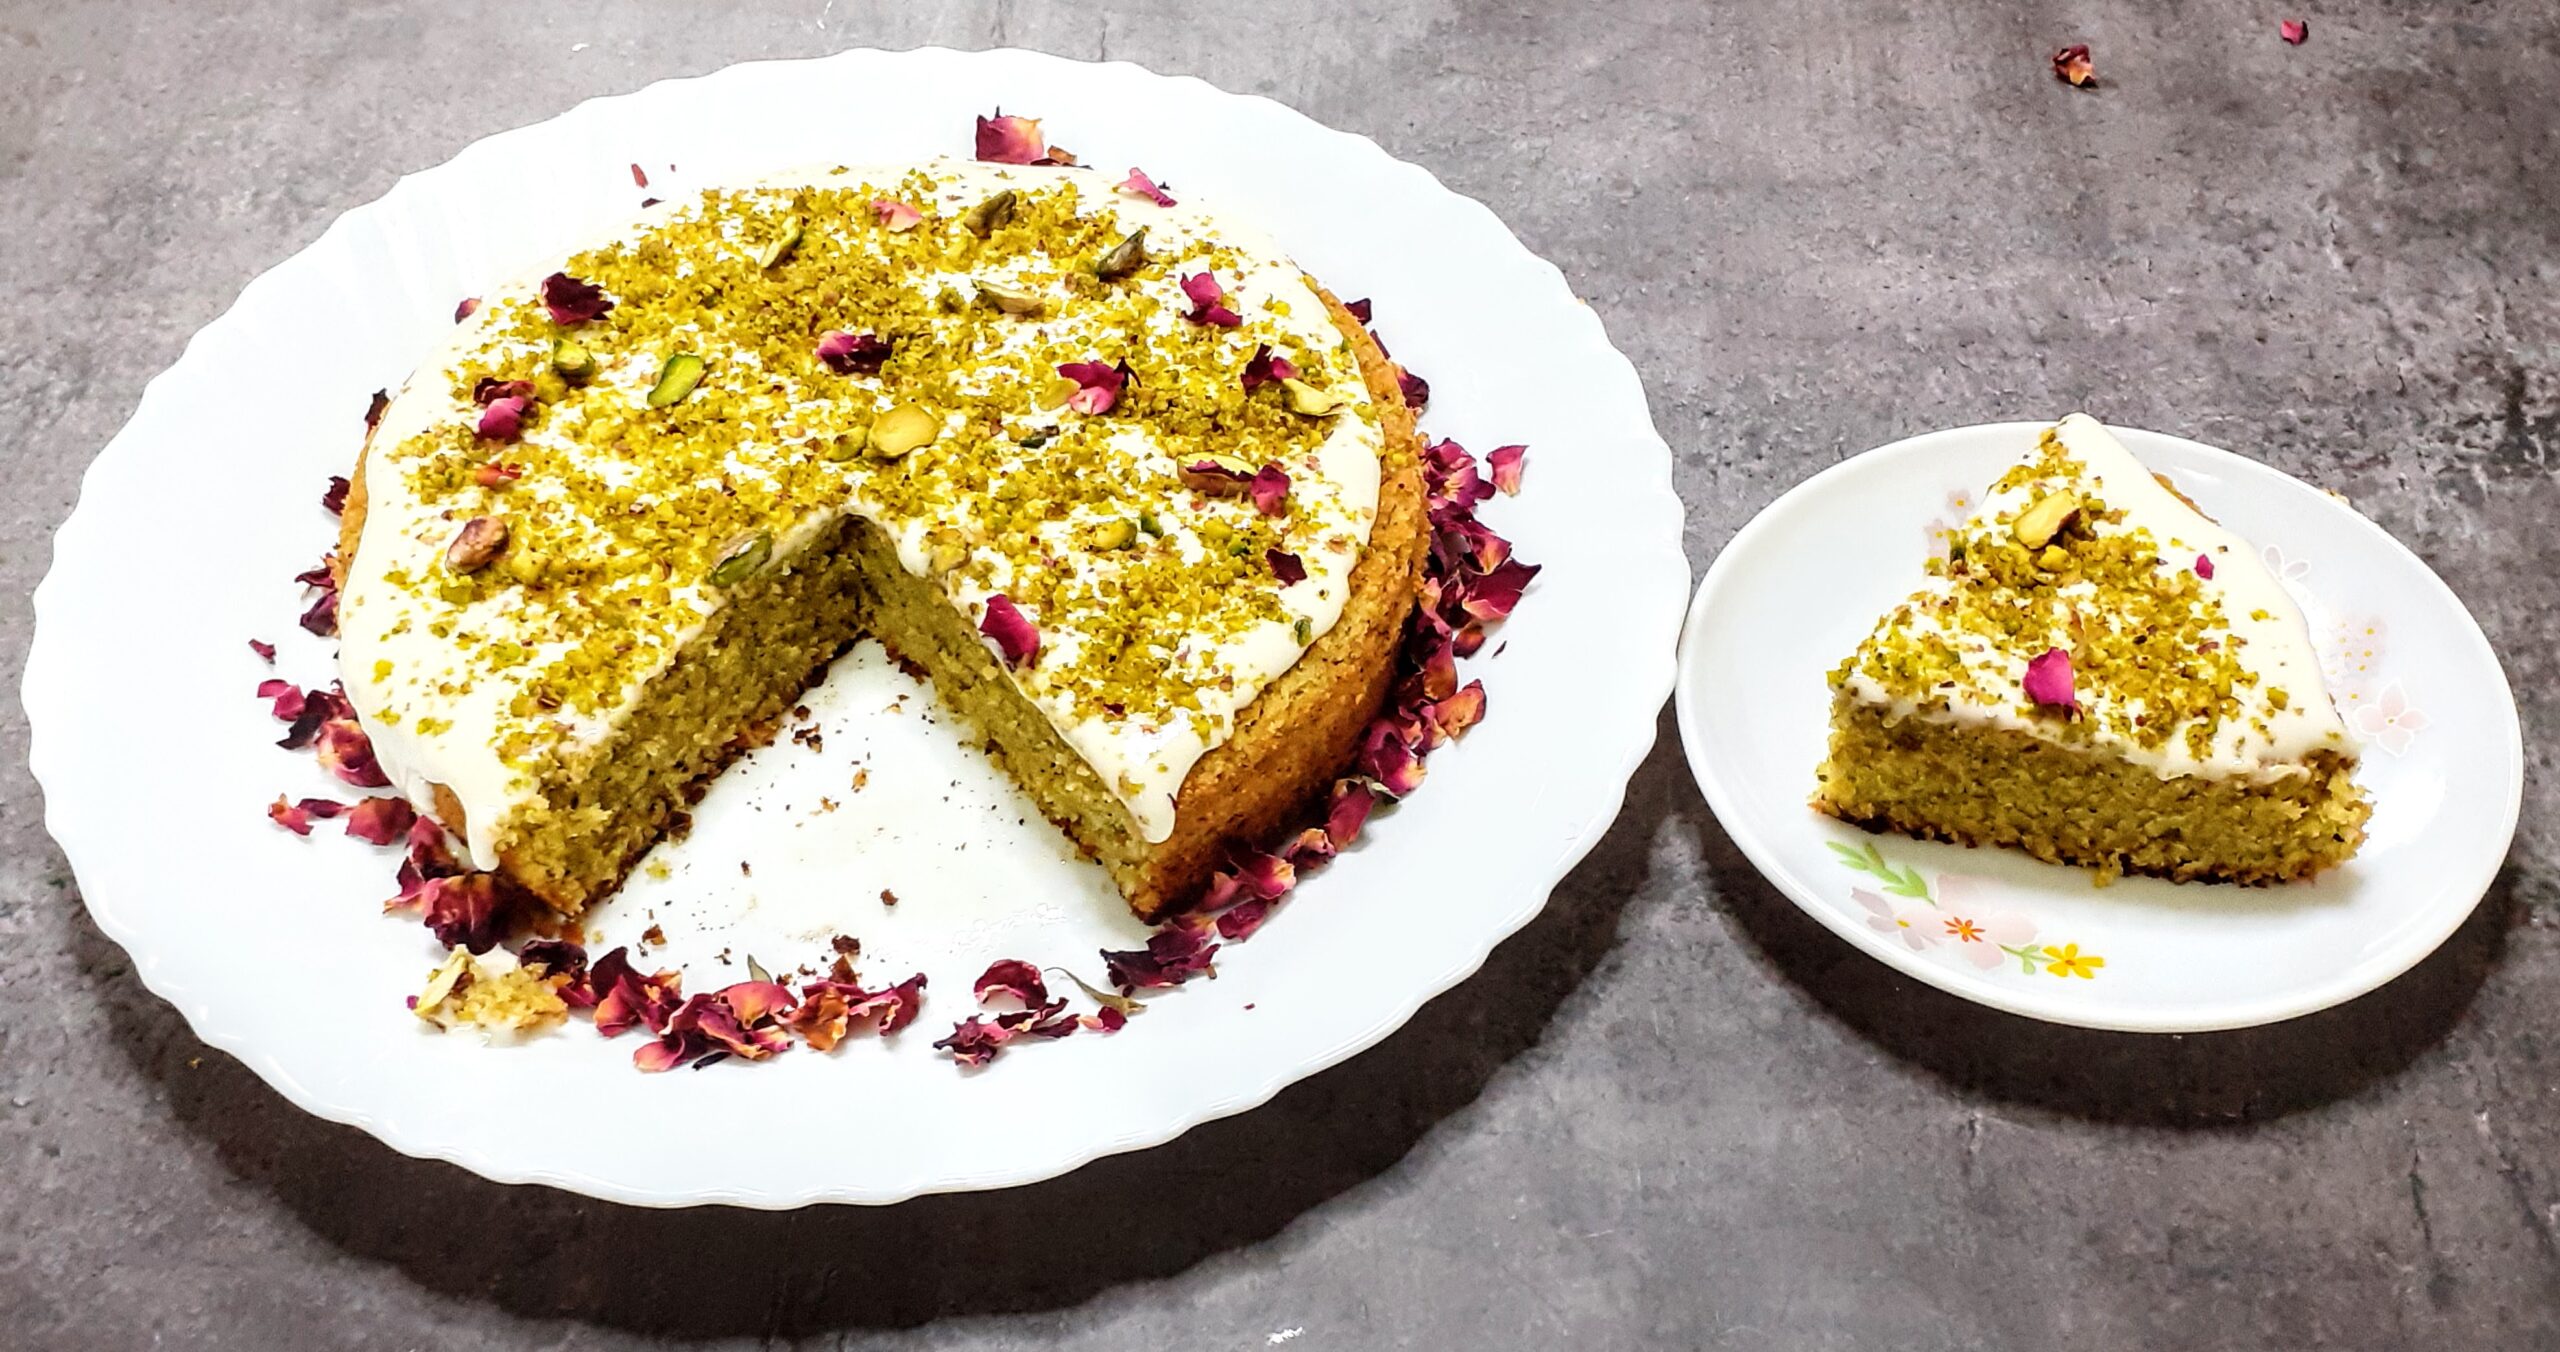
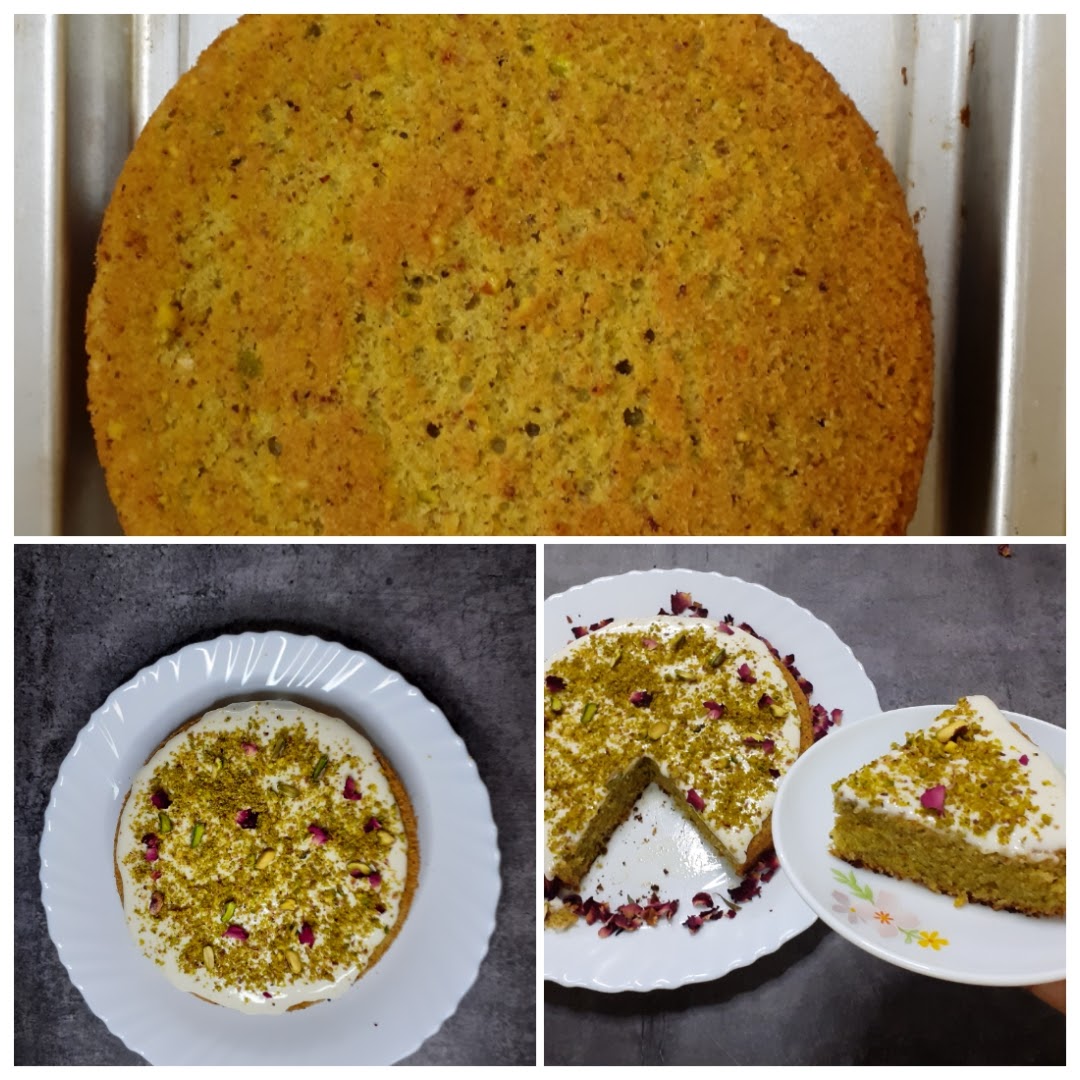
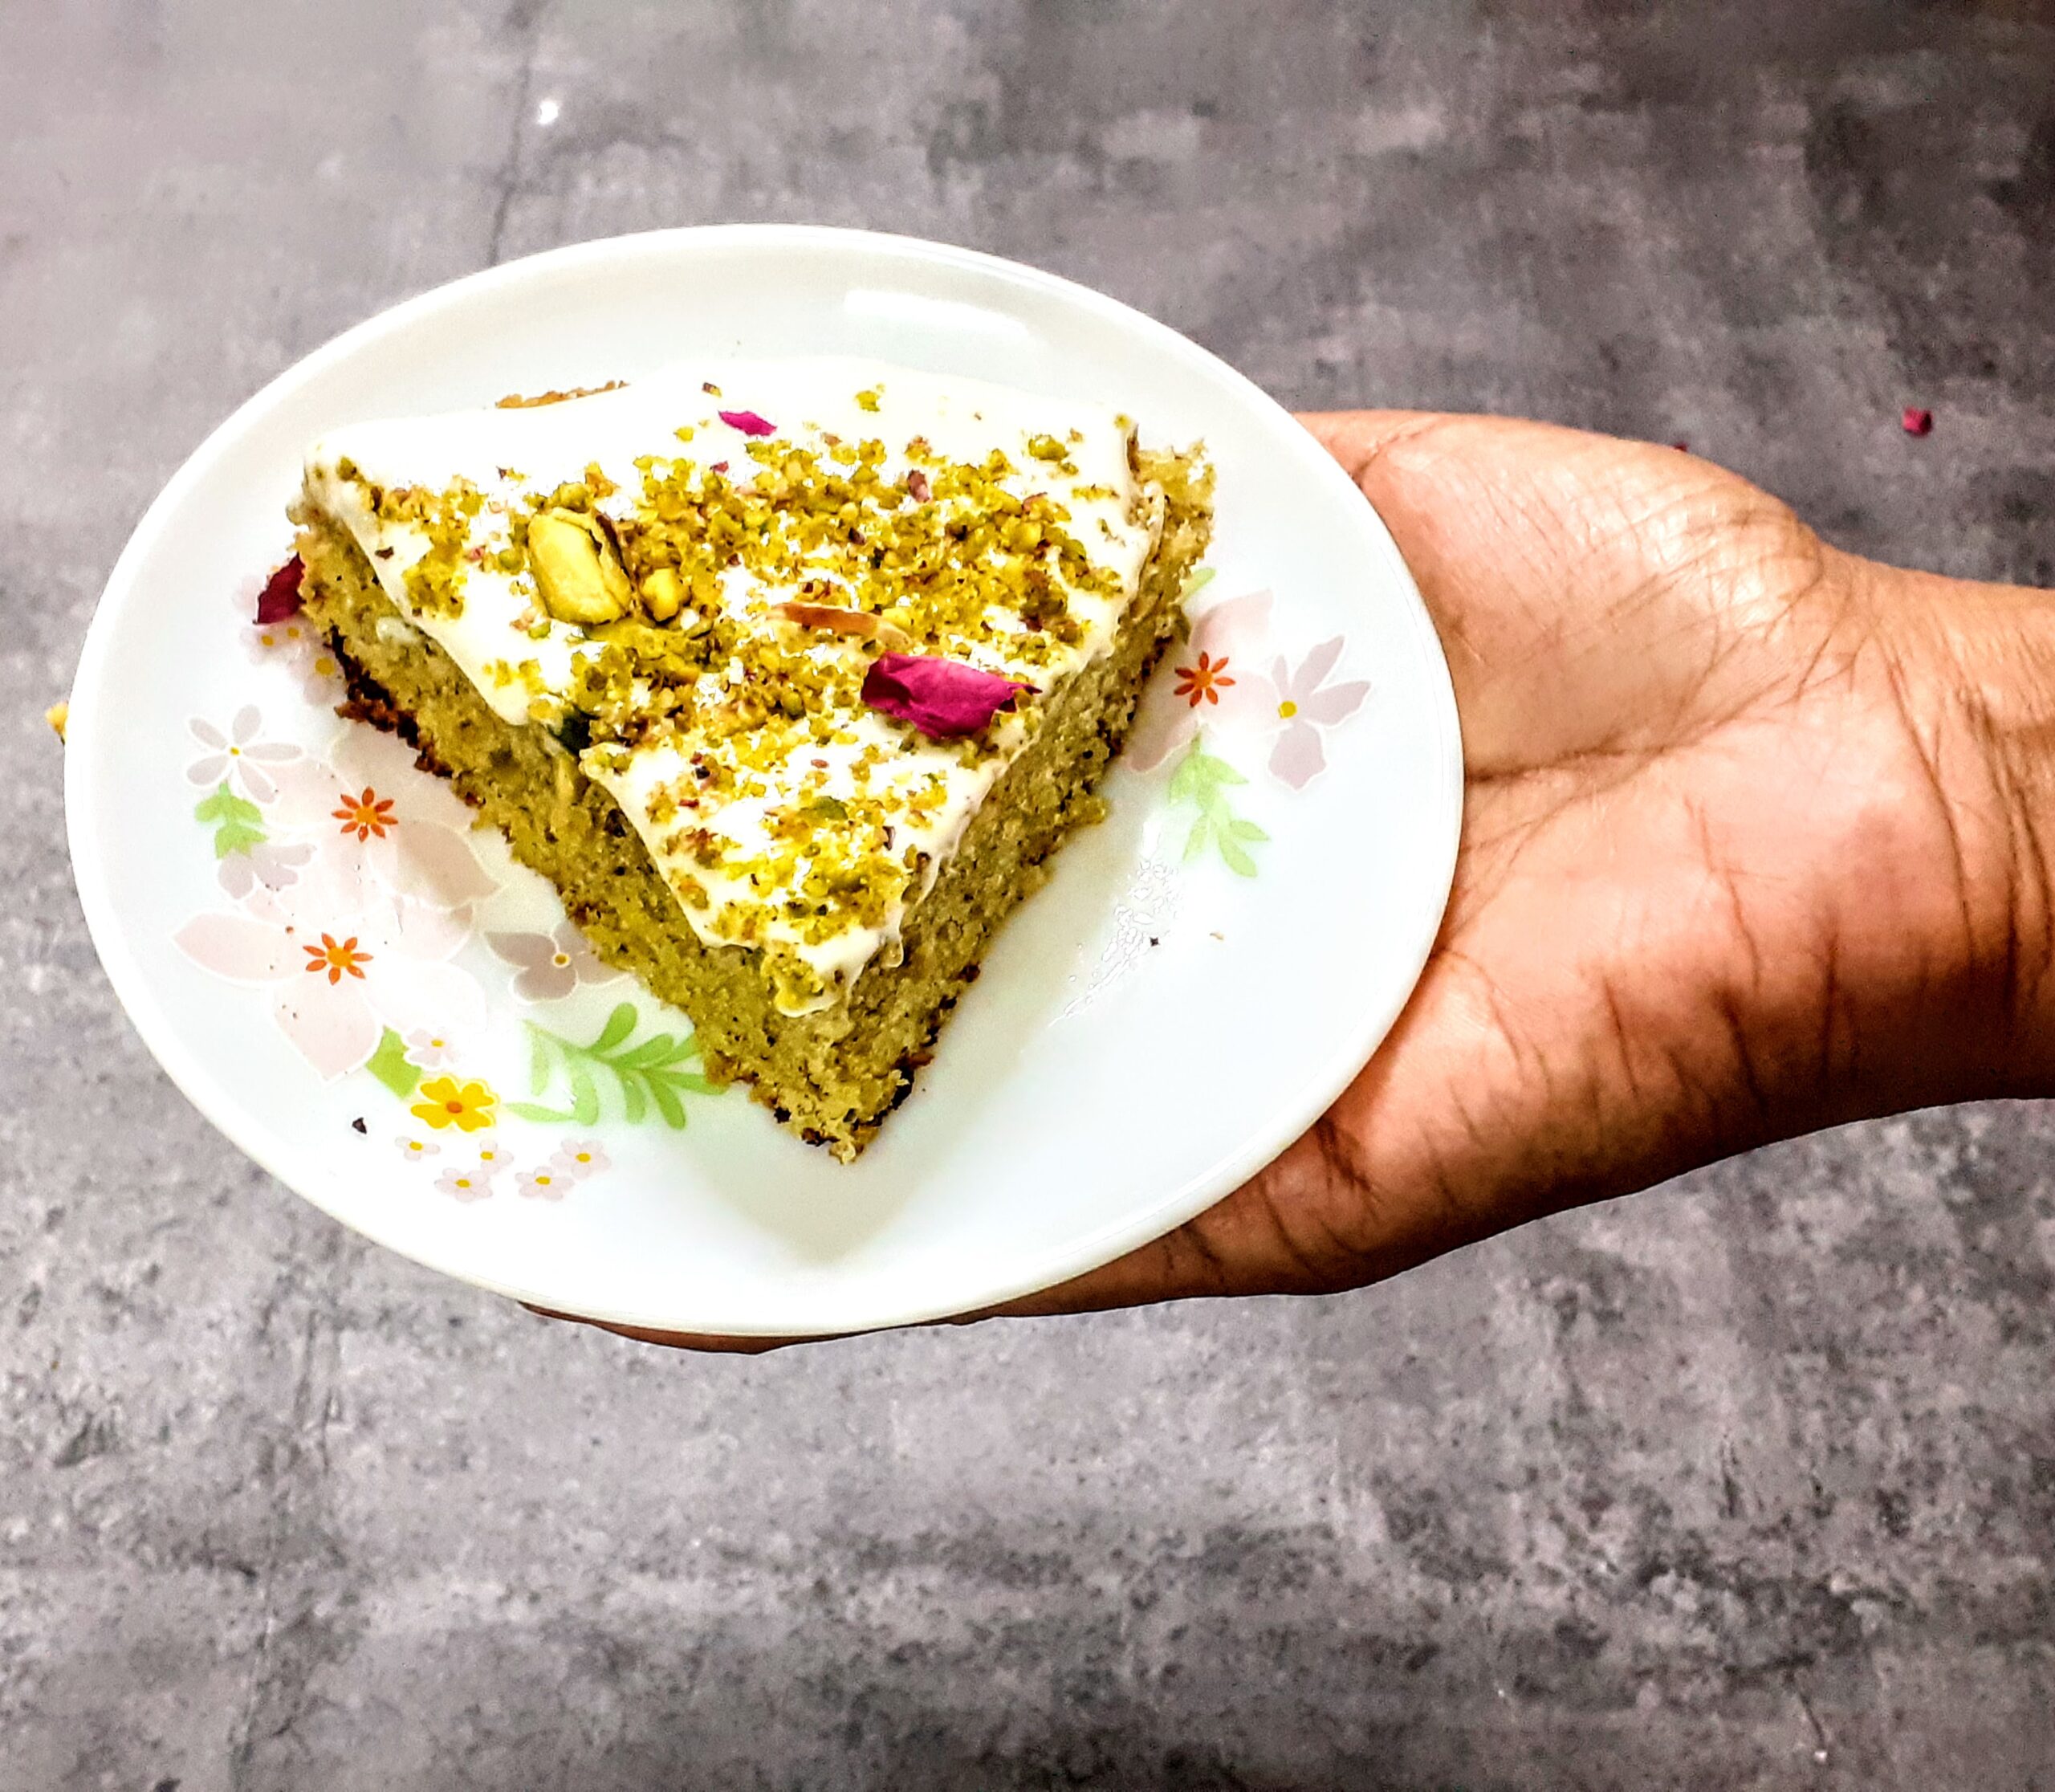
Pistachio Cake / Pista Cake With White Chocolate Glaze
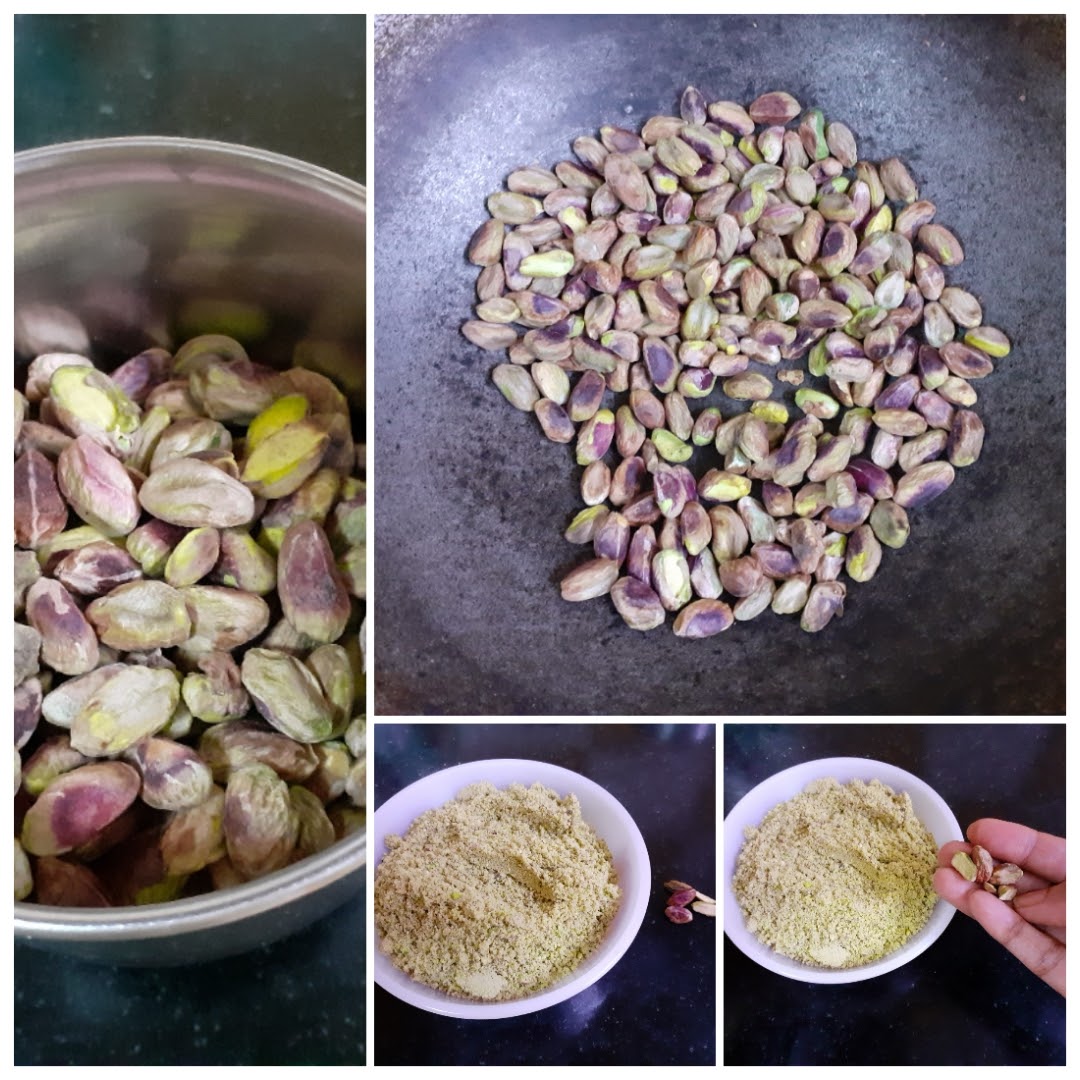
Baking a cake with Pistachio has been on my mind for a long time now, and I recently got to try my hand at it. The result was stunning. But I must say not everyone has a liking for the intense Pista flavour. I must add that I have not used any food colour for the cake and what is see is the natural Pista green, which is a dull green, unlike the bright green store bought ones.
Well, this cake was totally inspired by some wonderful chocolate bars ( both dark and white), that we bought recently from Fabelle by @itcltd . Just imagining the taste of Pista and white chocolate together was making me crave it and so this cake came about. Now when I cook/ bake a new recipe a lot of research goes in. Before I zero in on how I want to go about it.
As I always claim about my baking recipes, this one too is a single bowl recipe. No mess and no extra clean up. Let’s get to the recipe right away.
While you are here check out my other bakes like Apple Crumble, Blueberry Cheese cake, Upside down orange vanilla cake, Oatmeal cookies, Easy two way muffins, Apple Tea Cake, Eggless Pineapple cake and more…
Ingredients:
Pista/ Pistachios unsalted 100 GM
Flour/ Maida 1/2 cup or 70 GM approx.
Unsalted butter 100 GM
Refined oil 1/4 cup
Icing sugar/ castor sugar/ sugar powder 100 GM
Lemon zest of 1 whole Lemon
Eggs 2
Vanilla essence 2 drops
Baking powder 1 tsp
Salt 1/2 tsp
Ghee for greasing the baking mold 2 tsp
Ingredients for White Chocolate glaze:
White chocolate ( invest in a good quality one) 40 GM
Whipping cream 1 cup + 2 tbsp chilled
Castor sugar/ icing sugar 1 tbsp less than 1/2 cup
Directions for cake:
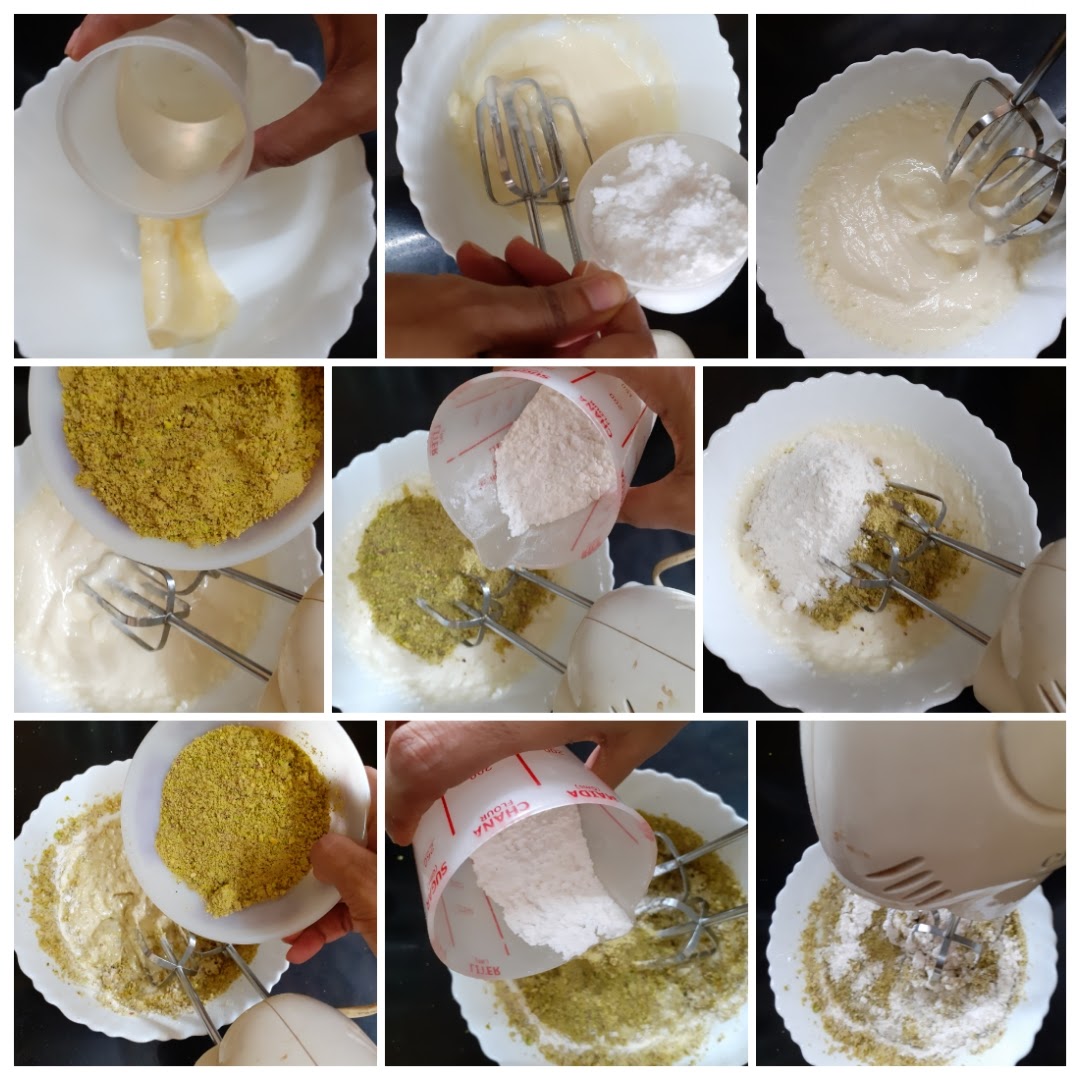
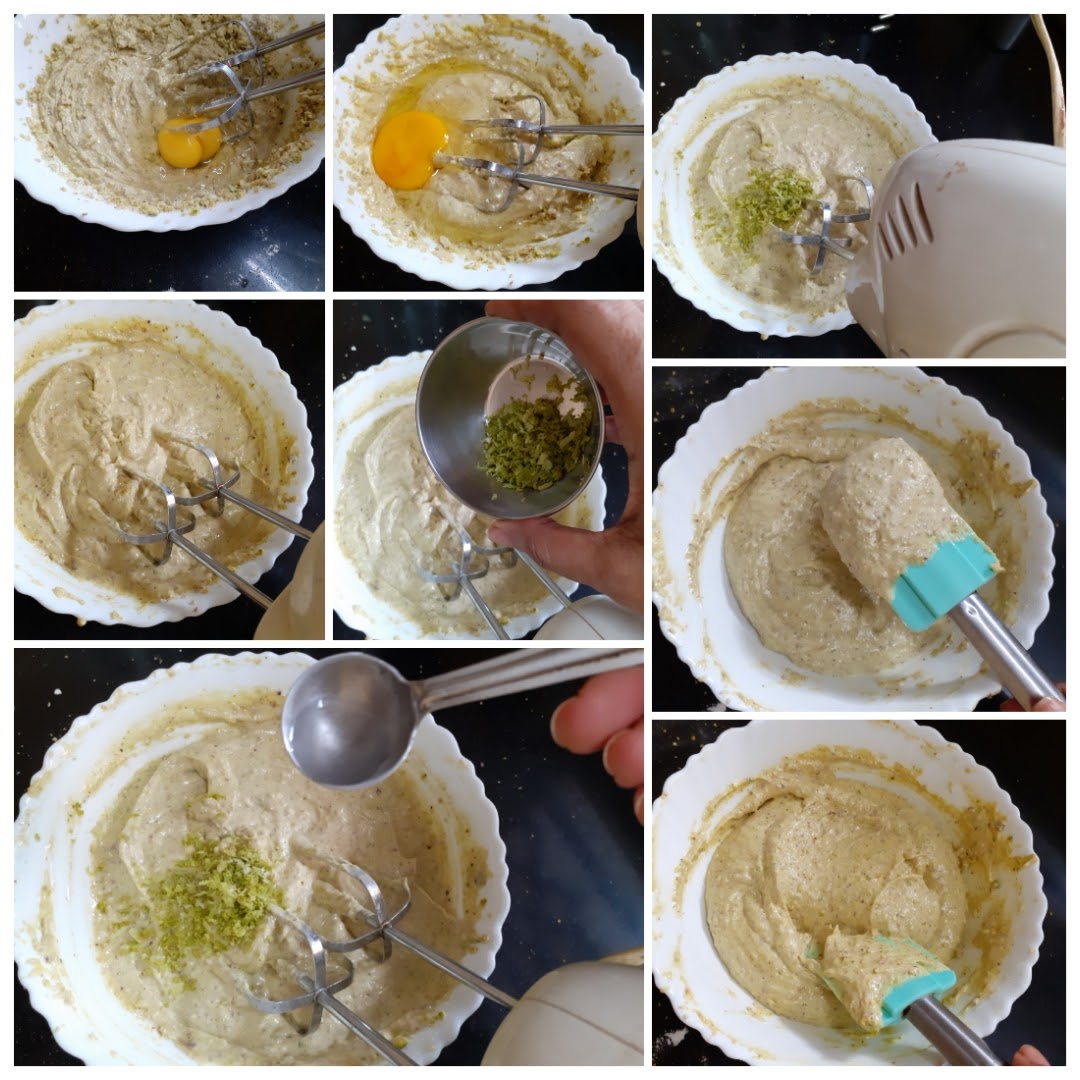
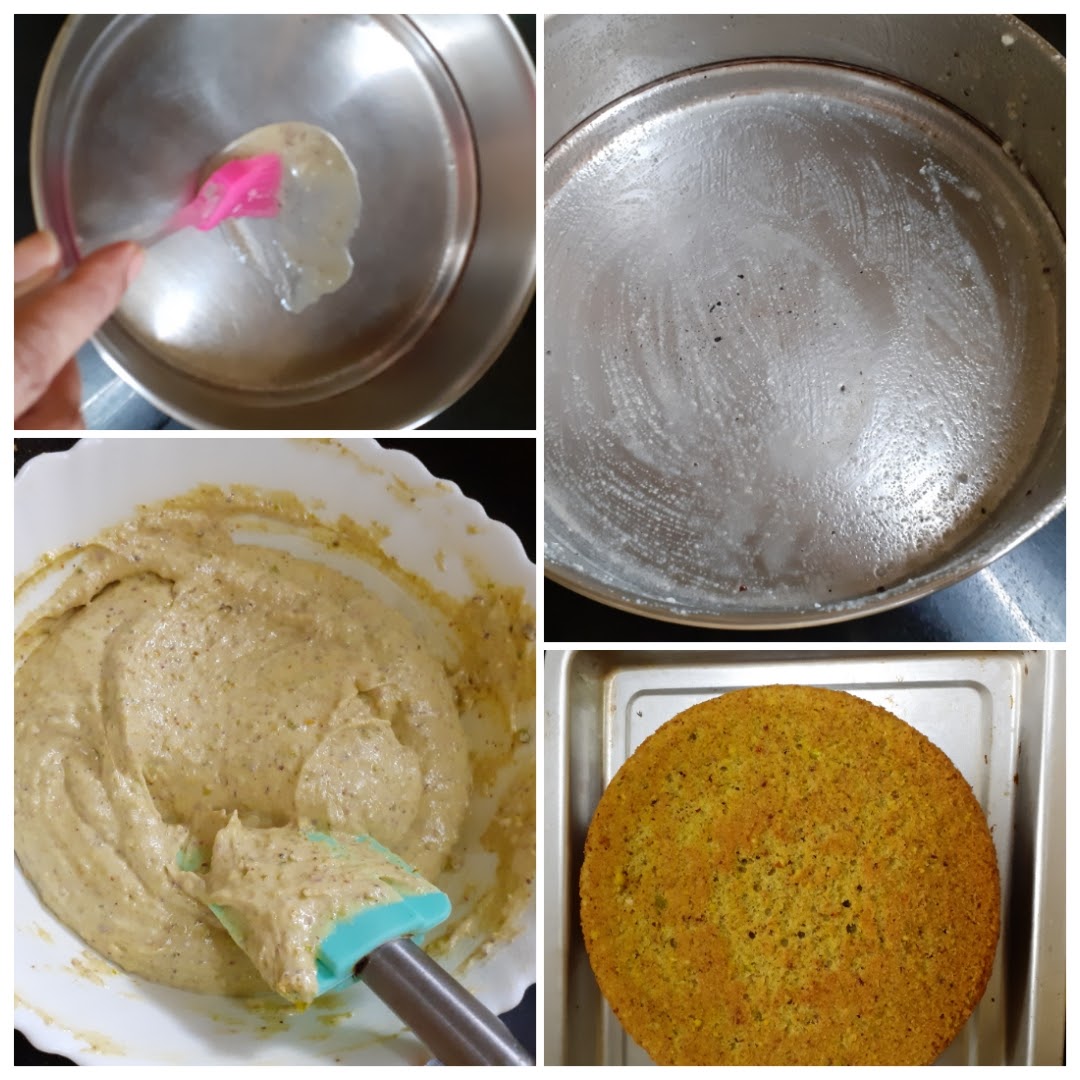
In a pan roast the Pistachios very lightly. They just need to get warm, and not change colour. Cool them and pulse them to a fine powder in a blender. Preheat oven to 200 C for 10 mins. In a bowl cream the butter, oil and sugar with a beater. Now add half the amount of Pistachio powder and half the amount of flour and beat. Add the remaining Pista powder, baking powder, and flour and beat again until combined. The mixture will appear a little dry. Now add one egg at a time and beat to combine. Finally, add the lemon zest and vanilla essence and give a finally spin with the beater. Now using a spatula, scrape the sides and stir just once. The cake batter is ready. Grease a circular cake mold or Loaf pan, and pour the cake batter into it. Tap once gently to remove any air gaps and put it in the oven for 15 to 20 minutes. Since each oven has a different setting, keep checking for fineness from 15 minutes onward. The cake is done when a toothpick inserted in the center comes out clean.
Directions for making glaze.
Bring the White chocolate to room temperature. Take the chocolate in a bowl, add 2 tbsp cream and put it in the microwave for 30 seconds. Bring it out and stir vigorously so that the melted white chocolate combines with the cream evenly. Cool it for 10 minutes. In the meanwhile, take the chilled cream in a bowl, add the castor sugar and start beating until it turns airy and forms soft peaks. Once soft peaks form, don’t whip it any more. Add the white chocolate mixture and gently fold it in with a spatula. Put it in the fridge until further use.
How to assemble ( no pictures)
Let the cake cool naturally. Now bring out the white chocolate glaze and using a spatula gently spread it on the cake. I have left the sides uncovered. Spread generously to form a 1 cm coating. Sprinkle some Pistachio powder over the glaze and some split pistachios too. Add a few edible rose petals for contrast. Keep in fridge until it’s ready to serve.
STEPWISE RECIPE FOLLOWS:
1. To make the cake– In a pan roast the Pistachios very lightly. They just need to get warm, and not change colour. Cool them and pulse them to a fine powder in a blender. Preheat oven to 200 C for 10 mins.
2. In a bowl cream the butter, oil and sugar with a beater. Now add half the amount of Pistachio powder and half the amount of flour and beat. Add the remaining Pista powder, baking powder, and flour and beat again until combined. The mixture will appear a little dry.
3. Now add one egg at a time and beat to combine. Finally, add the lemon zest and vanilla essence and give a finally spin with the beater. Now using a spatula, scrape the sides and stir just once. The cake batter is ready.
4. Grease a circular cake mold or Loaf pan, and pour the cake batter into it. Tap once gently to remove any air gaps and put it in the oven for 15 to 20 minutes. Since each oven has a different setting, keep checking for fineness from 15 minutes onward. The cake is done when a toothpick inserted in the center comes out clean.
5. To Make the glaze– Bring the White chocolate to room temperature. Take the chocolate in a bowl, add 2 tbsp cream and put it in the microwave for 30 seconds. Bring it out and stir vigorously so that the melted white chocolate combines with the cream evenly. Cool it for 10 minutes.

6. In the meanwhile, take the chilled cream in a bowl, add the castor sugar and start beating until it turns airy and forms soft peaks. Once soft peaks form, don’t whip it any more. Add the white chocolate mixture and gently fold it in with a spatula. Put it in the fridge until further use.

7. To assemble the cake– Let the cake cool naturally. Now bring out the white chocolate glaze and using a spatula gently spread it on the cake. I have left the sides uncovered. Spread generously to form a 1 cm coating. Sprinkle some Pistachio powder over the glaze and some split pistachios too. Add a few edible rose petals for contrast. Keep in fridge until it’s ready to serve. (no pictures)
NOTES:
1. Ensure that all ingredients are at room temperature before baking.
2. Use good quality eating chocolate instead of the cooking chocolate bars available at stores. They are mostly flavoured and not real chocolate.
3. Always use pulse mode in the blender to powder the Pistachio, so that it does not turn oily.
Corn Palak Subji
Palak is a very versatile green. It is mineral rich, healthy and fibrous. Any add-in that goes into it, gets its flavour enhanced. In my house I have been called the female Popeye for a reason. I love Palak/Spinach in all forms. Be it the simple Keerai Masiyal, Keerai Molagootal or the delicious Palak Paneer, Palak Paneer Paratha, or the simple Spinach curry in coconut milk.
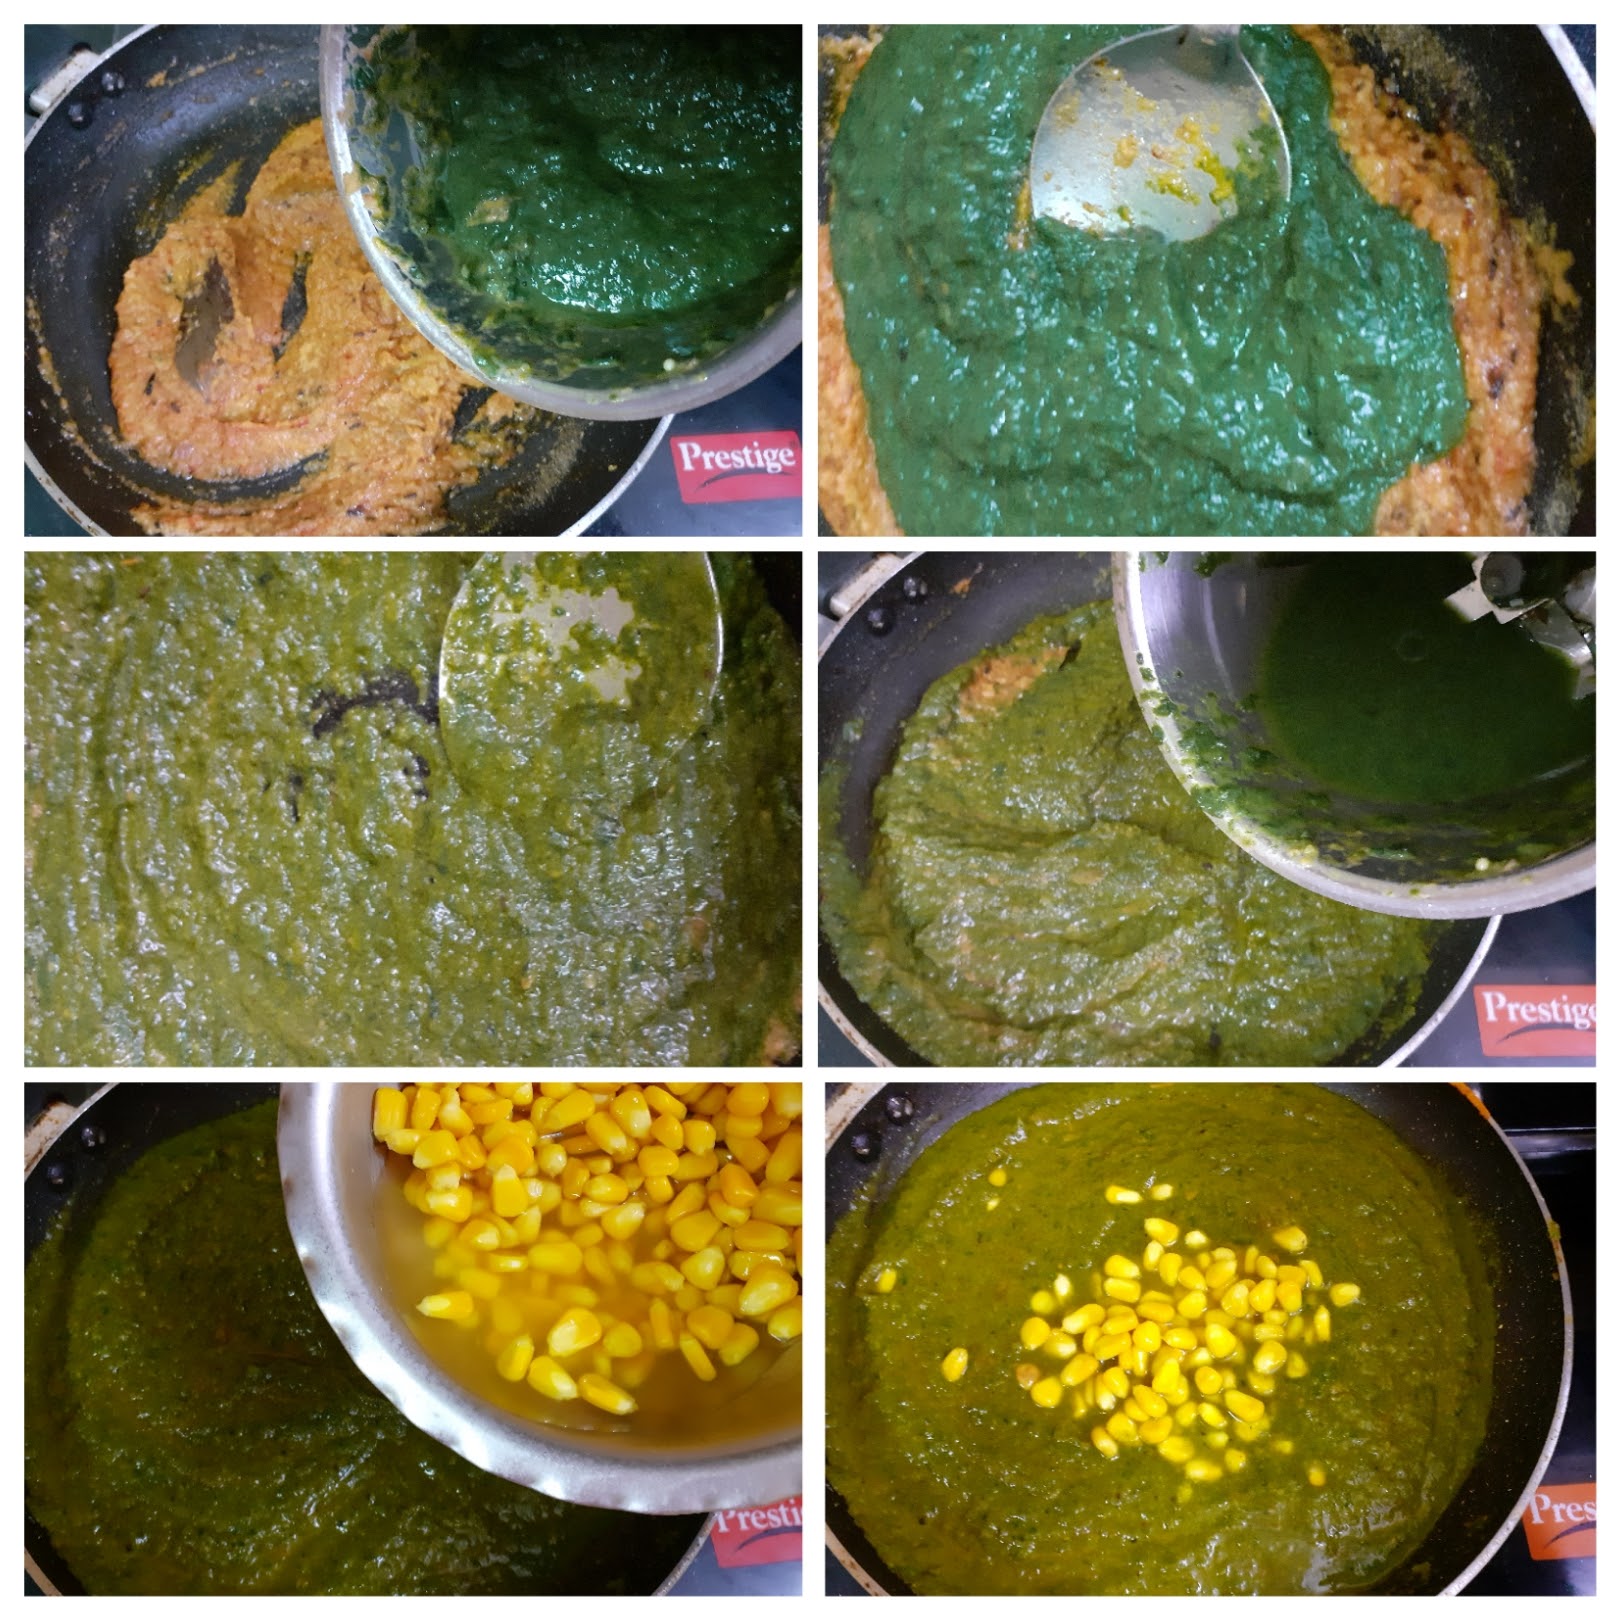
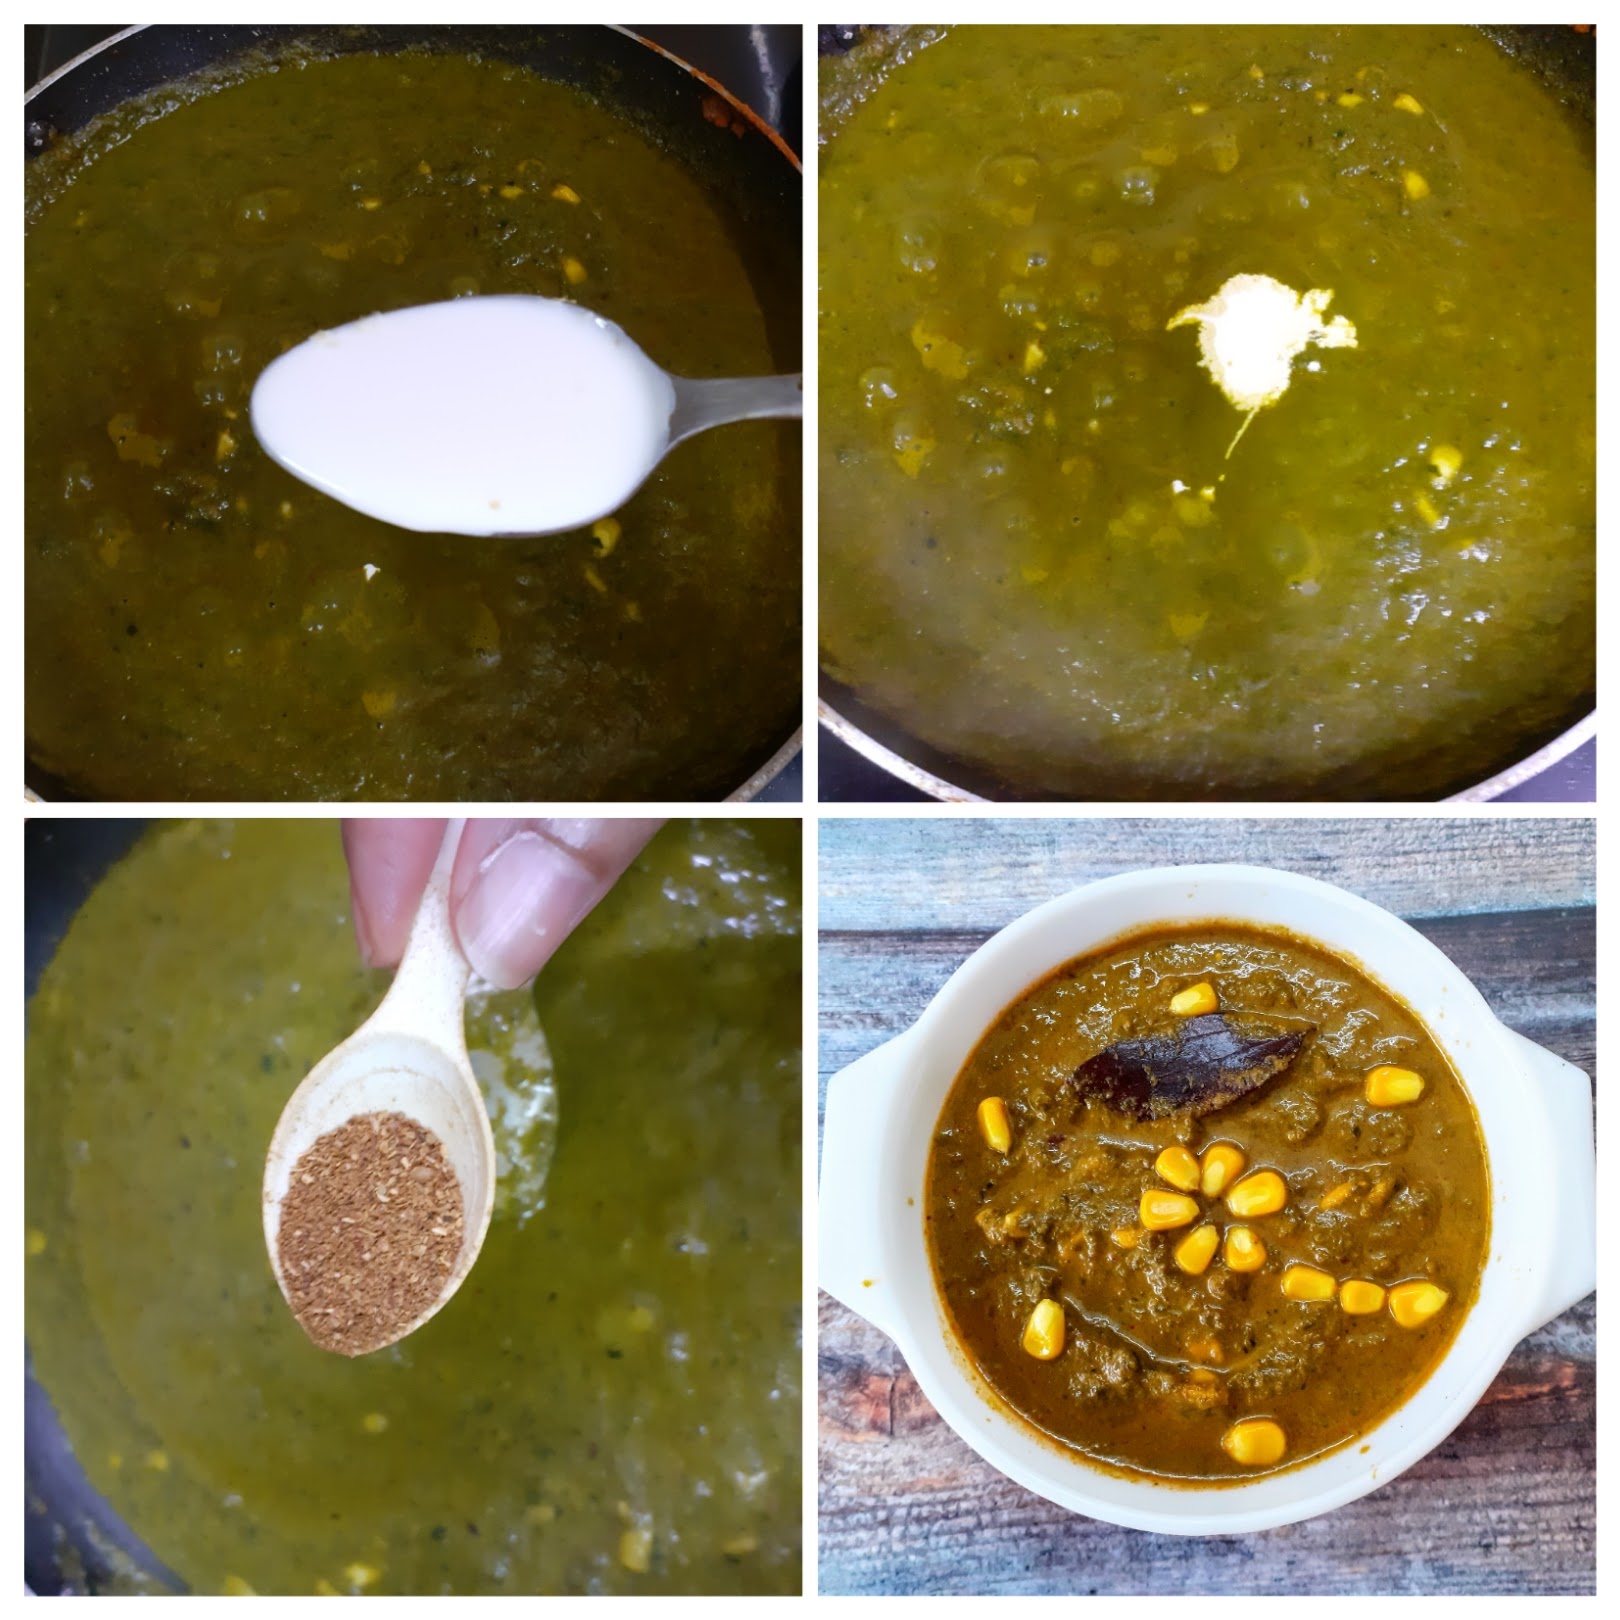
One of my favourite Palak/Spinach recipes is also this delicious Subji Palak Corn. This is a simple everyday subji that one can make even on a busy day if their greens are washed and blanched. Highly nutritious and high on Iron and the corn not only gives the green a contrast with its yellow, but also balances the tanginess from the tomatoes and palak combination. This combination of Spinach and corn is classic and in all cuisines including World cuisine you will find a few recipes dedicated to this.
I have used Sweet Corn in this recipe as only this was available at the time I was cooking this dish. My preferred corn is Makai aka Maize, but sadly since we forget to promote what is local and regional, doing a dis service to our farmers, our indigenous varieties suffer. Let us get back our own Maize/Cholam/Makai, which are very rarely seen even during rainy season when they are most likely to be found. Do give this a thought.
Getting to the recipe right away-

Ingredients:
Fennel Powder 1 tsp

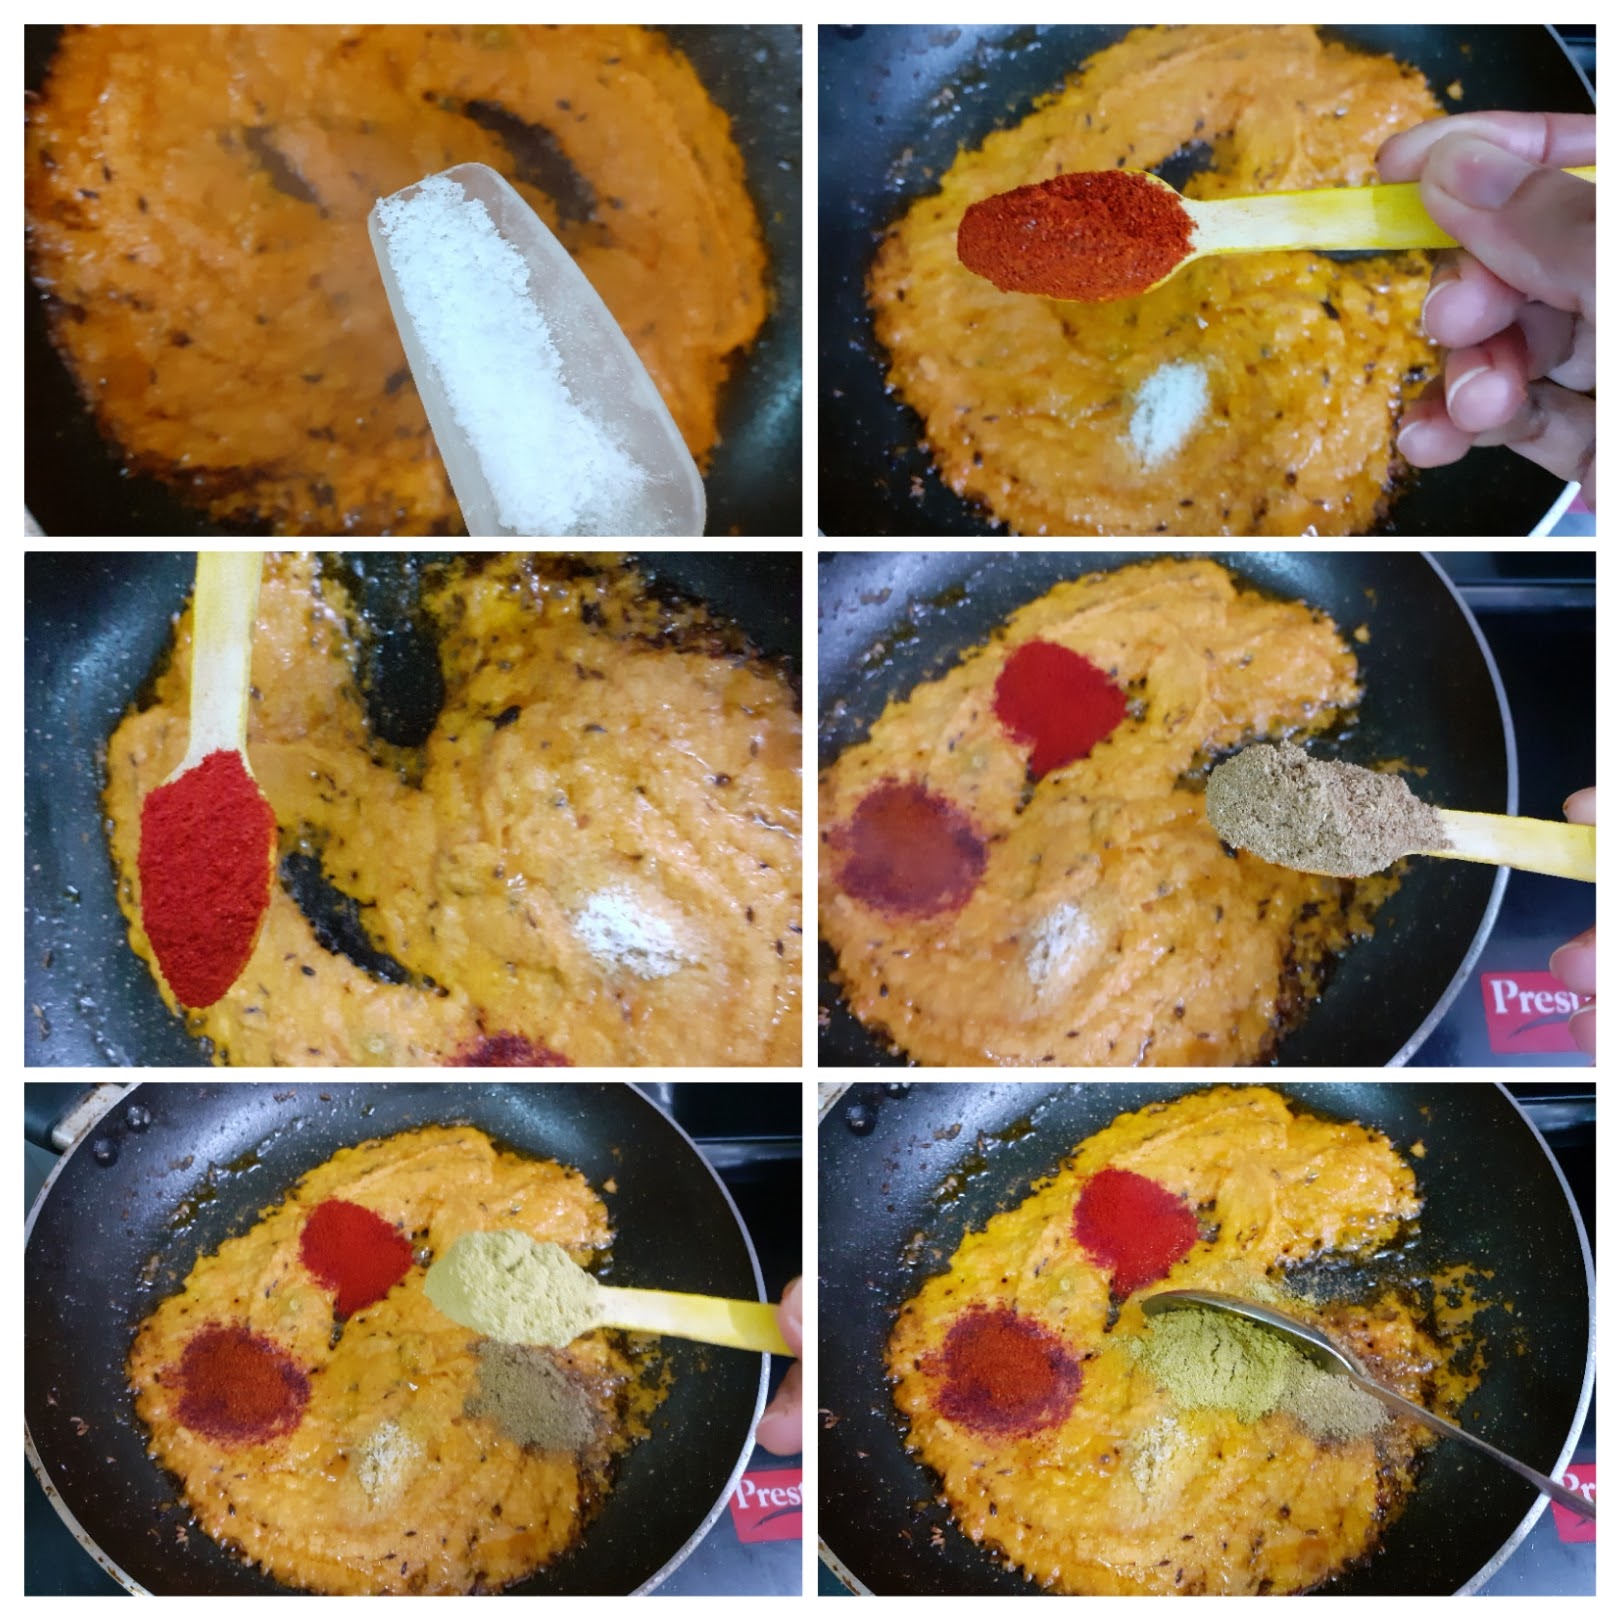
Now add the Palak Puree. Stir well to combine the tomato and palak puree. Be careful as the palak splutters a lot while cooking, you can keep the karahi partially covered. Add little water to dilute if required. After about 3-4 minutes of cooking the Palak and tomato mixture will come together, at that stage add the cooked corn, cook for two more minutes.
Chakki Ki Shak/ Chakki Ki Subji
The cuisine of Madhya Pradesh ( central India) has been unexplored by me so far. Recently while looking up the internet I saw this interesting recipe called Chakki Ki Shak from the MP cuisine. I found the recipe simple and interesting and as I don’t have this cuisine on the blog I gave it a try and the dish turned out so delicious that I had to blog it.
While looking up this recipe in detail I also came to know of many more interesting vegetarian recipes from the region and I will surely bring them all here over a period of time. If you are following the blog you know by now that when I try a new recipe it has to turn out well thrice, and that takes time.
Before we delve into the recipe, I must tell you that MP being the center of India is surrounded by various states and hence there is a similarity of cuisine between them. I found some dishes bearing similarities with Rajasthani and Maharashtrian cuisine. Wheat, Jowar, and Maize form the staple food, do you see that’s how “Bhutte Ka Kees” is a specialty from MP, Bafla which is made of whole wheat flour is also a famous dish from the region. The current dish Chakki ki Shak is a curry made of whole wheat flour and some aromatic spices. The flour dumplings are simmered in a tangy sauce.
While you are here check out my other curry recipes like Miloni Baby corn and Bell Peppers curry, kadai Paneer( gravy), Kathrikai Masala Kuzhambu, Pachai Mochai Kuzhambu, Keerai Molagootal, Mirch Ka Salan, Dum Aloo Ajwaini, Pachai Sundakkai Kuzhambu and more…
Here is the recipe for Chakki ki shak-

Ingredients to make Chakki:
Whole wheat flour 1.5 cups
Oil 1 tsp
Carrom seeds/ Ajwain 1 tsp
Salt as required
Red chilli powder 1 tsp
Turmeric powder 1/2 tsp
Water as required to make a dough
Ingredients for making the curry:
Cumin Seeds 1 tsp
Cardamom 2 pods
Cloves 2-3
Onions 2 small finely chopped
Tomatoes 3 large
Curd 1/2 cup
Cashewnuts 8 to 10
Red chilli powder( regular) 1 tsp
Red chilli powder( Kashmiri) 1 tsp
Coriander powder 2 tsp
Fennel powder 1 tsp
Turmeric powder 1/2 tsp
Garam masala powder 1/2 tsp
Fresh coriander 1 tsp finely chopped
Directions for making Chakki ( wheat dumplings)
In a bowl take the flour add the oil, salt and all spices and using water form a soft dough. It should be like roti dough. Immerse this dough in water for 15 minutes. After 15 minutes, scrub the flour lightly with your fingers, the water will become hazy. Throw this water. Pour some more water on the dough and scrub again and discard the water. The dough is now ready to be made to Chakki. Get the steamer ready, as the water in the steamer is getting boiled, smear your steamer plate with oil and spread this dough evenly on the plate using your fingers. Now place this in the steamer for 10 to 15 mins. Remove and cool the chakki. On cooling, cut into diamonds or squares. In a pan take some oil for shallow frying, and fry the Chakki to a golden brown. Drain on absorbent paper and keep aside.
Directions for gravy preparation:
In a blender add the chopped Tomatoes, and cashewnuts and blend to a smooth paste. In a Pan or Kadai take 1 tbsp oil and heat. Add the cumin seeds, cardamom and cloves and fry until aromatic. Now add the finely chopped onions ,turmeric powder, and saute until light brown. Now add the ground paste followed by all the spice powders- red chilli powder(both regular and Kashmiri), coriander powder, fennel powder and mix well. Cook for two minutes until the raw smell goes away. Now add half a cup of curd and stir continuously for 2 minutes. Add 2 cups water and gently drop in the cooled and cut Chakki(wheat flour dumplings). Cover and cook the dumplings in this gravy until they turn soft and the gravy thickens up. Depending on what you are serving the Chakki Ki Shak with you can thin down or thicken the gravy. Finally add Garam masala powder and fresh coriander leaves and switch off the flame.
Serving Suggestion: With Roti, Paratha, Naan or Plain or Jeera rice.
STEPWISE RECIPE FOLLOWS:
1. In a bowl take the flour add the oil, salt and all spices and using water form a soft dough. It should be like roti dough. Immerse this dough in water for 15 minutes. After 15 minutes, scrub the flour lightly with your fingers, the water will become hazy. Throw this water. Pour some more water on the dough and scrub again and discard the water.
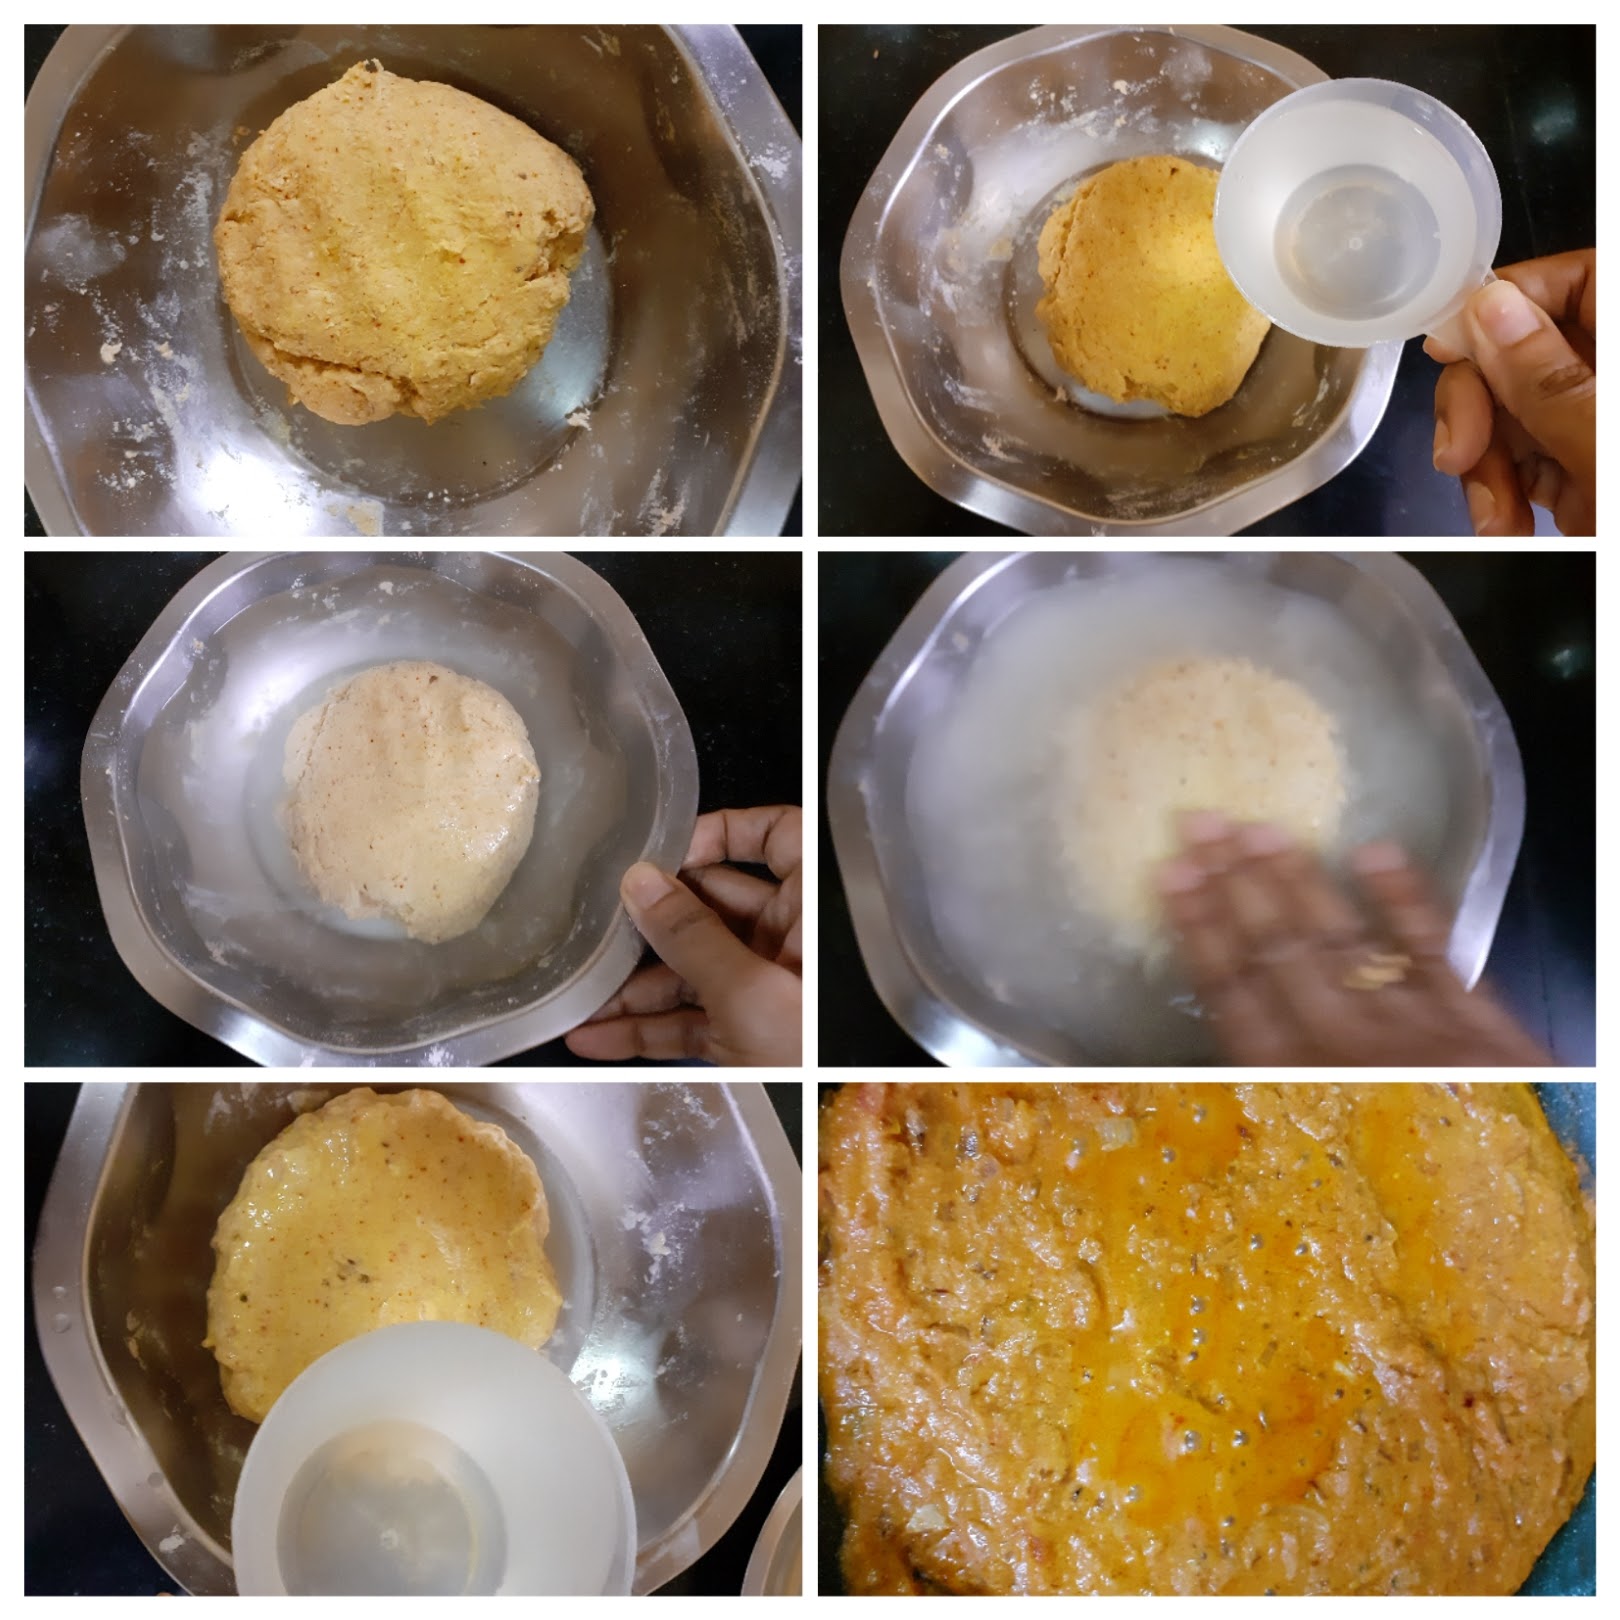
2. Get the steamer ready, as the water in the steamer is getting boiled, smear your steamer plate with oil and spread this dough evenly on the plate using your fingers. Now place this in the steamer for 10 to 15 mins. Remove and cool the chakki. On cooling, cut into diamonds or squares. In a pan take some oil for shallow frying, and fry the Chakki to a golden brown. Drain on absorbent paper and keep aside.
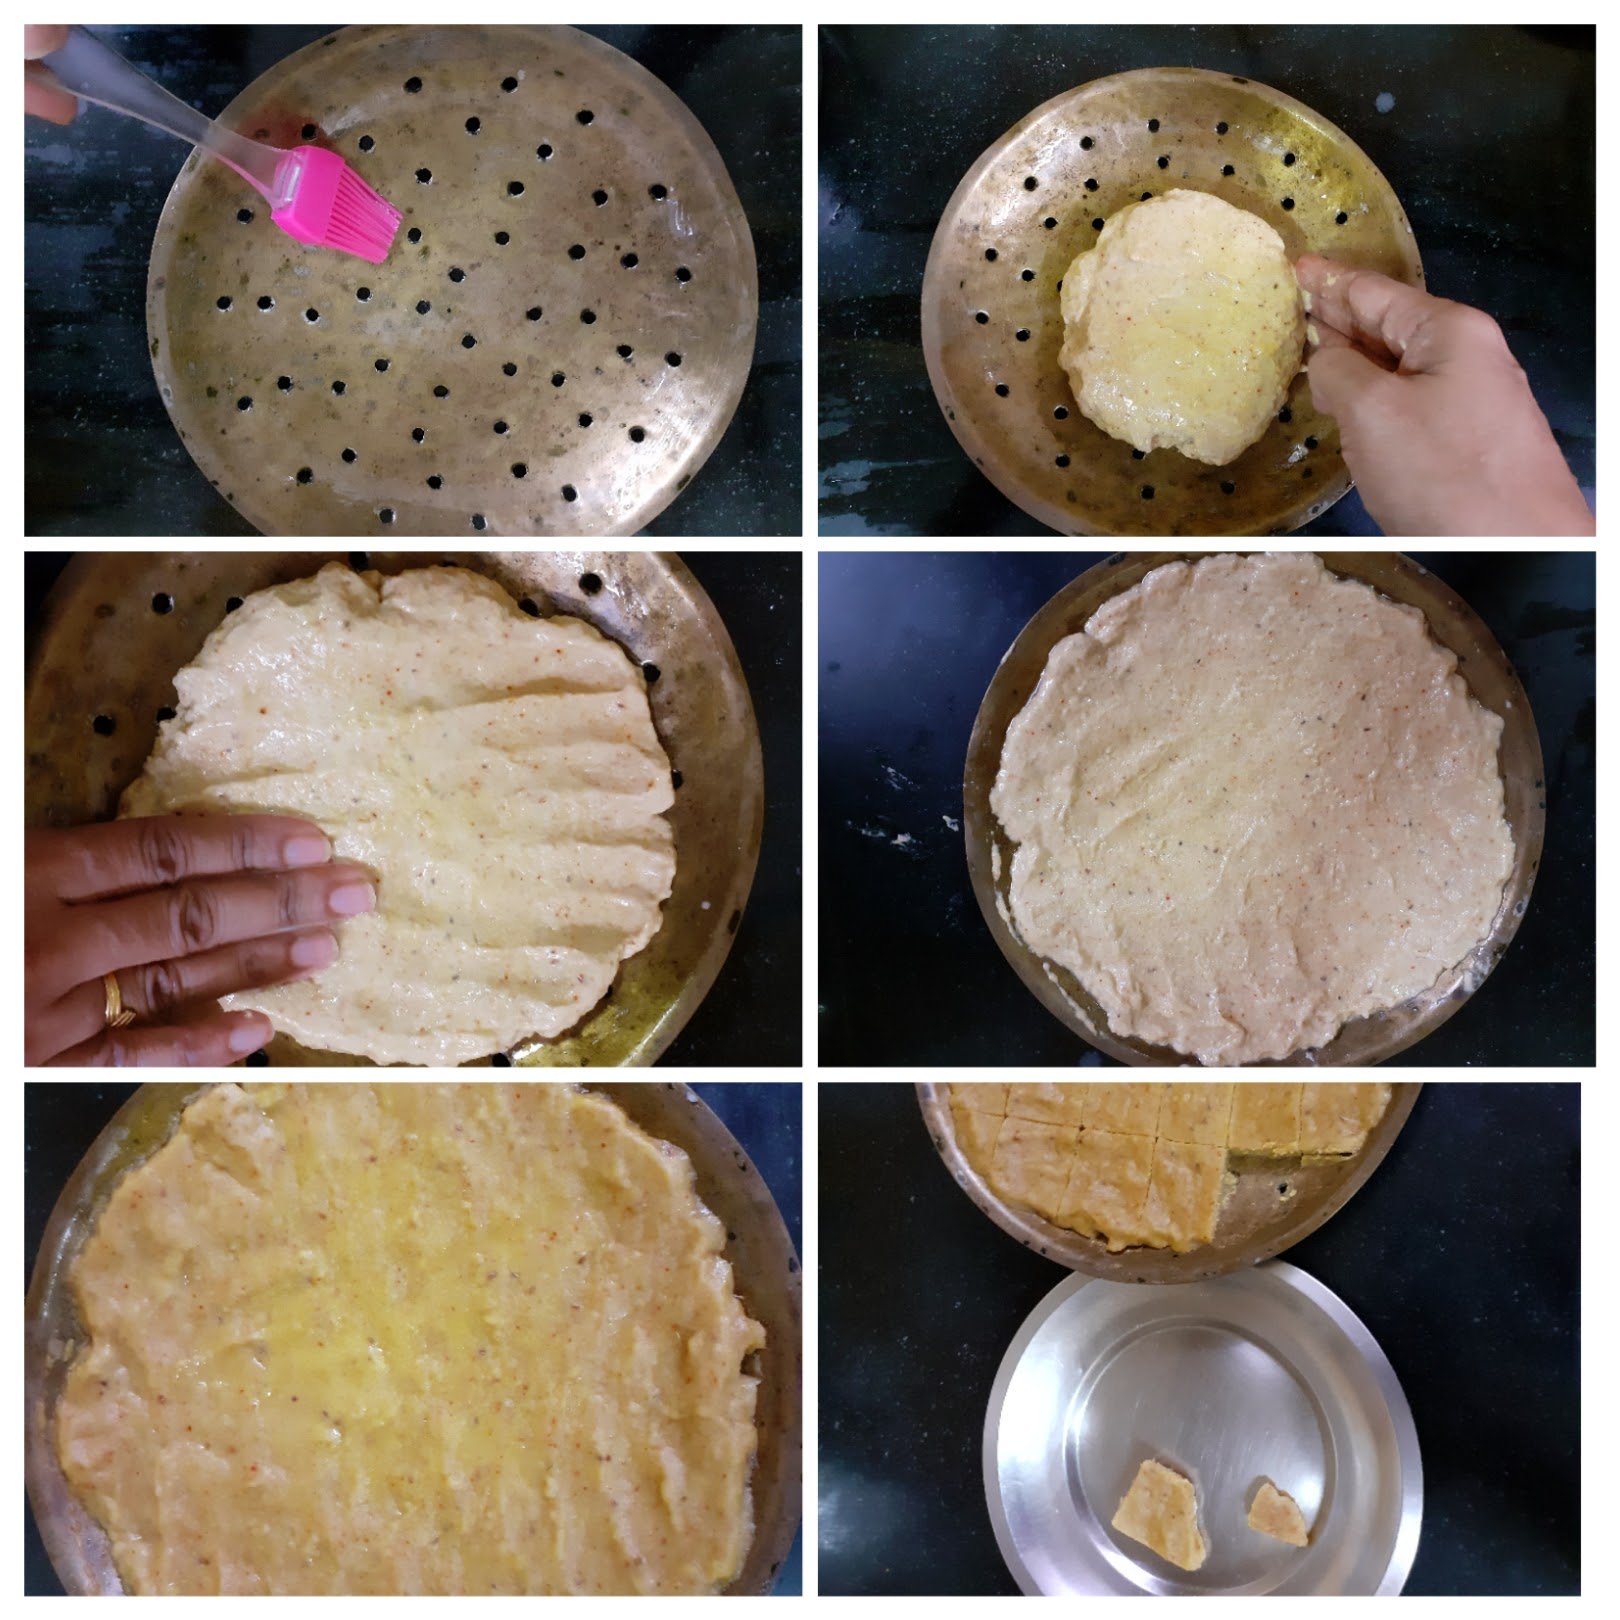
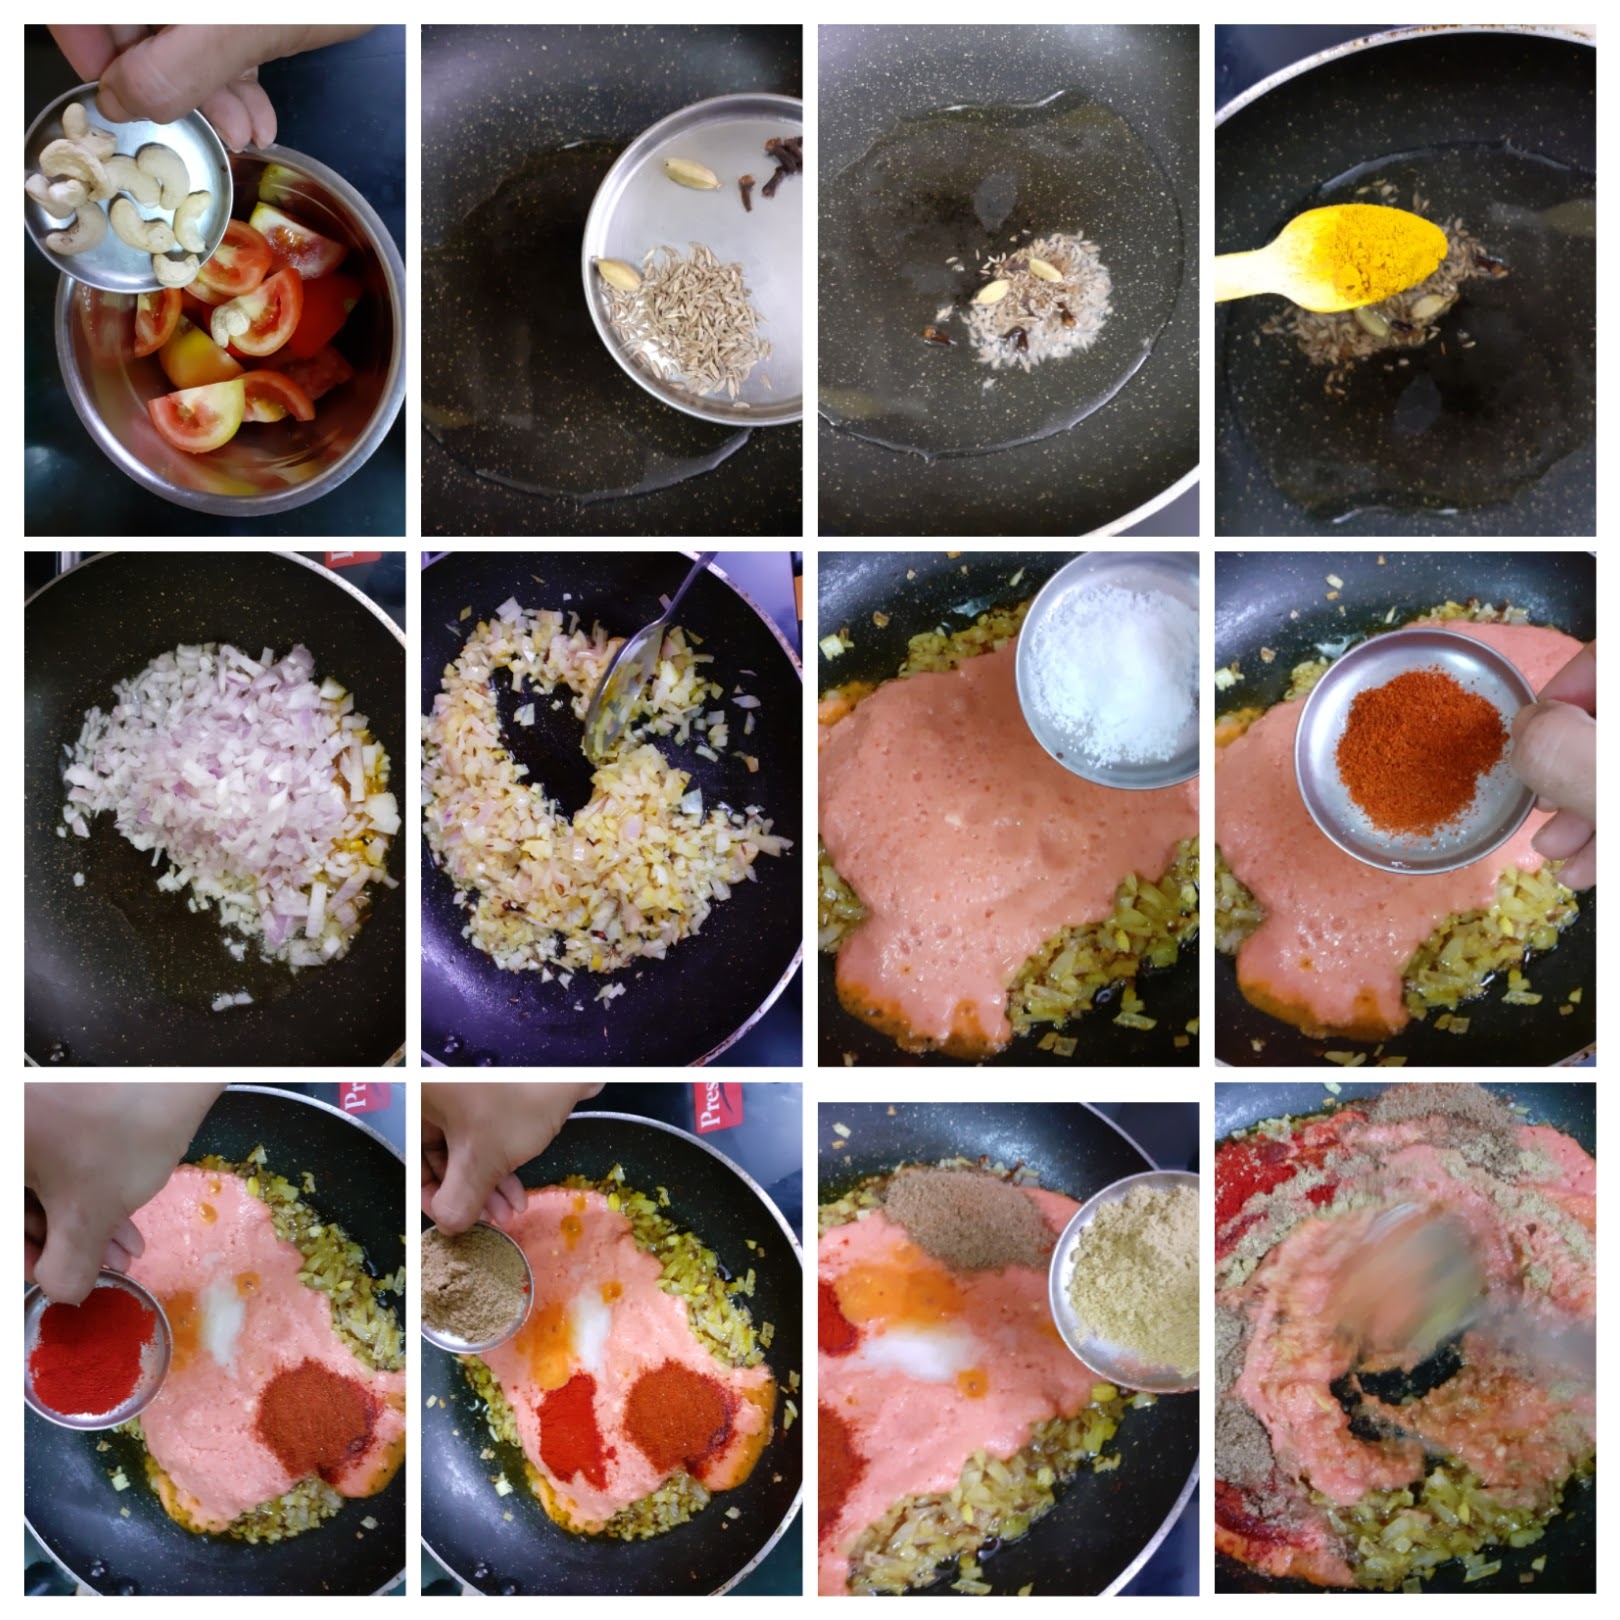
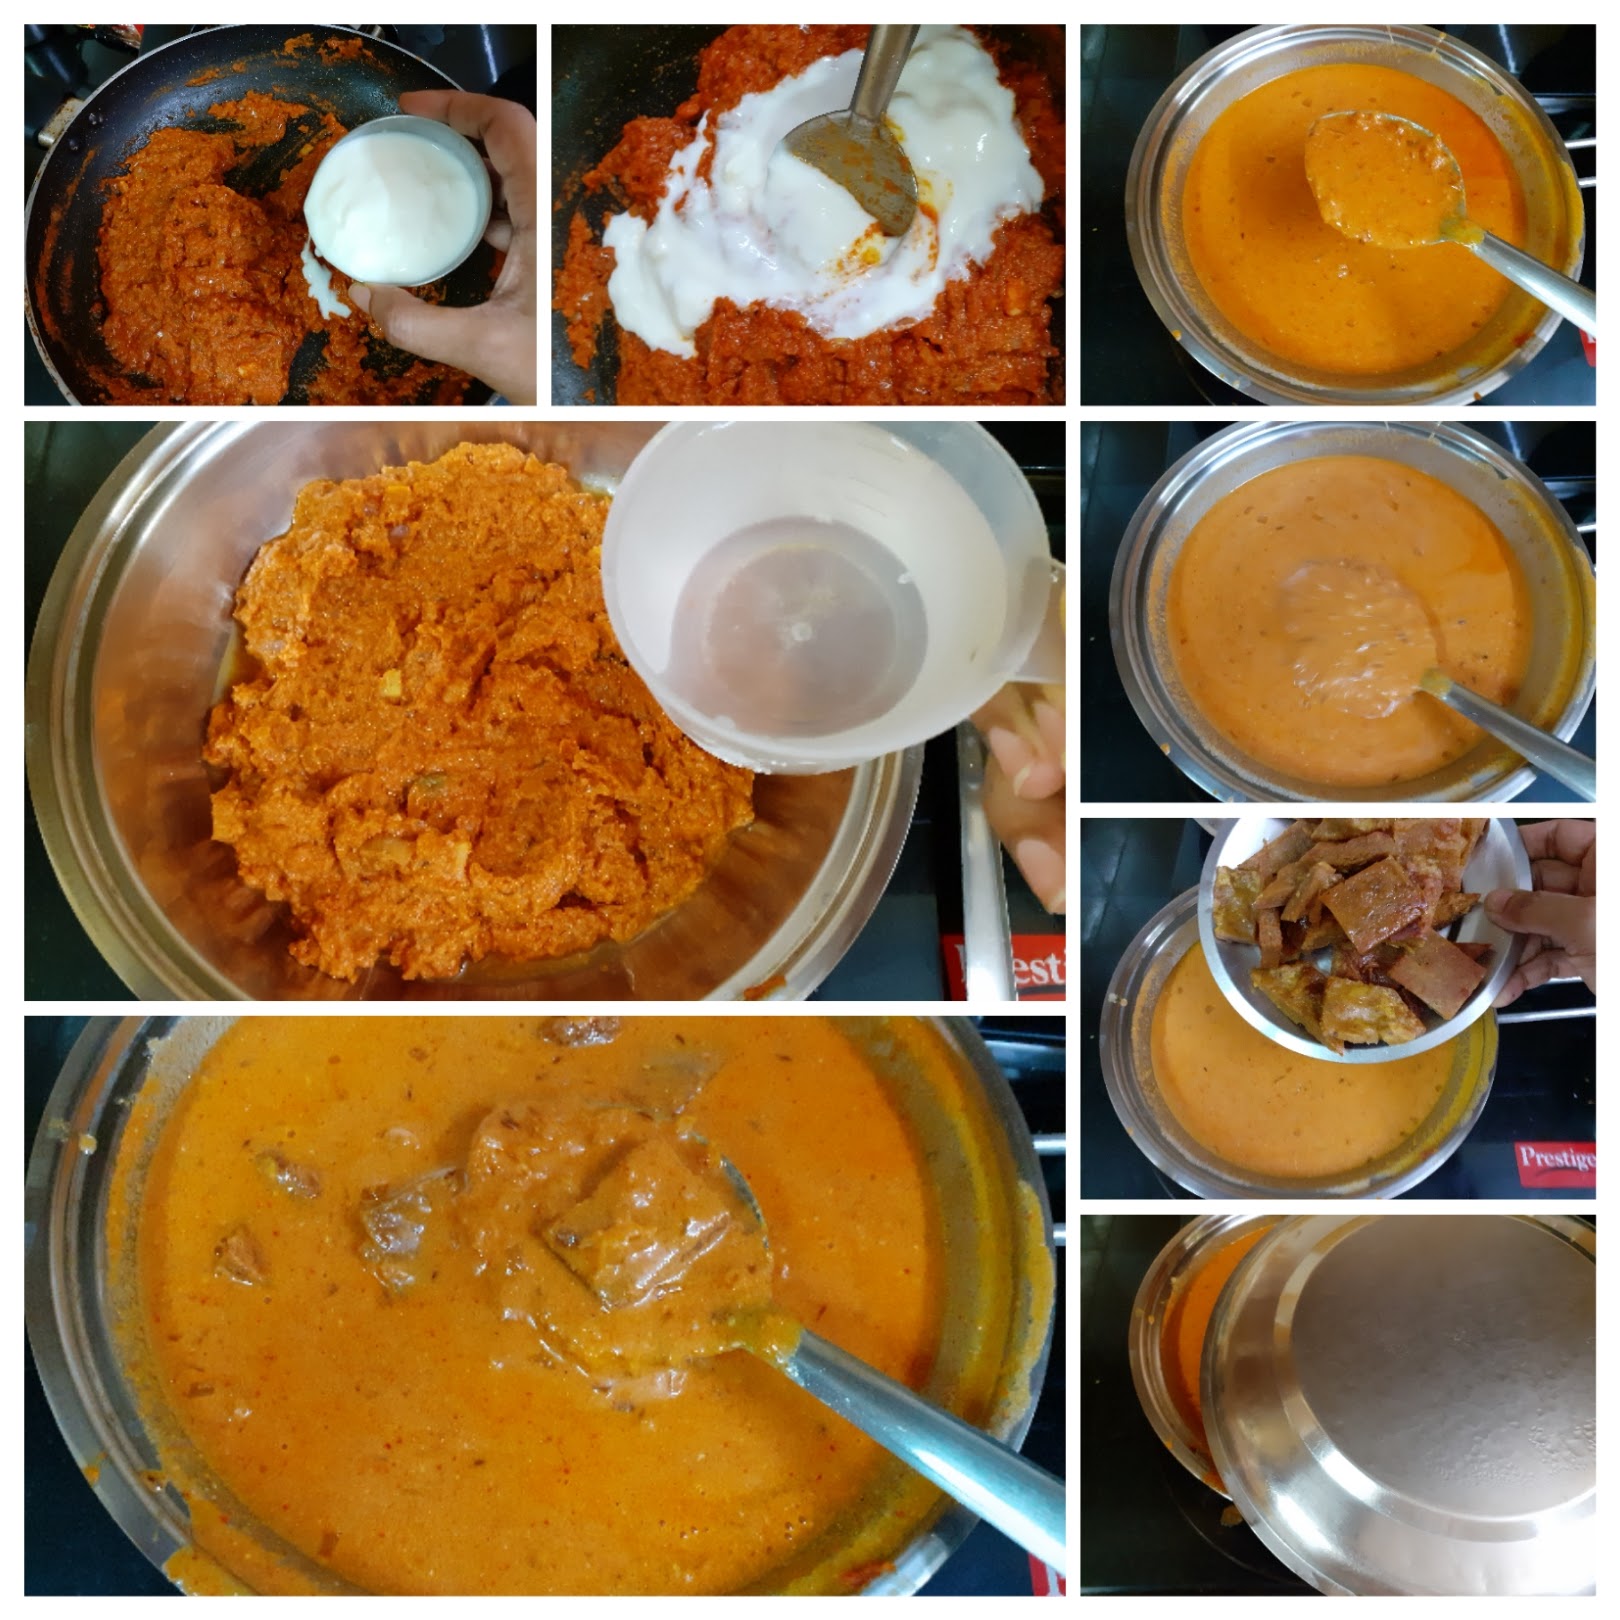
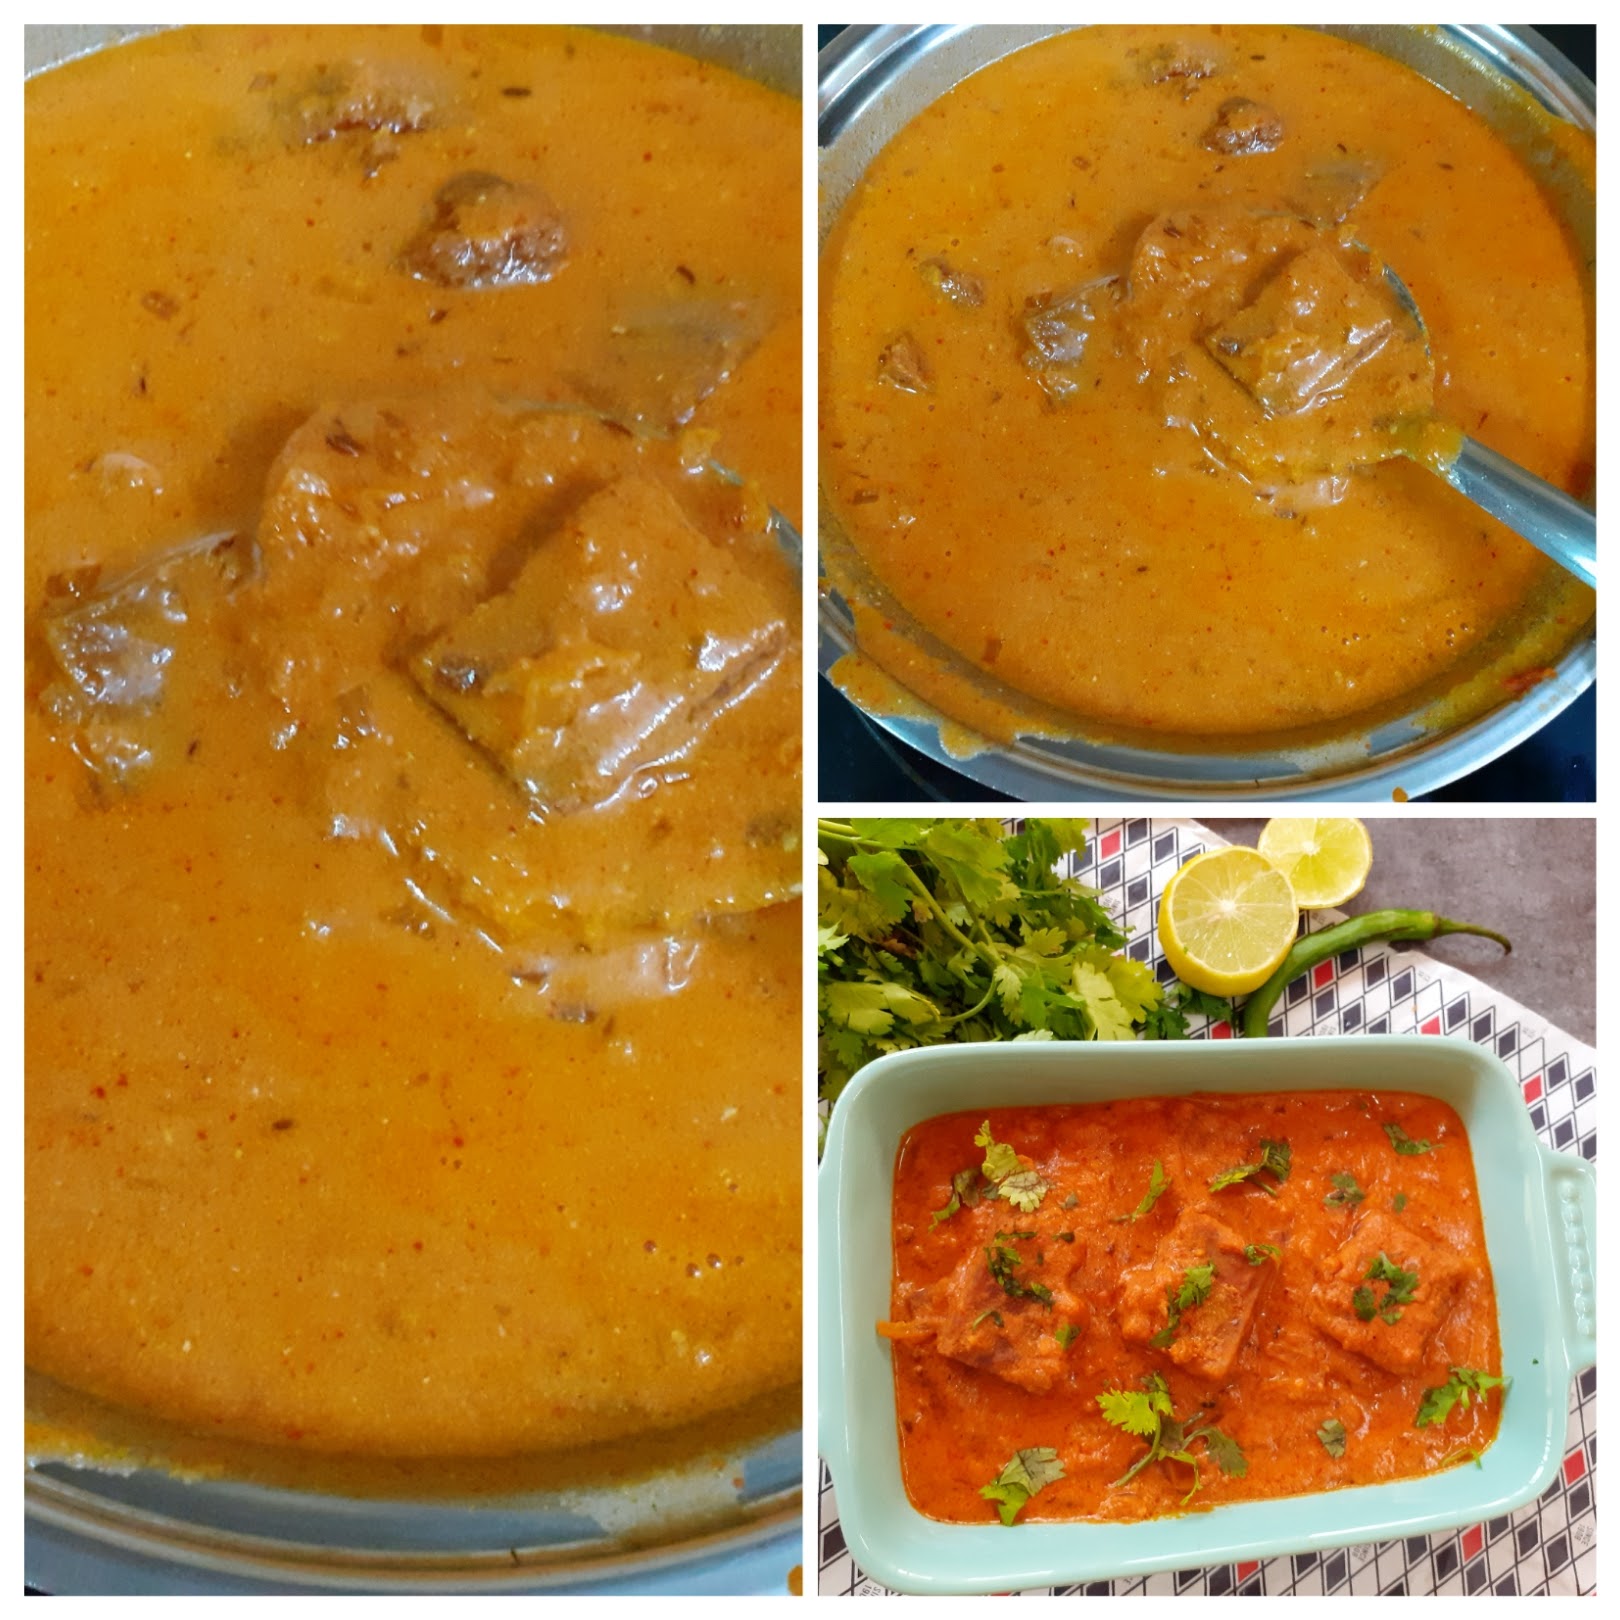
NOTES:
1. Since most recipes suggested soaking and washing the dough, i have followed it. One can also try steaming the dough, cutting to pieces and frying also.
2. The gravy can be allowed to thicken further if serving with Rotis.
3. Whichever the method, resting the dough for 15 mins is essential.
If you tried this recipe and liked it please comment below. I would love to hear from you. If you have a query about the recipe email us and i’ll respond as soon as I can.
This is my meal with Chakki Ki Sakh. I served it with Jeera Pulav, Bombay Potatoes and Beet root Raita.
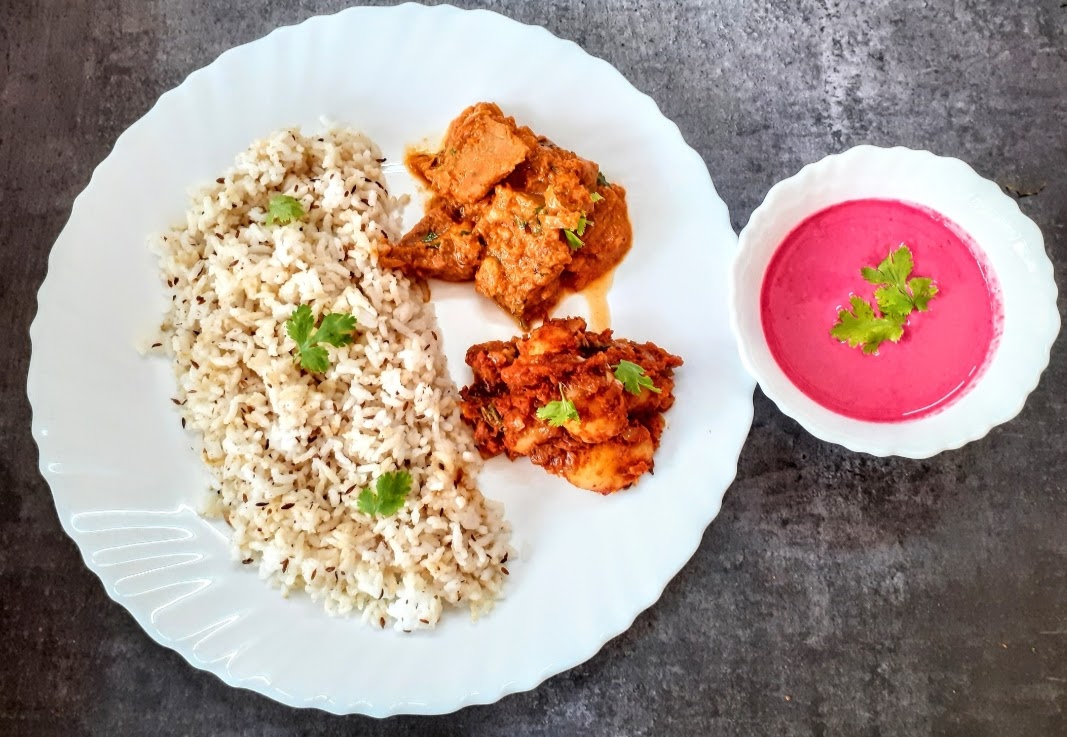
Dosakaya Chutney
Dosakaya is a type of Cucumber that is yellow in colour and round. There are longer versions of the yellow cucumber too, but I have used the round ones.
There are 3 varieties in cucumbers, one is the slicing one, which is used in salads. Then there is the pickling variety and the other burpless ones which the melons belong to. This vegetable Dosakaya, is the pickling kind.
This Cucumber is more popular in South India as compared to other places and especially in Andhra Paradesh they make many dishes of it. This chutney is my favorite of all those recipes and hence I am bring it here to share with all if you. Cucumber have a lot of water, minerals in them and their seeds are edible too. In summers one must include them as much as possible in ones diet.
For people who are first timers at using this vegetable, the skin needs to be peeled and seeds discarded and the flesh is used to cook. This chutney is an ideal accompaniment to Dosa, Chapati, Idli, Puri, Parathas and even hot rice.
This is a simple recipe so does not involve any stepwise instructions. I have included a video instead and the directions to the recipe.
While you are here also check out other recipes like Homemade Schezwan sauce, Thengai Molagapodi (Coconut Gun powder), Roasted red Bell Peppers Chutney, Homemade Pesto, Curry leaves Podi (Karivepilai Podi), and more.
Here is the recipe for Dosakaya Chutney-
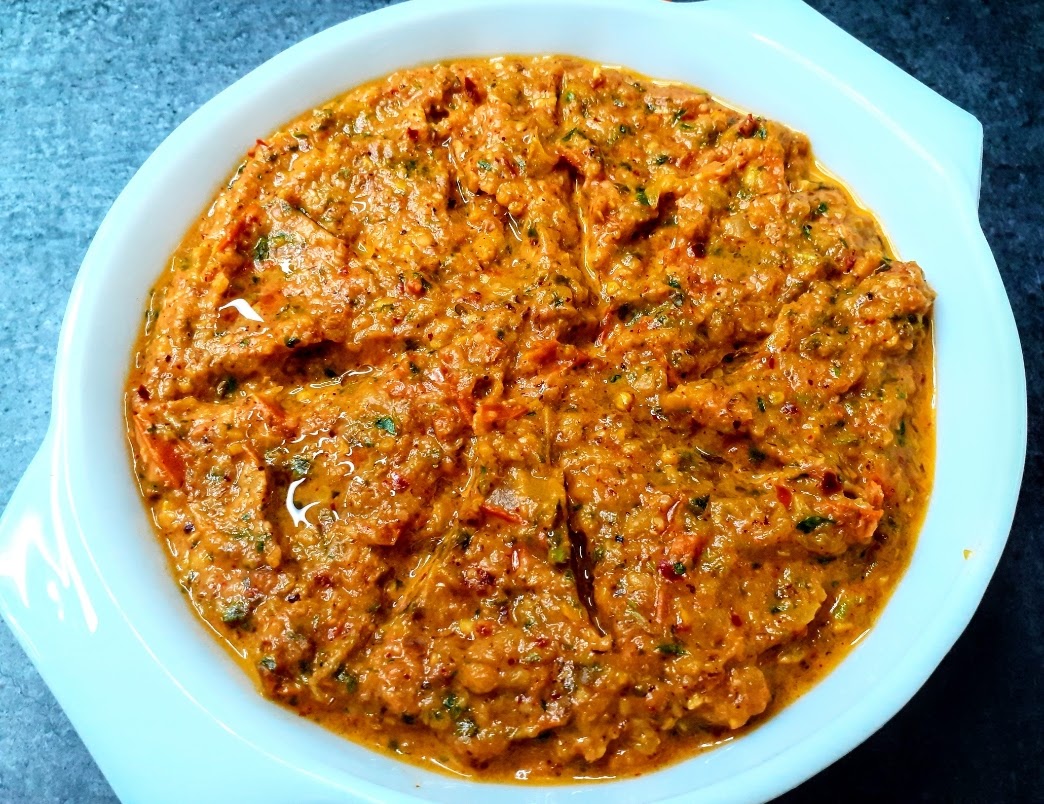
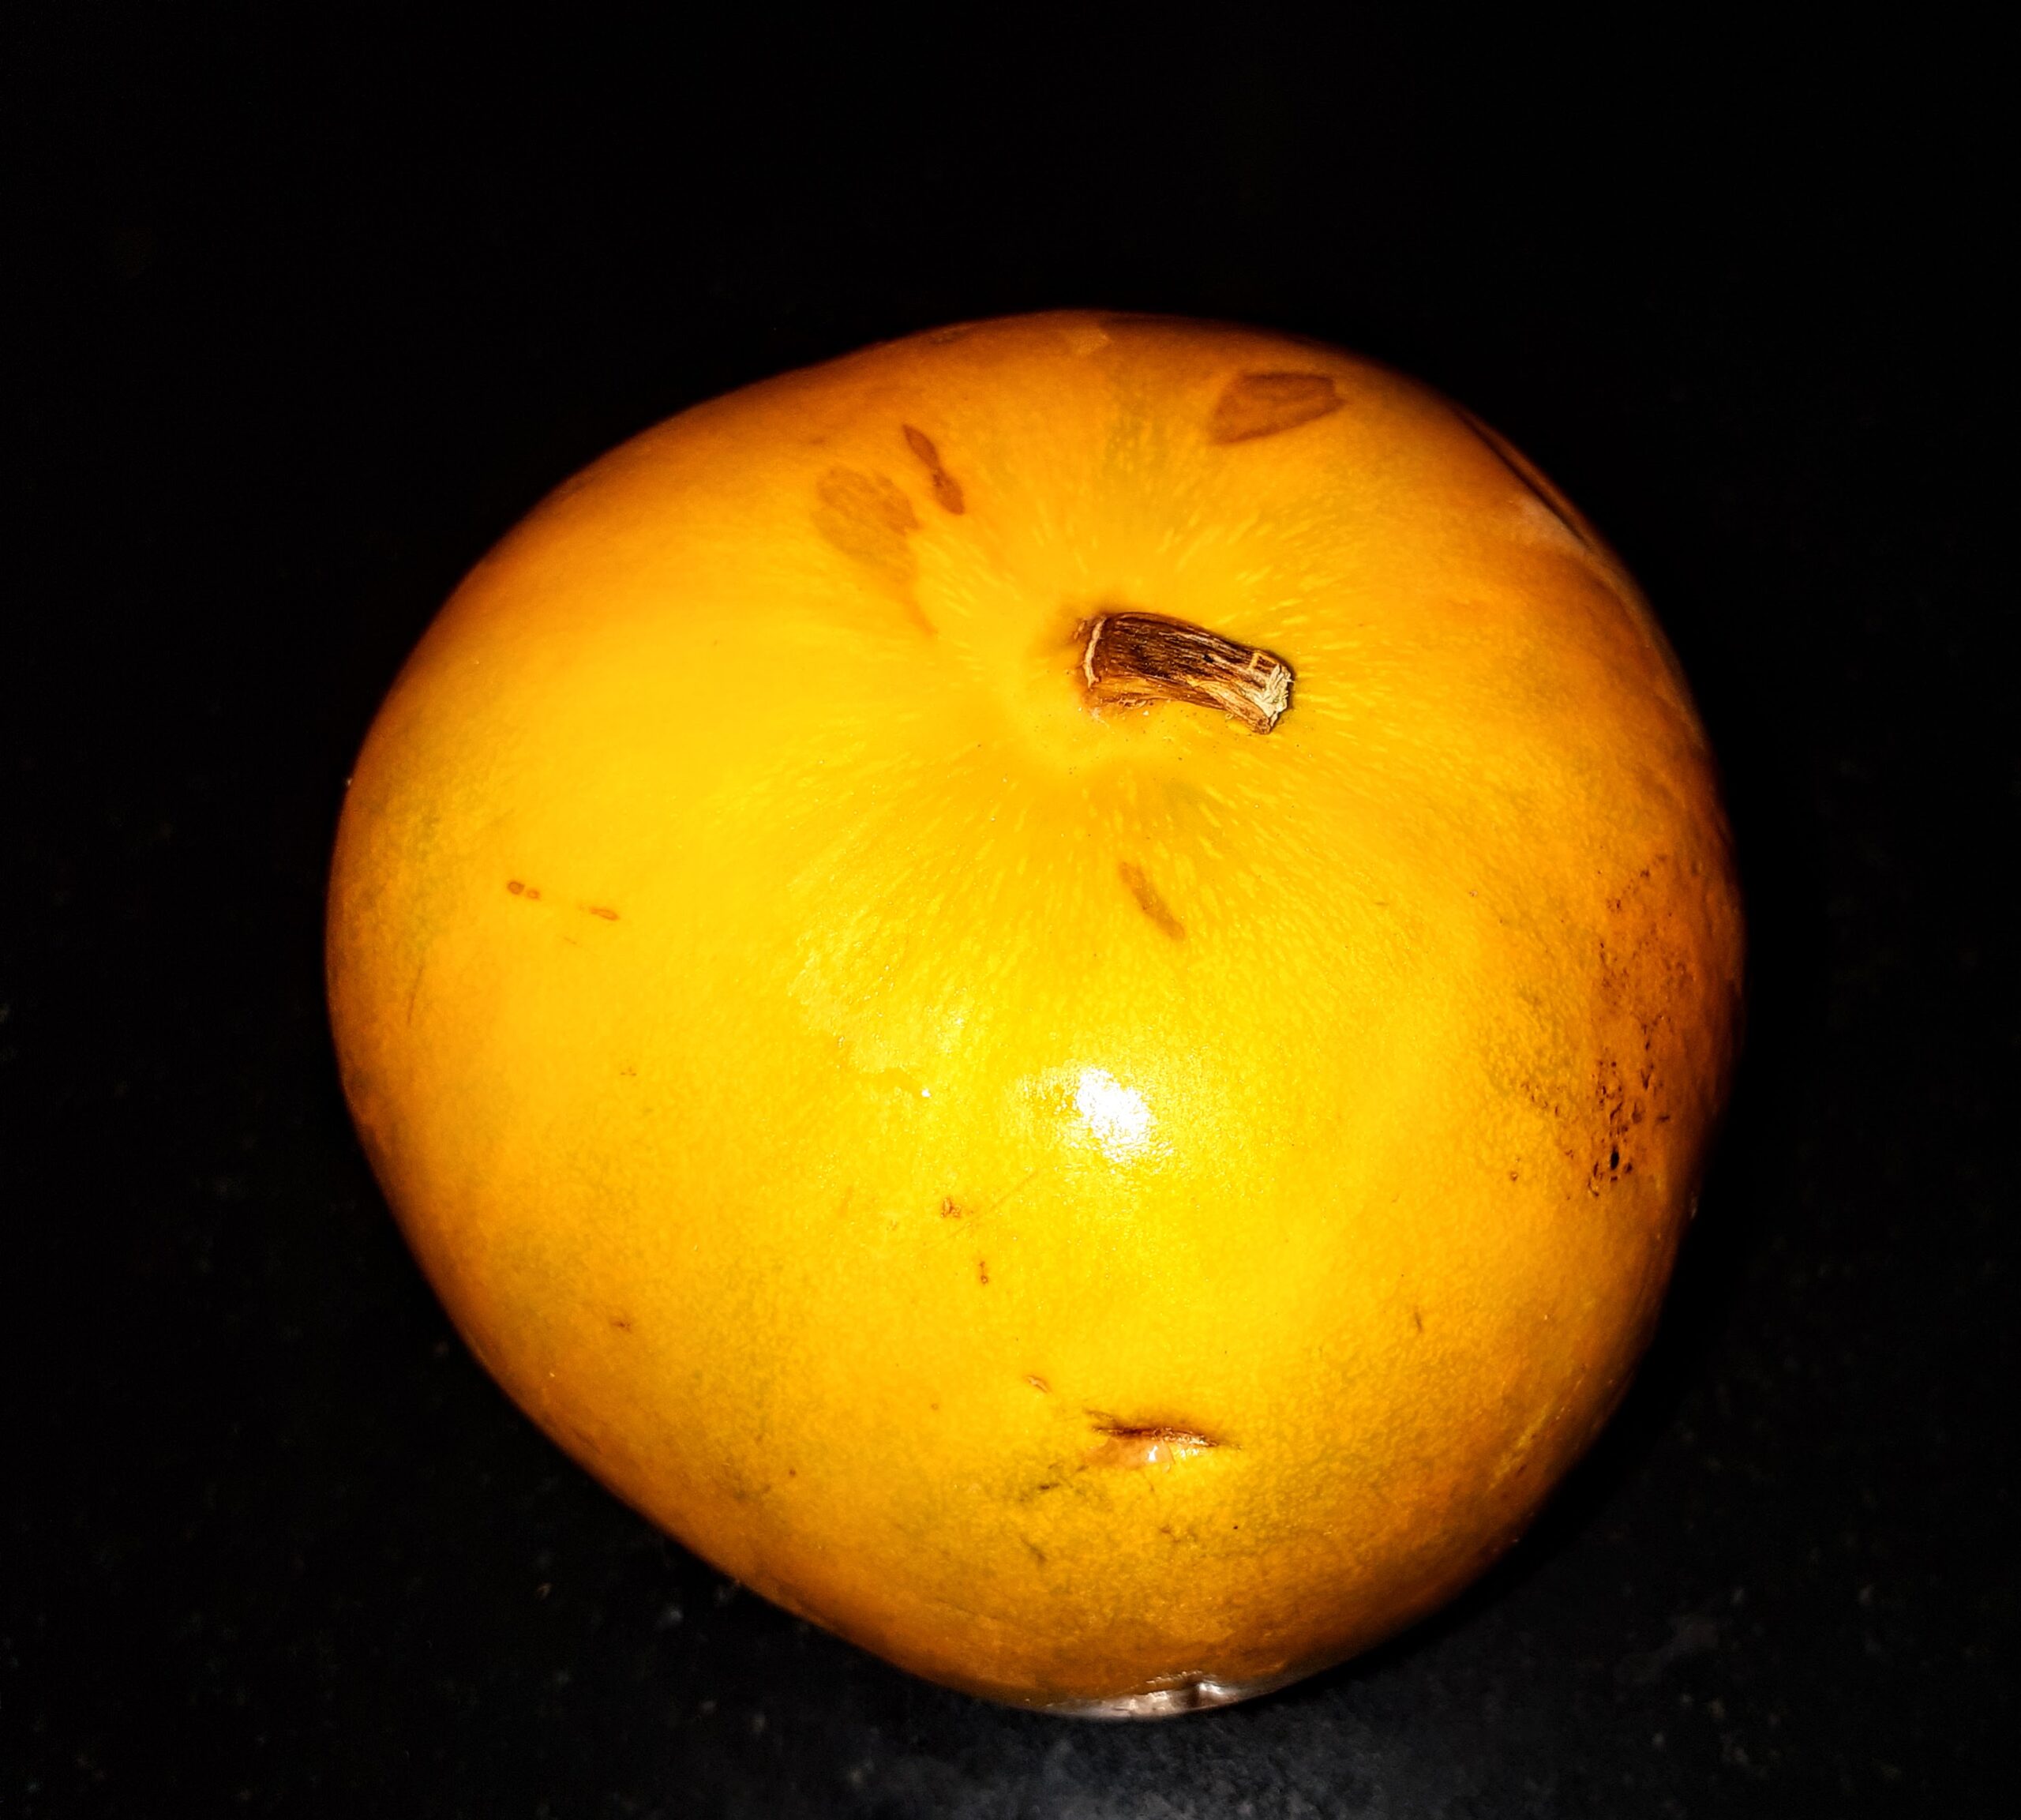
Ingredients:
Dosakaya/ Yellow Cucumber 1 medium sized, skin peeled, seeds removed and flesh chopped to pieces.
Tomatoes 2 large or 15-15 Cherry Tomatoes ( I used Cherry tomatoes)
Mustarrd seeds 1 tbsp
Methi seeds/Fenugreek seeds 1/2 tbsp
Chana Dal/ Gram dal 1 tbsp
Urad Dal 1/2 tbsp
Dry Red chillies 4
Green chillies 2-3 depending on spice
Asafoetida a pinch
Fresh Coriander leaves a handful
Oil for sauteing
Directions:
In a pan heat oil and add mustard seeds, Methi seeds, Chana dal and Urad dal. Fry for 30 second. Now add the Dry red chillies, green chillies and asafoetida and fry until the dals turn light brown. Remove them onto a plate and cool them. In the same pan, add ore oil if required and drop in the cut Dosakaya cubes. Saute them until half done. Now add salt followed by the tomatoes and continue to saute until the tomatoes turn tender. Cool the vegetables. Now powder the fried dals to a coarse mixture in a blender. Making a fine powder does not give the right texture to the chutney. Now add the sauteed vegetables and coriander leaves and blend again to a coarse paste. Watch video for the right texture. No tempering is required for this Chutney, and can be served directly with Idli, Dosa, Rice or Parathas. Enjoy. Bon Appetit !!
Watch Video here ????
Easy Corn Fritters
Corn Fritters are very simple to make, healthy and delicious and they get done in no time with no planning ahead needed. Isn’t this the very reason, one should make this often? This recipe has been on my mind for a very long time and it is a contest on social media that finally got me making this.
Other than the Corn, all other vegetables used here are customizable to one’s preference. I have used every day vegetables like carrots and capsicum. Grated Potatoes(after removing starch), Purple cabbage, Zucchini are other add ins that I usually use.
While you are here check out other snack recipes here like- Semolina Cheese Balls, Medu Vada, Potato Cheddar bake, Pepper vadai, Patra, Dhaniya wale Namak Pare, Oatmeal Cookies, Samosa Pie, and more…
Here is the recipe for Corn Fritters–
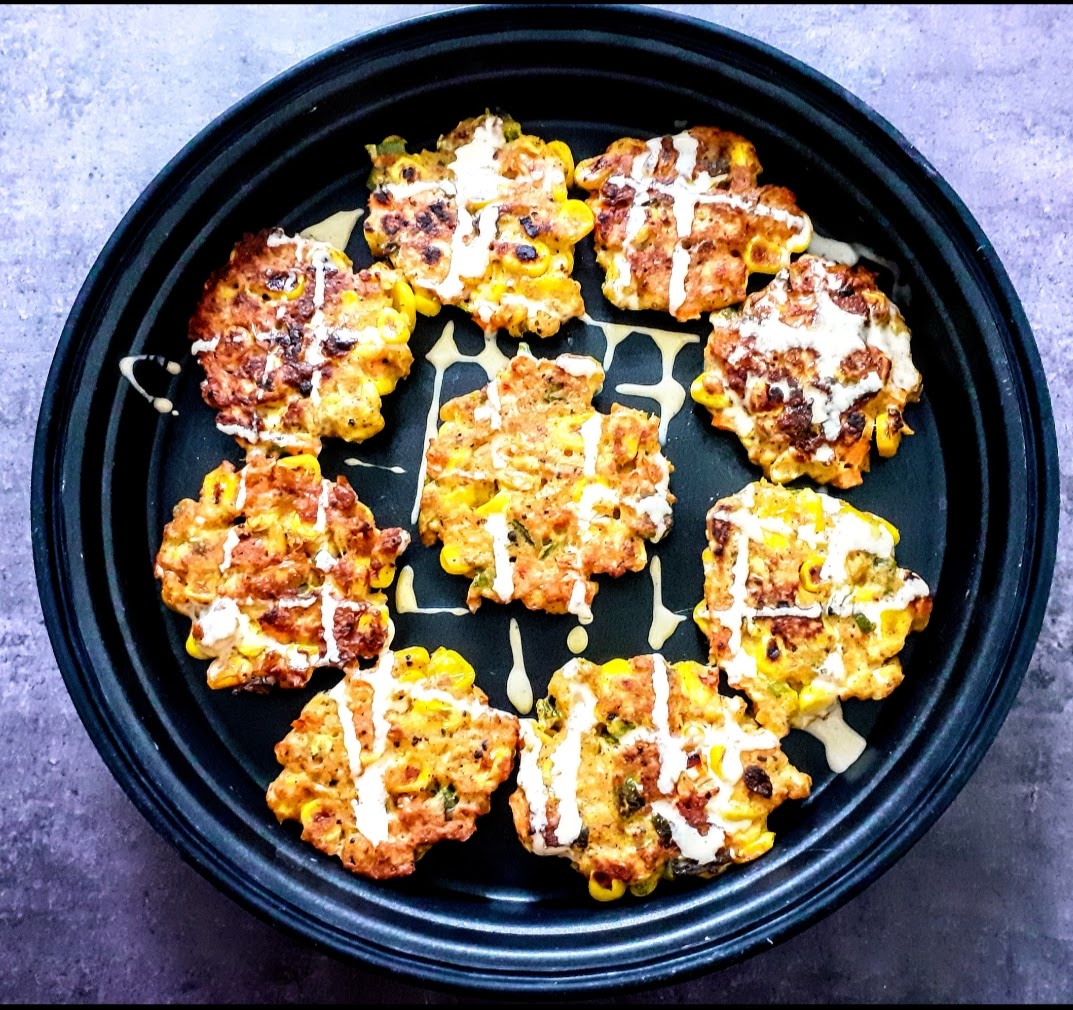
Ingredients:
Sweet corn Kernels 20 gm (divided into 100 each) cooked and kept aside
Carrot 1 small chopped finely
Capsicum 1 small chopped finely
Refined Flour( Maida) 1/2 cup
Egg 1
Salt as per taste
Pepper powder 1 tsp
Red Chilli powder 1 tsp
Oil for shallow frying the fritters
STEPWISE RECIPE FOLLOWS:
1. Boil Corn and divided it into 2 halves. Crush 1 half in a mixie/blender to a coarse paste and keep the other half as whole kernels. To the mashed or crushed corn, add all the other vegetables like carrot, capsicum etc, add the flour and egg, followed by salt, pepper powder and red chilli powder. Add chopped coriander if you like(optional).
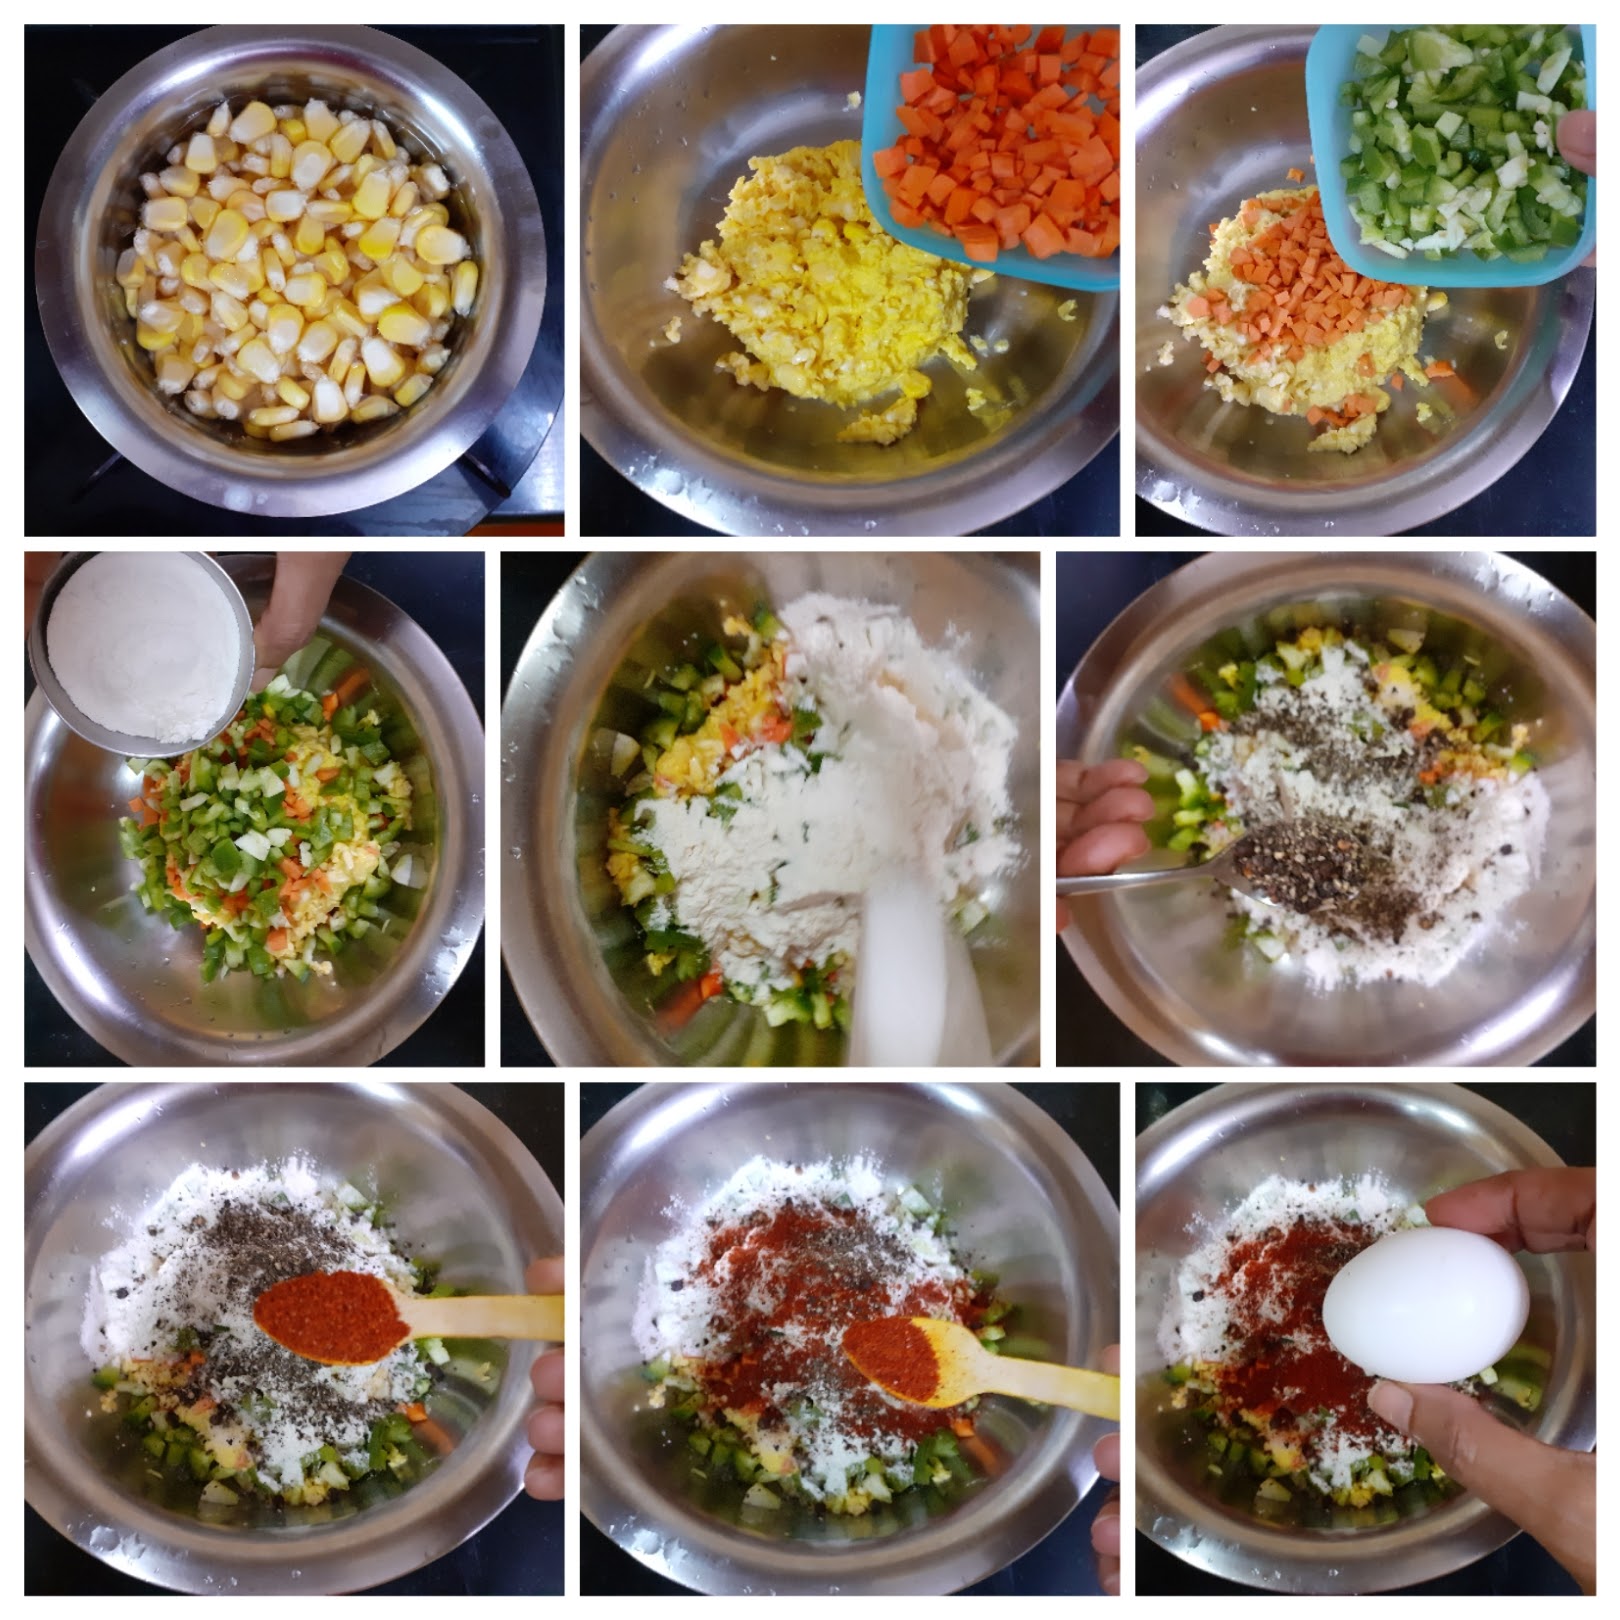
2. Mix well to make a thick mixture, and now add in the whole corn kernels, and mix lightly. Heat oil in a pan (2 tbsp will be enough, more can be added if required). Now drop small scoops of this corn mixture and flatten lightly with a spatula. Coo on one side and flip and cook on the other. Remove and enjoy with some sauce. I drizzled Cheese sauce over them. Alternately bake them in a pre heated oven, by spreading the mixture on a baking sheet, and bake at 200 C for 20 to 25 minutes. Since all oven work at different temperature ranges keep checking from 20 mins onward for doneness.

NOTES:
1. A very simple and fool proof recipe hence no notes are needed.
2. For more quantity just double up the ingredients.
3. As for alternate to egg, Flax egg can be used, but I have not tried the version yet.
If you tried this recipe and liked it please comment below. I would love to hear from you. If you have a query about the recipe email us and ill respond as soon as I can.
Medu Vada / Urad Vada
Urad Vada or Medu Vada, as it is called, is probably one of the most simplest and yet difficult to make recipes. This is because the texture of the ground batter is very important for a perfect turn out and the quality of the Urad dal is important too. With time and practice one gets a hang of it. In this recipe I have tried to give detailed pictures of various steps of grinding so that the recipe becomes a no fail one, and I am depending on your feedback on this once you try it. The Medu Vada is different from its North Indian counter part, because of the hole in the center, and making that hole is what makes grinding the batter perfectly important.
Urad Vada can be a snack, an accompaniment to the mains or even a starter when made bite sized. In South India it is a part of Prasad / Bhog ( holy offering) to God and so is made many times during the year. In my house after eating a few plain with chutney or Sambar the rest are converted to Dahi Vada in the evening. If one doesn’t want to get into making Dahi Vadas, just dunking them is tomato sauce is also a good option.
I prefer using the whole Urad dal without skin for these Vadas, as compared to the split urad dal as they almost are no fail. There are many add ins to into the batter like finely chopped onions, grated carrot, mix of finely grated veggies, the only rule- once the add in’s go in, pat and fry Vadas immediately. Another variation of this Vada is the dry Pepper Vada or Milagu Vadai.
While you are here, check out my other snack recipes like Semolina Cheese Balls, Patra/ Pathrode, Ratlami Sev, Mirchi Bajji/Mirapakaya Bhajji, Potato Cheddar Bake, and more…
Here is the recipe for fluffy Medu Vadai for you–
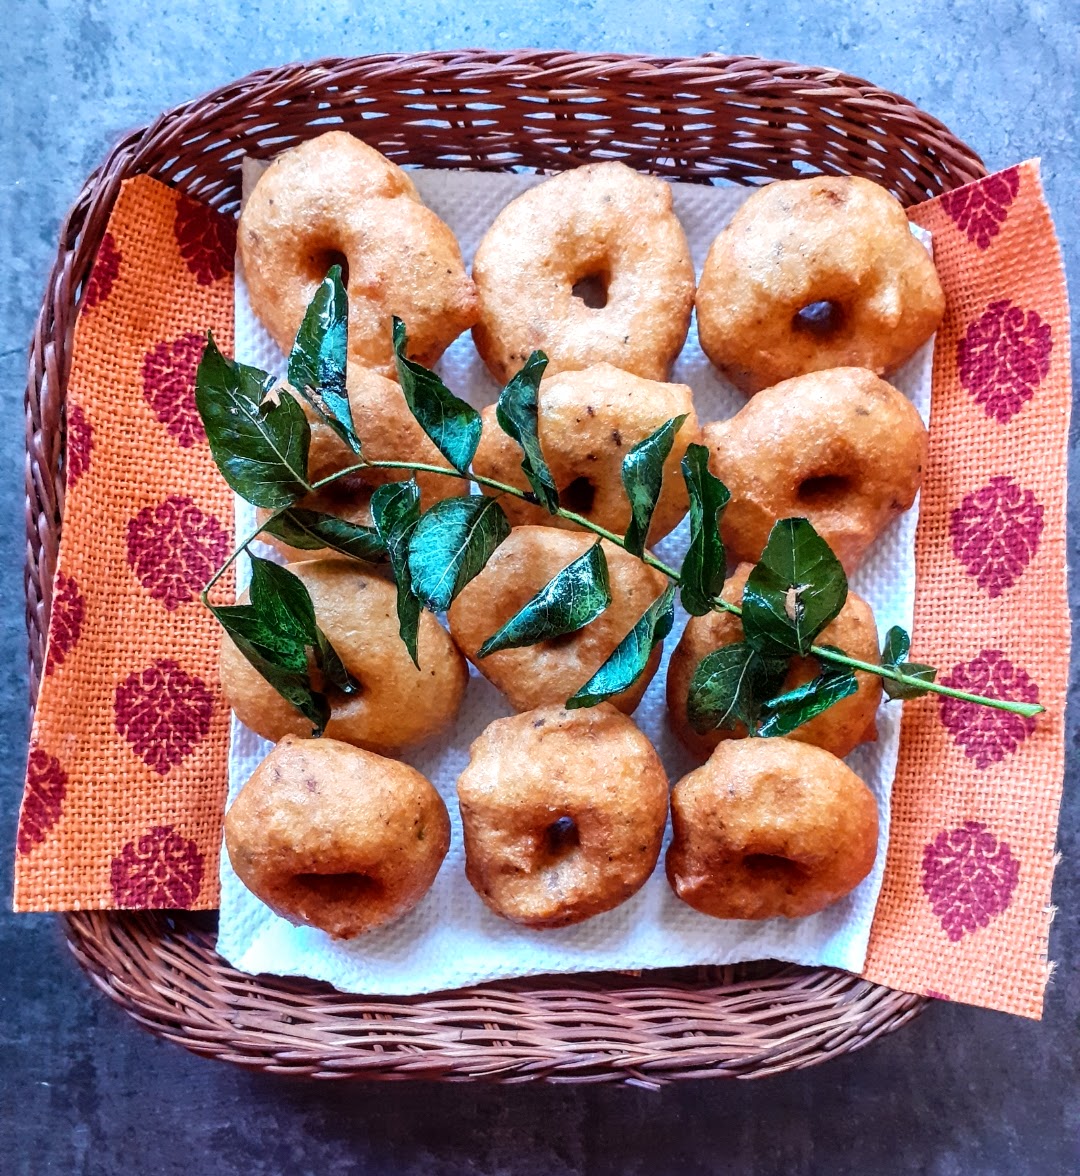
Ingredients:
Whole or Split Urad dal (without skin) 1 cup
Green chillies 2
Ginger 1/2 inch piece
Peppercorns 5 to 6 crushed
Curry leaves a few
Salt as required
Rice flour 1 tbsp (optional)
Directions:
Soak the Urad dal in water for 1 hour. Grind the green chillies, ginger, and curry leaves to a coarse dry paste ( check picture). Now in a blender add the dal after draining all the water and grind to a smooth paste. Add water a little at a time, by sprinkling and not by pouring it. So, sprinkle water, grind, sprinkle, grind, until the batter is smooth and thick. Take care to see that the batter does not become runny or else Vadas cannot be formed. The right consistency of the batter is when it doesn’t fall off your hand easily. Remove the batter from the blender into a bowl, add salt and the green chili and ginger paste, add few more curry leaves if required and rice flour in case using ( I have not used in this recipe), and mix well with your fingers. Next, take a banana leaf or a plastic cover( I have used a flexible plastic lid) for patting the Vada. Now, wipe the leaf/ plastic with some water, take a small lemon sized portion of the batter and place it in the centre of the leaf/plastic, do not flatten, just wet your index finger in water, and make a hole in the centre . Now carefully pick the Vada out of the leaf/ plastic and gently drop it on hot oil and fry until golden brown. Remove on to absorbent paper . Repeat the process for the entire batter. Enjoy hot with Sambar and Chutney.
STEPWISE RECIPE FOLLOWS:
1. Soak the Urad dal in water for 1 hour.
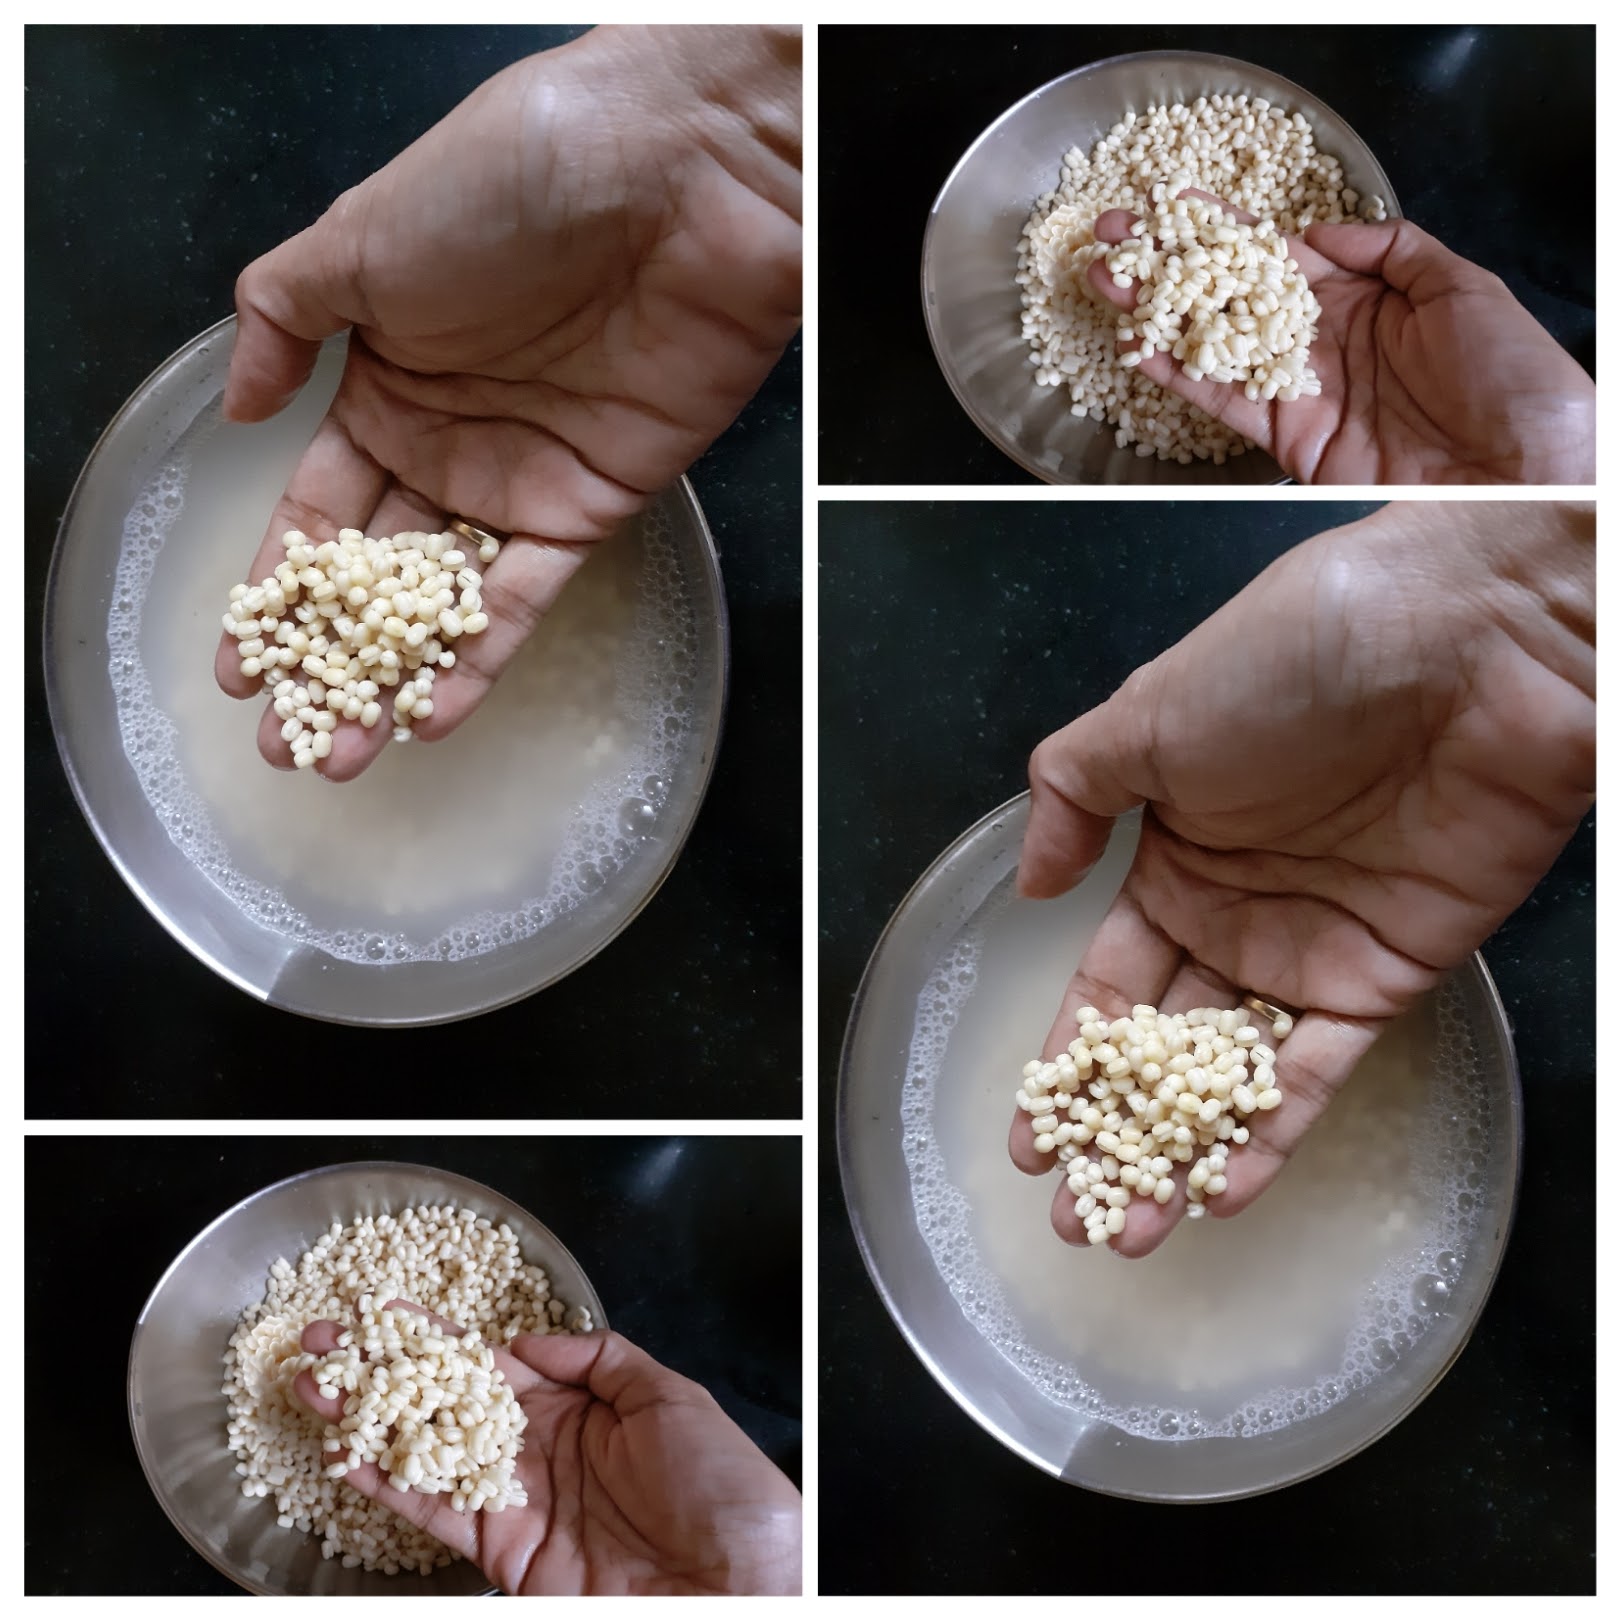
2. Grind the green chillies, ginger, and curry leaves to a coarse dry paste ( check picture).

3. Now in a blender add the dal after draining all the water and grind to a smooth paste. Add water a little at a time, by sprinkling and not by pouring it. So, sprinkle water, grind, sprinkle, grind, until the batter is smooth and thick. Take care to see that the batter does not become runny or else Vadas cannot be formed. The right consistency of the batter is when it doesn’t fall off your hand easily. ( see pics for stages of grinding)
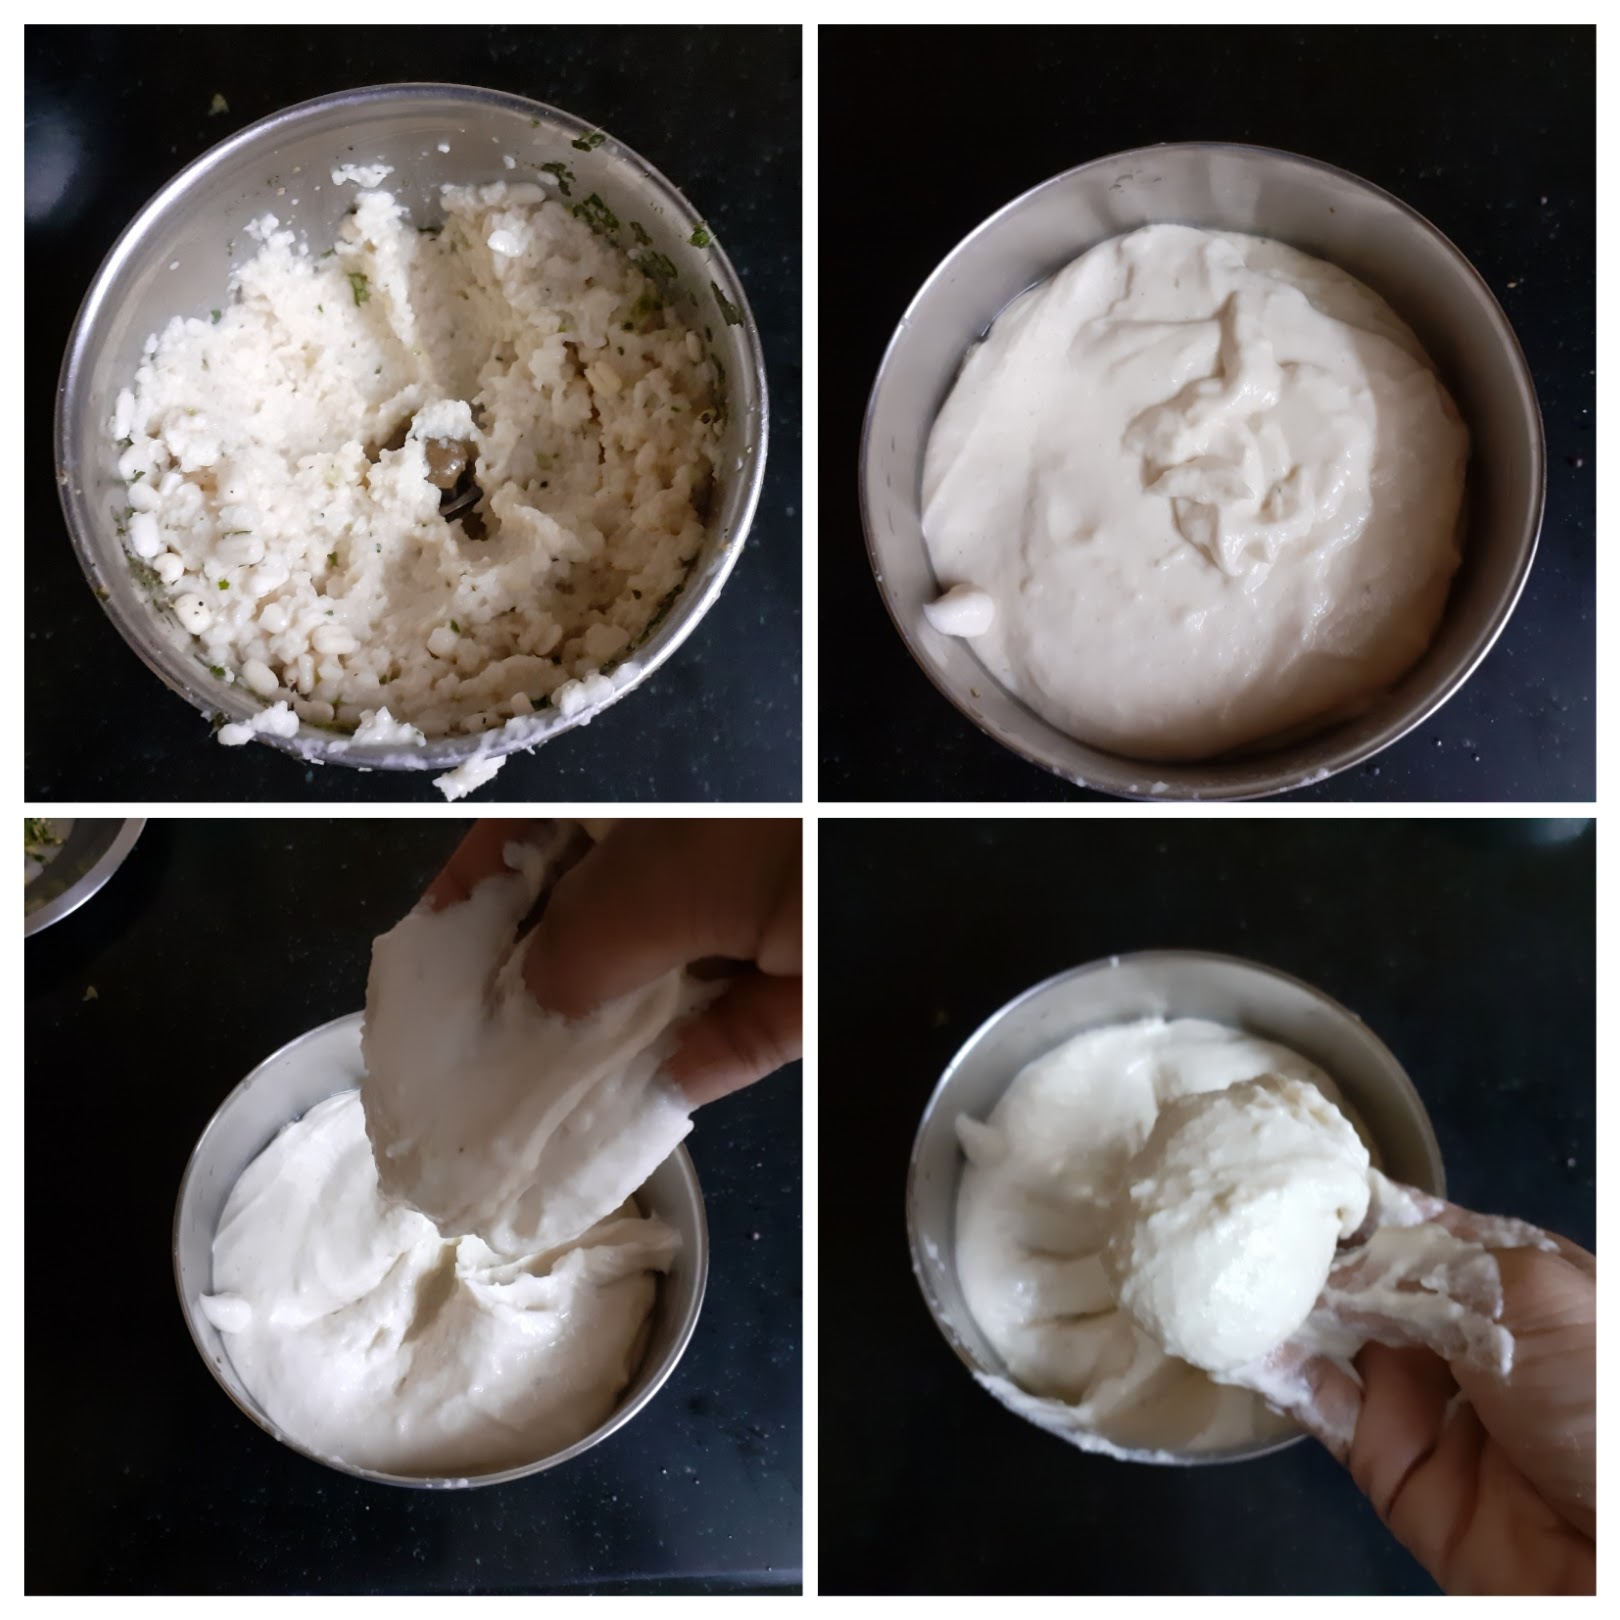
4. Remove the batter from the blender into a bowl, add salt and the green chili and ginger paste, ground pepper powder, add few more curry leaves if required and rice flour in case using ( I have not used in this recipe), and mix well with your fingers.
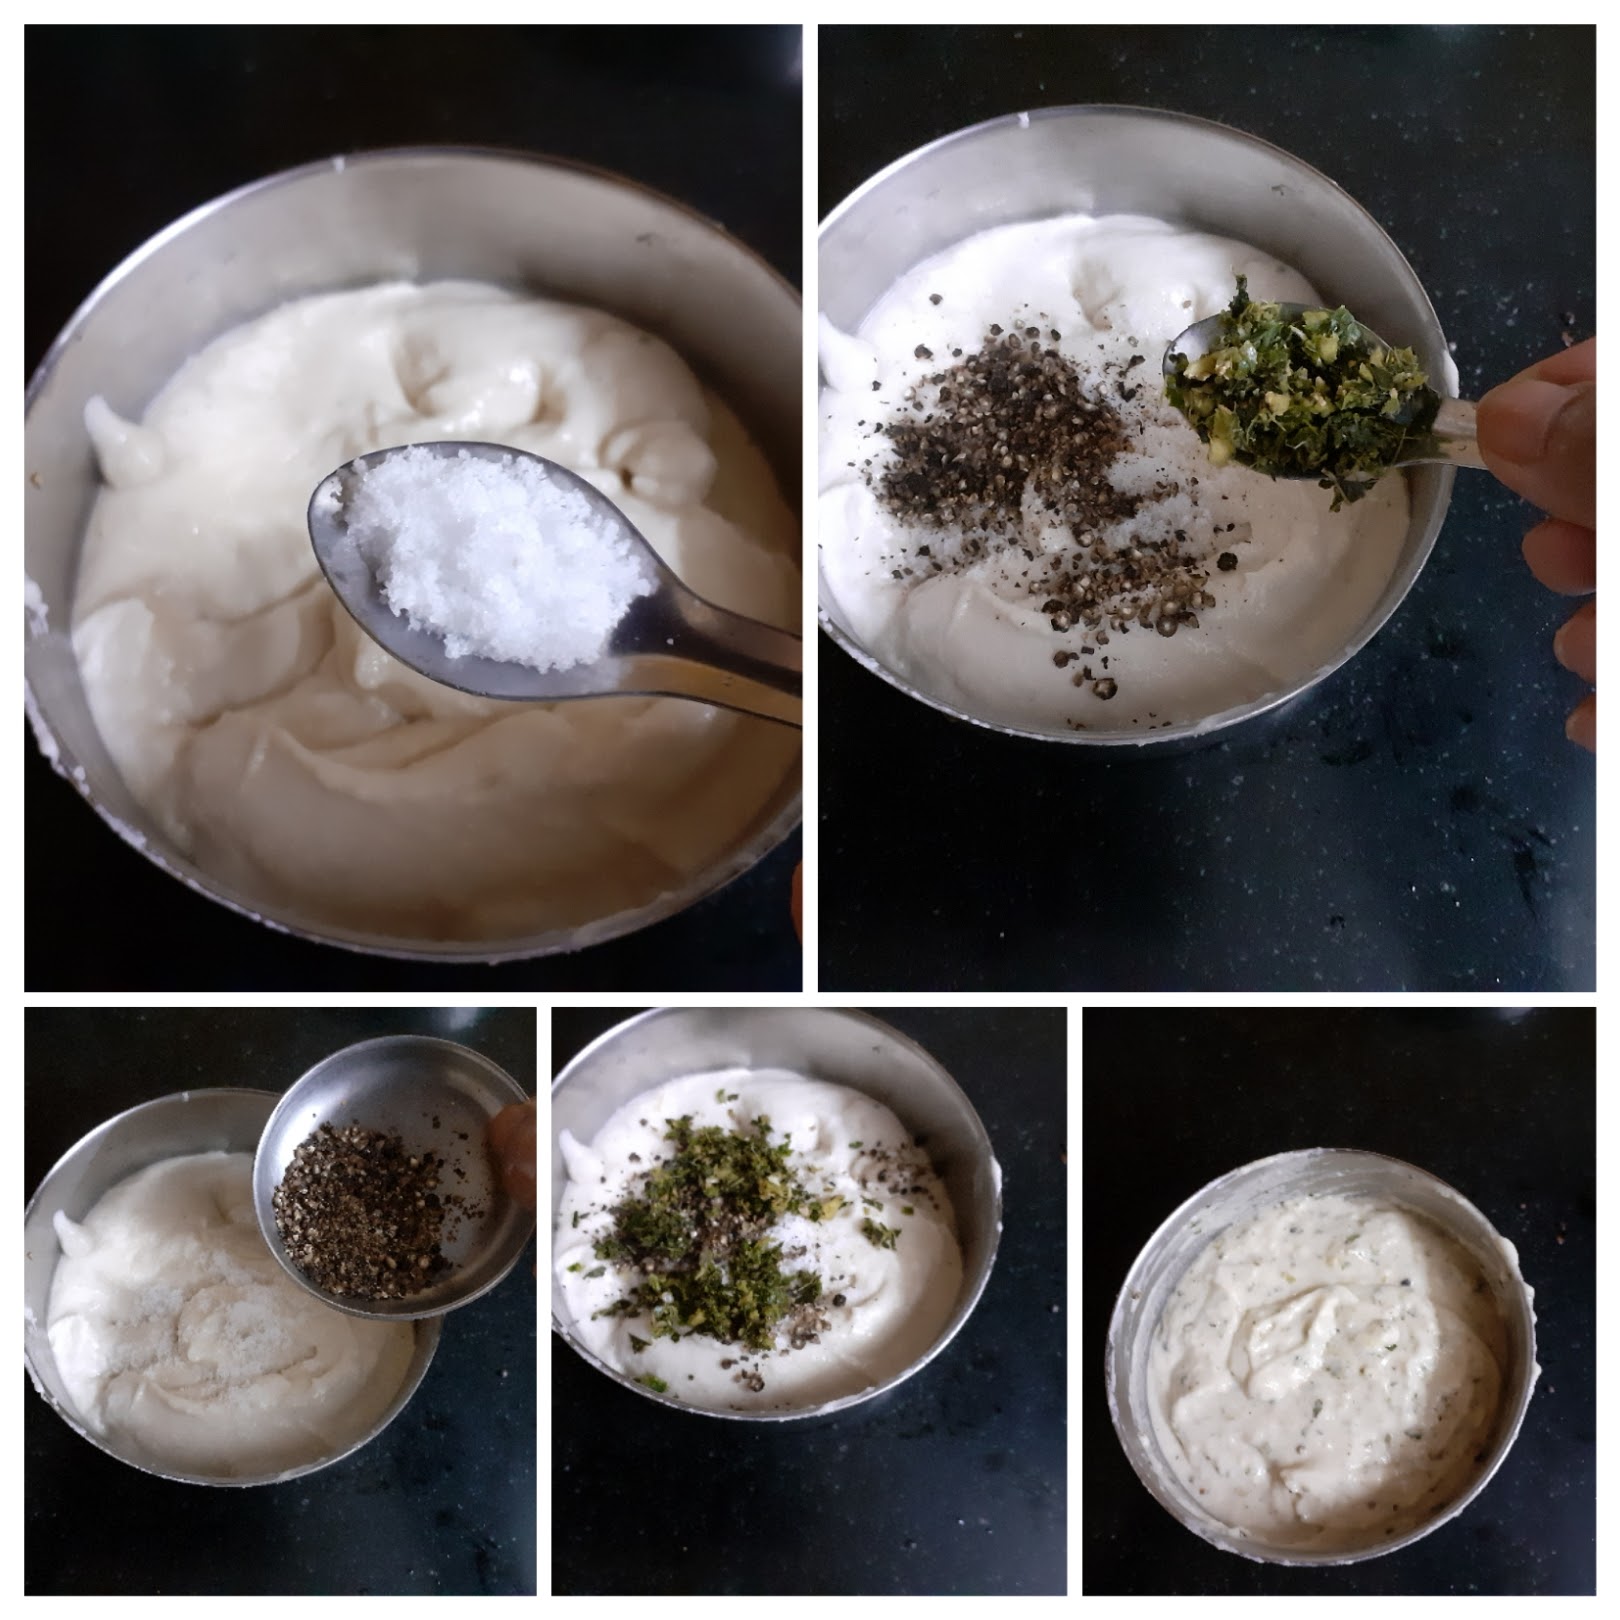
5. Next, take a banana leaf or a plastic cover( I have used a flexible plastic lid) for patting the Vada. Now, wipe the leaf/ plastic with some water, take a small lemon sized portion of the batter and place it in the centre of the leaf/plastic, do not flatten, just wet your index finger in water, and make a hole in the center . Now carefully pick the Vada out of the leaf/ plastic and gently drop it on hot oil and fry until golden brown. Remove on to absorbent paper .
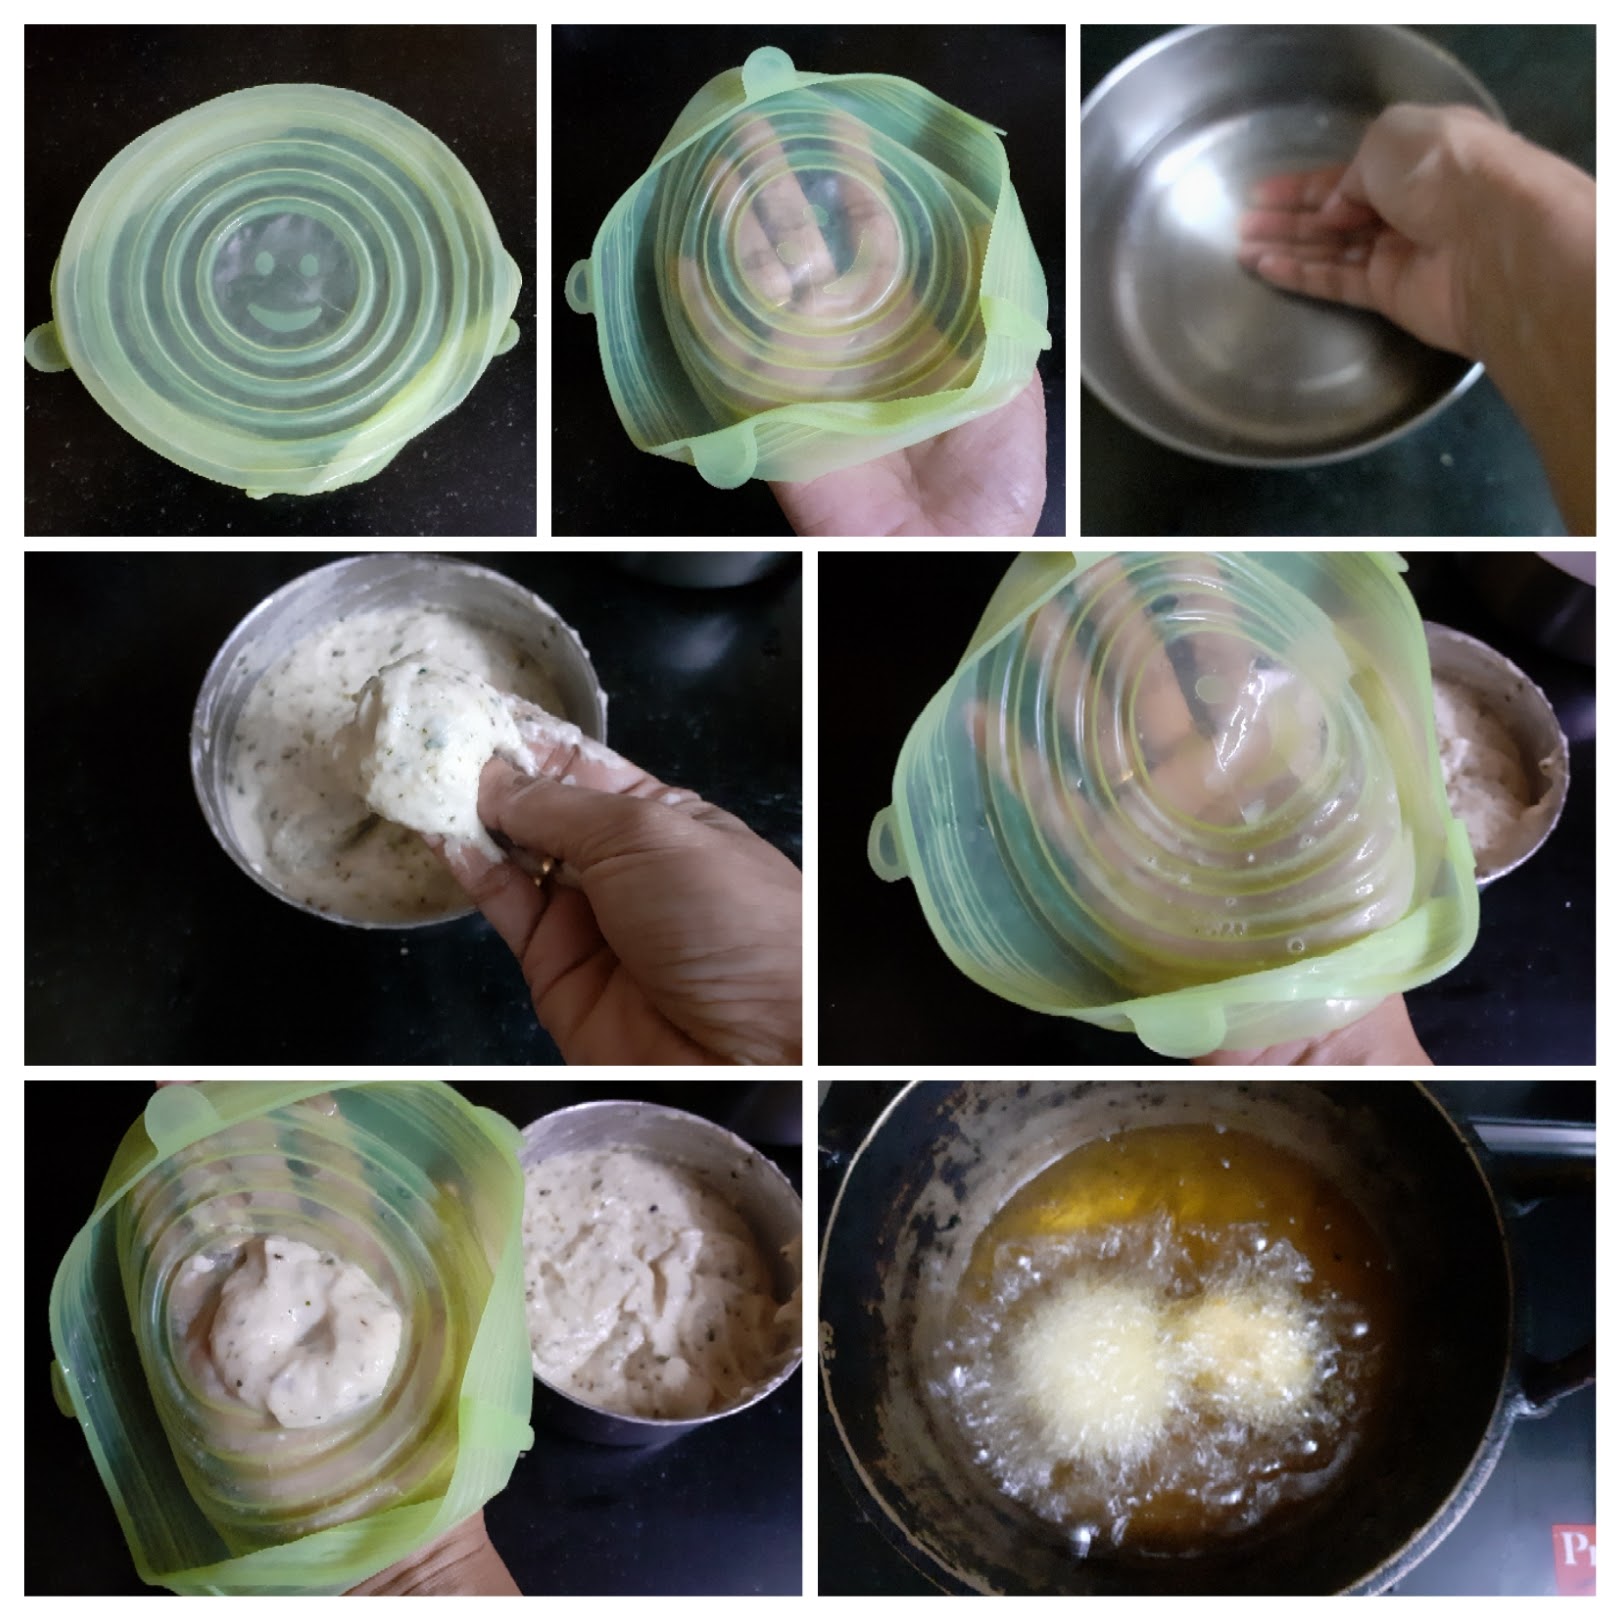

NOTES:
1. Sprinkling water a little at a time and not pouring it into the dal while grinding is critical.
2. The batter should be smooth, yet not lose or runny.
3. I usually add rice flour only if I find that the batter is not turning fluffy as we grind, and kind of flat. Anyway adding 1 tbsp does no harm, and gives crisp Vadas.
4. I prefer to grind in the wet grinder, as then, even with minimum water we are able to grind well. But those who don’t have one can certainly use the blender and be patient while grinding.
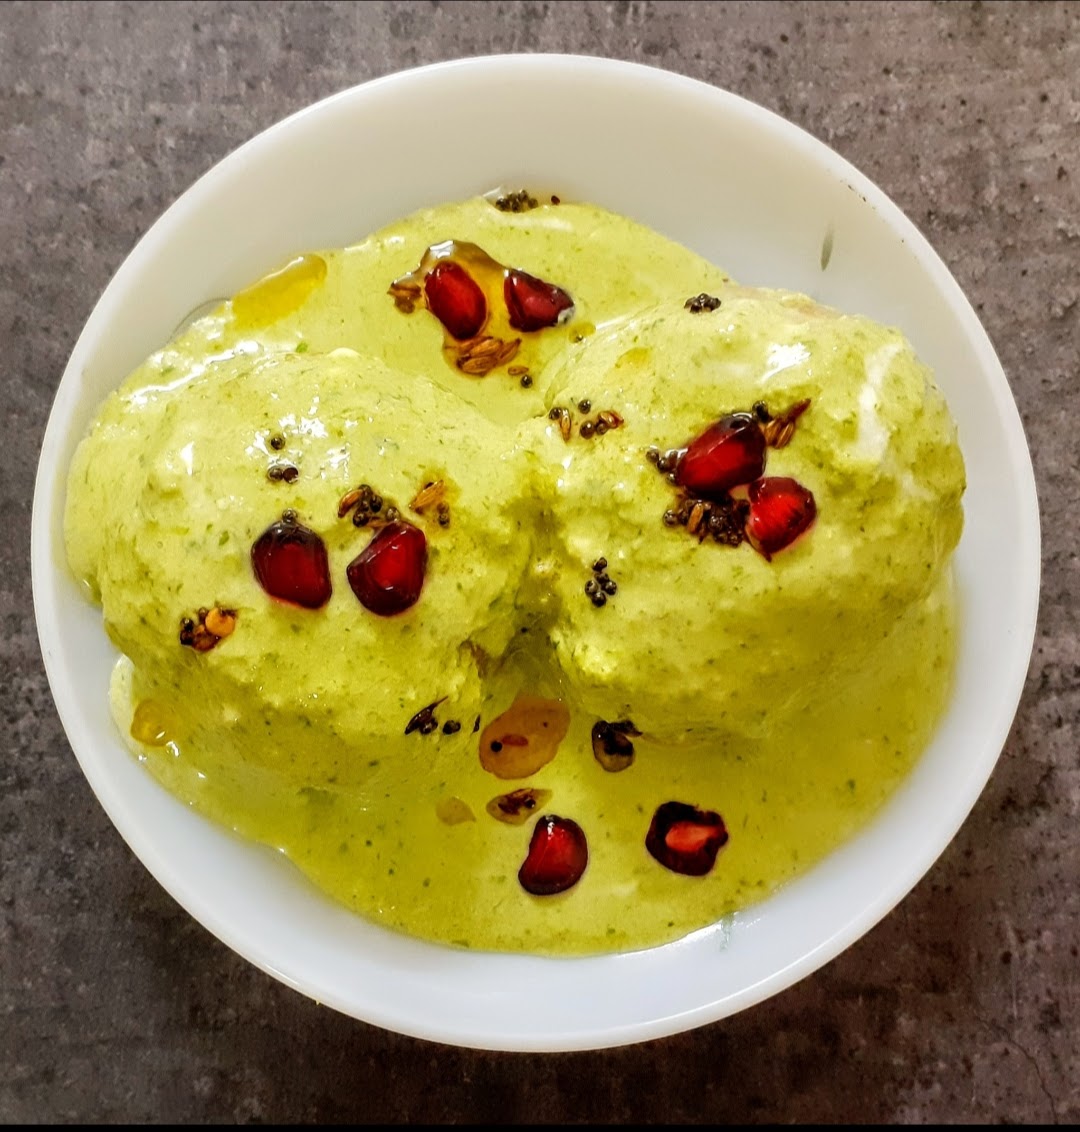
To make these yummy Dahi Vadas – To a blender add 1/2 a bunch of coriander leaves, 1/2 inch piece ginger and two green chillies. Blend to a paste. Add little curd to it and now blend to a smooth paste. Add this mixture to 500 ml of curd, and add salt as required. Soak the Vadas in hot water for 2 minutes, squeeze lightly and put them into this spiced curd mixture. Let it soak in for 30 mins in the fridge, before serving.
If you tried this recipe and liked it please comment below. I would love to hear from you. If you have a query about the recipe email us and ill respond as soon as I can.
Sweet Potato Puran Poli
Every year during Vaikunta Ekadashi and Shiv Rathri the elders in my family like to have Sweet Potato, as is the custom. Shiva Rathri and Vaikunta Ekadashi both are celebrated in winter and the carbs from the Sweet potato give the much needed warmth. This could have been the reason this custom was formed.
TOTAL TIME: 20Mins COURSE: DESSERT/SWEET
AUTHOR: Rajni Ram
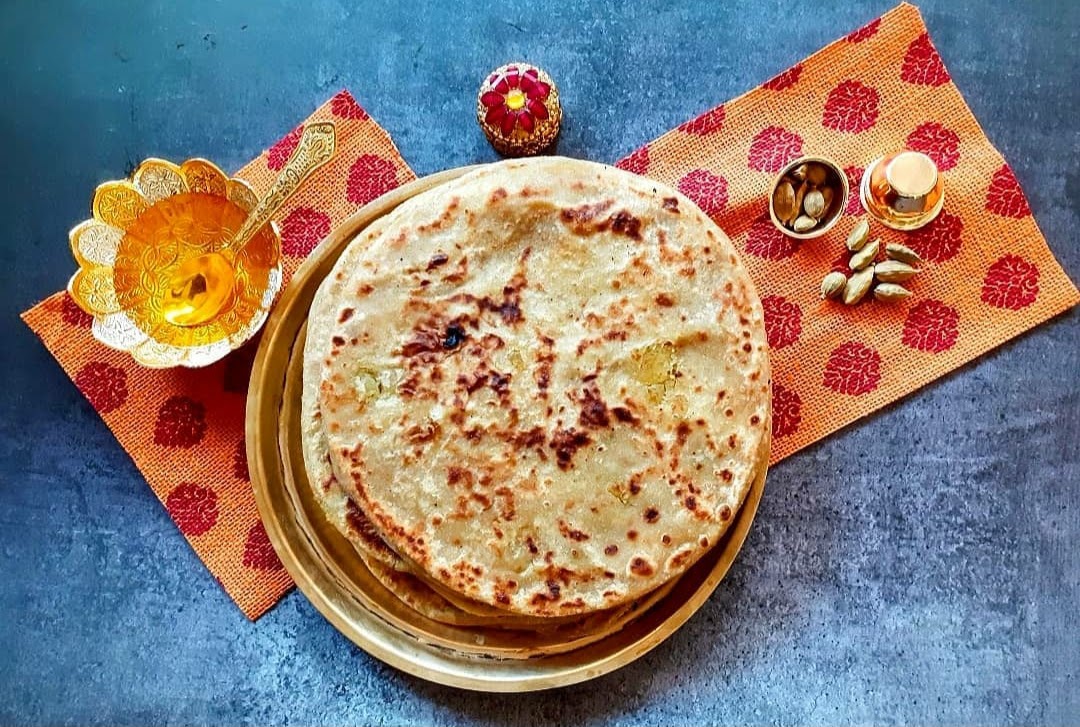
Ingredients for dough:


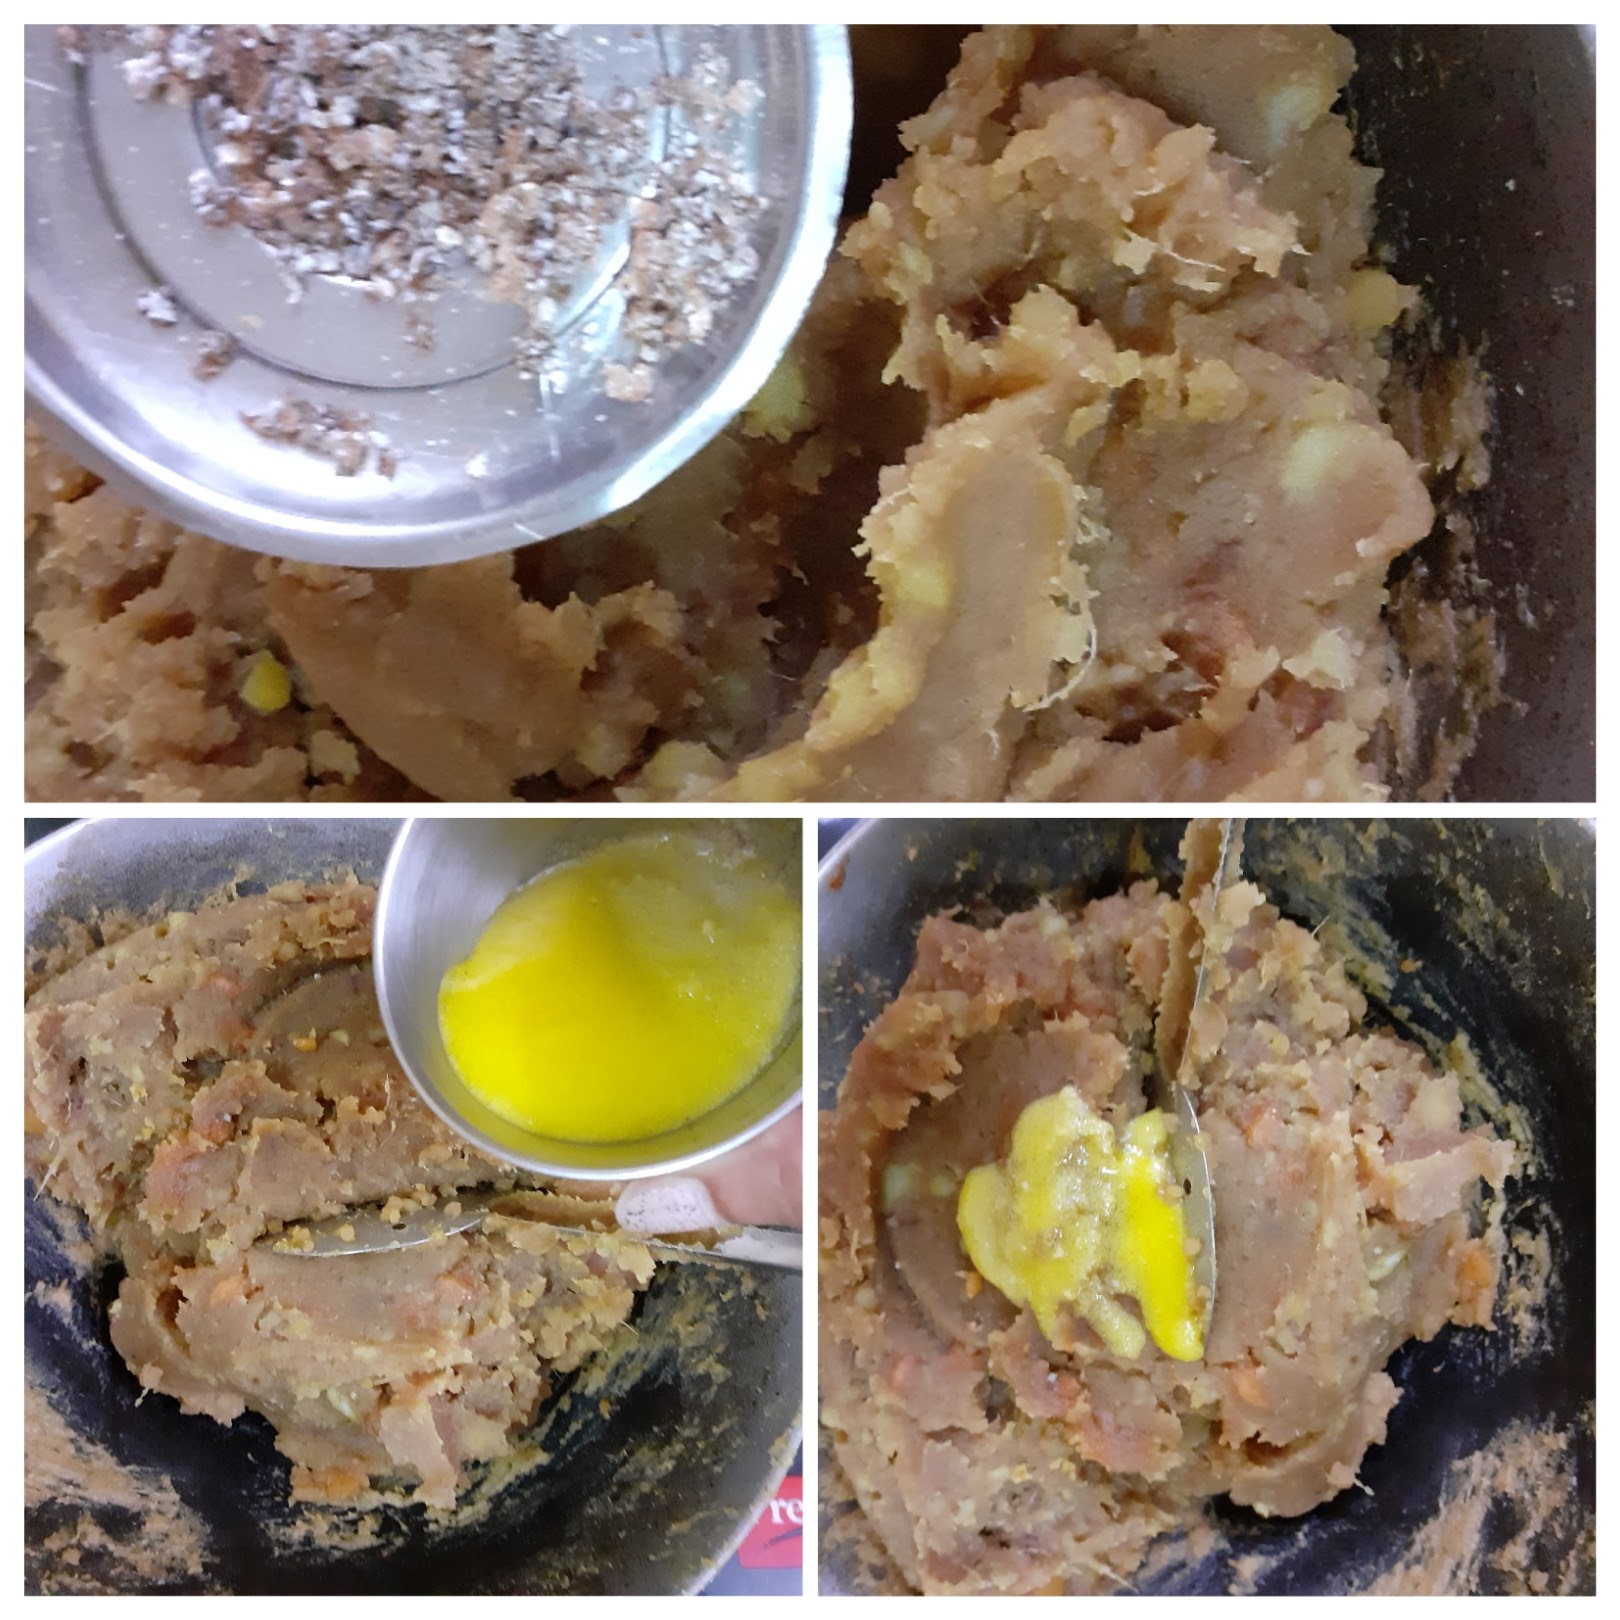
4. Now divide the dough into 10 equal parts and divide the stuffing also. Take one ball of the dough at a time, dust it with flour and roll into a small puri, put the stuffing in the centre, and seal the edges. dust with little flour again and roll out into a thick Chapathi.
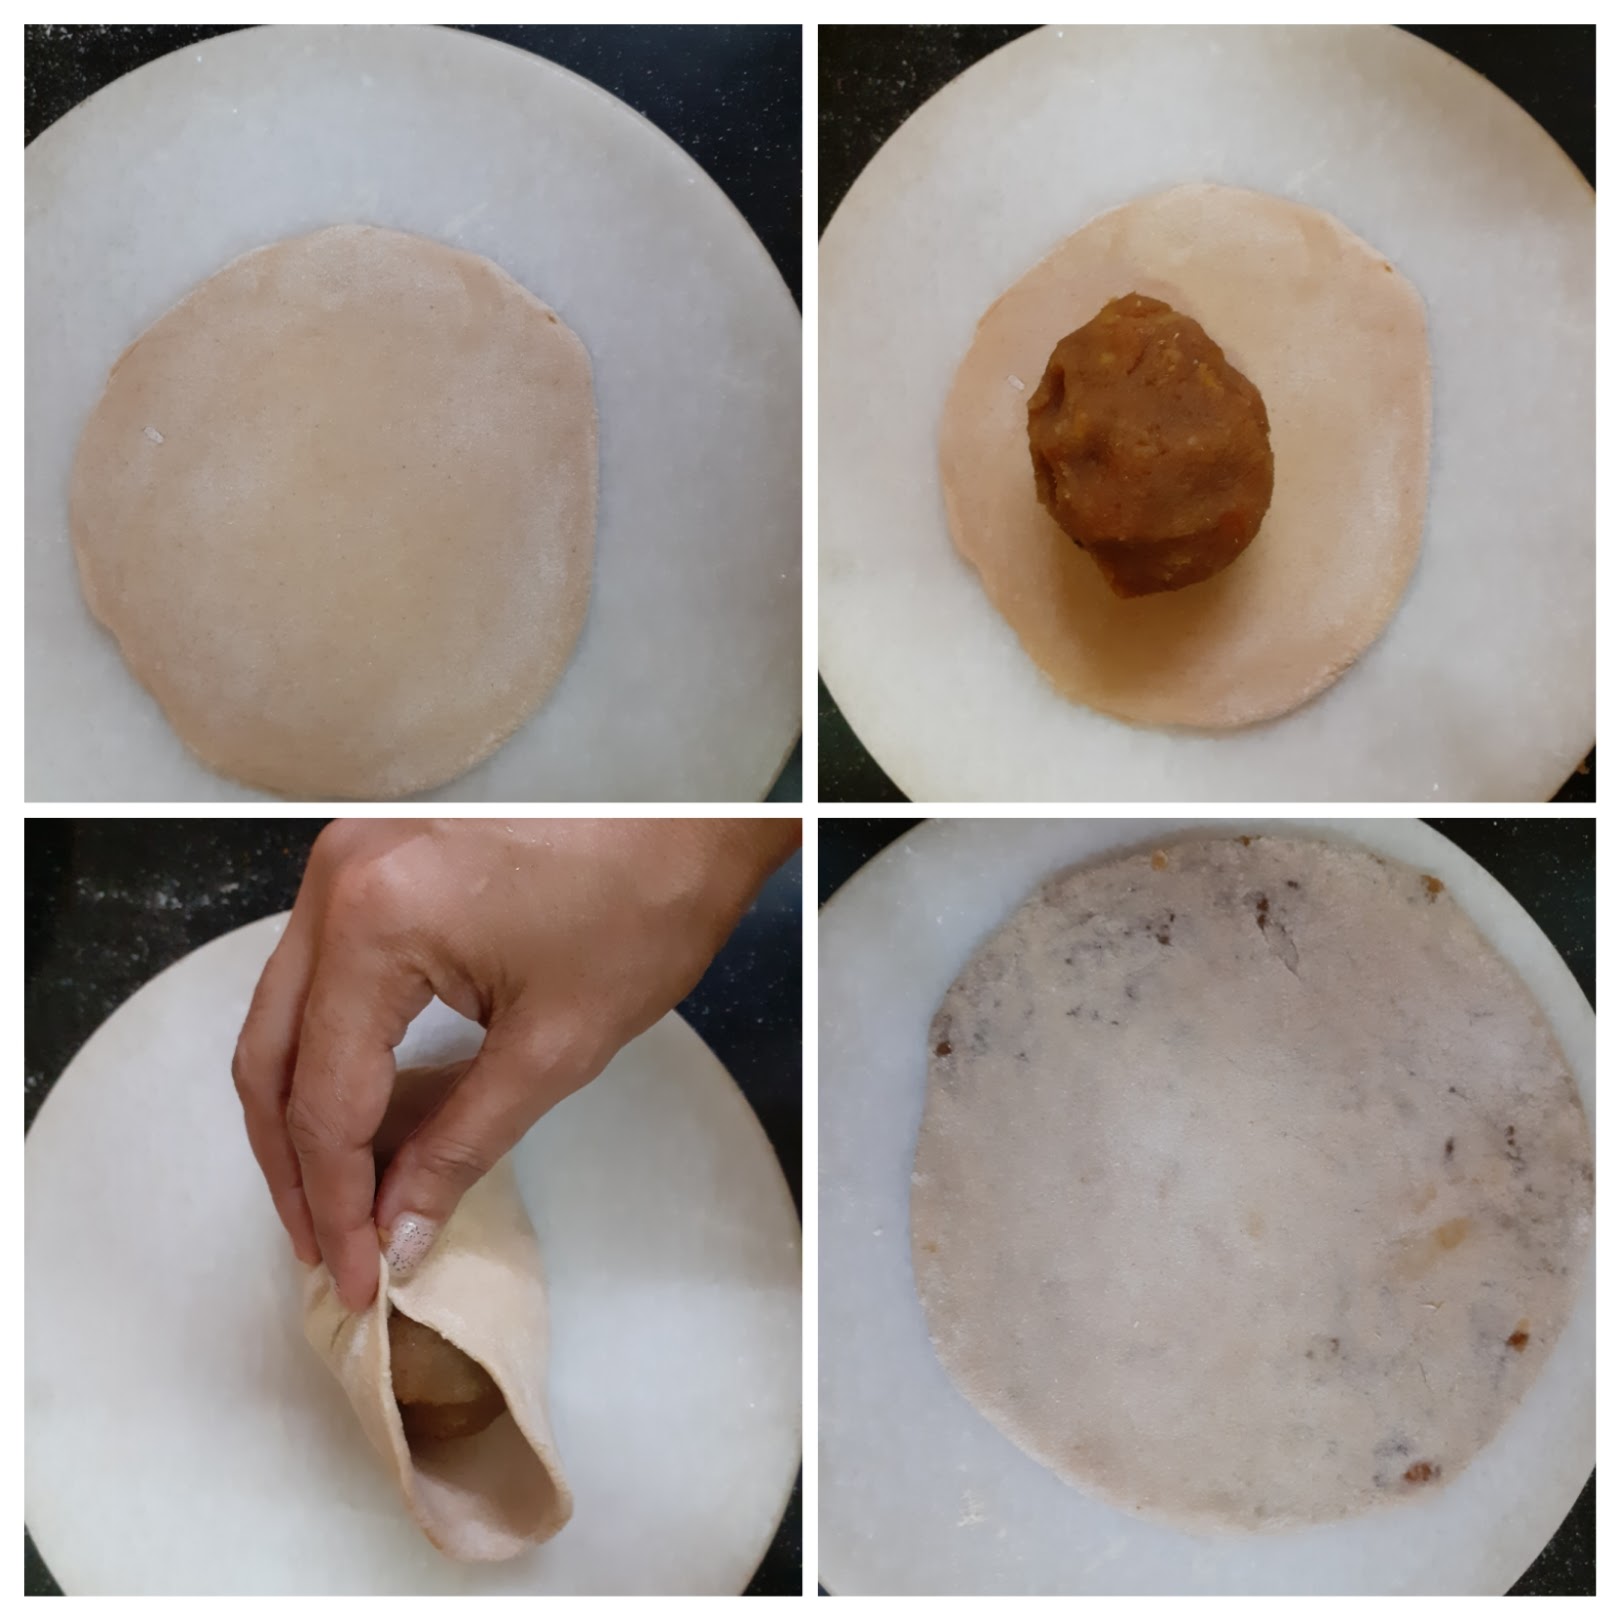
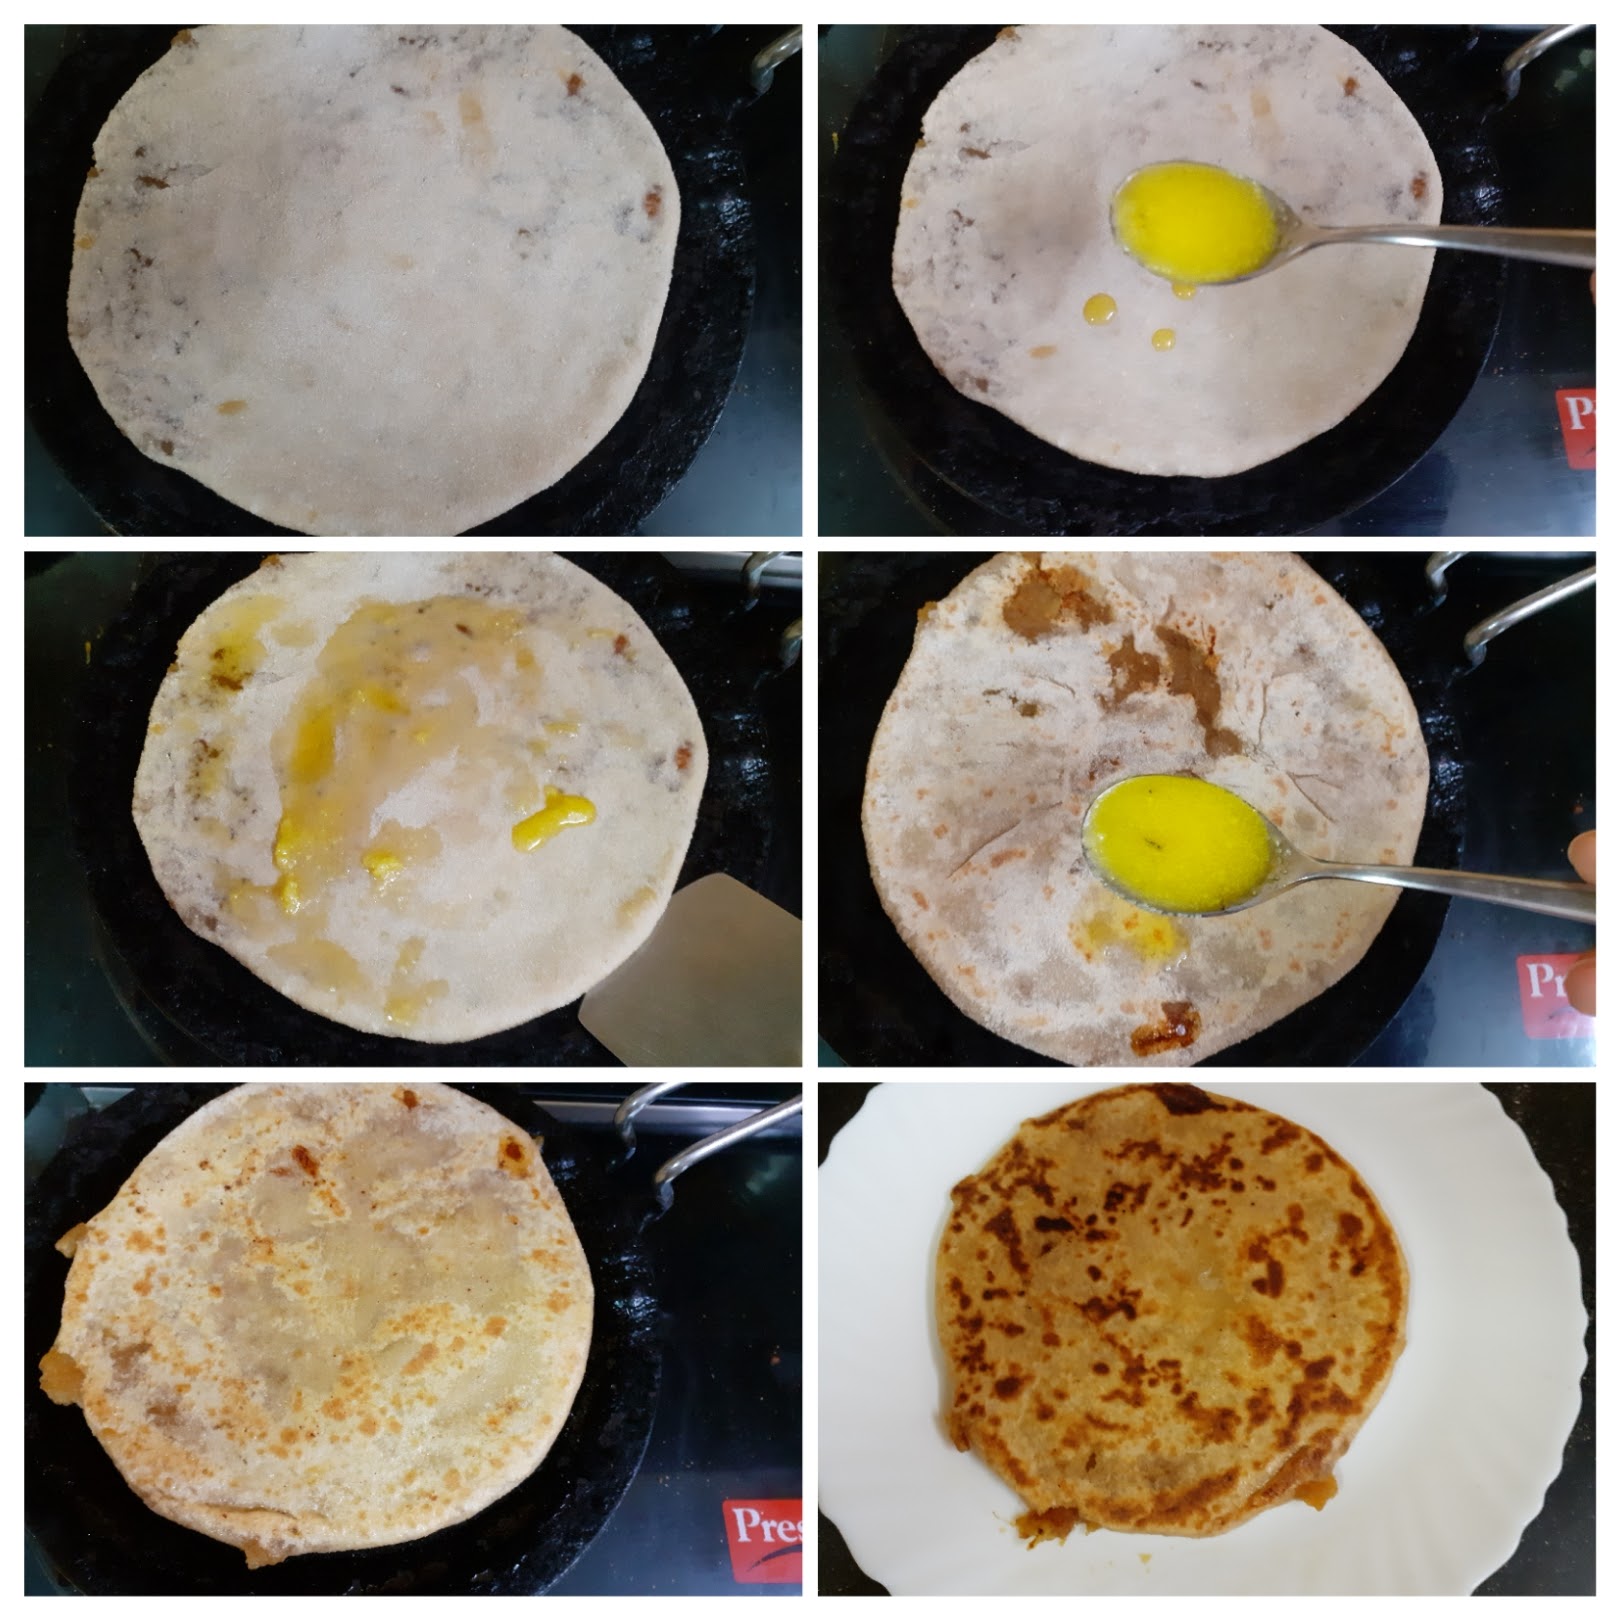
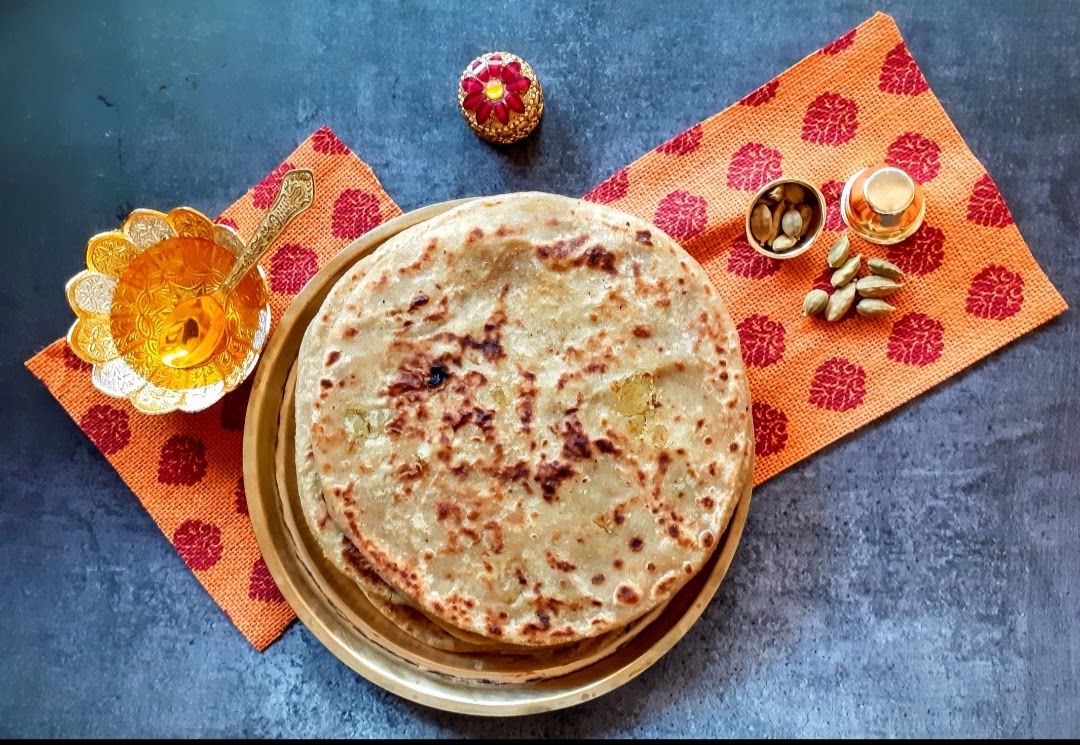
If you tried this recipe and liked it please comment below. I would love to hear from you. If you have a query about the recipe email us and ill respond as soon as I can.
Pepper Vada/Milagu Vadai
Pepper Vada or Milagu Vadai as it is known, is a drier and crisper version of the regular Vada. Simple ingredients and a hack make this a foolproof recipe. Read ahead. This is similar to the Tirupathi style Milagu Vadai.
I tried this recipe the first time during Navarathri this year. It was an instant hit at home as well as my social media pages. A few of you even asked for the recipe and I could not post the recipe immediately as I had not clicked stepwise pictures. So, this time I clicked all the necessary pictures to blog it.
As I always say, some recipes don’t need a huge introduction. The recipe does all the talking. While you are here check out my other savoury recipes like Dhaniya wale Namak Pare, Ratlami Sev, Samosa pie, Masala Wheat flour Papdis, Thattai, Kothimbir Vadi, Moongdal Khastha kachori and more …
Here is the recipe for Pepper Vada/ Milagu Vadai
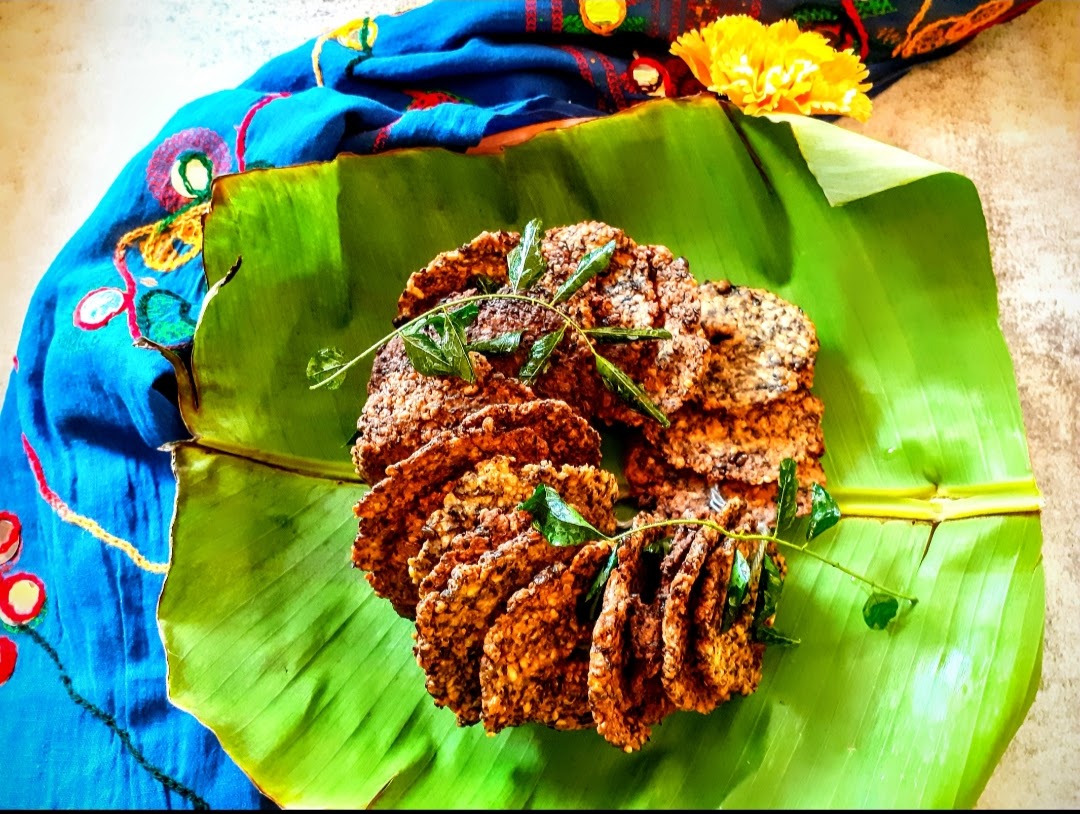
Ingredients:
Urad Dal/ Black lentils( with skin) 1 cup soaked for 4 to 5 hours.
Salt as required
Coarse Pepper powder 2 tsp ( add more if you like it spicy)
Rice flour 2 tbsp
Hot oil 2tbsp
Oil for deep frying
Directions:
Soak the Urad dal( use with skin for this colour and texture) for 4 to 5 hours. Drain water completely after it soaks and grind it to a coarse batter without adding( or by adding minimum) water. I have ground it without any water and later sprinkled a little over the coarse batter for the right consistency. Now to the coarse batter( check picture for consistency), add salt, coarse pepper powder, and rice flour and, mix well. If you feel the mixture is too dry, sprinkle a little more water. Mix using your fingers to combine well. Now heat the oil kept for deep frying, and when the oil is sizzling hot with a ladle pour 2tbsp into the batter and using a spoon or spatula mix the oil into the batter( don’t use your fingers now as the oil is too hot). Now pinch small portions from the mixture and make balls of it. Slit a zip pouch into two or use a Banana leaf to flatten the balls. Flatten the ball using the back of a cup or you palm. Pat them quite thin to get them crisp. Make a hole in the centre for even cooking. Now gently drop them into hot oil and fry at medium high until all the bubbles in the oil subside. Repeat the process for the entire batter. These Vadas stay crisp up to a month when stored in an airtight container. They make for a good dry snack for school lunch of kids or adults as they are protein packed.
STEPWISE RECIPE FOLLOWS:
1. Soak the Urad dal( use with skin for this colour and texture) for 4 to 5 hours. Drain water completely after it soaks and grind it to a coarse batter without adding( or by adding minimum) water. I have ground it without any water and later sprinkled a little over the coarse batter for the right consistency.
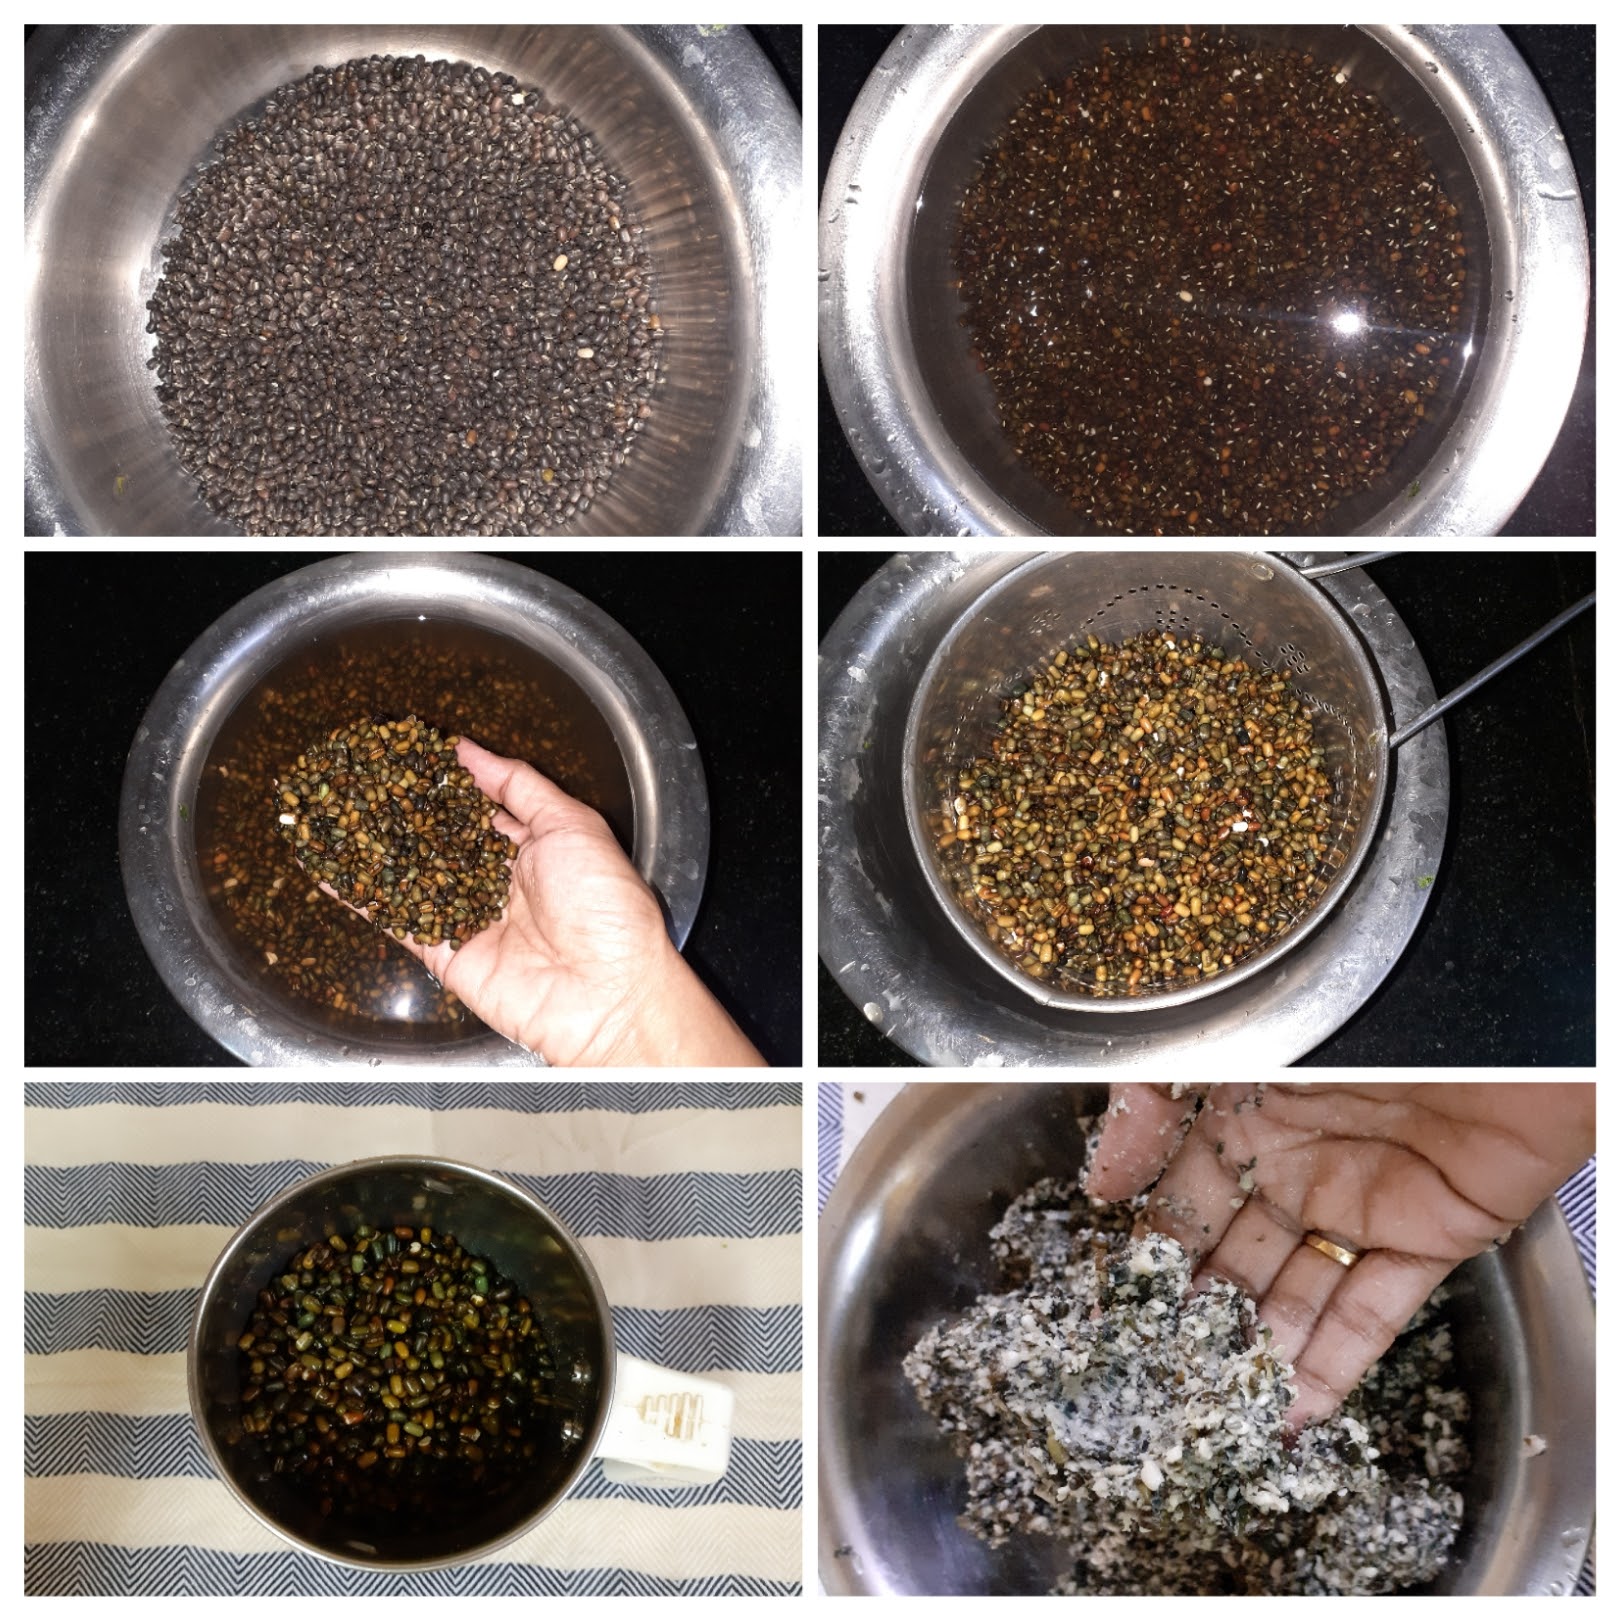
2. Now to the coarse batter( check picture for consistency), add salt, coarse pepper powder, and rice flour and, mix well. If you feel the mixture is too dry, sprinkle a little more water. Mix using your fingers to combine well.

3. Now heat the oil kept for deep frying, and when the oil is sizzling hot with a ladle pour 2 tbsp into the batter and using a spoon or spatula mix the oil into the batter( don’t use your fingers now as the oil is too hot).
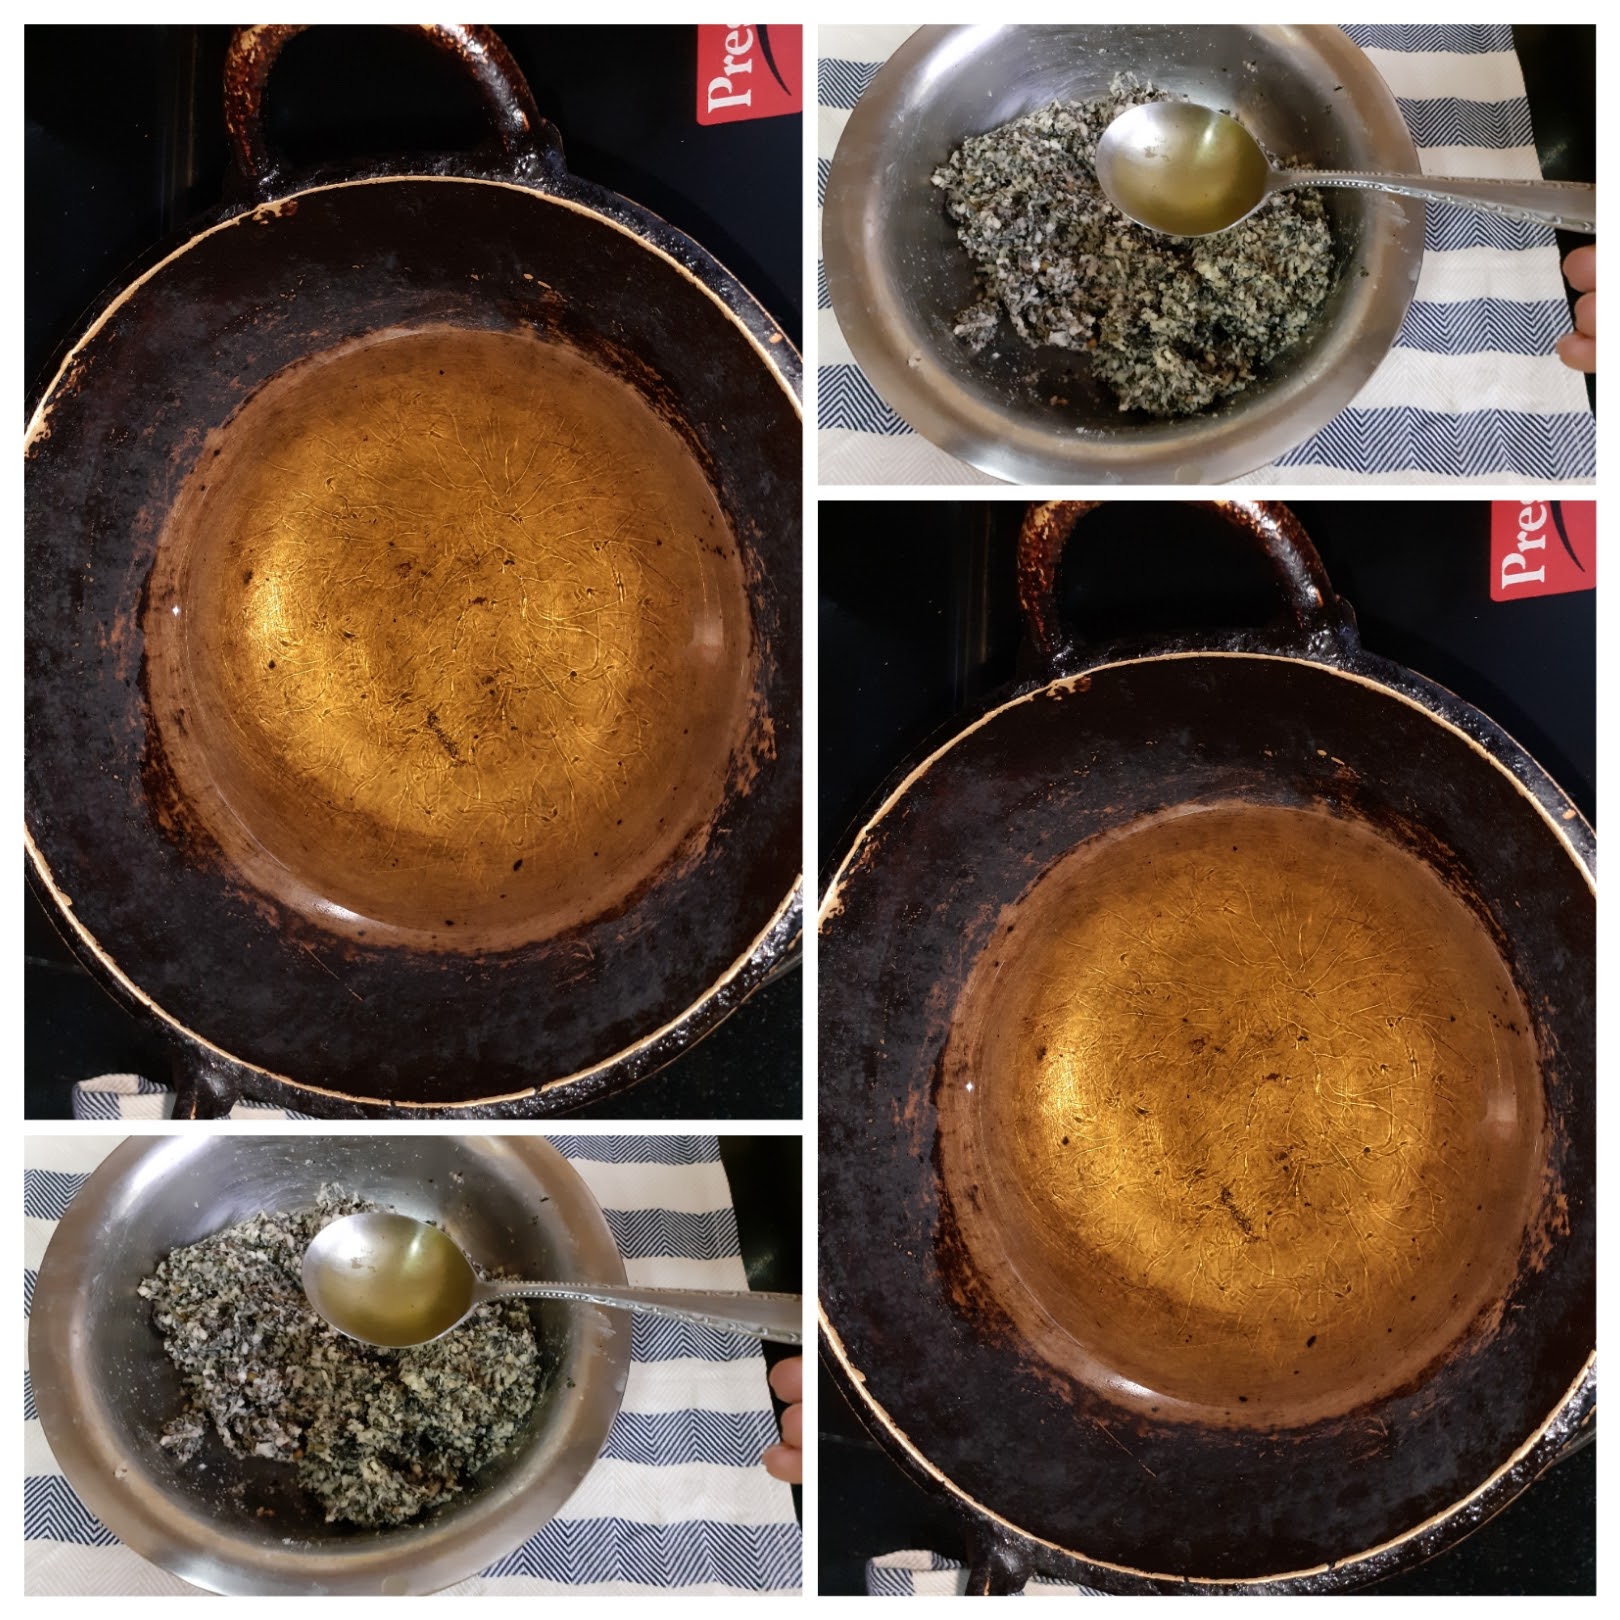
4. Now pinch small portions from the mixture and make balls of it. Slit a zip pouch into two or use a Banana leaf to flatten the balls. Flatten the ball using the back of a cup or you palm. Pat them quite thin to get them crisp. Make a hole in the centre for even cooking. Now gently drop them into hot oil and fry at medium high until all the bubbles in the oil subside. Repeat the process for the entire batter.
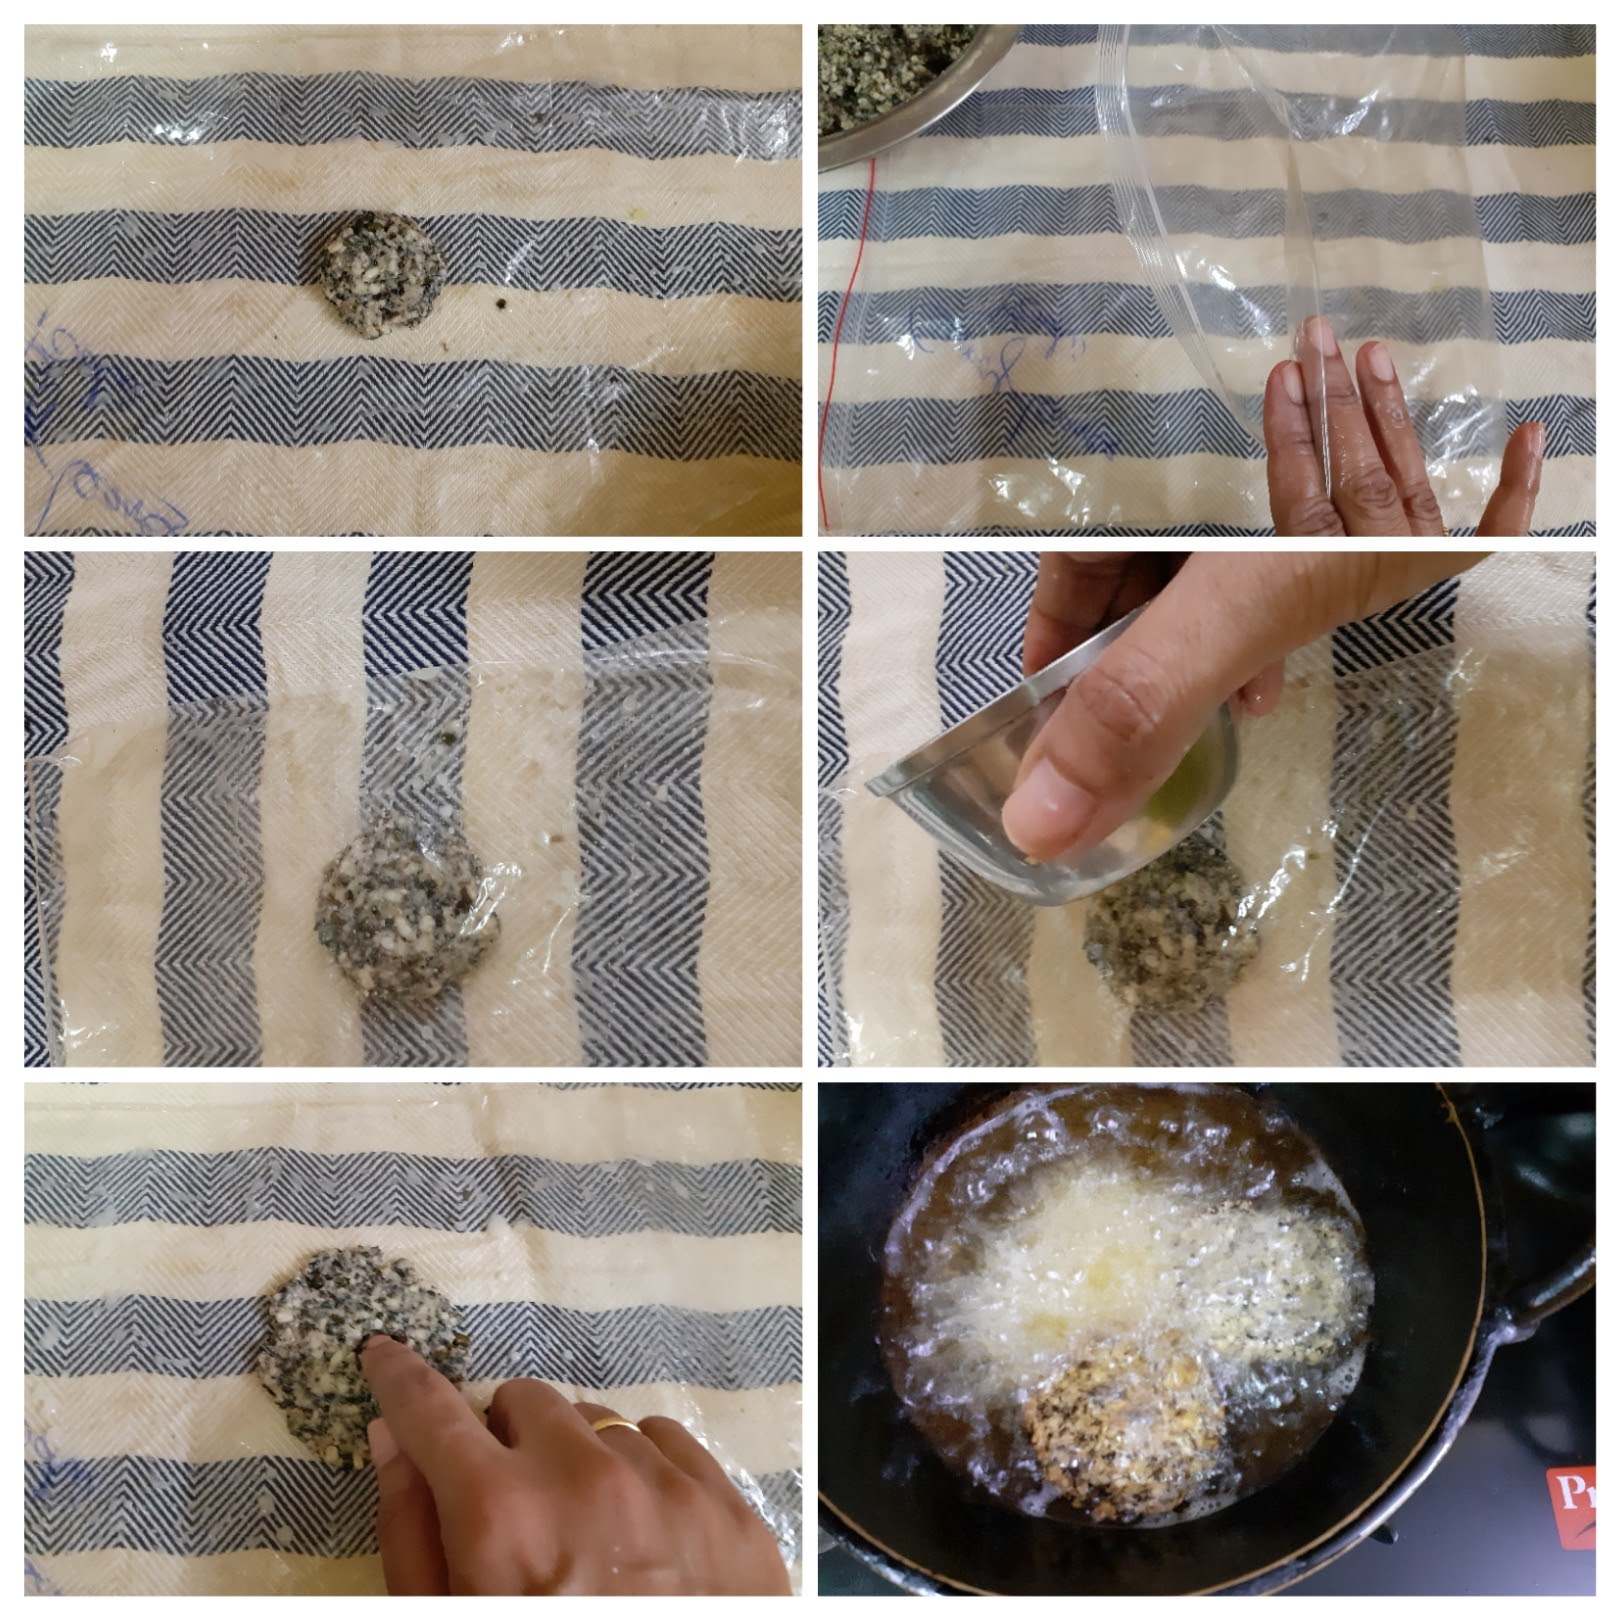


NOTES:
1. This Vada can be made with white Urad dal too ( the de skinned one) . The texture and taste remain the same. Just the colour varies.
2. If using white Urad dal, just 1 hour of soaking will do. The black lentils take time to soak and so need to be soaked longer.
3. The batter as well as the pepper should be ground coarse for maximum taste.
4. In this Vada Curry leaves are usually not added to the batter as its for long keeping, and any moisture in the curry leaves can affect its shelf life.
If you tried this recipe and liked it please comment below. I would love to hear from you. If you have a query about the recipe email us and ill respond as soon as I can.
Rasakalan
Rasakalan is a traditional mixed vegetable dish from the Palakkad cuisine. The dish is so rustic and delicious and very easy to make. It is great to go with hot rice or can be served on the sides with Dosa or Idli. The vegetables mostly used in this dish are Ash gourd, Sweet potato, pumpkin, that are cooked in a tangy tamarind sauce and then a flavourful coconut masala paste is added. It is the paste that makes all the difference. Finally the seasoning in coconut oil enhances the flavours of the dish and takes it to a different level.
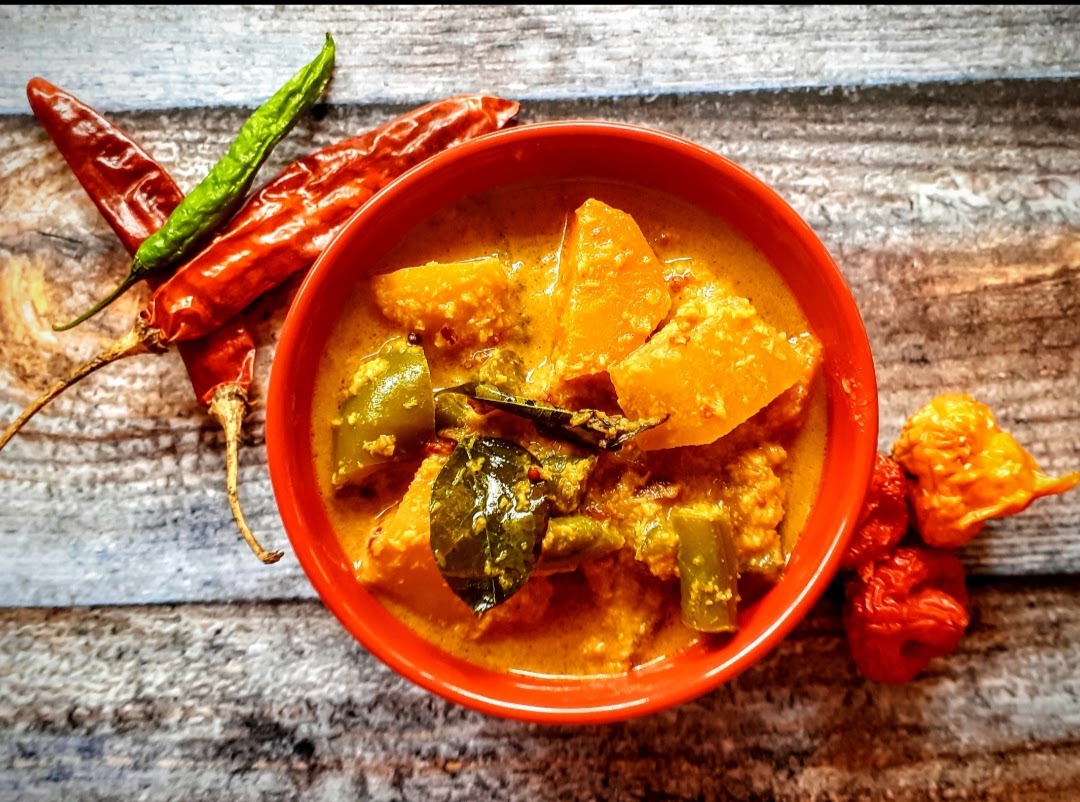
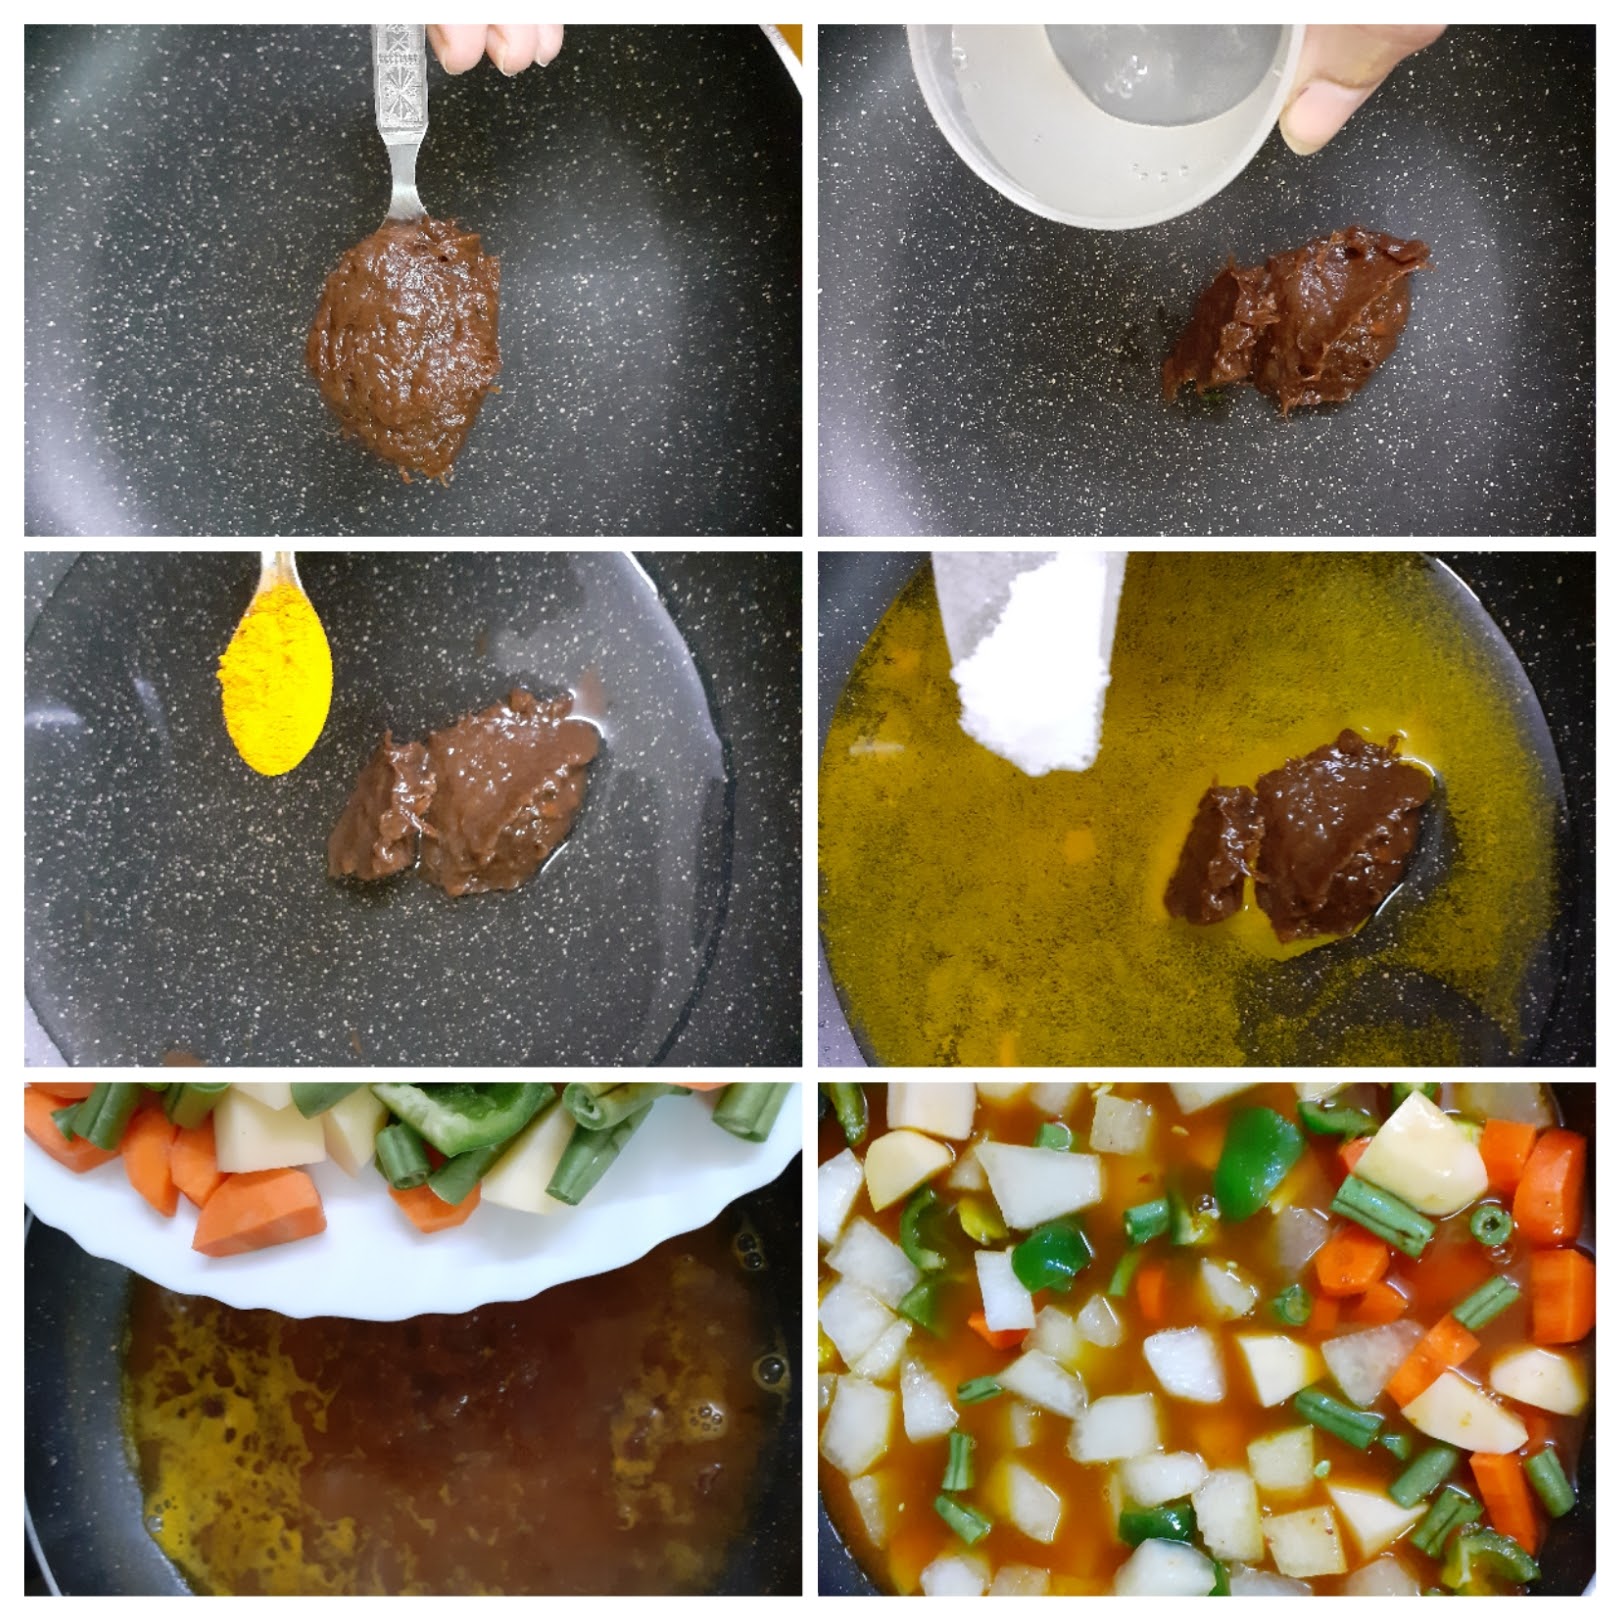
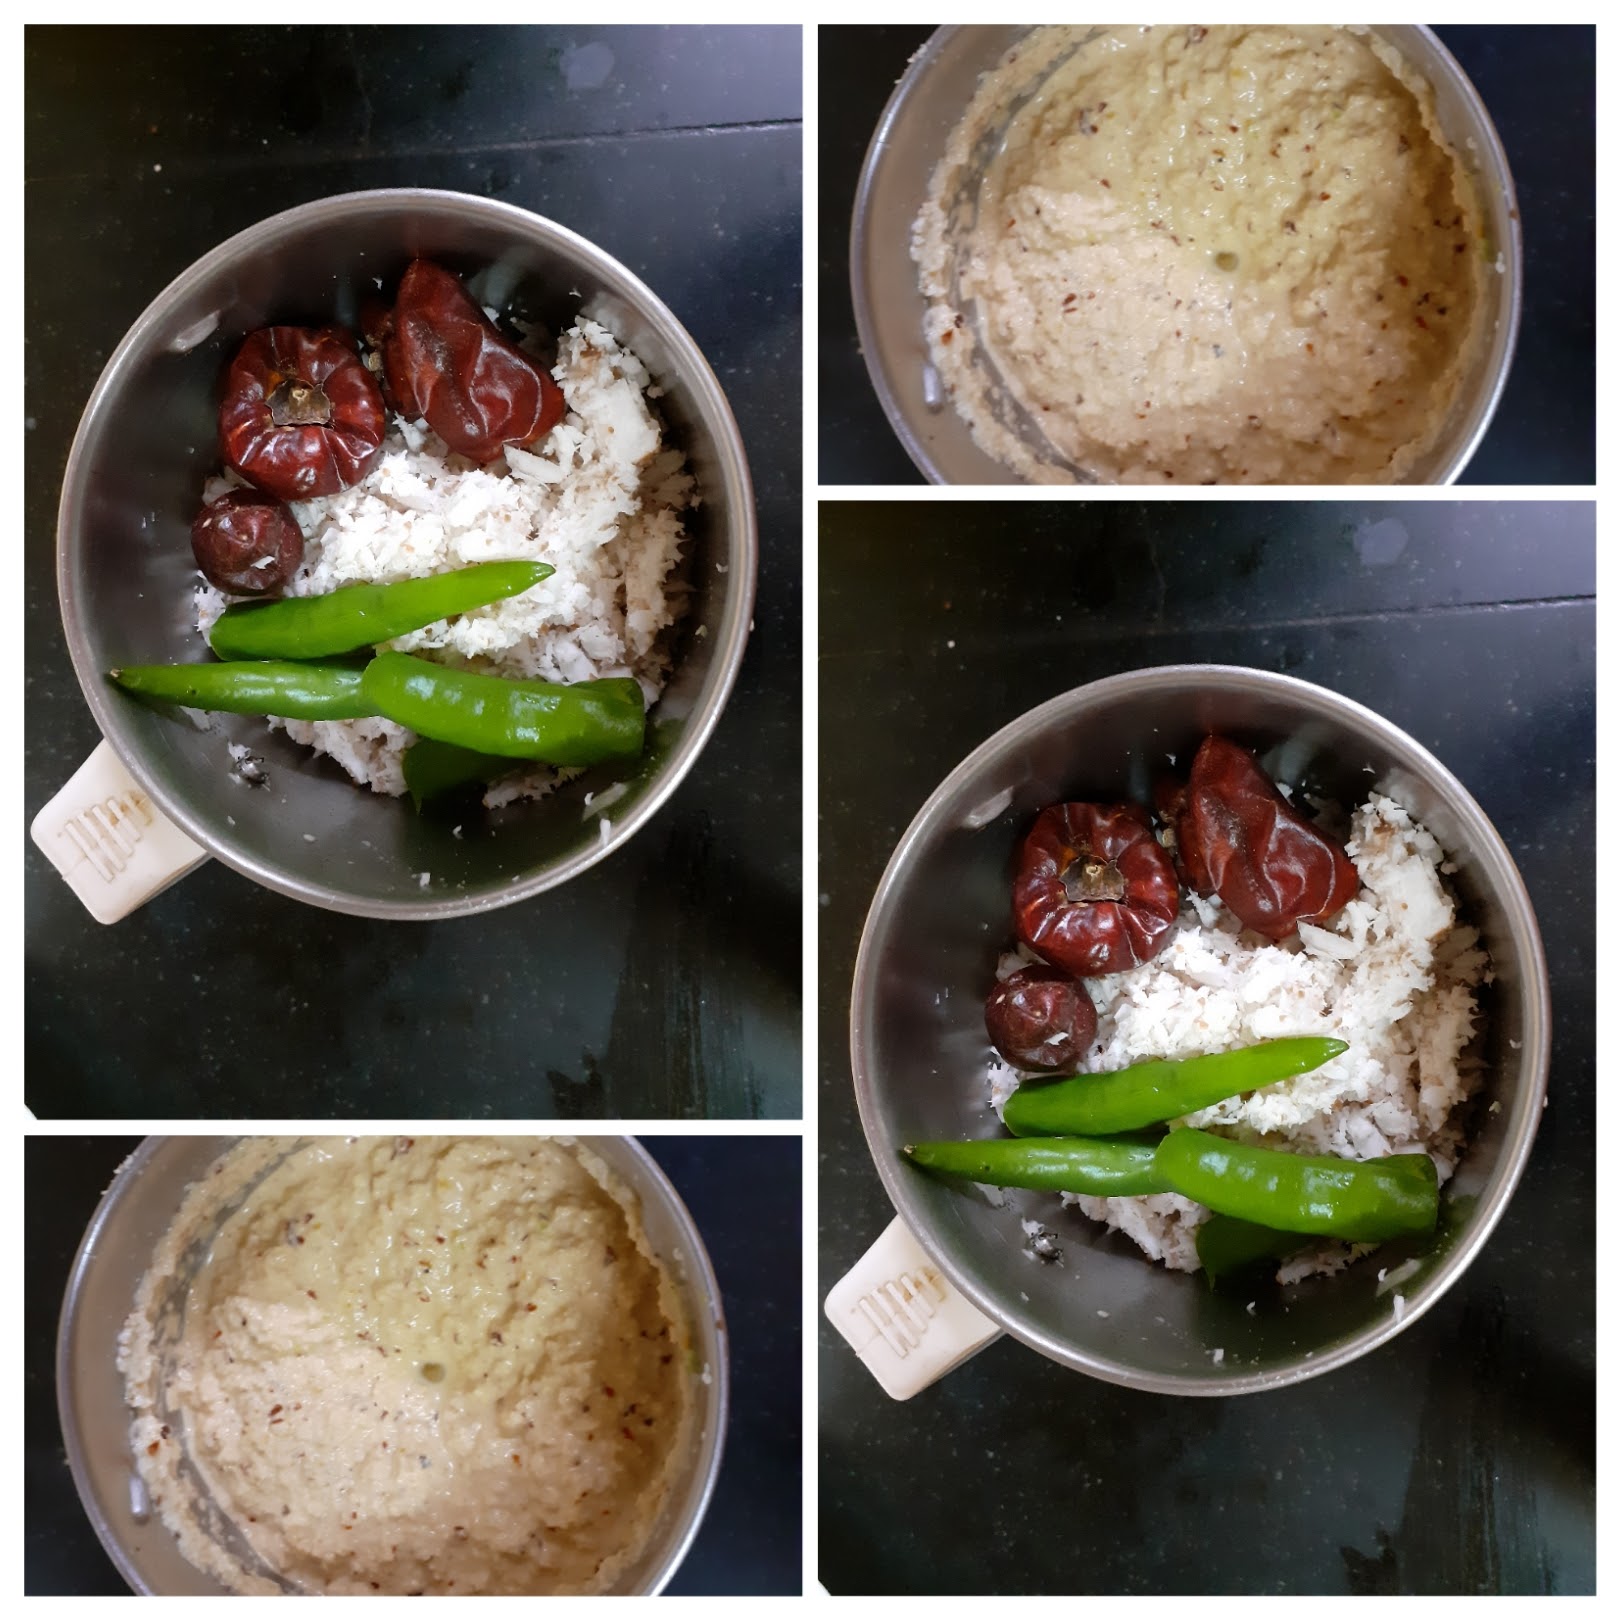
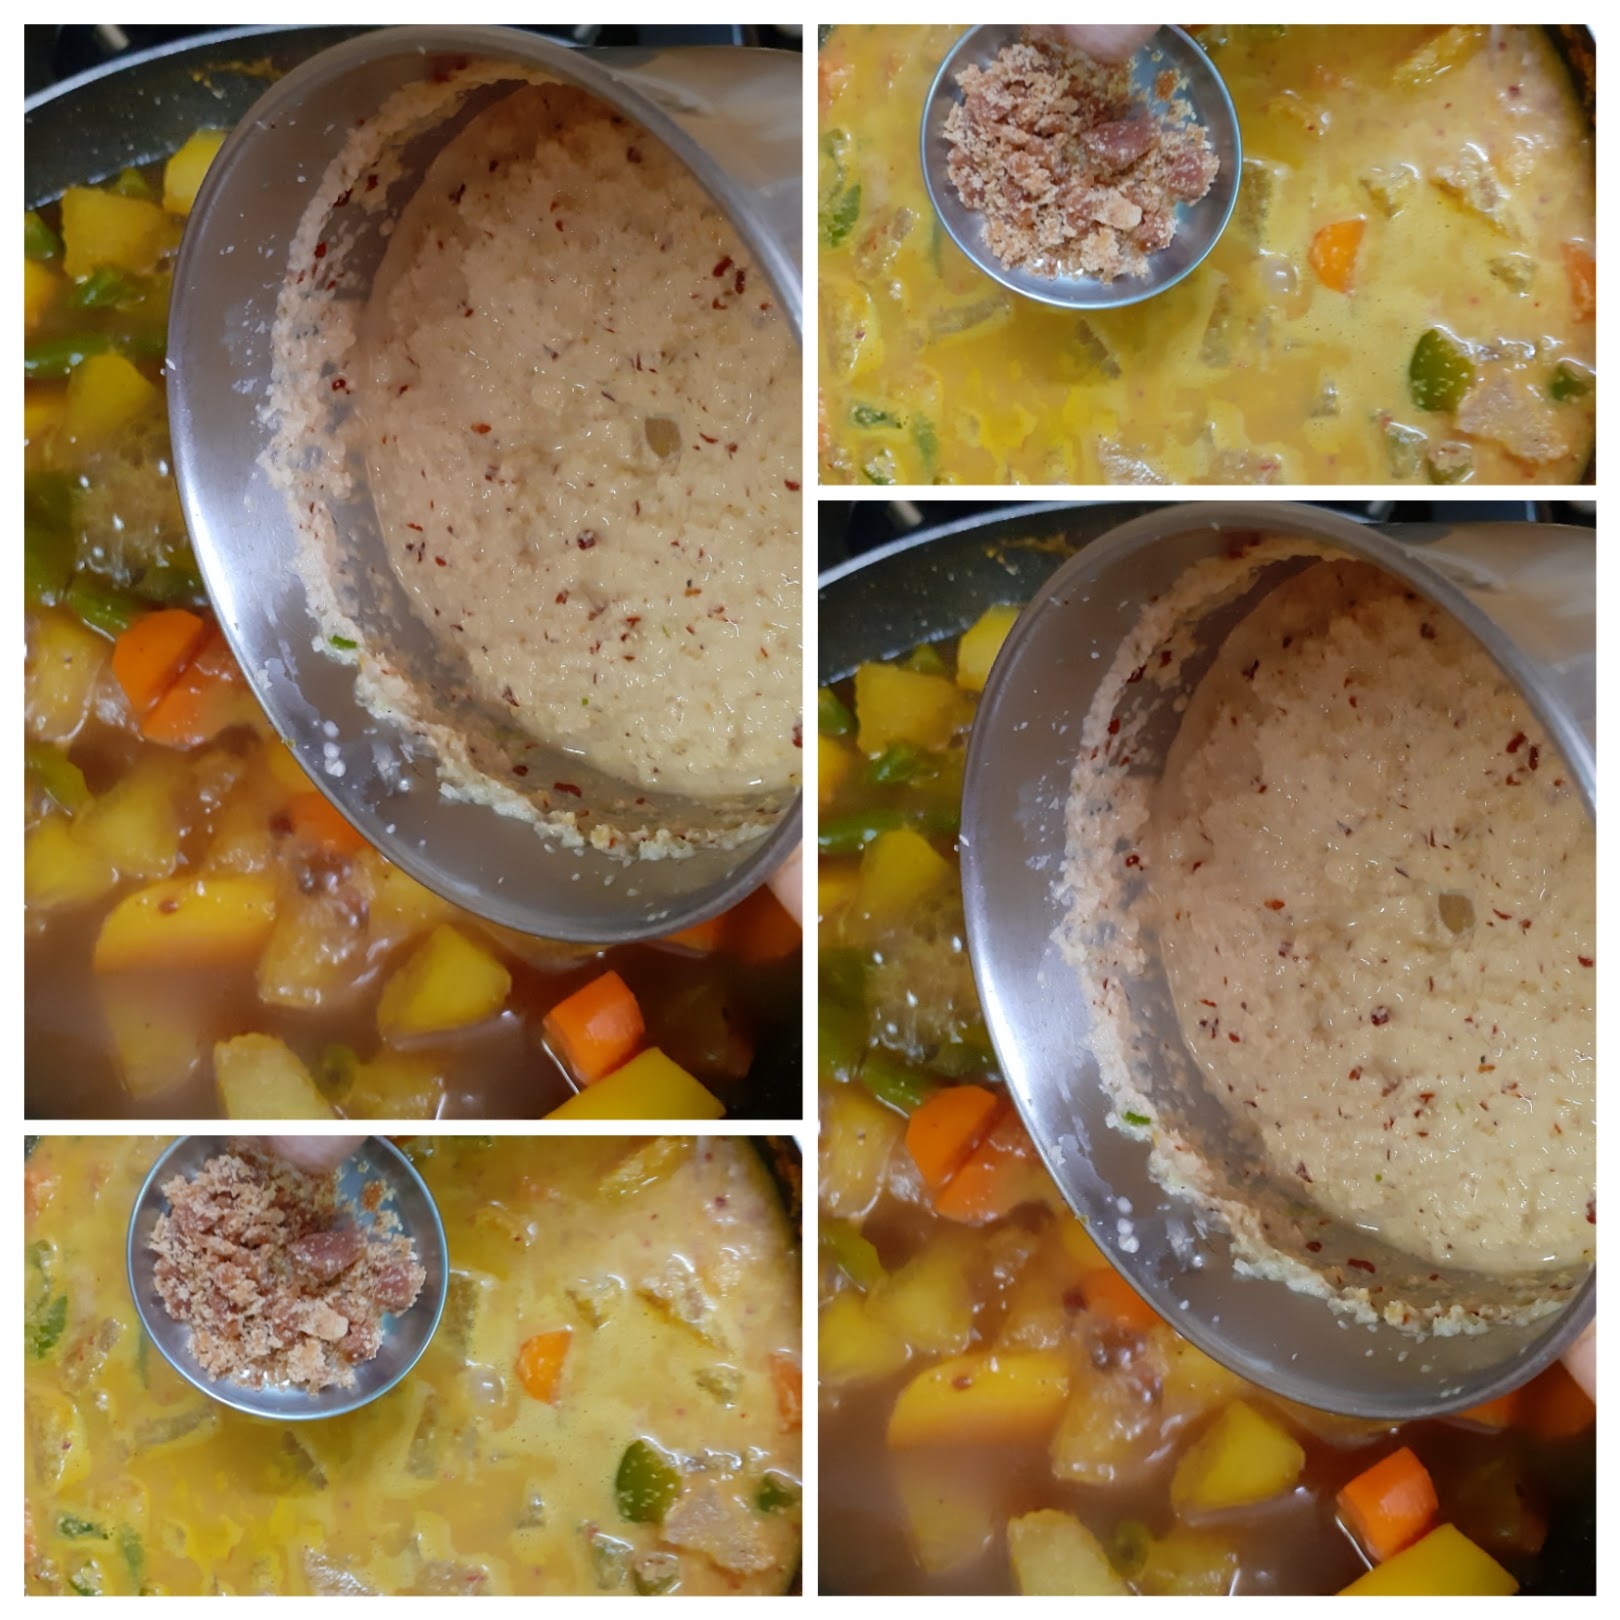
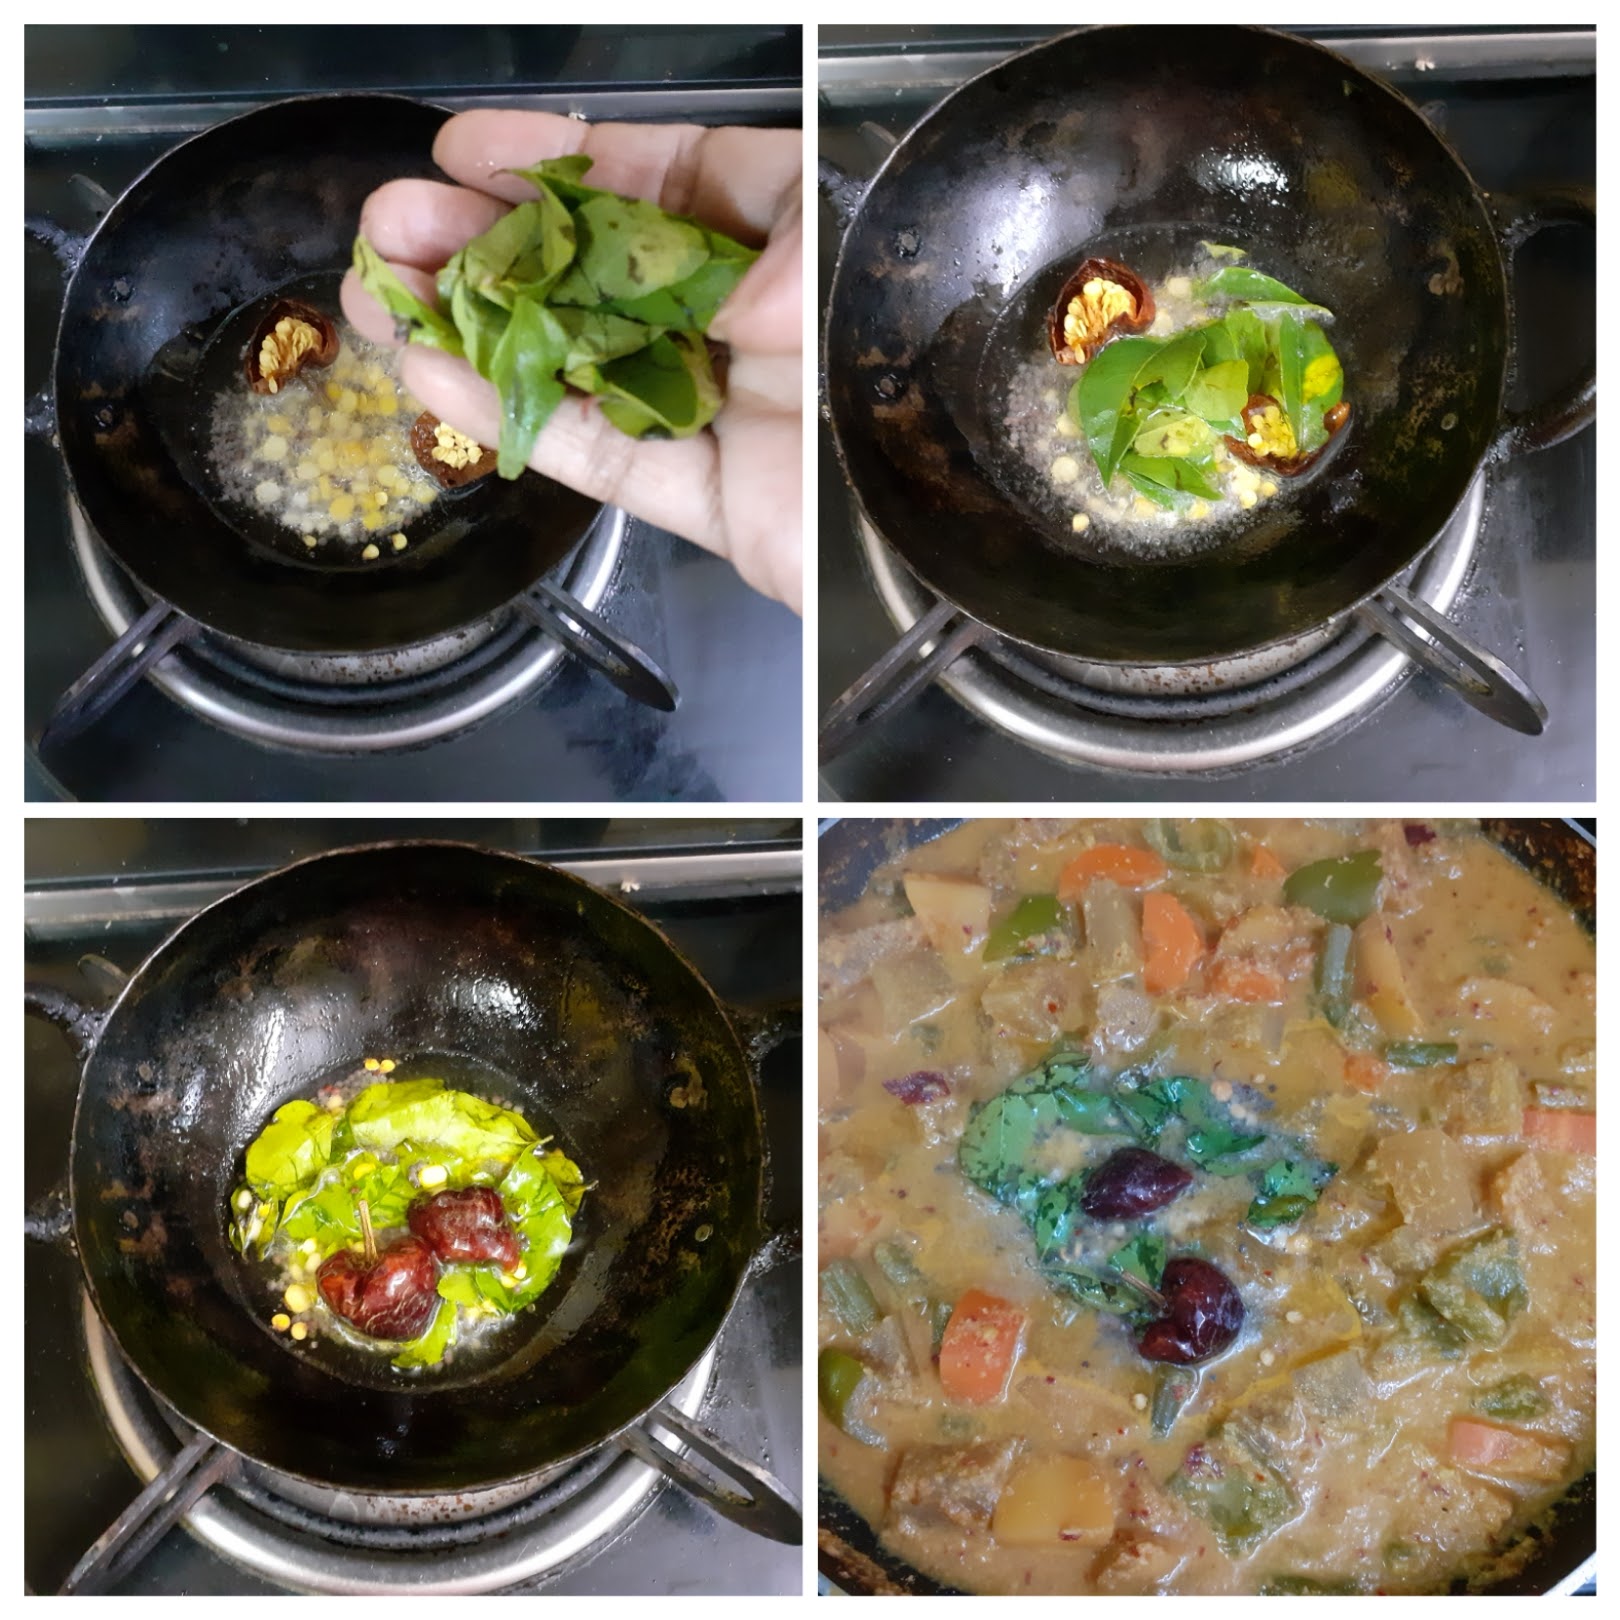

If you tried this recipe and liked it please comment below. I would love to hear from you. If you have a query about the recipe email us and ill respond as soon as I can.
.
Eggless Pineapple Cake
Come Pineapple season and all I can think of is Pineapple Rasam, Pineapple Raita, Pineapple Mor Kuzhambu, Pineapple Rabri and Pineapple Cake. In short, main course to sides to desserts in Pineapple. Oh yes, and salad too…just love the fruit.
This Eggless Pineapple cake is simple and I have followed the same batter used for Upside down orange vanilla cake. I am giving you a base here to which you can add anything you like, be creative, and yet you will have a beautifully moist cake every time. Anyone can make this, no beating, no major whisking. You all know by now the recipes I choose to bake are mostly non-messy ones.
Being an eggless version, this cake is different from the other eggless cakes as I have not used condensed milk or flax egg, but one simple ingredient that we have in our refrigerators. Curd/ yogurt. Yes, that’s the base, and I assure the cake will not taste of curd.
While you are here check out my other cakes like Blueberry Cheesecake, Nutella fudge brownies, Apple cake, Apple crumble, and more…
Here is the recipe for Eggless Pineapple Cake-
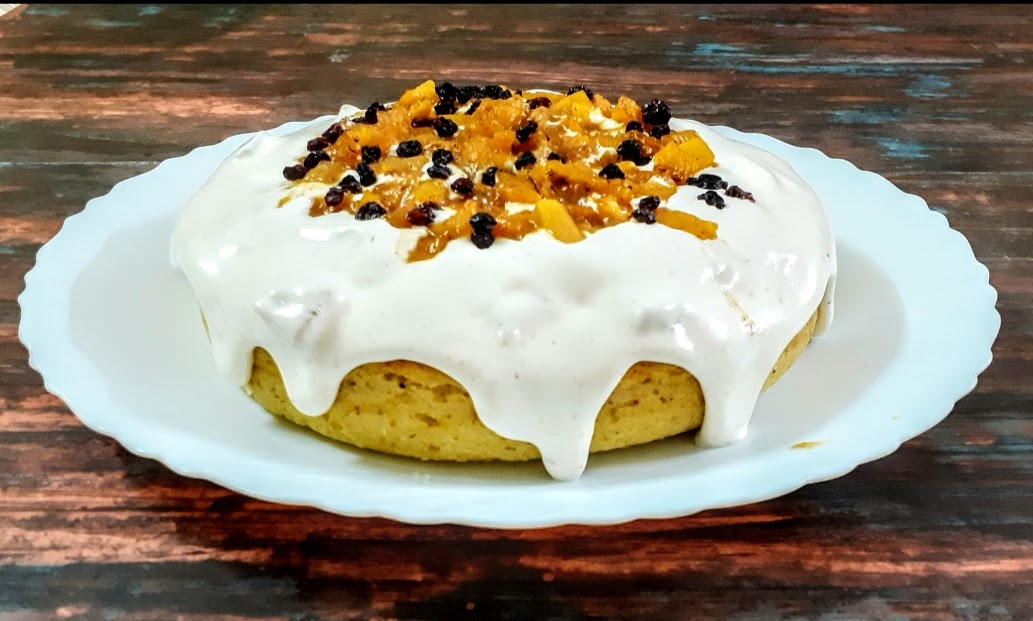
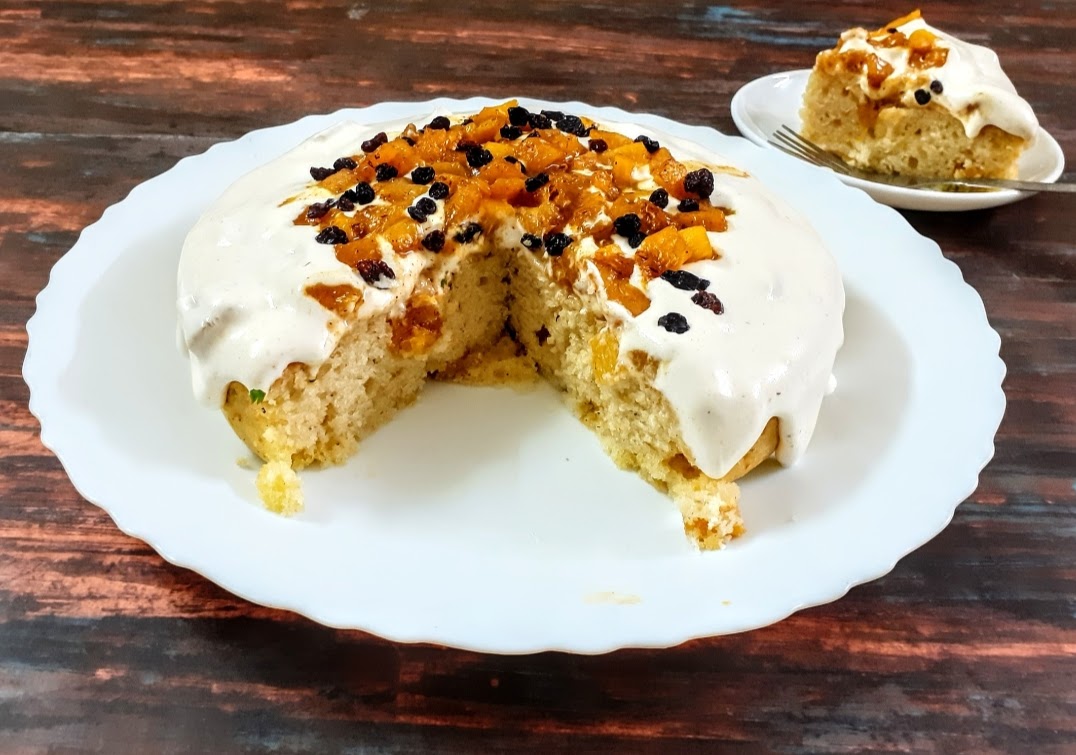
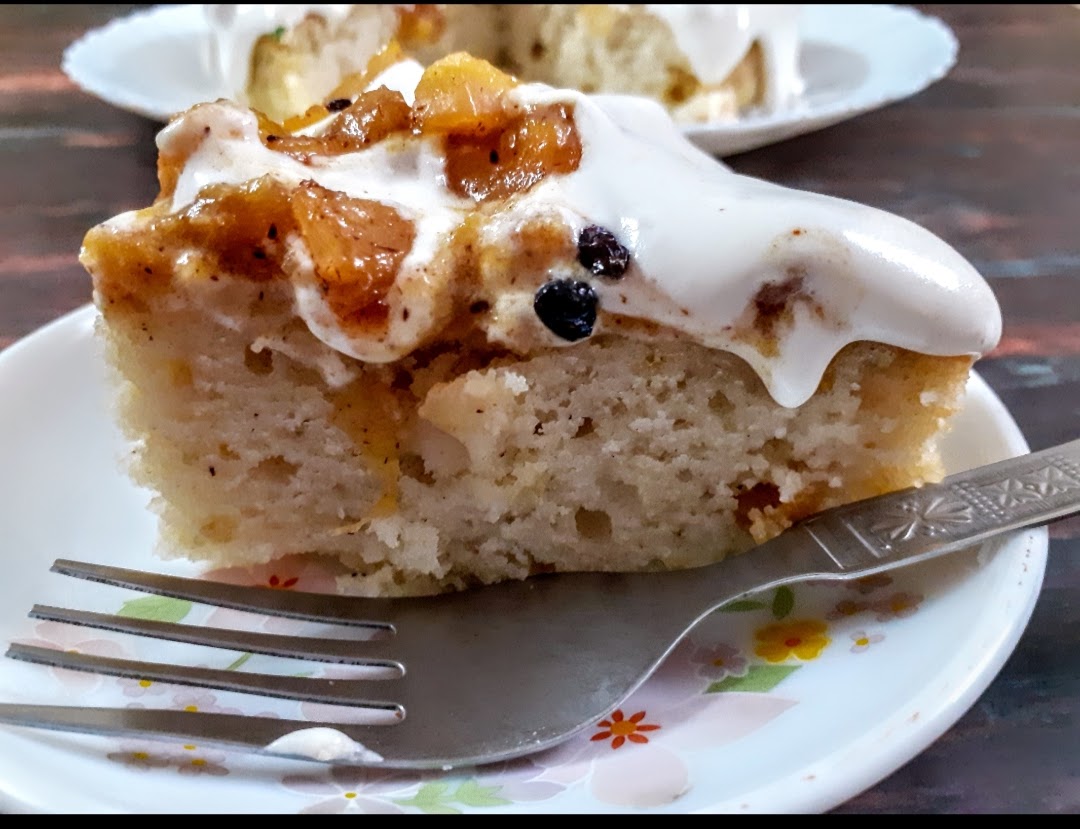
Ingredients for Cake:
Pineapple 1 small, skin removed and chopped finely(follow instructions under Glaze)
Maida ( refined flour) 1.5 cups ( 1 cup=150 ml)
Curd/ yogurt 1 cup
Sugar ( white) 3/4 of a cup
Baking powder 1 tsp
Baking soda 1/2 tsp
Oil ( refined oil or coconut oil) 1/2 cup
Vanilla essence 2 drops
Sauteed Pineapple chunks(check step 1 under directions)
Requirement: Square or rectangle baking tin/tray
Ingredients for the topping/glaze
Whipping cream 1 cup
Sugar 4 tbsp
Pineapple chunks
Cinnamon powder
Directions for glaze/topping
STEP1:
Remove the skin of the Pineapple, and cut it into fine chunks. In a pan melt 1 tbsp butter and add the finely chopped Pineapple. saute. Add 1/4 tsp salt, 1/4 cup water and 1/2 cup brown sugar and start cooking. When the Pineapple is half cooked, add cinnamon powder and continue to cook until the Pineapple is well cooked and yet firm. Remove from flame and cool. The mixture will solidify a bit and appear saucy. Keep aside.
STEP2:
Pour 1 cup pf chilled whipping cream into a mixing bowl and using an electric beater whip it to a consistency where, when the beater whisk is lifted, the cream forms a soft peak and doses not fall of the whisk. (PS: pictures for this step are not here, as the whipped cream frosting was just an impulsive decision, but a good one????. Picture for this step will be updated as soon as possible). When soft peaks appear to the cream, add 1/4 of the portion of the sauteed pineapple chunks and mix lightly. Keep some Pineapple chunks aside for topping up.
Directions for Cake:
Preheat oven to 180 c for 10 minutes. Sift the flour and keep ready. In a bowl take the curd, add the sugar and combine until the sugar dissolves completely. Now add the baking powder and baking soda and set aside for 5 minutes. This makes the mixture to froth up and double in size.
After 5 minutes add oil to the curd mixture and combine well. Add the sifted flour and with a spatula or wire whisk combine nicely to form a batter. Add in the vanilla essence and half the quantity the sauteed pineapples(refer instructions for Glaze step1) and mix lightly. Now transfer the cake batter into a previously greased tray. Place the tray in the oven and bake for 35 minutes at 180 C. Check for doneness or keep for a couple of minutes more, if a toothpick comes out sticky, don’t go beyond 5 minutes. Cool the cake for 30 minutes, or until completely cool. Now top with the whipped cream topping and remaining Pineapple chunks and dig in.
STEPWISE RECIPE FOLLOWS:
1. Remove the skin of the Pineapple, and cut it into fine chunks. In a pan melt 1 tbsp butter and add the finely chopped Pineapple. saute. Add 1/4 tsp salt, 1/4 cup water and 1/2 cup brown sugar and start cooking. When the Pineapple is half cooked, add cinnamon powder and continue to cook until the Pineapple is well cooked and yet firm. Remove from flame and cool. The mixture will solidify a bit and appear saucy. Keep aside.
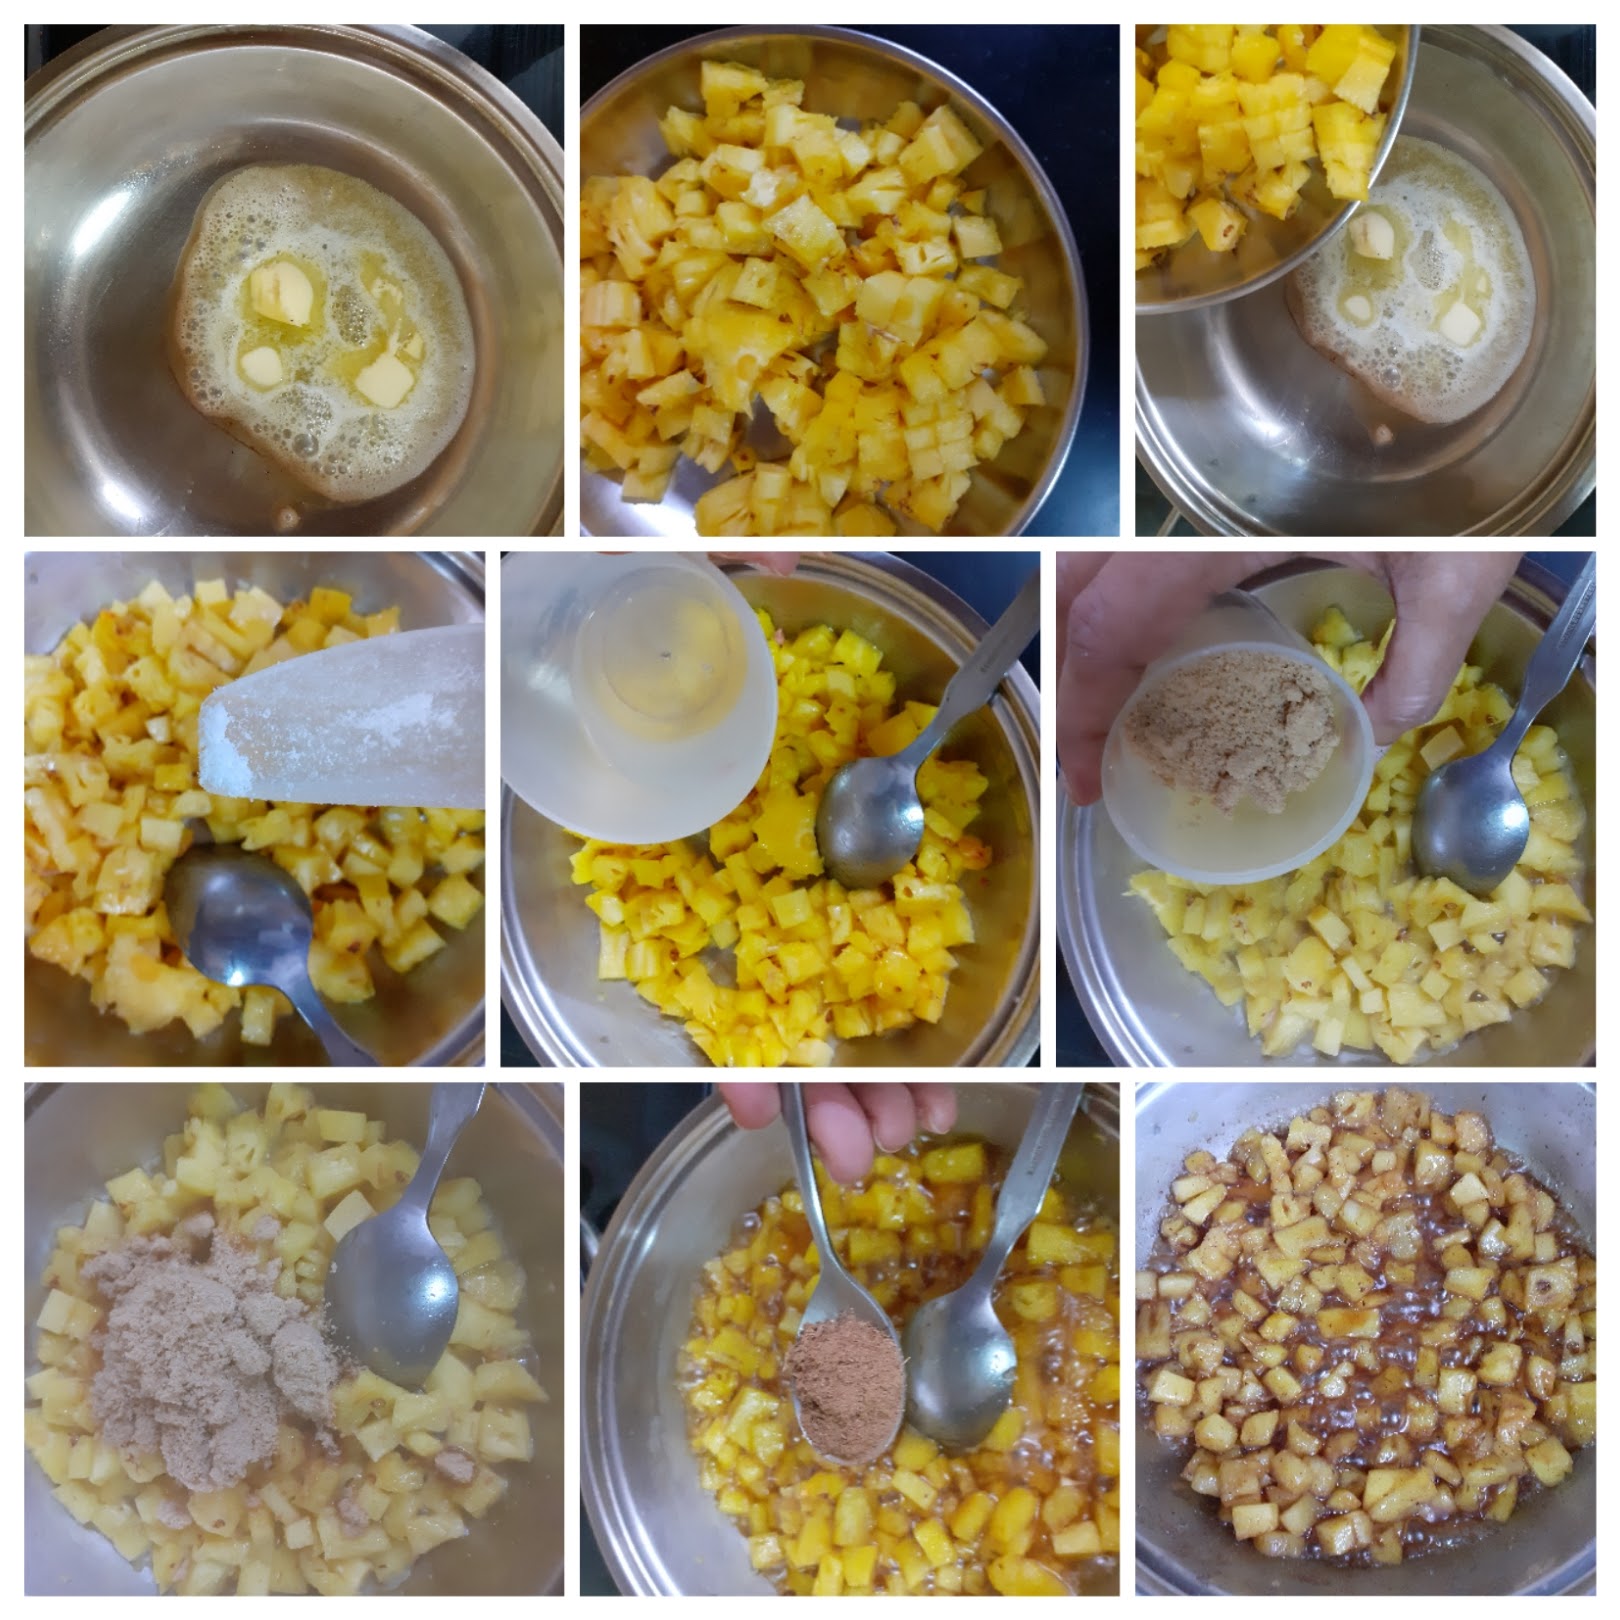
2. Preheat oven to 180 c for 10 minutes. Sift the flour and keep ready.
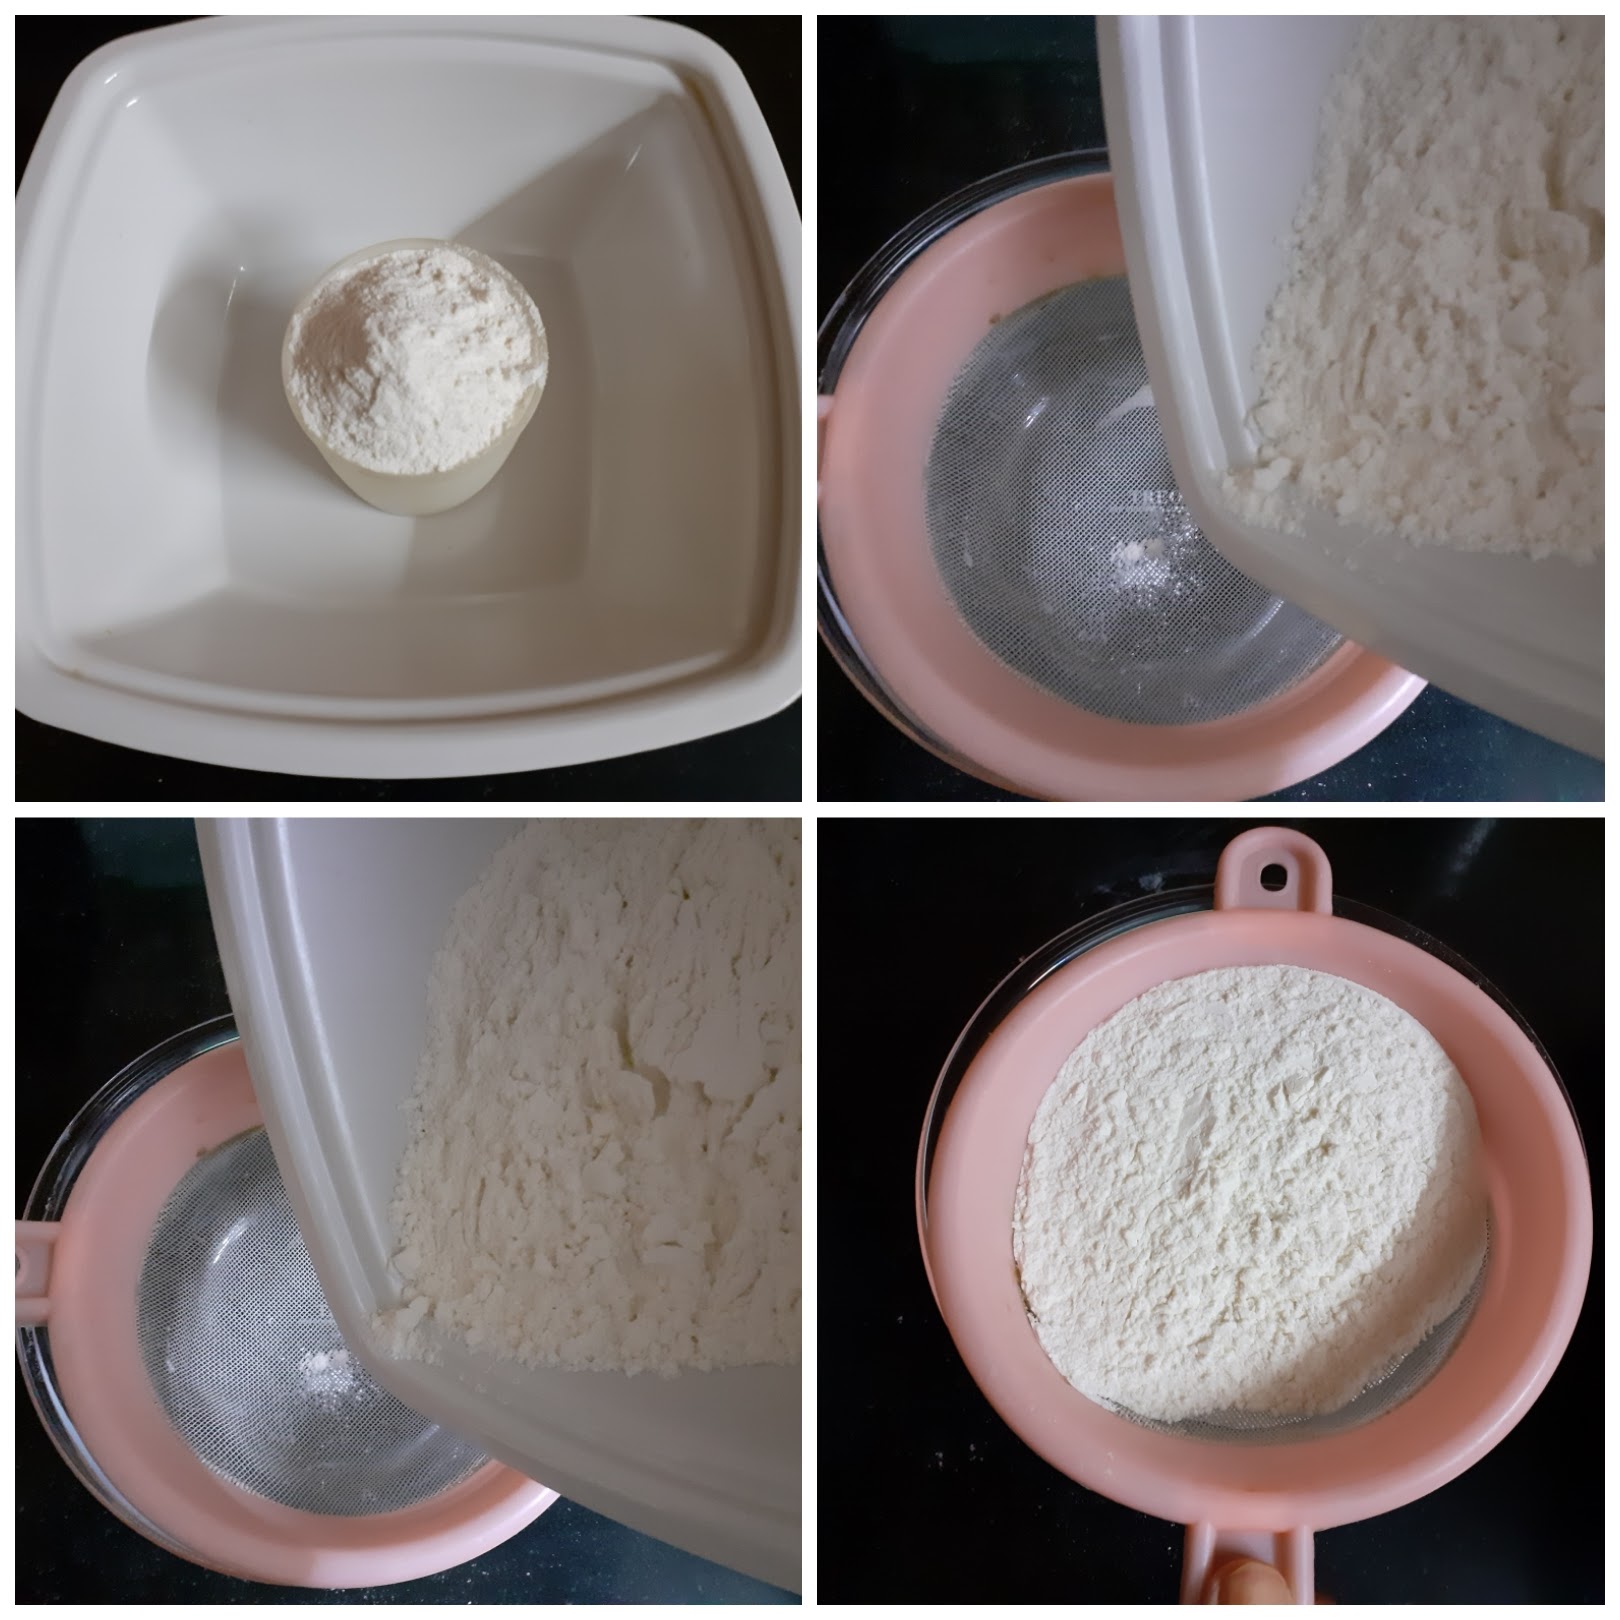
3. In a bowl take the curd, add the sugar and combine until the sugar dissolves completely. Now add the baking powder and baking soda and set aside for 5 minutes. This makes the mixture to froth up and double in size.

4. After 5 minutes add oil to the curd mixture and combine well. Add the sifted flour and with a spatula or wire whisk combine nicely to form a batter. Add in the vanilla essence and half the quantity the sauteed pineapples(refer instructions for Glaze step1) and mix lightly.
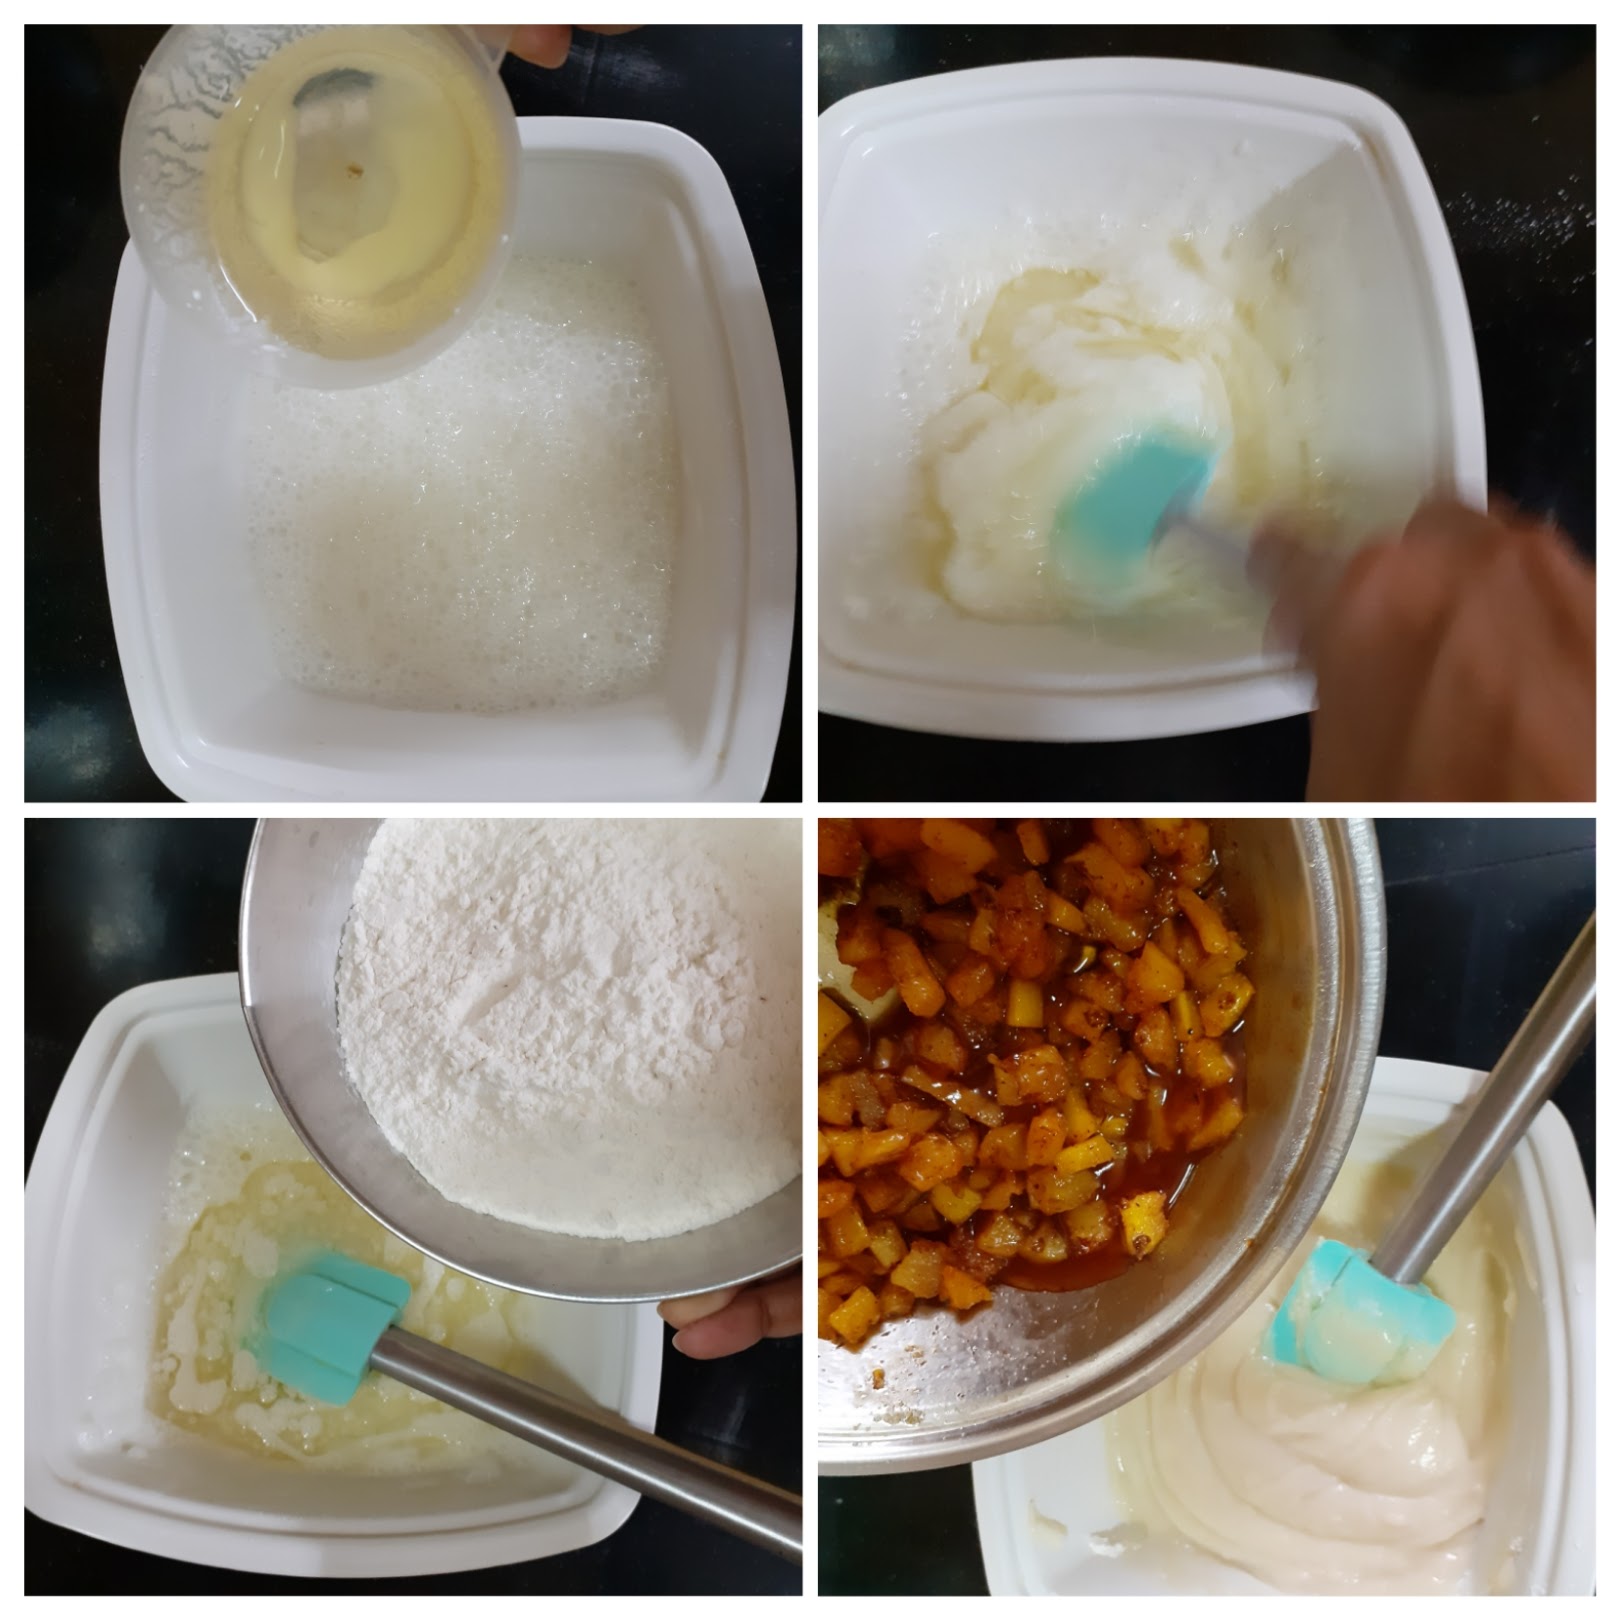
5. Now transfer the cake batter into a previously greased tray. Place the tray in the oven and bake for 35 minutes at 180 C. Check for doneness or keep for a couple of minutes more, if a toothpick comes out sticky, don’t go beyond 5 minutes. Cool the cake for 30 minutes, or until completely cool. Now top with the whipped cream topping and remaining Pineapple chunks and dig in.
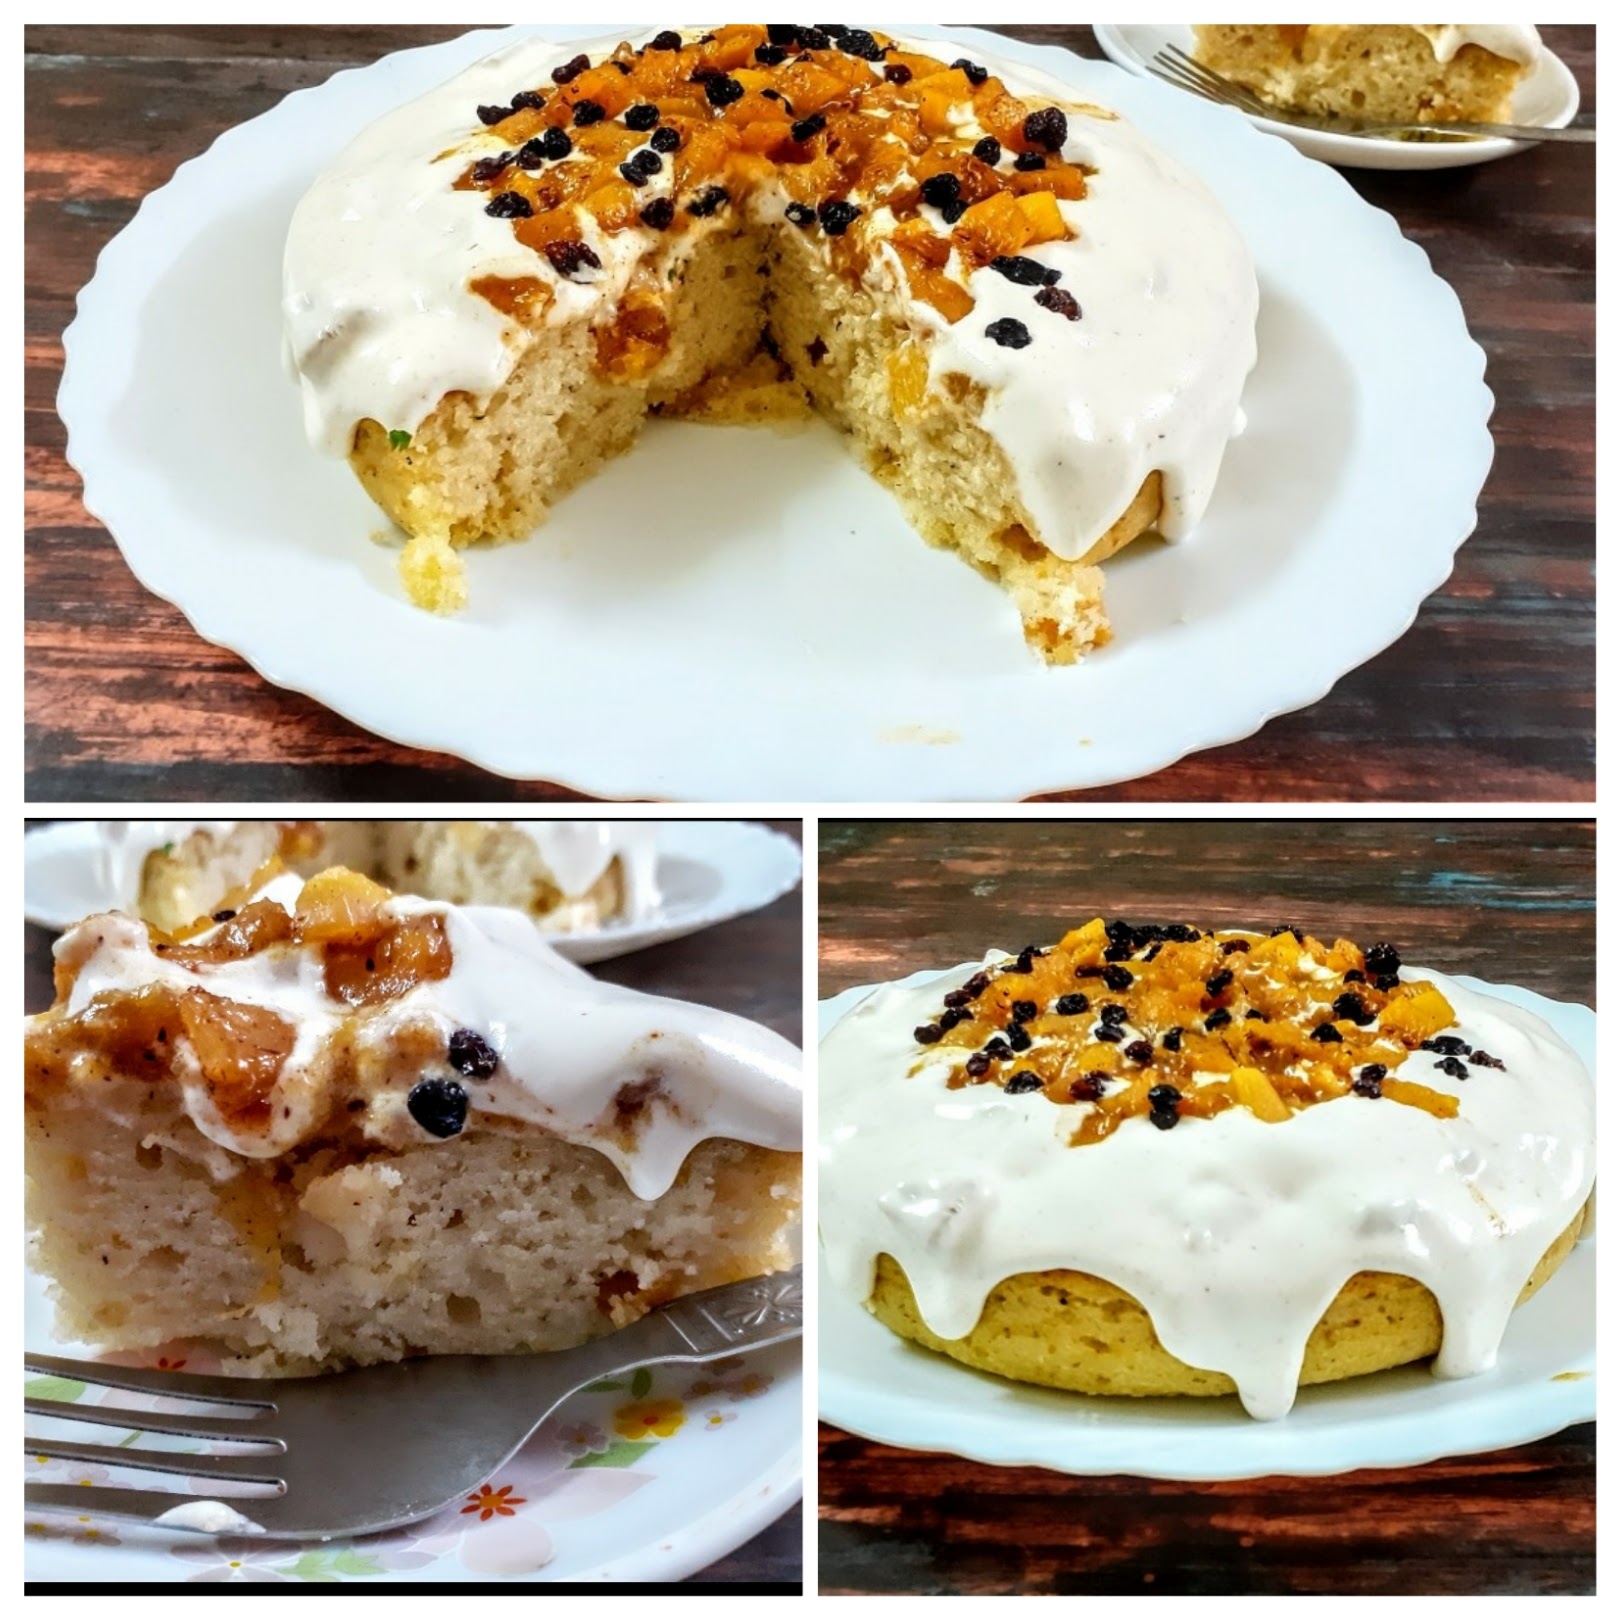
6. For the frosting:
Pour 1 cup pf chilled whipping cream into a mixing bowl and using an electric beater whip it to a consistency where, when the beater whisk is lifted, the cream forms a soft peak and doses not fall of the whisk. (PS: pictures for this step are not here, as the whipped cream frosting was just an impulsive decision, but a good one????. Picture for this step will be updated as soon as possible). When soft peaks appear to the cream, add 1/4 of the portion of the sauteed pineapple chunks and mix lightly. Keep some Pineapple chunks aside for topping up.
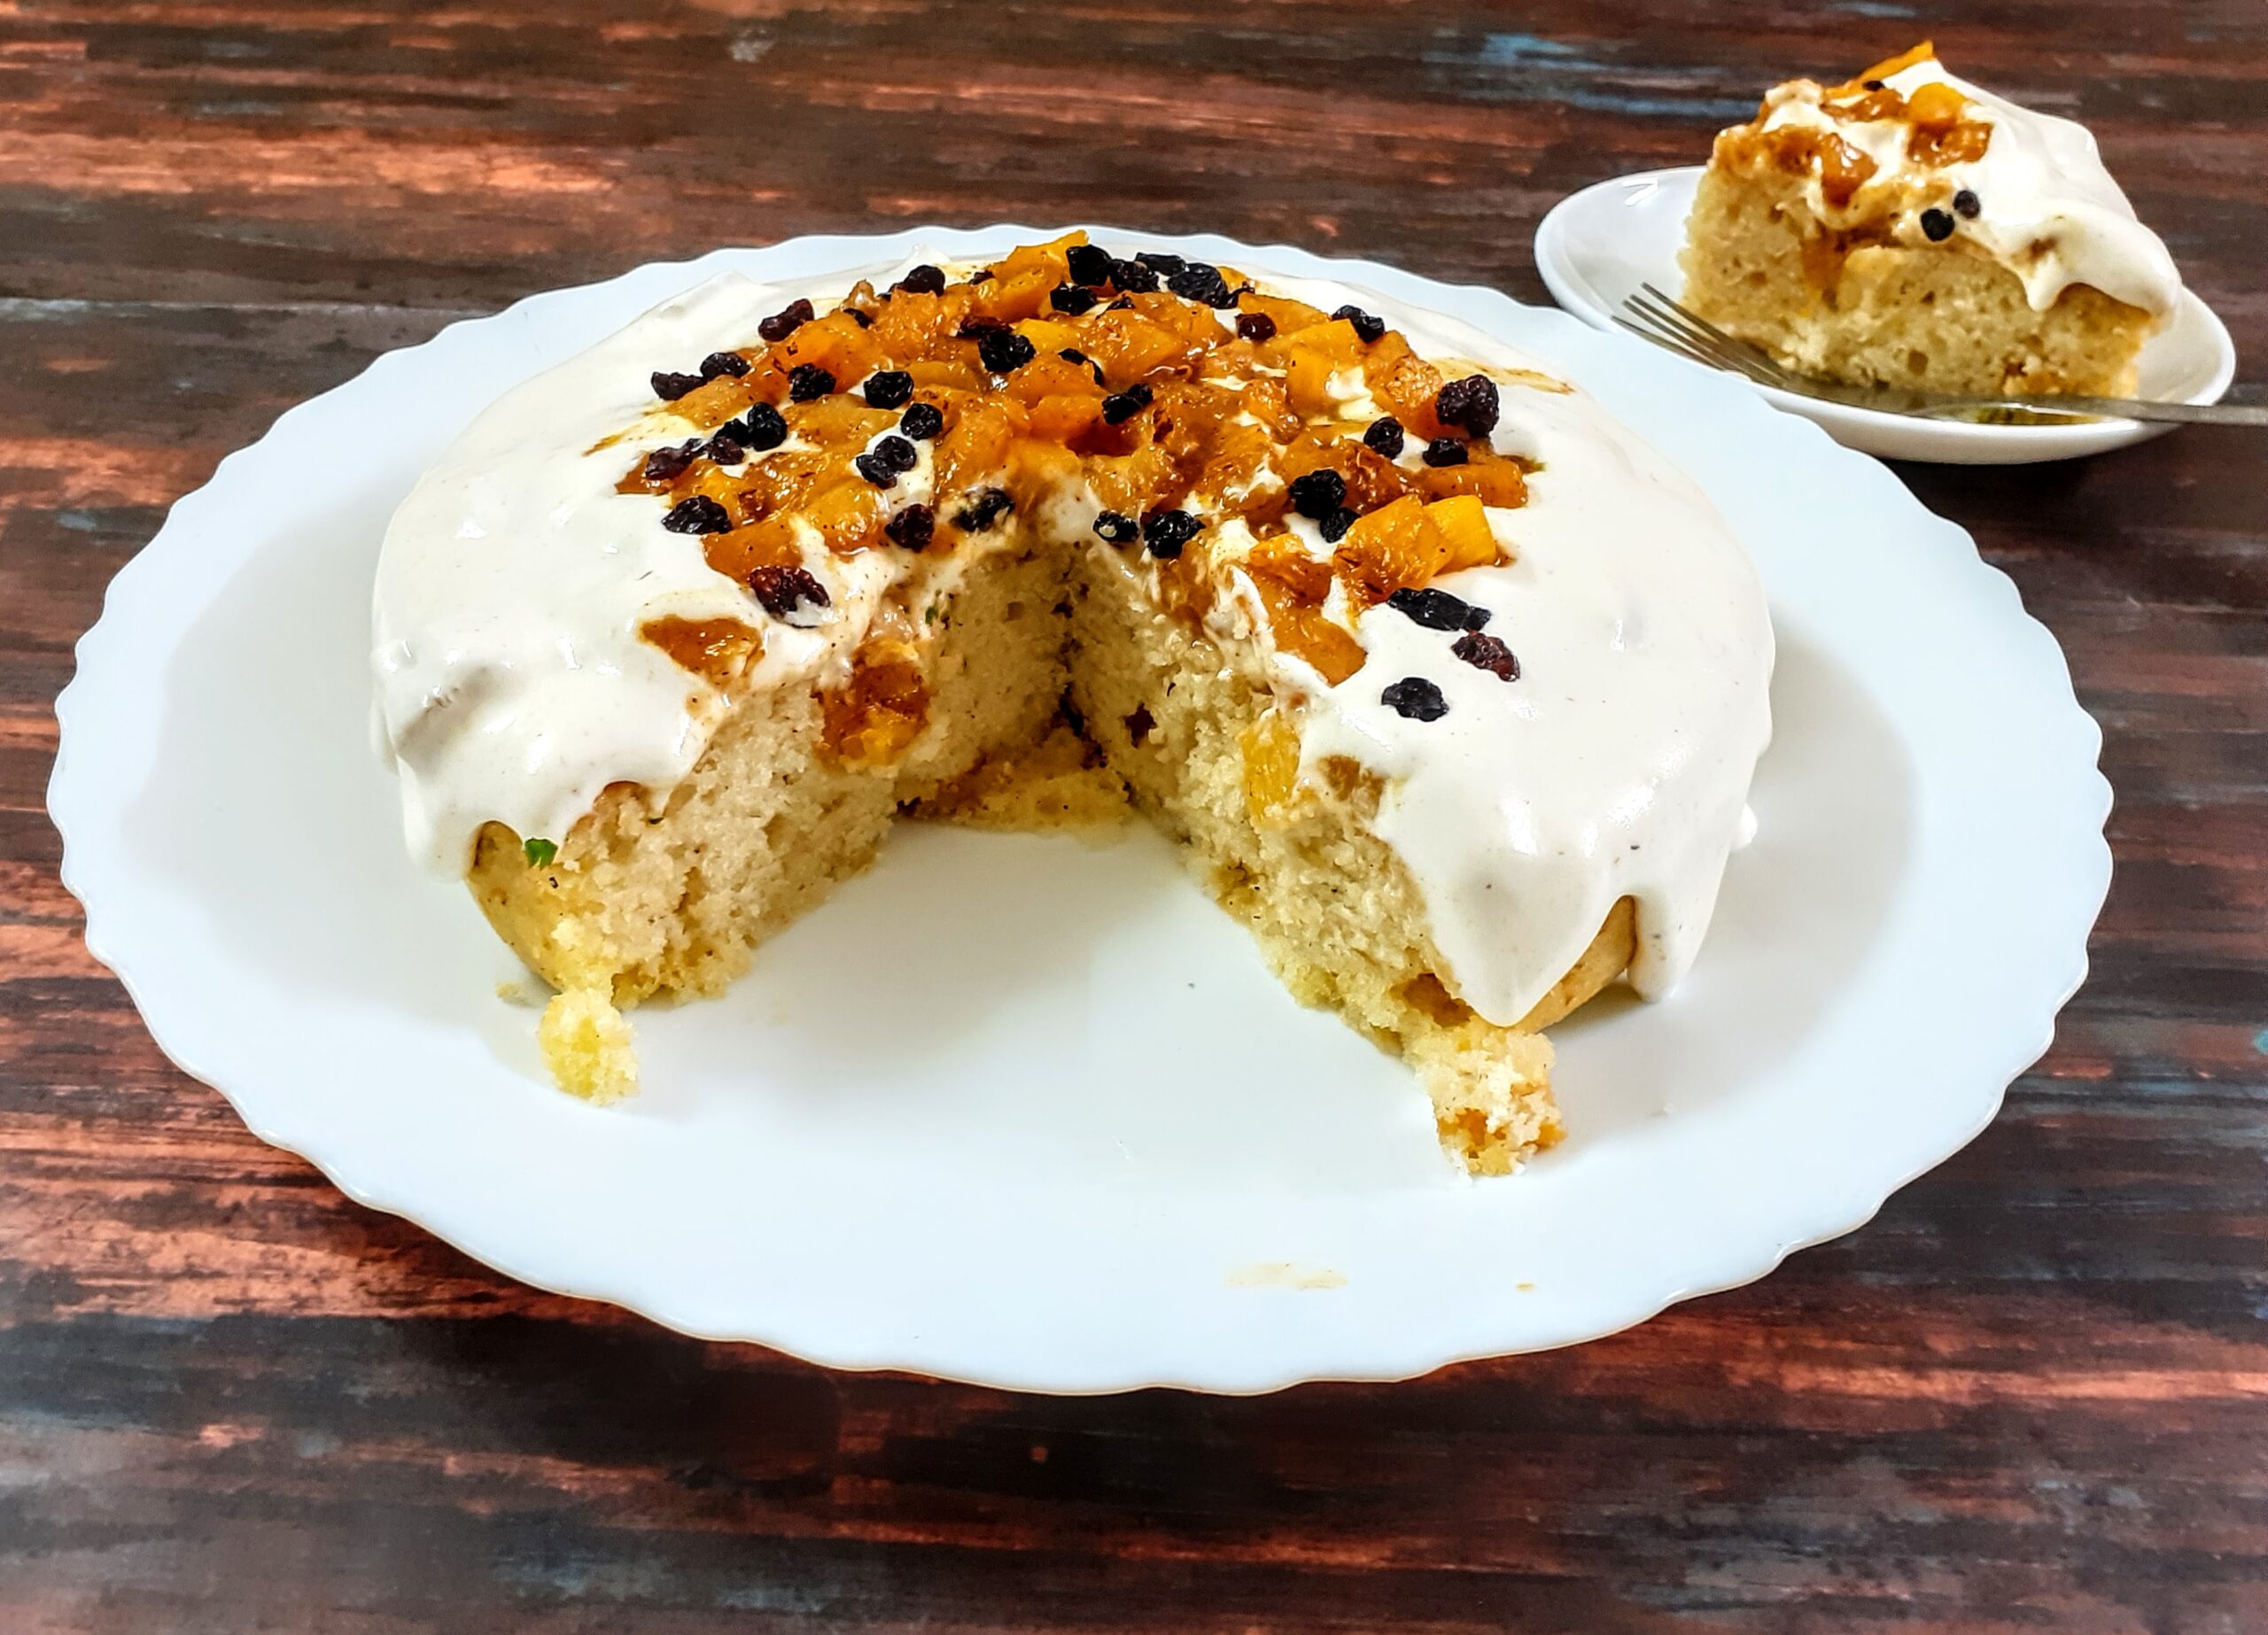
1. The curd should not be very sour.
2. Feel free to add your choice of fruits, the process of making sauce remains same. But cinnamon does not go well with all fruits, so go easy with cinnamon.
3. If you have extra whipped cream topping left, you may want to consider sandwiching some between two layers of cake.
If you tried this recipe and liked it please comment below. I would love to hear from you. If you have a query about the recipe email us and ill respond as soon as I can.
Miloni Babycorn & Bell Peppers Curry (Mixed Vegetable Curry)
Miloni Baby corn and Bell Peppers( both green and red) is a mixed vegetable curry that is simple and easy to make. With a little prep and chopping it can also be made on a working day. Some recipes use Spinach/Palak in Subz Miloni, but I have skipped it entirely, to bring out the flavours of the Baby corn and bell-peppers and some green peas too have been used, as they are in season now.
The flavours of this dish are very delicate and go very well with both Rice and Rotis(flatbread). This is one of those recipes where I have just gone with the follow and created, without any pre planning. When I started, only Baby corn and bell-peppers were chopped, but as I proceeded kept adding things to create this dish. This happens when I am bored of my own cooking and am looking for some inspiration from within.
While you are here do check out other subji and curry recipes like- Kadai Paneer Gravy, Kadai Paneer (semi dry), Bhindi Aloo, Paneer Khurchan, Dum Aloo Ajwaini, Methi wale Baingan, Mava Paneer Curry, and more…
Here is the recipe for Miloni Baby corn and Bell Peppers for you-
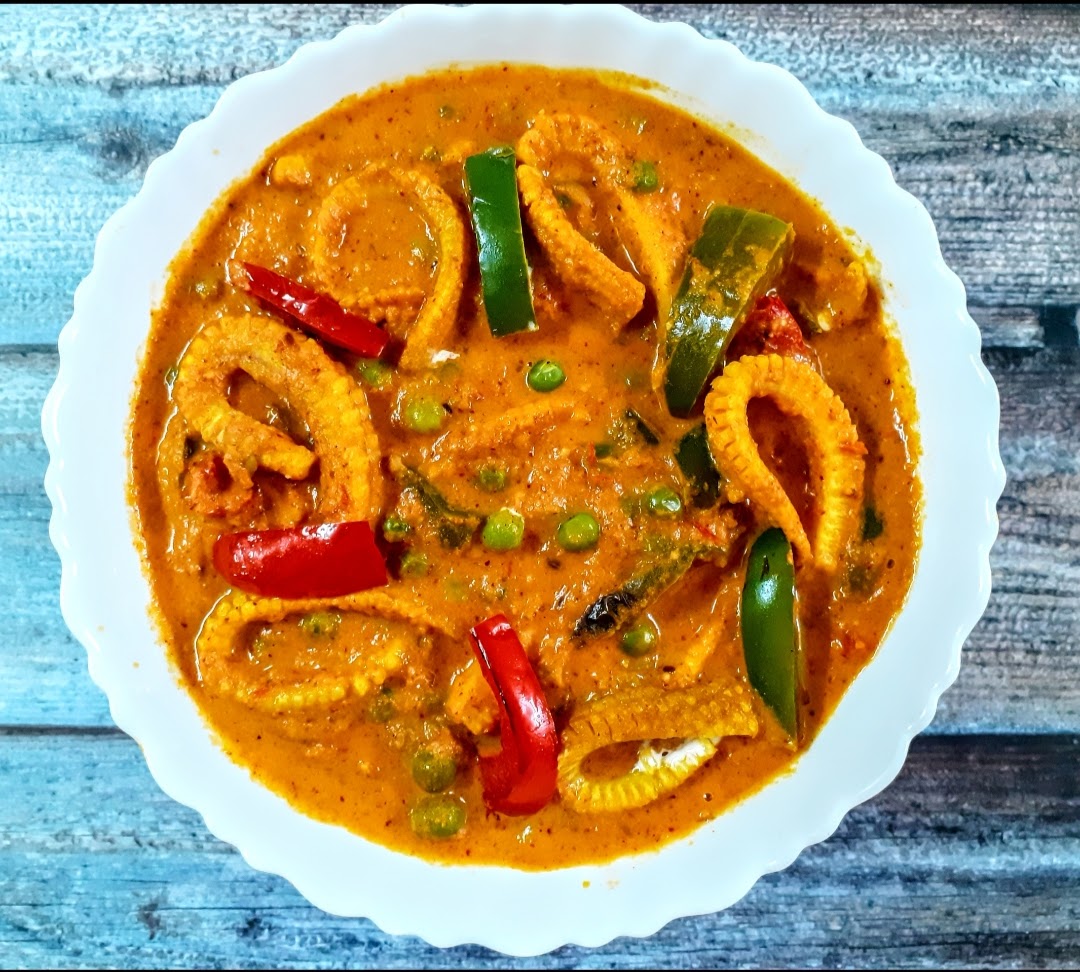
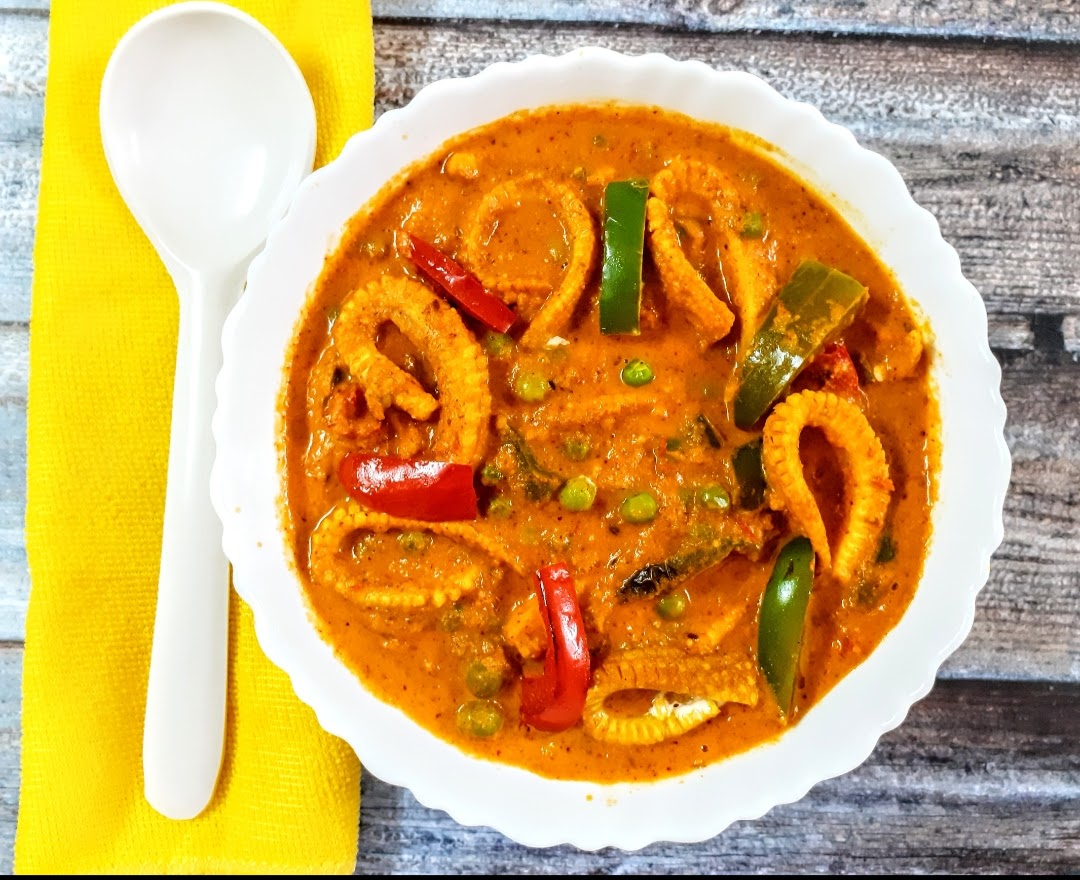
Ingredients:
Baby Corn 12 to 15 cut lengthwise
Red Bell Pepper 1 chopped to strips
Capsicum/ Green bell pepper 1 chopped to strips
Green Peas 1 handful (optional)
Onion 1 large chopped
Ginger 1 inch piece
Garlic 3 cloves
Tomatoes 2 large chopped
Green chillies 2
Cashewnuts 10 to 12
Salt as required
Cumin Seeds 1 tsp
Turmeric powder 1/2 tsp
Red chilli powder 1 to 2 tsp (depending on spice preference)
Kashmiri chilli powder 1 tsp for colour (optional)
Coriander powder 2 tsp
Sugar 1 tsp (optional)
Cream 1 tbsp (optional)
Garam Masala powder 1/2 tsp
Oil for sauteing
Directions:
Cook the chopped Baby Corn and peas until done. I put them in the Microwave, so that they don’t overcook and the baby corn retains shape. Next, in a pan pour oil for sauteing and when hot add the cumin seeds, followed by turmeric powder. Now add the chopped onion, tomatoes, ginger, garlic and slit green chillies and saute. Add little salt(about 1/4 tsp) so that the tomatoes break, add the Cashewnuts and saute until the onion turns transparent and the tomatoes breakdown. Switch off flame and cool completely. On cooling, grind to a fine paste and keep it aside. Now in the same pan take some more oil. Add some Cumin seeeds and put in the chopped Bell Peppers(both red and green) and saute. Add a little sugar and continue to saute. When the Bell peppers appear cooked add the cooked baby corn and peas after draining all the water. Add turmeric powder and salt and stir. Now add the ground paste followed by red chilli powders(both regular and kashmiri), coriander powder and pour 1 to 1.5 cups of water( I poured water into my mixie jar, gave it a spin and used it so that is don’t waste the stuck paste ). Stir nicely for the masalas to combine and cook until the water is partially absorbed, and gravy comes together. Finally, add the cream and put off the flame and sprinkle the garam masala giving the curry a final stir. The yummy Miloni Baby Corn and Bell peppers is ready to serve.
Serving Suggestions: With hot Phulkas, Roti, Parathas, Plain rice, Jeera rice, Peas Pulav and more.
STEPWISE RECIPE FOLLOWS:
1. Cook the chopped Baby Corn and peas until done. I put them in the Microwave, so that they don’t overcook and the baby corn retains shape. Next, in a pan pour oil for sauteing and when hot add the cumin seeds, followed by turmeric powder.
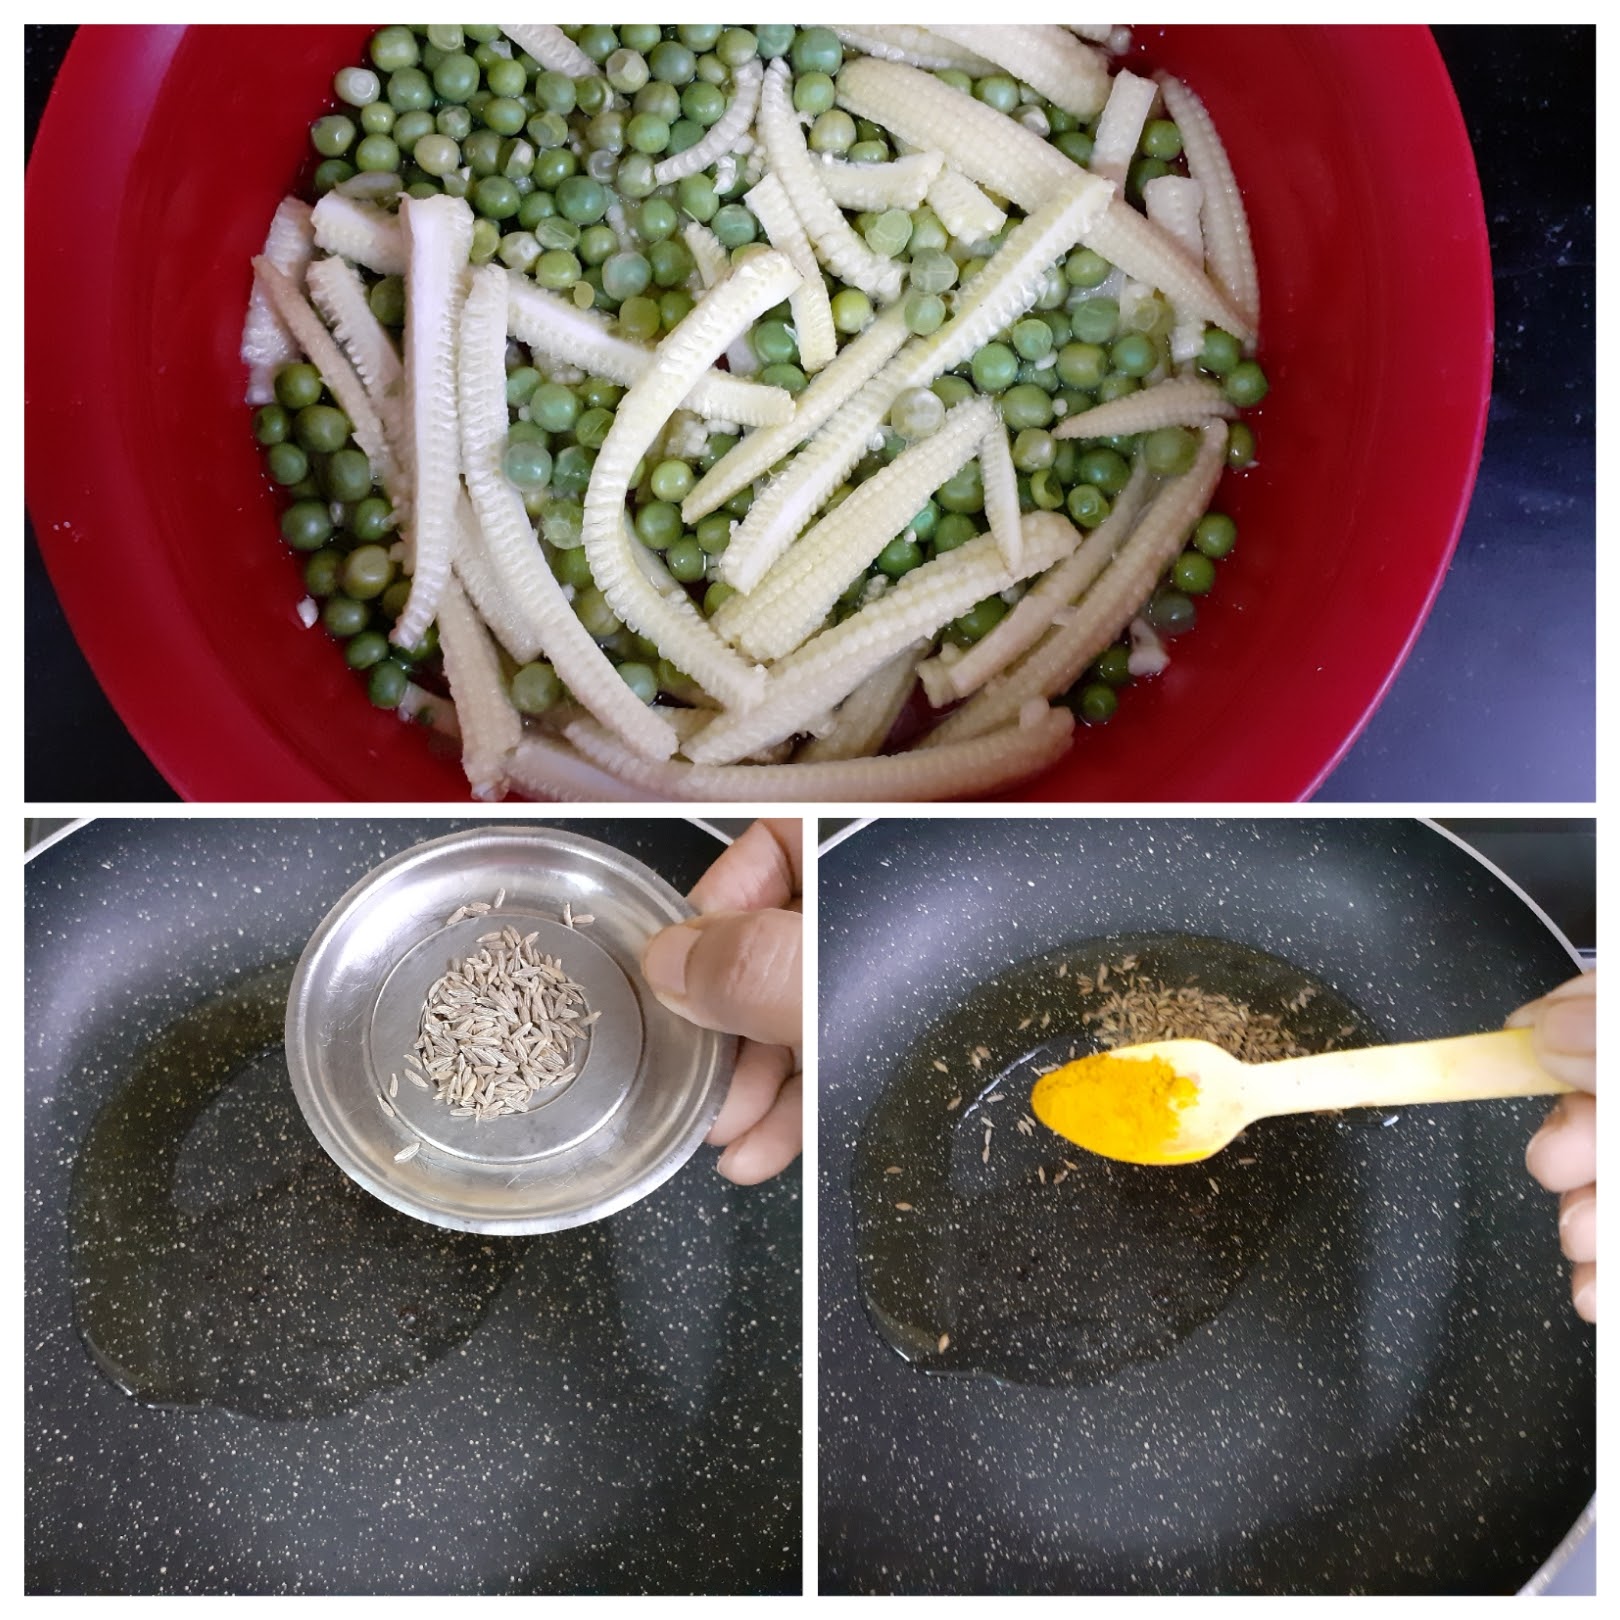
2. Now add the chopped onion, tomatoes, ginger, garlic and slit green chillies and saute. Add little salt(about 1/4 tsp) so that the tomatoes break, add the Cashewnuts and saute until the onion turns transparent and the tomatoes breakdown. Switch off flame and cool completely. On cooling, grind to a fine paste and keep it aside.
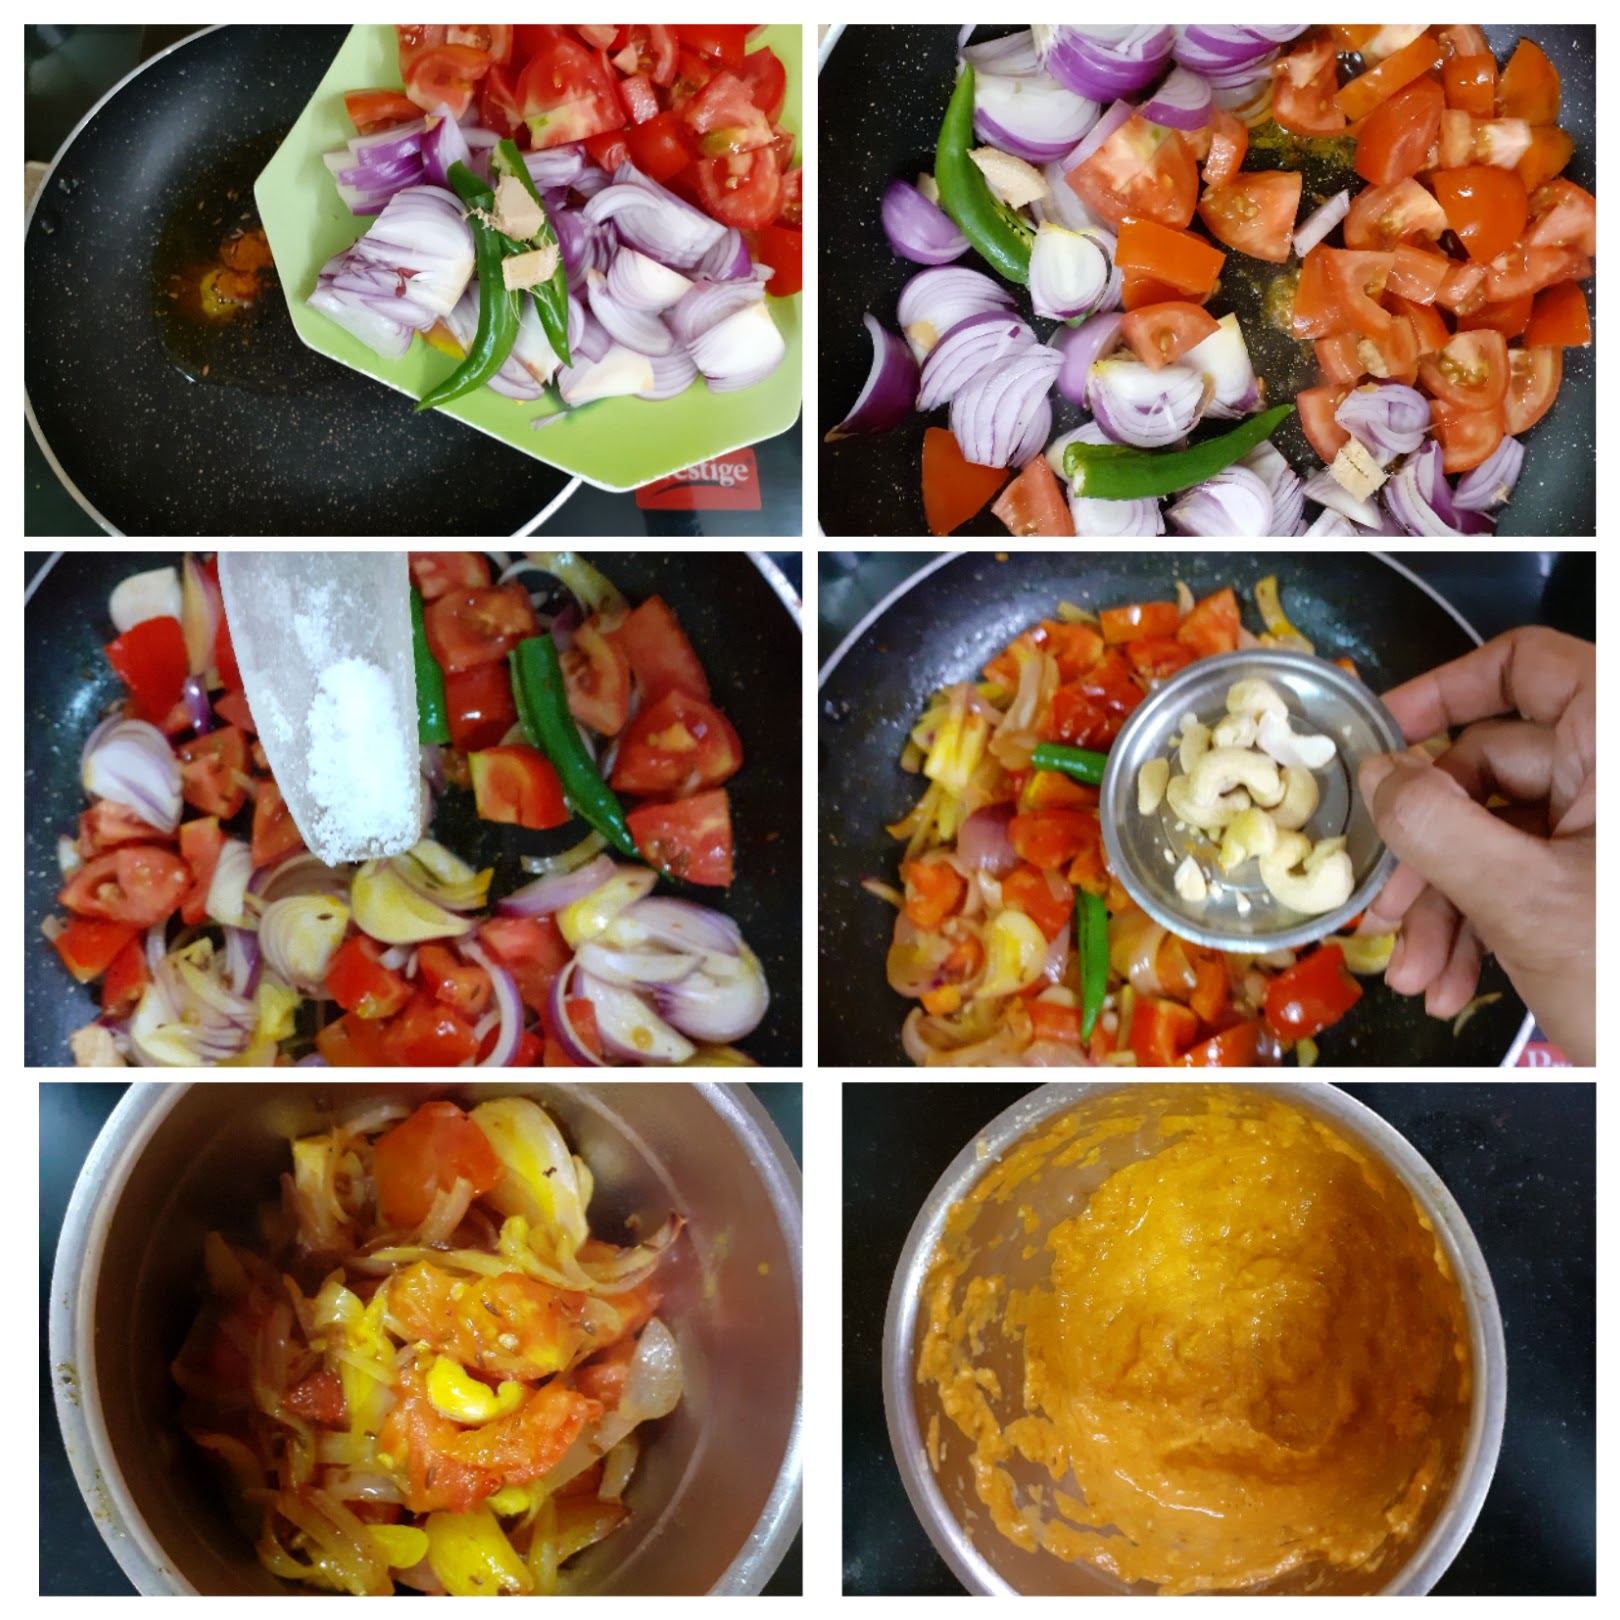
3. Now in the same pan take some more oil. Add some Cumin seeds and put in the chopped Bell Peppers(both red and green) and saute. Add a little sugar and continue to saute.
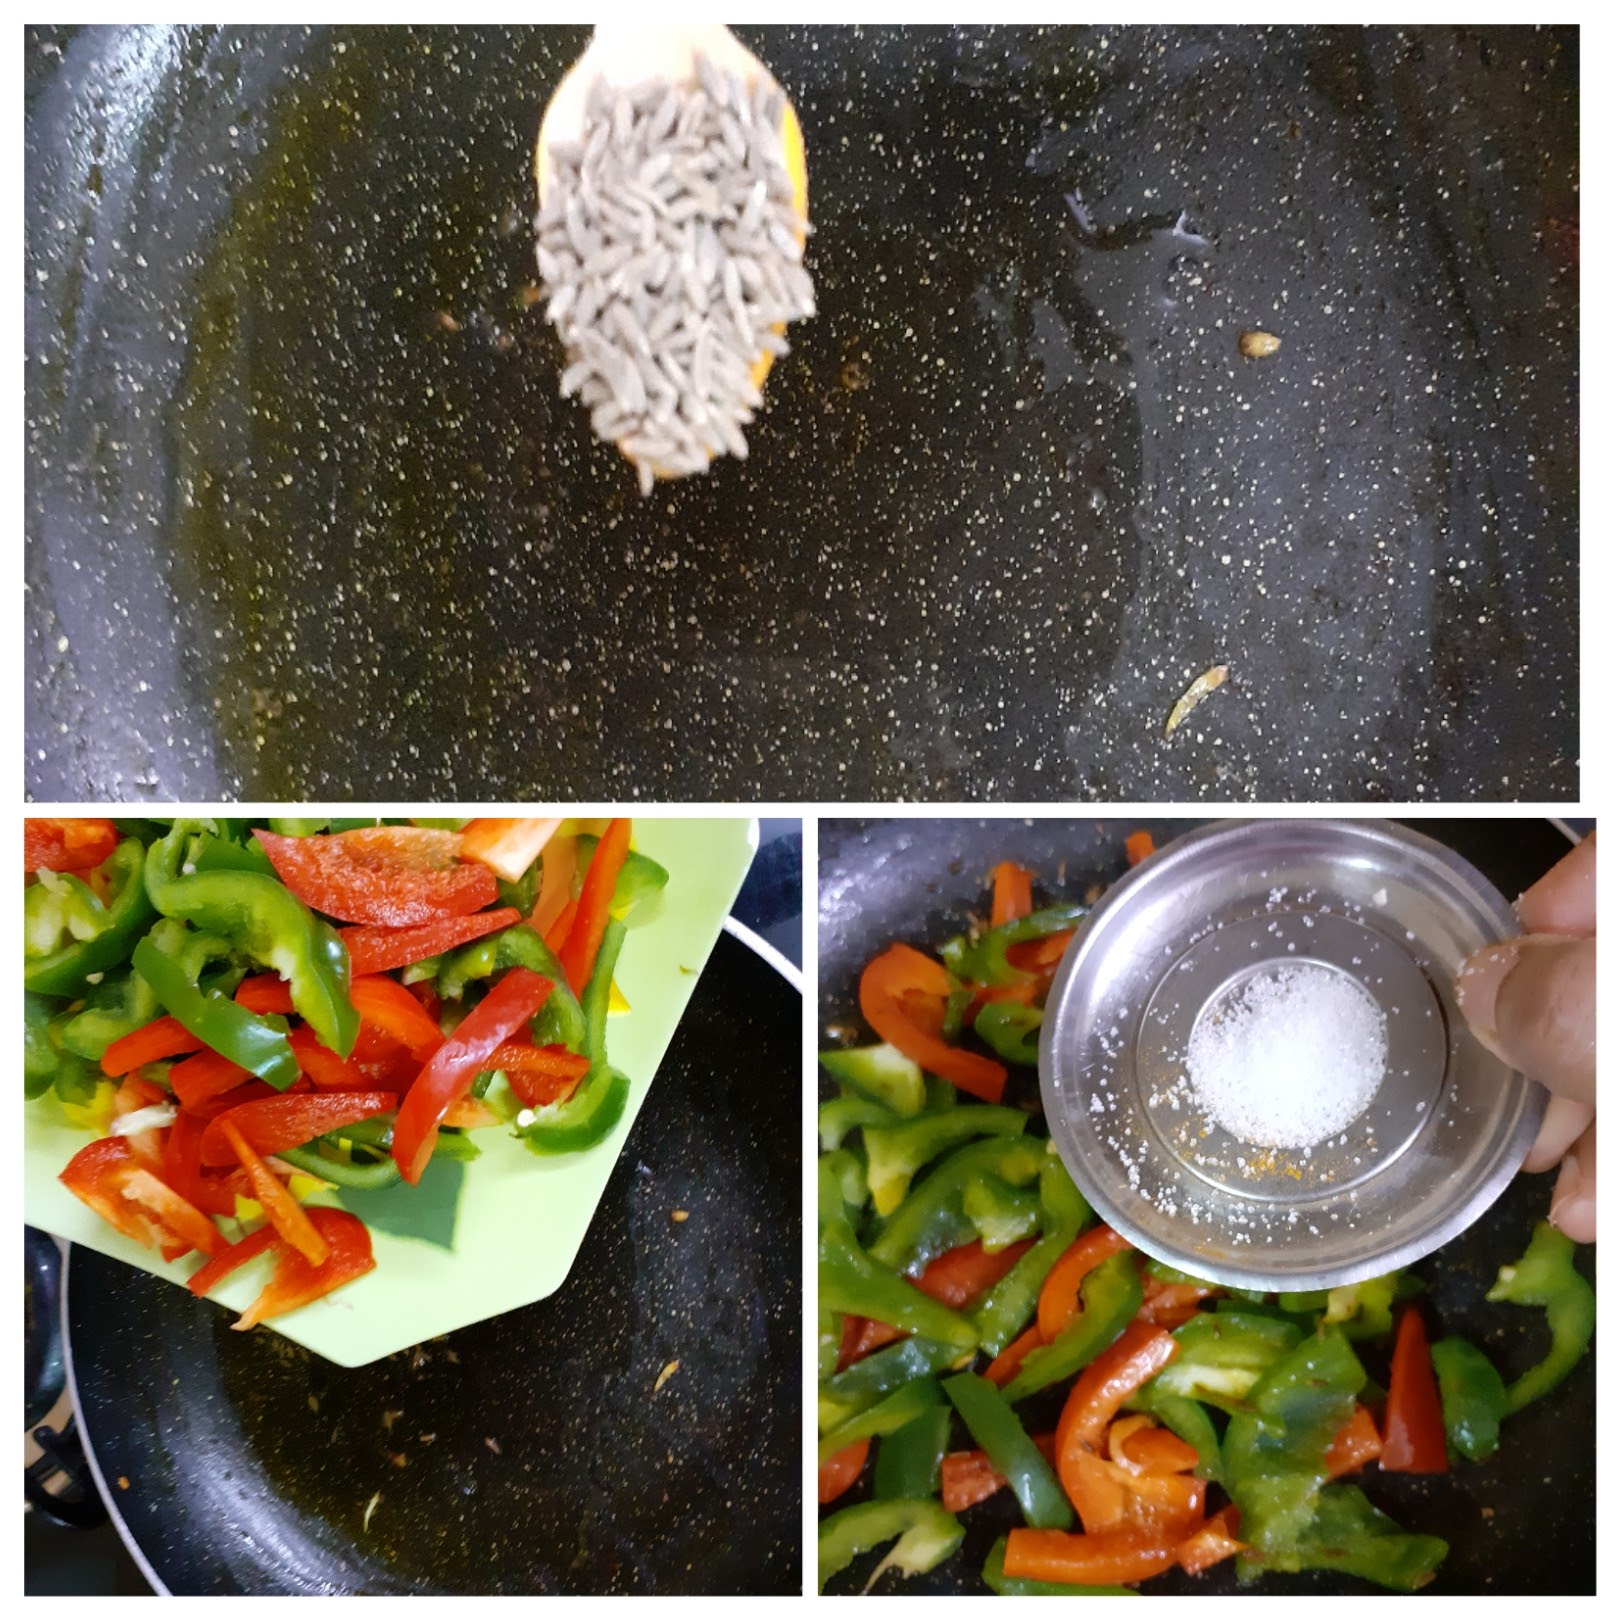
4. When the Bell peppers appear cooked add the cooked baby corn and peas after draining all the water. Add turmeric powder and salt and stir.
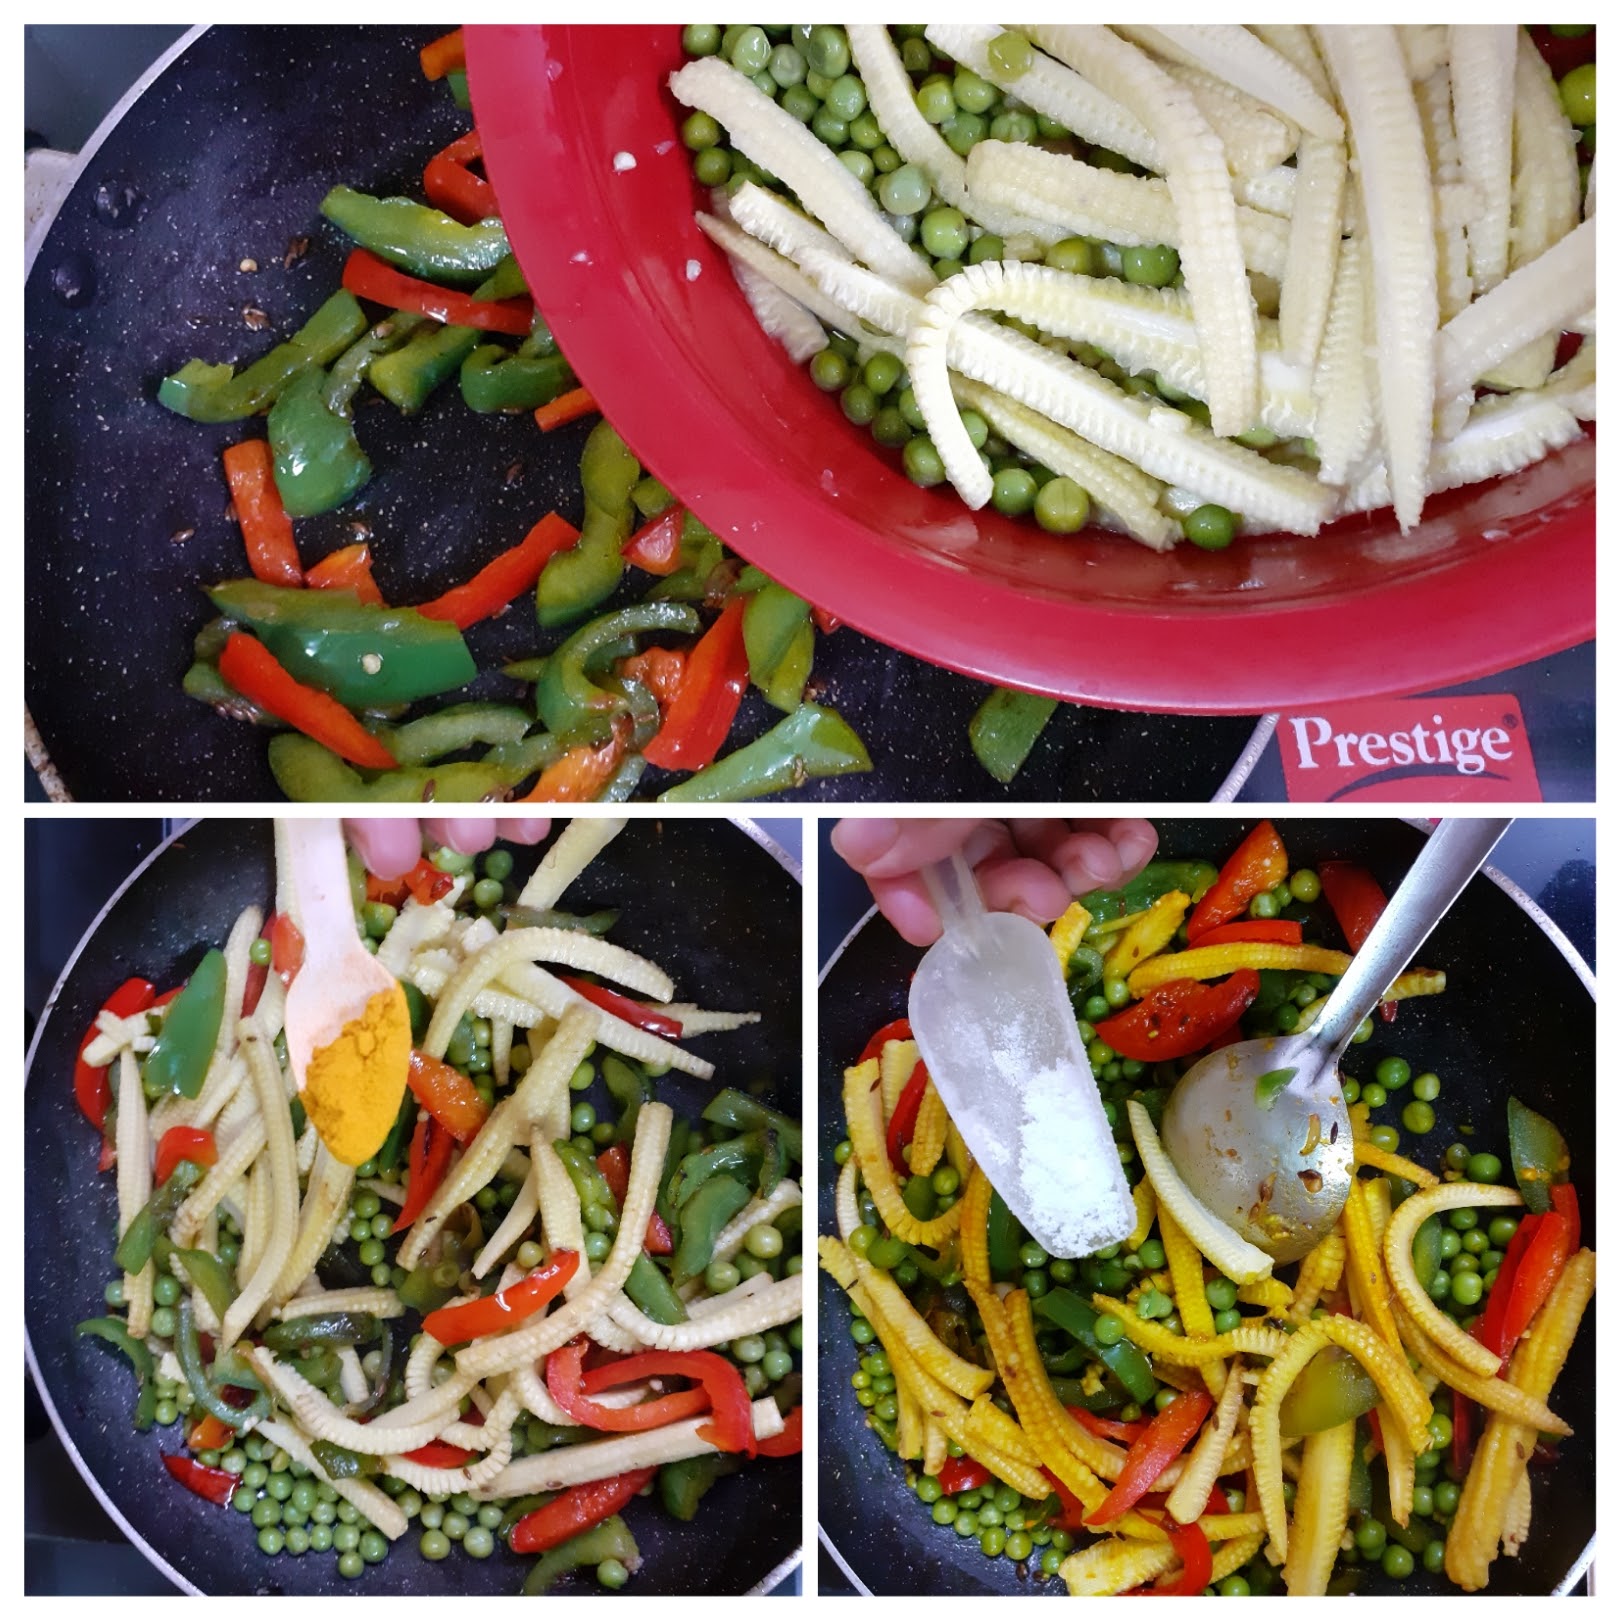
5. Now add the ground paste followed by red chilli powders(both regular and Kashmiri), coriander powder and pour 1 to 1.5 cups of water( I poured water into my mixie jar, gave it a spin and used it so that is don’t waste the stuck paste ).
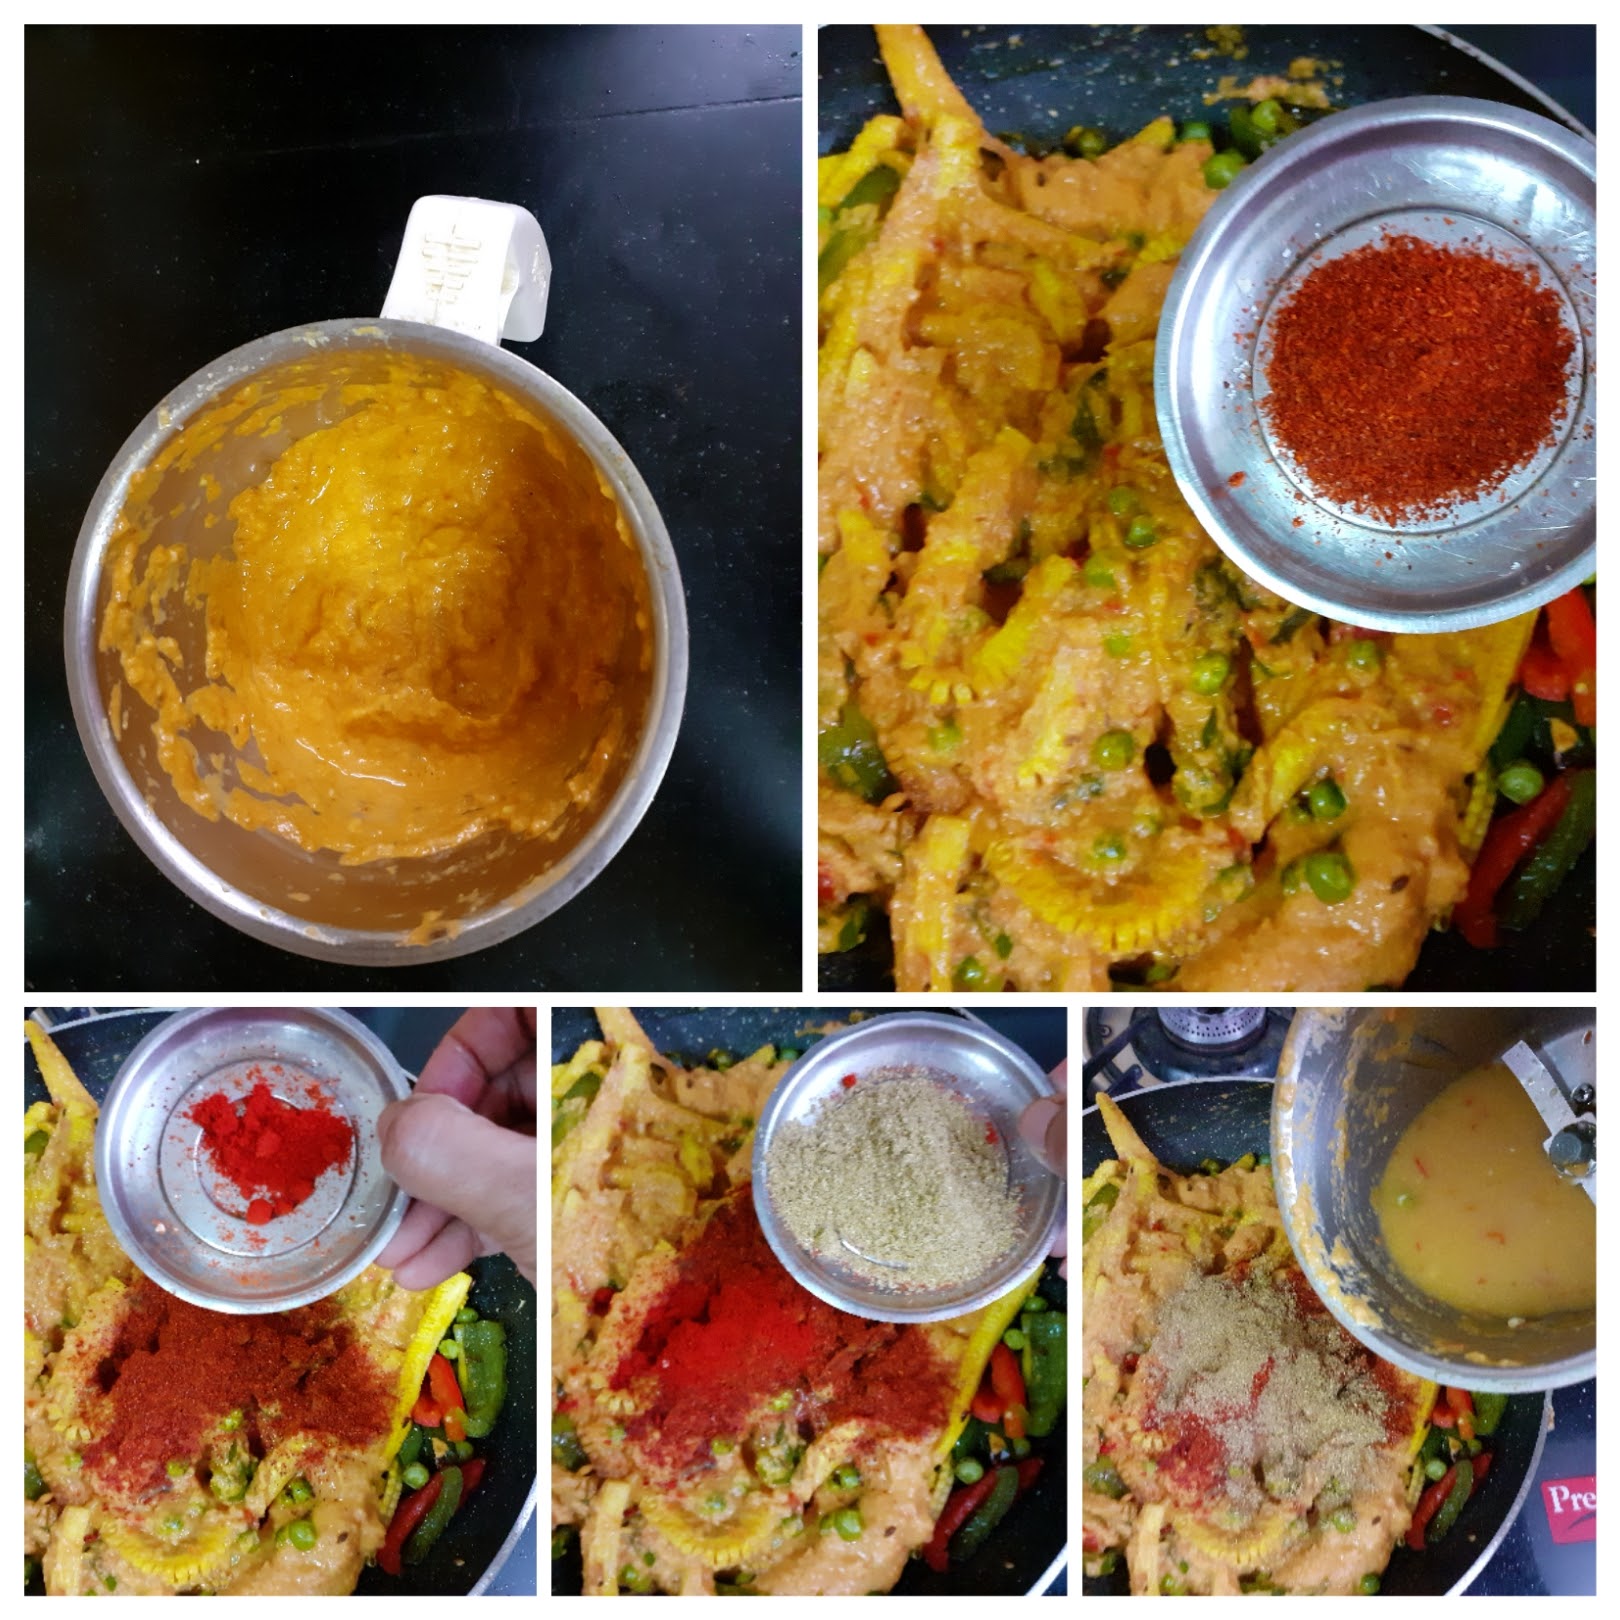
6. Stir nicely for the masalas to combine and cook until the water is partially absorbed, and gravy comes together. Finally, add the cream and put off the flame and sprinkle the garam masala giving the curry a final stir. The yummy Miloni Baby Corn and Bell peppers is ready to serve.
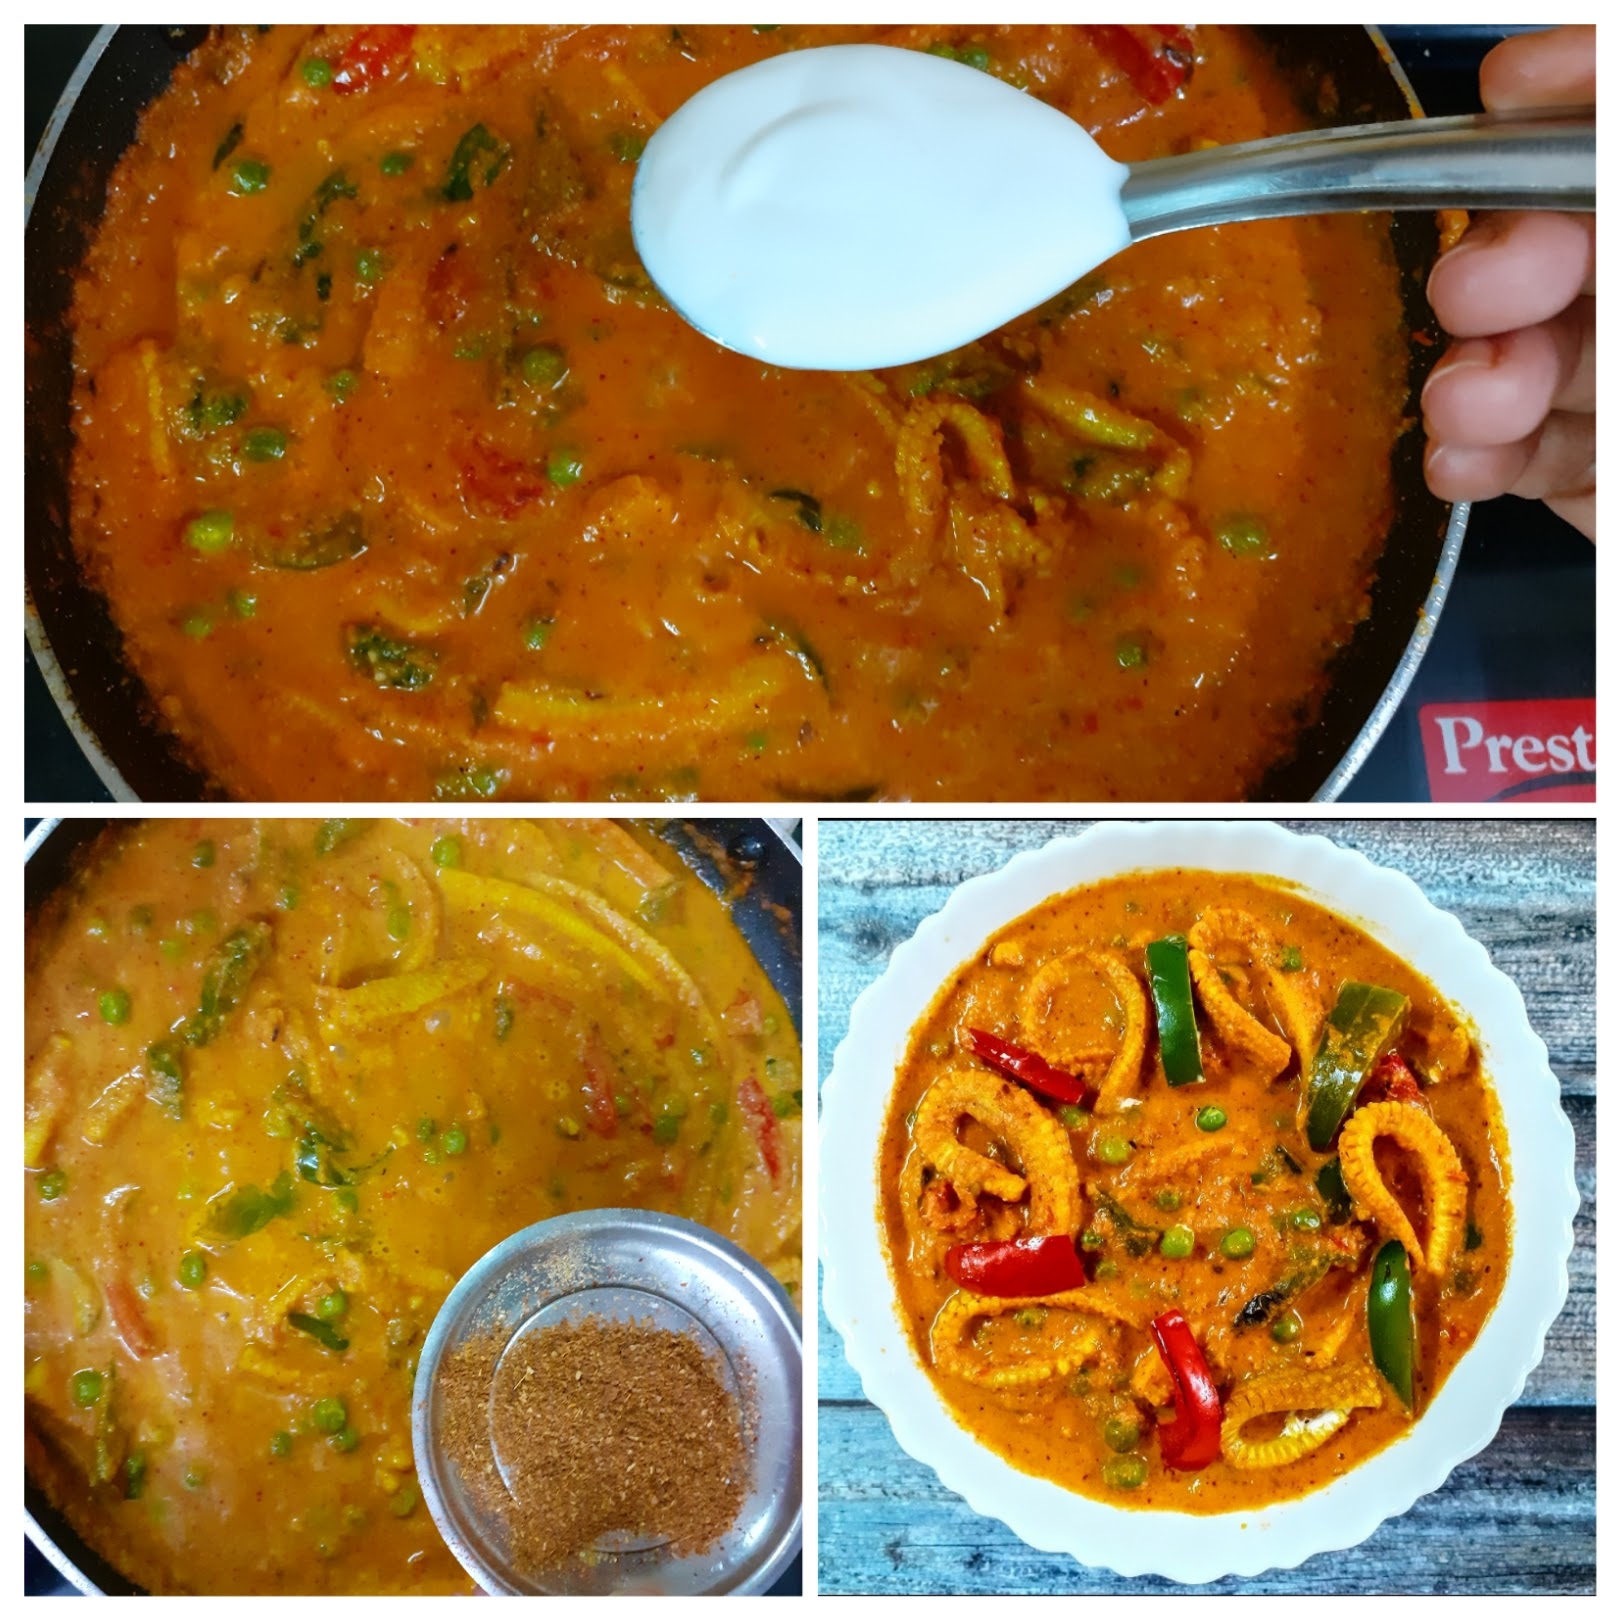
NOTES:
1. I have deliberately stayed clear of the regular mixed assorted Vegetables for this curry. There is a recipe for the regular mixed vegetable curry without onion and garlic, in case you are interested. It is very simple and basic recipe, which can be done by beginners too. Check it out here.
Menthiya Keerai Kootu/South Indian Methi Dal
Fenugreek or Methi green are my most favorite greens and i wish they were perennial. That said, even though they can be grown at home perennially, its always good to eat seasonal food, to get the maximum benefits out of them. These slightly bitter greens have loads of benefits to offer and one should make the most of it.
TOTAL TIME: 25 MINS COURSE: MAIN
CUISINE: SOUTH INDIAN SERVINGS: 4
AUTHOR: RAJNI RAM
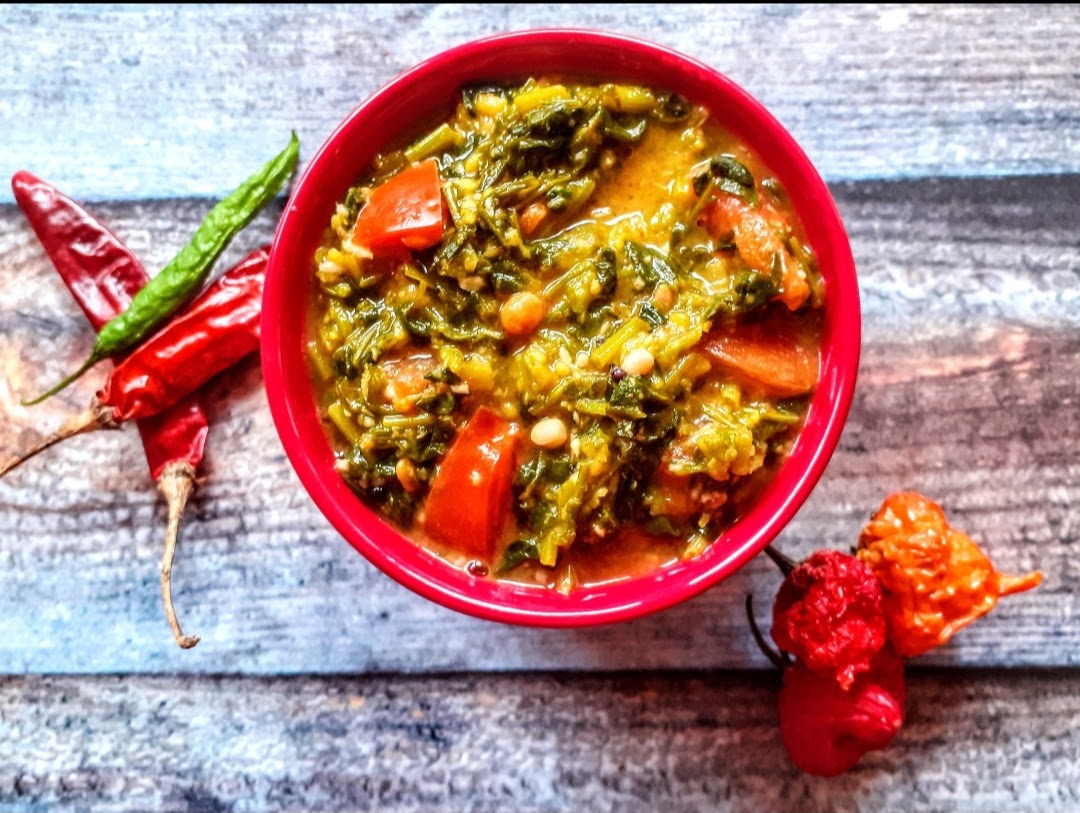


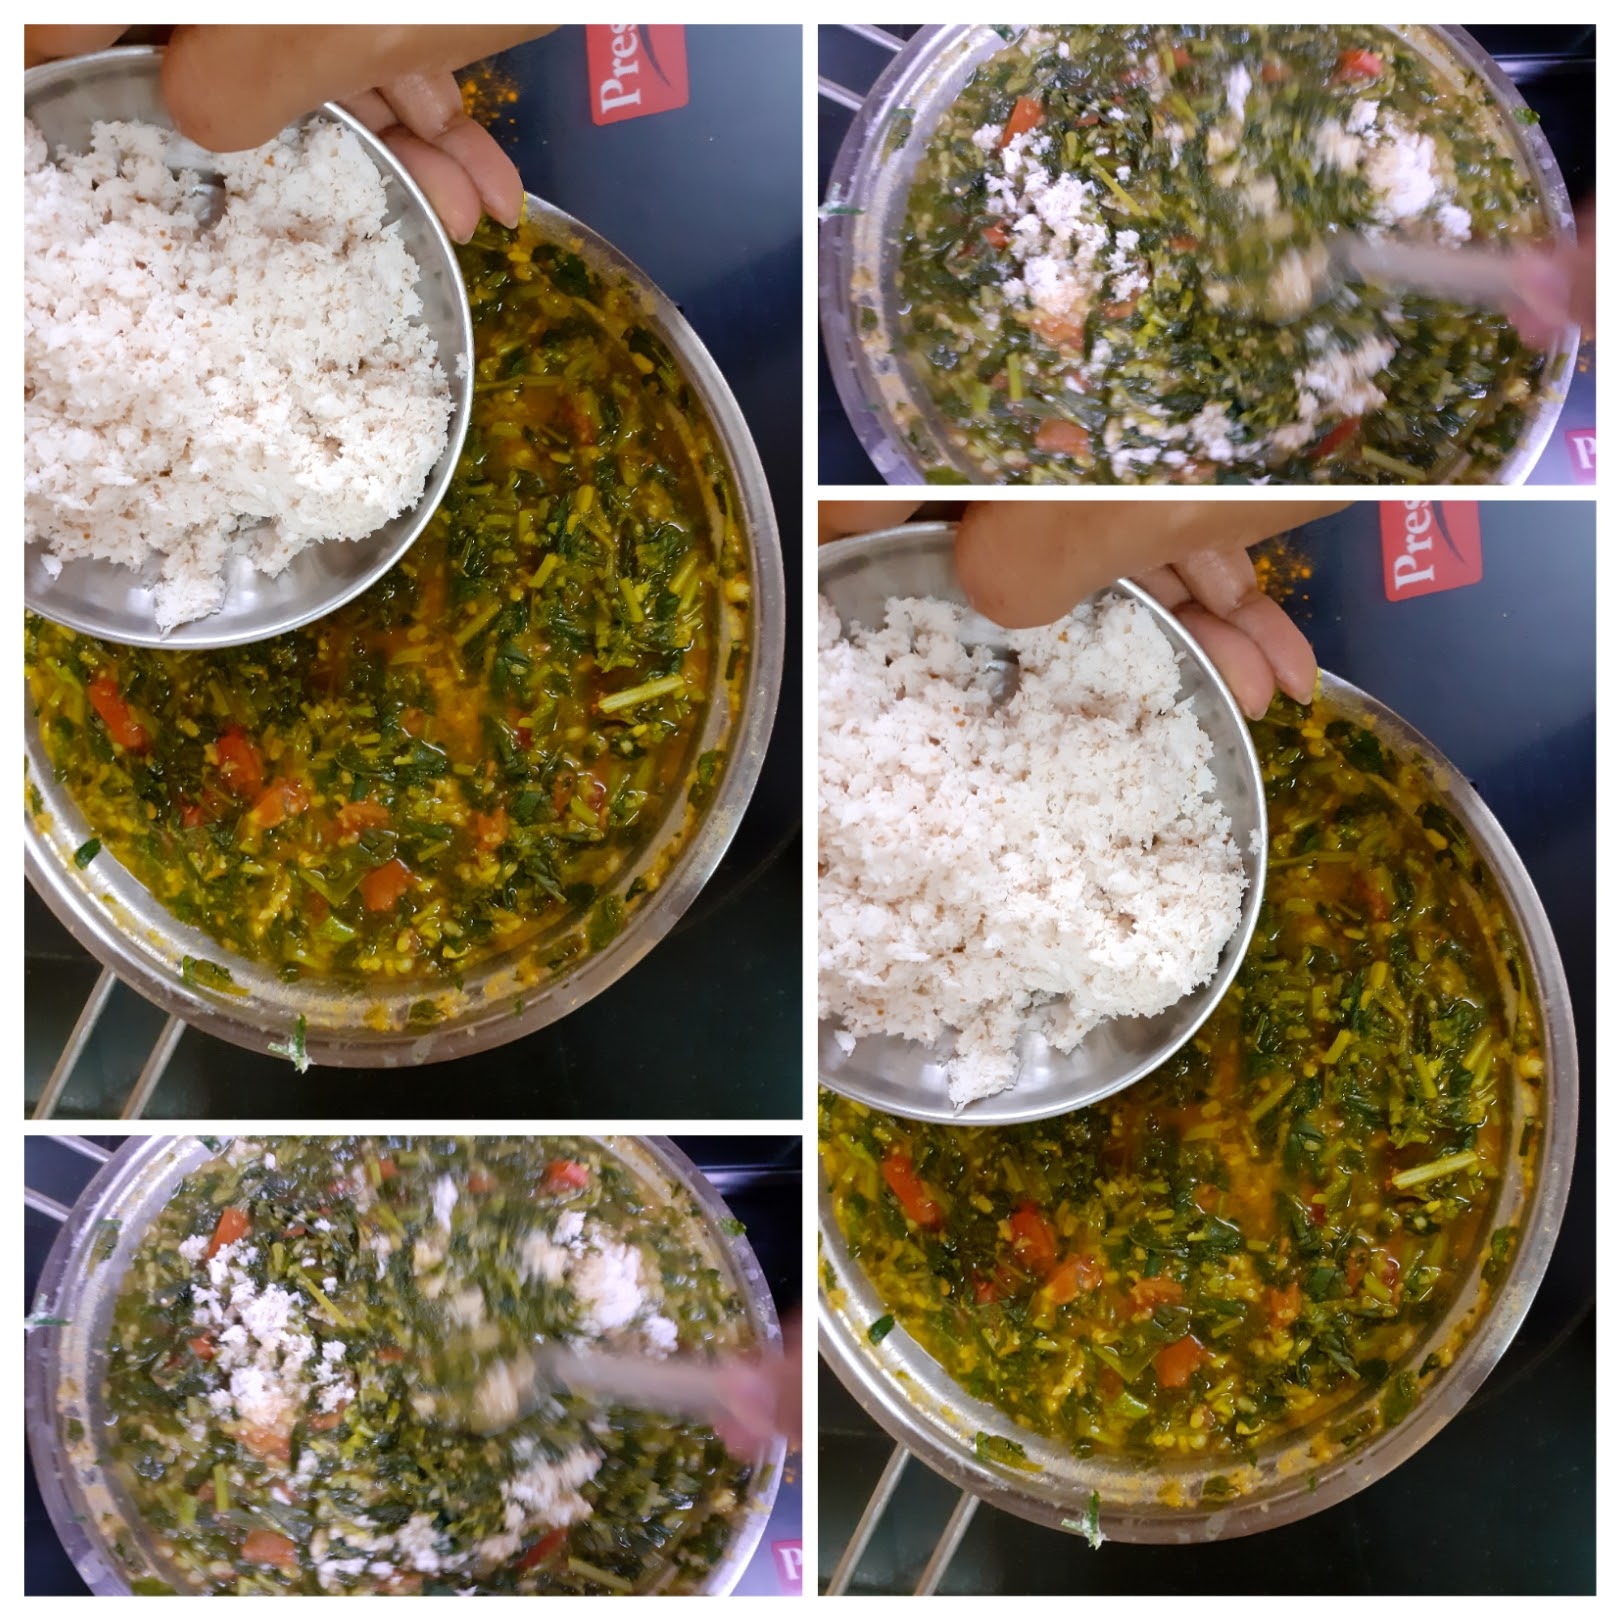
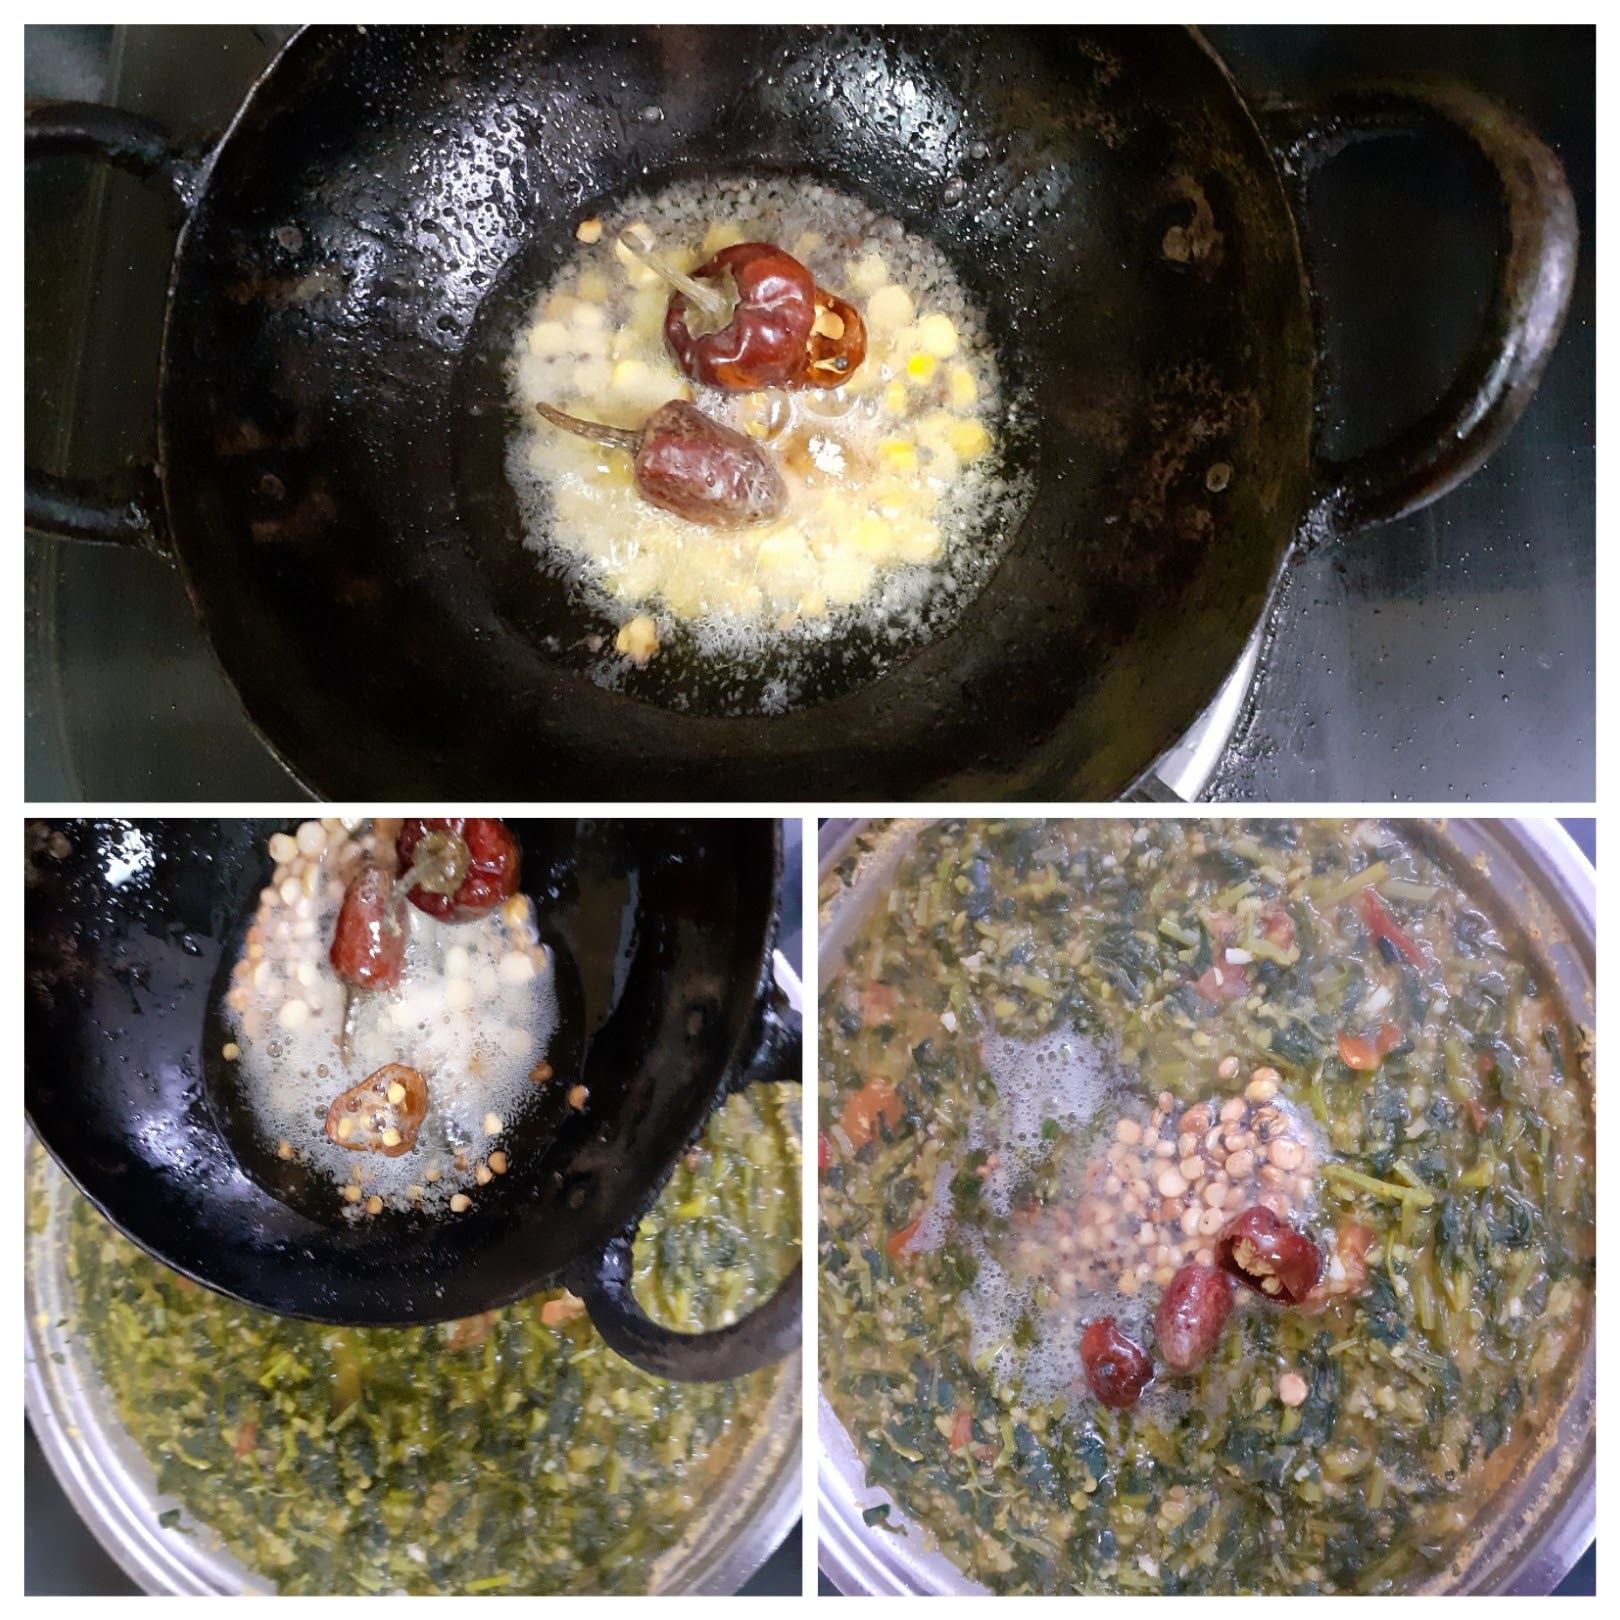
Strawberry & Lemon Loaf
Strawberries are in season now and what better way than storing up on all the goodness on what they have to offer by making, jams, desserts or just eating them fresh. But of course who can refuse a good bowl of Strawberry and cream…are you a berry addict like me? then this dessert/bread is certainly for you. If you are not a fan of berries you shall become one after tasting this????.
This as always is a one bowl recipe and one of the simplest. I have used Whole wheat flour in this recipe, which can be easily swapped with Maida/refined flour if you prefer. A simple dish does not need much of a description I believe, therefore lest get to the recipe directly.
While you are here do check out my other bakes like- Millet Cookies, Easy 2 way Muffins, Upside down Orange Vanilla cake, Oatmeal Cookies, Baked Samosa Pie, Apple Crumble, Pineapple Jam Tart, Blueberry Cheese cake and more…
Here is the recipe for Strawberry Loaf for you-
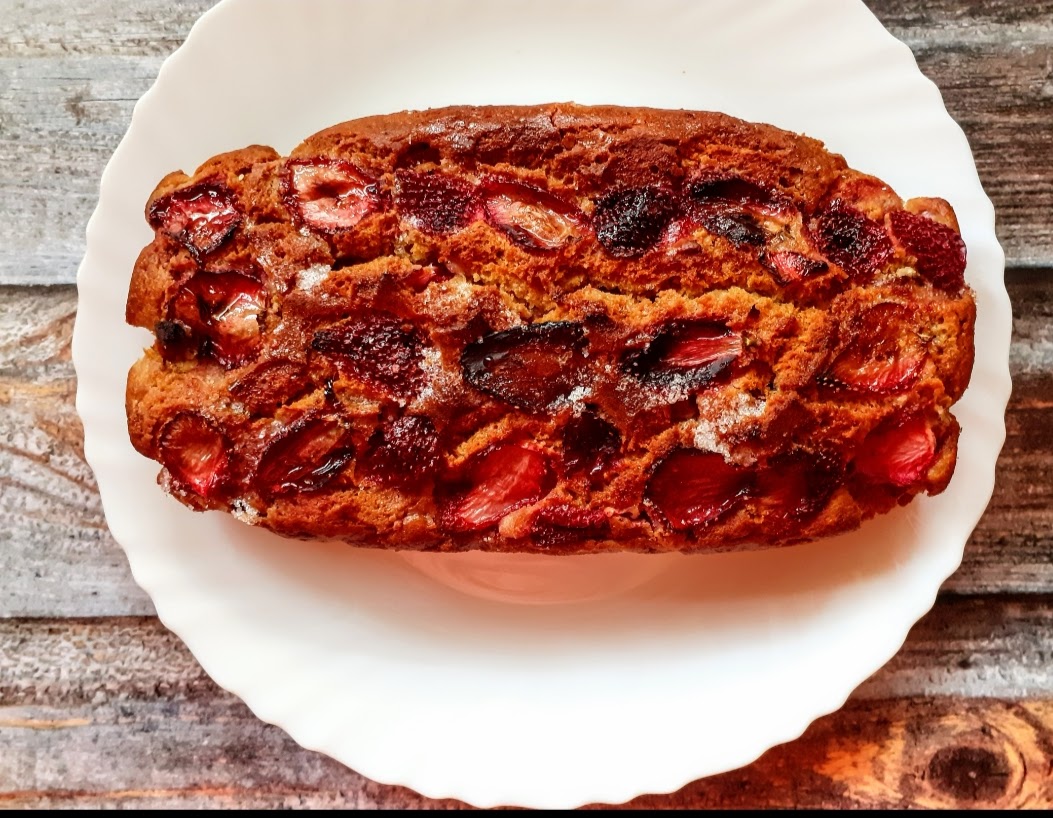
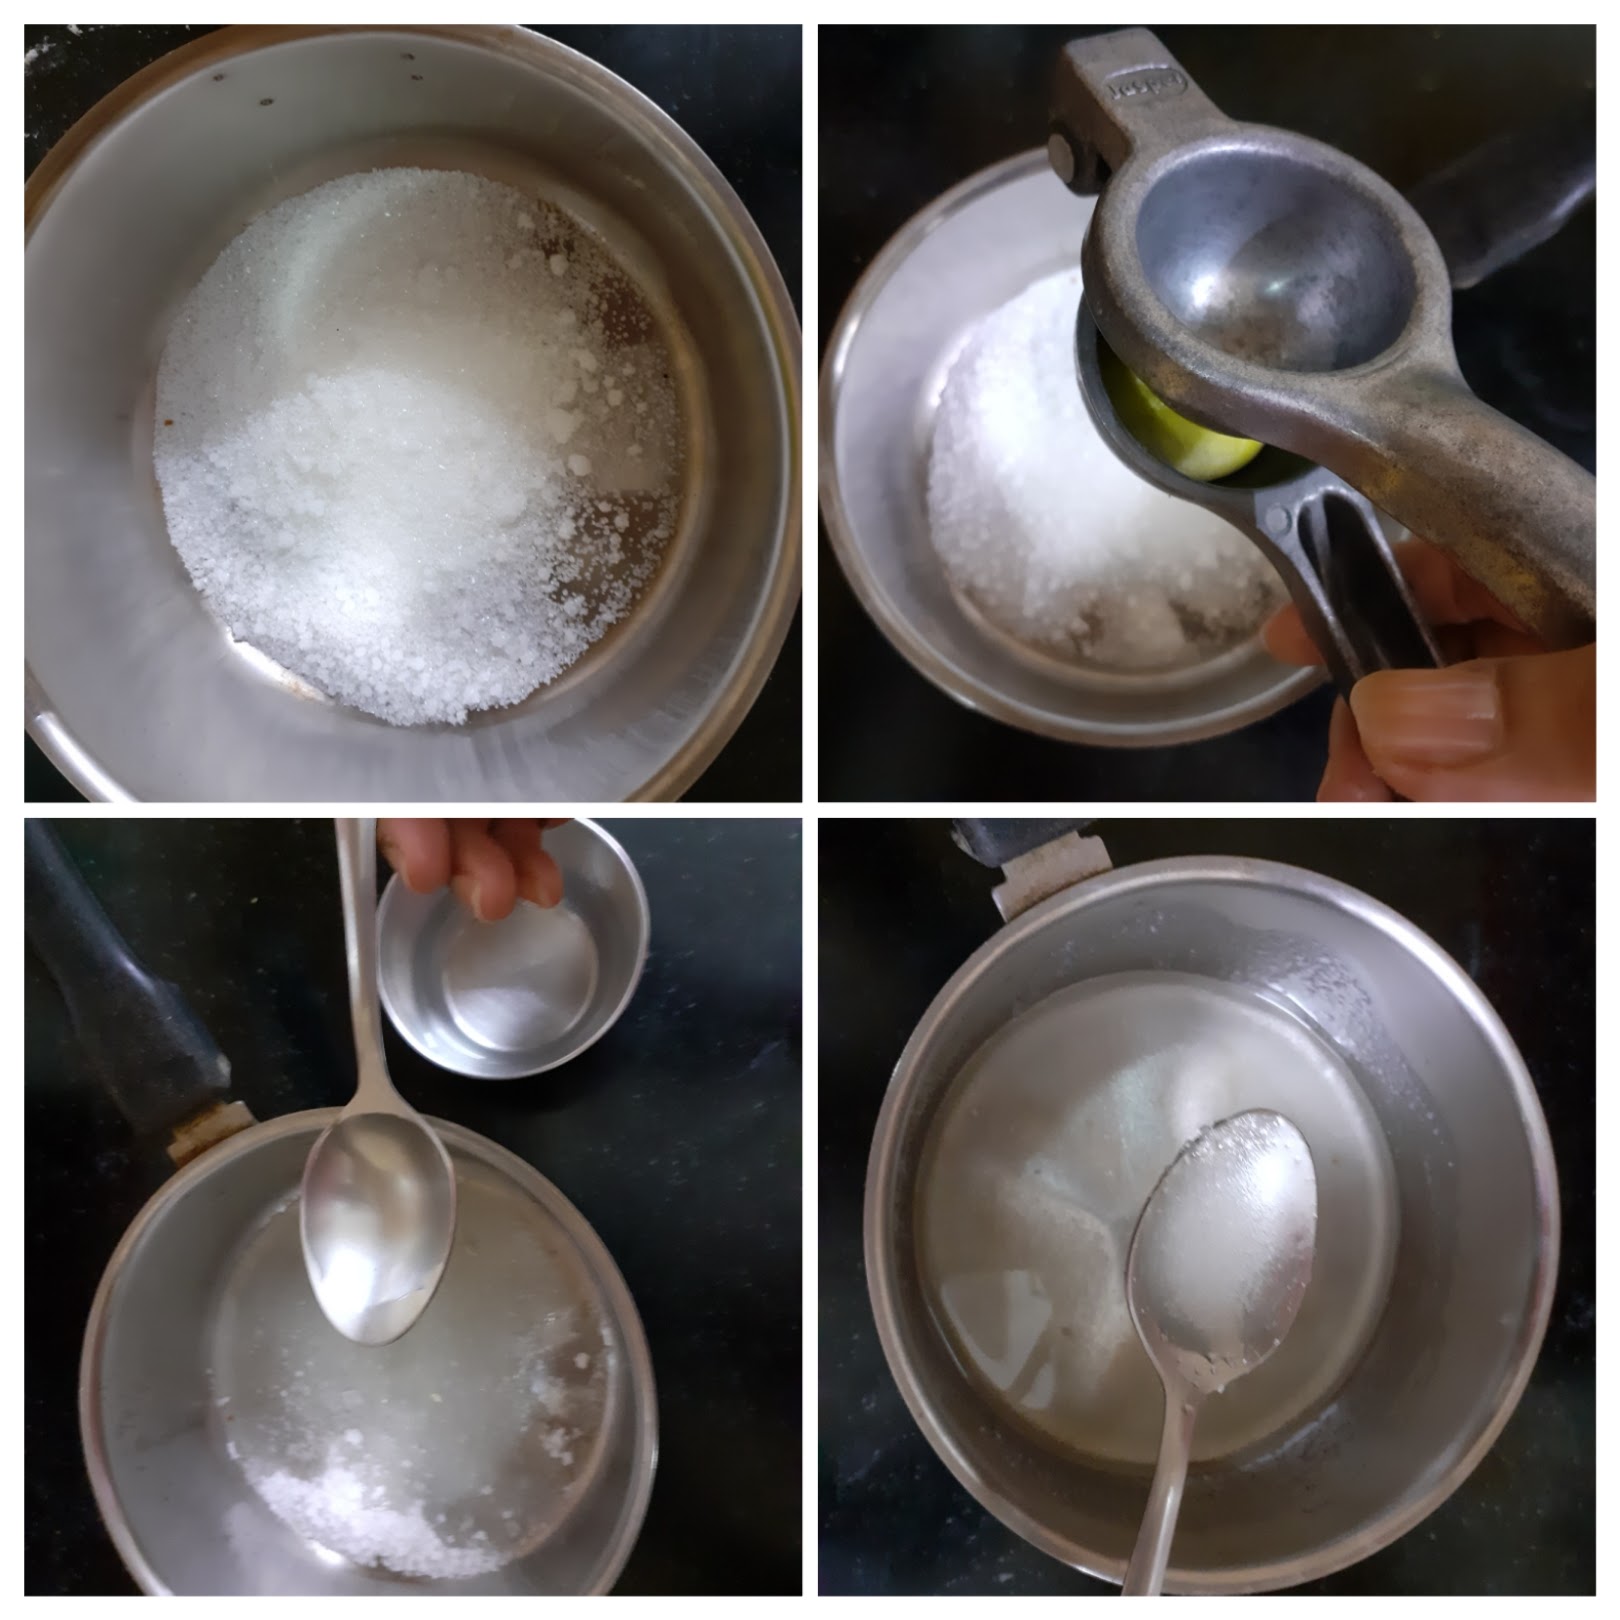
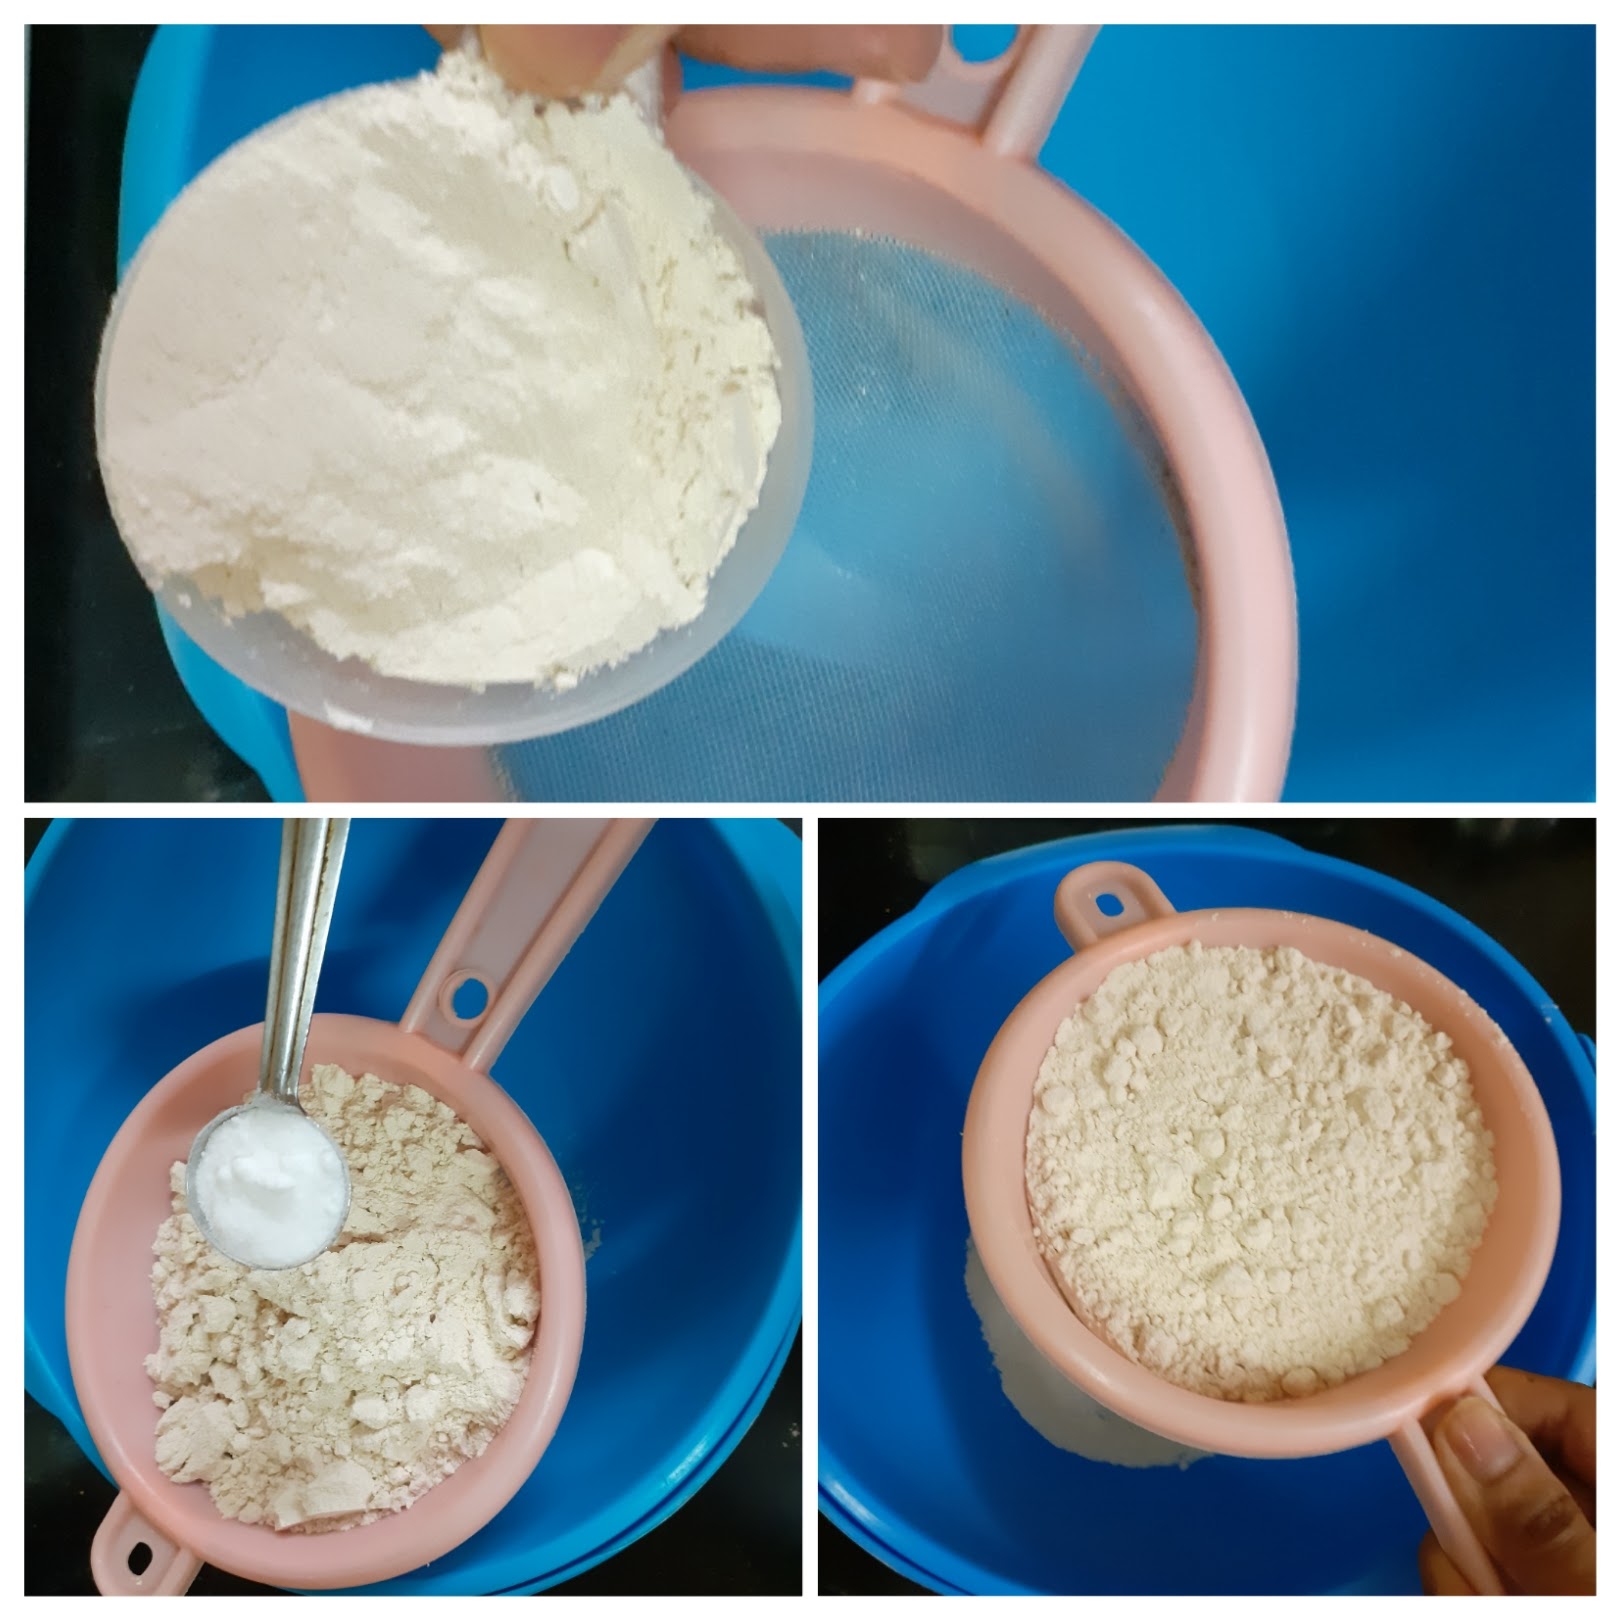
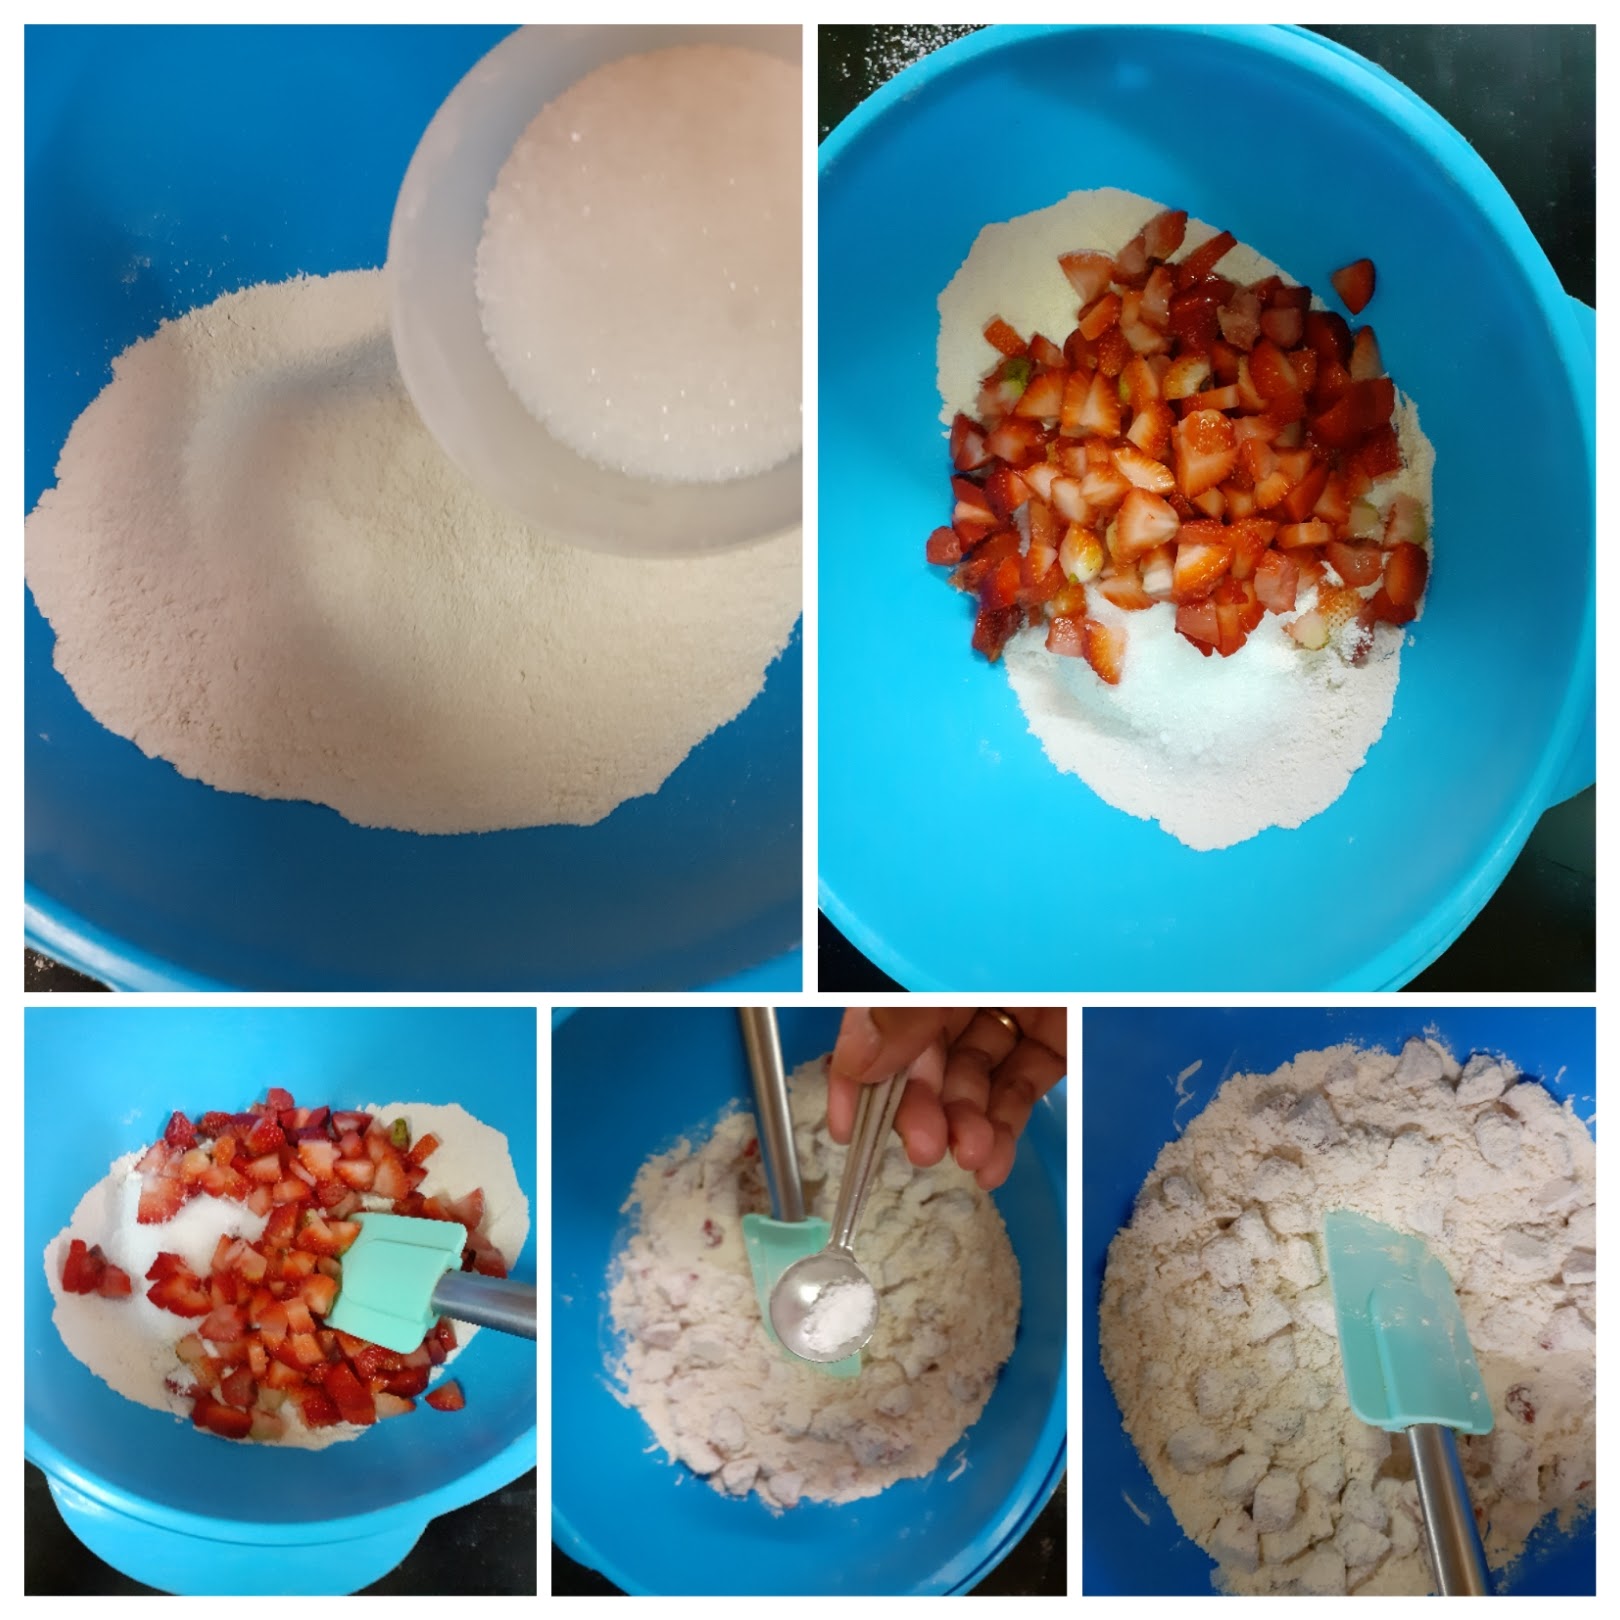
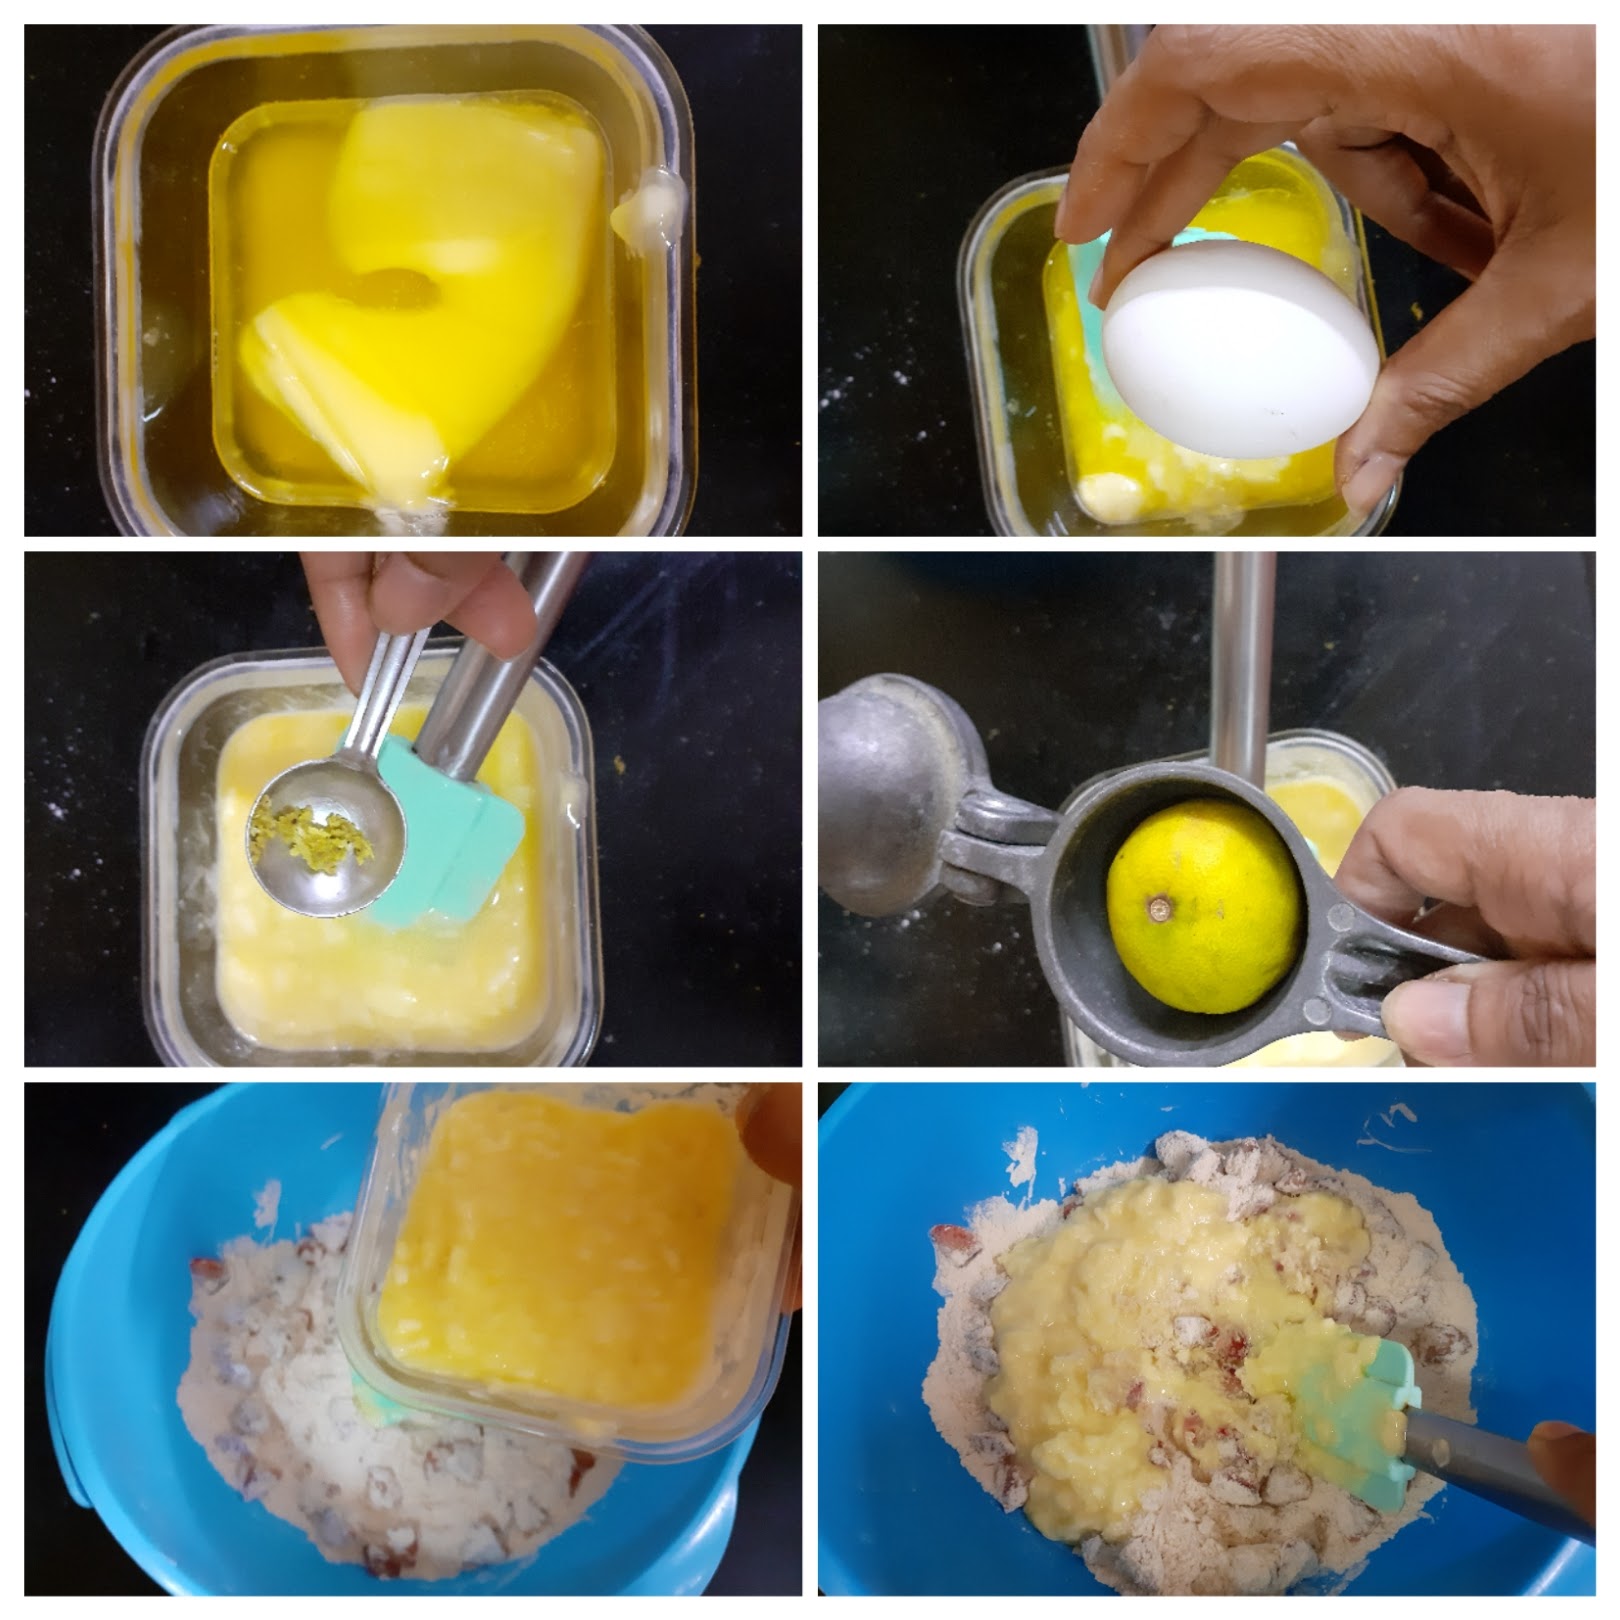
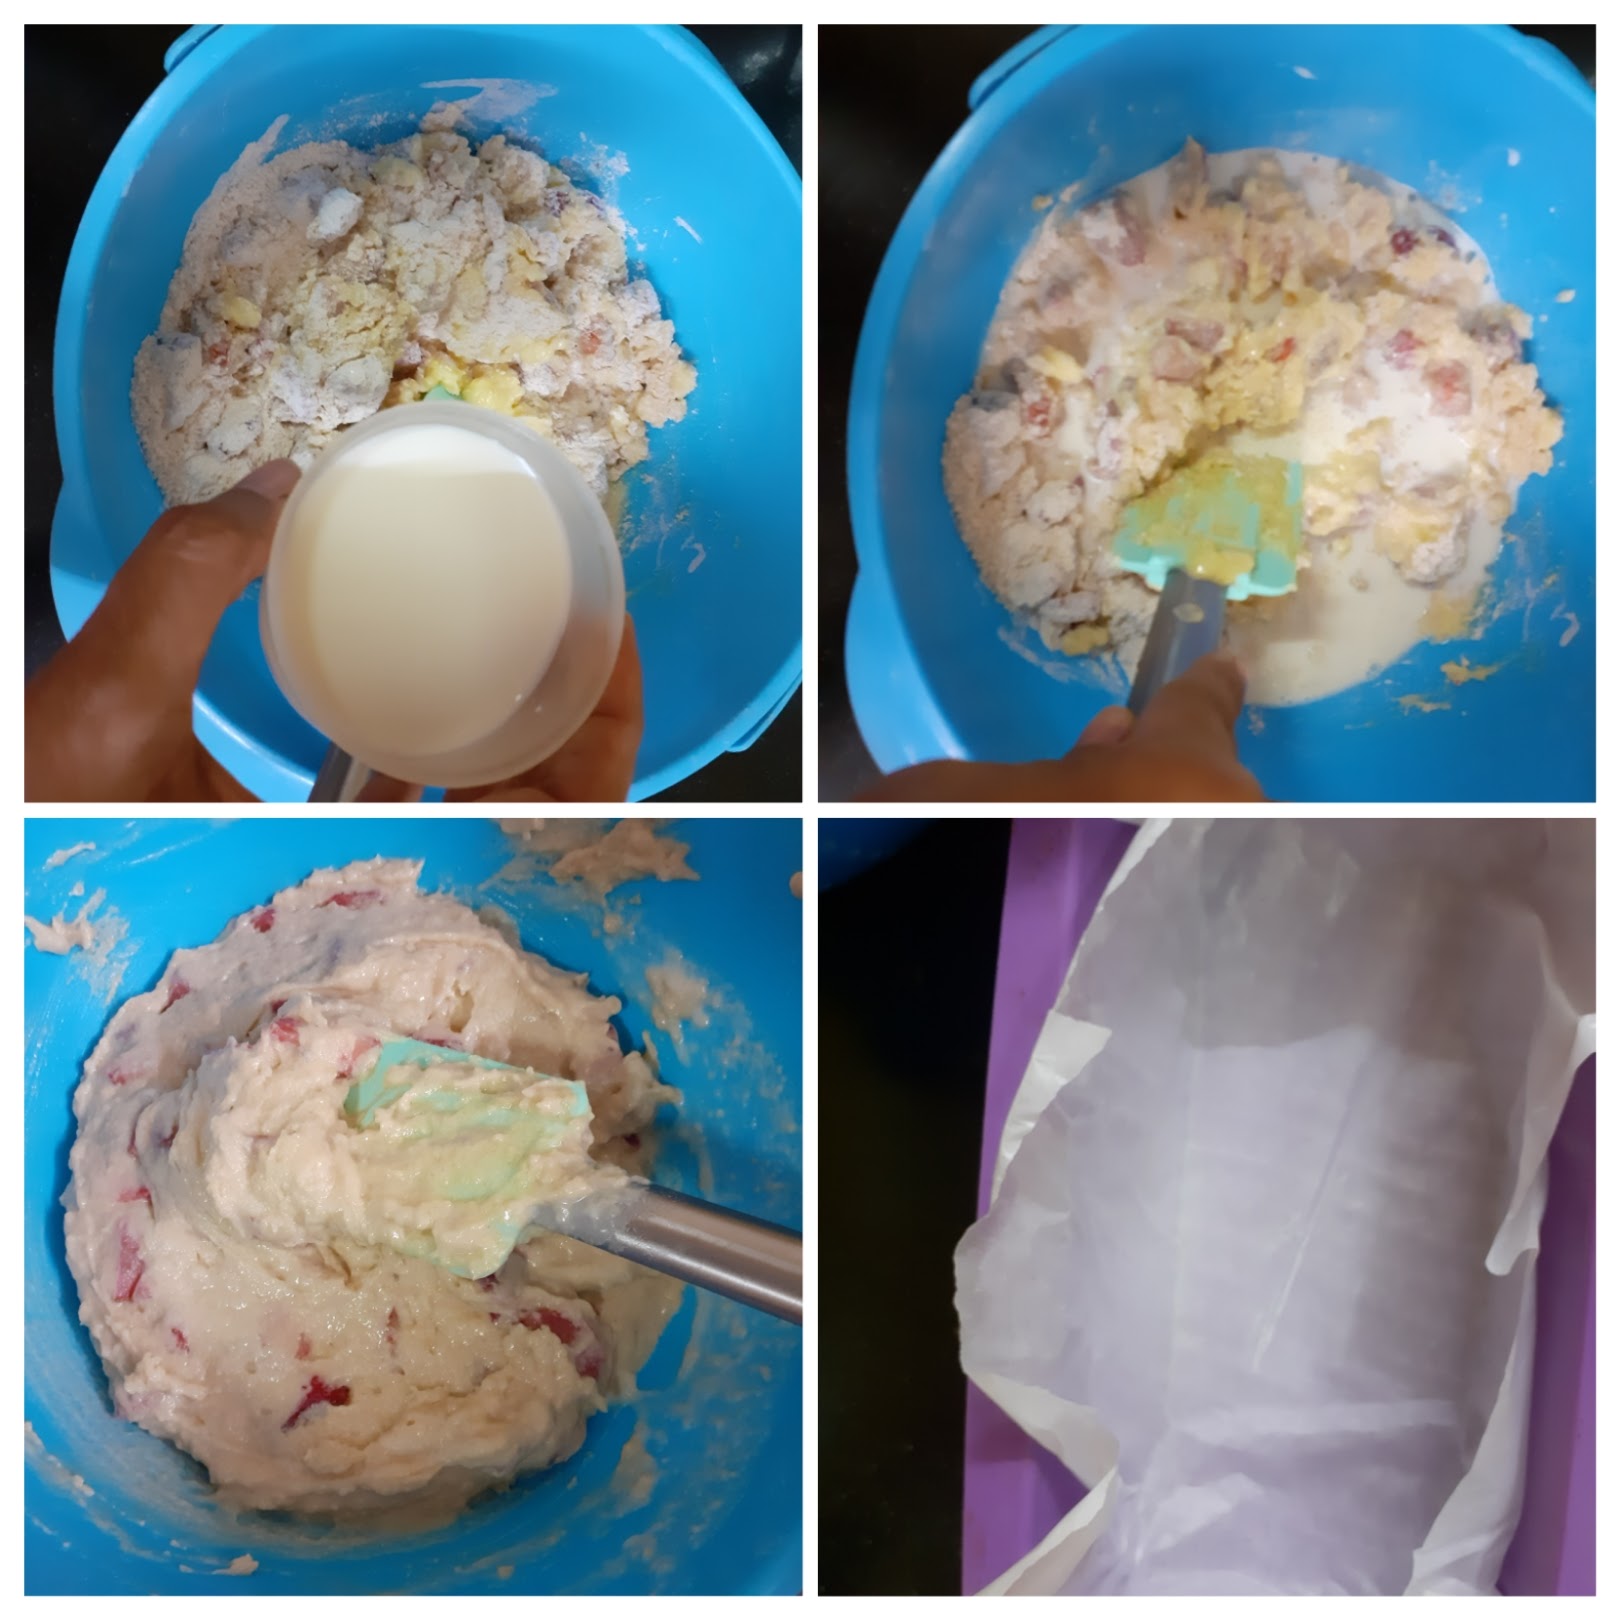
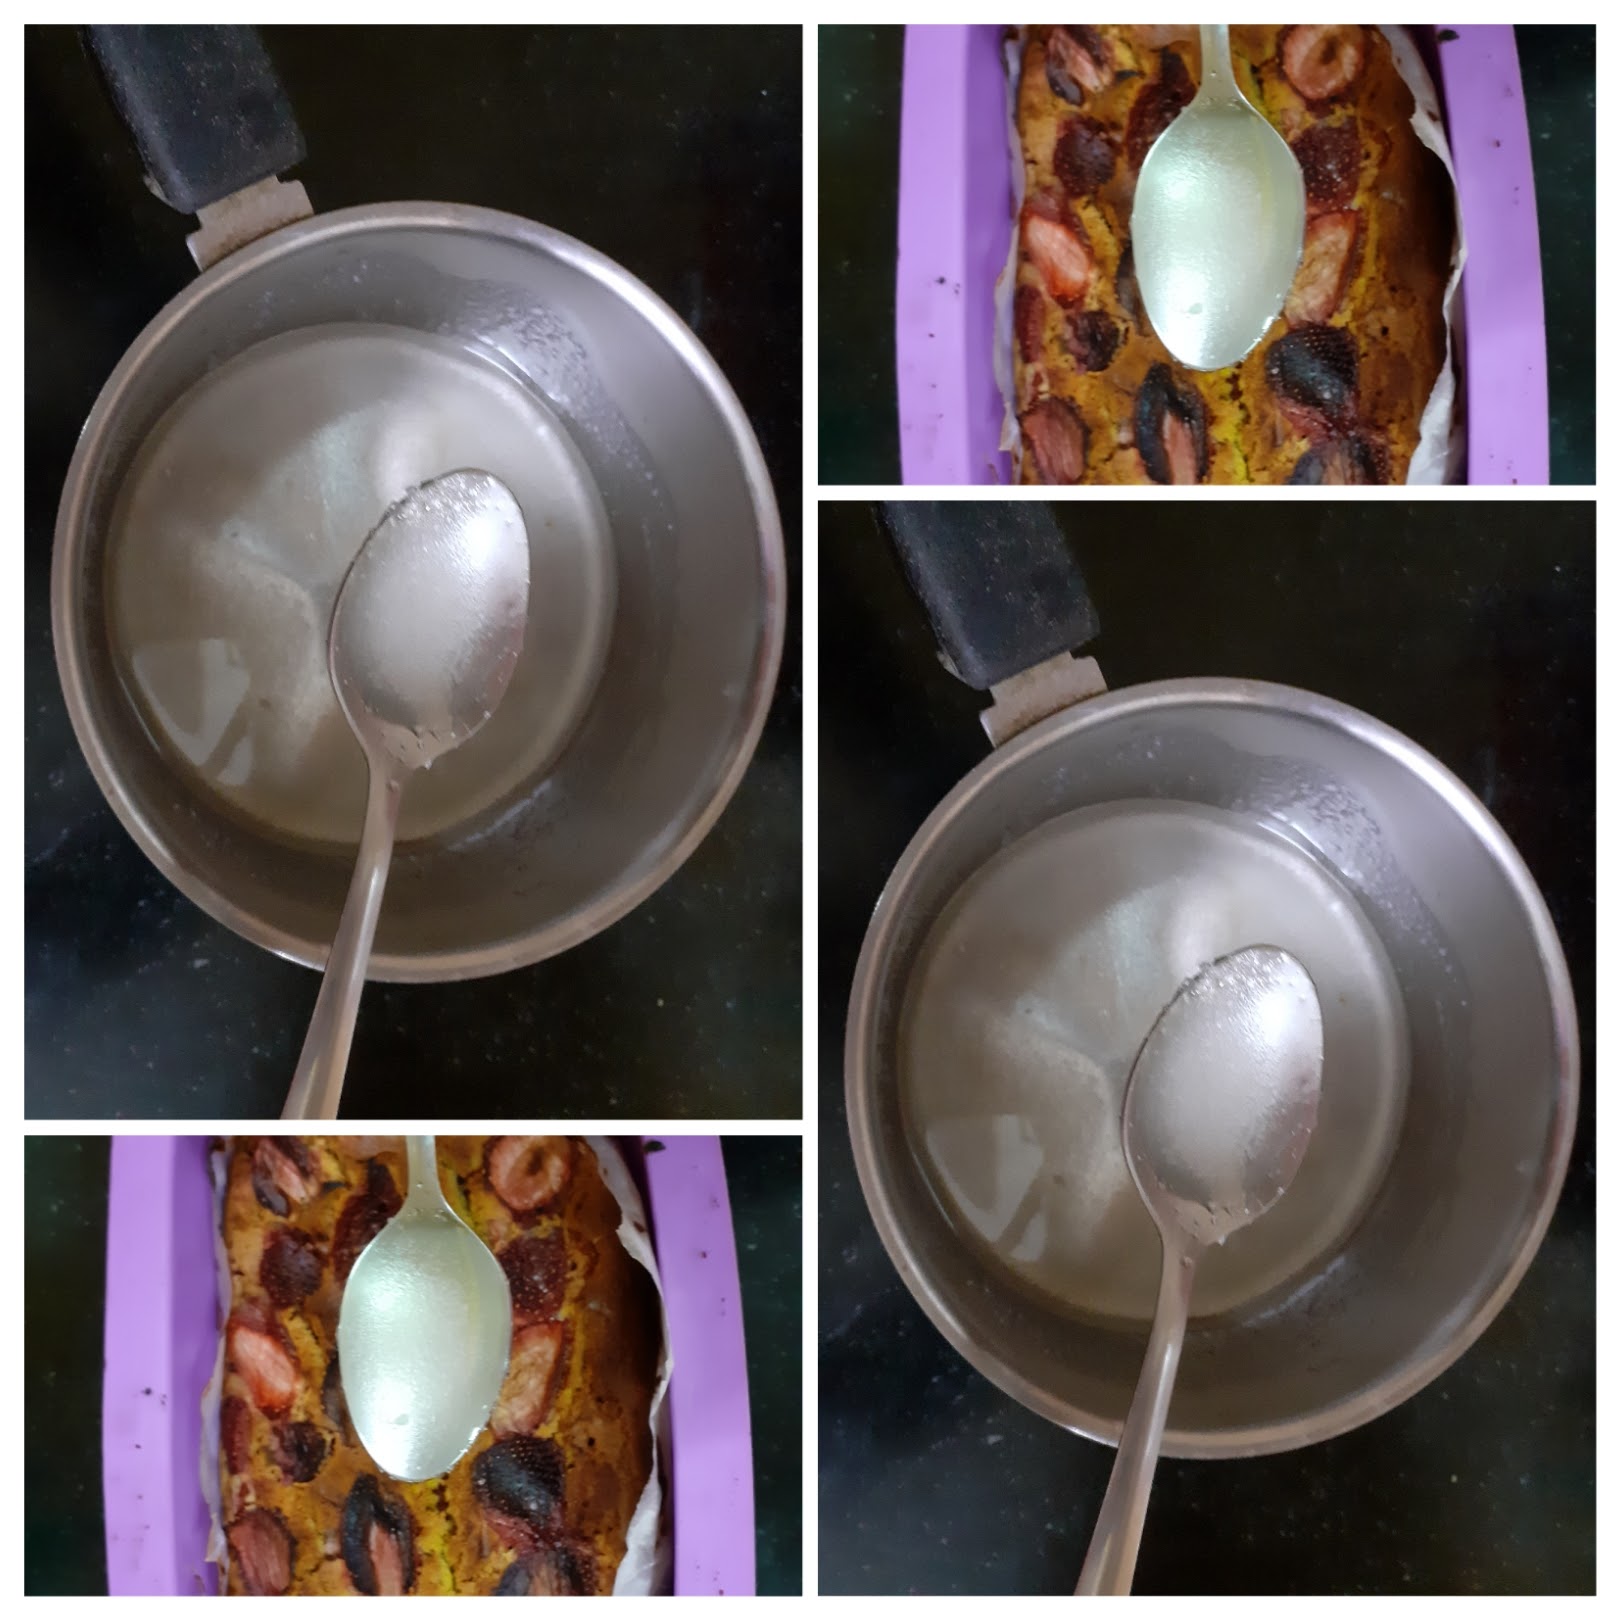

Bajra And Almond Flour Cookies (Millet Cookies)
I surfed the internet to find the easiest Cookie recipe with Millet’s (that are trending currently), using ingredients that are easily available in our pantries, I scored and scored but couldn’t find anything that interested me. By now those who are following the blog and my social media handles know that when it comes to baking, I choose the most easiest recipes, which can be mixed in a single bowl and stashed in the oven to bake. Zero mess.
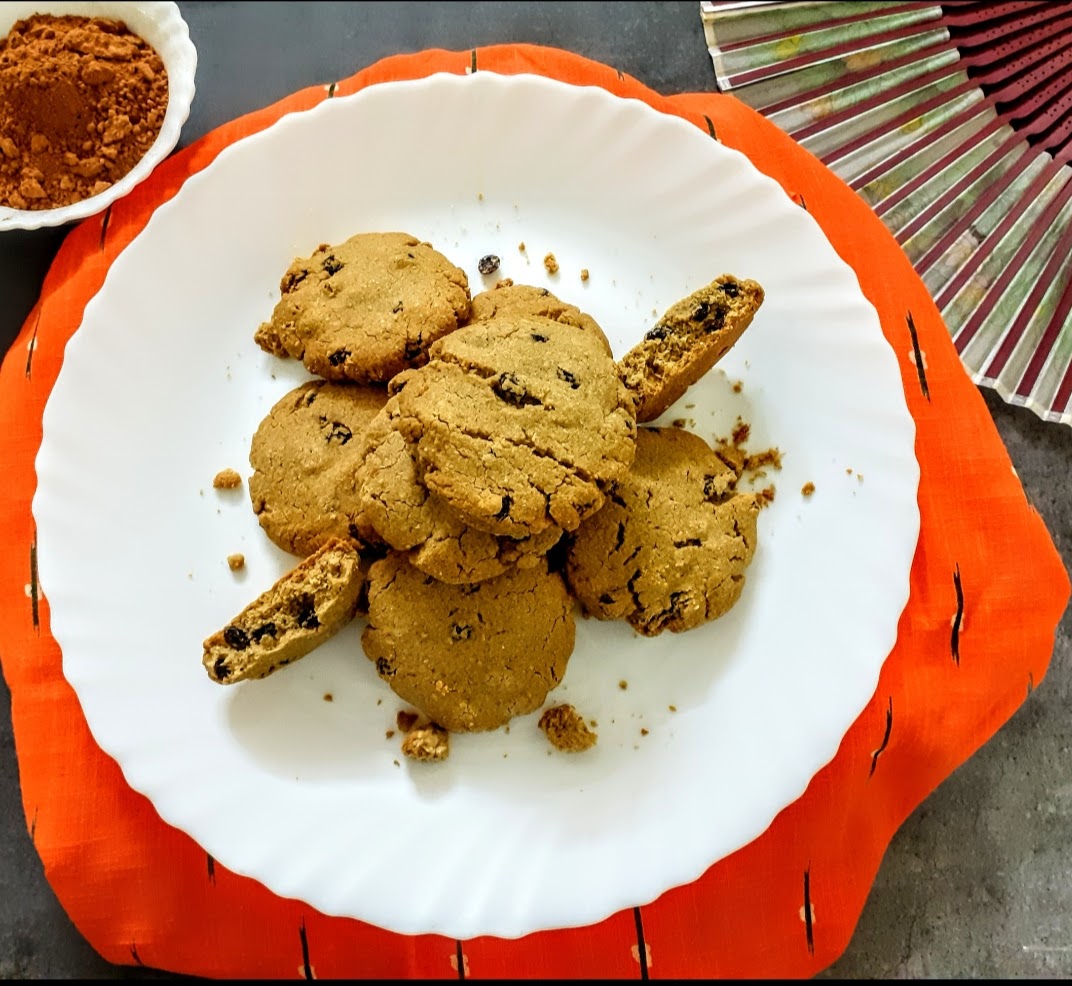
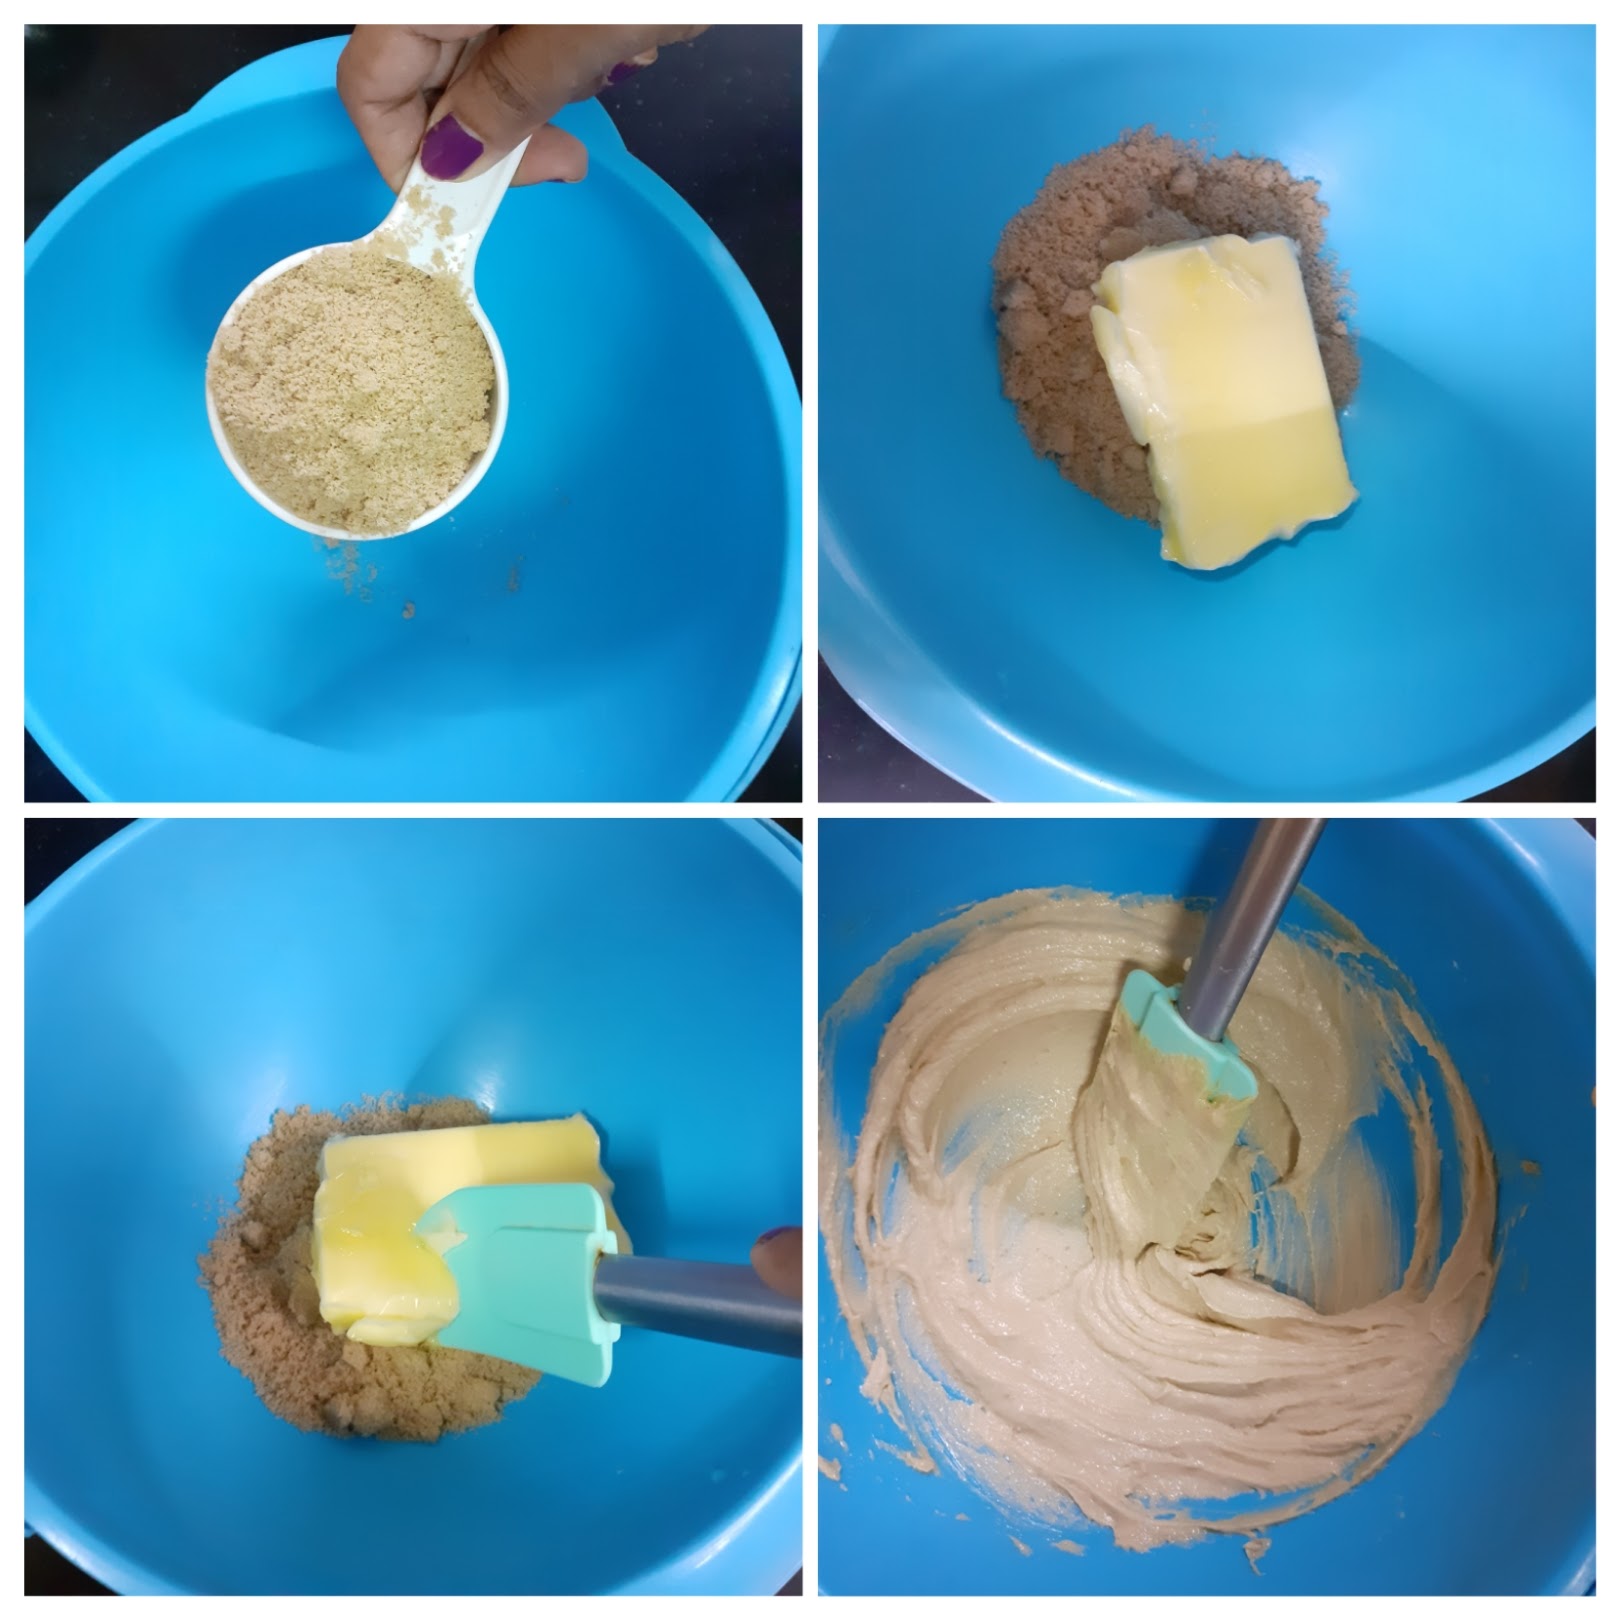

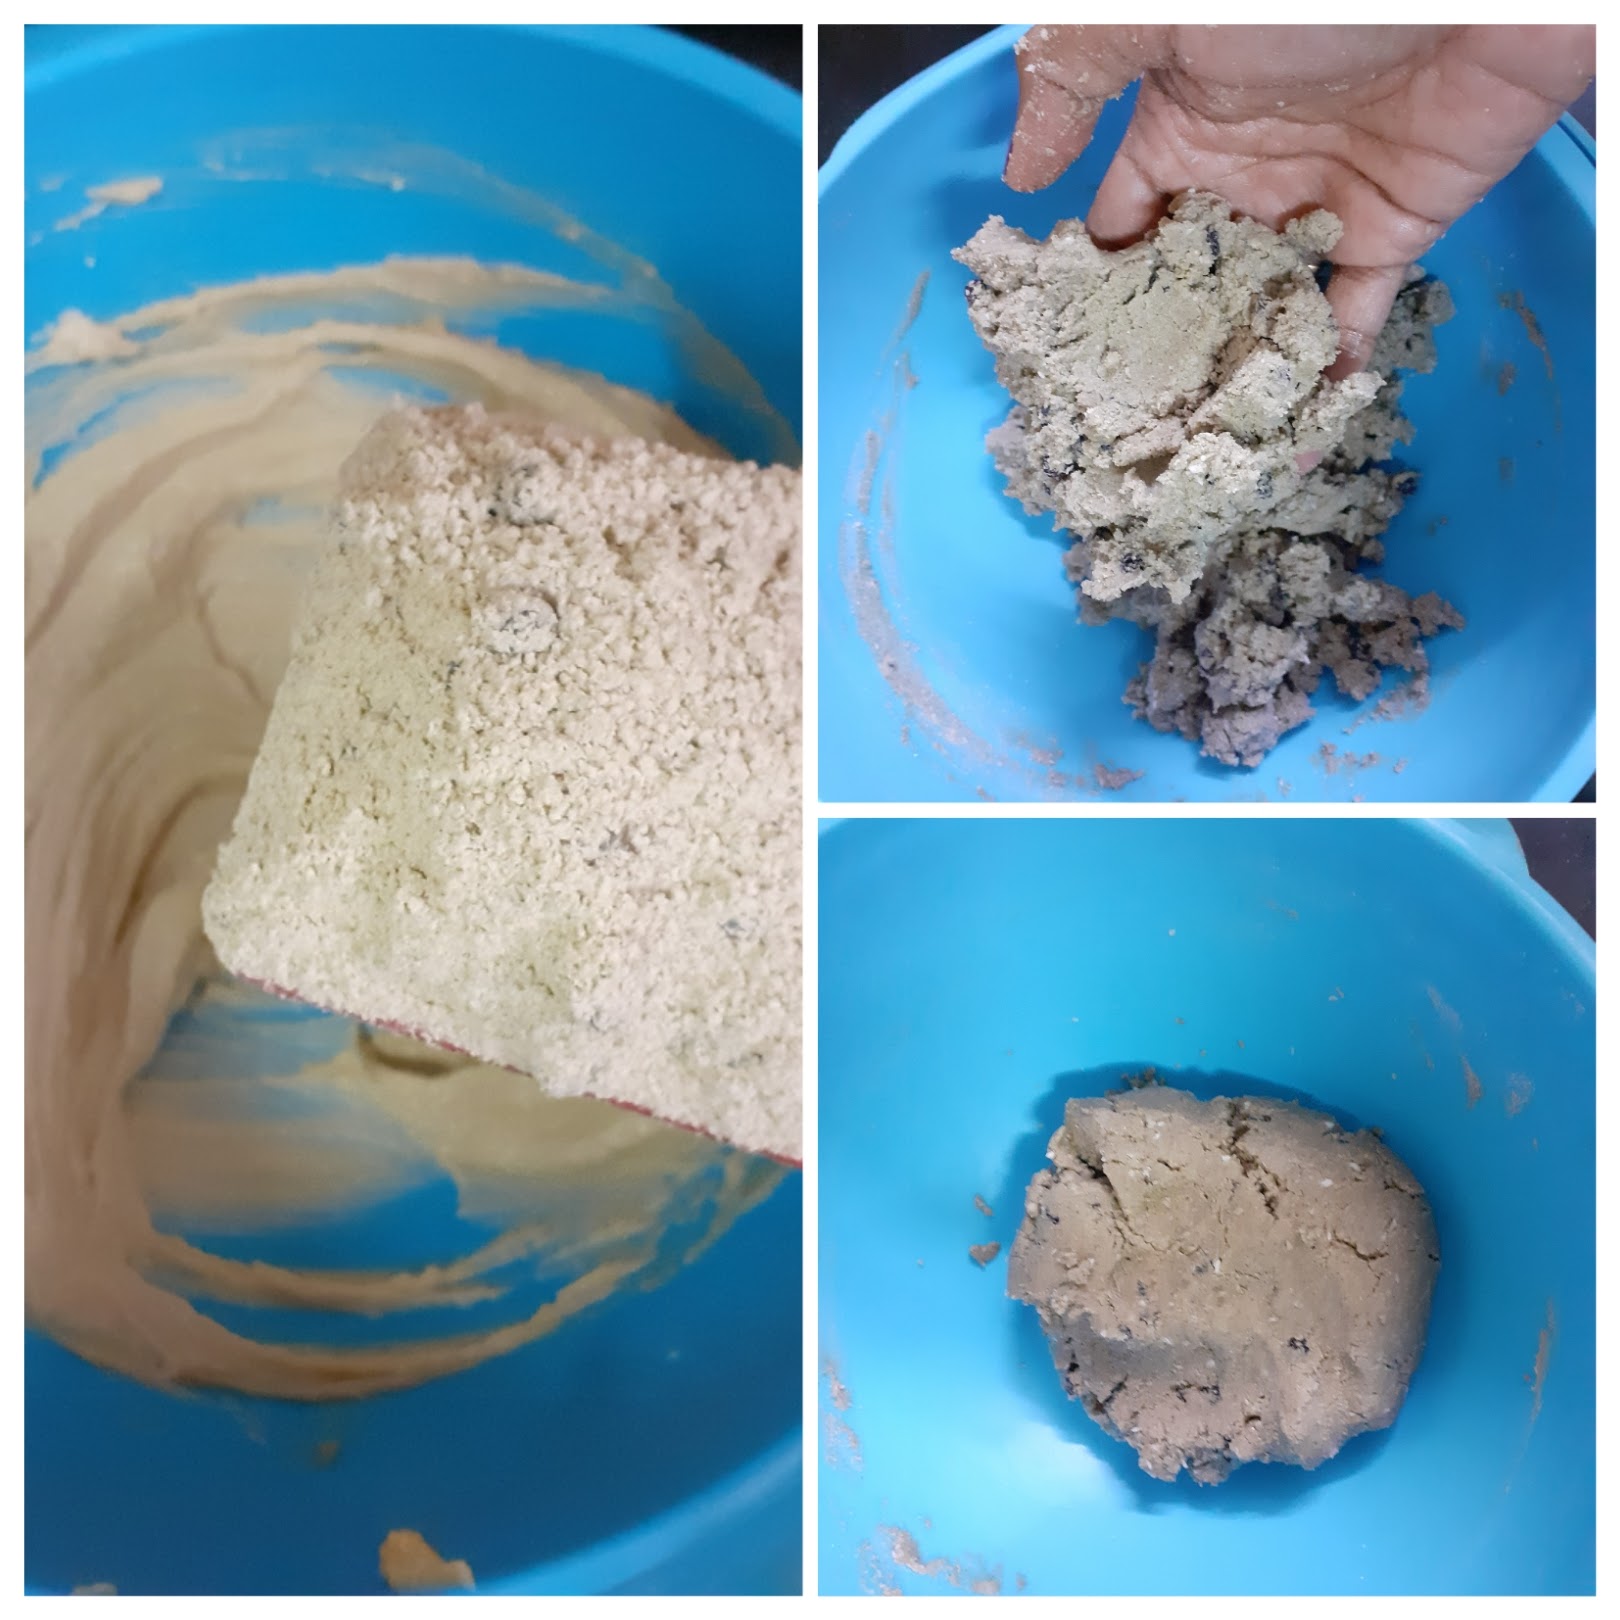
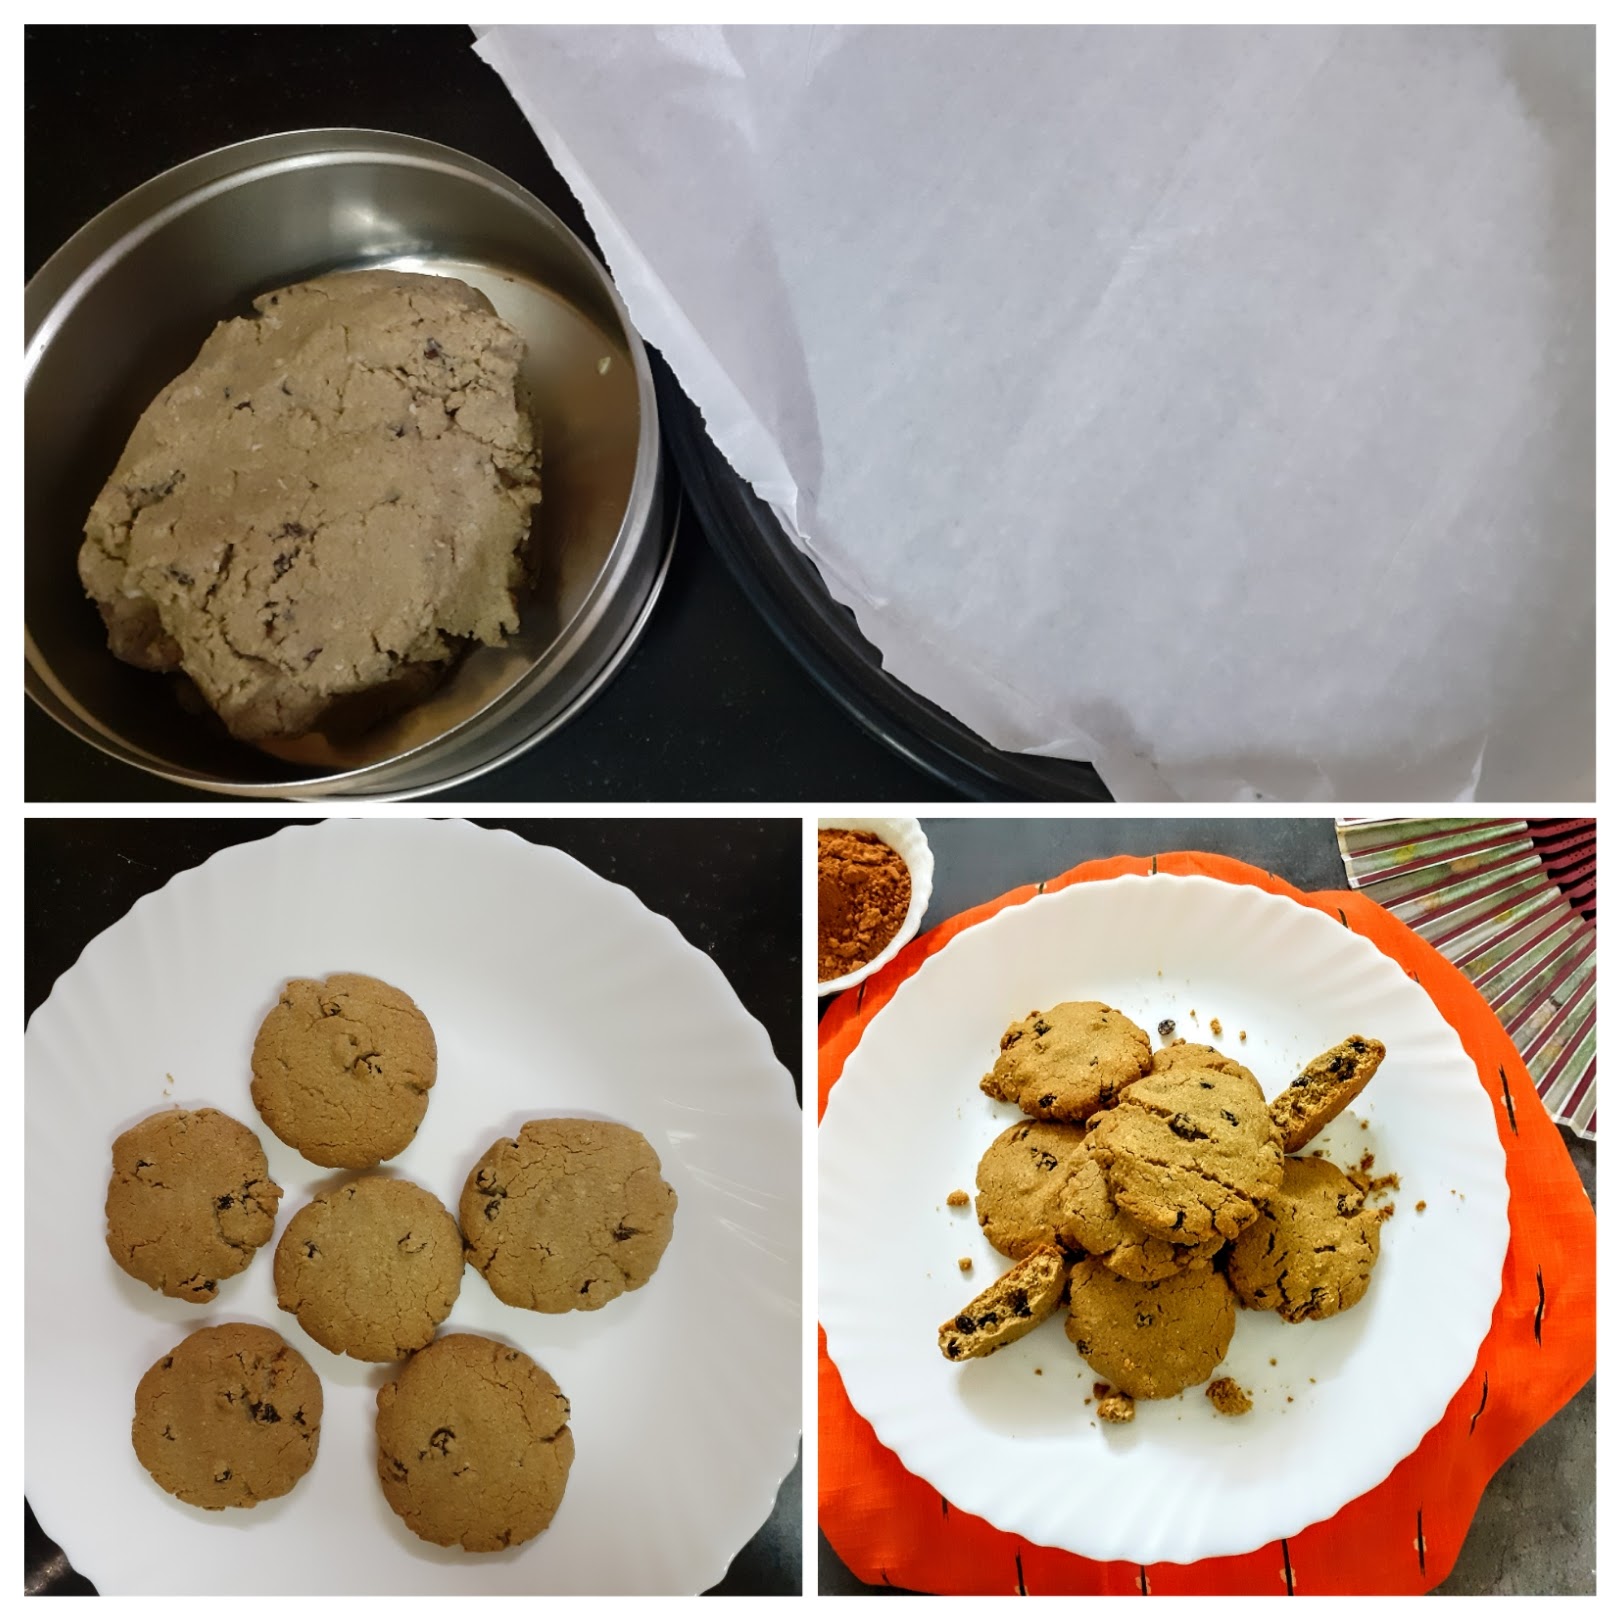
If you tried this recipe and liked it please comment below. I would love to hear from you. If you have a query about the recipe email us and ill respond as soon as I can.
Kadai Paneer (Gravy)
Kadai Paneer is a dish I like and make very frequently at home. I have this weekly one day is Paneer day compulsorily policy. Here on my blog I have another Kadai Paneer recipe which is a Semi dry version of this recipe. Though the Masala is same, the way I made it is slightly different. The Semi dry Kadai Paneer recipe is good to go with Rotis, and other flat breads and is a good lunch box recipe as it doesn’t have much in the name of gravy and so is not messy at all, to carry in a box.
This gravy version is a great option to go with rice dishes like Matar Pulav, Jeera Rice, Biriyani etc. This version is what you will find at Dhabas in the North India. Considering Dhaba meals are supposed to be reasonably priced, do you think they would use Cashewnuts and cream etc, to thicken their gravy? Well, they use a very everyday ingredient that is found in Indian Kitchens and is gaining popularity the world over for its high protein quotient (and we have been using it since ages, that’s India for us, a treasure house of recipes and food culture). Any guesses as to what that ingredient is? Besan. Yes, the humble chickpea flour. To find out how to use it, read the recipe and try it out and you will agree that it tastes delicious.
While you are here try out my other Paneer recipes likes Palak Paneer, Mava Paneer Curry, Paneer Khurchan, Malpua with Gulab Jamun mix and Paneer, and more…
Here goes the recipe for Kadai Paneer gravy style-
PREP TIME: 15 COOK TIME:15 MINS
TOTAL TIME: 30 MINS COURSE: MAIN
CUISINE: NORTH INDIAN SERVINGS: 5
AUTHOR: RAJNI RAM
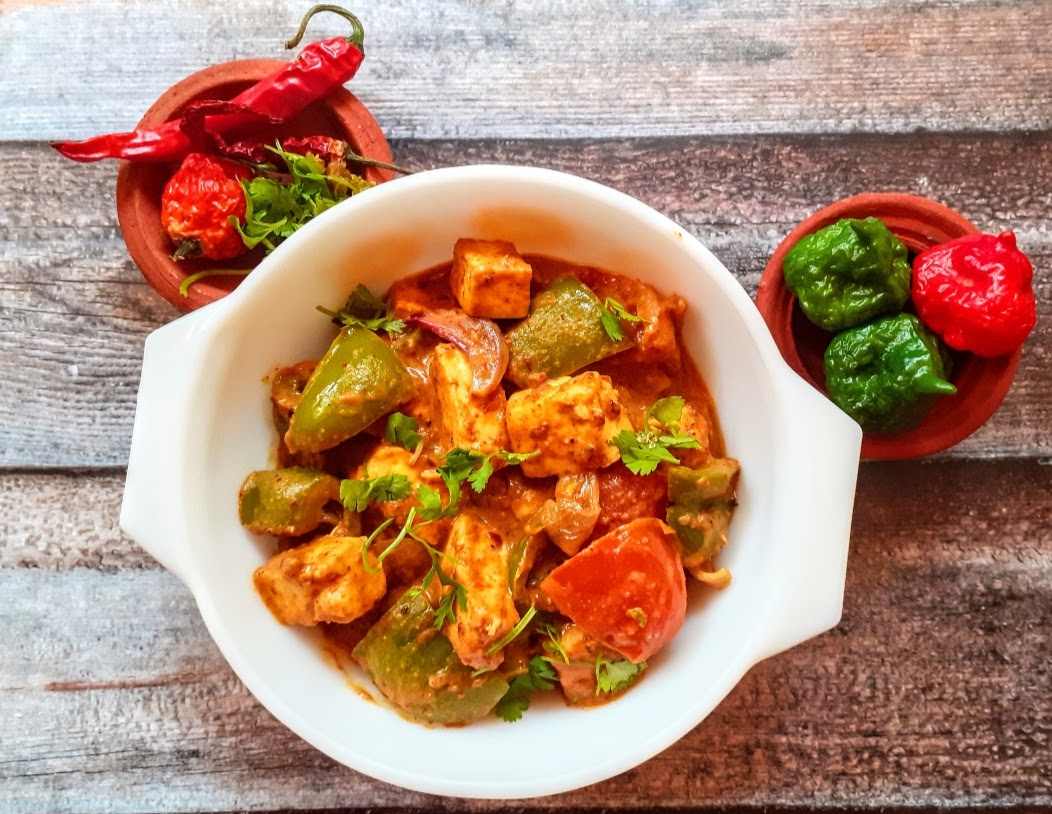
Ingredients:
Paneer 200 gm cubed
Onion 1 large cut into petals
Onion 1 medium size chopped finely
Capsicum 1 medium cut to large cubes
Green chillies 2 slit lengthwise
Ginger garlic paste 1 tsp
Garlic 3 to 4 cloves (big ones)
Tomatoes 2 large pureed
Tomato 1 medium diced
Turmeric powder 1/2 tsp
Salt as required
Cumin seeds 1 tsp
Besan/ Chick pea flour 1.5 tbsp roasted on low flame until aromatic
Methi seeds/ Fenugreek seeds 2 pinches
Garam Masala Powder 1/2 tsp
To be ground:
Coriander seeds 1 tbsp
Cloves 2
Jeera/ Cumin seeds 1 tsp
Dry red chilli 2 regular and 1 Kashmiri dry red chilli (optional)
Directions:
Take a Kadai and heat it, add the Besan and saute on low flame until it turns aromatic and light brown in colour. Keep stirring so that the Besan does not burn. Once aromatic, transfer to a plate. Now in the same kadai take 1 tbsp oil and drop in the Onion petals and saute for 1 minute. Now add the cubed capsicum and continue to saute over high flame for another 1 minute. Take care to stir constantly and the onion and capsicum should not overcook or turn limp. Transfer to a plate. Now in the same kadai take some more oil and add cumin seeds. Once they start crackling add the slit green chillies and saute for 30 secs. Now add the finely chopped onions and crushed garlic and continue to saute until the onion starts turning brown. In the meanwhile roast and grind the spices mentioned under “to be ground” and set aside. Grind them coarse and not very fine. Now add this powder to the sauteed onions, add turmeric powder, and if the mixture looks dry add another teaspoon of oil and saute the masalas in oil. Now add the roasted Besan and saute until the mixture starts appearing crumbly, but dry. To this add the tomato puree and mix nicely. Smoothen out all the lumps from the Besan. Add salt, followed by 1 to 1.5 cups water, drop in the diced tomatoes and cook for 5 minutes. Check for taste and add red chilli powder if required and adjust salt if required. Now add the cubed Paneer pieces , and the previously sauteed onion and capsicum and stir nicely. Add the fenugreek/Methi seeds. Cook until the gravy thickens. If you are particular about adding cream add now(this step is optional). Add garam masala powder and put off the flame. The yummy Kadai Paneer gravy style is ready. Enjoy with your favourite rice or Flat bread. Bon Appetit.
STEPWISE RECIPE FOLLOWS:
1. Take a Kadai and heat it, add the Besan and saute on low flame until it turns aromatic and light brown in colour. Keep stirring so that the Besan does not burn. Once aromatic, transfer to a plate.
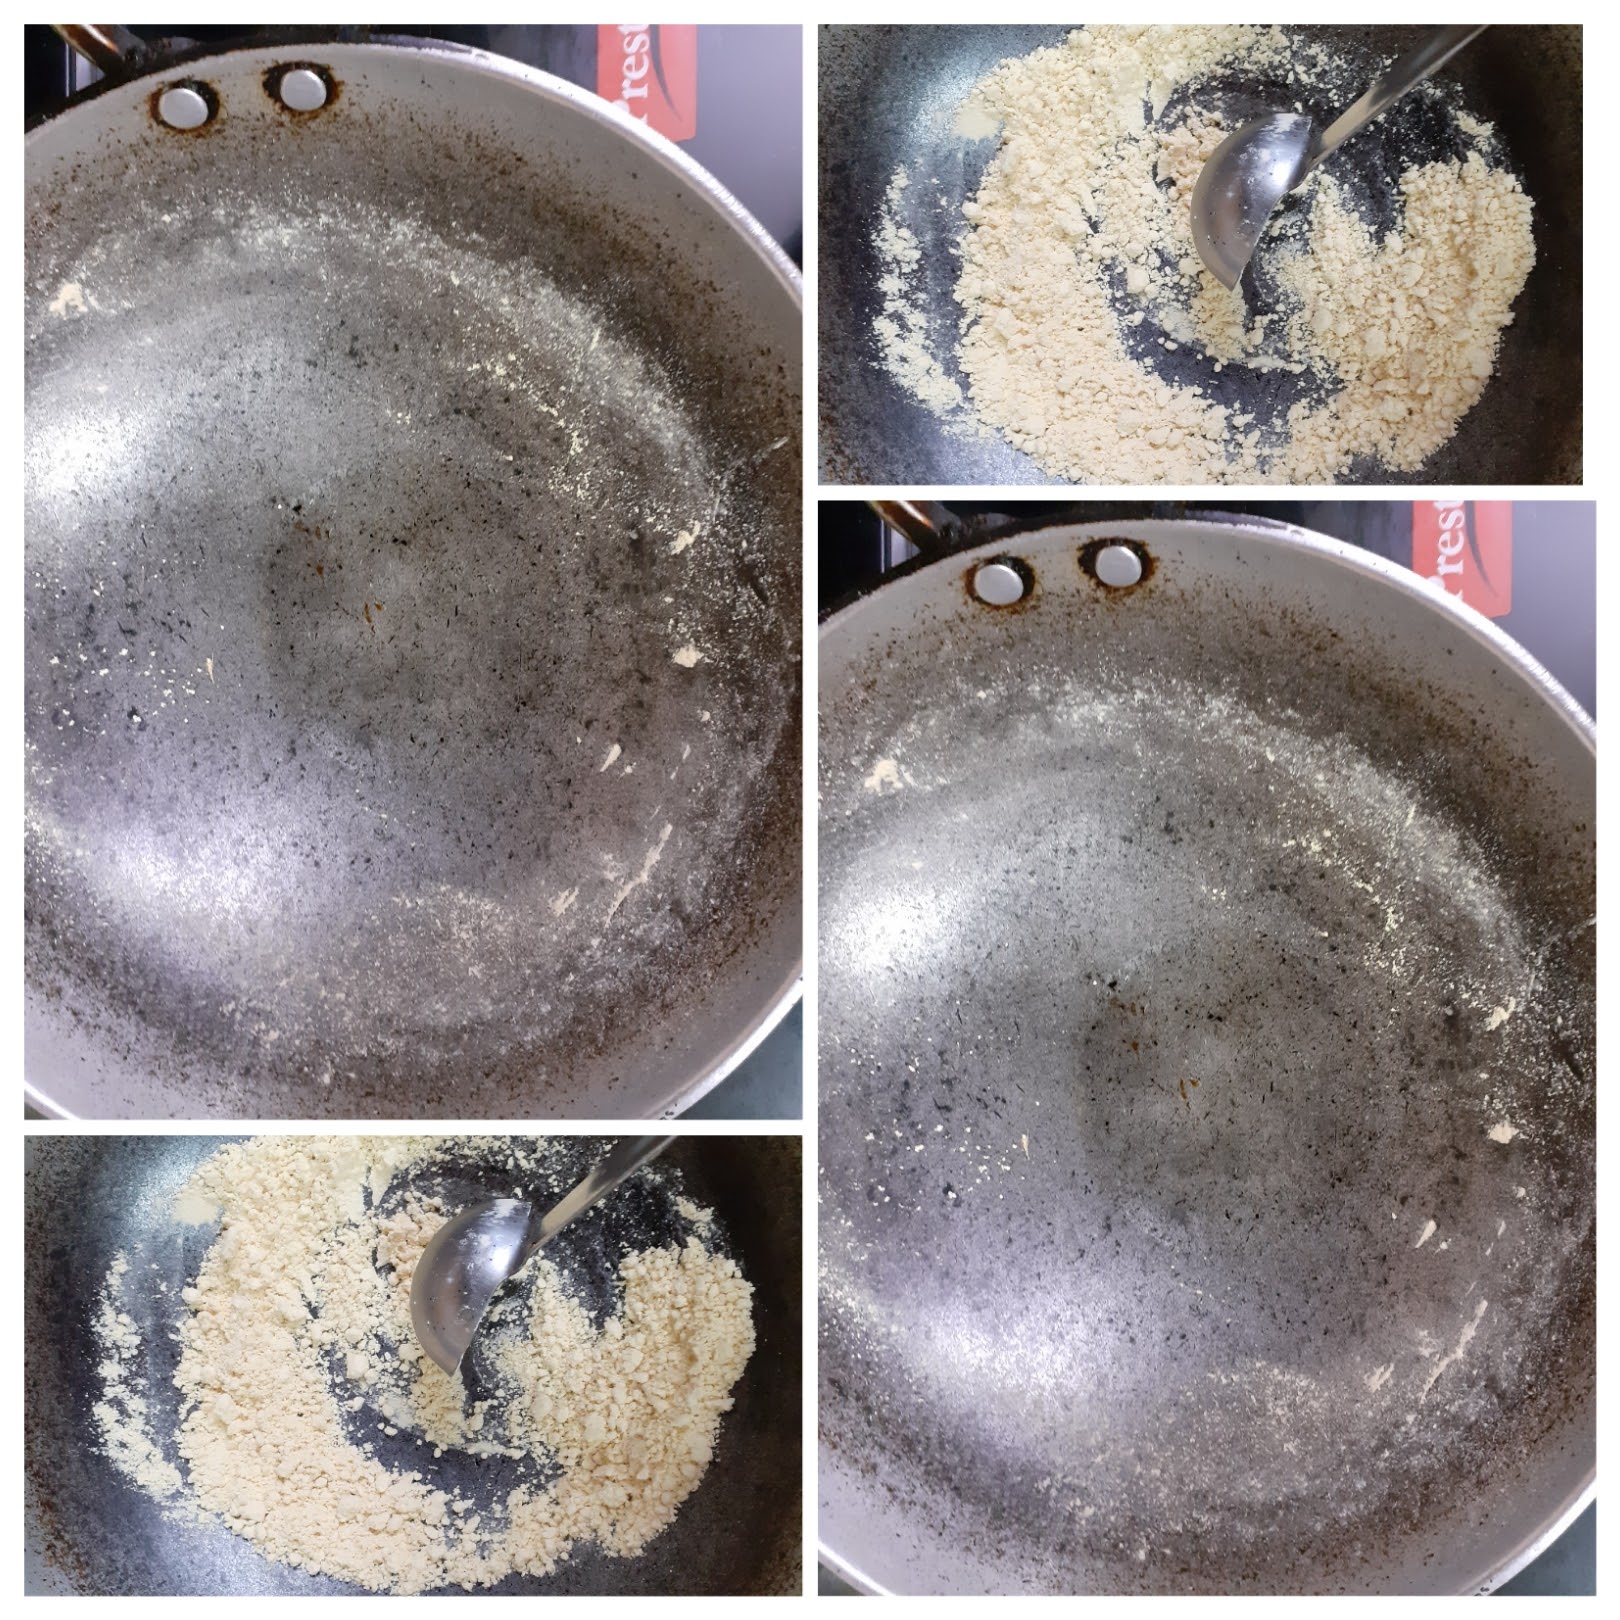
2. Now in the same kadai take 1 tbsp oil and drop in the Onion petals and saute for 1 minute. Now add the cubed capsicum and continue to saute over high flame for another 1 minute. Take care to stir constantly and the onion and capsicum should not overcook or turn limp. Transfer to a plate.

3. Now in the same kadai take some more oil and add cumin seeds. Once they start crackling add the slit green chillies and saute for 30 secs. Now add the finely chopped onions and crushed garlic and continue to saute until the onion starts turning brown.
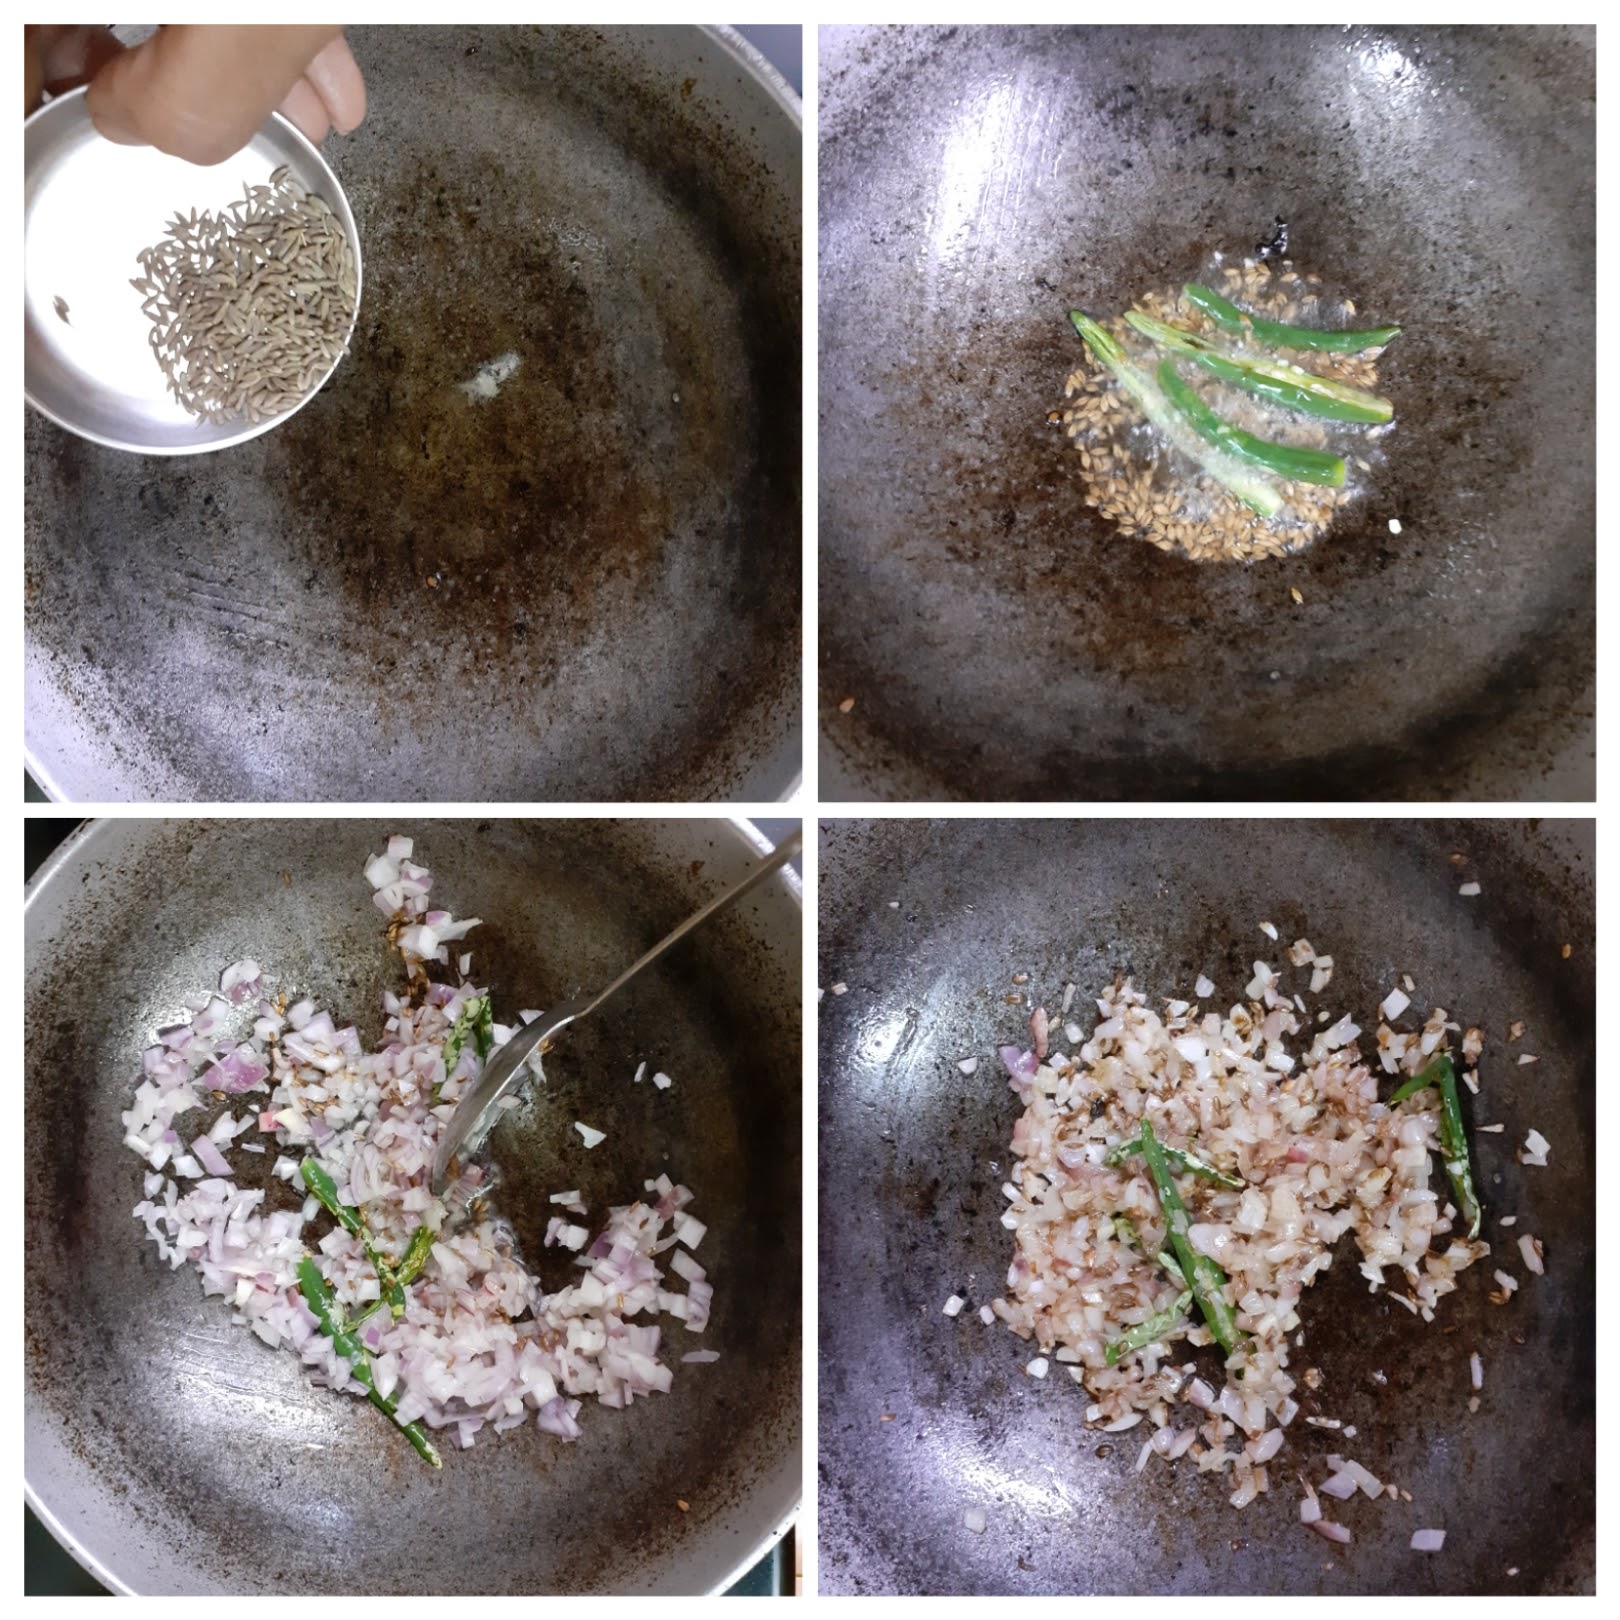
4. In the meanwhile roast and grind the spices mentioned under “to be ground” and set aside. Grind them coarse and not very fine. Now add this powder to the sauteed onions, add turmeric powder, and if the mixture looks dry add another teaspoon of oil and saute the Masalas in oil.
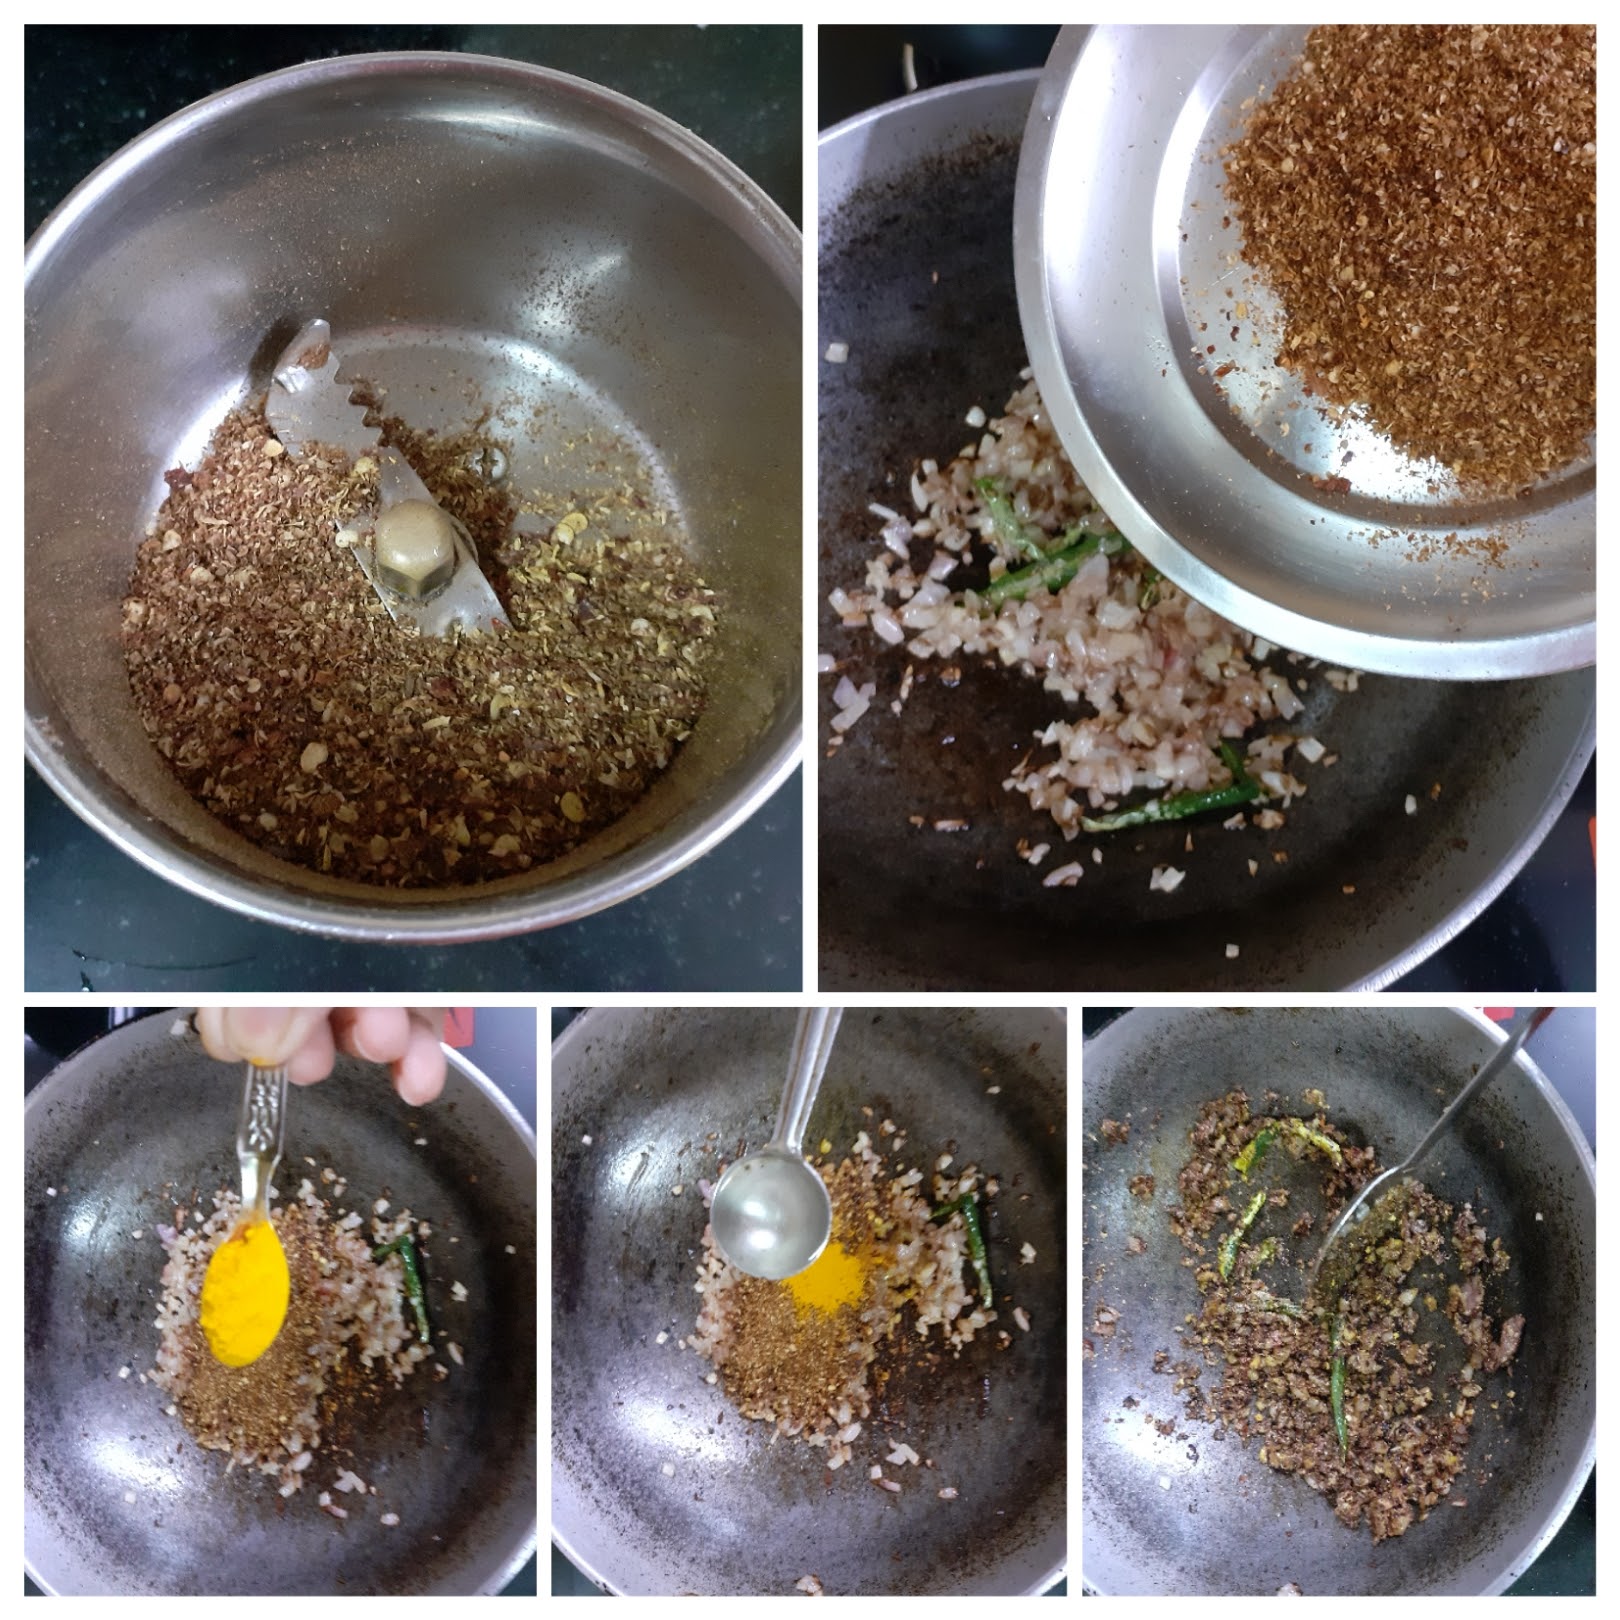
5. Now add the roasted Besan and saute until the mixture starts appearing crumbly, but dry. To this add the tomato puree and mix nicely. Smoothen out all the lumps from the Besan. Add salt, followed by 1 to 1.5 cups water, drop in the diced tomatoes and cook for 5 minutes. Check for taste and add red chilli powder if required and adjust salt if required.
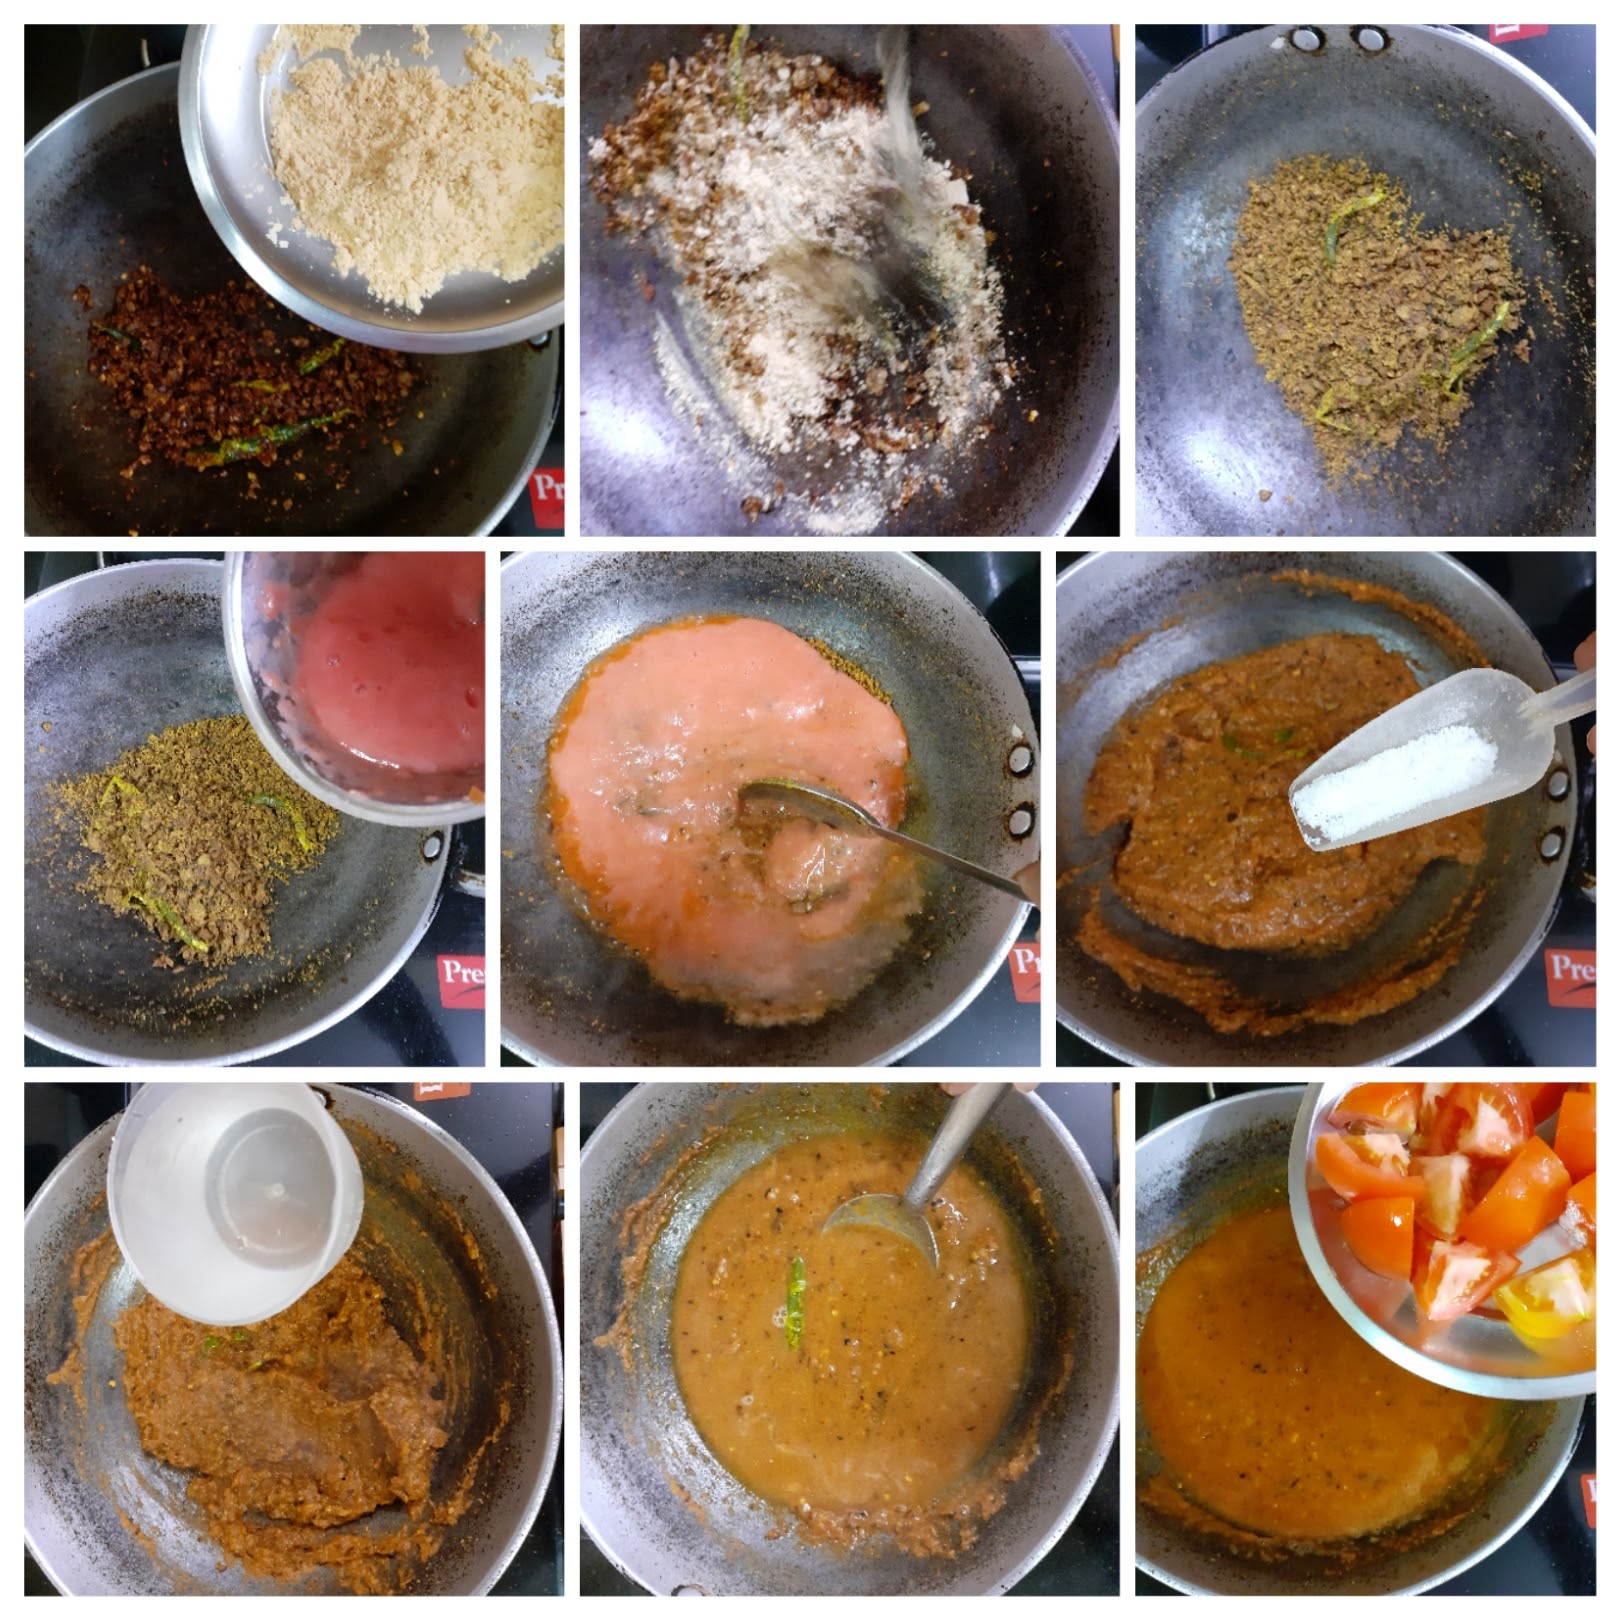
6. Now add the cubed Paneer pieces , and the previously sauteed onion and capsicum and stir nicely. Add the Methi seeds and cook until the gravy thickens. If you are particular about adding cream add now(this step is optional). Add Garam Masala powder and put off the flame. Garnish with coriander leaves. The yummy Kadai Paneer gravy style is ready.
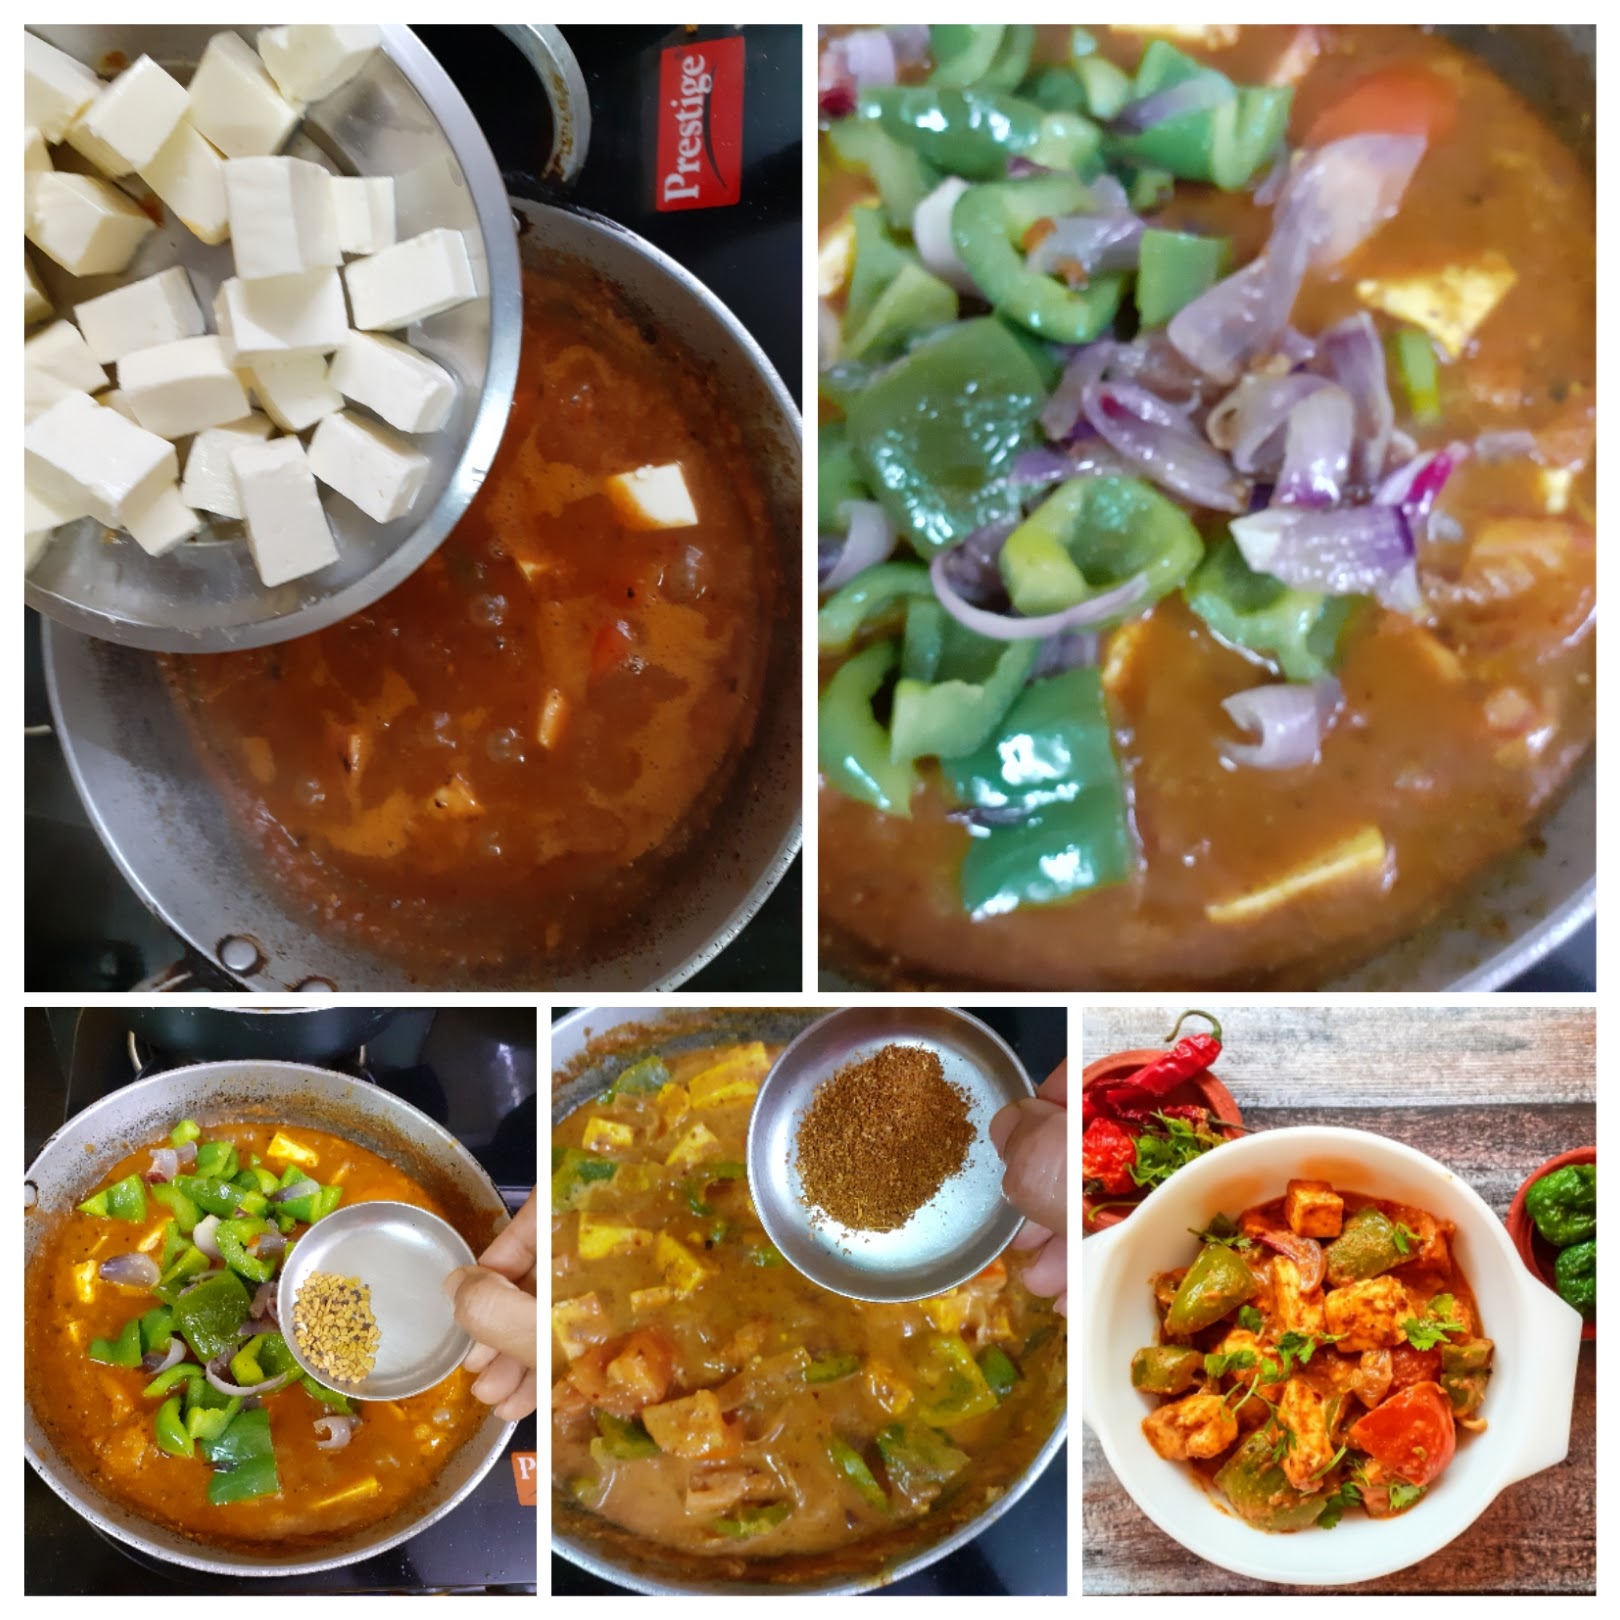
NOTES:
1. Roast the Besan very carefully. Any burnt taste or flavour will change the taste of the dish. I always have a bottle of roasted Besan in my kitchen it helps to thicken gravies in a jiffy.
2. The roast and ground powder can be made ahead and stored in a bottle. This called the Kadai Masala because of which the dish gets its name.
3. I have not used cream in this dish. If you prefer adding cream, do go ahead and do so. I have specifically mentioned when to do so.
If you tried this recipe and liked it please comment below. I would love to hear from you. If you have a query about the recipe email us and ill respond as soon as I can.
Kathrikai Masala Kuzhambu (Tangy Eggplant Curry)
Eggplants or Brinjal is one vegetable that I love cooking with, because it is so versatile and the possibilities are so endless. Most cuisines around the world have atleast one Eggplant dish. Indian cuisine has many to its credit- be it the Baingan Bharta from the Punjab, the Vangi Bath from Karnataka, Gutti Vankaya Kura from Andhra Pardesh or the Bharli Vangi from Maharashtra.

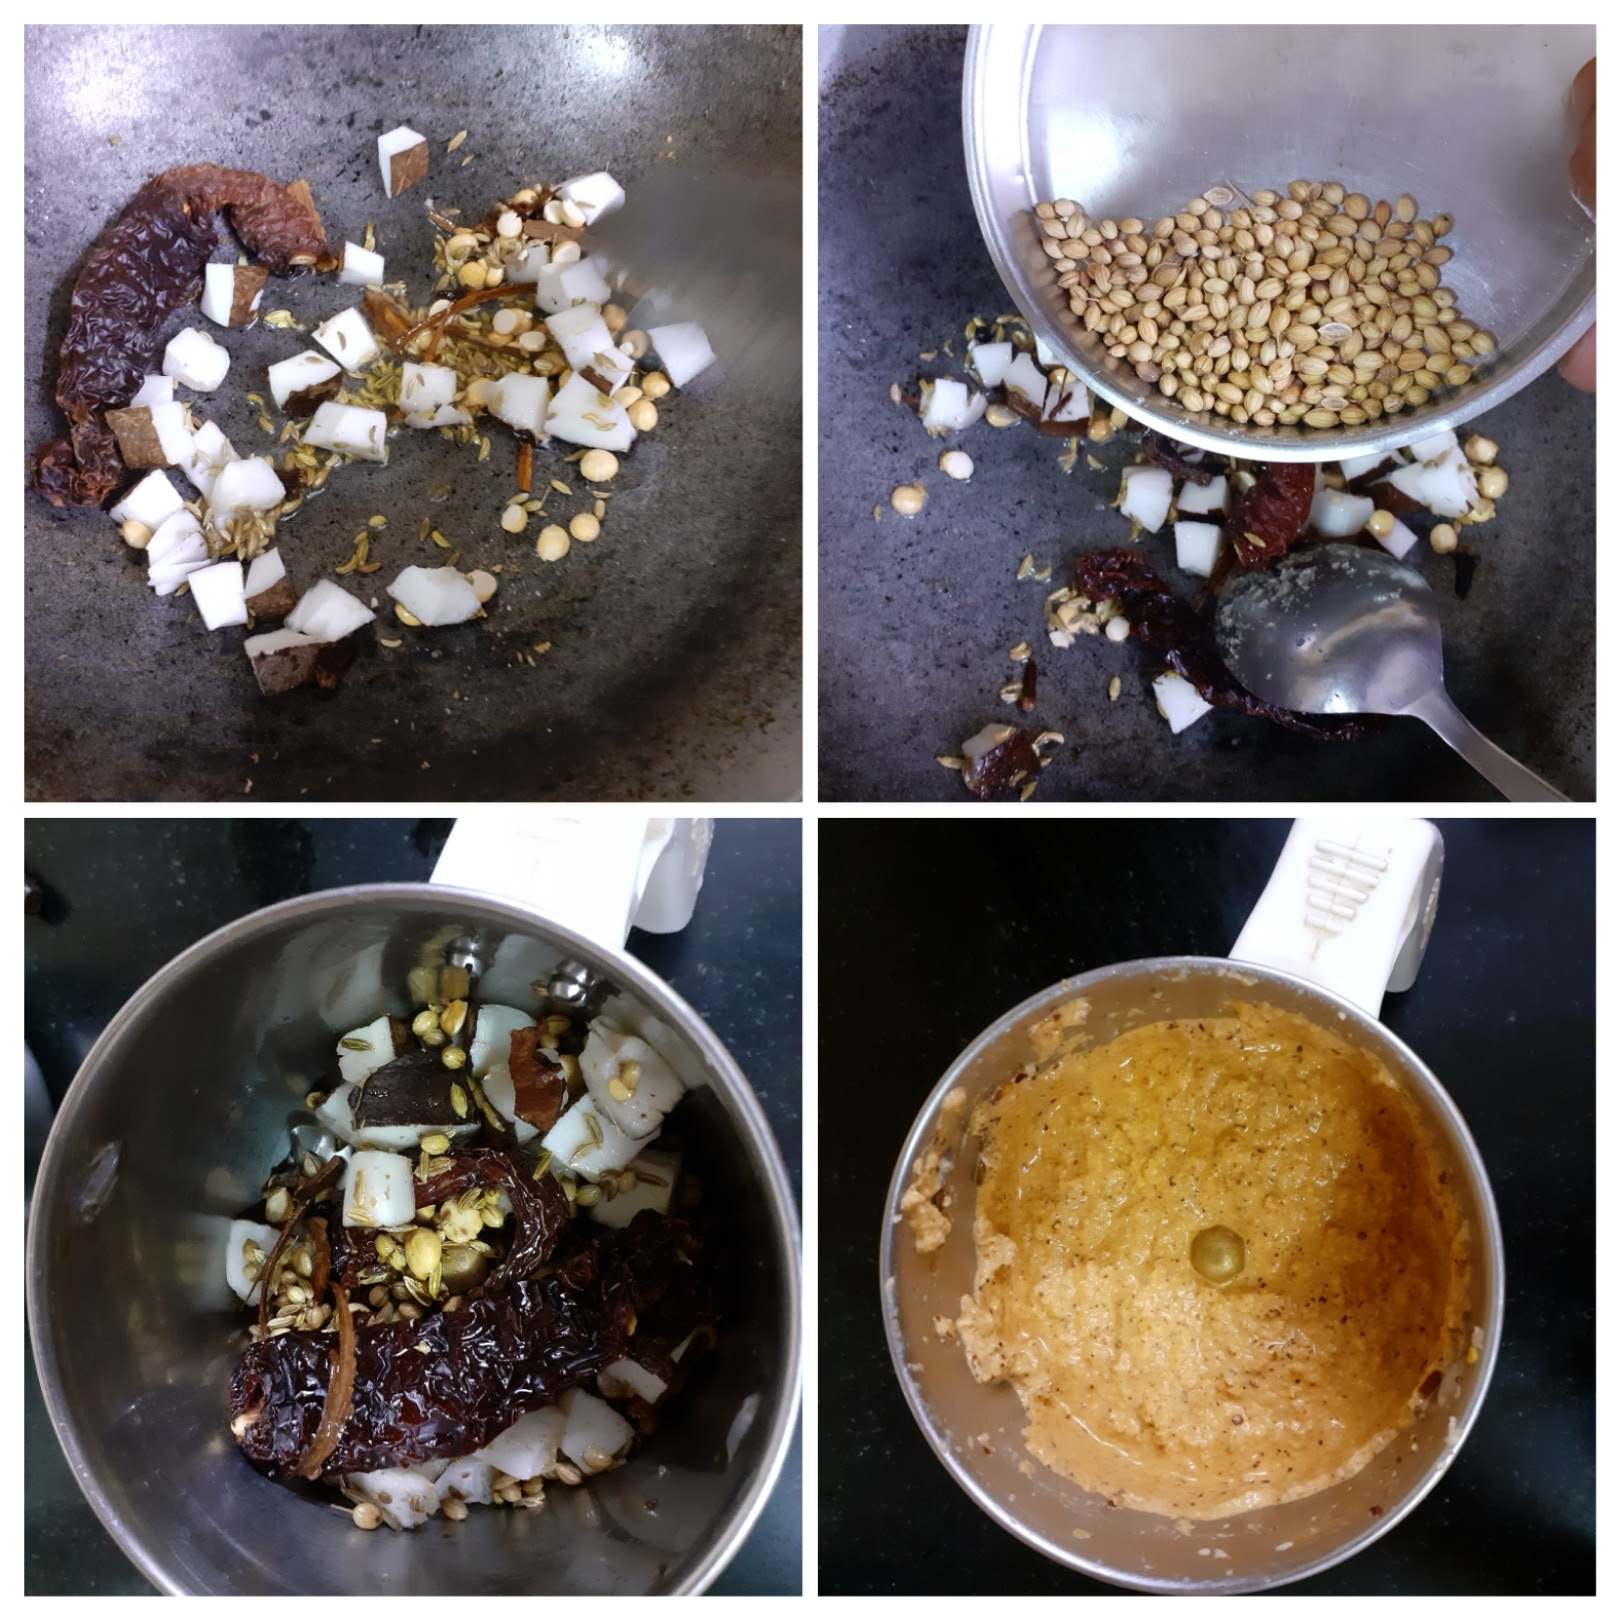
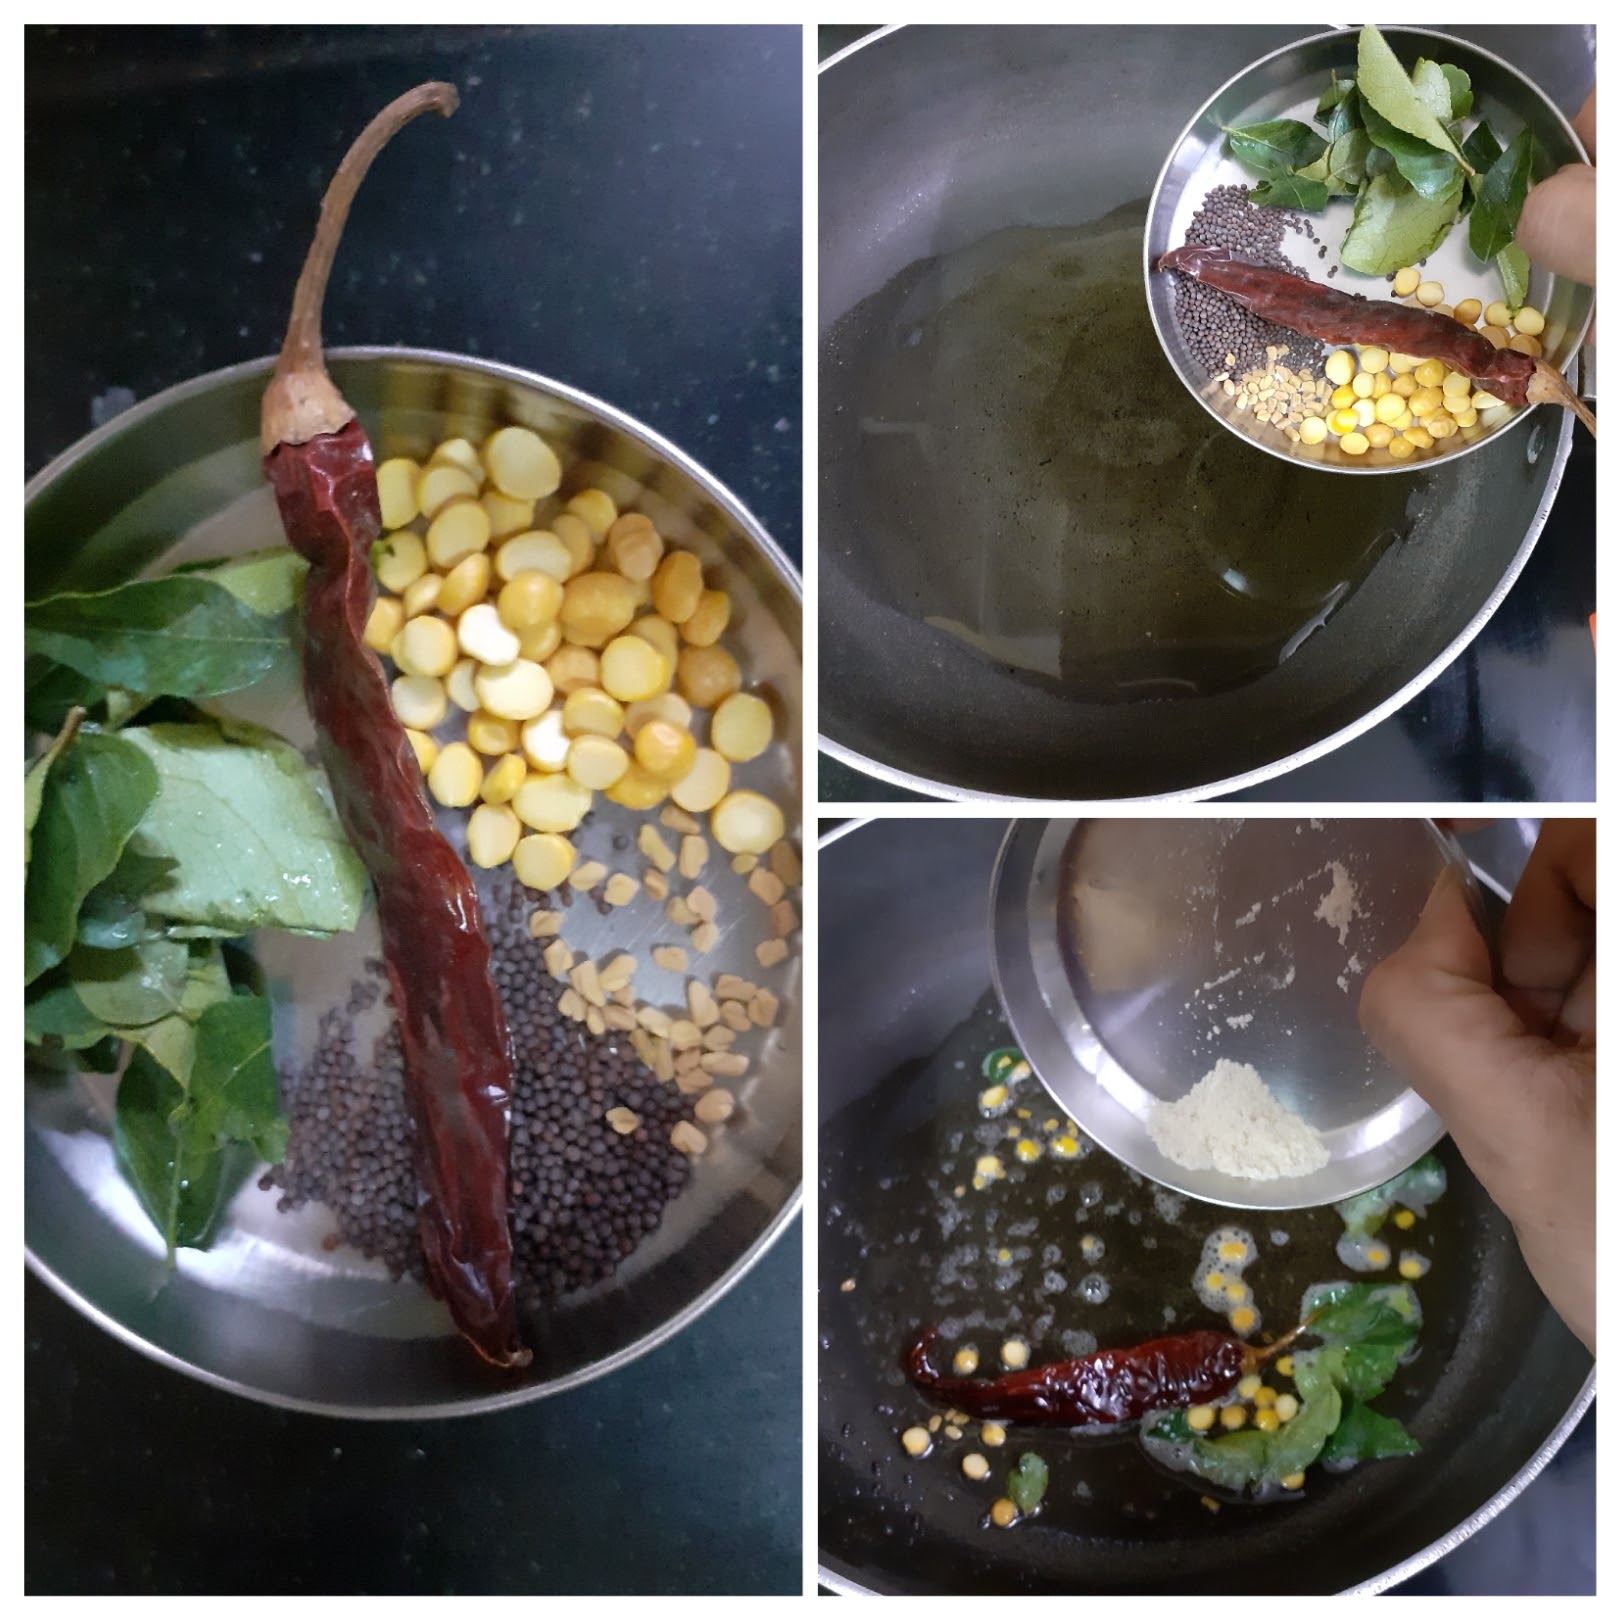
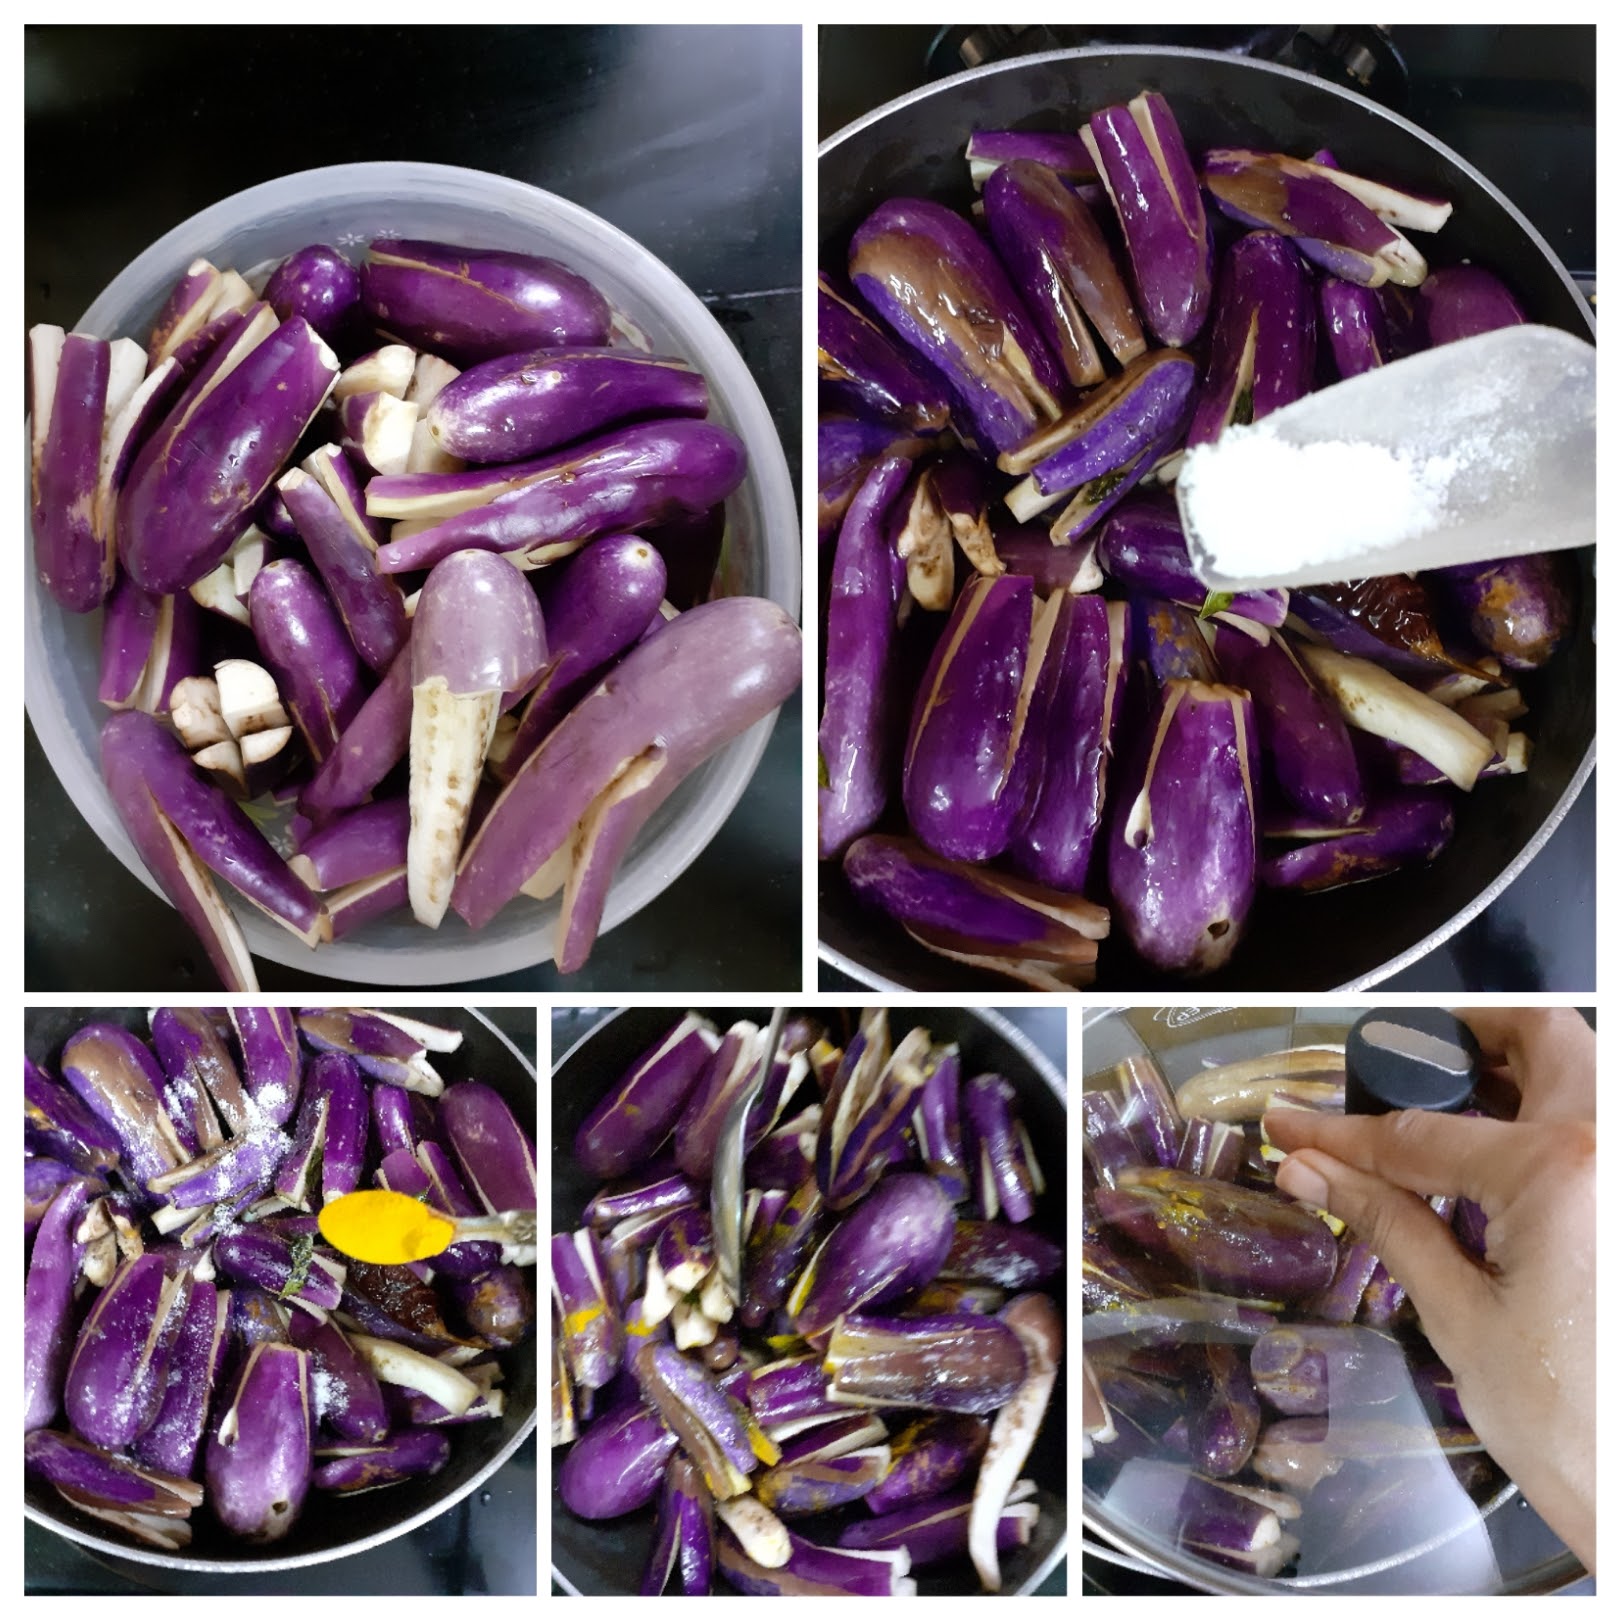
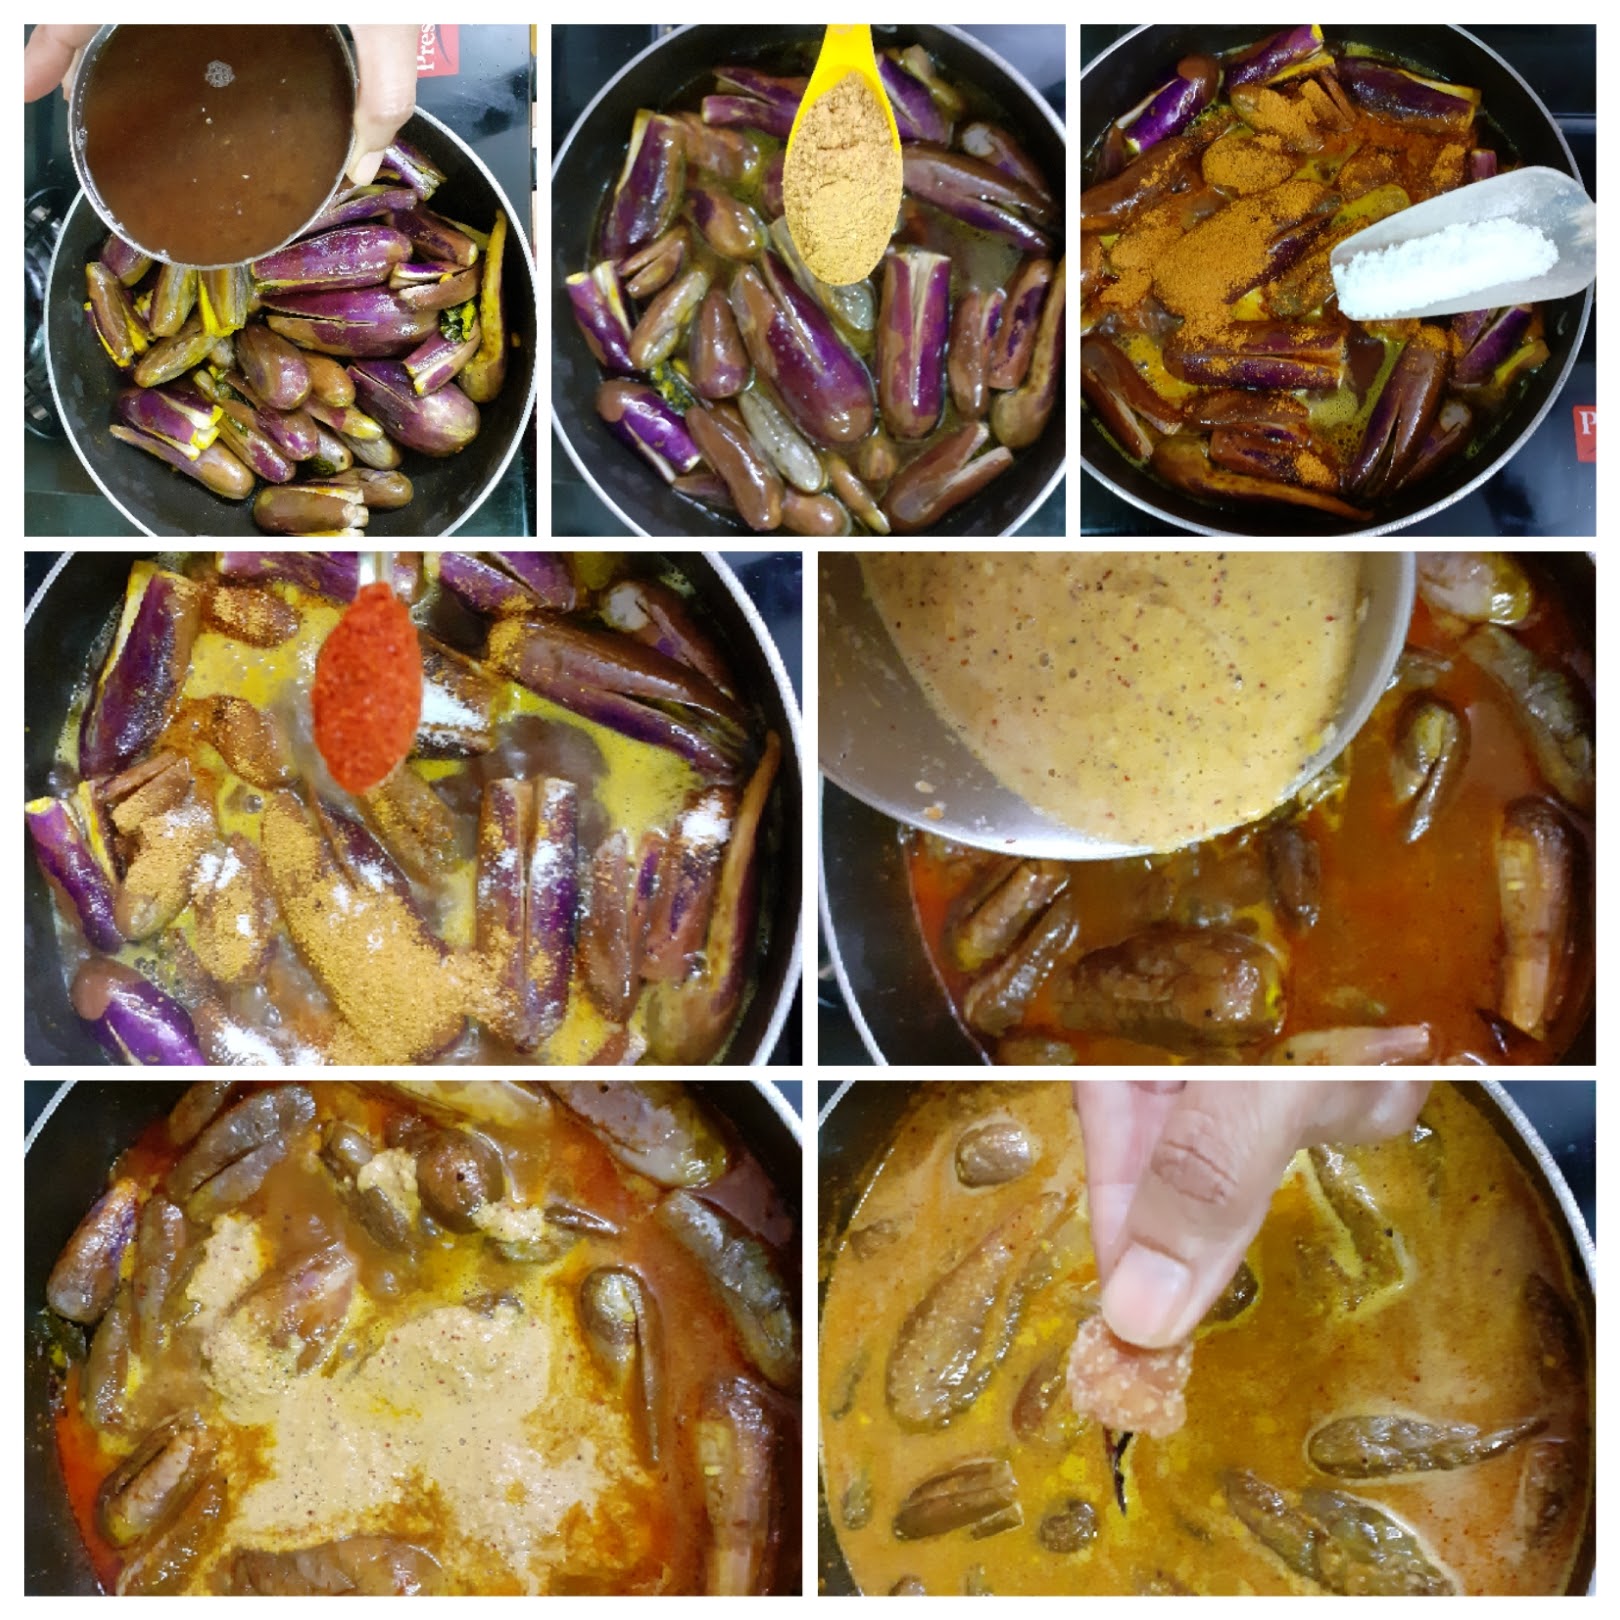
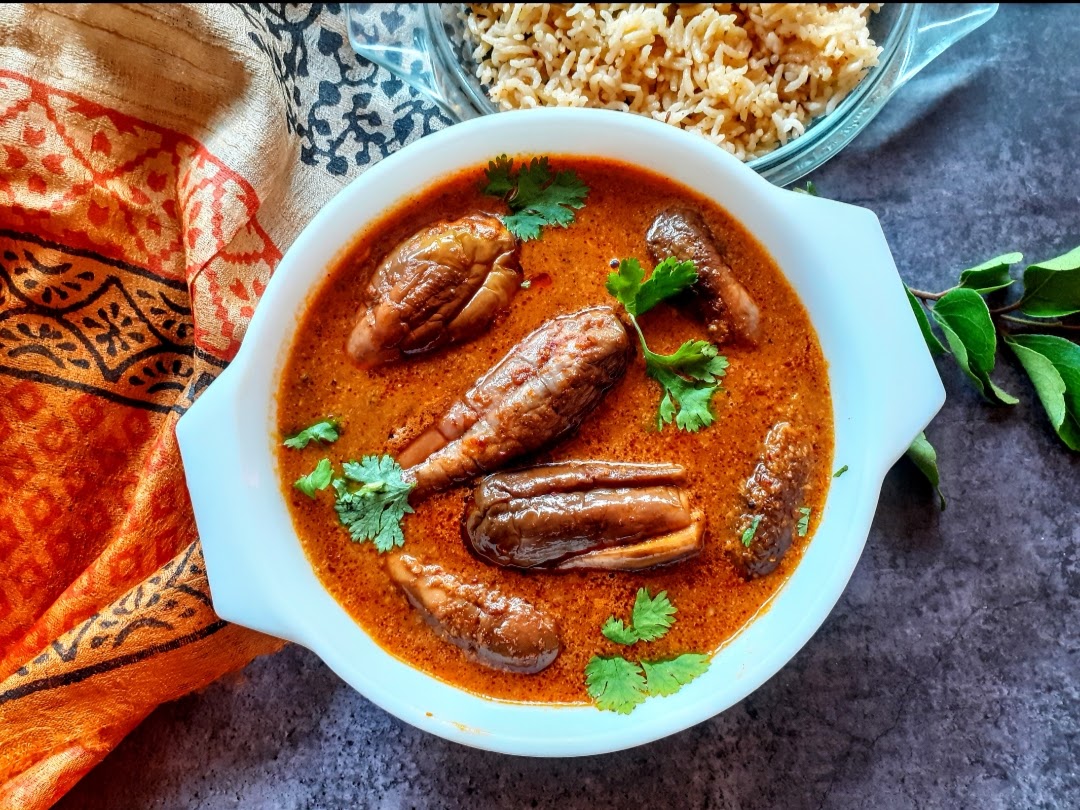
Garlic Naan
Usually when we think of Naan we think of eating it at a restaurant. That’s also the reason why I have never attempted to make this at home until now. But the Pandemic has made us all crave restaurant style food at home and so the search for the perfect Naan recipe, which can be made at home easily, without any sophisticated gadgets was on.
Its also common knowledge that an Iron Kadai is used to cook the Naan. But I wanted to get the dough right. One which will yield perfect Naans without much effort and also I did not want to make the instant one with baking soda, because when baking soda is used the dough must go on the girdle immediately without resting it. I always prefer resting the dough, be it Roti’s, Paratha’s or Naan. So, in this recipe I have used yeast, because that is what gives the perfect texture and fluffiness to the Naan.
As far as possible I try to use less, or no Maida, but, to get the fluffiness the Maida needs to be added, whereas taste and nutrition comes from wheat. So in this recipe I have used both. The result was fluffy and perfectly cooked Naan’s.
While you are here check out my other bread recipes like Aloo Methi Paratha, Beetroot Paratha, Missi Roti and more…
Here is the recipe of Garlic Naan for you-
PREP TIME: 10 MINS+ 2 hrs COOK TIME:15 MINS
TOTAL TIME: 2 hr 25 MINS COURSE: MAIN
CUISINE: NORTH INDIAN SERVINGS: 5
AUTHOR: RAJNI RAM
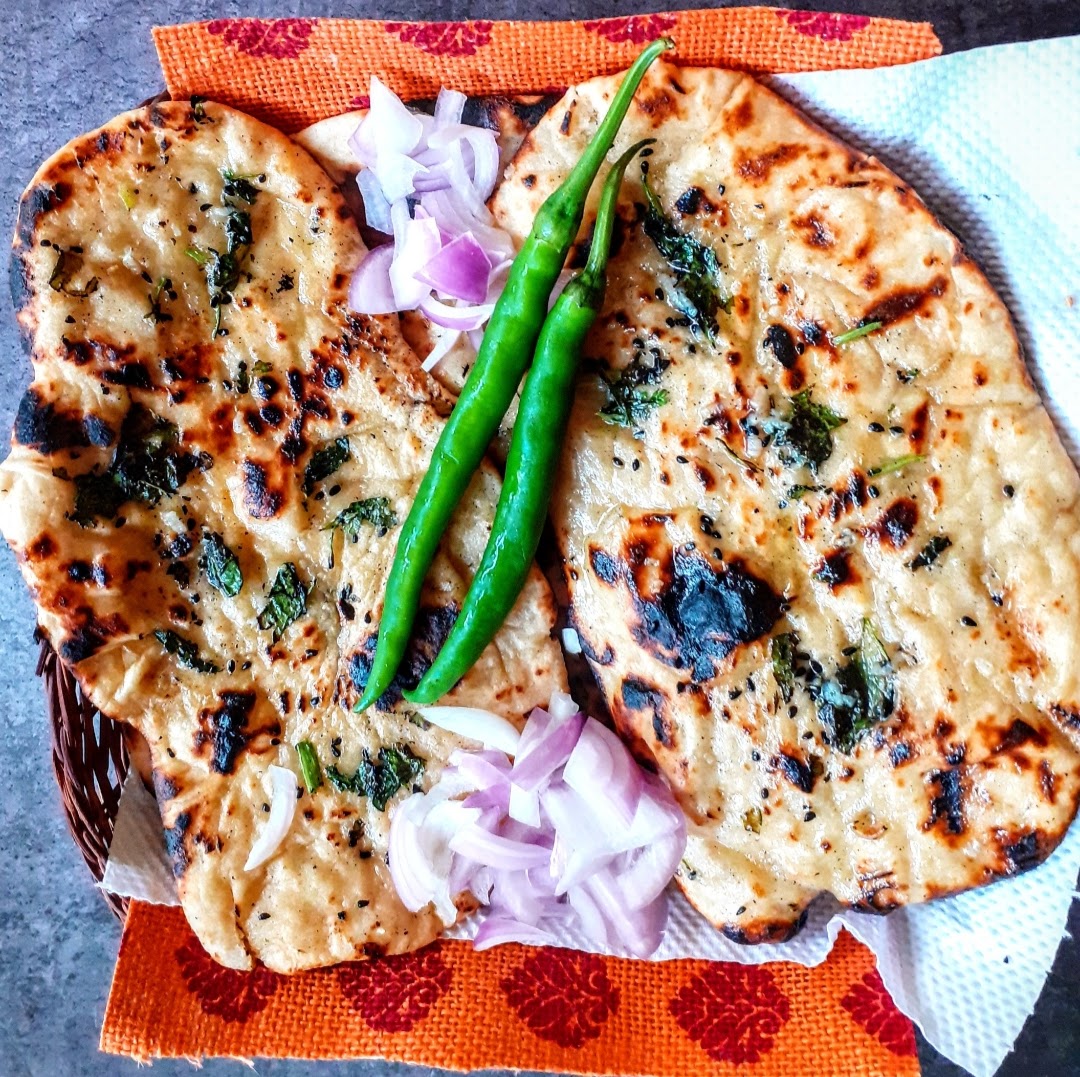
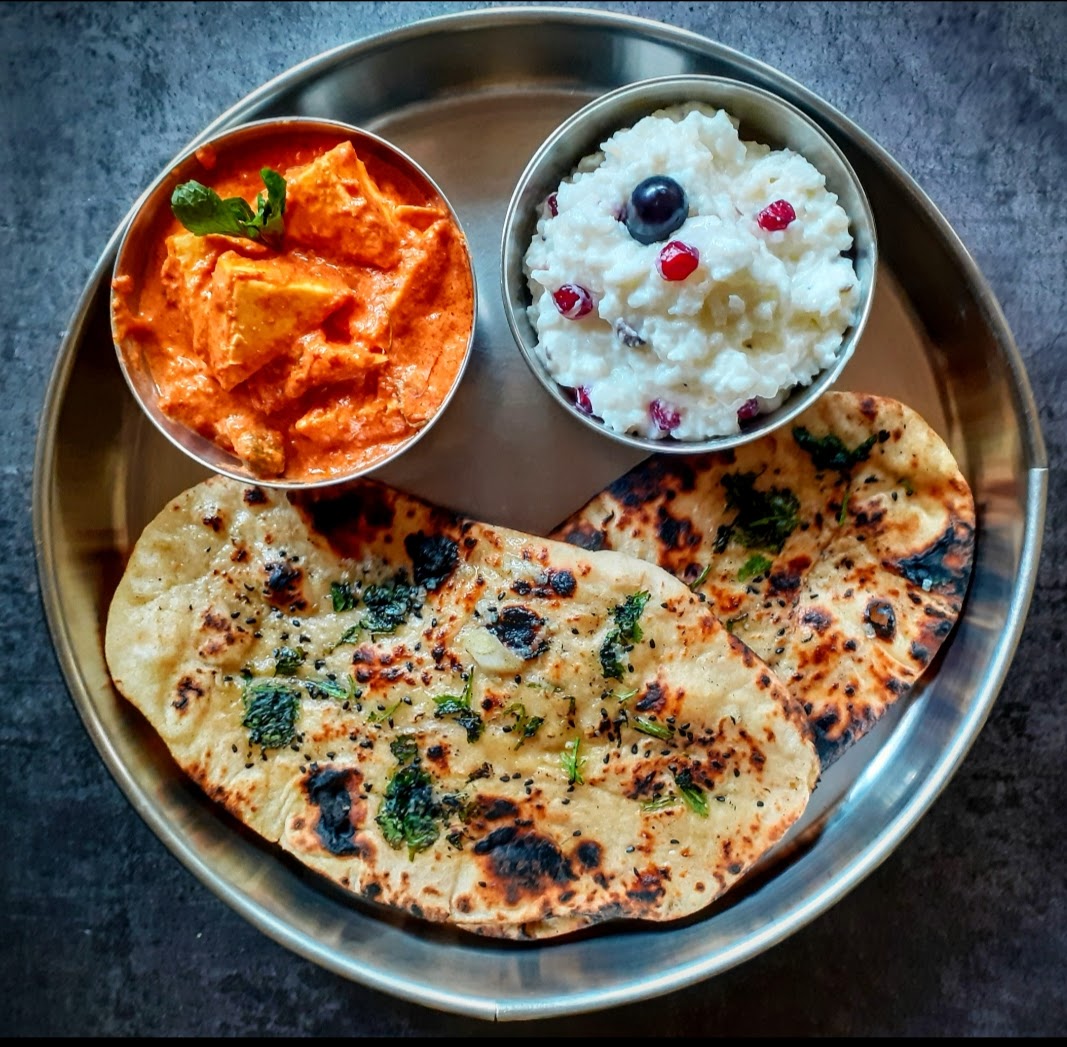
Ingredients for dough:
Whole Wheat flour 2 cups
Maida 2 cups
Water(lukewarm) 1 cup ( refer note1)
Dry yeast 2 tsp
Sugar 1 tbsp
Salt to taste or 1 tsp
Oil 3 tbsp
Curd 2 tbsp
Milk less than1/2 cup
Fresh coriander leaves finely chopped
Kalonji/ Nigella seeds 2 tsp
For Garlic butter:
Table butter/salted butter 50 gm
Garlic 2 pods minced
Coriander leaves finely chopped 1 tsp
Directions to make Garlic butter: Put all ingredients in a microwave safe bowl and microwave for 30 seconds, alternately put the ingredients in a bowl and melt the butter.
Directions:
In a large mixing bowl take both the flours, add the salt and mix well. Now in a bowl take lukewarm water, add the sugar followed by the yeast. Let this stand for 10 mins or until the yeast blooms and becomes frothy. Now to the bowl of bloomed yeast add the oil, milk and curd and mix well. Now use this mixture to knead the dough. Add little at a time to knead the dough. In case after using the whole mixture the dough is still dry, add water to make the dough. The dough will be sticky, but stiff. Grease a container and put the dough in it to rest 2 hours. After 2 hours, the dough would have doubled up in size. Take it out, punch to release the air inside and knead again. Now divide the dough into 10 equal portions. Dust a little flour and roll out in oval shape. Sprinkle the Kalonji/Nigella seeds and fresh coriander and gently press it on the rolled dough. Take an iron Kadai (non stick doesn’t give the best results), and invert it over the gas flame. When it is hot, stick the rolled out Naan on it and cook. When done the Naan comes out easily, without sticking. Now remove the Naan from the Kadai and transfer over direct flame and cook on both sides like how you would a Phulka. Transfer to a plate, apply the garlic butter over it and serve hot.
Serving Suggestions: Serve this Naan with Paneer Butter Masala, Mava Paneer Curry. Also goes well with Dal Makhni, Paneer Khurchan, Choley or Rajma.
STEPWISE RECIPE FOLLOWS:
1. In a large mixing bowl take both the flours, add the salt and mix well. Now in a bowl take lukewarm water, add the sugar followed by the yeast. Let this stand for 10 mins or until the yeast blooms and becomes frothy.

2. Now to the bowl of bloomed yeast add the oil, milk and curd and mix well. Now use this mixture to knead the dough. Add little at a time to knead the dough. In case after using the whole mixture the dough is still dry, add water to make the dough. The dough will be sticky, but stiff. Grease a container and put the dough in it to rest 2 hours. ( Please add the sugar, curd and milk, those pictures are not here and will be added as soon as possible)
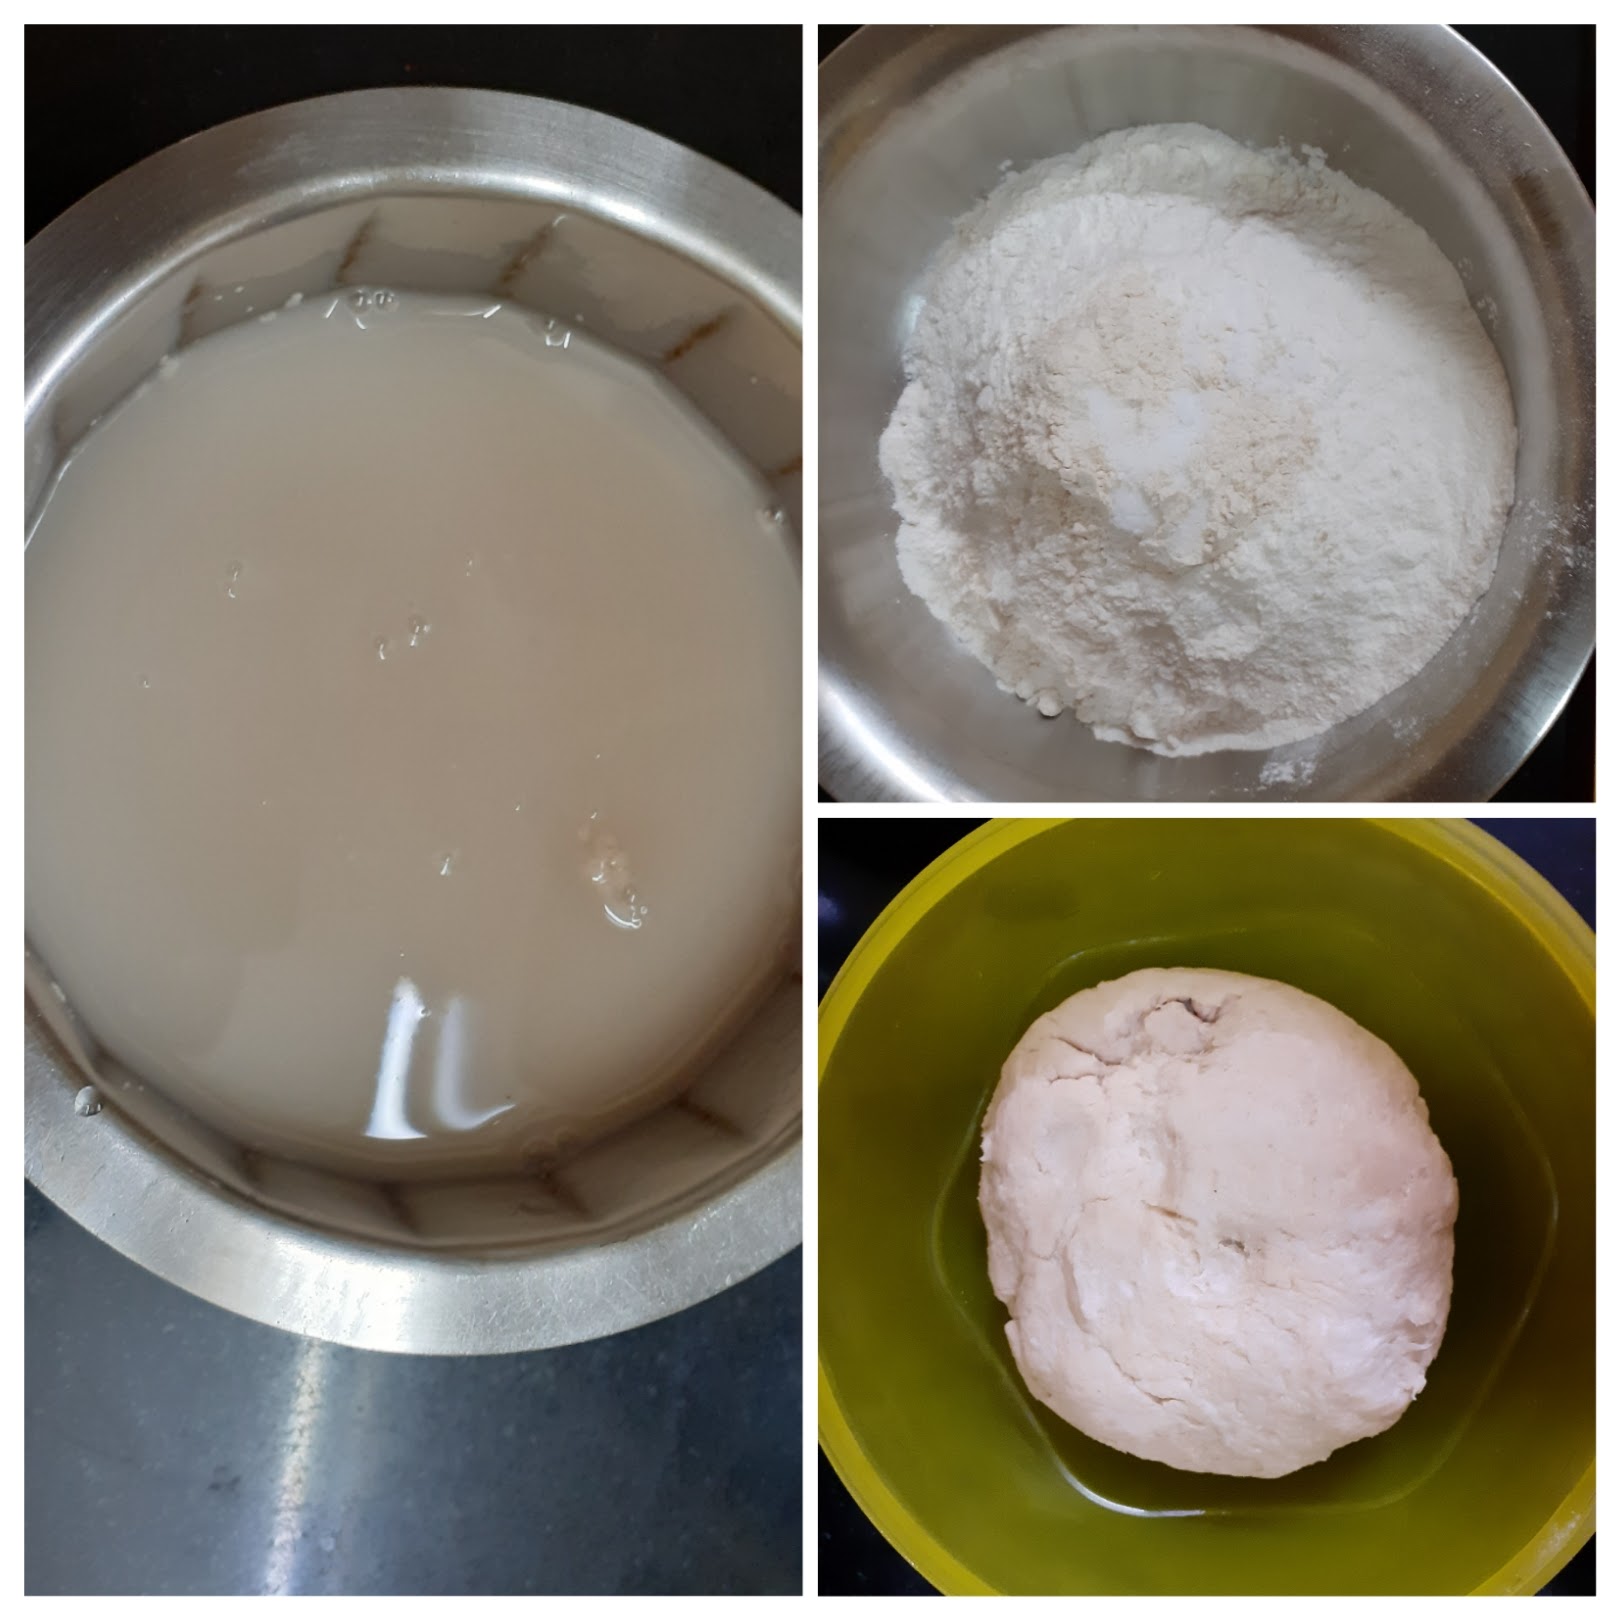
3. After 2 hours, the dough would have doubled up in size. Take it out, punch to release the air inside and knead again. Now divide the dough into 10 equal portions. Dust a little flour and roll out in oval shape. Sprinkle the Kalonji/Nigella seeds and fresh coriander and gently press it on the rolled dough

4. Take an iron Kadai (non stick doesn’t give the best results), and invert it over the gas flame. When it is hot, stick the rolled out Naan on it and cook. When done the Naan comes out easily, without sticking. Now remove the Naan from the Kadai and transfer over direct flame and cook on both sides like how you would a Phulka. Transfer to a plate, apply the garlic butter over it and serve hot.
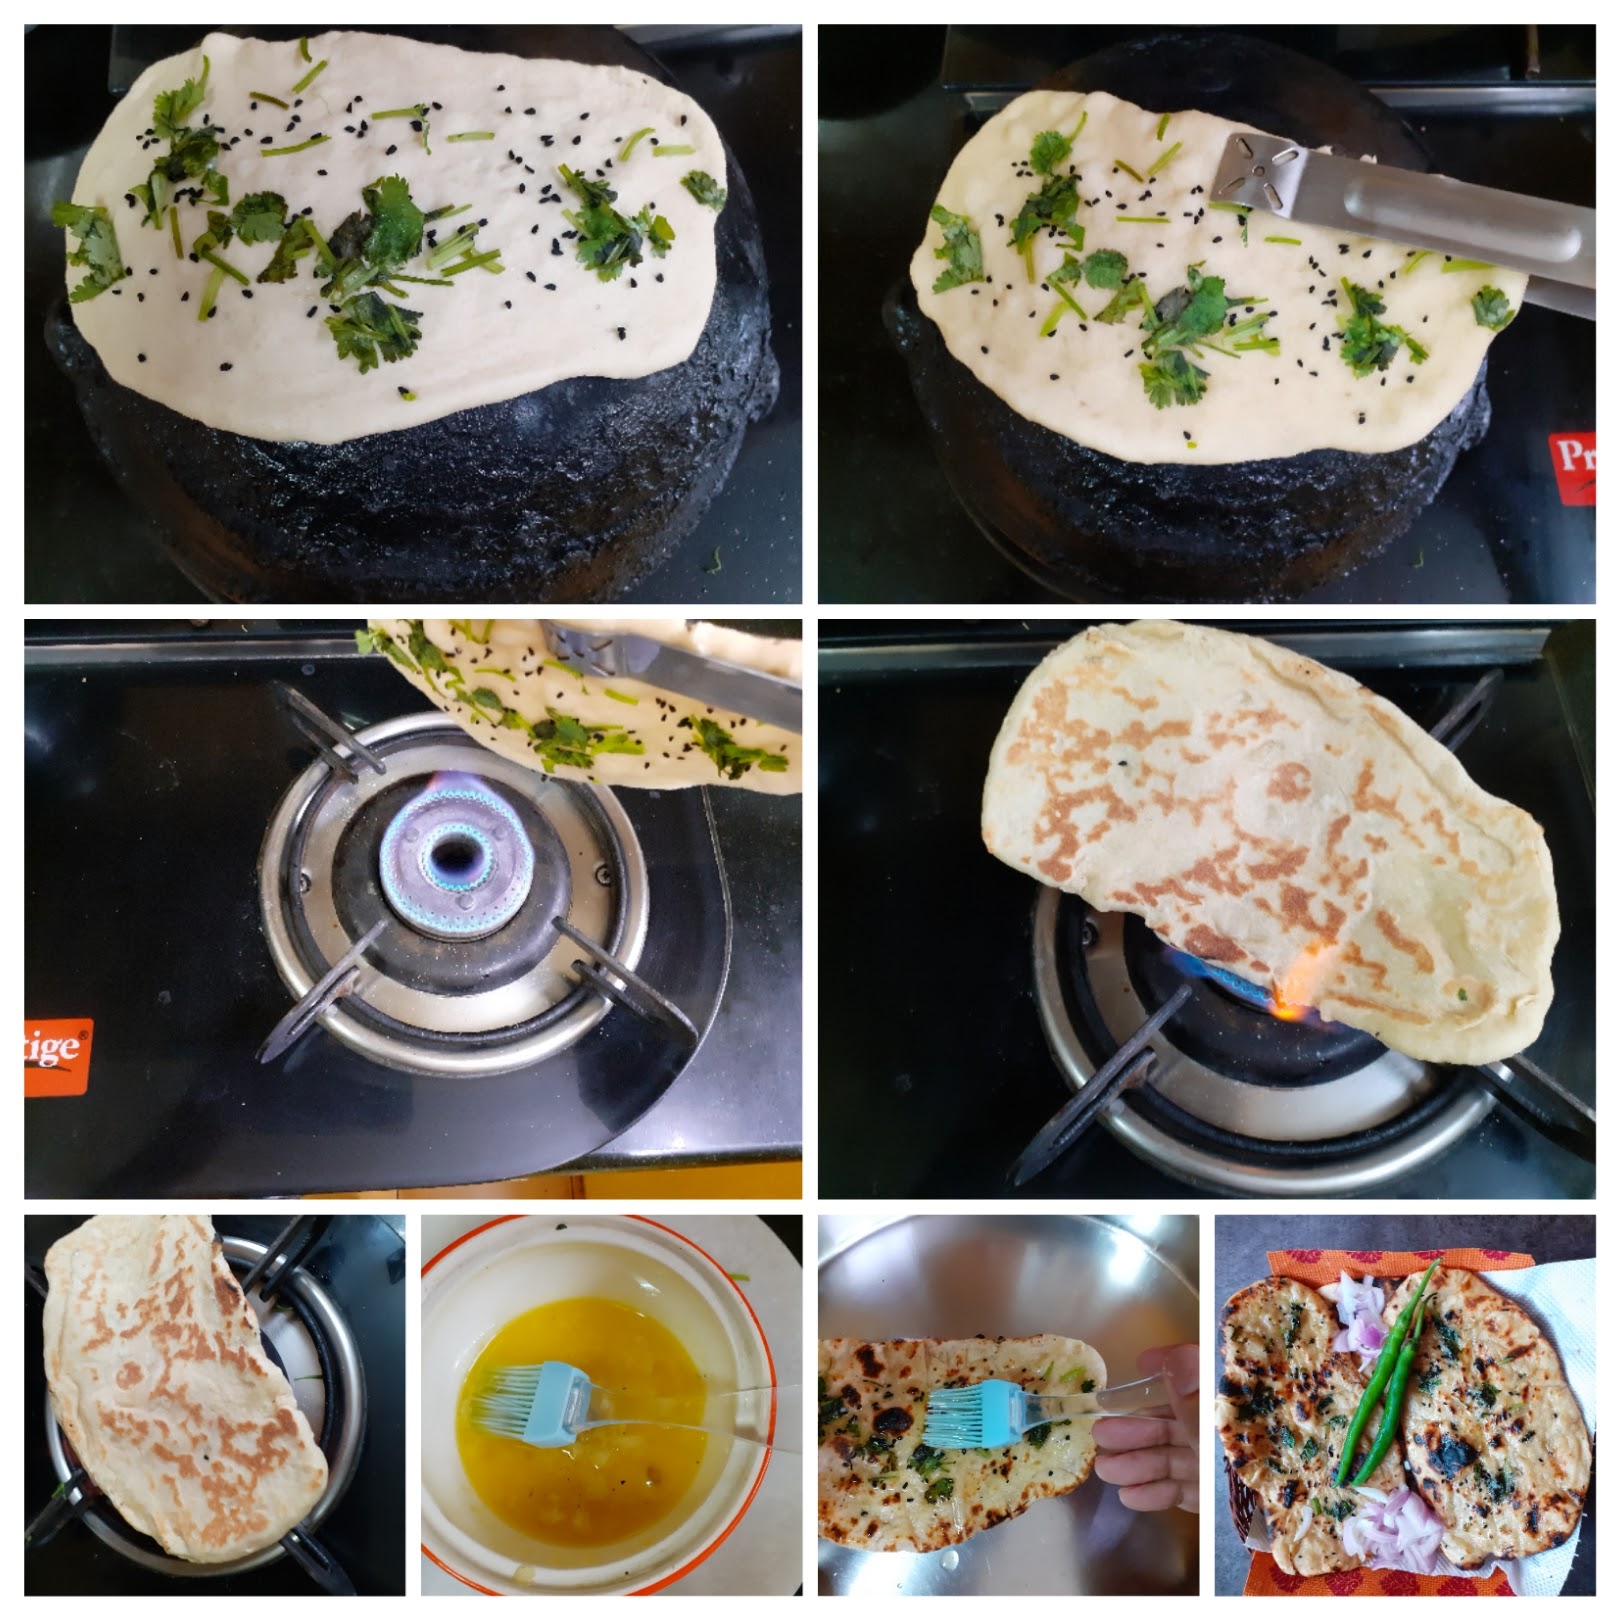
NOTES:
Kova Kajjikayalu
This Indian sweet is so close to my heart as they bring back many memories of places, people and a different time altogether. Kajjikayalu in Telugu means Karanji or Gujiya.
Kova Kajjikayalu or Kobbari Kova Kajjikayalu is a melt in the mouth sweet with a stuffing of coconut and jaggery, covered on the outside with sweetened Kova or Mava. This is a very easy to do recipe.
In this recipe I have gone completely by intuition and not referred any other recipe. That’s why it may be a little different from other ones.
Typically Almond flour is not used in this sweet, but I have used a little for the smooth texture and so that the Kova is easy to work around with.
Like me, my daughter also likes this sweet or may be she likes it, and so I like it????. This is one of the most popular sweets at G Pullareddy Sweets of Hyderabad. Every time my parents would visit us they would get this for my daughter as she would always ask for this as a child. After that due to some reasons the connect with Hyderabad broke(oh!only from a proximity point of view, at heart I’m always a Hyderabadi).
Since a few years we have not tasted this sweet and never dared to make it as it would always be compared to the Pullareddy ones, but then I guess today it had to happen. In my mind it was going on for a while. To bring it to fructification, I had to visualize it in my mind first. I am so happy that it turned out so well the first time.
Lets go to the recipe right away. While you are here check out my other Indian sweet recipes like – Akkaravadisal, Chakkara Pongal, Pineapple Rabri, Atte ka Sheera, Aval Kesari, Vella Aval, and more…
Here is the recipe of Kova Kajjikayalu-
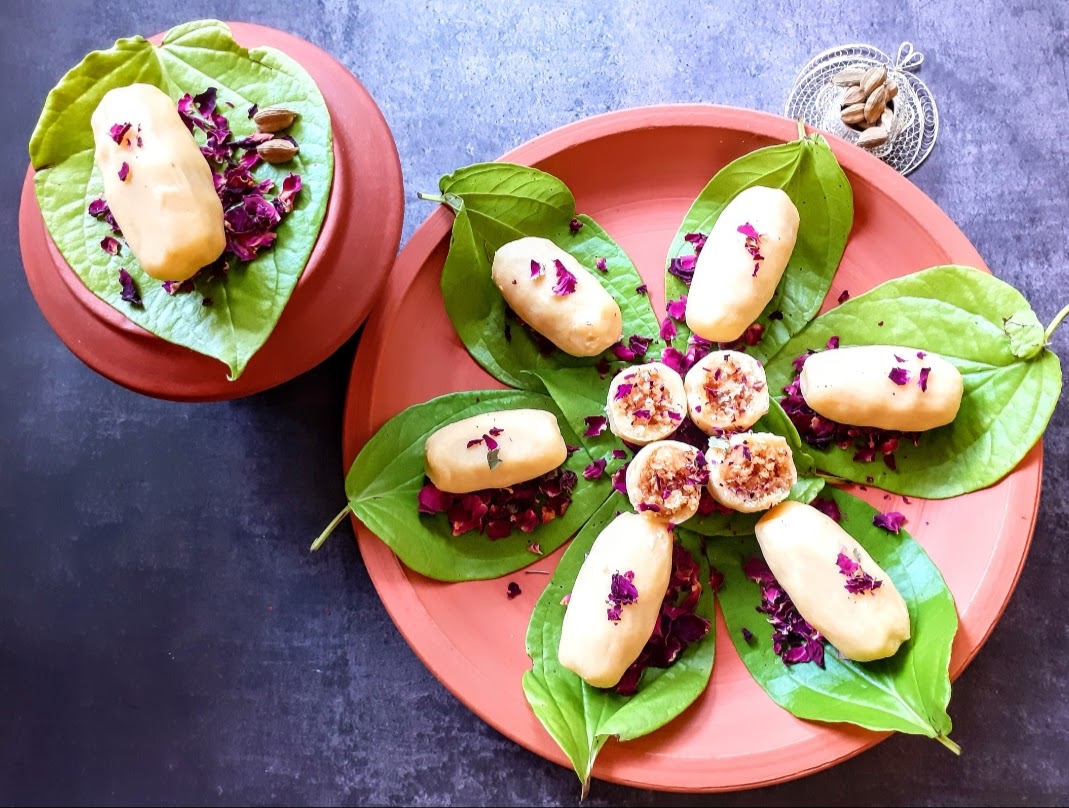
Ingredients:
Kova/Mava(unsweetened) 300 gm
Sugar 6 tbsp
Dessicated Coconut 2 cups( freshly grated coconut can also be used)
Jaggery 1 cup
Cardamom powder 1/2 tsp
Almond Flour 3 tbsp
Directions:
Take a heavy bottomed Kadai and put the Jaggery and desiccated coconut in it. Sprinkle some water(less than 1/4 cup) in it and put it on flame. Keep stirring over a low flame until the jaggery melts and mixes with the coconut, and the stuffing comes together. If you are able to form a ball with the coconut jaggery mixture, thats the right stage. This takes about 10 minutes. The poornam will leave the bottom of the Kadai when done. Add cardamom powder and, let the stuffing/Poornam cool down. Grate/shred the Kova and keep it ready. Put the shredded Kova in a non stick pan, add the sugar and start stirring. The Kova will loosen up as the sugar melts, but will start solidifying again. Keep stirring until it leaves the bottom of the pan. Transfer it immediately to a plate and let it cool for exactly 5 minutes(not more as, if it cools too much making the cover gets difficult). Now add the Almond flour and combine with a spatula. Divide the Kova into 15 equal portions. Divide the Coconut stuffing also into 15 equal portions, shaping them as ovals. Apply ghee to your fingers and palms.Now take one roundel of Kova and flatten it on your palms with your fingers. Place the coconut stuffing in the centre and seal the edges as shown in the picture. Repeat for all the Kova and stuffing. Cover them with a clean cloth and allow to set for 2 hrs. The outer Kova covering will toughen up a bit as it cools, but will melt in your mouth and the coconut Poornam just takes this simple sweet to a different level. Overall a healthy sweet recipe. Ideal for gifting friends, make it for Diwali or Janmashtami when milk based sweets are made. Make them just of no reason an relish them, just as I made them today.
STEPWISE RECIPE FOLLOWS:
1. Take a heavy bottomed Kadai and put the Jaggery and desiccated coconut in it. Sprinkle some water(less than 1/4 cup) in it and put it on flame. Keep stirring over a low flame until the jaggery melts and mixes with the coconut, and the stuffing comes together. If you are able to form a ball with the coconut jaggery mixture, thats the right stage. This takes about 10 minutes. The poornam will leave the bottom of the Kadai when done. Add cardamom powder and, let the stuffing/Poornam cool down.
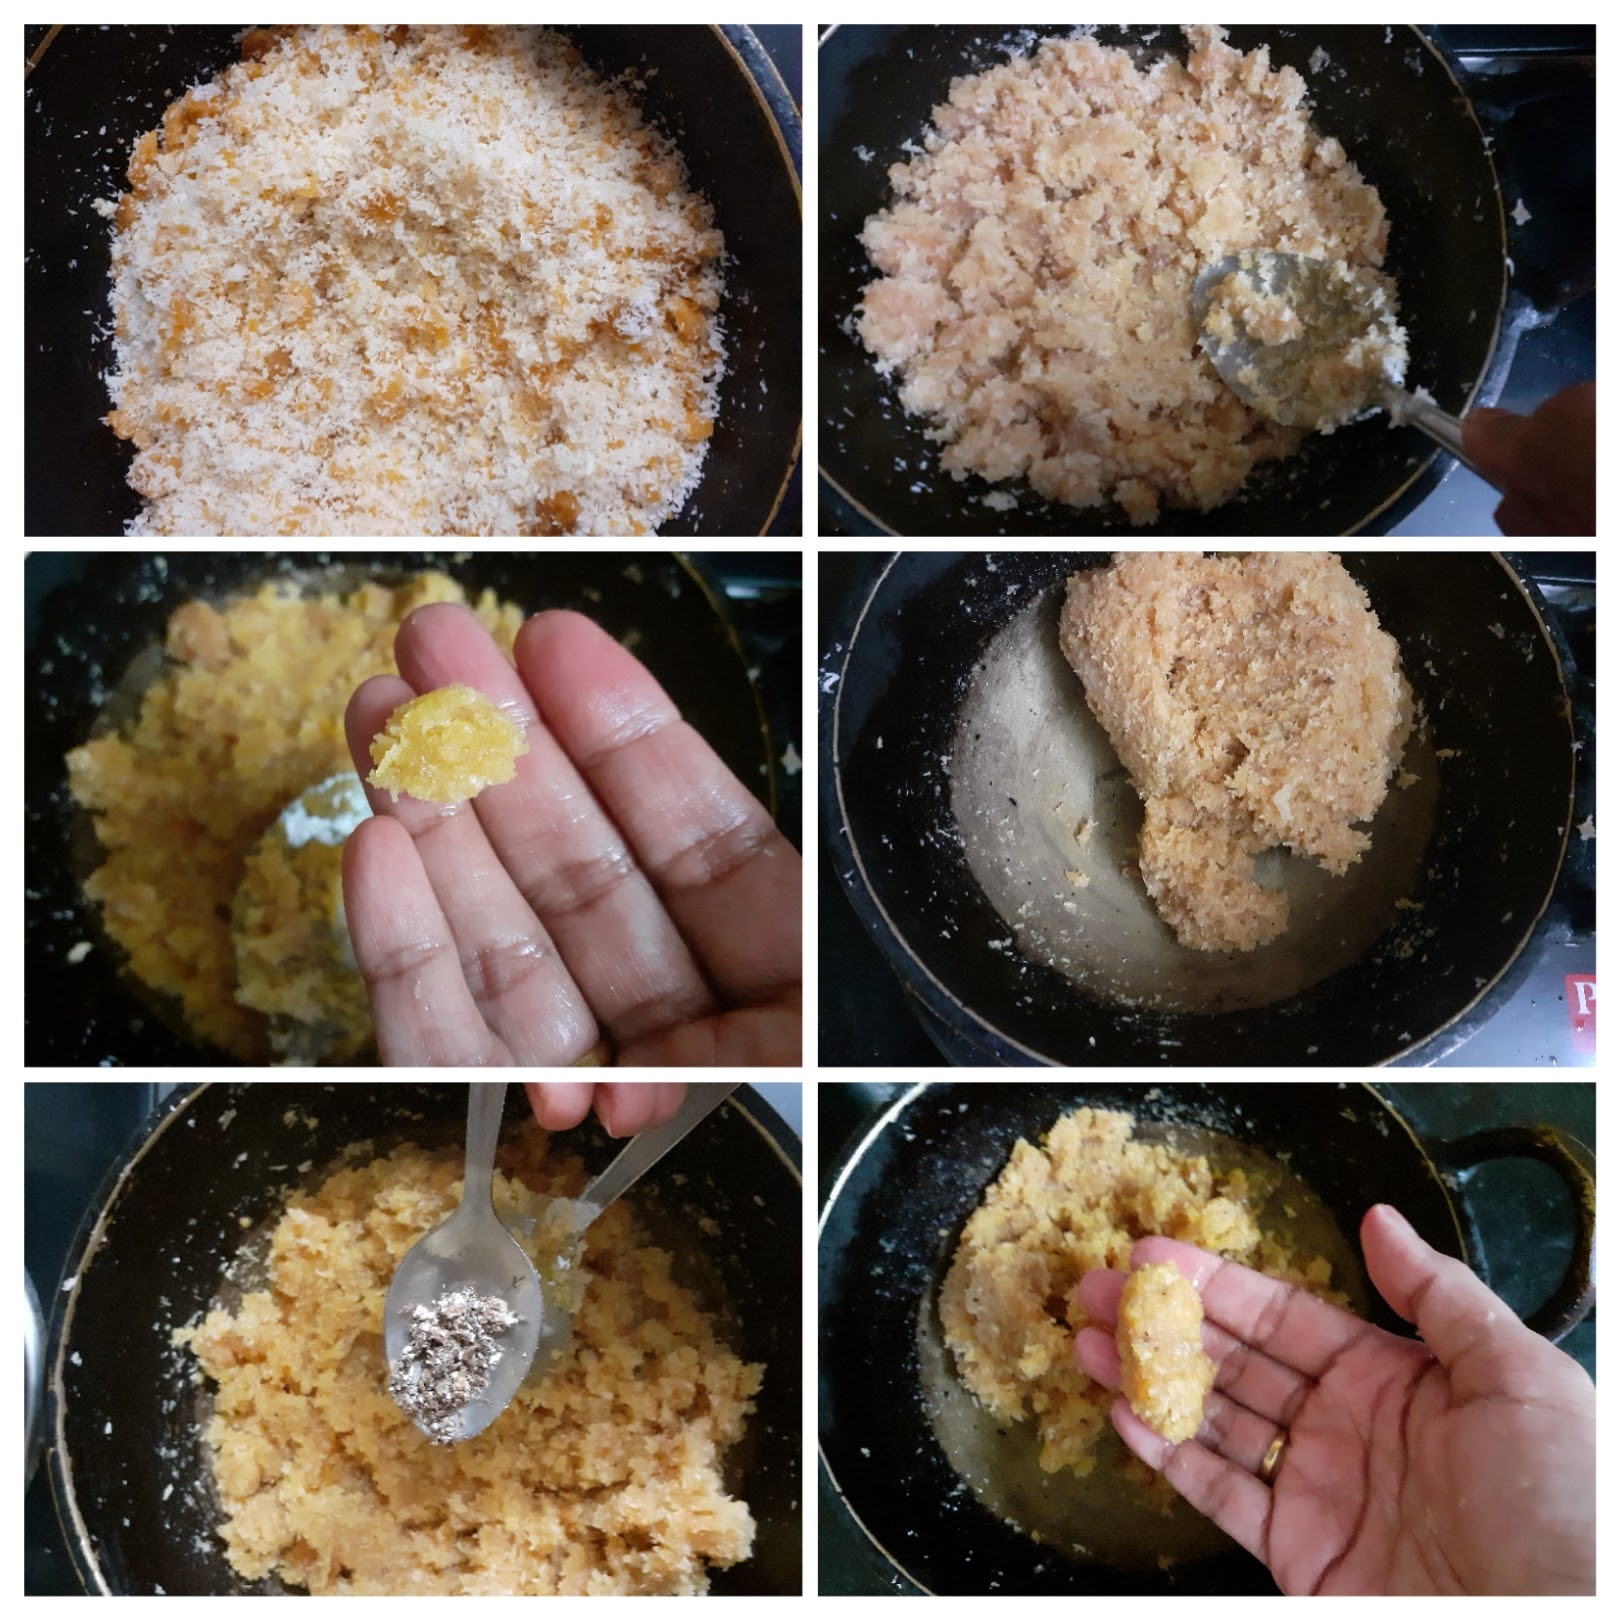
2. Grate/shred the Kova and keep it ready. Put the shredded Kova in a non stick pan, add the sugar and start stirring. The Kova will loosen up as the sugar melts, but will start solidifying again. Keep stirring until it leaves the bottom of the pan. Transfer it immediately to a plate and let it cool for exactly 5 minutes(not more as, if it cools too much making the cover gets difficult).
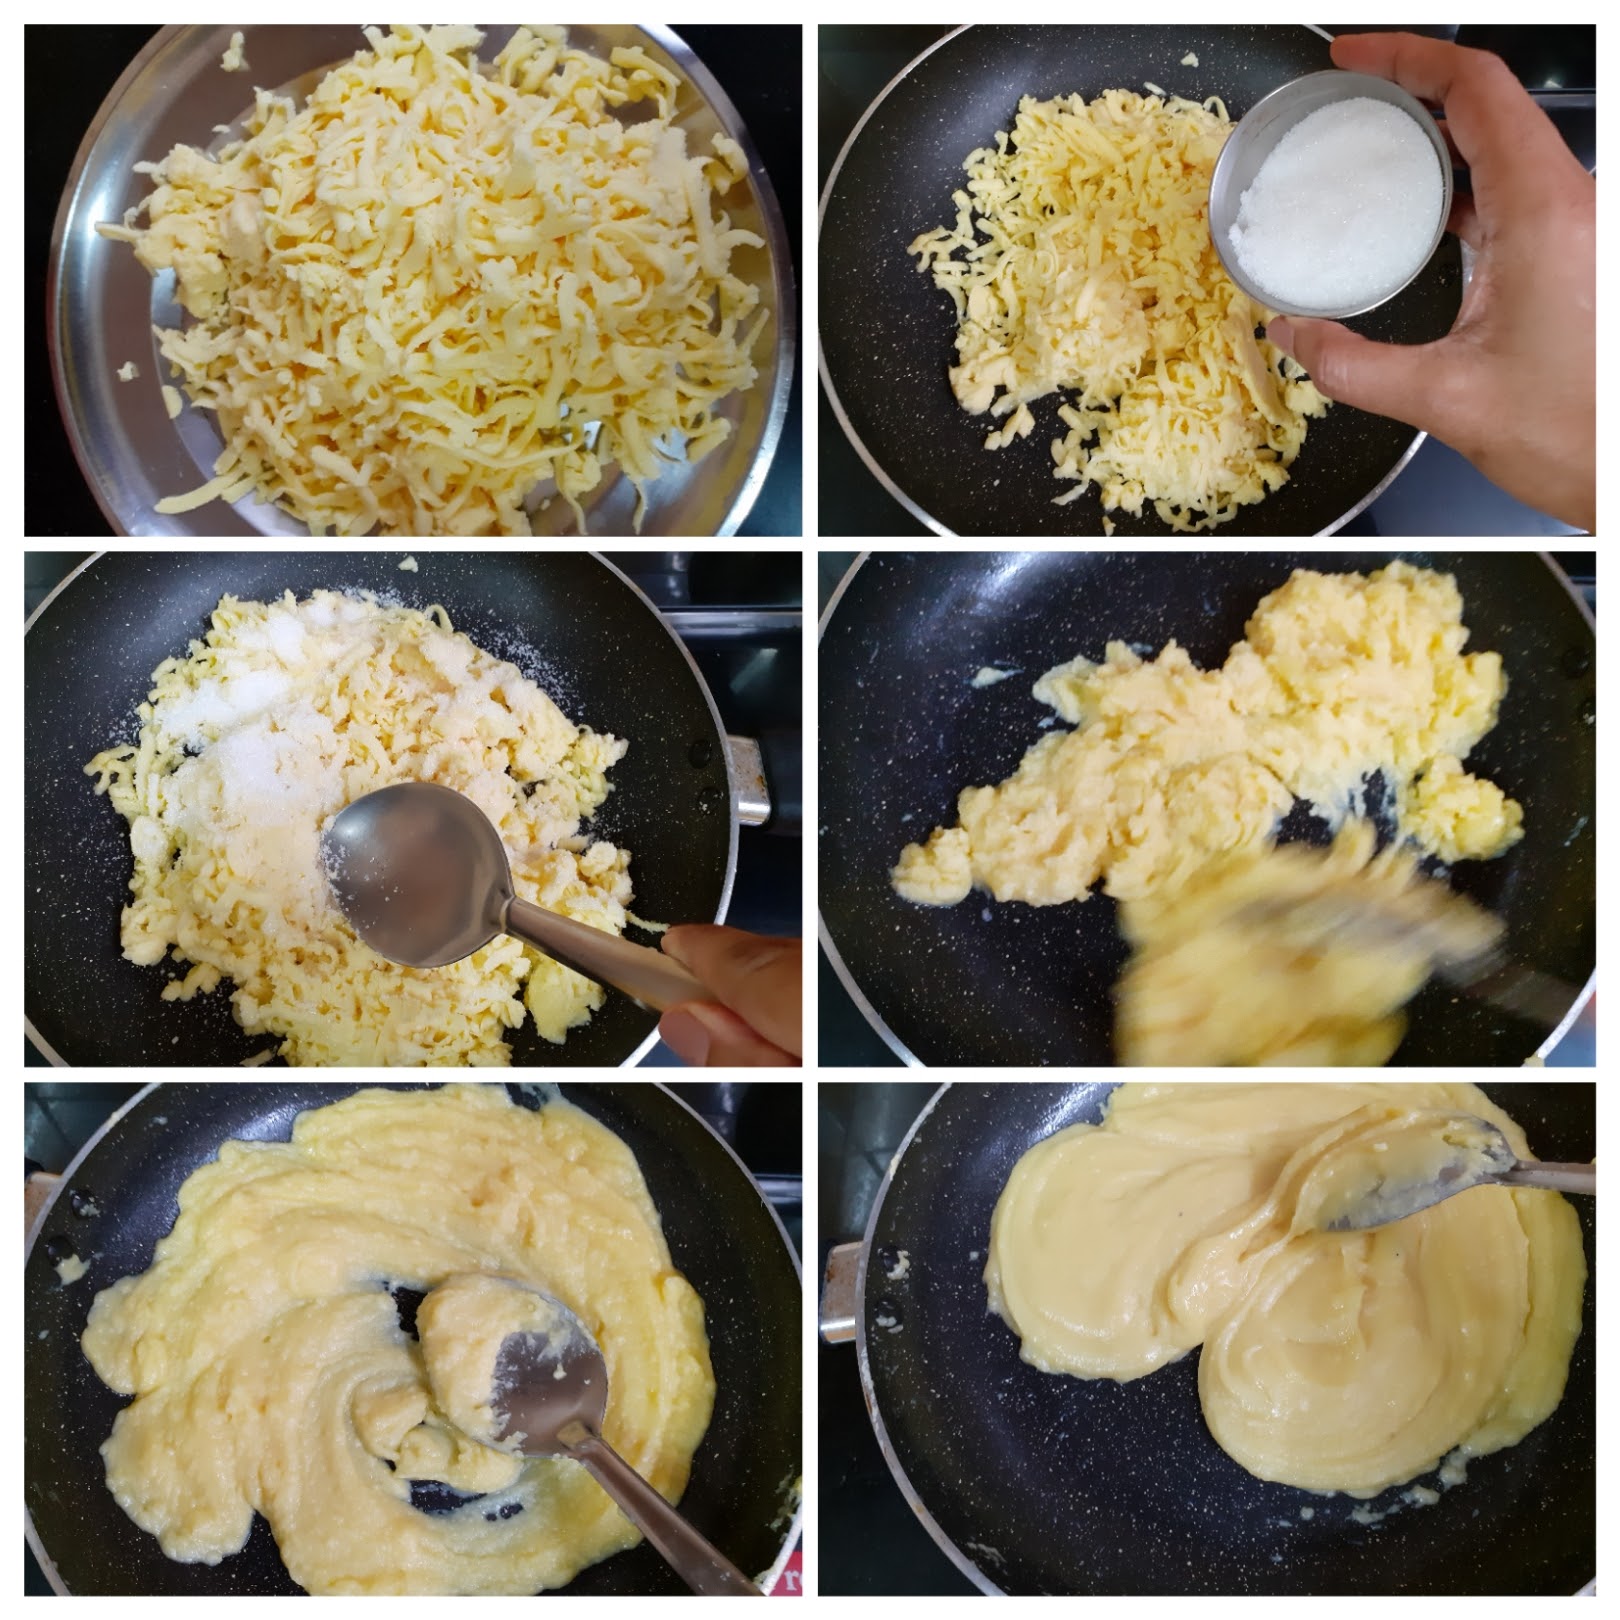
3. Now add the 3 tbsp Almond flour and combine with a spatula. Divide the Kova into 15 equal portions. Divide the Coconut stuffing also into 15 equal portions, shaping them as ovals. Apply ghee to your fingers and palms.Now take one roundel of Kova and flatten it on your palms with your fingers. Place the coconut stuffing in the centre and seal the edges as shown in the picture. Repeat for all the Kova and stuffing. Leave to set for 2 hrs.
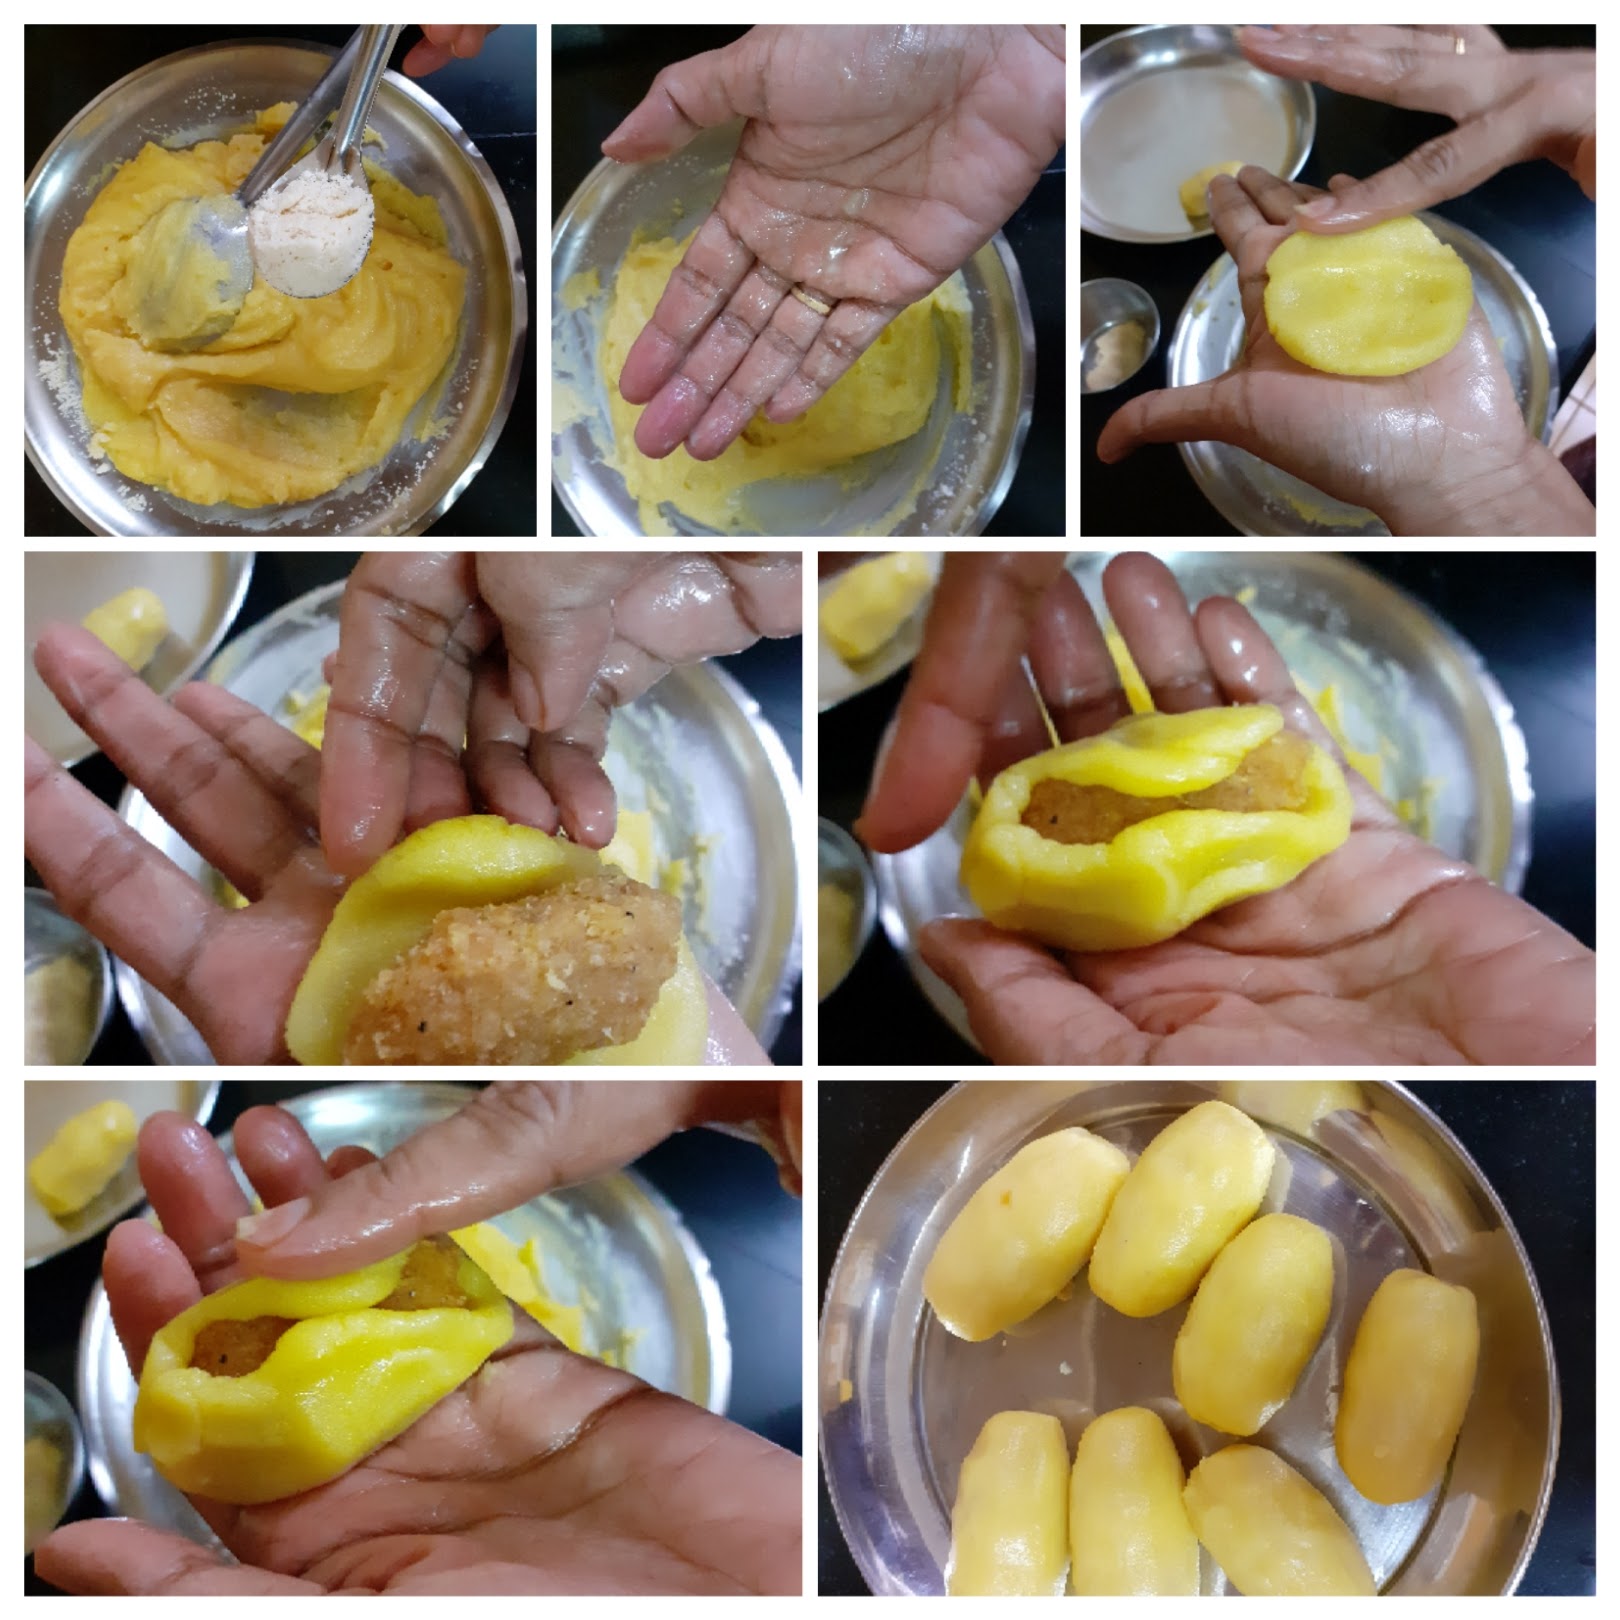
NOTES:
1. I have used Desiccated coconut, but fresh coconut can also be used. Quantity same as above.
2. As I have used only Almond flour I cannot suggest any other flour at the moment. Once i try it out with other lours shall update the recipe.
3. Almond flour is easily available in shops or almonds can be blanched in hot water dried for 1/2 an hour and then powdered in a mixie. The powder should be fine, without lumps.
4. This sweet can be stored outside for 3 days and in the fridge up to 15 days. Putting it in the fridge makes the Kova cover to become a little hard. Keep it out for a few minutes before consumption if storing in the fridge.
5. Store bought Kova is a light yellow in colour. If making at home it turns out white.
If you tried this recipe and liked it please comment below. I would love to hear from you. If you have a query about the recipe email us and ill respond as soon as I can.
Bhindi Aloo (Every Day Subjis)
This Subji is a simple stir fry with a mix of Ladyfinger and Potatoes as the name suggests. This is perfect for those rush hours in the morning or after work evenings when you want something simple that can be made with the least effort. This dish of Bhindi Aloo goes well with Rice and Roti or other flatbread varieties. It is healthy and becomes a good lunch box item for kids.
Without much detailing getting in to the recipe directly. While you are here check out my other Subji and curry recipes like Paneer Khurchan, South Indian Kurma, Methi wale Baingan, Roasted Eggplant 2 ways, Paneer Mava Curry and more…
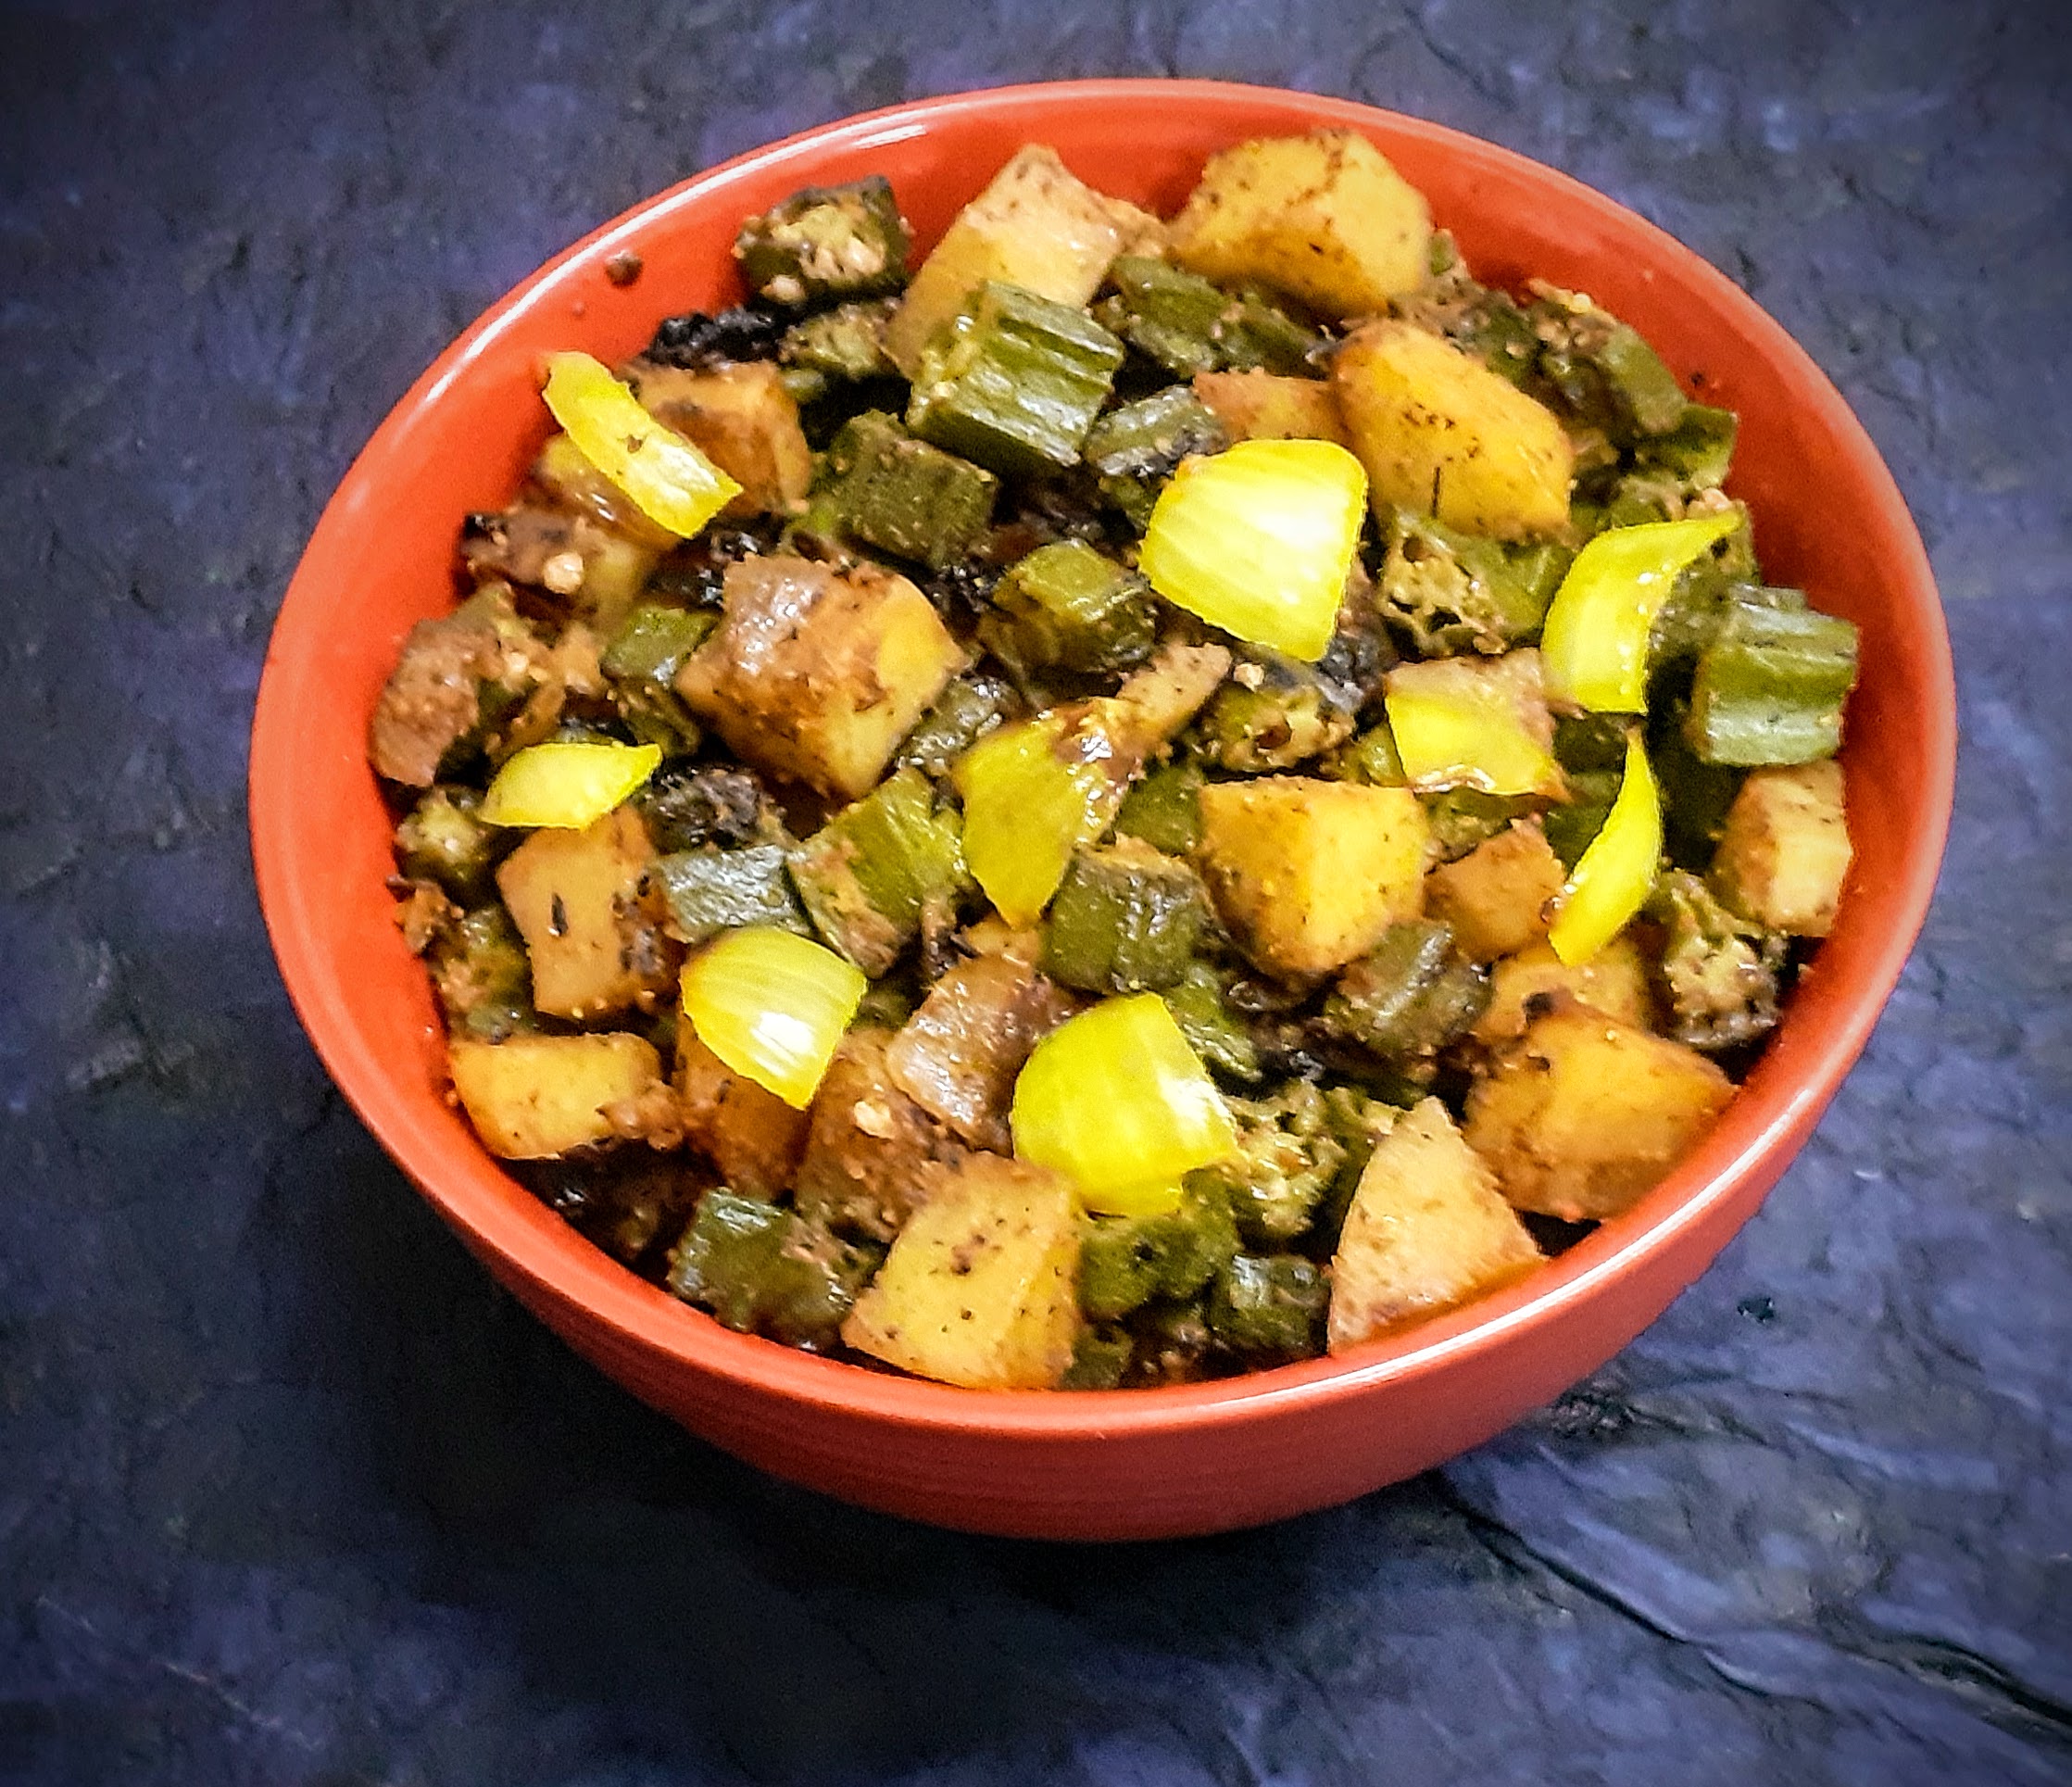
TOTAL TIME: 30 MINS COURSE:MAIN
CUISINE:INDIAN SERVINGS: 4
AUTHOR: RAJNI RAM
Ingredients:
Onion 1 large cut into petals
Bhindi/Okra/Ladysfinger 200 gm cut to 1 inch length
Potato 1 large or 2 medium diced
Cumin Seeds 1 tsp
Turmeric powder 1/2 tsp
Red chilli powder 1 tsp
Coriander powder 1 tsp
Fennel powder 1 tsp
Amchur powder 1/4 tsp
Garam Masala 1/2 tsp
Salt as required
Oil for sauteing
Directions:
In a Kadai or Pan heat oil. When its hot add the Cumin seeds and let them crackle. Add the turmeric powder followed by the chopped onions and saute until the onions start turning brown. Now add the diced potatoes and continue to saute. When the Potatoes are half done add the Bhindi and continue to saute. Keep stirring in between so that the vegetables don’t burn. When the Ladysfinger are half done add salt, stir nicely, and cover the Kadai for precise 2 minutes. After 2 minutes open the lid and add Red chilli powder, Coriander powder, fennel powder and Amchur(dry mango) powder and mix nicely. Check for doneness of the Aloo and Bhindi by mashing between your fingers. When done add the Garam Masala powder and turn off the stove. The simple and healthy Bhindi Aloo is ready to serve wit our choice of rice or roti.
STEPWISE RECIPE FOLLOWS:
1. In a Kadai or Pan heat oil. When its hot add the Cumin seeds and let them crackle. Add the turmeric powder followed by the chopped onions and saute until the onions start turning brown.
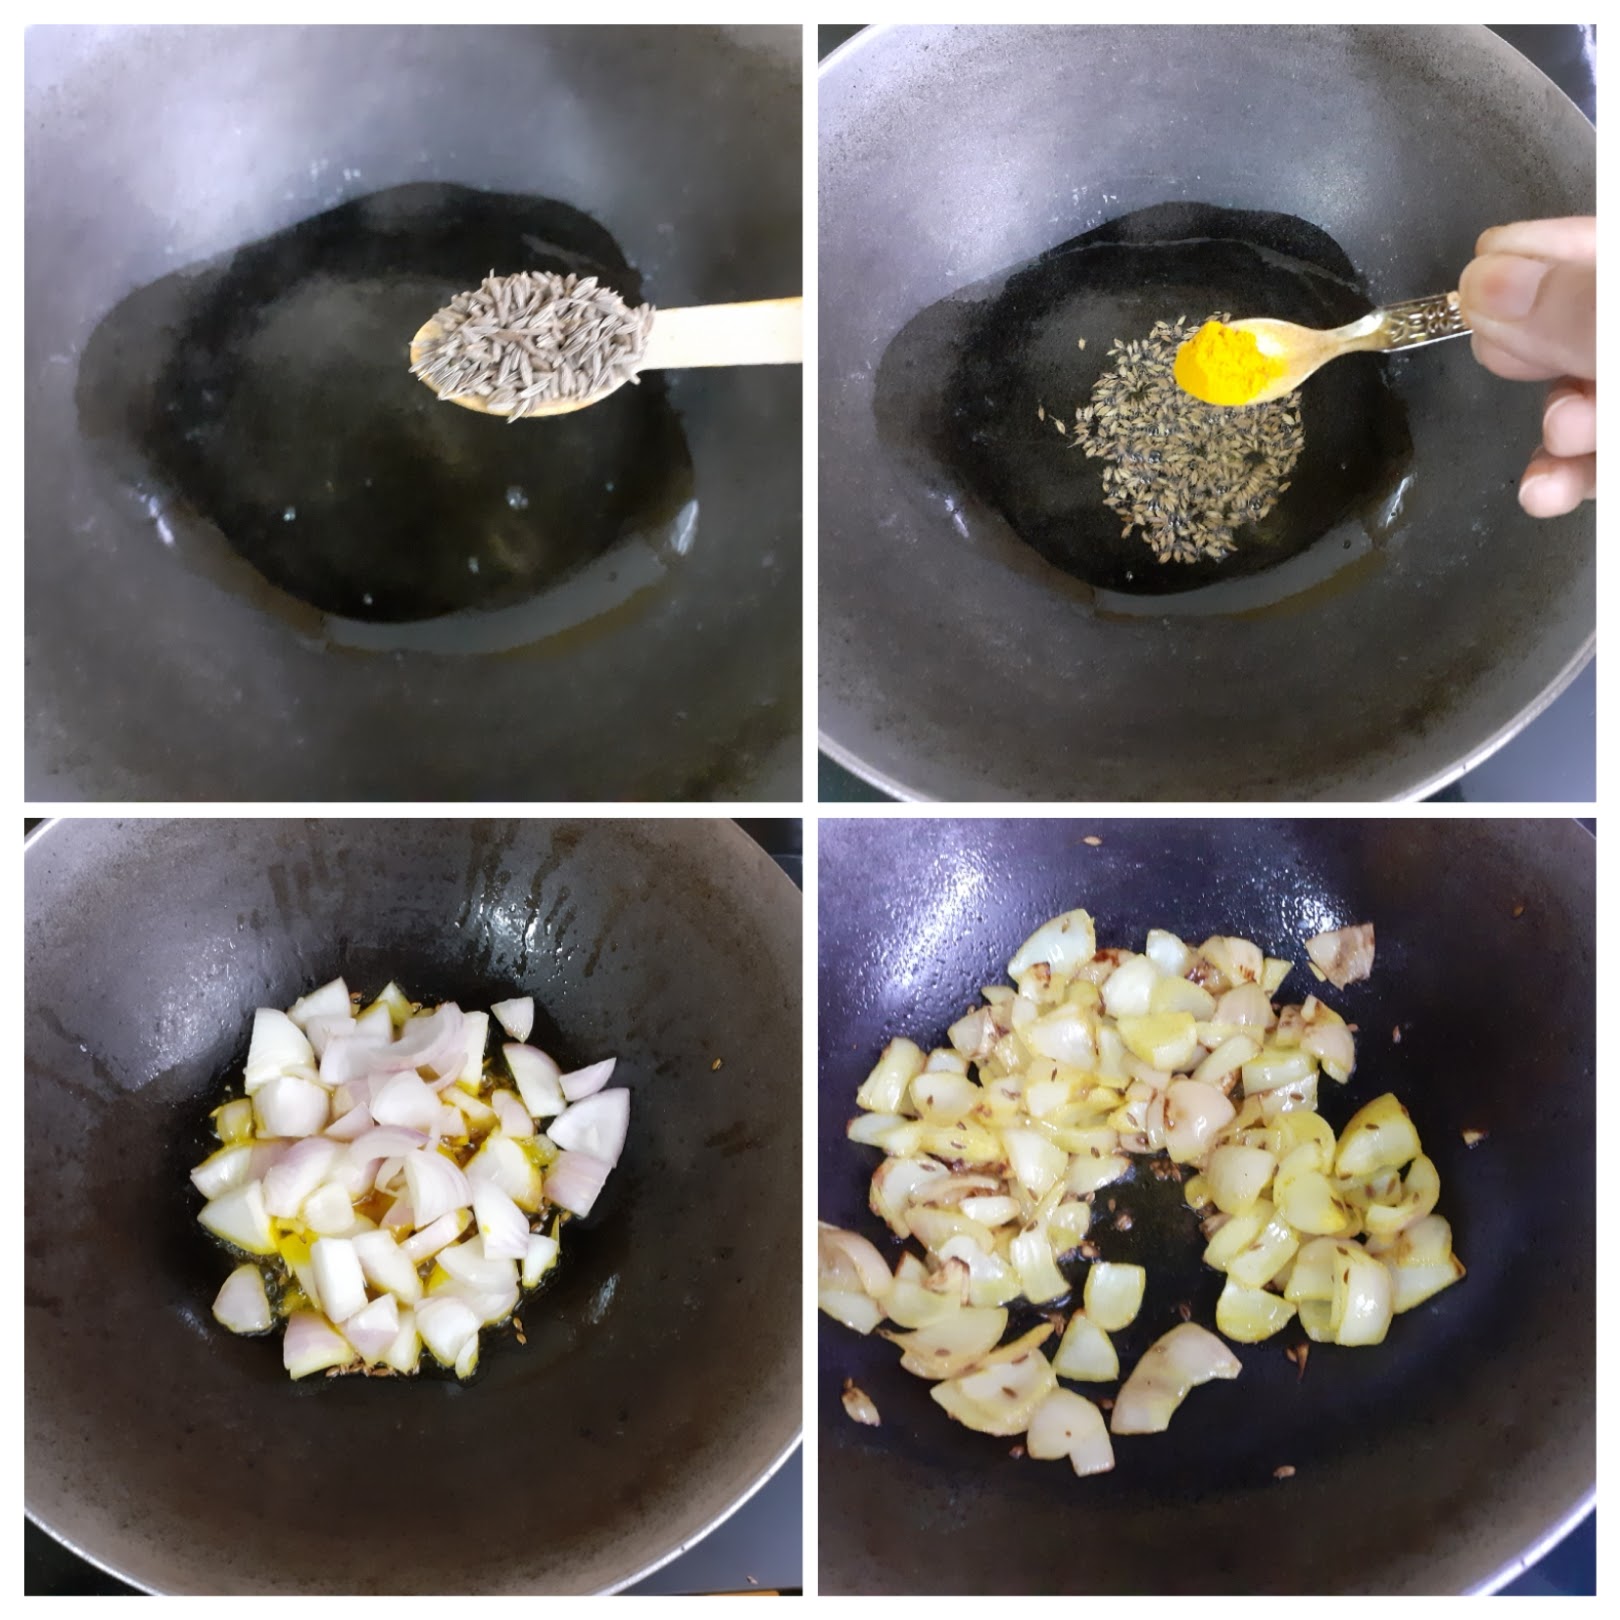
2. Now add the diced potatoes and continue to saute. When the Potatoes are half done add the Bhindi and continue to saute. Keep stirring in between so that the vegetables don’t burn.
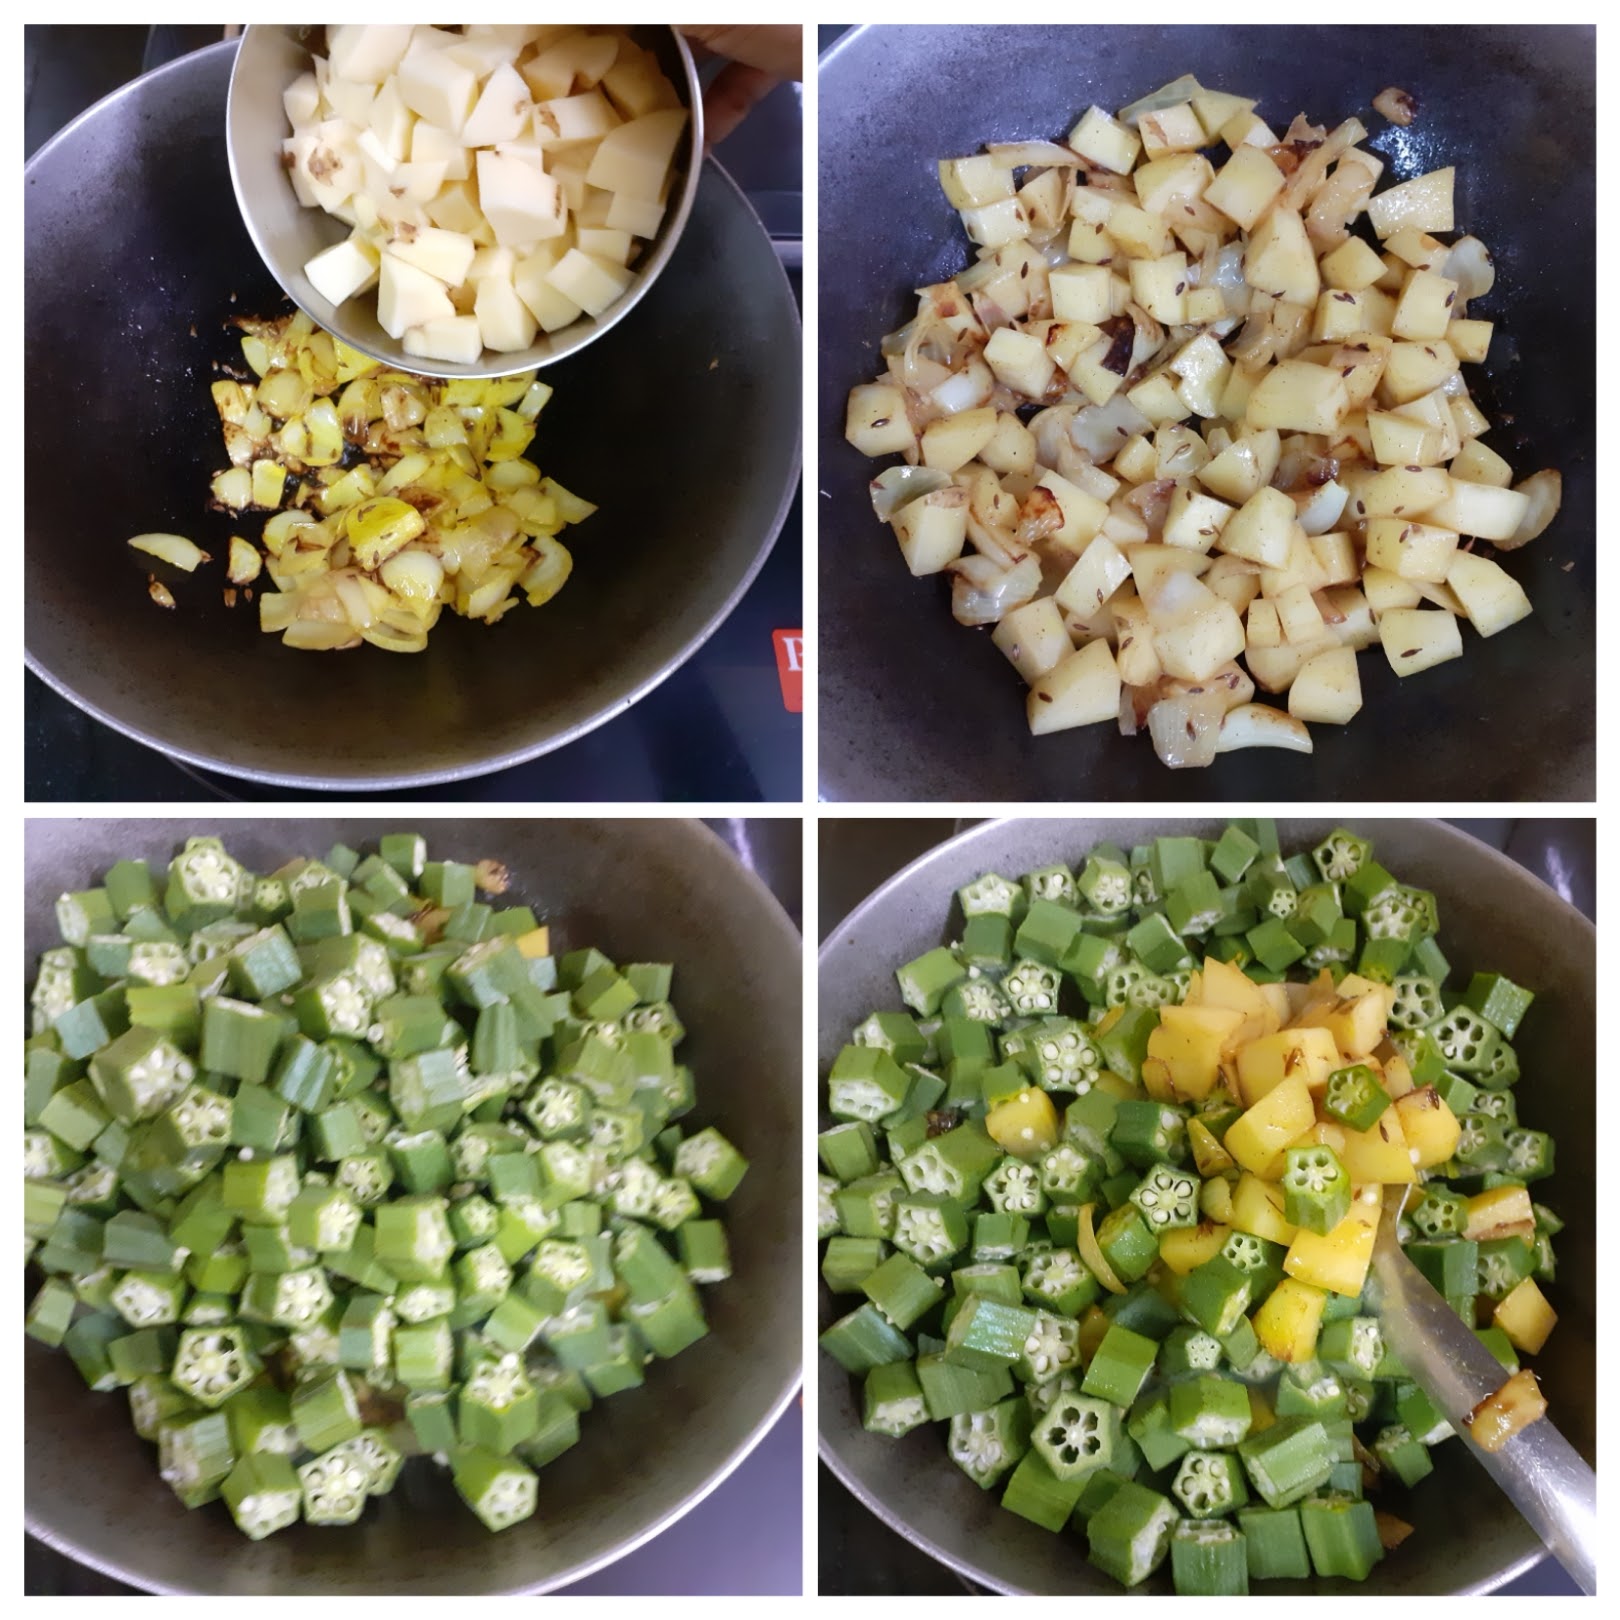
3. When the Ladysfinger are half done, add salt, stir nicely, and cover the Kadai for precise 2 minutes. After 2 minutes open the lid and add Red chilli powder, Coriander powder, fennel powder and Amchur(dry mango) powder and mix nicely.
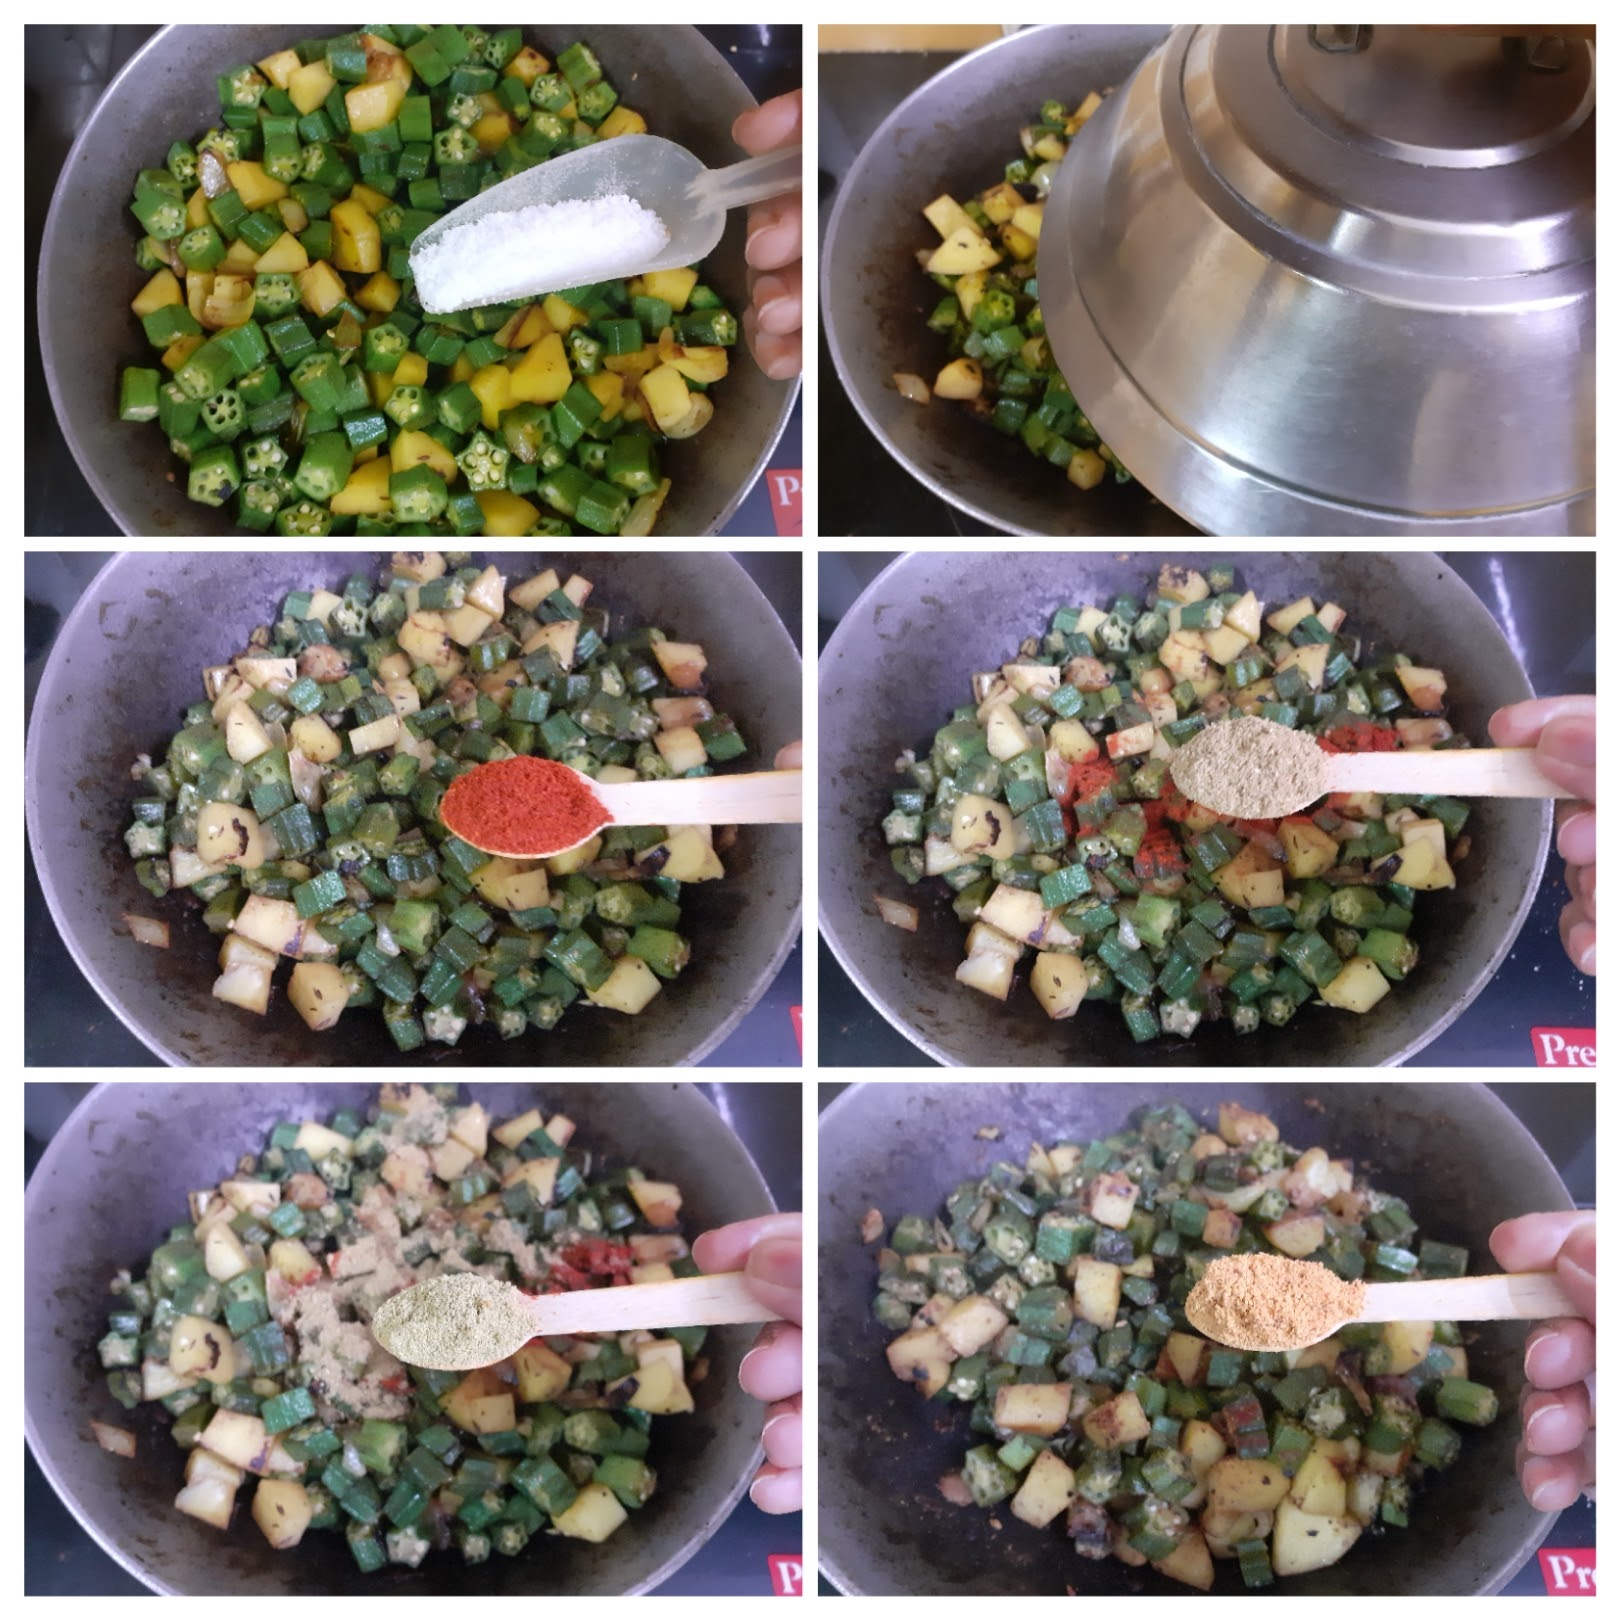
4. Check for doneness of the Aloo and Bhindi by mashing between your fingers. When done add the Garam Masala powder and turn off the stove. The simple and healthy Bhindi Aloo is ready to serve wit our choice of rice or roti.
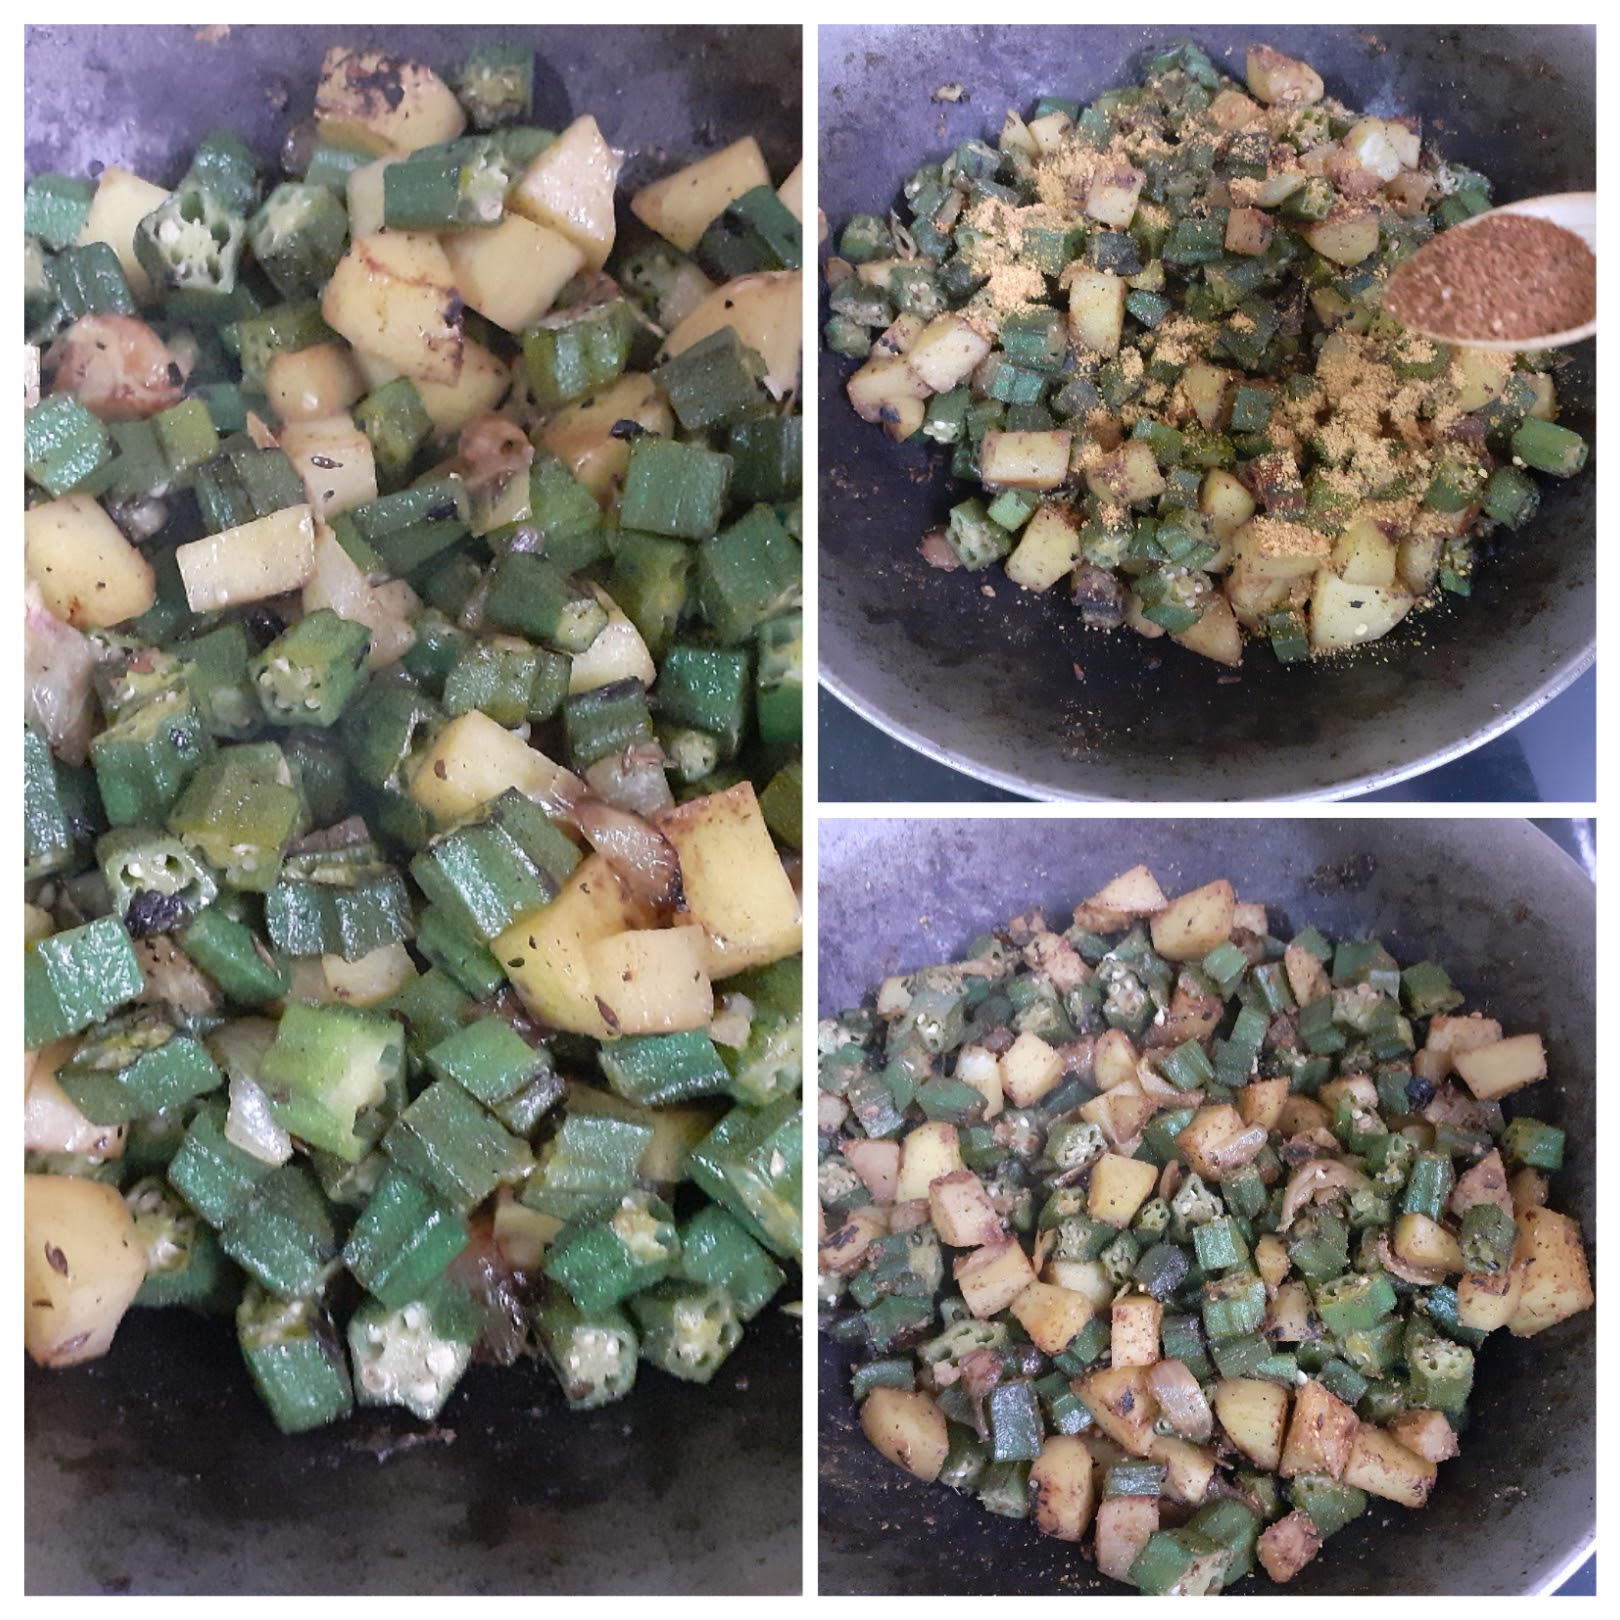
NOTES:
1. The Bhindi/Ladysfinger can sometimes turn slimy. To avoid this Pre cut the Bhindi and keep in the fridge or put it on a paper to absorb the moisture.
2. Alternately you can squeeze 1/4 of a lemon if you find that it is turning slimy.
3. Adding quarter spoon of sugar helps to retain the green colour of the Bhindi.
4. If after adding all Masala powders if you subji still looks a little moist and not crisp and dry, add 1 tbsp bread crumbs.
If you tried this recipe and liked it please comment below. I would love to hear from you. If you have a query about the recipe email us and ill respond as soon as I can.
Paneer Khurchan
Paneer Khurchan is a simple dish made with the most minimum ingredients. It is a simple subji to go with Rotis, Phulkas, Parathas and also Dal chawal. The beauty of this dish is that, it is mildly spiced and flavoured and is the best option for those days when the craving is for a simple meal.
This dish gets its name from the Hindi word “Khurachna” which means to scrape. In this recipe the Paneer can be added as either scrapings or as strips. Capsicum and tomatoes and some simple masalas are combined to bring out the flavours of the dish.
A simple dish doesn’t need a big introduction, just its simplicity will do. So here’s taking you to the recipe directly. While you are here please check out my other subji recipe like- Mushroom Do Pyaaza, Mixed Vegetable Curry, Palak Paneer, Creamy Palak in Coconut Milk, Mirch Ka Salan and more…
Here is the recipe for Paneer Khurchan-
PREP TIME: 10 MINS COOK TIME:15 MINS
TOTAL TIME: 25 MINS COURSE: MAIN
CUISINE: NORTH INDIAN SERVINGS: 4
AUTHOR: RAJNI RAM
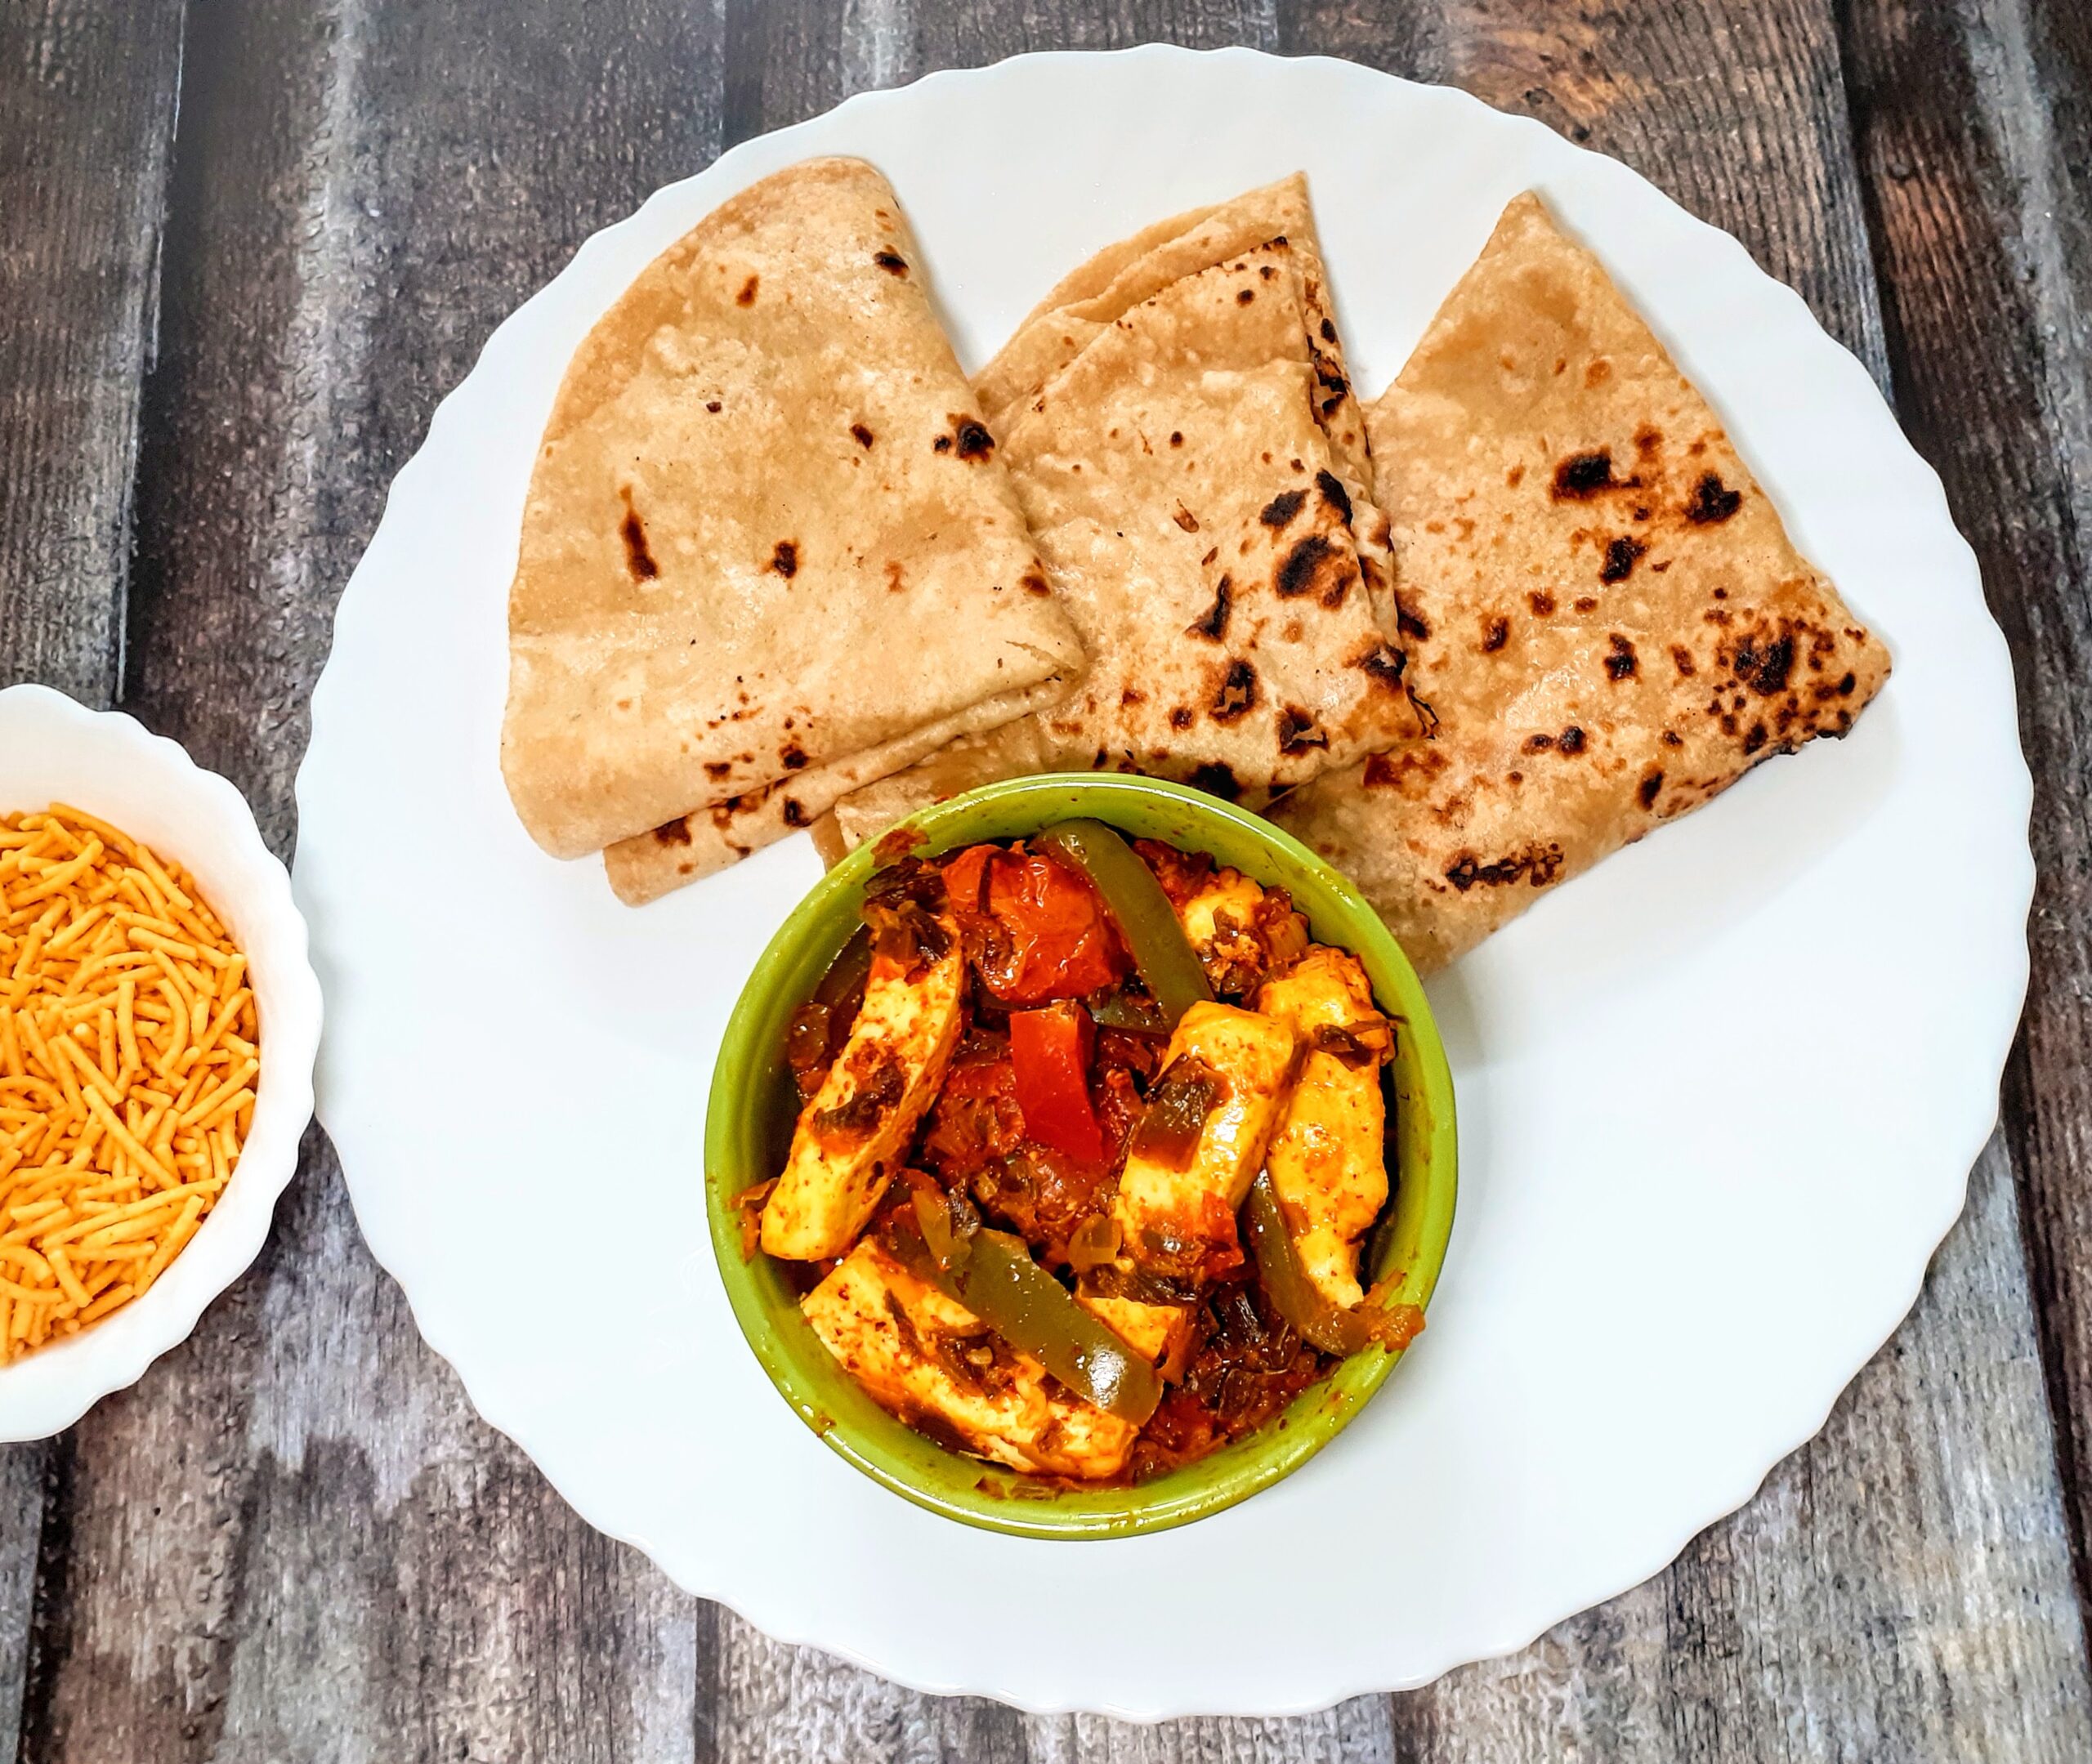
Ingredients:
Paneer 200 gm cut into strips
Capsicum 1 large cut into thin strips
Spring Onions/ Onions (one bunch/ 1 large)
Tomatoes 2 large chopped fine
Cumin 1 tsp
Turmeric powder 1/2 tsp
Ginger-garlic paste 1 tsp
Salt as required
Red chilli powder(regular) 1tsp
Kashmiri red chilli powder(optional) 1/2 tsp
Coriander powder 1 tsp
Green chilli 1 slit lengthwise
Garam masala powder 1/2 tsp
Oil for sautéing
Directions:
In a Pan or Kadai pour 1/2 tbsp oil and heat. When the oil is hot add the cumin seeds, followed by turmeric powder and the Spring onion(if in season or use regular onion). Sauté until the onions start turning brown and add the spring onion greens to it(if using). Sauté 30 seconds and add the ginger-garlic paste. Continue to sauté for another 30 seconds. Now add the chopped Capsicum strips and sauté on high heat, so that the capsicum don’t release much moisture. Sauté until the Capsicum are half cooked. They should retain the crunch and not turn limp. Now add the chopped tomatoes, followed by salt, red chilli powder, Coriander powder and Kashmiri red chilli powder and sauté until the tomatoes break and turn mushy. Now add the Paneer strips and the slit green chilli and toss well such that the masalas evenly coat the paneer. Cover and cook on low heat for 2 minutes. Remove cover, stir and add the Garam Masala and serve the hot Paneer Khurchan with rice or flat brad of your choice. Enjoy. Bon Appetit.
STEPWISE RECIPE FOLLOWS:
1. In a Pan or Kadai pour 1/2 tbsp oil and heat. When the oil is hot add the cumin seeds, followed by turmeric powder and the Spring onion or regular onion.
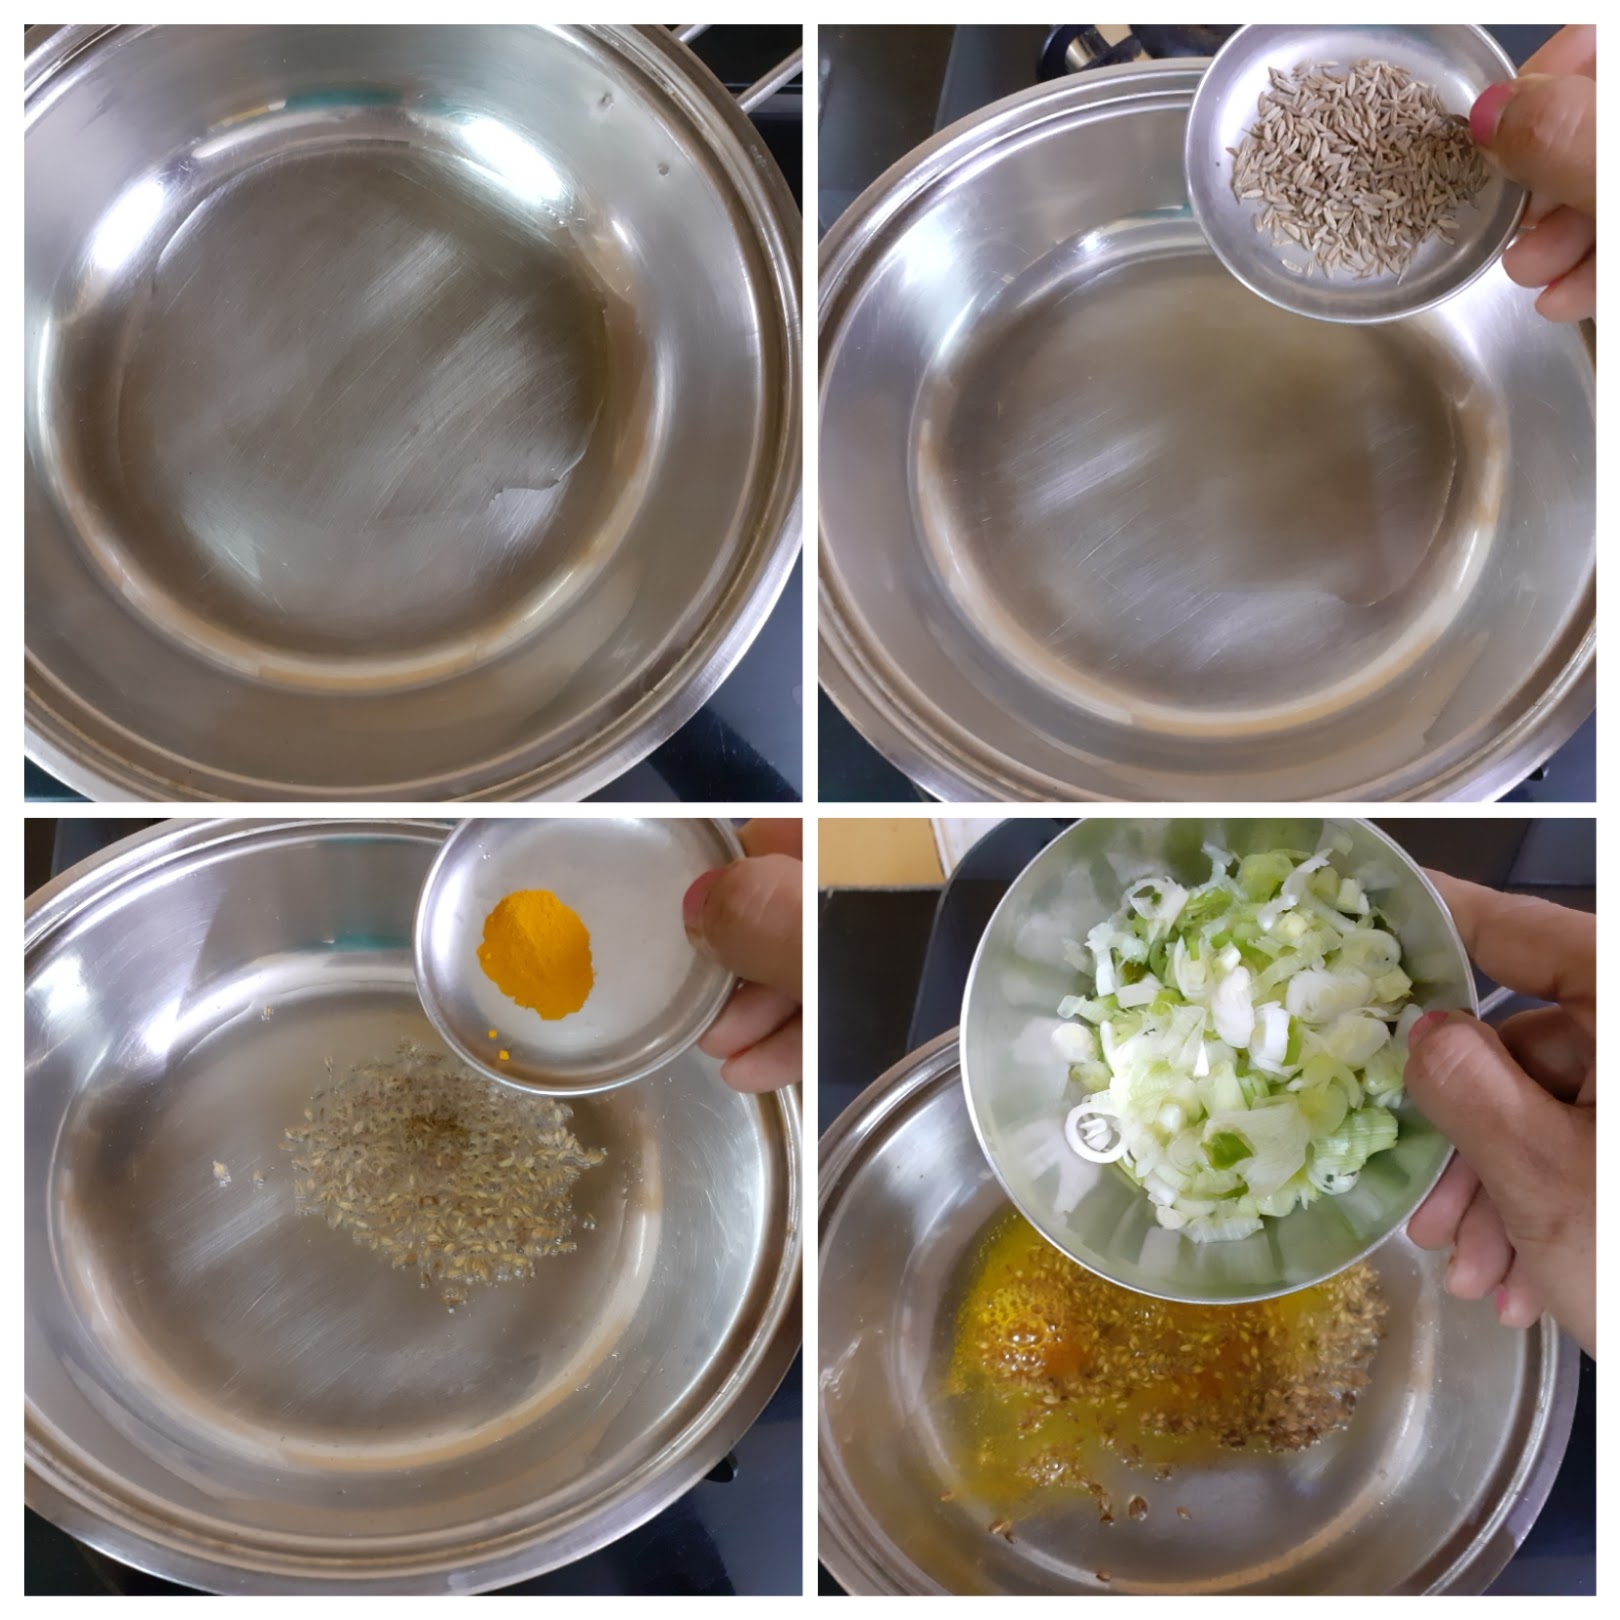
2. Sauté until the onions start turning brown and add the spring onion greens to it(if using). Sauté 30 seconds and add the ginger-garlic paste. Continue to sauté for another 30 seconds. Now add the chopped Capsicum strips and sauté on high heat, so that the capsicum don’t release much moisture.
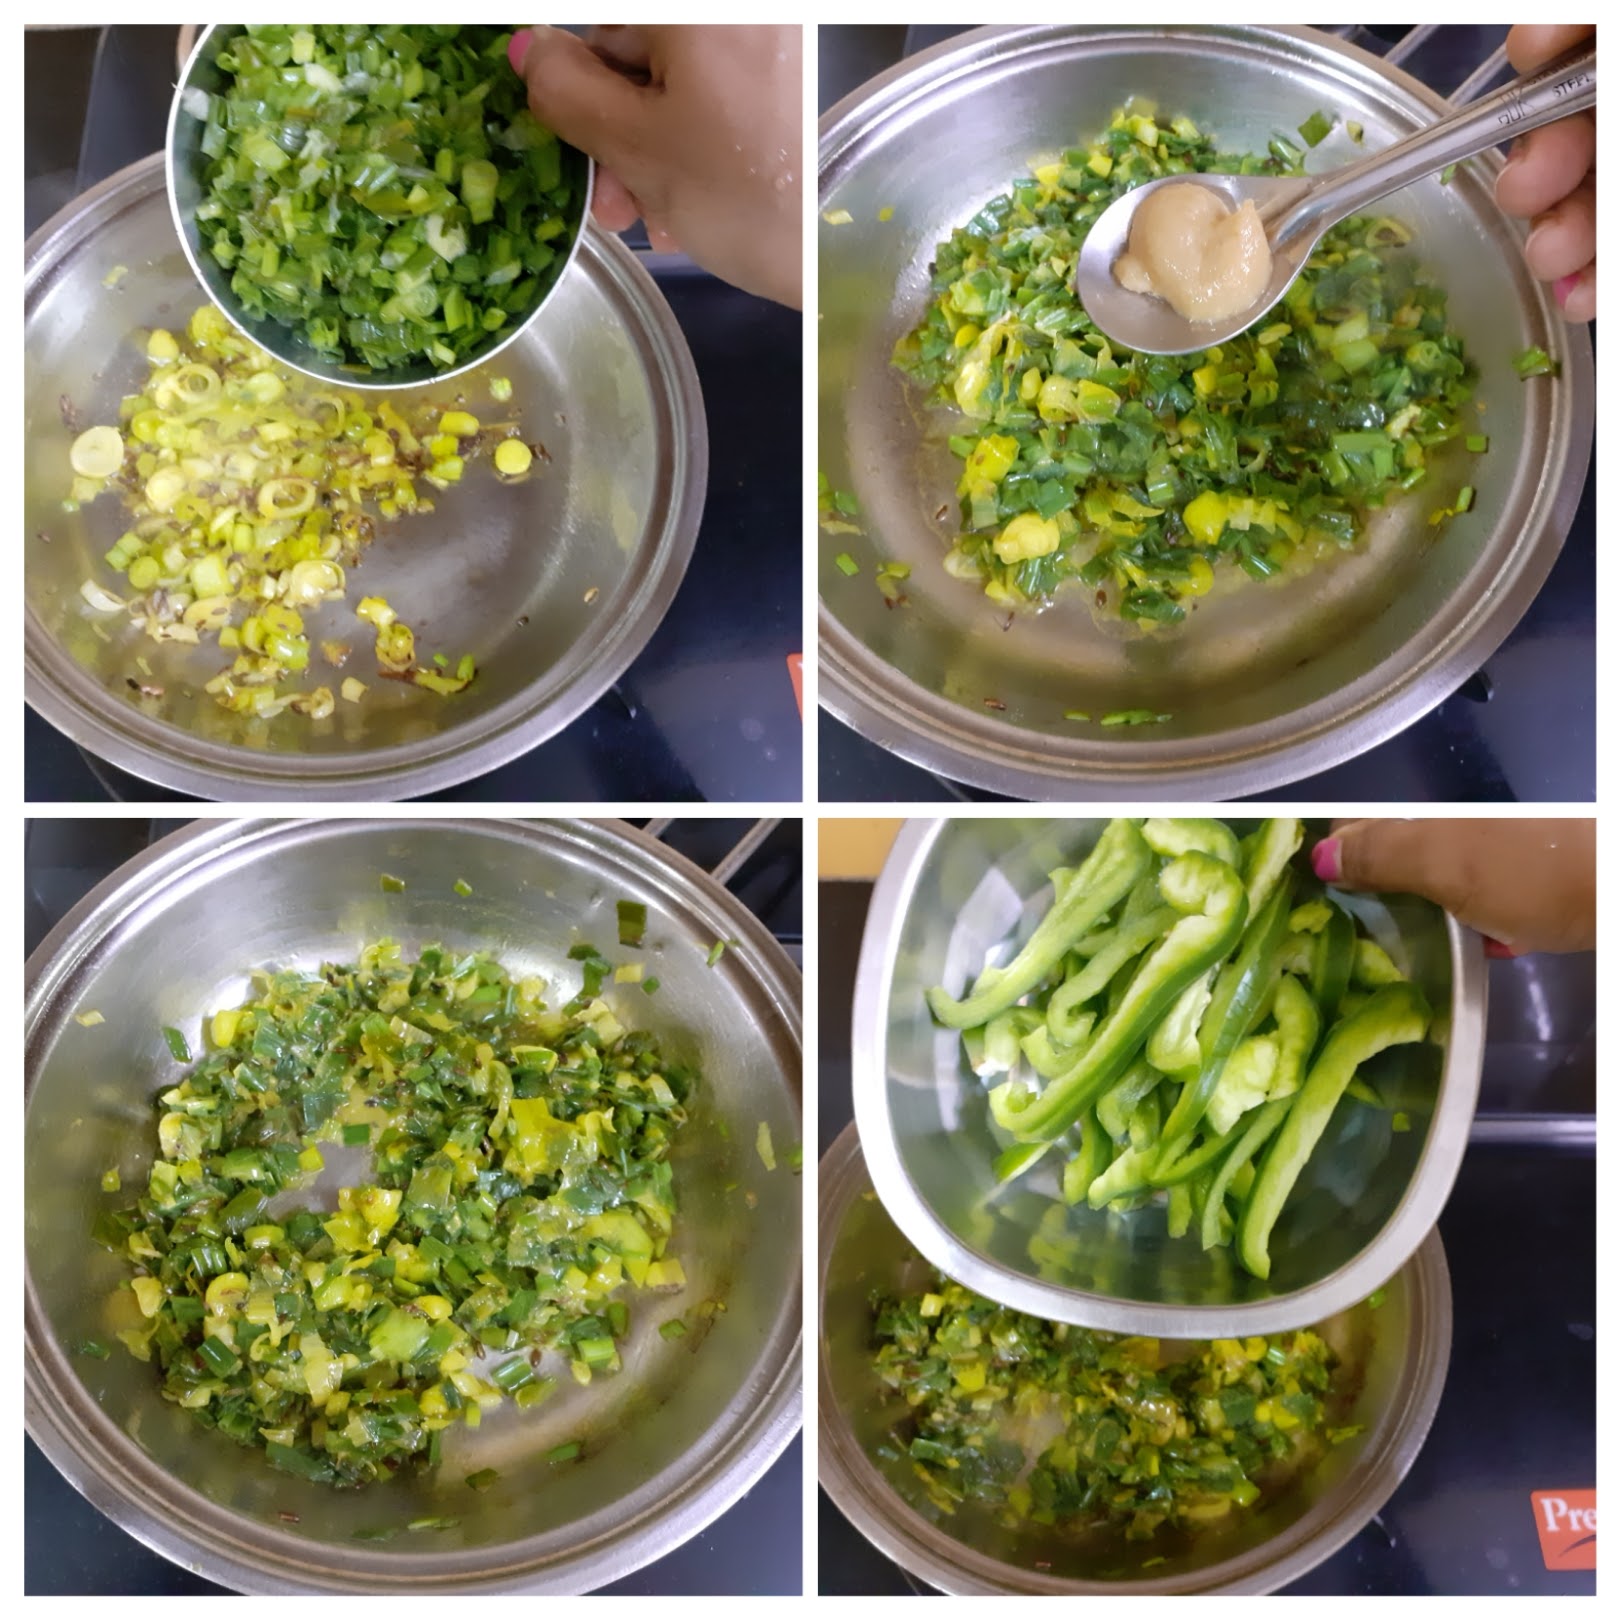
3. Sauté until the Capsicum are half cooked. They should retain the crunch and not turn limp. Now add the chopped tomatoes, followed by salt, red chilli powder, Coriander powder and Kashmiri red chilli powder and sauté until the tomatoes break and turn mushy.
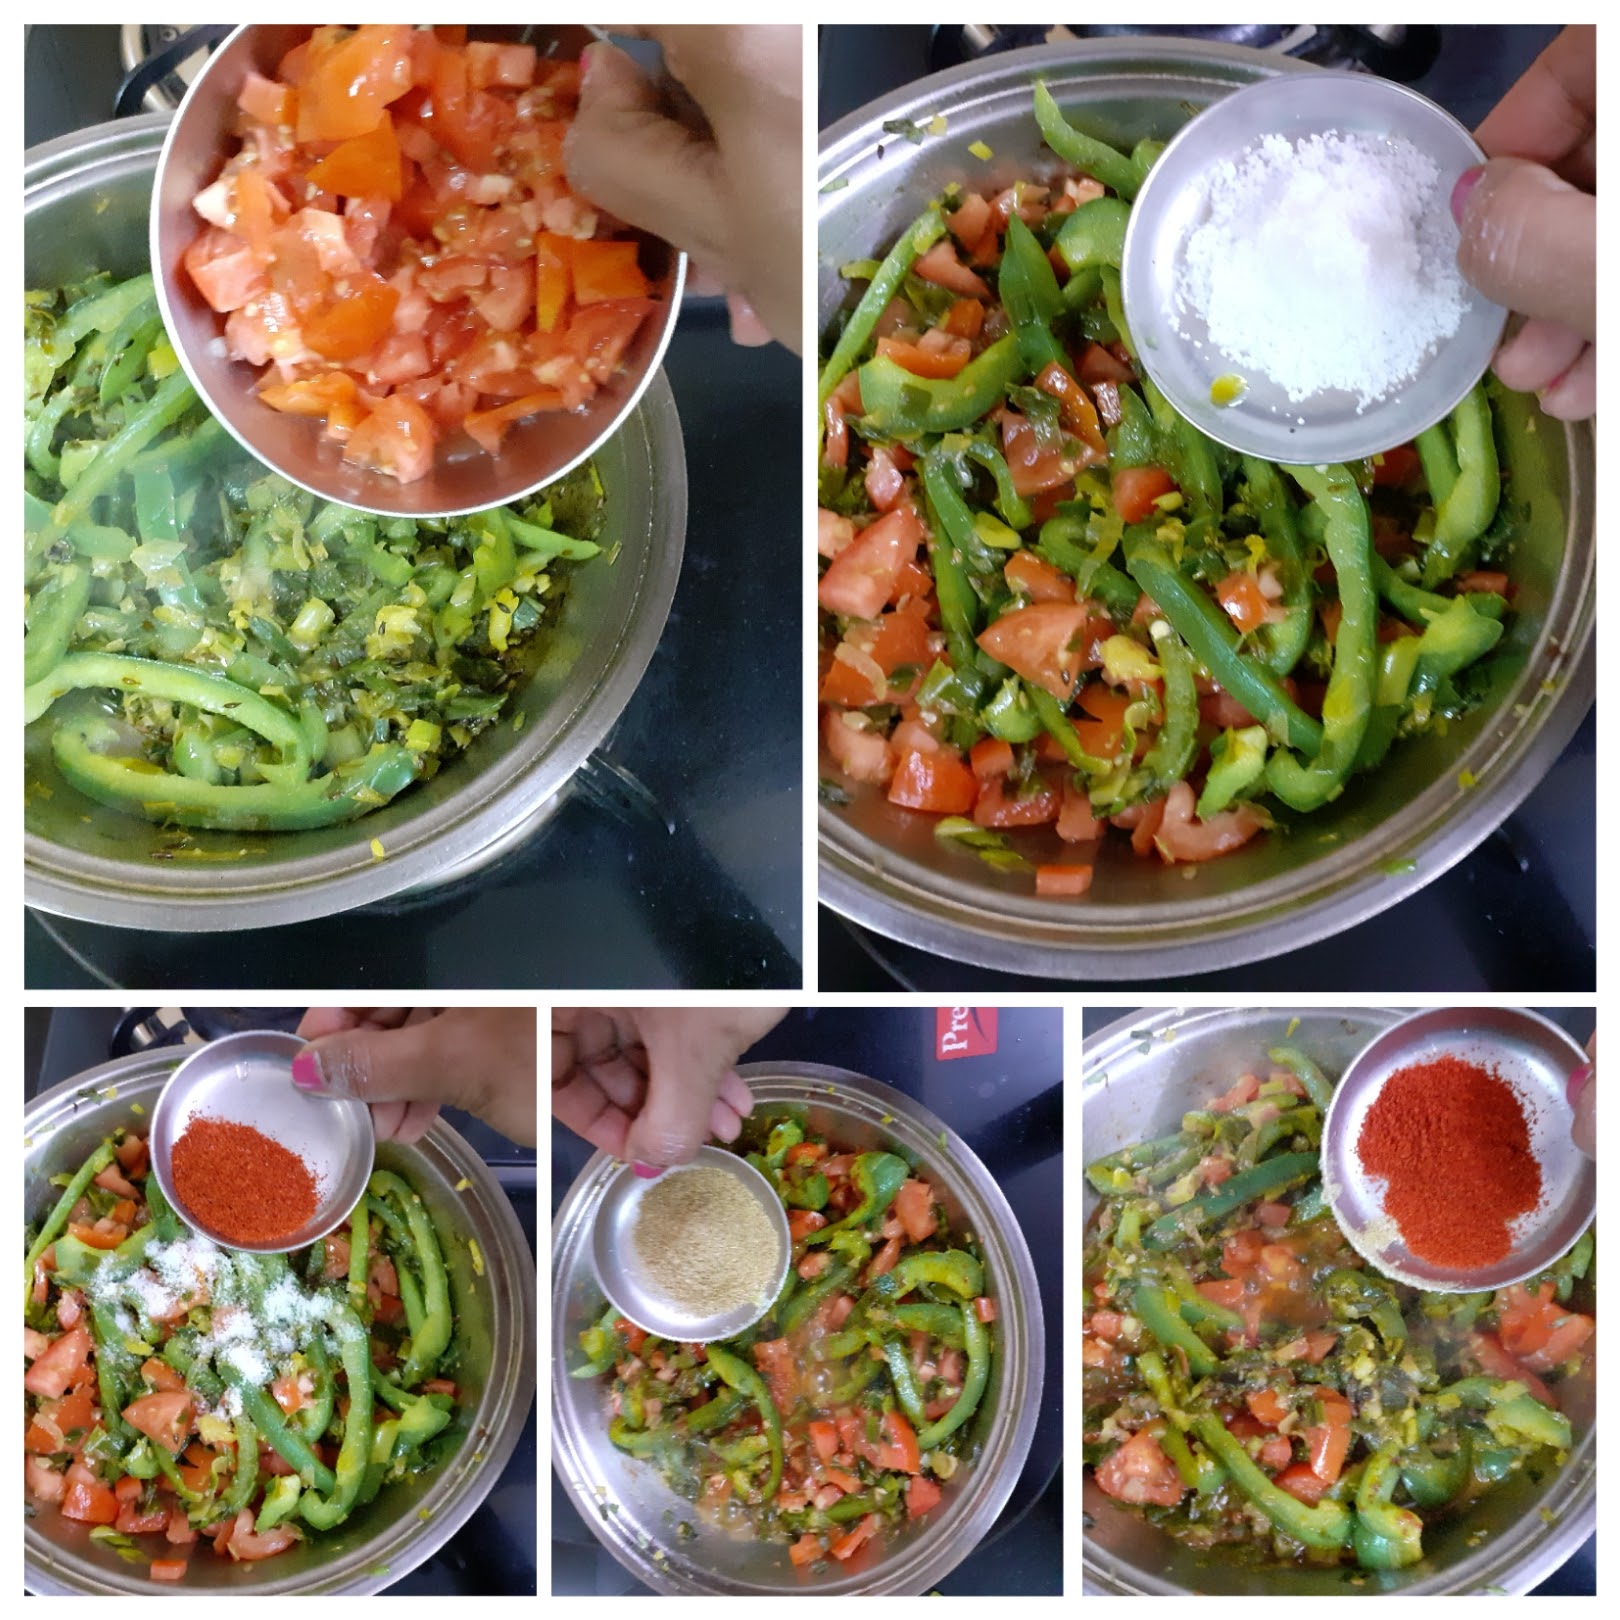
4. Now add the Paneer strips and the slit green chilli and toss well such that the masalas evenly coat the paneer. Cover and cook on low heat for 2 minutes. Remove cover, stir and add the Garam Masala and serve hot.
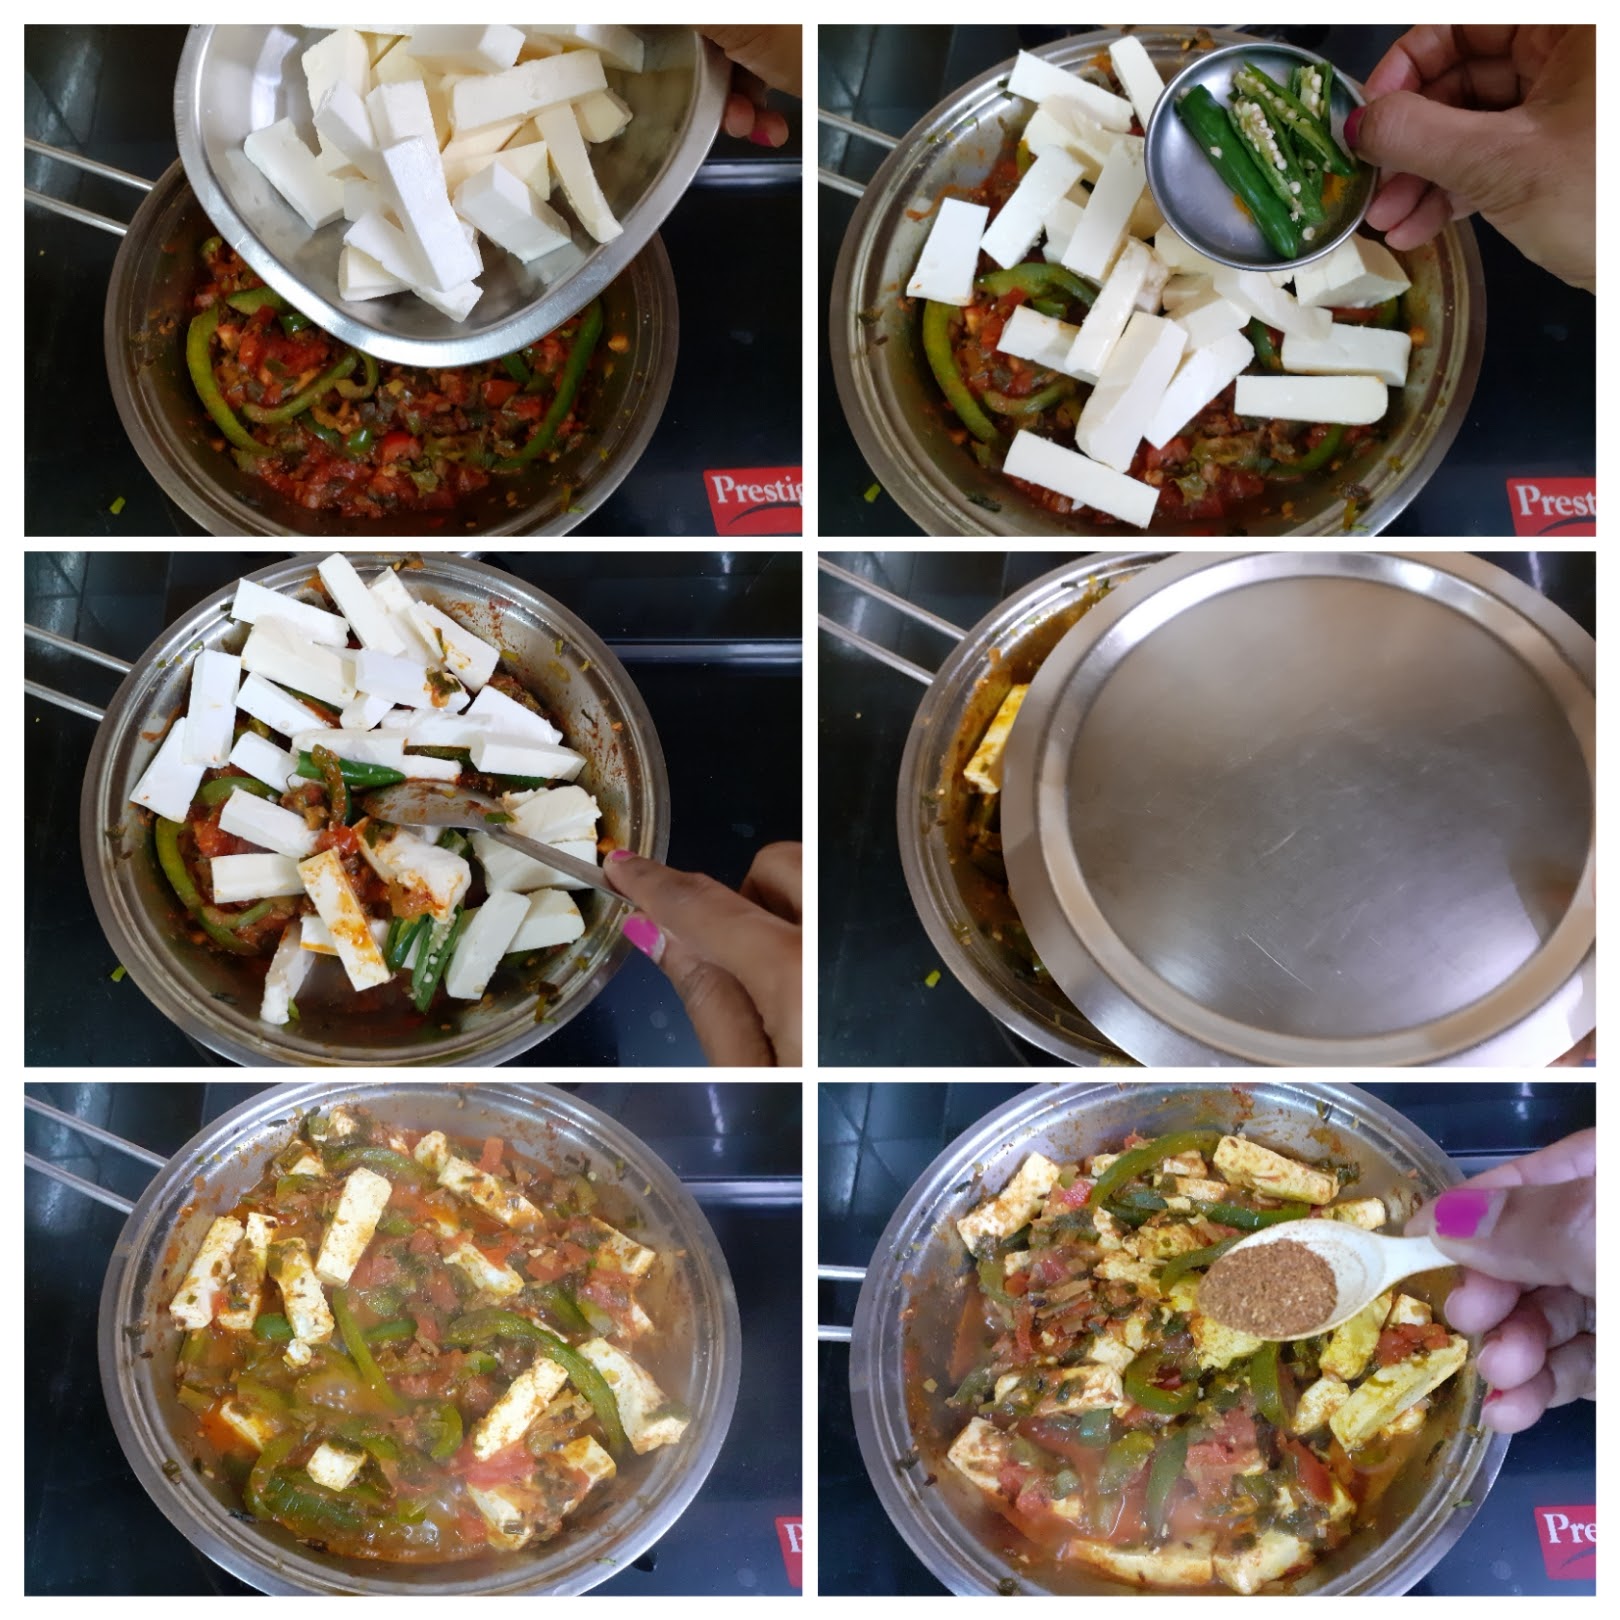
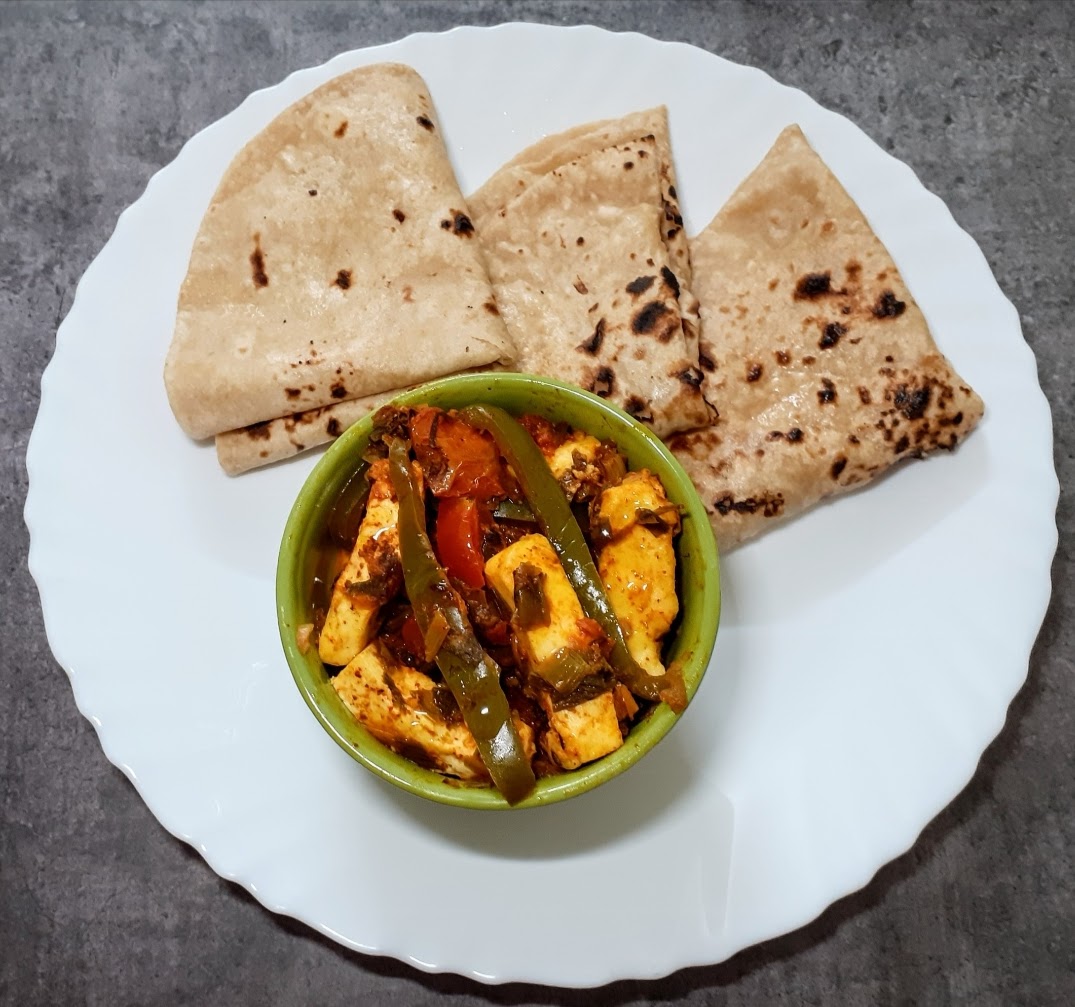
NOTES:
1. The dish actually uses regular onions. At the time i made these recipes Spring onions were in season, hence I used them. The Spring onion greens also impart a nice flavour to the dish.
2. No whole spices are used in this recipe.
3. While sautéing the Capsicum on high heat, keep stirring continuously so that they don’t get charred.
If you tried this recipe and liked it please comment below. I would love to hear from you. If you have a query about the recipe email us and ill respond as soon as I can.
Pachai Mochai Kuzhambu (Field Beans Gravy)
Though I may try fancy recipes from time to time, eat local and seasonal has always been my slogan. When it is carrot season I make my Gajar Halwa and during the Grape season my Grape conserve. Homemade is always a better option and the pandemic has taught us just that.
In south India December to February and specially the time around the harvest festival Pongal, is the season for Field Beans or Mocha Kottai as it is called in Tamil Nadu. These beans are used in the Pongal Kuzhambu that is made on the day of the Pongal festival, where in a Kuzhambu or Sambar is made with all the freshly harvested vegetables, which includes tubers, green vegetables and legumes likes the Field Beans.
I usually make this recipe in the Chettinad style where a the beans are cooked in a tangy gravy with garlic and coconut paste. This time however, I have tried it out in a different style which tasted very good and was an instant hit in my house. I added some Potatoes too and it turned out like a two in one curry, one that can go with rice as well as with Paratha, chapati etc. The vessel just went empty. In my house when the vessel goes empty and nothing remains for dinner, it means the dish was super good????, and here comes this dish called the Pachai(fresh) Mochai Kuzhambu with a different gravy.
While you are here checkout my other recipes like Pachai Sundakkai Kuzhambu, Bonda Morkuzhambu, Vatha Kuzhambu, Parupu Urundai Kuzhambu and more…
Here is the recipe for Pachai Mochai Kuzhambu for you-
PREP TIME: 20 MINS COOK TIME:15 MINS
TOTAL TIME: 35 MINS COURSE: MAIN
CUISINE:INDIAN SERVINGS: 4
AUTHOR: RAJNI RAM

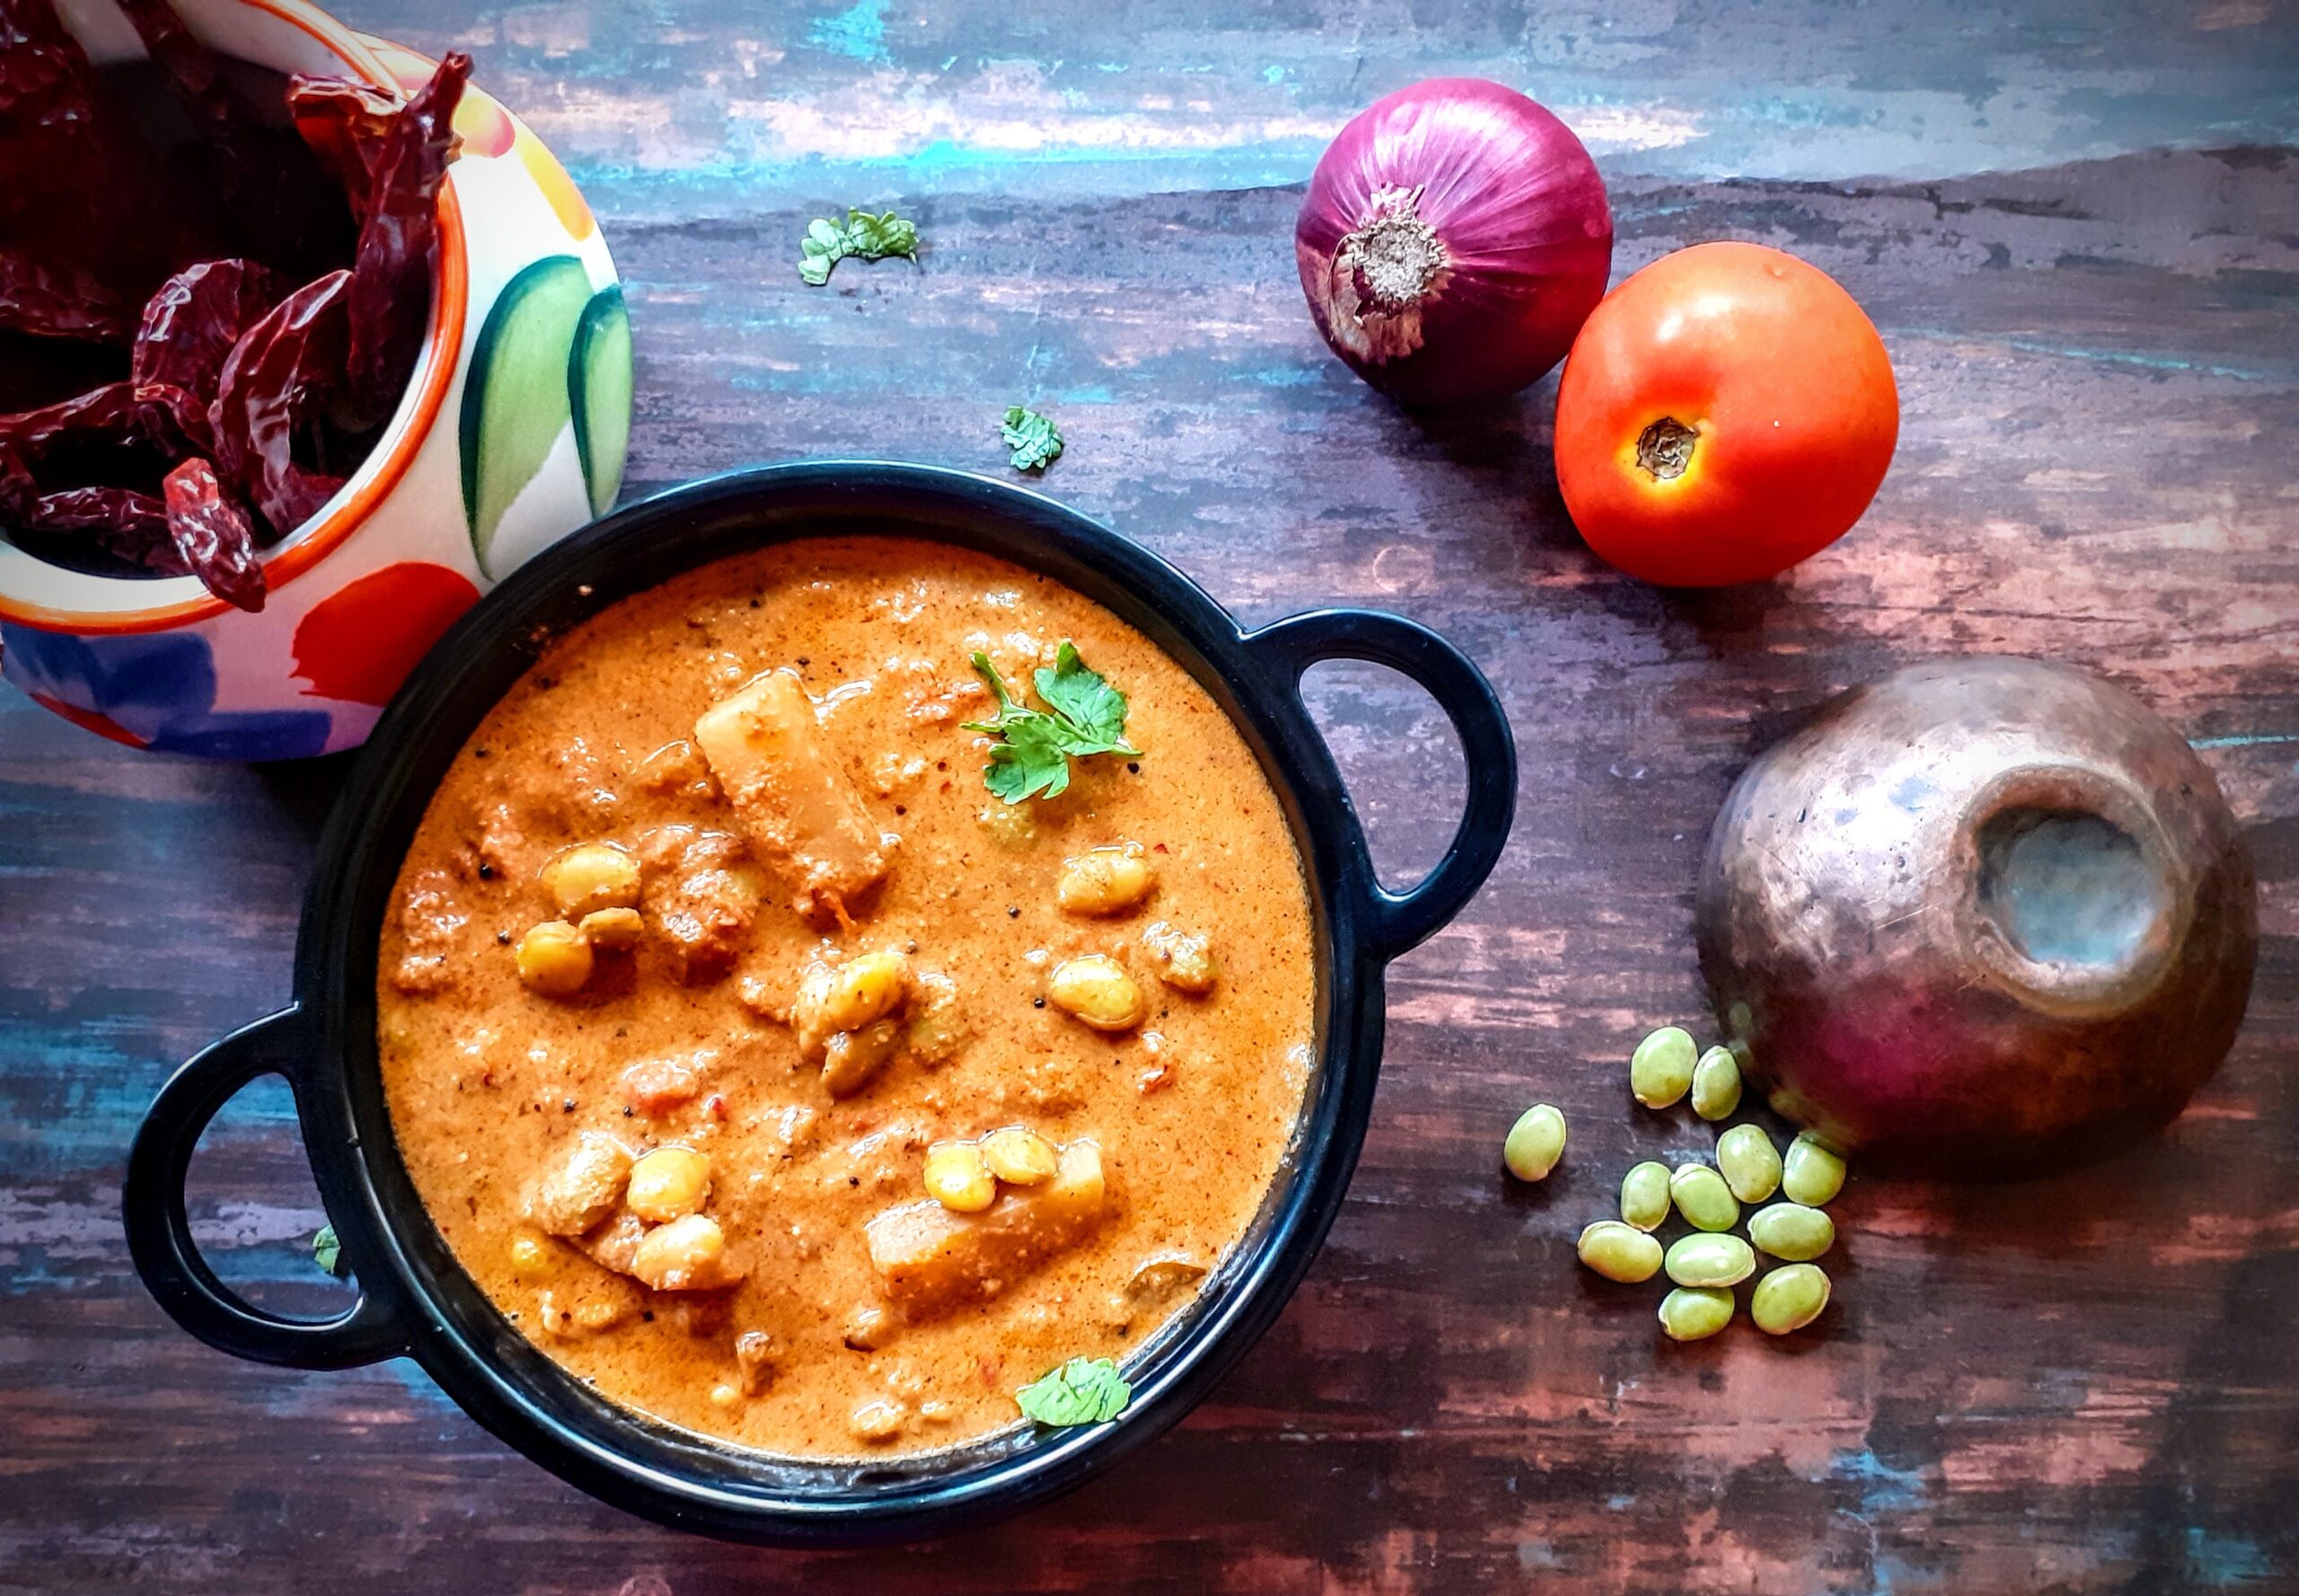
Ingredients:
Pachai Mochai Kottai (fresh Field Beans) 200 gm (pressured cooked for 5 whistles)
Onion 1 roughly chopped
Tomatoes 2 roughly chopped
Potato 1 large diced
Sambar Powder 1 tbsp. (refer notes)
Red chilli powder 1 tsp
Tamarind gooseberry sized ball pulp extracted
Jaggery a small bit
To be roasted and ground:
Peanuts 2 tbsp.
Dry red chillies 3 large ones
Fennel 1 tsp
Poppy seeds/Khus khus 1 tsp
Coconut 2 tbsp
To temper:
Oil 1 tbsp
Mustard seeds 1 tsp
Mustard seeds a pinch
Chana dal 2 tsp
Asafoetida 1/2 tsp
Dry red chilli 1 broken
Curry leaves a few
Directions:
In a big Kadai/pan put the oil and heat. Add all ingredients mentioned under “to temper”. When the mustard seeds begin to pop add the onion and sauté. When the onions start turning a light brown, add the potatoes and continue to sauté for a minute or two. Now add the chopped tomatoes, followed by salt, Sambar powder, red chilli powder, and the cooked Mocha Kottai(field beans). Mix nicely and let it cook for 2 minutes. Now pour the tamarind extract and let the potatoes cook. Keep the flame low. In the meanwhile take a small kadai and add 1 tsp oil and roast all ingredients mentioned under “to be roast and ground”. Start by adding the groundnuts first, followed by coconut, dry red chilli, fennel seeds and poppy seeds, Roast until the coconut starts turning a light brown in colour. Cool and grind to a smooth paste adding a little water. The potatoes must have cooked by now. Check for doneness of potatoes and add the ground paste and mix well. Dilute adding 2 cups water and continue to cook. The gravy will come together and the consistency will thicken. Add a small bit of jaggery and stir and put off the flame. The delicious Pachai Mochai Kuzhambu is ready to serve. Enjoy. Bon Appetit.
STEPWISE RECIPE FOLLOWS:
1. In a big Kadai/pan put the oil and heat. Add all ingredients mentioned under “to temper”. When the mustard seeds begin to pop add the onion and sauté.

2. When the onions start turning a light brown add the potatoes and continue to sauté for a minute or two. Now add the chopped tomatoes, followed by salt, Sambar powder, red chilli powder, and the cooked Mocha Kottai(field beans). Mix nicely and let it cook for 2 minutes.

3. Now pour the tamarind extract and let the potatoes cook. In the meanwhile take a small kadai and add 1 tsp oil and roast all ingredients mentioned under “to be roast and ground”. Start by adding the groundnuts first, followed by coconut, dry red chilli, fennel seeds and poppy seeds, Roast until the coconut starts turning a light brown in colour. Cool and grind to a smooth paste adding a little water.
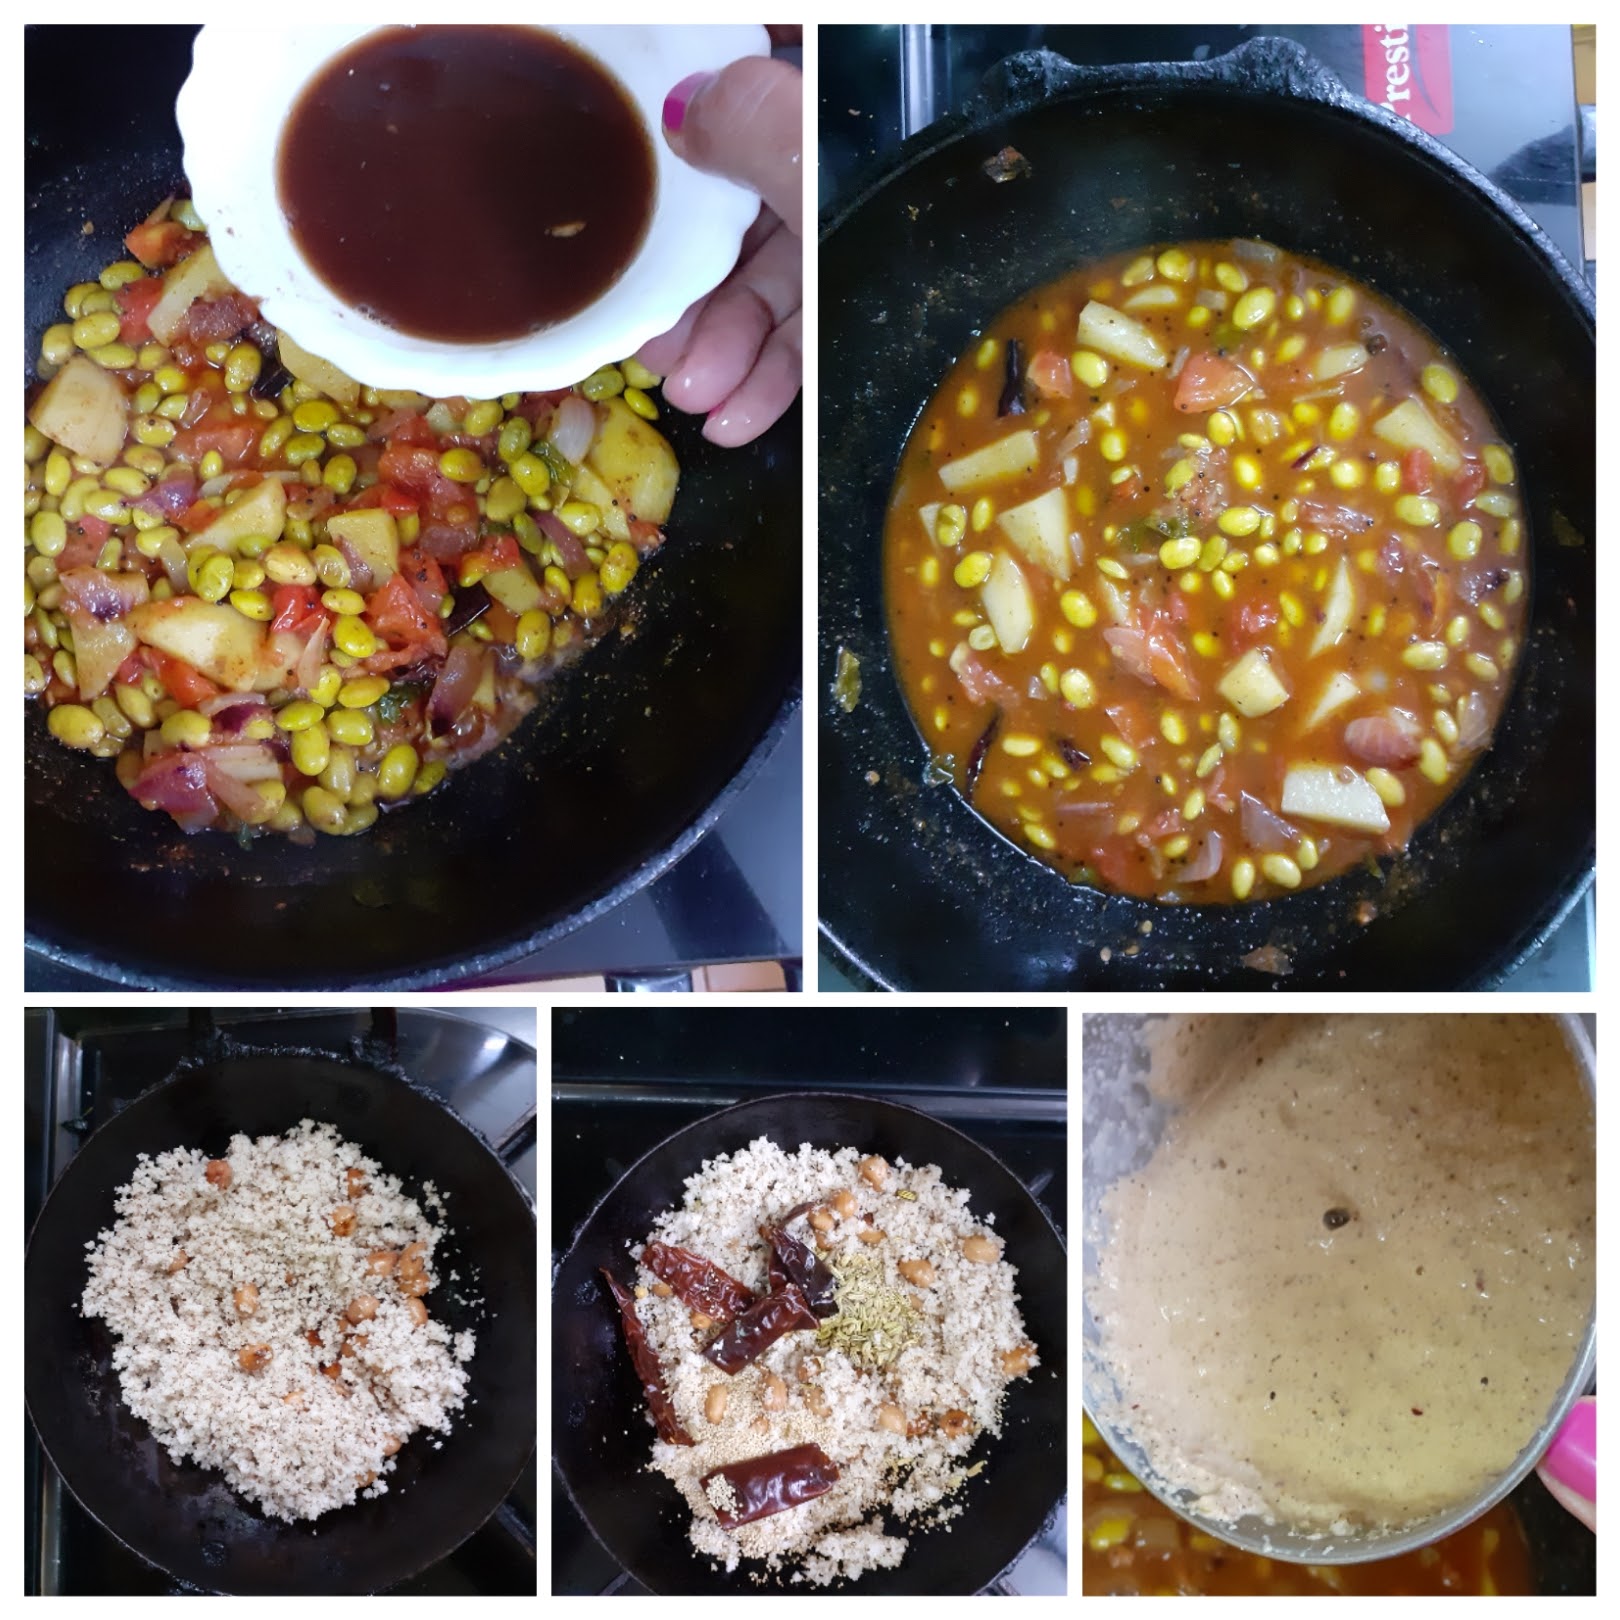
4. The potatoes must have cooked by now. Add the ground paste and mix well. Dilute adding 2 cups water and continue to cook. The gravy will come together and the consistency will thicken. Add a small bit of jaggery and stir and put off the flame. The delicious Pachai Mochai Kuzhambu is ready to serve.
NOTES:
1. I used homemade sambar powder as that really enhances the taste of the dish. However, store bought one also can be used. Foe the recipe of homemade sambar powder click here.
2. The use of jaggery is to cut down the gassiness of the peanuts, as some people cannot digest it. I recommend adding it though adding jaggery is not compulsory.
3. Take care not to overcook the Beans, at the same time they must be cooked well.
4. If you have roasted peanuts that too can be added, then only the coconut, chillies, fennel and poppy seeds need to be roasted.
5. This recipe can be followed for any fresh beans(seeds) variety. When the fresh Mochai are not available, the dry ones are sold. They can be soaked, cooked and the same recipe can be followed.
If you tried this recipe and liked it please comment below. I would love to hear from you. If you have a query about the recipe email us and ill respond as soon as I can.
GAJAR HALWA/ CARROT HALWA
Gajar Halwa/ Carrot Halwa is a very popular Indian dessert. Mostly a winter dessert. Though it is made frequently with the regular carrots ( English Carrots), using the Delhi Carrots or Red Carrots as they are called gives the best results.
This is one dessert I love and consider it very sacred, so if you are looking for an easy, one pot or microwave recipe, you are going to be disappointed. As far as Gajar Halwa is concerned I am old school. I cook it in milk( and a whole lot of milk) so that the raw taste of the Carrots is gone and the milk crumbles to a Rabri like texture. The taste of such a Halwa is divine. This is one recipe I have never made with regular carrot except in my dessert recipe- Gajar halwa Barfi where I was shaping it like fudge( Barfi) and using Khoya to speed up the process. Whereas this recipe of Gajar Halwa is a slow cook process. The slower it cooks the better it tastes. Am I disappointing you? Well, make it like this and you will be hooked to it for life. Remember the best things in life come with a lot of patience.
My belief is that when I wait a whole year for the Red Carrots to appear in the Market and then make the Halwa, then it should be made the authentic way. Which does not involve adding condensed milk or Koya or milk powder but in cooking the carrots in milk( whole cream), to perfection.
I use only whole cream milk to make this dessert. So the taste of the Halwa depends entirely on the quality of milk. A full/whole cream milk Halwa will give you better taste and I can say this because I have tried it will all milk varieties available in the market and what works best is whole/full cream milk.
So after the whole mega write up, taking you to the recipe. While you are here do check out my other carrot based desserts like Carrot Kheer( another speciality from Rajjo’s Kitchenn) and Gajar Halwa Barfi.
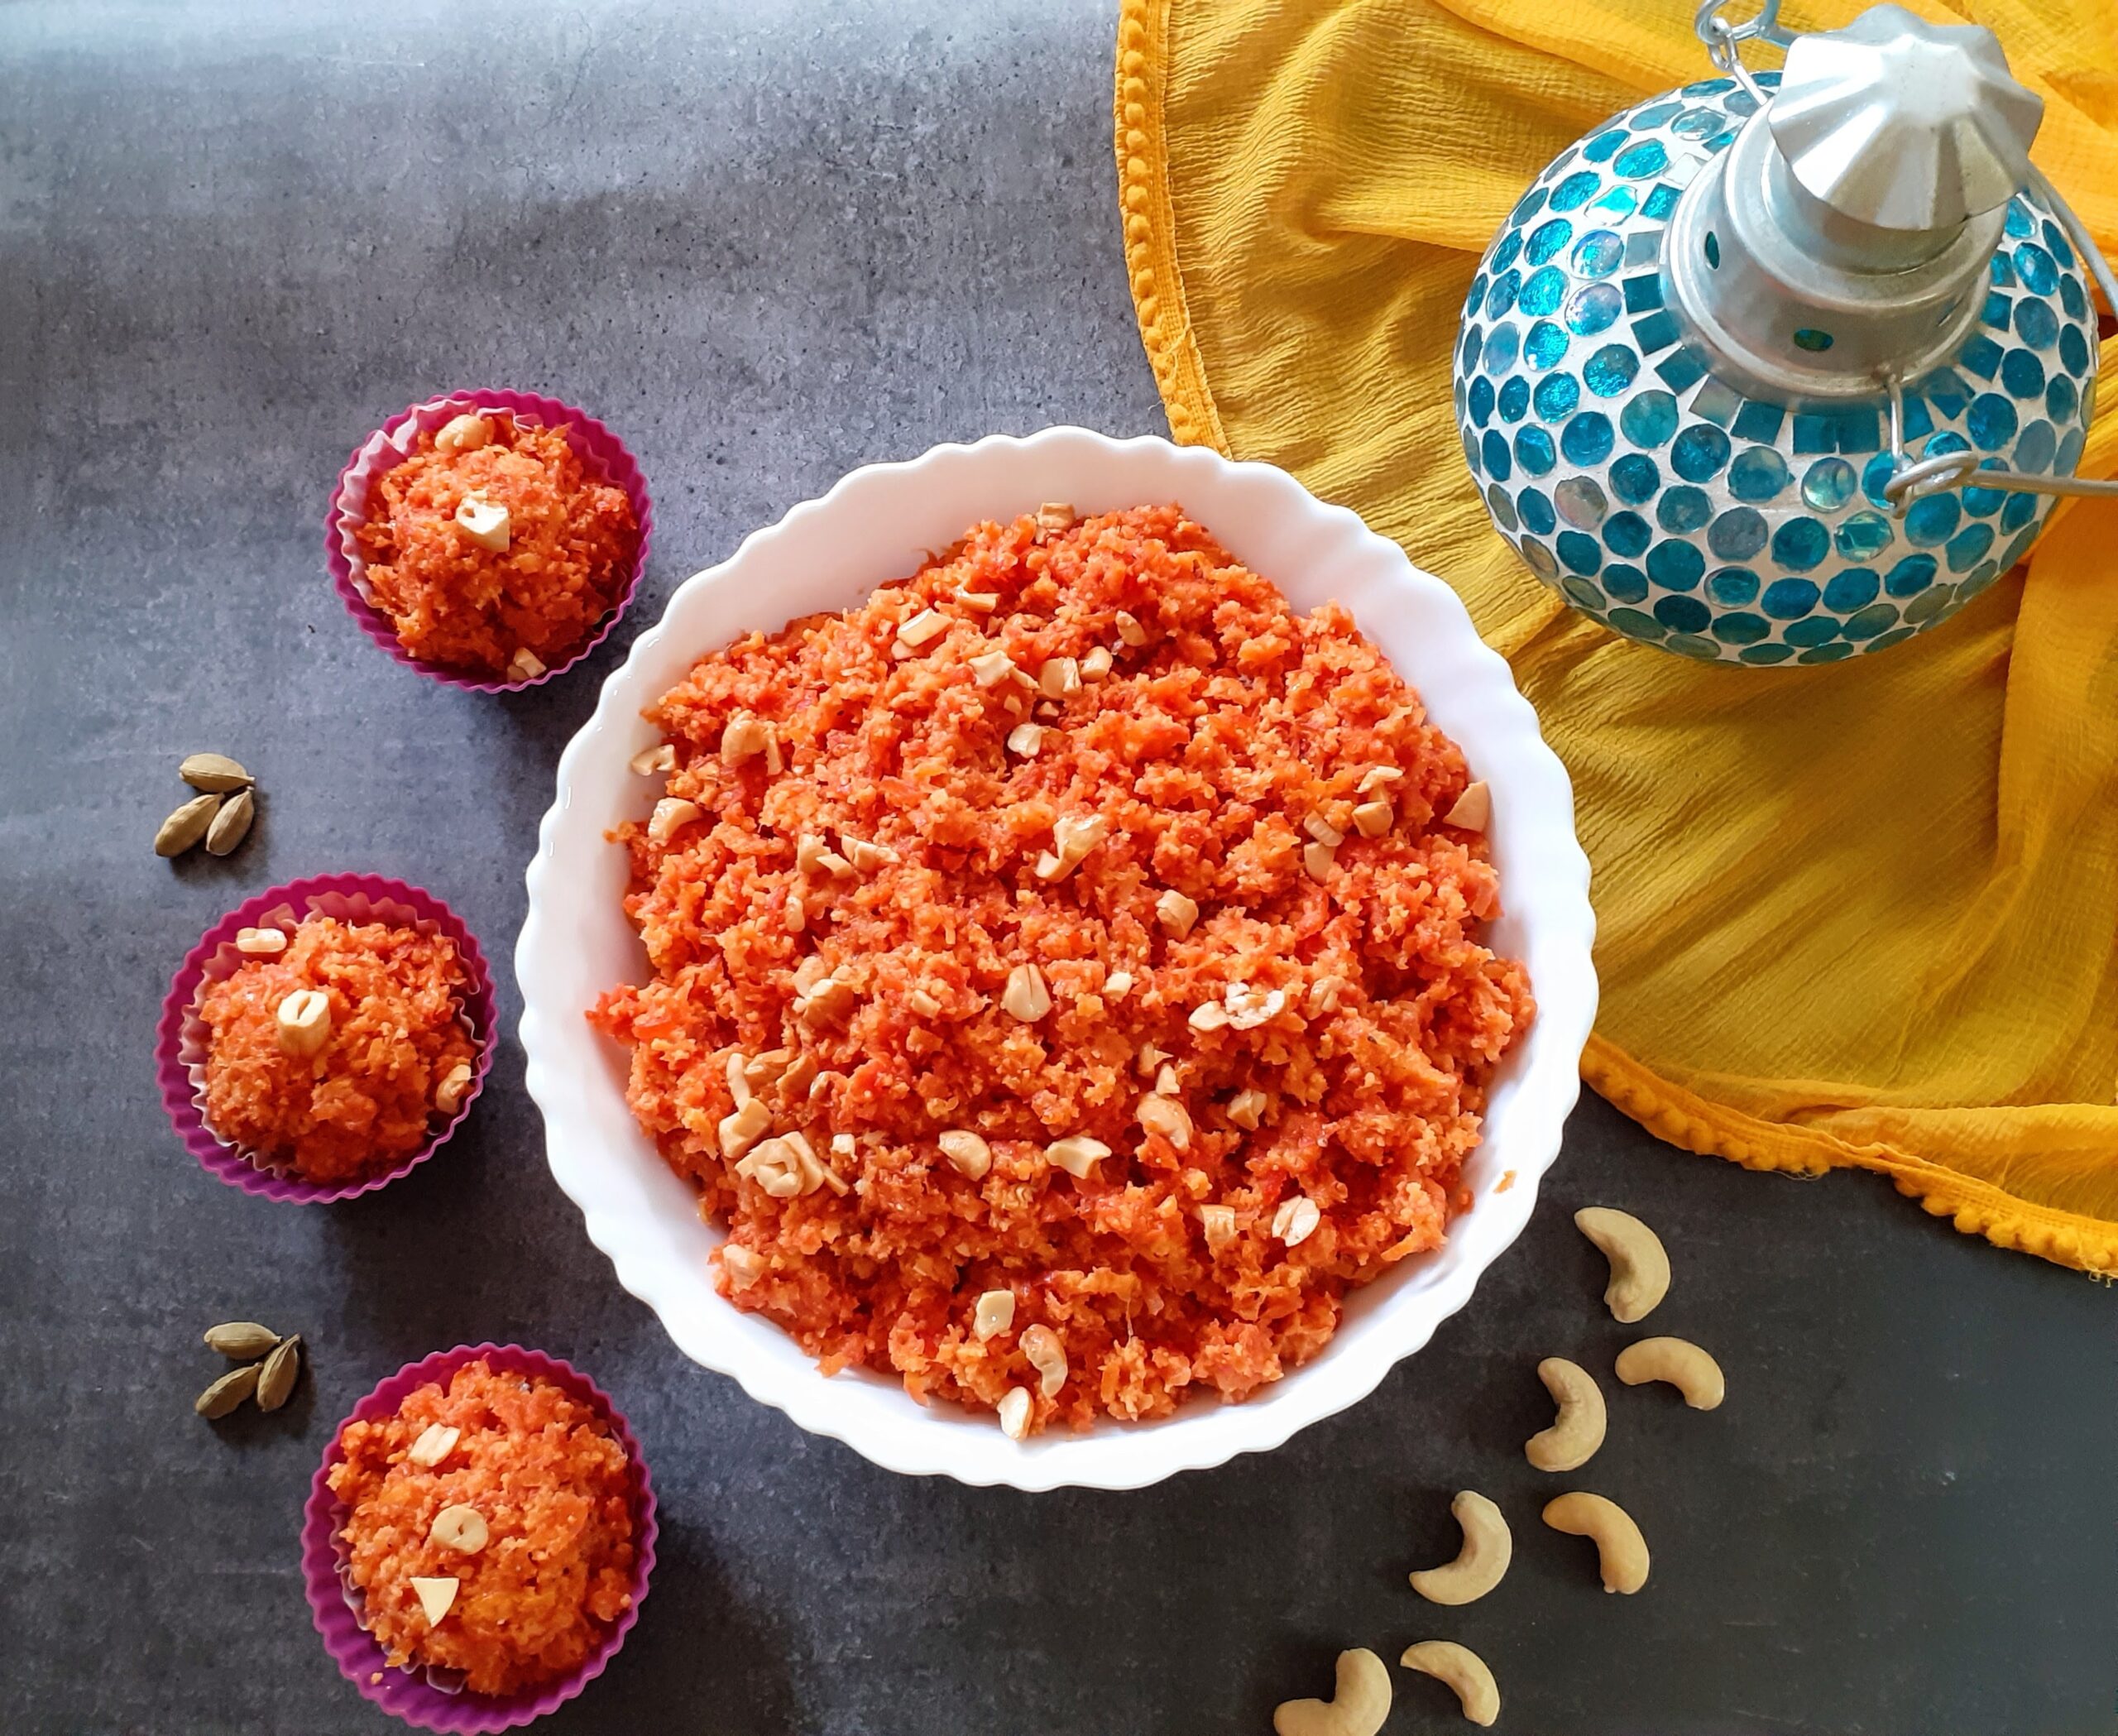
Ingredients:
Carrots ( Preferably Red ones) 1.5 kilo grated
Milk whole cream/ full cream 2 litres
Sugar 300 gm
Cardamom/ Elaichi powder
Ghee 4 tbsp
Cashews a new broken
Directions:
Wash, peel and grate the carrots and keep aside. In a huge thick bottomed vessel/ kadai/ or urli boil the milk. When it comes to a boil, reduce the flame and put in the grated carrots. Start stirring the mixture. The flame can be increased now but constant stirring is required . This process has to continue until almost all the milk dries up. The texture will look like Rabri stickng to carrot. Once all milk dries up, reduce the flame and add the sugar. Continue to stir again. Once the sugar is added the mixture will liquify, continue to stir until all the moisture is absorbed. The halwa will come together but it will not be gooey. Now add the cardamom powder. Fry the nuts in ghee and pour it over the halwa along with the nuts. The healthy and delicious Gajar Halwa is ready. Serve warm. Bon Appetite.
STEPWISE RECIPE FOLLOWS:
1. Wash, peel and grate the carrots and keep aside. In a huge thick bottomed vessel/ kadai/ or Urli boil the milk.
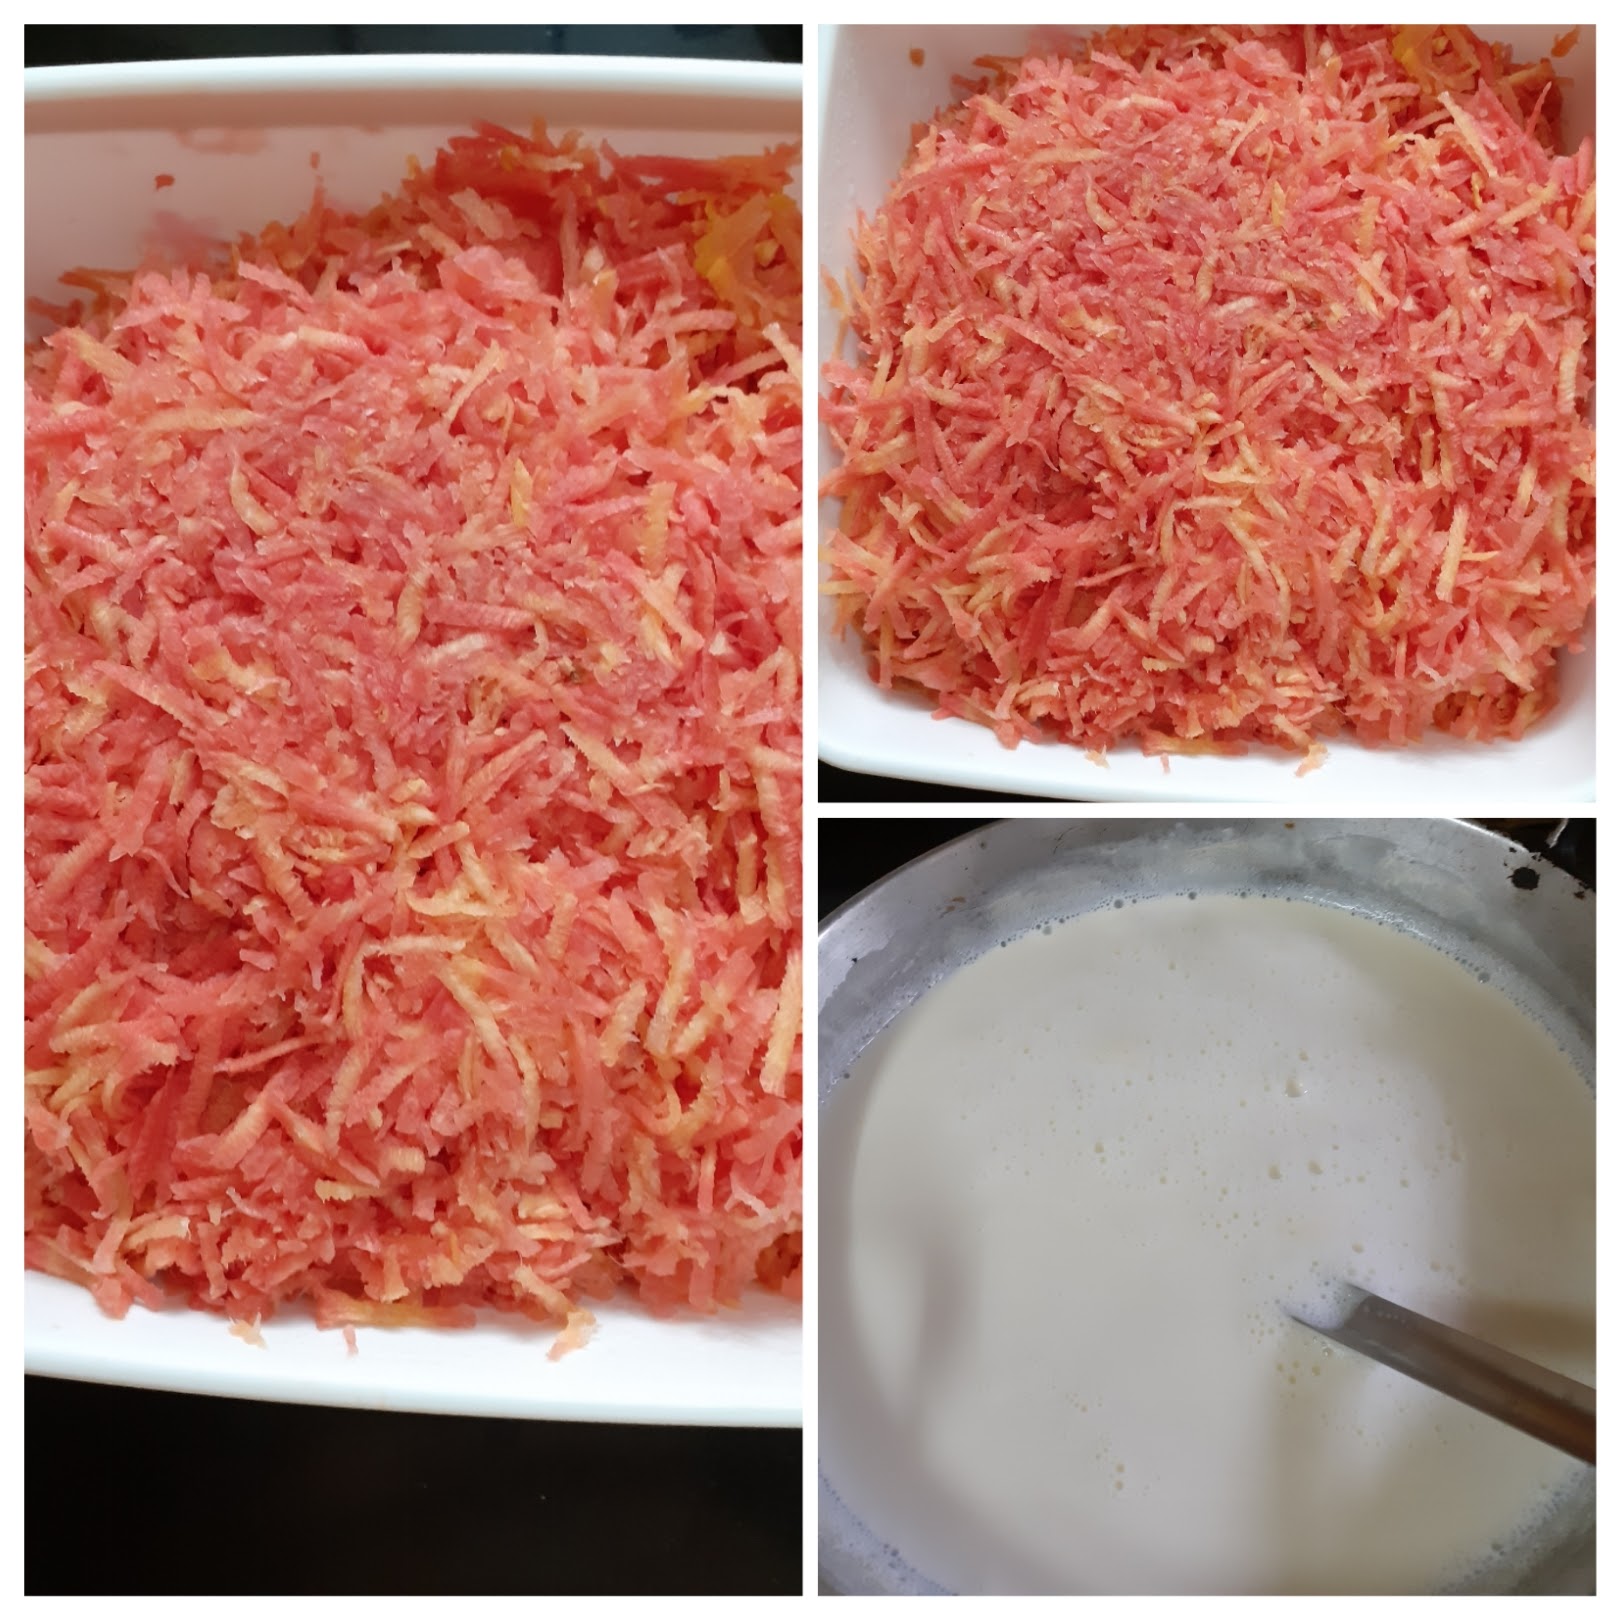
2. When it comes to a boil, reduce the flame and put in the grated carrots. Start stirring the mixture. The flame can be increased now but constant stirring is required . This process has to continue until almost all the milk dries up. Showing you the stages of reduction in pictures below that are self explanatory.
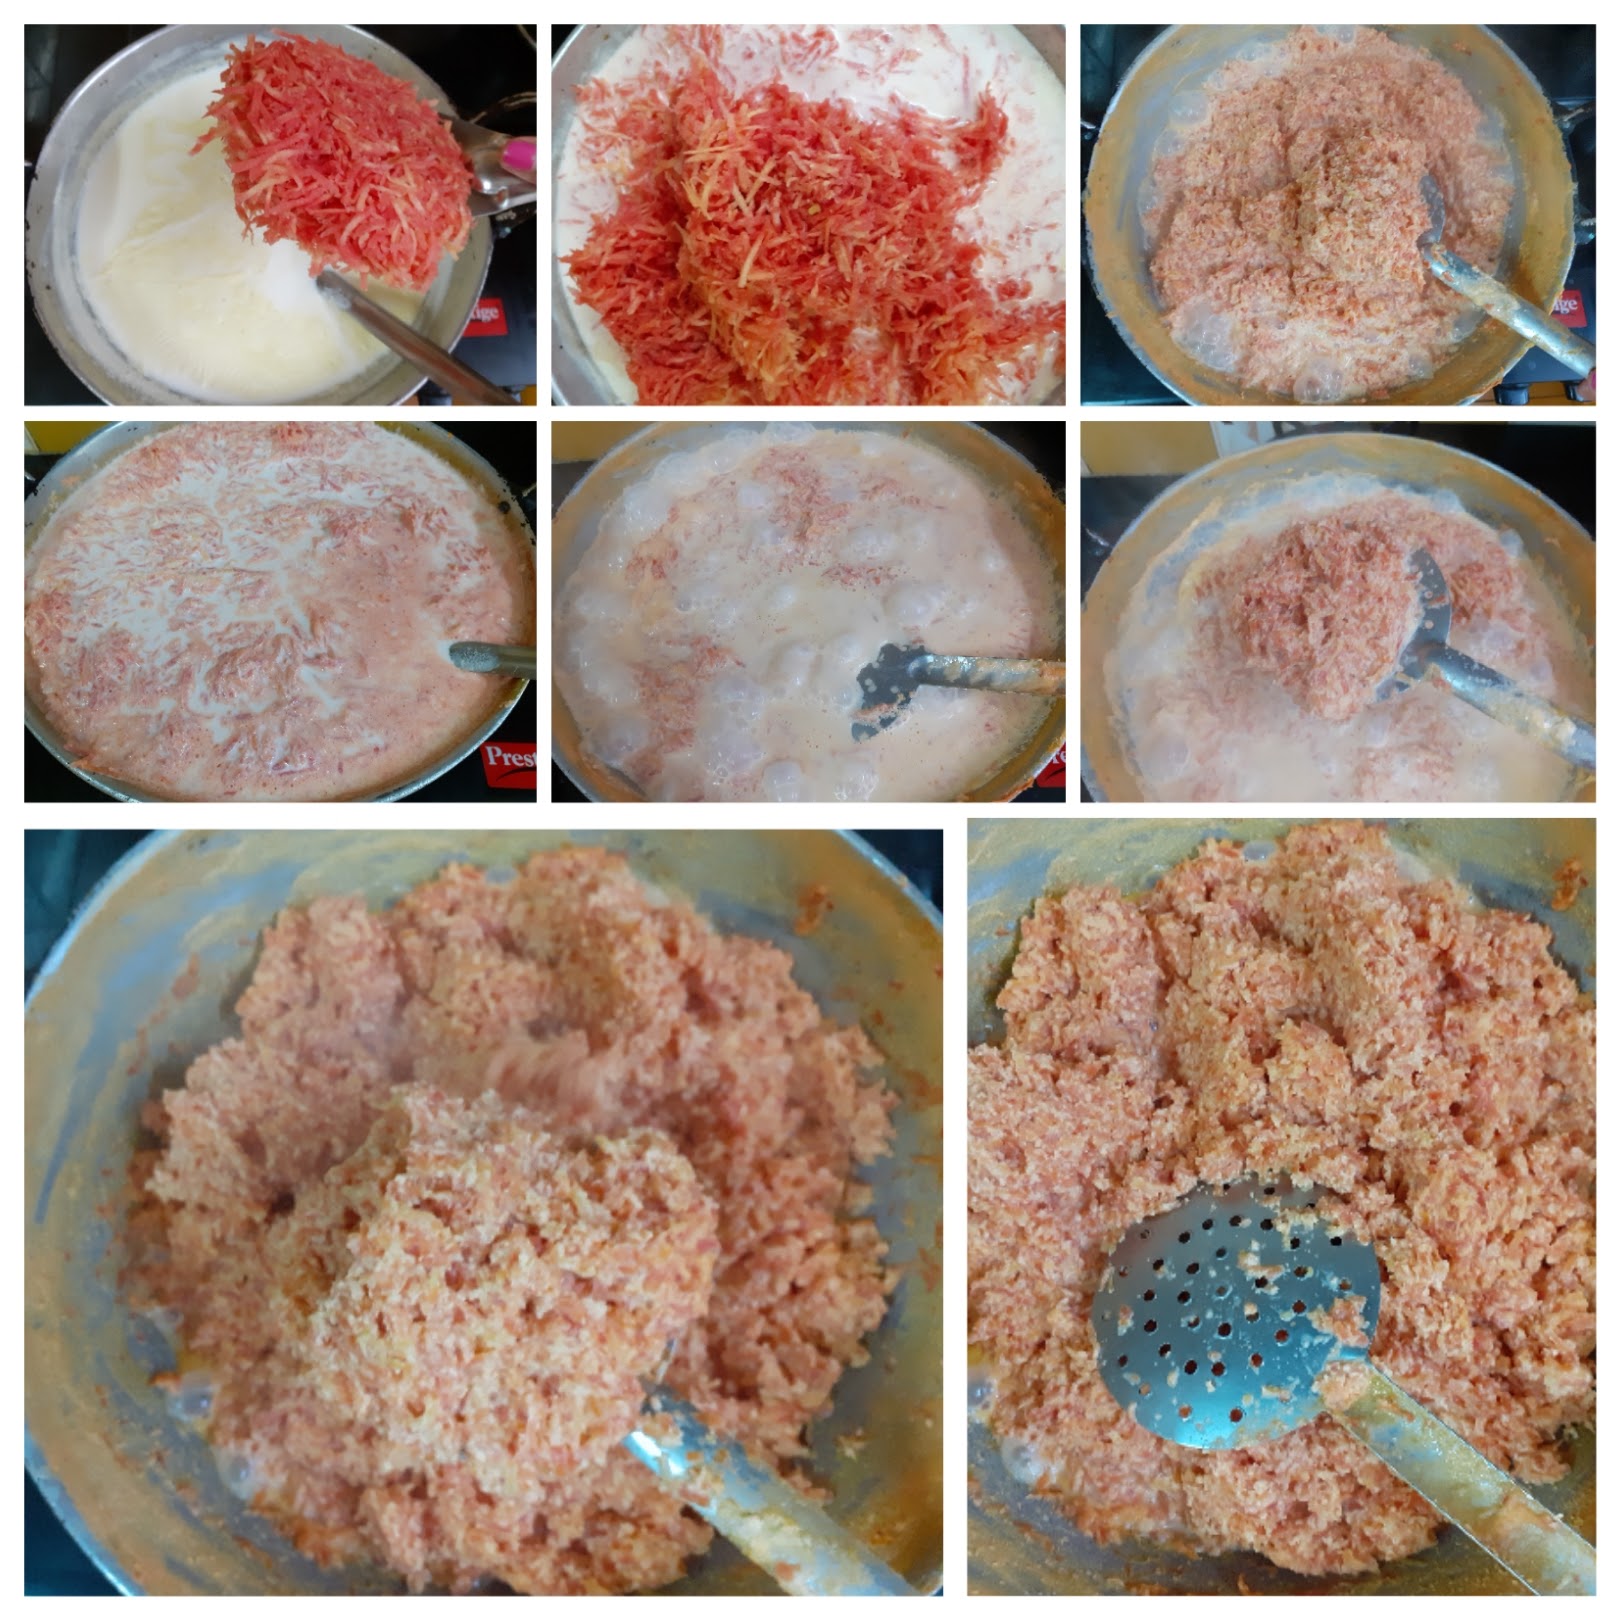
3. Once all milk dries up, reduce the flame and add the sugar. Continue to stir again. Once the sugar is added the mixture will liquefy, continue to stir until all the moisture is absorbed. The Halwa will come together but it will not be gooey. (forgot to click a picture finally to show the final consistency, so have included the one showing the cardamom powder. Please follow that texture for final consistency of Halwa).

4. Now add the cardamom powder. Fry the nuts in ghee and pour it over the Halwa along with the nuts. The healthy and delicious Gajar Halwa is ready. Serve warm.

NOTES:
1. While cooking at high heat keep stirring constantly to avoid burning the contents at the bottom of the pan.
2. Actually after sometime of cooking the milk and carrot mixture , it does not overflow from the vessel. That time the stirring can be relaxed a bit, but stir every couple of minutes. If you are following this reduce flame when not stirring.
3. Good quality full cream milk yields the best result, the Halwa can be made with milk of any consistency though. The results may not be what I have described .
4. Feel free to try this with regular Carrots too. Method being the same.
5. Sometimes people try to over power the subtle carrot flavour by adding huge amounts of ghee. This is not required. Pouring ghee at the right time is very important, such that the flavour is enhanced and a lot of ghee is not poured unnecessarily. Check out my Cakkara Pongal post for the directions on how to pour the ghee.
If you tried this recipe and liked it please comment below. I would love to hear from you. If you have a query about the recipe email us and ill respond as soon as I can.
Patra/Patrode With Bok Choy Leaves (Alu Wadi)
Patra or Patrode is a simple and healthy snack from western India. It is also called Alu Wadi in some regions. This dish is popular in karnataka too. Different regions, different names same dish.
In this healthy snack usually the Arbi or Colacassia leaves are used. Spinach leaves can also be used, but they have to be big and thick. Since that variety is not available all the time I decided to give the dish a twist by using a different leaf altogether. Bok Choy, or Pok choy is a type of chinese cabbage. The leaves are thick and nice so I decided to give the Patra a try with these leaves. It was a huge hit in my house and everyone came back for more.
Since I was making this the first time, I made only a small quantity and with my folks asking for more have promised to make some again very soon. So, what I’m driving at is that if you are one of those people who loves this dish and wait for the Arbi leaves to arrive in the market, well don’t wait. Grab some Pok Choy and try it out. The Pok Choy is closer in taste to Spinach with which Patra are made, if not for Arbi/Colaccssia leaves.
This is a steamed snack just like the Kothimbir Vadi, it can be fried too of you prefer. I have steamed and pan roasted them.
While you are here check out my other snack recipes like Mirchi Bajji, Semolina Cheese balls, Samosa Pie, Potato Cheddar Bake, Dhania wale Namak Parey and more…
Here is the recipe ot Patra with Bok Choy Leaf-
PREP TIME: 15MINS COOK TIME: 30MINS
TOTAL TIME: 45 MINS CUISINE: INDIAN
COURSE :SNACK SERVINGS: 5
AUTHOR: RAJNI RAM
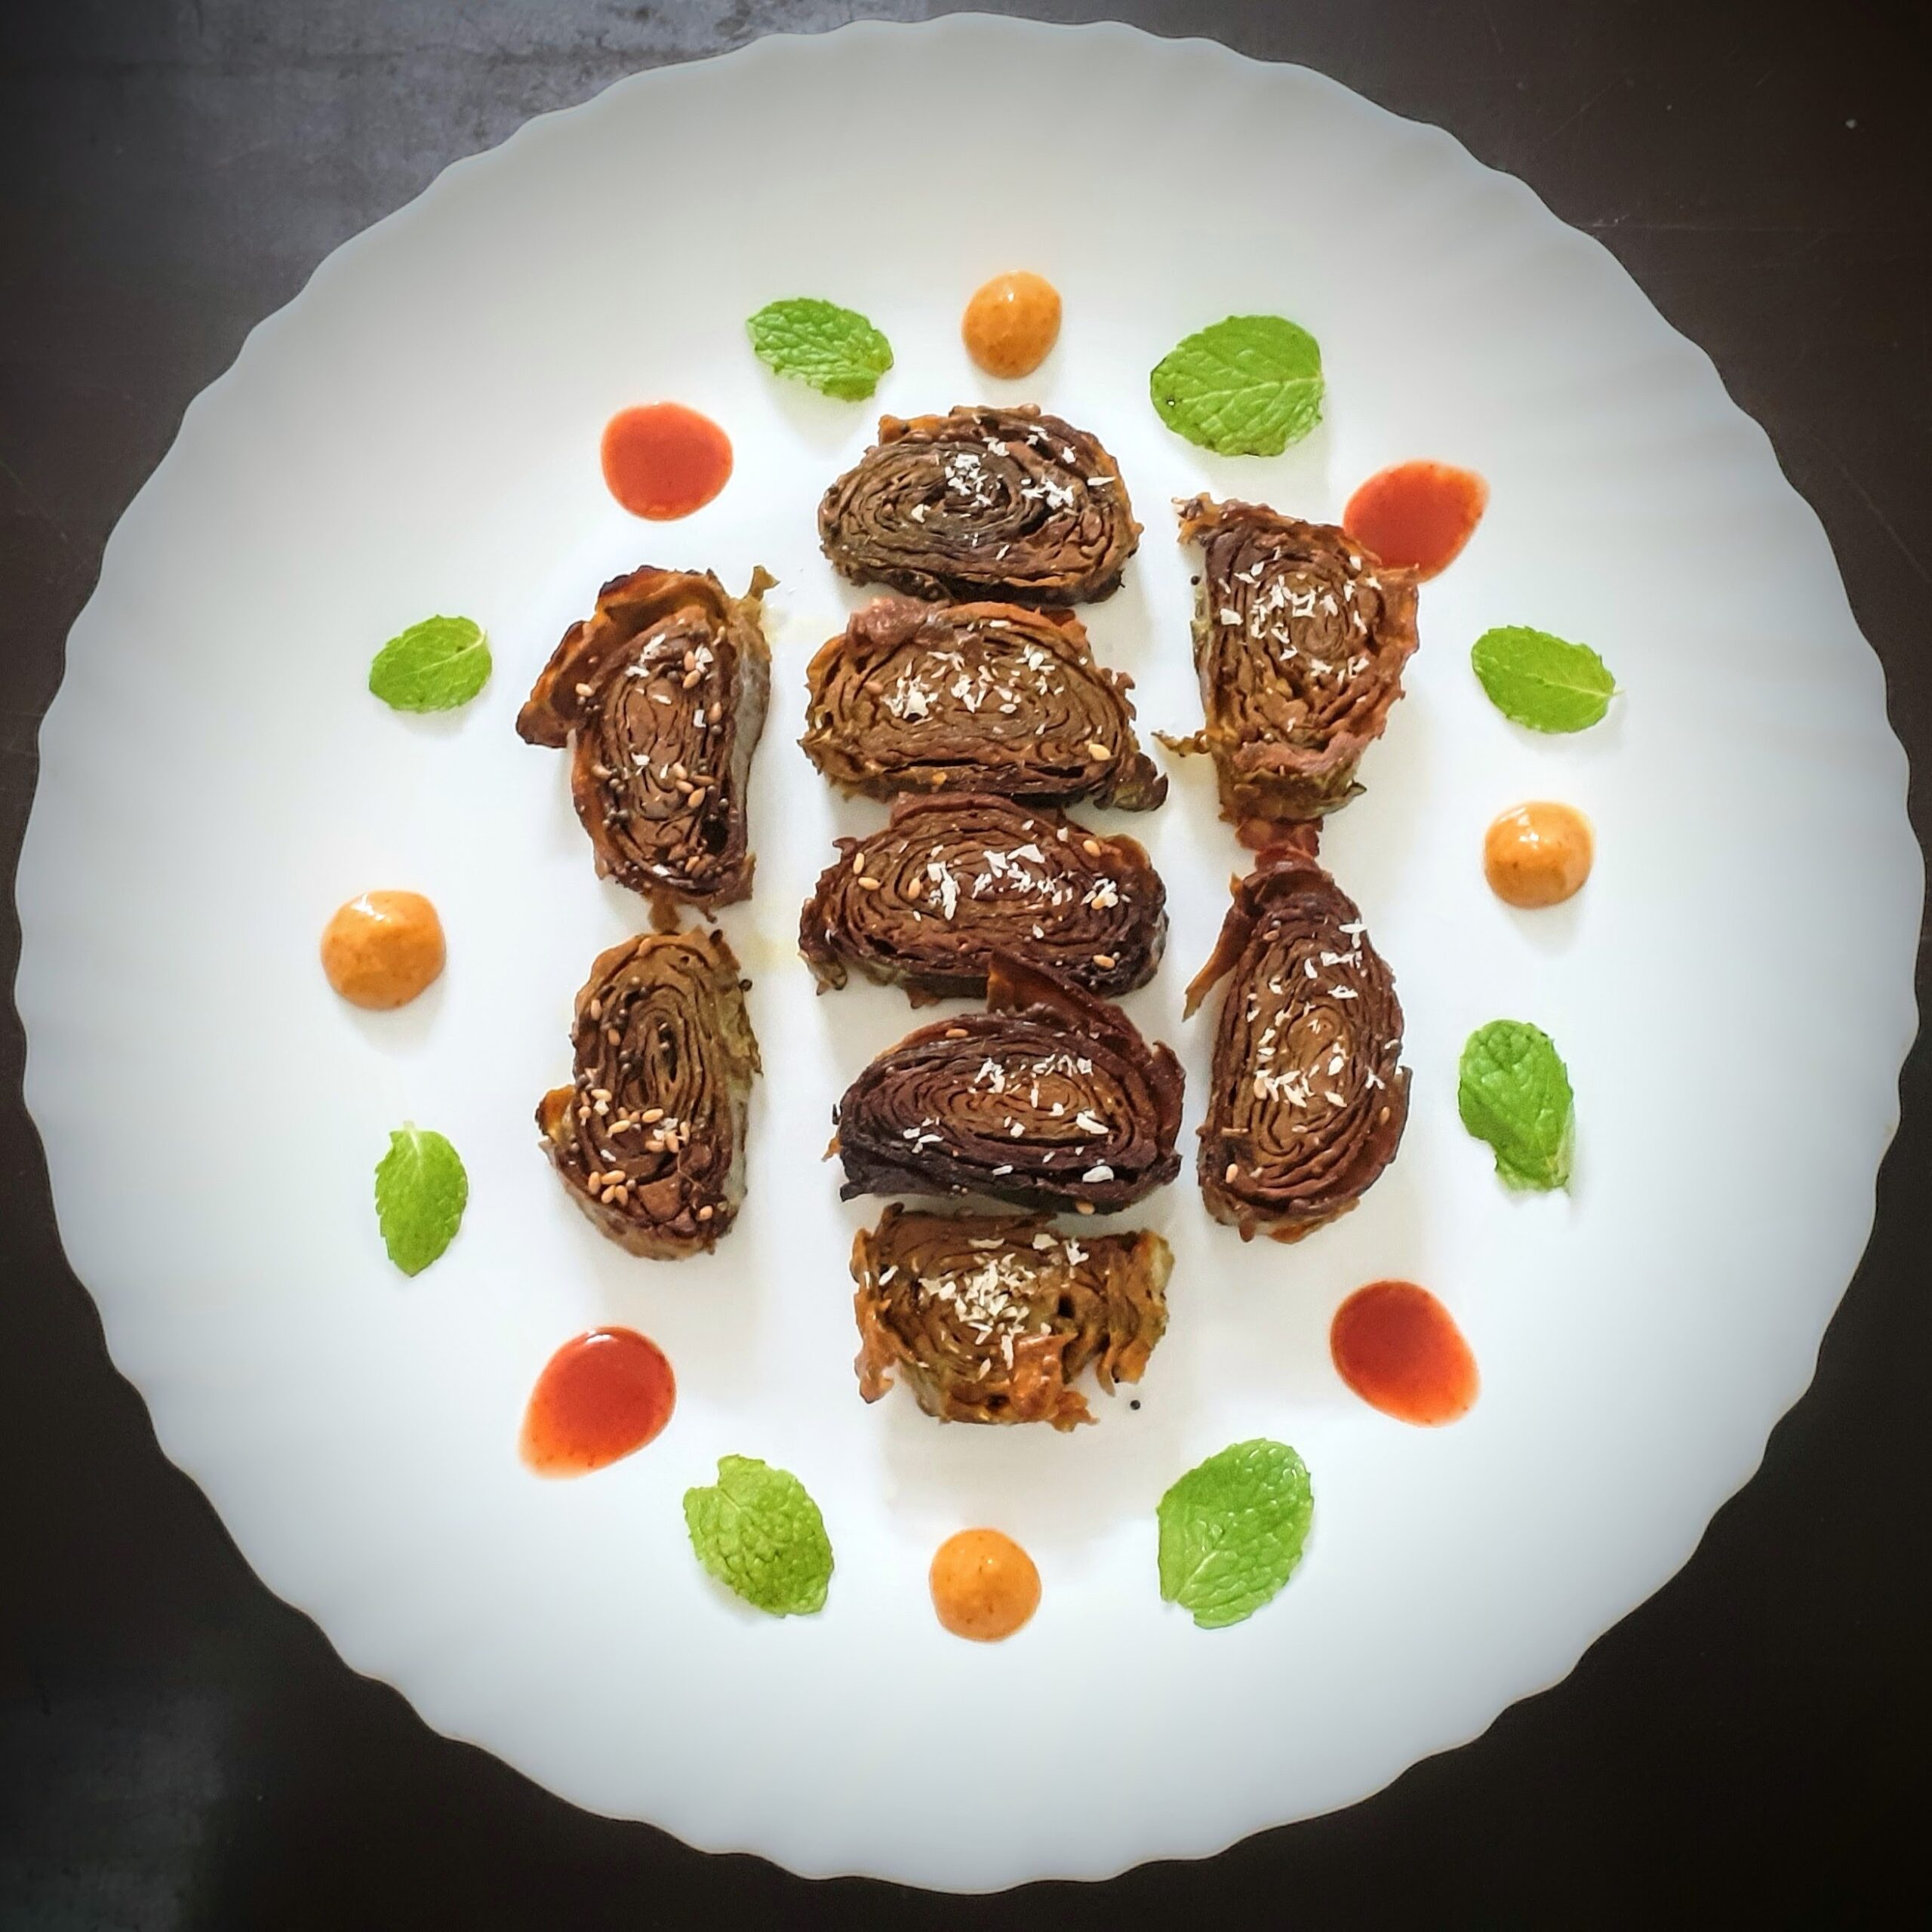
Bok choy/ Pok choy 2 heads ( clip leaves carefully, wash and dab dry with towel)
Besan/ Chickpea flour 2 cups
Salt as required
Red chilli powder 1 tsp
Coriander powder 1 tsp
Fennel powder 1 tsp
Turmeric powder 1/2 tsp
Sugar 1/2 tsp
Tamarind pulp 2 tsp diluted in 1/2 cup water or make pulp with Gooseberry size tamarind ball.
Green chilli 1 finely chopped
Ginger 1/2 inch piece finely chopped
Sesame seeds a few
Kopra / desiccated coconut 2 tsp
Oil 3 tsp for tempering
Directions:
Carefully cut the leaves from the Bok choy, wash them in water and pat dry. Keep aside. Now in a bowl take the besan and add all the masala powders and salt. Mix well with fingers and now start adding the tamarind water little by little to make a thick paste/ batter. If using tamarind paste add paste along with masalas, mix and then use water to make the paste. The batter has to be smooth and thick that it sticks to the leaves and does not slide off. Now take the leaves, bigger ones. Apply the paste to 3 leaves, and arrange 3 of them over lapping the other as shown in the picture. This is the first layer. On this another 3 paste applied leaves have to be arranged. If the leaves are in different sizes, keep bigger ones below and smaller ones on top. Like this for 3 layers. Now start rolling the leaves from left to right, and as you role more of the paste has to be applied each time you roll the leaf. After rolling completely, apply the besan paste all over the rolled leaf. Place this in a greased cooker vessel. Repeat for remaining leaves. I made two such rolls. Place the second roll also in the cooker vessel and keep the vessel in the cooker to steam. Steam for 20 to 25 minutes. Put off the cooker and wait 2 minutes. Now open and cool the steams rolls completely. Once cooled cut them into 1/2 inch thick circles and keep aside. Take oil in a Tava or Pan and heat. Add mustard seeds, Jeera, asafoetida, green chillies, sesame seeds and ginger. When the mustard pops arrange the cut circles on the tava and roast on one side. When it turns a golden brown, flip and roast the other side. Sprinkle some Kopra/ desiccated coconut and remove the Parta off the Tava. Enjoy with some green chutney and chai. Bon Appetit!!!
STEPWISE RECIPE FOLLOWS:
1.Carefully cut the leaves from the Bok choy, wash them in water and pat dry. Keep aside.
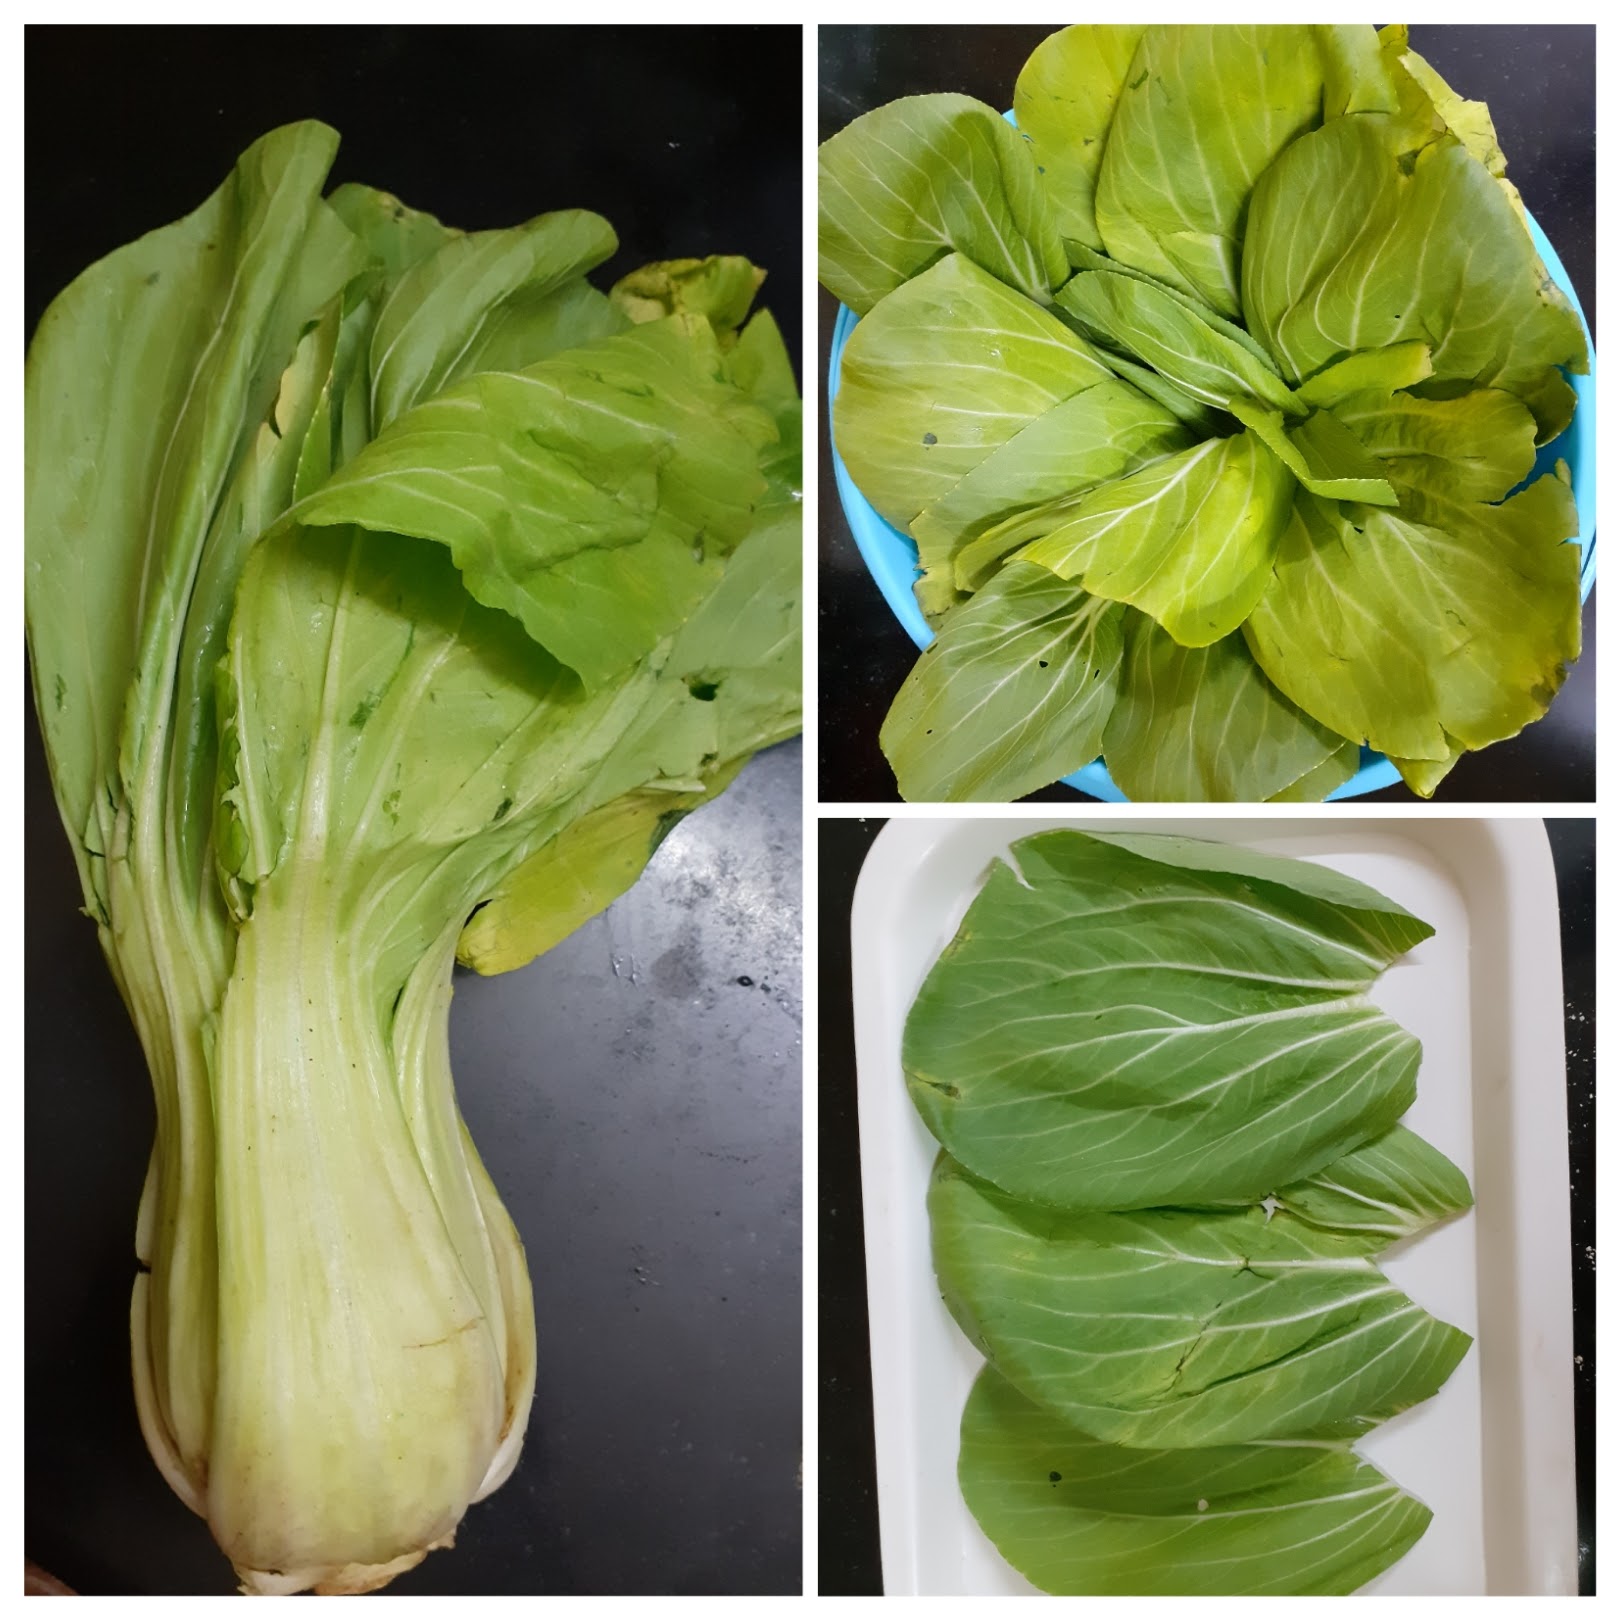
2. Now in a bowl take the besan and add all the masala powders and salt. Mix well with fingers and now start adding the tamarind water little by little to make a thick paste/ batter. The batter has to be thick and smooth.

3. Apply the paste to 3 leaves, and arrange 3 of them over lapping the other as shown in the picture. This is the first layer. On this another 3 paste applied leaves have to be arranged. Make 3 such layers.
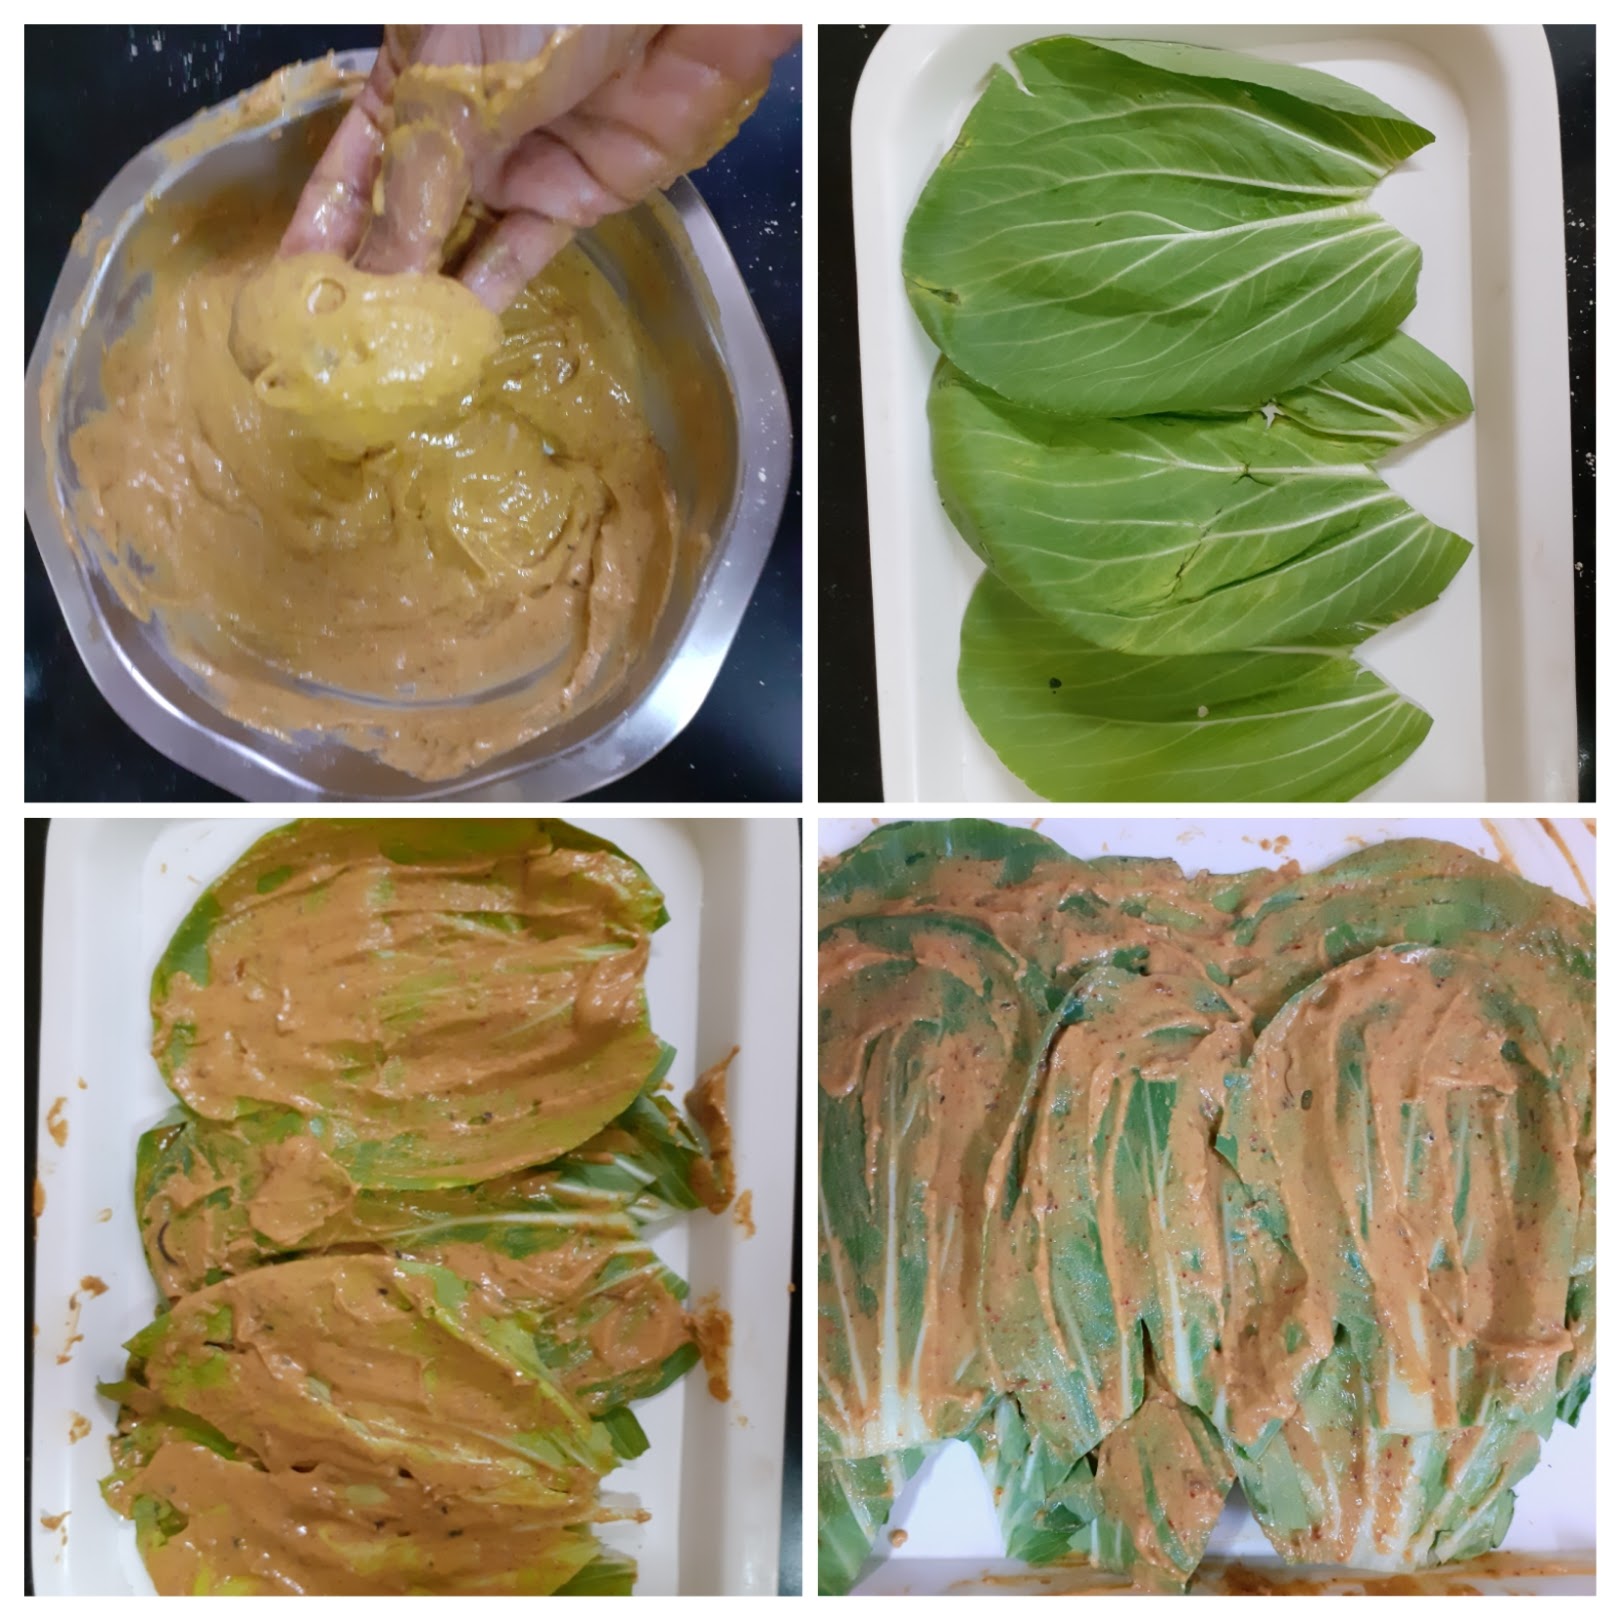
4. Now start rolling the leaves from left to right, and as you role more of the paste has to be applied each time you roll the leaf. After rolling completely, apply the besan paste all over the rolled leaf. Place this in a greased cooker vessel. Repeat the process and put both rolls in cooker vessel.
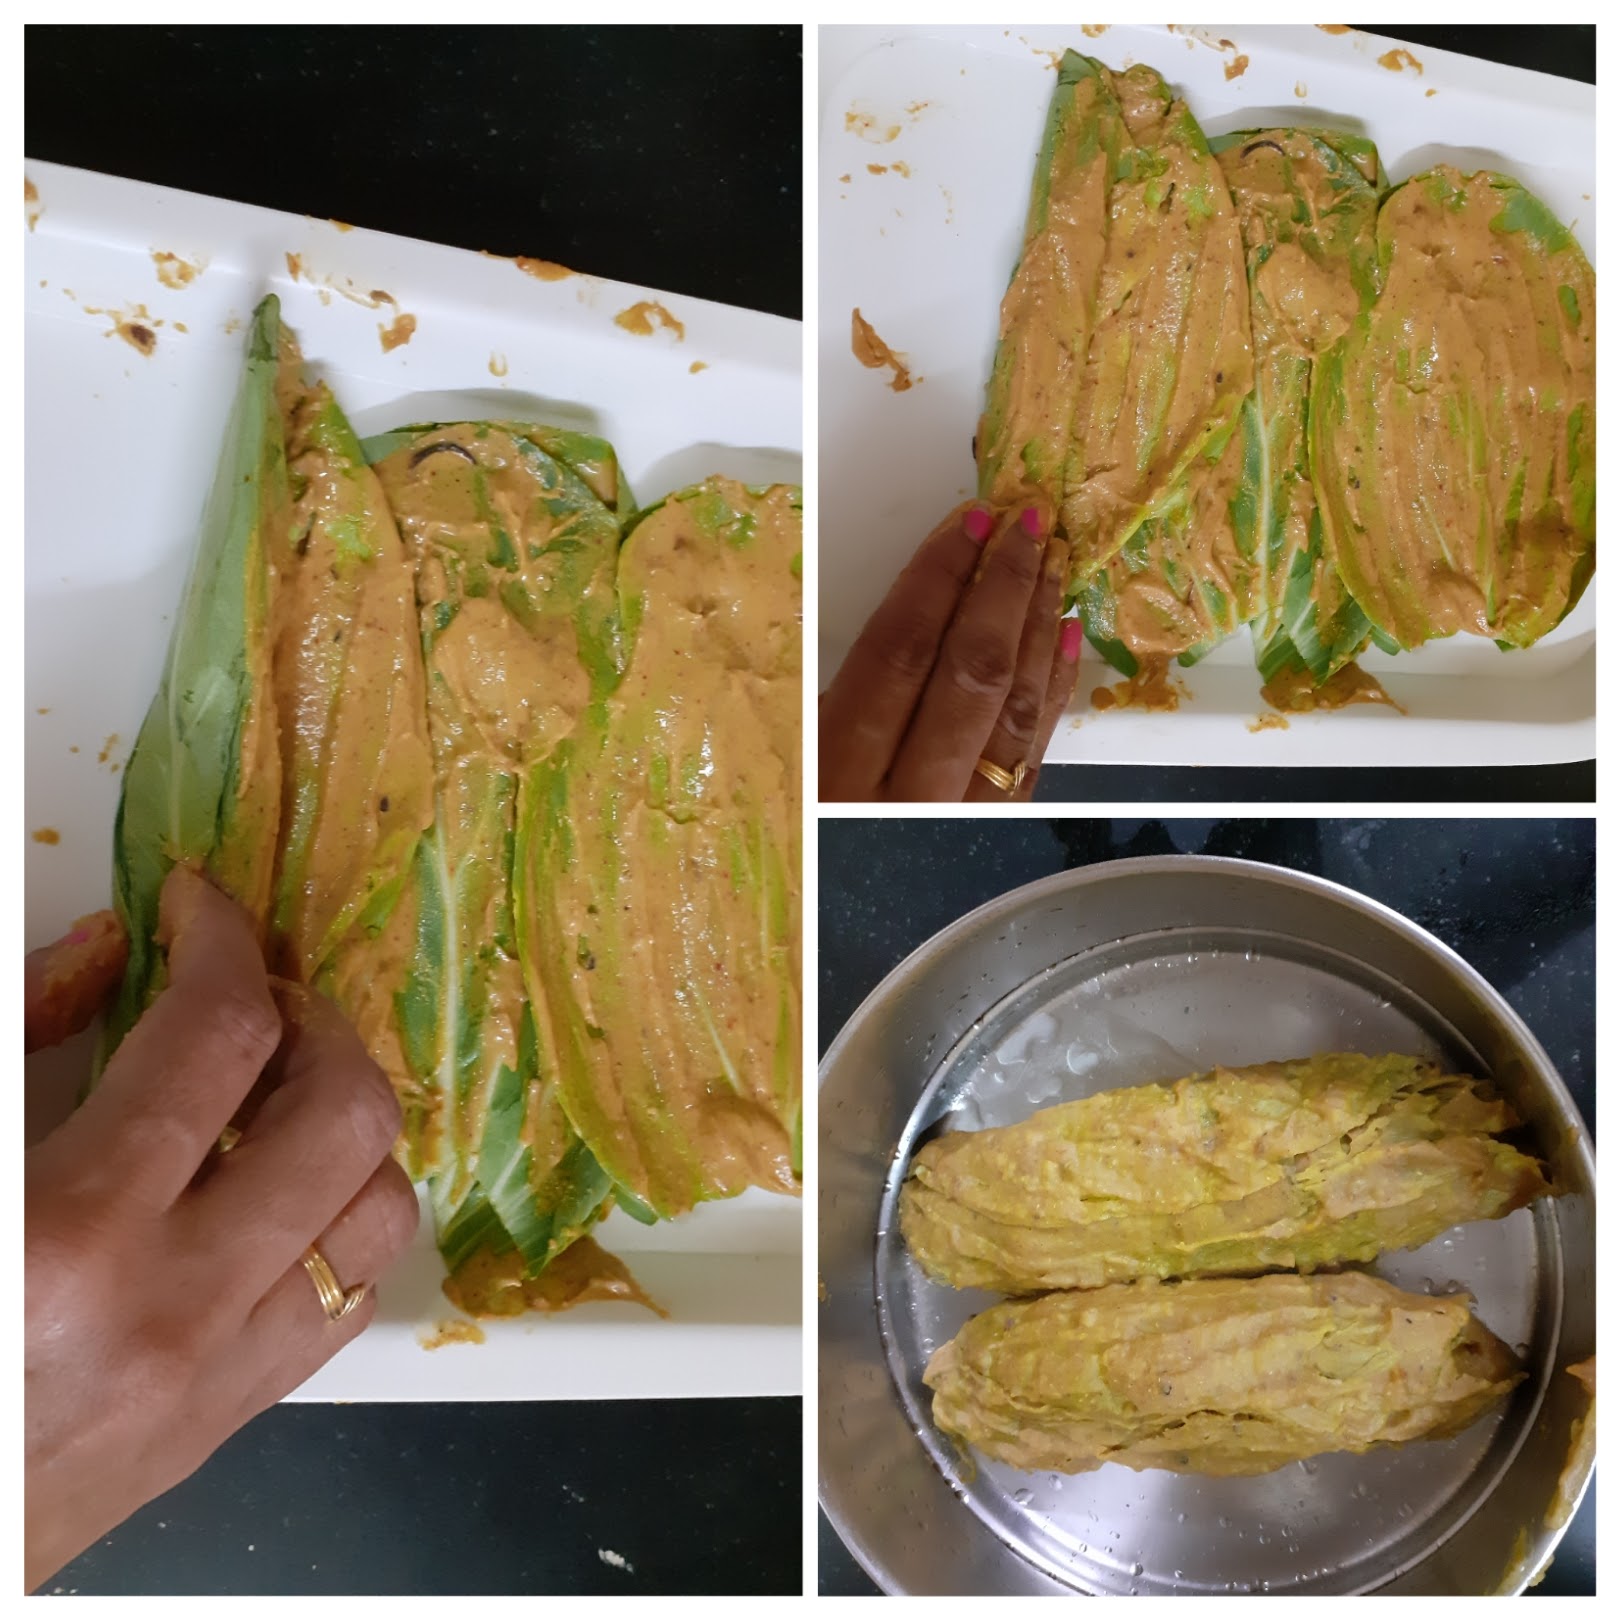
5. Keep the vessel in the cooker to steam. Steam for 20 to 25 minutes. Put off the cooker and wait 2 minutes. Now open and cool the steams rolls completely. Once cooled cut them into 1/2 inch thick circles and keep aside.
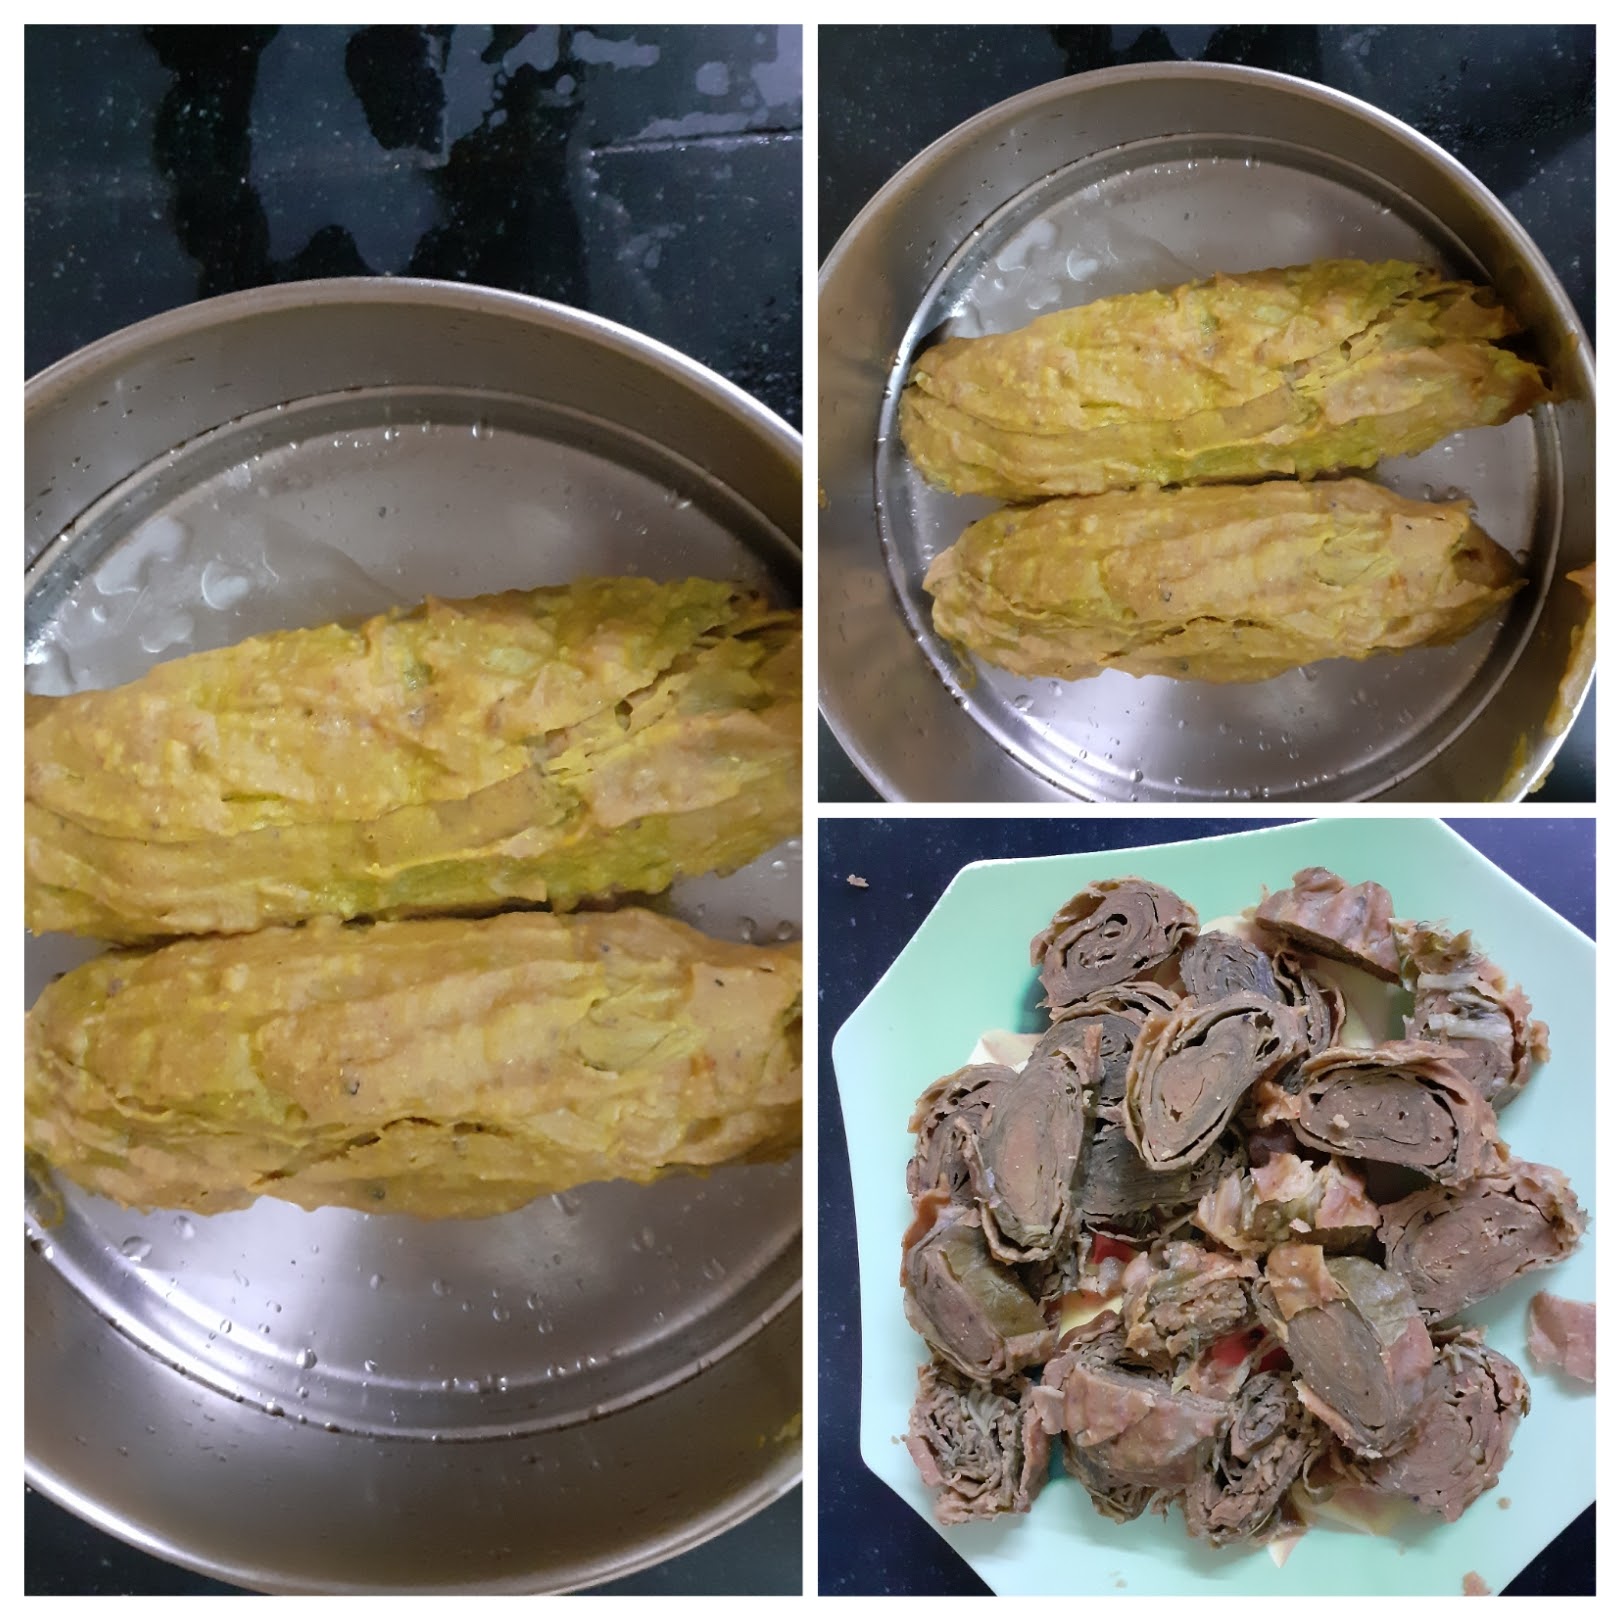
6. Take oil in a Tava or Pan and heat. Add mustard seeds, Jeera, asafoetida, green chillies, sesame seeds and ginger. When the mustard pops arrange the cut circles on the tava and roast on one side. When it turns a golden brown, flip and roast the other side. Sprinkle some Kopra/ desiccated coconut and remove the Parta off the Tava. Enjoy.


NOTES:
1. Select leaves which are fresh and big.
2. At the base of the leaf if the stem is hard, make a V shape cut to remove the hard veins.
3. Ensure the batter is thick like a paste or else it won’t stick to the leaf. Incase the batter turns runny add more besan and adjust spice and continue with the recipe.
4. While toasting on the Tava take care not to burn them or the taste will change.
South Indian Vegetable Kurma
The South Indian Vegetable Kurma is a very popular dish in most south Indian restaurants. It goes very well with most south Indian dishes like the Sevai aka string hoppers, Parotta, Kothu Parotta( for which it forms part of the kotthu gravy), Poori, Dosa, Kal Dosa Rava Dosa, and more…
Than the ones at a restaurant I like the home version as the masalas can be customized. I find the restaurant ones very pungent with a strong masala impact which subdues the taste of the vegetables. A good kurma is one where the taste and texture of the vegetables is retained and the mild masalas enhance the taste of the dish.
So here’s my version of the South Indian Vegetable Kurma–
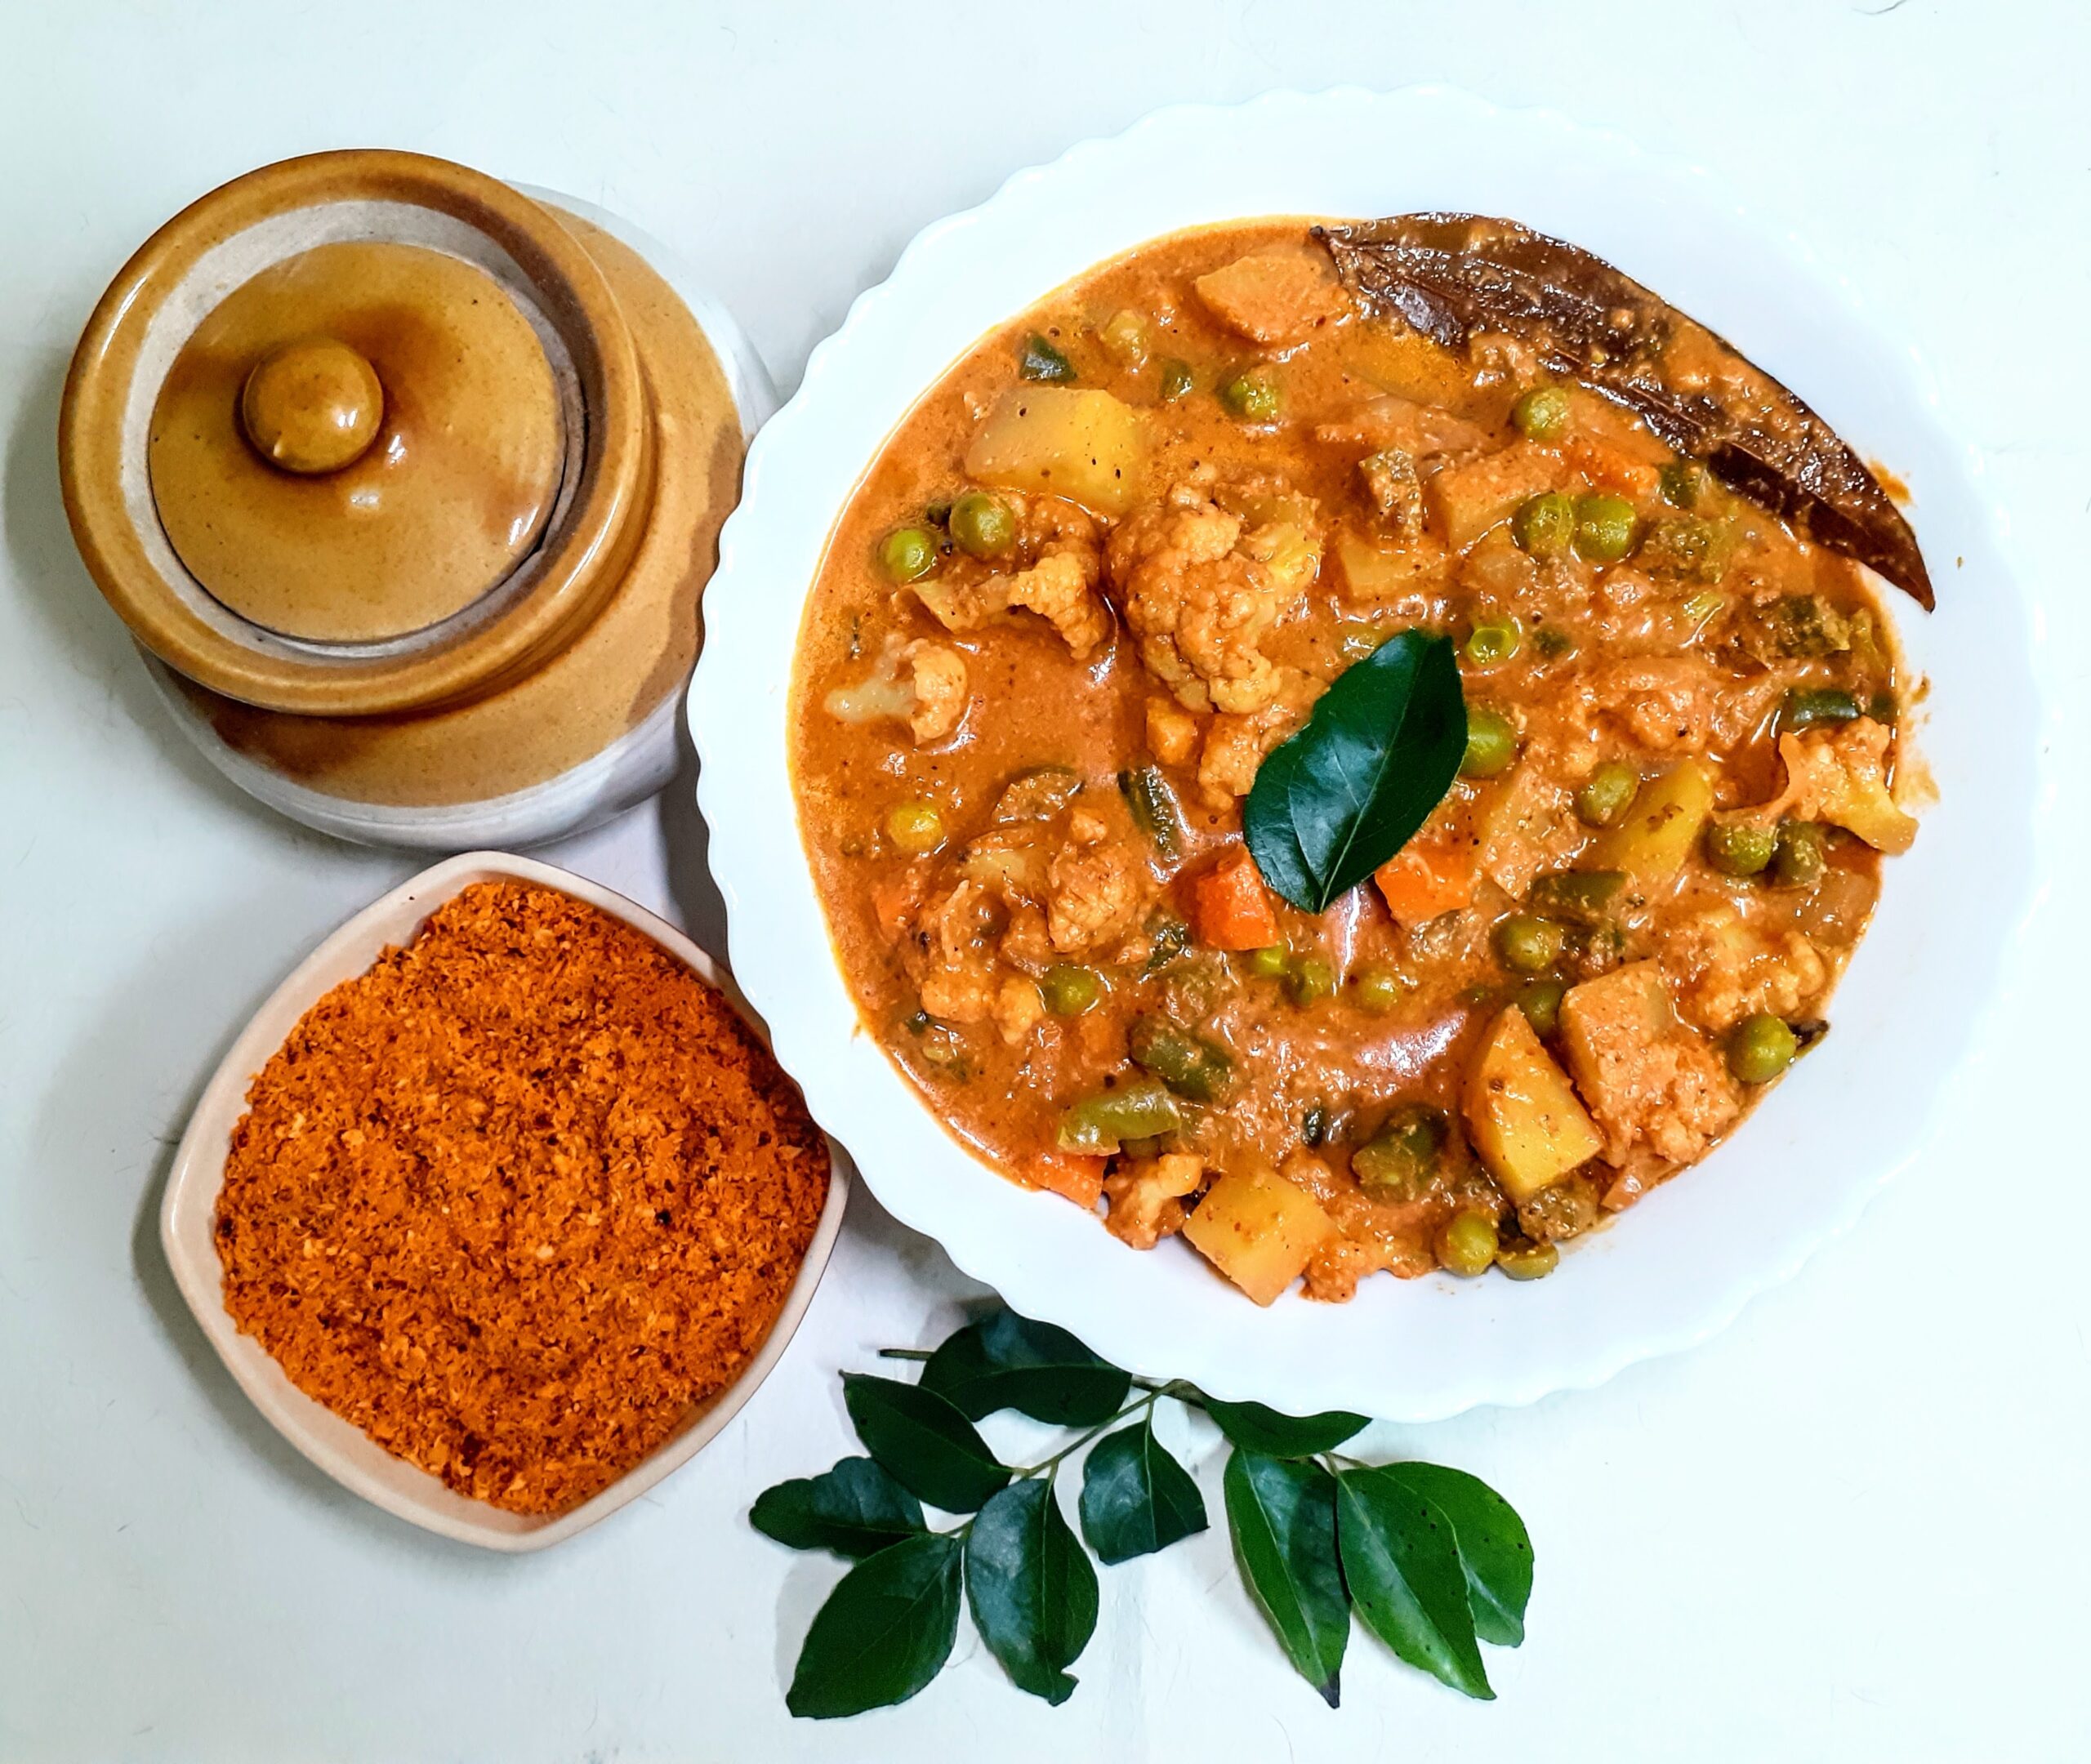
PREP TIME: 15 MINS COOK TIME:15 MINS
TOTAL TIME: 30 MINS COURSE: MAIN
CUISINE:INDIAN SERVINGS: 4
AUTHOR: RAJNI RAM
Ingredients:
Chopped Mix vegetables 200 gm ( carrot, cauliflower, potatoes, beans) etc;
Green peas 50 gm
Capsicum 1 chopped
Onion 1 medium chopped
Tomatoes 2 large pureed
Cashewnuts 10
Coconut 1 tbsp
Fennel seeds 1 tsp
Bay leaf/ Tej patha 1 medium
Cumin seeds 1 tsp
Green cardamom 2
Cloves 3 -4
Ginger garlic paste 1 tsp
Green chilli 1
Biryani masala 1 tsp depending on flavour
Red chilli powder 2 tsp
Oil for sauteeing
Garam masala powder 1/2 tsp optional
Directions:
Steam all the mix vegetables with salt and turmeric powder, except capsicum, onion and tomatoes. Take care to not turn them mushy. Now in a pan or Kadai pour oil and heat. Put in the Bay leaf, cumin seeds, green cardamom and cloves and fry for 30 seconds. Now add the onions and ginger garlic paste,and saute for 30 seconds. Add the capsicum and continue to saute for another minute. Now add the tomato puree and all other spice powders like red chilli powder, biryani masala and the salt. Cook the gravy until the oil separates. Now add the steamed vegetables, mix well and cook for a minute. Grind the coconut, fennel seed, cashewnuts and green chillies to a smooth paste adding a little water. Pour this paste into the cooking gravy. Cook for another2 minutes or until the gravy cones together and put of the stove. Garnish with curry leaves add the garam masala powder now if using, and enjoy with your choice of tiffin.
STEPWISE RECIPE FOLLOWS:
1. Steam all the mix vegetables with some salt and turmeric powder, except capsicum, onion and tomatoes. Take care to not turn them mushy.

2. Now in a pan or Kadai pour oil and heat. Put in the Bay leaf, cumin seeds, green cardamom and cloves and fry for 30 seconds. Now add the onions and ginger garlic paste, and saute for 30 seconds. Add the capsicum and continue to saute for another minute
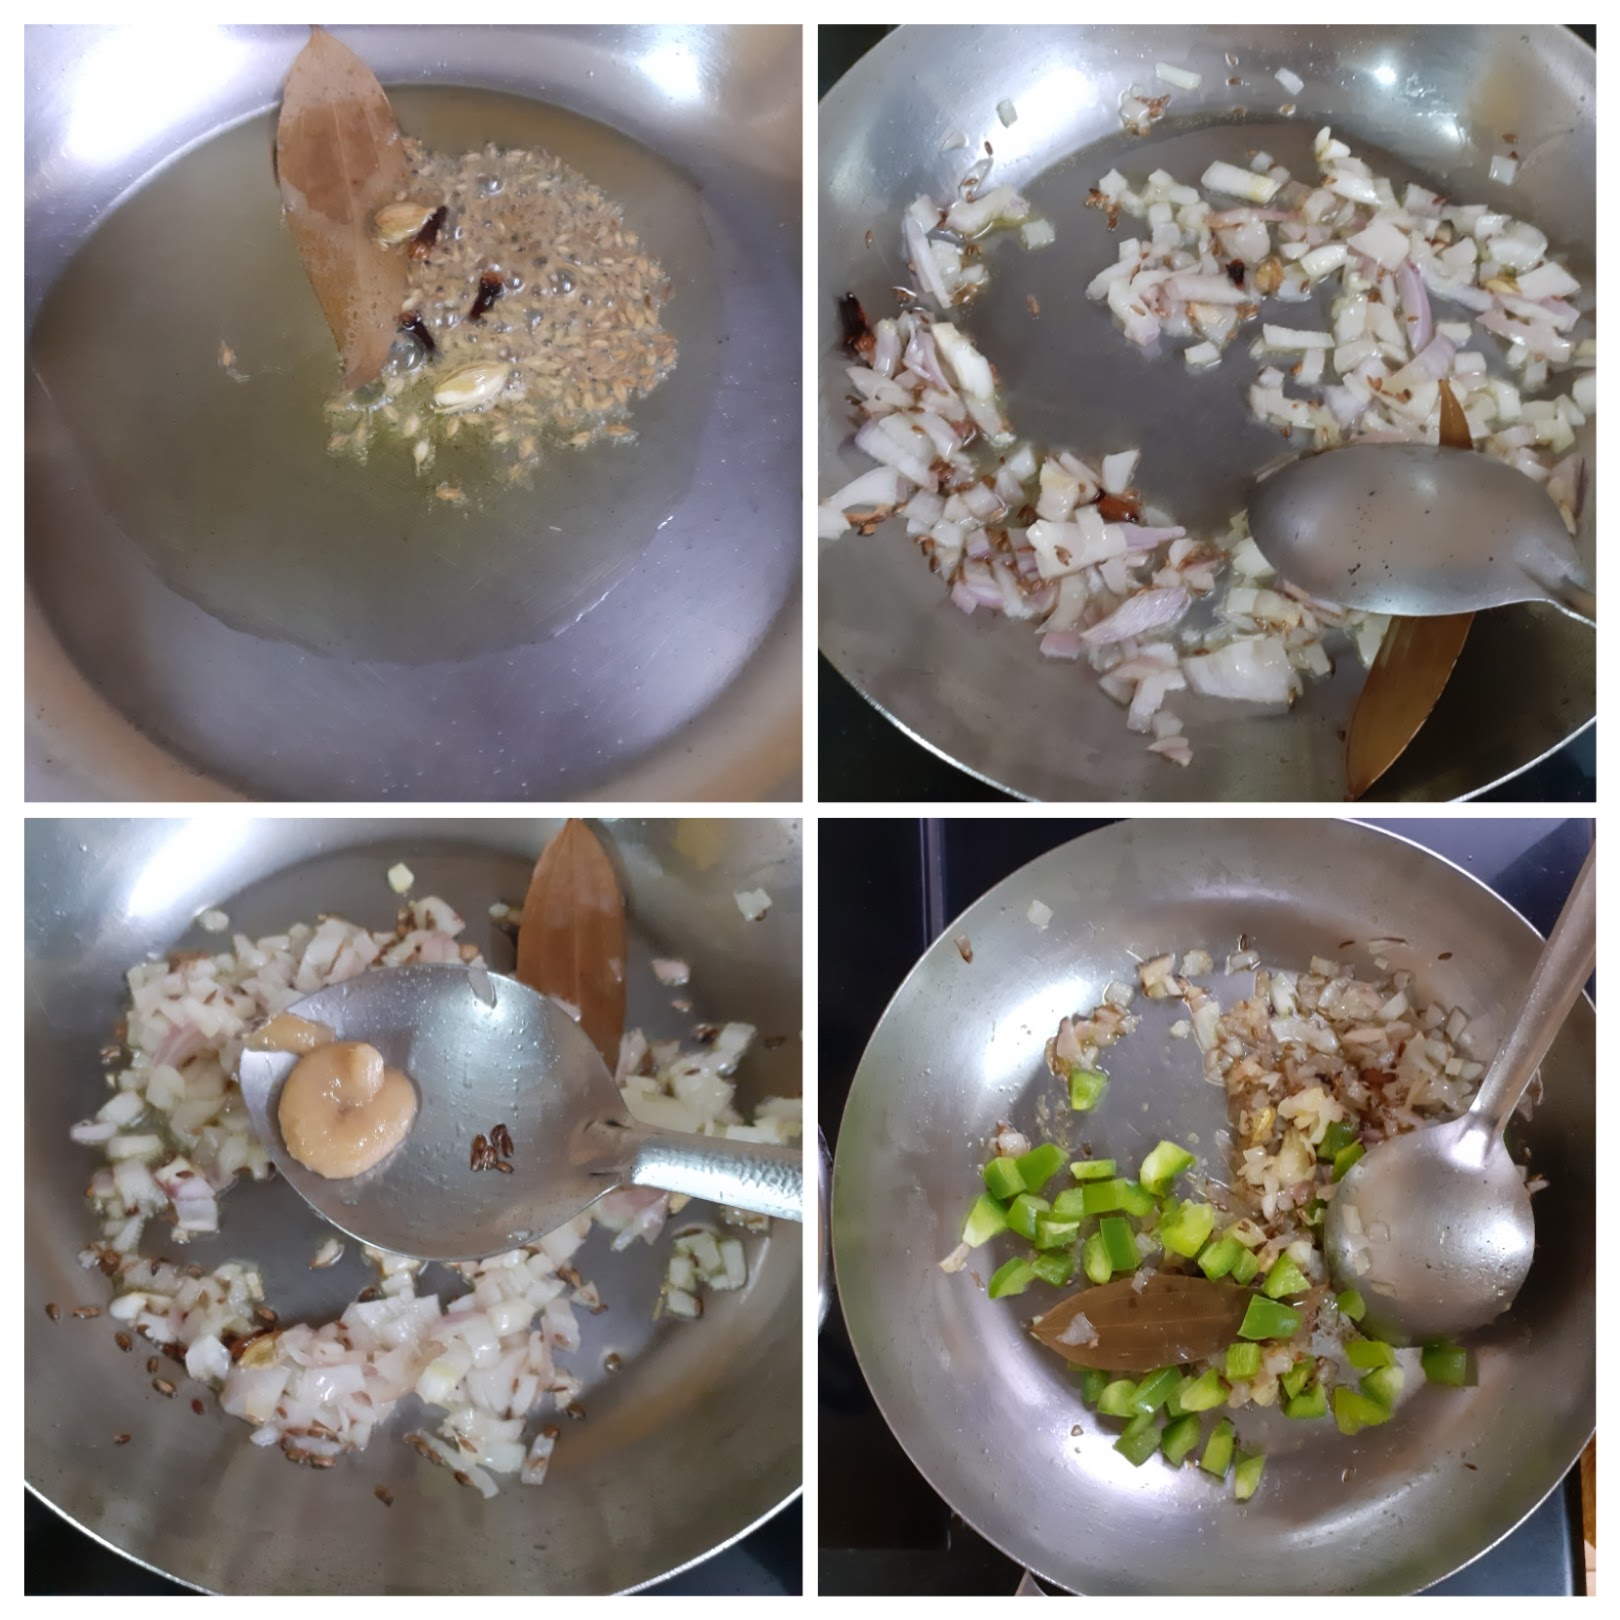
3. Now add the tomato puree and all other spice powders like red chilli powder, biryani masala and the salt. Cook the gravy until the oil separates.
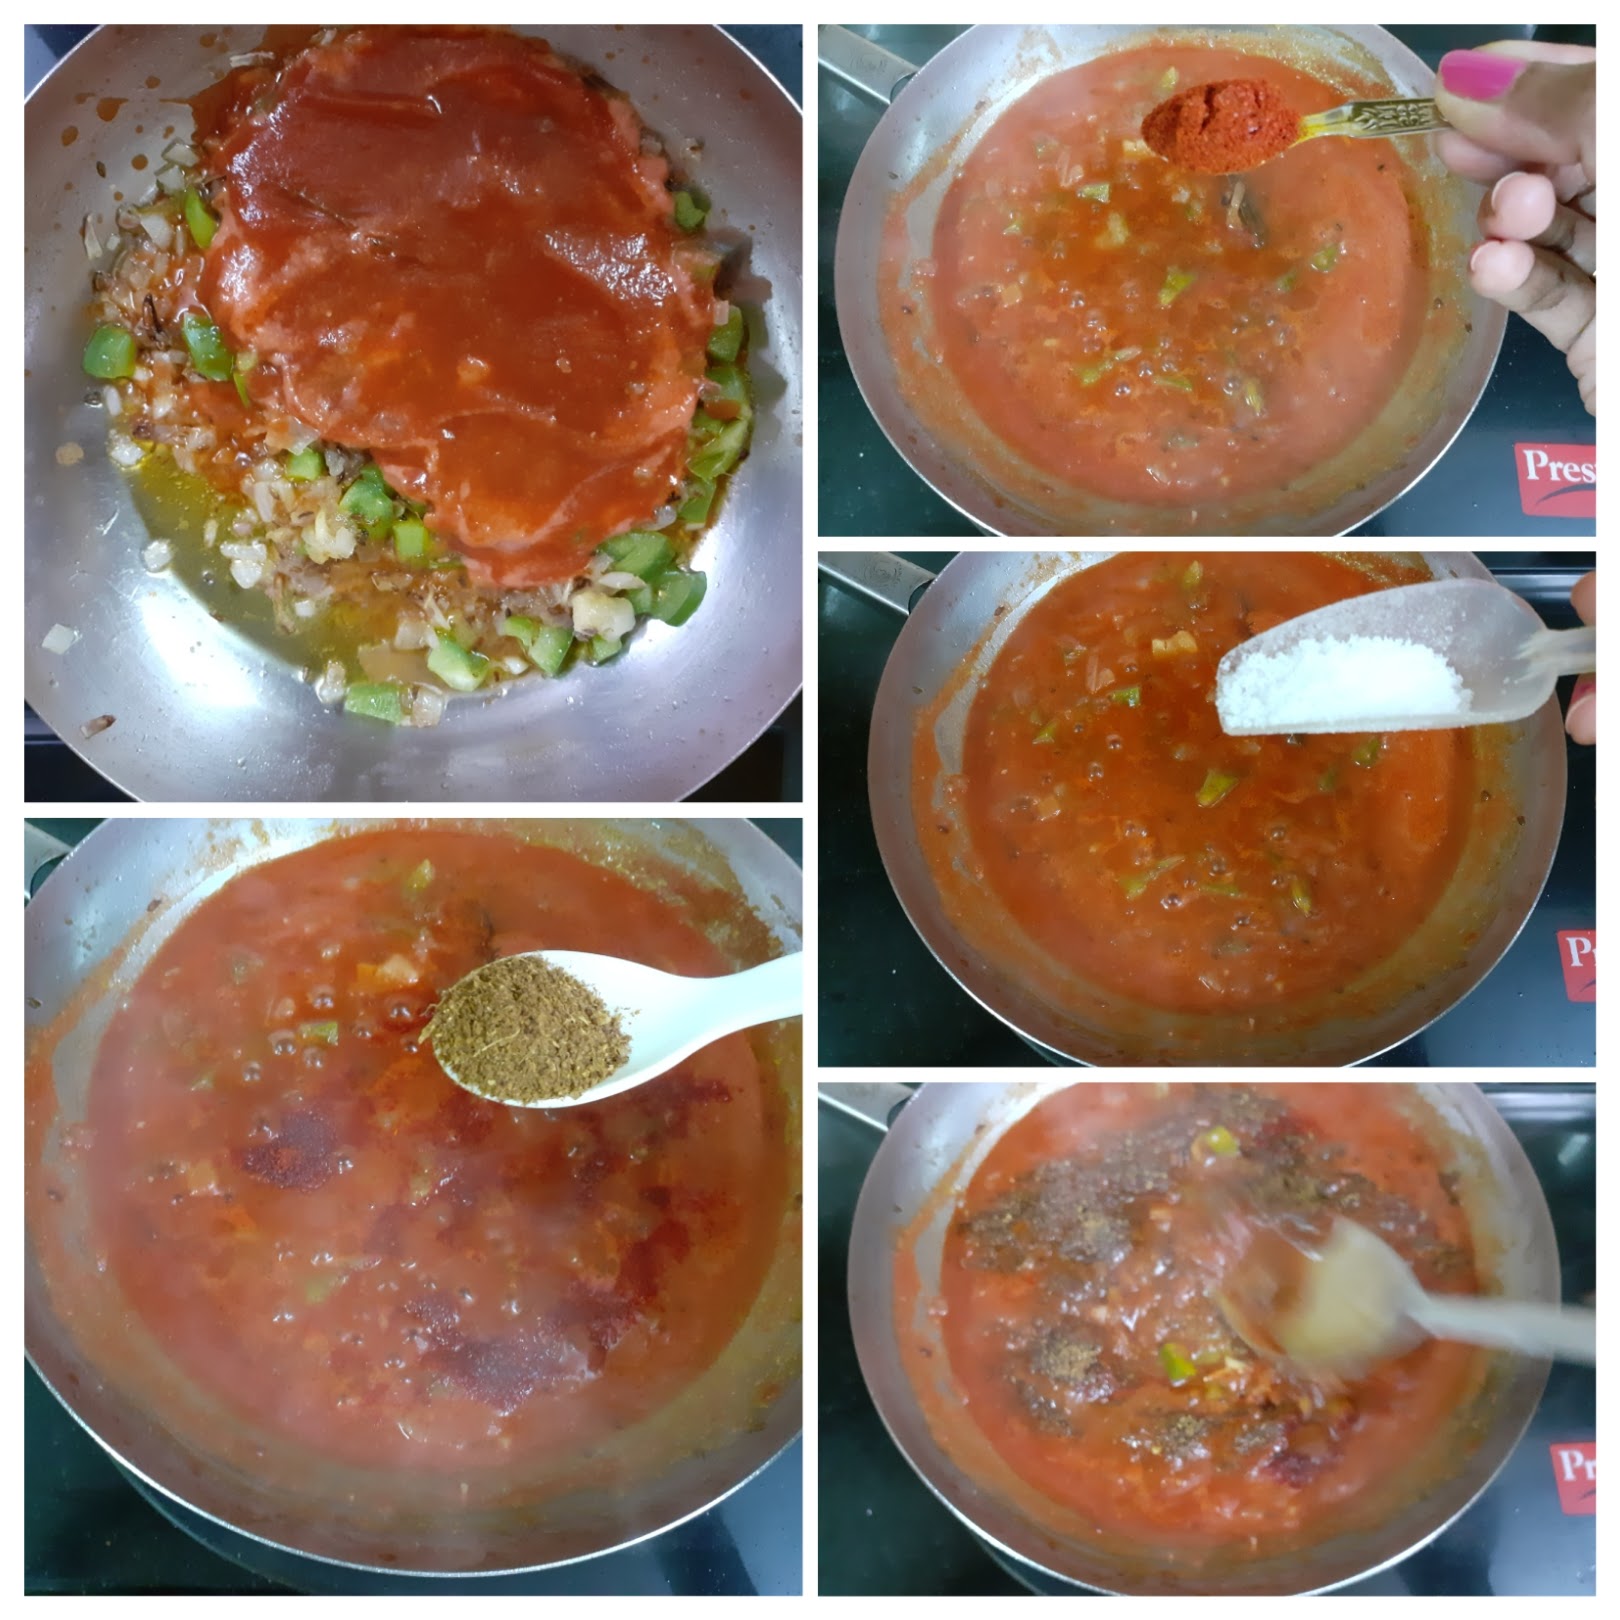
4. Now add the steamed vegetables, mix well and cook for a minute. Grind the coconut, fennel seed, cashewnuts and green chillies to a smooth paste adding a little water.
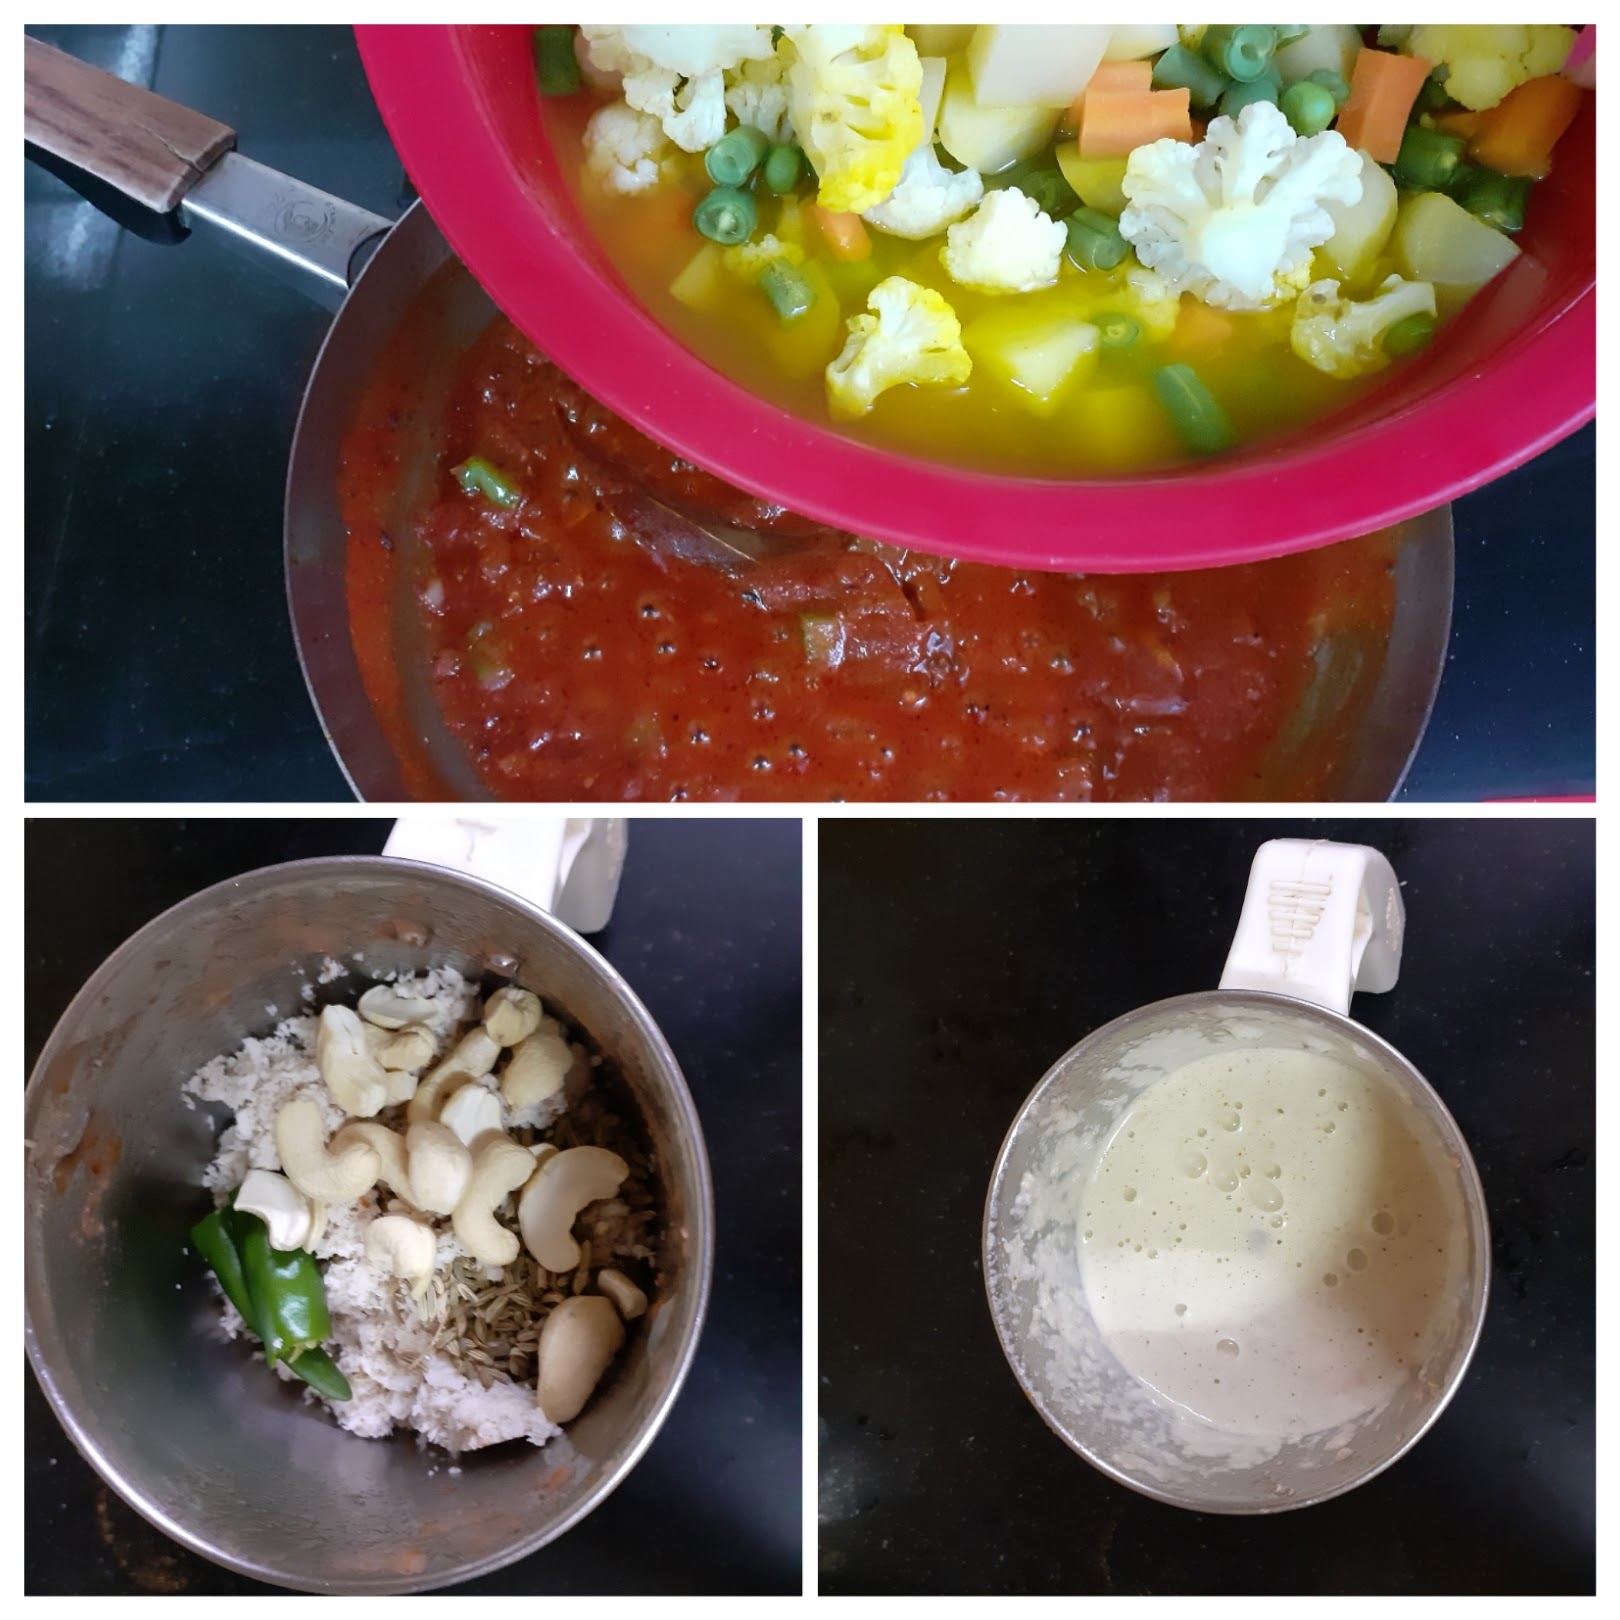
5. Pour this paste into the cooking gravy. Cook for another2 minutes or until the gravy cones together and put of the stove. Garnish with curry leaves add the garam masala powder now if using, and enjoy with your choice of tiffin
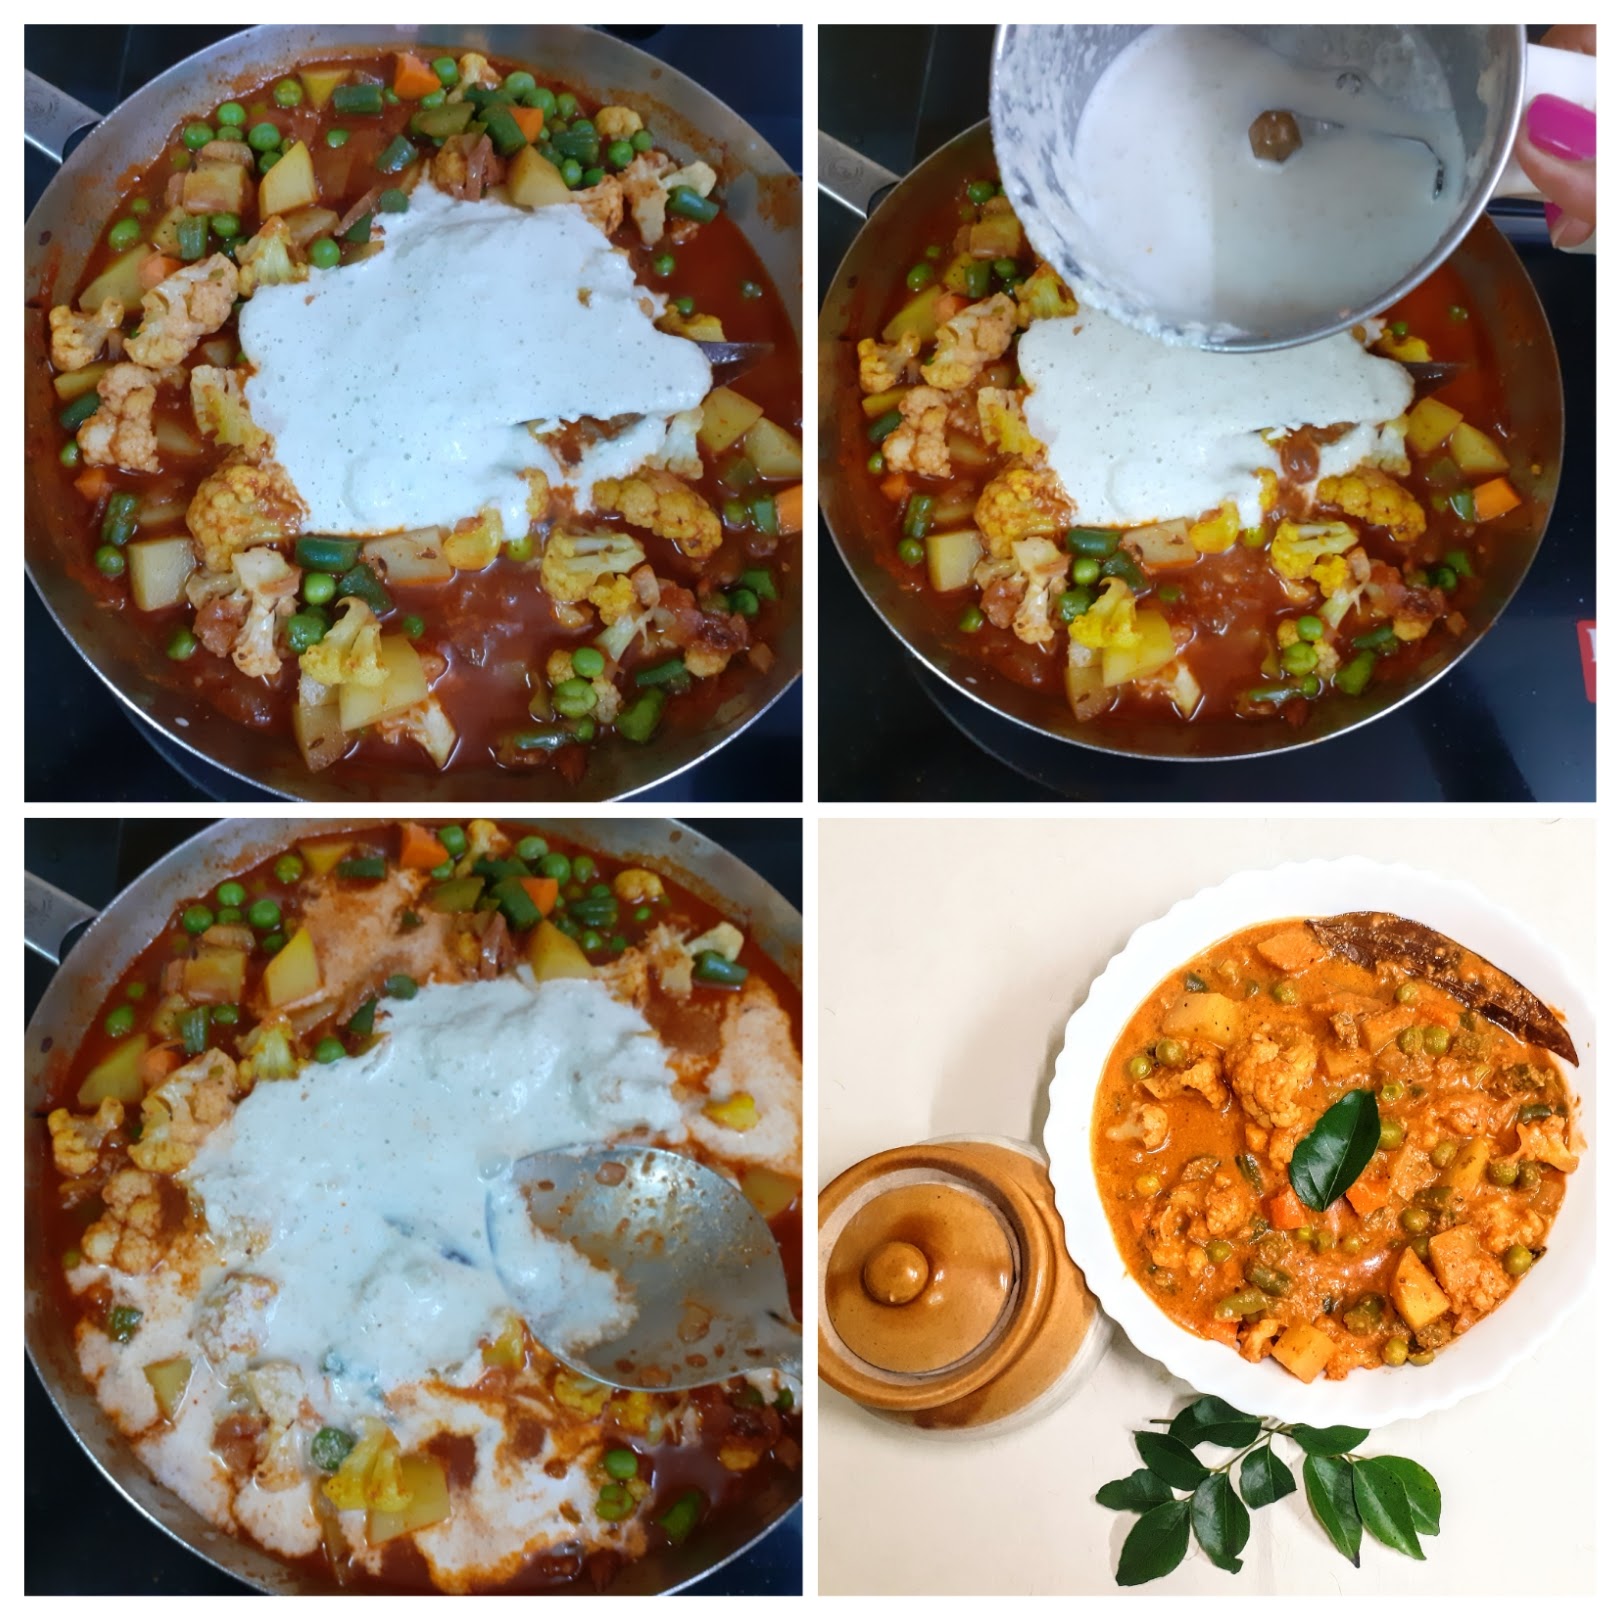
NOTES:
1. The vegetables used can be customized to your liking. That said vegetables with a lit of water content like gourds, brinjal etc are not preferred much.
2. For a thicker gravy add more cashew and coconut. For a thinner one reduce the cashew and coconut or use the quantity given and then thin down with water
3. I use biryani masala for the kurma as it gives a very nice flavoring to the kurma. One can use garam masala too but the authentic taste does not come in.
4. I use homemade Biryani masala. For recipe of Biryani masala click here. Feel free to use store bought one too.
If you tried this recipe and liked it, please let us know in the comment box. I would love to hear from you. If you would like to receive our future posts on your mail, please leave your mail Id so that we can post it to you.
Bajra & Ragi Cheela
A healthy breakfast is a beautiful start to the day. What better than millets to keep you satiated for longer, and lighter on the tummy too. Millets are in fashion now, but have been in our land for ages. Our ancestors used them extensively and then they kind of vanished from the scene owing to “ready to eat meals” revolution and the “instant meal” idea. After a long time they ( Millets ) are getting their due. As this generation falls prey to lifestyle diseases, the millets came to the rescue and they started trending all over again.
So, here is my take on the regular Besan Cheela, where I have added Bajra and Ragi flour to the besan. This breakfast dish keeps one satiated and is tasty too. It gets done with minimum oil and can be served with pickle, or a green chutney. Homemade butter goes well too. A glass of buttermilk to go with and a lovely breakfast platter is ready.
While you are here please check out my other breakfast recipes like Kuthiraivali Pongal aka Barnyard millet Pongal, Dahi Pohe, Rava Dosa and more….
Since this is a simple and mix everything together recipe I have not given stepwise pictures or instructions. Yes its that easy ????.
PREP TIME: 15 MINS COOK TIME:15 MINS
TOTAL TIME: 30 MINS COURSE:BREAKFAST
CUISINE:INDIAN SERVINGS: 4
AUTHOR: RAJNI RAM
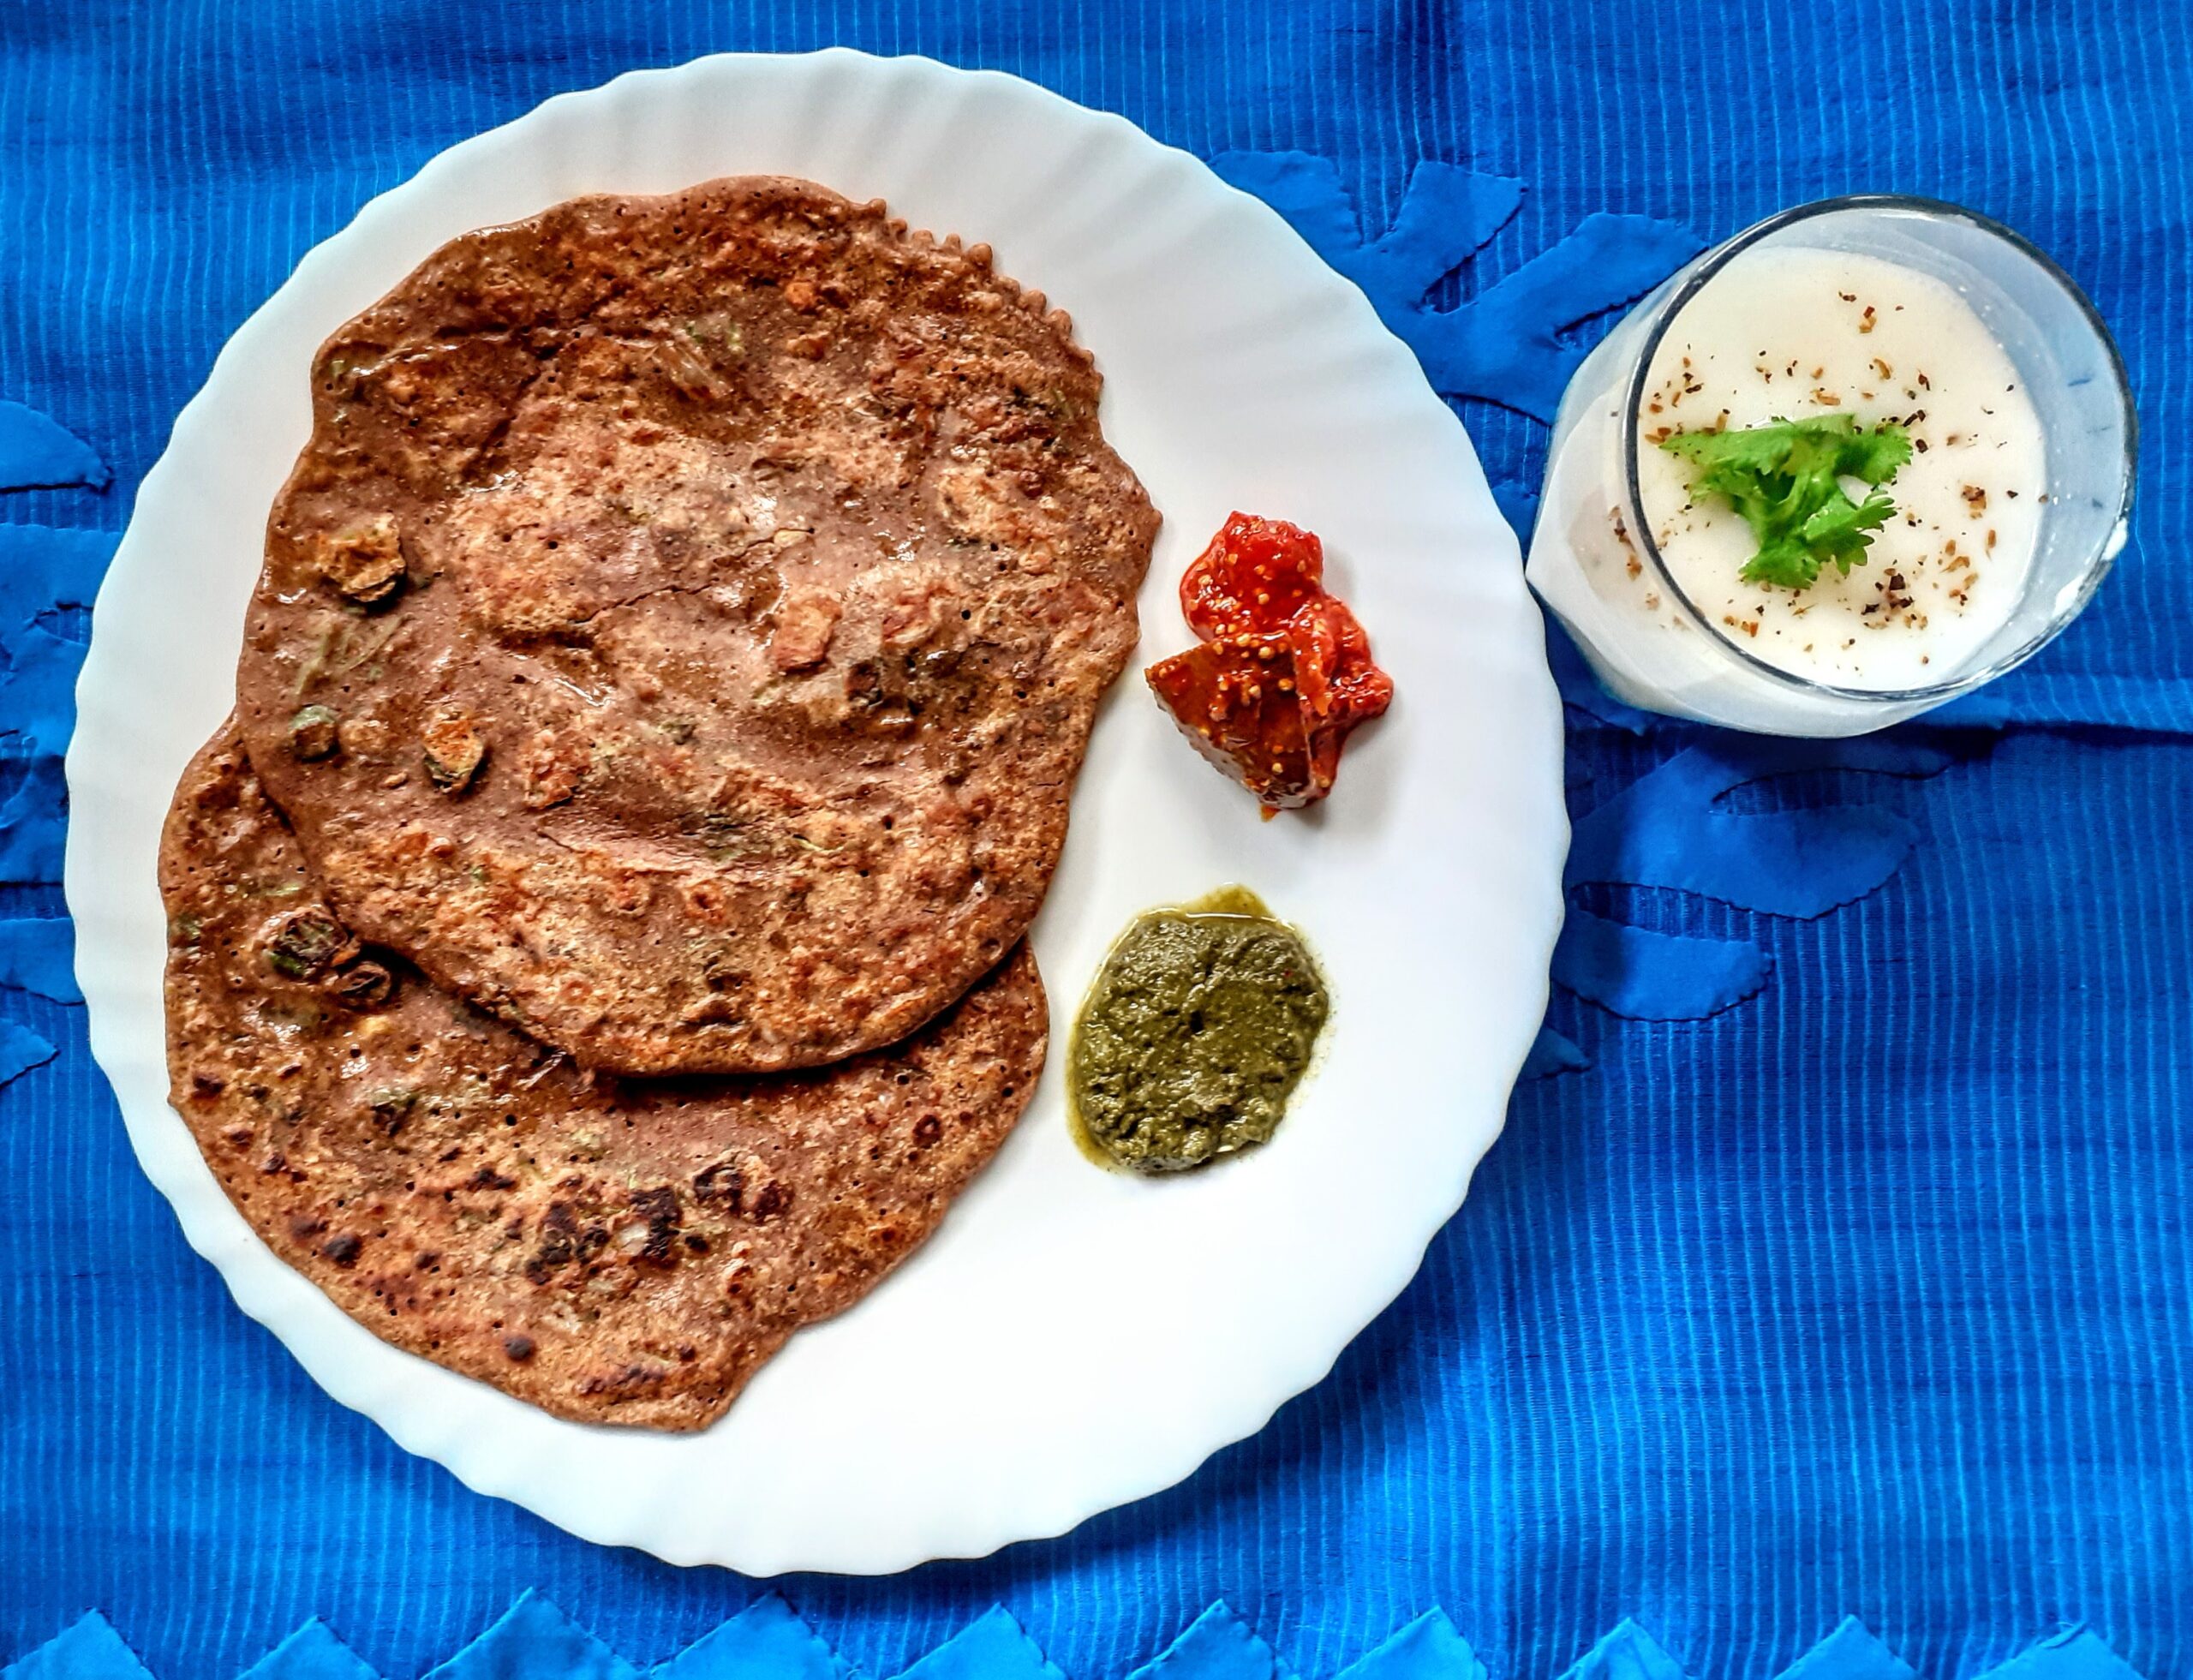
Ingredients:
Besan 1.5 cups
Ragi flour/ finger millet flour 1 cup
Bajra flour/ pearl millet flour 1 cup
Salt as per taste
Curd 3 tbsp
Green chillies 2 or 3 finely chopped
Ginger 1 inch finely chopped
Ajwain/ carrom seeds 1 tsp
Fresh coriander a few sprigs finely chopped
Onion 1 finely chopped
Red chilli powder 1 tsp or as per taste
Coriander powder 1 tsp
Fennel powder 1 tsp
Water for making the batter
Oil for cooking the cheela
Directions:
In a large bowl put in all the 3 flours. Add salt and all dry masalas like- Ajwain, red chilli powder, coriander powder, andfennel powder. Now add the chopped onions, green chillies, ginger, fresh coriander and mix thoroughly. Now add the curd and stir again. Now adding water little by little making a batter. The consistency should be like the Dosa batter, not too thick and not too thin. Let it rest for 10 minutes minimum. Now heat a girdle/ tava and smear little oil. Pour the batter and don’t spread it with a ladle, instead let it spread by itself( just like a pan cake). Drizzle little oil and cook on one side, flip and cook on the other and remove. Repeat for all the batter and serve with your choice of chutney or sauce.
Notes:
1. One can try the same with other millet flours too.
2. Millet flours don’t absorb a lot of water, therefore while adding be careful and it’s best to add a little at a time.
If you tried this recipe and liked it, please let us know in the comment box. I would love to hear from you. If you would like to receive our future posts on your mail, please leave your mail Id so that we can post it to you.
Thengai Molagapodi (Coconut Gun Powder)
Molagapodi or south Indian Gun Powder as it is referred to is an everyday accompaniment in every southindian household. It also goes by the name Idli Podi or Dosai Molagapodi.
In my house we make this powder every other week. In this recipe I am adding coconut to the gun powder/ molagapodi and this gives a very nice flavour and texture to the powder.
Usually making Thengai Molagapodi is a ritual for me after the Navarathri celebrations, as a lot of coconuts get accumulated at home, owing to visits to friends and family for accepting the Vethalai Paaku or Haldi Kumkum. So many coconuts cannot be consumed at a time, but ofcourse grating them and storing in the freezer is an option, but I prefer making the Thengai Molagapodi instead as then I don’t have to make a chutney everyday ????.
The procedure of making it is very simple. Therefore I am giving the stepwise recipe directly.
While you are here please check out my other Podi and sauce recipes like Rasam Powder, Sambar Powder, Karuvepilai Podi/ Curry leaves powder, Homemade Schezwan Sauce, Homemade Pesto and more…
Here is the recipe
PREP TIME: 15 MINS COOK TIME:15 MINS
TOTAL TIME: 30 MINS COURSE:ACCOMPANIMENT
CUISINE:INDIAN QUANTITY: 500 gms Approx
AUTHOR: RAJNI RAM
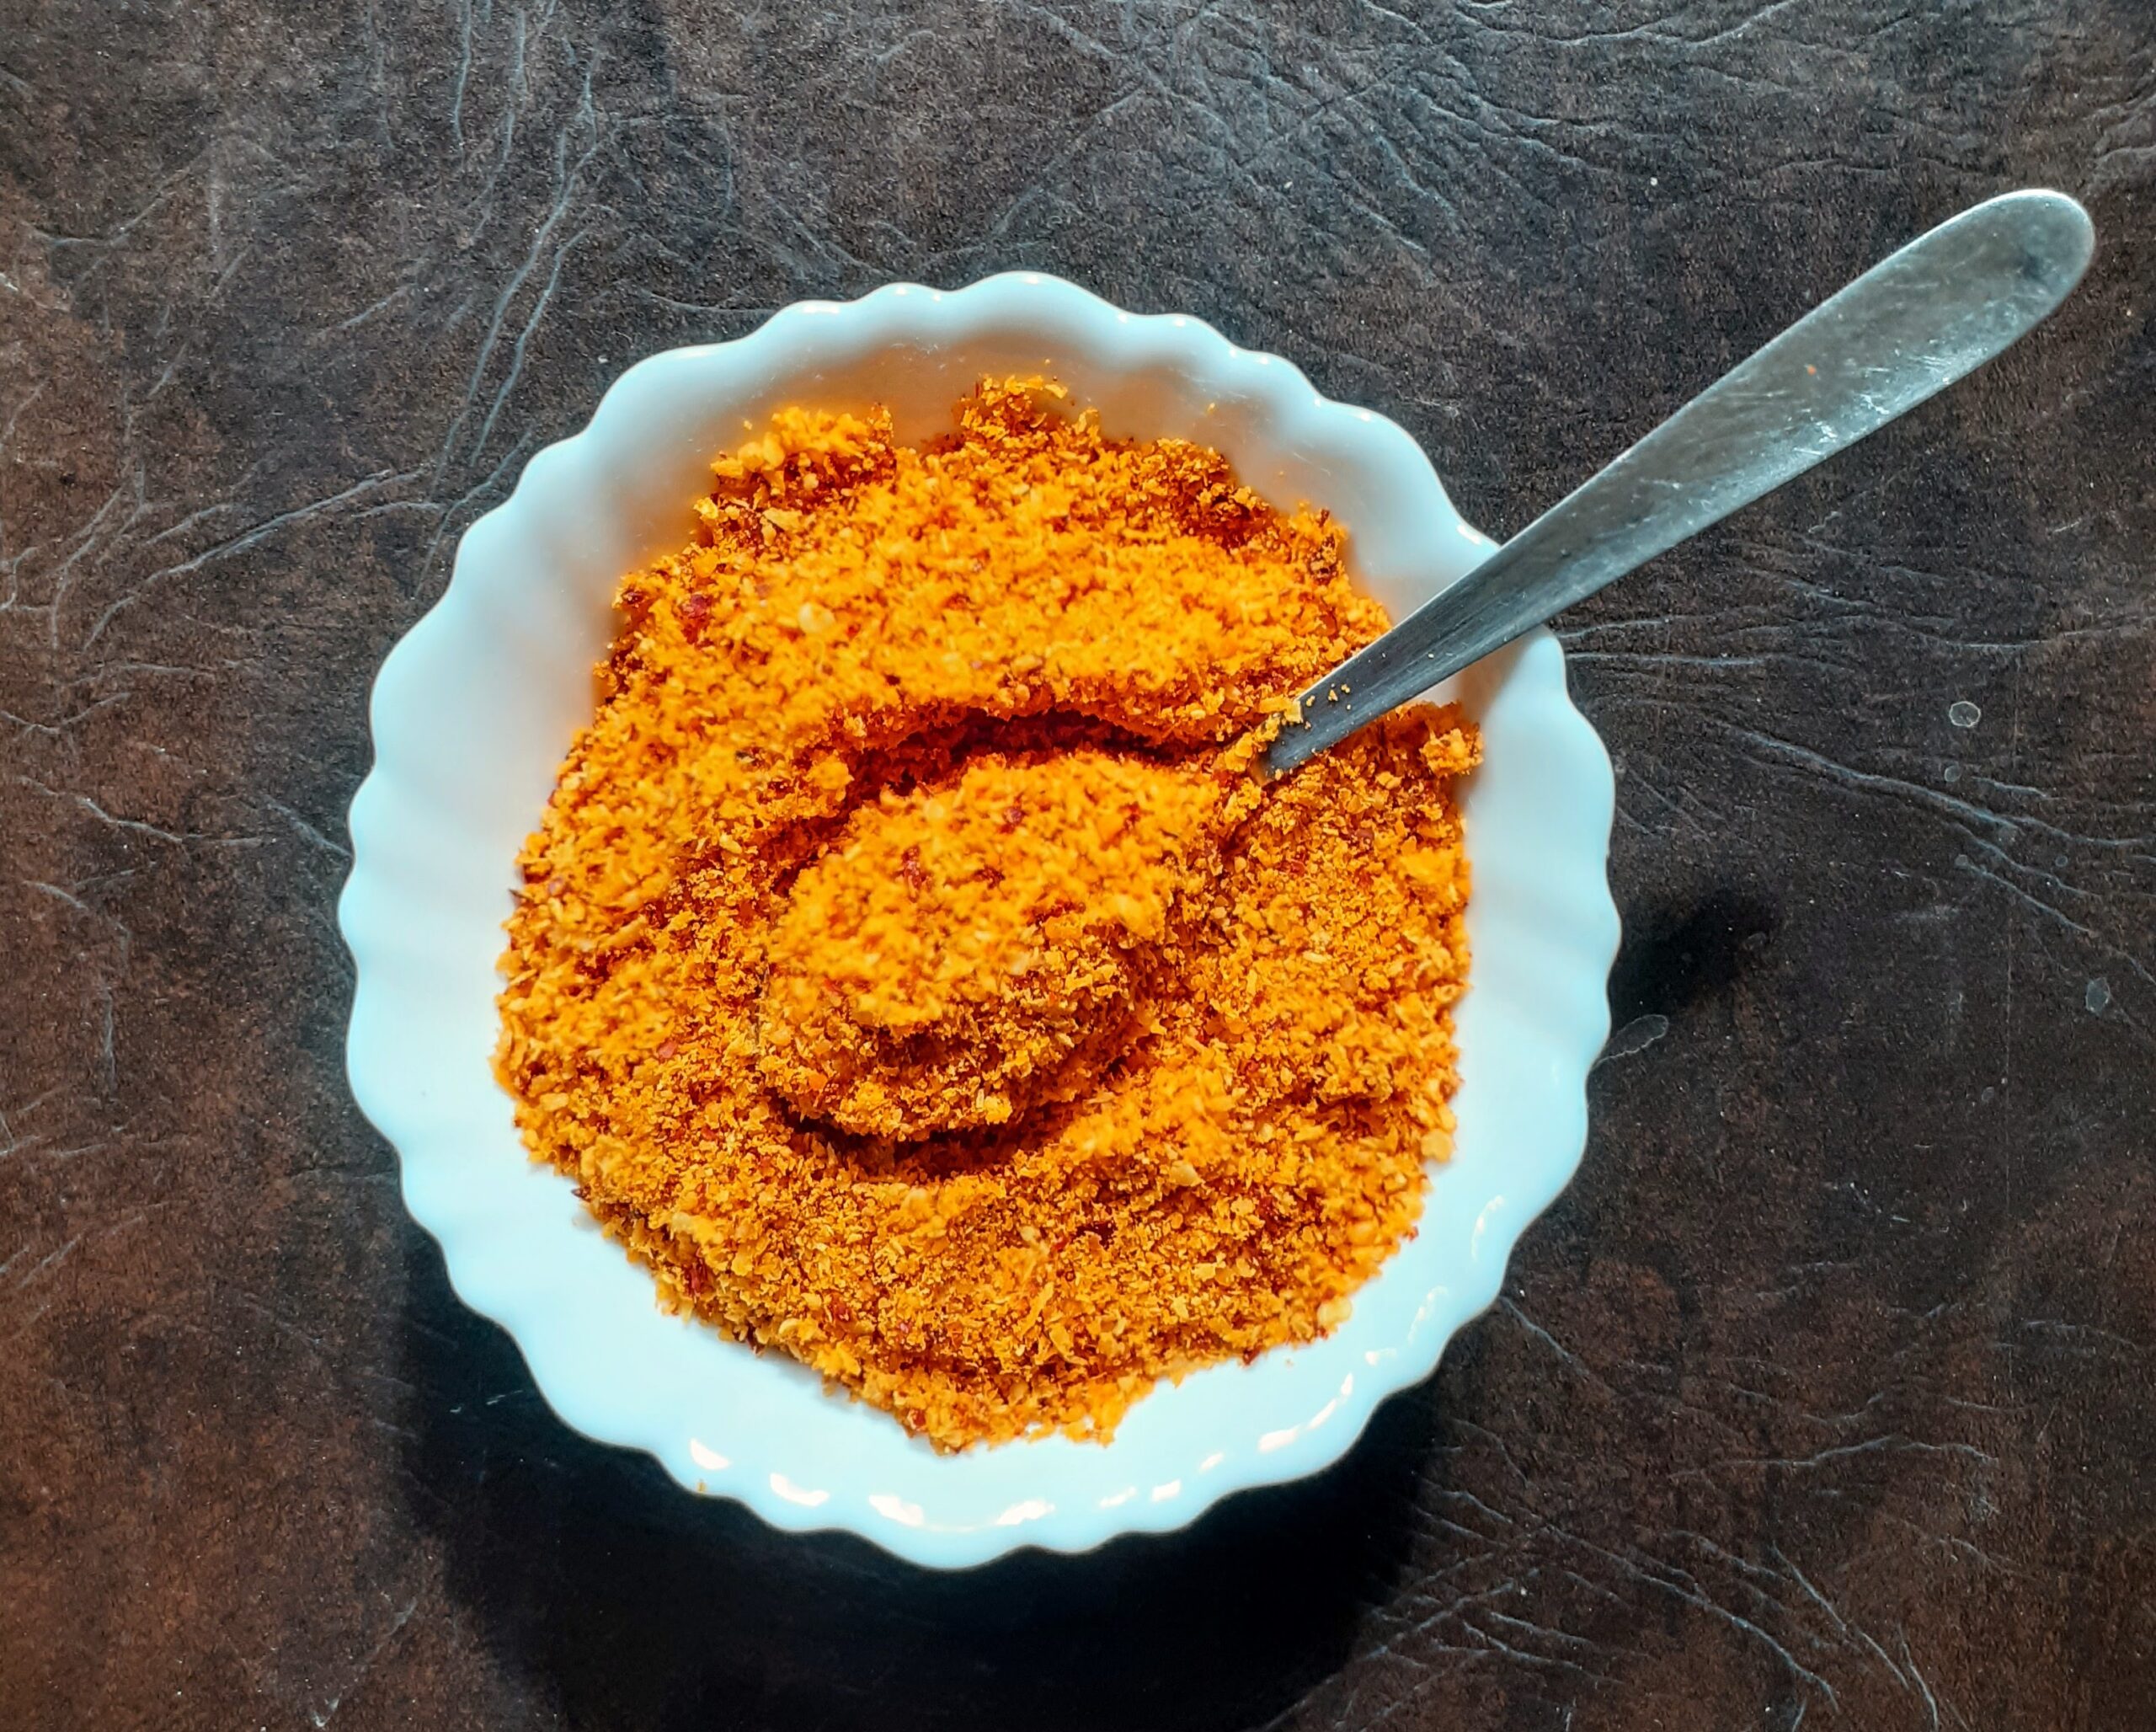
Ingredients:
Coconut 3 whole grated
Urad dal 2 cups
Chana dal 1/2 cup
Salt as required
Asafoetida 1 tsp
Dry red chillies whole 150 gm
Oil 1 tbsp for frying the dals
STEPWISE RECIPE FOLLOWS:
1. In a Kadai/ pan heat oil. Put the Urad dal and Chana dal and start roasting on low flame . Add Asafoetida 5 mins into the roasting process.

2. Roast the dals until they turn light brown in colour. Keep the flame low while roasting and keep stirring so that the dals fry evenly. Transfer to a plate and cool.
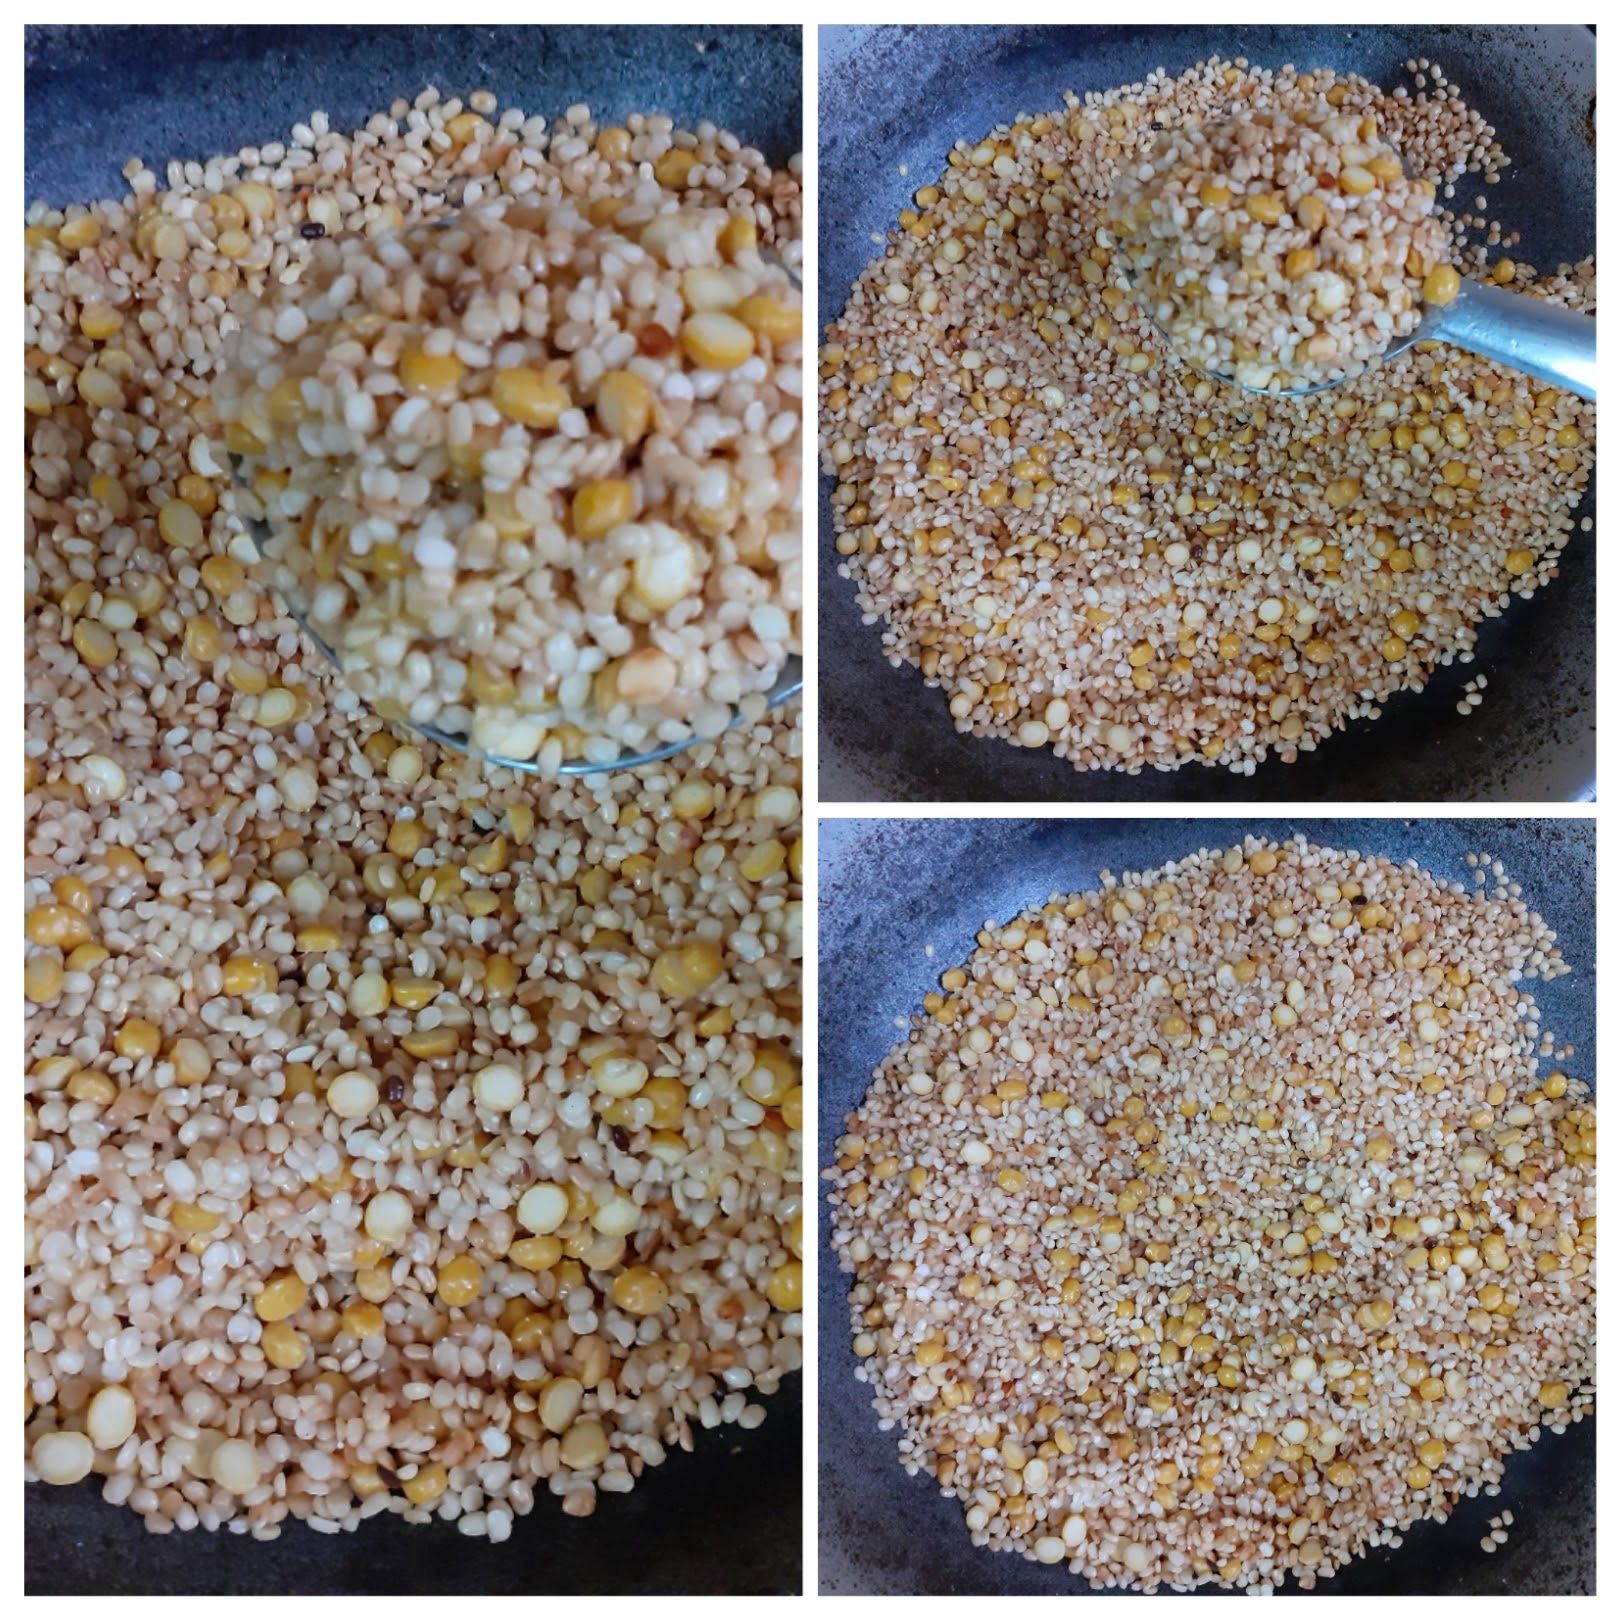
3. Now put the dry red chillies after removing the stems and roast on low fire for a minute. Put of flame let them stand in the hot kadai for few minutes. Cool completely.
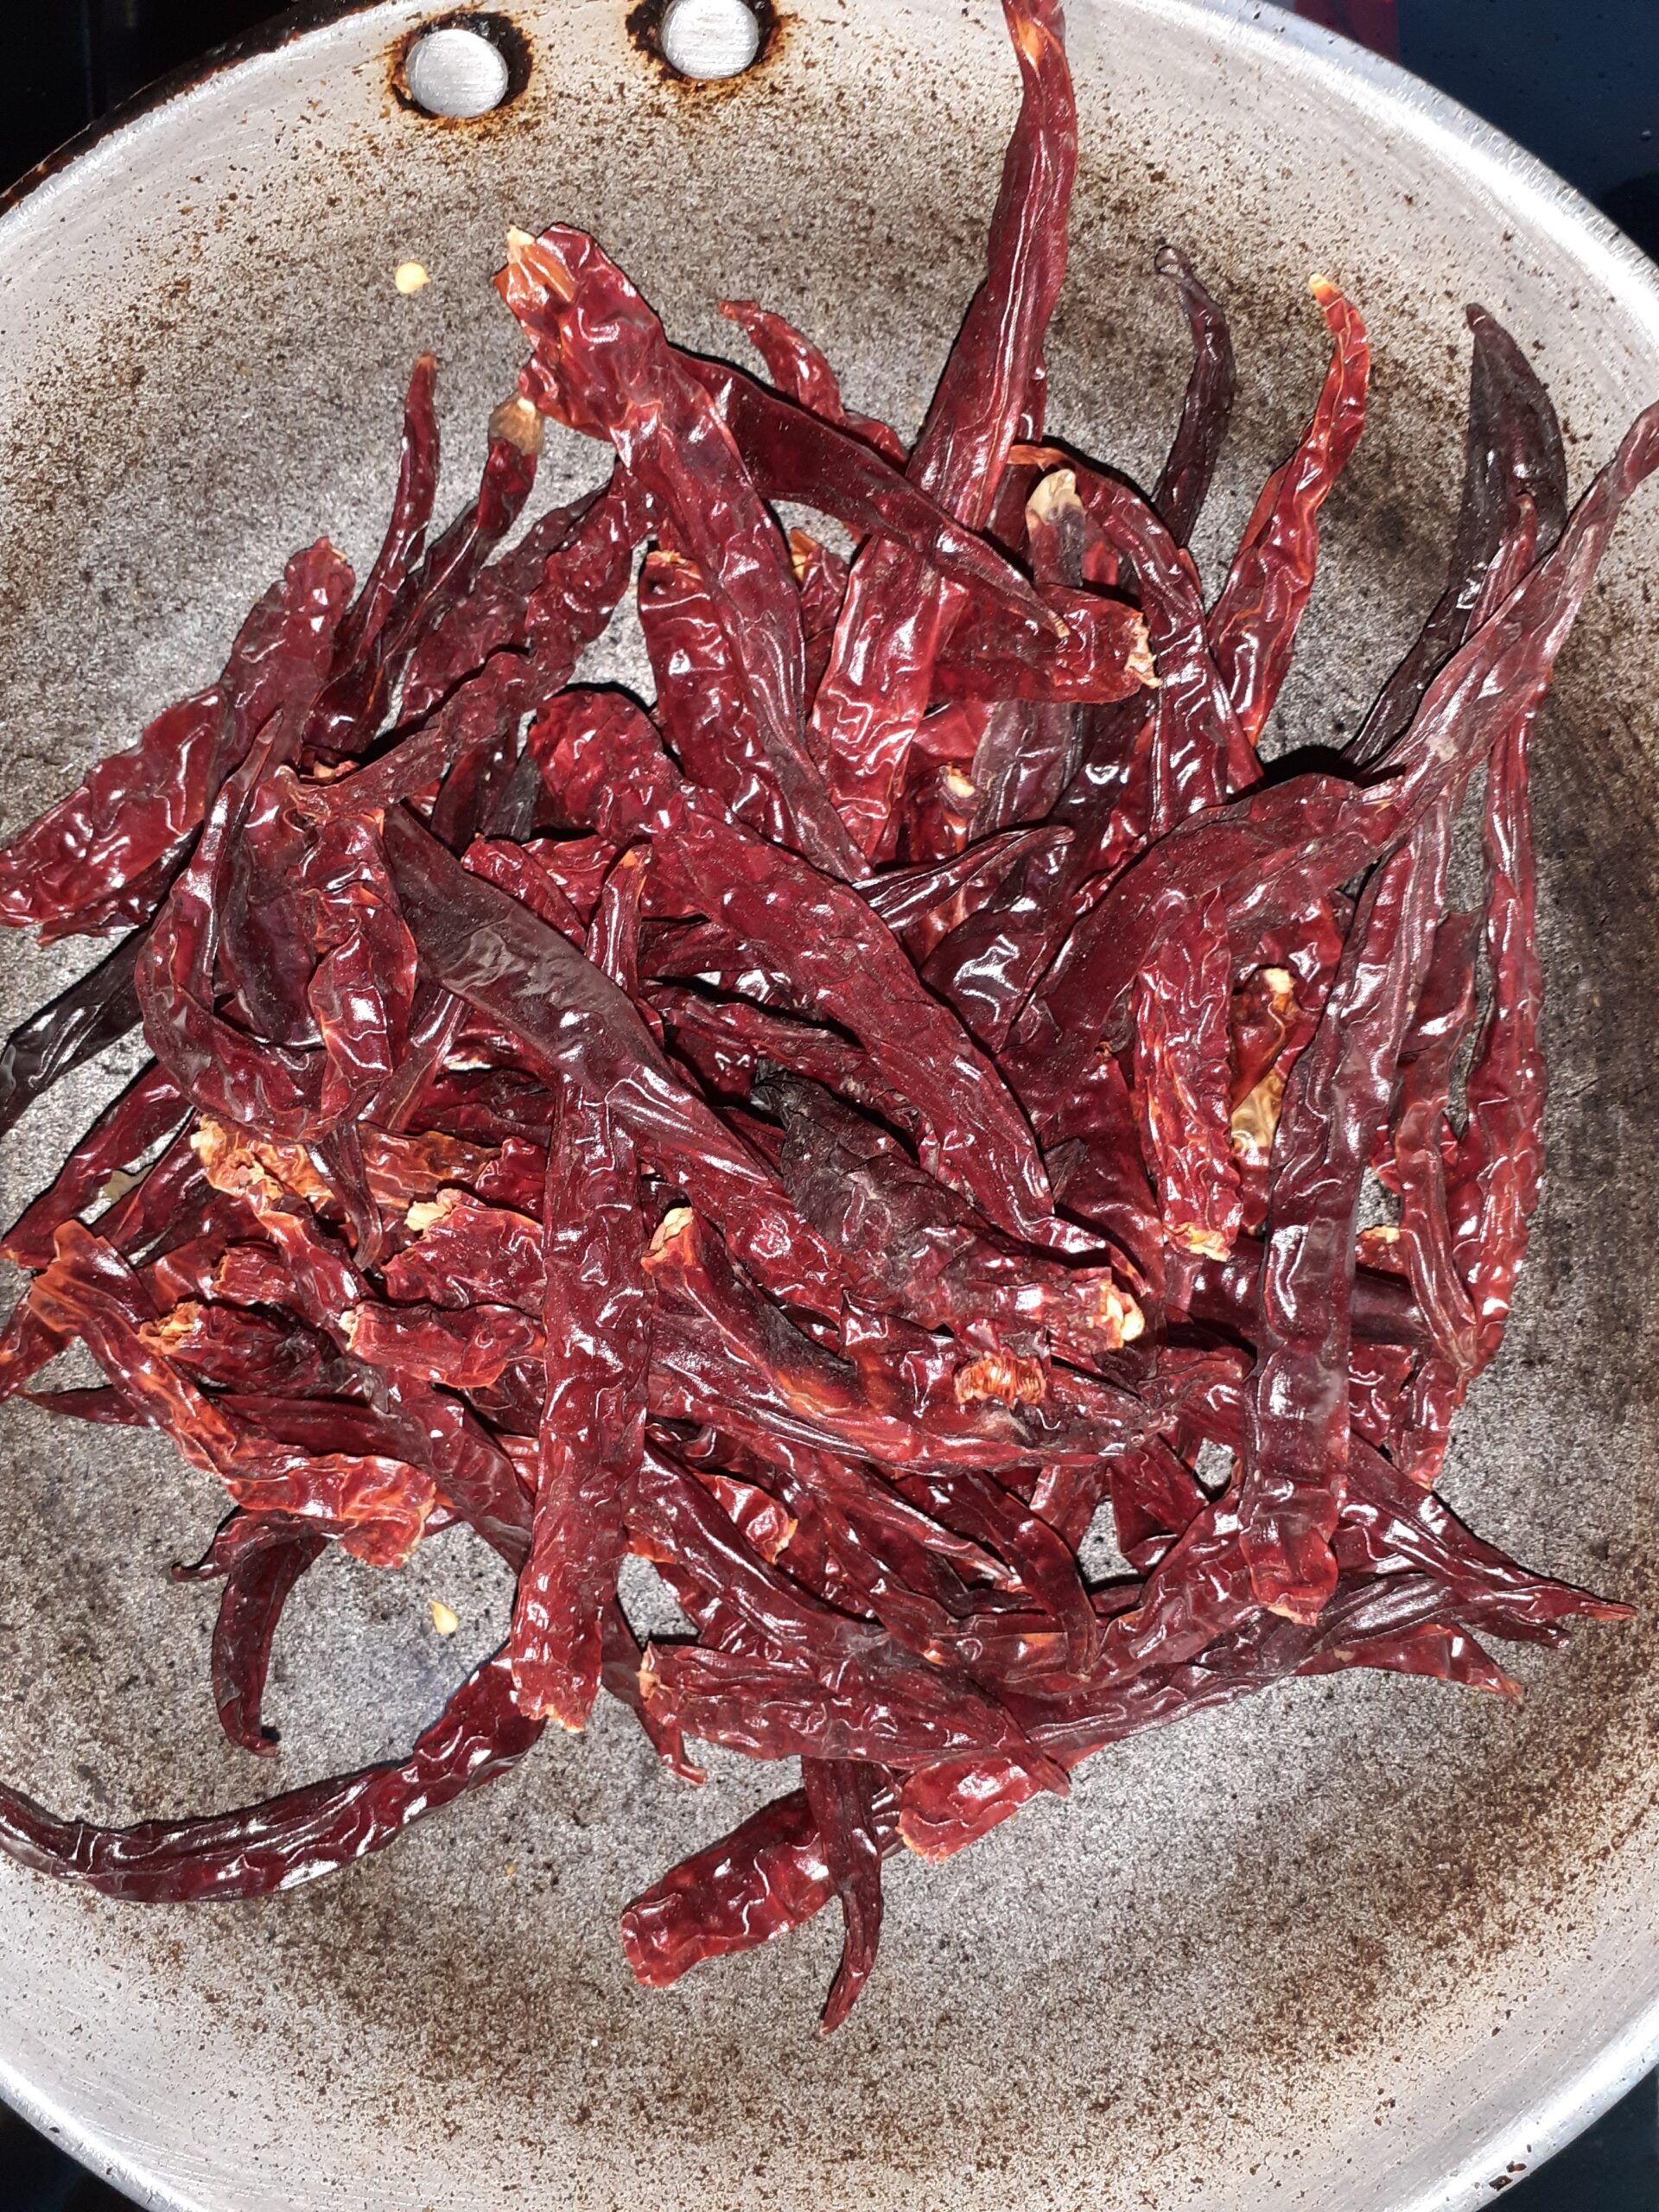
4. Now put the grated coconut in the kadai and start roasting it. If you prefer do it in batches. The coconut should not burn or else the taste of the powder will be ruined. Keep roasting until it turns light brown. Transfer to a plate and cool completely. Once cooled pick out any big pieces of coconut gratings you may find.
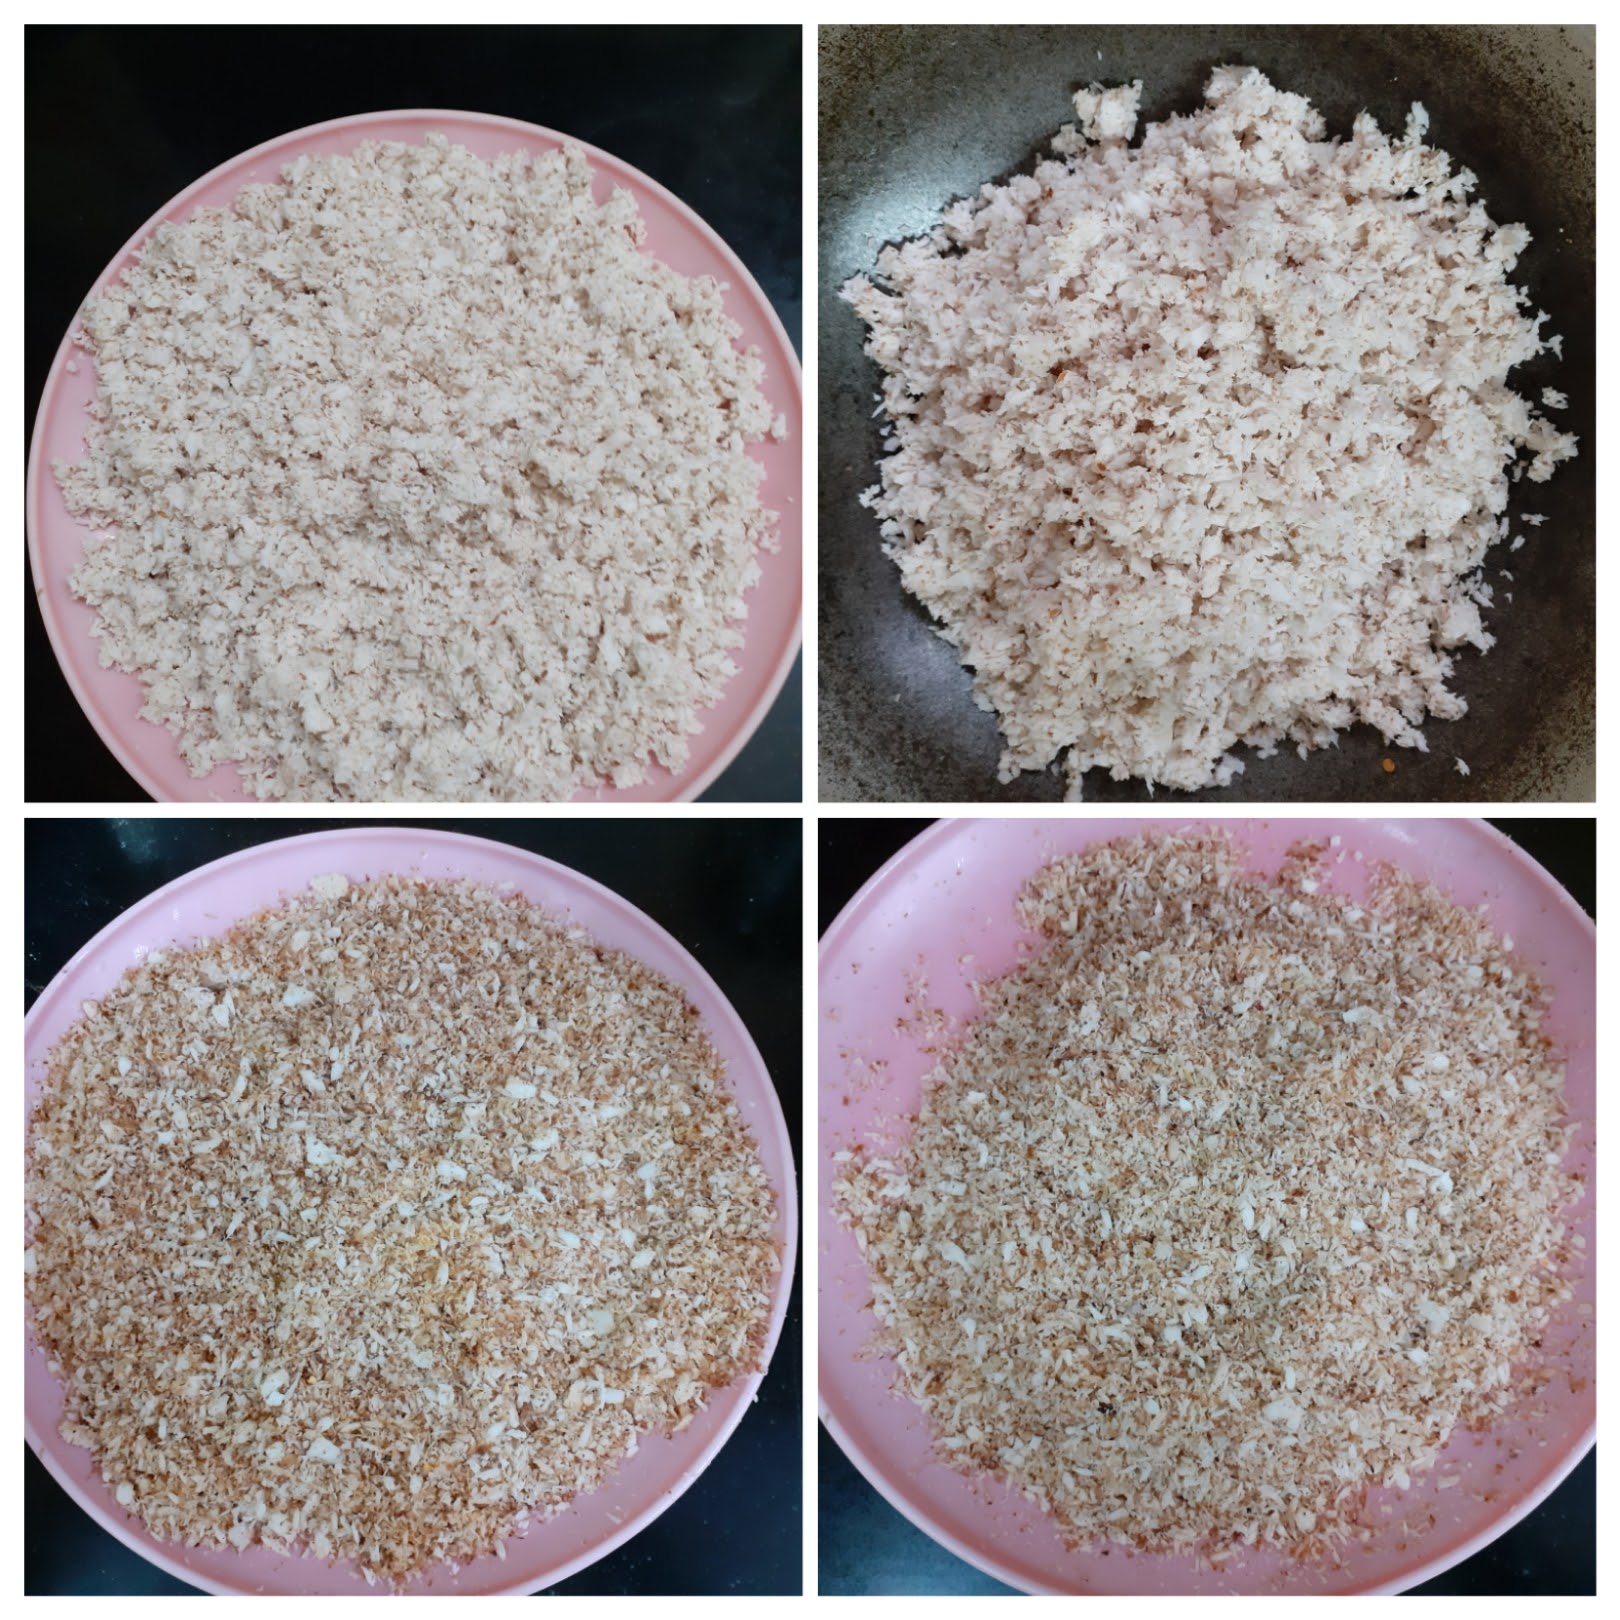
5. Now in your dry grinding jar put the dals and the chillies and grind to a fine powder. Do it in batches if you prefer. As you keep grinding keep transferring the ground powder to a big bowl. Now add the required salt and the grated coconut and start mixing with a spatula/ spoon. If you find the powder is a little coarse for you preference after mixing in the coconut, then just blitz it once again. The spicy and yummy Thengai Molagapodi is ready. Serve with Idli, Dosa, Kuzhi Paniyaaram, Rava Dosa, Adai and more.
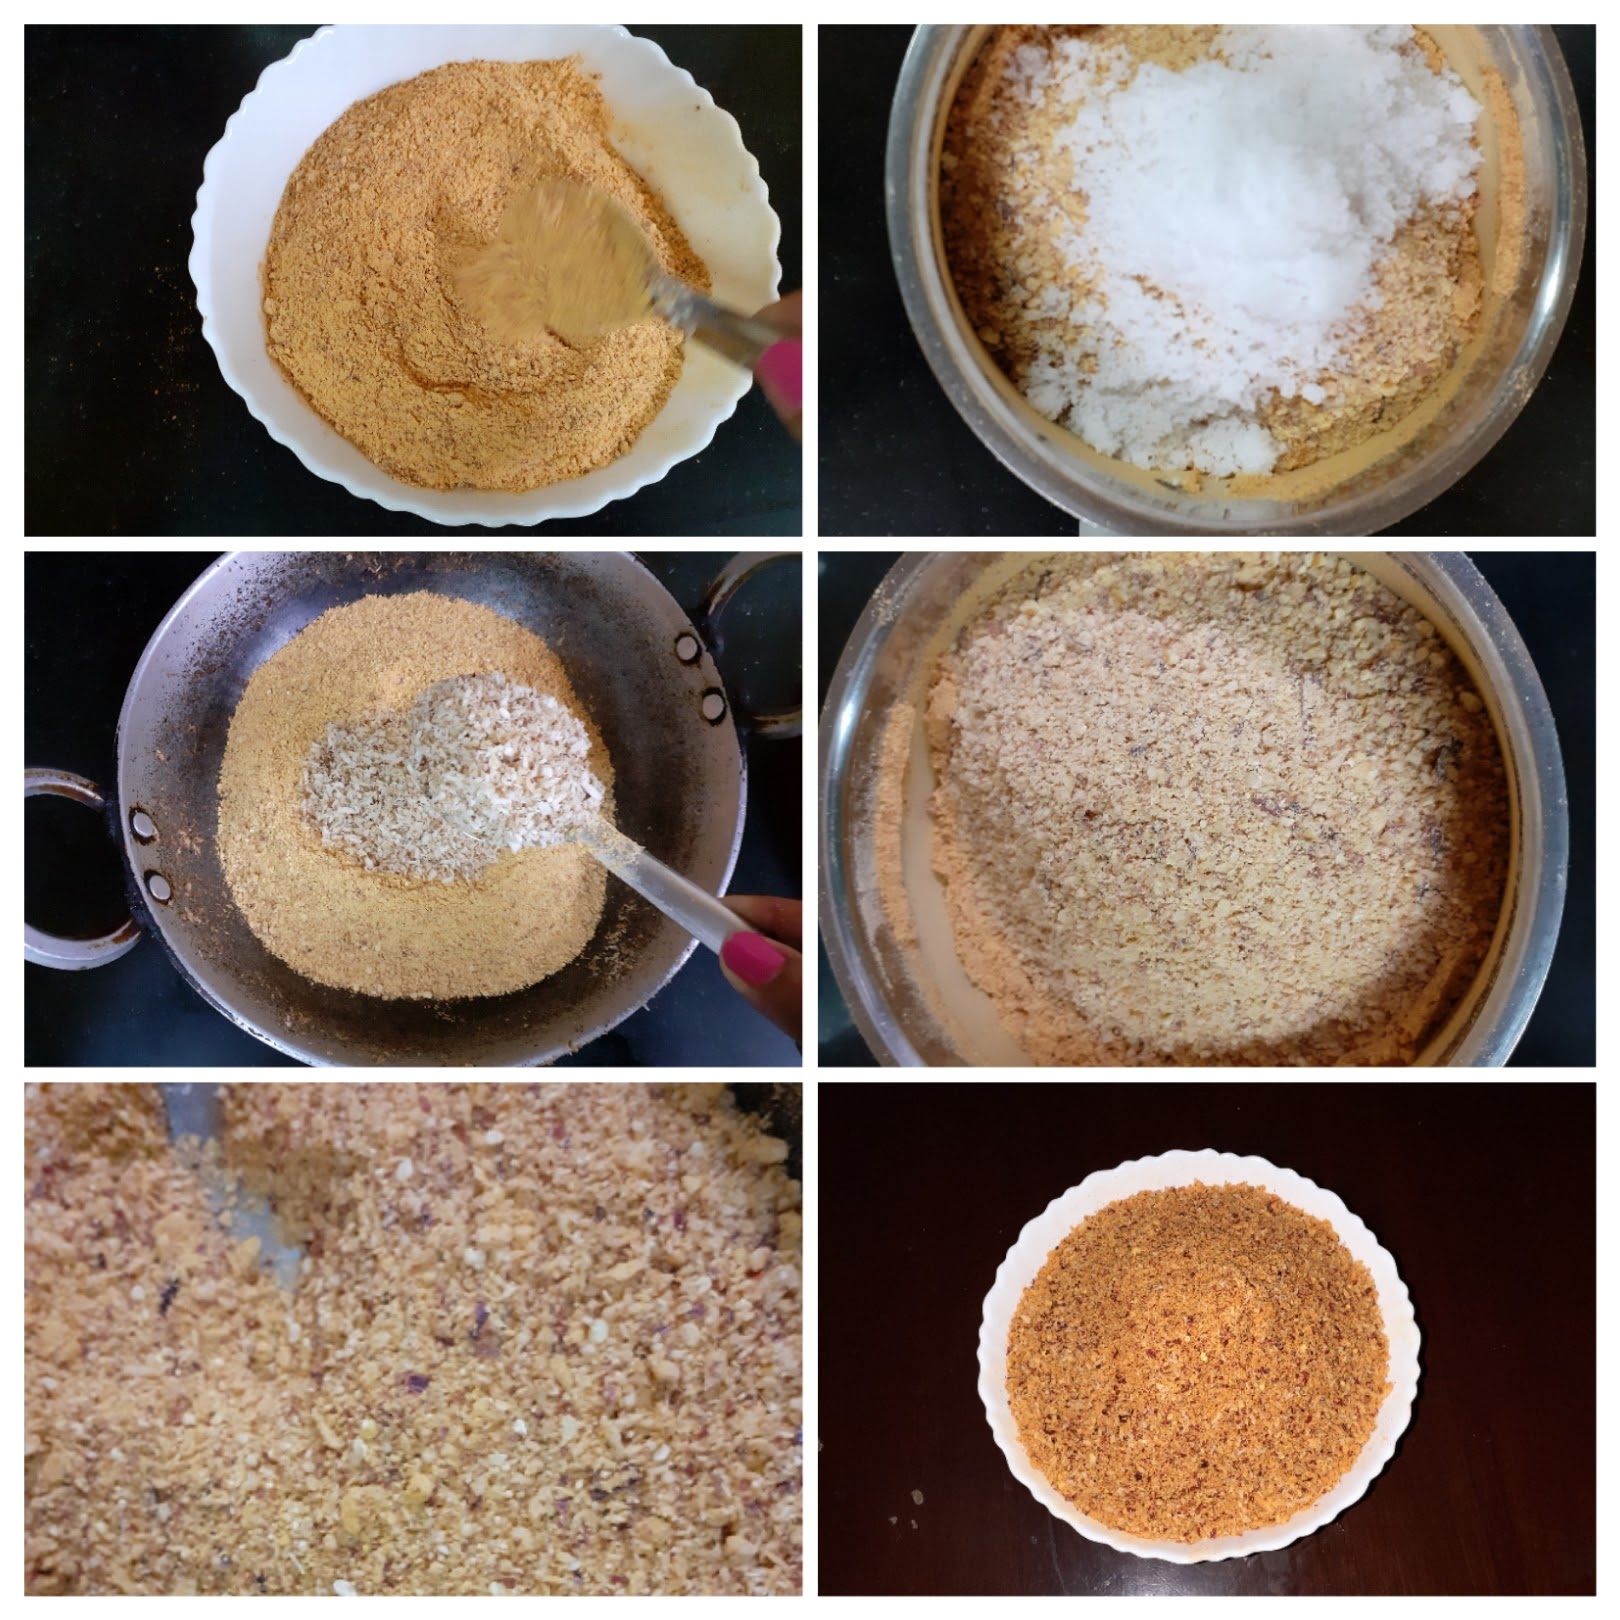
NOTES:
1. Patience while roasting the dals and the coconut will yield best results.
2. Salt and spice can be adjusted as required. The spice can be a little more as the sweetness of the coconut subdues the spice.
3. Choose coconuts that are mature and will have a thick inside. The tender ones which are light brown will not have the texture required for this recipe and you will also have to roast it for long as the moisture content will be high.
If you tried this recipe and liked it, please let us know in the comment box. I would love to hear from you. If you would like to receive our future posts on your mail, please leave your mail Id so that we can post it to you.
Easy 2 Way Muffins (Blueberry – Chocochip)
These Muffins are so easy to bake, the prep is easy too. By now you all know that when I choose to bake, it has to be something that is super easy and fuss free.
So here I am giving you a cup cake dough base which you can customize with your favorite add ins and toppings. These are good for breakfast or as a snack for kids snack box . The muffins can be stored in the refrigerator for upto a week and can be warmed in the oven before serving.
In this recipe I have topped them with my homemade Paneer Grapes conserve for the blueberry muffin and creamcheese-chocolate topping for the chocochip muffins. There are no pictures to them as the topping came as an after thought. However, I will share the procedure for the cream cheese icing without pictures. As for the conserve, a separate post for it will follow soon.
This is one such recipe where I have not added wheat flour and stuck to just refined flour. Usually I do only wheat flour or mix of wheat and refined flour.
While you are here please try out my other super easy cake recipes like Blueberry cheese cake, Upsidedown Orange Vanilla cake, Apple tea cake, Nutella fudge brownies, and more…
PREP TIME: 15MINS COOK TIME: 20MINS
TOTAL TIME: 35 MINS CUISINE: INDIAN
COURSE : DESSERT SERVINGS: 12 nos
AUTHOR: RAJNI RAM

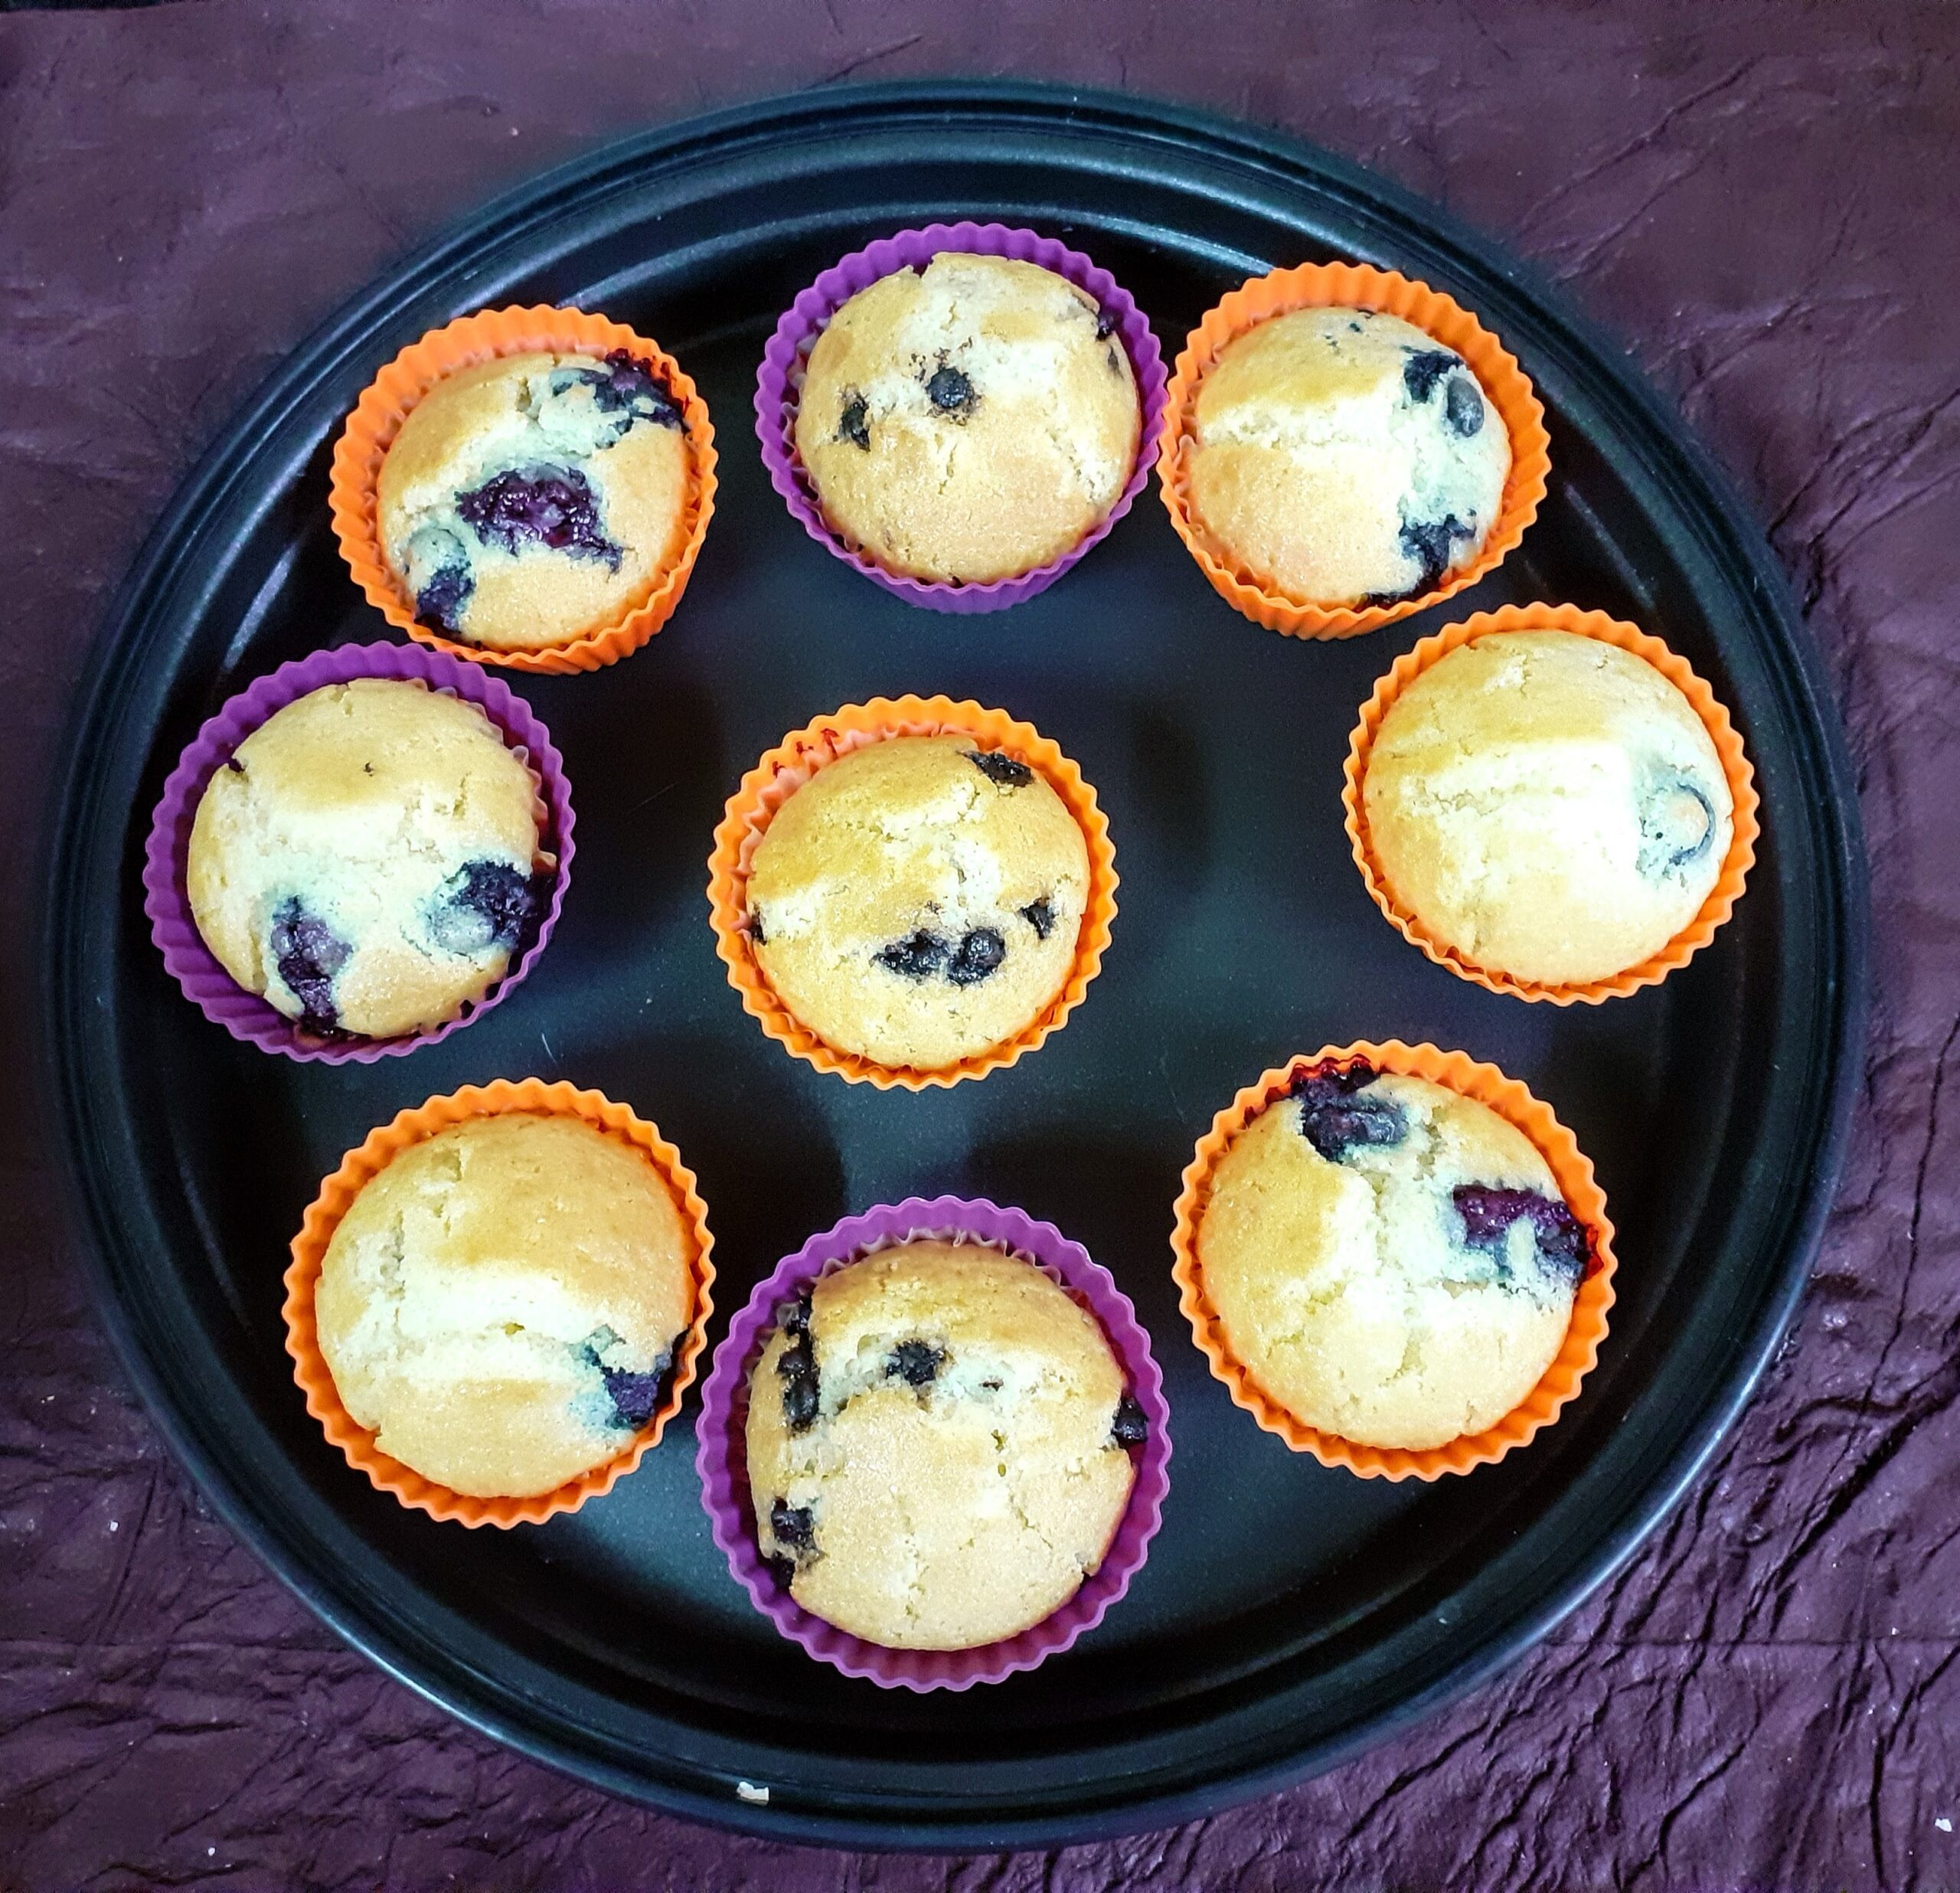
Here is the recipe for the Muffins–
Ingredients :
Plain flour 2.5 cups
Sugar 1 cup
Baking powder 3 tsp
Baking soda 1 tsp
Salt 2 pinches
Buttermilk 1cup
Oil ( any unflavored oil) 4 tbsp
Butter melted 50 gm ( if using salted skip the salt)
Vanilla essence 1 tsp
Eggs 2 ( refer notes)
Blueberries 125 gms
Chocochips 50 gm
Directions:
In a bowl put in all the dry ingredients, that is flour, sugar, baking powder, baking soda and salt and whisk.
In another bowl put in all the wet ingredients, that is the buttermilk, oil, butter, eggs and the vanilla essence and whisk. Preheat oven to 180 C.
Now slowly add the wet ingredients into the dry ingredients little by little. Combine nicely with a spatula no beater required. Now divide the dough into 2 equal halves. Add Blueberries to one half. Mix it in with very light hands. To another half add chocochip, stir it in light. Scoop the dough into muffin tins lined with muffin liners. Bake at 200 C for 20 minutes. Insert a skewer to check for doneness. Transfer the muffins into a tray to cool. Enjoy these homemade muffins with your favourite beverage.
For Cream cheese icing : in a bowl add 75 gm of cream cheese, 1/2 cup of icing sugar, 2 tbsp cocoa powder, and beat until smooth using an electric beater. The mixture to be smooth and thick and not thin or watery. Use this to top the muffin and enjoy. ( This step is optional and there are no pictures to this step)
STEPWISE RECIPE FOLLOWS:
1. In a bowl put in all the dry ingredients, that is flour, sugar, baking powder, baking soda and salt and whisk.
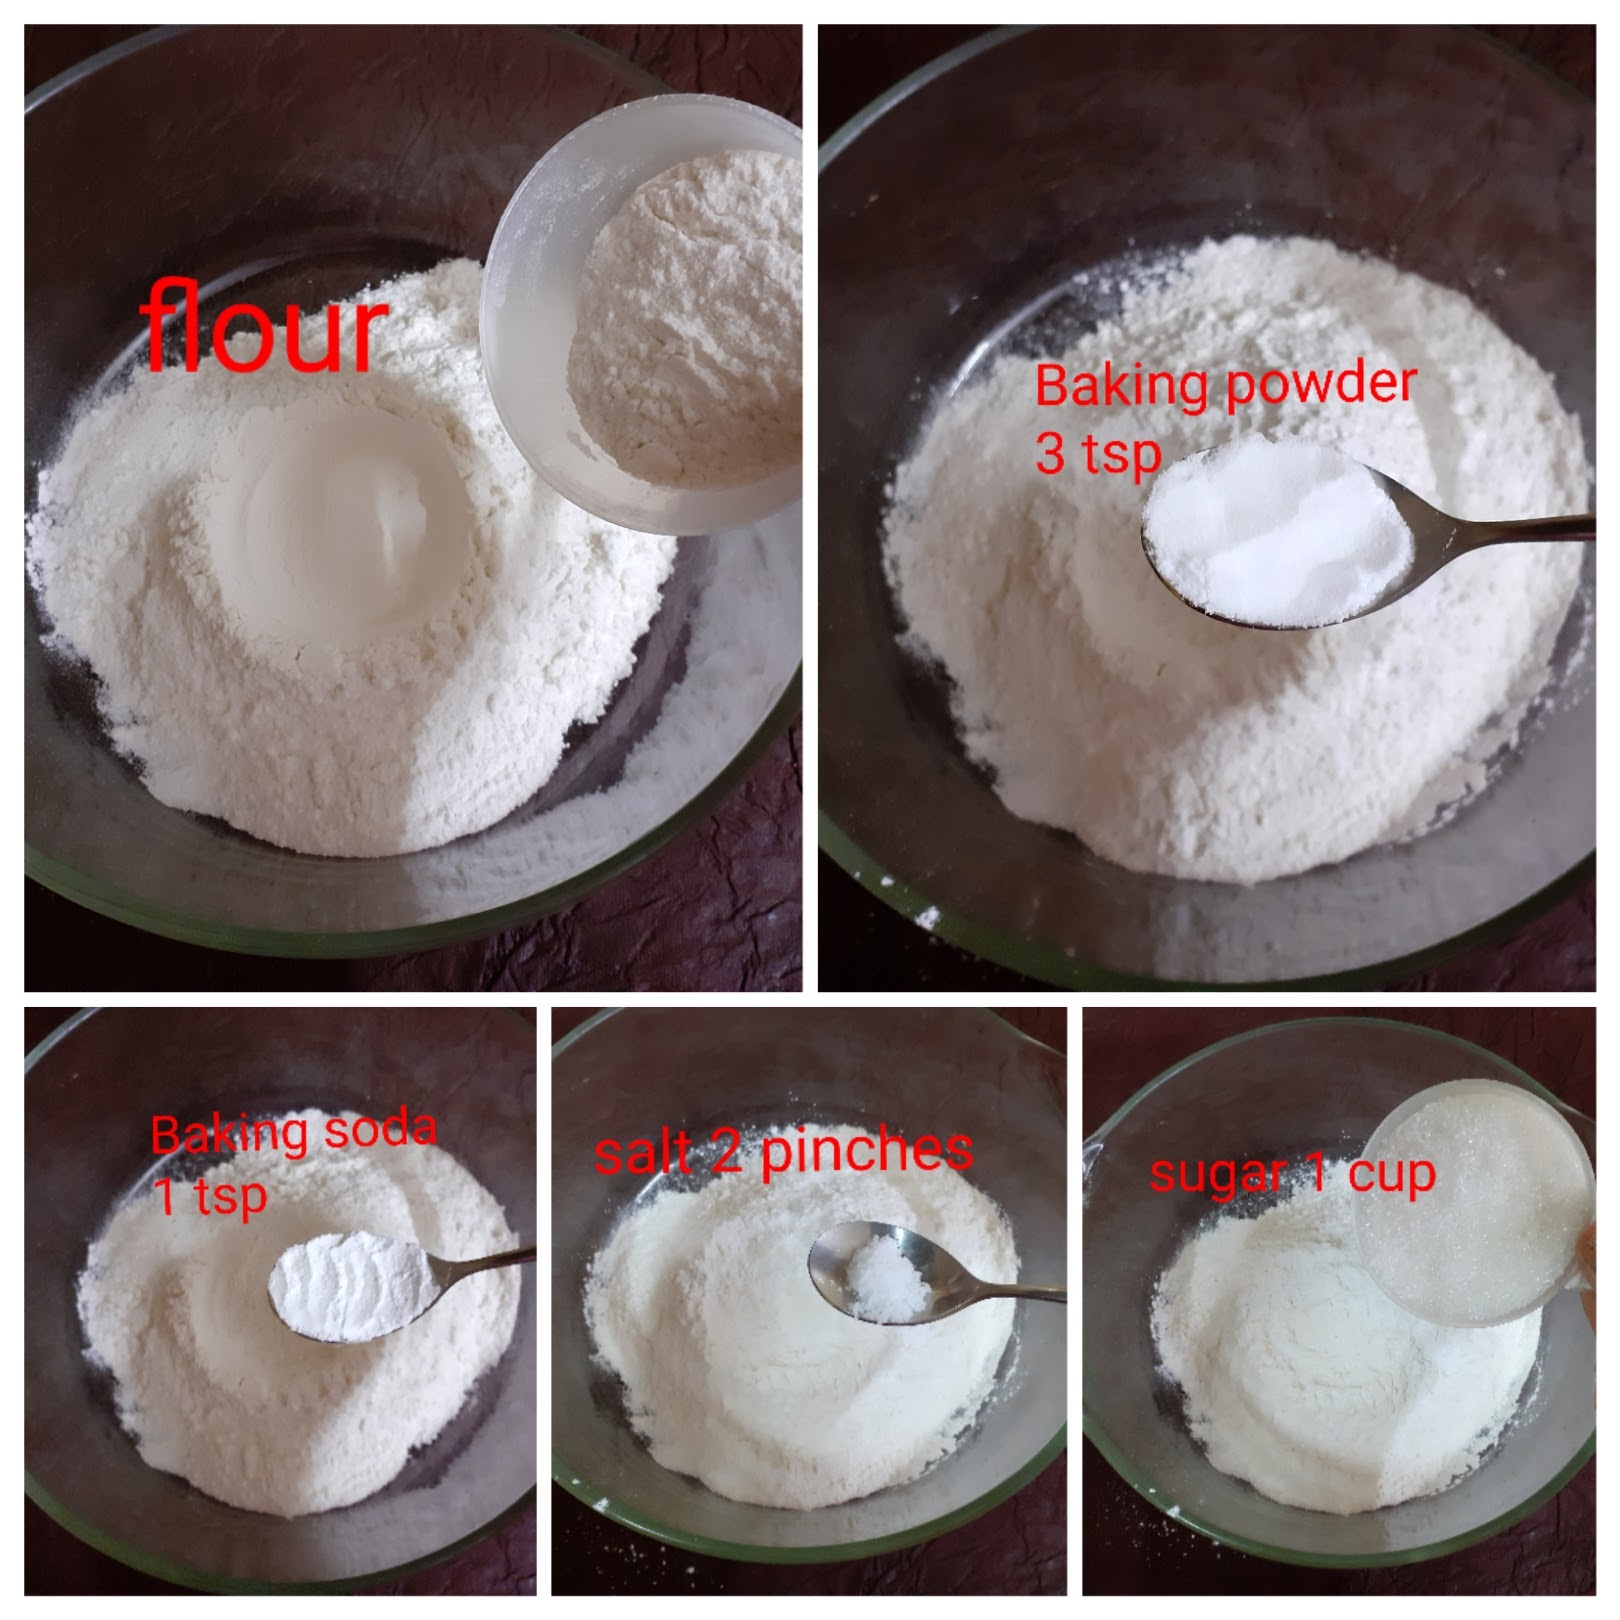
2. In another bowl put in all the wet ingredients, that is the buttermilk, oil, butter, eggs and the vanilla essence and whisk. Preheat oven to 180 C.

3. Now slowly add the wet ingredients into the dry ingredients little by little. Combine nicely with a spatula no beater required. Now divide the dough into 2 equal halves.
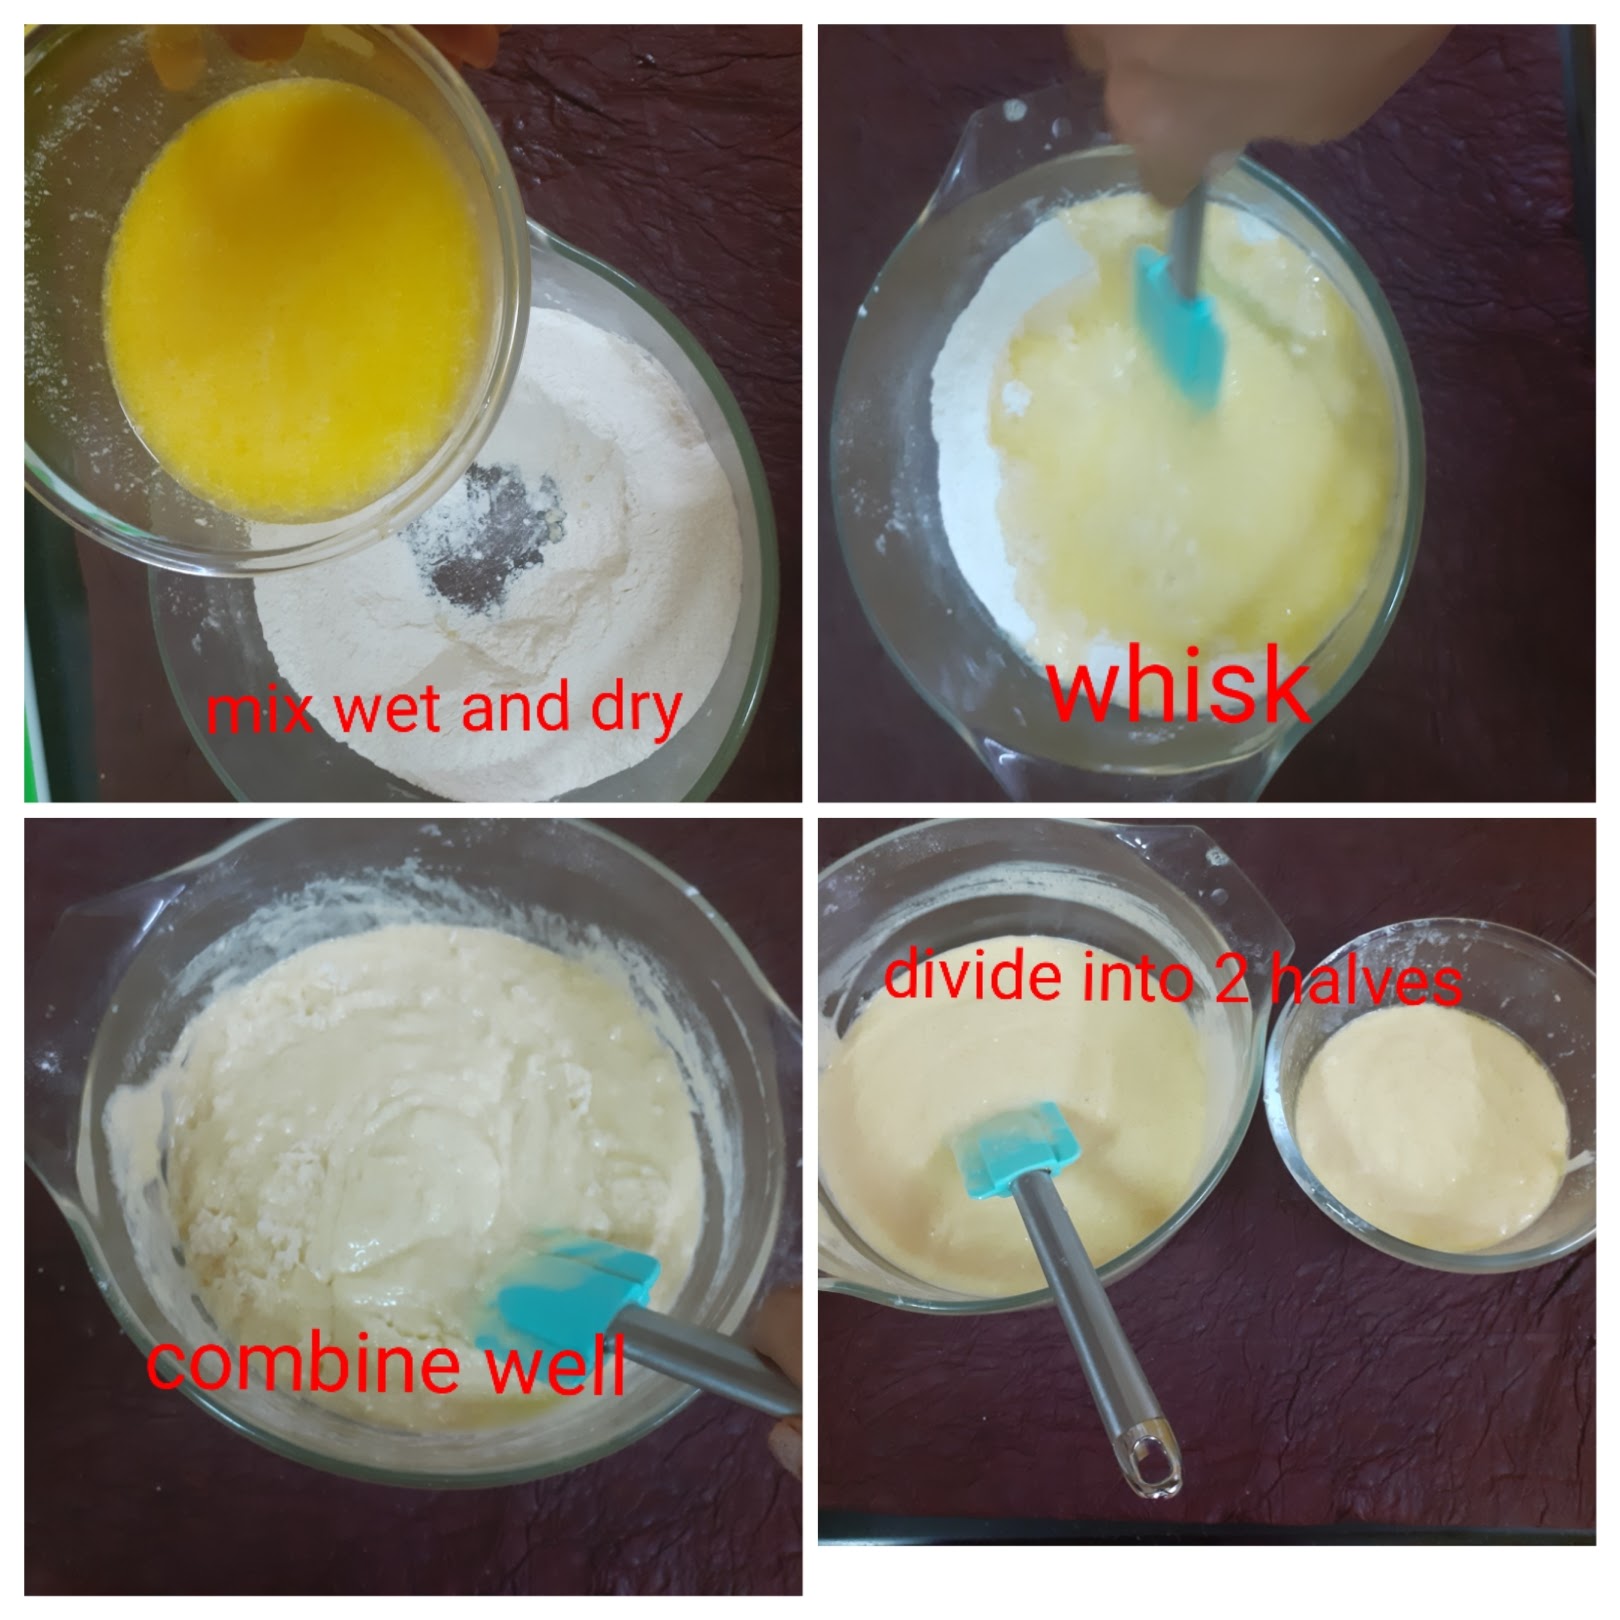
4. Add Blueberries to one half. Mix it in with very light hands. To another half add chocochip, stir it in light. Scoop the dough into muffin tins lined with muffin liners. Bake at 200 C for 20 minutes. Insert a skewer to check for doneness. Transfer the muffins into a tray to cool.
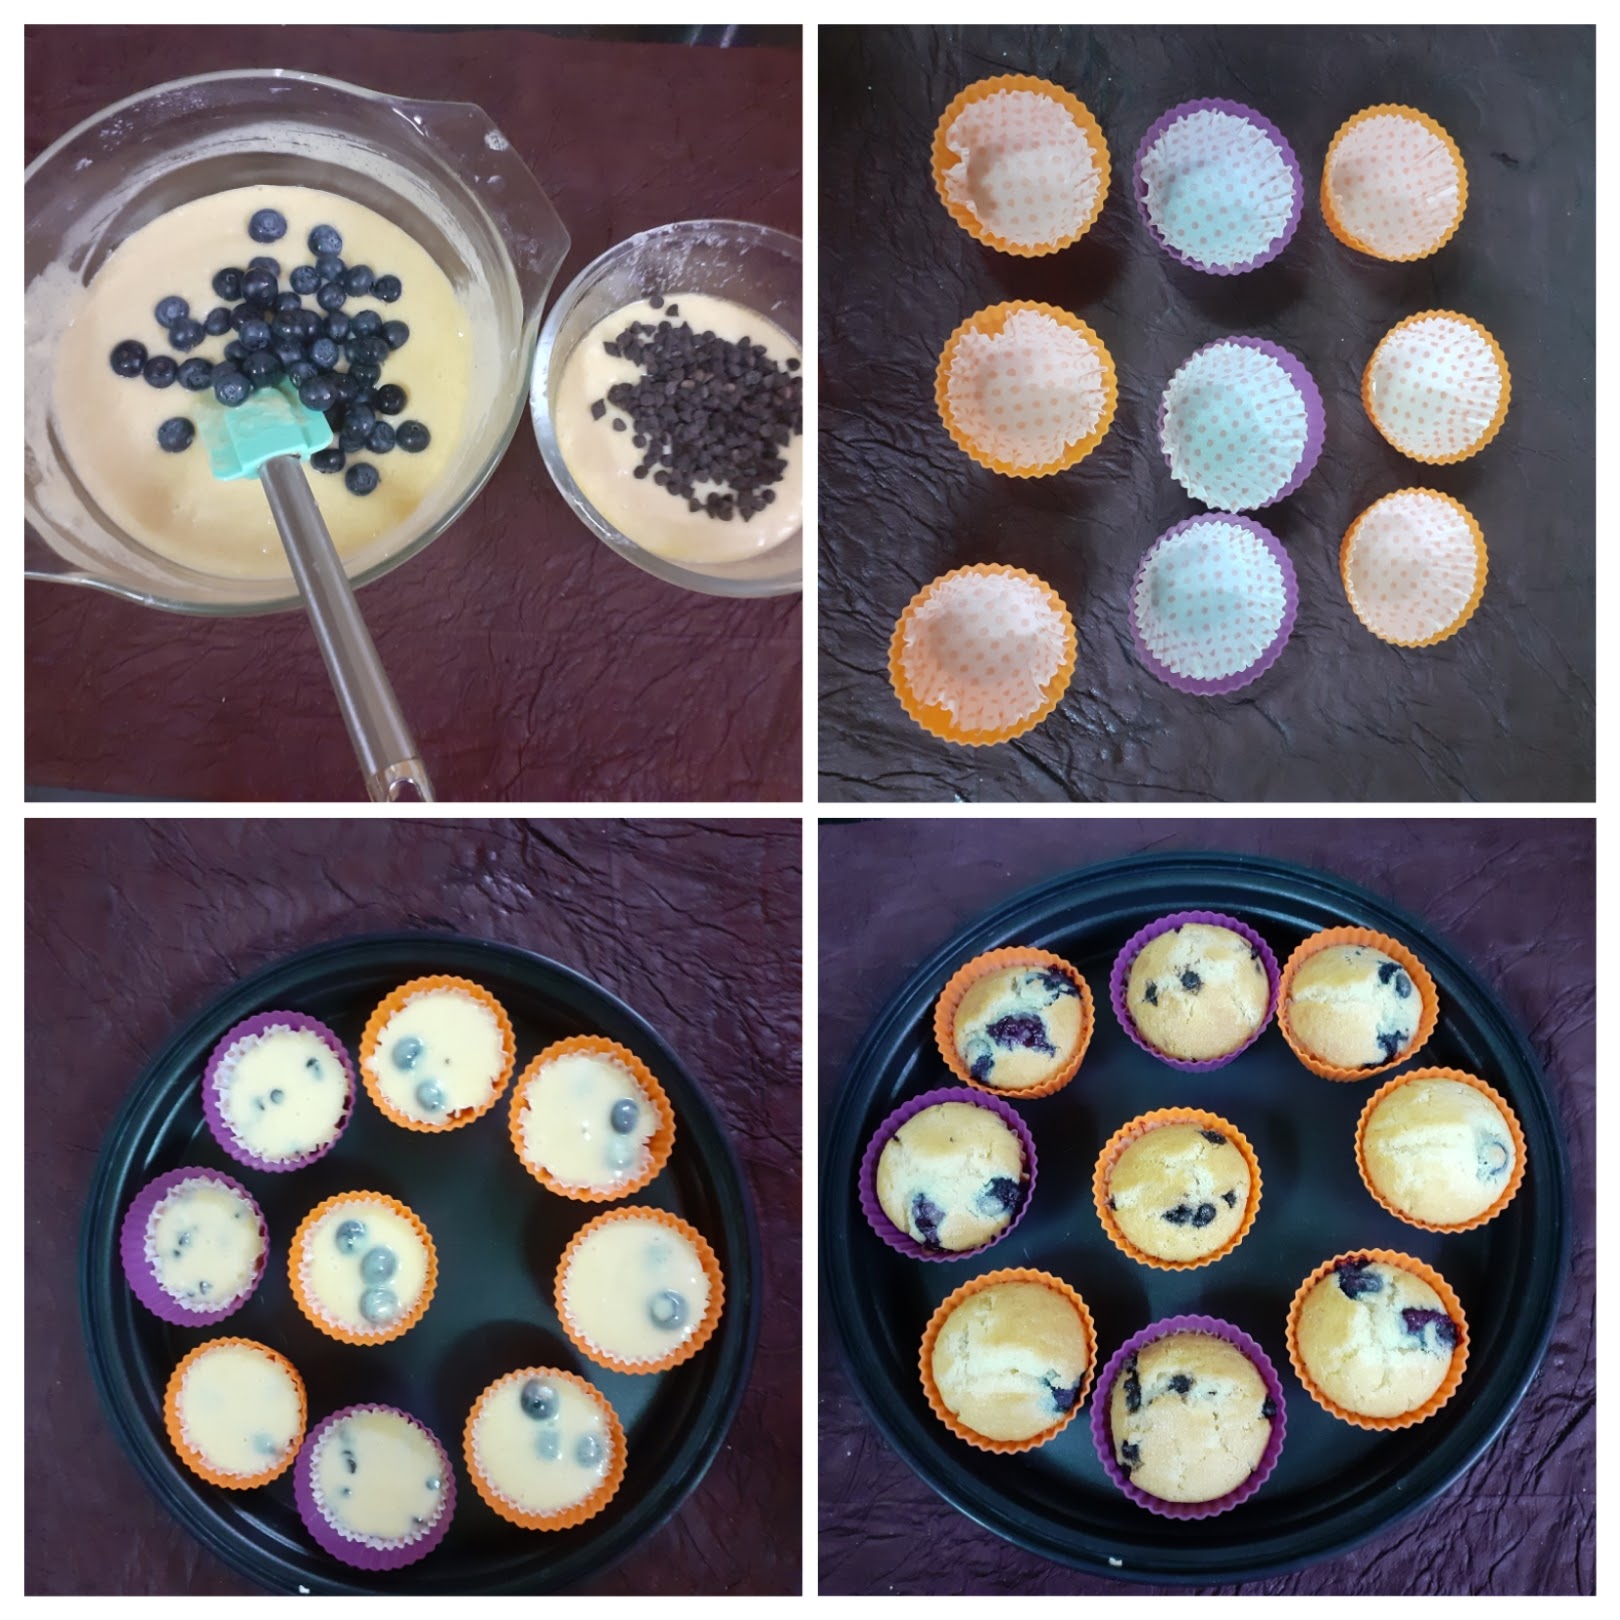
5. To top the Blueberry muffins use a fruit conserve, preferably berryish and for the chocochip muffins any chocolate icing will do. To follow my style procedure for cream cheese chocolate icing is given above. This step is totally options. The muffins taste just as great even without the toppings.
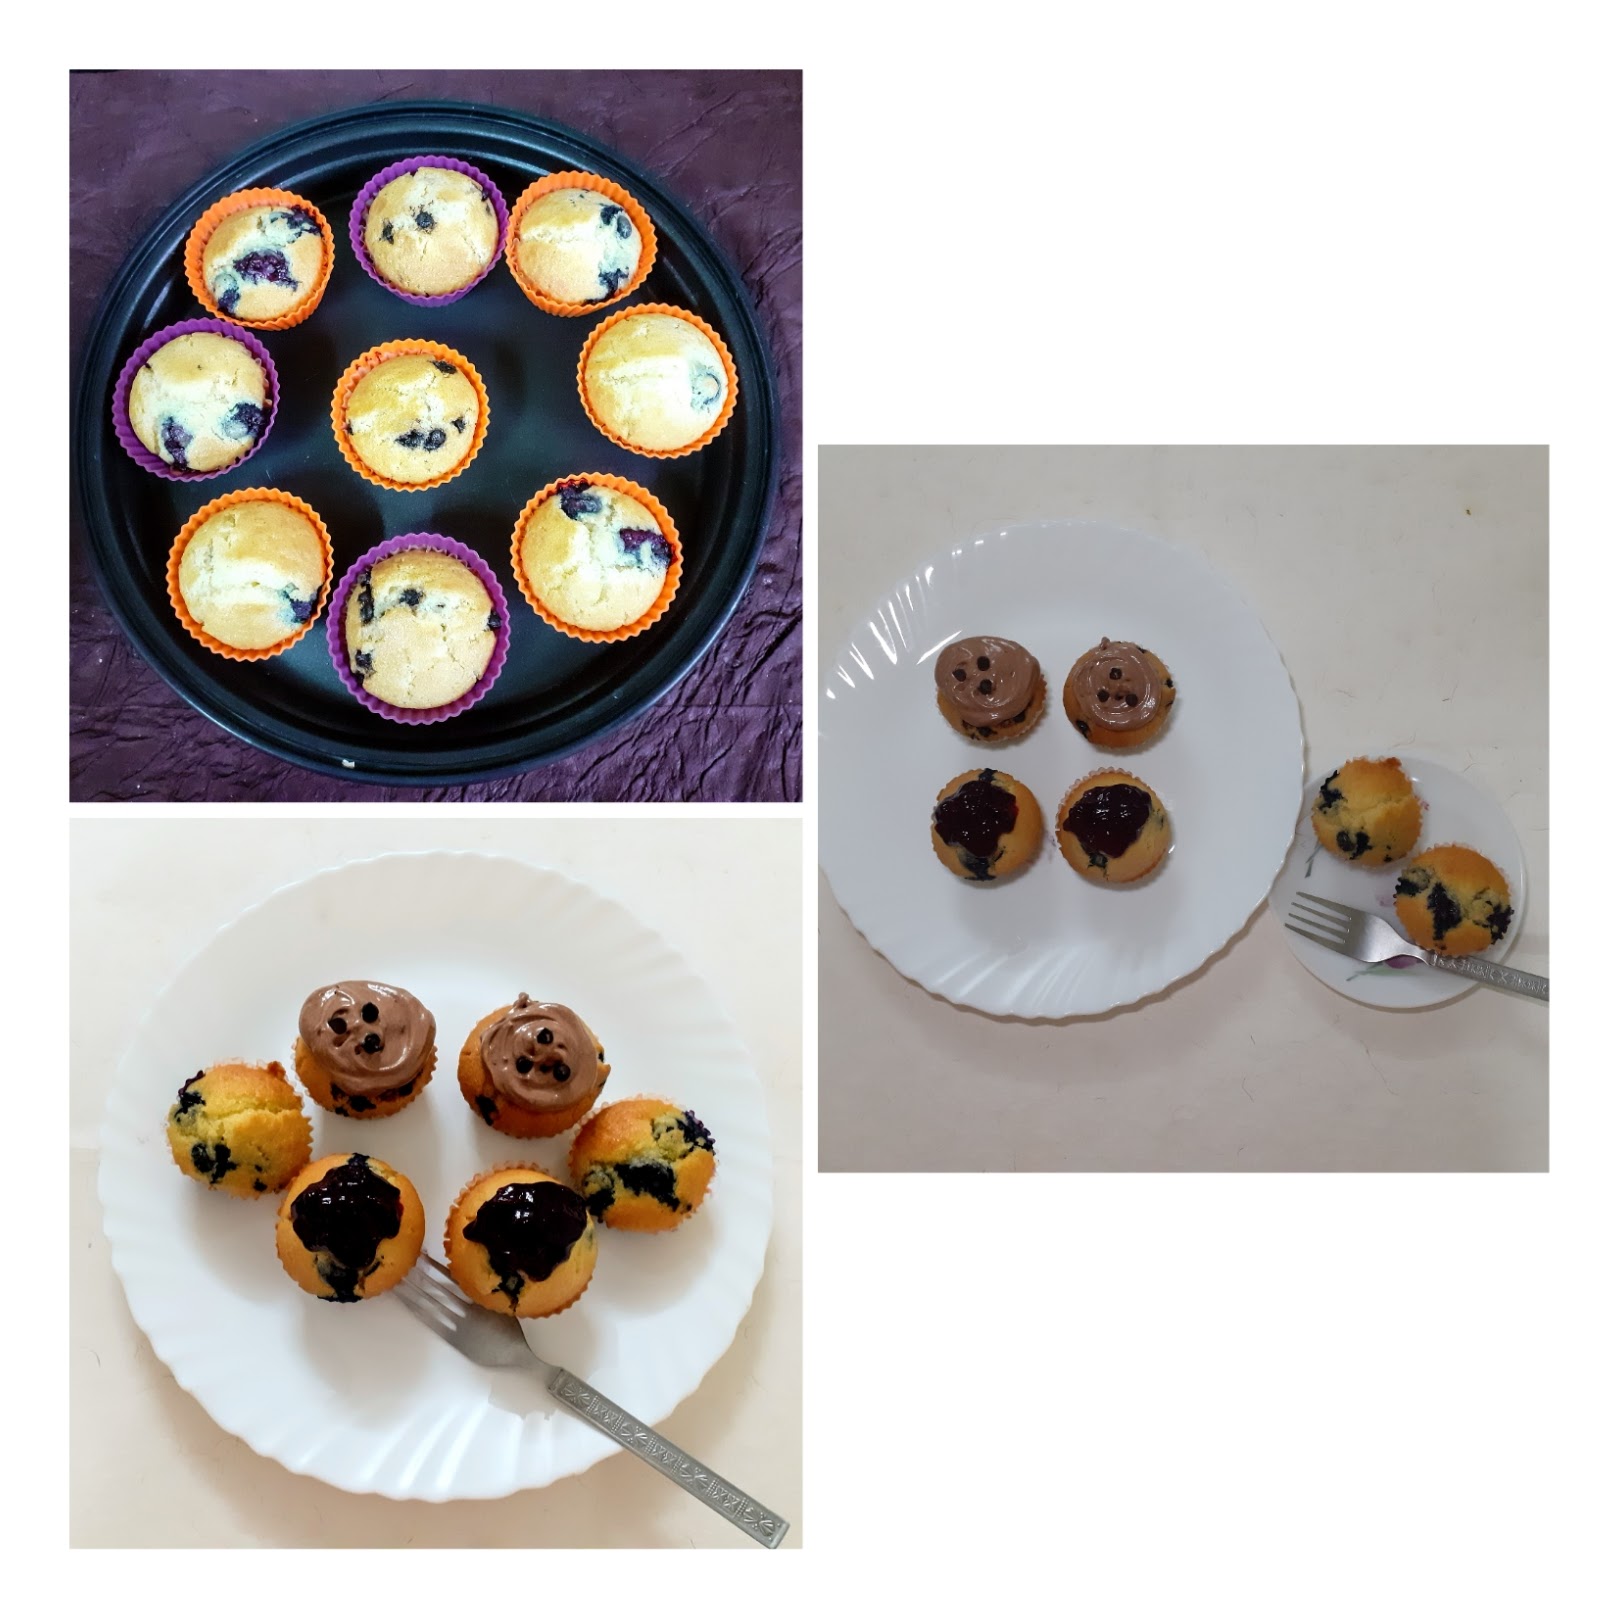
NOTES:
1. I usually use Olive oil for baking, coconut oil or even refined oil work well.
2. While baking the eggs should always be at room temperature. It’s also recommended to have all ingredients at room temperature.
3. Unless a recipe demands chilled butter, always use melted butter for baking.
If you tried this recipe and liked it please comment below. I would love to hear from you. If you have a query about the recipe email us and ill respond as soon as I can.
Vegetable Oats Kichdi
This Oats and vegetable kichdi is very simple to make and is a one pot recipe. It can be customized to your preference be it spice or the vegetables added. In all it is a healthy, delicious and simple meal for the days you want a simple yet yummy meal.
I usually make this for dinner on the days our lunch is heavy or make it as a quick meal after a shopping trip as it gets ready in a jiffy.
I use Moong dal mostly but this time I have used half of Moong dal and half of Tuvar dal and it turned out yummy. But since I used Tuvar dal I had to pre cook the dal in a vessel for 10 mi utes and then transfer to cooker along with all other ingredients. If you want a fully one pot recipe, then use only Moong dal.
While you are here visit my other recipes like Barnyard millet Pongal, Cauliflower fried rice, Coriander Rice, Adai, Bhindi Raita and more…
Here is the Vegetable Oats Kichdi recipe for you-
PREP TIME: 10 MINS COOK TIME: 15 MINS
TOTAL TIME: 25 MINS CUISINE: INDIAN
COURSE : MAIN SERVINGS: 5
AUTHOR: RAJNI RAM

Ingredients:
Instant Oats 2 cups
Moong dal 1/4 cup
Tuvar dal 1/4 cup
Onion 1 small finely chopped
Spring onion 3 sprigs finely chopped with greens
Capsicum 1 small
Carrot 1/2 finely chopped
Baby corn 3 to 4 finely chopped
Tomatoes 2 finely chopped
Palak/ Spinach few leaves finely chopped
Salt as required
Turmeric powder 1/2 tsp
Red chilli powder ( regular) 1 tsp
Kashmiri Red chilli powder 1 tsp
Coriander powder 1.5 to 2 tsp
Cumin seeds 1 tsp
Fennel powder 1 tsp
Ghee 1 tbsp for topping
Oil for sauteeing 1 tbsp
Directions:
Wash the dals and cook in open pan for 10 mins in 2 cups water. Set aside. Now in a cooker take 1 tbsp oil and heat. Add cumin seeds and as they splutter add the chopped onions, followed by spring onions and sauteed for a minute. Now add the capsicum and saute for another30 seconds. Now add all other vegetables and tomatoes and mix well. Add the partially cooked dals along with the water and the Oats and mix all of them nicely. Now add 4.5 cups water, followed by salt, turmeric powder, red chilli powders, coriander powder, fennel powder and stir nicely. Close the cooker and cook for 5 to 6 whistles. Switch off the flame and allow the pressure to settle. Now open cooker, adjust consistency of the kichdi if required by adding some hot water, check and adjust salt or spices if required. Drizzle 1 tbsp ghee on top and enjoy this healthy and delicious meal.
STEPWISE RECIPE FOLLOWS:
1. Wash the dals and cook in open pan for 10 mins in 2 cups water. Set aside

2. Now in a cooker take 1 tbsp oil and heat. Add cumin seeds and as they splutter add the chopped onions, followed by spring onions and sauteed for a minute.

3. Now add the capsicum and saute for another30 seconds. Now add all other vegetables and tomatoes and mix well. Add the partially cooked dals along with the water and the Oats and mix all of them nicely.
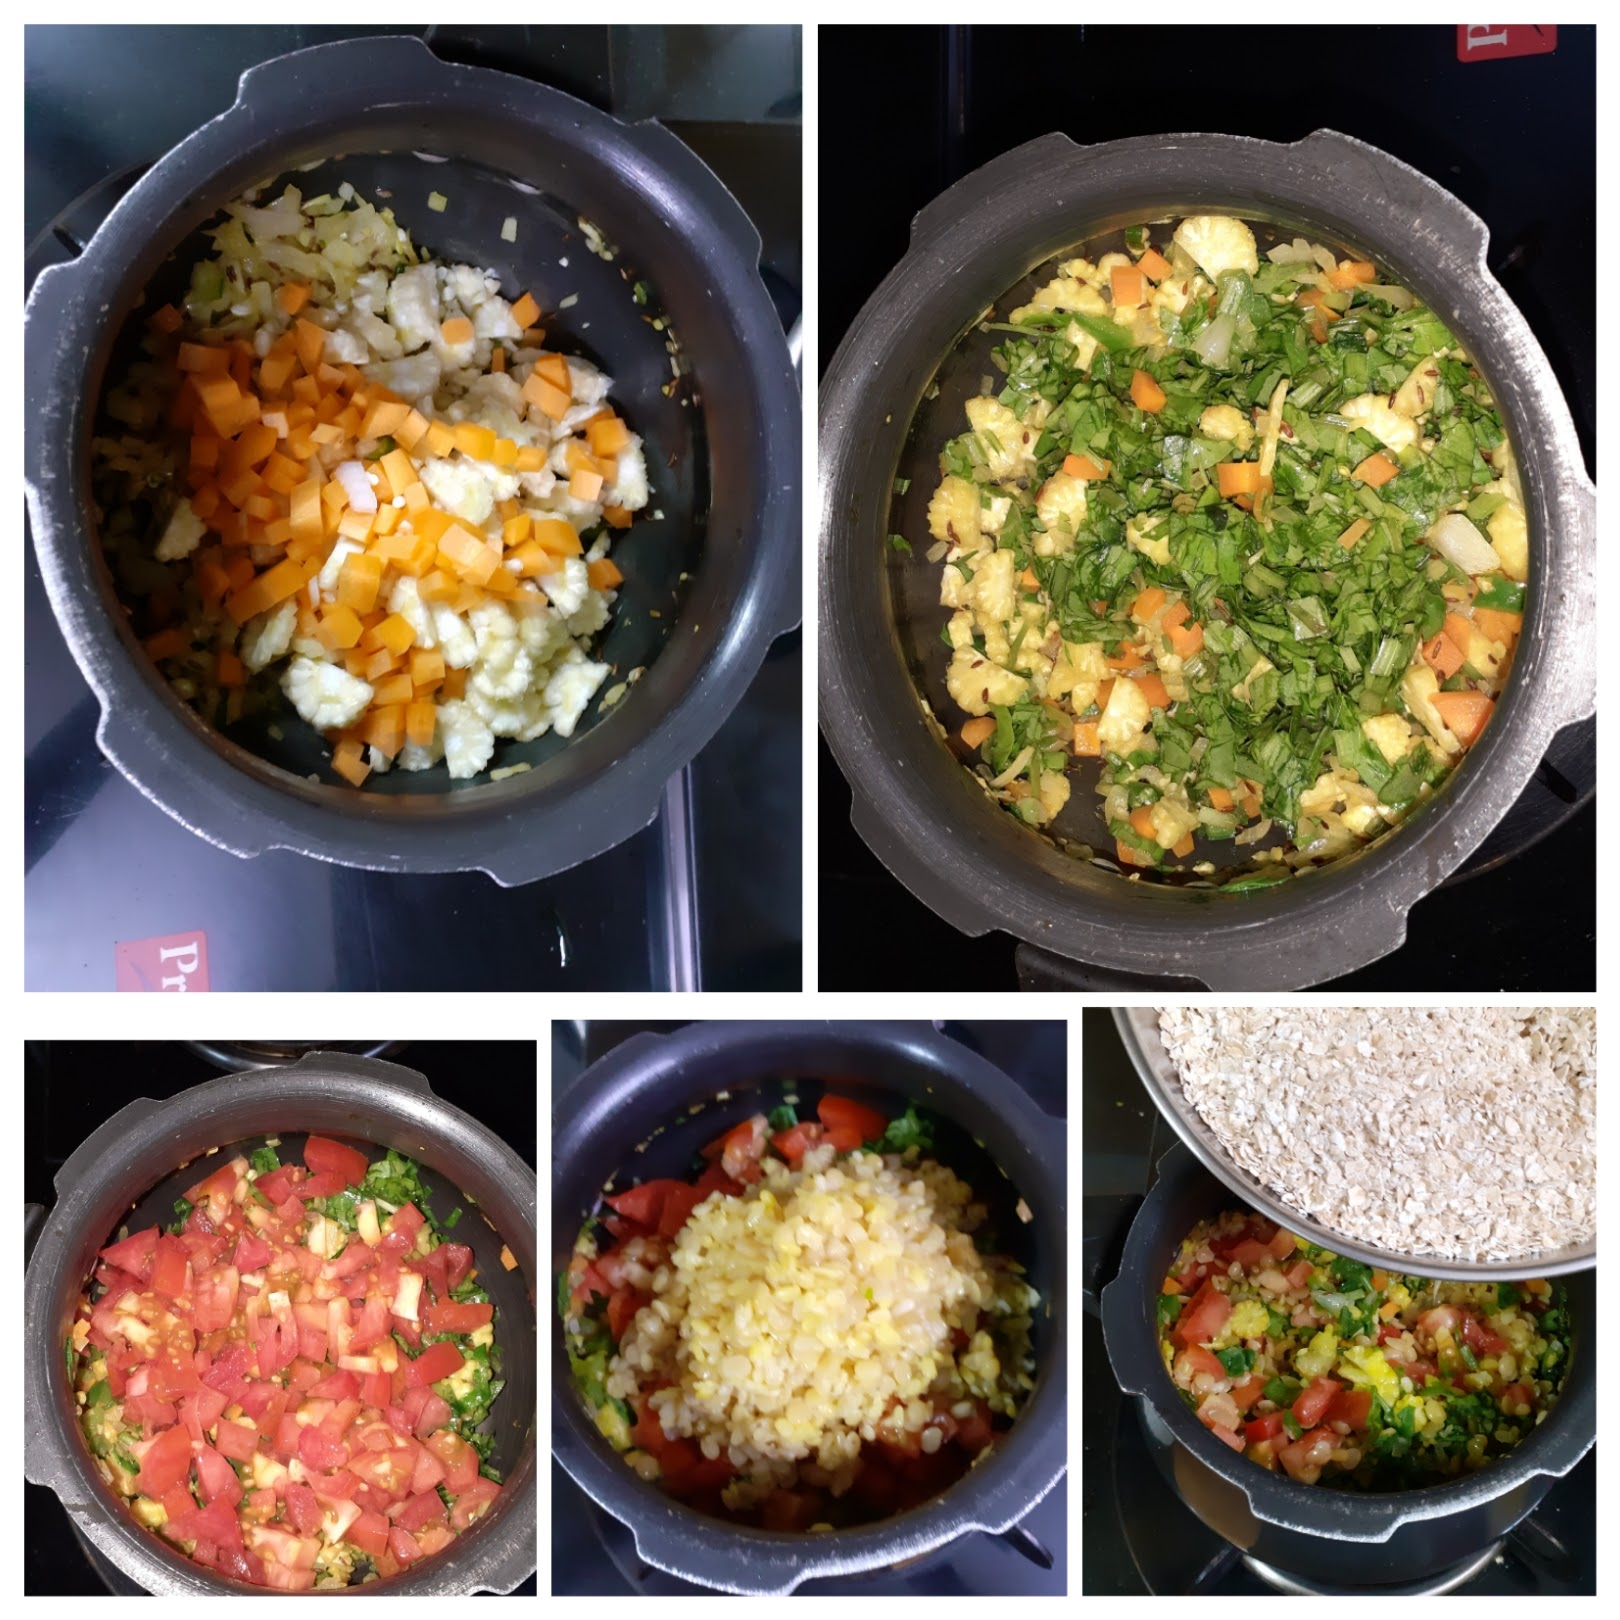
4. Now add 4.5 cups water, followed by salt, turmeric powder, red chilli powders, coriander powder, fennel powder and stir nicely. Close the cooker and cook for 5 to 6 whistles. Switch off the flame and allow the pressure to settle.

5. Now open cooker, adjust consistency of the kichdi if required by adding some hot water, check and adjust salt or spices if required. Drizzle 1 tbsp ghee on top and enjoy this healthy and delicious meal.
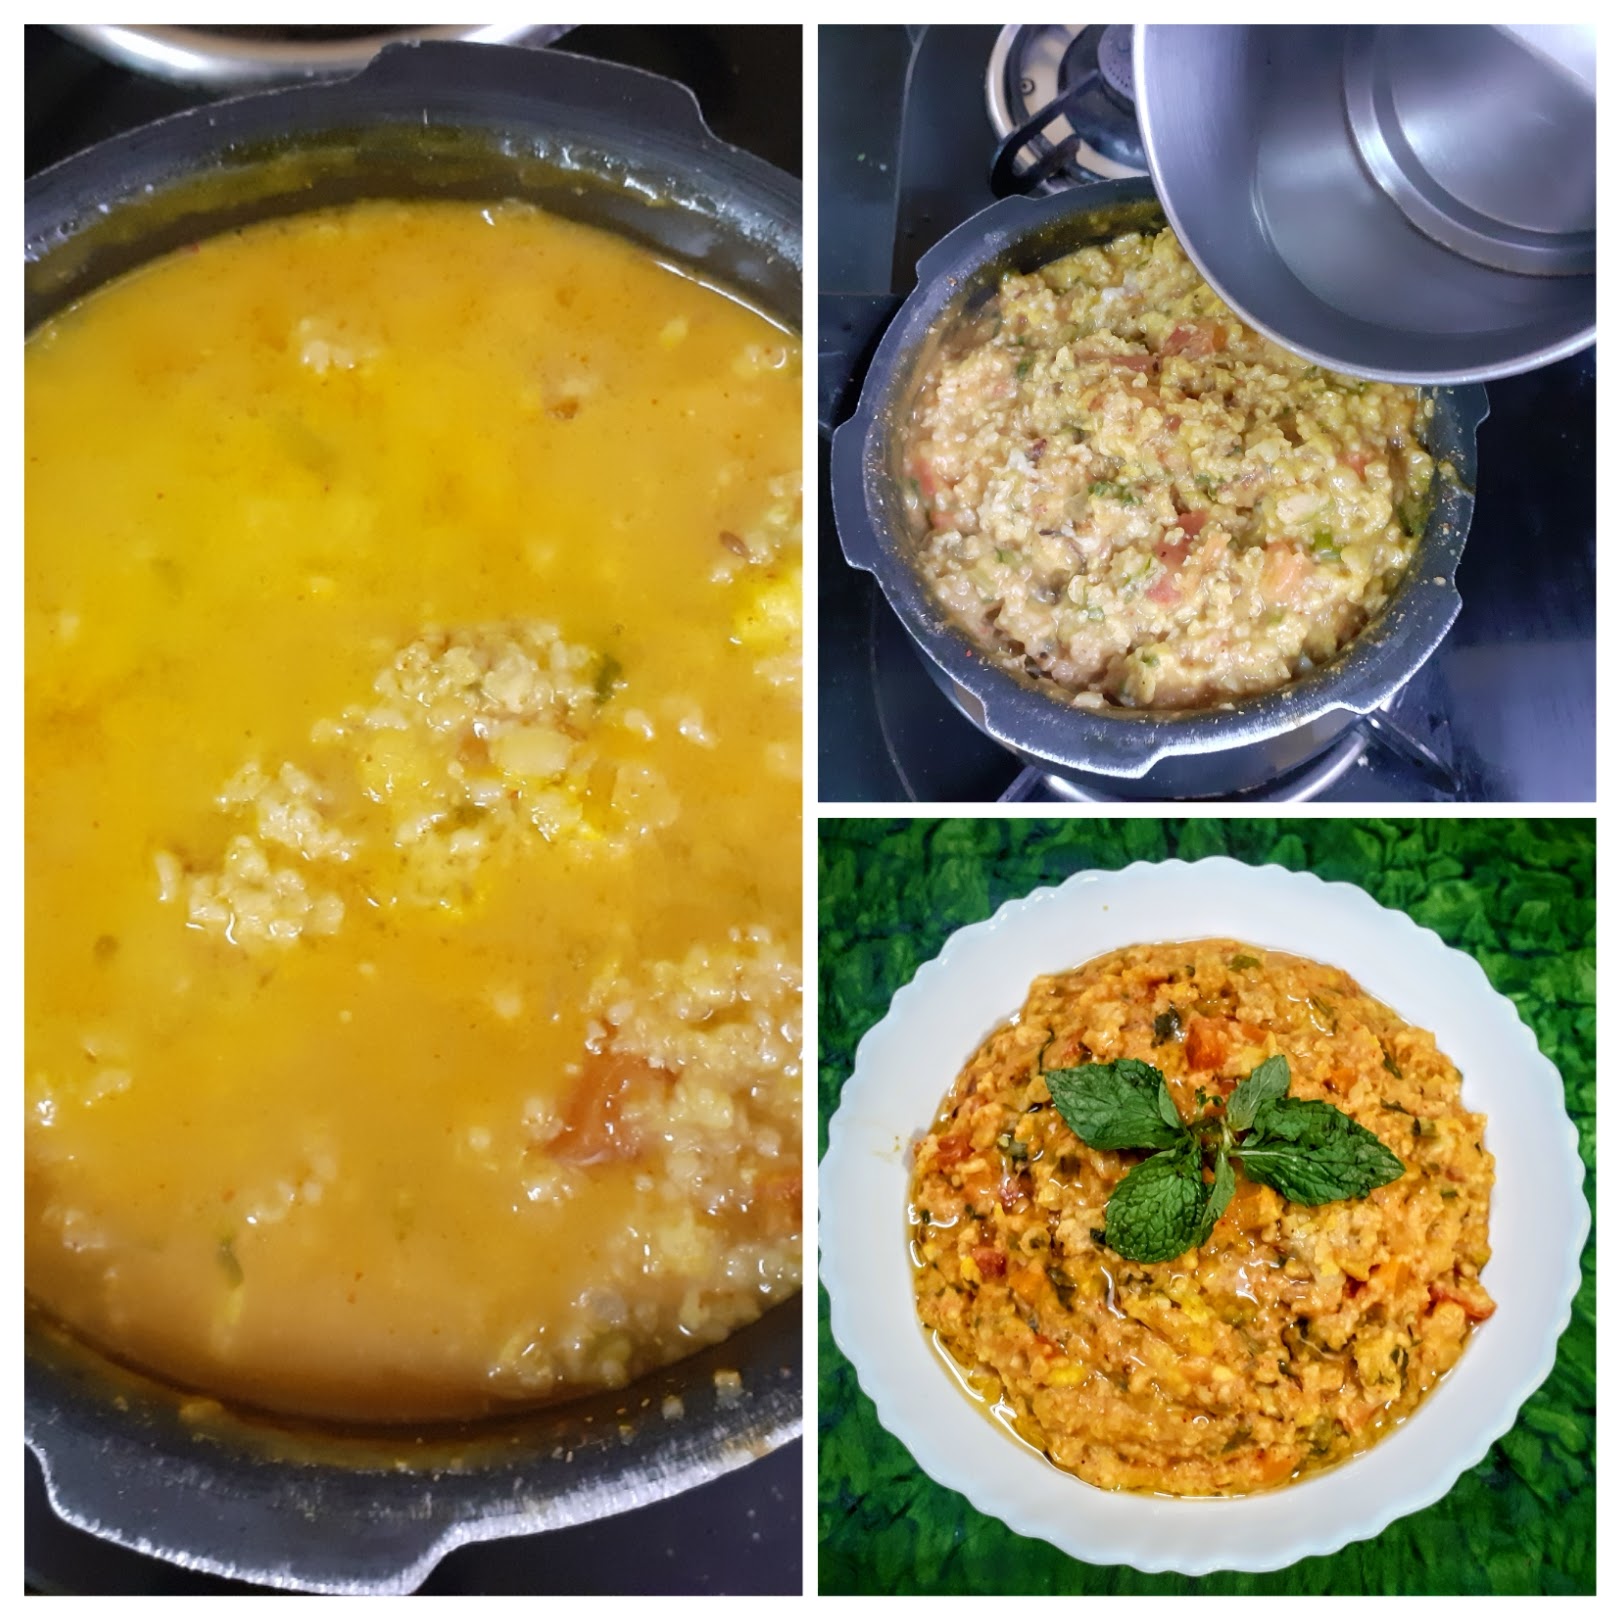
If you tried this recipe and liked it please comment below. I would love to hear from you. If you have a query about the recipe email us and ill respond as soon as I can.
Soya Chunk Biriyani
This Biriyani recipe is the first biriyani recipe on my blog. This dish I had actually posted as a casual post on my social media handles and a lot of people asked for the recipe. Then it was festival time with Navarathri and Diwali round the corner and I was a little tied up blogging the sweets and savory recipes. So, finally got down to making this Soya chunks biriyani and blogging it now.
Earlier like most households I had the practice of making biryani twice a month. This was because there was this amazing biryani paste by #itc called the #kitchensofindia. This paste was so good and the biryani made from it was as flavourful as the ones we get in any of the ITC hotels, obviously because it was specially designed by the chefs there. Then suddenly it stopped coming to the markets. It no longer is marketed, but they have their chicken biriyani paste though. Since I am a vegetarian I don’t buy that. So from the time I stopped getting the paste I was in search of a similar masala, which would come close to it. In the process, I have tried many brands and was not happy with them. Then I decided to give making my own Biriyani masala a try. After a few attempts, I have succeeded in making one that works for me. Though I don’t claim that it is the best, it was what I was looking for in terms of flavour. So this recipe is a from the scratch recipe, where I am sharing with you the Biriyani Masala recipe too.
While you are here please check out my other Rice recipes like Coconut rice, Lemon rice, Tomato rice, Schezwan fried rice, Coriander rice, and more…
Also check out my Raita recipes to serve with the biryani- Mint raita, Baigan Raita, Pineapple raita and more…
Here is the recipe for Soya chunk Biriyani-
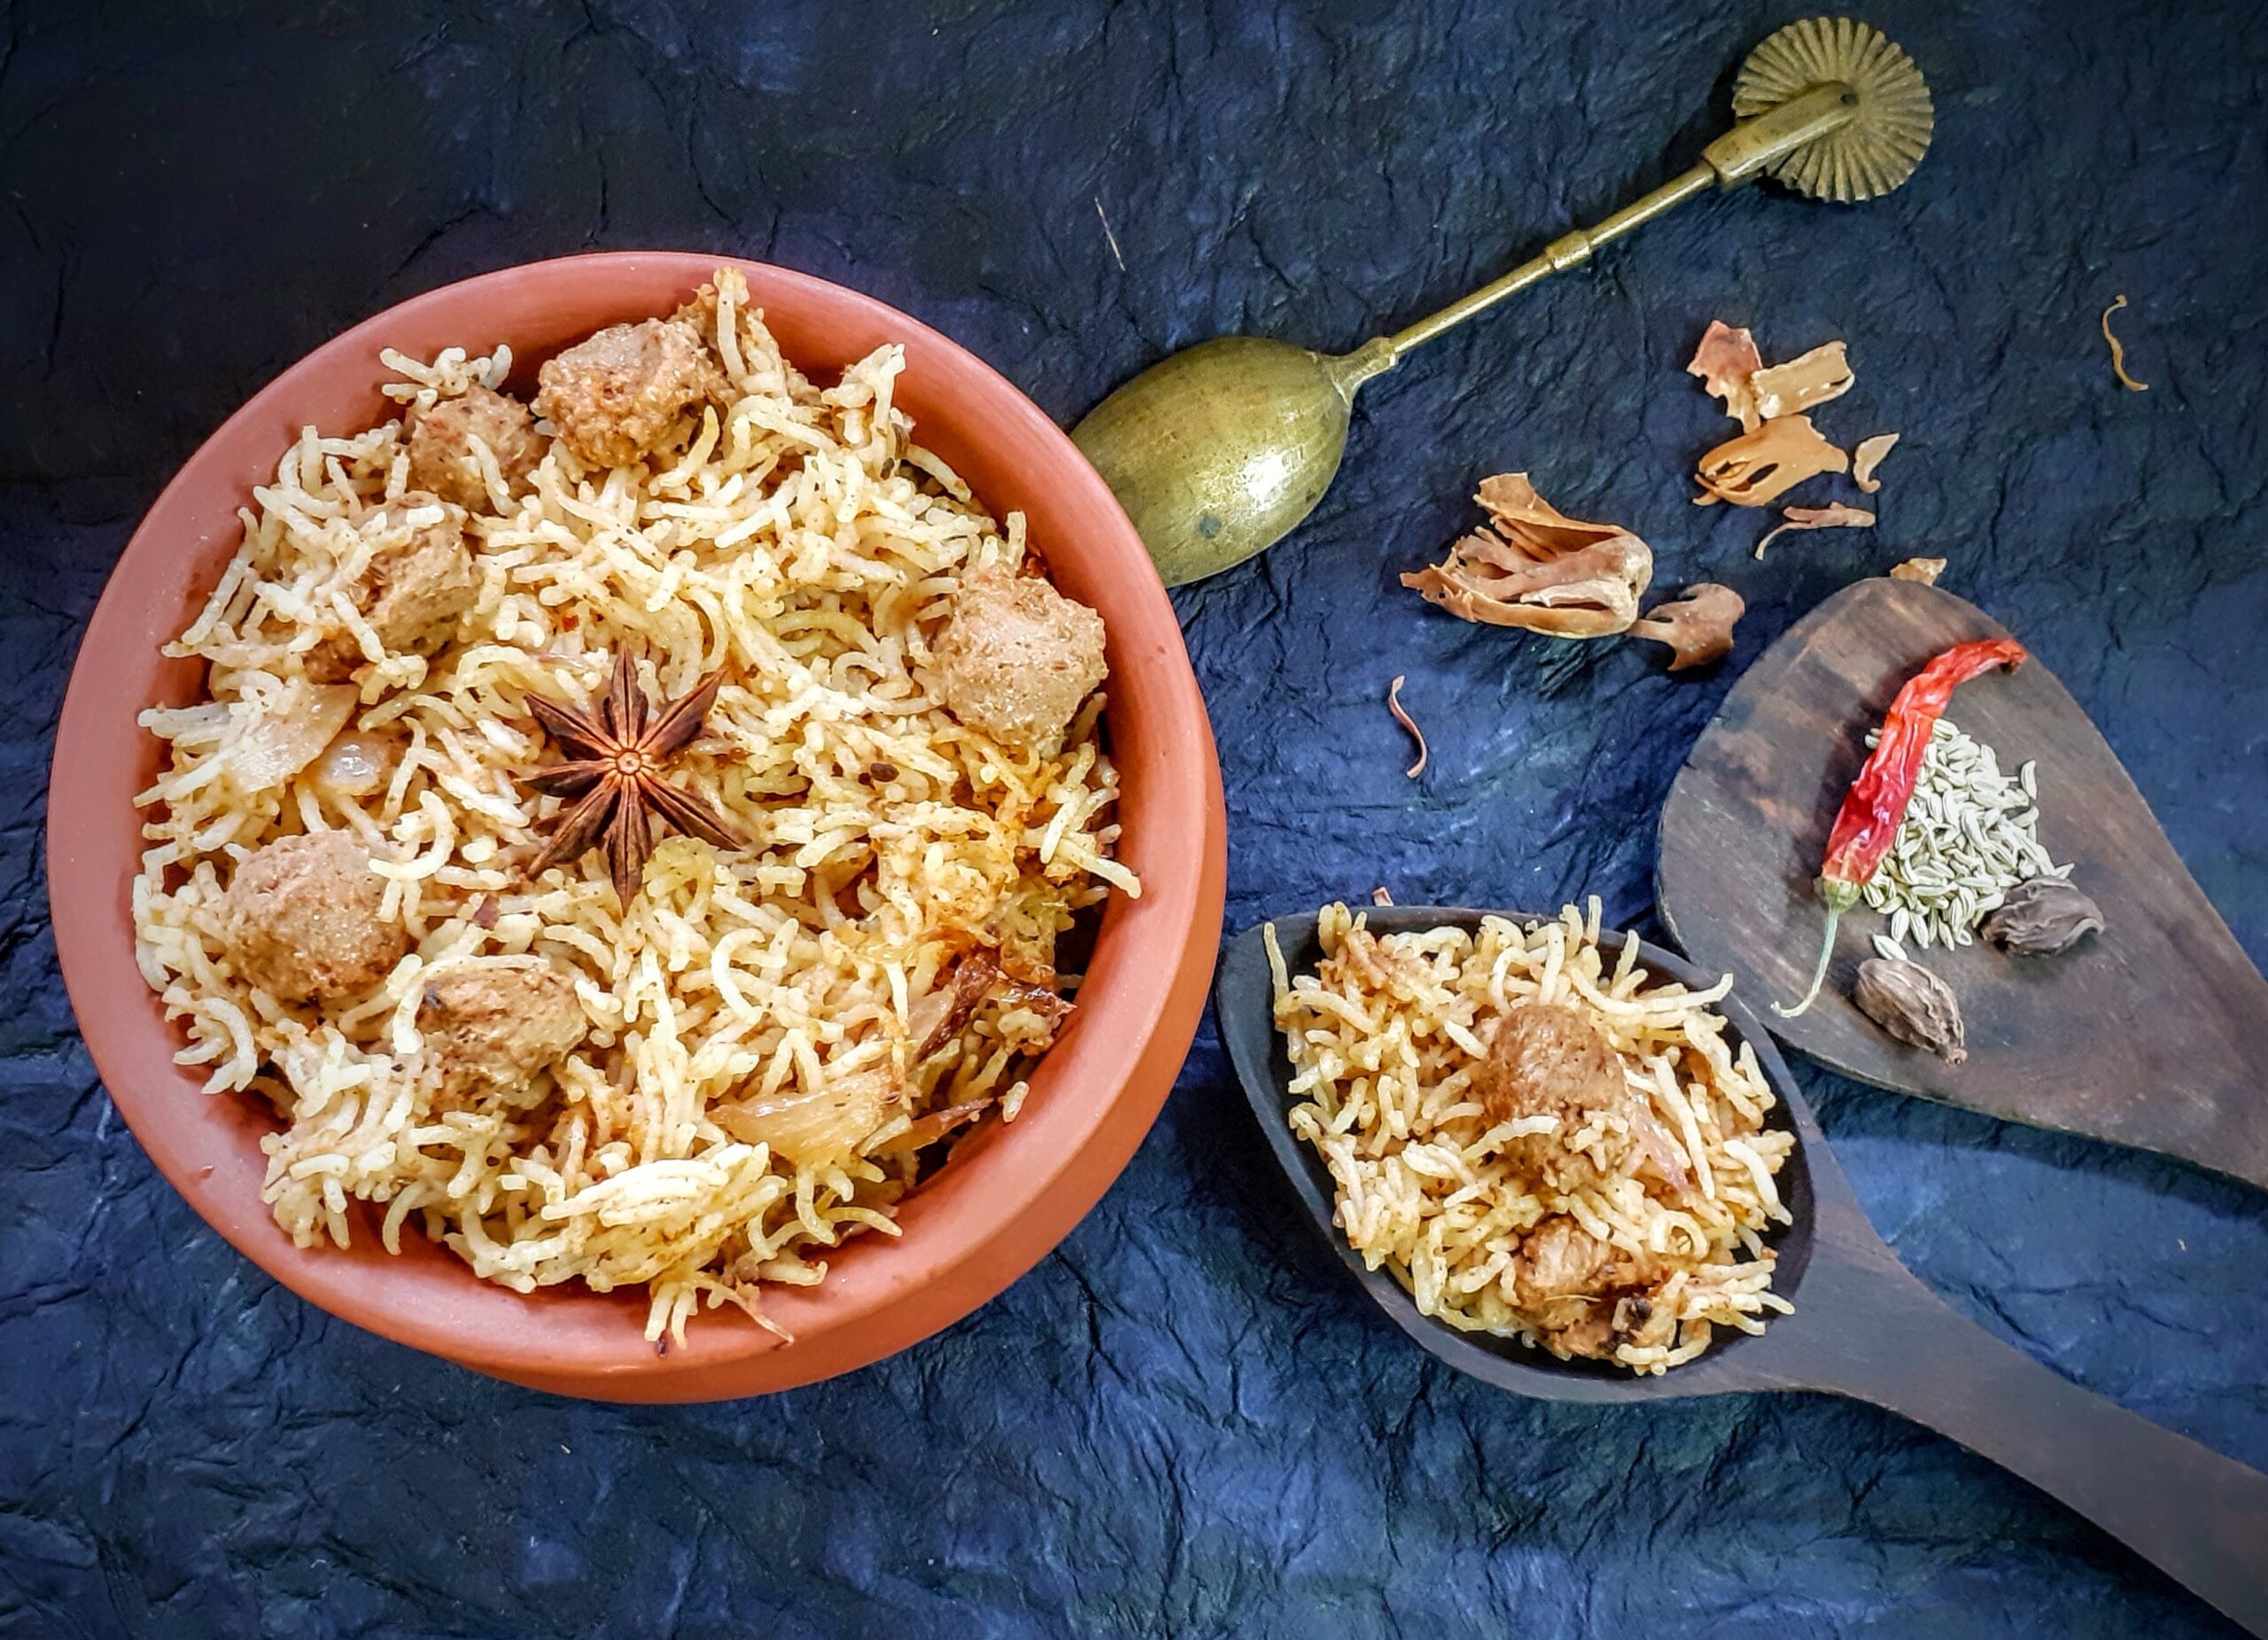
Ingredients for Biriyani masala:
Coriander seeds 3 tbsp
Cloves 1 tbsp
Tej patha 8 small or 4 big ones
Jeera 1 tbsp
Shahjeera 3 tbsp
Javithri/Mace 1 tbsp
Elaichi 10 to 12
Badi Elaichi/ Black cardamom 3
Cinnamon 2 whole swirled sticks
Dry red chillies regular 3
Kashmiri red chillies(dry) 3
Black pepper 1/2 tbsp
Directions to make Biryani Masala powder:
Dry roast all the ingredients together in a Kadai over a low flame until they turn aromatic. Keep stirring, so that they get evenly warmed. Cool them and grind them toa powder. Store in a container. This yields around 100 to 125 gms of powder.
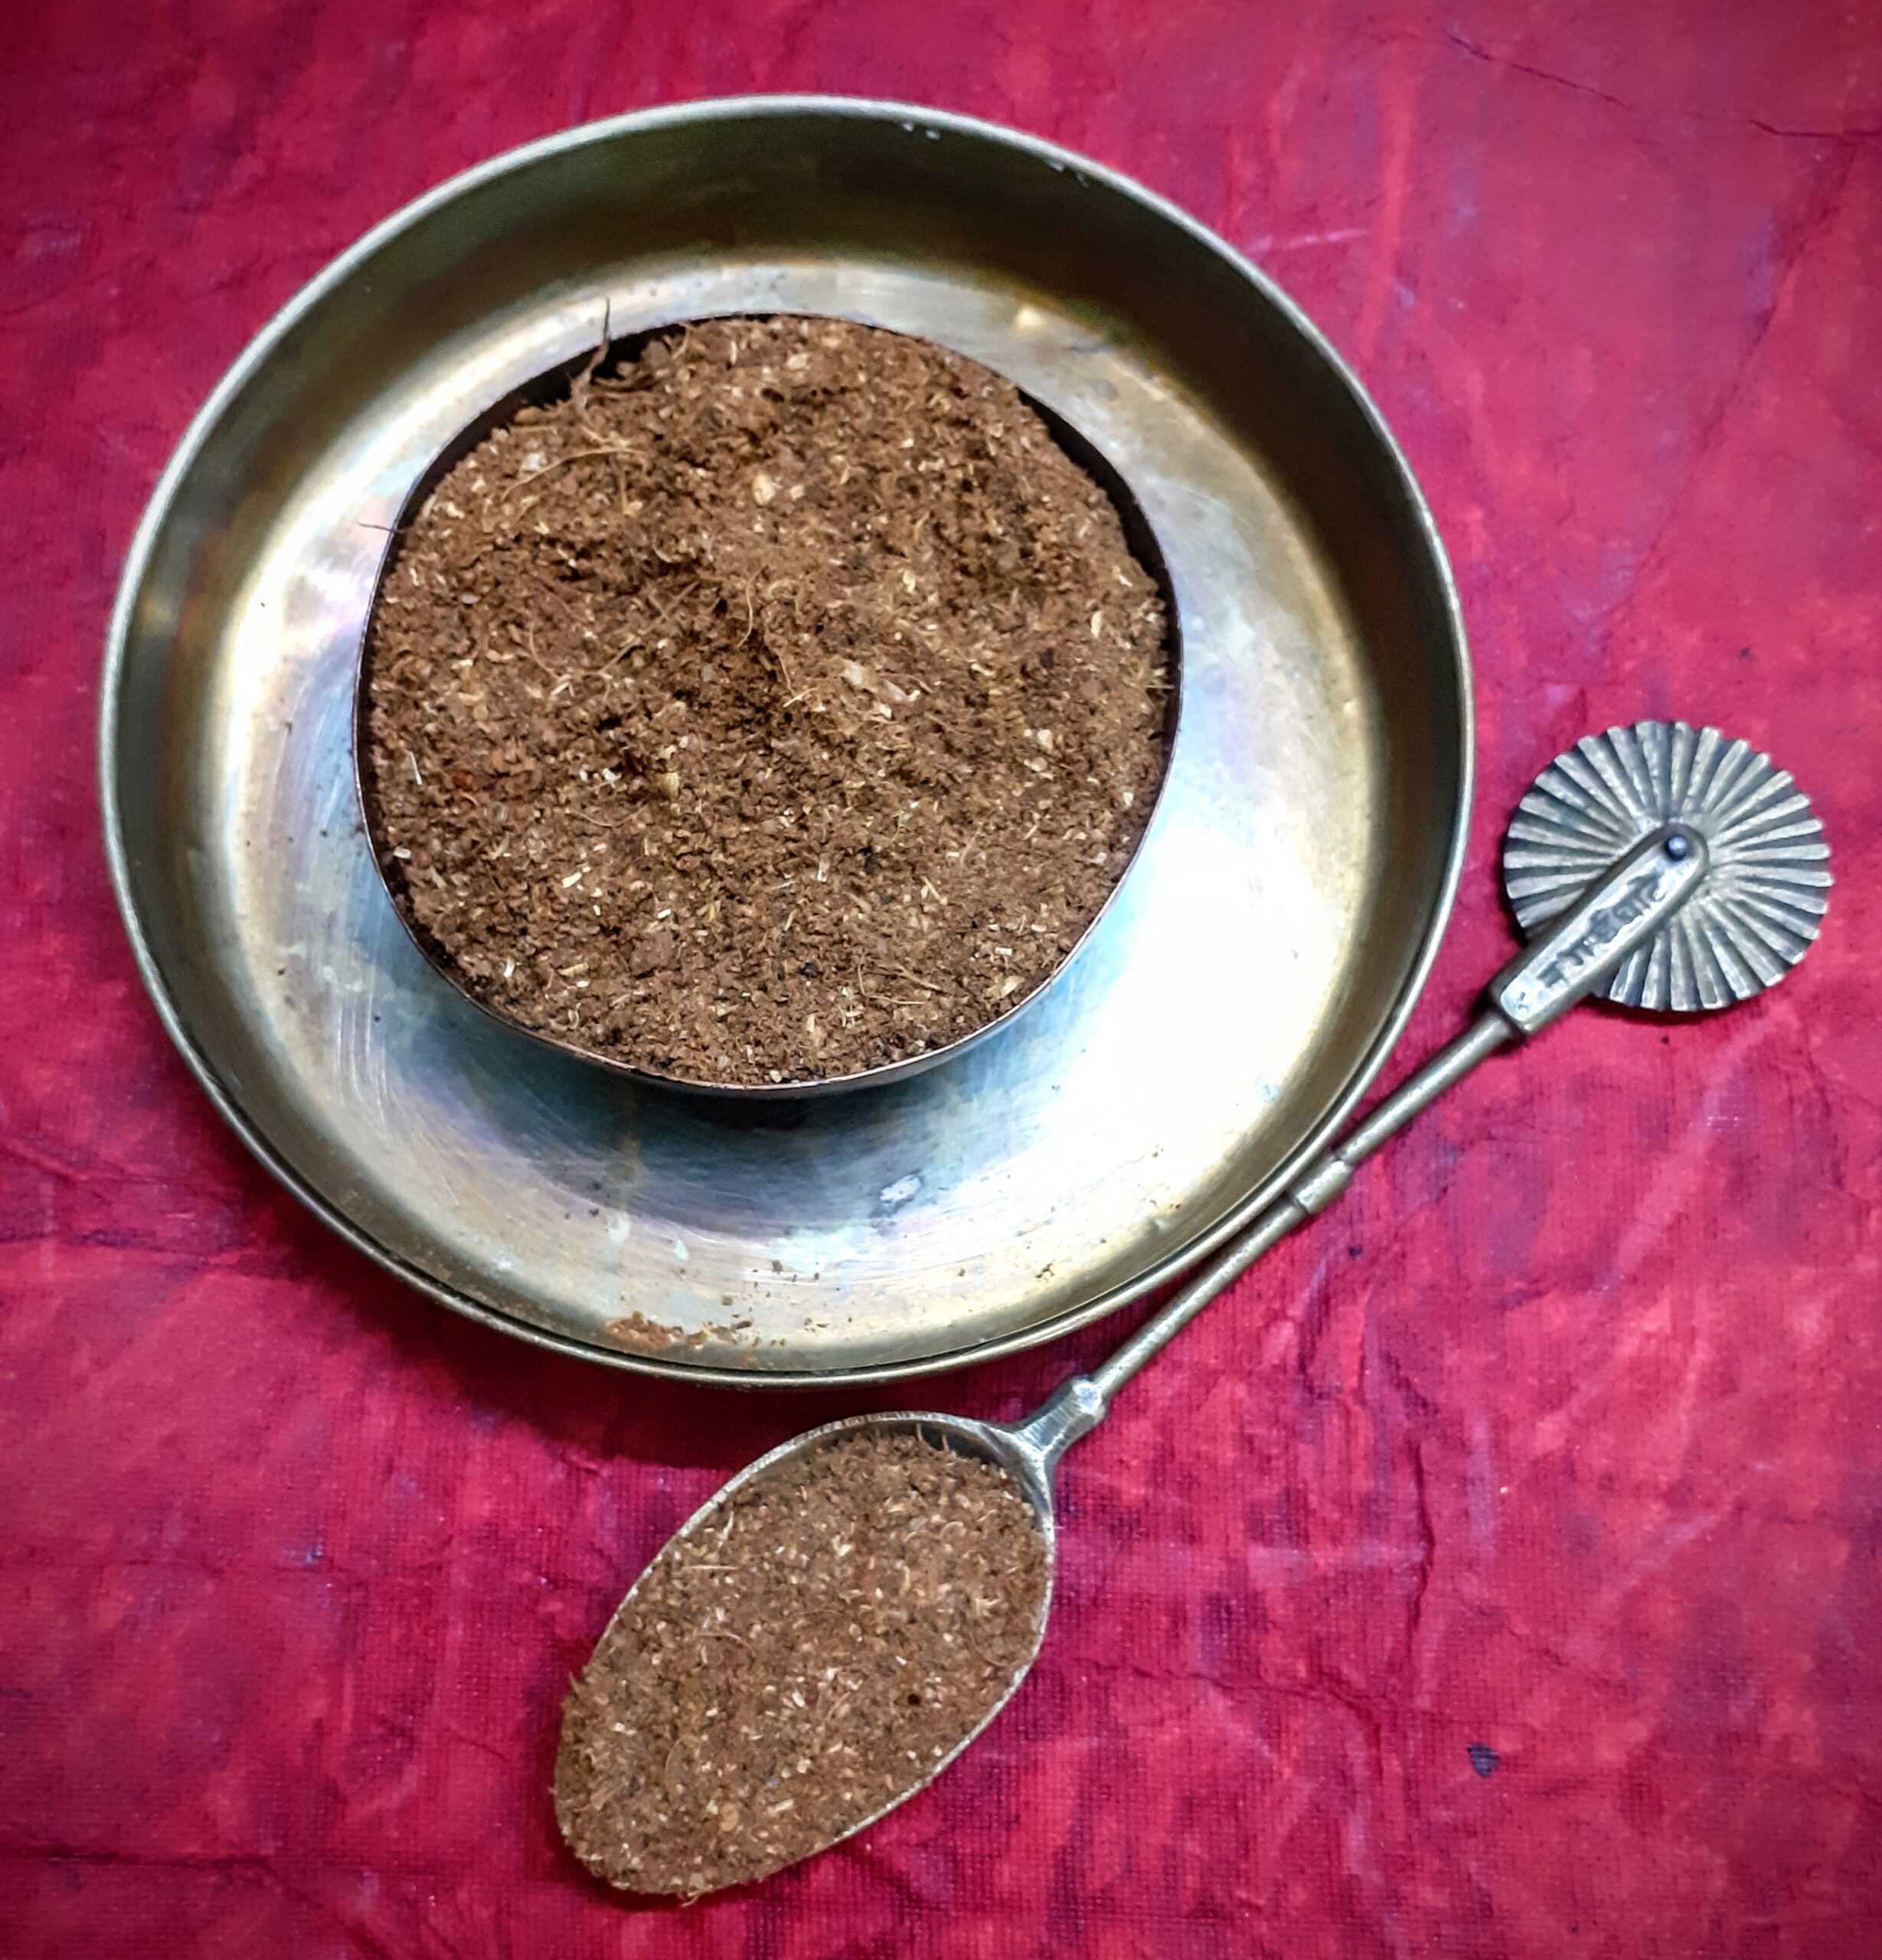
Ingredients for the Soya chunks Biryani:
Basmati Rice 1 cup (soaked for 15 mins and pre cooked ( I used pot in pot method)
Soya chunks 100 gm soaked in hot water for 15 mins and rinsed thoroughly 2 to 3 times
Onions 2 – 1 sliced lengthwise and another chopped finely
Tomato 1 large
Ginger garlic paste 1 tsp
Biryani masala 3 tsp or 1 tbsp
Red chilli powder 1 to 1.5 tsp
Curd 3/4 cup
Bay leaves 2 small or 1 big
Cinnamon stick 2 sticks 1inch pieces
Cloves 4 to 5
Black Cardamom 2
Green cardamom 3
Fennel seeds 1/2 tsp
Oil for sauteeing
Ghee 1 tbsp
Directions:
In a Pan or Kadai take the ghee and heat it. On high heat fry the sliced onions in the ghee, until they turn brown. Remove the nicely browned onions to another plate and set aside. In the same Kadai add oil and put all the whole masalas and fry for 30 seconds. Now add the soya chunks after squeezing out all water and saute for a minute. Puree the onion and tomatoes in a blender, and add the puree to the sauteed Soya chunks. Stir nicely and add salt, red chilli powder and biryani masala and cook the chunks for a minute. Now add the curd and cook for 2 minutes. The oil will start separating, at this stage add 1/2 cup water and stir nicely. Now start adding the cooked rice little by little and stir well to evenly mix the gravy into the rice. Now top with the fried browned onions, pour a tablespoon of oil or ghee over it and cover the Kadai or pan and cook on low flame for 5 minutes, for flavours to infuse. Enjoy the aroma wafting through the house. The soya chunk biryani is ready to serve.
STEPWISE RECIPE FOLLOWS:
1. Prepare Biryani Masala as directed. (Can be made ahead). You can use the store-bought masala. Assemble all ingredients.
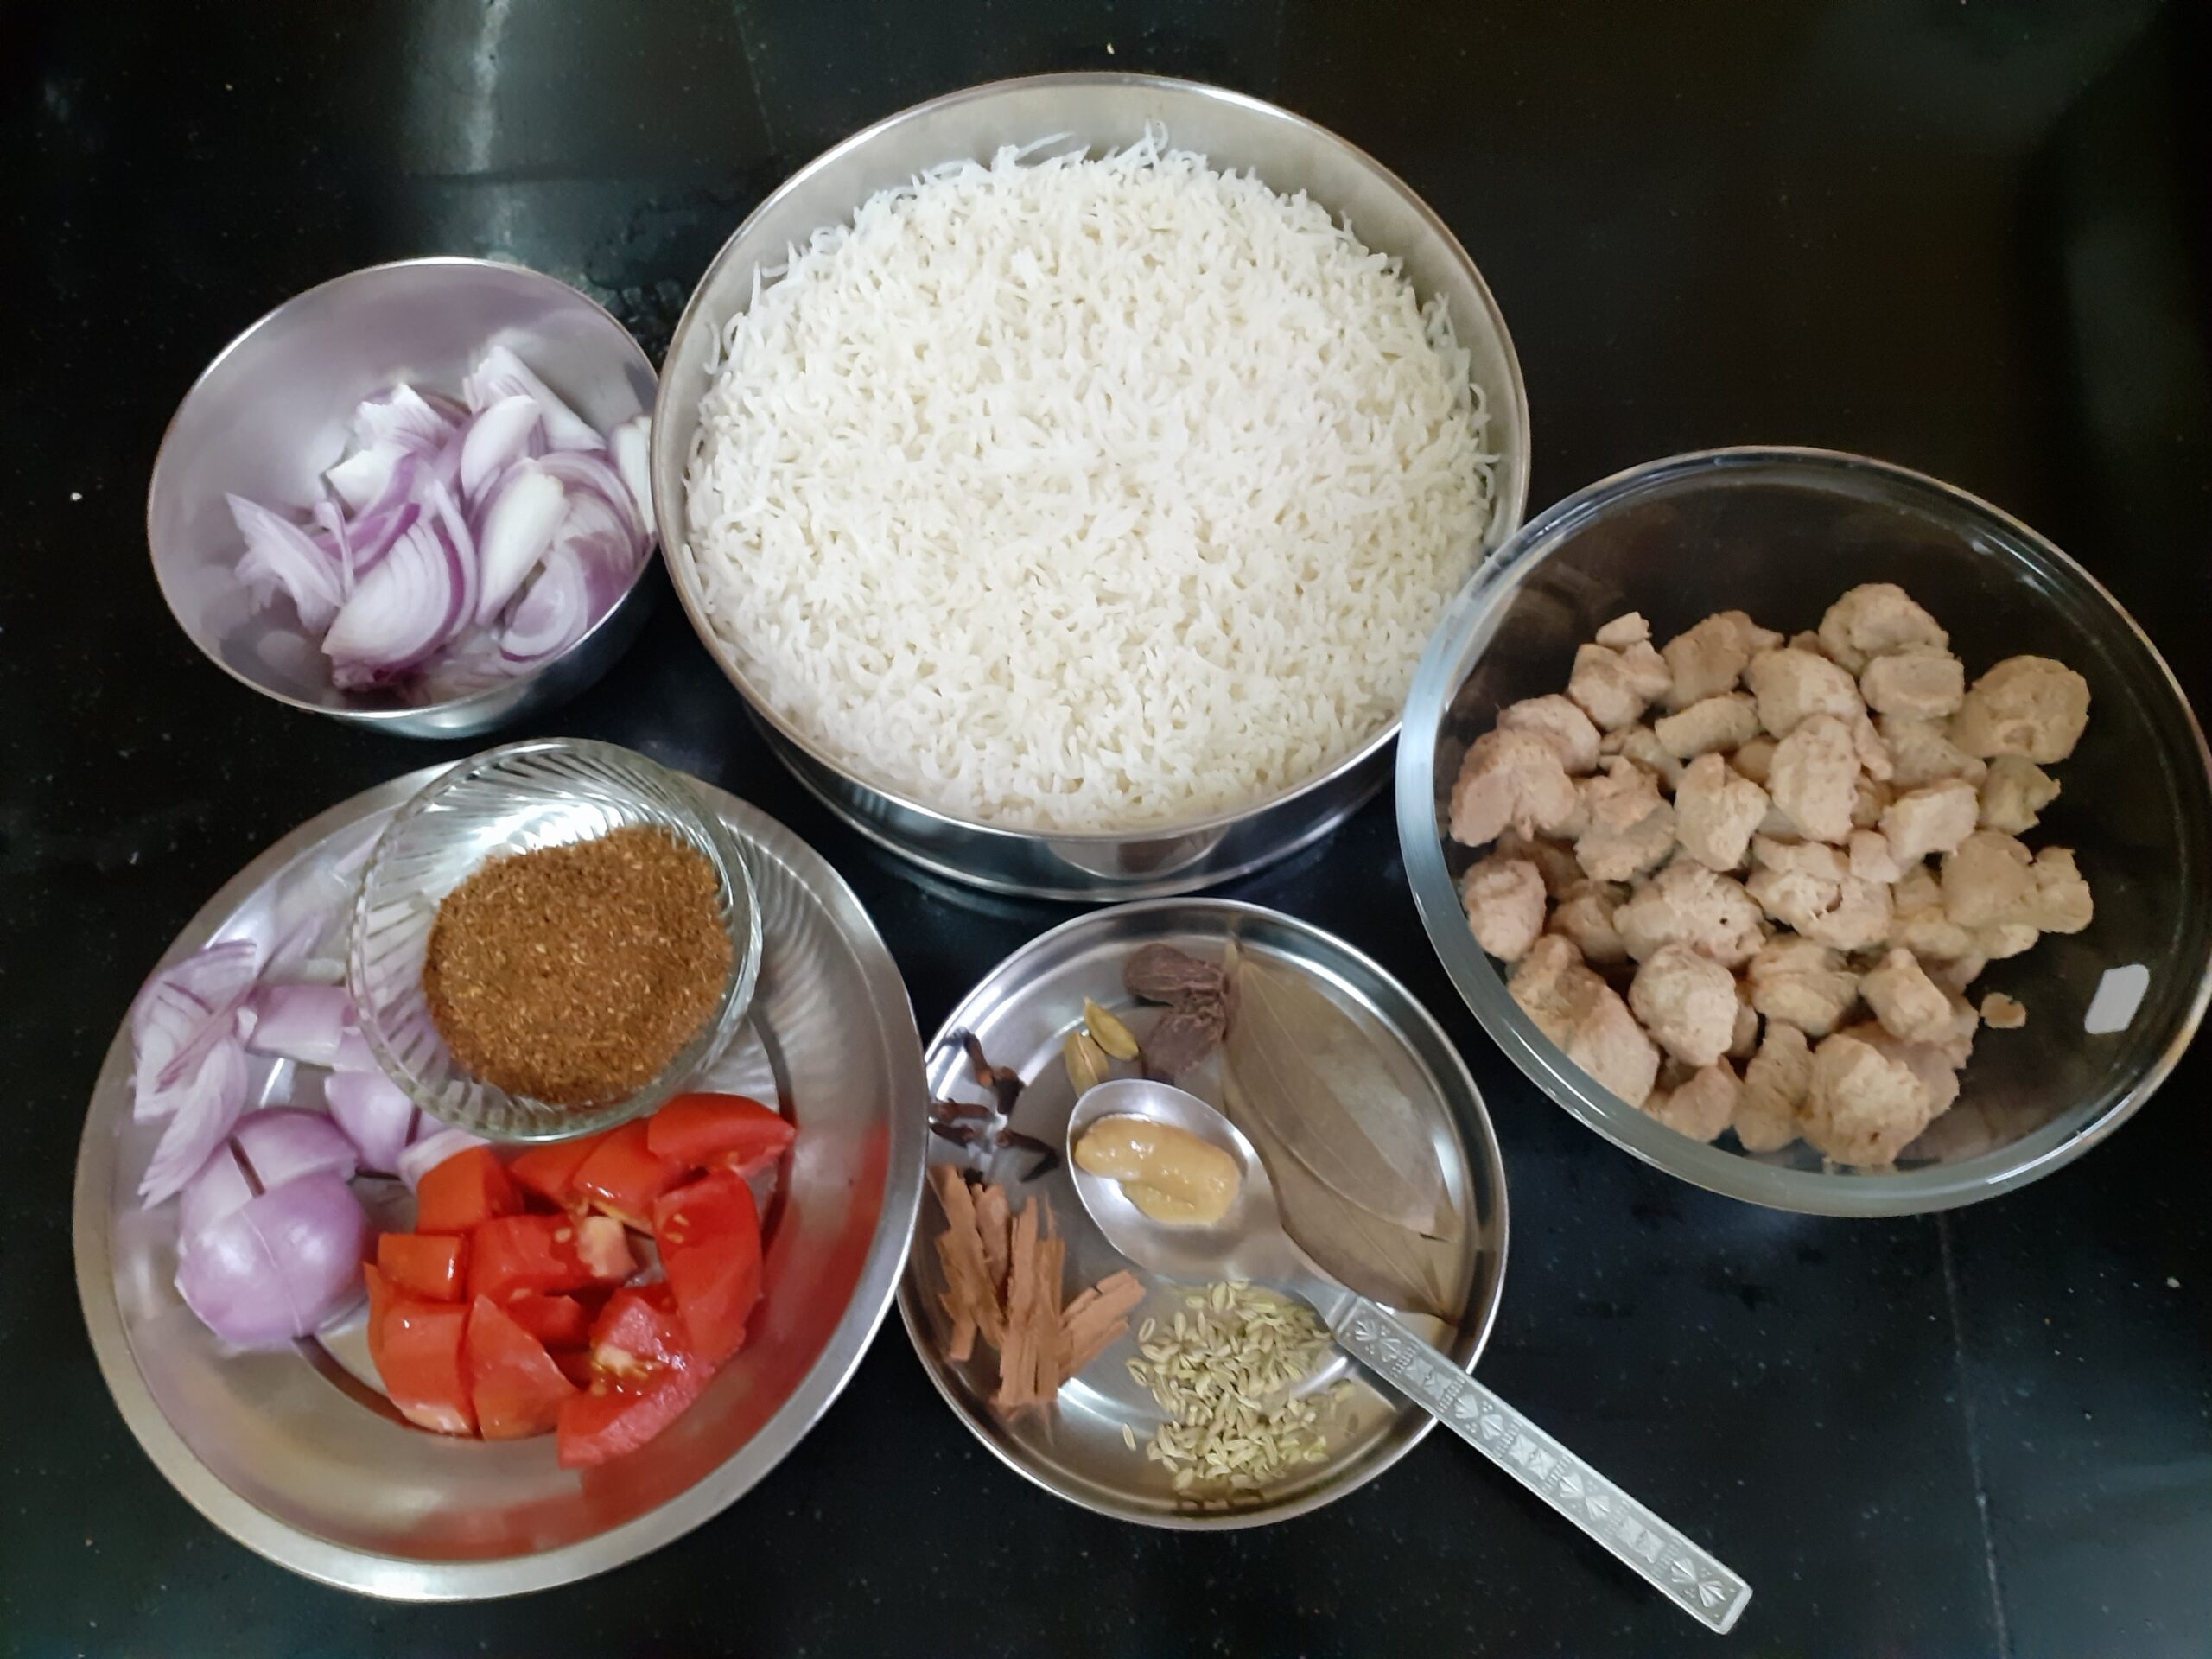
2. Soak the Soya chunks in hot water for 15 mins and rinse thoroughly in cold water 2 to 3 times.

3. In a Pan or Kadai take the ghee and heat it. On high heat fry the sliced onions in the ghee, until they turn brown. Remove the nicely browned onions to another plate and set aside.
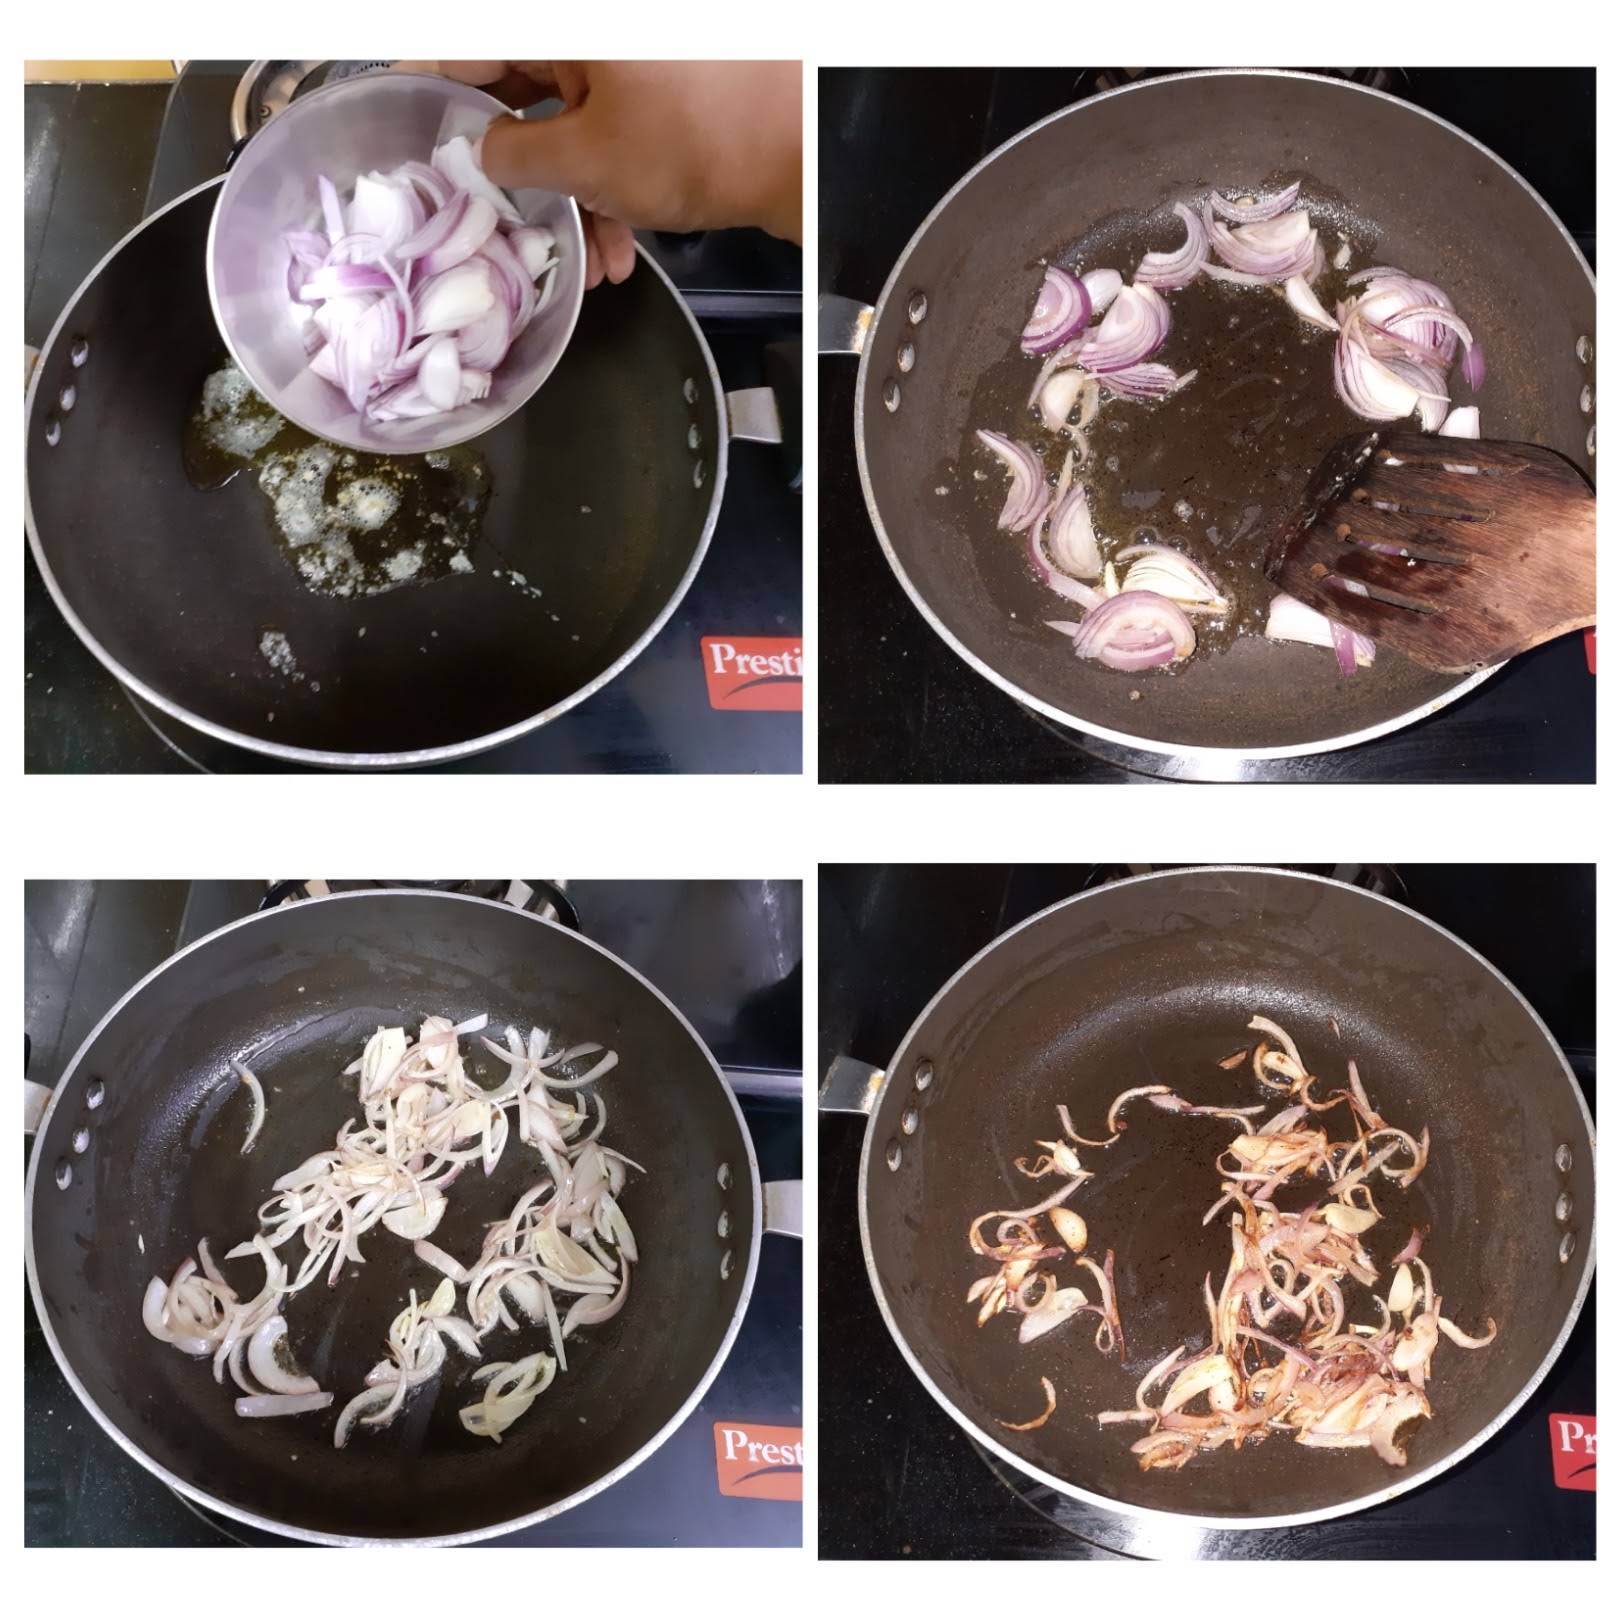
4. In the same Kadai add oil and put all the whole masalas and fry for 30 seconds. Now add the soya chunks after squeezing out all water and saute for a minute.
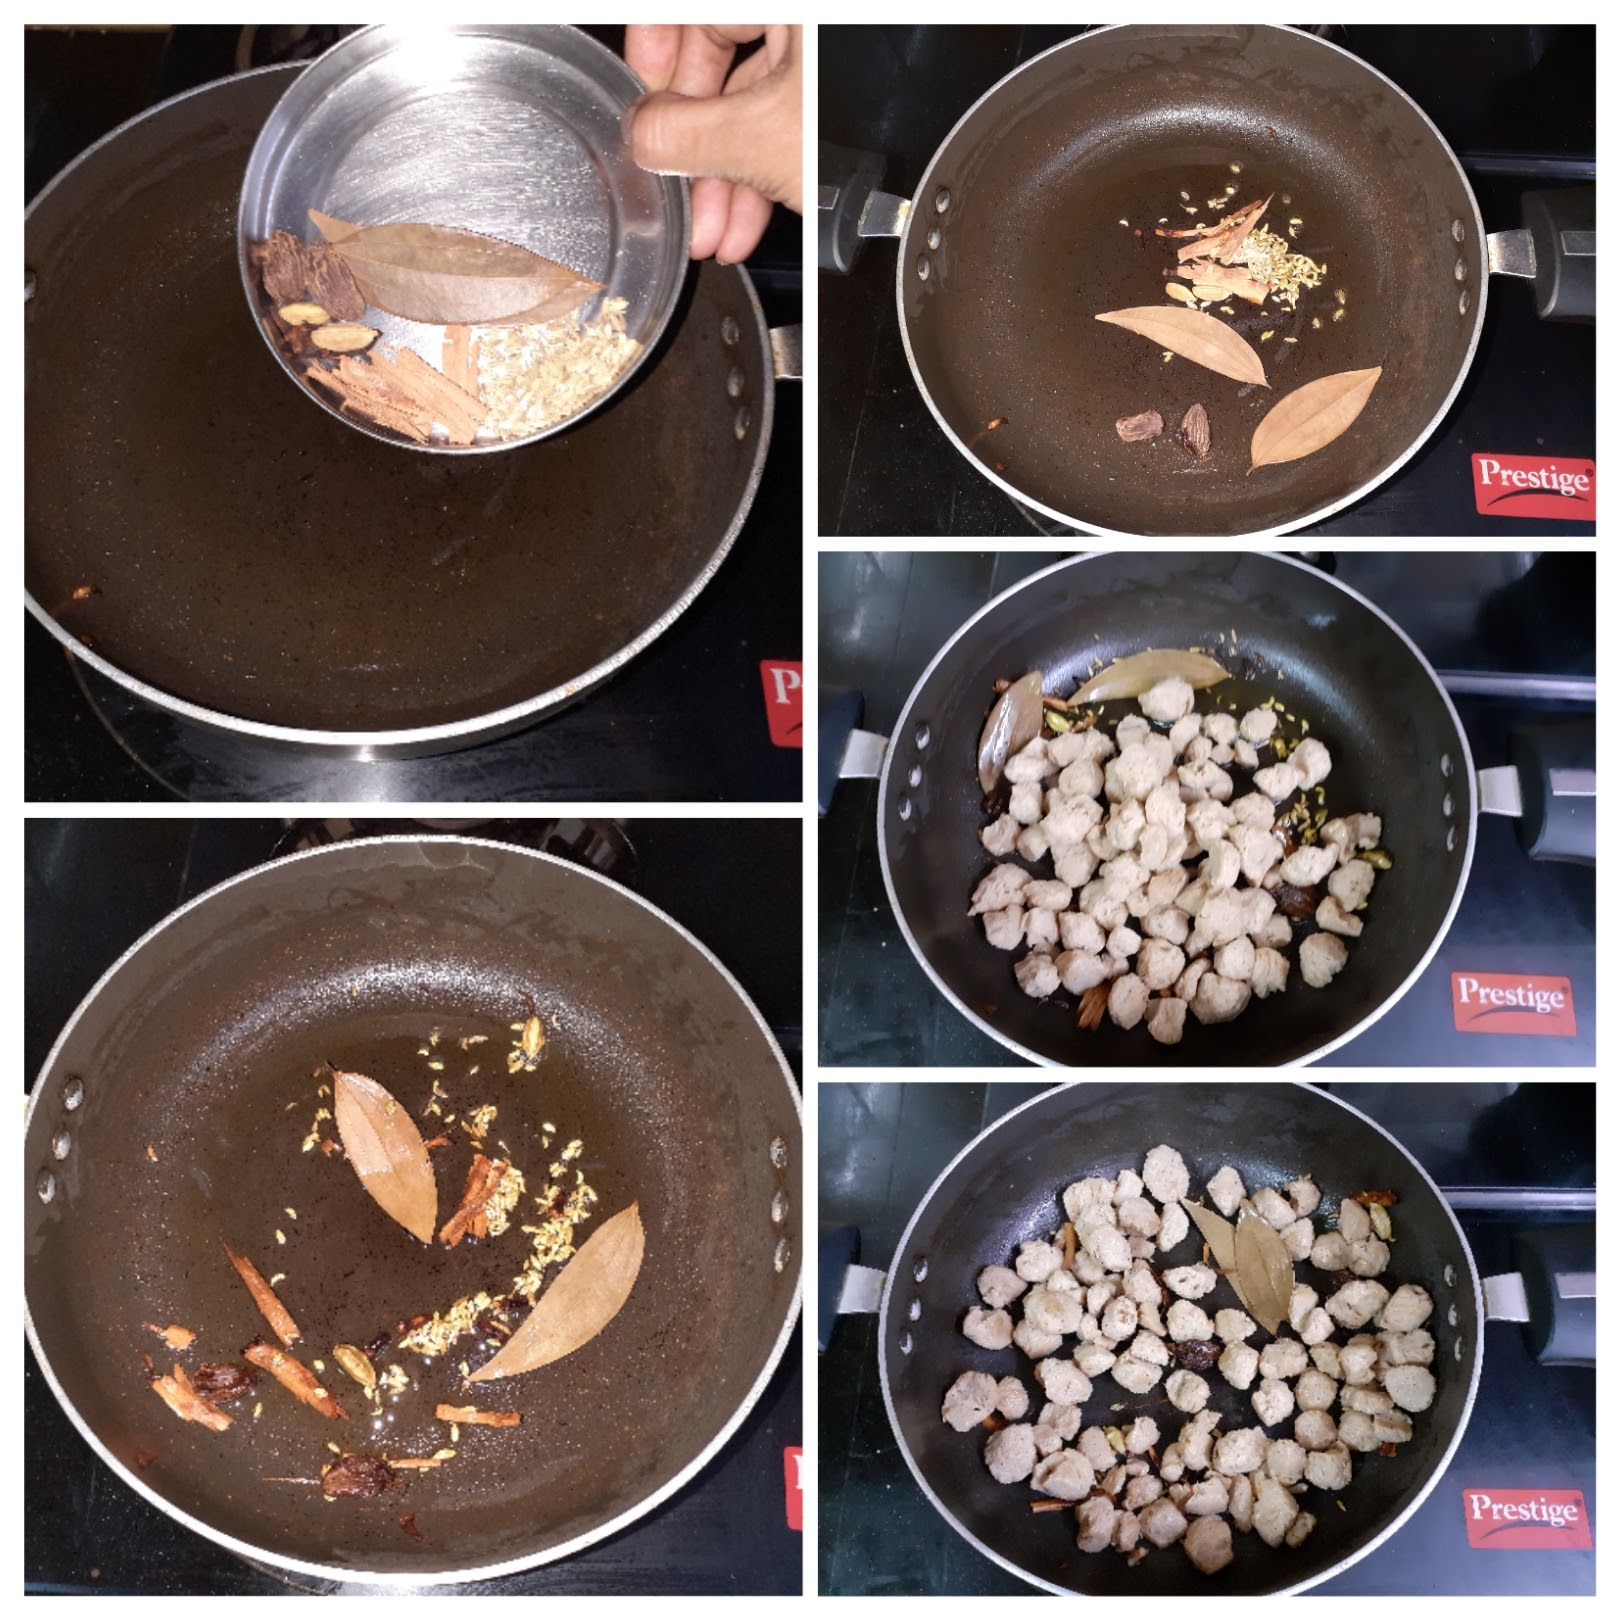
5. Puree the onion and tomatoes in a blender, and add the puree to the sauteed Soya chunks. Stir nicely and add ginger- garlic paste, salt, red chilli powder and biryani masala and cook the chunks for a minute.

6. Now add the curd and cook for 2 minutes. The oil will start separating, at this stage add 1/2 cup water and stir nicely.
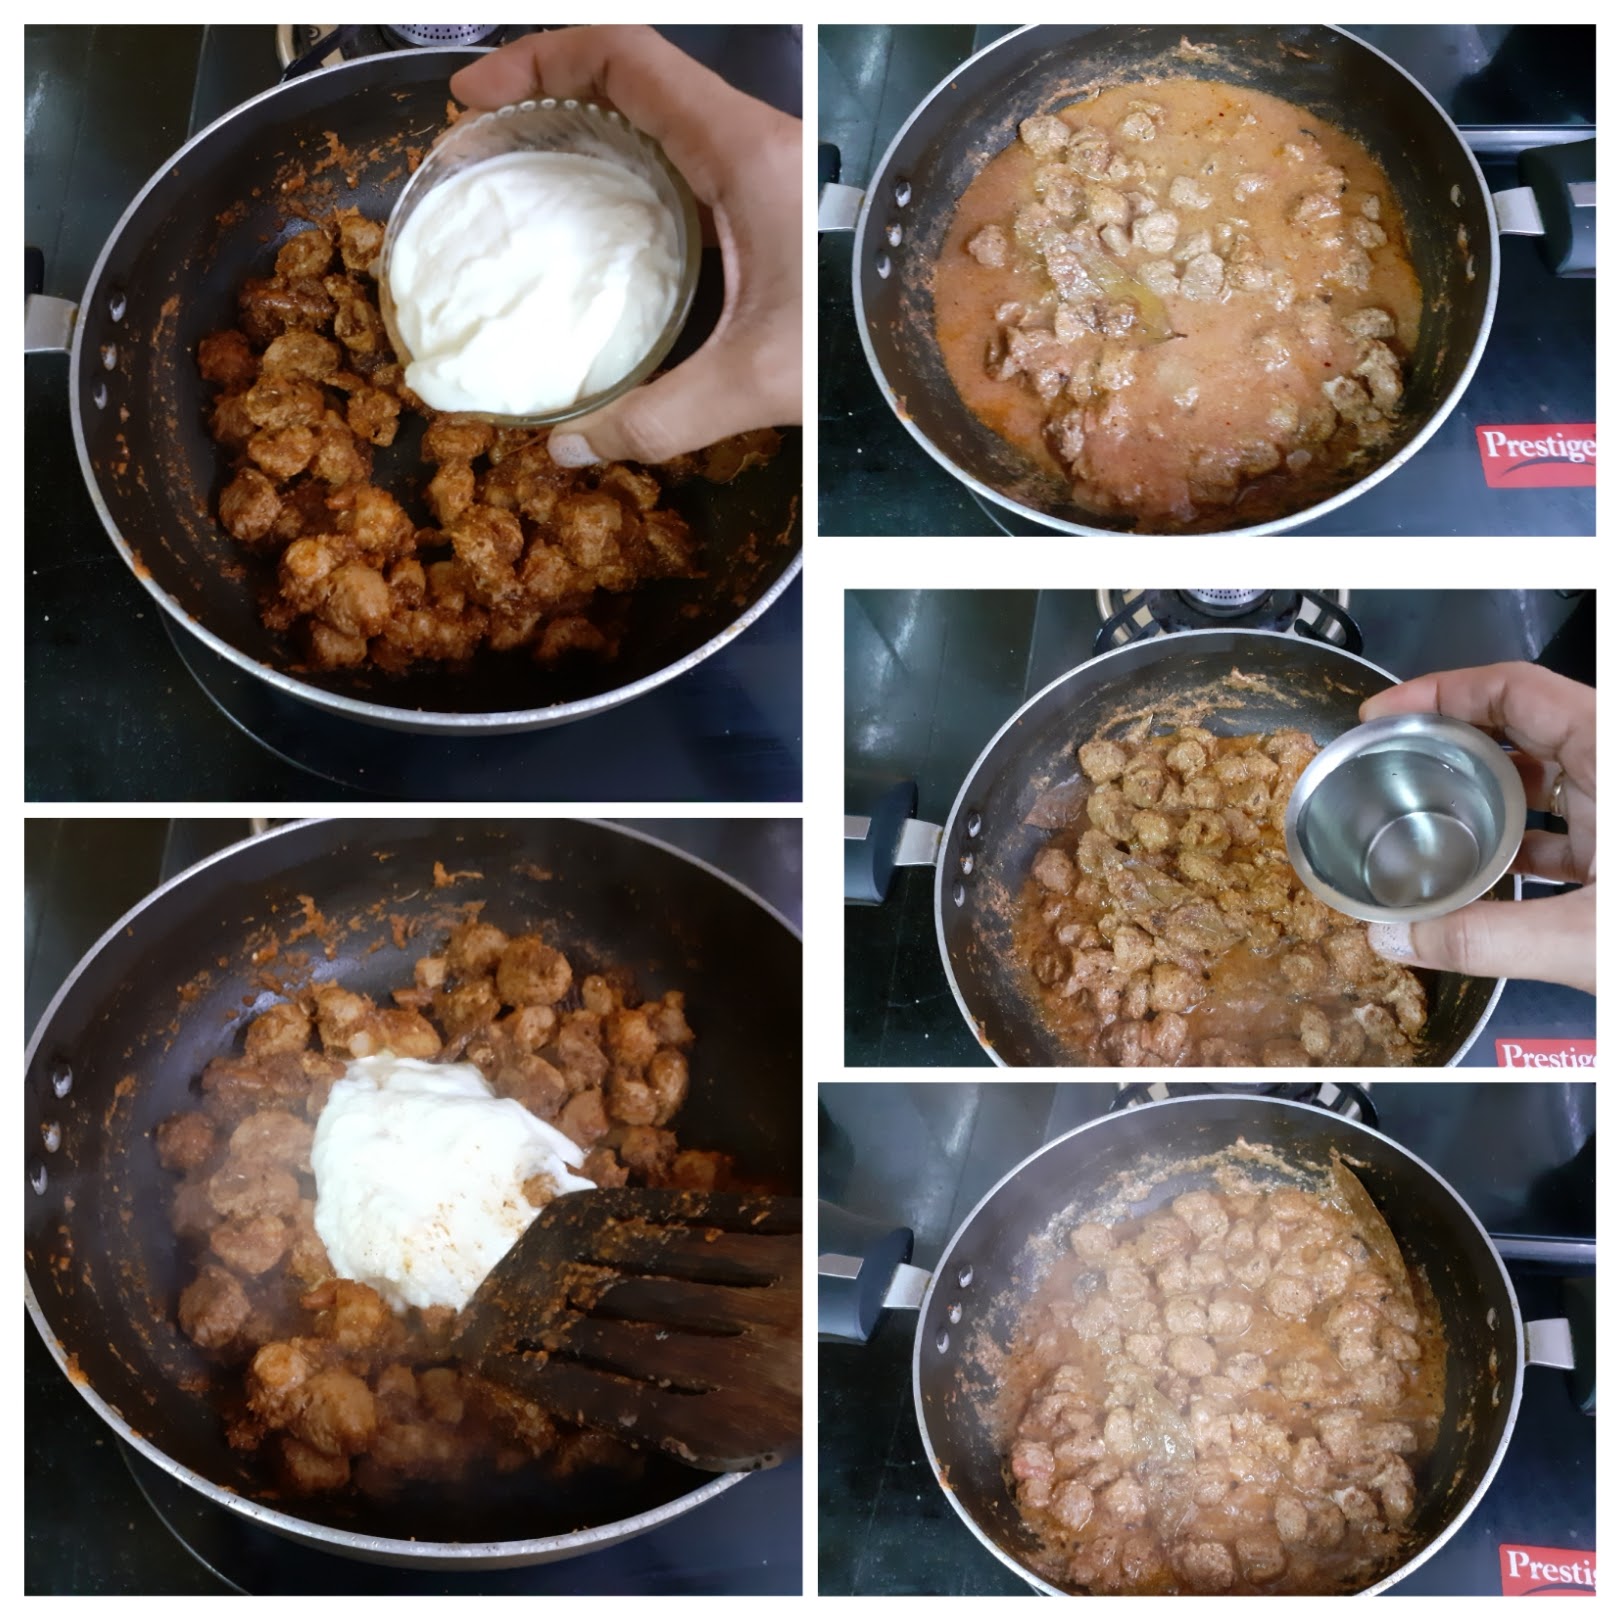
7. Now start adding the cooked rice little by little and stir well to evenly mix the gravy into the rice. Now top with the fried browned onions, pour a tablespoon of oil or ghee over it and cover the Kadai or pan and cook on low flame for 5 minutes.

NOTES:
1. If one does not want to prepare the Biryani masala, it can be easily swapped with store bought one, the taste will be a little different though.
2. Sliced and browned onions impart a nice taste and flavour to the dish, so I add them in all Biryani Varieties. The stage of adding them differs.
If you tried this recipe and liked it please comment below. I would love to hear from you. If you have a query about the recipe email us and ill respond as soon as I can.
Palakkad Mini Thaali (Thali Ideas)
Before I delve into the recipe I would like to give you a small introduction to Palakkad also called Palghat, which is a city in the state of Kerala. It shares its border with Tamilnadu and has a cuisine of its own. Many people are not aware of the amazing dishes this small district in Kerala has and so I am taking it on me to bring you all a few varieties from this cuisine.

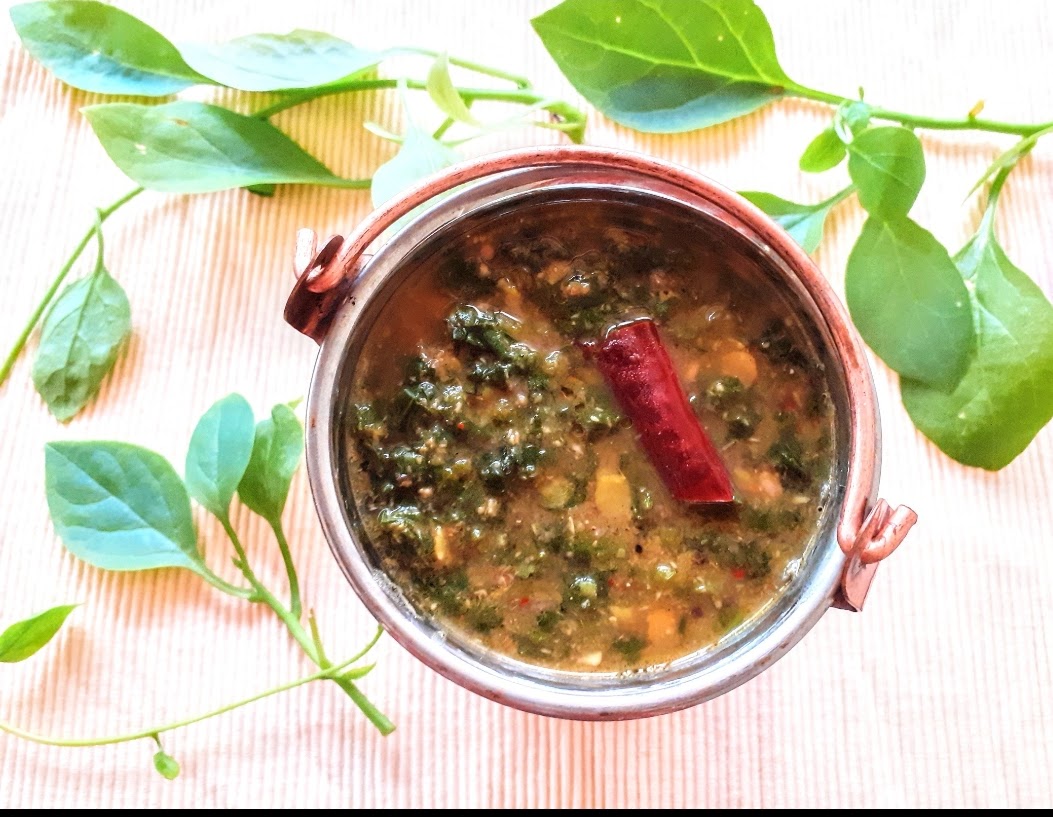
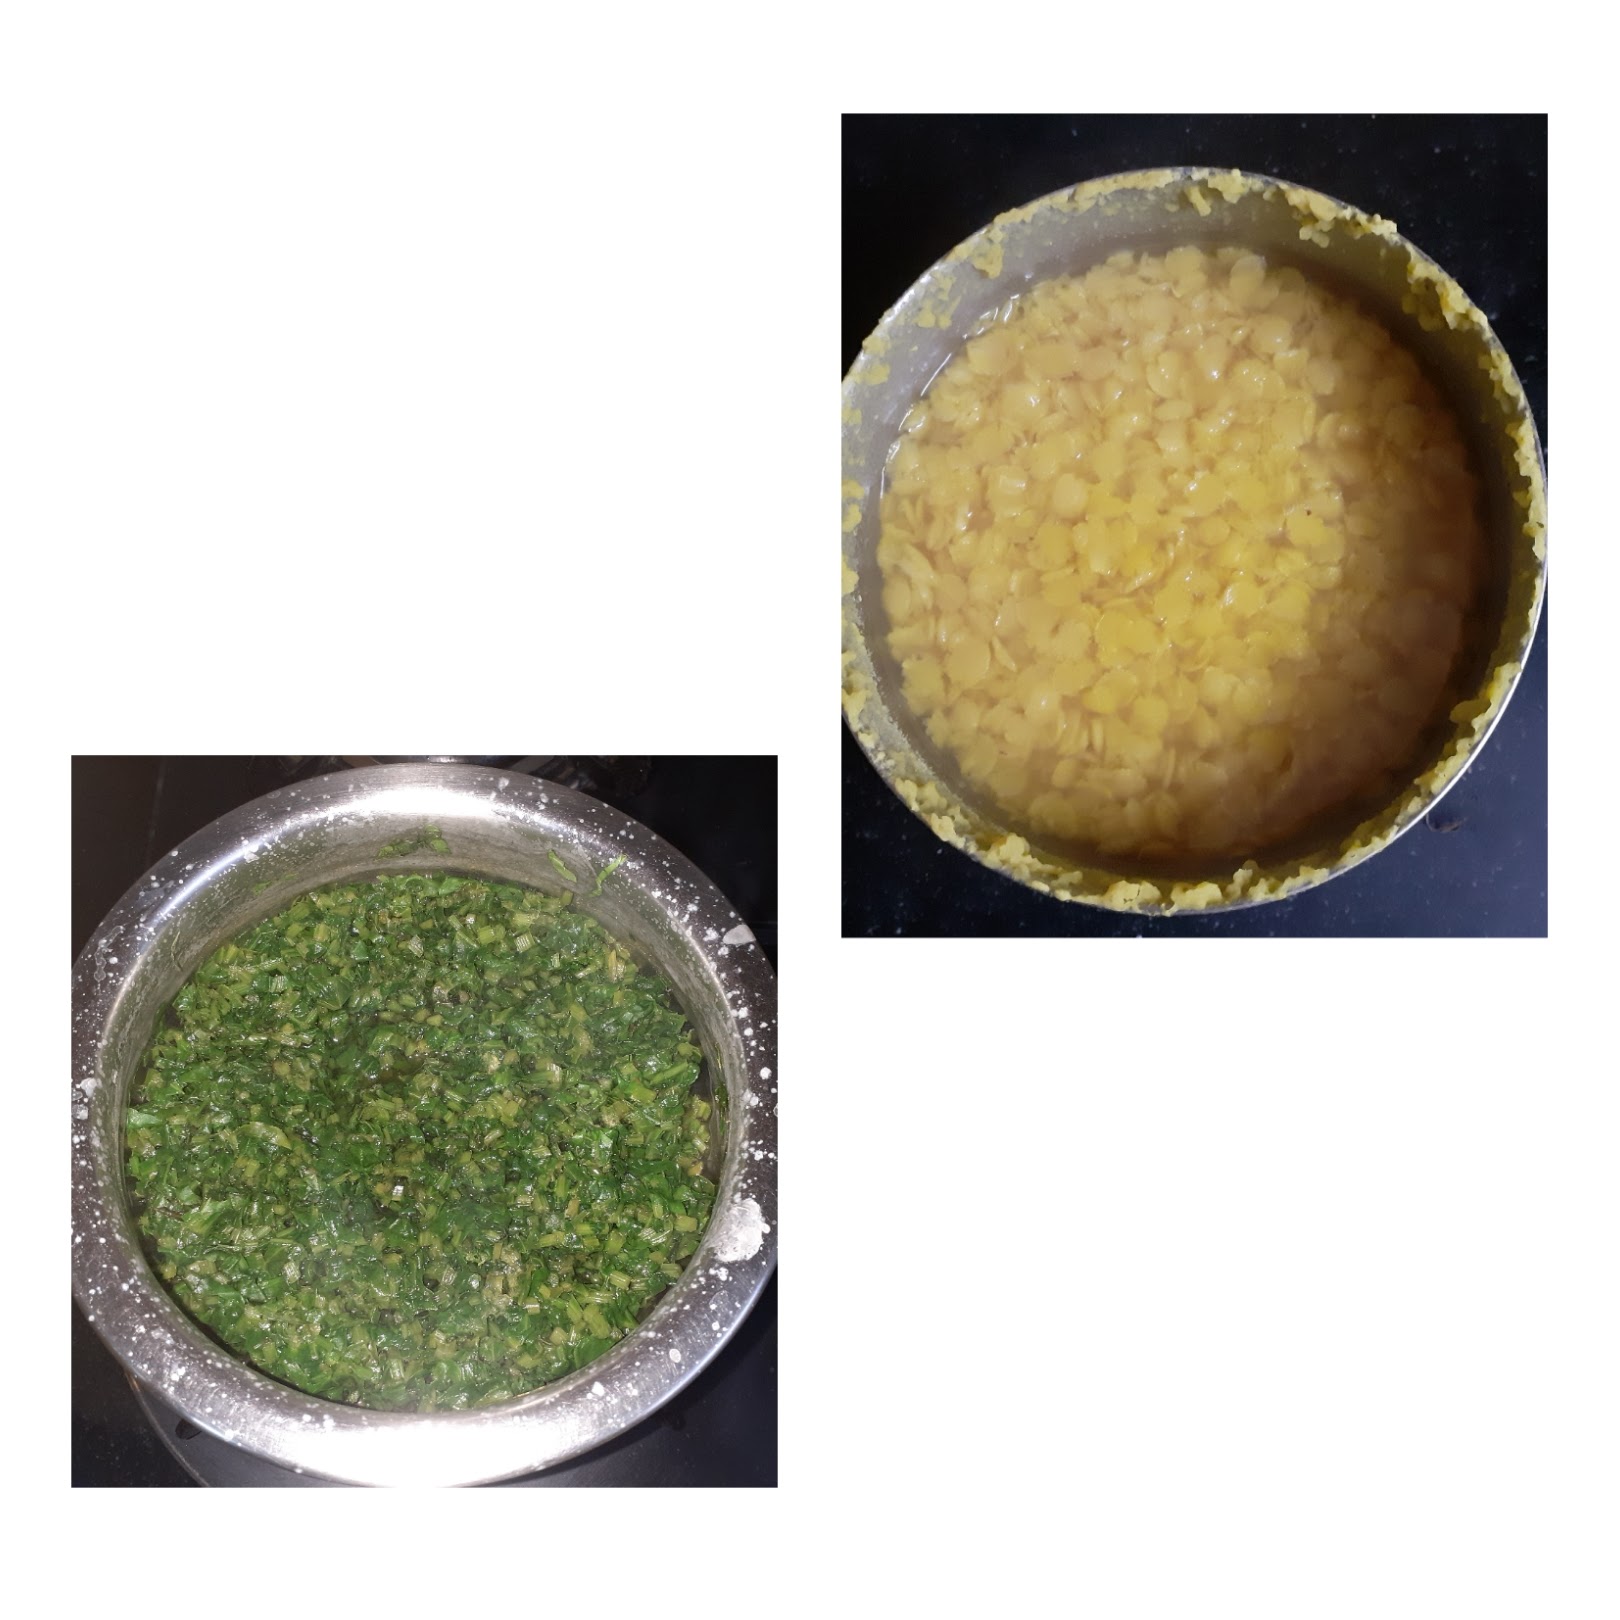
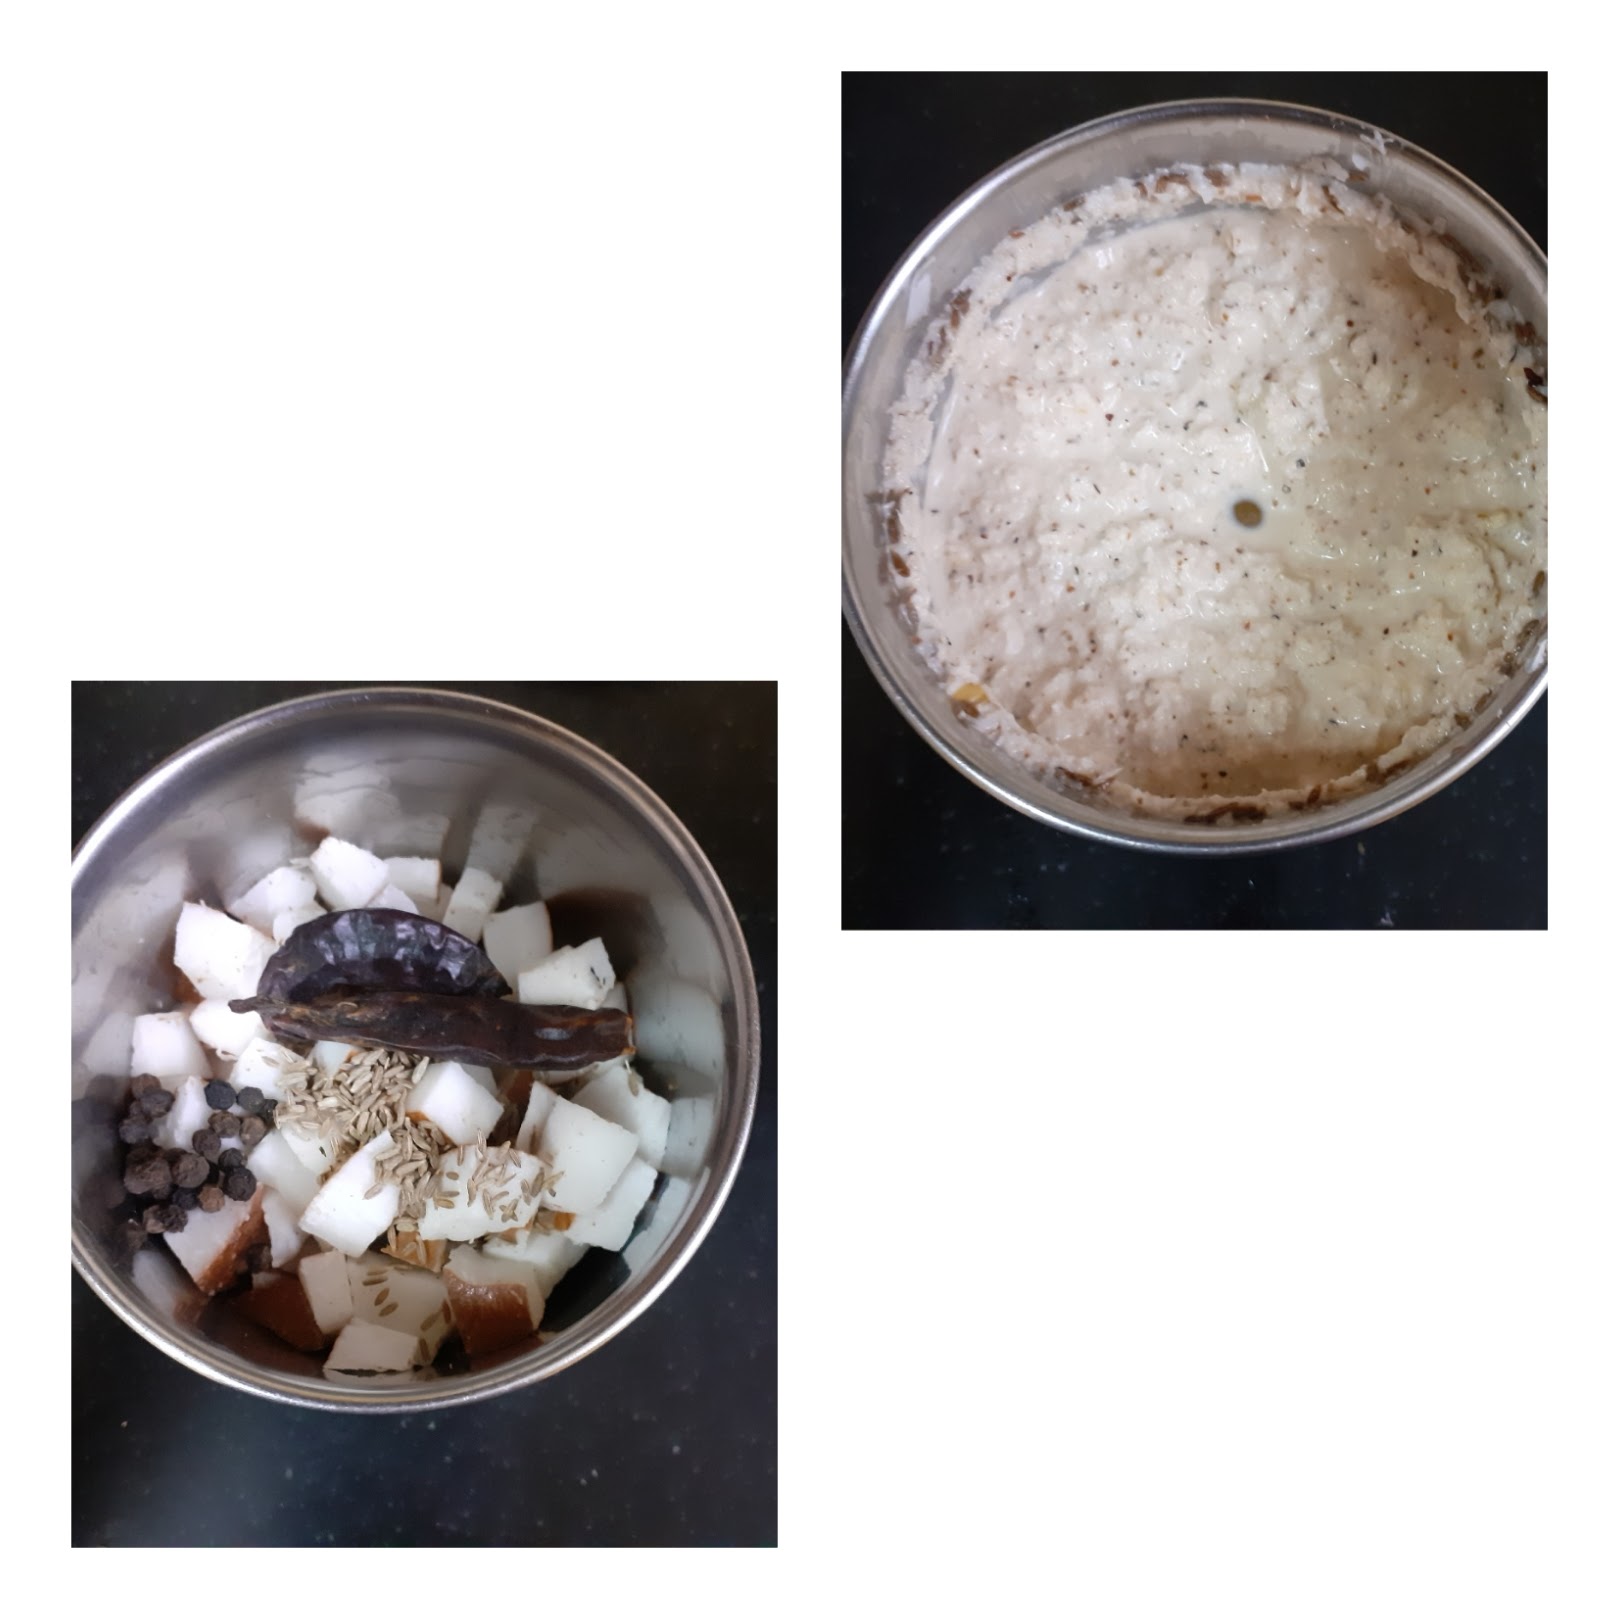


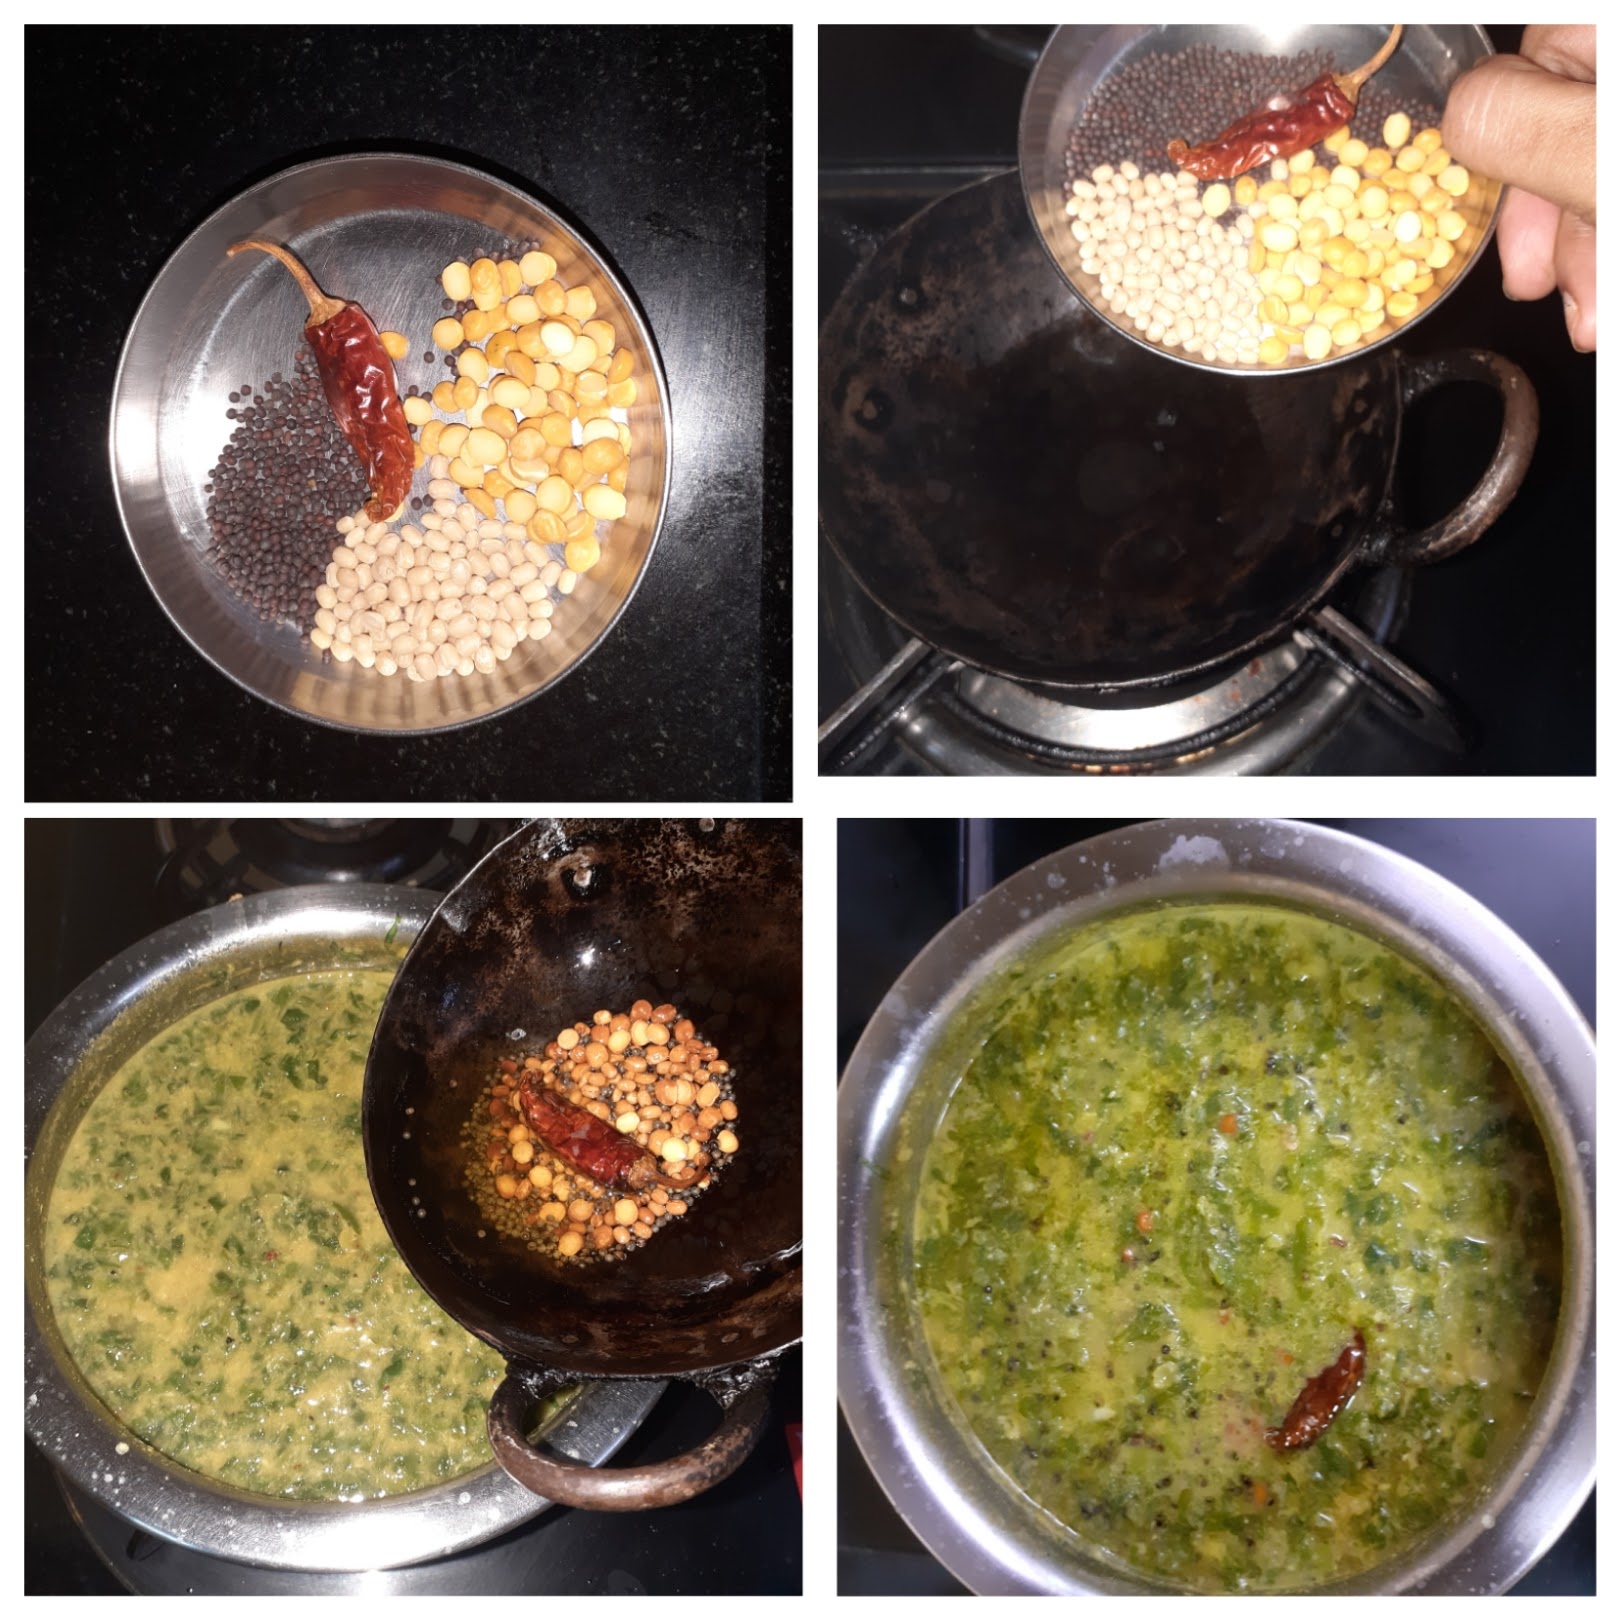
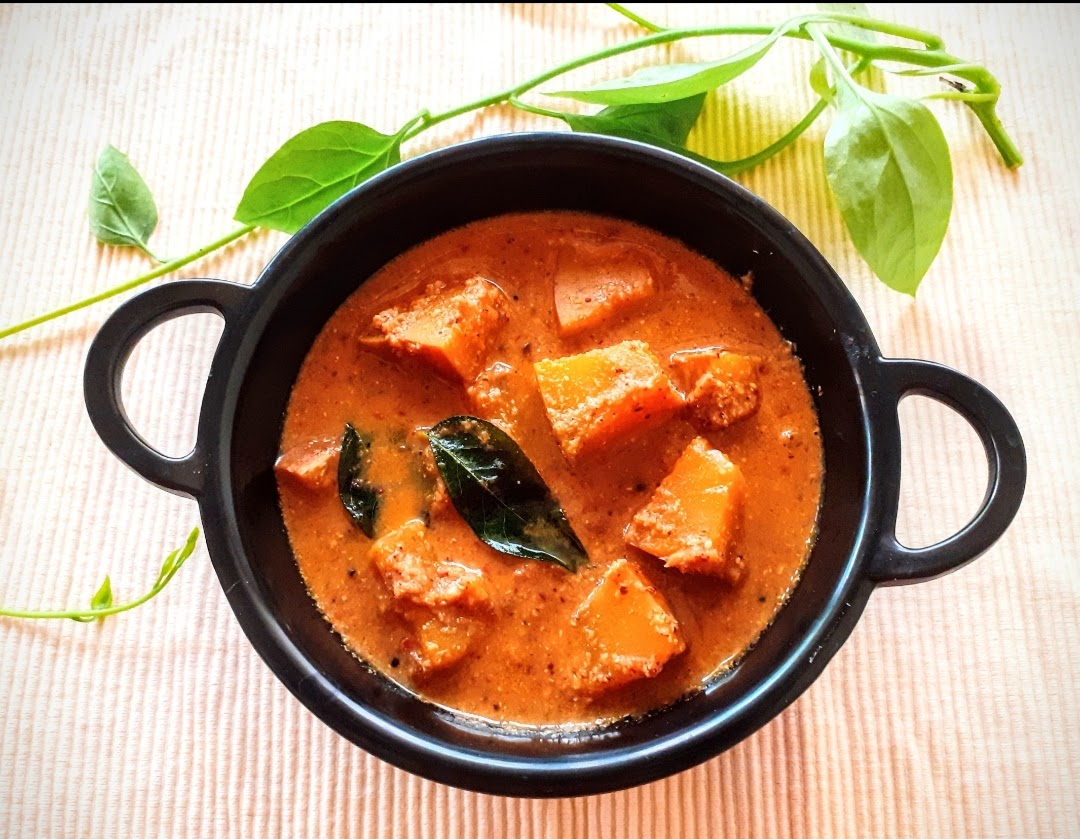
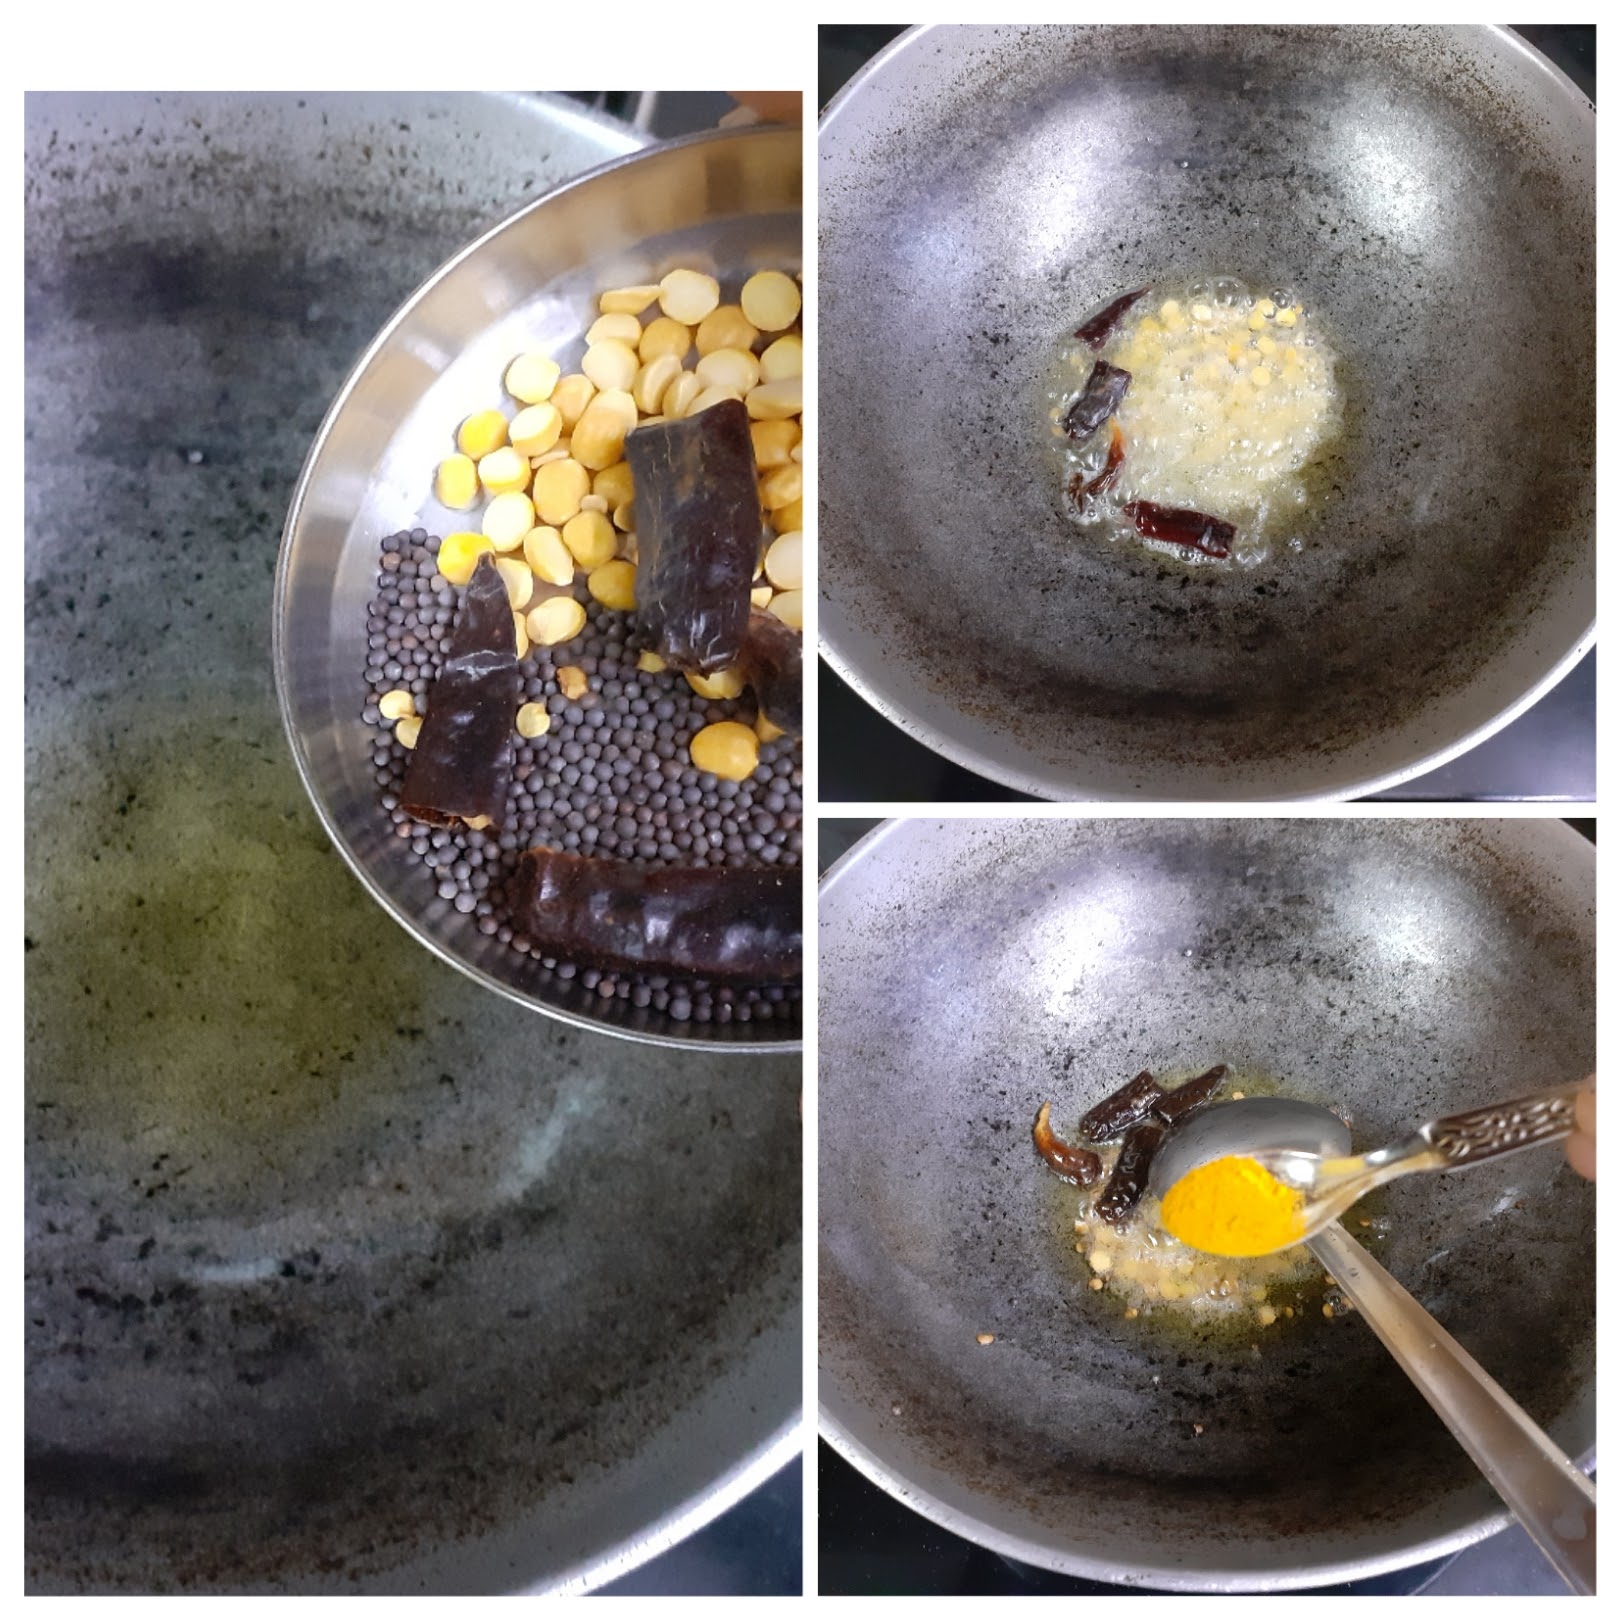
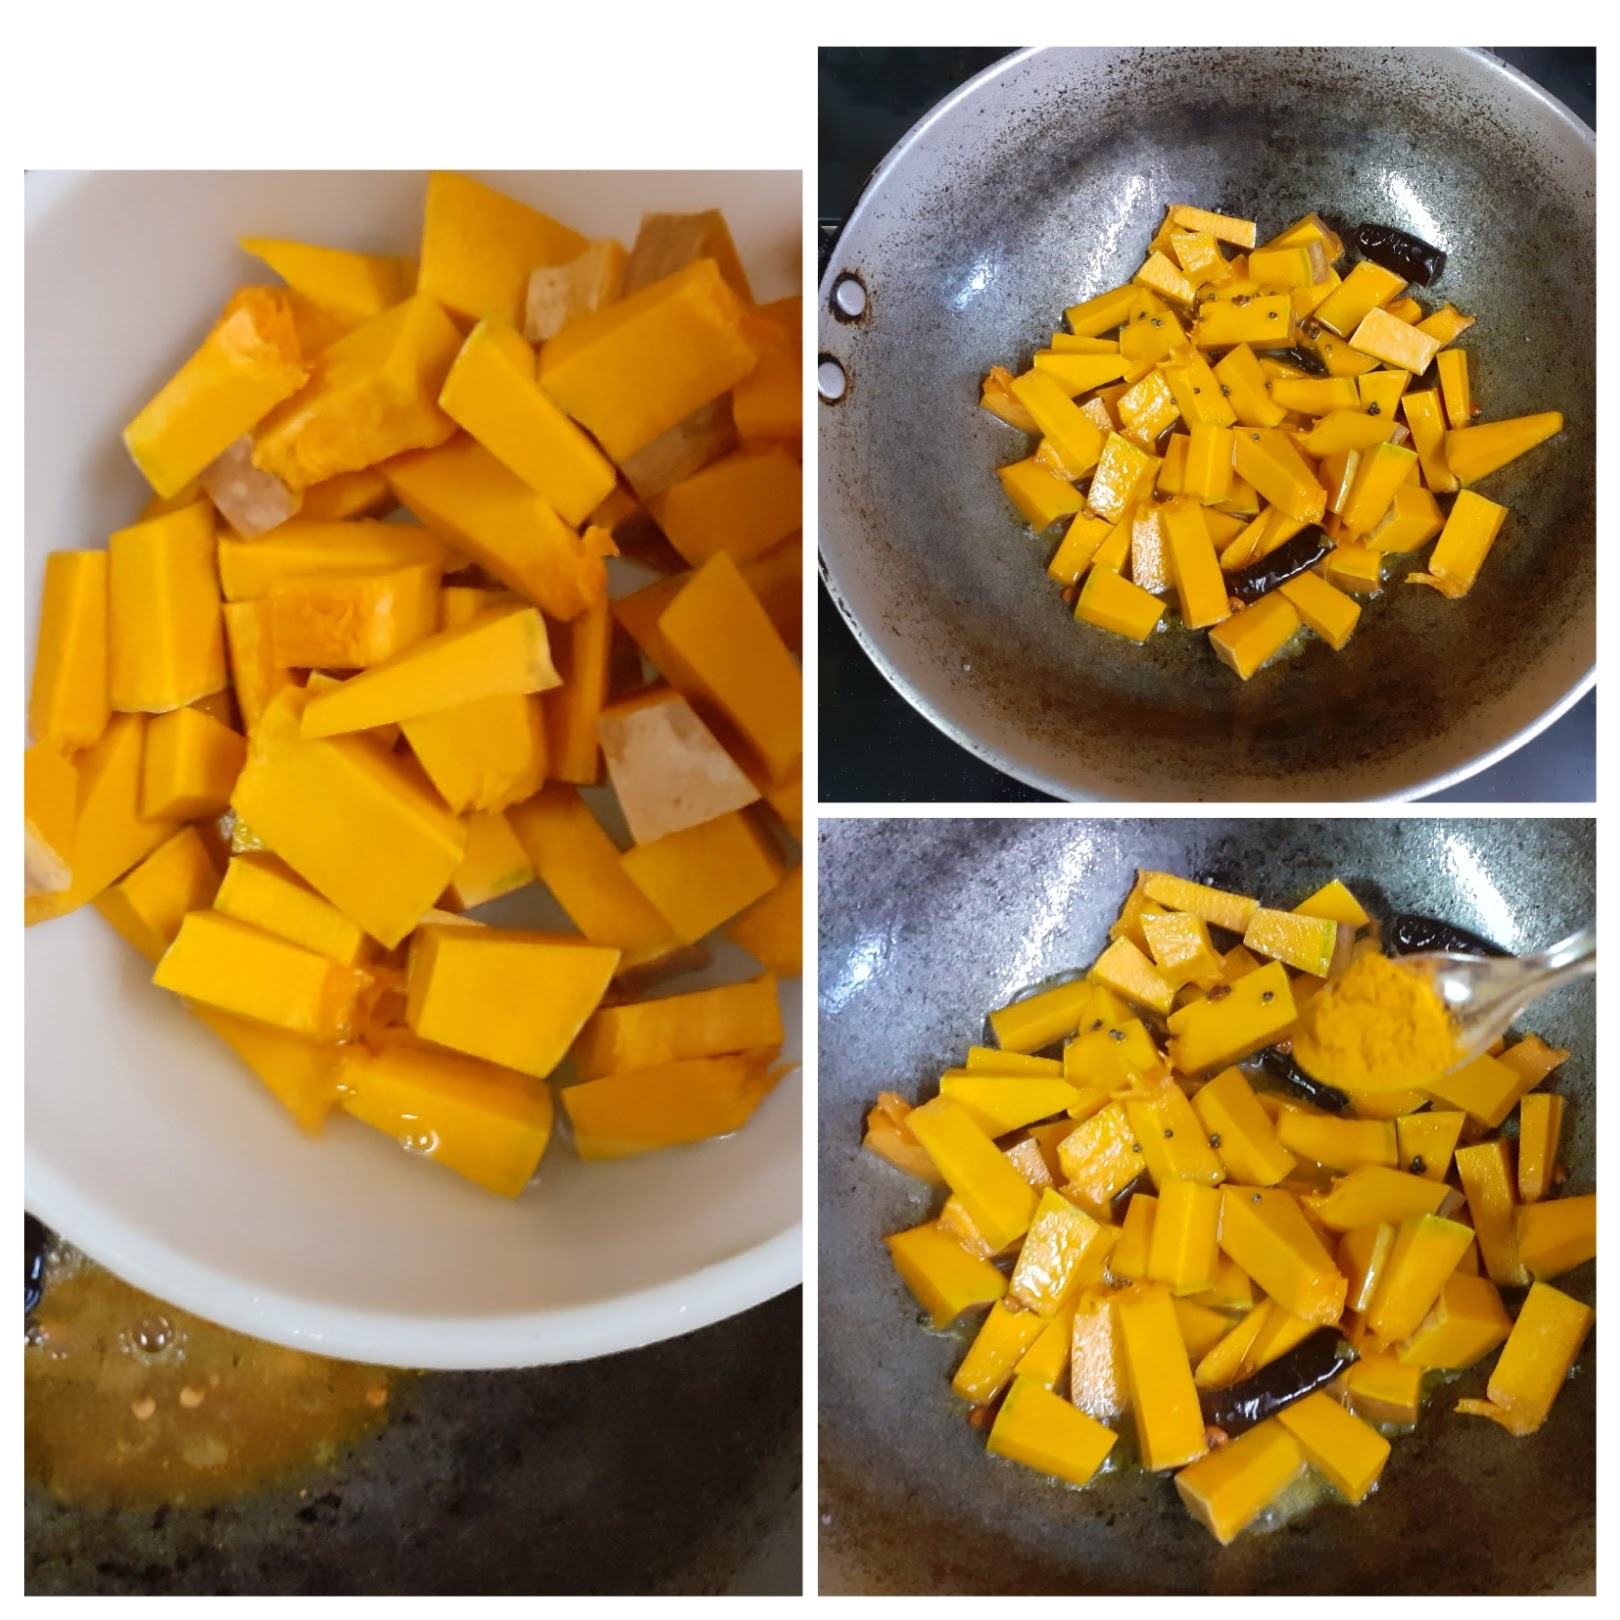
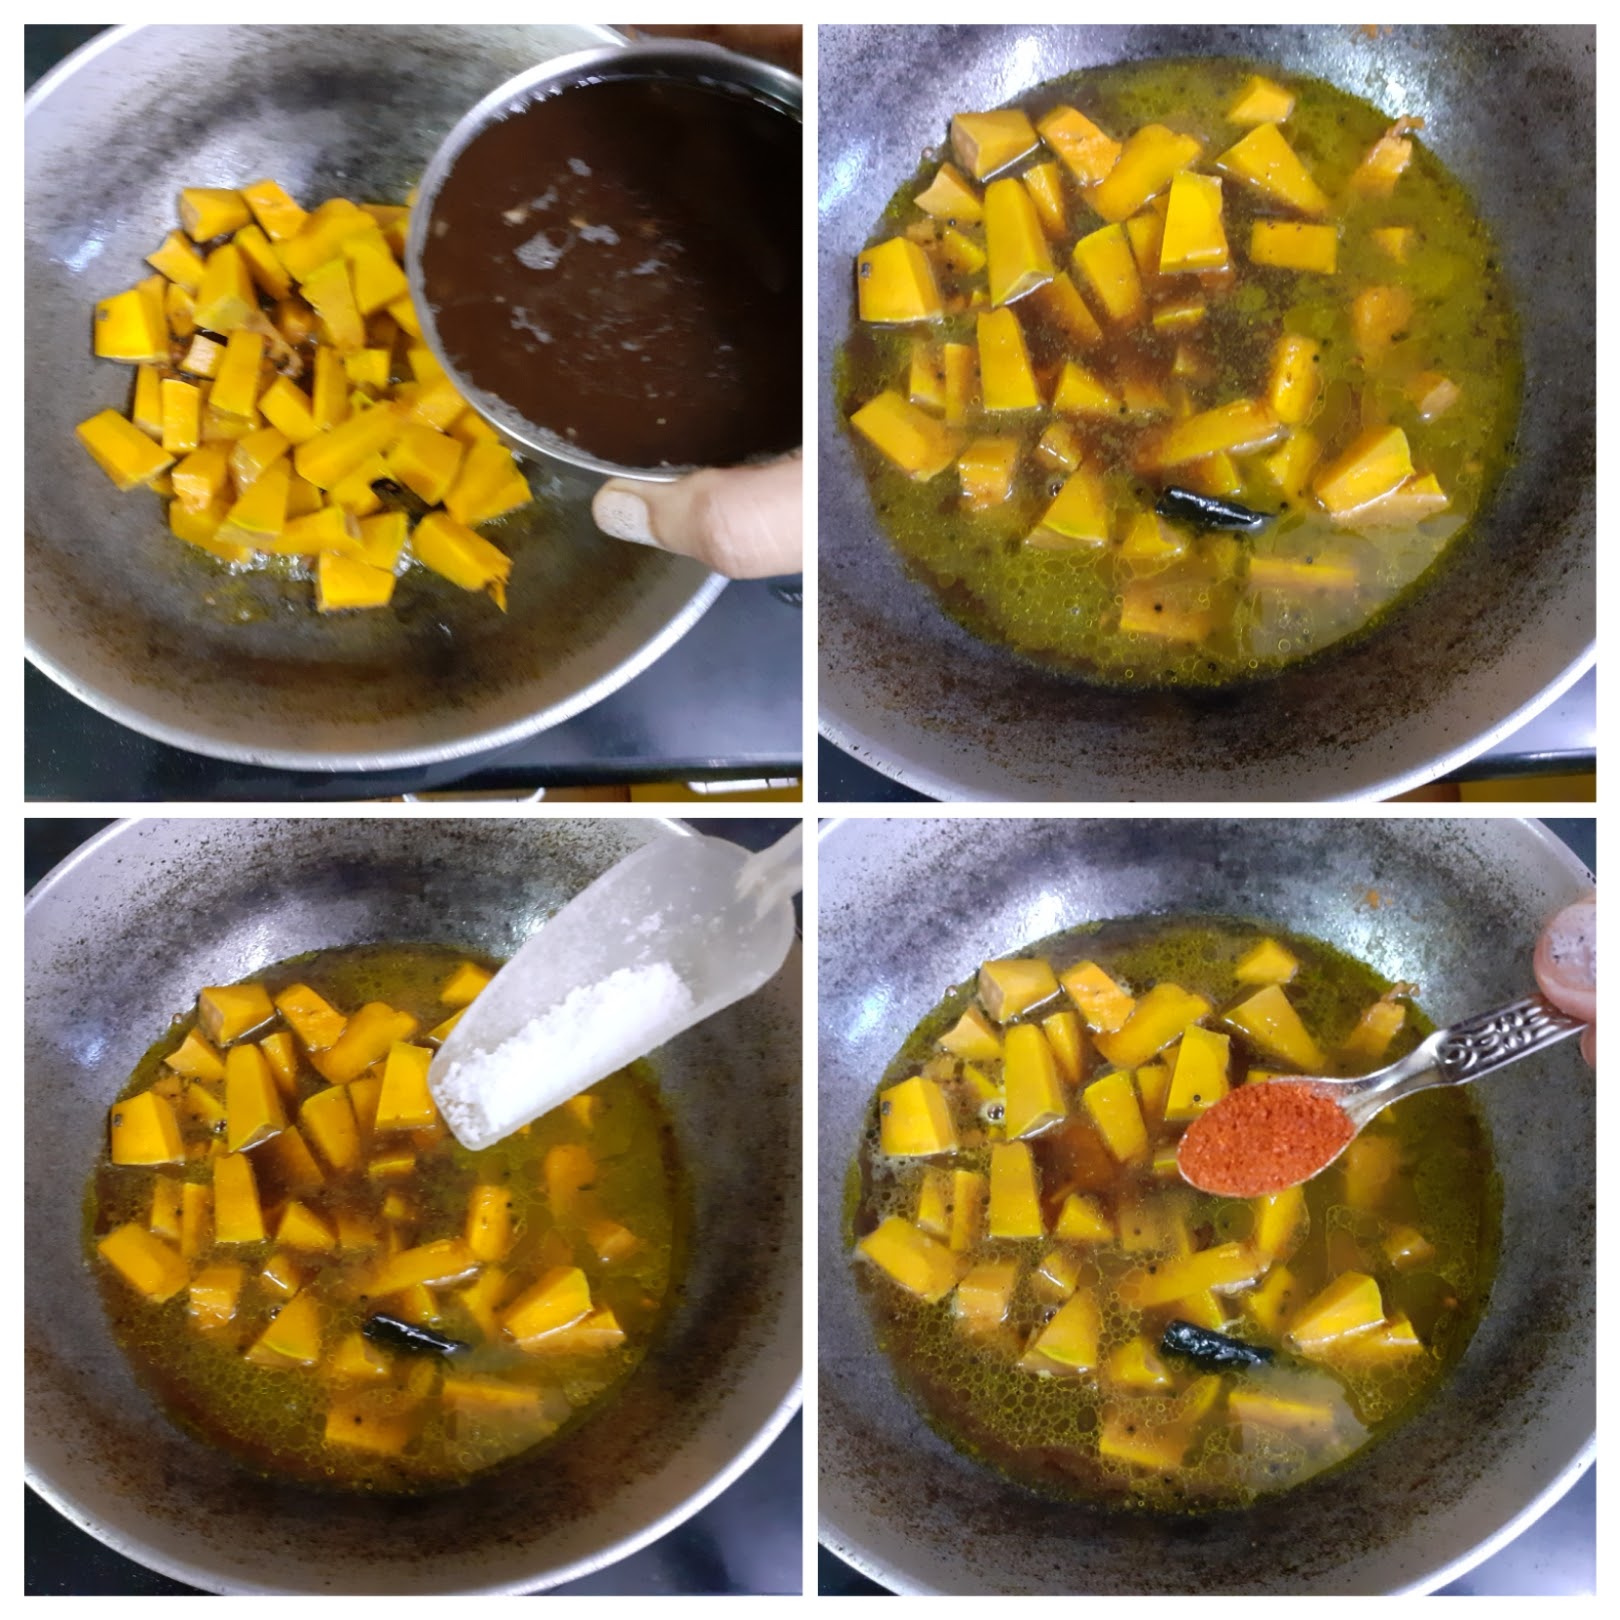
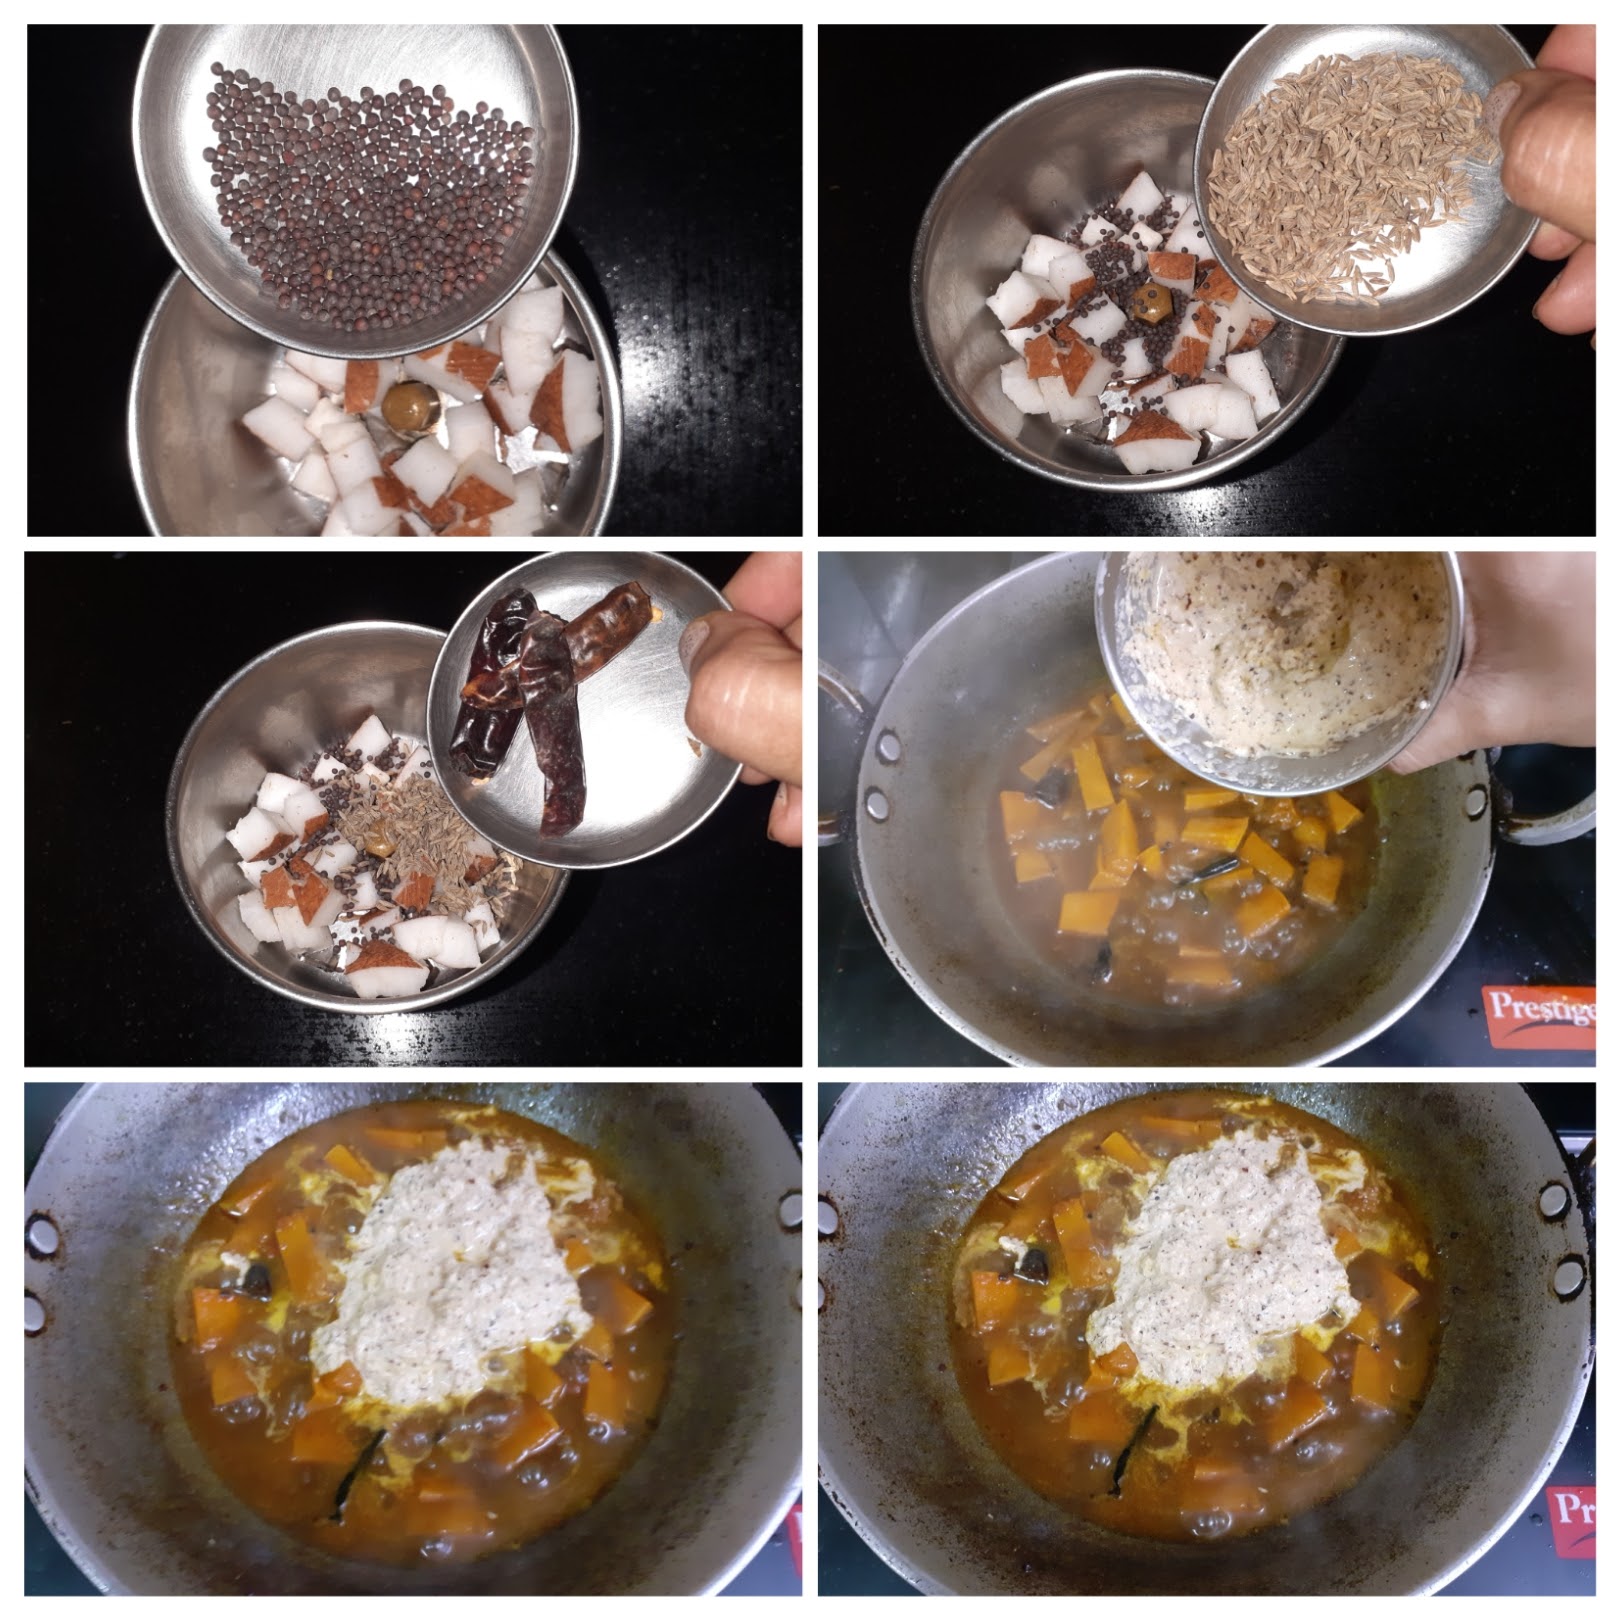
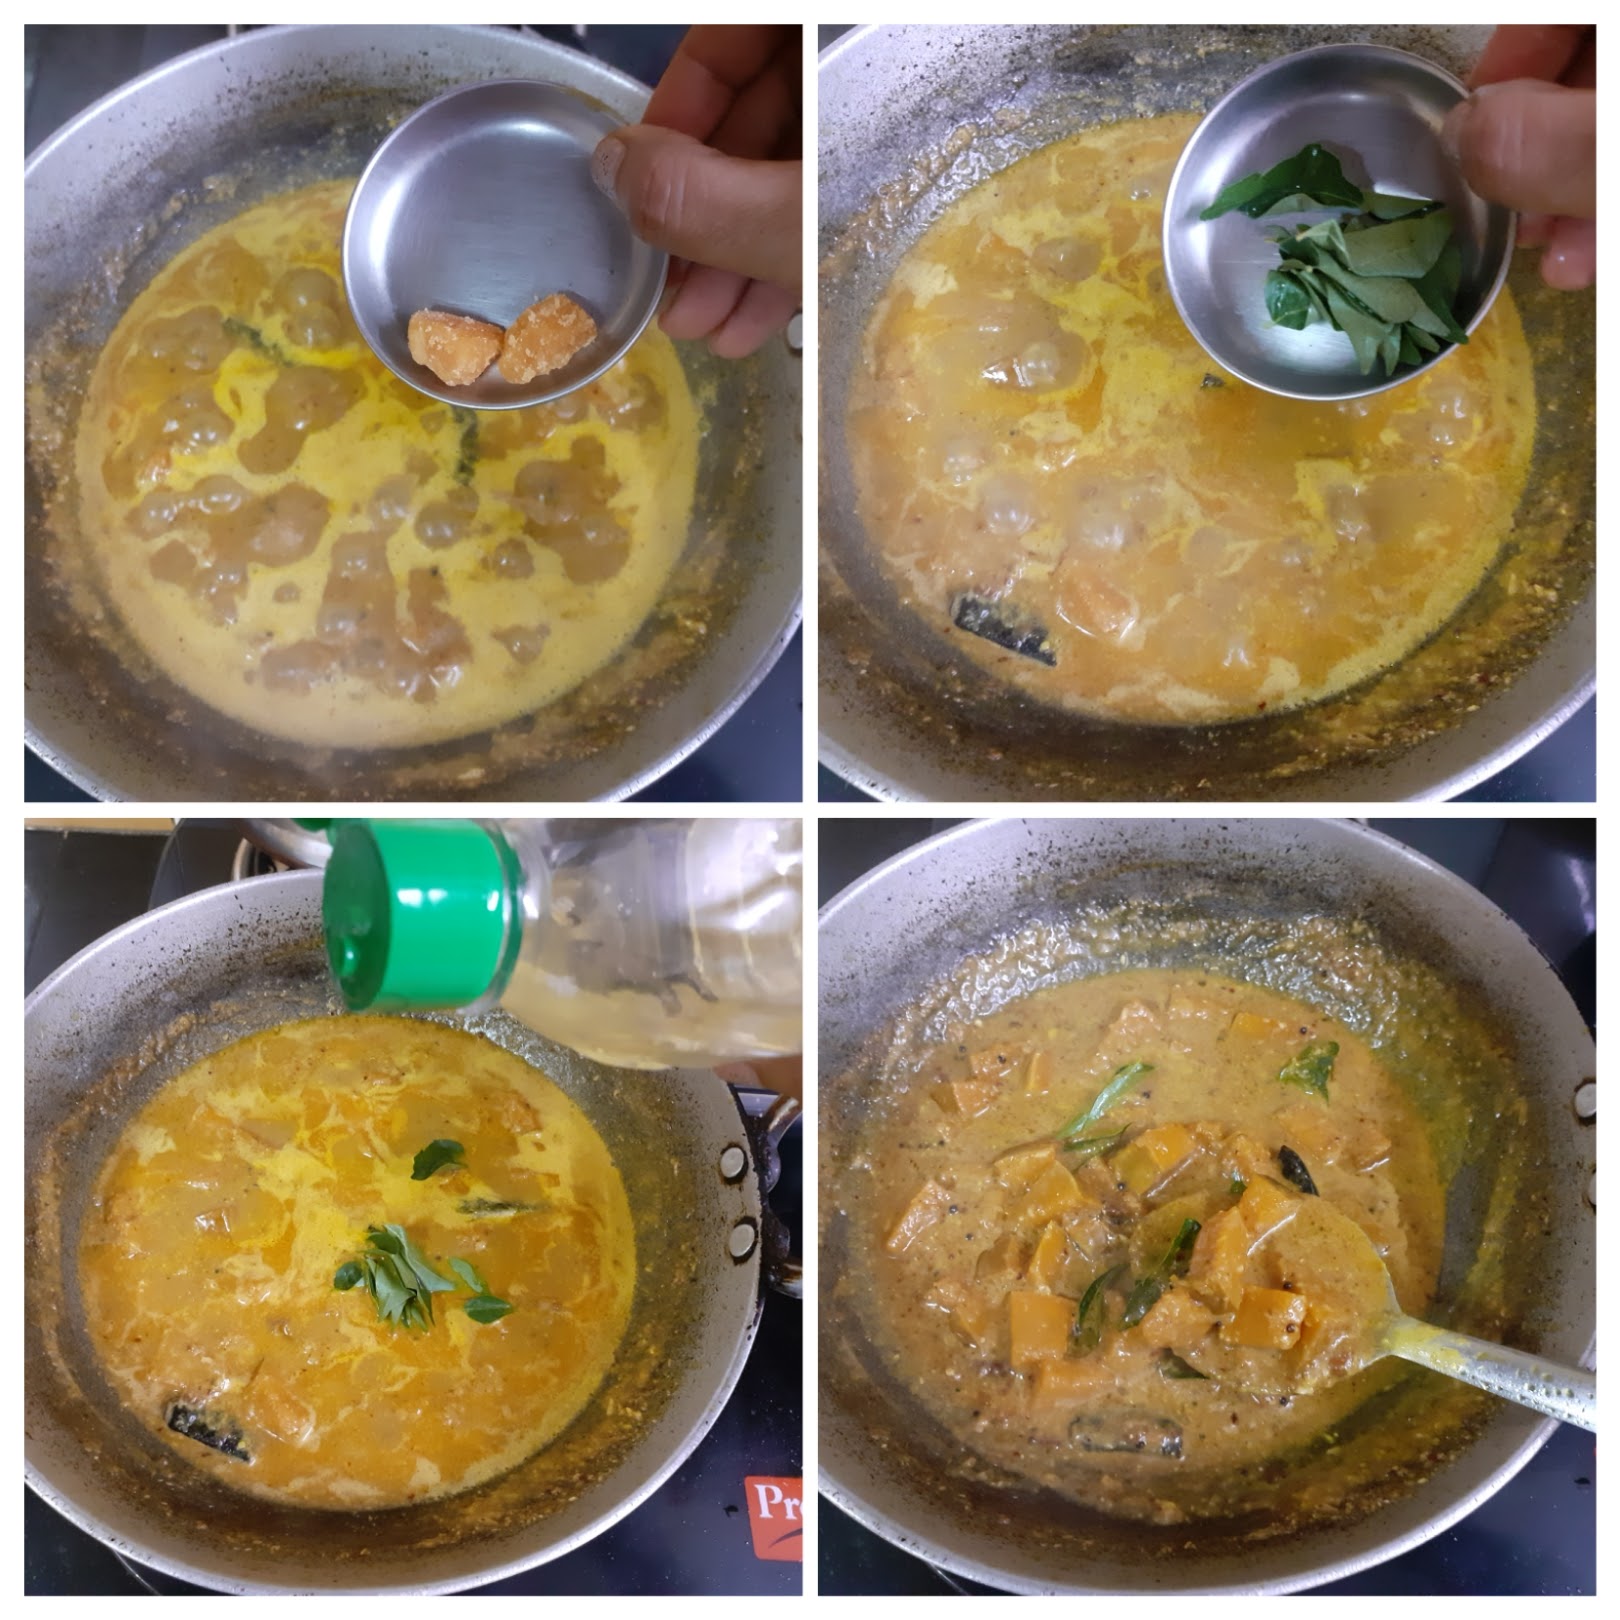
If you tried this recipe and liked it please comment below. I would love to hear from you. If you have a query about the recipe email us and ill respond as soon as I can.

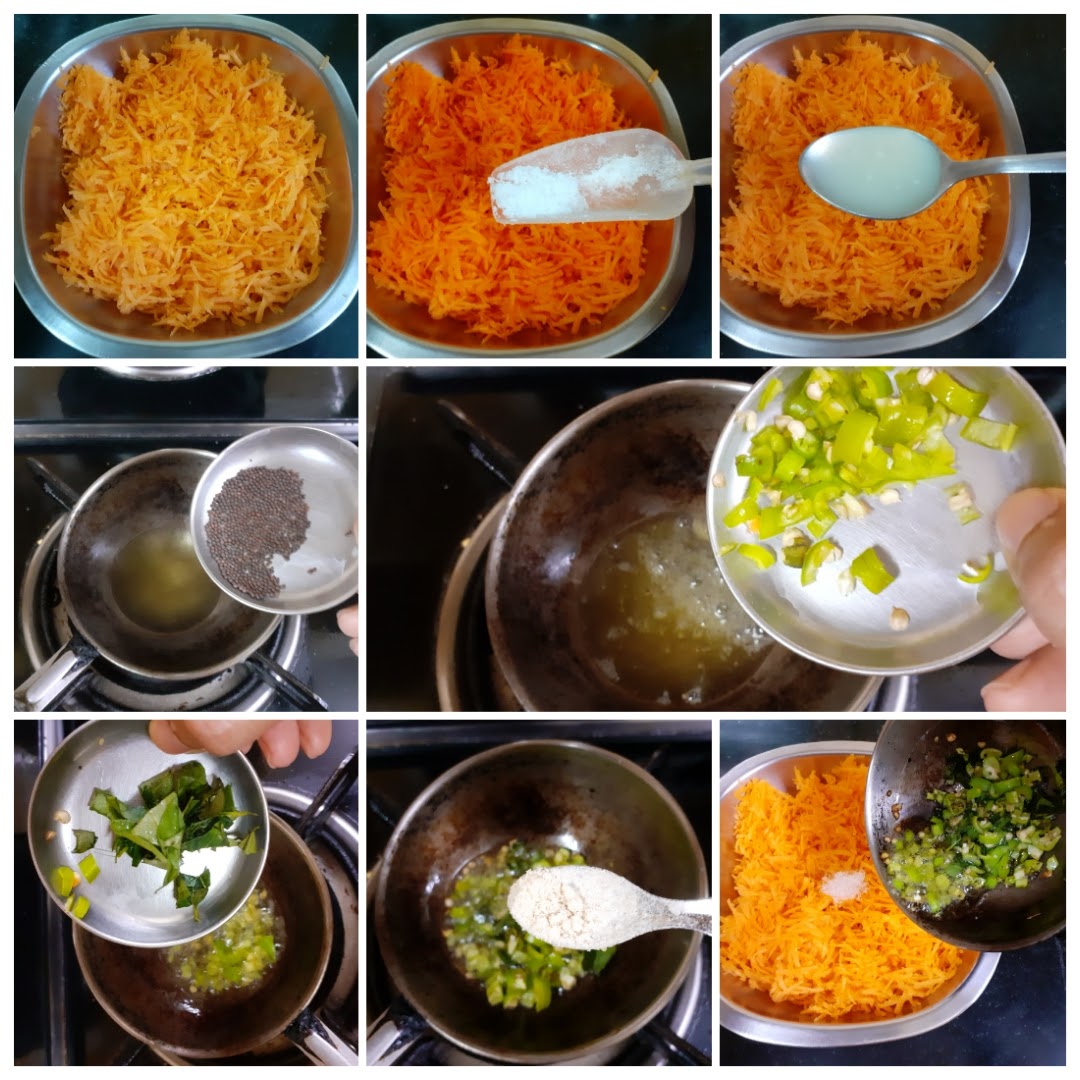
NOTES:
Methi Wale Baingan
This is a very regular Sabji and goes amazingly well with both Rotis and Rice. I chanced upon this recipe while browsing the net. I fell in love with the recipe instantly because my favourite greens Methi are used in it. This subji can be made with both fresh methi and Kasuri Methi and gives a wonderful flavour and taste to the dish. From the time I saw this recipe I have made it a couple of times and is a hit with everyone at home.
I have used the small variety of brinjal as it releases less moisture when roasted, the big globe eggplants have a lot of moisture and are not the right choice for this recipe. The only requirement for this recipe is a small amount of patience while roasting the Brinjals. Alternately one can bake them in the oven. For this method check out my Roasted eggplant 2 ways recipe.
Apart from being aromatic and flavorful, the Methi greens are also good for health as they are rich in iron and high in fibre. In this recipe, I have used Kasuri Methi as it gives a more intense aroma and flavour compared to fresh ones. The fresh methi is also a little bitter, so refer to notes on how much fresh Methi to use.
While you are here please check out my other curry and subji recipes like Brinjal Pepper masala, Gutti Vankaya Kura, Mava Paneer Curry, Mirch ka Salan, Dum Aloo Ajwaini, and more…
Here is the recipe of Methi Wale Baigan for you-
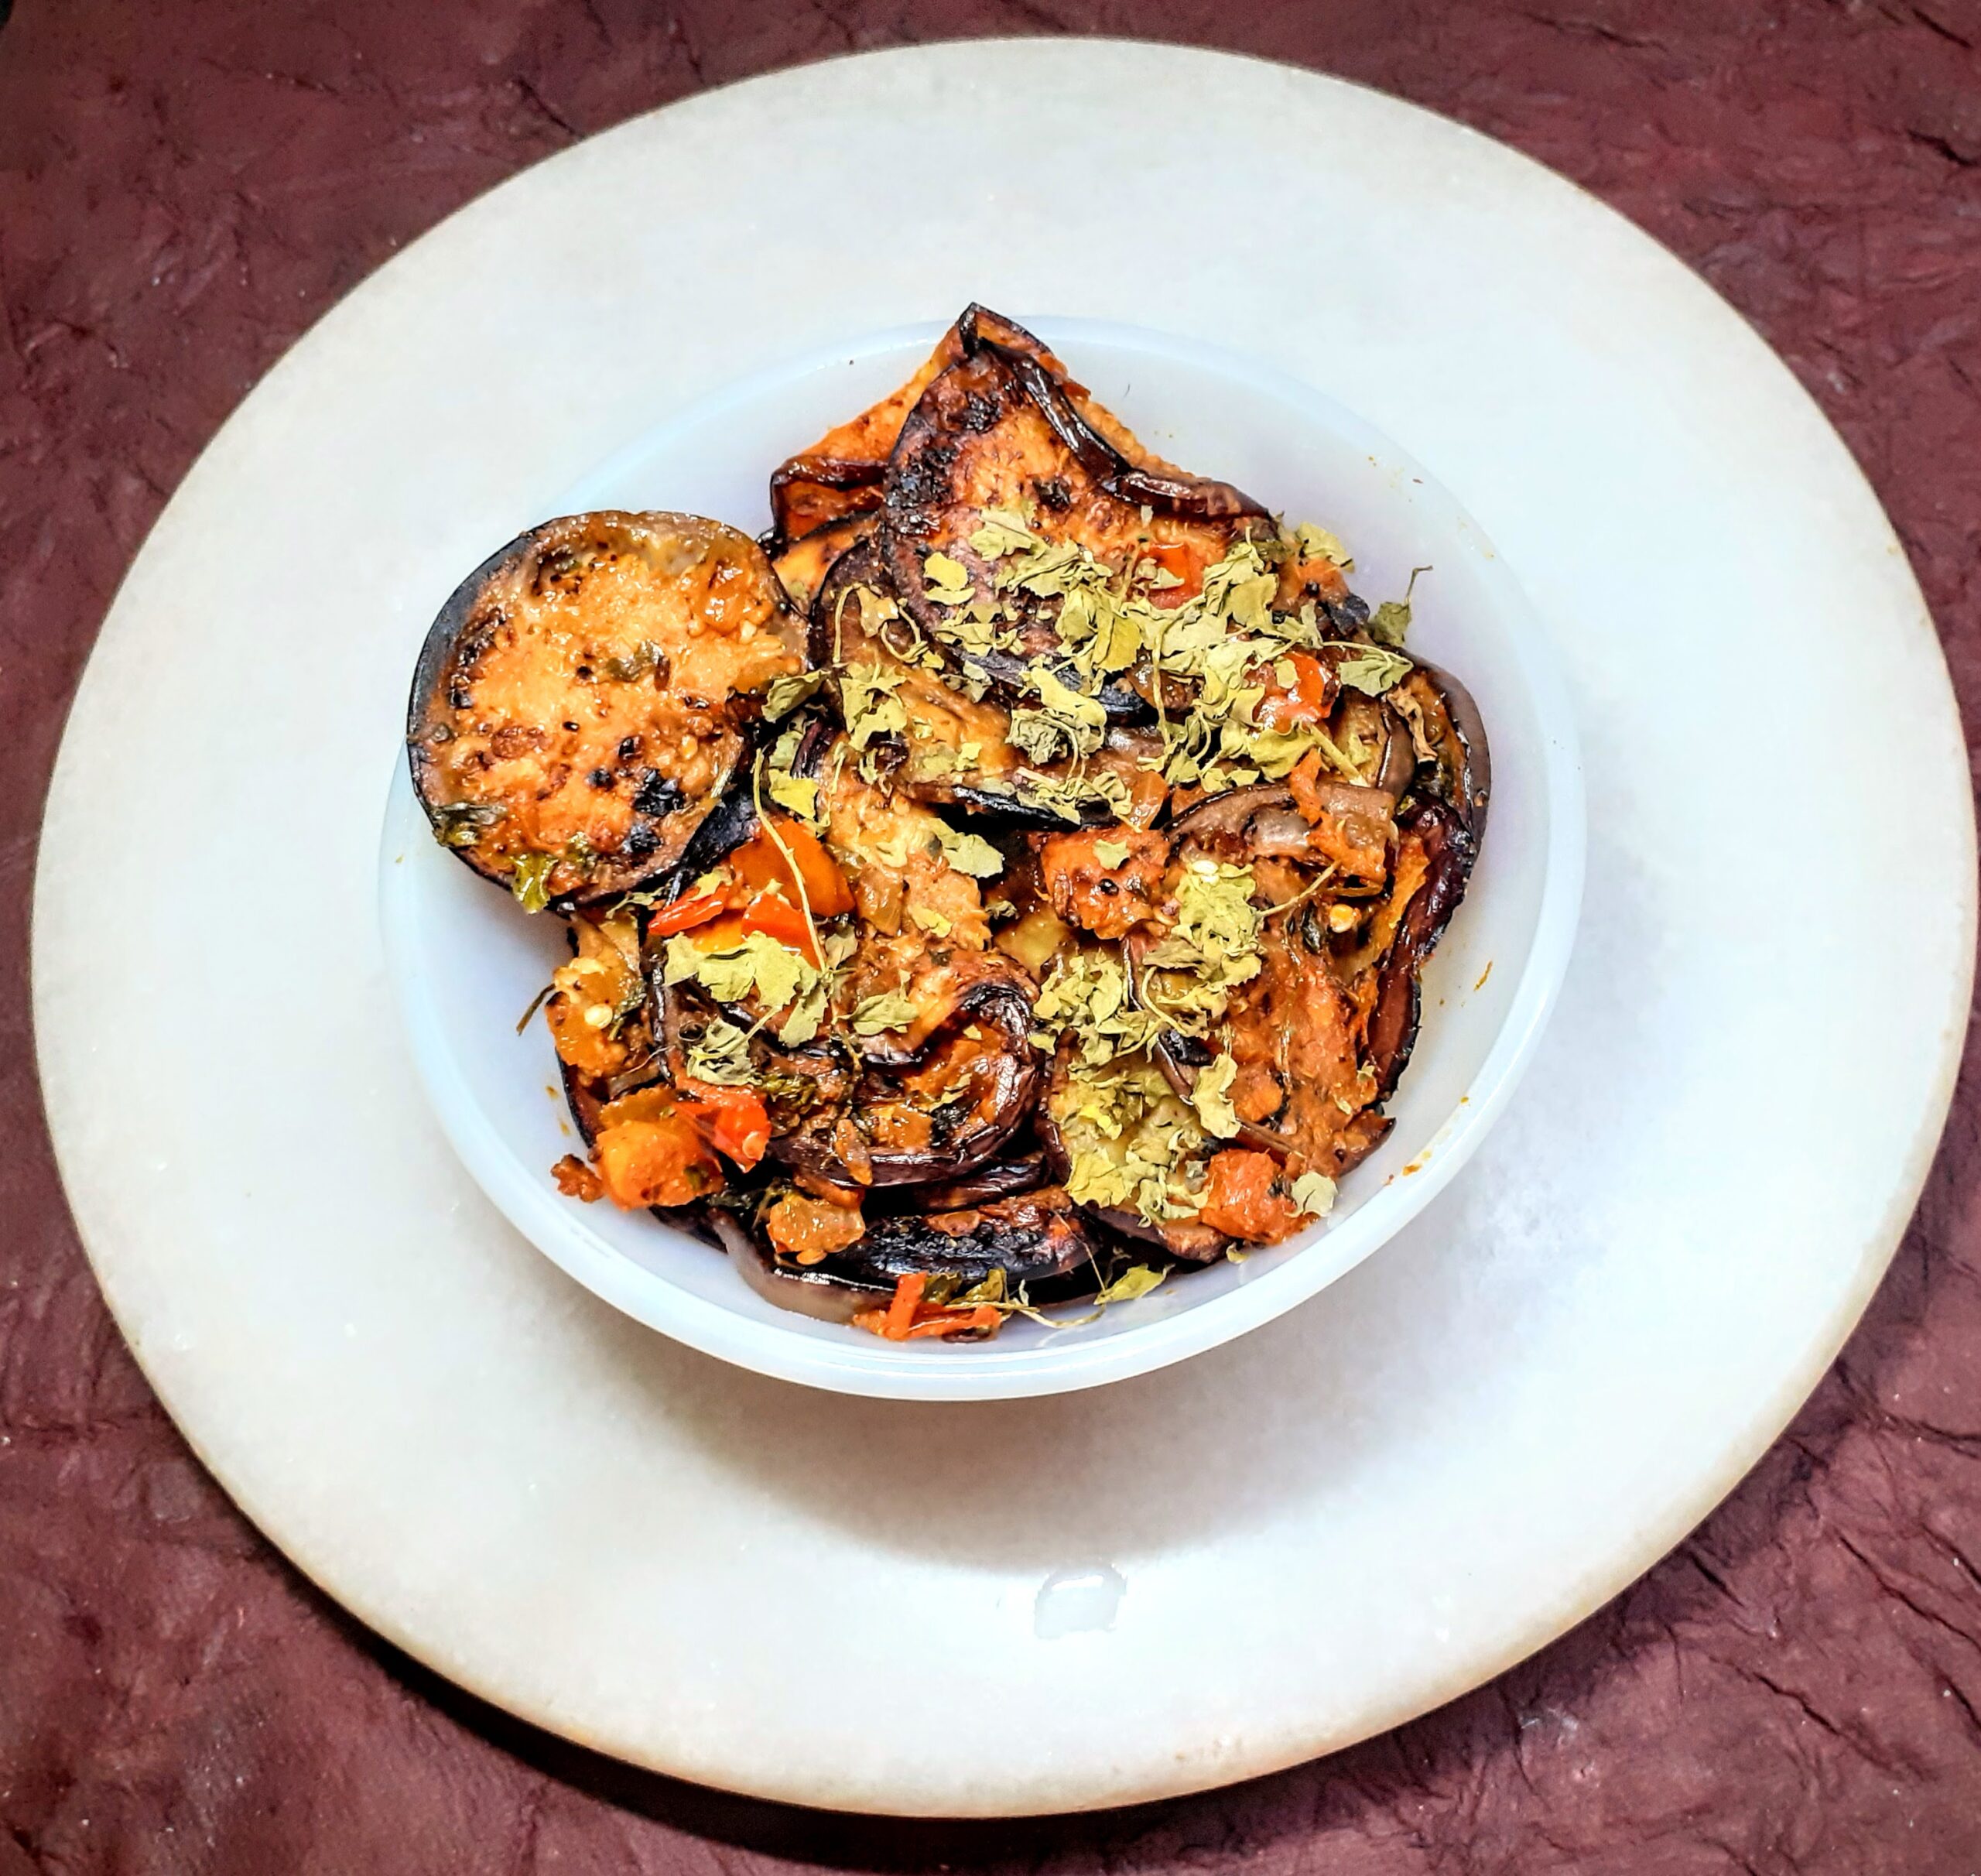
Ingredients:
Eggplants/Brinjal ( small variety )10 nos cut into slices of medium thickness
Onion 1 large cut finely
Green chillies 2 finely chopped
Tomatoes 1 large or 2 medium chopped finely
Ginger garlic paste 1tsp
Kasuri Methi(dry Methi leaves) 2 tbsp (can go up to 3tbsp)
Mustard seeds 1tsp
Cumin seeds 1tsp
Salt as required
Turmeric powder 1/2 tsp
Red chilli powder 1 to 1.5 tsp
Coriander powder 2 tsp
Fennel powder 1 tsp
Garam Masala powder (optional) 1/2 tsp
Oil for roasting the brinjal and for sauteeing
Directions:
Wash the Brinjals and slice them into circles of medium thickness. Wipe away the moisture with an absorbent towel and set aside. Heat a nonstick pan, add 2 tsp oil and arrange the Brinjal slices in it. Roast on now side until it becomes a nice brown, then flip and roast the other side. (To bake it check out my Roasted Brinjal 2 ways recipe). Repeat this process for all brinjal slices and set aside.
Now in the same pan add 1tbsp oil for sauteeing and heat it. Add mustard seeds and when they crackle put the cumin seeds in. Add the turmeric powder followed by the chopped onions and green chillies. Fry until the onions turn a nice brown. Now add the chopped tomatoes and stir for a minute. Now add the salt, chilli powder, coriander powder and the fennel powder and saute nicely until the tomatoes are cooked and the mixture is semi-dry. The rawness of masalas should have gone. Now add the Kasuri methi and saute for another minute for the flavour to infuse. Now add the roasted Brinjals into the pan and toss nicely, such that the masala is well mixed with the brinjal, close and cook for a minute. Top up with 1 tsp Kasuri Methi and garam masala powder. Serve hot.
Serving Suggestions: With Rotis, Parathas or with Dal Chawal, Rajma Chawal etc.
STEPWISE RECIPE FOLLOWS:
1. Wash the Brinjals and slice them into circles of medium thickness. Wipe away the moisture with an absorbent towel and set aside. Heat a nonstick pan, add 2 tsp oil and arrange the Brinjal slices in it. Roast on now side until it becomes a nice brown, then flip and roast the other side.
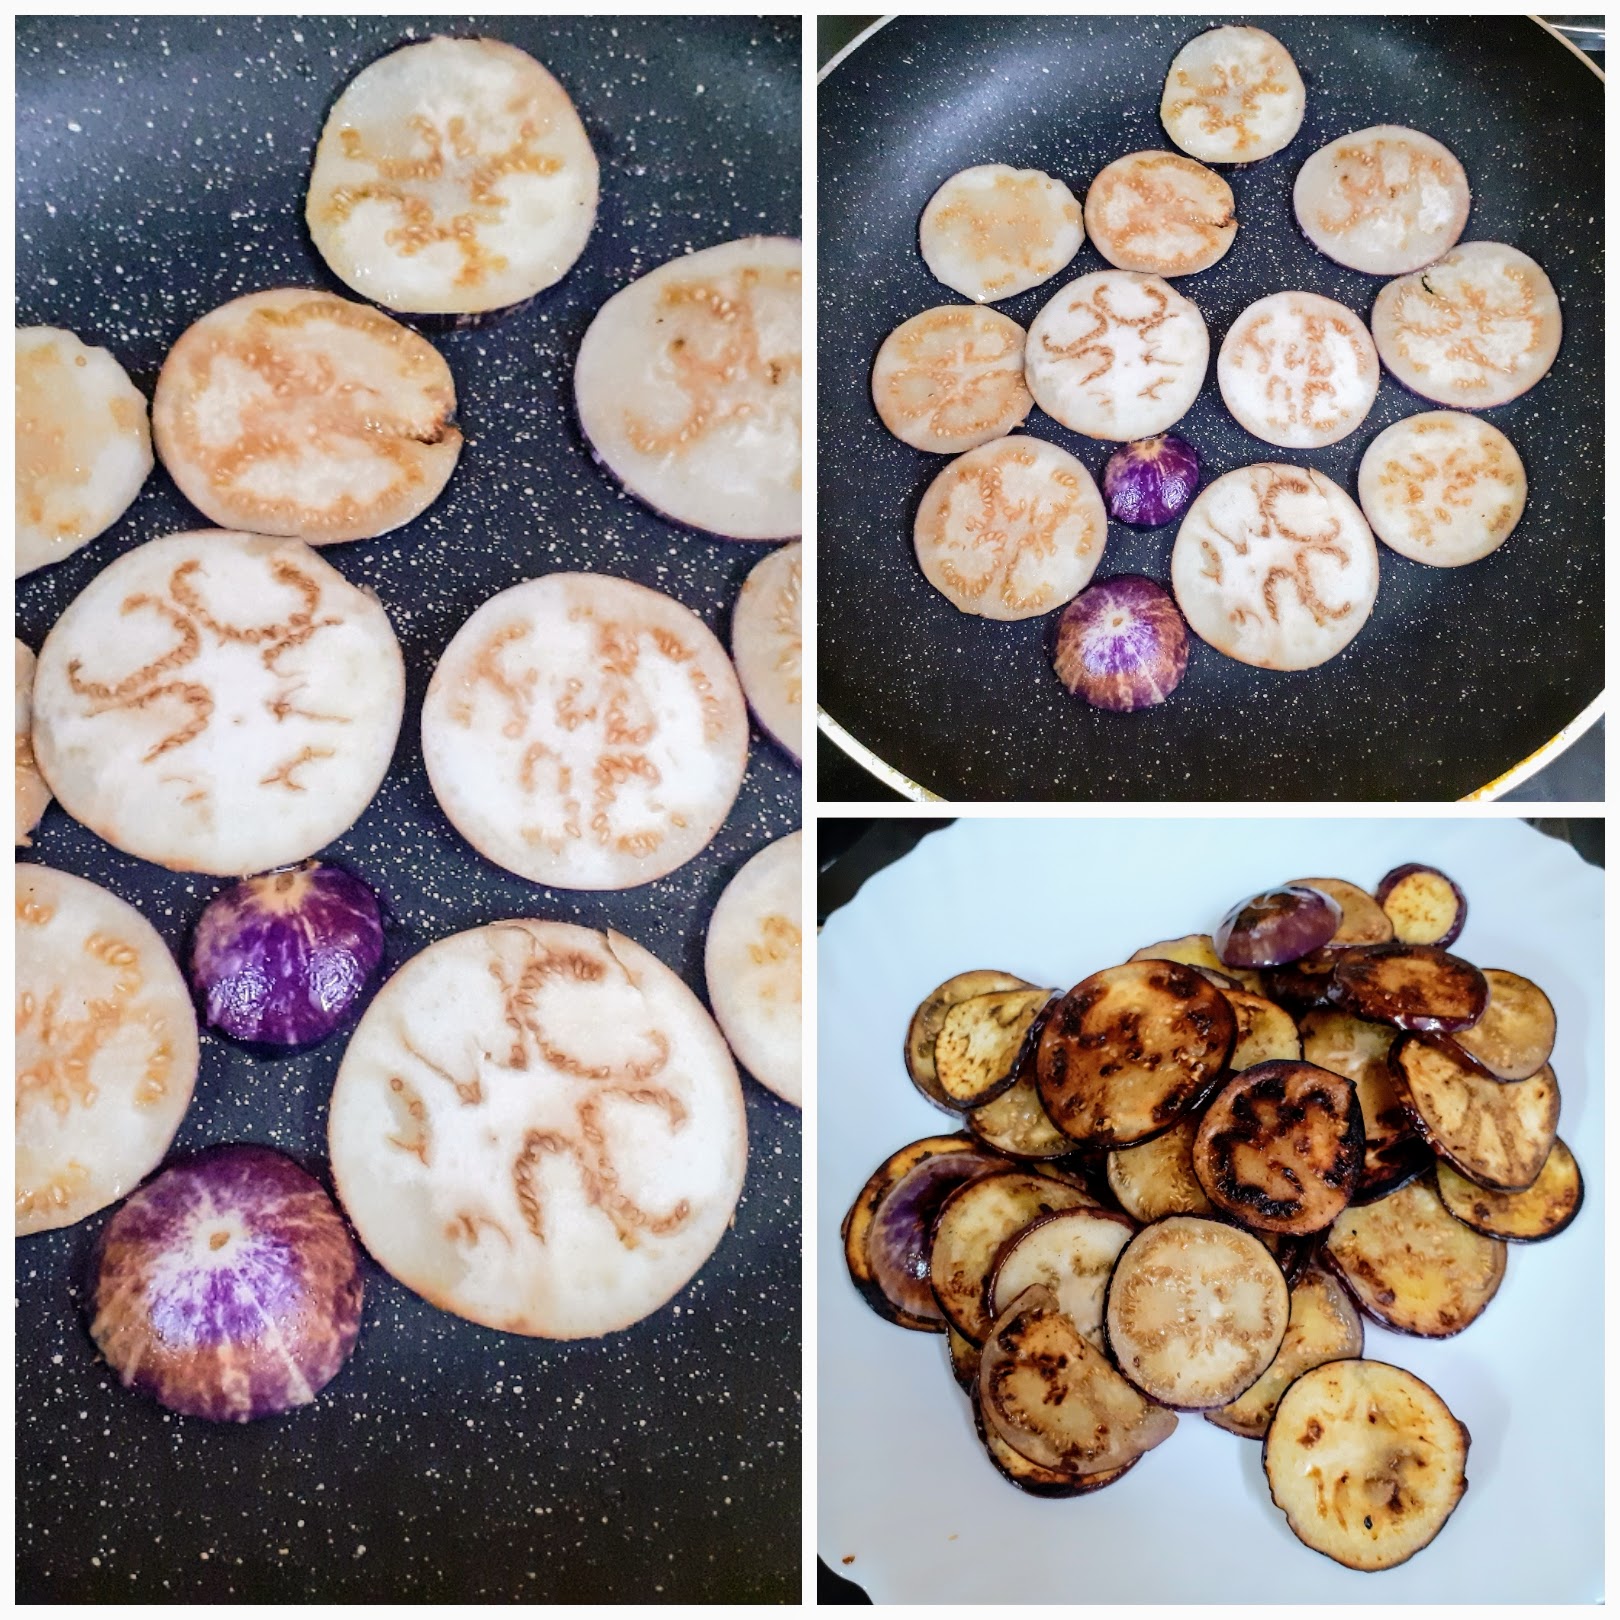
2. Now in the same pan add 1tbsp oil for sauteeing and heat it. Add mustard seeds and when they crackle put the cumin seeds in. Add the turmeric powder followed by the ginger garlic paste and chopped onions, and green chillies. Fry until the onions turn a nice brown.
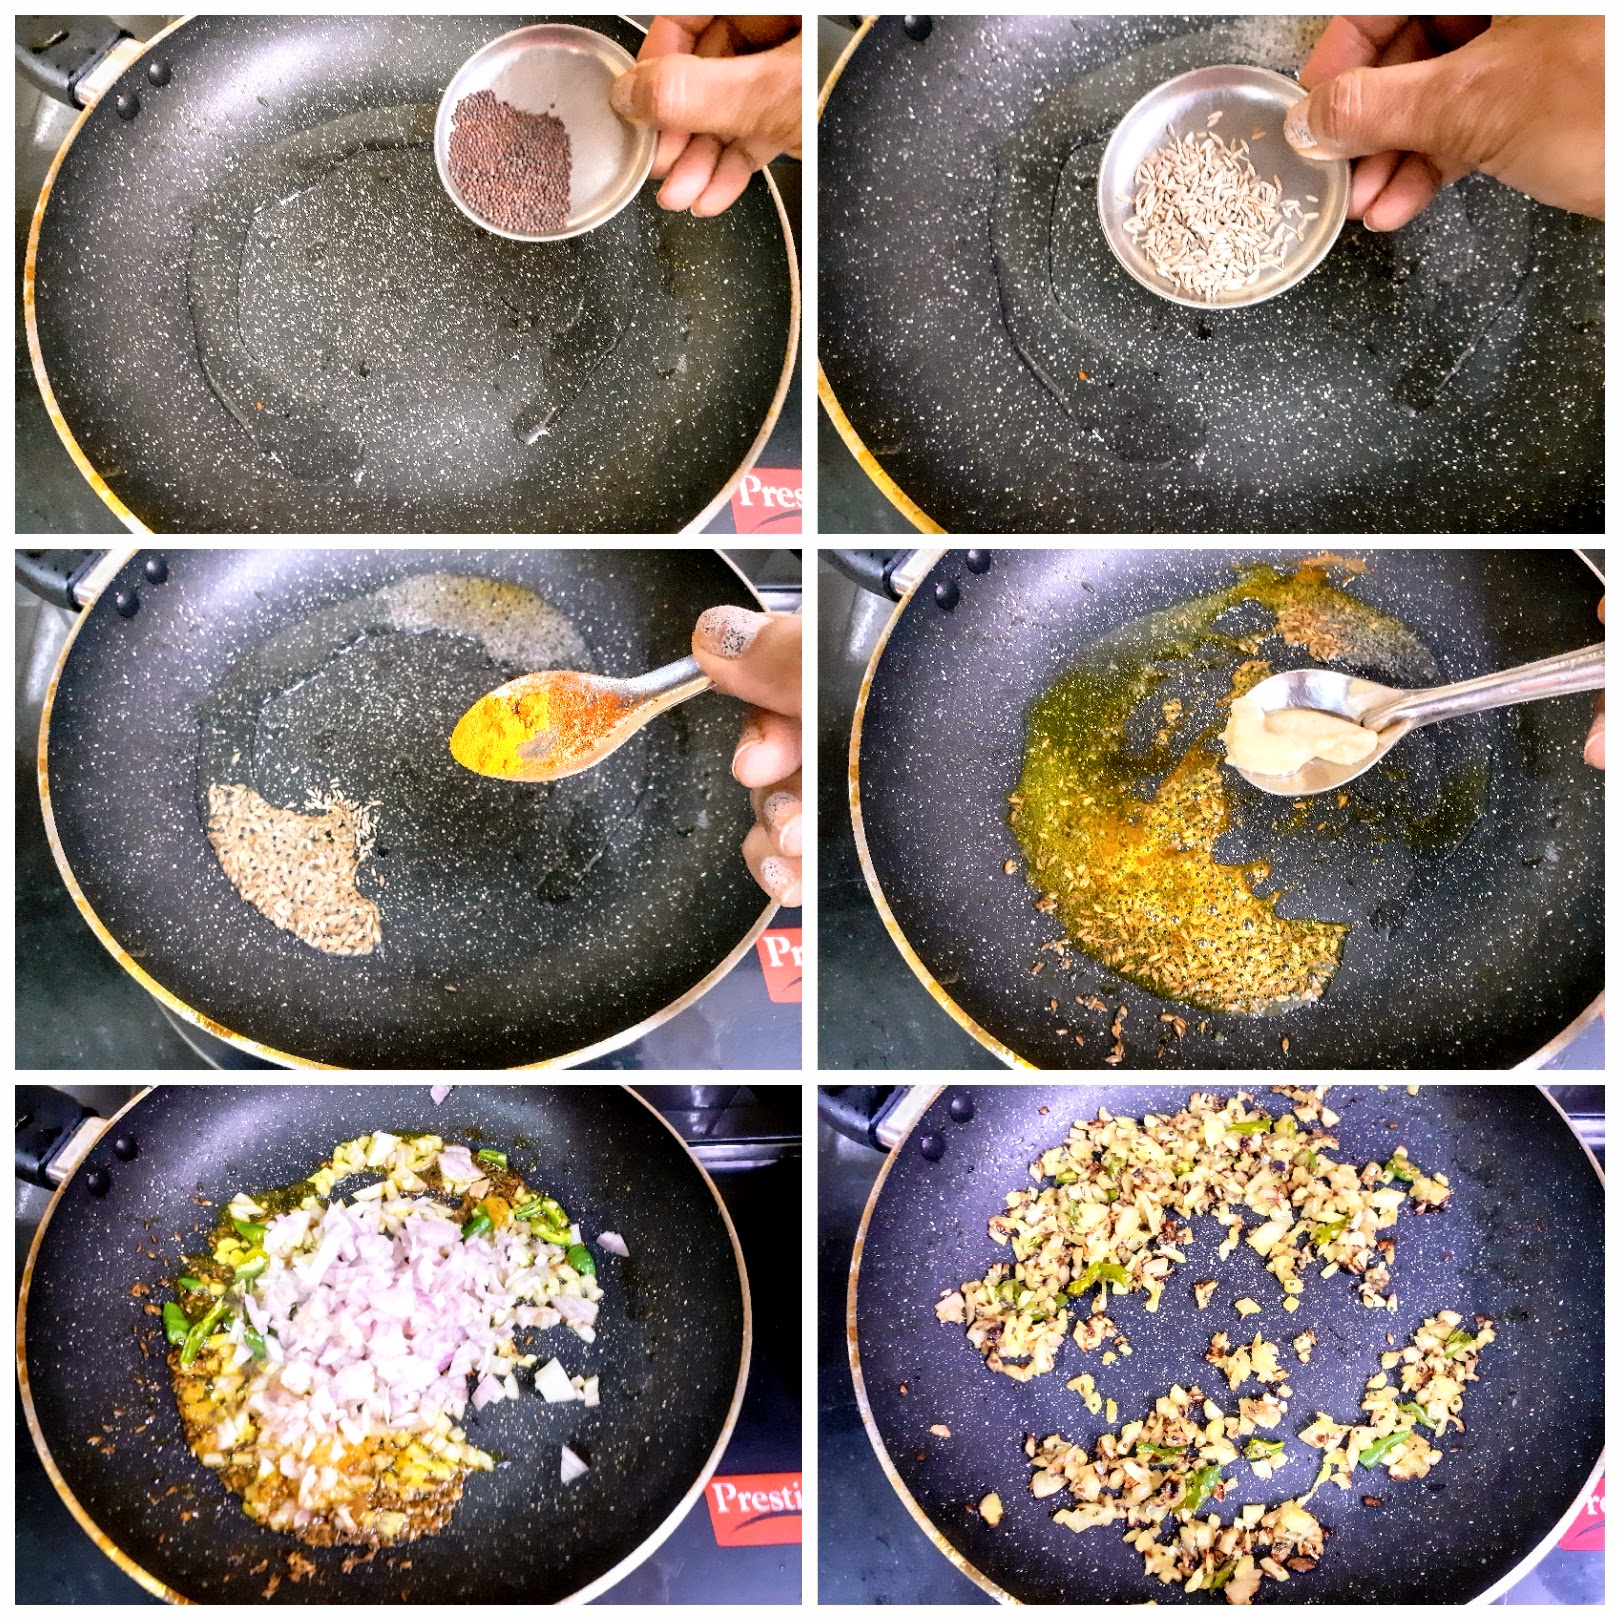
3. Now add the chopped tomatoes and stir for a minute. Now add the salt, chilli powder, coriander powder and the fennel powder and saute nicely until the tomatoes are cooked and the mixture is semi-dry.
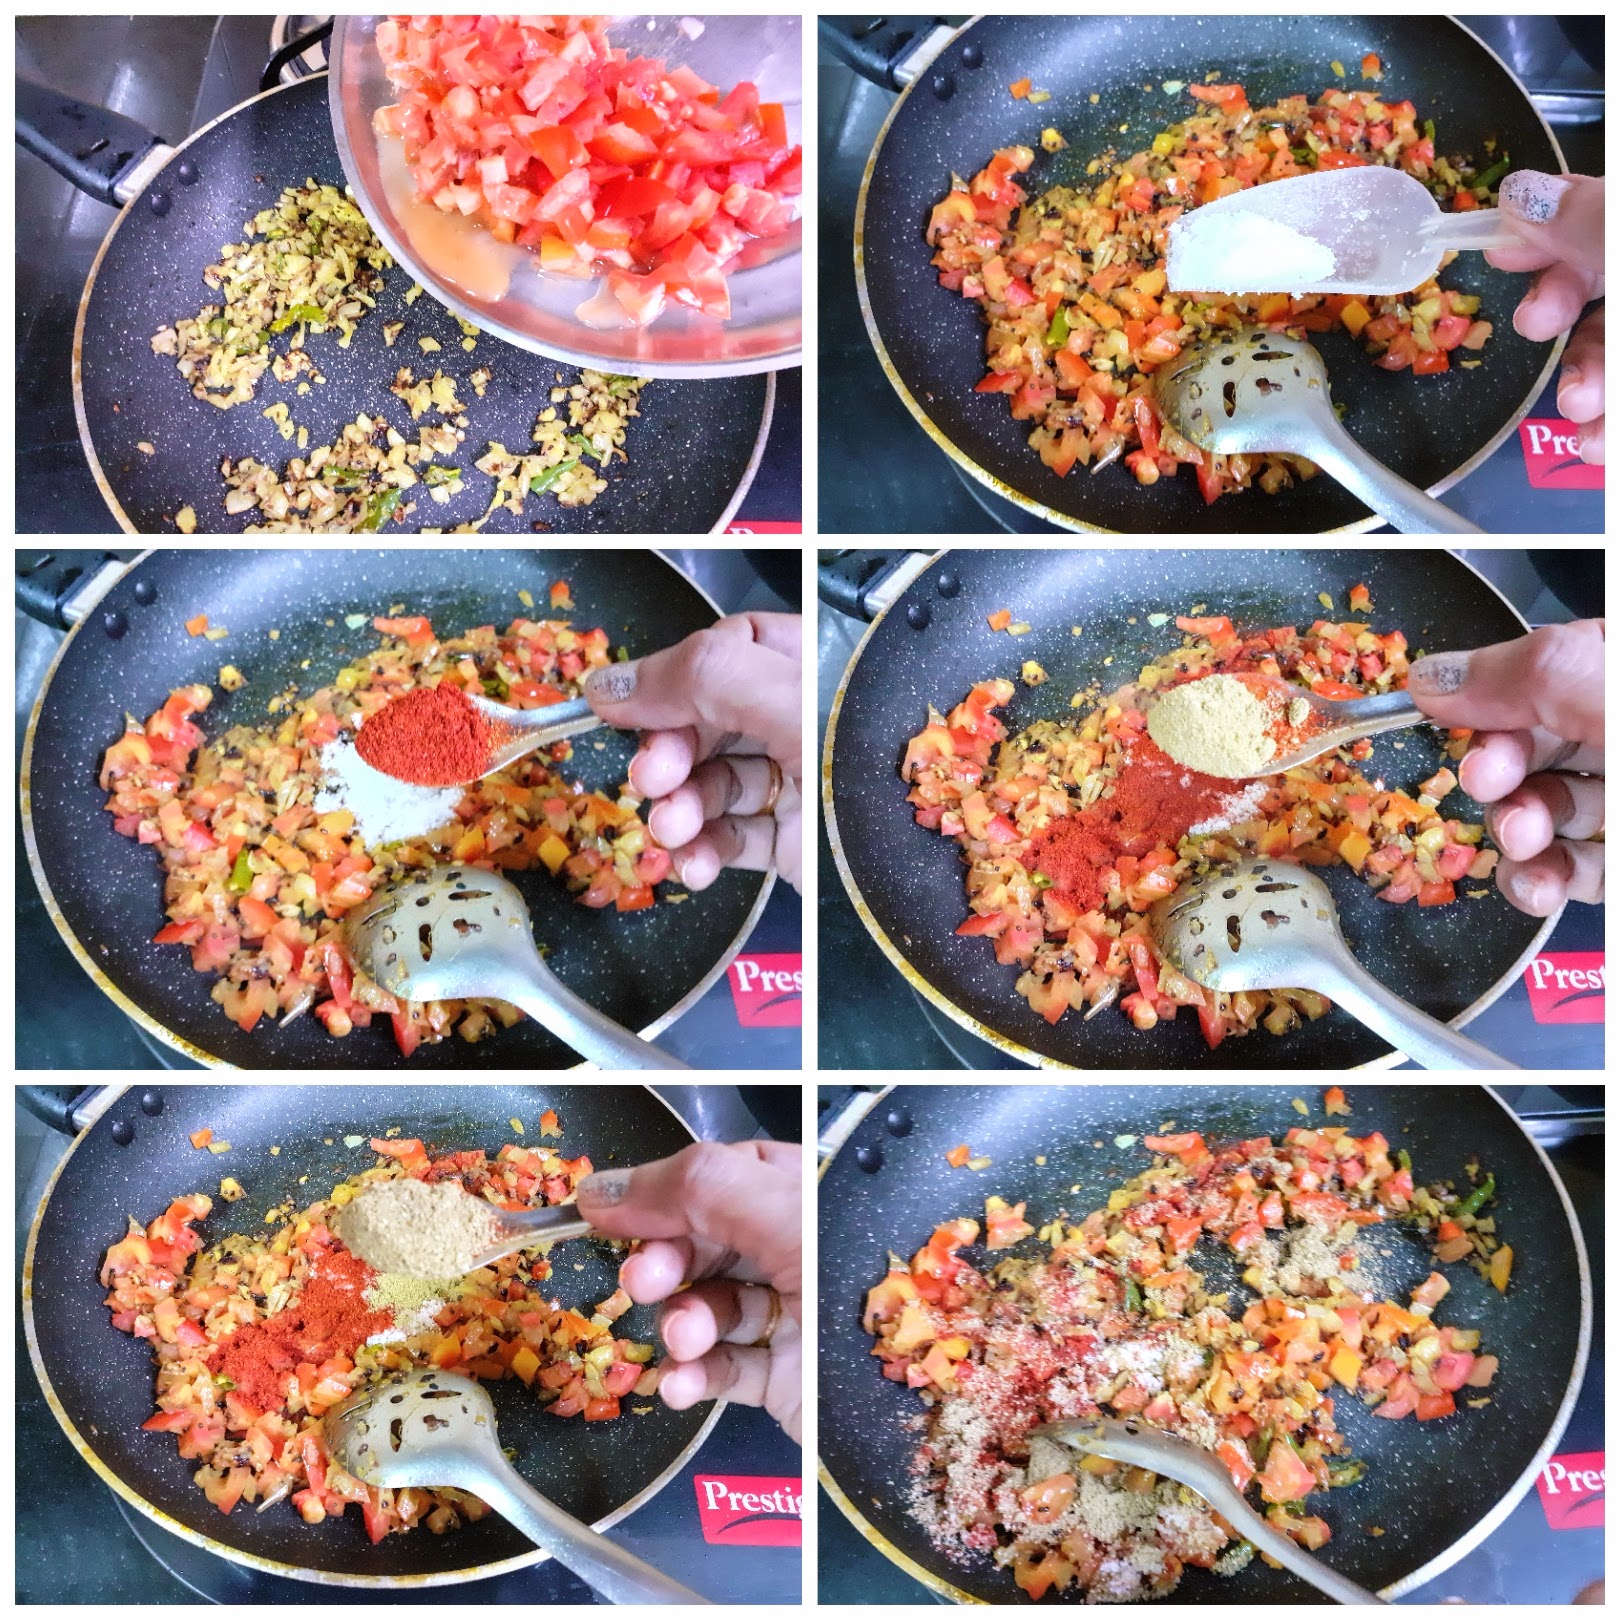
4. Now add the Kasuri methi and saute for another minute for the flavour to infuse. Now add the roasted Brinjals into the pan and toss nicely, such that the masala is well mixed with the brinjal. Close and cook for a minute. Put off flame, top up with 1 tsp Kasuri Methi and garam masala powder. Serve hot.
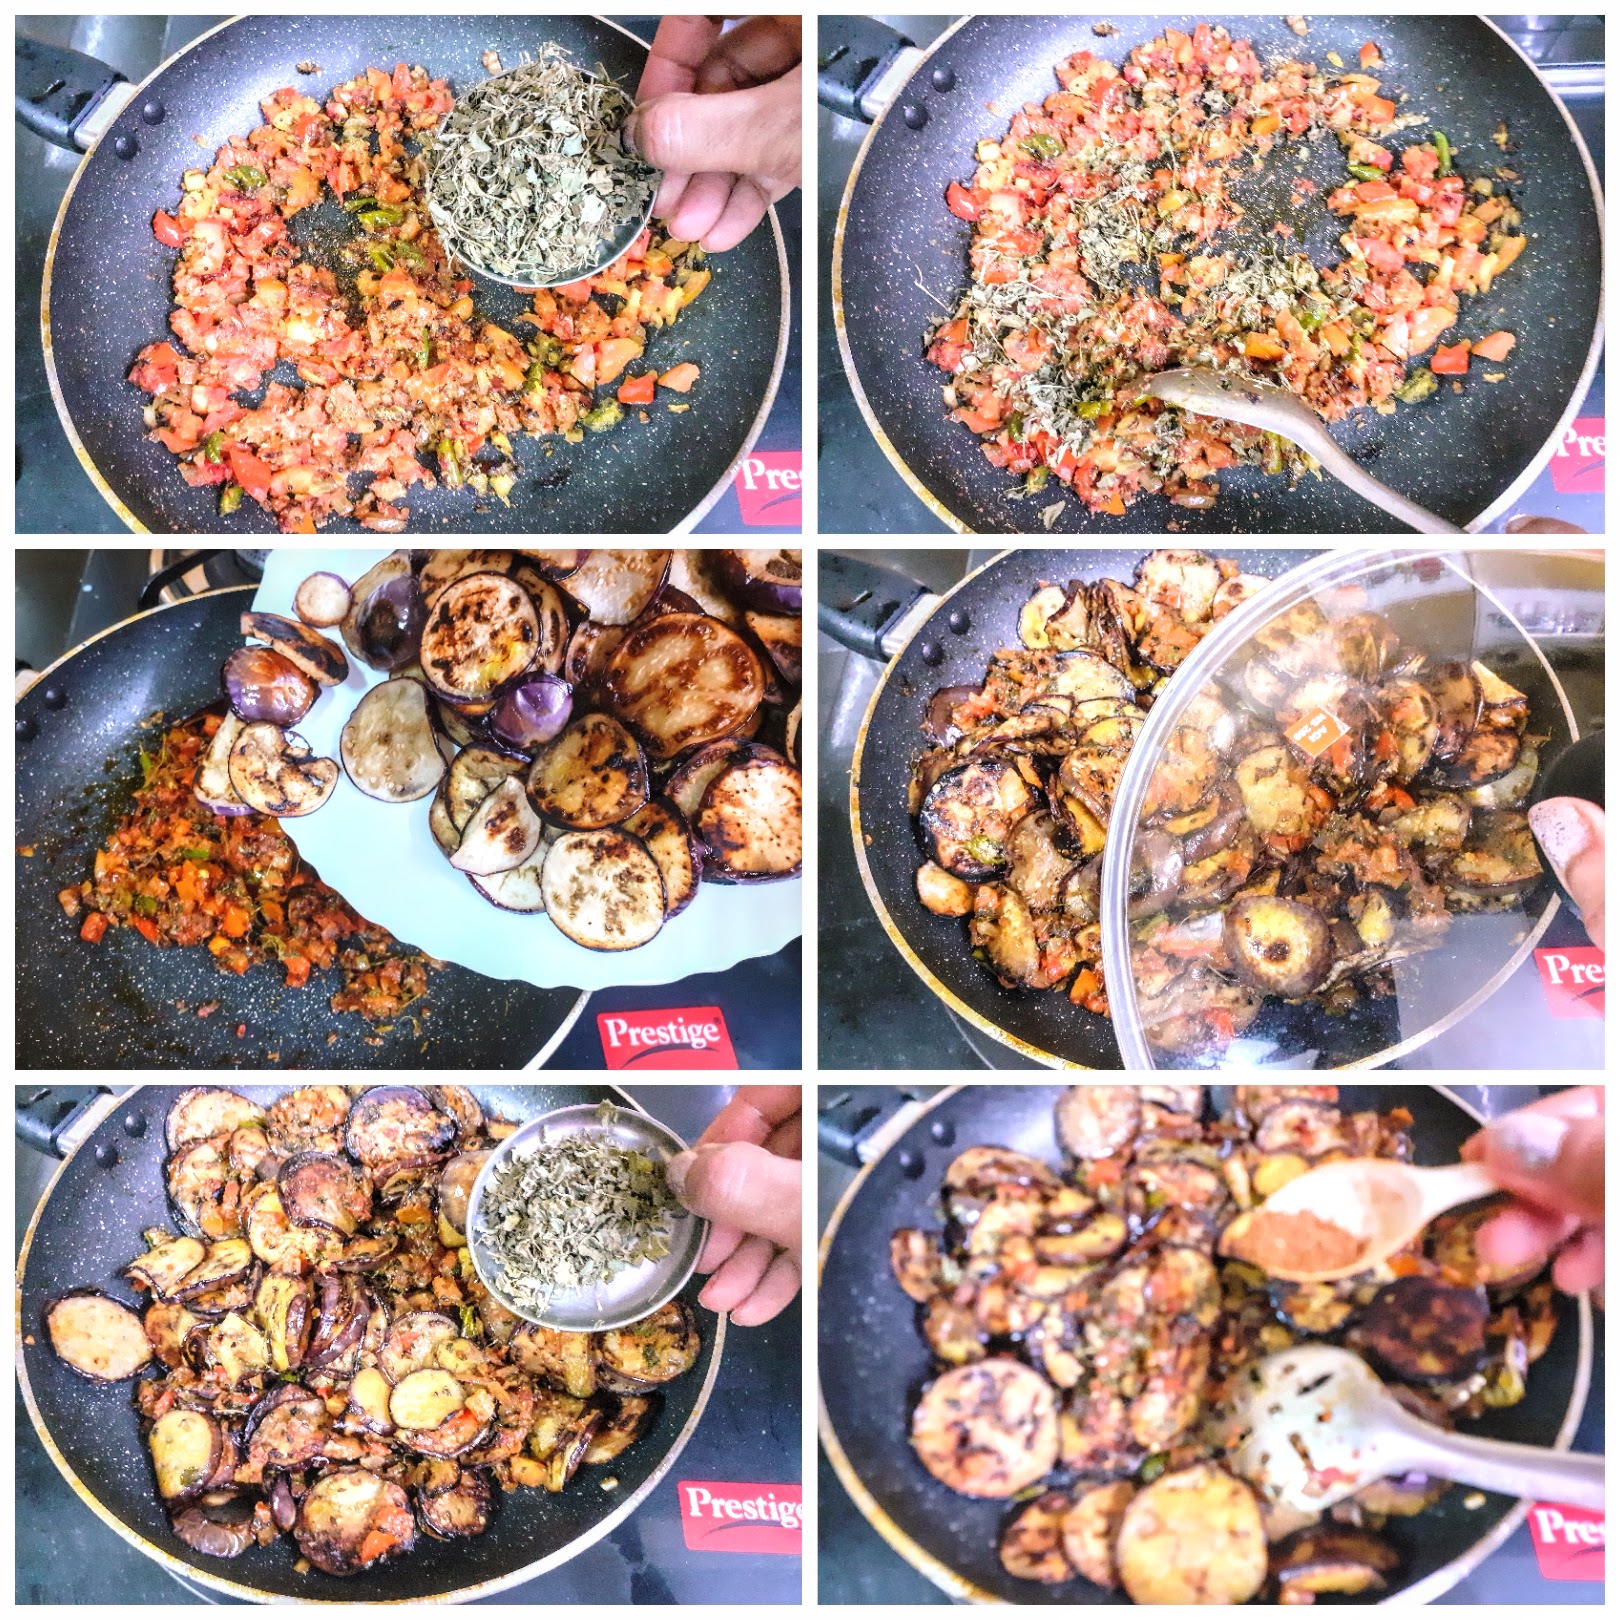
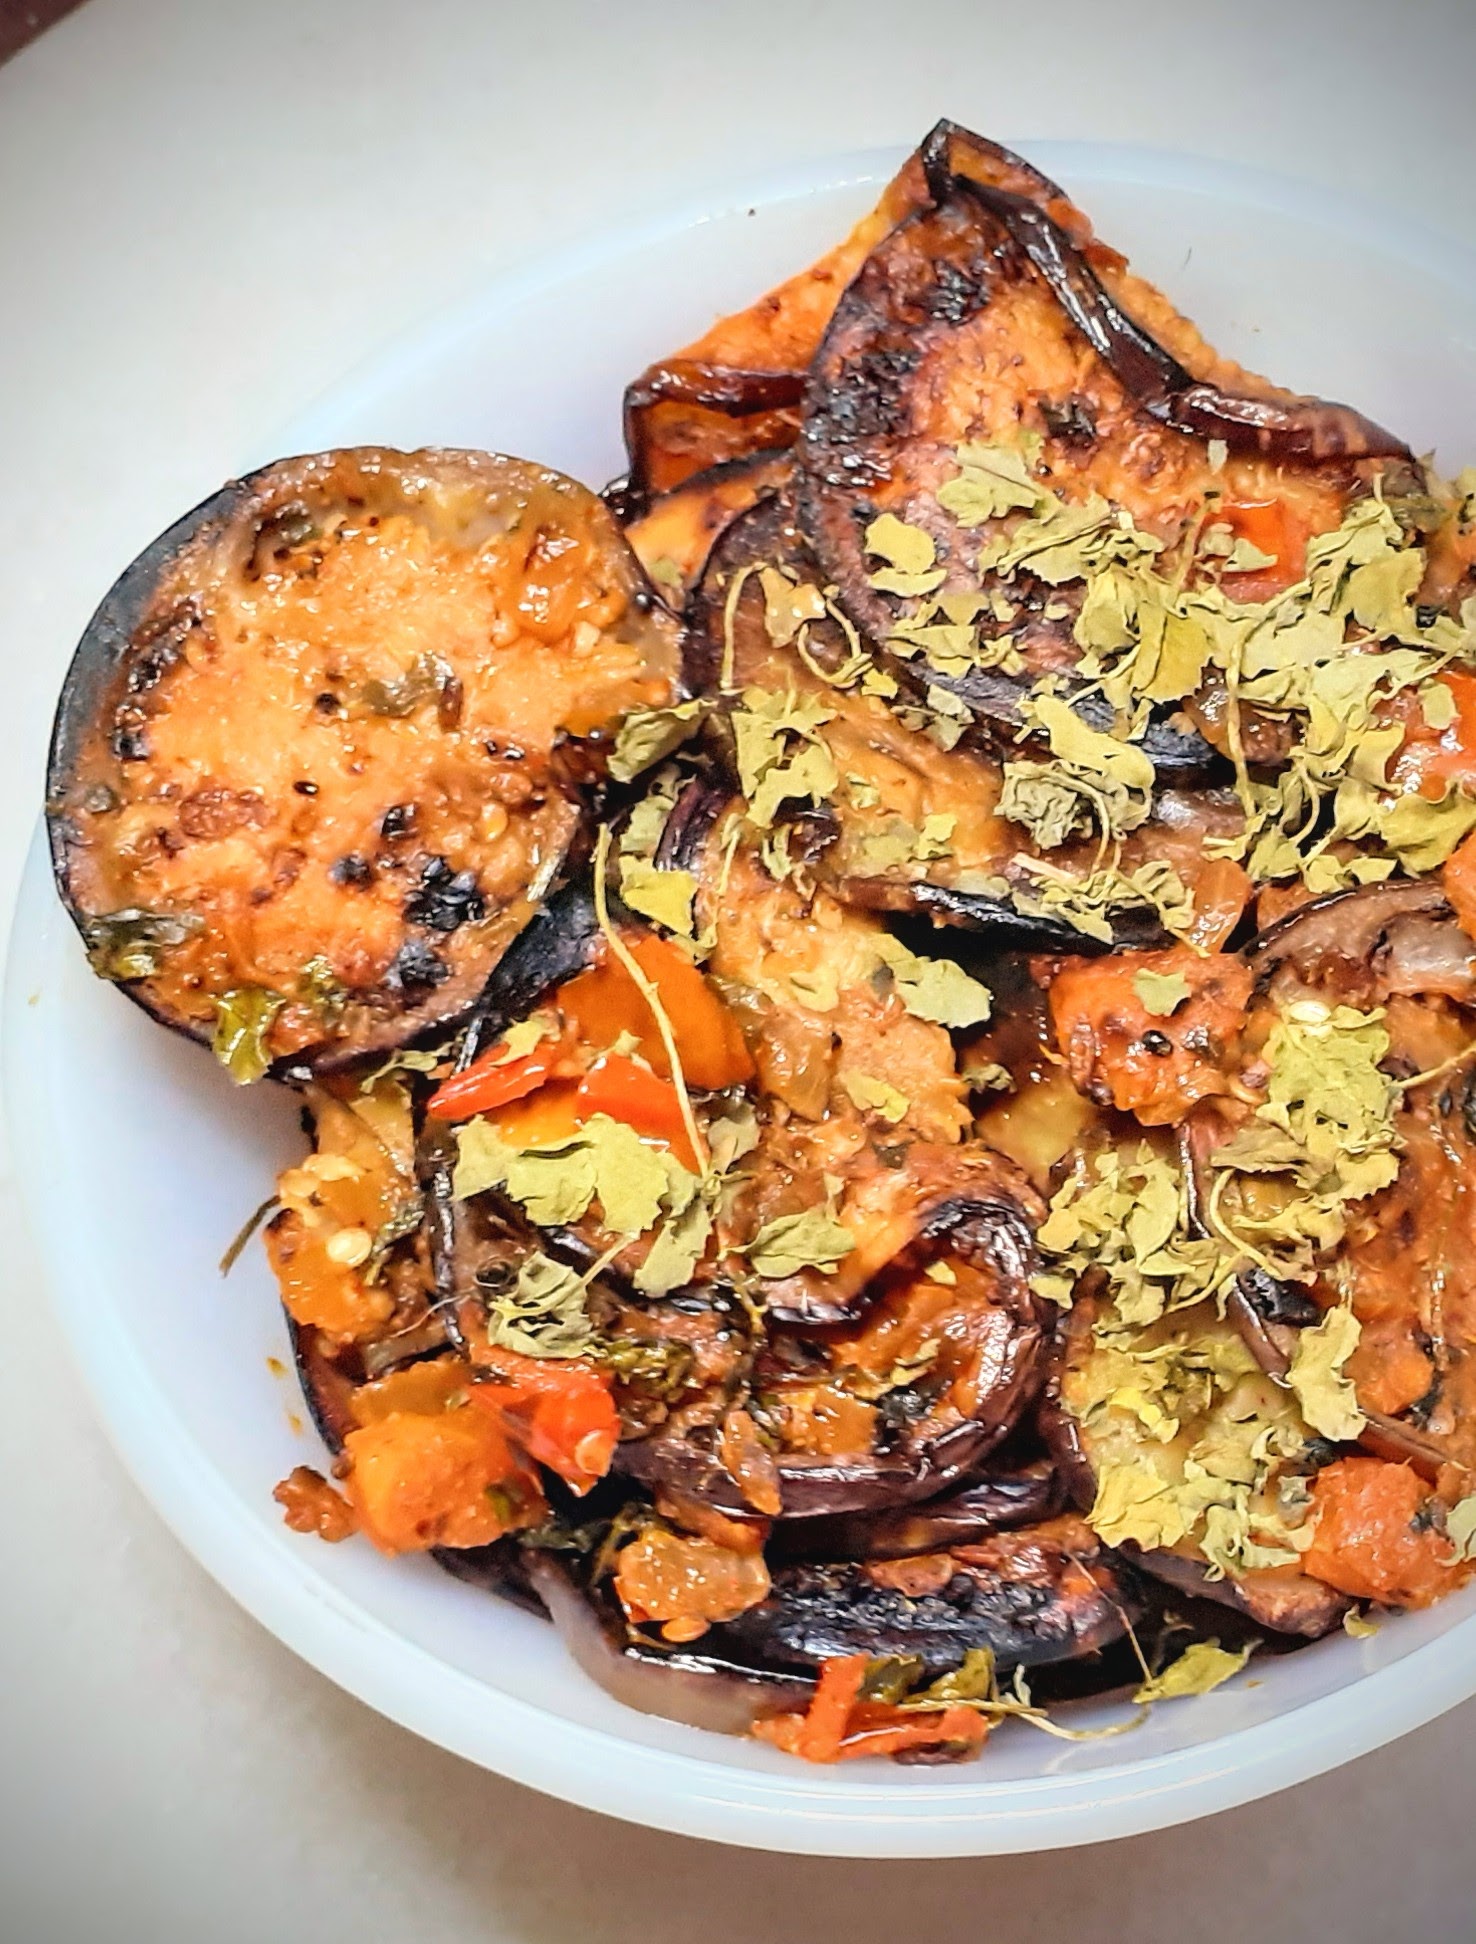
NOTES:
1. If using fresh Methi leaves for this dish, use only half a bunch, as a big quantity can turn the dish bitter.
2. The big eggplants are not best suited for this dish as they release more moisture and that can make the brinjals soggy.
3. Since we did not add any salt or masalas to the Baigans while pan-roasting them, be liberal with the masala you add to the onion-tomato mixture.
If you tried this recipe and liked it please comment below. I would love to hear from you. If you have a query about the recipe email us and ill respond as soon as I can.
Mirch Ka Salan
This recipe is one of the most flavourful dish from the Hyderabadi cuisine. This dish is made from a particular type of Chilli called Banana Peppers or Bajji Milagai. You will find a mention of this in my Mirapakaya Bajji or Mirchi Bajji post. Like I have said in that post, there is also a Jaipuri style of making this dish, but today I am sharing the recipe of the Hydrrabadi style.

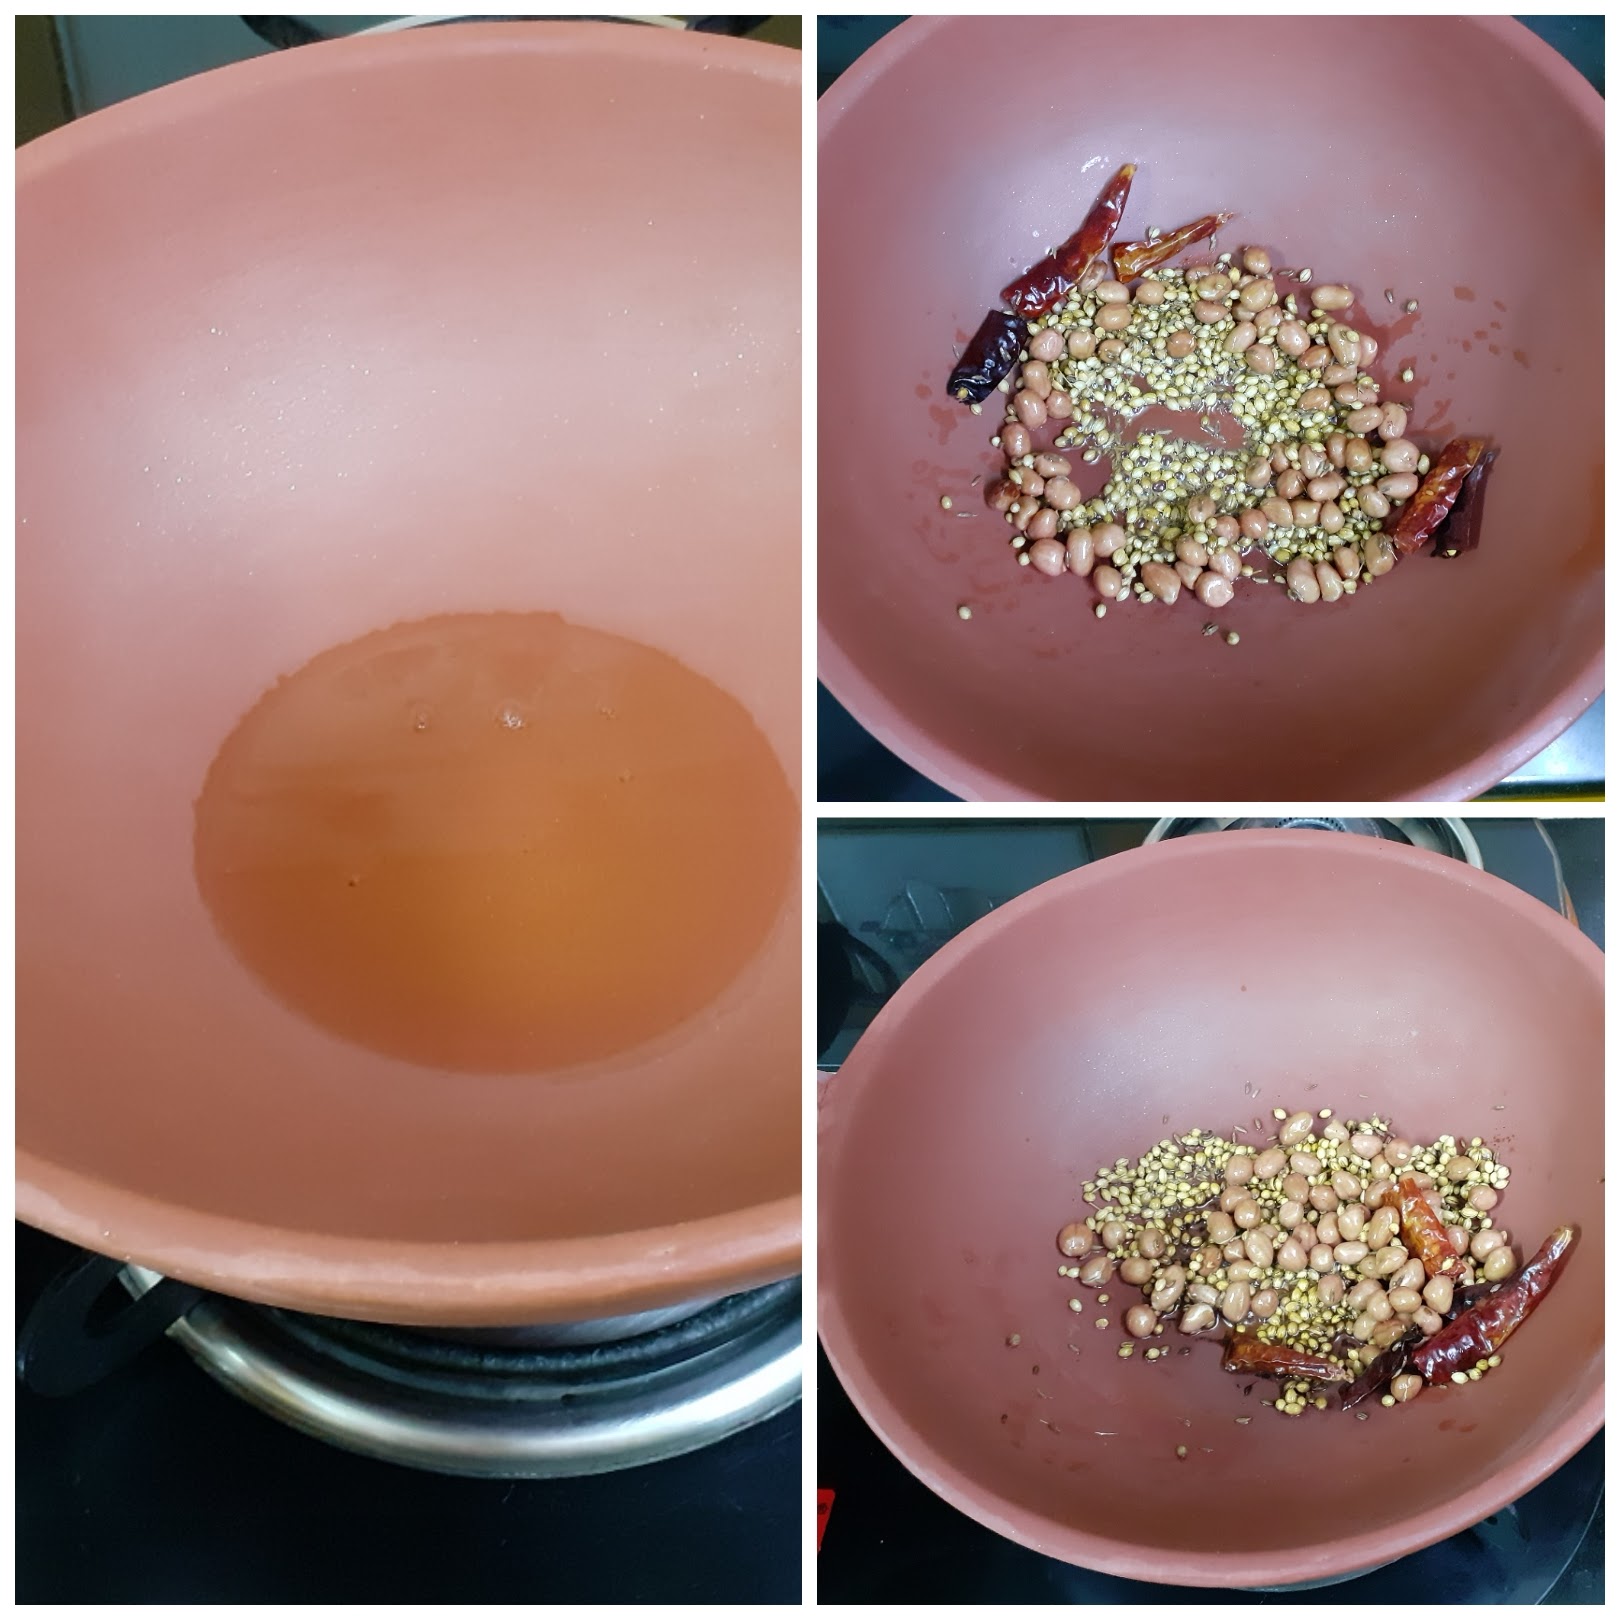
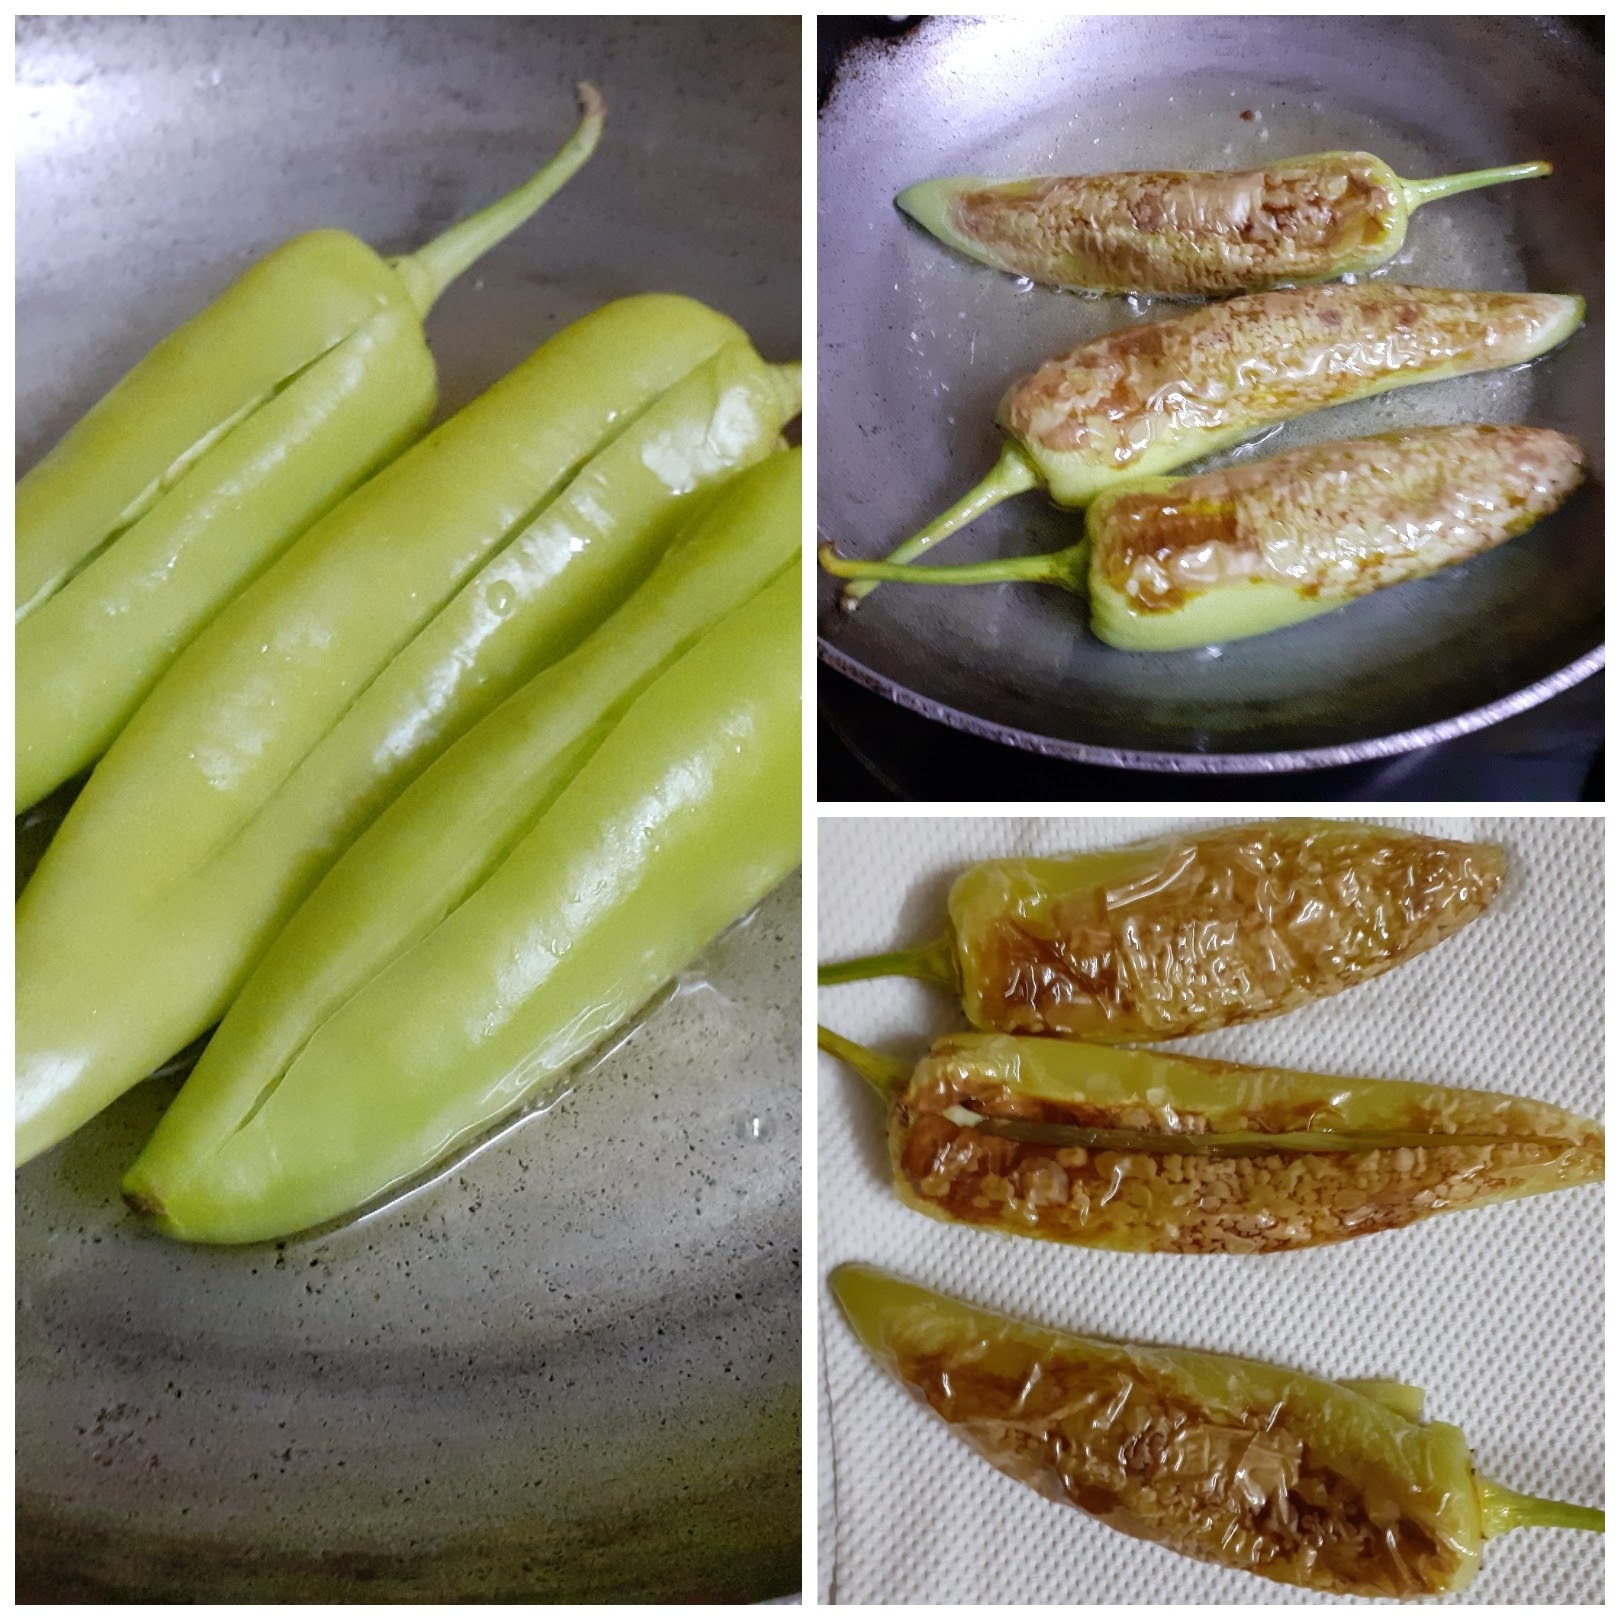
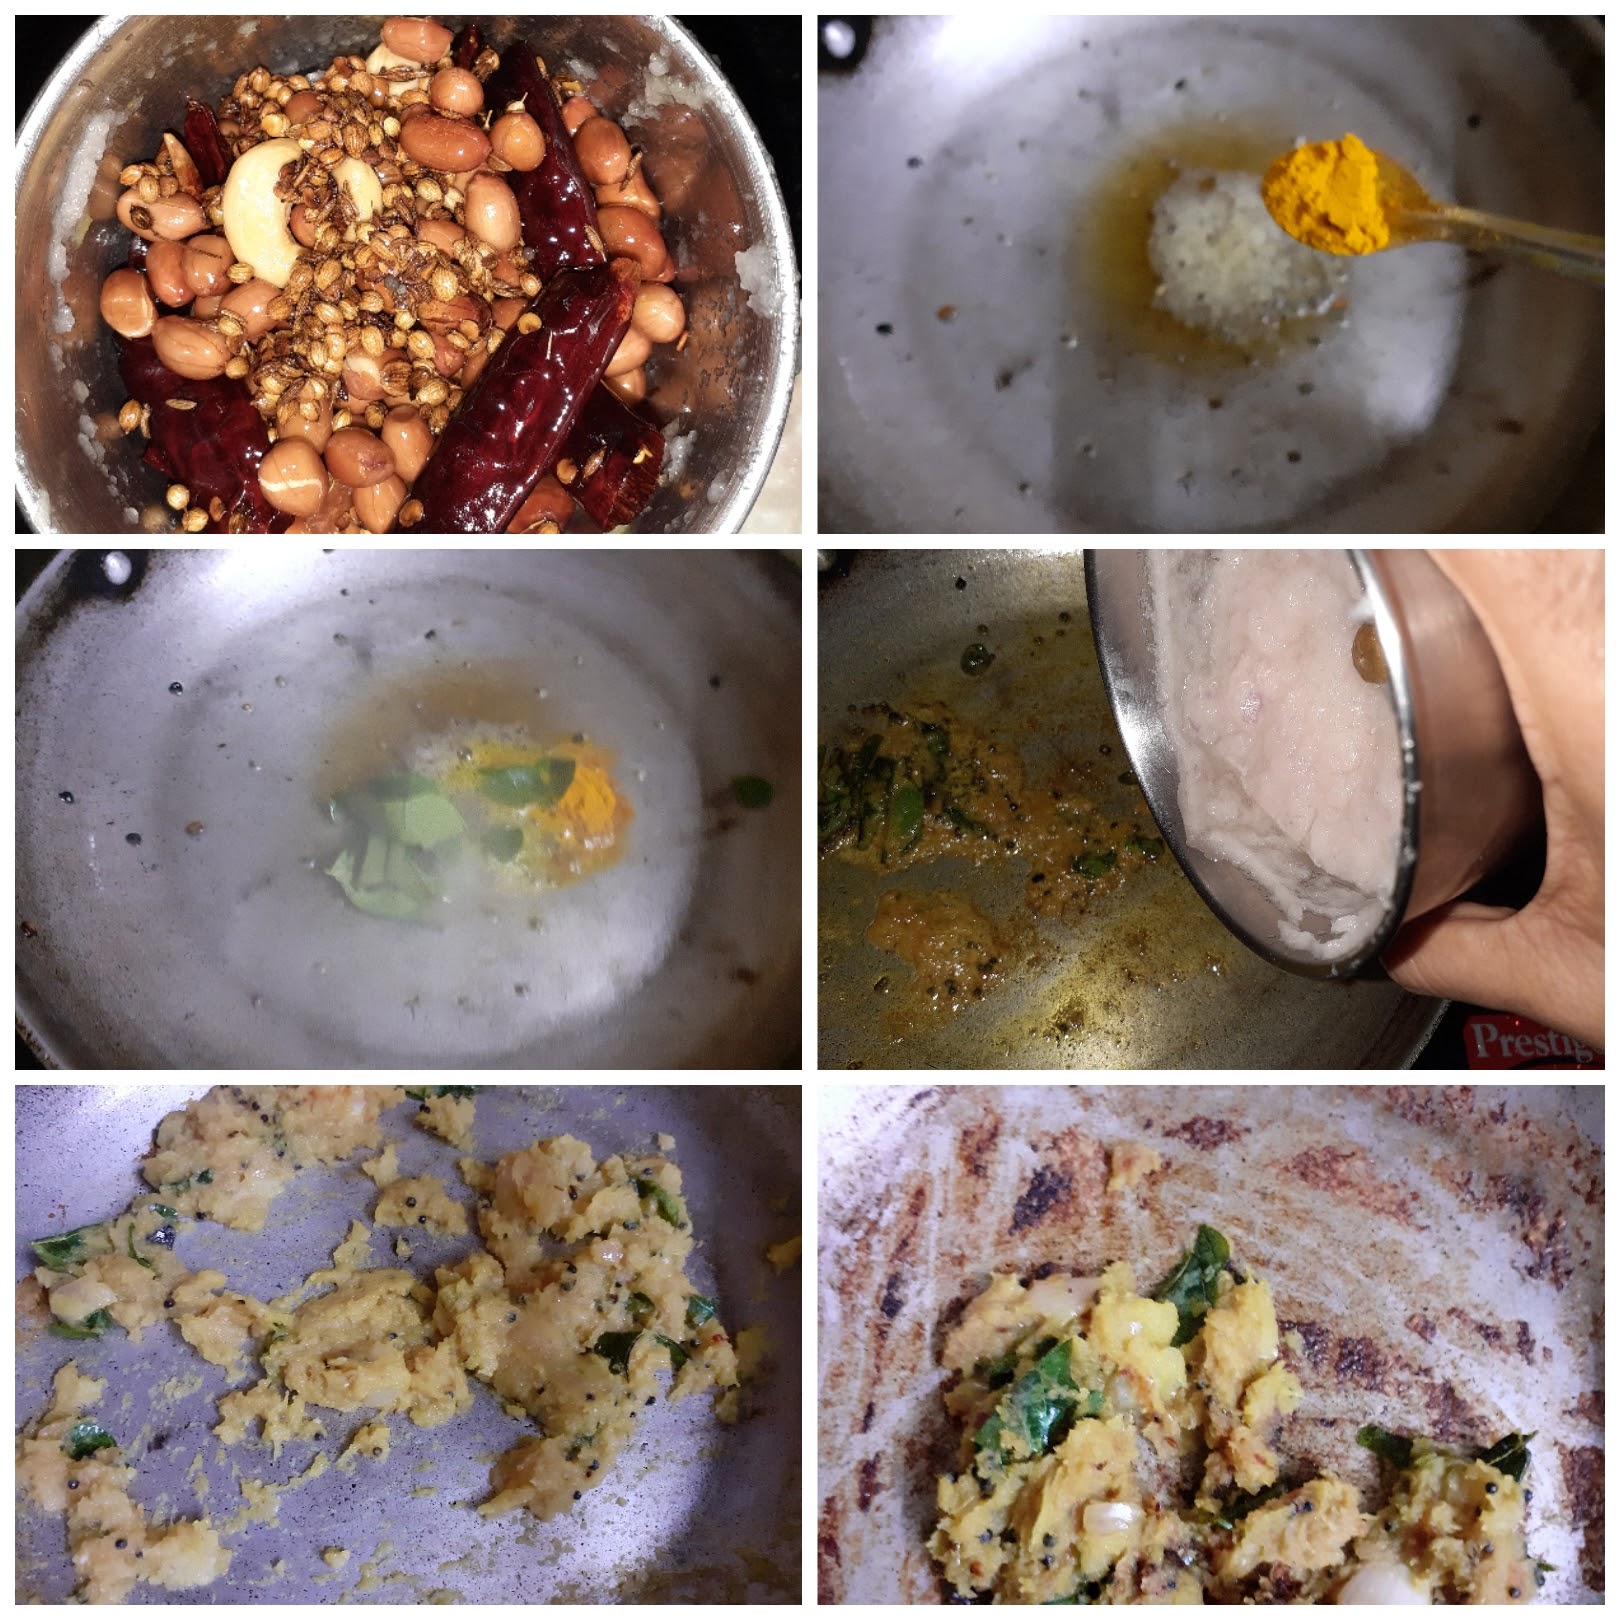
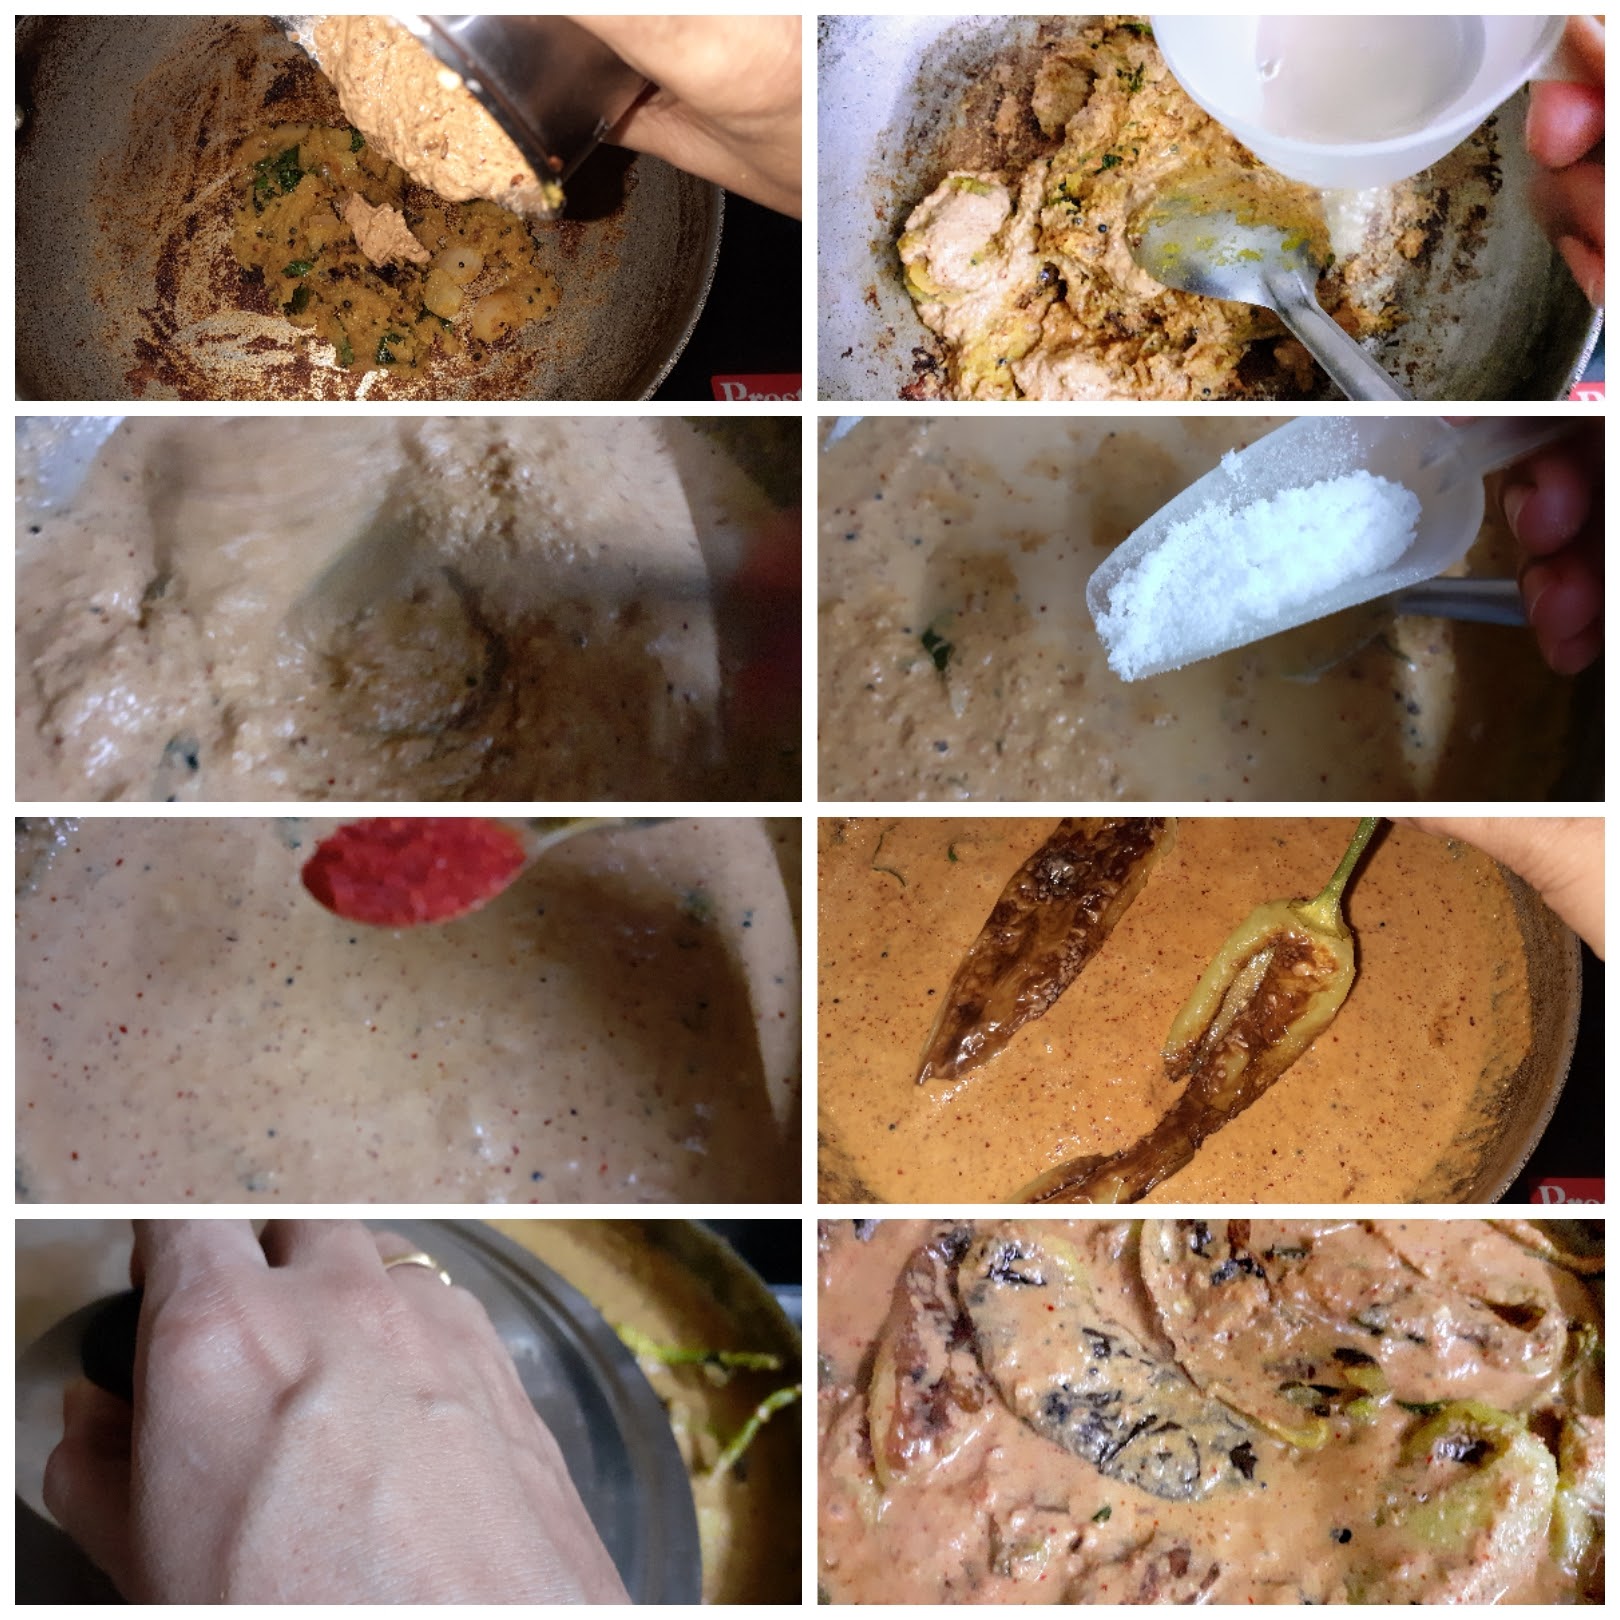
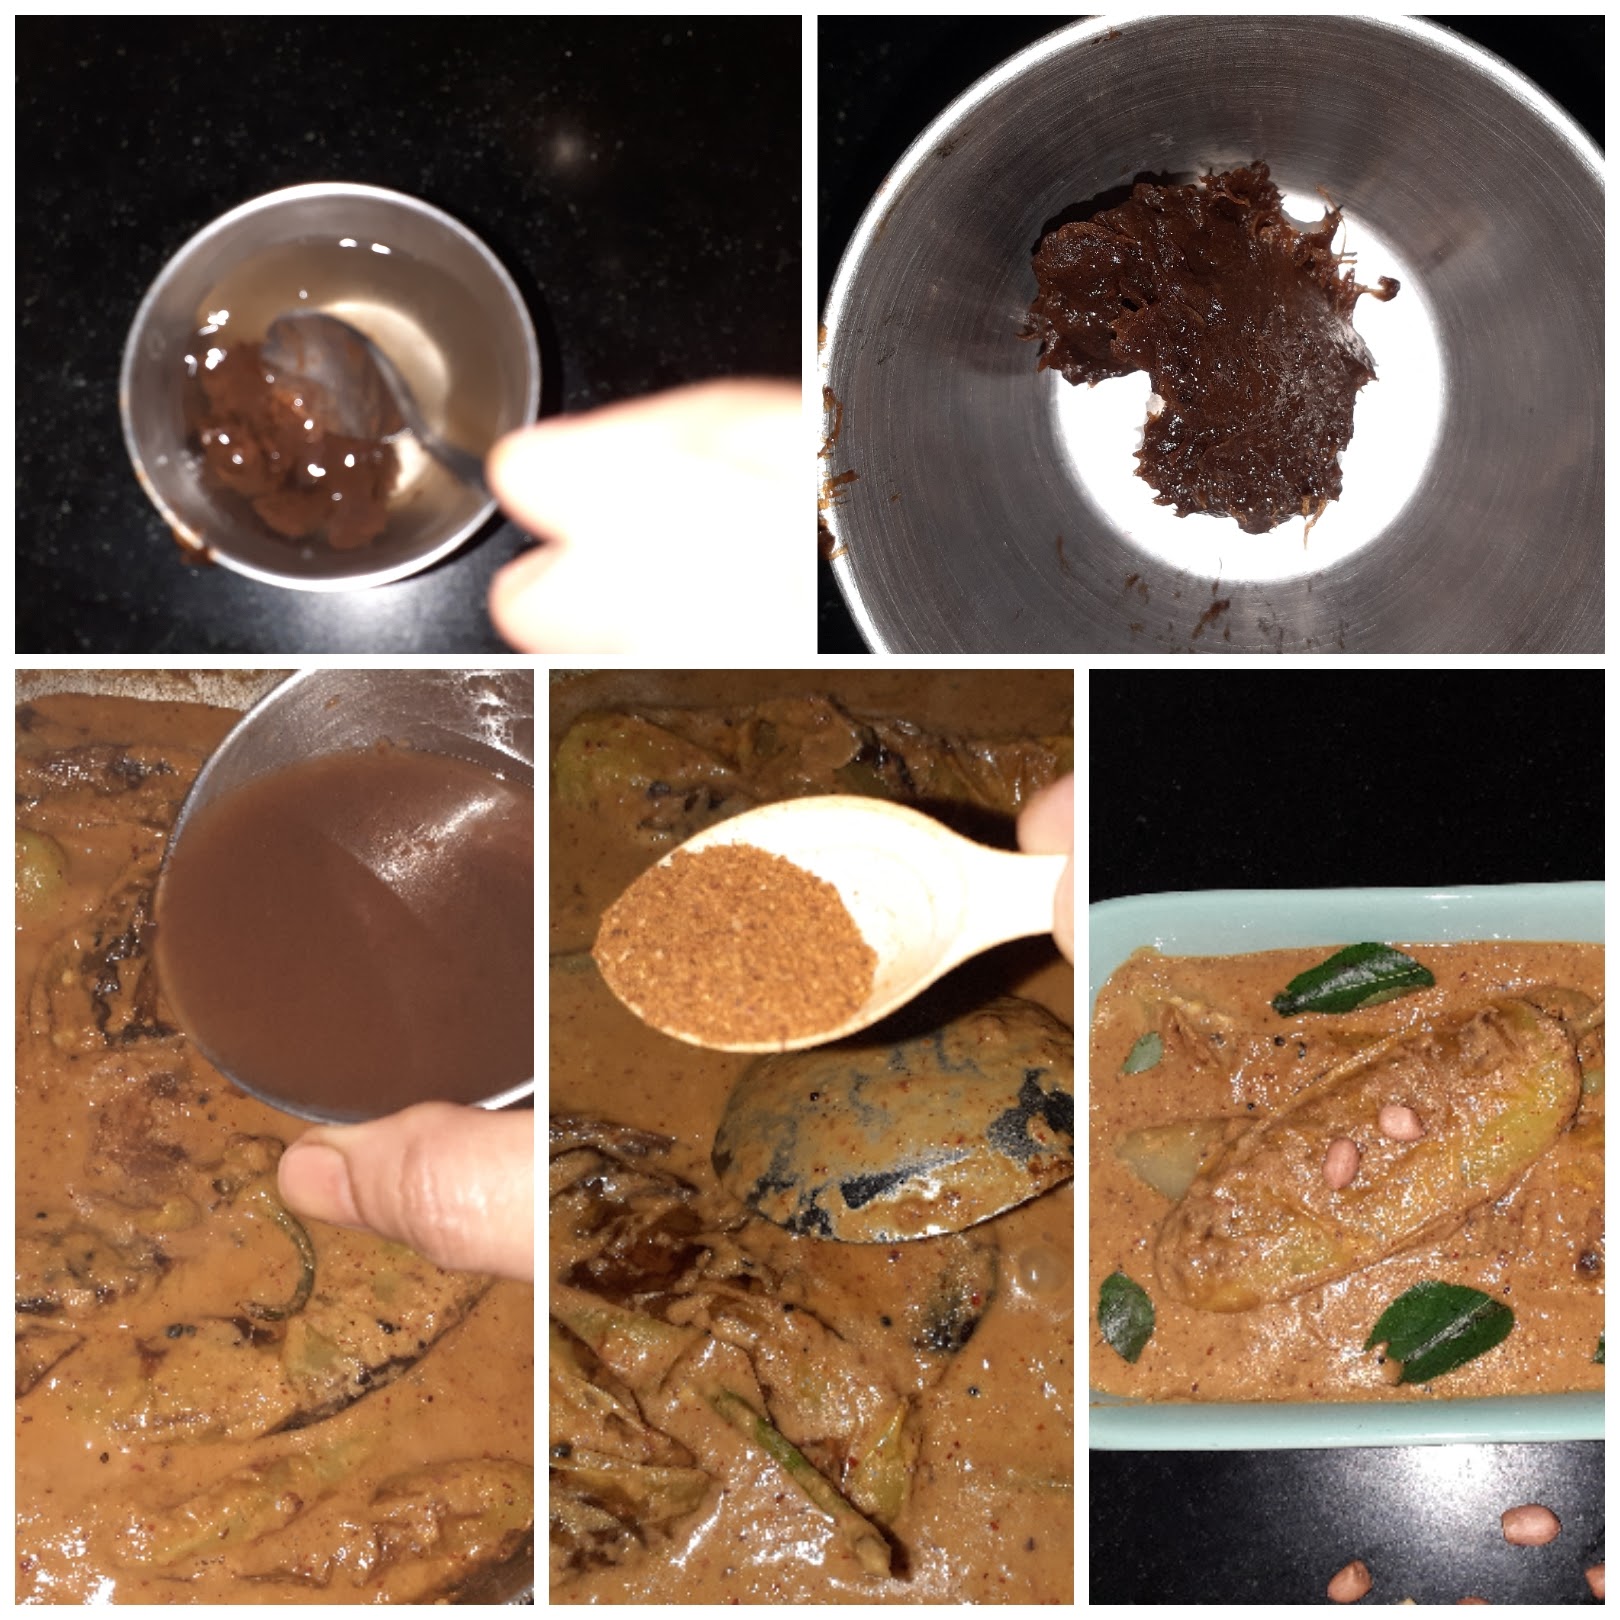
If you tried this recipe and liked it please comment below. I would love to hear from you. If you have a query about the recipe email us and ill respond as soon as I can.
Dry Fruit Ladoo
These Ladoos are absolutely delicious and healthy. In my house, these are made not only during Diwali but all year through. They have a long shelf life and can sometimes substitute for breakfast. People who fast can rely on this for some quick energy. No sugar or honey or jaggery is added and I use minimum ghee(about 3 teaspoons). Yes! this is a whole package of health. Remember good things always come in small packages? This is that package????.
My daughter gets it packed for hostel without fail every time she comes homes on her break. According to her, whenever she gets up late and is late for breakfast at the mess, she pops in 2 of these ladoos and grabs a glass of milk and her breakfast is taken care of for that day. I don’t recommend this on a daily basis, but we all have times when we are running against time, this healthy ladoo comes in handy, it also takes care of sudden hunger pangs. My home always has a stock of these ladoos. And the best part you can customize them as per your desired dry fruits and nuts.
While you are here please check out my other sweet/dessert recipes like- Red Poha Ladoo, Carrot Kheer, Gajar halwa barfi, Maa Ladoo, and more…
Here is the recipe for Dry fruit ladoo-
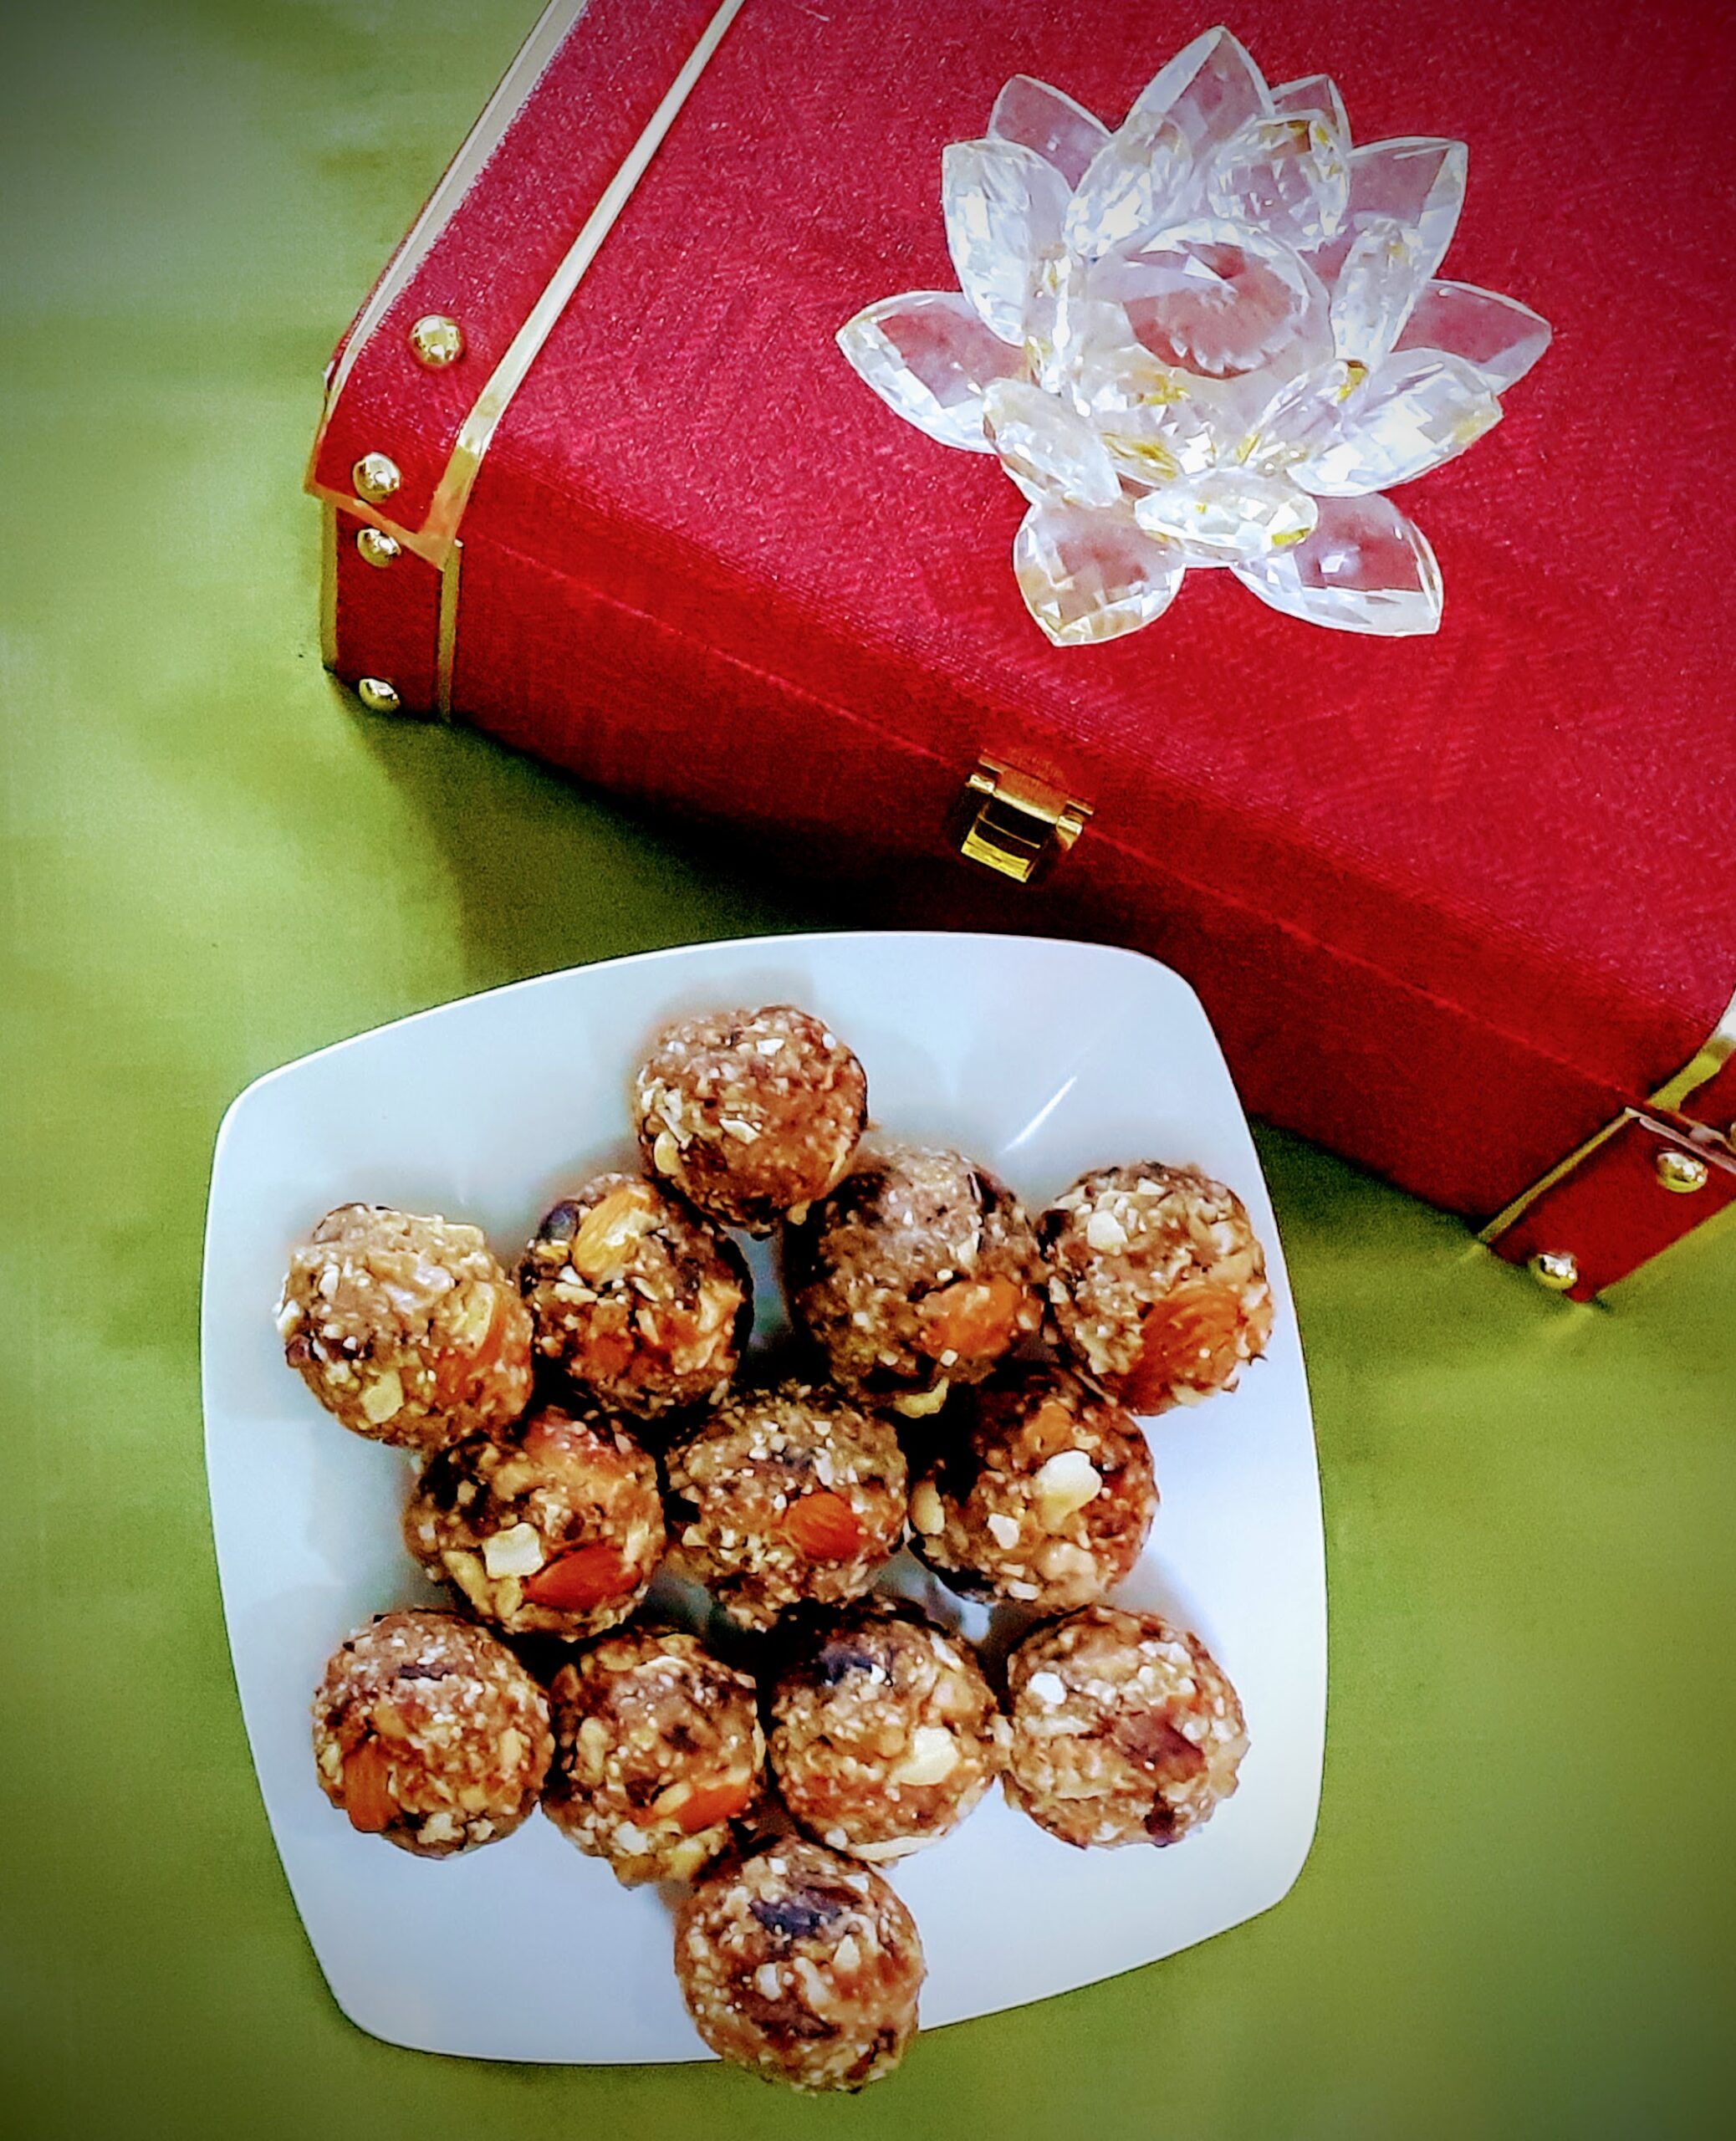
Ingredients:
Dates ( juicy, fleshy ones) 250 gms deseeded
Cashewnuts 100 -125 gms
Almonds 100 gm
Walnut 75 gm
Ghee 1 tbsp
Directions:
Put a pan over the flame and add 1 tsp ghee to it. Now roast all the nuts separately to a nice golden colour. Take care not to burn them, as the burnt smell will reduce the taste and flavour of the ladoo. Transfer them to a plate and cool them. On cooling using the “pulse mode” of your blender, blend them to a coarse mixture. Now to the same pan add another teaspoon ghee and put in the deseeded dates. Keep stirring and mashing them with the back of a spatula. As it turns warm, the dates start getting a little gooey. Now start adding the coarse nut mixture, little by little, until the gooey date paste absorbs most of it( mixture will look semi-dry). All through this process, the flame should be on low. Once your date and nut mixture is combined, remove from flame and cool for 5 minutes. We want a little warmth for binding, so don’t let it go too cold. Grease your palms with a little ghee and start making ladoo of them. Repeat for the entire mixture. The yummy and tasty Dry fruit ladoo are ready. Store them in an airtight jar once they are completely cool.
STEPWISE RECIPE FOLLOWS:
1. Assemble all ingredients. Put a pan over the flame and add 1 tsp ghee to it. Now roast all the nuts separately to a nice golden colour. Take care not to burn them, as the burnt smell will reduce the taste and flavour of the ladoo.
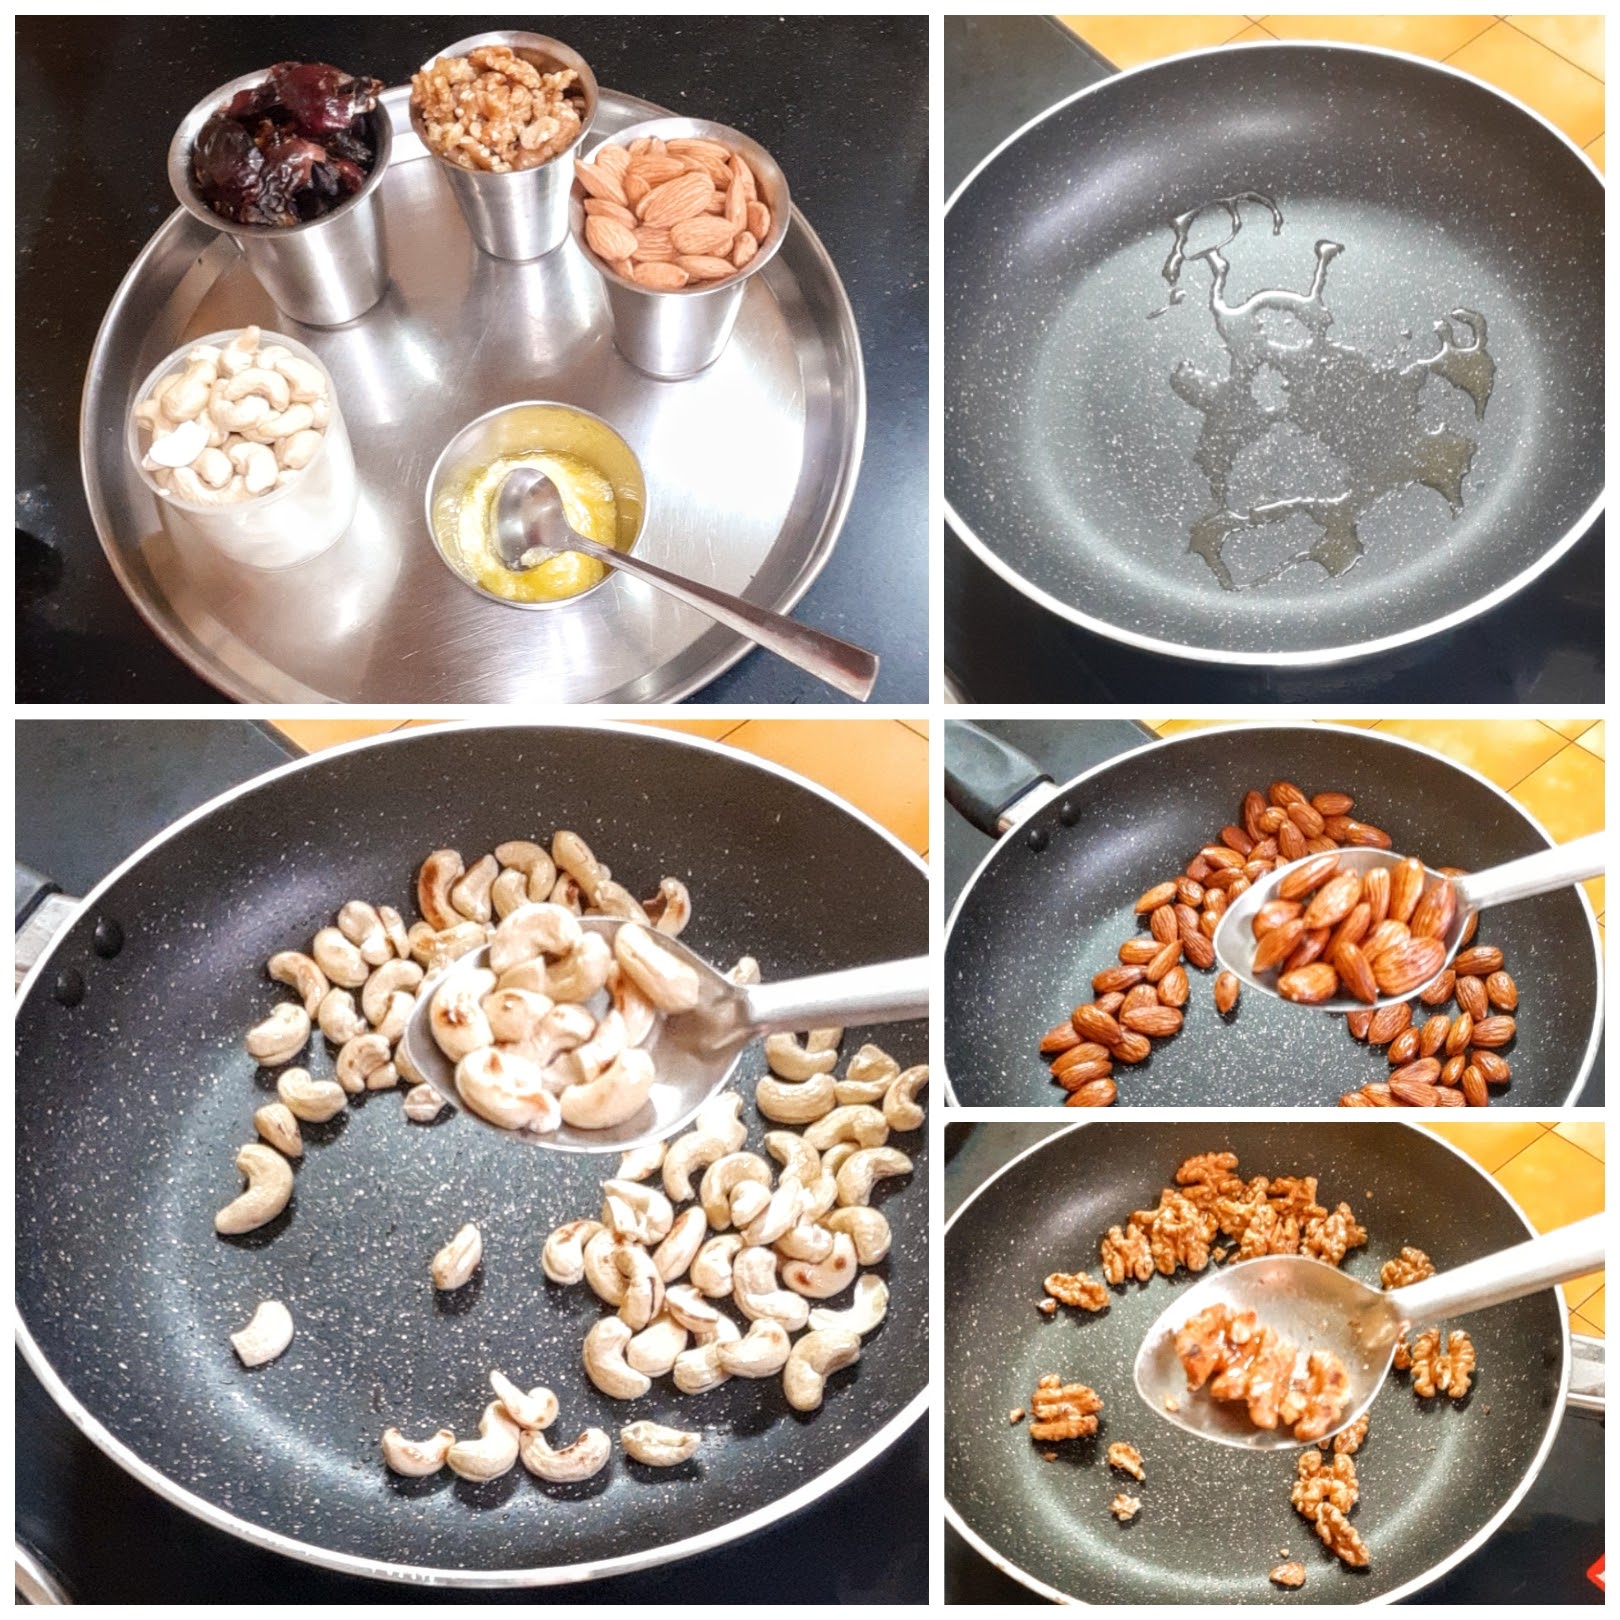
2. Transfer them to a plate and cool them. On cooling using the “pulse mode” of your blender, blend them to a coarse mixture.
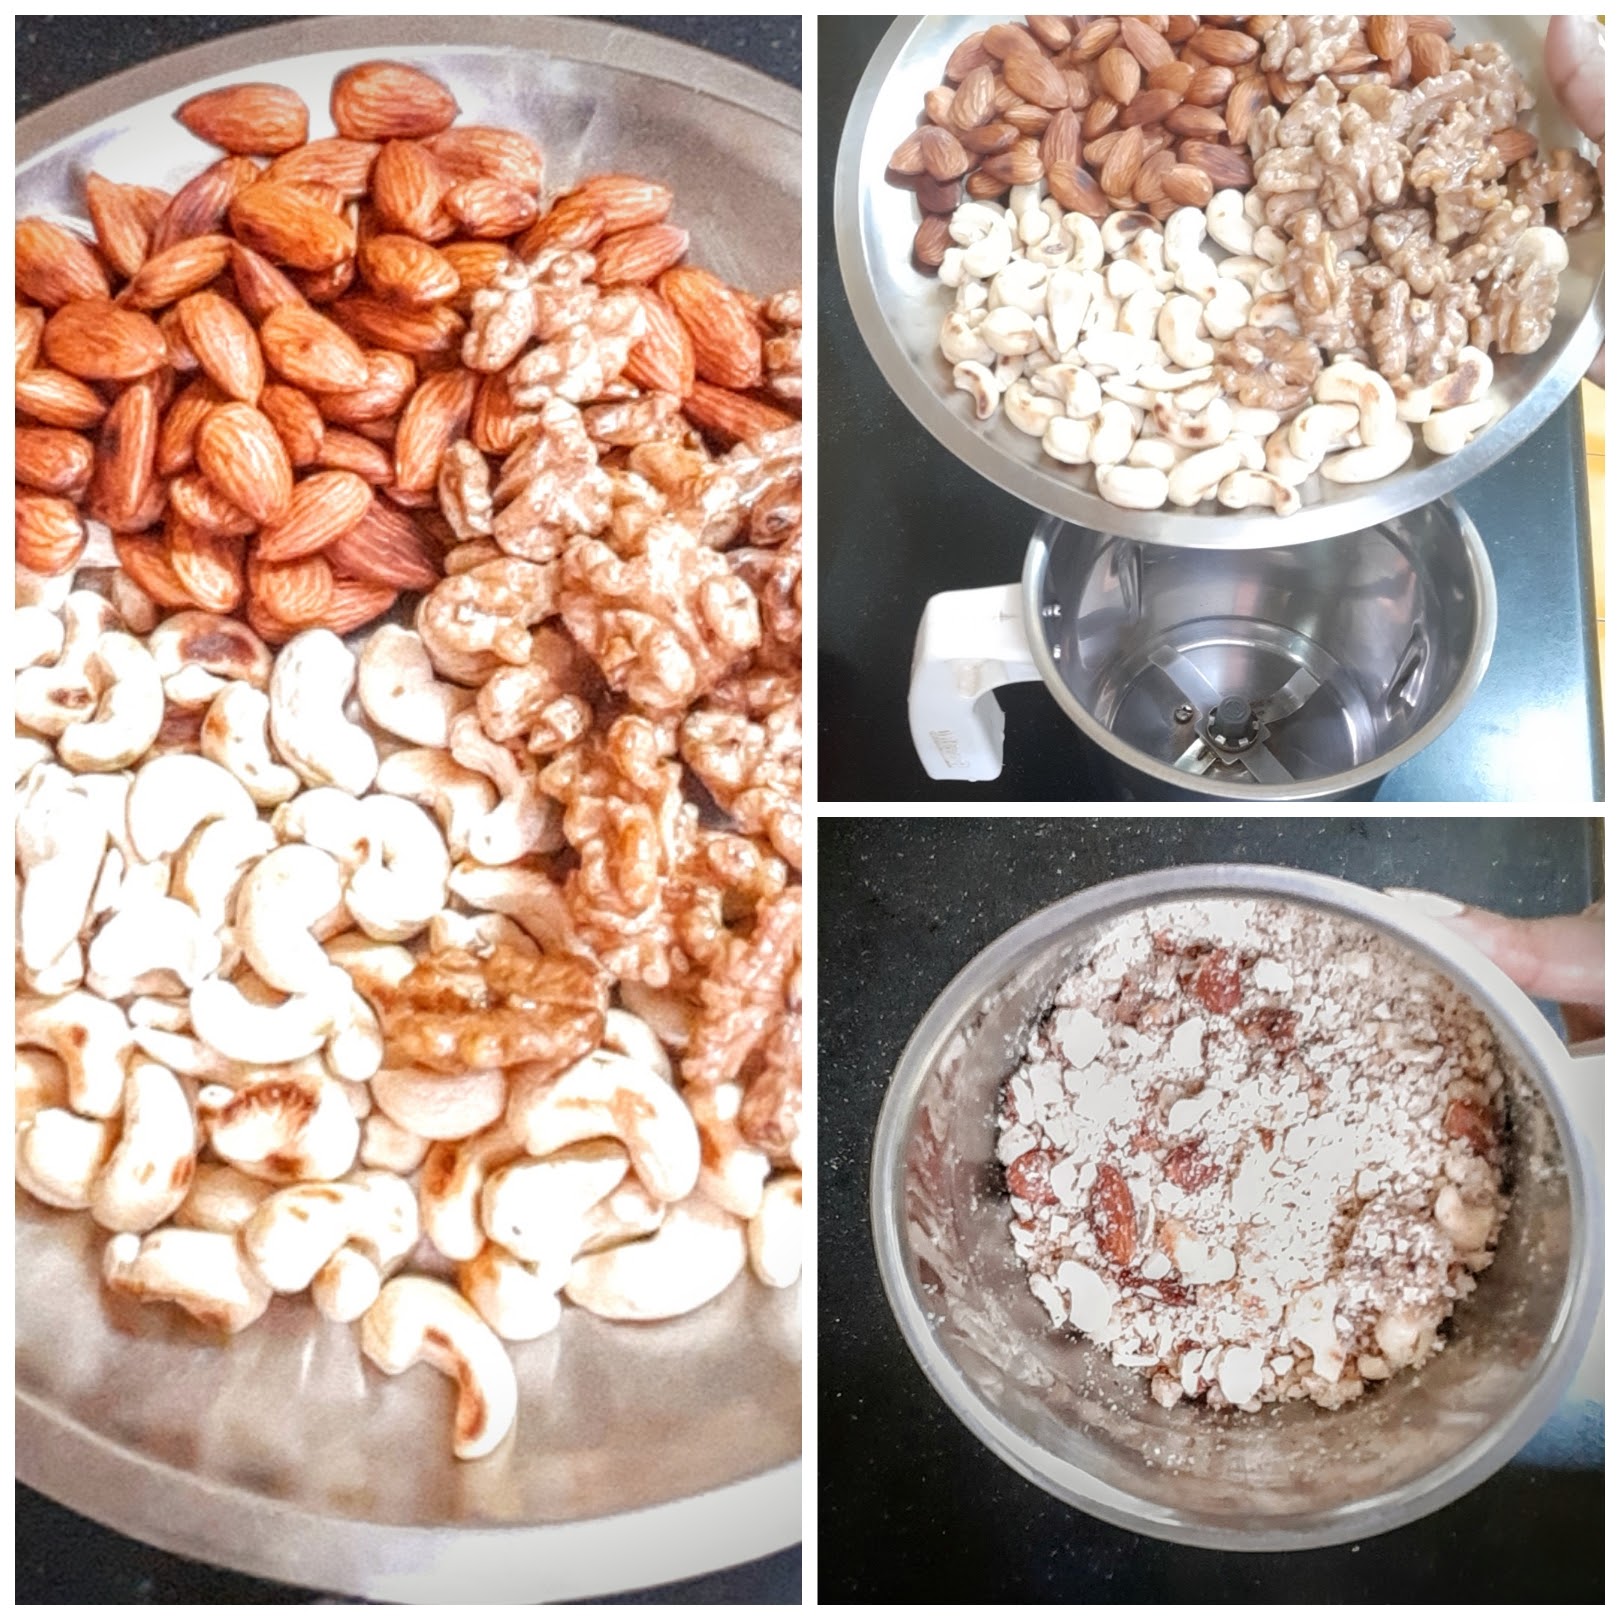
3. Now to the same pan add another teaspoon ghee and put in the deseeded dates. Keep stirring and mashing them with the back of a spatula. As it turns warm, the dates start getting a little gooey.
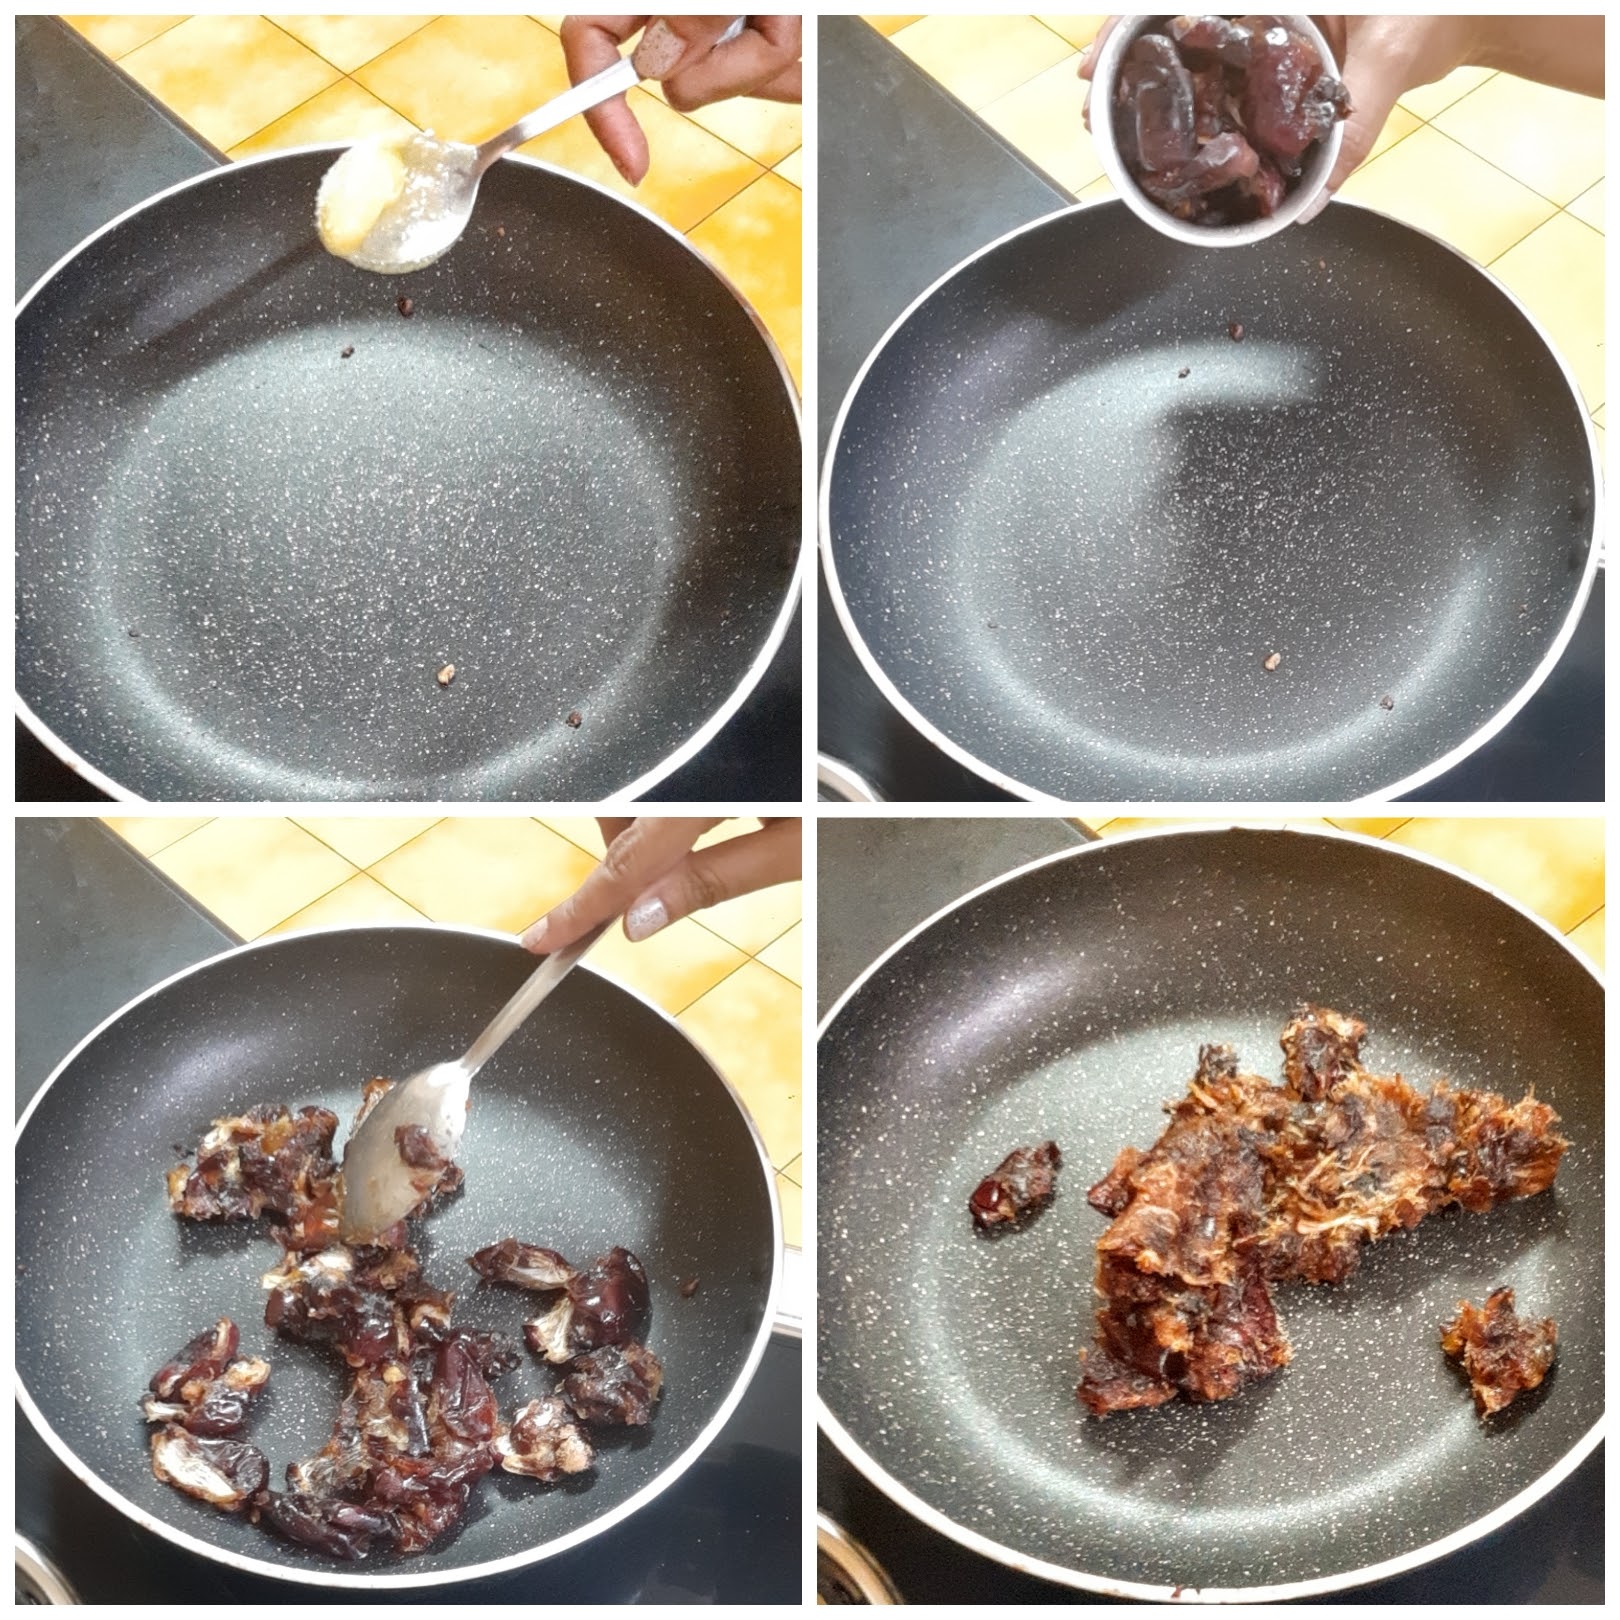
4. Now start adding the coarse nut mixture, little by little, until the gooey date paste absorbs most of it( mixture will look semi-dry). All through this process, the flame should be on low. Once your date and nut mixture is combined, remove from flame and cool for 5 minutes.
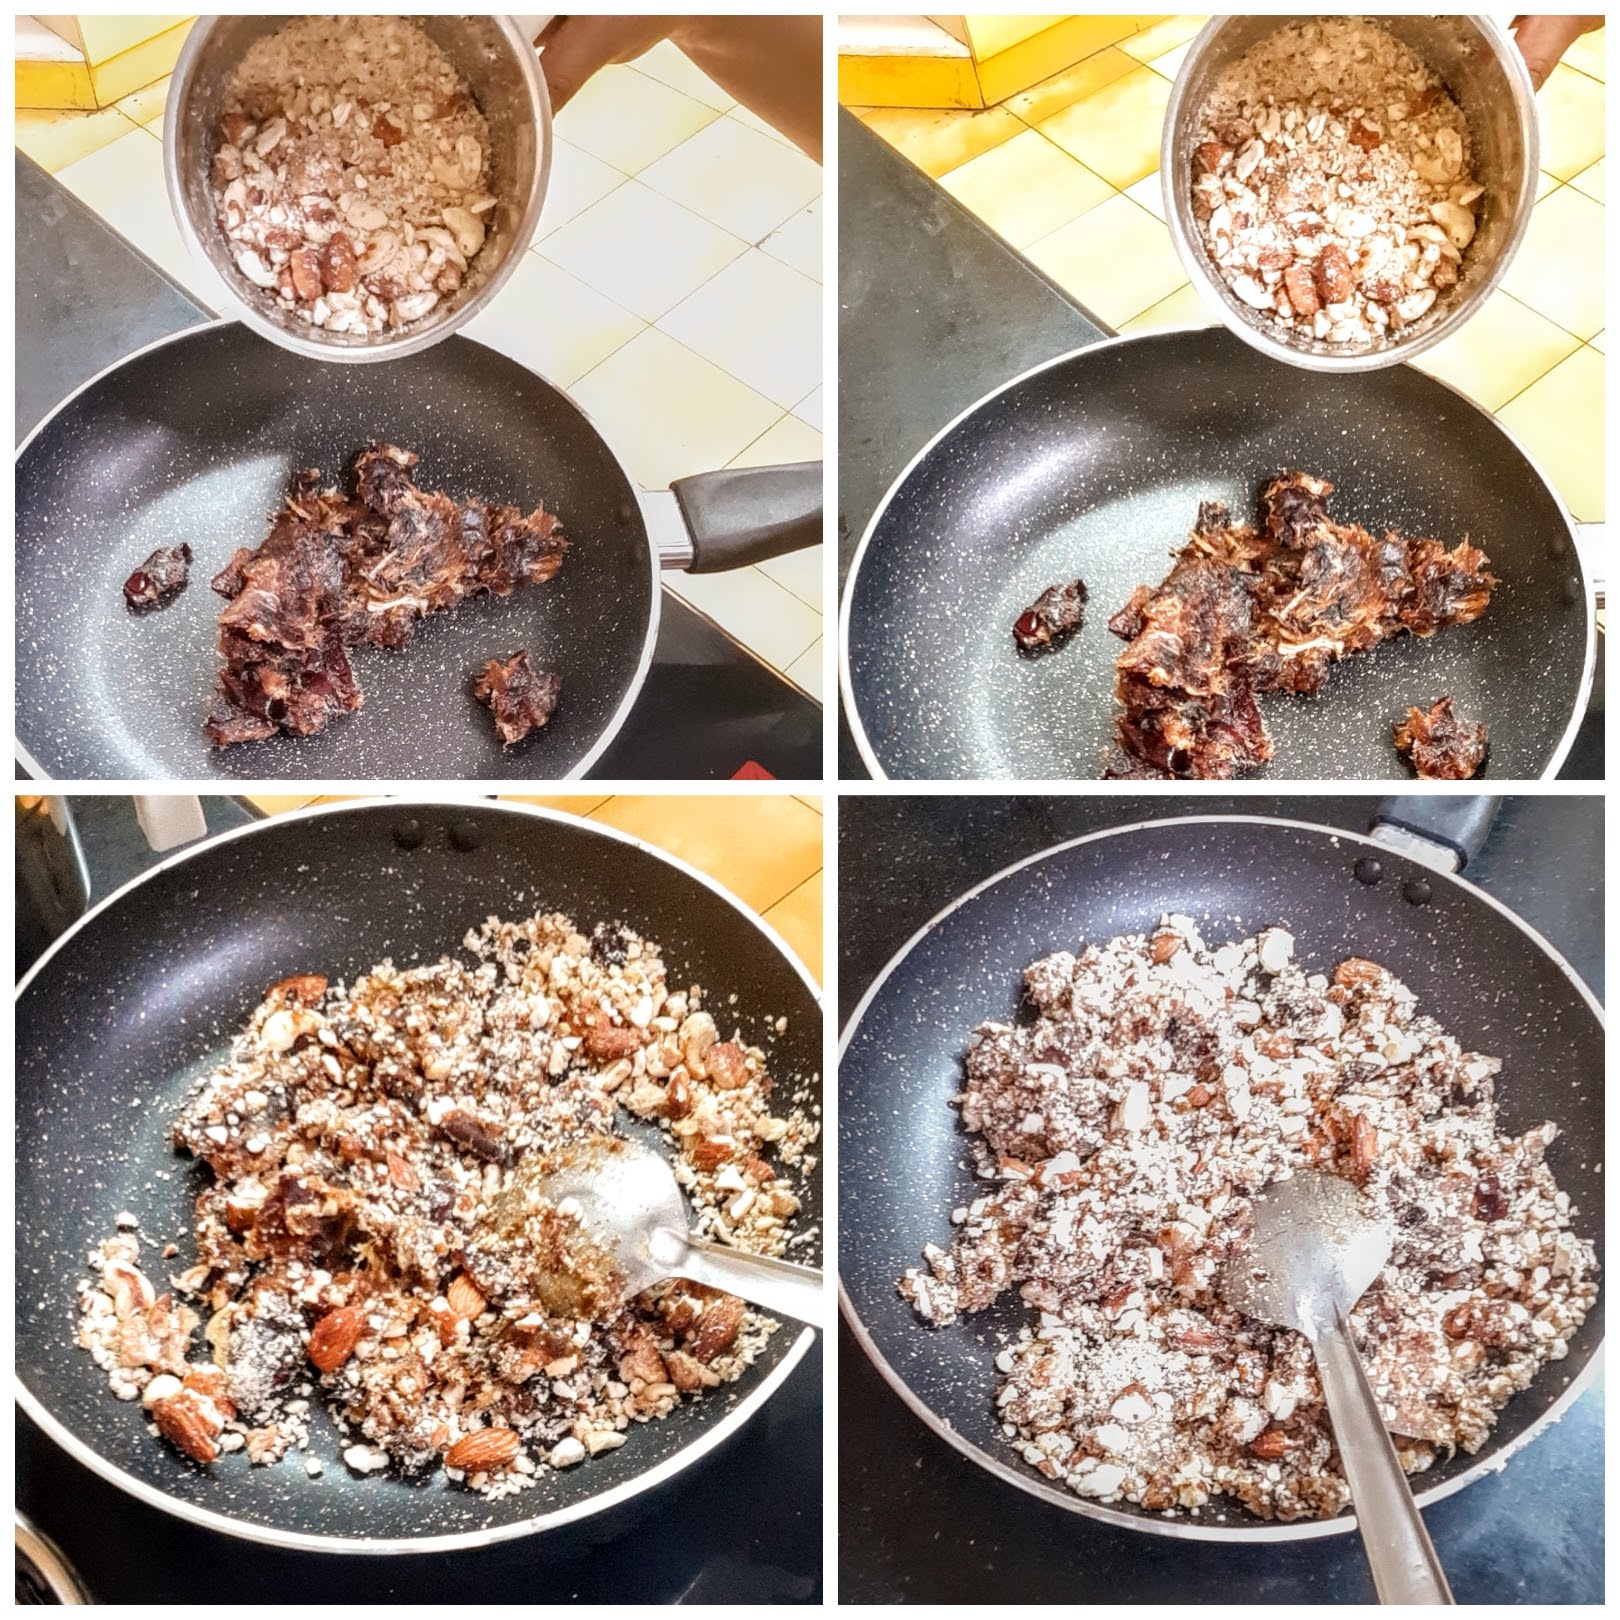
5. Grease your palms with a little ghee and start making ladoo of them. Repeat for the entire mixture. The yummy and tasty Dry fruit ladoo are ready.
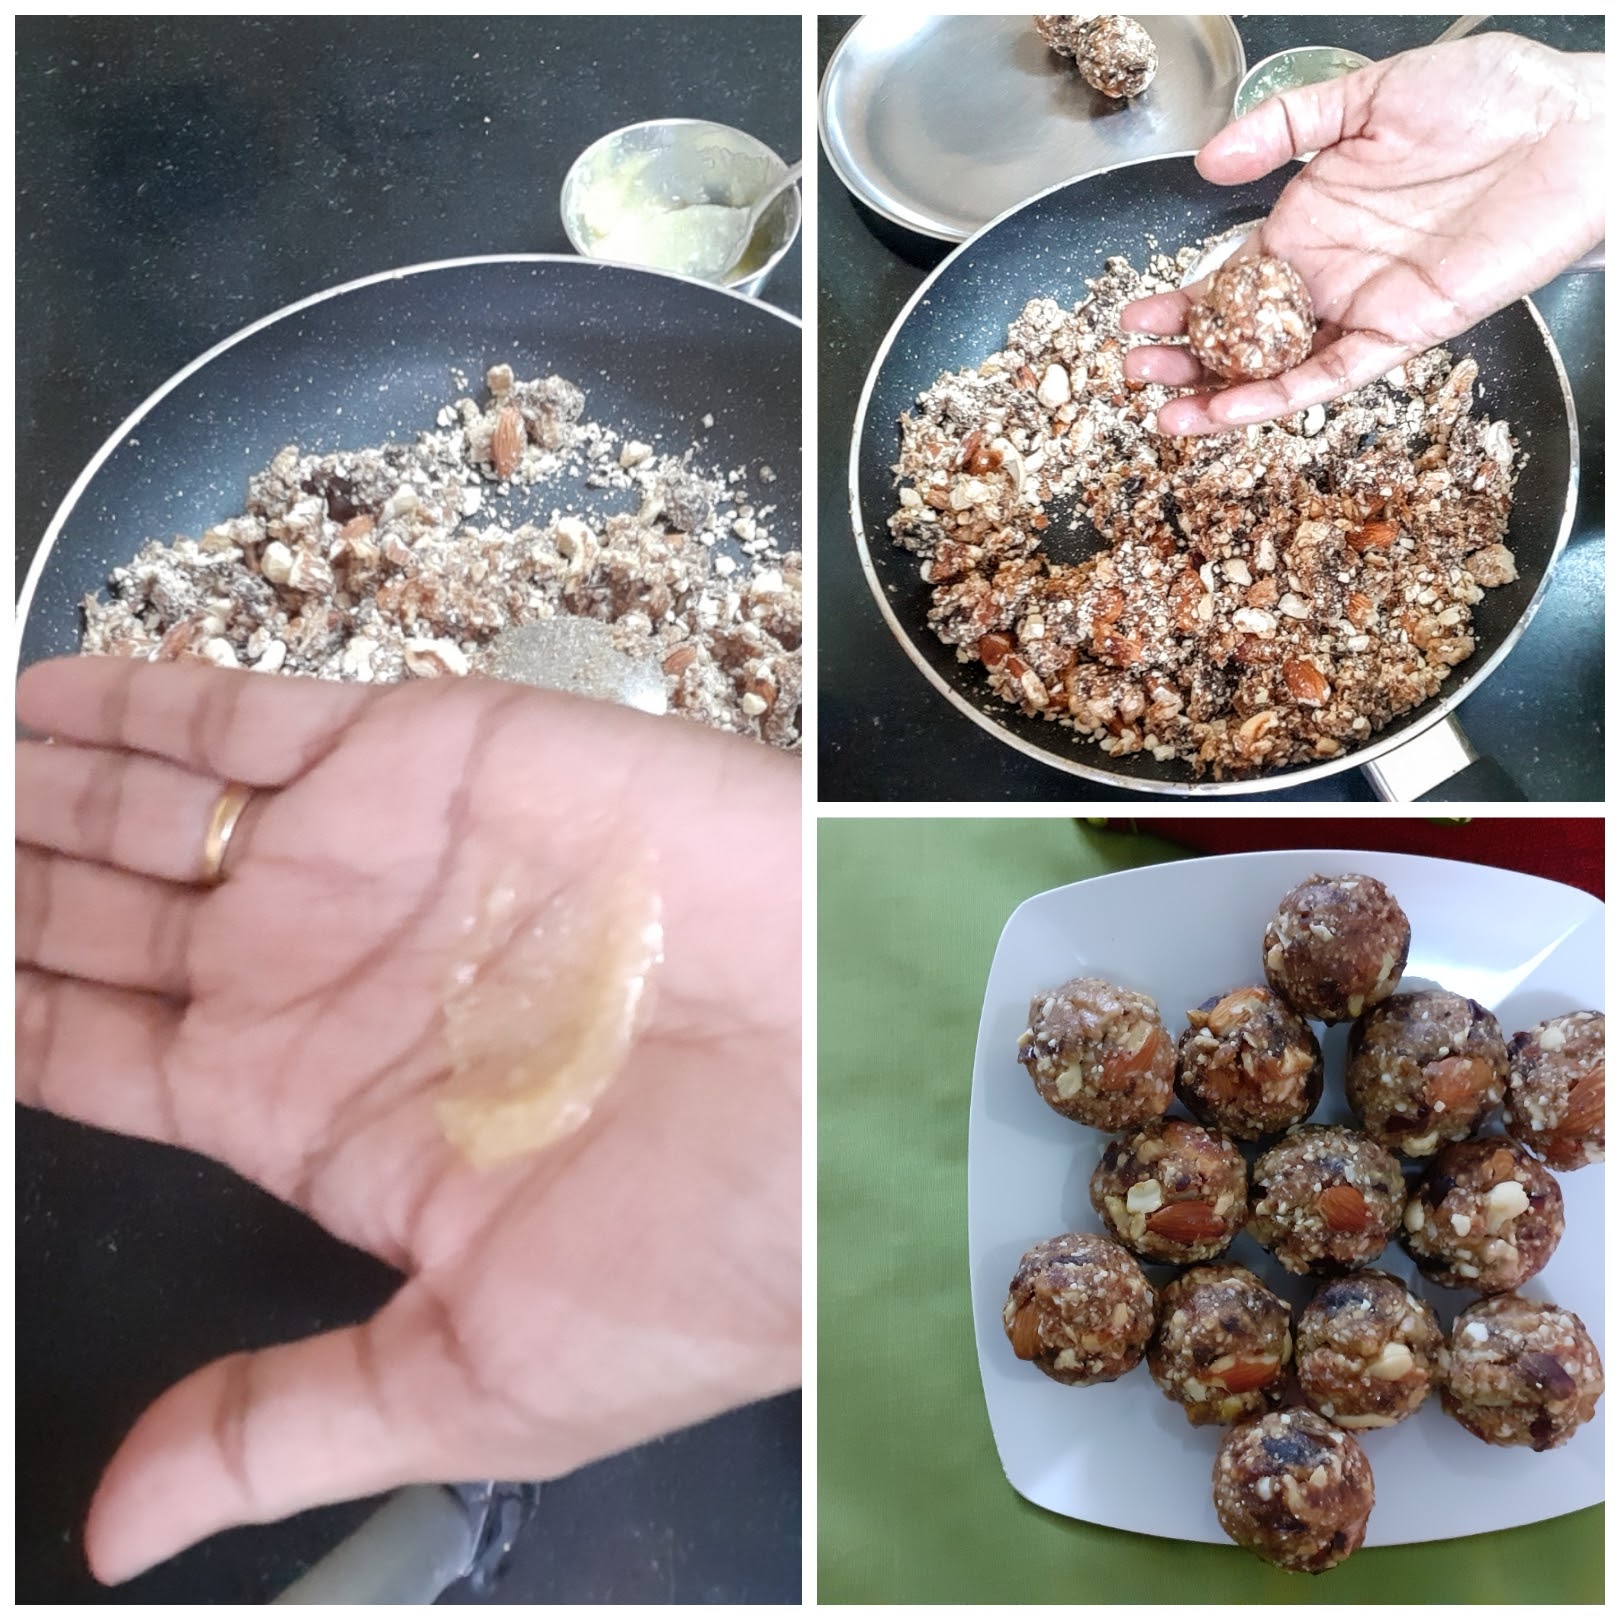
NOTES:
1. The amount of nuts required depends upon the juiciness of the dates. The juicier the dates the more nuts will be required.
2. Good quality nuts and dates always give the best taste.
3. During Diwali we all receive lots of dry fruits and nuts and have to stuff everything into our refrigerators to avoid insects accessing them. These ladoos are a great idea to use up all those dry fruits in the best possible way.
4. After adding the required amount of coarse nuts to the dates, if it is still gooey then add more nut mixture after roasting and coarsely grinding them.
5. After adding the nut mixture to dates if you find it is too dry and are not able to make ladoos, them warm up more dates and add to them.
If you tried this recipe and liked it please comment below. I would love to hear from you. If you have a query about the recipe email us and ill respond as soon as I can.
Dhaniya Wale Namak Pare (Namak Pare)
Namak Para’s are a simple dry snack made from refined flour or whole wheat flour. They make for a good tea time snack too. Here the flour is combined with salt and spices to form a stiff dough. The dough is then rolled out and cut into diamonds and deep-fried in oil. This is an easy savory recipe to make around festivals like Diwali or Janmashtami where the tradition calls for making some flour-based snacks. One can just make it as a regular tea time snack too.

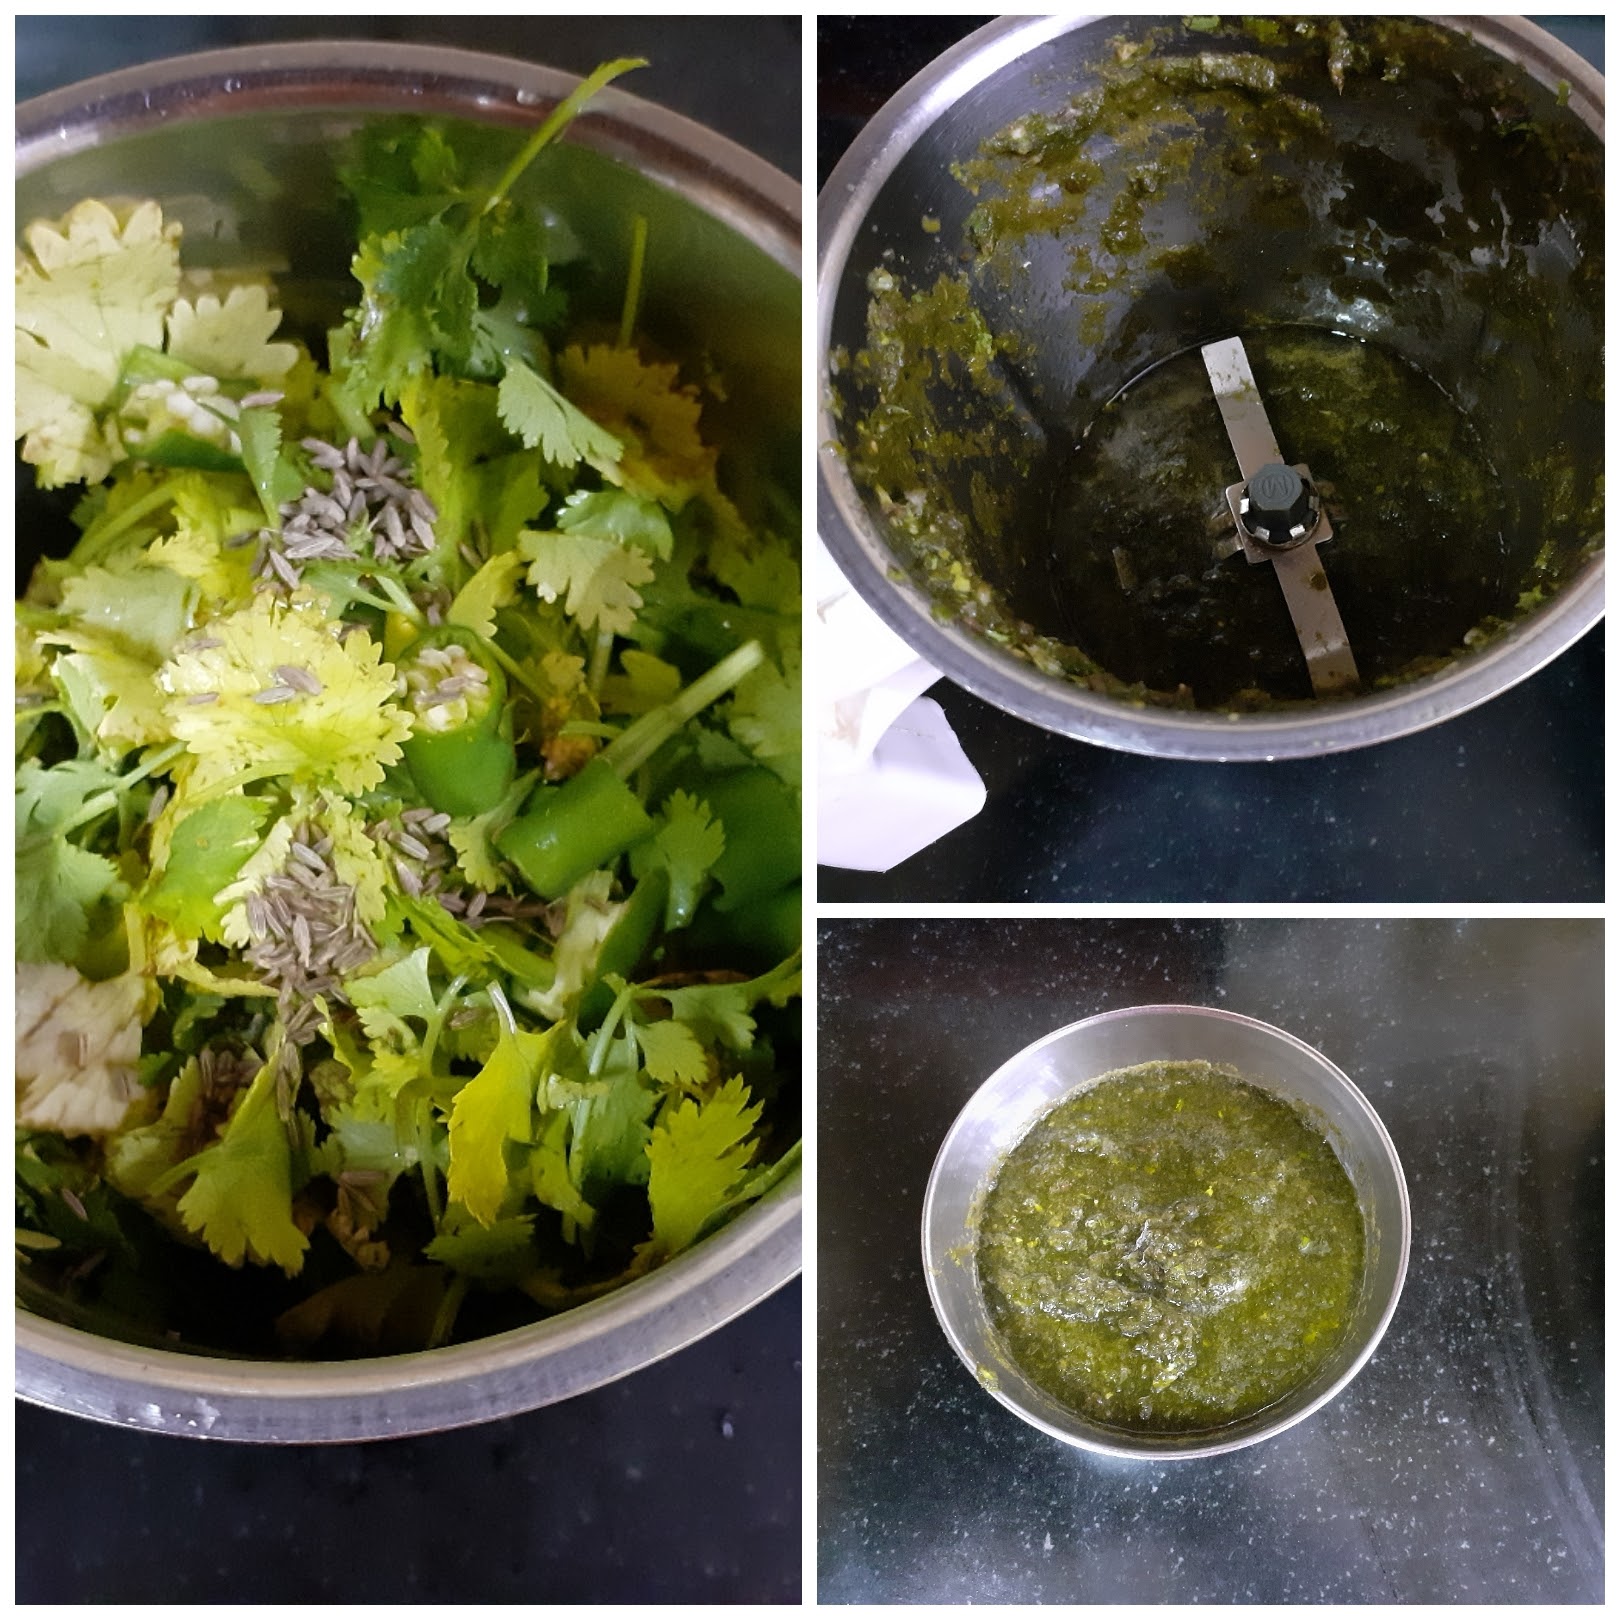

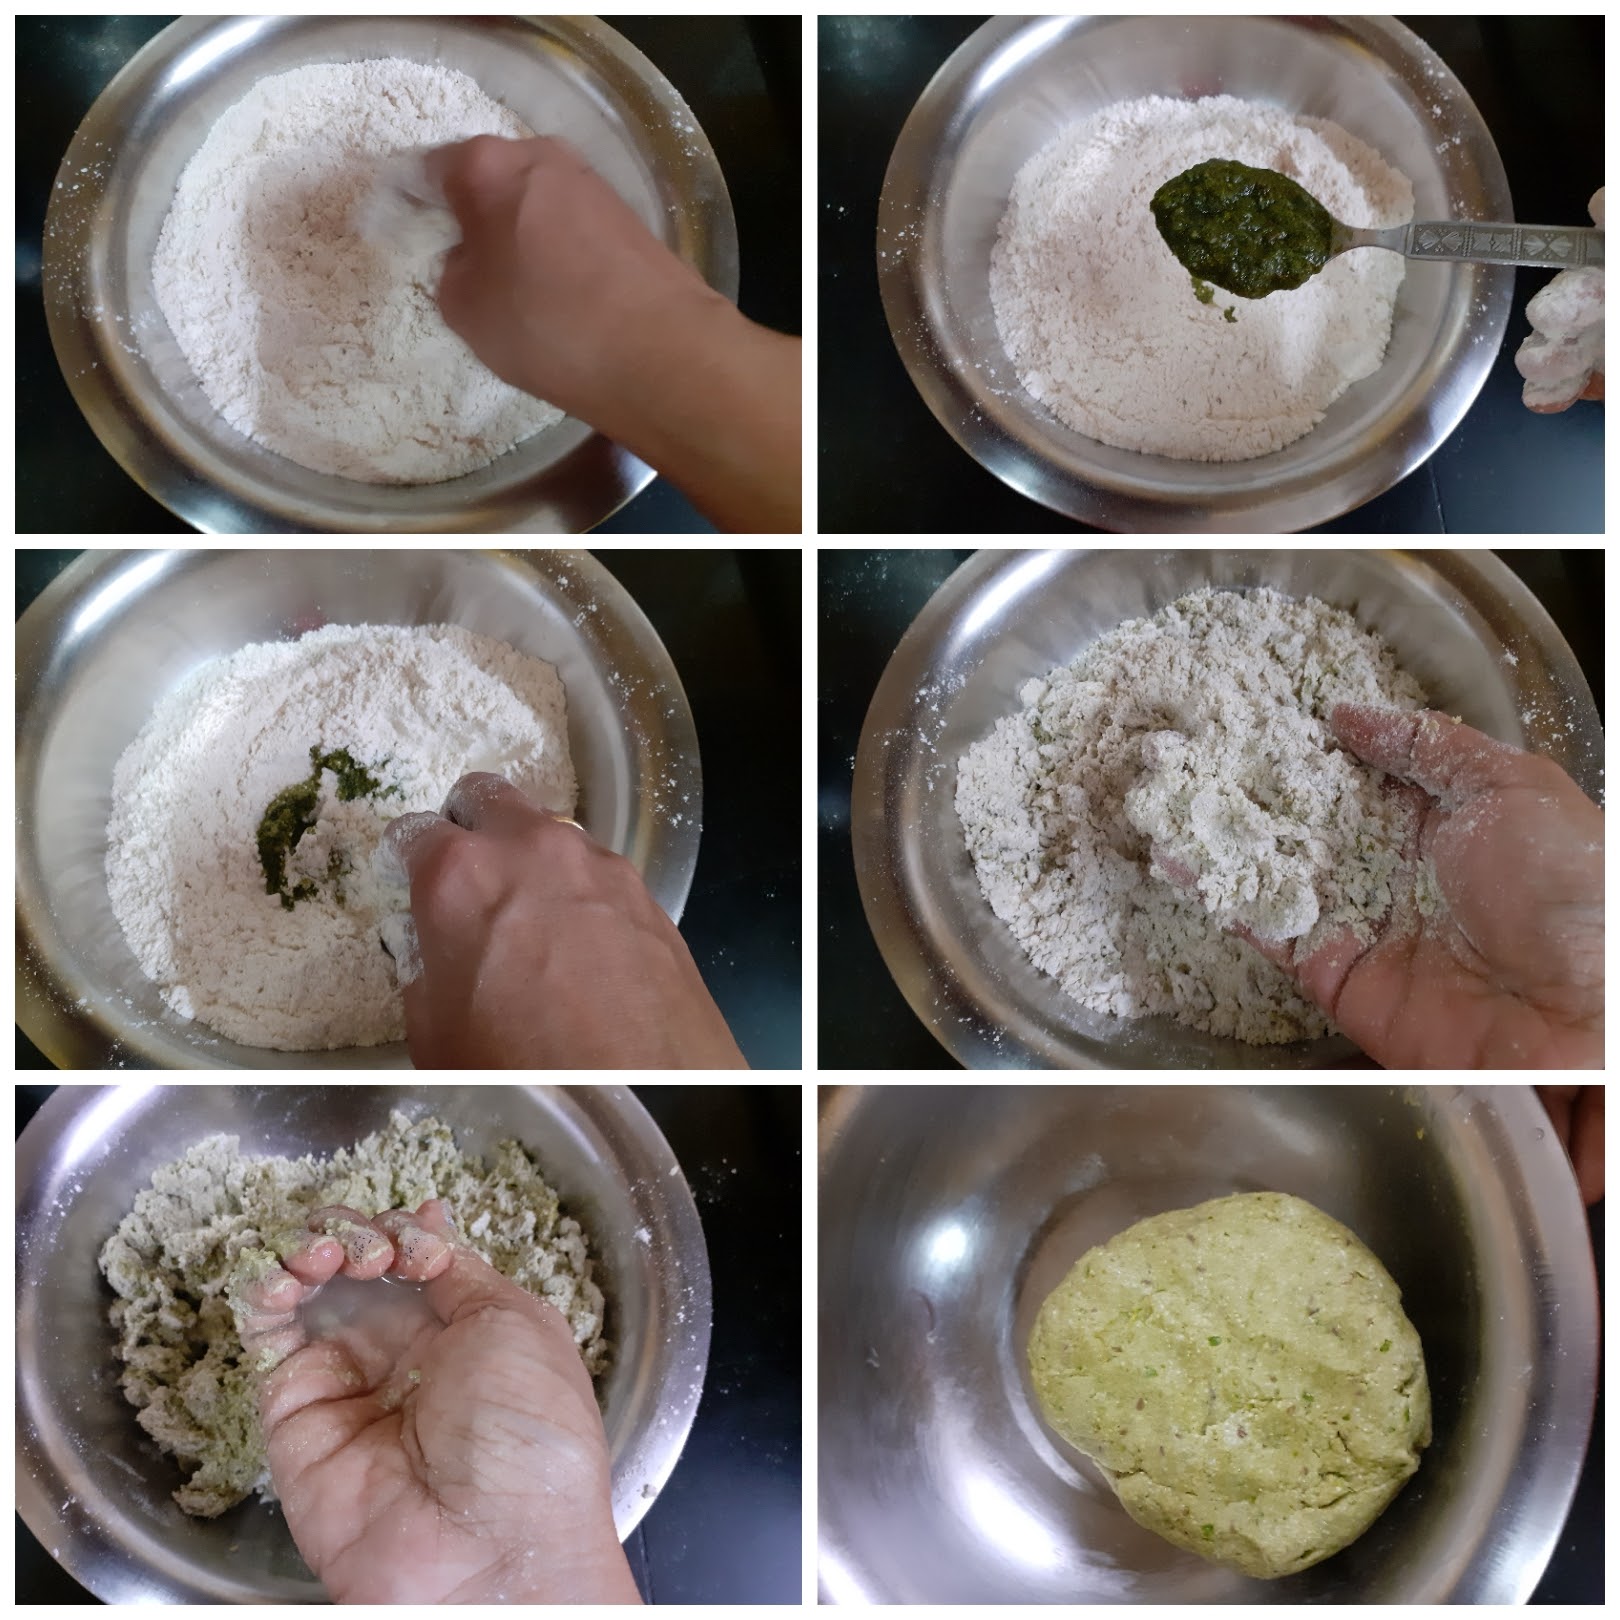
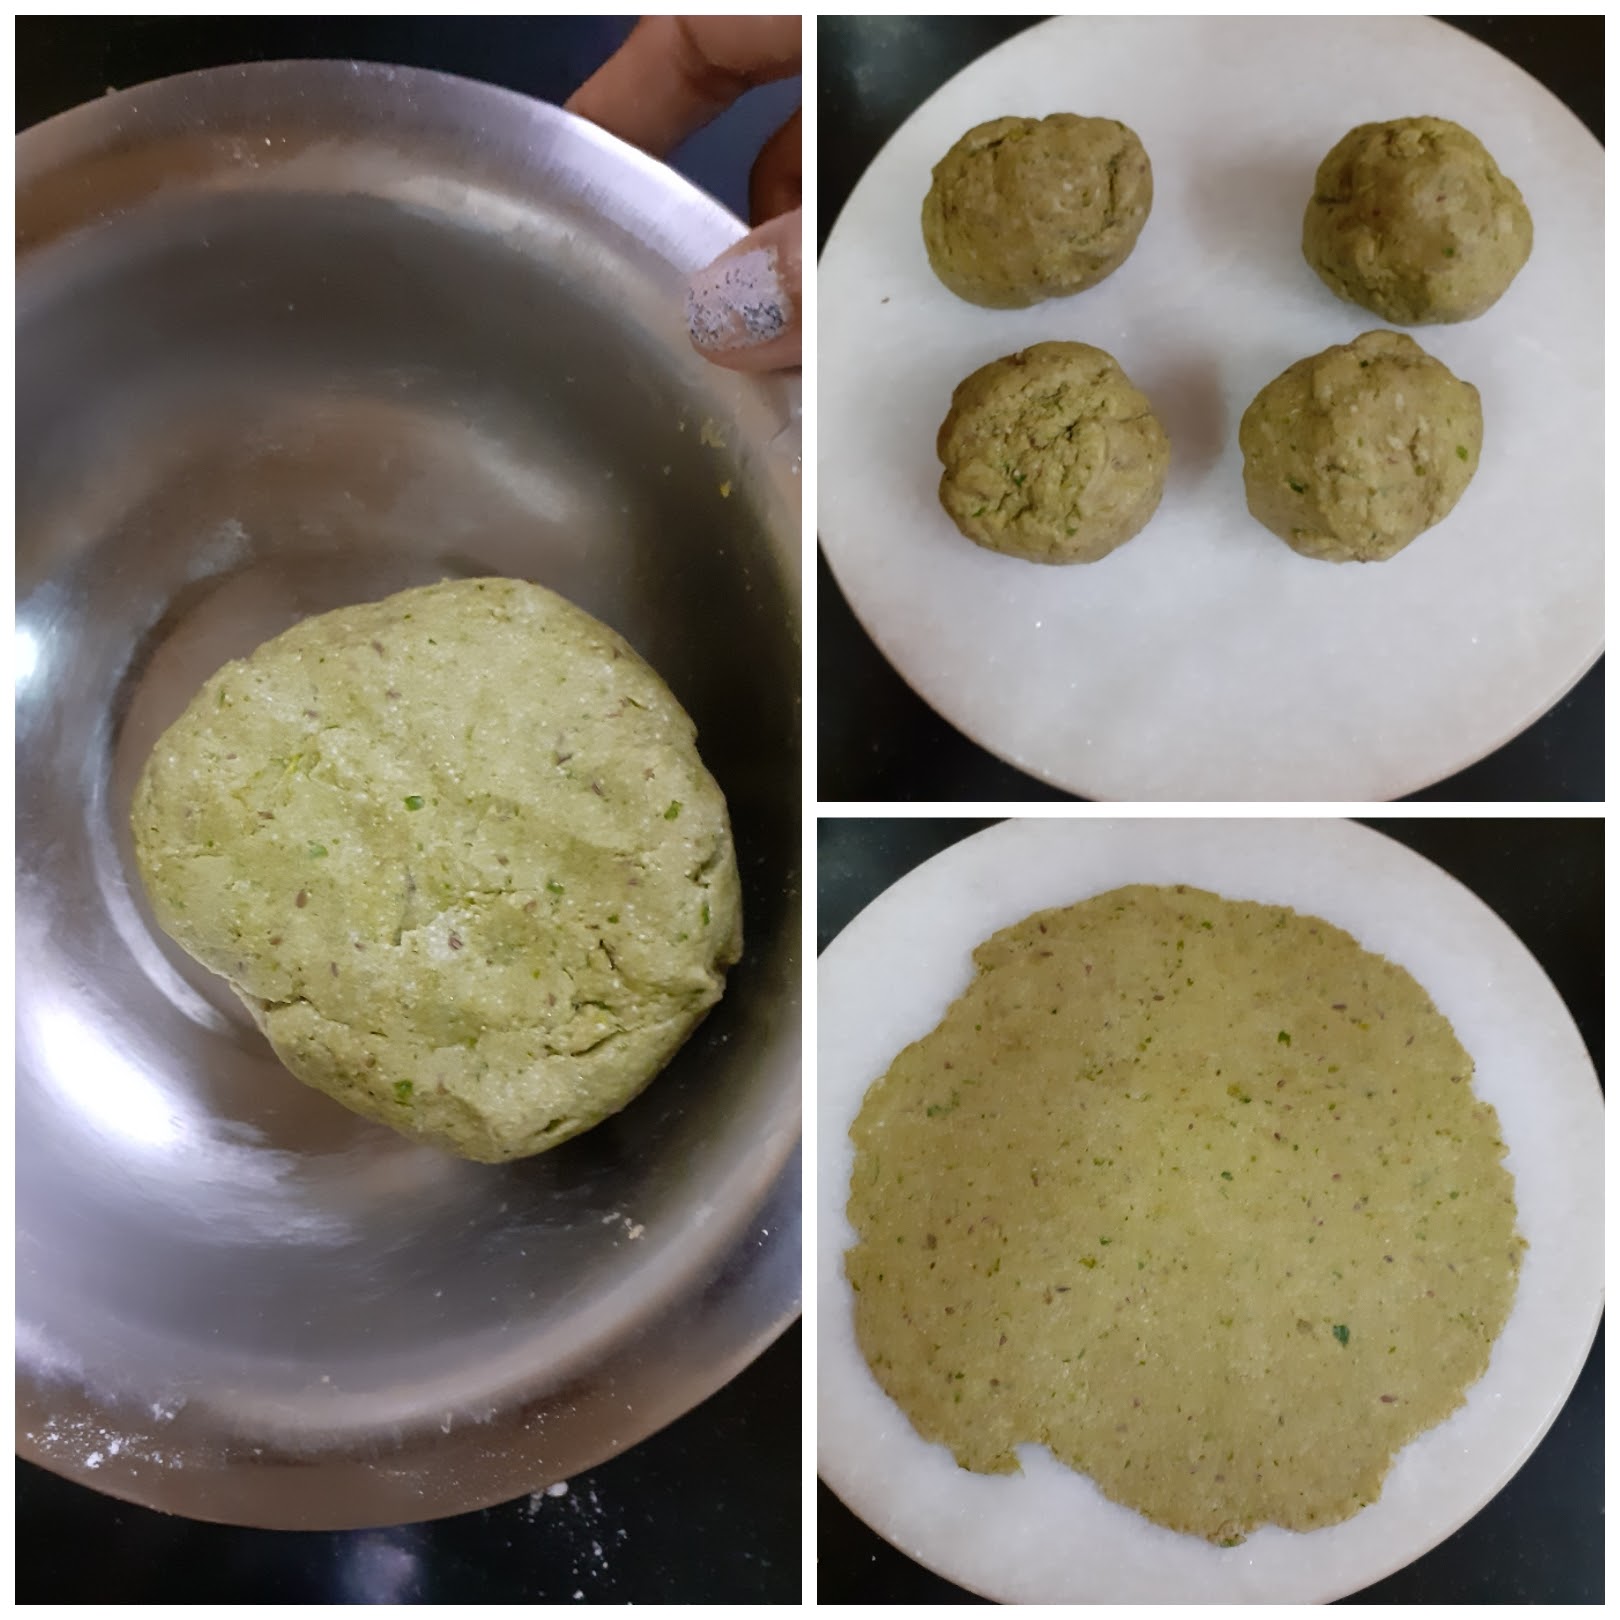
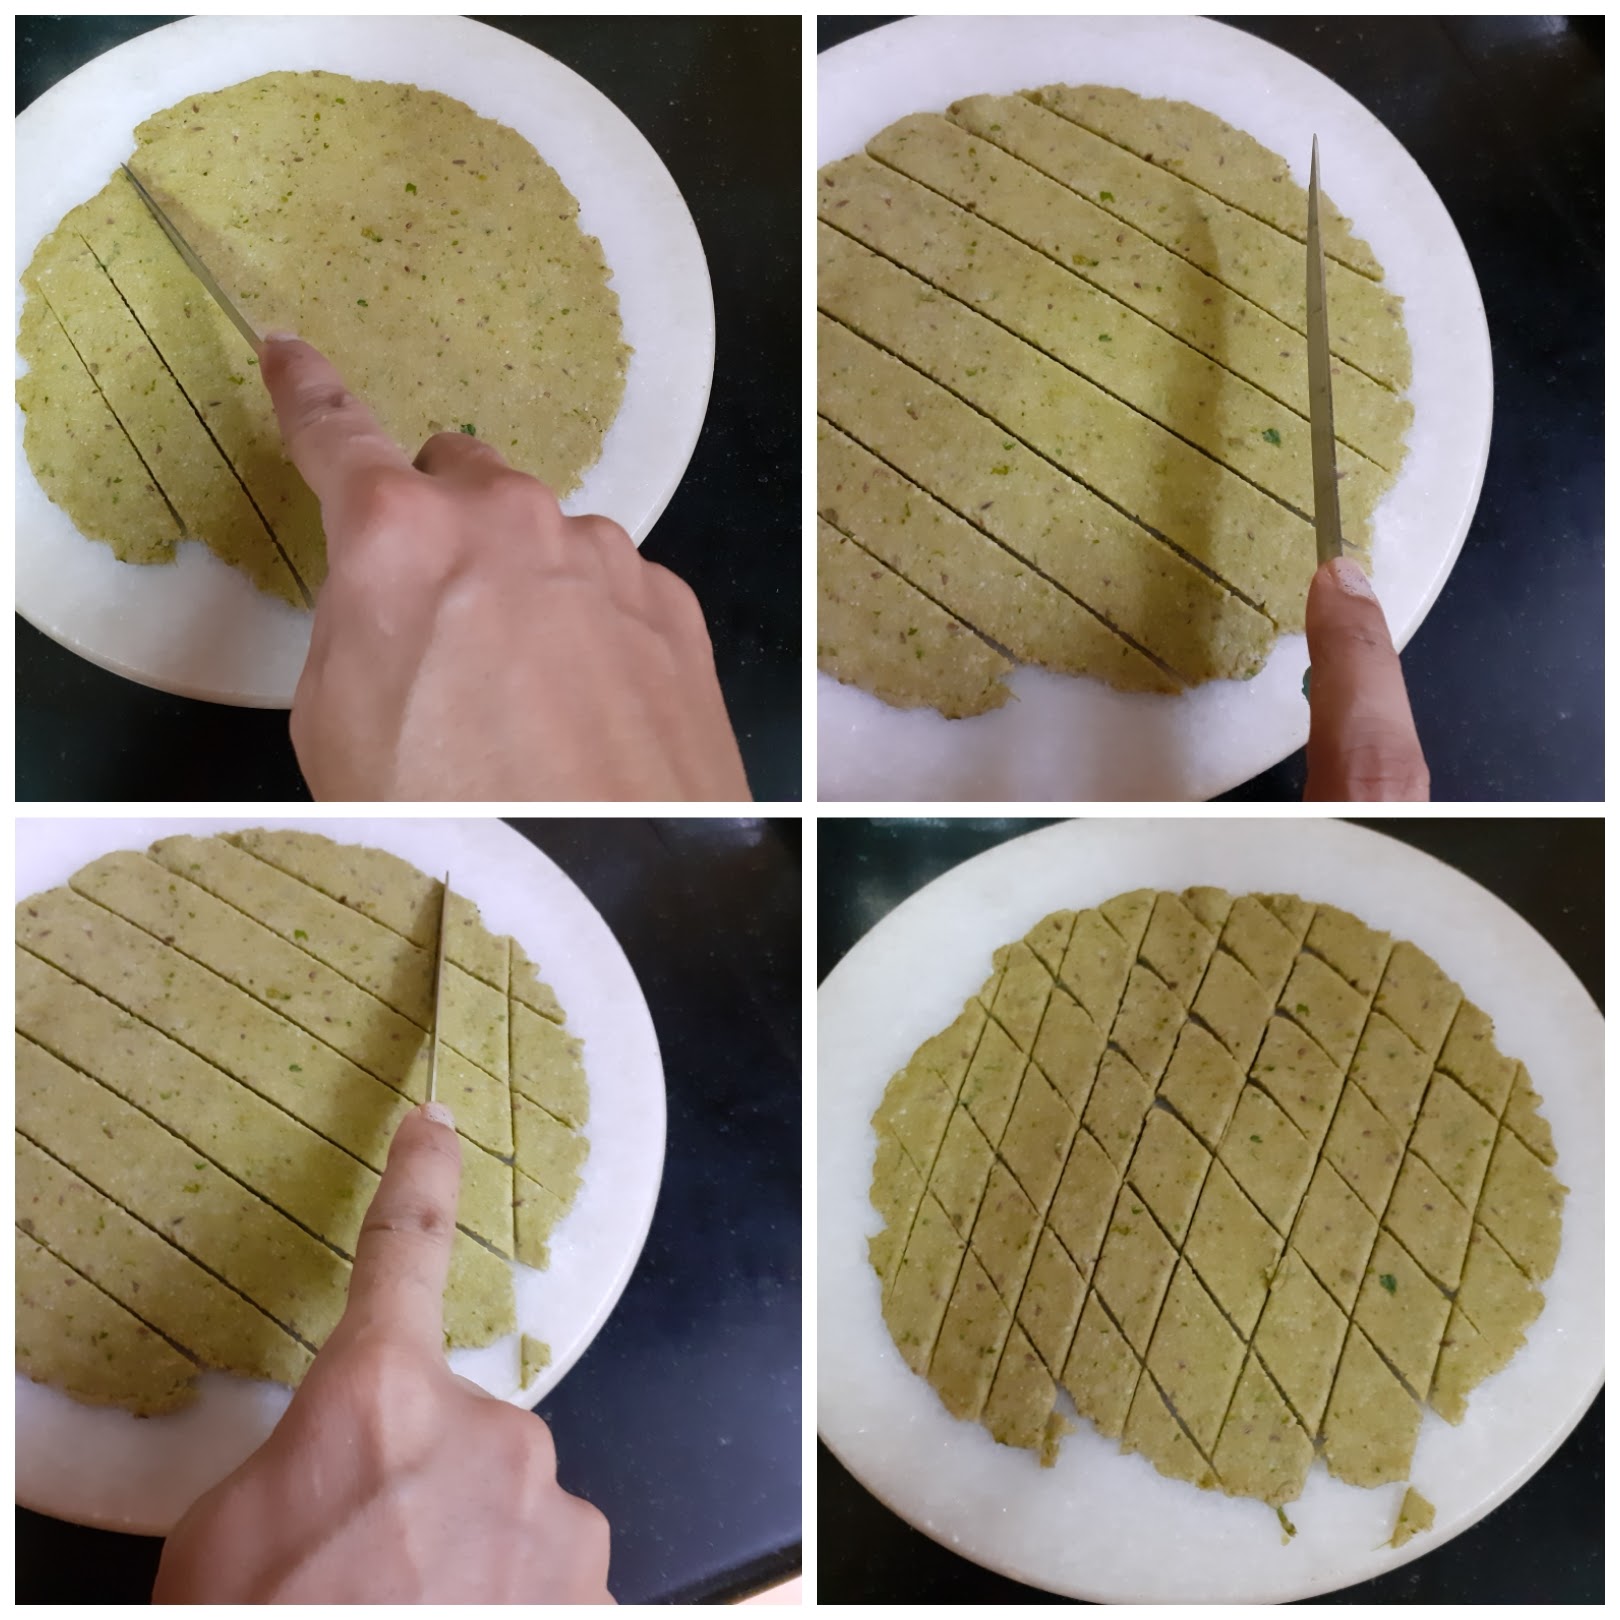
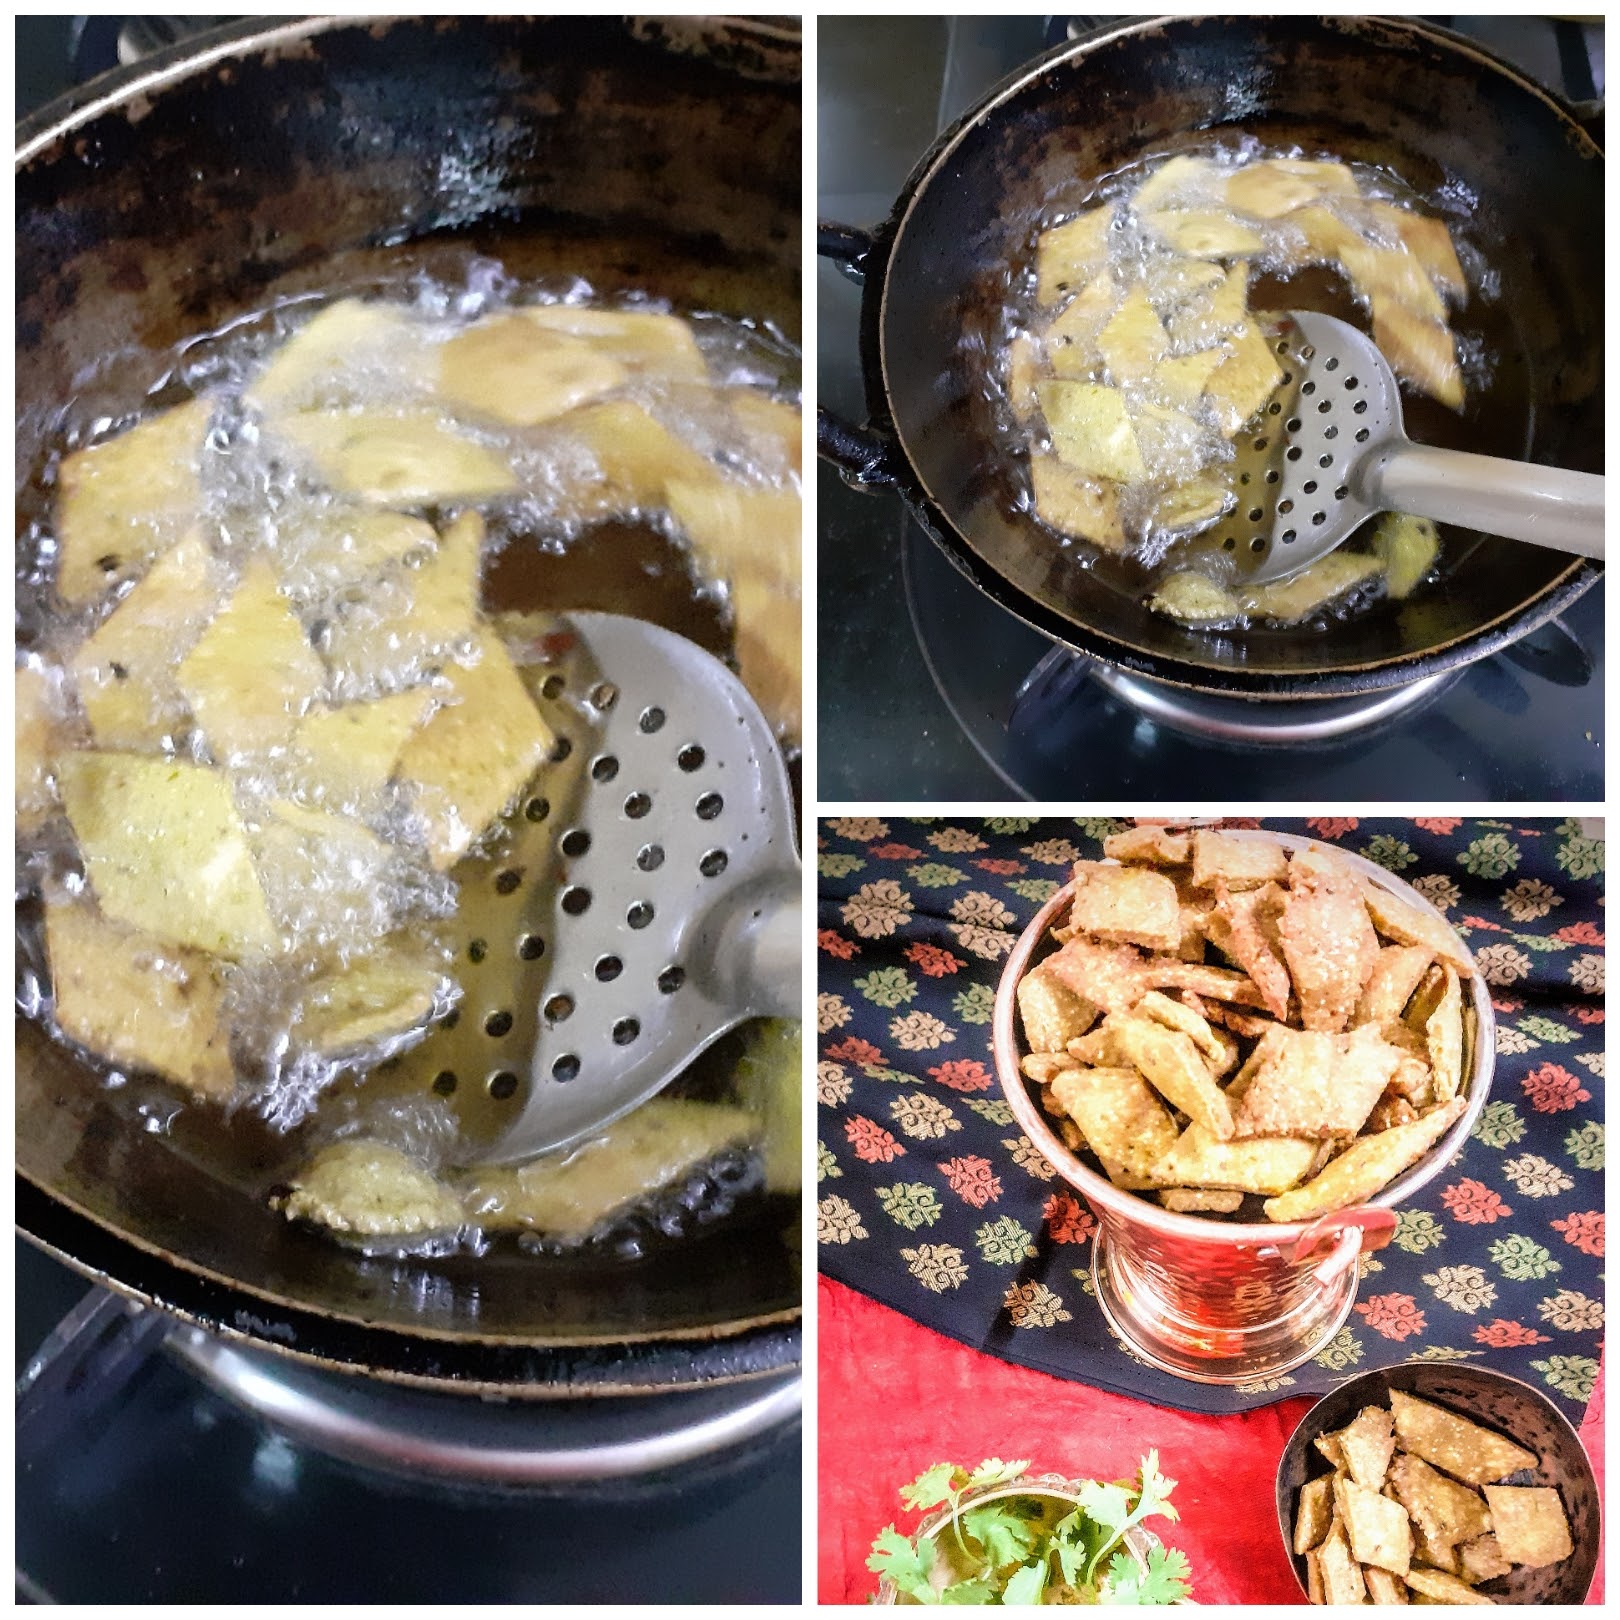
If you tried this recipe and liked it please comment below. I would love to hear from you. If you have a query about the recipe email us and ill respond as soon as I can.
Ratlami Sev
Usually every Diwali I make the usual Omapodi( sev) , Tenkozhal and Ribbon Pakoda. This time I have tried something different. This is called the Ratlami Sev and though we get it at the sweet shops and some brands also market it, I have never tried making it at home. The credit to this recipe goes to @indiankhana.net , where I found this while browsing for something new.
This is a simple recipe( oh yes, I mostly pick simple, as that’s what we all want). Very similar to the Kara Sev of South India, but different in taste because of the masalas used and the Ratlami Sev does not have rice flour, while the Kara Sev does.
This savory gets its name from a place in Madhya Pradesh, India, called Ratlam, where it is famous. As I mentioned it is a quick recipe and difficult to resist munching.
While you are here checkout my other Diwali Sweet and Savoury recipes like Maa Ladoo, Thattai, Gajar Halwa Barfi, Masala wheat flour Papdis, Baked Samosa pie, and more…
Here is the recipe of Ratlami Sev
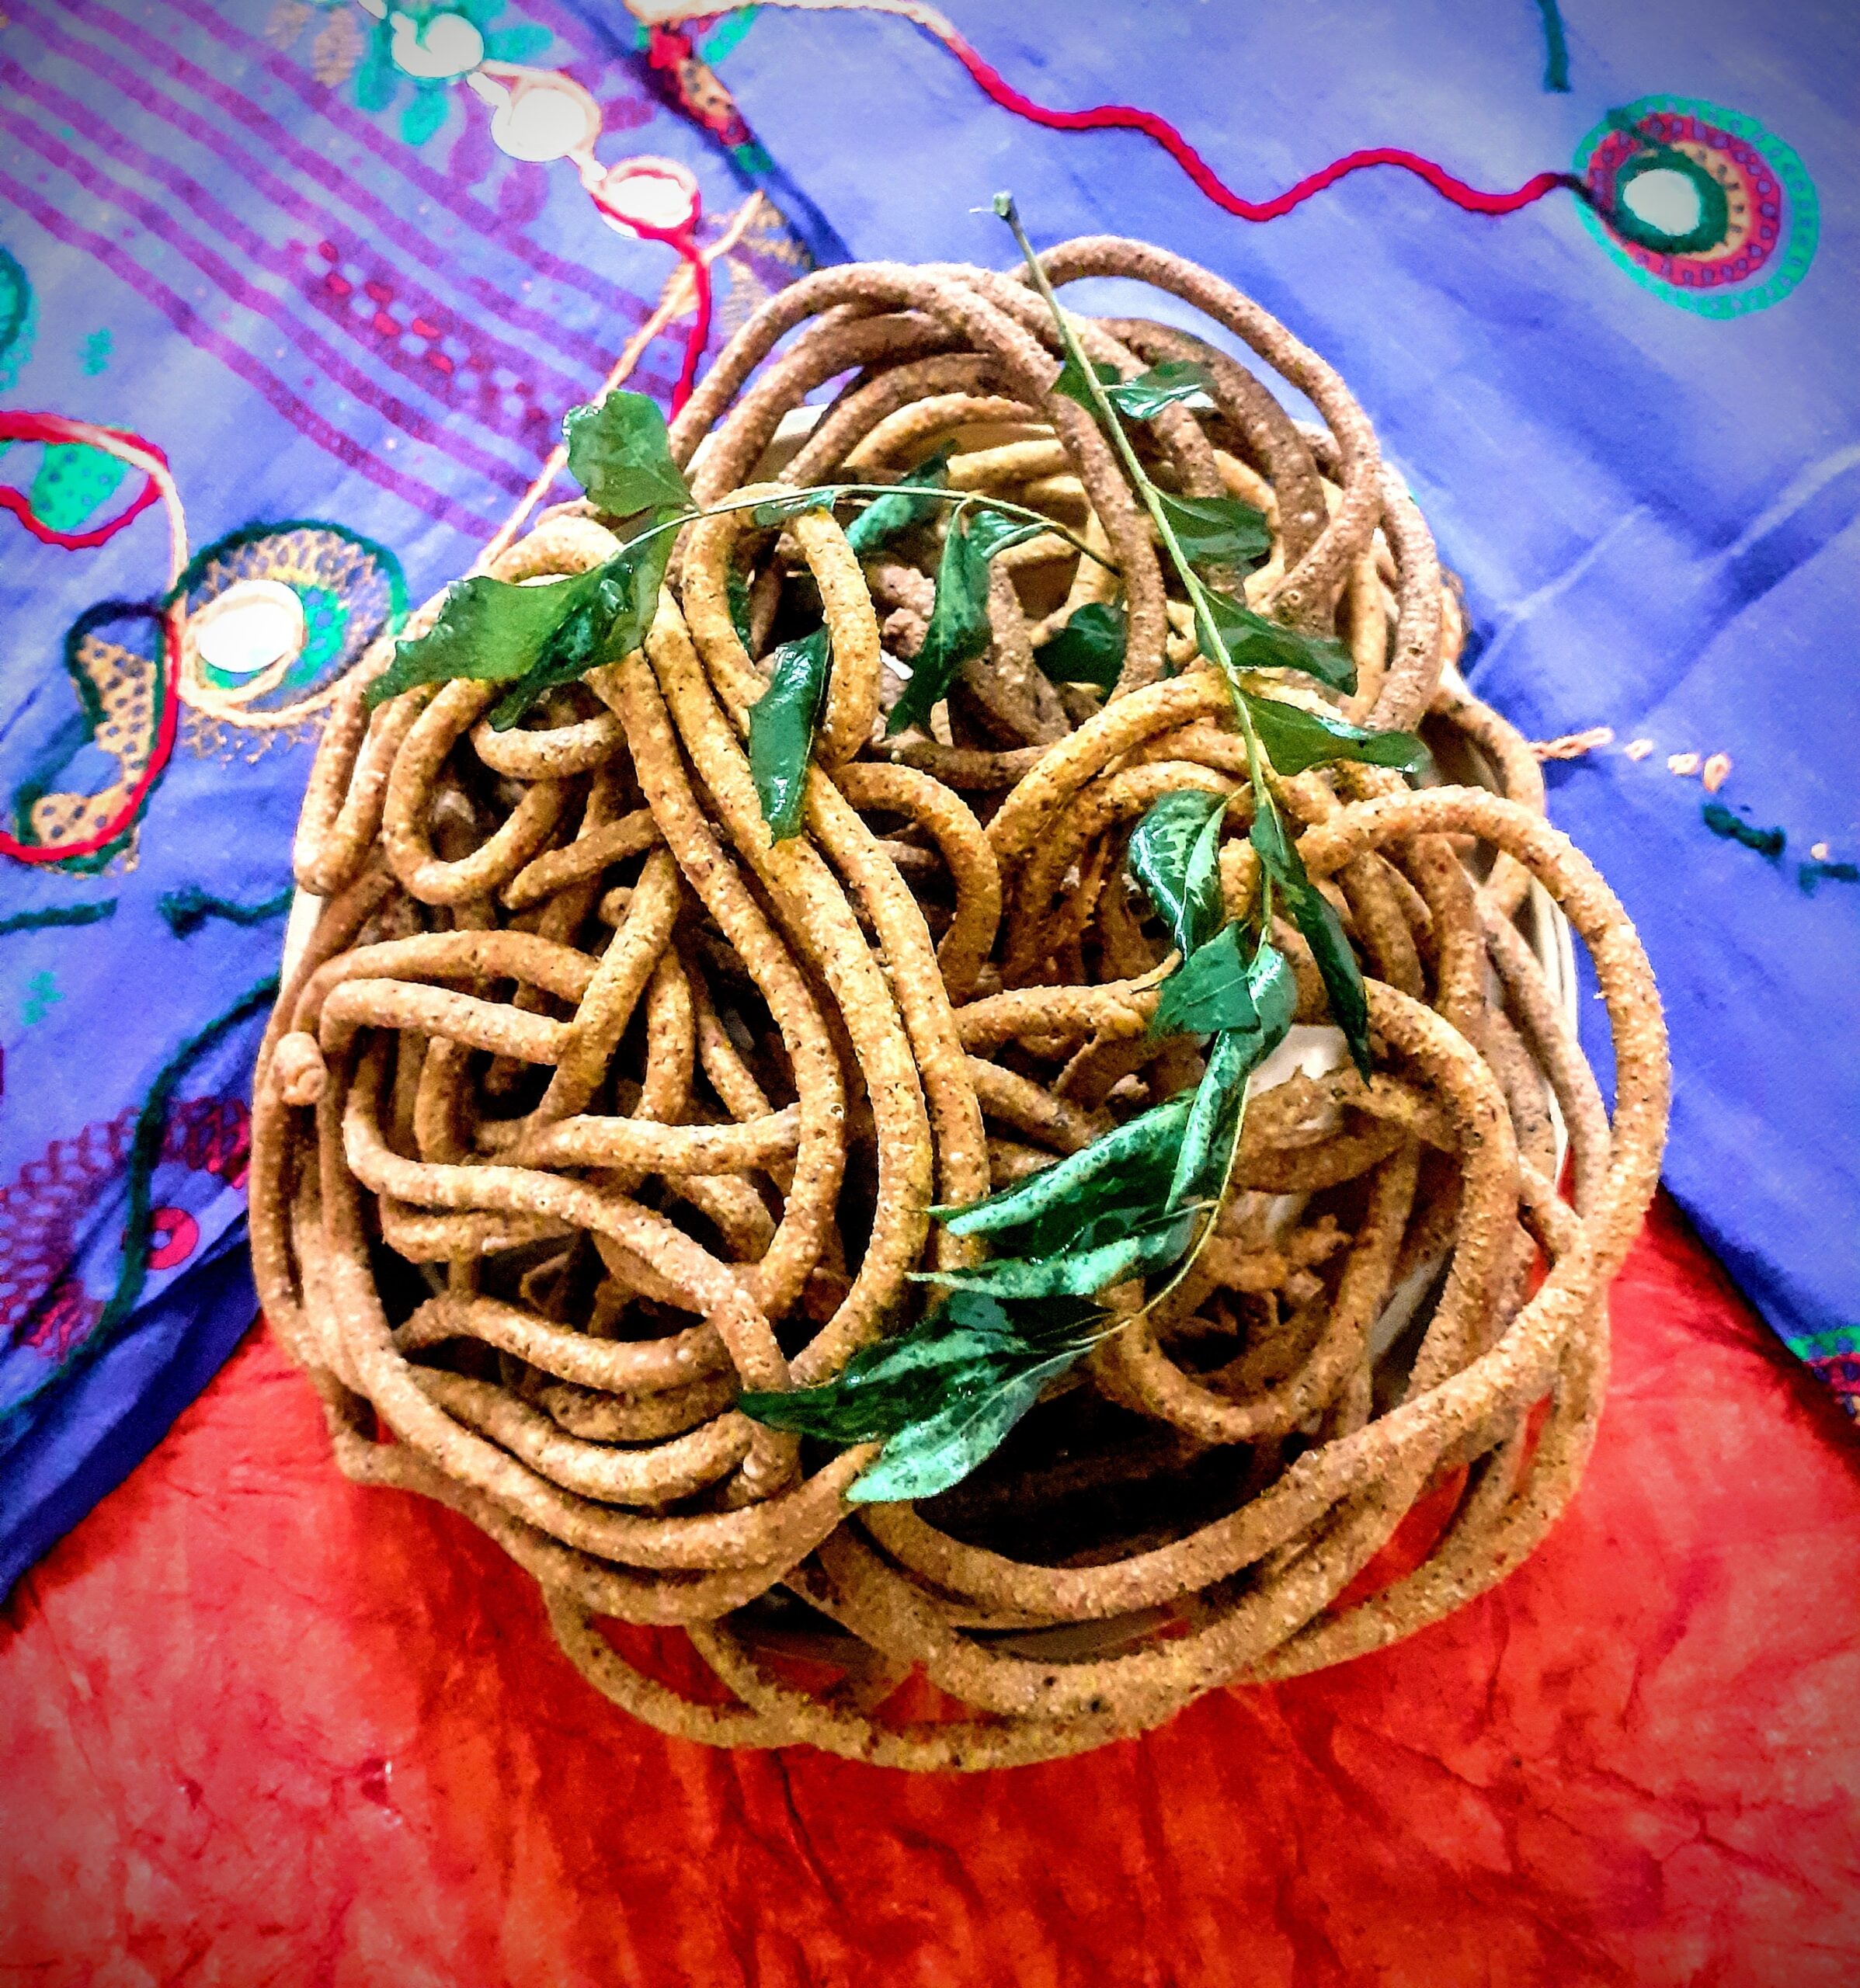
Ingredients:
Besan/ chickpea flour 1 cup
Cooking Soda 1 pinch
Hot oil 3 tbsp
Salt as required
Red chilli powder 3/4 to 1 tsp depending on taste
Turmeric powder 1/2 tsp
Clove powder 1/4 tsp
Fennel powder 1/4 tsp
Pepper powder 1/4 tsp
Ginger powder 1/4tsp
Black salt 1/4 tsp
Cinnamon powder 1/4 tsp
Ajwain powder 1/4 tsp
Roasted Cumin powder 1/2 tsp
Asafoetida 1/2 tsp
Dry ginger powder 1/4 tsp
Lemon juice 2 tsp
Oil for deep frying
Directions:
In a mixing bowl take the Besan/ Chickpea flour. To it add Salt, red chilli powder, turmeric powder and all the other powders like clove, fennel, cinnamon, Ajwain/ carrot seeds, black salt and asafoetida , cooking soda,and 2 tsp of lemon juice. To this add 3 tbsp of hot oil and mix nicely with a spoon( as the oil will be hot), when it turns warm mix nicely with your fingers to form a crumbly mixture. Now adding water 1 tbsp at a time make a soft but stiff dough. Heat oil in a Karahi for deep frying. Grease the Chakli/ Muruku press with oil and put in a little dough into it and squeeze into the oil when it is hot. Oil should be medium hot. Fry on medium heat, until the bubbles subside and the Sev turns a golden brown. Repeat for the whole mixture. The spicy and flavorful Ratlami Sev is ready.
I have combined the Cinnamon Powder, pepper powder, Roasted cumin powder, dry ginger powder, fennel powder, clove powder, Ajwain powder, and black salt, in the given measures and made it as a single powder, and am calling it the Ratlami spice mix.
Some of these powders we might not have at home readily, for which one can roast 1 tsp of all the given ingredients under Ratlami spice mix as a whole and powder them. Use 1 to 1.5 tsp of this for the recipe.
STEPWISE RECIPE FOLLOWS:
1. In a mixing bowl take the Besan/ Chickpea flour. To it add salt, red chilli powder, turmeric powder, and Ratlami spice mix( refer paragraph above). Also, add the asafoetida, Cooking soda, and 2 tsp lemon juice. (I forgot to add salt in the beginning and have added towards the end as you will see in one of the pictures).
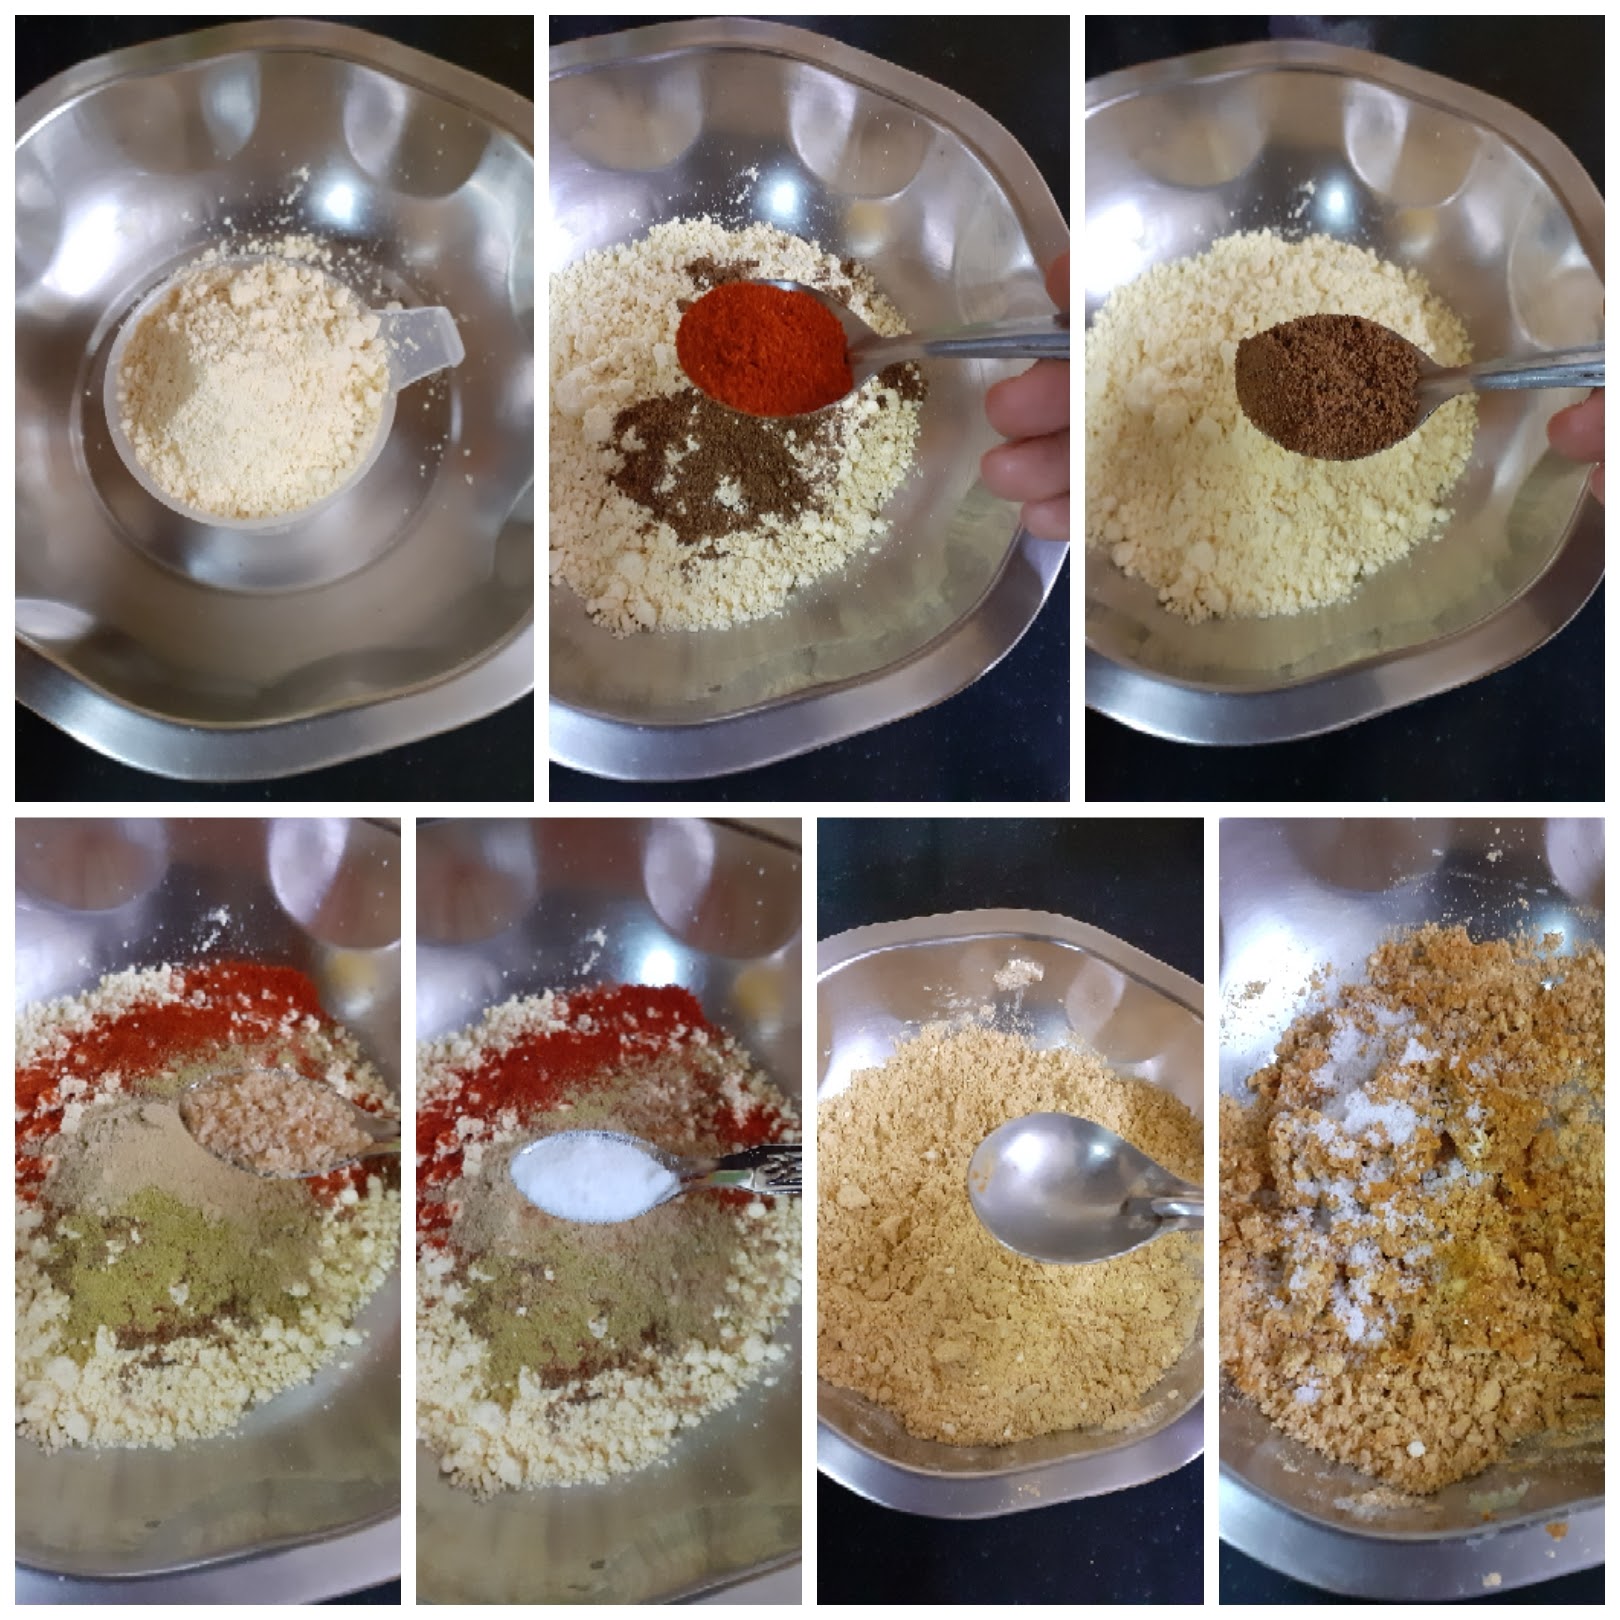
2. Now heat 3 tbsp oil in a Kadai ( heat it well, but don’t turn it smoky) and pour it into the Besan and spice mixture. Using a spoon combine well(do not use your hand now as the oil is hot).
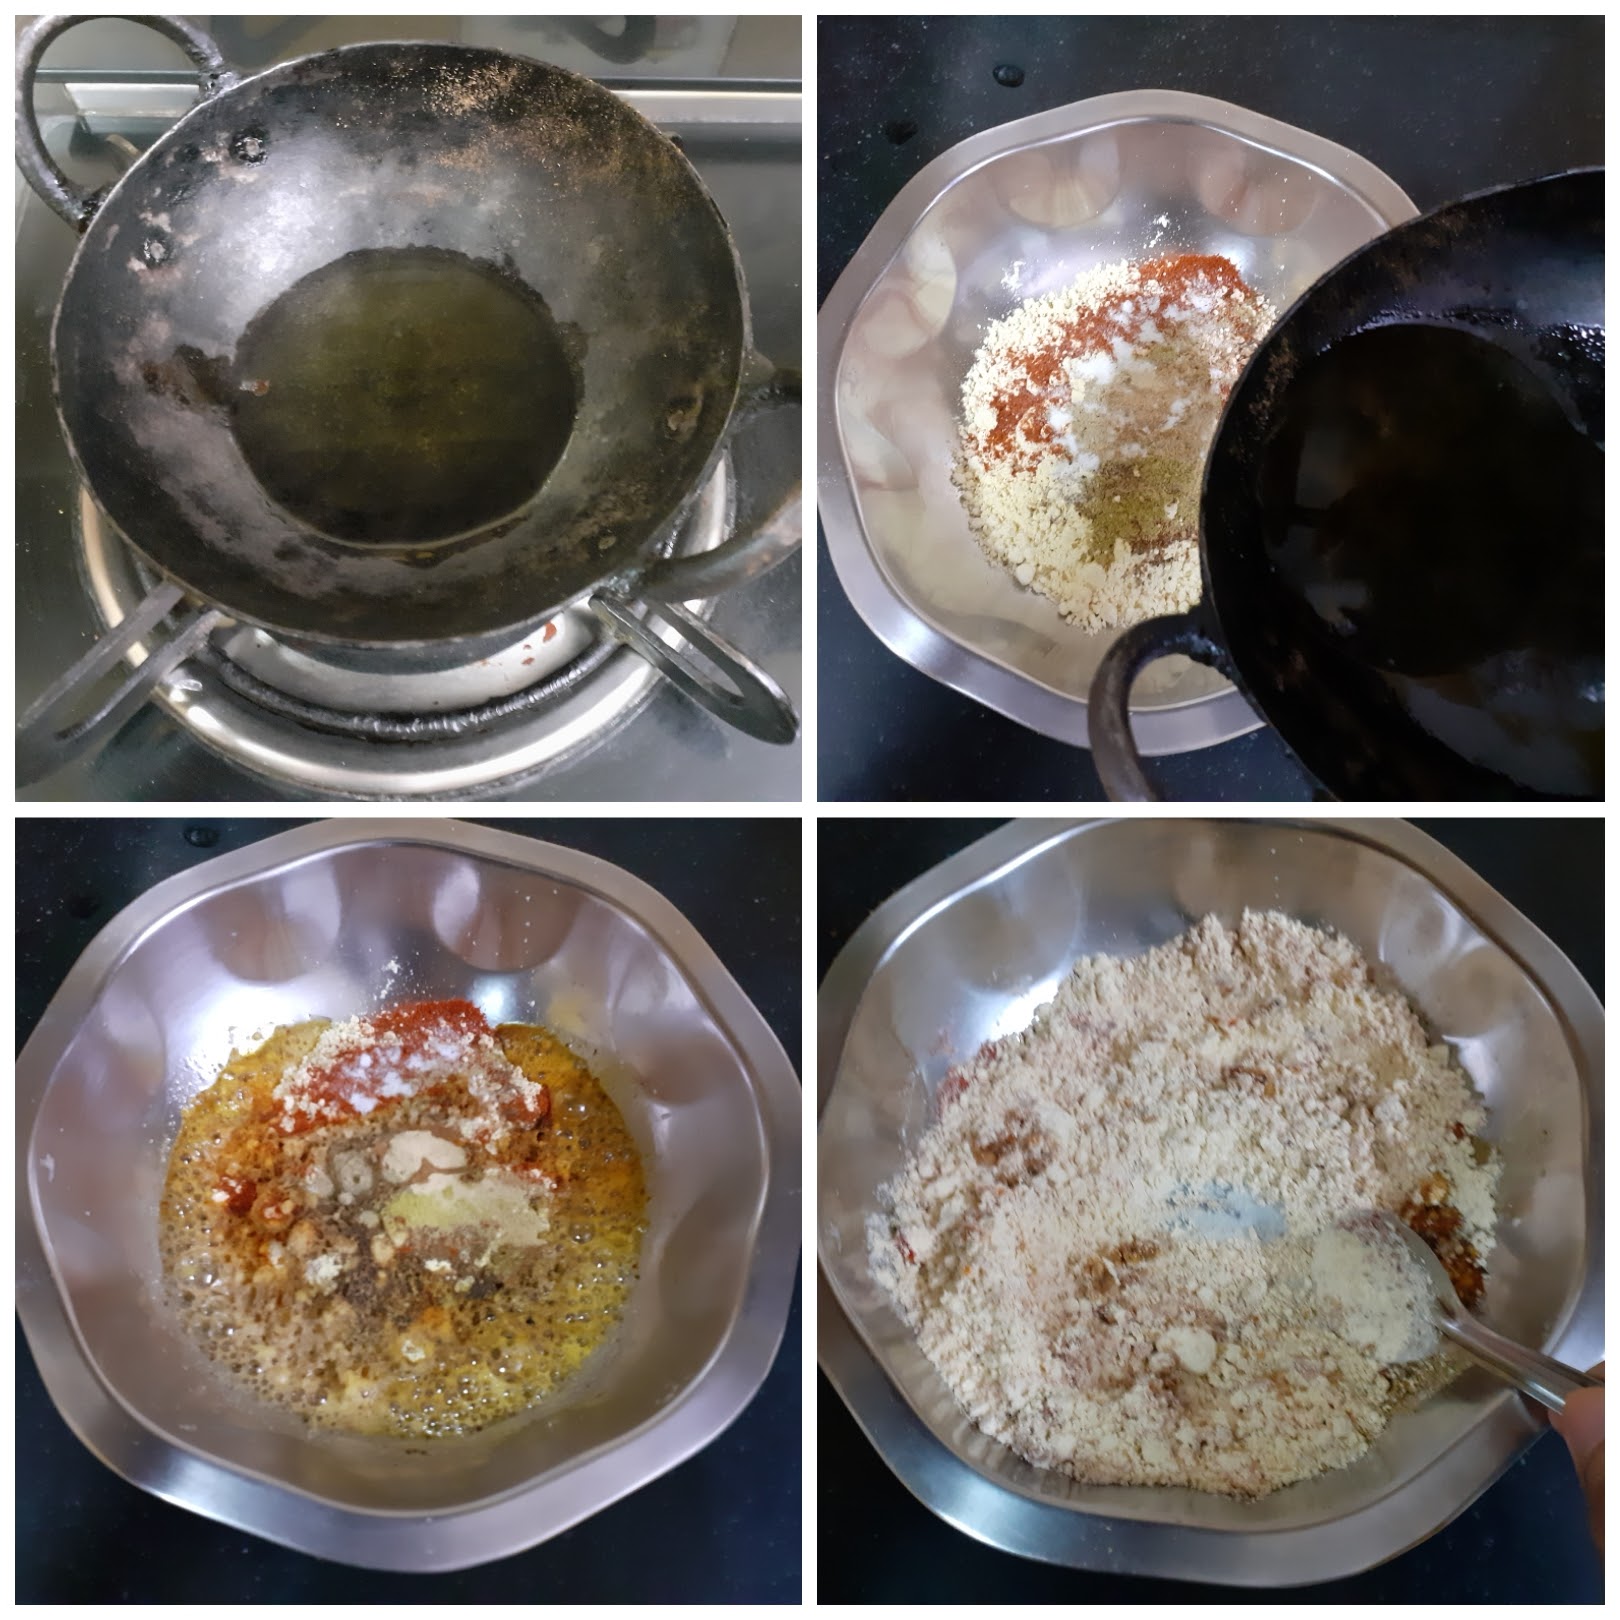
3. After it turns a little warm, using your fingers nicely mix the mixture until it turns crumbly. Now adding water one tablespoon at a time start combining it to form a soft but stiff dough. We want a dough that is easy to squeeze through, but also stiff enough to retain shape. I used about 3 tbsp water to make my dough.
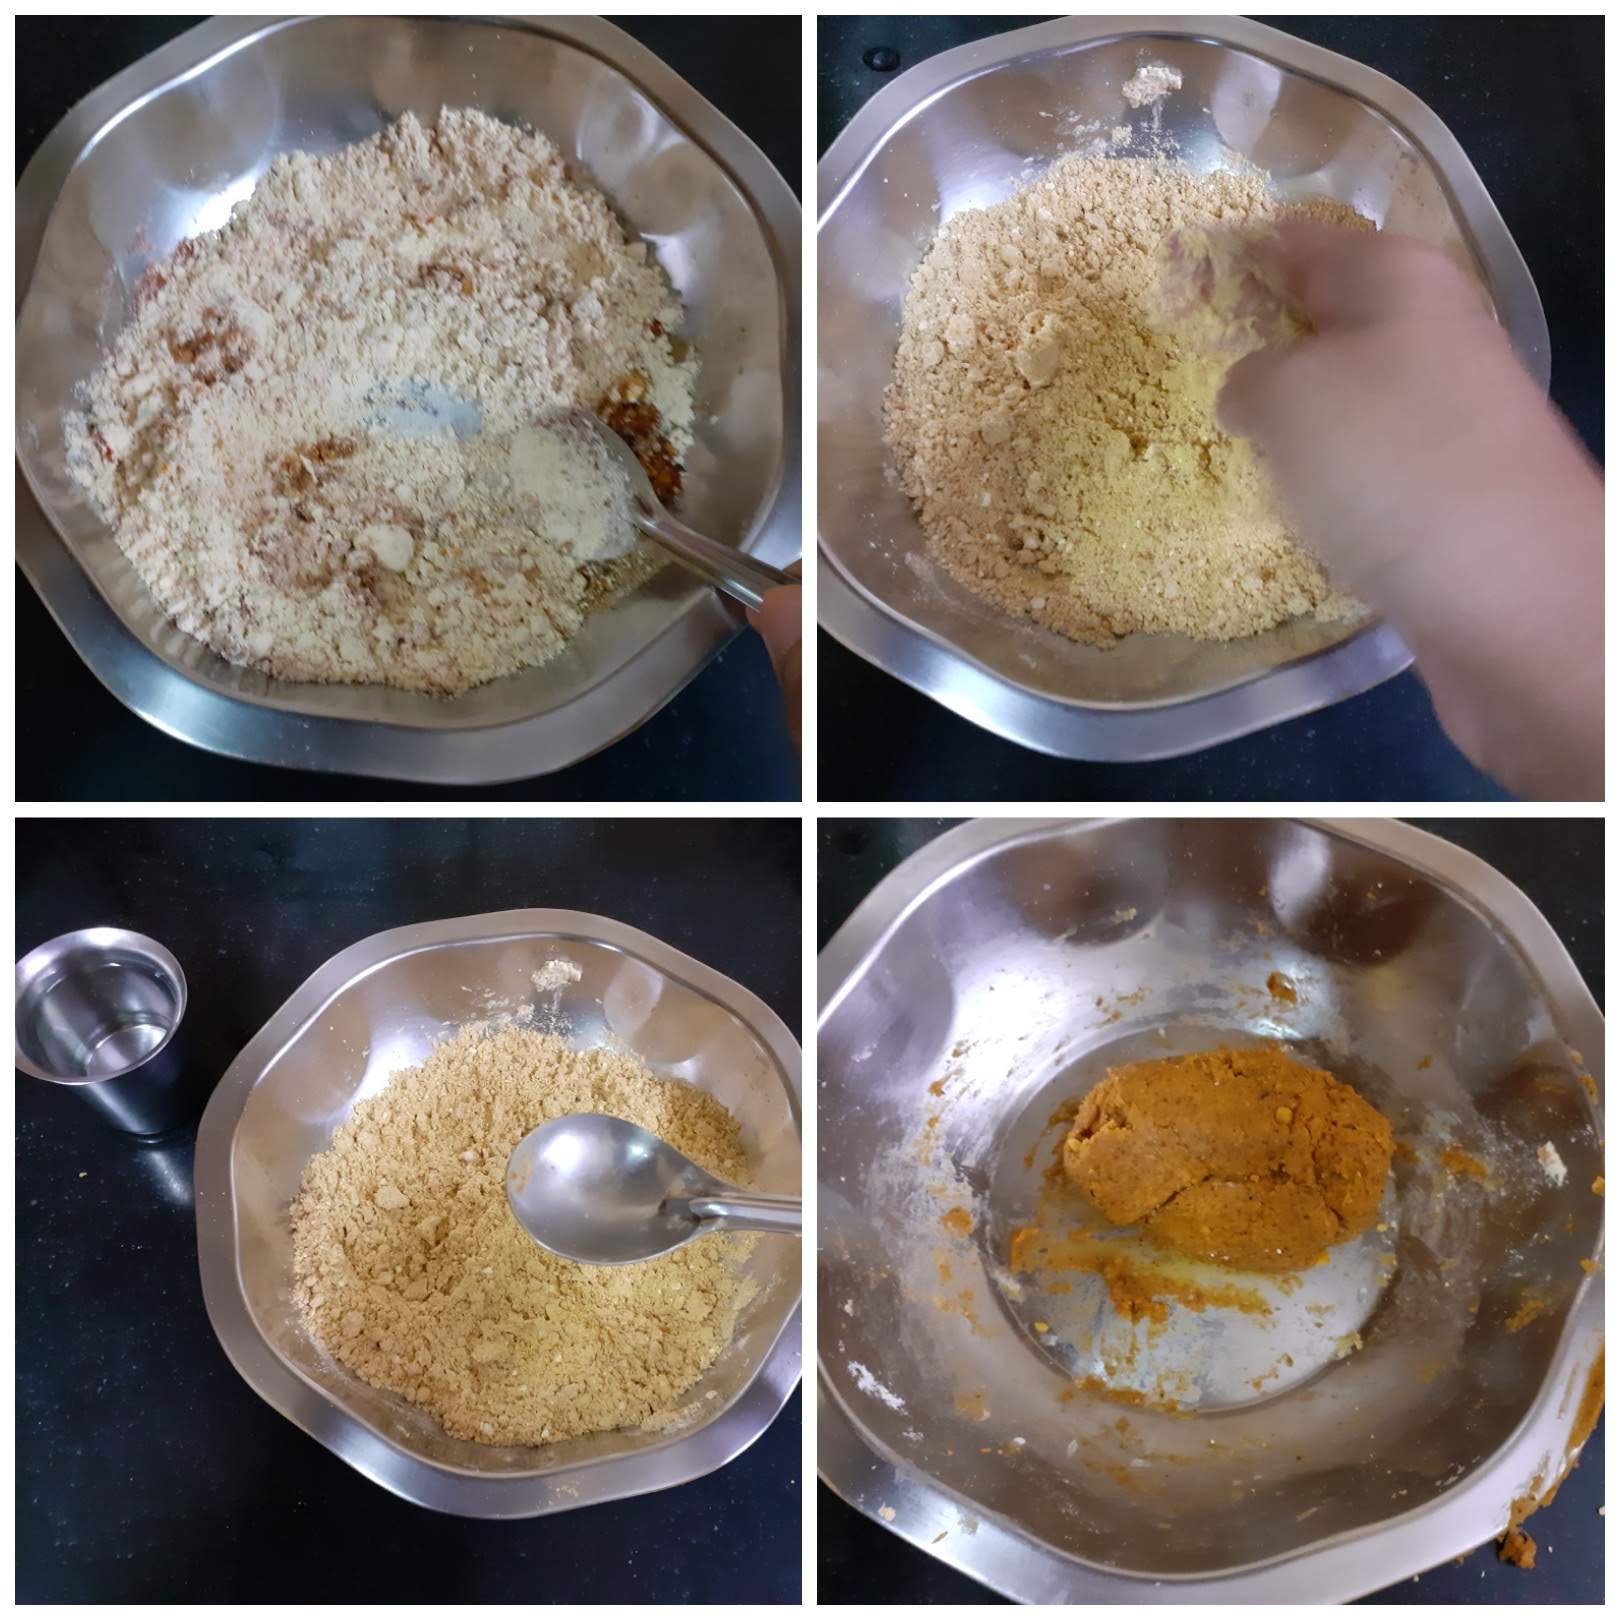
4. Heat oil for deep frying on medium-high. Grease the Chakli/ Muruku press with oil and put in a little dough into it and squeeze into the oil when it is hot. Oil should be medium hot. Fry on medium heat, until the bubbles subside and the Sev turns a golden brown. Repeat for the whole mixture. The tasty and spicy Ratlami Sev is ready.
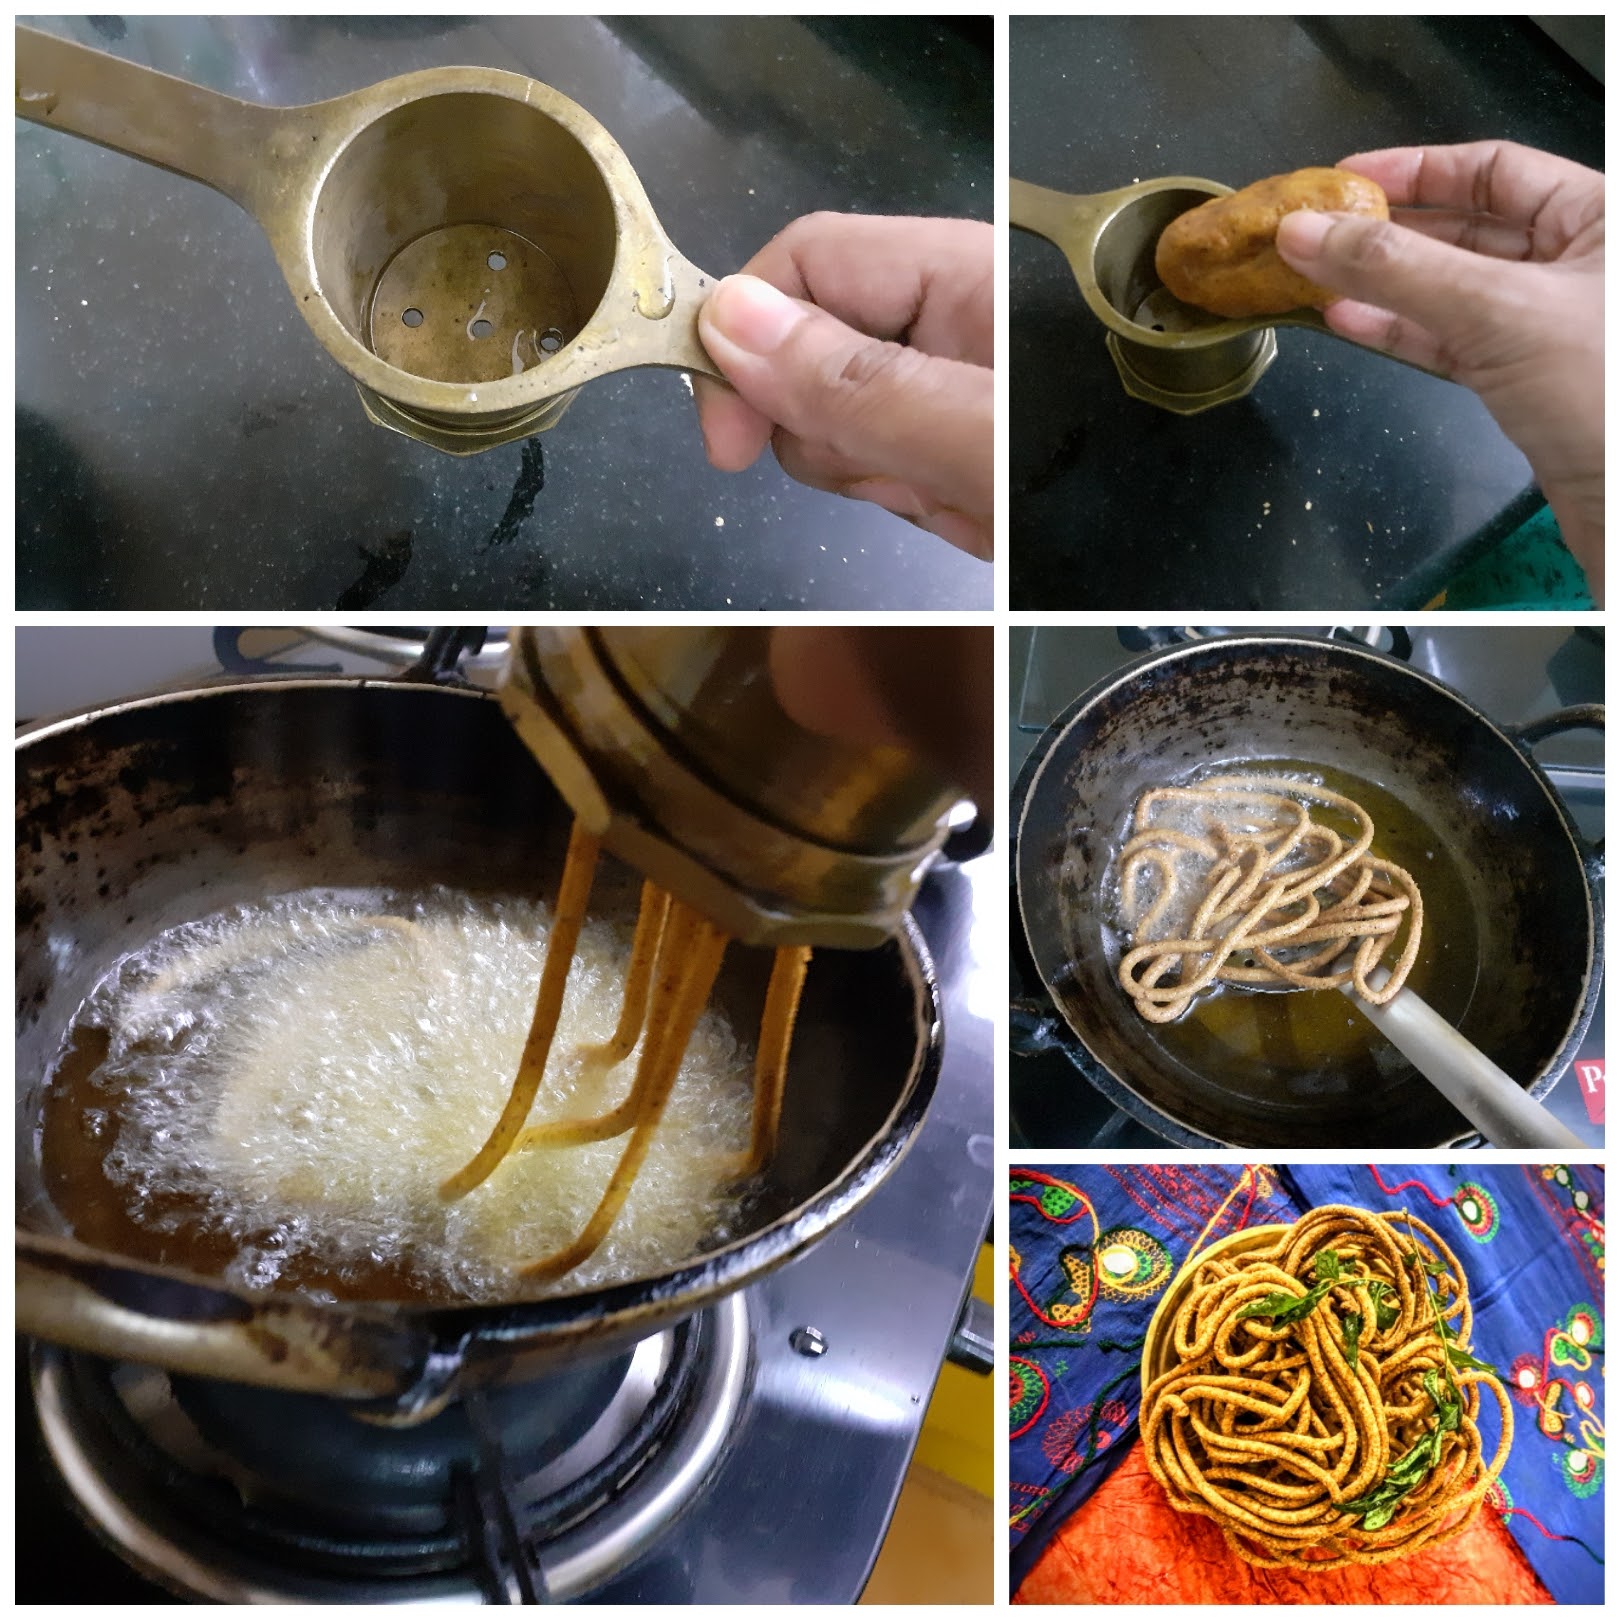
NOTES:
1. Some of these powders we might not have at home readily, for which one can roast 1 tsp of all the given ingredients under Ratlami spice mix as a whole and powder them. Use 1 to 1.5 tsp of this for the recipe.
2. I used 3 tbsp water, one can use more as required as different qualities of Besan absorb water differently.
3. Take care not to use your fingers as soon as you pour hot oil in the mix. Let it become warm and then use your fingers to combine.
If you tried this recipe and liked it please comment below. I would love to hear from you. If you have a query about the recipe email us and ill respond as soon as I can.
Red Poha Ladoo (Red Aval Ladoo)
Poha is my go-to food many times during the week. Sometimes as breakfast and sometimes as dinner and, sometimes as a quick dessert or as a simple prasad. I like the fact that this humble ingredient is so versatile allowing us to create so many dishes from it. The Poha can even go into the Idli batter to make the Idlis soft and into the Dosa batter to make super crisp Dosas.
Diwali for me is about feasting consciously. There are loads of sweets that can be made with less ghee like these Poha Ladoos. They need less sugar too, which makes them an ideal recipe for Diwali times. In this recipe, I have used the Red Poha that is available at all stores these days. These Poha/rice flakes are made from Red rice. Red rice does not undergo as much processing as regular rice. Therefore it is rich in fiber, Vitamin B, and minerals like Zinc, Iron, and Magnesium, making it a healthier choice. This Ladoo is easy to make and gets done within no time.
If you make these Ladoos don’t forget to tag us.
While you are here check out my other Poha recipes like –SweetPoha, Dahi Pohe(Mor Aval), Aval Kesari…
Here is the recipe of Red Poha Ladoo for you-
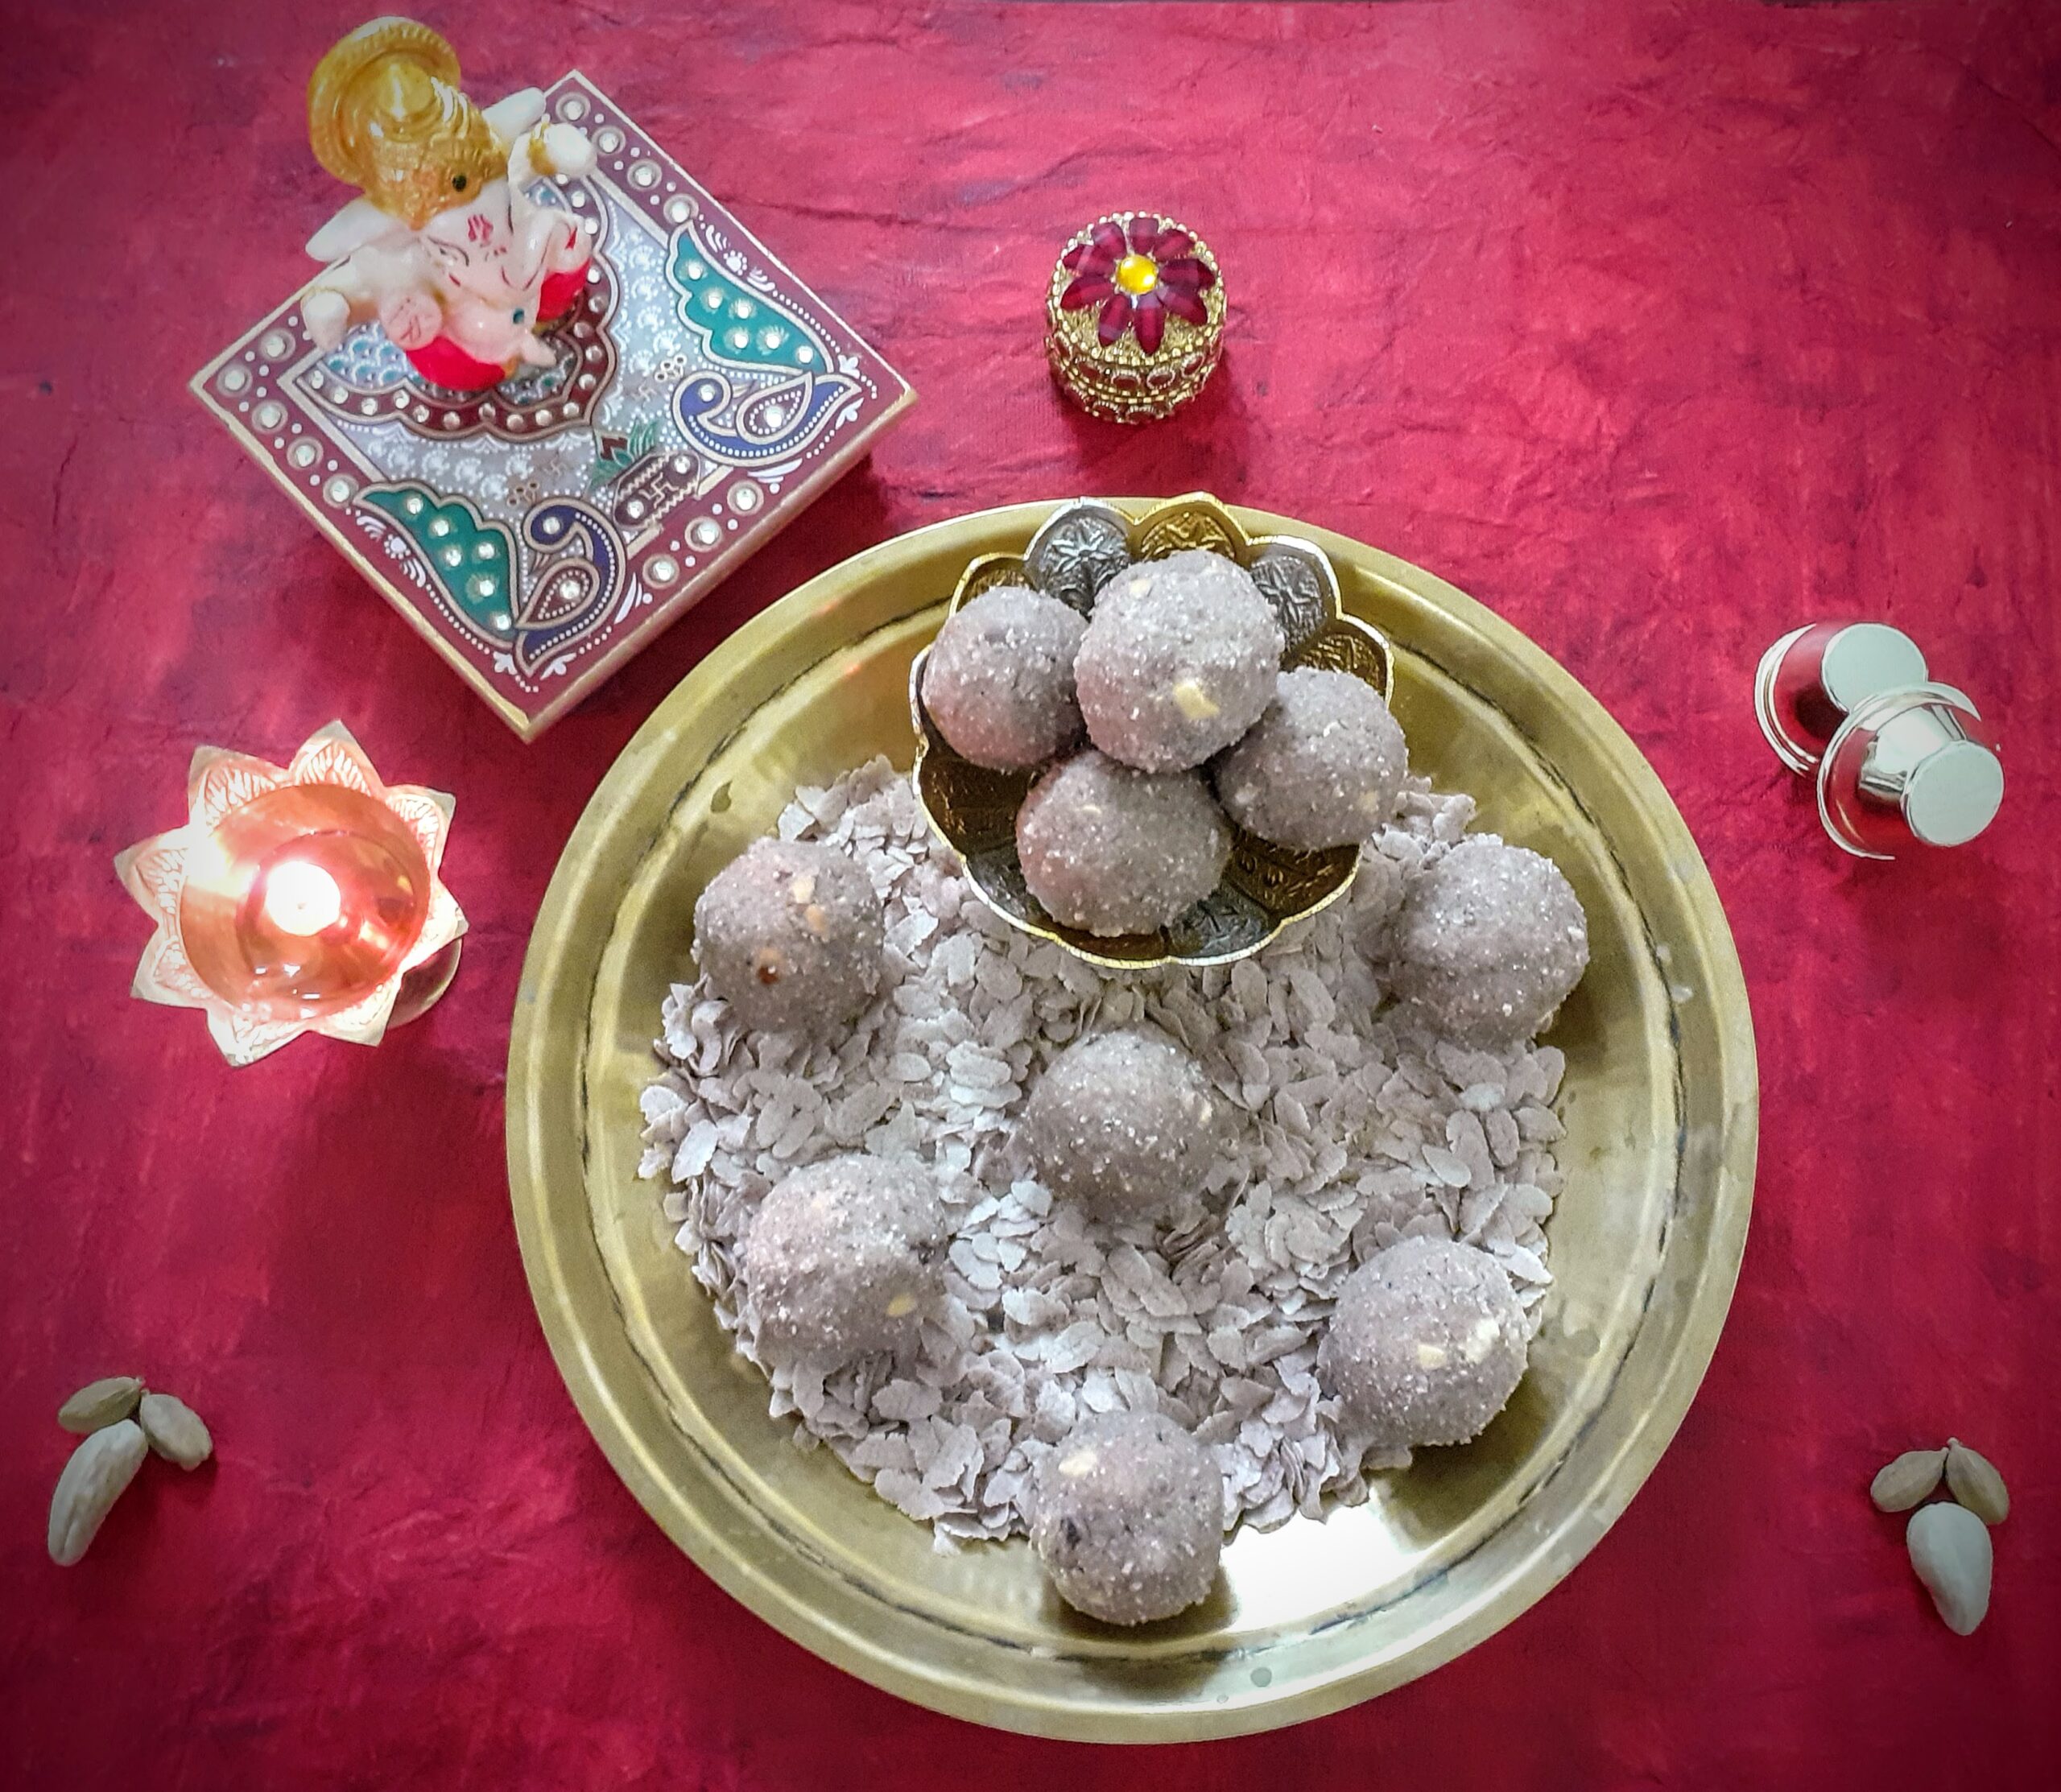
Ingredients:
Red Poha/Aval 2cups ( any measure of two cups is fine)
Sugar 3/4 to 1 cup powdered (depending on your preference)
Ghee 4 tbsp
Cashewnuts 6 to 7 broken to bits
Raisins(Kishmish) 6 to 7
Cardamom/Elaichi 5 to 6
Nutmeg/Jaiphal 1 tiny bit
Directions:
In a Kadai take 1 Tbsp ghee and heat. Add the Red Poha to the ghee and start roasting it, until they become crisp. Keep stirring continuously as we don’t want the Poha to turn brown, but to get crisp evenly. Once crisp, transfer to a plate and cool for a few minutes. Now in the blender jar take the sugar and add the cardamom and nutmeg to it and grind them to a fine powder. Transfer the sugar to a plate or vessel and in the same blender jar, grind the roasted Poha to a fine powder. Now transfer the Poha powder to a wide vessel, and add the powdered sugar to it. In a small Kadai take 1/2 tbsp ghee and fry the cashews and raisins until they turn a nice brown. Drop the fried nuts and raisins into the Poha and Sugar mixture. Now in the small Kadai warm(not heat) 3 tbsp ghee. The ghee should have melted and be warm( if your fingers can bear the heat, that is the right temperature for the ghee, be careful while testing, don’t scald your fingers). Now mix the Poha sugar and dry nuts mixture well with your fingers, so that the sugar is mixed evenly. Create a well in the center of the Poha flour and pour the ghee into it, rub the ghee nicely into the flour, and start making Ladoo(balls) immediately. The ghee should be warm while making the Ladoo as it gives the right binding. If the ghee is not warm and is at room temperature, the ladoos will not form. Form the ladoos with the entire mixture, you can customize the size to your preference. The tasty and healthy Red Poha Ladoos are ready to gobble. Enjoy. Happy feasting!
STEPWISE RECIPE FOLLOWS:
1. Assemble all ingredients.
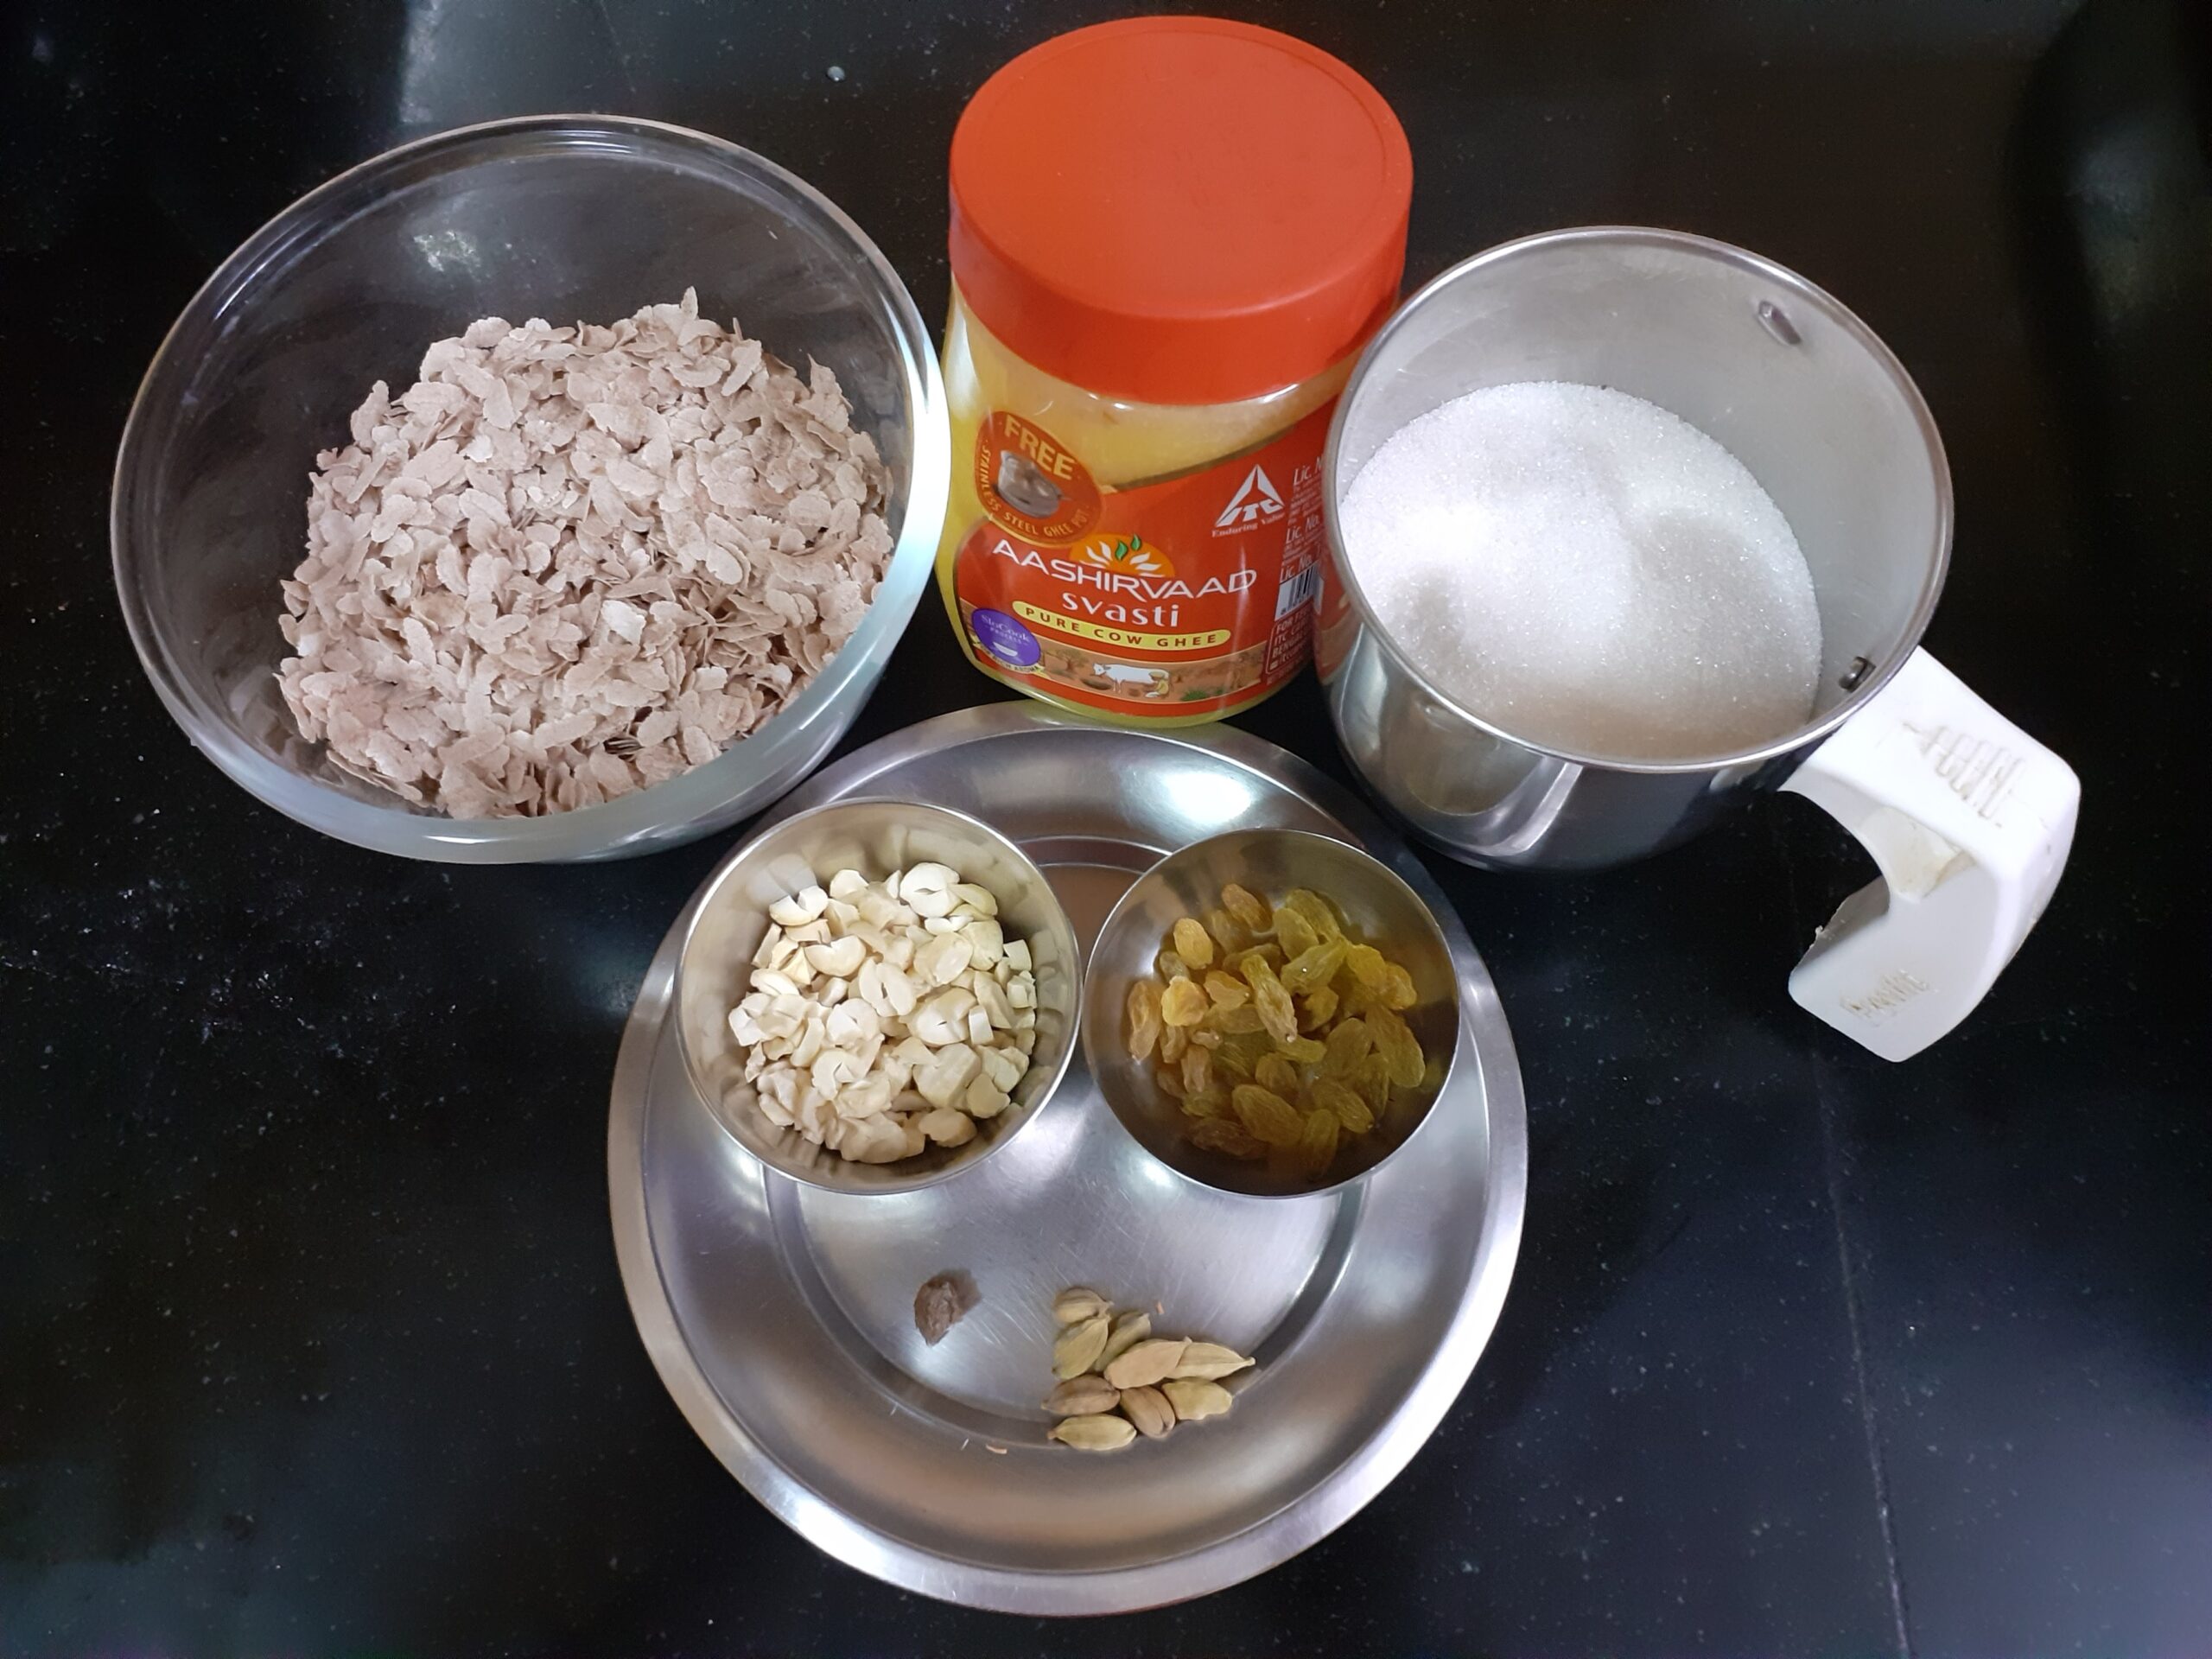
2. In a Kadai take 1 Tbsp ghee and heat. Add the Red Poha to the ghee and start roasting it, until they become crisp. Keep stirring continuously, taking care not to brown the Pohas or burn them. Transfer to a plate and cool for a few minutes.
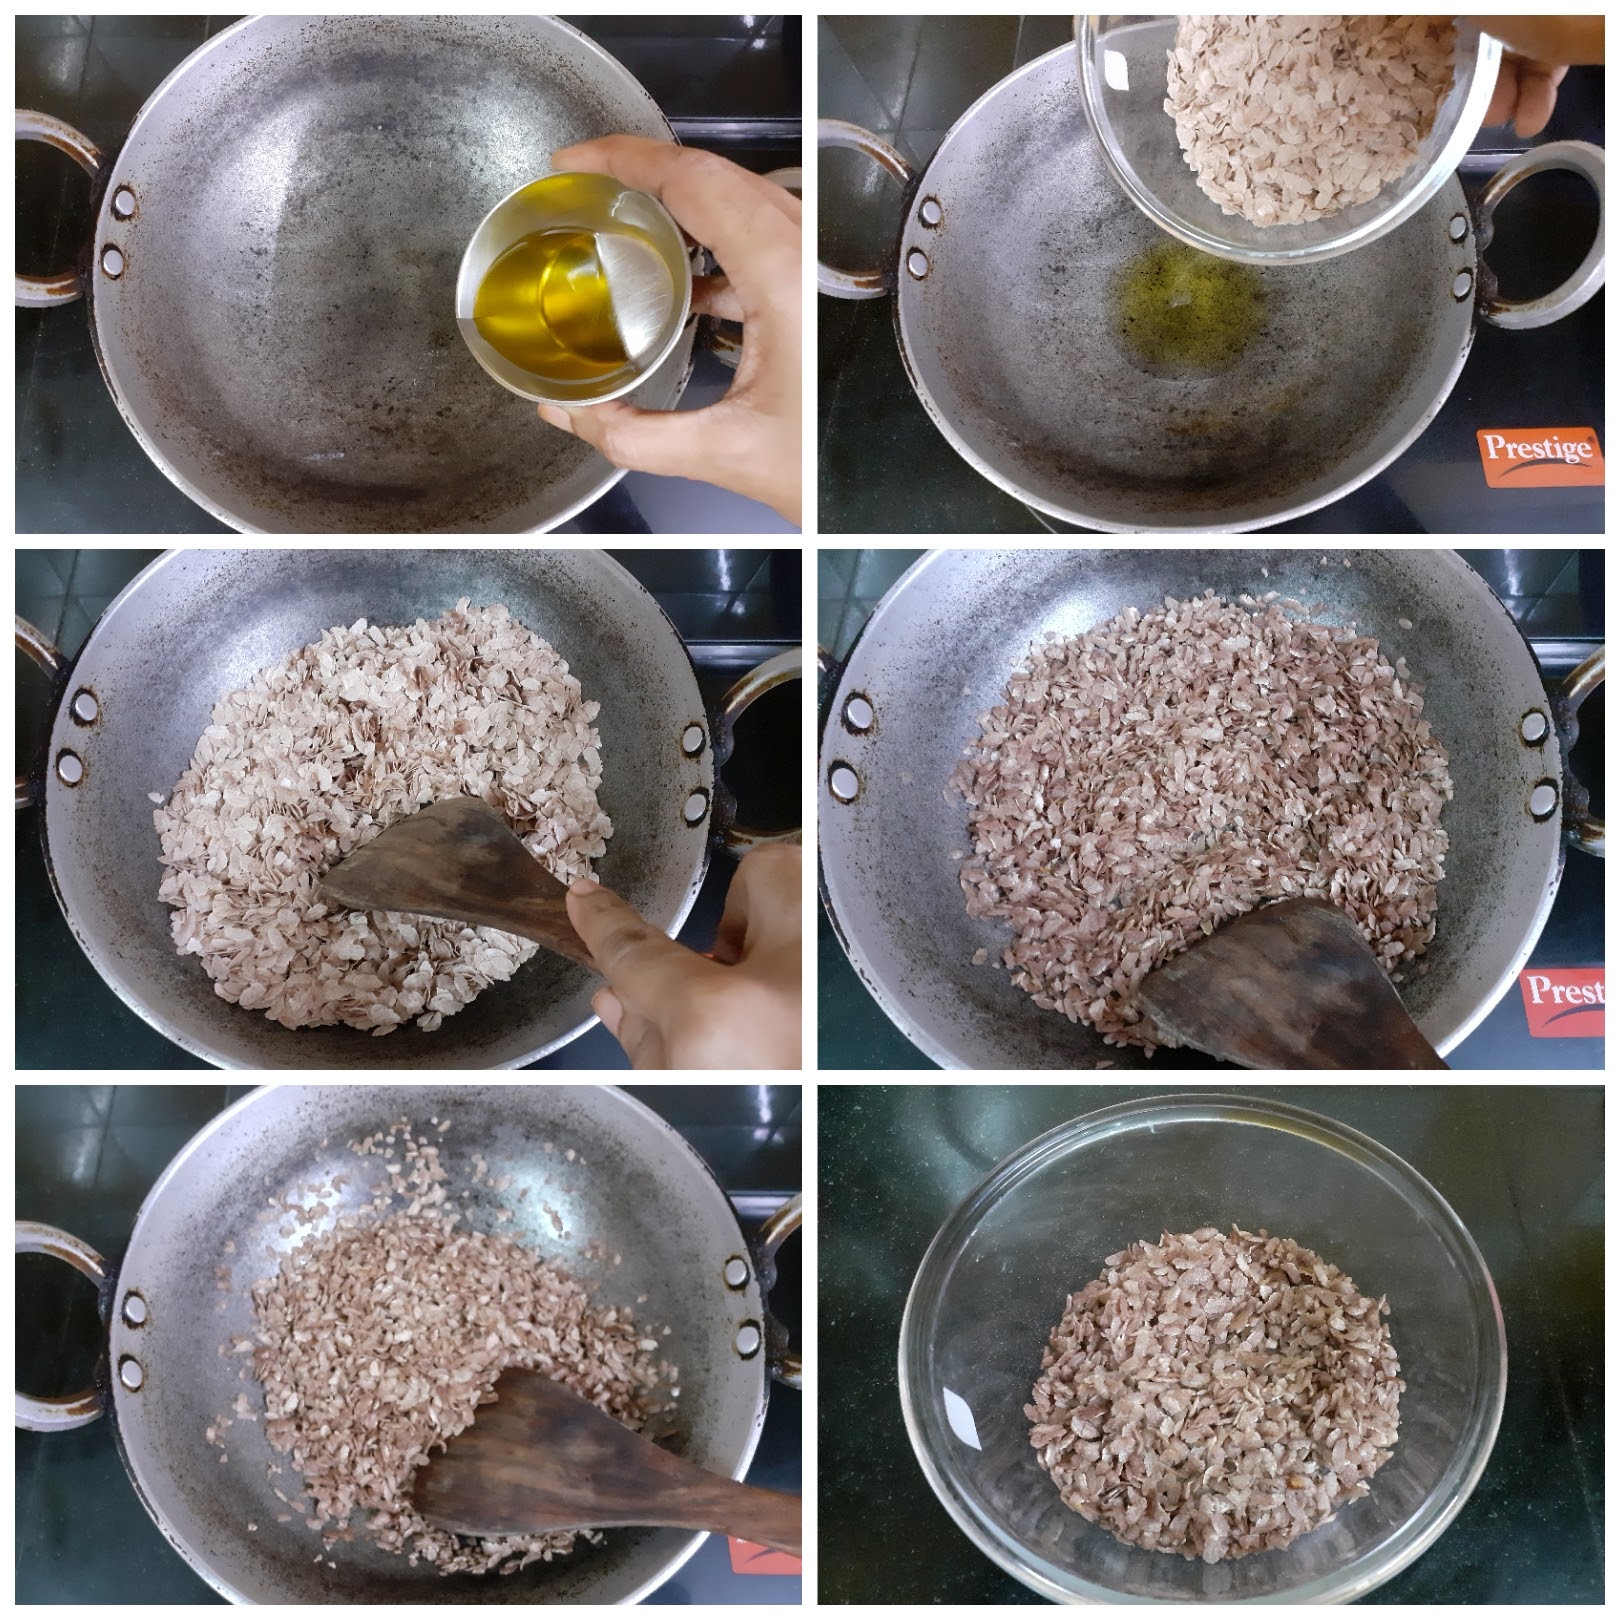
3. Now in the blender jar take the sugar and add the cardamom and nutmeg to it and grind them to a fine powder. Transfer the sugar to a plate or vessel and in the same blender jar, grind the roasted Poha to a fine powder.
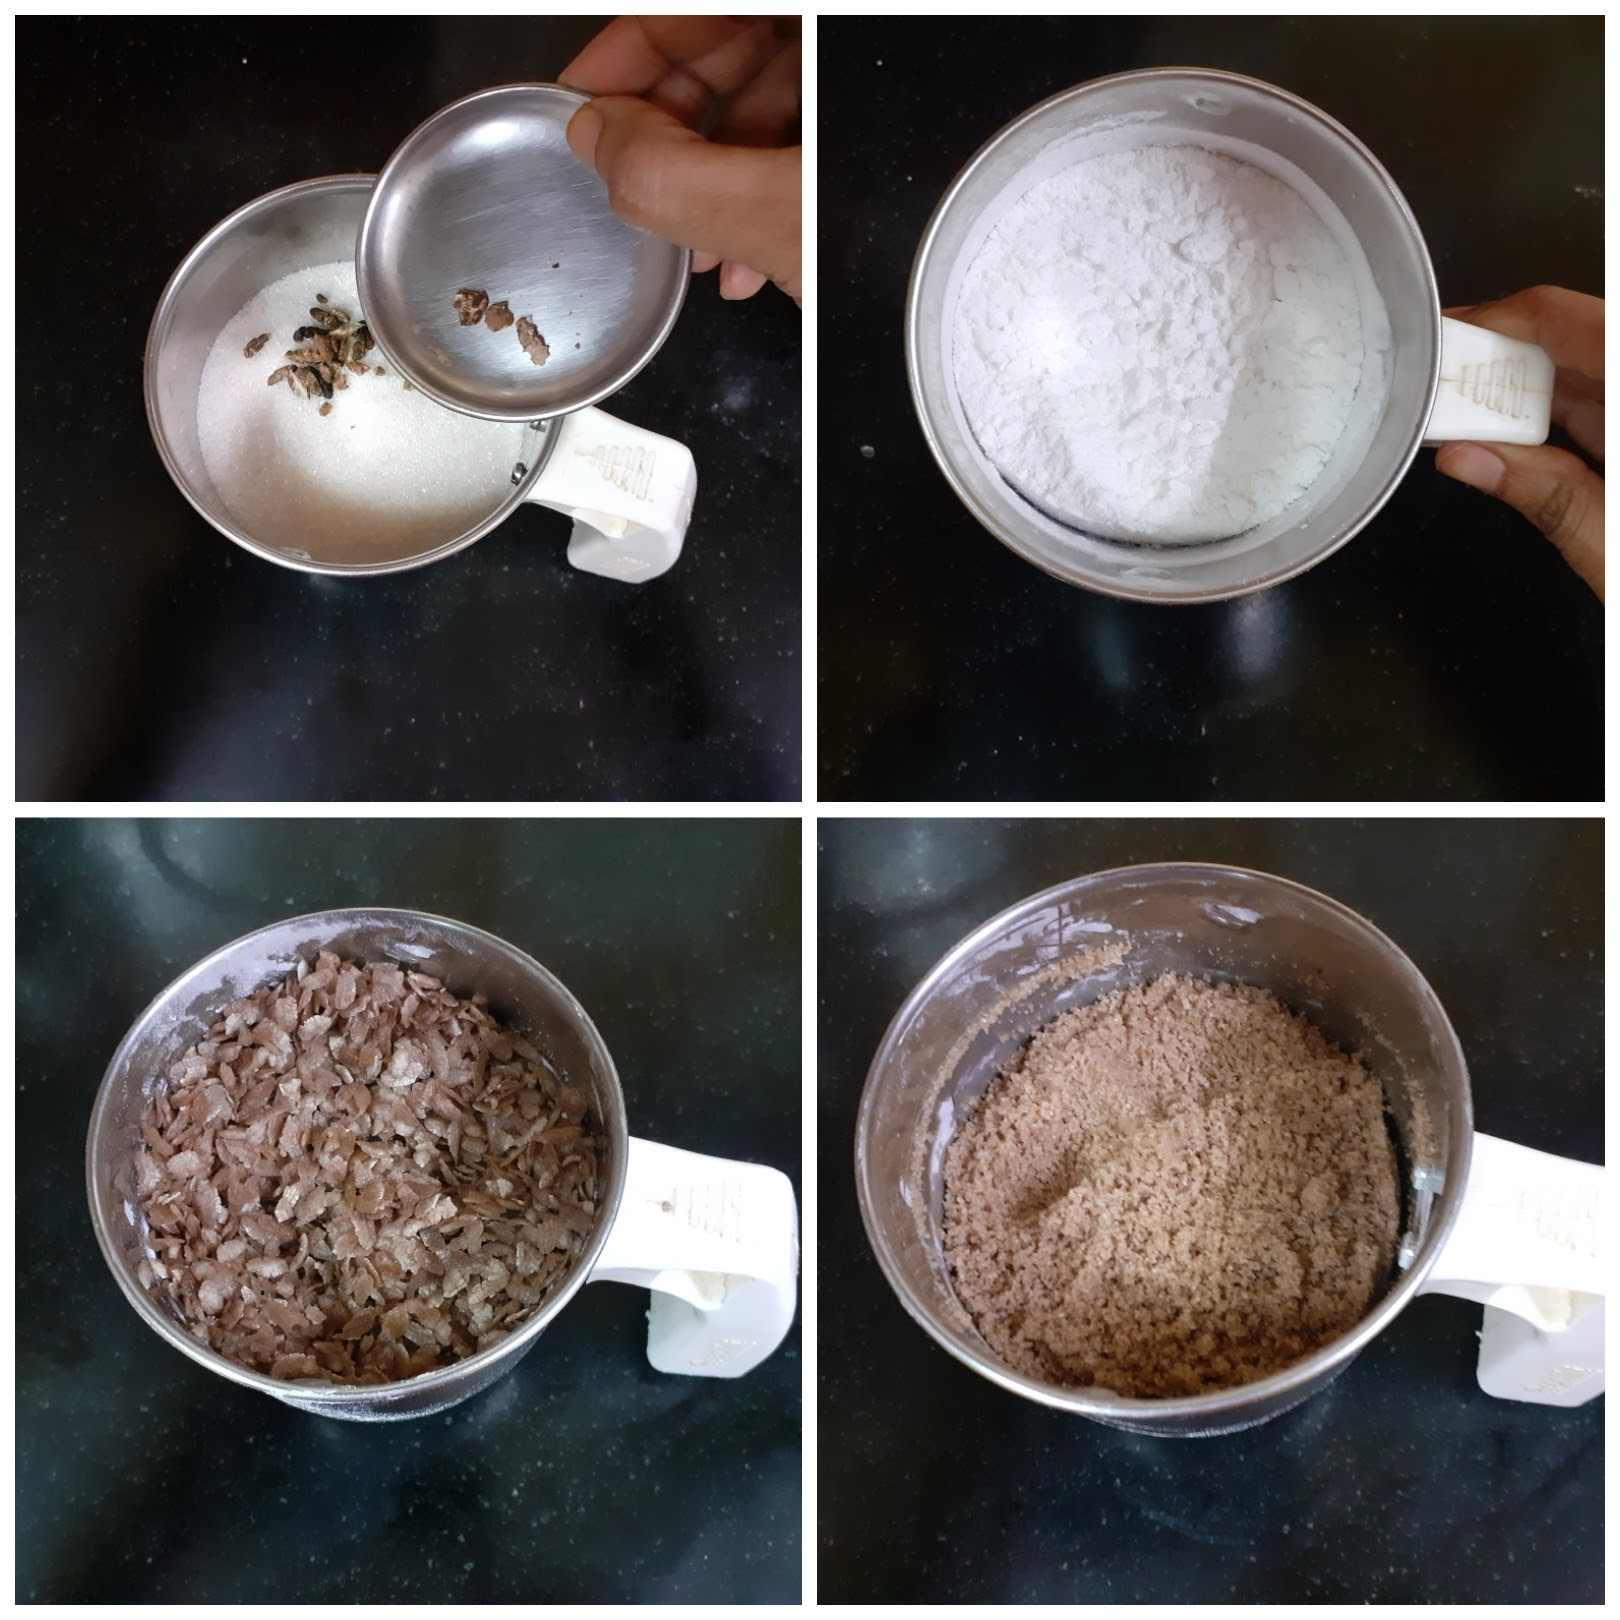
4. Now transfer the Poha powder to a wide vessel, and add the powdered sugar to it. In a small Kadai take 1/2 tbsp ghee and fry the cashews and raisins until they turn a nice brown. Drop the fried nuts and raisins into the Poha and Sugar mixture.

5. Now in the small Kadai warm(not heat) 3 tbsp ghee. The ghee should have melted and be warm, now mix the Poha sugar and dry nuts mixture well with your fingers so that the sugar is mixed evenly. Create a well in the center of the Poha flour and pour the ghee into it, rub the ghee nicely into the flour, and start making Ladoo(balls) immediately.
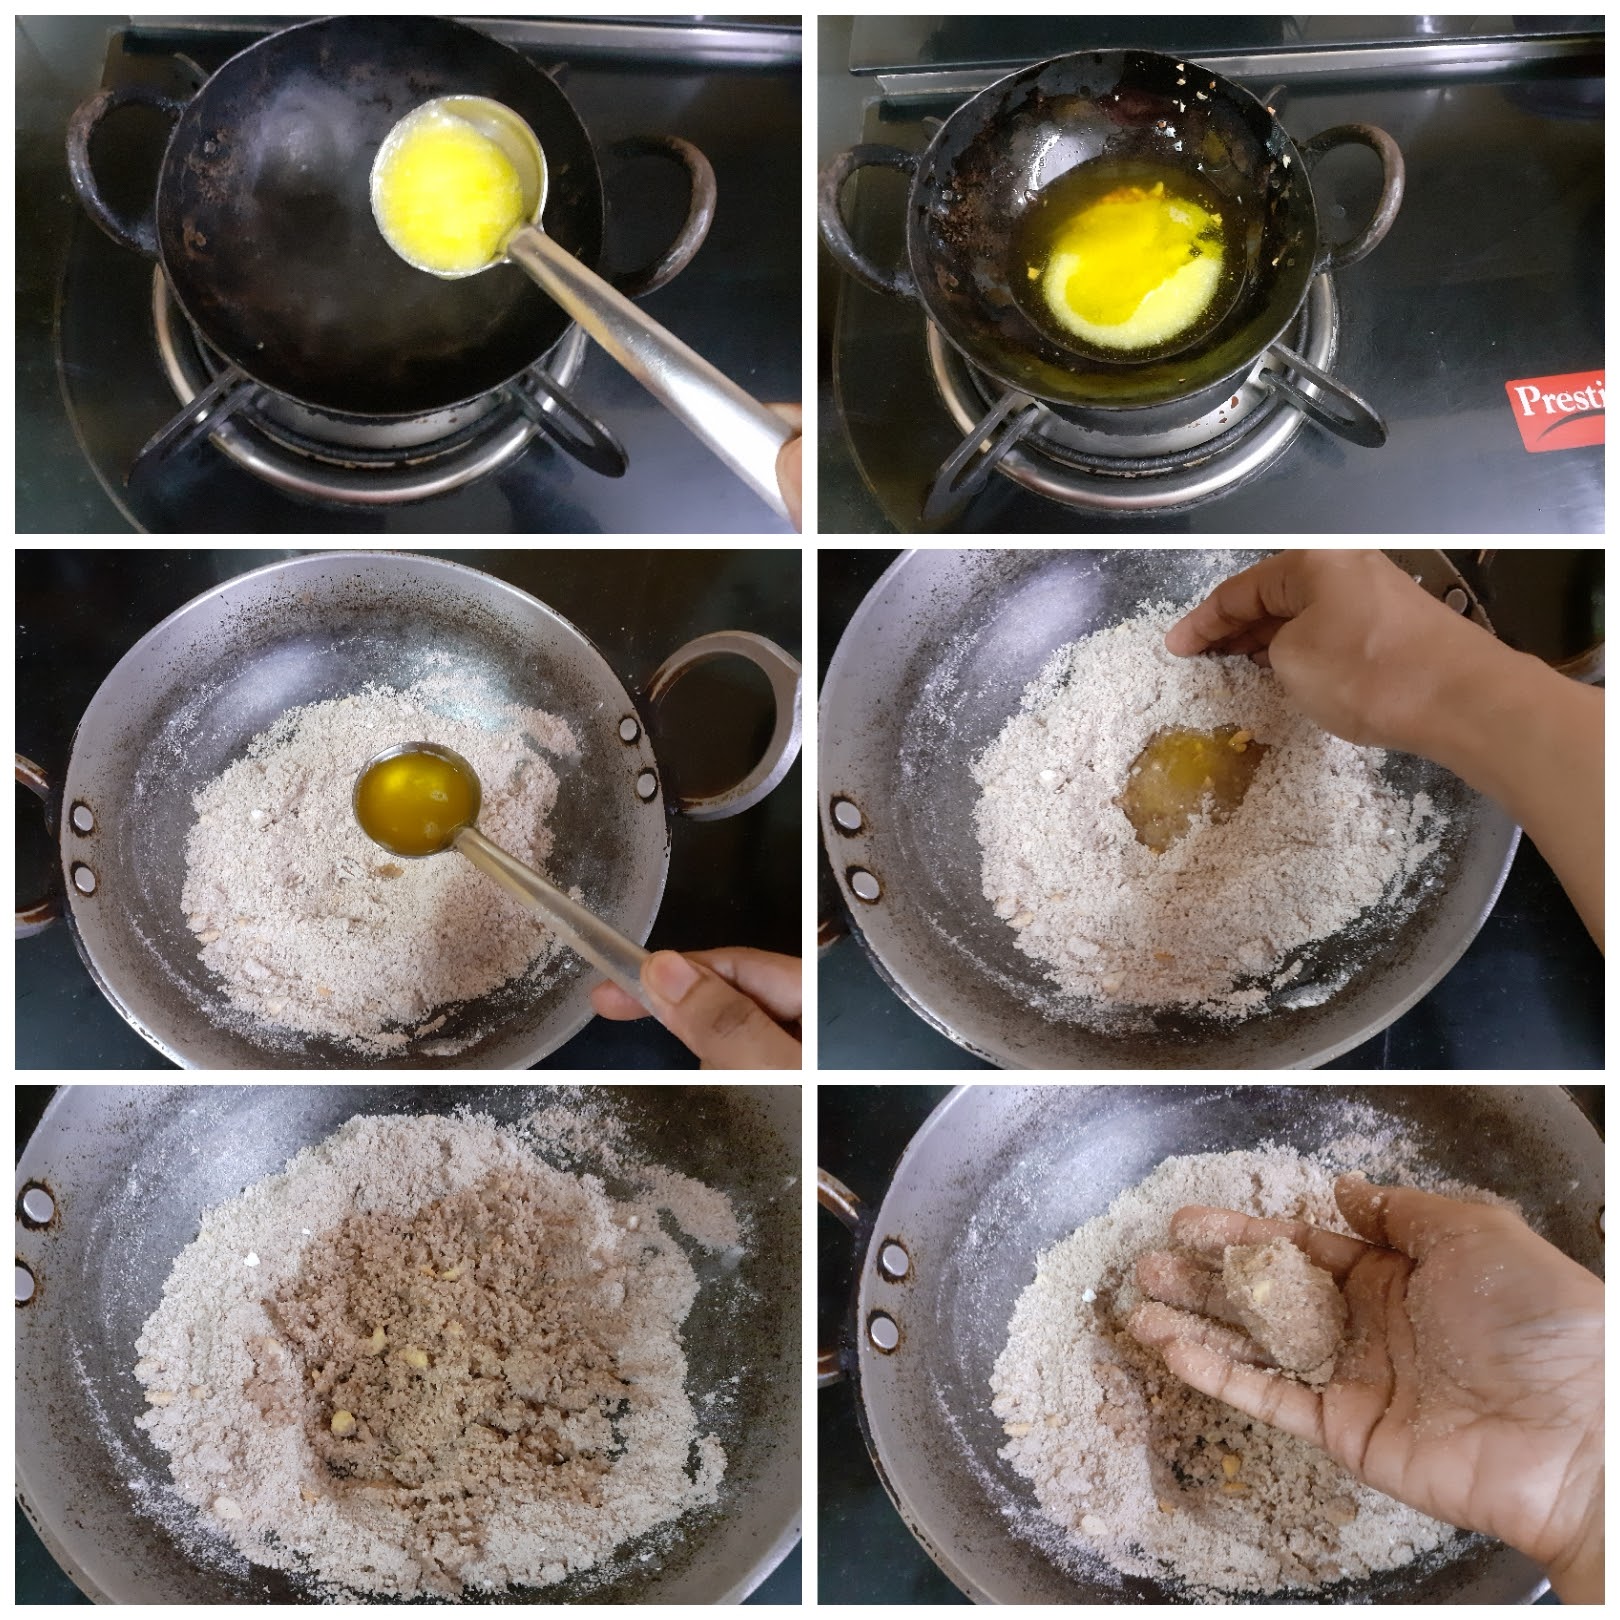
6. Form the ladoos with the entire mixture, you can customize the size to your preference. The tasty and healthy Red Poha Ladoos are ready to gobble. Enjoy.
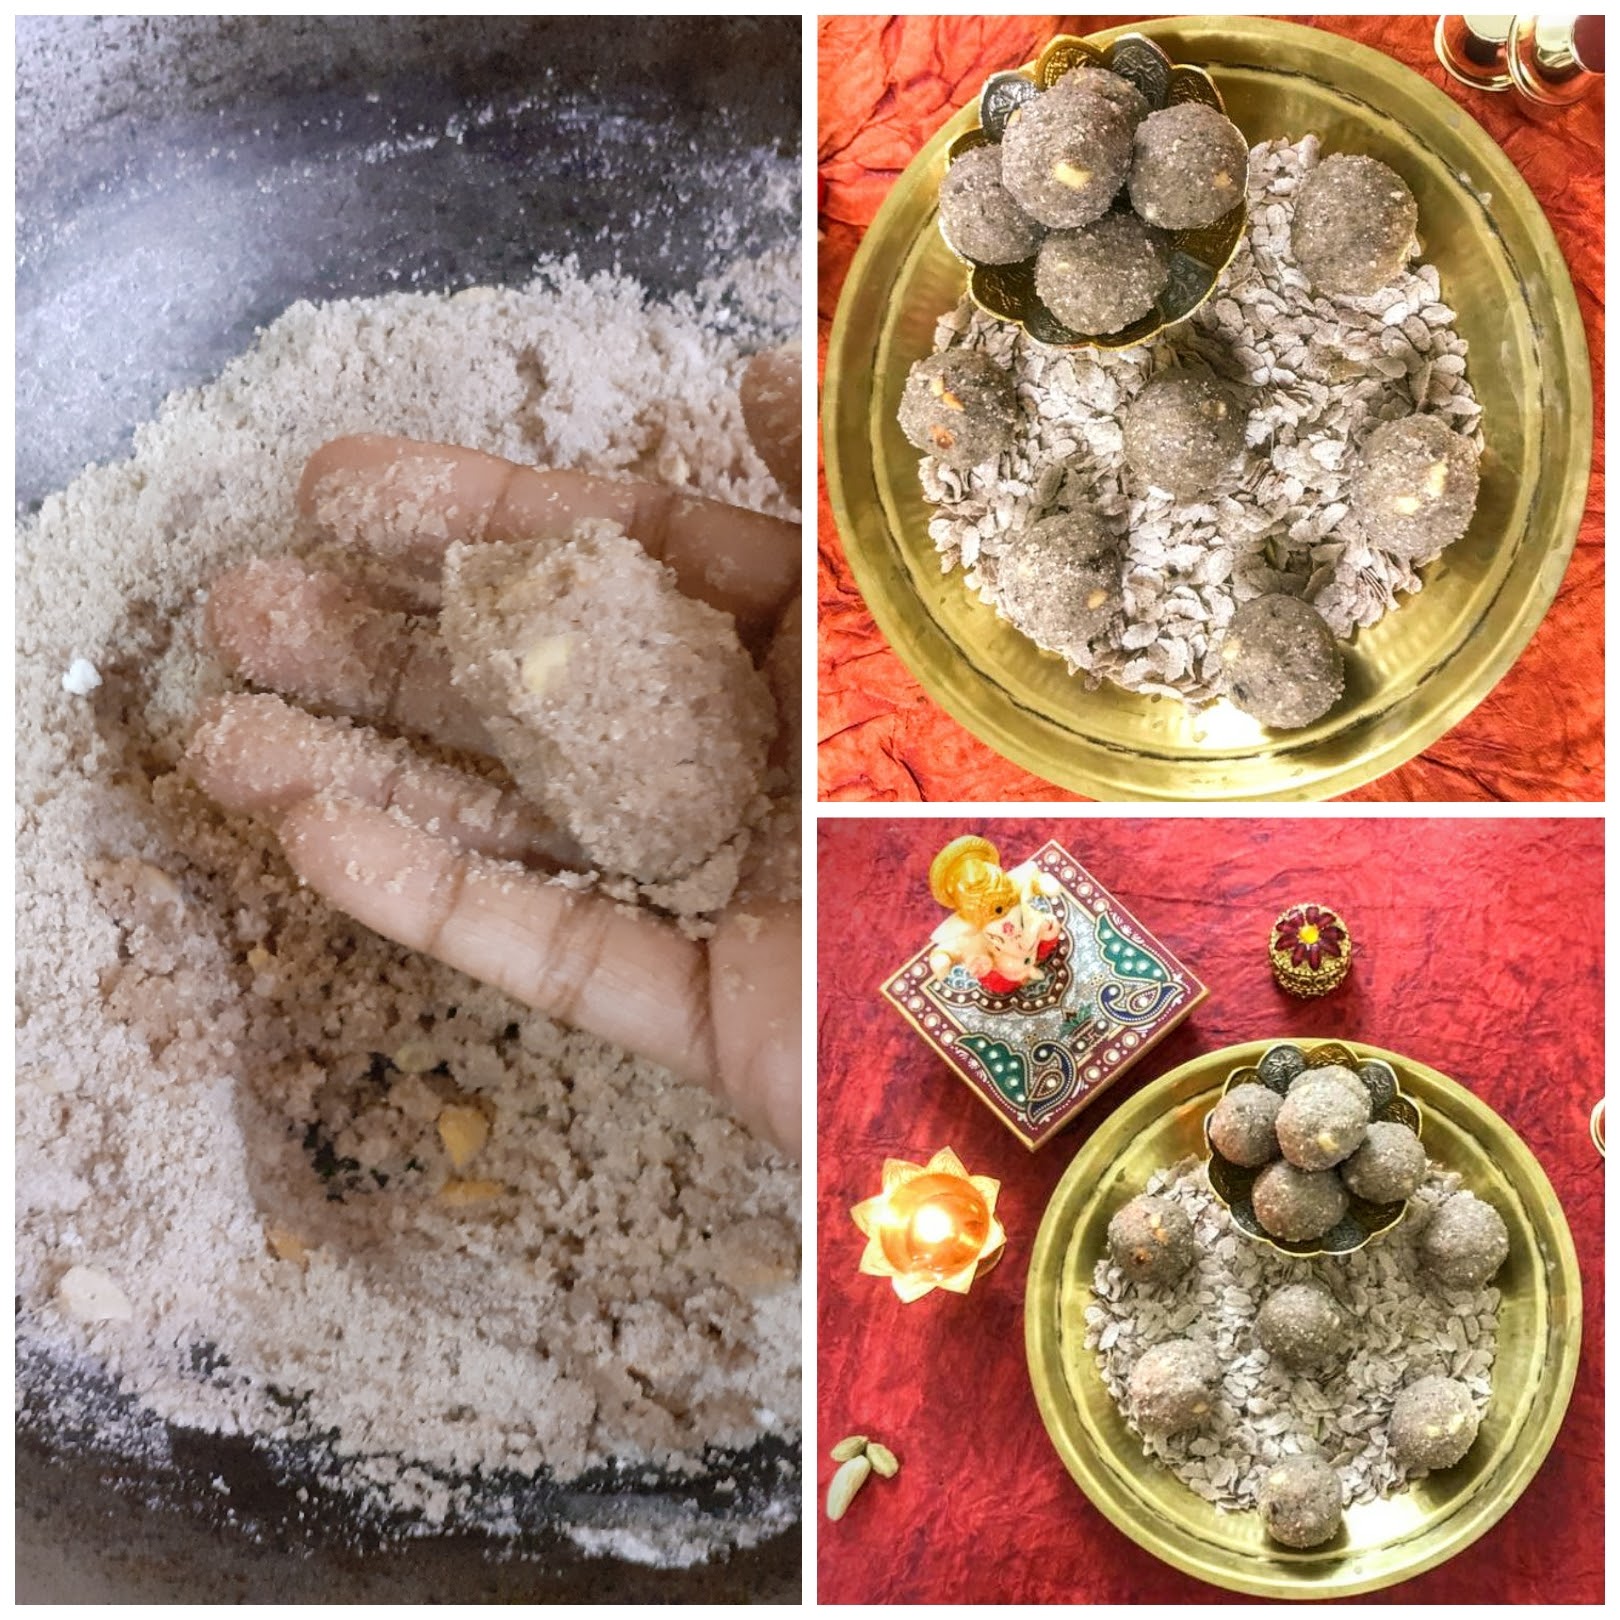
NOTES:
1. I ground my Poha to a step less than superfine, as then you get a little crunchy feel. One can customize between superfine or a stage before, but take care not grind it coarse, as them forming the ladoos will be difficult.
2. The temperature of the ghee is very important. If it is very hot, you can form the ladoos immediately, so wait for it to turn warm. However, if the ghee is not warm enough, then the ladoos will not form. Add a little warm ghee and form the balls.
3. If you have poured too much ghee, the ladoos will slump and not hold shape. Try to stick to the measure given. However, if you do end up adding too much ghee, roast more poha, grind it to powder, and add it, to form ladoos.
4. The Poha does not hold much sugar, so stick to the measure given.
If you tried this recipe and liked it please comment below. I would love to hear from you. If you have a query about the recipe email us and ill respond as soon as I can.
Dum Aloo Ajwaini (One Pot)
Dum Aloo Ajwaini is a recipe that is a little different from the regular Dum Aloo, because of a “magical masala paste’ I add just before turning off the flame and that masala is what makes this a flavour blast dish, that goes very well with Pulav, plain rice and all types of flatbreads.
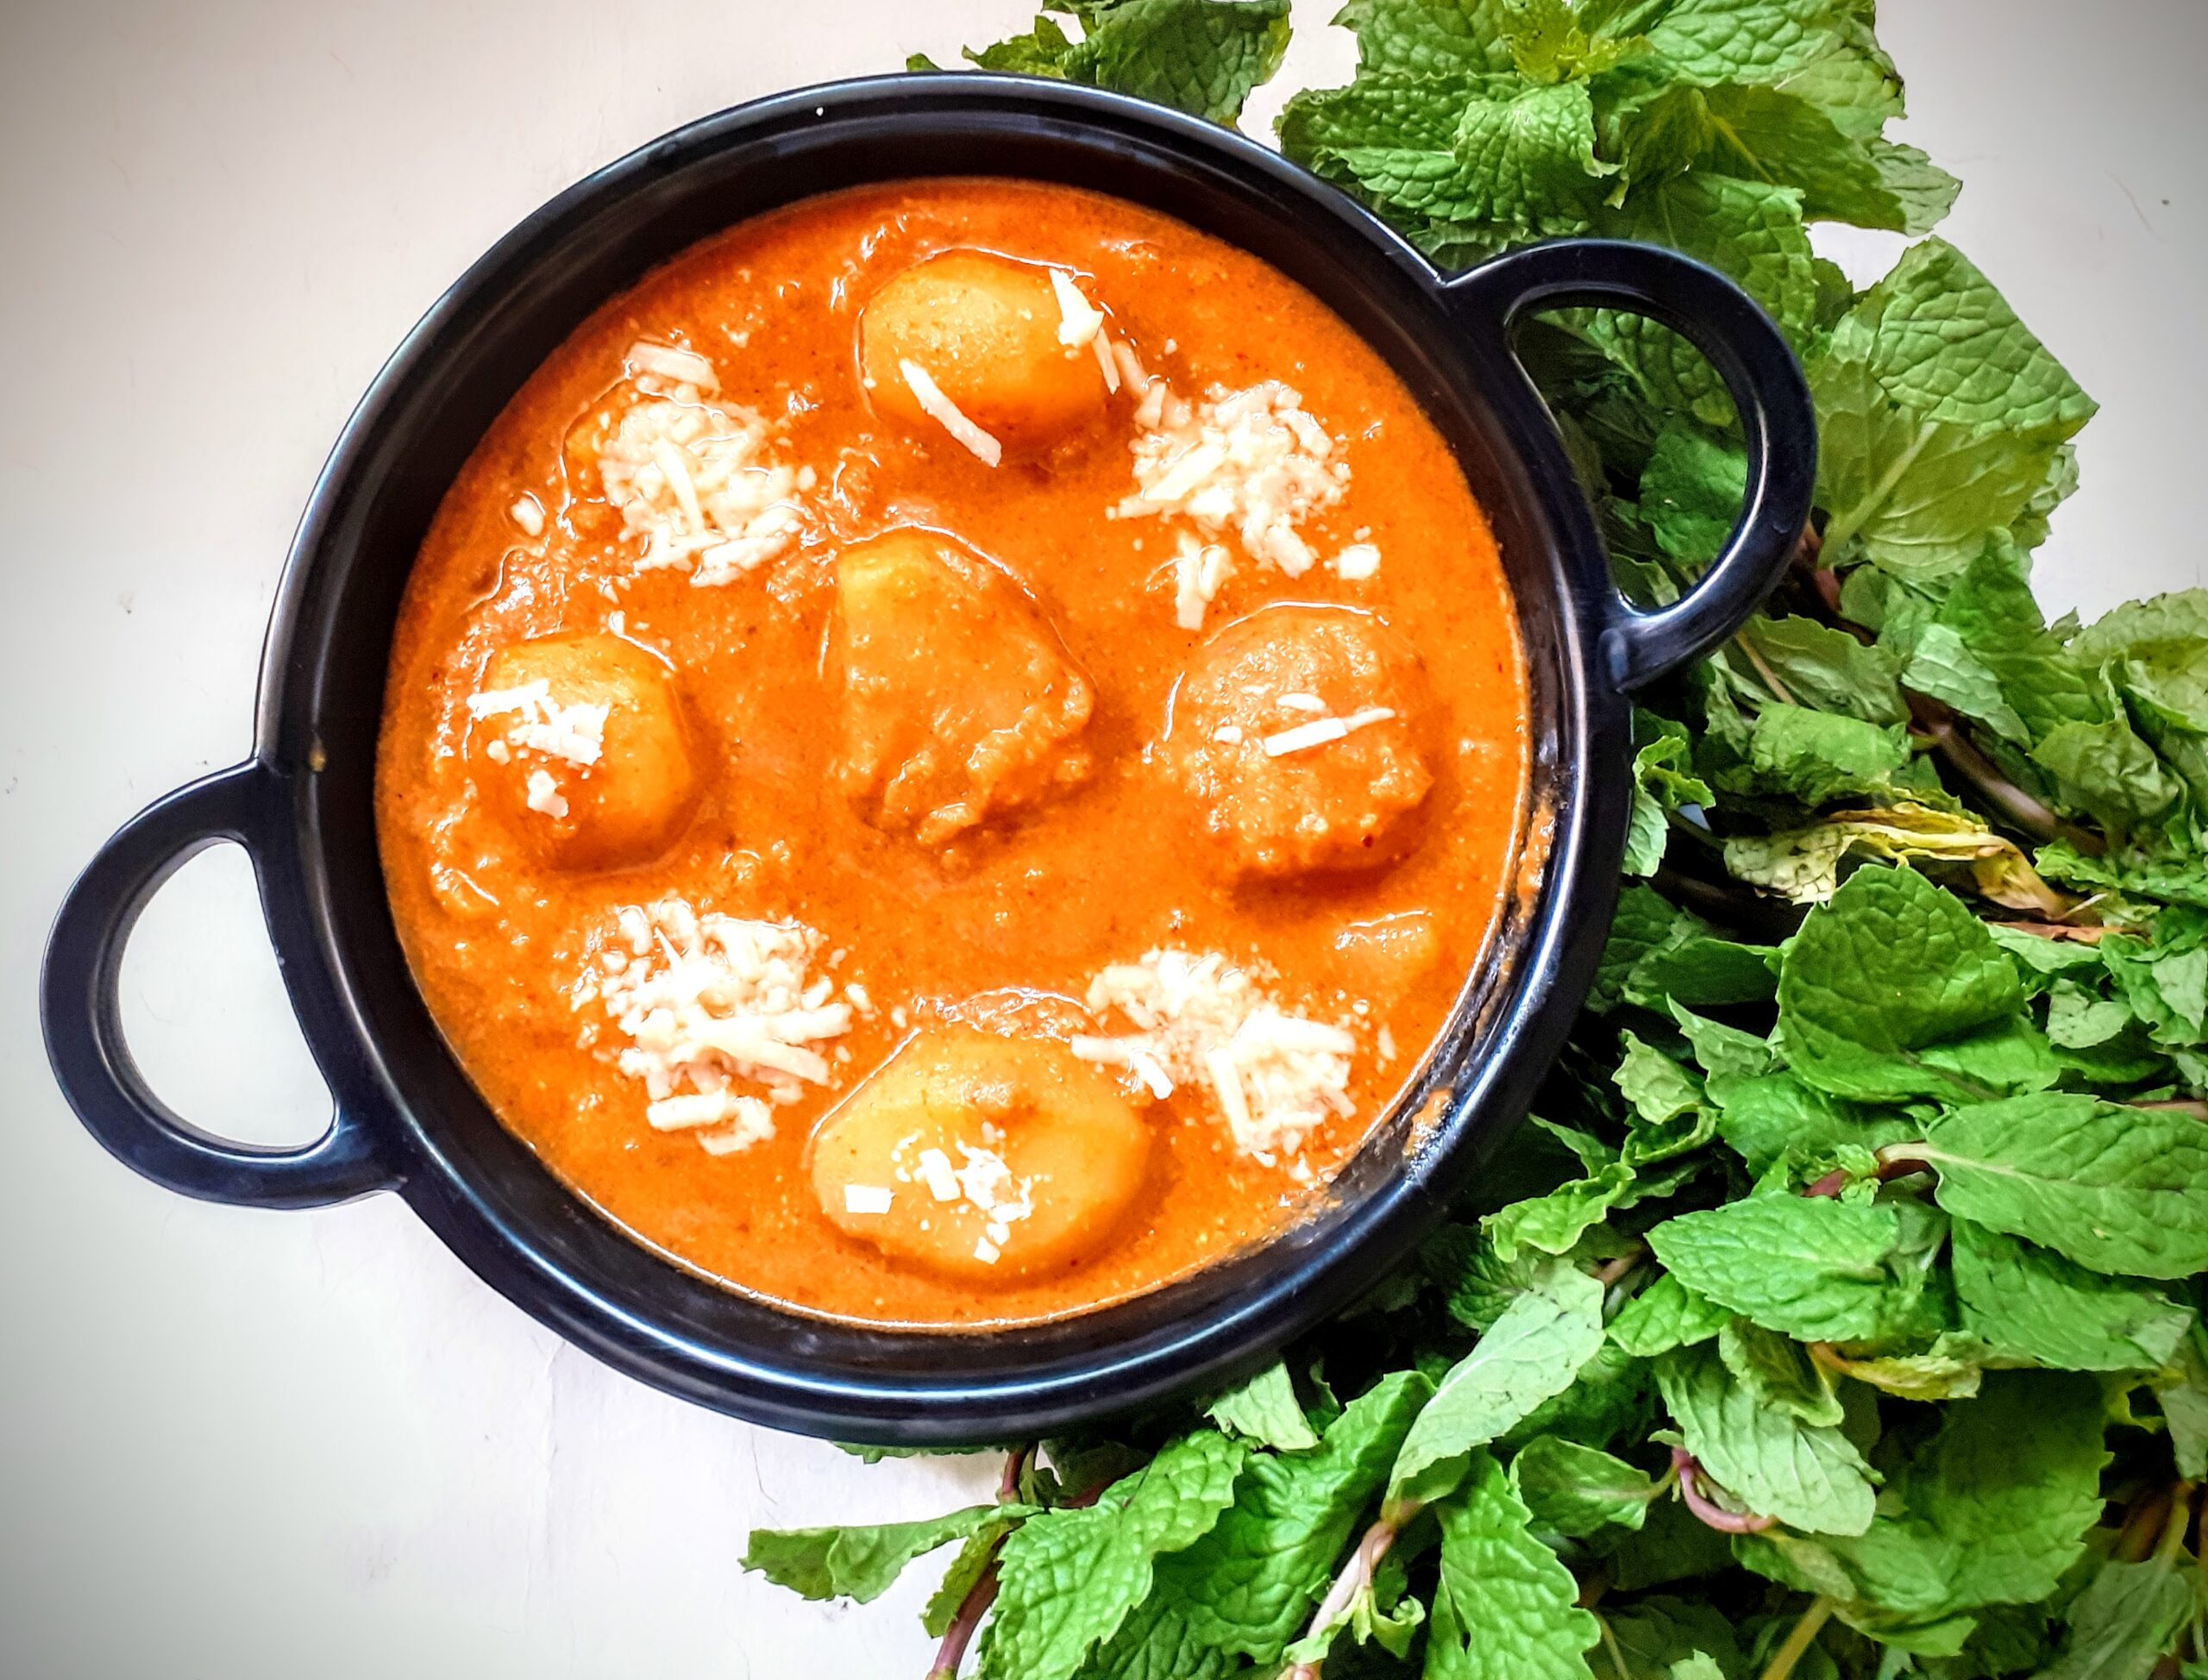
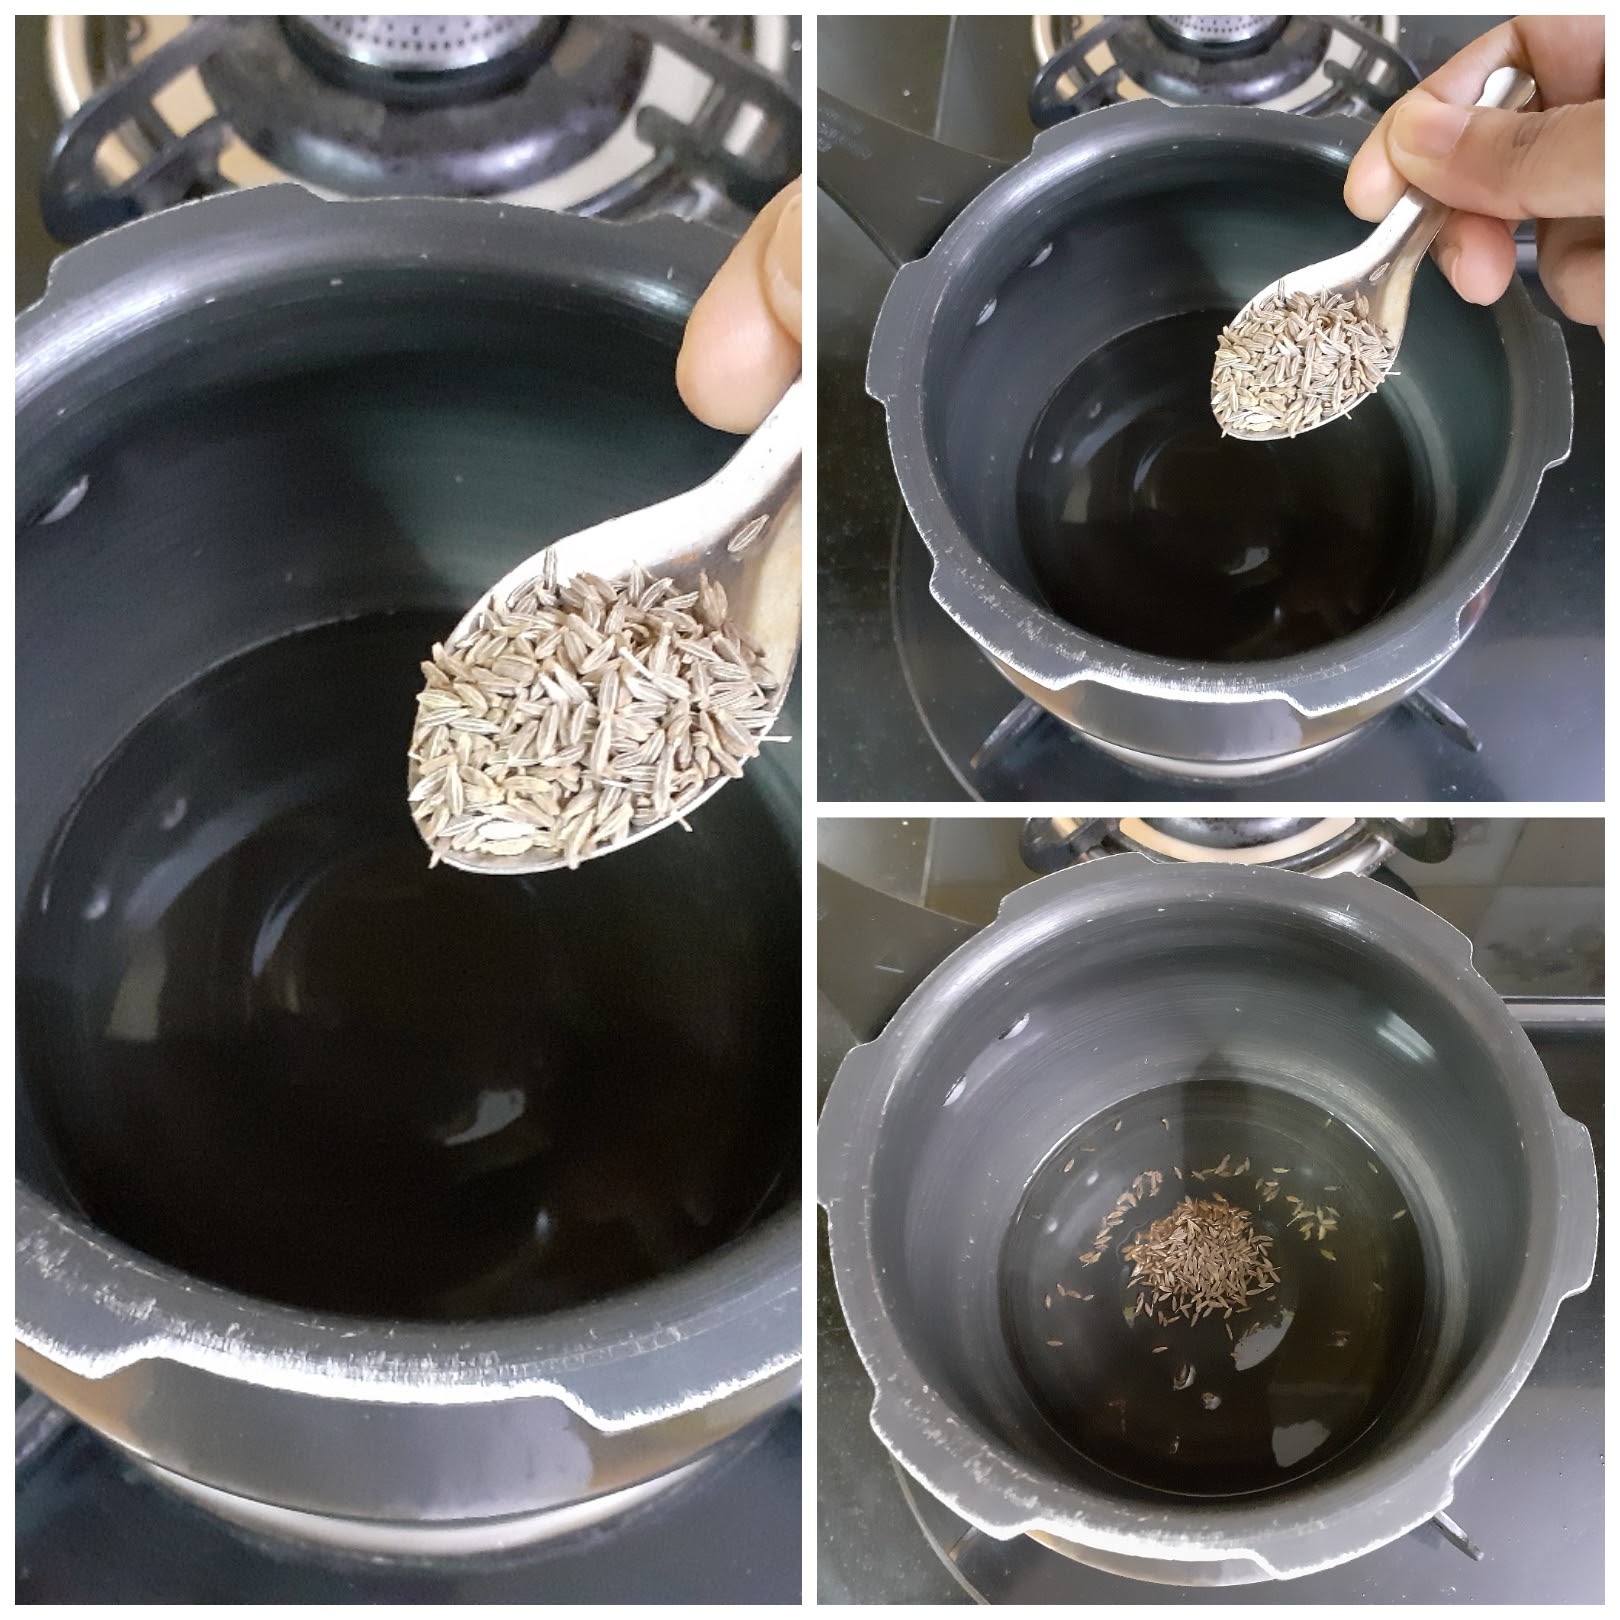
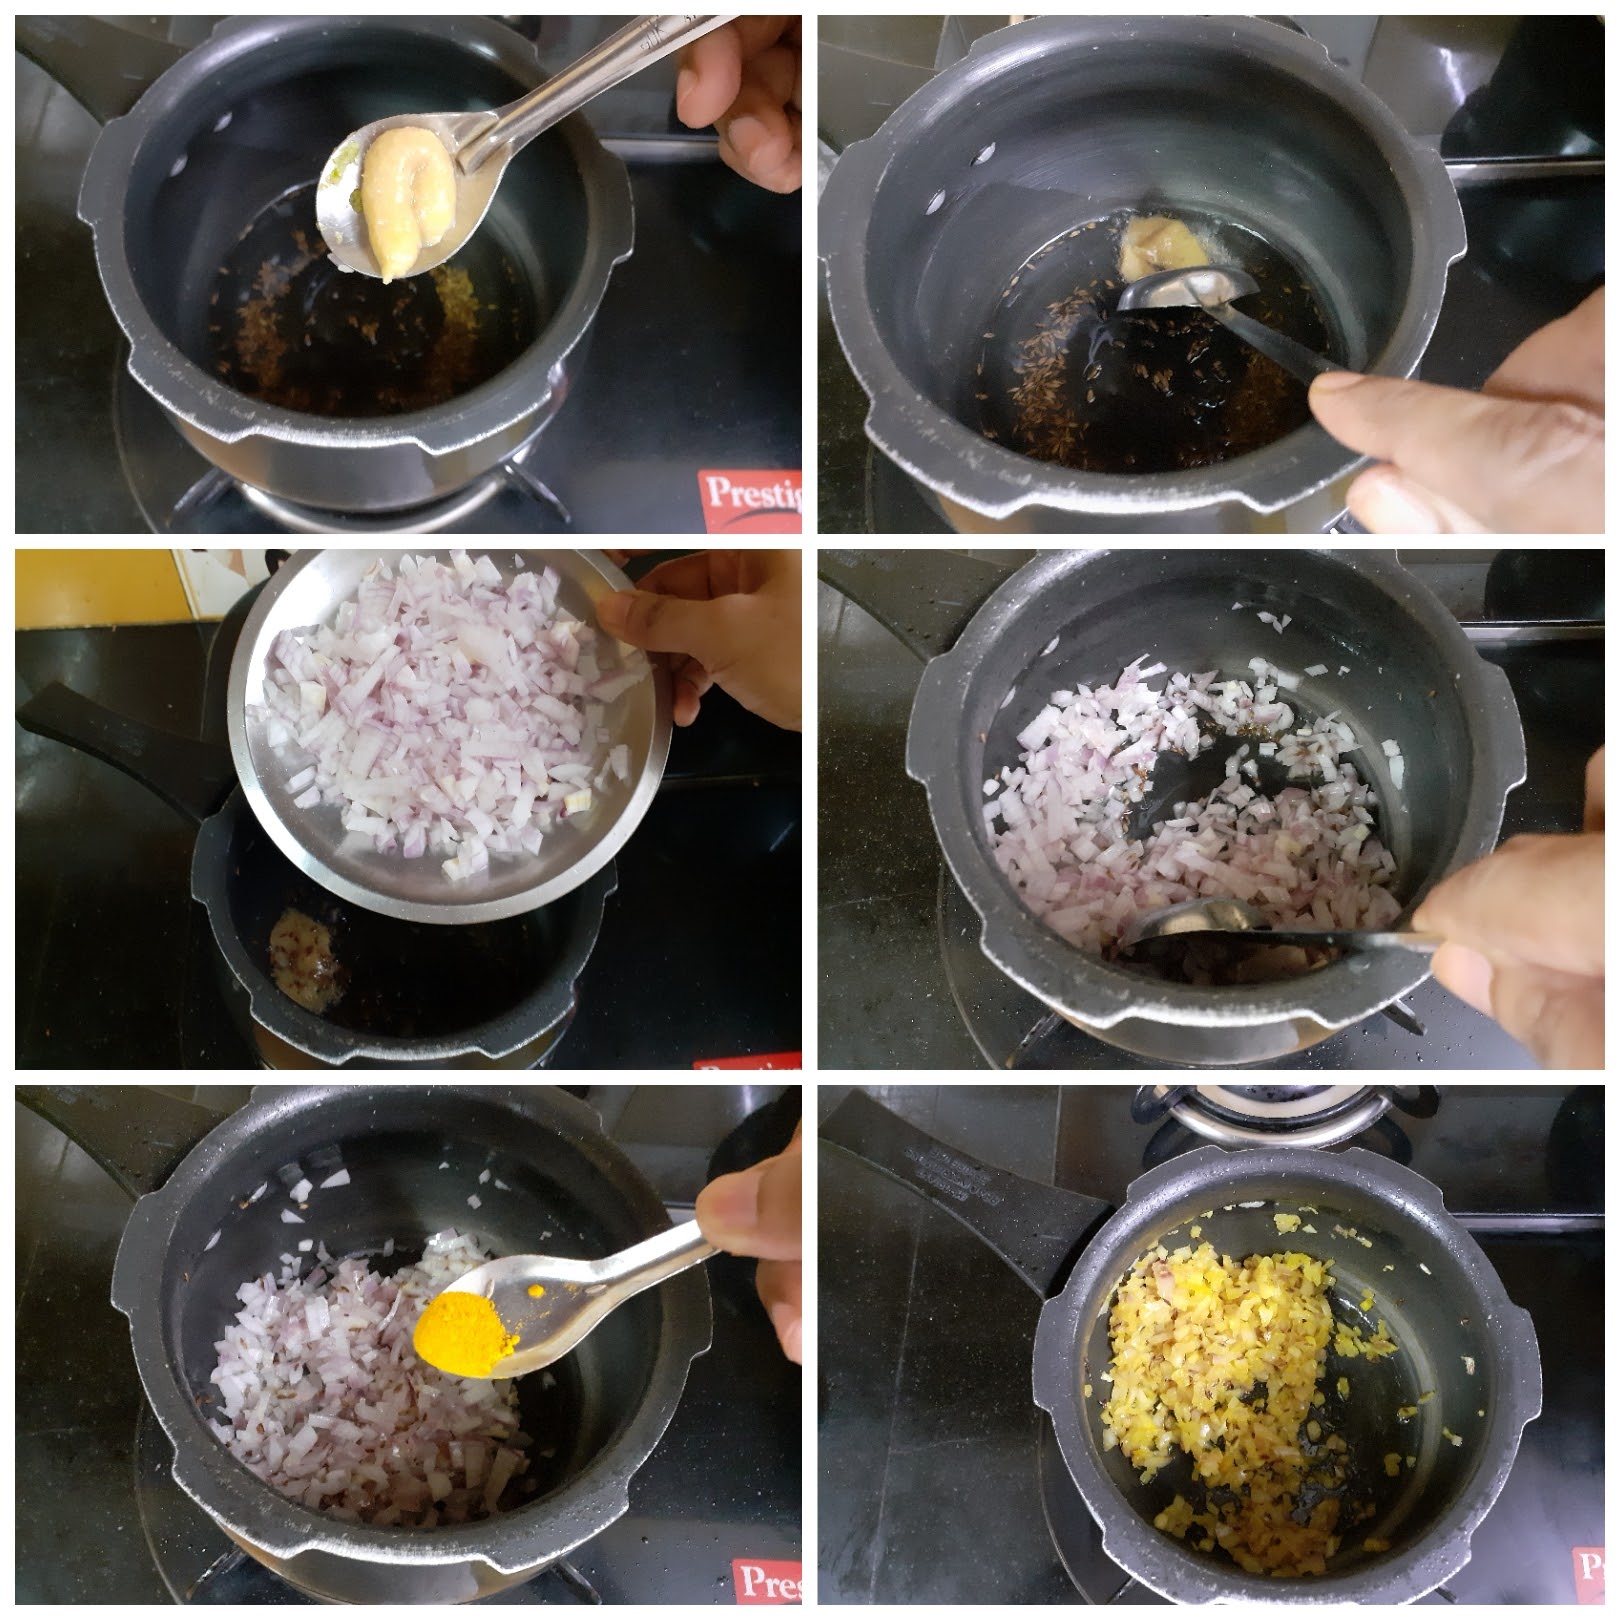
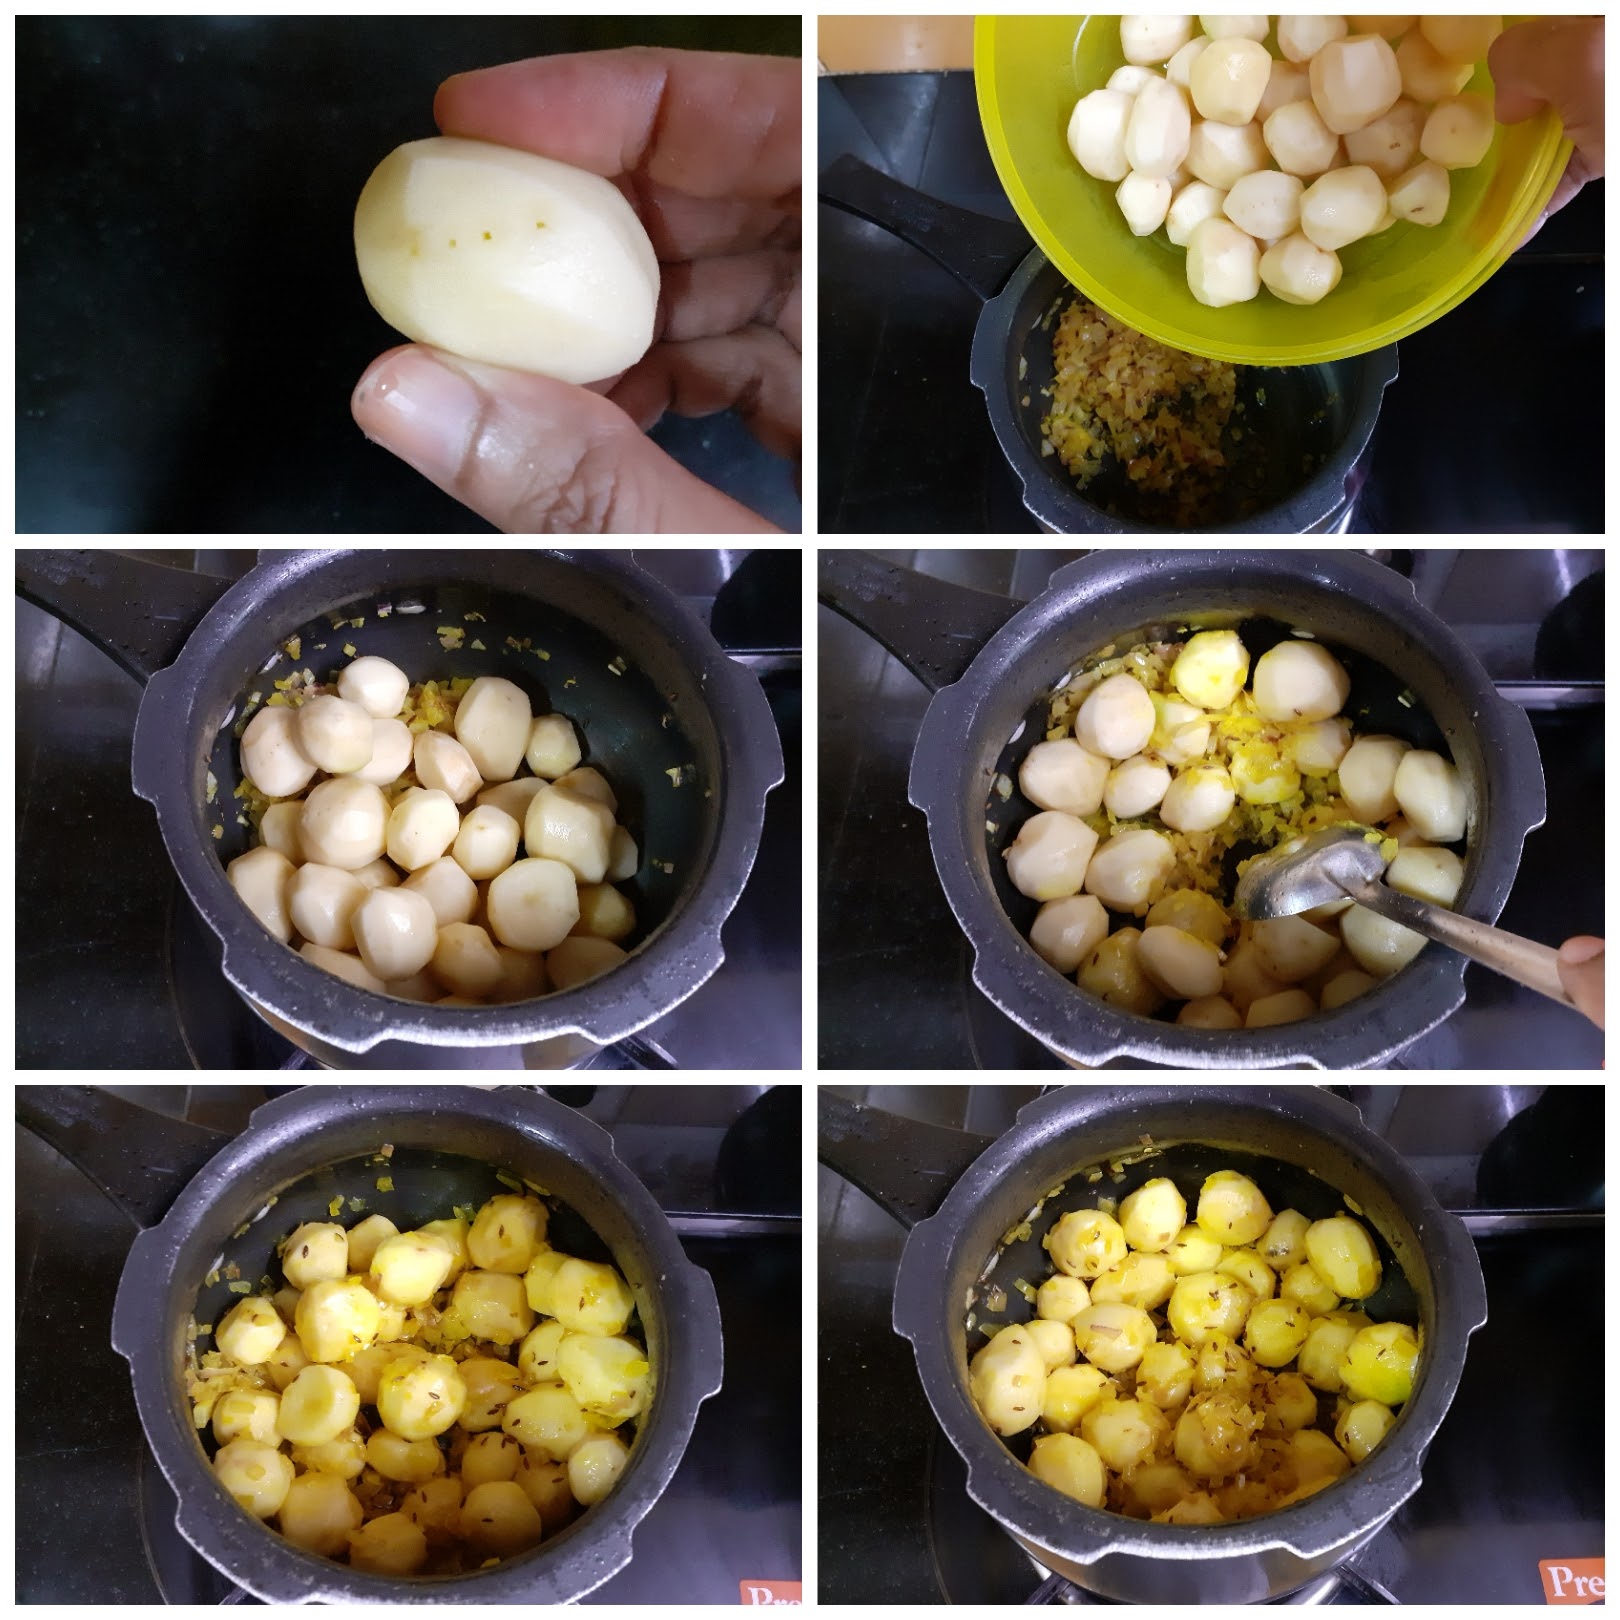
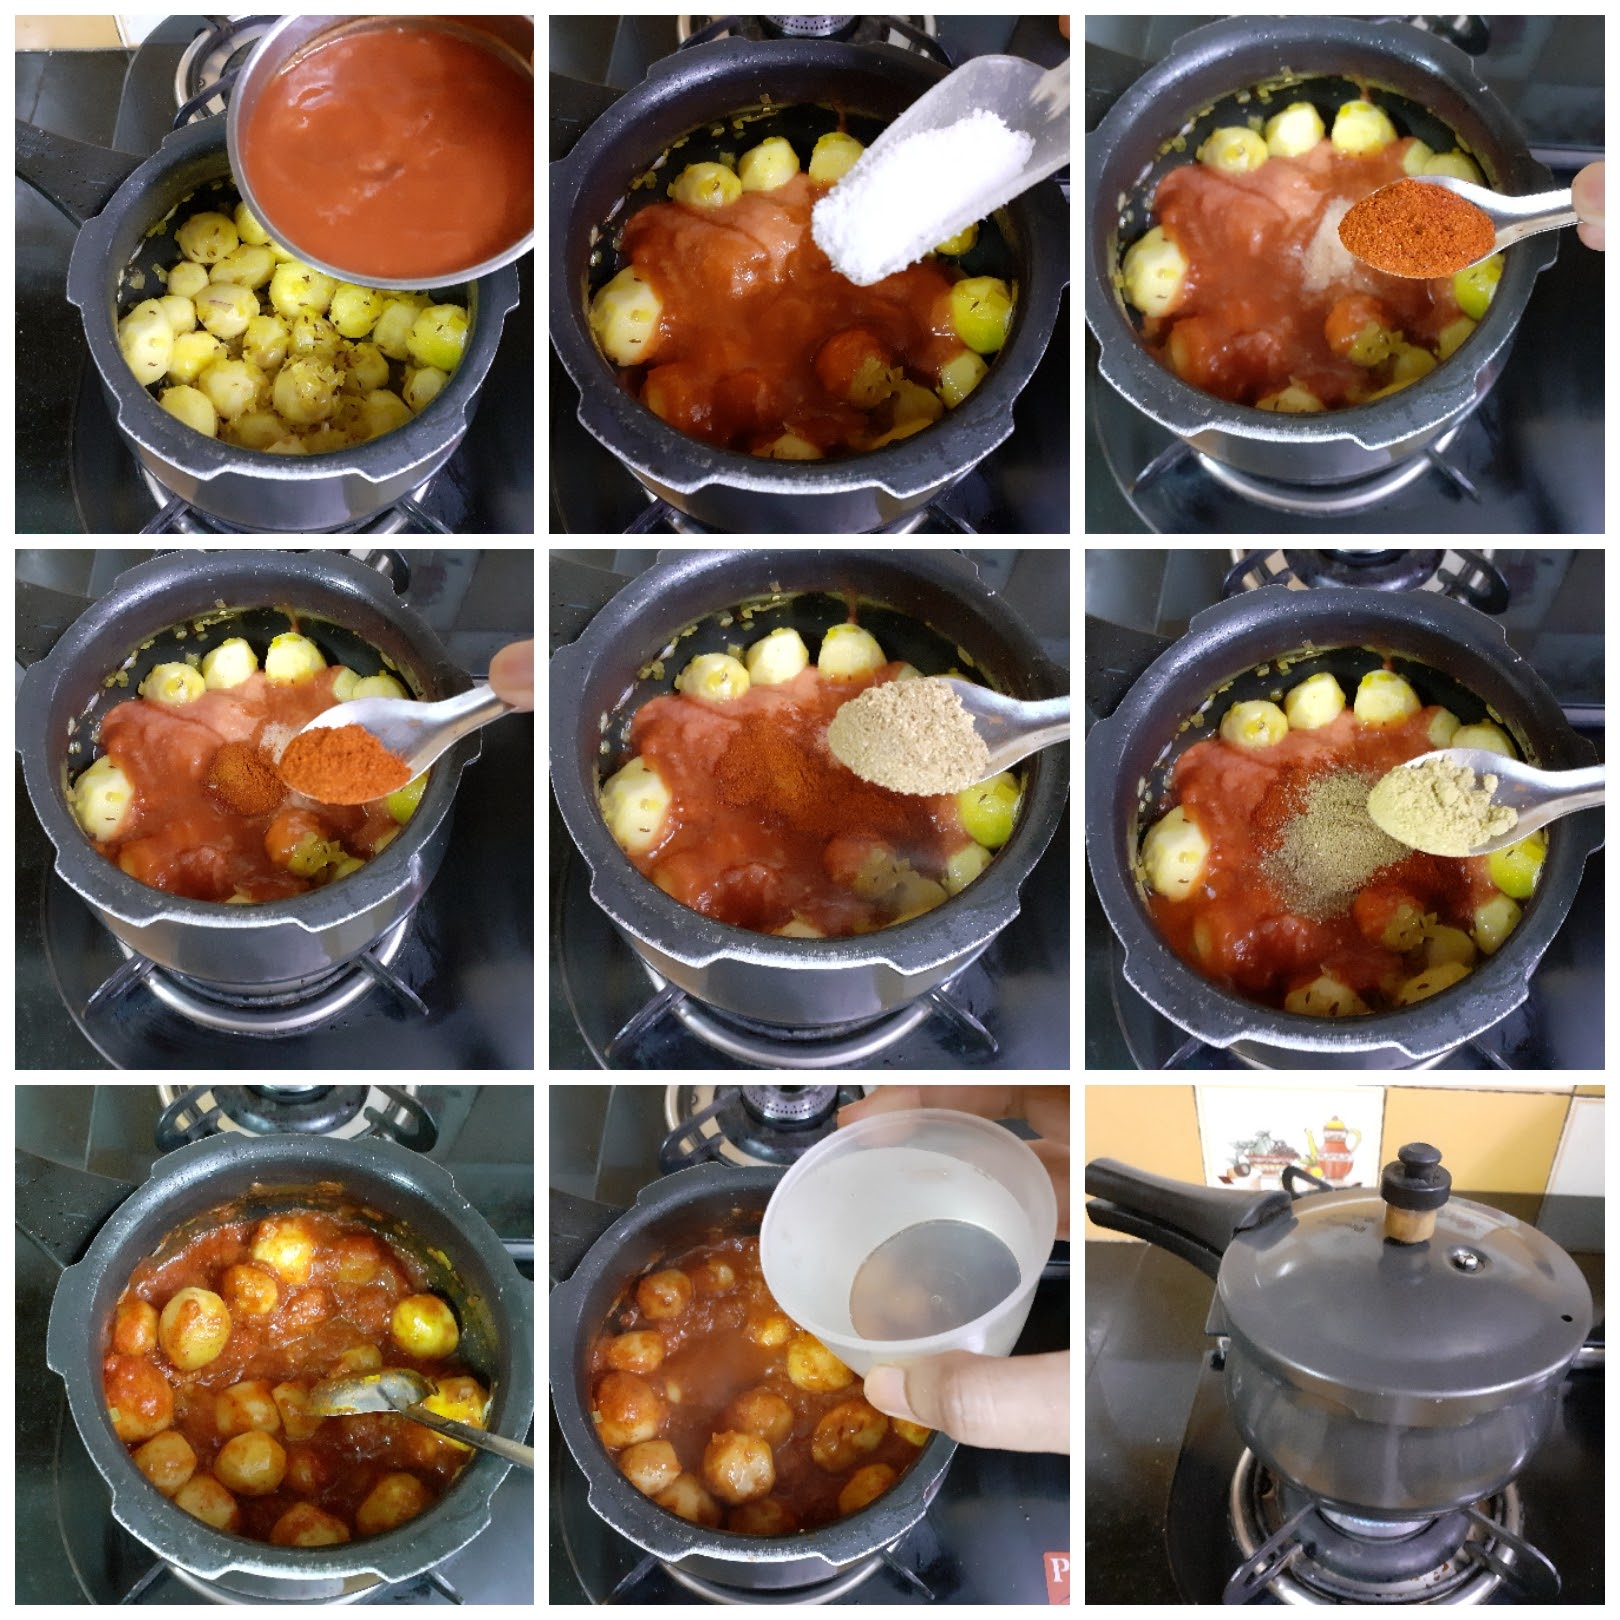
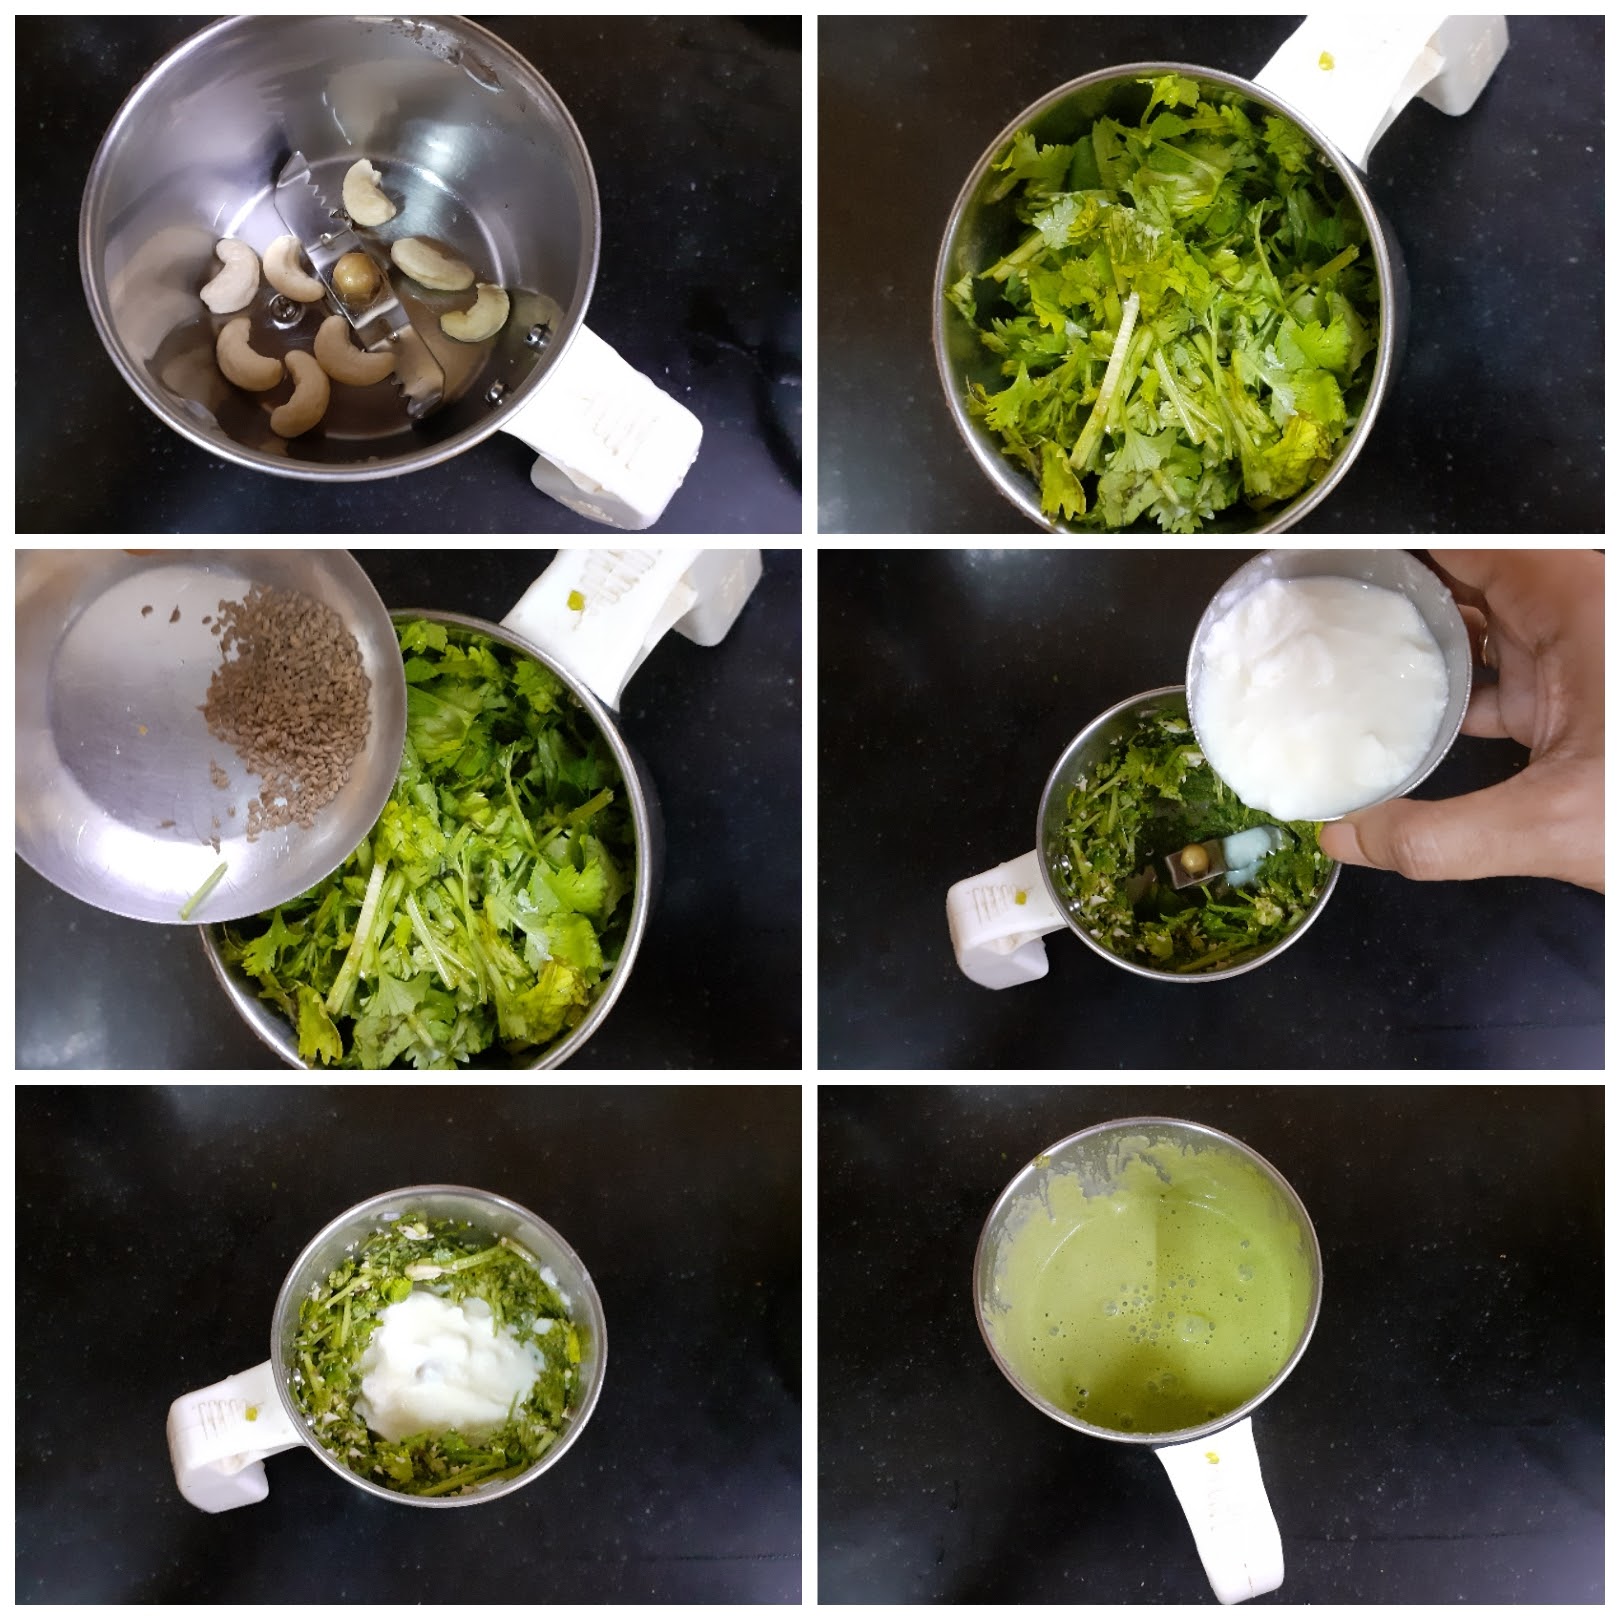
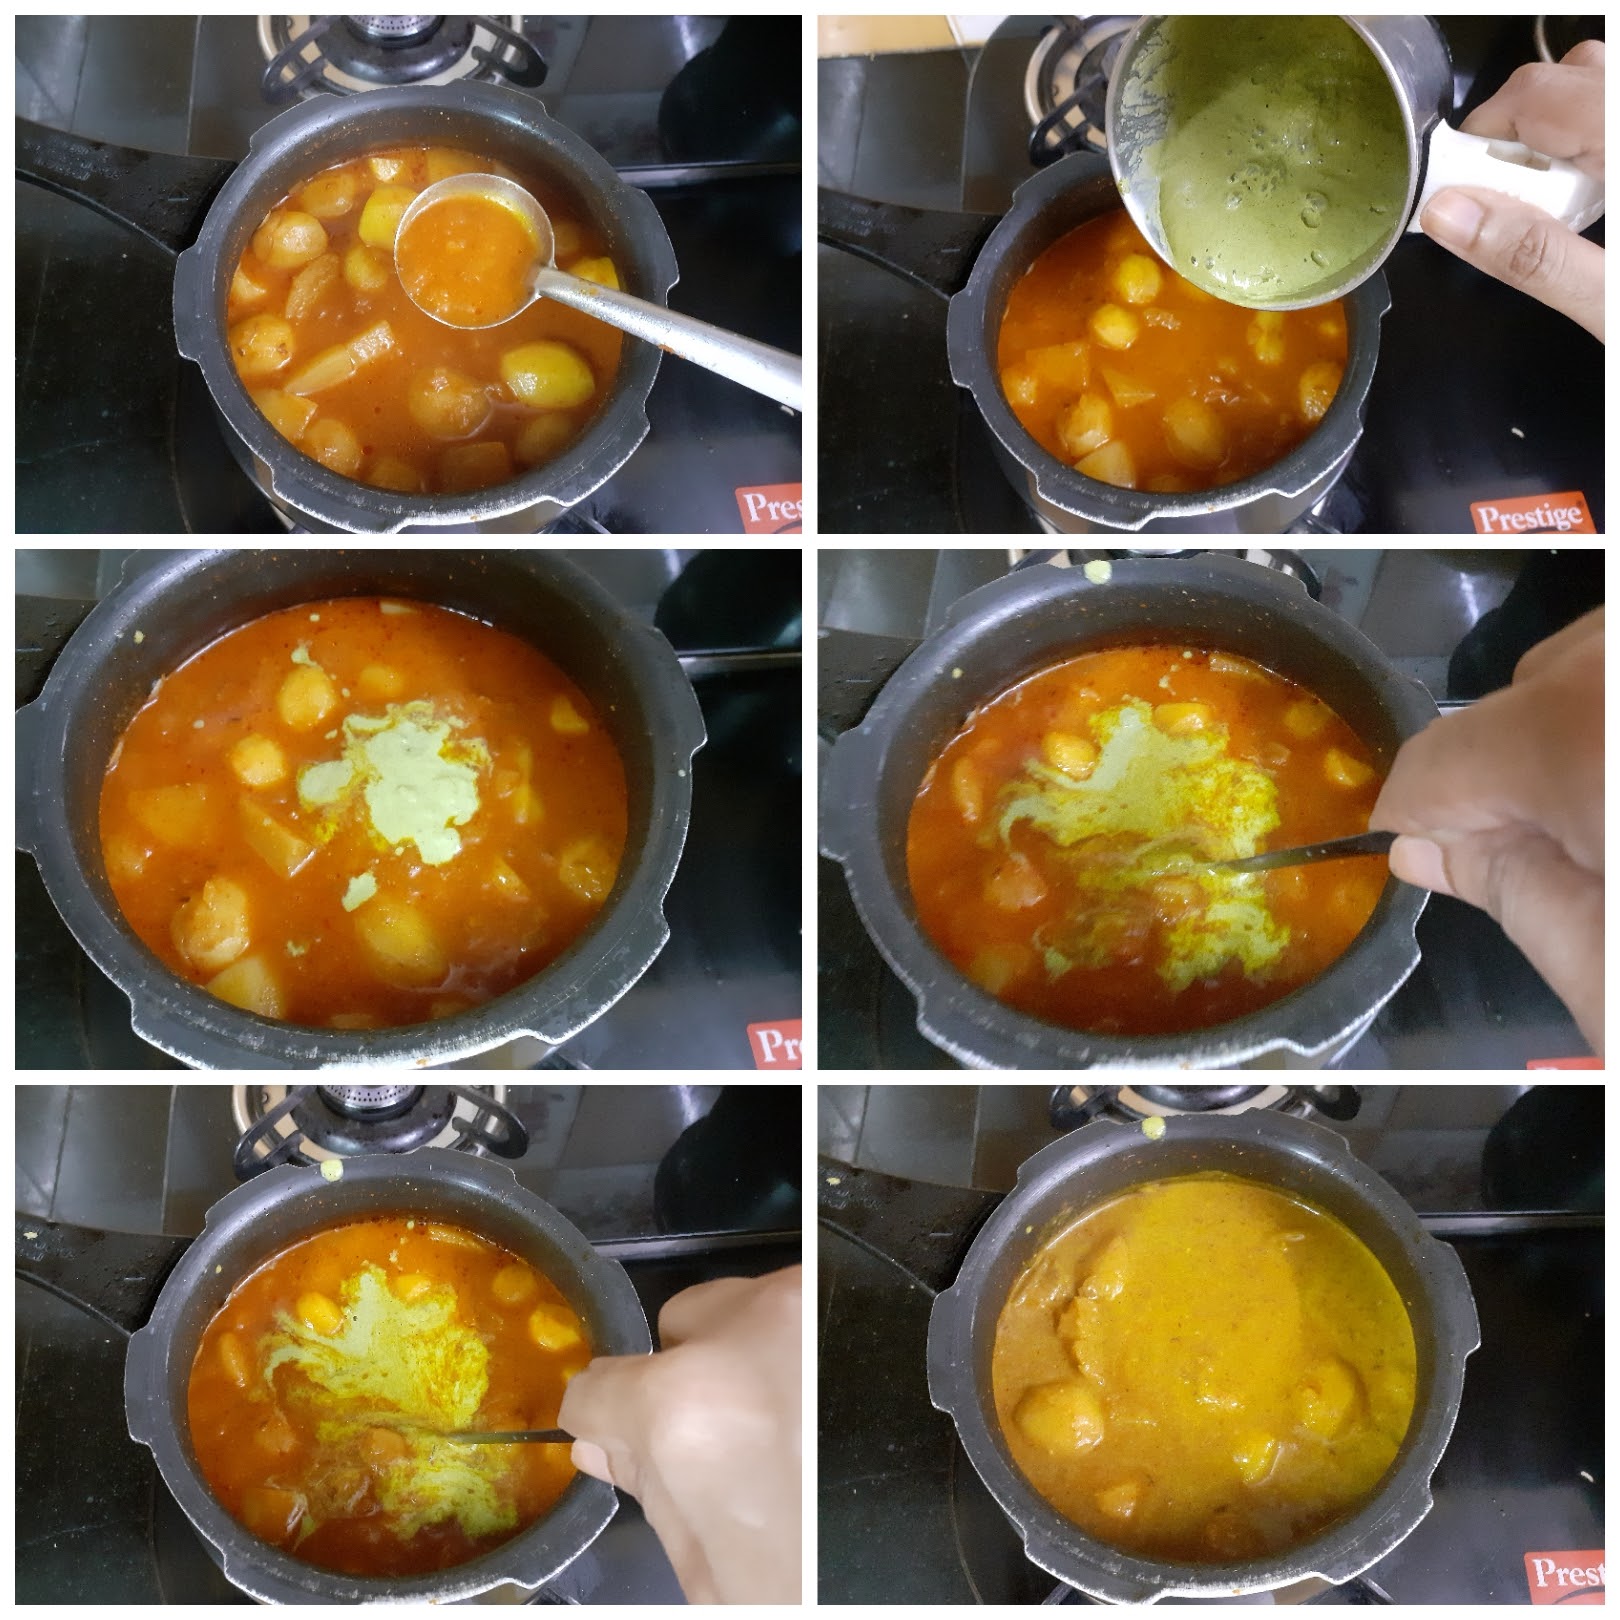
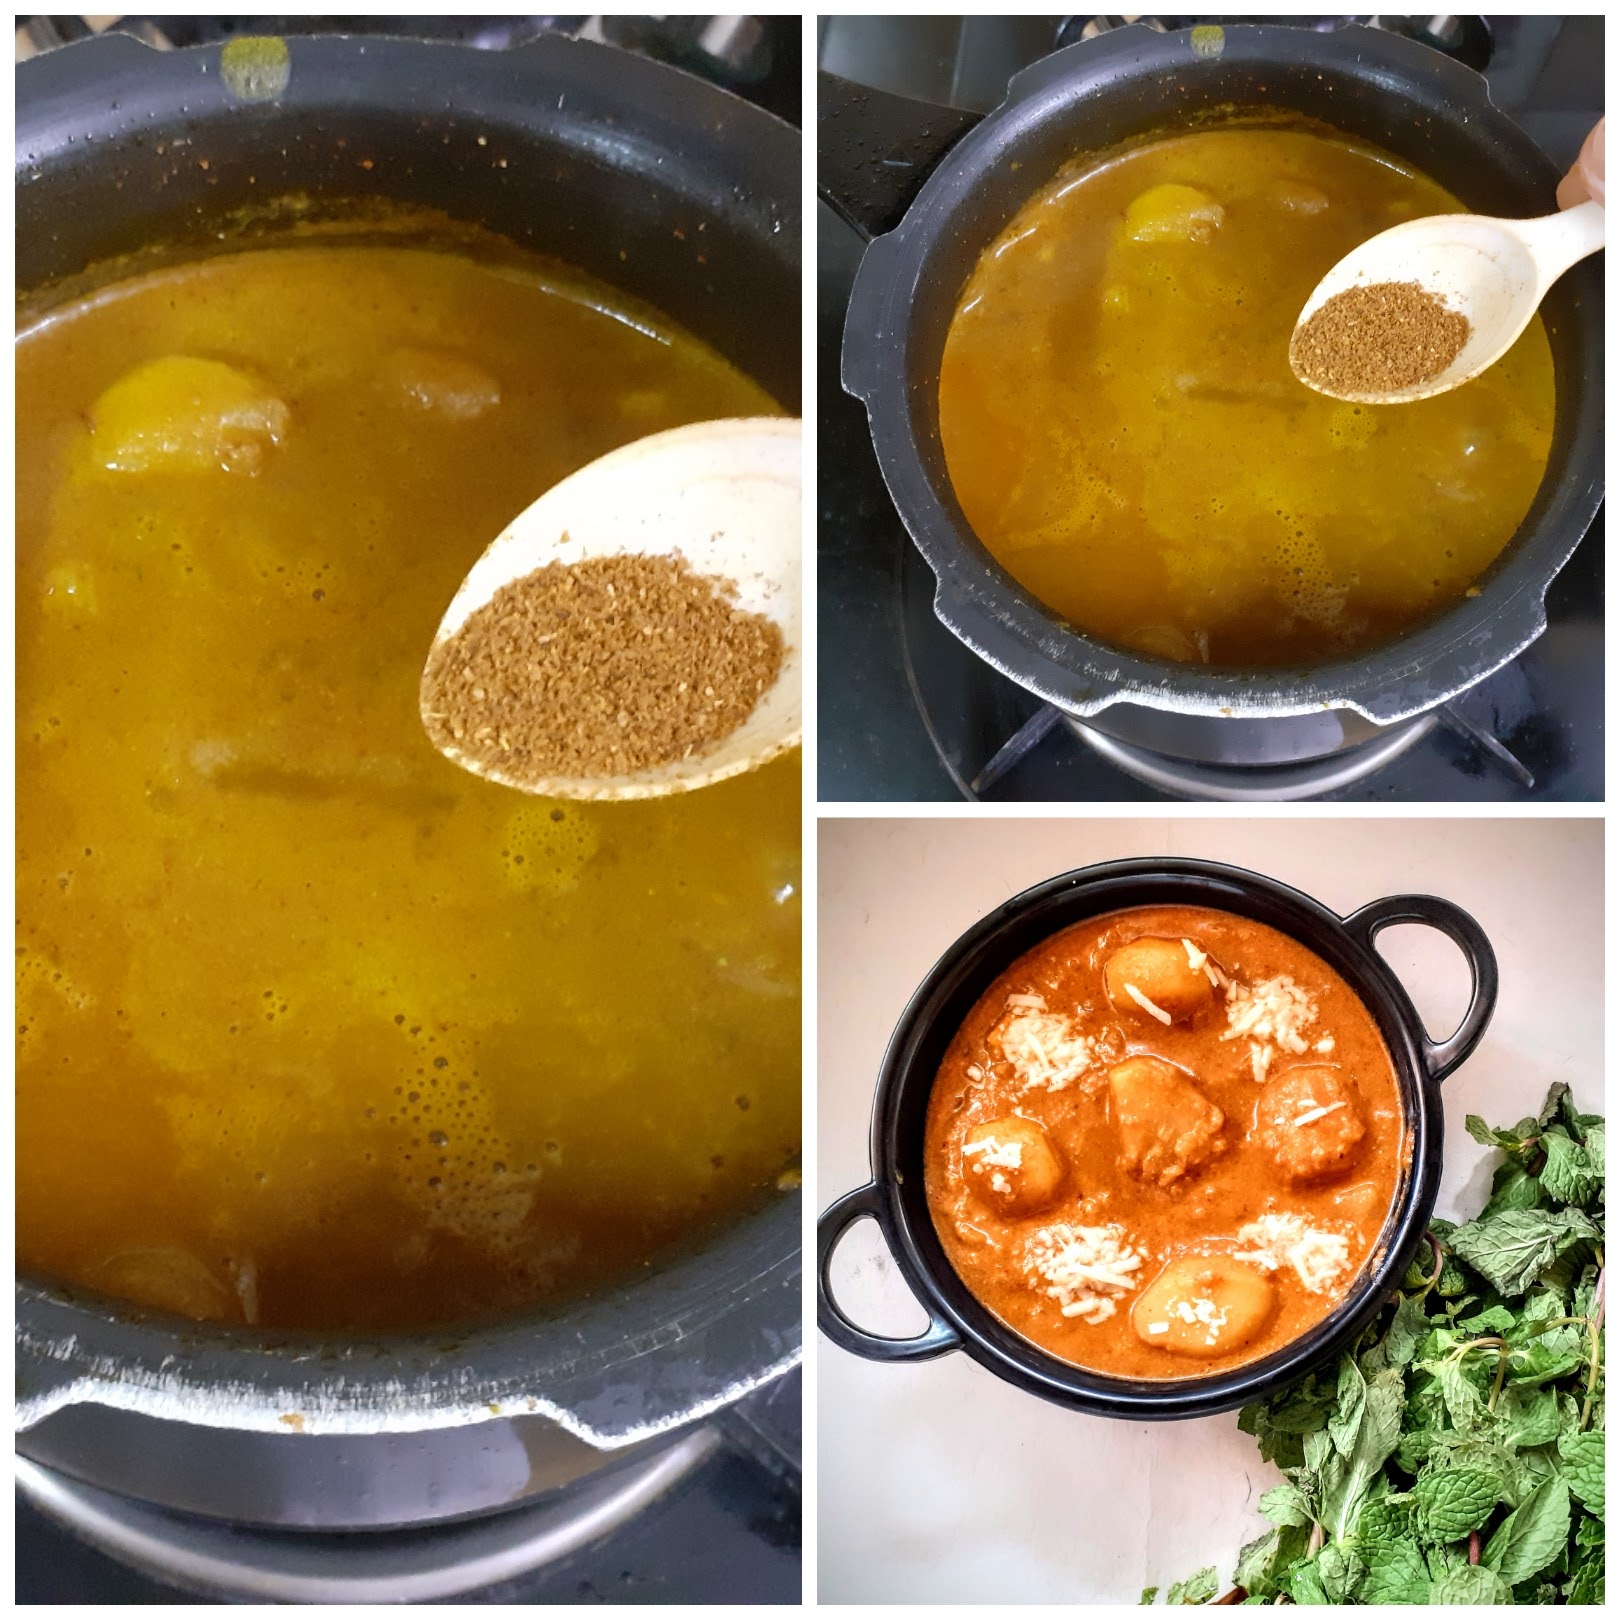
If you tried this recipe and liked it please comment below. I would love to hear from you. If you have a query about the recipe email us and ill respond as soon as I can.
Shrikhand (Kesar)
It is a double whammy when you get a probiotic as dessert. Under this category come sweet dishes like Misthti Doi, Bappa Doi, and Shrikhand. The previous two I am yet to try and blog. But the Shrikhand is something that I love making and relish eating.
This is one recipe that used to make in our Delhi days when curd was in excess or a little sour. Then there was a period when I entirely stopped making Shrikhand and relied on the store-bought one. Until recently when Aishu( pointed out that ” amma you haven’t made Shrikhand in ages”), that I decided to whip it up again. (The advantage of homemade Shrikhand is that we can customize the sugar, as per requirement. I find the store-bought ones very sweet).
But this time the Mantra was to make it in a much simpler way, in the past, this was a half-day procedure for me as it involved making hung curd, and that took anywhere between 3 to 5 hours, depending on the milk we use.
So I improvised my previous method to a smarter one, by using a mix of Greek Yogurt and homemade curd.
While you are here try out my other Indian dessert recipes like Pineapple Rabri, Thengai Therattipal, Atte ka Sheera, Gajar Halwa Barfi, Akkaravadisal, Sweet Poha, Carrot Kheer, and more…
Here is the recipe for Shrikhand( very detailed pictures are missing because this was supposed to be a causal post for social media and turned out that many people requested the recipe). So I am blogging it with minimum pictures, but I shall compensate for that with a good set of instructions.

Ingredients:
Greek yogurt( any brand) 400 gm
Homemade Curd 400 gm
Sugar 1/2 cup powdered ( add more if you prefer it sweeter)
Kesar powder a pinch
Kesar stands soaked in warm water a pinch
Elaichi/ Cardamom
Directions: Take a clean Muslin or cotton cloth, which will allow water to pass out. Spread the cloth into a bowl and empty the Greek yogurt plus homemade curd into it. Collect the edges and tie it such that all the water is able to drain away. I usually tie it to the Kitchen sink tap, so that the excess water from the curd drains away into the sink. Allow 45 minutes to pass. Now untie the cloth from the dripping arrangement. Almost all the excess water from the curd must have dripped away and the hung curd is now ready. Transfer the hung curd to a bowl in which you can whip/beat it. Now with an electric beater, at low speed start beating the hung curd. Beat for a minute until the hung curd looks like cream. Now add the powdered sugar and beat again for 30 seconds. Add in the colour, the cardamom powder, and a little of the water in which the kesar strands were soaked( about 2 tsp). Use a spatula to combine well until the kesar colour is evenly spread. Garnish with Kesar strands and the yummy probiotic Shrikhand is ready. Put it in the refrigerator until ready to serve.
Serving Suggestions: Puri and Shrikhand is a match made in heaven. In my house, we like it with Parathas and Rotis too.
STEPWISE RECIPE FOLLOWS:
1. Take a clean Muslin or cotton cloth and spread it into a bowl and empty the Greek yogurt plus homemade curd into it.
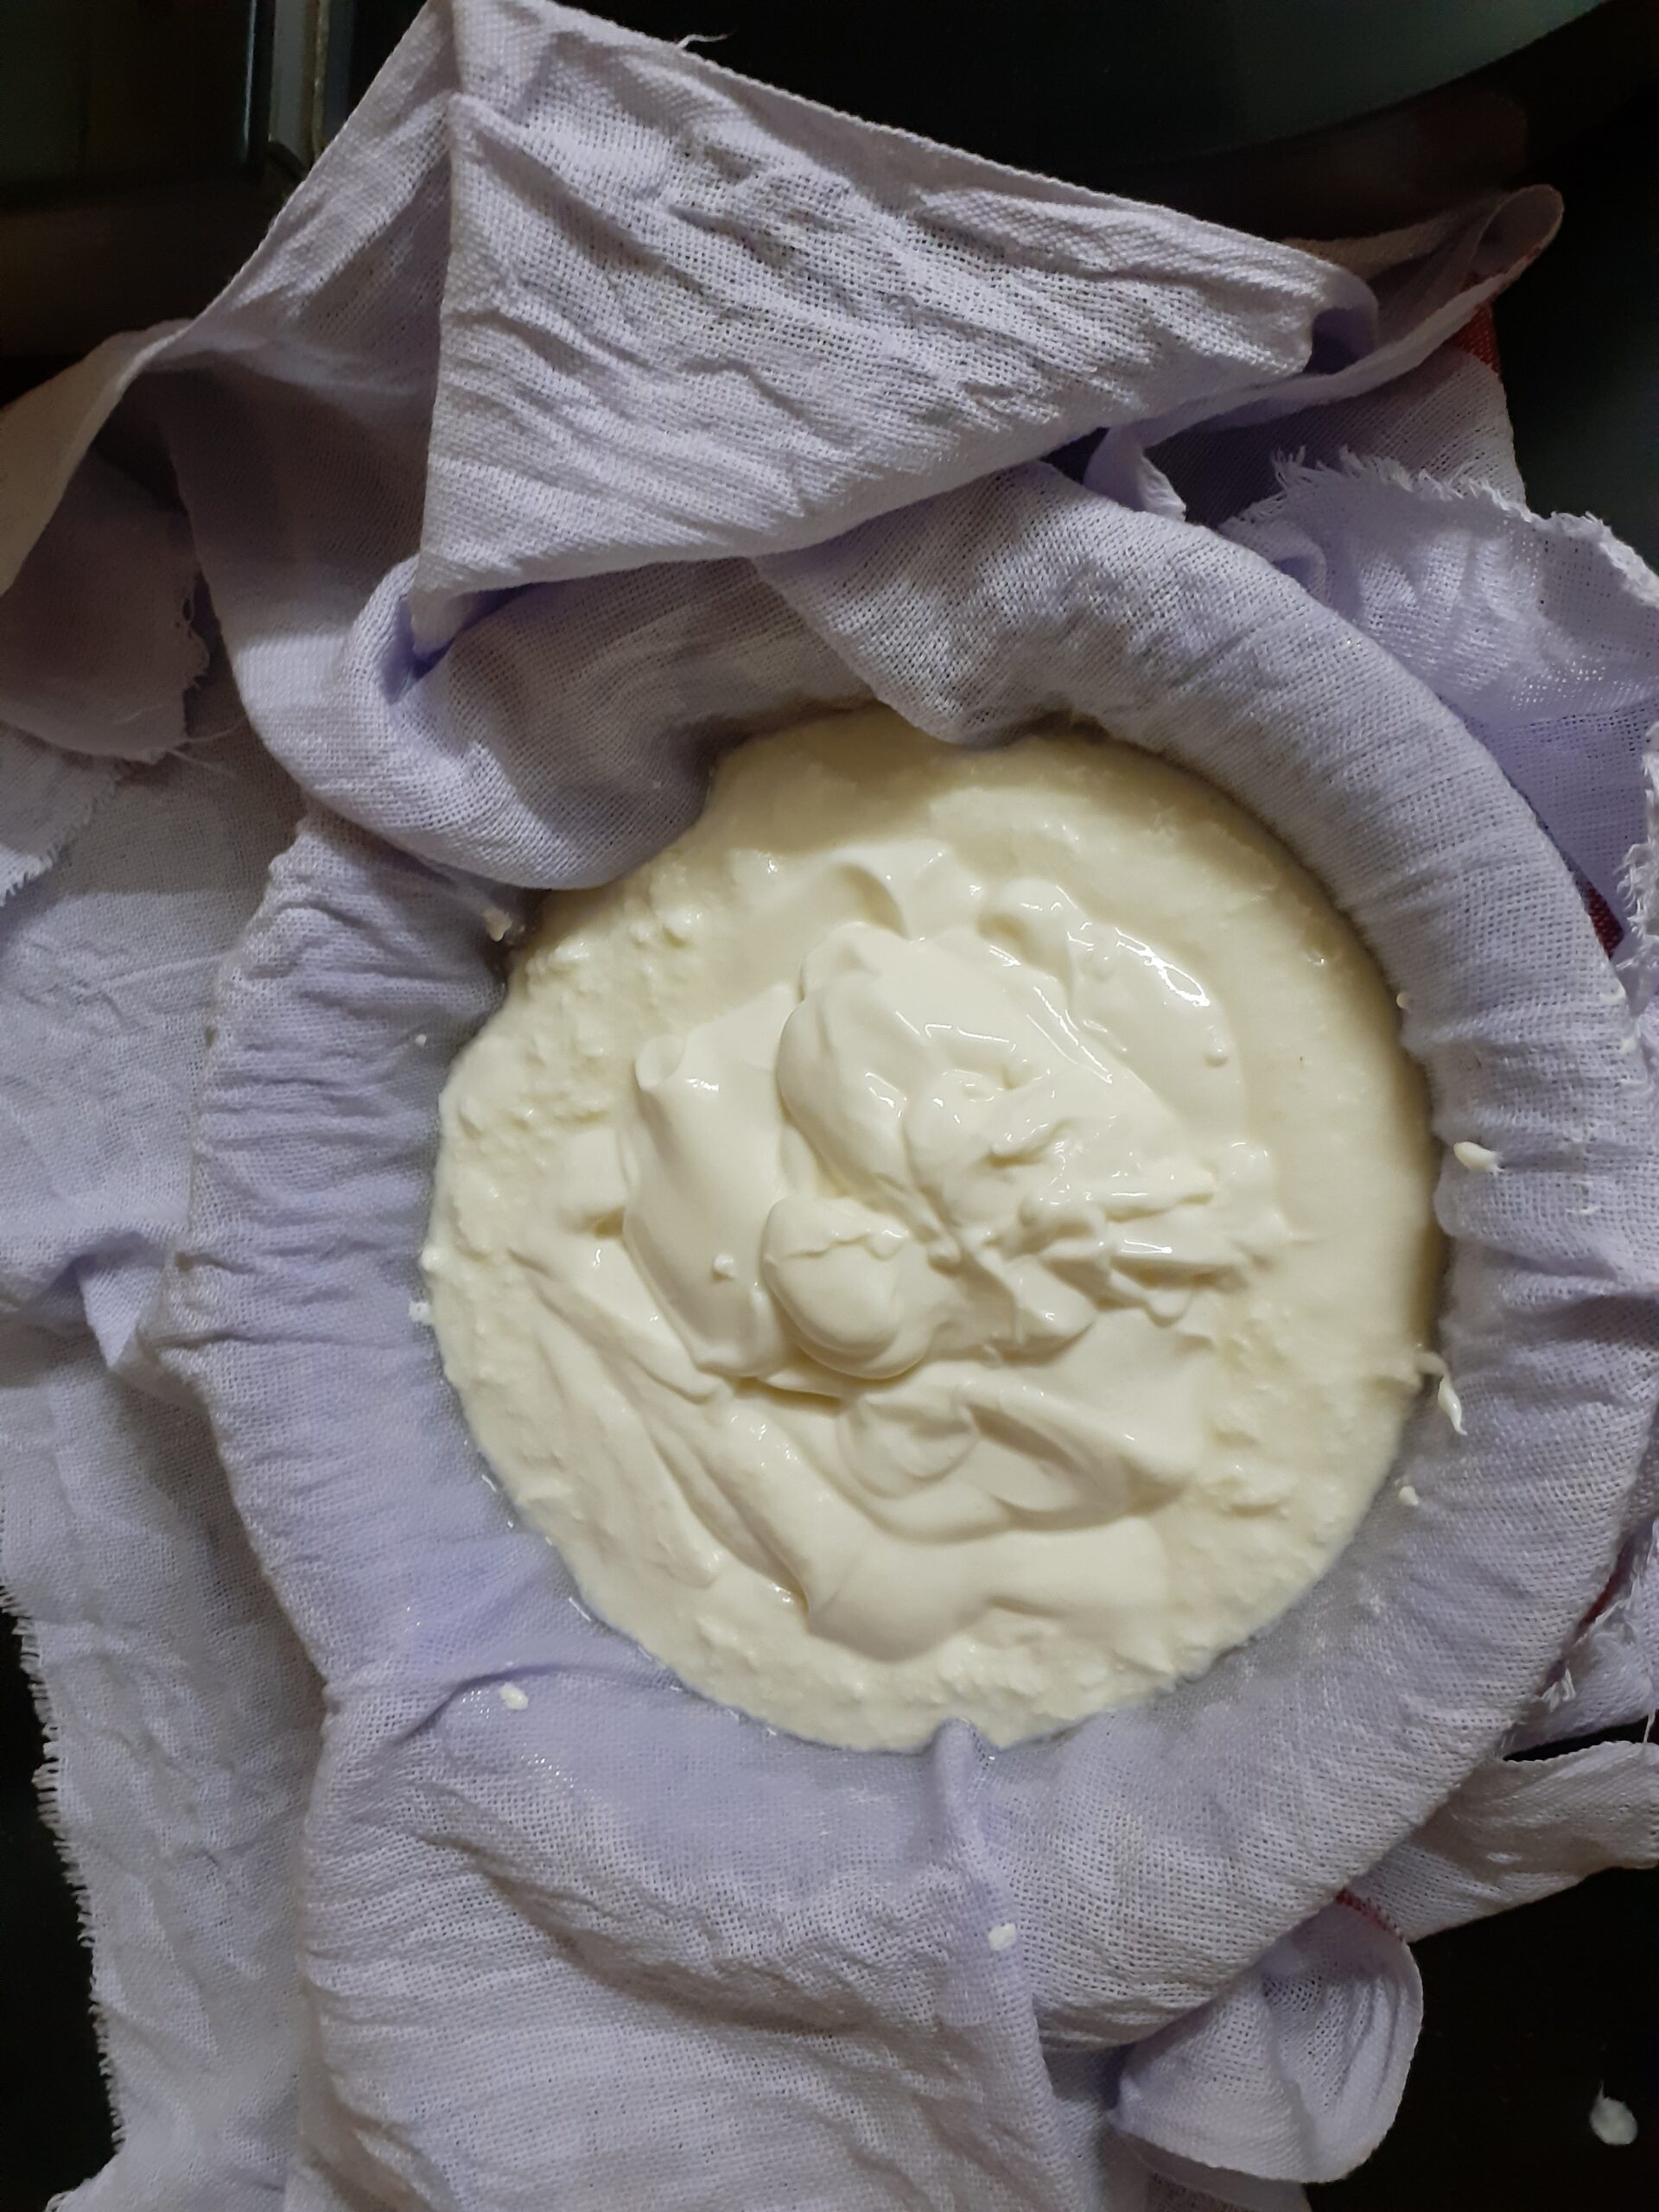
2. Collect the edges and tie it such that all the water is able to drain away. Allow 45 minutes to pass. Now untie the cloth from the dripping arrangement. Almost all the excess water from the curd must have dripped away and the hung curd is now ready.
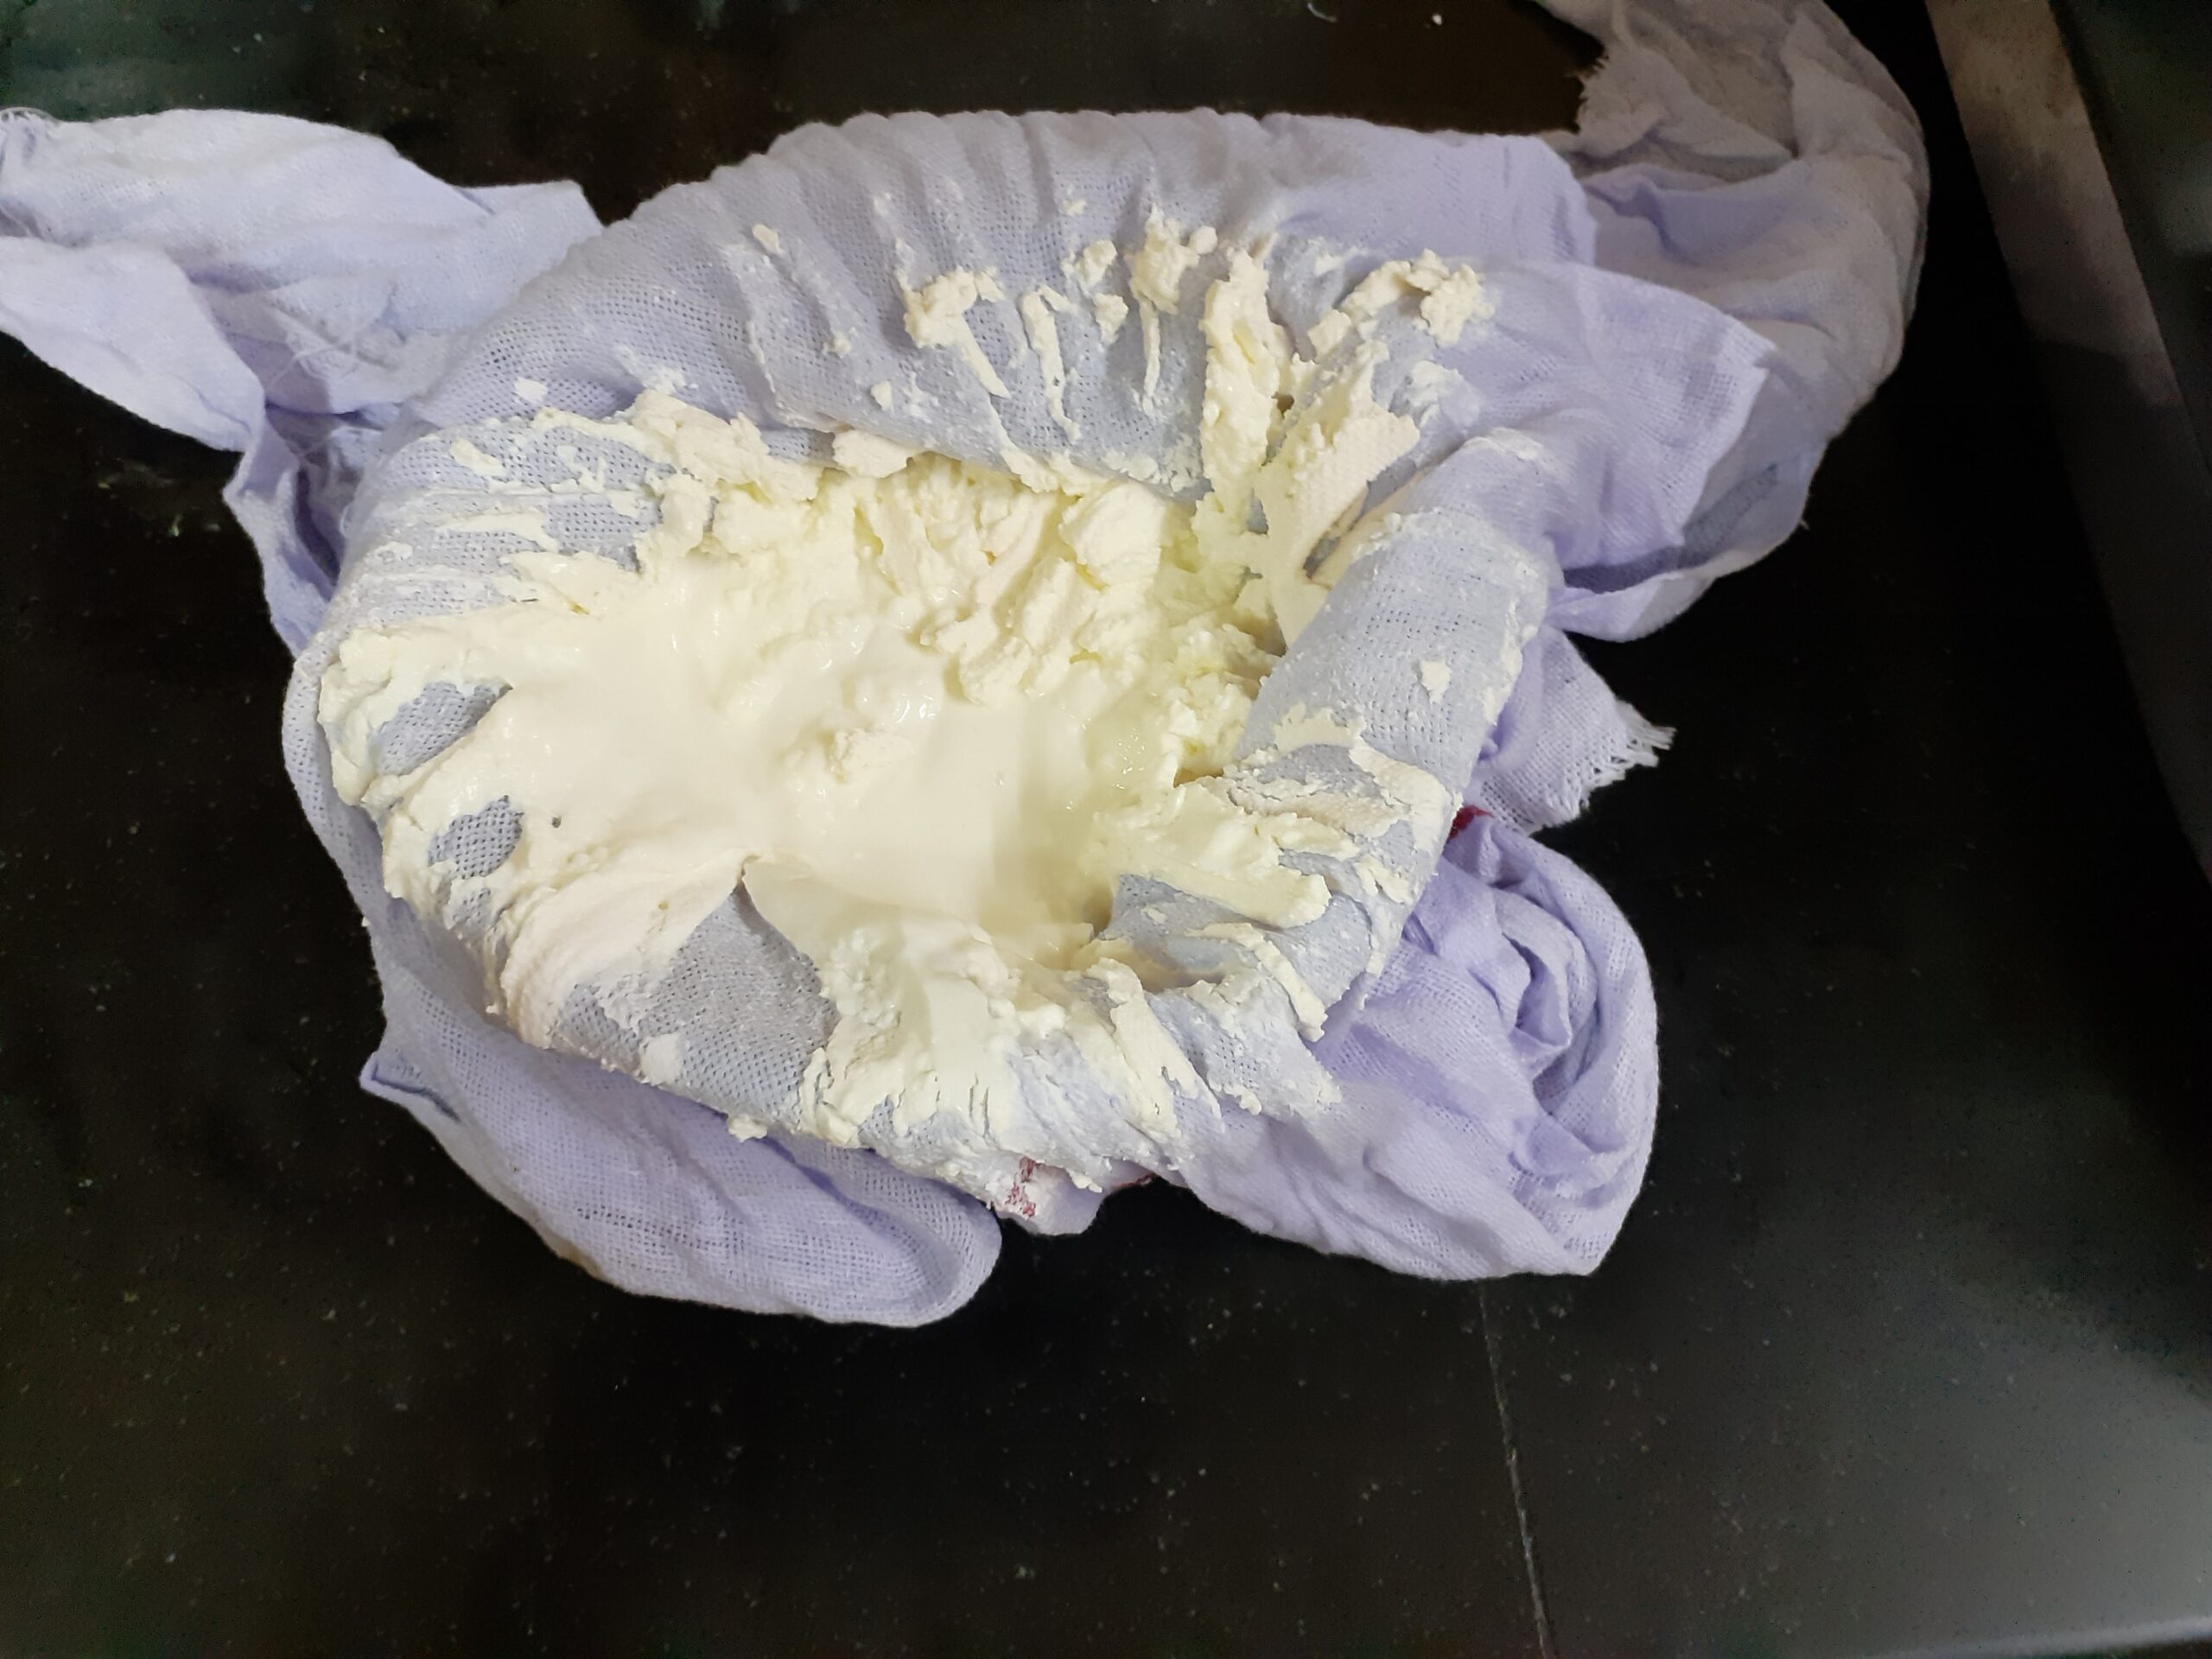
3. Transfer the hung curd to a bowl in which you can whip/beat it. Now with an electric beater, at low speed start beating the hung curd. Beat for a minute until the hung curd looks like cream.
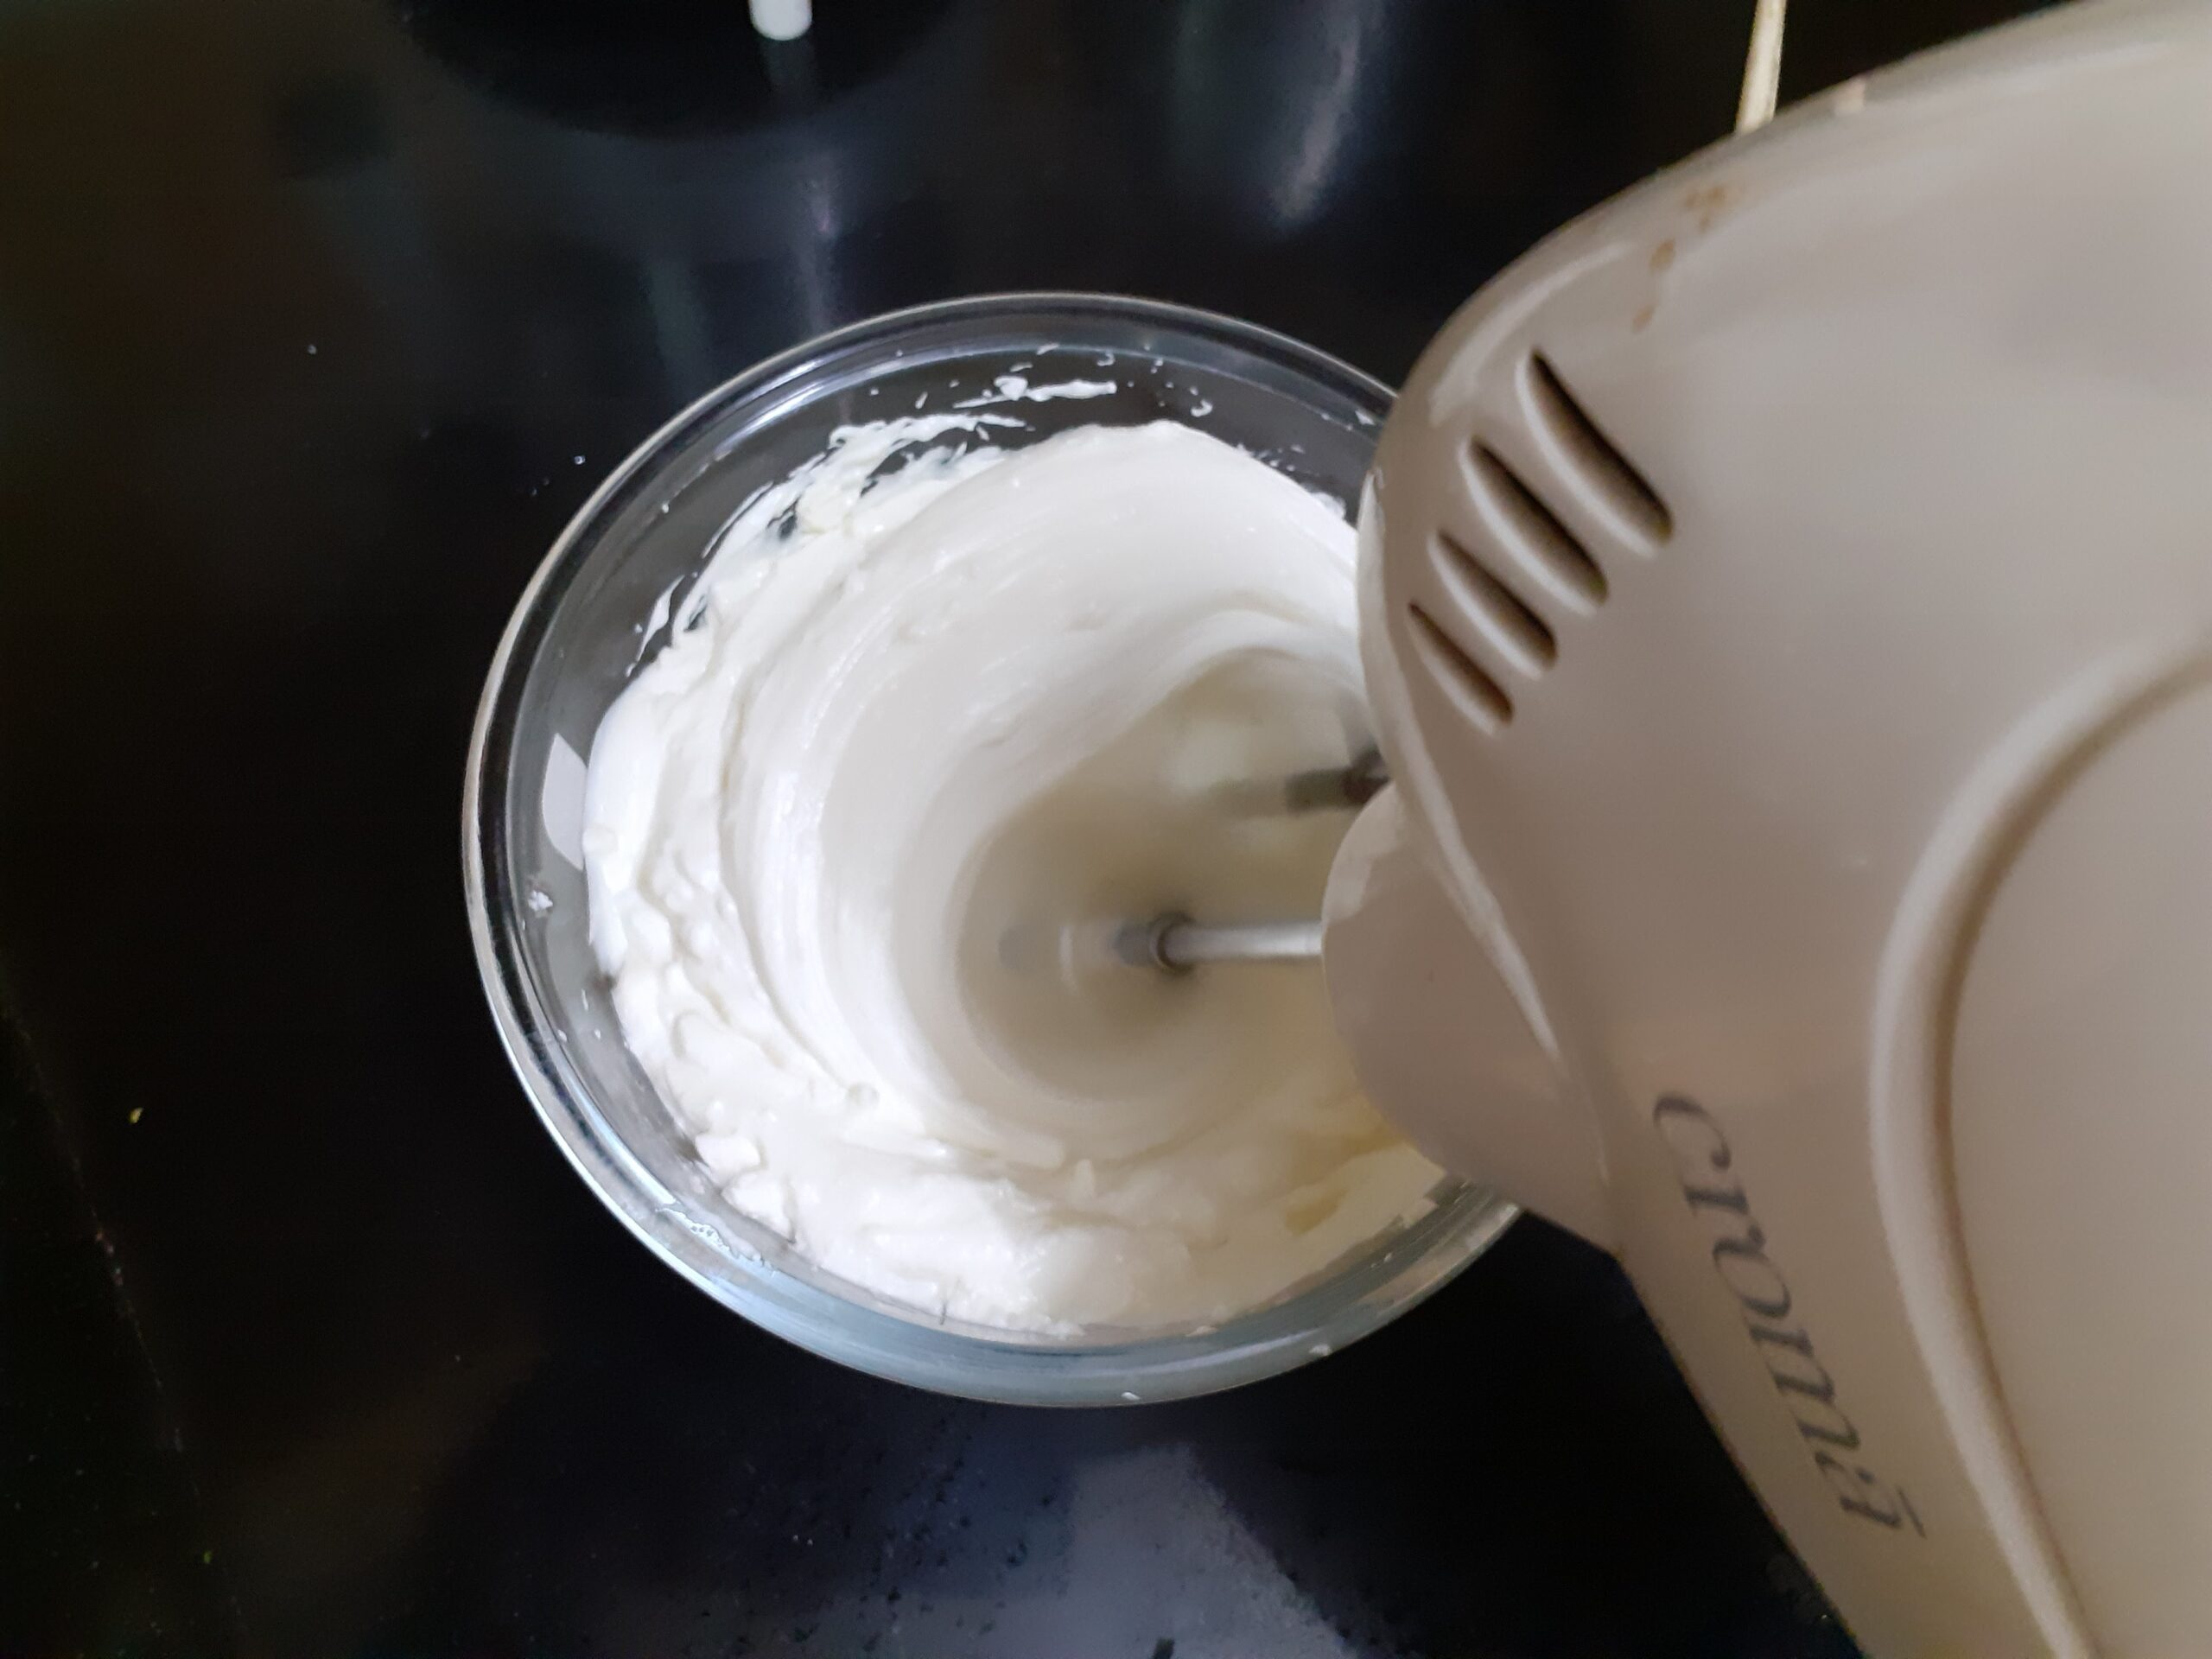
4. Now add the powdered sugar and beat again for 30 seconds. Add in the colour, the cardamom powder, and a little of the water in which the kesar strands were soaked( about 2 tsp). Use a spatula to combine well until the kesar colour is evenly spread.
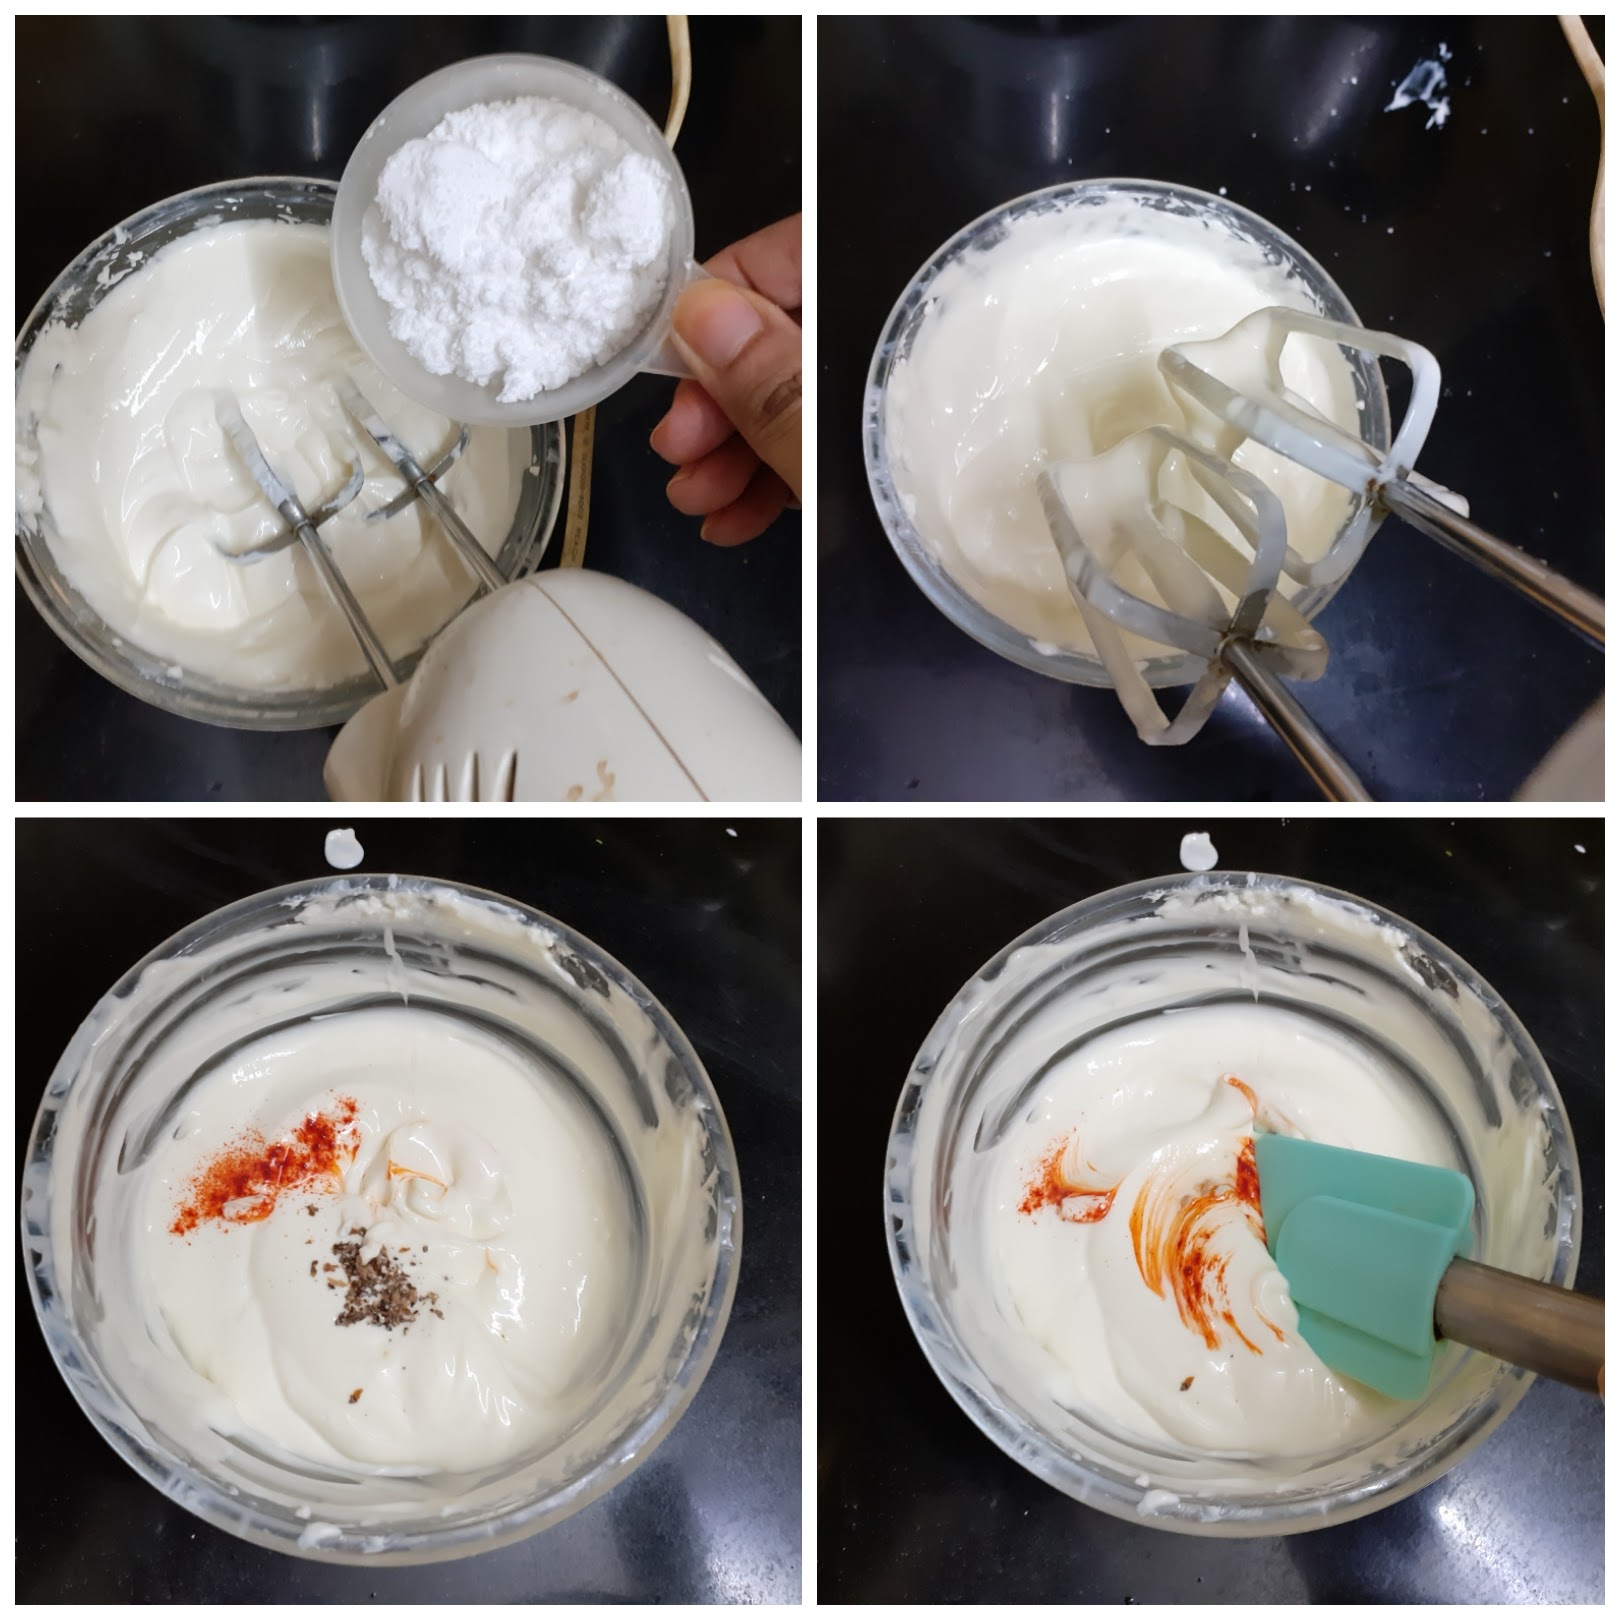
5. Garnish with Kesar strands and the yummy probiotic Shrikhand is ready. Put it in the refrigerator until ready to serve.
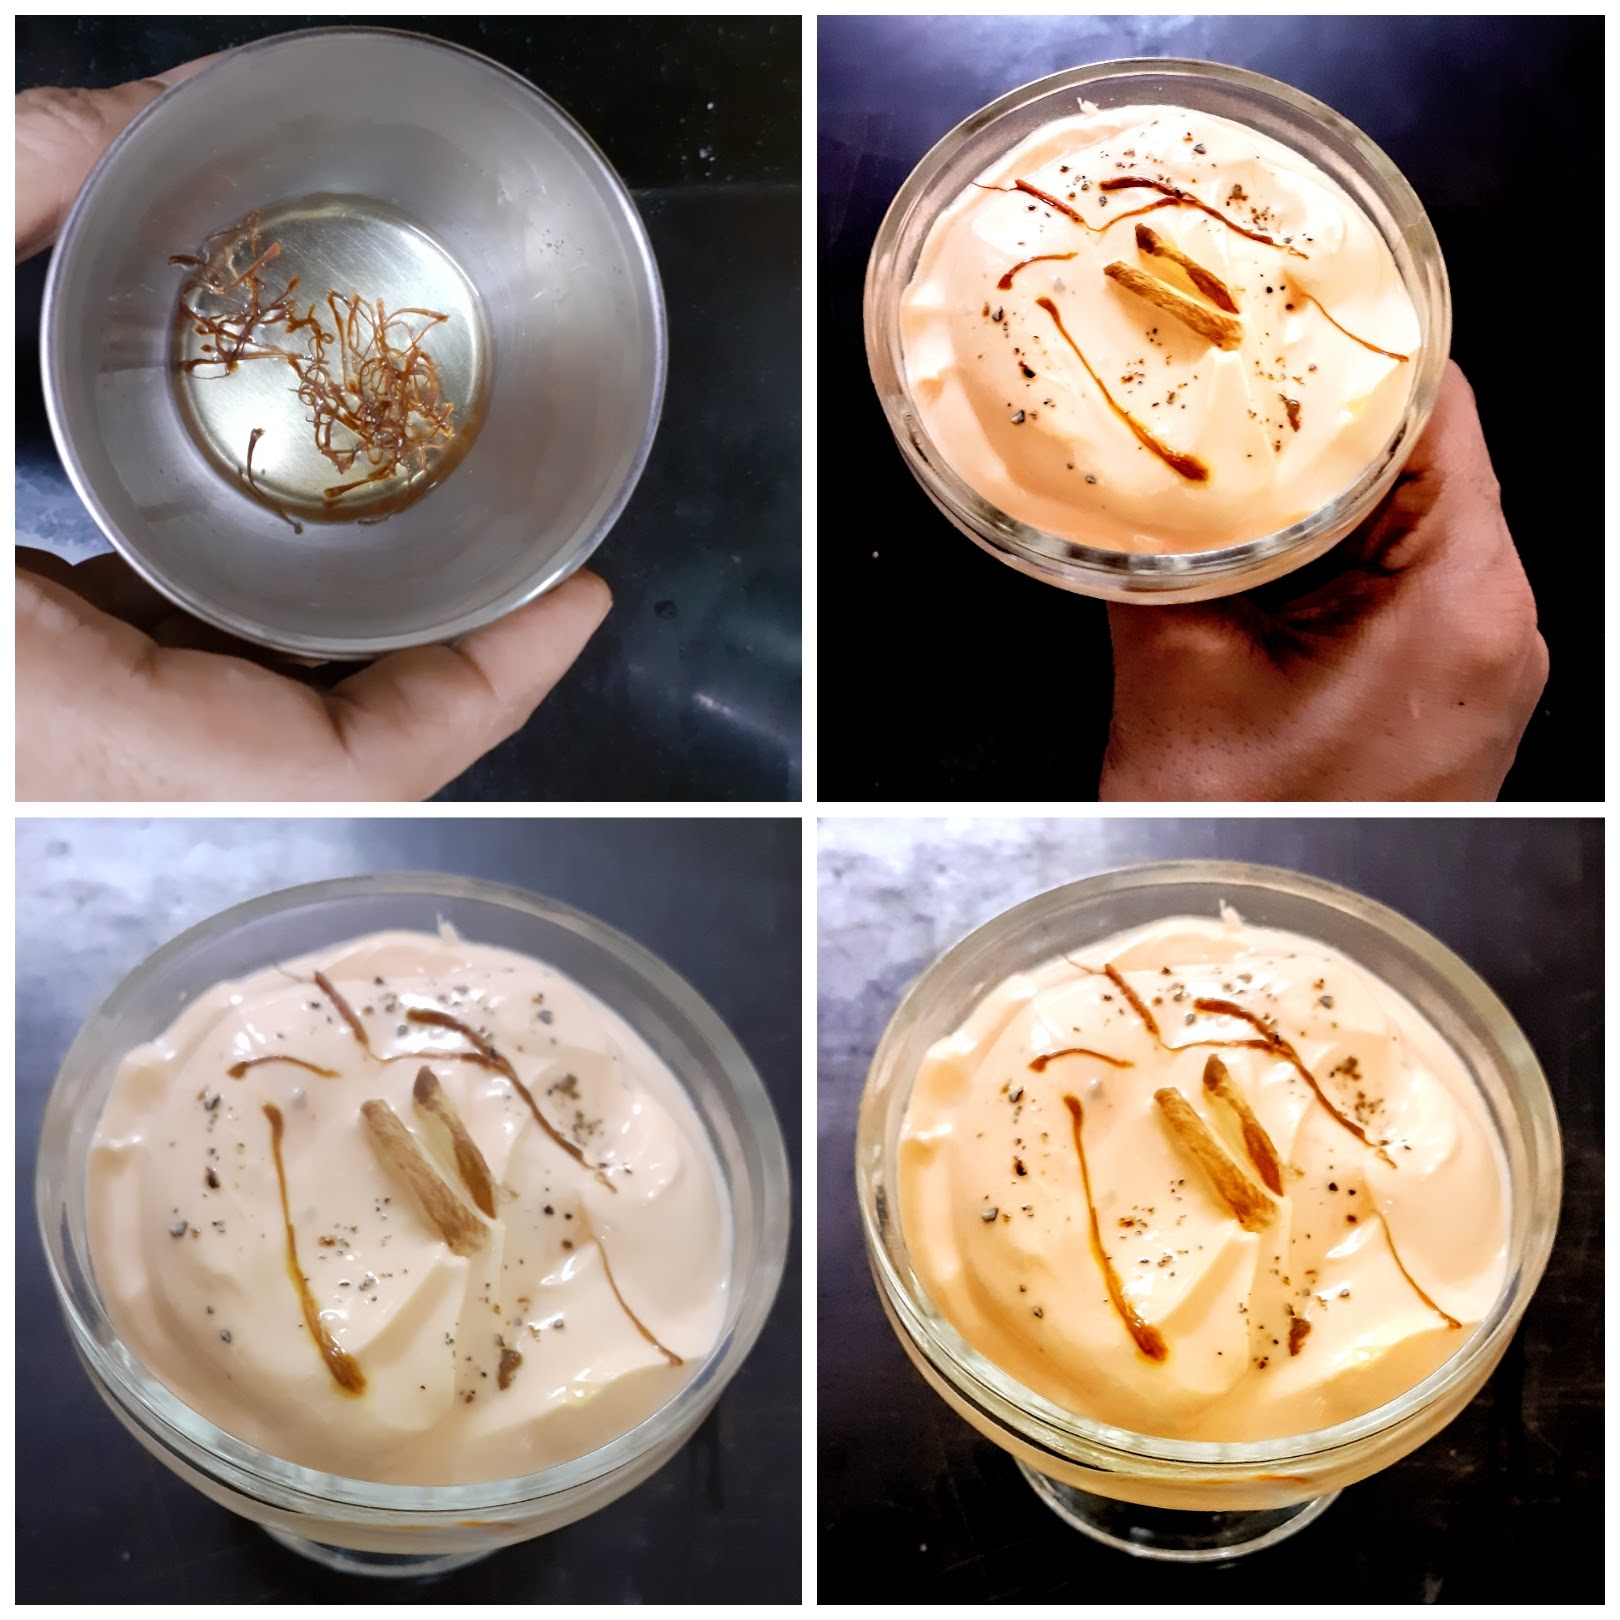
NOTES:
1. Always add powdered sugar, so that the consistency of the Shrikhand does not go runny.
2. I have made a variant of Rose flavour too. I had some homemade Rose syrup, so tried it out. One can buy storebought ones and try. Use the rose syrup in place of the kesar colour and proceed.
3. This recipe can be made with homemade curd too. It takes longer for the water from the curd to drain. The rest of the recipe is the same.
If you tried this recipe and liked it please comment below. I would love to hear from you. If you have a query about the recipe email us and ill respond as soon as I can.
Bonda Moru Kuzhambu
This is a popular south Indian dish made of curd/yogurt and is the counterpart of the North Indian Kadi. In the North Indian Kadi chickpea flour or besan is used to give body to the dish, whereas in Mor Kuzhambu, Chana dal and Tuvar dal( yellow lentils and gram) along with coconut and coriander seeds are used to give body. The masalas used in Kadi are in powdered form, whereas in the South Indian Mor Kuzhambu the whole masalas are ground to a paste.
The array of vegetables that can be used in making this dish is huge. Vegetables like Plantains, Brinjal, Colaccasia/Arbi, Ash gourd, Pumpkin, Mango(ripe), Bhindi/Vendakai can be used to make this dish. These vegetables are used in a combination or individually to make the Mor Kuzhambu. Sometimes lentil dumplings are also used.
In this recipe, I am showing the method for the Bonda/Dumpling Moru Kuzhambu. This is a dish that I used to make so often in the past and then stopped making altogether for the past two years, for no specific reason ofcourse. Though the Moru Kuzhambu/Kadi is a weekly dish in my house, the Bonda Moru Kuzhambu I make only once in a while.
Usually, Urad dal/ Black lentils are soaked and ground to a fine batter and then deep-fried in oil. There is a popular south Indian snack called Mysore Bonda, so these Bondas are put in the Kadi. I make this in a much simpler fashion though. Idli/Dosa batter is a staple in all our homes, I have used that to make the Bondas with a little additional flours. That’s all.
While you are here please check out other recipes by me like Vatha Kozhambu, Moru Kuzhambu with Bhindi, Gutti Vankaya Kura, Drumstick curry, Brinjal Pepper masala, Pachai Sundakkai Kuzhambu, and many more…
Here is the recipe for Bonda Moru Kuzhambu-
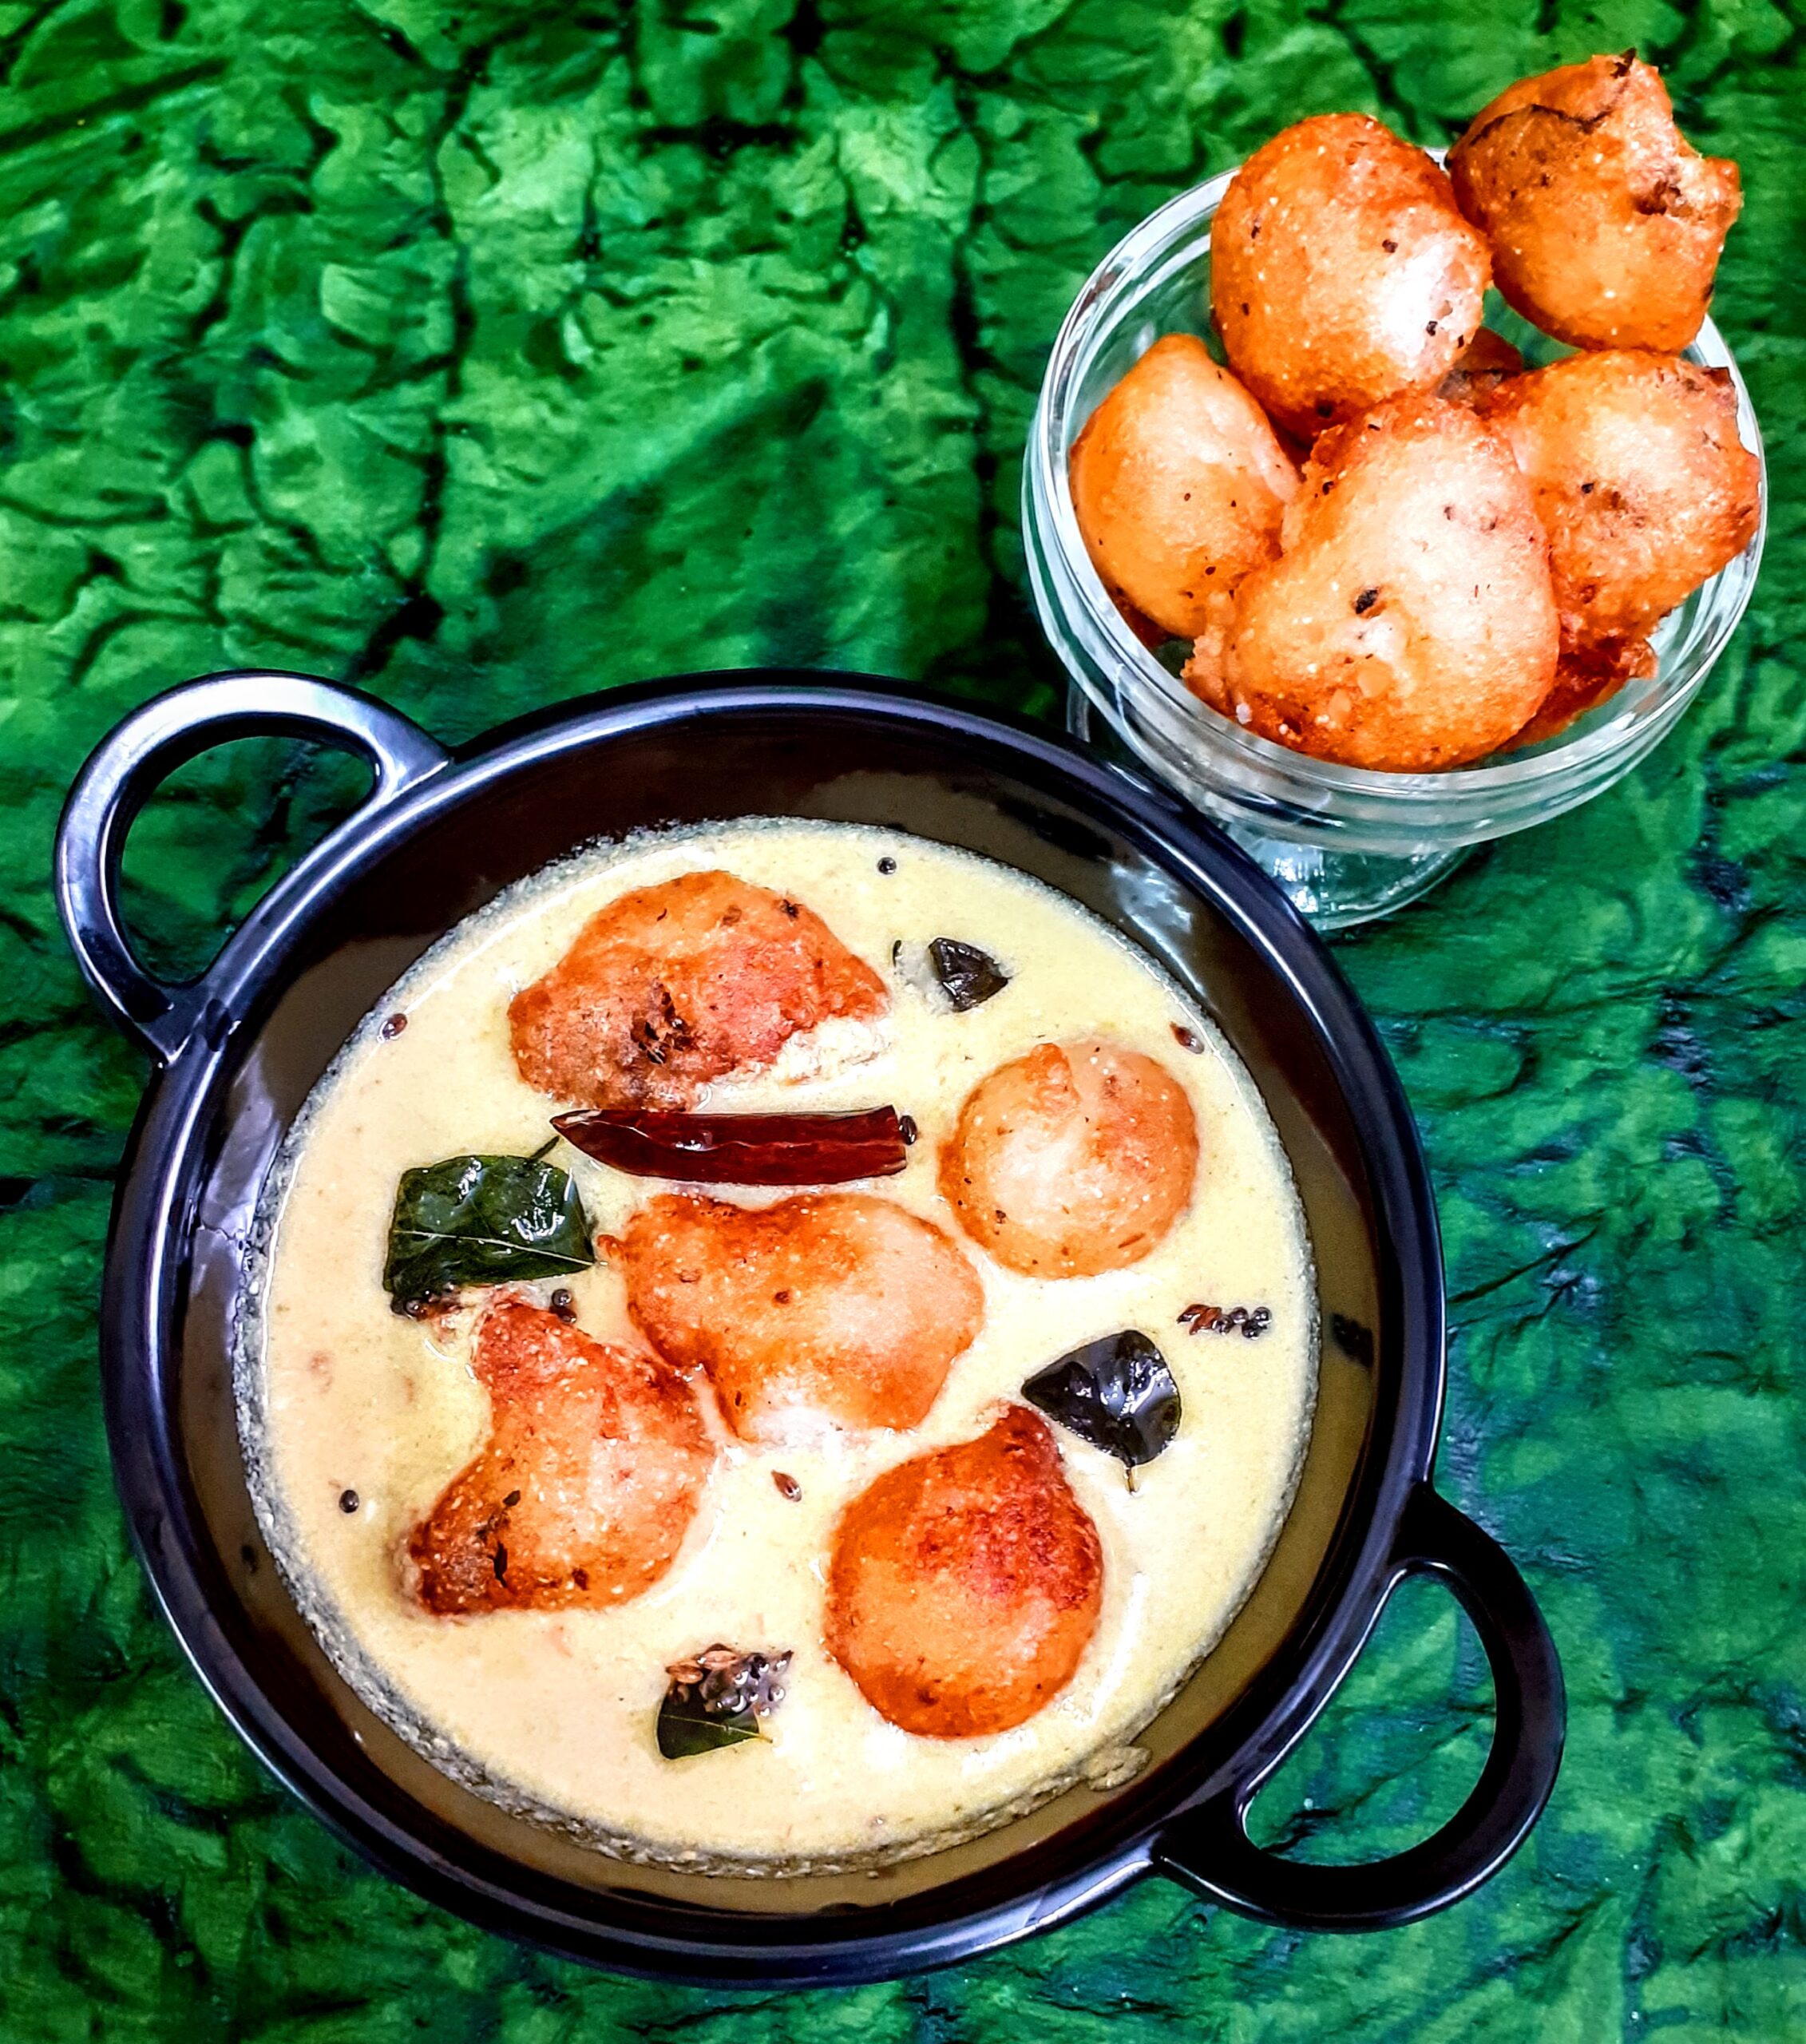
Ingredients:
To Soak for 15 mins:
Dhania/Coriander seeds 1 tbsp
Jeera 1/2 tsp
Chana dal 1.5 tsp
Tuvar dal 1 tsp
Dry red chilli 1
Methi seeds a pinch(optional)
To grind:
Green chilli 1 big
Ginger1/2 inch piece
Coconut 2 tbsp +
All soaked ingredients after draining water.
Curd 300 ml or 2 cups(refer method) (1 cup=150ml)
For the Bondas/lentil Dumplings:
Idli/Dosa batter 1.5 cup
Rice flour 1.5 tbsp
Green chillies 2 chopped
Ginger 1/2 inch piece chopped
Cumin- pepper powder 1 tsp
Curry leaves a few
Oil for frying the dumplings
For tempering:
Oil 1 tbsp
Mustard seeds 1 tsp
Cumin seeds/Jeera 1/2 tsp
Dry red chillies 2 broken
urad dal 1 tsp
Chana dal 1/2 tsp
Curry leaves a few
salt to taste
Directions:
Soak all ingredients mentioned under “to soak” for 15 minutes. After 15 minutes, drain water and put the soaked ingredients into a blender. Add the ingredients mentioned under “to grind” except the curd and grind them to a coarse mixture. Now add 2 tbsp curd to the coarse mixture and grind again to a smooth paste.
While the above ingredients are soaking, let’s fry the Bondas. To the Idli/Dosa batter add the rice flour, green chillies, ginger, cumin-pepper powder, and curry leaves and mix nicely. Heat oil in a Kadai for deep frying the Bondas. Now drop a small amount of batter into the oil with your finger or one can use a tablespoon to do it. Drop tiny amounts of batter, because they fluff up in the oil. Repeat for all batter, drain in absorbent paper and keep aside.
Now put a Kadai on the flame and pour the ground paste into it. Reduce the flame and add 1 to 1.5 cups of water and simmer it. The paste has to cook well, for about 2 minutes or until the raw taste of the masalas is gone. Now smoothen the remaining curd(we used only 2 tbsp for the paste) with a whisk or give it a single spin in the blender and pour this curd into the cooking paste. Add turmeric powder and salt. The flame should be low throughout. Once the curd is poured, keep stirring constantly for a few minutes. This should take approximately 2 minutes and then switch off the flame. Once the curd is poured, it should not simmer for long. Now add the fried Bondas. Now in a small Kadai heat oil, add all the tempering ingredients, fry them and add to the Mor Kuzhambu.
Let the Bondas soak for 10 minutes. The tasty Bonda Mor Kuzhambu is ready to relish.
Serving Suggestions: Hot rice and Parupu Usili on the sides. It is a match made in heaven with Coconut(Thengai ) Sevai(rice hoopers) or even with Coconut rice.
STEPWISE RECIPE FOLLOWS
1. Assemble all ingredients. Soak all ingredients mentioned under “to soak” for 15 minutes. After 15 minutes, drain water and put the soaked ingredients into a blender.


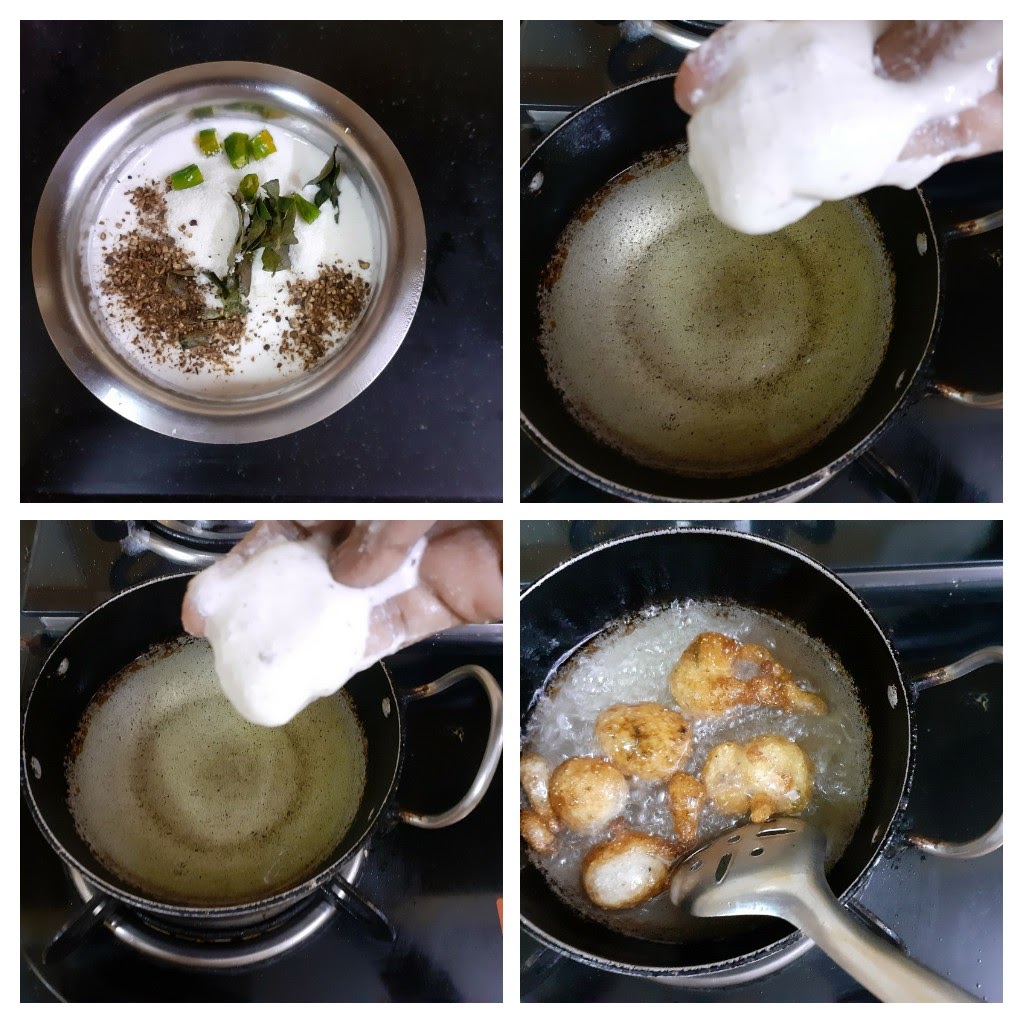


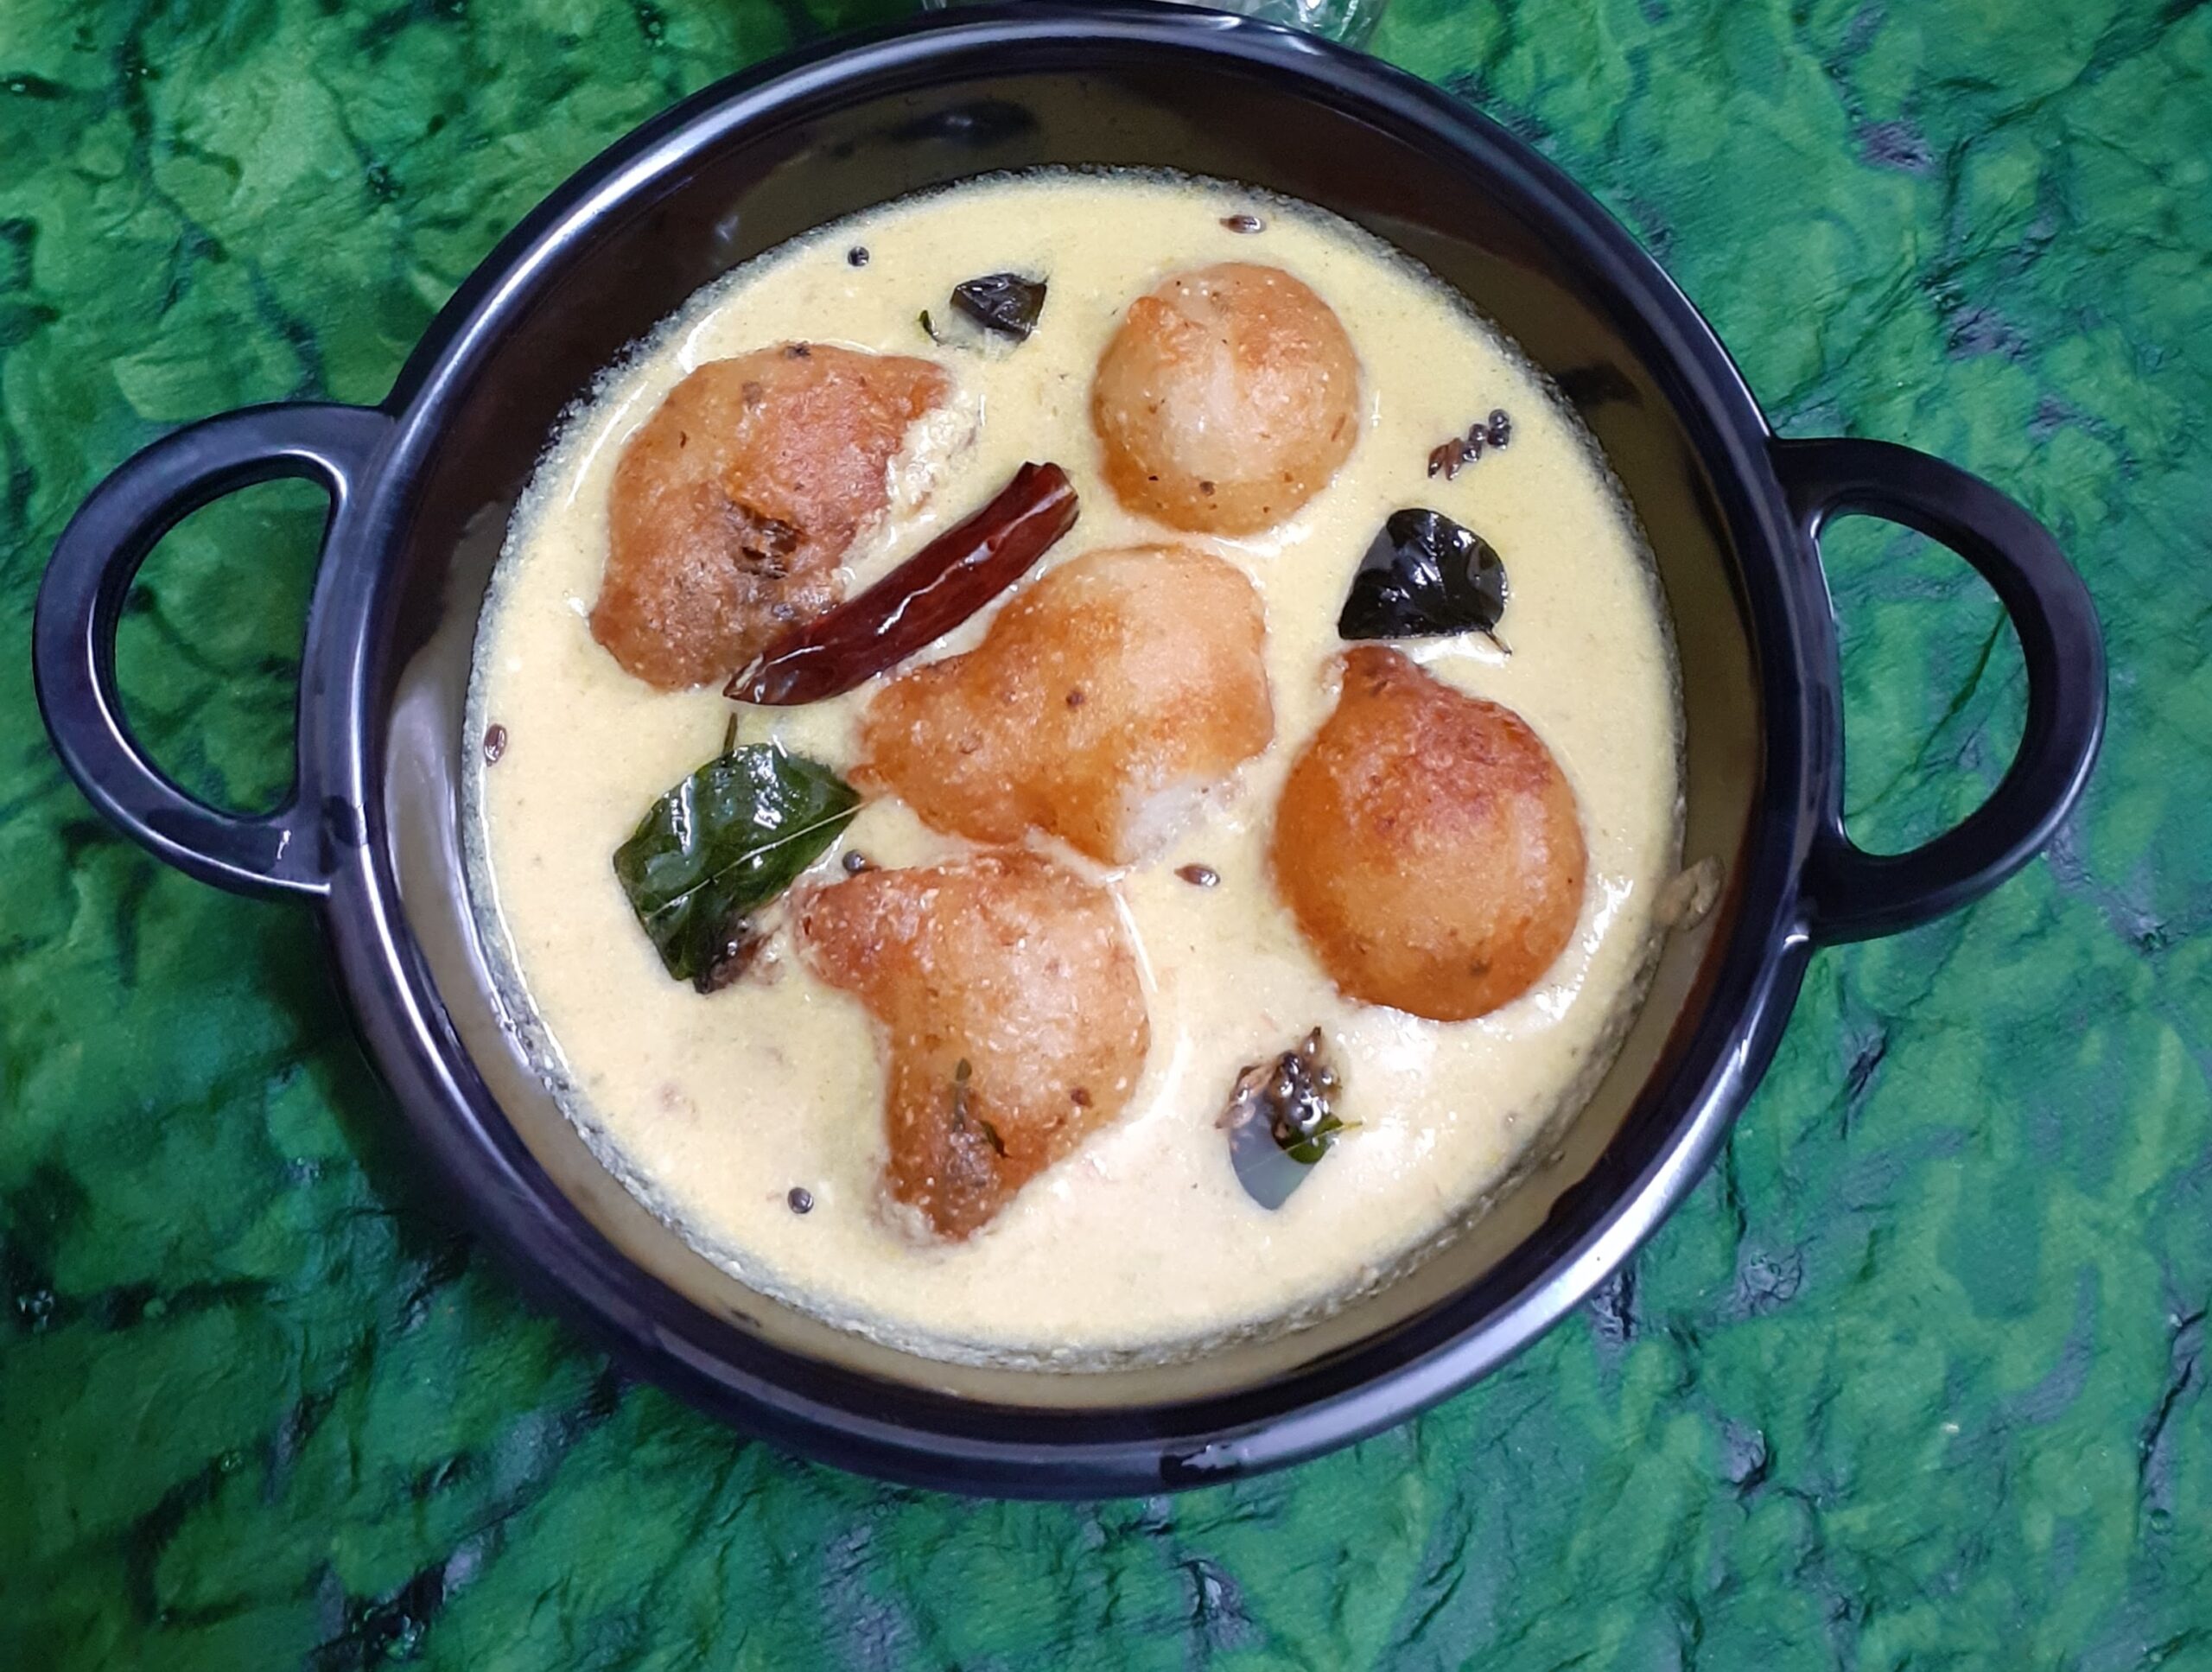
2. For the same reason once the curd is poured into the masala paste it has to be stirred constantly, to avoid separating of water and curd, which will turn the dish runny.
3. To fry the Bondas use a spoon to drop the batter, as it is safer. At a time a few Bondas can be fried.
If you tried this recipe and liked it please comment below. I would love to hear from you. If you have a query about the recipe email us and ill respond as soon as I can.
Roasted Red Bell Peppers Chutney
I have created this chutney as per my imagination and have not referred to any recipes. I was always intrigued by recipes showing roasting Red Bell Peppers and so I wanted to give it a try. In the past I have used green Capsicum in chutneys, but this is the first try with the Red ones.
This is a very simple recipe, gets done in 20 minutes(just because it involves cooling time, otherwise it would take much lesser) and goes very well with Idli, Dosa, Pongal, Upma and Chapati or Puris too. The red bell peppers give the chutney a beautiful texture and body and tomatoes give it the tang. Herbs and spices enhance its flavors and what we get it absolute yumminess.
While you are here do try my other recipes like Stuffed Kuzhi Paniyarams, Adai, Rava Dosa, MLA Pesarattu, Tomato Coconut Chutney, and more…
The recipe for the Red Bell Peppers Chutney is given below-
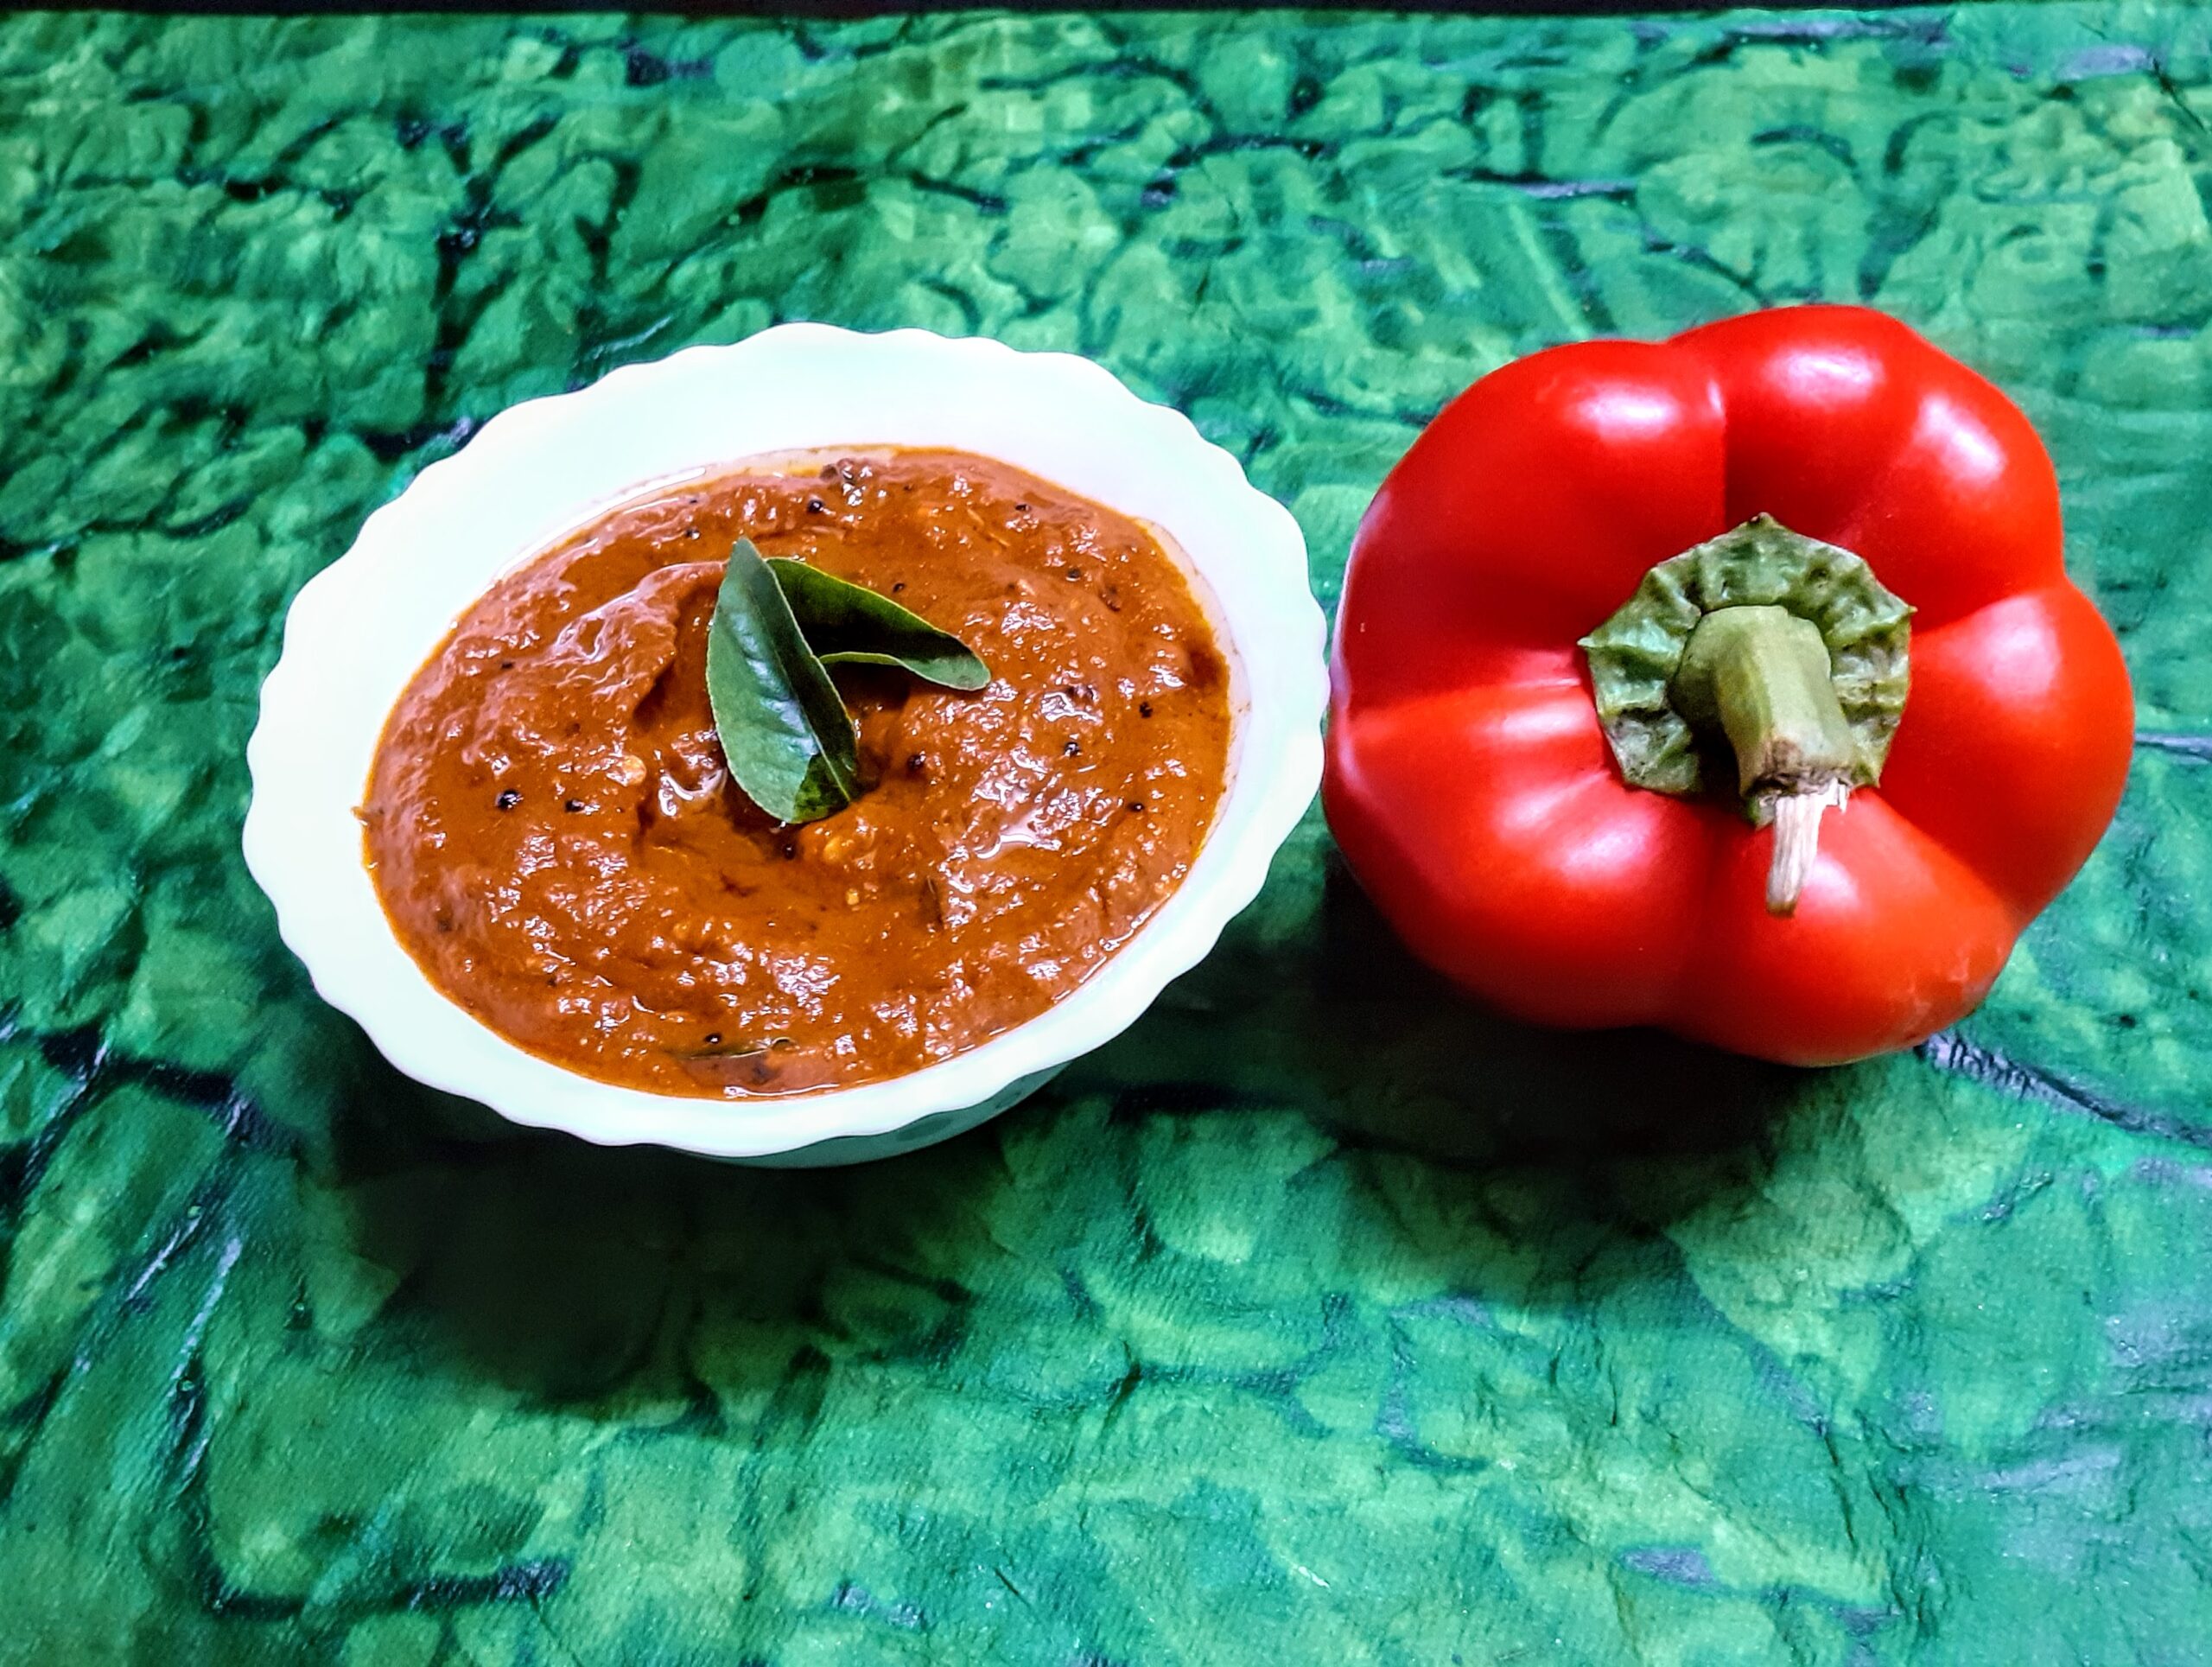
Ingredients:
Red Bell Peppers 1 big
Tomatoes 2 medium chopped
Tamarind paste 1 tsp or less
Green chillies 2
Cumin seeds 1 tsp
Asafoetida 1/4 tsp
Dry red chillies 3 ( refer note 1)
Curry leaves a few
Mustard seeds 1/2 tsp
Fresh Coriander leaves a few sprigs
Jaggery 1/2 tsp
Directions: Put the Red Bell Pepper on the gas flame and roast them as you would a Brinjal. No oil needs to be applied on the pepper before putting it on flame. The bell peppers are very fleshy, so the skin peels away easily. Keep turning the Bell pepper on the flame so that all sides are equally cooked. Remove when they have black spots over them. Set aside and let it cool. Once they cool down, peel the skin off and chop them . Now in a kadai heat some oil. Add cumin seeds and when they crackle put in the dry red chillies followed by the green chillies and saute for 10 seconds. Now add the tomatoes and the coriander leaves and saute. Add salt, followed by the chopped Red bell peppers and continue to saute. Add the tamarind paste and saute until the tomatoes break down. Put off the flame and allow to cool.
After cooling, put all ingredients into a blender and blend to a fine puree without adding any water. Now in the same kadai heat some oil for tempering. Add the mustard seeds, asafoetida and curry leaves and as they splutter pour the puree into it, and stir nicely. Add the jaggery now, mix well until the jaggery dissolves and put off the flame. The tasty Red Bell Pepper Chutney is ready to serve.
STEPWISE RECIPE FOLLOWS:
1. Put the Red Bell Pepper on the gas flame and roast them as you would a Brinjal. Keep turning the Bell pepper on the flame so that all sides are equally cooked. Remove when they have black spots over them. Once they cool down, peel the skin off and chop them .
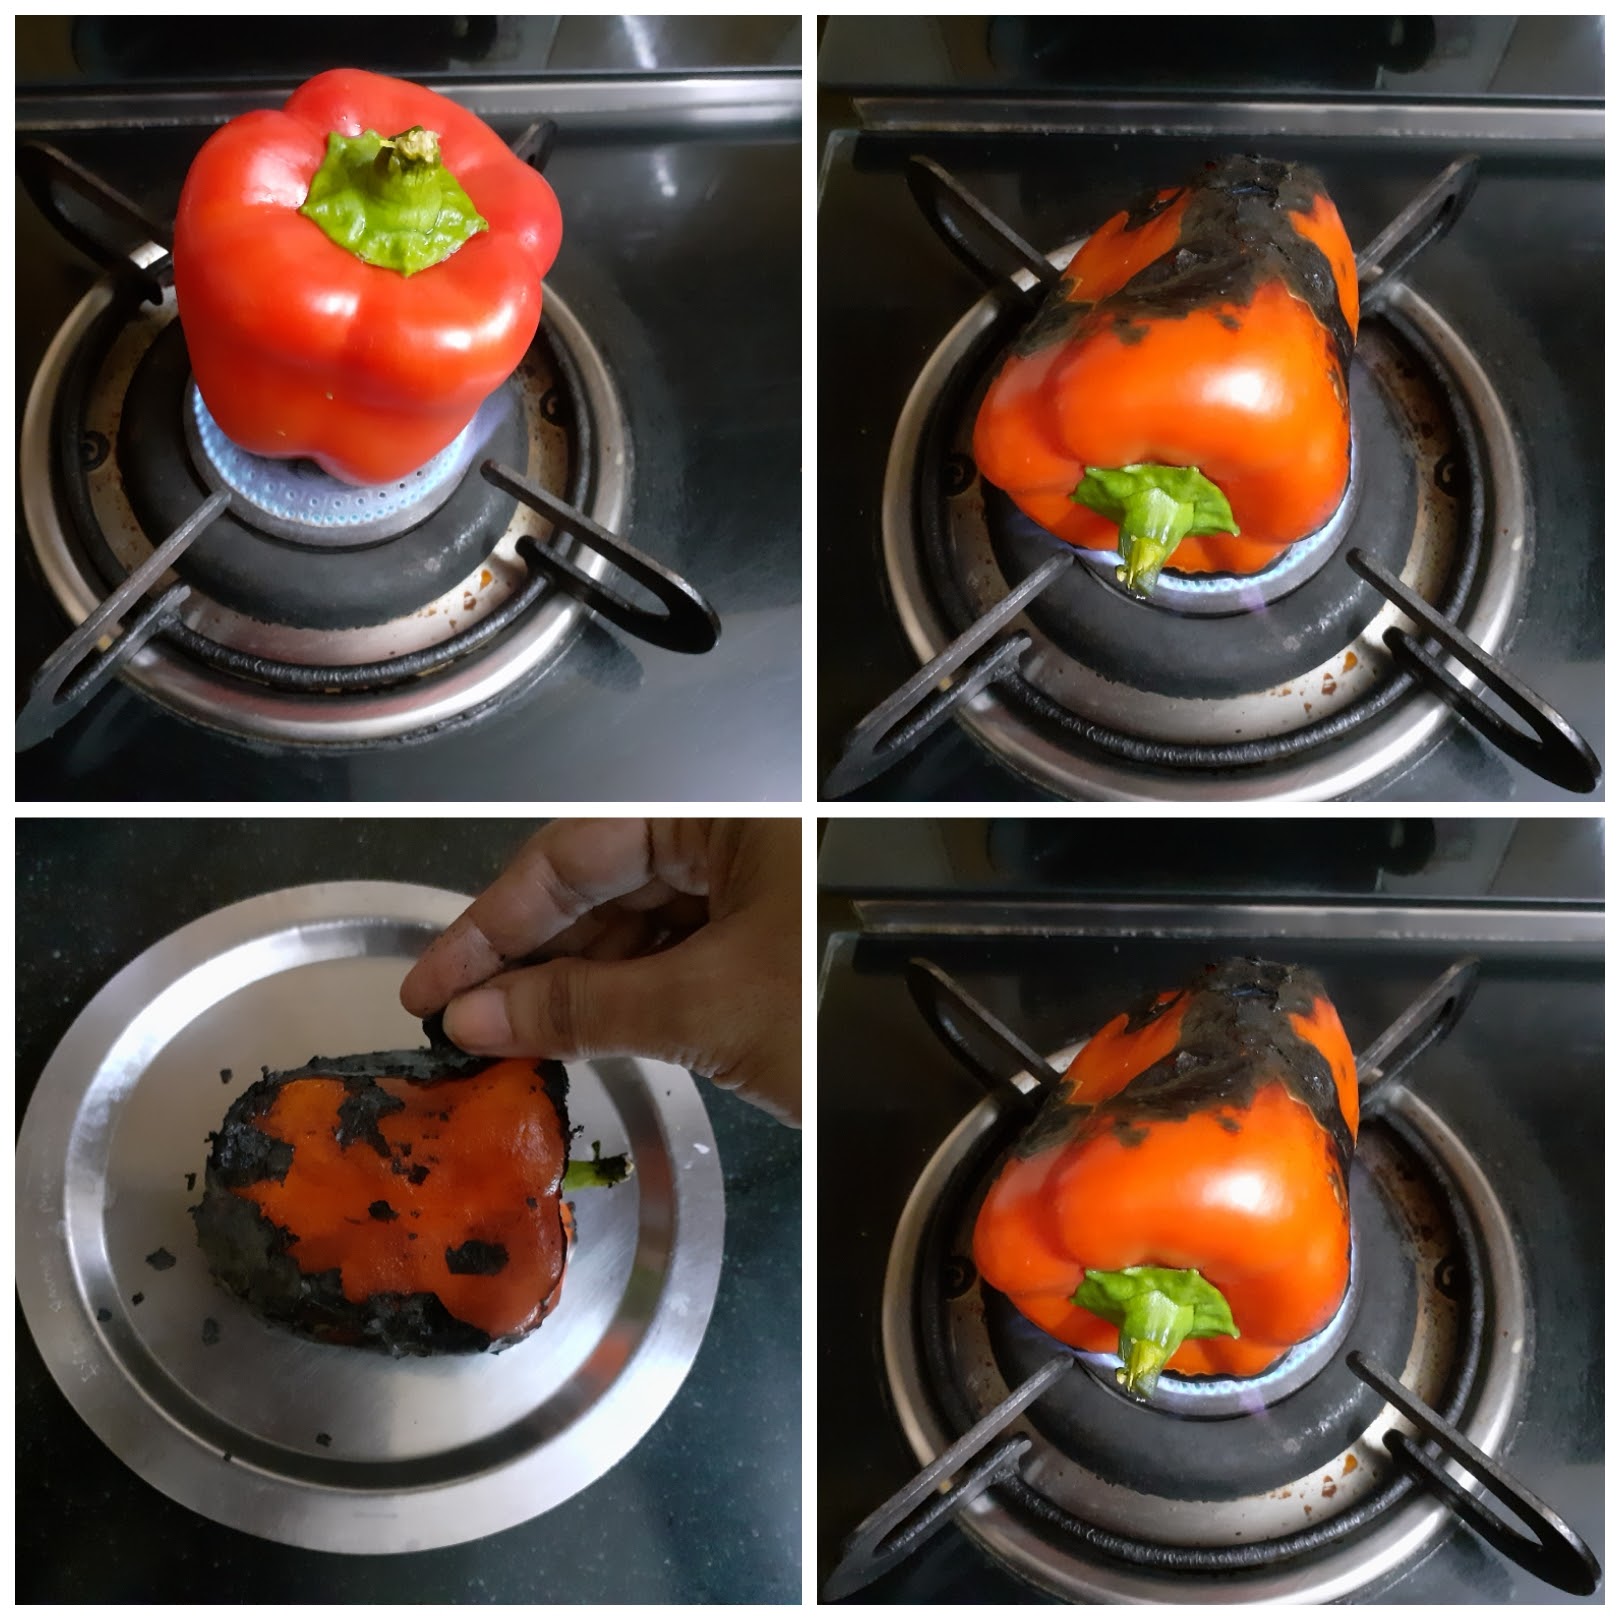
2. Now in a kadai heat some oil. Add cumin seeds and when they crackle put in the dry red chillies followed by the green chillies and saute for 10 seconds.
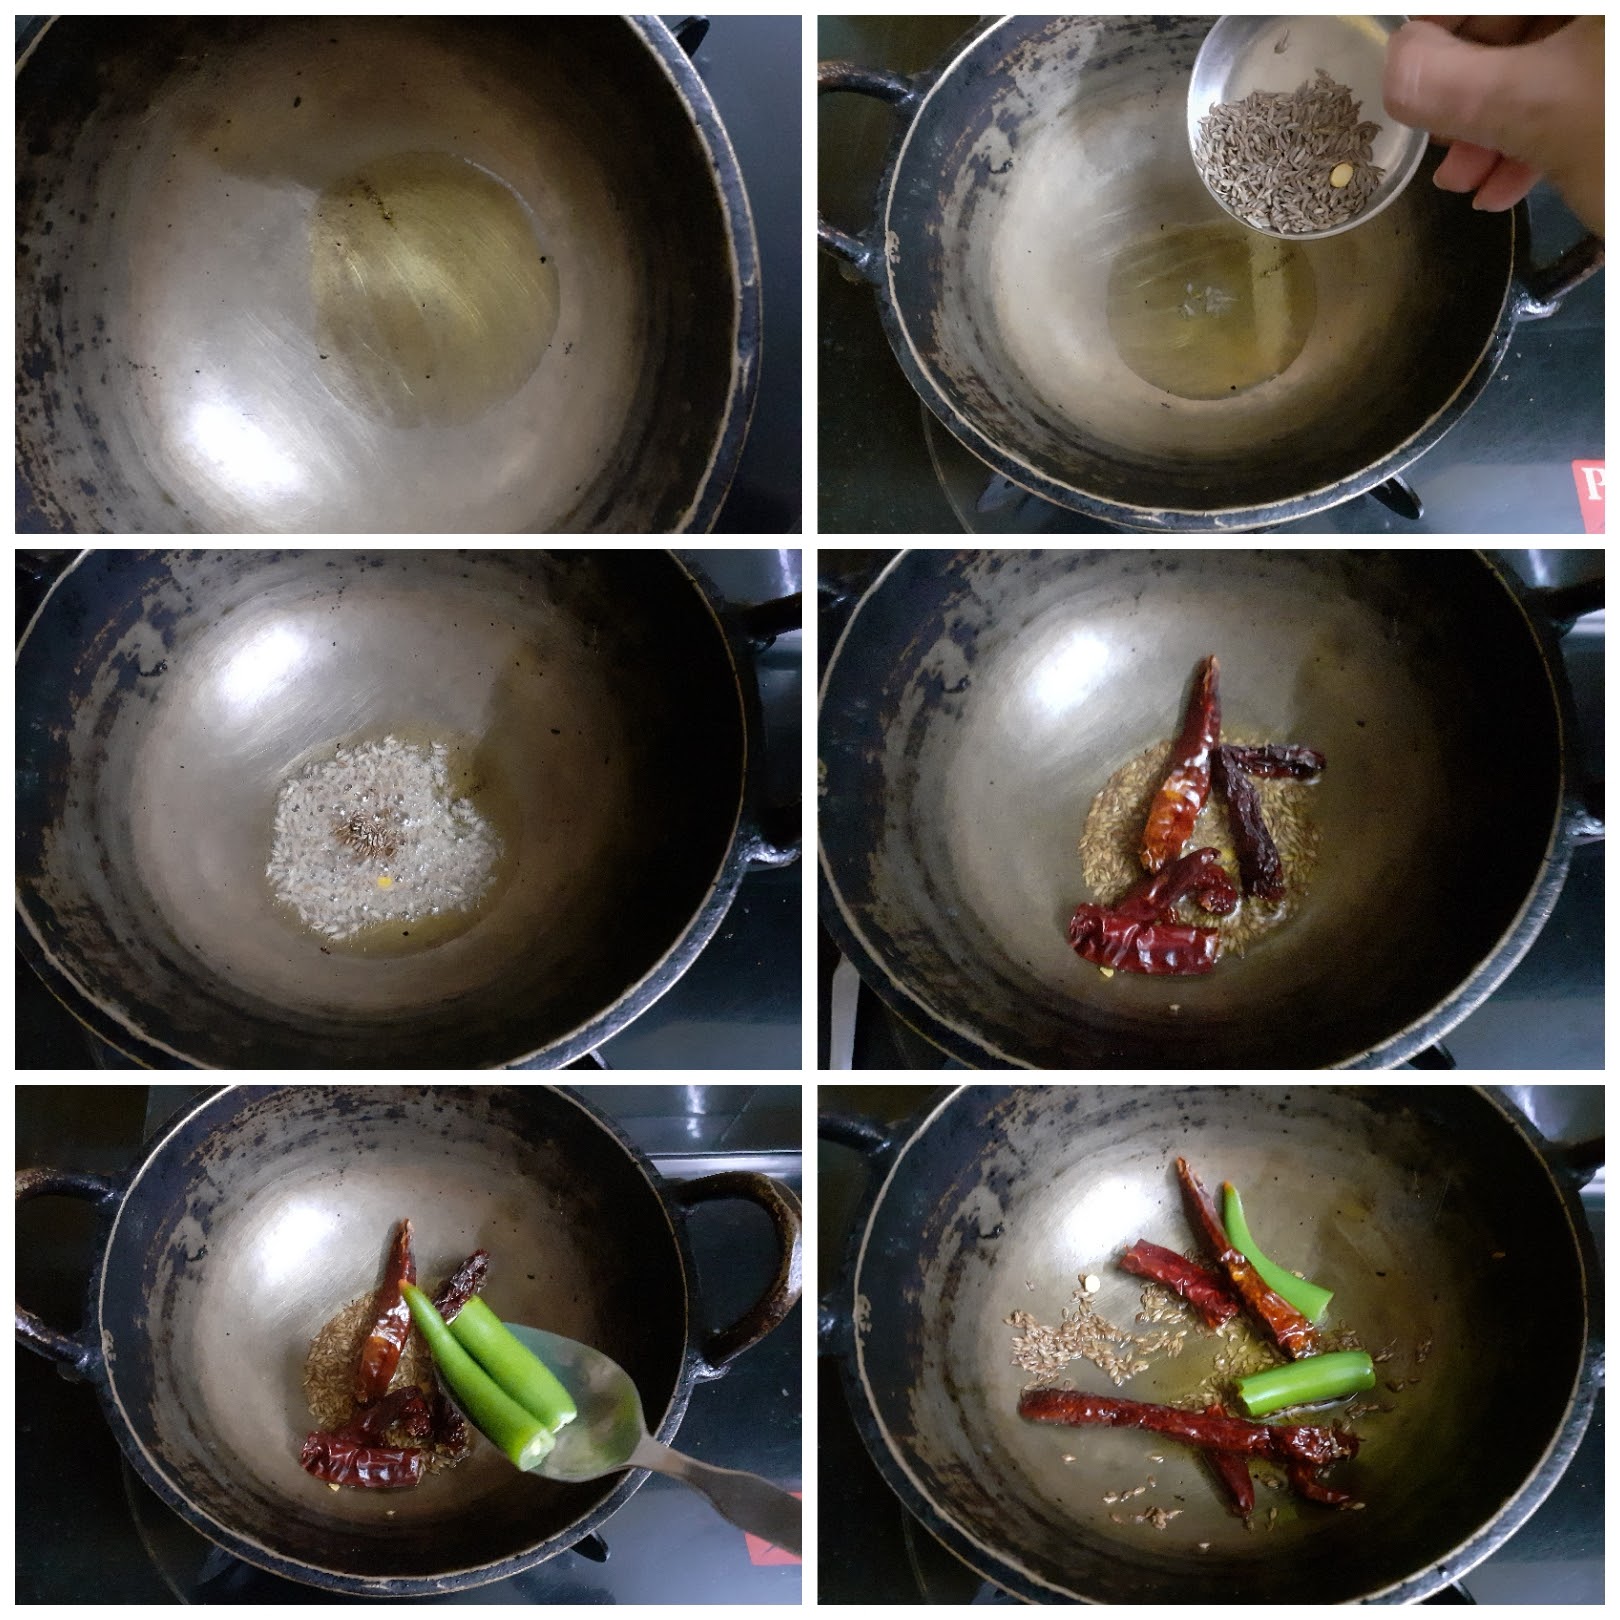
3. Now add the tomatoes and the coriander leaves and saute. Add salt, followed by the chopped Red bell peppers and continue to saute. Add the tamarind paste and saute until the tomatoes break down. Put off the flame and allow to cool.
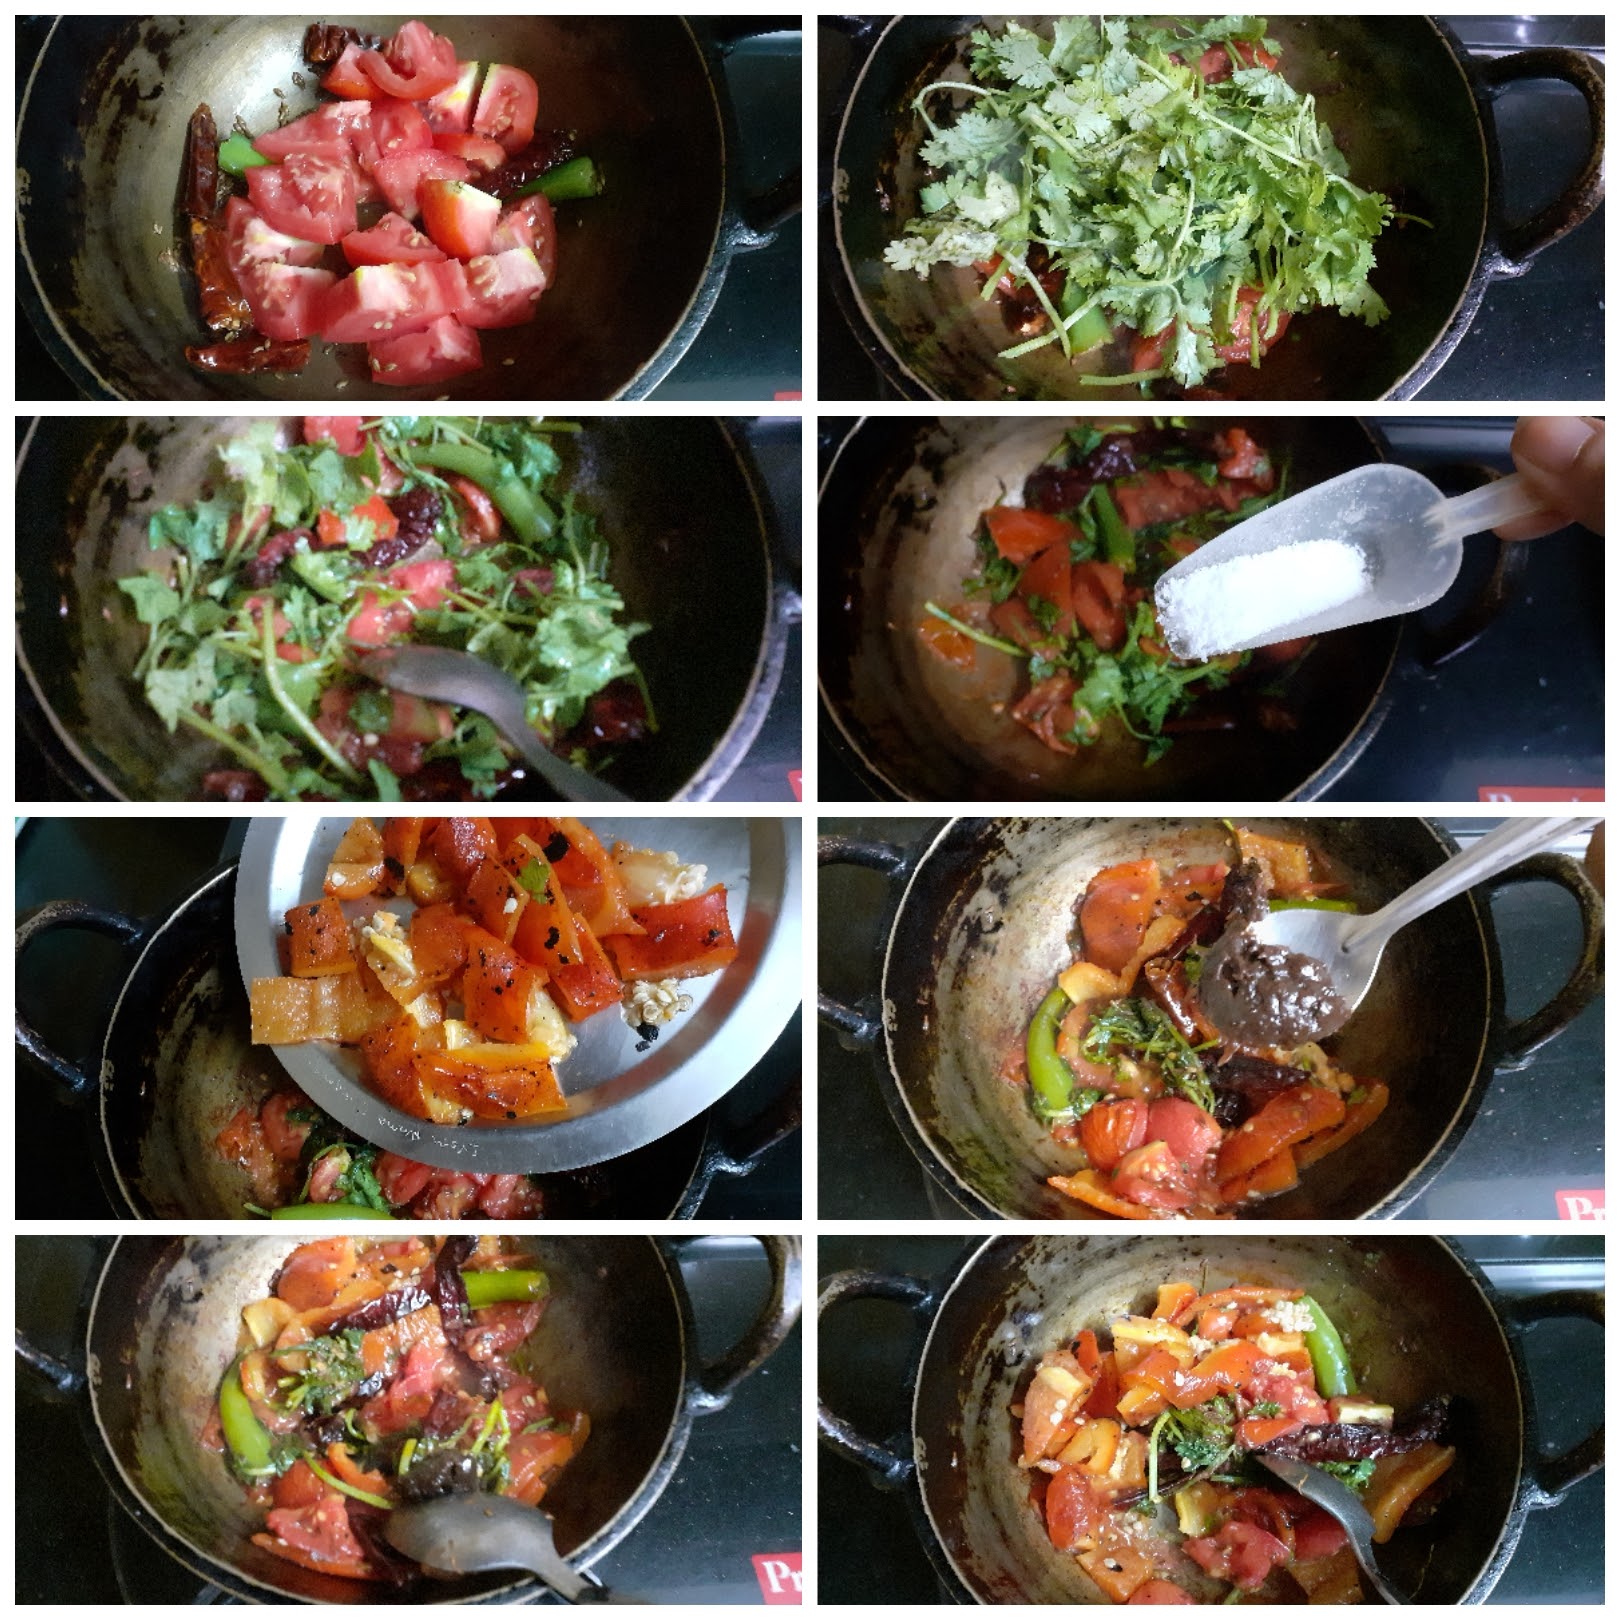
4. Put all the sauteed ingredients into the blender on cooling and grind to a smooth puree. Now take oil in a Kadai and heat. Add mustard seeds followed by curry leaves and asafoetida.
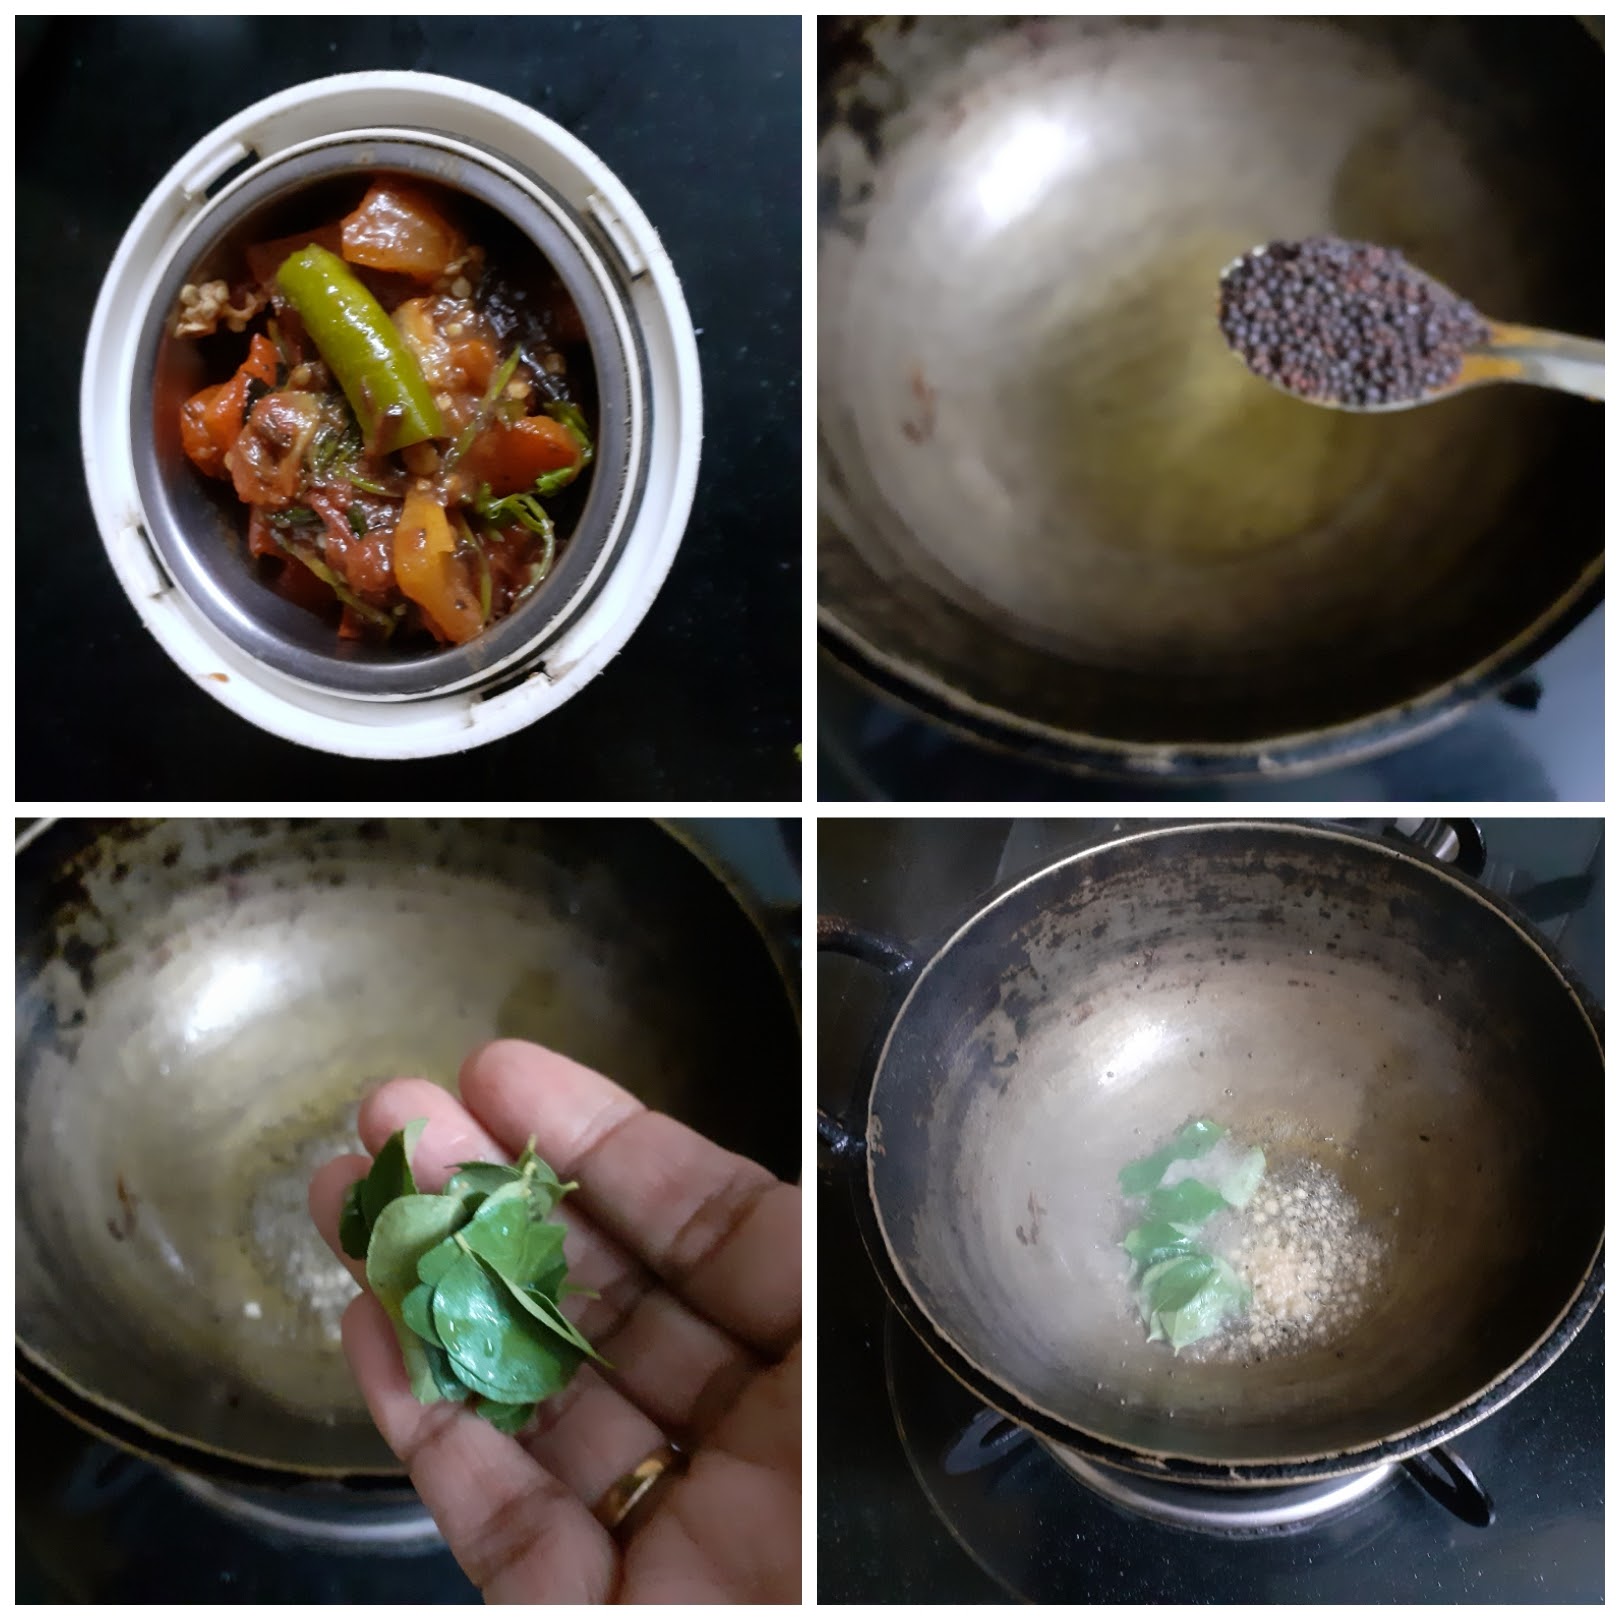
5. Now Pour the puree into the tempering, add the jaggery and, mix well until the jaggery dissolves and put off the flame. The tasty Red Bell Pepper Chutney is ready to serve.
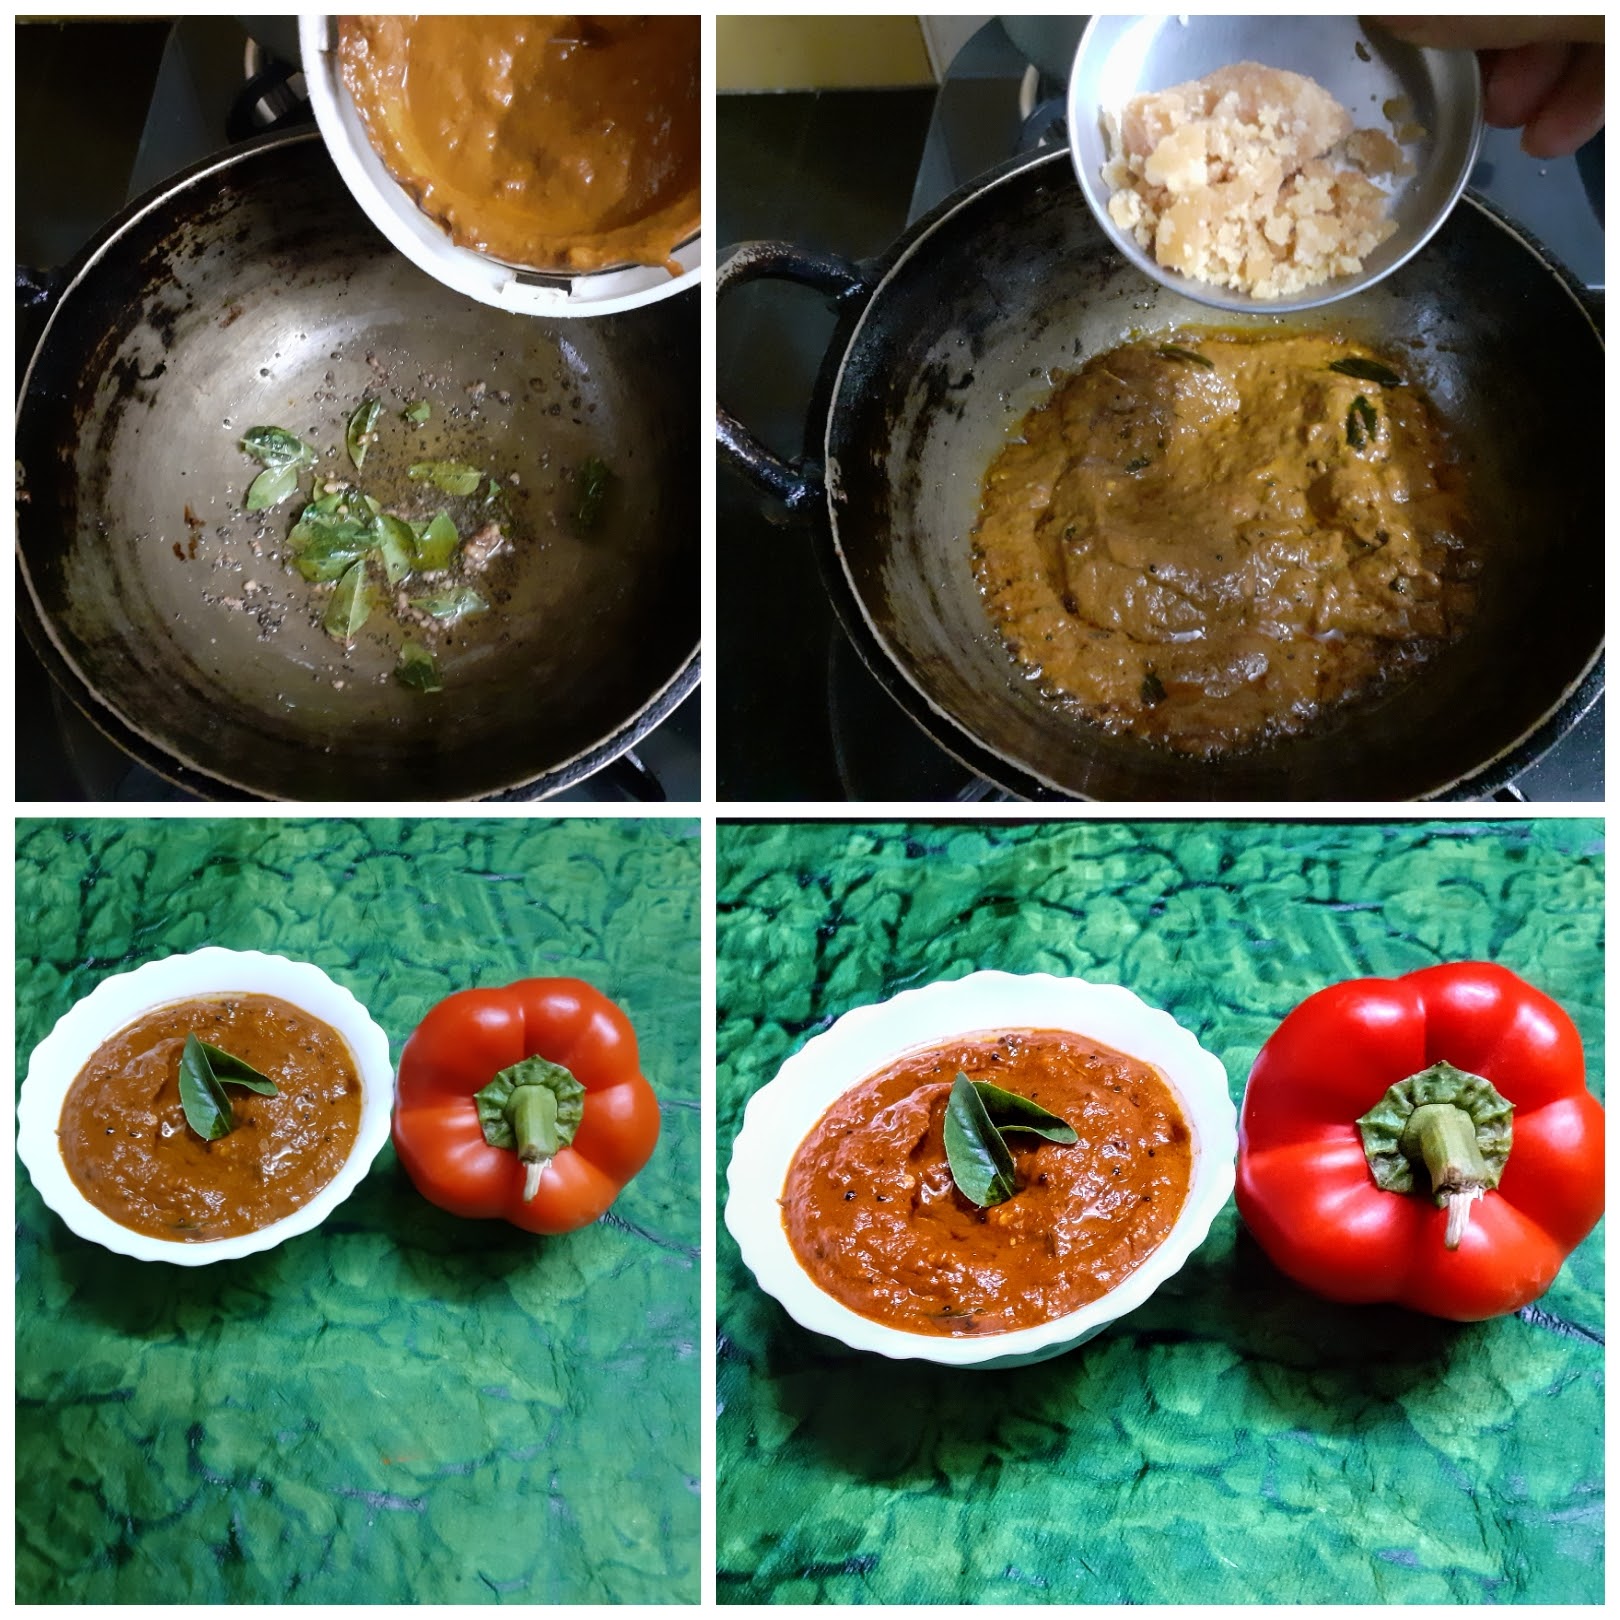
NOTES:
1. I have taken 2 dry red chillies regular, and 1 Kashmiri red chilli for colour, you could do this or just use regular dry red chillies.
2. Spice level can be increased or decreased as per taste.
3. The bell Peppers will not stand too much sourness, so stick to the tamarind quantity mentioned. Same holds good for Jaggery as well.
If you tried this recipe and liked it please comment below. I would love to hear from you. If you have a query about the recipe email us and ill respond as soon as I can.
Upside Down Orange Vanilla Cake (Eggless Recipe)
I have imagined creating this cake many times and finally got down to baking it recently. This cake requires small and firm Oranges that can be sliced with the peel. I spotted them at the store I buy my vegetables from and just grabbed them.
This is a simple recipe and an eggless one. Anyone can make this, no beating, no major whisking. You all know by now the recipes I choose to bake are mostly non-messy ones.
I am giving you a base here to which you can add anything you like, be creative, and yet you will have a beautifully moist cake every time. I have not infused the Orange sauce into the cake, but wanted them on top, and so made the upside-down version.
Being an eggless version it is different from other eggless cakes as I have not used condensed milk or flax egg, but one simple ingredient that we have in our refrigerators. Curd/ yogurt. Yes, that’s the base and I assure the cake will not taste of curd.
While you are here check out my other cakes like Blueberry Cheesecake, Nutella fudge brownies, Apple cake, Apple crumble, and more…
Here is the recipe for Upside down Orange Vanilla Cake.
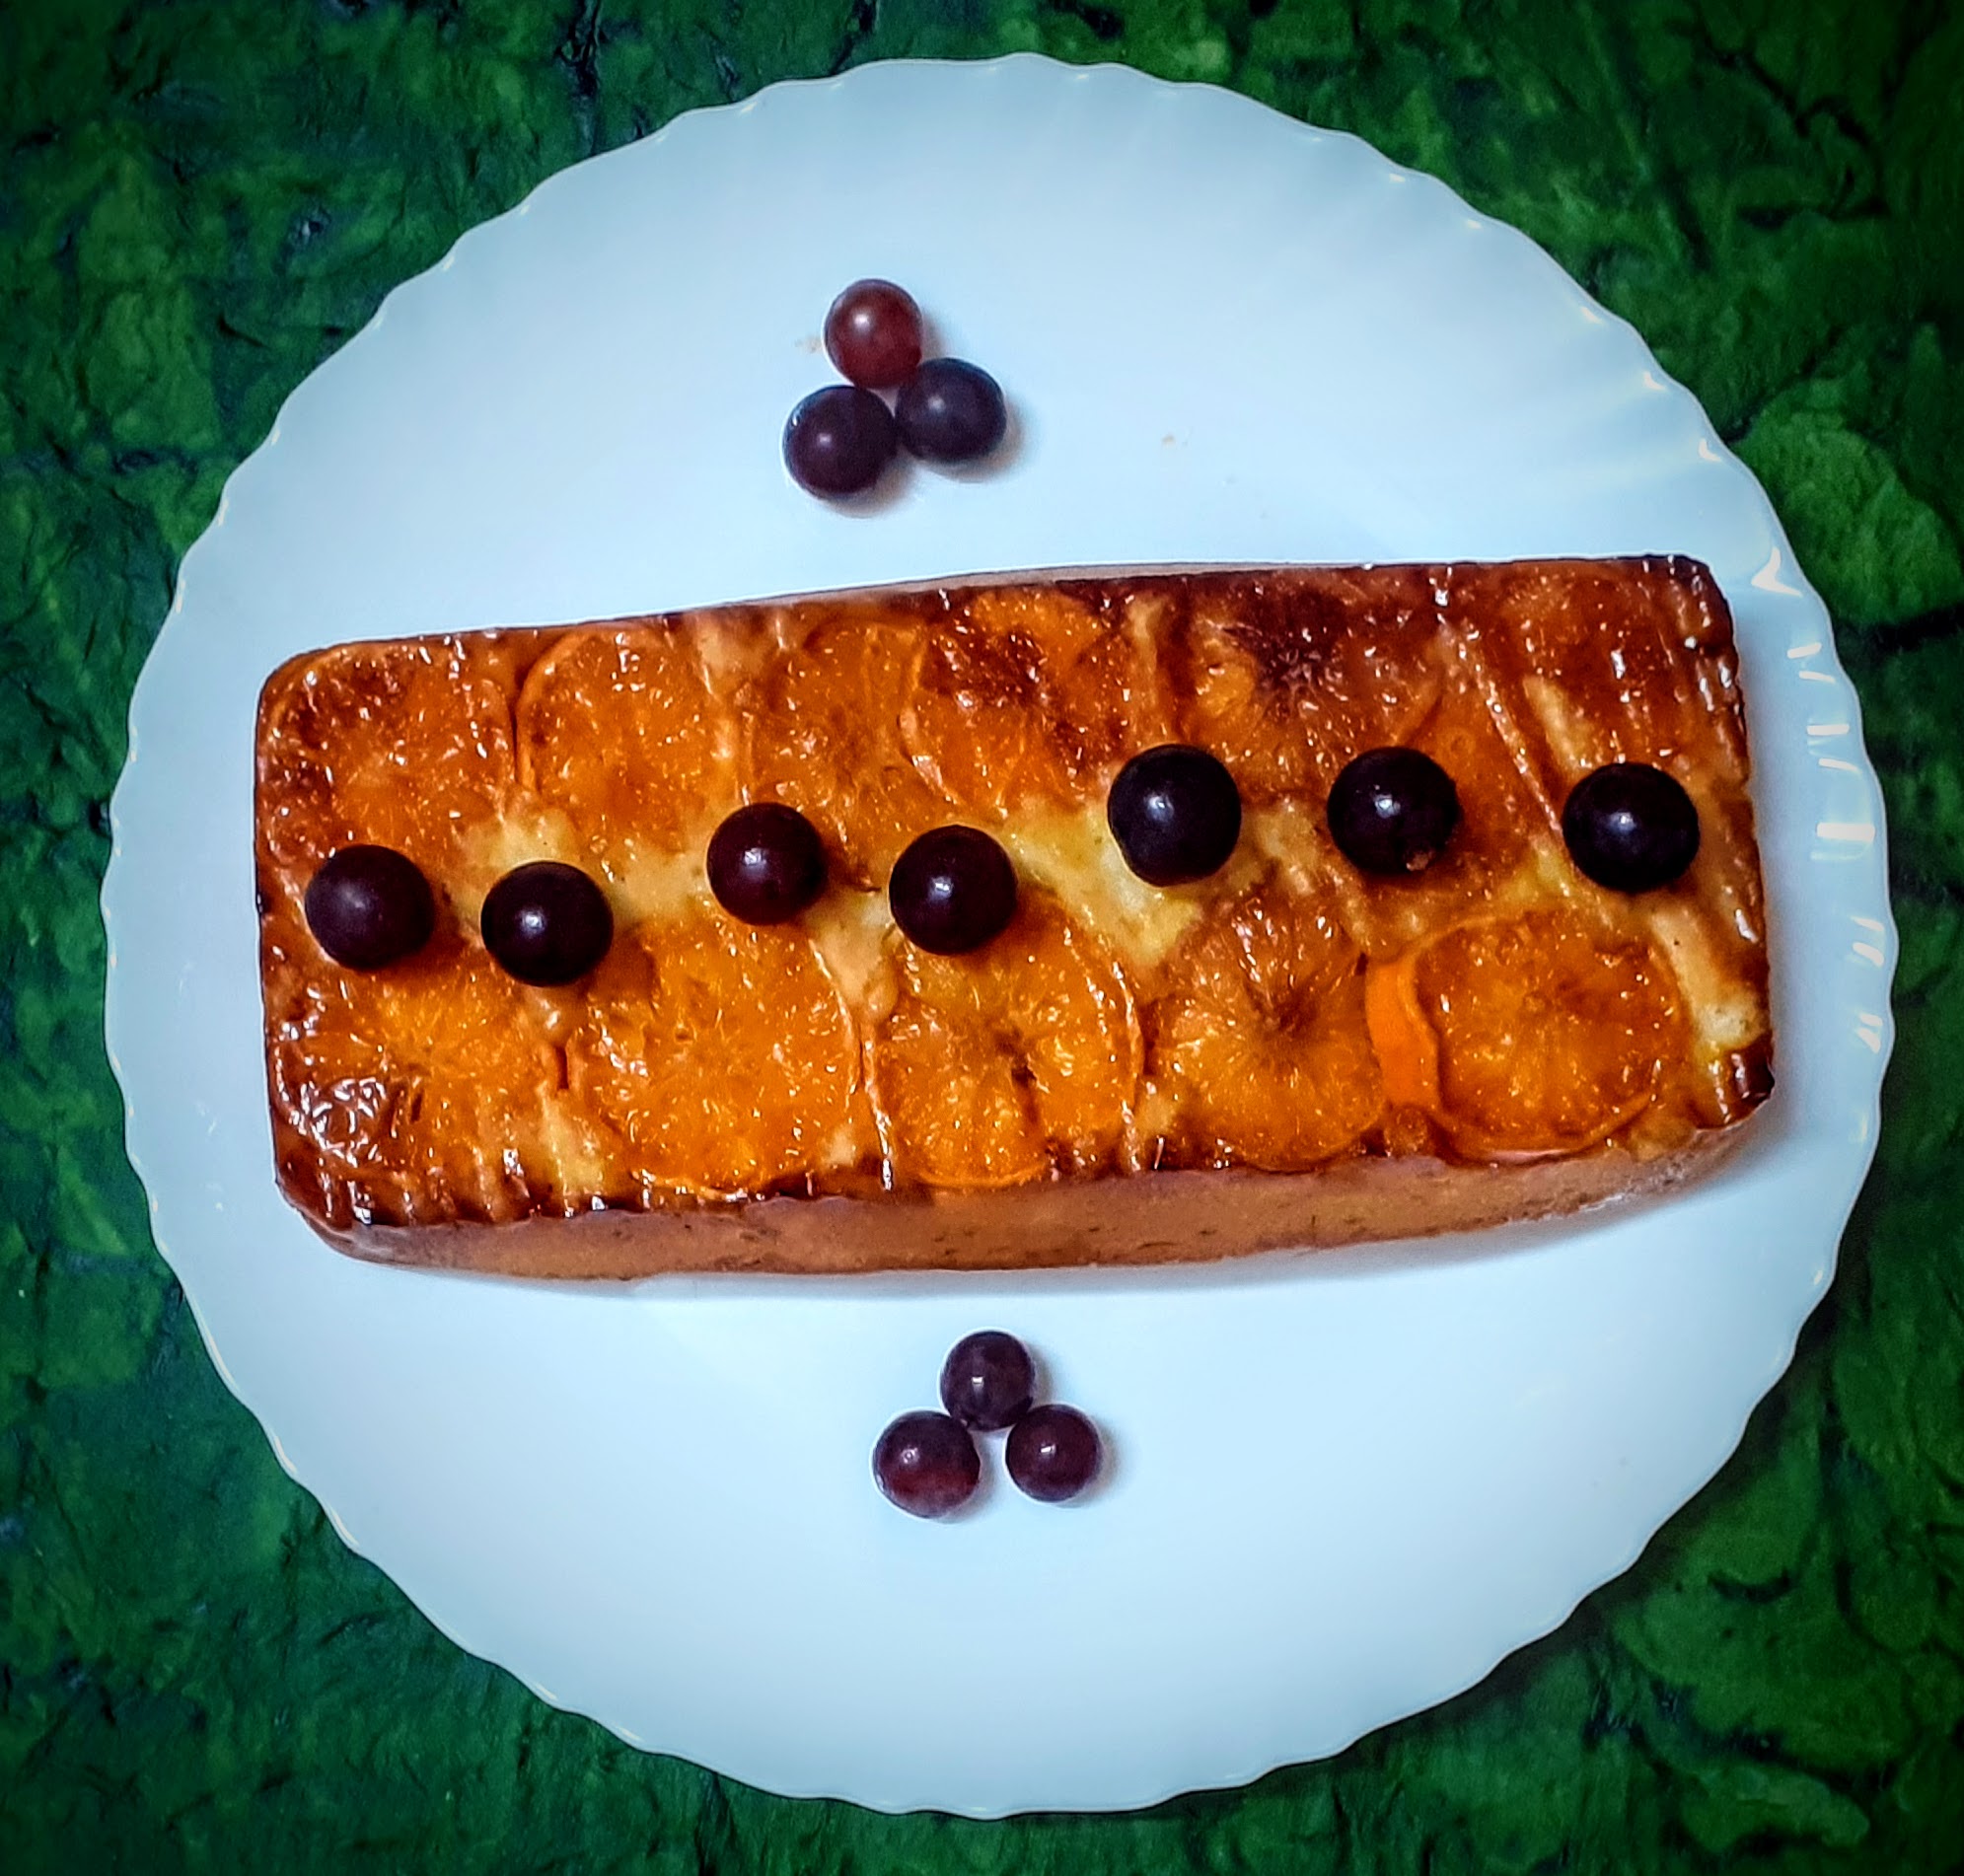
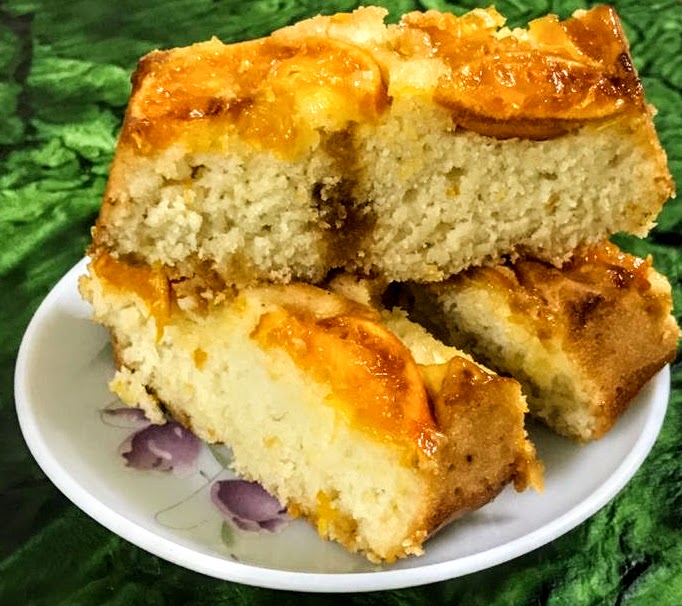
Ingredients for the topping:
Oranges 4 with a taut peel ( baby oranges are the best) sliced in circles.
Honey 3 tbsp
Butter 10 gms or 1 tbsp
Ingredients for Cake:
Maida ( refined flour) 1.5 cups ( 1 cup=150 ml)
Curd/ yogurt 1 cup
Sugar ( white) 3/4 of a cup
Baking powder 1 tsp
Baking soda 1/2 tsp
Oil ( refined oil or coconut oil) 1/2 cup
Vanilla essence 2 drops
The rind of 1 small orange grated (optional)
Requirement: Square or rectangle baking tin/tray
Directions for topping:
Slice the Oranges into thin circles and keep aside. In a pan place the butter and melt (take care not to overheat the butter). When the butter melts, add the honey and warm it, on low heat. Now place the Orange slices in the pan and cook for 2 minutes, until the oranges absorb the honey. Flip and cook on both sides ( 1 minute each side). We don’t want the Orange to overcook and lose shape. Put off the flame and allow it to cool.
Directions for cake:
Preheat oven to 180 c for 10 minutes. Sift the flour and keep ready. In a bowl take the curd, add the sugar and combine until the sugar dissolves completely. Now add the baking powder and baking soda and set aside for 5 minutes. This makes the mixture to froth up and double in size.
After 5 minutes add oil to the curd mixture and combine well. Add the sifted flour and with a spatula or wire whisk combine nicely to form a batter. Add in the vanilla essence and grated Orange rind(if using) and combine lightly once again.
In a previously greased tray, arrange the Orange slices such that they cover the bottom of the tray. Now transfer the cake batter into the tray lined with Oranges and tap one gently. Place the tray in the oven and bake for 35 minutes at 180 C. Check for doneness or keep for a couple of minutes more, if a toothpick comes out sticky, don’t go beyond 5 minutes. Cool the cake for 30 minutes. In case you have any sauce from cooking the oranges in honey remaining, you can pour it over the cake as soon as you turn it upside down. let it stand for 10 minutes before slicing. Enjoy this refreshing cake with tea.
STEPWISE RECIPE FOLLOWS:
1. Slice the Oranges into thin circles and keep aside. In a pan place the butter and melt. When the butter melts, add the honey and warm it, on low heat. Now place the Orange slices in the pan and cook for 2 minutes, until the oranges absorb the honey. Flip and cook on both sides.
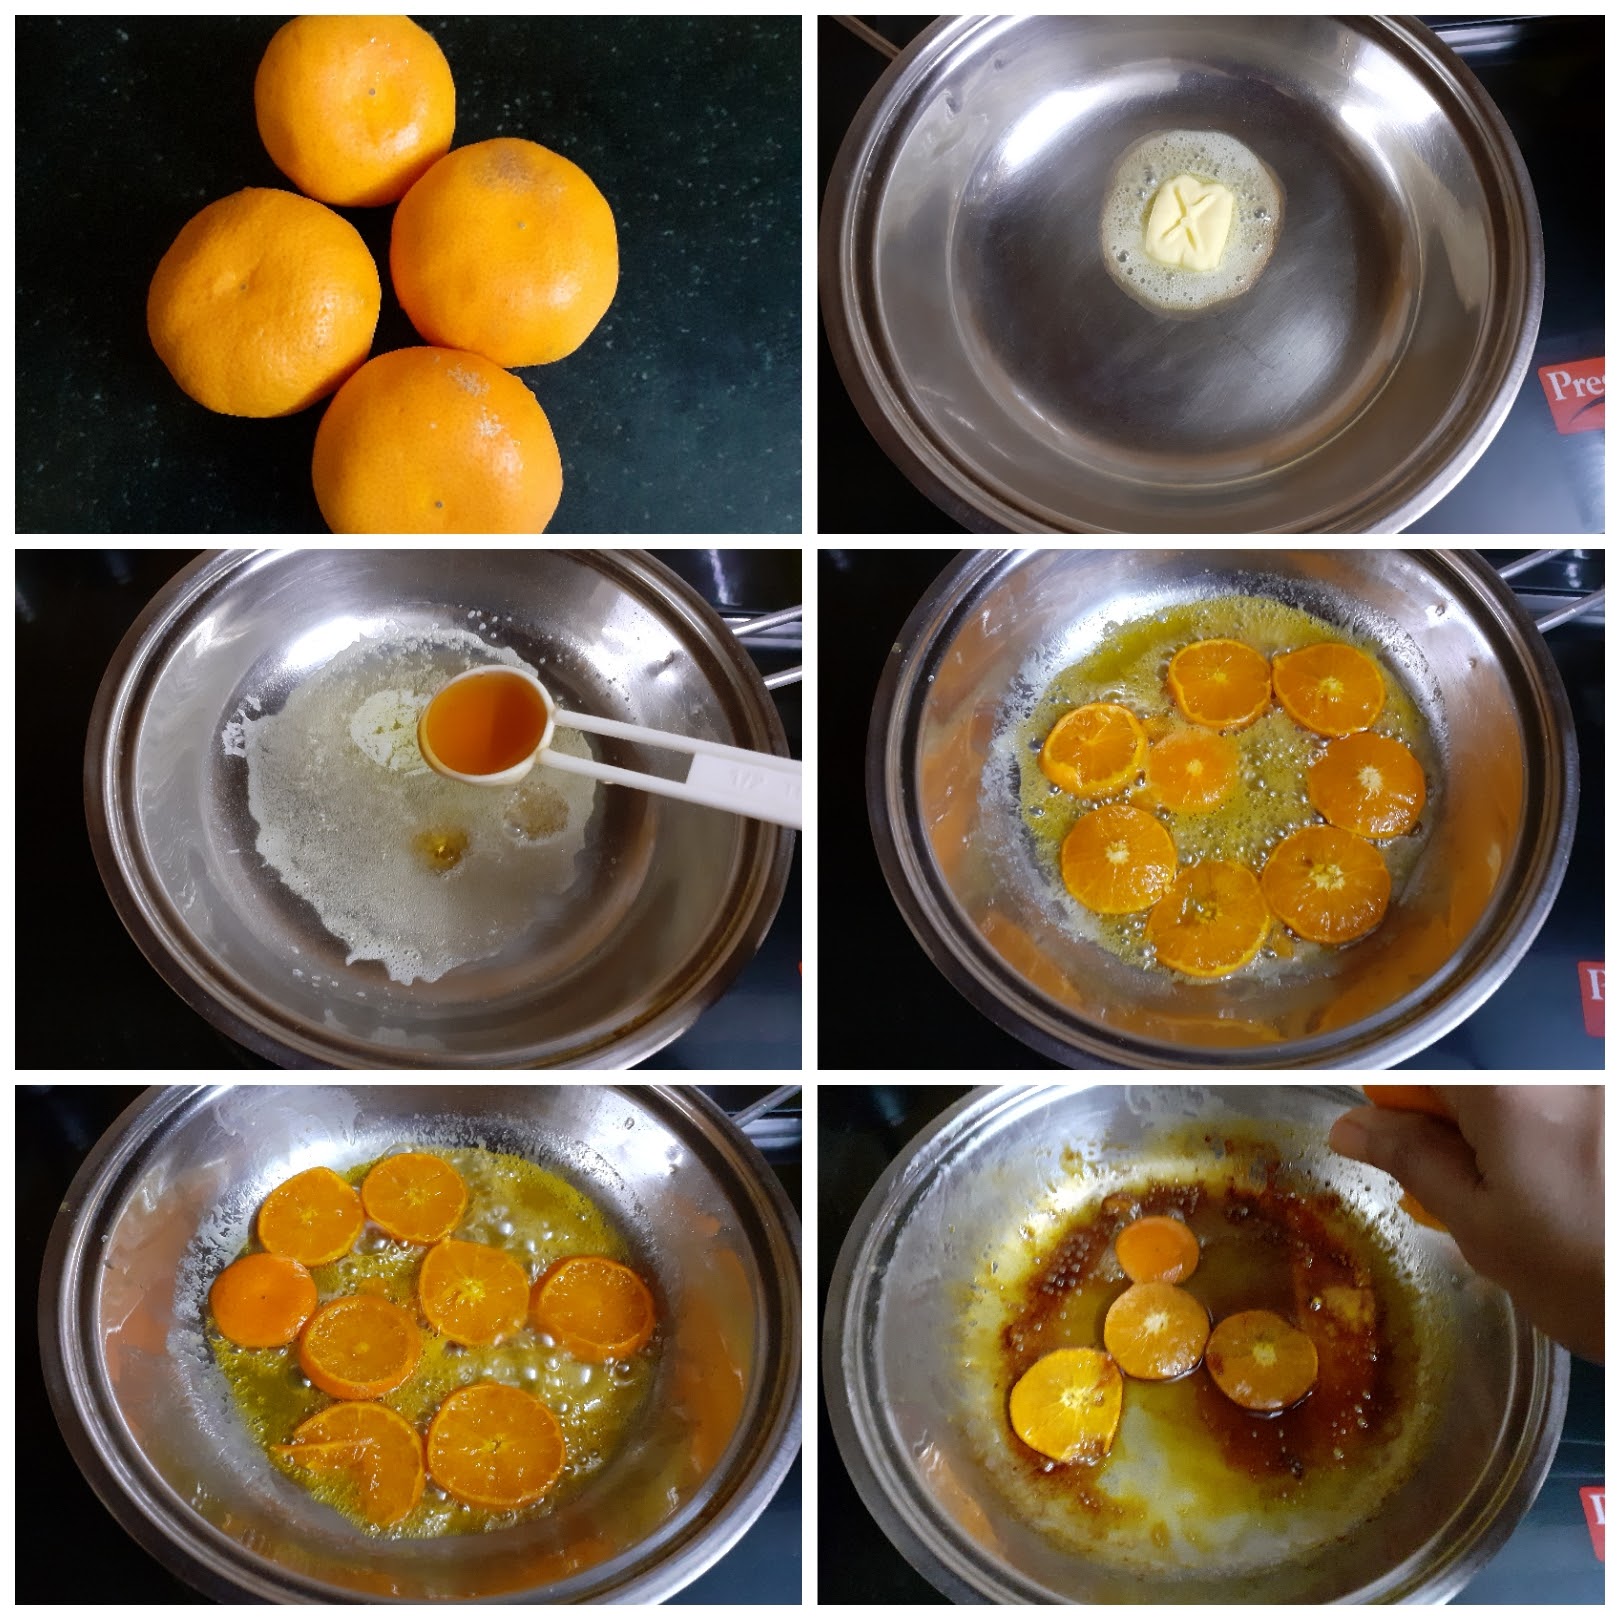
2. Preheat oven to 180 c for 10 minutes. Sift the flour and keep ready.

3. In a bowl take the curd, add the sugar and combine until the sugar dissolves completely. Now add the baking powder and baking soda and set aside for 5 minutes. This makes the mixture to froth up and double in size.
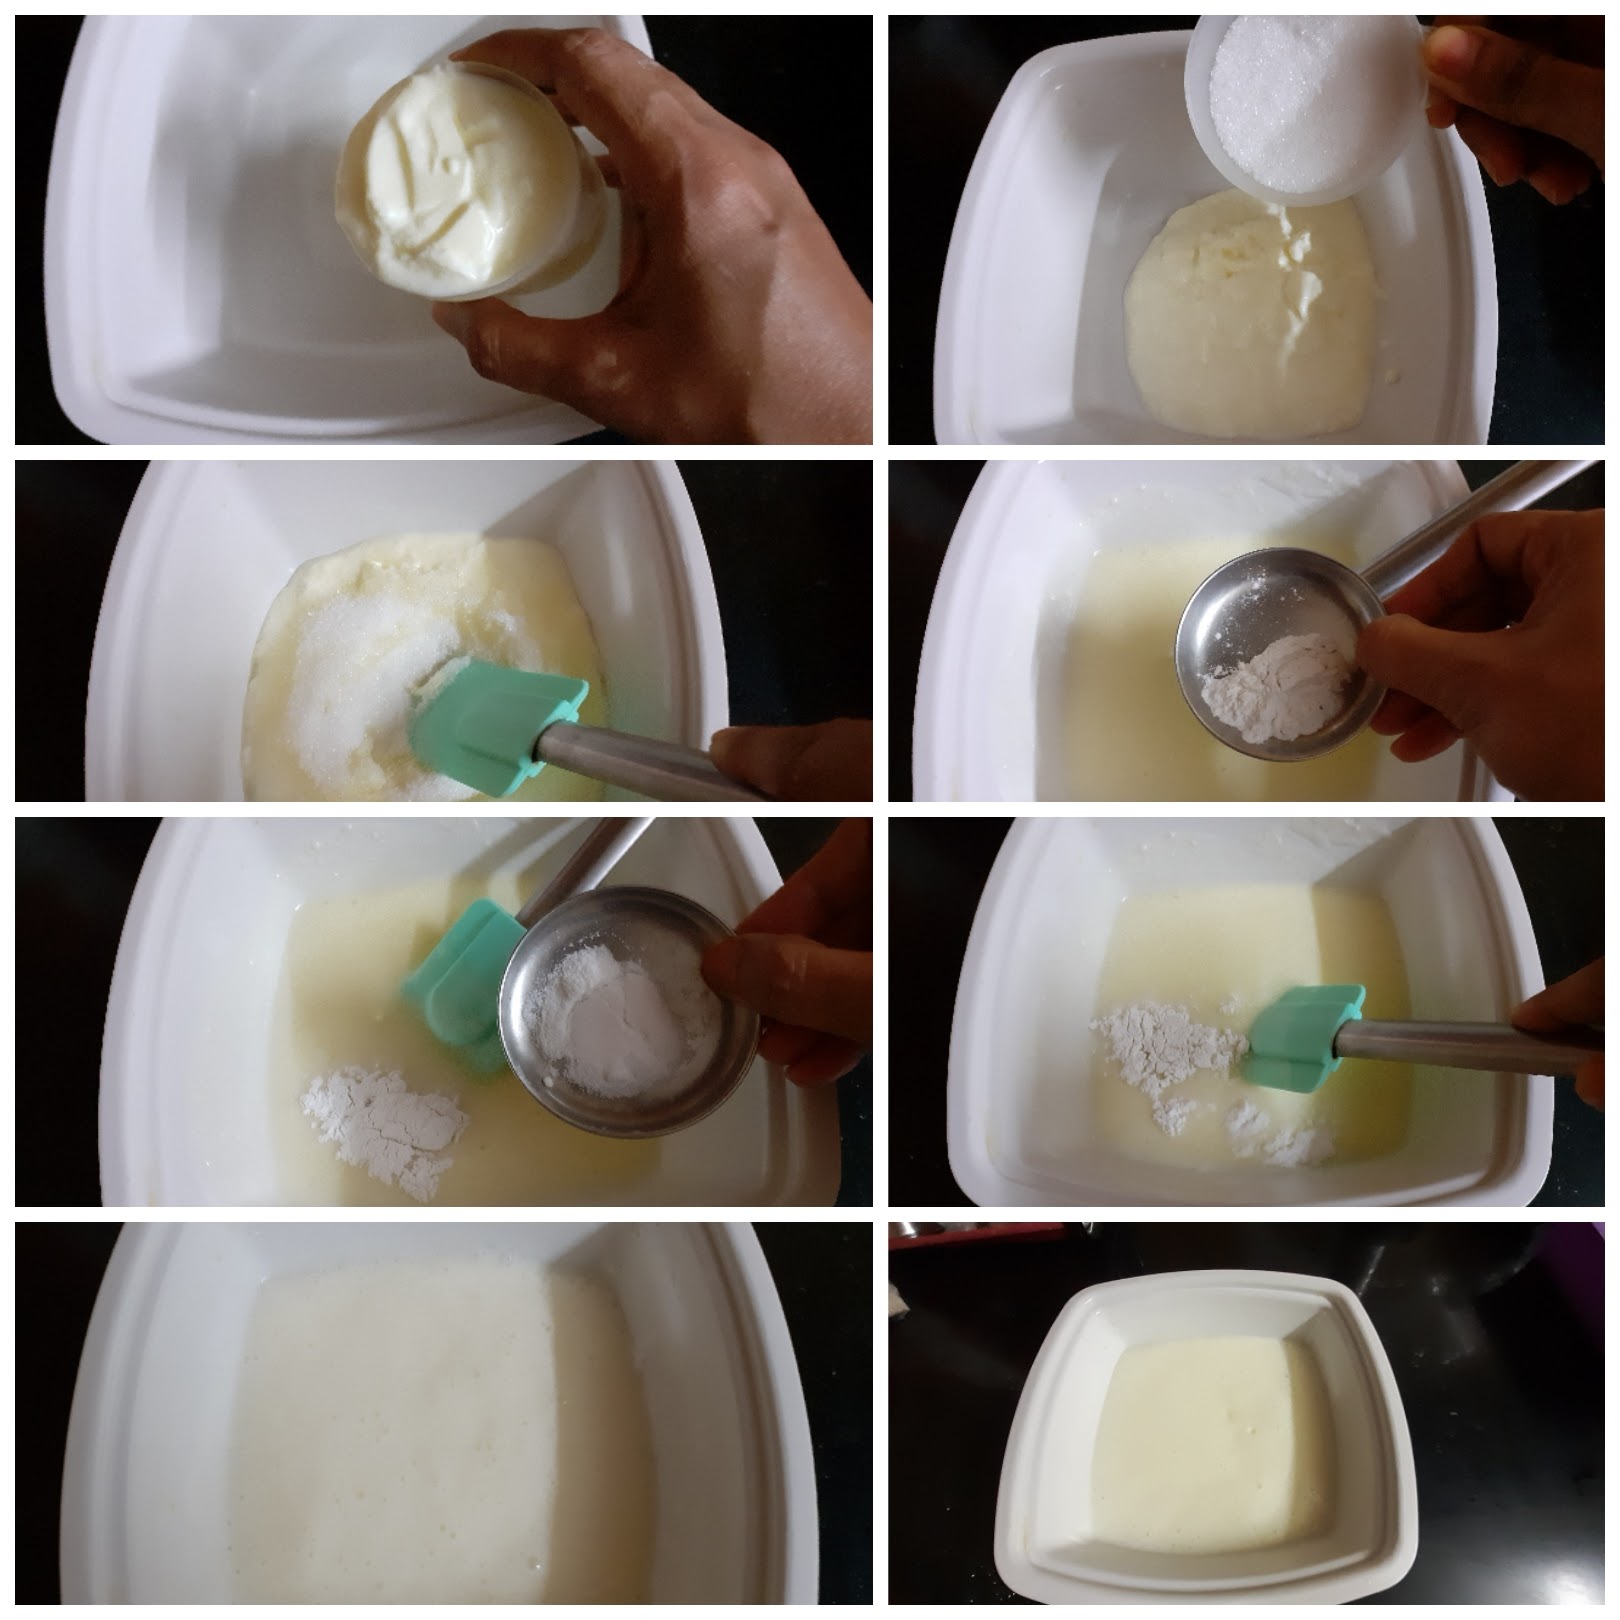
4. After 5 minutes add oil to the curd mixture and combine well. Add the sifted flour and with a spatula or wire whisk combine nicely to form a batter. Add in the vanilla essence and grated Orange rind(if using) and, Vanilla essence and, combine lightly once again. ( I forgot to click a picture of adding the vanilla essence).

5. In a previously greased tray, arrange the Orange slices such that they cover the bottom of the tray. Now transfer the cake batter into the tray lined with Oranges and tap one gently. Place the tray in the oven and bake for 35 minutes at 180 C. Check for doneness. Remove from oven, and cool for 30 minutes. Now when you turn the cake upside down, the Oranges will be on top.
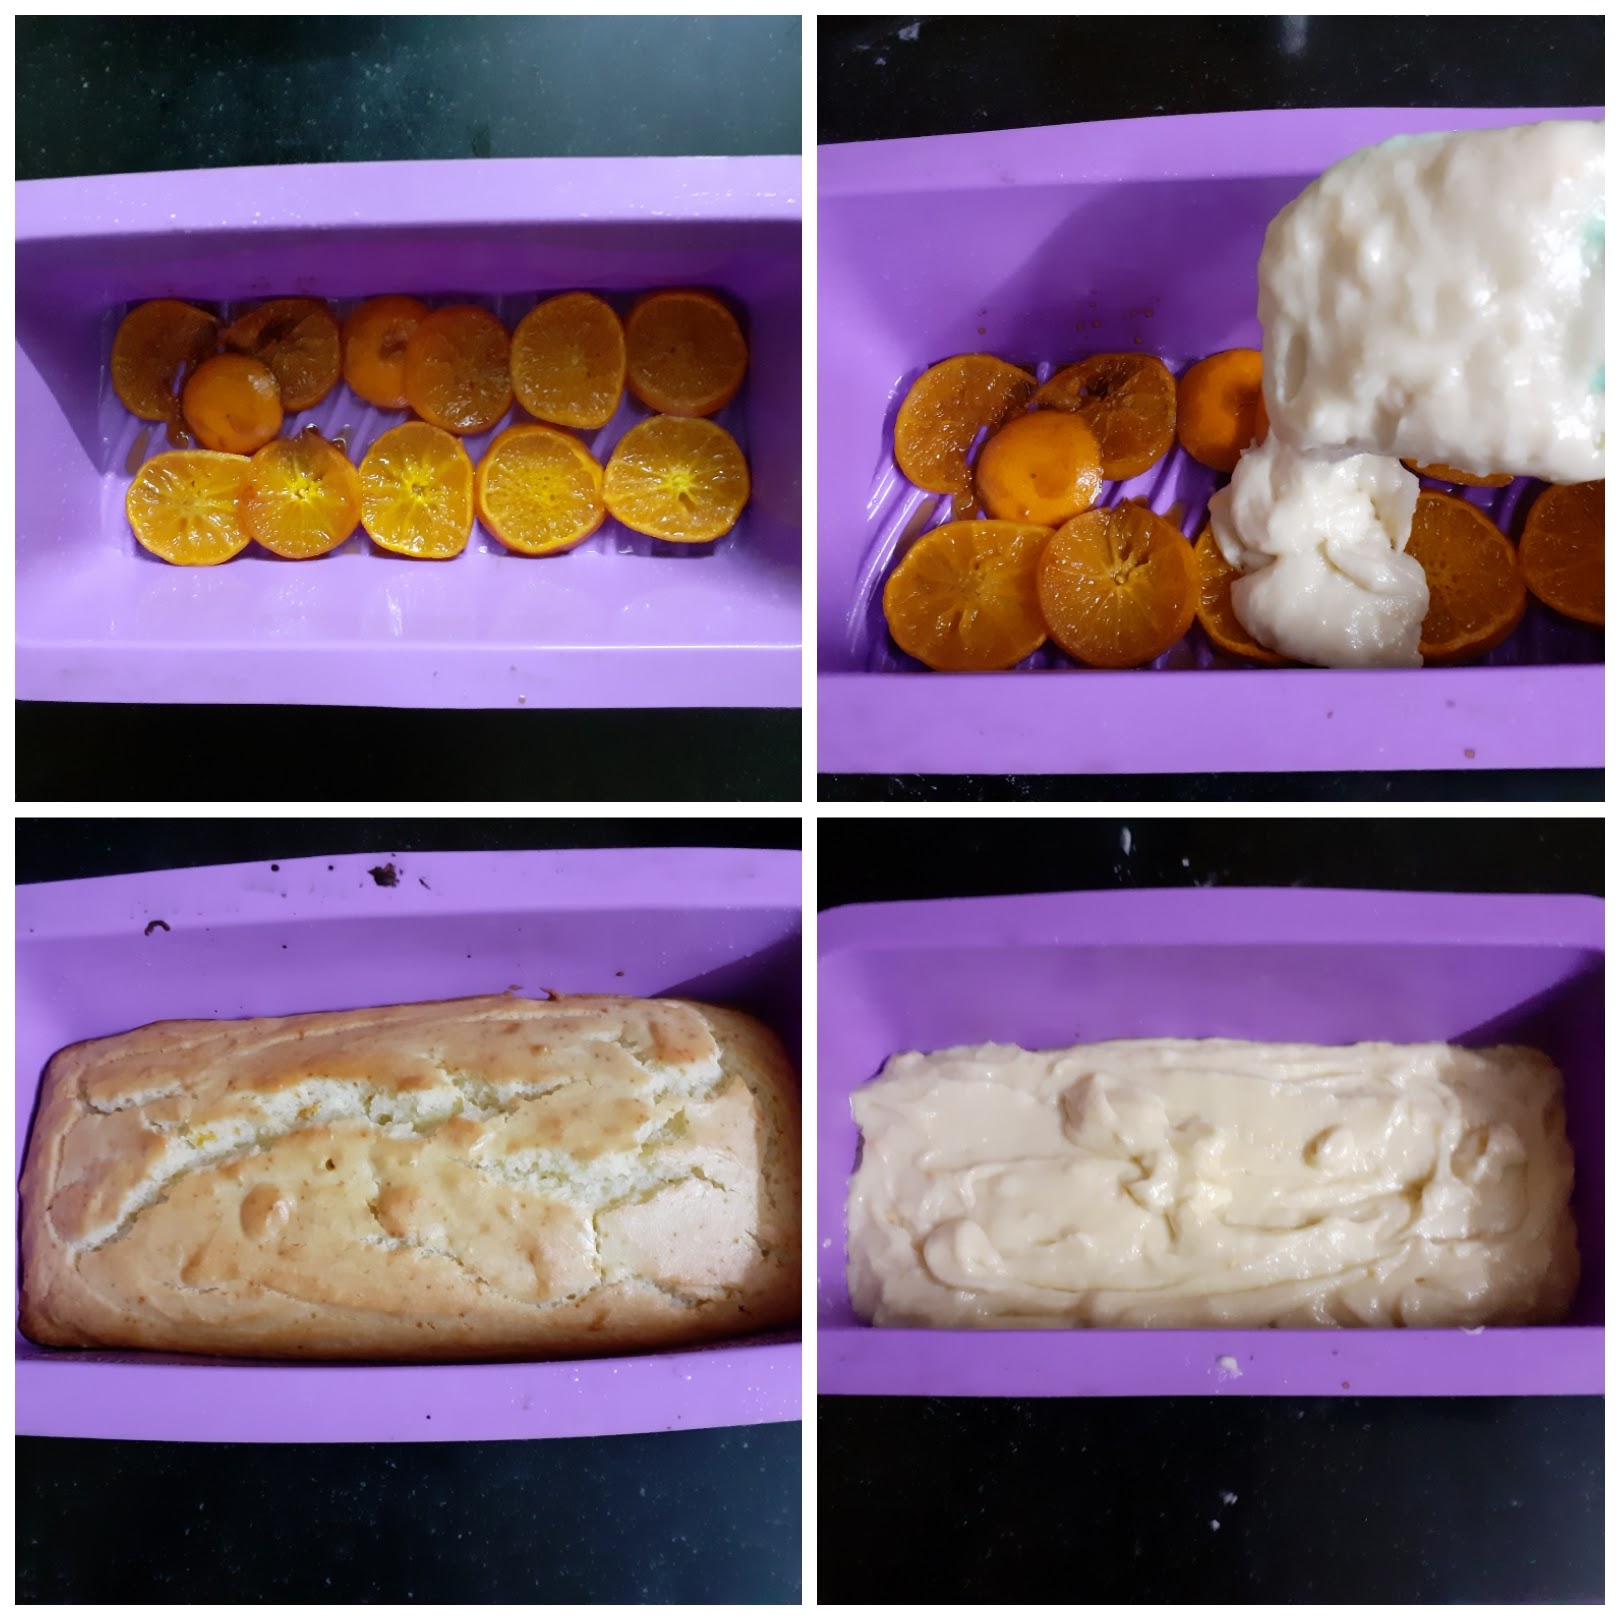

NOTES:
1. The curd should not be very sour.
2. If using Orange rind(peel) gratings add only 1tsp of it, more quantity can make the cake turn bitter.
3. If any butter Orange sauce is remaining after cooking the oranges in butter, set aside. It can be used as a topping for the cake, pour it after you turn the cake upside down, that is on cooling for 30 minutes.
4. If you want to infuse the cake with this sauce then pour it while baking along with the batter.
If you tried this recipe and liked it please comment below. I would love to hear from you. If you have a query about the recipe email us and ill respond as soon as I can.
Ven Pongal (Moong Dal Kichdi)
This savory Pongal is a popular breakfast item in Sout India. Like the Rasam, the Ven Pongal too is one recipe, whose taste I find is different from house to house, though the same ingredients are used. The proportion of the rice and dal and the proportions of the pepper and cumin are what make the difference.
This is a simple recipe that can be made as a one-pot recipe or a pot in pot one. I follow both the methods depending on when I am making it. In this recipe, I have followed the pot in pot method.
I prefer the Pongal to be spicy(not the chilli kinda spicy, but the pepper kind of spicy). The quality of pepper we use always makes a difference to the dish. I source my peppers from Kerala, where they are the freshes and spicy.
Though this dish is made as a breakfast dish, in my home I always prefer it for lunch, as I find it too heavy for breakfast. For breakfast, I make a Millet Pongal which is lighter to have in the morning. Like the Chakkara Pongal, this dish too is loaded with ghee, but I prefer adding my ghee in the end and I don’t use too much.
I have mentioned in my previous blog posts how and when to add ghee to a dish, such that it is not too much, but is proportional to the dish. I have shared some tips and tricks for adding ghee in the Chakkara Pongal post, do check it out.
While you are here please view my other recipes like Chakkara Pongal, Barnyard Millet(Kudiraivali)Pongal, Rava Dosa, Lemon Rice, and more…
Here is the recipe for Ven Pongal for you-
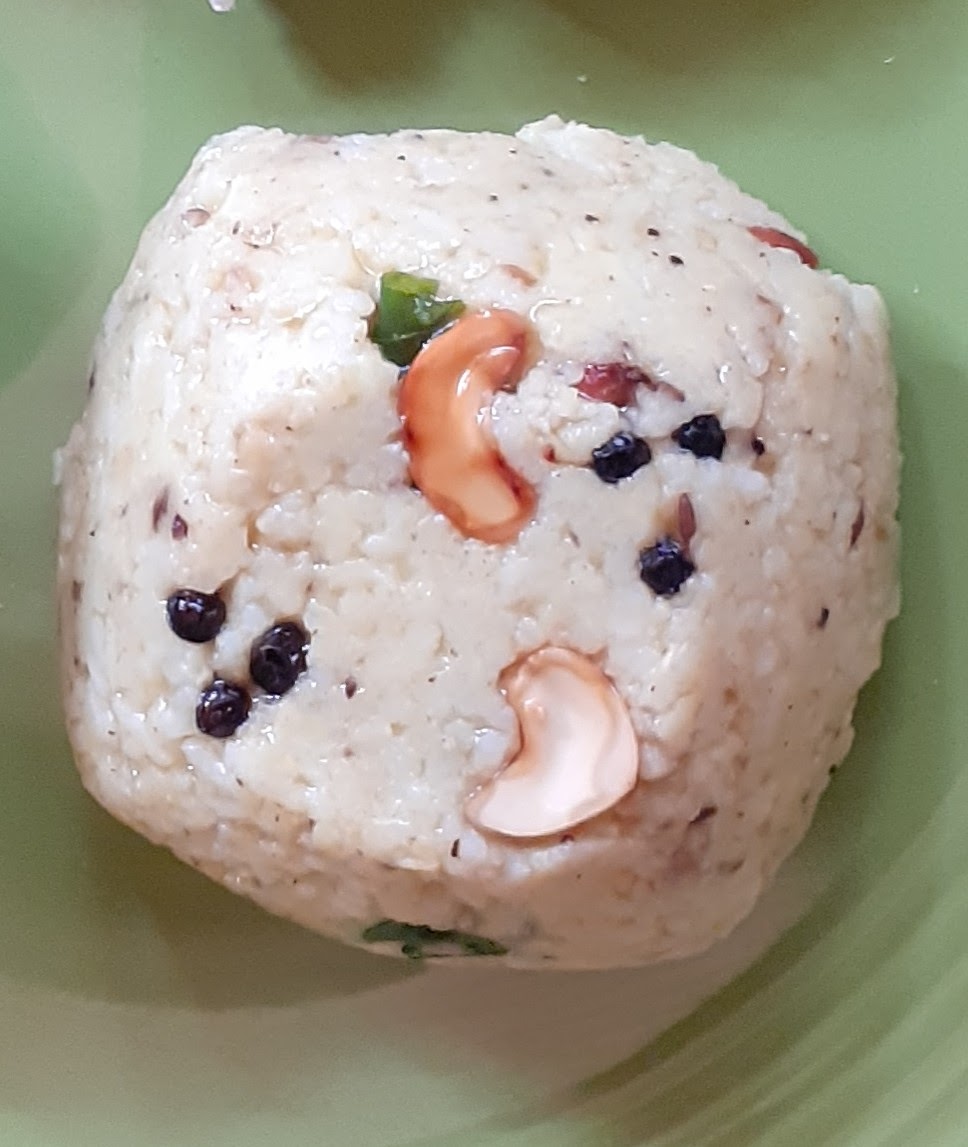
Ingredients:
Rice 1 cup washed (regular small-grained rice)
Moong dal 1/2 cup roasted to a light brown
Water 4 to 4.5 cups (more to add later)
Salt as required
Turmeric powder 1/4 tsp
Pepper-cumin powder 3 tsp
Peppercorns 4-5
Cumin 1/2 tsp
Cashewnuts 6 to 8
Curry leaves a few
Ginger 1inch piece chopped fine
Oil for tempering
Ghee 2 to 3 tbsp for garnish
Directions:
Take the rice in a vessel that fits into the cooker. Dry roast the moong dal in a Kadai to a light brown colour or until you get a nice aroma. Add the roasted moong dal to the rice and wash them well together. Place the vessel into the cooker and add the required water. Add salt and turmeric powder, 1/2 tsp jeera, and 4 to 5 peppercorns and close the cooker. Cook for 5 to 6 whistles.
After the pressure from the cooker releases, remove the vessel and mash the rice and dal mixture with the back of a ladle. Keep aside. In a Kadai take some oil and heat. Add the 1 tsp Cumin and drop in the chopped ginger and curry leaves. Fry for 30 seconds and add the Pepper-cumin powder and fry for another 10 seconds. Now add the cooked and, washed rice and dal mixture and mix well. Add some hot water handy to adjust the consistency of Pongal, approximately 1/2 cup to 1 cup. Stir nicely. Adjust salt and spice, add more hot water if the consistency is too solid. The Pongal should be a little gooey, but not runny. Now in another small Kadai take some ghee and heat. Add the cashew nuts and fry until light brown. Pour this into the Pongal mixture. The yummy and spicy Ven Pongal is ready to serve as breakfast or lunch.
Serving suggestions: With Sambar, with chutney, with Gotsu or even Moru Kuzhambu(kadi). I like it just as it is and needs no accompaniment.
To make pepper- cumin powder, dry roast pepper, and cumin in the proportion of 3 tsp of pepper and 1 tsp of cumin. Cool and make a coarse powder. I always have this handy as I use it to temper Rasam too.
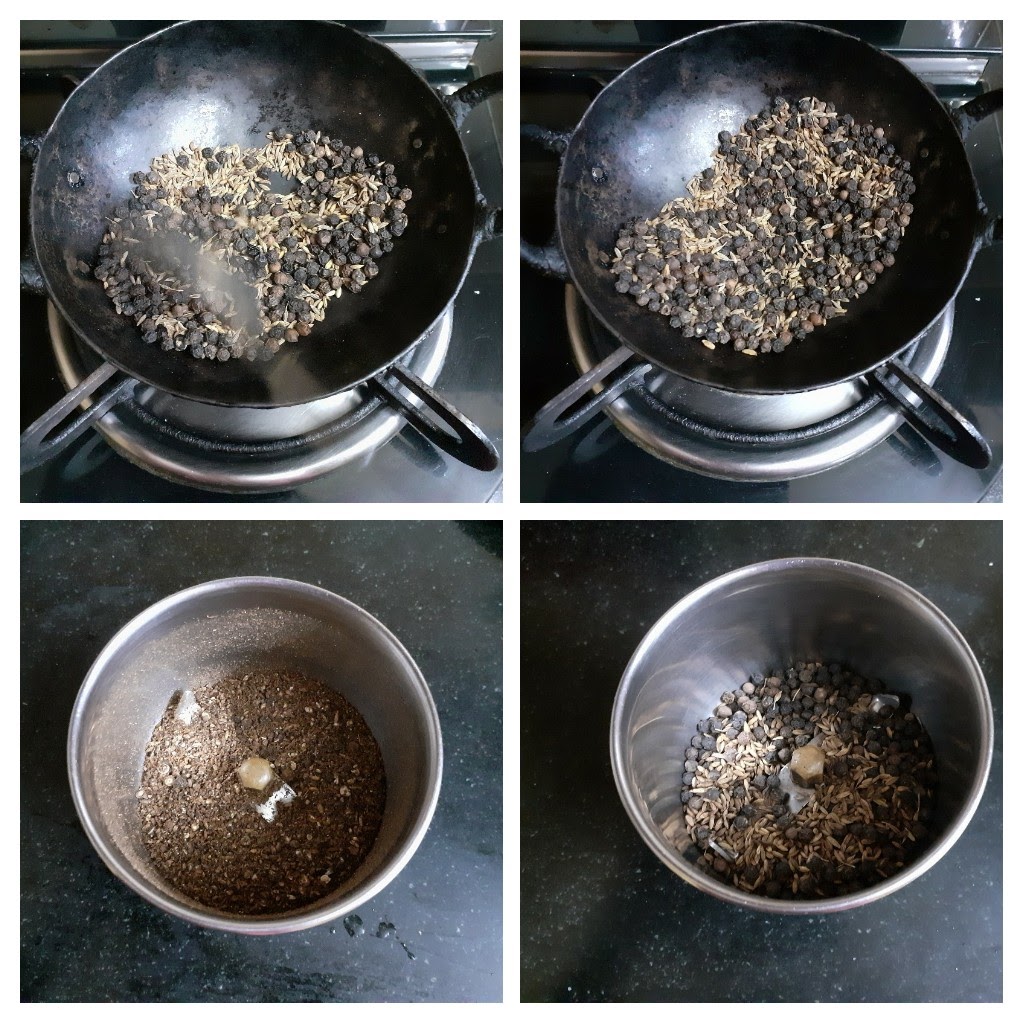
STEPWISE RECIPE FOLLOWS:
1. Dry roast the moong dal in a Kadai to a light brown colour or until you get a nice aroma. Add the roasted moong dal to the rice and wash them well together.
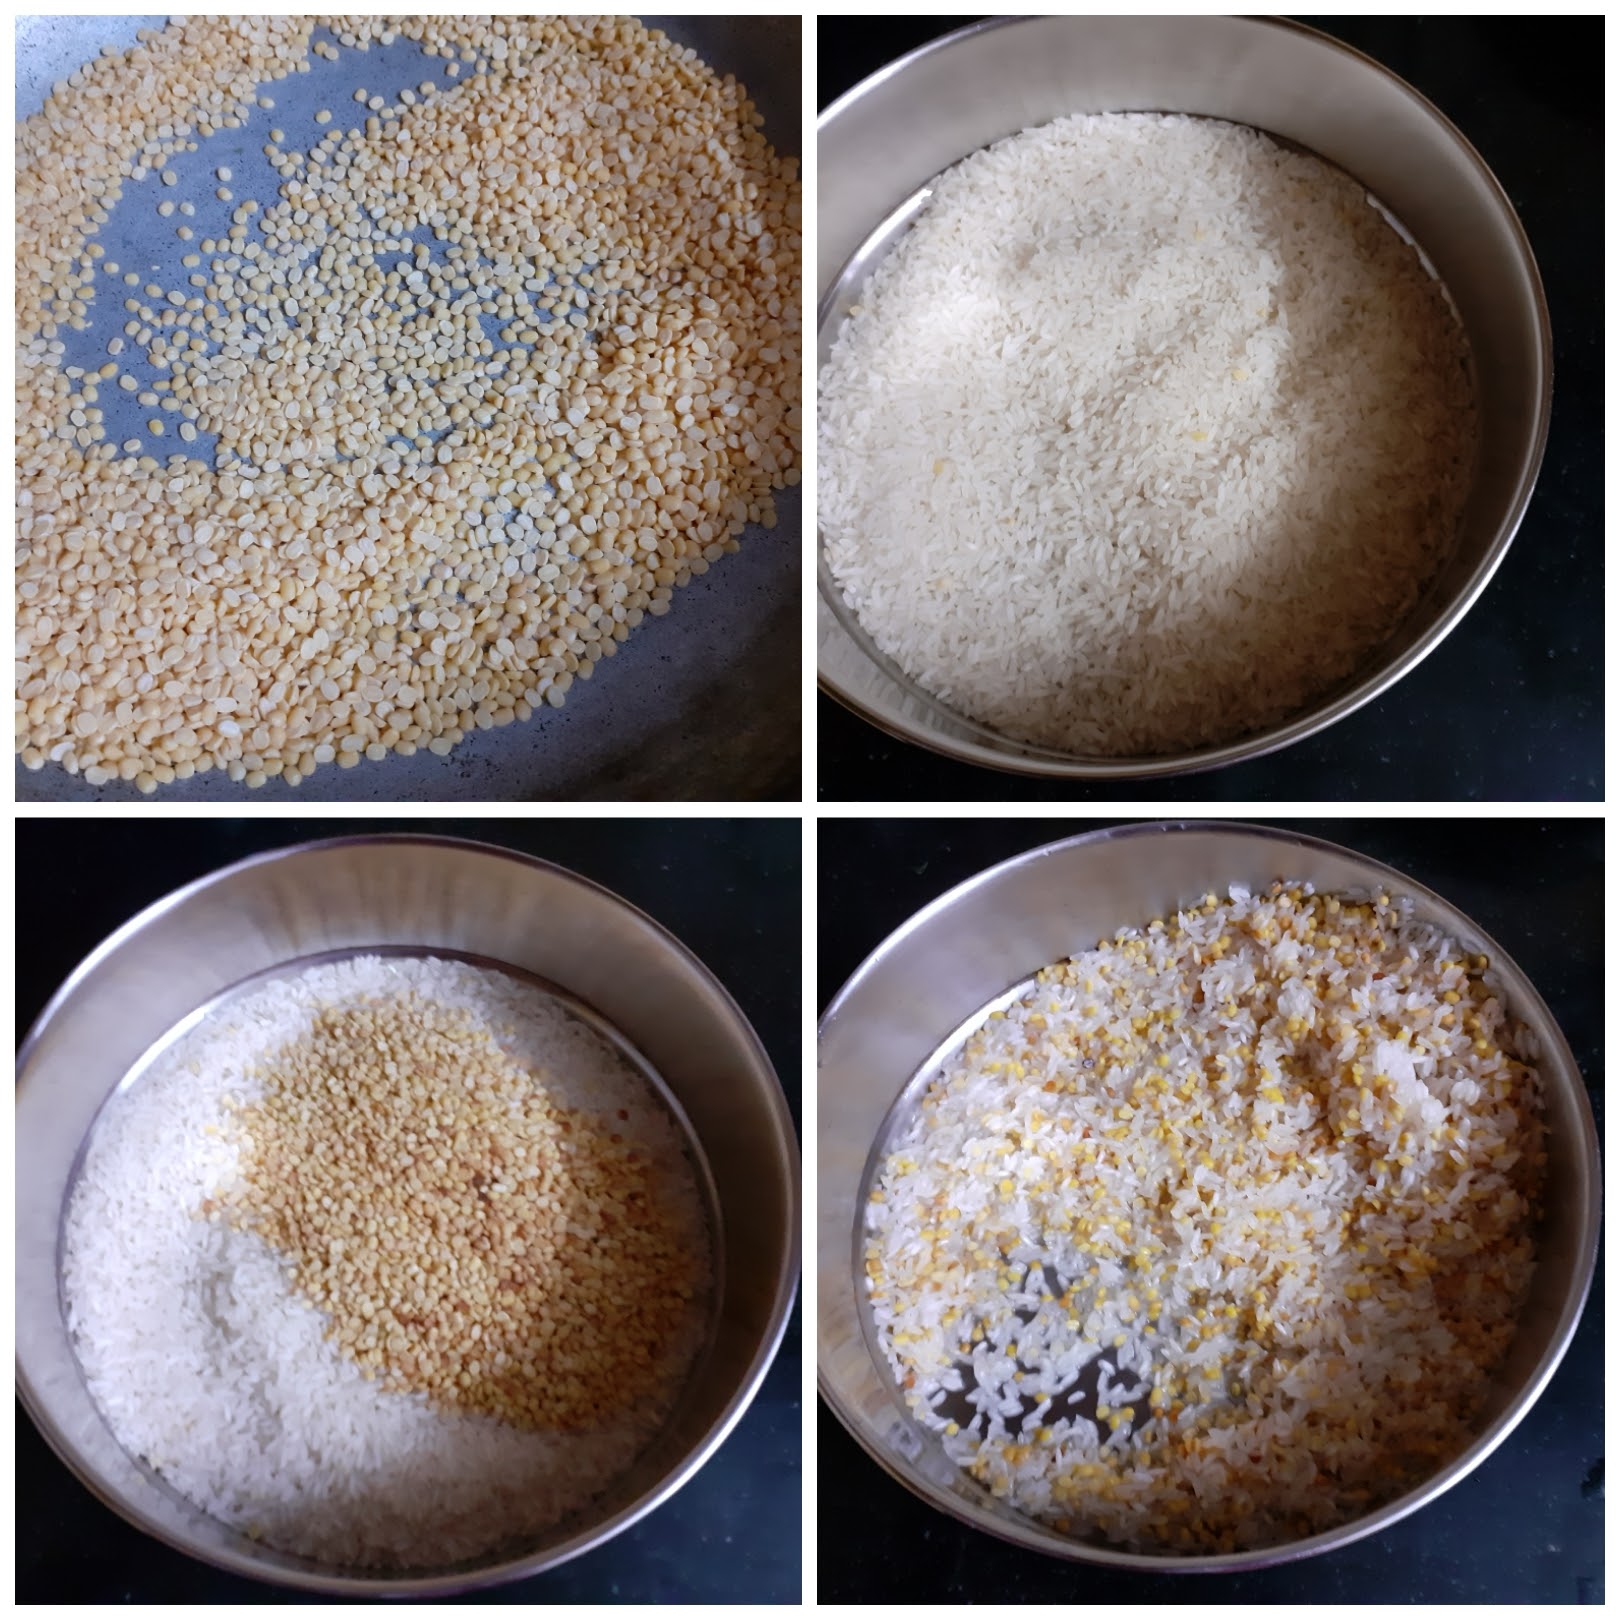
2. Place the vessel into the cooker and add the required water. Add salt and turmeric powder, 1/2 tsp jeera, and 4 to 5 peppercorns and close the cooker. Cook for 5 to 6 whistles.
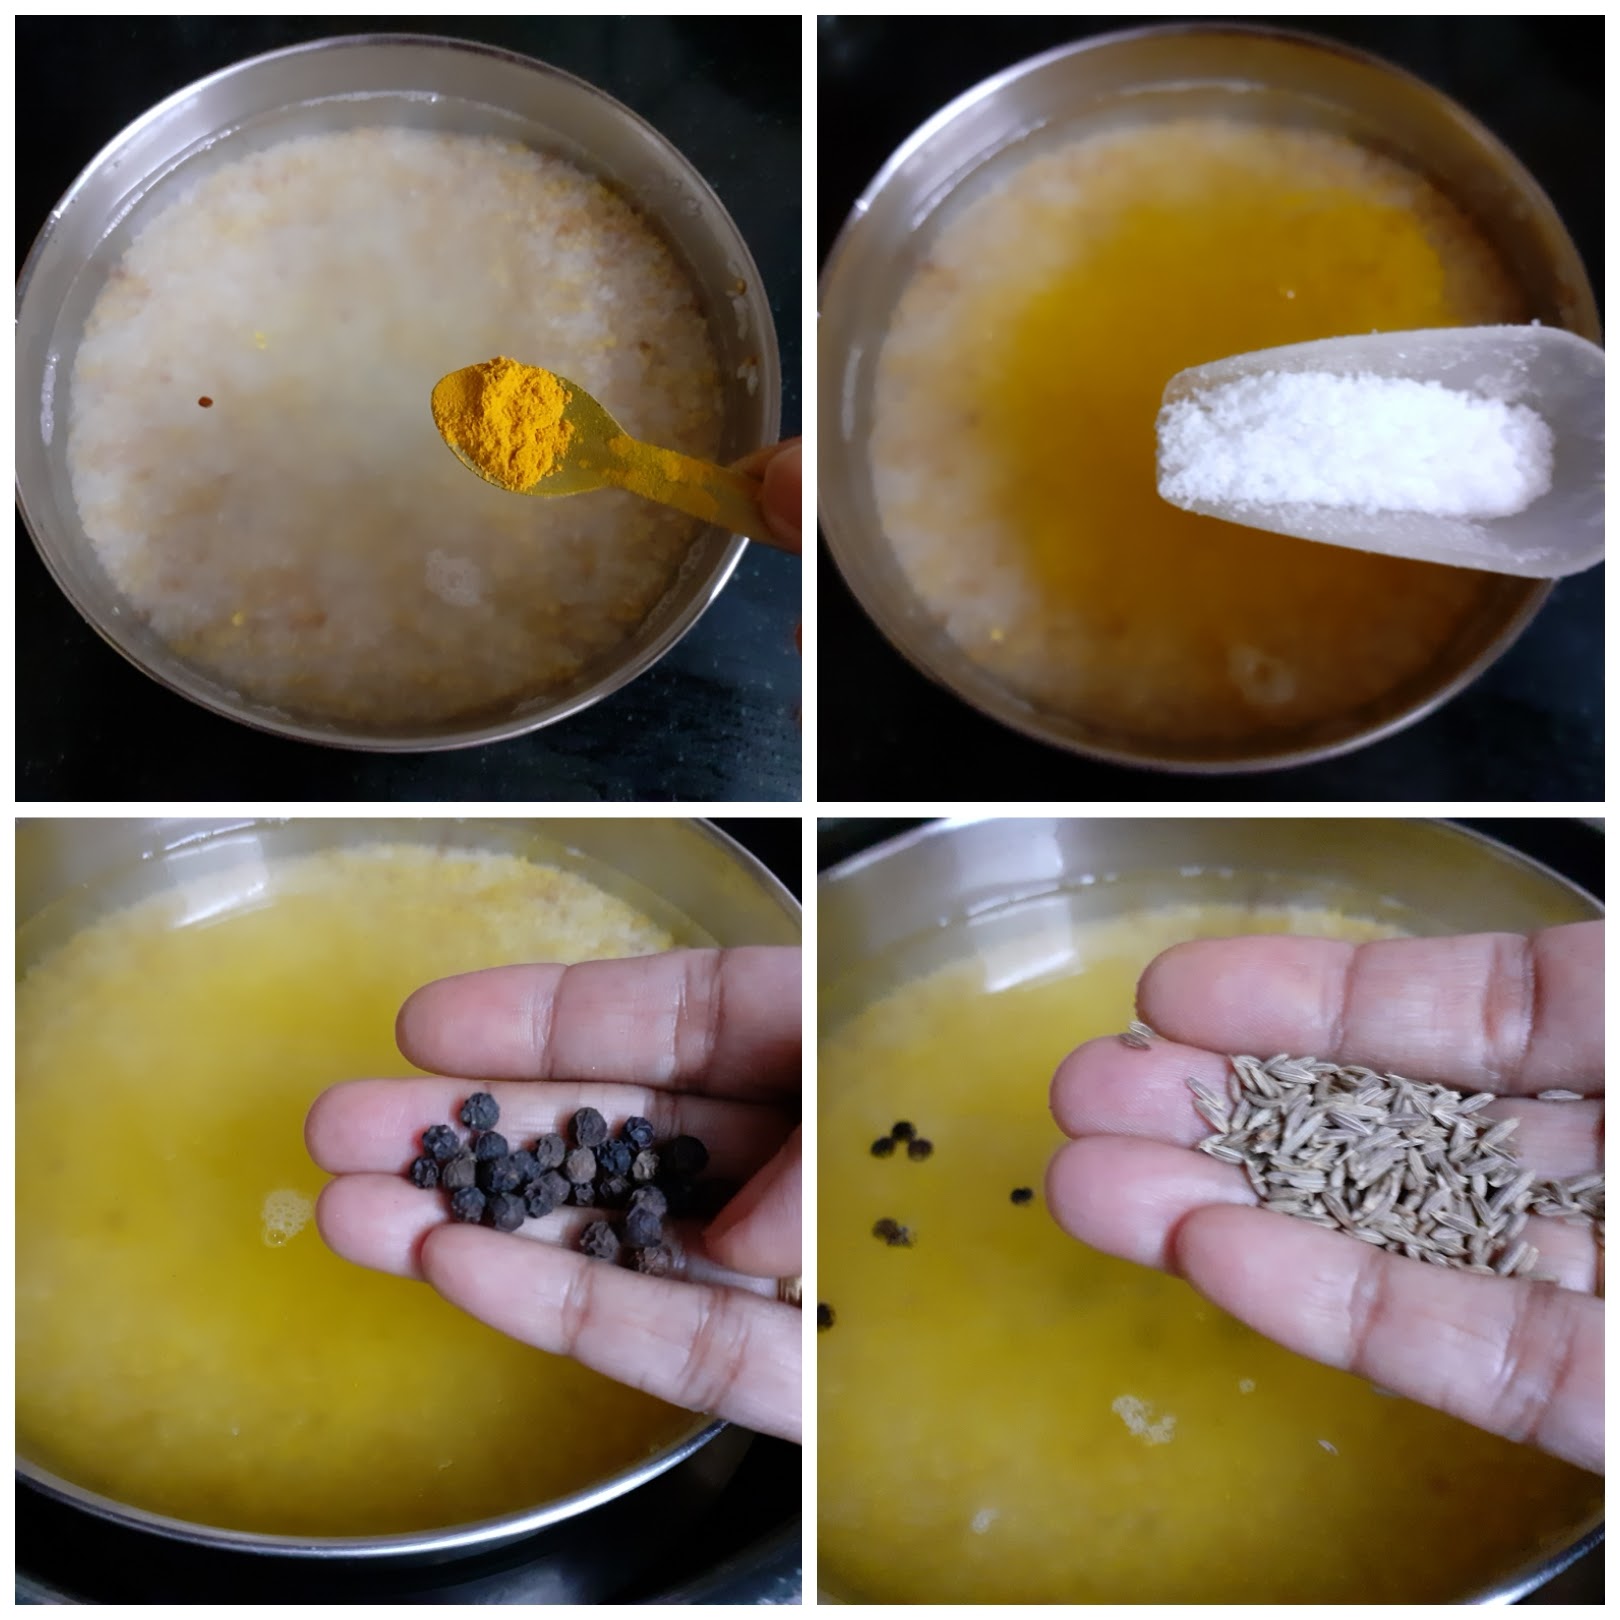
3. After the pressure from the cooker releases, remove the vessel and mash the rice and dal mixture with the back of a ladle. Add around 1 to 1.5 cups of hot water and adjust consistency.
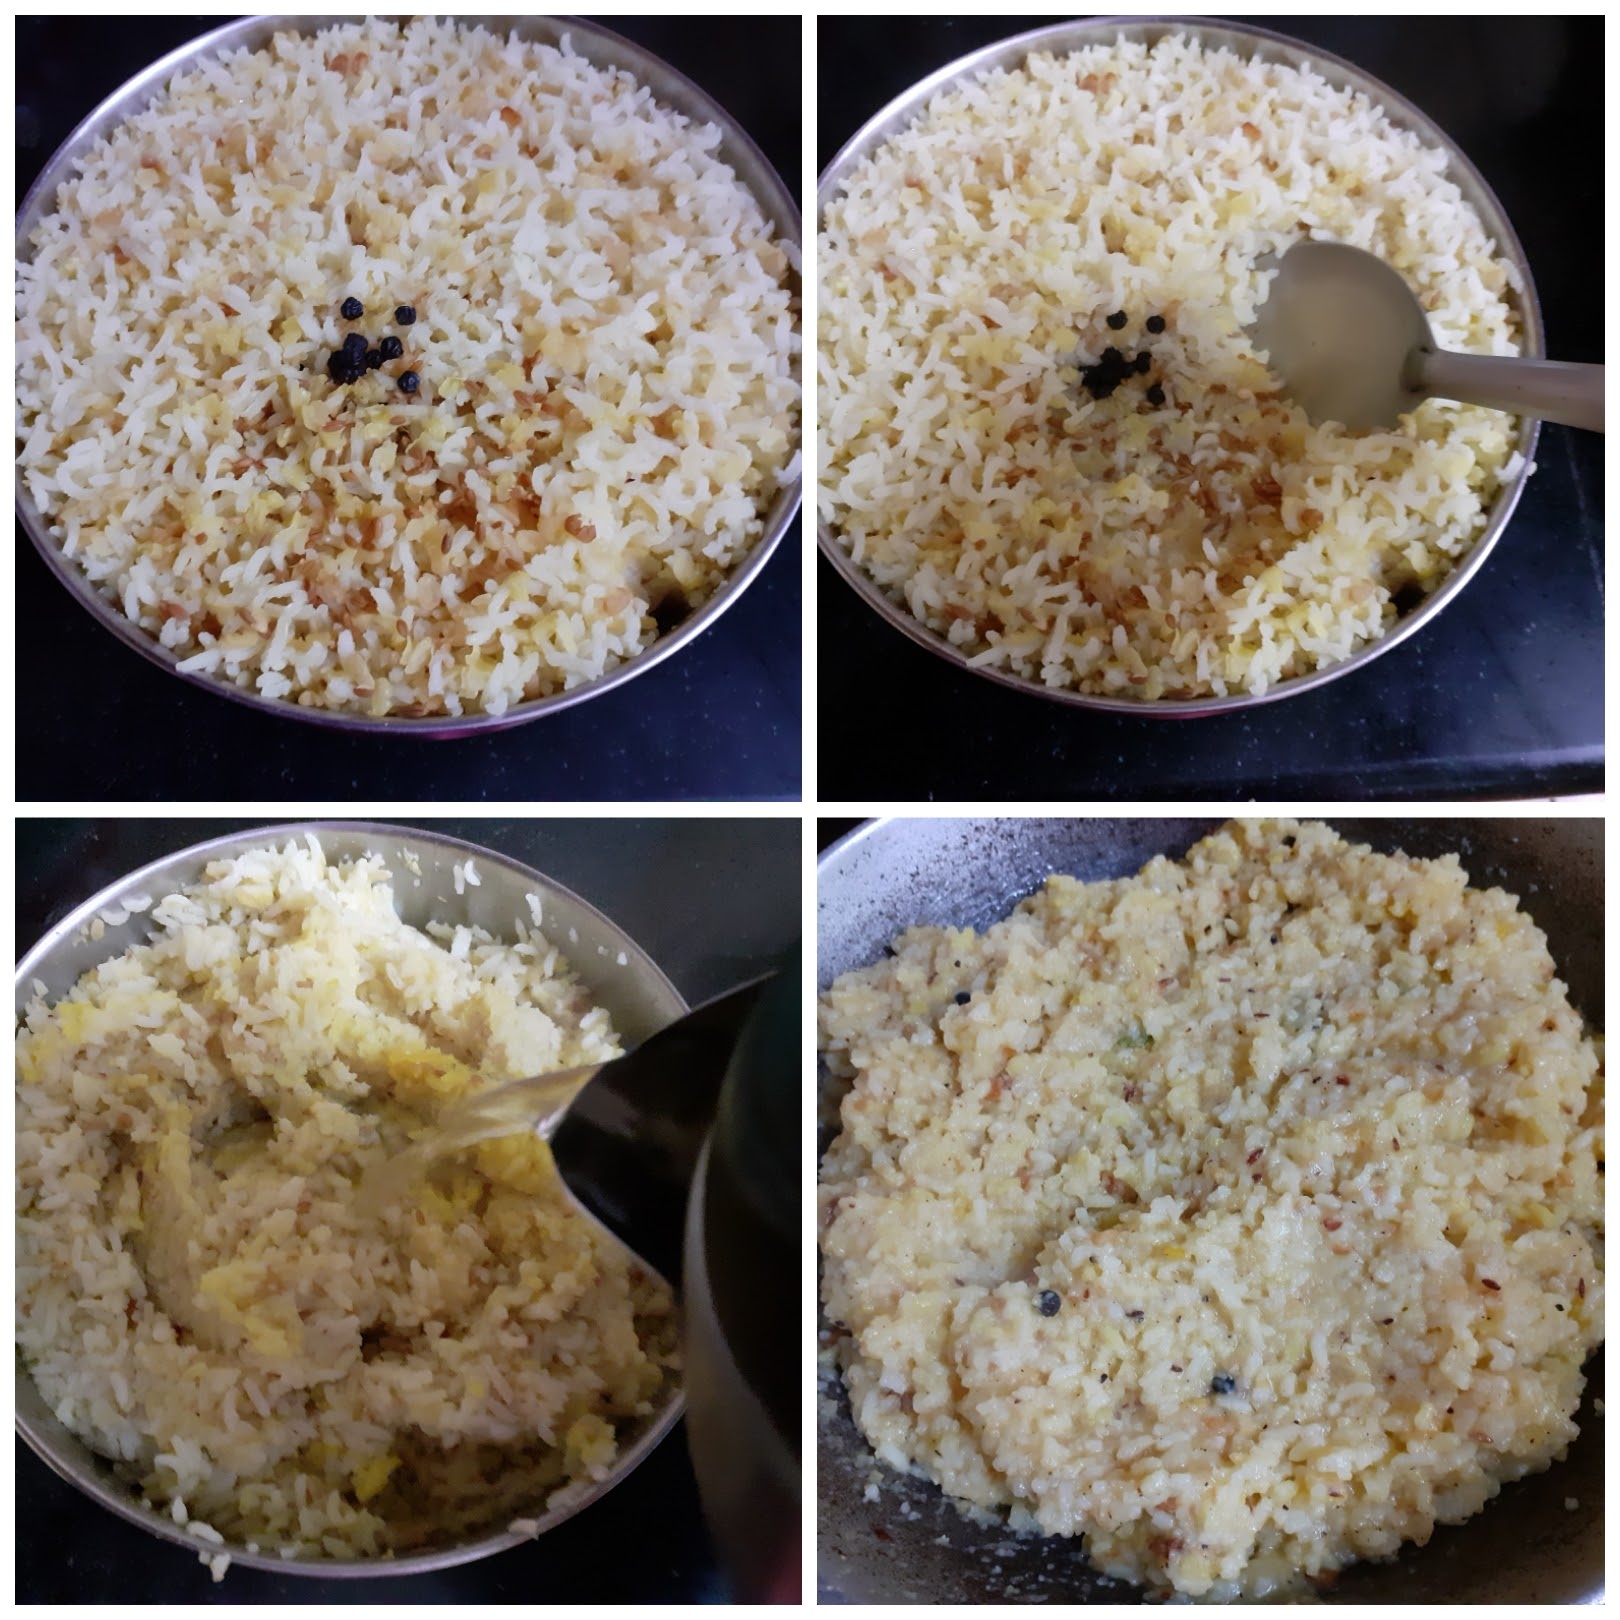
4. In a Kadai take some oil and heat. Add 1tsp Cumin and drop in the chopped ginger and curry leaves. Fry for 30 seconds and add the Pepper-cumin powder and fry for another 10 seconds. Add a little more salt, if required. Now add the cooked and, washed rice and dal mixture and mix well.
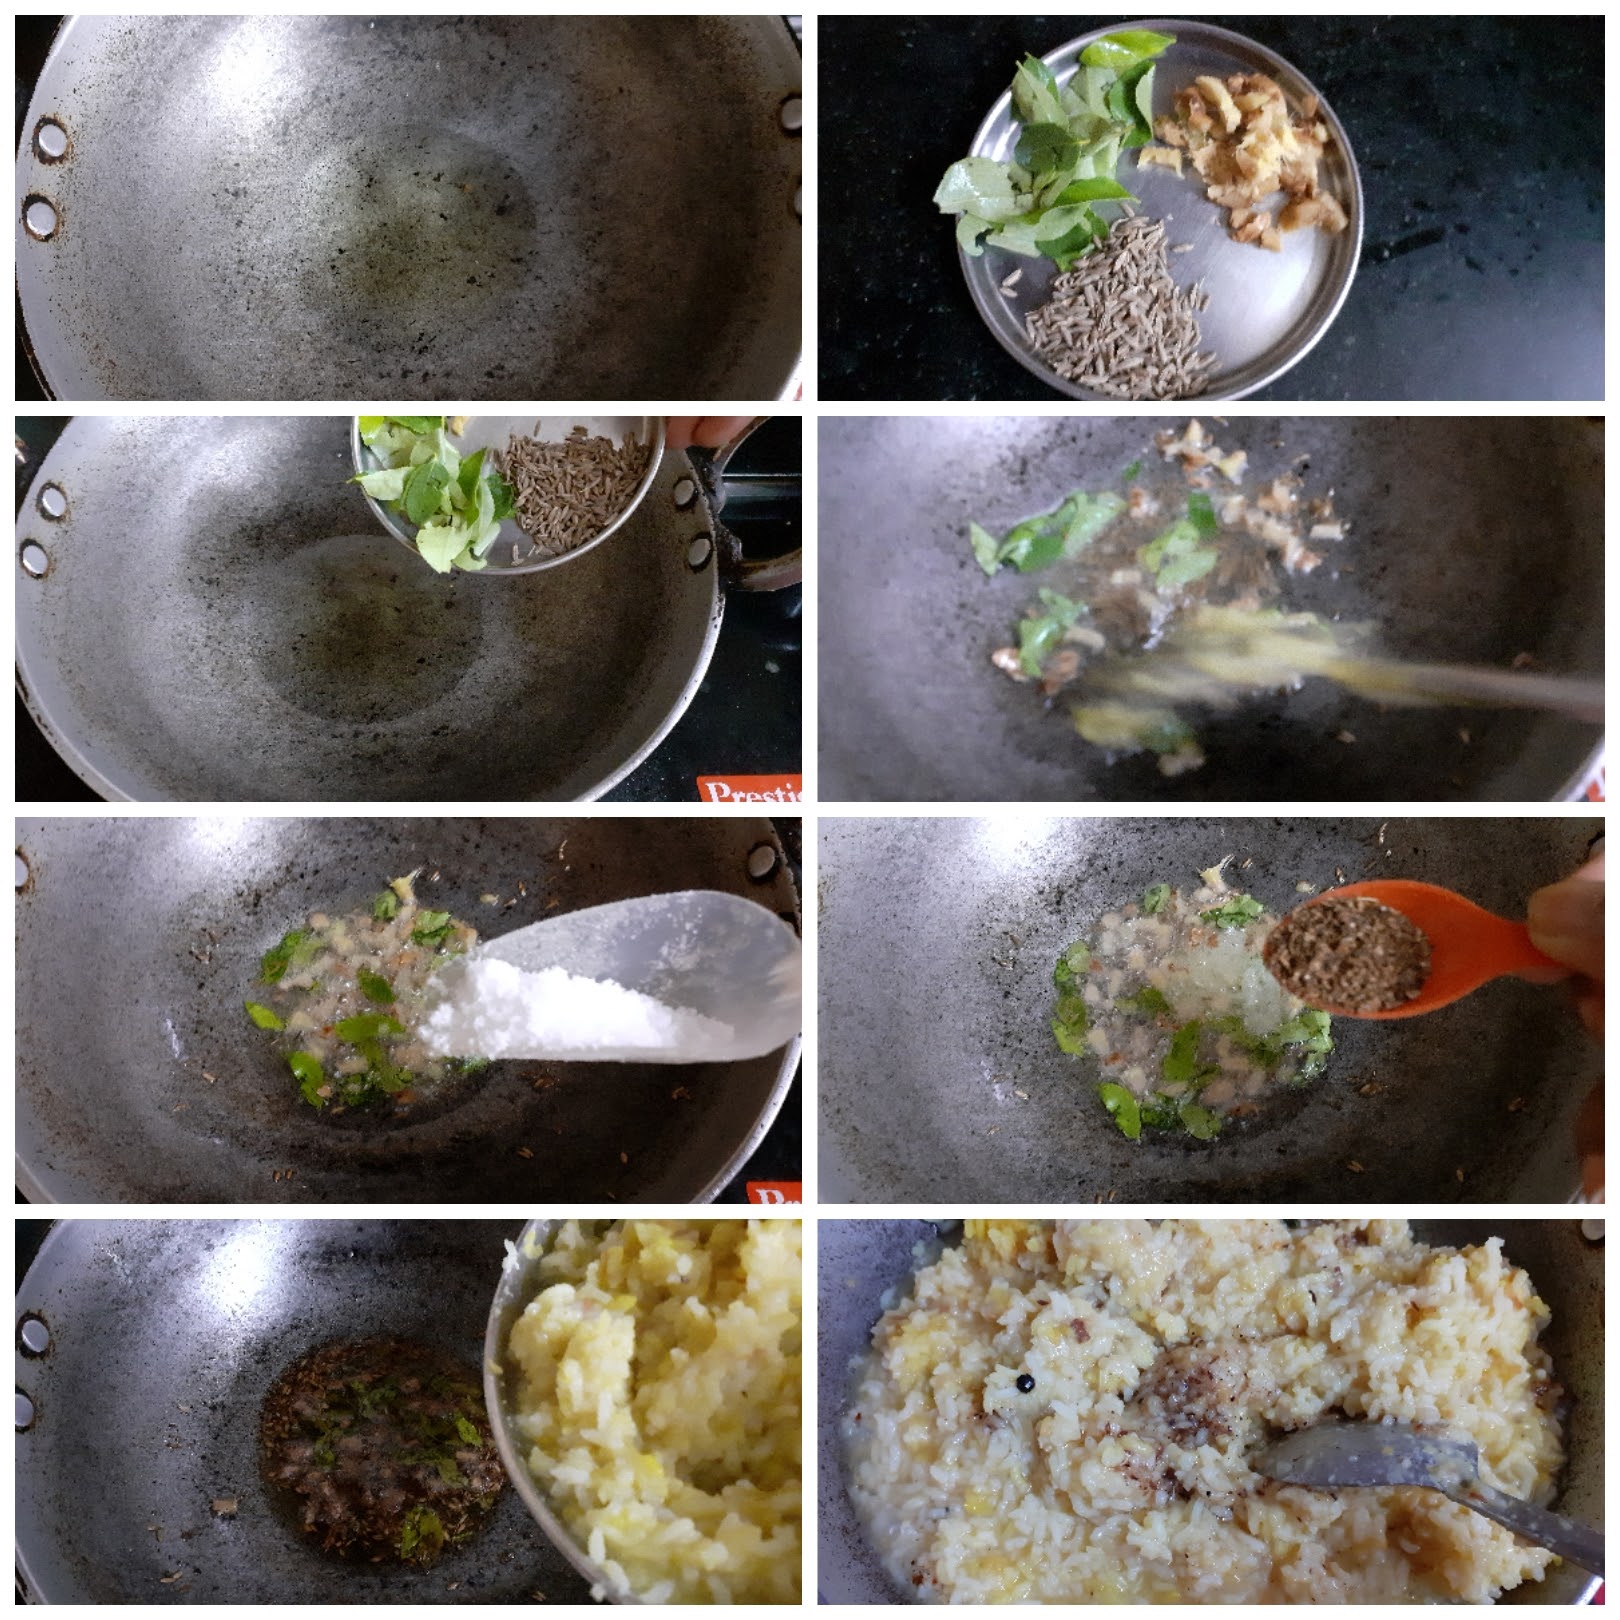
5. Now in another small Kadai take some ghee and heat. Add the cashew nuts and some more curry leaves and fry until light brown. Pour this into the Pongal mixture. The yummy and spicy Ven Pongal is ready to serve
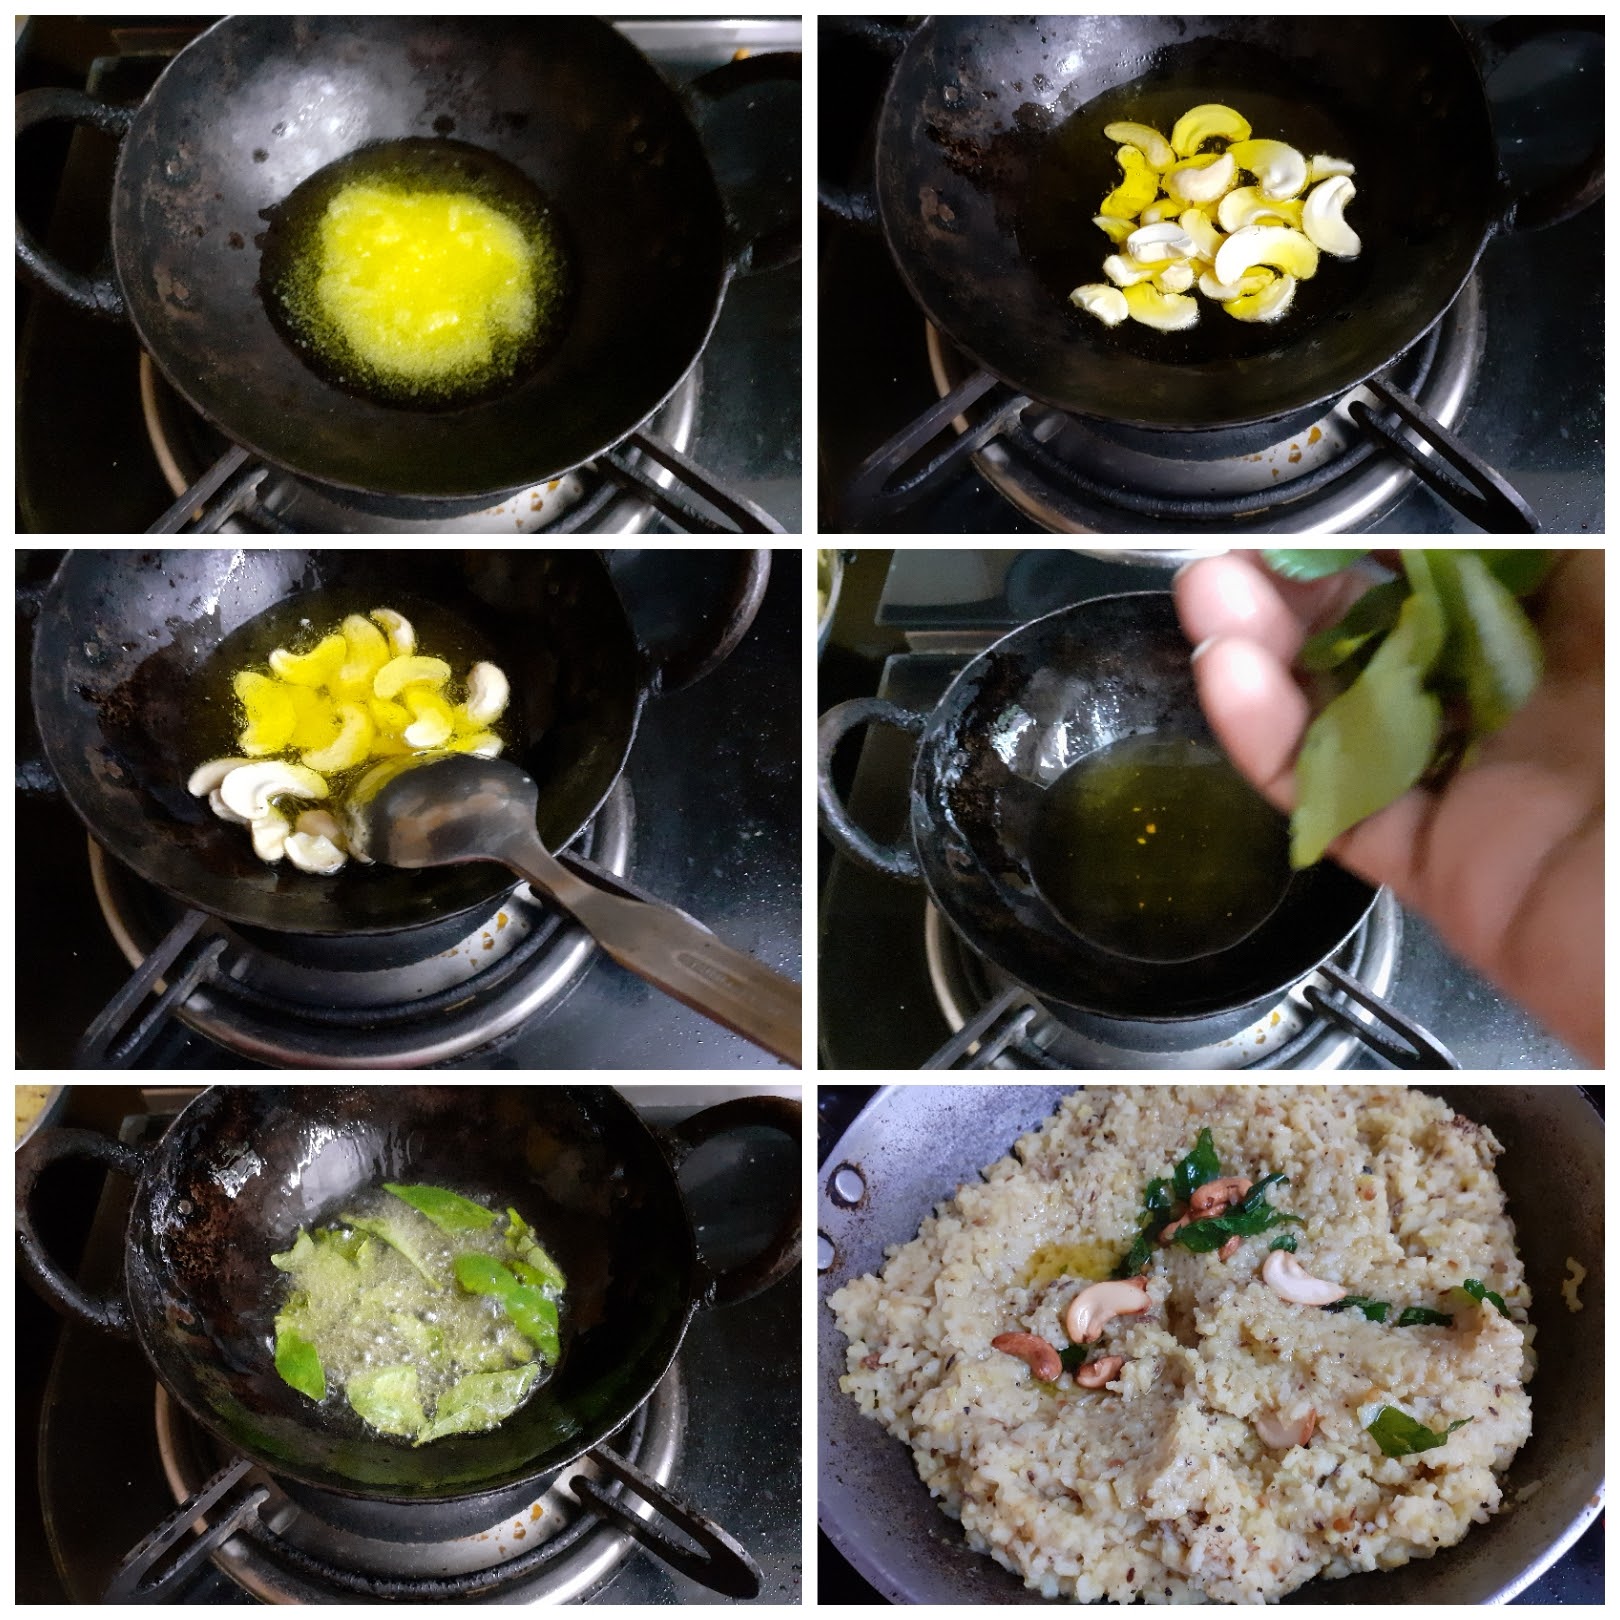
NOTES:
1. The cashewnuts can be fried in ghee before adding the regular tempering too.
2. The softer the rice and dal cook the better will be the texture of the Pongal.
3. Asafoetida can also be added while tempering. I have not added in this recipe, but it definitely can be done.
If you tried this recipe and liked it please comment below. I would love to hear from you. If you have a query about the recipe email us and ill respond as soon as I can.
Tomato Rice/Tamatar Pulav
Tomato Rice is a very simple recipe and I love making it just for this reason. It is a quick fix in many ways. Whether I have to head out in a hurry or have to fix a lunchbox in a short time, this dish is always my option. This dish also necessarily does not need a side dish to go with it. Any stir fry will do, or just by itself, it is great too. This dish has all the goodness of tomatoes, so it is rich in vitamin C, in lycopene that is good for the skin, a decent amount of fibre.
I keep my tomato rice very simple, subtly flavoured with the minimum of spices. In this dish, I don’t use any pungent spice like cloves, cardamom, cinnamon, or even onion, garlic, or ginger. I just let the Tomatoes do all the talking????and the flavor is always bang on. The most concession I can make is adding fresh green peas to the rice. I don’t puree my tomatoes too, I love to keep it rustic.
While you are here do check out my other rice varieties like Lemon Rice, Coriander rice, Lobia pulav, Masala rice, Flavoured rice, Coconut rice, and more…
Here is the recipe for Tomato Rice for you–
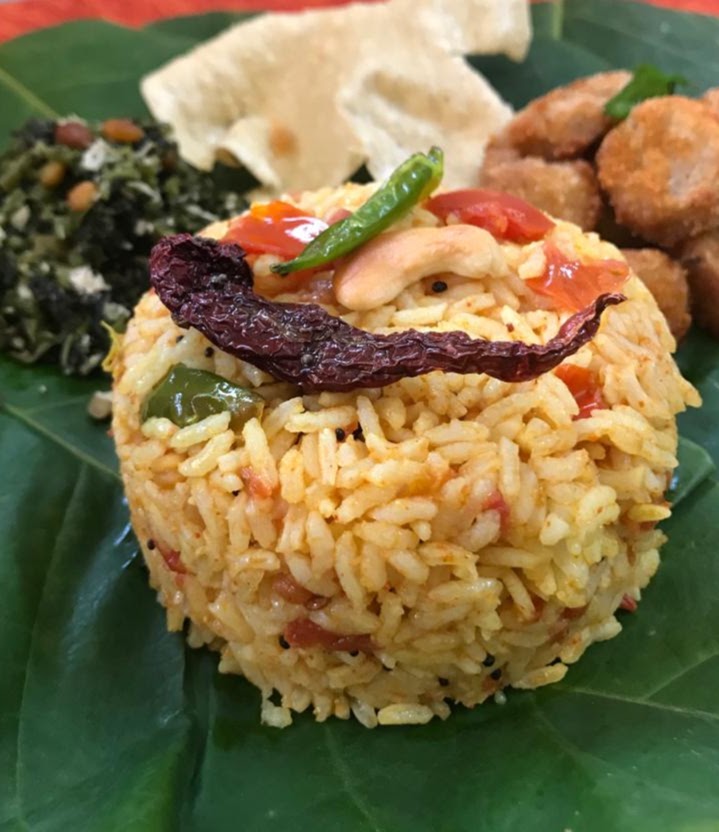
Ingredients:
Tomatoes 4 big chopped fine chopped finely
Rice 1 cup pre-cooked and cooled
Cashewnuts a few
Green chillies 2 slit lengthwise
Curry leaves a few
Dry red chillies 2 broken
Chana dal(yellow gram) 1/2 tbsp
Urad dal 1/2 tbsp
Mustard 1 tsp
Turmeric powder 1/2 tsp
Salt as required
Red chilli powder 1 tsp(add more for more spice
Coriander powder 2 tsp
Oil for sauteeing
Directions:
Cook 1 cup rice, spread it on a plate to cool, and drizzle some oil over it so that the grains do not stick. Now in a Karahi heat oil and add the Cashewnuts to it and fry until light brown. Remove them onto a plate. Now to the same oil add the mustard seeds, Chana dal, urad dal, dry red chillies, and fry until the dals turn light brown. To this add the slit green chillies and curry leaves. Saute for 30 secs. Now add the turmeric powder and chopped tomatoes and saute for a minute. Now add salt, followed by red chilli powder and coriander powder, and cover the Karahi and cook until the tomatoes become mushy and the oil is released. Remove the lid and mash the tomatoes with the back of a ladle, so that it turns saucy. Now add the rice little by little and mix well. The tomato gravy must nicely coat the rice. Check for salt and spice and adjust if required. Put off the flame and add the fried Cashews. The yummy and tangy Tomato rice is ready.
Serving Suggestions: With any stir fry vegetable or Potato roast, Sepankazhangu(Colaccasia)roast, or just by itself.
STEPWISE RECIPE FOLLOWS:
1. Assemble all ingredients. Cook 1 cup rice, spread it on a plate to cool and drizzle some oil over it so that the grains do not stick.

2. Now in a Karahi heat oil and add the Cashewnuts to it and fry until light brown. Remove them onto a plate. Now to the same oil add the mustard seeds, Chana dal, urad dal, dry red chillies, and fry until the dals turn light brown.
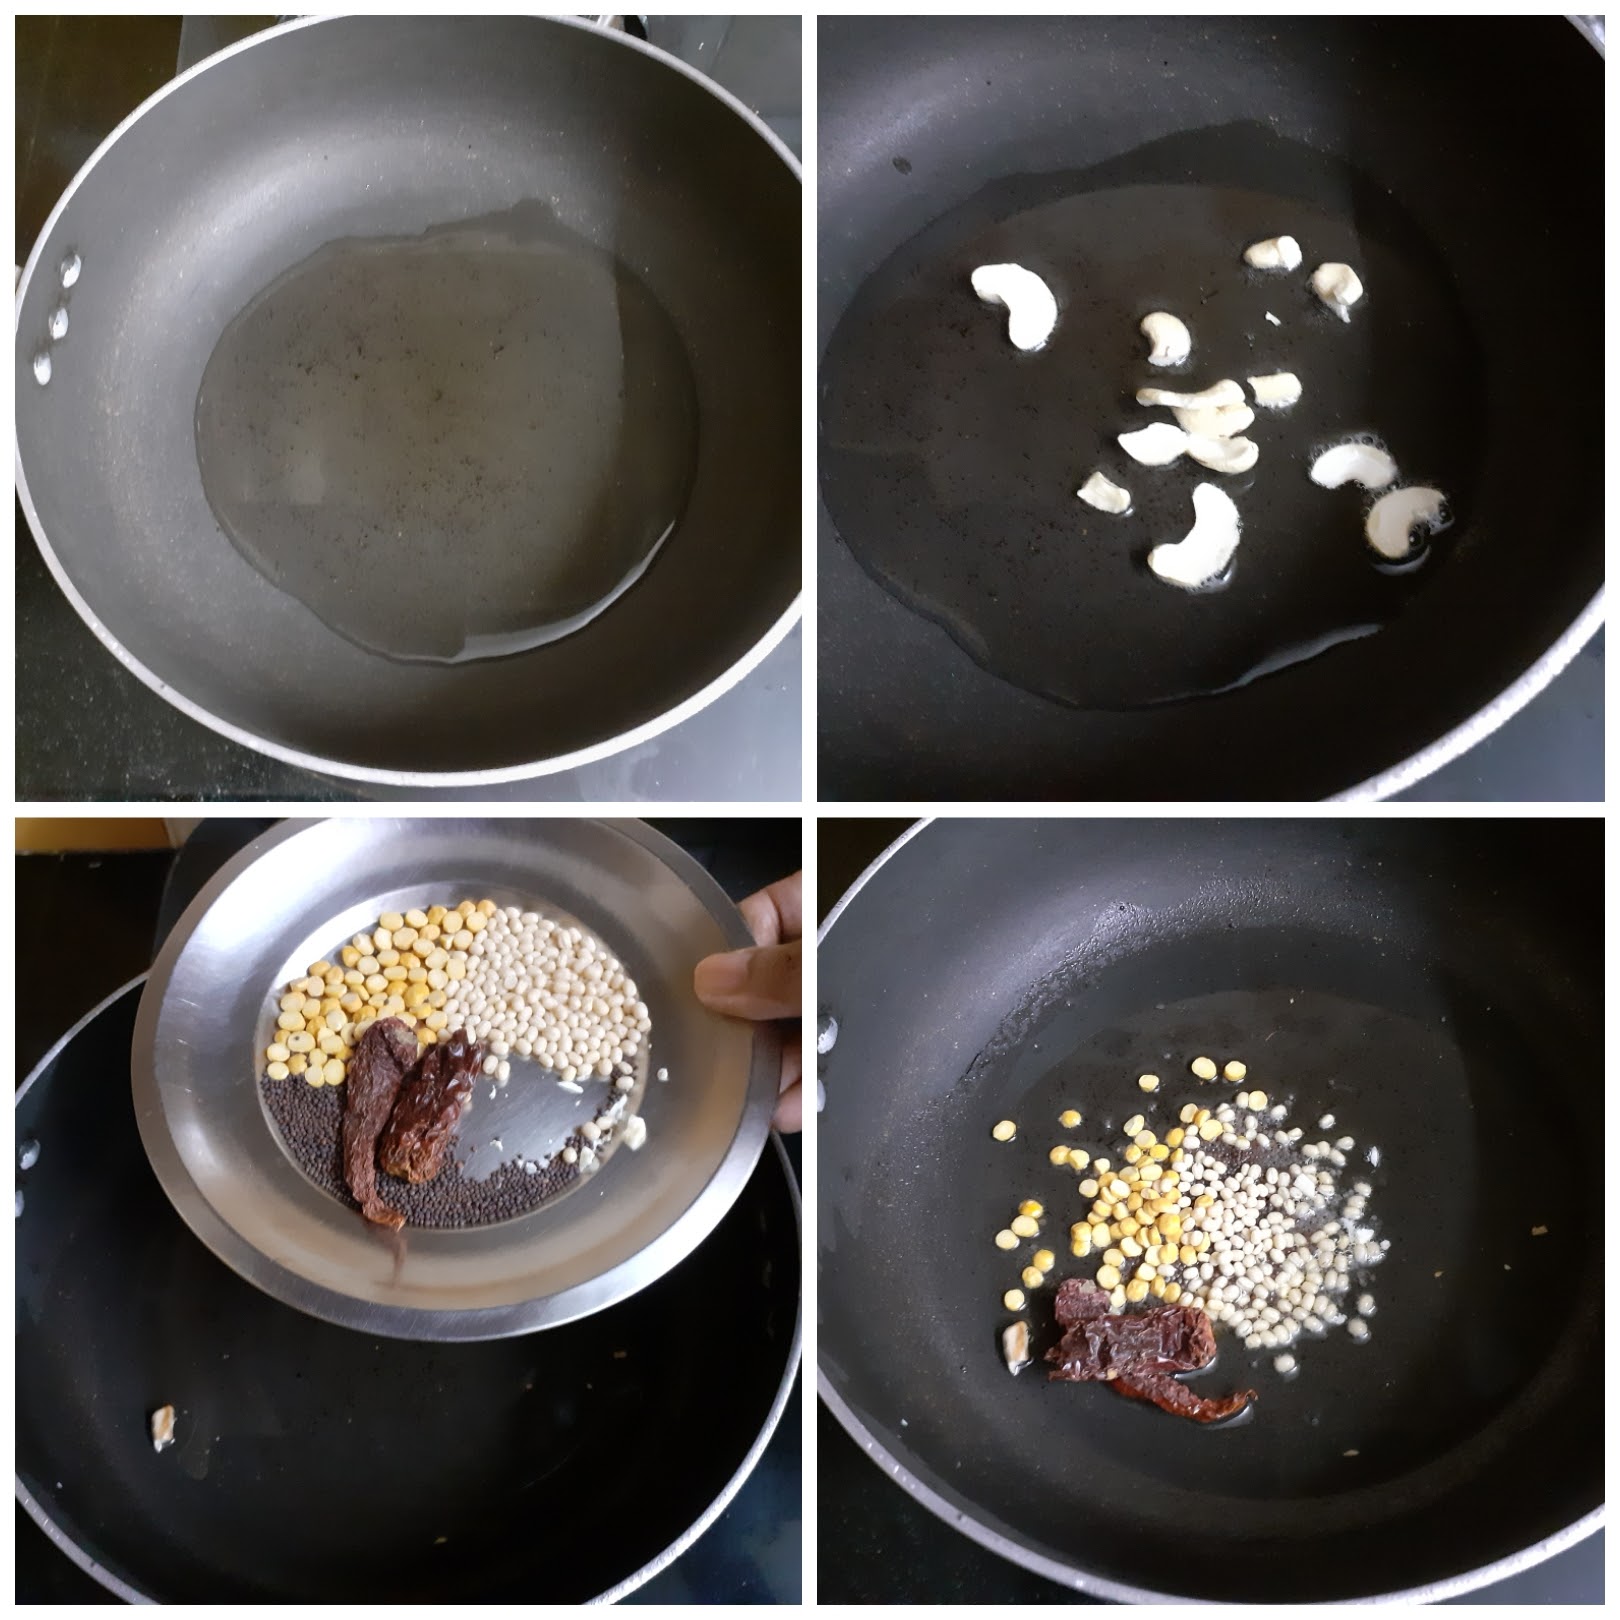
3. Now add the slit green chillies and curry leaves. Saute for 30 secs. Now add the turmeric powder and chopped tomatoes and saute for a minute.

4. Now add salt, followed by red chilli powder and coriander powder, and cover the Karahi and cook until the tomatoes become mushy and the oil is released.
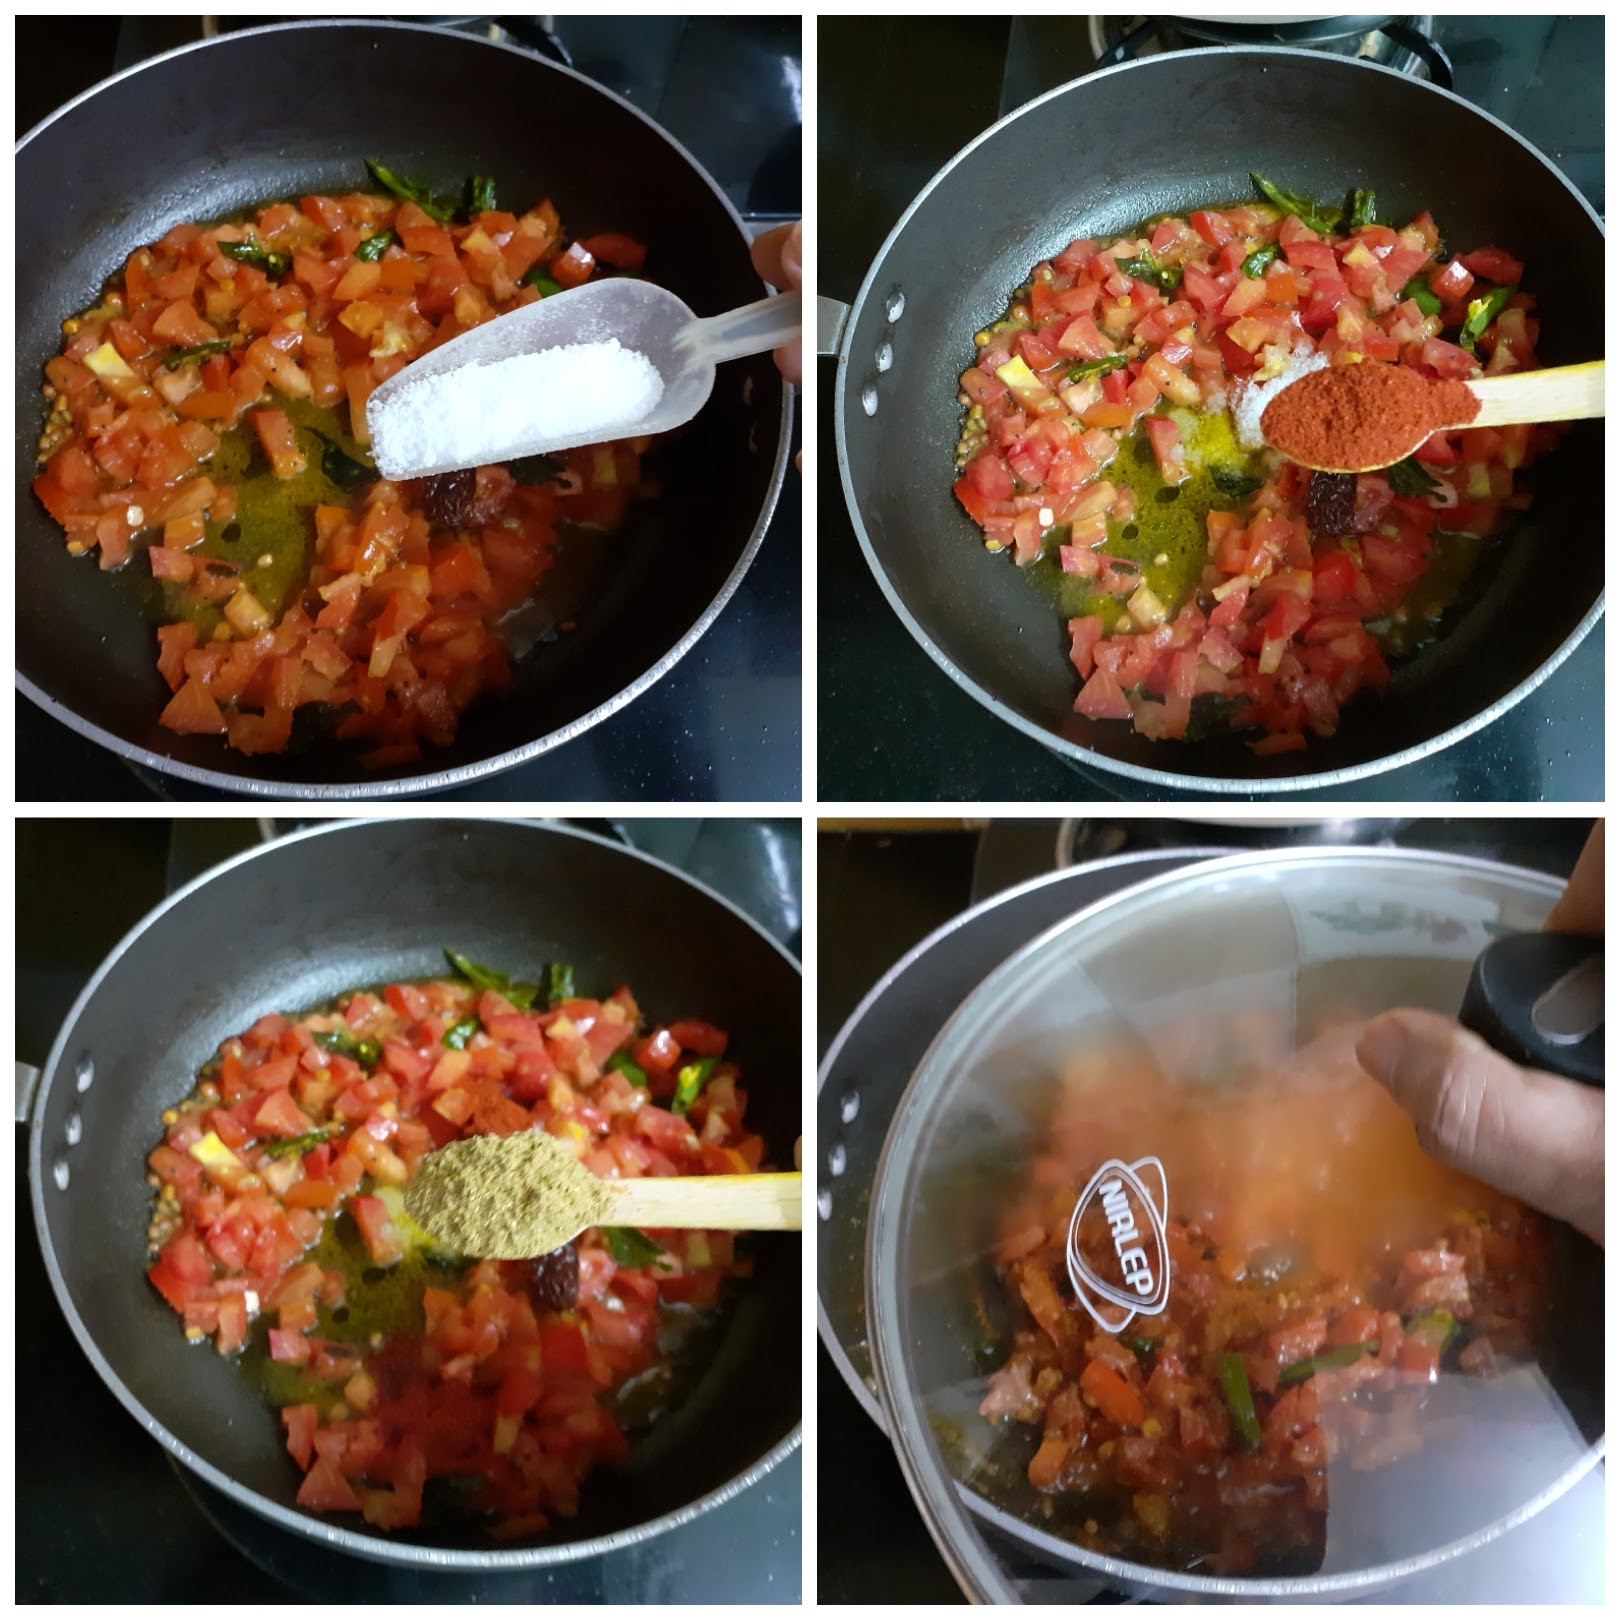
5. Remove the lid and mash the tomatoes with the back of a ladle, so that it turns saucy. Now add the rice little by little and mix well. The tomato gravy must nicely coat the rice.
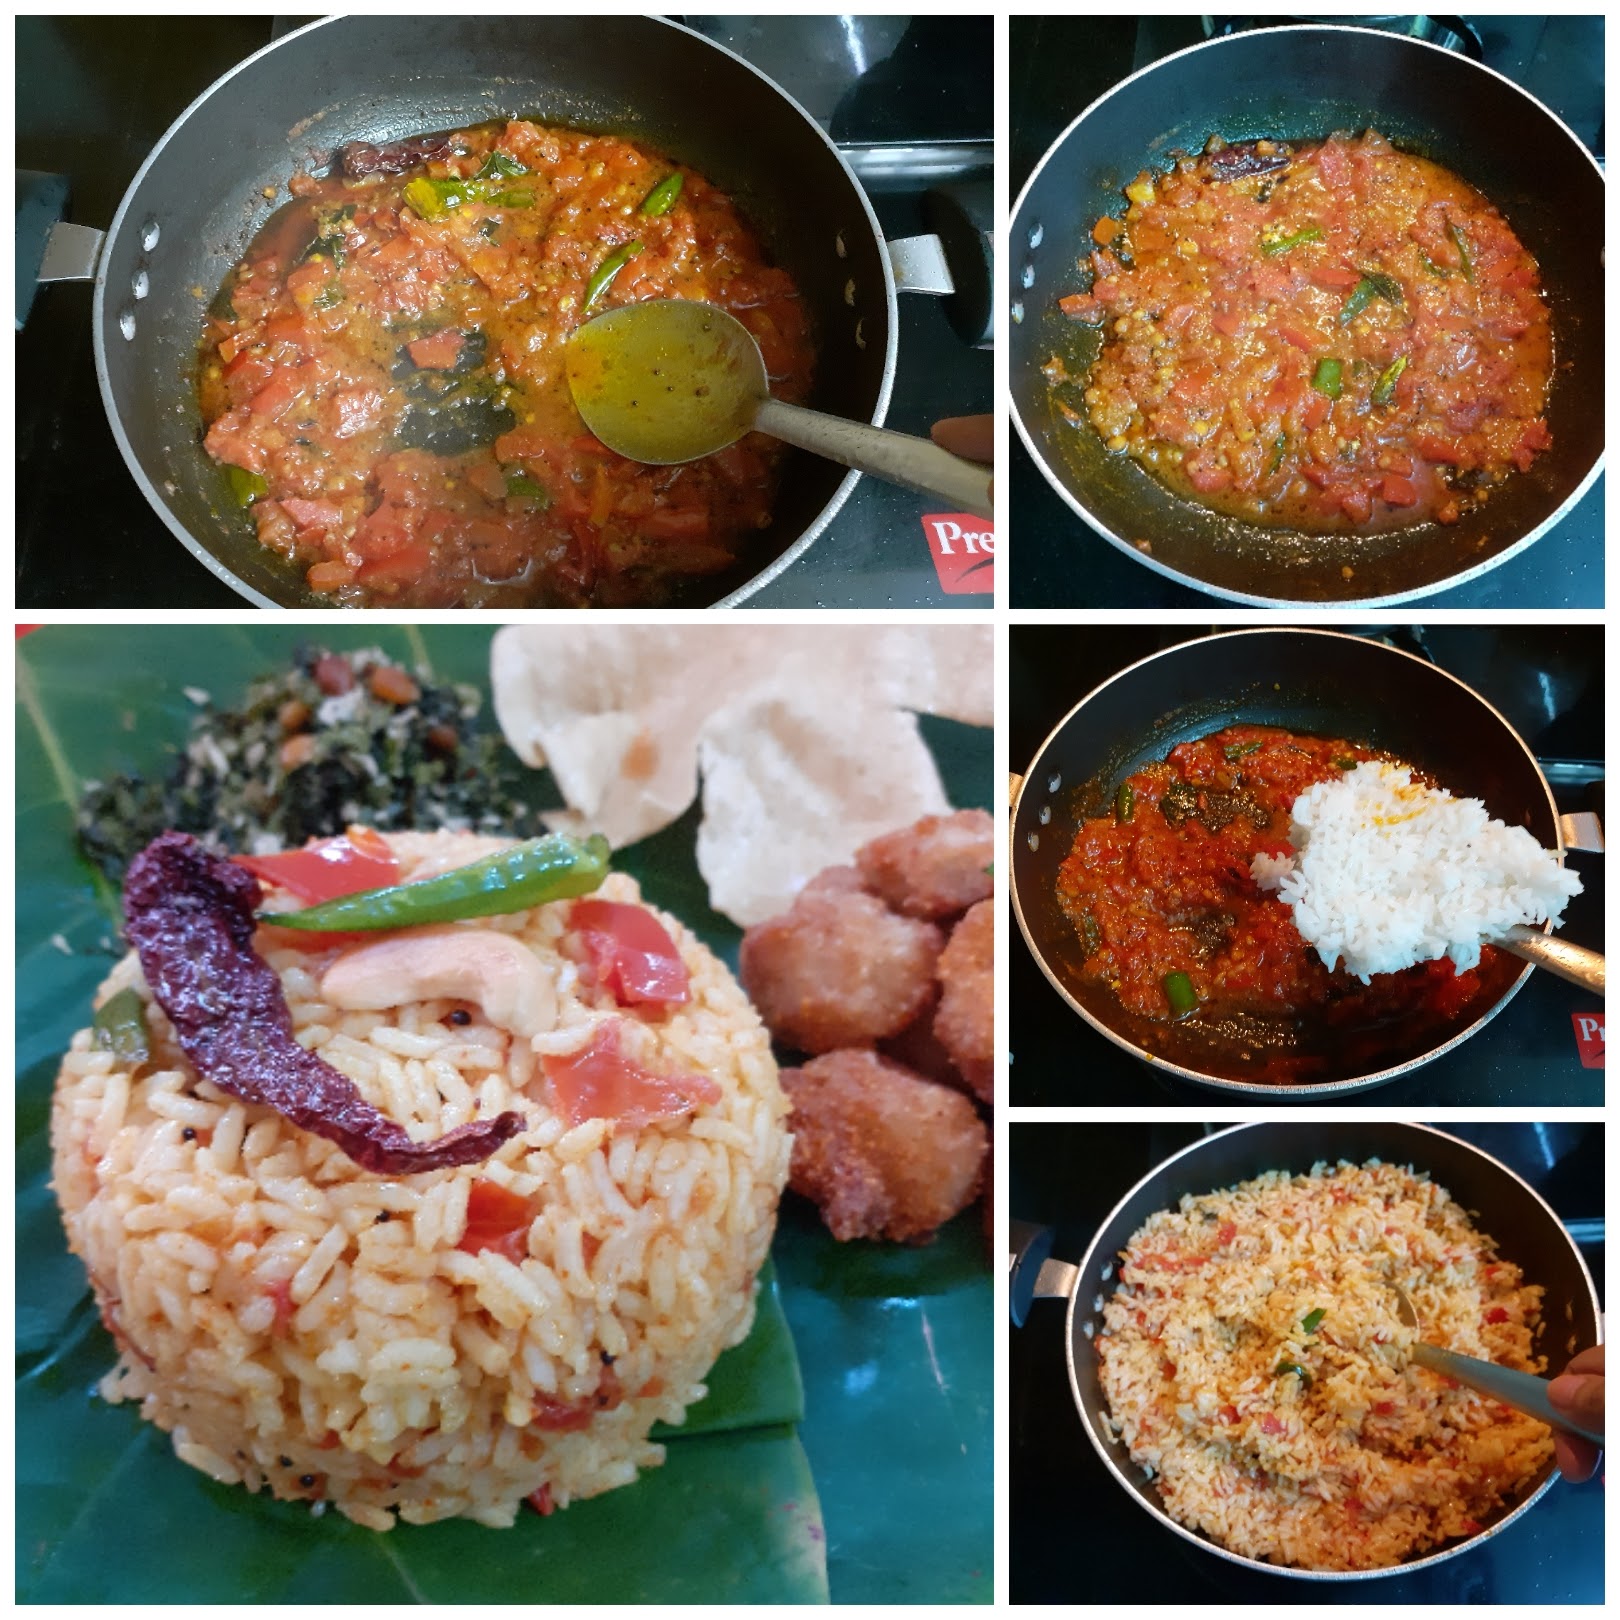
NOTES:
1. One can use Basmathi rice if they prefer. I have used regular raw rice.
2. I have kept the rice simple in flavour, if one wants onion and garlic can be added after adding the green chillies and sauteed well before adding the tomatoes.
3. Along with regular chilli powder, Kashmiri chilli powder can also be used for colour. I have used 1tsp regular red chilli powder and half teaspoon Kashmiri powder.
If you tried this recipe and liked it please comment below. I would love to hear from you. If you have a query about the recipe email us and ill respond as soon as I can.
Oatmeal Cookies
Oatmeal Cookies are hearty and chunky cookies that are like granola bars in cookie form. Some days we are in a hurry or rush to get to work, and most times ignore our hunger pangs. This Cookie comes in handy. For those mid-morning or early evening hunger pangs this a healthy option to eat. Have fussy teenagers at home who skip breakfast for sleep????? Ideal cookie for them.
I am giving you such a simple recipe that one bowl and all the mentioned ingredients are what you need. No mess, mix up everything in a single bowl, scoop the cookie dough into a baking sheet, and done.
These cookies can be stored at room temperature for a week and stay good in the refrigerator for 15 days. I prefer to make them in batches that last me a week or a fortnight. They are very simple to make so I don’t mind the process of making them regularly.
This Cookie requires Almond flour/almond meal, which is not available at all stores. Amazon has it though and I ordered it from there. Regular flour will not work for these cookies and will make them doughy. These cookies are not the crunchy ones but the chewy type.
While you are here please check out my other recipes like Blueberry Cheesecake, Apple tea cake, Apple Crumble, Savoury Muffins, and more…
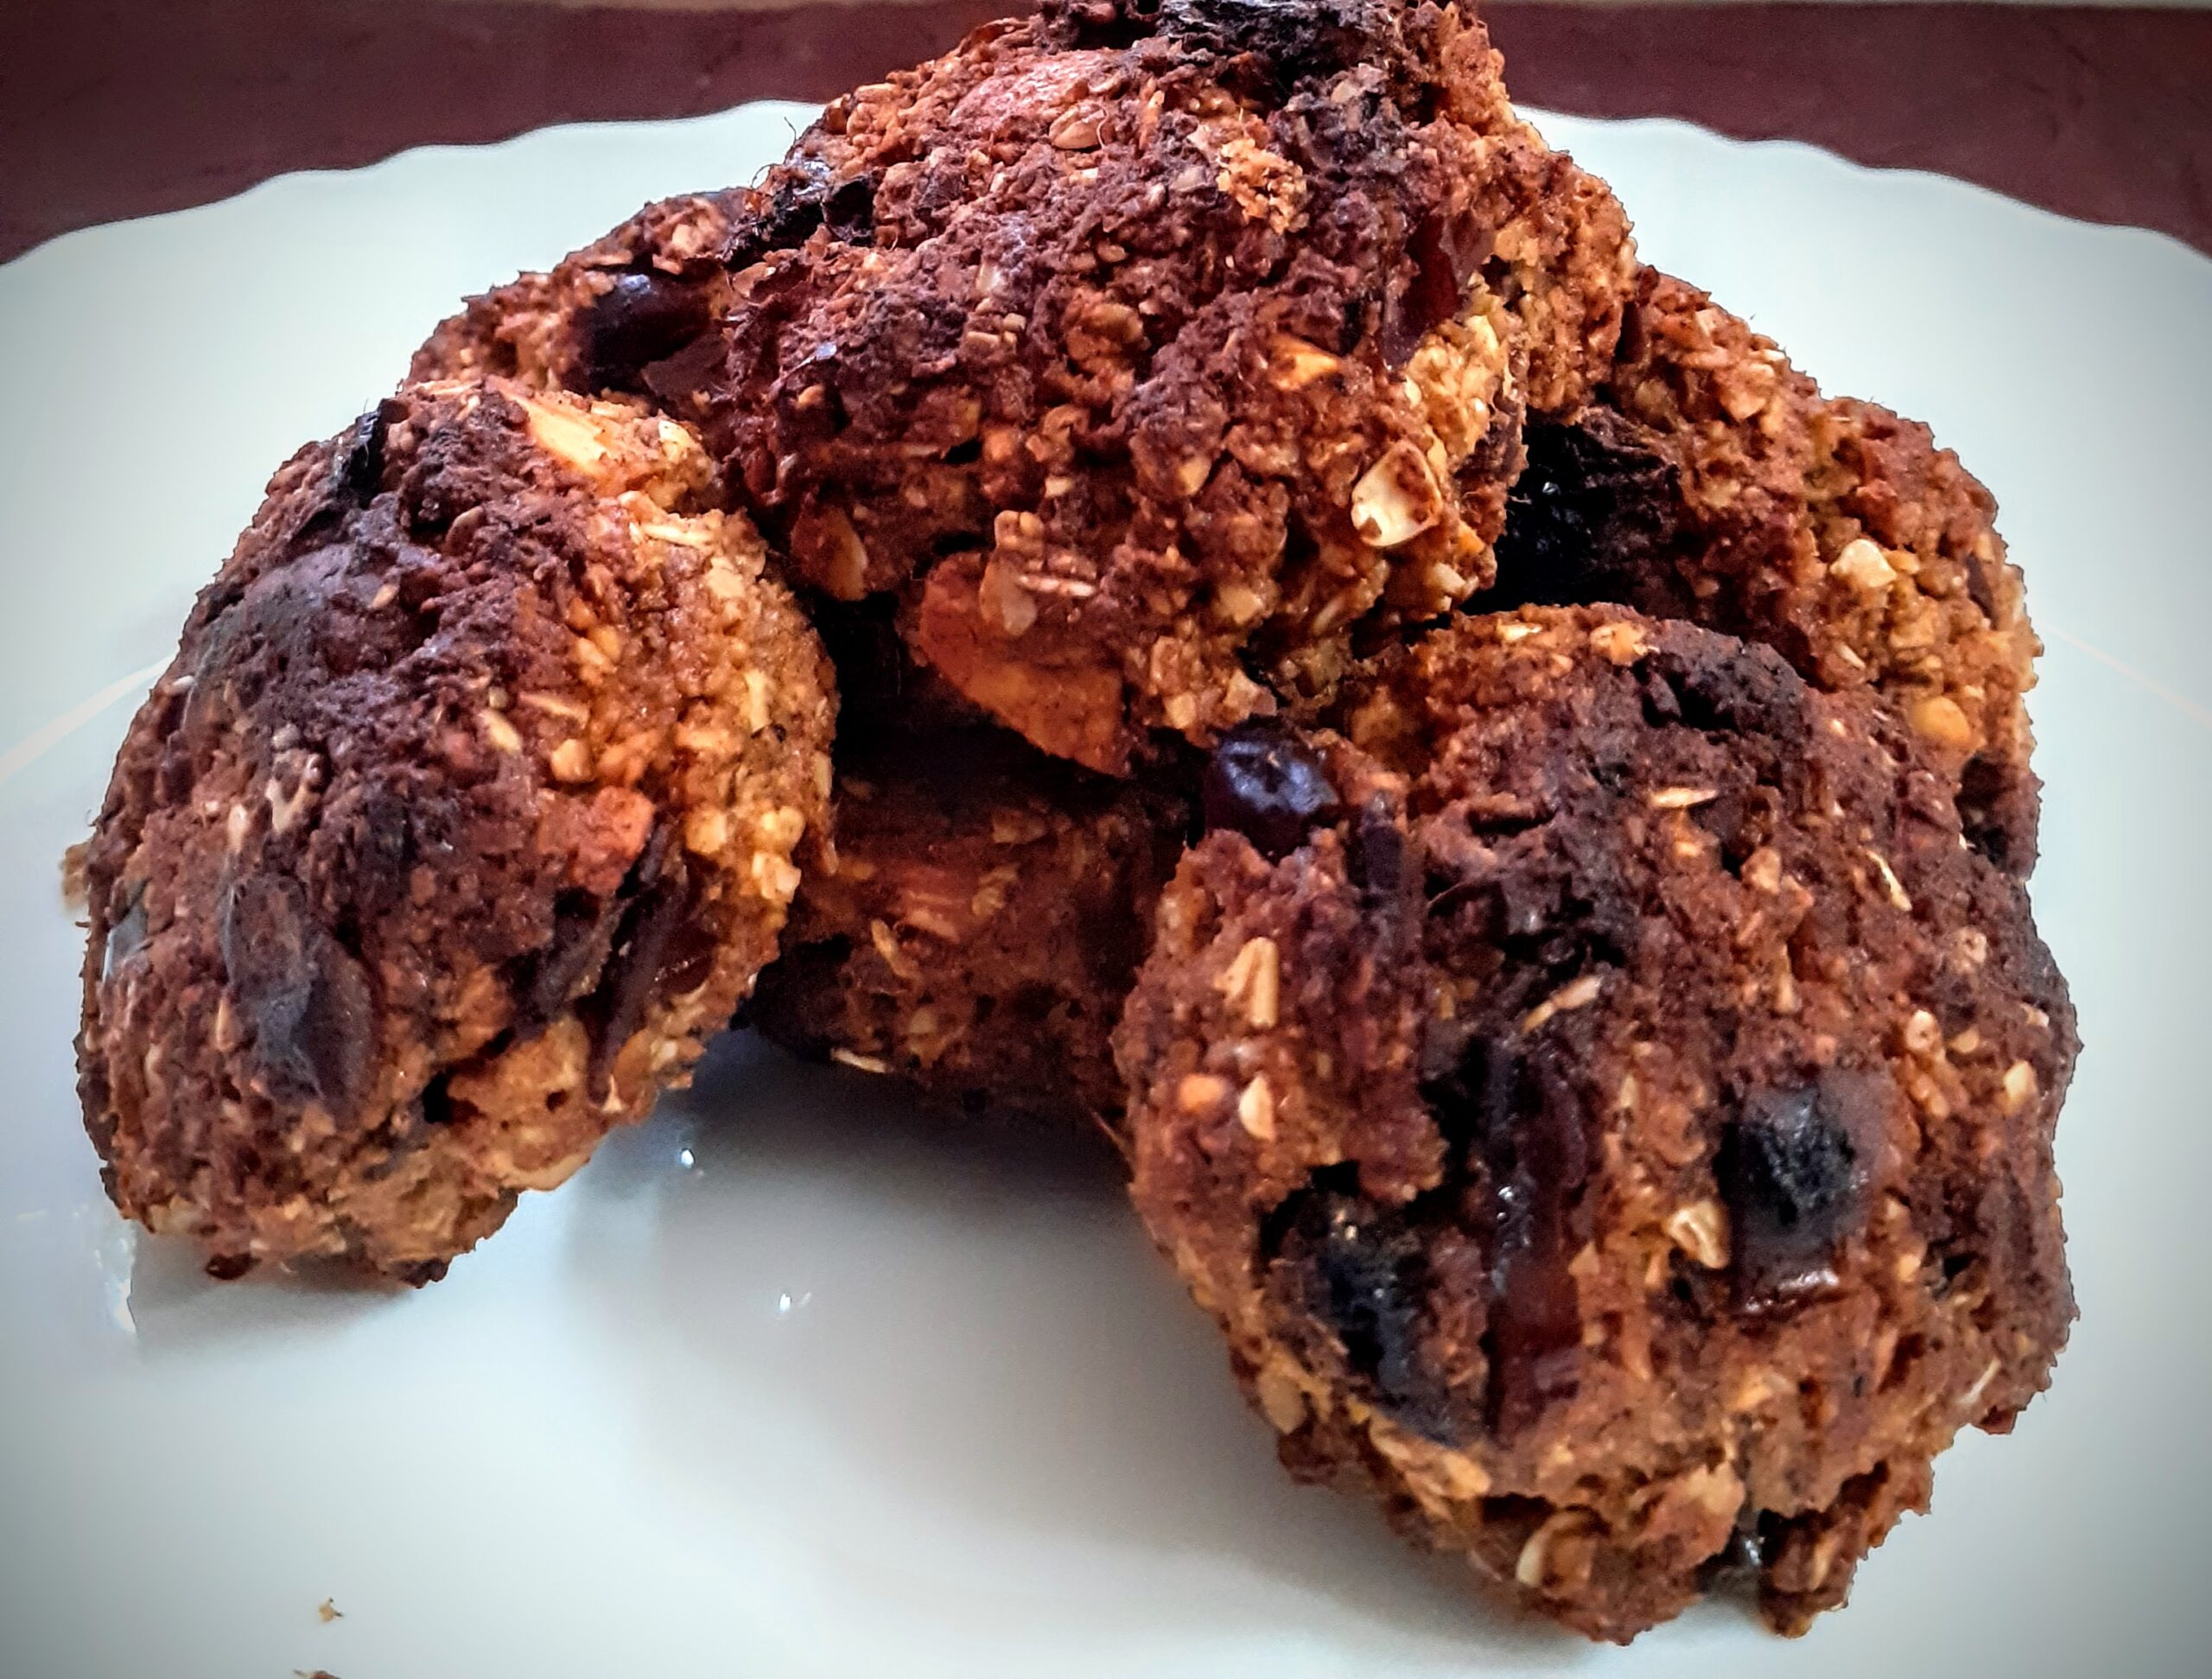
Here is the recipe for Oatmeal cookie-
Dry Ingredients:
Oats – 1 1/4 cup Instant or rolled (refer note1)
Almonds 1 handful or 50 gm
Cashewnuts 1 handful or 50 gm
Walnuts 1 handful or 50 gm
Raisins 1/2 cup
Almond flour 3/4 cup (refer note2)
Cinnamon powder 1 tsp
Baking powder 1/2 tsp
Desiccated coconut 1/4 cup
Wet Ingredients:
Dates 100 gm pitted or 15 numbers after pitting
Hot water 1/4 cup or just enough to soak the dates
Honey 3 tbsp
Egg 1
Coconut oil or Olive oil 3 tbsp
Vanilla essence (optional)
Directions:
Soak the pitted dates in hot water, just until they are submerged. Preheat oven to 180 degrees for 10 minutes. While the oven is getting hot let’s get the Cookie dough ready. Take the instant Oats and dry roast them on low flame for 3 minutes. We don’t want to brown them, but just make them a little crisp. Keep feeling the oats with your fingers, when they hot enough and your fingers can’t stand the heat, switch off the flame and let it cool while we get other things ready. Dry roast the Almonds, Cashewnuts, and walnuts, cool them slightly, and pulse them a single time in the blender. We want them to be partly broken.
The dates would have softened by now. Take a spatula or wired whisk and mash it to a smooth puree. Add all other ingredients mentioned under wet ingredients and combine well with a spatula. Add the dry ingredients to this mixture and mix well, such that all are well integrated. Now what you have at hand is a thick batter.
Line a baking tray with parchment paper or baking paper and grease lightly. Now with an ice cream scoop or a deep round spatula scoop the batter and place them on the baking sheet, giving an inch distance(these cookies do not spread much) between them. Bake at 180 degrees for 30 minutes or until they turn golden brown. Do the skewer/toothpick test if in doubt. (prick through the center, if it comes out clean without any batter, the cookie is done). Enjoy the cookies with a hot cup of coffee, tea, or hot chocolate. Bon Appetit.
STEPWISE RECIPE FOLLOWS:
1. Soak the pitted dates in hot water, just until they are submerged. Preheat oven to 180 degrees for 10 minutes. Take the instant Oats and dry roast them on low flame for 3 minutes. Keep feeling the oats with your fingers, when they hot enough and your fingers can’t stand the heat, switch off the flame and let it cool.
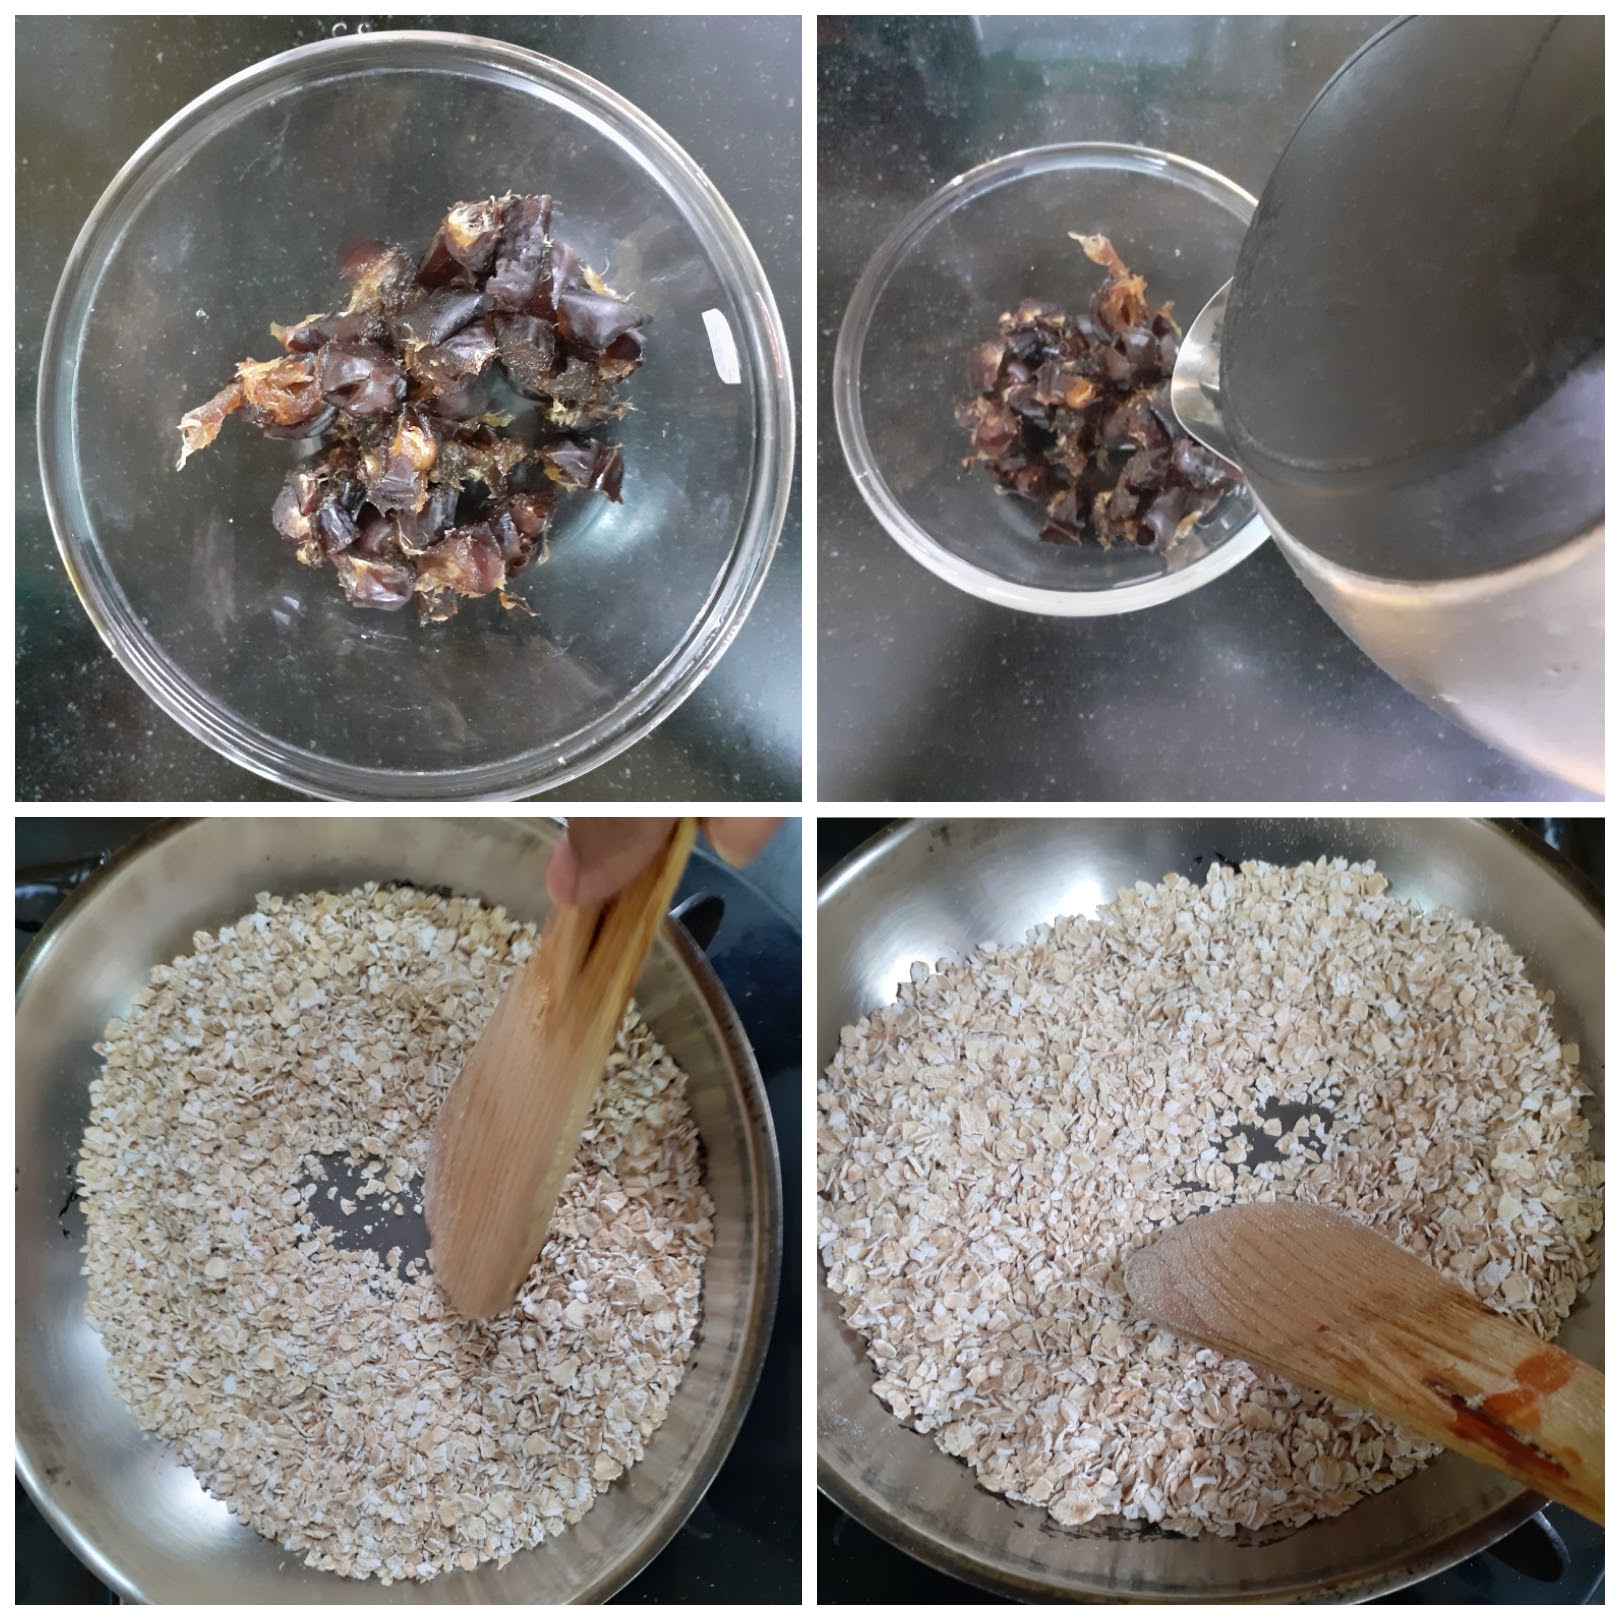
2. Dry roast the Almonds, Cashewnuts, and walnuts, cool them slightly and pulse them a single time in the blender. We want them to be partly broken.
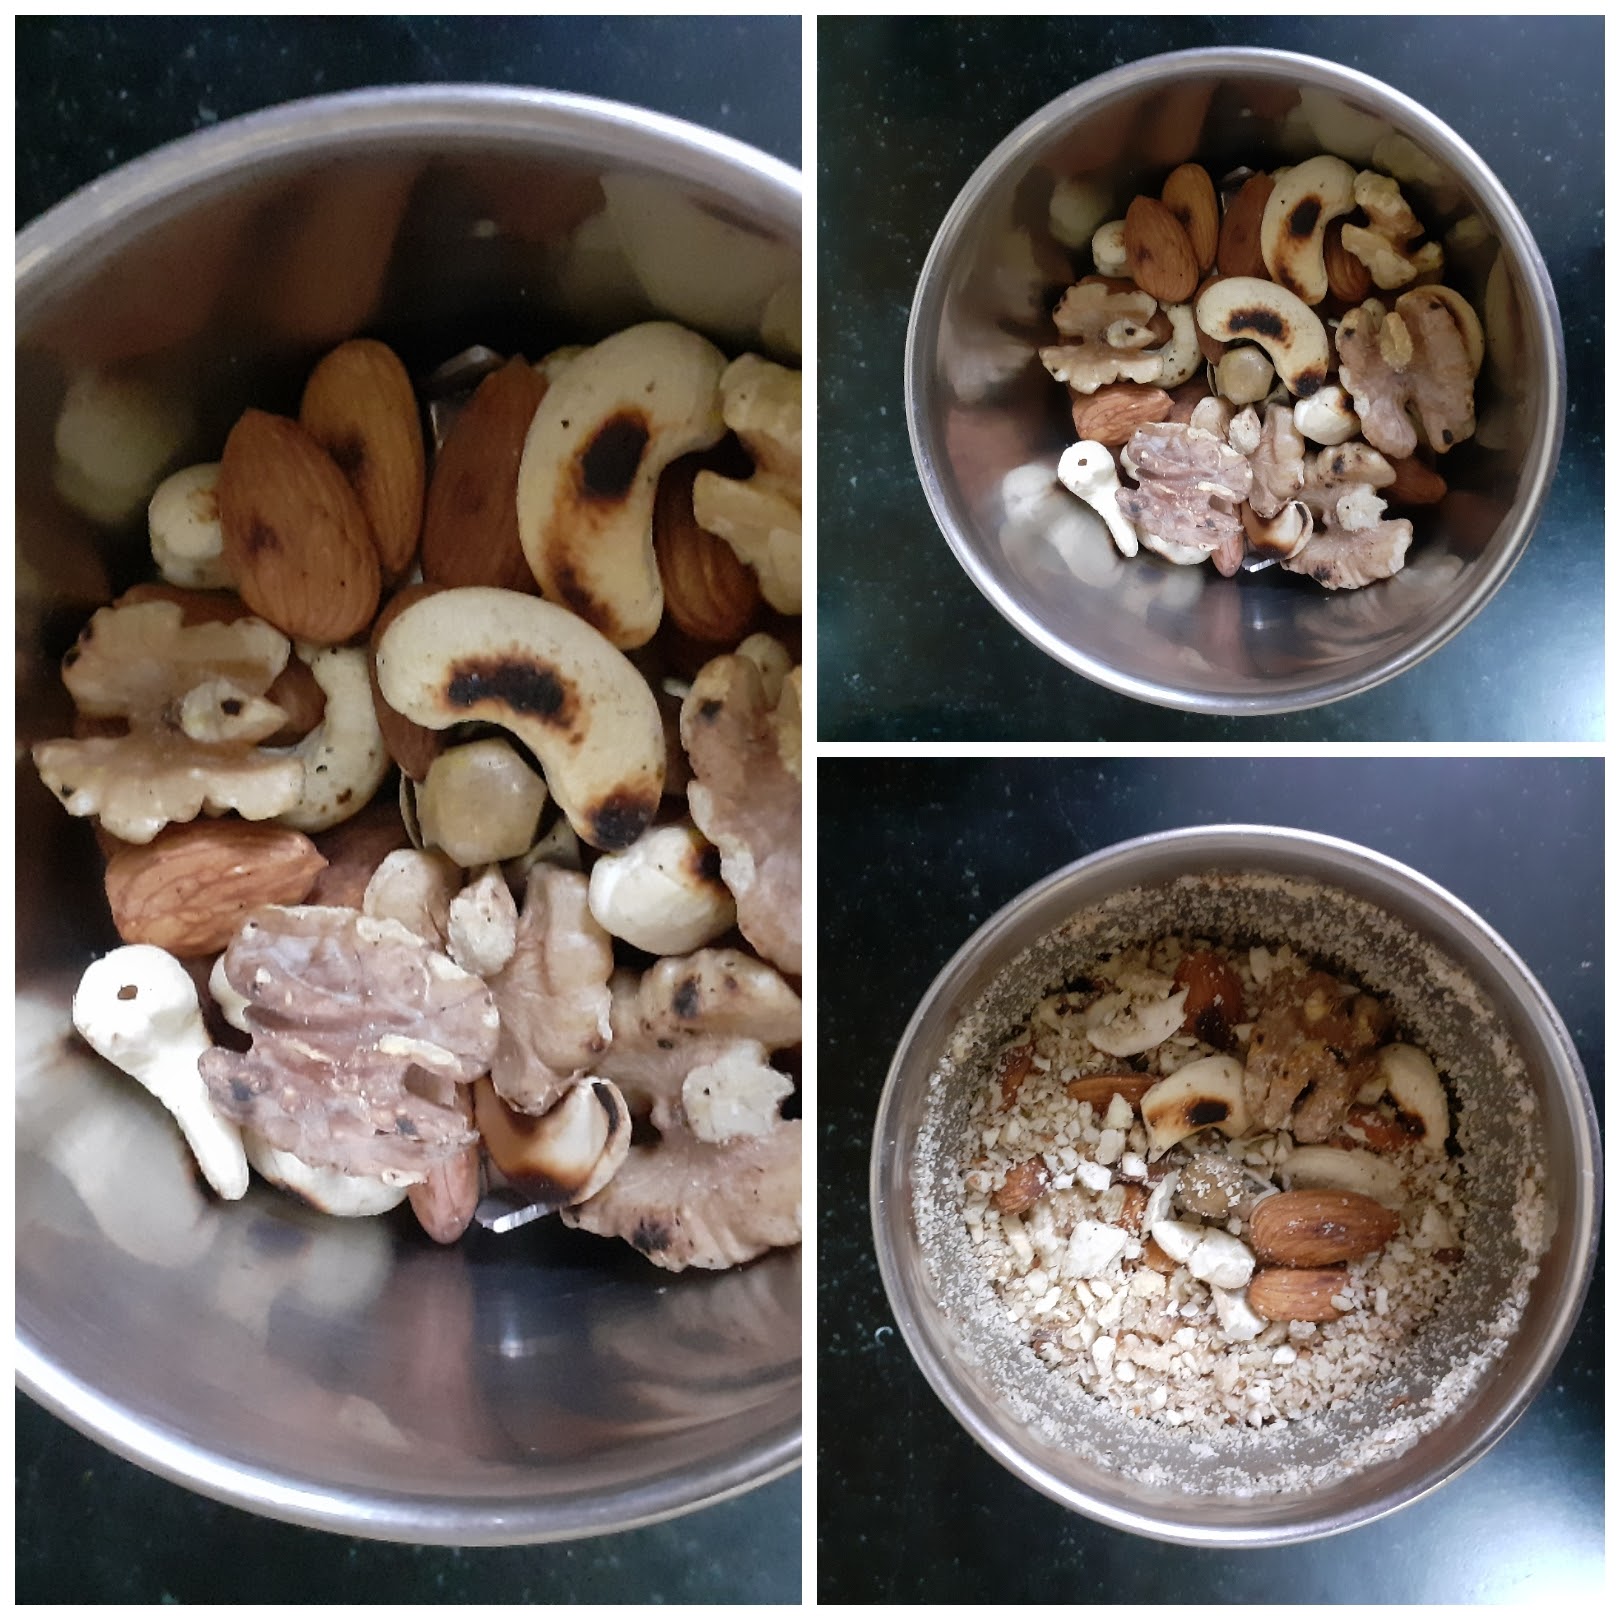
3. Now take a spatula or a wired whisk and mash the dates to a smooth puree. Add all other ingredients mentioned under wet ingredients and combine well with a spatula.
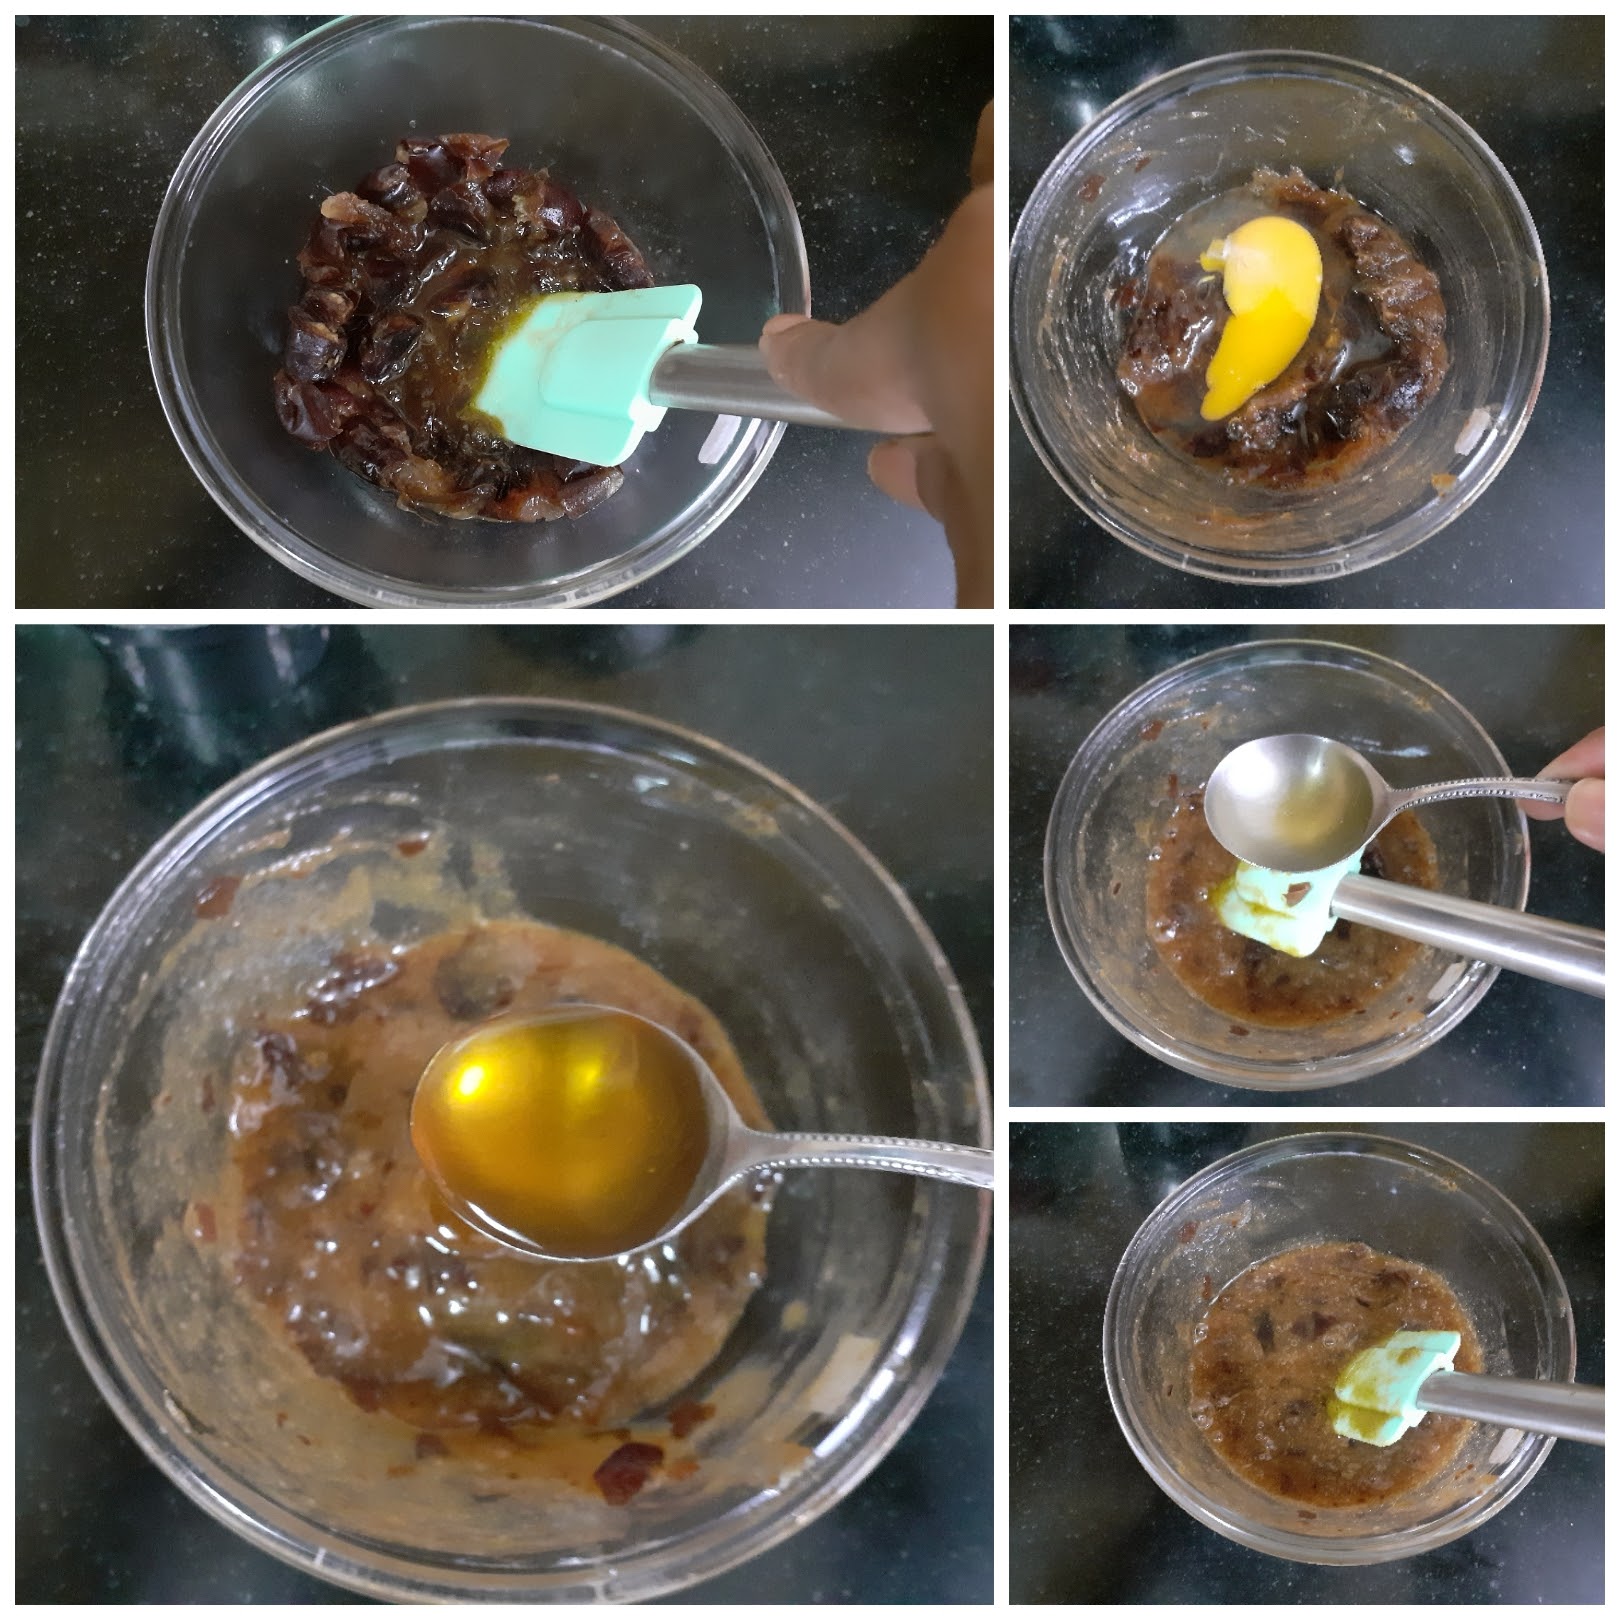
4. Mix in the dry ingredients into this mixture and combine well until all are well integrated. We will have a sticky dough.
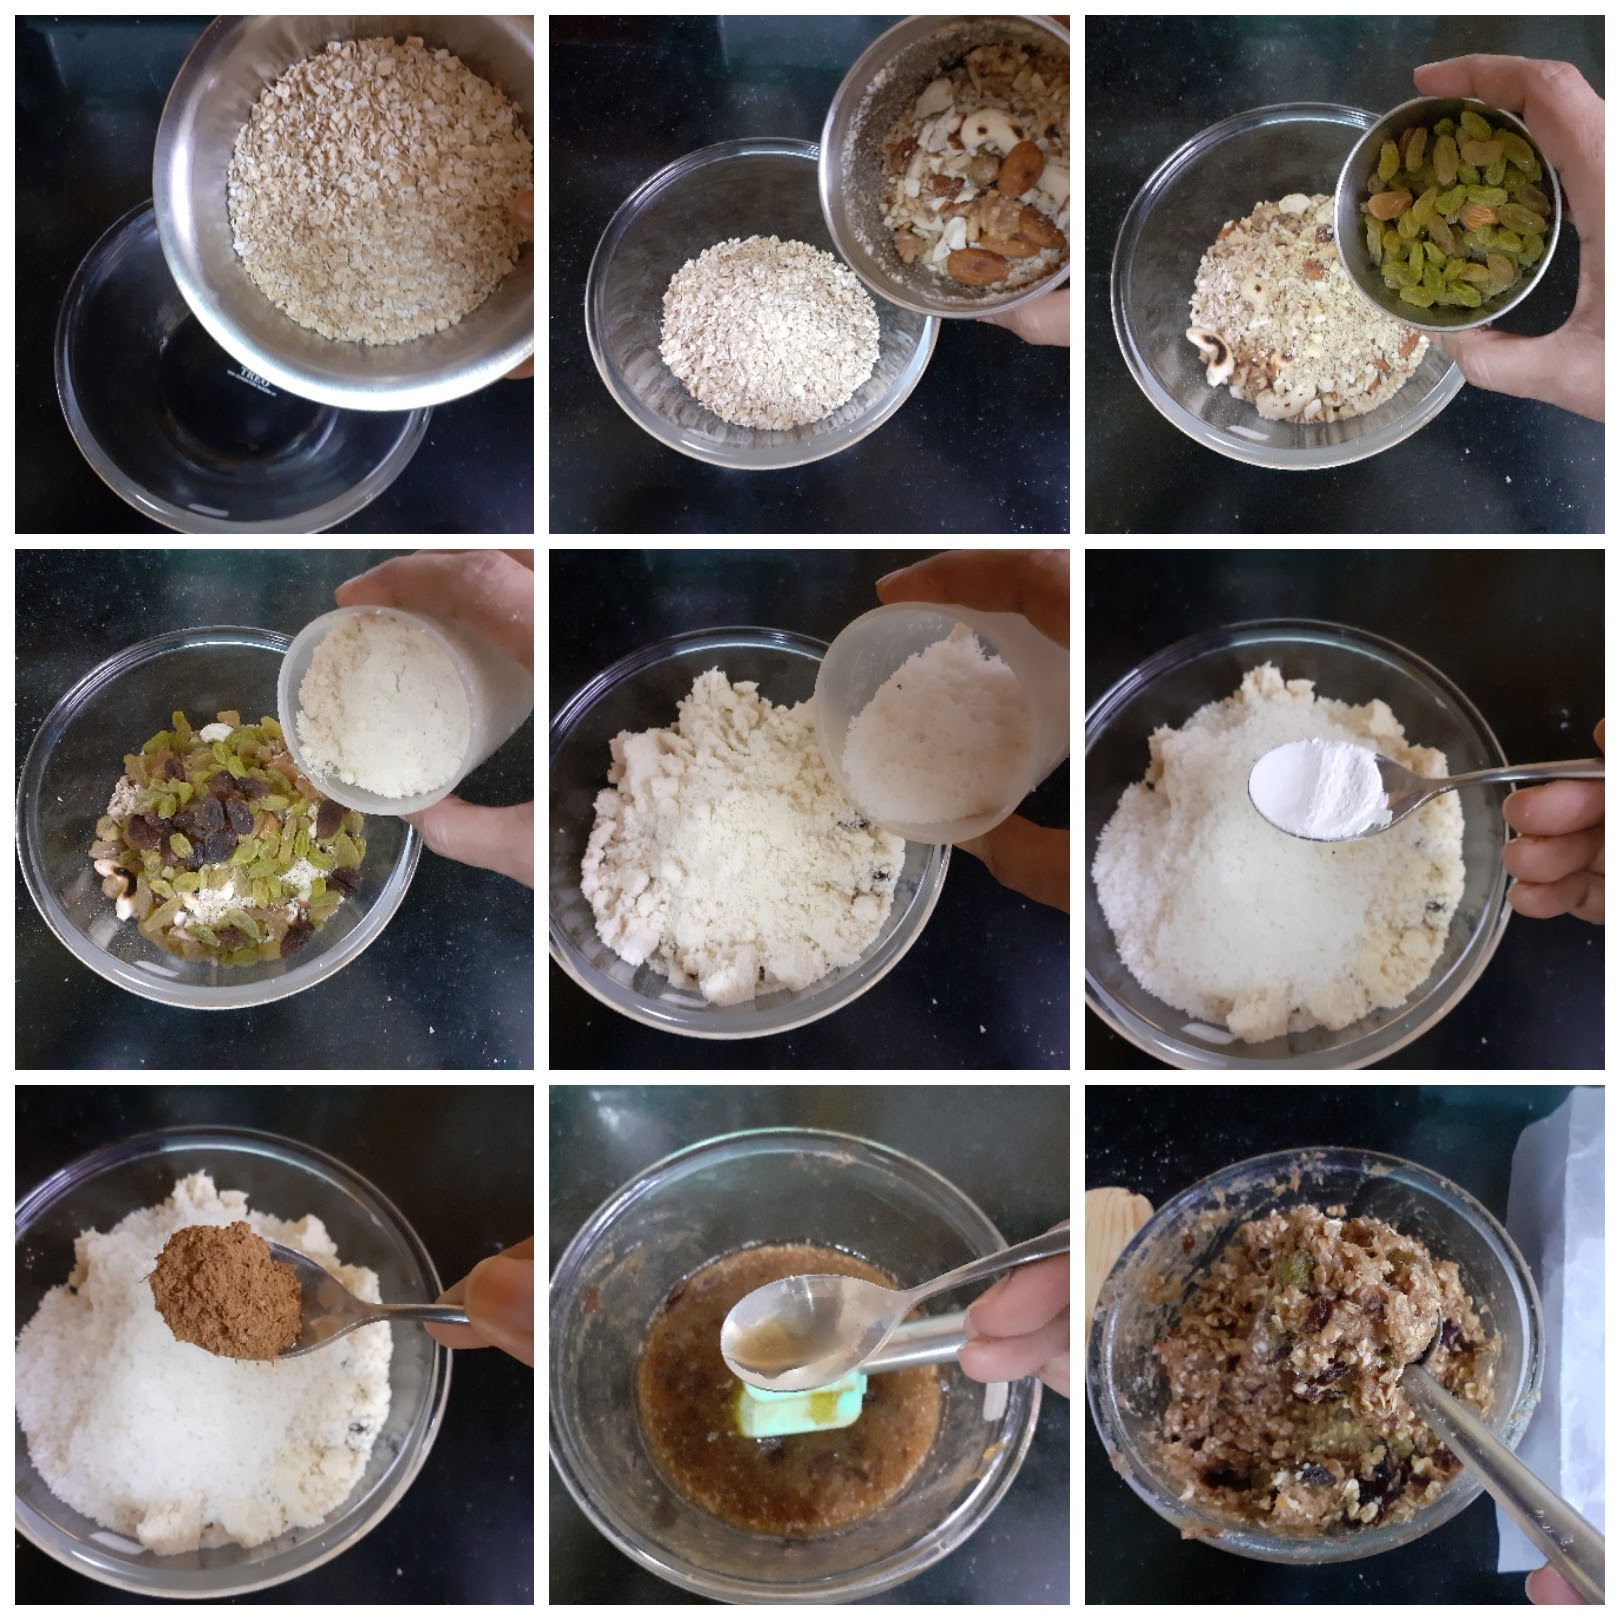
5. Line a baking tray with parchment paper or baking paper and grease lightly. Now with an ice cream scoop or a deep round spatula scoop the batter and place them on the baking sheet, giving an inch distance(these cookies do not spread much) between them. Flatten the cookies with a spatula slightly. Bake at 180 degrees for 30 minutes or until they turn golden brown.

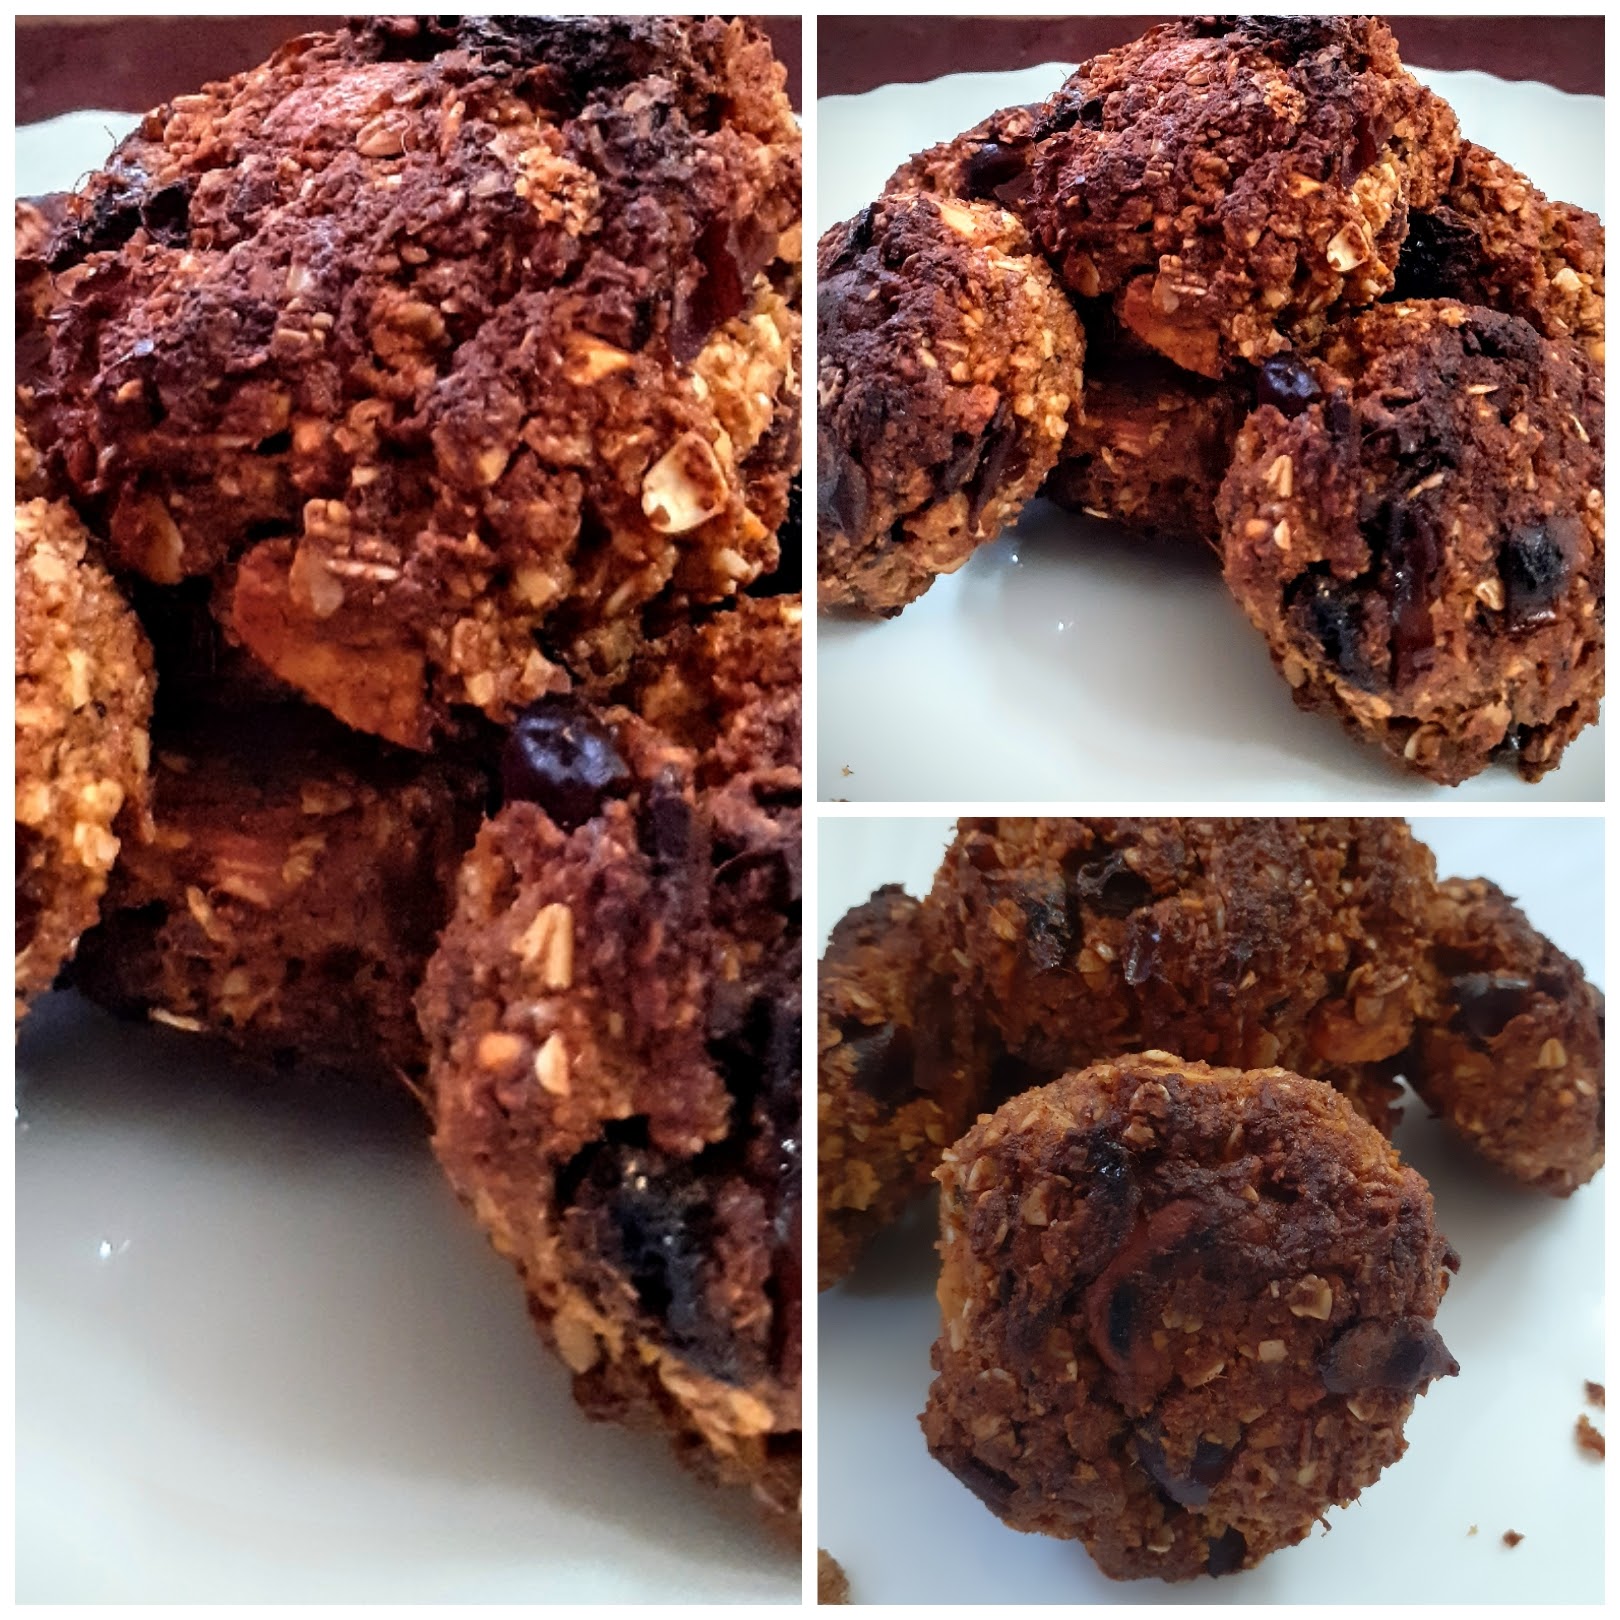
NOTES:
1. I have dry roasted the Oats as they are the instant ones. If using rolled oats, roasting is not required.
2. Almond flour can be made at home also by blanching almonds, dry them, and then grinding to a fine powder.
3. If one doesn’t mind the skin of the almonds they can be directly ground to a fine powder.
4. I have added the Cinnamon powder at the end along with the dry ingredients.
Aloo Methi Paratha
There is no doubt that Aloo Parathas are the king of Parathas. But once the Methi leaves season comes, I make these Aloo Methi Parathas which are healthy as the Methi leaves are rich in iron and fiber. They lift the regular Aloo paratha to a different level. The Methi leaves themselves are very aromatic and when added to any dish they enhance the flavour and aroma of that dish manifold.
Aloo Methi is a popular north Indian subji that I have stuffed into these Parathas. which makes this dish a wholesome lunchbox option for kids and adults alike. It is also a good way to make kids eat the Methi leaves.
Using fresh methi leaves also gives the Parathas wonderful texture. I have not tried this paratha with Kasoori methi as firstly a huge amount of it will be required because dried leaves will lack volume, and secondly nothing can compensate for the taste of fresh methi leaves.
While you are here please check out my other flatbread/ Paratha recipes like Beetroot Paratha, Missi Roti, Garlic Lachcha paratha, and more…
Here is the recipe for Aloo Methi Paratha for you-
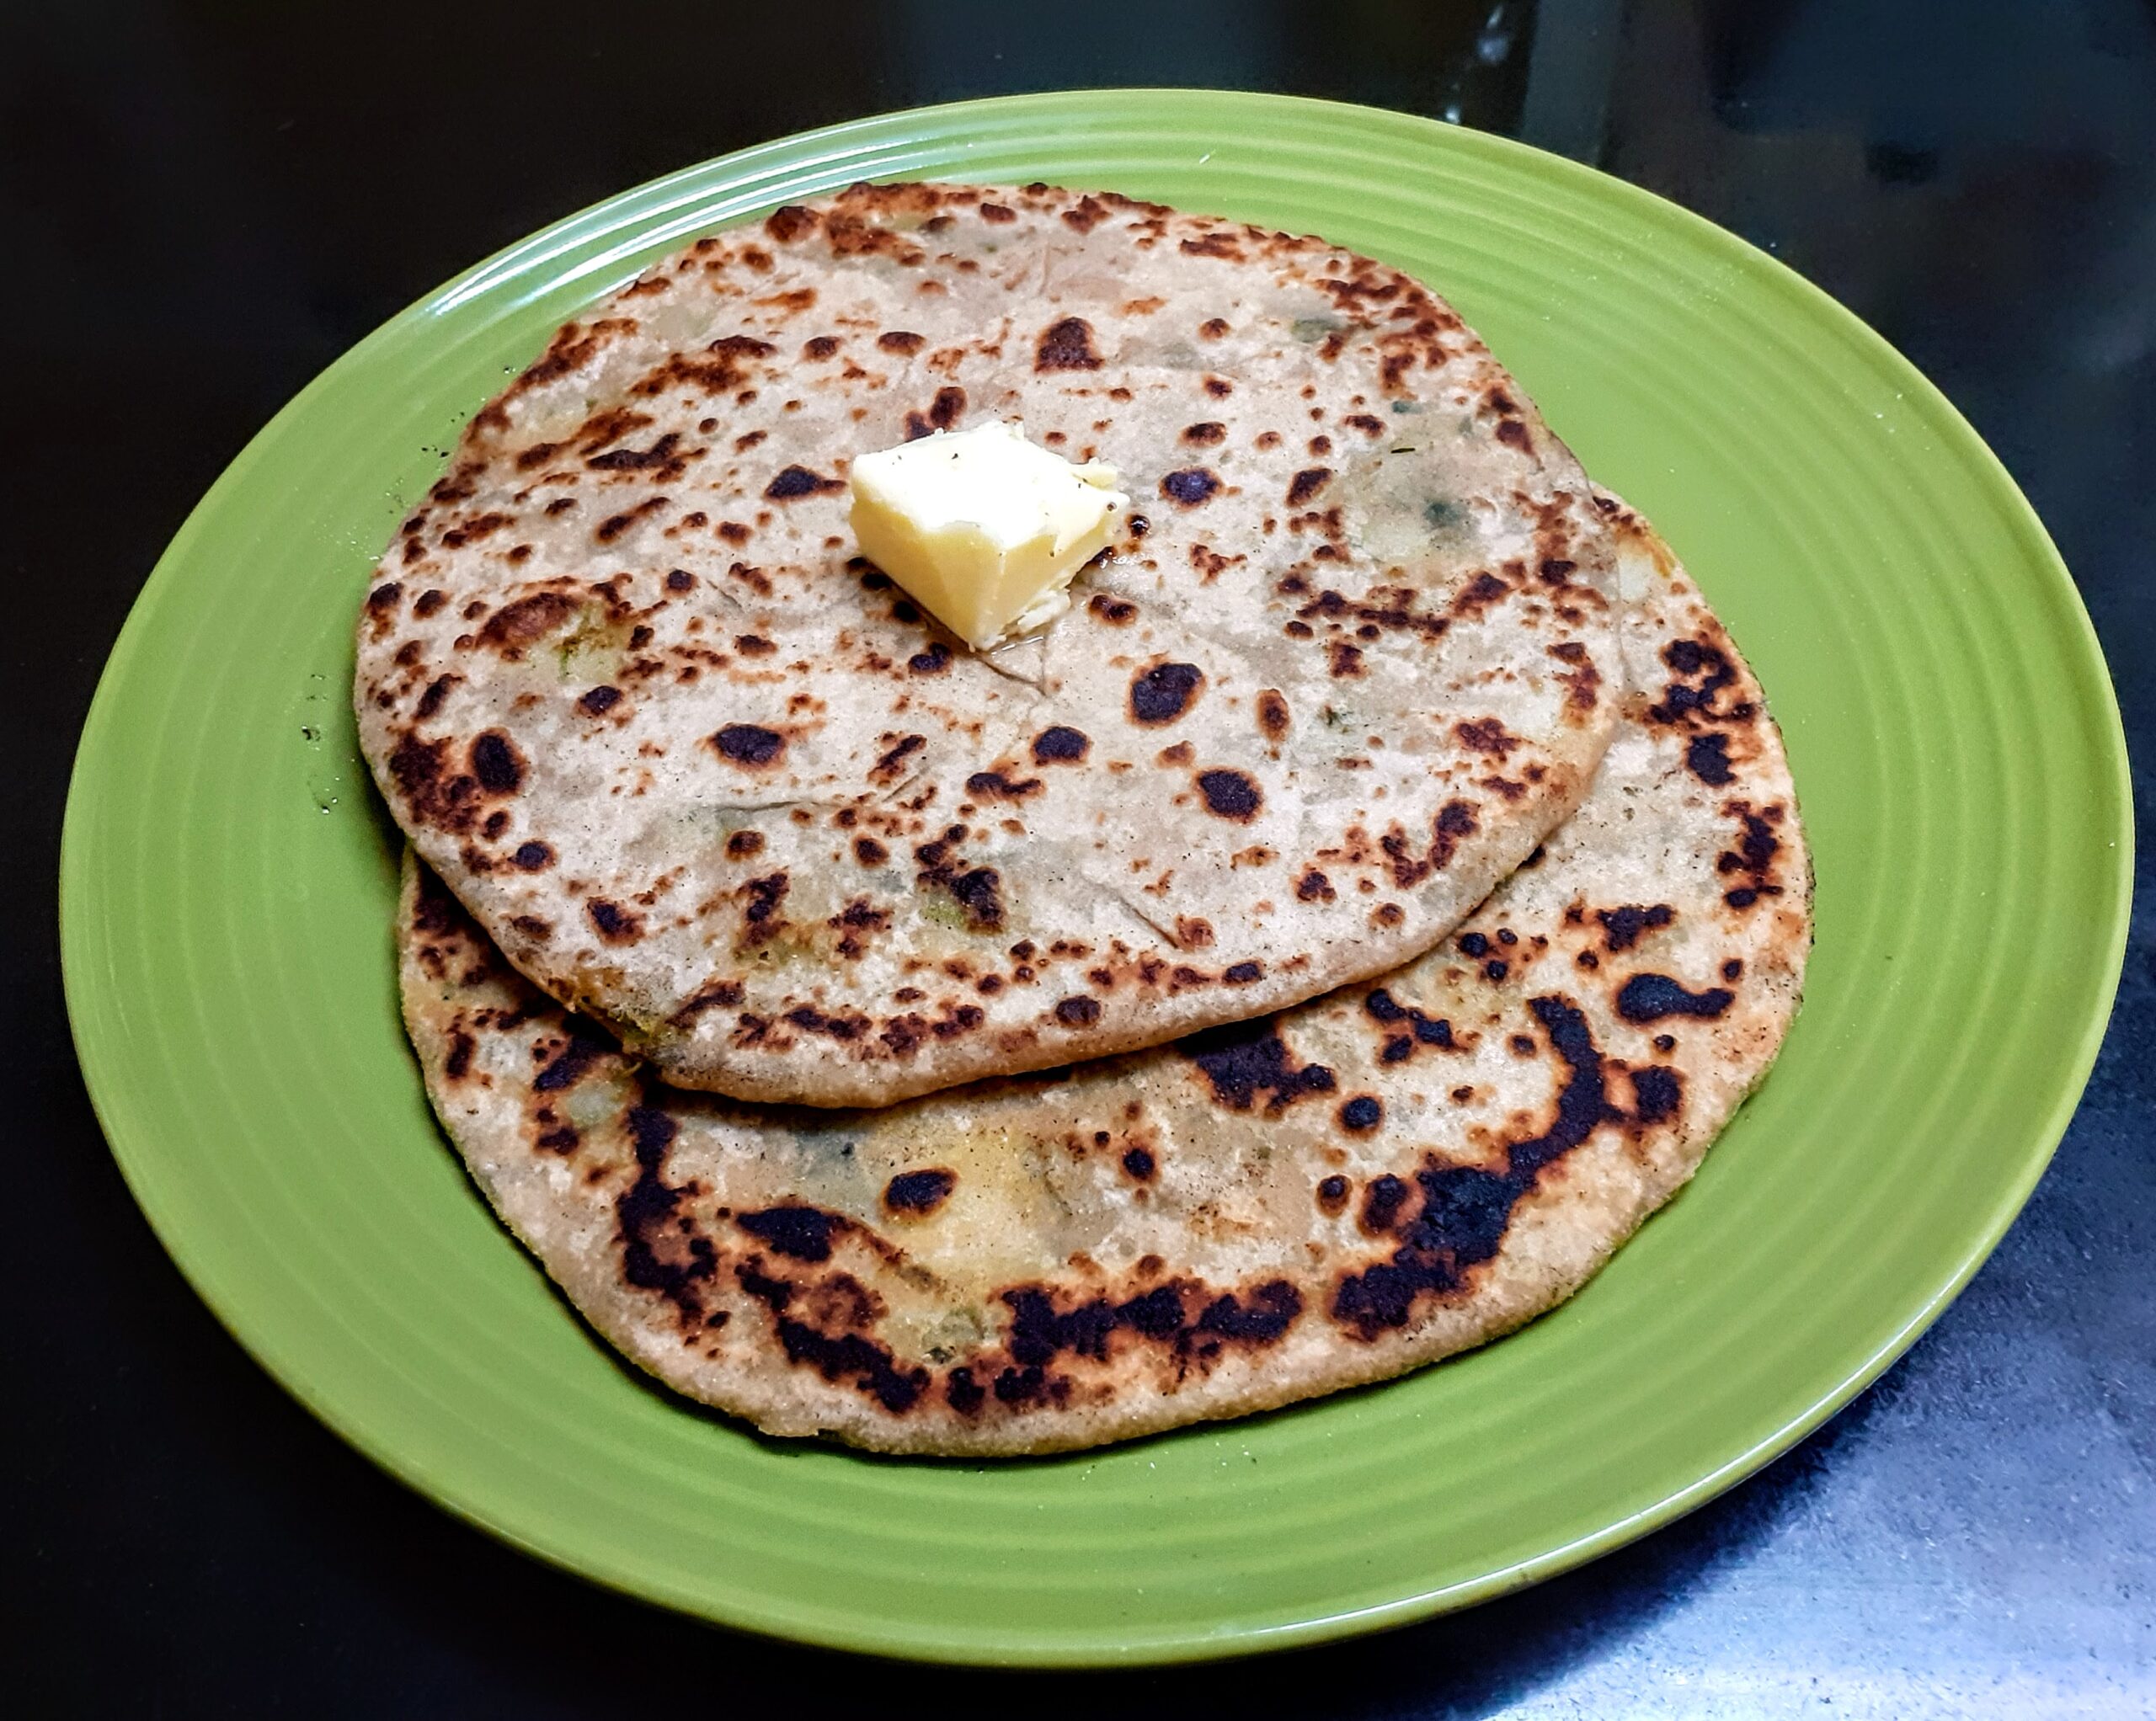
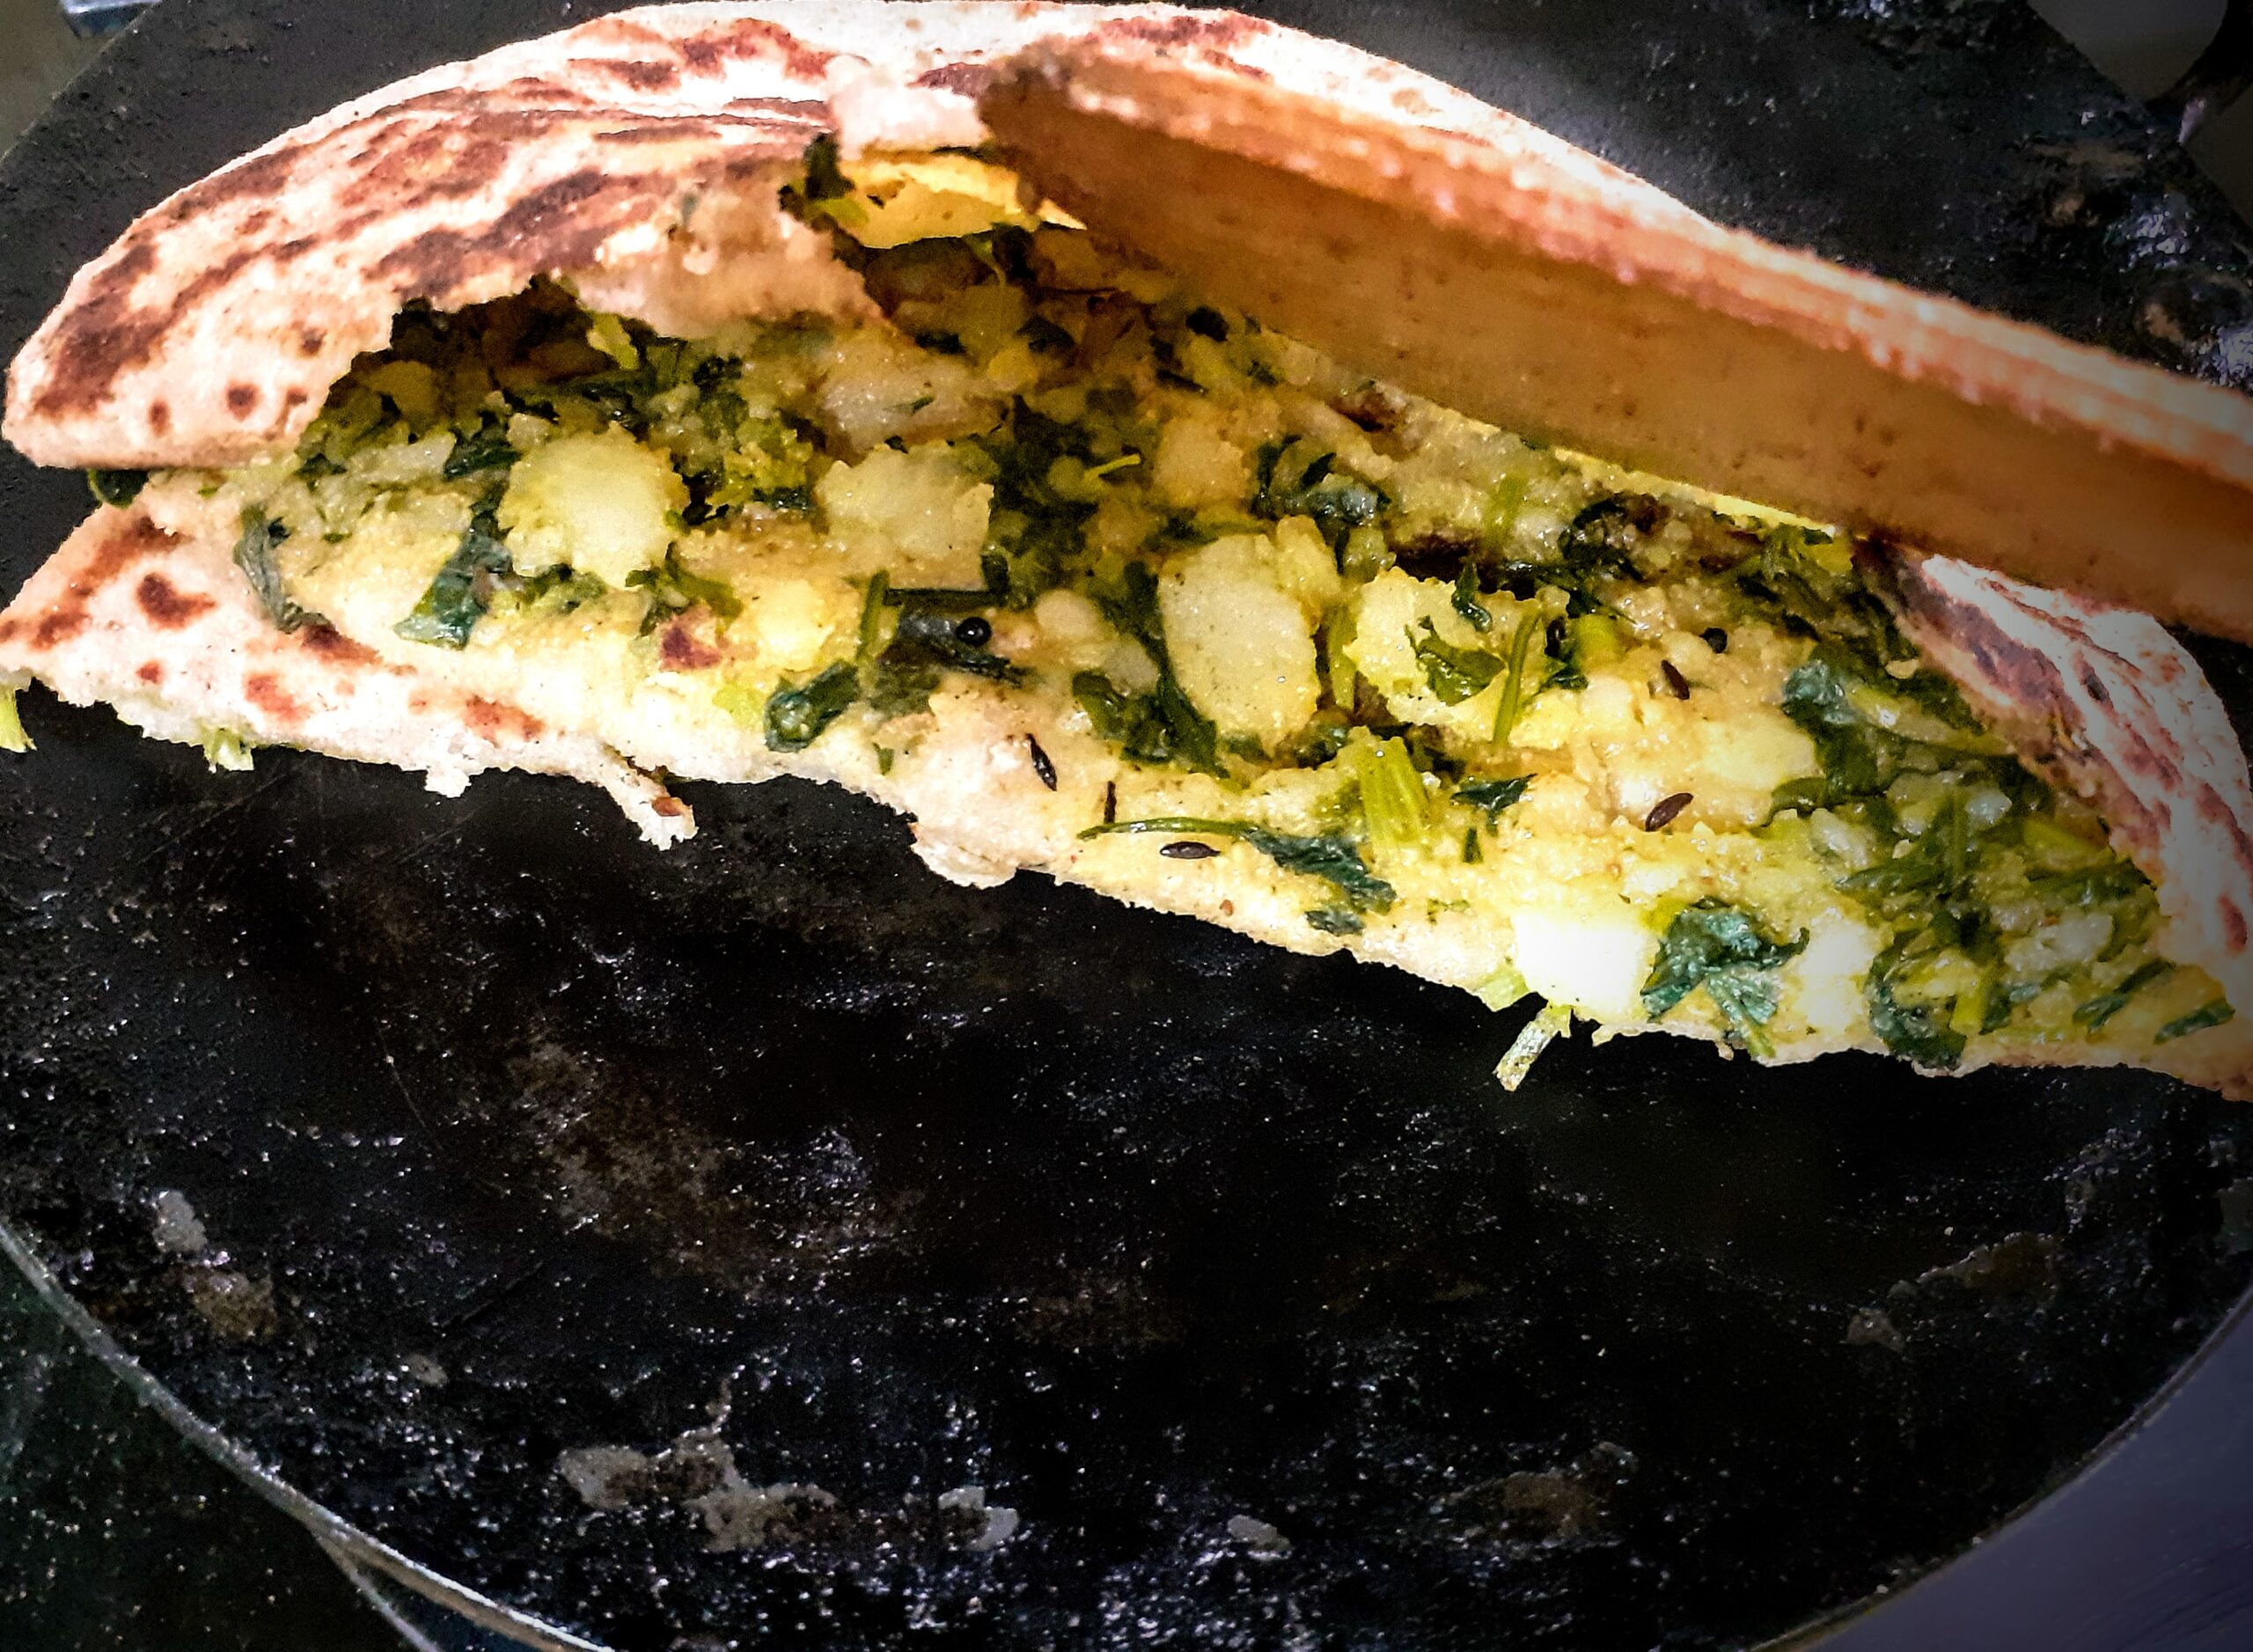
Ingredients for stuffing:
Aloo/ Potatoes 5 medium-sized, boil, skin peeled and mashed
Methi leaves/Fenugreek leaves 1 bunch finely chopped
Salt as required
Red chili powder 1 tsp(or more as per spice)
Turmeric powder 1/2 tsp
Coriander powder 2 tsp
Fennel powder 1 tsp
Garam masala powder 1/2 tsp
Mustard seeds 1/2 tsp
Cumin seeds 1/2 tsp
Oil for tempering 1 tbsp
Ingredients for dough:
Whole wheat flour 3 cups
Salt a pinch
Oil 1 tsp
Water for kneading
Oil for cooking the Parathas
Directions for making the stuffing:
Chop the Methi leaves finely and wash them thoroughly. Drain all the water and keep aside. Boil the potatoes, peel the skin, and mash them. In a pan or Kadai take 1 tbsp oil and heat. Drop the mustard seeds and as they crackle add the cumin seeds and turmeric powder. Now add the washed and drained Methi leaves and saute. Add salt followed by red chilli powder, coriander powder, fennel powder and continue to saute. The methi leaves will release moisture, keep sauteeing and let the moisture dry out. Now add the mashed potato to the Methi leaves, little by little, and mix them nicely. The Methi leaves should have combined evenly with the potato mash. Finally, add some Garam masala powder, mix once again, and allow the mixture to cool.
Directions to make the dough:
Take 3 cups whole wheat flour in a big mixing bowl, add a pinch of salt, a teaspoon of oil and mix well. Now adding water, a little at a time, combine to follow a slightly tough dough. A loose dough will not help in spreading the filling well. Rest the dough for 20 minutes.
Directions to make the Paratha:
Take the dough and pinch it into balls and divide it into 12 equal portions. Now dust one ball at a time in flour and roll it out into a palm-sized circle. Take about 2 tbsp of stuffing and put it in the center of the circle. Bring all the sides together and seal the stuffing. Now dust the stuffing filled ball in flour again and roll it out into a thick and medium-sized circle. Heat a girdle/tava and put the Paratha on it. Drizzle some oil over it and cook on one side. Flip over and cook on the other side too, drizzling a little oil on it. Cook both sides until brown dots appear. Repeat for all the dough and stuffing. The yummy and wholesome, one meal parathas are ready. Enjoy. Bon Appetit.
Serving suggestions– as it is filled with a proper subji it actually doesn’t need anything to go with. One can just enjoy them with a dollop of butter and plain curd.
STEPWISE RECIPE FOLLOWS:
1. Chop the Methi leaves finely and wash them thoroughly. Drain all the water and keep aside. Boil the potatoes, peel the skin, and mash them.
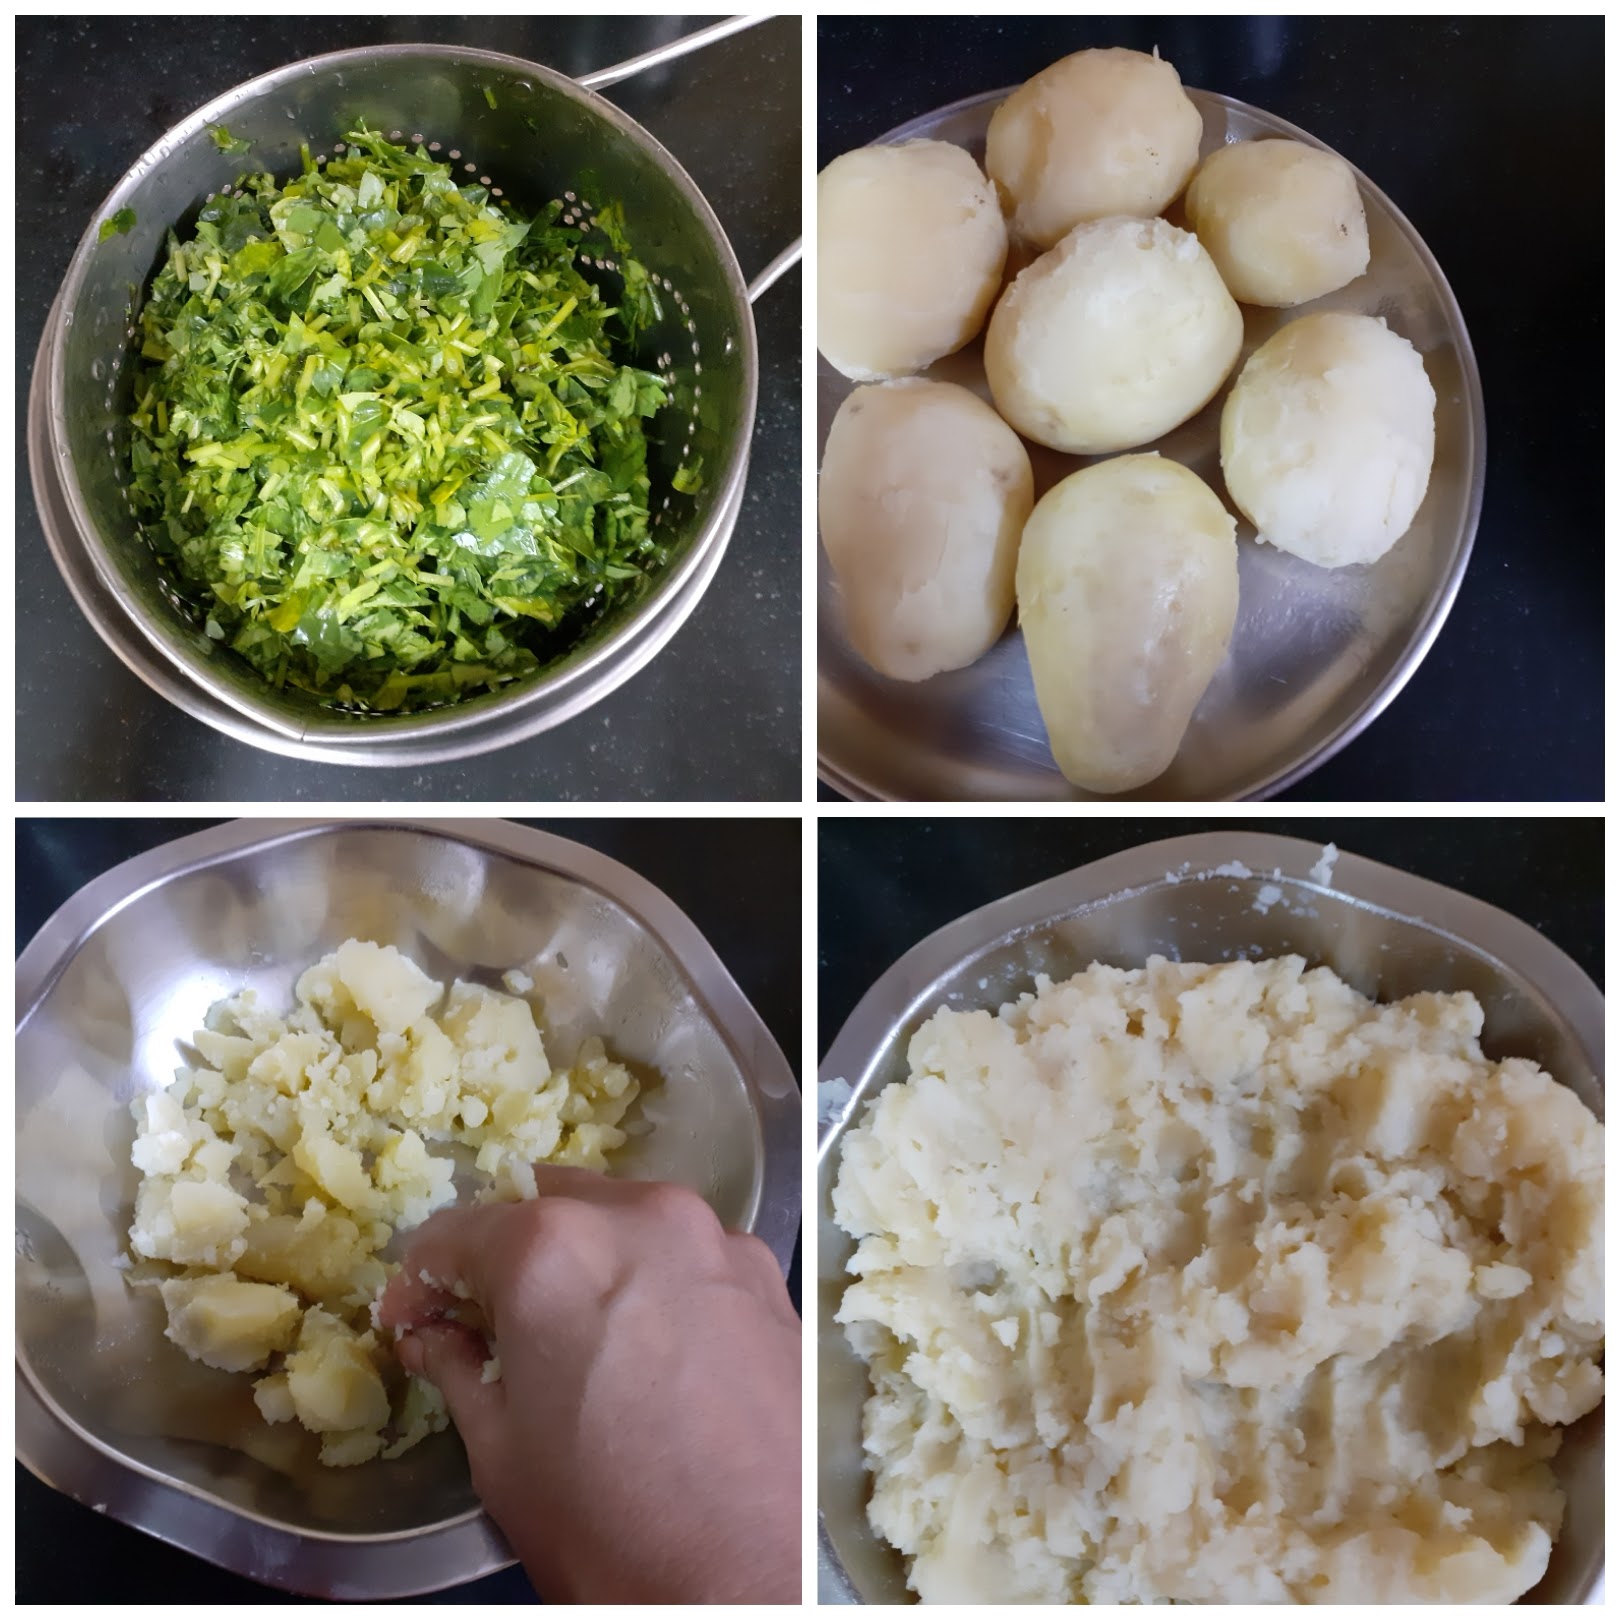
2. In a pan or Kadai take 1 tbsp oil and heat. Drop the mustard seeds and as they crackle add the cumin seeds and turmeric powder. Now add the washed and drained Methi leaves and saute.
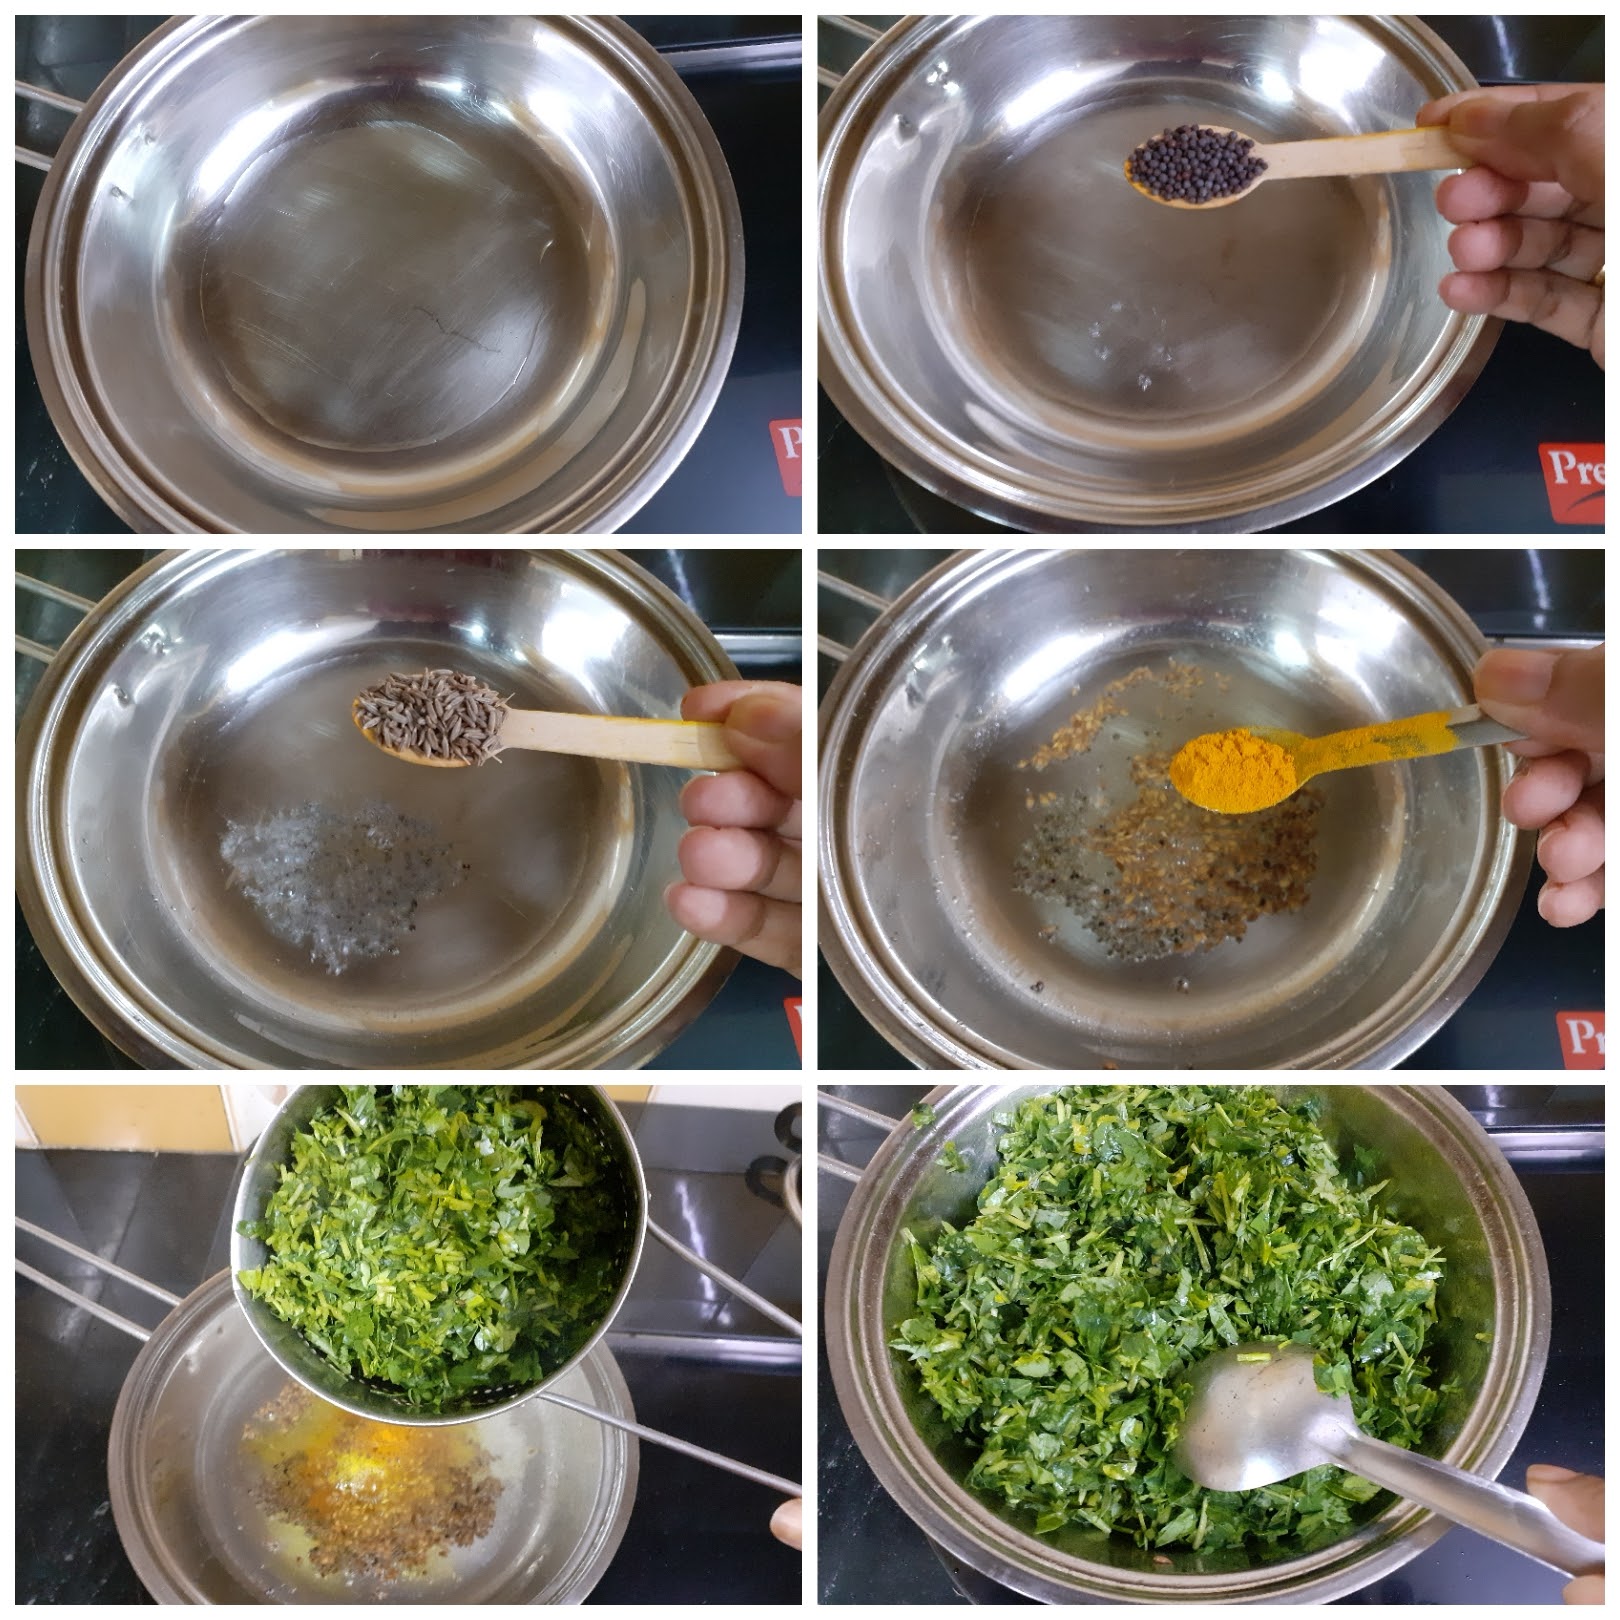
3. Add salt followed by red chilli powder, coriander powder, fennel powder and continue to saute. The methi leaves will release moisture, keep sauteeing and let the moisture dry out. Now add the mashed potato to the Methi leaves, little by little, and mix them nicely.
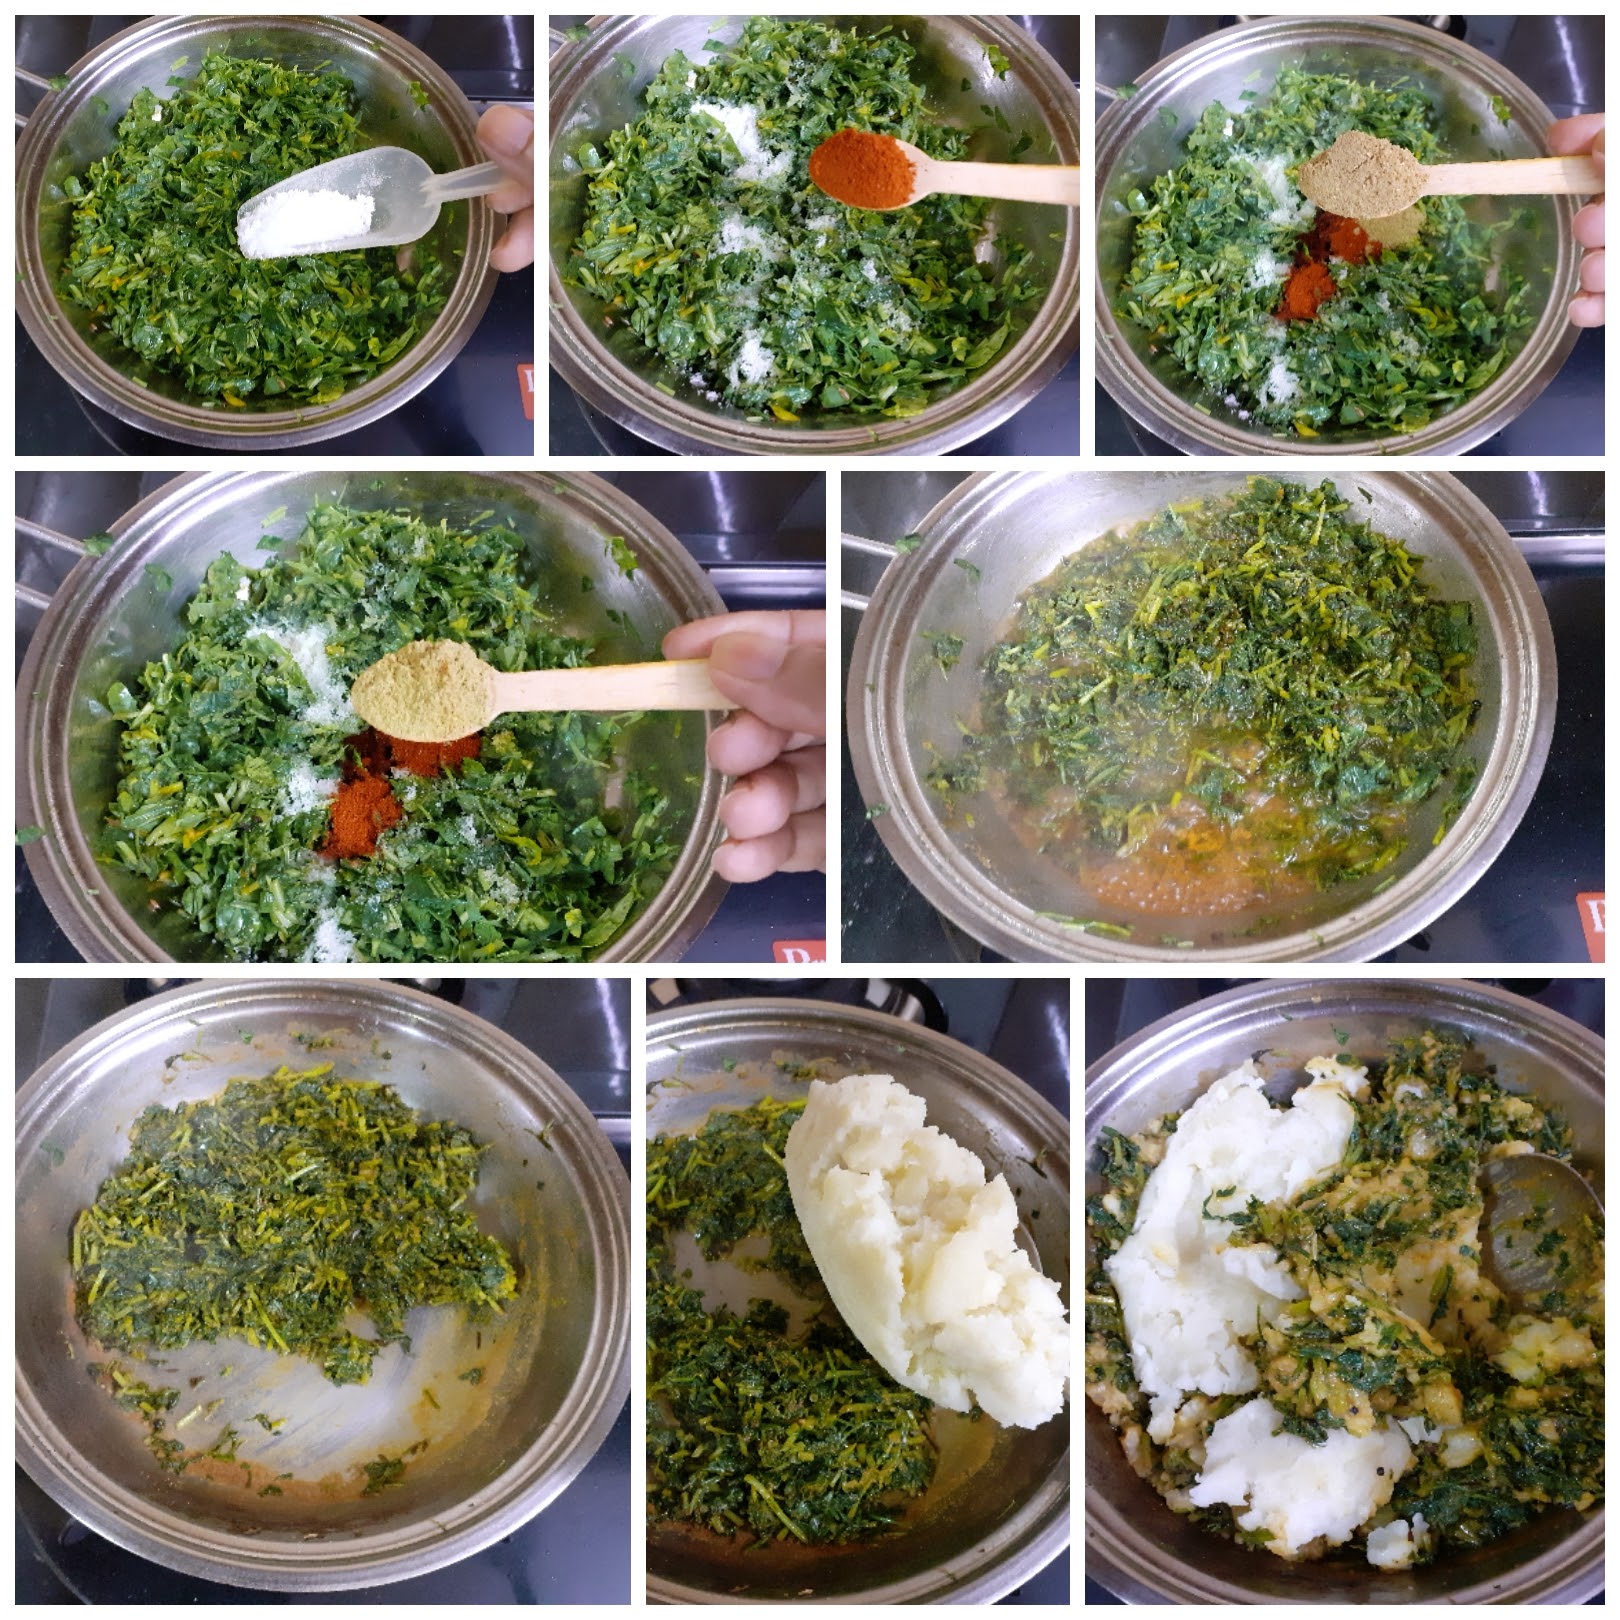
4. The Methi leaves should have combined evenly with the potato mash. Finally, add some Garam masala powder, mix once again, and allow the mixture to cool.
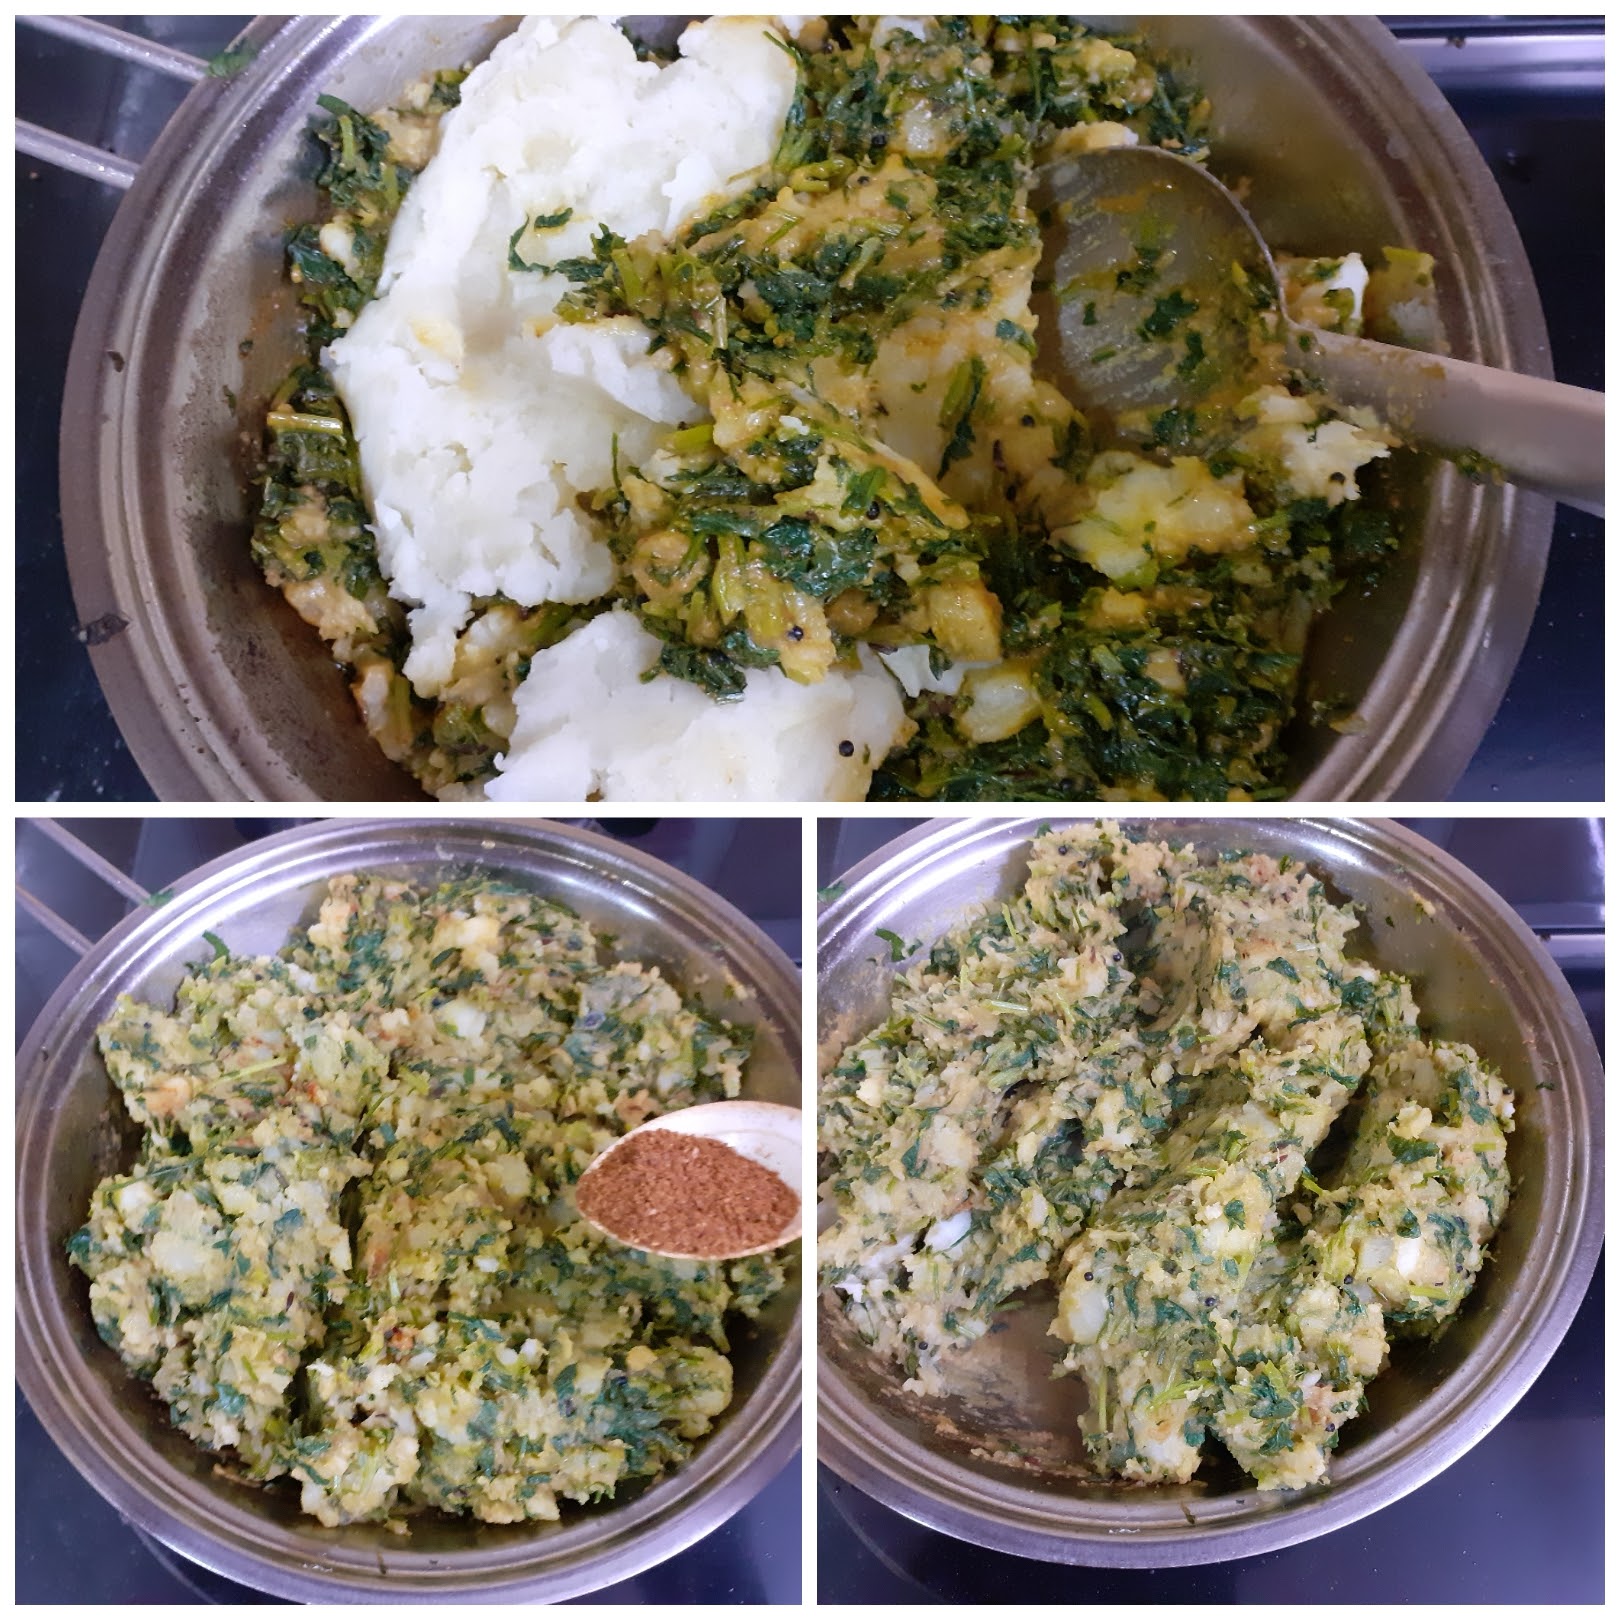
5. Take 3 cups whole wheat flour in a big mixing bowl, add a pinch of salt, a teaspoon of oil and mix well. Now adding water, a little at a time, combine to follow a slightly tough dough. Rest the dough for 20 minutes.
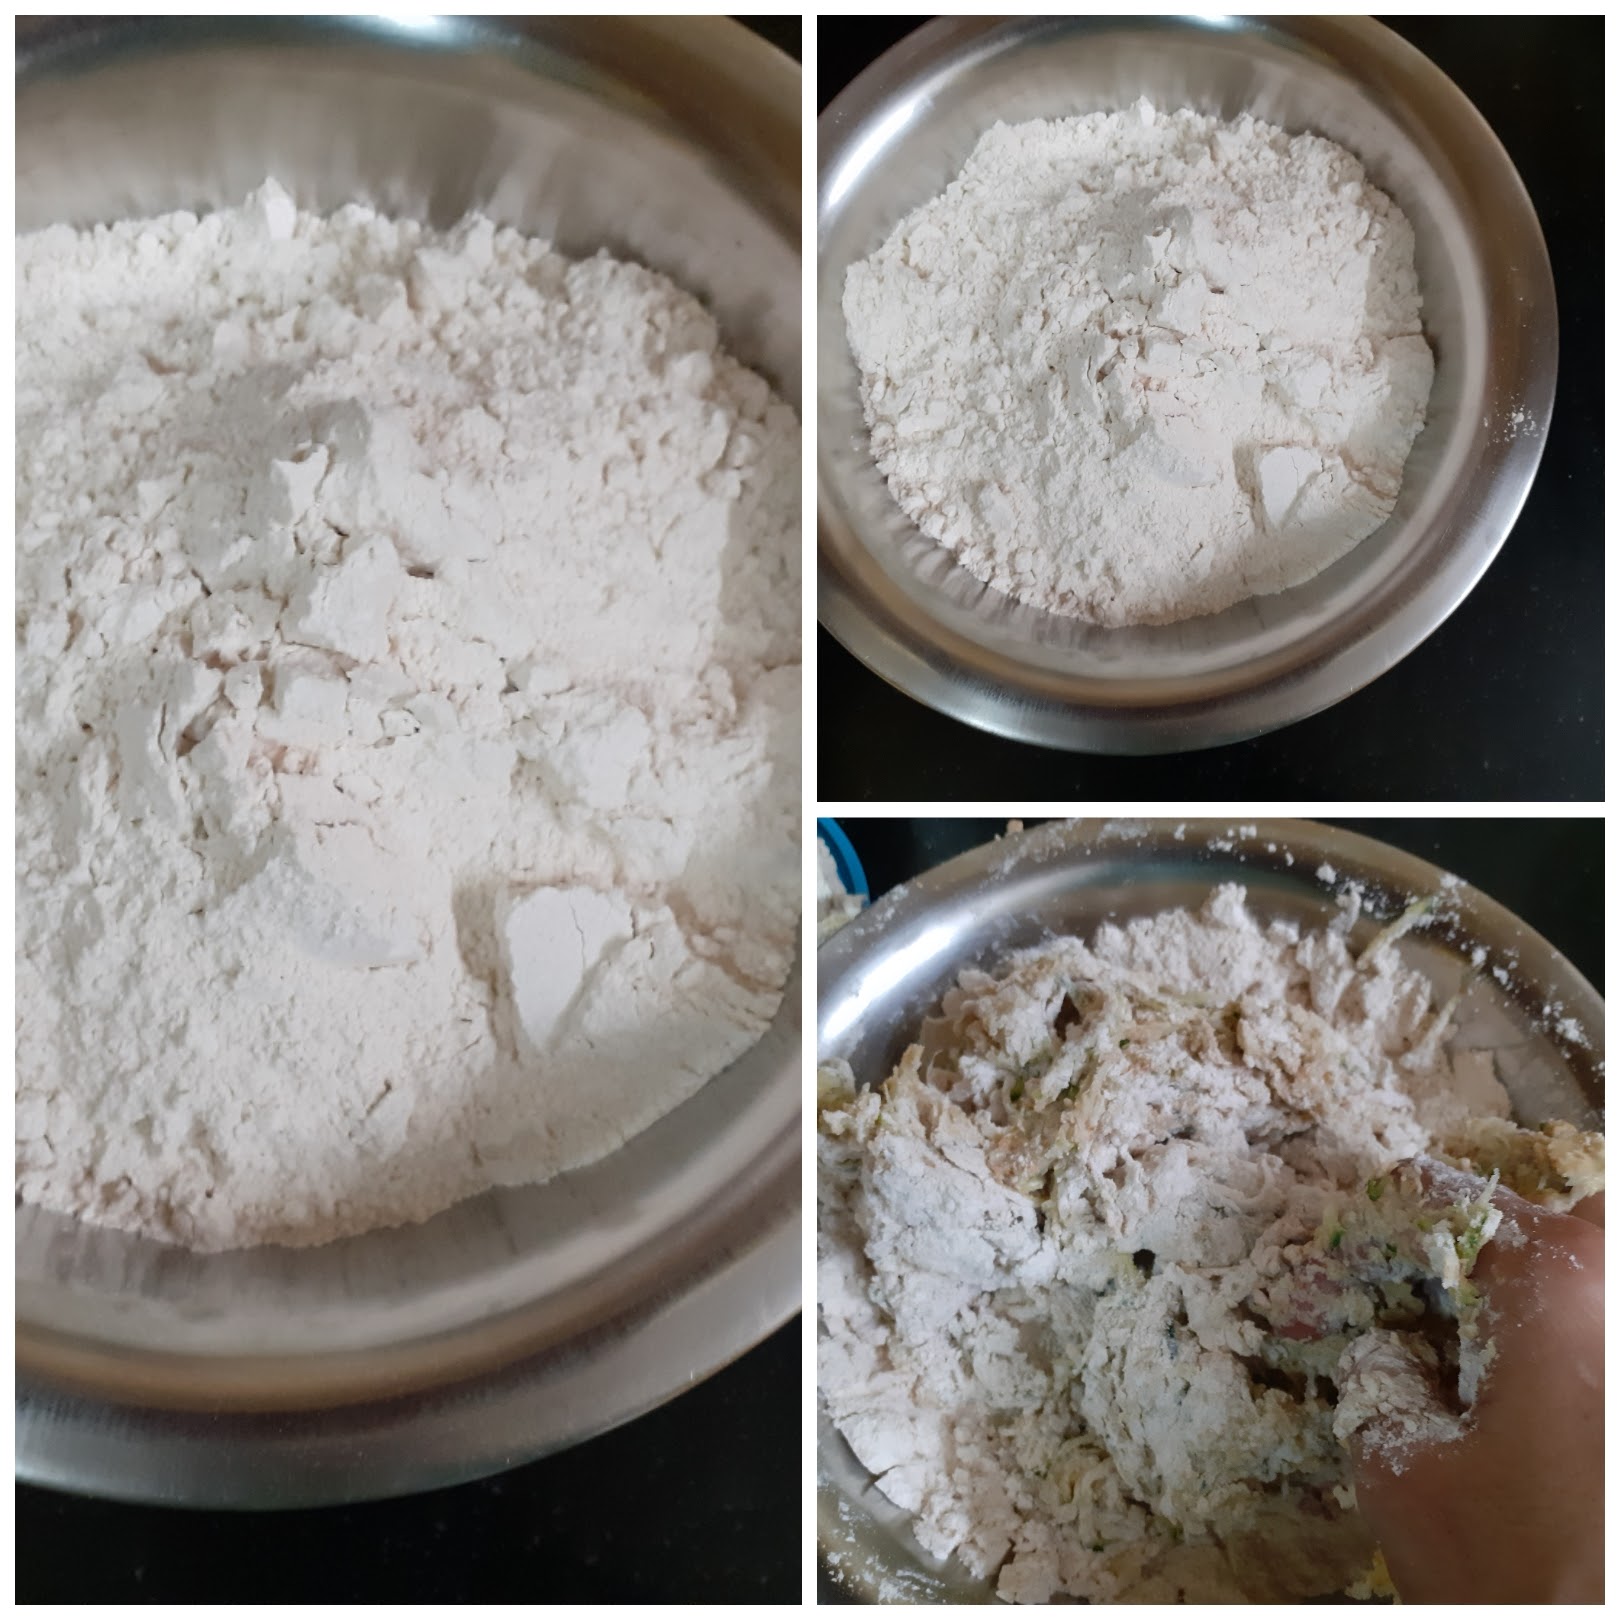
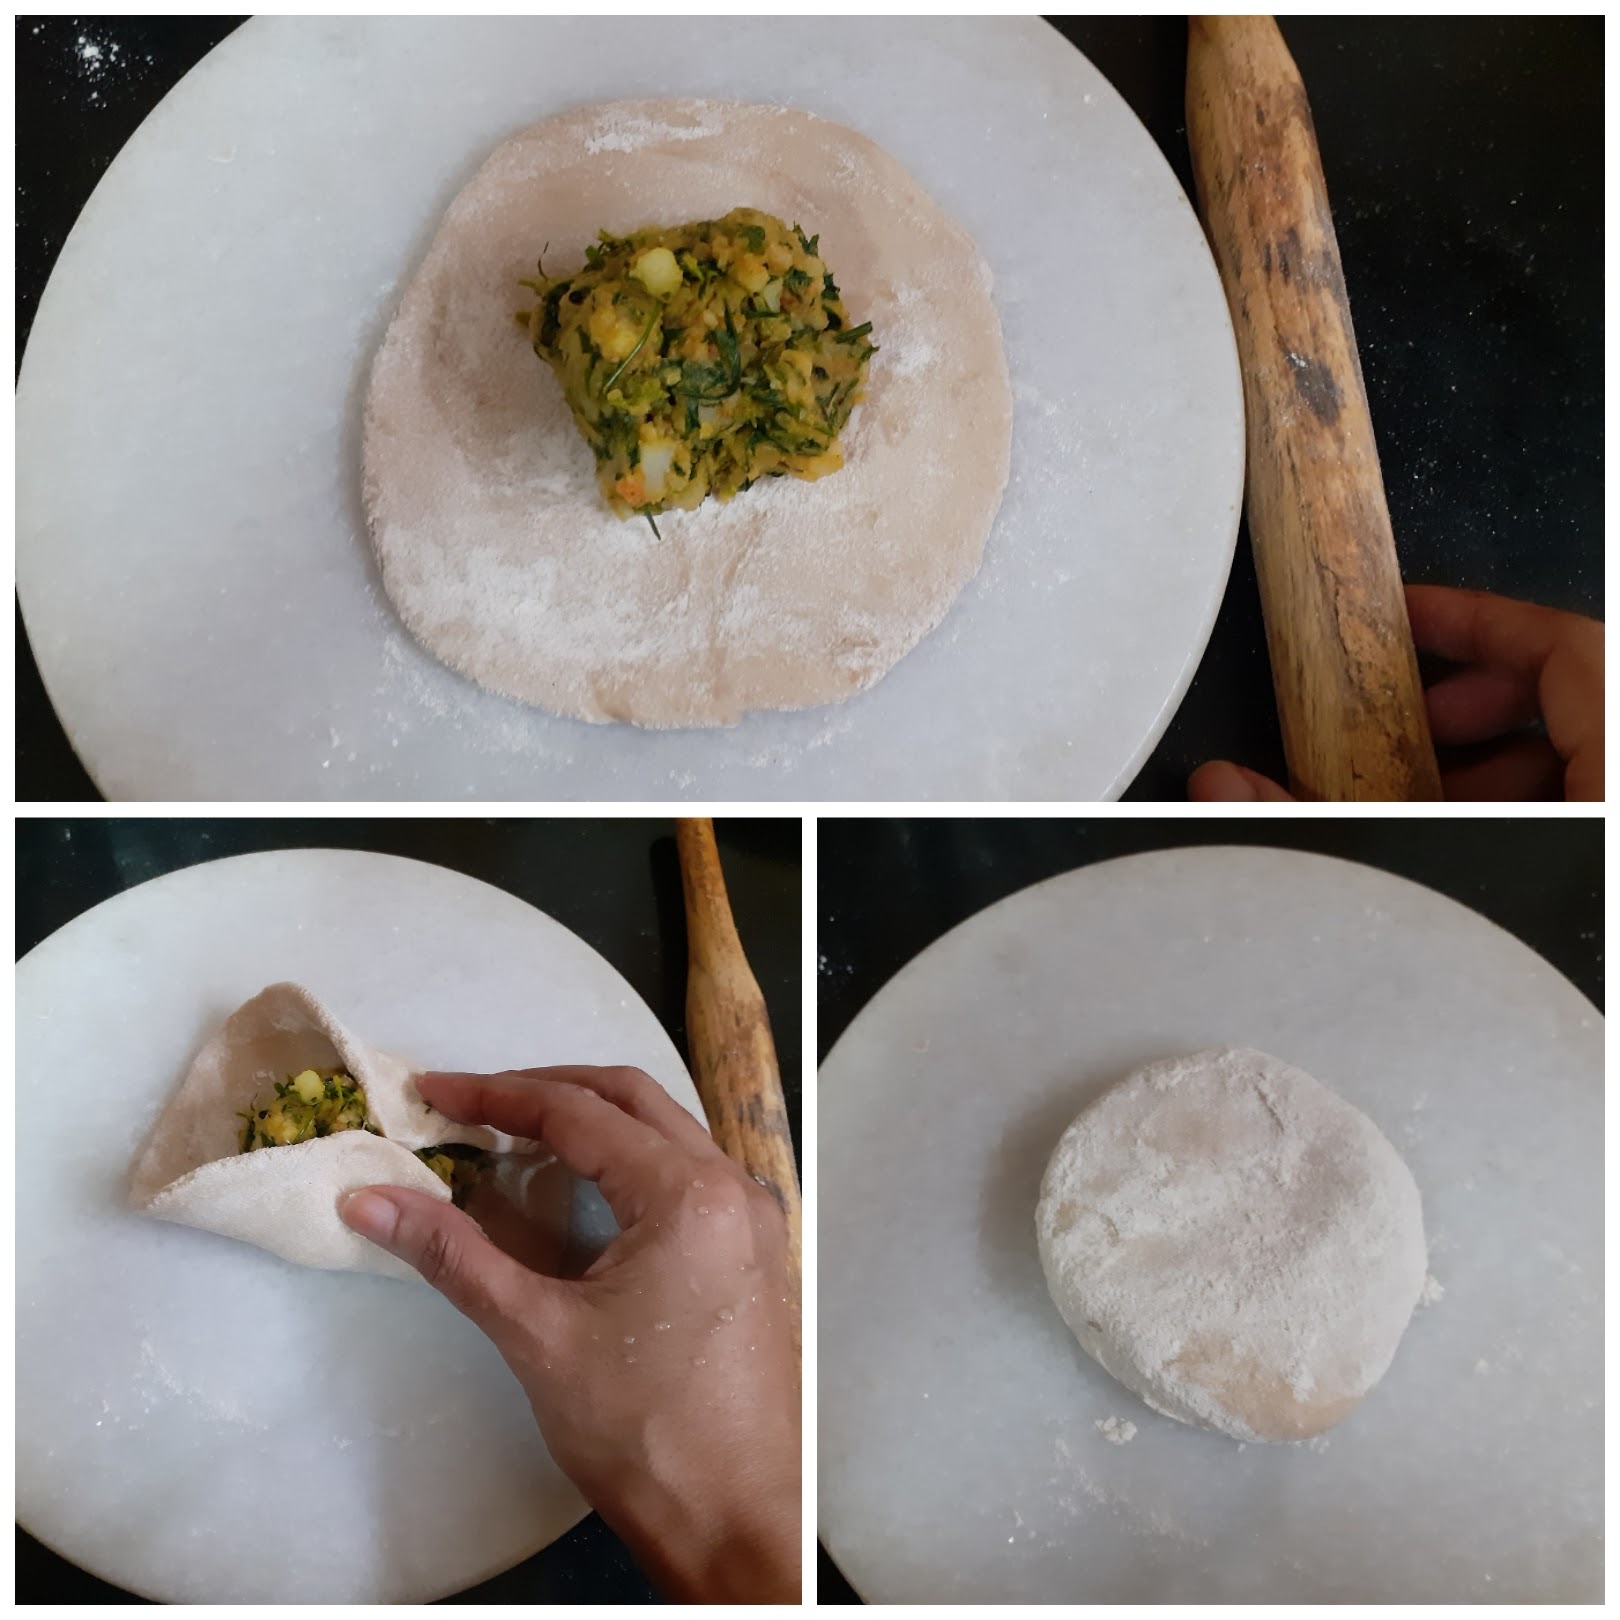

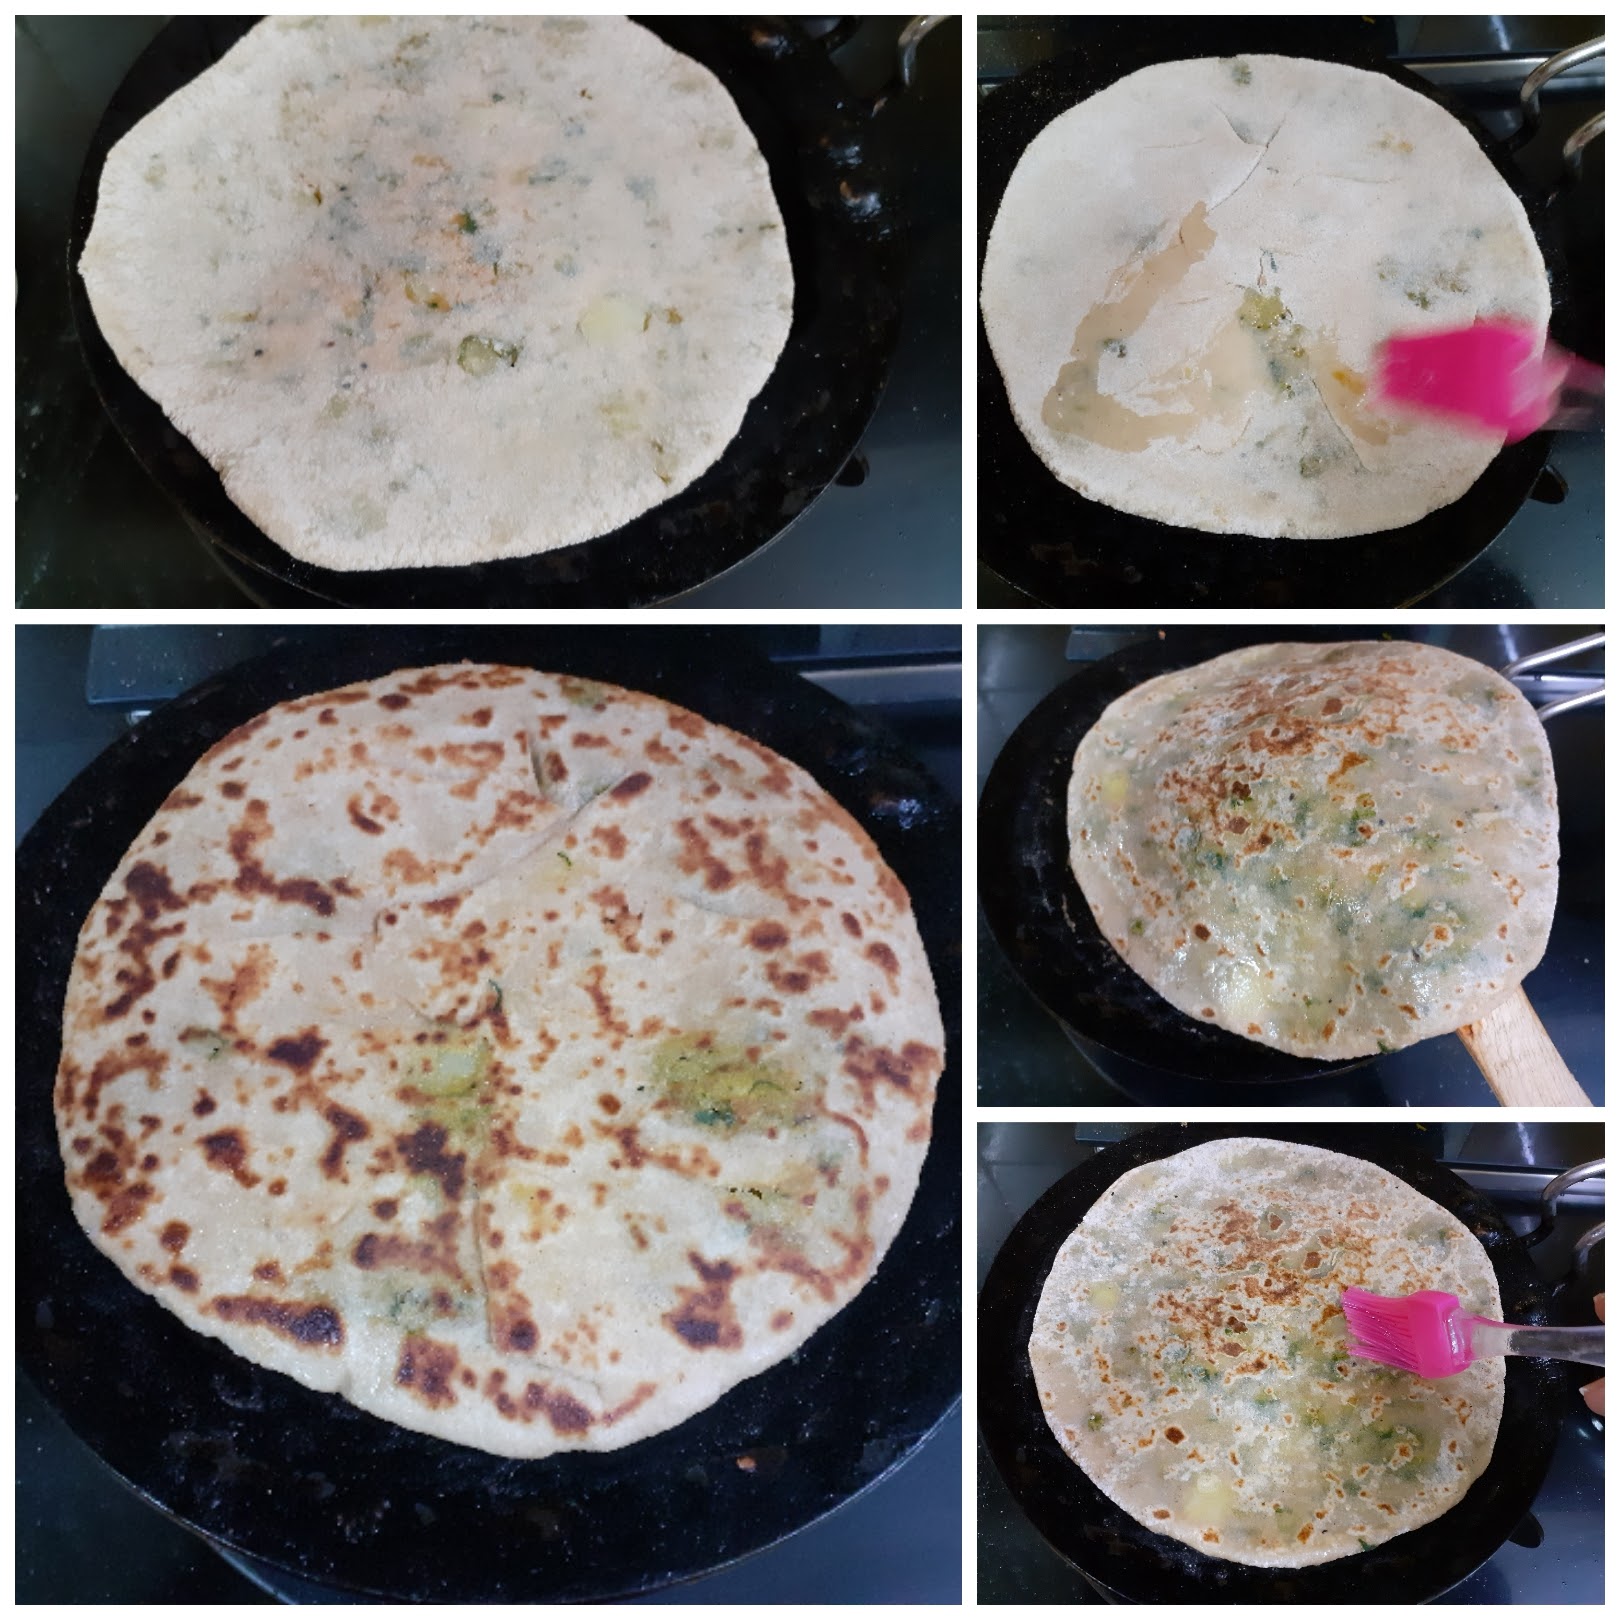

If you tried this recipe and liked it please comment below. I would love to hear from you. If you have a query about the recipe email us and ill respond as soon as I can.
Mirchi Bajji/Mirapakaya Bajji/Chilli Fritters
Mirchi Bajji or Mirapakaya bajji as it is called in Andhra Pradesh, is popular street food in most South Indian states. The way of making them differs though. This snack is popular in Jaipur/Rajasthan too and the style of making it is different. This snack is made from a particular type of Chilli, called Banana Peppers or Bajji Milagai. They are a light shade of green and huge.
In this recipe, I have followed the Hyderabadi style, wherein the chilli is first processed by slitting it in the centre, de-seeding it, and stuffing it with a paste. The then chillies are coated with chickpea flour batter and deep-fried.
In the Rajasthani style, the Mirchi/chilli is de-seeded and is topped with a spicy mashed potato coating(not stuffed), then dipped in chickpea batter and then fried.
In some other states in South India, the chillies are just deseeded and then dipped in batter and deep-fried. This version is not the best way to make this bajjis though. The stuffing is what makes all the difference.
I am getting to the recipe without much ado. I request you to have a look at my other snack recipes like Semolina Cheese Balls, Kothimbir Vadi, Dahi Pohe/Moru Aval, Masala Wheat flour Papdis, and more..,
Here is the recipe for Mirchi Bajji/Mirapakaya Bajji for you-

Ingredients for stuffing:
Chickpea flour/Besan 2 cups
Tamarind paste 1 tbsp or Tamarind pulp 1 cup(refer note1)
Salt as required
Red chilli powder 1/2 to 1 tsp
Ajwain seeds/Omam 1 tsp
Water as required(if using tamarind paste)
Ingredients for batter:
Besan/ Chickpea flour 2 cups
Rice flour 1/4 cup
Salt as required
Red chilli powder 1 tsp
Ajwain 1/2 tsp
Hot oil 1 tbsp
Ingredients for Mirchi Bajji:
Bajji Chillies 12 numbers
Oil for deep frying
Processing the Bajji Chilli:
Wash then and pat them dry. With a sharp knife make a lengthwise slit in the center and remove the seeds complete with your fingers, or spoon. Be very gently or they may break. The chilli should be clean on the inside and devoid of any seeds.
Directions for making Mirchi Bajji:
Once the processing of the Chillies is done, take all ingredients mentioned under stuffing except water and mix them well with your fingers. Now add water little by little to make a dough, which is neither too stiff nor too loose. (this procedure is if using tamarind paste)
If using tamarind pulp then take all ingredients mentioned under stuffing, in a bowl and combine them to form a dough, using the tamarind pulp.
Now make small cylinders out of this stuffing dough and stuff it into the chillies. Note that the chillies need not be fully stuffed, making a cylinder of them ensures that the stuffing is there from stalk to tip. Repeat for all chillies.
Now take all ingredients mentioned under batter, except water and mix well with your fingers. Adding water little by little, form a batter that is not too flowy. It should be thick enough to coat the chilli. The chilli surface is very smooth and slippery. so the natter has to be a little thick(refer picture). After making the batter, put oil for deep frying in a Kadai and heat. Bring the oil to smoke point and reduce heat completely. Pour 1 tbsp of this oil into the batter, and mix the batter nicely with a spoon(be careful not to use your hands, the oil is very hot). The hot oil does the job of baking soda here, and make your bajji turn fluffy and crisp(secret out????). Now it is time for frying. Holding the chilli by the stalk, dip it into the batter, use your fingers if required to coat the chilli well and drop them gently into the hot oil. Fry on medium-high until it turns a nice brown in colour. To serve, sprinkle some Chaat masala and enjoy. Bon Appetit.
STEPWISE RECIPE FOLLOWS:
1. Assemble all ingredients. Follow the processing of chillies step and set them aside.
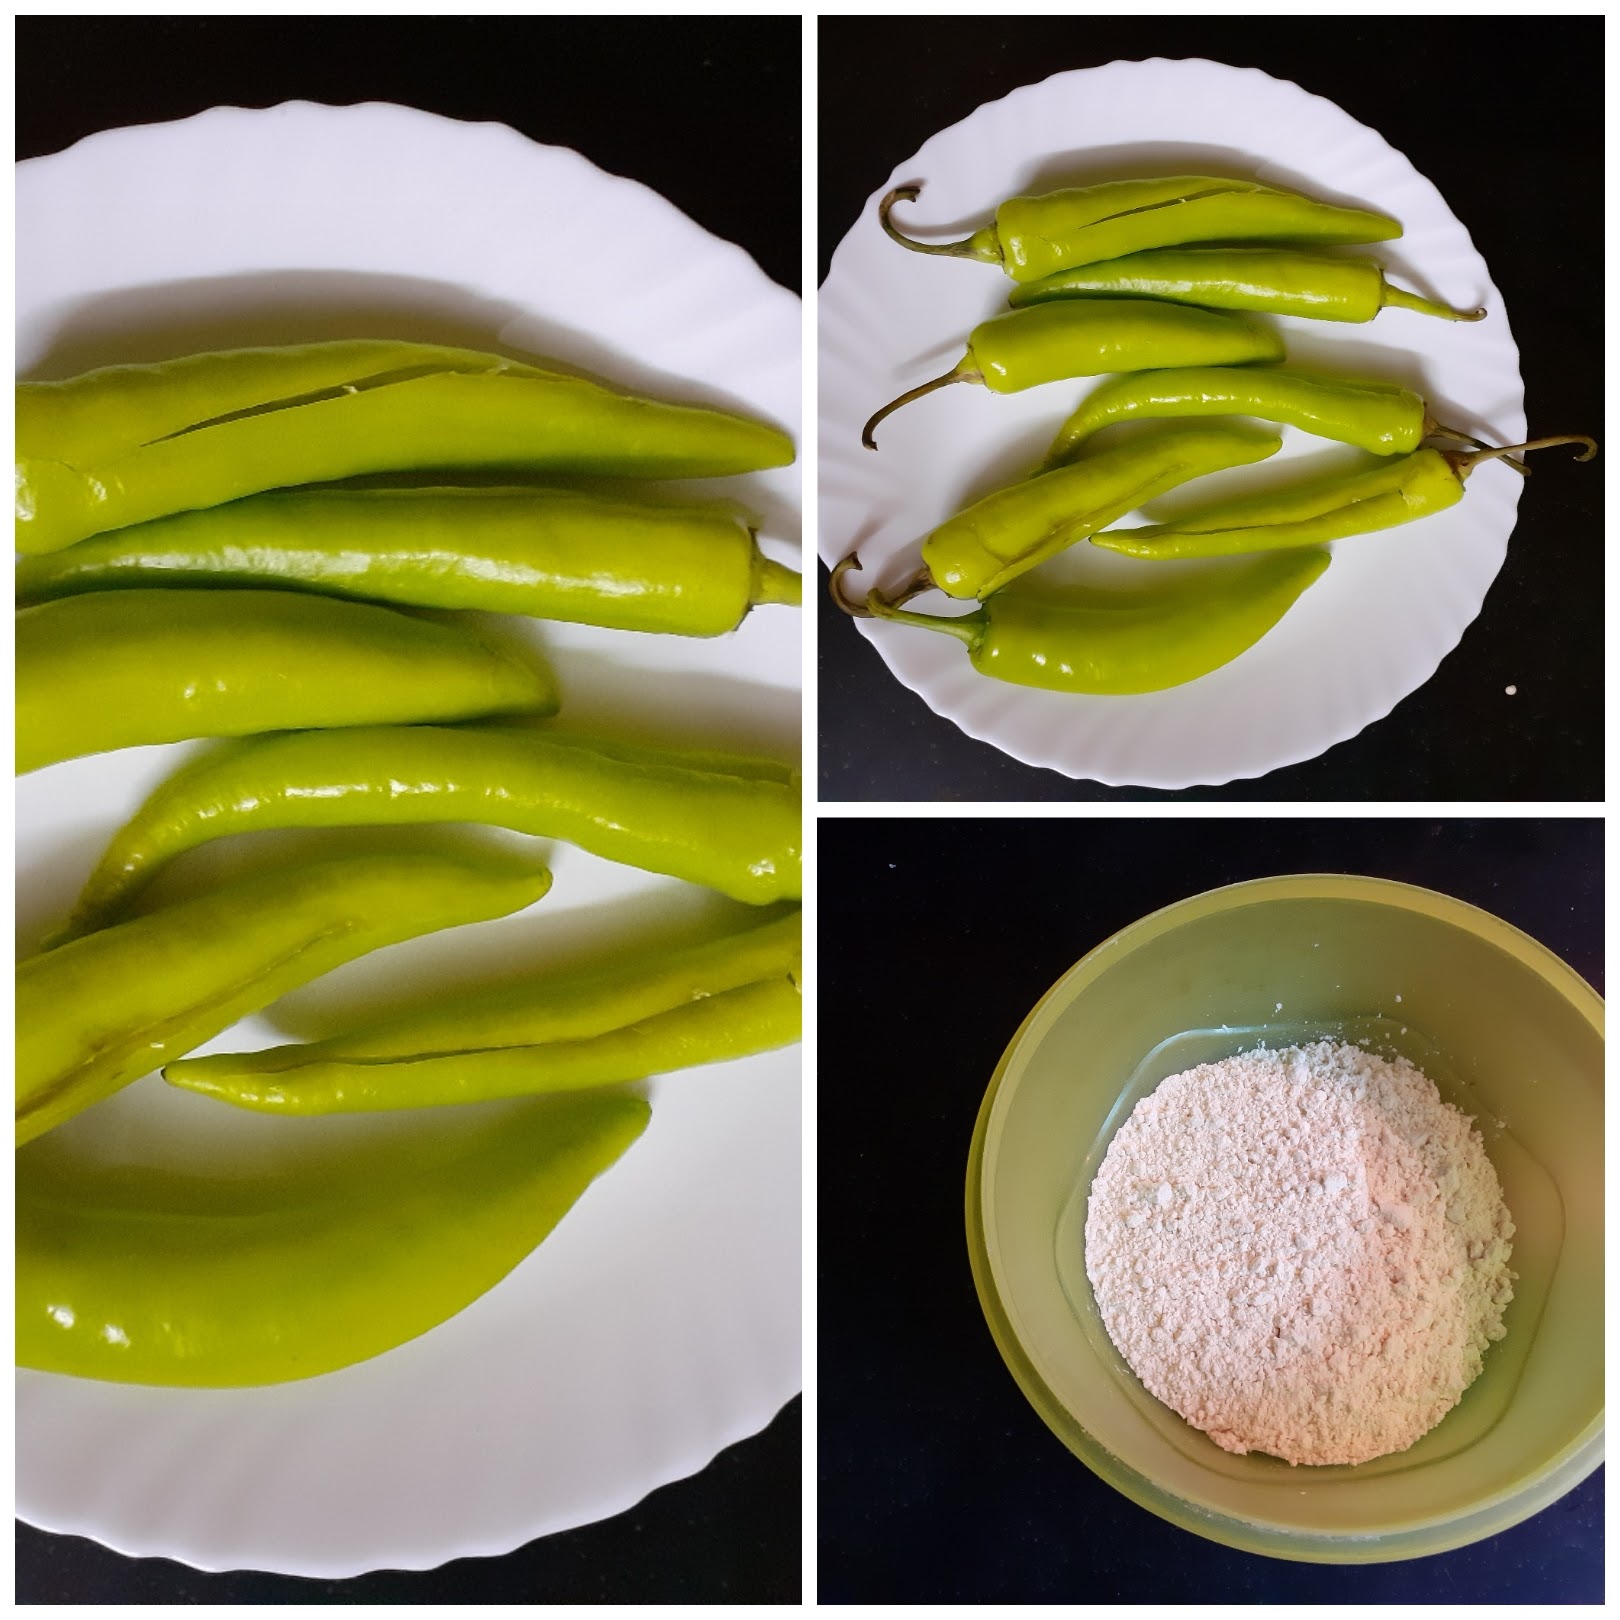
2. This step is if you are using tamarind paste- take all ingredients mentioned under stuffing except water and mix them well with your fingers. Now add water little by little to make a dough, which is neither too stiff nor too loose. (if following this step ignore step 3)
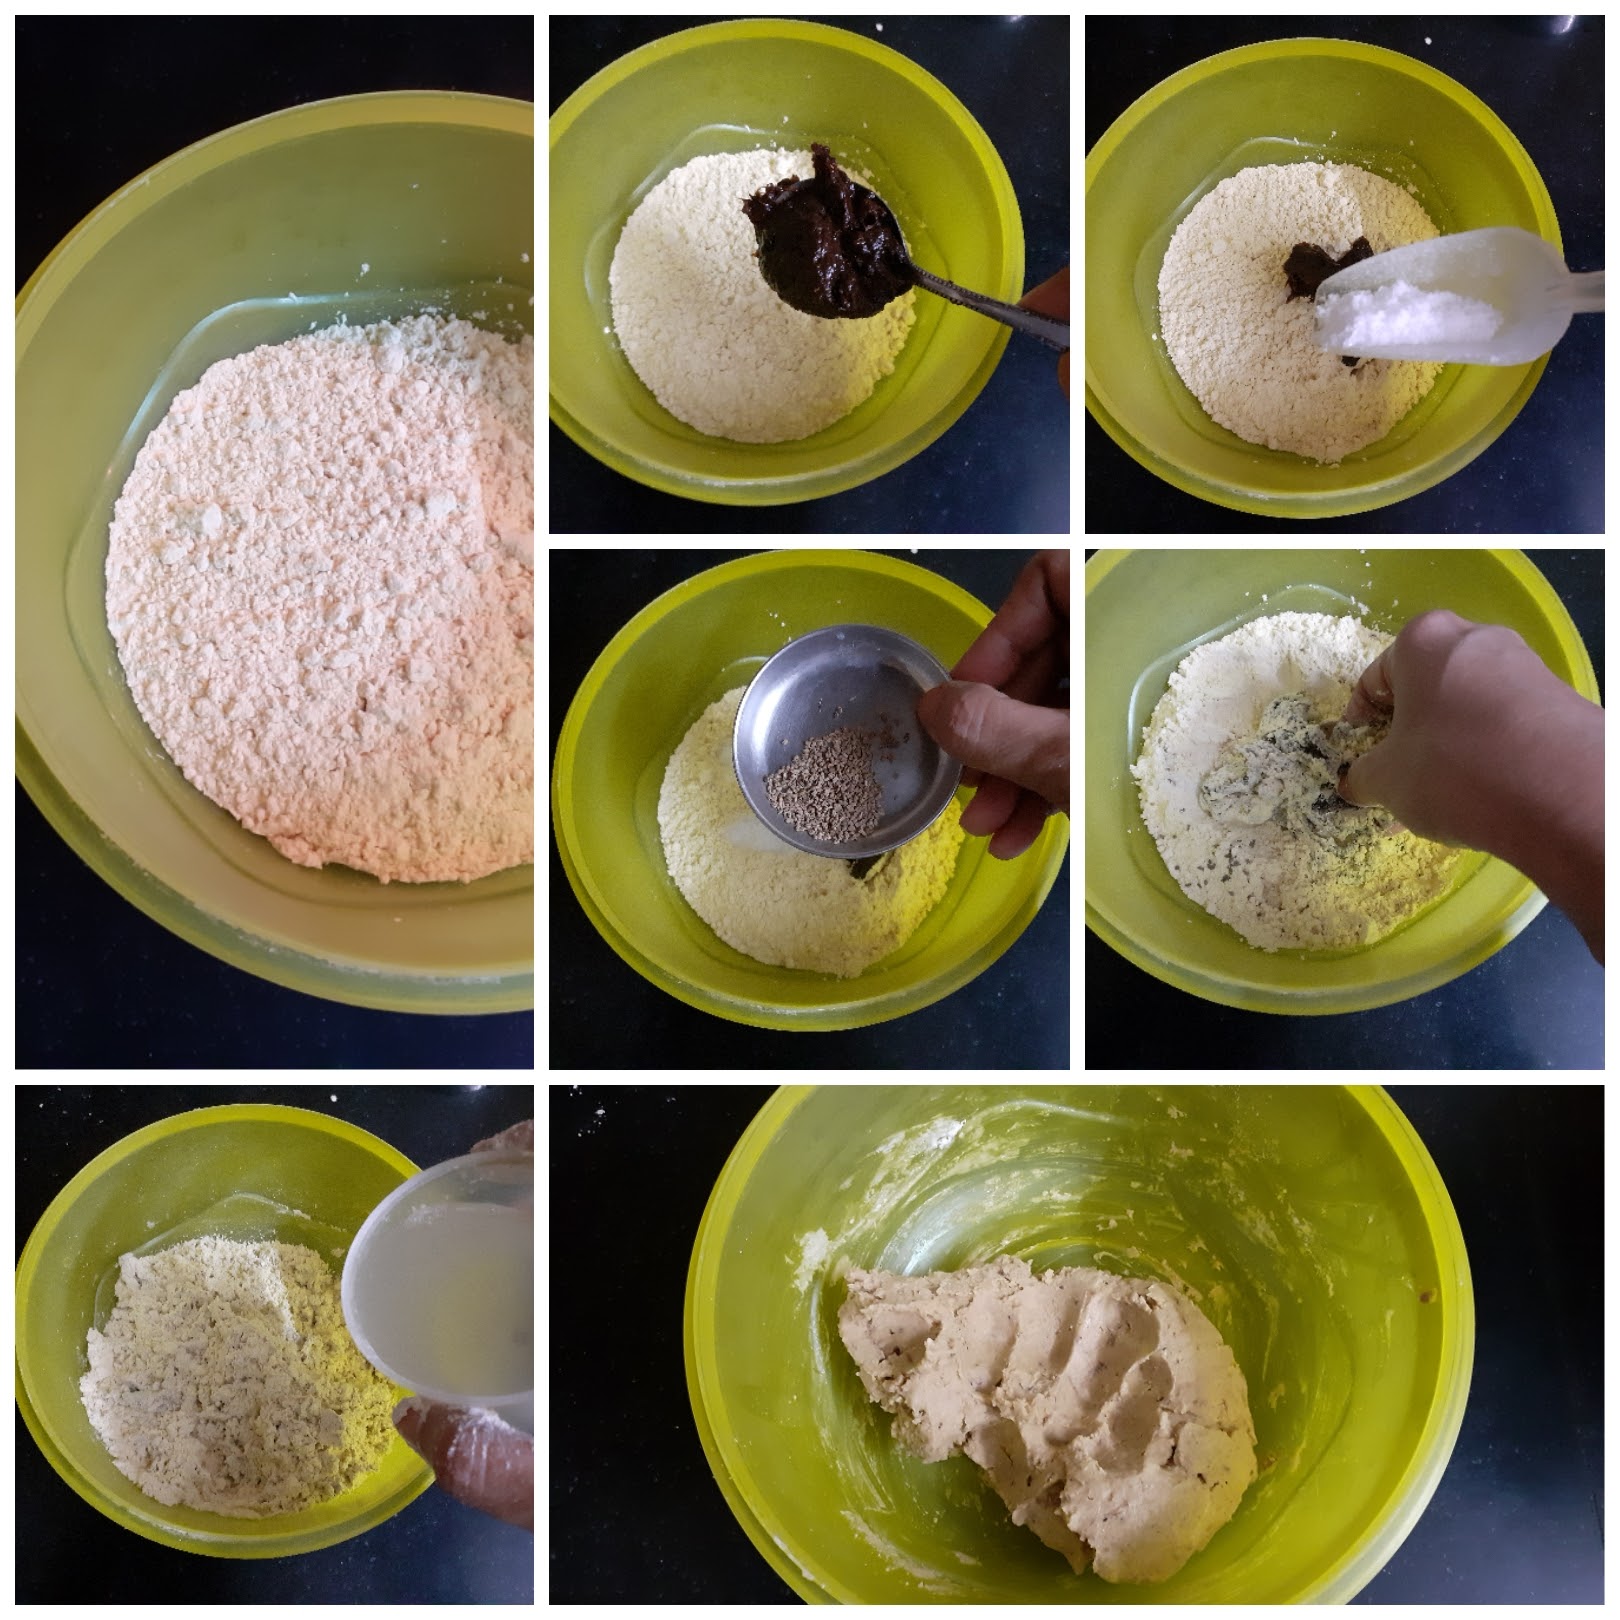
3. This step is if you are using tamarind pulp: take all ingredients mentioned under stuffing, in a bowl and combine them to form a dough, using the tamarind pulp.
( PICTURES SAME AS ABOVE, USE TAMARIND PULP INSTEAD OF WATER)
4. Now make small cylinders out of this stuffing dough and stuff it into the chillies. Note that the chillies need not be fully stuffed, making a cylinder of them ensures that the stuffing is there from stalk to tip. Repeat for all chillies.
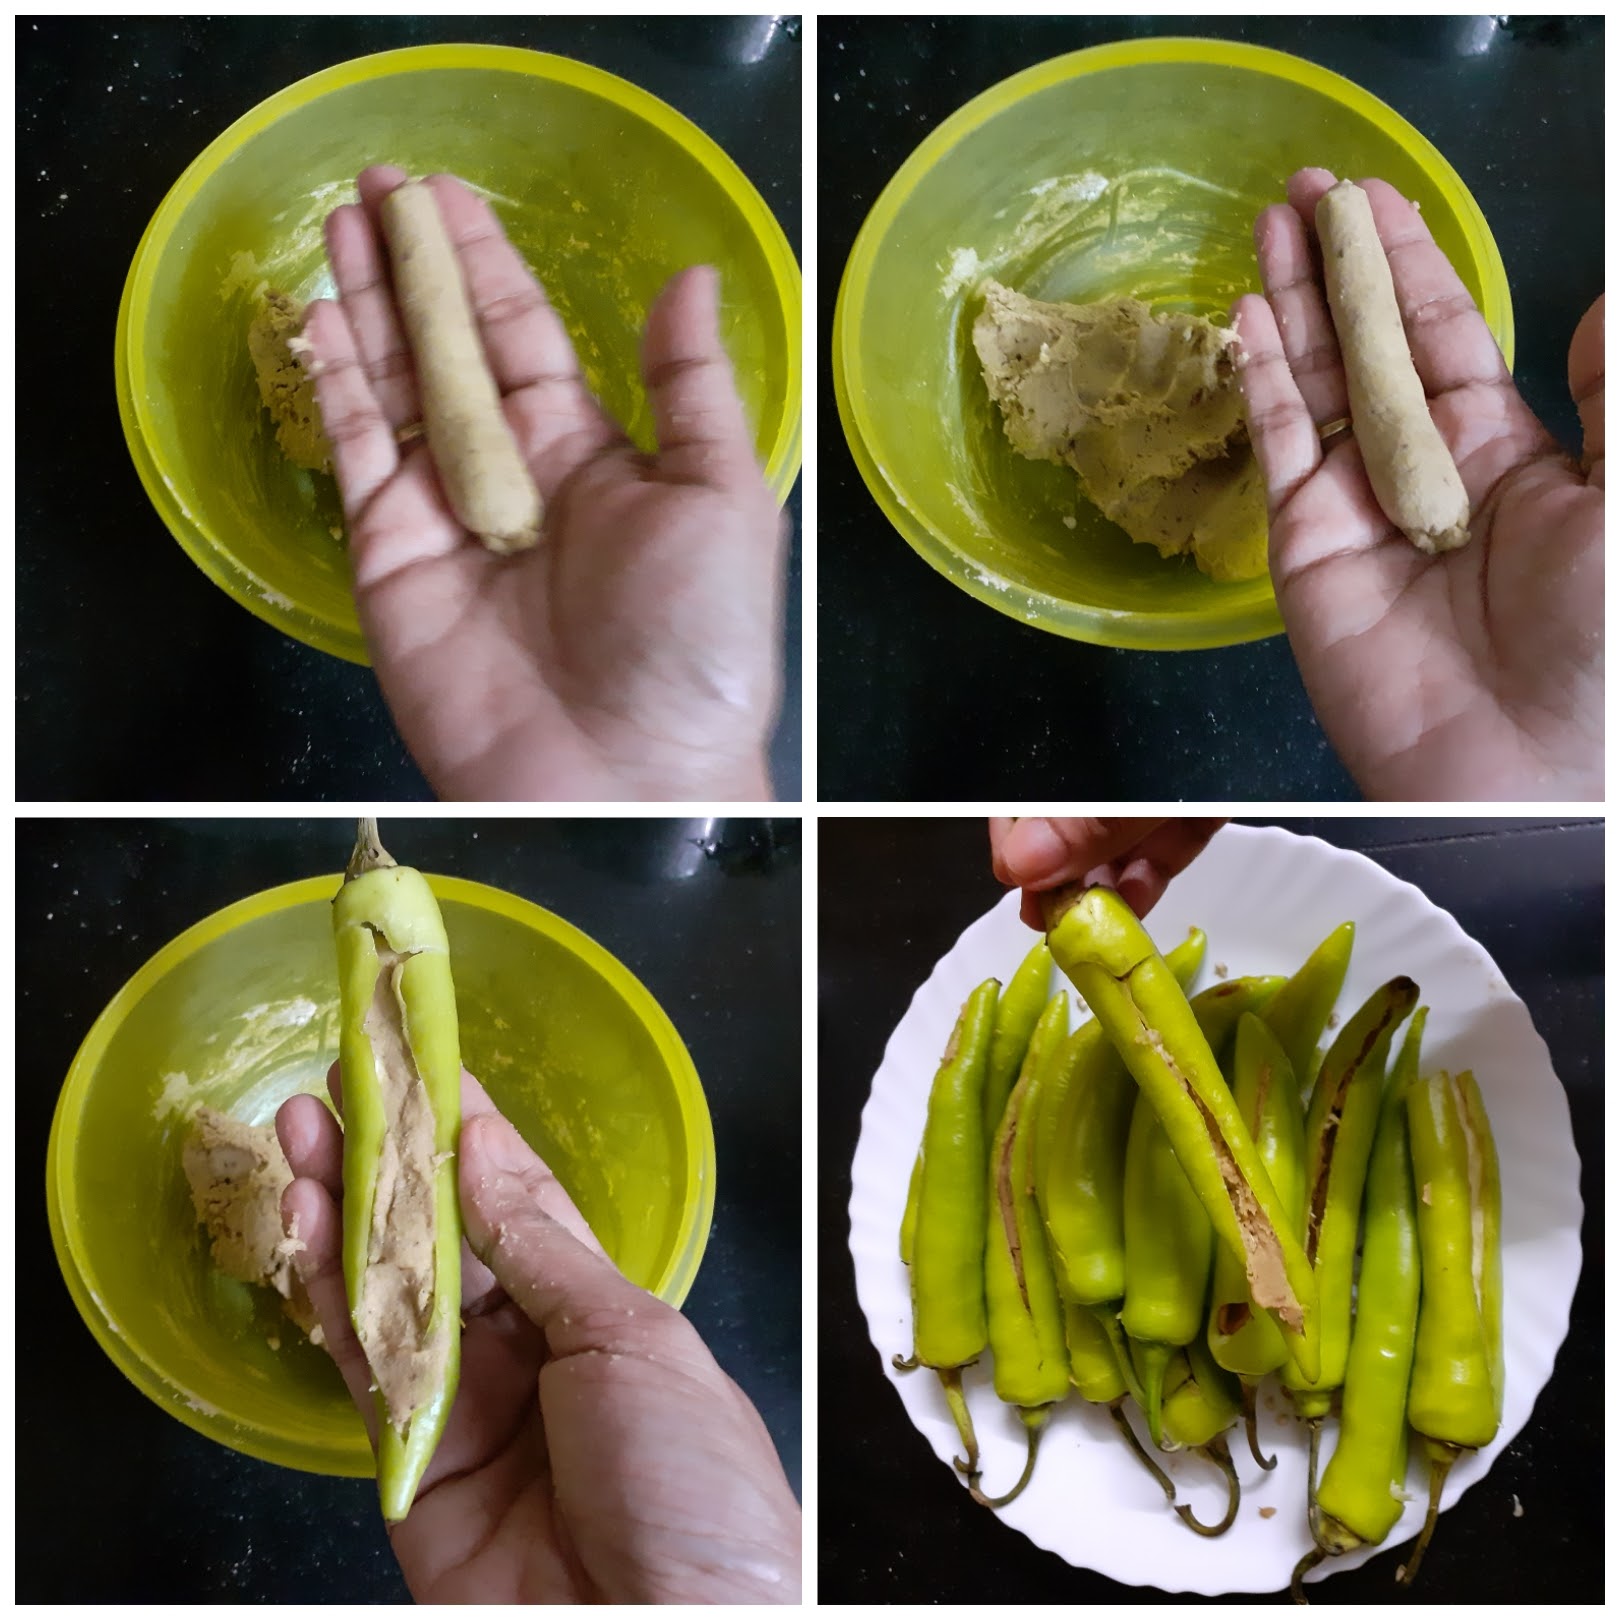
5. Now take all ingredients mentioned under batter, except water and mix well with your fingers. Adding water little by little, form a batter that is not too flowy. It should be thick enough to coat the chilli.

6. After making the batter, put oil for deep frying in a Kadai and heat. Bring the oil to smoke point and reduce heat completely. Pour 1 tbsp of this oil into the batter, and mix the batter nicely with a spoon(be careful not to use your hands, the oil is very hot).
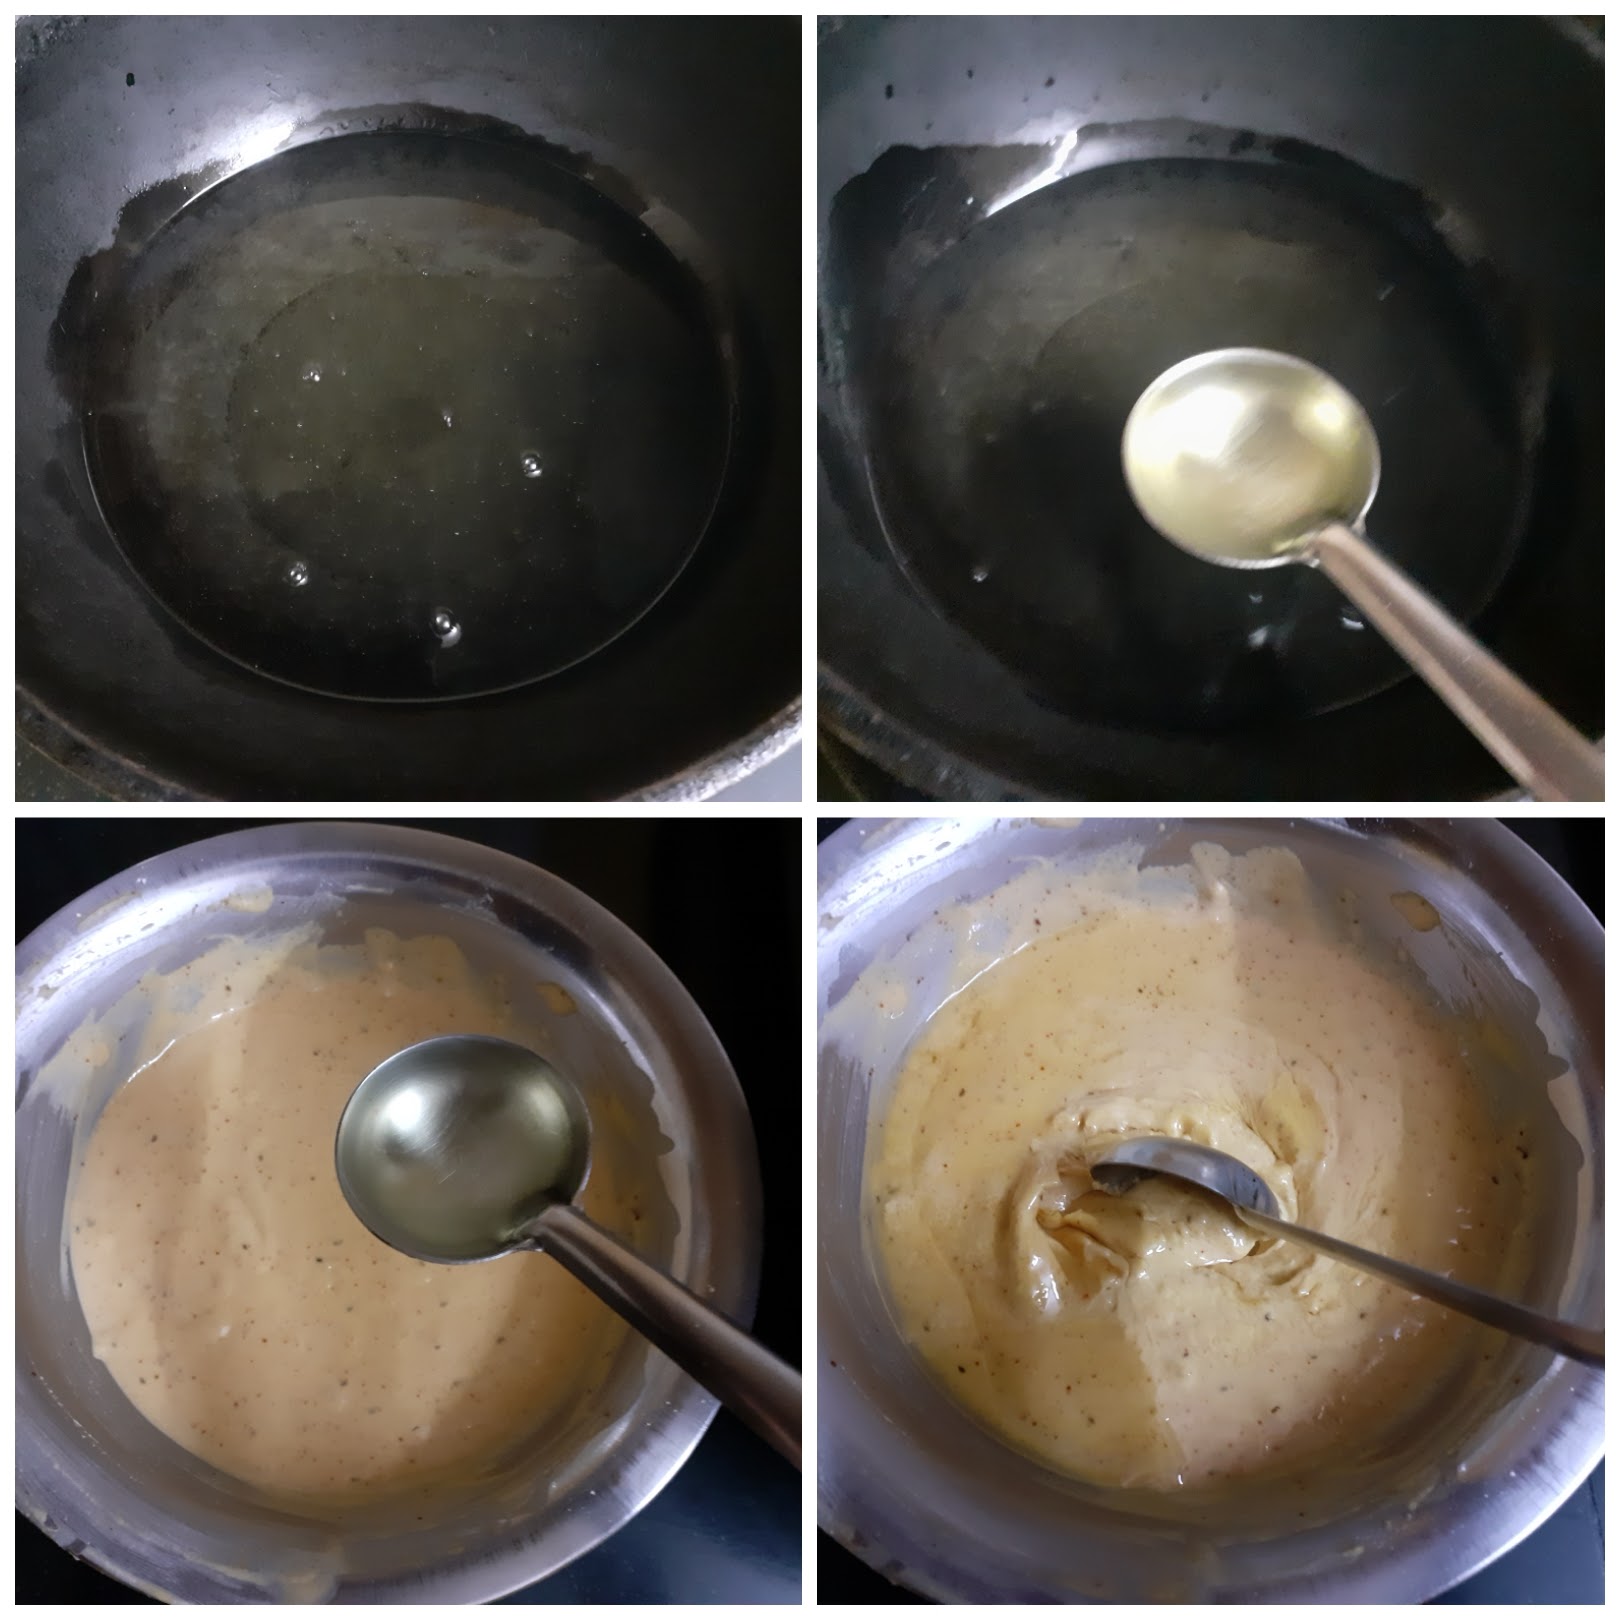
7. Holding the chilli by the stalk, dip it into the batter, use your fingers if required to coat the chilli well and drop them gently into the hot oil. Fry on medium-high until it turns a nice brown in colour.

NOTES:
1. I usually make a paste of tamarind and keep it handy. This post is on my Facebook and Instagram handles. I will try to share that in the blog sometime soon. Store-bought paste also can be used, quantity should be 1.5 tbsp. If using store-bought paste, decrease the amount of salt in the stuffing.
2. For making Tamarind pulp take lemon size ball of tamarind, soak in warm water for 5-10 minutes and extract a pulp that comes to 1 cup. Use this to make the stuffing dough.
3. Pouring hot oil into the Bajji batter does the job of soda. It makes the Bajji fluffy and crisp and also gives it a good colour.
4. While frying these Bajjis patience is required and fry them in high heat will give you an uncooked stuffing.
If you tried this recipe and liked it please comment below. I would love to hear from you. If you have a query about the recipe email us and ill respond as soon as I can.
Gajar Halwa Barfi
A Barfi is the Indian cousin of the western Fudge. In a Barfi either milk or flour is a base along with fruit or vegetables or dry fruits or a combination of them. This is a sweet dish I tried just for fun and I really did not have an idea of the quantities. I just went by gut feeling and it ended up in something really yummy. It is a twist to the regular Gajar Halwa and tales just 1/4 of the time to get it done. It took me precisely 20 minutes for the entire cooking process, 5 minutes for grating the Carrot. It needs a 20-minute chilling time(in the refrigerator).
I tried this out with small quantities of everything as I was trying it for the first time. Since it turned out very well, it is blog-worthy and worth a try by everyone. I usually make Gajar Halwa only when the Delhi Carrots(the orangish-red ones) arrive in Chennai, and I make it 3 to 4 times before the season gets over. Since I was trying a Barfi I went ahead with the regular carrots.
While you are here check out my Indian sweet recipe collection like- Pineapple Rabri, Atte Ka Sheera, Unni Appam, Aval Kesari, Thengai Therattipal, Maa Ladu, Vella Aval, Chakkara Pongal, Carrot Kheer, and more…
Here is the recipe for Gajar Halwa Barfi for you-
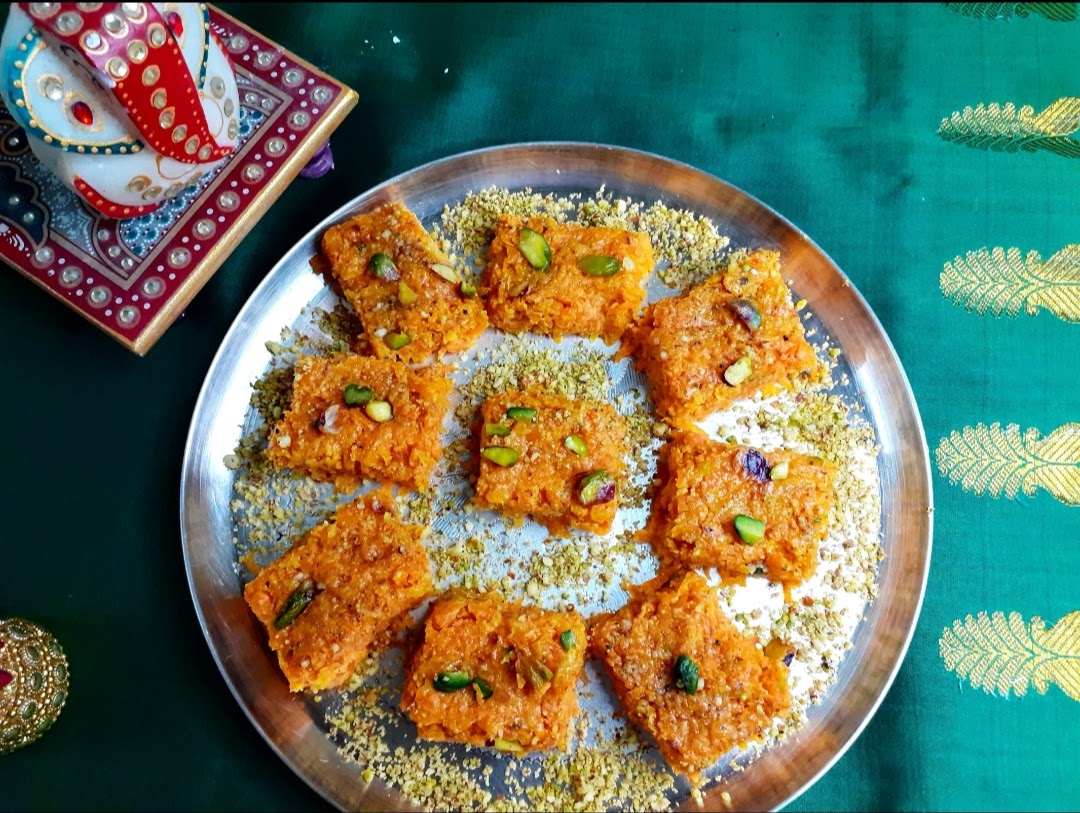
Ingredients:
Carrots 2 big shredded
Kova/Khoya/Mava 100gm(store-bought)
Sugar 1/2 cup
Milk 1/4 cup
Ghee 6 tsp
Cardamom powder 1/4 tsp
Broken nuts for garnish
Directions:
Grease a small plate with ghee and keep ready. In a Kadai or pan take 2 tsp ghee and heat. Drop the grated carrot onto the Kadai or pan and saute on high for a minute. Now add the milk, reduce the flame, and cook the carrots for 5 minutes. The carrots should cook but not turn limp. Now add the grated Khoya/Mava and continue to cook for few minutes. Once the Mava is added the mixture becomes a little thick, now add the sugar and stir, the mixture liquefies a little as the sugar melts. Keep stirring for a few minutes and the mixture will start to thicken up. When the mixture no longer sticks to the bottom of the pan, its time to transfer it into a greased plate. Another method to check for doneness of the mixture is to wet your hands, take a small amount of the carrot mixture, and try to form a ball. If the ball retains shape its time to transfer into the greased plate. Spread the mixture evenly on the plate, sprinkle some chopped nuts on top, and press it gently with the ladle back or your palm. Put the plate into the fridge for 20 minutes. Bring it out, cut into diamonds or squares and it’s ready to serve. Enjoy the dessert. Bon Appetite.
STEPWISE RECIPE FOLLOWS:
1. Assemble all ingredients. Grease a small plate with ghee and keep ready. In a Kadai or pan take 2 tsp ghee and heat. Drop the grated carrot onto the Kadai or pan and saute on high for a minute.
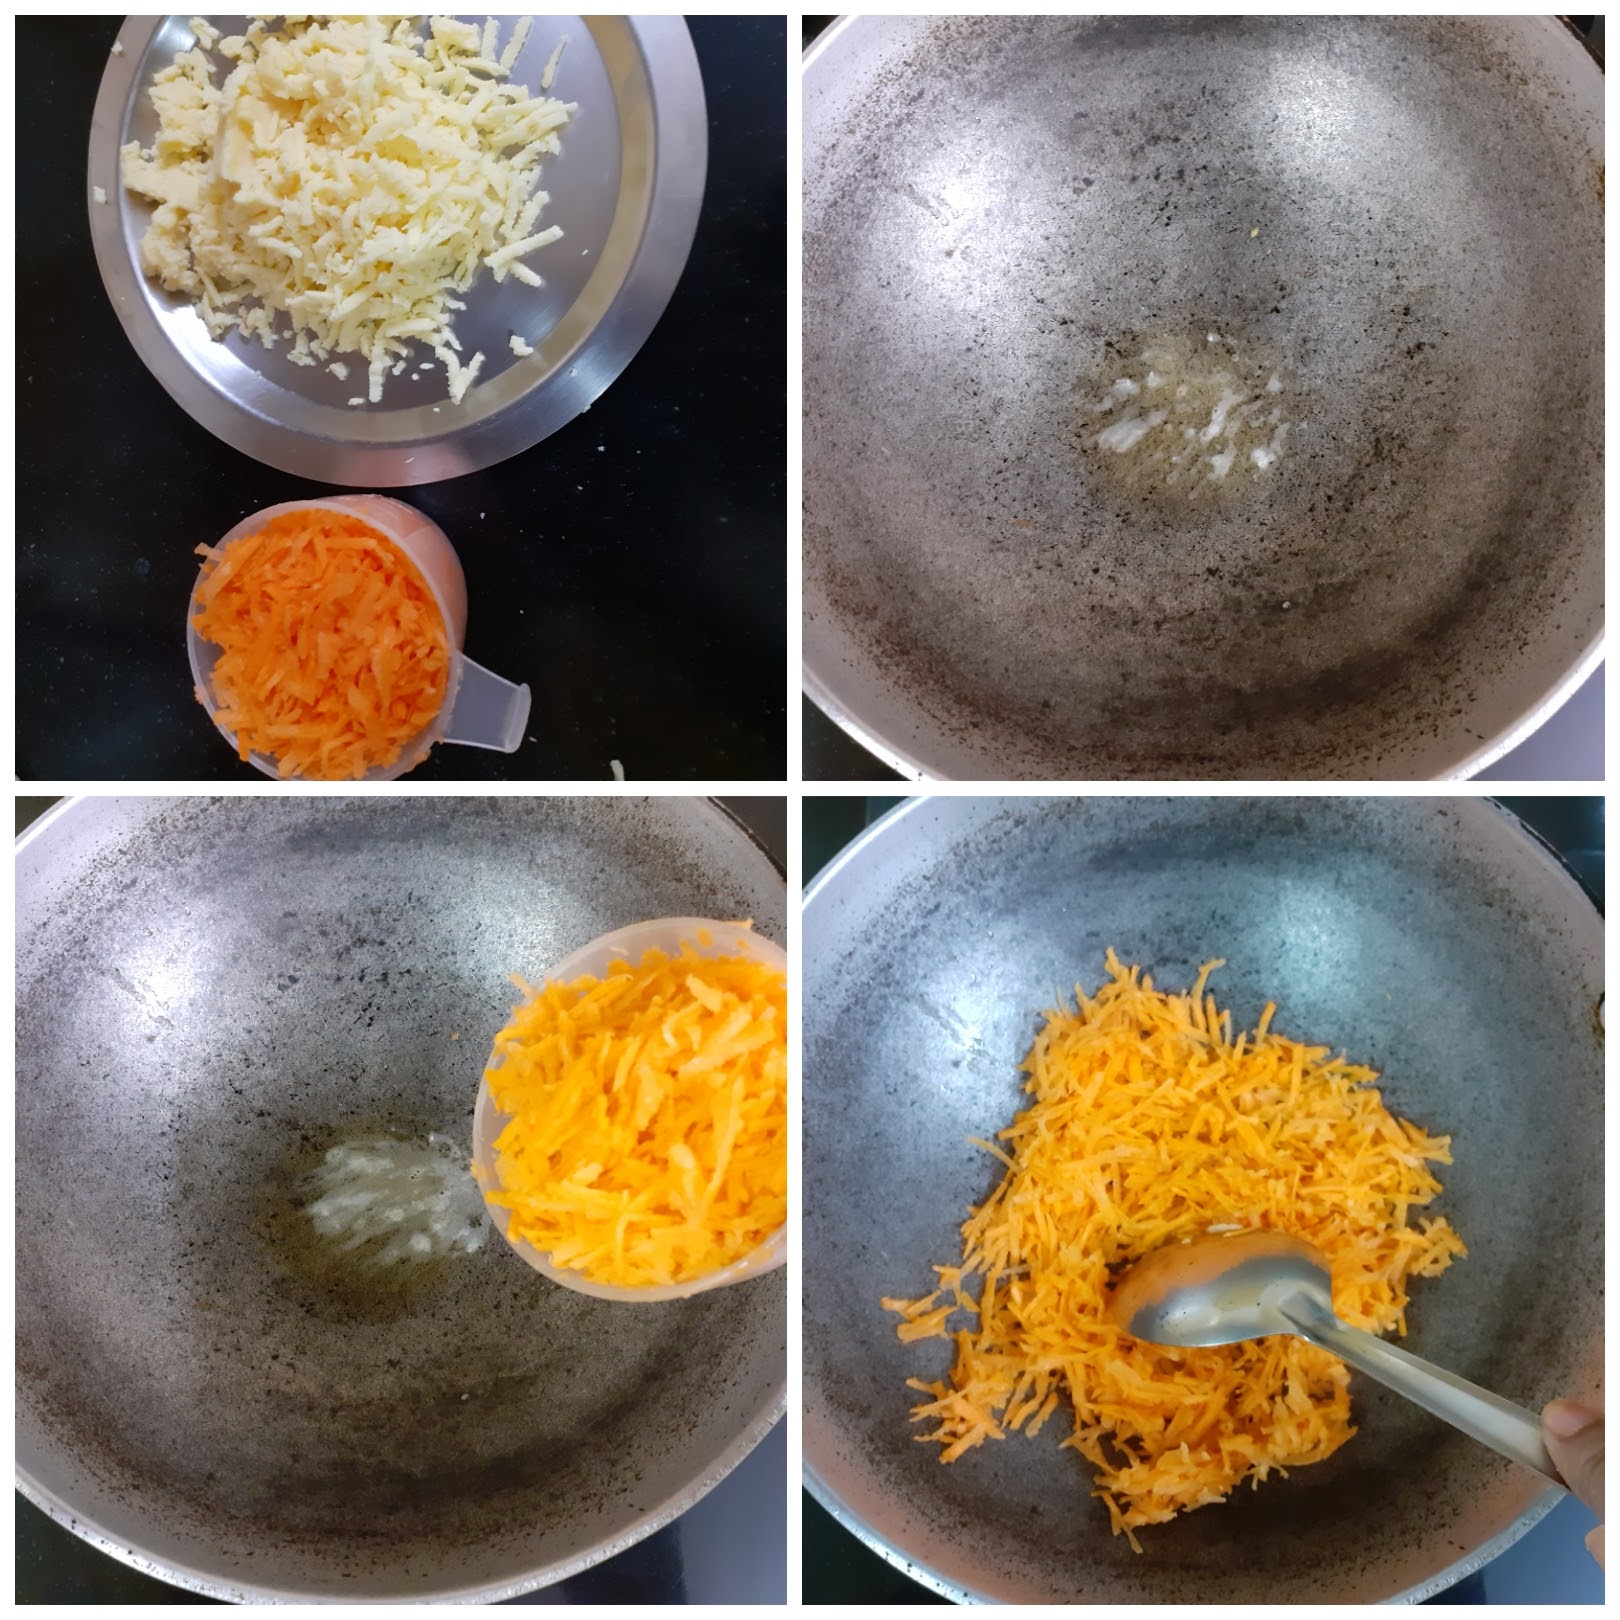
2. Now add the milk, reduce the flame, and cook the carrots for 5 minutes. The carrots should cook but not turn limp. Now add the grated Khoya/Mava and continue to cook for few minutes.
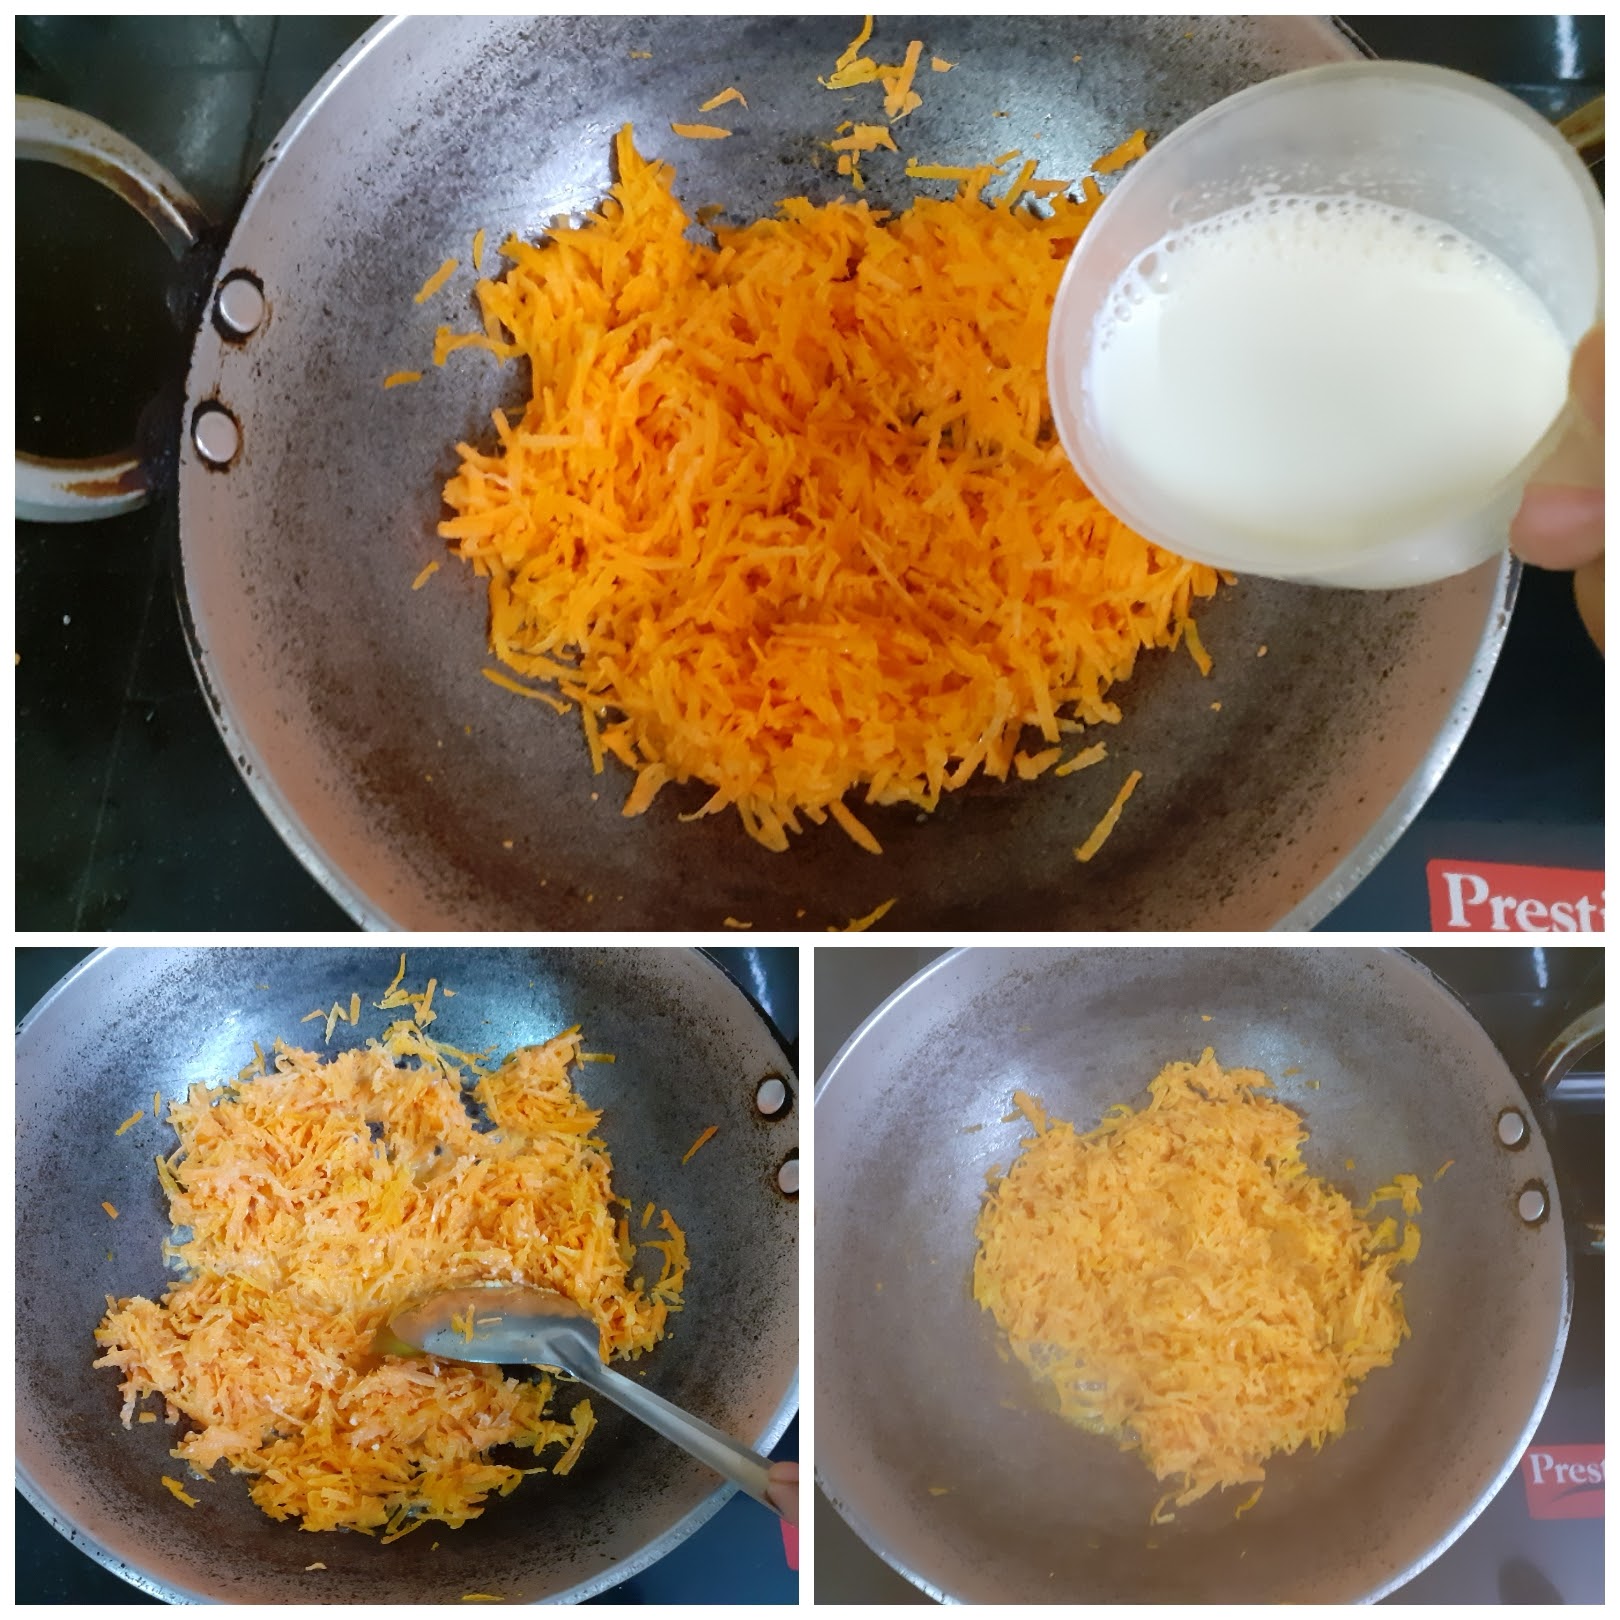
3. Once the Mava is added the mixture becomes a little thick, now add the sugar and stir, the mixture liquefies a little as the sugar melts. Keep stirring for a few minutes and the mixture will start to thicken up. When the mixture no longer sticks to the bottom of the pan, its time to transfer it into a greased plate. Before transferring to a greased plate add cardamom powder and 2 tsp ghee.
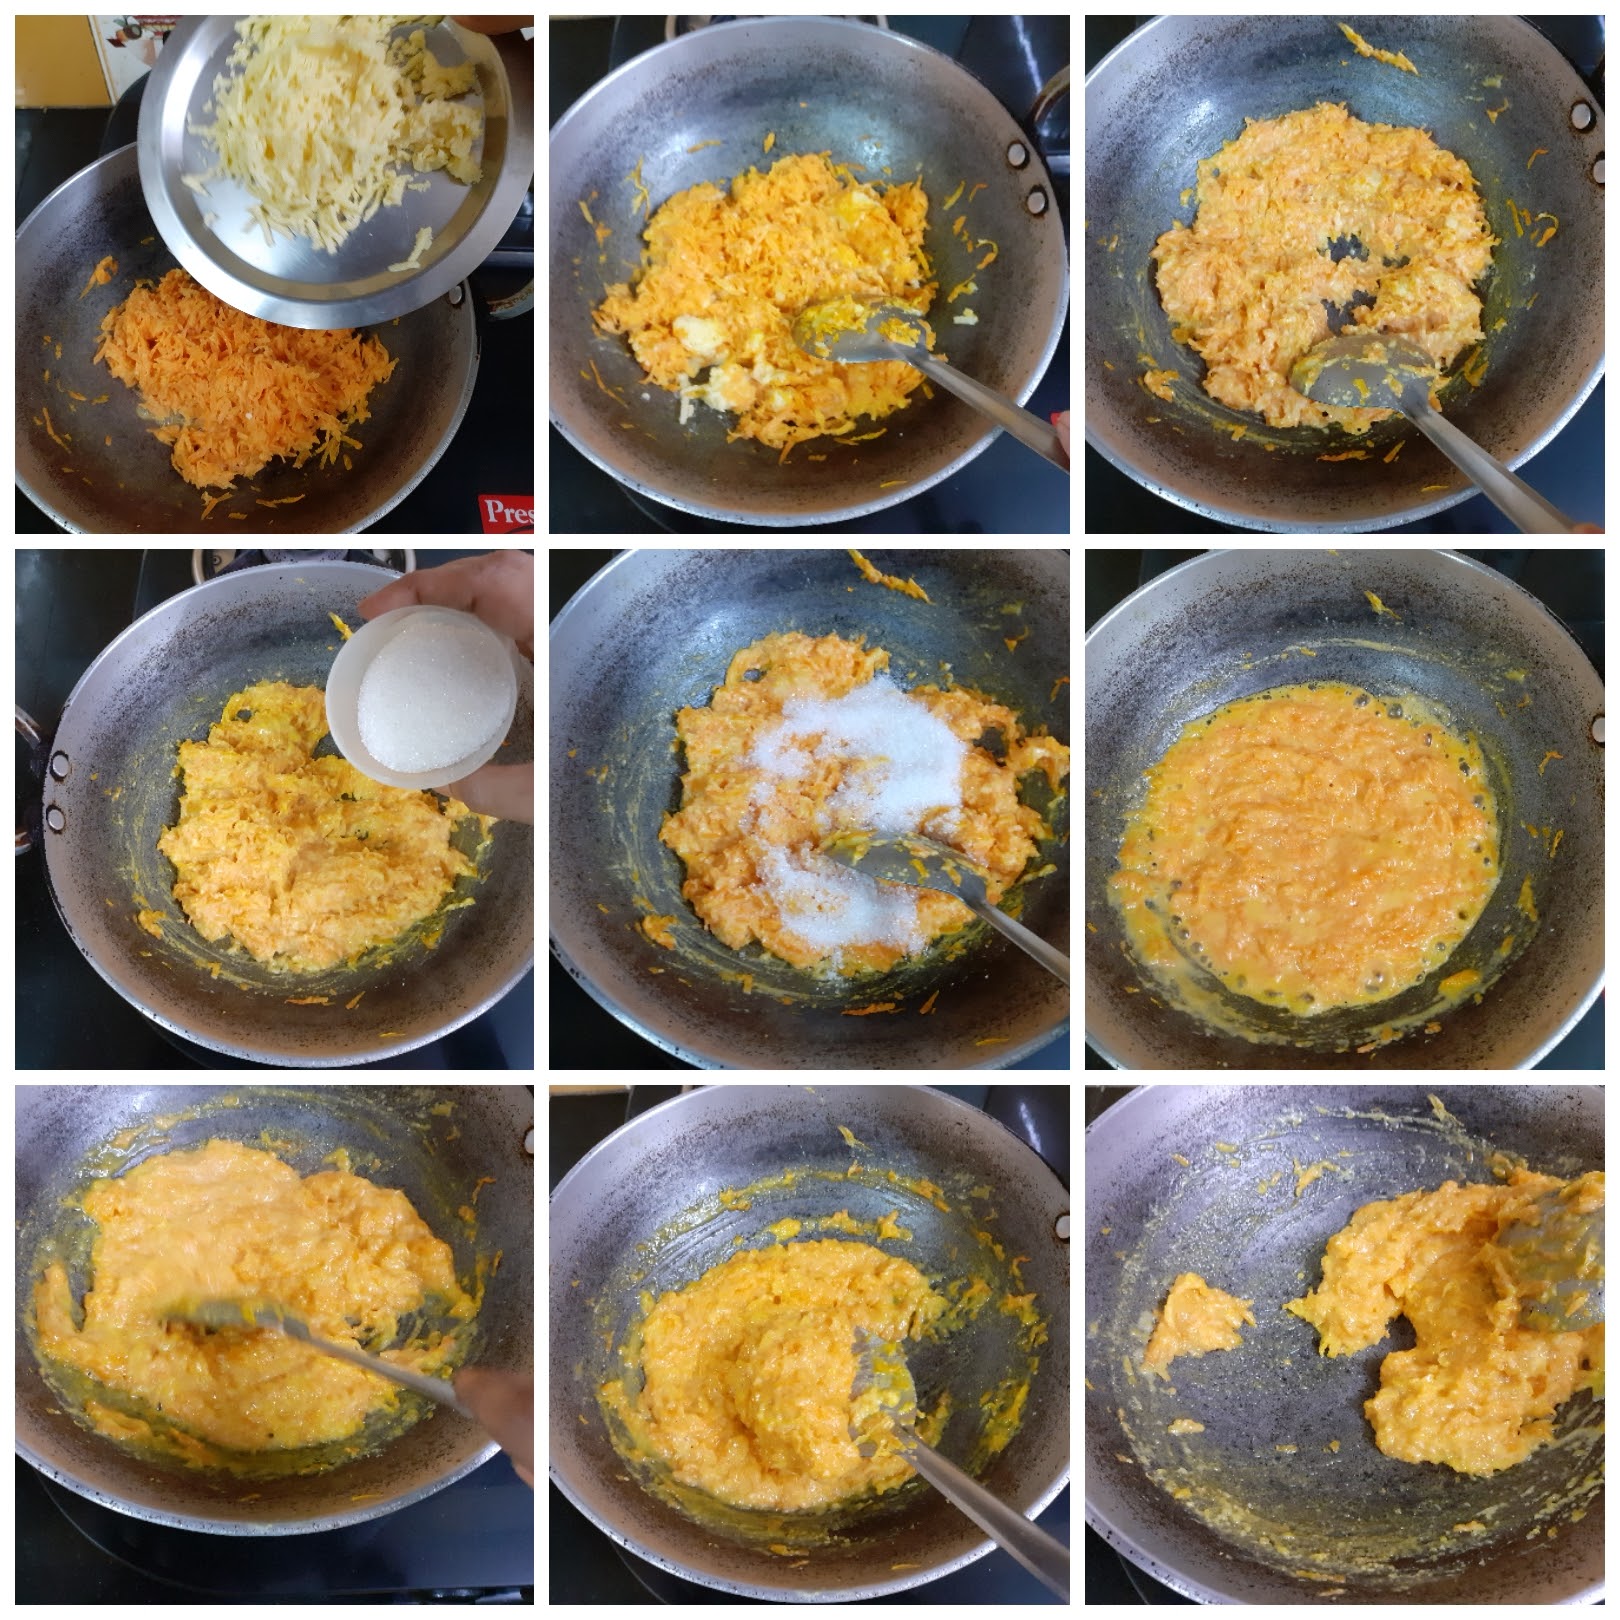
4. Another method to check for doneness of the mixture is to wet your hands, take a small amount of the carrot mixture, and try to form a ball. If the ball retains shape its time to transfer into the greased plate. Before transferring to a greased plate add cardamom powder and 2 tsp ghee.
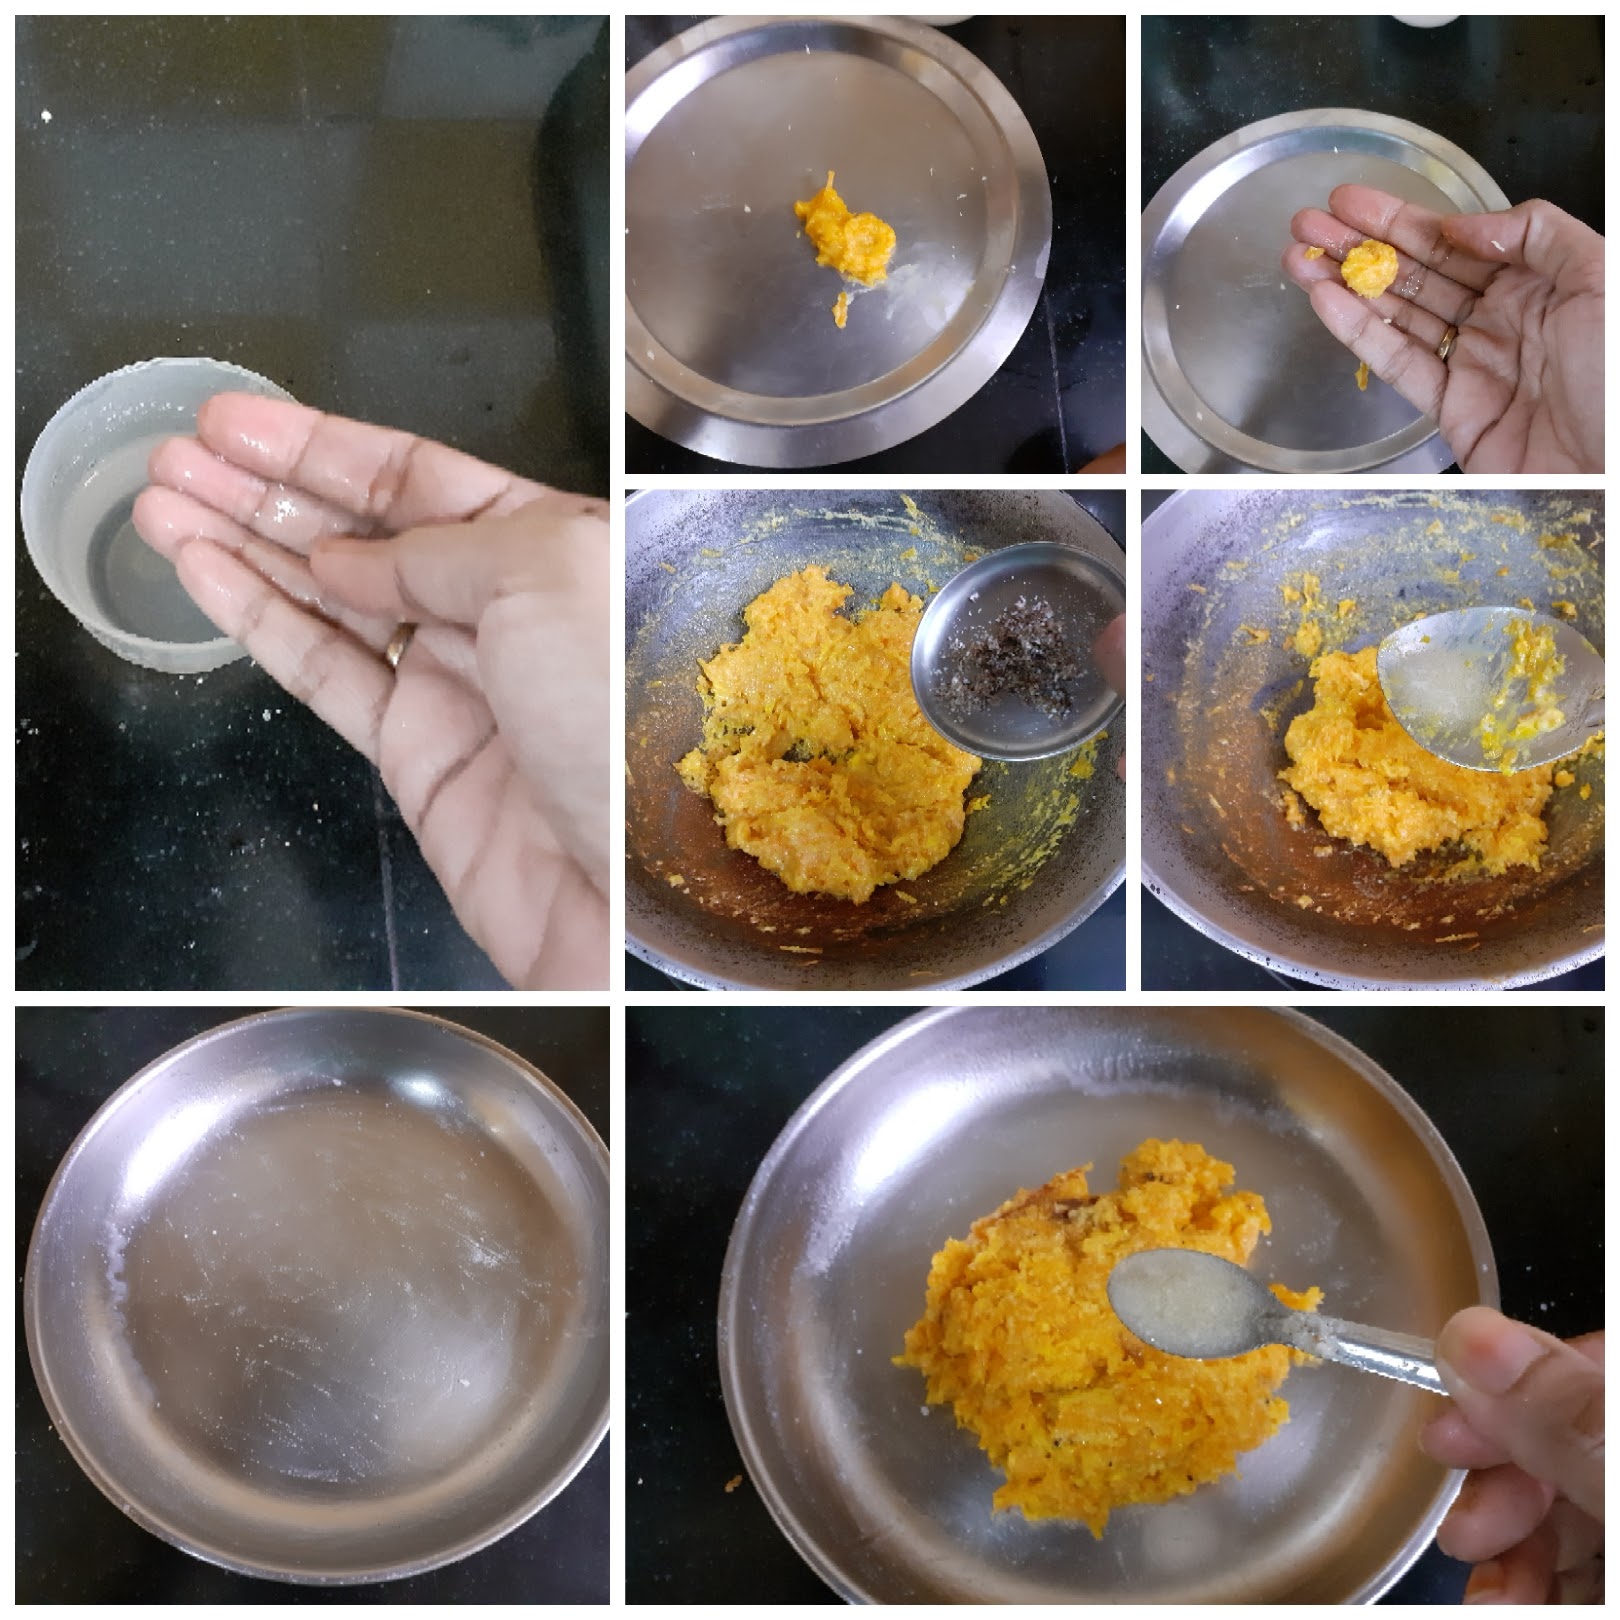
5. Spread the mixture evenly on the plate, sprinkle some chopped nuts on top, and press it gently with the ladle back or your palm. Put the plate into the fridge for 20 minutes. Bring it out, cut into diamonds or squares and it’s ready to serve.
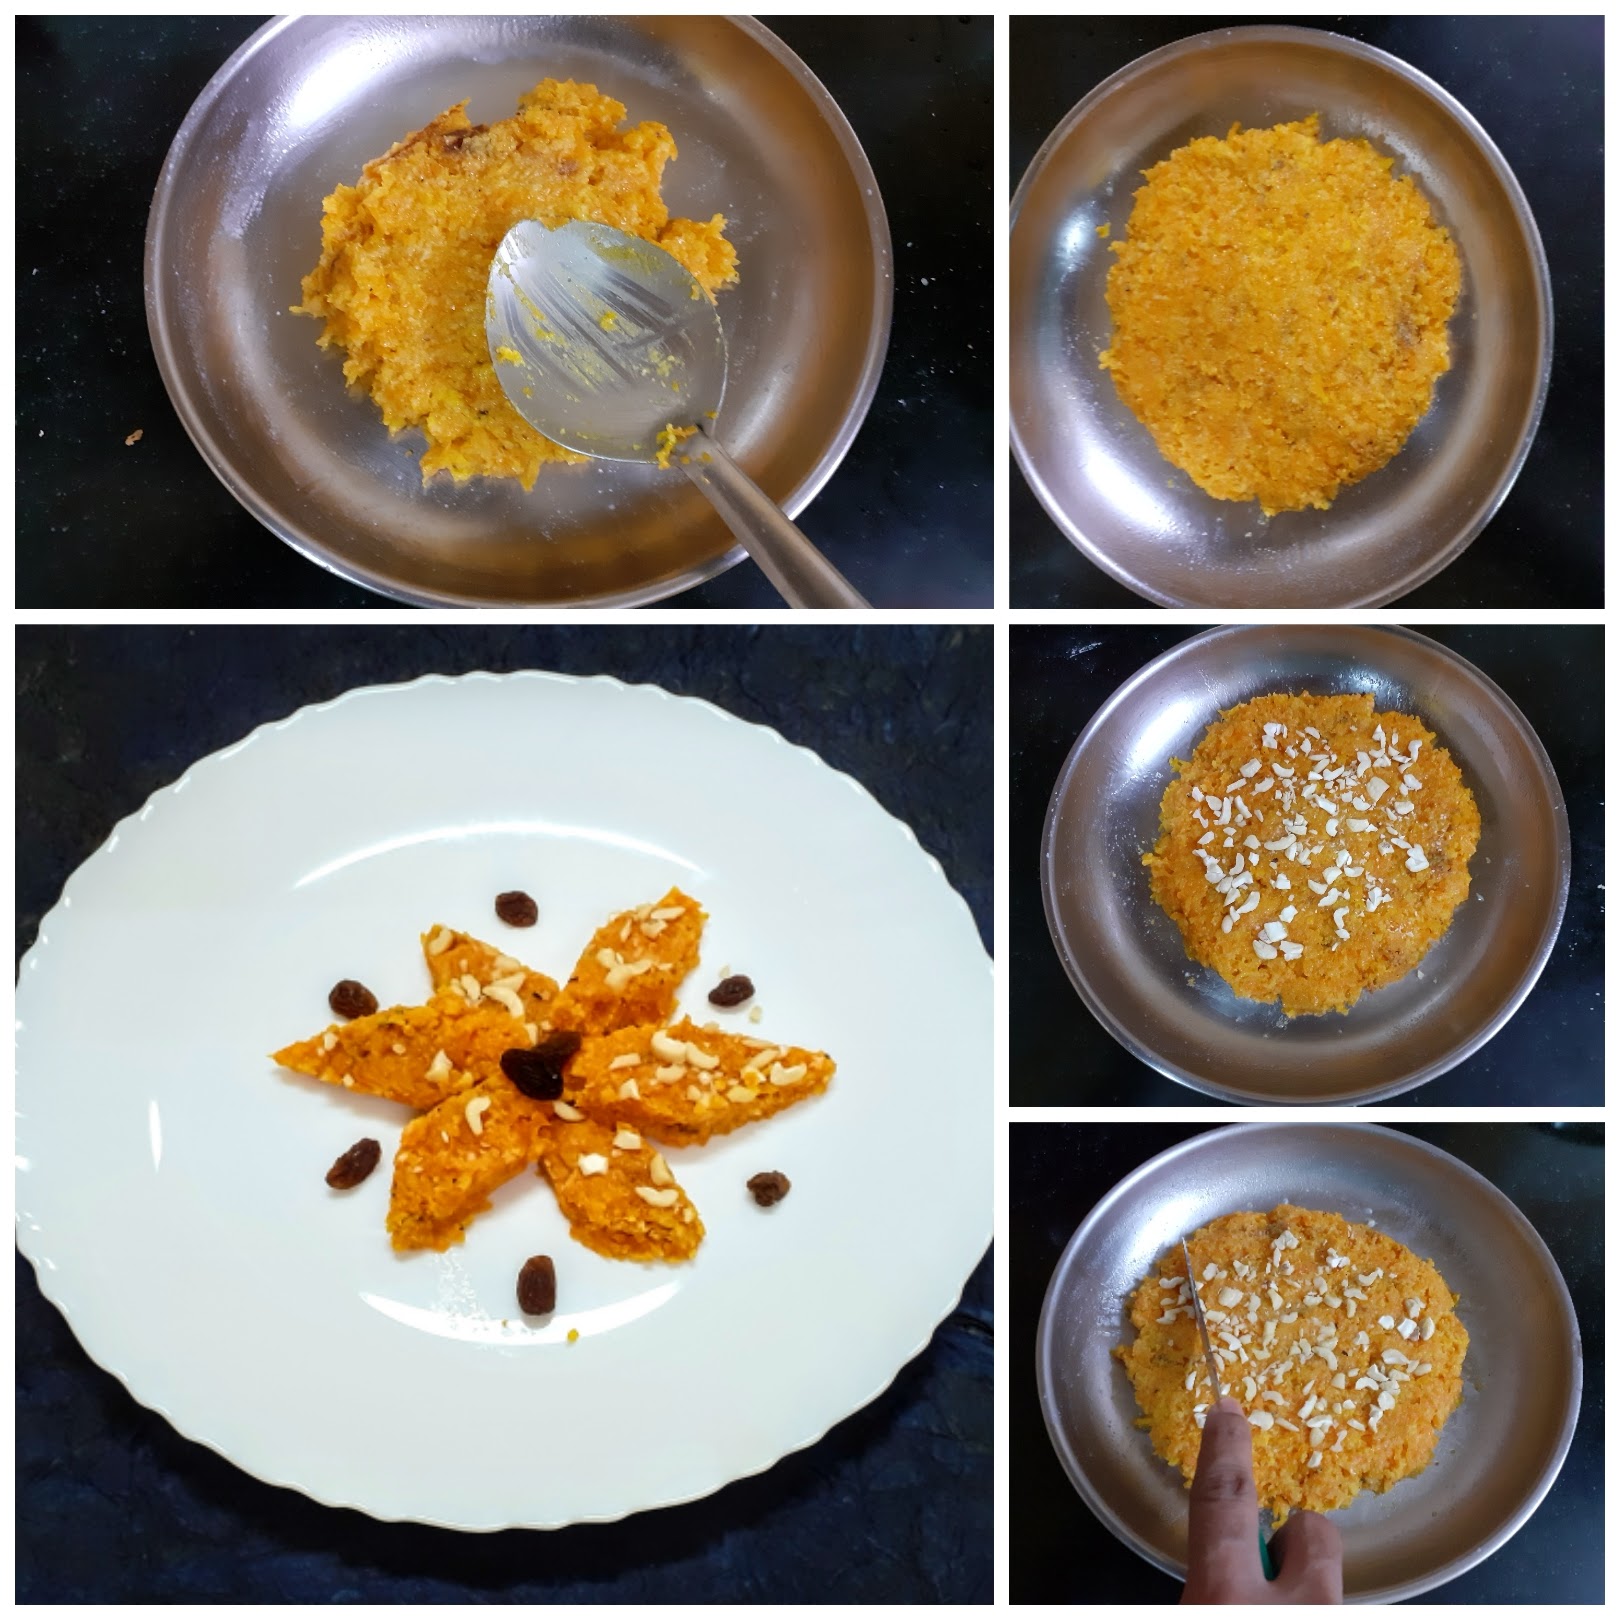
RECIPE VIDEO HERE ????
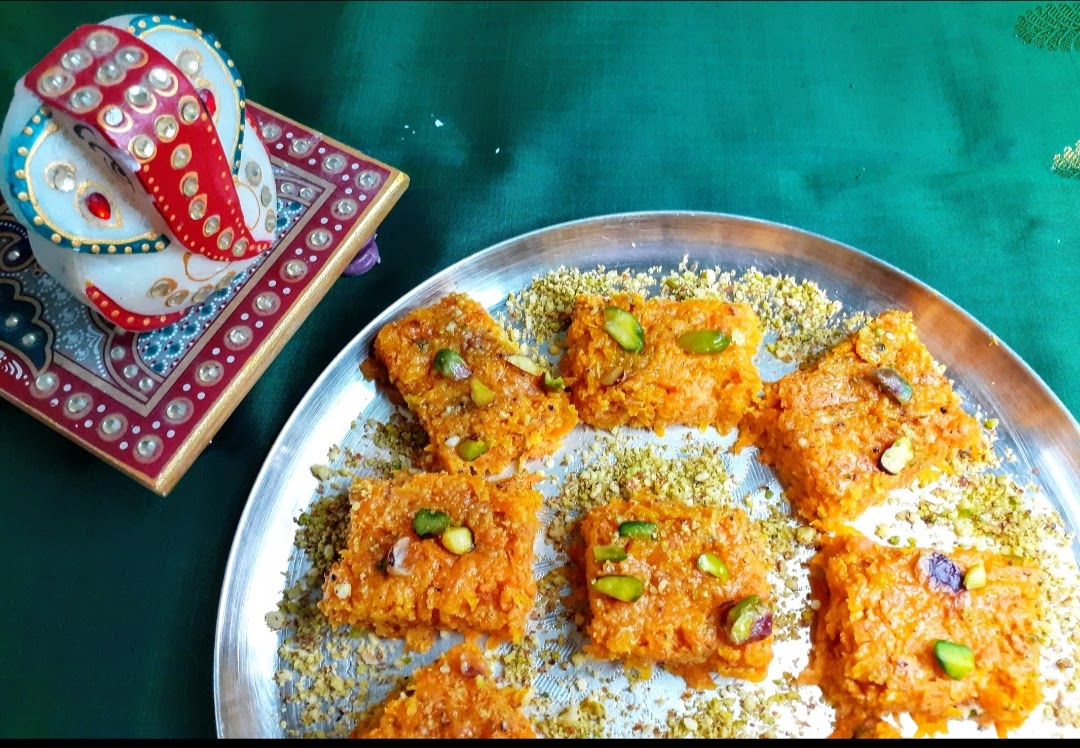
NOTES:
1. The process is not lengthy, but stirring from time to time is required.
2. Don’t want the Barfi? no worry- just don’t refrigerate, temper with dry fruits and nuts fried in ghee, and enjoy as Instant Gajar Halwa????.
3. I have not added any colour as the Carrots were so bright themselves. One can add food colour of they prefer a deeper colour.
4. Adding 2 tsp of ghee on the mixture before spreading on the plate, helps in even and smooth spreading. Alternately apply little ghee to the back of the ladle with which you will spread the mixture.
If you tried this recipe and liked it please comment below. I would love to hear from you. If you have a query about the recipe email us and ill respond as soon as I can.
Vegetable Manchurian (With Gravy)
Who doesn’t like Vegetable Manchurian? This is the most Indianised Chinese dish, that has been customized to the Indian palette. The dry version of this dish aka Vegetable Manchurian dry is one of the most popular Starters offered at all weddings, get-togethers, parties, and the like. This also happens to be my most favourite starter. I also have a recipe on this blog for Fried rice with these dry Manchurians, do check it out. The only difference is that I have used Cauliflowers instead of cabbage in the fried rice recipe. Fried rice and Manchurian with gravy are a match made in heaven, so do try out the combination from the recipes in my blog.
This is a no-fail recipe and turns out well every time that I make it, which is why I make it frequently. In this recipe, I have used 1 whole medium-sized cabbage( oh yes that’s how much we like this dish), one can customize it as per their requirements though.
While you are here please do check out my other Indo Chinese recipes like Schezwan fried rice(with Soya chunks), Cauliflower fried rice and other dessert recipes like Pineapple jam tarts and Apple crumble.
Here is the recipe for Vegetable Manchurian(with gravy) for you-

Ingredients for the Manchurian dough:
Cabbage 1 medium-sized (shredded)
Carrot 1 (shredded)
Spring onions 1 bunch chopped finely
Onion 1 finely chopped
Green chillies 2 finely chopped
Ginger 1/2 inch piece finely chopped
Salt as per taste
Pepper powder 1 tsp
Maida 1/2 to 3/4 of a cup
Rice flour 1/4 cup
Ingredients for the gravy:
Garlic 3 cloves finely chopped(reserve some for garnish)
Ginger 1/2 inch piece
Green chillies 2 finely chopped
Spring onion greens 1 tbsp finely chopped
Onion 1 small finely chopped
Tomato puree 1/4 cup or puree of 1 large Tomato
Green Capsicum 1/4 of a whole chopped medium-sized
Red Bell pepper 1/4 of a whole chopped medium-sized
Tomato sauce 2 tbsp
Chilli sauce 2 tsp(add for more spice)
Soy sauce 1 tbsp
Vinegar 1 tbsp
Cornflour 2 tbsp
Salt as required
Pepper powder 1tsp
Oil for frying the Manchurian
Directions to make the Manchurian:
In a bowl take the shredded Cabbage, add to it rest of the vegetables like shredded carrot, spring onions, onions, green chillies and ginger. Add salt and pepper powder and combine well using your fingers. Now add Maida/refined flour, followed by rice flour and combine nicely. It needn’t become a dough, but you should be able to form a ball that doesn’t go flat or break. Now divide the mixture into lemon sized balls( I got around 20 of them with this quality). Heat oil in a wok or Kadai and fry the balls in medium heat until a golden brown. Keep them aside.
Directions for making the gravy:
Heat oil in a pan and add the finely chopped green chillies, ginger and garlic to it. Saute for 30 seconds. Now add the spring onion greens and saute. Add the onions and continue to saute, until the sweat a bit. Remember all sauteeing to be done in high heat and with constant stirring. Now add the tomato puree and cook for a minute. Add salt and pepper powder and continue to cook for another minute. When the raw smell from the tomato puree is gone, drop in the both the Red and Green capsicum. Saute for another 30 seconds. You can add a teaspoon of sugar at this stage(optional). Now add the tomato sauce, followed by the red chilli sauce. Stir nicely. Now add the soya sauce followed by Vinegar, stir and cook for a minute. Prepare the cornflour mix by adding 1/2 cup water to 2 tbsp of cornflour. Pour this mix into the prepared sauce and stir continuously for a minute. Now dilute the sauce to the consistency you prefer by adding water. I have added 1 cup as I like a thick gravy. Simmer for 2 minutes on low heat and the gravy is ready. Now arrange the Manchurian balls in a serving dish and pour the gravy over it. Enjoy hot with any Fried rice varieties. Bon Appetit.
STEPWISE RECIPE FOLLOWS:
1. In a bowl take the shredded Cabbage, add to it rest of the vegetables like shredded carrot, spring onions, onions, green chillies and ginger. Add salt and pepper powder and combine well using your fingers.
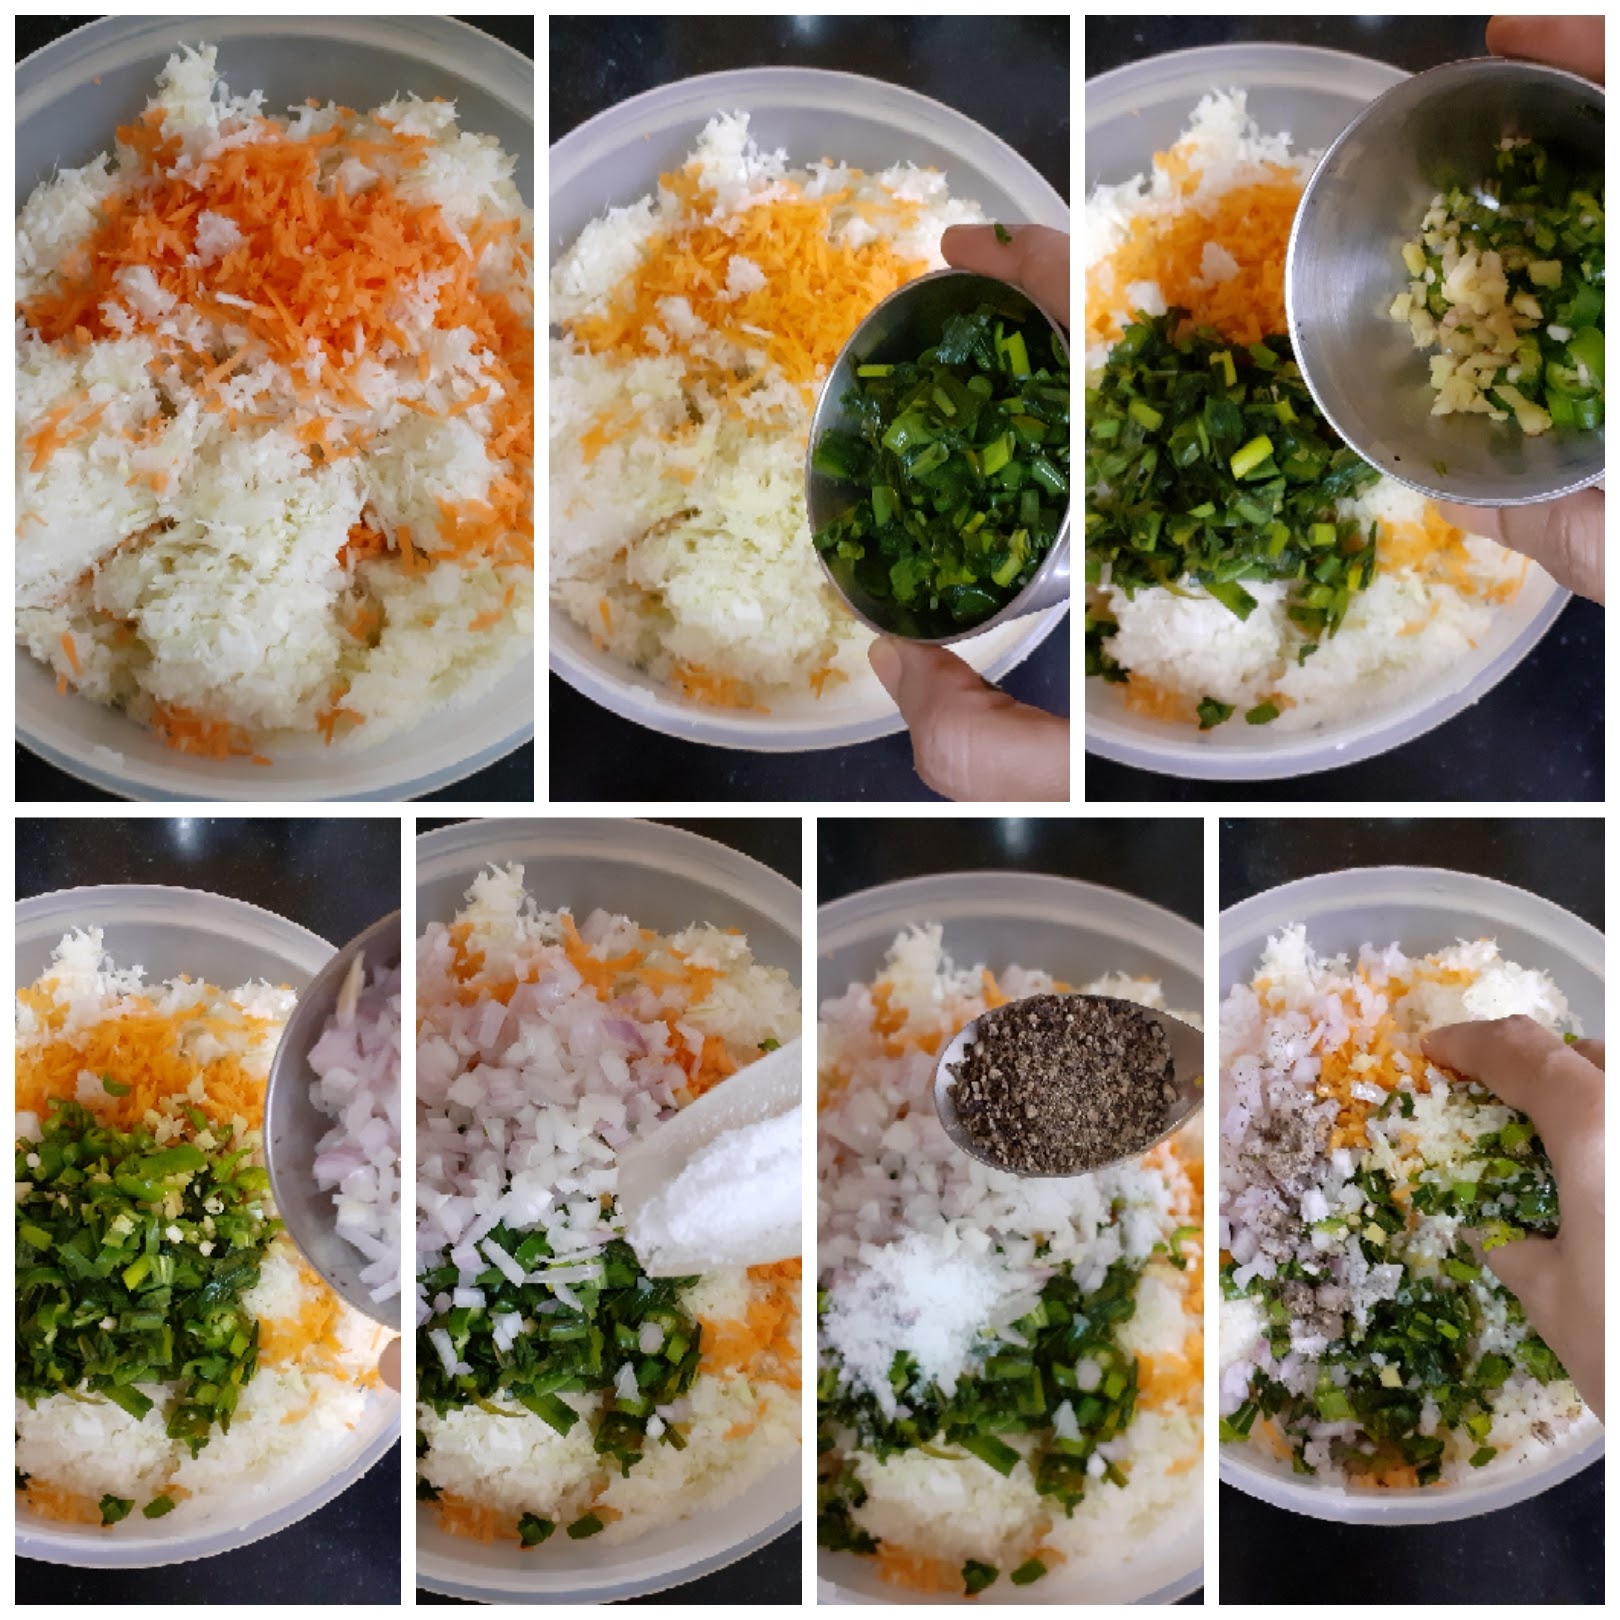
2. Now add Maida/refined flour, followed by rice flour and combine nicely. Now divide the mixture into lemon sized balls( I got around 20 of them with this quality). Heat oil in a wok or Kadai and fry the balls in medium heat until a golden brown. Keep them aside.
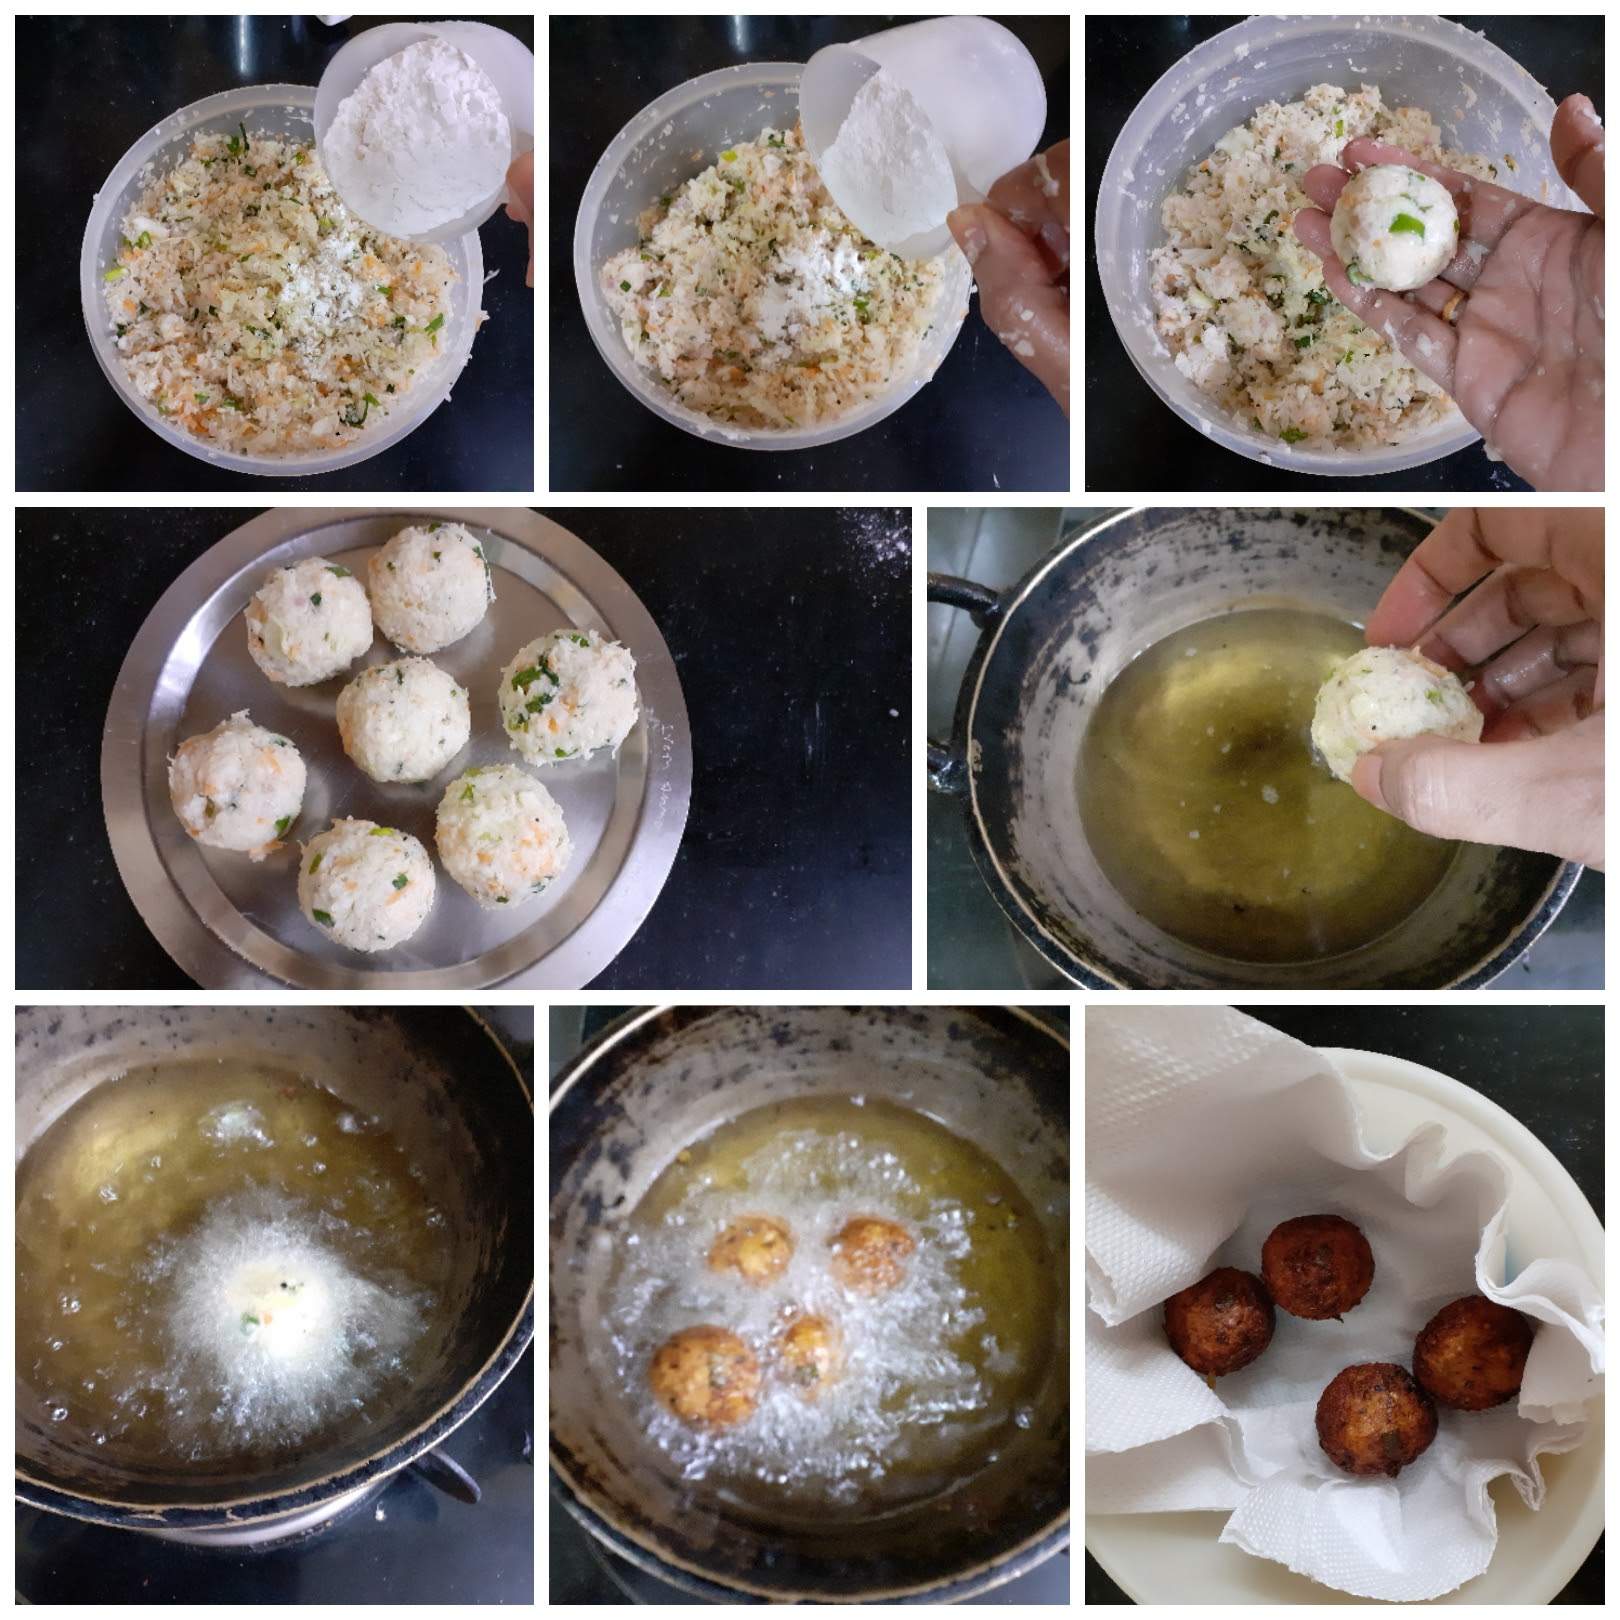
3. Heat oil in a pan and add the finely chopped green chillies, ginger and garlic to it. Saute for 30 seconds. Now add the spring onion greens and saute.

4. Add the onions and continue to saute, until the sweat a bit. Remember all sauteeing to be done in high heat and with constant stirring. Now add the tomato puree and cook for a minute. Add salt and pepper powder and continue to cook for another minute.
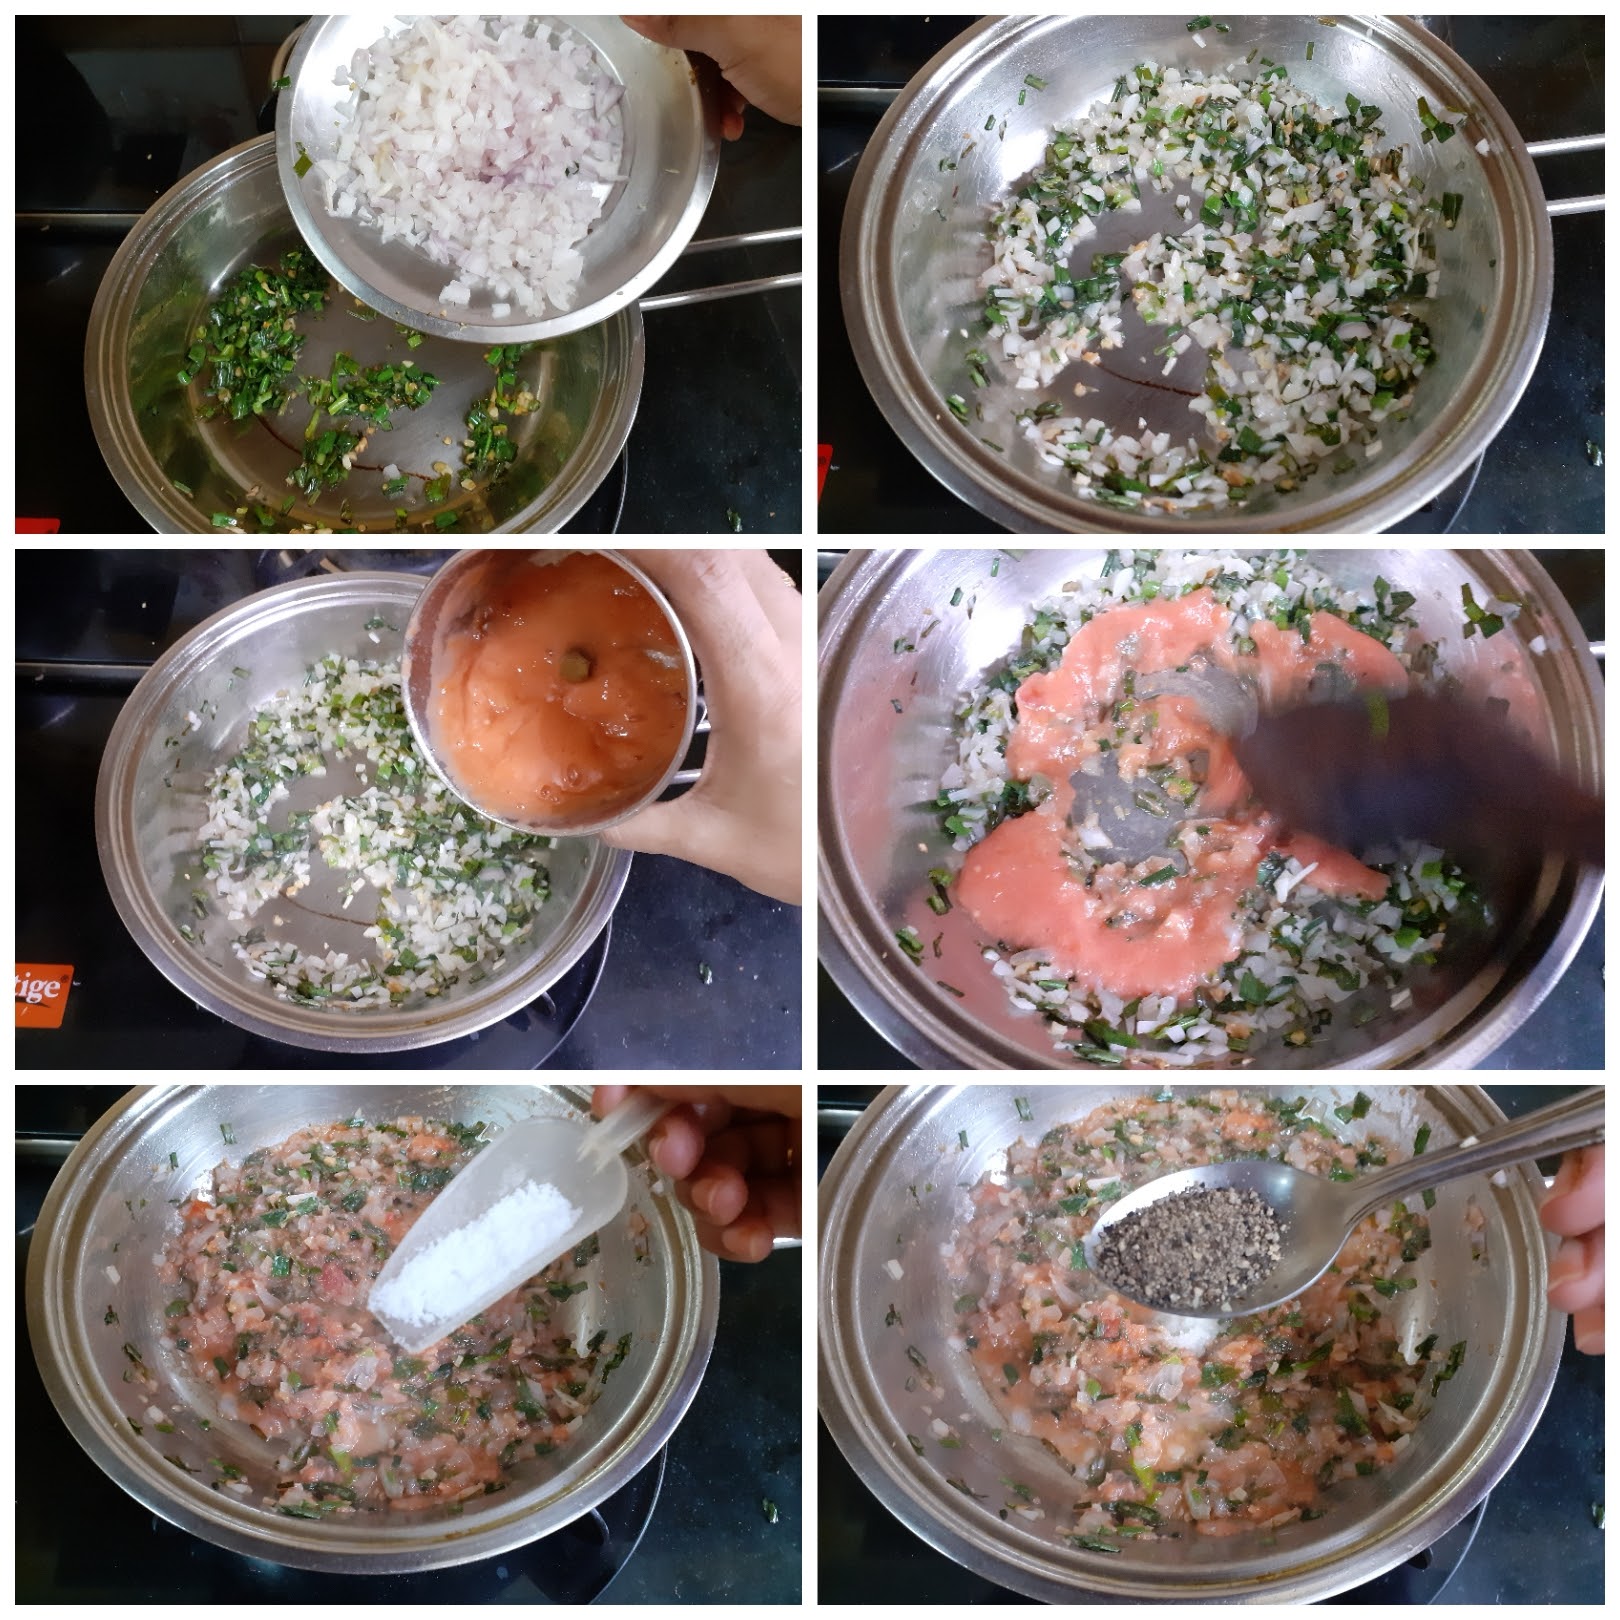
5. When the raw smell from the tomato puree is gone, drop in the both the Red and Green capsicum. Saute for another 30 seconds. Now add the tomato sauce, followed by the red chilli sauce. Stir nicely. Now add the soya sauce followed by Vinegar, stir and cook for a minute.
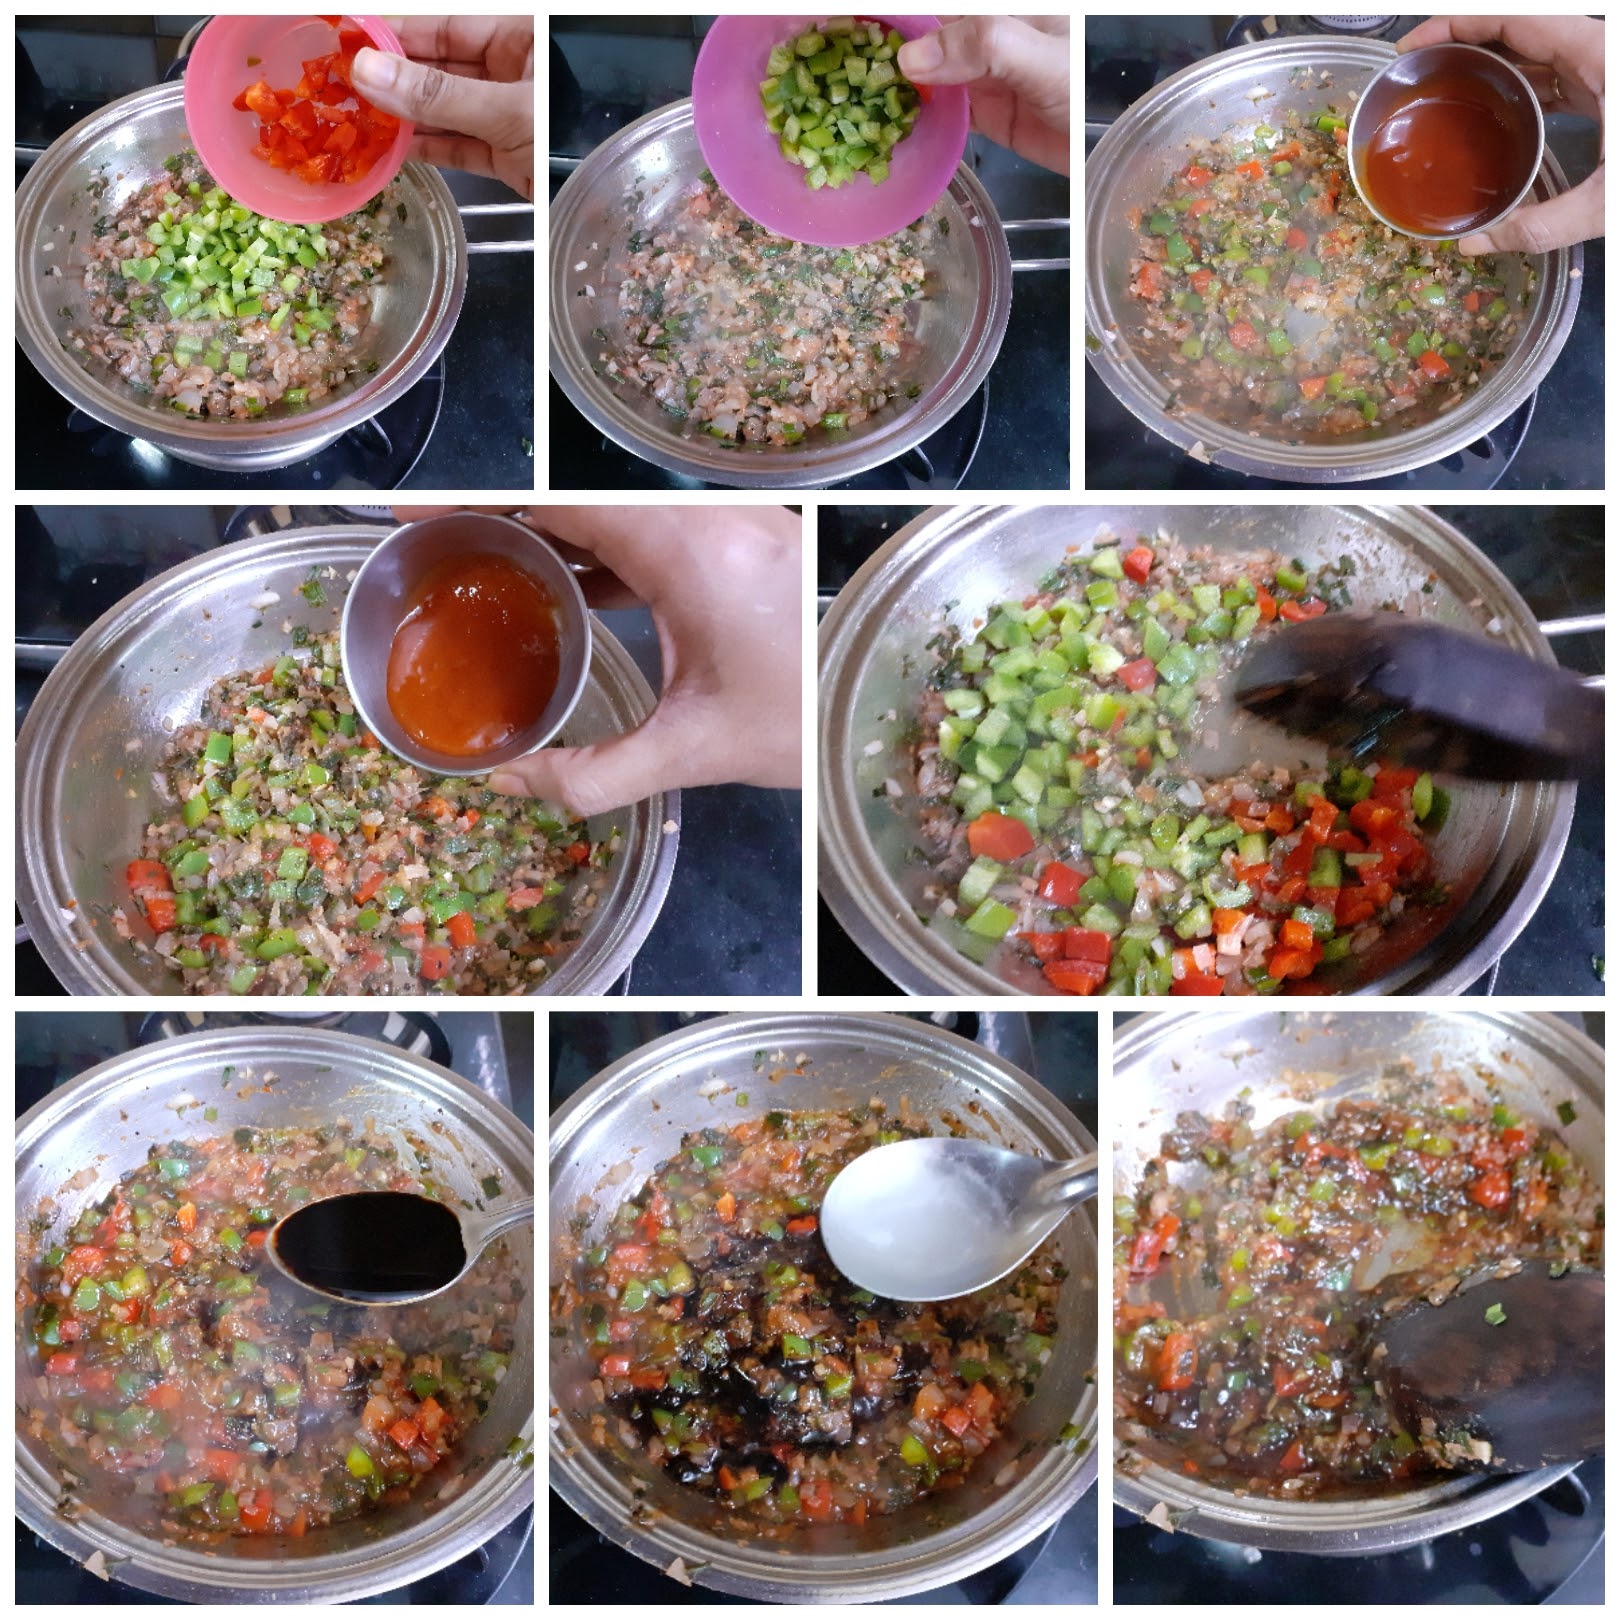
6. Prepare the cornflour mix by adding 1/2 cup water to 2 tbsp of cornflour. Pour this mix into the prepared sauce and stir continuously for a minute.
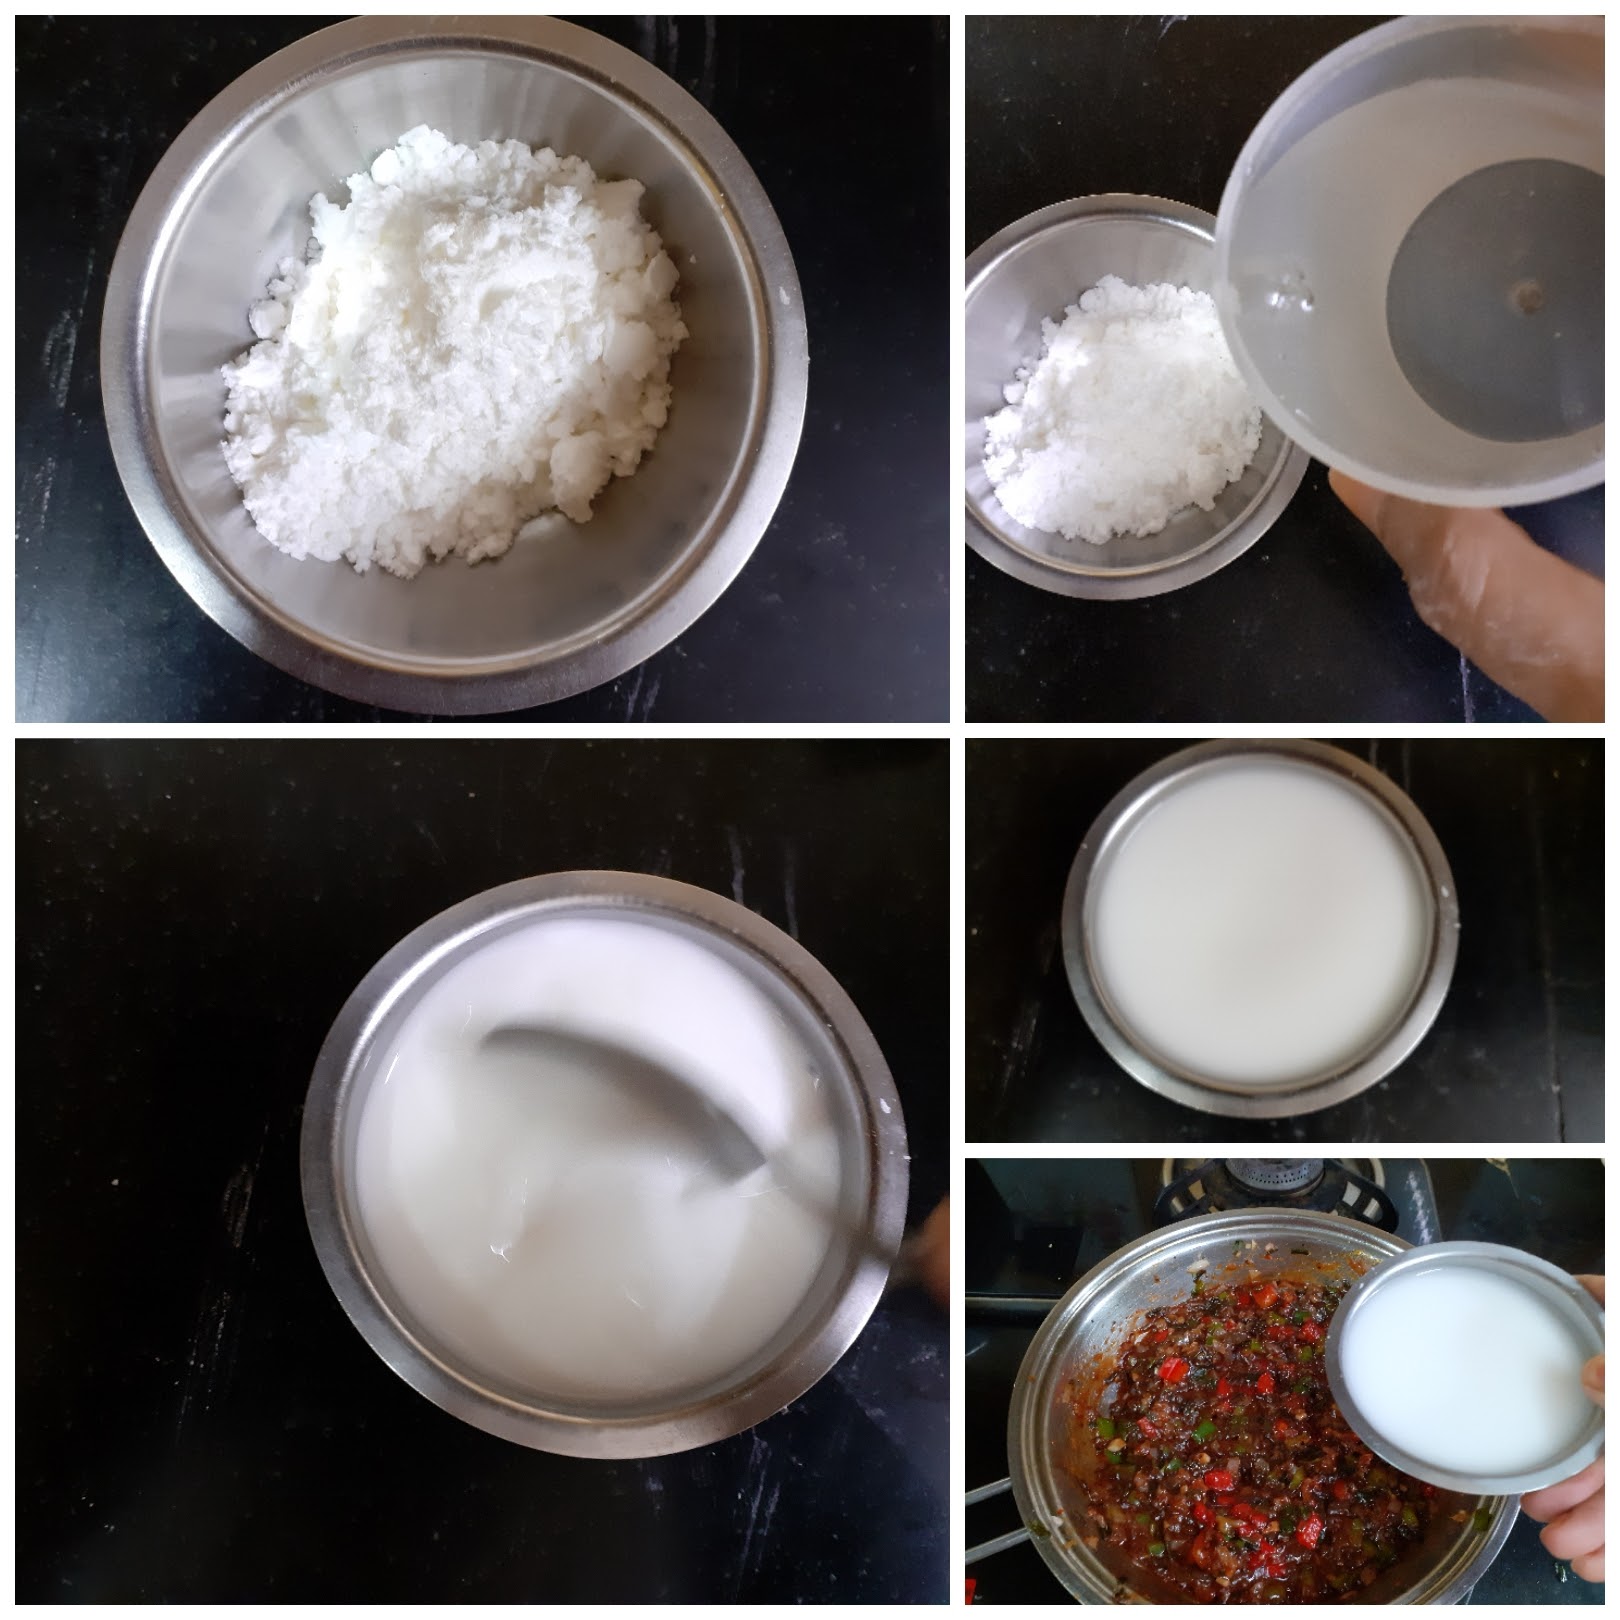
7. Now dilute the sauce to the consistency you prefer by adding water. Simmer for 2 minutes on low heat and the gravy is ready. Now arrange the Manchurian balls in a serving dish and pour the gravy over it. Enjoy hot with any Fried rice varieties.
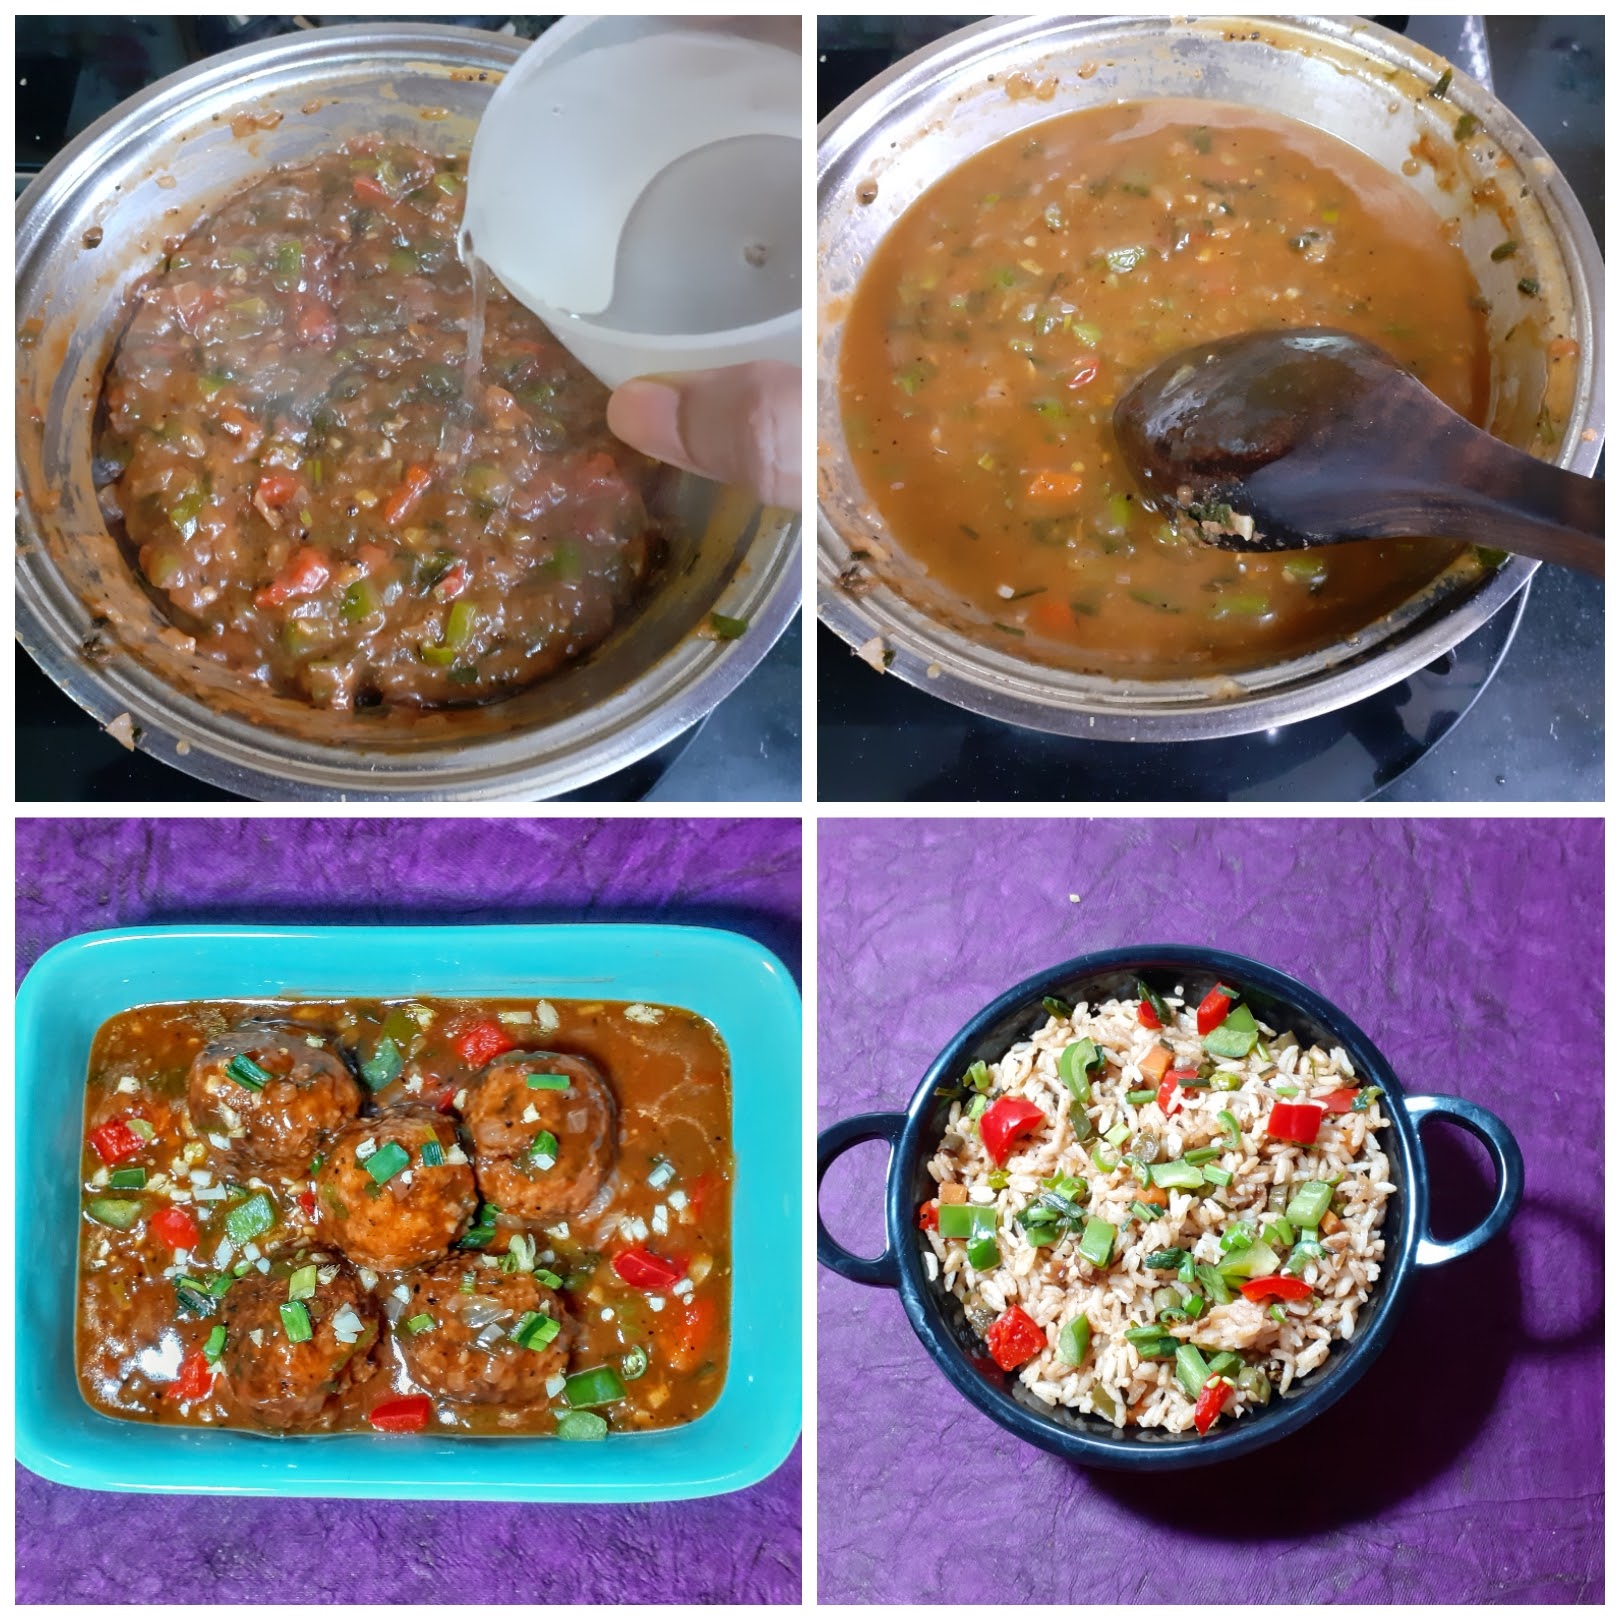
Notes:
1. The gravy for any wet Manchurian is the same, so one can experiment with other vegetables like Cauliflower, Potato, Brocolli, Soya Chunks beside others. If you make Manchurian with any other interesting vegetable do let us know. We love learning.
2. I usually make a slightly thick gravy as that’s how we like this dish. If you prefer a lighter one, feel free to dilute the gravy by adding little warm water.
3. If you make an excess of the Manchurian balls, don’t fret, as you can mix them ina onion tomato paste, add some spices, add Schezwan sauce and get it to the consistency of a dry paste. Toss in the balls into this paste, mix nicely and stir fry and you have a dry Manchurian at hand???? to relish.
If you tried this recipe and liked it please comment below. I would love to hear from you. If you have a query about the recipe email us and ill respond as soon as I can.
Roasted Eggplant (2 Ways)
This roasted eggplant subji is the simplest to make as I roast/bake it in the oven. The actual recipe involves deep-frying this in oil, but these days most of us want food that is light on the oil. Moreover, I feel when deep-fried these Brinjals/Eggplants take in a lot of oil. So the best way to cook them is over a pan or in the oven.
Here I am giving both the methods so one can choose whichever is convenient for them. What I do is bake one batch and pan-fry the other. Both methods yield the same result. Baking takes a little longer, though with a little less oil than pan-frying. So while one batch is baking I get done two pan-fried batches. Does that sound weird????? Well, I do this because the roasted Eggplant subji is a family favourite and just one batch of baking is not enough????.
I Have used the big globe type Eggplants/Brinjals here(Bharta Baingan). The small ones can also be used but the bake time might vary. I have not tried baking with the small Eggplants/brinjals.
While you are here I request you to check out my other subji recipes like- Creamy Palak in Coconut Milk, Stuffed Karelas, Drumstick Curry, Kadai Paneer, Beans Paruppu Usili, and more…
Here is the recipe for Roasted Eggplant/Baingan for you-

Ingredients:
Eggplants(globe/big/Bharta Baingan) 2 or 3
Oil 2 tbsp
Red chilli powder 2 tsp(divided)
Turmeric powder 1 tsp(divided)
Salt as required
Coriander powder(optional) 2 tsp
Mustard seeds 1 tsp
Jeera/Cumin 1 tsp
Curry leaves a few
Directions for Prepping the Brinjal/Eggplants:
Wash the Eggplants well and cut them to Slices that are of medium thickness. Sprinkle some salt on them and mix well, so that the salt gets coated evenly on all slices. Leave to rest for 20 minutes. Now rinse the sliced Eggplants and pat dry them on a towel. Set aside.
Directions for Masala paste:
Take 1 tsp red chilli powder, 1/2 tsp turmeric powder and required salt in a small bowl. Add 1 tbsp oil and make a paste. I suggest you make the paste as required, depending on the number of Brinjal/Eggplant slices. The given quantity will cover 10 big slices approximately. If it gets over, make the paste again. The quantities given in ingredients is for 2 batches.
Directions for Baking the Eggplants:
Preheat oven at 180 C for 10 minutes. Take a baking tray and grease with a thin film of oil. Arrange the Eggplant/Baingan slices in the tray in 2 layers such that they are not crowded and the lower ones get some heat(refer picture). Take a brush and coat all slices with the masala paste. Repeat on the other side. Put the tray in the oven and bake at 200 C for 10 minutes. Remove, flip them around and bake again for 10- 15 minutes. Remove and transfer to a bowl. Repeat for all slices.
Directions for Pan-frying the Eggplants:
Heat a Tava/Girdle. Grease with a little oil. Brush the Eggplant slices with the Masala paste and arrange them on the girdle. Drizzle 1 tsp oil on the Tava for quick cooking. Cook on one side until crisp and flip the slices around, drizzle another teaspoon oil and cook until crisp. Remove from girdle to a separate vessel. repeat for all slices.
Tempering:
In a small Kadai take 2 tsp oil and heat. Add mustard seeds, when they crackle add the Jeera/Cumin seeds followed by the curry leaves. Pour this tempering over the baked/pan-fried Brinjals. The Roasted Brinjal/Eggplants are ready to serve with Rotis(flatbread), Dal Chawal, Kadi Chawal and more. Enjoy. Bon Appetit.
STEPWISE RECIPE FOLLOWS:
1. Wash the Eggplants well and cut them to Slices that are of medium thickness. Sprinkle some salt on them and mix well, so that the salt gets coated evenly on all slices. Leave to rest for 20 minutes. Now rinse the sliced Eggplants and pat dry them on a towel. Set aside.
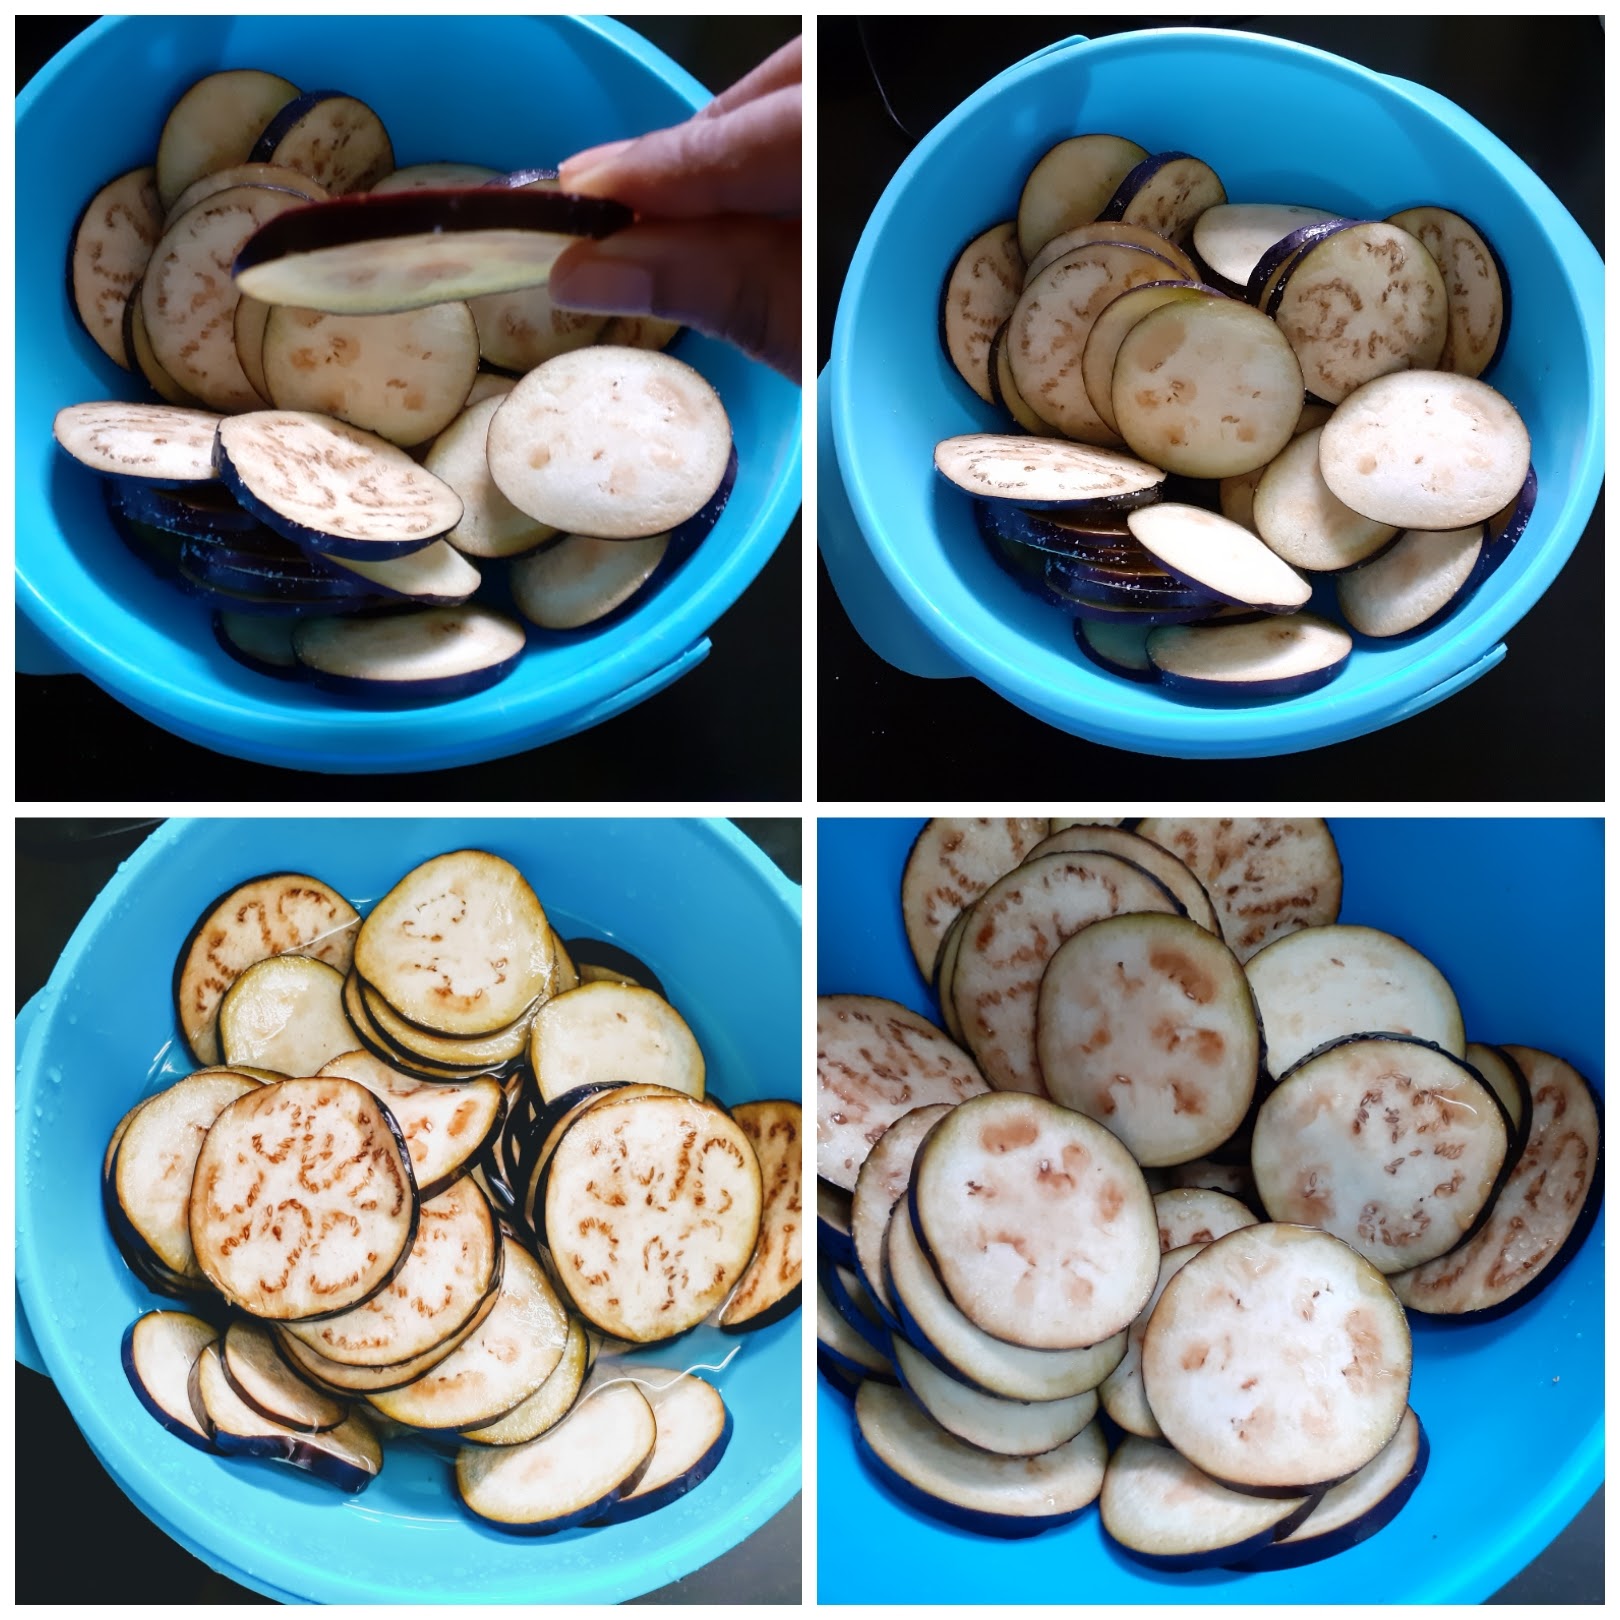
2.Take 1 tsp red chilli powder, 1/2 tsp turmeric powder and required salt in a small bowl. Add 1 tbsp oil and make a paste.
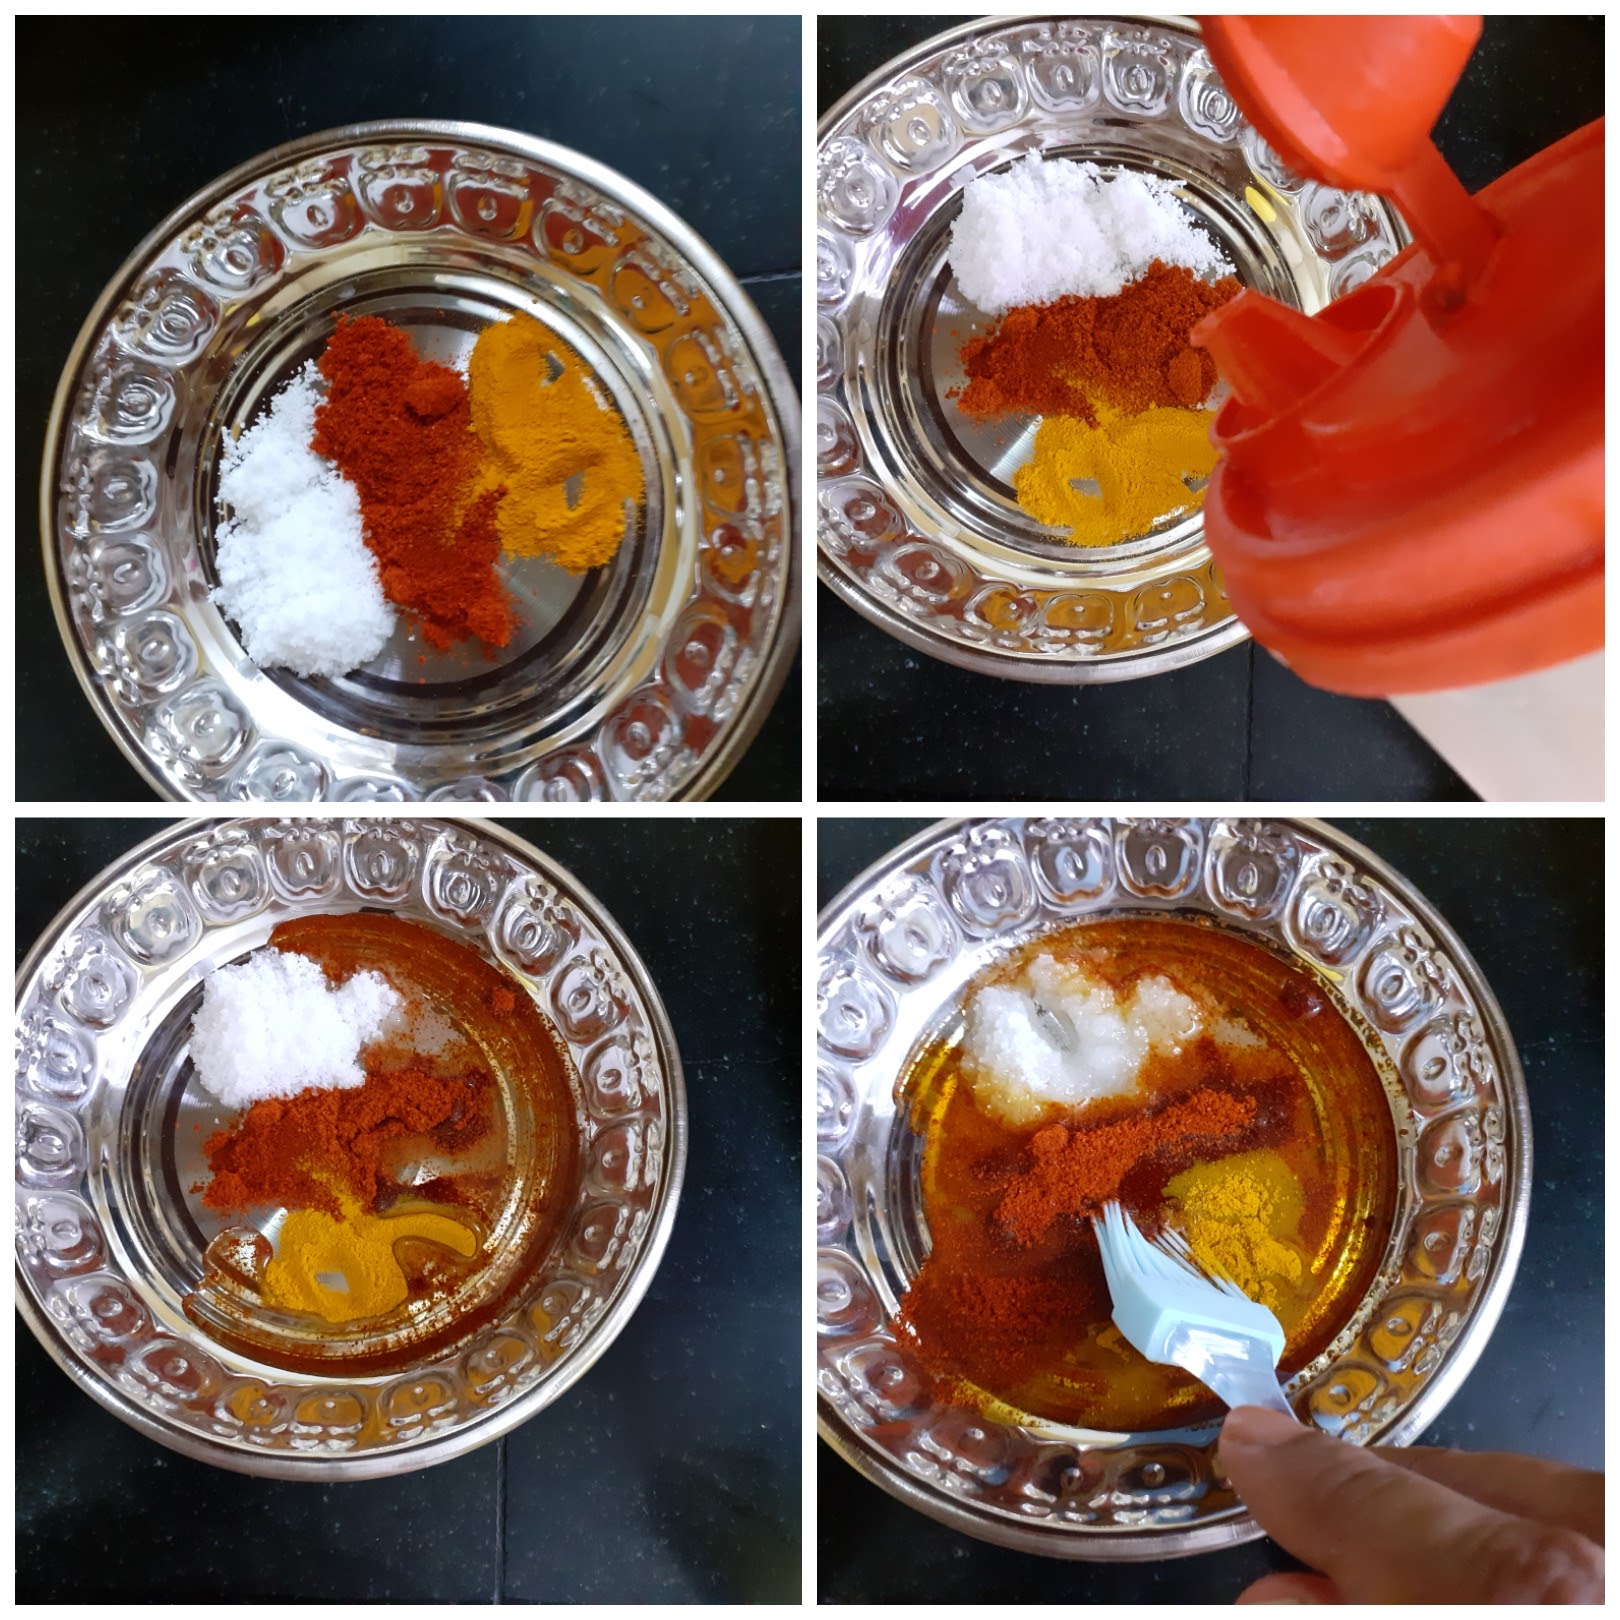
3. For baking- Preheat oven at 180 C for 10 minutes. Take a baking tray and grease with a thin film of oil. Arrange the Eggplant/Baingan slices in the tray in 2 layers such that they are not crowded and the lower ones get some heat(refer picture).
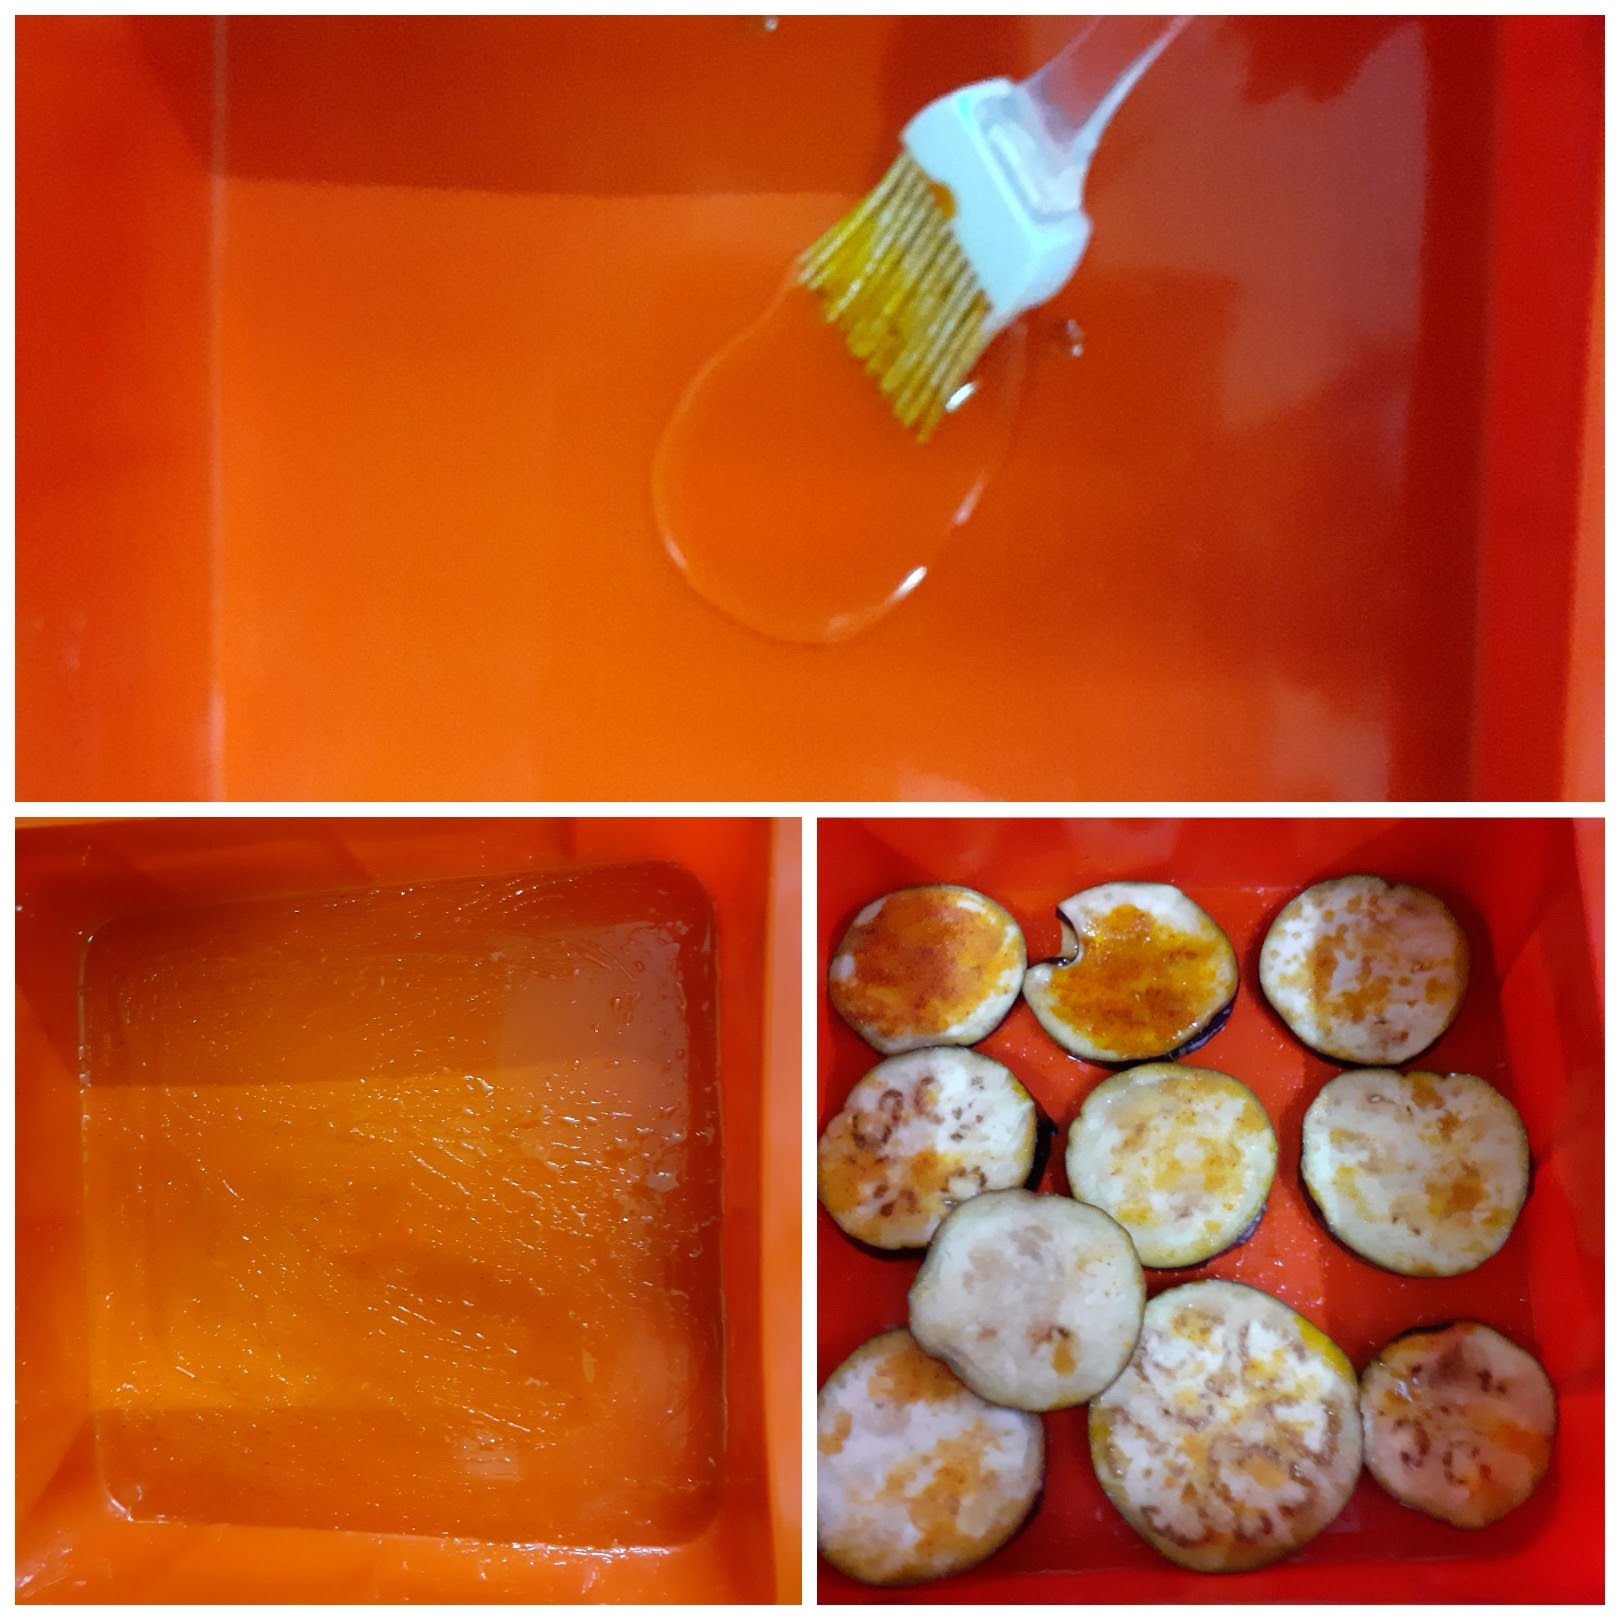
4. Take a brush and coat all slices with the masala paste. Repeat on the other side. Put the tray in the oven and bake at 200 C for 10 minutes. Remove, flip them around and bake again for 10- 15 minutes. Remove and transfer to a bowl. Repeat for all slices.
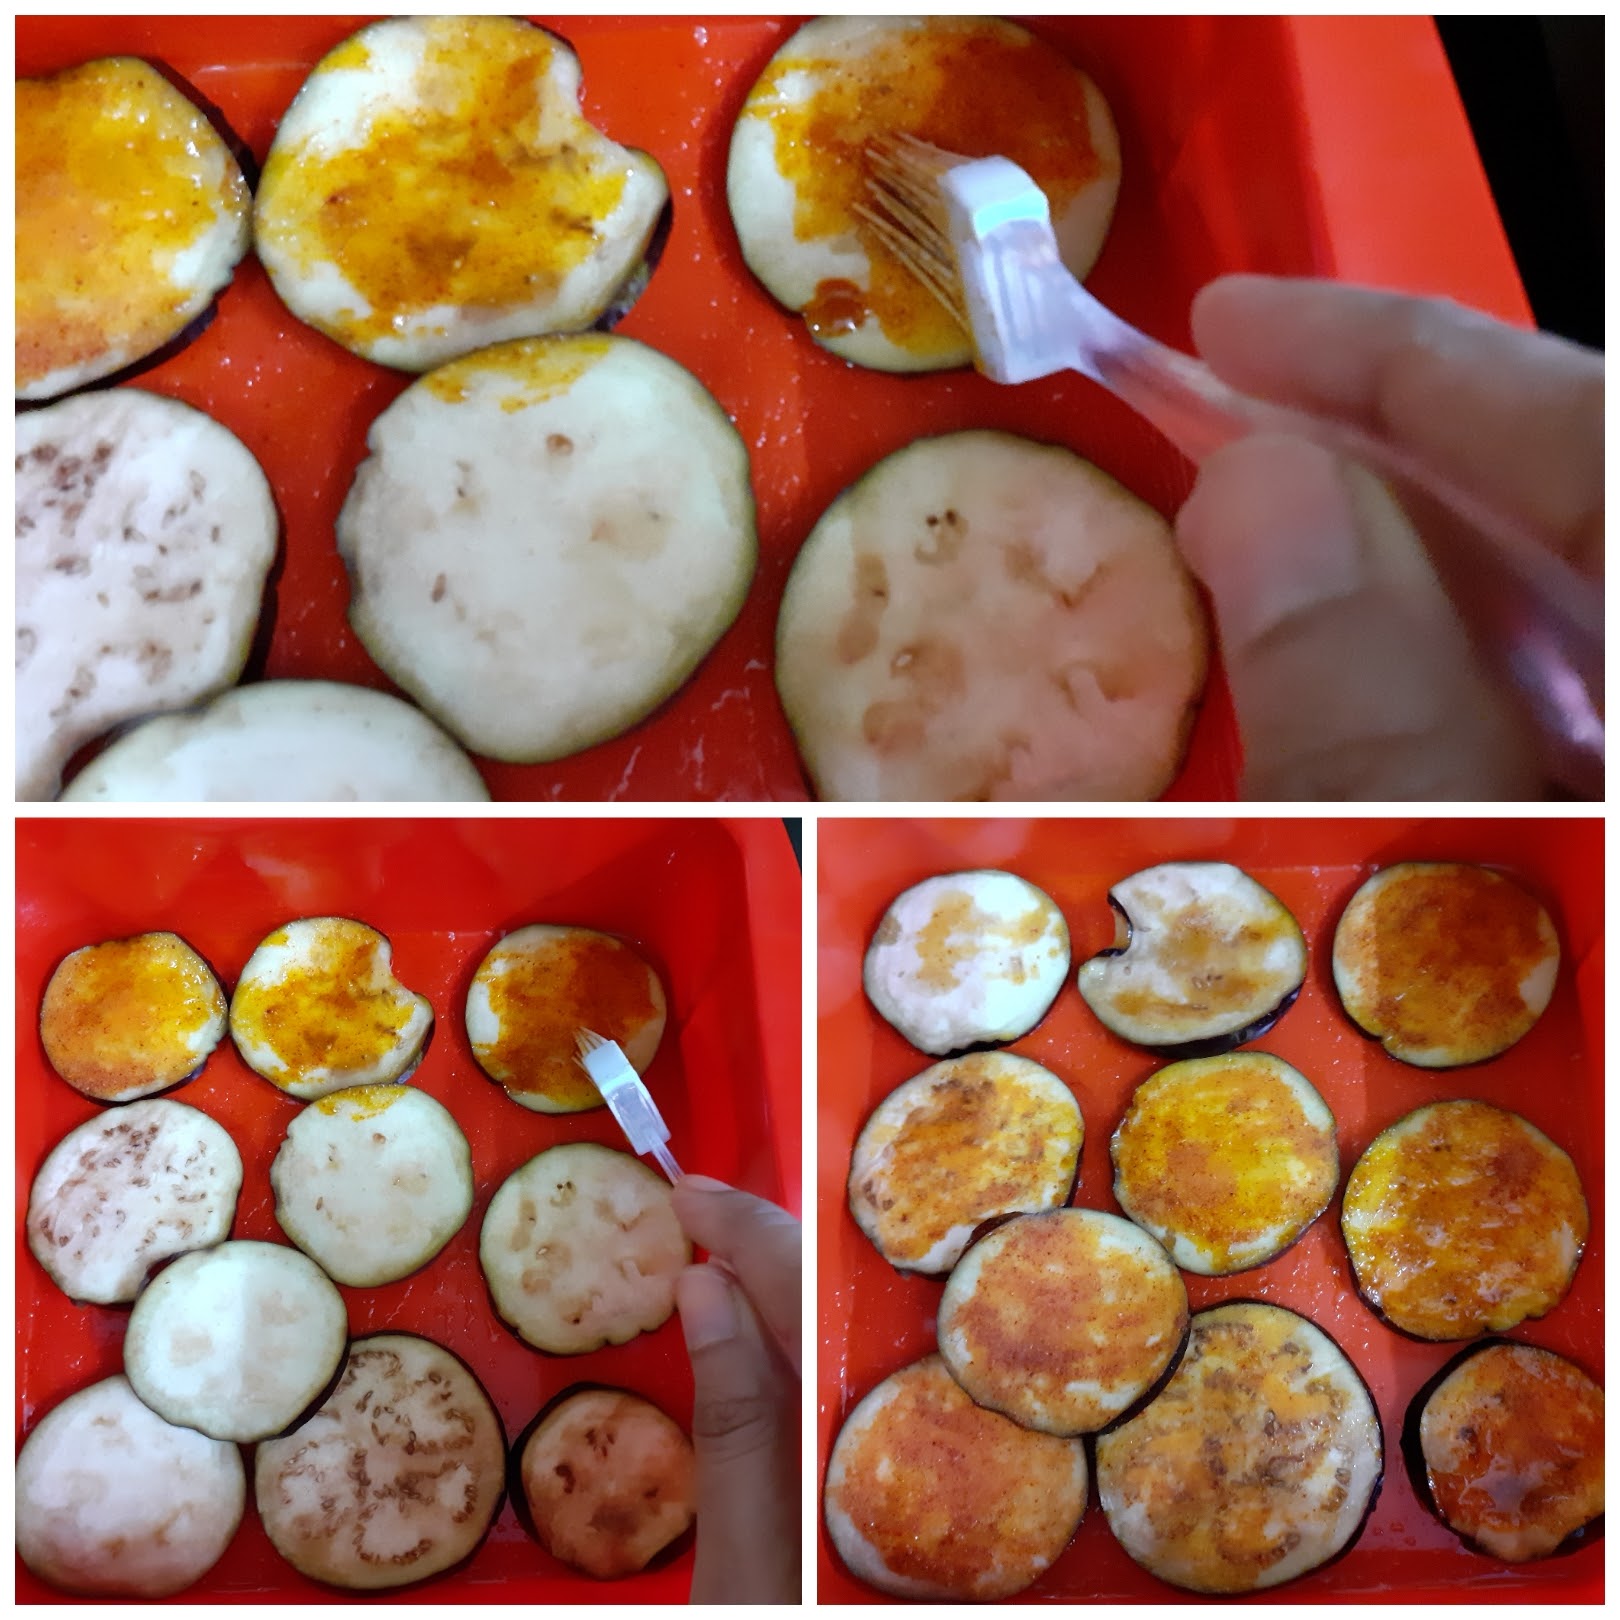
5. For Pan-frying: Heat a Tava/Girdle. Grease with a little oil. Brush the Eggplant slices with the Masala paste and arrange them on the girdle. Drizzle 1 tsp oil on the Tava for quick cooking. Cook on one side until crisp and flip the slices around, drizzle another teaspoon oil and cook until crisp. Remove from girdle to a separate vessel. repeat for all slices.
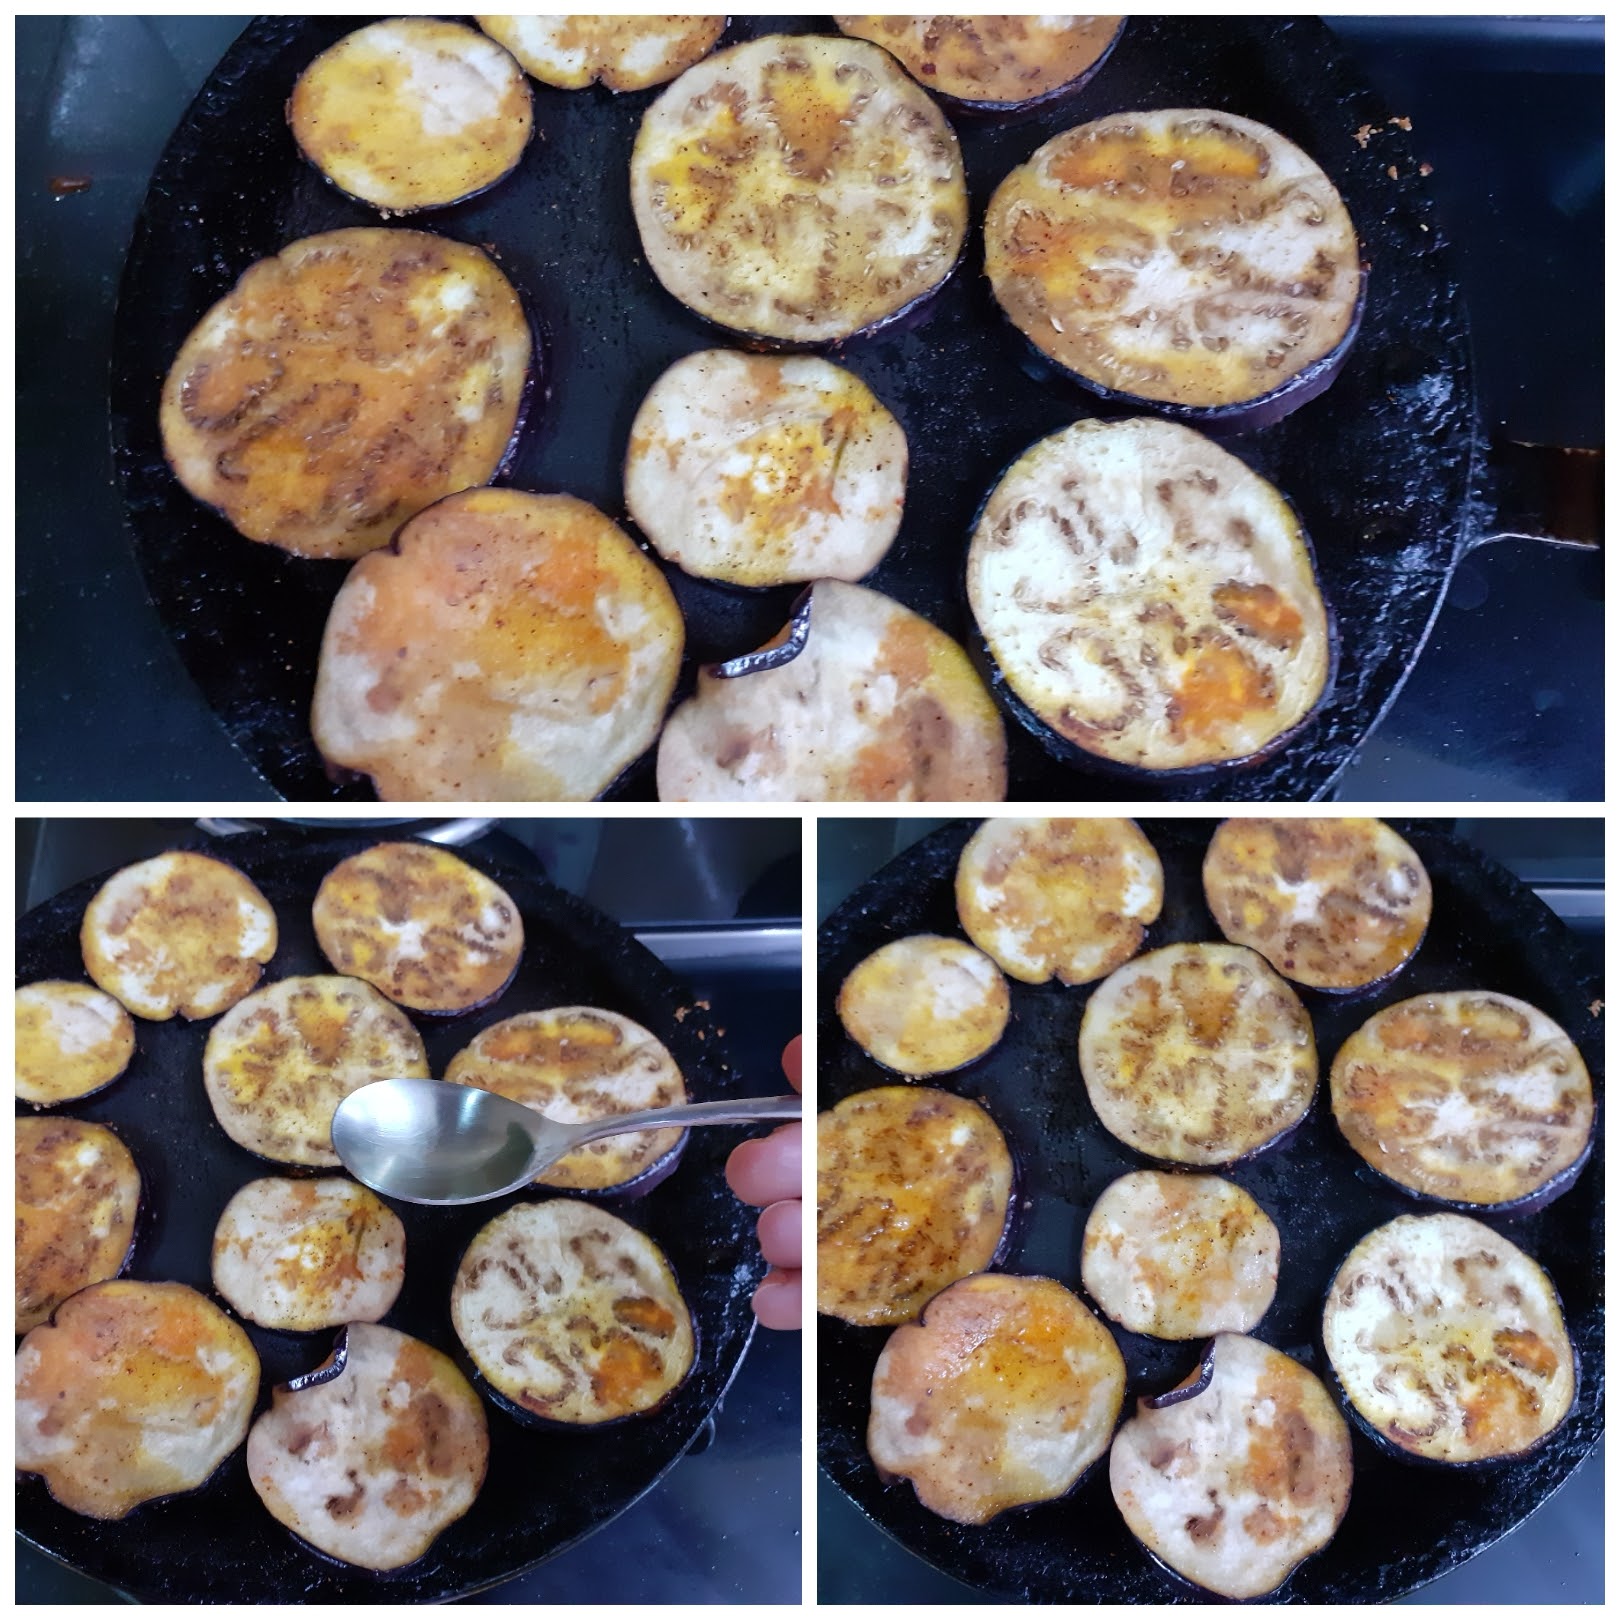
6. Finally, to temper take some oil in a small Kadai and heat. Put in the mustard seeds and as they crackle add the cumin seeds and curry leaves. Pour this tempering over the roasted Eggplants. Enjoy with Rotis or Dal Chawal or whatever you feel like.
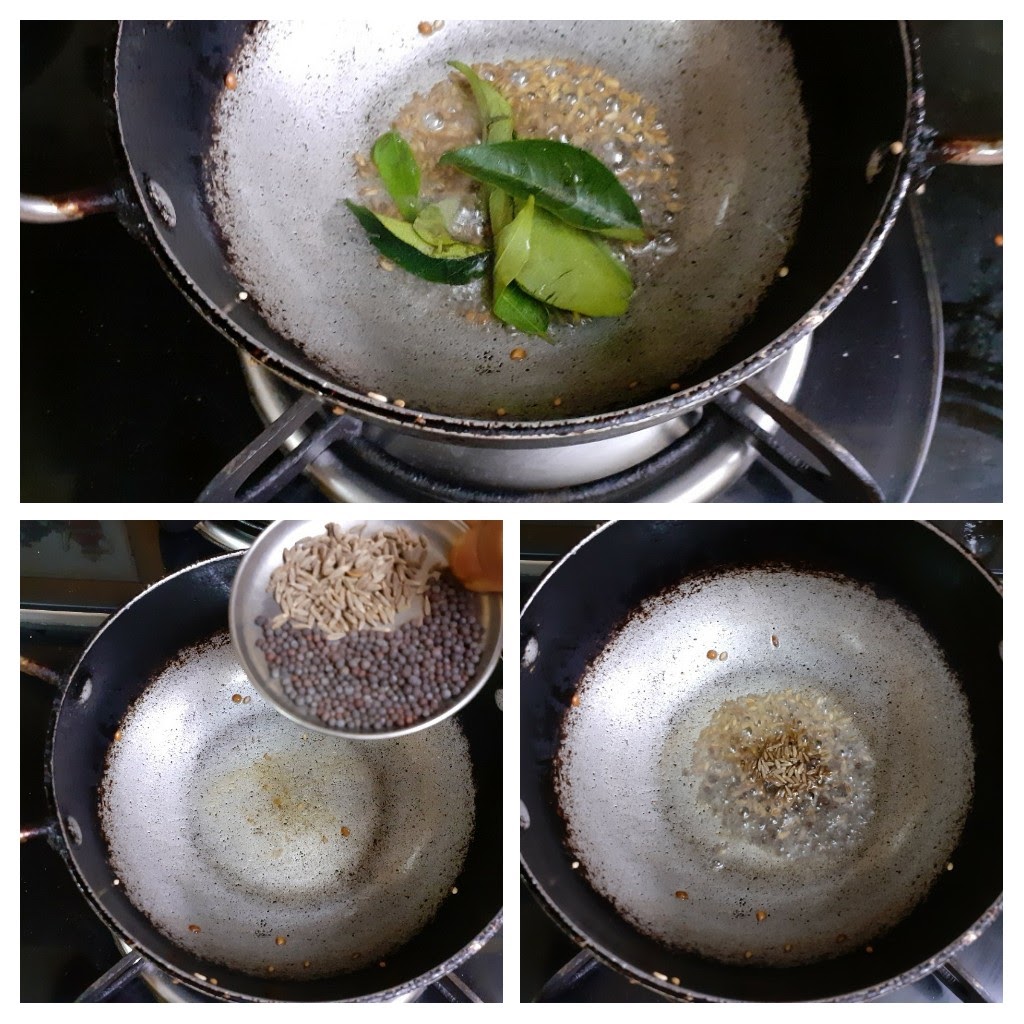
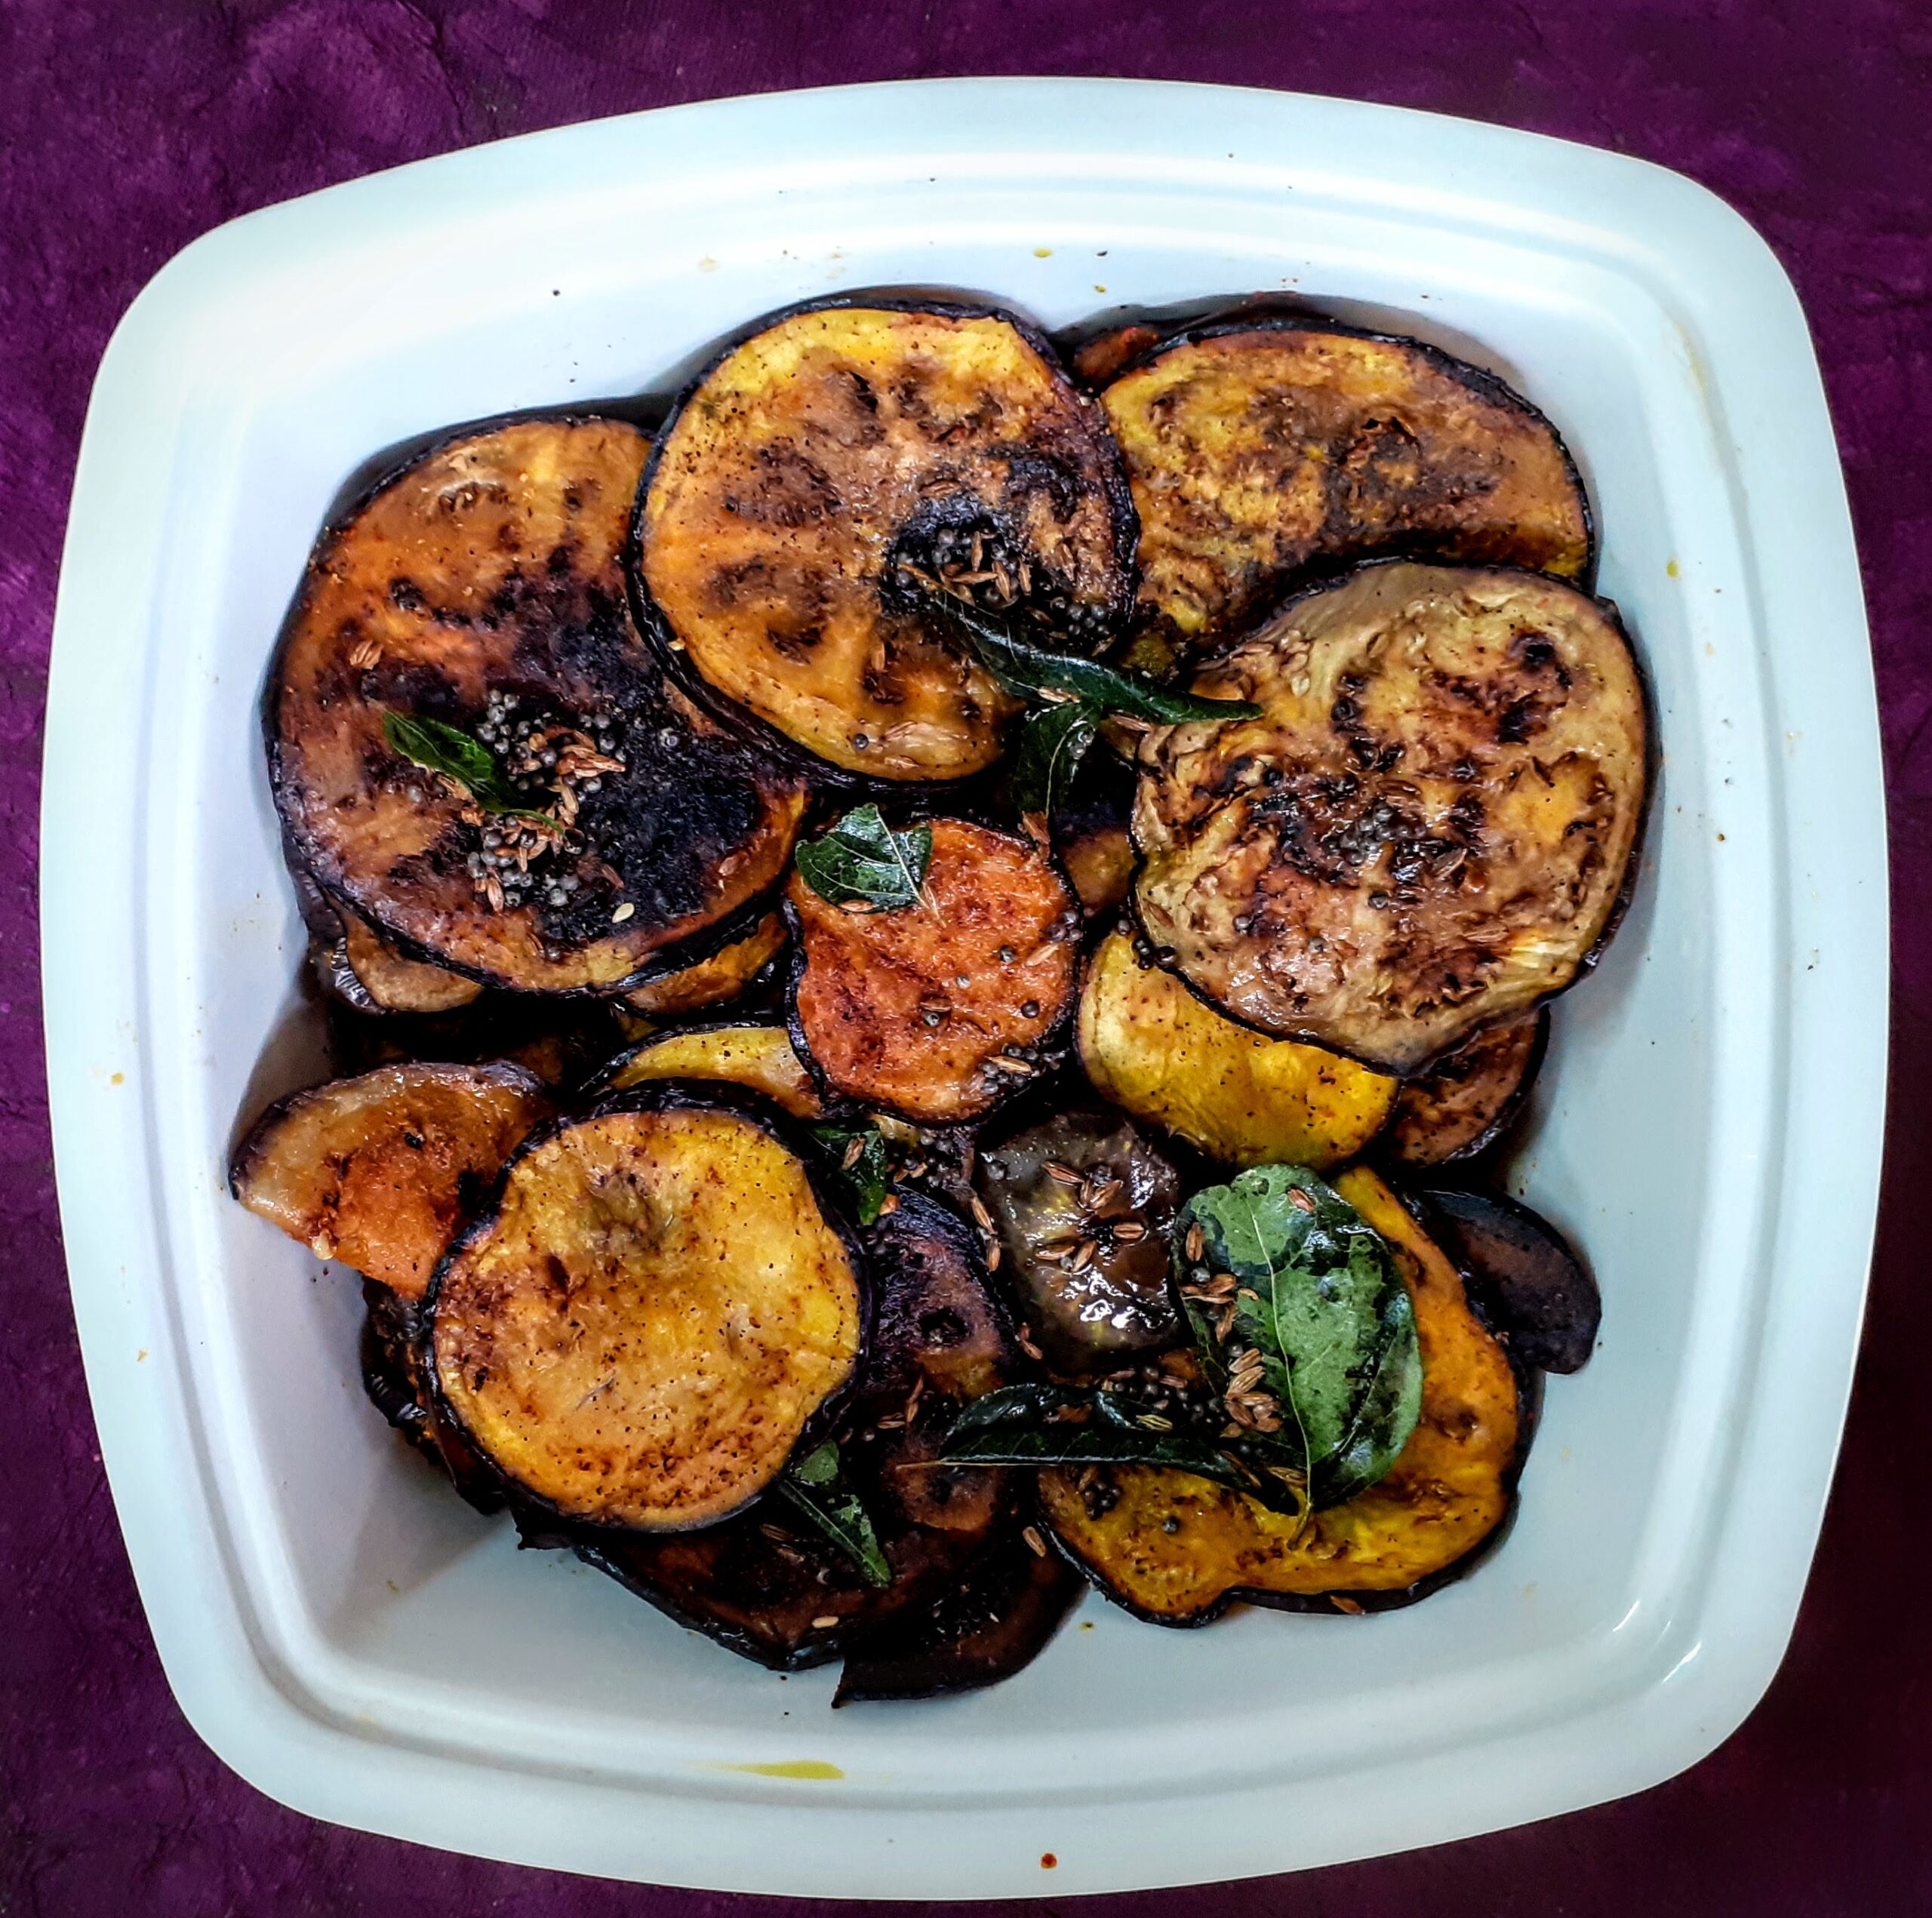
NOTES:
1. The smaller variety of Brinjal can be used in the Pan-fry method. Since I have not used them anytime in the baked method, unable to be specific of the result. When I try it, I will definitely update here.
2. If one does not wish to apply the masala paste while pan-frying or baking, the masalas can be added along with the tempering and mixed also.
3. Prepping of the Eggplants is critical as otherwise, they will release a lot of moisture and instead of turning crisp they will turn soggy.
4. This is a simple everyday recipe, therefore I have kept the masalas to the minimum. Feel free to add your choice of masalas/spice powders.
If you tried this recipe and liked it please comment below. I would love to hear from you. If you have a query about the recipe email us and ill respond as soon as I can.
Garlic Lachcha Paratha (Multigrain Flour)
Lachcha Paratha is a popular Paratha variety that we find at all Indian/North Indian restaurants. Earlier I would be very intrigued by the way the layers were created and had my own theory of how they must be done????(this was before the internet took over us and all recipes became household). The recipes at that time showed a very complicated process and as a person just venturing into cooking(more than 20 years back), I found the process very intimidating. Then as time passed by and I started gaining confidence in the cooking arena I tried out this Lachcha Paratha(had to rely on pictures only) and it turned out fine. The efforts put were greater than the outcome at that time, so I stopped experimenting with it. After a few years, I suddenly developed an interest in recreating it again. But this time I was better equipped with knowledge and practice. Today I can try out this Paratha with any flour, that is Wheat, Maida, or Multigrain and the results are always great. The method I am giving here is a very simple one which even beginners will find easy to follow.
The recipe that I am blogging now uses Multigrain flour(store-bought). I use Wheat flour and Multigrain flour mostly for all my bread/roti/paratha recipes. I am not much of a fan of Maida, though I do use it in some dishes where it is necessary and also in Parathas(just about a tablespoon for the pliability).
There will always be a difference in textures when we experiment with different flours, and one should be open to it. In this recipe, I have not used baking powder or baking soda for the fluffiness, so they may not be entirely fluffy, but will definitely be flaky.
While you are here please check out my other bread recipes like Beetroot Paratha and Missi Roti.
Serving Suggestions: Matar Paneer, Palak Paneer, Mava Paneer Curry, Mixed Vegetable Curry, Kadai Paneer, all go very well with this Garlic Lachcha Paratha.
Here is the recipe of Garlic Lachcha Paratha for you-
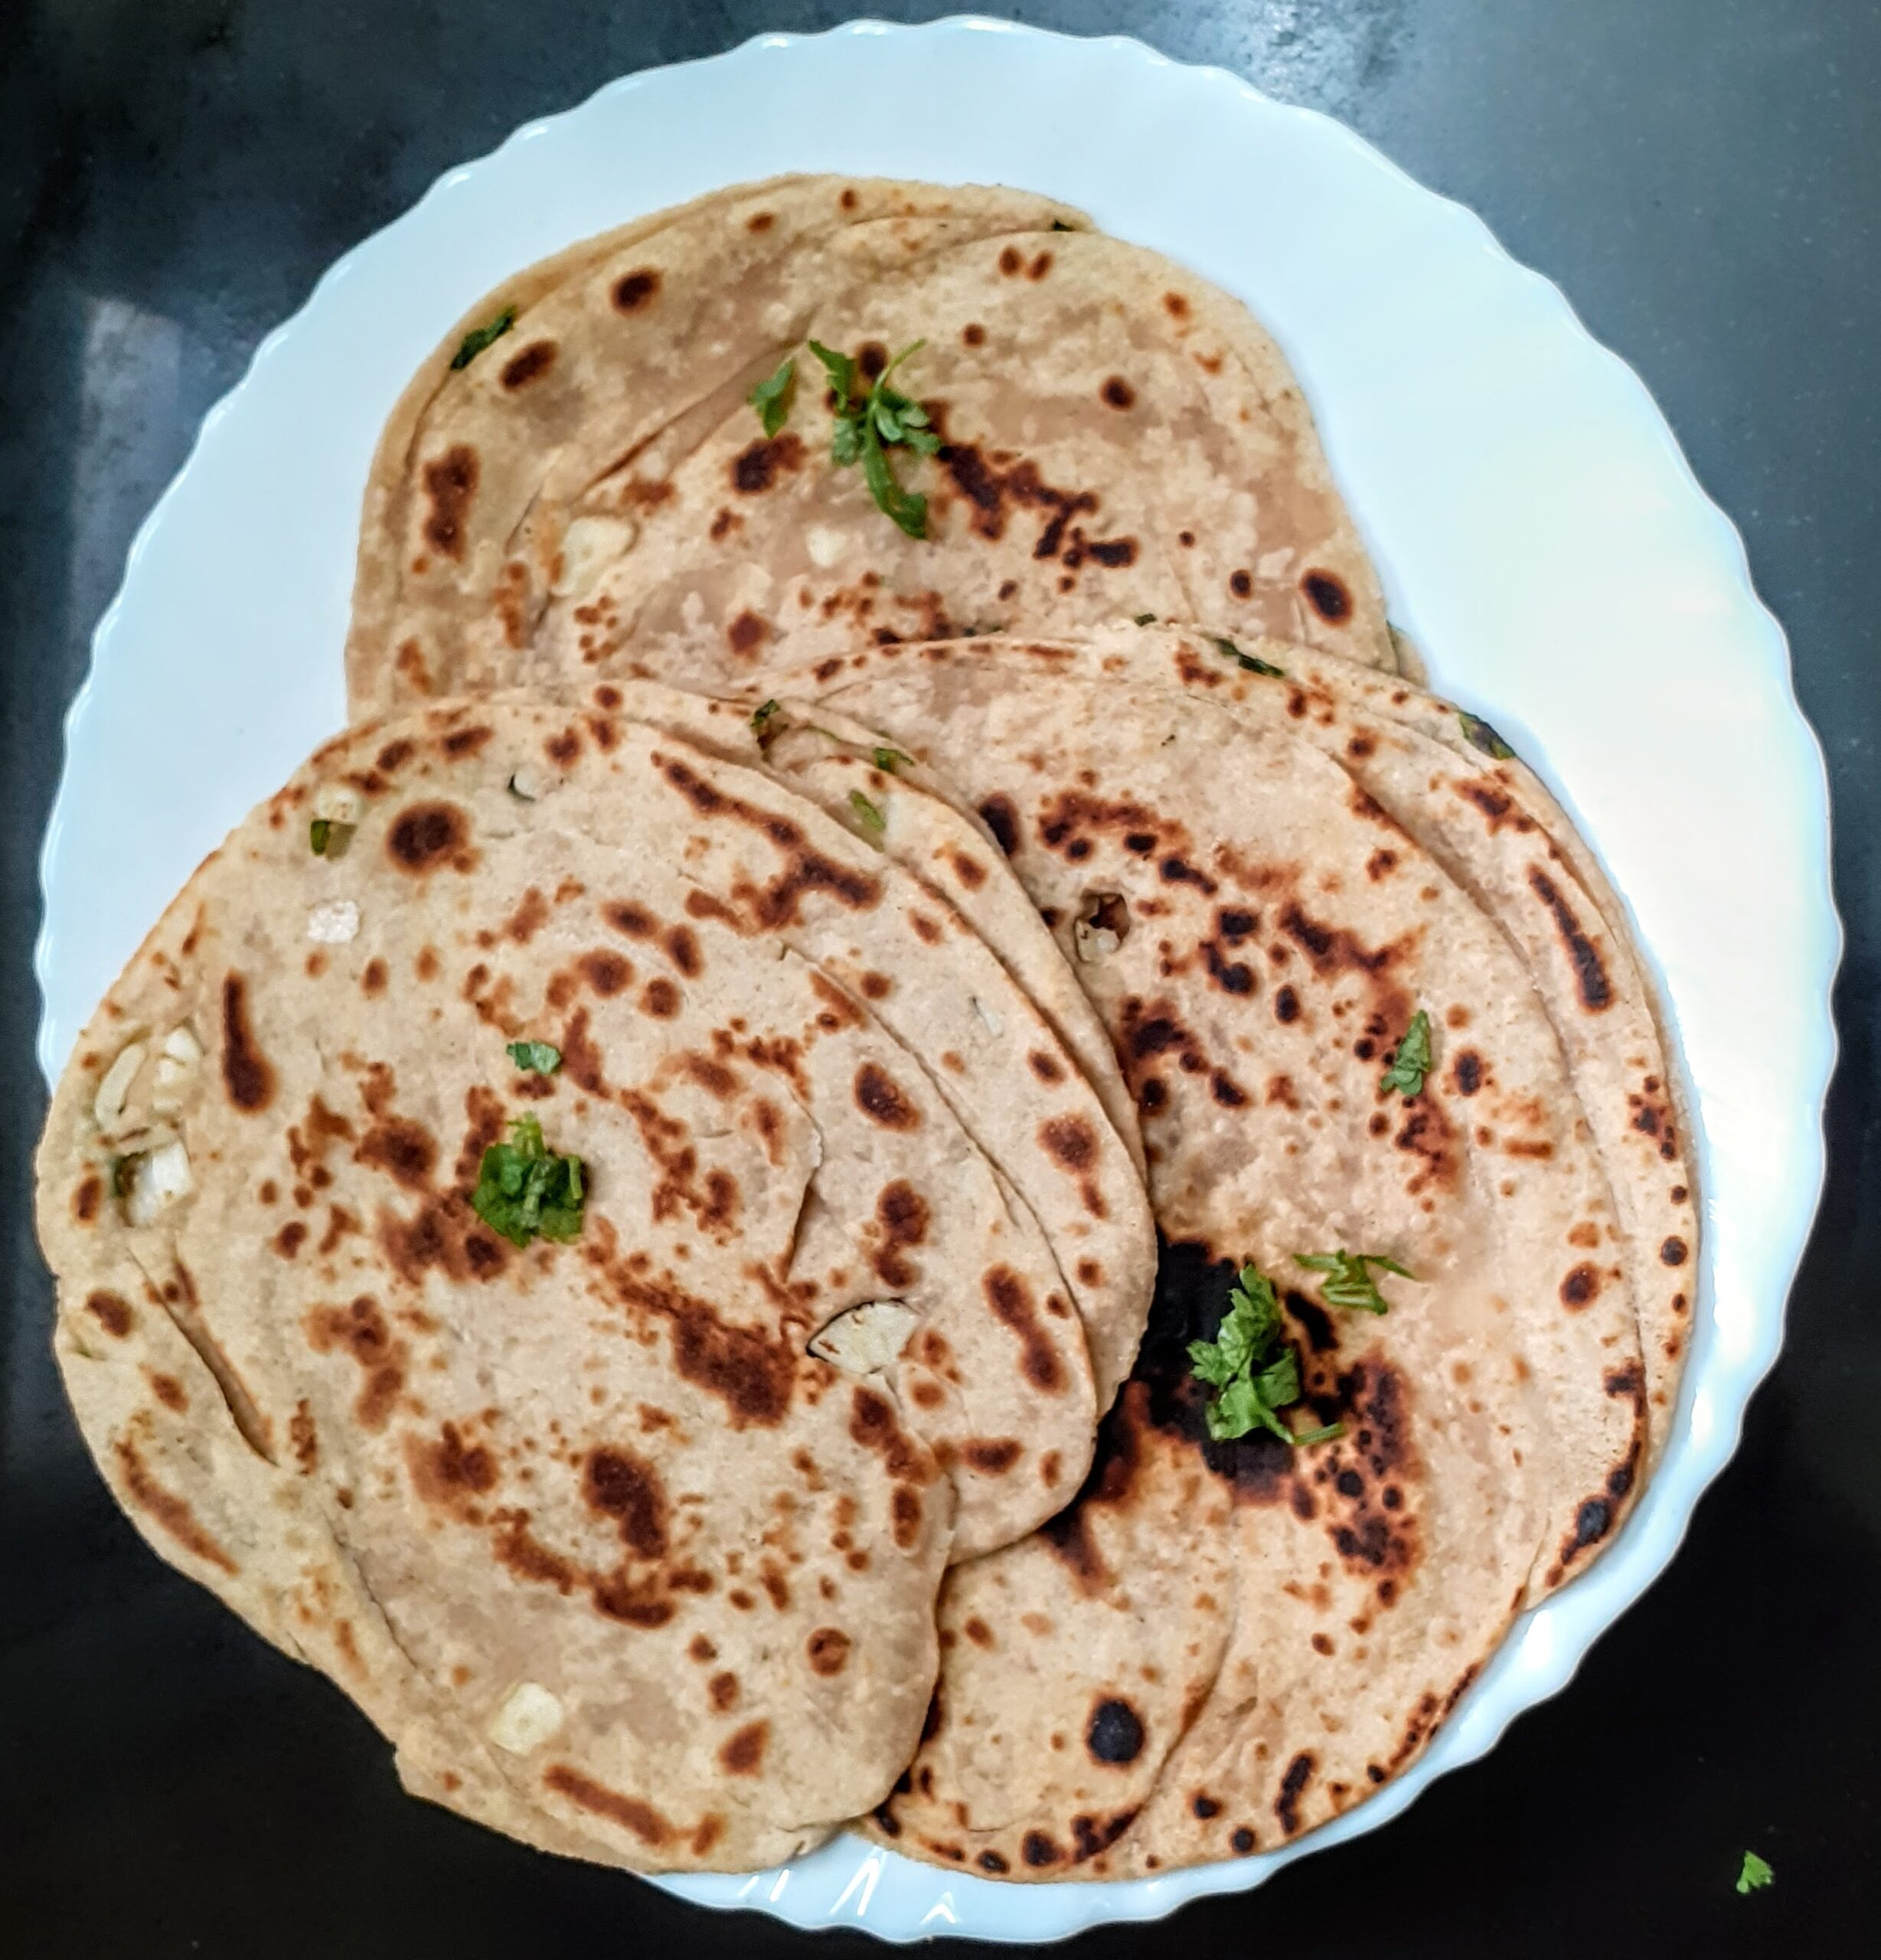
Ingredients:
Multigrain flour 3 cups
Maida 1 tbsp
Oil for kneading 1 tbsp water as required
Butter 50 gm
Garlic 3 cloves finely chopped
Fresh coriander leaves finely chopped 2 tsp
Salt 1/4 tsp
Directions:
In a big mixing bowl take the multigrain flour, add the tiny amount of maida and salt and mix well. Create a well in the center and pour the oil. Now work the oil into the flour(no water to be added at this stage) nicely. Now create a well in the center again. Now knead the dough adding a little water at a time. We want a dough that is neither too tough nor too soft. The texture should be like Chapati dough. Rest the dough for 20 minutes to half an hour.
For Garlic Butter:
Take 50 gm butter ina bowl, add the crushed garlic and coriander leaves to it, and microwave for 30 seconds. The butter to only melt and not boil. Alternately you can keep the bowl of butter in some hot water to melt and then add the garlic and coriander.
To make Parathas: Divide the dough into 10 big balls. Now take one ball at a time and roll it in dry flour. Place it on your rolling board and roll it out into a big Chapati first. Apply the garlic butter on the chapati with a brush, liberally. Now pleat the Chapati or fold like a fan( refer video). Arrange the pleated dough into a roll, press it down with your fingers, dust it with a little flour and start rolling it out again gently. Roll it out a little thick and medium-sized. Now heat a girdle/tava and put the rolled out Paratha on it. Drizzle a little oil and cook on one side, flip on the other side, apply oil, and cook. You will see the flakes rising out. Cook until nicely brown and crisp. Serve right out of the girdle. The Lachcha paratha is ready!!!
STEPWISE RECIPE FOLLOWS:
1. In a big mixing bowl take the multigrain flour, add the tiny amount of maida and salt and mix well. Create a well in the center and pour the oil. Now work the oil into the flour(no water to be added at this stage) nicely.
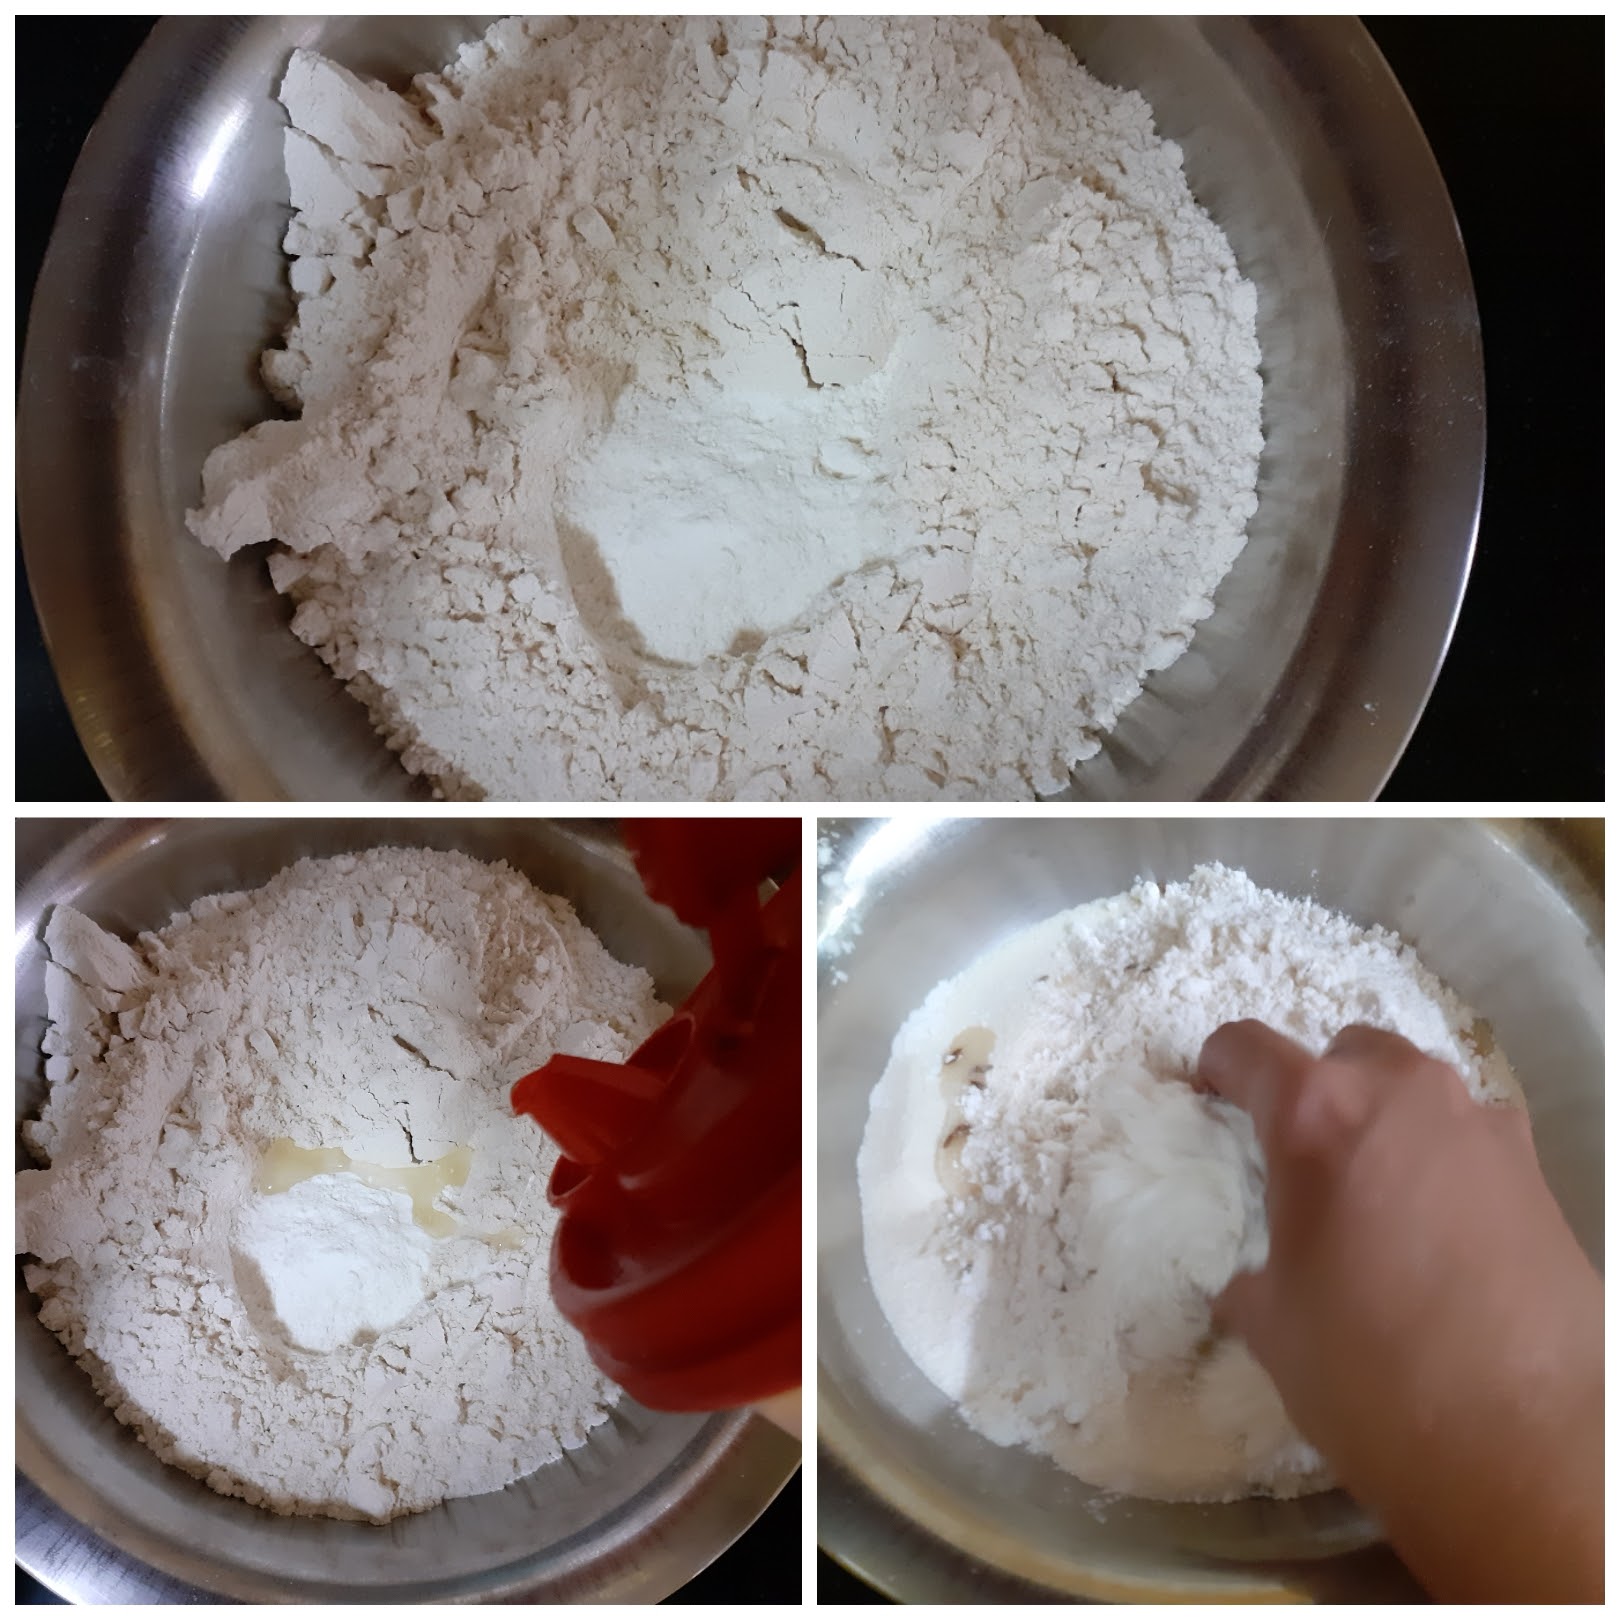
2. Now create a well in the center again. Now knead the dough adding a little water at a time. We want a dough that is neither too tough nor too soft. Rest the dough for 20 minutes to half an hour.

3. Take 50 gm butter in a bowl, add the crushed garlic and coriander leaves to it, and microwave for 30 seconds. The butter to only melt and not boil. Alternately you can keep the bowl of butter in some hot water to melt and then add the garlic and coriander.
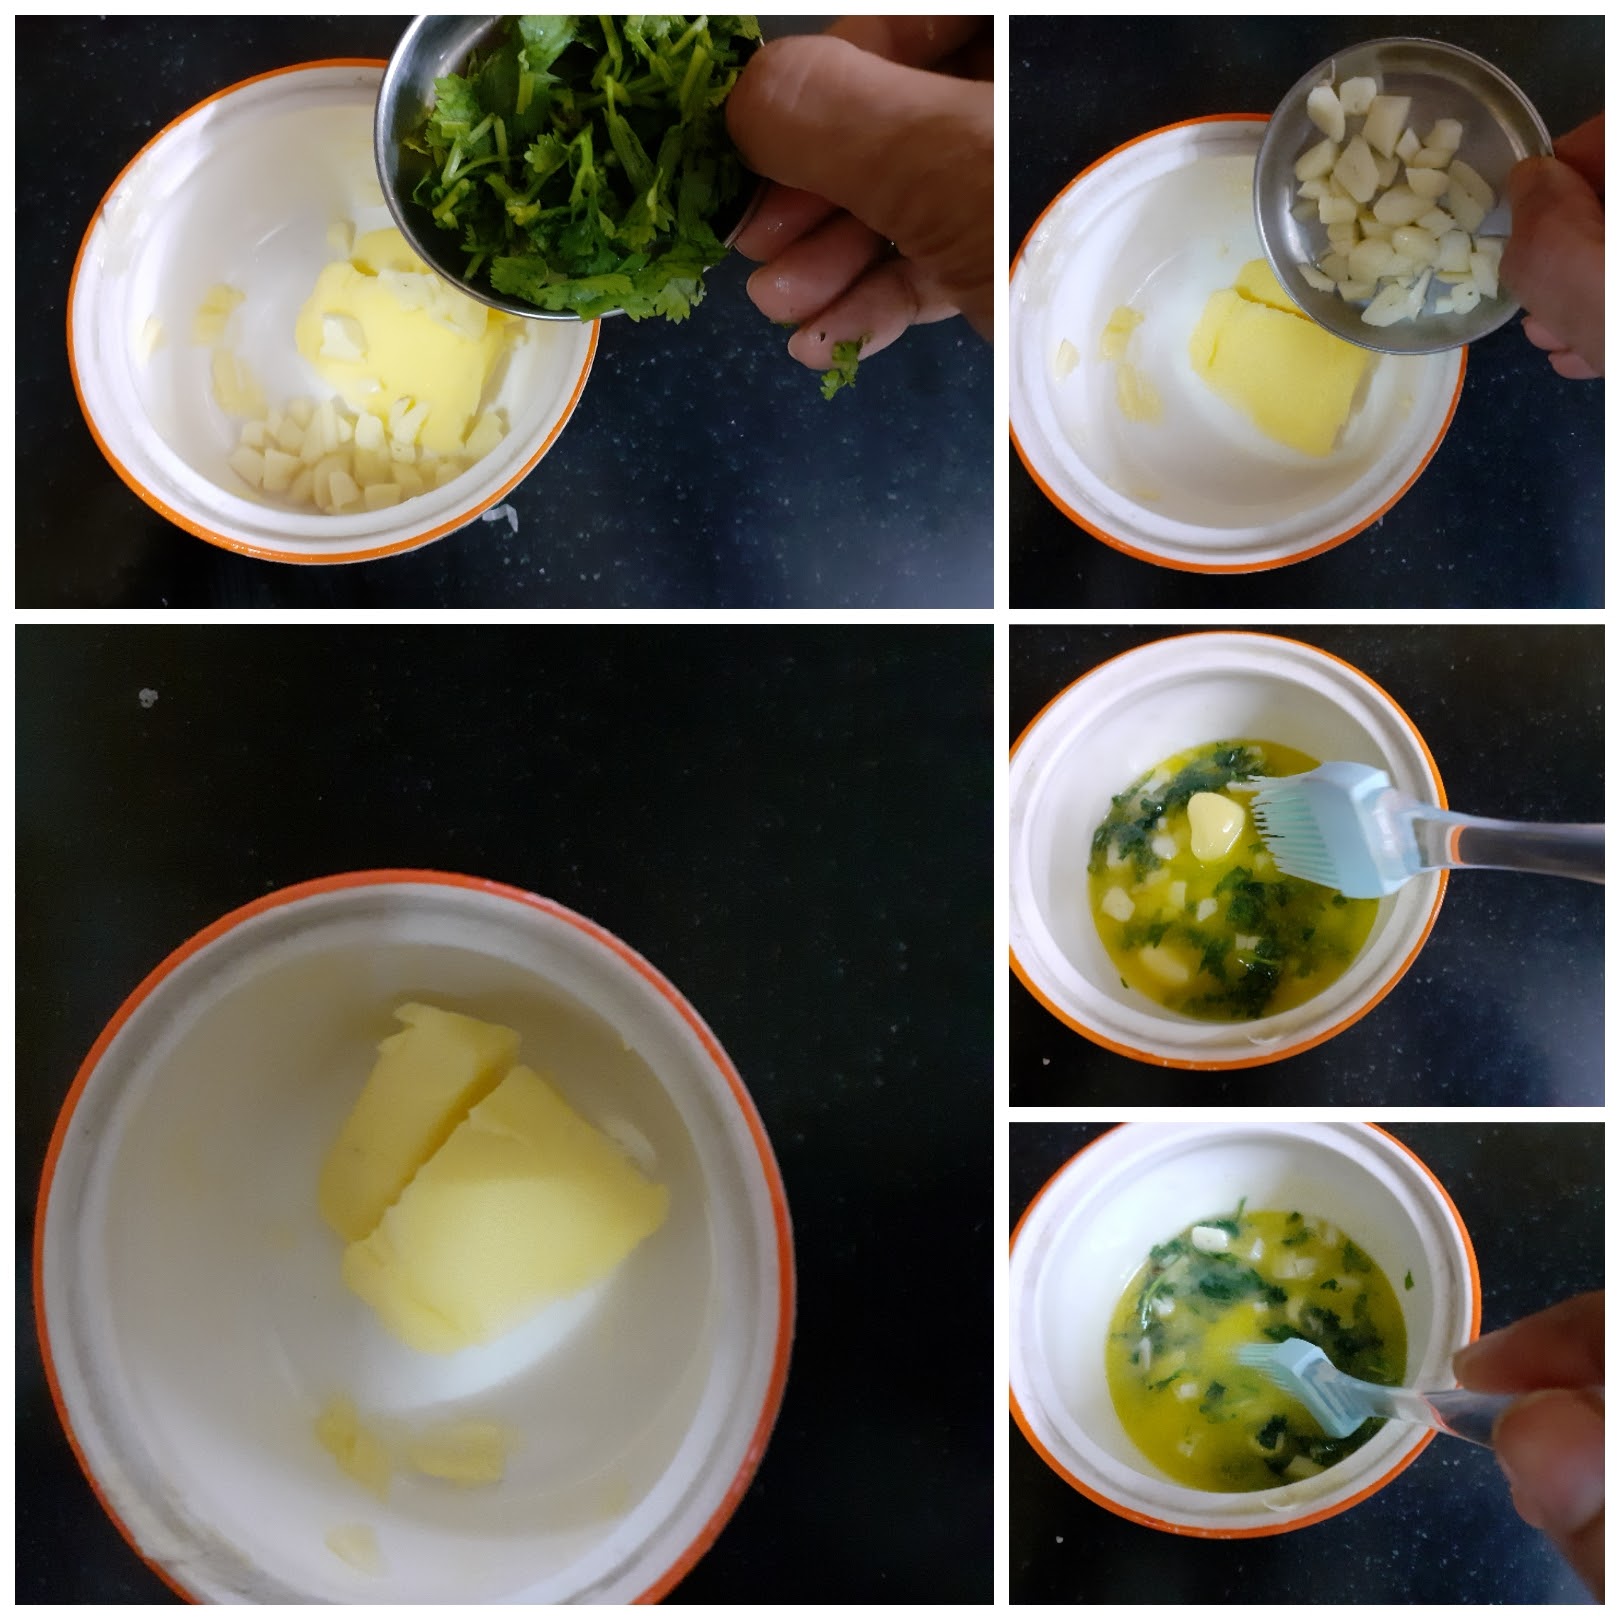
4. Method to make Garlic Lachcha Paratha video given here????
My platter of flaky Garlic Paratha and Matar Paneer with Boondi Raita
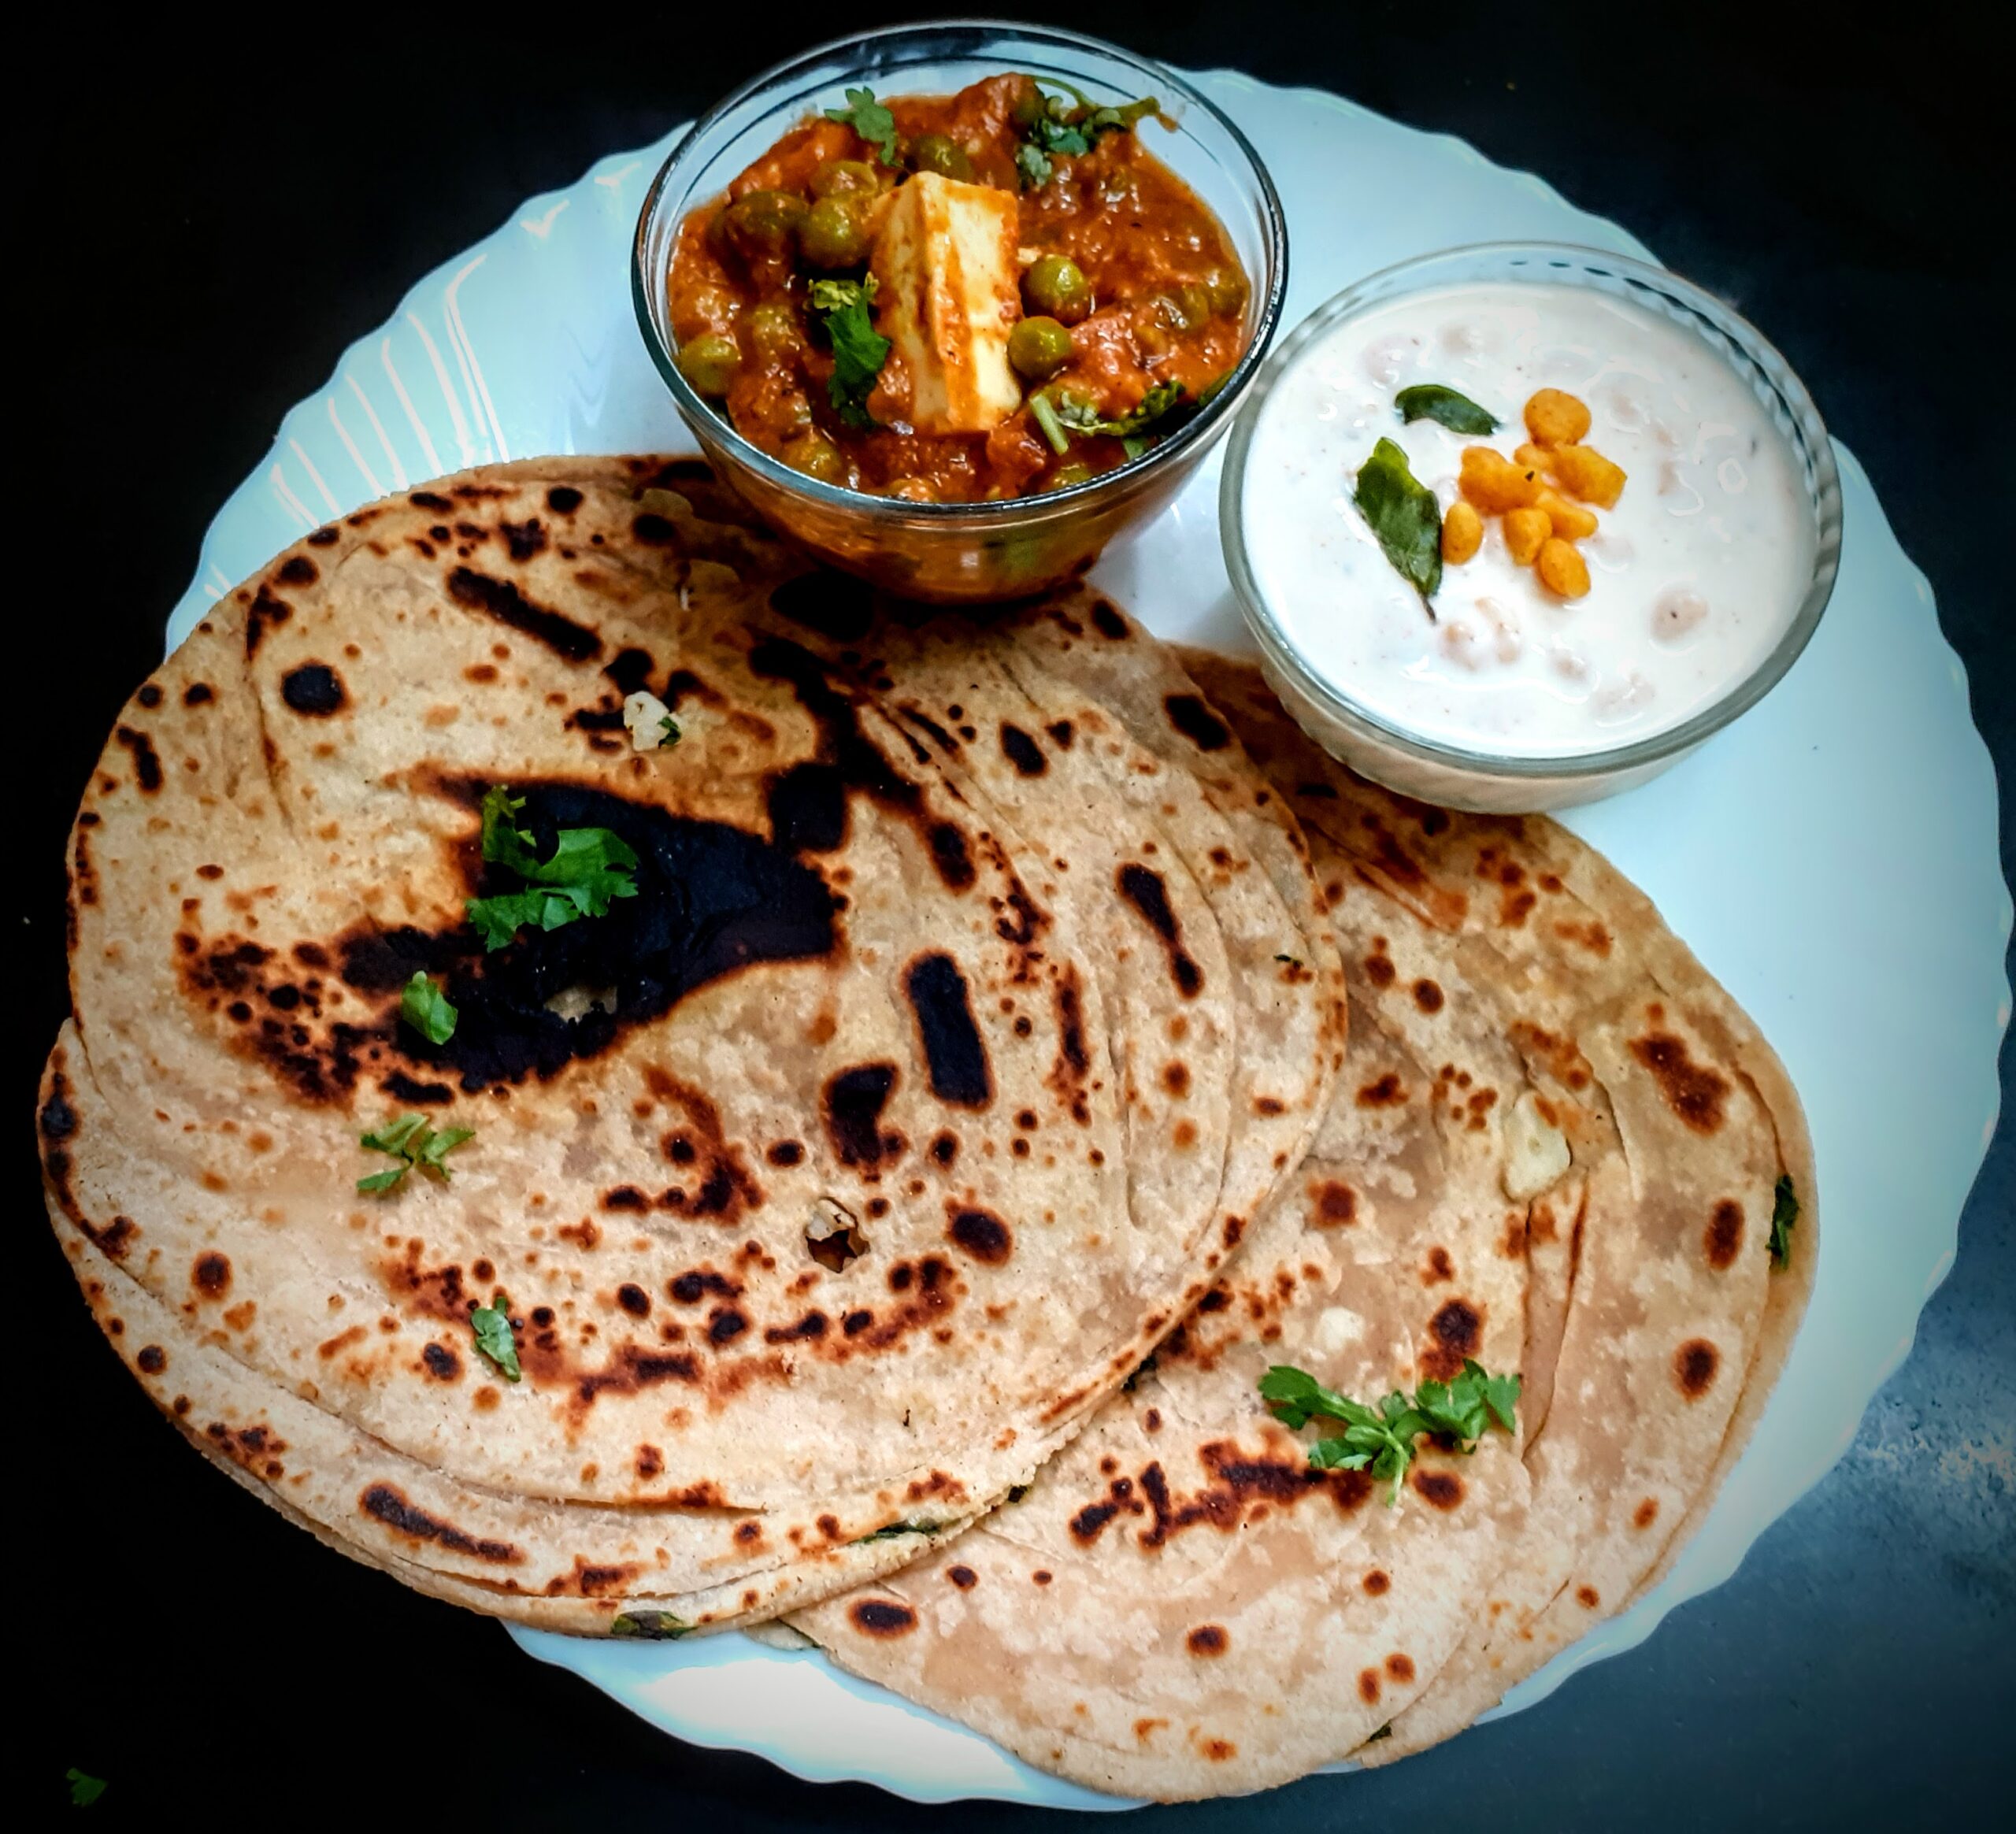
Samosa Pie
When one wants to have Samosa but “I feel guilty having fried stuff” is the mood, what to do? You bake it???? and call it a pie????.
Well, I’m a fan of Samosas and love them fried, but the Mr. is on a no fried stuff mode, so I just went ahead and baked it. I did not expect to get a nicely browned crust but made a slight adjustment and I got baked Samosas which had a golden-brown crust. Happy moment.
I have used Chiroti Rava/ Suji in this recipe. Chiroti Suji is more popular towards Karnataka, where it is used in making Dosas, and other fried snacks. I use this Choroti Rava to make most fried food like Samosa, Kachori, Karachikai(sweet fried snack). This Rava gives the much-required crunch to these snacks. This Suji, when kneaded and rested, becomes as pliable as maida or refined flour. Chiroti Rava is available in all departmental stores. If Chiroti is not available it can be easily swapped with Maida.
While you are here please check out my other snack recipes like Masala Wheat flour Papdis( 2 ways), Unni appam(sweet), Thattai/Nipattu, Kothimbir vadi, Kuzhi Paniyaram, Suji Cheese balls, and more…
Here is the recipe of Samosa Pie for you-
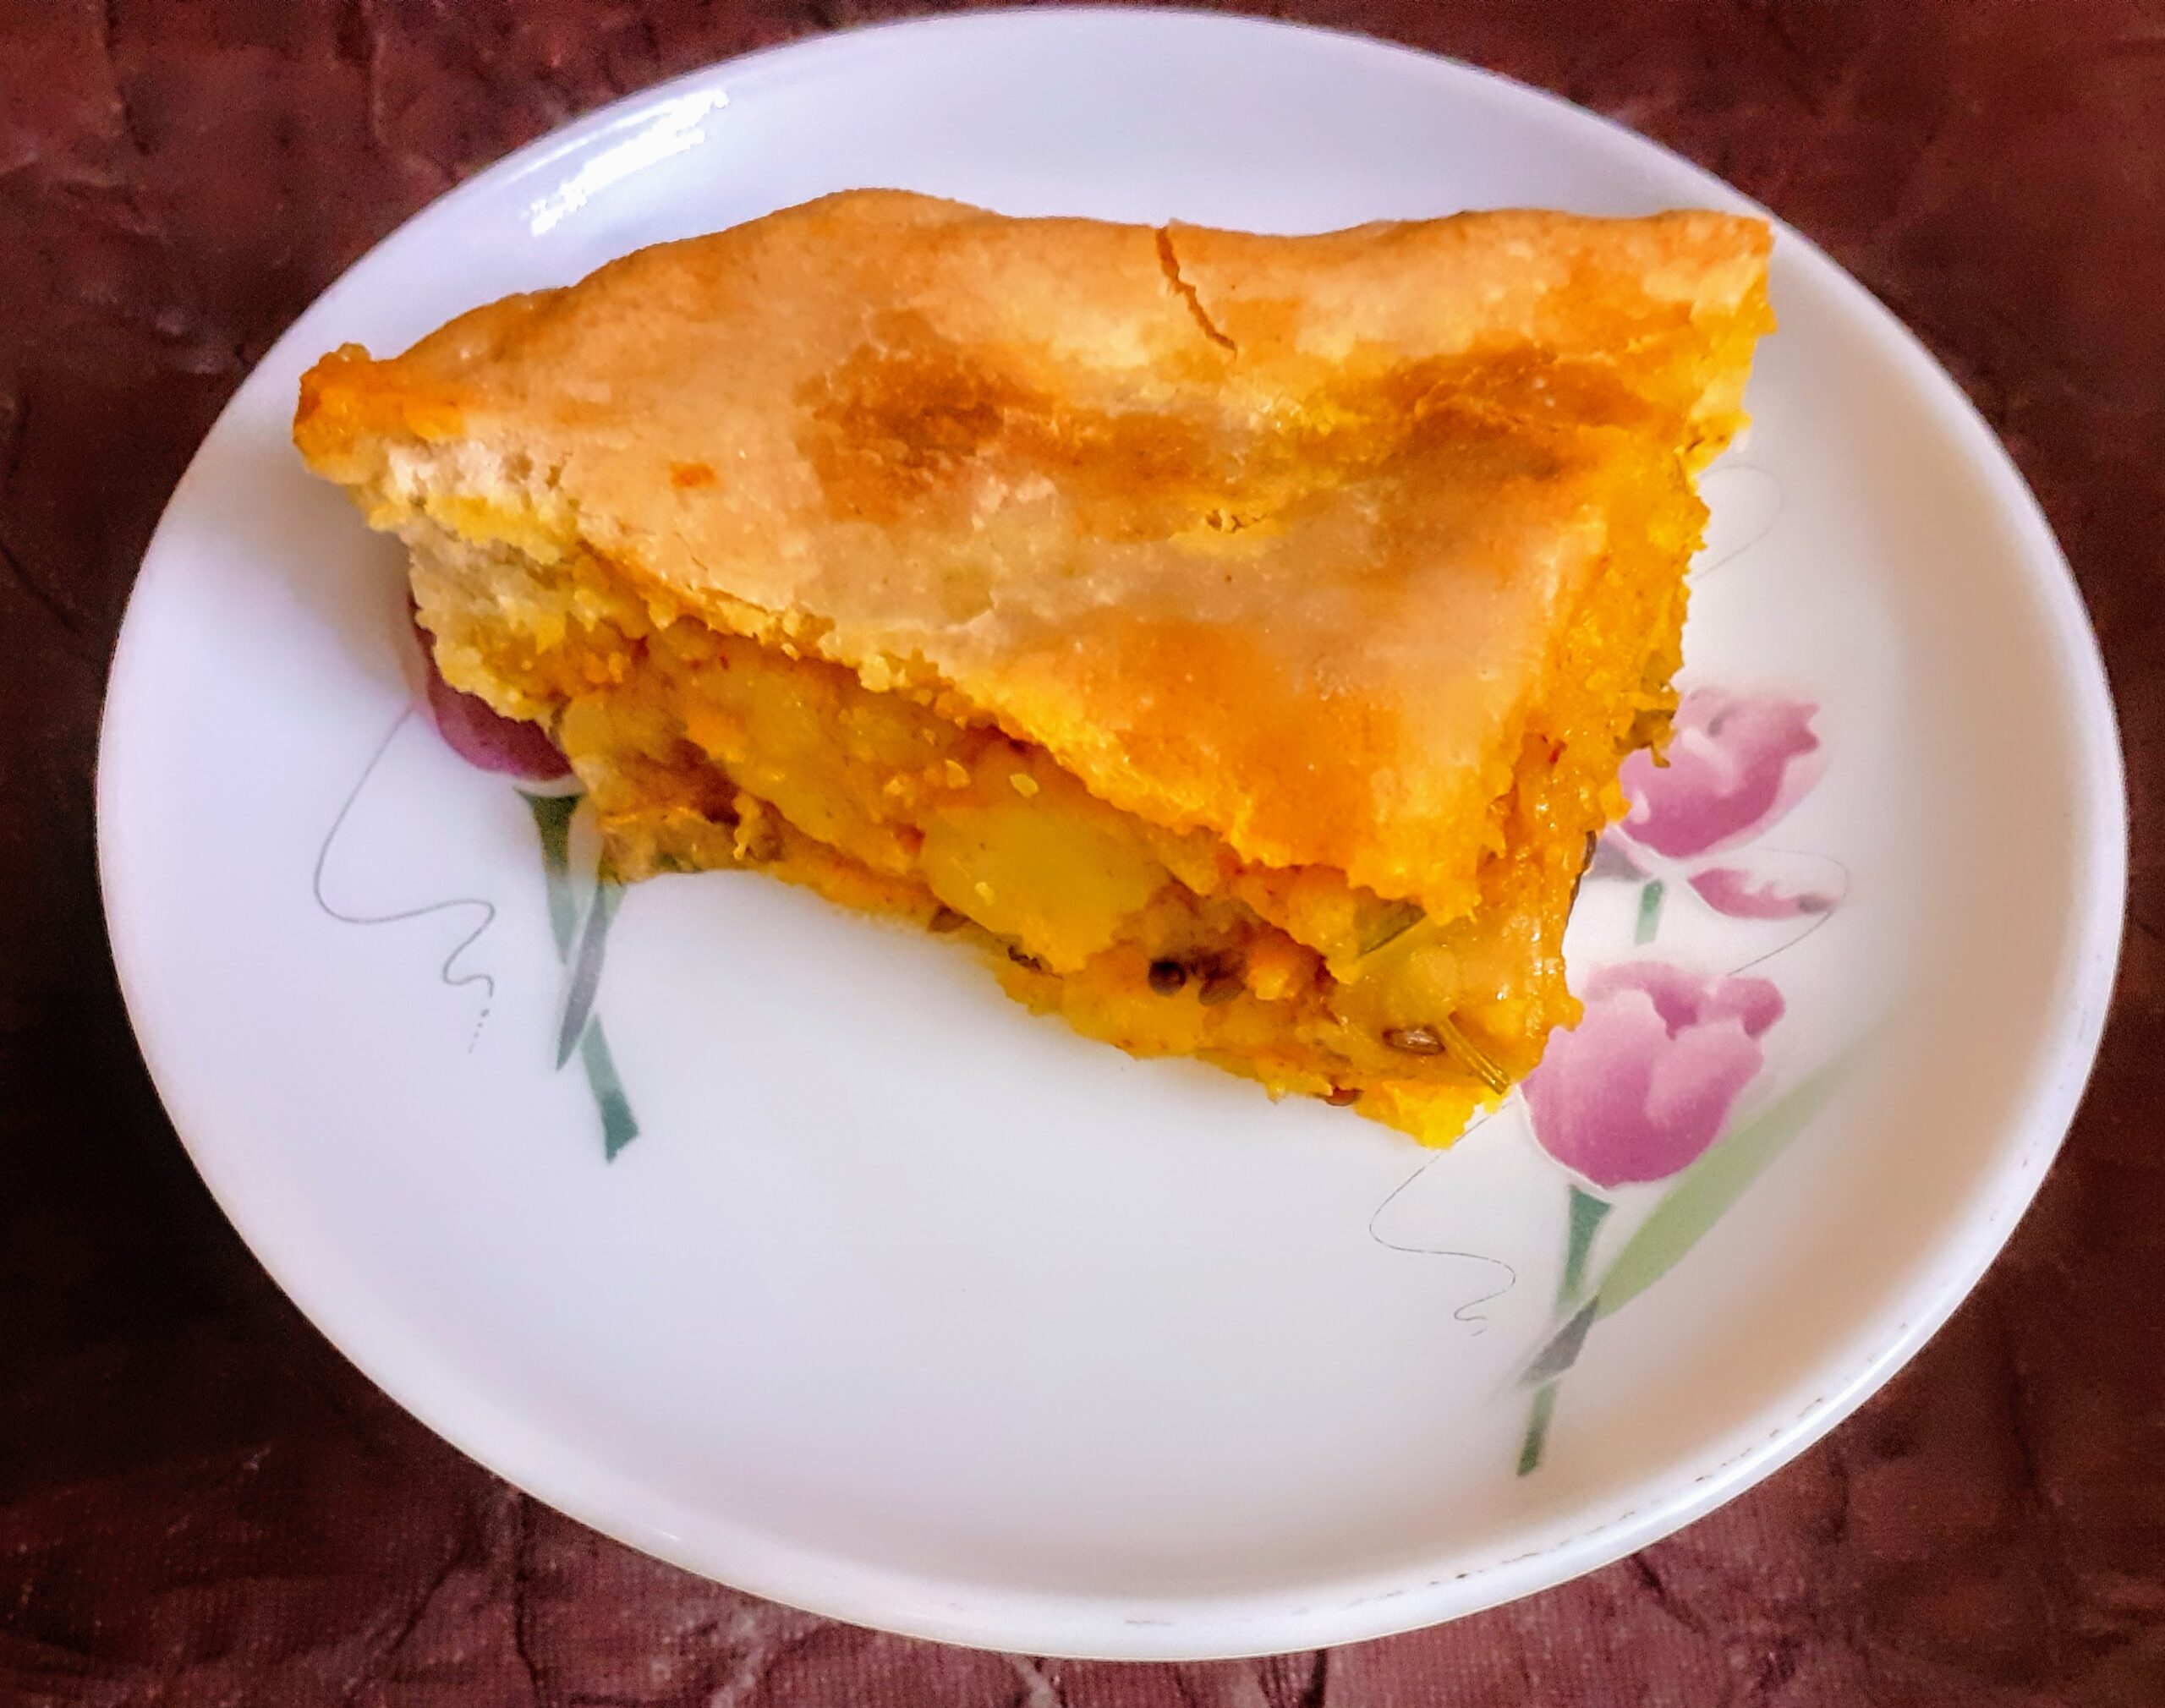
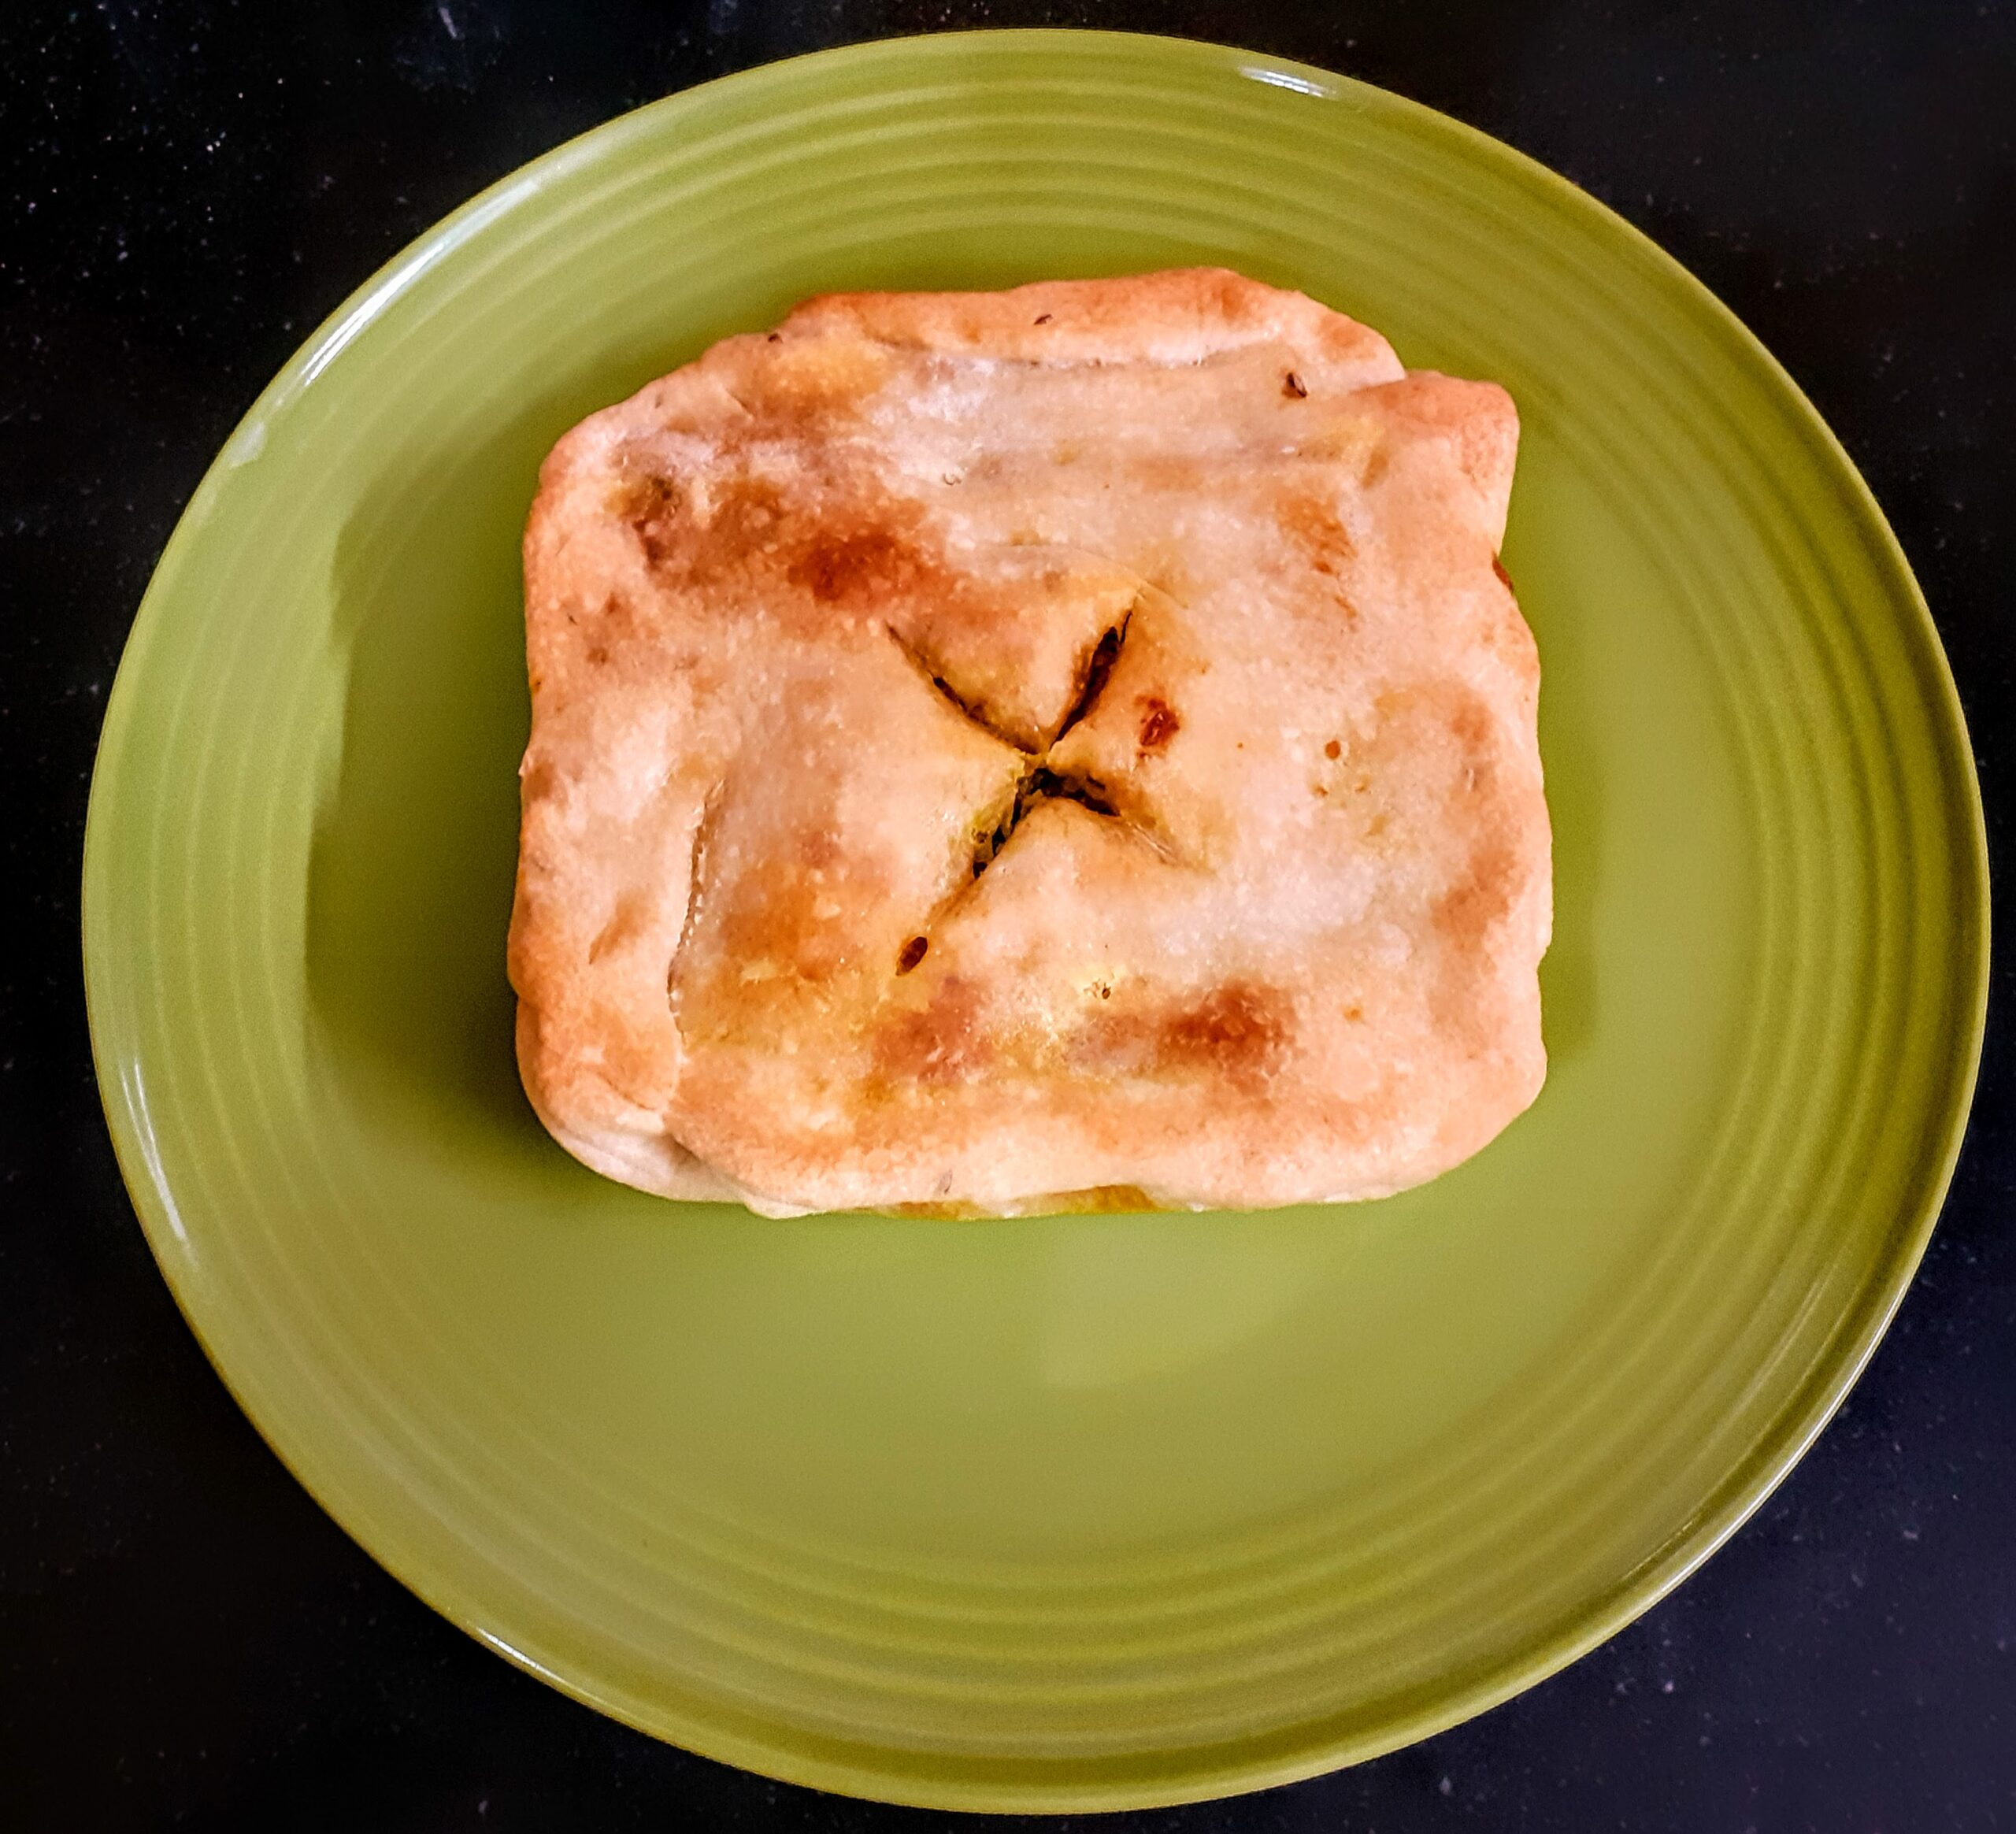
Ingredients:
Chiroti Suji 2 cups
Maida 1/4 cup
Salt to taste
Potatoes 5 big cooked and mashed
Onion 2 small or 1 big finely chopped
Green Peas a handful (optional)
Red chilli powder 1 to 1.5 tsp
Coriander 1 tsp
Baking Powder 1/4 tsp
Cumin seeds 1.5 tsp (divided)
Turmeric powder 1 tsp
Amchur/dry mango powder 2 tsp
Fresh Coriander leaves chopped 1tbsp
Garam Masala powder 1/2 tsp
Oil for brushing and kneading
Directions:
To make the dough:
Take the Chiroti Rava in a mixing bowl and add the Maida to it. Add 1/2 tsp Cumin seeds. Add Baking powder and salt and mix well. Create a well in the centre and add 1 tbsp oil and combine well. No water must be added now. Mix in the oil nicely into the flour, takes about a minute. Now form a well again in the centre and adding water little by little combine to form a stiff dough. Rest the dough for 1/2 an hour at least before use. (Refer note 5)
To make the filling:
In a Kadai heat oil. Add cumin seeds and mustard seeds, and as they crackle add the chopped onions. Fry the onions until light brown and add the mashed potatoes. Now add salt, followed by red chilli powder, coriander powder, Amchur powder, and mix them all nicely such that all masalas get well incorporated with the potatoes. Finally, add the garam masala powder(picture not taken) and chopped coriander and stir. Allow the filling to cool down a bit.
To assemble the pie:
Preheat the oven to 180C for 10 minutes. Knead the Chiroti dough again and divide it into two halves-one slightly bigger than the other. Roll each of them into a circle like a Chapati. The bigger part of dough should be rolled out thicker than the smaller portion of the dough. After rolling the dough, grease the pie dish or any oven-safe dish that is flat. Take the dough that was rolled bigger and thicker, and press it to the bottom of the pie dish forming the base. Prick holes to the dough base as shown in the picture. Now fill in the stuffing on the base, leaving a little space on top to seal it. Now with the dough that was rolled thinner, cover the filling and start sealing the edges. To seal the edges, bring the bottom and upper edge together and give it a twist as shown in the picture. Make a cross-cut with a knife after sealing the stuffing. Now place the dish inside the oven and bake 200 C for 15 minutes. Remove and turn it over gently and bake again at 200 C for 5 minutes. Remove from the oven, turn it over again and now grill for 5 minutes(that’s how I got the golden colour). The crunchy and tasty Samosa is ready to dig in. Enjoy. Bon Appetit.
STEPWISE RECIPE FOLLOWS:
1. Take the Chiroti Rava in a mixing bowl and add the Maida to it. Add half teaspoon Cumin seeds, Baking powder and salt and mix well. Create a well in the centre and add 1 tbsp oil and combine well.
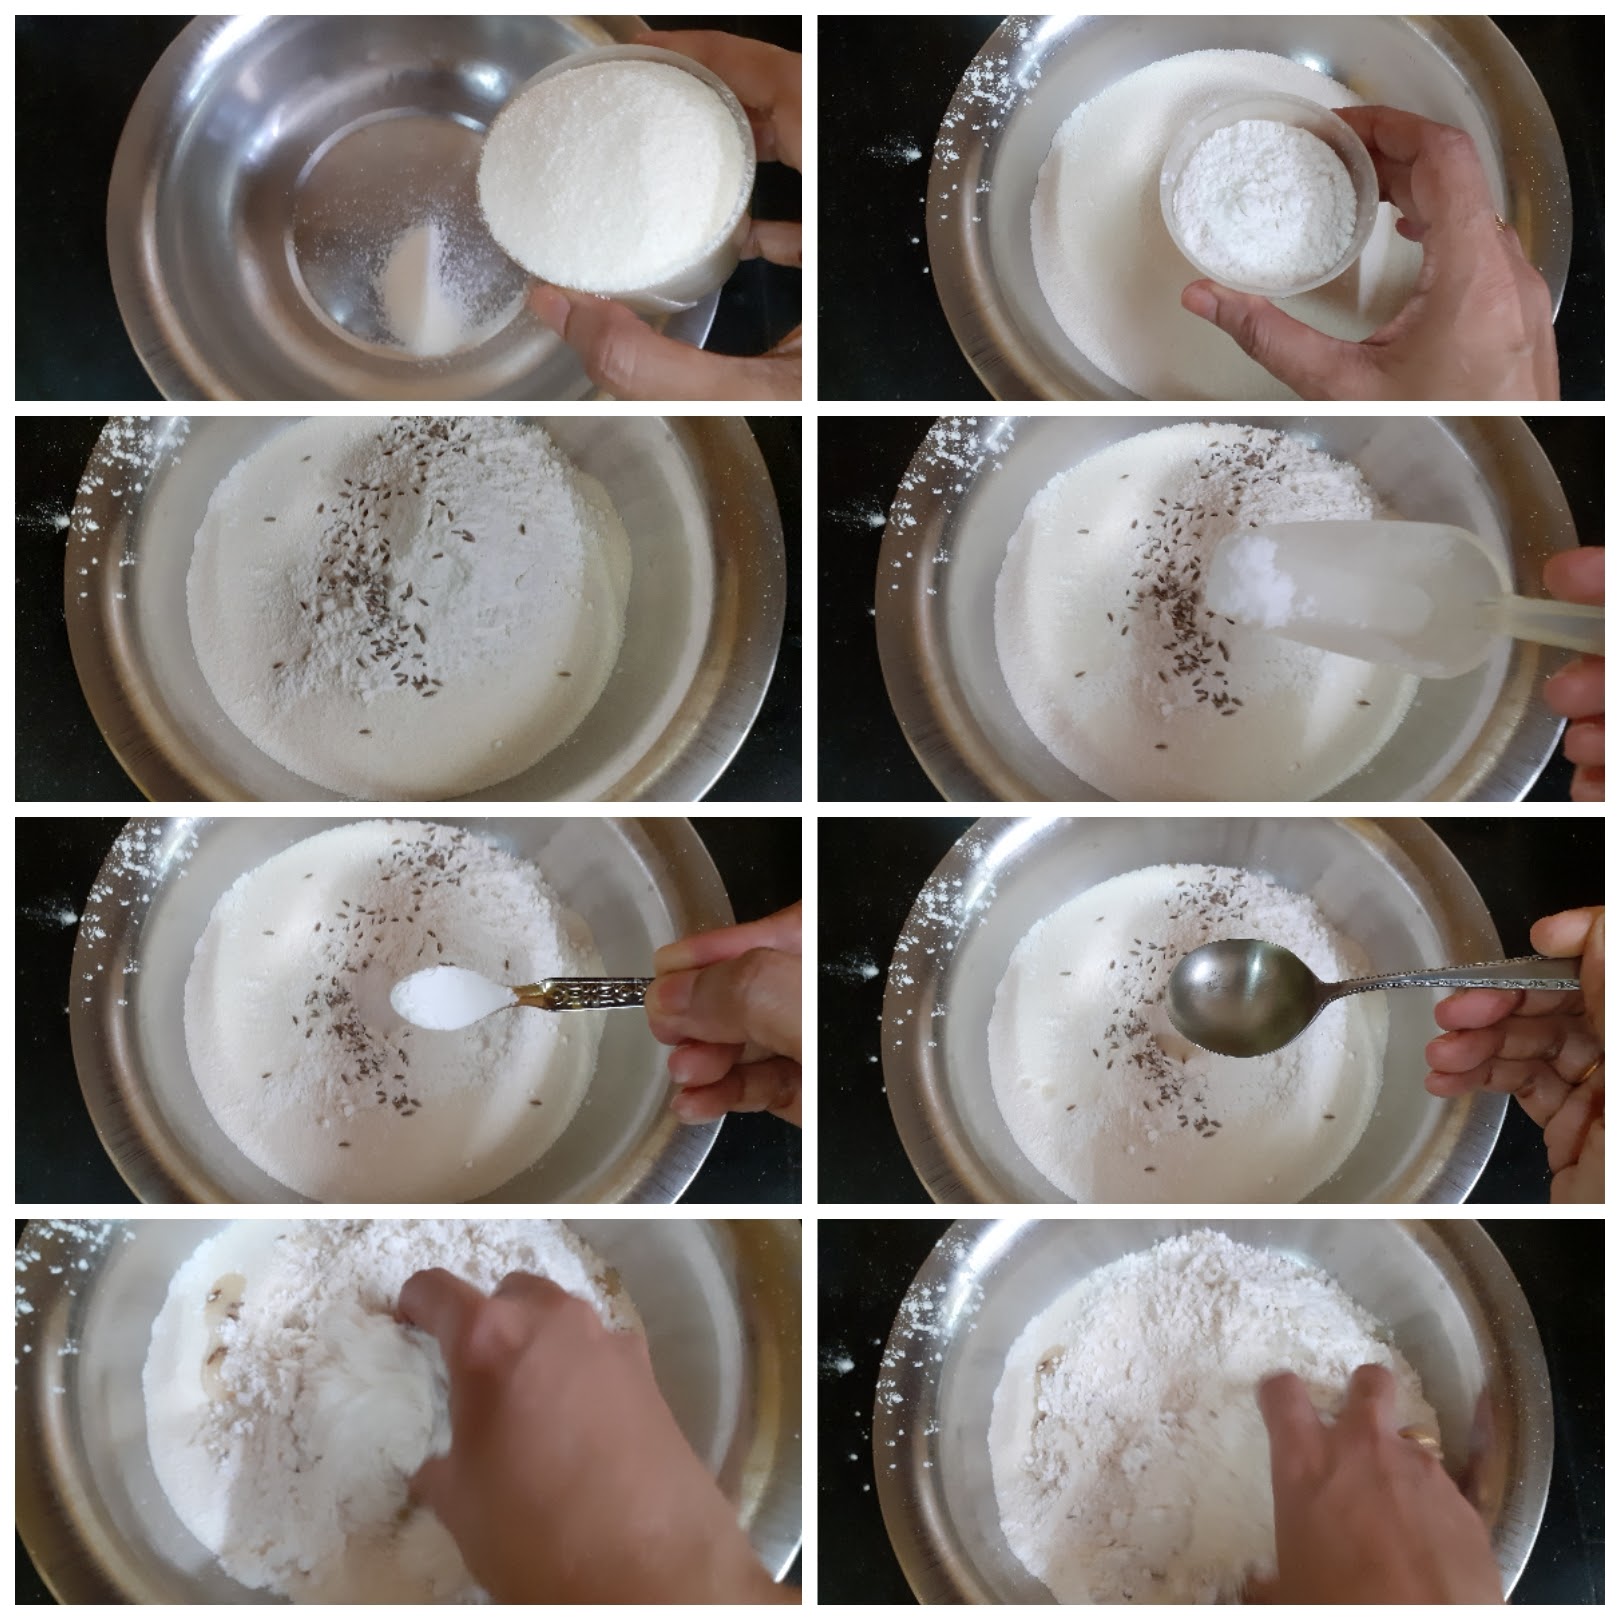
2. Mix in the oil nicely into the flour, takes about a minute. Now form a well again in the centre and adding water little by little combine to form a stiff dough. Rest the dough for 1/2 an hour at least before use.
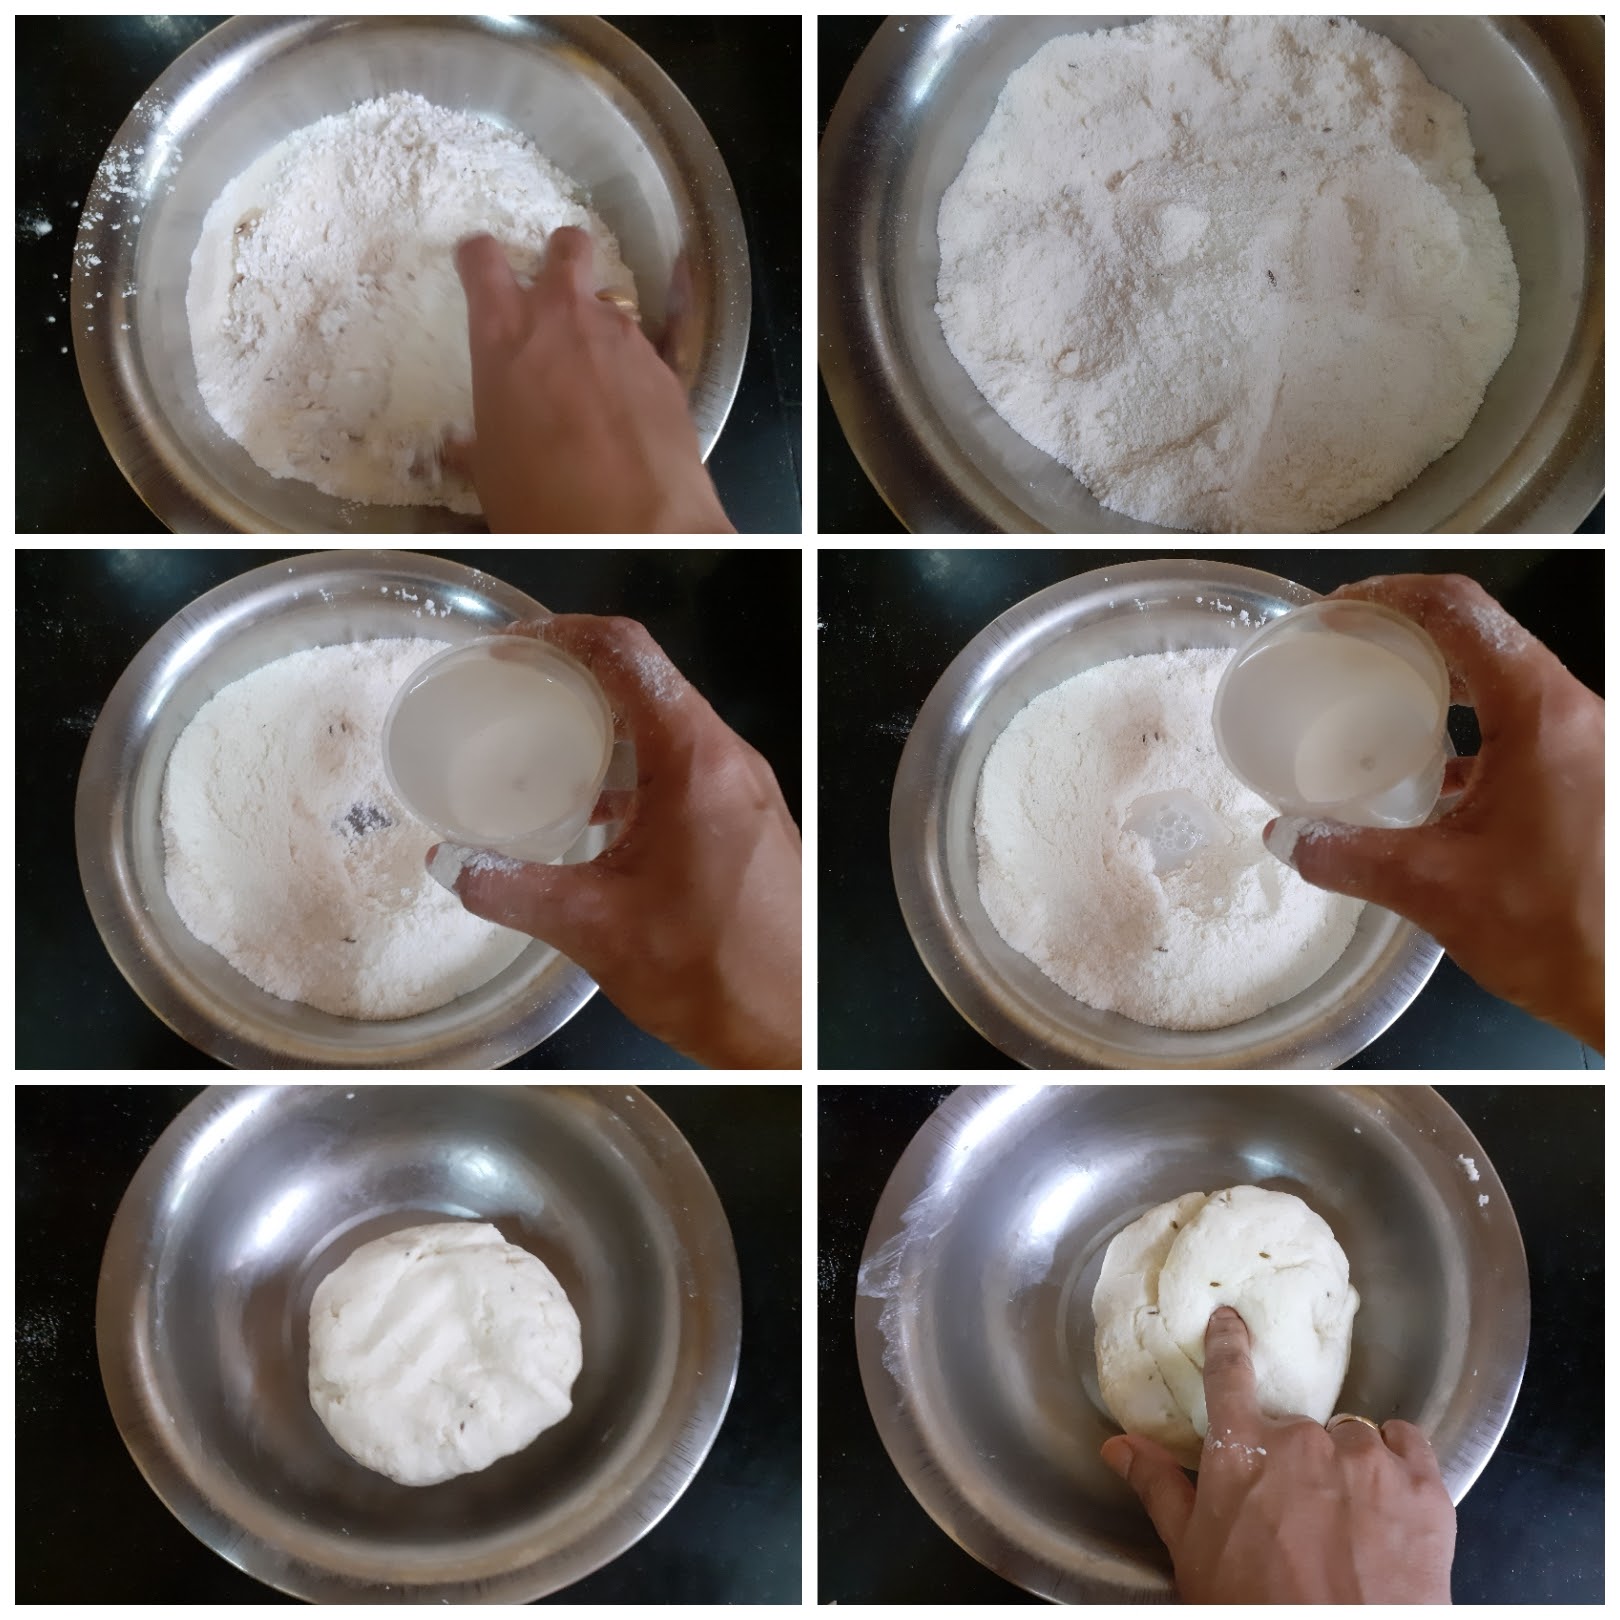
3. In a Kadai heat oil. Add cumin seeds and mustard seeds, and as they crackle add the chopped onions. Fry the onions until light brown and add the mashed potatoes.
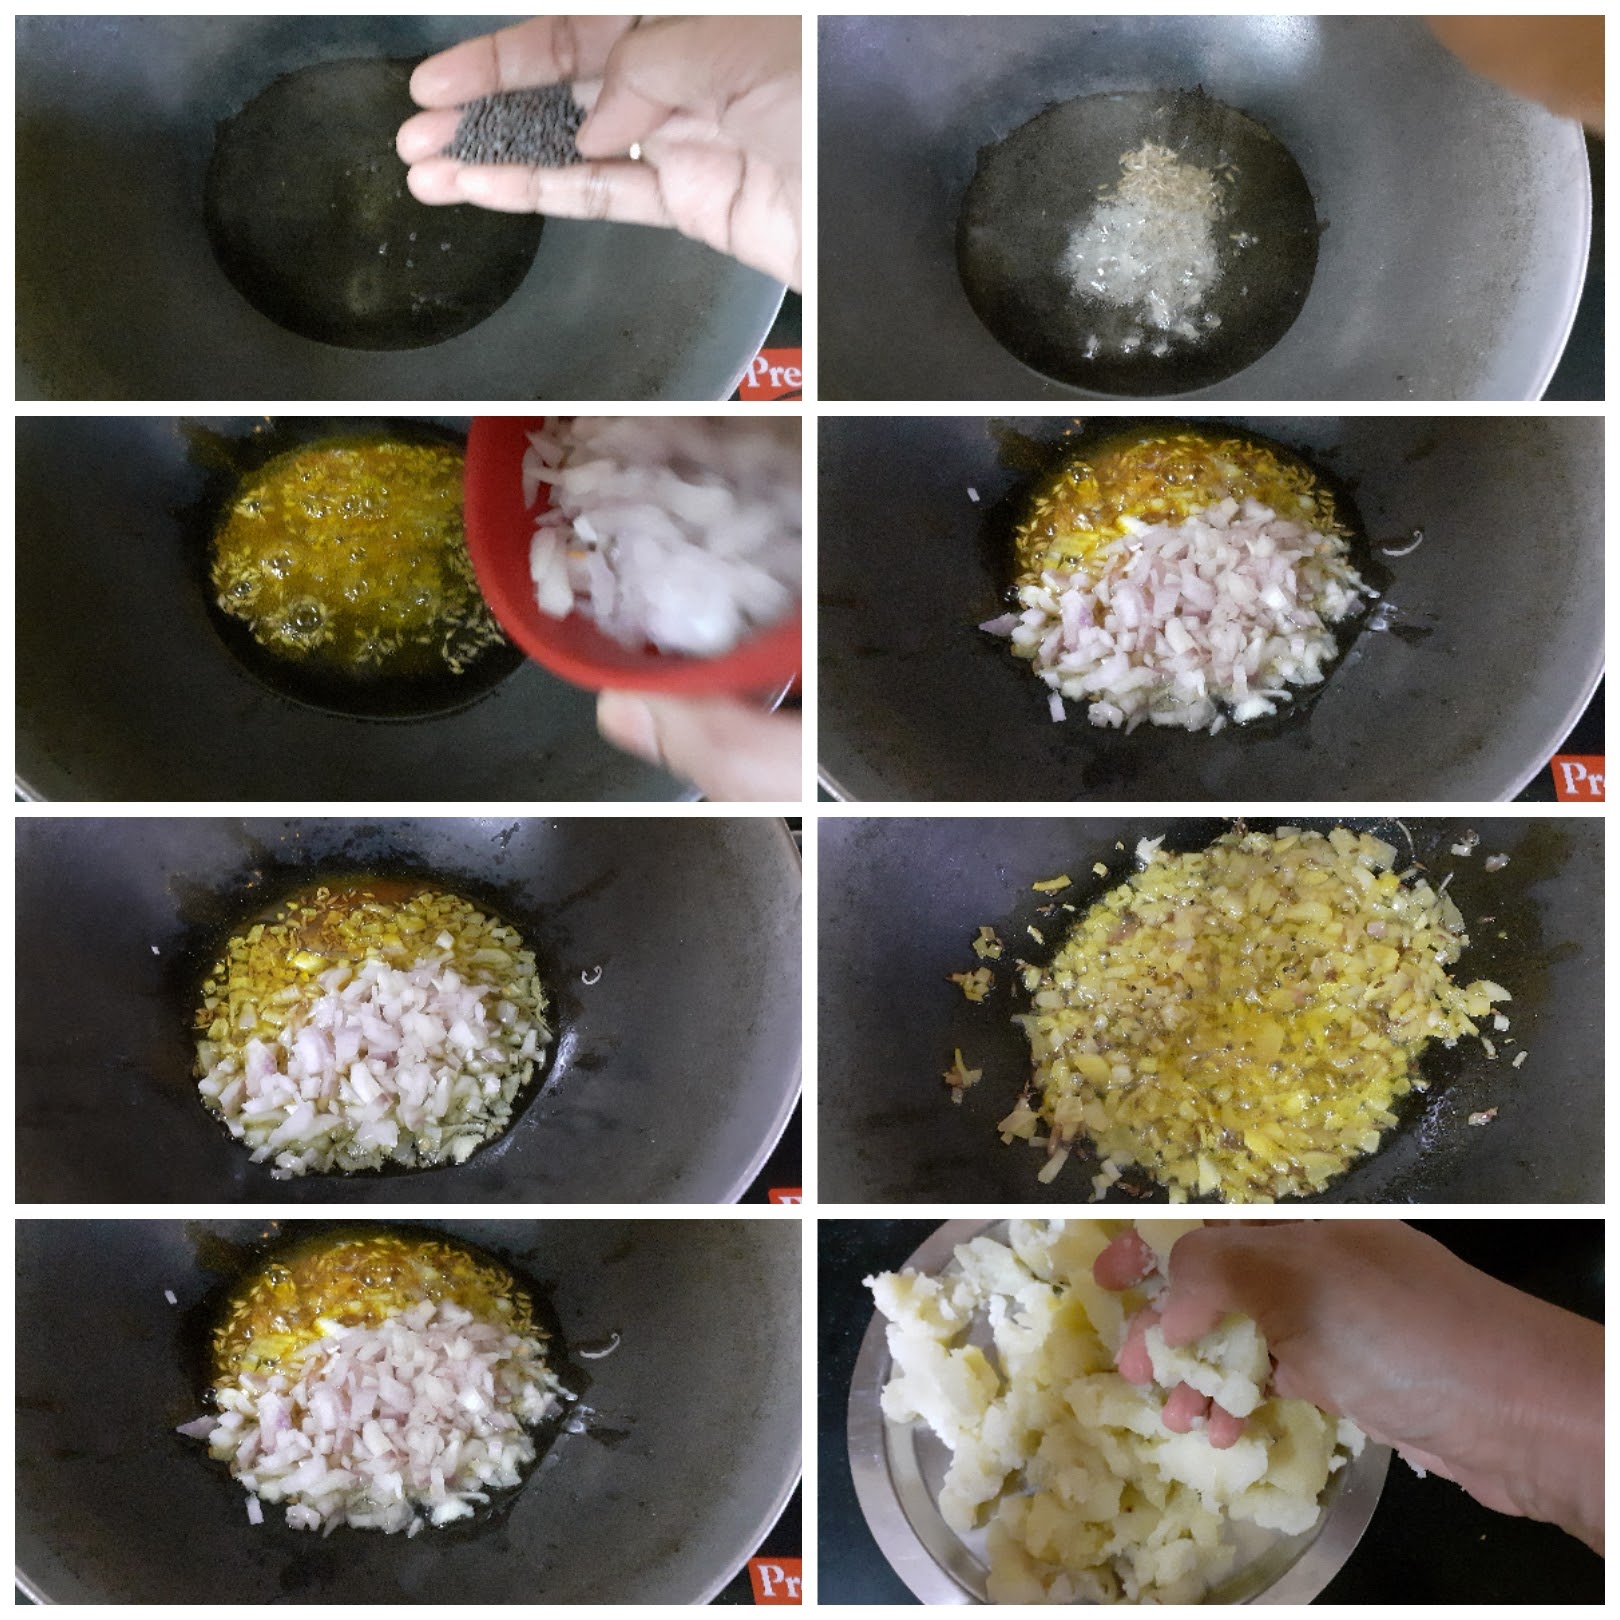
4. Now add salt, followed by red chilli powder, coriander powder, Amchur powder, and mix them all nicely such that all masalas get well incorporated with the potatoes. Finally, add the garam masala powder(picture not taken) and chopped coriander and stir. Allow the filling to cool down a bit.

5. Preheat the oven to 180C for 10 minutes. Knead the Chiroti dough again and divide it into two halves-one slightly bigger than the other. Roll each of them into a circle like a Chapati.
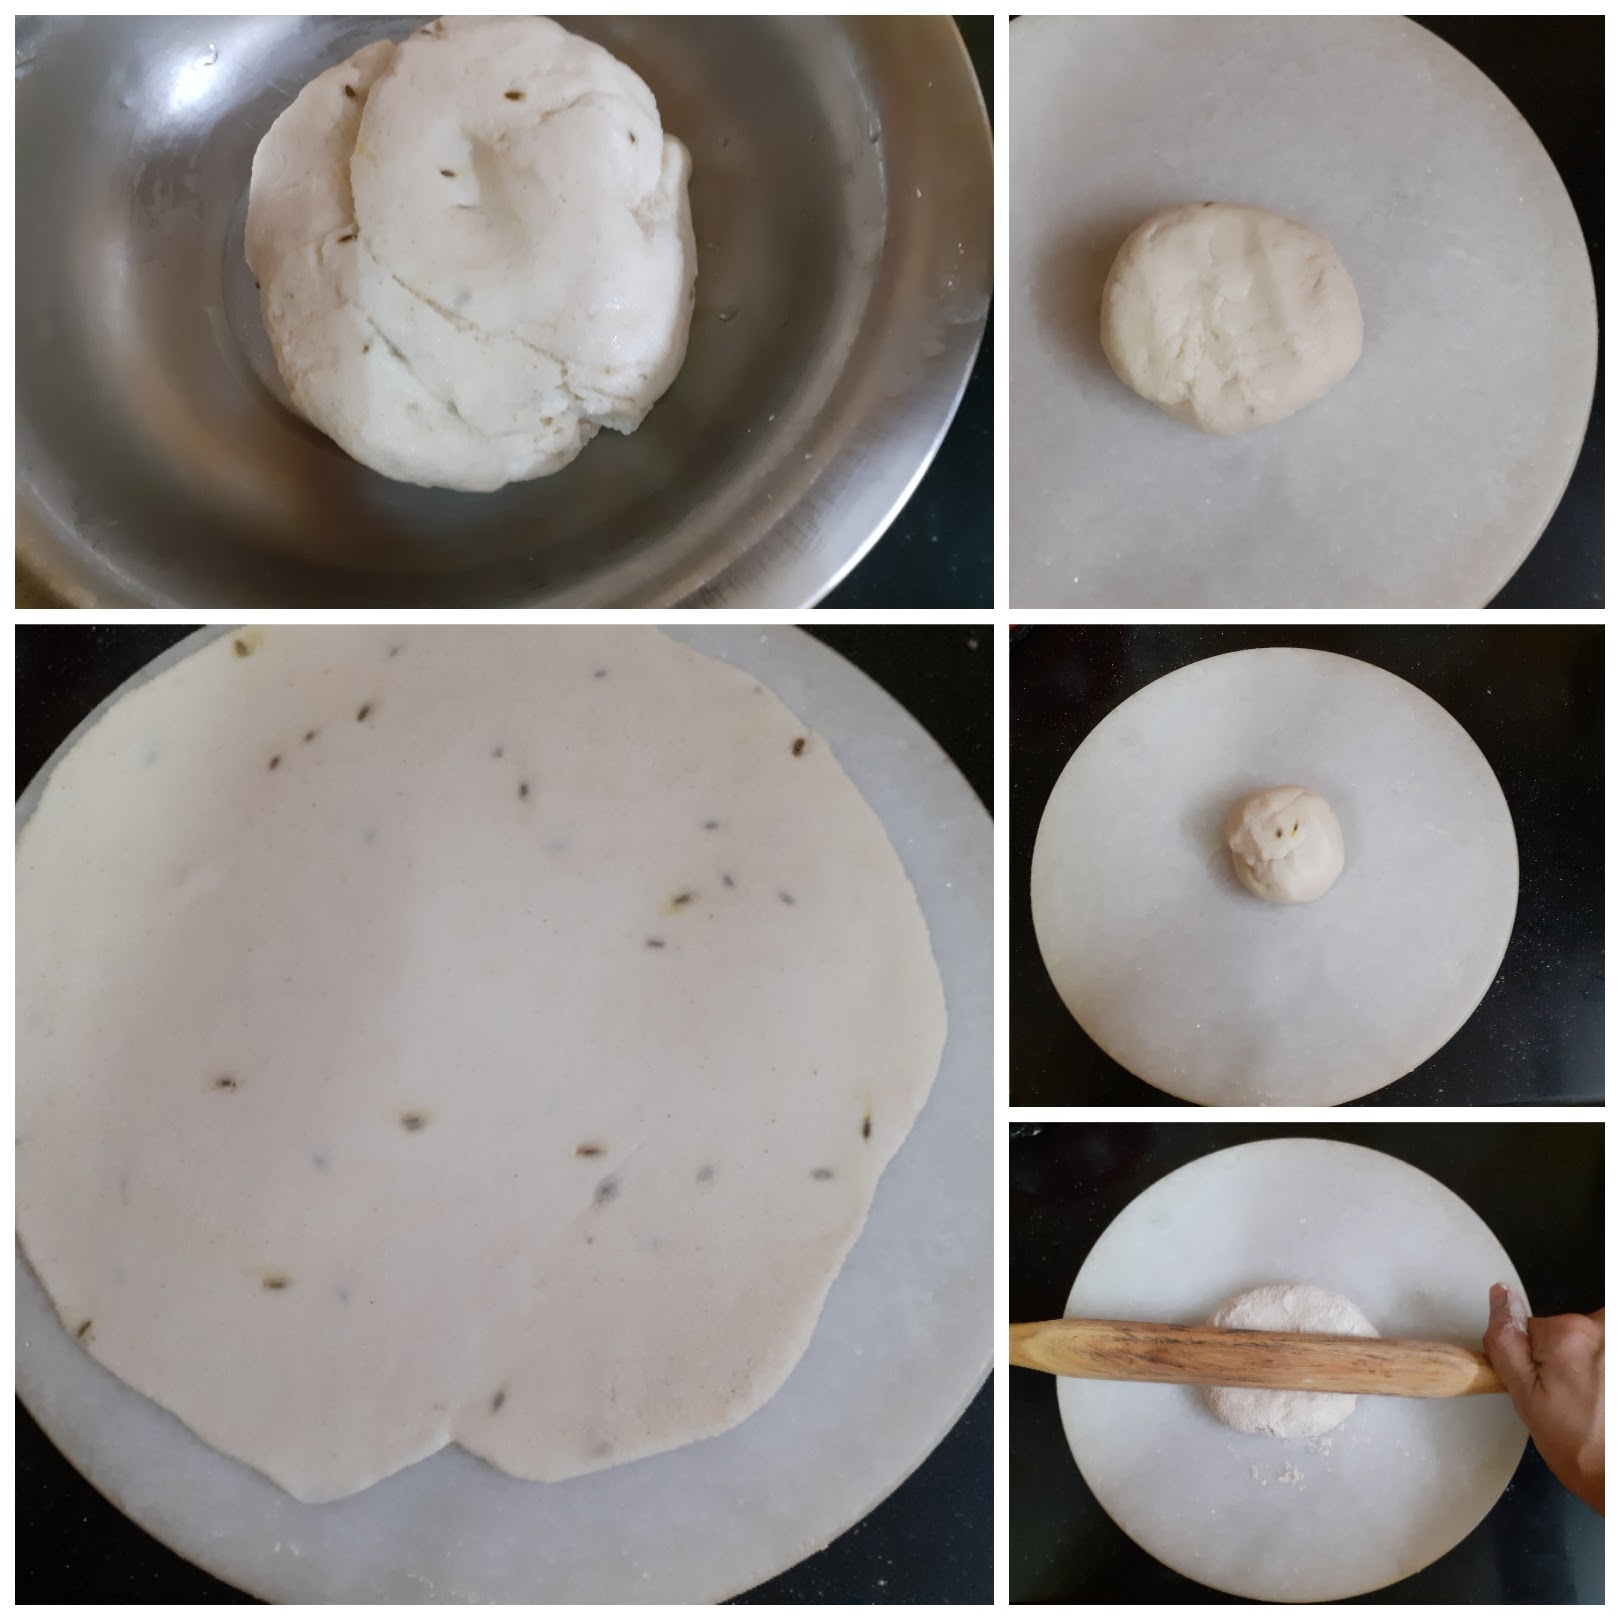
6. The bigger part of dough should be rolled out thicker than the smaller portion of the dough. After rolling the dough, grease the pie dish or any oven-safe dish that is flat. Take the dough that was rolled bigger and thicker, and press it to the bottom of the pie dish forming the base. Prick holes to the dough base as shown in the picture.

7. Now fill in the stuffing on the base, leaving a little space on top to seal it. Now with the dough that was rolled thinner, cover the filling and start sealing the edges. To seal the edges, bring the bottom and upper edge together and give it a twist as shown in the picture. Make a cross-cut with a knife after sealing the stuffing.
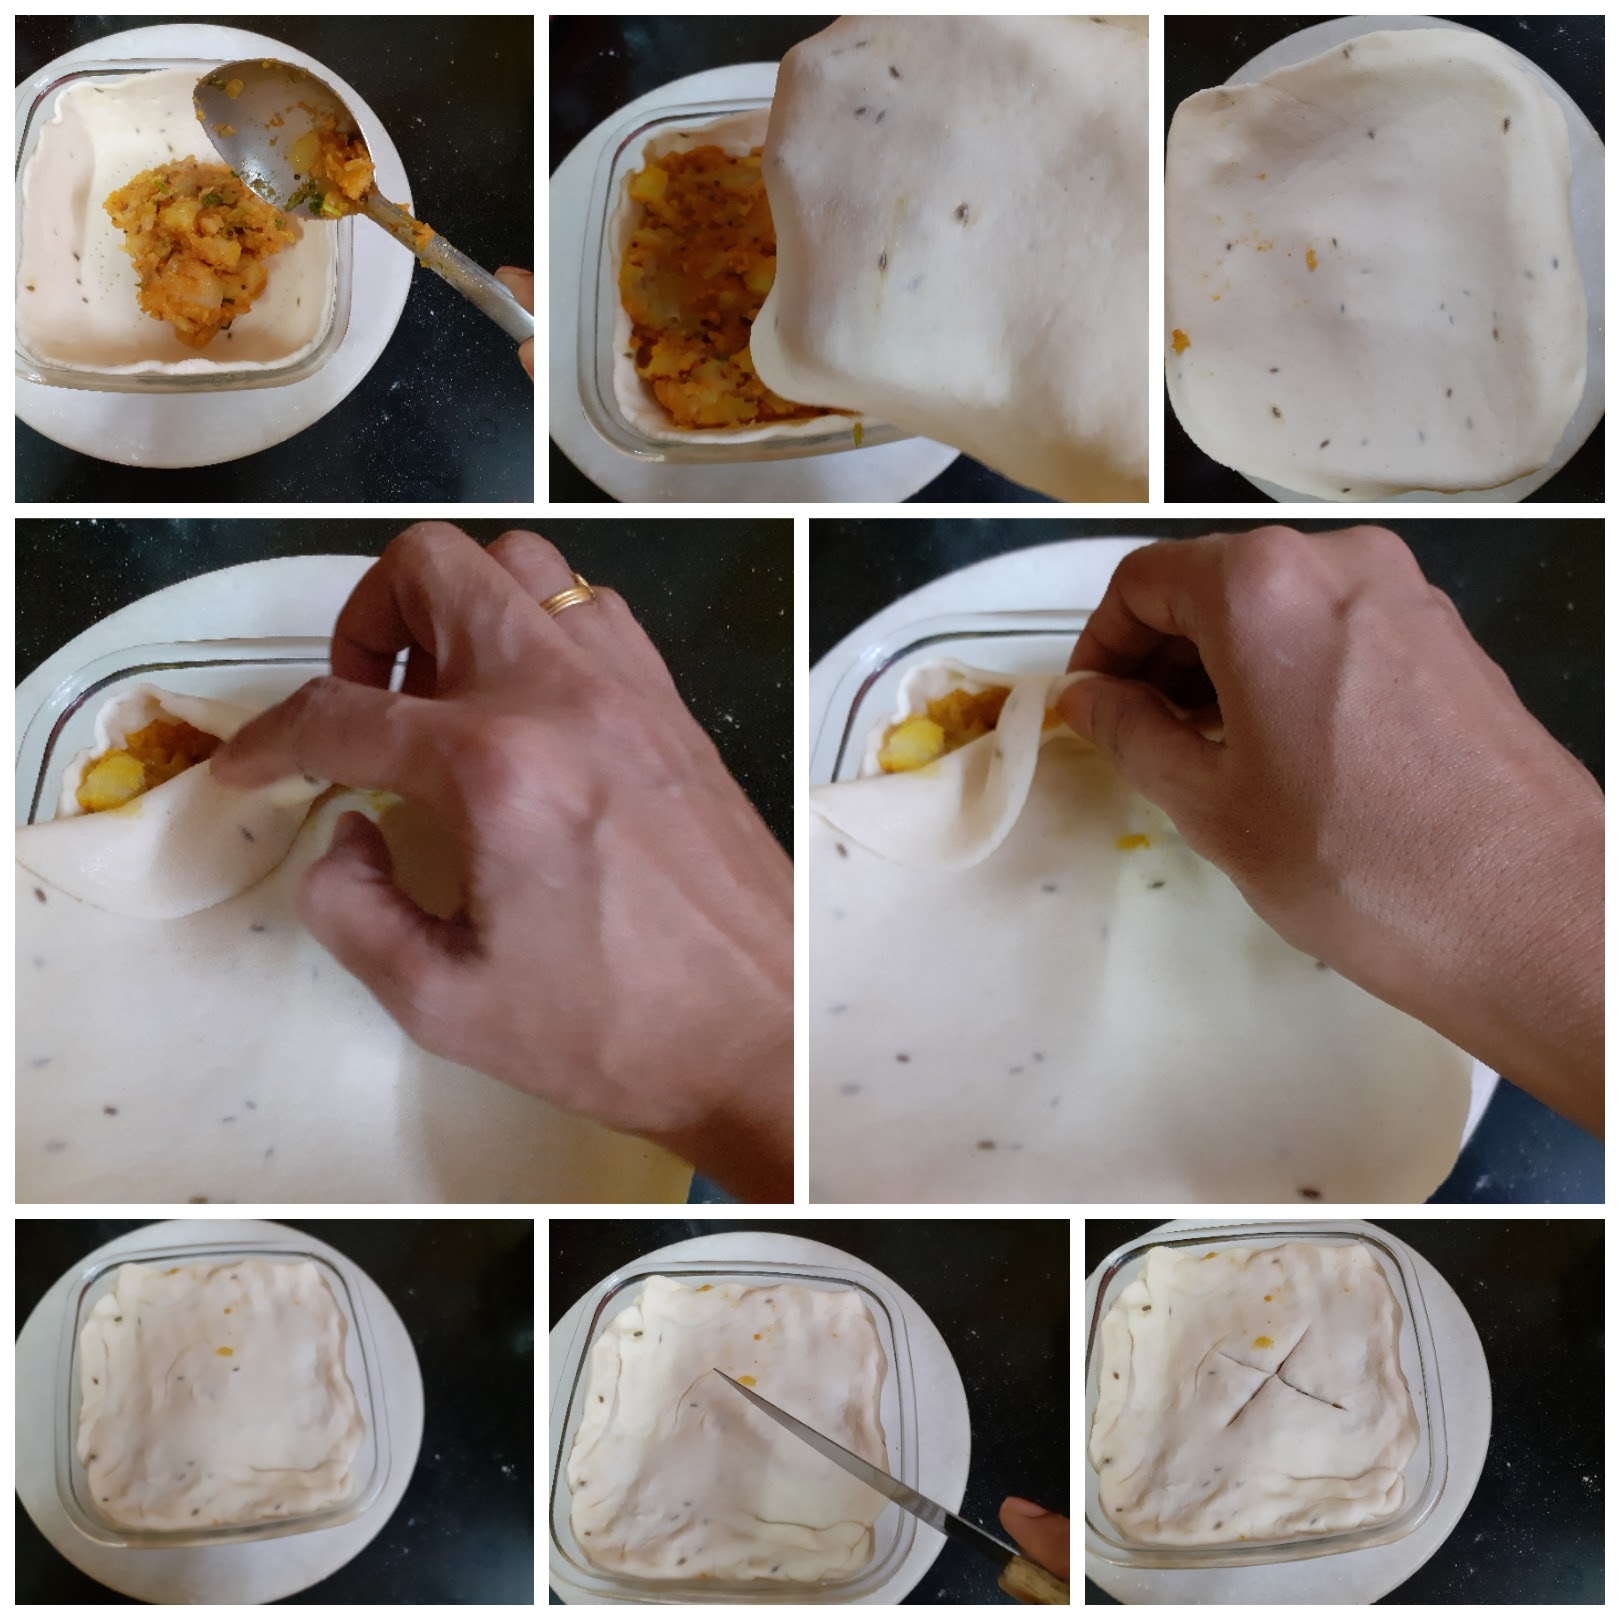
8. Now place the dish inside the oven and bake 200 C for 15 minutes. Remove and turn it over gently and bake again at 200 C for 5 minutes. Remove from the oven, turn it over again and now grill for 5 minutes(that’s how I got the golden colour). The crunchy and tasty Samosa is ready to dig in.
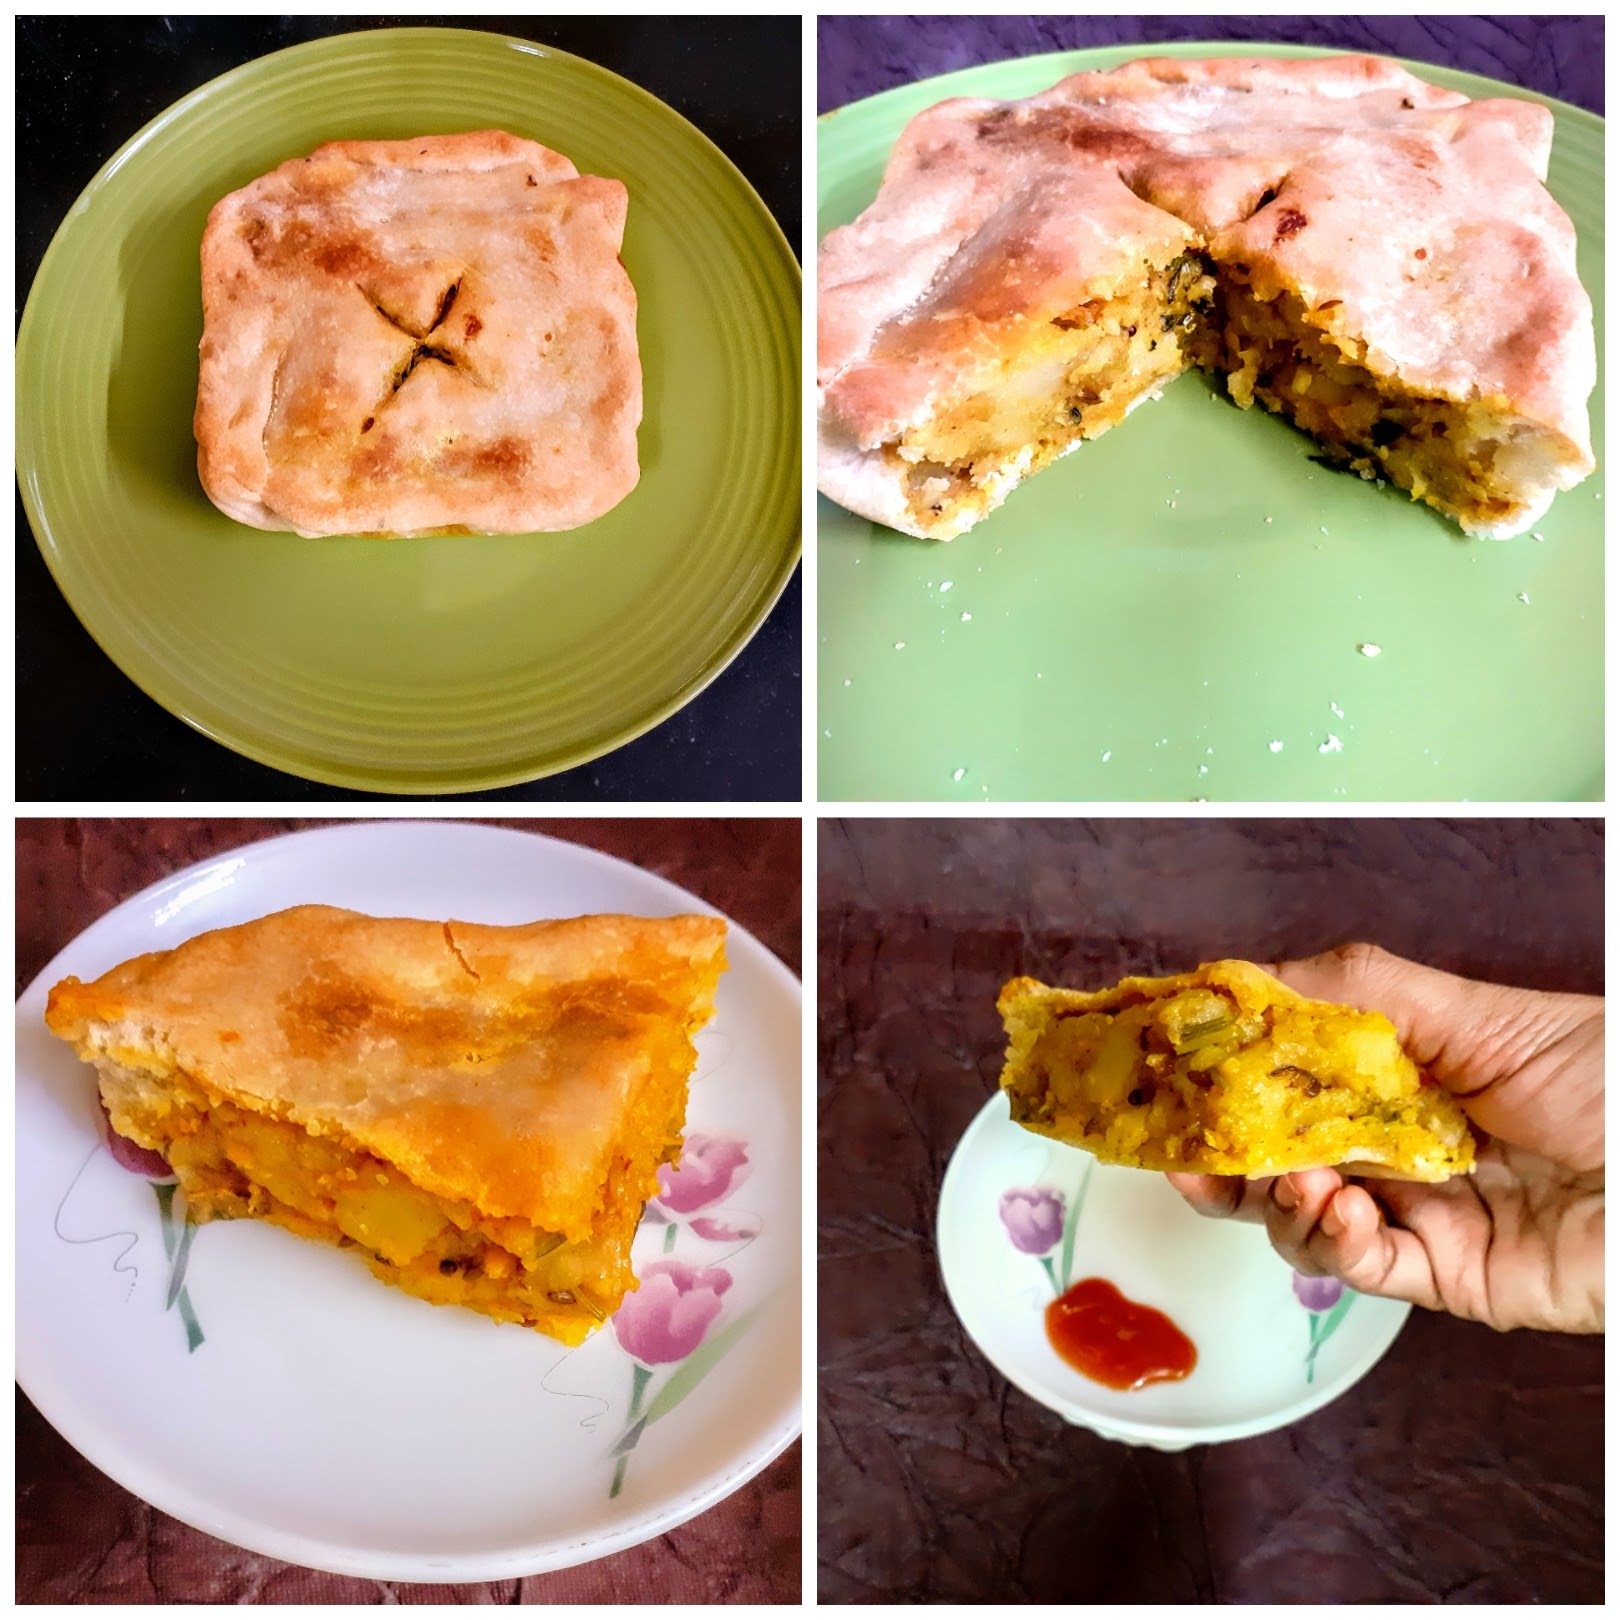
NOTES:
1. Let not the Chiroti Rava stop you from making this dish. Just use Maida and continue as per recipe. Instead of 2 cups Chiroti and 1/4 cup maida, use 21/4 cup Maida or 2 cups maida and 1/4 cup wheat flour.
2. I have not used green peas in this recipe, it can be an add- in to the stuffing. If using pre-cook it and add it along with the potatoes in the recipe.
3. Feel free to increase or decrease spice levels as per taste.
4.. If you are not particular about the browning on the top, it is fine to not grill, but I would recommend it because it is really worth the 5 minutes.
5. I made 2 Samosa pies with the quantity of flour and potatoes used here.
6. Holes are pricked to the dough base after placing on the pie dish to avoid puffing. Ensure that you follow this step. If the pastry puffs the crunchiness will be compromised.
7. After the filling is put in and the edges are filled, make a cross-cut to ensure cooking is even through the layers.
If you tried this recipe and liked it please comment below. I would love to hear from you. If you have a query about the recipe email us and ill respond as soon as I can.
Mava Paneer Curry
Mava or Khoya when added in a recipe gives it a rich texture, flavour and taste. Mava is mostly used in sweet dishes, but can be used in gravies also to add body to a dish. The khoya is available in all stores or can be made at home. Check notes for making at home.

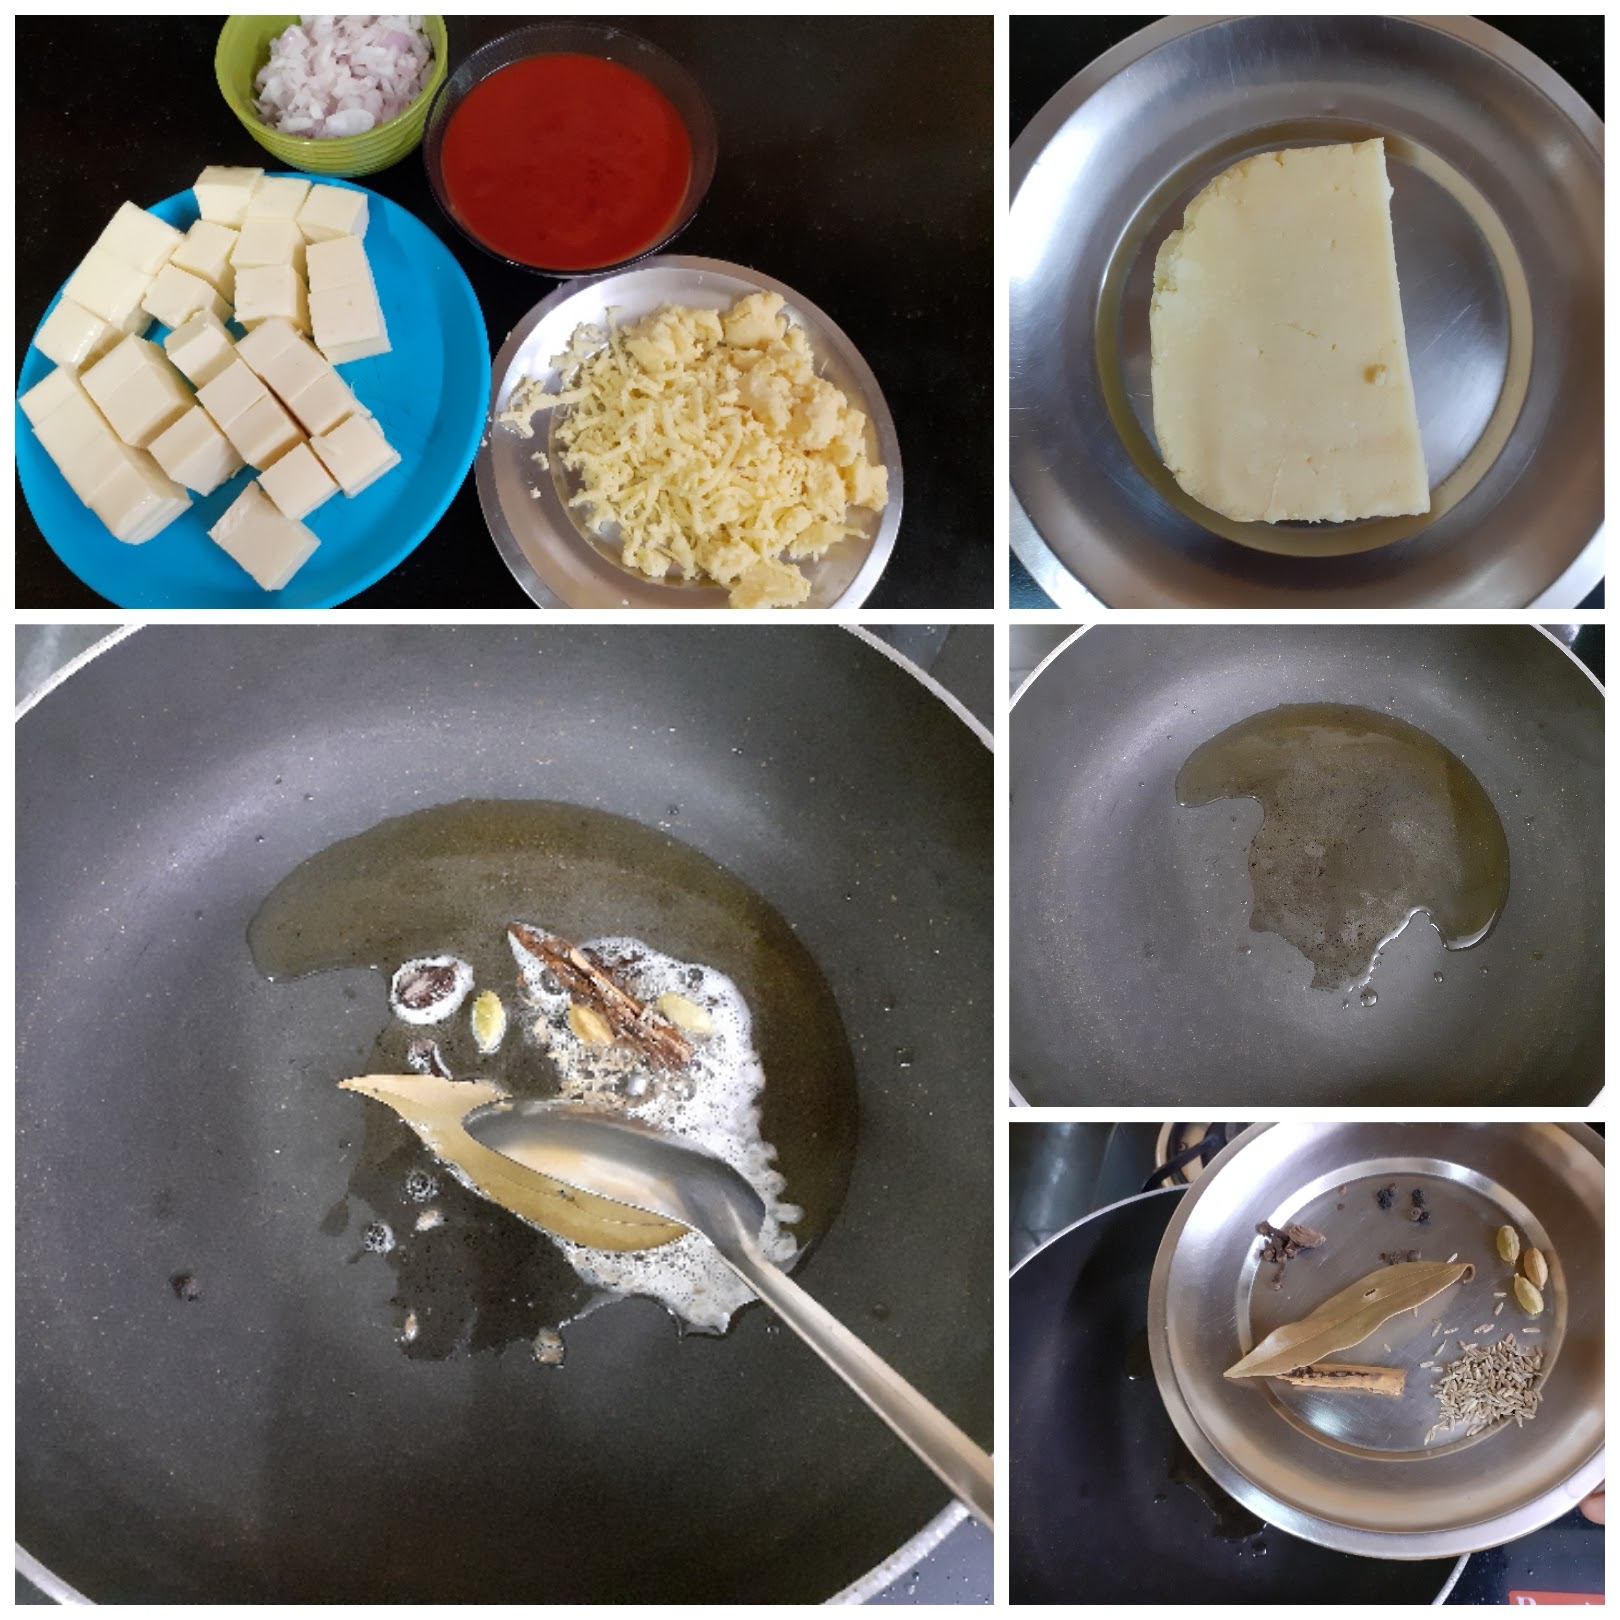
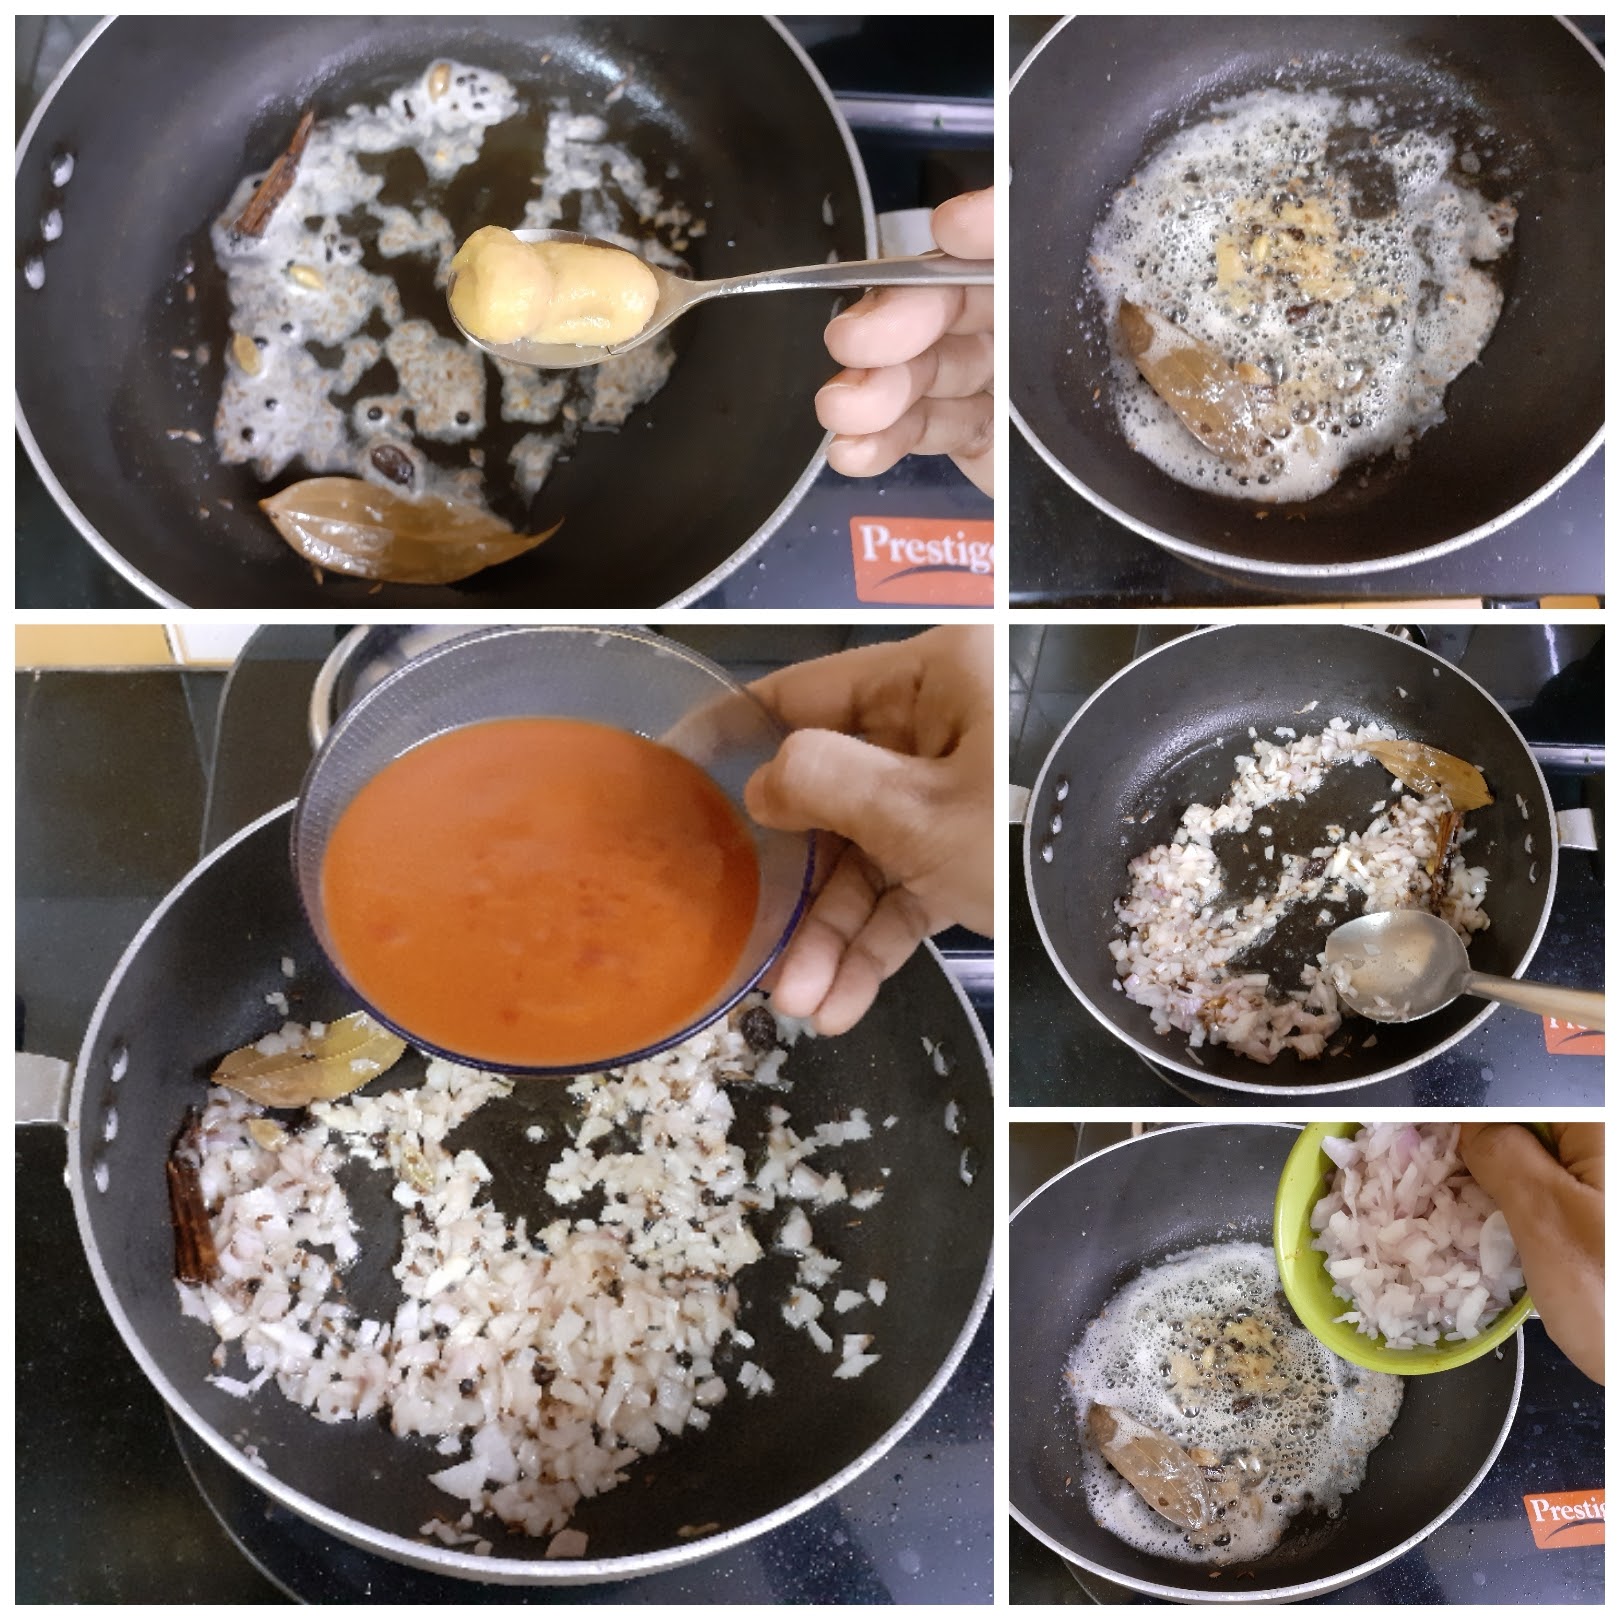

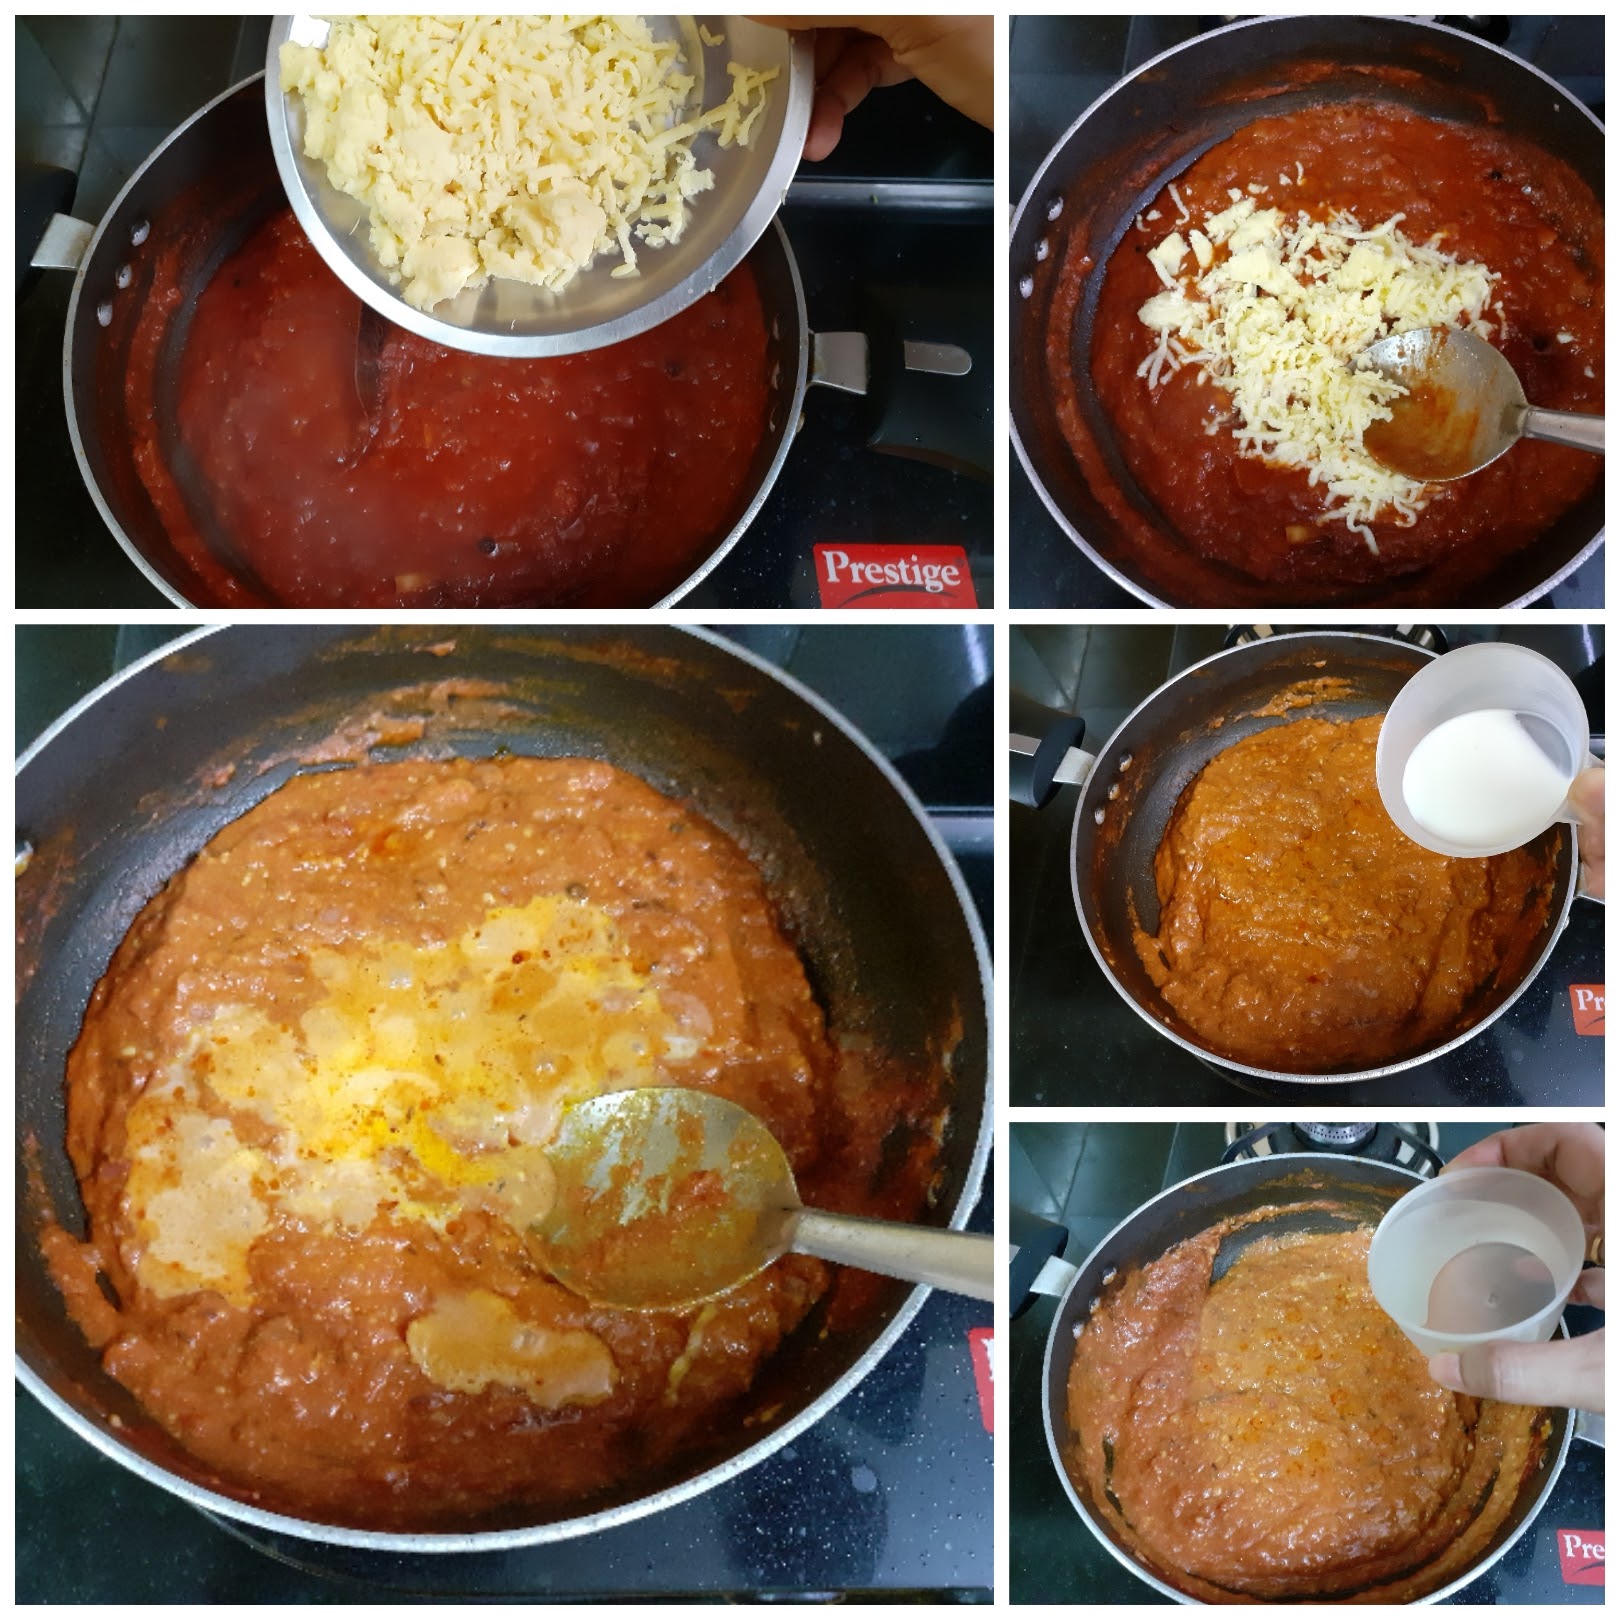
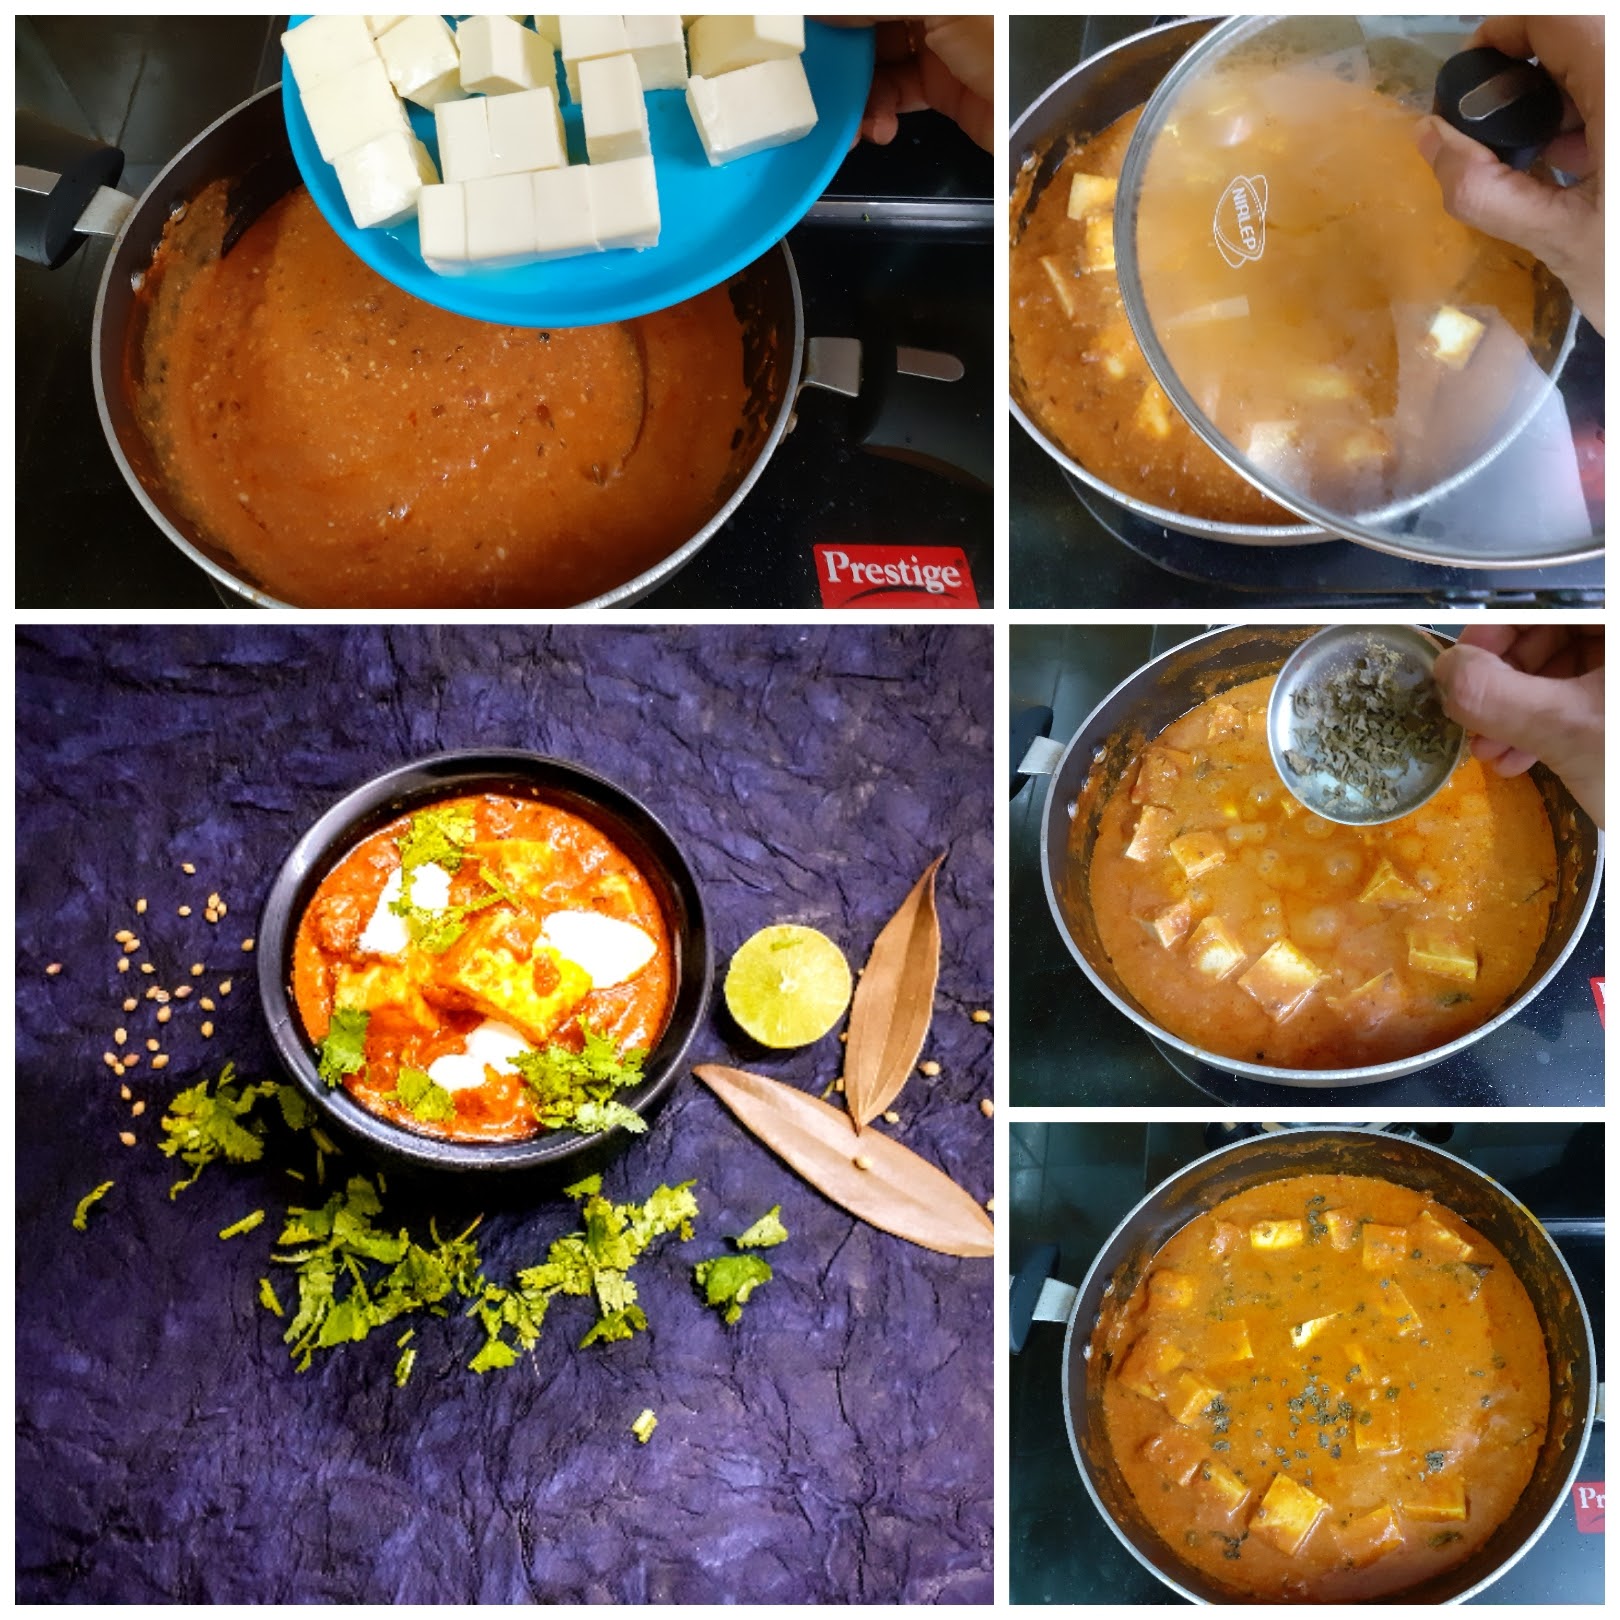
If you tried this recipe and liked it please comment below. I would love to hear from you. If you have a query about the recipe email us and ill respond as soon as I can.
Pachai Sundakkai Kuzhambu (Chettinad Style)
Sundakkai/ Chundakkai in Tamil or Turkery Berry in English, as it is widely known, is a vegetable used in South Indian cooking to make a Kuzhambu or a gravy in which these berries are simmered with spices. As tasty as the Kuzhambu tastes, the berries are slightly bitter and have many medicinal benefits. This Vegetable is also known as Kudenekayi in Kannada or Usthikaya in Telugu. In Hindi it is called Bankatiya. I am giving here different names so that if you know this vegetable, one must try out recipes made of it because of its medicinal properties.
In SouthIndia the berries are blanched and then dried in the sun for a few days until it changes colour and is completely dry. The dried berries are then stored in an airtight jar then used to make the Sundakkai Vathakuzhambu. The dried berries are also fried in ghee and make an yummy accompaniment for curd rice. The berries fried in ghee are also mixed with hot rice and eaten as it is believed that it helps in deworming.
Health benefits of Sundakkai/ Turkey Berry- cures common cold, helps in treating kidney related issues, treats Anaemia, helps in treating cough and asthma, clears mucus, help in controlling diabetes, and they heal gastric ulcers.1Berry myriad benefits.
In this recipe I am using the fresh Sundakkai and not the dried ones( Vathal). Here the berries are cooked in tamarind sauce with a spicy, ground masala paste. The fresh berries are little bitter and so have to smashed using a pestle, so that as the Berry gets cooked in the tamarind pulp the bitterness is reduced. I am calling this a Chettinad style Kuzhambu because the masala paste used here is the Chettinad masala paste.
While you are here check out my other recipes like Vathakuzhambu, Rasam, Coriander rice, Karuvepilai Podi and rice, Mor Kuzhambu and more.
Here is the recipe of Pachai Sundakkai Kuzhambu for you-
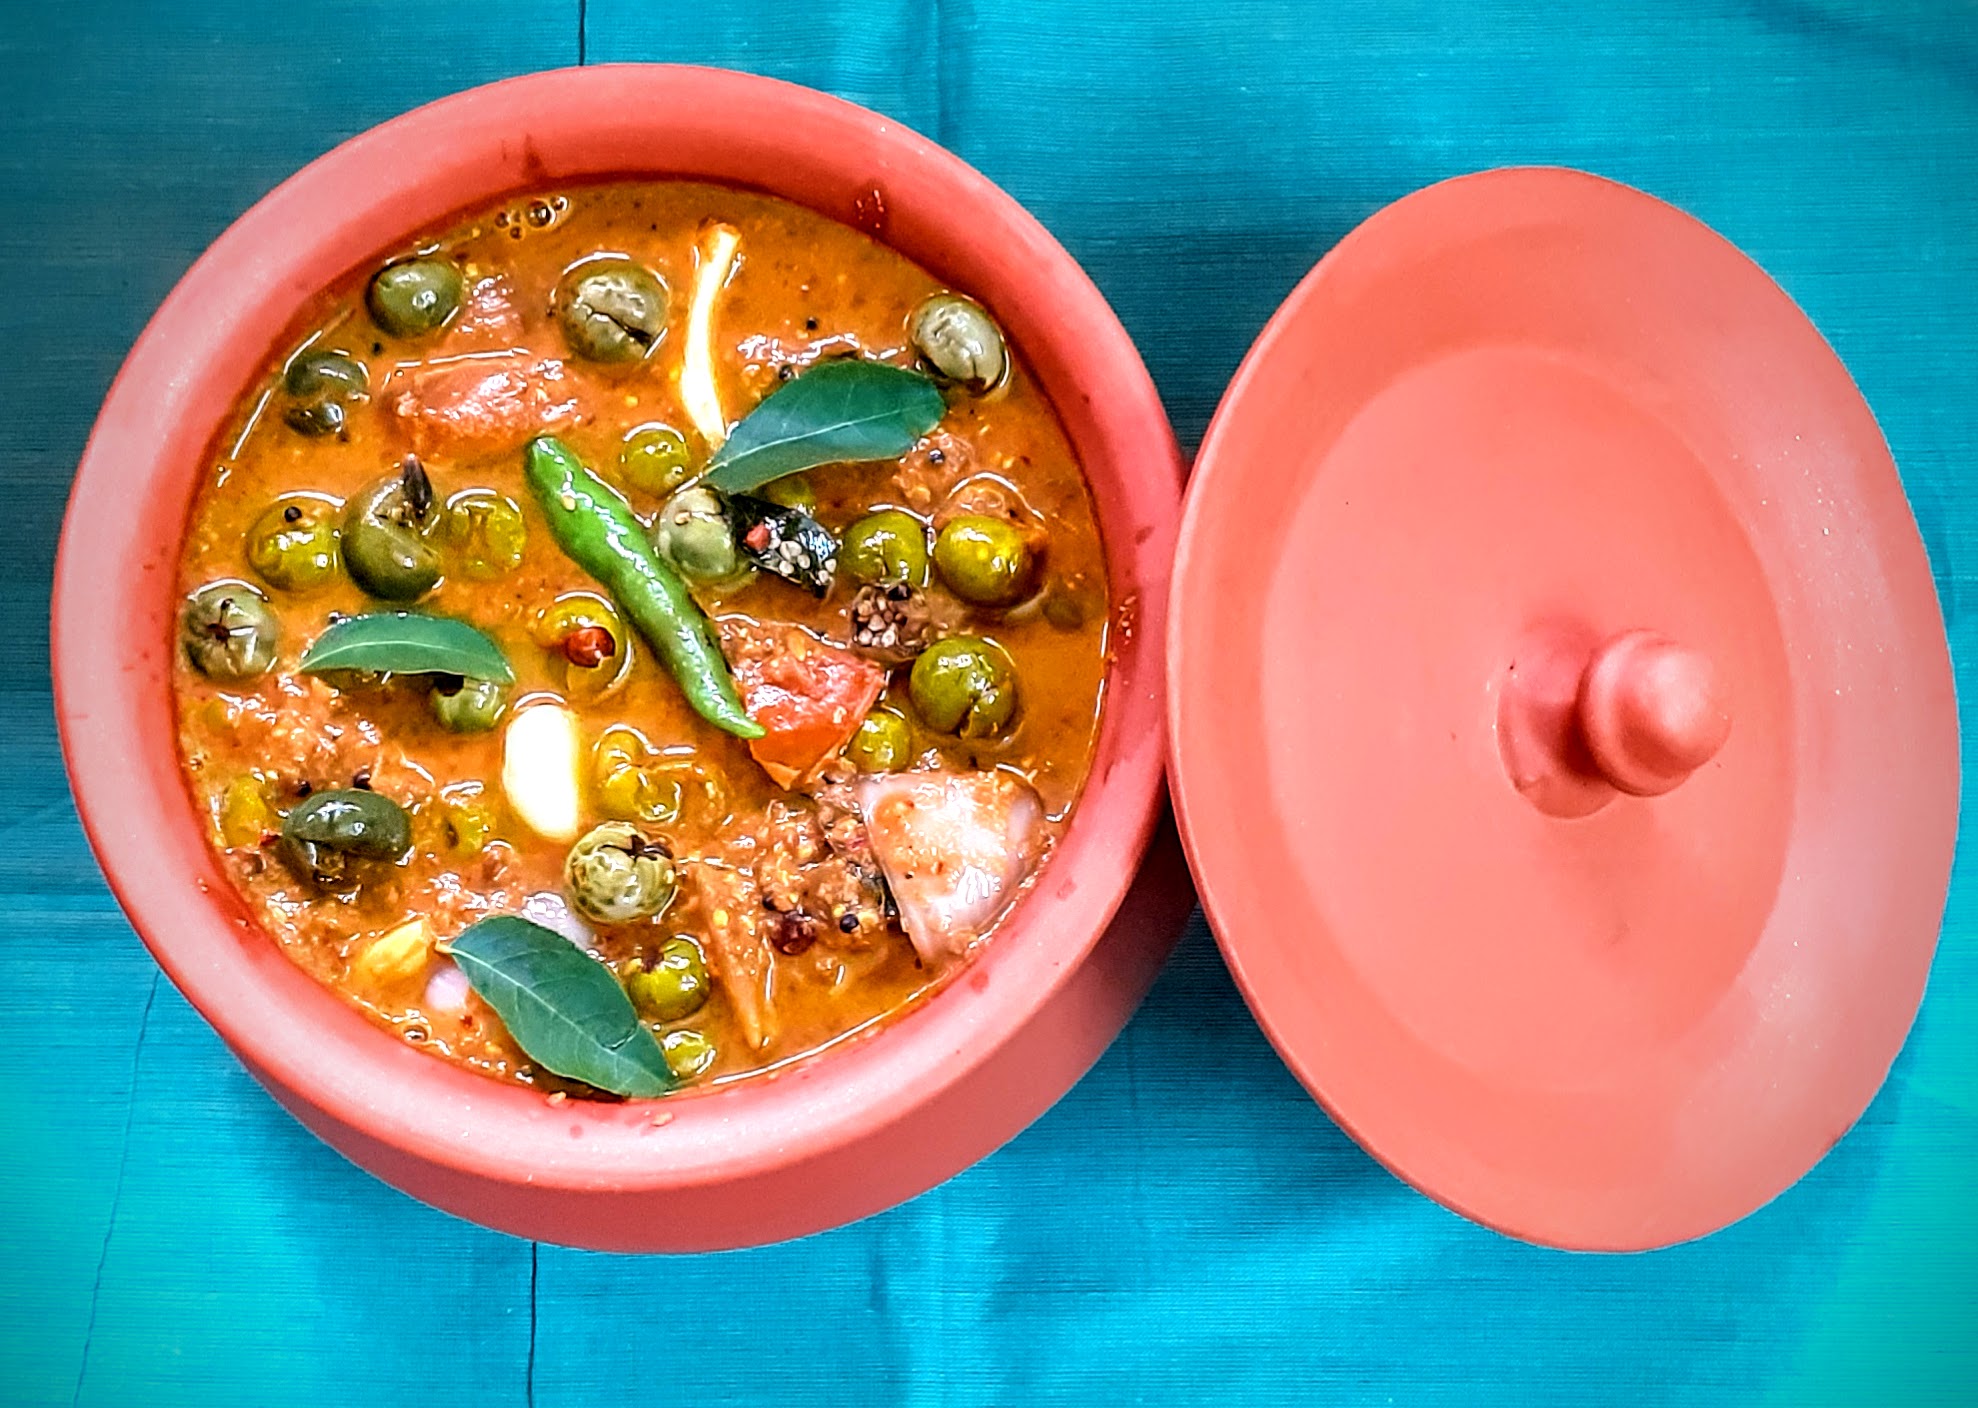
Ingredients:
Sundakkai/ Turkey Berry (fresh) 150 gm
Tamarind paste 1.5 tbsp ( or pulp of lemon sized ball)
Onion 1 (medium) diced
Tomato 1 large chopped roughly
Garlic 10 to 12 cloves
Curry leaves a few leaves
Green chillies 2
Gingelly/Til/Sesame oil 1.5 tbsp
Asafoetida 1/2 tsp
To grind:
Coriander seeds 1 tbsp
Fennel seeds 1.5 tsp
Dry red chilli 2
Kashmiri dry red chilli 1(optional)
Coconut gratings 1.5 tbsp
To temper:
Mustard seeds 1 tsp
Chana dal(gram) 1 tsp
Dry red chilli 1 broken
Methi/ fenugreek seeds 1 pinch
Asafoetida 1/2 tsp
Method:
Wash and pat dry the Sundakkai/Turkey berry. Now with a mortar and pestle smash it lightly, such that it splits midway(refer picture). Now in a pan heat oil, add all ingredients under tempering followed by asafoetida and fry for 30 seconds. Now add the lightly crushed Sundakkai to the tempering and fry nicely for a minute.Now add the garlic cloves followed by onion, curry leaves and green chillies and continue to saute for 2 minutes. Now add the tomatoes and saute until the tomatoes turn tender. Add the tamarind paste followed by 2.5 cups water (or) add the pulp extracted from lemon sized ball of tamarind. Stir nicely and begin boiling. Add turmeric powder and cook until the Sundakkai turns tender. Check for doneness of Sundakkai by crushing one with a spoon/ladle. If it mashes easily the berries are cooked. Now grind all the ingredients under “to grind” to a coarse mixture, then add 1/2 cup water and grind to a smooth paste. Add this paste to the Sundakkai simmering in the Tamarind pulp,stir well and allow to cook. Continue cooking until the gravy thickens and the raw small of the masala is gone. The tasty and healthy Chettinad style Sundakkai Kuzhambu is ready.
SERVING SUGGESTIONS: With hot rice, with Dosa, Idli, pongal,
and Curd rice.
STEPWISE RECIPE FOLLOWS:
1. Assemble all ingredients. Wash and pat dry the Sundakkai/Turkey berry. Now with a mortar and pestle smash it lightly, such that it splits midway.

2. Now in a pan heat oil, add all ingredients under tempering followed by asafoetida and fry for 30 seconds. Now add the lightly crushed Sundakkai to the tempering and fry nicely for a minute.
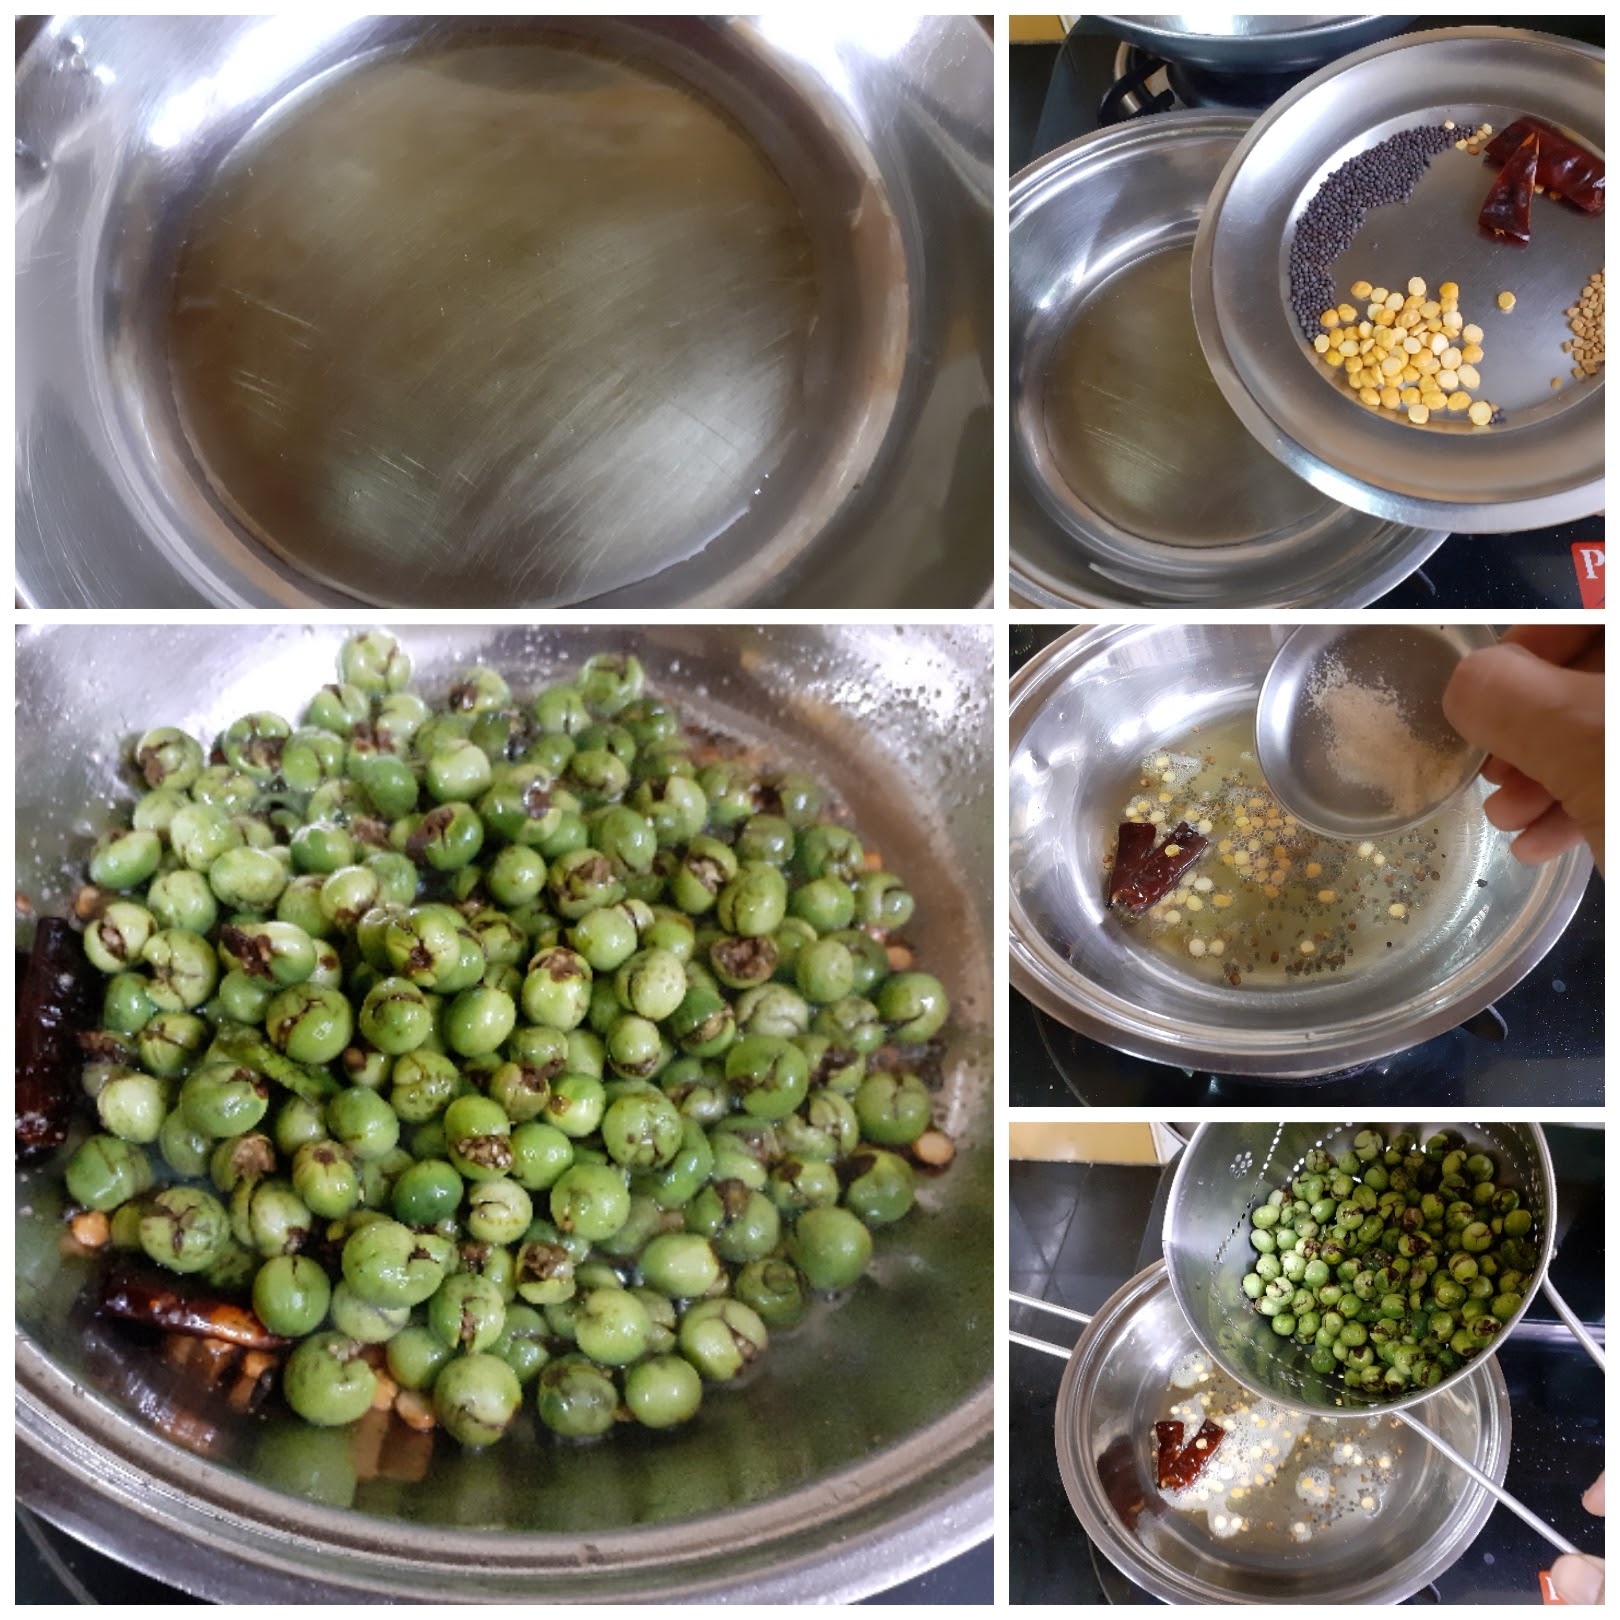
3. Add the garlic cloves followed by onion, curry leaves and green chillies and continue to saute for 2 minutes. Now add the tomatoes and saute until the tomatoes turn tender.
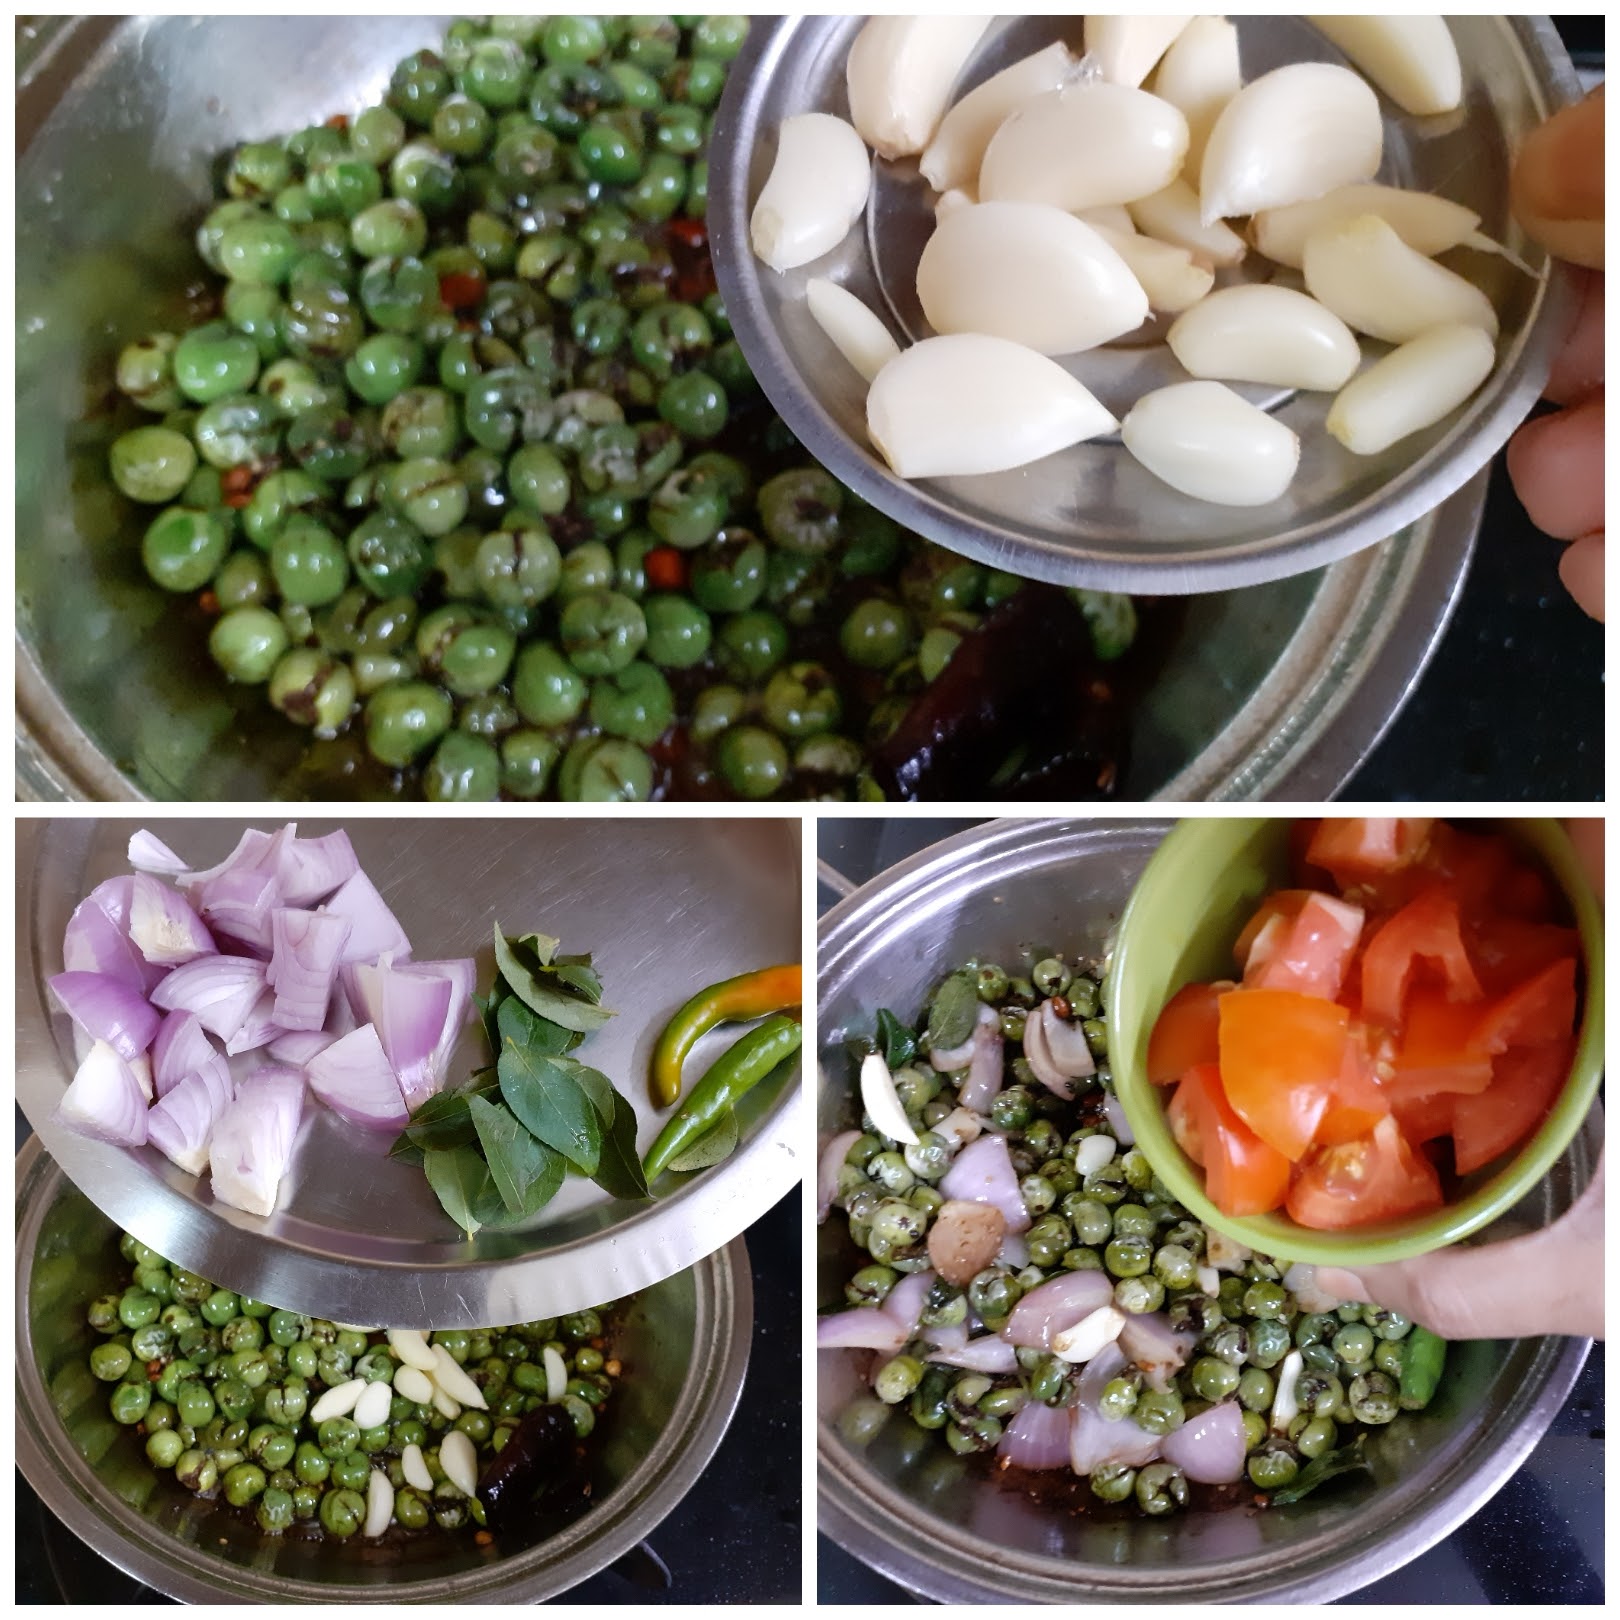
4. Add the tamarind paste followed by 2.5 cups water (or) add the pulp extracted from lemon sized ball of tamarind. Stir nicely and begin boiling. Add turmeric powder and cook until the Sundakkai turns tender.
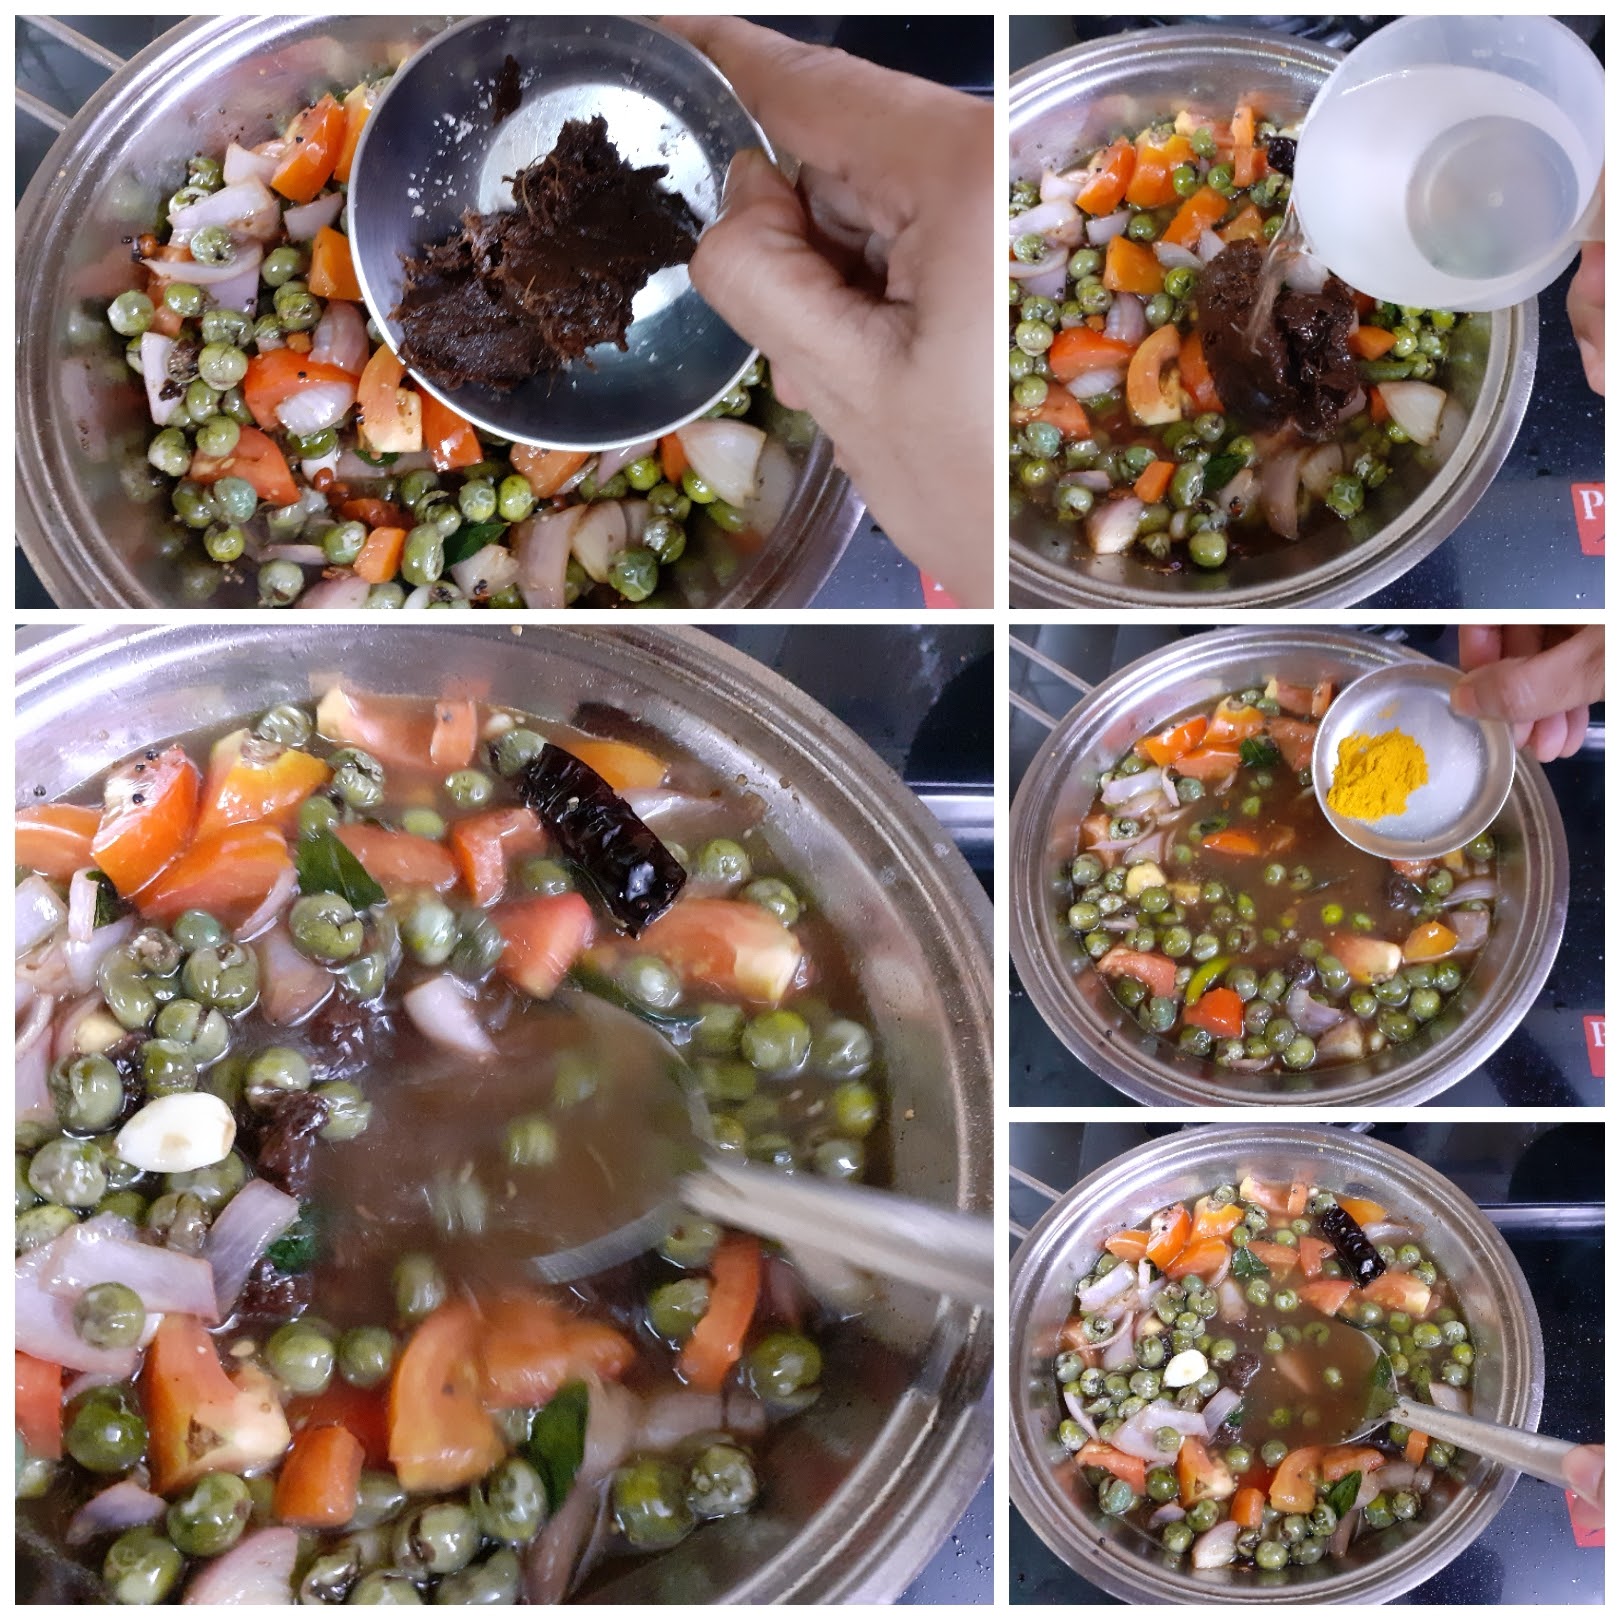
5. Now grind all the ingredients under “to grind” to a coarse mixture, then add 1/2 cup water and grind to a smooth paste. Add this paste to the Sundakkai simmering in the Tamarind pulp,stir well and allow to cook. Continue cooking until the gravy thickens and the raw small of the masala is gone.
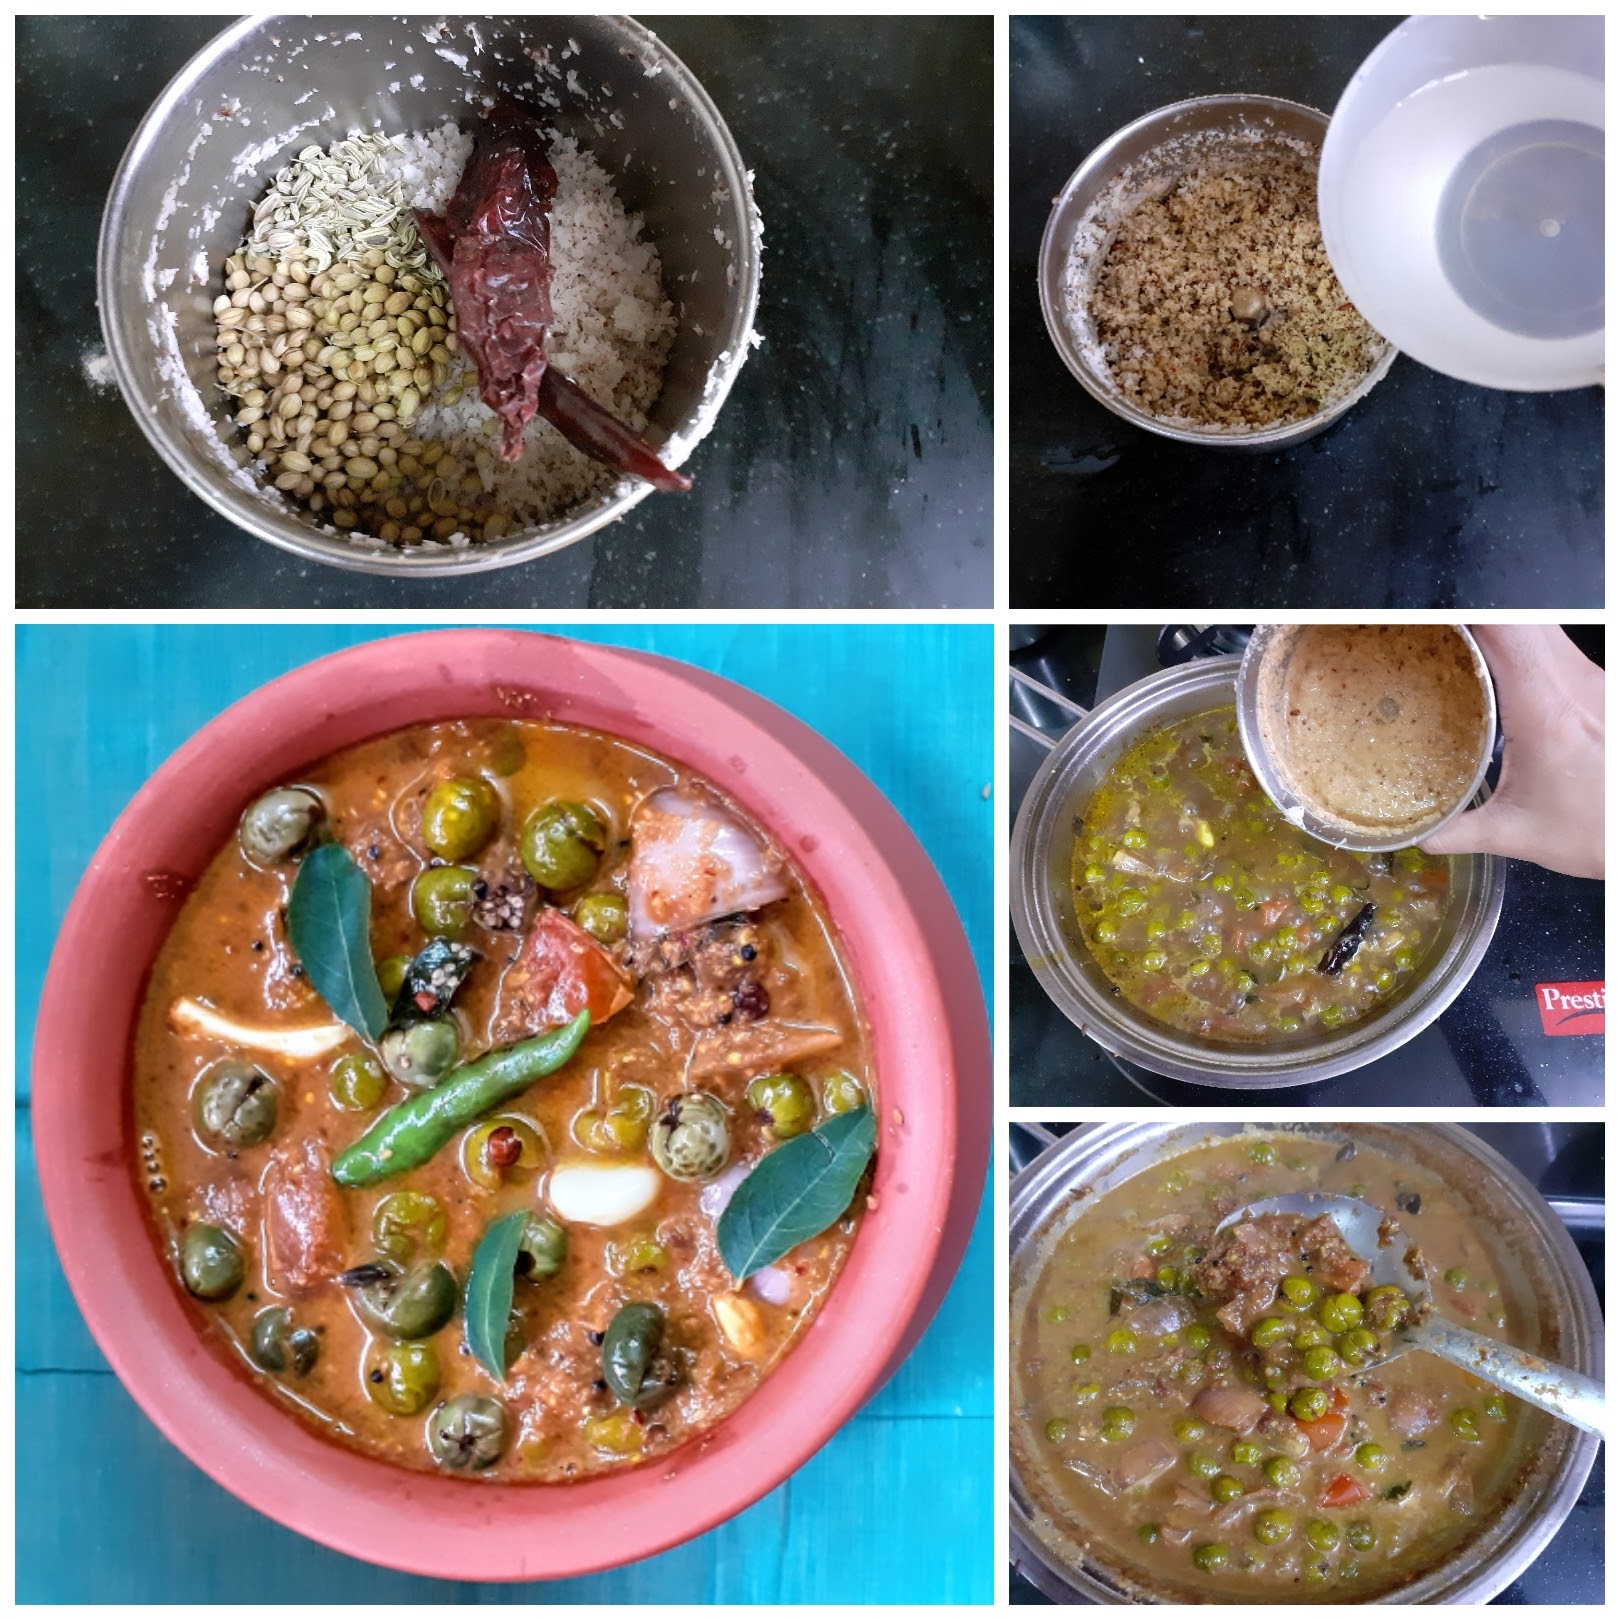
NOTES:
1. Follow the precedure given to split open the berry midway. The kuzhambu will taste to bitter if the berries are not split.
2. After the berries cook in the tamarind sauce, check for doneness by pressing them with a ladle or soon. If they crush easily, they are cooked.
3. I have used Gingelly/Til oil as it adds extra flavour to the dish. Unless one is allergic to sesame oil or does not like the taste I recommend using the oil. Alternately refined oil can be used.
If you tried this recipe and liked it please comment below. I would love to hear from you. If you have a query about the recipe email us and ill respond as soon as I can.
Akkaravadisal One Pot
This is a very traditional South Indian sweet dish. Lord Mahavishnu is offered this sweet as prasad(holy offering). The main ingredients are Rice, moong dal, jaggery, milk, and ghee. The ingredients are similar to the Sweet Pongal but both taste very different. It tastes heavenly when served a little warm. Without much ado let’s get to the recipe right away.
This recipe already exists on this blog, but I am adding another method to make it, which is the one-pot method. One can choose whichever method they find doable. The results are the same for both, just a few steps vary which I will guide you through here.
While you are here check out my other Indian Sweet recipes like Malpua, Pineapple Rabri, Atte ka Sheera, Chakkarai Pongal, Aval Kesari, Unni appam, Sugiyan, and many more…
Here is the recipe of One -Pot Akkaravadisal for you-
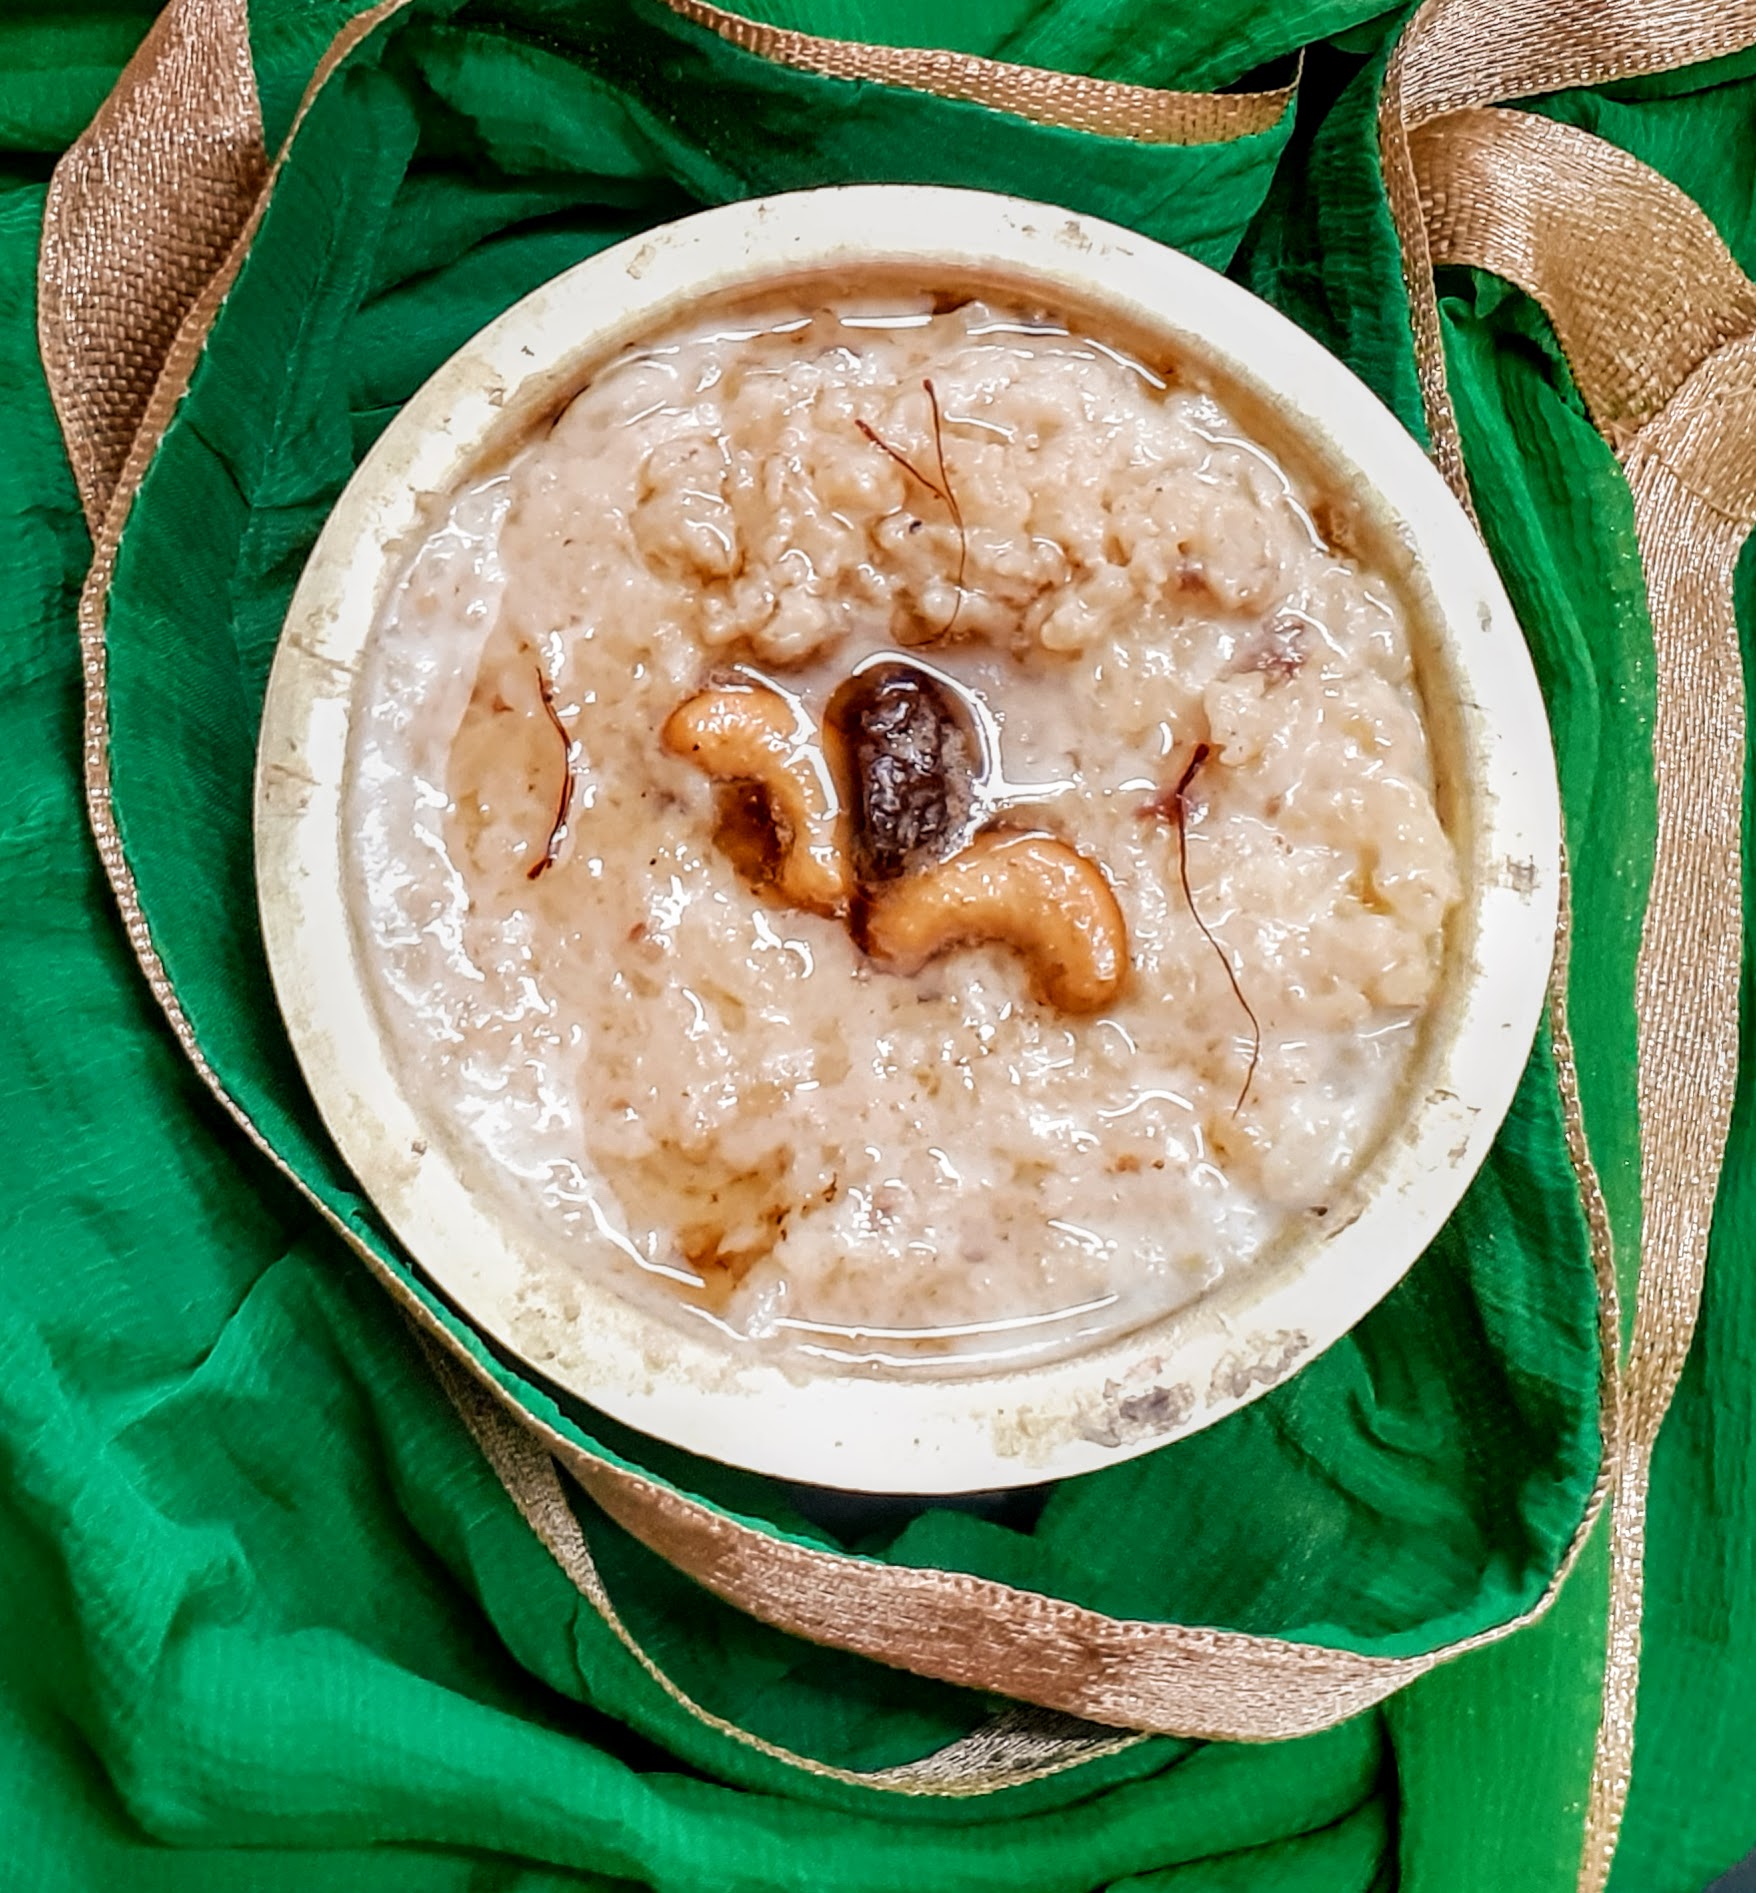
Ingredients:
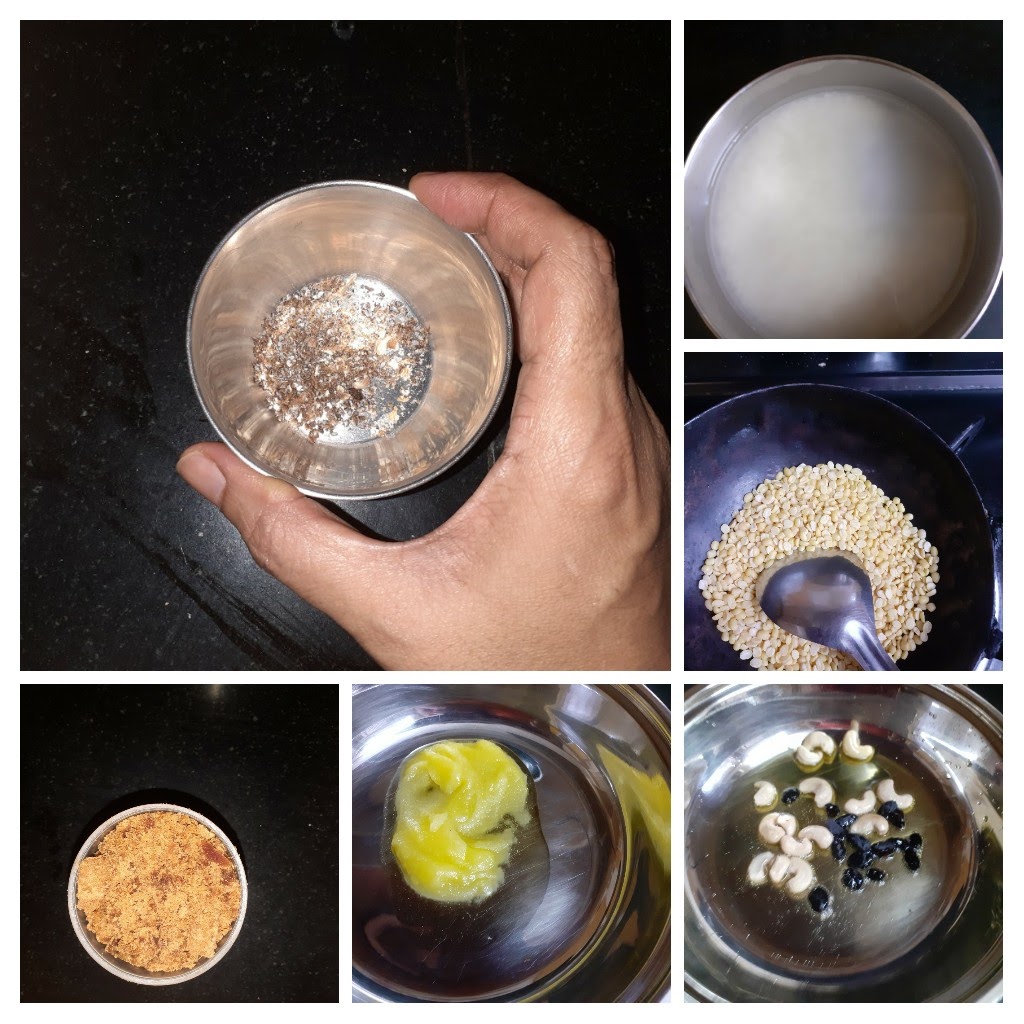
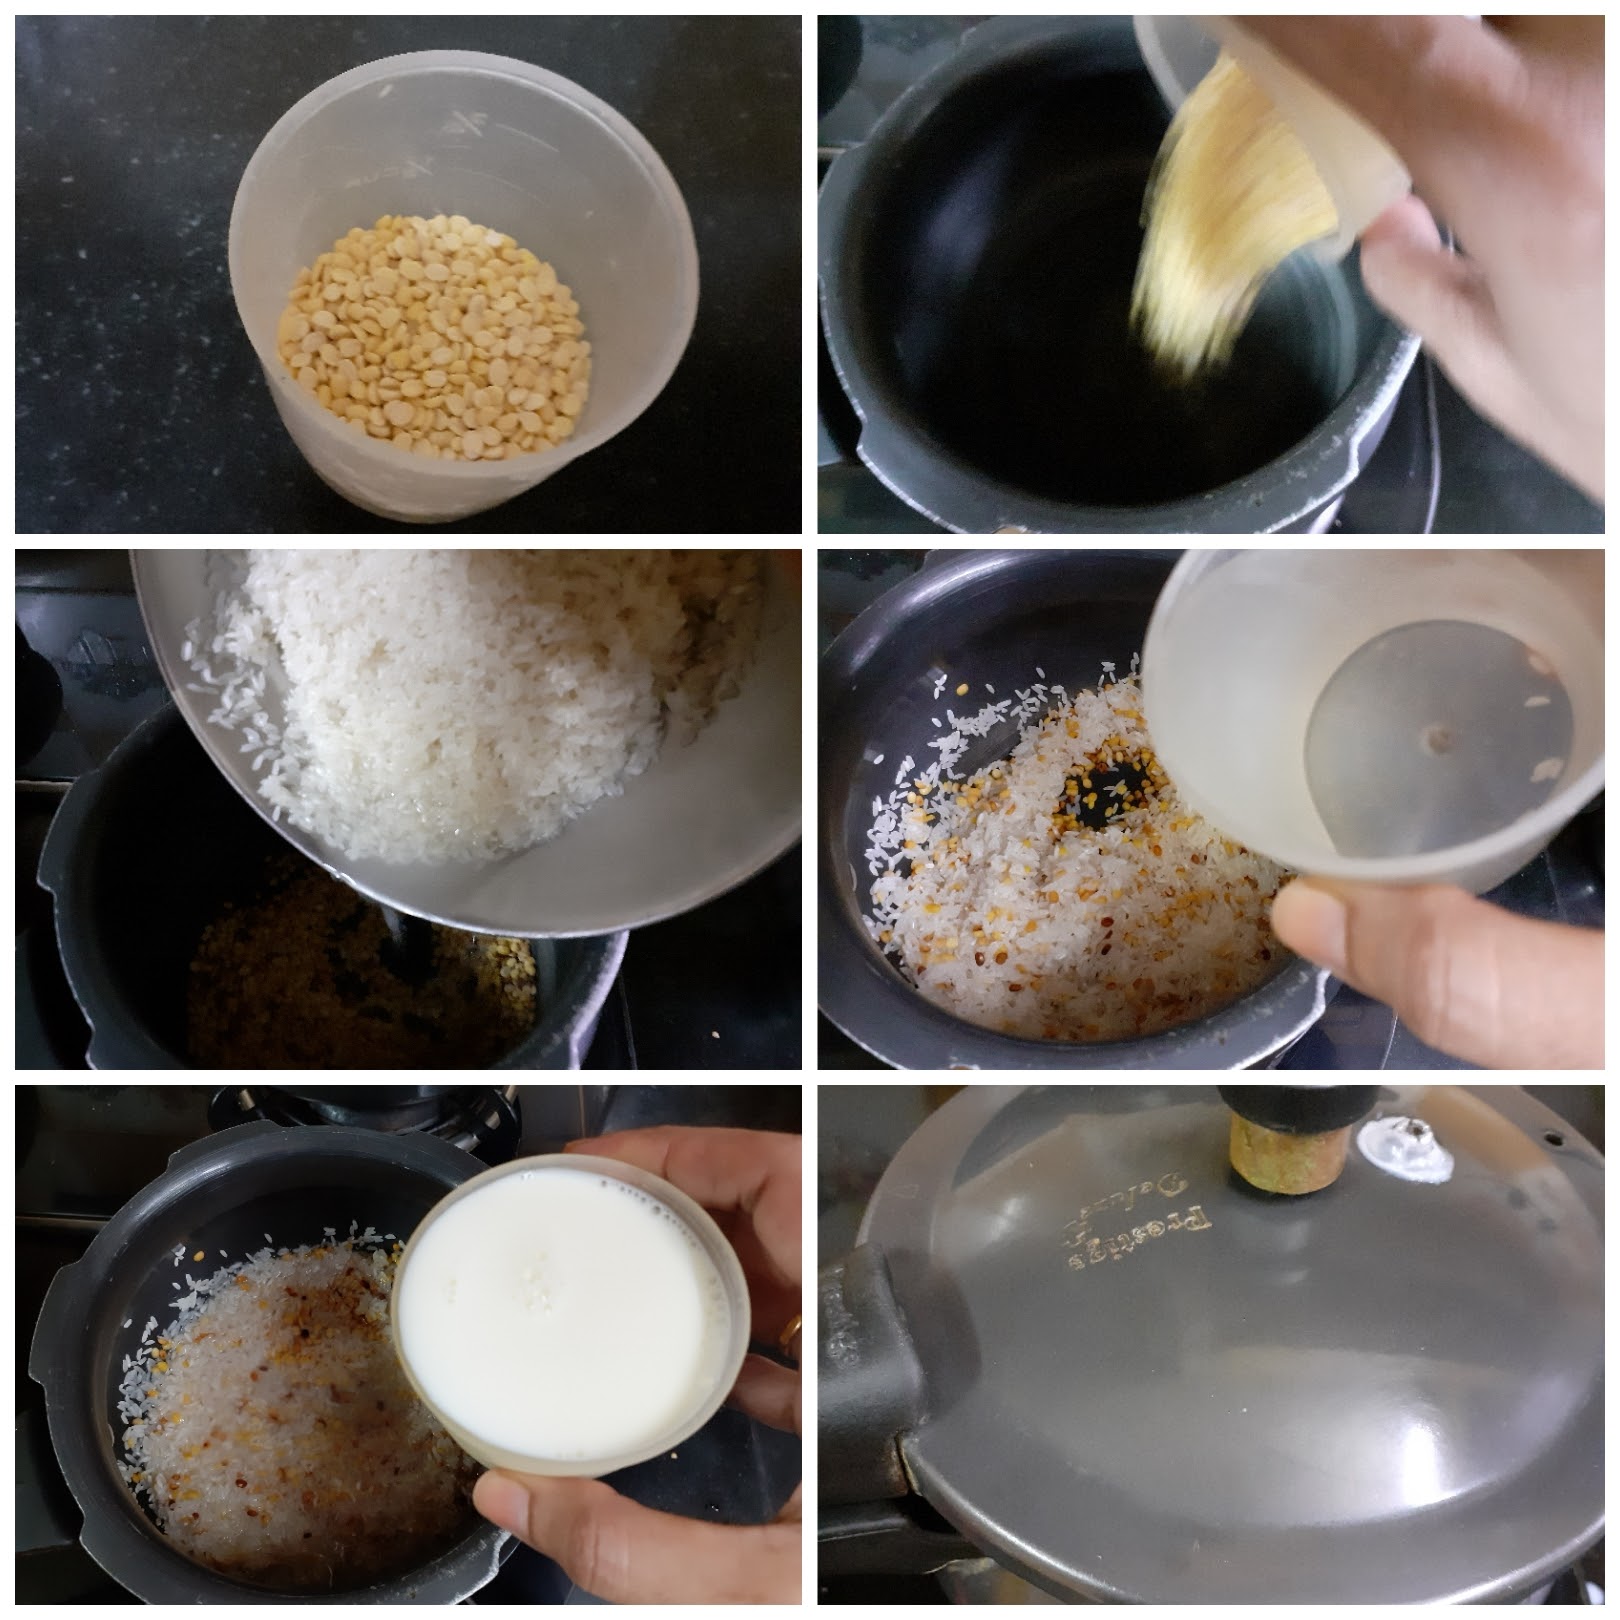
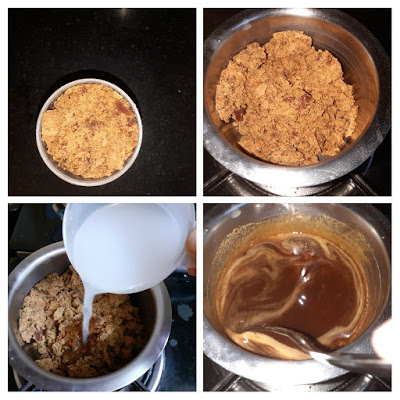
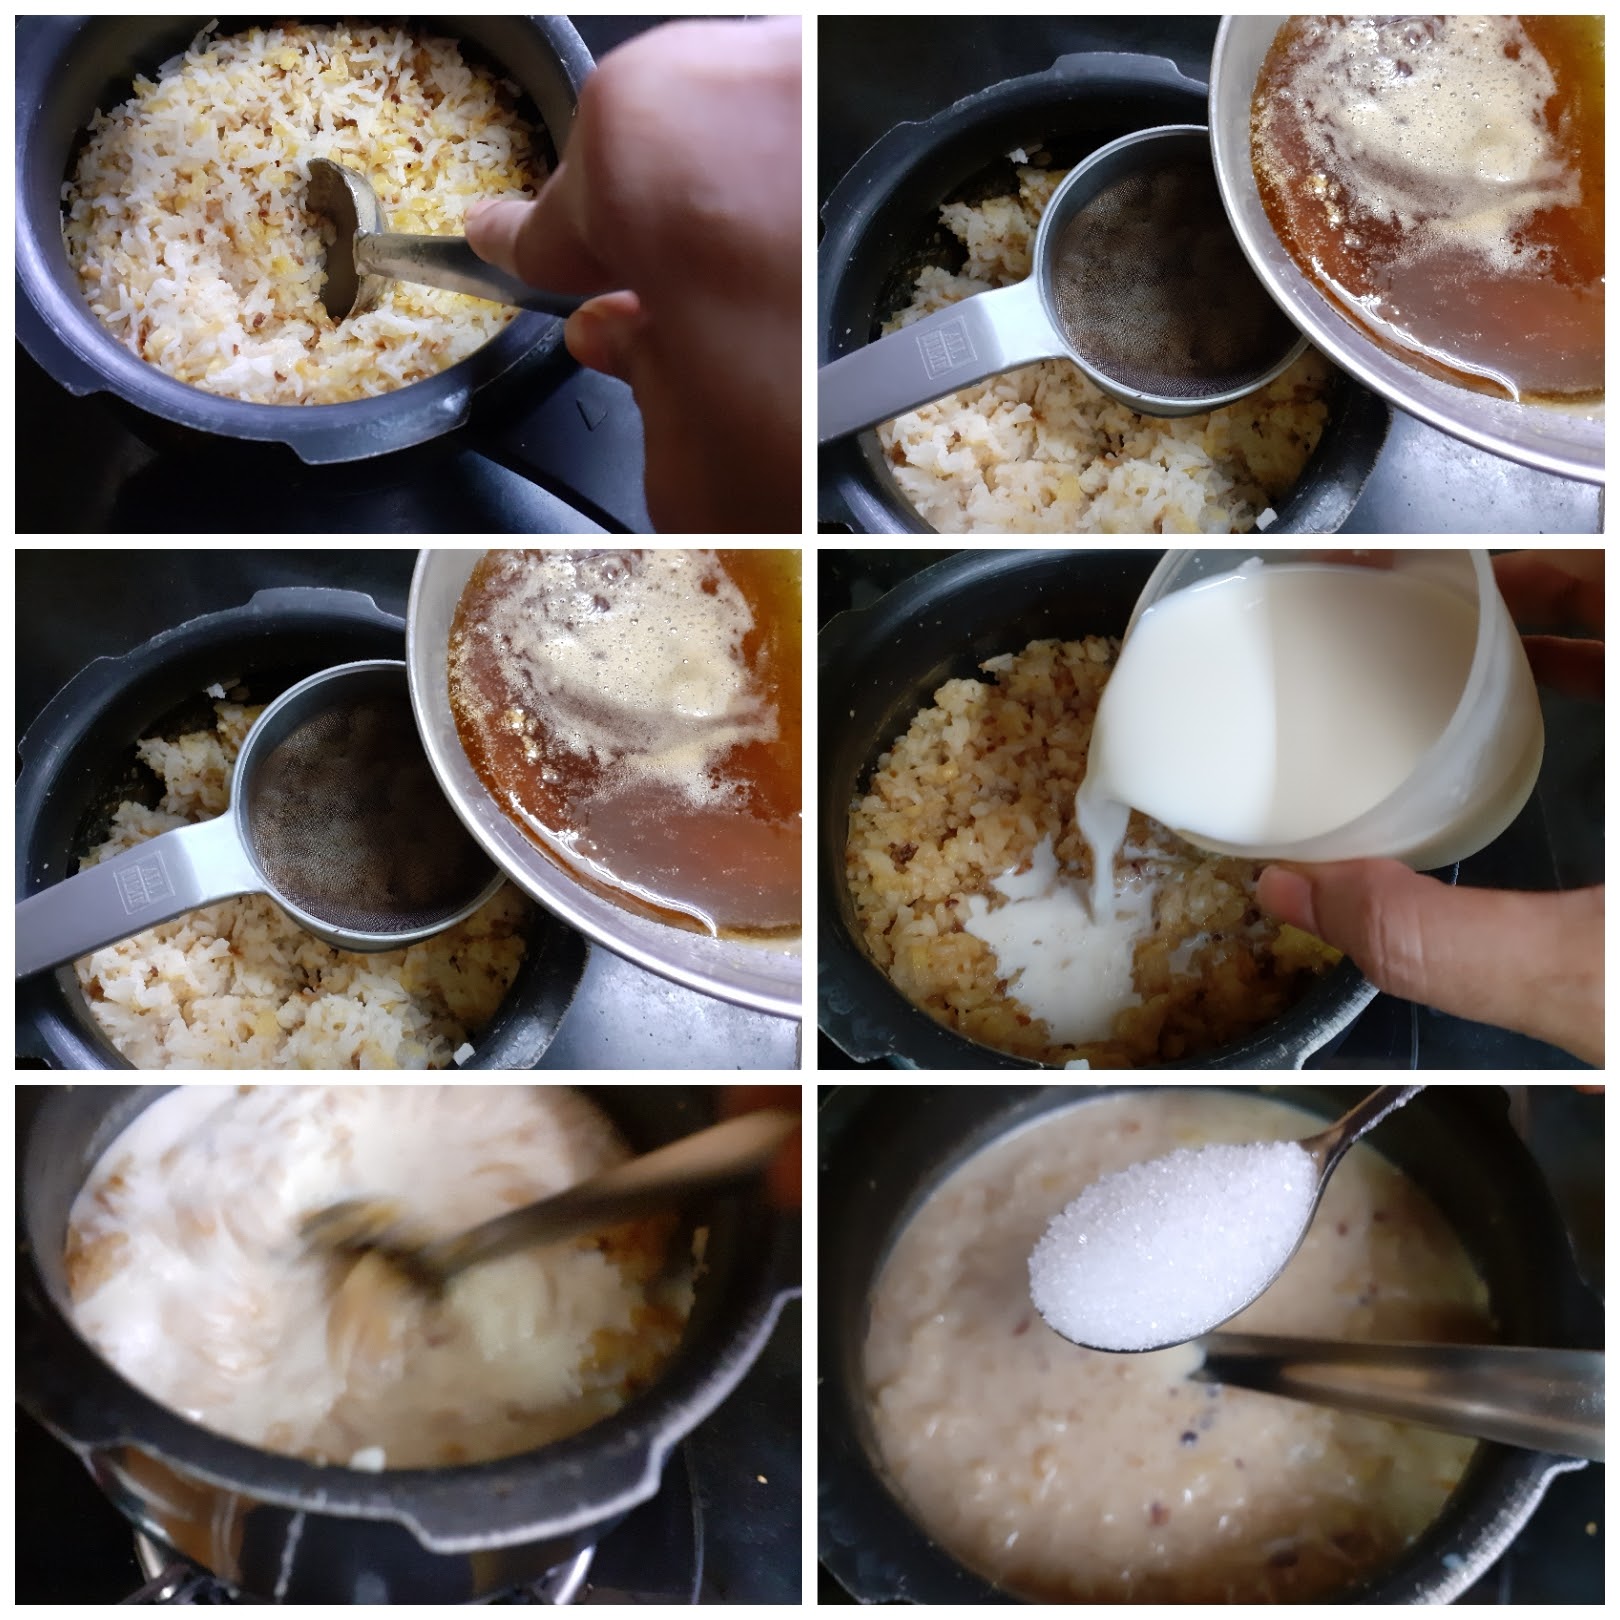
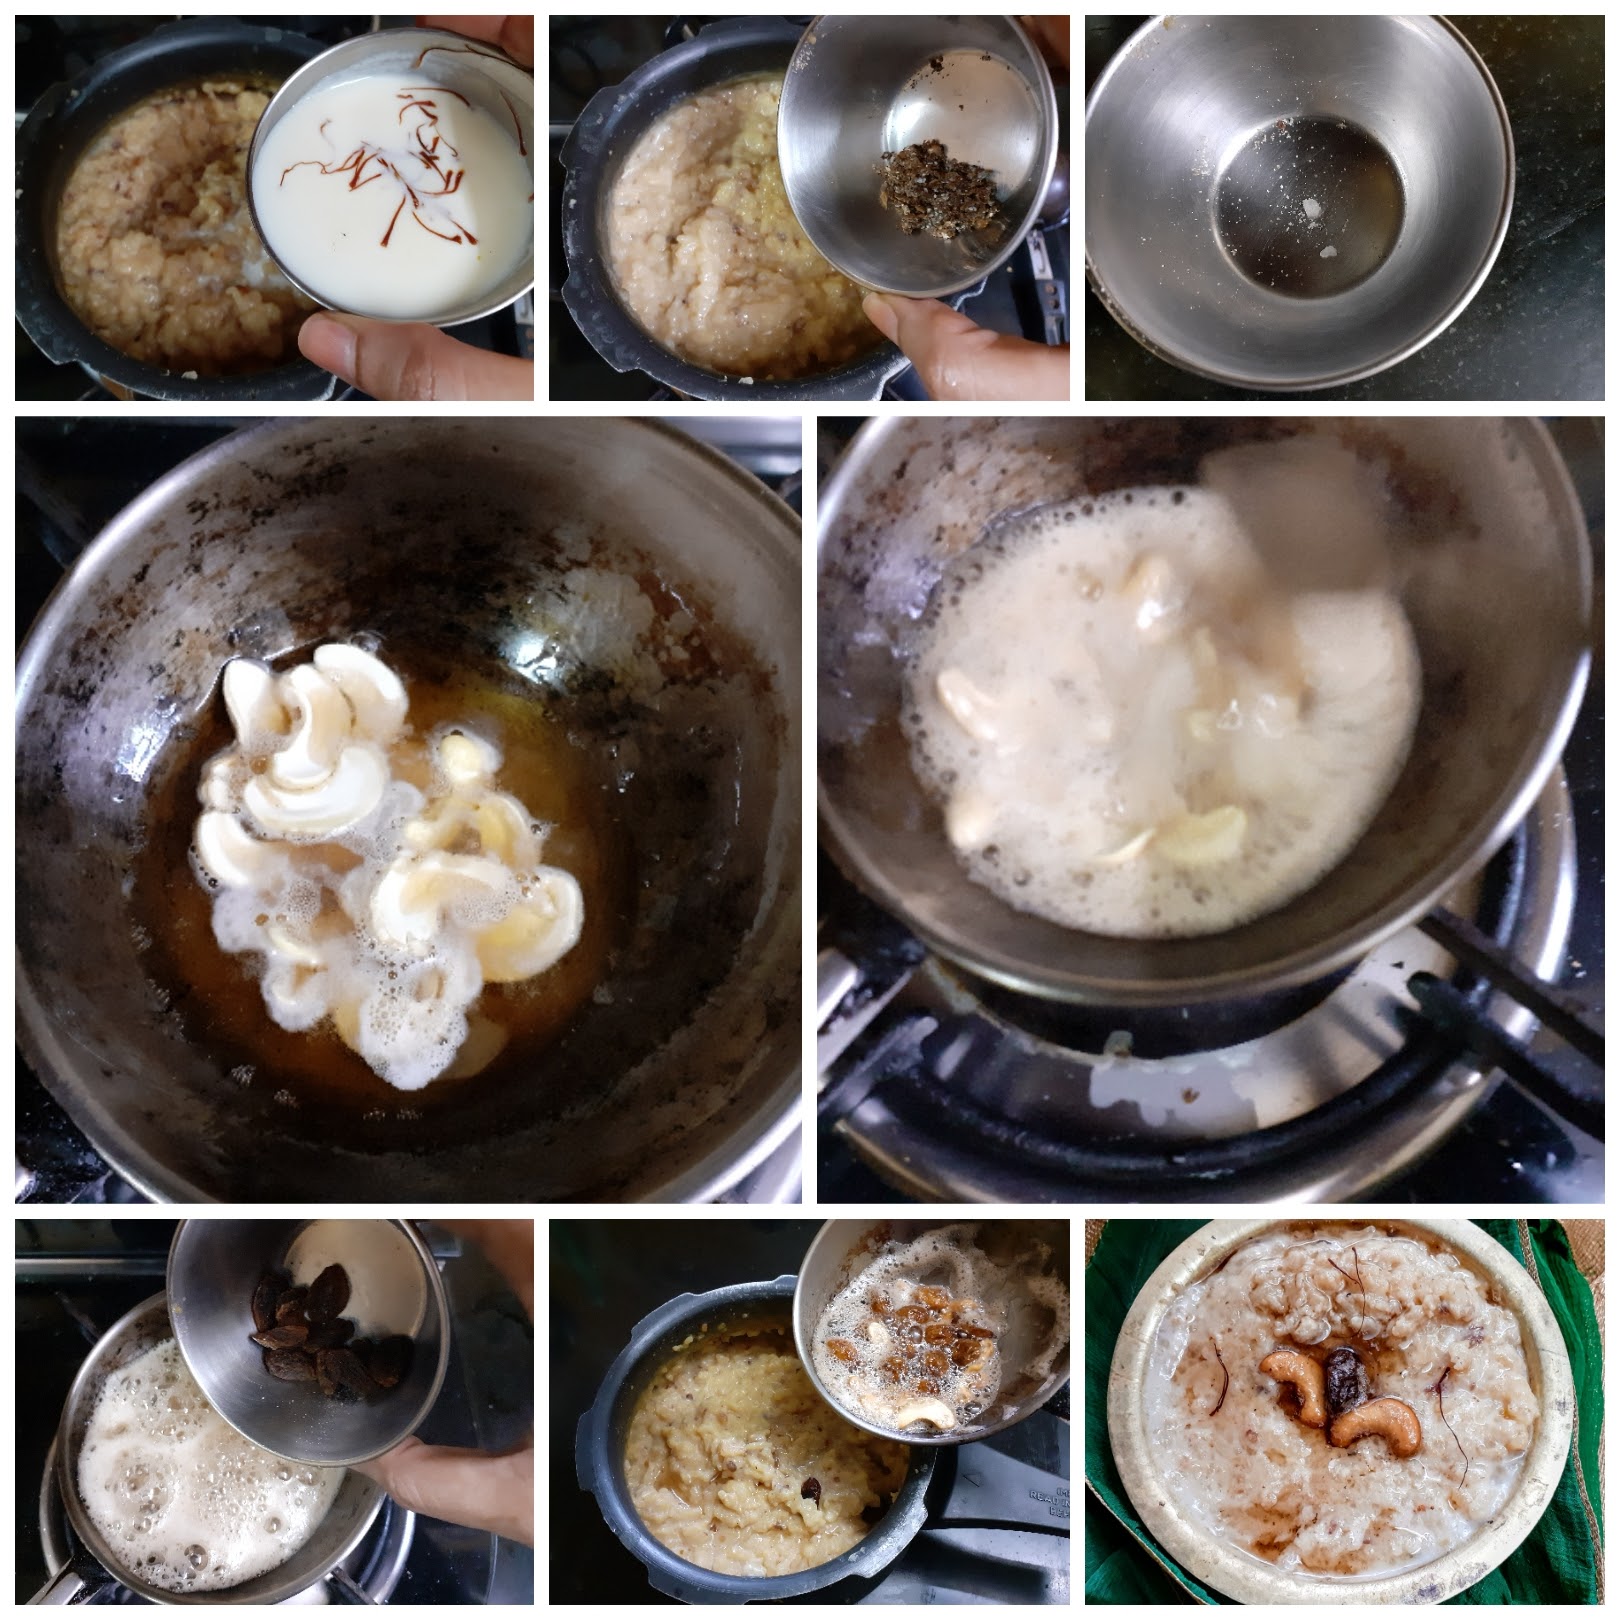
NOTES:
Karuvepilai Podi/Curry Leaves Powder (For Rice)
Karuvepilai or curry leaf plant is an aromatic plant the leaves of which are used in seasoning dishes. Most south Indian dishes have Curry leaves as their common tempering element. Apart from imparting their aroma to a dish they also add a huge amount of flavour. These leaves have many medicinal properties like- high calcium content, rich in Iron, aids in digestion, improves vision, rich in Vitamin A, and many more such benefits.
In our house, we make this powder with fresh curry leaves and other spices that can be mixed with hot rice and ghee, or it can be added to rice tempered with peanuts and spices and made into Karuvepilai Sadam or Curry leaves rice.
Karuvepilai powder can be stored in an airtight container for 3 months and more.
While you are here please check out my other spice powder and sauce recipes like Sambar Powder, Rasam Powder, Sechzwan sauce, Pesto sauce and more…
Here is the recipe of Karuvepilai powder for you-

Ingredients:
Curry leaves 2 cups(stalks removed) washed and pat dried
Coriander seeds/Dhania 2 tbsp
Chana dal/ Gram 1 tbsp
Urad dal 1/2 tbsp
Jeera/ Cumin seeds 1 tsp
Dry red chillies 5 big ones
Tamarind lemon sized ball
Salt to taste.
Asafoetida 1 tsp
Oil for frying spices 1 tbsp
Directions:
In a Kadai heat the oil and add the chana dal and urad dal and fry until they turn golden brown. Now add the coriander seeds and Cumin and continue to fry. When the coriander turns aromatic add the dry red chillies and continue to fry. Now add the tamarind followed by asafoetida and fry until the tamarind turn a little crisp, about 30 seconds. Finally, add the washed and pat dried curry leaves and saute for about a minute. Switch off the flame and cool all the roasted ingredients. On cooling, transfer them to the dry mixer jar and grind to a fine powder. Add salt and give another spin the mixture. The Karuvepilai powder is ready for storing. Enjoy with hot rice and ghee. One ball of rice with this powder helps maintain iron levels, good for hair growth and has many more benefits.
STEPWISE RECIPE FOLLOWS:
1. Assemble all ingredients.
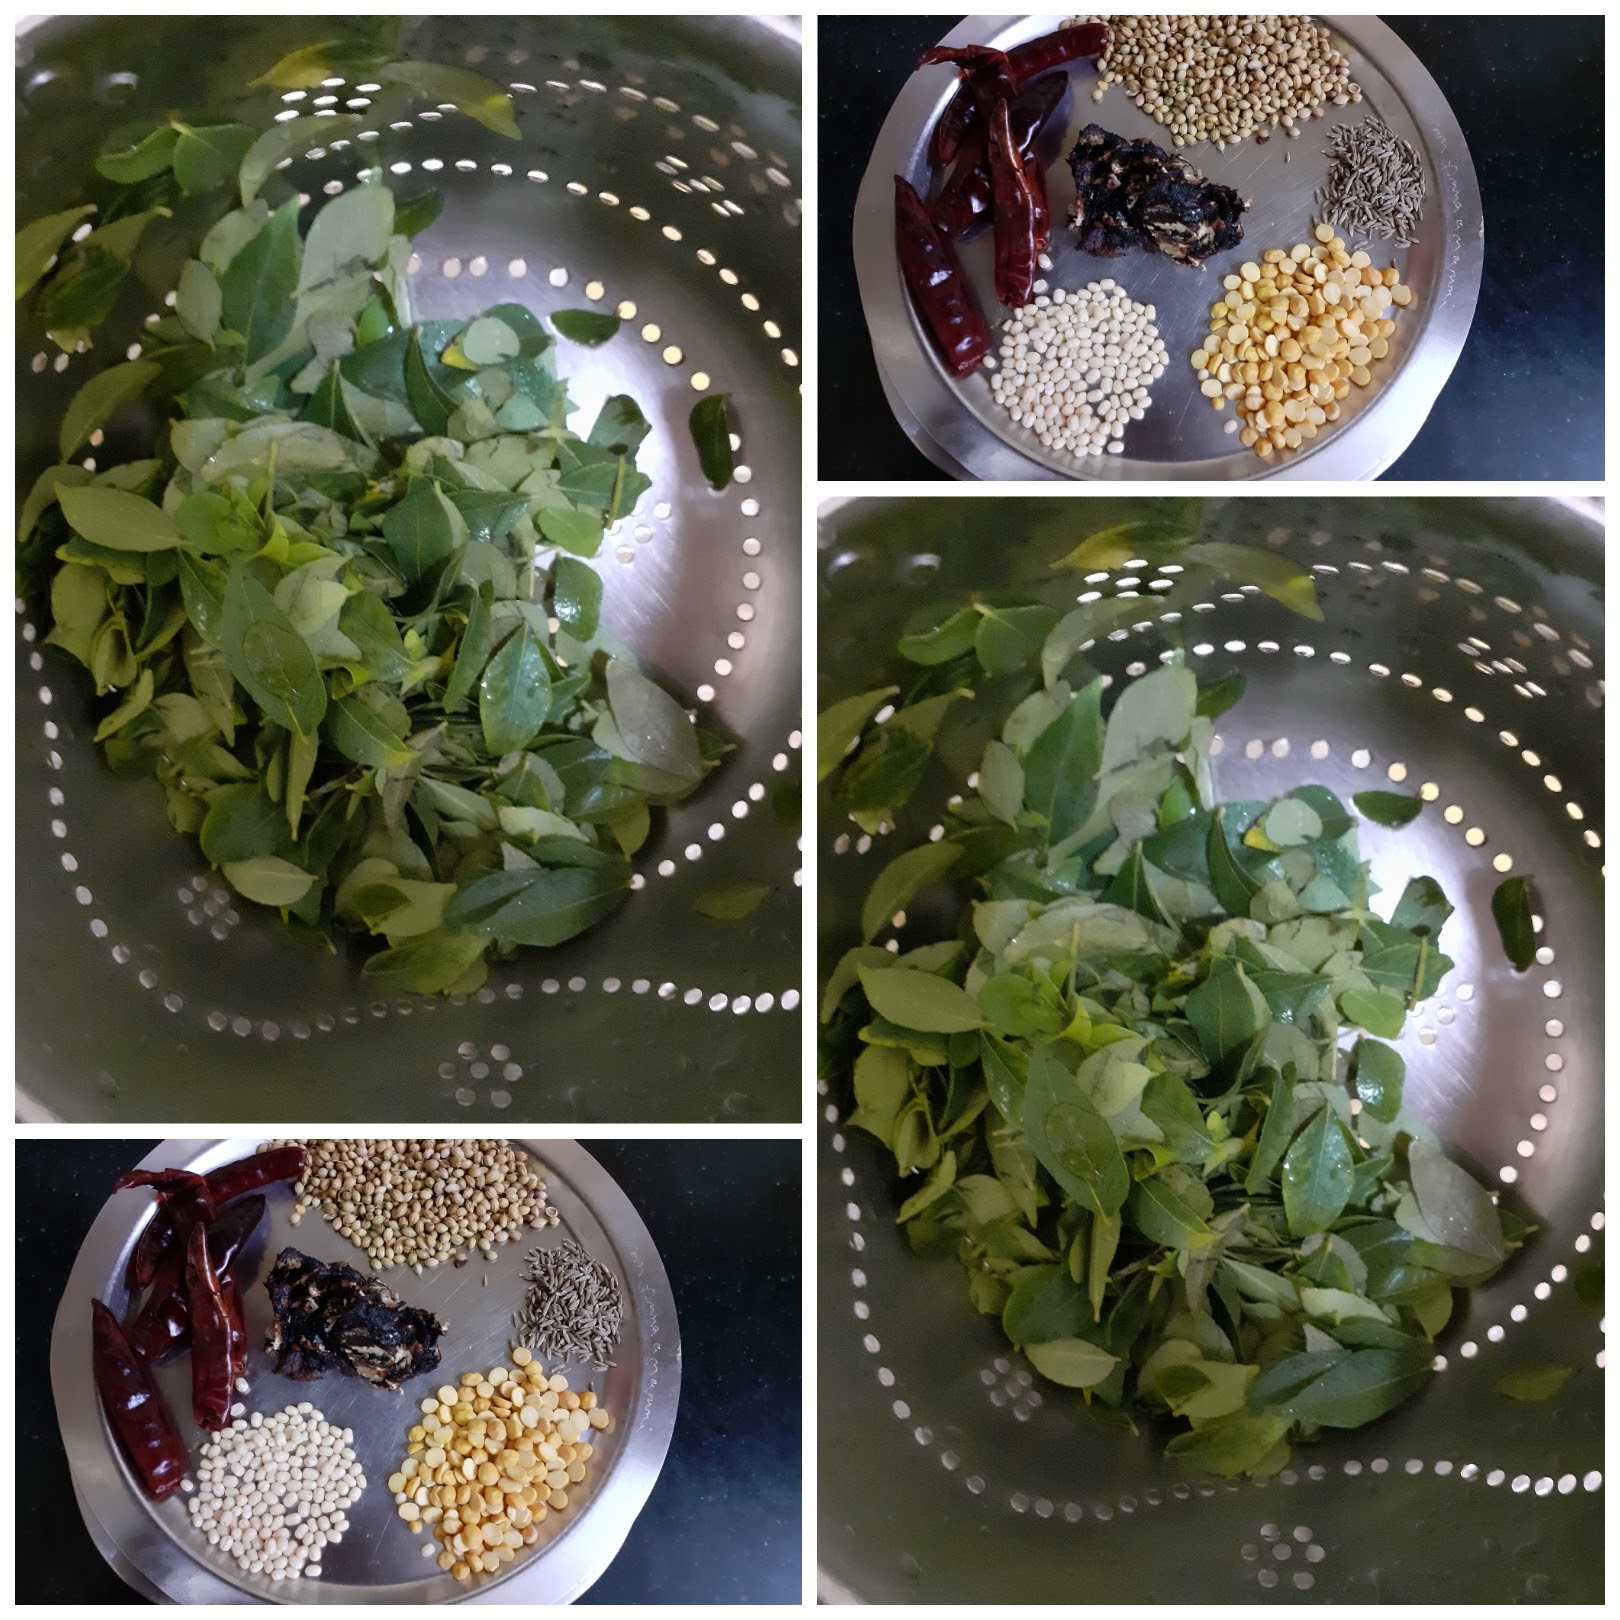
2. Heat oil in a Kadai and add the urad dal and chana dal and fry until they turn light brown.
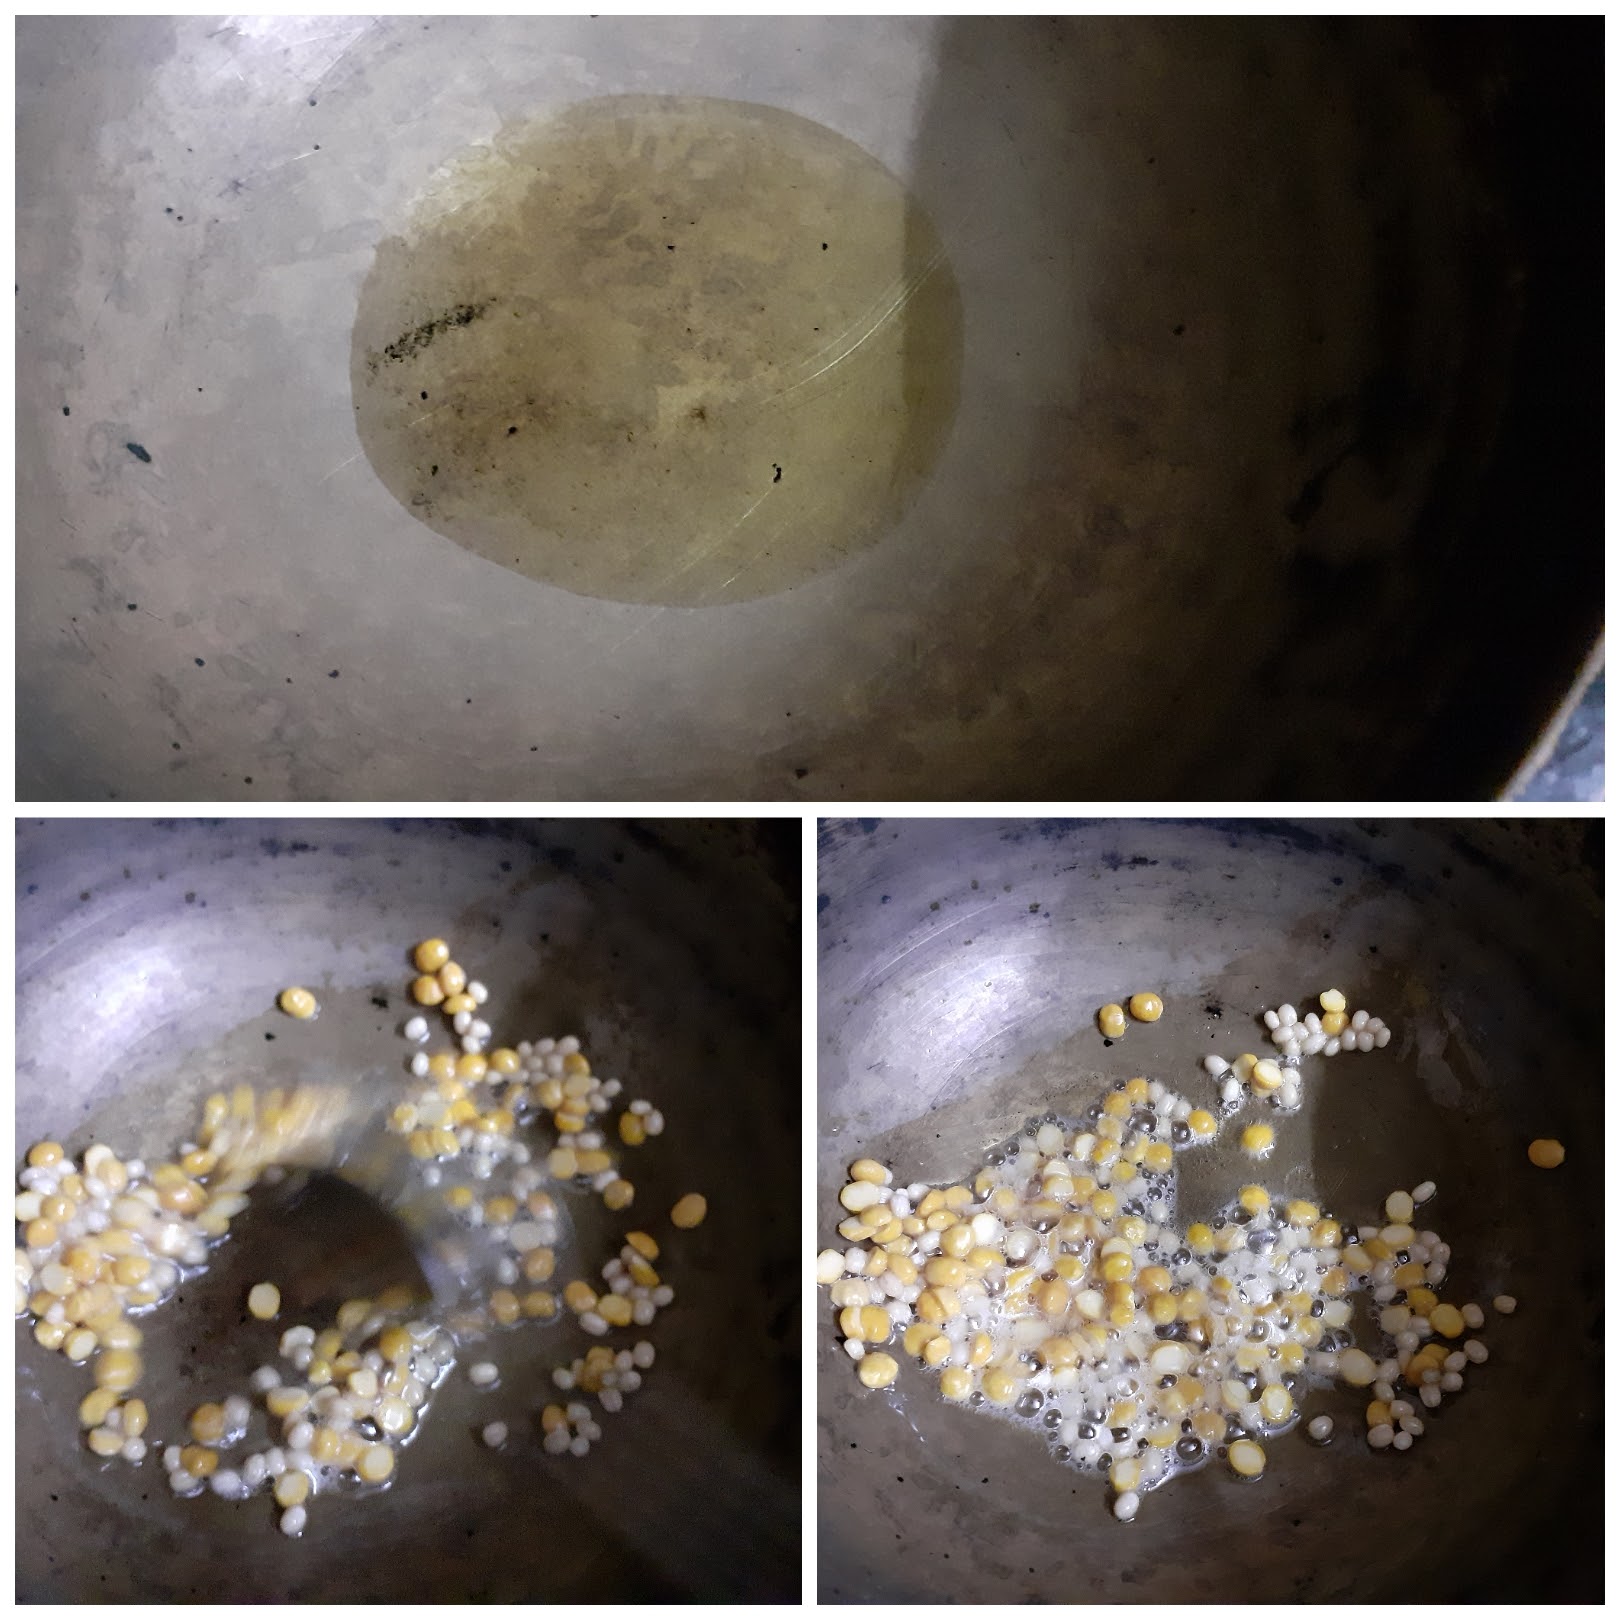
3. Add the coriander seeds and cumin seeds and continue to fry until the coriander seeds turn aromatic.
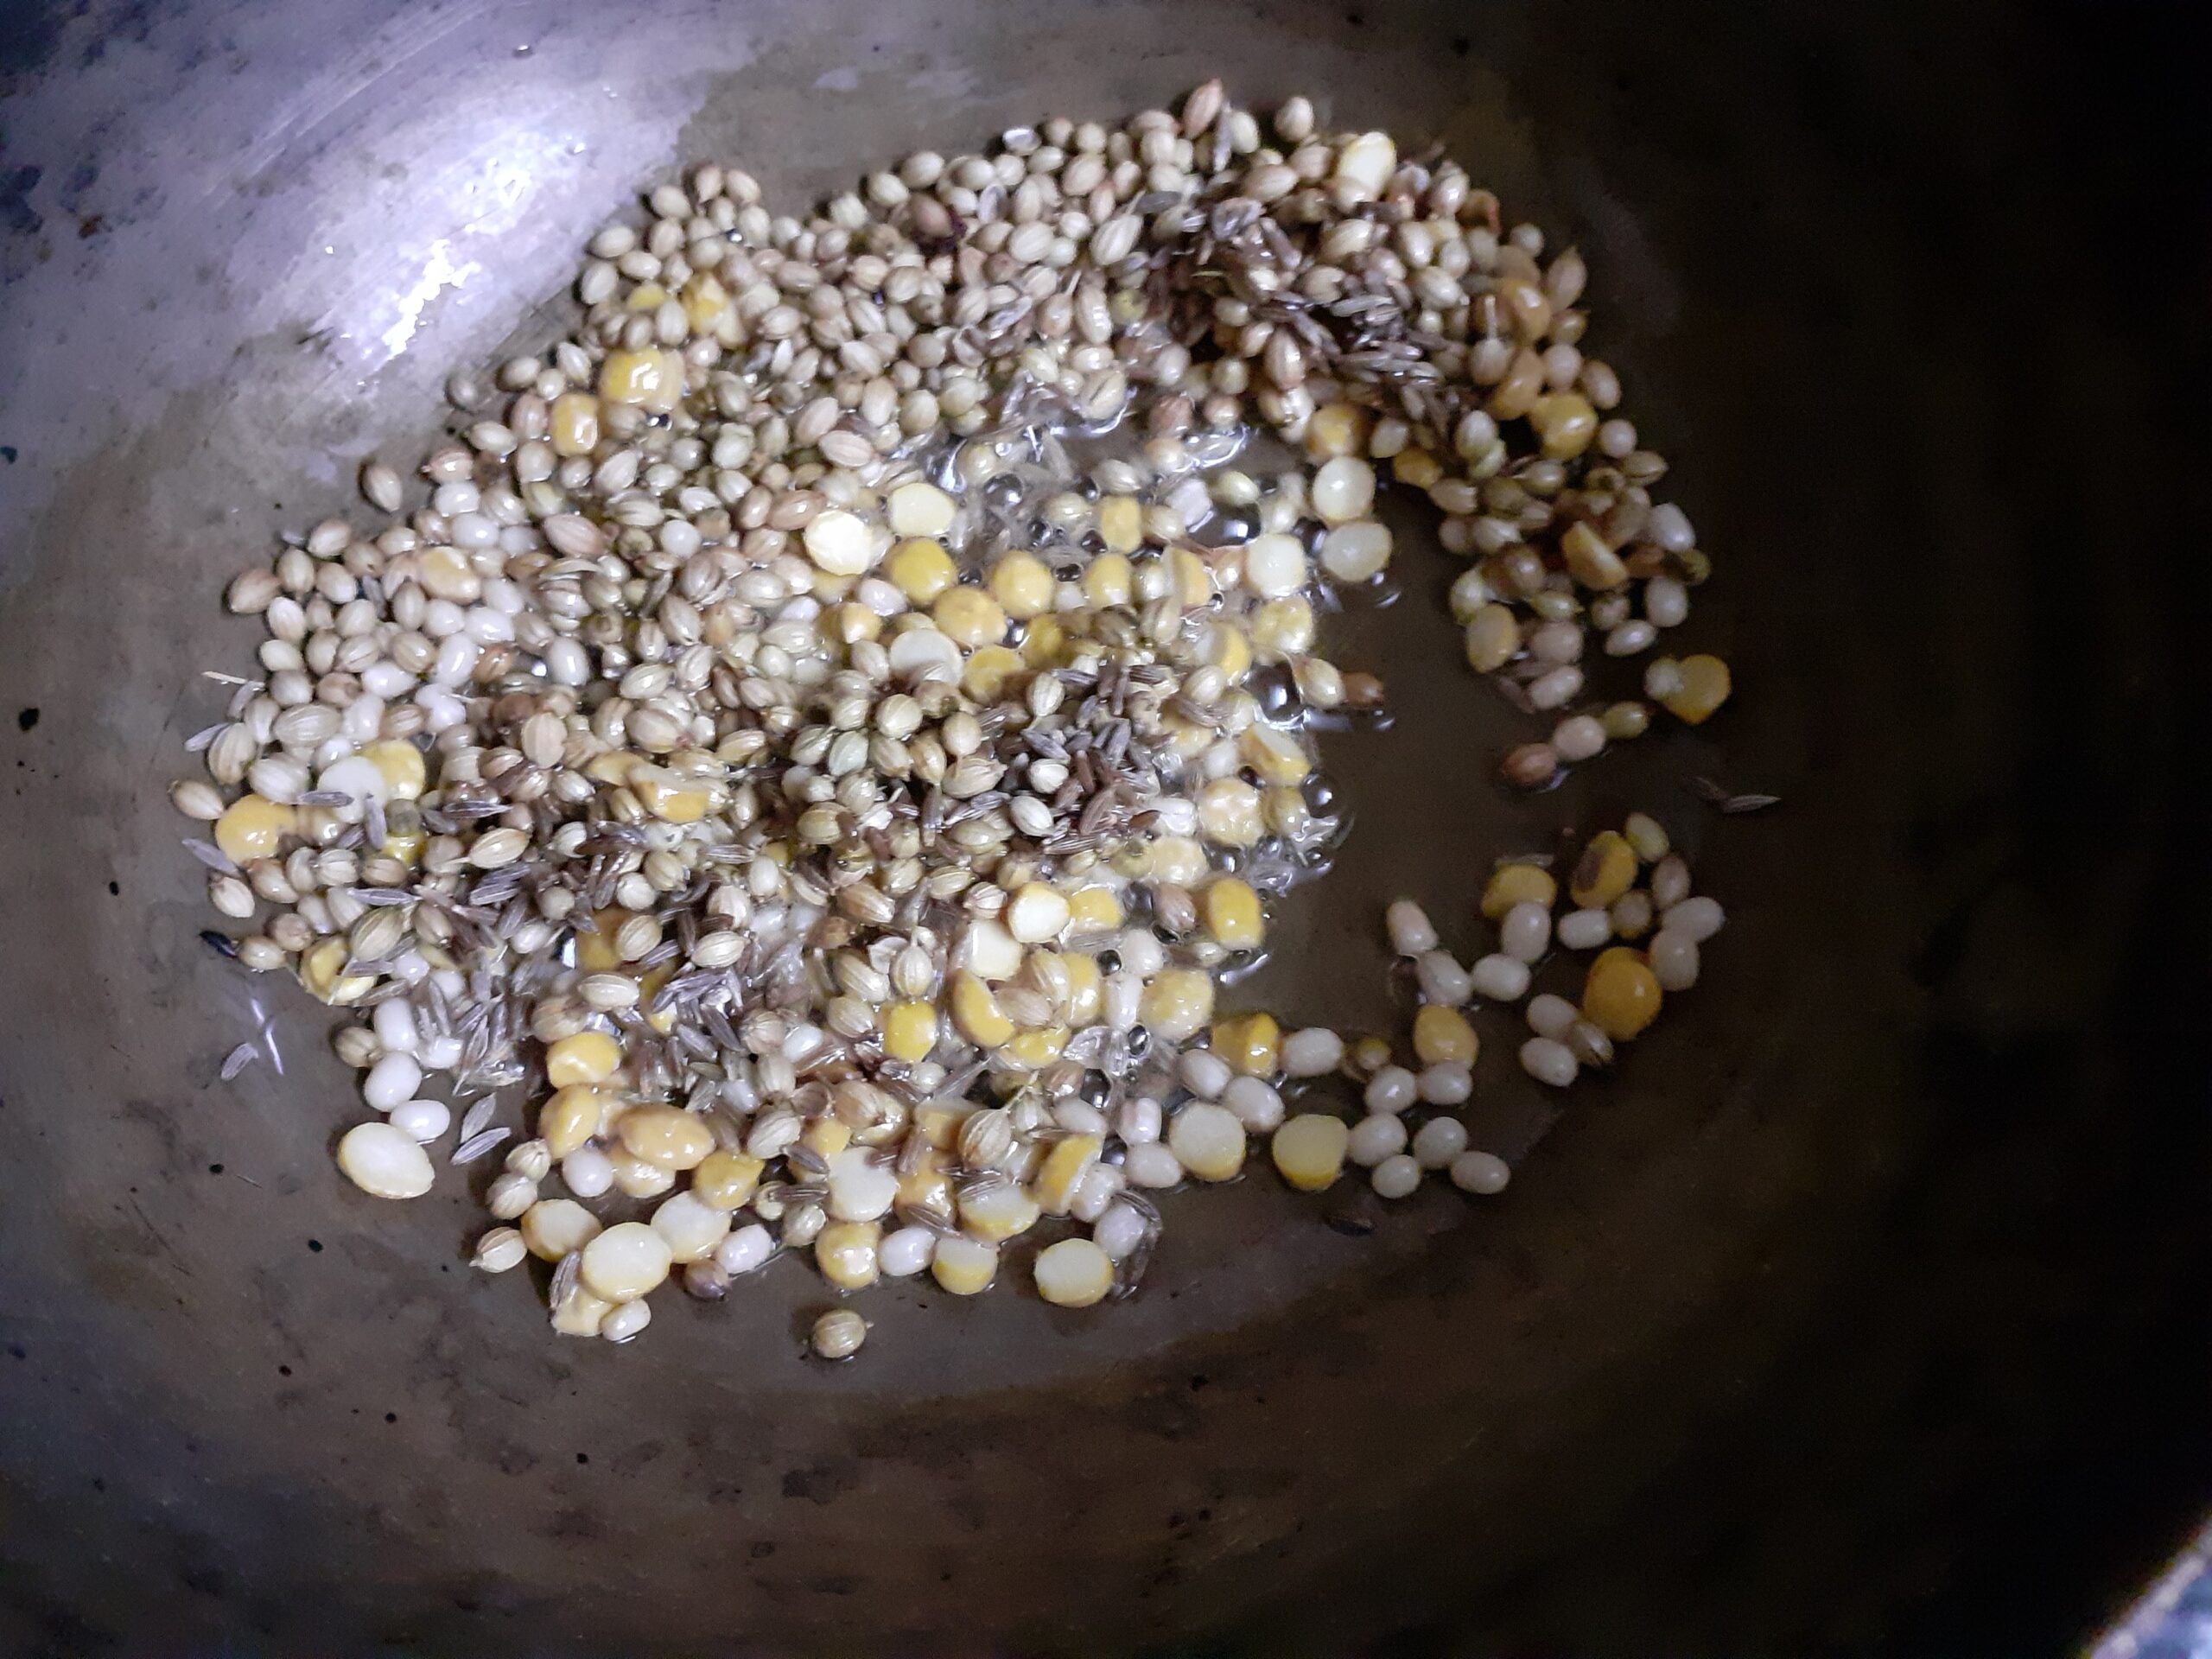
4. Now add the dry red chillies, tamarind, followed by the asafoetida and continue frying until the tamarind turns a little crisp.
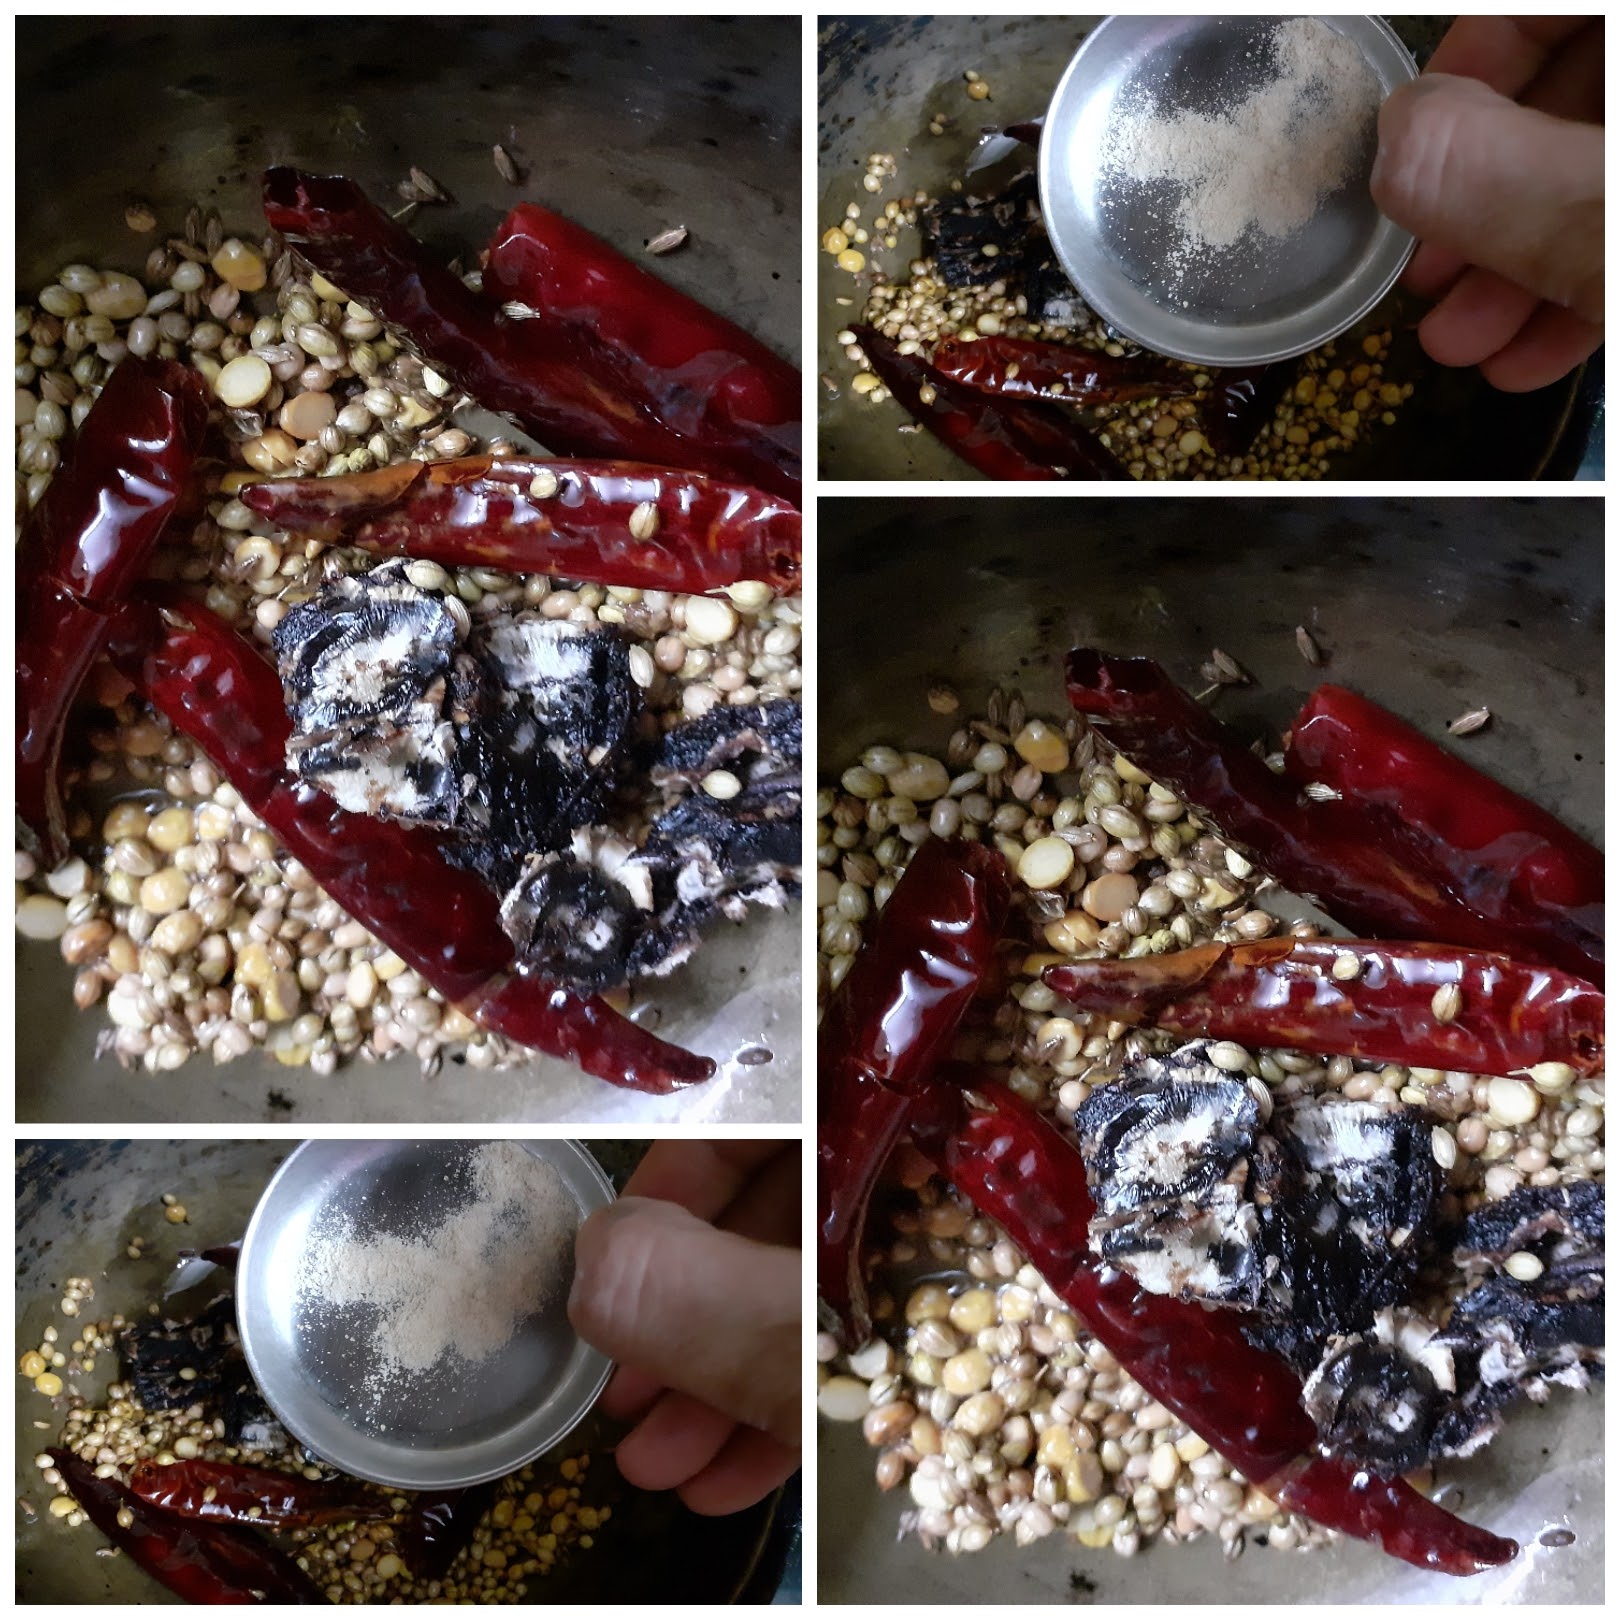
5. Now add the washed and dried curry leaves and saute for a few minutes and put off the stove. Cool the roasted ingredients.
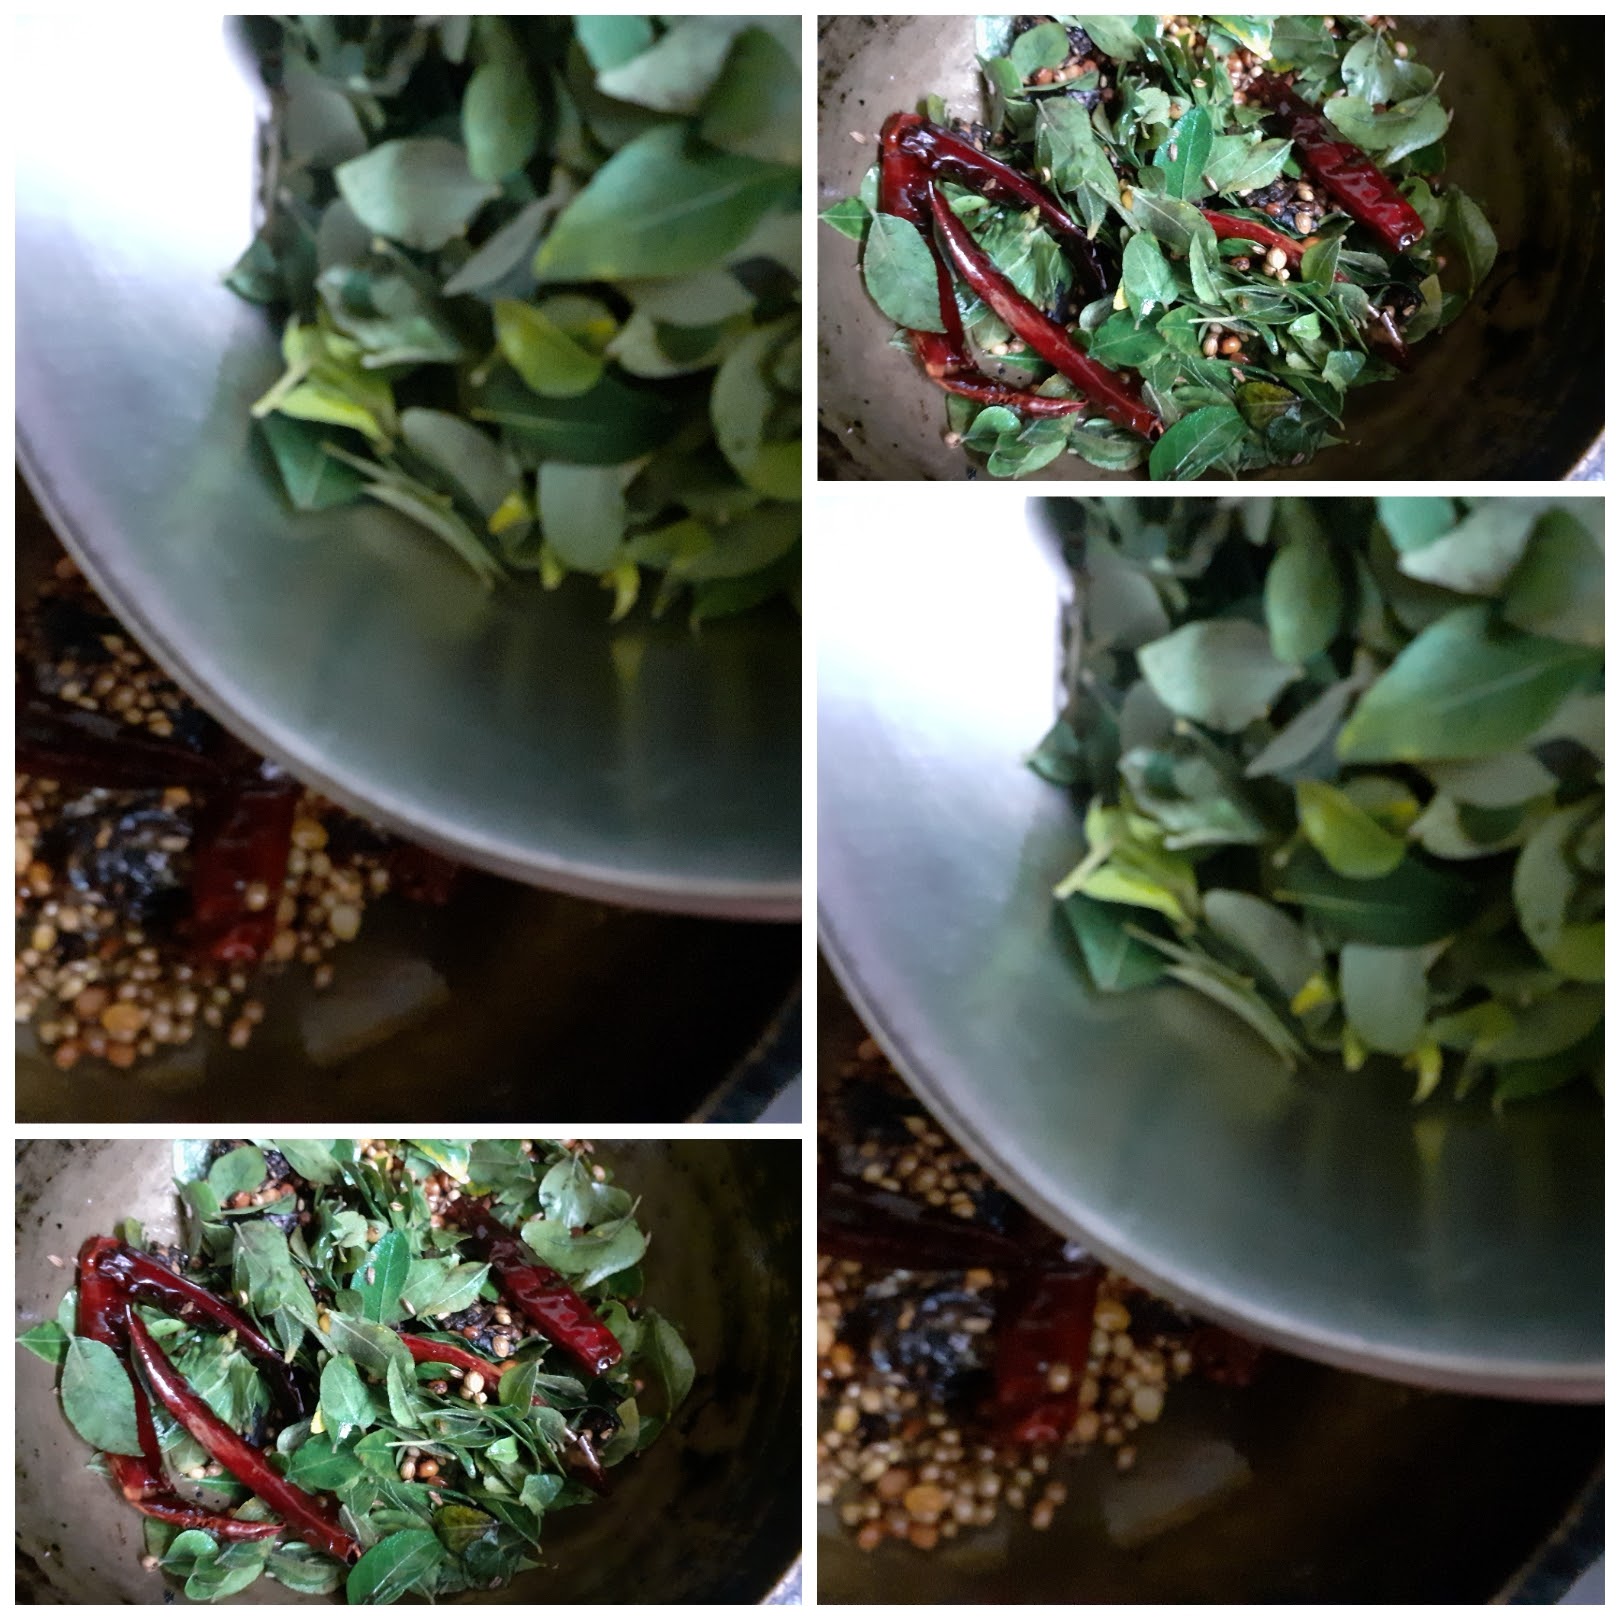
6. Put all of them in a dry grinder jar and grind to a fine powder. Add salt as required and the Kruvepilai powder is ready to store.
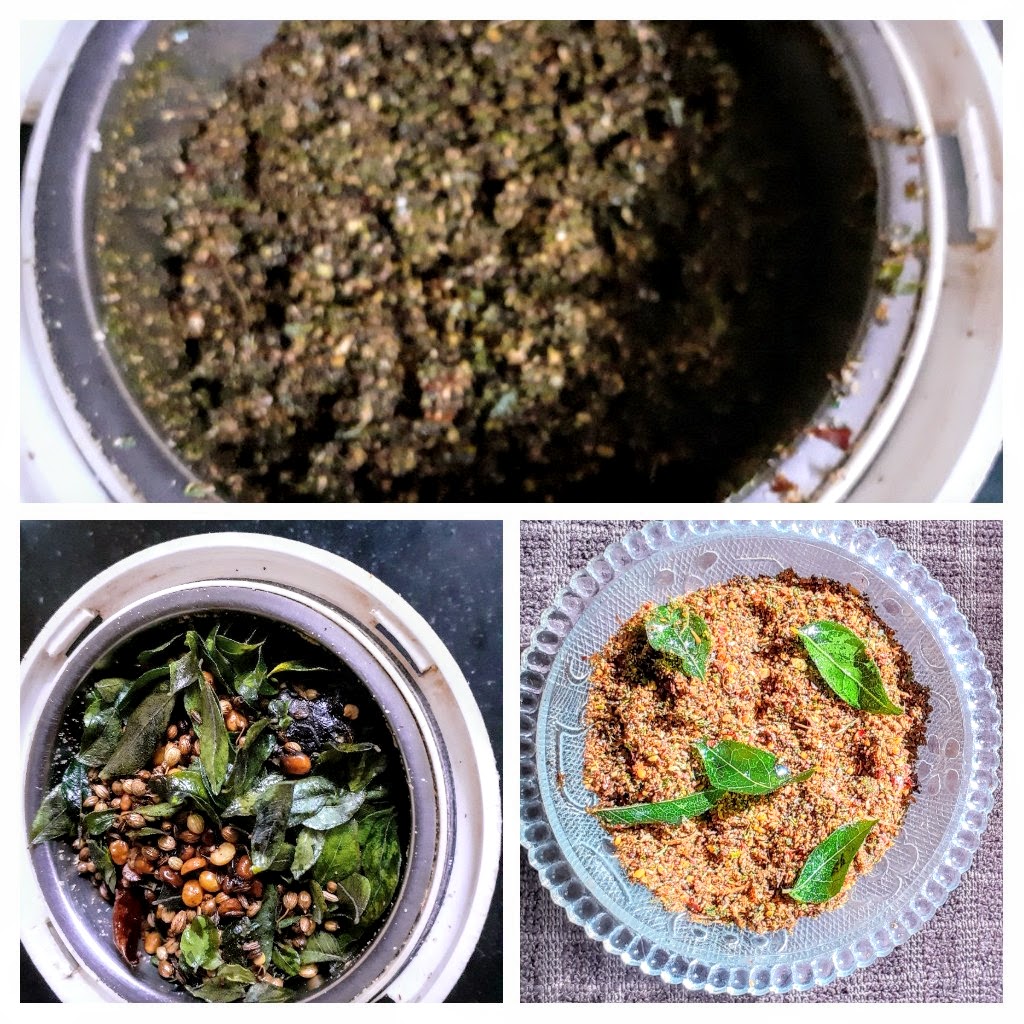
NOTES:
1. The curry leaves must be separated from the stalks, washed and pat dried.
2. Salt can be added while grinding or after grinding.
3. Store ina dry container.
4. More dry red chillies can be added for more spiciness.
Karuvepilai Rice made from the Karuvepilai Podi
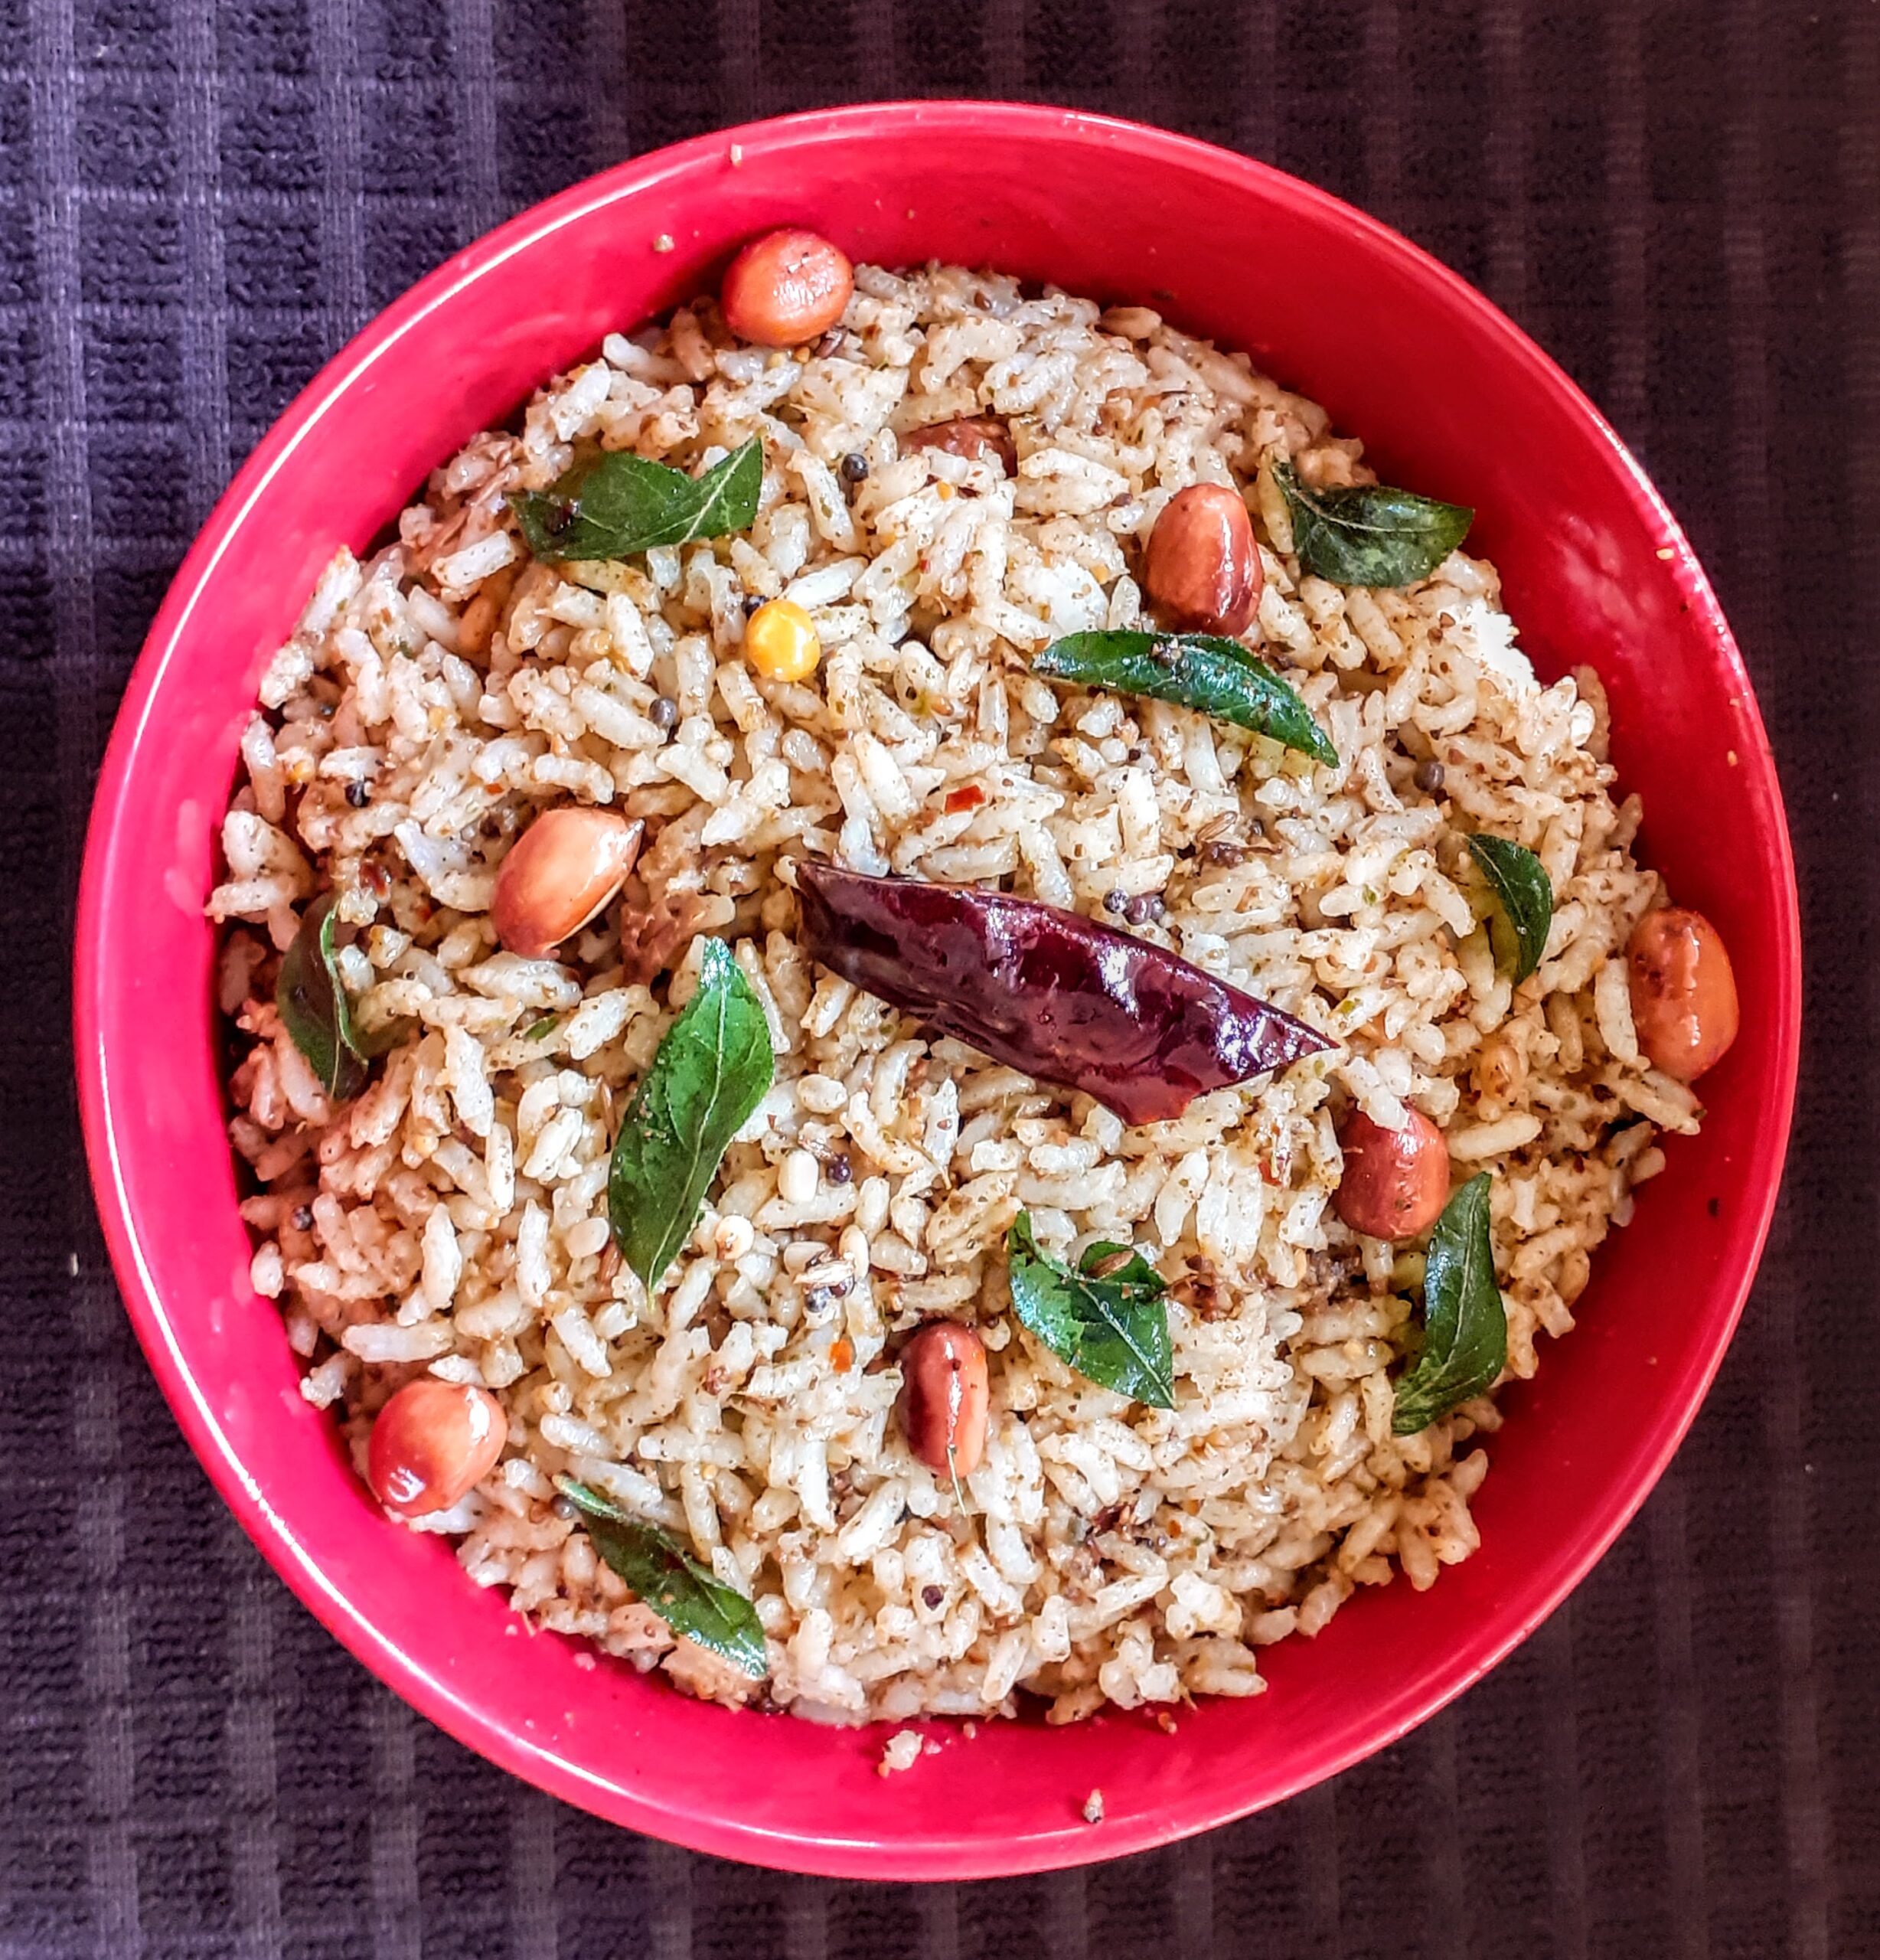
To make Karuvepilai Rice- In a Kadai heat oil. When hot add peanuts and fry until light brown. Now add mustard seeds 1 tsp, chana dal 1 tsp, Urad dal 1 tsp, followed by broken dry red chillies and aasafoetida. Fry until the dals turn light brown. Add Cooked rice made from 1 cup rice, followed by 2 to 3 tbsp of Karuvepilai Podi. Check and adjust salt. The yummy and healthy Karuvepilai Rice is ready. Enjoy. Bon Appetit.
Mor Kuzhambu (Vendakai)
This is a popular south Indian dish made curd/yogurt and is the counterpart of the North Indian Kadi. In the North Indian Kadi chickpea flour or besan is used to give body to the dish, whereas in Mor Kuzhambu Chana dal and Tuvar dal( yellow lentils and gram) along with coconut are used to give body. The masalas used in Kadi are in powdered form, whereas in the South Indian Mor Kuzhambu the whole masalas are ground to a paste.
The array of vegetables that can be used in making this dish is huge. Vegetables like Plantains, Brinjal, Colaccasia/Arbi, Ash gourd, Pumpkin, Mango(ripe), Bhindi/Vendakai can be used to make this dish. These vegetables are used in a combination or individually to make the Mor Kuzhambu.
I am giving the method to make Vendakai/Bhindi Mor Kuzhambu here as it is slightly different from the kuzhambu prepared with other vegetables. Here the Bhindi/Okra is sauteed or deep-fried before adding it to the Kuzhambu(gravy). Whereas other vegetables are cooked(boiled) before adding them to the gravy, therefore the process changes a little but not the masalas and other steps.
While you are here please check out other recipes by me like Vatha Kozhambu, Gutti Vankaya Kura, Drumstick curry, Brinjal Pepper masala, and many more…
Here is the recipe of Mor Kuzhambu for you-
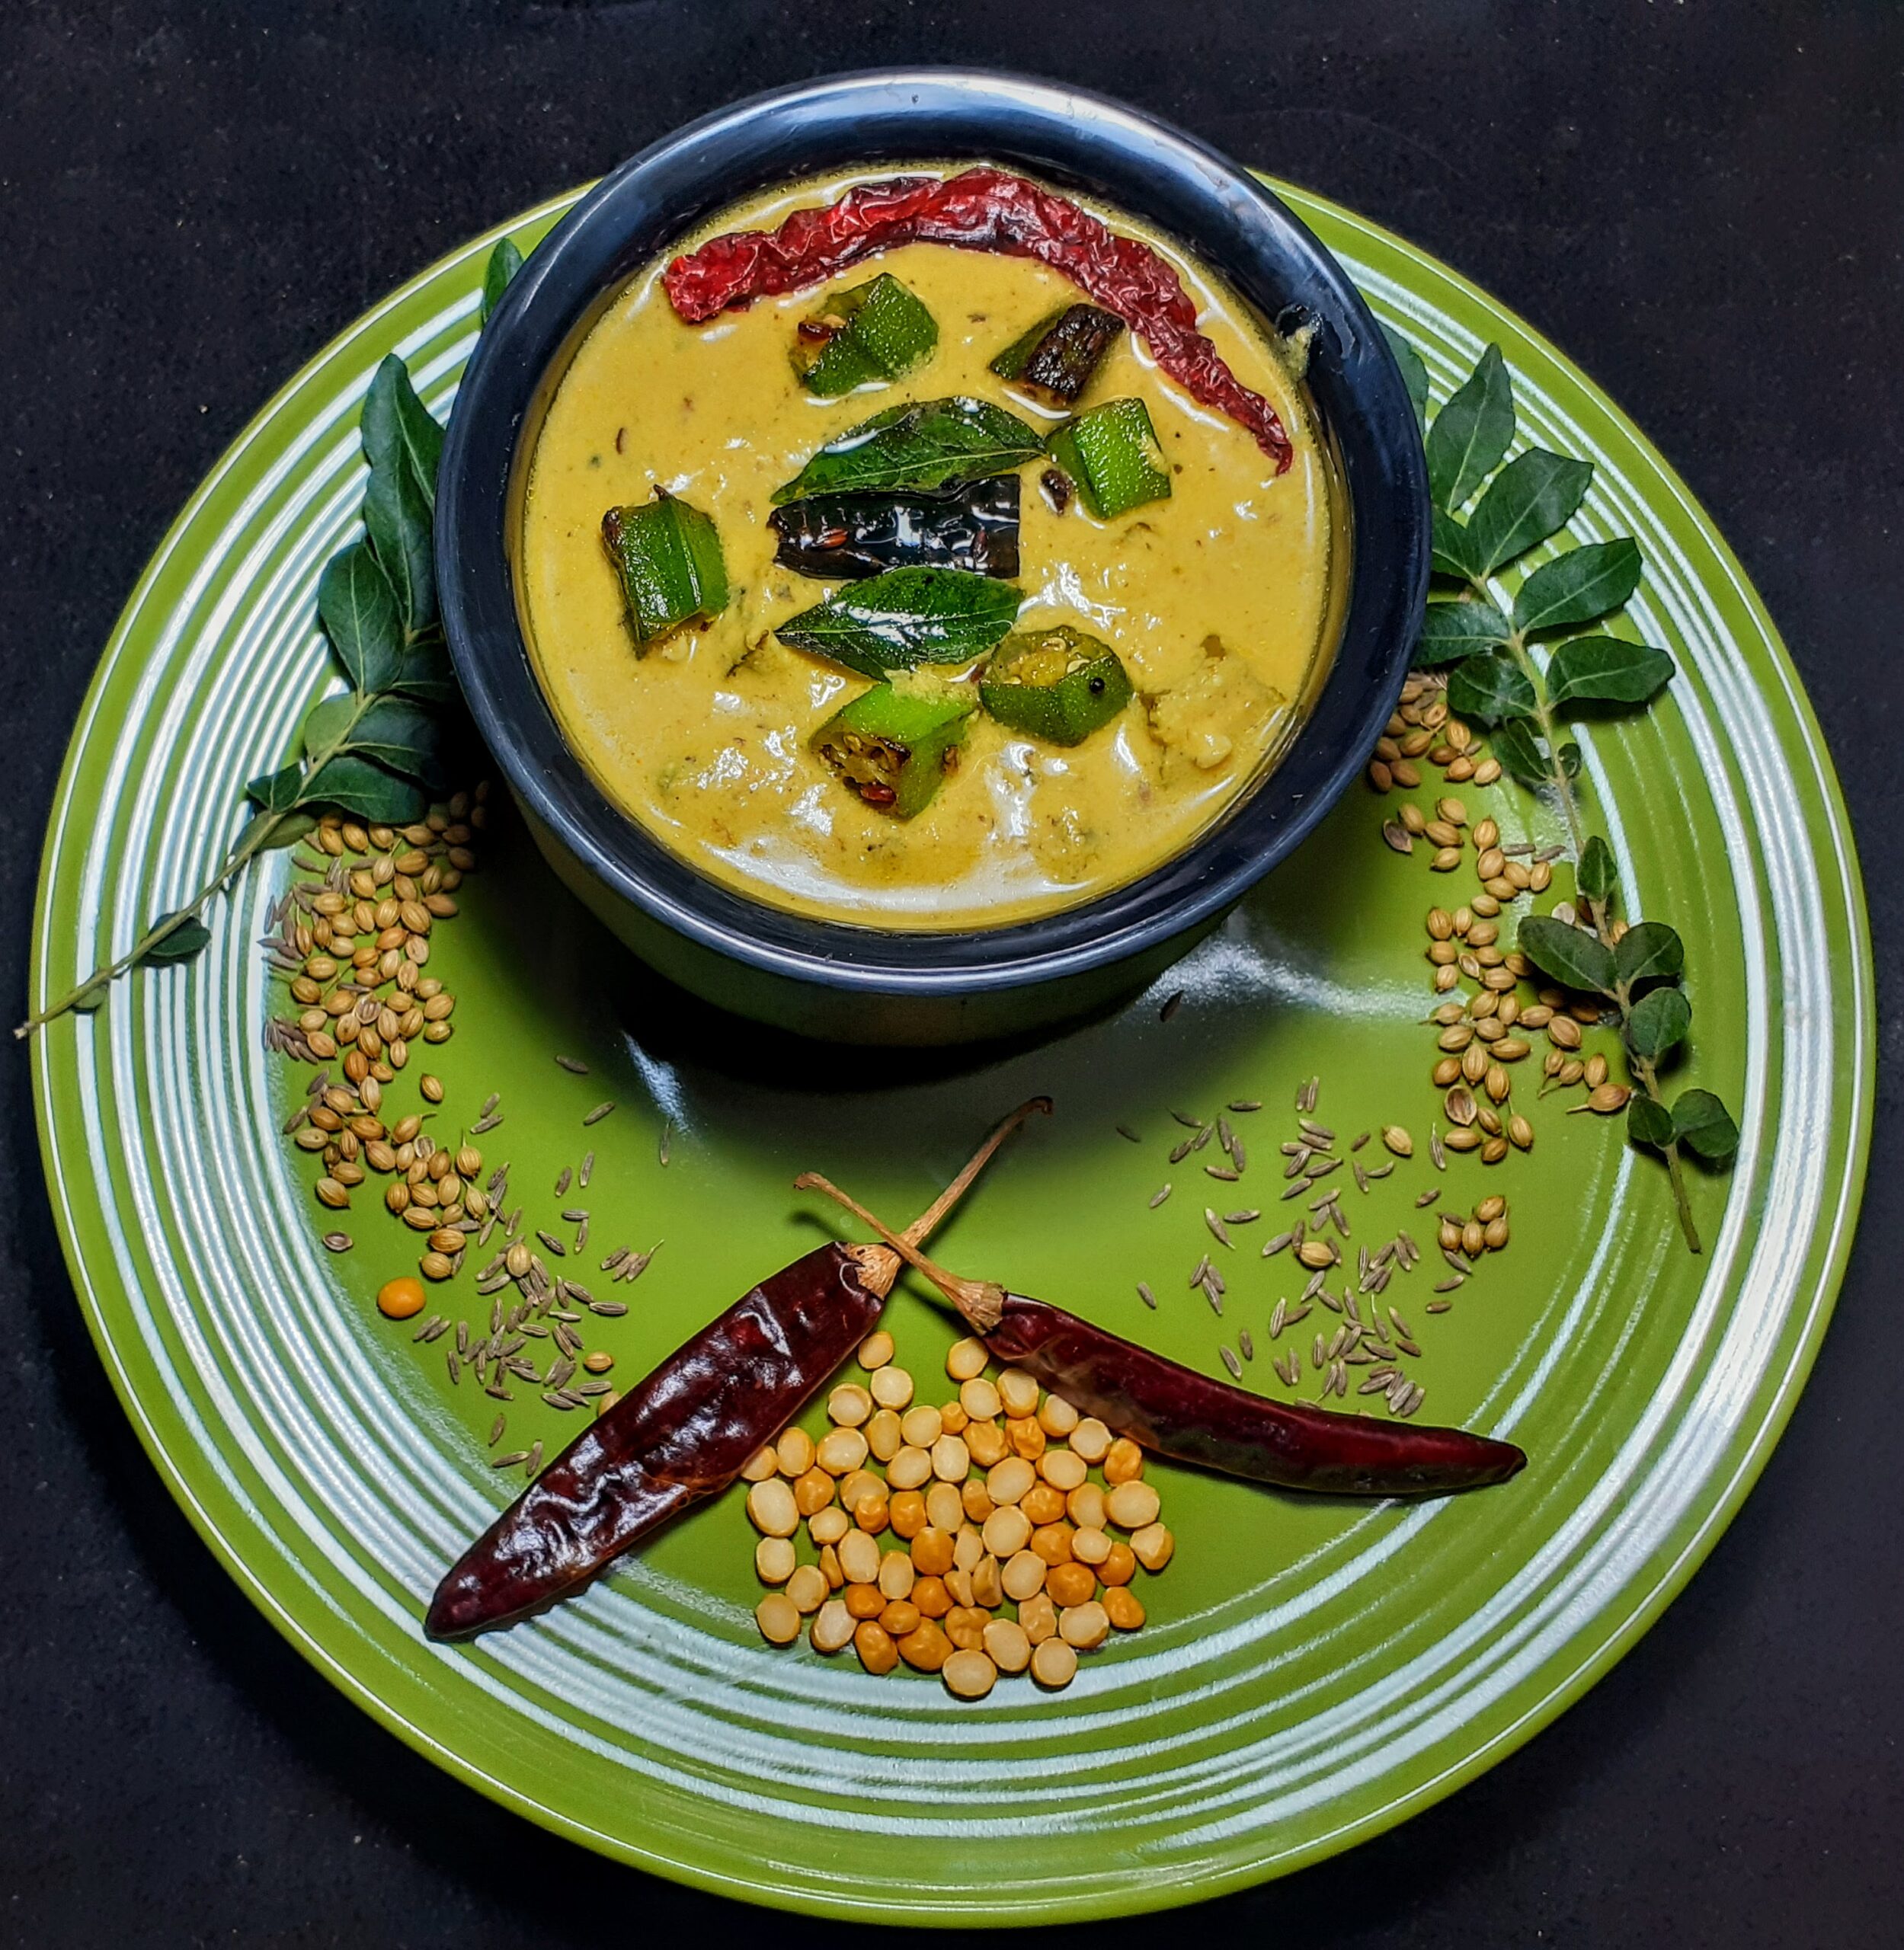
Ingredients:
To Soak for 15 mins:
Dhania/Coriander seeds 1 tbsp
Jeera 1/2 tsp
Chana dal 1.5 tsp
Tuvar dal 1 tsp
Dry red chilli 1
Methi seeds a pinch(optional)
To grind:
Green chilli 1 big
Ginger1/2 inch piece
Coconut 2 tbsp +
All soaked ingredients after draining water.
Curd 300 ml or 2 cups(refer method) (1 cup=150ml)
For tempering:
Bhindi/Okra/Ladysfinger around 6 to 8 cut 1 inch long
Salt a little
Oil 1 tbsp
Mustard seeds 1 tsp
Cumin seeds/Jeera 1/2 tsp
Dry red chillies 2 broken
urad dal 1 tsp
Chana dal 1/2 tsp
Curry leaves a few
salt to taste
Directions:
Soak all ingredients mentioned under “to soak” for 15 minutes. After 15 minutes, drain water and put the soaked ingredients into a blender. Add the ingredients mentioned under “to grind” except the curd and grind them to a coarse mixture. Now add 2 tbsp curd to the coarse mixture and grind again to a smooth paste.
Now in a Kadai/Pan take oil for tempering. On heating add all ingredients mentioned under “to temper” except the Bhindi and fry for 30 seconds or until the dals turn light brown. Now add the bhindi and saute. Keep stirring every now and then so that the bindi doesn’t stick to the pan. We want the bhindi to be crisp and cooked, but not mushy. Once the Bhindi is cooked transfer to a plate or vessel.
Now put the same Kadai on the flame and pour the ground paste into it. Reduce the flame and add 1 to 1.5 cups of water and simmer it. The paste has to cook well, for about 2 minutes or until the raw taste of the masalas is gone. Now smoothen the remaining curd(we used only 2 tbsp for the paste) with a whisk or give it a single spin in the blender and pour this curd into the cooking paste. Add turmeric powder and salt. The flame should be low throughout. Once the curd is poured, keep stirring constantly for a few minutes. This should take approximately 2 minutes and then switch off the flame. Once the curd is poured, it should not simmer for long. Now add the sauteed/fried bhindi and mix nicely. The tasty Mor Kuzhambu is ready to relish.
Serving Suggestions: Hot rice and Parupu Usili on the sides. It is a match made in heaven with Coconut(Thengai ) Sevai(rice hoopers) or even with Coconut rice.
STEPWISE RECIPE FOLLOWS:
1. Assemble all ingredients. Soak all ingredients mentioned under “to soak” for 15 minutes. After 15 minutes, drain water and put the soaked ingredients into a blender.
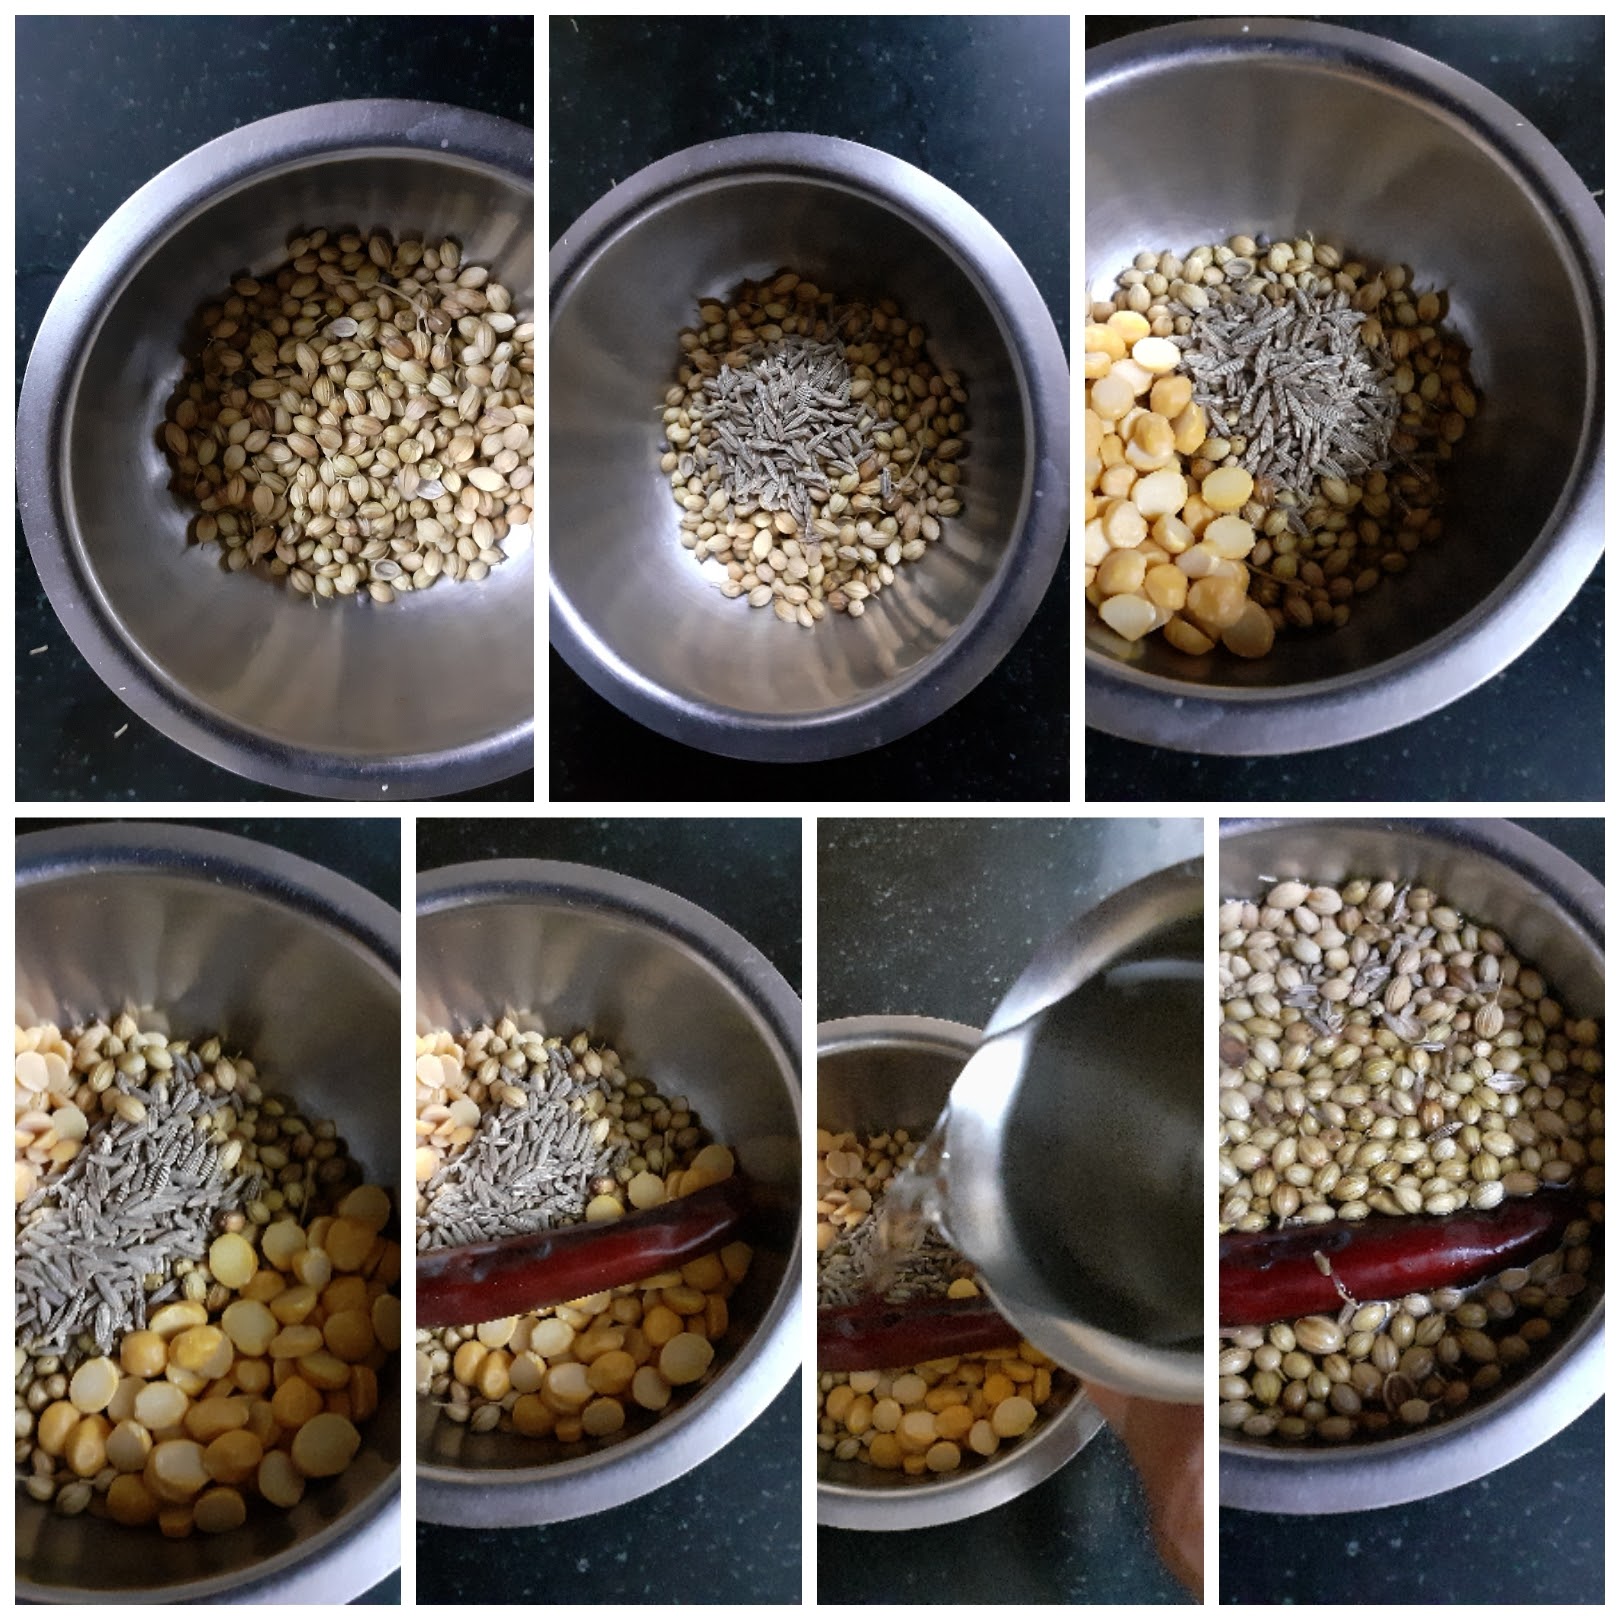
2. Add the ingredients mentioned under “to grind” except the curd and grind them to a coarse mixture. Now add 2 tbsp curd to the coarse mixture and grind again to a smooth paste.
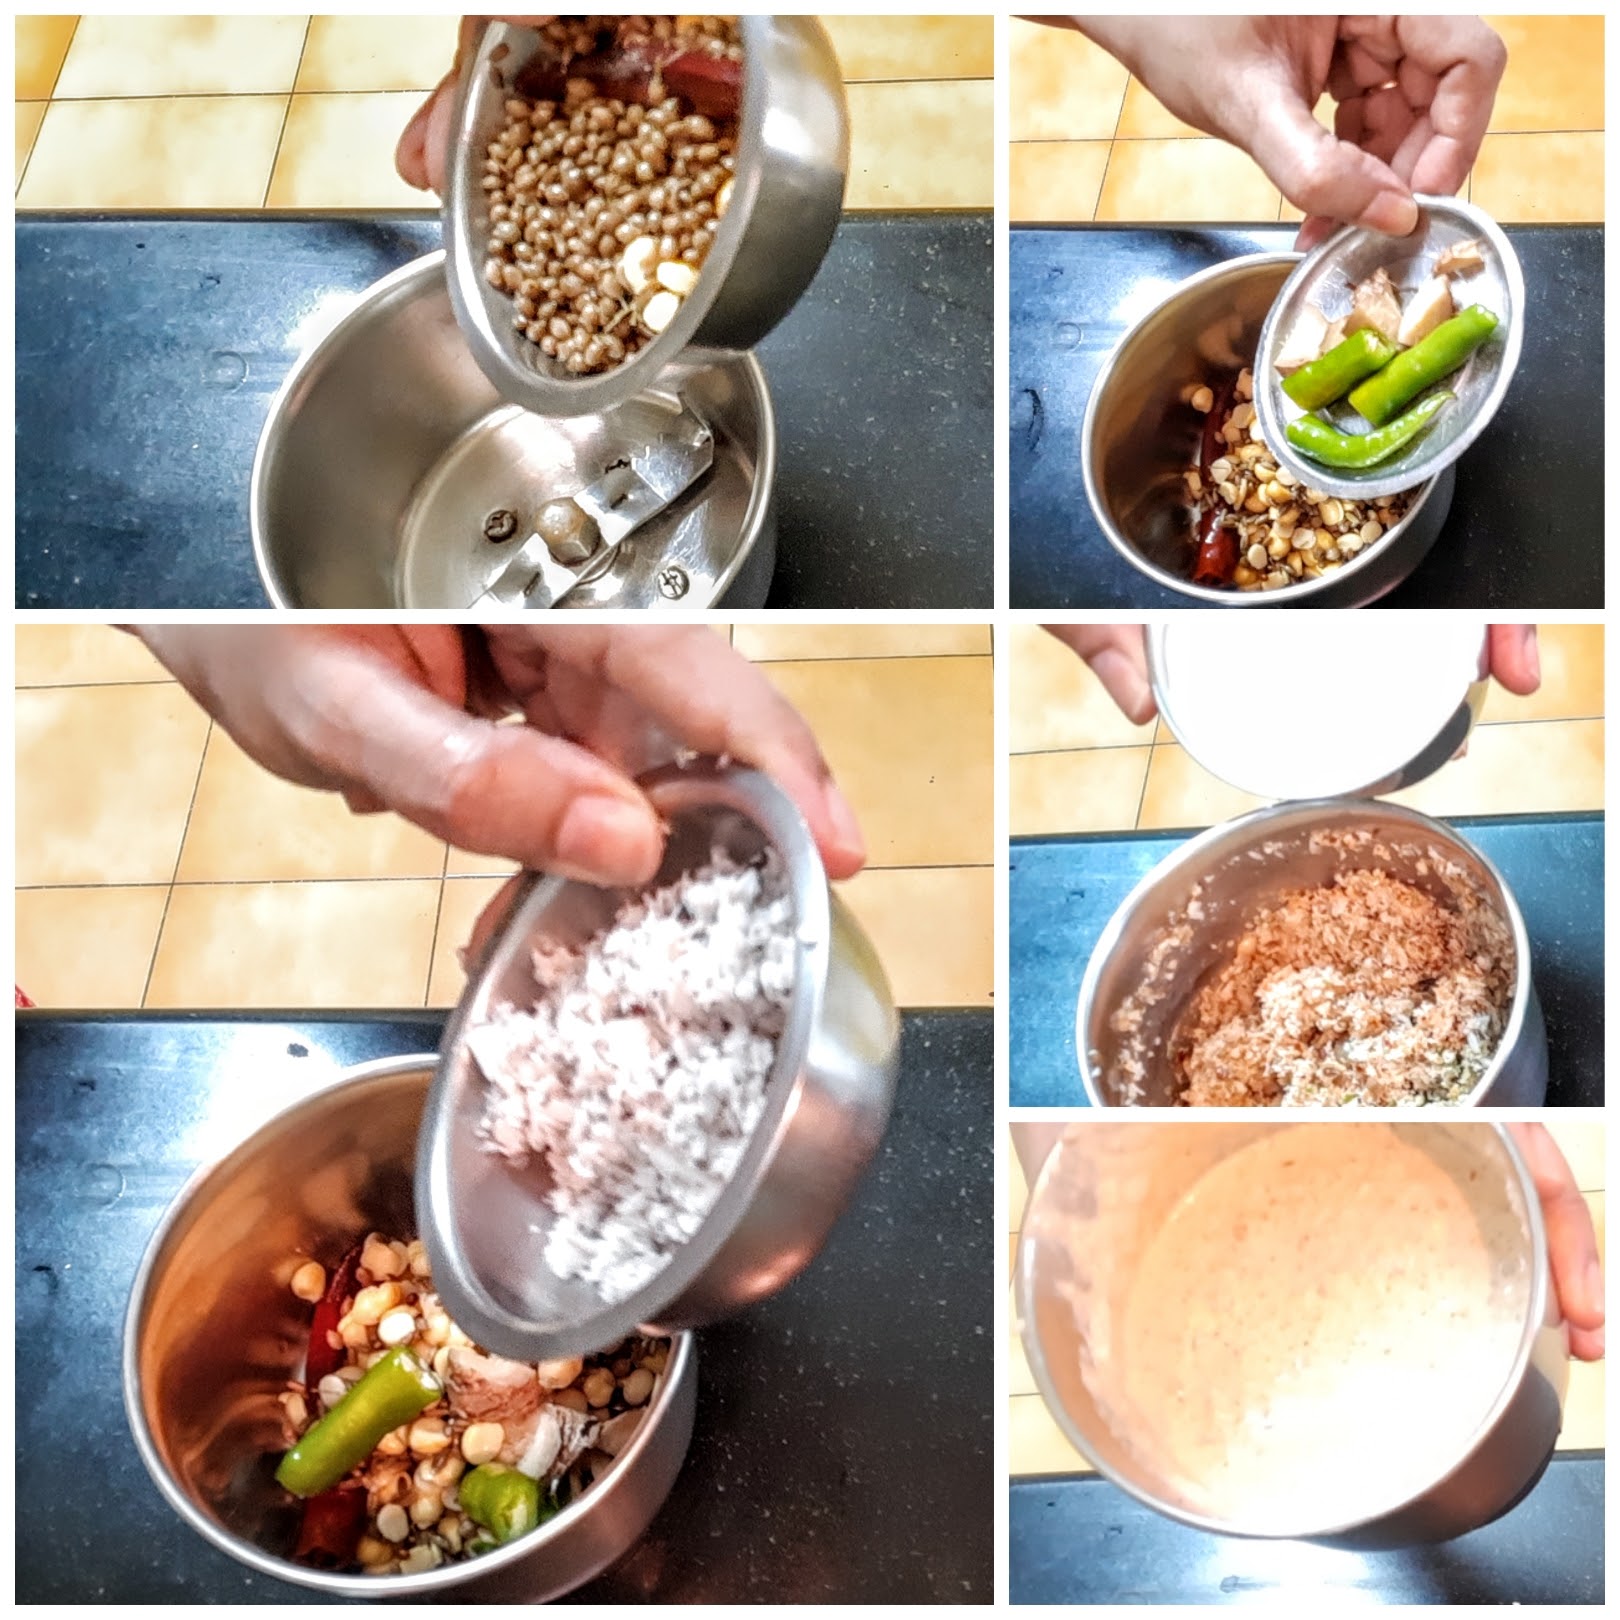
3. Now in a Kadai/Pan take oil for tempering. On heating add all ingredients mentioned under “to temper” except the Bhindi and fry for 30 seconds or until the dals turn light brown. Now add the bhindi and saute.
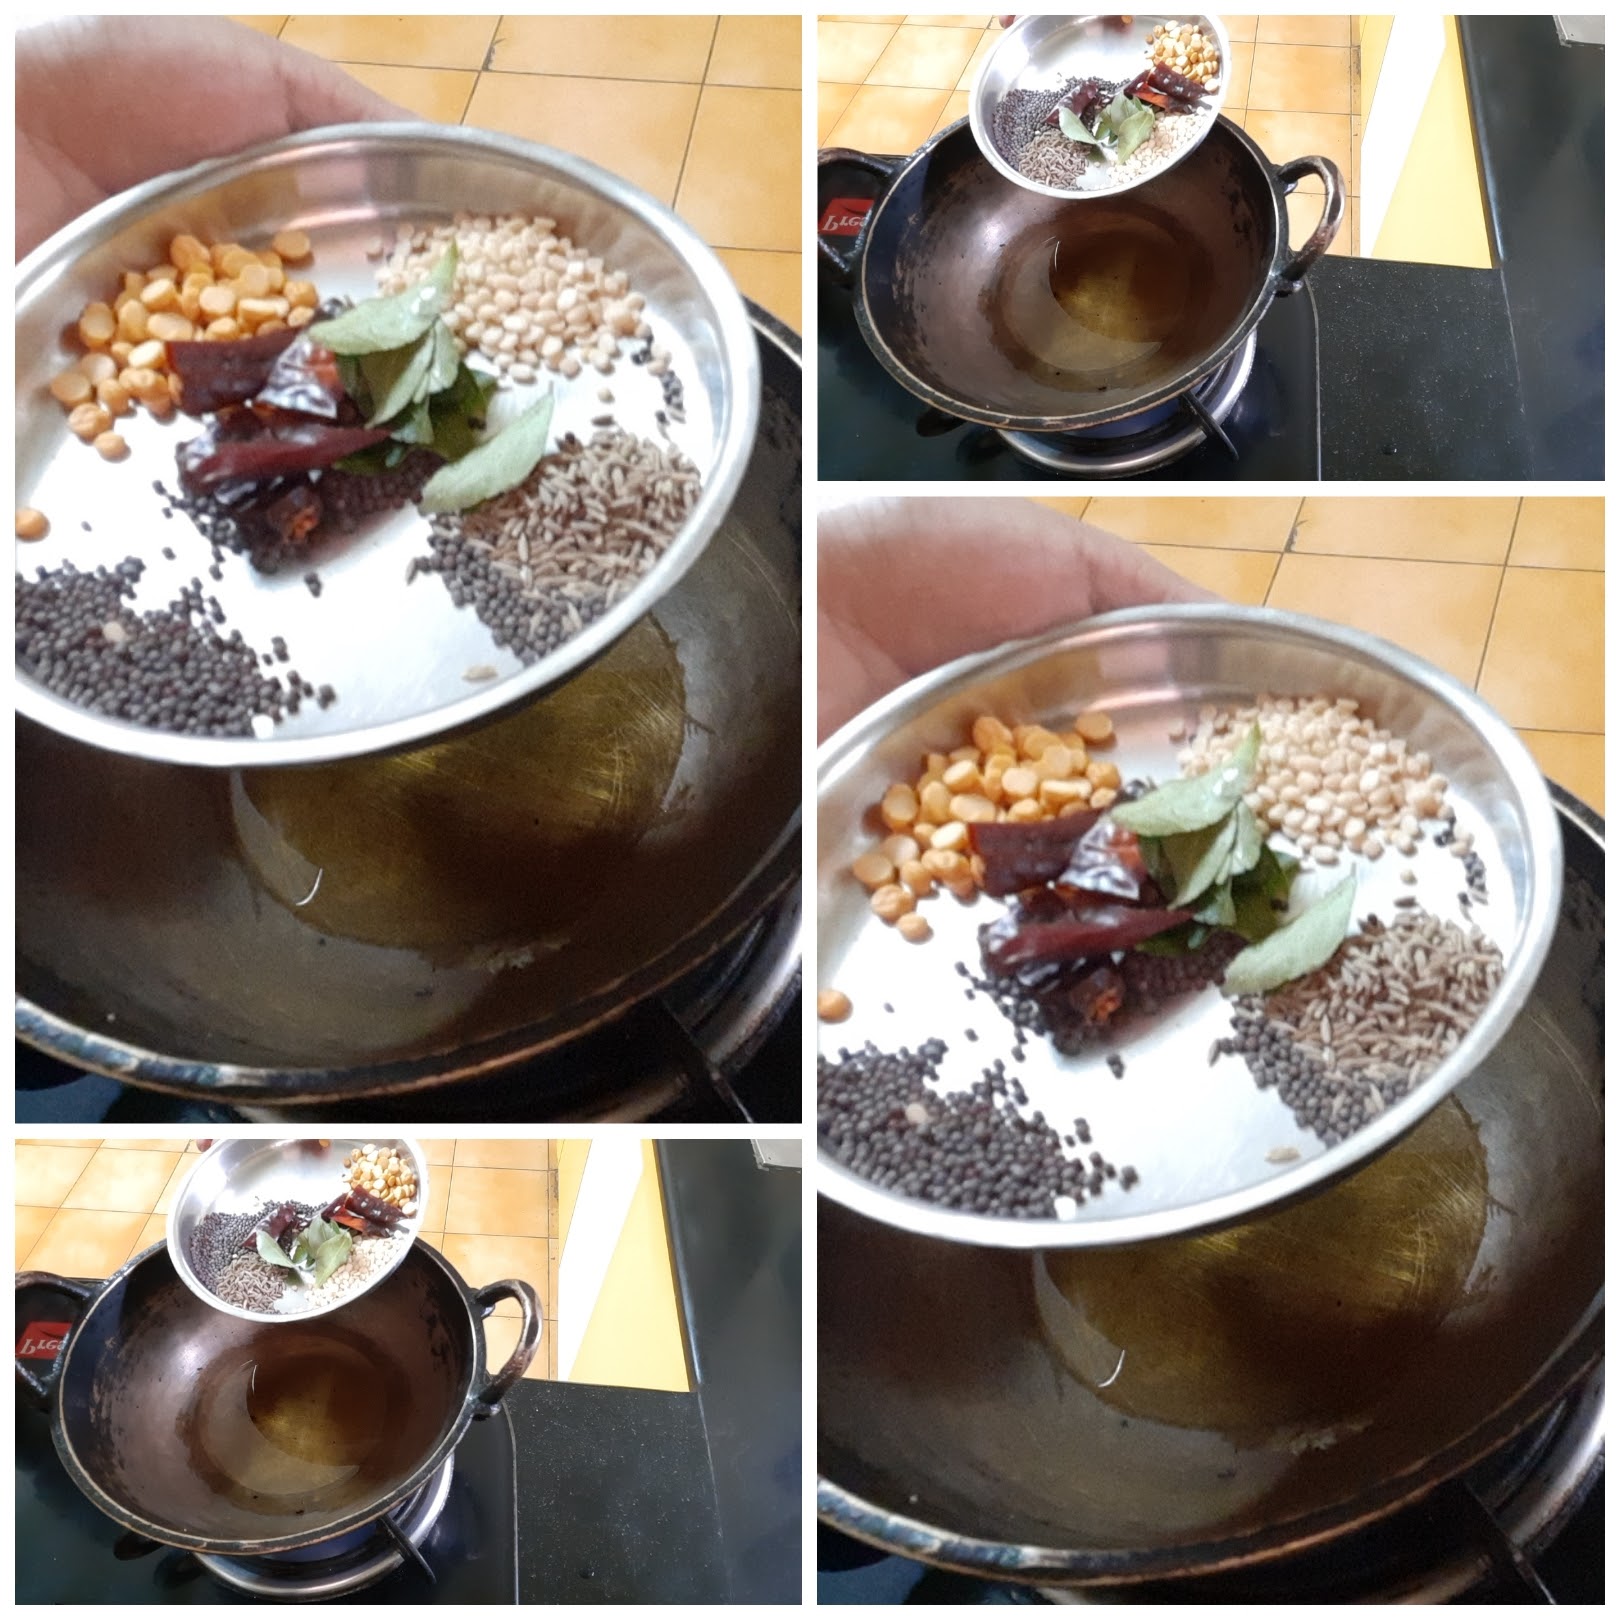
4. Keep stirring every now and then. Bhindi should be crisp and cooked, but not mushy. Once the Bhindi is cooked transfer to a plate or vessel.
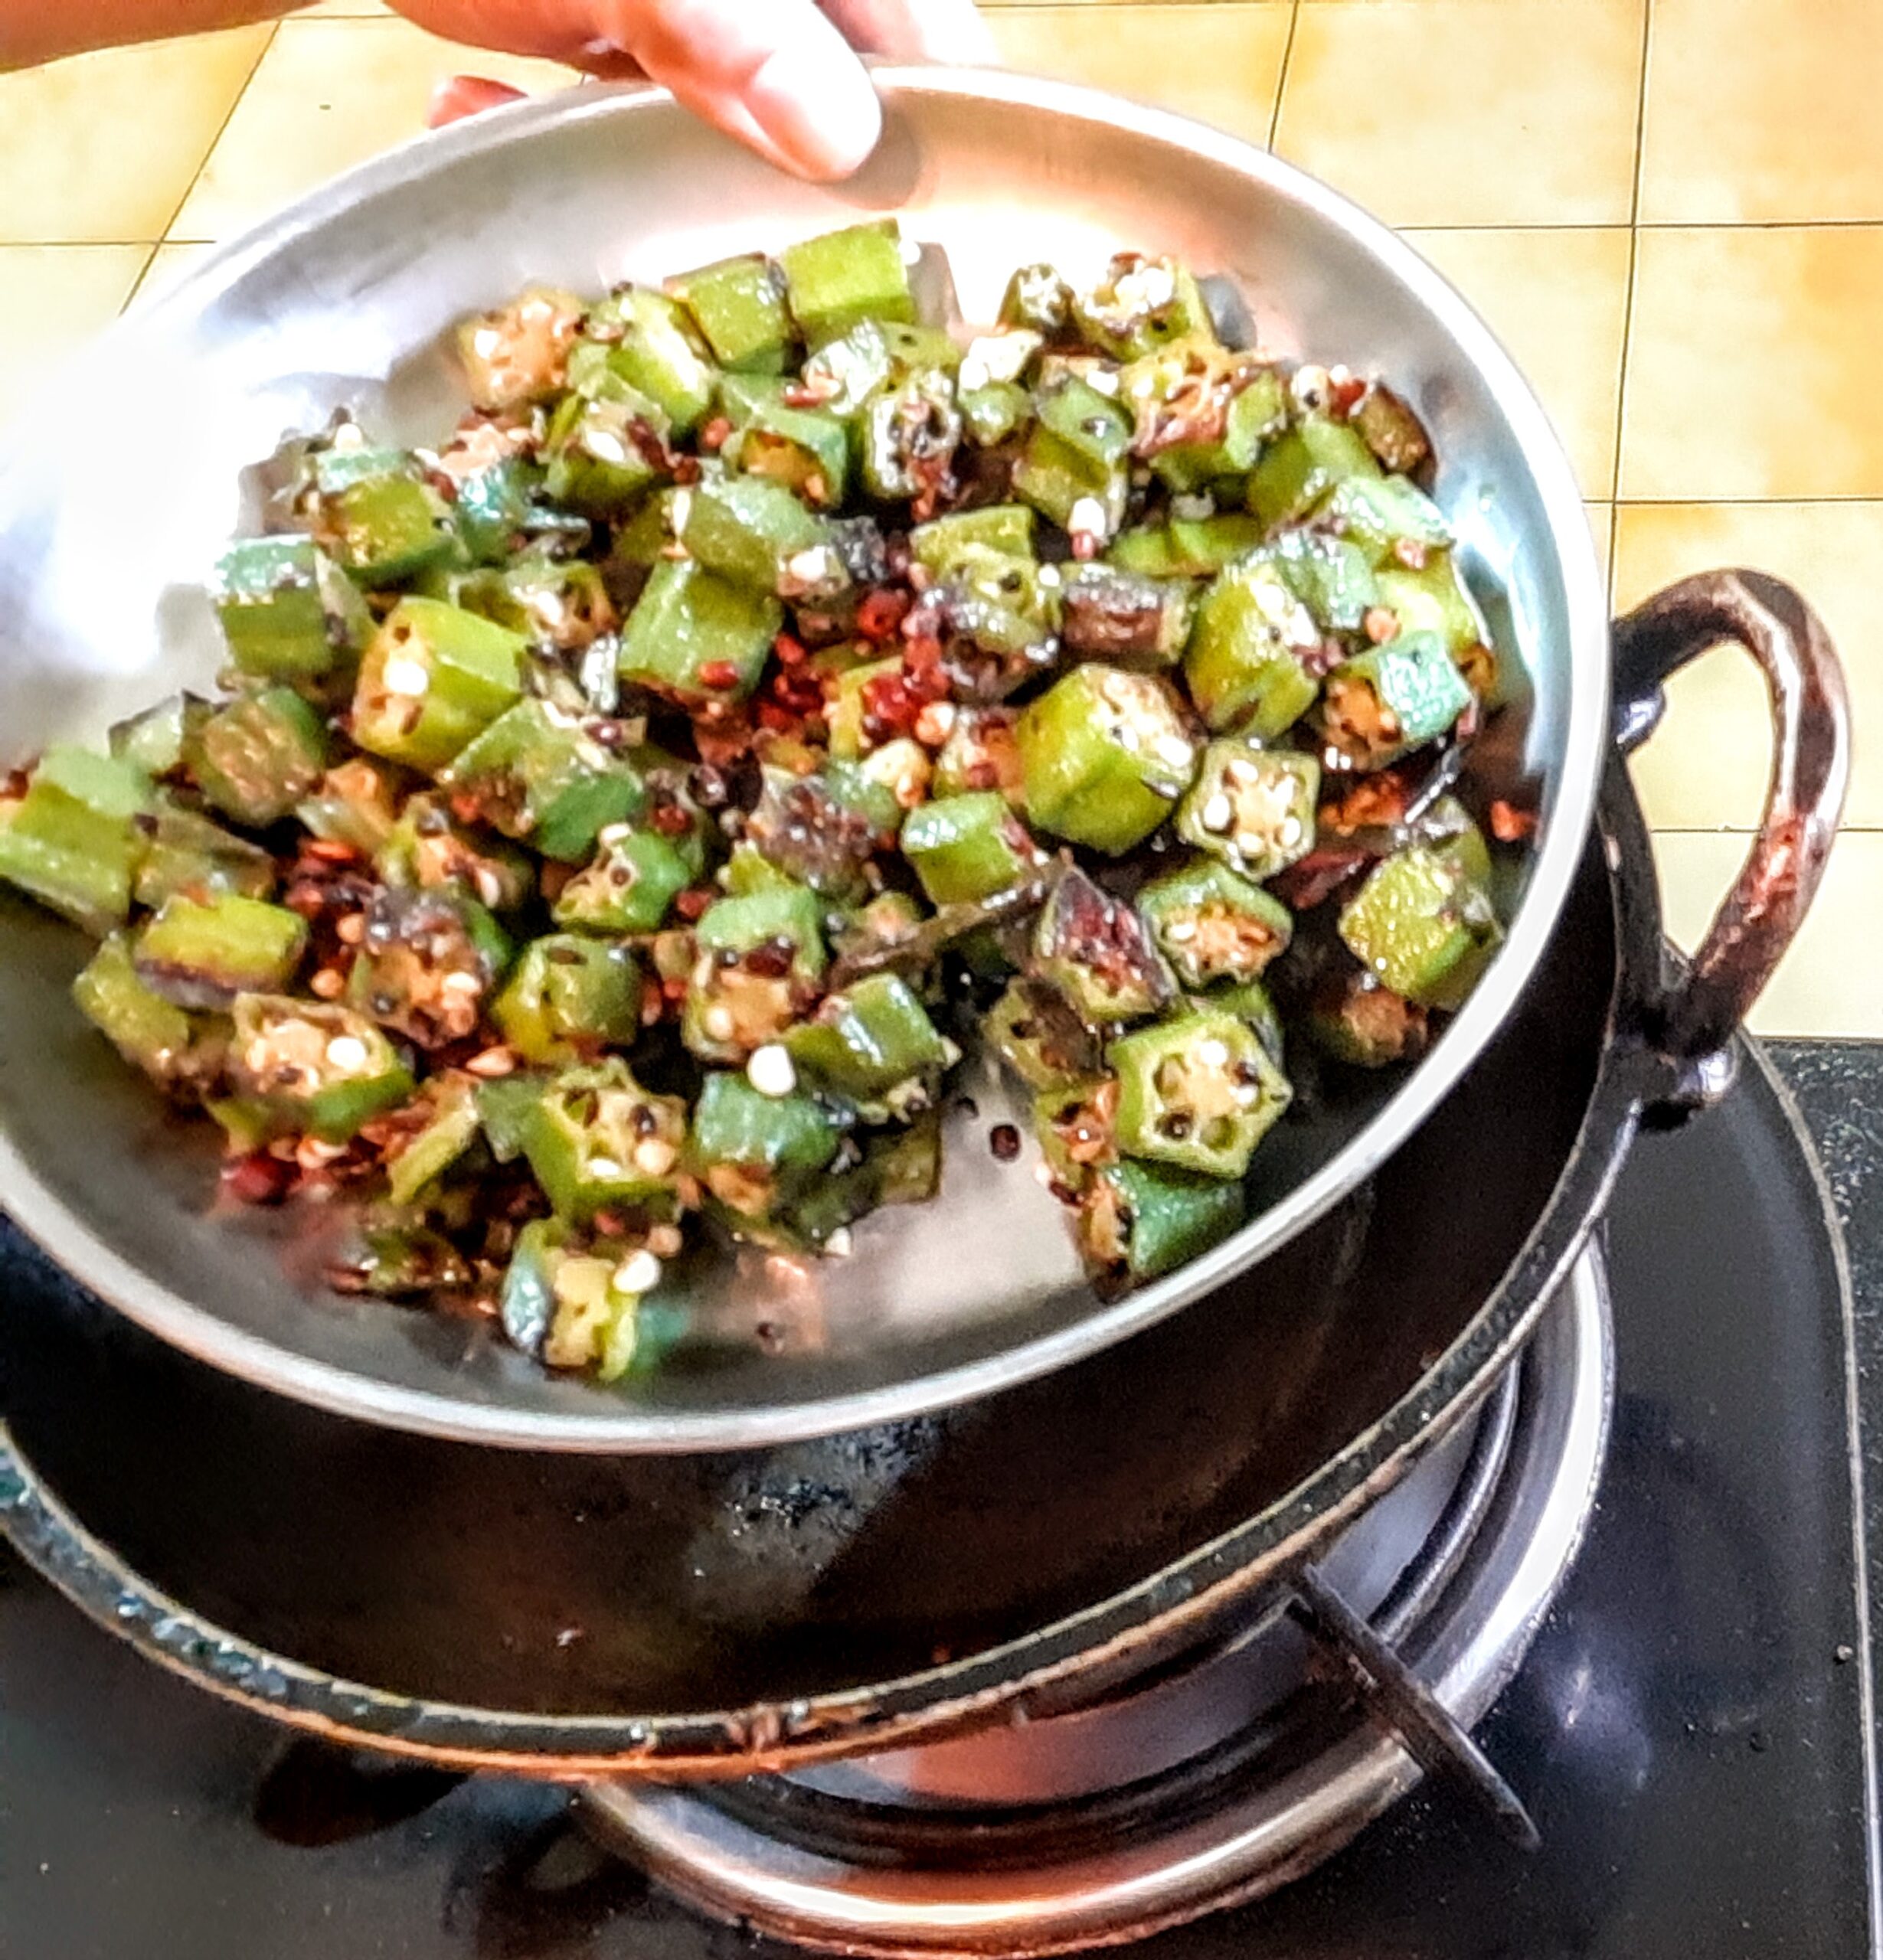
5. Now put the same Kadai on the flame and pour the ground paste into it. Reduce the flame and add 1 to 1.5 cups of water and simmer it. The paste has to cook well, for about 2 minutes or until the raw taste of the masalas is gone.
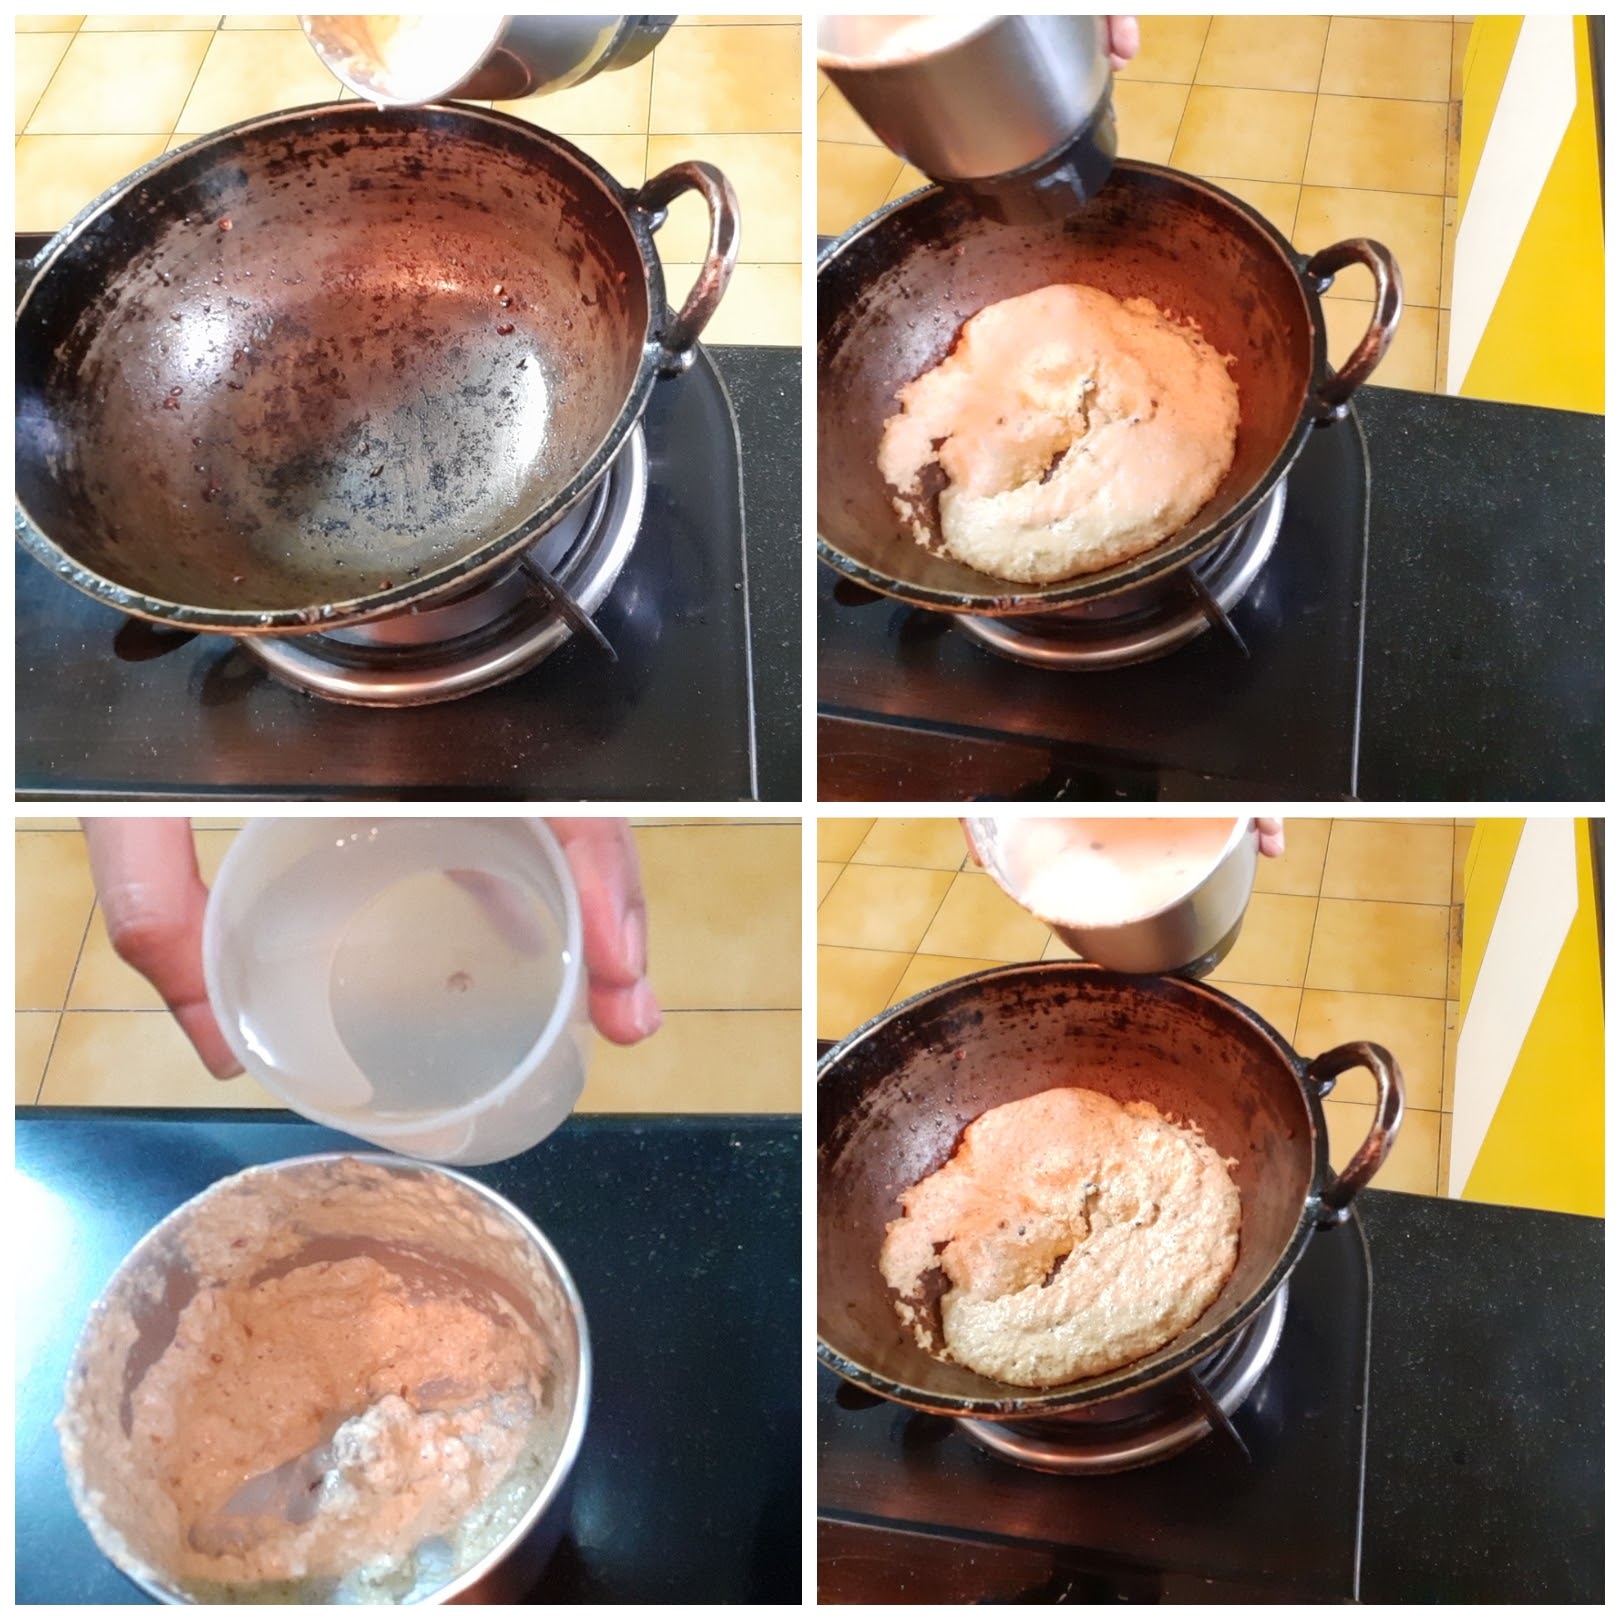
6. Now smoothen the remaining curd(we used only 2 tbsp for the paste) with a whisk or give it a single spin in the blender and pour this curd into the cooking paste. Add turmeric powder and salt.
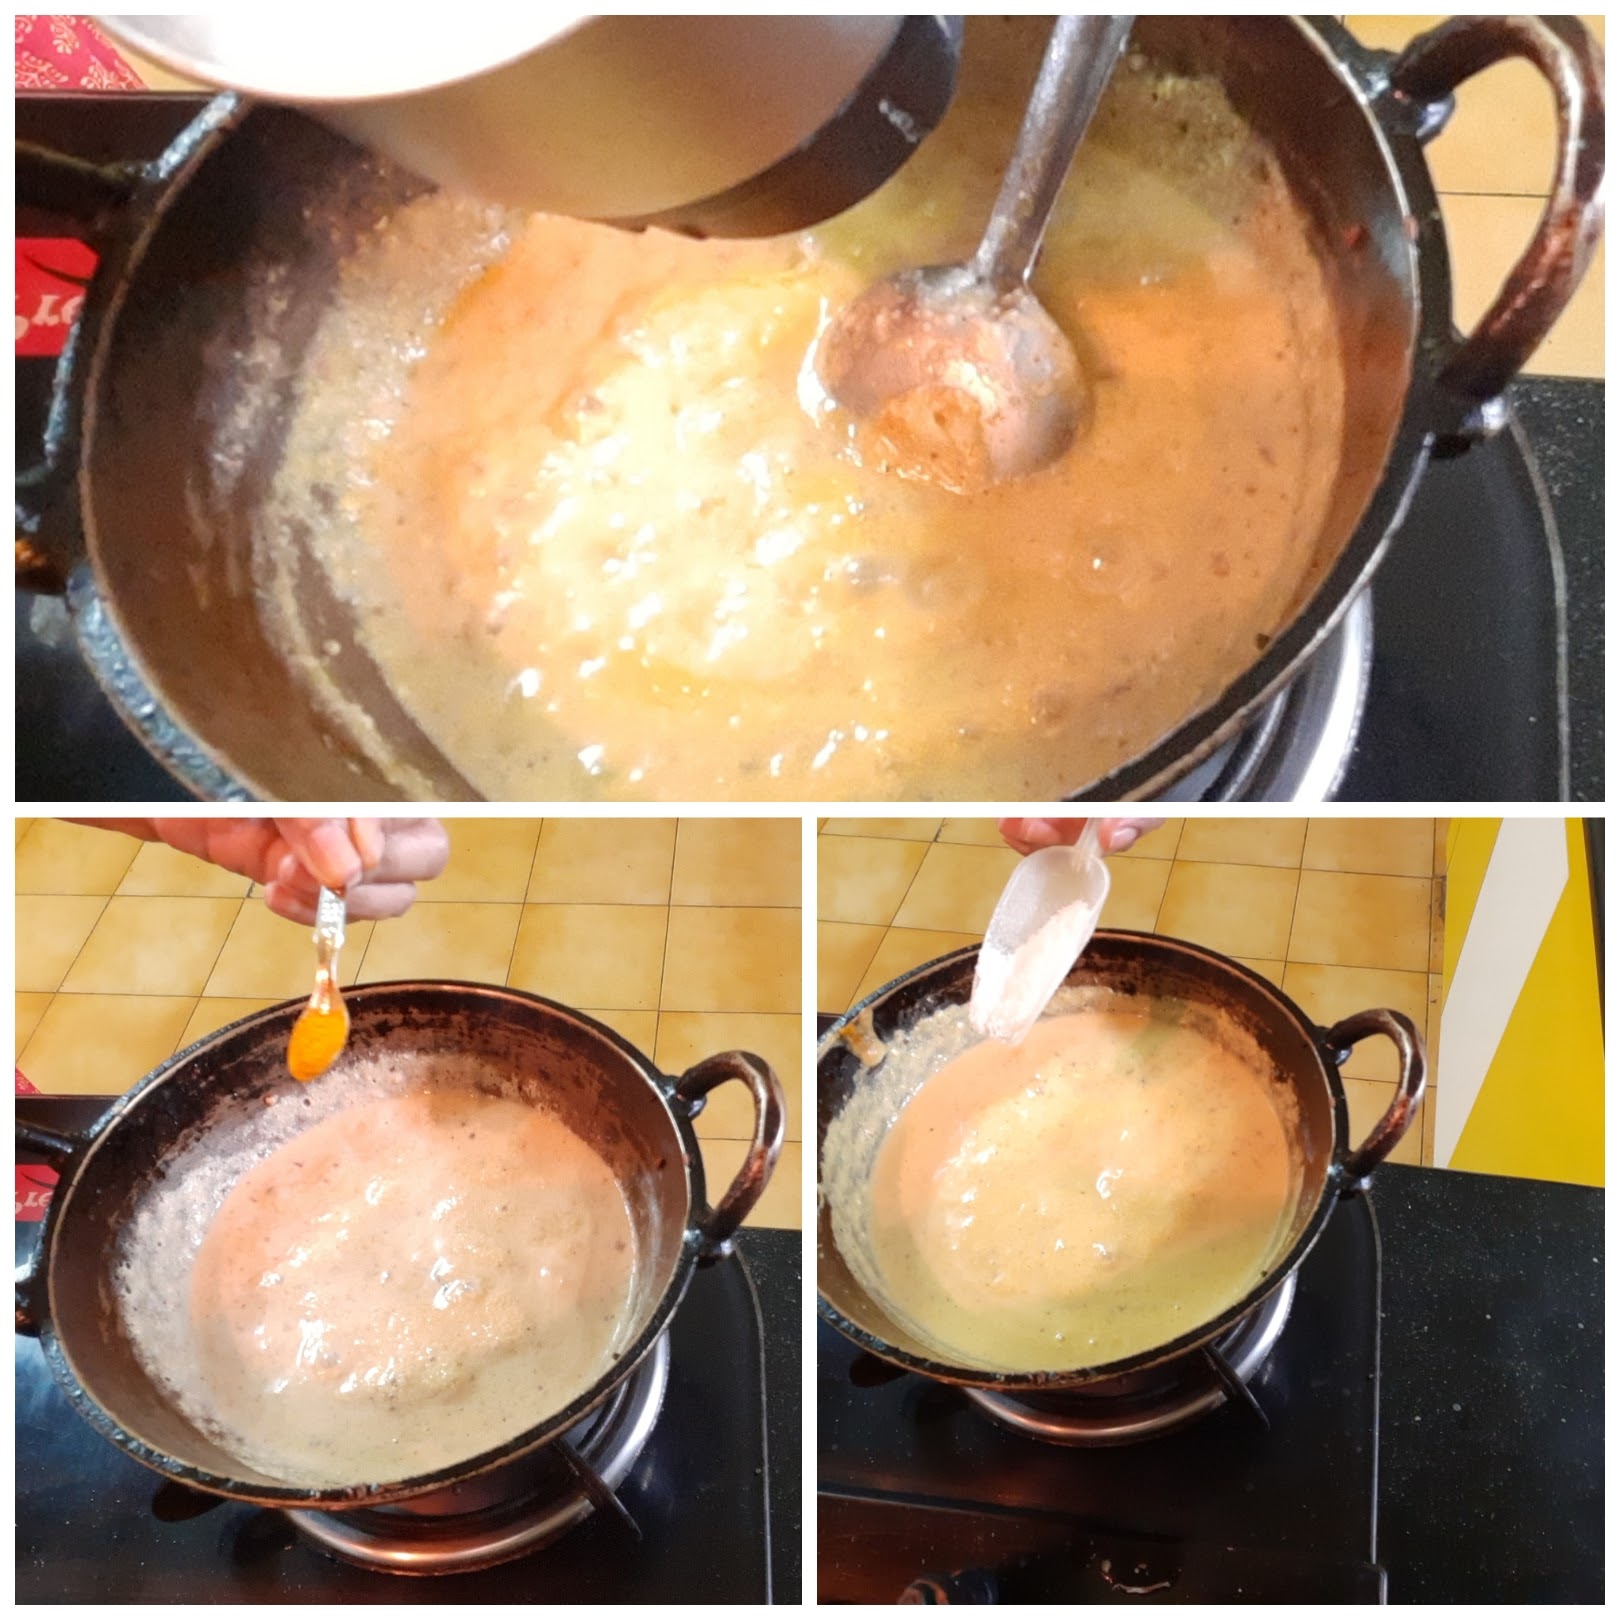
7. Once the curd is poured, keep stirring constantly for a few minutes, approx. 2 minutes and put off the flame. Now add the sauteed/fried Bhindi to the gravy. The yummy Mor Kuzhambu is ready. Enjoy with hot rice and ghee or Coconut rice.
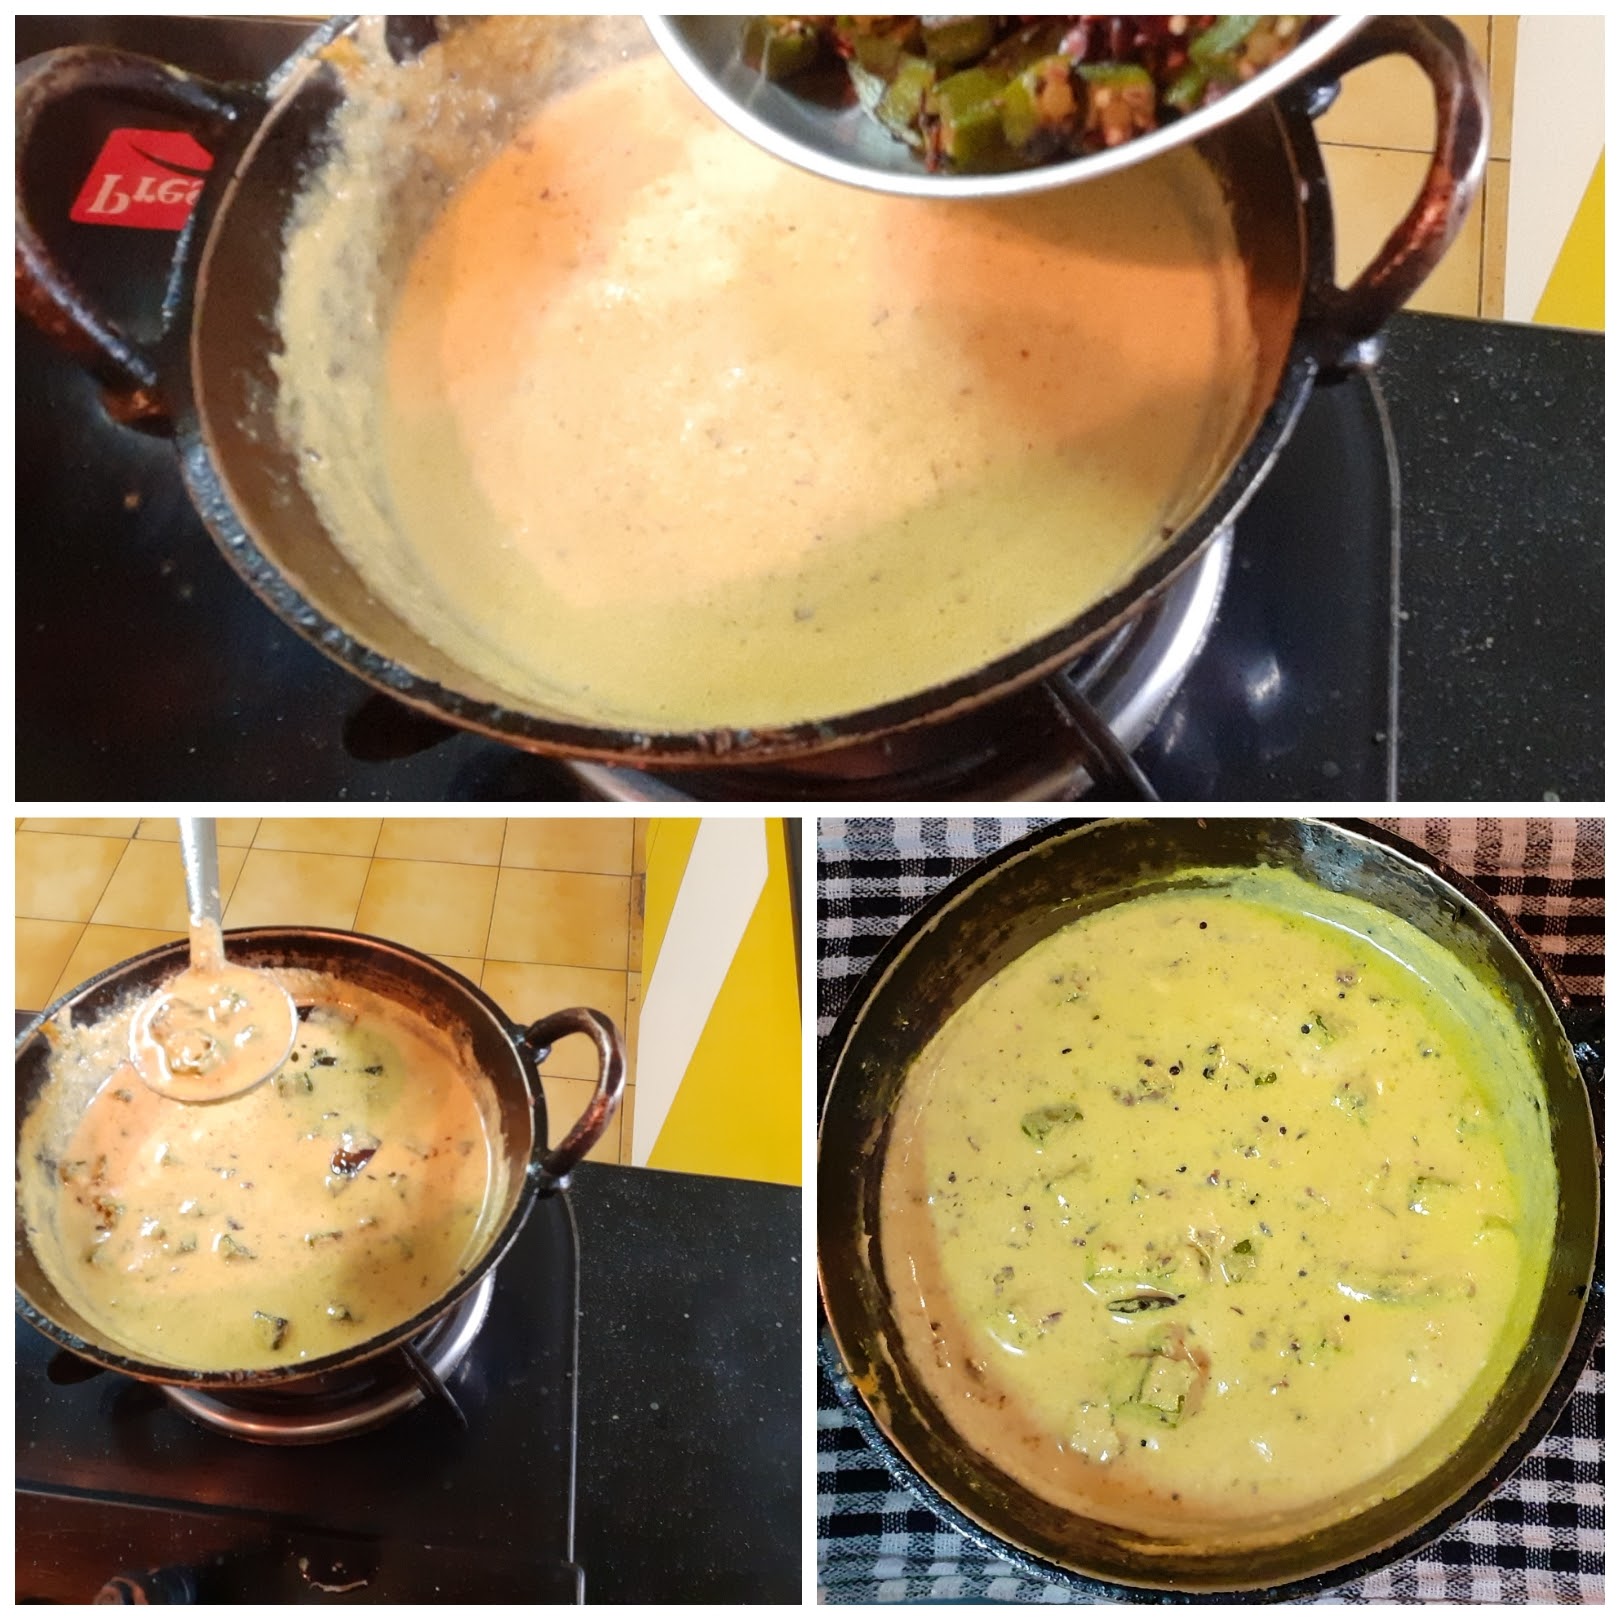
8. The Mor Kozhambu cam be made with the veggies I have mentioned about. Recently I tried this with Pineapples and they turned out very well. To make it with Pineapple, cut the pineapple into chunks, cook it first and then proceed with rest of the recipe.

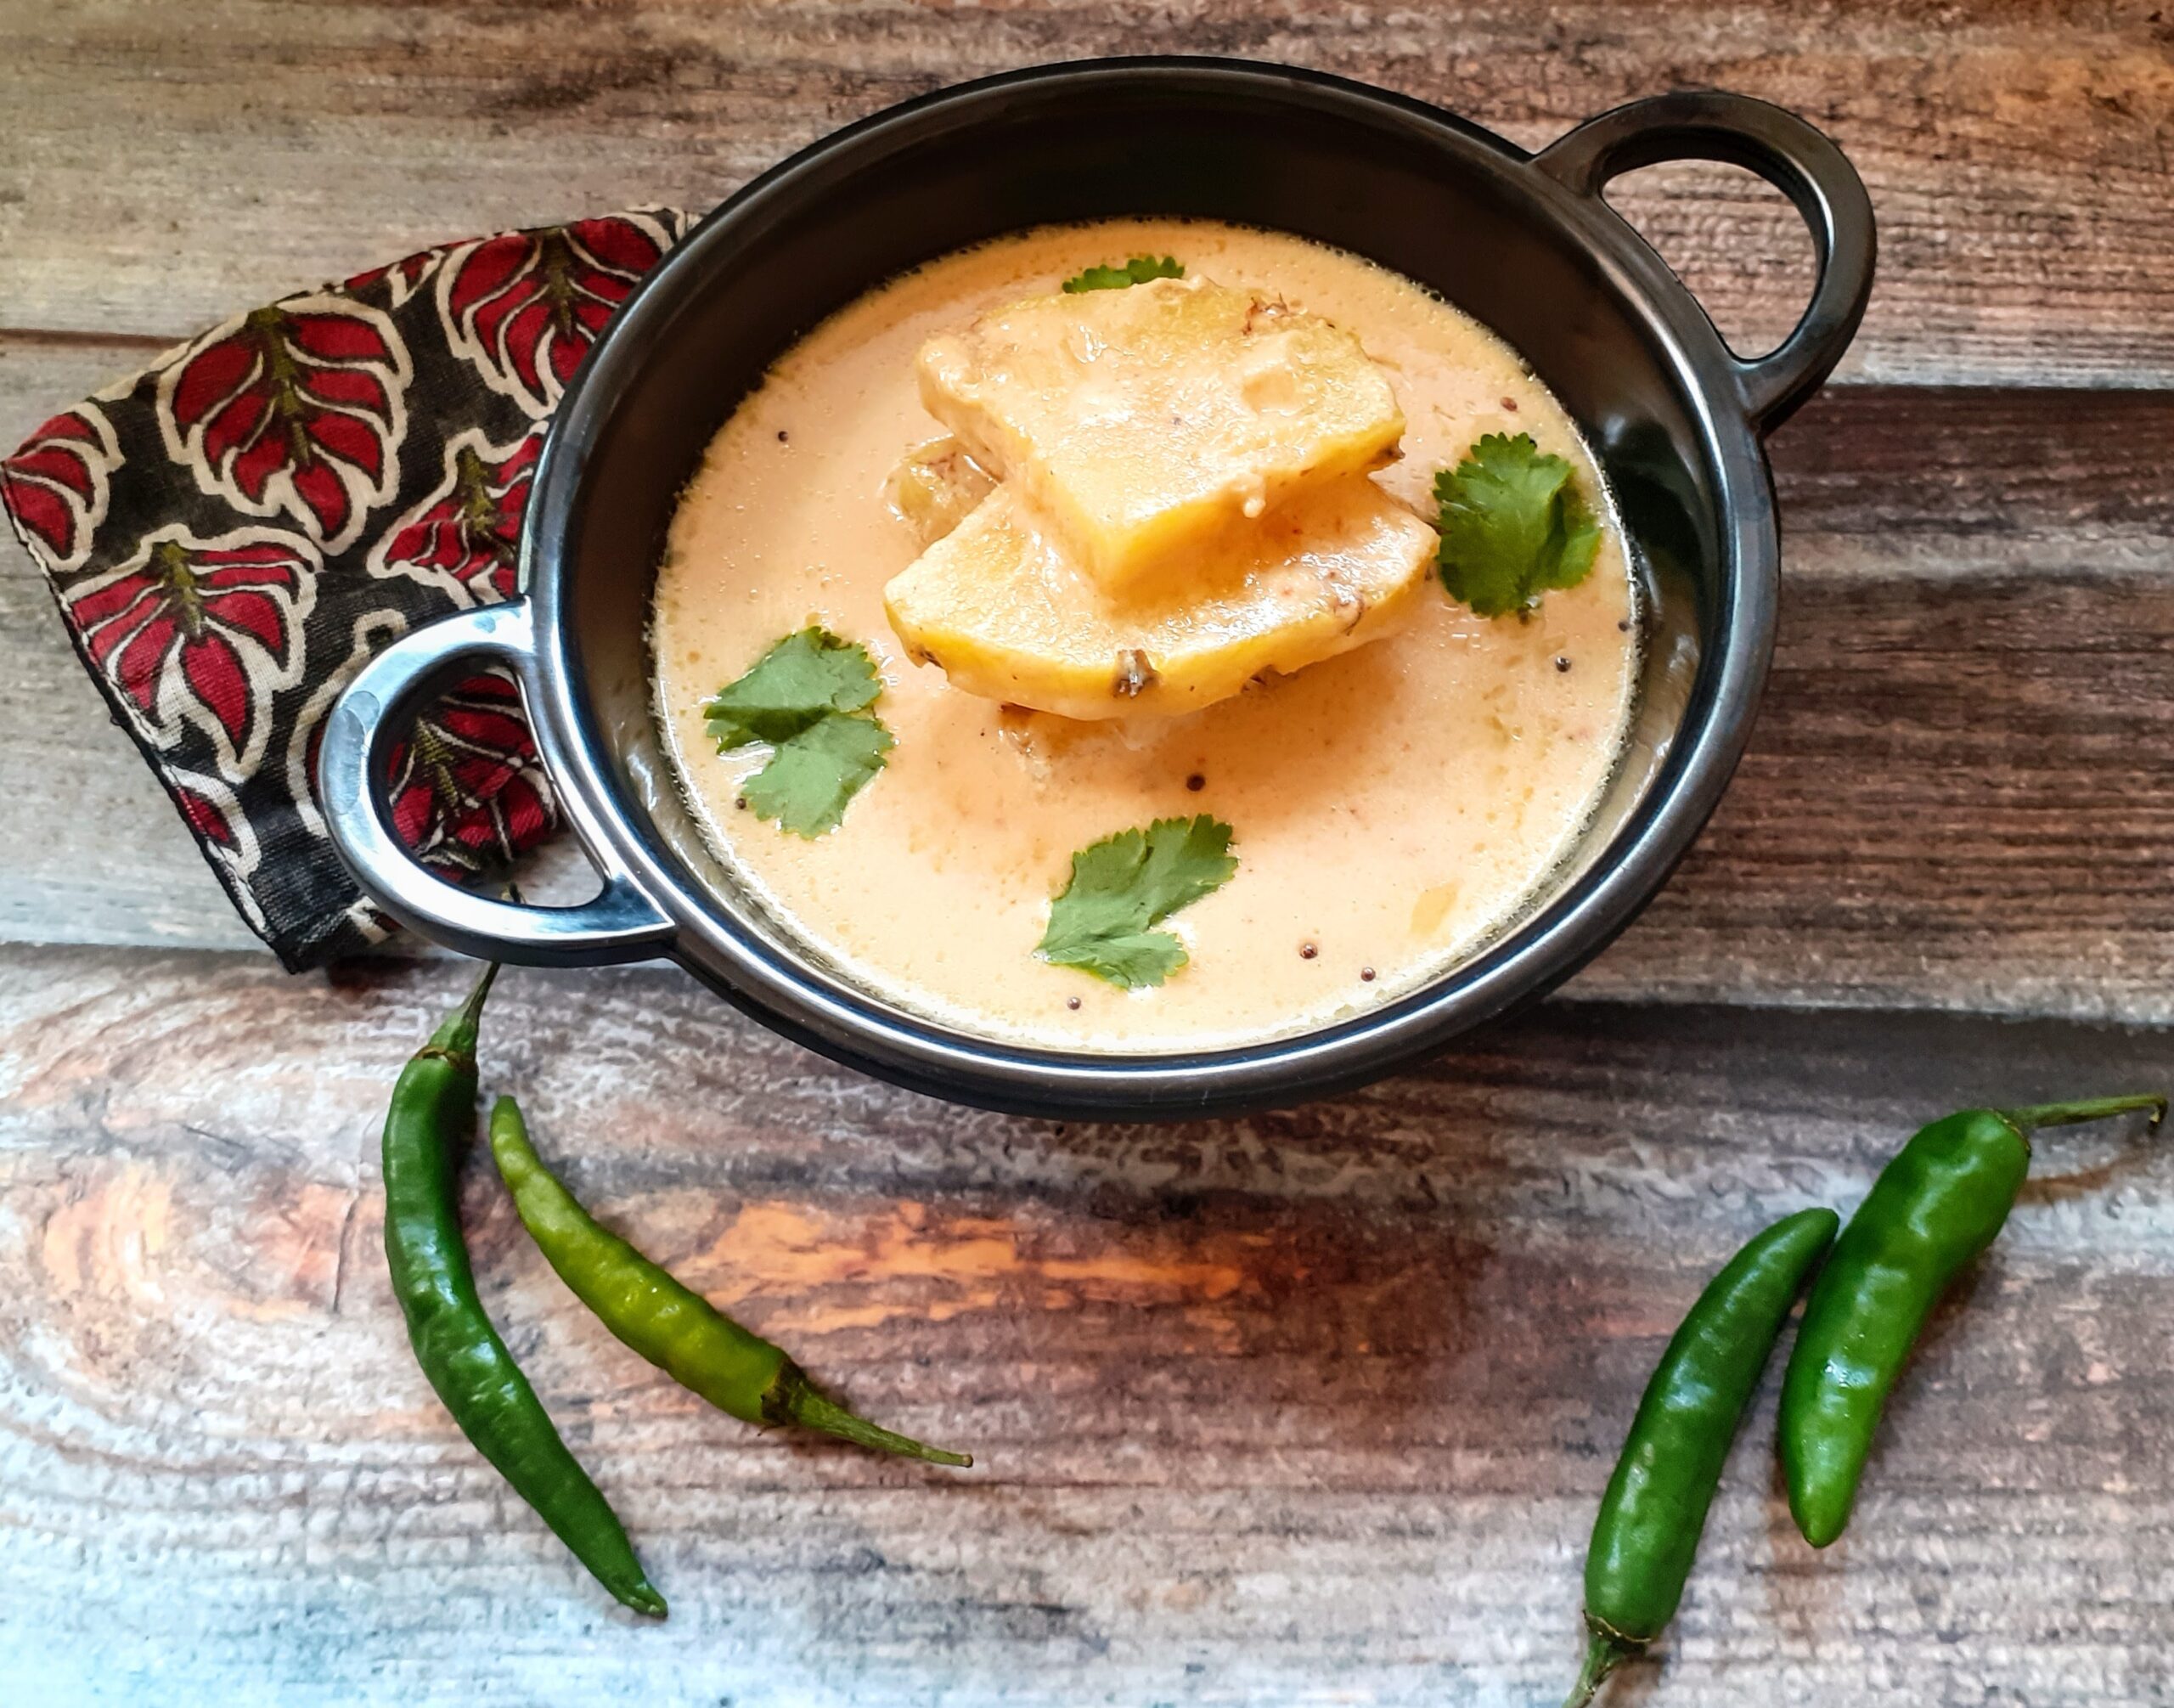
NOTES:
1. I have sauteed the Bhindi in this recipe, it can be deep-fried in little oil too.
2. The flame should always be low while cooking this dish, as curd on the high flame will split and the water will separate.
3. For the same reason once the curd is poured into the masala paste it has to be stirred constantly, to avoid separating of water and curd, which will turn the dish runny.
4. Be liberal with the coconut as it gives body and flavour to the dish.
Video on how to make Mor Kuzhambu here????
If you tried this recipe and liked it please comment below. I would love to hear from you. If you have a query about the recipe email us and ill respond as soon as I can.
Homemade Pesto
Pesto is a simple sauce made of fresh Basil leaves, Parmesan cheese, pine nuts, garlic, Olive oil, pepper, and salt. Other greens like Spinach or onion greens can also be used. Basil is fragrant and imparts a lot of flavour so is more commonly used. Pinenuts can also be substituted with other nuts like walnut, cashew nut, etc.
I make this Pesto sauce very frequently as I like using it as a dip for finger food, as a spread on toast, and thin it down a bit and use it as a sauce for pasta. This is a simple 5-minute recipe and needs no cooking. Along with the Basil leaves, I have added Onion greens also. This is optional.
The basil leaves I have used here are Italian Basil. The commonly available ones are Italian Basil and Thai Basil. In Tamil, these are called Vibuthi Pachai and are medicinal.
While you are here also check out my Schezwan sauce recipe which is also a simple 5 minute one.
Here is the recipe for Pesto sauce for you. This does not have a stepwise recipe as it is a simple one.
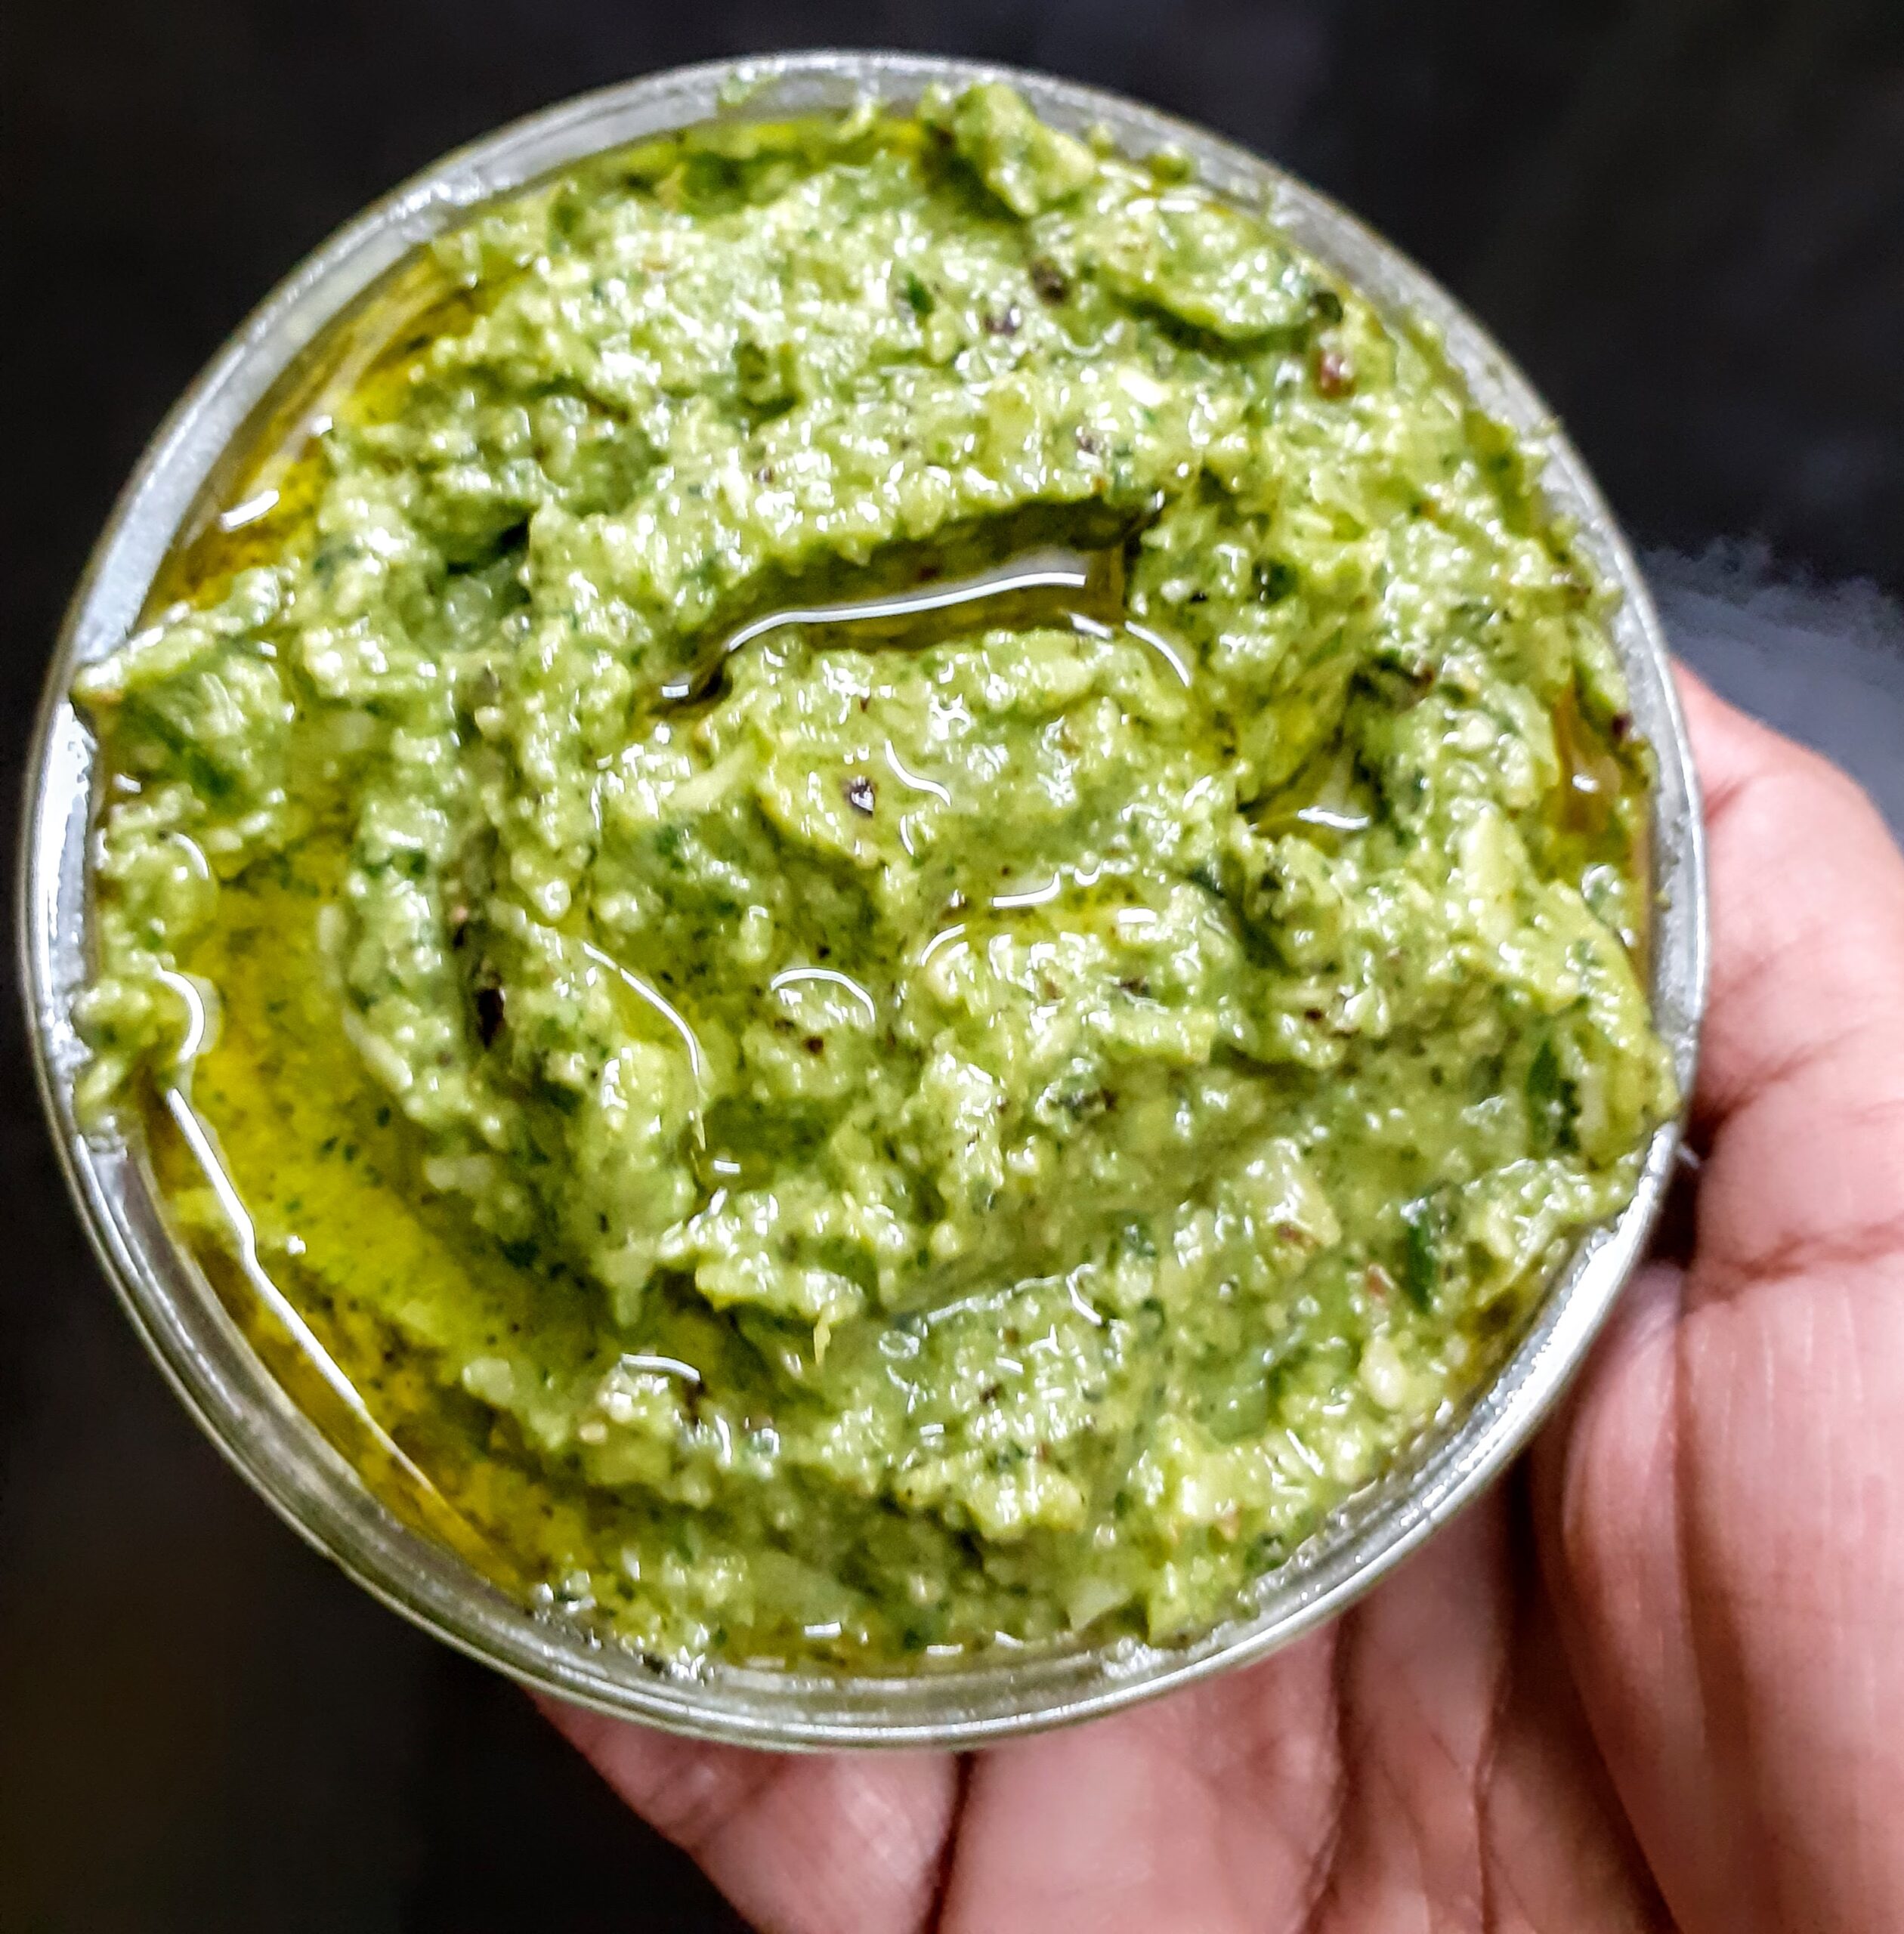
Ingredients:
Basil leaves 1 cup
garlic 3 to 5 cloves
Parmesan cheese 1/2 cup shredded
pepper 1tsp
salt as per taste
Cashew nuts 6 nos
Onion greens one handful finely chopped
Olive oil 1/4 cup or more
Directions:
Put all the ingredients in a blender except the oil and grind to a coarse paste. Now add half the quantity of oil and blend again. A slightly grainy Pesto tastes better than a smooth one. After grinding transfer to a container and top up with the remaining Olive oil and store. Use as required. Add more oil if required. The green and flavourful sauce is ready.
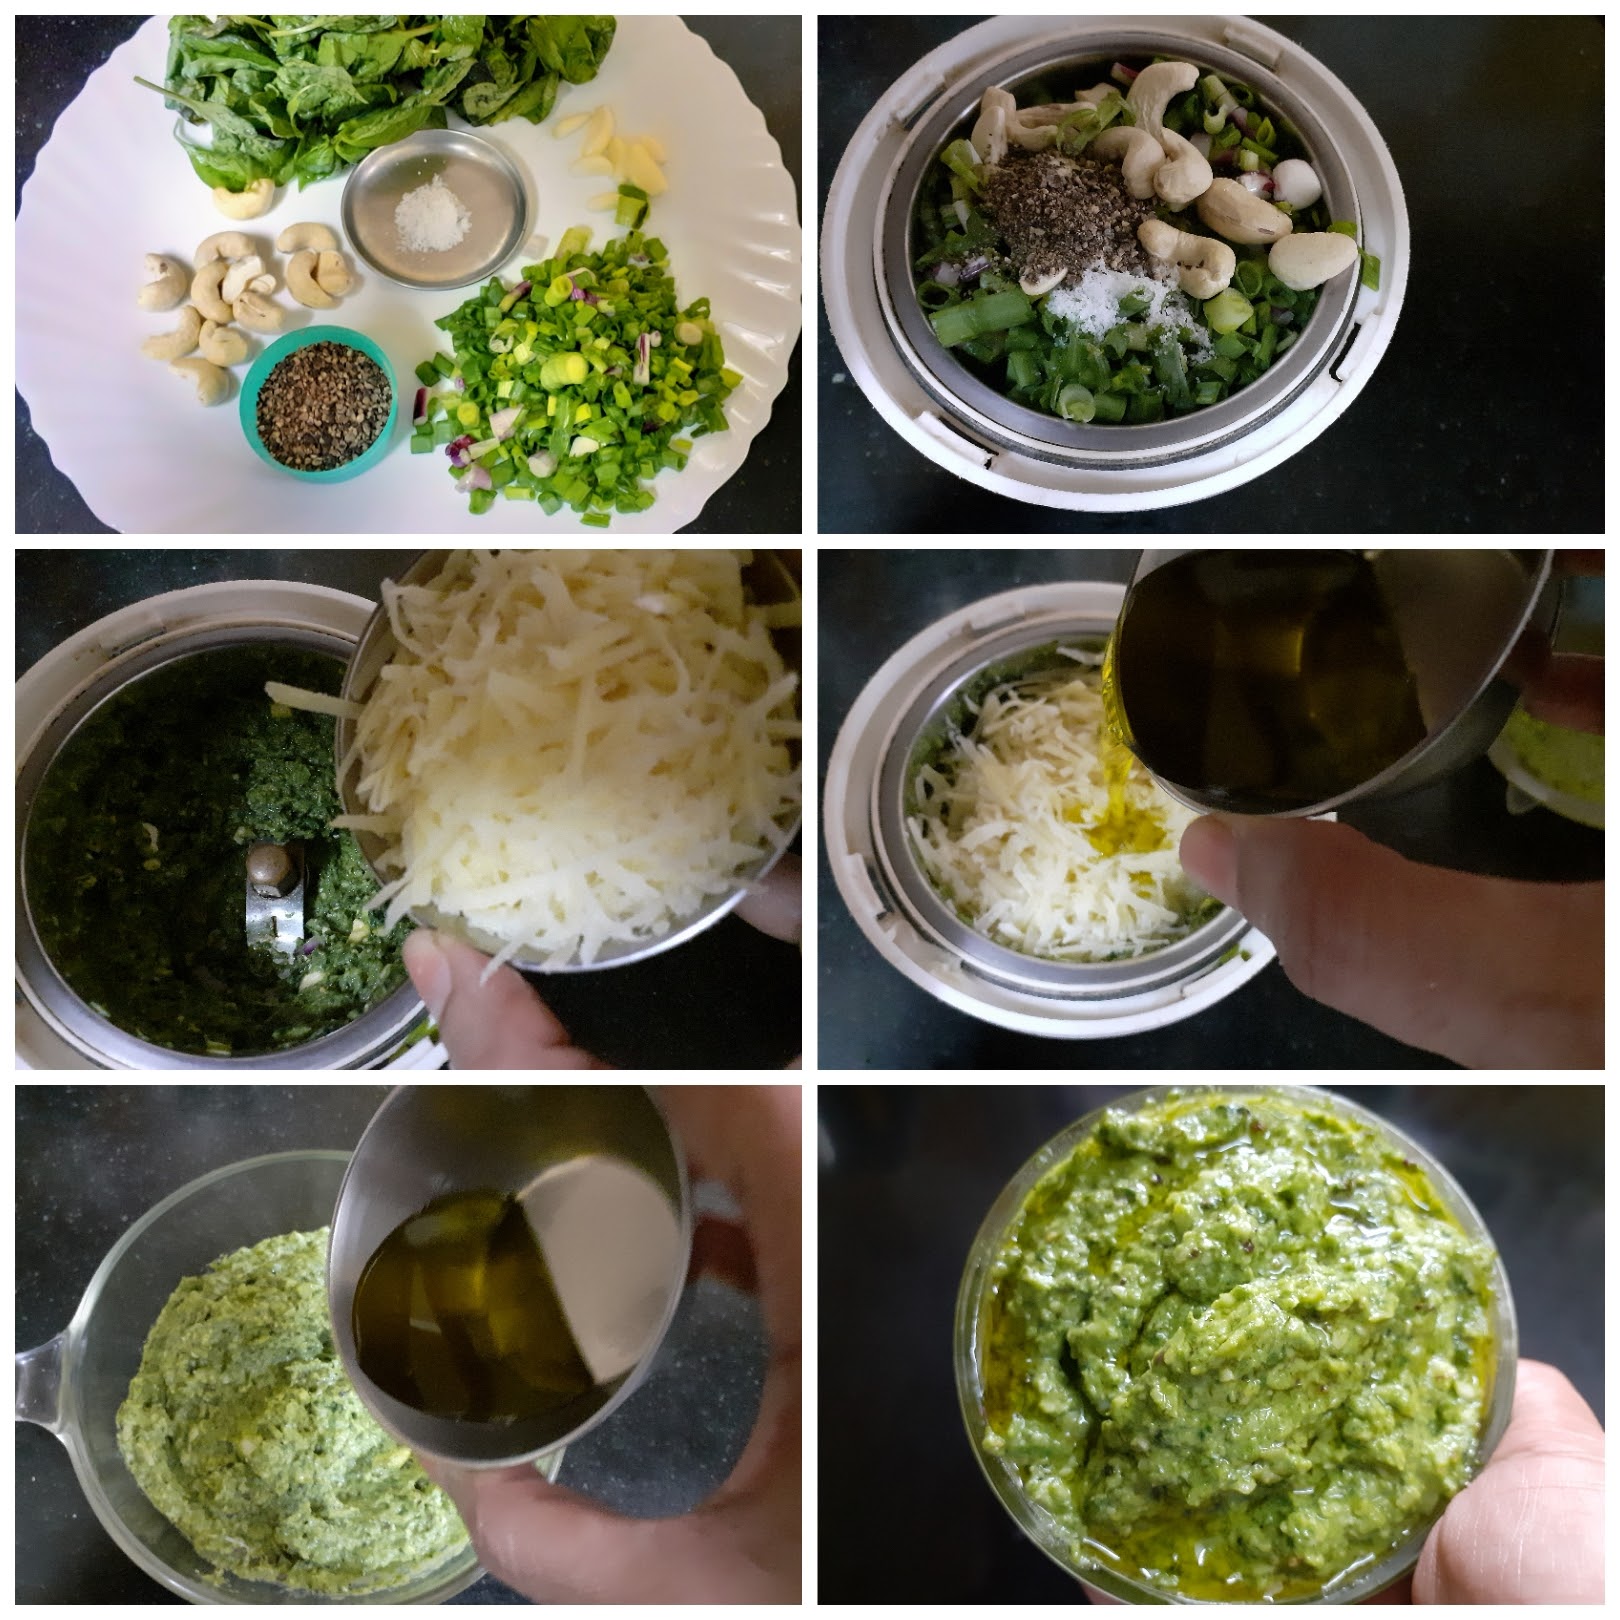
NOTES:
1. Using other cheese like Cheddar will alter the taste a bit and the consistency will differ. Mozarella is not the preferred cheese for this recipe.
2. For that lovely green colour add other greens like blanched Spinach or Onion greens.
3. Be liberal with the olive oil, and use a good quality olive oil for better flavour.
If you tried this recipe and liked it please comment below. I would love to hear from you. If you have a query about the recipe email us and ill respond as soon as I can.
Malpua With Gulab Jamun Mix & Paneer
Malpua is a sweet dish close to my heart and I have taste both the Bengali version and the ones made in the north. I like both of them equally. My hands have been itching to try out this recipe that I thought of and scoured the internet to find if such a one exists. There are a hundred recipes of Malpua with Gulab Jamun mix, but what makes this one different is the use of Paneer(cottage cheese) and Wheat flour. Using Paneer makes the Malpuas soft and fluffy on the inside and wheat flour gives it a little crunch on the exterior.
This is the first time I’m trying out this version and I am happy that it turned out well. Sometimes our hunches do work, and this time the hunch was to use paneer with the mix. The Bengali version of Malpua uses Chenna or paneer along with refined flour though.
The sugar syrup here is a very thin one as it is only to keep the Malpuas moist. I have also made an instant Rabri, the recipe of which I am posting, but I am not uploading the pictures as I couldn’t click any, since the Rabri here was made as an afterthought.
I have a Pineapple Rabri recipe here on the blog which you can refer to. This is the authentic way of making Rabri. Whereas what I have made with the Malpua is a shortcut one, which was made as an accompaniment with the Malpua.
While you are on this page please check out my other sweet/dessert recipes like Apple cake, Carrot Kheer, Unni Appam, Blueberry Cheesecake, Maa Ladoo, Berry Smoothie Icecream, and more…
Here is the recipe of Malpua from Gulab Jamun Mix-
TOTAL TIME: 40Mins COURSE: DESSERT/SWEET
AUTHOR: Rajni Ram
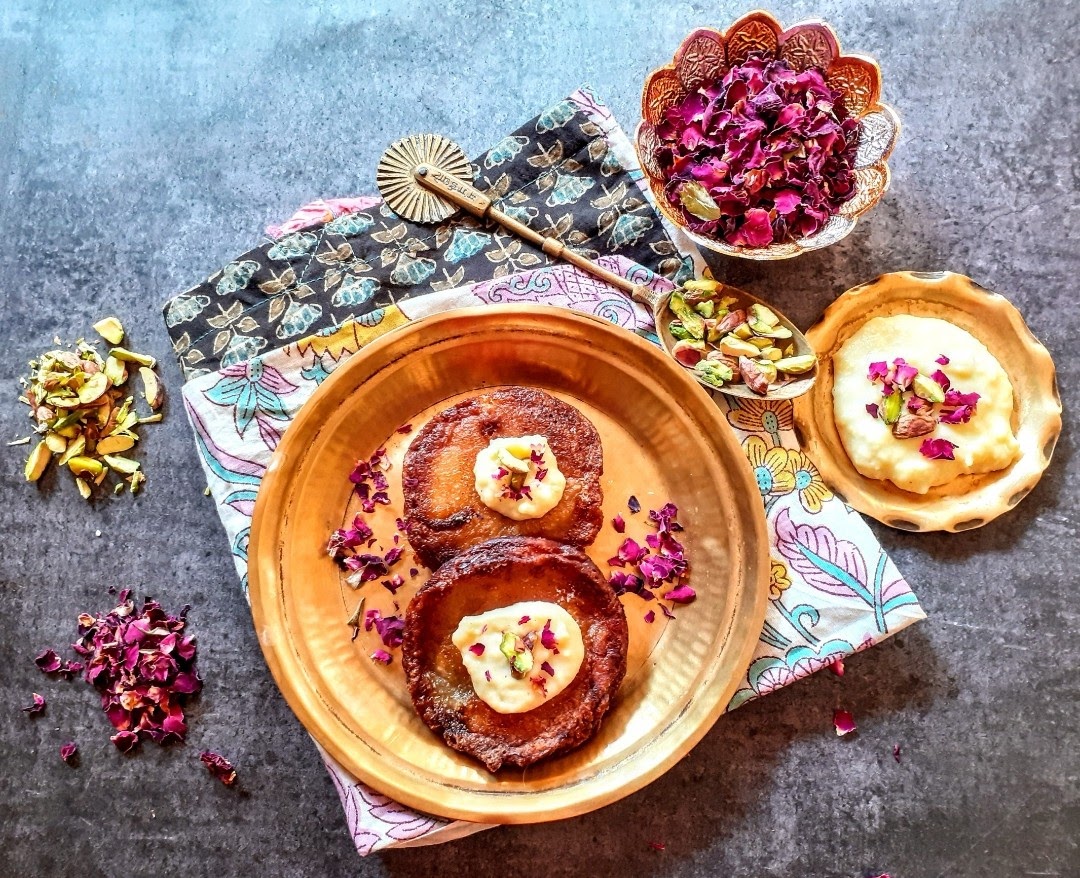
Gulab Jamun Mix 1 cup
Paneer 100 gm minced
wheat flour 1/2 cup
Sugar 1 tbsp( for batter)
Milk 1 cup (or more if required)
Sugar for syrup 1 cup
Water for sugar syrup 1/2 cup
Elaichi/green cardamom 2 pods
Fennel seeds 2 pinches
Oil for frying
Directions for making the batter:
In a bowl take the Gulab Jamun Mix. Mince the paneer in a blender and add it to the Gulab Jamun mix in the bowl, add the wheat flour followed by the 1 tablespoon sugar. Nicely mix them all together to a dry mixture. Now adding milk little by little whisk to form a pouring consistency batter( like dosa batter or a little thicker). Now add the fennel seeds to the batter and mix.
Directions to make the sugar syrup:
In a pan/ flat vessel take one cup sugar, add 1/2 cup water, and put it on the flame. Stirring continuously so that the sugar dissolves, allow it to boil for 2 to 3 minutes, and put off the flame. String consistency of the syrup is not required in this recipe. Add 2 cardamom pods while boiling the syrup.
Directions for making the Malpua:
Next, take oil for frying in a flat Karahi or pan preferably and heat. The flame should be medium-high. The oil should not be too hot, nor warm. When you put a little batter, it should sizzle. Now take a scoop of batter in a ladle and pour it into the hot oil. The batter will spread out by itself, like pancakes. Cook on one side and flip it over and cook on the other until both sides are equally golden brown. Remove from oil and drop in the sugar syrup for 10 seconds. Remove and store in a container. If storing for more than a day, let the Malpuas remain in the sugar syrup itself, so that they stay moist. Enjoy the sweet dish. Bon Appetit.
Directions to make instant Rabri ( optional) No pictures for this.
Ingredients:
Milk 1 cup
Sugar 2 tsp
Milk powder 2 tbsp
Directions for Rabri: Take one cup of milk and boil. When it reduces to half, add 2 tsp sugar and 2 tablespoons of milk powder and stir nicely. Within 2 minutes it will reach the desired consistency. Put off the flame and let it cool completely before plating.
STEPWISE RECIPE FOLLOWS:
1. Assemble all ingredients. In a bowl add the Gulab Jamun mix, Paneer, wheat flour, sugar, and mix. Now add milk little by little to make a batter of flowing consistency. Add fennel seeds, mix it in, and keep the batter aside.
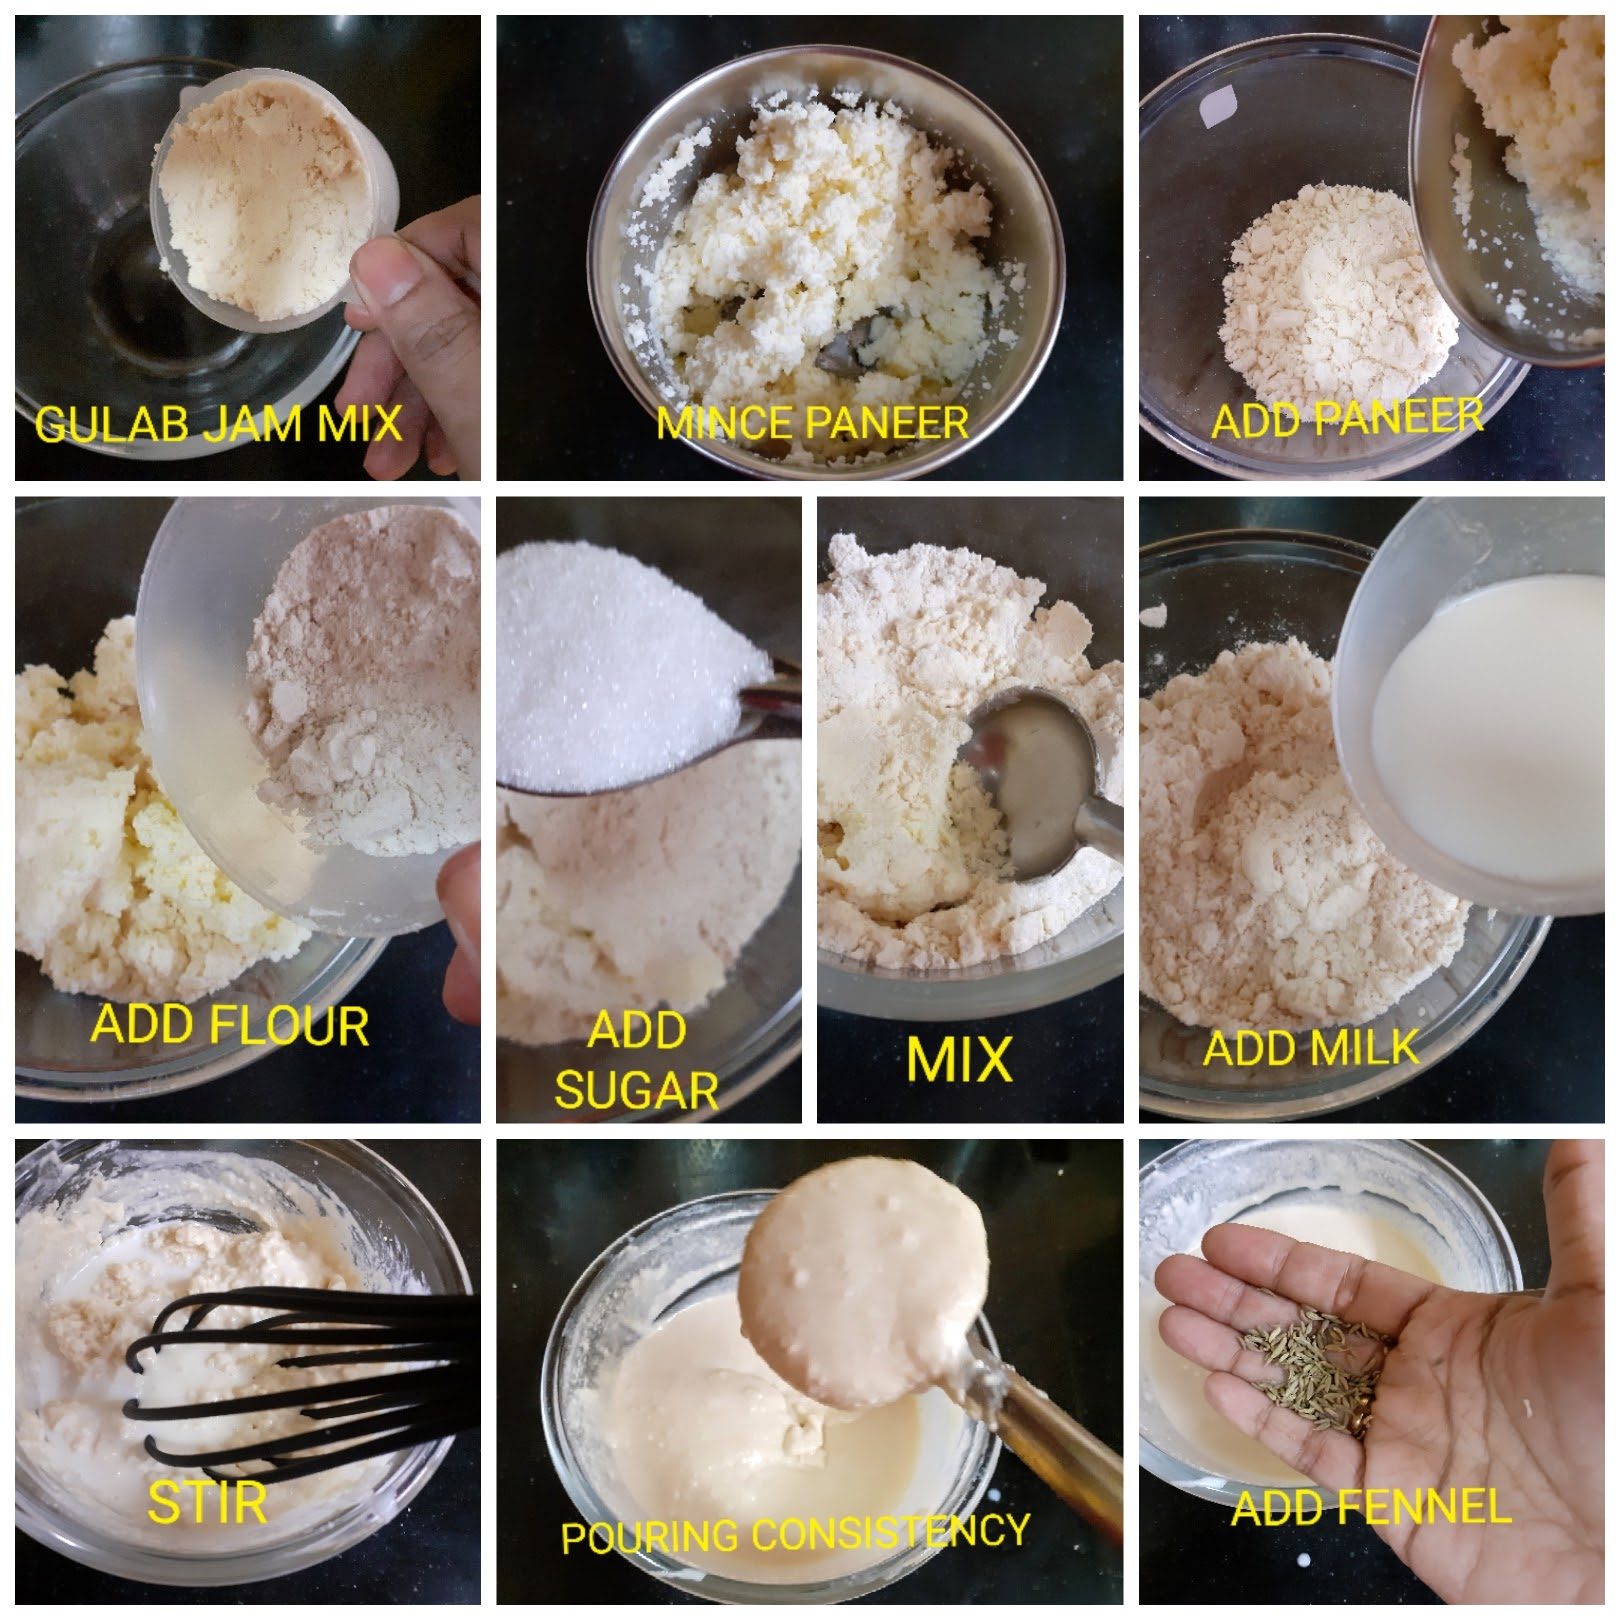
2. To prepare the sugar syrup, add 1/2 cup water to 1 cup sugar and put it on the flame to boil. Keep stirring for the sugar to dissolve and boil for 2 to 3 minutes, not more. Put off flame and cool. Add 2 cardamom pods while boiling.

3. In a flat pan/Karahi take oil for deep frying and heat. The flame should be medium-high and the oil should be hot, but not smoking hot. When the batter is poured, it should sizzle. Now take a scoop full of batter and pour it in the oil. Let it spread by itself. Fry until it turns golden brown on one side and then flip it and fry until golden brown on the other side too.
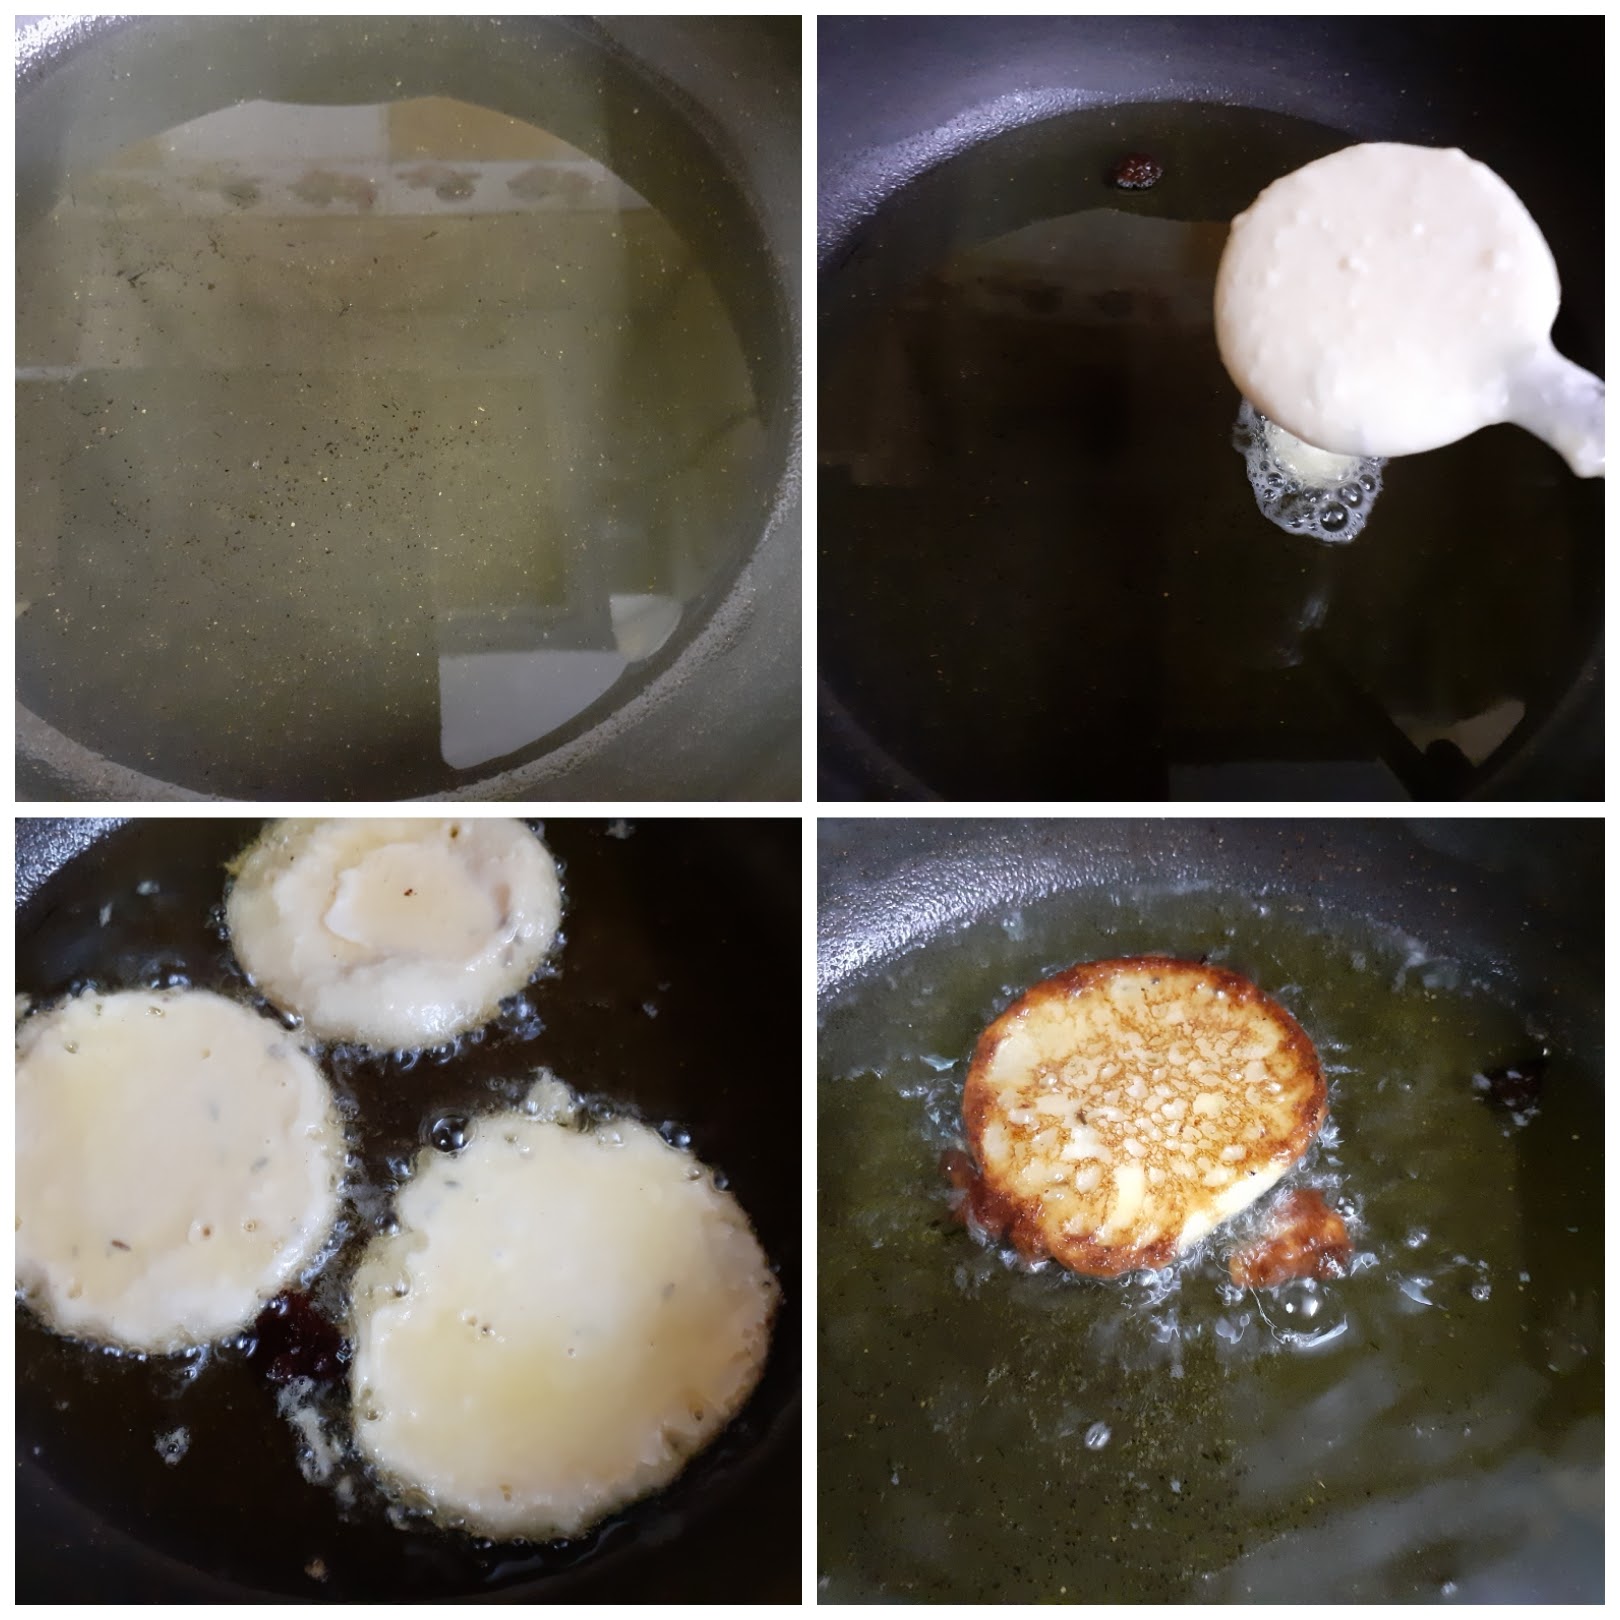
4. Now put the fried Malpua into the sugar syrup and remove after a few seconds if serving immediately. If storing for a day, let the Malpuas remain in the syrup so that they remain moist.
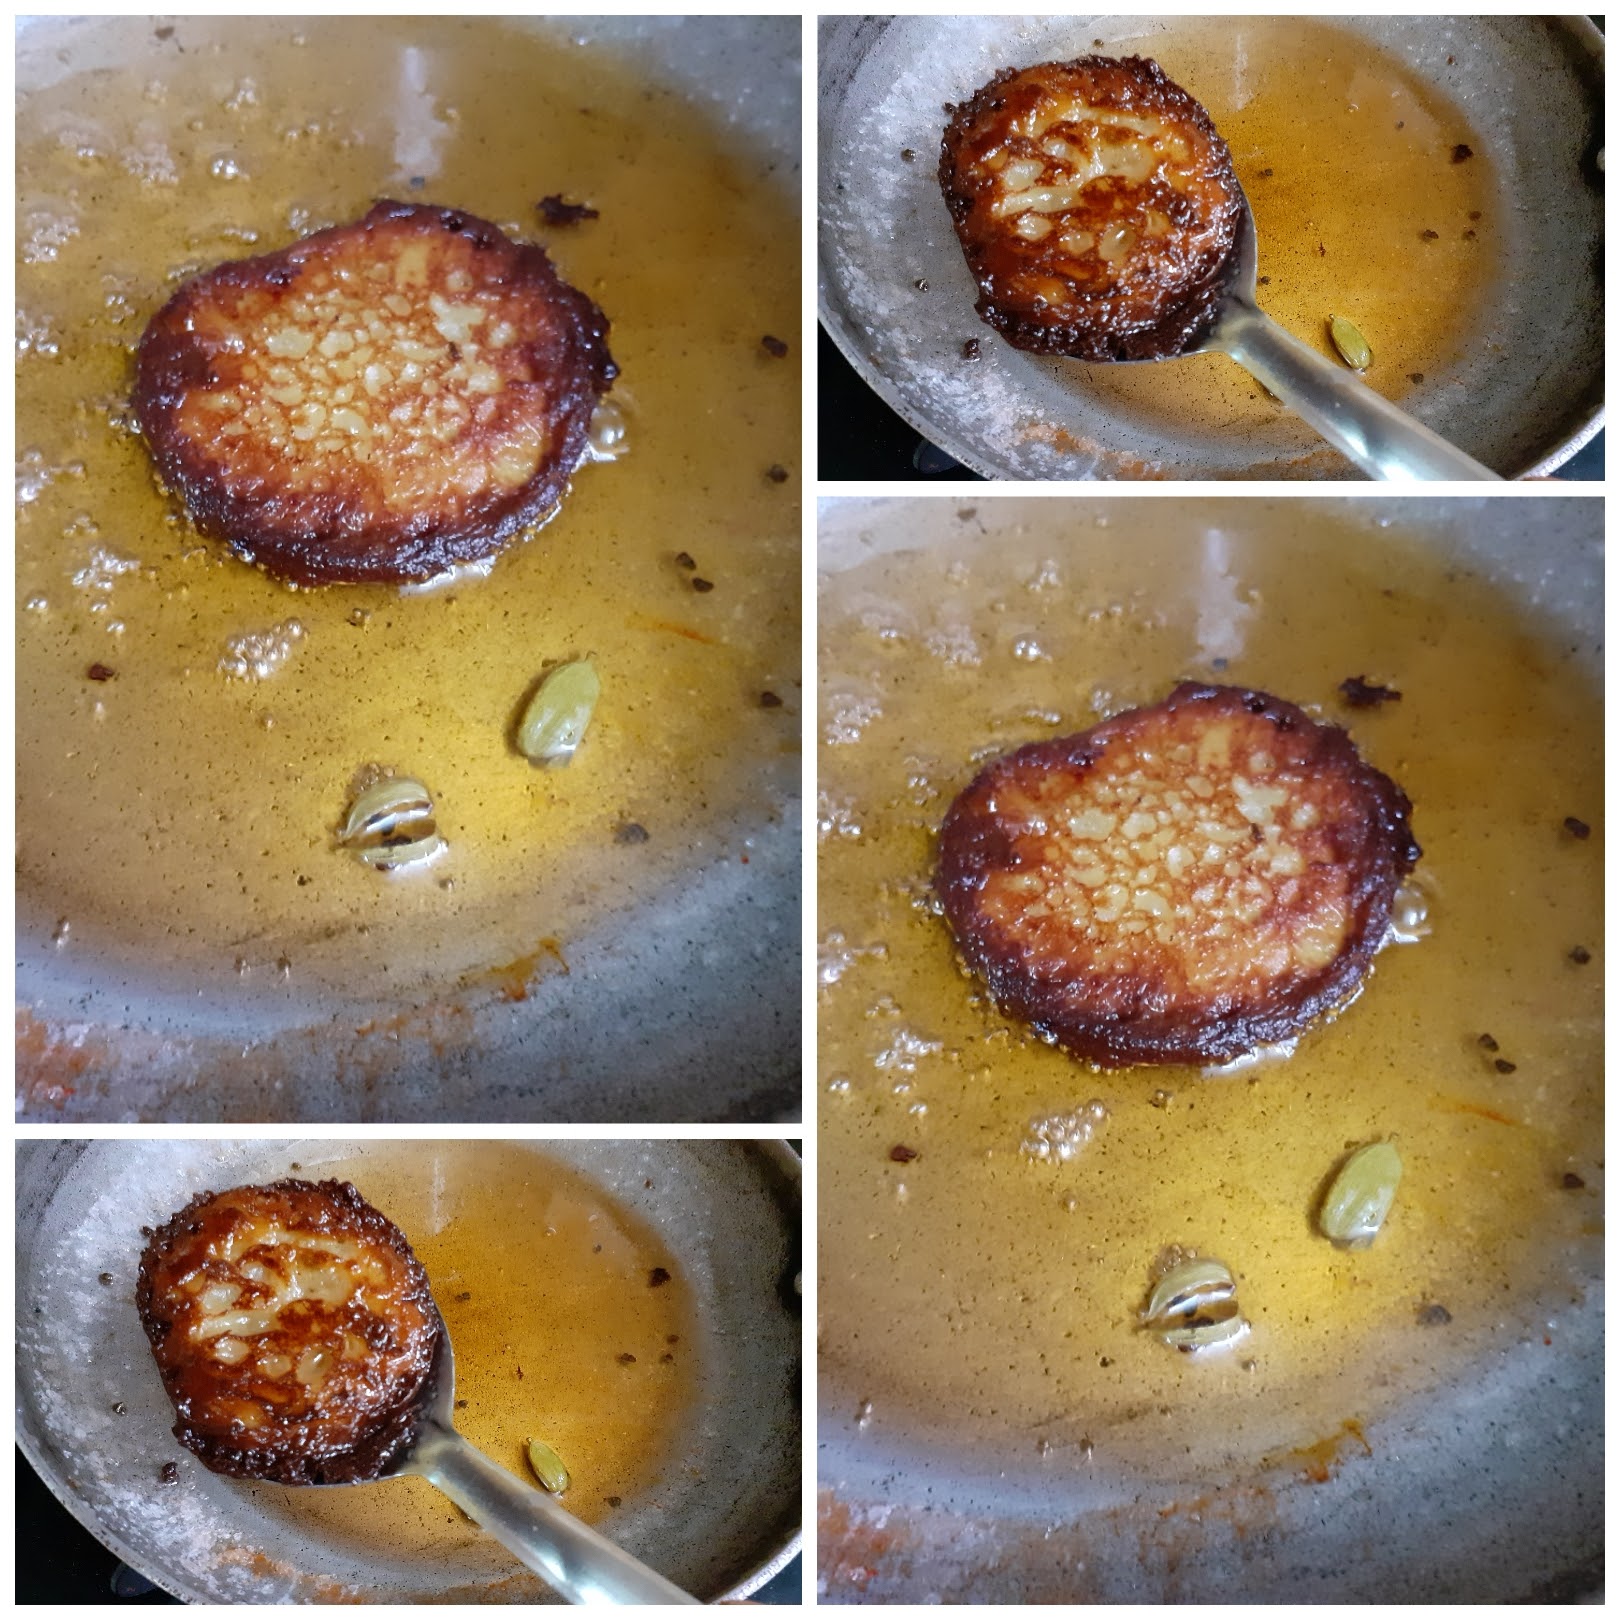
5. Serve warm with Rabri or just as it is.
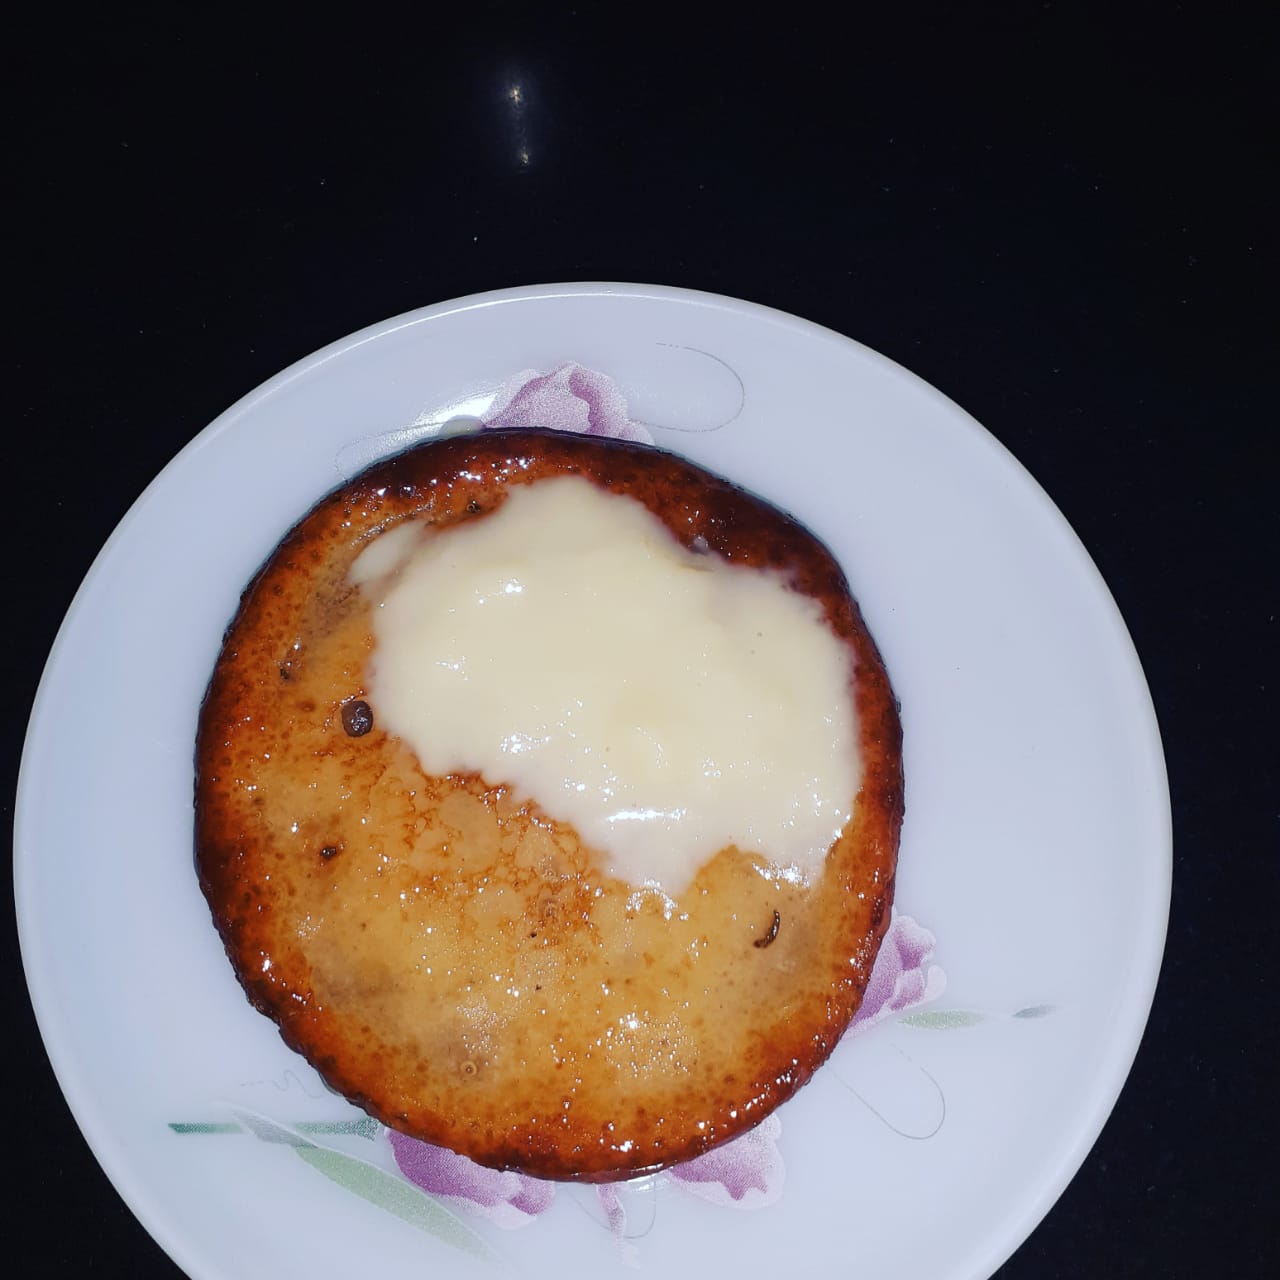
NOTES:
1. If the sugar syrup solidifies after some time, add a tablespoon of water and put it on the flame and keep the flame very low. The syrup will loosen. Put off the flame. You can keep repeating this process until all the Malpuas are fried, if required.
2. A flat pan or Kadai is the perfect one for frying this sweet as in a curved Kadai the batter may turn to a ball and roundish, instead of a flat pancake-like shape.
3. Before pouring the batter, check if the oil is hot, by dropping some batter gently into the oil. If it sizzles immediately, the oil is ready for frying.
If you tried this recipe and liked it please comment below. I would love to hear from you. If you have a query about the recipe email us and ill respond as soon as I can.
Lobia Pulav
Lobia or Black-eyed Beans are a great source of plant-based protein. It has an adequate amount of fibre too and hence is a sought after food for weight watchers. All the same, it is a nutritious legume for everyone, whether weight watchers or not. It has many benefits and many dishes from different cuisine are made from it.
In south India, it is used to make a Sundal/salad and is also used in making Kootu(a dal based gravy dish). In north India, a dal is made using Lobia, which is similar to Rajma. They are used in the famous dish of Kerala-Olan and is used in Mediterranean cuisine in Felafel and Salads. It is also made into flour, which can be added to the wheat flour while making Rotis.
Here I have made a Pulav using these Beans. This recipe is a good lunch box option as it is a meal in itself. It is easy to make and gets done in 30 minutes provided the beans are pre-soaked and cooked. To make this Pulav I have cooked the dal in a tomato-based gravy with spices and added the cooked beans to it.
While you are here please check out my other rice recipes like Masala Rice, Coriander Rice, Coconut Rice, Flavoured Rice, and more…
Here is the recipe of Lobia Pulav for you-
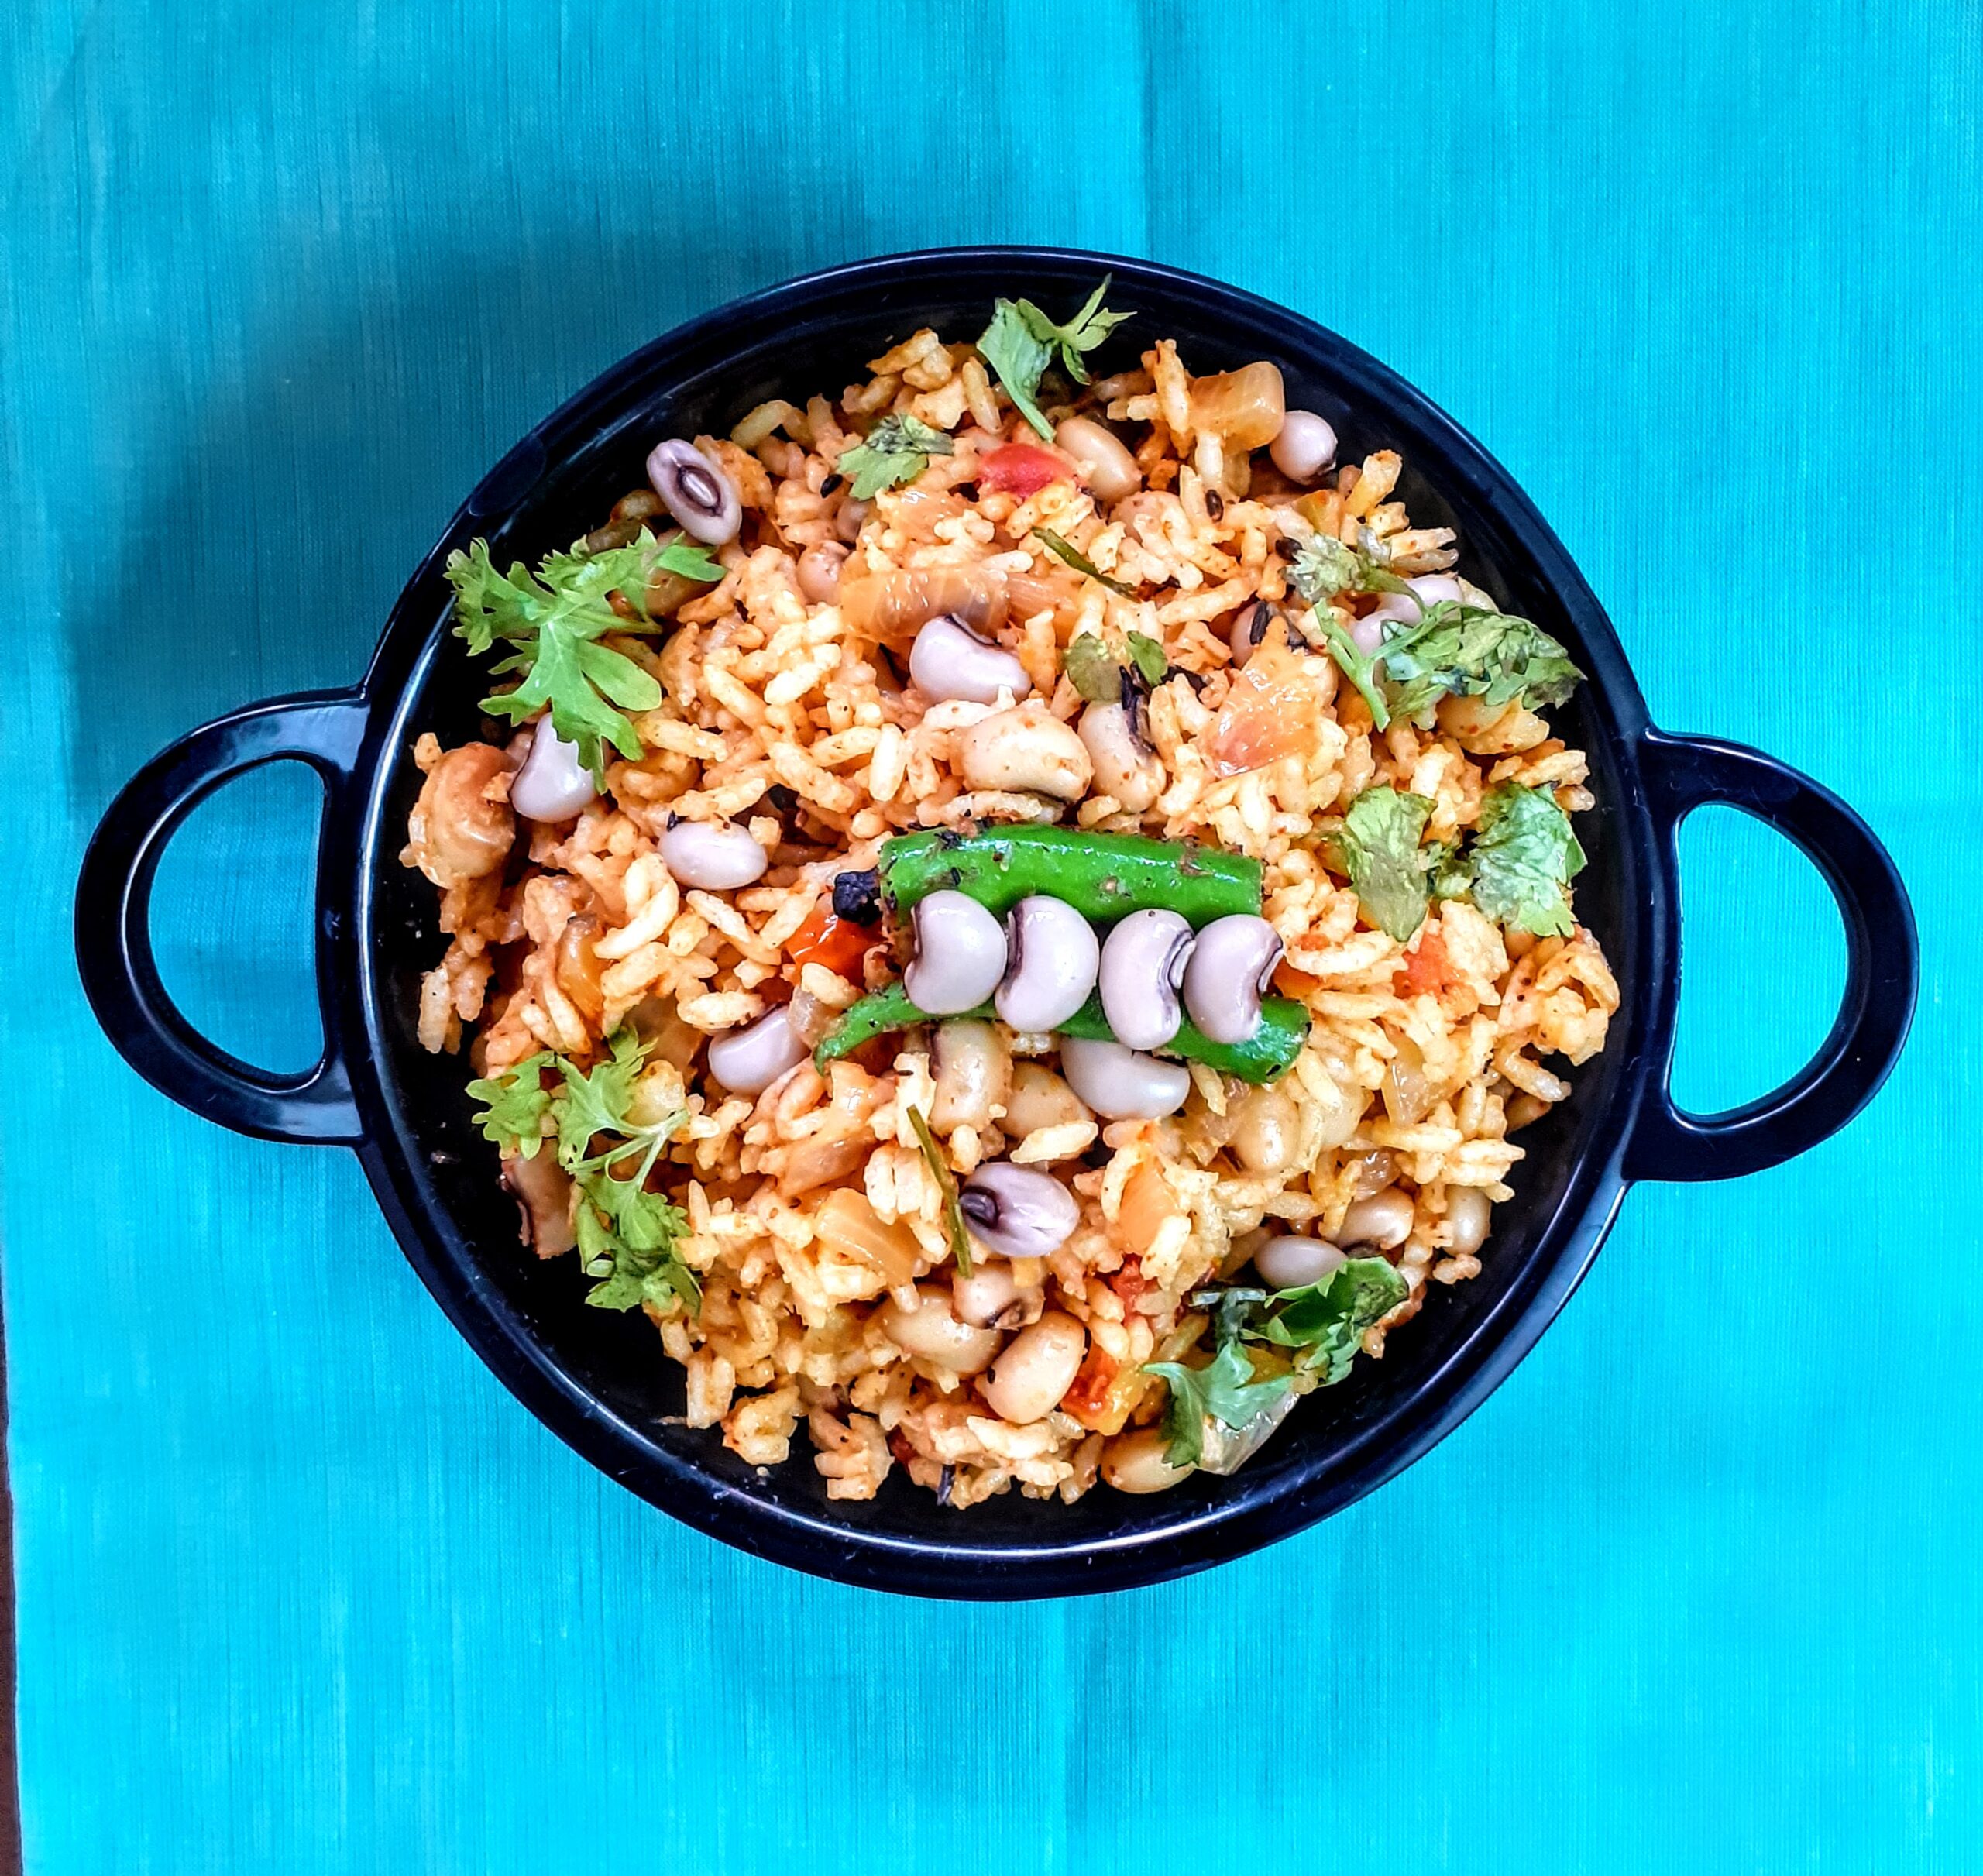
Ingredients:
Rice 1.5 cup cooked
Lobia/Karamani 100 gm (soaked for 2 hrs and cooked)
Onion1 chopped finely
Tomatoes 2 chopped finely
Green chilli 1 chopped
Cinnamon 1 inch stick
Badi Elaichi 1 whole
Shah jeera 1 tsp
Cumin 1 tsp
Cloves 5
Fennel seeds/Saunf 1/2 tsp
Black peppercorns 1.2 tsp
Ginger-garlic paste 1/ tsp
Turmeric powder 1/2 tsp
Salt as required
Red chilli powder 1 tsp
Coriander powder 1 tsp
Fennel powder1/2 tsp
Biriyani powder 1 tsp(optional)
Garam masala powder 1/2 tsp
Coriander leaves finely chopped 1 tbsp
Directions:
Soak the Lobia for 2 hrs and pressure cook for 5 whistles. Cook the rice and cool it by spreading it on a plate and drizzle some oil on it, so that the grains don’t stick together. Now take oil in a pan/Kadai and heat it. Add all the whole spices – Cinnamon, Cloves, Black cardamom/Badi elaichi, Fennel seeds, Shah jeera, Peppercorns to it. Fry for 10 seconds and add the green chillies and saute. Now add the ginger- garlic paste followed by chopped onions and saute until onions turn translucent. Now add the tomatoes followed by salt and cook, until the tomatoes turn mushy. Add all the dry spice powders-red chilli powder, coriander powder, fennel powder and saute for 2 minutes, until the masalas are well incorporated. Now add the cooked Lobia followed by a cup of water and cook for 2 minutes. Now add the biriyani powder(skip if you don’t have it handy) and stir nicely. Start adding the cooked rice to the Lobia gravy, little by little. Mix nicely, such that the gravy coats the rice well. Sprinkle some Garam masala over it, and add some chopped coriander leaves. The yummy Lobia pulav is ready. Enjoy. Bon Appetite.
STEPWISE RECIPE FOLLOWS:
1. Assemble all ingredients. Soak the Lobia for 2 hrs and pressure cook for 5 whistles. Cook the rice and cool it by spreading it on a plate and drizzle some oil on it, so that the grains don’t stick together.
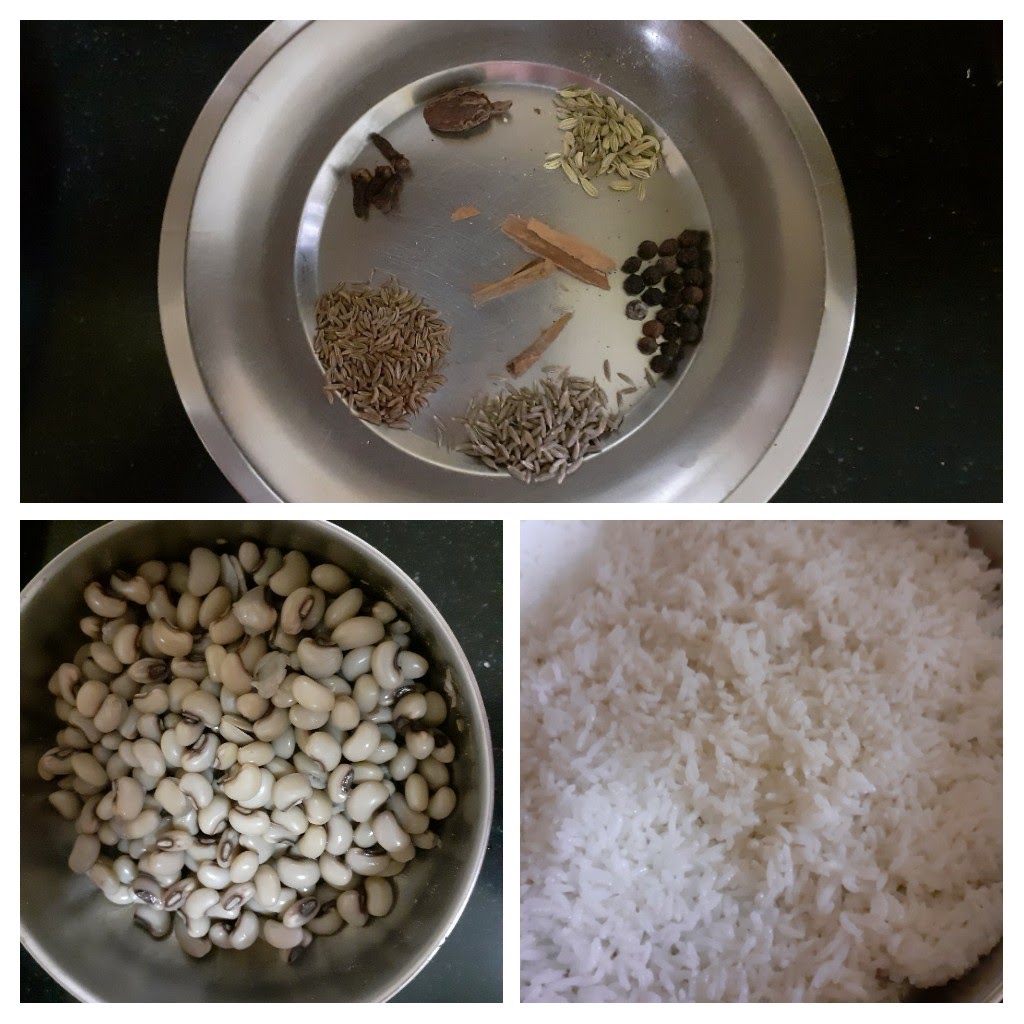
2. Now take oil in a pan/Kadai and heat it. Add all the whole spices – Cinnamon, Cloves, Black cardamom/Badi elaichi, Fennel seeds, Shah jeera, Peppercorns to it. Fry for 10 seconds and add the green chillies and saute.
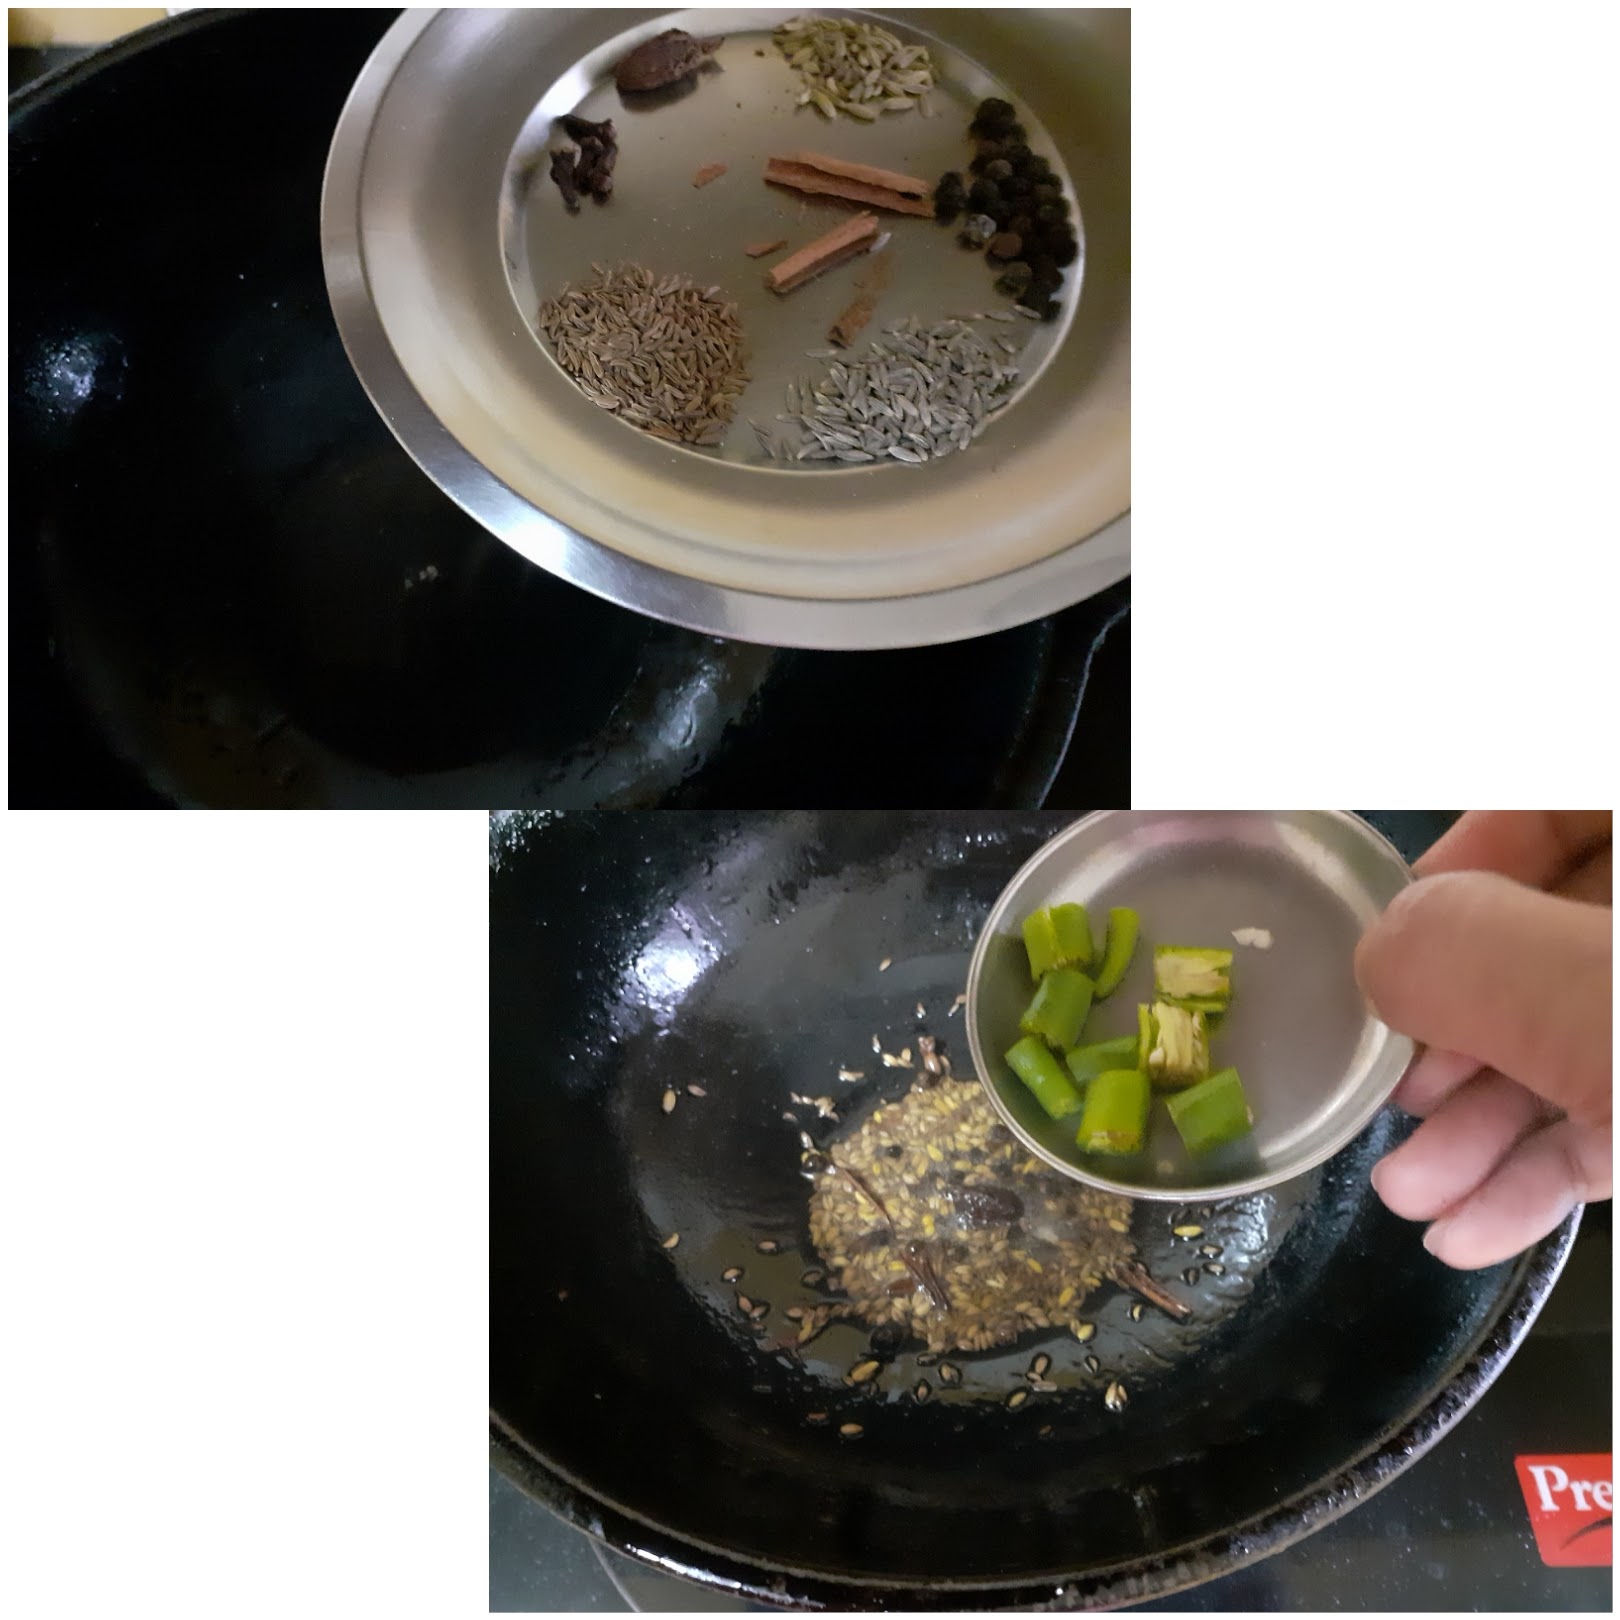
3. Now add the ginger- garlic paste followed by turmeric powder and chopped onions and saute until onions turn translucent. Now add the tomatoes followed by salt and cook, until the tomatoes turn mushy.
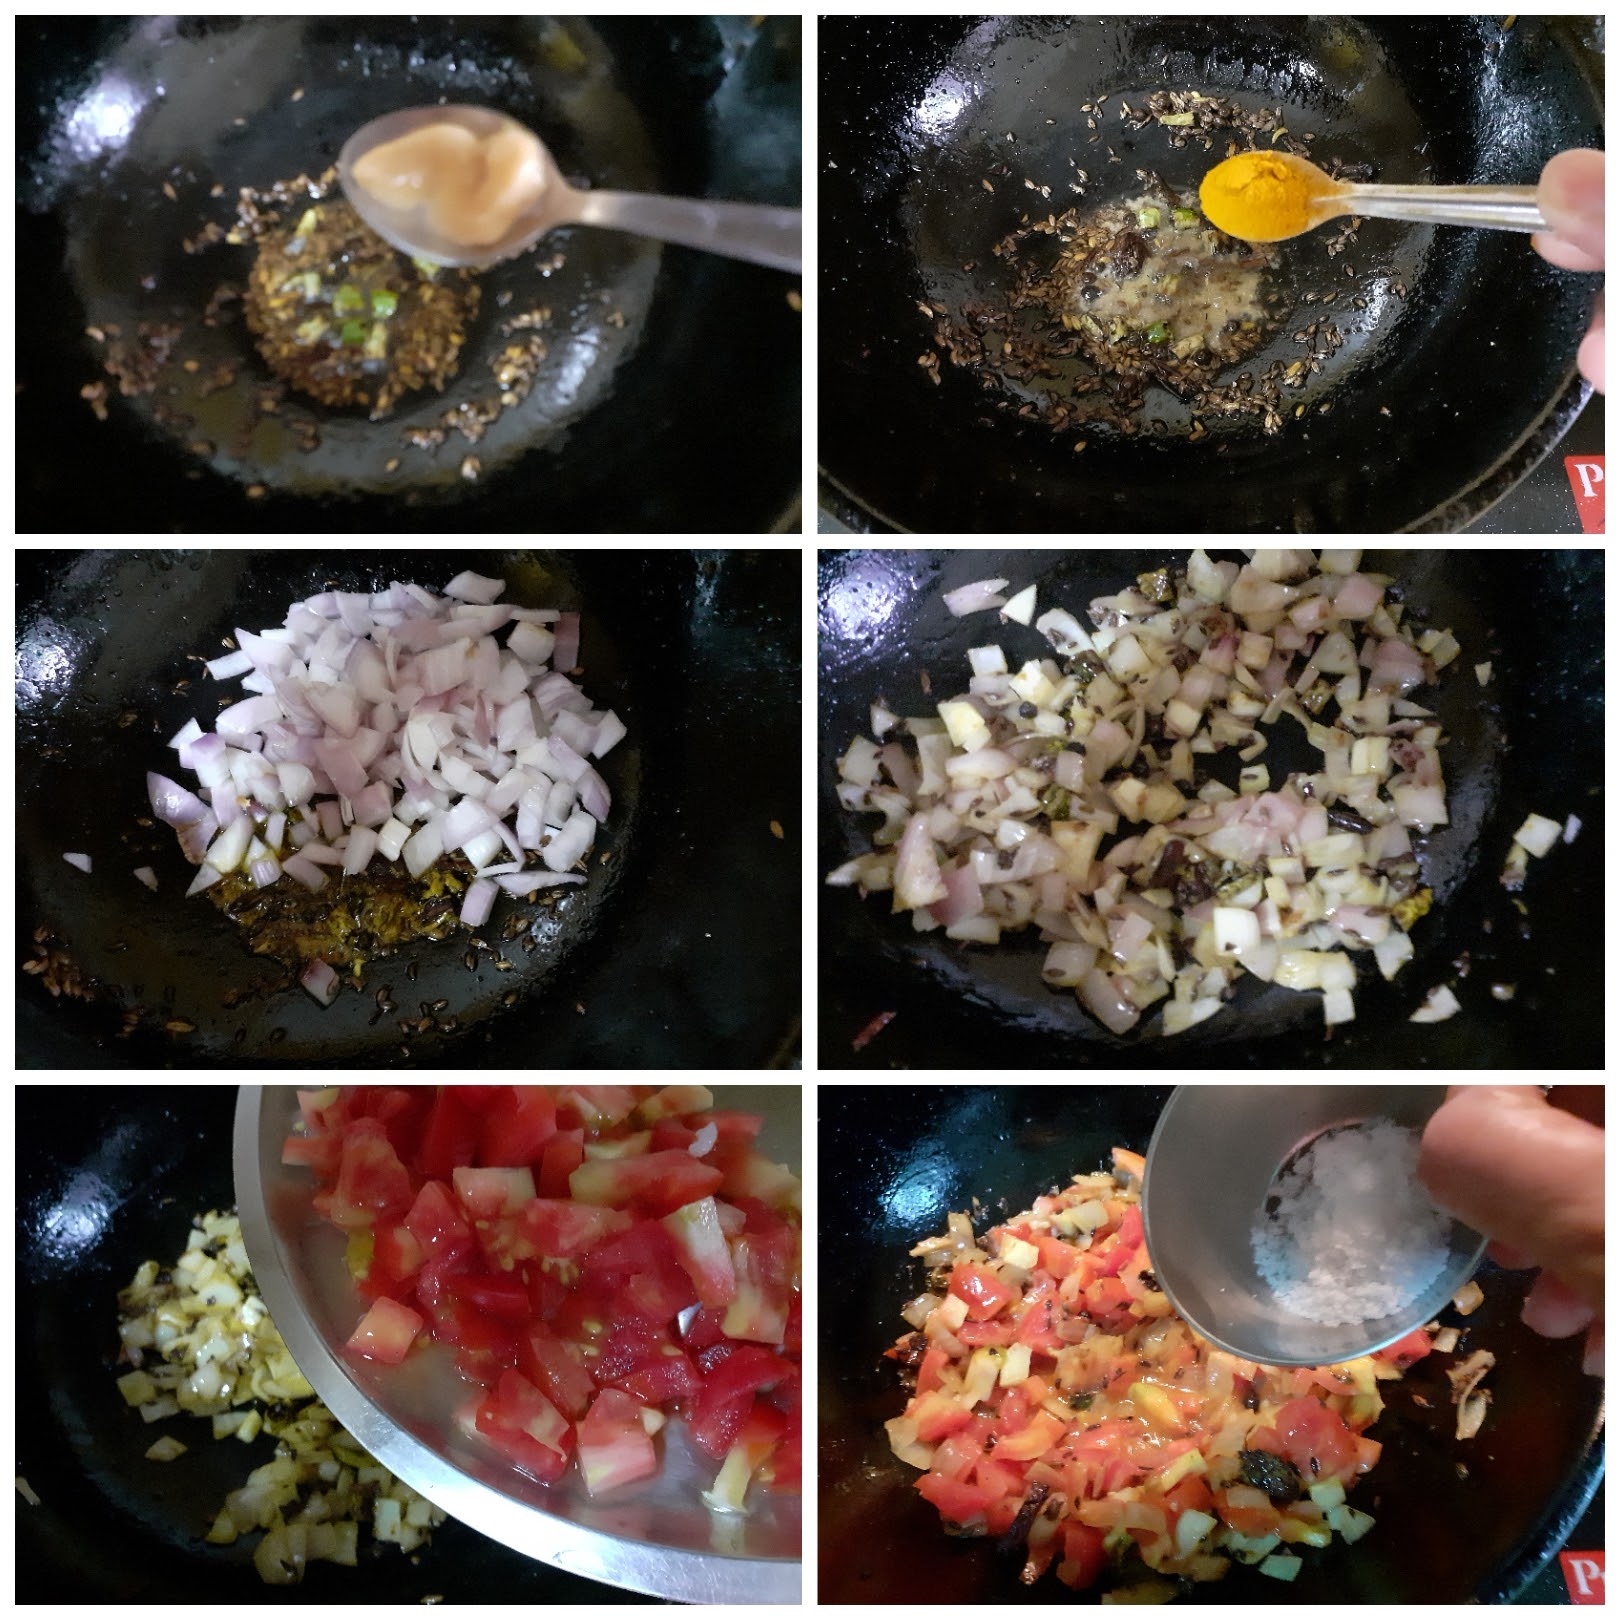
4. Add all the dry spice powders-red chilli powder, coriander powder, fennel powder and saute for 2 minutes, until the masalas are well incorporated. Now add the cooked Lobia followed by a cup of water and cook for 2 minutes.
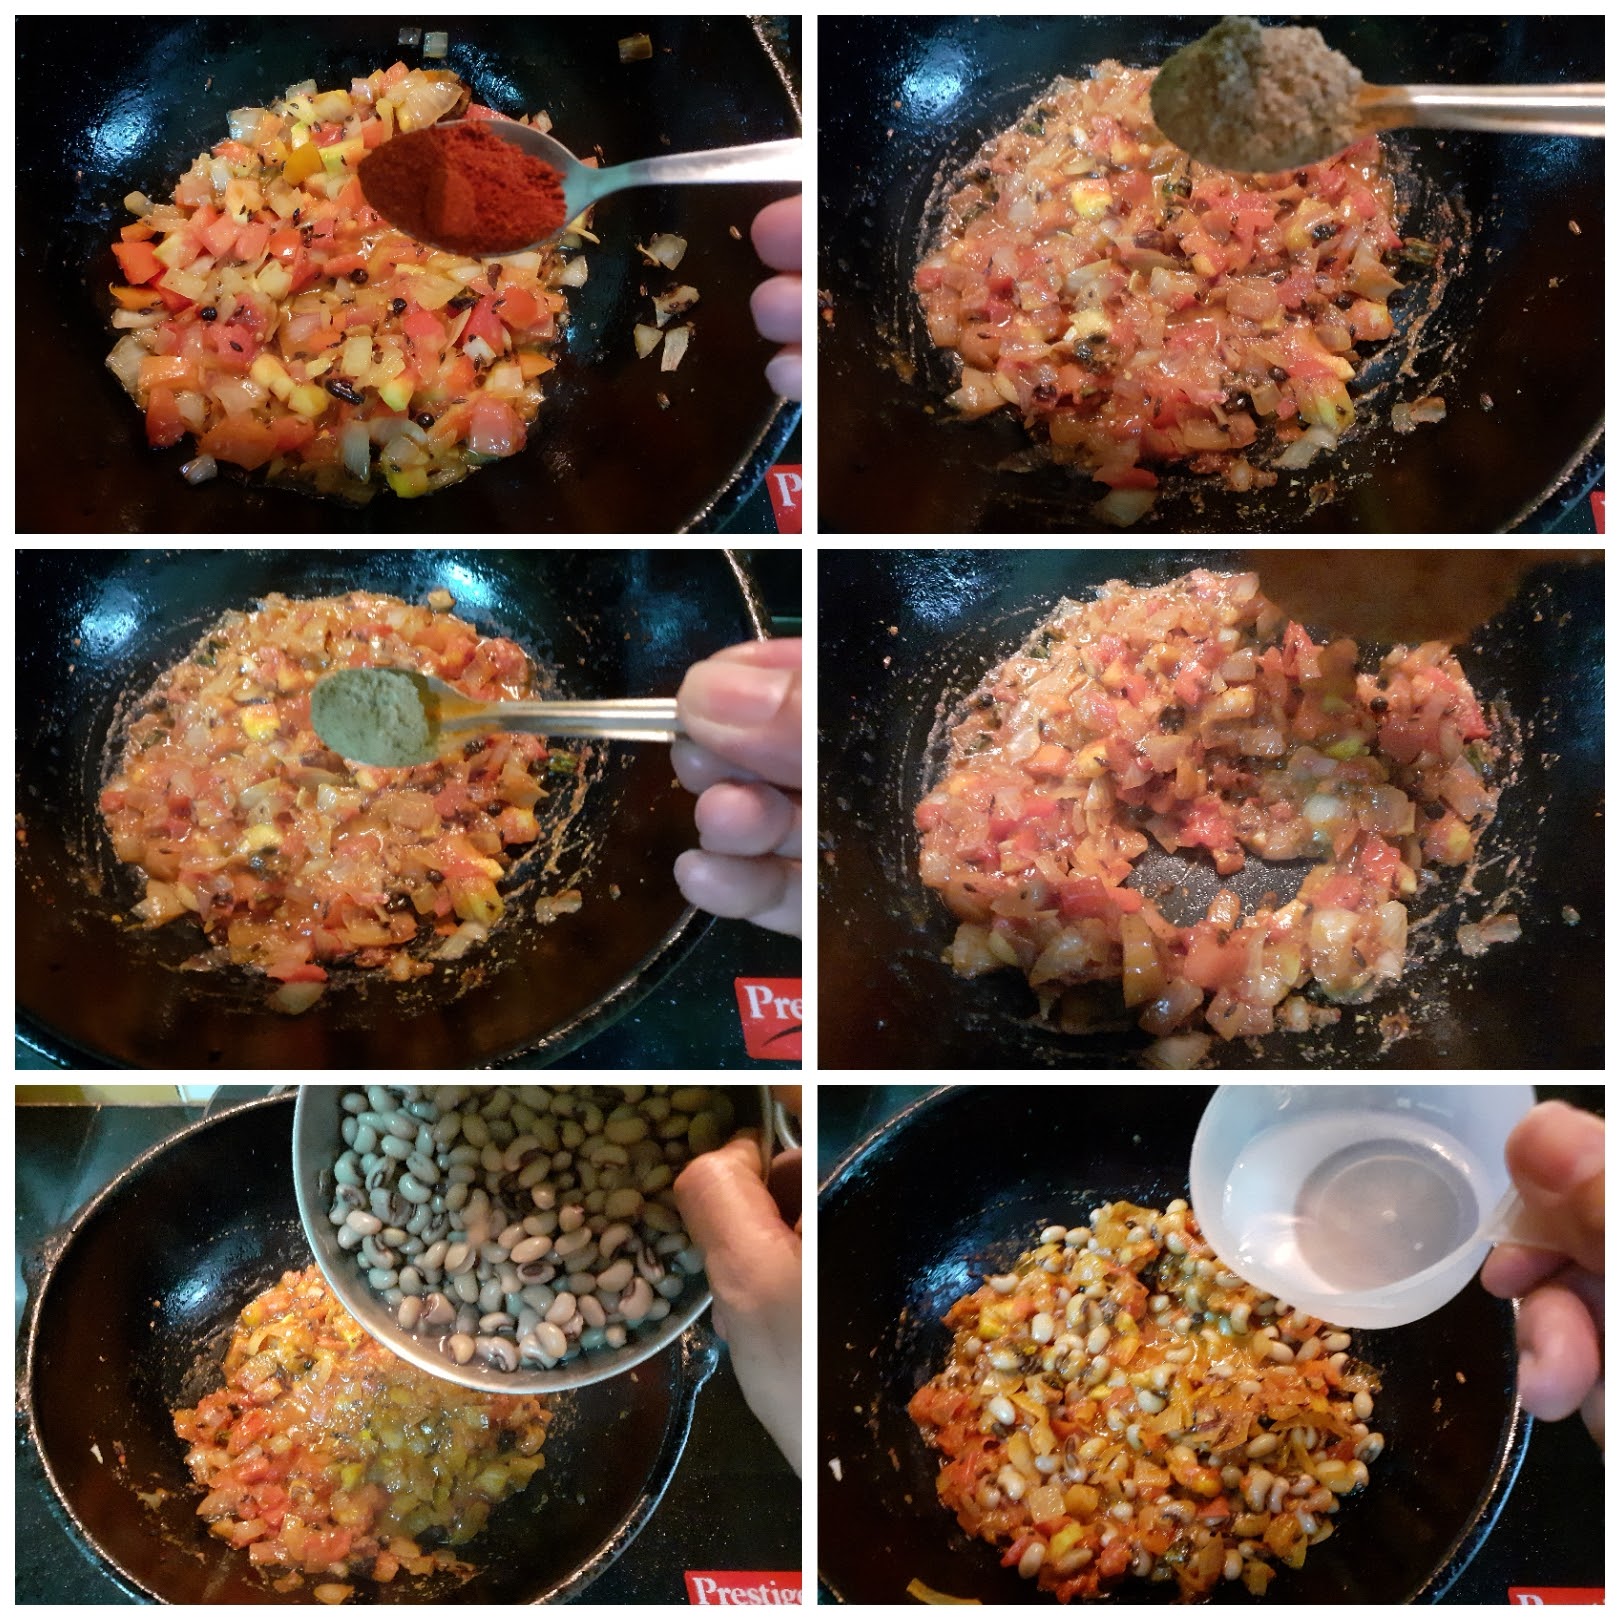
5. Now add the biriyani powder(skip if you don’t have it handy) and stir nicely. Start adding the cooked rice to the Lobia gravy, little by little. Mix nicely, such that the gravy coats the rice well.
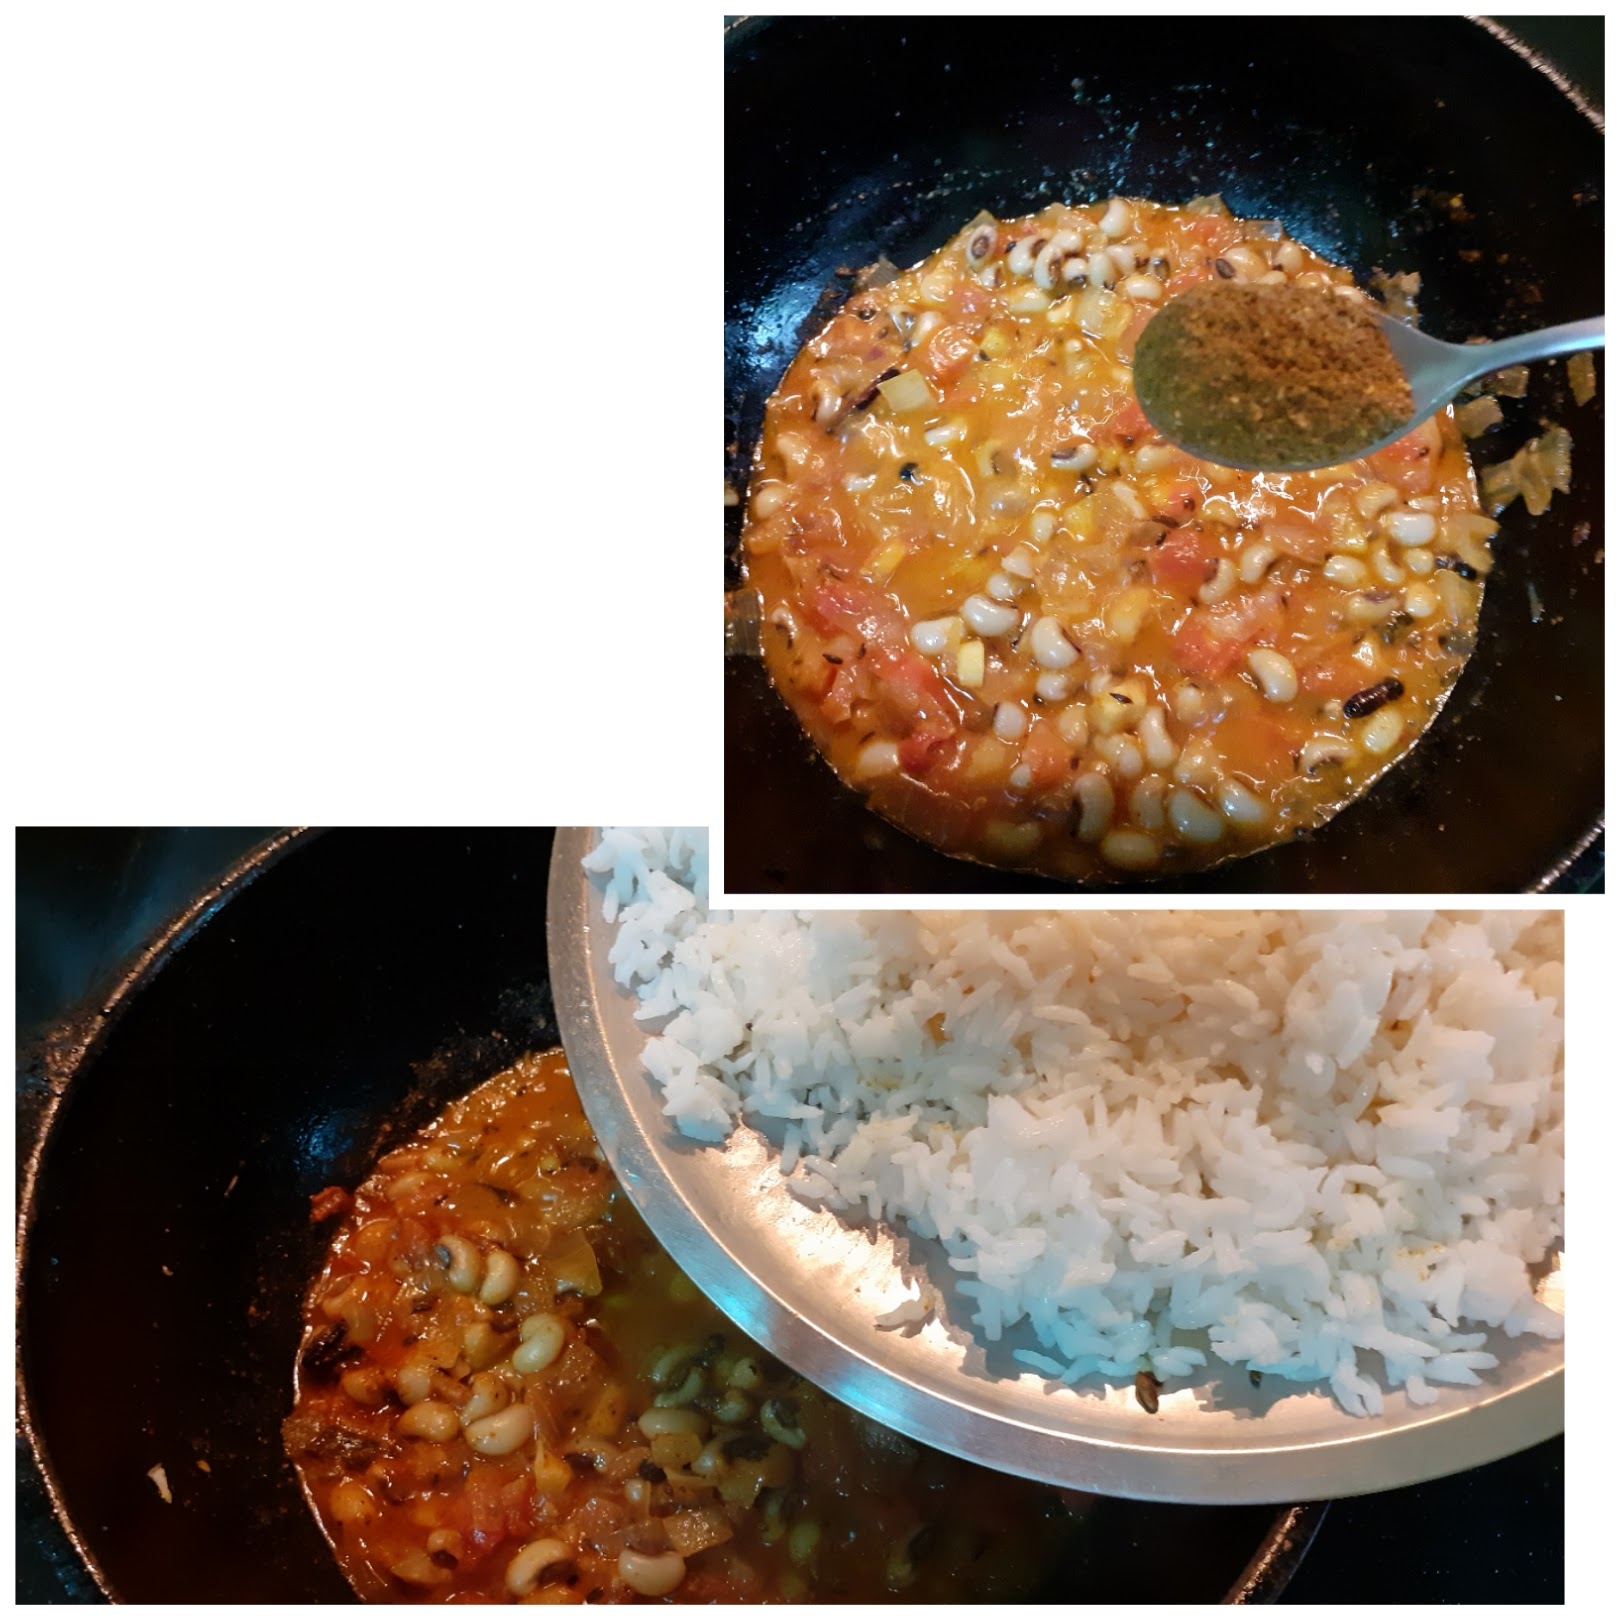
6. Sprinkle some Garam masala over it, and add some chopped coriander leaves. The yummy Lobia pulav is ready. Enjoy. Bon Appetite.
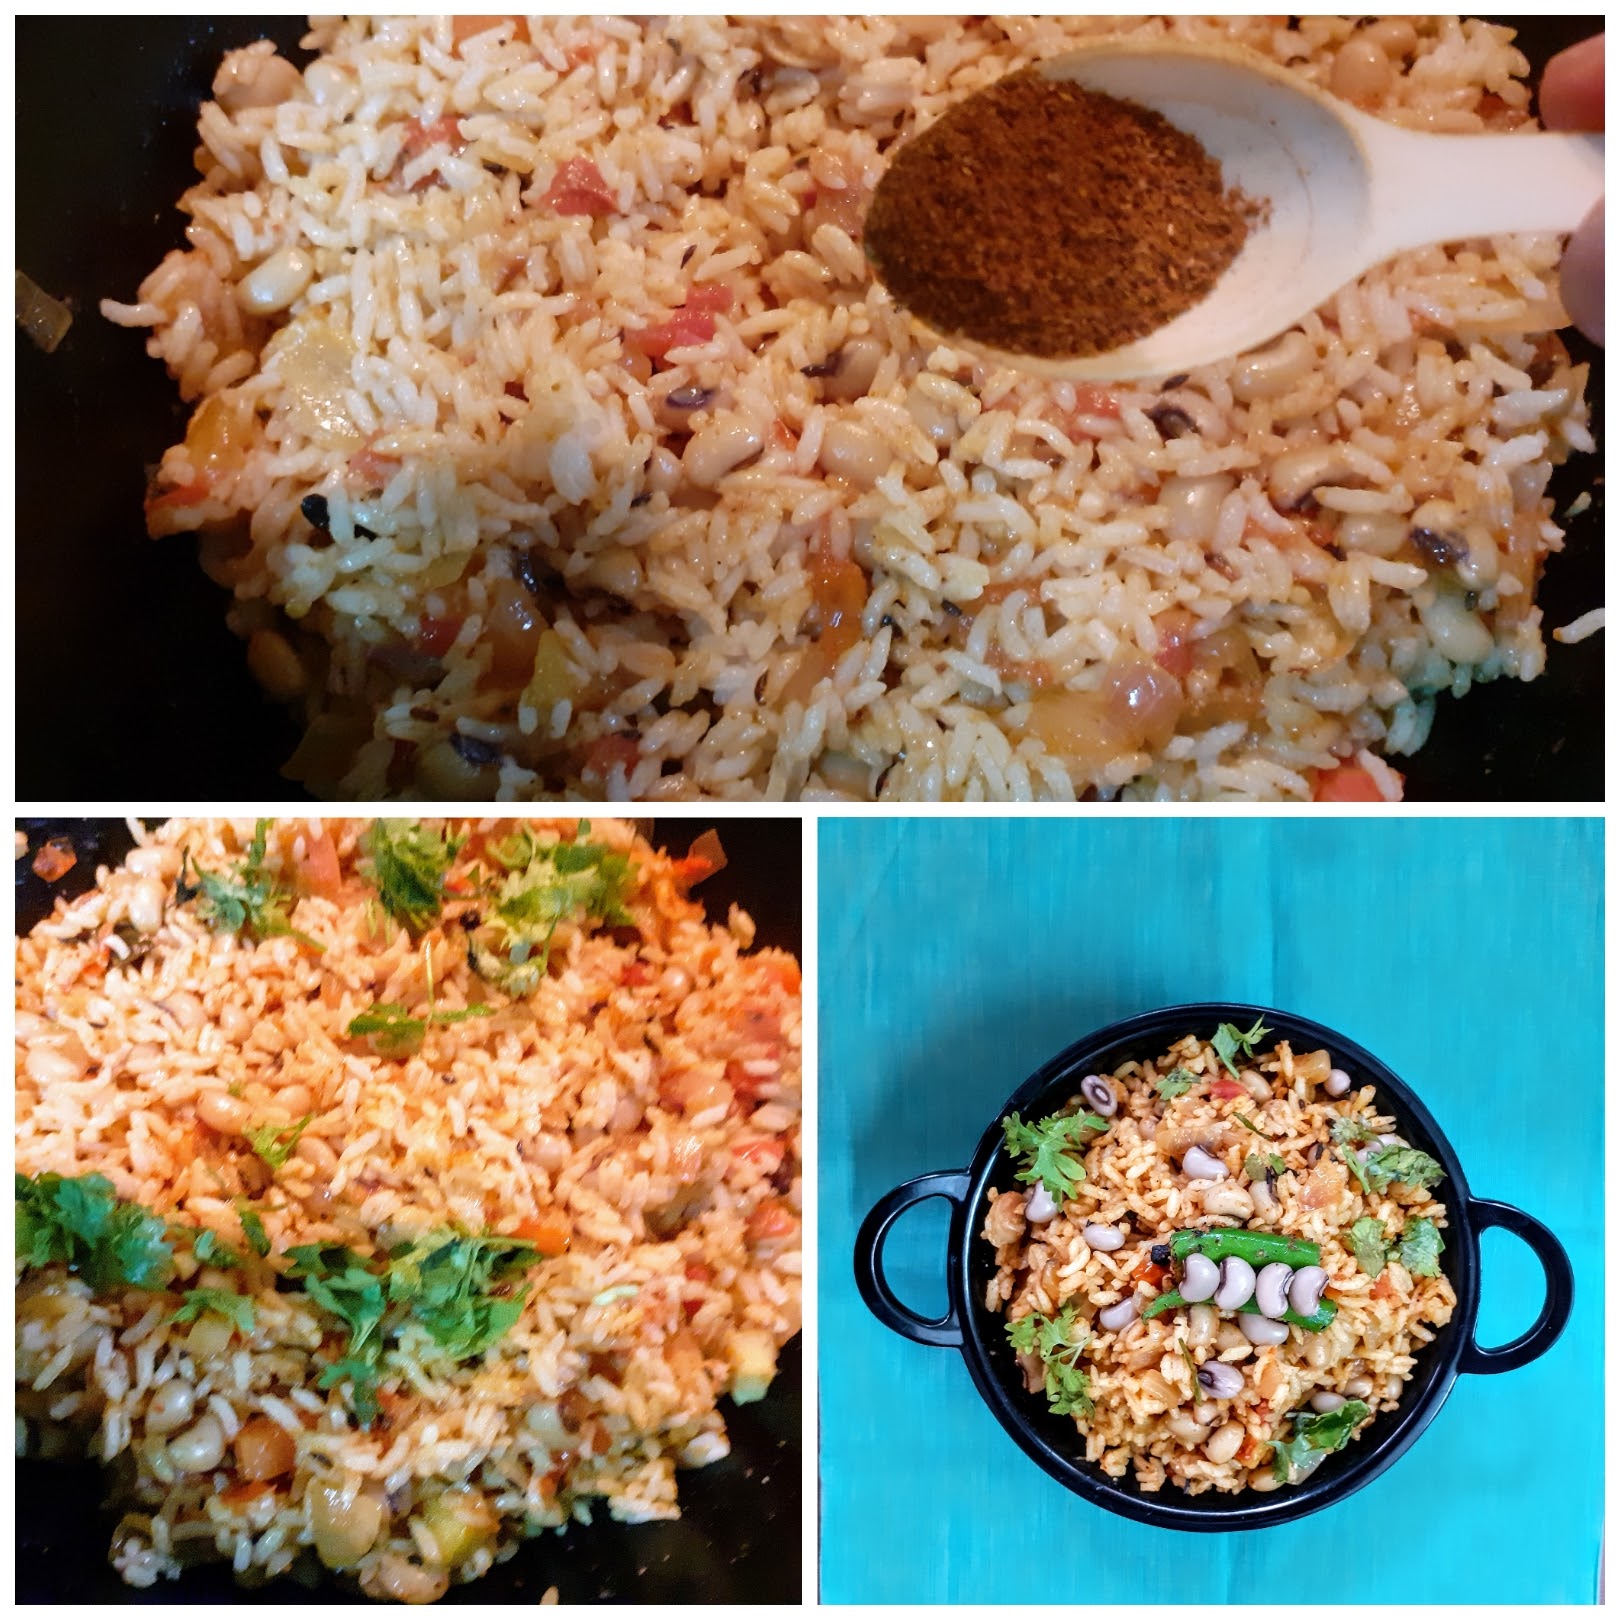
NOTES:
1. I have used the white Lobia here. This dish can be prepared with the Red ones, or even green peas and turns out absolutely delicious.
2. The Lobia should be well cooked but not mushy.
3. I have used Biriyani masala for extra flavouring, the dish tastes good even without it.
If you tried this recipe and liked it please comment below. I would love to hear from you. If you have a query about the recipe email us and ill respond as soon as I can.
Omavalli Rasam/Ajwain Leaves Rasam
Rasam is a popular South Indian dish prepared with tamarind, tomatoes, and Rasam powder. There are many variations of this dish, and each South Indian household has its own recipe for the proportions of the ingredients of the rasam powder. Therefore though Rasam is almost a regular feature in all South Indian households its taste is unique to each. No two Rasam recipes taste the same. Rasam is also a sought after comfort food in South Indian households when one has a Cold(Common Cold) or is a little under the weather because it is made of simple ingredients that are easily digestible and pepper that helps in combating the cold. A good Rasam powder makes for a flavourful Rasam, the recipe for the Rasam Powder has been included here.
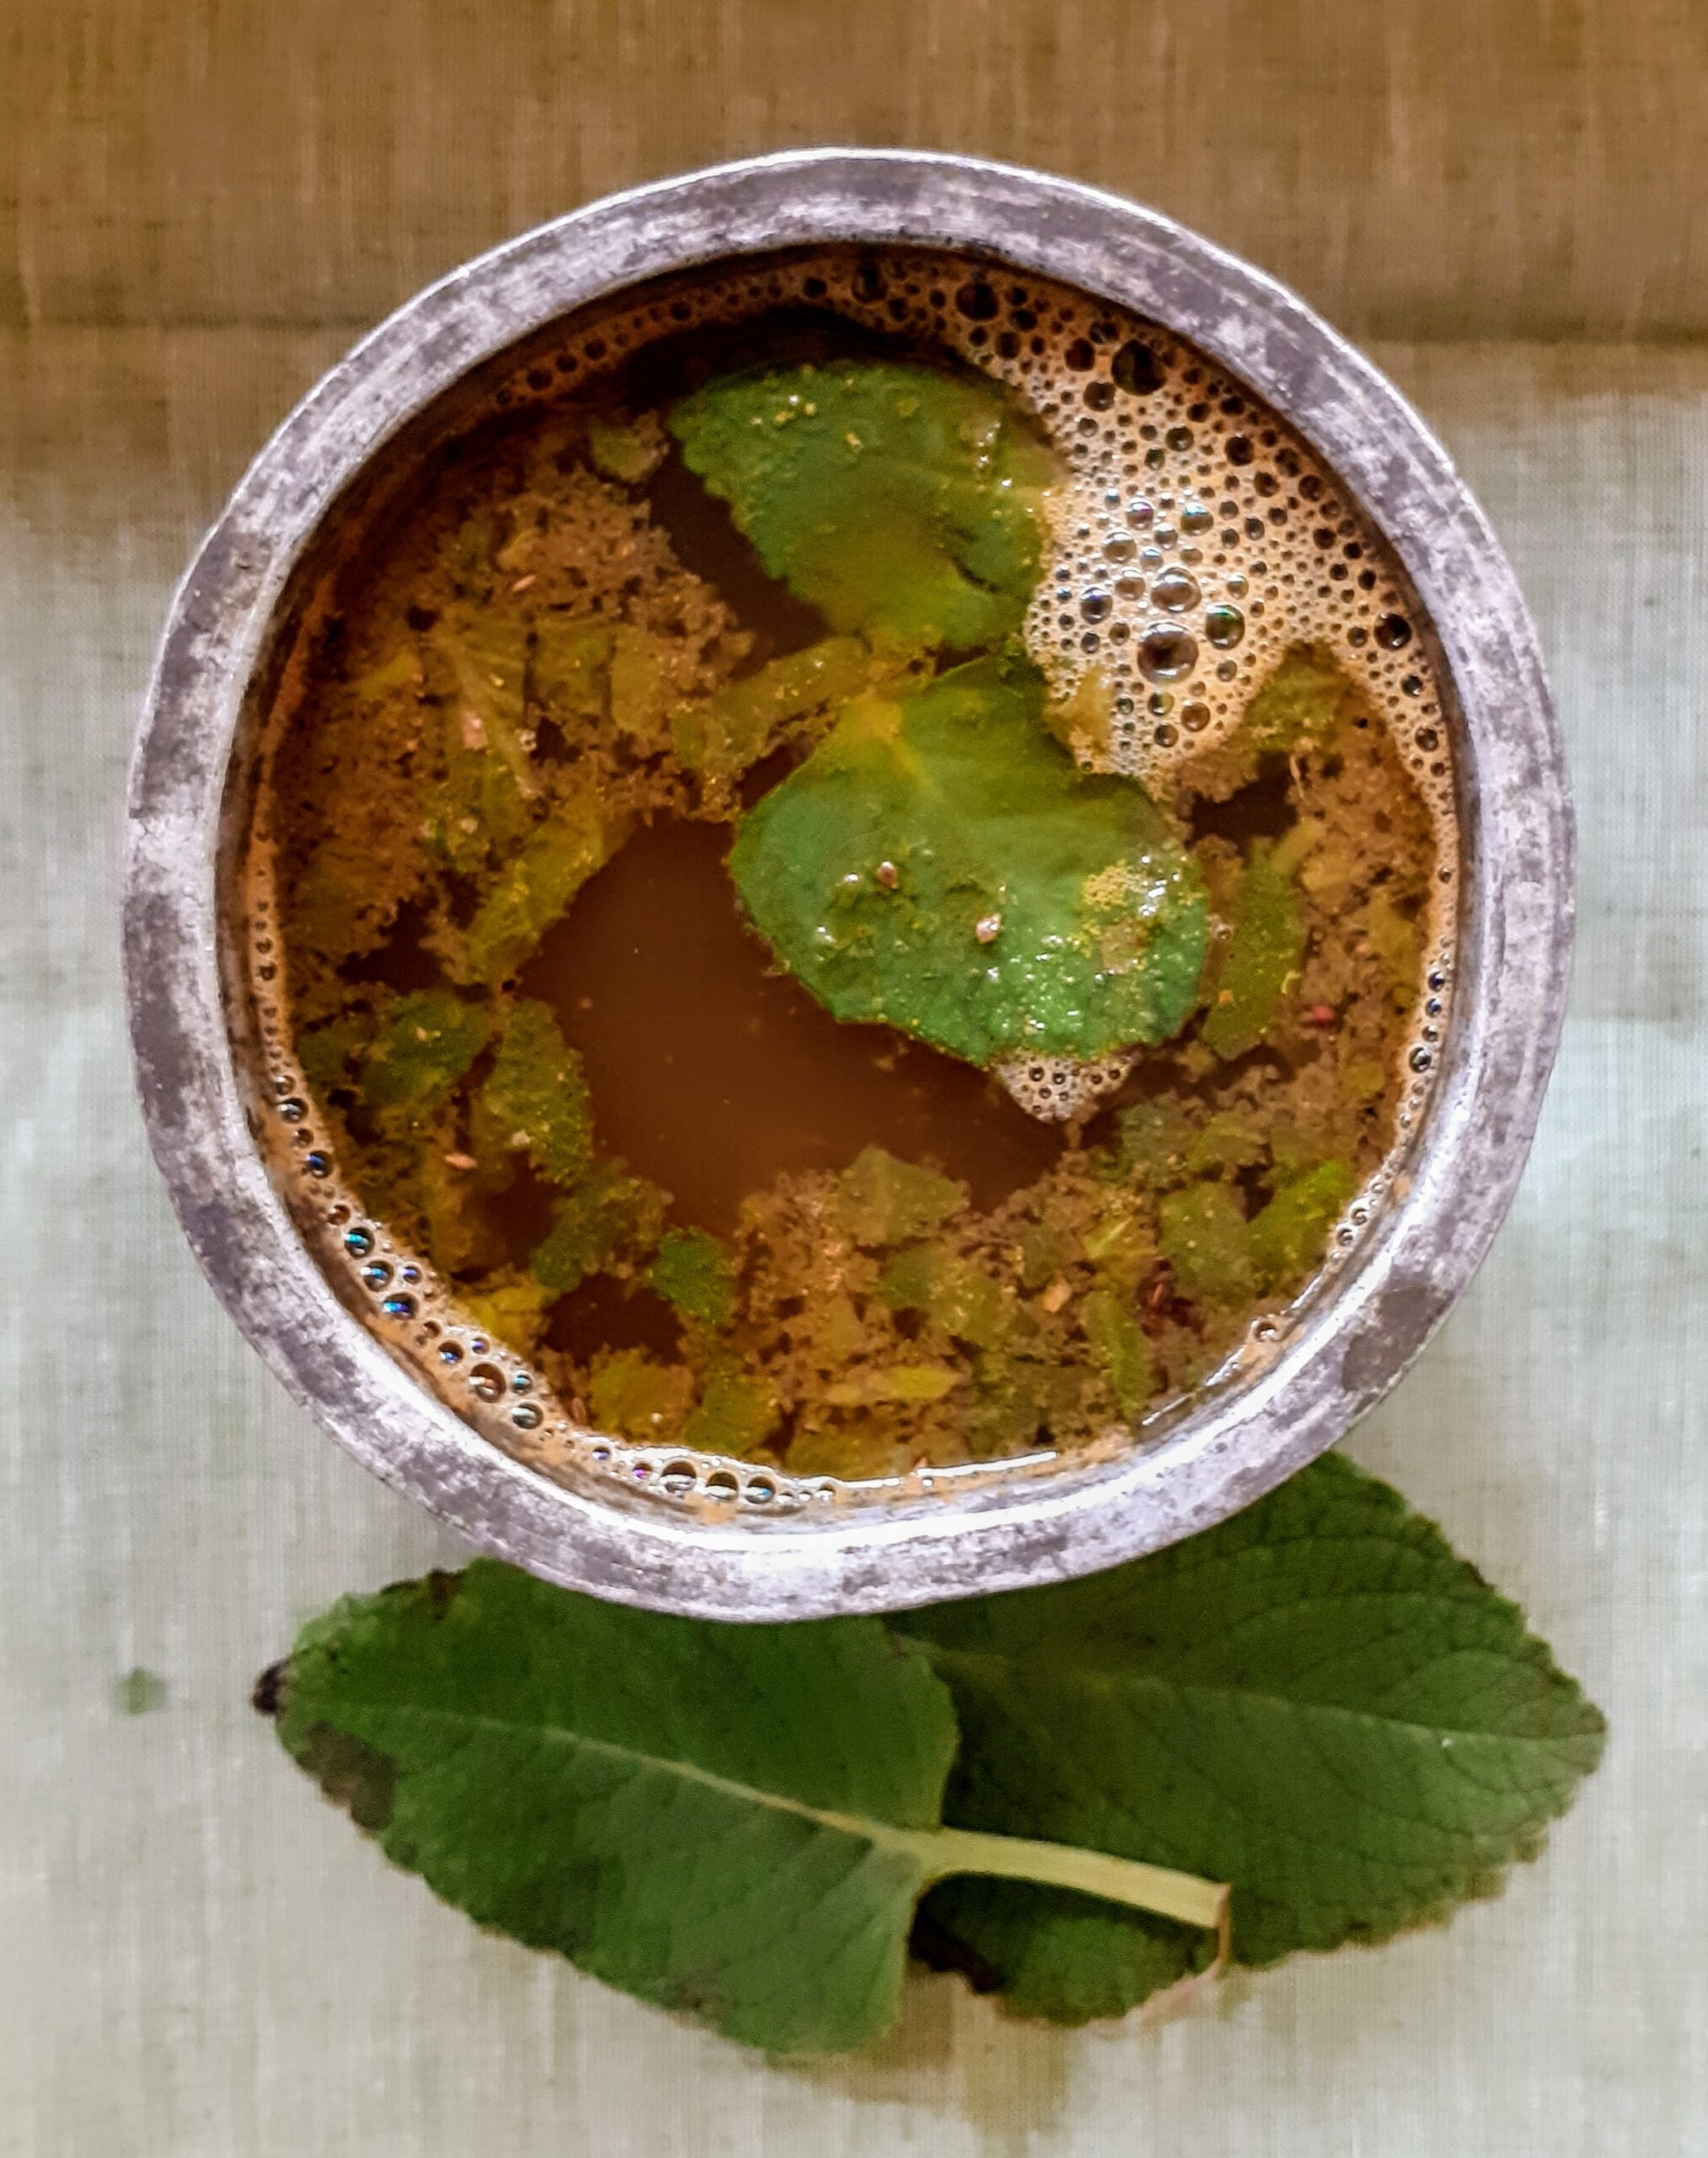
If you tried this recipe and liked it please comment below. I would love to hear from you. If you have a query about the recipe email us and ill respond as soon as I can.
Pineapple Raita
Raita is a yogurt-based condiment. It usually contains cooked or raw vegetables/fruits/pulses, mixed with the Yogurt/Dahi and tempered with Mustard and Jeera. The Raita is usually served with Biriyani, Pulav, Parathas, Naans, or can be served as a dip for Kebabs too.
Raitas are a regular feature at my house. Whenever I make Parathas I usually pair it with a Raita instead of plain curd, and it goes without saying that Biriyani is almost always served with raita. I use raitas such as Mint raita as a dip for Kebabs too. I have different Raita varieties like Bhindi/Okra Raita, Mint Raita, Baigan/Eggplant Raita to my repertoire, please check them out while you are here.
This recipe of Pineapple Raita Is a very simple one and takes around 15 minutes to assemble. During the Pineapple season, I make this raita very frequently. It tastes good just by itself too, and I usually pair it with Parathas or Jeera Rice.
Here is this simple recipe for you-
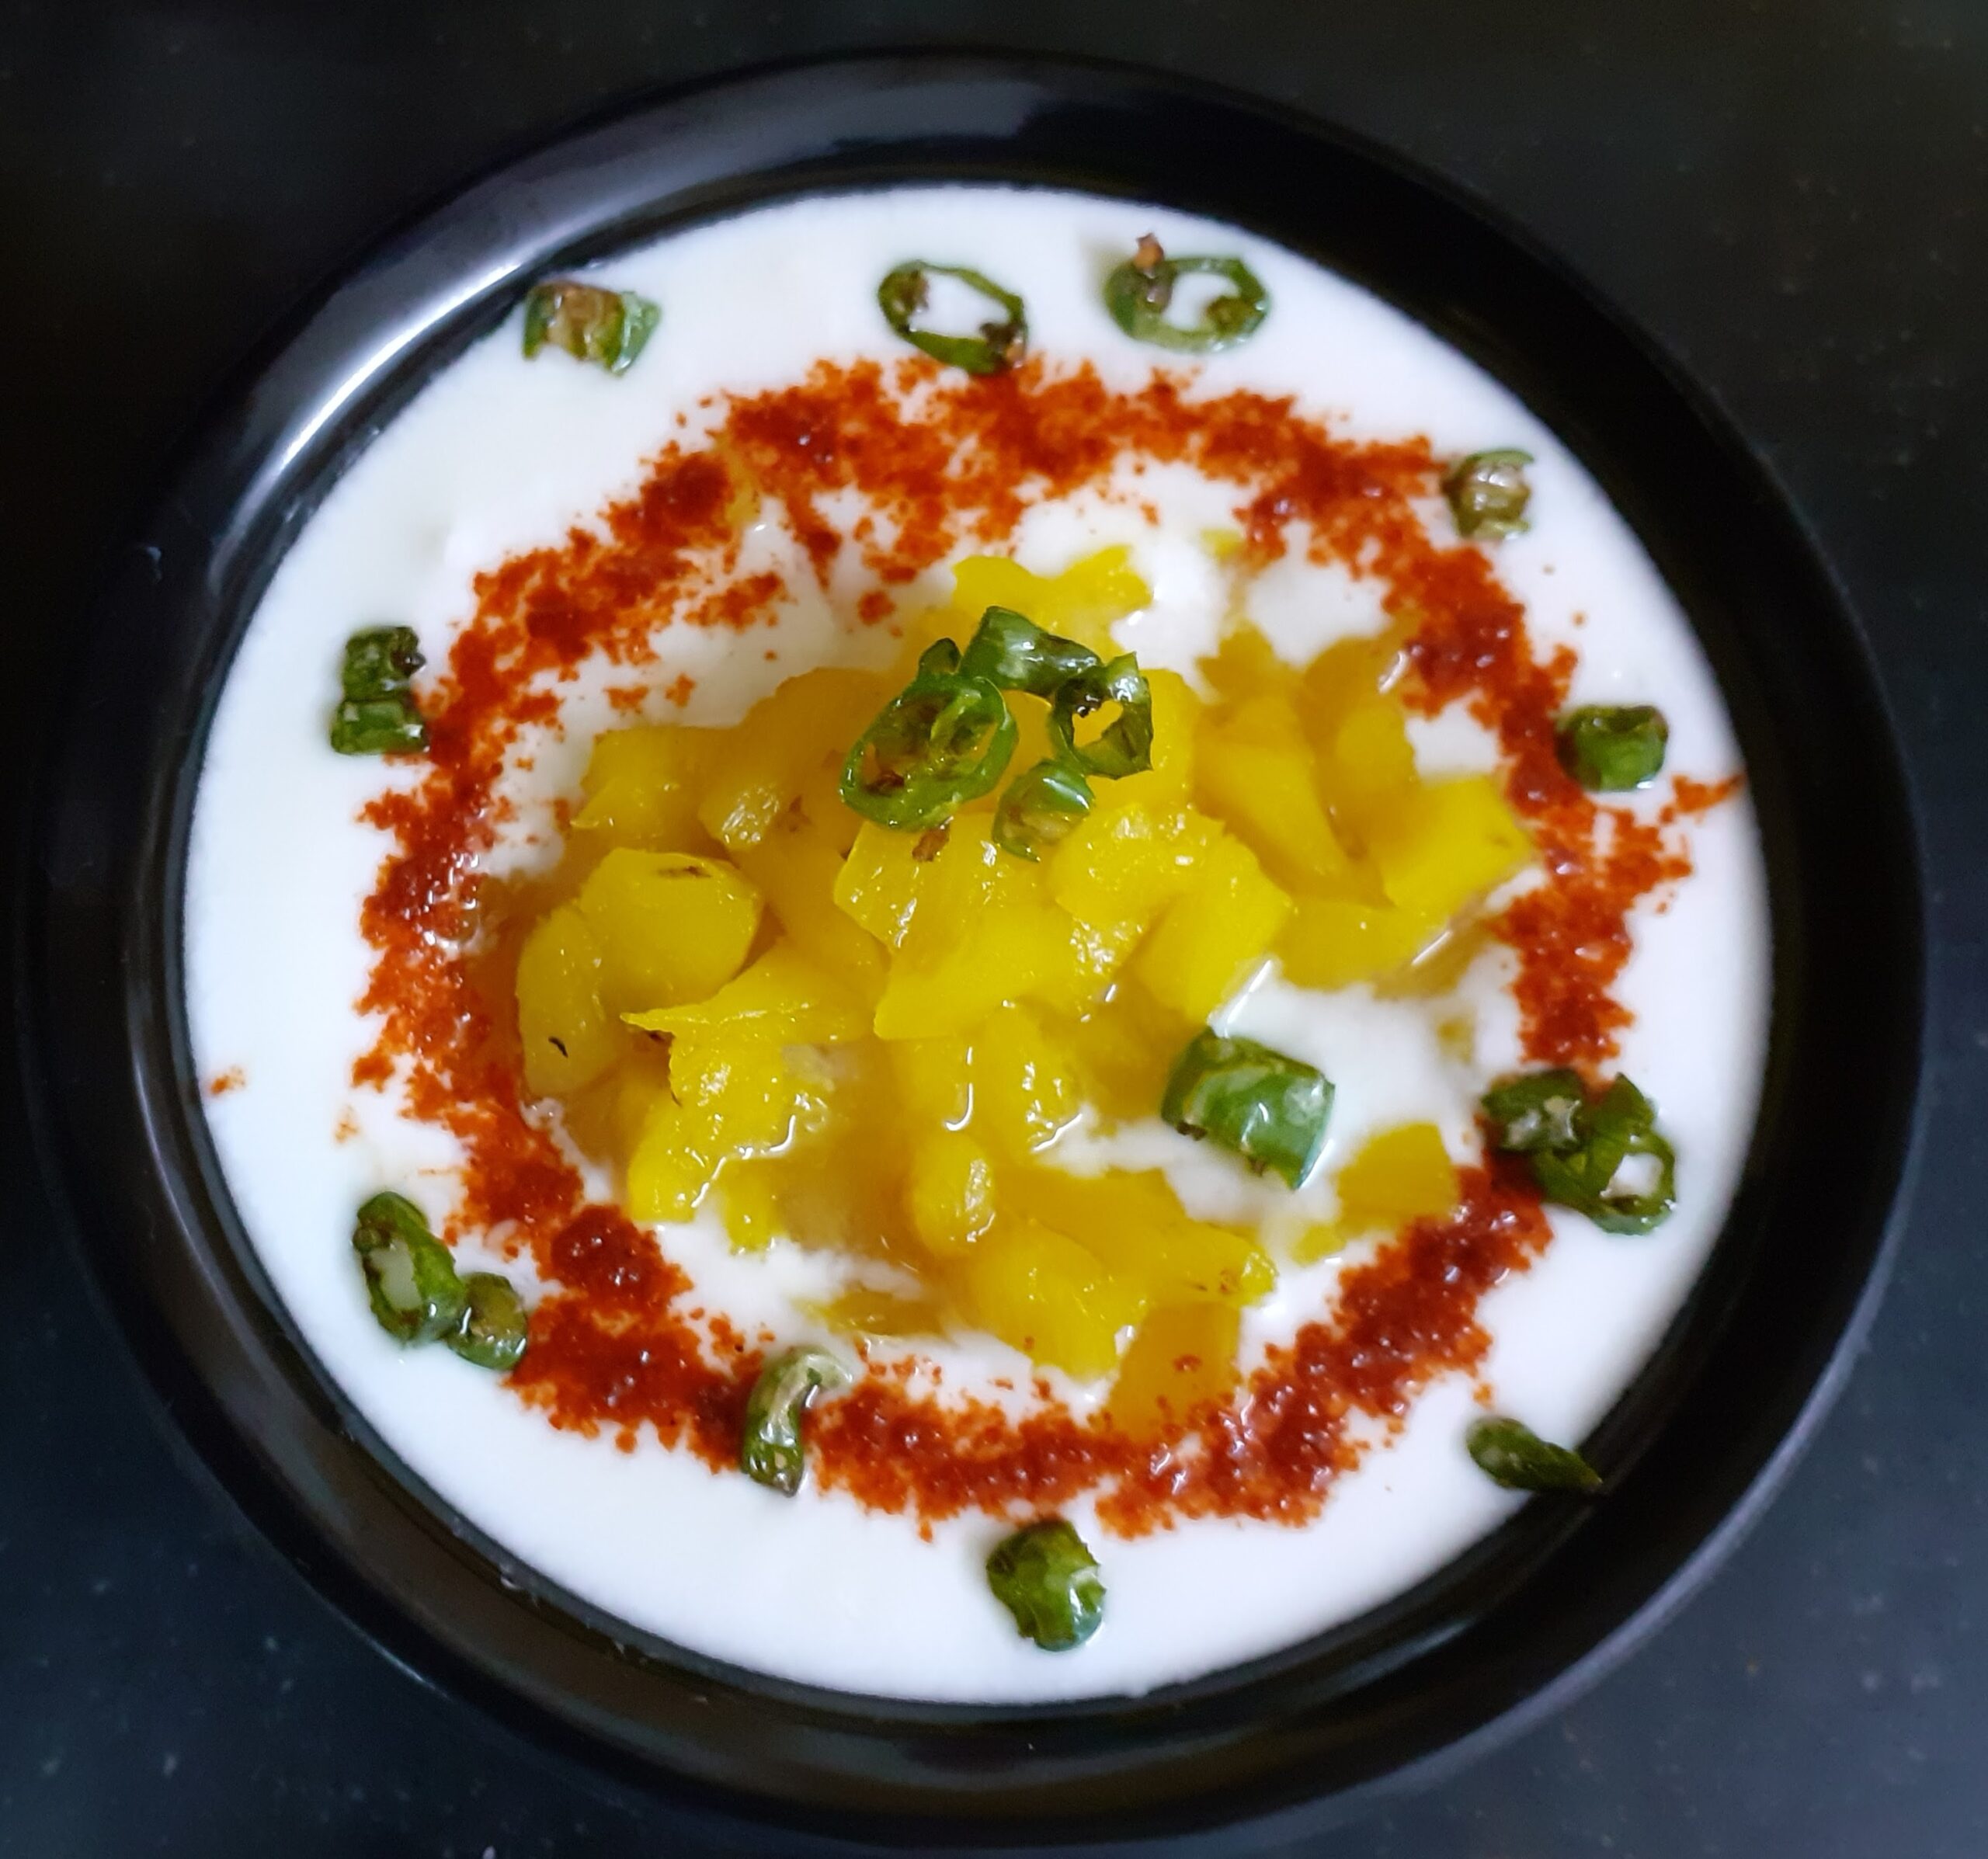
Ingredients:
Pineapple 100 gm (if buying slices 3 slices)
Curd 400 gm
Sugar 2 tsp (divided)
Salt as per taste
Red chilli powder 1/2 tsp
Green chillies 2 chopped finely
Oil for tempering
Directions:
Gently smoothen out the curd with a whisk. Be gentle and avoid over whisking. Just 3 whisks will do. Put the Curd in the refrigerator in the meanwhile. Now dice the Pineapple to small cubes and cook them with 1/4 cup water and a pinch of salt and a teaspoon of sugar. The Pineapple pieces should be just cooked, prick a knife/fork, and if it goes without resistance, put off the flame. Cool the cooked Pineapple completely. Remove the curd from the refrigerator, add salt, 1 teaspoon sugar, red chilli powder and fold nicely. Now stir in the cooled Pineapple cubes and chill in the refrigerator until ready to serve. In a tadka Kadai/pan add 1 tsp oil and heat. Add the chopped green chillies to this and fry for 10 secs. Pour this tempering into the raita. The delicious Pineapple Raita is ready to serve.
Serving Suggestions: With Parathas, Roti, Jeera rice, Masala rice or just by itself????.
STEPWISE RECIPE FOLLOWS:
1. Assemble all ingredients. Dice the Pineapple and whisk the curd and put it in the refrigerator until required.
2. Cook the Pineapple pieces in 1/4 cup water, add a pinch of salt and 1 tsp sugar to it. Cook until just done and cool them completely.
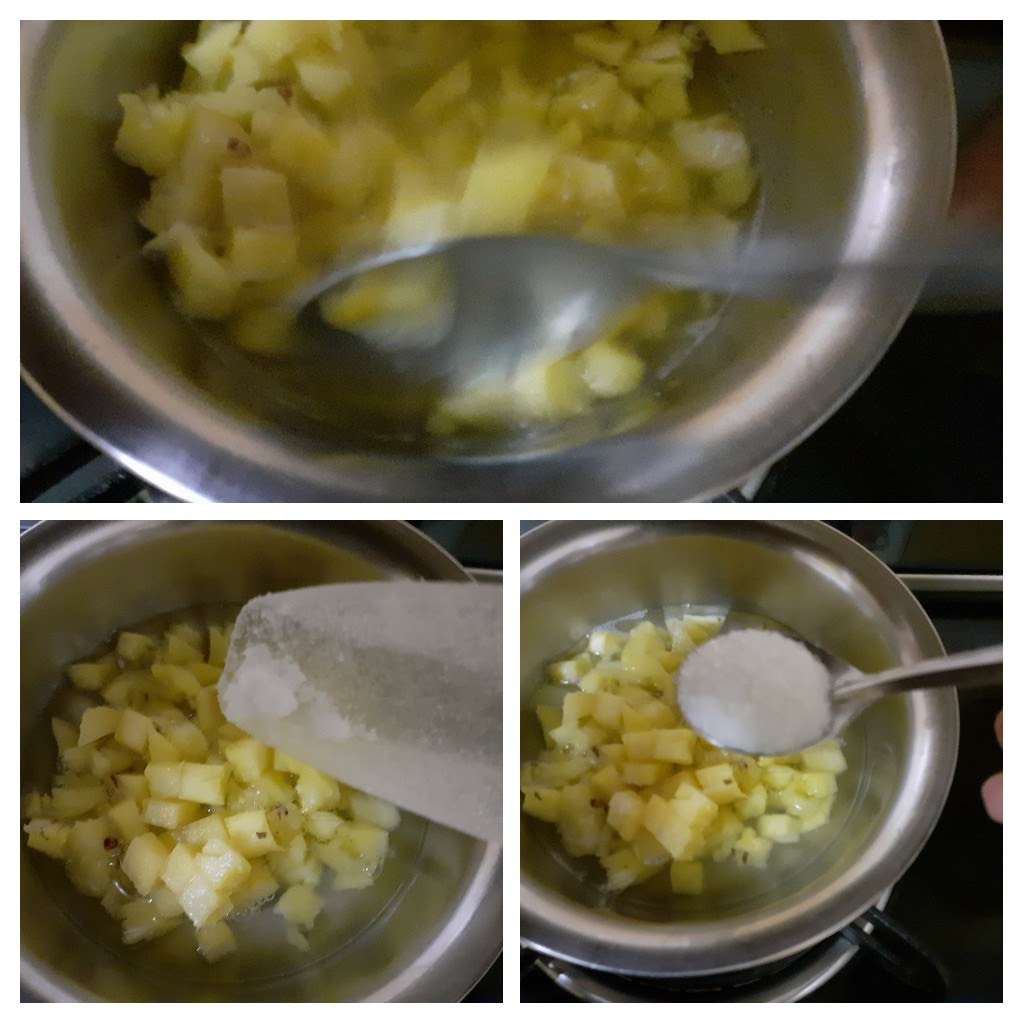
3. Now get the curd out and add salt, followed by red chilli powder. In a small pan/Kadai heat some oil. Add the finely chopped green chillies and fry for 10 seconds. Pour this tempering into the Raita and chill in the refrigerator until ready to serve.
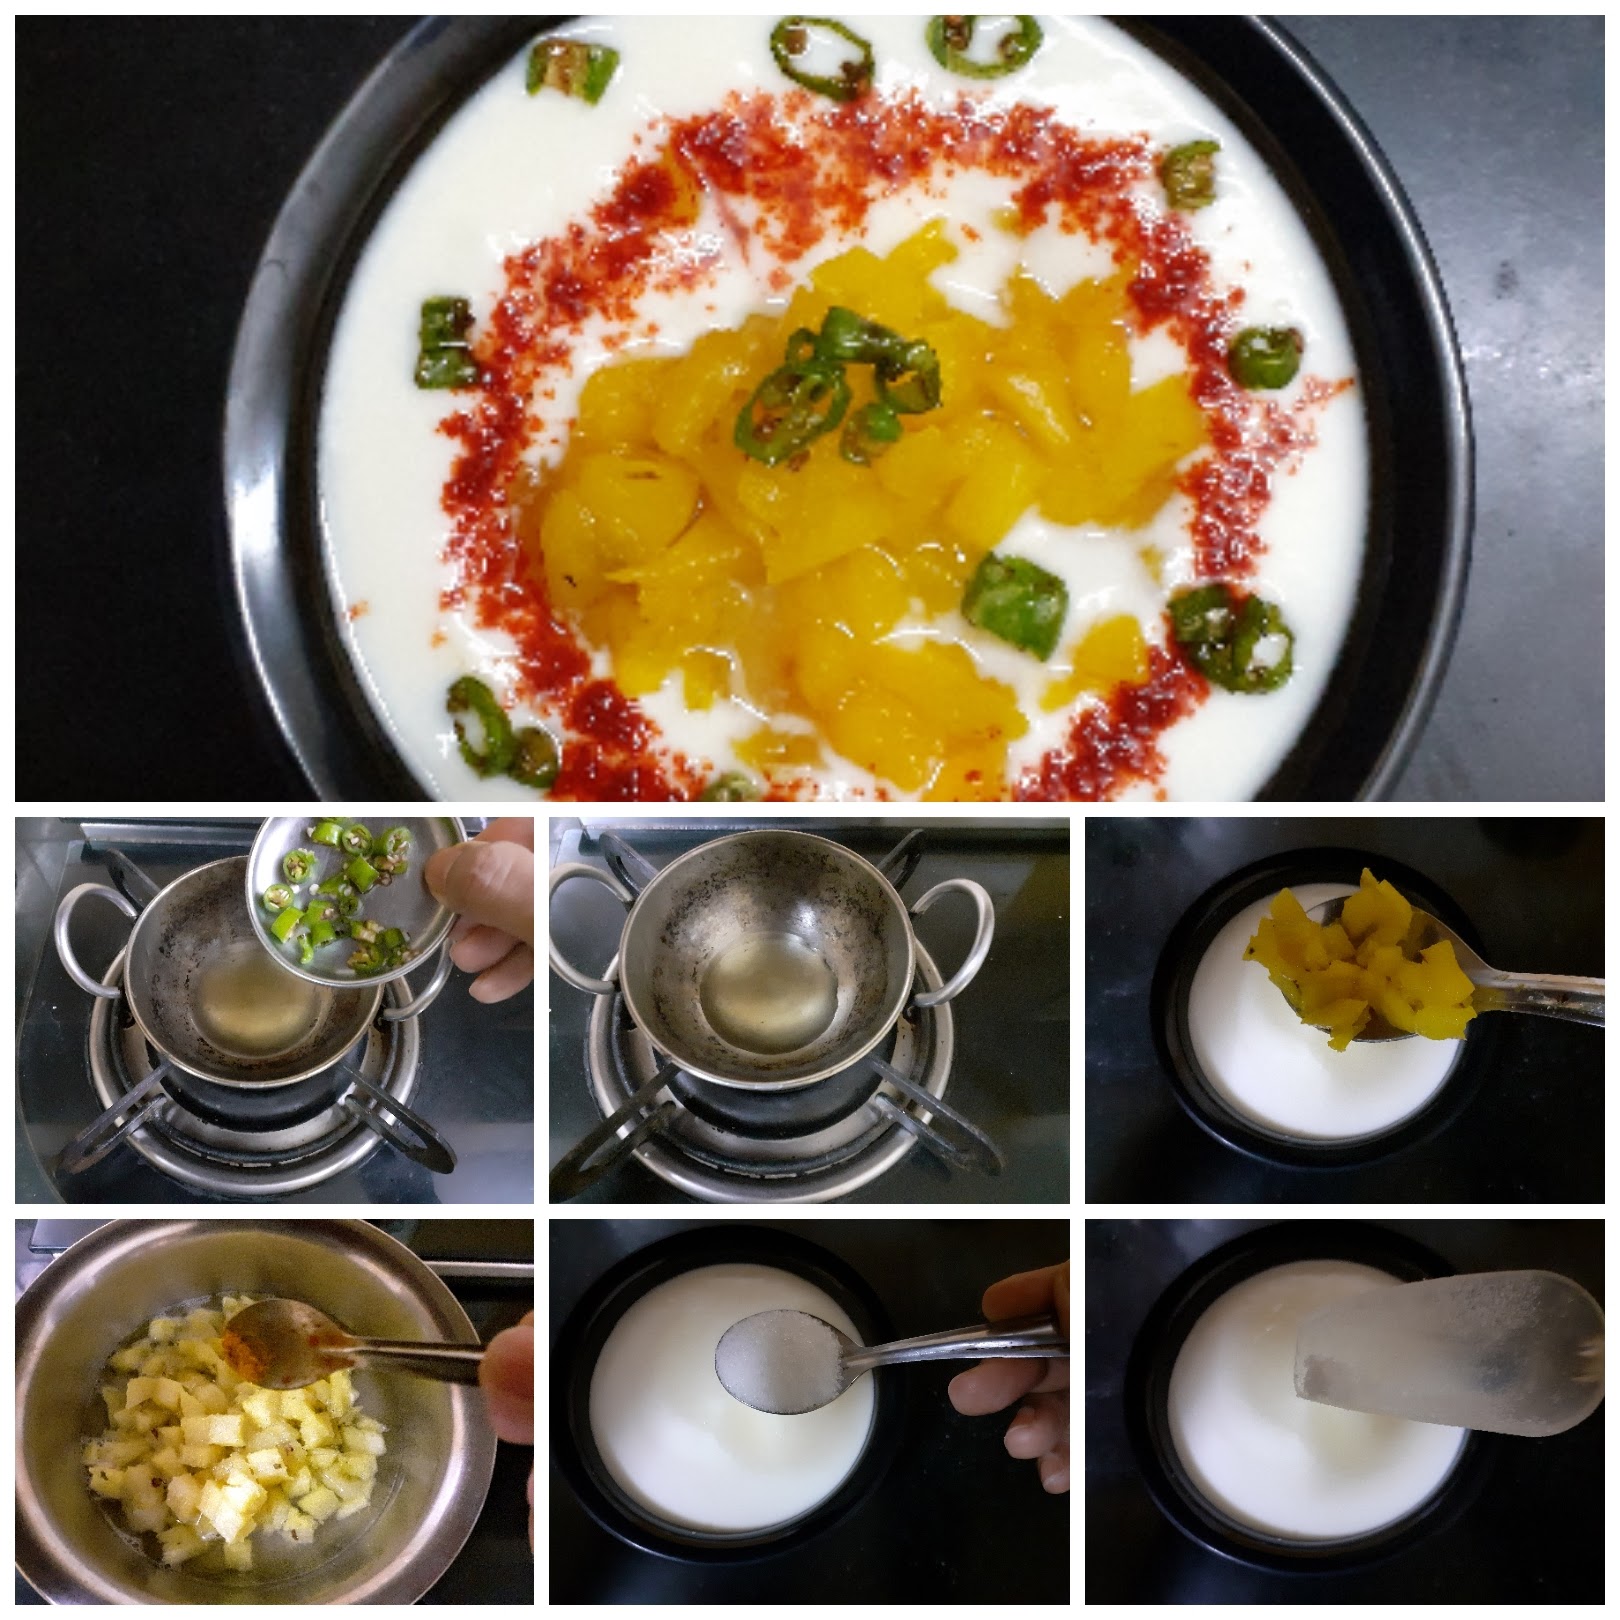
NOTES:
1. Over whisking the curd will make runny, so just smoothen out the curd with a ladle or whisk.
2. Adding sugar to the pineapple while cooking is optional, if the Pineapple is sweet, adding sugar can be avoided. I strongly recommend adding sugar to the curd though. The quantity of sugar in curd can be increased or decreased as per taste.
3. The green chilli tempering really elevates the raita to a different level, so try not skipping that step.
If you tried this recipe and liked it please comment below. I would love to hear from you. If you have a query about the recipe email us and ill respond as soon as I can.
Pesarattu/MLA Pesarattu/Moong Dal Chila
This recipe of soaked Moong beans and rice is one of my favourites as it is healthy and tasty at the same time. Simple recipe, just soak grind with ginger and spices and spread on the Tava like a Dosa/Adai and serve with Allam(ginger)chutney or any chutney. Yes, it is that simple. No fermentation.
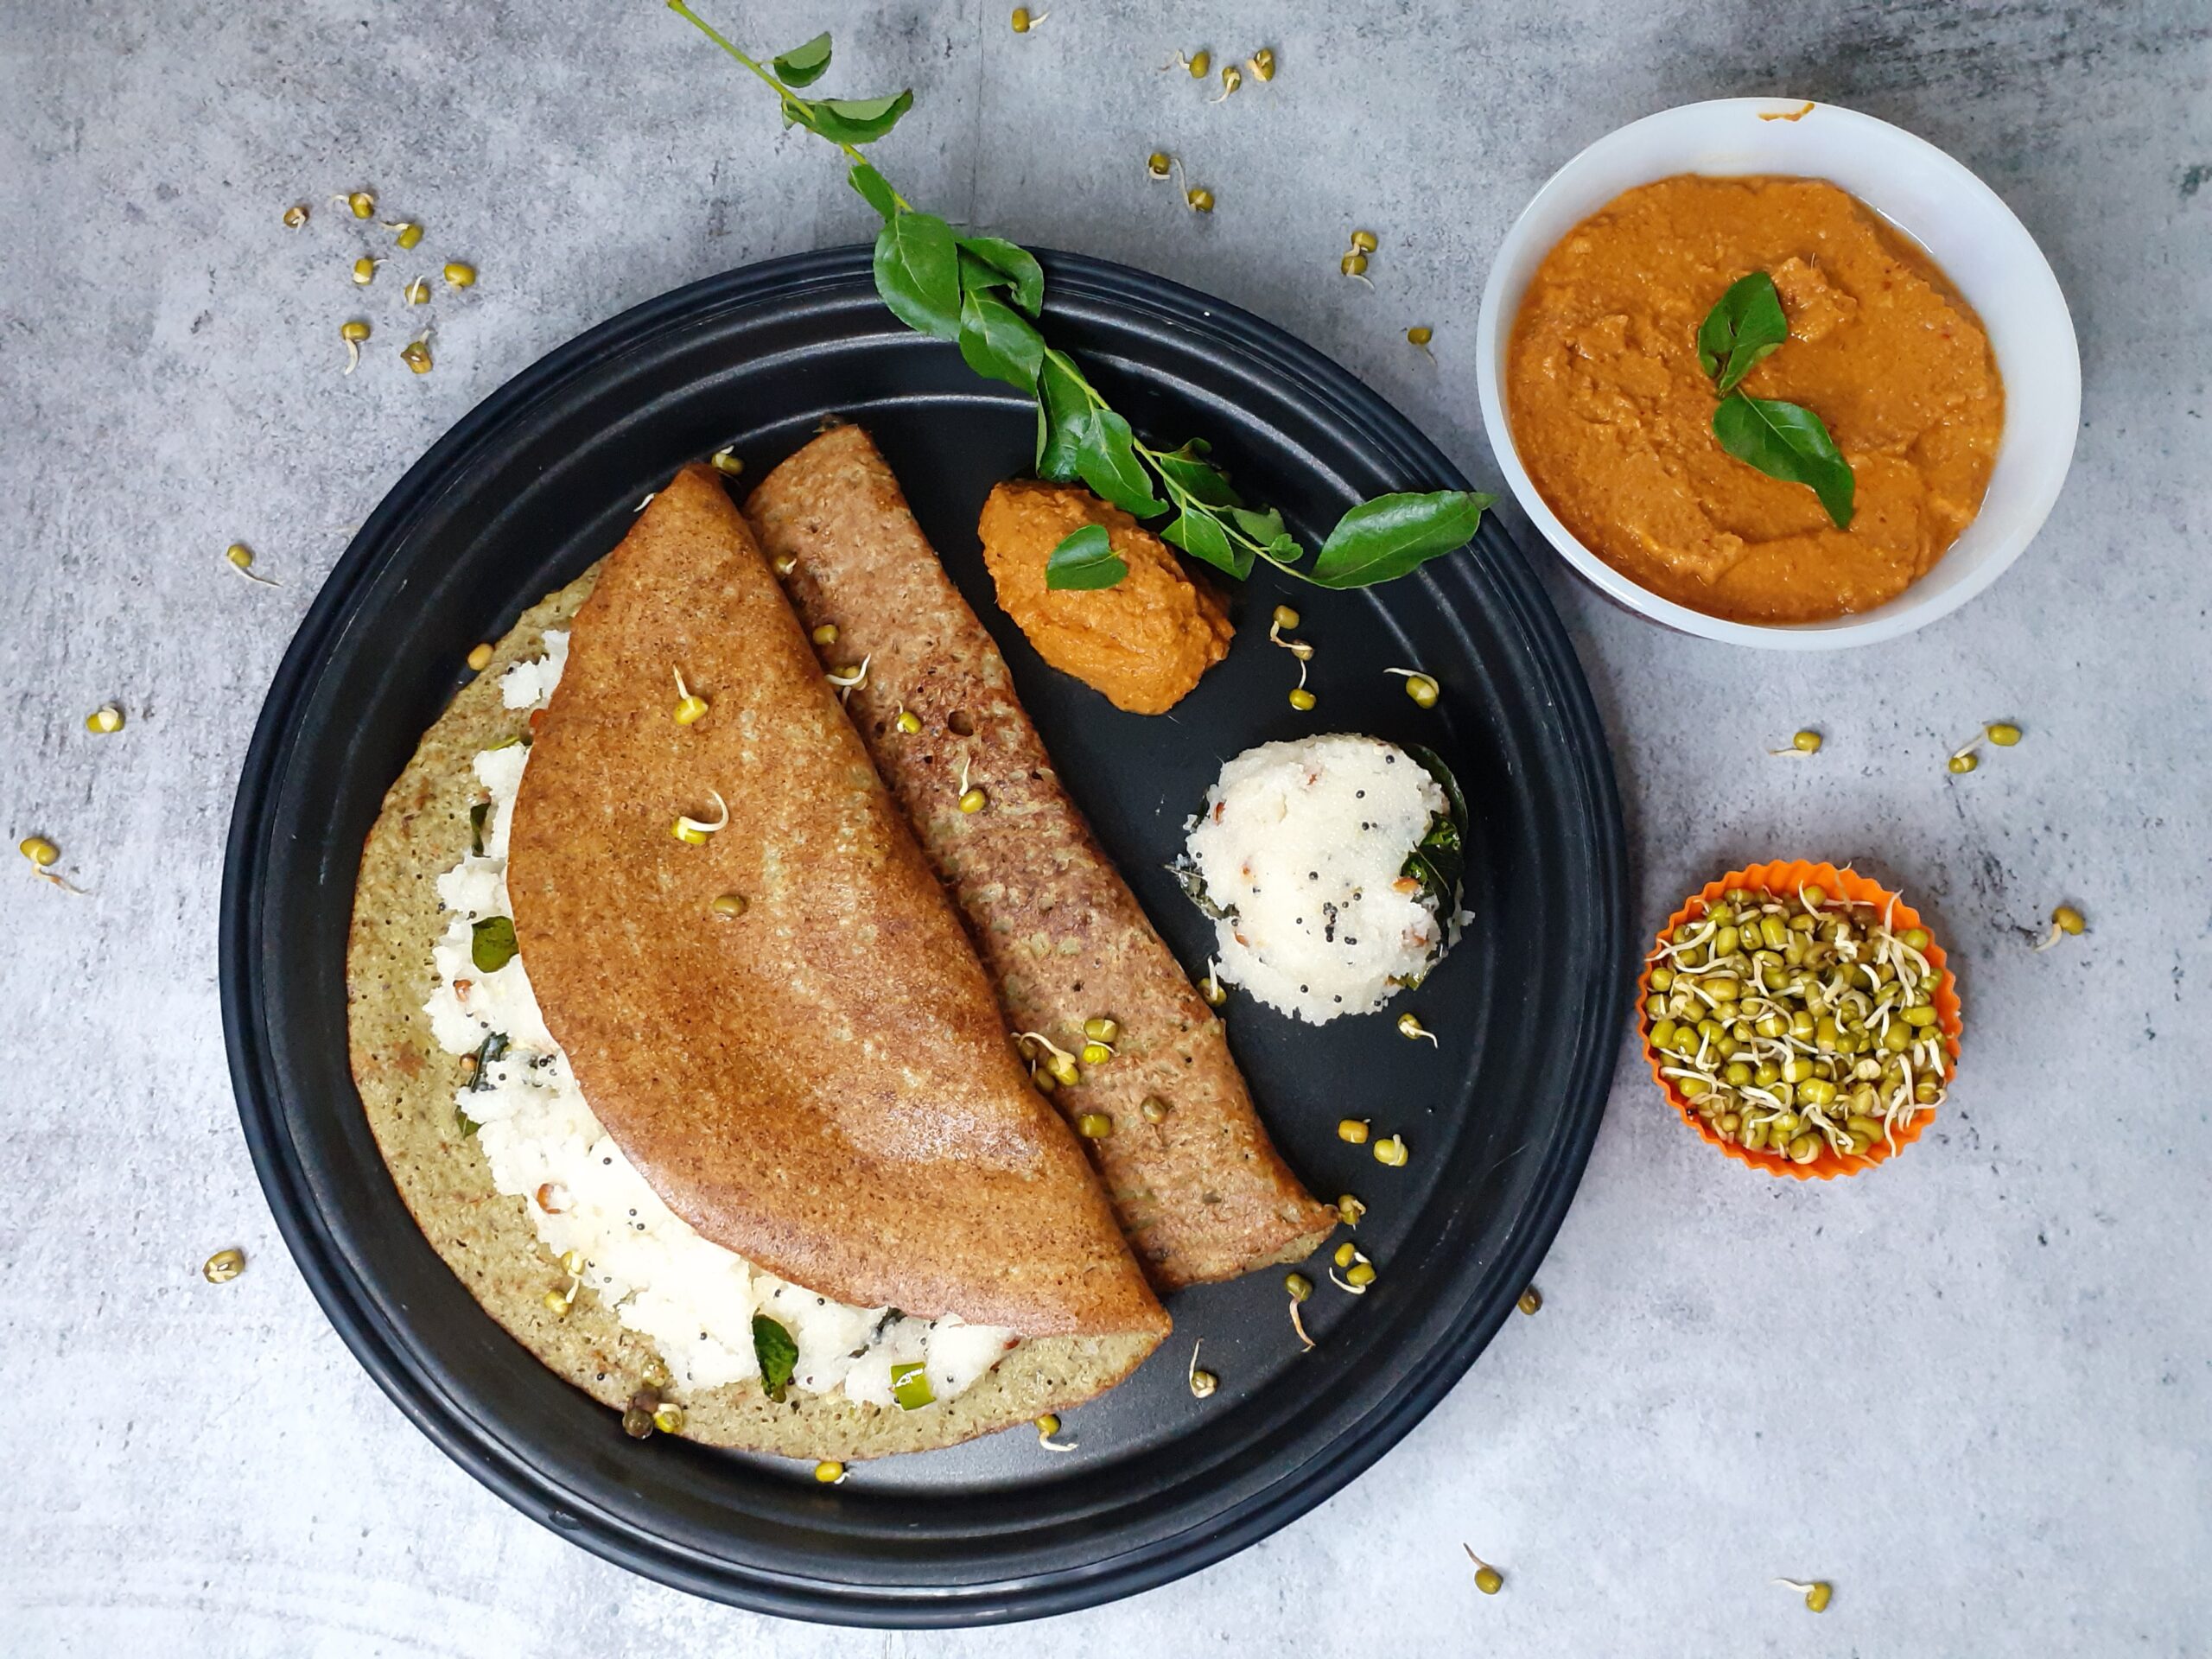
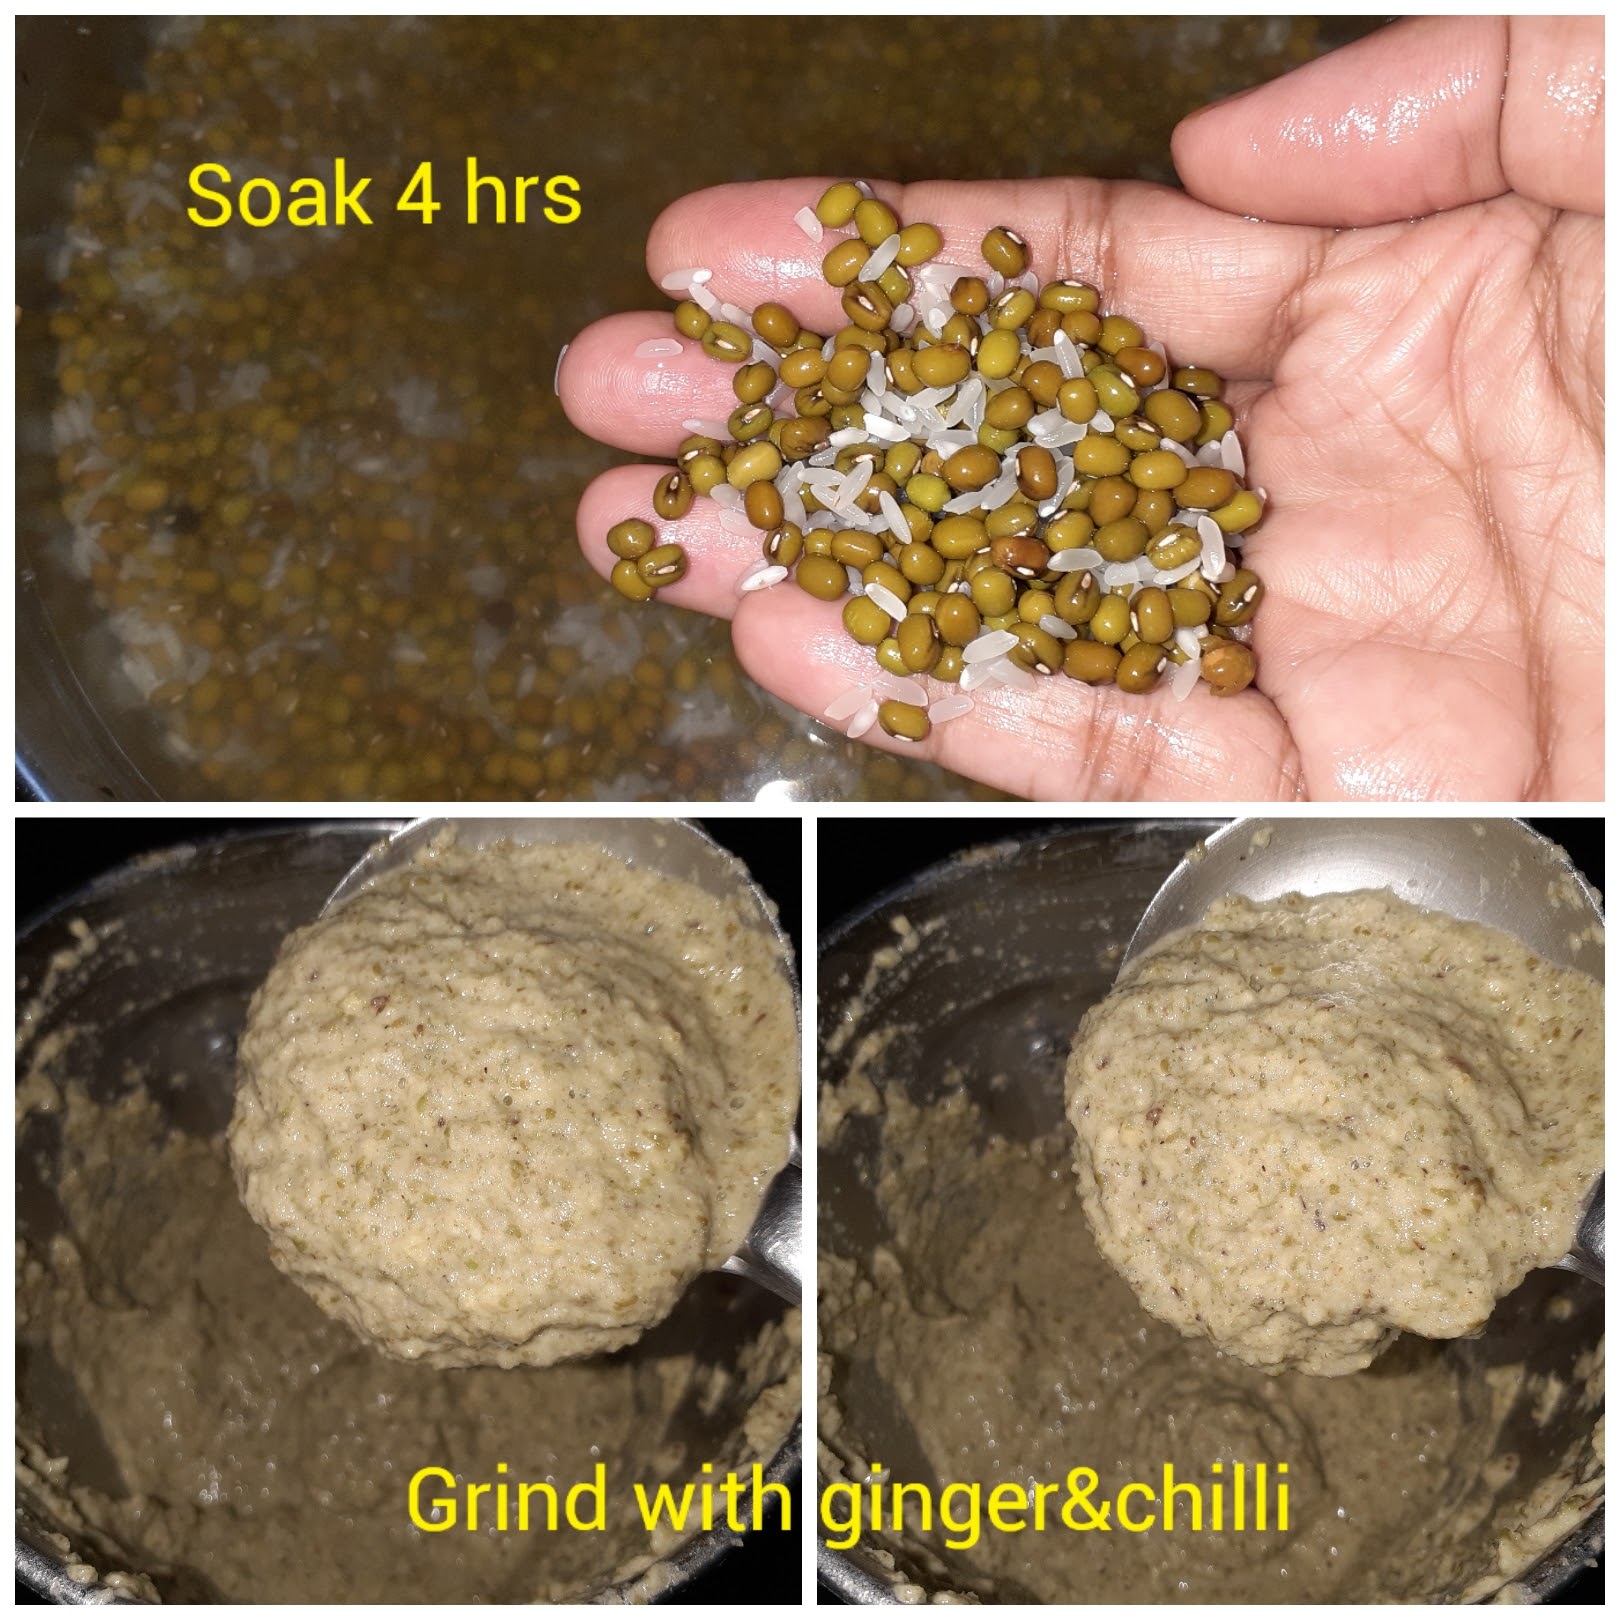
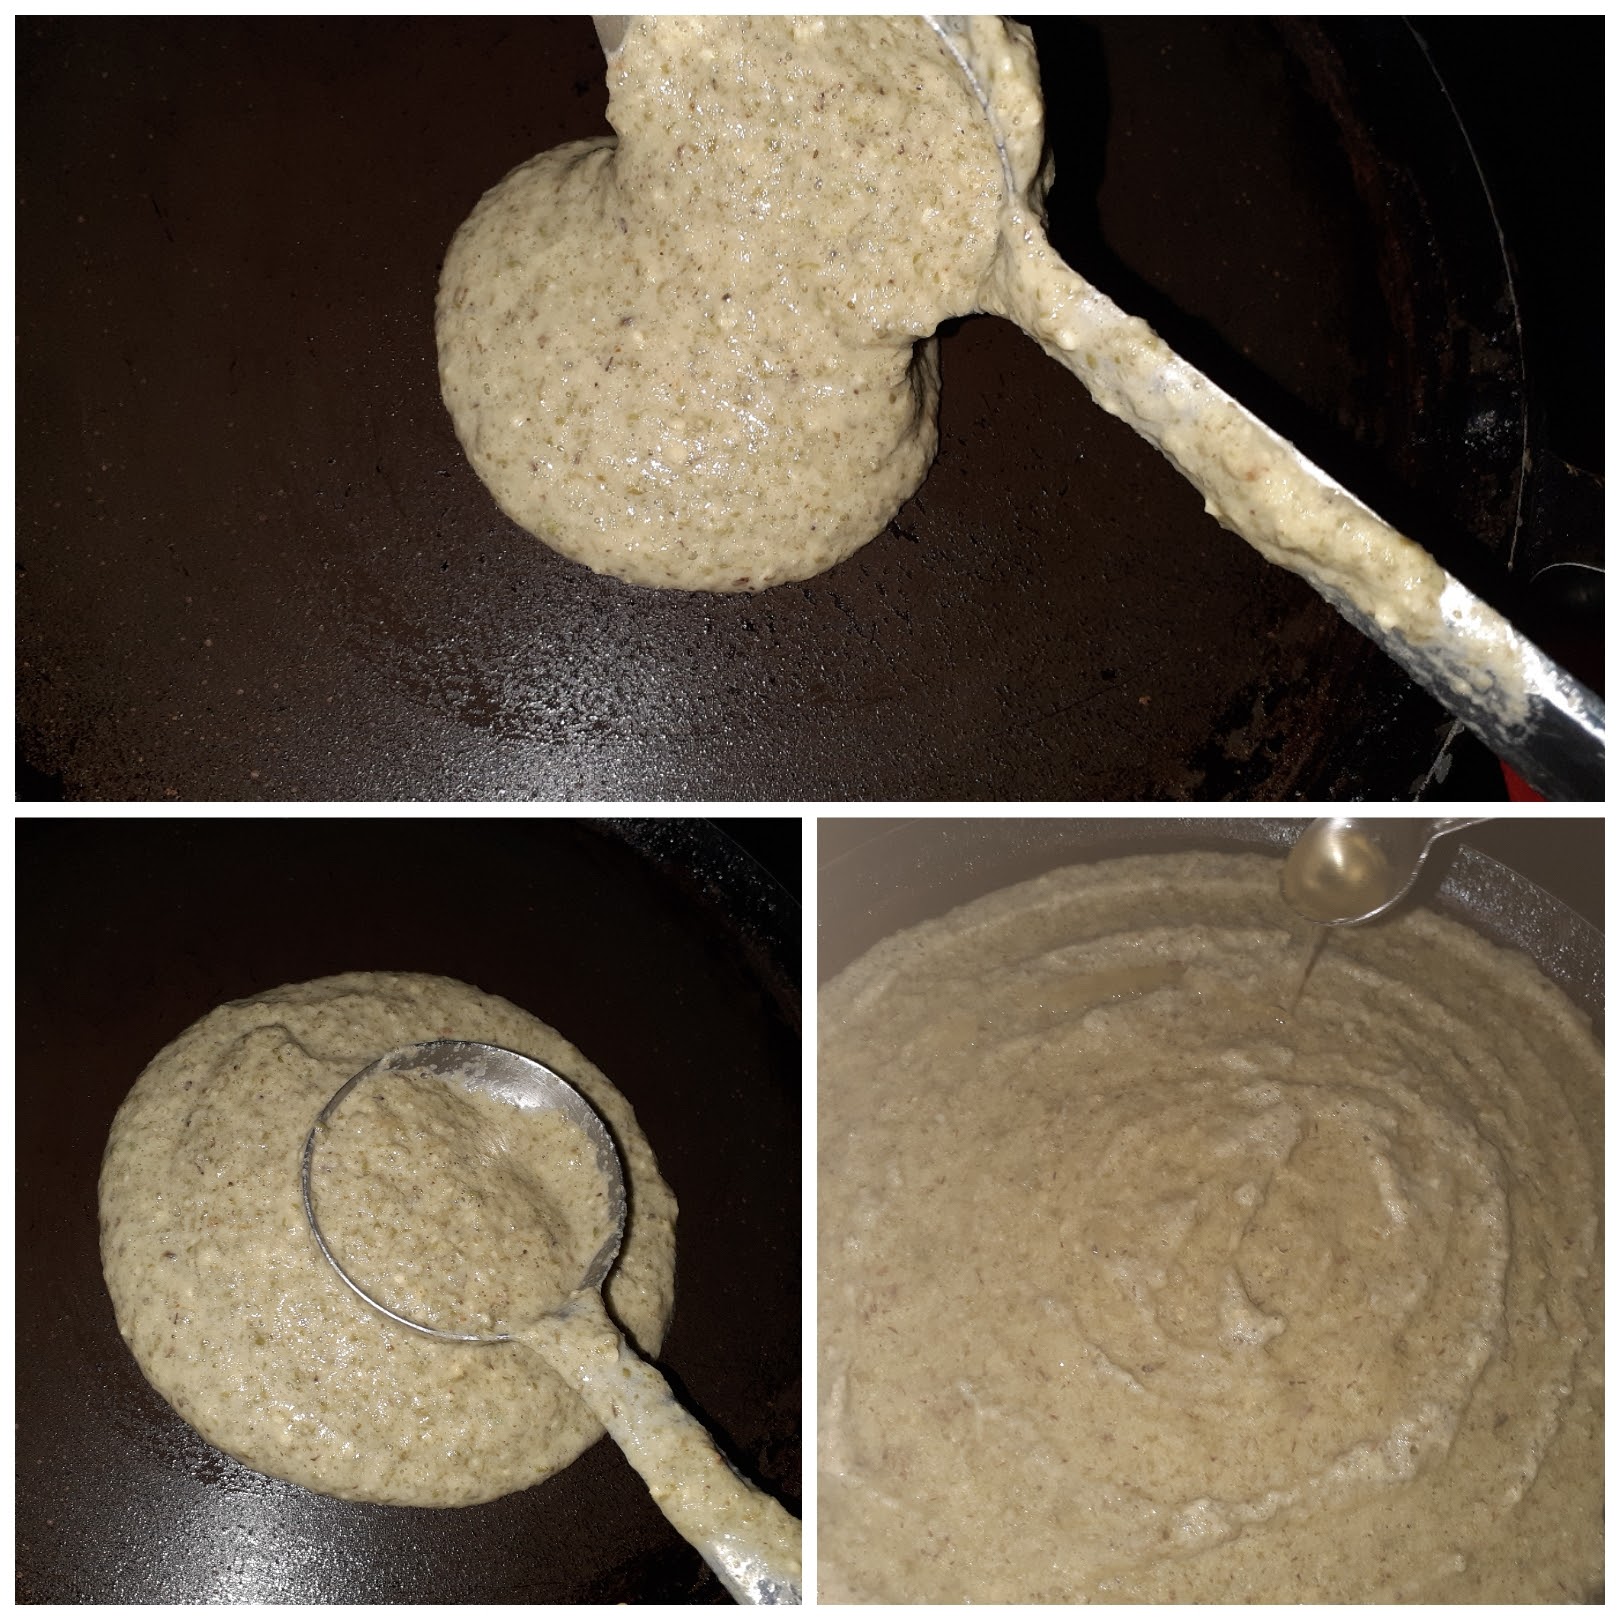
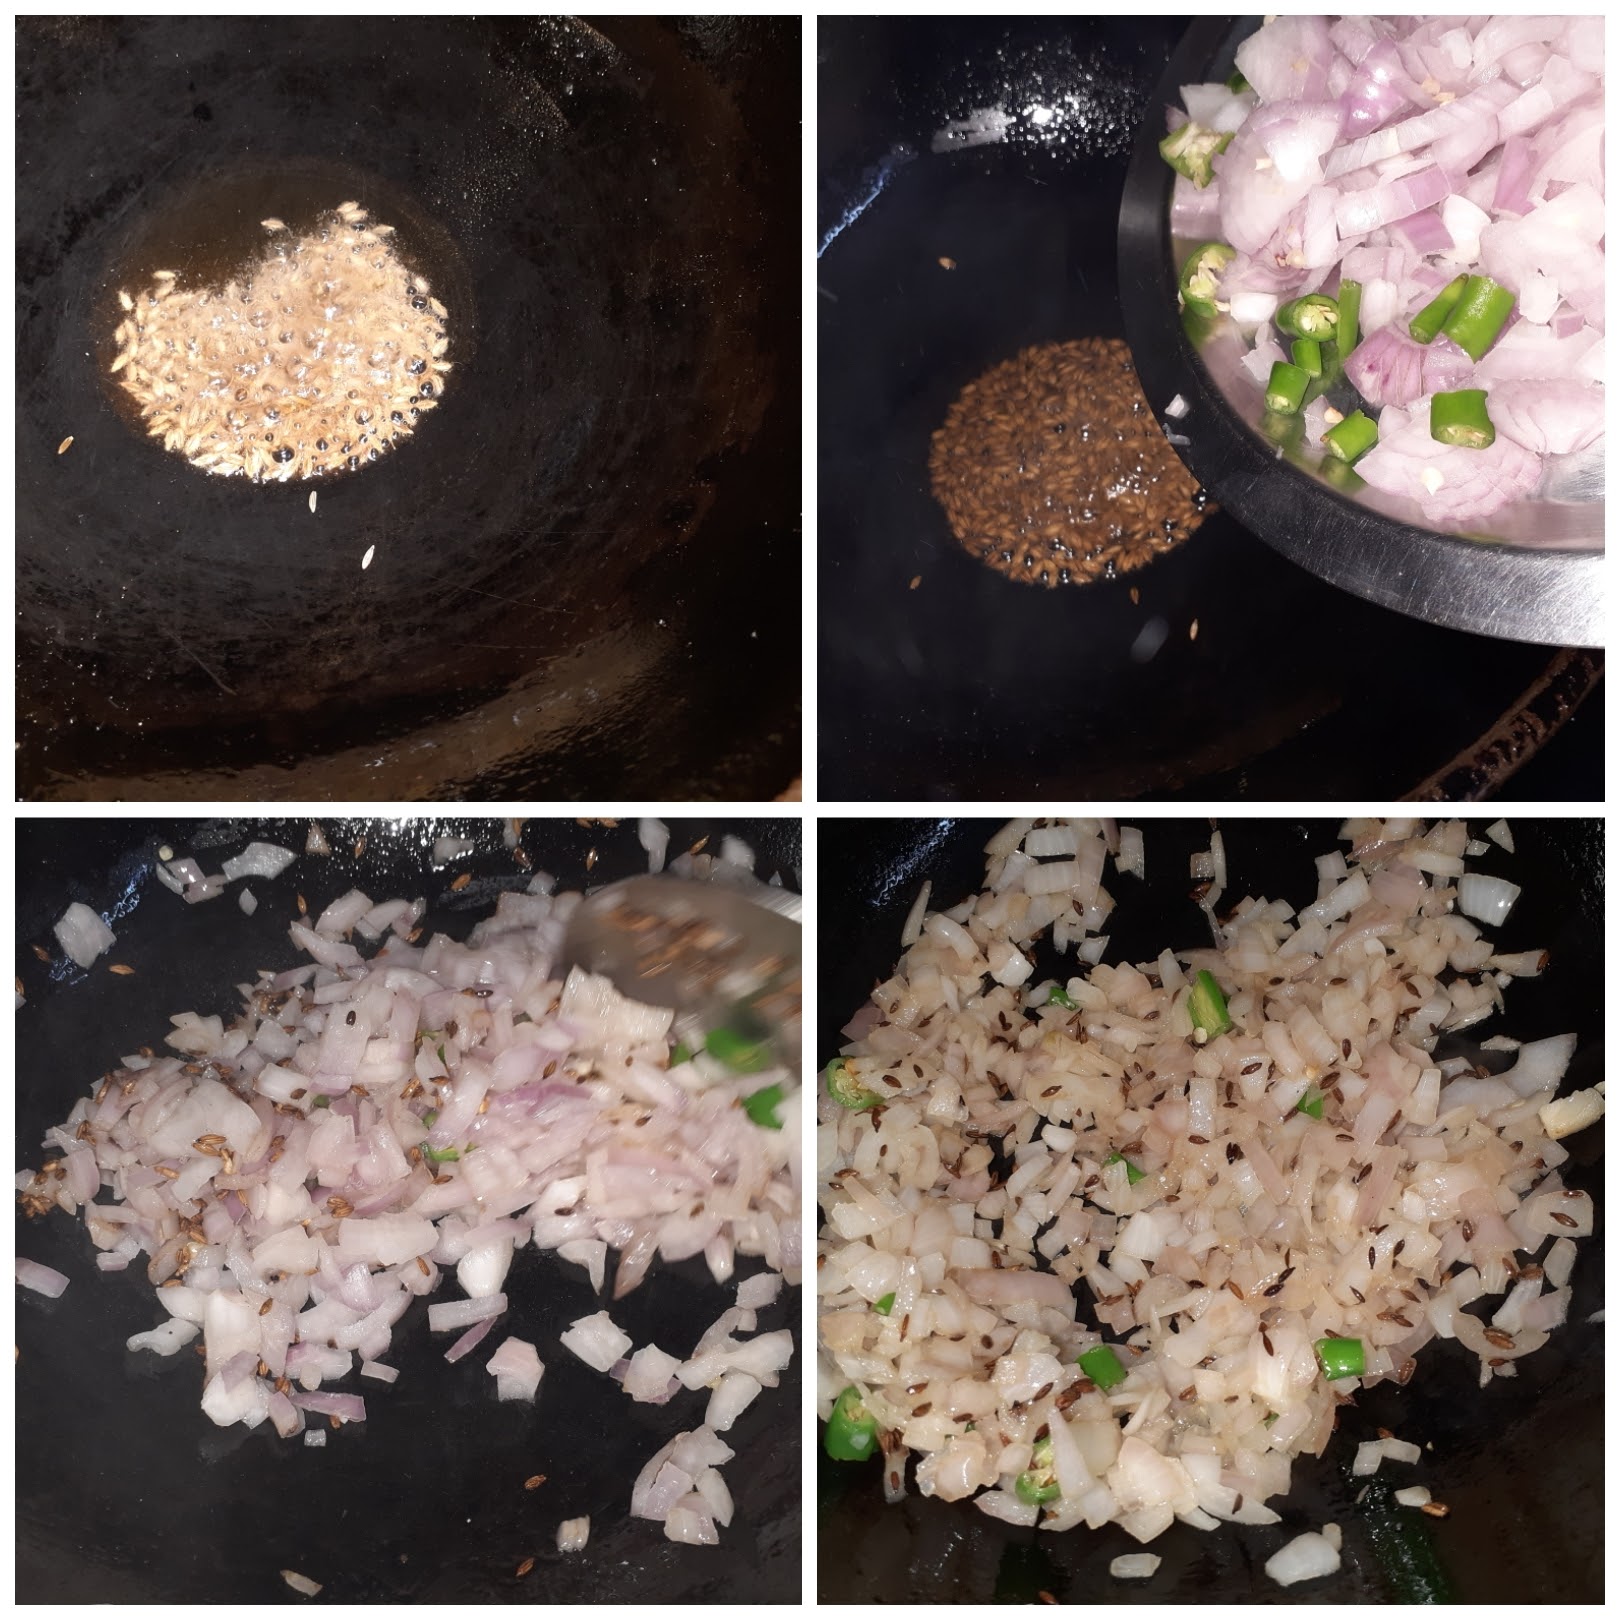

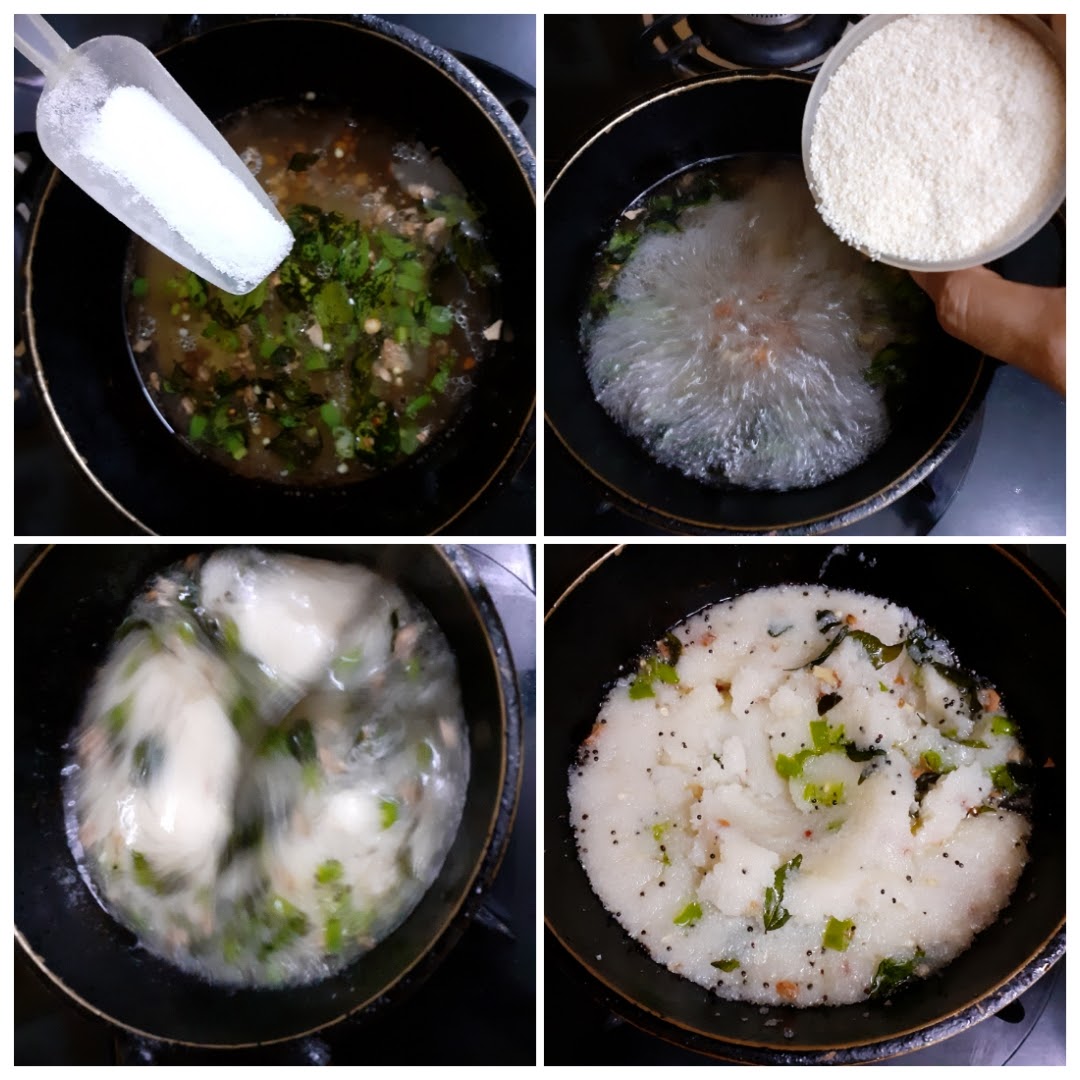
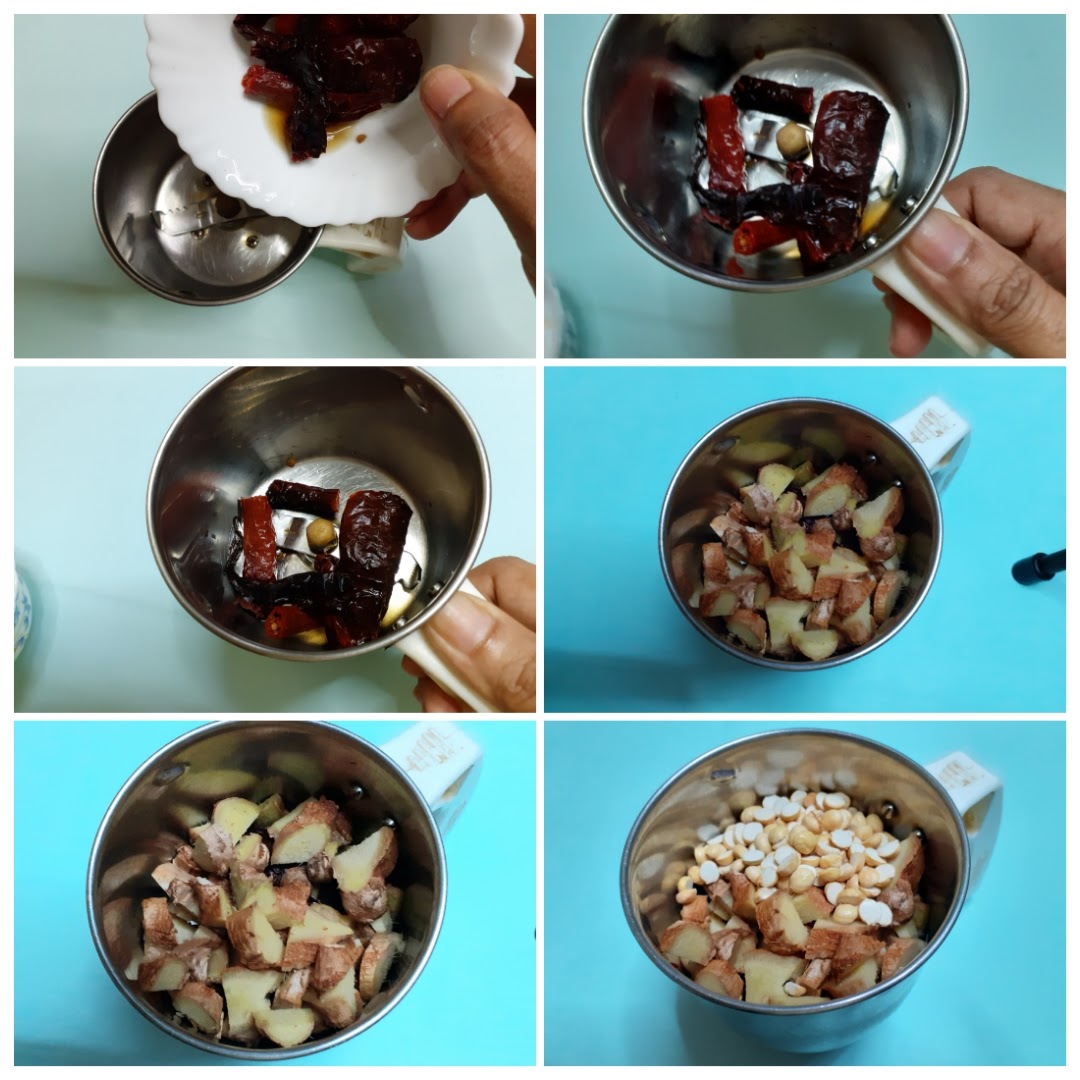
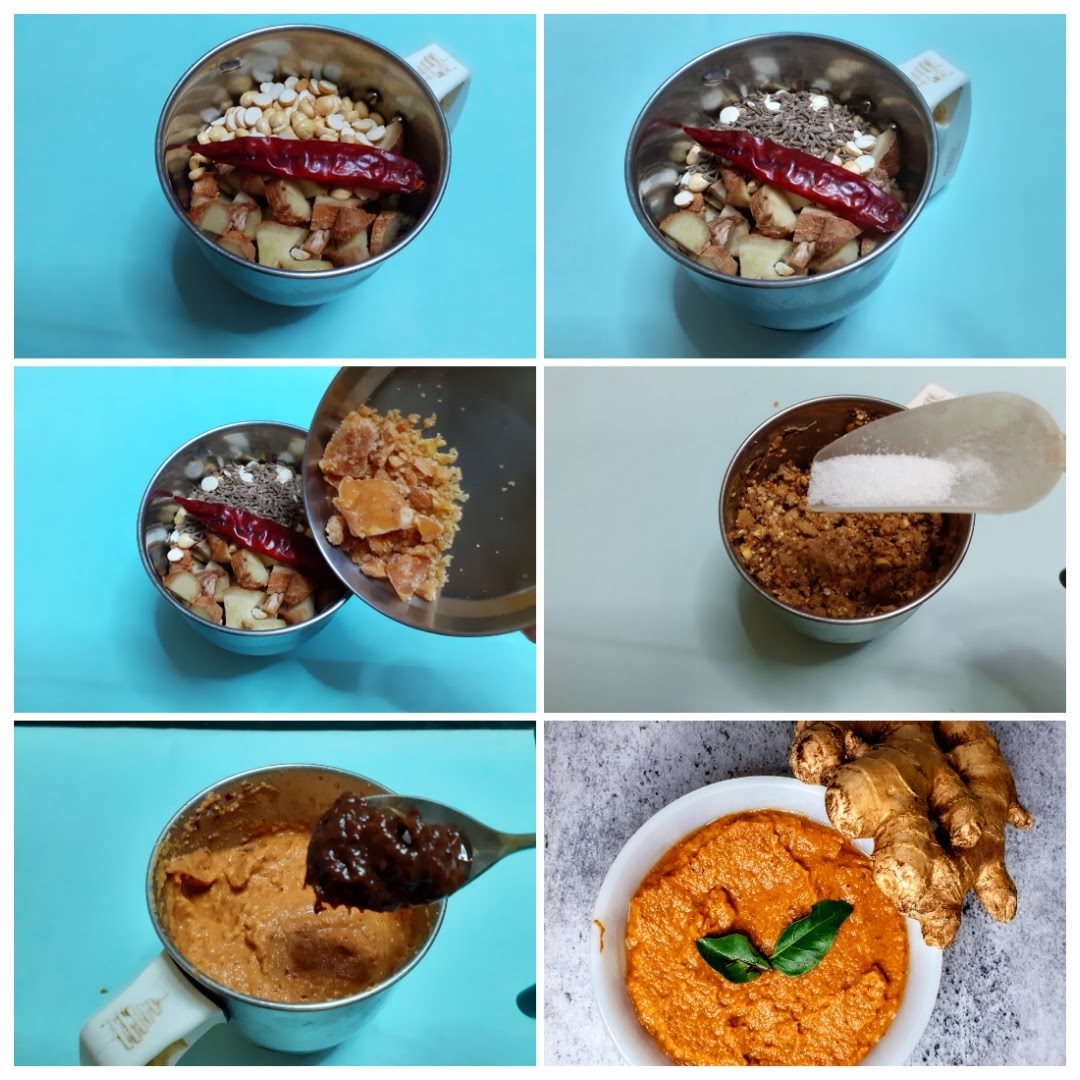
NOTES:
If you tried this recipe and liked it please comment below. I would love to hear from you. If you have a query about the recipe email us and ill respond as soon as I can.
Potato Cheddar Bake
This is a very simple recipe and a great finger food/ starter option at get-togethers. Most of the prep can be done ahead and the baking can be done half an hour before serving. This dish can also be a tea time snack and the kids will love it. To make it healthy I have used roasted oats to coat the potatoes instead of cornflour. The baking can be easily replaced by the grilling method( on a girdle /tava).

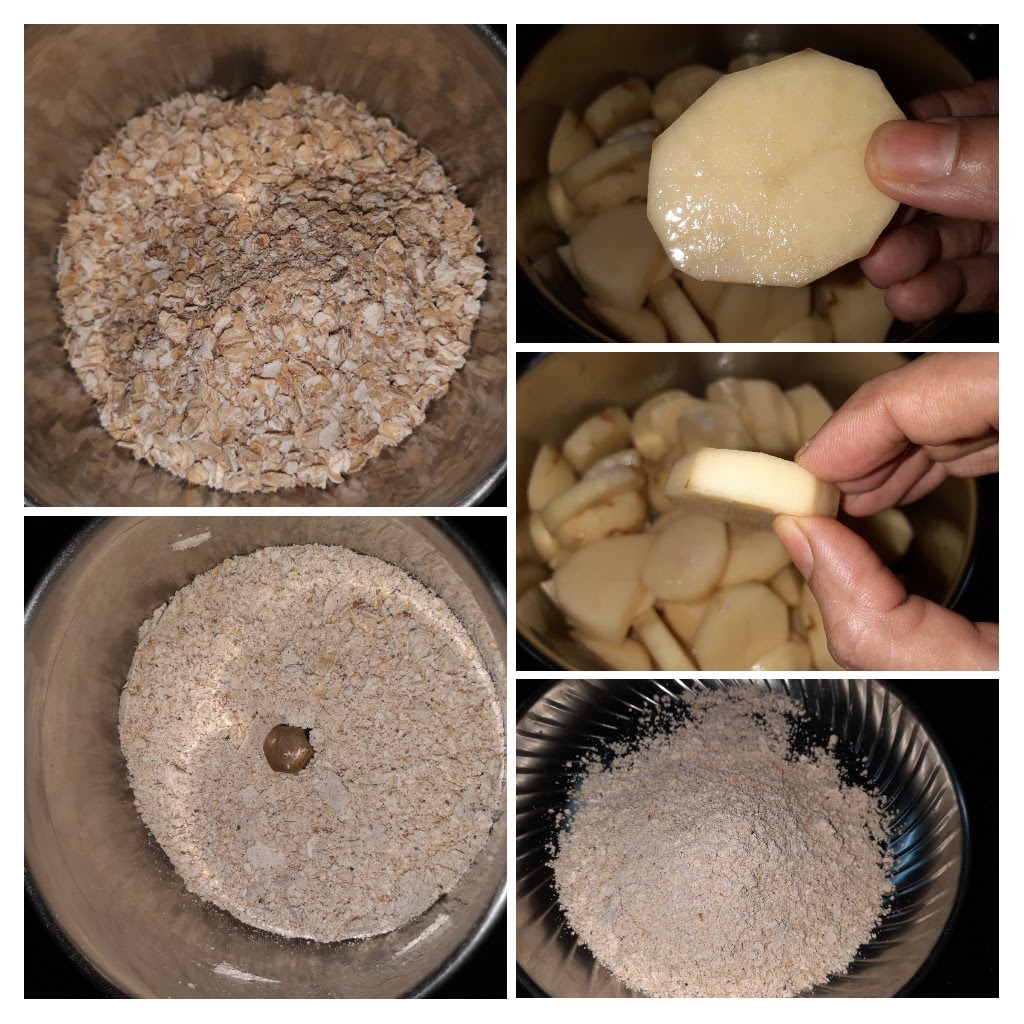

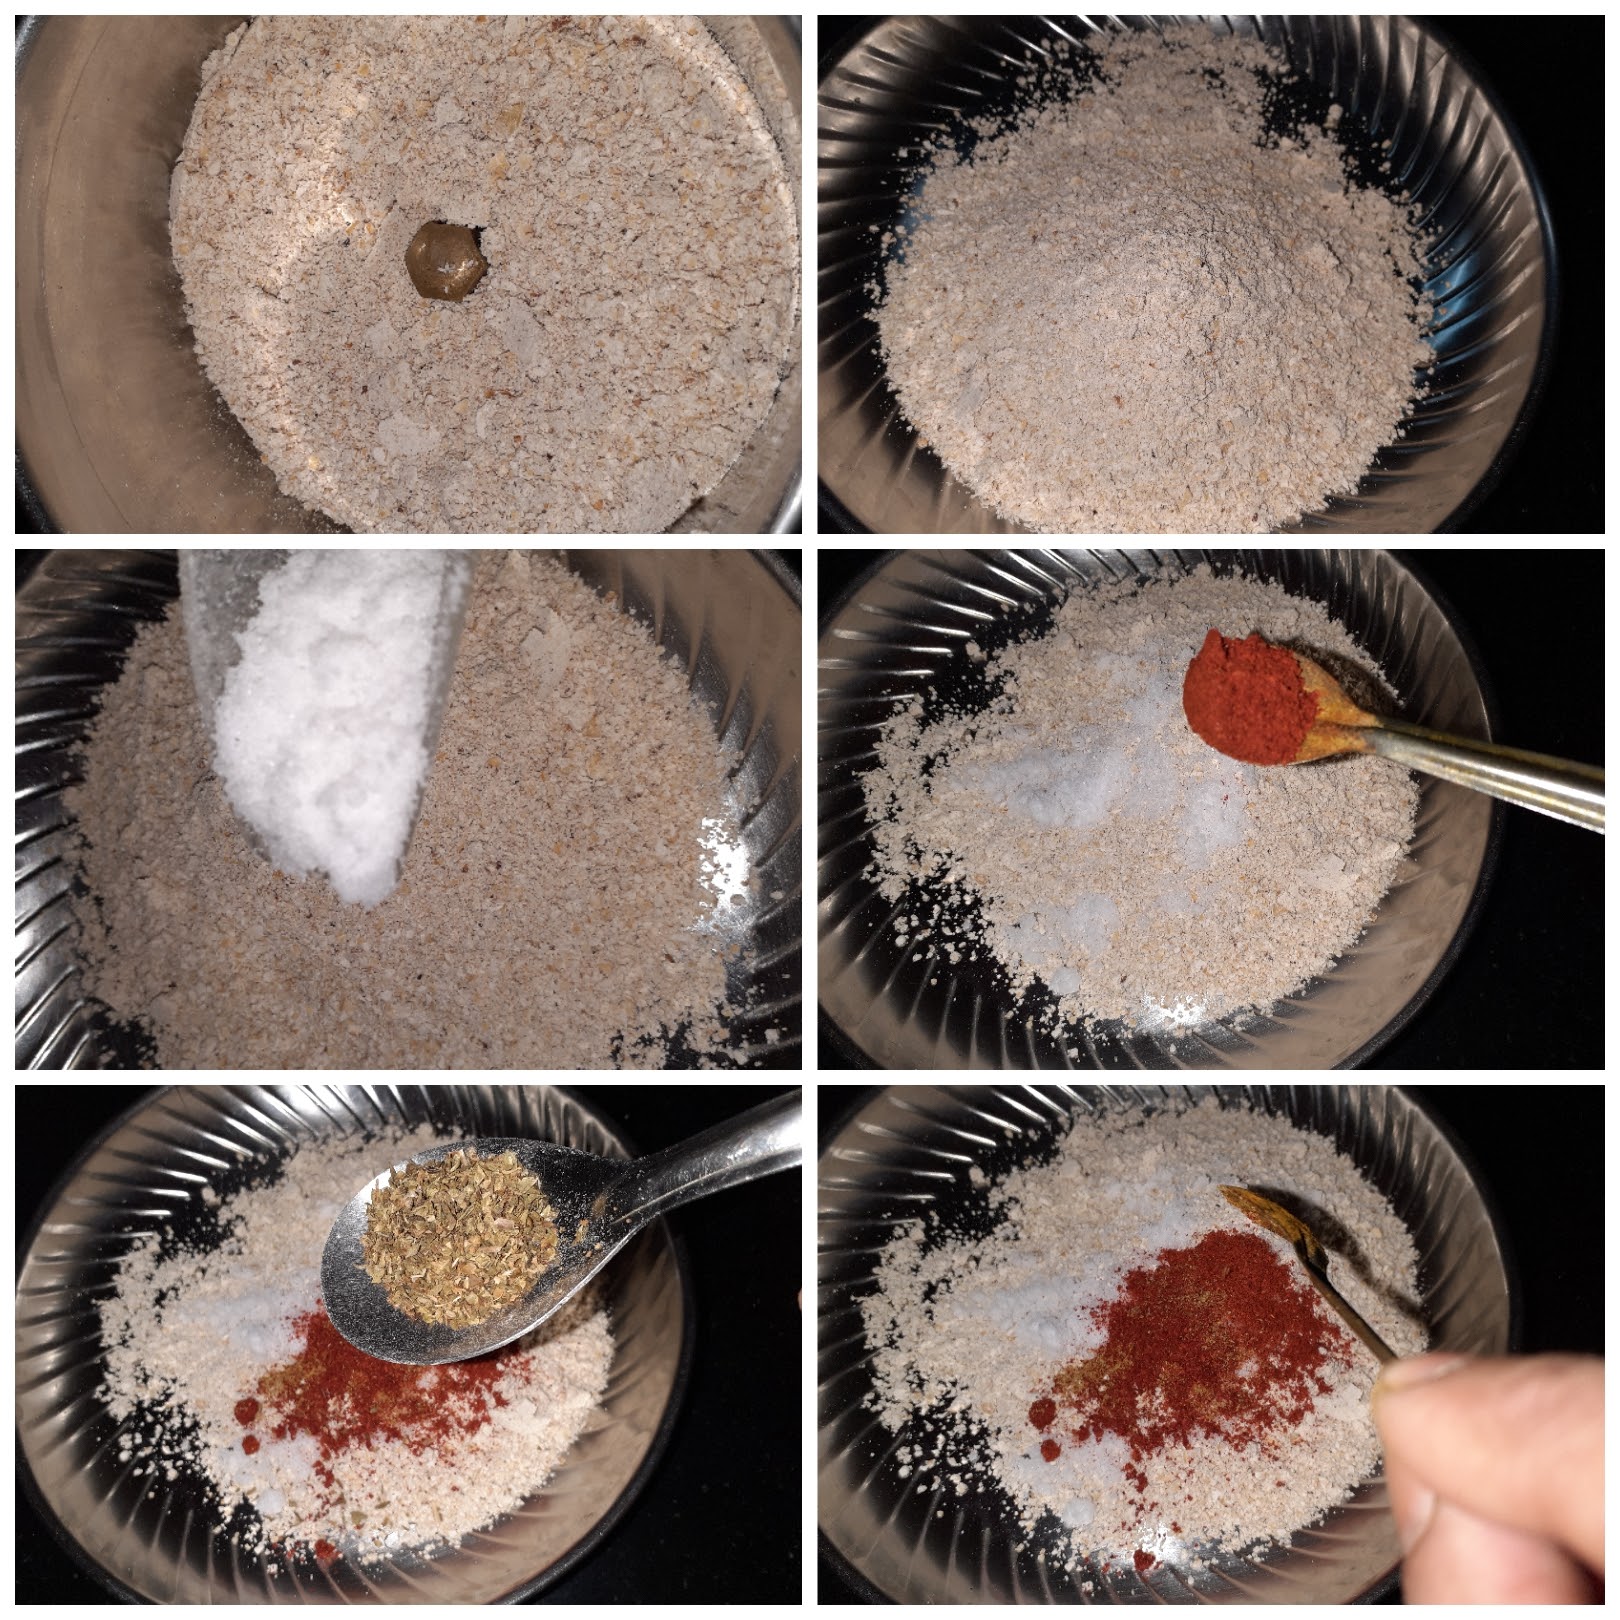
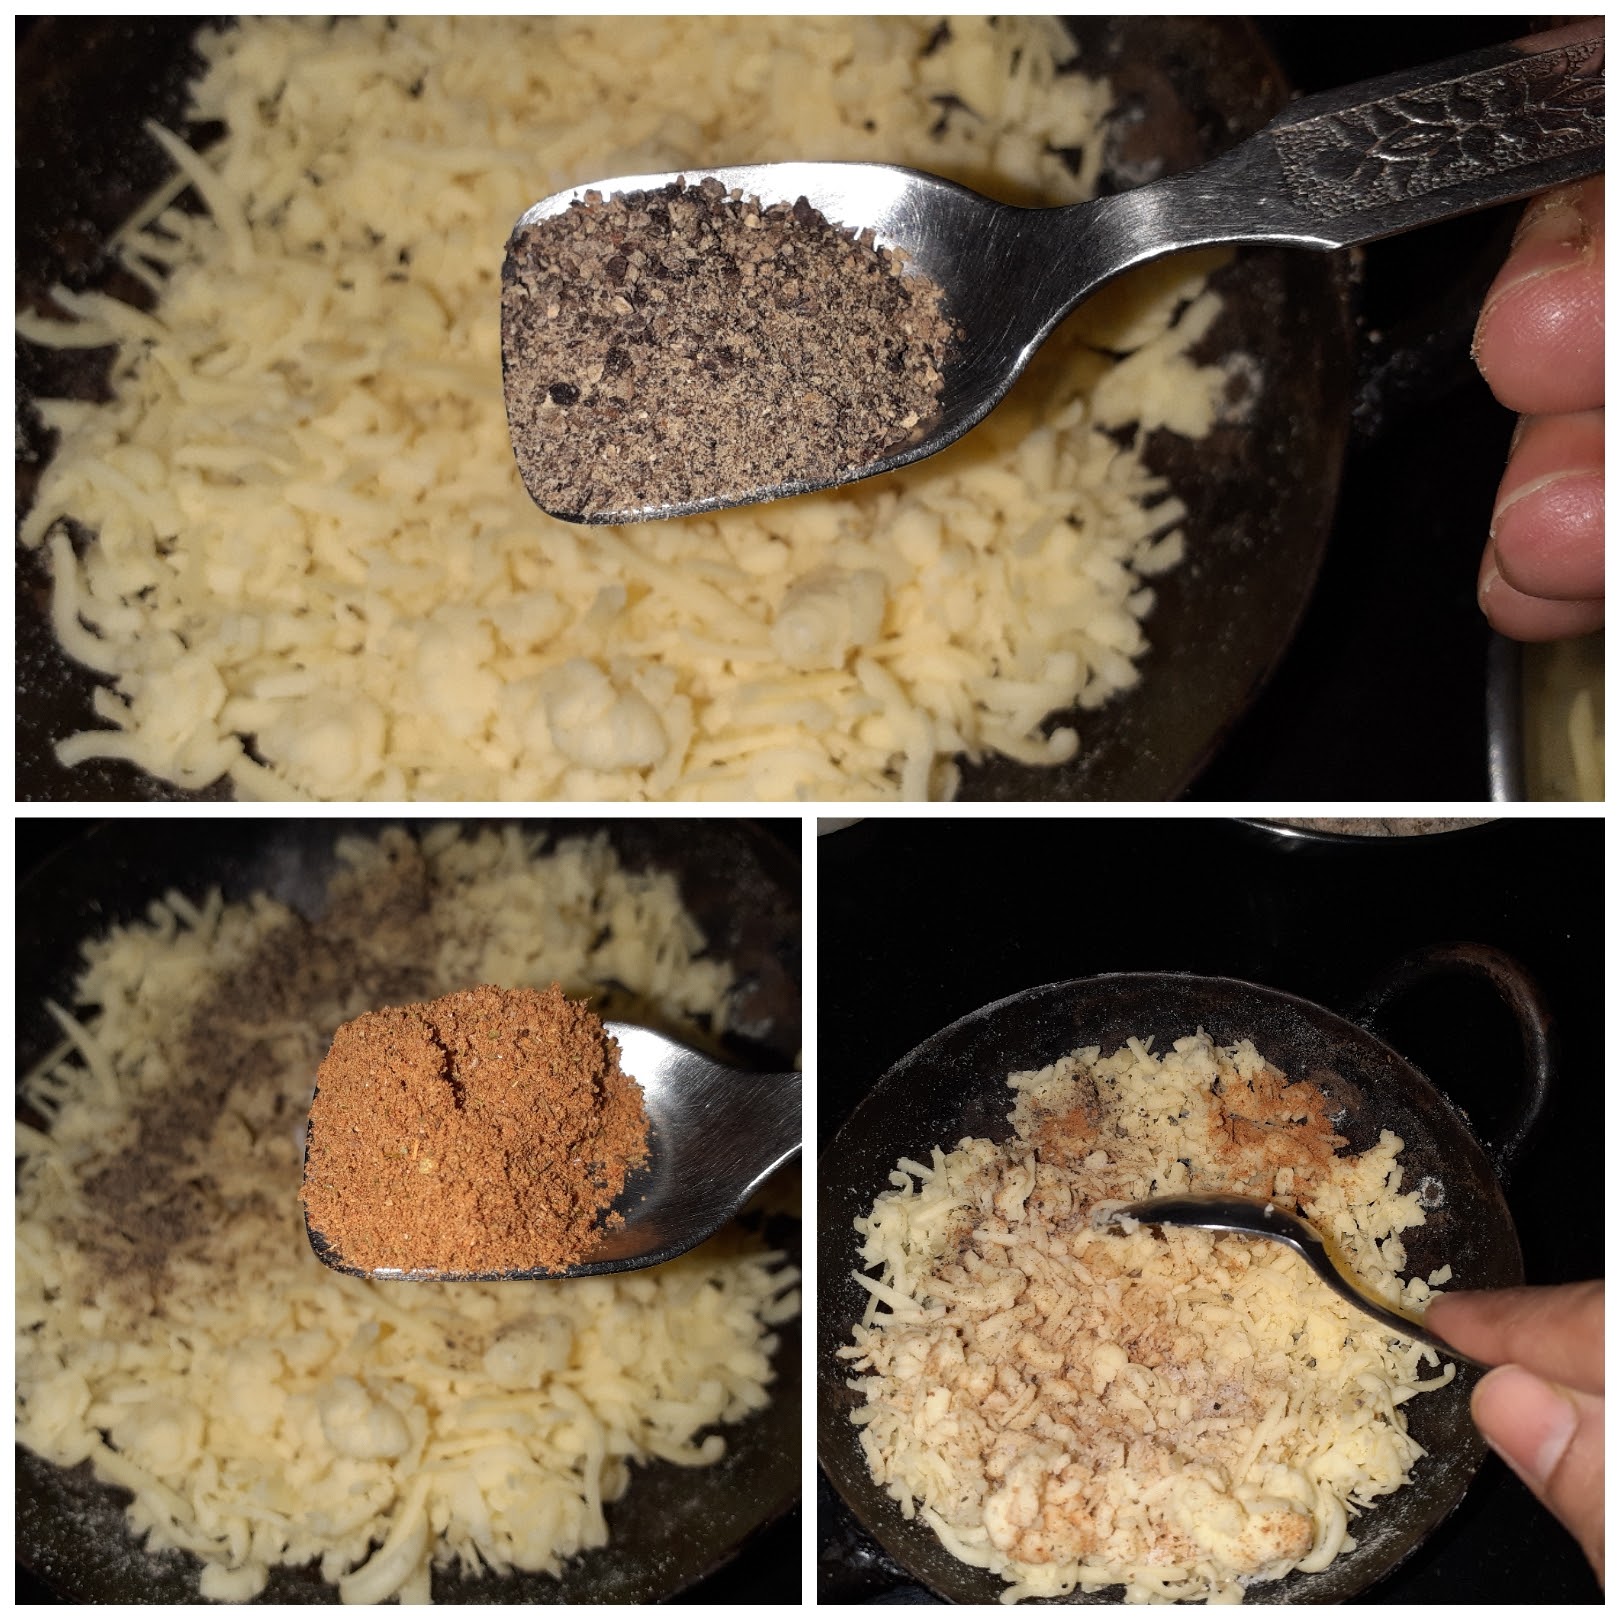
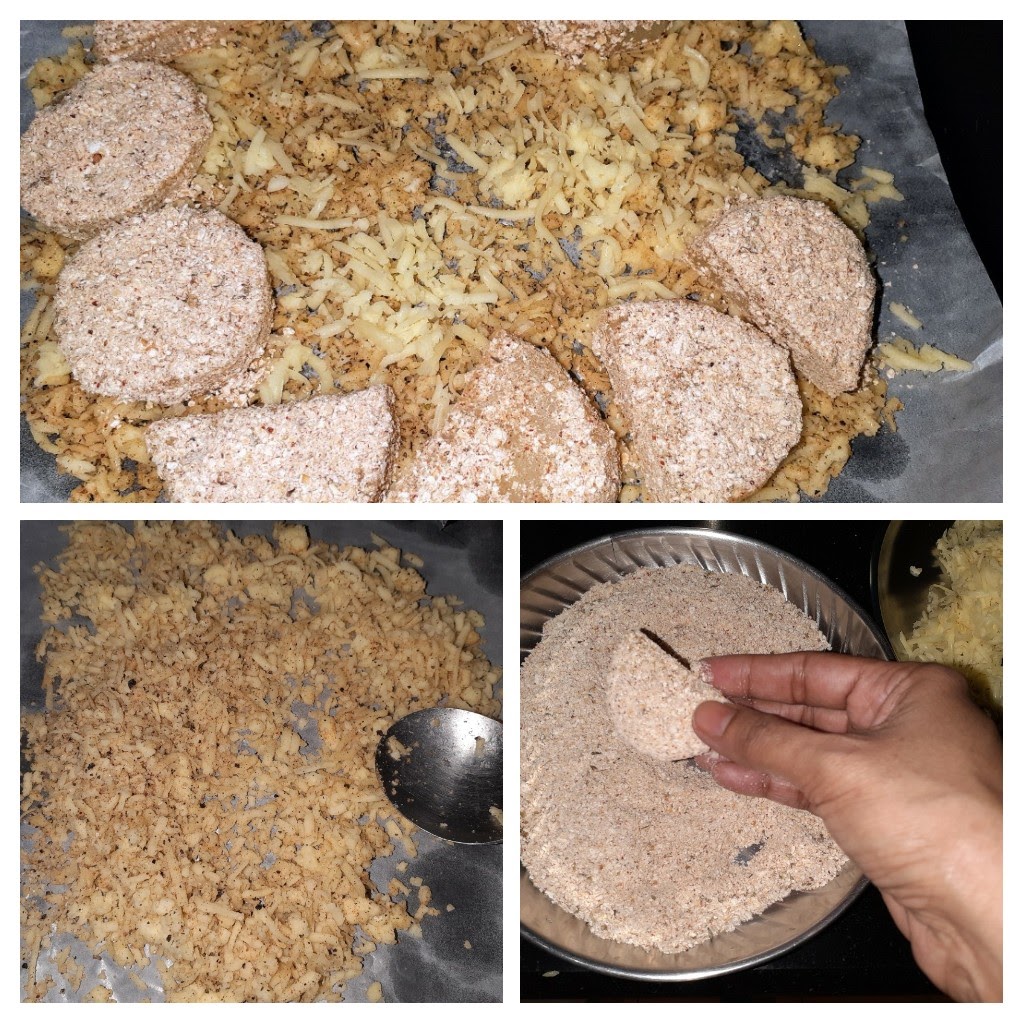
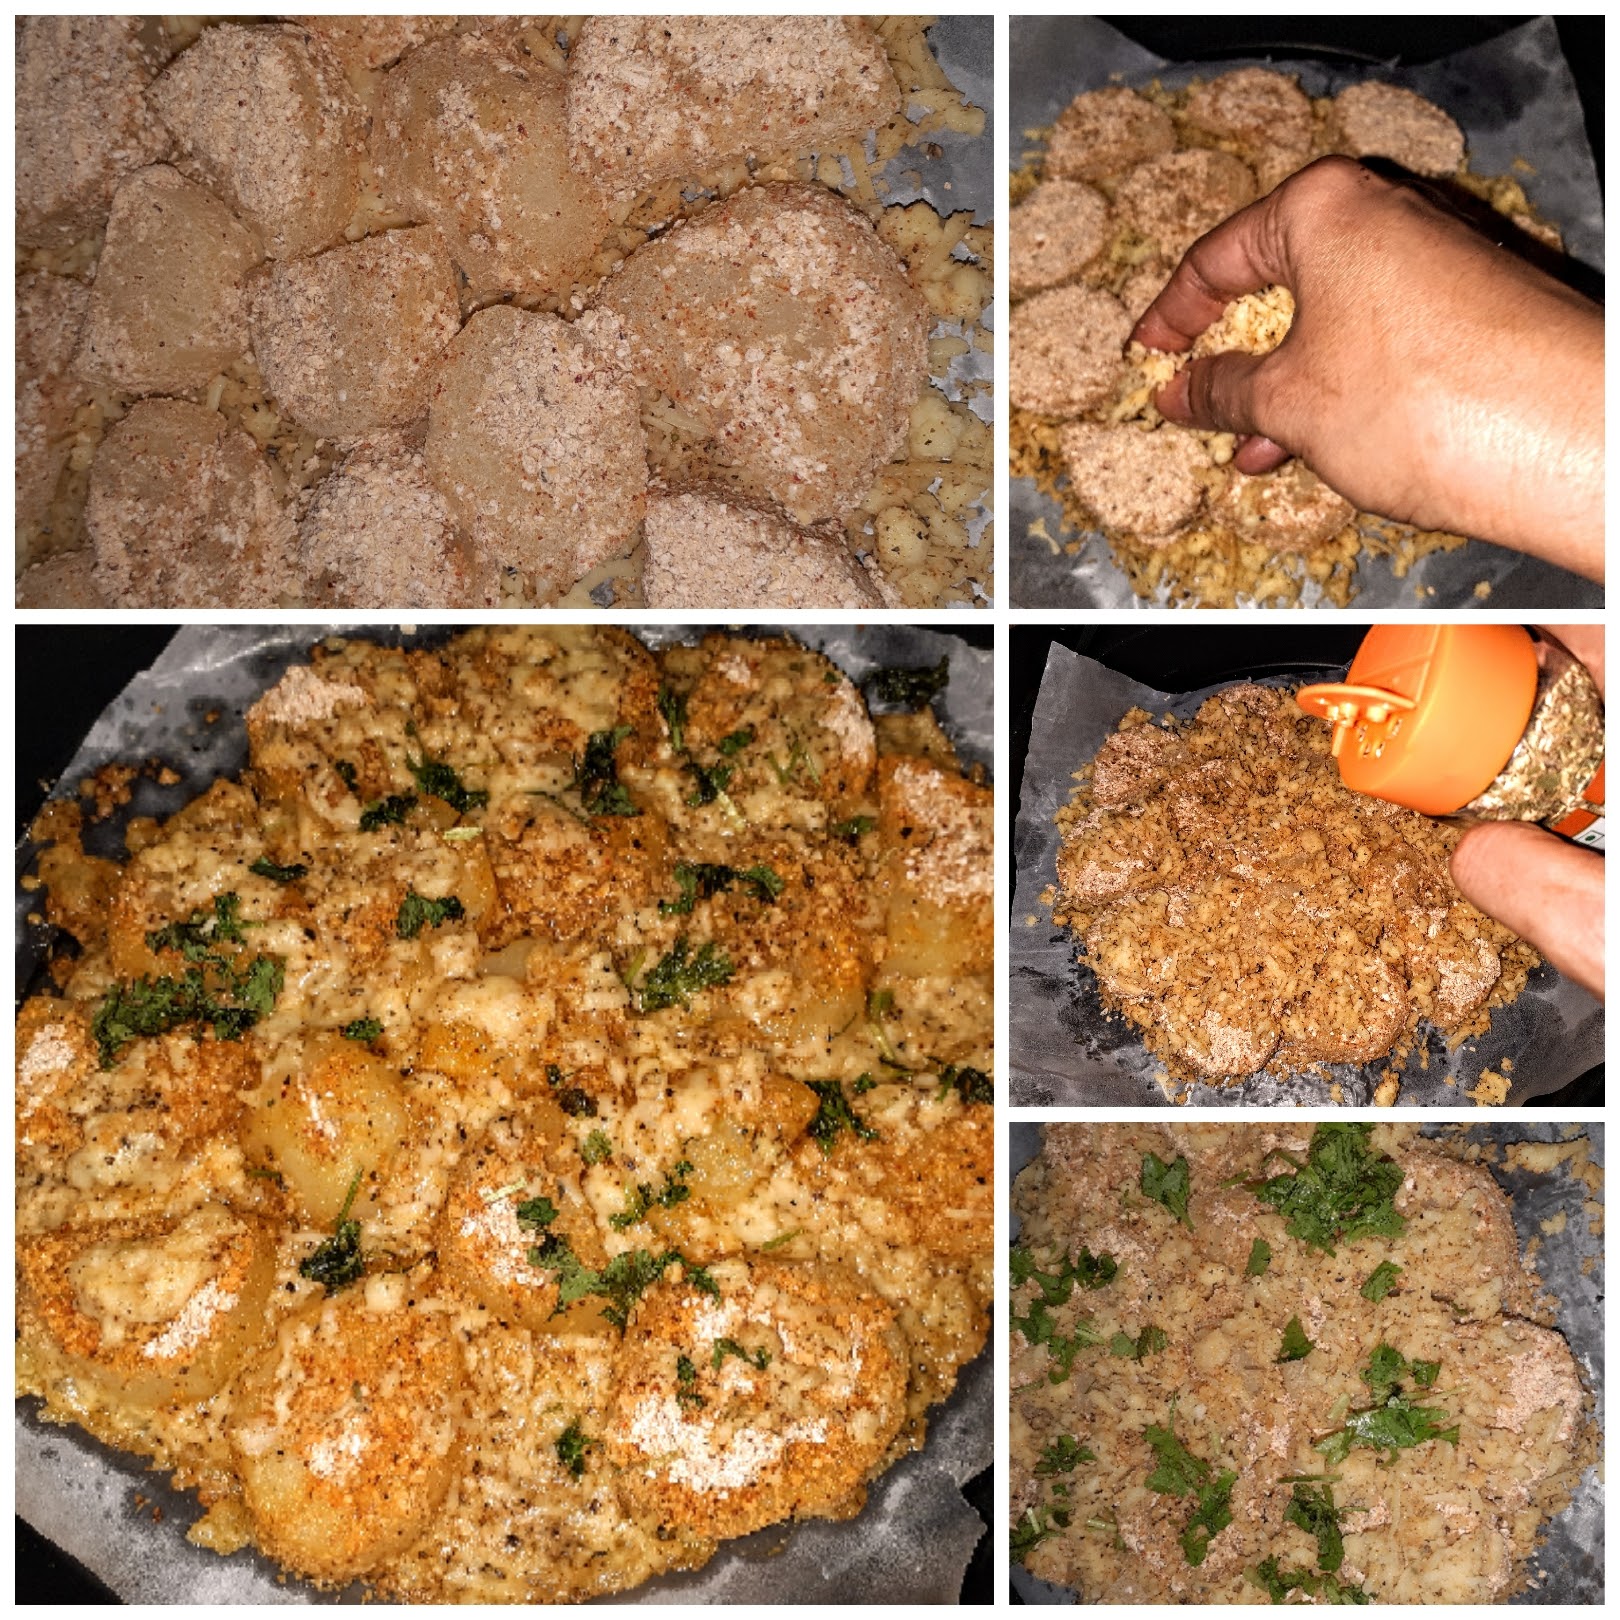
If you tried this recipe and liked it please comment below. I would love to hear from you. If you have a query about the recipe email us and ill respond as soon as I can.
Drumstick Rasam/Murungakkai Rasam
Rasam is a popular South Indian dish prepared with tamarind, tomatoes, and Rasam powder. There are many variations of this dish, and each South Indian household has its own recipe for the proportions of the ingredients of the rasam powder. Therefore though Rasam is almost a regular feature in all South Indian households its taste is unique to each. No two Rasam recipes taste the same. Rasam is also a sought after comfort food in South Indian households when one has a Cold(Common Cold) or is a little under the weather because it is made of simple ingredients that are easily digestible and pepper that helps in combating the cold.
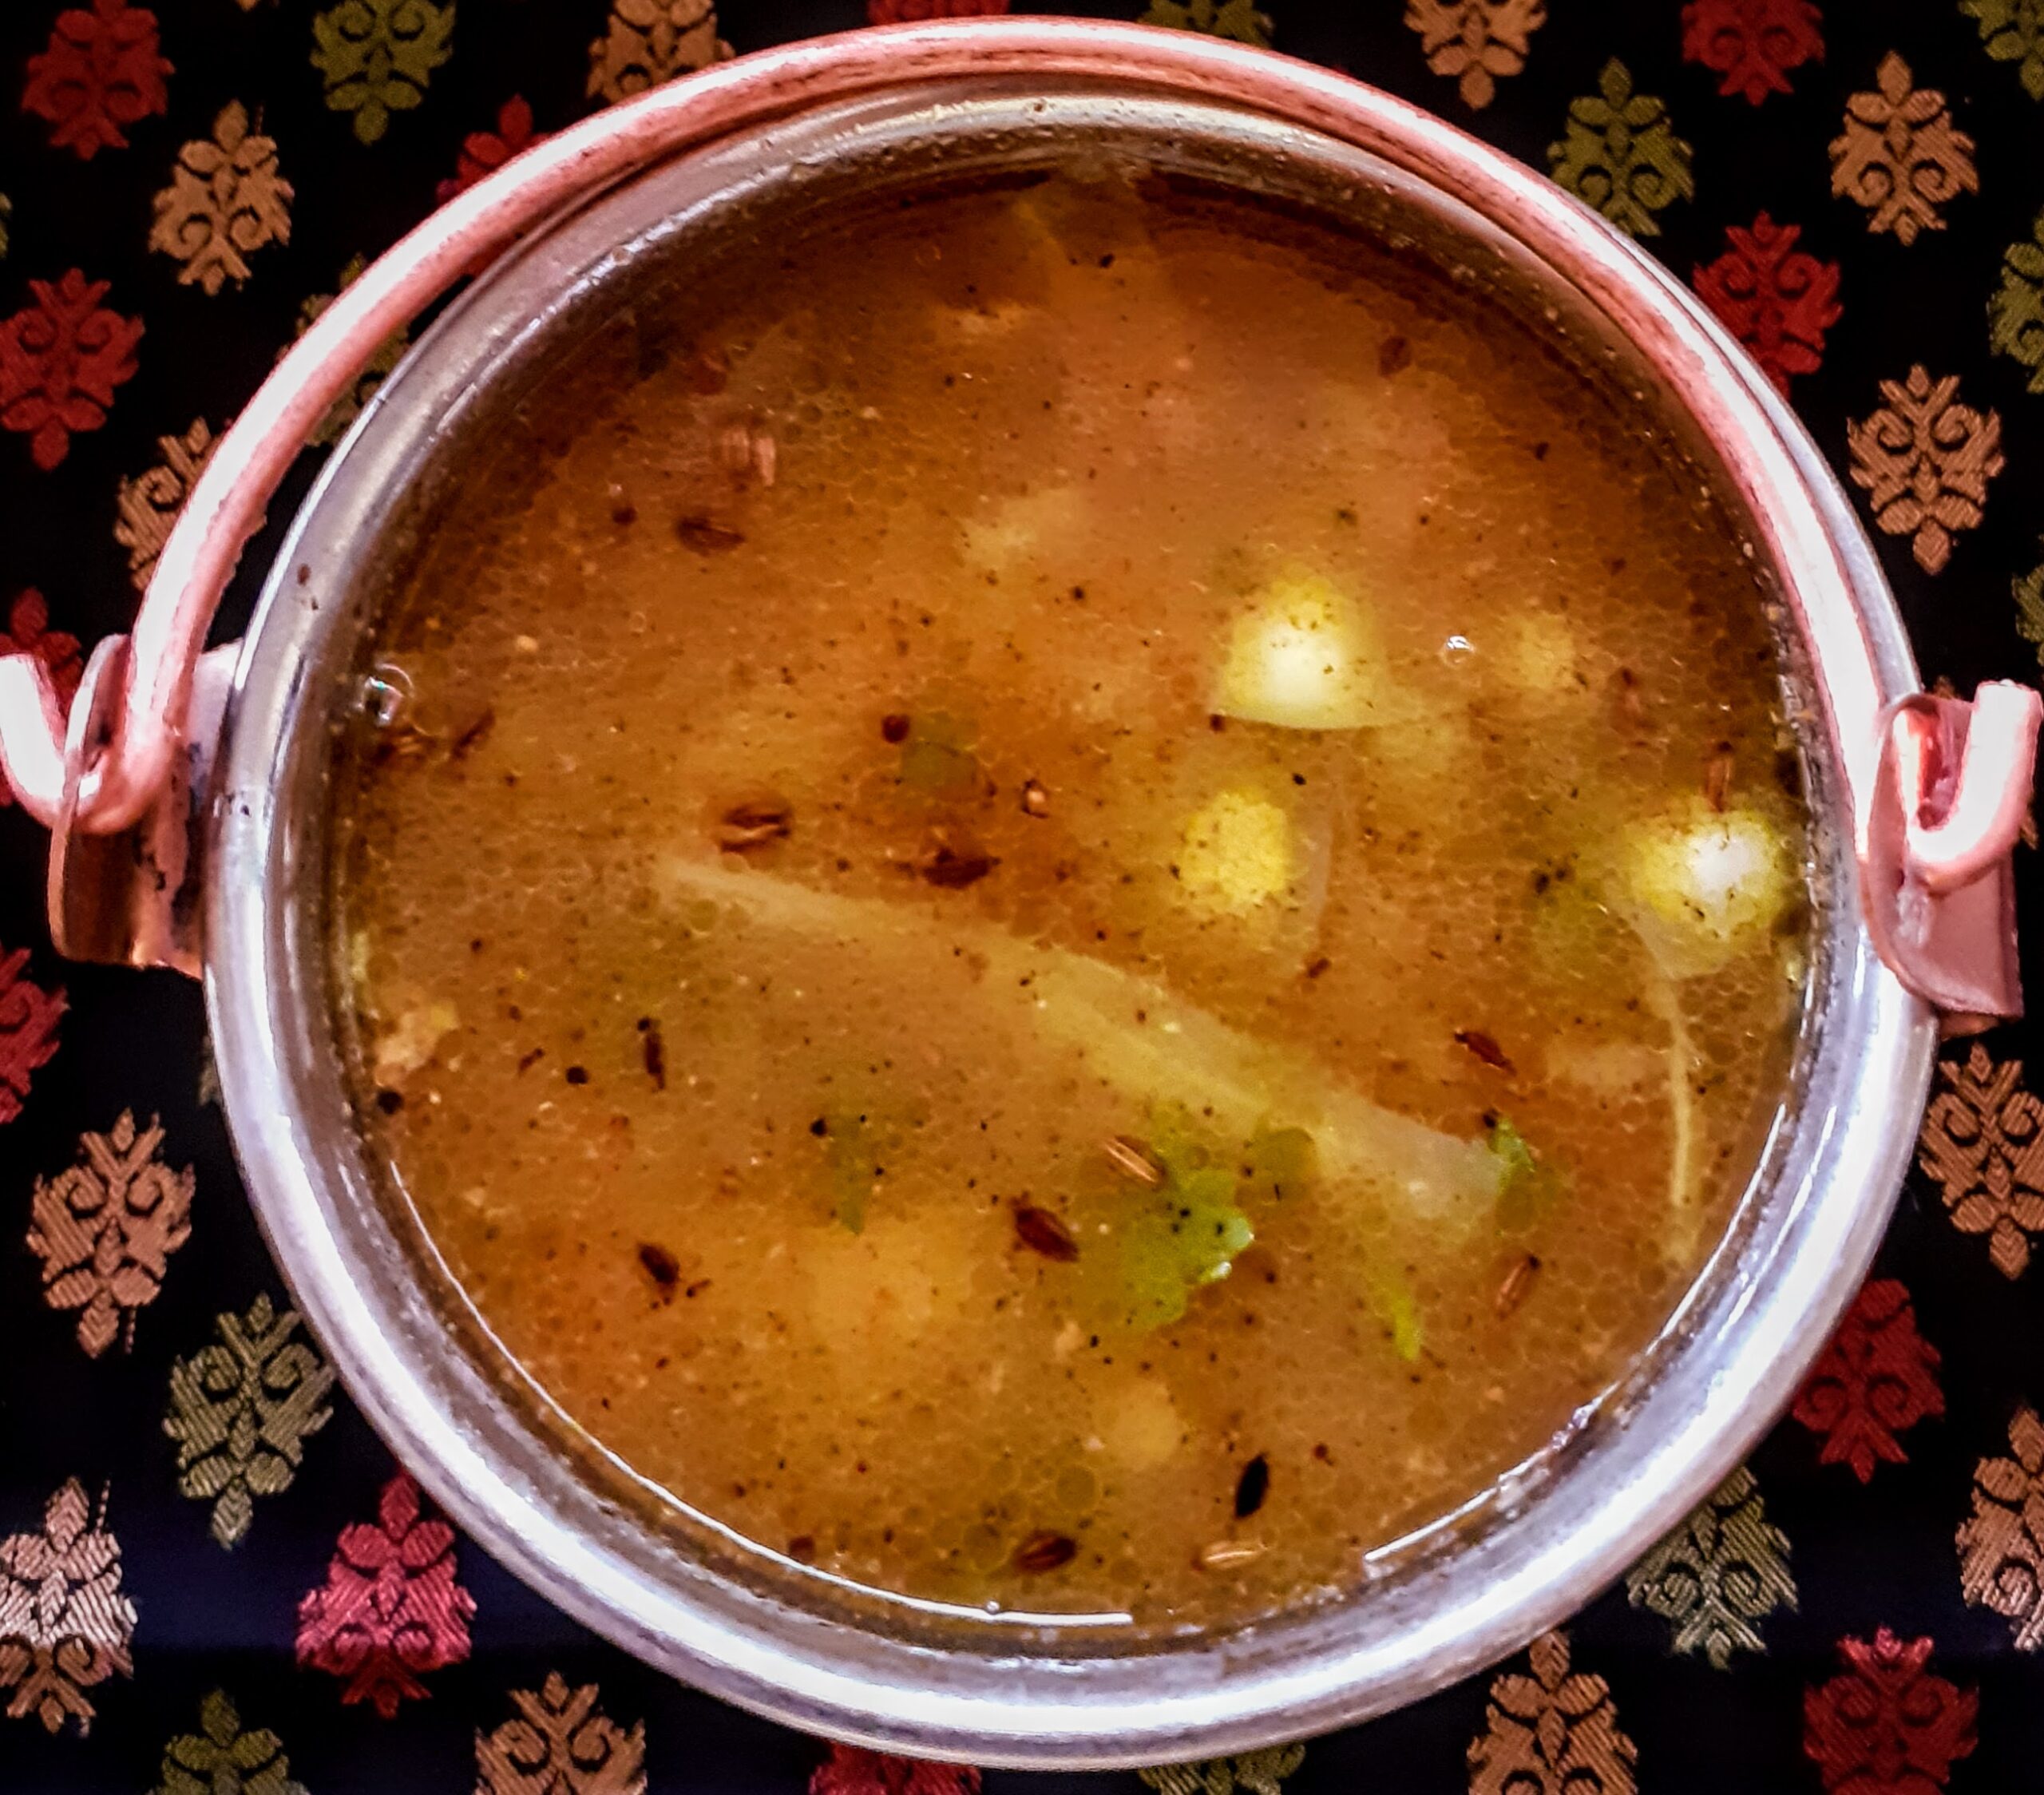
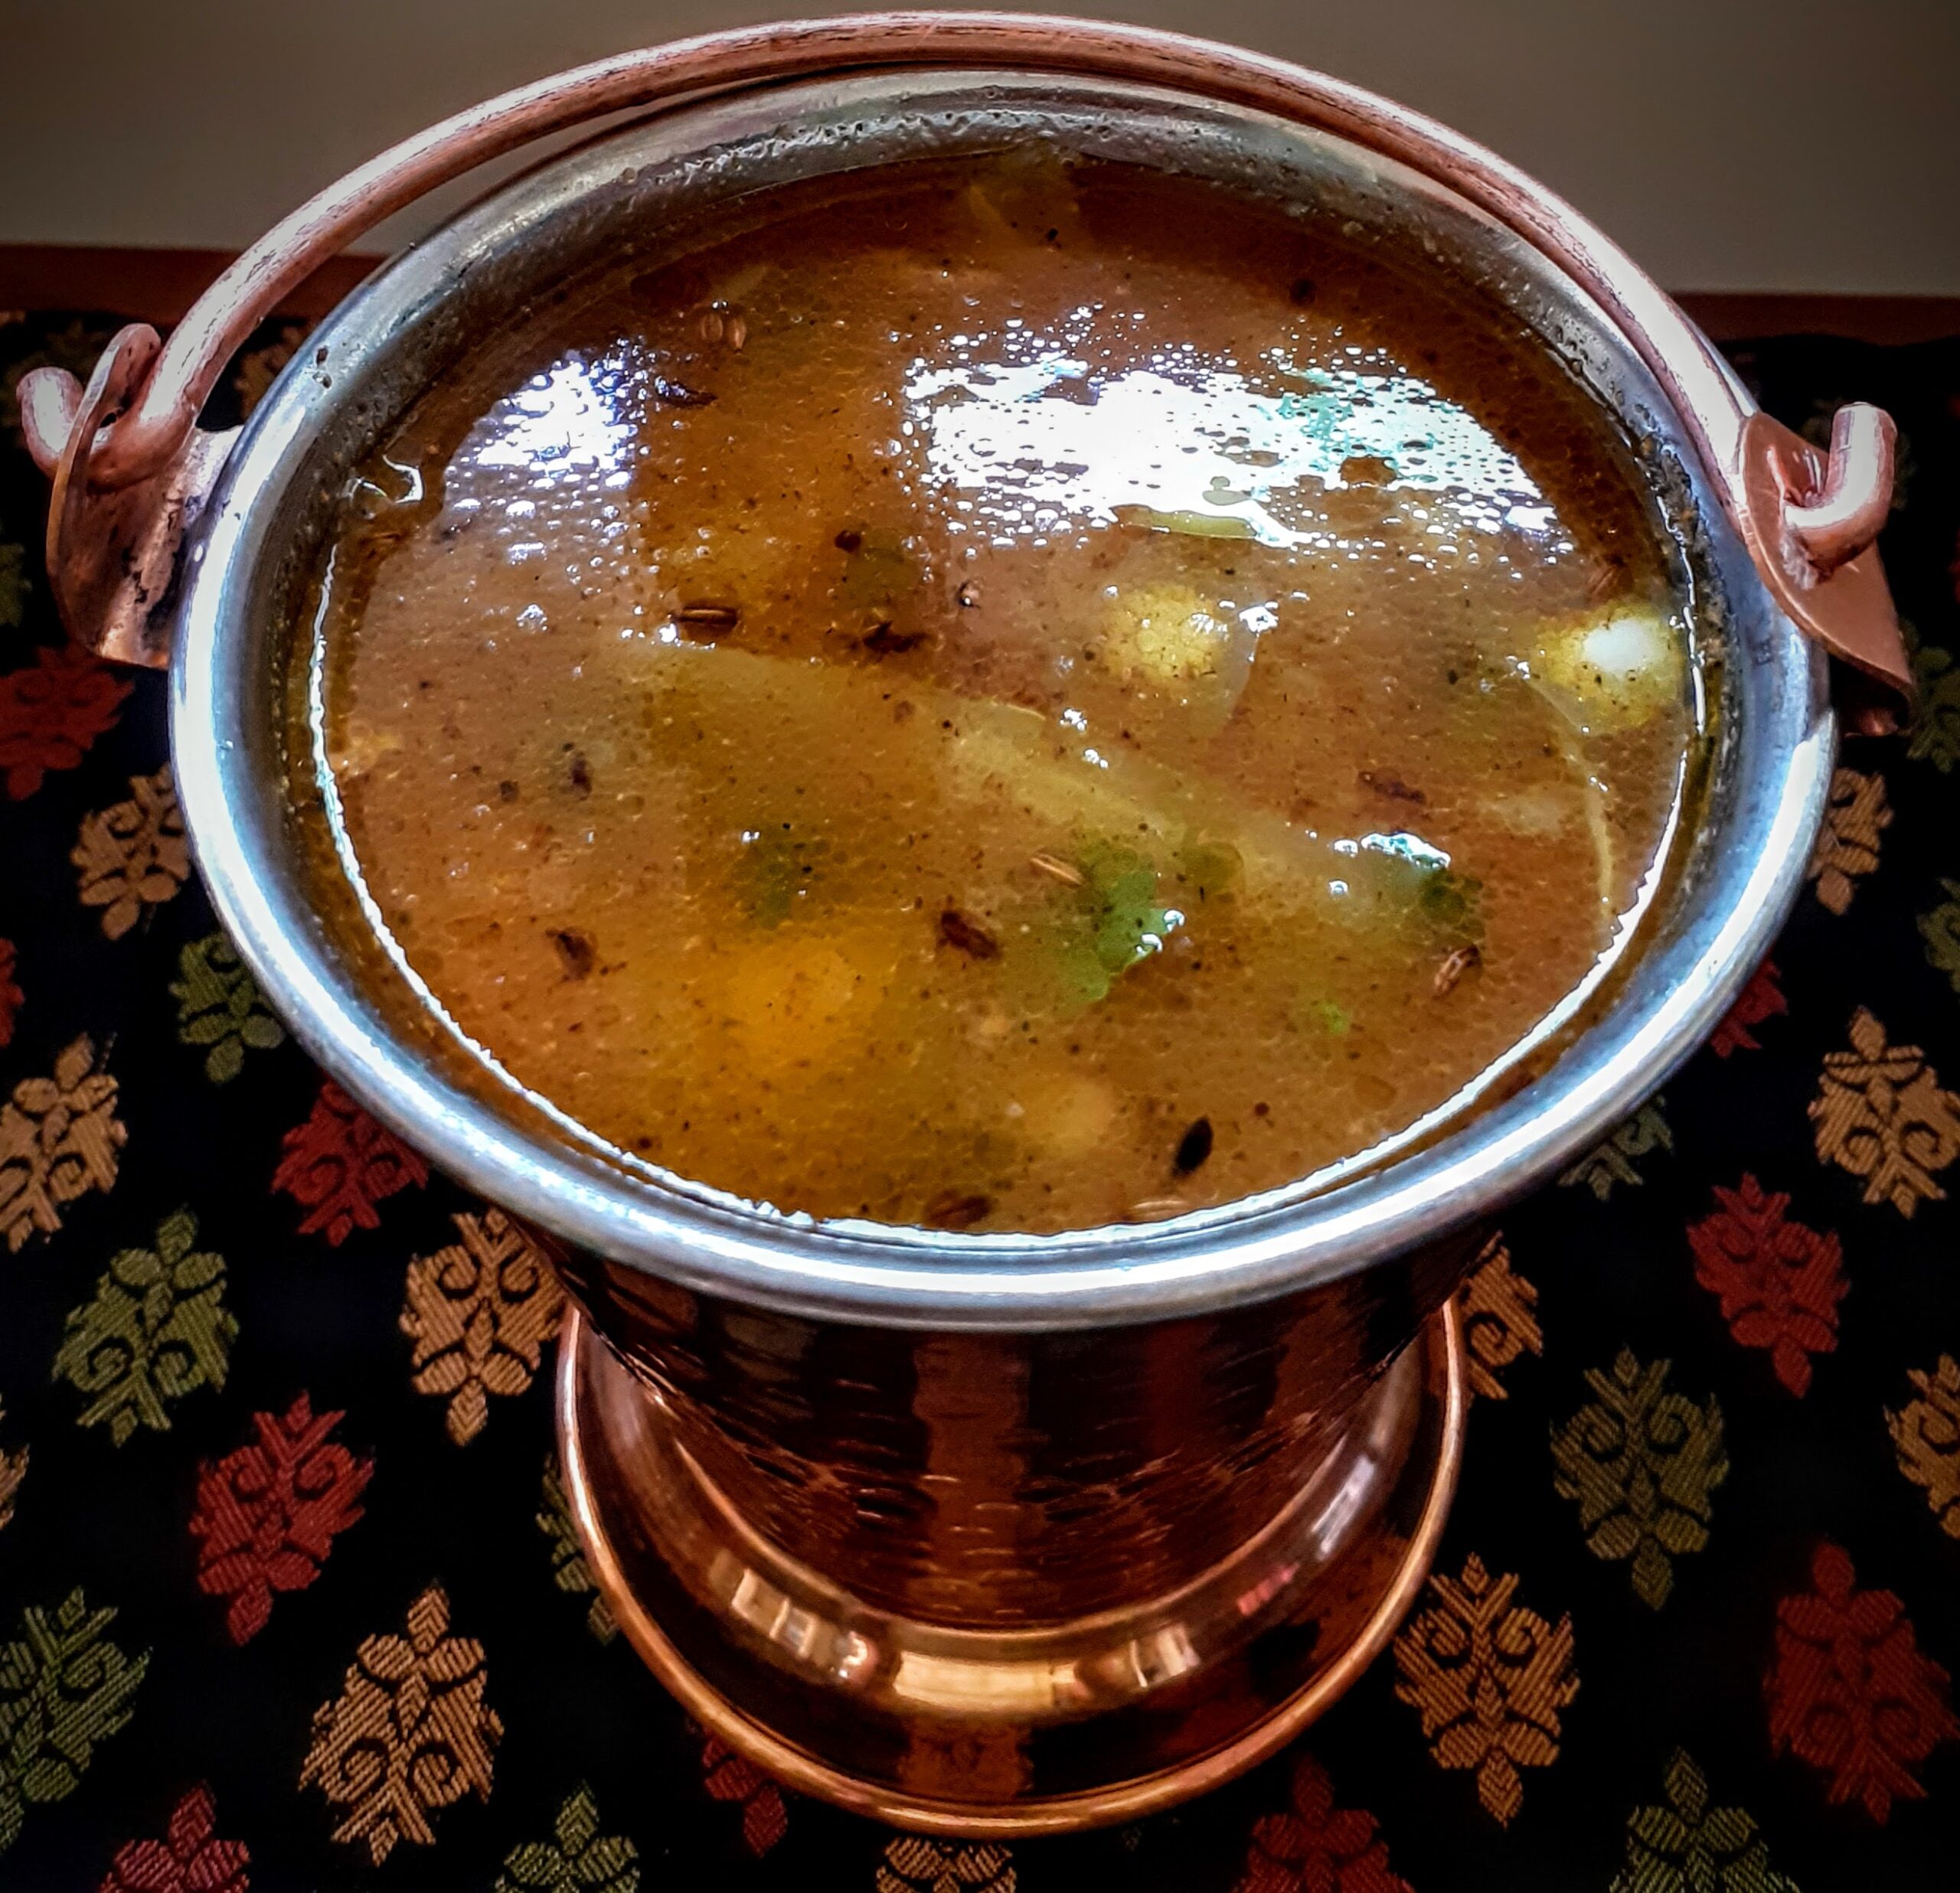
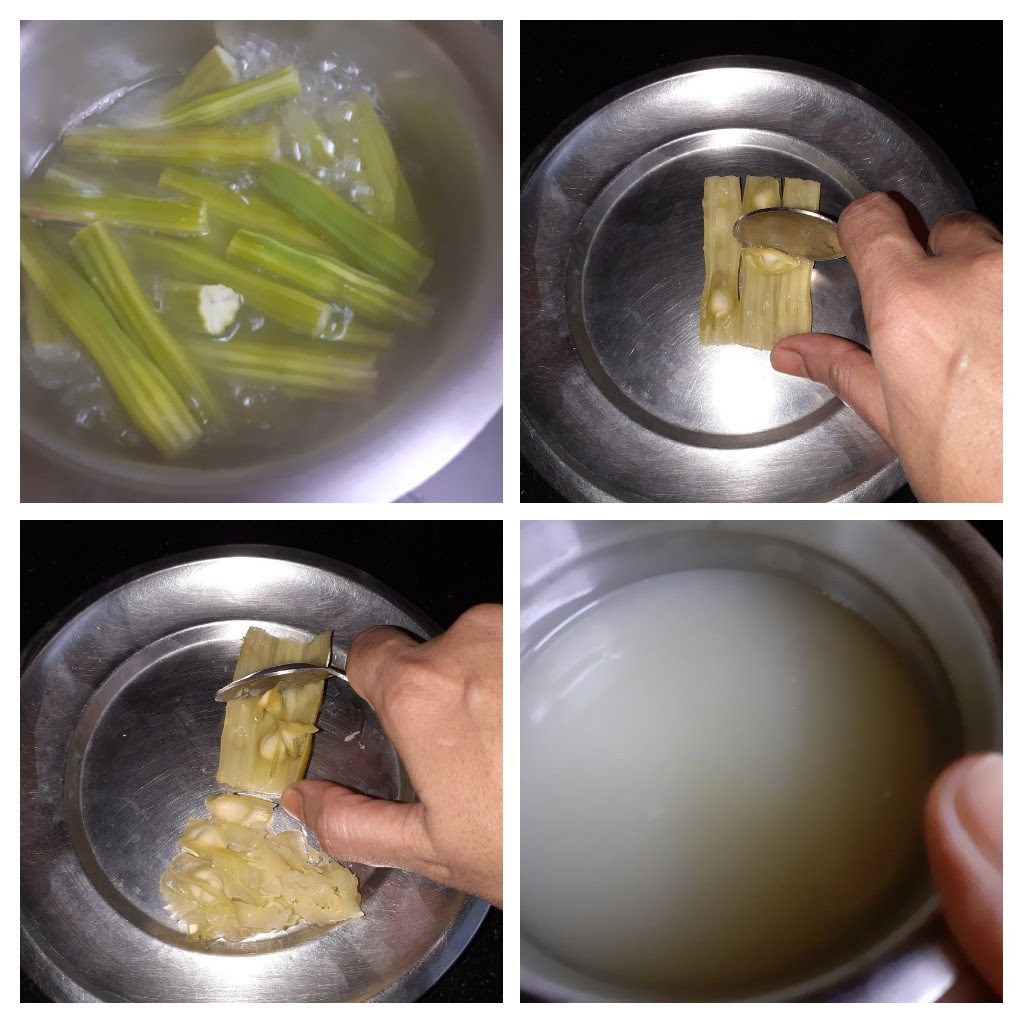
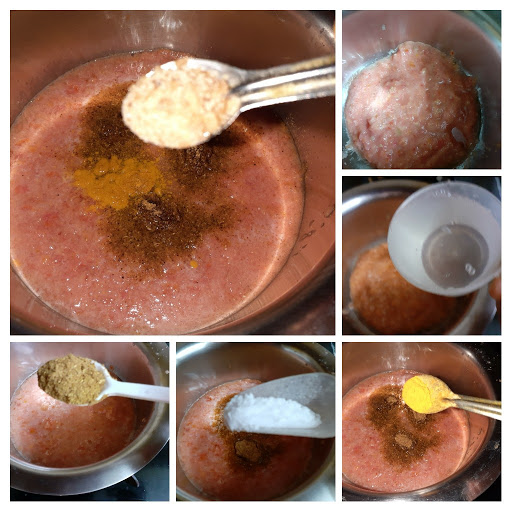
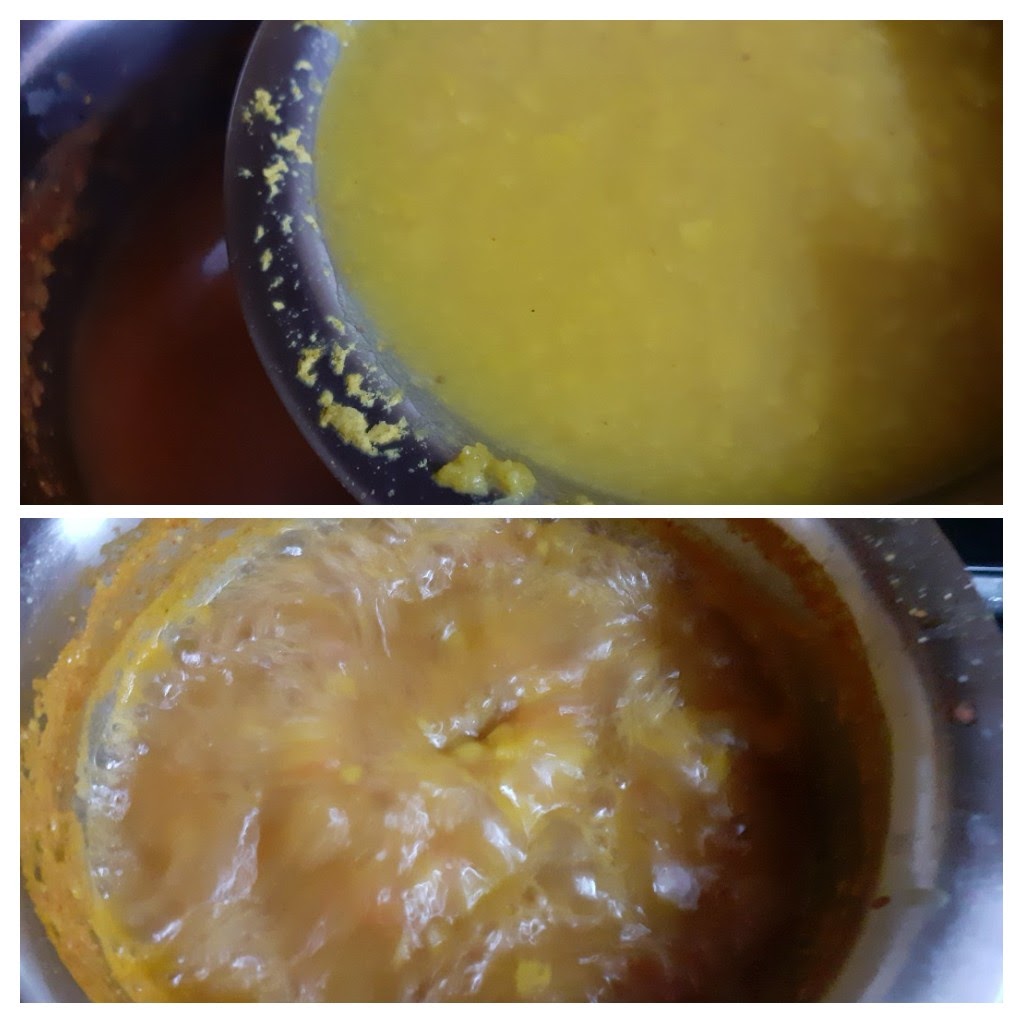
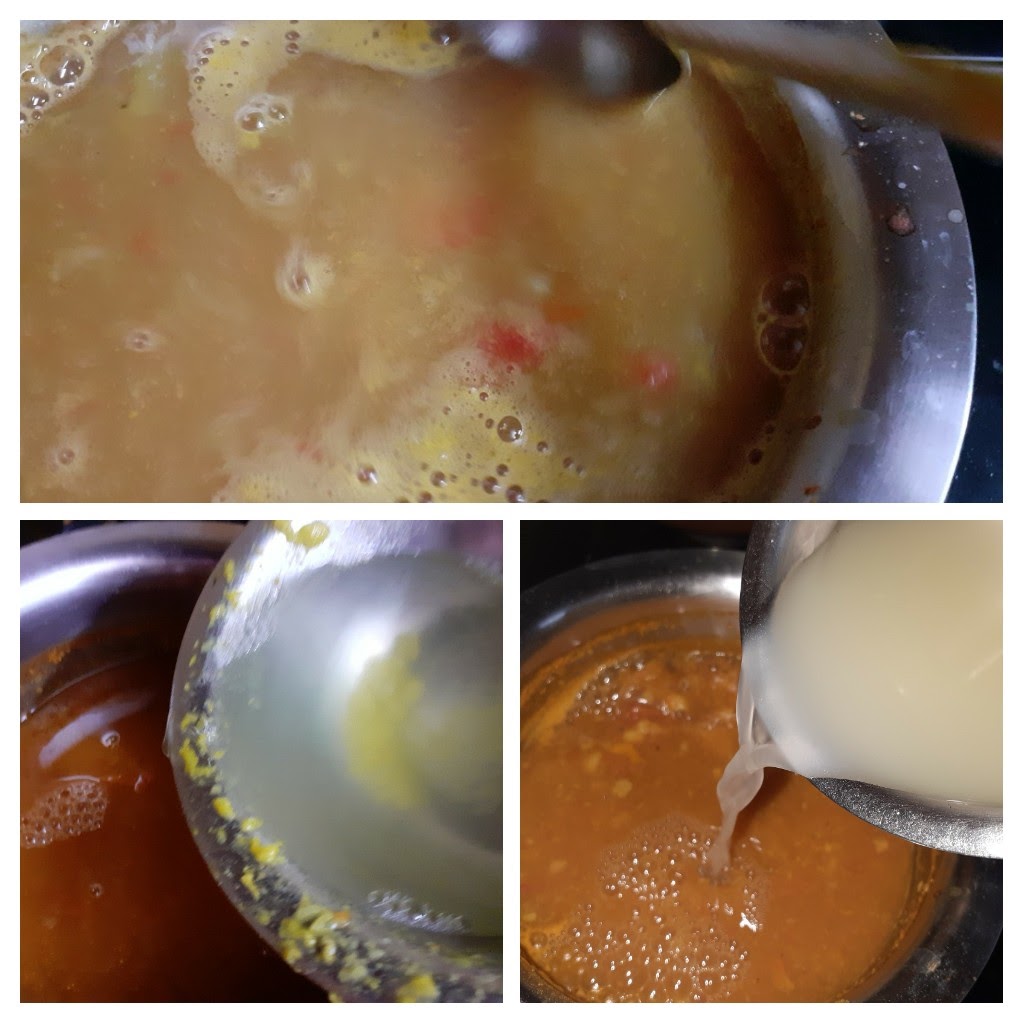

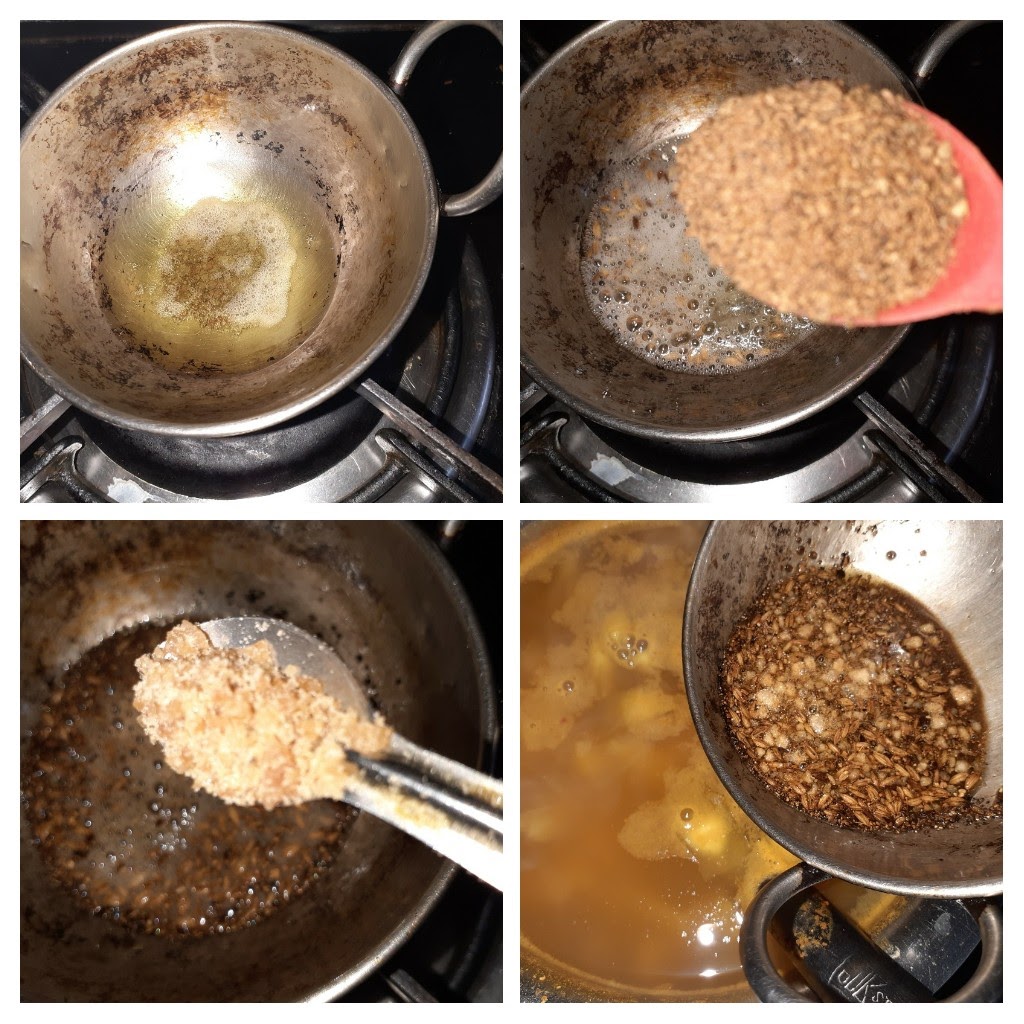
If you tried this recipe and liked it please comment below. I would love to hear from you. If you have a query about the recipe email us and ill respond as soon as I can.
Apple Cake (Tea Cake)
Until recently I did not know that such delicious cakes could be made using Apples. I mostly stuck to making the Apple Crumble. I came across this recipe some time ago, and as you know I have to try it thrice without errors for it to feature on the blog. So here is the recipe that is foolproof, also no whisking, just mixing, so mess at all.
This cake has a very delicate flavour and is a crumbly cake, it is very light and a great tea time cake. What more, it is healthy and kids will love it( you could just drizzle chocolate sauce or Nutella over it for them). It tastes best when warm and keeps good for 2 days at room temperature. Just warm before you serve and it is fresh again.
The apple slices that you see in the picture make it look sophisticated, but it is not such a difficult cake to make. The apple slices on top can be excluded altogether, as the cake batter has them already, but I like them with a lot of apples and the glaze and hence I make it this way.
While you are here please check out my other cake recipes like Blueberry Cheesecake, Nutella Fudge brownies, Apple Crumble and Pineapple Jam Tart.
Here is the recipe of Apple Cake for you-
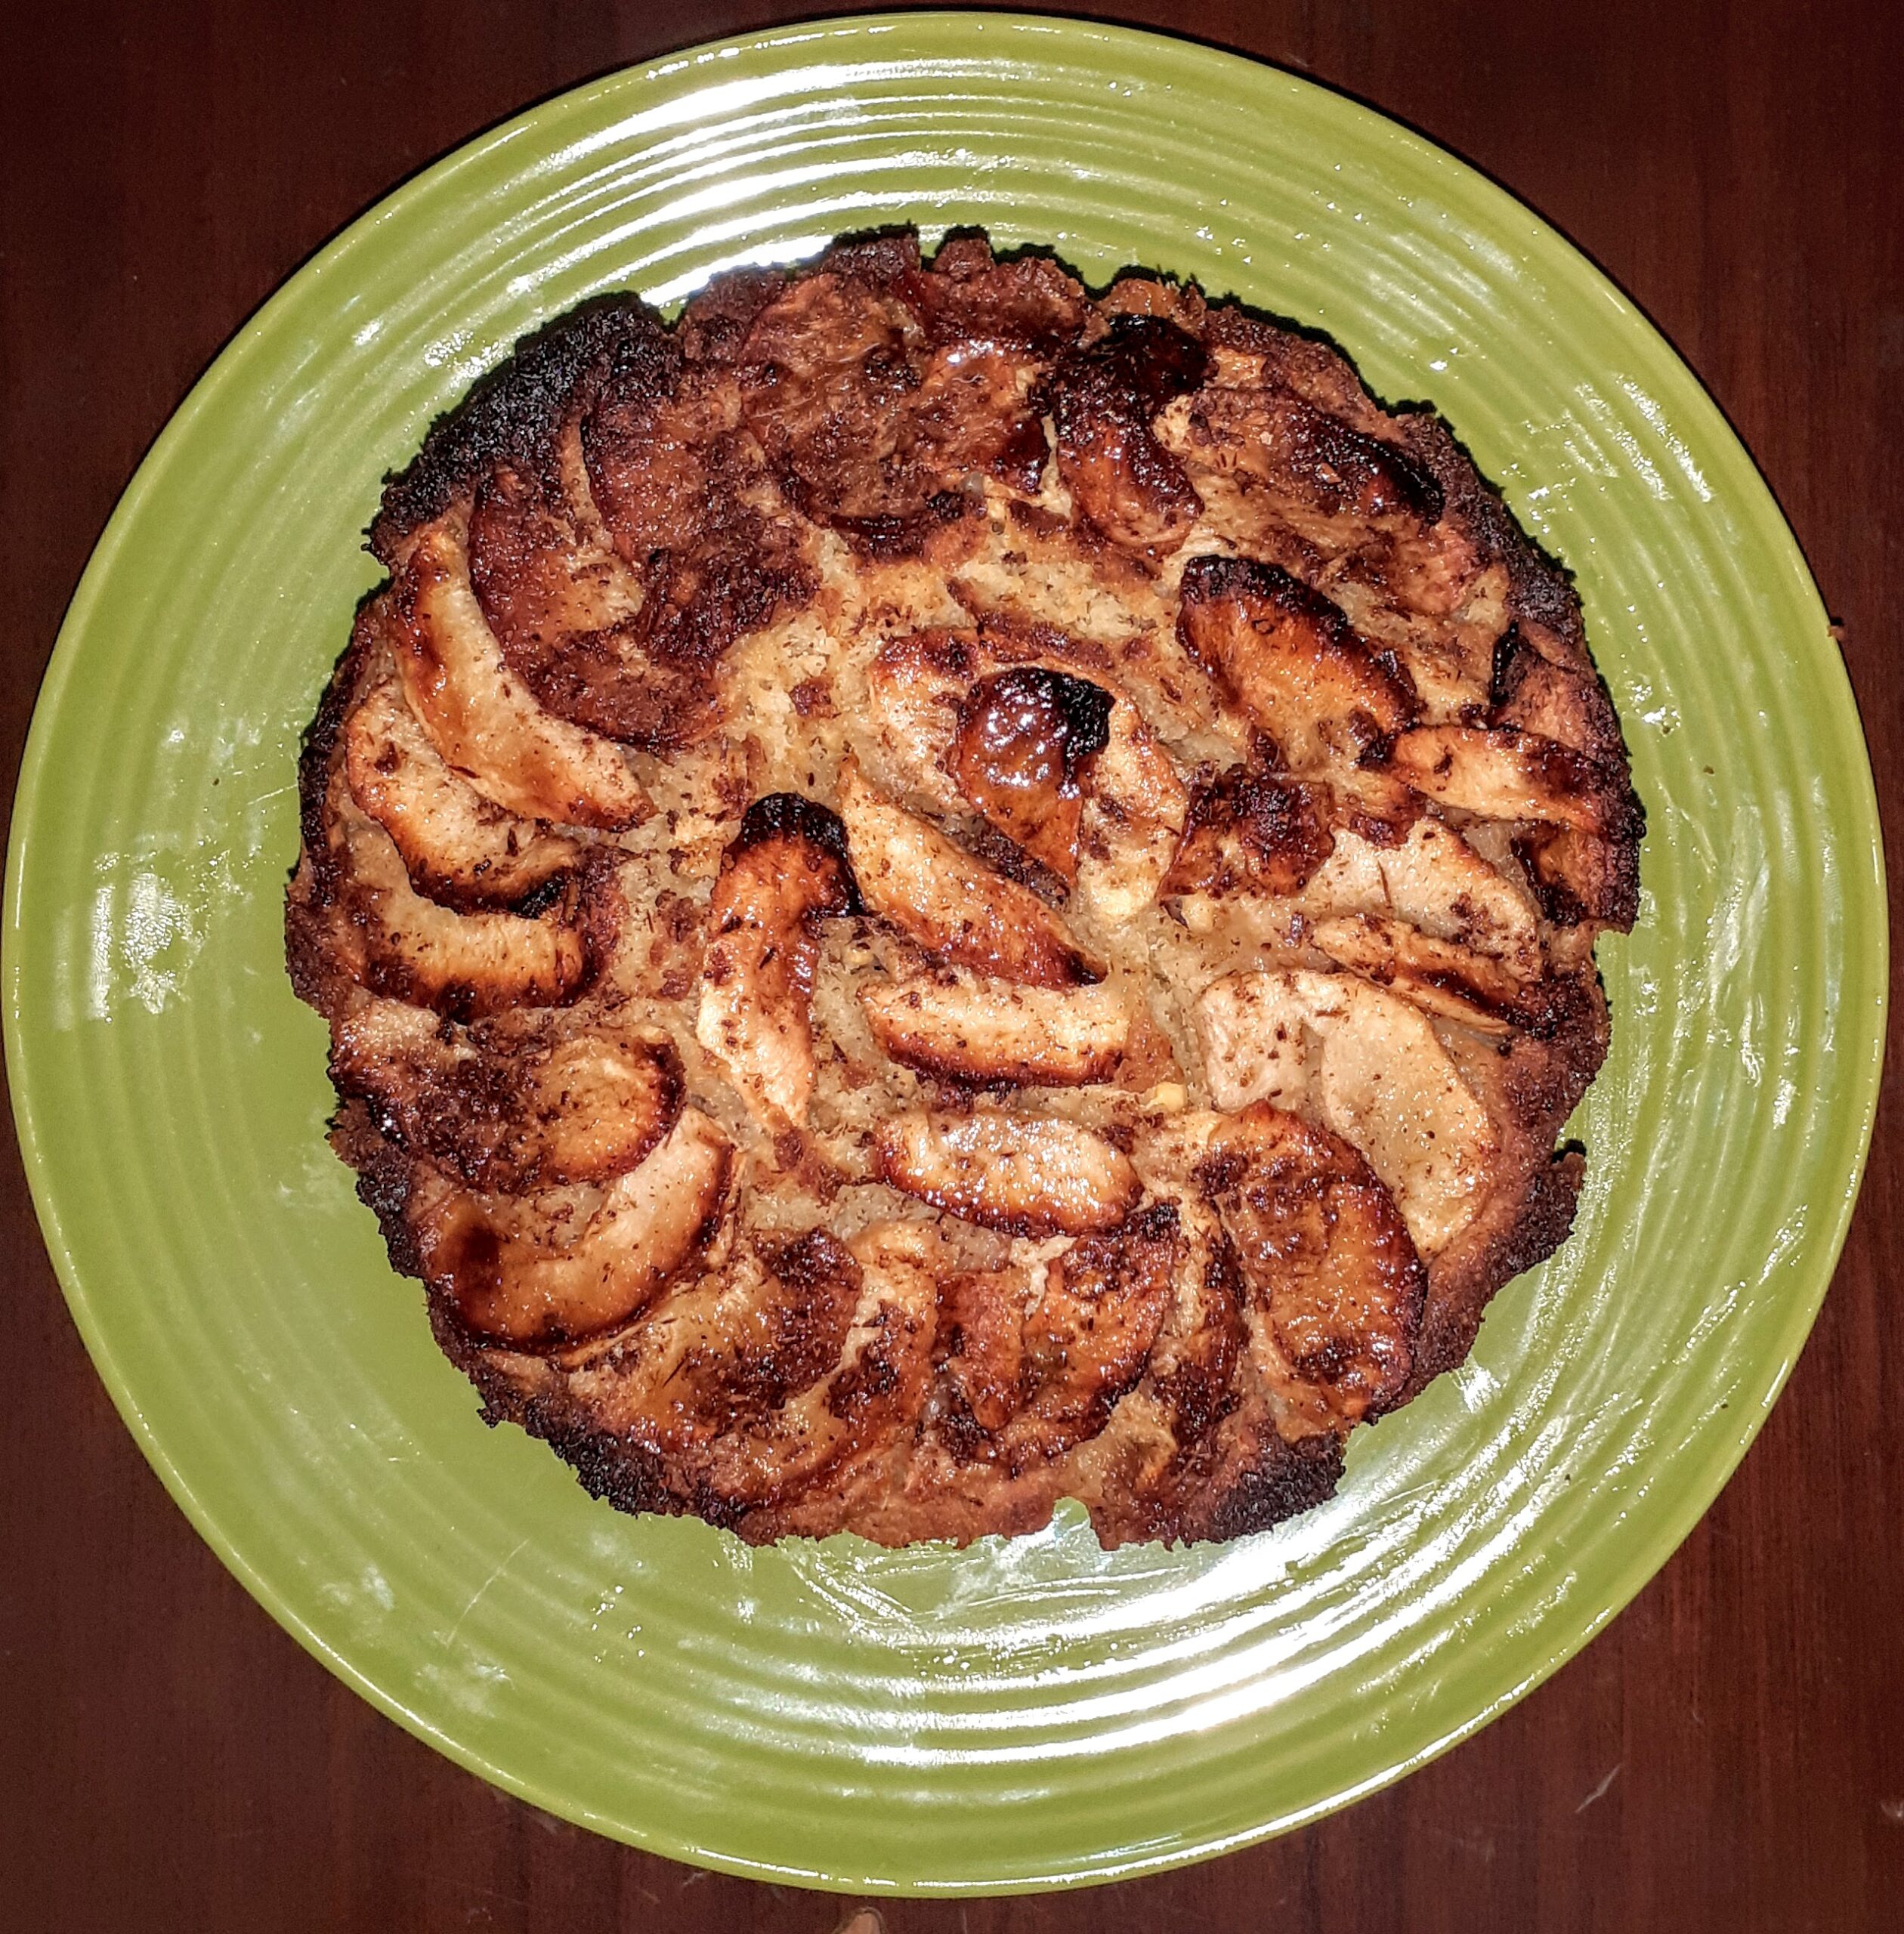
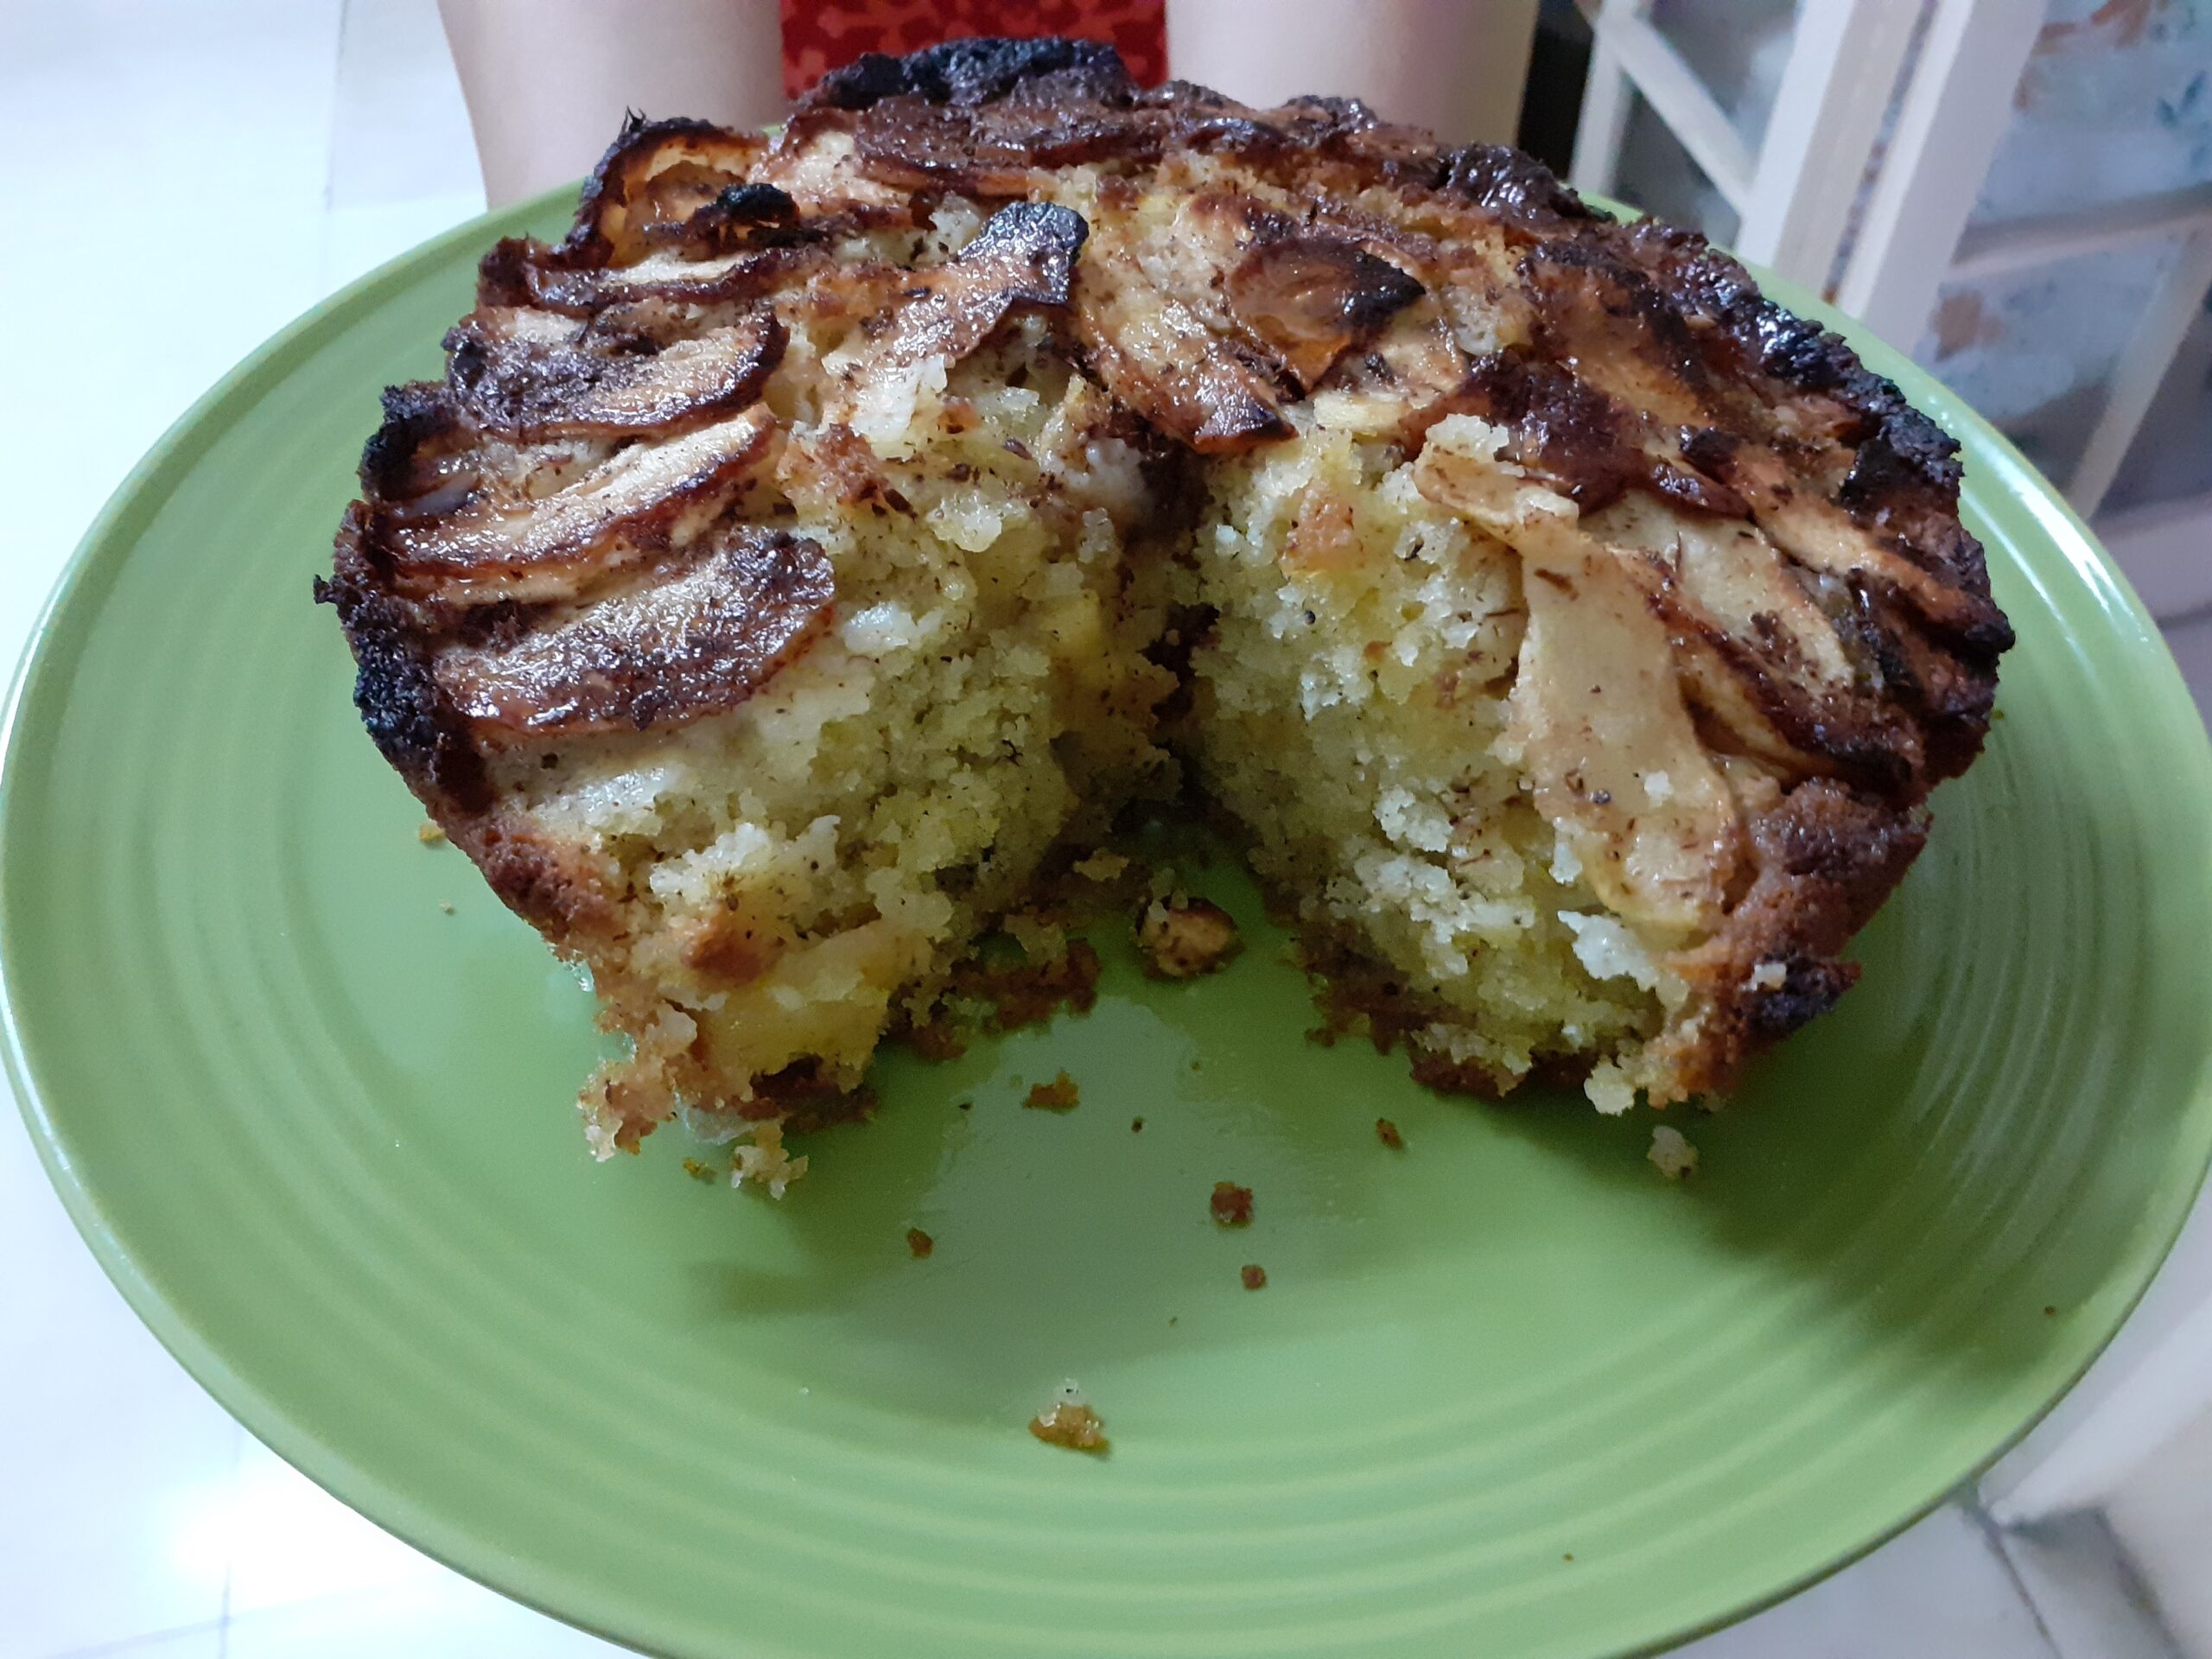
Ingredients for coating apples:
Apples 3 large( any variety) cut half to cubes and half of them in slices.
Cinnamon powder 3 tsp( divided)
Butter 3 tbsp ( divided)
Sugar 2 tbsp (divided)
Dry Ingredients:
Flour/ Maida 1.5 cups
Baking powder 2 tsp
Salt 1/2 tsp
Wet Ingredients:
Butter 60 gm melted
Oil ( refined) 1/2 cup
Eggs 2
Sugar ( white) 3/4 cup
Vanilla essence 1 tsp
Glaze:
Honey 2 tbsp.
Directions:
First, peel the apples and chop 1 1/2 apples to small cubes and another 1 1/2 to slices. Pug them in two separate bowls.
Divide and add the cinnamon powder, butter, and sugar between both the bowls equally and mix. Set aside.
Preheat the oven to 200 c and start preparing the cake batter.
Put all the dry ingredients in one bowl and mix well.
In another bowl combine all wet ingredients( refer to ingredients above)Now add the wet ingredients to the dry ingredients and combine nicely using a spatula. No electric beater required. Once nicely combined, mix in the apples chopped to cubes to the batter and mix gently.
Grease a baking tray and line it with parchment paper/ baking paper. Pour the batter into the tray, tap it once gently and place it in the oven. Bake at 200 C for 50 minutes or until a toothpick comes out clean. Once done remove from oven and leave to cool down a bit. Cut when still warm and serve. The delicious Apple cake is ready to serve.
STEPWISE RECIPE FOLLOWS:
1. Assemble all ingredients. Chop 1 half of the Apples to cubes and the other half to slices. Put them in 2 separate bowls.
2. Divide and add the butter, cinnamon powder, and sugar in both bowls, mix nicely and set aside.
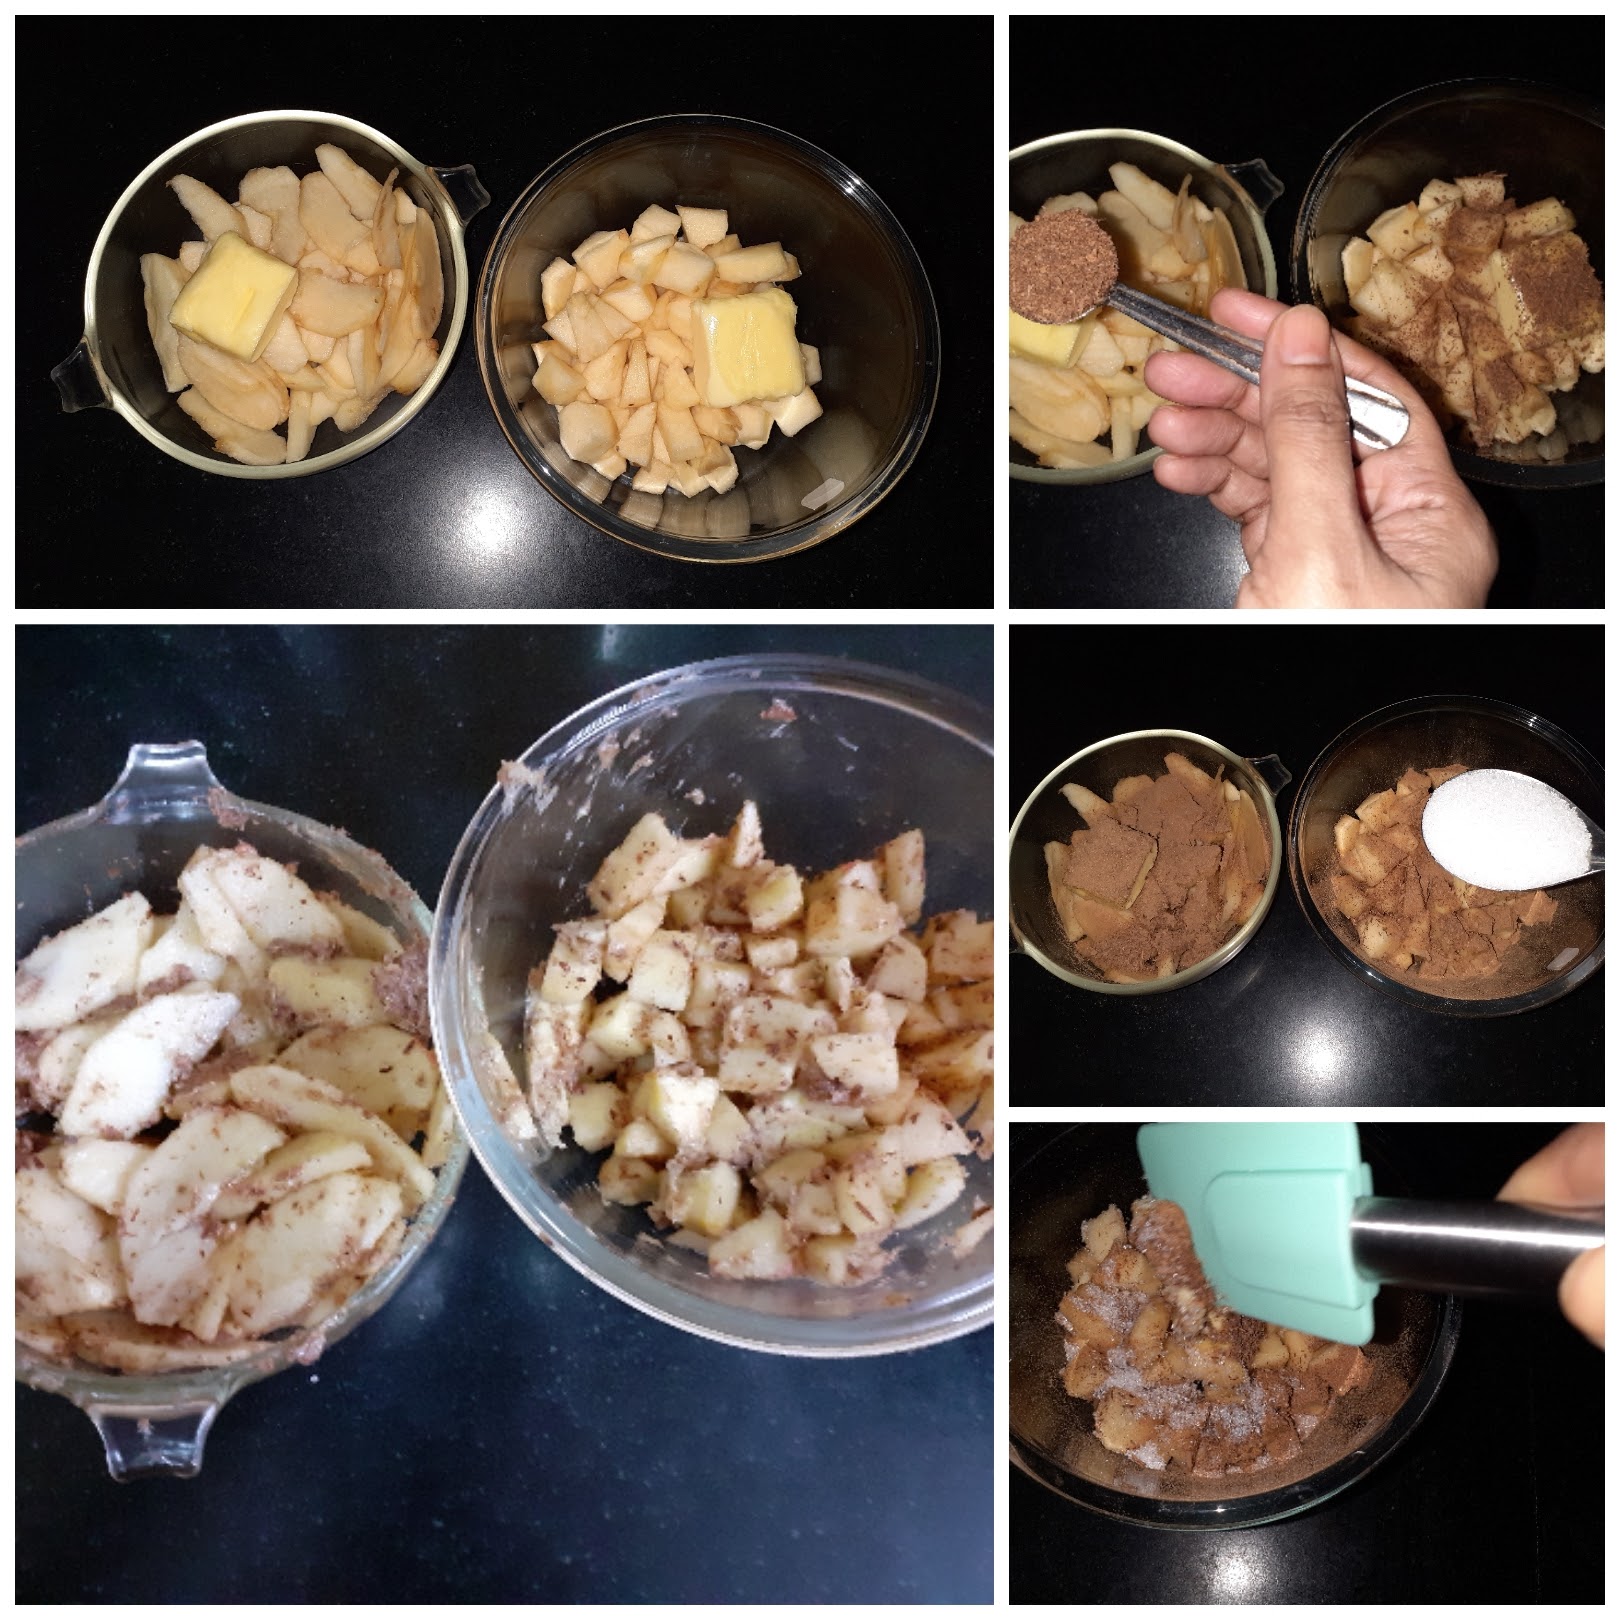
3. Preheat oven to 200 C. Now put all dry ingredients in a separate bowl and mix.

4. Take all wet ingredients in another bowl and combine well. Now mix the wet ingredients to the dry ingredients and combine well.
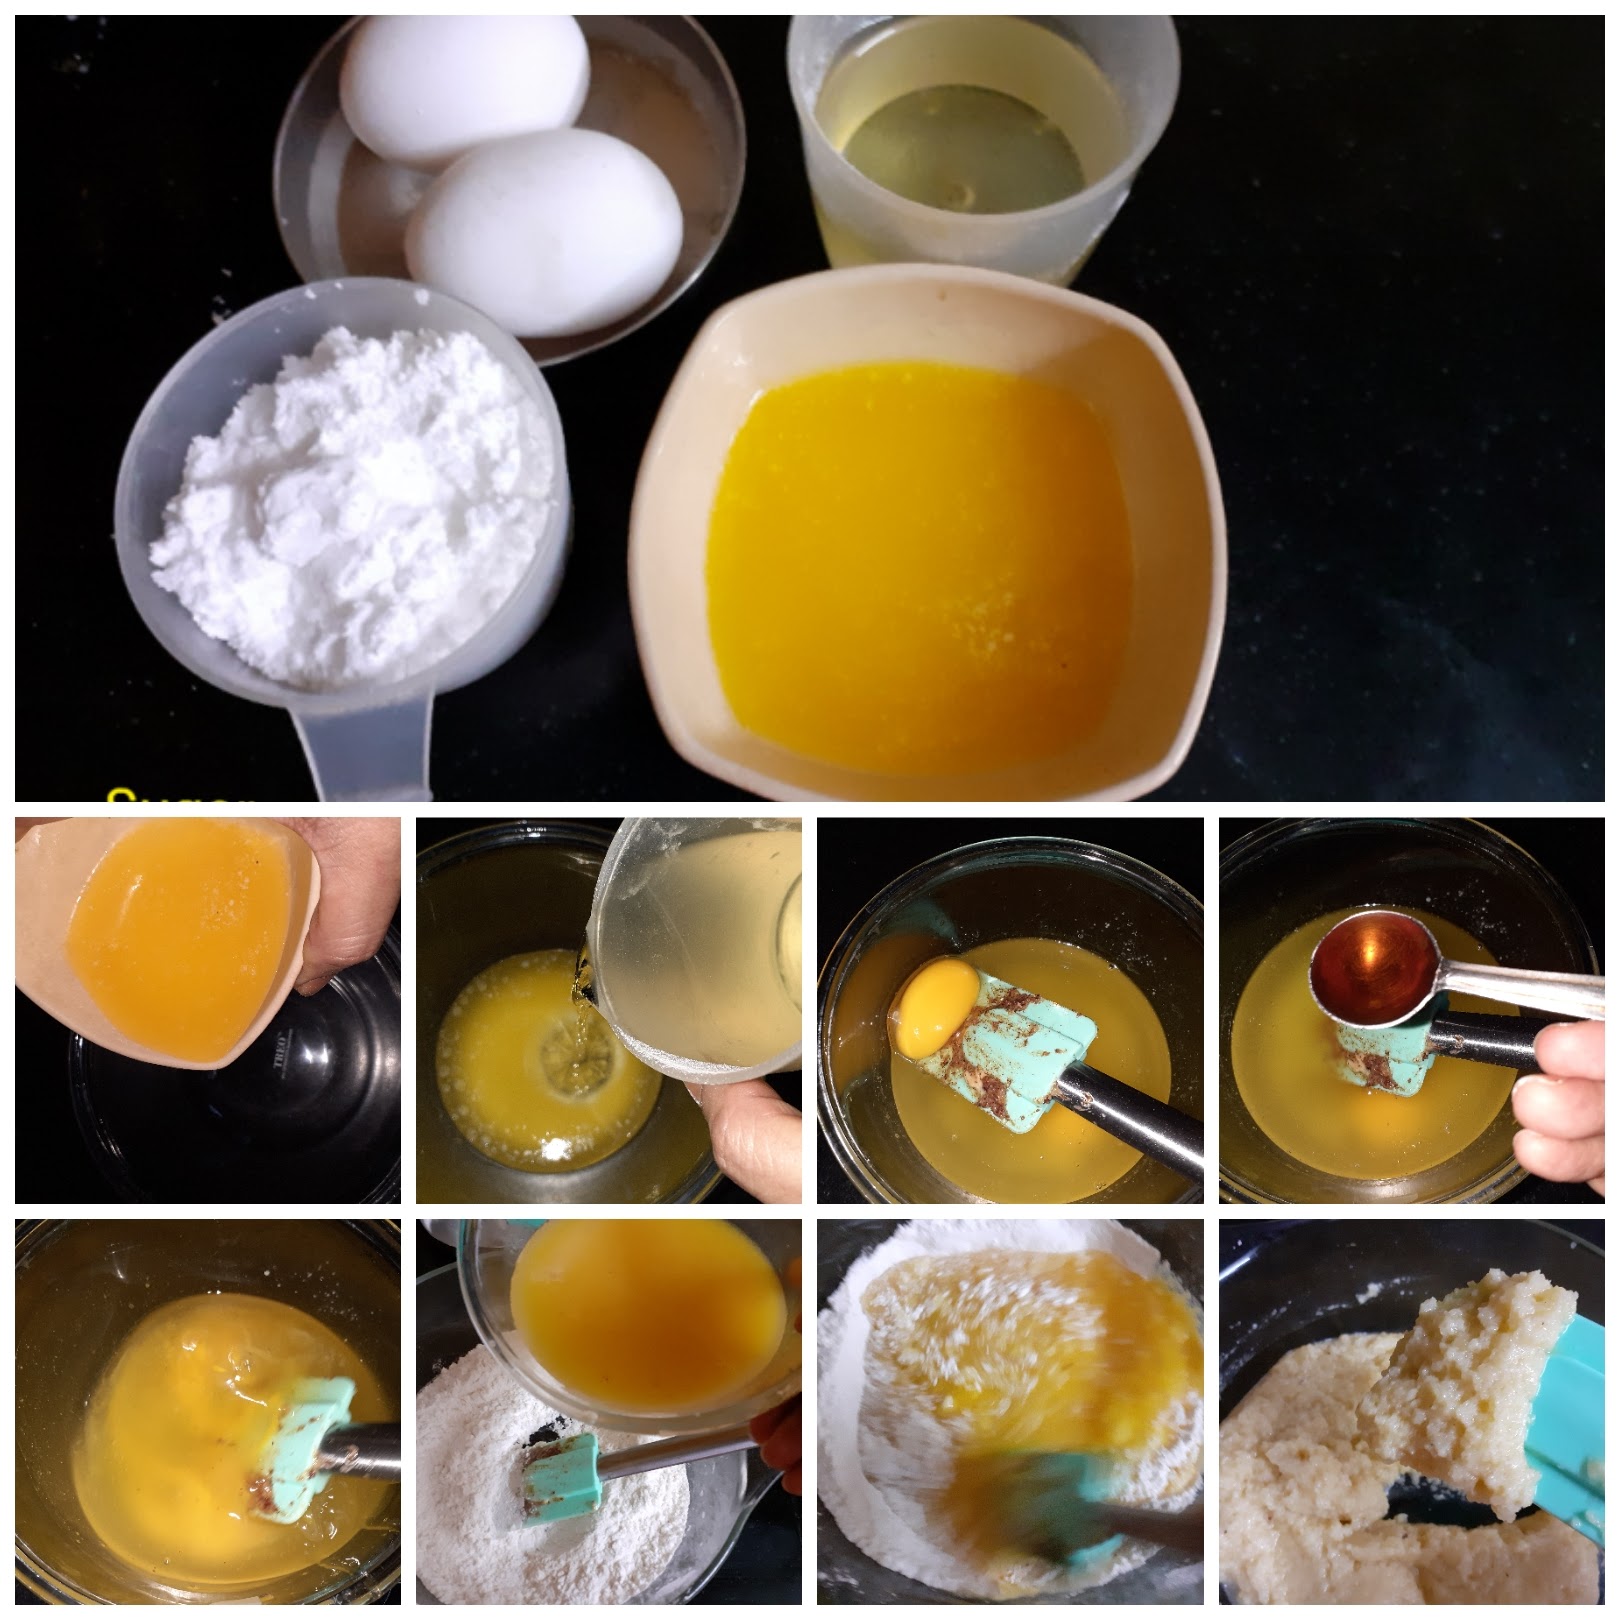
5. Now add the cubed apples to the batter and fold gently. Grease a circular cake mould and line with parchment/baking paper. Now scoop in the batter into the mould.
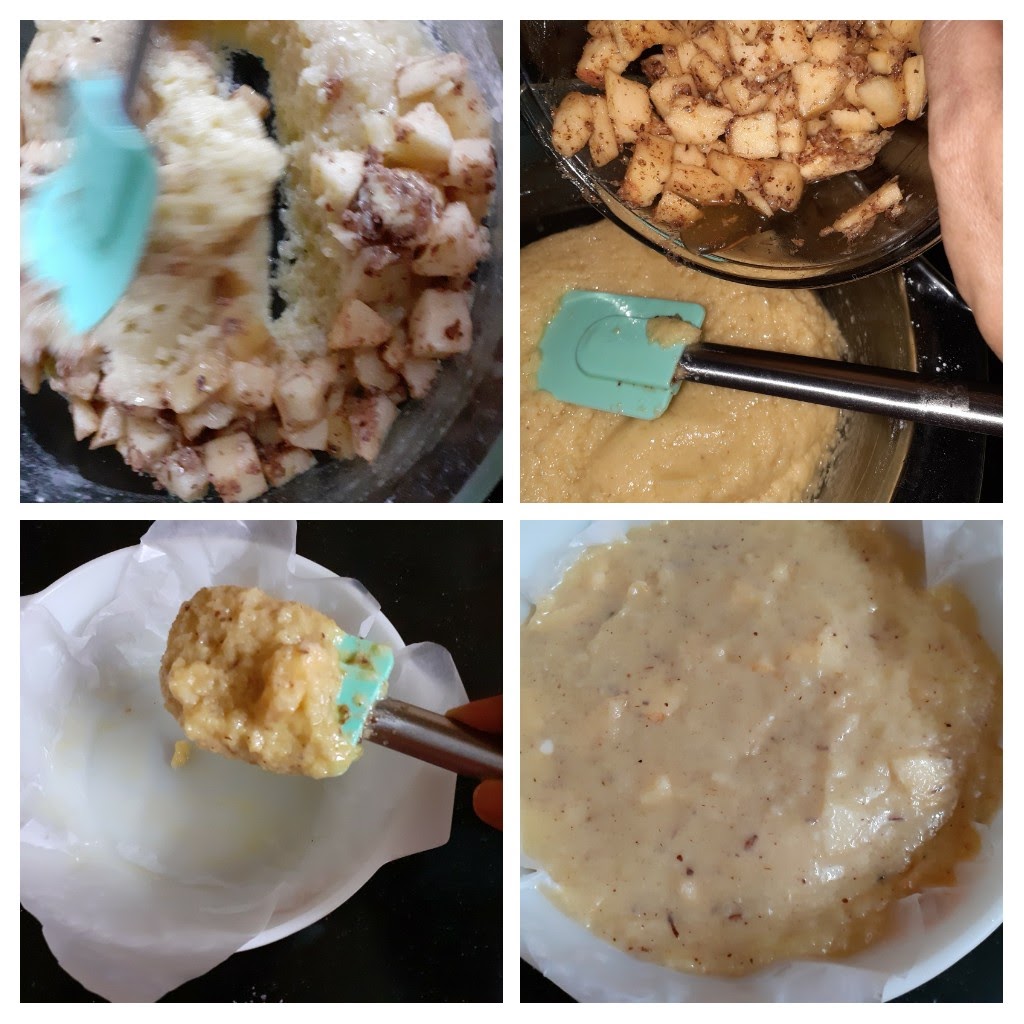
6. Take the sliced apples and arrange them like a fan on the batter. Now it is ready to be popped into the oven. Bake at 200C for 50 minutes or until a skewer comes out clean.

Allow it to cool for 5 minutes and apply the honey over it with a brush and cool it. The honey gives the apples a beautiful glaze. Serve them a little warm.
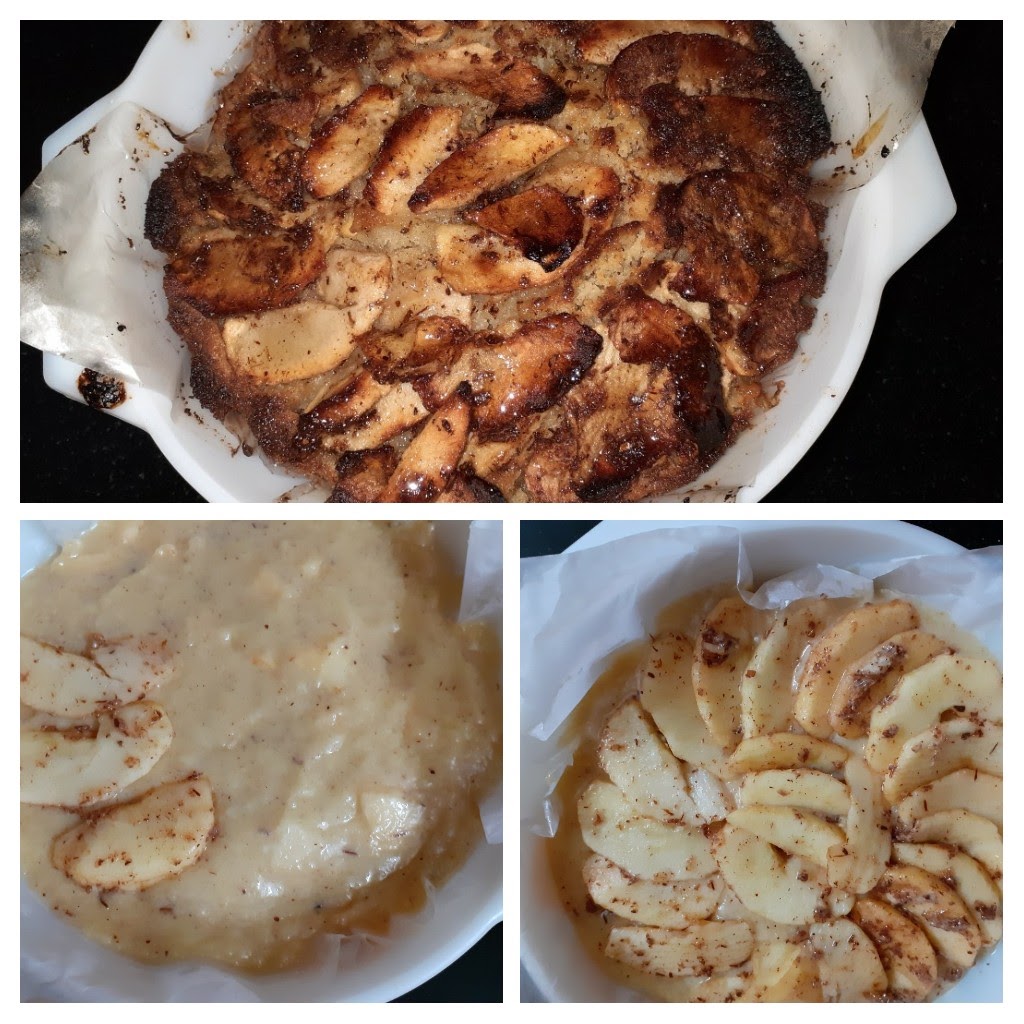
NOTES:
1. Any variety of apples can be used for this recipe.
2. This cake has a crumbly texture, you will know if you look at the picture. It is super moist.
3. It holds good for 3 days at room temperature, for long storage put it in the fridge and warm just before serving.
4. It is also a good snack box idea for kids as it can be made ahead, just remove from the refrigerator, warm it and allow it to sweat, then pack.
5. This cake can be made without the sliced apples on top too. Just mix the chopped apple and scoop mixture into the baking tin/ tray and bake.
If you tried this recipe and liked it please comment below. I would love to hear from you. If you have a query about the recipe email us and ill respond as soon as I can.
Creamy Palak In Coconut Milk
This recipe is really worth a try. It is different from the Palak recipes that we usually come across. As the name suggests the Palak/Spinach had been cooked in coconut milk. Surprised? Well, the flavor of the coconut is very subtle and does not overpower the palak at all. The coconut milk gives a creamy texture to the dish. This dish goes well with rotis, paratha, and rice. It is a simple and healthy recipe with loads of flavour. This is an excellent way to add palak to your diet, as Palak/spinach is rich in iron and fibre. This recipe is adapted from a similar recipe I spotted on @ budgetbytes.com. I have also added a small video for this recipe for easy reference.
When I made this dish I had only 1 bunch of Spinach and then when I tasted the dish I regretted making it with just a bunch as it tasted so good, that we all craved for more. So made it again within a week’s time. If you feel this dish might be very bland because of the coconut milk, let me assure you that on the contrary, it holds on to how much ever spice you put. So one could increase or decrease the spice as per their preference.
While you are here please view my other recipes like Palak Paneer, Coriander rice, Kothimbir vadi, Drumstick curry, Mixed vegetable curry and more.
Here is the recipe of Creamy Palak in Coconut milk for you-

Ingredients:
Palak/Spinach 1 bunch
Coconut milk 1 pouch (200 ml)
Onion 1 large finely chopped
1 Tomato large finely chopped
Garlic 5 cloves finely chopped
Cumin seeds 1/2 tsp
Turmeric powder 1/2 tsp
Salt as required
Red chilli powder 1 tsp( add more for more spice)
Coriander powder 1 tsp
Fennel powder 1 tsp
Garam Masala powder 1/2 tsp
Directions:
Chop the Palak finely and wash. Drain all the water and put the Palak in a pan. Pour 200 ml coconut milk to the palak and switch on the flame. Keep stirring and cooking the Palak. While cooking keep mashing the Spinach with the back of a ladle from time to time. Cook on low flame until most of the coconut milk is evaporated and the mixture resembles a mash. Transfer to another plate/ vessel. Now in another pan/ kadai heat some oil. Add the cumin seeds and as they splutter add the chopped garlic and saute for 30 seconds or until nicely brown. Now add the turmeric powder followed by chopped onion and saute until the onions start turning brown. Now add the chopped tomatoes and saute for a minute. Now add the salt and cook until the tomatoes start turning mushy. Keep mashing the tomatoes as you stir them. Add the chilli powder followed by coriander powder and fennel powder and stir. Now add the cooked Palak and mix well. Cook for a minute or 2 on low flame, add the garam masala and put off the flame. The Creamy Palak in Coconut Milk is ready to serve.
Serving Suggestions: Rotis, Parathas, Rice and also works as a dip for bread. To use as a dip just blitz in a blender for a single spin after cooking.
STEPWISE RECIPE FOLLOWS:
1. Assemble all ingredients. Chop the Palak, wash and drain all the water.
2. Put the Palak into a pan and add the coconut milk and put it on the flame. Add salt.

3. Cook on low flame until most of the coconut milk gets evaporated. Keep mashing the Palak with the back of a ladle while cooking. The mixture should resemble a mash when cooked. Transfer to a plate or vessel.

4. Now in a karahi or pan heat some oil and add the cumin seeds. As they splutter add the chopped garlic and saute for 30 seconds.
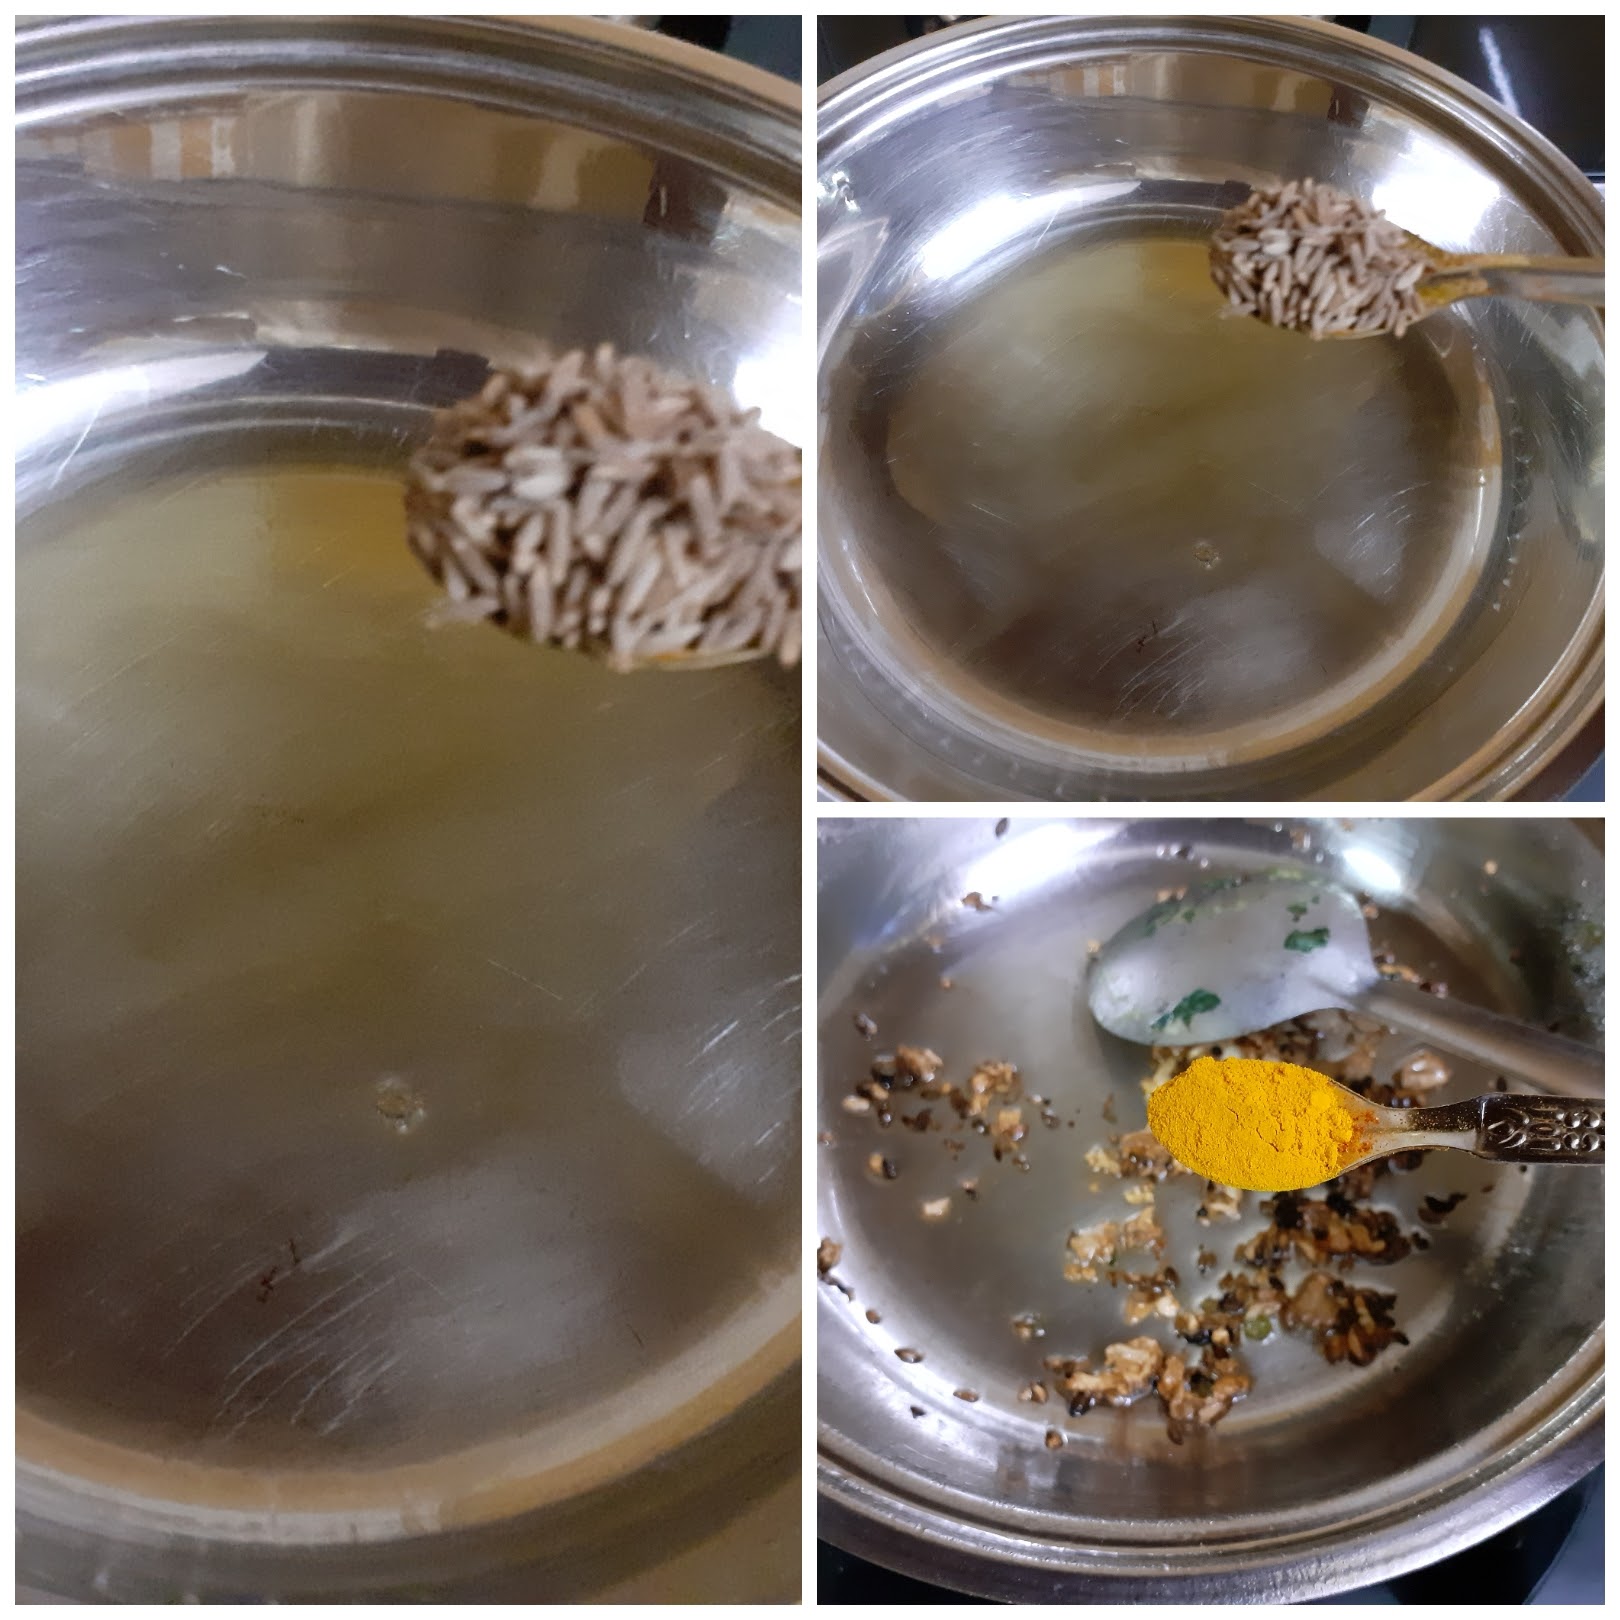
5. Now add the turmeric powder followed by chopped onions and saute until the onions start turning brown.

6. Now add the tomatoes and saute for a minute. Add the salt and continue to cook for a minute. Keep mashing the tomatoes as you cook. Now add the red chilli powder, followed by coriander powder and fennel powder and cook until the tomatoes turn mushy and the mixture looks like a paste.
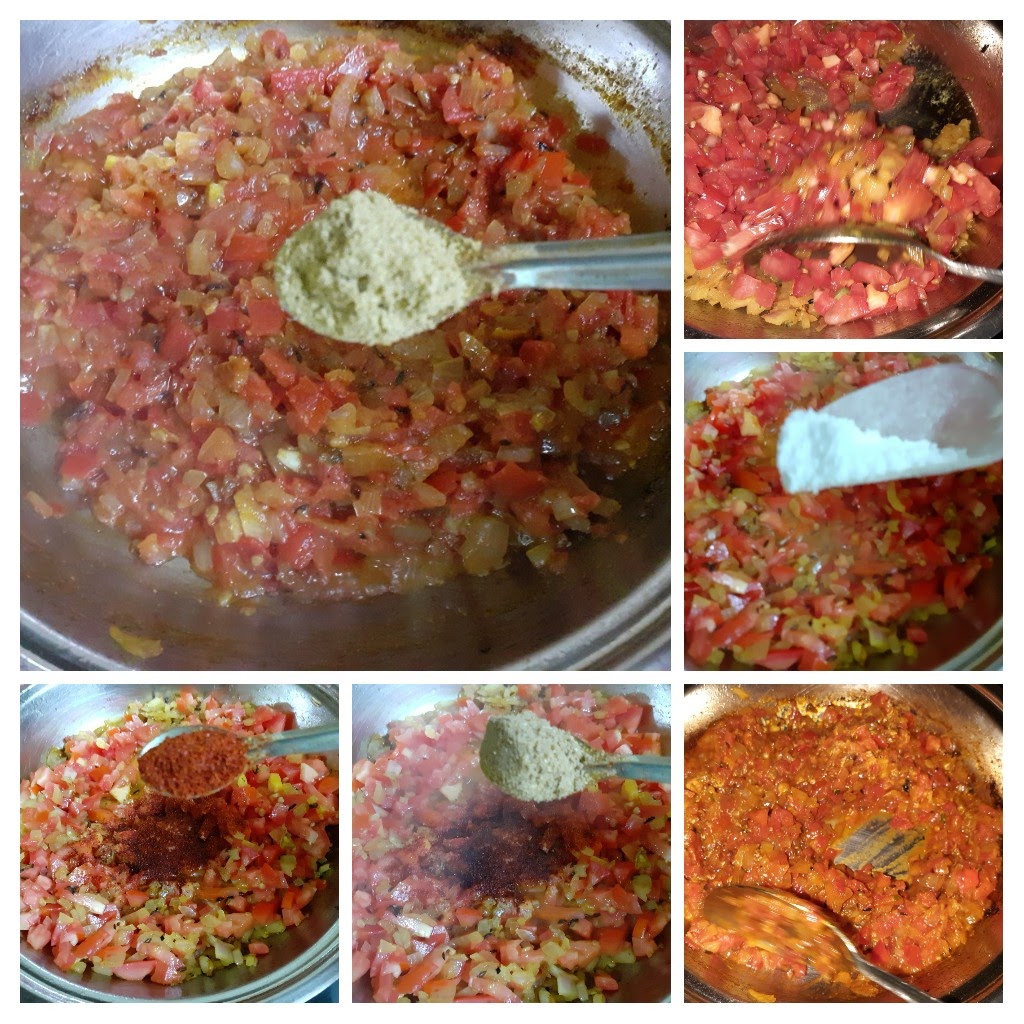
7. Now add the Palak cooked in coconut milk and mix nicely. Lower the flame and let it cook for a minute. Finally, add the garam masala powder and switch off the flame. The Creamy Palak curry is ready to serve.
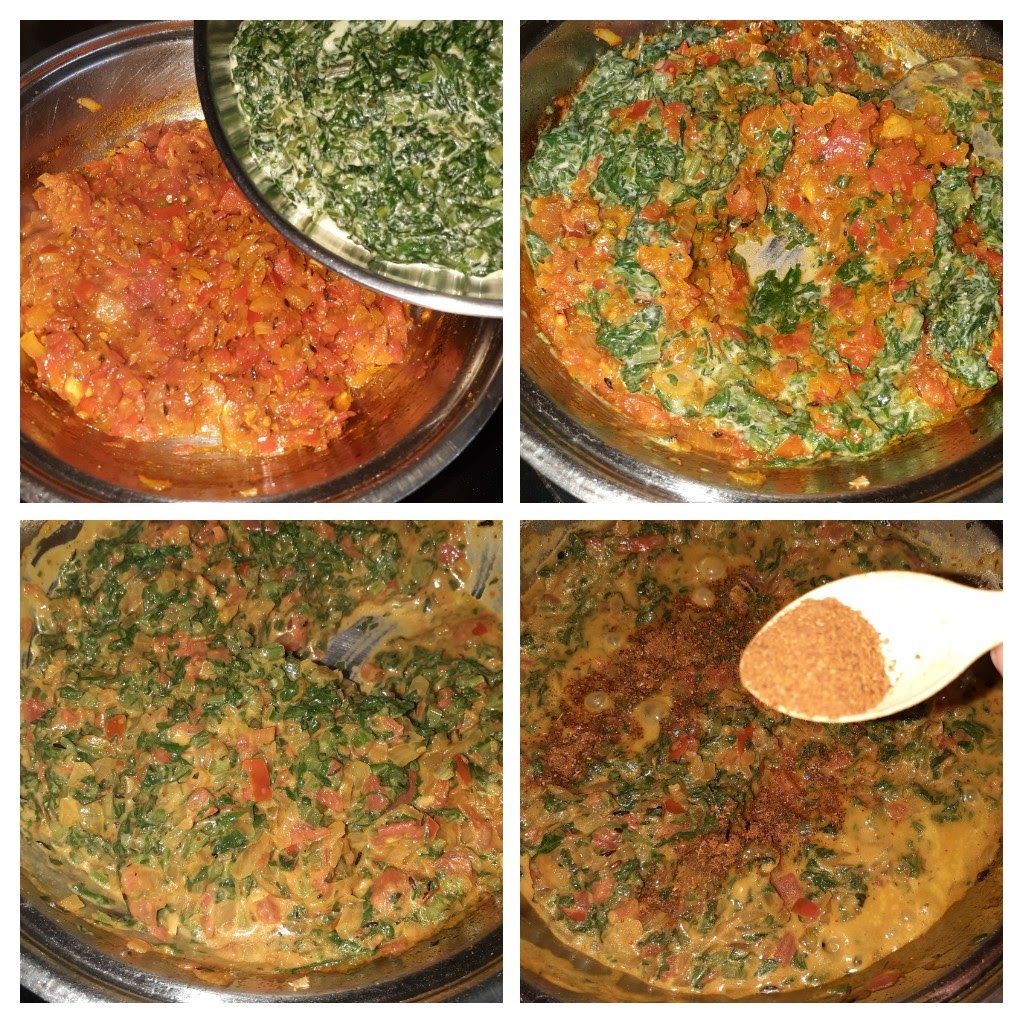
NOTES:
1. I have used only 1 carton of coconut milk and hence the flavour of coconut was mild. For a more intense flavour add more coconut milk. You can use up to 250 ml for a bunch of spinach.
2. As mentioned in serving suggestions this recipe works well as a sauce or dip for bread. Just blitz the curry through a blender after cooking it to use as a sauce.
SHORT VIDEO OF RECIPE HERE????
If you tried this recipe and liked it please comment below. I would love to hear from you. If you have a query about the recipe email us and ill respond as soon as I can.
Aval Kesari/Poha Kesari
This recipe of the humble Poha(beaten rice flakes)/Aval cooked in sugar syrup is one of my favourites. I make it whenever I have a sweet craving or as an offering(Prasad) for Pujas at home. It is similar to the Kesari Bath made with Sooji/Rava Sometimes I make with a combination of other Pohe recipes, to serve during Navarathri when guests visit home.
TOTAL TIME: 20Mins COURSE: DESSERT/SWEET
AUTHOR: Rajni Ram
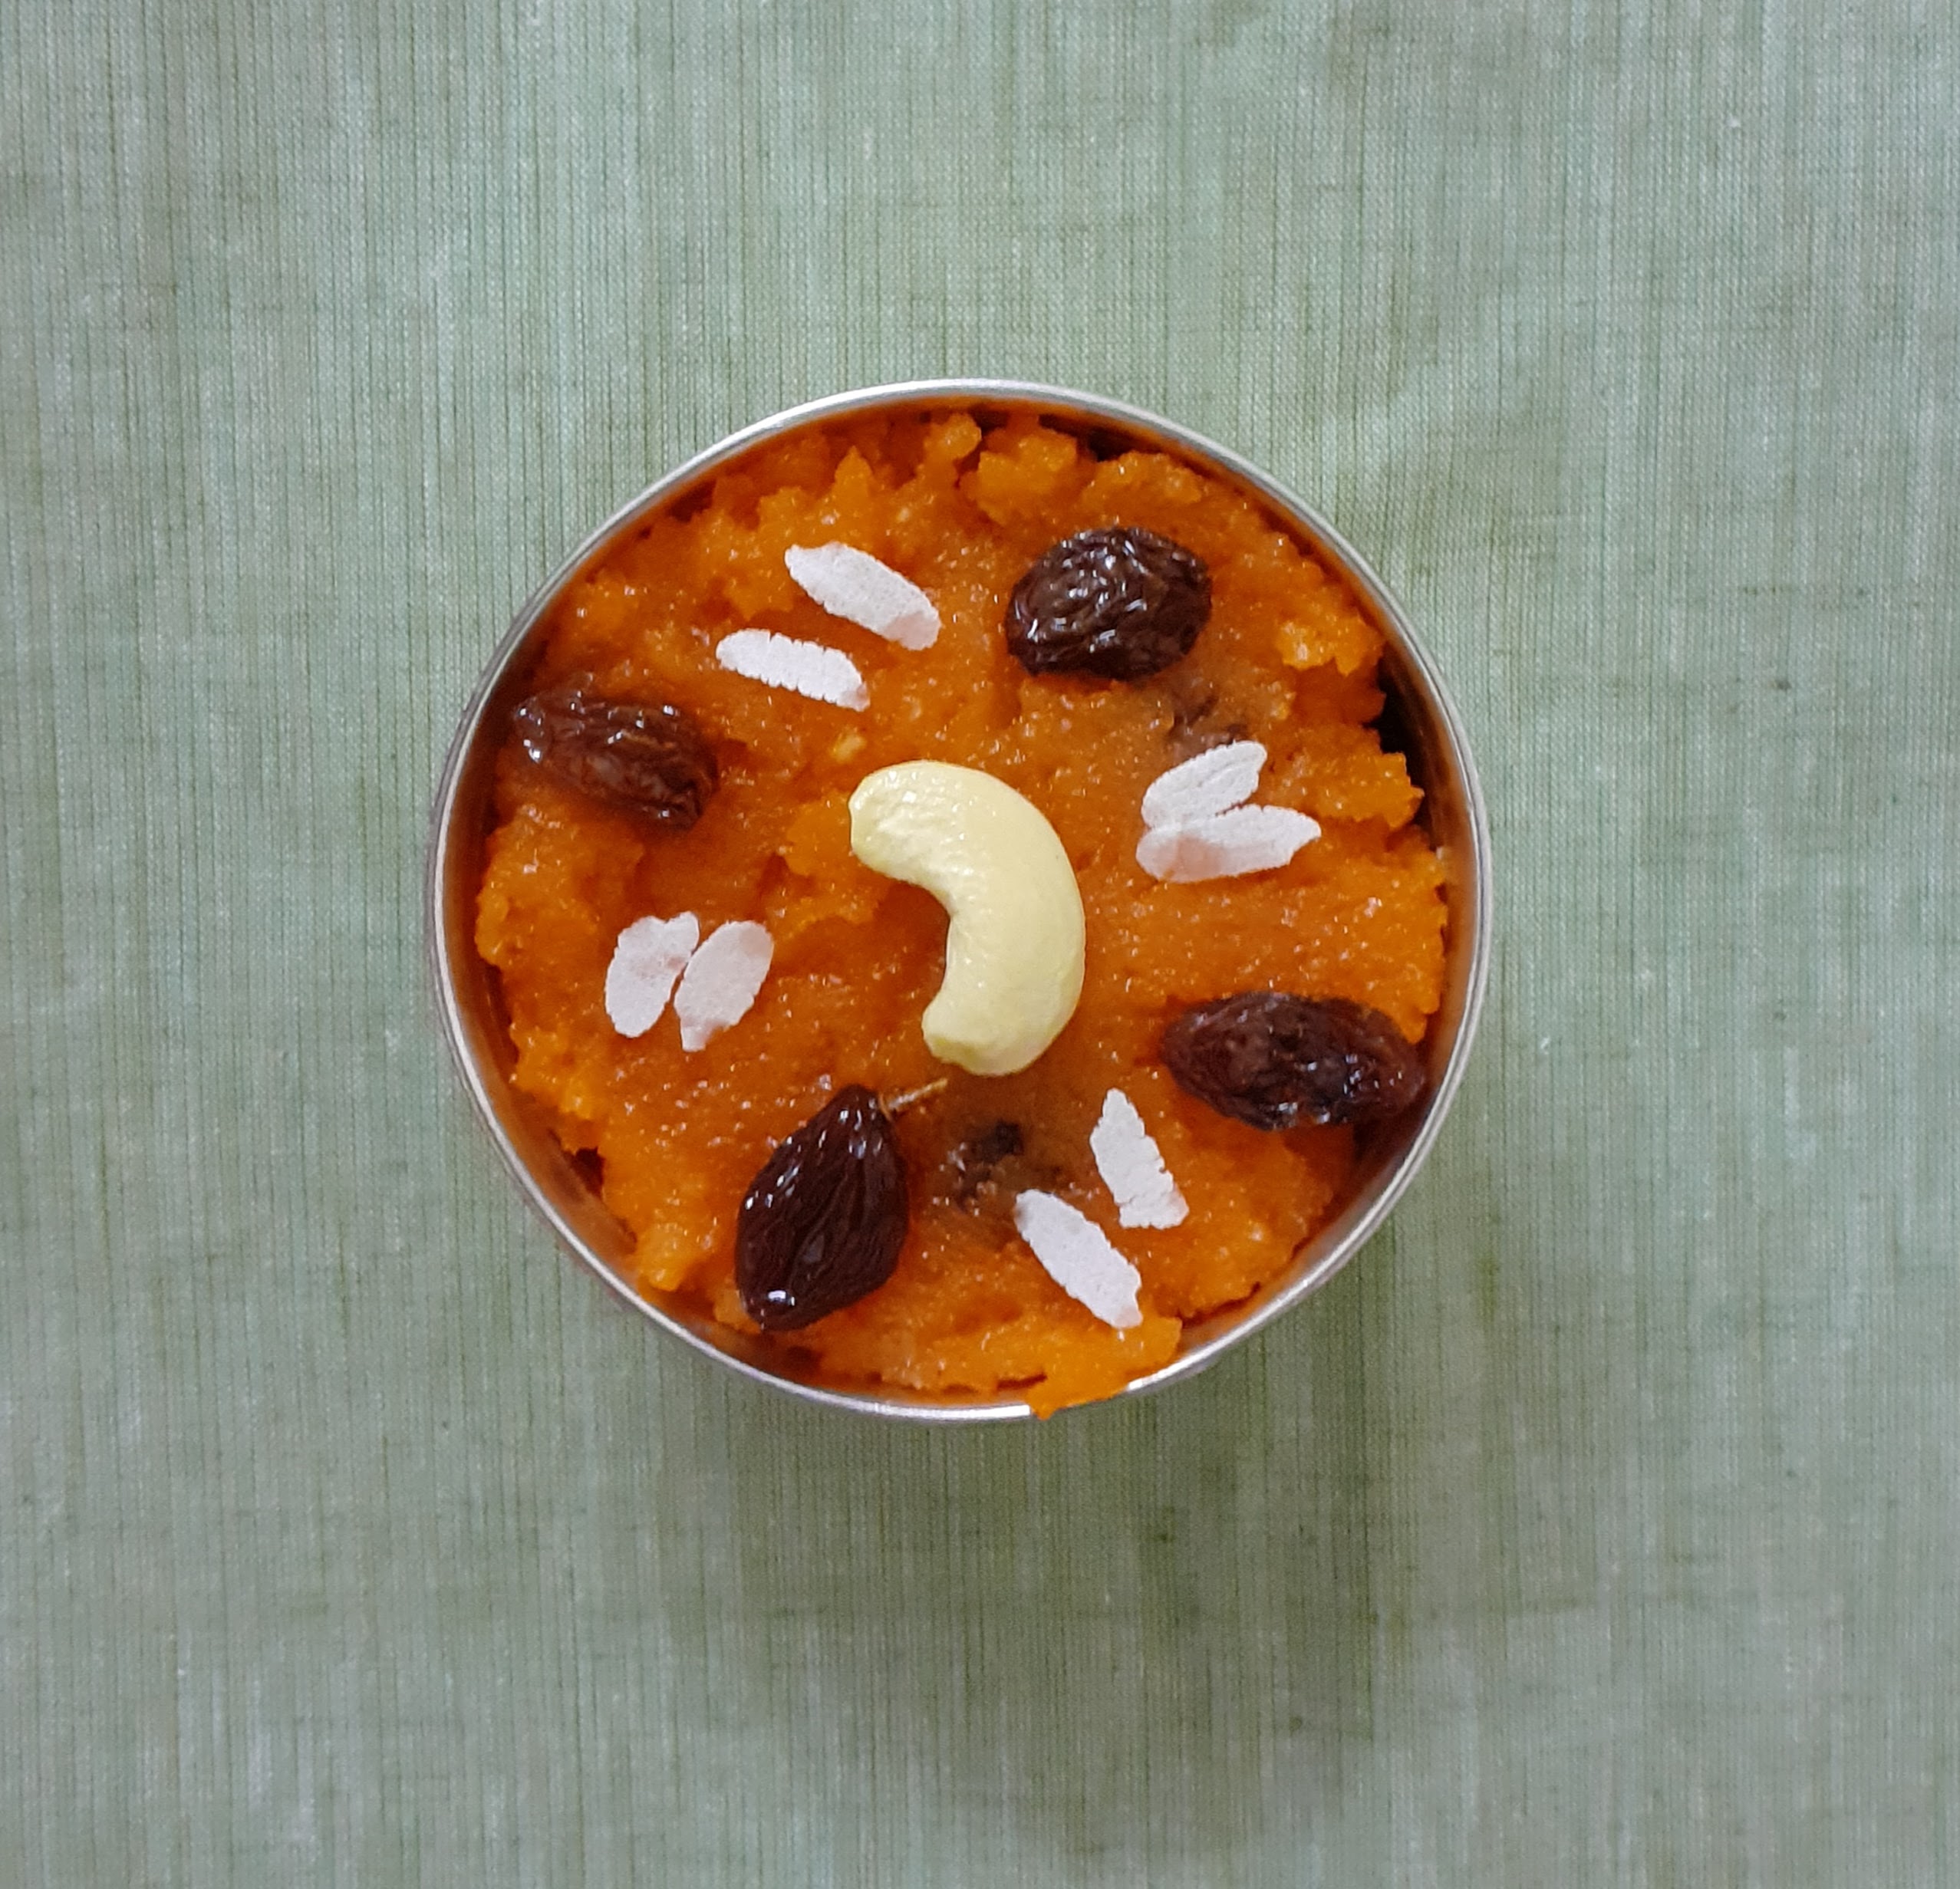
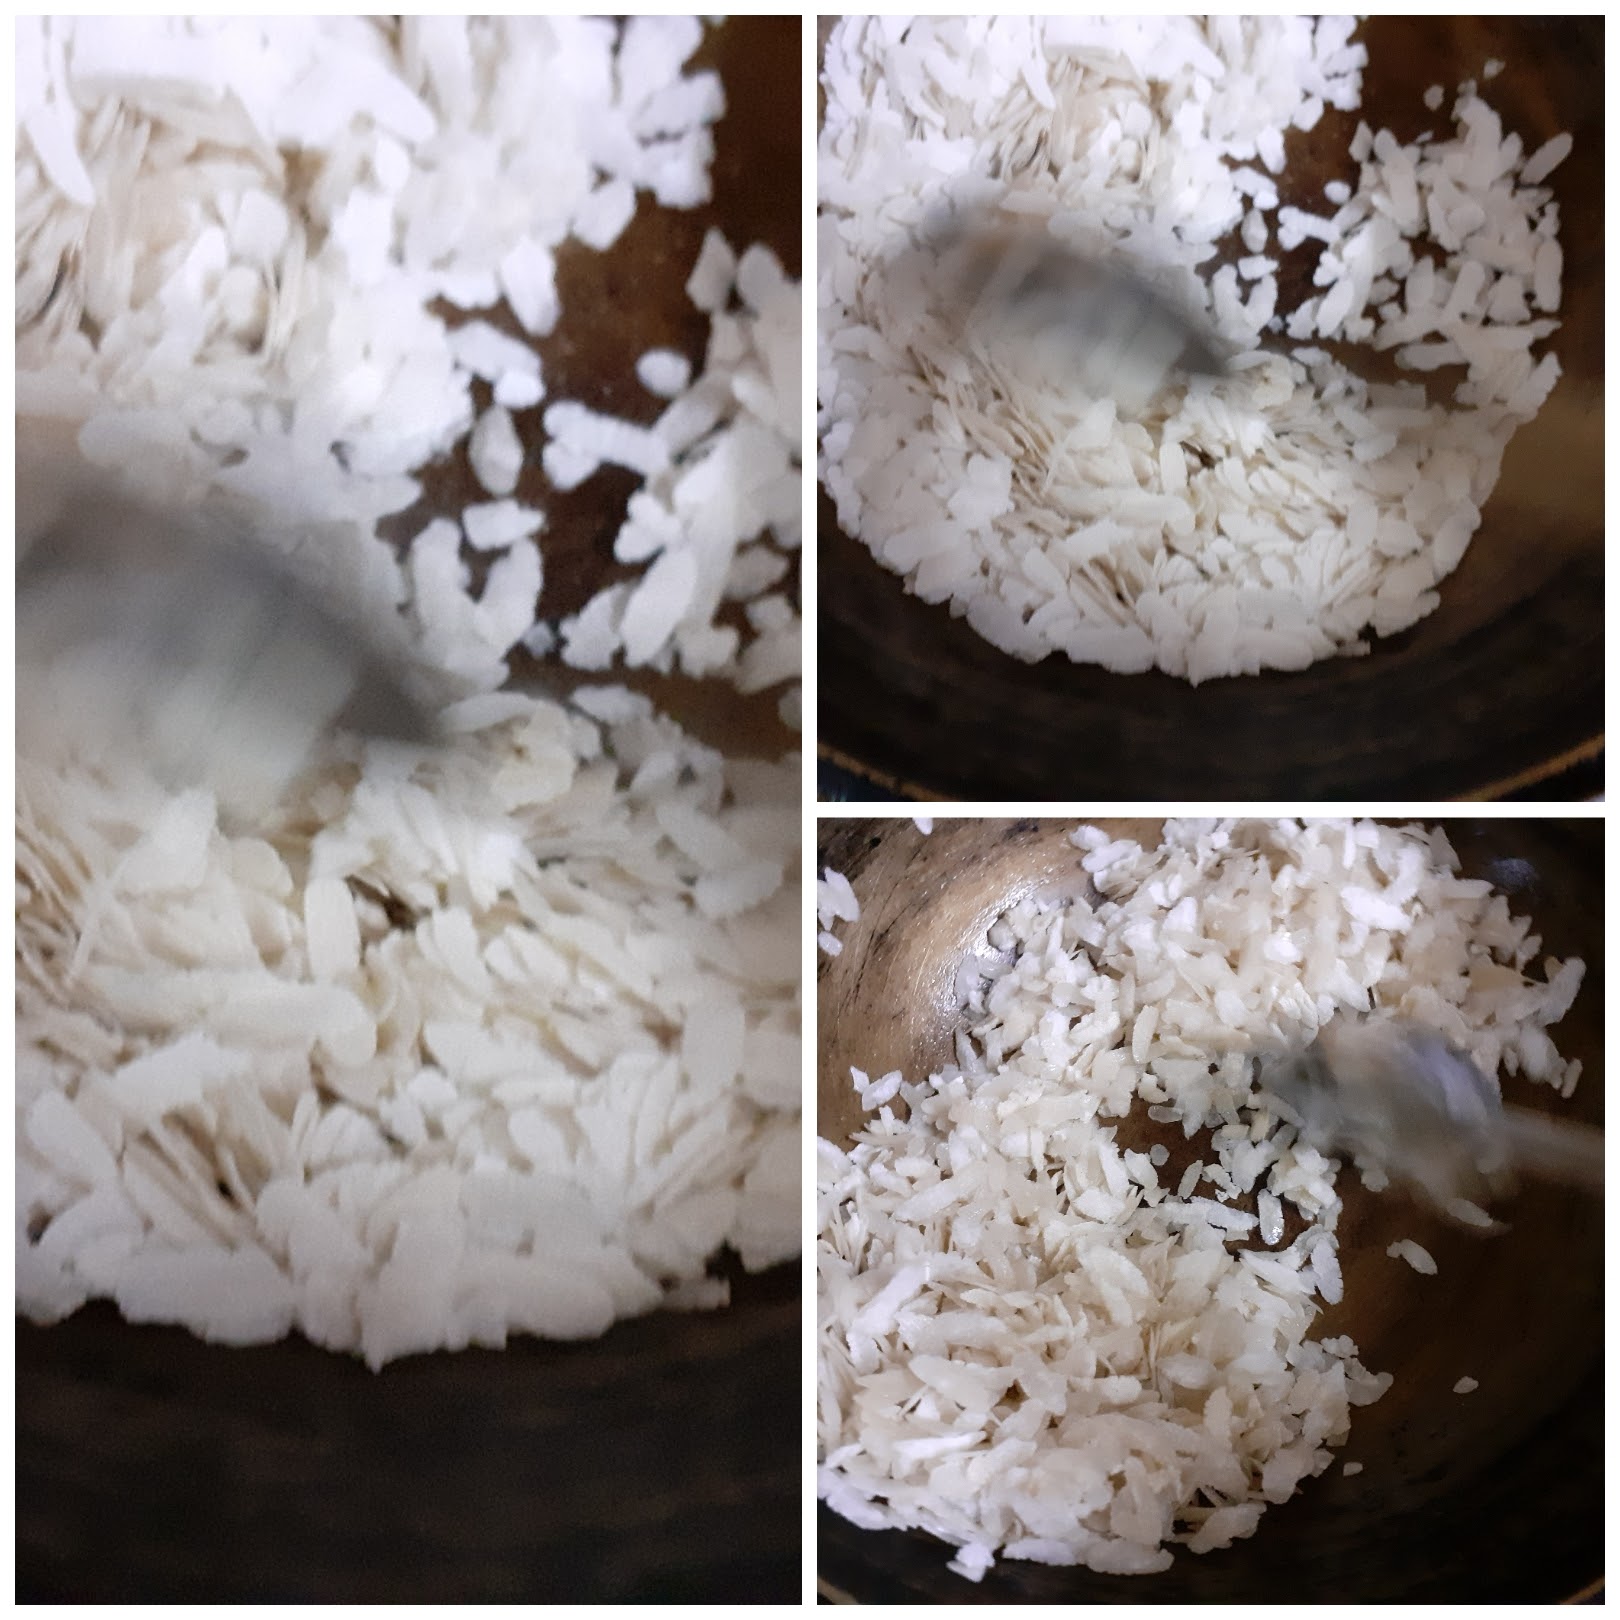
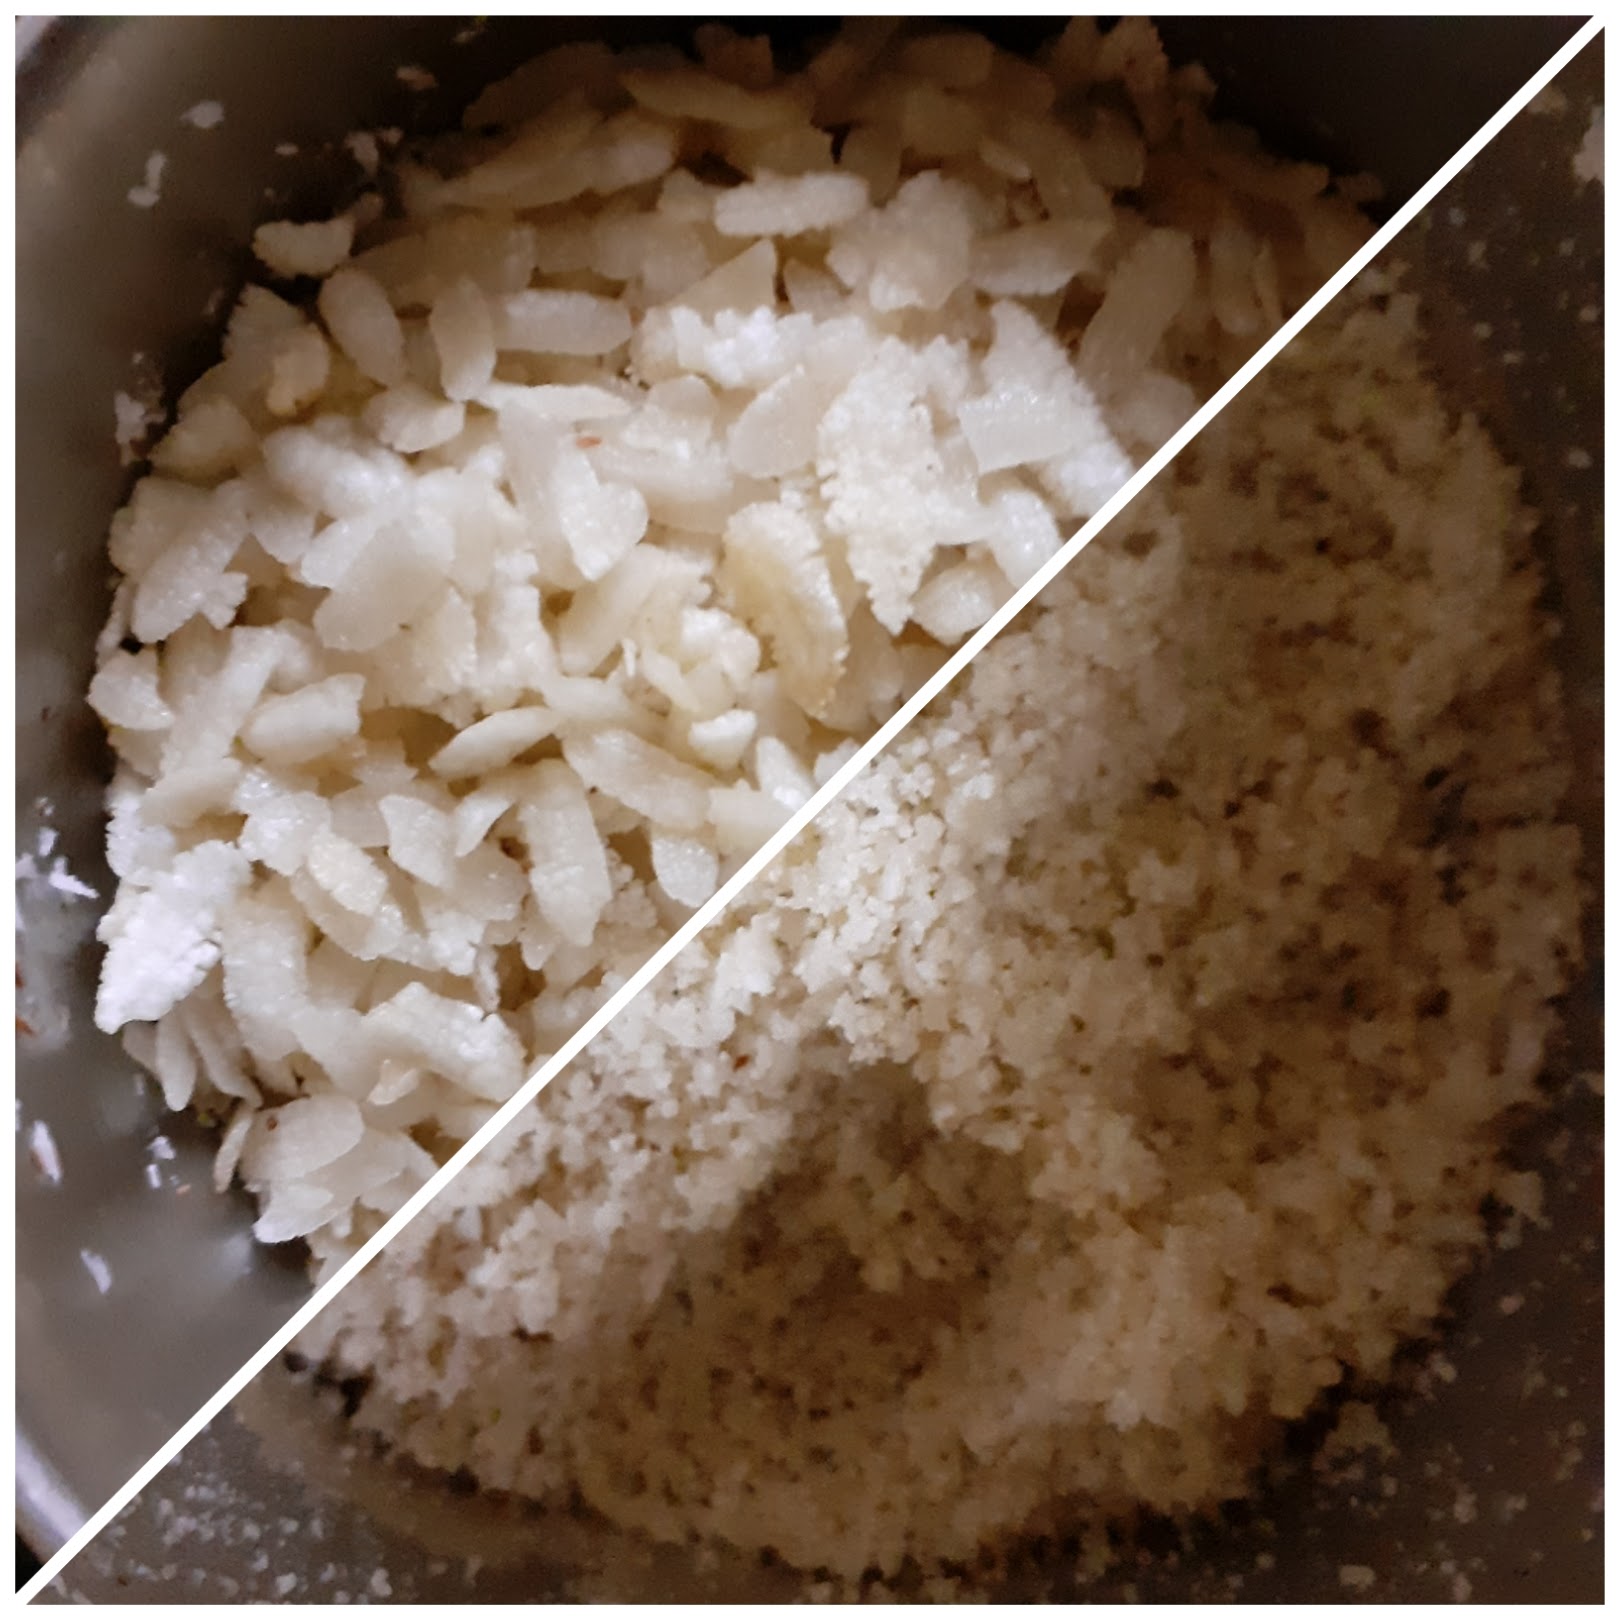

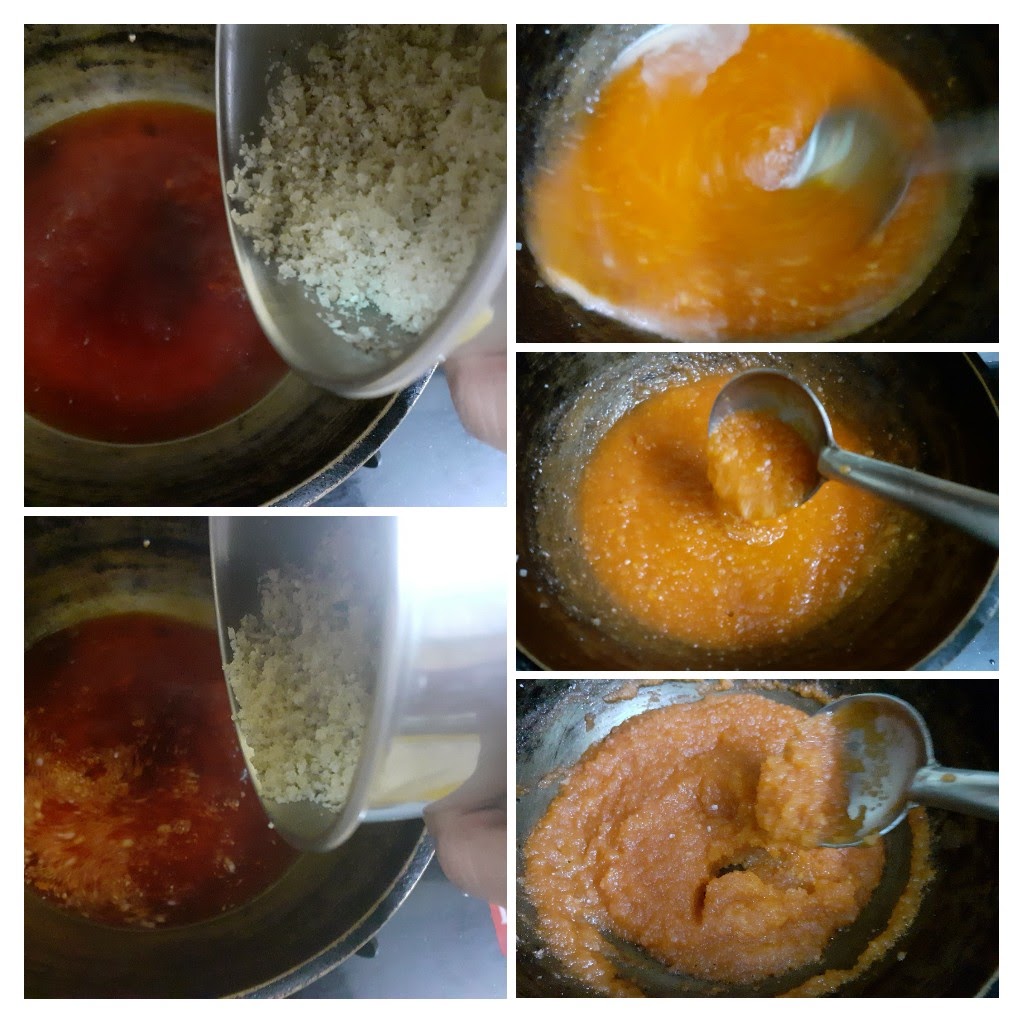

Unni Appam/Nei Appam/Sweet Appam
This Appam recipe is the Kerala style Appam, made with soaked raw Rice, Jaggery, Banana and Cardamom. It is one of the most simple recipes and is also one of the main offerings in festivals like Janmashtami, and Ganesh Chaturthi. In our house, it is also an instant snack that my mother would make in a jiffy apart from the soak time. Usually, an Appam mould/ Appa karai is required for this, but some also make it by directly pouring a ladle of batter into the oil and deep-frying. If fried without a mould the shape is flat like that of a Pancake, whereas the one made in a mould is round. It is best made with ghee, though oil too can be substituted for ghee.
Grinding the batter to the right consistency is a critical step, as too dilute a batter will affect the moulding of the appam and the batter may just scatter away in the oil. Therefore I have mentioned the right way to grind the batter in the recipe. Once the batter is ground we are just five minutes away from yummy tasting Nei Appams.
While you are here look at my other Sweet dish recipes like Sugiyan, Vella Aval, Akkaravadisal, Chakkara Pongal, Maa Ladoo, Carrot Kheer, Pineapple Rabri and more.
Here is the recipe of Sweet Appam/ Unni Appam for you–
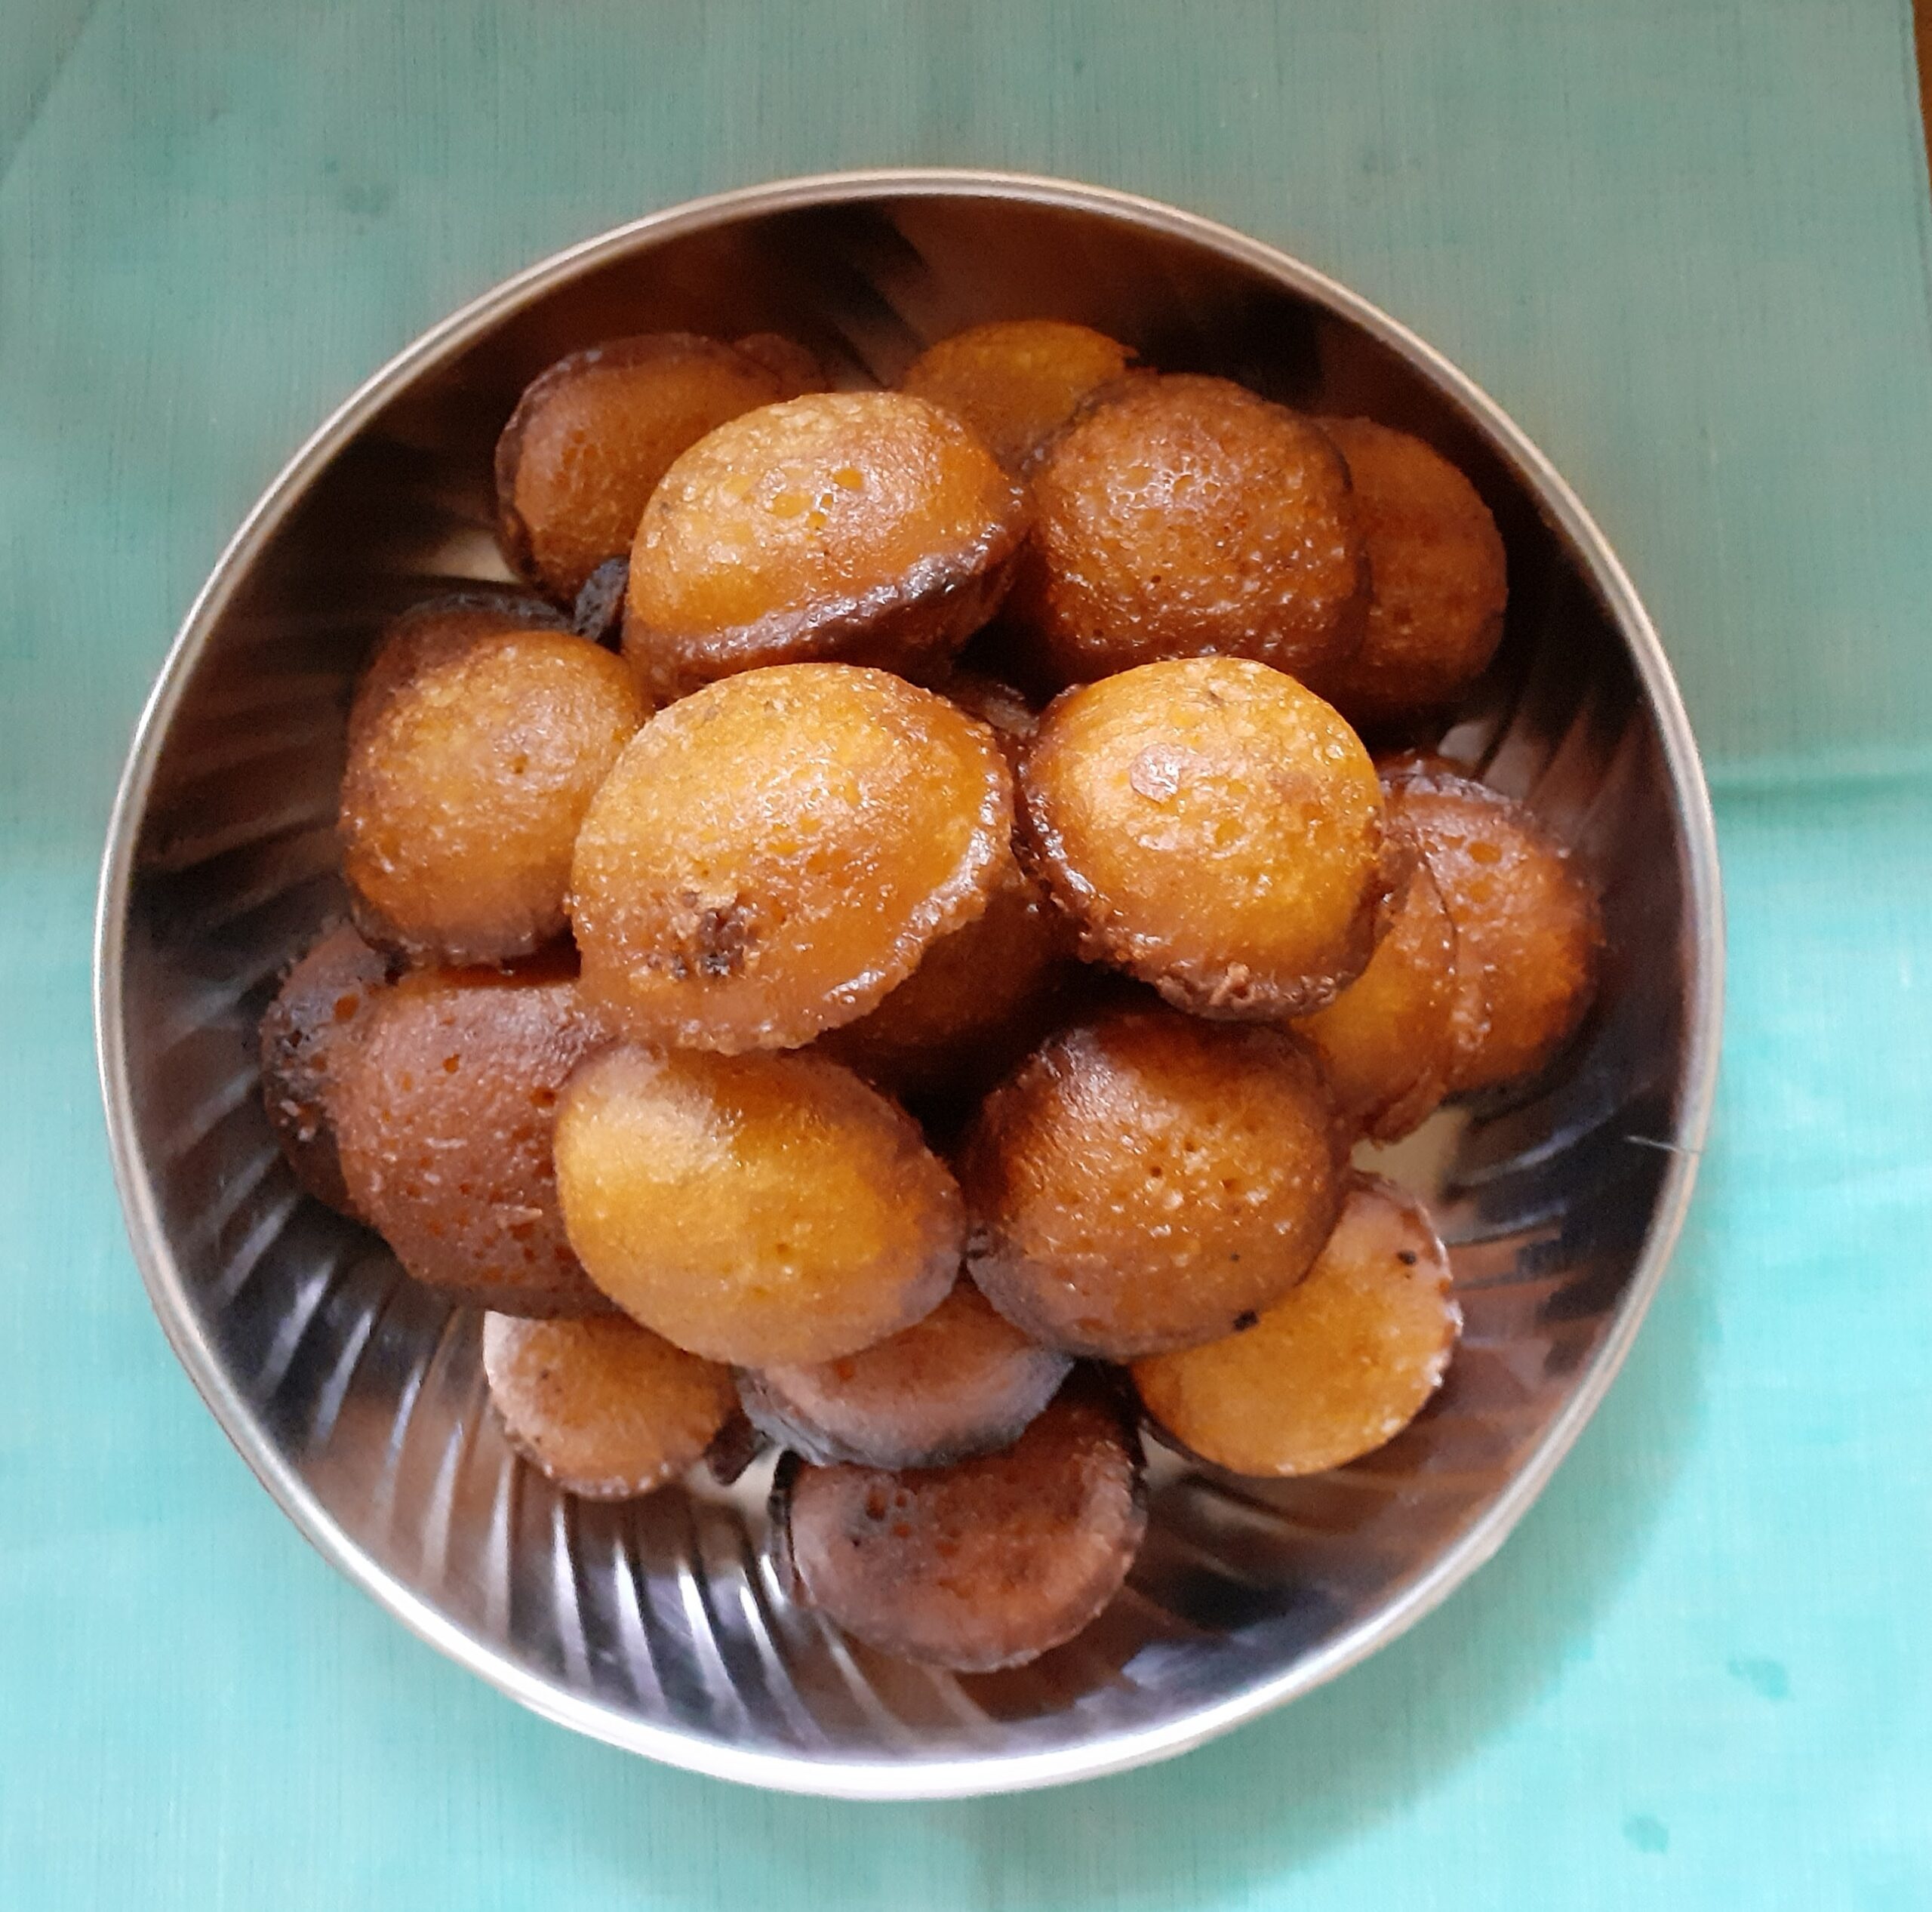
Ingredients:
Raw Rice 1 cup soaked for 1-hour minimum ( 1 cup equals 200 gm) ( refer note1)
Jaggery 1 cup powdered/shredded
Banana 1/2 to 3/4 th of 1 large
Cardamom powder 1/2 tsp
Coconut grated or cut to small pieces 2 Tbsp
Directions:
Soak the Rice for a minimum of 1 hour and up to a maximum of 1.5 hours. After soaking, drain all water and out the rice into a blender. Grind it first to a Rava/Sooji like texture without adding water, now add little water and grind to a smooth paste. Take care not to add too much water, as adding jaggery will liquify it further. So try to use only 1/4 cup water to get a smooth texture. Now add the Jaggery and grind again. Add coconut grating and blitz. Mash the bananas with your fingers and add them to the batter and bring again to a smooth batter. Transfer to a vessel and add the cardamom powder. The Appam batter is now ready.
Now put the Appam mould/Appam Chetty or Appa Karal on flame and heat it well. Spoon in the ghee into the moulds liberally. Let the ghee heat up, now spoon the batter into the moulds and fry on one side until golden brown, using a kambi/skewer or a fork, to loosen the edges of the Appam and flip it to the other side and fry until golden brown. To check for doneness, pierce the appam with the skewer/toothpick or fork in the center, if it comes out clean, remove appams from the mould. The delicious Unni appam/ Sweet Paniyarams/ Nei Appams are ready. Enjoy. Bon Appetit.
STEPWISE RECIPE FOLLOWS:
1. Soak rice for 1 hour. It can be soaked up to a maximum of 1.5 hours.

2. After an hour drain all the water and put the rice ina blender and grind it without any water at first to a Rava/Sooji like texture.
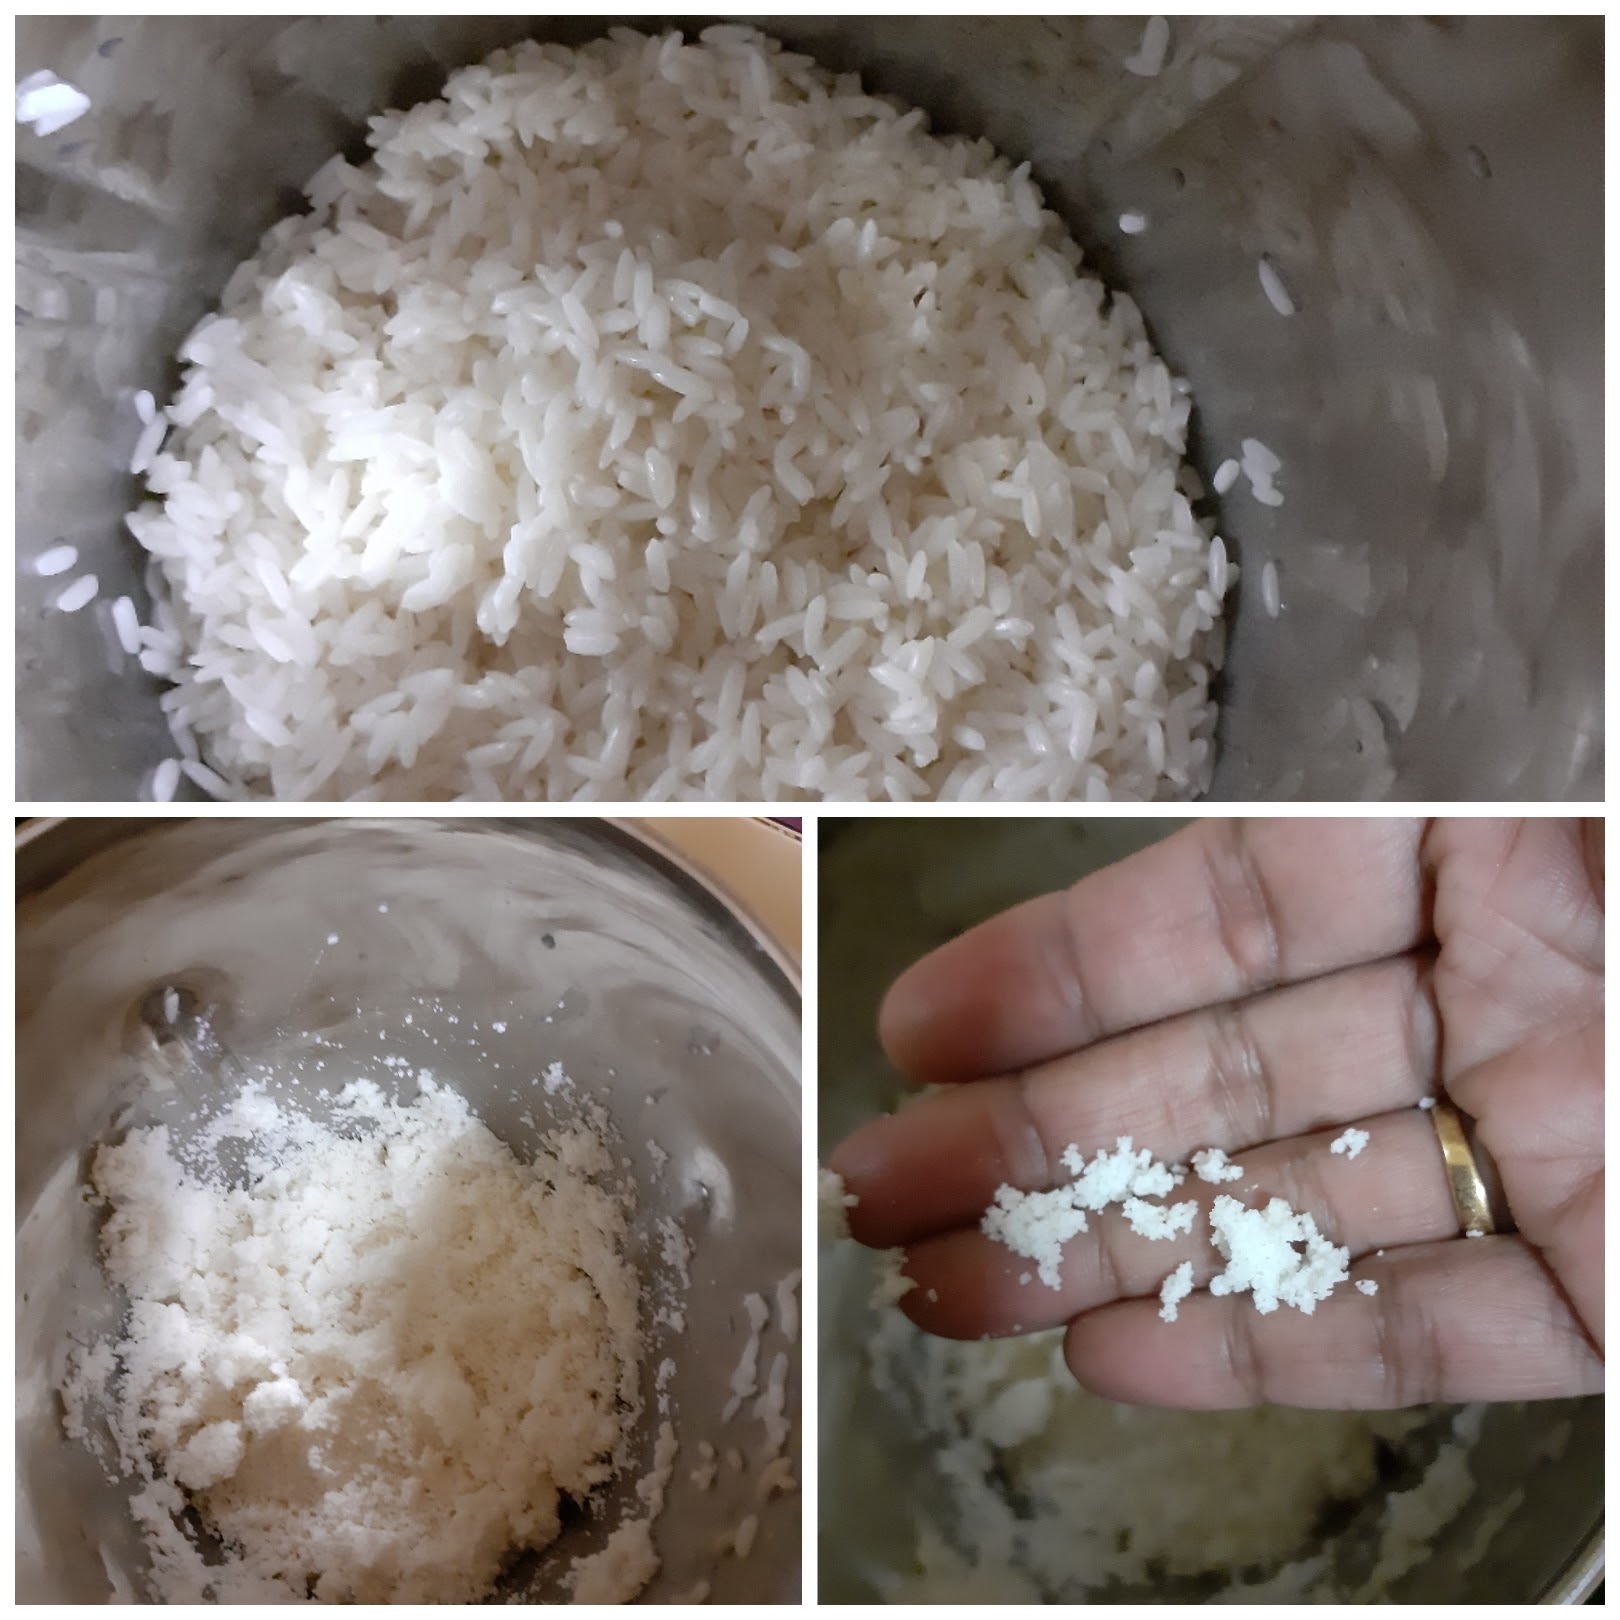
3. Now add water little by little and grind it to a smooth paste. Water should be used minimally. I used around 1/4 cup water to grind. Check cup measurement given above.

4. Now add the jaggery again and grind to a smooth paste, add the coconut gratings and blitz again.
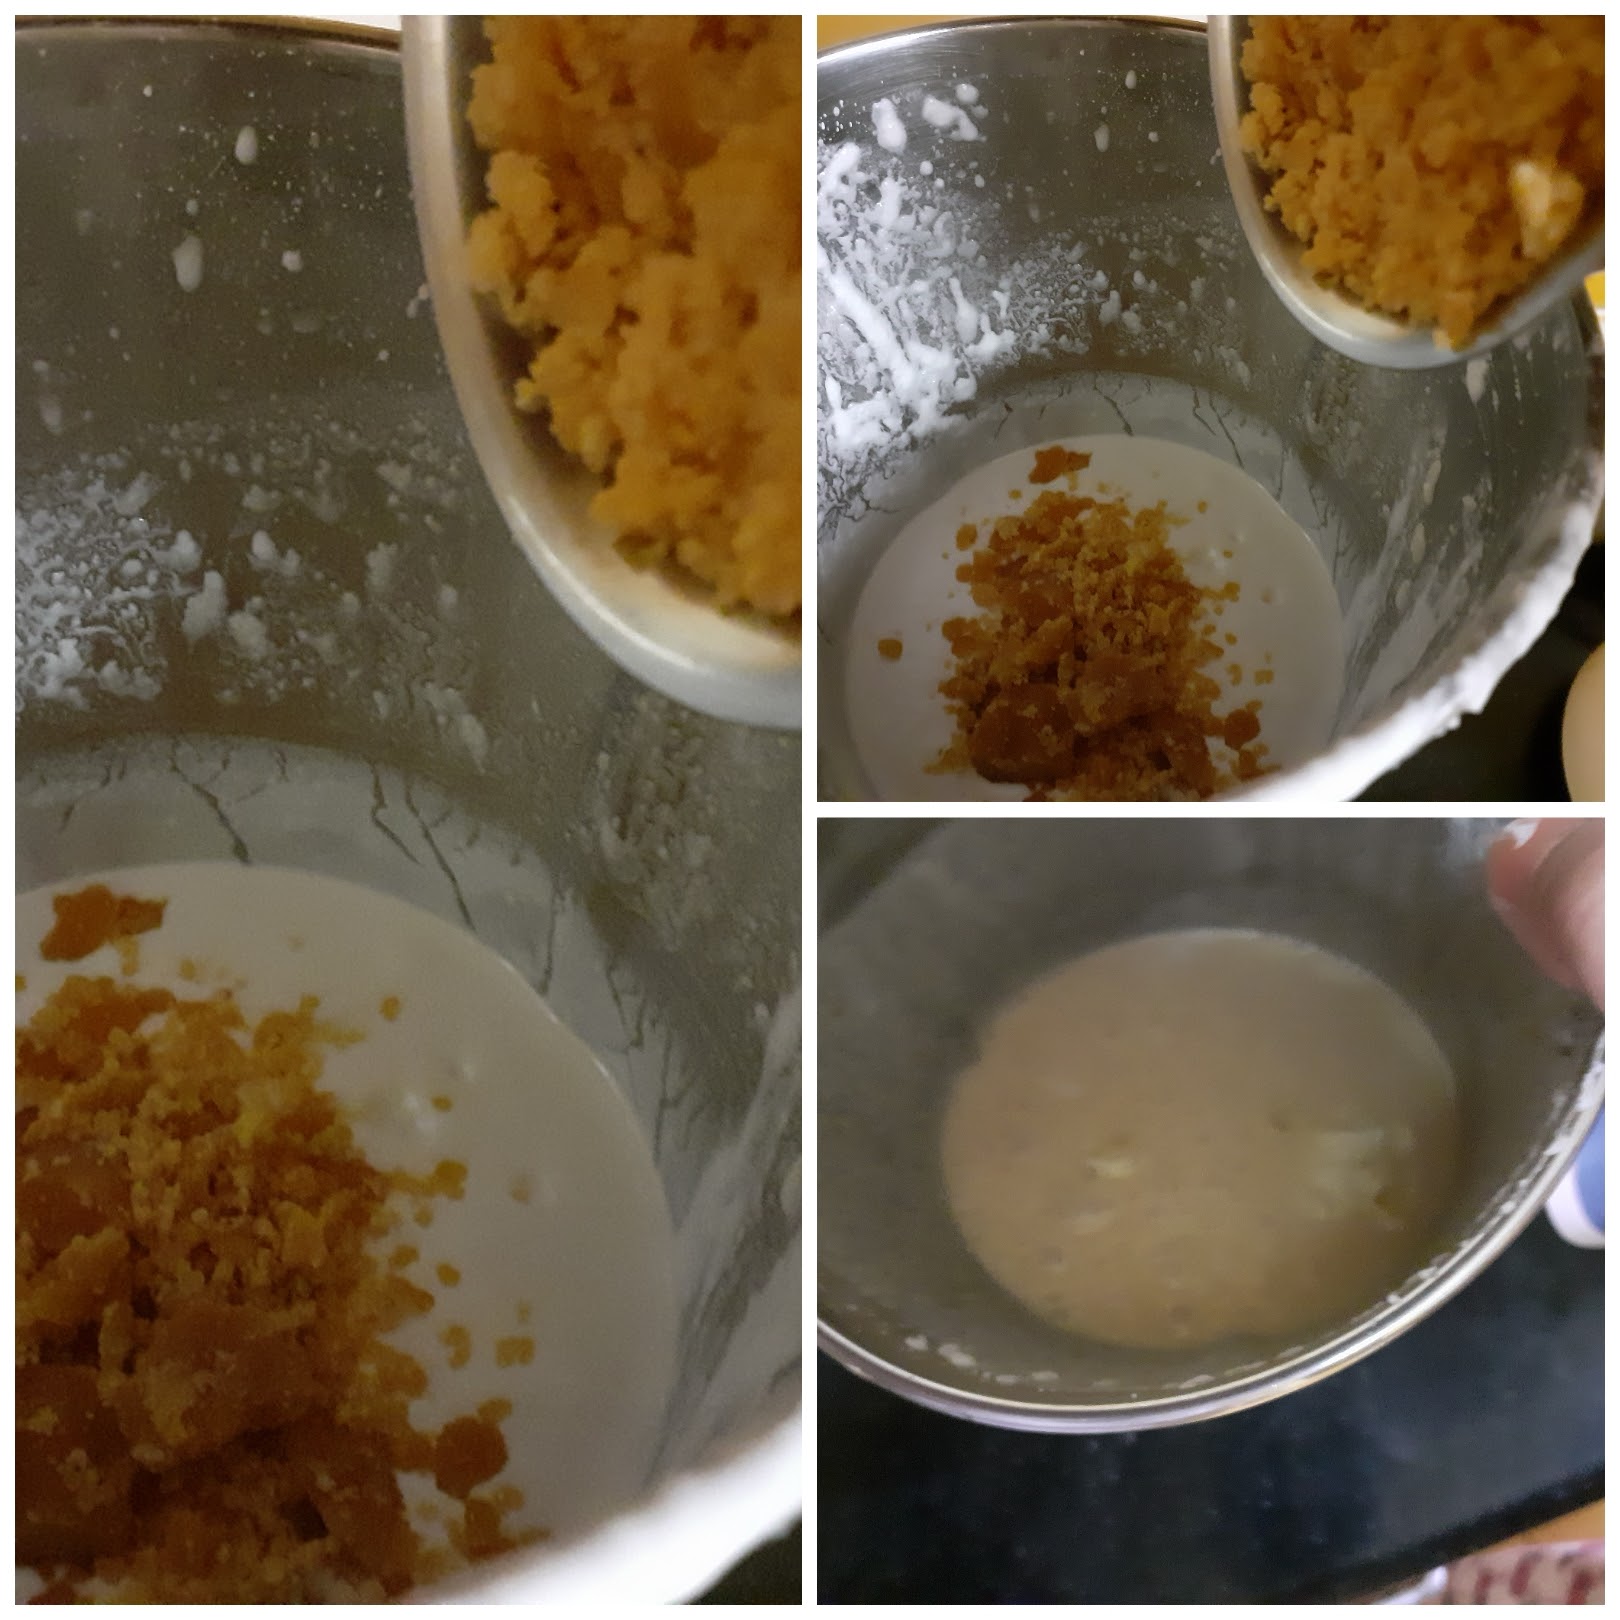

5. Now mash 3/4 of a Banana with your fingers and add it to the paste, grind once again to a smooth batter. The consistency should be that of dosa batter. Transfer it to a vessel and add the cardamom powder. The appam batter is ready. Have added a mini video to show the consistency of the batter.

6. Put an Appam Chetty on the flame. Spoon in the ghee and heat it. Now spoon in the batter into the moulds and fry on now side until a golden brown. Using a skewer or fork loosen the edges of the appam and gently flip it to the other side and fry again to a golden colour. Repeat for all batter. The Sweet Appams are now ready.
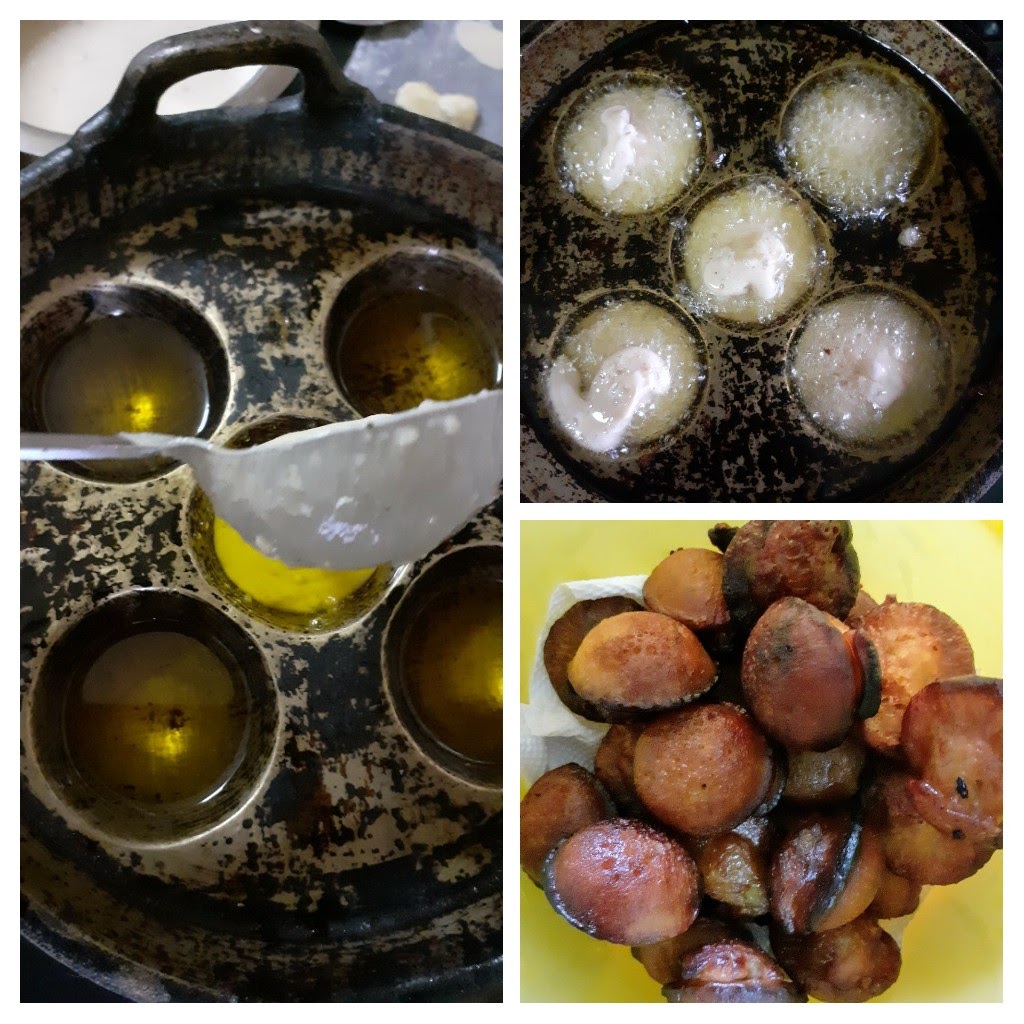
NOTES:
1. Any raw rice variety can be used other than Basmathi as the Basmathi rice does not have a lot of starch content that is required for binding. The appams turn out rubbery with it.
2. While grinding if you end up with a runny batter accidentally, then add rice flour a tablespoon at a time until you achieve the right consistency.
3. If the batter splits or breaks apart in the ghee either your batter is runny or too much jaggery has been added. So modify accordingly and fry.
4. It is ideal to fry these appams in ghee/clarified butter as it tastes best. But oil also can be used.
5. Banana varieties that are sweet can be used. Avoid the slight sour ones like Poovan.
6. Always start with frying a single Appam first so that if something needs to be adjusted it can be done and then the rest can be fried.
If you tried this recipe and liked it please comment below. I would love to hear from you. If you have a query about the recipe email us and ill respond as soon as I can.
Gobi/Cauliflower Fried Rice
This is a fusion recipe and I usually make it by stir-frying the Cauliflower, but this time I tweaked my own version of the recipe a little and first made a dry Manchurian of the cauliflower and then incorporated it into the fried rice. This is a complete meal and you won’t have to make any accompaniments to go with, as the cauliflower is curried. Usually, a wet Manchurian is served with Fried rice, but here the Manchurian is incorporated into the rice, so just by itself it is a meal.
Apart from the cauliflower Manchurian, I have added the usual Fried rice vegetables as well like Carrots, French Beans, Capsicum etc, had to skip the Spring onions as I couldn’t get hold of it when I planned to make this dish. Never the less, the rice tastes just as good.
I have used regular rice and not Basmathi as I find that Basmathi and Chinese flavours do not go very well. Jasmine rice can be used in place of regular rice if you prefer. Fried rice varieties like this one and Schezwan Fried rice with Soya chunks are my go-to food during weekends as just one dish makes everyone happy, and I get time to do some baking.
While you are here I request you to check out my other recipes such as Schezwan Fried Rice, Schezwan Sauce, Creamy Tomato Pasta, Nutella fudge Brownies, Apple Crumble and more…
Here is the recipe of Gobi Fried Rice for you—

Ingredients for Manchurian:
Cauliflower 1 medium-sized, cut into florets
Rice flour ½ cup
Corn flour ¼ cup
Salt as required
Red chilli powder 1 tap
Pepper powder 1 tsp
Water 1 tbsp approx.
Onion 1 large
Tomato 1 medium
Tomato sauce 1 tbsp
Red chilli sauce ½ Tbsp
Garlic 5 cloves finely chopped
Green chillies 3 finely chopped(divided)
Oil for frying
Ingredients for Fried Rice:
Rice precooked and cooled (spread and cool on a plate, drizzle little oil)
Carrot 1 chopped finely
French Beans a few chopped finely
Capsicum 1 small chopped finely
Salt as required
Sugar 1 tsp
Soya sauce 1 tbsp
Pepper powder ½ tsp
Directions for Manchurian:
Boil 1litre water. Take the cauliflower florets in a large vessel, add 1 tsp st and ½ tsp turmeric powder and pour the boiling water over it. Cover the vessel and let it stand for 10minutes. Now drain all water and cool the florets. On cooling add the Rice flour, followed by Corn flour, add salt, red chilli powder, pepper powder and toss nicely with a spatula or using your fingers. Take approximately 1 tablespoon water and sprinkle it over the flour and cauliflower mixture. Now nicely mix them all together. Adding 1 tbsp water helps the flours to stick to the Cauliflower. Heat oil for frying in a Karahi and fry the Cauliflowers nice and crisp. Drain in absorbent paper and keep aside.
In a wok/karahi take some oil and heat. Put in the finely chopped garlic and saute for 30 seconds. Add the green chillies and saute for another 30 seconds. Transfer the sauteed garlic and chilli to a plate. Now put the onion and 1 green chilli into a blender and grind to a smooth paste. Remove and blend the tomato into a smooth puree. Now in the same wok heat the oil and drop in the onion paste. Fry nicely until light brown. Now add the tomato puree and mix well. Cook the onion tomato paste on high flame and start drying out the moisture. When most of the moisture has evaporated add the Tomato sauce, Red chilli sauce, salt and red chilli powder and stir nicely. The sauce should be semi-dry. Now add the fried cauliflower florets to this sauce and toss nicely, such that the sauce coats the cauliflower well. The Manchurian is ready. Set it aside.
Directions for Fried Rice:
Pre-cook rice. Spread it on a plate, drizzle some oil and cool. Now in a wok heat some oil. Over a high flame saute the capsicums first for 1 minute. Now add the chopped beans and carrot and stir fry for a minute. Add a teaspoon of sugar while stir-frying. Now add the salt, pepper powder and saute for another minute. Now its time to add the cooked and cooled rice. Add it little by little and mix nicely. Add a tablespoon of Soya sauce and give everything a nice stir, so that the Soya sauce mixes in. Now add the Manchurian to rice and toss well. Finally, mix in the sauteed chillies and garlic to the Fried rice. The Gobi fried rice is ready to serve.
STEPWISE RECIPE FOLLOWS:
1. Assemble all ingredients. Chop cauliflower to florets, cook rice and cool as directed. Take the cauliflower florets in a large vessel, add 1 tsp st and ½ tsp turmeric powder and pour the boiling water over it. Cover the vessel and let it stand for 10minutes. Drain the water and cool the florets.
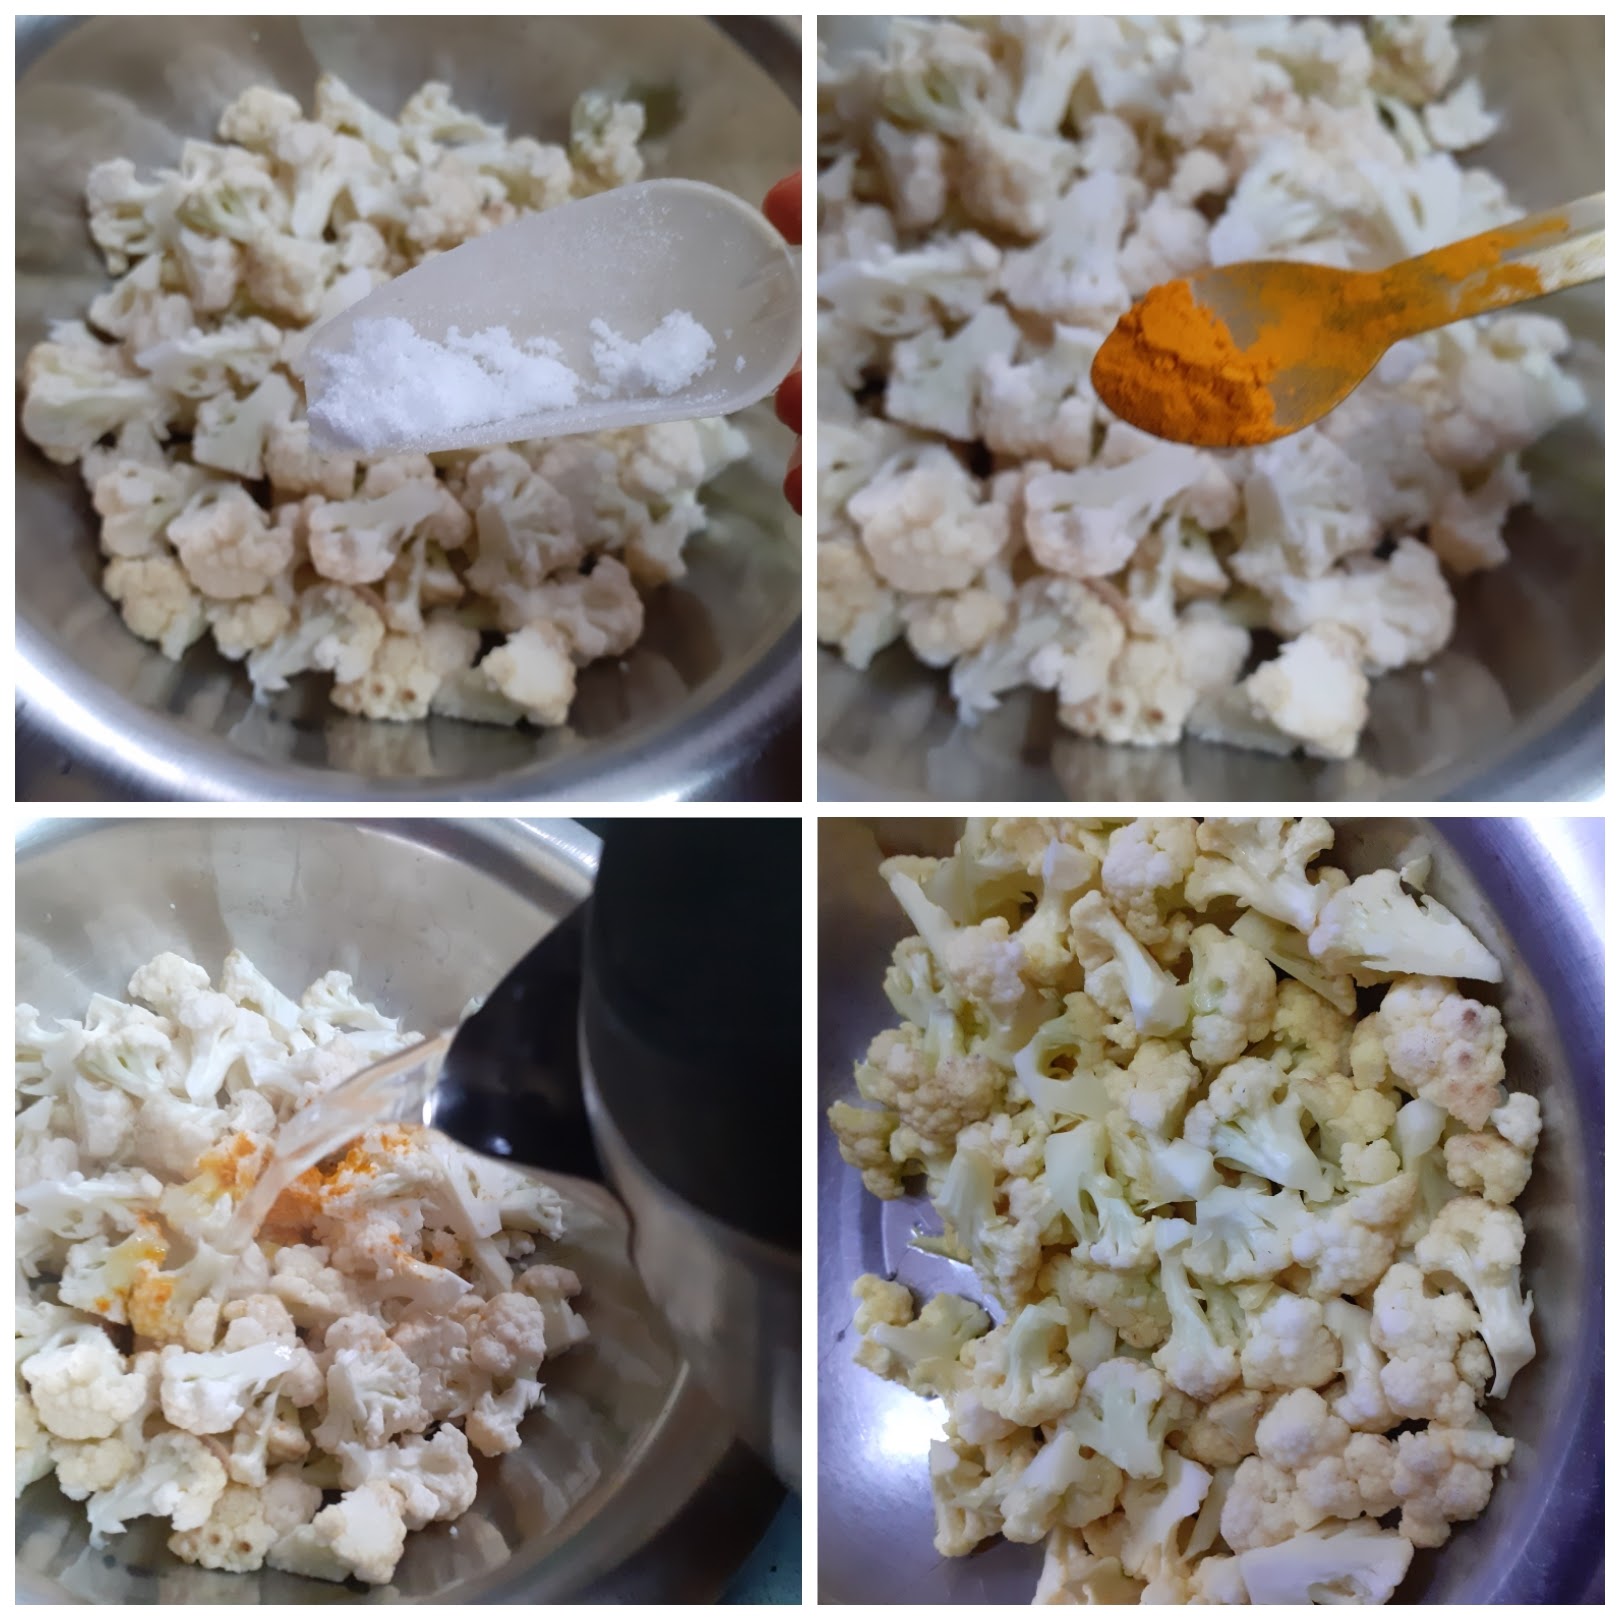
2. Add the rice flour and cornflour along with salt, red chilli powder, pepper powder and toss well. Add a tablespoon of water and mix nicely. It should be a dry mixture, the flours must stick to the florets.
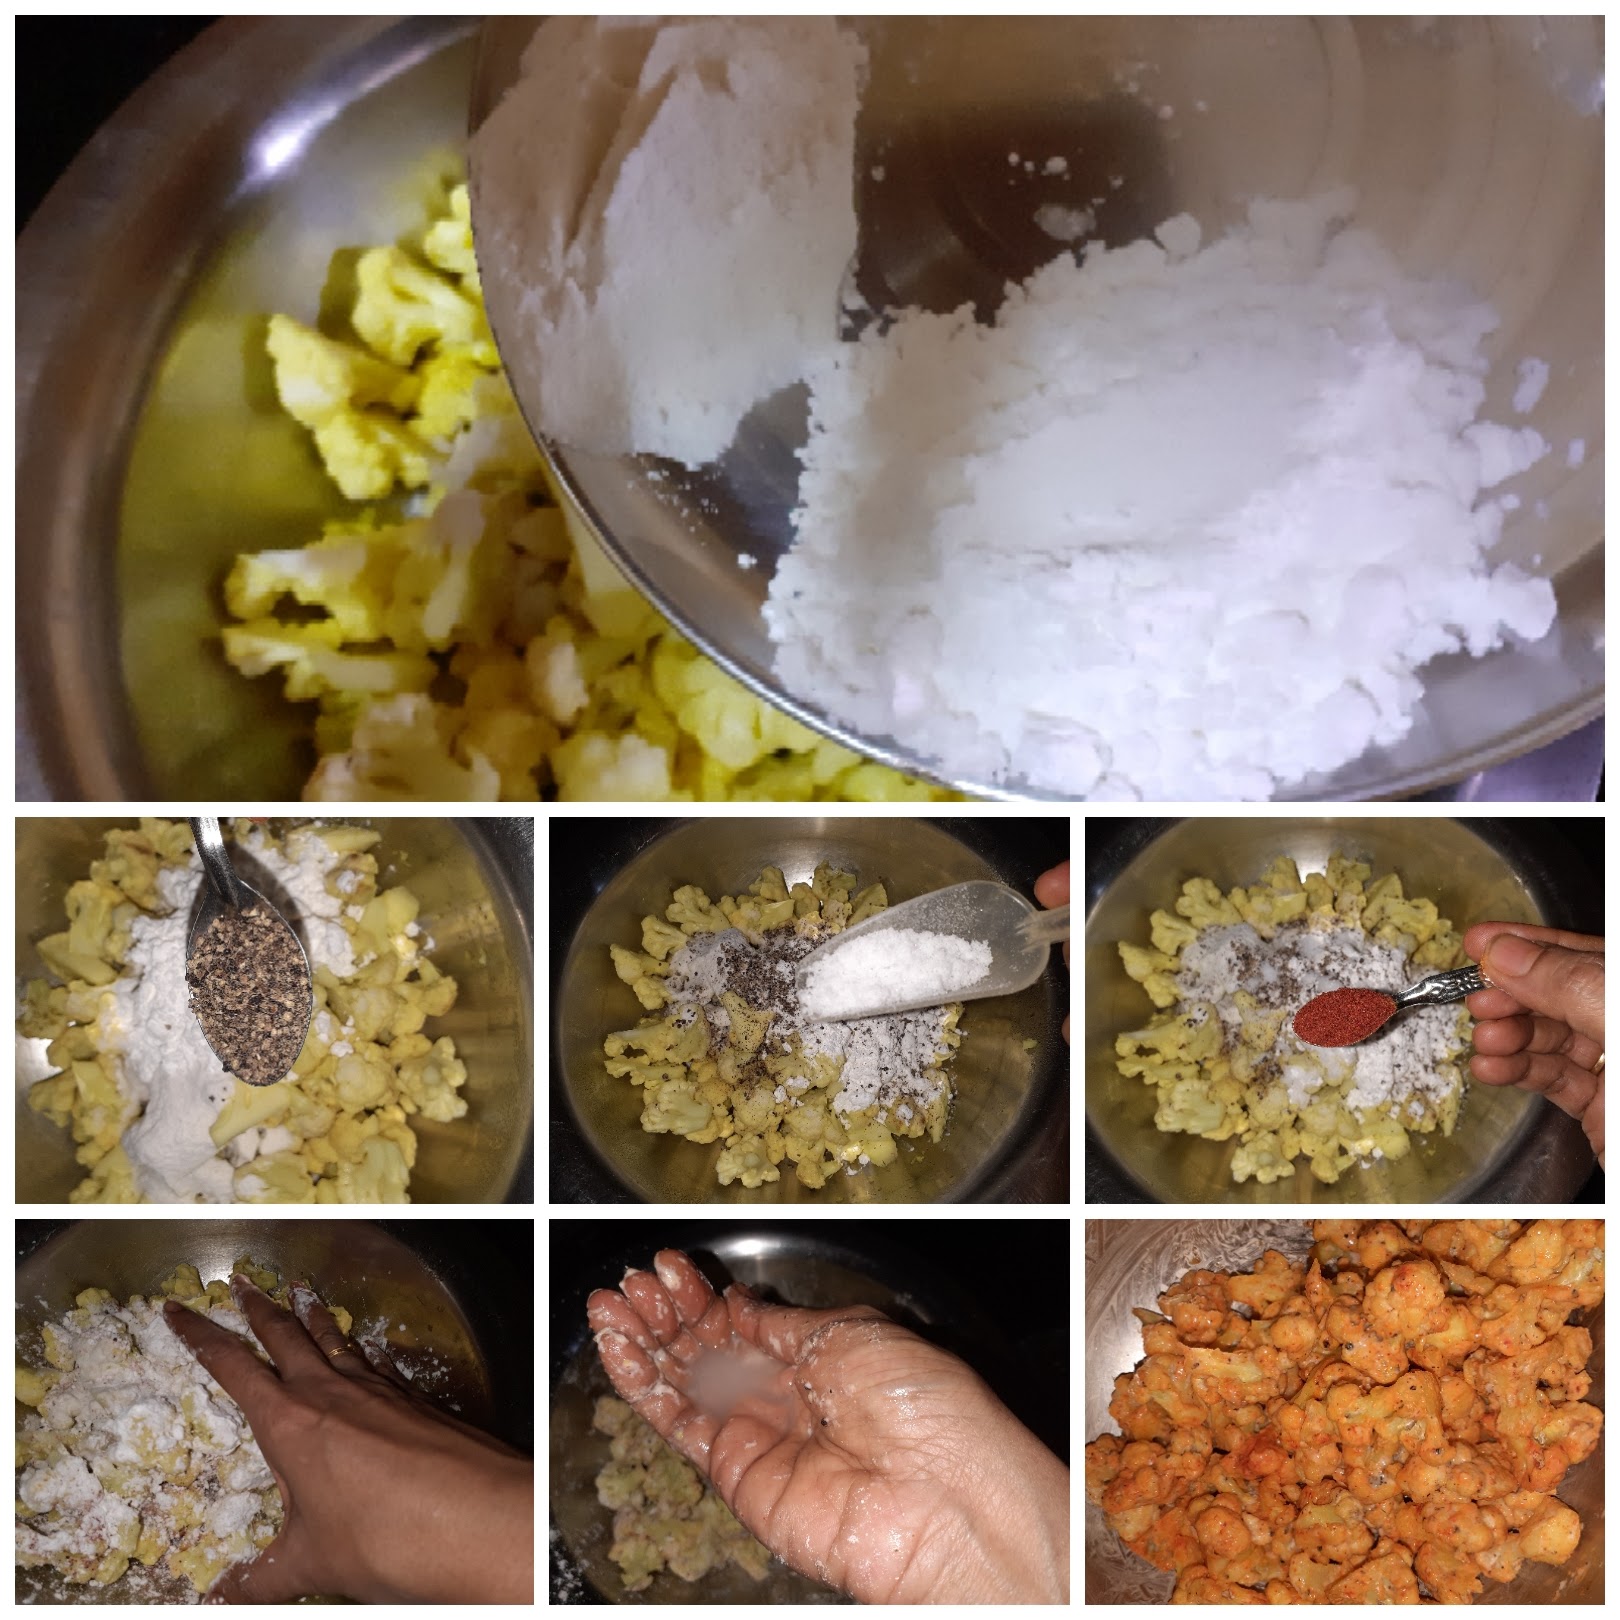
3. Heat oil in a wok/karahi for deep frying and fry the cauliflower florets until crisp. Drain excess oil on an absorbent paper and set aside.

4. In a wok/karahi take some oil and heat. Put in the finely chopped garlic and saute for 30 seconds. Add the green chillies and saute for another 30 seconds. Transfer the sauteed garlic and chilli to a plate.
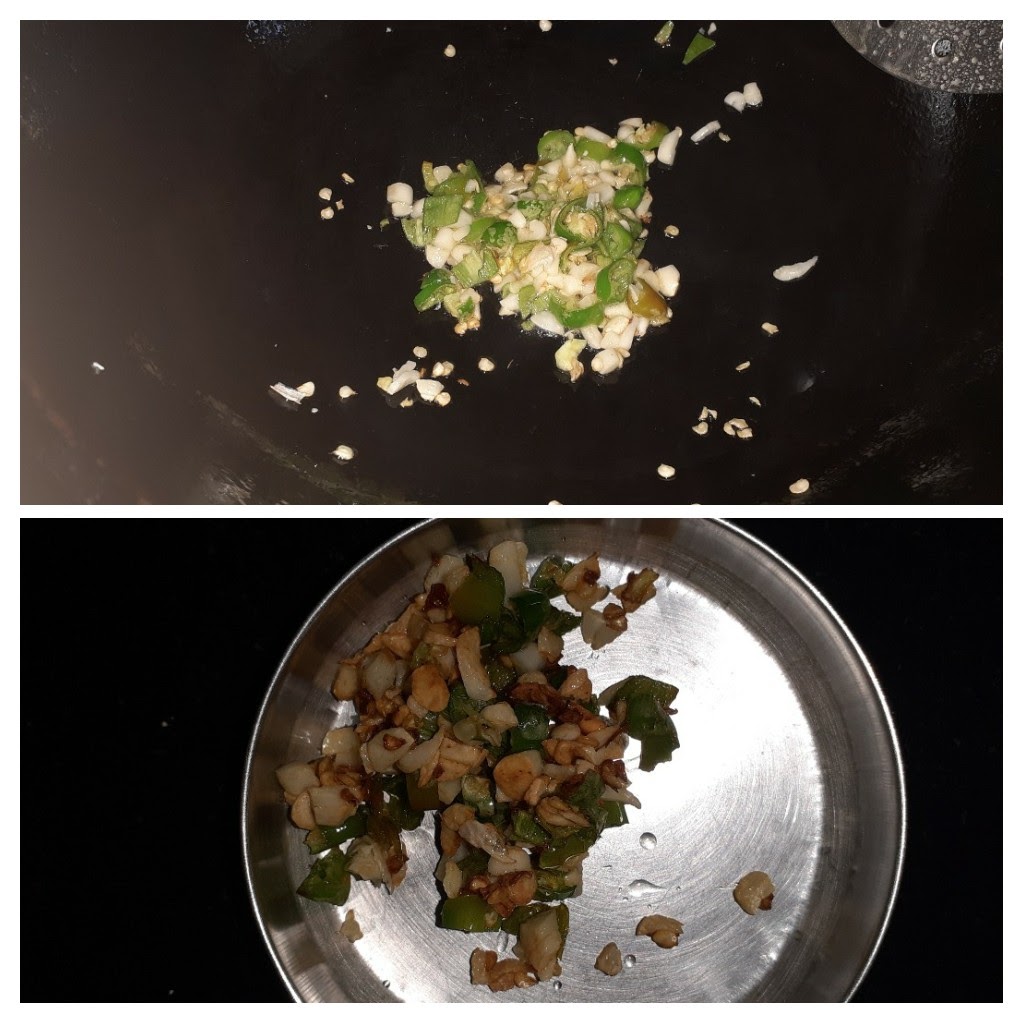
5. Put the onion and 1 green chilli into a blender and grind to a smooth paste. Remove the paste, and blend the tomato into a smooth puree. Now in the same wok heat the oil and drop in the onion paste. Fry nicely until light brown. Now add the tomato puree and mix well. Cook the onion tomato paste on high flame and start drying out the moisture.
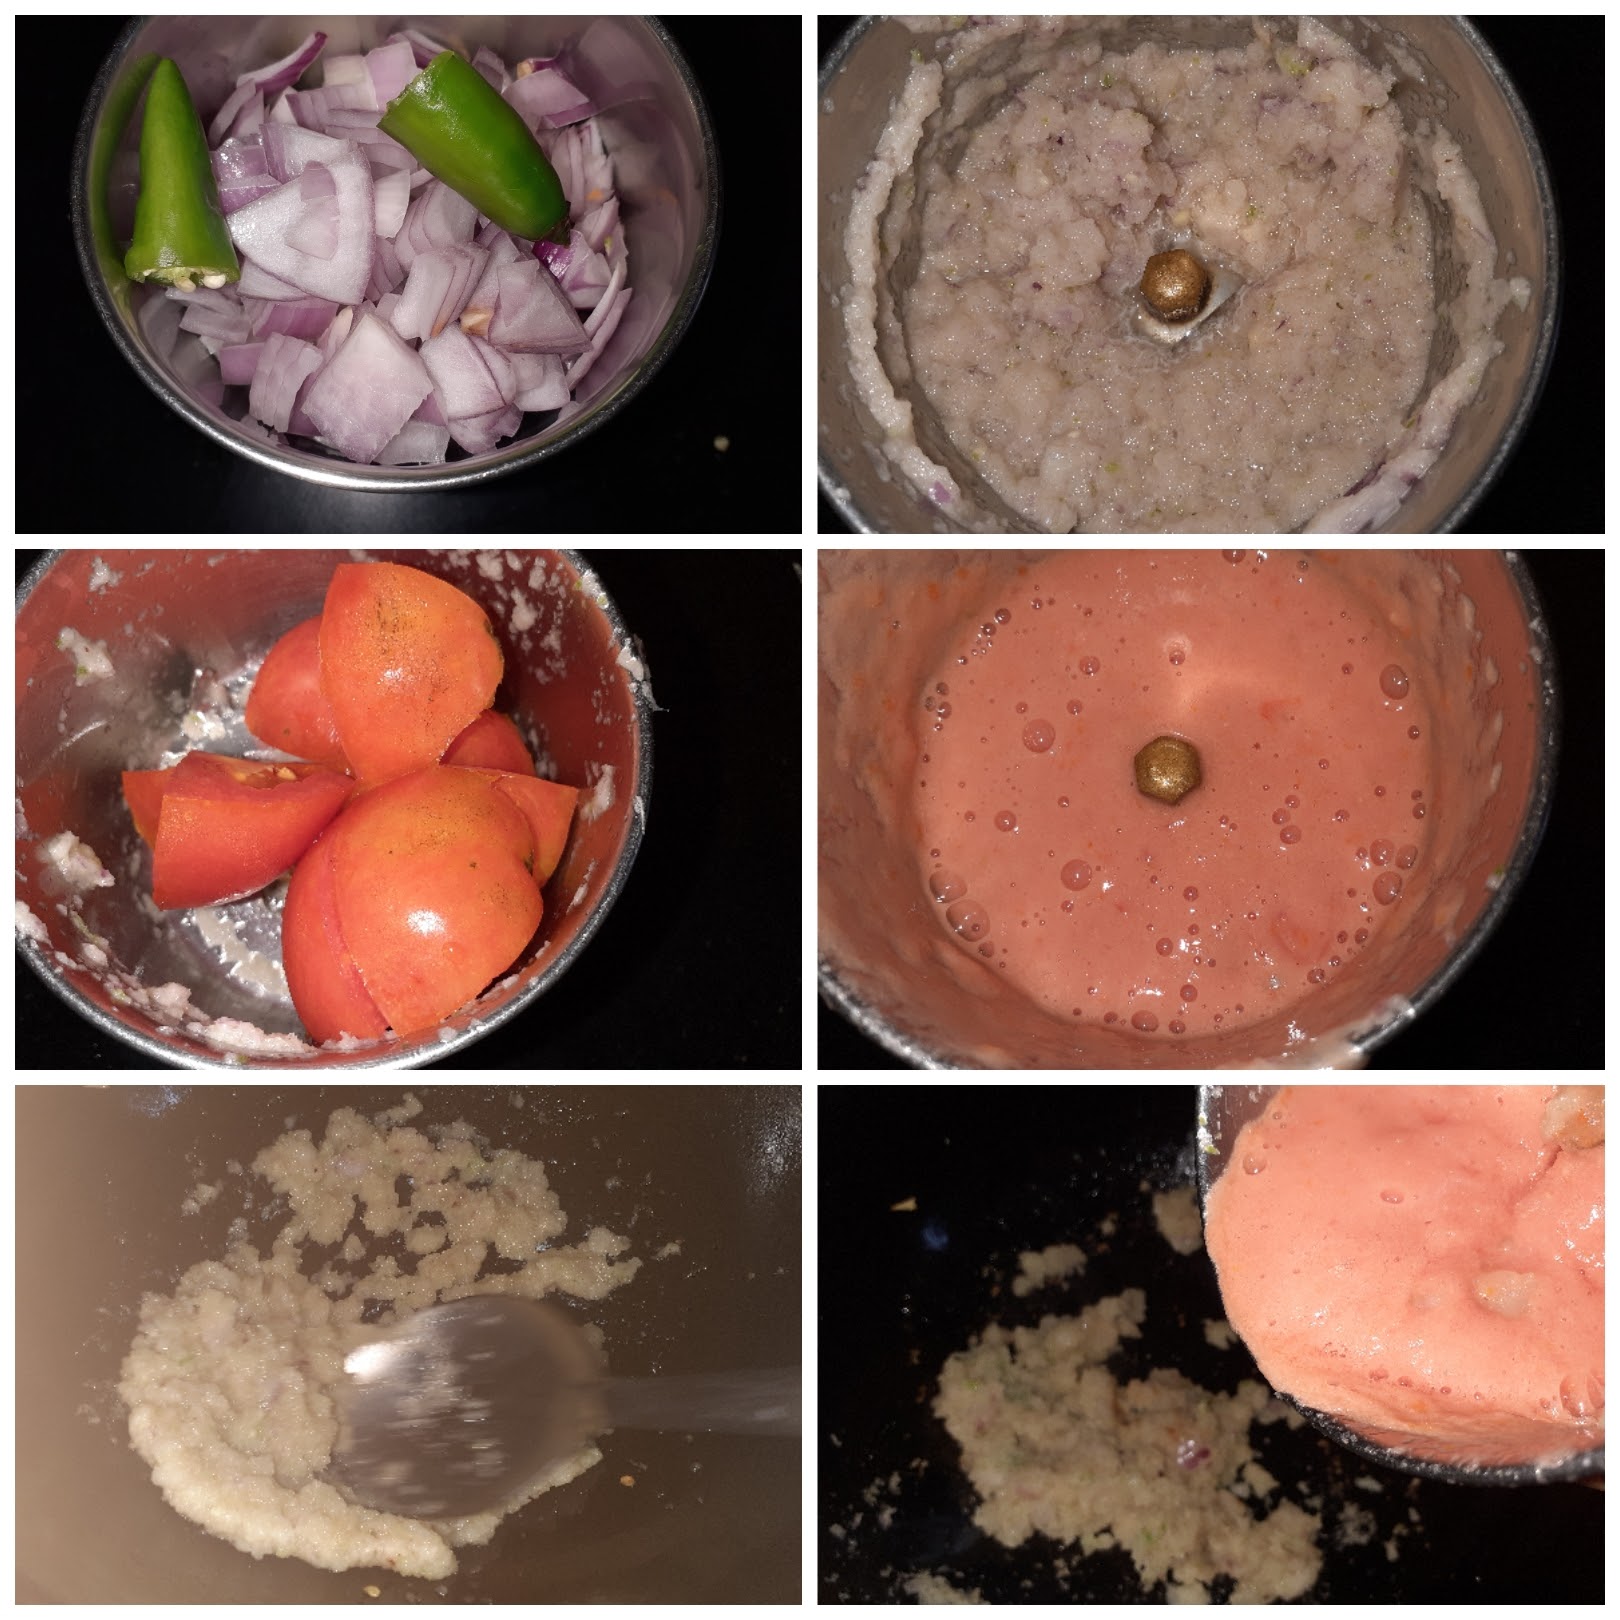
6. When the mixture is almost dry, add the Tomato sauce, Red chilli sauce, salt and red chilli powder and stir nicely. The sauce should be semi-dry. Now add the fried cauliflower florets to this sauce and toss nicely, such that the sauce coats the cauliflower well. Set the Manchurian aside.
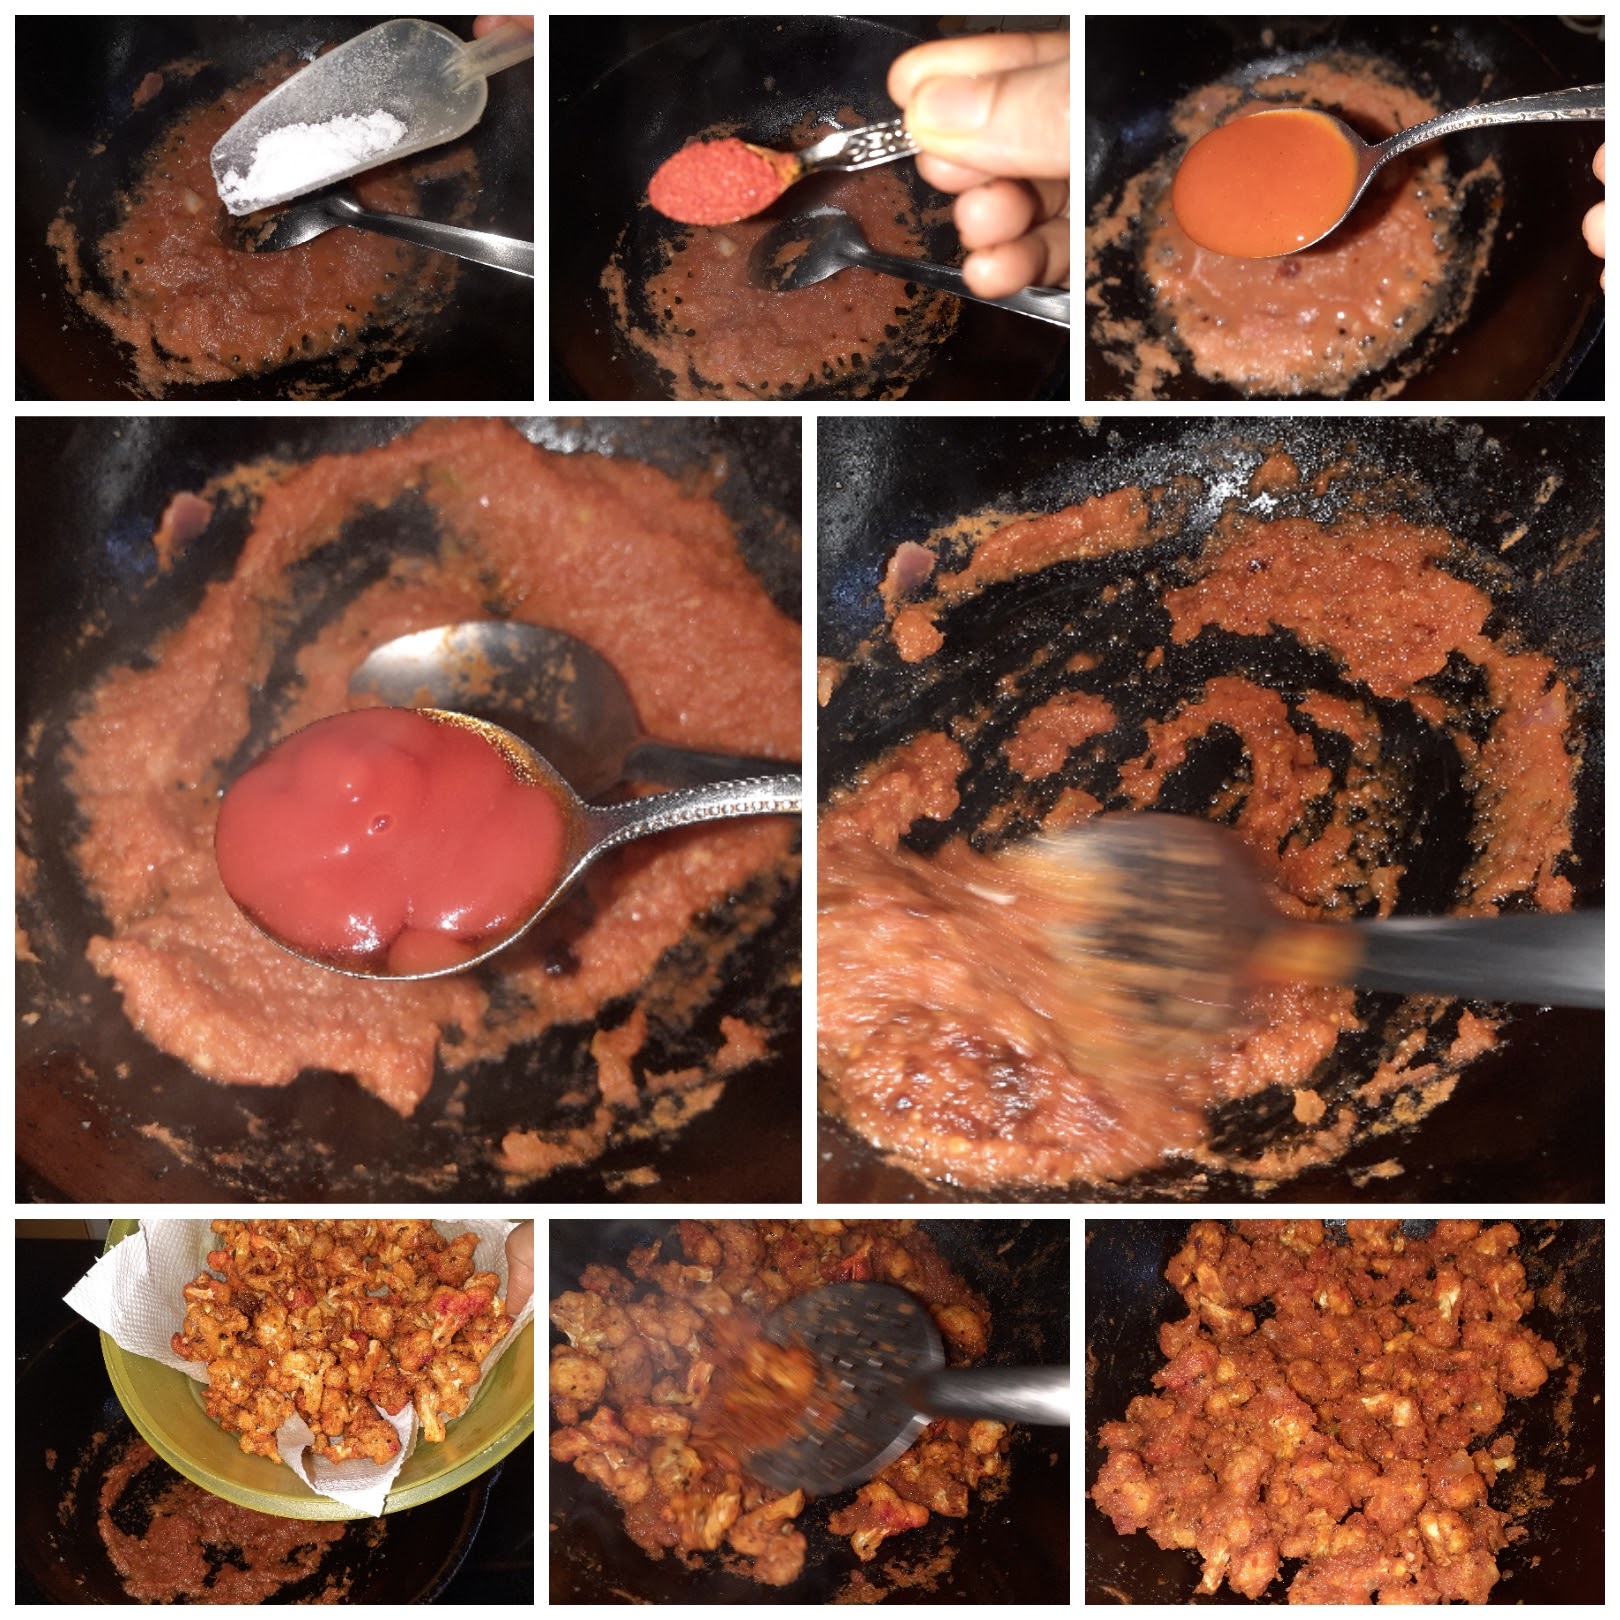
7. In a wok, heat oil and add the chopped beans and carrot and stir fry for a minute. Add a teaspoon of sugar while stir-frying. Now add the salt, pepper powder and saute for another minute.

8. Now add the rice little by little and mix well. To this add the soya sauce and mix again, such that all the contents are well integrated. Now add the Manchurian to the rice and toss nicely. Follow this up by adding the sauteed green chilli and garlic. Toss again. The Gobi Fried rice is ready to devour.
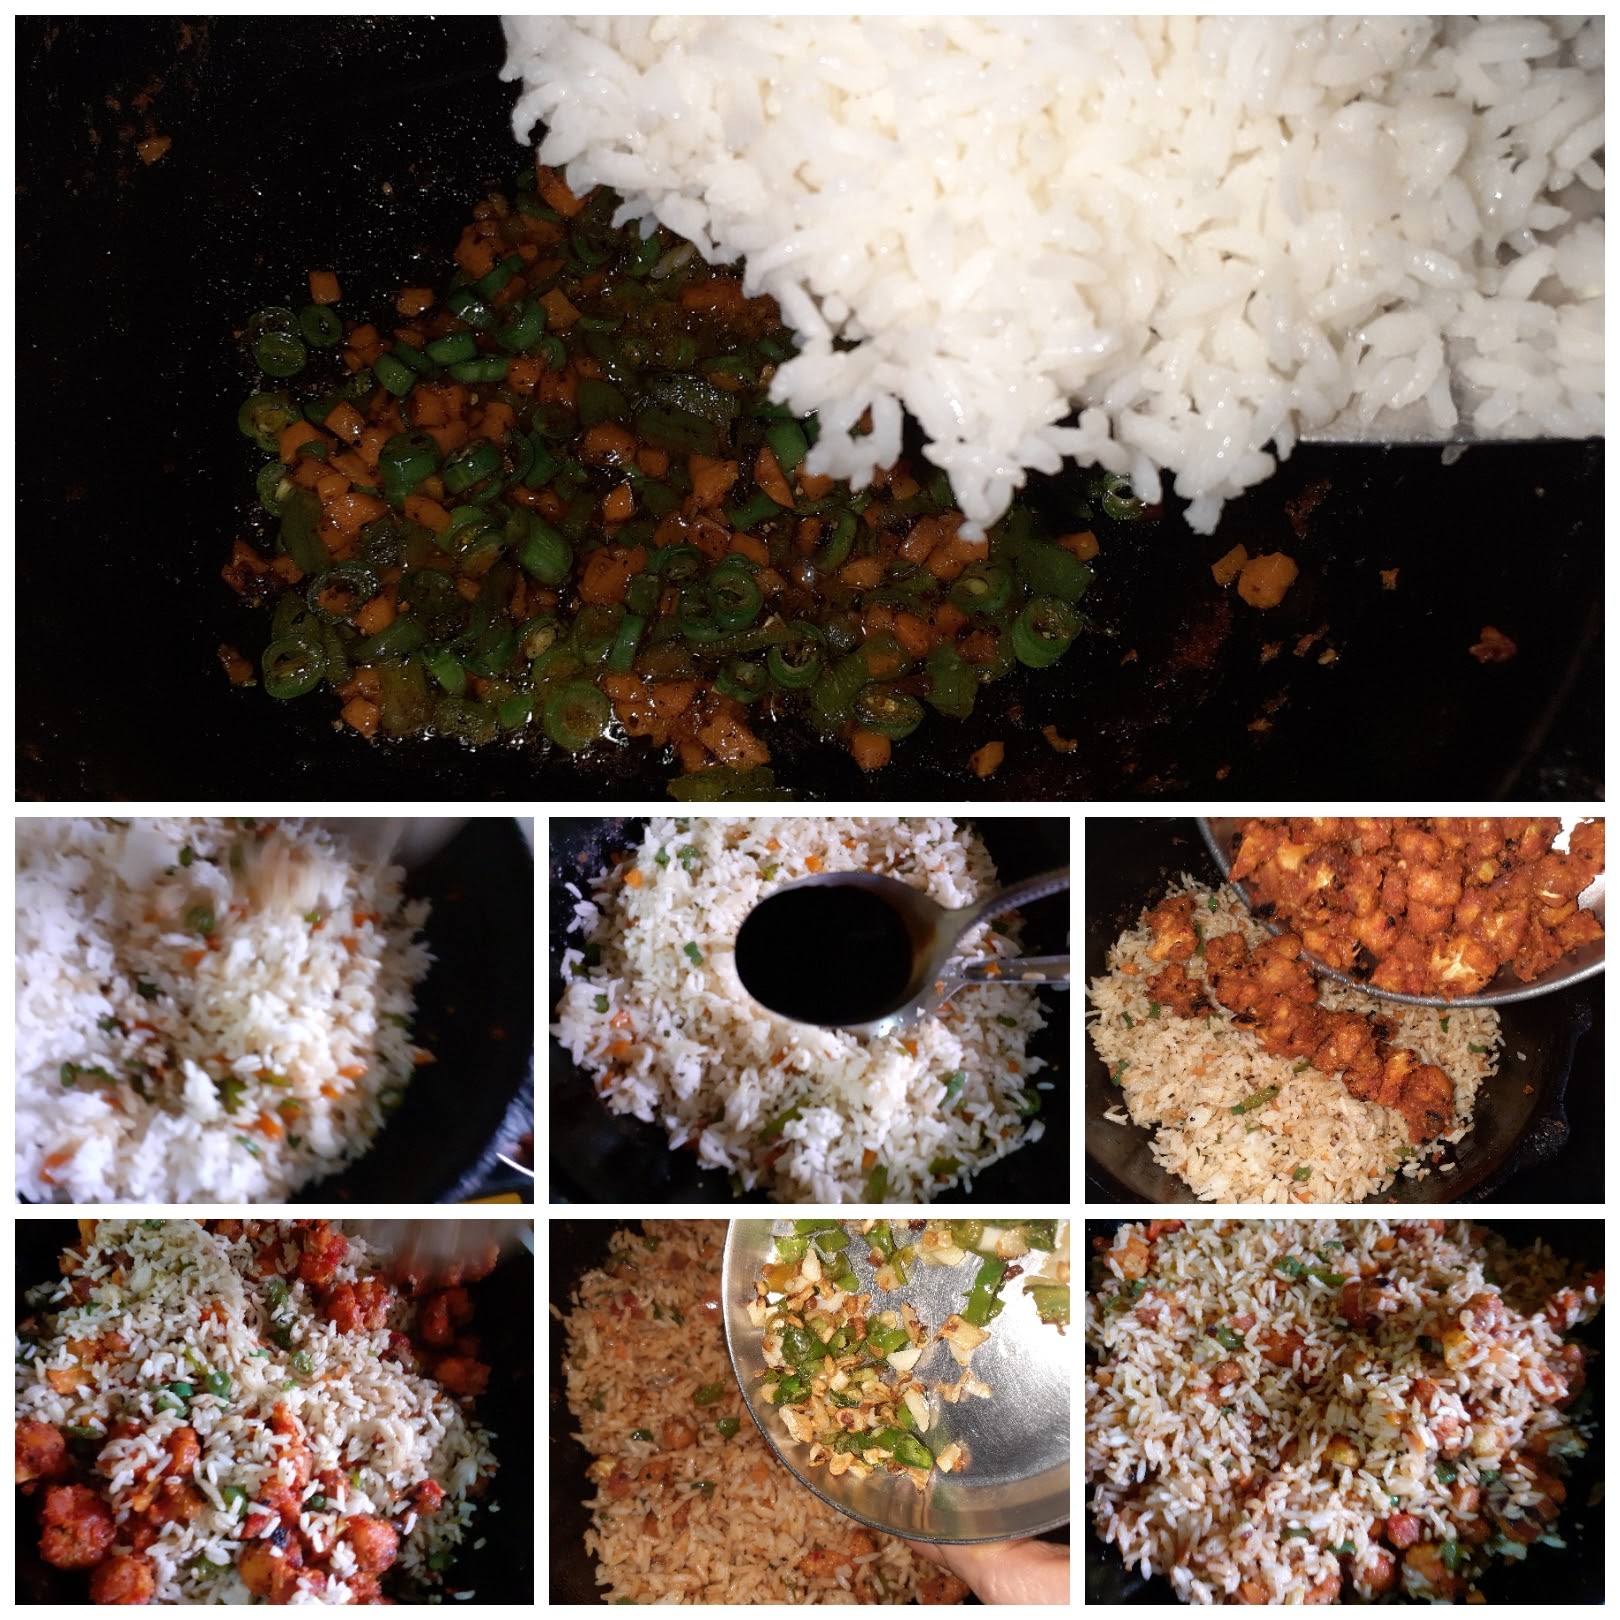
1. The same recipe of Manchurian works well if you want to make dry Gobi Manchurian. If using the recipe only for Manchurian then add the sauteed chillies and garlic after to have mixed the florets with the sauce.
2. In case you add more water while mixing the flours with the florets and the flour is not sticking to the florets add in extra flour.
3. While making the fried rice I have not added any chilli powder. Only pepper powder has been added, as all other spices are there in the Manchurian. If you prefer more spice, feel free to add more.
4. Sugar is added while sauteeing vegetables so that they retain the colour and cook well.
If you tried this recipe and liked it please comment below. I would love to hear from you. If you have a query about the recipe email us and ill respond as soon as I can.